-
Posts
9,185 -
Joined
-
Last visited
Content Type
Profiles
Forums
Events
Gallery
Posts posted by peteski
-
-
I read articles about using Micro Balloons as a Filler. They NEVER said "How To". Most were Contest winners and such. I had to give this stuff a go. I (Foolishly) bought a Jar(?). There were no real instructions on it. Mixing a small quantity with water didn't help. I emailed the Magazine that Showcased said Models and asked how to use Micro Balloons. I should have known better. The only reply from said Magazine was; Micro Balloons are a filler for wood. It didn't matter how many articles in their Publication I referred to. There was nothing online and trying to reach the Manufacturer, lead to even more frustration.
Mixing them with water? Why? Did you look at this post earlier in this thread? It sure shows "how to".
-
Those are really nice! And I can appreciate that this is not only done using metal bodies (not plastic) but also in 1:43! Well done!
-
Ouch! That is terrible! You might want to contact the forum administrators directly.
There is a link on the bottom of the page for contact: http://www.modelcarsmag.com/forums/contact/
-
Is there really some law out there which makes it legal for someone to use somebody else's work as long as there is 15% difference (however that could be measured)? That doesn't seem reasonable.
-
I received an email from Sandy Ritzmann at Molotow. I asked about durability. Here is her response:
"As for the durability of Liquid Chrome, this should not be an issue when it comes to light handling. The paint itself is being commonly used for models, applyed with marker or even by air brush.
Really?! Paint commonly used for models? So all they are doing is repackaging the good old Testors Chrome paint from the little square bottles, calling it Molotov and selling it for mots of money? The stuff that never really dries?

I'm joking of course, but I just found their statement funny.
-
Is this a game changer since its now brushless? From reading earlier posts, the concern seems to be around fumes and potential sparks which should not be anymore with brushless I would assume. Might need two depending on the booth but still cheaper than other options as DIY.
Delta Breez Slim Ceiling Exhaust Bath Fan 70 CFM
"The innovative DC brushless DC motor is designed for long life and low power consumption..."
Well, AC induction motors (which are also brushless by design) have been widely used for all sorts of fan applications for many, many decades. From tabletop fans to exhaust fans. Many power tools (like bench grinders, band saws, etc.) also use them.Those are very simple (no electronics required to drive them). They just need AC power (which is widely available everywhere). Not sure what real advantage a DC brushless motor has over the AC induction motor. Maybe they use slightly less power than the SC motors but the AC motors are dead-reliable (since they are very simple and robust). One disadvantage is that their speed depends on the frequency of the AC on which they run, so speed control is not easy to accomplish. But that is ok as in the applications they are used for, speed control is not required.
AC induction motors have been around as long as the AC household power has been around. (that is over 100 years!).
-
An old fart? Well you make a good point there, and I'm happy and lucky to have reached my age as a lot of people are less fortunate.
It wasn't meant as a put down - being an old fart is something to be proud off. Like you said, it is a fortunate thing to be still alive, and to have a perspective on how (much better) things were in the past.
-
Ron, the old magazines from the 60's and 70's are a lot better than the magazines you'll find on today's racks. I
Just making a statement like this makes you an old fart! Ah, the good ol' days when things were much better than now. . .
Don't worry, I feel the same way.

-
Interesting Stuff. Anybody here use it yet?
Seems like everybody is waiting for the other guy to try it.

-
-
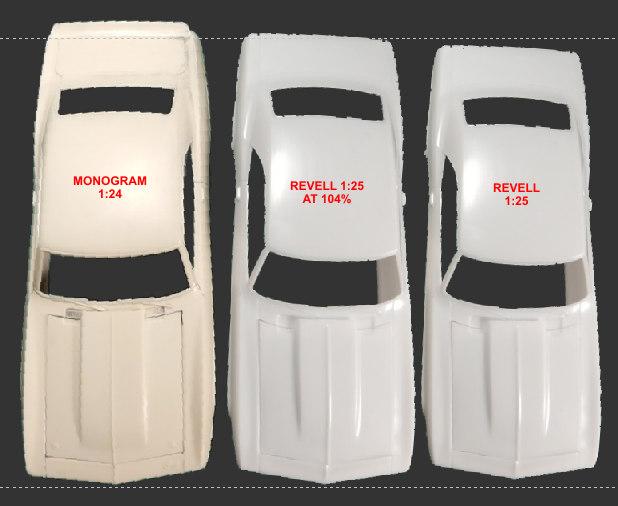
That photo got me thinking. Actually it appears that the scales are pretty close after all. I took the 1:25 model and enlarged it to 104%. It is pretty close to the size of the Monogram 1:24 scale model. The angles of the models in the photo and the spoiler on the 1:24 car are a bit distracting, but even then, the enlarged Revell body is very close to the Monogram 1:24 scale body.
-
Flat finish is from the paint surface being very rough (on a microscopic level). That scatters the light hitting the painted surface making it look dull. That rough finish makes the surface fragile so can be scratched or stained easily, even by just handling it. The less flat paints (satin or semi-gloss) have smoother surface and are more durable in handling.
Just like others said, flat paint can be clear coated, but the result will not have the same sheen as the original paint surface.
-
Your post reads like something would say Yoda.
There is a section about decals over Alclad (and lots of other helpful hints) at http://www.swannysmodels.com/Alclad.html
-
While informative, the above webpage does not mention whether Mike is still with us or not.
-
Yes, it can be cleared. It is a thin metal foil - lacquers or enamels will not attack metal.
What you might have heard is that the chrome-like paints (like Molotov chrome pens or Alclad II chrome) will dull if clear coated. That is true.
-
It's not enough for me to dislike 1/24th................but it does come into play in regards to what James is talking about here in this quote:
The answer here is .................yeah, it's a big of a difference.
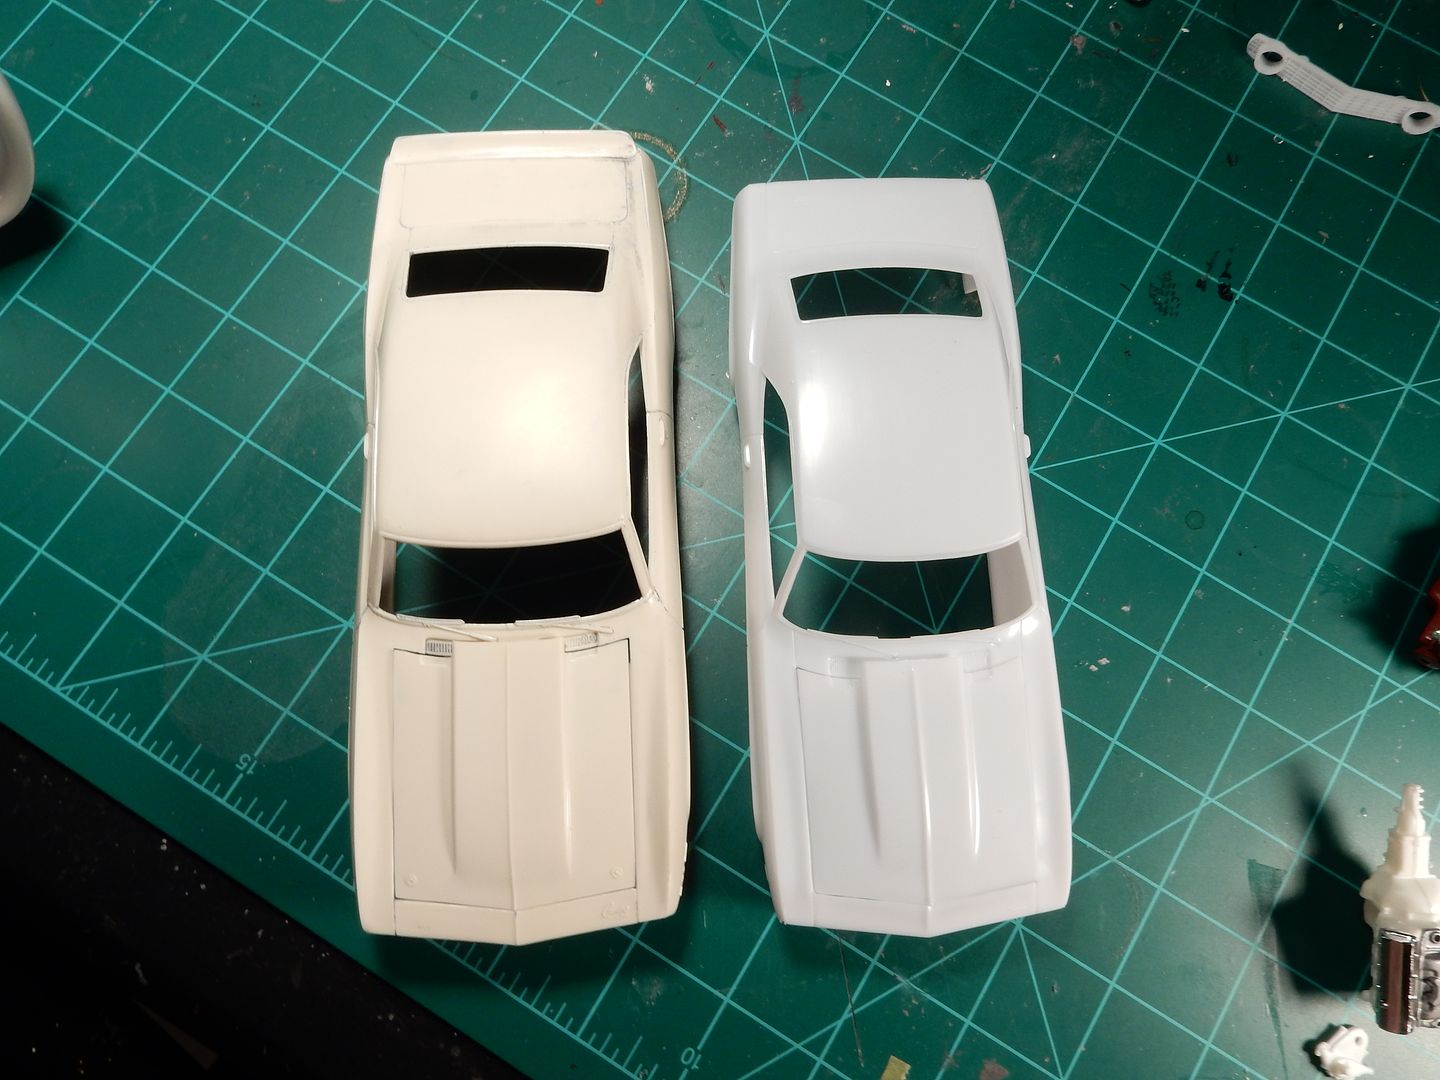
Here's a comparison with the way out of proportion Monogram 1/24 scale Camaro on the left and the newer Revell 1/25 scale Camaro on the right:

That looks to be more than the supposed 4% difference.
-
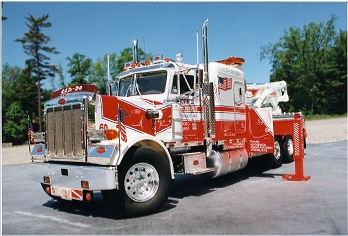
As we New-Englanders say: Wicked pissah!
It is really shame that they replaced these awesome smoke-belching monsters with Diesel locos (except for occasional steamer run).
-
Yeah, something doesn't add up.
Is it possible that the model was fairly close to the heating elements? Even if it the thermostat is adjusted for 110 degrees, the heating elements will get much hotter as they warming up the entire oven. Id the body was close to those elements it would have melted. Dehydrators use much lower power elements which are further away from the drying cavity, so there are no hot-spots. I use a dehydrator which is running around 110 degrees F and I have no problems with polystyrene deforming.
-
This is a historical question concerning the model industry. I am not a big fan of 1/24 scale model cars. 1/25 scale is my preference.
Jim, is there really that much visible difference between a 1:25 and 1:24 scale model to make you dislike a 1:24 scale models? Percent-wise it is only about 4% difference in size. I don't worry about it myself, but it would have been nice if all the automotive model kits were made in the same scale (either 1:24 or 1:25).
-
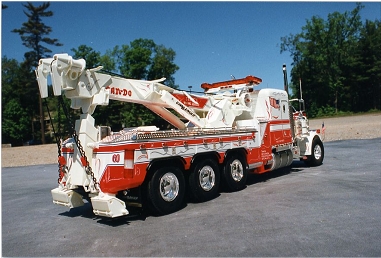
Thanks Anthony! I've seen, and photographed, some of your incredible model trucks!
-
Pączki? So you guys like Polish Dounuts? I have hard time finding those in my neck of the woods. The small Polish store I frequent sometimes has them but, they are usually stale.
You probably would probably also like makowiec and chruściki. :-)
-
Excellent model, excellent photography!
-
Well, I'm not a beginner, but I'm far from being an expert. About 30 years ago, I did use an SLR camera (Nikon FG) with detachable lenses and with extension rings for extreme closeup-photos. But that camera has been in mothballs for decades. Most of small point-and-shoot cameras I've dealt with had a macro mode. But even in macro model the cameras can still focus ok up to infinity. The camera I use currently for model photography is a 13-year-old Nikon CoolPix 8700. When bought it in 2004 it was a pretty good prosumer camera. It is not a DSLR and it has a permanent lens.
Problem with many point-and-shoot small cameras is that they usually don't have good manual aperture control, or they only have couple of aperture settings. Even my 8700 only stops down to f8. But most of those cameras have a small image senor which partially compensates for the rather large aperture. Same goes for the cameras built into smart phones or tablets, which also makes them goot for taking model photos.
It is true that extreme wide angle or telephoto lenses produce distortion, a judicial use of the effect makes a closeup of a model car look more like a 1:1 car. A good explanation of wide-angle and telephoto lenses is here , although it does not give you specific examples of model car photography. The affect I'm after is fairly subtle. I'm after slightly exaggerated perspective which makes the model look like it is larger than it really is. I don't always do that either, but I like to when I'm trying to make a model look like a 1:1 object it represents.
I also do not focus-stack every model photo I take. Here are some photos I took few years ago (using the 8700) Not all are taken using wide angle. None were focus-stacked.
Here is a good example of exaggerated perspective which makes the 1:24 scale model look more like a large truck. These were taken many years ago using my 35mm film SLR with a 28mm lens (which is a mild wide-angle).


-
Dental acrylic is a 2-part compound. One is the acrylic powder and the 2nd part is a liquid (catalist?). But you can get the same stuff in any beauty supply store as the stuff they use for doing acrylic nails. It even comes in different colors.
I have tried it to mold come 1:160 scale wheels/tires using open mold made form silicone rubber. I used that mold in the past with urethane resins. I filled the mold cavities with the acrylic powder and then using eyedropper I soaked it with the liquid. The worked - I got my molded tires but the liquid made the silicone mold swollen. It did eventually return to its original shape, but it took a while.
Latest issue of the Finescale Modeler Magazine showed a modeler who accidentally drilled through a urethane resin part using the acrylic stuff to fill the hole. So. it does seem useful for modeling tasks. But a word of warning - the liquid part will soften polystyrene (which might or might not be desirable).


3d printed figures
in Tips, Tricks, and Tutorials
Posted
That is Shapeways, not Shapeway. There are zillions of 3D printed items available there and if you know how-to, you can design your own items and they'll print for you. As far as how those take paint, it depends on the material they are printed with. Some materials are very porous, others (like FUD or FXD) have a waxy coating which has to be washed off before painting.