Kustom Steve
-
Posts
52 -
Joined
-
Last visited
Content Type
Profiles
Forums
Events
Gallery
Everything posted by Kustom Steve
-
I have been looking at doing some cars based on 50's to '60's style Hot Rods lately. I found a cool looking '30 Model A chopped coupe in a recent issue of from fall 2014 Rod & Culture that is a funky but rich green color. After reading and re-reading the article gleaning as much as possible about the build, I realized the car was from a car building TV show on cable. I haven't had cable TV in over five years now so I missed it. So Google being my friend and I found pictures and some more info about the car online. At first I was going to build a sorta, kinda looks like the car but now that I know it has some Hollywood glitz to it I may try to do as accurate as I can (within reason) replica of a '60's style rod. I have in my stash an R&D Unique chassis that I wasn't sure what to do with since all of the cool 1/25th scale kits of '32 Fords have been out by Revell stuffing it under a Monogram 30 Model A will do. I also have been having a bit of a parts problem since I liquidated 80% or more of my stash and most 1/24th scale went out the door. I kept some '40 Ford Pickups and '37 Sedans and the "lil Coffin kit. That's it. I sold off my Model A parts and my '32 Monogram Ford Roadster. Fast forward to the March Toledo show last week I went with my shopping list of kits and parts I wanted. I scored the Monogram '30 Model A Phaeton. I will be stealing the engine out of this model and the headlights bar for some other yet not thought up build for the cool custom headlight bar (It was mentioned in the new Revell Model A Roadster kit that these headlights are great '50's parts). So This kit wasn't just bought for a headlight bar assembly, lol. Now for an engine and headlight bar! ( when I got home and opened up the kit I may build a Rat Rod out of the tub with the custom flathead out of the '40 Ford Pickup kit and wheels I traded from a Danbury Mint Classic car. I am trying to be as economical with my cash as possible with the price of kits these days. I couldn't find the Model A kit at Toledo except for one air box for 5 bucks - no thanks. A friend from my local model car club came to the rescue. He has a spare coupe body and some interior parts - Score! I was going to use the wheels and tires from the 'Lil Coffin as well as the engine, but now that I am considering going more Replica I will use just the tires and grab a set of Radirs from my T Bolt kit that were the custom rims from that kit. Now I need to see if there was ever any finned Corvette scripted valve covers on a Monogram kit, and I may need to get the Monogram 1/24th scale Deuce roadster for the grill, grill shell and some of the front suspension components. I think it had a dropped axle and split wishbone suspension and the mid '80's version might of had the Corvette script finned valve covers? I would have to scratch build the air cleaners, chop the body, make a diamond tuft roof insert as well as make the interior upholstery match. The article mentioned they used House of Color Lime Green and I am set. I didn't watch the show, saw online during my research about the "drama" about the show. I am not concerned about the "Reality" TV side of things, just a cool car.

-
A retirement coming in the aftermarket!
Kustom Steve replied to Art Anderson's topic in Car Aftermarket / Resin / 3D Printed
I saw them at the Toledo Show as well. Mrs Holthaus has changed a bit since I last saw her in the late '90's and Don just shaved his 'stauche off. But what I did notice was their fatigue, both physically and especially mentally. I have done for my job five day trade shows where there is up to or exceeding 50,000 attendees and I am a bit younger then they are and I am beat after the show. It's not worth beating themselves up, especially since I was so shocked as to how small the Toledo show has gotten. I heard some people talk about a possible retirement when I was there but I was more focused on my shopping list of tires... -
MAD Hudson 308 I6 finned cylinder head
Kustom Steve replied to Chuck Most's topic in Car Aftermarket / Resin / 3D Printed
Thanks for the info Kris. A lot of so called casters just open pour everything and show pictures of the one time they get lucky with a good cast. Then they never give a straight answer as to how they cast the product and when you order it is Swiss cheese, lol. -
MAD Hudson 308 I6 finned cylinder head
Kustom Steve replied to Chuck Most's topic in Car Aftermarket / Resin / 3D Printed
do you pressure or vacuum cast these parts? -
Thanks, I have my post with the Ranchero here: http://www.modelcarsmag.com/forums/index.php?showtopic=96602&hl=
-
Pro Street Nash Metropolitan Sedan Delivery
Kustom Steve replied to Kustom Steve's topic in Model Cars
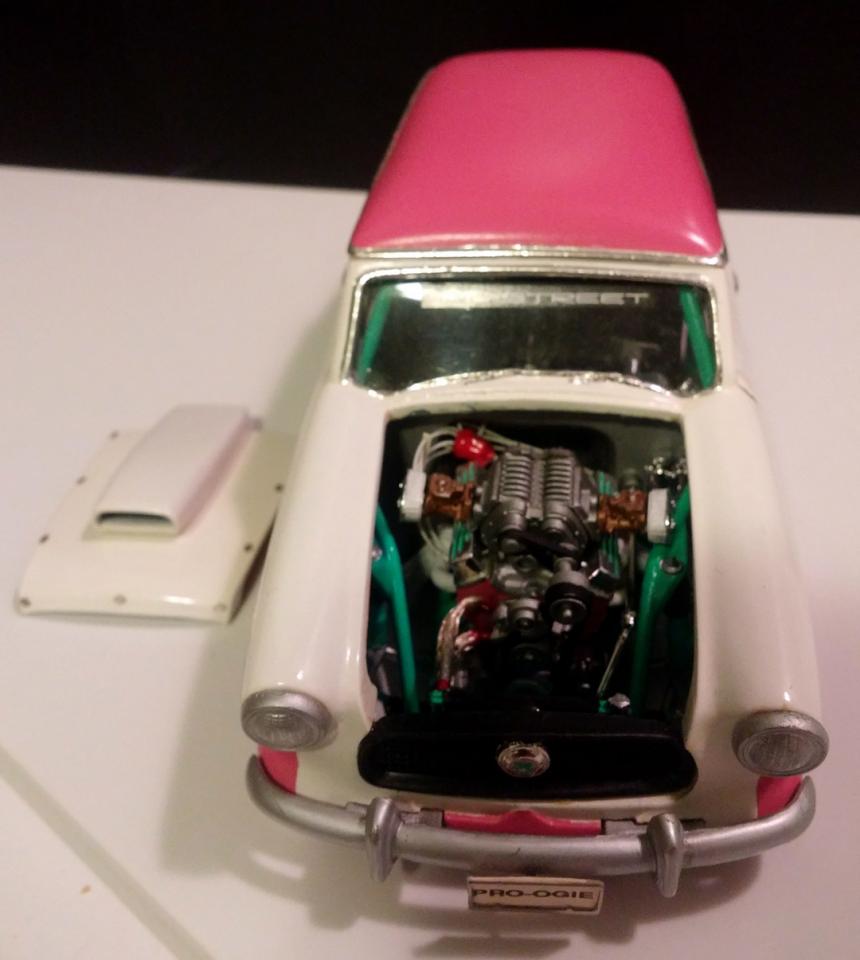
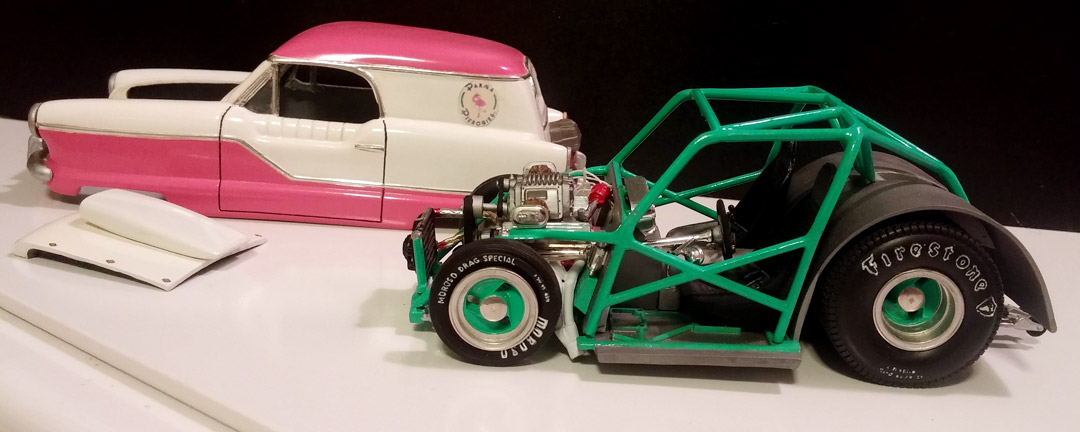
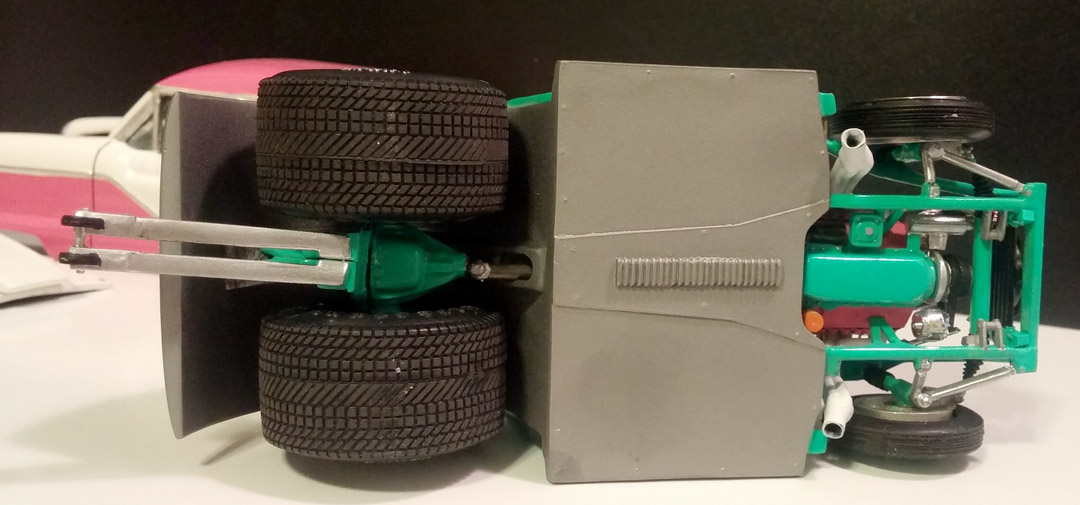
Yes, Al is correct. The blower and carb set up all came from the Pro Street Beretta kit with a lot of the chrome taken off and painted with Testor's Metalizer paints. The chassis was Titanium if memory serves me correct. The only aftermarket parts are the body, rims, ignition wires, license plate frames and hood latches. The engine is right out of the box. The radiator is modified to fit the body. -
Back in 1991 my modeling friends were ragging on me to build something out of my head and not follow magazine articles. So at Toledo Toy Show I purchased a Modelhaus Nash Metro Sedan Delivery phantom body. I also picked up the then cool Revell Pro Street Beretta. My friends also much maligned that kit for the excesses and too much chrome. They were Hot Rodders and Muscle car fans and worked so they had big toy cars while I toiled in college and was broke. I started on this project in mid July, there was a lot of family things to take care of with the failing health and passing of my Grandfather. Once life calmed down to a dull roar I started in earnest. I cut open the hood and attempted to thin things out. I used the Beretta's scope and tossed the rest of the body aside. The chassis and roll cage was the biggest engineer hurdle for me. I was able to trim off excess floor material in the back to flow with the body and cut off what wasn't needed up front. This still left me with a wheelbase way too long. I forget how much I took out but the floor pan was deigned that it was impossible to make a clean cut and save the tranny tunnel, louvers and such. I filed it off flat and laminated thin sheet polystyrene with 5 minute epoxy to rebuild the detail. I used a strip of louvers from the Revell '53 Chevy Sedan Delivery on the tranny tunnel. Then the roll cage was too low and a lot of fiddly work ensued to make it work. I used after market pewter rims and wire on the engine. I strpped off most of the chrome and used various colors of Testors Metalizer on the blower and other once chrome parts. I also used some very old Pactra turquoise enamel and that almost blew the whole project. The color was about 25 years old then and wouldn't dry right and took about 2 weeks to cure to the touch. The body is painted Duplicolor white from a rattle can and Fiat pink lacquer I airbrushed onto the model. Another almost trajic moment in paint was when I finished laying down the pink a midge landed on the fresh paint and almost destroyed the roof and my timing. Another problem was my masking, I left the paint to dry too long and t started to chip around the edges. I touched it up and rubbed out the finish, I made the Parma Pierogi logo from an color xerox print that was scaled down from a business card, I clear coated the paper and then applied to the side. This is in the age before good color printers and before we could print our own decals. I had fun with this build.
-
Thanks you all for your kind words. Also Thank you Dennis for finding the Issue for me!
-
Caesar, can you tell us more about the front suspension build up and what parts you used? Thanks!
-
I have the '60 Desoto kit and I built it as a kid back in about '77. fast forward to about 1994 or so, I stripped the paint and started to make a pro streeter of of the kit. I used the AMT Plymouth GTX Pro street and stole the chassis, tires and engine for the build. It has languished for years in my stash and I found it and dusted it off and mocked up some 24" American style mags with rubber band tires for a por touring look. So you can build a pro touring which could be really cool with a deep color and it would be very striking. Use modern mirrors, and steal some headlights from an AMT custom grill and bumper set, there are some early sixties looking MOPAR headlight bezels in there.
-
Thanks Dennis!
-
Do you remember which issue this was in Dennis? I still have all of my old Street Rodders, Most are in one place, but recently I have started to move some around and I want to be sure to keep everything together. I would like to see article again. I totally forgot about it until last night I was talking to my dad and he mentioned he remembered that it was published once back in the day.
-
I am pretty sure Tim you did see the model because I remember briefly being able to speak to you at the show. I have been away so long that I didn't hear of the passing of Brian Borden. A shame, I enjoyed his artwork.
-
She's winking at yah!
-
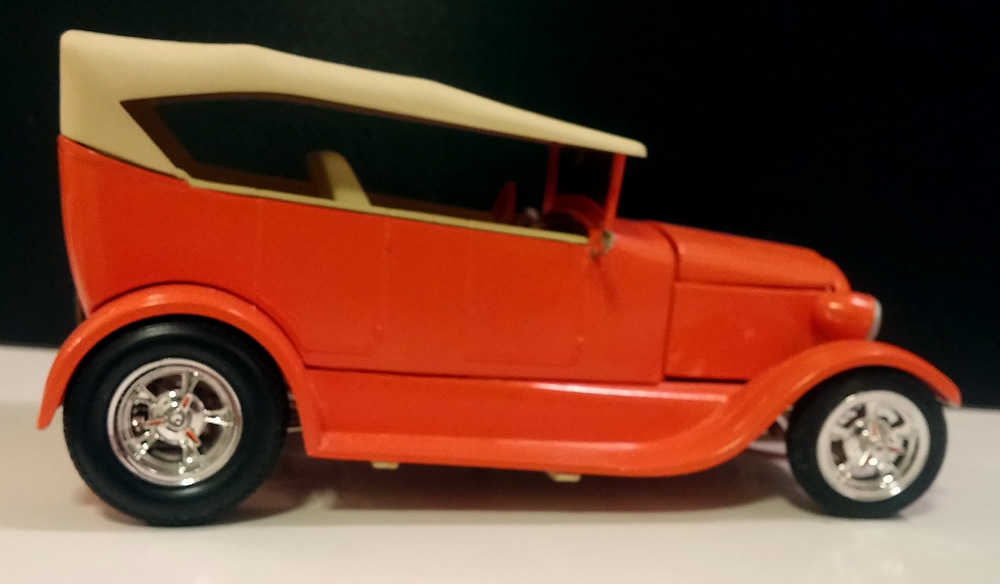
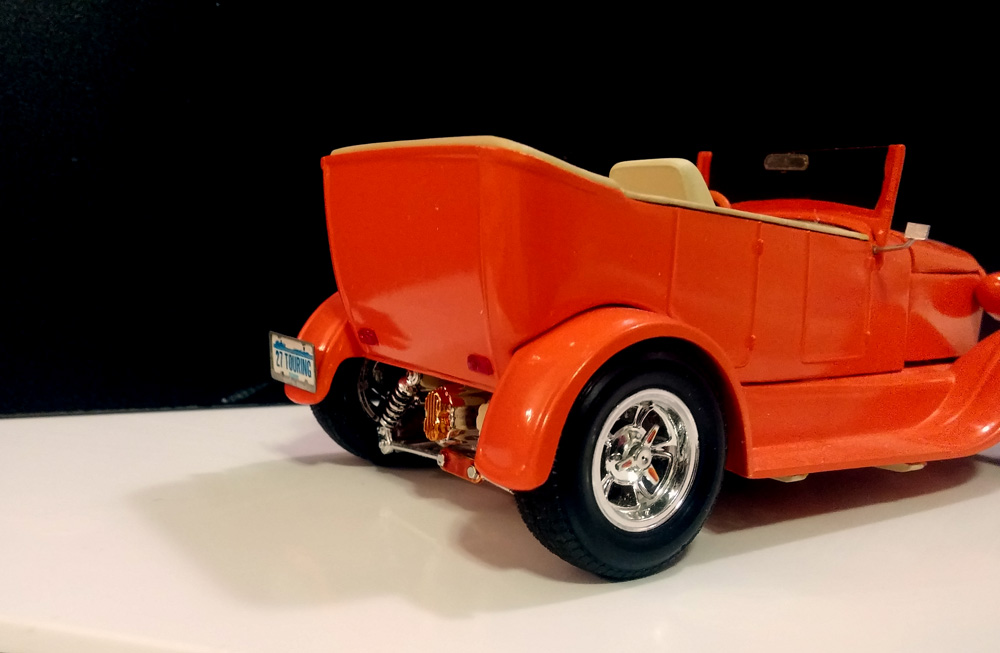
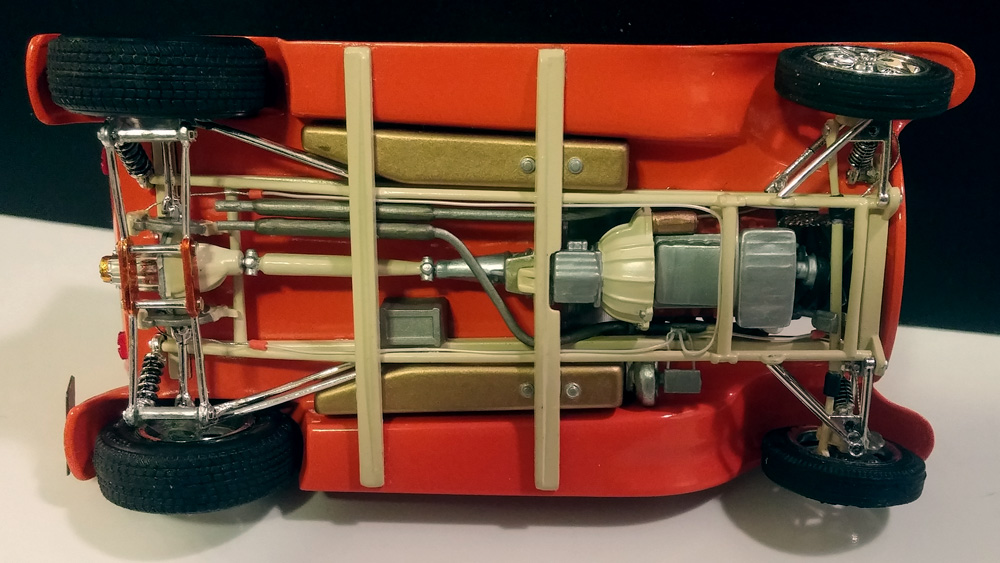
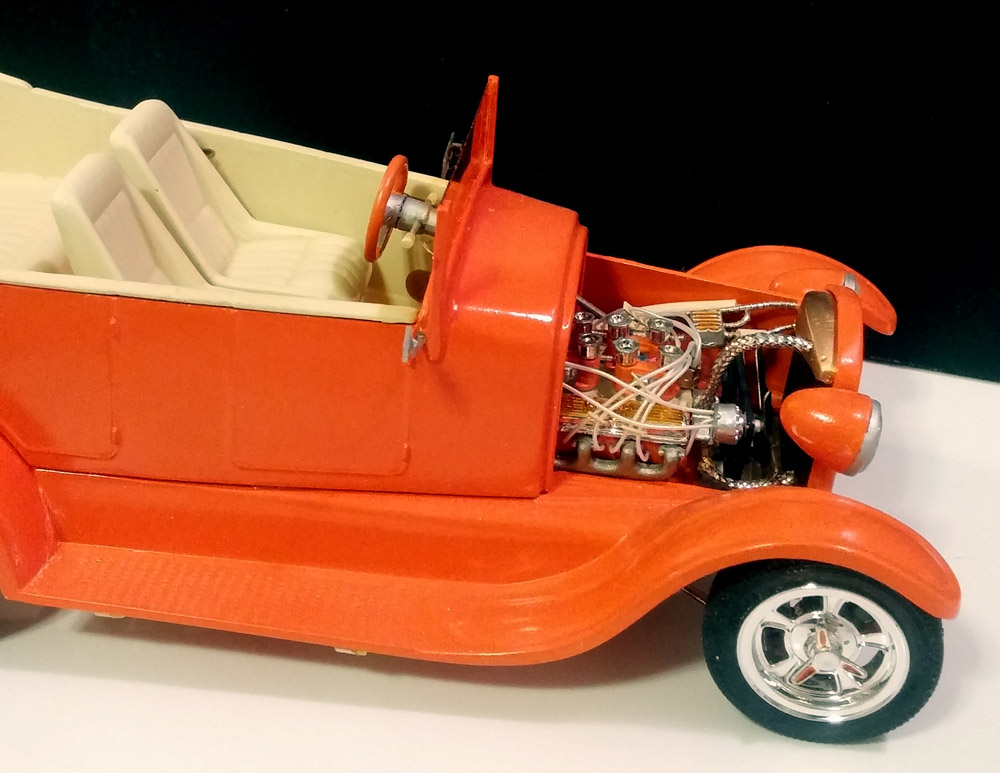
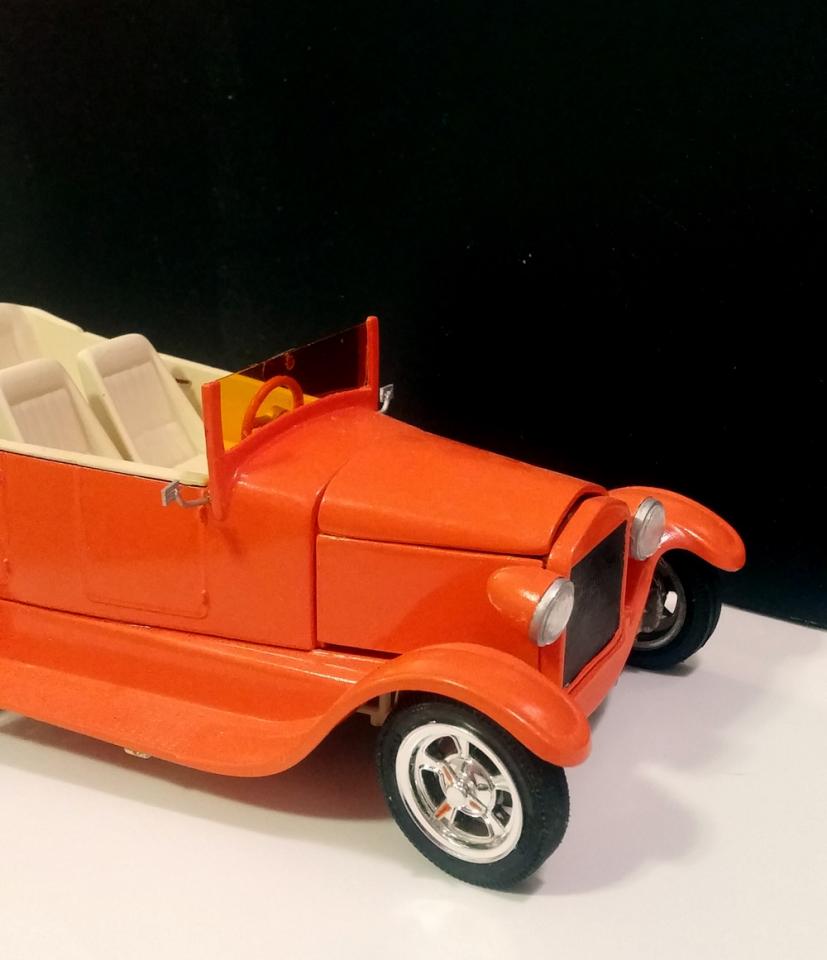
After I finished my '40 Ford Roadster Pickup based on a Tim Boyd article, I was drawn to one of Tim's Street Rodder articles and making a then modern Street Rod out of the '70's vintage Revell Buttera kit. I built the inaccurate '34 3 Window by Revell and I loved the chassis. I completed this model during my summer break between May and June before I started summer classes. This model was not as heavily modified as my '40 Ford Roadster Pickup but I did do far more plumbing on this model than I ever did before. The colors I used were Krylon Popsicle Orange (OSHA Safety Orange), Model Master Ivory, Tamiya transparent Orange, Pactra Gold and Revell Metal colors in Humbrol pots and a few other odds and ends colors. The theme I chose was to make the car an Orange Creamsicle, a cool car, with a tangy orange outside and a creamy cool interior. Ah, the early '90's with all of the bright colors drilled into a young impressionable mind... I chopped the top, but unlike the article I retained the reverse angle to the sides - Tim made more of a vertical formal side panel to the roof. I stole the intake from an MPC Camaro with injectors, '36 Ford Headlights, front tires from some o;d gasser or dragster from my parts box, the turn signals and the rear taillights are from a sprue of Big Rig Trailer lights trimmed down. I used Detail Master flexible fan and used a Detail Master interior detailing kit for the speakers and the door handles. The dash was scratch built and an epoxy casting was made off of another Rod kit for the cluster. I wired the engine, added break and fuel lines to the chassis, hoses for the air conditioner and radiator. My challenges was the chopped top and molded windshield, wiring and photo-etch. I broke with the instructions flow and built the motor and wired it up and set it into the chassis to later find out how hard it is to get the fenders over the engine. The instructions show that you put the heads on after the fenders are installed, Doh! I did a lot of cussing that afternoon in the basement and my Mom yelling at me for swearing so much. I got it together and I was pleased with it and I got a shinier body after I had polished the Krylon with Automotive buffing compound (the days before Micro Mesh polishing systems). Looking back and trying to keep it together has been quite a challenge as well. The Buttera chassis is beautiful and has pose-able front wheels. The A arms keep on opening up and the front wheels pop out, various phot etch bits fall off and the rear wheels fall off and break off of the mounts. The kit was designed to originally have 2 part plastic tires and small rimmed wire wheels. By the late '80's new vinyl tires and bigger rims were a part of the kit and were heavier and then break I think I will finally have to pin the rear wheels on and glue the wheels in place. Once again thank you Tim for making interesting projects to inspire builders. After I did this model I was brow beated by a modeling friend to quit following model magazine articles and make my own rods and customs. My friend Jeff had built many models kit bashed his own way but my technique was still more advanced than his. My confidence was bolster by doing these two conversions and I took up his challenge. The model I built the following year tested by kit bashing skills and I used my first resin body as well. P.S. Yes, I was trying to get a little artsy with the composition of the photos...
-
Thank you all for your comments and suport. Thank you Tim, glad you got to see this. I had it at the Toledo NNLor the Spring Toledo contest way back in Fall 1989 or Spring of 1990 and in a group shot there is a tiny picture of the model in SAE. I will have to find the old article.
-
Thanks for your support!
-
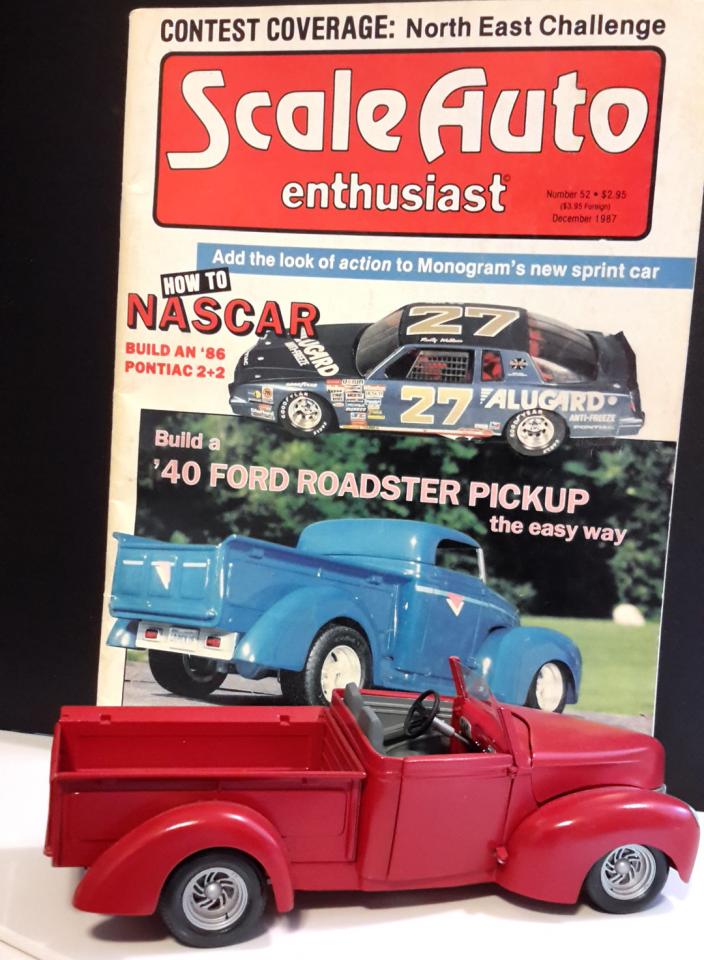
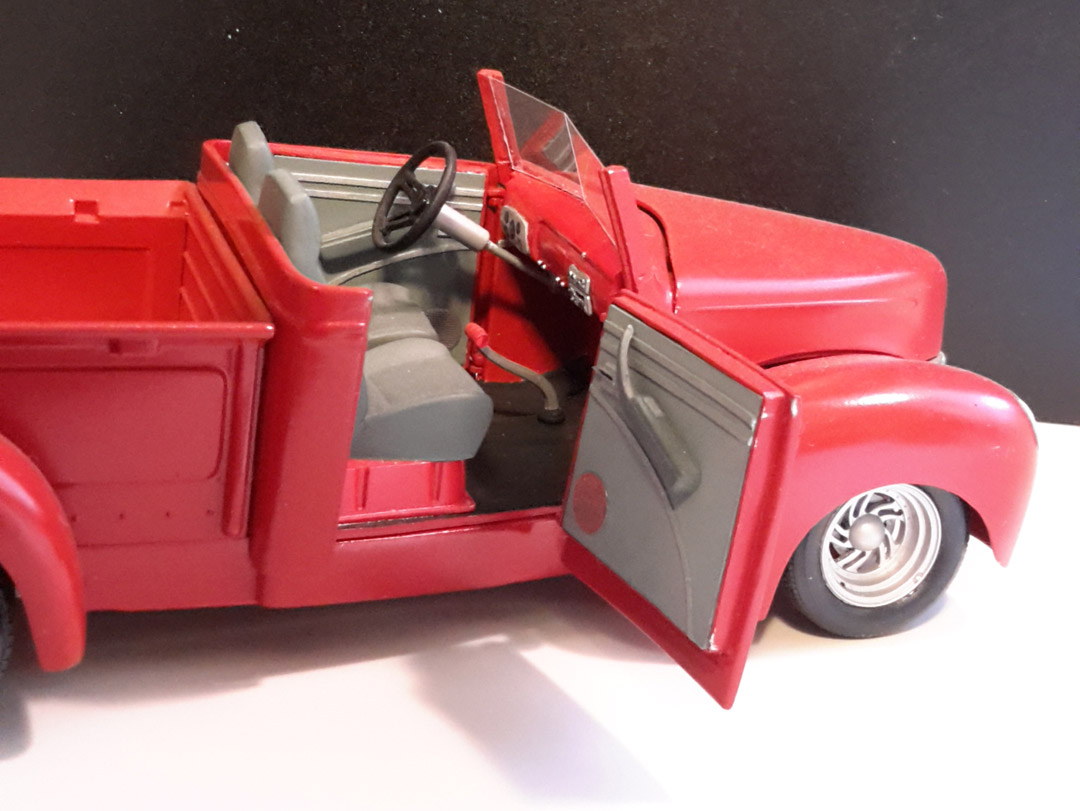
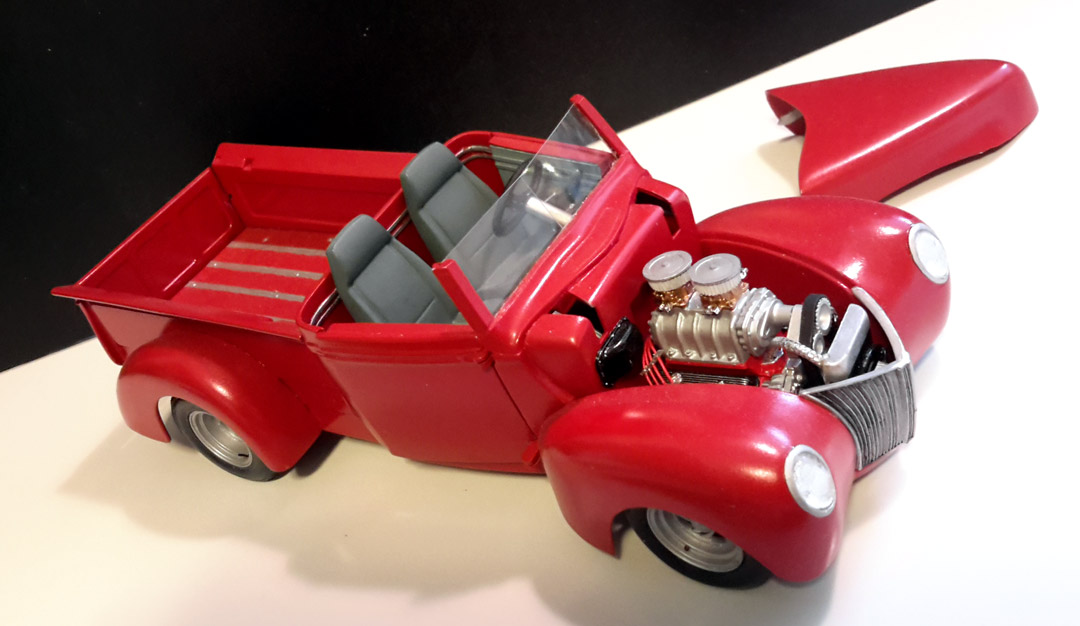
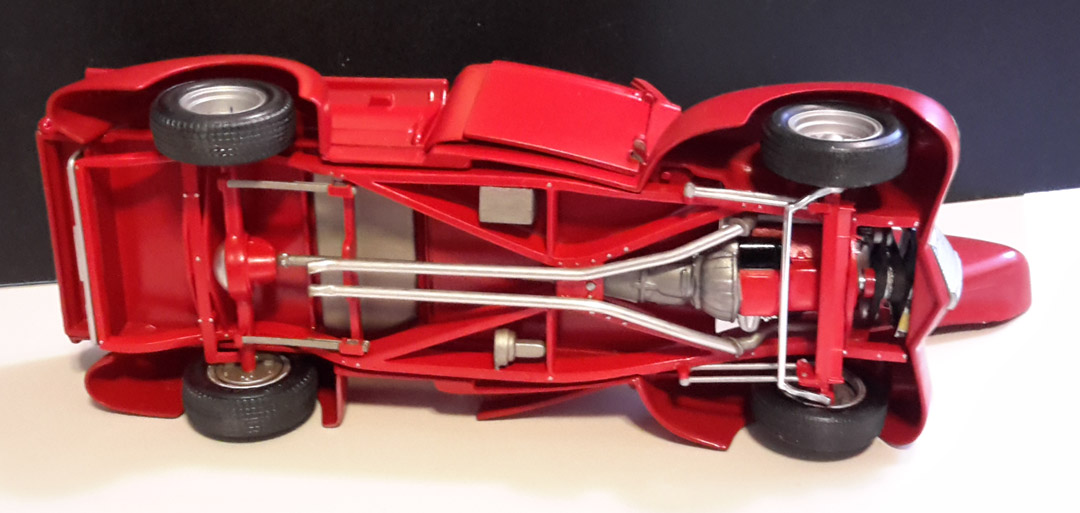
Back in the mid eighties I started to heavily build and collect model cars and it coincided with getting my drivers license and greater interest in all things automotive. I also started to read very carefully all of the model car mags I could get my hands on. I received my first Dremel tool for Xmas of '88 and I just finished my first semester in design school at college. I was itching to use my new Dremel tool on a more difficult build. build a more advanced model beyond some simple wheel swaps. I remembered seeing in my collection of model car mags a build up of a Phantom 40 Ford Roadster Pickup with a removable hardtop roof. So with my Xmas money on December 26th my Dad and I drove out to our favorite Hobby shop with money burning in my pocket and I purchased a Monogram 40 Ford Pickup and a Monogram Chevy Camaro 3 in 1 kit for the engine and other parts. I wanted the Chevelle for the Rat motor as used in the article but the shop was out of stock and went for the SBC with a blower. I also remember getting the Firebird as well because it had some of the other engine hop up parts I wanted as well. I also wanted to try out the Dremel and I used it to grind out the floor boards and other molded in "stuff" on the chassis that I did not need. It was an aurdous task for me then to clean up the chassis, grind off the texture on the inside of the roof and remove all of the louvers from the hood and tailgate. This was the era of ultra smooth cars with little chrome and all billet.. I started using Squadron Green stuff and moved to an automotive spot putty at this time for filling. Also I made some more work for me using the Dremel. I didn't have a foot control to slow it down nor a flex shaft to have better hand control. I made a lot of divots in the roof and chassis. I also went a few steps further and I made the doors stay working and scracth built the door panels and added and extended the trim around the cabin. I also used Detail Master photo etched speakers. I used mostly Testors paints, Model Master Engine red over a Silver rattle can base. I also used for the first time Testors Metalizer paints and fell in love with the look. I do have a roof but that took some serious damage and I need to restore that part. Otherwise I only needed to fix a few parts that feel off over the past 25 years. My main problem was that I was not able to get as glossy of a finish with the airbrushed red paint. I was running it too dry and I did not gloss coat the paint. I was running out of time and finished it the night before I entered it into a model contest. I got a second place with it if memory serves me correct. So now I say it is Suede, lol Here is the list of parts I stole from different kits Monogram 40 Ford Pickup Body Chassis Front Suspension Dash Floorboard & seat riser Monogram Camaro and Firebird Engine and rear suspension Seats Arm rests Shifter Monogram 37 Ford Sedan Rims and Tires Dash Insert - Foil Cast copy AMT 39 Ford Sedan Head Lights and Bezels I did not get to work on the model much during college, but I did work on it heavily during my summer break and finished it before I went back in the fall. So sometime I think in late July or early August I completed the model. I learned a lot from reading Tim Boyds articles and I stuck through it and got it done. As I like to call it I "T Boyded" the suspension to get the right ride height and ground away until it was just right. Tim always was able to do that and the viewer would never be able to see and of the trimming away he did to get things to fit. Thanks Tim for all of your articles and inspiration over the years!
-
That is totally Awesome! I love the steampunk look of the model.
-
My Holy Grail: Scottys Muffler Shop Monograms 55 Ford
Kustom Steve replied to A.R.C.'s topic in Model Cars
Great back story, always interested in hearing what motivates a modeler during the building process. Glad to see you built it just like the box with a very clean build style. -
Kewl!
-
Here is a shot of the dash and steering wheel just sitting in place, no glue yet so the wheel is resting on the seat. I also detail washed the steering wheel and tried to make a Falcon scribble for the center of the horn ring. I plan on painting the pleated areas of the seats and the door panels pearl white. I also plan to use some teal flocking for the floor - I think I still have some left and didn't purge it from my collection. I didn't mention that I am trying to go for a 1965 look to the Ranchero. The Ford Tahoe Turquoise color was available that year (from '63 through at least '68), the Keystone Mags where available in '65 from my research and the tires were popular at the time. I am pitching the hole through the engine block Chevy motor and stealing a 427 out of the Crusin' USA series AMT '65 Ford Galaxie. Finally I have two shots of what I did to stuff the tires especially the slicks under the car. The slicks barely fit the wheel wells. I had to do some minor trimming on the chassis plate to open the area up. The strange part was that I had to move the center of the wheel back 1/16" when I moved the hole up. Notice the weird hook to the hole. I will be using some epoxy putty to fill in the old holes, and and shoot the chassis. I was considering to paint the chassis white. My Dad painted his '65 Mustang coupe floor white and I have seen that done a lot back then in photos and car mags.
-
Here is a basics of the color therory I am experimenting with: http://www.cybermodeler.com/color/scale_effect.shtml This details scale color and the color affect for distance. I am looking at more of a forced stage lighting effect. I feel it is odd to do the effect on one area and not attempt to do it on another (exterior of the car versus an interior)
-
Since I started this model back in 1987, pre-shading and post shading were not common even in most modeling circles. Since the body was 75% painted pre-shading was not an option now. I will be applying gloss coat over the holidays. I feel that my modeling in other areas has improved my skills and gave me new ideas to try out in car modeling. This is more of a "git 'er done" model with some experimenting along the way.
-
HI Mike, I actually did post shading on this model. 1. I used Games Workshops' Drakenfelds Nightshade Shade Paint which is a type of a varnish, a pigment suspended in a varnish. Be forewarned that this paint is a semigloss, not a hi gloss finish. 2. I used a 00 brush for the detailpainting and I prefer using Windsor and Newton Kolinsky Fine Sable brushes (if you can still find them - there has been a ban on importing them recently) 3. I flowed the paint into the recesses like body panel lines and vents and I let capillary action do its job. 4. On the drivers side view I also hand brushed the varnish onto the recessed edges of the side body sculpture, door lines, gas lid cover, B pillar sculpture. Notice how this makes the detail pop in the photo versus the right hand side w/o the detail painting. 5. The dashboard really illustrates the painting process. I used the tone on the raised panel lines for the glove compartment and ash tray, on the underside of the dashboard top. I layered several coats of paint to make the tone deeper and I spread the paint out the widest on the first layer and applied narrower bands of paint to make it look deeper. I flowed the shaded around the instrument cluster as well as the radio, all buttons and knobs. This color works very well with Teal and chrome. The instruments are not painted with any type of black paint, just the shade. It is very dark w/o being black. The black paint is almost too stark and will kill the Tahoe Turquoise color. On the knobs I used an Acylic bone color and then hit the tops of the knobs with a very light cream color to make a highlight I will be posting more picks as I get parts and sub assemblies done.. 6. no more flat toned details and details that will pop!