shaunmza
-
Posts
121 -
Joined
-
Last visited
Content Type
Profiles
Forums
Events
Gallery
Everything posted by shaunmza
-
I remember watching this show as a kid, I loved that car, your build looks great.
-
I think it looks great and I love that colour!
-
That is a great colour, beautiful overall.
-
Hasegawa 1988 Isuzu Gemini (JT190) irmscher
shaunmza replied to Erik Smith's topic in Car Kit News & Reviews
I have taken quite a liking to the japanese kits lately. I browse way more than I buy though. This kit actually looks interesting to me, but kits like this make my wife roll her eyes What's your experience with Plaza Japan been like? Reliable? -
Eu sou estrangeiro, então meu português não é bom, não tenho mais modelos então eu tenho que fazer funcionar. I hope that made sense, in english, I don't have many kits, so I have to make it work. If I mess up on the body I will have to fix it, one way or another! Thanks for checking in.
-
Thanks, I can't believe how long this takes me though. It's therapeutic in a way too, I owned a mini many many years back, fun cars to drive.
-
I find it fascinating how you are crafting this, thanks so much for sharing.
-
I started a new model a few nights back. The weather here is so cold and wet I don't have a chance to go outside and spray anything, so all I have done is a bit on the engine. Here's the box; Mocking it up a bit. I decided to dress it up a bit with some spark plug wires, I had hoped to do more details but these wires look so comically huge on the engine that I am considering just doing spark plug wires. Without the body to hide the engine, a lot of green... I had to make my own distributor cap, as I was trying to make holes in the kit part it slipped out of my hand and shot who knows where. It does not seem to show up in the photos though! Overall I am not too unhappy with what I have done, only the second engine I have done, so not too bad. The wire is from a network cable, with the 'boots' being the insulation around it, hence the blue colour. I am a bit swamped with freelance work now, but soon I will get the ignition coil painted and glued on, so that the last wire has a place to go. My first Tamiya kit too, I am impressed with the detail, instructions and how well everything is done! I told myself 'no more kits till you build all the cars!' so I am hoping for better weather to get some paint on the chassis and all the other places where a rattle can would look better than a brush. I have 2 started and 2 kits not started yet, so it may be a while before I get more at this pace... What a random assortment of sentences, comments welcome, I am not an experienced builder and am using what I have on hand, so it's never going to be life like
-
Looks like this is going to be an interesting build, am following.
-
That interior looks amazing, looking forward to seeing the body too!
-
Thanks!
-
I do have another copy of this kit, so maybe on that one. When i realised I had 2 of the same kit I decided that this one would be the one I 'test things on'. I have tried scribing the grill, but an not happy with how it is turning out. I may try create my own grill and print it out to see how good I can get it.
-
I enjoyed watching this show as a kid, so this kit is on my list to buy some day. Looking forward to seeing how yours turns out.
-
I am dabbling with 3d printing and model kit building together. I print at home with an FDM printer so it's not the best quality, still fun though Seeing the level of quality on your prints and the work you do blows my mind!
-
Thanks, appreciate the compliment.
-
Thanks, I remember reading something like that a while back. It's great that the kit is still around, I also have the Talbot kit, which I think is an old Merit kit too.
-
I will let you know when I do it. Thanks for checking in.
-
That does look amazing, but 10X what I paid for the kit! I actually own the SMER kit as well, I added both to my cart not realising they were exactly the same on the inside. Maybe one day I can justify buying an update like that.
-
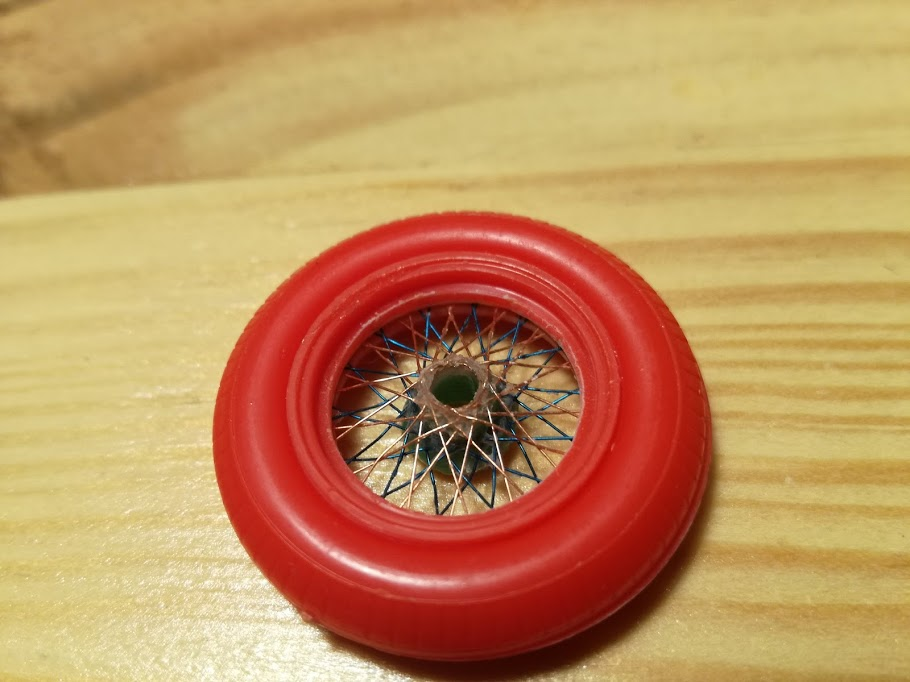
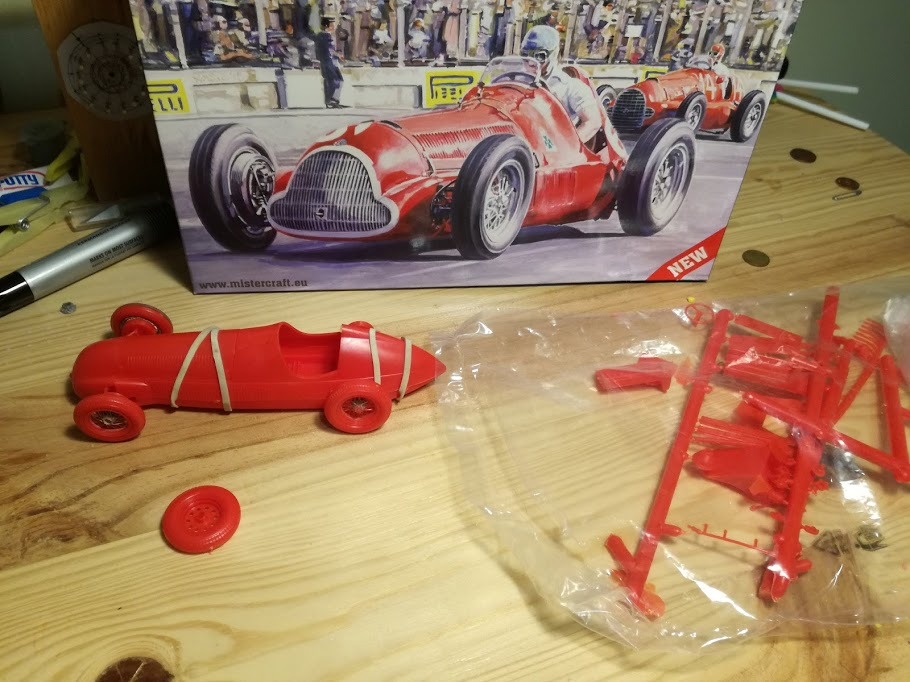
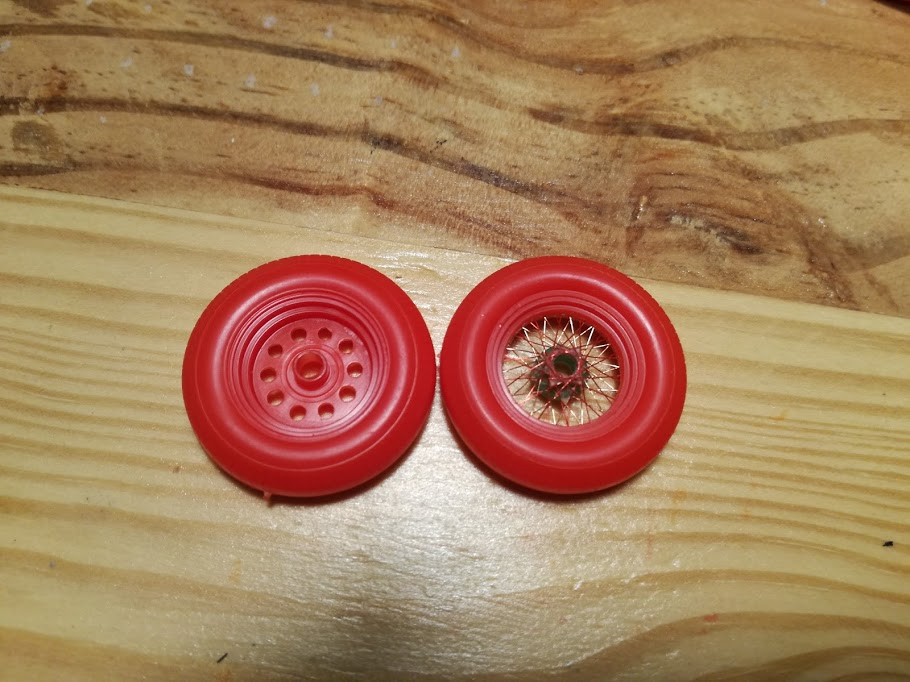
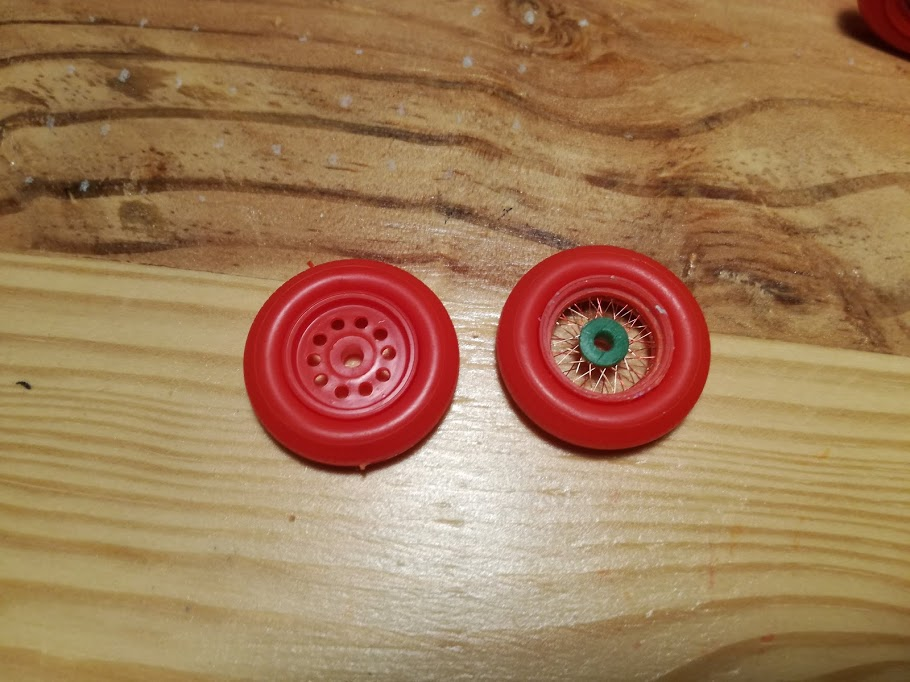
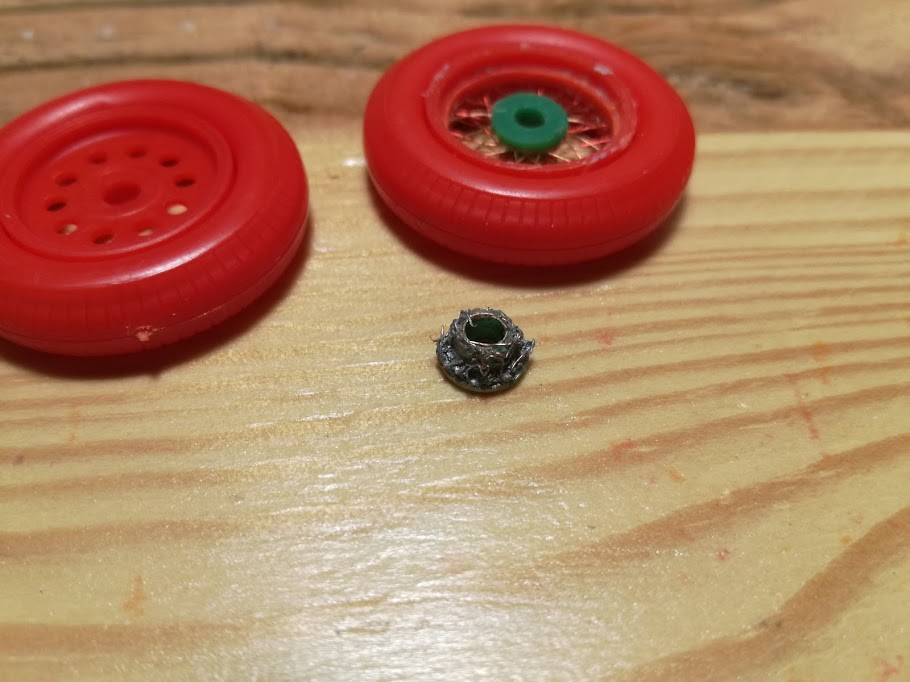
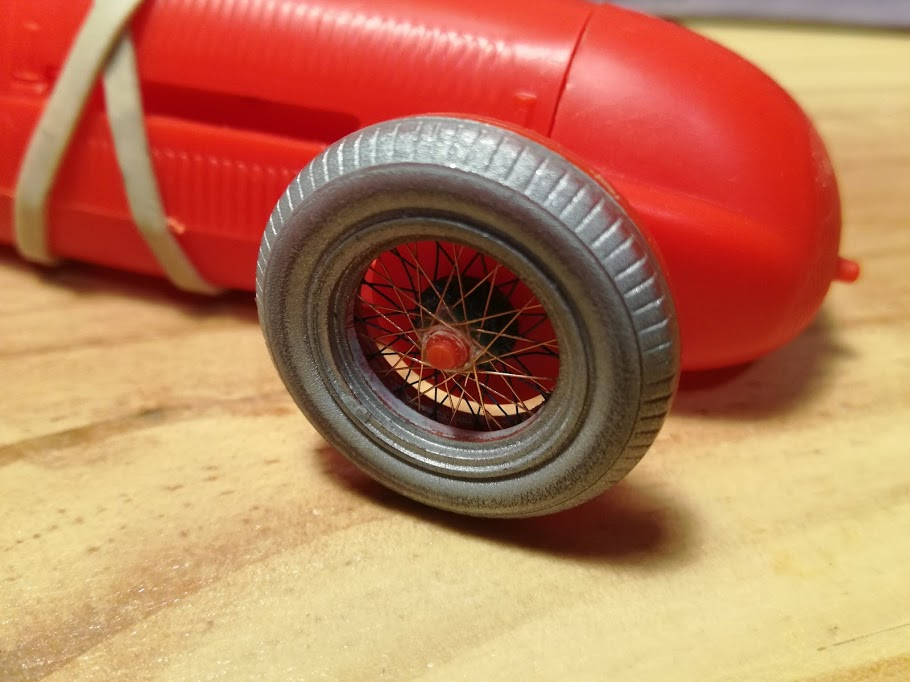
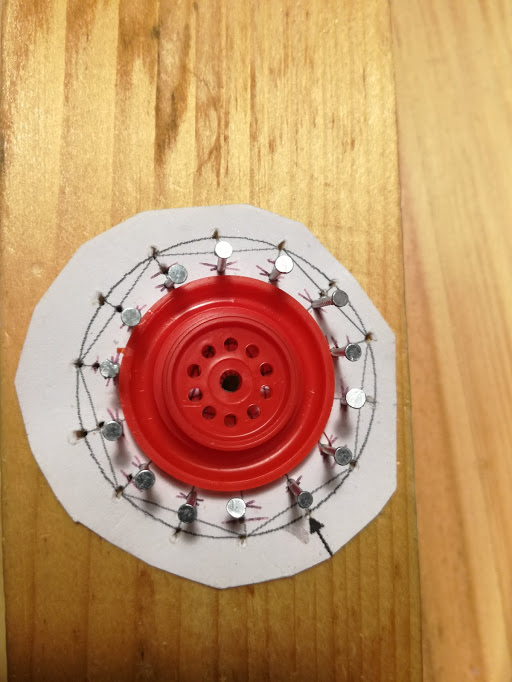
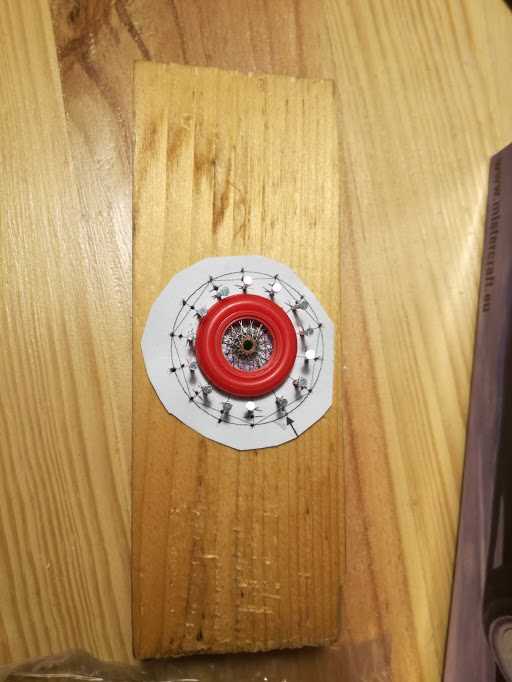
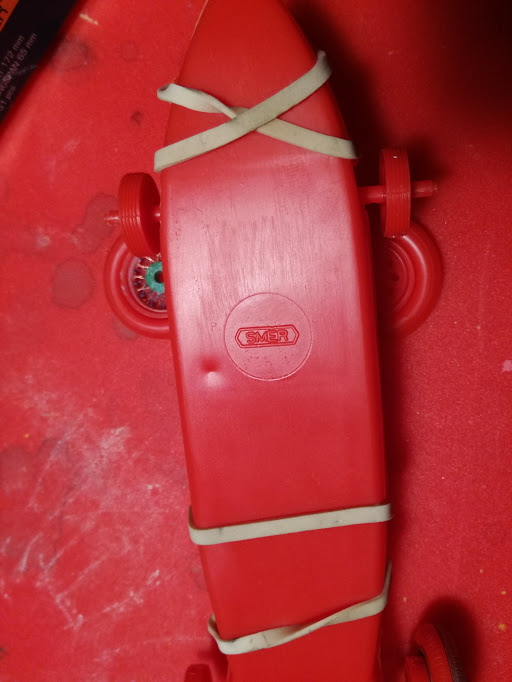
Here is a kit I started on not too long ago. It's not really something I would normally get excited about, but it was cheap (for Portugal) and I had seen a video on doing up wire wheels that I wanted to try out. The kit manufacturer is MisterCraft, I bought 2 airplanes and helicopters that they do in the same order, those were VERY cheap and I see now why. The quality on this model far exceeds the other kits of theirs that I have. The model has a long way to go yet, I focussed mainly on the wheels. Here is the original wheel and one I have redone. View of the back of the wheel. The holes in the original are vent holes for the brake drums I think. I will be drilling corresponding holes into the drums on the axles. They may not turn with the wheels, but I think it will be ok... I 3d printed my own inner hub, this is the remains of my first attempt. I had glued the wheel slightly skew, so ripped it apart and did it again. This was the first wheel I did, I was so excited to see what it looked like with paint on I grabbed some silver paint from a rattle can and doused it. The paint reacted with the plastic and left this rough pattern you see. I saw later how skew I had glued the wheel together and redid it, no paint applied yet. Do you like the colours? The wires are from a cheap headphones, I stripped the outer layer off, the colours are for the ground, left and right wires. My terrible jig. Scrap wood, a printout and some small nails. Crude but it works. Did I say MisterCraft? Yes I did! It seems they use the same tooling as the Smer kit, but this one is a tad cheaper. I am hoping to do a video and photo series of the last wheel in case anyone has an interest in how I did it. When I have time of course...

-
It has taken me weeks of messing around and learning the program to get to this point.
-
Here is a screenshot of the model as I printed it. Here it is as I am working on it. Many finer details have been removed, I am going to remove the hood and trunk lid too. Then I should be able to print them separately, saving filament that would have been used as support.
-
I built one model as a kid, an El Camino. No idea what manufacturer it was, I had no paint, so it was all white. My dad taped it up and painted the lower half black with some rattle can paint that he had lying around! I was pretty reckless with my toys as a kid so that model is long gone, I do wish I had kept it though! I am hoping to print the body oly and make a simple chassis out of styrene. I will upload an image of the 3d model in Blender when I get a chance. Thanks again for your comments
-
That would take some major surgery on the Camaro! I could always print another one though, right?
-
Not as much as you would think, will give details below; I realise the tone of the following seems defensive, please understand I don't mean it that way. To put this into context, I LOVE 3d printing stuff, I have designed and printed a number of small things, so am enjoying the process of creating as much as anything else. If you are thinking of 3d printing to make a model cheaper than what you can buy in store, forget about it! Once you take into account the cost of the machine, electricity, time etc. it's always a loss. So how much did the filament cost me? 1. the car has a 20% infill, so it's not solid and is actually very light (156grams of filament apparently) 2. It took 52 meters of filament (https://www.gearbest.com/3d-printer-supplies/pp_423470.html?wid=21 A 340 meter roll of filament is probably less than $40 shipping included). That puts the cost of filament for the car at roughly $6 YOU can buy a model for $6, I can't. Well I can, $6 for the model and $20 to ship it to Portugal Or I buy here in Europe and pay €10 + €10 shipping. My point is I have looked for some time to try and find cheap models to practice on. Here we have a 23% tax on items such as model kits, making them that much more expensive. In the model shop close by, a model car costs at least €20 new, and getting models secondhand is not much cheaper because of shipping. Then I mess the whole model up... because I am impatient, or just make a mistake If you are planning to buy a 3d printer to make bodies cheaply, don't. That being said, I have a 3d printer, and I enjoy watching it work. I have wanted to print a car since before I bought the printer, so it made sense. With this I gained experience, and a better understanding of how to work with Blender / Cura / my 3d printer. I enjoyed the whole process. I am going to print another one, I am still hacking away at the 3d model, trying to make it such that I get a cleaner print, not to save money, but to gain experience. @rickcaps55 You have to start somewhere right? Once I have worked out the kinks I can print my own body for an existing kit / chassis, but first I need to learn how it all goes together! Thanks for your comments!
-
That was definitely a lesson learnt. Printing would have been more than 24 hours at a layer height of 0.06mm, so I printed it at 0.15 to get it done in 11 hours. Having to sand so much meant I lost a lot of detail, so next time I am going to print at a much higher quality. Then be VERY patient