jacoballardtattoo
-
Posts
181 -
Joined
-
Last visited
Content Type
Profiles
Forums
Events
Gallery
Everything posted by jacoballardtattoo
-
 This one had 2 cups different sizes and 3 bottles when I got it. I thought it was a badger but want sure, it does have sears stamped into it. It's a duel action. Is outa decent airbrush? Is it suitable for a beginner? I do have a compressor (I think it's a fifteen gallon) that I was using for auto painting (it's basically useless for anything else I have tried) I'm not sure if it would work for the airbrush? I have been looking on amazon fora cheap one that might work but don't know what I would need. I'm working with maybe 50$ tops right now.
 -
weathered models
jacoballardtattoo replied to jacoballardtattoo's topic in Tips, Tricks, and Tutorials
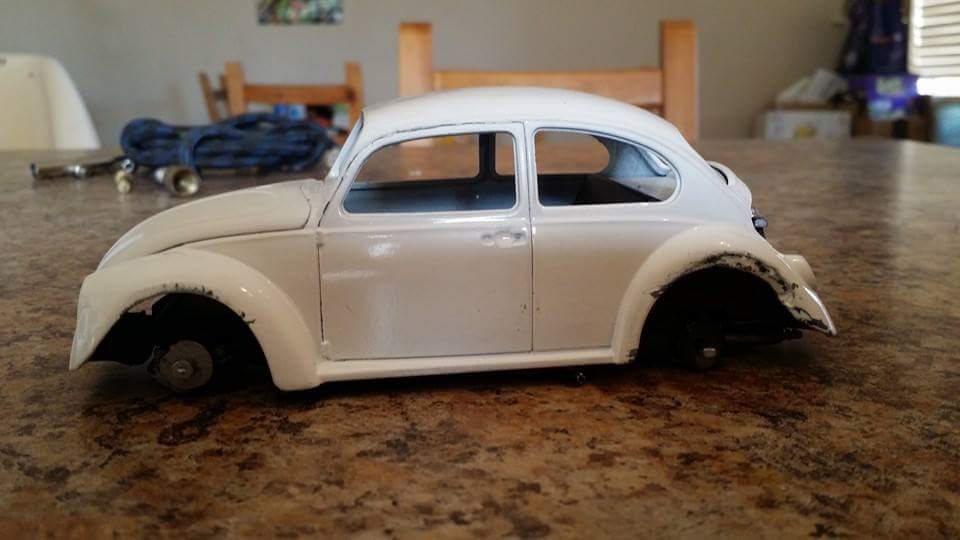
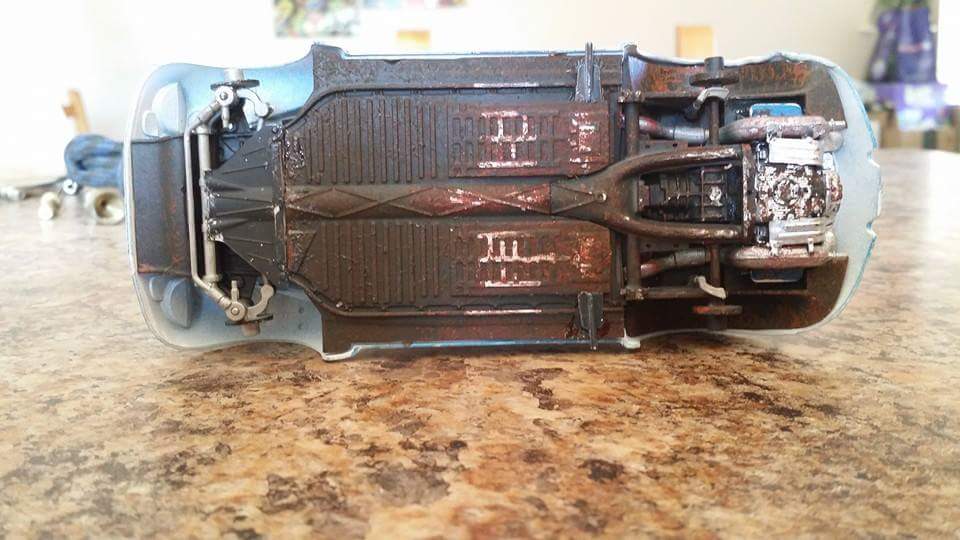
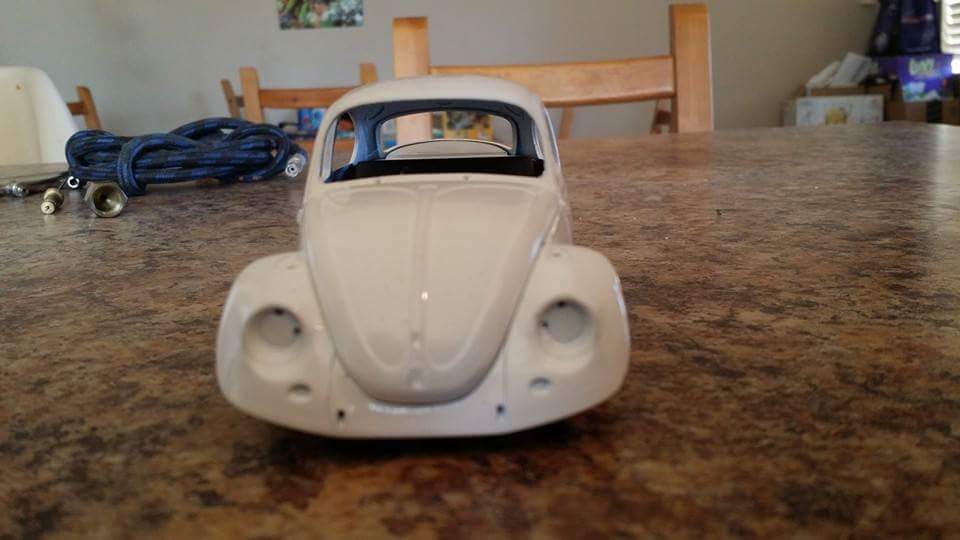
Finally got the pics to post. So here they are so you guys can see what I did with all your guys advice, it's still not done though. Please keep in mind this is the first model I have done since I was maybe 10.
-
I just found my old airbrush hiding in the tool box, I got it over 10 years ago but never was able to use it. I want to finally learn to use it for both pictures and models but have no clue where to start, so any advice would be great! To start in the pic is what I have now, if you can help me out with what I need from here and maybe telling what it is that I do have. Then thoughts on the cheapest way to start since I am just starting. Thank you.
-
dented fenders?
jacoballardtattoo replied to jacoballardtattoo's topic in Model Building Questions and Answers
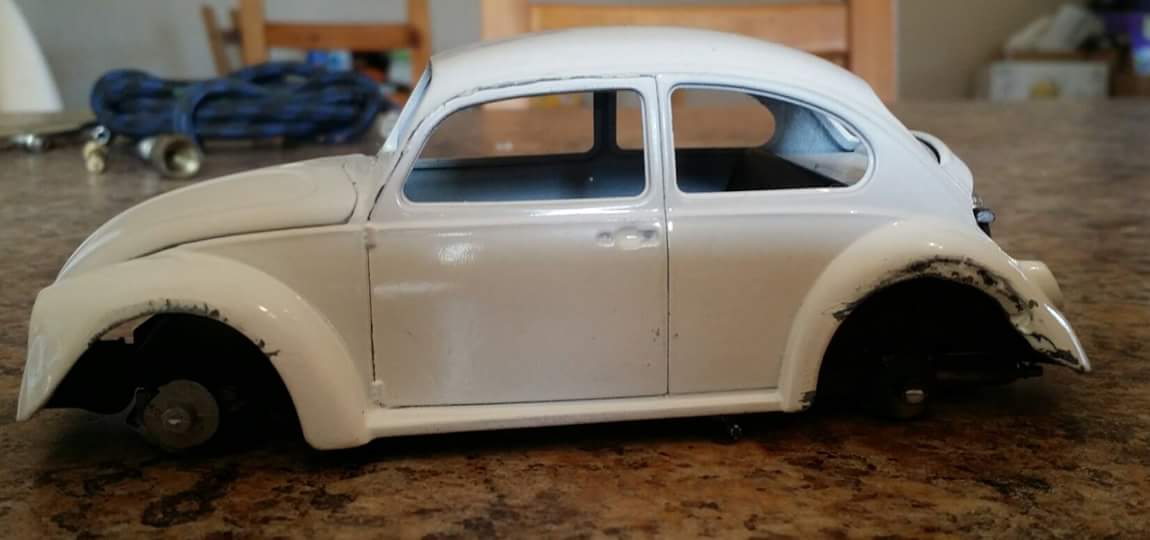
Okay finally got some pics of my fender denting. I still have some detailing to do but wanted to get some responses first.
-
Go salvage yard with it, the type of car you can buy at a salvage yard as a running complete but junked ride. Flat red paint poor interior mix matched rims. At the price you paid you can have fun with it and have no loss of it doesn't turn out good.
-
dented fenders?
jacoballardtattoo replied to jacoballardtattoo's topic in Model Building Questions and Answers
Steven, I would love to see your build finished, it's looking good already. Thank you to everyone a lot of food for thought here. I do want to check out the foil idea. Randy I will check out your link right now. What I did I think worked out for the most part I hope. I shot the fender with a blue paint, then chrome, then my final color white, heated it up from the backside and used the sharp edge of the lighter for the first impact and the rounded for the filing drag. This broke up the paint where I dented it nicely and showed the chrome a bit giving the exposed metal look, the blue bar coat serves as the paint transfer from the impact. The final step will be scratching away some of the white for finger detail and rising out the edges. I hope to finally have pics tomorrow. The blue bar coat was a bit of a mistake that turned out good in the end it really gives the paint transfer effect. -
dented fenders?
jacoballardtattoo replied to jacoballardtattoo's topic in Model Building Questions and Answers
Okay again thank you everyone for all the advice, I went ahead and used my lighter on the backside of my fender, heated it up to just before really melting and pushed in my dent. It worked out great! I am going to try and get some pics posted to show how everyone's advice helped so much. -
working headlights?
jacoballardtattoo replied to jacoballardtattoo's topic in Model Building Questions and Answers
Thank you all so much, right now I'm thinking the aaa route is my best bet I have them laying around I was thinking of sourcing my lights from a set of mini Christmas tree lights from the dollar store, they already run 2 AAA batteries as there power. I just need to know how to build the battery box and wire in the lights? The only wiring I know is on real cars. -
dented fenders?
jacoballardtattoo replied to jacoballardtattoo's topic in Model Building Questions and Answers
I thought about using my lighter trick that way, (from the inside). I have left myself at a bit of a advantage on this one, I have little to no experience at the moment, this will be maybe my 6th build ever and the first serious adult attempt, yet I'm going after advanced skills. I have no trash models or even good ones to practice on and to small a budget to do the practice and the build at the same time. Good hobbies cost money even if it can be done cheap I guess. I dropped more than I should have into my scale R/C crawler and put the models short for a bit. Probably a common issue with those of us with multiple hobbies, lol. -
Okay so I painted my body already but decided after the fact that I would like to dent in a fender (to mimic the all to often seen damage on a new drivers car) normally I would get out the good old bic lighter heart up the area and dent away but it's painted any suggestions? I do not have a heat gun but could steal the wife's hair dryer if that would get hot enough?
-
Thank you Mike, I will try that . I am trying to learn all the terms, you said the term weathered is a rather broad one so I want to make sure I'm using it correctly. What I'm looking to find is the models built not to look there ultimate best but to look as most would driving around town. Am I using the correct term here?
-
Nick and Lee, I didn't mean to start a post that would clog up anything, I only went this route for the chance of starting a collection of just weathered models. I have checked out the under glass section and it is a wonderful collection of beautifully built models but as weathered models are not as popular as show room styles I have a hard time finding the style I enjoy. Again I had no idea this was the wrong way to go about it. I do appreciate the input though, it is best to find out you went the wrong route before go down it to far. It's there an easy way to separate the weathered models from the rest in the under the glass section?
-
Thank you Aaron out helps out a lot having the links.
-
I just entered the hobby but I always shoot for the stars with every project I do. I love the models that are not prefect, ones that look like what people normally see driving around town, weathered. So if anyone else loves these less than perfect builds please post what you have done here. I'm searching for ideas and to learn more on doing weathered builds. Again thank you. I will try and get some pics of the one I'm doing right now up soon.
-
working headlights?
jacoballardtattoo replied to jacoballardtattoo's topic in Model Building Questions and Answers
Bill I just checked out the link you gave me on the hinges, thank you I found my answer there quickly. -
working headlights?
jacoballardtattoo replied to jacoballardtattoo's topic in Model Building Questions and Answers
Some amazing tips, thank you guys these are all very helpful. -
working headlights?
jacoballardtattoo replied to jacoballardtattoo's topic in Model Building Questions and Answers
Okay wow, thanks for all the tips. The model I'm building right now is a VW bug so I'm thinking I will use the trunk for the battery compartment. I think I have a salvage switch from an old R/C helicopter I can use.i just need to find the right battery and figure out how to hinge the trunk lid to open and close. -
I have not attempted it just yet but thought asking others would be a great start, I want to put some small LED lights into my 24th scale. I have done it in a 10th scale R/C which is pretty common but was thinking the same would work here. My plan without further advice is this, drill out the light buckets to fit the LED glue the light in the hole, place a small battery pack and switch hidden in the body somewhere out of sight. My question is this, what's the best way to make a small cheap battery pack and switch and the best way to glue in the lenses cleanly? Any suggestions are welcome, ps. All builds I plan to do are on a tight budget and I love scratch building so tips that do not lead me to pre built options are preferred. Thank you
-
I just picked this kit up for my son, he is 8 and this is his first model please post pics of your work so I can show him what's possible. Thanks I really hope he falls in love with the Hobby.
-
Monogram Blue Beetle
jacoballardtattoo replied to TooOld's topic in Model Trucks: Pickups, Vans, SUVs, Light Commercial
Nice! -
I'm for Jeep personally but this is some amazing work. Great job!
-
weathered models
jacoballardtattoo replied to jacoballardtattoo's topic in Tips, Tricks, and Tutorials
I have finally had a chance to dive into my build and have used a few of the ideas given here. Thanks to everybody. I will need to start posting pics soon. -
.
-
weathered models
jacoballardtattoo replied to jacoballardtattoo's topic in Tips, Tricks, and Tutorials
Lone wolf 15, I really like your idea I do have plenty of oil pastels not sure if that's what you mean, but if I get the desired effect how would I set it so it won't just wash or rib off later. Chris I was also wondering the same with the acrylic on my past experience with acrylic on plastic it rubs off easy what would be a good sealant for it. I was thinking I have used hairspray to seal pencil drawings would it work? -
weathered models
jacoballardtattoo replied to jacoballardtattoo's topic in Tips, Tricks, and Tutorials
Great tips, unfortunately no I am not using an airbrush. I am looking to find my old one I got as a kid and never really perfected. Can I still pull it off with out? My primary paint choice has been krylon.