jacoballardtattoo
-
Posts
181 -
Joined
-
Last visited
Content Type
Profiles
Forums
Events
Gallery
Everything posted by jacoballardtattoo
-

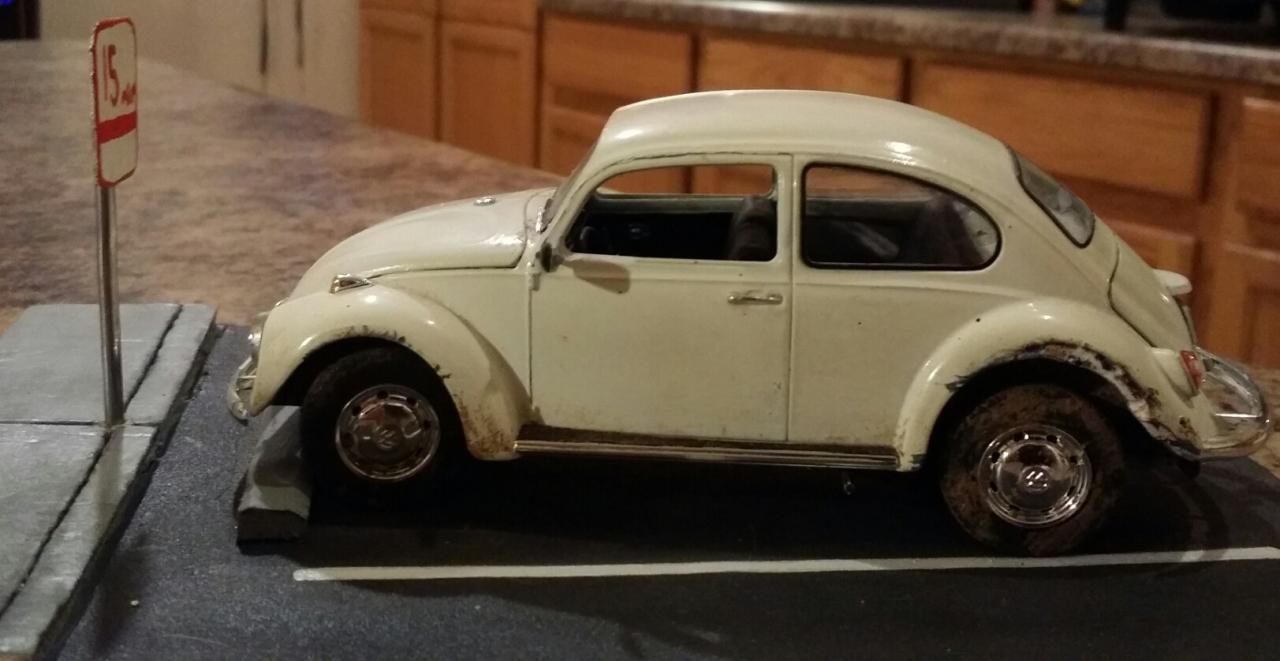
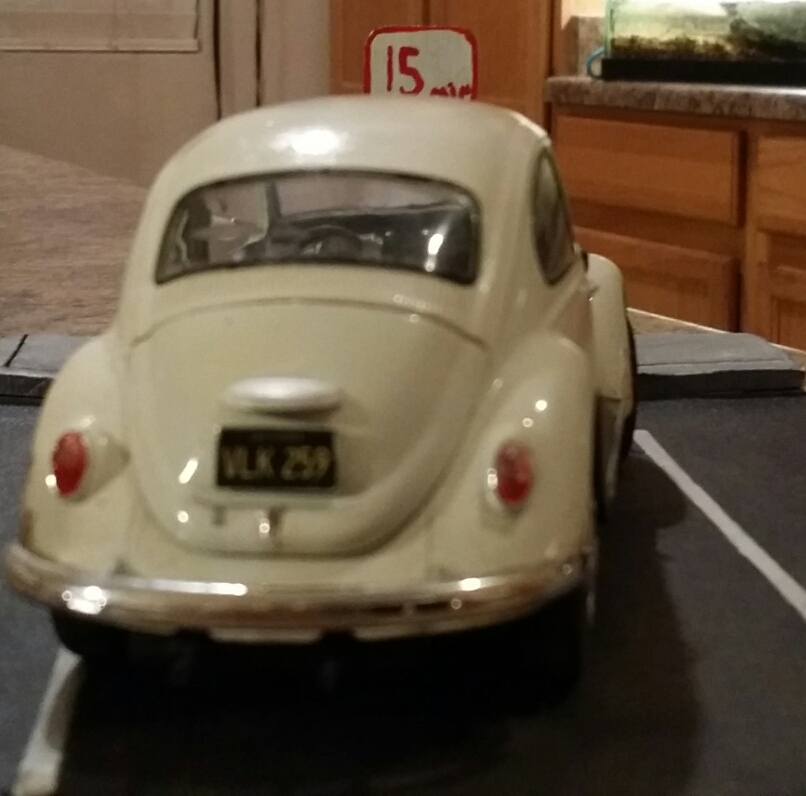
1960s VW bug (slightly weathered)
jacoballardtattoo replied to jacoballardtattoo's topic in Model Cars
Thank you everyone. I enjoyed this build. I'm in the process of building a baja right now, that one can be found on the workbench under 63 baja if anyone wants to see it. -
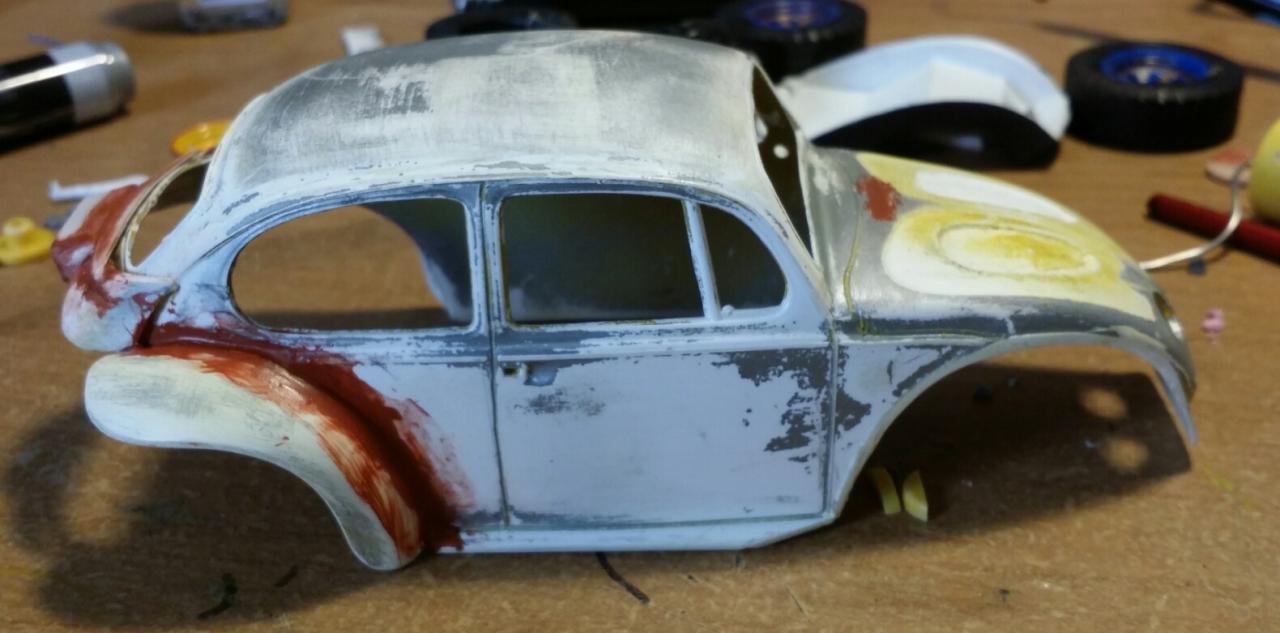
So this one has been done for a while but I'm just now getting pics posted to here. This was my first build since I about 10 years old. Almost box stock except for some weathering.

-
Are these "Swamp Coolers"?
jacoballardtattoo replied to Deano's topic in Model Building Questions and Answers
Wow that is some cool information Art, thanks. I was familiar with there existence but not much more than that, I'm in Arizona and I tried finding one for my 63 Baja around 2001. Either i didn't look hard enough or they were not very available because I never did find one. Now knowing how they work i could have built one. (Maybe) -
Are these "Swamp Coolers"?
jacoballardtattoo replied to Deano's topic in Model Building Questions and Answers
These type of coolers were used in the old VW bugs that may be where they are from. -
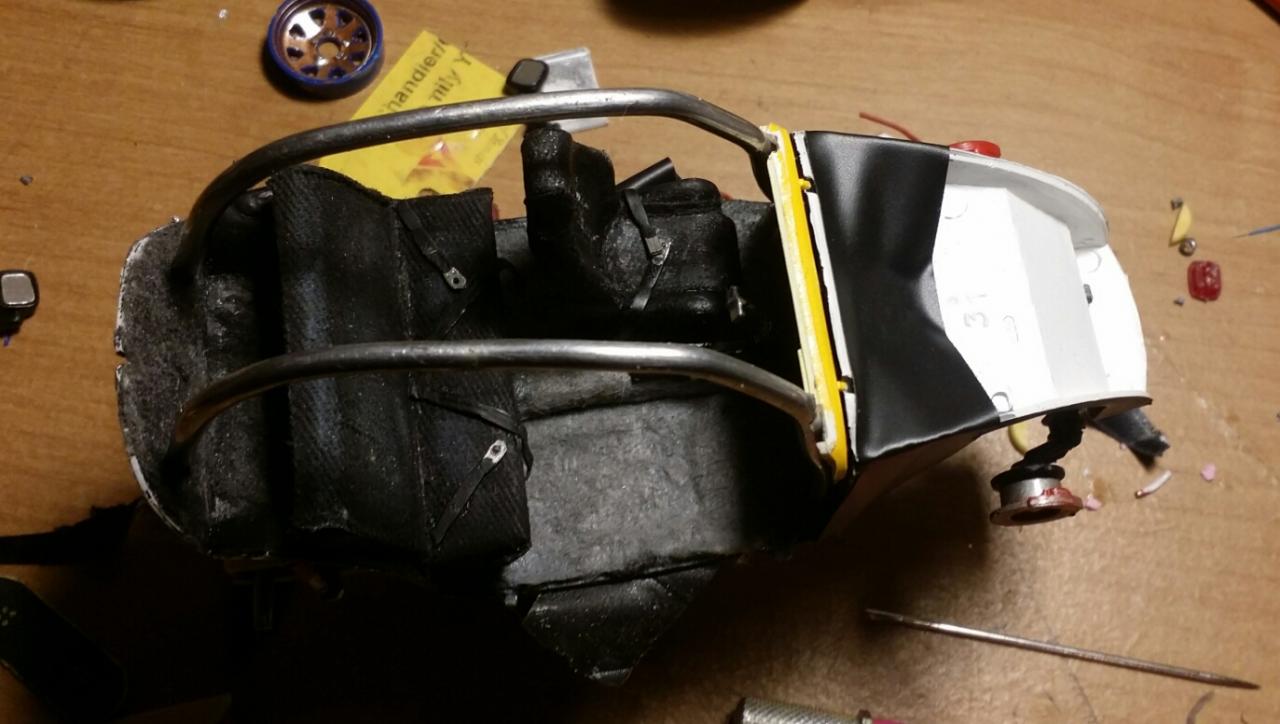
Small update, touched up the interior a bit and trying out a possible cage. I think I'm going to redo the front seat though it looks kinda grungy to me. I'm also thinking about going topples with it, what do you guys think? Suggestions please.
-
Thank you so much Chris, I'm enjoying this build. I'm very proud of my work so far this is the first build I have ever done with this extent of serious modifying, it also is only my second real build ever.
-
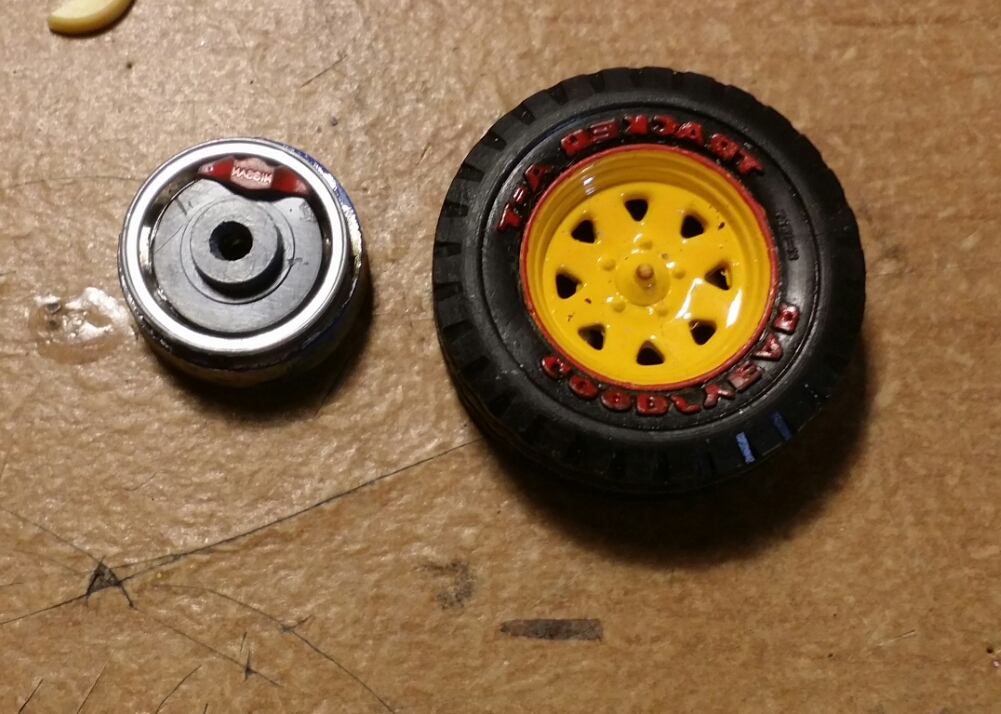
Okay now the interior, at least what I have so far. Photos 1 and 2. Photos 3 and 4 suspension. Photo 4 shows the section I had to craft to work with the lift in the rear. The last photo is the rim and tires on the right and the backside of the rim with the disk brake in place.
-
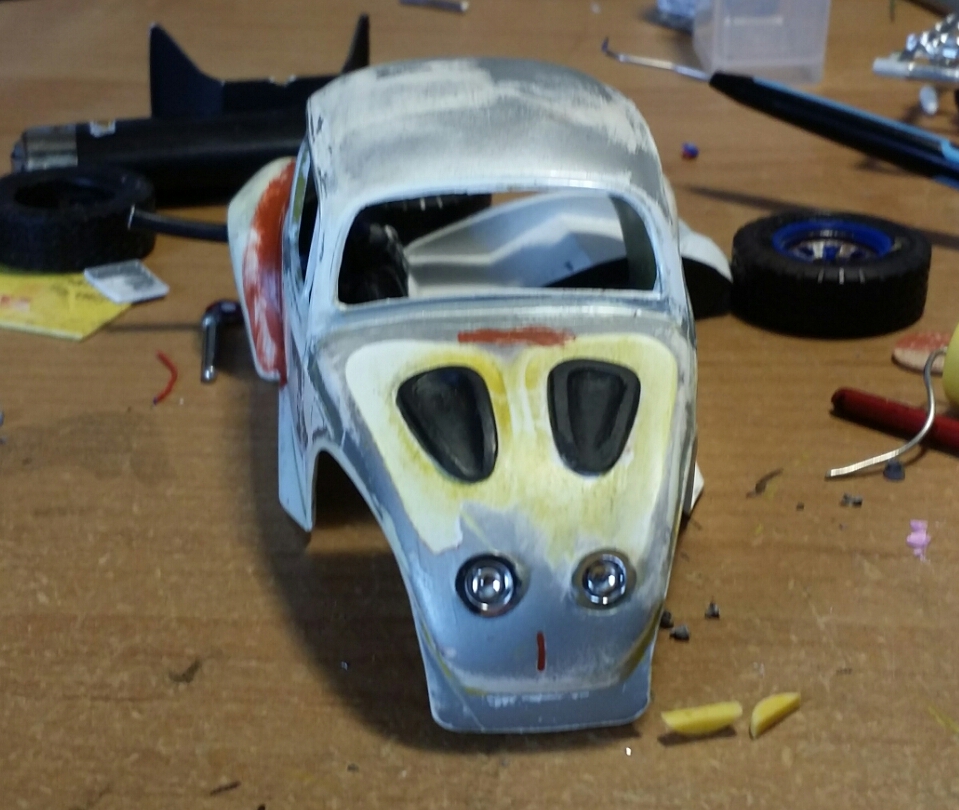
I know Miles I'm not super happy with the headlights. I chopped up the front fenders before figuring out the headlight placement and got myself stuck with what I have. When making a Baja in full scale you typically chop of a bit of the nose and place ina fiberglass replacement, I have no way of making the replacement which would shorten the front up and provide room for larger wider set lights. I'm working this bug off of what came in the kit and what I have laying around so this is what I have for lights. I'm still trying to come up with something different though, suggestions are welcomed.
-
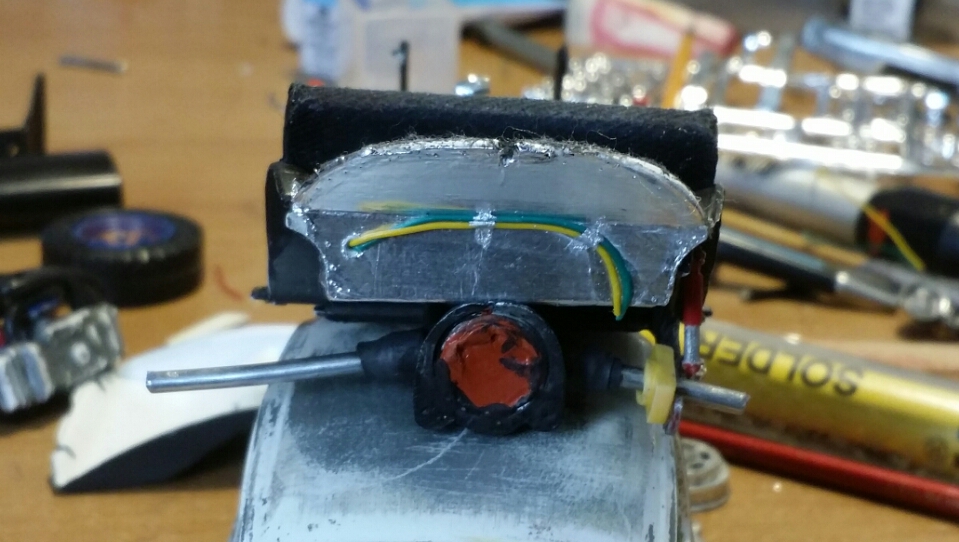
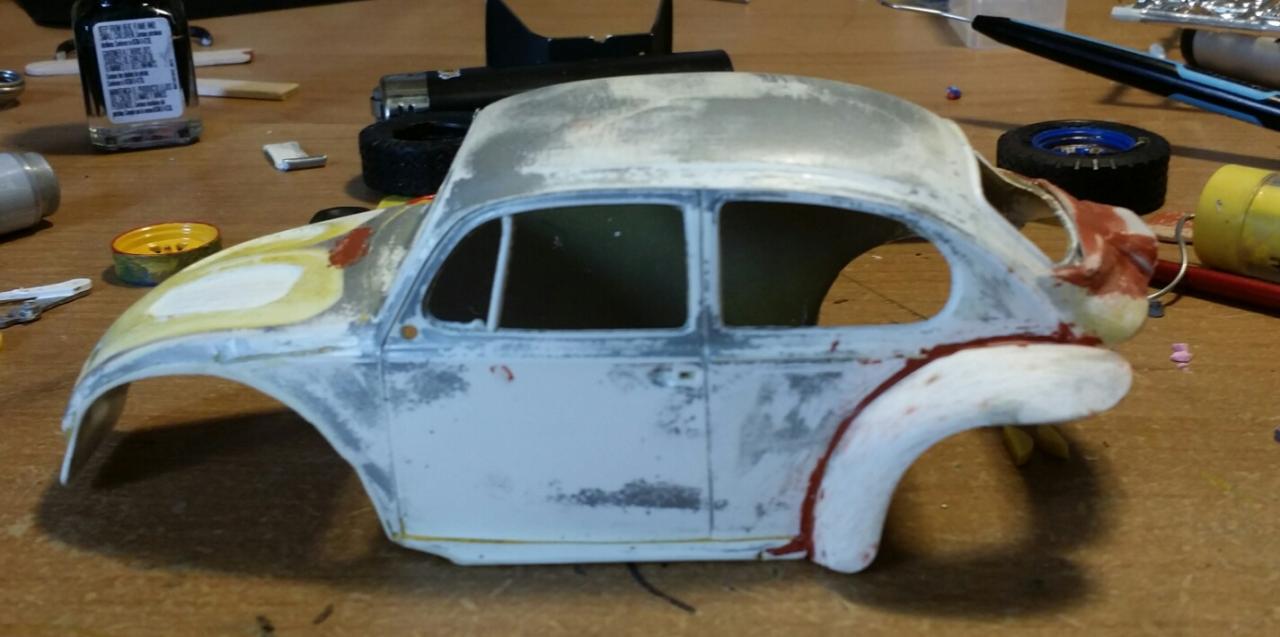
Next the body update. Photo number 1. The black hood design are drop inns I will glue them into place when the body and paint are complete. The chrome light buckets will also glue in along with the lenses after paint. 2 just the trim job and modified front fenders paved in the rear to complete the Baja fender kit. 3. Just the other side. 4. Rear Baja cowl in progress. (This one has been difficult to perfect. Hopefully this one will be it.) Still to come hopefully tonight interior and rear suspension.
-
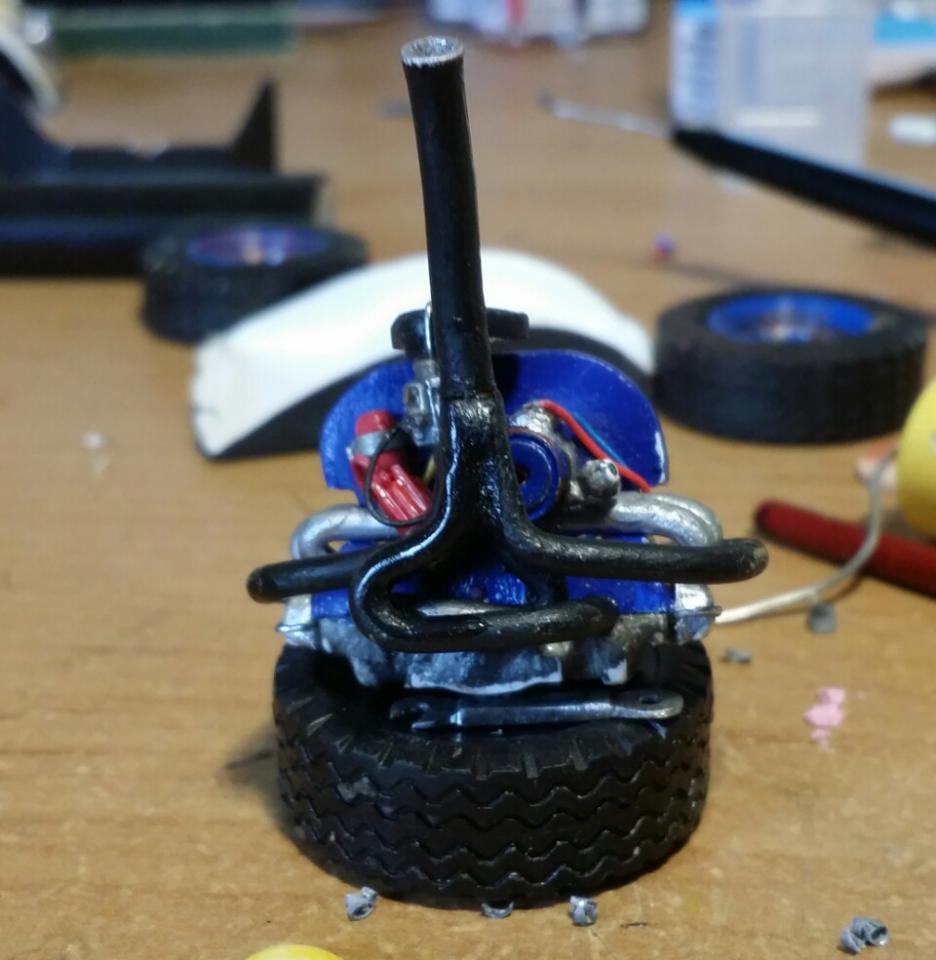
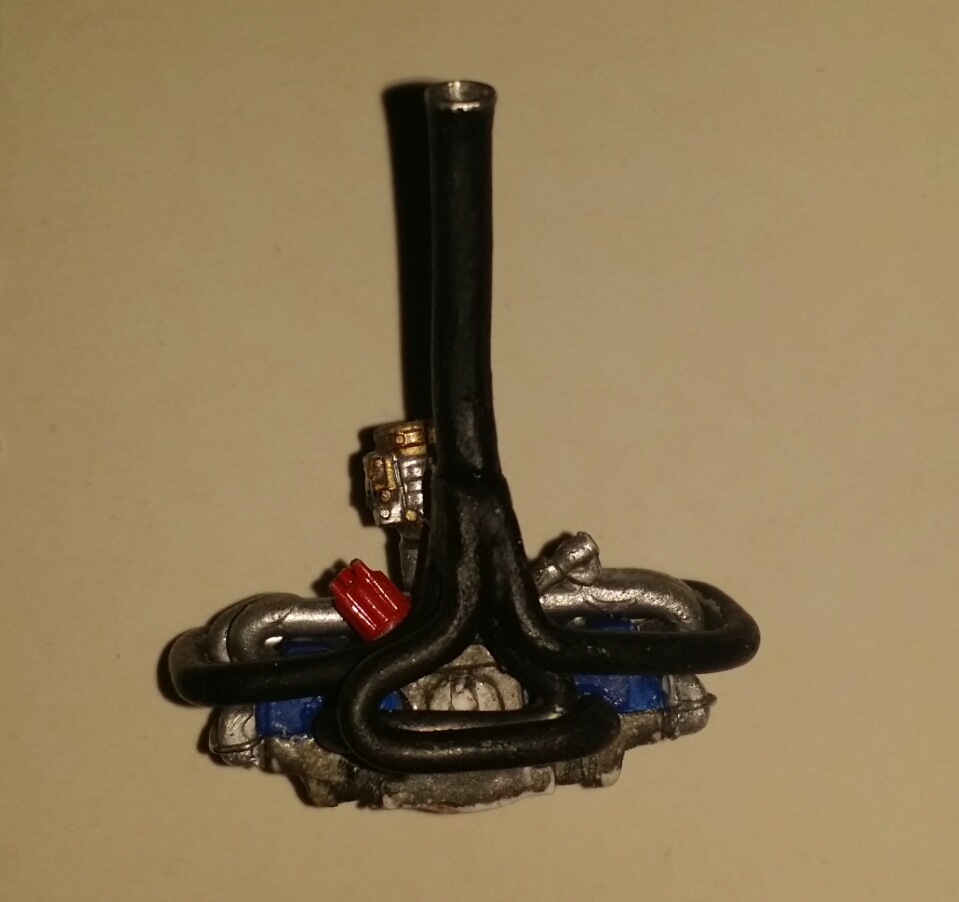
Okay so I finally have some pics for an update. I will need to do it in a couple posts though. First I have for the most part completed the engine it still need touch up work on the paint that will be done when I have matted it to the tranny. (I'm debating on adding some more gone details.) I created the airbox from a random piece I had, it's made to resemble a aftermarket Edlebrock. I used a single barrel from a V8 engine, made the fuel intake manifold and exhaust from solder and ran some wires. Next the body update.
-
I have never built one of these myself and have no clue how easy or difficult this would be, but for the wheels you might be able to pick up some wooden skewers cut them to size for the wheel spokes that way they don't just look wood but actually are wood. Just a thought not sure if you like it, please feel free to comment on it though.
-
Looking real nice! I love the spare tire, the exhaust looks good. I feel you on being tired of bending solder I'm in the middle of a Baja myself and used solder for my exhaust as well. This is what I ended with on mine.
-
Sam are you running a thread on this build?
-
Cal-Look Bug - Back Again! 2015.5.20
jacoballardtattoo replied to chunkypeanutbutter's topic in WIP: Model Cars
If you find the MSD set up please post some pics. -
carpeting and upholstery on seats
jacoballardtattoo replied to jacoballardtattoo's topic in Tips, Tricks, and Tutorials
I would love to John. Males me feel good to contribute specially as a rookie builder. -
carpeting and upholstery on seats
jacoballardtattoo replied to jacoballardtattoo's topic in Tips, Tricks, and Tutorials
Normal testor's acrylic enamel. I found the best way to do it is with a sponge. Bye dabbing the the paint on with a sponge the baby wipe starts to pull up a bit, than whole still wet from the paint take a fresh moist wipe and flatten it down. If you want a dirty carpet thin out the colors you want stained into your carpet and paint it on with a brush -
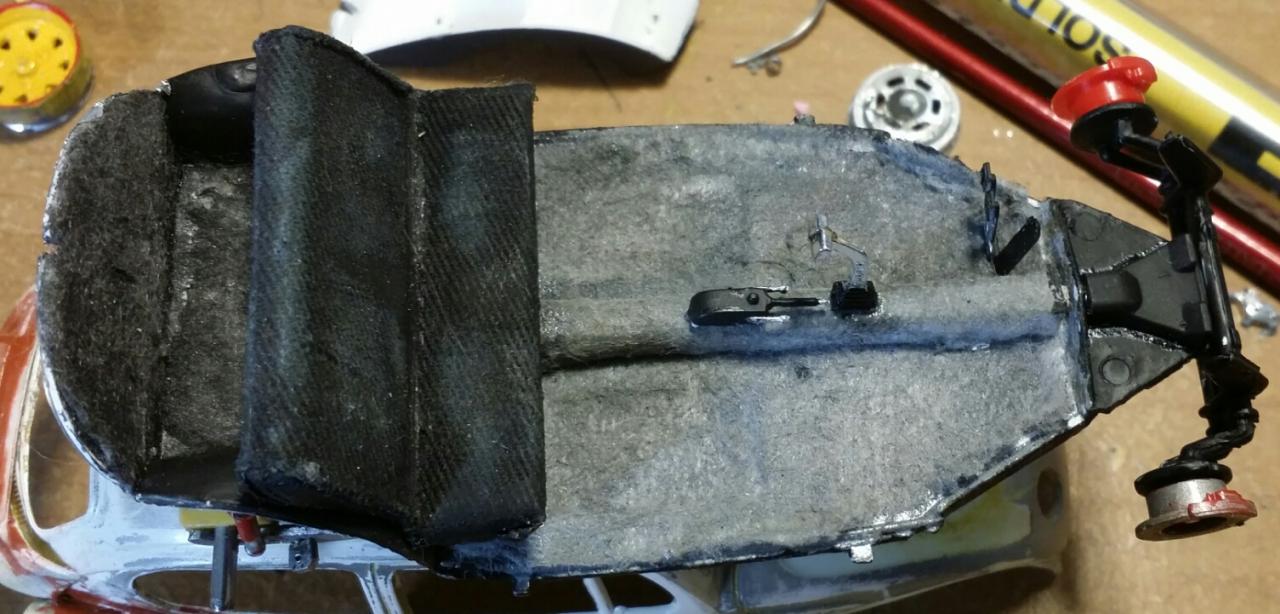
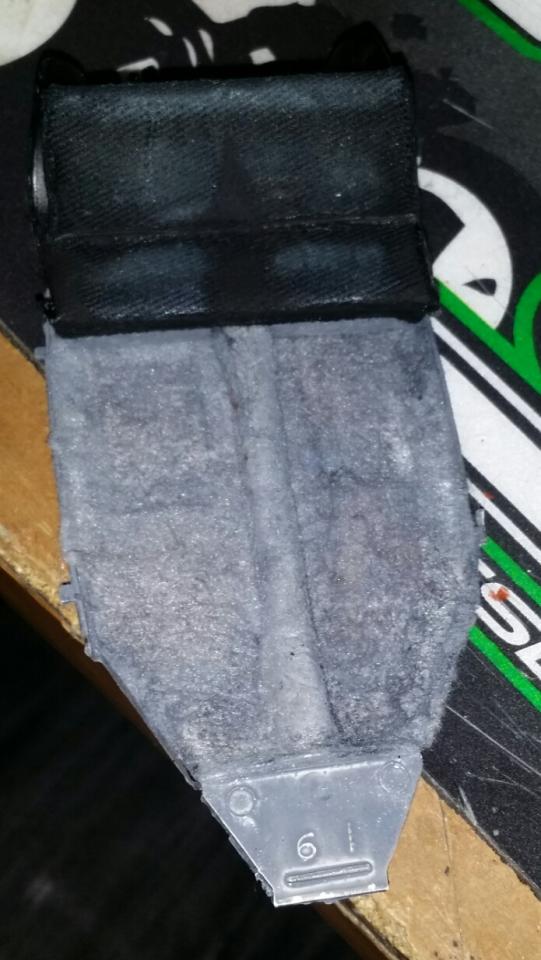
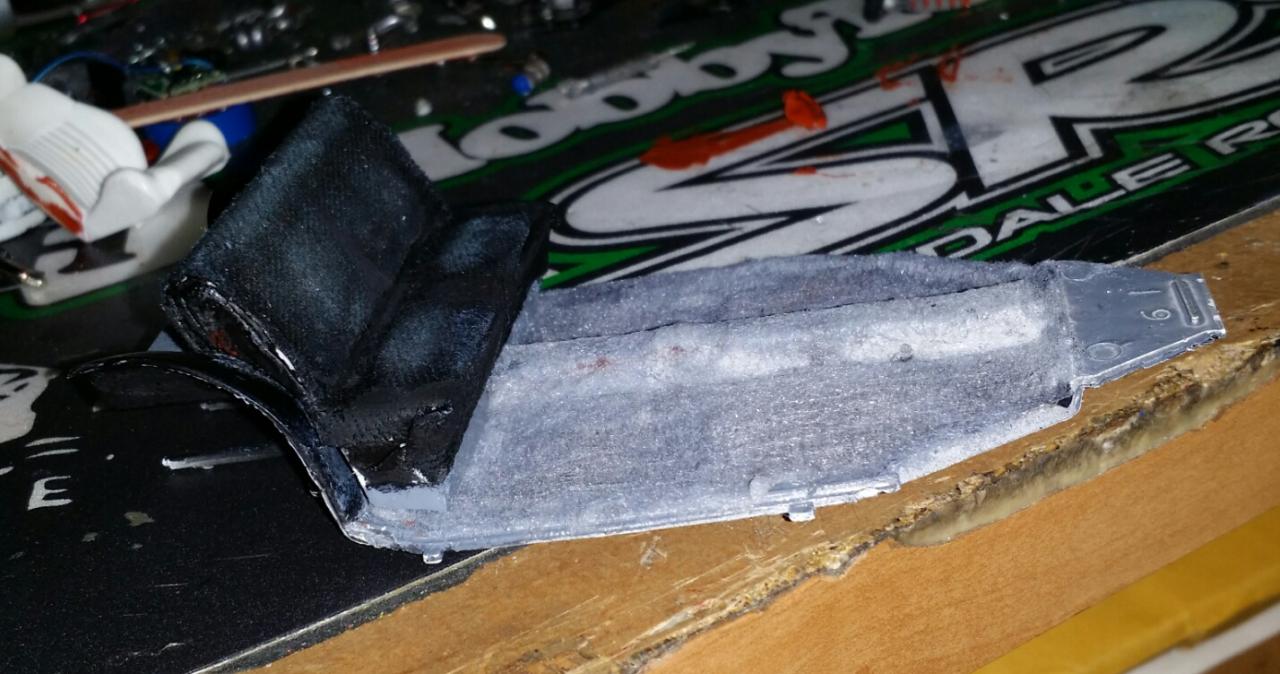
So I'm sure there are millions of ways people do carpet and upholstery on there models, I just stumbled onto a good one I think. Take a standard cheap baby wipe and let it dry out, then using rubber cement cover the floor or carpeted area worth the baby wipe and let the cement dry. Once the wipe is well secured you can paint it any color you need to match your interior. This makes perfect carpet. On your seats do the same only with scrap denim. You can then use your emery board to scrub the surface for weathering.
-
One small update. I spattered upholstered the back seat and laid down some carpet.
-
Depending on the scale and your method some shocks from a truck kit may work for you. I am doing a Baja right now myself and this is my current attack at this problem. I may change it soon though. I created a new spring plate and frame work for the rear out of solder. I am kicking around a standard has shock (in the picture painted) a coil which will be made by wrapping jewelry wire (cheap stuff from Walmart) around a screw to get the coil. Or possibly doing a coil over by combining the two systems.
-
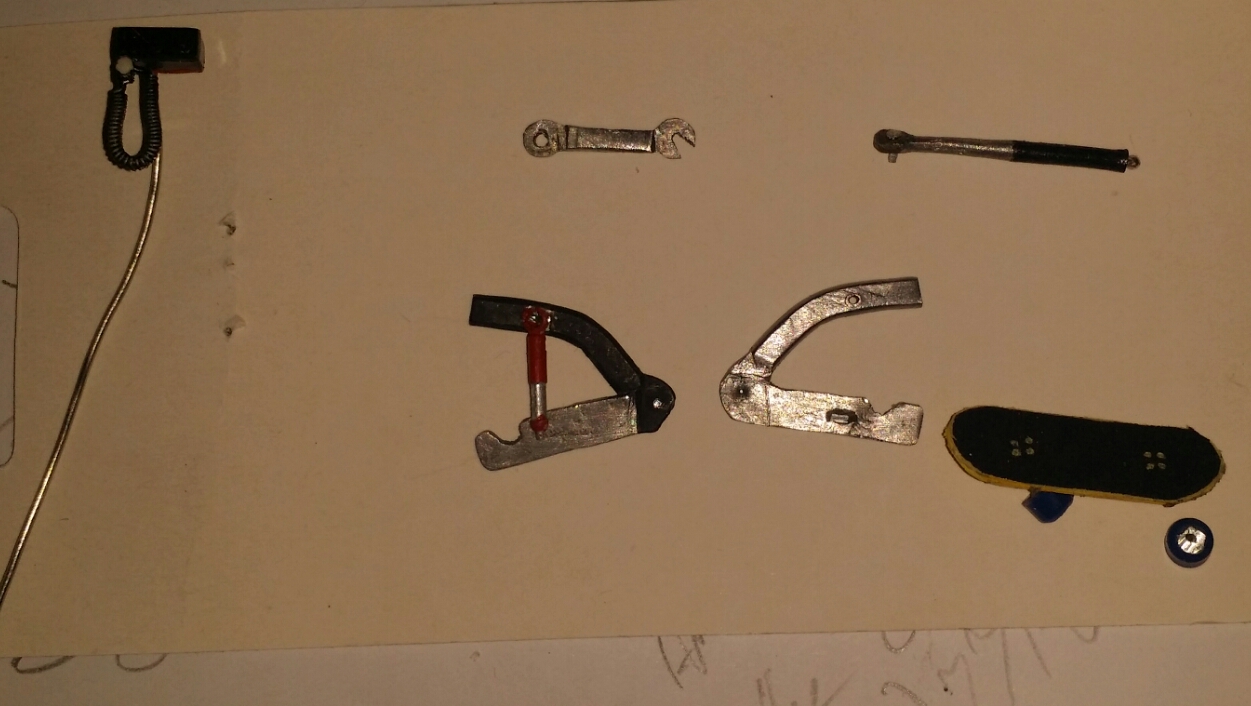
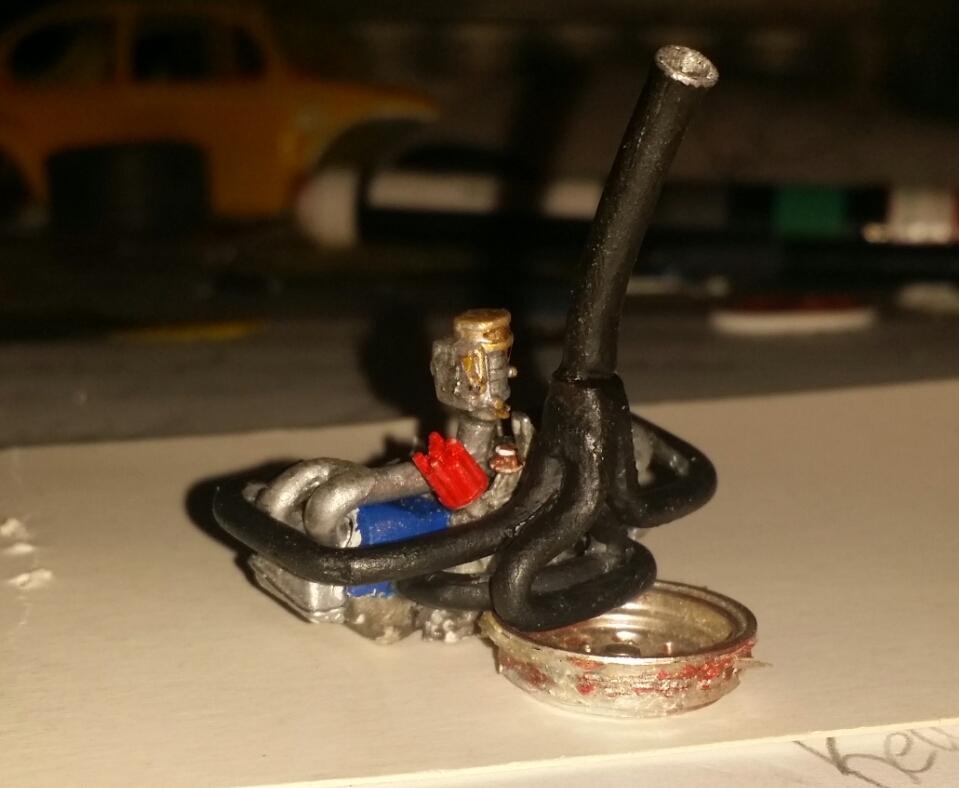
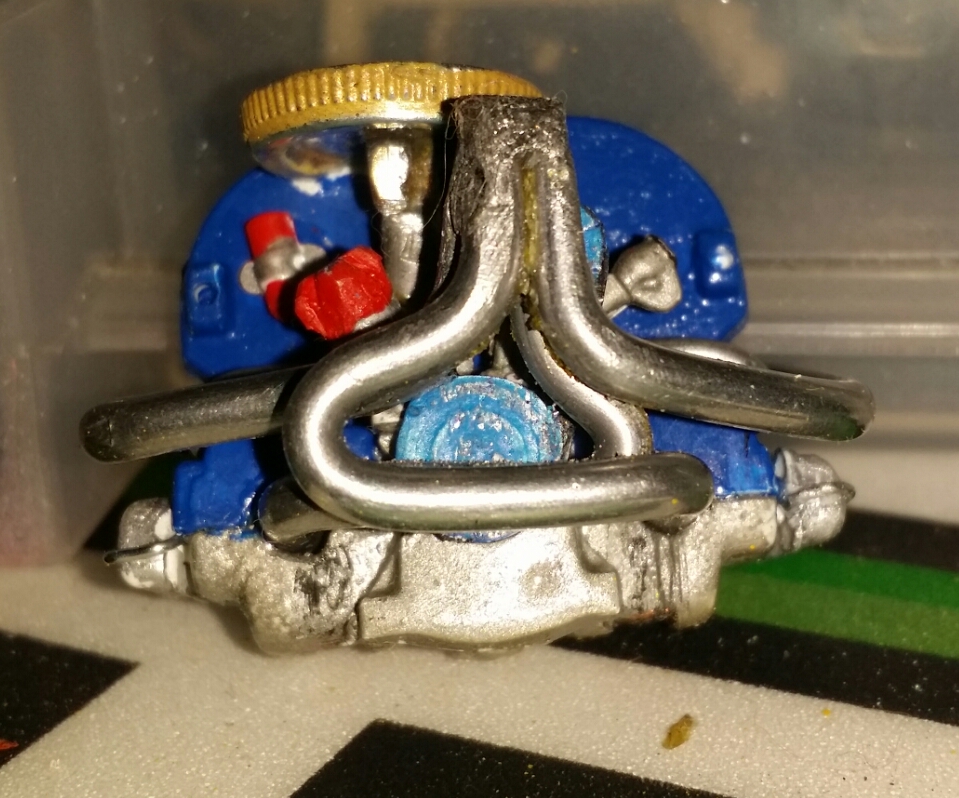
Okay is been a bit but I have some updates. First I felt the engine was pretty rough and just plain not good enough. So I tore it apart and re-did some of it. On the engine, I completed the exhaust and painted it flat black. Created a whole new duel port fuel intake manifold. Replaced the old distributor with one that actually looks right. And put on a real carburetor. The next picture is the rear spring plates built from solder. A couple tools to put in the back. (Torque wrench and combination wrench.) A skateboard deck and some tires to throw in the back seat. Rear rim and tire with paint scheme. And the last picture is the workings of my Baja hood.
-
This one I have to watch, I spent quite some time running a U-haul repair shop. Personally I hate the things but that's only the ones I had to repair constantly. Your build is looking great and the van box looks almost perfect.
-
I like to use super glue for most of my building but like pointed out here watch the paint. I have never tried gorilla glue? The times I have used it on furniture or what not the kind I used foamed up and expanded during drying. (By foamed I mean dried thick and puffy) so that I wouldn't use but I'm sure there must be another kind that won't do that. For paint if your using rattle can I have always trusted and used Krylon there area lot of color options, it lays smooth and with a good clear it shines quite nice. If you have an airbrush I like testors. (Other than standard acrylic from a tube this is all I have used though) I have hade good luck with regular acrylic paint, the kind that's used for painting on a canvas. They lay nicely when you thin it, you can get our create any color in the world, it can be washed off if you make a mistake. The down fall though is its flat and dull, you need a good primer first and a clear coat to get any shine on it.
-
Yeah Jason I'm doing a Baja so I'm kinda stuck showing, just trying to do the best I can to improve it. It's am older kit that was given to me. It is a Revell just not the 68. It's a generic 60s, the kit is slightly confused as to what it should be. It's titled as a 60s beetle and is a full or hippie bug complete with the peace and flower decals but the kit includes a roll cage, after market bucket seats and the mold was set with a 70s style fuel door up front. Kinda why I wasn't afraid to start chopping on it.
-
Thank you Martin you have given me some good direction here. I am looking forward to washing your build progress.
-
Beautiful work on. I'm building a dub right now and my kit provided little to no real detail on the heads and block, was the detail on yours there to start, or did you add to it? If so what did you do and how? As you can see mine is rather basic, I couldn't figure out how to detail out the heads. Any tips or help would be amazing.