jacoballardtattoo
-
Posts
181 -
Joined
-
Last visited
Content Type
Profiles
Forums
Events
Gallery
Everything posted by jacoballardtattoo
-
At this point all that's shown is the addition of the scoop, but just that has me interested! The scoop looks prefect like it should have come that way from the start.
-
Hey Ray I can't find it in the under glass section, what is the thread title?
-

Jacked '49 Merc Wagon 7/7/17 switched to Fotki
jacoballardtattoo replied to Foxer's topic in WIP: Model Cars
I think fun metal would be good, or do the black but have it flat with rust showing through to match with the distressed wood finish. -
Jacked '49 Merc Wagon 7/7/17 switched to Fotki
jacoballardtattoo replied to Foxer's topic in WIP: Model Cars
It may be to late for this but if you wanted to a more accurate job on the lift you could do a shackle lift. When doing a lift on a leaf spring suspension in real life you can do a block lift in the rear (placing your block between the axle tube and the spring) but it is very dangerous to do this up front. Up front you would put on a longer shackle on the rear spring hanger. This is just a suggestion. This build is coming out very nice though I'm enjoying seeing your progress. -
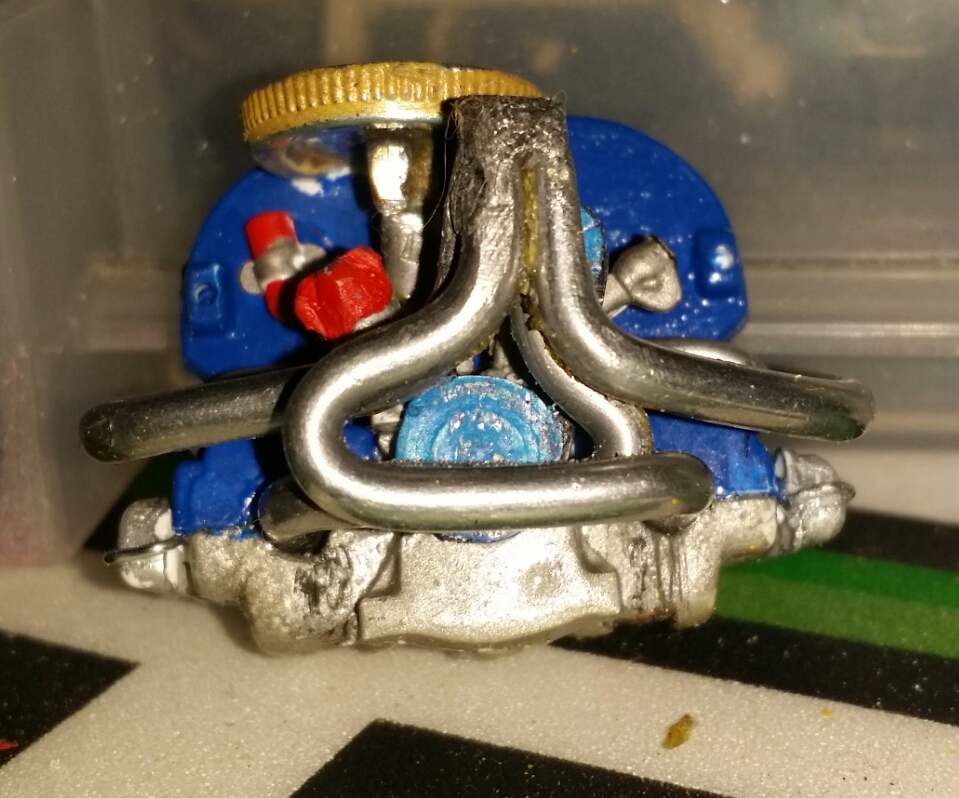
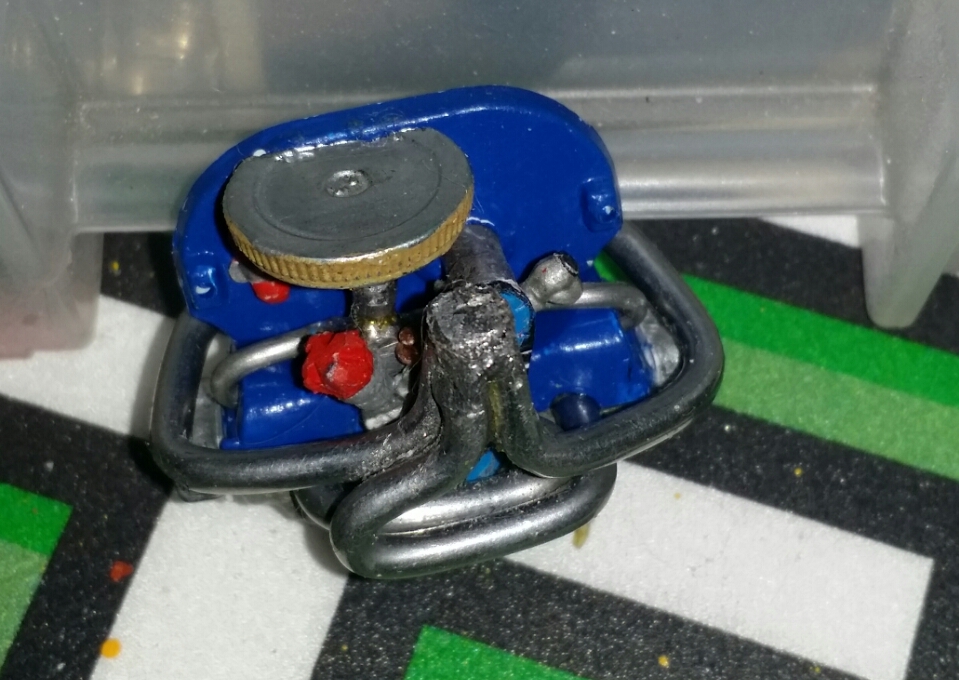
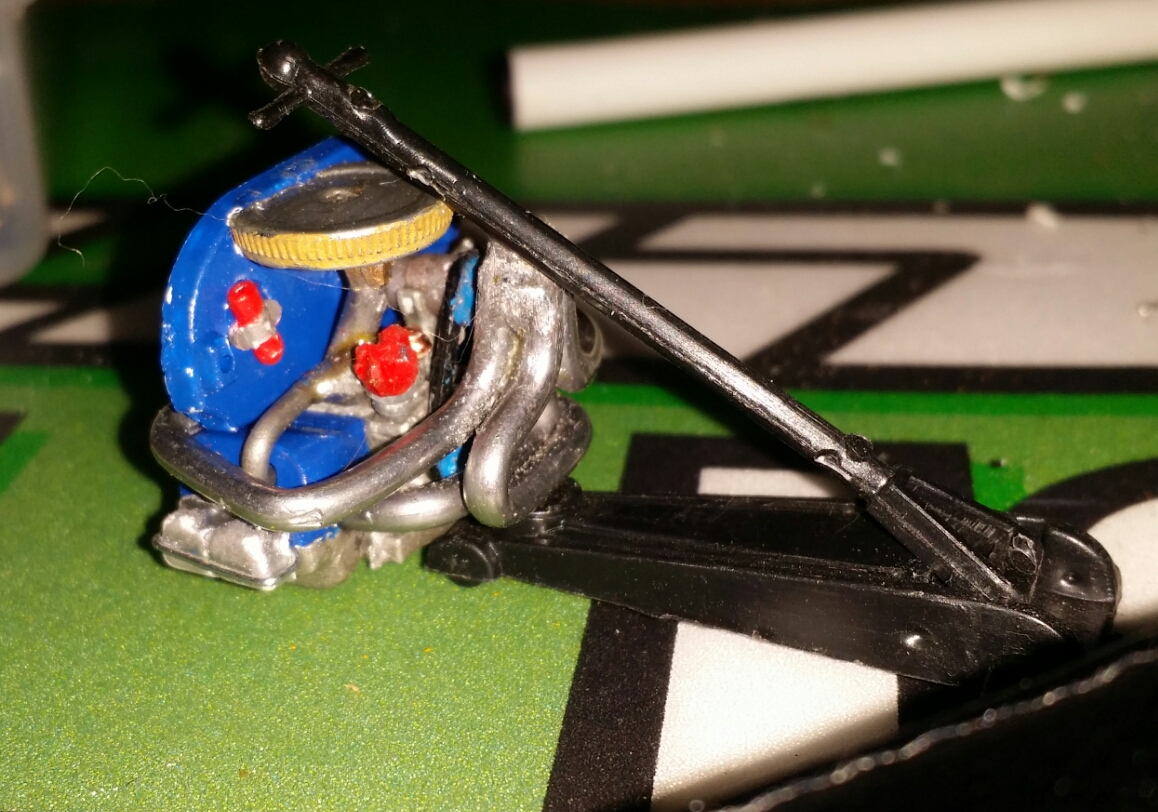
Thanks Miles I will most likely be doing just that for the exhaust. Okay so it's not much but here are some pics of the engine. It's still rough and I will most likely be adding to it still but here we go. To list what I have done to it as far as mods go. Custom built exhaust (the stinger tip broke off and I still haven't fixed it yet) Custom single port intake tube and carb. Tried to shape the heads. And a poorly done self built distributor. (I lost the one from the kit) I may pull this one off and try again.

-
It looks great . I know I threw out a huge list of suggestions earlier but I thought was coming out amazing then and even more now with the paint.
-
Thanks Randy, I'm kinda proud of the exhaust, unfortunately I'm struggling with gluing the stinger tip back on after I broke it. I'm trying to glue solder to solder. Since it broke after I glued the exhaust to the motor I can't just fuse it together. I do have rims and tires for the rear, I want tall and thin for the front so the rims I used in the rear won't work up front so I'm still digging through my parts box for the rear rims. I will be trying to post pics soon.
-
It's coming along very nicely, but for my 2 cents the frame looks to long, the engine should hang mount in front of the front tires to suck them back closer to the body, being the rear toes closer to the wheel wells, shorten the bed and give the body some rounded edges. This style of vehicle is a more or there almost a cartoon, the body lines on the bus are to straight which throws everything off a bit and the wheel well being so far in front of the wheels takes all the flow away. You lengthen the wheel wells a bit on the body pull the body back closer to the rear end of the frame and shorten the front this would allow you to retain more of the bed and keep it all flowing. Drop the front of the cab down a bit while raising the rear a little and reshape it be a little more bubbly. Just my thoughts not sure if you'll like them or if you know how to make all that happen. (I say this last part only because I have no clue how to do all things I just suggested.)
-
No pictures yet but just finished up the engine tonight. I was planning on going full detail with plug wires throttle linkage the whole nine but found I not that skilled on this small of scale yet. Pictures are delayed due to me breaking the singer tip and not having much luck tree gluing it. I will fought that again tomorrow and then hopefully snap some shots. Also I found the carb and single port intake tube in this kit won't work without all the shielding you remove with the back end on a Baja so I spent most the night creating a new tube and carb. Along with a not so realistic air box I hope I can hide in the body when I'm done. So here's hoping I get some pics up tomorrow. Again thanks to everyone for all your comments.
-
Adventures in soldering:The GT40 project New pics 2/13/17
jacoballardtattoo replied to Randy D's topic in WIP: Model Cars
Utterly amazing! Your not building a model your fabricating a car. This thing looks like you could shrink down to scale jump in and drive away. Amazing work. -
They are slightly narrow Jason, on the 1:1 y you have here the nose is shortened but on mine I modified the stock hood. I have buckets I will be putting in and possibly molding in not sure yet but it should look good.
-
Very nice, looks like you carried the fade down further, good choice. Looks great.
-
Maybe a mat green?
-
using aluminum foil
jacoballardtattoo replied to jacoballardtattoo's topic in Model Building Questions and Answers
Nice! I'm getting some great ideas here, guess I addled the right question this time. Lol -
Wow! Mixing Ford and Chevy may be sacrilege but this nice! Amazing paint and a beautiful car, great build.
-
using aluminum foil
jacoballardtattoo replied to jacoballardtattoo's topic in Model Building Questions and Answers
Wow I messed that up! Mark I responded to your comment but the response is added to the quote. Lol. Bye the way the build I'm working on that this question was for is in the workbench section under 63 Baja please check out out leave some comments. (It hasn't shown to be a popular thread yet) I don't have much in there right now but will be updating more. -
using aluminum foil
jacoballardtattoo replied to jacoballardtattoo's topic in Model Building Questions and Answers
Yeah Matt I'm familiar with the sharp edges (probably for the same reason) I have used soda/beer cans for years for a number of things. Building a body for my 10th scale r/c rock crawler so it would show off road damage, in the field exhaust repair... I actually made a 10mm wrench to repair my humvee out of energy drink cans in Afghanistan one time. It took almost 20 minutes and I went through like six cams to do it, but hey it worked and it only cost me one major cut on my pointer finger. Lol. Good old super glue fixed that. -
using aluminum foil
jacoballardtattoo replied to jacoballardtattoo's topic in Model Building Questions and Answers
Oh wow! Thanks for the sign tip, I have butchered up old tupaware (I know I misspelled that one) for the plastic but never did think of the signs. -
using aluminum foil
jacoballardtattoo replied to jacoballardtattoo's topic in Model Building Questions and Answers
Thank you Art. I will give that a try. -
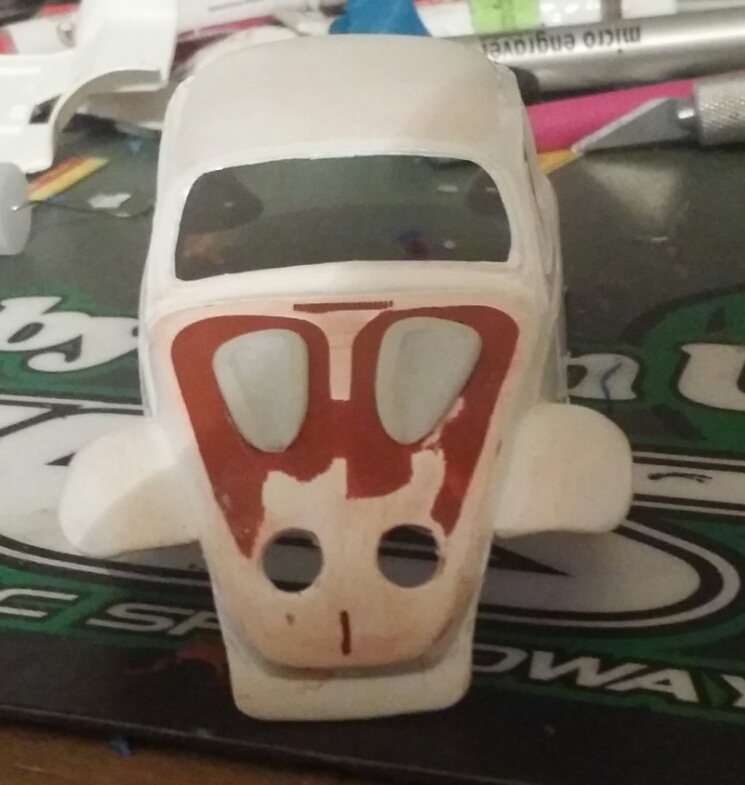
Finally had a chance for pictures and an update so here it is. From top to bottom. #1 & 2 sooner exhaust. This has been the biggest headache of the build. I first tried to create it from spare exhaust pieces that I was hearing and bending but could not get the bends right. The final exhaust was done with solder I had in garage. Work pretty good. #3 is the hood and front end copied and shaped. #4 just a side view. Next step will probably be paint and assembly of the engine so I can shape the rear to fit right. Let me know what you guys think, good bad or ugly.
-
using aluminum foil
jacoballardtattoo replied to jacoballardtattoo's topic in Model Building Questions and Answers
I'm building a Baja bug with chrome don't get you home style so I want the engine tins painted blue along with the doghouse. I am also trying to create an interior because this kit doesn't include any for off door paneling. I don't have any poly styrene and don't see the budget allowing it anytime soon so I was thinking the foil could be a good option in its place. -
So I have been thinking about creating some parts for my current build out of standard store brand aluminum foil (door panels that are mentioned to mimic aluminum sheet, simply engine tin heat shields) but I'm not sure if it will paint very well. Has any one used foil for parts that are meant for paint? What was your results?
-
84 CJ7
jacoballardtattoo replied to BLOODBANE's topic in WIP: Model Trucks: Pickups, Vans, SUVs, Light Commercial
Coming along real nice. I am a die hard Jeep freak myself and love seeing people build then. I like that you showed the 1:1 for the scale, the real one is not my kind of Jeep (ties are way to big to stuff under any real travel) but the model is looking dead on. I'm waiting to get a few of my current projects done then I'm gonna try and replicate my 05 TJ unlimited. -
I don't blame you on the wood with the texture of the bed hiding the cut would be pretty difficult.
-
Not sure if all your spare parts survived but if you need something let me know I have a few rear end configurations hanging around.