lghtngyello03
-
Posts
1,246 -
Joined
-
Last visited
Content Type
Profiles
Forums
Events
Gallery
Everything posted by lghtngyello03
-
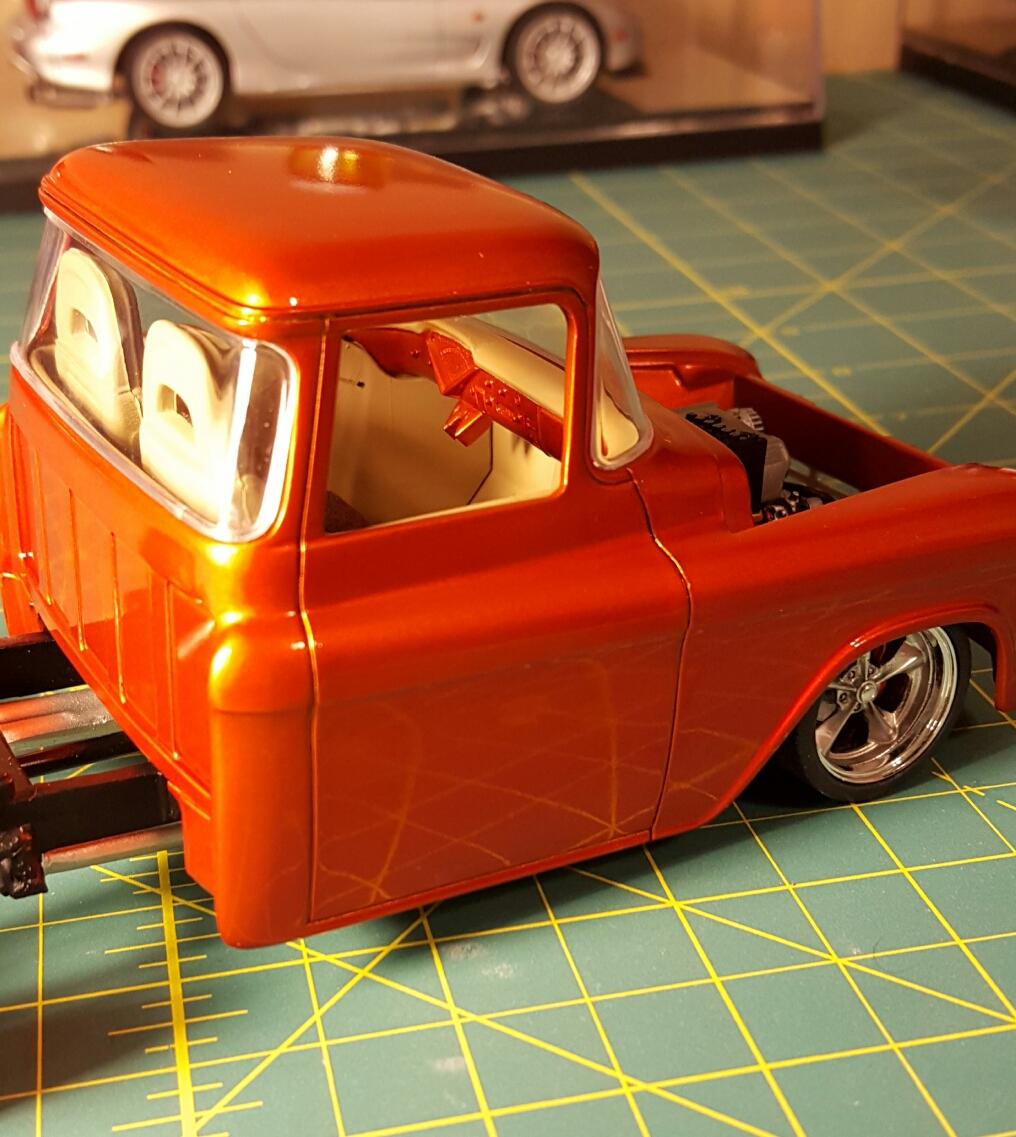
 Here's a little update. Got the window gaskets painted, the dash detailed, the engine cover painted but still have to detail the letters, the air box/intake tube fitted correctly, and radiator hoses fitted. Also got the bed assembled and the BMF on the bed trim. Last truck build for a while, lol that bed was a PITA to put together. Pay no attention to the battery on the firewall....since this pic I have cut the box off and am in the process of shaving the firewall and repainting it.
 -
Chevy Camaro Concept - Breast Cancer Survivor build
lghtngyello03 replied to playzwtrux's topic in Model Cars
Love that custom color. Great build by the way. Lost my Mom to breast cancer, and her name was Cindy as well so the tag did it for me. -
Awesome build! I have this in my stash as well waiting to be built. Going to do black, red stripes, and red interior with the dog dish hub caps on mine.
-
Super clean build. Looks like it rolled off the show room floor. Makes me want to build one!
-
Thanks so much! Since I have started back building I couldn't find anywhere what everyone was using for mock up fittings. So I was using tape or putty, and it didn't work well. I see there is a Fast Grab and a Turbo version of these. The Fast Grab says it will adhere on contact, and the Turbo version says it dries in under 35 min. Ever used either of those? Will the Fast Grab allow parts to come apart in hot water as well?
-
Thanks for the ideas. I'll keep them in mind for a future build. Thanks for the idea... I didn't totally like the battery on the firewall. So You've talked me into it. I'm going to hack off the battery mounts and send the firewall into the purple pond since nothing is glued together yet, just a dry fit. I was also thinking about mounting the battery to the underside of the truck on the frame rail. I knew this in the 1:1 aspect...this is my first build that isn't box stock. I feel that swapping front subframes is a little out of my comfort zone or skill level at the moment. I will definitely try this on a future build. I also wanted to ditch the spare tire carrier, and build a nice sheet metal tank out of some styrene, but again, out of my comfort zone for the moment. Thanks for all the tips, I'll definitely be using them on a future build. Thinking about doing a 57 Cameo, or maybe just another 55.
-
Thanks guys! Getting there. I'm probably going to do a little changes on some stuff, like move the battery off of the firewall and smooth it up. So off to the purple pond it shall go.
-
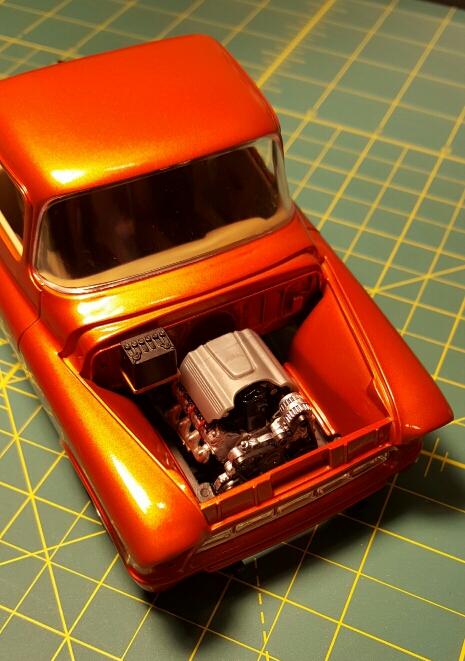
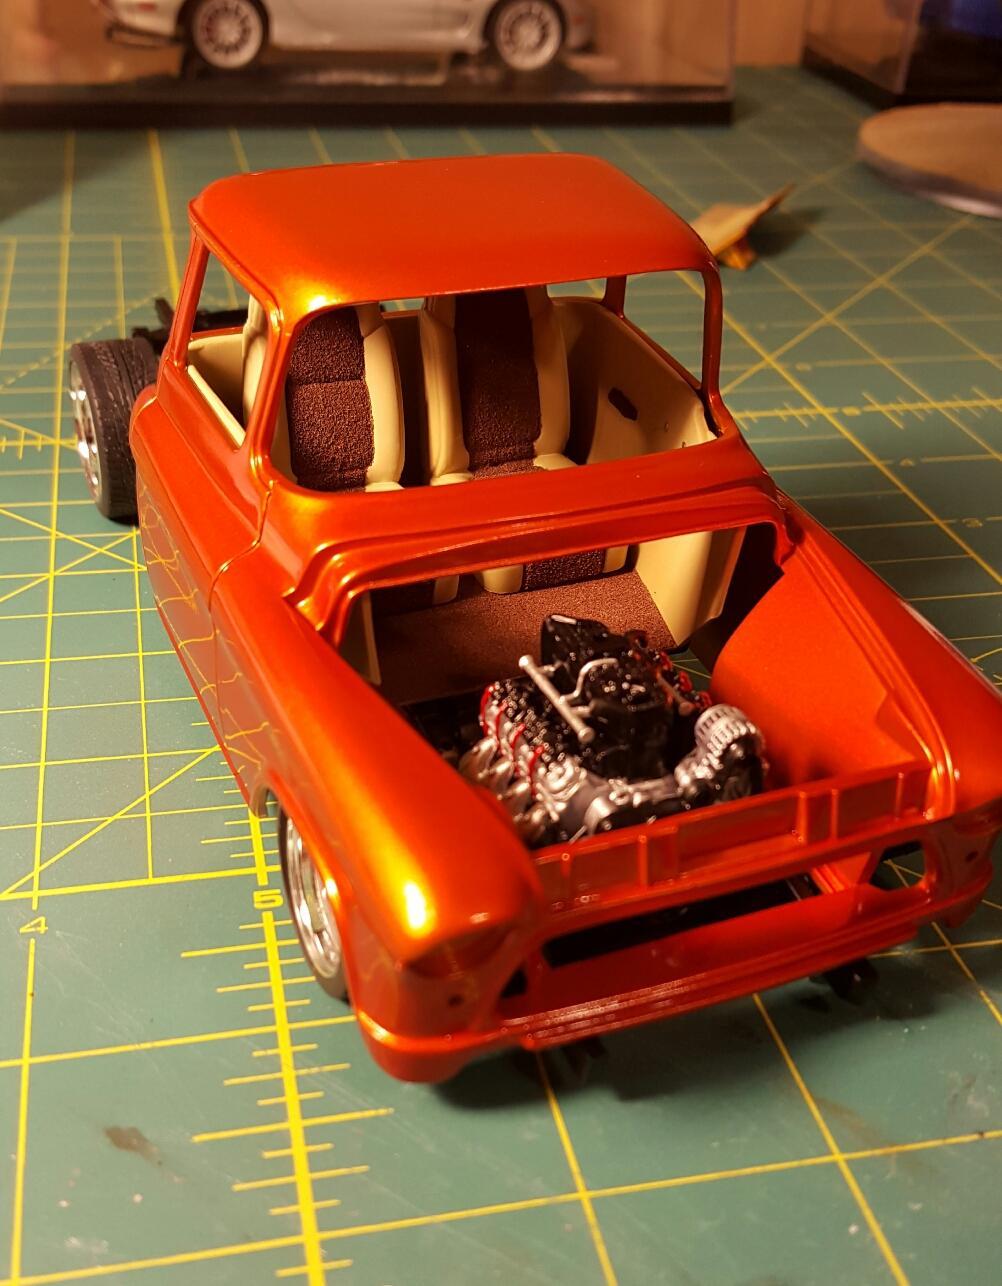
Got the dash two toned tonight. Still have to detail it, I have a decal on the way for the gauges as well. Also test fitted all the glass...fits like a glove when it's pushed in right. Still have to paint the edges of the glass for the gaskets. Also is a teaser of the truck with the bed mocked up. Fitment is perfect! Engine cover is unpainted as I dunno which way to go with it. I'm stuck between black with orange in the middle, gunmetal with orange in the middle, or the tan of the interior with orange in the middle. Also I think I'm going to move the battery off of the firewall and smooth it up.
-
Nice! Thanks man, I'll be purchasing that now!.
-
Got the dash two toned tonight. Still have to detail it, I'm wondering how the heck I'm gonna do the gauges, there wasn't a decal in the kit for them. Anyone know of one made? Also test fitted all the glass...fits like a glove when it's pushed in right. Still have to paint the edges of the glass for the gaskets. Also is a teaser of the truck with the bed mocked up. Fitment is perfect! Engine cover is unpainted as I dunno which way to go with it. I'm stuck between black with orange in the middle, gunmetal with orange in the middle, or the tan of the interior with orange in the middle.

-
Awesome looking build! Paint is flawless, are the stripes painted as well? The more I see cobras popping up, the more I want to get one and build it. Great job man!
-
Thanks guys! I'm really happy about my color choice. Nothing looks better to me than tan/chocolate interior with a candy orange color.
-
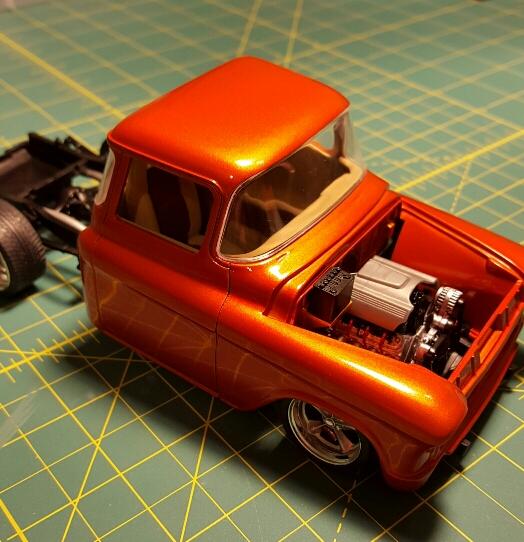
Here is an interior update with the 55 tub and the ssr seats. Also a shot of the body after another coat of orange to finally match the bed side color.
-
Body after another coat of orange.
-
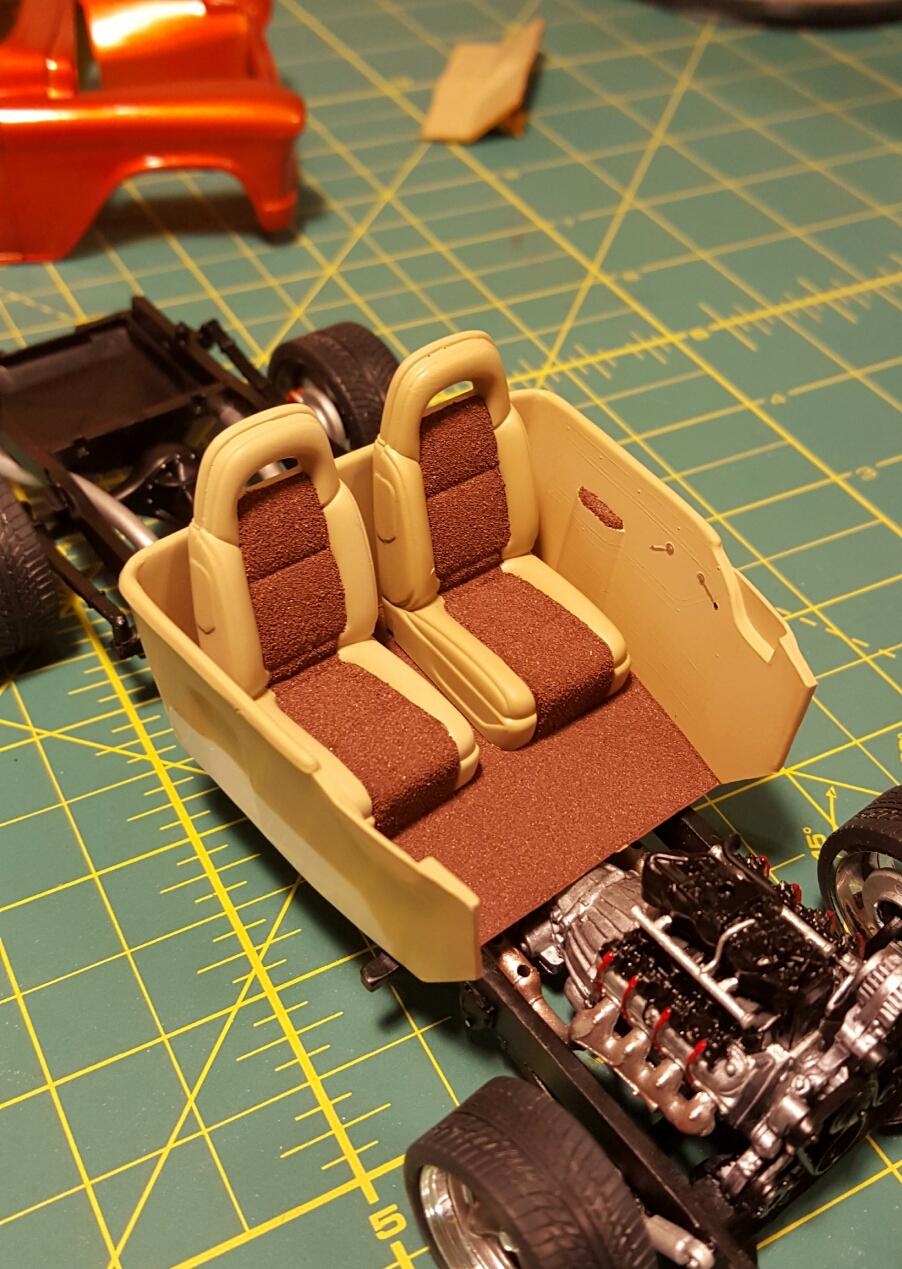
Here's a quick awaited update. As some of you read......I couldn't use the SSR interior...but I did utilize the bucket seats still though. Here is the 55 tub and SSR buckets after paint and some embossing powder. The dash will get a 2 tone treatment of thr tan up top like a dash pad, and the orange body color on the bottom.
-
About 2 to 3 mm gap...I took as much off as possible in all areas. If I took anymore the air buffer would burn through the floor pan, lol.
-
I tried the entire 55 tub with the SSR console...way more work than I want to have to do. I'm ready to be done with this build, lol.. Is that bad? I'll have some interior pics up tonight of the 55 tub. Or what I have done to it.
-
I wish I could. If I go any thinner, the floor will be non existent. So it's pretty much a dead end on that.
-
Thanks Wayne. No big deal I guess...just disappointed in the work that I put into it. Oh well, lesson learned from my first non box stock build, lol.
-
Little update for you guys. Although I haven't worked on this one in a while, I did last night. It has hit a stand still....all the mods for the SSR Interior were for nothing. The cab will not sit all the way down in the rear so it isn't touching the frame...causing the bed side bodylines to not line up...so its off to the junk pile for that interior. Will have to use the 55 interior I sat both interior tubs side by side from the beginning. The SSR tub was taller, so I took my air buffer to it and thinned it out as much as possible without going through the plastic. They sat the same height. Well I thought. When I sprayed the interior yesterday, and then went to put it in the cab then sit it on the frame, it looked perfect.......then I noticed the severe rake from the rear of the cab. I placed the bed on, and the body lines are not even close to lining up between the cab and it. I couldn't mock up the bed with the sides on it because I didn't want to glue it and not be able to get it apart for paint or screw up my body work on it. Oh well, looks like I'll have to use the 55 interior with the SSR Bucket seats.
-
Thanks! Although I haven't worked on this one in a while, I did last night. It has hit a stand still....all the mods for the SSR Interior were for nothing. The body will not sit all the way down in the rear so it isn't touching the frame...causing the bed side bodylines to not line up...so its off to the junkpile for that interior. Will have to use the 55 interior.
-
Thanks Andy! Going to practice some more on some old bodies before I spray my next project with it. Try different needle sizes and air pressures.
-
1971 F100 shop truck
lghtngyello03 replied to slammedi'am's topic in Model Trucks: Pickups, Vans, SUVs, Light Commercial
Thanks for the response! I will definitely be trying this possibly in the near future. -
Thanks! It will be even better with some clear on it so I can polish it even better.
-
Thanks guys! It's definitely been the longest project I've worked on. Here is a mock up to show the gloss even without clear coat.