swede70
-
Posts
727 -
Joined
-
Last visited
Content Type
Profiles
Forums
Events
Gallery
Everything posted by swede70
-
Though wishing not to over promise with regards to stocks and availability of such, I've done my own casting in 1:18th scale consistent with supporting an ongoing personal interest in the '66-'72 SCCA Trans Am Series. To date I've done carburetors, wheels, ignition pieces, remote oil filter mounts, oil breathers and coolers, seats, electrical switchboards, etc. It helps if our interests overlap for I haven't any strict interest in doing contract work, but all the same is someone is looking in and wonders if I have spares for creating molds of this or that, feel free to gently inquire via PM. I've attached a pair of images depicting the kind of stuff I've done for myself as a kind of ready reference. Thanks... Mike K./'Swede70' M.K.

-
Swede Savage Trans Am AAR 'Cuda Hwy. 61 based project
swede70 replied to swede70's topic in Diecast Corner
...a mild update of sorts. Given that I haven't the equivalent of a stack of low-cost, unassembled 1:18th plastic kits to draw spares from, I must instead search intently for parts from damaged models or those on hand for items that might be copied, modified and copied, or in some instances scratch built to suit my needs and to push my projects ahead. What is seen in the photograph is a series of open face molds as well as two-part urethane molds I've worked up consistent with creating needed supplies. Employing such, GMP Trans Am Camaro Hurst shifter assemblies can be reproduced (to later be vacuum plated unlike the standard GMP issue), a Hurst reverse lock out lever is seen (employed on the AAR 'Cuda's then), while further seen is a Shelby Collectibles GT 350R shift boot that will overlay vacuum plated resin plates with small divots ground into the corners to vaguely represent set screws. Positioned in the middle is a new one-piece mold for a GMP Trans Am Camaro seat mount that I hadn't done up until now. Also noticed will be the happy result of efforts to reproduce the signal light lenses specific to the race AAR 'Cudas and positioned on the roll cage main hoop positioned approximately two-thirds of the way up on either side. Tail lights from a 1:25th scale AMT 1968 Corvette which feature faint radial ribs across the surface and likewise come to a soft point as such were carefully cut out and isolated, whereupon the four I had were used to create the urethane mold seen on the far right. The mold was passed to a fellow scale enthusiast known for his quality 1:32nd scale period slot car windshield reproductions, who very kindly employed his methods to yield me extremely serviceable examples in clear resin. In particular, clear resin mixed and poured at room temperature typically clouds for very small bubbles remaining visible in the mix, while drawing the material into any mold often proves problematic. For much trial and error effort, heating both the resin as well as placing the mold or molds employed in a toaster over across hours can ameliorate the problem, and thankful I am to be able to lean upon those who've done the arduous work necessary to perfect the problem at a cottage industry-level. Though difficult to make out, the results are fine indeed and happy I am for his evident knowledge and skill - kind thanks to Brad in SE Michigan. Again, thank you each for looking in and contributing in a personally valued way. Mike K.
-
Greetings and welcome to the board... I too would be a Downriver Model Car Club/Dearborn, MI. member, whereas I thought I'd 'shout out' regarding my interest in like topics. Indeed, the club meetings are certainly worth taking in to partake of the fellowship on offer on the skills in evidence. As for me, I've attached a solitary image capturing my small decommissioned fleet of a certain type of sedan: ...the AUTOart Crown Victoria is rather rare now, whereas the UT Caprice too is not seen everyday. Thanks... Mike K.
-
Swede Savage Trans Am AAR 'Cuda Hwy. 61 based project
swede70 replied to swede70's topic in Diecast Corner
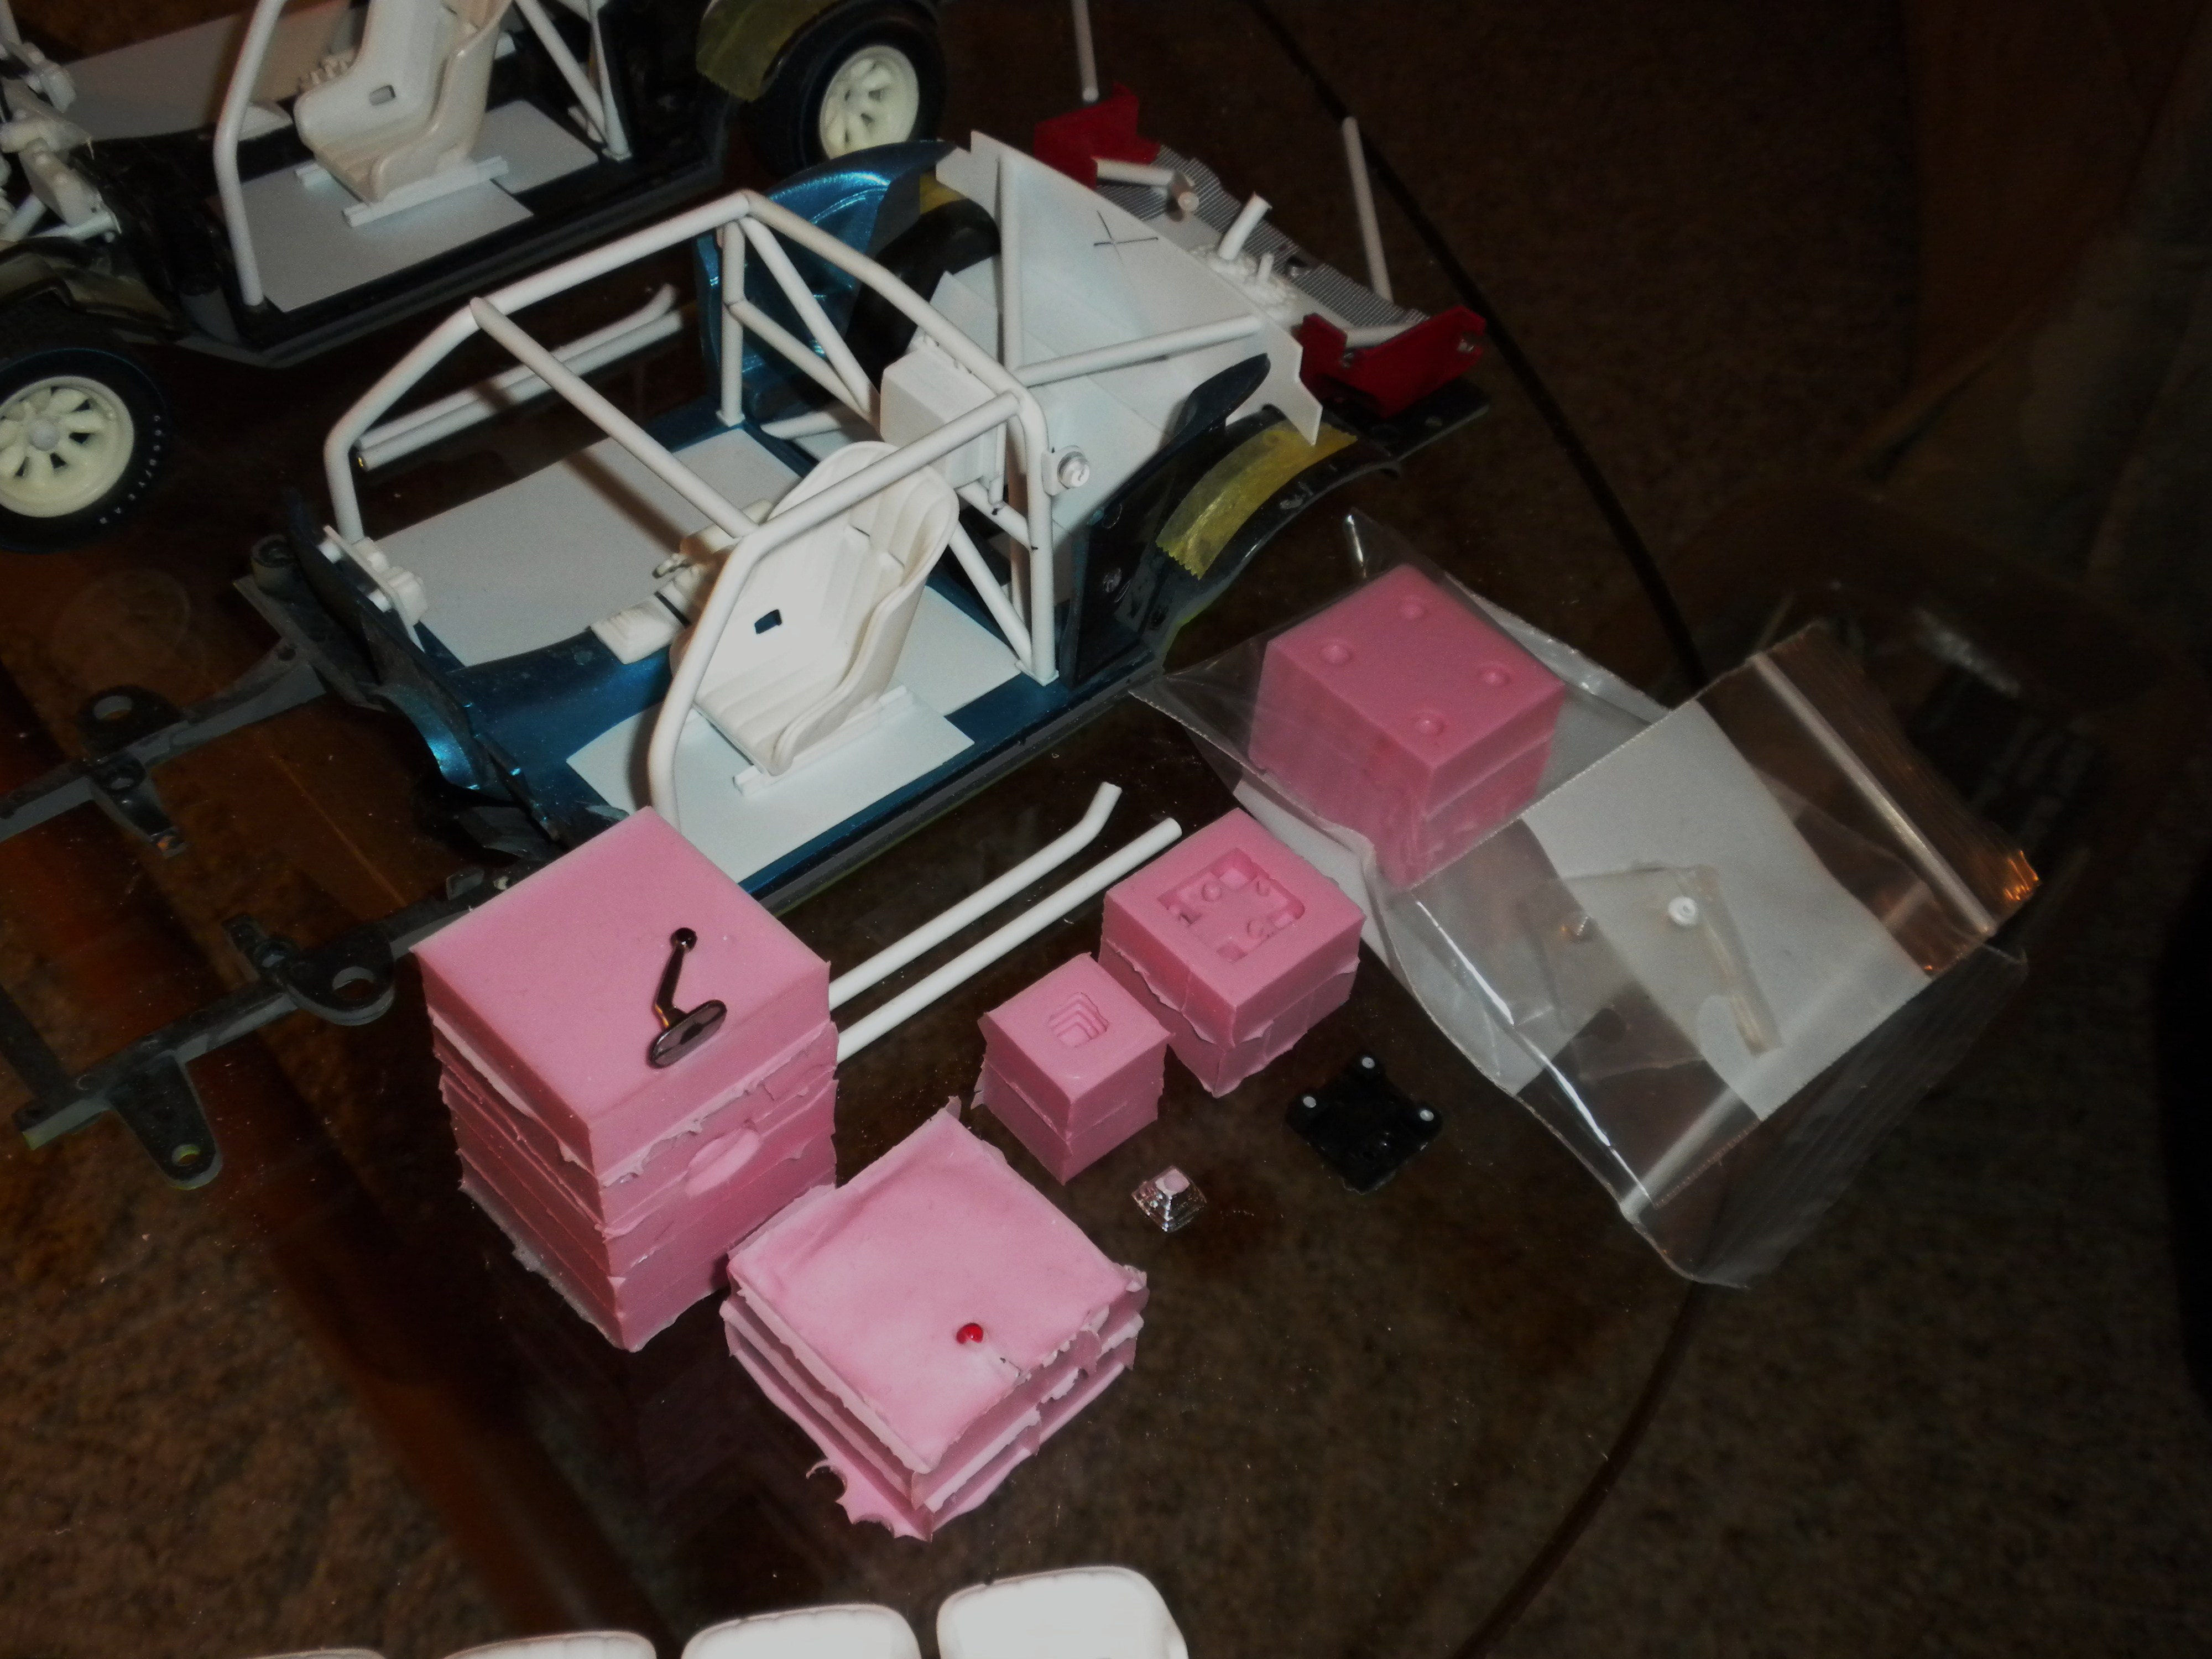
Greetings, Thanks for the creative input. Indeed, there is a Gurney retrospective being held at the Petersen Museum as I write this, while there has been a modern trickle of period SCCA Trans Am-related merchandise produced by HW in recent years that has also intrigued. In time I'd like to gather up a reproduction of the HW Sizzlers Trans Am AAR 'Cuda to display near to my 1:18th efforts, the former being the rechargeable electric motor powered iterations of the usual 1:64th scale fare HW is known for. In addition, I have a copy of the period Don Getz Goodyear Swede Savage 'Cuda poster as well as the old HW 'Racing 48's' Dan Gurney promotional poster and am happy to have each. - ...and now a brief update. Below will be seen my efforts to create reasoned 4-point cages for both the 'Cuda and the Challenger. When refined each structure will 'grow' further bars, etc., whereas at this point it was simply an effort to come up with something symmetrical and square twice over. In particular I could extend the bars securing the cage to the floor pan only so far forward given that attachment hardware and structure interferes with such. Some added reinforcement of the X-brace center is noticed on the Challenger chassis, while some modest updating of the fuel cell inlets might also be discerned for perusing what I've posted here. Finally, the 'X' marked on each rear bulkhead illustrates where a single roll cage bar will sprout forth to attach to the main hoop corner of each scale replica. Thanks for following along... M.K.
-
Swede Savage Trans Am AAR 'Cuda Hwy. 61 based project
swede70 replied to swede70's topic in Diecast Corner
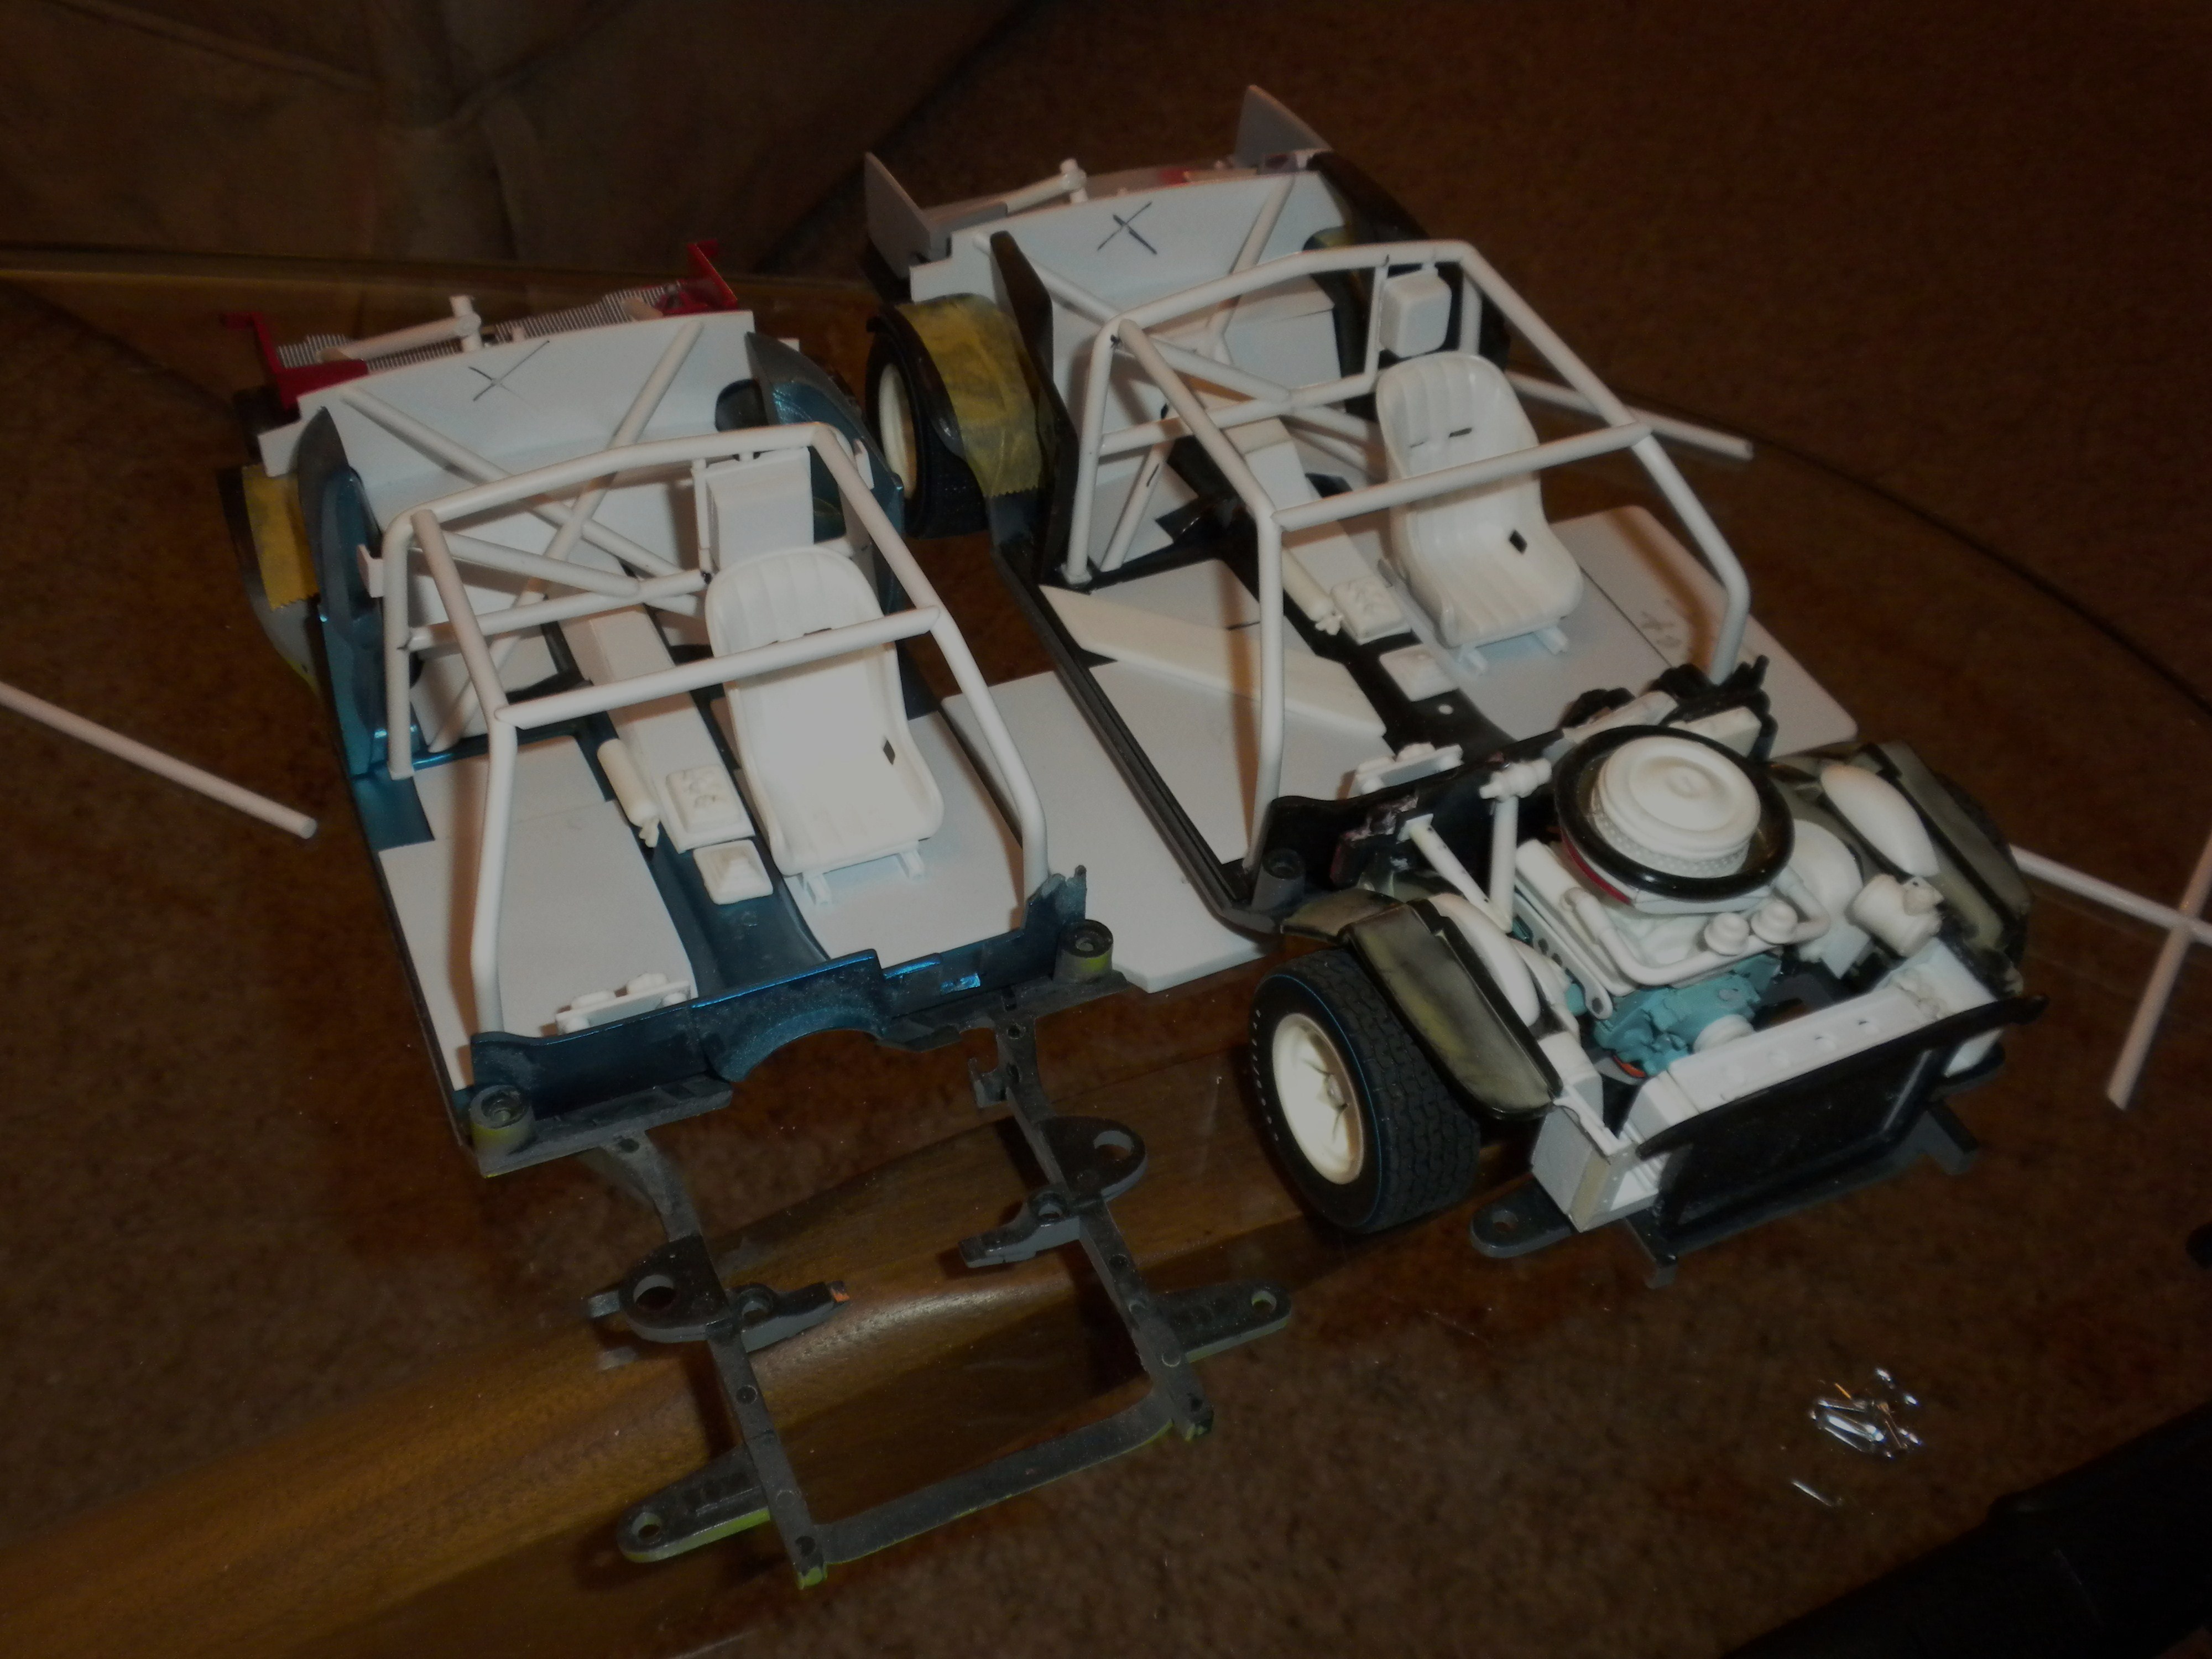
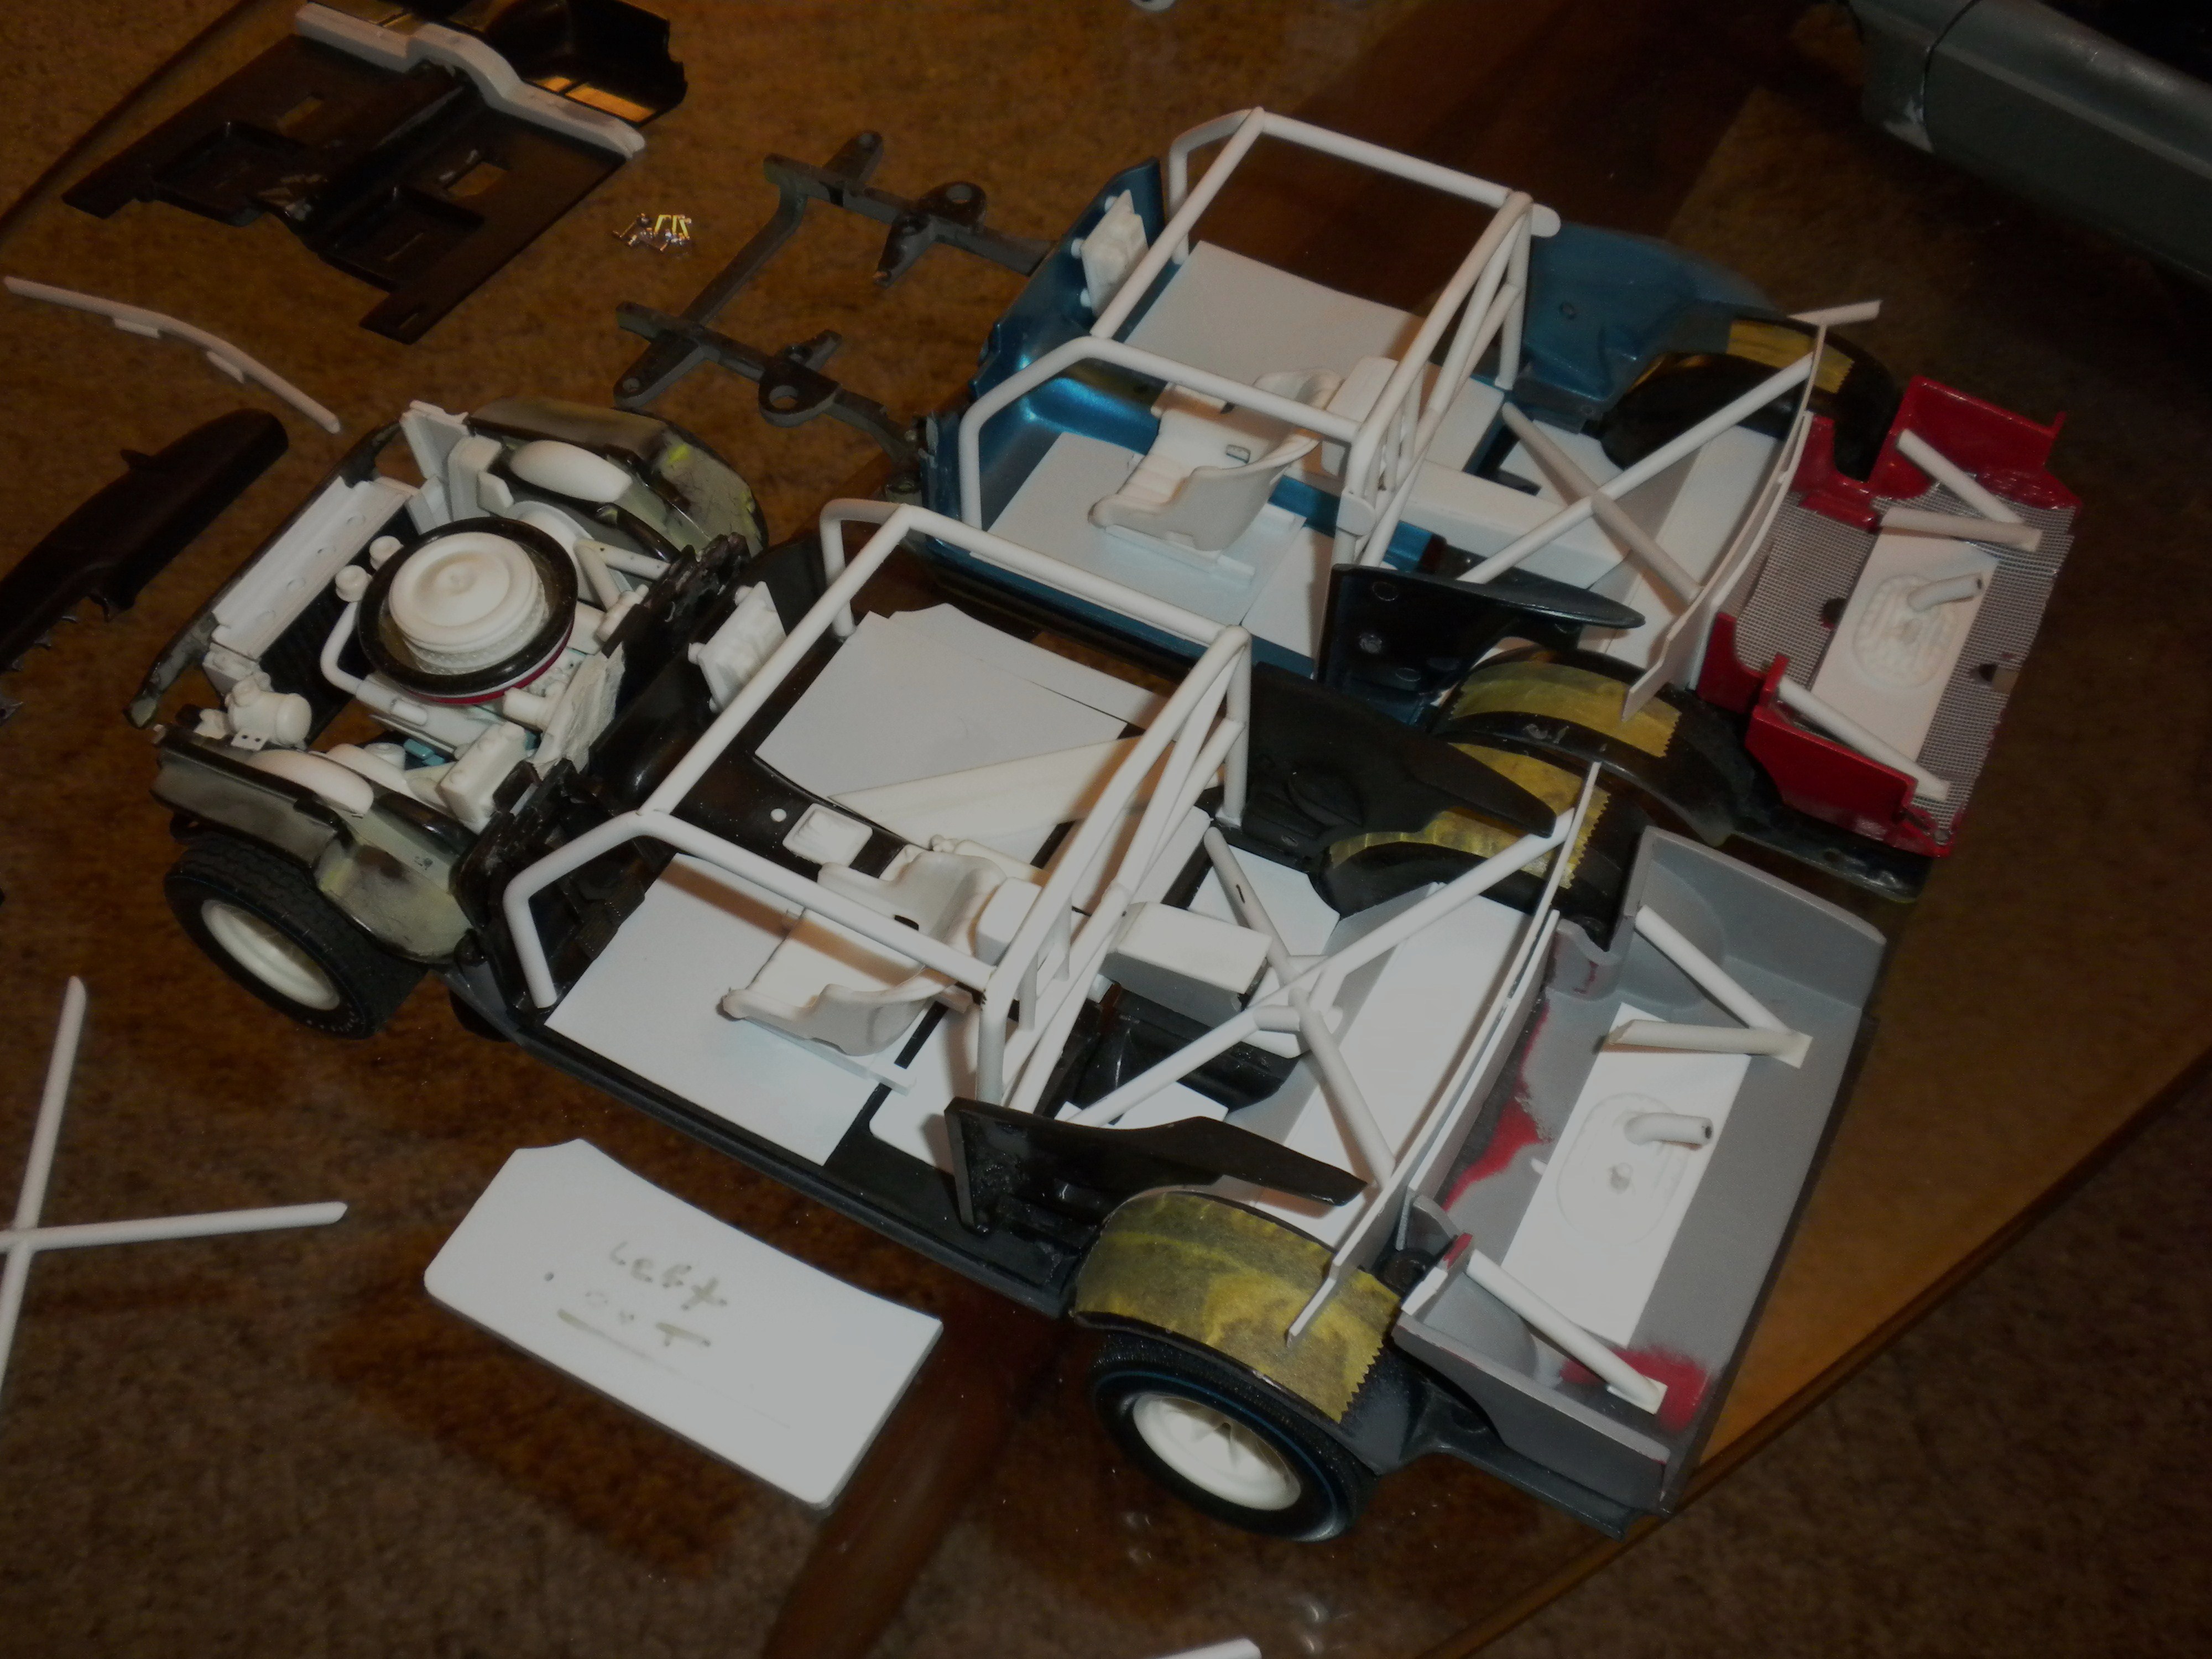
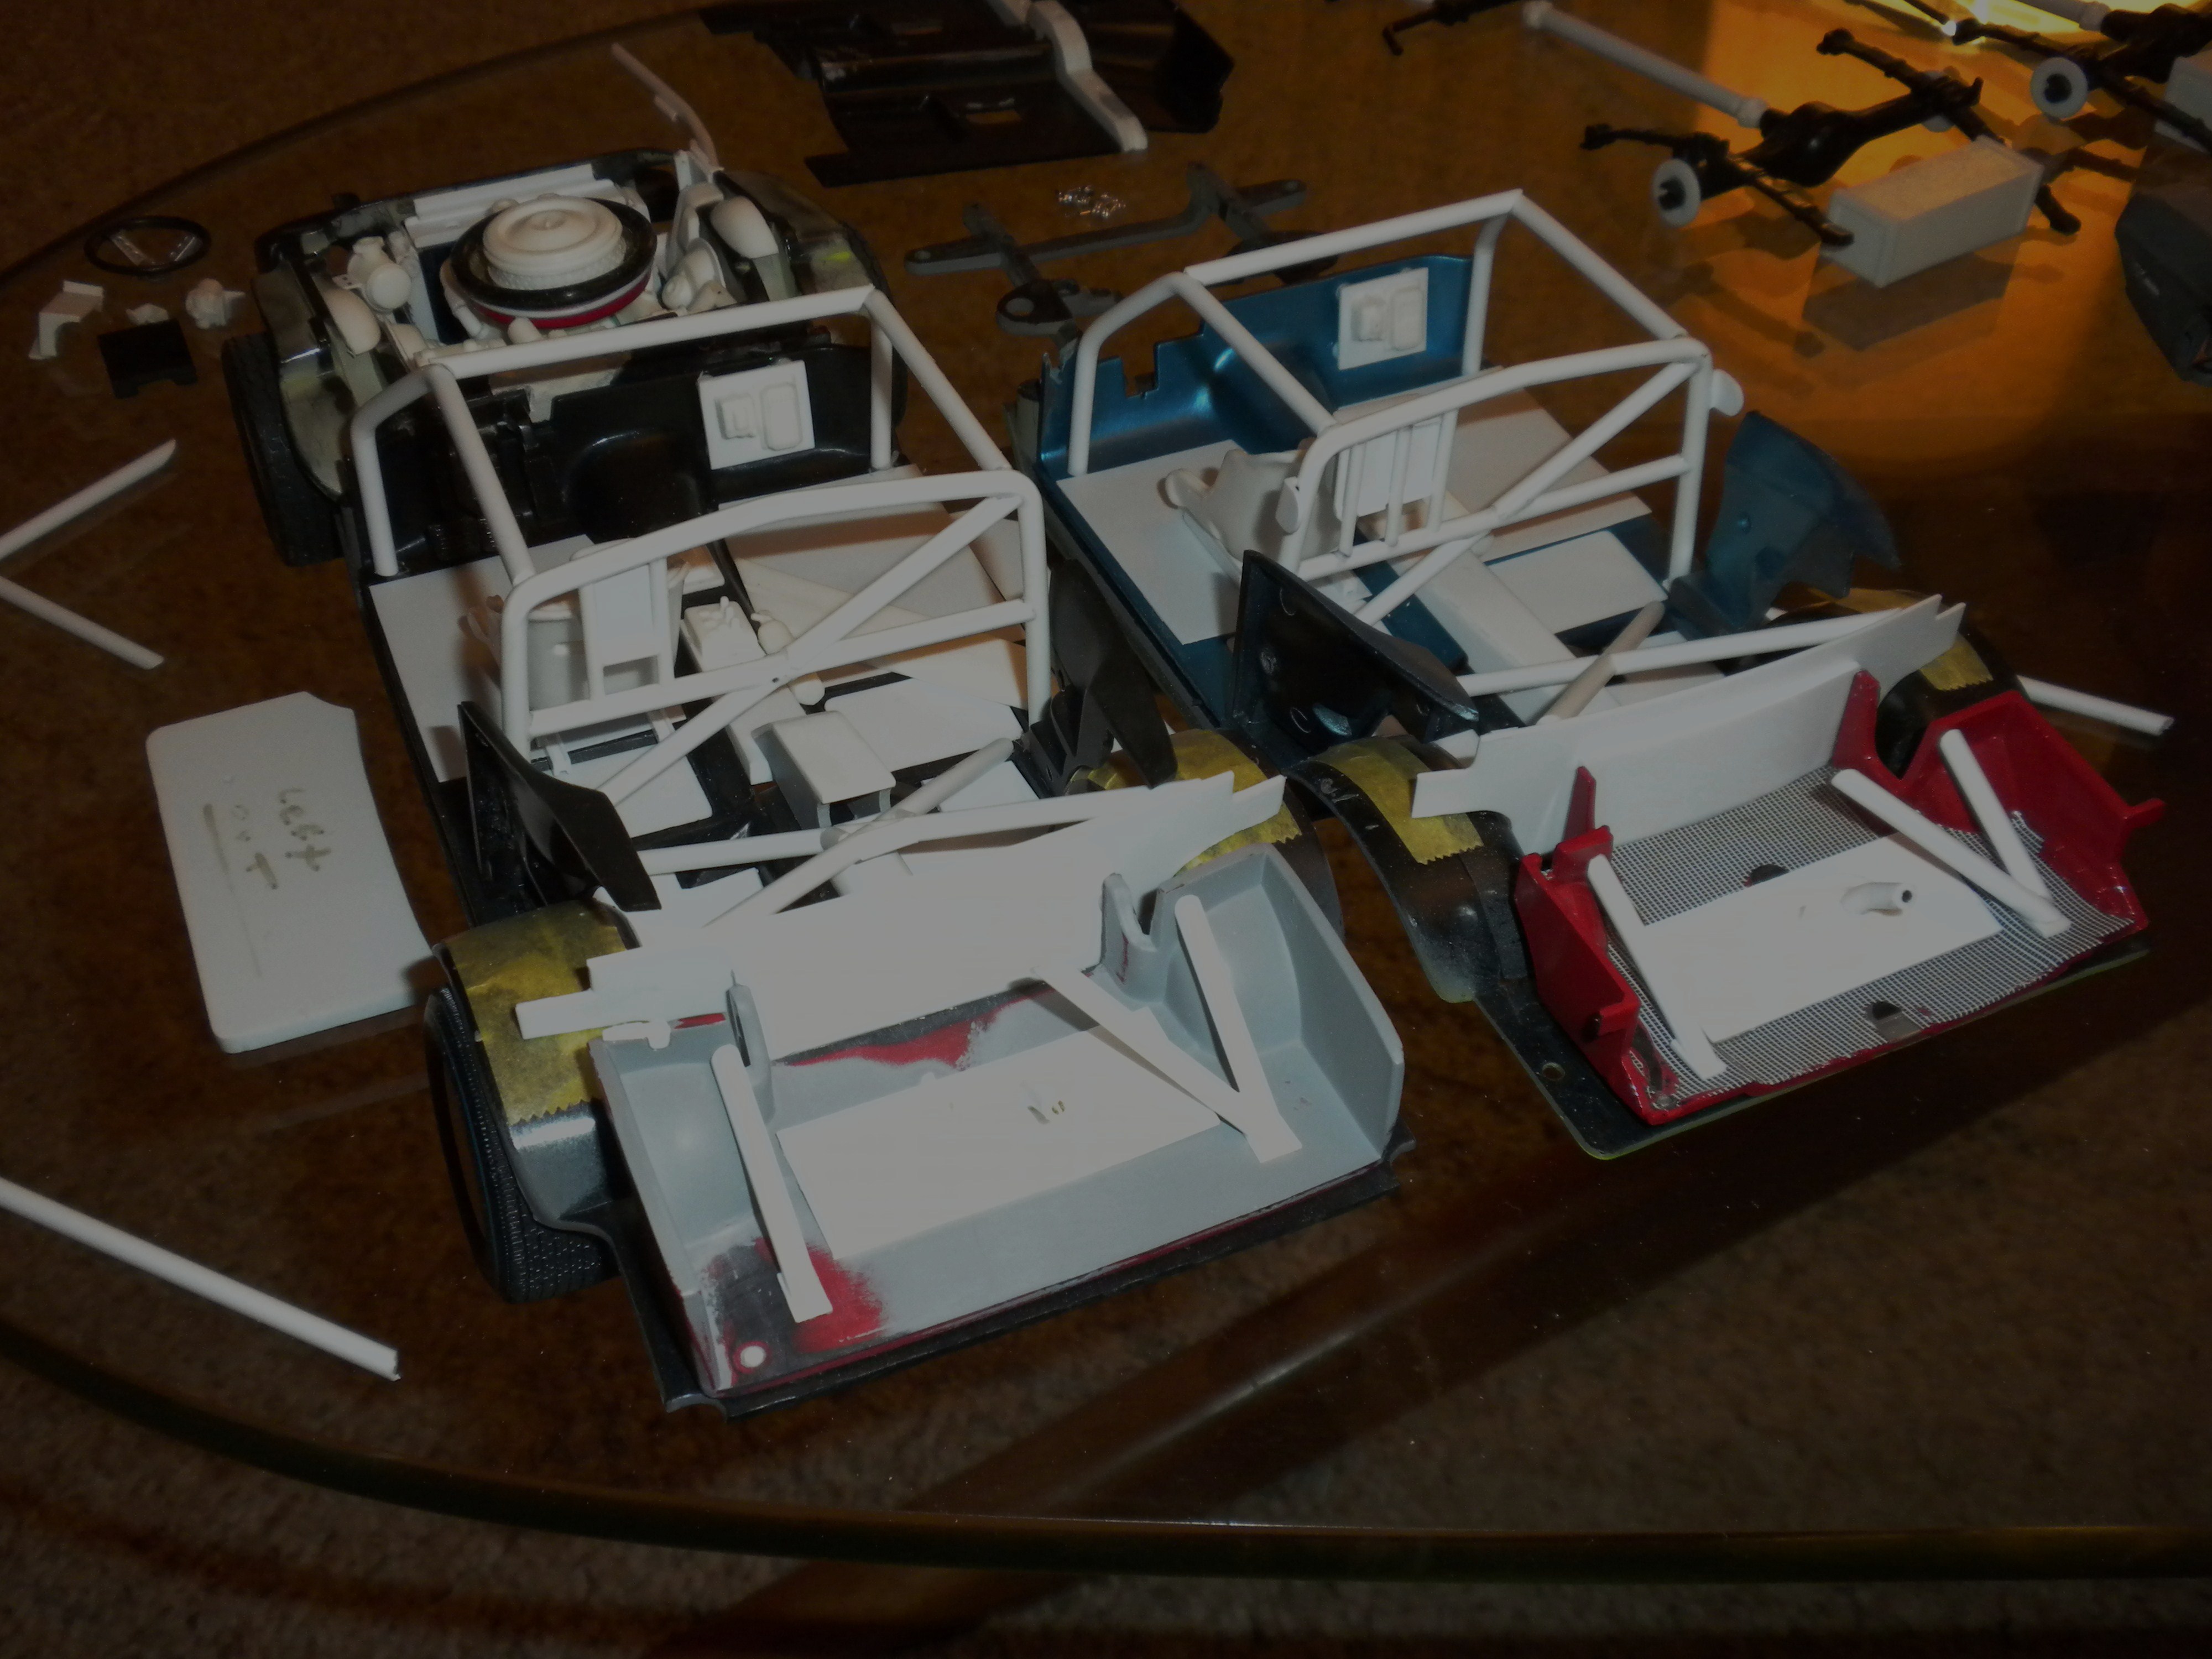
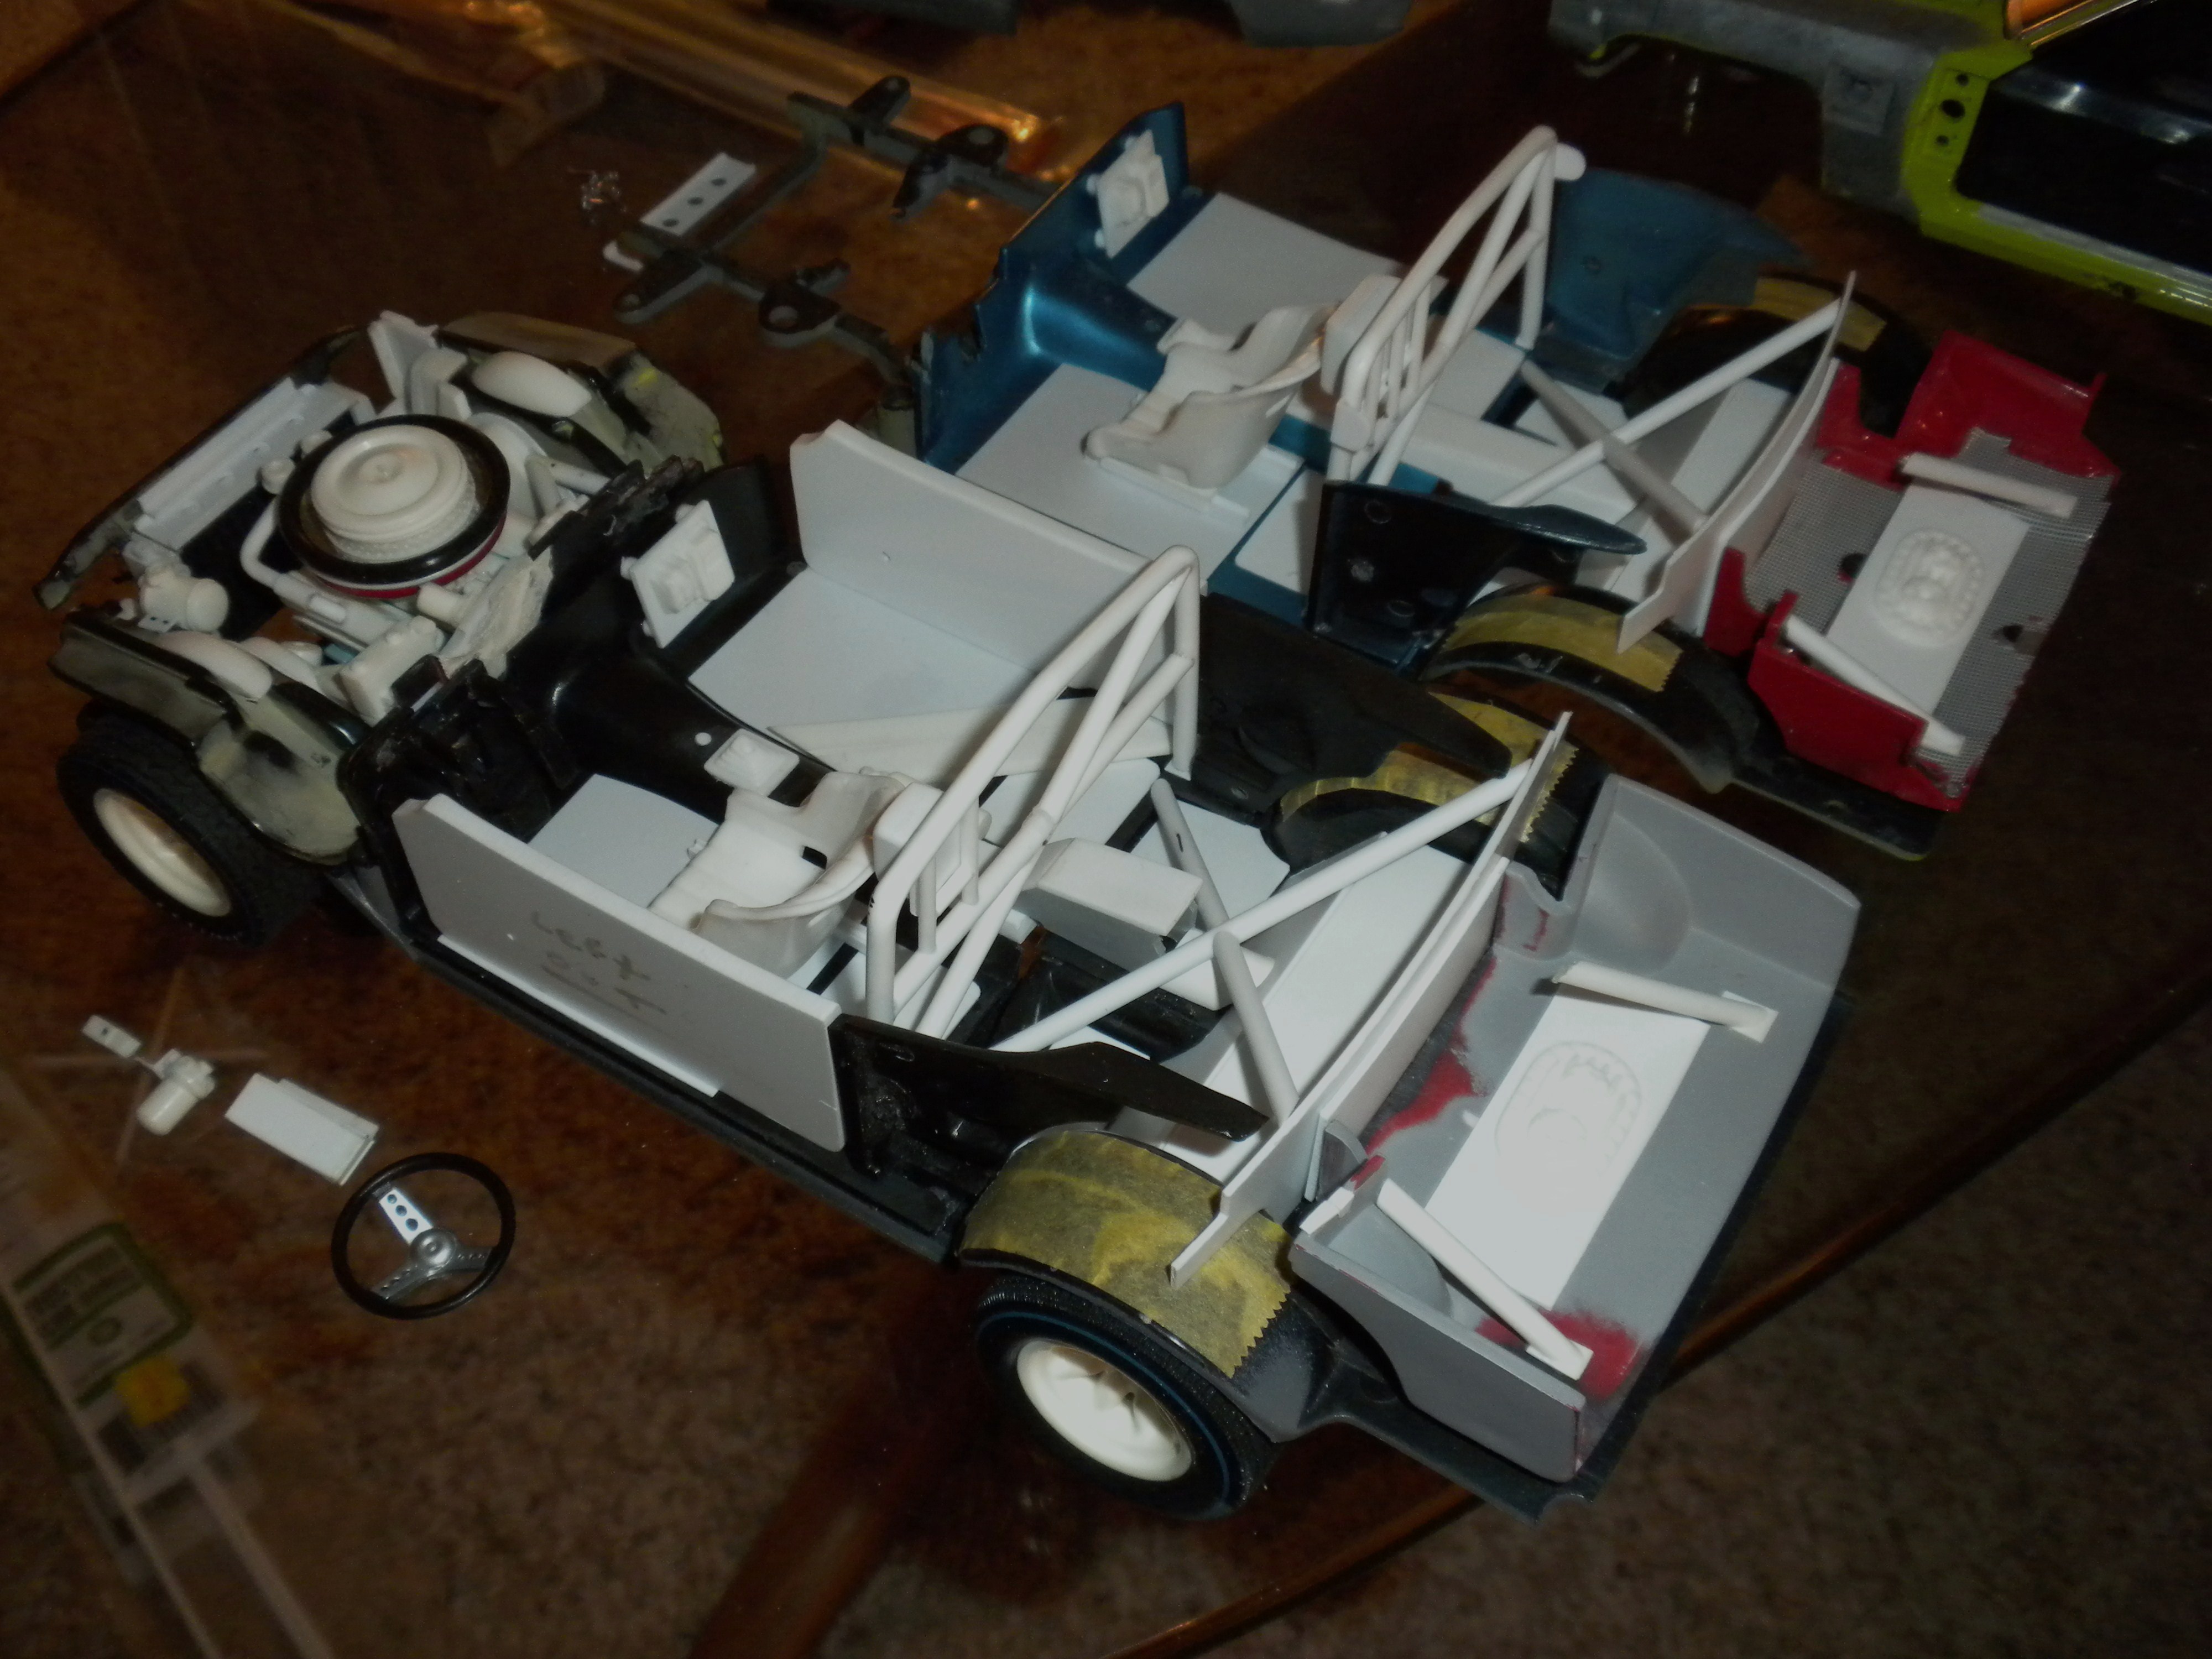
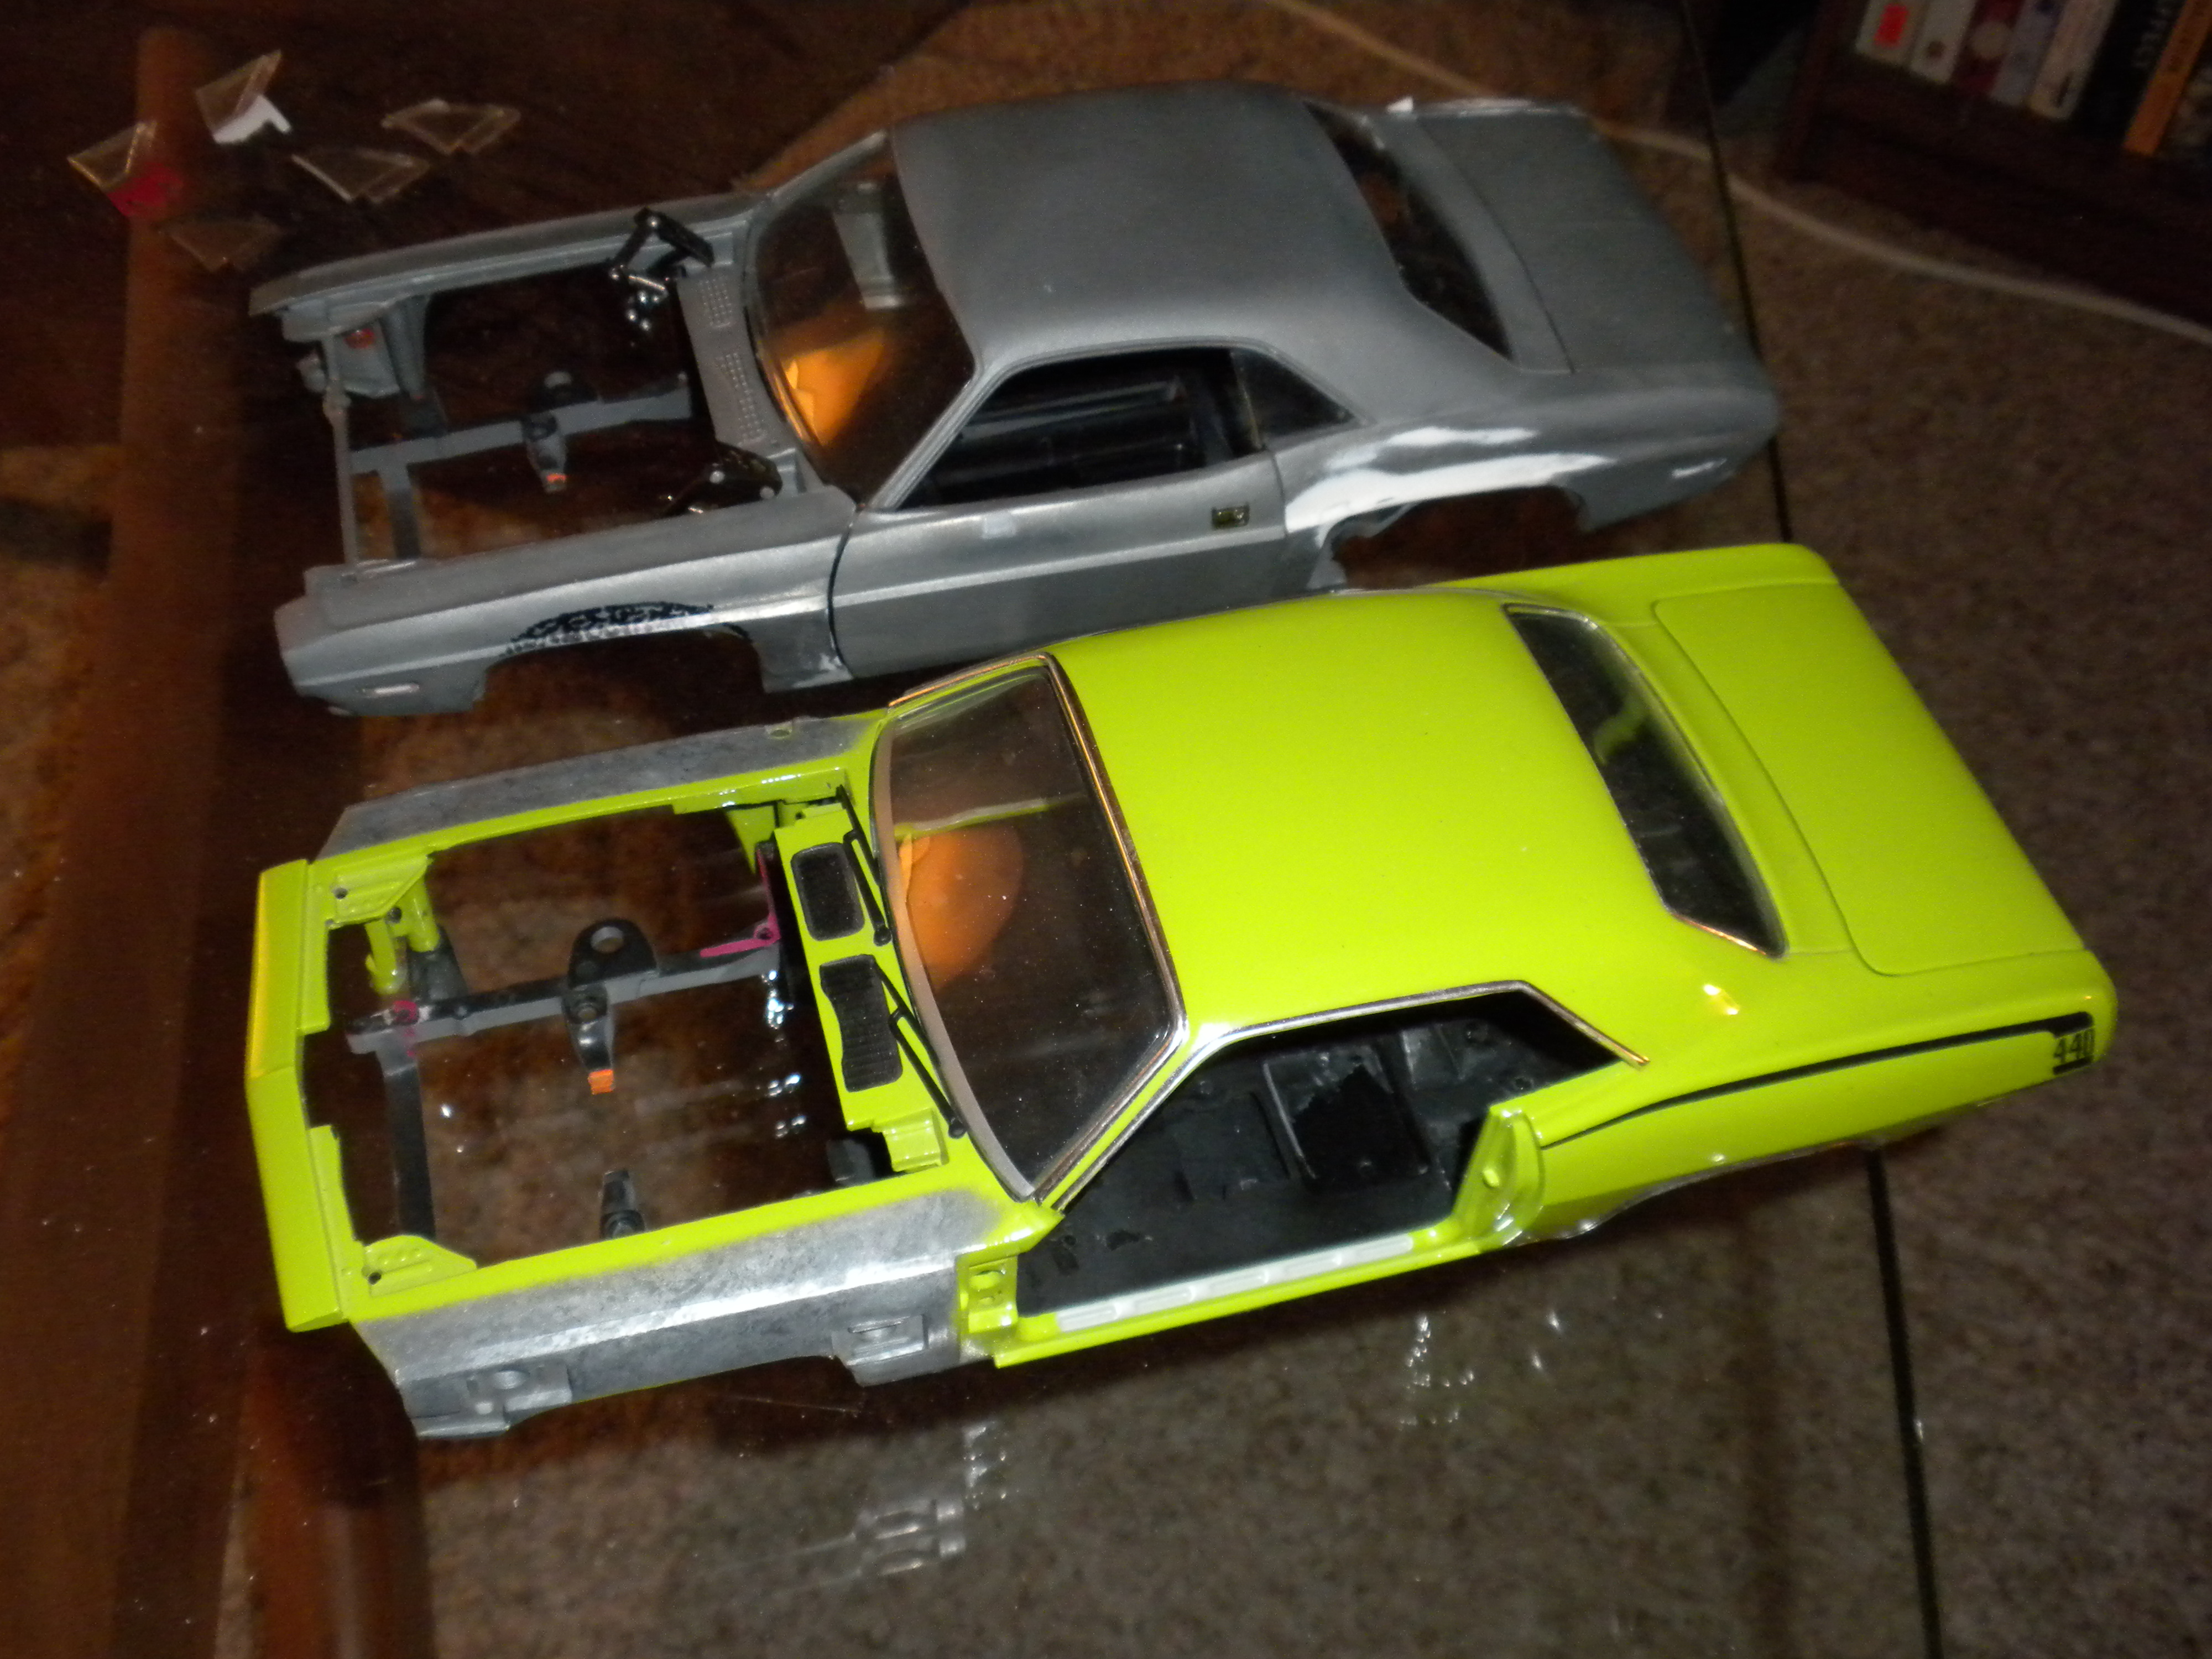
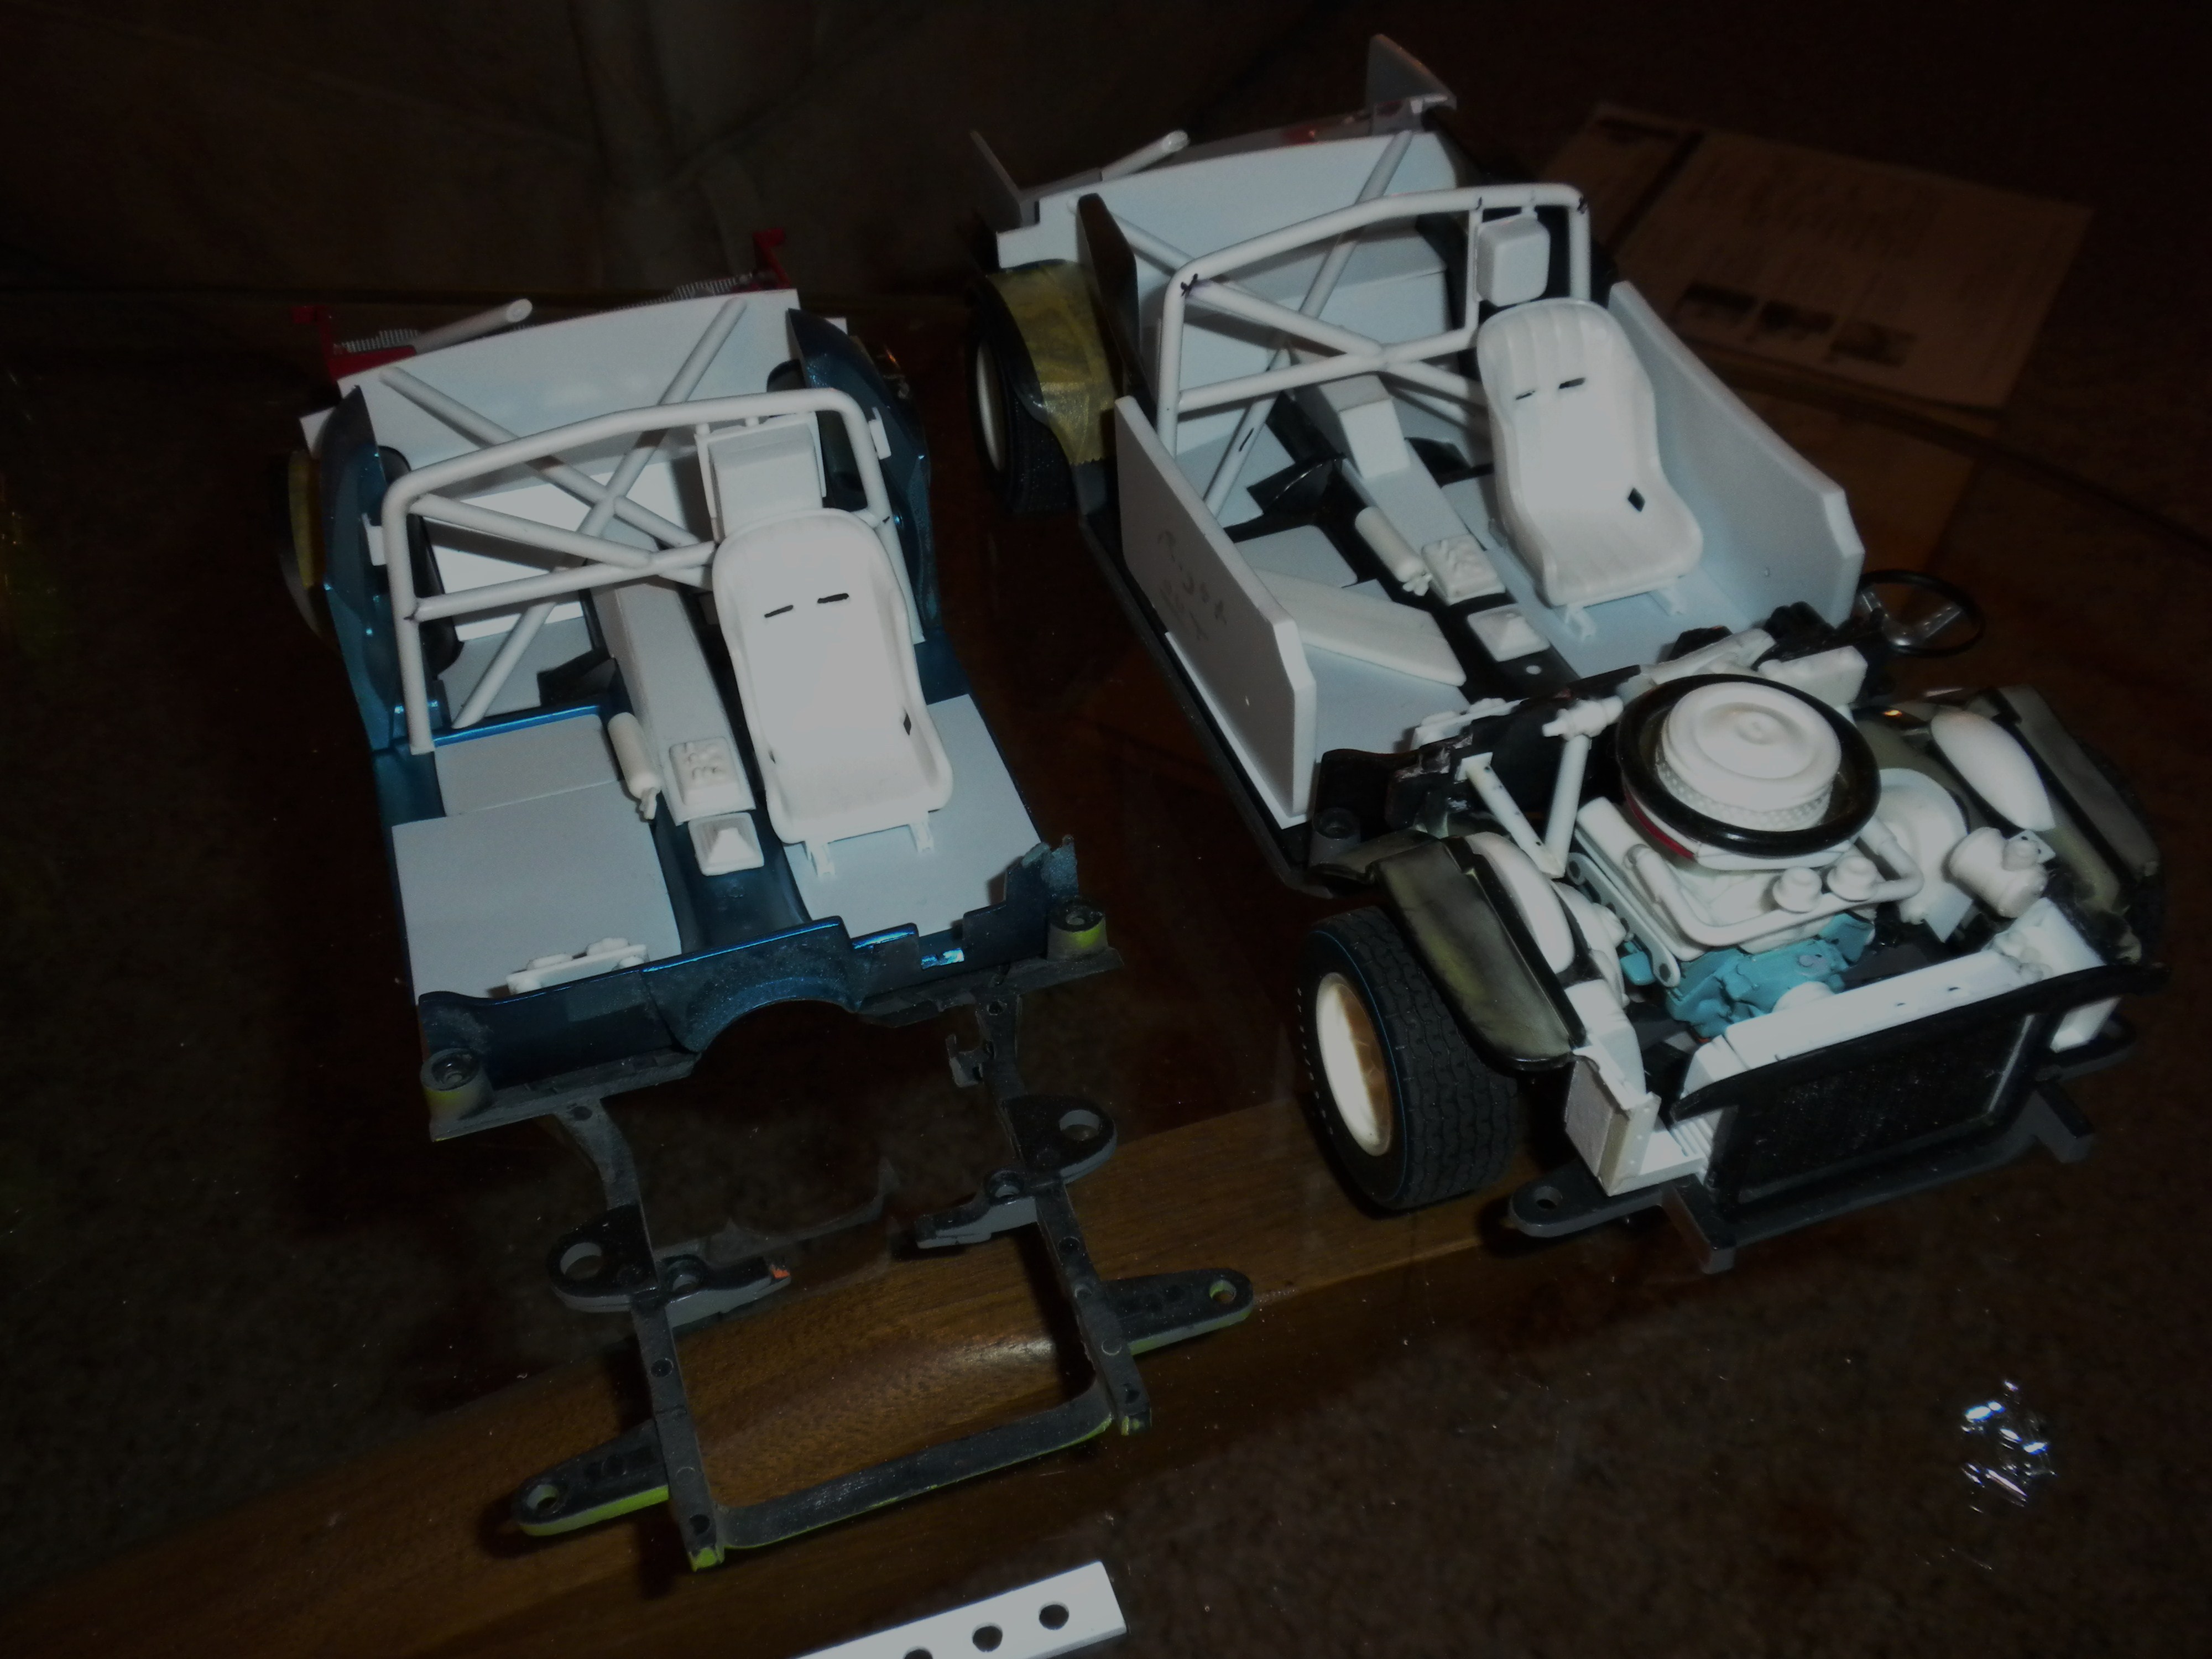
Greetings, Thanks Ed for the kind notice in relation to the Bob Tarrozi material as well as the Lime Rock vintage racing event program cover reference. I try hard to collect all the source material that I may, while having extra eyes searching for additional materials is always helpful and deeply flattering. Another update then... ...seen above will be the two interiors taking shape. Details to notice include the beginnings of a pair of scratch built roll cages, the differing design of two raised driveshaft humps looking back, differing headrest support and pad detail, and seats effectively copied from a GMP Trans Am Camaro part. The rear bulkheads are cut away at the corners to accommodate the plastic 'glass' installation on each of the scale E-bodies. The Challenger chassis is in the foreground, whereas the AAR 'Cuda chassis is in the background. Given that all the apparently missing bits and pieces seen on the Challenger chassis are affixed and in place on the up-on-wheels 'Cuda not seen here, the two models are effectively matched up for progress made thus far. Other things seen are the thickened core radiator with scratch built end tanks, the main roll hoop signal light mounts seen on the 'Cuda, as well revised Autodynamics Challenger air cleaner housing based formed from an aluminum wine bottle top. An O-ring was sourced for the fresh air seal, while I may cast this and squash it down a bit to better approximate what is needed here. ...more of the same, with the head rest support structure and pads seen to better effect. Soon I'll attempt to fabricate forward members of the roll cage as well as the support structure affixed to the X-brace in pairs and welded to the floor. As a side note, select period photographs depict the Challenger as having rather thick foam pads painted black replacing the interior door trim, and hence the cut out panels reflect an attempt to duplicate this detail. ...and these constitute a pair of extra bodies plus stripped floors and chassis to allow greater latitude for rough handling and quick trial and error fit concerning the roll cage structure being worked up. Yes - many a Hwy. 61 E-body gave its life to the creation of these scale efforts! As a further update for those intrigued by the topics chosen by this builder, apparently ACME is intending to do both the Autodynamics Challenger as well as the AAR 'Cuda as tribute cars based on the Hwy 61 tool. Slated for second and third quarter release in 2017, I can only hope that what I do here will not strictly be in vain. They'll list for $129.95, hence some question exists about just how much in the way of new parts they'll tool for whatever is eventually availed to us. Thanks for reviewing this update... Mike K.
-
Swede Savage Trans Am AAR 'Cuda Hwy. 61 based project
swede70 replied to swede70's topic in Diecast Corner
...this would be my Swede Savage Hwy. 61-based project a bit further along then. Considerable work have been performed to bring it up to the level of what has been done to my Autodynamics Challenger, and hence the post. Two full race chassis are being built up independently with all the attendant tubing and panel work, although I've yet to photograph such. This understood, know that more work has been done than is suggested by photos thus far provided. M.K. Mike K.
-
Hi Jim, No great surprise for my post, but here too I am given the Diecast Pub II is no more. Also willing to share information, insights and parts related to period road racing topics in 1:18th scale conversions. Though typically low-key, I'm always working upon something. Kind thanks for all that you've repeatedly and consistently brought to the scene however manifest. Mike K.
-
The First L-88
swede70 replied to LaughingIndian's topic in WIP: Other Racing: Road Racing, Land Speed Racers
Looks terrific and a great project idea this. Thanks for sharing... Mike K. -
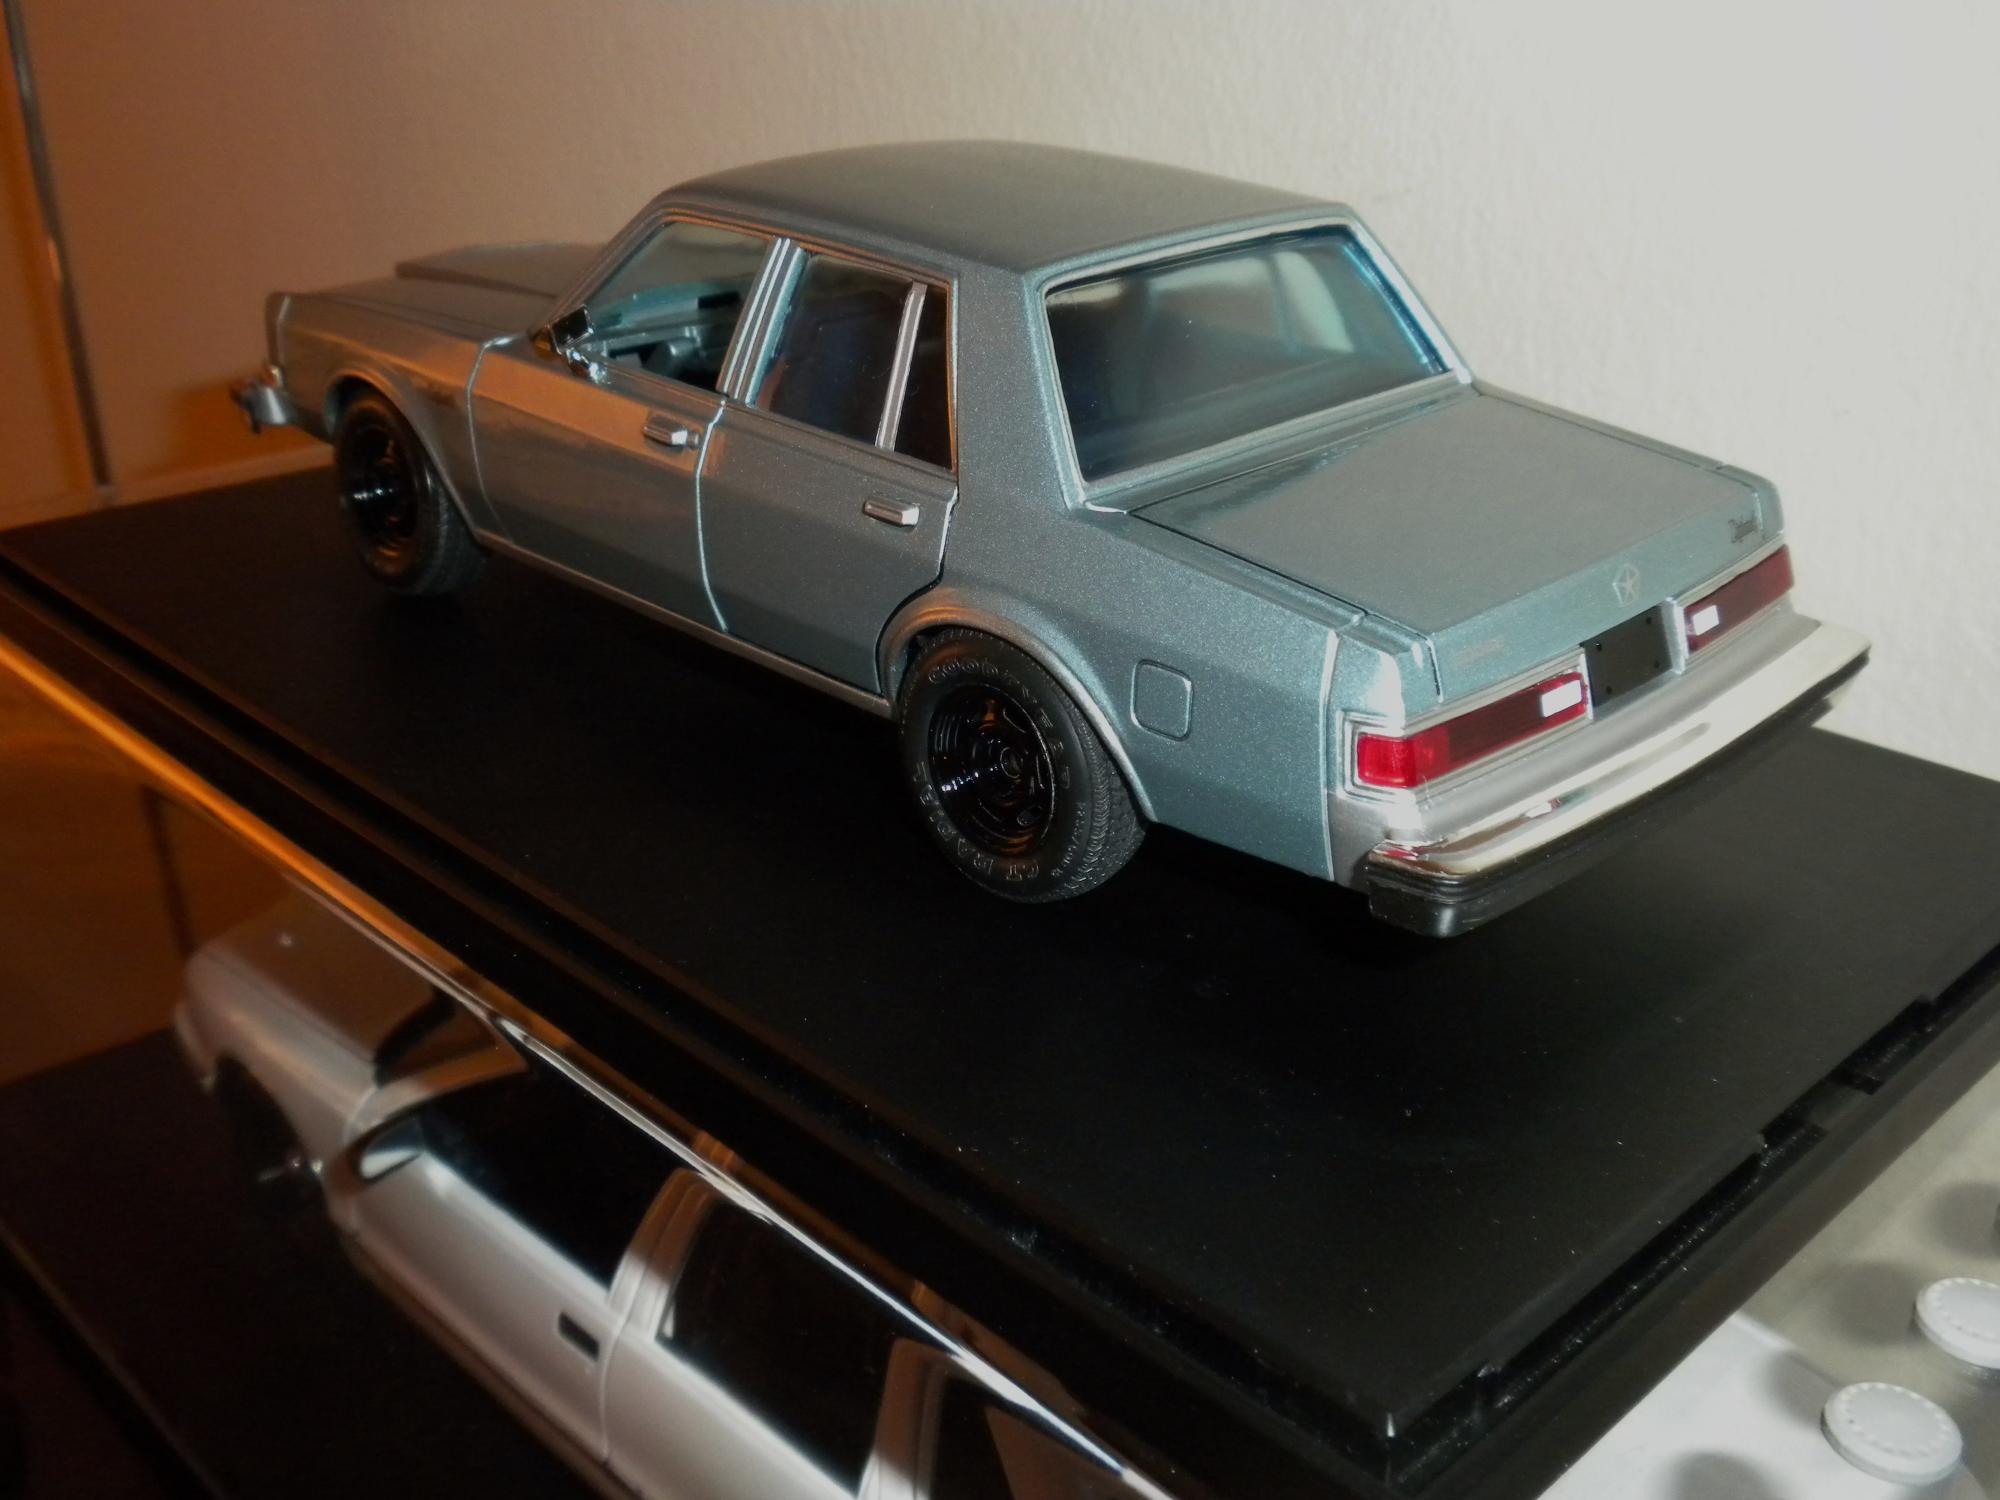
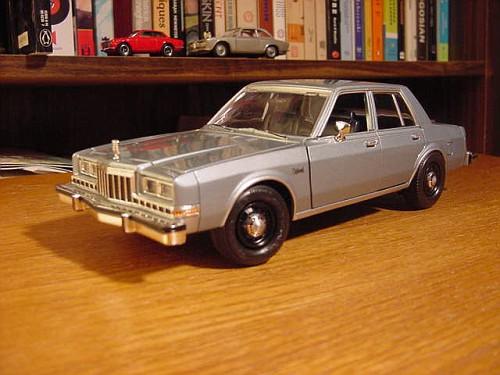
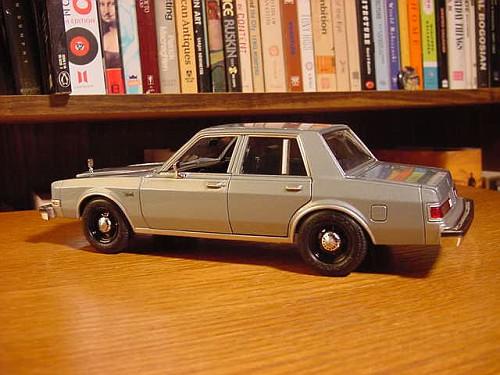
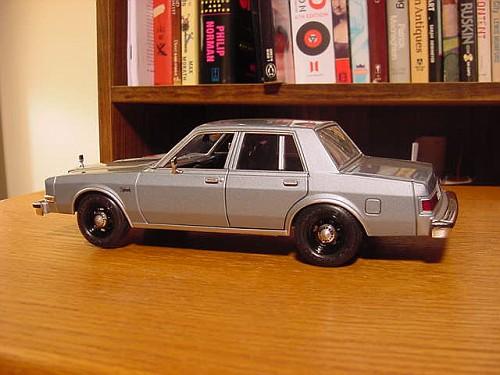
1:25th Motor Max '86 Dodge Diplomat A38 Police Package modified diecast
swede70 replied to swede70's topic in Diecast Corner
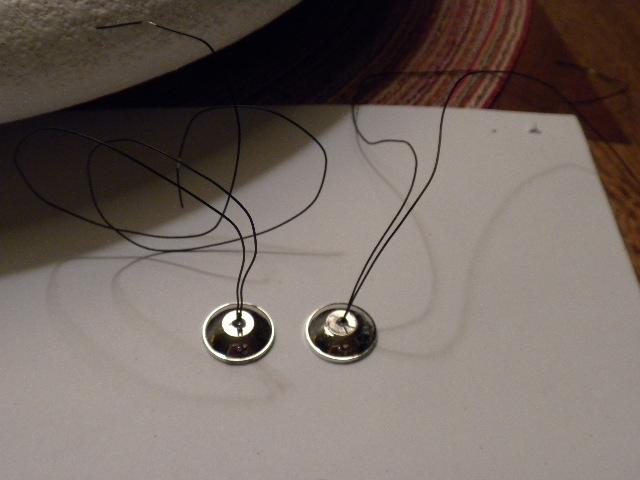
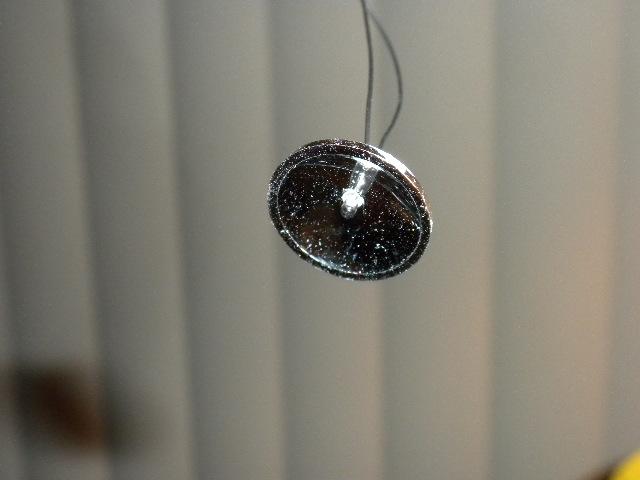
Thanks for the kind notice... ...this would be a pair of table decorations picked up to employ as reflector material behind the otherwise clear headlamp lenses. Unlike Bare Metal Foil, the backing on this stuff is rather thick and can be easily trimmed to whatever shape is desired. ...a bit fuzzy this image, but how matters appear for using the stuff seen above in tandem with some clear nail polish lacquer to hold matters fast. ...this would be the new wheels in place on the new Diplomat model. All will be removed to paint the brakes discs and drums. Note the tinted glass with the sunscreen just visible here, whereas the side indicator lamps up front have been touched it to ensure they'll be a bit more prominent. Though well nigh invisible, the navy blue 1:1 vinyl interior refinish spray has been used hear and reflects back a nice semi-gloss tone. ...the urethane body to bumper fill panels were painted silver and appear a bit more distinct than on my first effort. Black wash is seen employed underneath the rear doors and towards the back of the panels, while the trunk lid and fuel inlet door also received some attention in this regard. Not strictly noticed is a reduction in the rear track which is slightly narrower now and better for it. Scrubbing down the tire tread to even matters out and scrubbing in some Armor All to restore the tone of the tires also helped. ...a license plate holder has been fabricated and added here, while the tampo-printed reversing lamps have been replaced with Fred Cady white decal stock cut to suit. Notice also that the small 'chrome' pillar before the C-pillars proper has been extended top and bottom versus the first iteration of the Diplomat where this detail is incomplete or truncated. Thanks for skimming this brief update. Mike K.
-
Greetings, This is a project I'm in essence doing again for having sold off my first effort, whereas for recording impression and past directions explored, perhaps others can be saved time. The base model is a $13.95 Motor Max 1986 Dodge Diplomat combined with various wheel combinations as described. Auto paint shop interior vinyl color dye in an aerosol can navy blue was employed for the interior, although it seems the MM CHP release does include a blue interior as-delivered if one wishes to save a bit of effort here. ...my dear topic then. ...this would be the Motor Max model combined with 1:25th AMT '65 GTO Rally I wheels, and then combined with chrome plated hand cast resin Modelhaus MPC '77 Fury poverty caps. The ventilation holes on the hubcaps were reproduced by hand, while other modest things that can be made out are the urethane bumper fill panels painted silver on this light blue metallic replica. The tires are 1:24th Monogram Goodyear GT Radials mostly seen within the space of their '70 Challenger T/A release. The tires have to be filed to expand the center diameter a bit, but otherwise work well on this application. ...looking hardly different, this would be the same model fitted out with Monogram '70 Roadrunner optional police six-slot pressed steel wheels with the same hubcaps as before. Wishing to reproduce the brushed finish on the center of each cap, I employed a cotton swab and silver paint and spun each assembly before applying a small amount of half-dried color. Further, some panel lines were made a bit more prominent for an application of black wash. - I'm working on another example which will be photographed to flesh out this thread employing the new Fireball Modelworks rendition of the classic Chrysler Corp. police car wheels to hopefully improve matters again. The windows on my new effort will be tinted blue/green, while other small matters will be seen too consistent with extracting the most from this otherwise homely model. For example, fairly resilient chrome foil stolen from some otherwise garish center table graduation display will be cut and positioned to bring the clear headlamps to life from behind. Thanks for reviewing this short thread... Mike K.
-
1:12 1969 Camaro Z/28 as seen in the August '69 issue of Car Life.
swede70 replied to swede70's topic in WIP: Model Cars
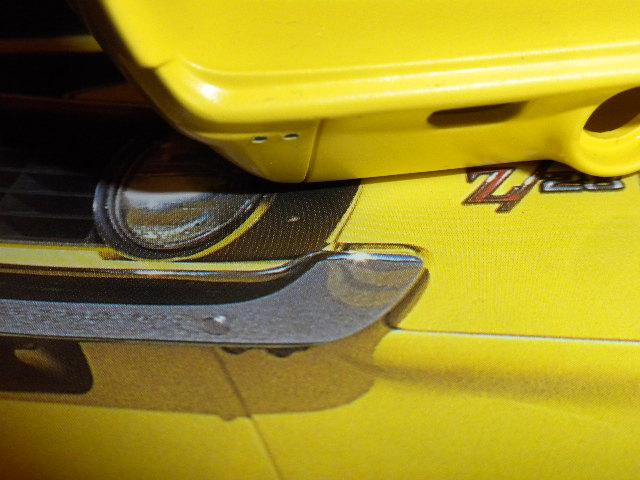
Greetings, Picking up matters again and reflecting the availability of spares for the purchase of a second kit, some updated work is here on view. Nothing terrible daring in total, although consistent it is with what has been done to date. Here is a seen an enlarged photo image of a '69 fiberglass Heavy Duty cross ram fresh air hood which is employed to generate a tracing of what I need to create from scratch. No factory ductwork is provided beneath the ZL2/Super Scoop fresh air hood Revellogram provides as per stock, whereas I've sanded off the cast-in steel hood brace work and like-reproduced insulation to start off matters. Given I enlarged the Guinn 'Untold Secrets' image about 190% and created five copies to cut same-shaped elements for my duct work, here can be seen the first large element resting in place. 'L' section Plastruct, etc. will be employed to flesh out what can be made out here. A terrible photo image this, but all I could capture when I last attempted to gather such. Here a second set of valve covers have been put to use to the extent that the oil fill cap and PCV port/connection were sanded off to exist as separate pieces which I anticipate casting and vacuum chroming. Less chance of mess for so-dividing everything, whereas the air cleaner lid will also be cast - mainly to eliminate the mold fill points unfortunately sited along the perimeter of the lip of the lid. Touching in my cut points with silver paint didn't seem good enough, hence a revision of matters here. Finally, a larger 'Day Two' Purolater air filter element that is taller in section will be done up with a pair of cloned filters and round out what will be attempted here. Thanks for skimming this update. Mike K.
-
Swede Savage Trans Am AAR 'Cuda Hwy. 61 based project
swede70 replied to swede70's topic in Diecast Corner
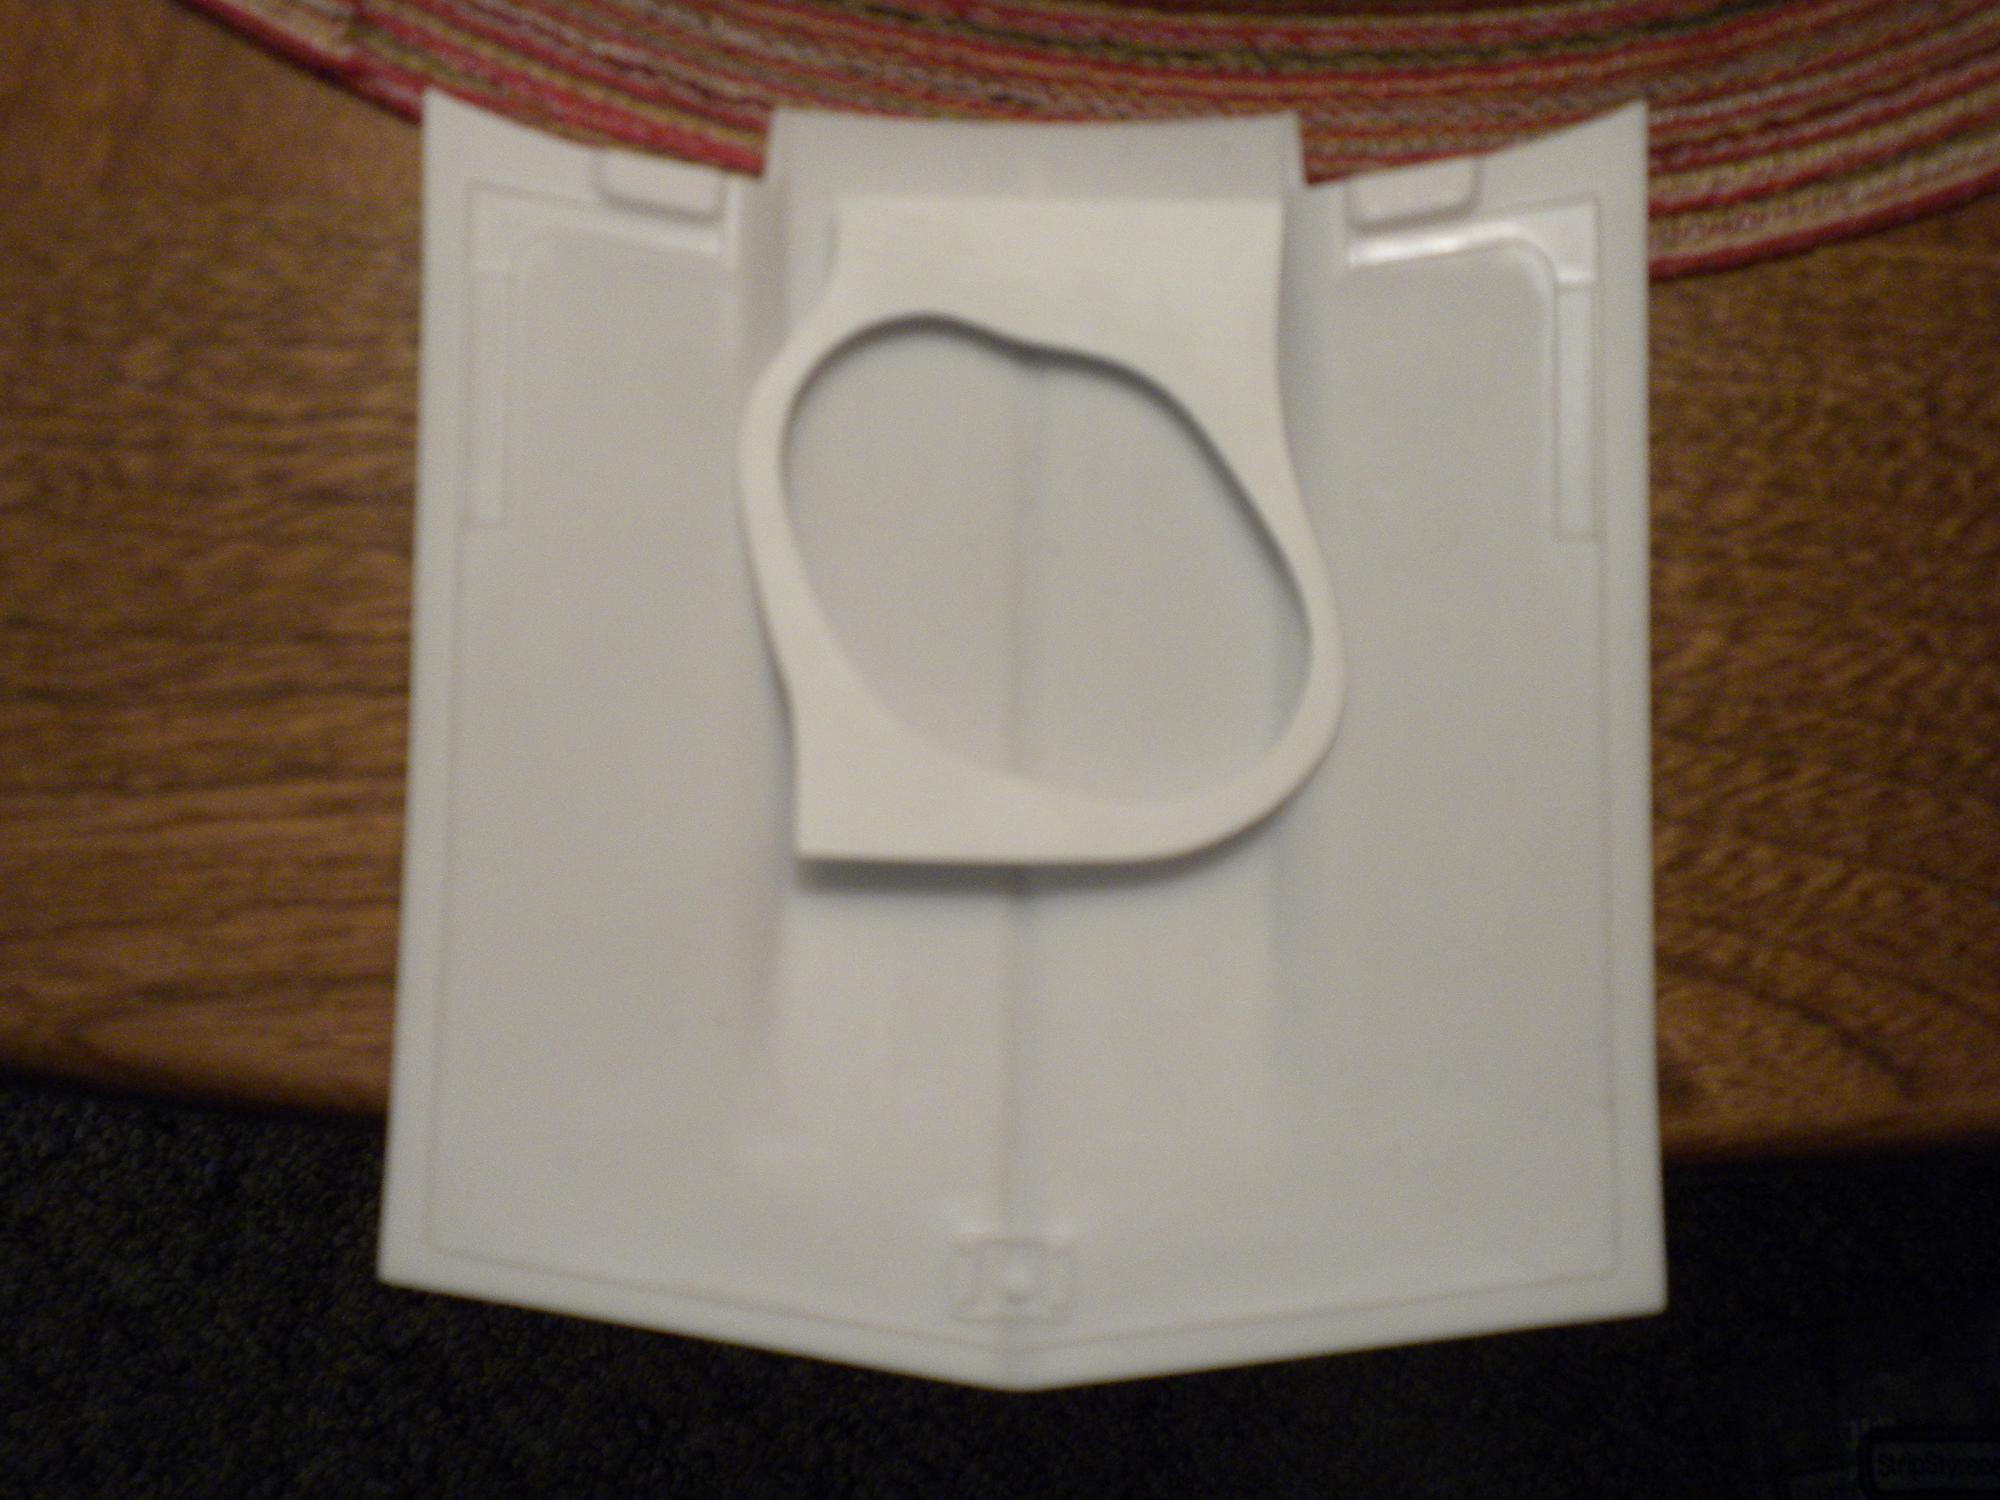
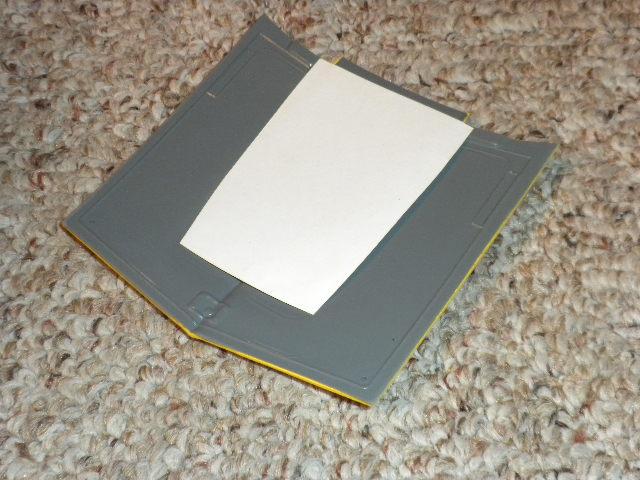
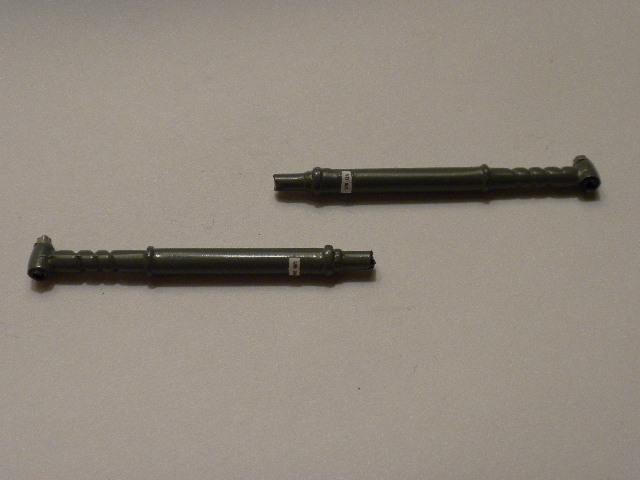
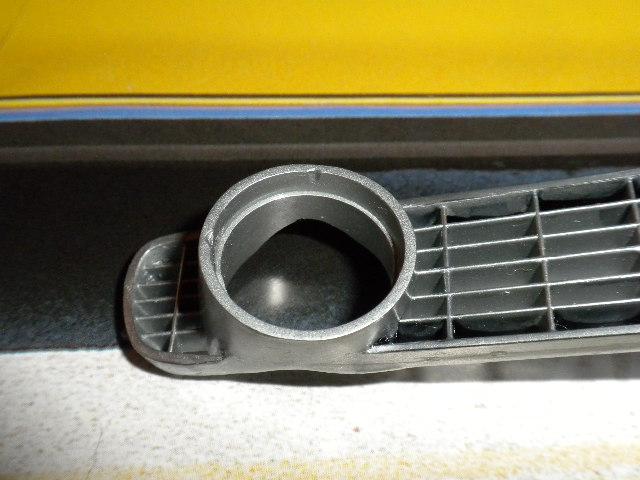
Greetings (and thanks for the kind comments of those looking in), It seems I stalled pondering whether or not to cast a clone of the Autodynamics Challenger A-pillar fresh air duct, finally deciding to scratch build two new versions entire. Here may be seen the 'Cuda A-pillar mounted fresh air duct after having fabricated the same last evening. At the very least, there seems to have been at least two distinct designs employed, differing for length and shape of either end. See the photos provided: ...the caption suggests Mid-Ohio '70, but I'm thinking it was captured a bit later. This is basically what I want; i.e. rather tight of dimension, larger rectangular pick up and shallow oval opening inside the car. ...Gurney at Riverside/Mission Bell 250 '70. This would be the later and longer duct. If I ever do a 'retirement ride' Gurney entry, this is likely what I'll work for. ...and in a manner of a few words - how I do it. The photo is from Michael Keyser's title The Speed Merchants and shows the Savage 'Cuda at Mt. Tremblant/St. Jovite '70. Note the lighter body color again. As for the scoop fabrication, the shape and dimensions are roughly mocked up with a small length of plastic sheet bent to suit, whereas here I've stacked about seven layers of plastic sheet in laminate fashion. Hence to the left is mass without form, whereas right may be seen form without mass. Seven and a half hours later I had: ...mostly good, fairly tight and short too! ...another view of the same. ...while here the inlet has been drilled to suggest that the item is functional. More work needs to be done here, although such time dedicated over an evening is quite enough for me. Thanks for reviewing this update. Indeed, the Chrysler teams ran 303.8 c.i.d. short stroke LA small block engines allowed for the destroking options afforded by the SCCA looking into the '70 season. And yes - they often went KABOOM! Mike K.
-
Swede Savage Trans Am AAR 'Cuda Hwy. 61 based project
swede70 replied to swede70's topic in Diecast Corner
Thanks for the nice comments. Some time ago I started hand casting select parts in resin, whereas when one tries this the practice alters just how much work one will invest in a master before producing however many clones are required. I started with an update of the GMP Minilite wheel which I felt needed some help, whereas to scratch build four would have been unthinkable then and unthinkable now. In short, I'll invest more time for making a very special one-off if I can count on producing multiples later. Concerning this project I may have gone a bit overboard with regards to casting a great many things that I didn't strictly need to, although I much rather work with readily replaced duplicates than scarce original parts. The small block Chrysler single 4BBL intake is a Hwy. 61 340 Dart item that is a rare parts bin discovery to say the least, whereas once one registers the undoubted utility of casting this or that, one gets excited about the possibilities. I maintain two corkboards where I've laid out all the likely spares I possess so that I'll be able to contrast carburetors, batteries, coils, exterior rear view mirrors, air cleaners, etc. for use on current and future projects, whereupon I privately duplicate what I specifically desire. (pictures to be inserted soon - M.K.) Thought has been given to affording the 1:18th scale community a small line of products consistent with what is afforded the vast and diverse 1:25th scale scene, whereas know that my focus is period road racing topics as well as replica stock miniatures. I maintain a small catalog and have forwarded the same to select inquirers consistent with making discreet lots of this or that available to fuel projects pursued by others, whereas sometimes a person has a 'rare spare' that can translate back as something cast and cloned for the good of all. Casting isn't stone simple, but it isn't particle physics either. One generally has to care about a topic to do justice to it; i.e. level-headily devise a means to capture all the detail availed, construct a reasoned mold with current materials, etc. I does take time, whereas with most scale hobby things outsourced to another the wind must be blowing in a particular direction and planets have to be aligned just-so before even small scale contract work is taken on. Given the up front costs aren't wholly crippling, I like others tend to err in the direction of affording insight and feedback to others wanting to take the plunge and cast items for themselves. Some haven't the powers of attention or concern for detail that is required to produce consistent product quality, hence not everyone can strictly do it and expect first-class results. This said, the basics of resin casting are just that - i.e. basic. I generally converse widely in relation to what I'm taking on and let others know that what is 'visible in white' is what images I post may be available to complement what it is they do in turn. Discreet email mail traffic helps as individuals speak of what they desire, what parts they might have, and how our interests might overlap or coincide. As parts in 1:18th vary greatly in relation to quality, very well rendered spares command a premium in terms of the attention I'll avail them, whereas other items won't rate consideration given I (or others) know of some better rendering of such on some other diecast model, typically in 1:18th again. In sum and in a manner of speaking, yes I resin cast for the 1:18th community - albeit quietly via backboard PM traffic. Kind thanks... Mike K. -
1/12 Camaro Pro Street and Twin Turbo Touring 69
swede70 replied to Ralph Torres's topic in WIP: Drag Racing Models
Very impressive - looking very nice indeed. Mike K. -
Swede Savage Trans Am AAR 'Cuda Hwy. 61 based project
swede70 replied to swede70's topic in Diecast Corner
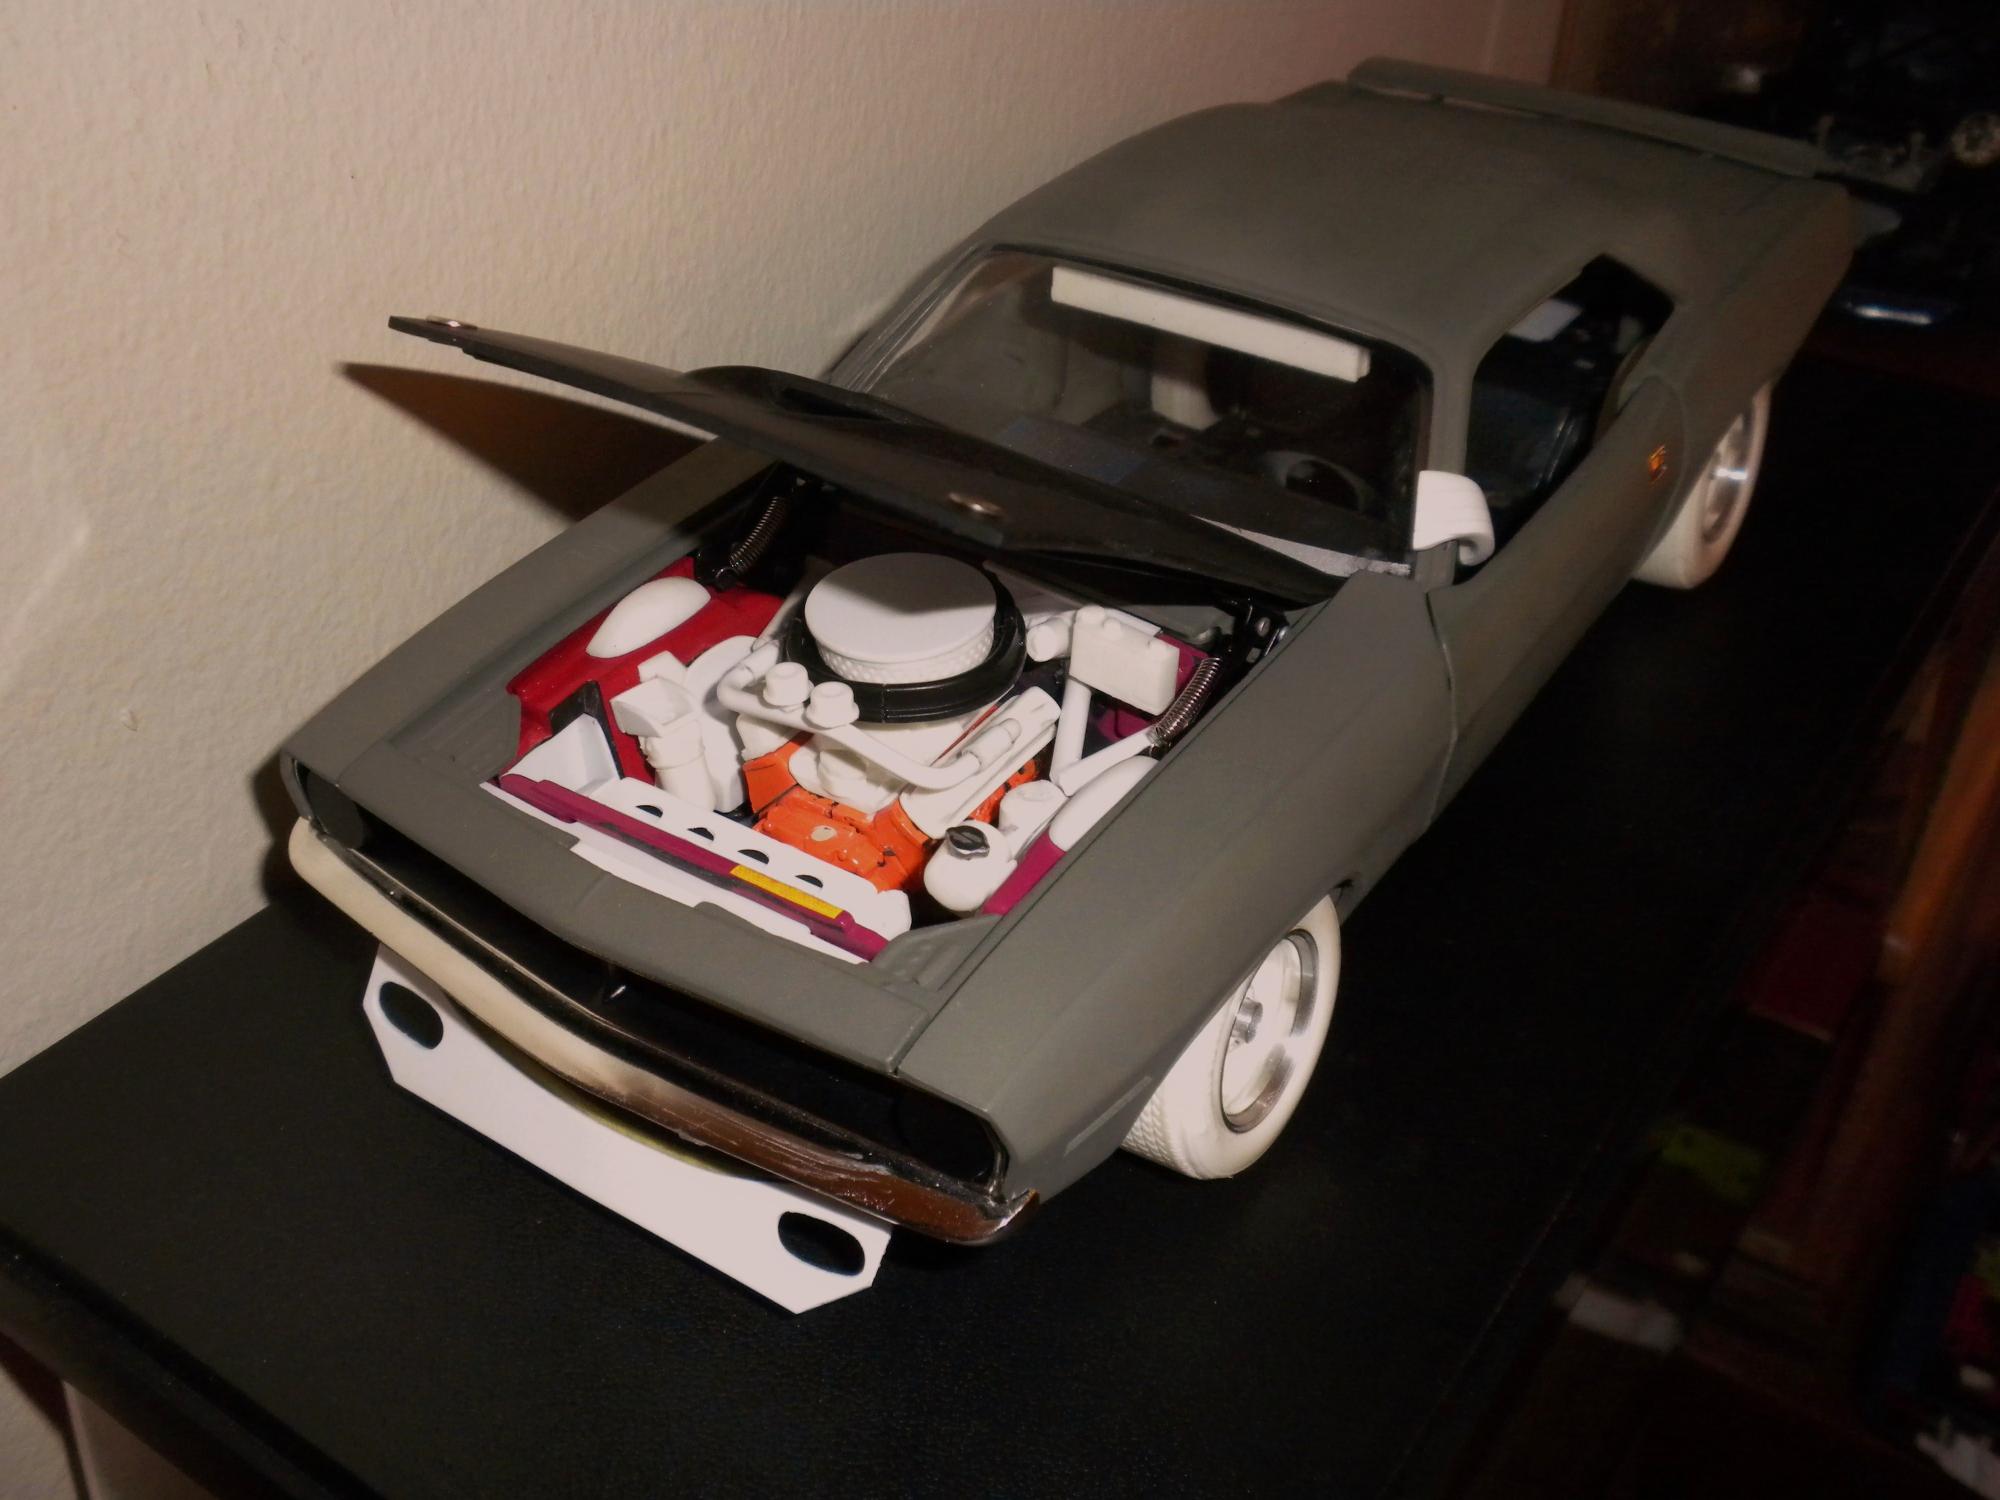
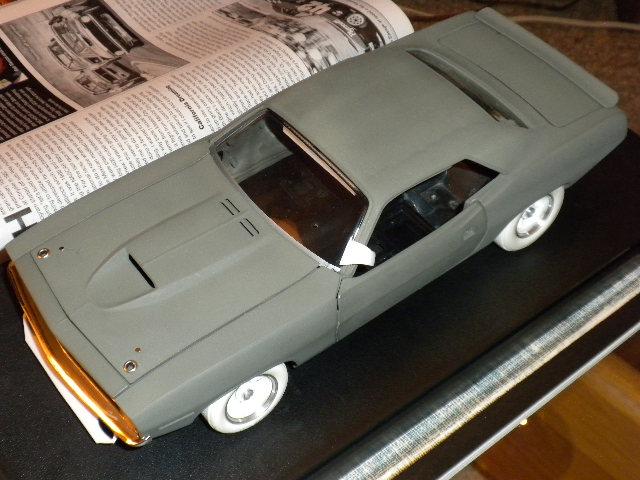
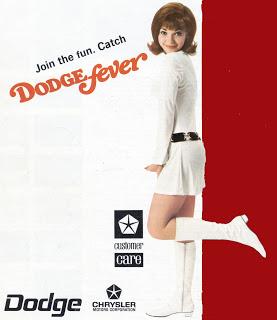
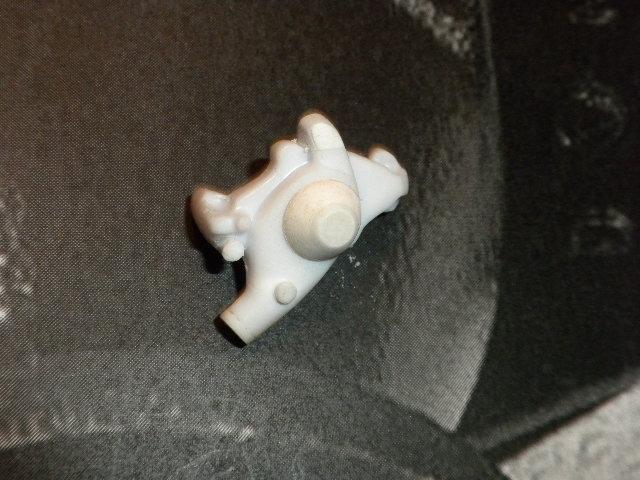
Greetings, More a record of old material and work done on the Autodynamics Challenger consistent with relating what stands to be cloned for the 'Cuda, what follows will be a few 'vintage' images of under the hood work done to date on the Dodge. ...this would be the mysterious 'bread loaf' oil pan which is quite a departure from the usual extended inverse 'T' Trans Am pan. Note how the steering drag link passes clear through the sump. ...although wearing early-season brake fluid reservoirs, do note the firewall to inner fender brace work as well as the oil breather setup. Given much wasn't available to borrow from other 1:18th models, the breathers were done from aluminum rod from scratch. The interior panel work and floor effort will be used almost as-is on the 'Cuda but for variations manifest for purposes of rear axle location, drink reservoir holder, twin exhaust dumps, etc. Note too the oil cooler pocket, whereas when this photo was taken the pocket opposite had not yet taken form. ...opposite view of the same. The upper control arm pockets were also scratch built, although the AAR 'Cuda assemblies will have to be different reflecting the fact that the mounting points were relocated upward on their team cars. Note too the #77 'metal' interior floor brace (#76 has something different) as well as the CDI box, etc. Tiny header flanges may be seen, whereas the wiper motor combines Hwy. 61 and ERTL Authentics '71 Charger parts. ...here the coolant overflow tank is rendered in turned aluminum, the cap is a chromed item from a Lane '68 Shelby GT500, whereas the double oblong head lamp fill panels are scratch built from sheet plastic. Here the old-style brake fluid reservoirs (three then) have been swapped out for a scratch built model with visible seam detail captured in hand cast resin. Such will be shared with the 'Cuda, as will the small marine battery barely visible in the pocket opposite of that to be occupied by the oil cooler to come. ...a severe close-up under hood of the Challenger at Laguna Seca '70. Note the 'DODGE' and 'Keith Black' decals on the valve cover... ...the 'Dodge' font is borrowed from the '69 'Dodge Fever' ad. campaign and took some time for me to research, whereas this identification will be shrunk and eventually rendered as a decal. A friend who services the actual #77 in California has afforded me a color Keith Black decal that too will be shrunk and employed. ...and yes it all fits under the hood. If photographed head-on, the stacked filters are visible through the hood scoop. Some crude aluminum tubing work is noticed in the form of a rudimentary cage, although now I stand to do everything again in better material and with greater experience beneath my belt. ...the same model with revised headlamp fill panels, cloned parts assemblies, and much revised fresh air system plus hood seal. Period photos reveal a stamped standard base crudely duct taped to the hood seal, hence this will all look messier when complete. Thanks for reviewing this most recent thread addition. Mike K.
-
Those both look very nice indeed. Thanks for sharing... Mike K.
-
1:12 1969 Camaro Z/28 as seen in the August '69 issue of Car Life.
swede70 replied to swede70's topic in WIP: Model Cars
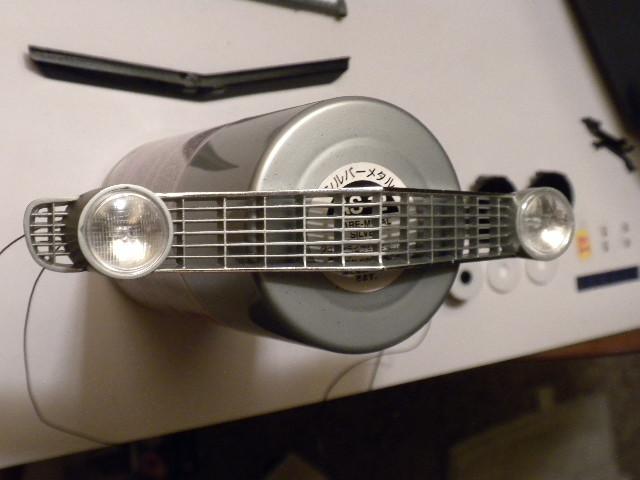
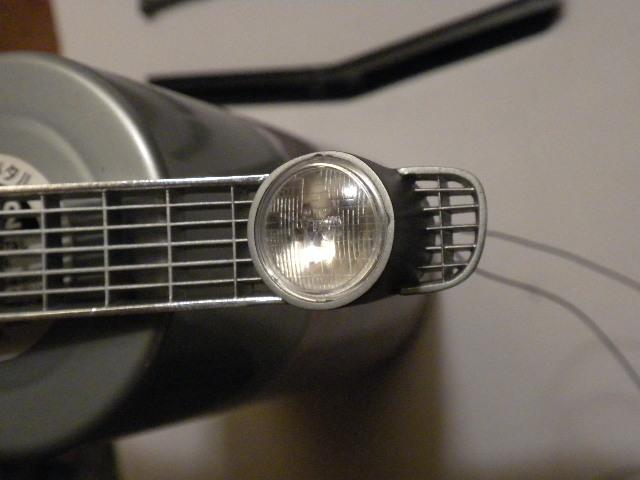
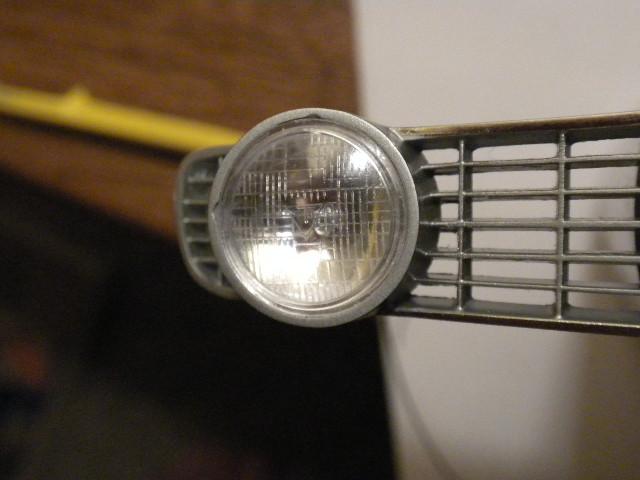
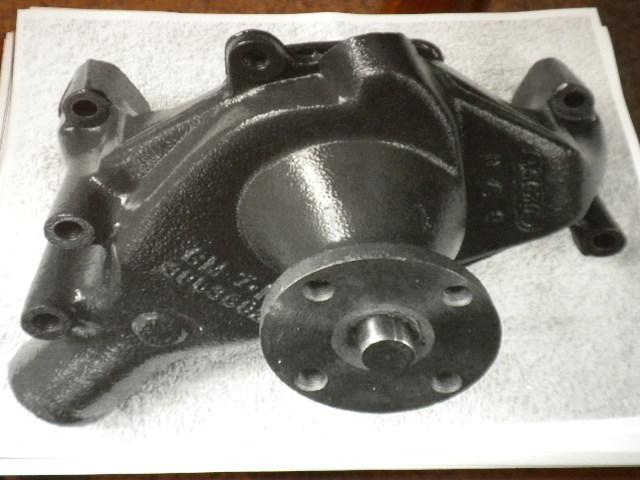
Renewed Greetings, After mulling the matter for weeks, a second kit was purchased to avail myself much needed spares, second tries, as well as excuses to cut matters into several parts to facilitate paintwork as deemed required. Slow motion progress to report then...: ...a bit preliminary here, but notice that the tepid cast-in sheet metal stiffening brace work has been sanded out whilst saving the raised perimeter and hood hinge location detail, whereas in time the ZL2 fresh air hood in fiberglass plus cross ram ductwork will be scratch built and reproduced. I've just slipped in some sheet plastic here, whereas this aspect of the project stands to be redone and much elaborated upon. ...notice the tiny bulb can in fact be noticed, whereas the border of the grille (less the area on the outside of each head light bucket; i.e. such is to come) wears some chrome foil. ...a little sloppy with the chrome foil (it's obviously slipping a bit), but again the bulbs show up nicely. ...the full refinished grille, with a compromise sanded mesh being a bit lower than the 'chrome plated' surround still incomplete for the outside edges requiring foil. ...this image was drawn from the Camaro Research Group water pump thread, while the water pump design reflects what was fitted to 1969 Camaros. ...a bit overexposed, this would be the kit item as-delivered. Notice that the heater hose attachment point and/or 'bulge' is missing along the top, whereas the taper emanating from the center is missing. Further notice the absent of the cast-in 'dot' towards the left bottom, the missing material on the left bottommost attachment point, whereas know that the back view would reveal that the hose attachment point isn't quite fully rendered and appears a compromise at best. ...still unfolding, but notice the material additions consistent with rectifying that which I could. Attachment hardware in the form of either miniature hardware or simple plastic hex rod will be substituted in prior to textured paint application. ...and finally, something fairly modest. Presuming that interior seats perfectly lined up is something of an anomaly, here an additional mounting slot has been drilled in under the assumption that the passenger of this particular scale ride may be shorter of stature. Oops - it seems I reversed the seat when I took this photo image. I'm not sure I'll bother with seat rails, but all the same some attention so-manifest might help matters visually. Thanks for skimming this update. Mike K.
-
Swede Savage Trans Am AAR 'Cuda Hwy. 61 based project
swede70 replied to swede70's topic in Diecast Corner
...a small update then, ... a pair of 303.8 small block Chryslers taking shape then. Intakes are cast resin Hwy. 61 340 Dart, carburetors are modified cast resin GMP Trans Am Camaro, whereas the valve covers are Hwy. 61 items softened for contour across the top edges. Pulleys are Lane '68 Firebird, oil breathers are Lane/Exact Detail '68 Shelby GT500 Mustang, while the unseen oil pans have been cut to allow the creation of what I'll term 'bread loaf' sumps with a channel situated in the rear to allow the passage of a steering drag link through the same. Easily missed is the blue A833 four speed sourced from a Hwy. 61 383 Dart that will be cast and employed to replace twice over the transmissions otherwise seen on the standard Hwy. 61 Trans Am Chrysler homologation specials. The leftmost upper control arm 'pockets' reflect what will be fitted to the Challenger inner fenders/aprons, whereas the rather raw looking pockets on the right reflect the starting point of what will be fitted to the 'Cuda. The upper control arm mounts on the AAR-entered 'Cuda were shifted upwards, whereas their cars also featured dropped spindles up front as contrasted to what was built for the Autodynamics team. Cast resin u-joint detail from a GMP Trans Am Camaro replaces the too tiny standard Hwy. 61 parts, while rear springs have been isolated to make way for scratch built Koni double adjustable shocks. It seems likely I'll cut out and enlarge the 'hump area' atop the rear axle to facilitate the addition of laterally mounted shocks rather like a Shelby GT 350 on the 'Cuda, as well as the odd combination of linkages that located the Challenger's rear axle. Thanks for skimming this update... Mike K.
-
1/12 Camaro Pro Street and Twin Turbo Touring 69
swede70 replied to Ralph Torres's topic in WIP: Drag Racing Models
Very nicely engineered and hat's off to your solid pace through these respective projects. I scratch build little things consistent with my project focus, but clearly not to the degree and intensity that you so clearly excel at. If only we could take our creations around the block whence finished... Mike K. -
Not crazy at all - these are unexpectedly nice and impressive to view at first hand. Good score! Mike K.
-
Swede Savage Trans Am AAR 'Cuda Hwy. 61 based project
swede70 replied to swede70's topic in Diecast Corner
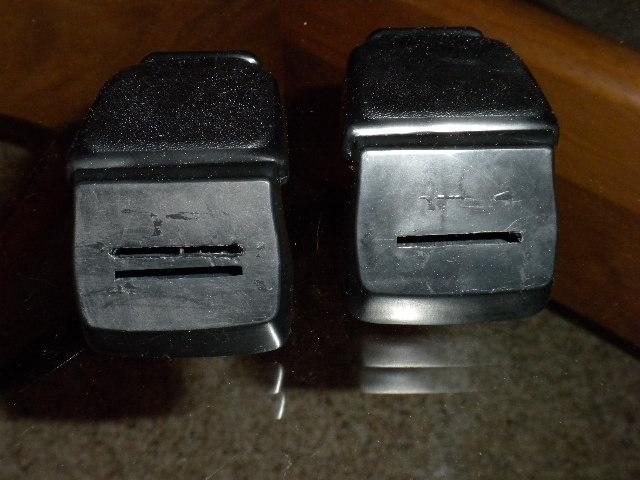
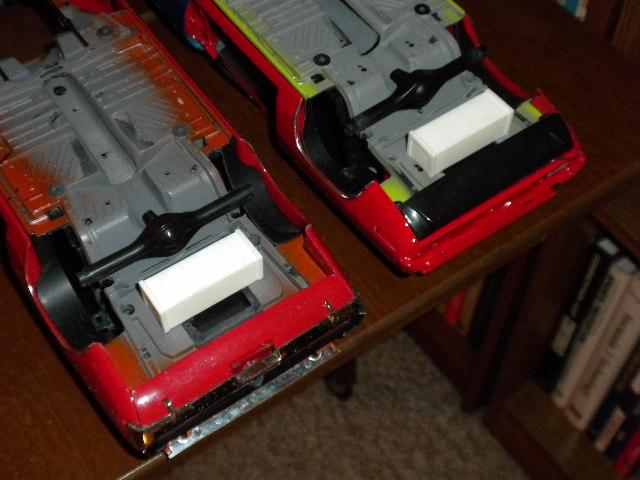
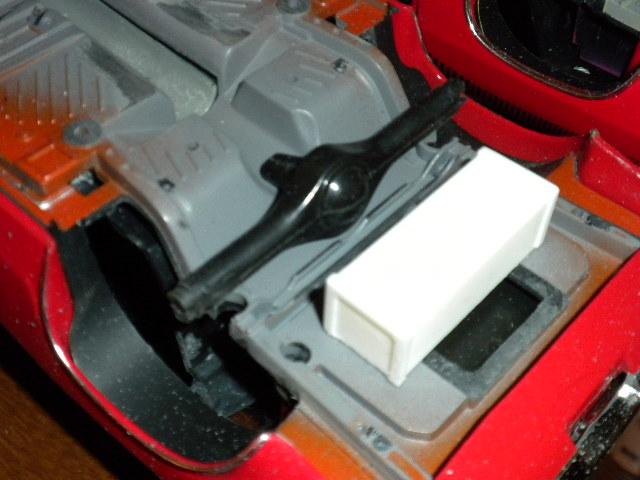
...another update then, ...the awful and bulbous Hwy. 61 rendition of the Mopar 8 3/4 inch differential had to go, its reason for being to accommodate an operable ring and pinion within. Quite useless this detail to me, hence I found two dead '68 383 Hwy. 61 Darts that featured far better tools of the same. ...in addition to the aforementioned differential swap in across one Challenger and one 'Cuda chassis, preliminary work to remove and plug the cast-in fuel tank has been performed. A pair of cast resin fuel cells/housings have been roughly set in place, whereas notice that the wheel housings have been extended back to the subframe rails twice over. Clean plugs/walls to seal such are to come. ...the licensing and 'Made in China' lettering has here been scrubbed off, while the round mounting pegs to situate the chassis upon the as-delivered upon display base show signs of being reduced for mass. Most of the holes witnessed across the two chassis stand to be plugged, whereas to sustain my morale, I intend to use the assembled junk seen above as an easily assembled and disassembled hack for both rollcages, etc. For having sufficient spares to do such, I can keep my 'rolling chassis' intact and not be strictly dispirited for ripping all that came before off and out. ...Hemi-specific skid plates removed from both K-members, whereas all the holes otherwise present on these parts will be plugged as per racer spec. Note the kaleidoscope of dead Hwy. 61 E-bodies on view. There was a time when such could be had for $55 or less, and hence I never really thought twice about ripping one apart... Kind thanks for your skimming this update... Mike K.
-
1:12 1969 Camaro Z/28 as seen in the August '69 issue of Car Life.
swede70 replied to swede70's topic in WIP: Model Cars
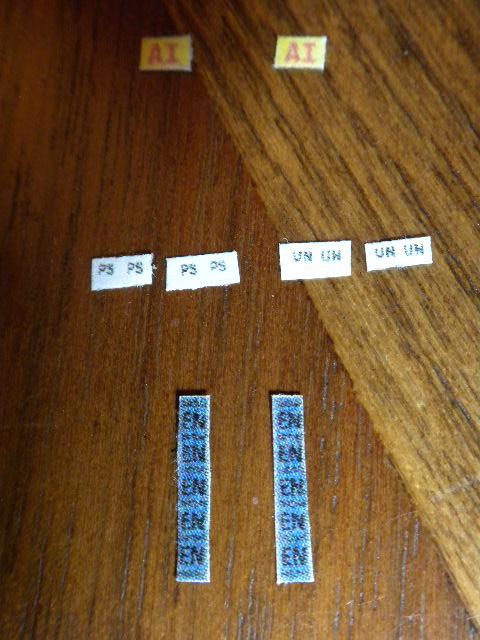
...a brief respite concludes, while matters are taken up again... ...rather raw looking I do believe, these would be the spring tags and front disc brake backing plate decals reduced 75% twice over to carefully approximate what it is I require. Not the best, but nevertheless a start as I have the 1:1 images now on file for having gathered them up again. At the very least, multiple tries are desired so that I'll be able to trim such accurately. ...some of the above noted images in place, these calling out the rate of the spiral shocks fitted to the '69 Z/28. ...a pair of bumper mount holes are missing on each side up front, hence before another color coat was added I drilled these discreet holes through the front of the shell. ...I also forgot to mention my desire to extend out the trim on the bottom of the windscreen. It shouldn't terminate on either side of the A-pillar but rather stretch across from the center before ending short of the top of each respective door. Some time ago I extended the trim out from the cowl area prior to applying primer and paint. Clear coats are up next, with Testor's Wet Look the coating of choice. ...notice at the 12 o'clock and 9 o'clock positions that headlamp positioning detents have been added (i.e. merely filed these) into place. ...succumbing to pressure evidenced by the better ideas of other builders here, I tore out the grille and filed the back until the top and bottom egg crate pattern opened up. A small brass brush can help a lot here even as the inclusion of the same can scarcely be made out within the space of the photo image provided. ...looking better, with further work done to improve the circular profile of each respective headlamp bucket. Paintwork to come then... ...though mostly a fan of the headlamp detail afforded, I've felt the lenses looked a bit dead on center for featuring no bulb detail. I have no desire to make these strictly operate, although cutting into the back of each respective lens and introducing a grain of wheat bulb to improve matters helps. ...a little dusty from the front, but better surely. I'll dip this in car wash solution and blow dry it, otherwise I'll just end up scratching the surface in an undesired sense. Thanks for skimming this most recent update. Mike K.
-
Might you consider selling copies of your decals for this topic? Looking very nice here... Mike K.
-
Indeed and as you've said. Sometimes one can be too precise and show up other very real inaccuracies of a tool for presuming that everything else is in scale. A plastic casting modeled thick enough to bear weight isn't going to have the scale thickness of stamped metal on offer, whereas disguising this and that part to suggest appropriate material use and manufacturing methods to the discerning scale enthusiast looking on indeed is an art. I'll be picking up on my 1:12 Camaro project in the weeks to come, preparing brake discs, calipers and mounts plus backing plates that will satisfy - I hope! Somehow I misplaced/lost the suspension decals that I'd purchased and consequently stopped dead in relation to worthy effort up to that point, although replacements are now in hand. The November 15th, 2015 'Macomb Show' held in nearby Warren, MI. isn't far off now, although whatever I do will be seen there, completed or not. I appreciate the words of encouragement consistent with helping me reengage matters and press ahead. Kind thanks... Mike K.
-
If it helps, know that Fred Cady Design did a set for the ARA Can-Am (hence not 'Trans-Am') racer (think '70 and '71) that might yield some markings, whereas know too that the Camaro Research Group Trans Am subpage has a very good RWR/ARA thread that you've likely consulted already. Furthermore, it is my understanding that they used engine prepared by Al Bartz, hence colors used and the distinct oil fill cap might come into focus for pursuing information online so-identified. I'll try to plug in what I can below: Roy Wood's Racing/American Racing Associates thread Good luck... Mike K.