Kmb0319
-
Posts
468 -
Joined
-
Last visited
Content Type
Profiles
Forums
Events
Gallery
Everything posted by Kmb0319
-
Just WOW! Should have more, but I'm speechless...
-
2nd car model? Outstanding!!! It looks ready to drive off of the page. Beautiful work, and one of my all-time favorite cars.
-
Jim, this is absolutely beautiful!! Stance, wheels, gorgeous finish... Looks ready to tear up the strip on Saturday night...
-
Triple that.... This is phenomenal!!!
-
This is absolutely gorgeous!!! Fantastic work.... And Revell, please update and reissue this kit!!!
-
I thought of something similar after I posted this... I'm going to cut the wire I used for the heater hose at both ends.... Basically cut the middle out, and then attach hose over the two ends to at least make my single layer hose look better. Thanks for the suggestion!!!
-
Spectacular!!!!! This is just gorgeous. Someday I want to get one paint finish to look something like this.... Amazing work!
-
Beautiful kit-bash! It really came out great! Two questions: What is that color? I love it, but I've had a bit of a problem lately with Testors Nassau Blue (using it too much) and that might be what I love... It's feeding my addiction. second, where did you get those tires? They look to be molded BFG T/As.... Are they from a kit? thanks!
-
Agree with above.... Fantastic color and she is M-E-A-N looking!!!
-
no warp in the body, but a bent A-pillar I had to work around.
-
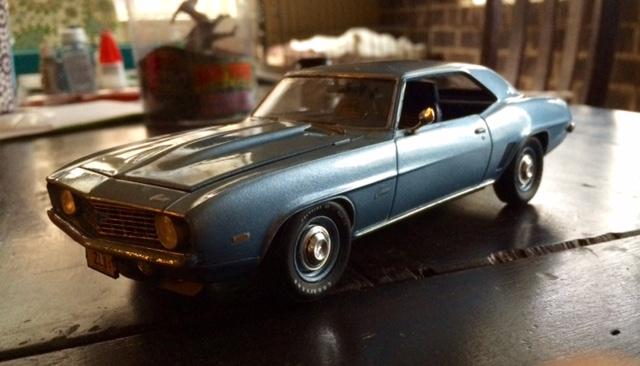
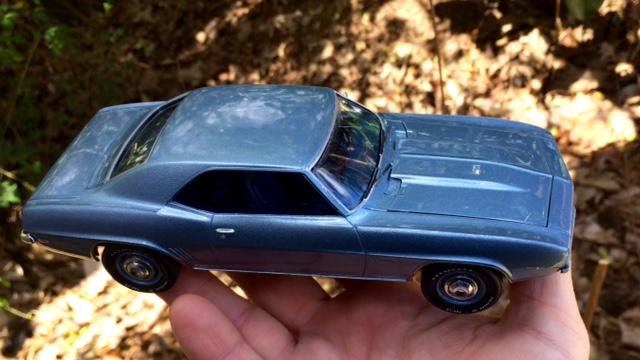
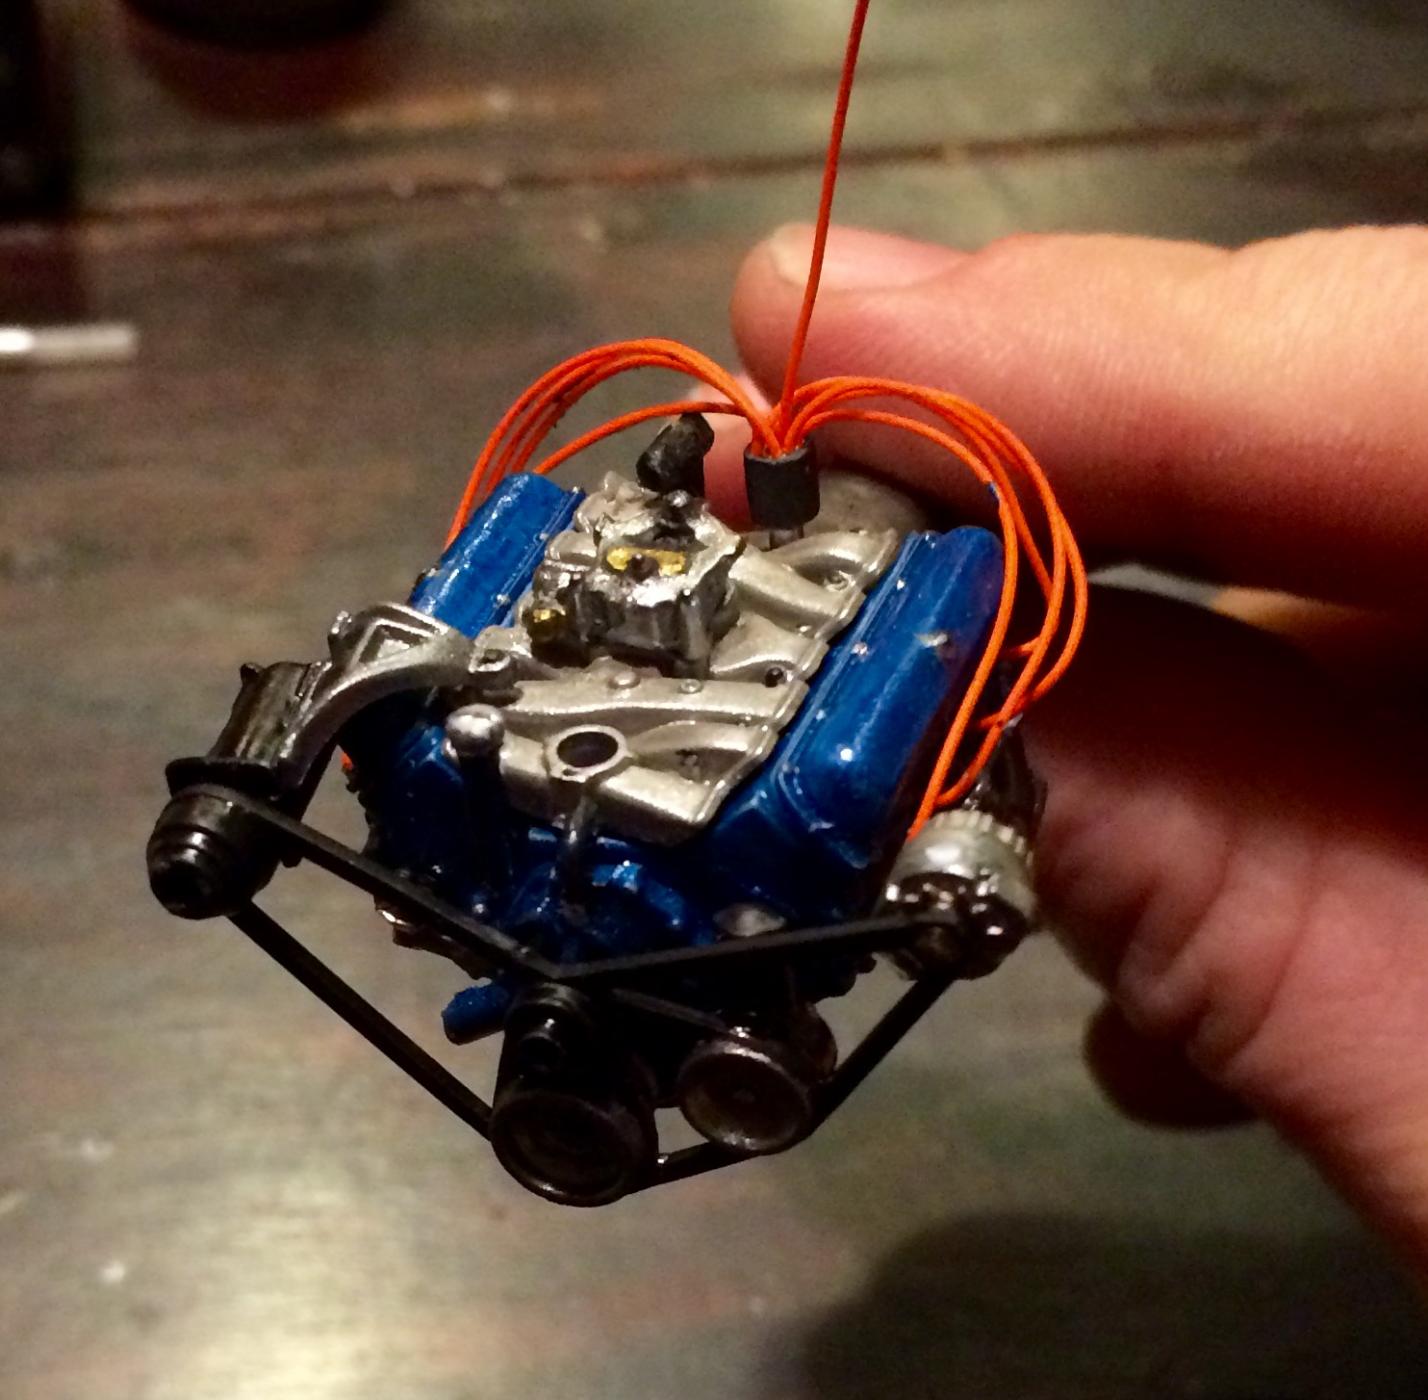
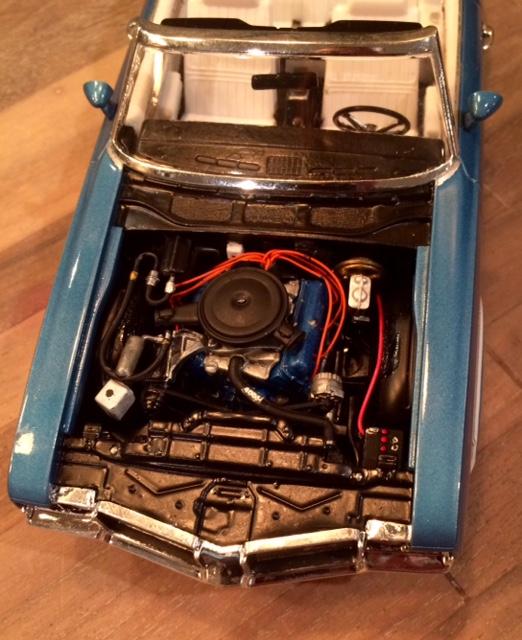
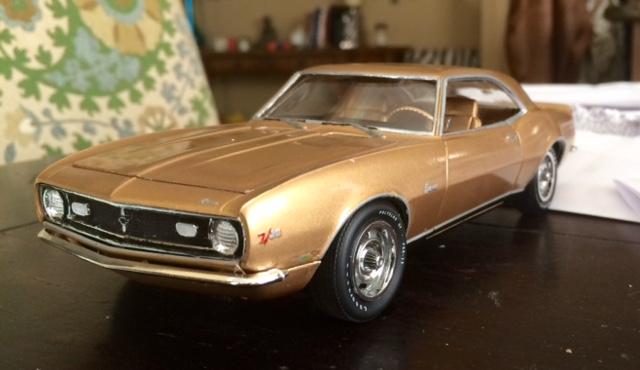
Over the Holidays, I had 3 big projects... (sorry for repeating myself).. the Better Off Dead Camaro, the Revell 70 Cuda and the Revell 72 Cutlass... all are posted here. In addition, I bought the Revell 67 Chevelle, as I needed the Chevelle's short-cap rally wheels for the BOD Camaro. But now I had no wheels for the Chevelle! I was going to use parts box wheels, but another kit I'd always had my eye on was the 69 COPO Camaro from Revell, and checking into the box contents, I found out the kit came with the Chevy Rally wheels as well as the dog dish set, so that was perfect! I got a kit I had always wanted, and got wheels for my Chevelle. I started researching and doing some work on this kit back before Christmas, but the other projects were in front of it when it came to my finishing order, and I wanted to really work this one up as much as possible. This was my first build of Revell's 69 Camaro in its various iterations, and it really is an amazing kit. Very few build issues. As I've built my last few with extra details, I felt a little more confident and took some extra steps with this one, and went a little further... I know there's a few things I haven't tried yet, but this one will have a place of honor on my shelf... and it's probably my favorite car of all-time. Here are a few details and then pics: PAINT - With this car, I wanted it to be a color I really liked, but also maximize the "sleeper" effect of this car... so I chose a light blue metallic. It's pretty enough, but also has a "grandpa" vibe, which I was after. I bought a Duplicolor Honda light metallic blue. It's a little lighter than GMs Glacier Blue, but close. For the interior, I wanted to mimic the dark blue interior: In trying to get it right, I came up with a "process"... I first painted the whole interior Testors flat sea blue. Then, for the seats, door panels, steering wheel and lower dash, I painted on a second coat of Testors arctic blue metallic, which is a gloss color. When that dried, I shot the seats and door panels (below the top trim line) with a dull clear coat, but left the lower dash, steering column and wheel gloss. I wanted to create the subtle differences in the carpet, dash and vinyl colors. Finally, I filled in the control areas in the dash with either flat or semi-gloss black. Not perfect, but it was mostly successful. . Then I added my seatbelt hardware in blue, and painted the buckle housings with the sea blue. ENGINE - I added a Parts by Parks pre-wired distributor and battery cables. I then used some spare hose to add a hose to the master cylinder, and spare spark plug wire to add in the jumbled gray wire coming from the bottom of the master cylinder. That was a bit of a failure, only in that it got a little squished.. you attach the firewall to the body/interior, and the engine and firewall come together near completion as the body goes on the chassis. The wire got pushed down, and is hardly visible. The other major things I wanted to create were the smog system, which appeared in almost every reference photo, and the heater hoses. Reference pic: I searched my parts box, but didn't have any piece I could utilize or modify to make an alternator bracket. For the smog system, I used a heavier gauge wire as the runners, and inserted some hose material over the two ends to make the center piece. I was going to paint the wire, but honestly, I had to push it in to get the engine to mount properly between the fender wells, so only the top hose is visible... would have been a waste. For the Heater hose, I messed up.... I drilled two holes in the firewall, but since the firewall and engine don't come together until the very end, I didn't realize my miscalculation. I drilled the holes too small, so my hose material wouldn't fit into them. I was able, with a little digging, to get the heavier wire into the top hole, so my heater hose is a little too small, and I could only get 1 instead of 2, but I wasn't willing to take everything apart. It's not great, but it's serviceable: I also think I found my paint system going forward. I used the Duplicolor I mentioned, but for a clear coat, I tried something different. I had a can of Krylon Colormaster Acrylic Crystal Clear that I had purchased as an option a few months ago. I tried it on my Donnie Allison Mercury, and it was fantastic! But, that car had been painted nearly 5 months earlier... I tried it again on a kit I was painting, and had a bad enough reaction that I had to drop it in brake fluid and strip it. Well, my automotive clear was getting low from my Cutlass, BOD and Cuda builds, so I tried the Krylon with the Duplicolor. All I can say is WOW!!! Easily the best finish I've ever gotten. I shot it with 4 wet but relatively light coats (it flows smoothly enough that that is easy), and I was floored with the results. It self-levels for the most part and dries to a beautiful shine. It IS a little softer of a clear coat, but for someone who doesn't have an airbrush, this was a revelation. I wet-sanded the paint to give it a smooth surface, hit it with 4 coats, and used a little compound to buff it out. I even had a disaster.... my paint that I had been admiring for a month got a huge scrape in the roof, but I was able to wet-sand it, compound and shoot another coat, and it was perfect. As an example, I'm also working on another 67 Camaro, using this same combo but a darker color... here's my painted body. You can see a reflection of my ugly mug in the roof: TIRES - I was going to use the kit tires, but would also have liked something "beefier" without killing the sleeper look. I had some Fireball Modelworks decals, but ended up using the AMT pad printed Goodyear Polyglas. The F60s were a little wider than the kit tires, but still right for this car, so on they went. I know they won't be seen, but I had to detail the lug nuts and center lugs: OK, enough of the build notes... she's done. I tried to get it in a few different light conditions to highlight the finish and the color. Hope you like it:

-
I was following this build on the Randy Ayers site... this is INCREDIBLE!!!!!! Just jaw-dropping.
-
Oooooohhh.... I've been debating whether to pick one of these up. I think you just convinced me this is a must-do... this is REALLY nice. Great job!!!
-
Ron, I've seen some of your work, including, I believe, the last release of this kit in red with some Cragars?? I'm looking forward to seeing what you have done with the new version!
-
Are you positive this is a model and not some pics you took at an auto museum? This is phenomenal!!! The finish, the engine details, even the wood trays in the back seat.... Really impressive!
-
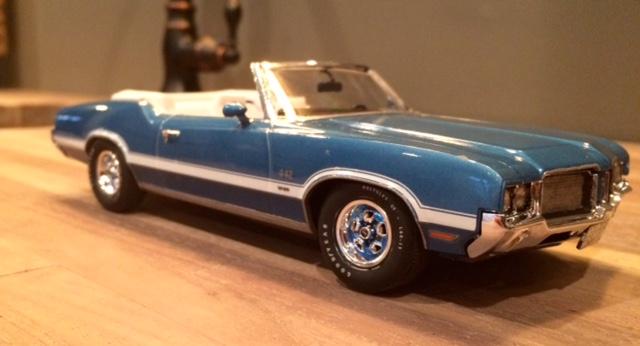
So, when the Holidays came, I finally had some commission coming in, and had a few projects I couldn't wait to get to work on. There wad ere three builds I was absolutely dying to get into. I have already built and posted the '70 Hemi Cuda (Revell's newest version) and turned the Revell 67 Camaro into the Better Off Dead car. The third was the Olds 442 convertible re-release. I never knew that Revell had released a 442 model in all my time away from the hobby, so I missed the previous versions. As it turned out, I ordered the new Pace Car 442 on the first day it arrived from Model Roundup. While I really liked the Hurst version, I knew I wasn't going with the Pace Car or a "normal" Hurst... I wanted to build a straight 442, without the W-30 hood. Thend, when the kit arrived, my decision was confirmed when I opened the box. No offense to anyone.... I understand the historical significance and wouldn't ever have a negative thought towards anyone who used it, but personally, I find model people to be a little odd, and the pre-painted Linda Vaughn figure was just plain creepy to me. So what to do with this car? Looking at reference pics, I knew I wanted a bright color, and I wanted a white interior. In the end, I fell into a color I'd used before and really liked... my Testors Nassau Blue. I used automotive clear, the same one I got in a can when I bought the verdoro green that I used on the Cuda. A few build notes: The kit is amazing in its detail and the way everything fits together, but I had one issue that plagued me. I couldn't get the engine to fit in properly. Maybe I mounted the cross-beam a little too far back, or my headers were a little off... not sure. I just couldn't get it to fit. In the end, it's a little tilted. I'm completely positive it's entirely my error... 28 yrs off is sure to generate a little rust. Just frustrating. The weakest part of this kit is the tires. I also bought the 69 COPO Camaro during the Holidays, and realized the tires are the same ones as this kit. Really?? I was complaining that the kit tires were too small in the COPO kit for the Camaro... and they put the same tires in the box for a 442??? I bought some aftermarket tires from Fireball Modelworks, but they didn't quite work. In the meantime, I bought the AMT '68 Road Runner, and the Polyglas GTs there were somewhat more useable, so they are on the car now Speaking of the same issue, why does Revell insist on such tiny wheels? Three of the last 4 "Level 3" Revell kits I've built... the 68 Charger, the 67 Camaro and this kit all have scale 14" wheels, while most other kits and tires are 15". So, upgrading those tiny, crappy tires are nearly impossible. It was a horrible task trying to keep the wheels and wheel backs from falling through the middle, but in the end, it's OK. Just don't pick it up, or at least two wheels will fall apart. Ugh.... Wired the engine, used my battery cables and seat belts. The interior is incredible in the sharpness of the molding, making it a pleasure to detail paint On to the pics... first, a few WIP shots: The 455 is REALLY nice in this kit Got the door panels painted up before decals: Chassis is good, but another mistake: I couldn't get the drivetrain to fit, so I cut it down. Then the engine wouldn't fit, so I ended up moving it forward, leaving the driveshaft short now. OOPS Interior pan before assembly. With this being a convertible, had to purchase the floor mats, as they'd be seen in this kit With detail paint and decals, this dash is superb. The wood grain decals are outstanding! Interior together, complete with seatbelts Right before final assembly and adding my stripes, had to get a quick shot And, FINISHED: All in all, this is a great model. I'm fairly happy with my version, but not thrilled. And I must promise myself that I will now slowly back away from the Nassau blue:
-
This is truly one of the most remarkable models I've ever seen.... INCREDIBLE job!!!!!!!!
-
WOW Chuck!!!! That is awesome! I love the 72 Cutlass... I'm just finishing my Revell kit now, but I always loved the coupes more than the convertibles as well, and this one looks like it's ready to hit the strip and cruise away a Saturday night. I guarantee this one would have a crowd around it in the parking lot when you pulled over to talk with people. Great work!!!!!
-
Wow, that's sweet! I'm generally not a huge fan of the drag versions of cars... Only because I love straight stock, but I have to tell you... This is one of the coolest models I've seen. Bravo and fantastic job!!!
-
this was my #1 reference picture, which linked me to the site about the actual car. I'm so glad it's still alive and well!
-
WOW.... Nice!! I love those Ferraris, the old truck looks incredibly real, and I had thought about that NSX kit.. that's a sweet model.
-
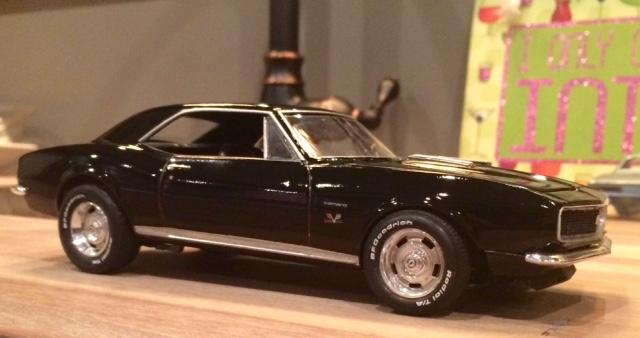
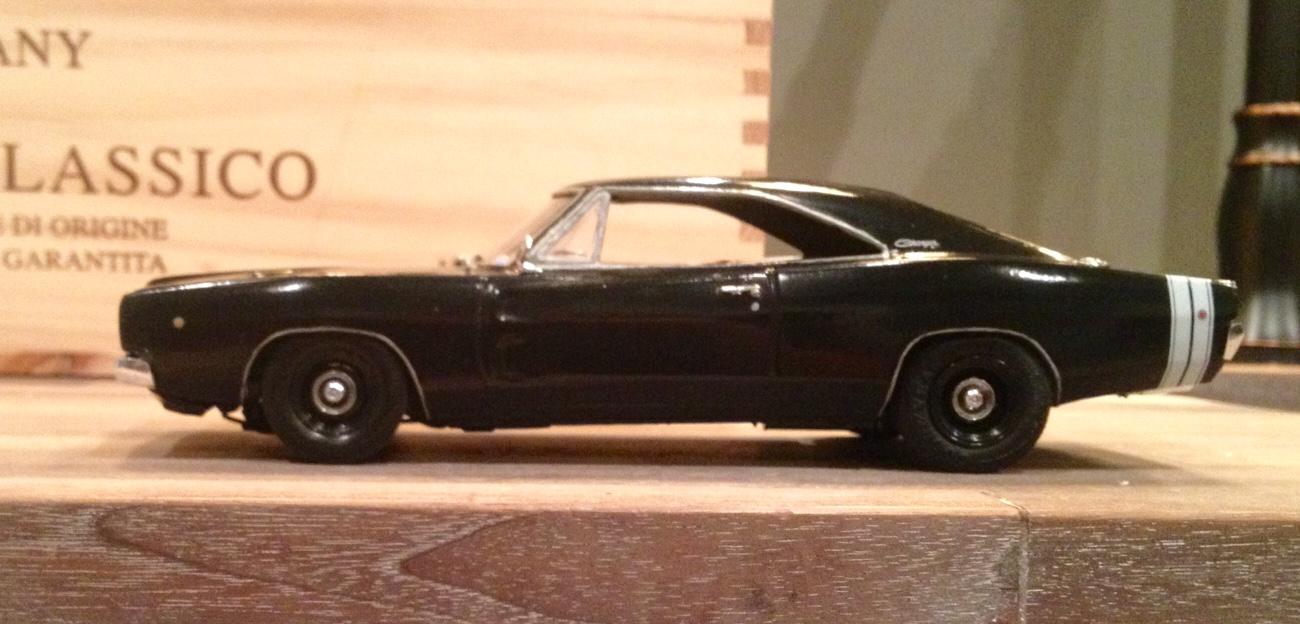
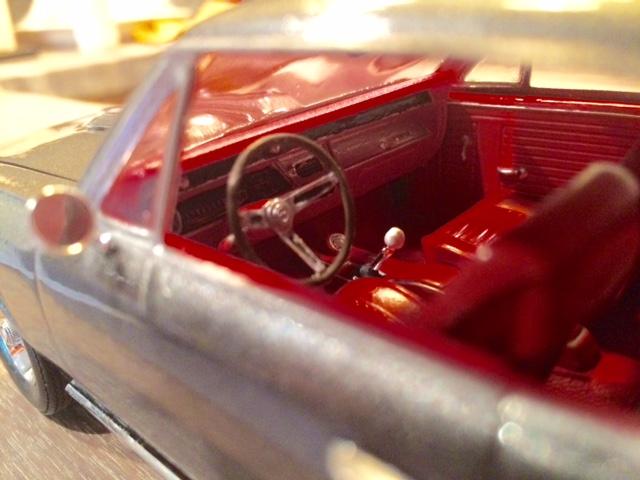
When Revell released the '67 Camaro, I couldn't wait to get my hands on it. I wasn't sure if it was possible, but I had something I had always wanted to try. One of my favorite movies in high school was Better Off Dead with John Cusack, and like many, I lusted after the black Camaro he and his hot exchange student love interest rebuild in the garage. It was also my wife's all-time dream car. I hadn't really seen anyone do a model of it before, but I wanted to try. So I bought the Revell kit, then had a laundry list of things to get: Pre-wired distributor and battery cables MCG seat belt hardware Paint - after using the automotive clear on the 70 Cuda and having it look so nice, I bought Duplicolor Universal Black and then used that clear again BFG decals from Fireball Modelworks Resin RS Grille was an ebay purchase Bought a set of floor mats for extra detail Wheels/tires - the kit wheels are way too small, so I needed a larger diameter short-cap (for 1967) Chevy rally wheel. The best example was the Revell 67 Chevelle SS, so I bought that kit (already built and posted that one) to borrow its wheels. Interestingly, the tires in that kit were strangely low profile and small for such a large car, but two of them were perfect for the front tires in this build. (ended up using the 70 Cuda kit tires for the Chevelle) The rears were KEY to this... searched around quite a bit, and decided the best fit (and something I know would work with a Revell wheel) was the larger rear tires from the Starsky and Hutch Torino or the '32 Duece kits. I didn't want to buy another kit... I bought 4 for Holiday/2016 projects including the Chevelle, so I posted on the Randy Ayers board, knowing that the S/H Torino would be a popular NASCAR conversion and some people wouldn't be using the kit tires. I found someone who sold me two sets of the rears, and I had my rubber. Build Notes: I didn't follow one major detail. The movie car had a red interior. As I was building my wife's dream car, I let her adjust if she wanted something different while maintaining the outside appearance. Her biggest request was a black interior instead of red. HOWEVER, she wanted the black deluxe interior, and this car has the base interior. Keeping that simple, I free-handed the white outline around the seats with my tiniest detail brush. Not perfect, but I'm happy with it This kit is awesome... everything fits perfectly. However, I did have one major difficulty at the end. Since the kit tires are so tall and skinny, my low-profile fronts were sitting way up... the ride height was level, and the car looked like a tractor. So I removed the axle pins, found some extra wheel backs in the parts box, shaved the brake calipers off of the brakes to give a flat surface, and super-glued the wheelbacks to the disc brakes. Not perfect, but effective. This car is all about that stance... there's a million black Camaros, but not like this one! My first seatbelt and battery cable application... that was fun Anyway, I'm sure others have done this before, but I had never found a post of this iconic car. I had always wanted to build this. I hope you like it!! (Go that way really fast..... if something gets in your way... turn) First, one shot of the real thing: A few WIP/details pics: Rolling stock: Once I got the front wheels adjusted, I still had to move into final assembly of door handles, lights, etc, but had to get a couple pics: Complete:
-
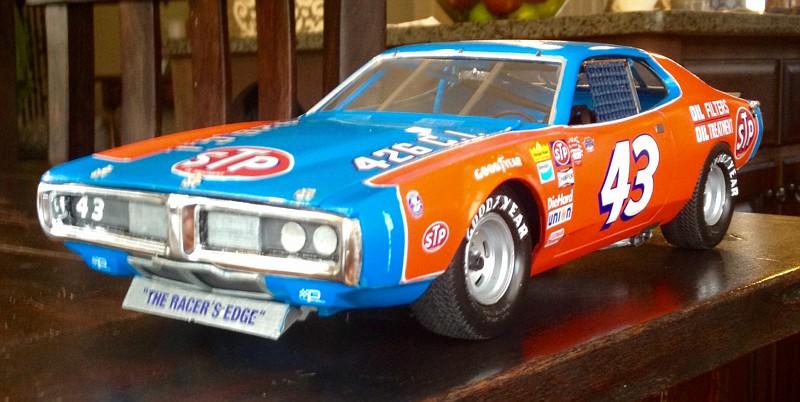
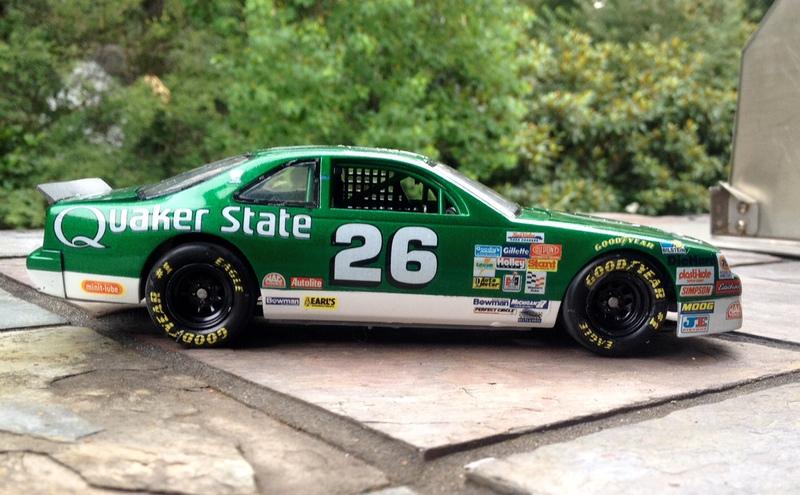
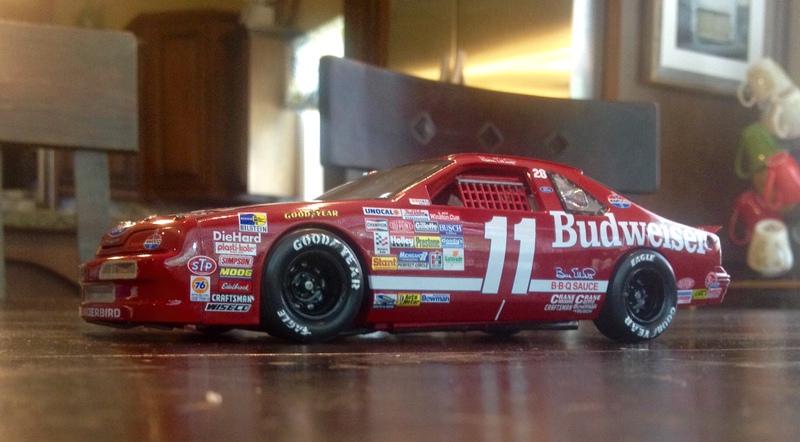
I hadn't built a model in 28 yrs. I did as a kid, and all through high school, but hadn't since. In fact, I fondly remember before having a driver's license, my best friend and I would ride our bikes 8 miles to the hobby shop, pick out our next build and paint colors, then hang the bag over the handlebars and ride back to my house, excited to get started. Anyway, in January of this past year, my wife started an intensive training program to become a yoga instructor. I have a pretty intense sales position covering 5 states, but was going to have to focus my travel around her schedule, and when home, I would find myself to be a single parent quite often. In my downtime, I will often slip off to the basement and grab a guitar for a while, but with the amount of time home without my bride, I needed to have something else to occupy me. The idea of building a model again became extremely exciting to me. I shopped around, and decided on my first build: a better version of one of the first models I ever built, Richard Petty's Dodge Charger. Only this one was the big 1/16 scale reissue. I bought it and the Buddy Baker 1/16 car right off the bat. I started in early February, and finished in late March. I had a ton of frustrations, and had to strip and repaint the body and order all new decals, but I was happy with the result: Then I turned my attention to the Baker car. Since that one was just red, I wanted to do something different with it. I decided to make a "what if" car.... one of my all-time favorite stock cars was Buddy Baker's "silver ghost" Cutlass in the late 70s, so I decided to combine that with the K&K car, and this is what I came up with: These two got me fully addicted, but I had to move back into regular scale. Even though I wasn't a giant Nascar fan, the classic race cars were a subject I loved. I jumped into building several: Richard Childress Chevy Laguna David Pearson Ford Talledega Another Pearson, this one a "what if" fantasy '72 Torino: Quaker State Thunderbird: AJ Foyt's 71 Monte Carlo Cale Yarbrough fantasy... did up his Hardee's Olds as if he went retro for a race: Terry LaBonte '84 Monte Carlo: Bill Elliott's Budweiser Thunderbird: Richard Petty Talledega, another "what if" idea: Donnie Allison's Wood Brothers Cyclone: Along the way, I grew a bit tired of just NASCAR builds, so I ventured back into muscle cars. The first one was a kit our son wanted, but then didn't want to build. The Foose edition '68 Firebird: '65 Impala: '68 Charger '68 Camaro '70 Camaro And my final completion of 2015, the '70 Hemi Cuda
-
 I hear you! It should come back. I heard a rumor that the Petty '71 Road Runner is being re-released, which I would LOVE. Give me that and a Superbird, and I'm d-o-n-e.
 -
As we came into the Holidays, I wanted to spend some time with a few fun plastic projects I've been waiting to do. I had three main cars I wanted to do: The new '70 Cuda, the re-release of the '72 Cutlass convertible, and a holy grail for both myself and my wife (her all-time dream car): the 67 Camaro from "Better Off Dead." I needed lots of detail parts for these, and for my Camaro, I needed larger diameter Chevy SS wheels, but they had to be the short center caps of the 67 Camaro. The only kit I could find with the wheels I was after was the Revell 67 Chevelle SS, so I bought the kit to use the wheels for my Camaro. I worked on the Camaro after finishing my Hemi Cuda (already posted here)... I'm very close to completion on it, but have a couple issues I'm working out. In the meantime, I went ahead and got to work on the Chevelle. I did this one box stock, except wheels and tires. I'm wiring everything in my other builds, so this one was a simple one. One interesting note... the wheels were perfect for my Camaro, but so were the tires.. they seemed strangely low-profile and small for this model. I used two of this kit's tires as my fronts for the "BOD" Camaro. I also purchased the Revell COPO '69 Camaro... I'm doing a little "his/hers dream rides... her BOD Camaro and mine a '69 COPO... and that kit came with a set of the SS wheels as well as the steelies/dog dishes, so I had a replacement set for this build. As for tires, while they were a tougher fit, the kit tires from the '70 Cuda had a taller sidewall that filled out the fenders better and gave the car a better look. A few other details: Duplicolor paint, Testors Ultra-Gloss Clear mixed Krylon Fusion pepper red, Testors Flat Red and Testors Gloss Dark Red to detail and vary things in the interior My one mistake that really annoys me: I slapped the interior together, glued it into the body, and realized an hour later I forgot to install the armrests Nice kit. Simple, more molded detail than separate pieces, but sharply molded and fits together nicely. I just got back into the hobby after not having built a model in 28 yrs in 2015, so I know I'm building a lot of stuff others built years ago, but I hope you enjoy.