Kmb0319
-
Posts
468 -
Joined
-
Last visited
Content Type
Profiles
Forums
Events
Gallery
Everything posted by Kmb0319
-
So progress on this has been slow... partially because work has been crazy, partially because I'm also working on another project for a friend, and that has taken priority with any limited time I've had, but I have made some headway. Several major engine components are painted. I'll post a pic when I have the block and base assembled, but I assembled my front and rear suspensions. I painted the photo-etched brake discs... not sure if that ruins the effect of having the actual metal pieces, but the reference photos I saw showed brakes of a darker color than the bright metal on the sprue, so i used some MM Metalizer (Gunmetal) to darken them. The calipers are yellow to fit my scheme, which was a must even though it makes the Ferrari decals almost impossible to see. I also sorted out most of my interior. Flocked the rest of the floor and got one door panel painted. Once I paint the other, I'll figure out my dash and what I'll do as far as seatbelts. Then, just to guage where I'm headed, I snapped the body, chassis and interior together and set two tires under to mock up my scheme. Nothing's attached, but I'm liking where it's heading. From here, I'll get into my engine (I will research, but want to add some wiring/hoses here and there to add more detail), figure out the rest of my interior an start on all the glass and body details like the headlights. More to come.
-
GORGEOUS!!!! This is the only kit I've built two of, because it's a fantastic model (and the 67 Camaro is probably my all-time favorite car). Anyway, every detail is crisp and perfect, the color looks great, as do the interior and engine. Beautiful work!!
-
Thanks! It's just the classic blue painter's tape roof. 1" wide strips, one down the middle, one on each side to overlap and trim with a hobby knife.
-
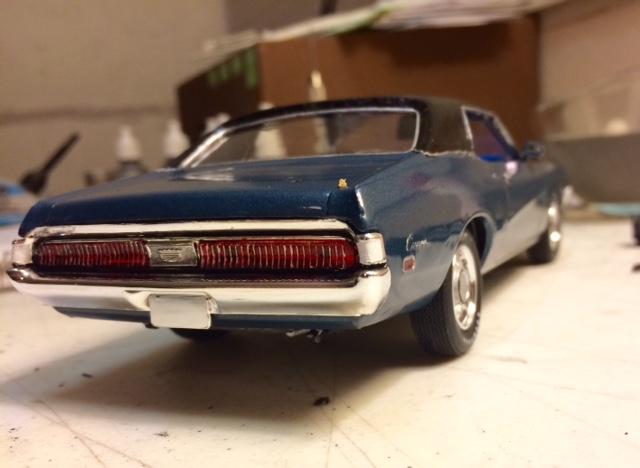
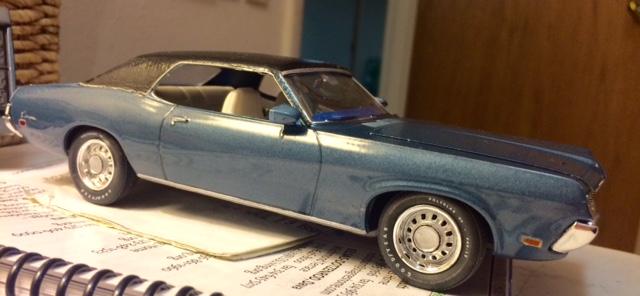
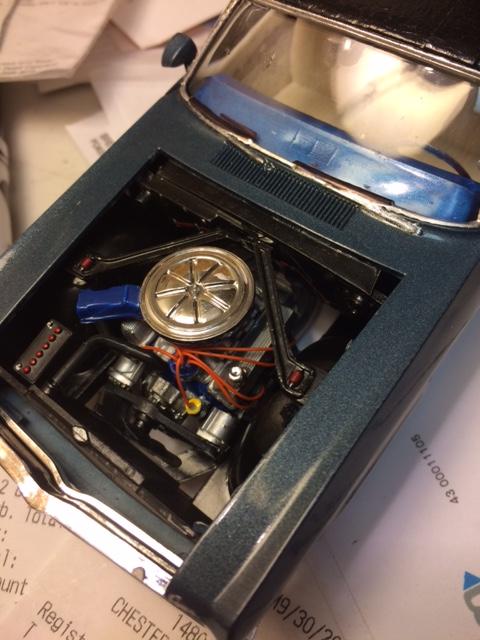
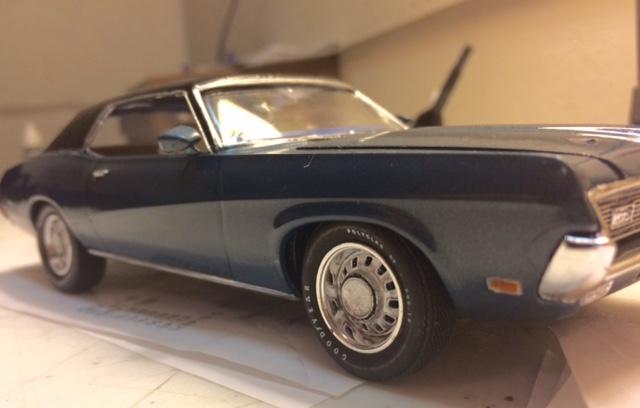
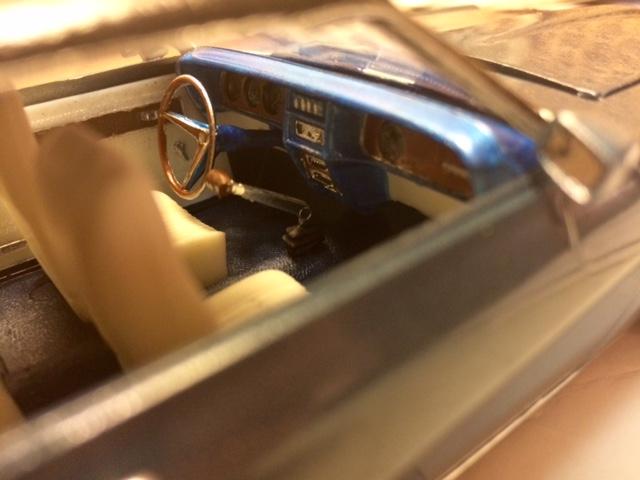
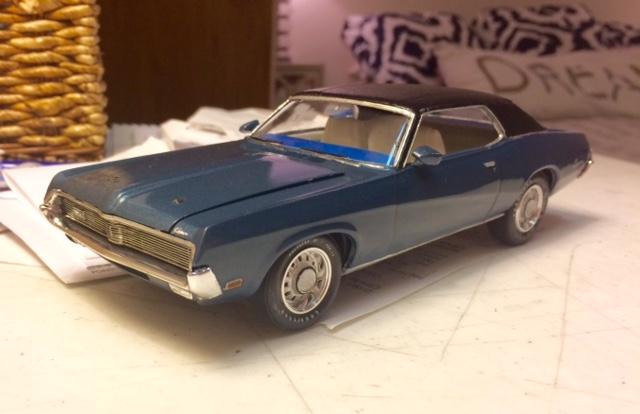
This kit wasn't in my stash, but an $8 clearance find at Hobby Lobby was too good to pass up, and I always liked the Cougar. I wasn't sure what to do with it.. most of the Cougars around my neighborhood that I saw as a high-schooler in the mid-late 80s were either half primer with the rear jacked up and Cragars or base models with hubcaps and whitewalls. Without a real inspiration, I decided to try something different. I hadn't ever tried a vinyl top... partially out of fear or messing it up, partially because I never wanted to take the biggest surface of a body and make it flat. But, time to try it. With a Vinyl roof, I didn't use the spoilers or hood scoop... I guess it's more of an XR-7. Ended up leaving everything box stock here... used my cans of Mercedes B396 blue and clear for the body, after my top was painted, i had a little regret... should've used white instead of black... but it's OK. I wish most of these AMT kits had better interior detail, but overall, I really enjoyed this build. Hope you like it.

-

Round 2's MPC 1974 Plymouth Road Runner
Kmb0319 replied to drksd4848's topic in Car Kit News & Reviews
It's so ironic to see this thread pop up... my high school and first 3 years of college car was a gray 73 RR with black stripes and interior and a 360. I LOVED that car. I've been thinking about grabbing this kit and replicating my old ride for months now. I guess the universe must be telling me something, because I was in Indianapolis for the last 3 days for a big convention for work. I started driving home yesterday, and about 30 minutes into my drive, I see a car on a trailer up ahead. As I got closer, my jaw dropped: Change the stripe color and put the Mopar rally wheels back on, and it's my car. Now I have to order this kit...
-
Absolute PERFECTION, Steve!!!!! ?
-
A-ha! It was strangely shaped, so I wondered if I had that correct. Thanks!! I will reverse it.
-
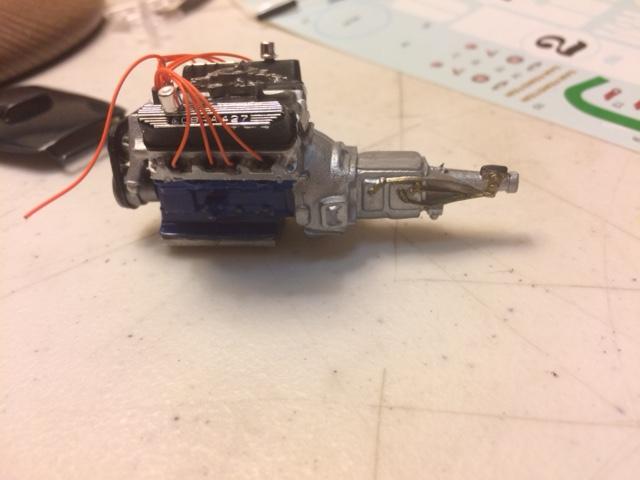
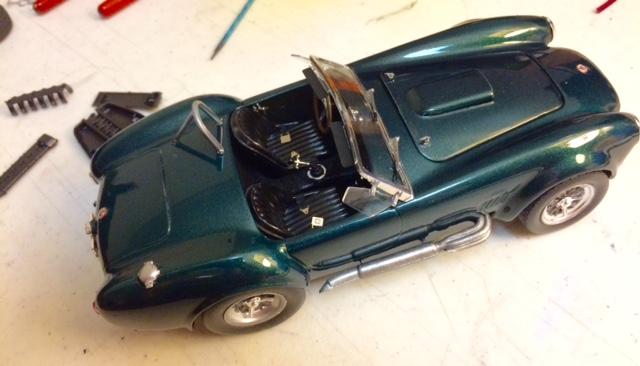
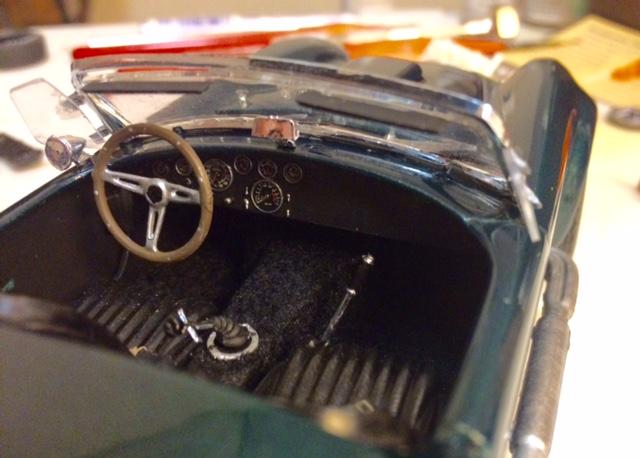
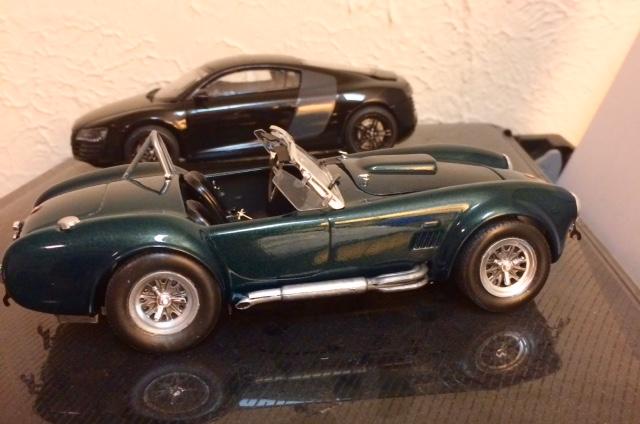
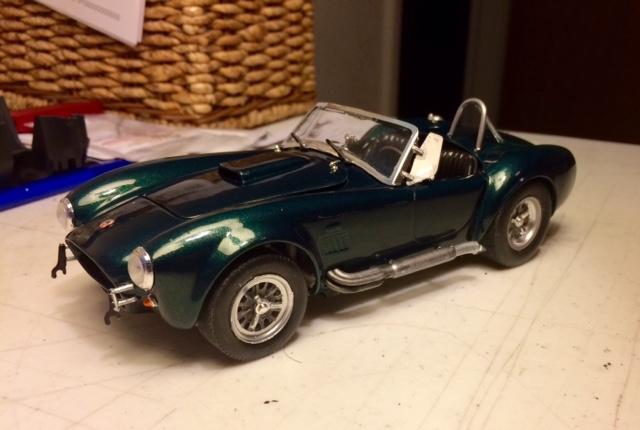
I built models from the time I was 8 until I was 18. Then, almost two years ago, at age 45, I started again. Despite my proclivity for building muscle cars and my love of this vehicle, somehow, I never built a Cobra. This was a major issue that needed to be corrected. So, as I built a stash of kits this summer, I purchased the Revell Germany kit. I wanted to keep this one as a roadgoing version... no race decals and the full windshield. These are beautiful kits... simple, but they really work. I did have a couple issues at the end... the hood doesn't quite want to fit closed, I think I put the radiator in at an incorrect angle the first time (rookie error), and my rear suspension wasn't centered in the fenders. It took a couple attempts breaking them out and resetting. Finally, I mounted the radiator into the body, then glued the frame to the radiator. It also seemed like I broke a little piece every time I touched the car in the final stages... the little bumper hooks and rearview mirrors all seemed to break off several times. Anyway, I now have a Cobra!! Not perfect, and I know there are some huge Cobra aficionados who have done far more realistic and authentic versions, but for my first one, I just needed a general version to fill the gap. Paint is Duplicolor Deep Jewel Green, which I loved, then Automotive Touchup spray clear. I used Duplicolor chrome for the trim rings on the wheels, then burnt iron metalizer for the wheel center. Flocked the carpet, made seatbelts from masking tape (first time I've tried that), wired her up, and she's done. I did realize as I took the pictures that I didn't paint the side emblems, so I will cover that detail. I'm surprised that wasn't a decal in the kit. Anyway, thanks for looking. First, a couple WIP shots. Chassis... really nicely done by Revell: Engine wired up and ready for installation: One other detail I LOVE about this kit was the Shelby Motors license plate frame: OK.... done:
-
I haven't seen many builds of this, although the few I have seen have been amazing. It's been on my holy grail list for a while... and I bought it back in June. It took quite a while to figure out what I was going to do with it. I have a problem with red Ferraris... nothing wrong with them, just not very imaginative imo. I'm also not really a red fan, but if I do use it, I want it to be something where red isn't as expected. I'm also feeling like I need to do something original with this kit, as I have seen a few builds that are both highly inspiring and intimidating, as the skill of those builders far outweighs mine. This is the kit that includes the photoetch fret, which will be my first time ever using those. So, here I go... I'm excited to work with such an awesome kit and hoping I can do it justice. I'm open to suggestions along the way. This won't be a quick build, as I want to get it right. When researching for colors, I came up with an idea... back in the 80s/90s, I loved the Saleen Mustangs, and while I really don't like yellow at all, I liked how those cars mixed a little yellow in with gray on the interior... just looked sharp to me. I've always thought about using that influence in one of my builds, and this seemed like the one calling for it. With this car being a classic GT, it seemed right. It's also a mean-looking beast already, so what could I customize to make my own personal special edition? I bought some beautiful Hobby Design wheels and came up with a color scheme: battleship gray, two tone gray interior with black and yellow accents to add to the look. Paint is Testors Gray enamel with my automotive spray clear: Painted the HD wheels black and detailed the lug nuts And got a start on my interior to check my idea... I haven't done any touch-ups yet, and have only flocked one side of the floor, just seeing what it will look like. I'm thinking the inner framework outside of the underhood piece might need to be something other than blac... a metal color. The photoetch radiator grill goes in the middle, but I'll research to see if the sides need to be redone. This one won't be fast, but lots more to come. Any suggestions, let me know. Thanks!
-
I think it's a beautiful build!! I can't see the blemish in the roof in the pictures, but I understand how annoying that is. I built one a year ago... I had some issues with the windshield as well, but not as many as you mentioned. My biggest problem was the decals, as they didn't want to snug down around the rear spoiler and fractured in places. I am thinking about pulling the body, stripping it and repainting without stripes. I don't know how much the roof annoys you, but if mine was this nice, I'd probably let it alone. Great job!
-
Holy incredible!!!! That is perfection right there.
-
I'm glad you posted this, Mike... beautiful job!! I love the photo etch detail, especially those seatbelt clips. Great job!
-
Beautiful job!! It seems like the 3 most popular colors for this car when they were new were white, black and this one. Black and white are always good, but this was far more interesting. You totally nailed it... Looks ready to cruise in.
-
Go for it.... I'll be watching to what you do with yours!
-
Go for it.... I'll be watching to what you do with yours!
-
HOLY €#%!* that's beautiful!!!! Are those tail lights working??? Amazing work.... Standing ovation is warranted!
-
yes!! I loved the quilted pattern in the research pictures, and was really excited to find those decals in the box. Overall, these are the best decals I've ever seen in a Revell kit. This one is finished, btw... Just posted it in Under Glass a couple hours ago.
-
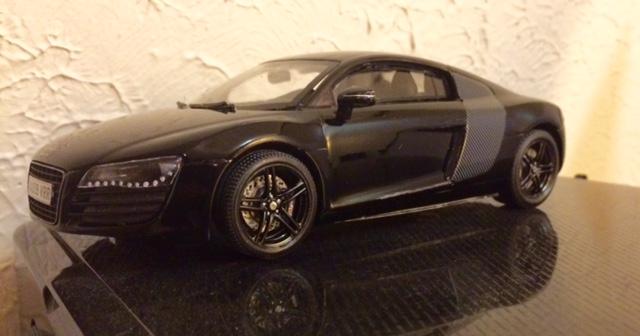
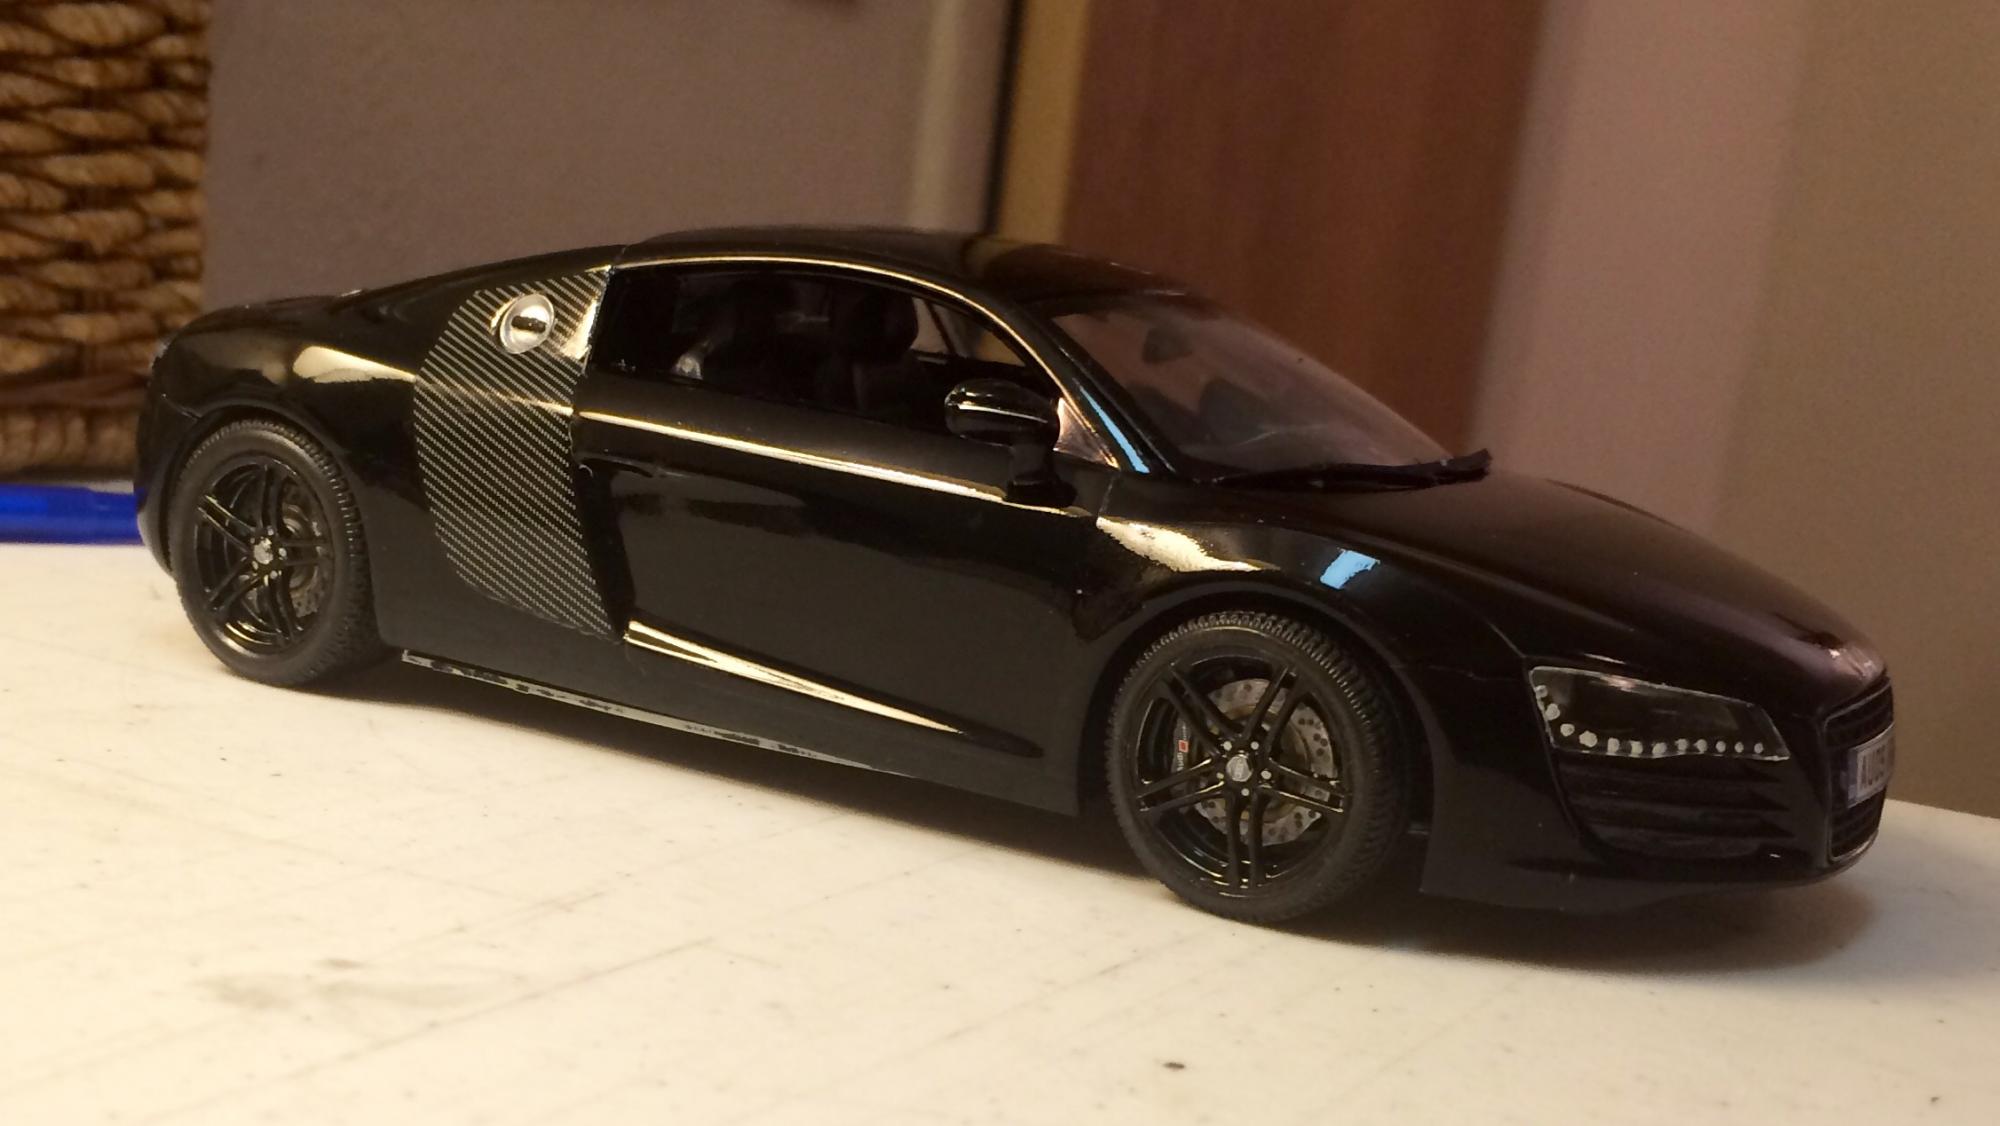
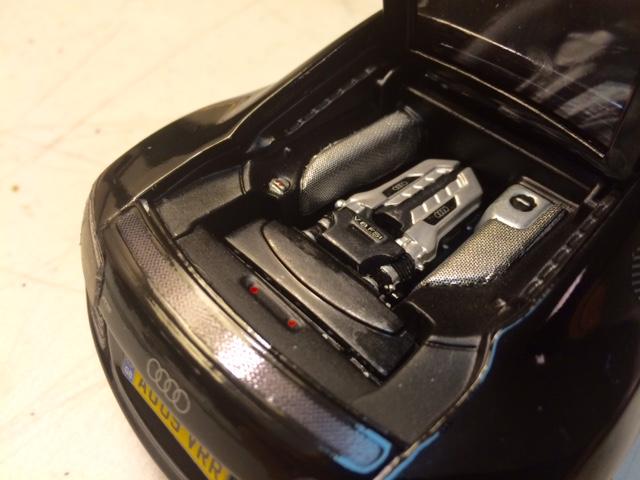
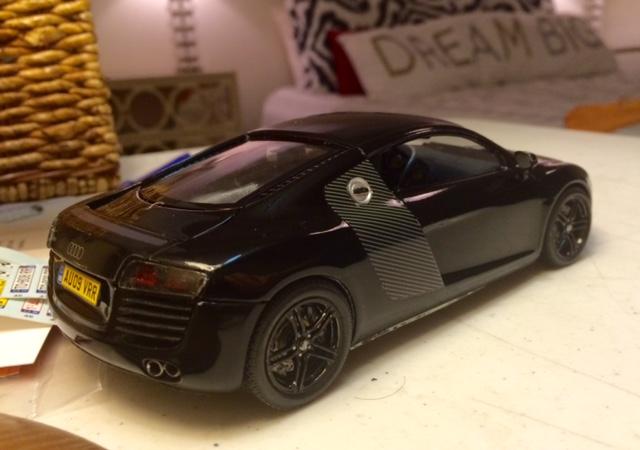
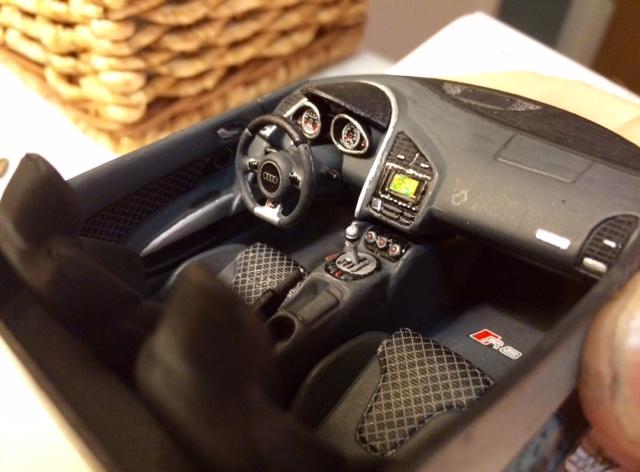
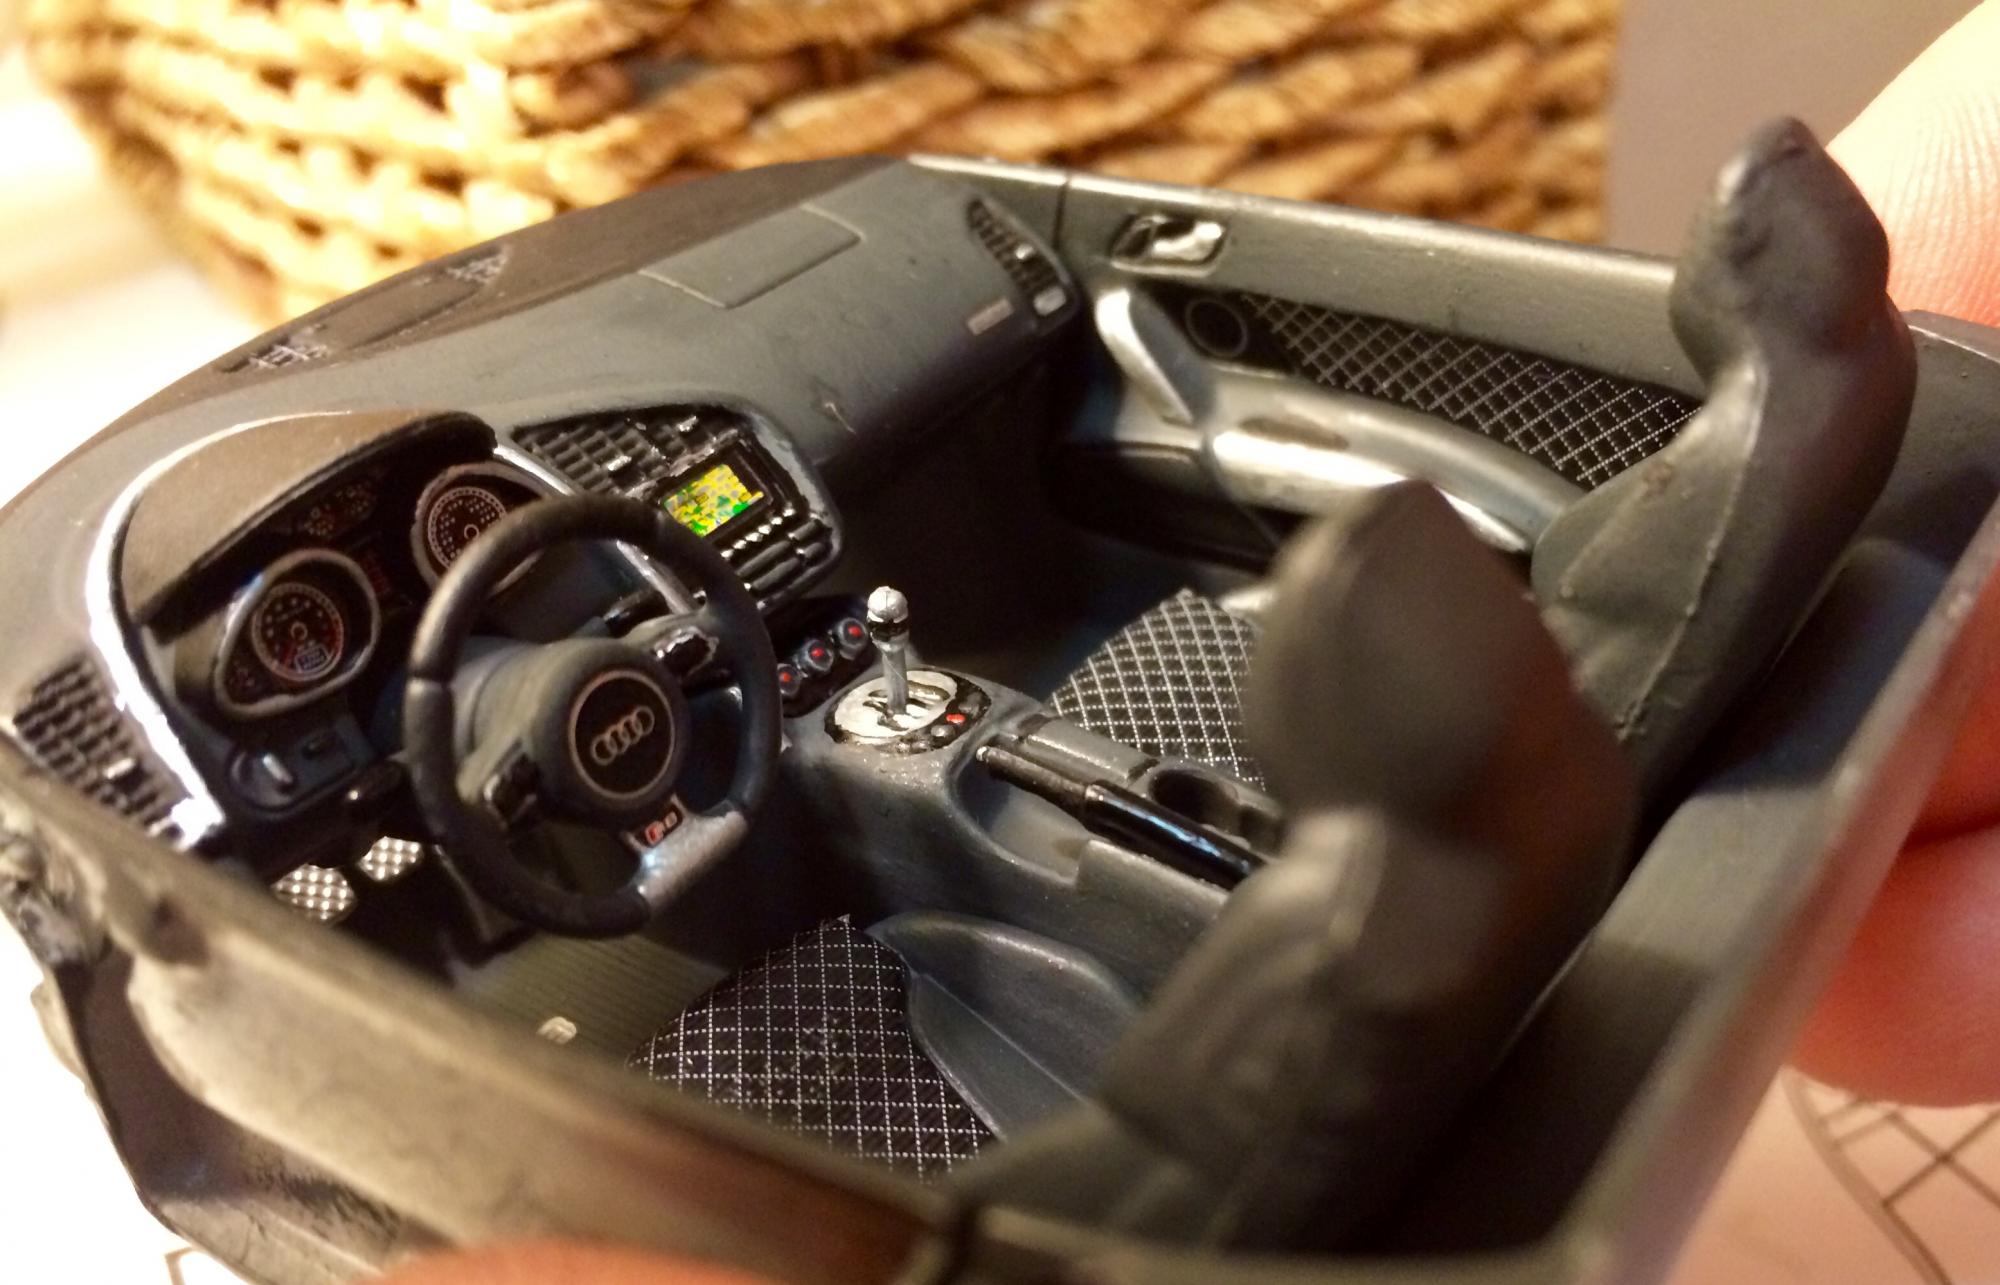
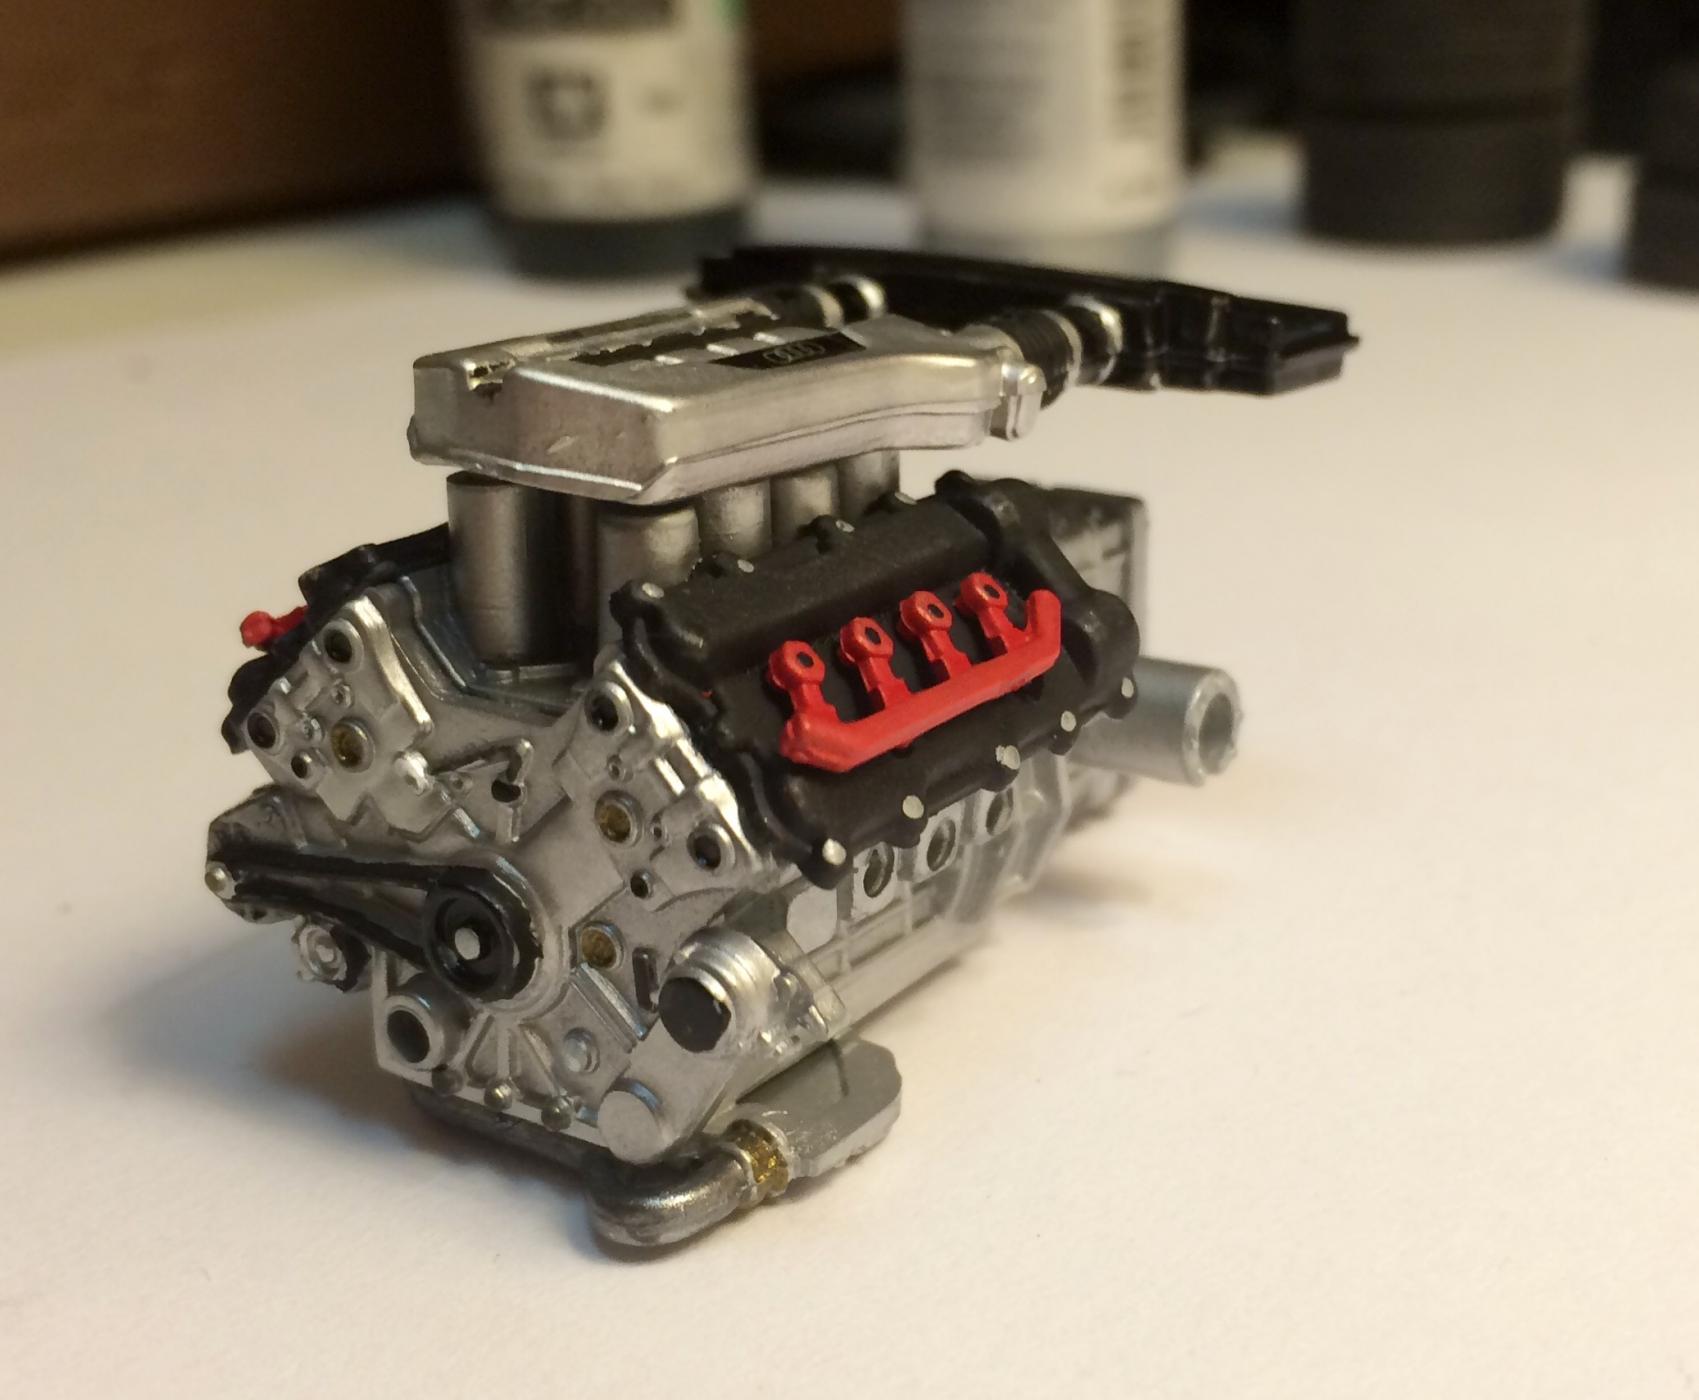
Zig-zagging from old to new, I moved into building my Revell Audi R8. I love this car, and was excited to dive into this kit. Seeing other builds and researching, this is a pretty car, but the black ones have a real presence. The roof line and headlights make it look a little like Darth Vader's helmet, so I had to do that with mine. I left it box stock, as this is a beautifully detailed kit, one of the best I've ever seen from Revell. I also have to compliment the decals... again, the best I've ever seen in a Revell box. Duplicolor black and my Automotive Touchup spray clear. The interior is Vallejo gray-black and semi-gloss black with the kit's quilted decals on the seats and door panels. I like the brightness alumimum adds to a dark interior, so that's what I used for the dash arch and door areas. For the tail lights, keeping with the theme, I painted the red in the light assembly and used a little Tamiya Smoke for the lenses. I did have one problem, and that was the windows. They were brittle, the etching for the black areas was heavily faded and hard to see, and a little warped. The right side window just wouldn't go into place properly, so I had to leave it out. Anyway, I wanted sinister... I think this did it. Hope you like it. The Engine, before and after placement The interior
-
I'd love to see ANY 1/12 muscle car, but, thinking somewhat logically, three of my all time favorite muscle cars happen to be the 69/70 Boss Mustangs, the 70 Chevelle SS and the 71 Road Runner/GTX. These all are kitted in 1/24 scale from the old Monogram models. Wouldn't it be easier to just double the size and add parts rather than start from scratch with new molds? I'd be happy with one kit from each of the Big 3.... Well, at first, anyway. ?
-
I agree wholeheartedly with this sentiment!! I have this kit in my stash because it's my best friend's favorite car, so I'll try to make it into something nice for him. Question: How did you fix the rear bumper? Did you cut it, find an old issue kit with a proper fitting one or is that aftermarket? Phenmomenal job on all 3, btw!! Just amazing builds!
-
Thanks all! Did the door panels last night. Interior is done. Moving on.
-
I got my interior done other than door panels, which I need to research more. But MAN, between some well molded pieces and the best decals I've ever seen in a Revell kit, this makes one heck of a nice interior! All for now.
-
OK, made a little more progress on this Audi today, and I'm trying a new thing here and there. First of all, I added the kit blade decals. They are carbon fiber, but are black/white with the pattern instead of black/gray. They would look more realistic if they darkened the other color in the pattern, but they sit down nicely. I thought about painting the blades, but want to keep the theme dark, and these looked better than any paint I could use to me. Once they were dried in place, i threw a couple coats of wax on Painted my wheels black, and added the center cap decals and detailed in the lug nuts. I figured out what to do with my interior. I wanted to keep it sinister, but not black, as there are so many great details molded in, I don't want to lose them in a sea of black. Also, i wanted to have a two-tone and use the quilted decals included in the kit. I chose a Vallejo acrylic color called black grey, which allowed me to use semi-gloss and flat black as contrast colors. I decided not to flock this one, as I wanted to keep the floor matching the dash, and this model ends up with all the glass in place anyway. Started with the interior pan with the floor and console. I painted in the shifter surround and buttons (red one is the Hazards), painted the cupholders flat black to give them some contrast, and then tried using a black wash around the console storage areas to make them look a little more real. Next, I painted in the two-tone seats with semi-gloss black and added the quilt decals. I used a decal bonding spray on them. I'll let them sit overnight and will then shoot the whole seat with a dull clearcoat to blend them better and hide the decal. And finally for today, I started to work on my dash. After painting the main part with the black gray, I used flat black on the vents, semi gloss on the gauge cluster and center stack areas and then detailed according to my research and preference. I wanted to add the aluminum arch in the dash countour.. I see a lot in gloss black or carbon fiber, but I prefer the pop of bright metal to warm up the interior a bit. Lots more to do, but it's starting to take shape. Although, now I look at the close-up pic, and i need to repaint that trim strip between the vents and the nav screen. Sheesh... it didn't look that terrible to my old eyes. Once I fix that, the dash should really pop with all the decals added. This is one of the nicest kits I've ever built... the molding detail is the closest I've seen to top-level Tamiya or Fujimi kits from Revell. I've heard of problems at final assembly getting the body and chassis together, so I'll have to watch out, but so far, this is a FUN build and a great car.
-
Yes... I'll post pics later, as I have applied them and you can see what you think. I thought about leaving them alone, but wanted a mild contrast, and felt the decals would look better than paint. They aren't the most convincing carbon fiber, but they lay nice and I'm happy with them.
-
Working through my stash of kits, I have now completed a 71 Charger, a Ferrari California and a 65 Belvedere. So what next? Back to modern, I'm tackling the Revell Audi R8. First of all, man what a nice kit!!! Tons of molded in details, crisp fit so far. Researching for this build, I didn't want to do another silver/gray one, so what to do? The pics that stood out to me most were the black ones. It would have been easy to just go with a flat black, but I had to challenge myself to do a good black finish. Then, I looked at it and thought "I need to black out the wheels, too. This car can look really "pretty" in most colors, but in black, it looks pure evil. I haven't totally decided on the interior yet, but it will be two-tone with the quilted decals. I used Duplicolor black, and my spray automotive clear. I wet sanded the paint, then tried with each of the first two coats of clear, but this clear dries so hard, I wasn't cutting through it at all, so I just layered a couple more coats on. It's not perfect, but it's my best black finish so far. Then I got started on the engine and painting the under tray: Loving this kit so far! More to come.