Kmb0319
-
Posts
468 -
Joined
-
Last visited
Content Type
Profiles
Forums
Events
Gallery
Everything posted by Kmb0319
-

Dual 68 Chargers - new/rebuild - the adventures of Bronzie and Bluebell
Kmb0319 replied to Kmb0319's topic in Model Cars
oh, I'm dying to see what you do with these! -
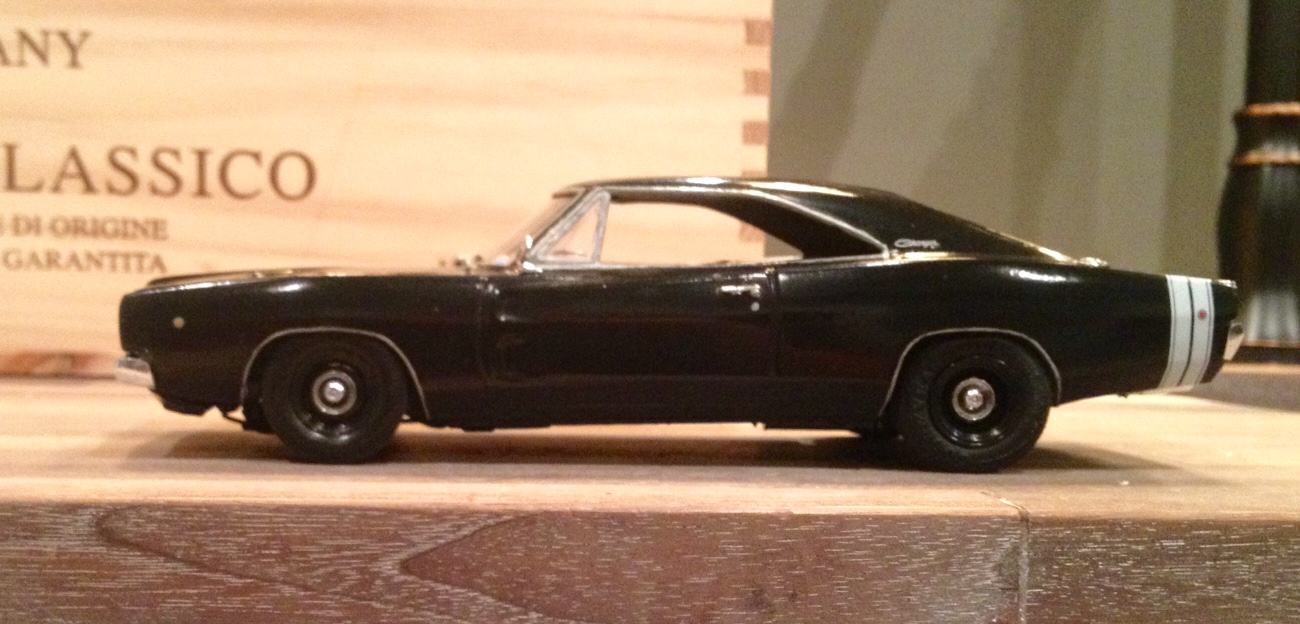
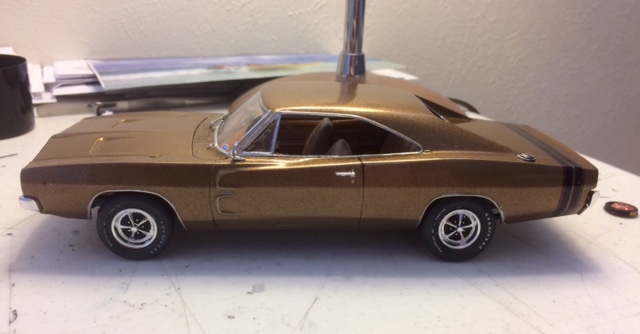
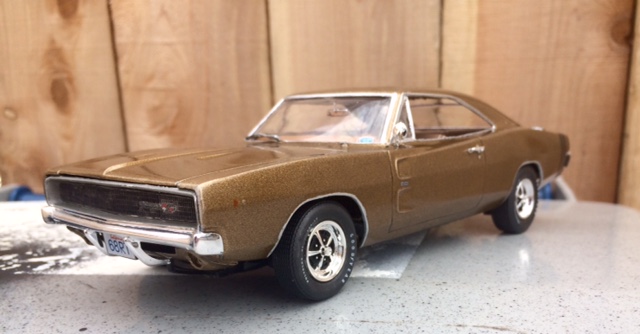
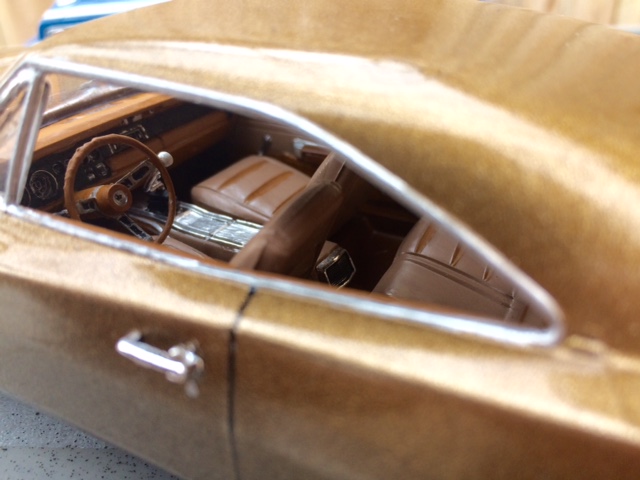
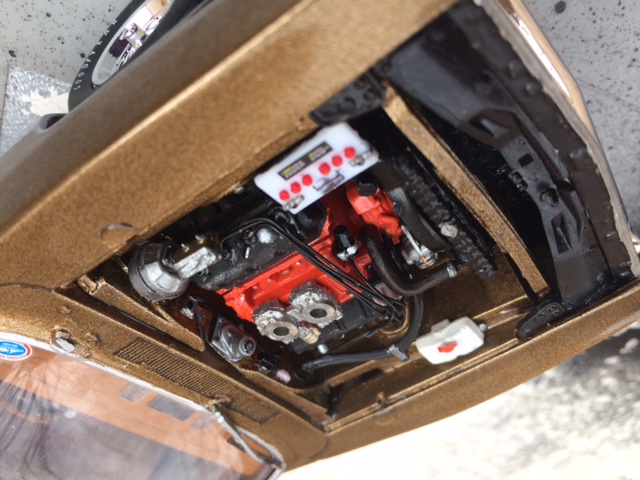
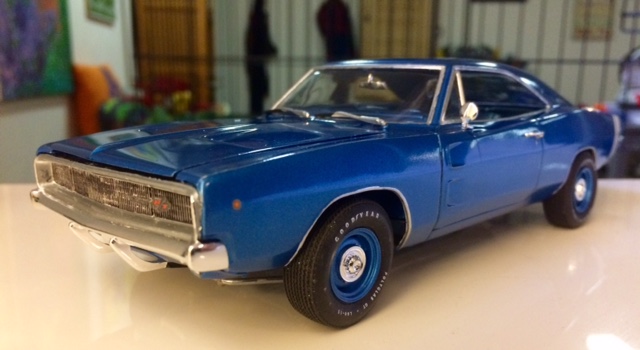
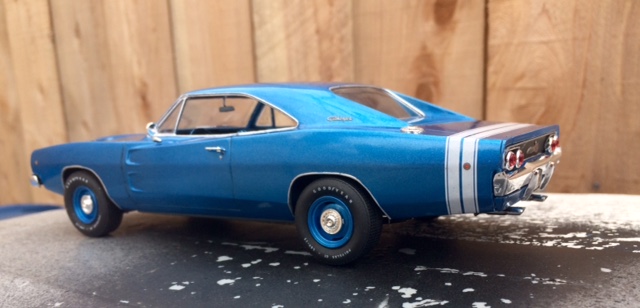
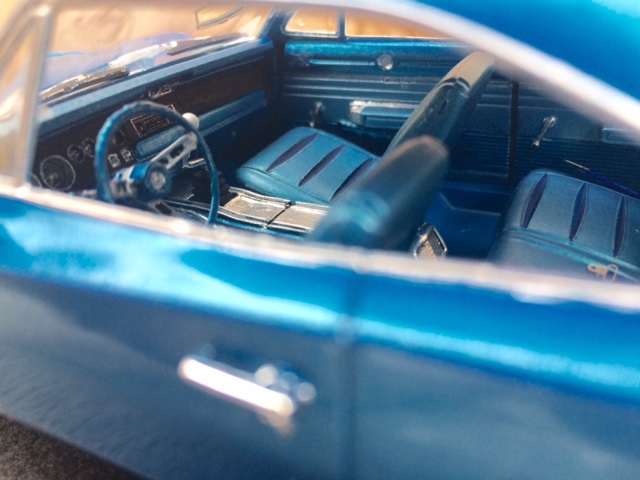
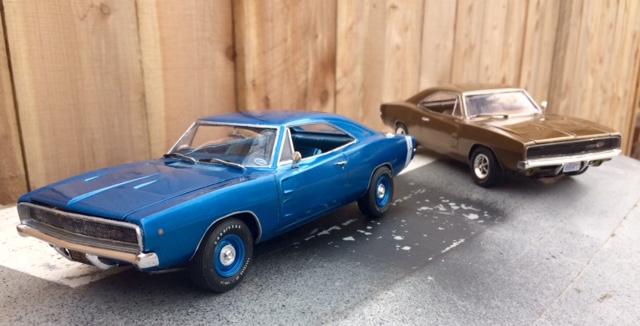
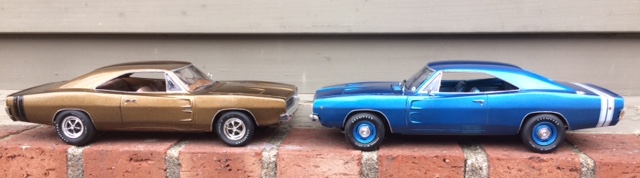
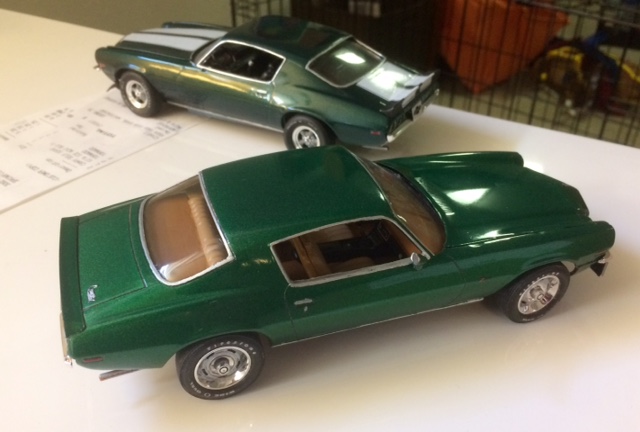
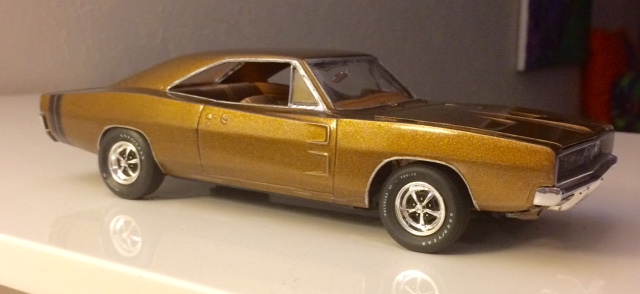
I got back into this hobby in 2015. I built models as a kid and into my teenage years, but hadn't since 1988 or so... almost. Somewhere around 2008, our son was expressing interest in cars, so I built two models for his room, thinking he might enjoy them and get into the hobby. One, a Revell 69 Camaro, was a success. The other, the Revell 68 Charger R/T, was a disaster. I couldn't get the body/chassis/interior to match up, and ended up throwing the model in the trash. After building mostly NASCAR kits when I started back, I moved into street cars again, and took another shot at the 68 Charger, as it's one of my all-time favorite cars. I had a TON of problems with it, but was able to get it done and on the shelf. The problem was, it didn't look good enough. As I built more, it really stood out as one of my worst jobs. I decided to take it apart as much as I could and try to improve it. At the same time, the holidays came, and my sister bought me a model for Christmas. It was the Dominic's 70 Charger. Good kit, but I don't like blown street machines. I went to exchange it, and looked at the 68 sitting on the shelf. There wasn't anything else that I was jonesing to build at that moment. Maybe I could take one last shot at this kit to really get it right while fixing the old one. The old build was black with a tan interior... OK, but not a popular combo in 1968. I re-did the interior, leaving it tan, but adding contrasting tans for the door panels, dash, seat inserts and carpet to bring it to life. For exterior color, I went with Testors One Coat Bronze. One the new build, I chose Tamiya light blue metallic with 4 different blues for the interior. I was able to get the 440 out of "Bronzie,"and replaced it with the new kit's Hemi, all wired up. "Bluebell" got the stock 440. Bronzie got the magnum 500s, Bluebell got the dog dish caps. Bronzie used the larger Goodyear Polyglas in the rear and smaller up front, while Bluebell got the larger ones all around, with the rears pushed out a little. Bronzie got black stripes, Bluebell got white. As a new build, the blue one got a few extra details... seatbelts, extra vacuum hoses on the engine and master cylinder. This was the build that was redone: Rebuilt, it became Bronzie: The new kit is Bluebell: I took the air cleaner off to show the hoses, although the one is cut too short to attach, so it's hidden under said air cleaner. Anyway, the twins together: I'm finally happy with the Revell 68 Charger... two times over. One of my all-time favorite kits of one of my all-time favorite cars, so it was worth having 2. Which one do you like better?

-
Fantastic build and what a great looking garage for display!!
-
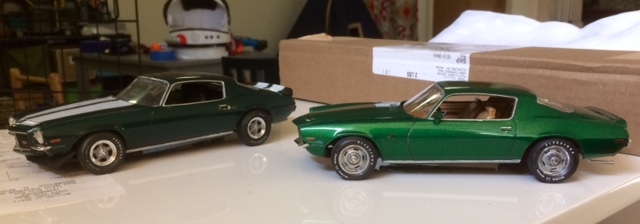
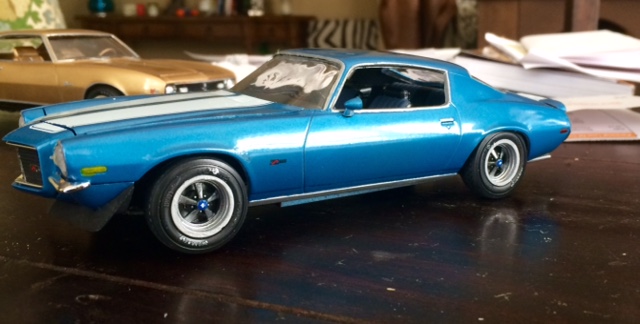
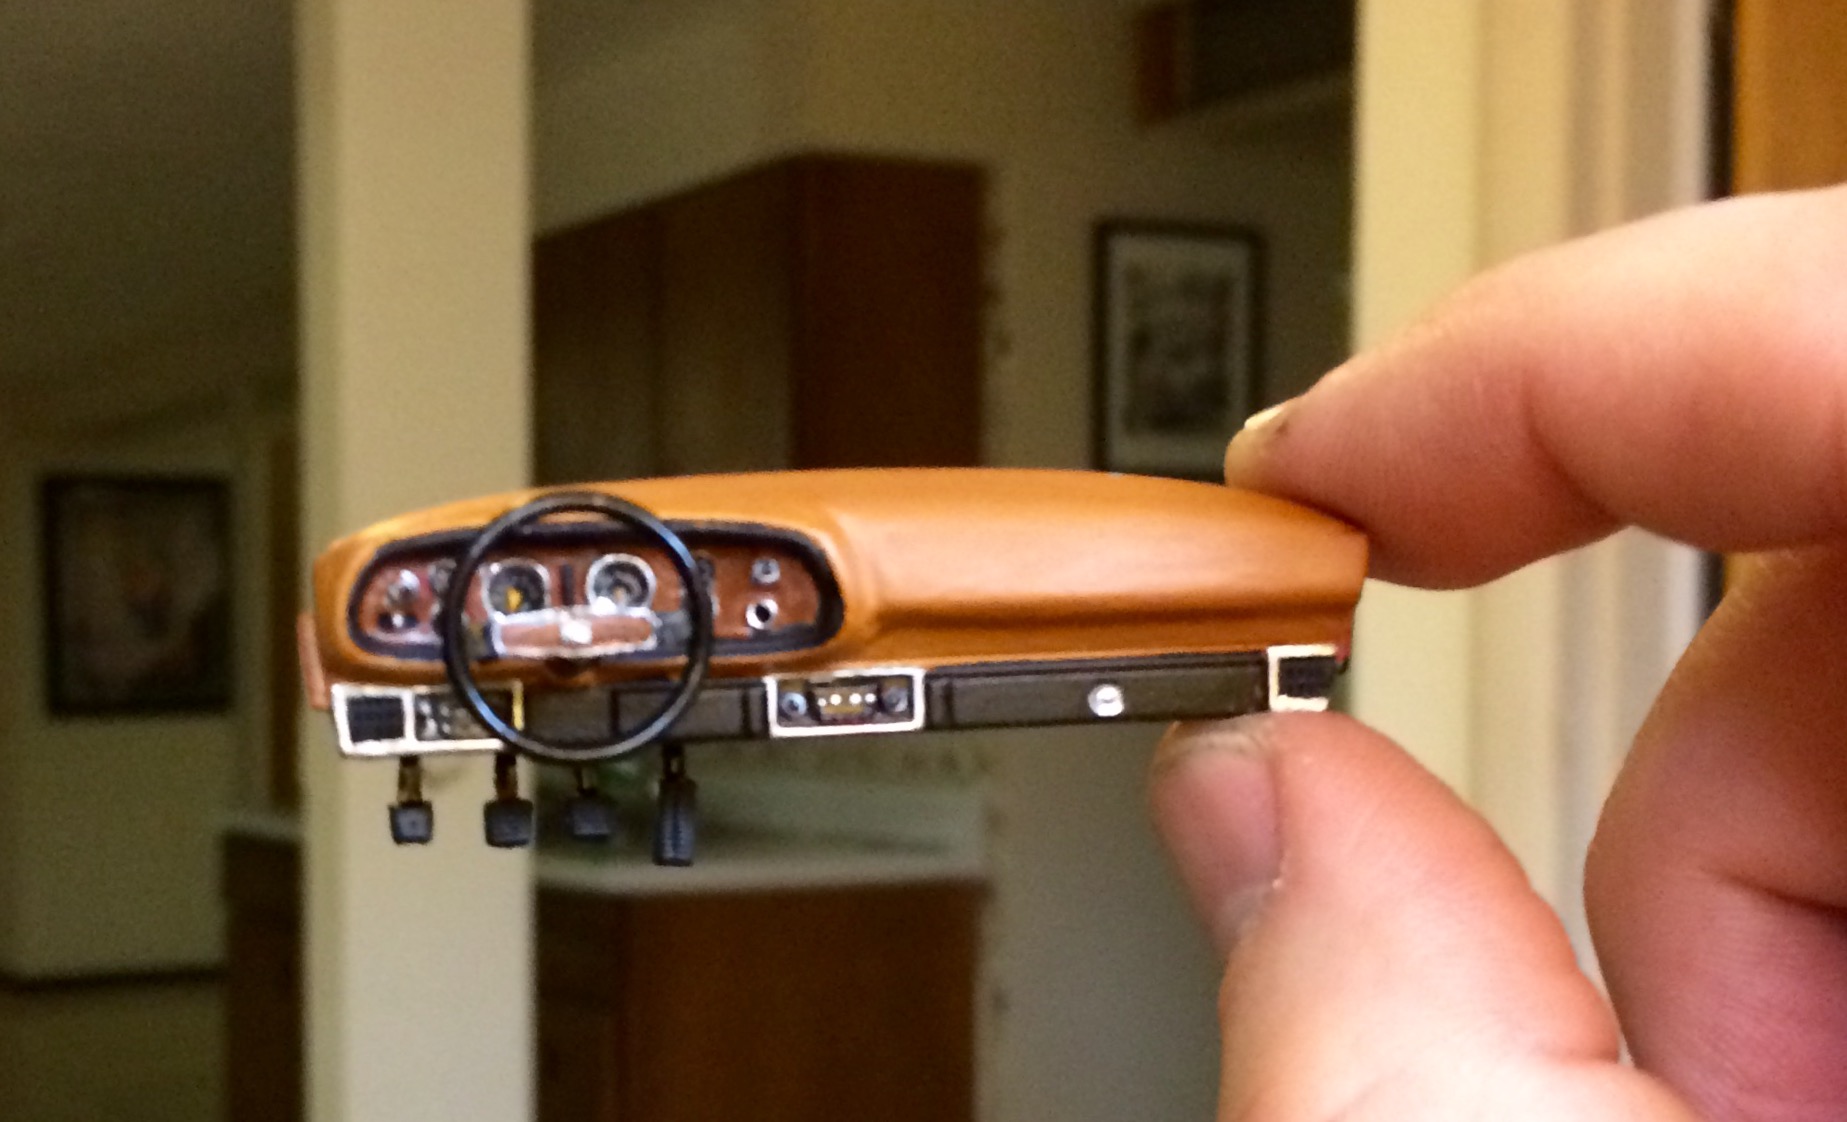
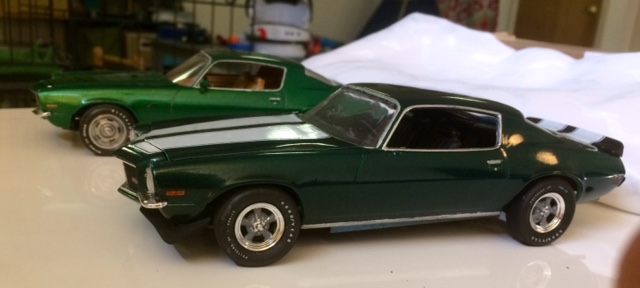
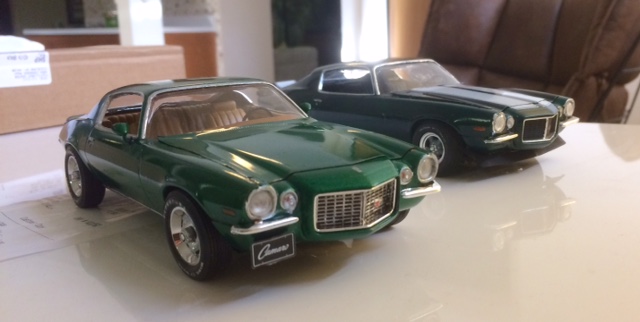
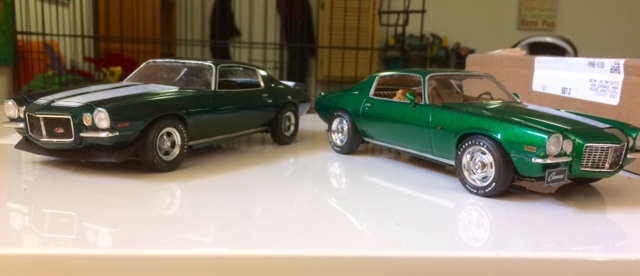
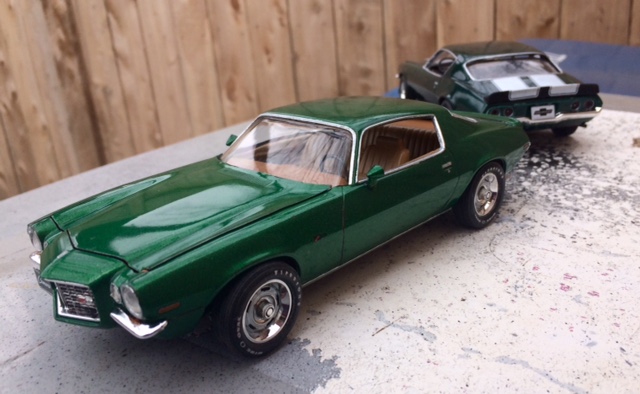
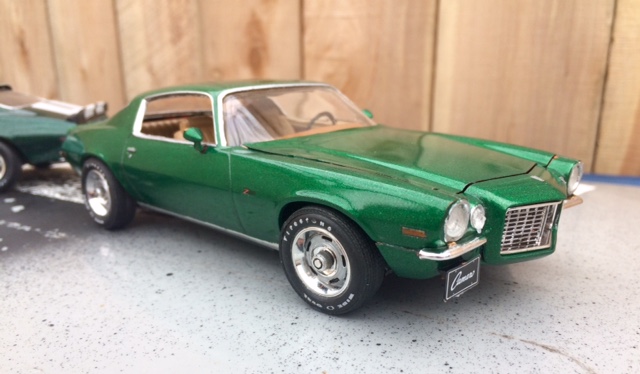
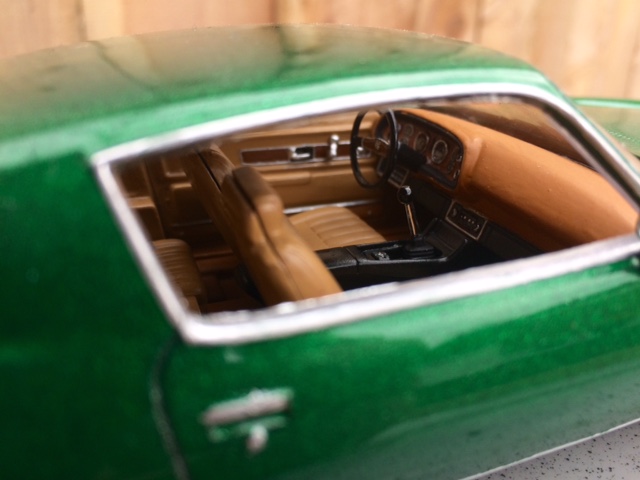
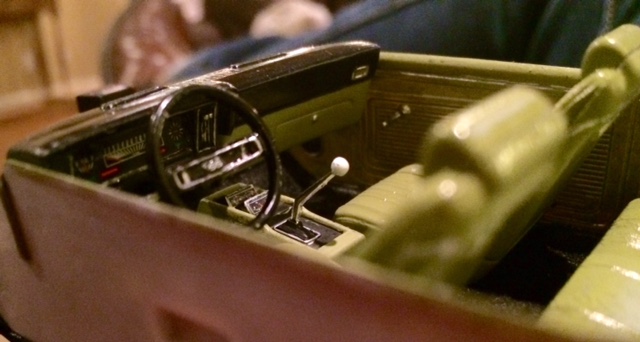
So, I built the AMT 70 Camaro Z28 a year or so ago. It came out OK, but I felt it could be better. When we moved, a few pieces of it broke, so I set it aside, and decided to redo it over the Holidays. After stripping the body of parts and paint, I repainted my interior. I don't really like white usually, but thought it might look good on this car, so I tried painting it as such. My paint was old, and it cracked and bubbled... so it went back into the brake fluid. I repainted it deep jewel green metallic... a color that always gives me a great finish. It came out OK, but I lost the rear spoiler, both mirrors, and attempts to get things back together or adjusted caused more broken pieces and frustration. I decided to throw it in the garbage and build a new one. I bought a new kit, and was figuring out what I wanted to do to make this one come out the way I wanted. I knew I wanted a camel interior. In testing wheel/tire combos for the car, something happened: I had seen a couple research pictures of Camaros with torque thrusts, and really liked that look, but also found a set of slightly larger diameter Chevy rally wheels in my parts box that really fit this model perfectly. I dedided those rally wheels were the choice for the new build, but when I held up one of my torque thrusts from the Moebius Belvedere kit to the old "trash" Camaro, I thought "wow, that looks good.. maybe I'll save this one after all." I still need to find a mirror in the parts box... the rear spoiler came from a 68 Camaro. There is one other oops in this... I debated between Testors Mystic Emerald and Tamiya Gunmetal Gray for body color on the new build. In the end, I chose the emerald thinking I'd be throwing the other kit away. I really didn't intend to have two green ones, but oh well. I didn't want to use the stripes on the new car, but did use them on the old one for contrast. Same with the front spoiler, that I'm generally not a fan of. The 1970 Camaro was a great car, and while it was the height of the muscle car era, it really had a very European sports car look. I tried to make them (especially the new build) reflect that, hence the slightly smaller tires, tan interior, and lack of stripes... a little cleaner look to me. Anyway, I hope you like them. I wired both engines and added a couple extra vacuum and heater hoses. I flipped the front wheel spindles on the new build, as the stance needed to be lowered significantly. This was the first build of the kit. It came out well, but the wheels in this pic wouldn't stay in, so I had to replace them with the kit wheels, which I'm not a big fan of. Also, the decals split in several places, wouldn't lay right over the rear, and the rear stance sat too low. In the move, the paint got scuffed in a couple places and a few parts were broken loose. After a couple attempts, I'm happy with the redo: A couple details on the new build... dash: My 350 The wheels and tires are Revell units from a 69 Camaro kit, and the tire decals are from Fireball. The twins: If only they were real.... I'd love to take them out and race.
-
Dual 68 Chargers - a new build and a restoration
Kmb0319 replied to Kmb0319's topic in WIP: Model Cars
-
THAT is how you do box stock. Beautiful!!!
-
Dual 68 Chargers - a new build and a restoration
Kmb0319 replied to Kmb0319's topic in WIP: Model Cars
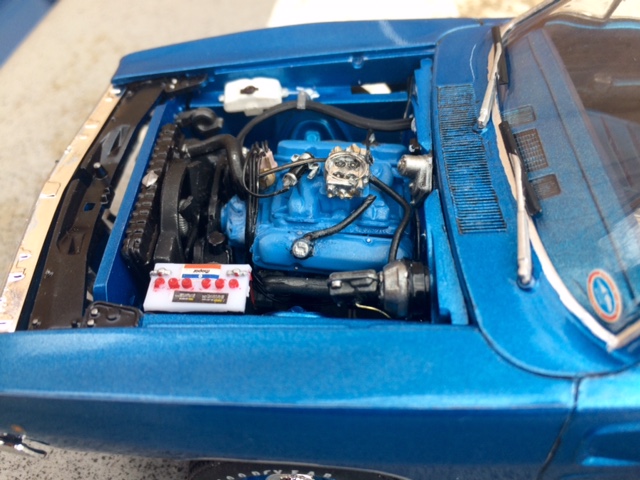
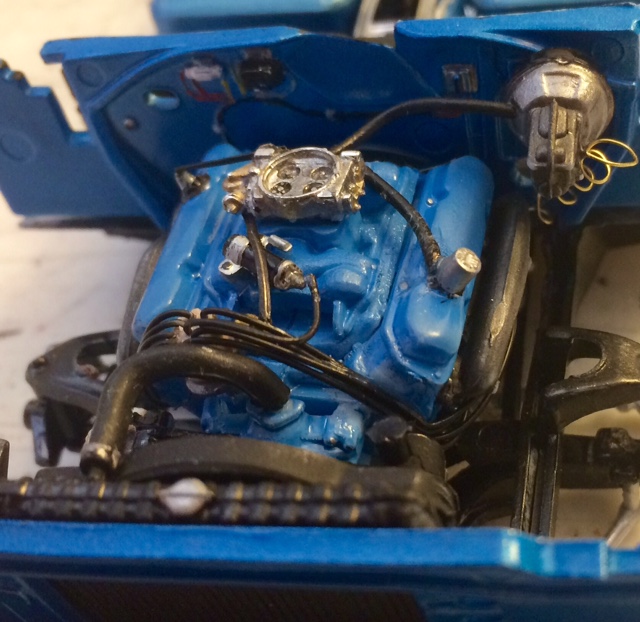
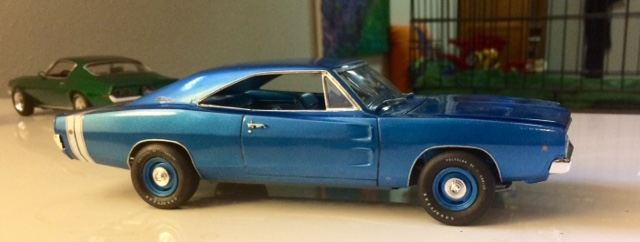
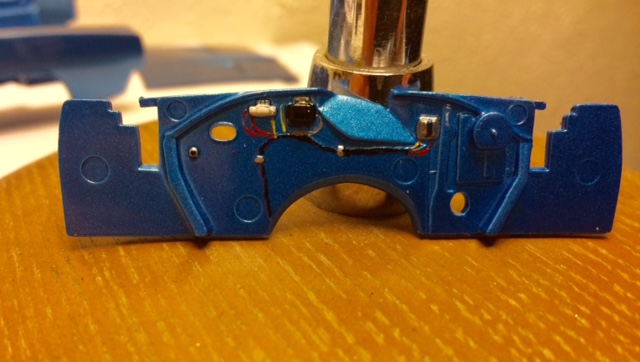
OK, final post for this. After getting the 440 together and wired for the blue car, I installed it and added a few extra details: some carb vacuum hoses, a hose from the master cylinder and I used some .01 brass wire to make the brake line squiggle also coming from the master cylinder. Then I added seatbelts and got my interior together Then moved into final assembly. I used the larger Polyglas GTs at all 4 corners this time... just liked that look here. On the rear wheels, I added a thin disc brake from another kit to the wheelback and then super glued them to the end of the axle, as I felt like I wanted to push the wheels out a little. They can sit a little too far inside the fenders to me, and I wanted to give this one a little more aggressive stance. I am still going to put a little wash on the hubcaps and paint the dodge symbol, but other than that, I'm done. I will take some pics of the two together and post under glass tomorrow, but since I threw a couple of "Bronzie" up, here's one shot of "Blue Bell." Third time was the charm... I think I finally got this kit right, and it may be my best result ever.
-
Dual 68 Chargers - a new build and a restoration
Kmb0319 replied to Kmb0319's topic in WIP: Model Cars
Thanks! I'm glad I was able to get the motor out to make the switch to the Hemi. I've made more progress on the blue one... it's coming out phenomenal, and I'm happy that in the end, they have contrasting engines. -
AMAZING!!! Possibly the best build of this I've seen. Bravo!!!
-
What's with me and doubles? Dual 70 Camaros - by accident
Kmb0319 replied to Kmb0319's topic in WIP: Model Cars
Really? I thought the 72 had those big long marker lights under the bumperettes, but I'm no expert. Thanks for the input! -
LOVE IT! I've been wanting to build one of these for a while... I have to pick one up. You did a phenomenal job.
-
Well, I built the AMT 1970 Camaro Z28 a year and a half ago. It's a really good kit, and I was OK with it, but not thrilled with my results. My color was good, but the finish could have been better. The three big things that annoyed me were 1) the stripes, which cracked and tore in places and wouldn't settle in others 2) the wheels and tires; the Z28 wheels have never been my favorite, and the Firestones included in the kit were a little small and have the big prominent groove, I guess for a redline. I tried to replace them with pad-printed Polyglas, but couldn't get the tires to stay on or the wheels to stay in the tires, so I wasn't fond of the look. And 3) The rear end sat too low I decided over the Holidays to redo it. I stripped and repainted it, but it didn't come out. Tried again, and got a good finish, but almost everything else went wrong, and I decided it would be easier to just get a new one and replace it. I bought a new kit. This time, my thinking about this model changed. The 1970 Camaro was a totally different animal than the previous version. It was more of a sports car than ever before, and its styling had a little Ferrari in it. 1970 Was the height of the muscle car era, and with the wide body and bulging fenders, I had thought of this car as something that needed wider tires and should be a proper muscle car. But, when I was trying to figure out wheels/tires for the new build, I grabbed a set of the Revell Chevrolet Rally wheels from a 69 Camaro kit. They were a slightly larger diameter... too big to fit the pad-printed Polyglas GTs, and the only tires that they fit were another Revell offering that is a little low profile and not very wide. (They are the kit tires in the 67 GTX, the 68 Dart GTS and a host of others) I didn't think they'd work for me, but when I put them on the Camaro I was going to dispose of to look at them, they filled the wheel wells nicely and gave the car more of a Euro sports car look that fit with the redesign of the Camaro. It was just what I was after. For a paint color, I was leaning toward Tamiya Gunmetal, but also thinking about a brighter, richer color. I ended up going with Mystic Emerald. I am doing the interior in saddle. No stripes. Wiring the engine, doing some extra hoses and underhood stuff, and adding seatbelts. In researching, this picture is the one that made my color choice: At this same time, I was doing a little "refreshing" of a couple kits, mostly changing out wheels and tires. I really liked the look of the Torque thrusts on this picture, even though I was definitely planning on using the rally wheels. I have a great set of Torque Thrusts left over from the Moebius Belvedere kit. I dropped those wheels into a set of Polyglas GTs (the smaller ones, actually) and held them up to the "junk" Camaro, and they looked GOOD. So, I guess I'm salvaging that one, too, and I have another build of two of the same car going on (dual 68 Chargers is already a WIP). I wouldn't have planned to have two, much less both green, but oh well. I've made good progress already. On the old one, I repainted the interior, and painted the body with Duplicolor Deep Jewel Green. (Tried white first, but the paint I had was old and didn't come out) I got the glass back in and got the car back together, then worked on getting the stance right. I still have to get the front wheels on (they are just setting under the fenders on this pic) and find a rearview mirror, but I like it. (the rear spoiler was also lost, the one on it is from a 68 Camaro): As for the new one, I started on my interior Then my engine, with a couple added hoses And, got paint on:
-
Dual 68 Chargers - a new build and a restoration
Kmb0319 replied to Kmb0319's topic in WIP: Model Cars
The adventures of Bronzie and Bluebell continue. I've made some progress over the last couple weeks, mostly with the Bronze rebuild, as I've not received the replacement steering column for the blue car yet. Anyway, the problems with the bronze car did give me a benefit... when everything broke again, I went ahead and tried to get the 440 out, and was able to. So, I wired the hemi in the new kit and put in the bronze car, and then detailed up the new 440 for the blue one, so at least they will both have wired engines. The spare parts I needed for the bronze car also arrived, so once I got the engine in, I could move into putting it back together. With her new engine installed, just lacking an air cleaner Now, both builds of this thing have cause major problems... this model hates me. Along with things not fitting back together properly, my glue suddenly decided to call me problems. When I re-glued the front suspension attaching the hemi, I had the car sitting upside down. After letting everything dry, I flipped it over to find big drops of glue dried on either side of the front fenders. I'll probably make an antenna to hide the right one, but sheesh..... As of today, I got wheels and tires back on, using the Magnums for this car. Other than wipers, door handles and a few other little bits, she's rebuilt. Not perfect, but at least better than the black version. Next post on this will be under glass: Meanwhile, over to blue. I wired up the 440... there will be a couple additional hoses added. And, I painted the inserts in the seats. I will do extra details on this one, so I'll work on seatbelts next. Then, when I get the replacement steering column, I can put it all together. So one is pretty much done, the next one will be coming together soon.
-
1963 Pontiac Bonneville Hard Top. Update, 3/25
Kmb0319 replied to StevenGuthmiller's topic in WIP: Model Cars
Steve, you can't cuss on this board, but you're making me want to.... holy --------, that is amazing!!! I'm a huge fan of your work, but the finish on this may top them all. WOW.... -
Looks pretty outstanding to me... especially for a first model. Great work!
-
Beautiful color combo and WHAT A FINISH!!! Fantastic work.
-
Dual 68 Chargers - a new build and a restoration
Kmb0319 replied to Kmb0319's topic in WIP: Model Cars
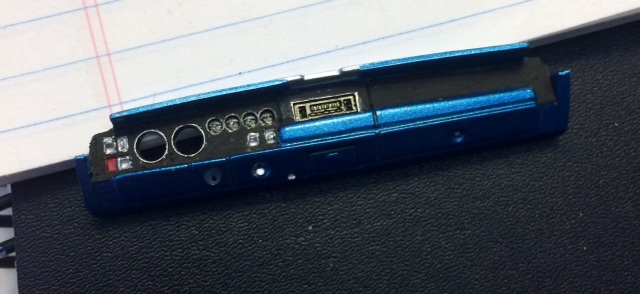
Well, I got a little more work done tonight... some good, some not so much. The bad: I reinstalled the firewall in the bronze car, and then, since I had everything else in place (other than my missing vent window and rearview mirror), I wanted to get a mockup of it with the Magnum 500s and Polyglas GTs. Well, the old problems cropped back up... I got the body and chassis to snap together, and in doing so, the passenger seat broke loose. I thought that was it... but when I took the body and chassis apart again, it broke off the dashboard, the left door panel, and the heater box. I swear this model hates me. On the positive side, working with the new kit, I got a few things accomplished, and they came out nicely. Painted my firewall: My console, other than having to put some dullcote over the "carpet" on the sides: And, last but not least, my dash, which I'm very happy with... If I can get this thing to fit together, I'll be very happy with the build. I can tell that Bronzie is itching for a fight..... she'll get it. But first, sleep..... G'night, all.
-
Dual 68 Chargers - a new build and a restoration
Kmb0319 replied to Kmb0319's topic in WIP: Model Cars
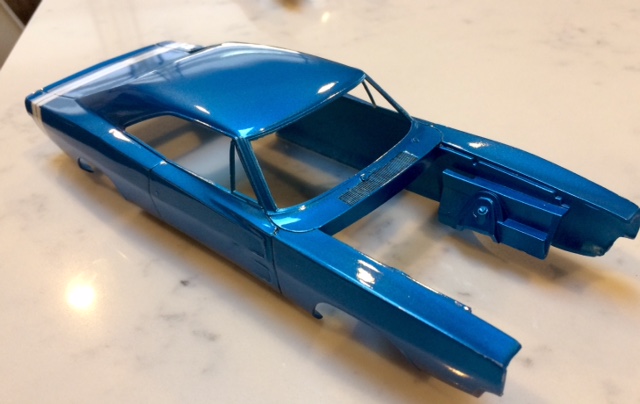
OK, a little new progress..... I corrected the lower door panel per Bill's input (thanks again!), and then started on engines. I'm a little uncertain here... My original thought was put the Hemi in the new kit, as I've got the 440 in the other one, and the contrast of the orange engine would be better than more blue, but there are more details to the 440. And, the Hemi is a race version... so I'm still debating. I started building both, and hopefully it will come to me. I have a wired distributor waiting for whichever engine I pick. Interior mock-up thus far Which one shall I pick? (Still lots of detail painting to do, just a "so far" shot) In the meantime, since I got the stripes on, I clear-coated. I LOVE Mr. Hobby clear... and this one may be my favorite. Last visit to the hobby shop, instead of the taller can of "Gloss Clear," they had the regular sized can that said "Clear Topcoat." I really love the finish I got from this stuff: There's a smudge on the rear fender of the bronze body, but it was just a passing piece of dust... fell right off. I put the windshields back into the bronze car. It will get fully cleaned up and reassembled. The blue one, as my new build, will get some extra stuff like seatbelts, extra wiring, etc. Of course, today I learned a new thing: I put all of the disassembled pieces of the bronze car into box. I haven't messed with it much, as the body and parts I had to paint bronze were kept out of that box. Today, I pulled the box out... I am missing 1 windshield wiper, 1 quarter window, 1 door handle, and 1 exhaust tip. How that happened, I have NO idea. I guess I'll be emailing Revell.
-
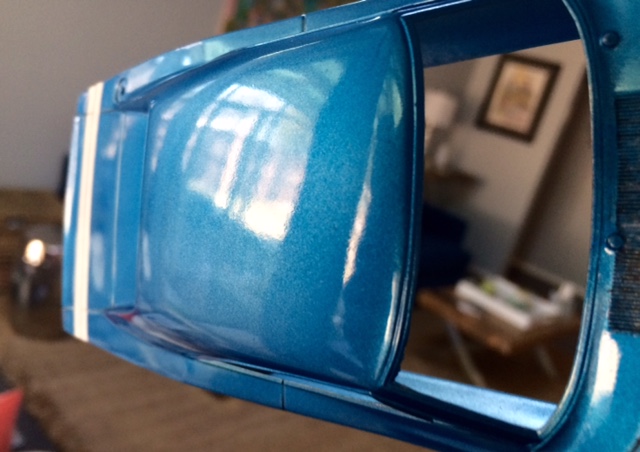
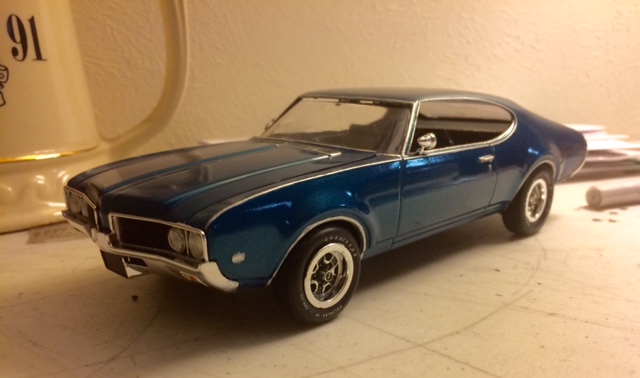
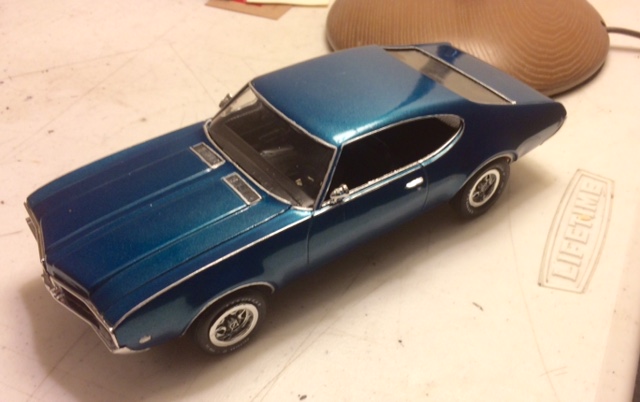
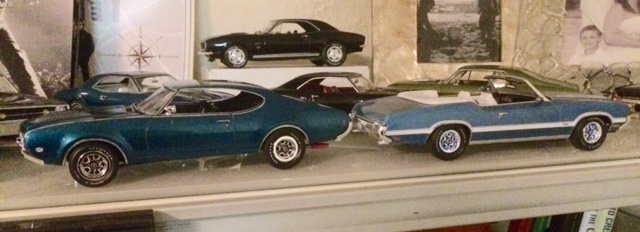
Well, I'll make this short. I bought the AMT 69 442, as I'm trying to do something with the MPC 72 GTO, and heard it was the best donor chassis. SO, now I have half a Cutlass. Can I make something of it? Let's just say "don't look behind the curtain." Or in this case, underneath. I used the MPC GTO chassis, which has the right wheelbase, but is narrower than the 442 body and too long. I cut some lenghth off, as the chassis plate had a wierd amount of space after the gas tank. I used the Cutlass kit body, engine and interior... since the chassis was too narrow, I glued the interior in, and then glued the chassis to the interior. The firewall and radiator are from the GTO. The last issue was that since the chassis was too narrow, the tires were sunk way inside the fenders. I wasn't going to put too much effort in... just wanted something to look OK on the shelf, so I glued another wheel back to the wheel backs, and they set at the right spot. Easy, quick... just don't turn her over. Color is Duplicolor dark turquoise. Also just realized I need to paint the amber onto the front marker lights. Right after I took this one, I tucked the exhaust pipes up into the bumper... oops. Put her on the shelf with her prettier younger sister: On to the next.
-
Dual 68 Chargers - a new build and a restoration
Kmb0319 replied to Kmb0319's topic in WIP: Model Cars
Good catch and thank you for the info. I literally have a picture of a door panel saved on my computer and still got it wrong. ? So instead of dullcote, I'll be shooting that darker blue on that bottom strip! -
Dual 68 Chargers - a new build and a restoration
Kmb0319 replied to Kmb0319's topic in WIP: Model Cars
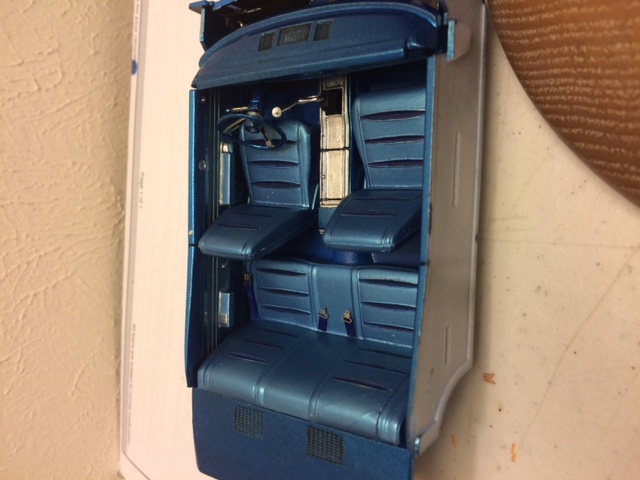
New update: masked off and repainted the door panel centers and seats with Testors Nassau Blue.... much better to me. This has more blue color than the Duplicolor silver- blue I had used, but still contrasts nicely with the top and bottoms of the door panels. I detailed a little, but not all to get a good idea of the look.... I'll touch up and finish. Also, the blue I have for the carpet, which is on the bottom strip of these panels, is a gloss color. I'll mask off and hit that with dullcote, as shine isn't a good mix for carpet. Now, I think the interior is more cohesive. I also laid the body stripes on both cars. I bought some .01 brass wire that I thought I could use for the trim at the base of the vinyl top for the bronze car, but it's far too tiny and I can't get it to stay in place to start laying it. I'm either going to try a larger gauge or chicken out and not do the vinyl top at all before I mess up the paint trying. Not sure yet.
-
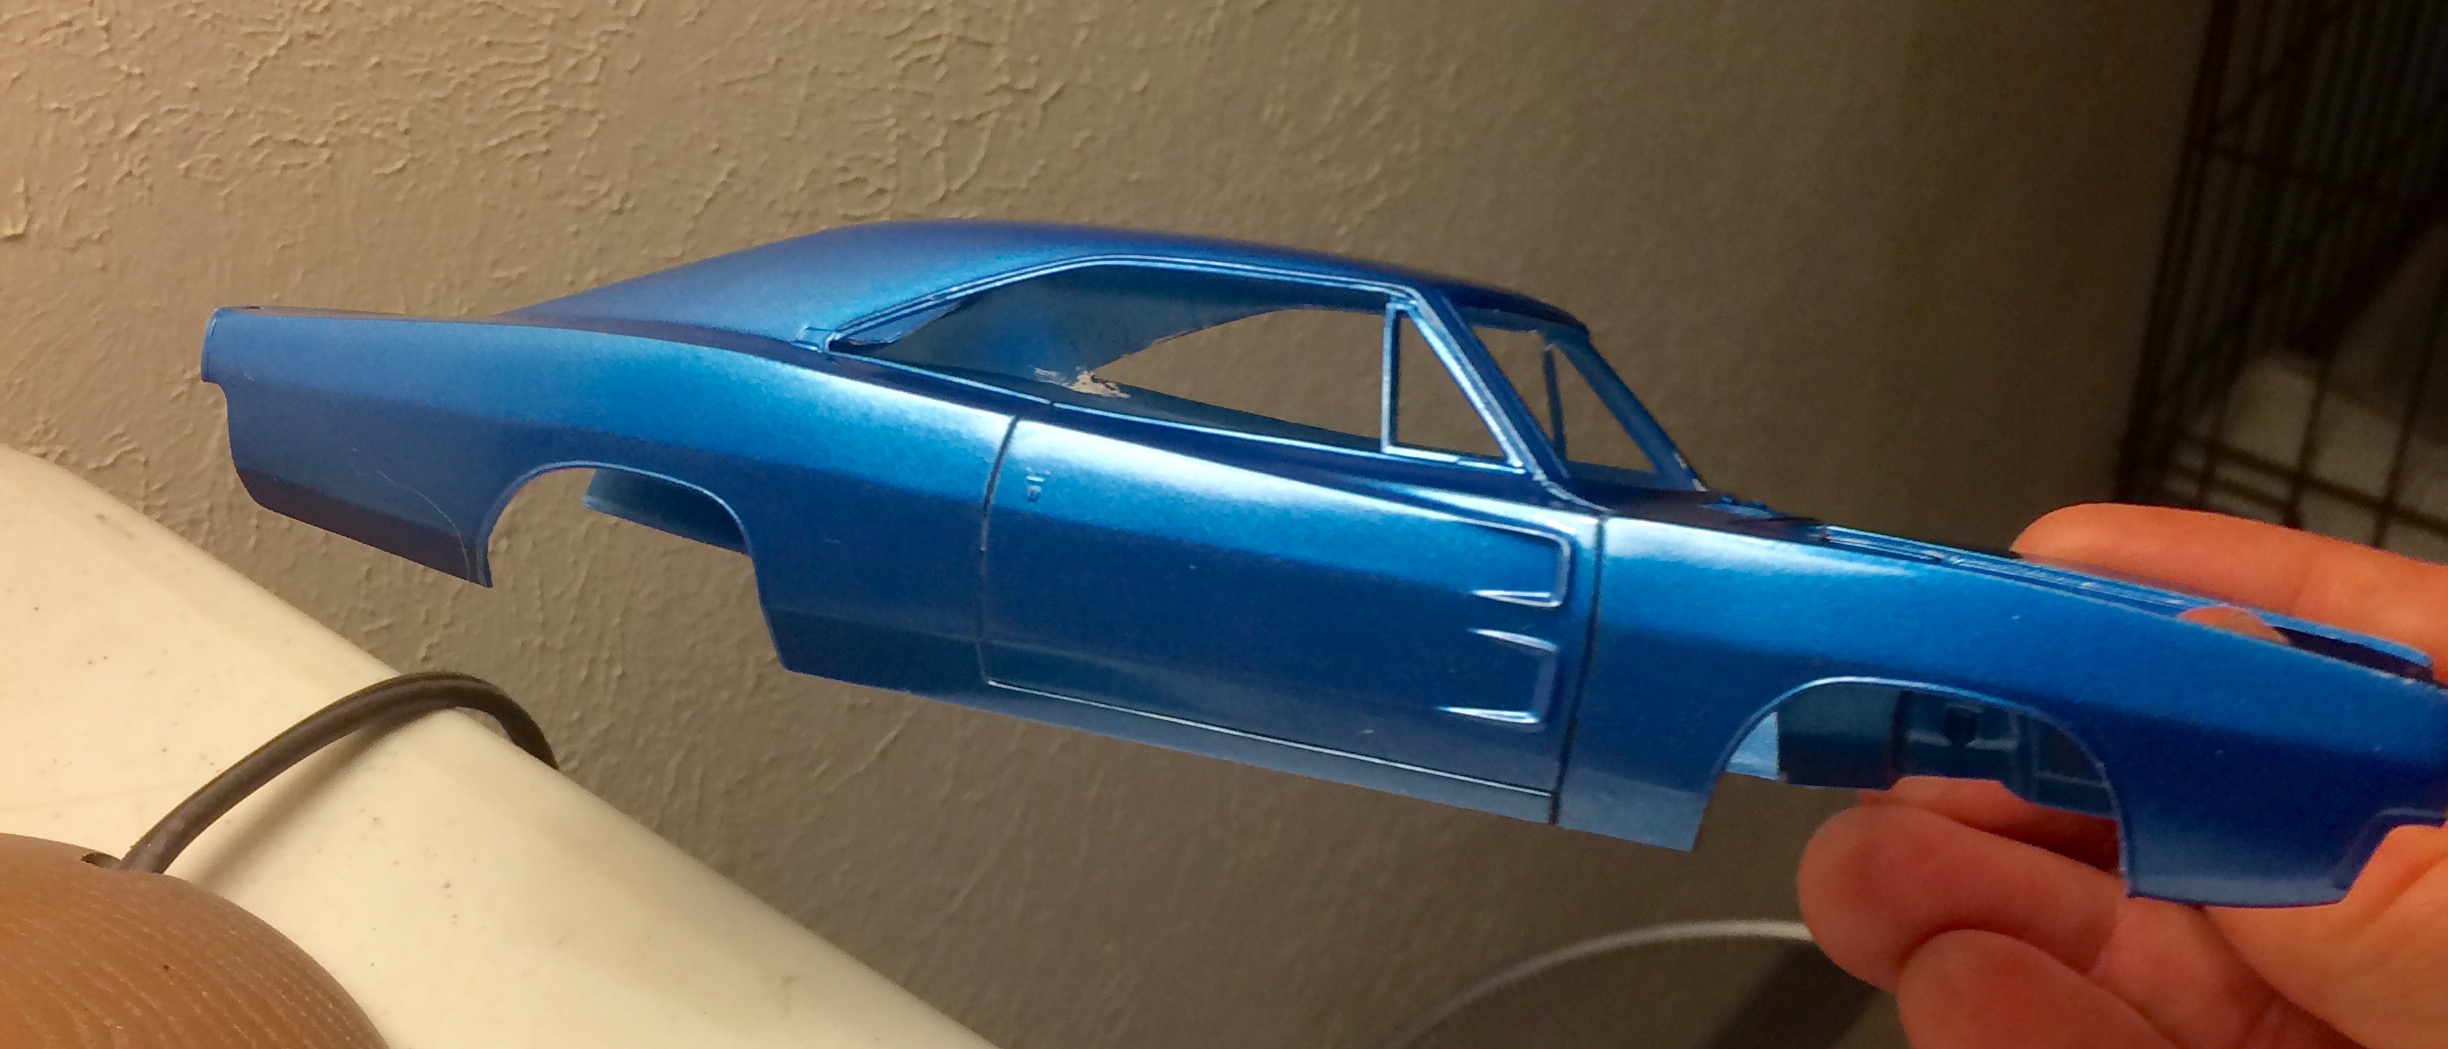
The Revell 68 Charger kit is an awesome model of one of my top 2-3 all time favorite cars, but it has NOT been good to me. Before I really got back into building in early 2015, I dabbled once. Back in 2008 or so, our older son was in 4th grade, and was asking a few car questions. I thought he'd like it if I built a couple models for his room. I bought 2.. the Revell 68 Charger and a 69 Camaro. I didn't know anything then about polishing out paint or extra detailing, just painted as best as I could and assembled. The Camaro went together beautifully... The Charger, not so much. I couldn't get the body and chassis to fit together for anything, and the front end sat so high it looked like a tractor. I gave up and threw it in the trash. So, in 2015, I started building NASCAR cars when I started back into the hobby. After building several, I wanted to build a street car again, and my first attempt was that same Charger kit. I fought it like crazy... in the end, I got it built, but I had a TON of problems with it, and my final results were far less than I had hoped. I had wanted it black, but I didn't want a black interior. I ended up with tan, which wasn't a satisfying choice. Partially because I had one tan paint, a very "blah" shade, and I painted the whole interior with it. Partially because I used a dark brown for the carpet that was too earthy and dull. The whole thing just looked sad, and while I like the combo overall, black with tan interior wasn't a popular choice in the 60s. Then there was my paint job... I tried like crazy to polish it out, but it was that Rustoleum paint for plastic, and it just didn't want to smooth out nicely. I cleared, polished my brains out, but it wasn't good... not bad, just not good. Finally, I had a million assembly problems, broke some pieces, and ended up with the same stance issue as before and the body/chassis not wanting to come together. After breaking things a half dozen times, I finally got the body and chassis together, broke off the mounting points on the front end and raised them, then finished it up. I posted it on another board under the title "My Dream Car Hates Me" for all the issues I'd had both times. So for Christmas, my sister got me a model. She got me the Dominic's 70 Charger. I don't build street machines.. I build everything stock except for maybe wheels. So, I took it for exchange, and decided that I'd take one last shot... I got another Revell 68. This one HAS to come out well.. I've built it twice already. At the same time, I kept looking at the black one, and feeling like it could be better. So... let's do both! It'll be a Charger family! Here's the previous build I tore apart: I tore things apart, and dropped the body and engine compartment pieces into some brake fluid. For the interior, I grabbed two other brown colors to bring it to life. The seats remained the same tan, but I used a military brown for the dash, steering wheel, upper and lower door panels and seat inserts, then used leather brown for the carpet and package shelf. Overall, much better. I also touched up a few spots. Not quite done, but I like it a heck of a lot better than I did. (sorry, don't have a before pic) The chassis is what it is at this point. There were so many issues when I was building it, that everything ended up fused with super glue. I MIGHT try to get this engine out, as it was before I wired anything, and wire both of the engines in the new kit. But if not, I can live with it. I used the dog dish caps on this one originally, but I think I'm going to use the dog dishes on the new build, so then this one will need the Magnums. As for color on the redo, I looked a lot, and decided on Testors One Coat Bronze with the tan interior. I think I'm going to put a black vinyl top on this one, but not 100% yet. Then, for the new build, I used Tamiya Light Blue Metallic for the body. Got the body painted, wet-sanded and compounded and painted up the chassis. I assembled the front suspension first, as that caused me so many problems on the others. If I can make sure the body and frame properly meet when it's together, the stance will be perfect. As for my interior, it will be the subtle two-tone blue. I painted it with a two Duplicolor paints; light blue metallic and Acapulco blue. I like the look, but the light blue metallic is too light...almost silver. So, I'll probably use Testors Bahama blue as the base seat and mid-door color. A little too much contrast to me. So, I'll try again and repost. In the end, since I love these cars, I hope to have two with different features, but both good representations. I plan to use the white stripes on the blue and the black stripes on the Bronze. More to come...
-
I got mine from Automotive Touchup. (automotivetouchup.com) They sell any color for any model year of car. I got verdoro green and Mercedes B396 blue for my 300 SL build. Great paint, great automotive clearcoat. I don't own an airbrush, so I buy the spray cans. Those are $20 apiece, but they are big 16 oz cans. They also sell paint in cans for mixing.
-
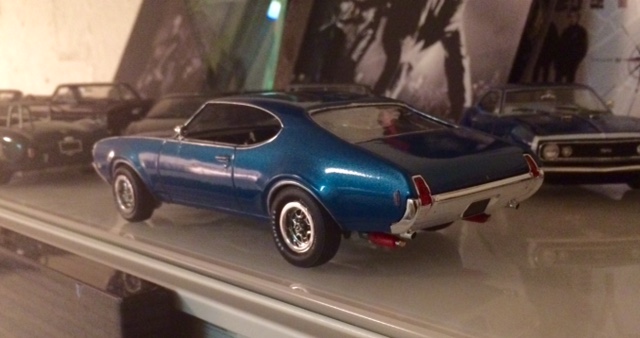
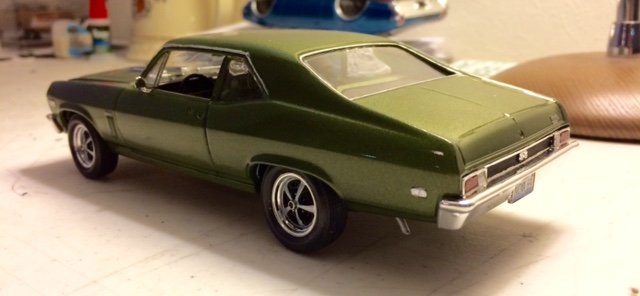
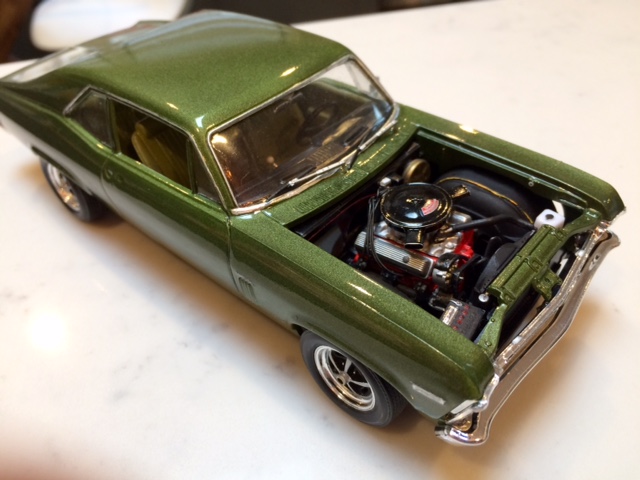
I built the Revell 69 Nova kit back in the Spring of last year. I loved the kit... just fell together beautifully, and I like Novas... they weren't my all time favorite, but they were cool, and they were common when I was in my teen years back in the 80s. I built the model and posted it here back in April. When I was finished, while it was a great kit and everything came out OK, I wasn't quite happy with my result: It all came out nicely, but I had 3 things that bothered me. 1. The dark green, while a great color, just didn't seem to match this car somehow. That sounds stupid, but something wasn't right. Maybe I'd have liked the green better if: 2. I found an ugly green called pea soup at my local hobby shop, and grabbed it. The Nova wasn't Chevy's high-end vehicle... the ugly green interior fit, to me, and I liked how it came out: But, the yellow-y pea green didn't mesh at all with the "Deep Jewel Green Metallic," and it just looked odd. Finally... 3. I didn't like the Chevy Rallys in this kit... too flat and the holes were too square. I had wanted to put a little wider rubber on it, but the rear fenders got in the way. I wanted to use some of the pad-printed Goodyear Polyglas, but I couldn't get them to fit or hold any of the wheels I was thinking about using, so I ended up using the kit tires, which are just a little too skinny. Then, for wheels, I couldn't find anything I liked, so I settled on a set of Magnum 500s from the 68 Charger kit. All in all, not bad, but I just wasn't satisfied with it. SO... this isn't a new build, but I took the Nova apart and set about making it into something that I liked better. I played with different ideas, even thinking about repainting that interior without ruining the black portions and wrecking the decals, when the simplest solution presented itself: my can of Verdoro Green. Then, for wheels and tires, another idea: I had a set of the larger diameter Magnum 500s from the 67 GTX kit available... the slightly lower profile tires were also a little wider while still fitting under the wheel wells, and the larger diameter wheels gave the car a little more presence while still looking stock. I painted the wheel centers in a steel paint since Chevy's Magnums weren't chrome, and stuck them on. As of the pics, I still have to paint on the side marker lights and I'm looking for where I stashed the door handles when I took it apart, but overall, I'm happier. Whatcha think? Almost the same pic as the posted original version:
-
This is both incredible work and possibly the coolest thing I've ever seen... can't wait to see more!!