Kmb0319
-
Posts
468 -
Joined
-
Last visited
Content Type
Profiles
Forums
Events
Gallery
Everything posted by Kmb0319
-
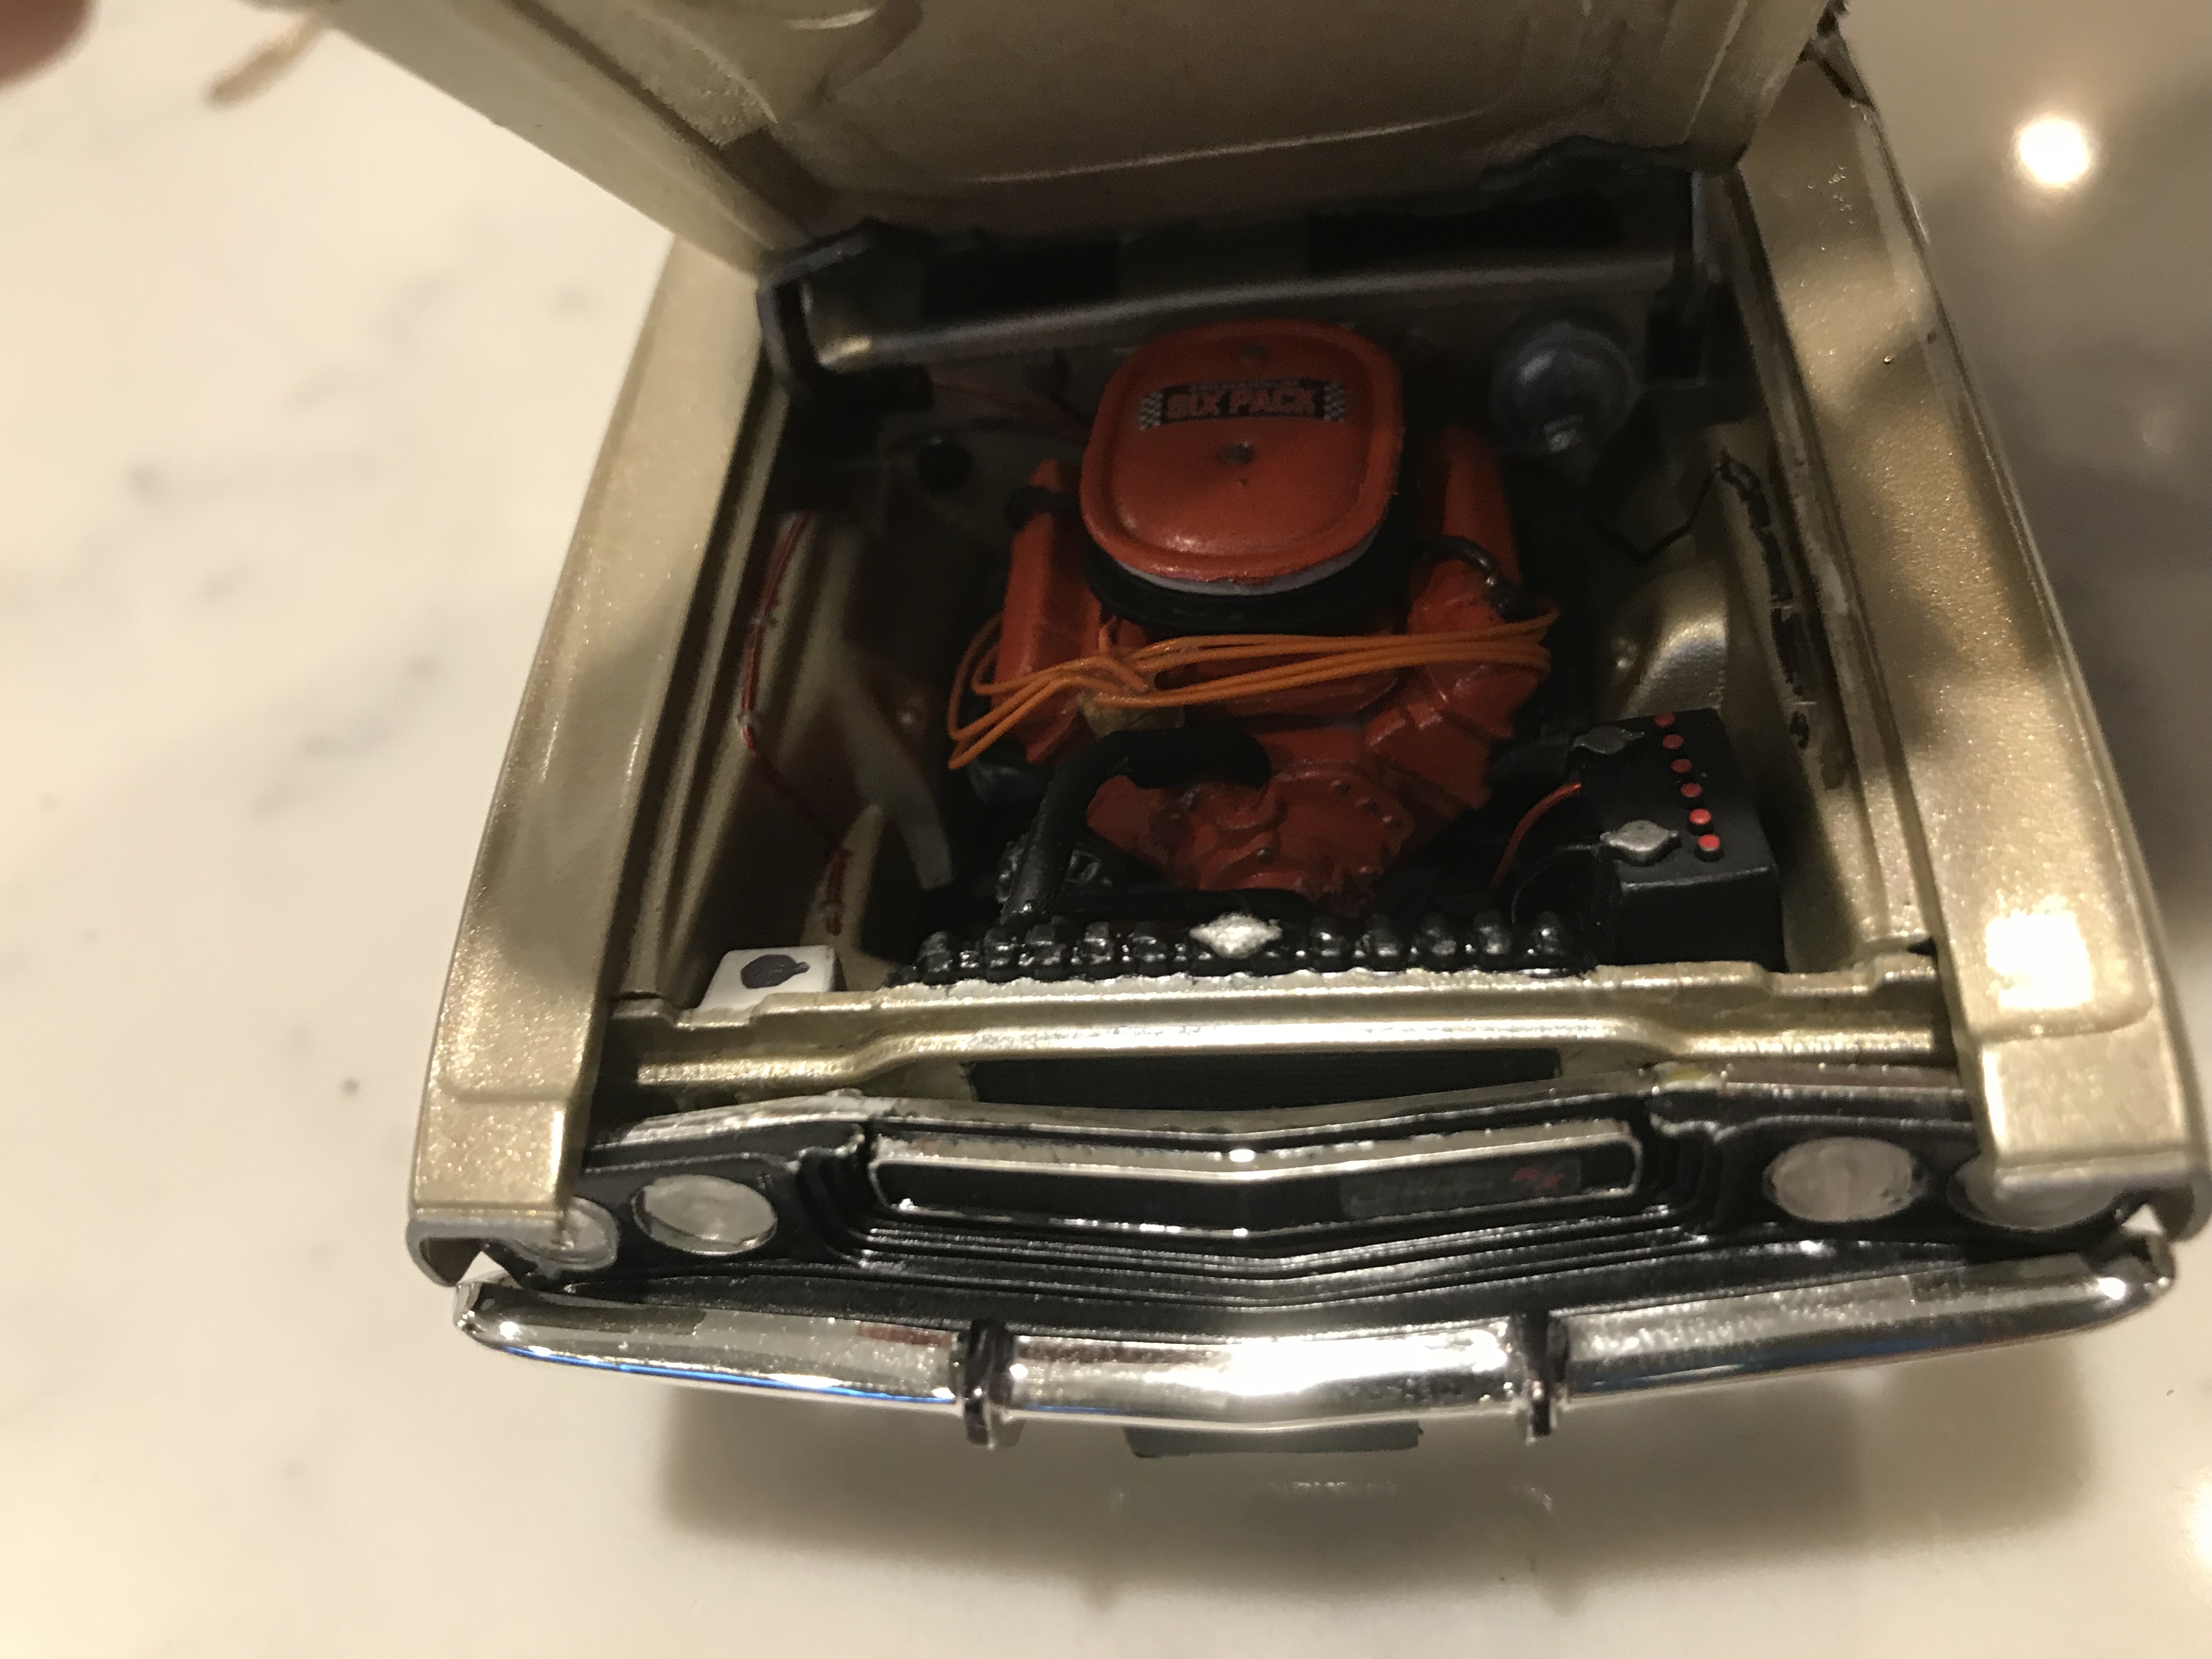
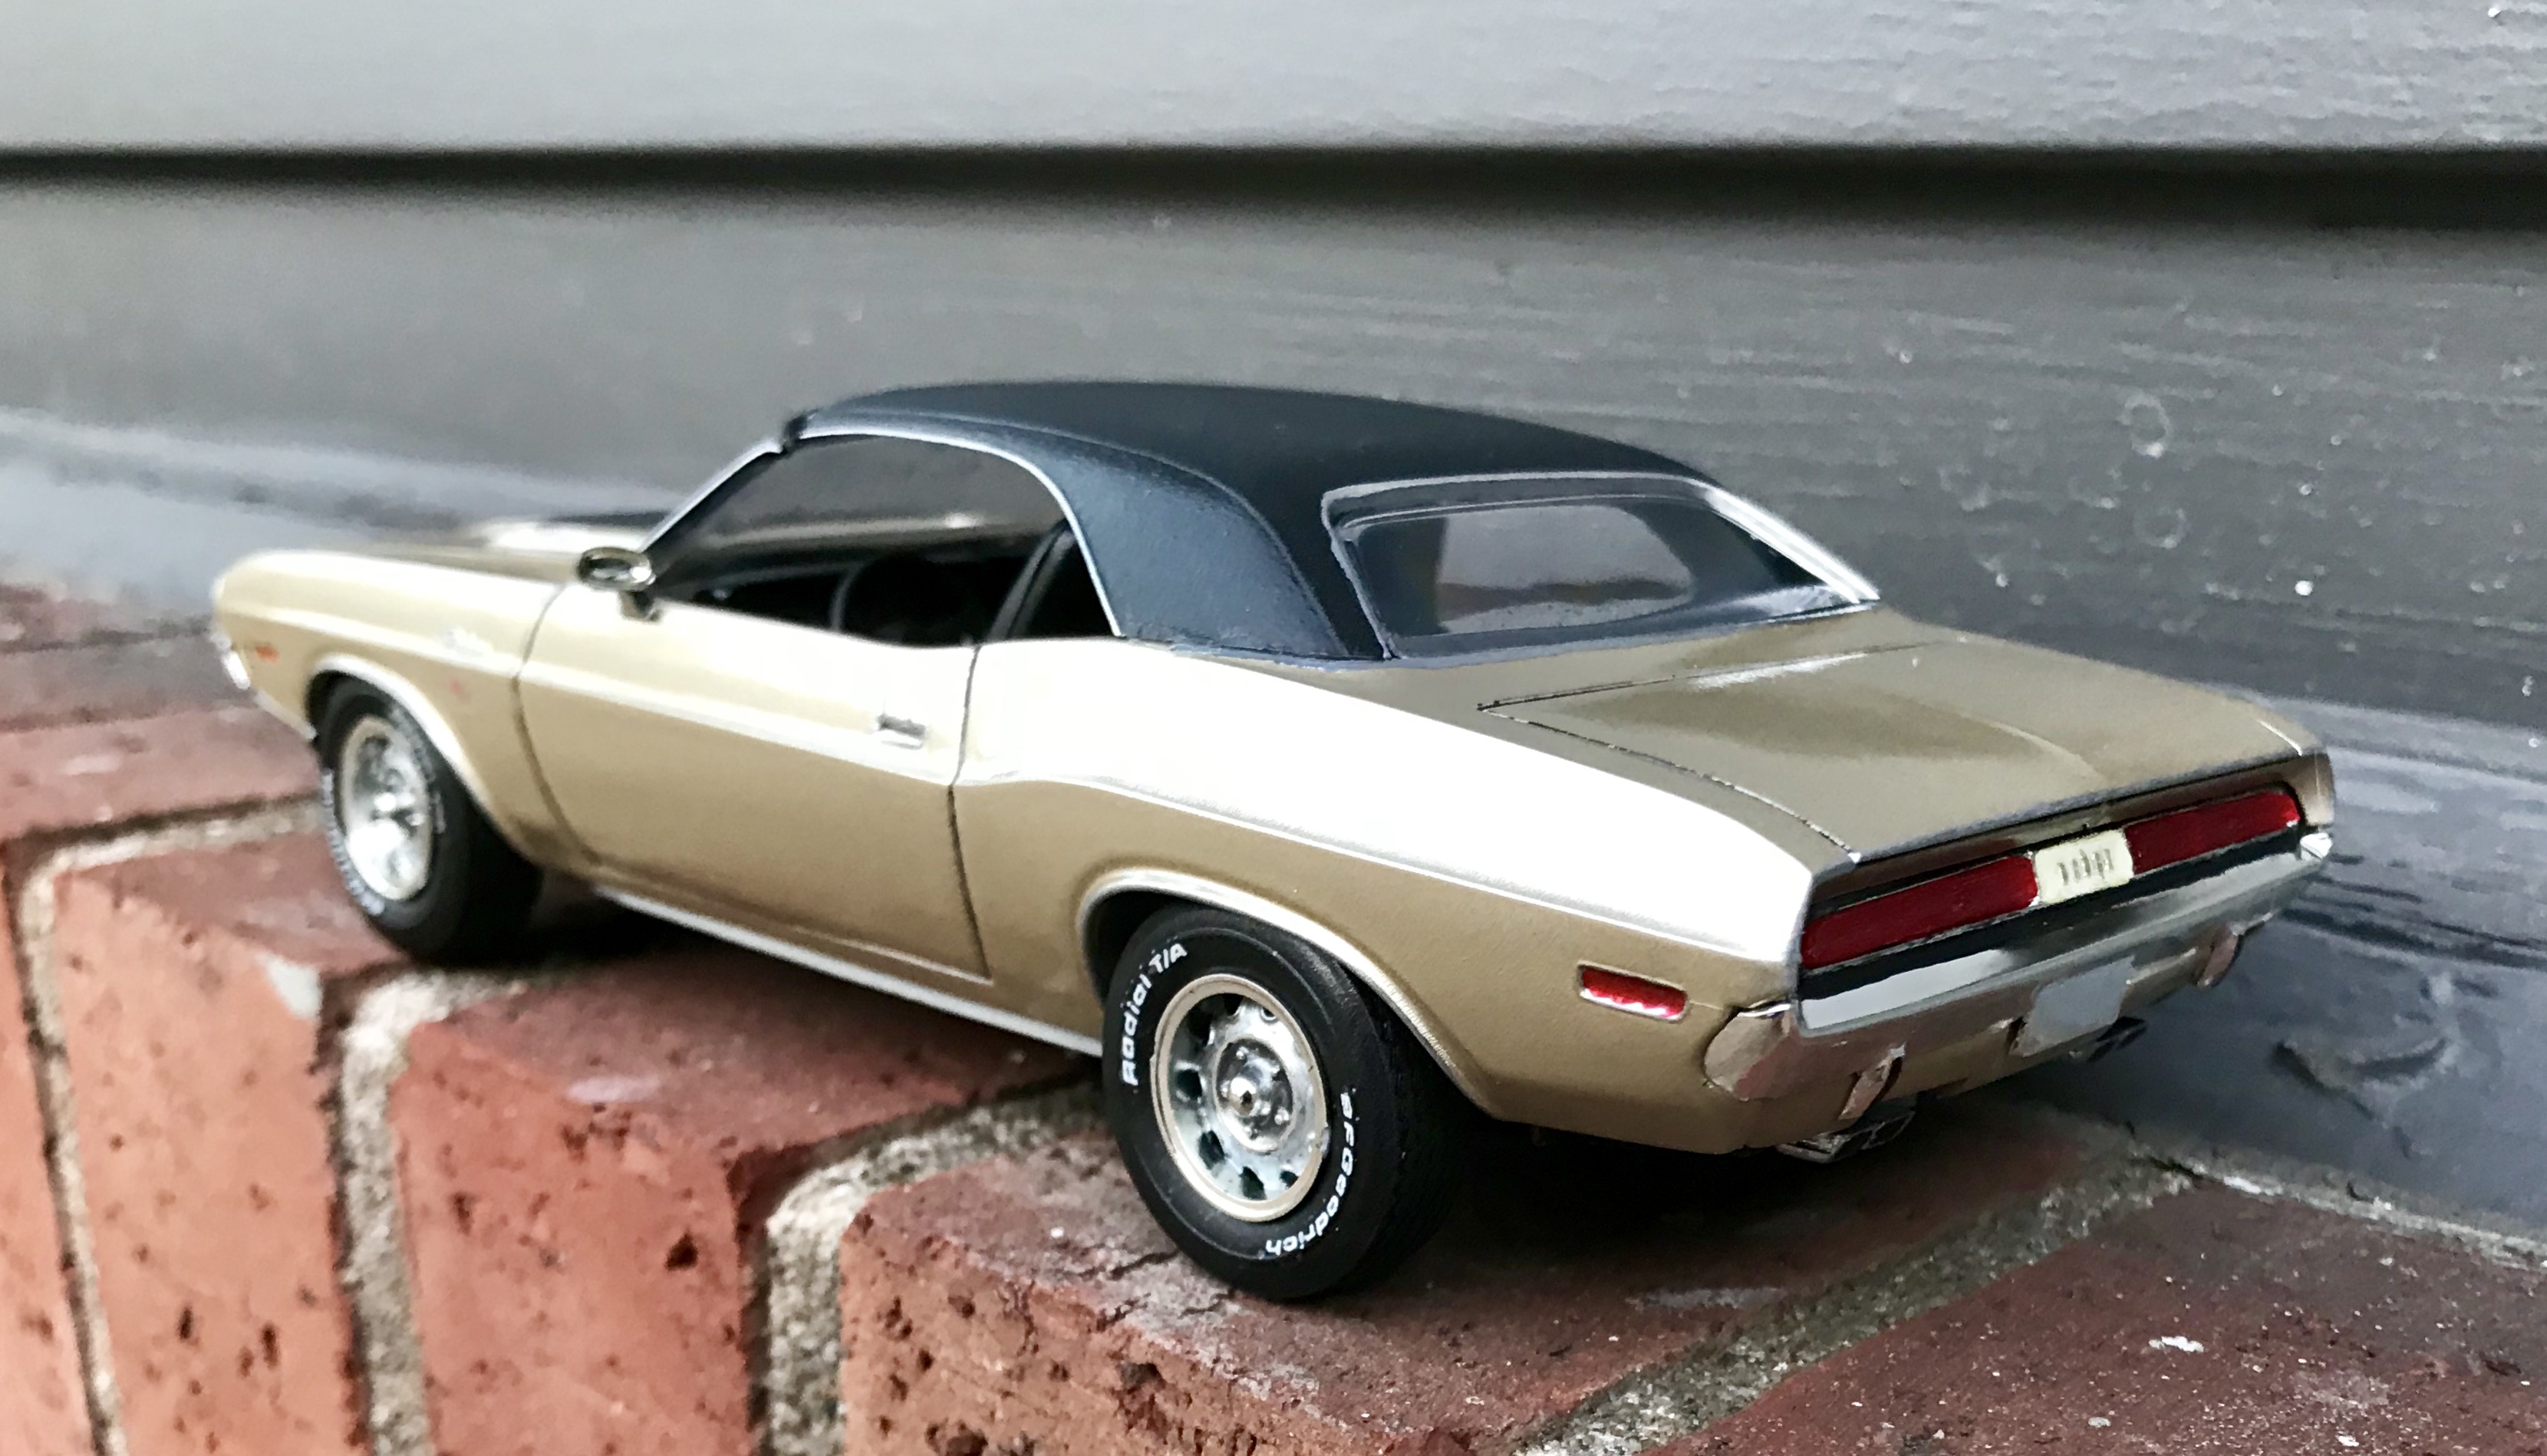
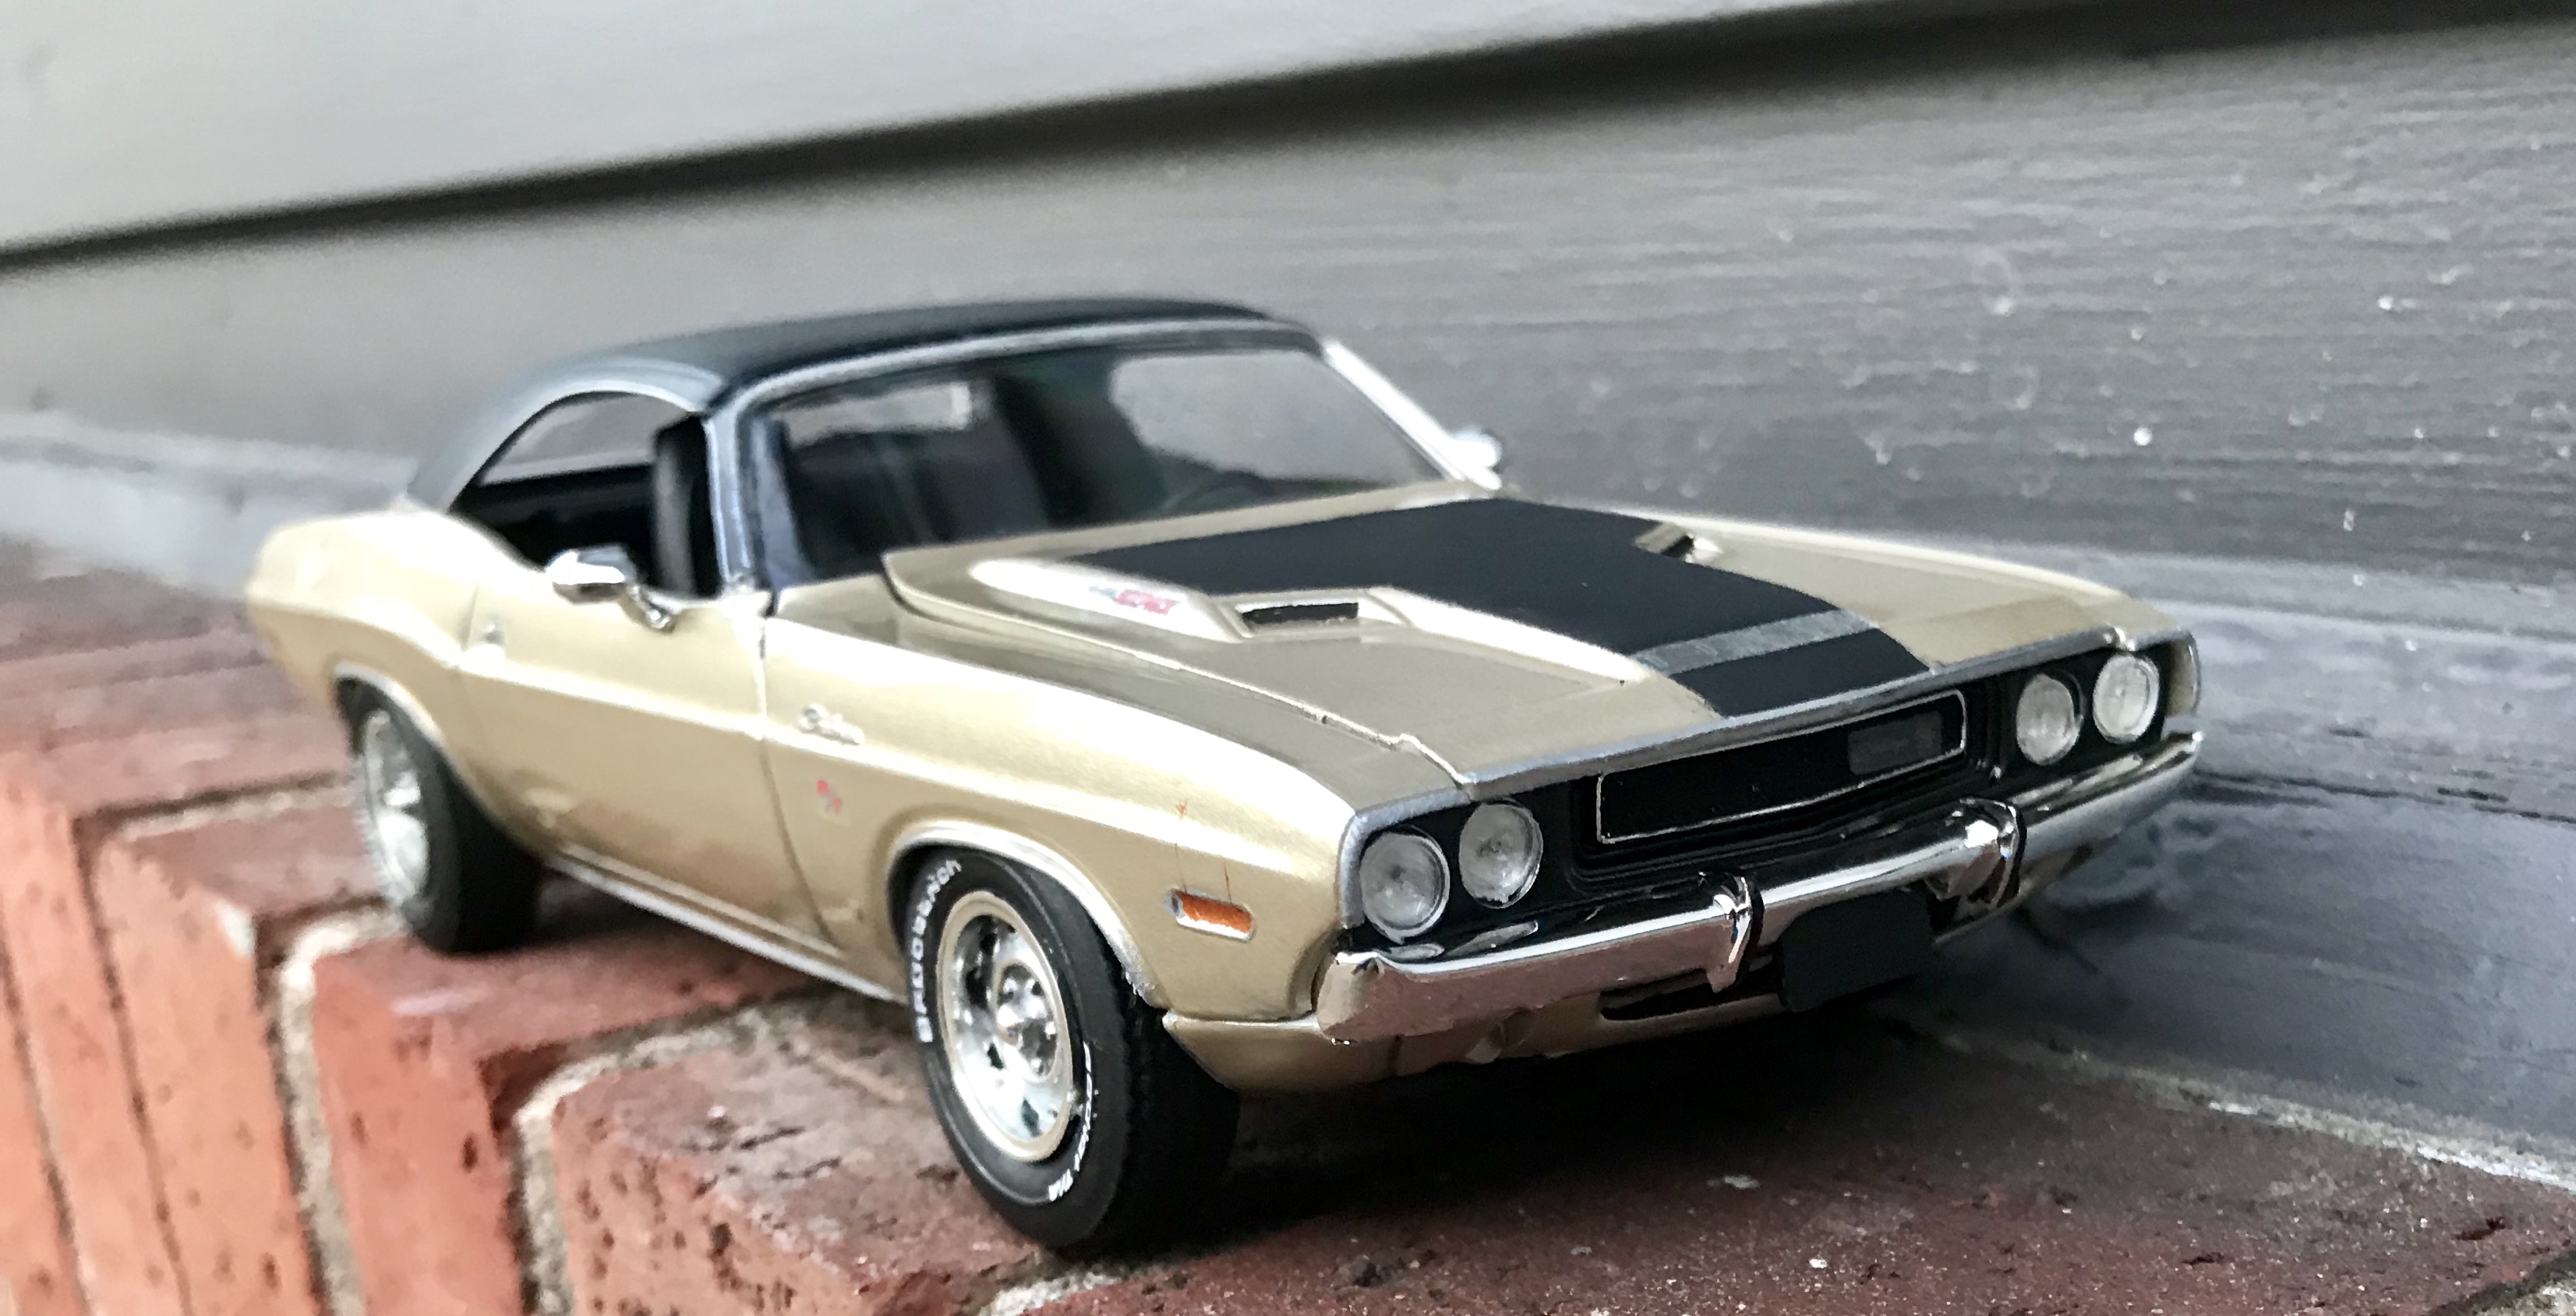
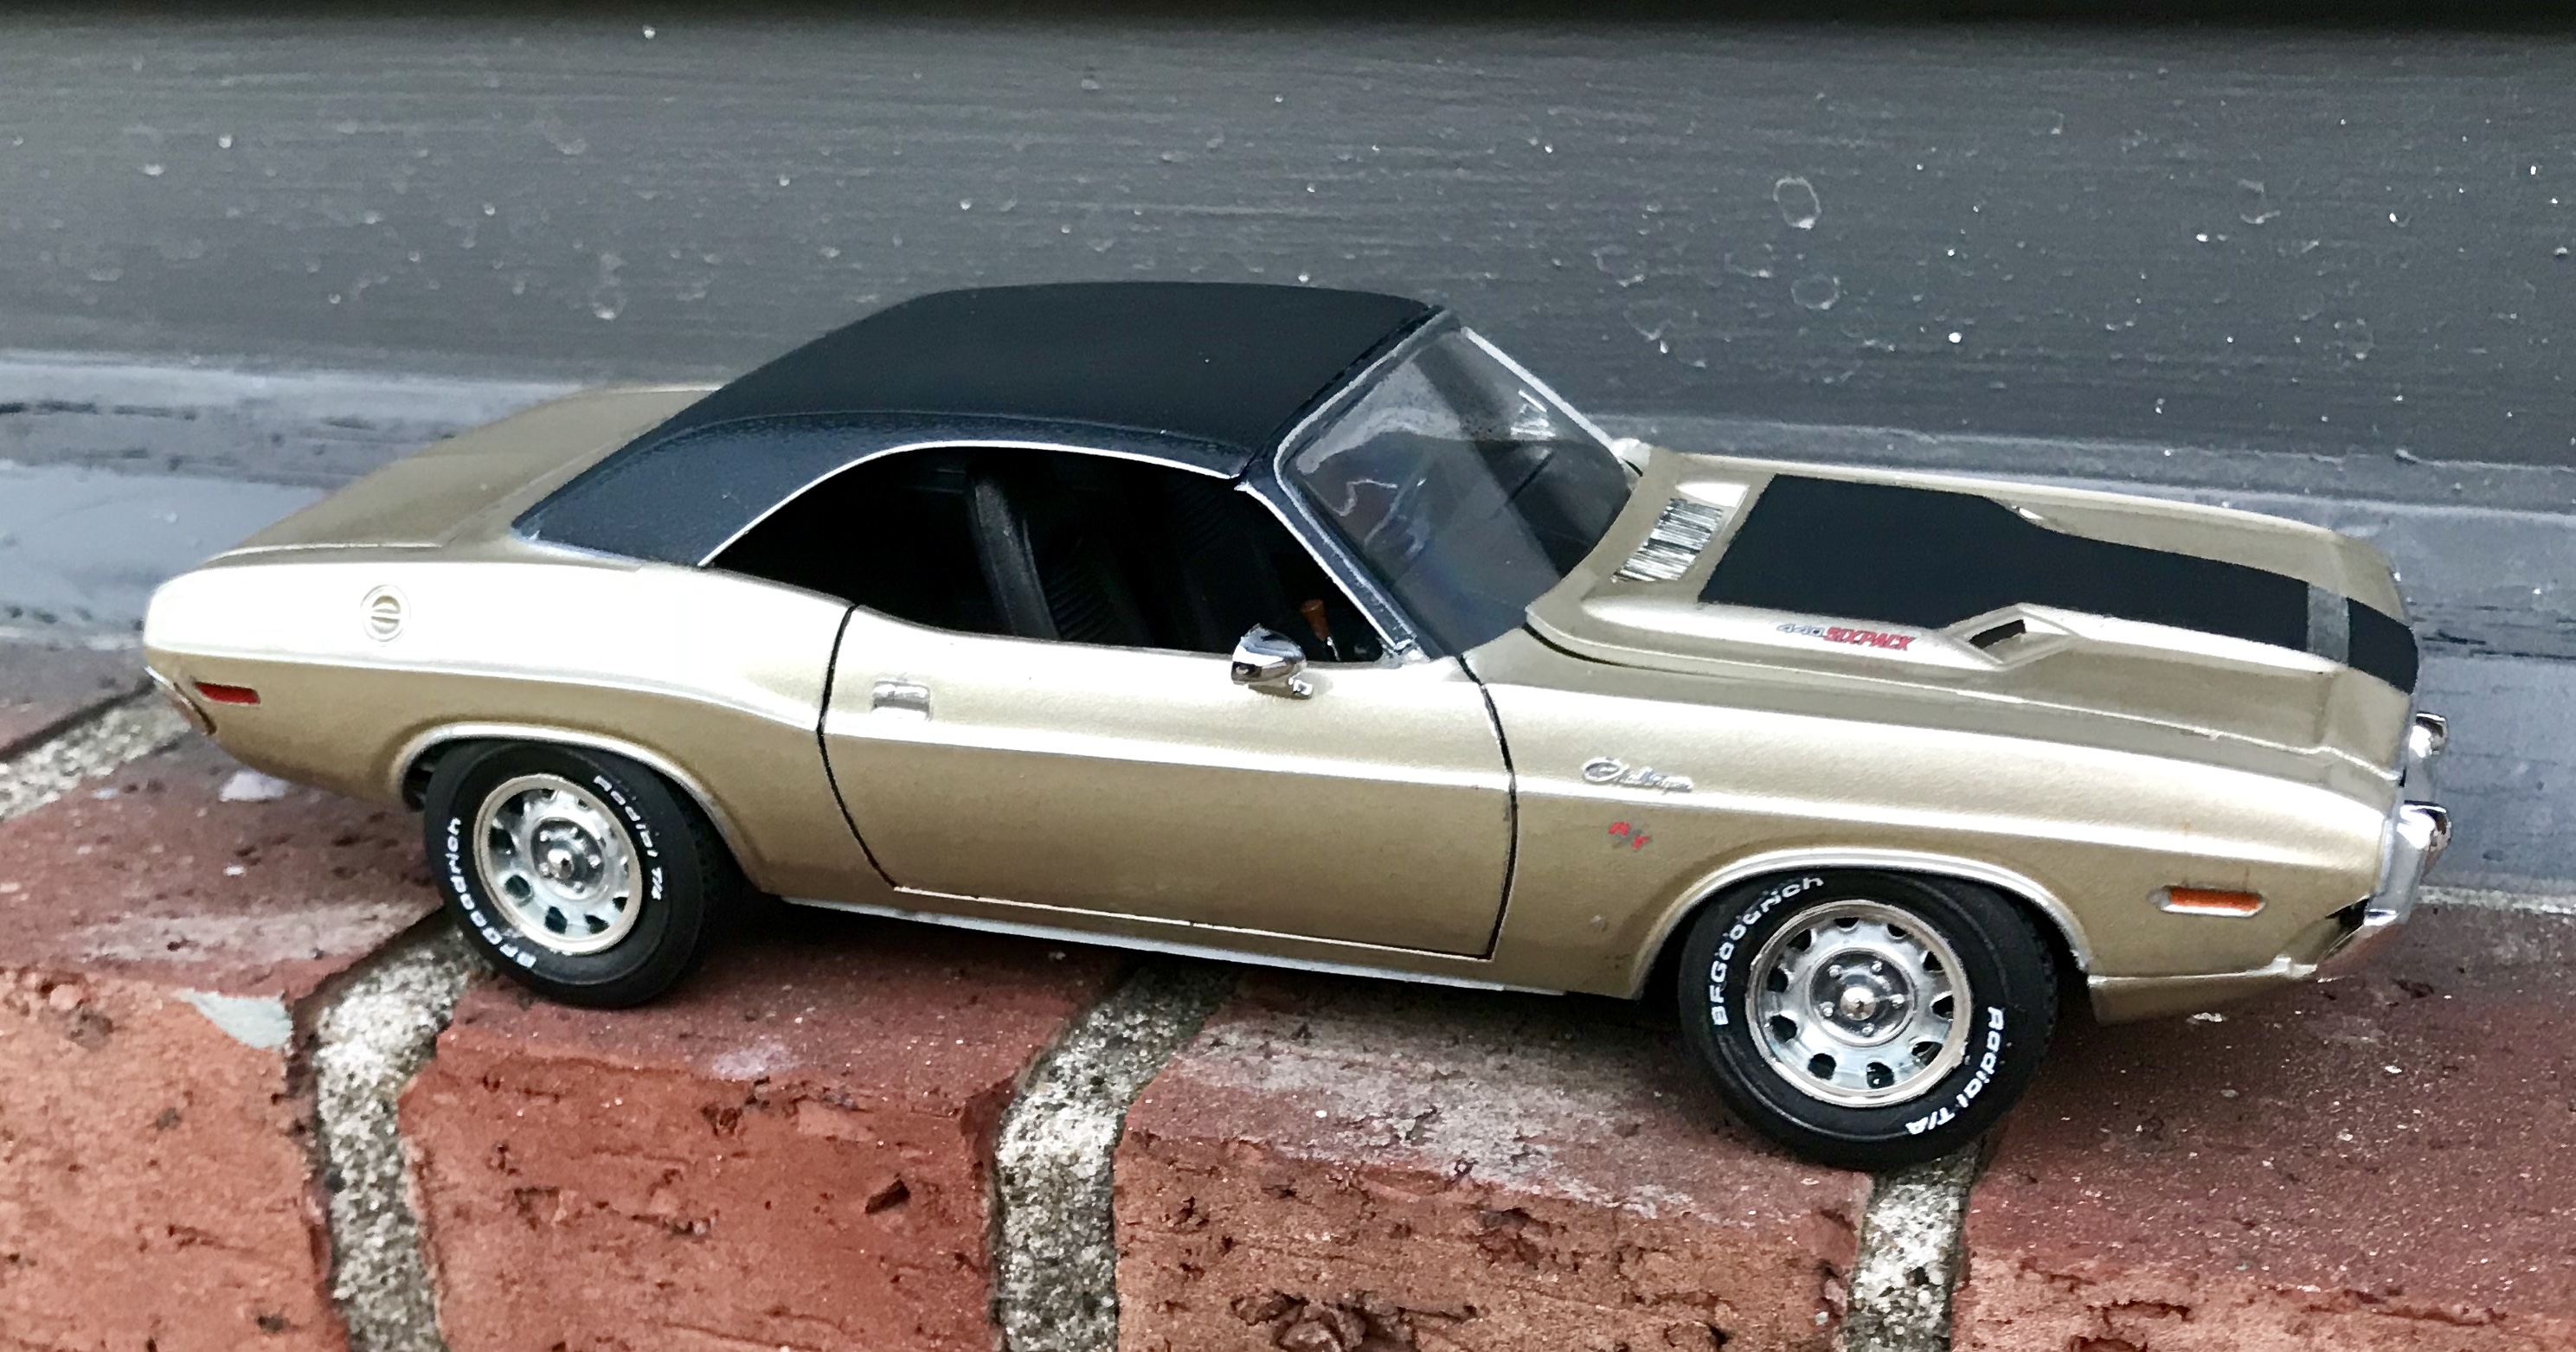
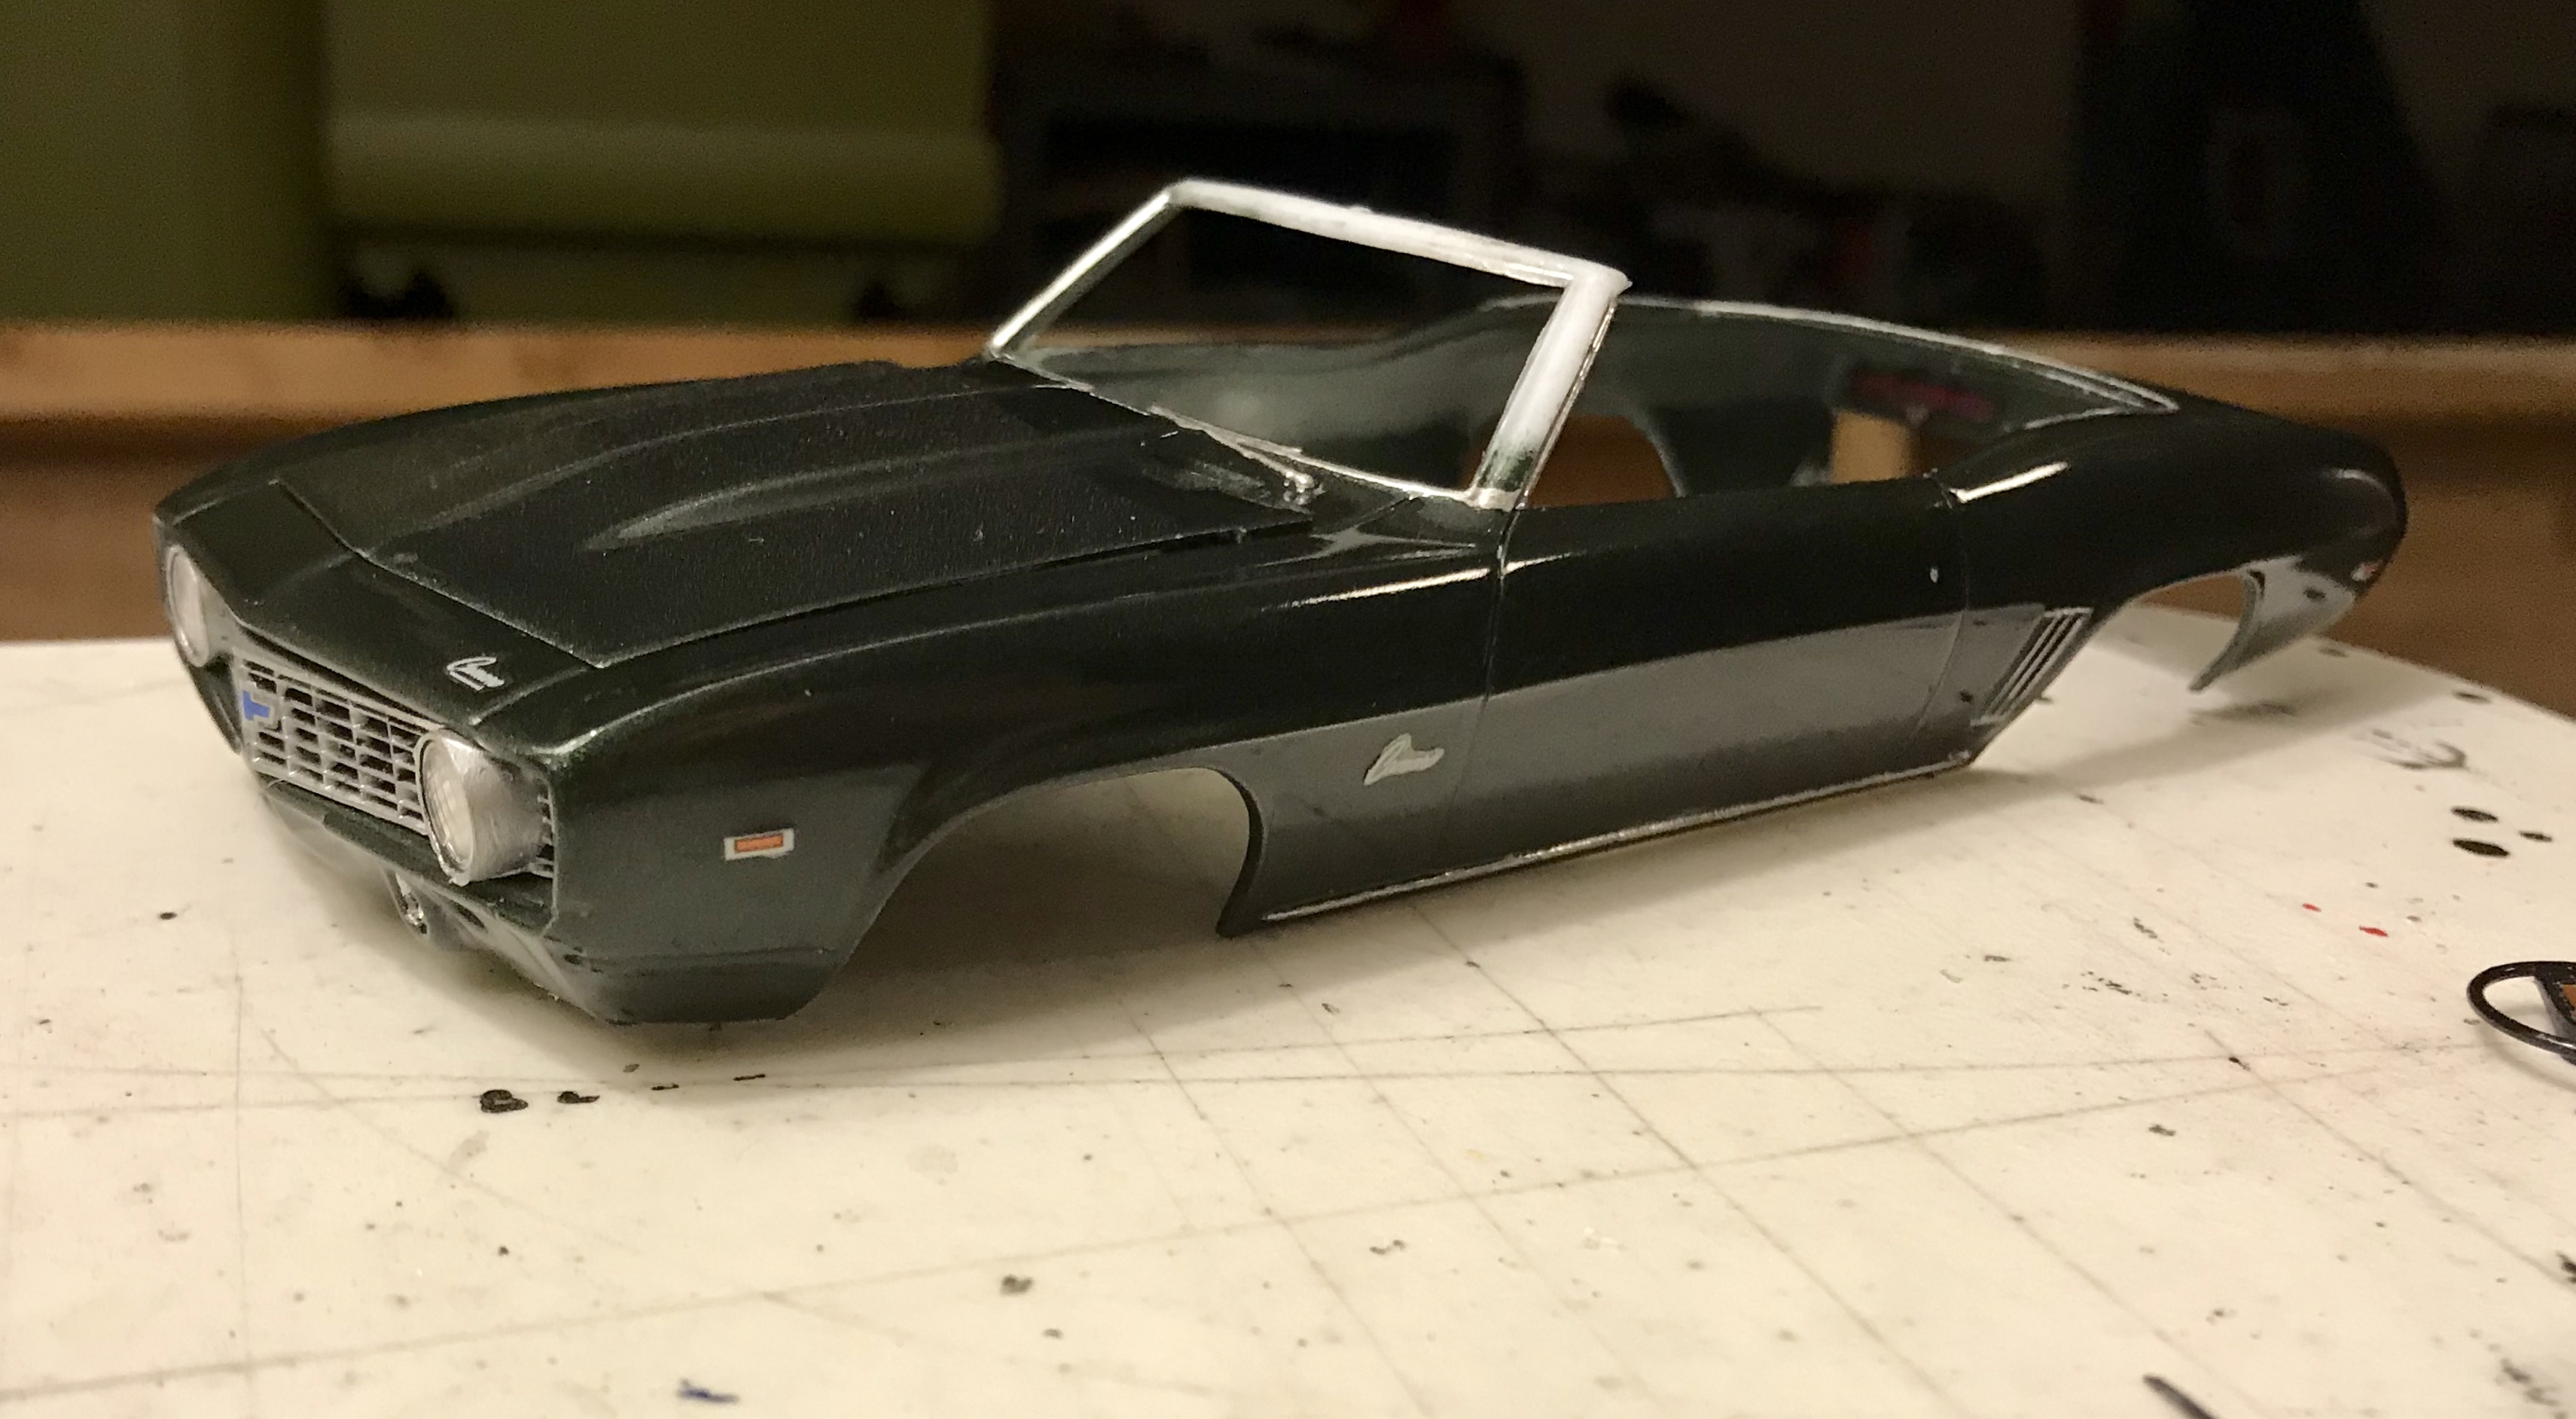
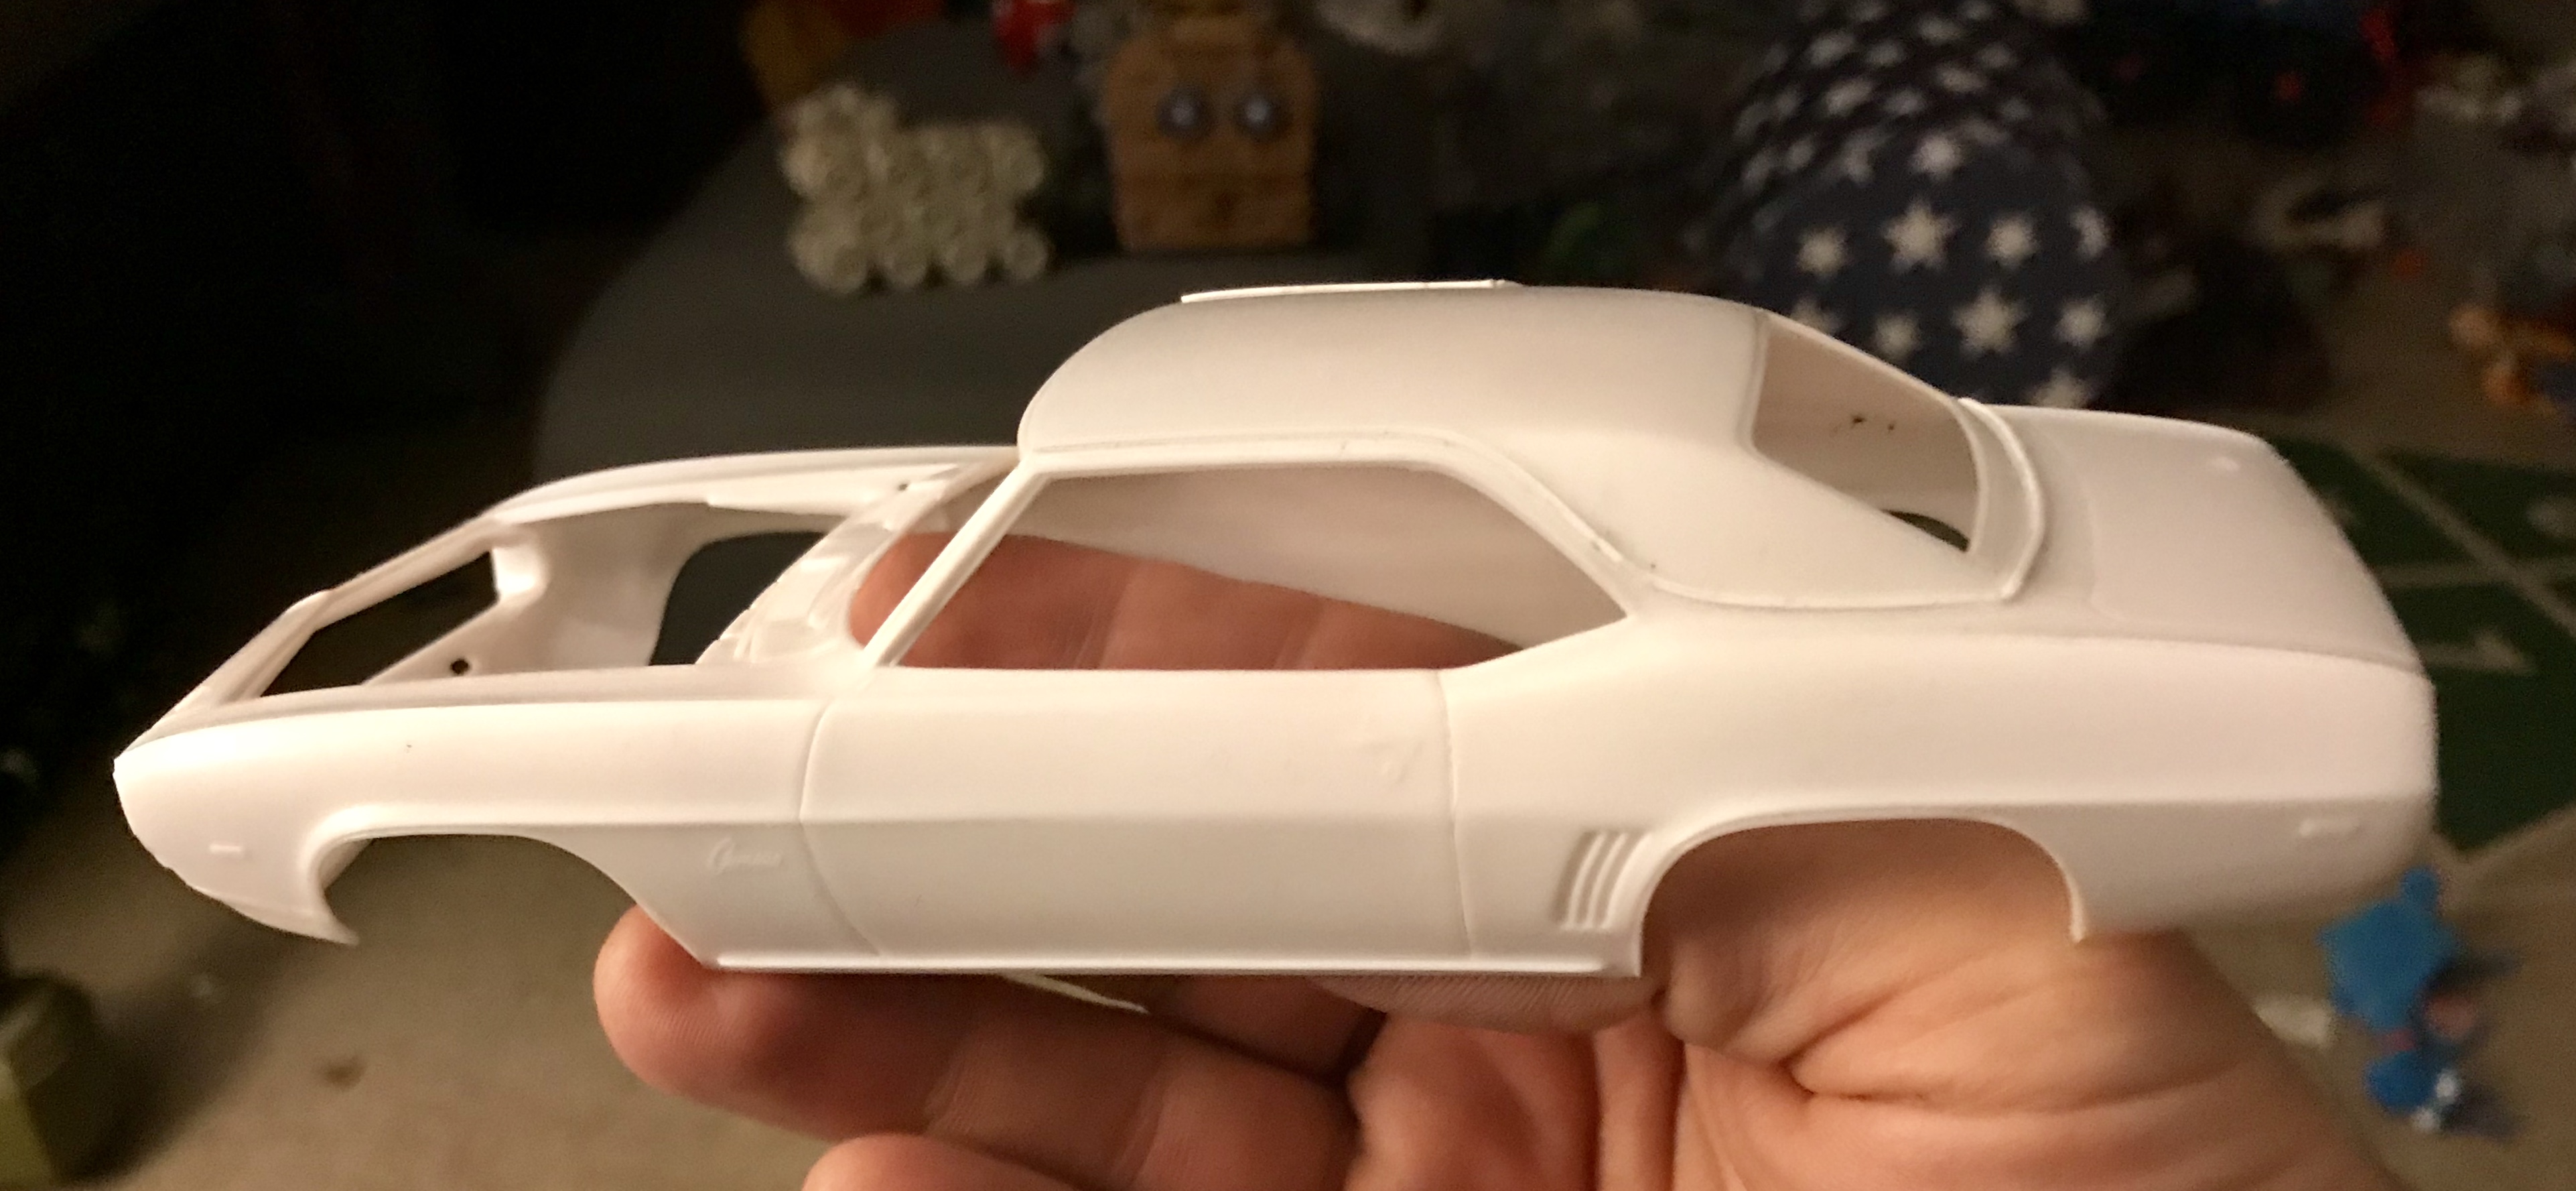
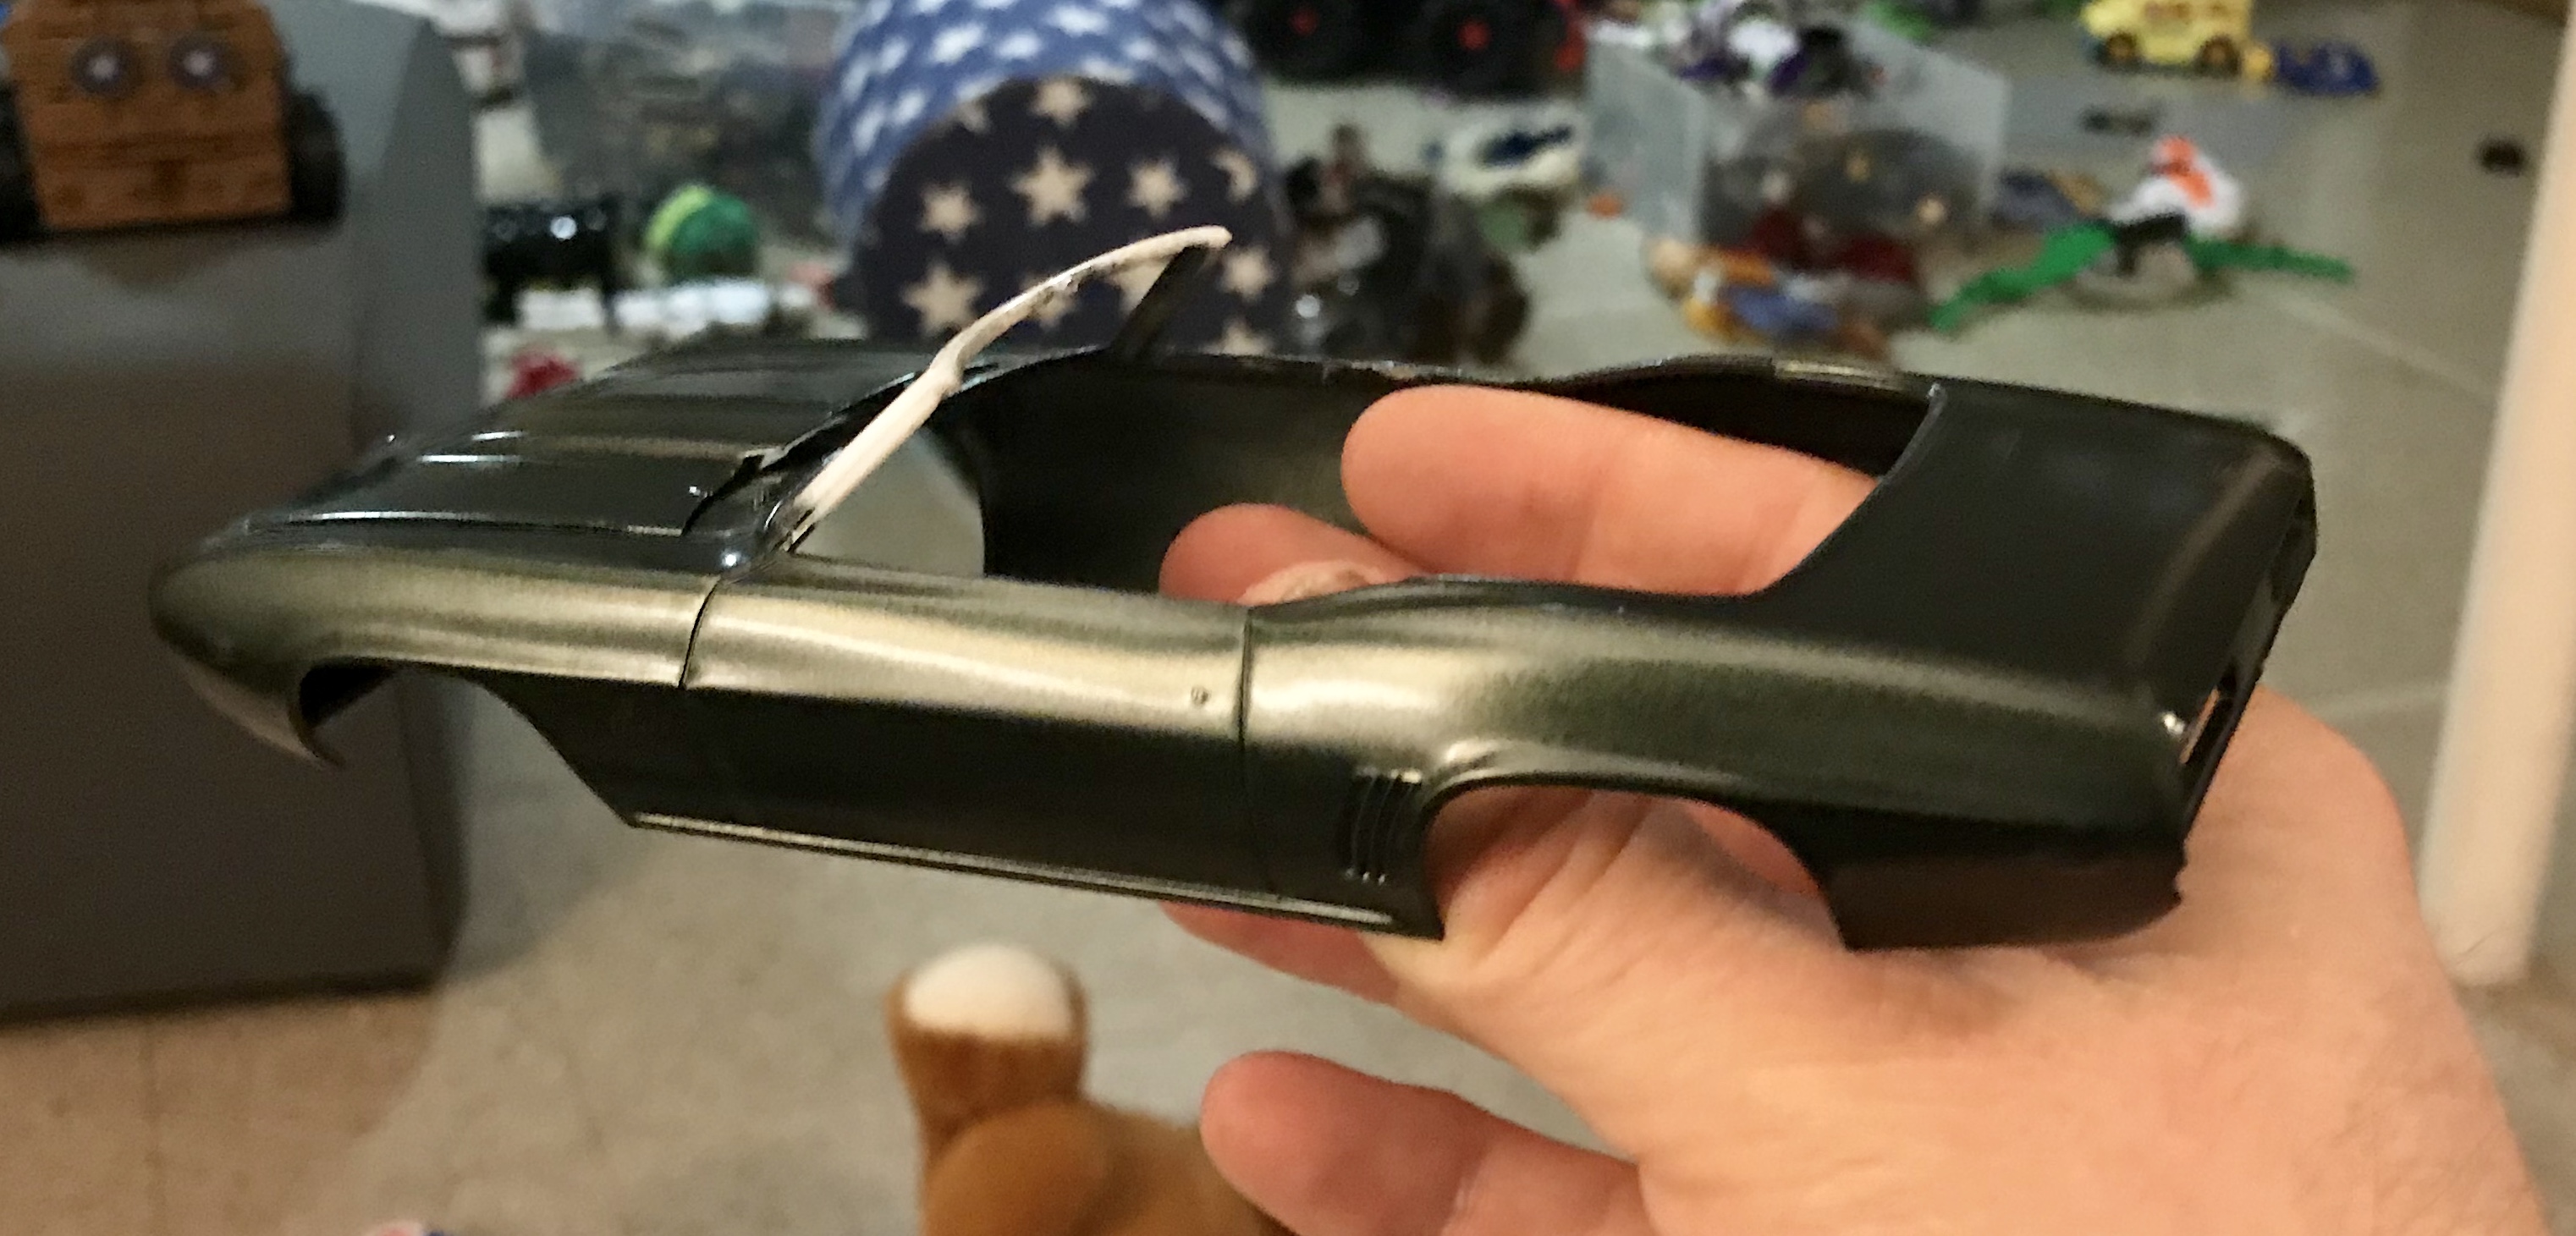
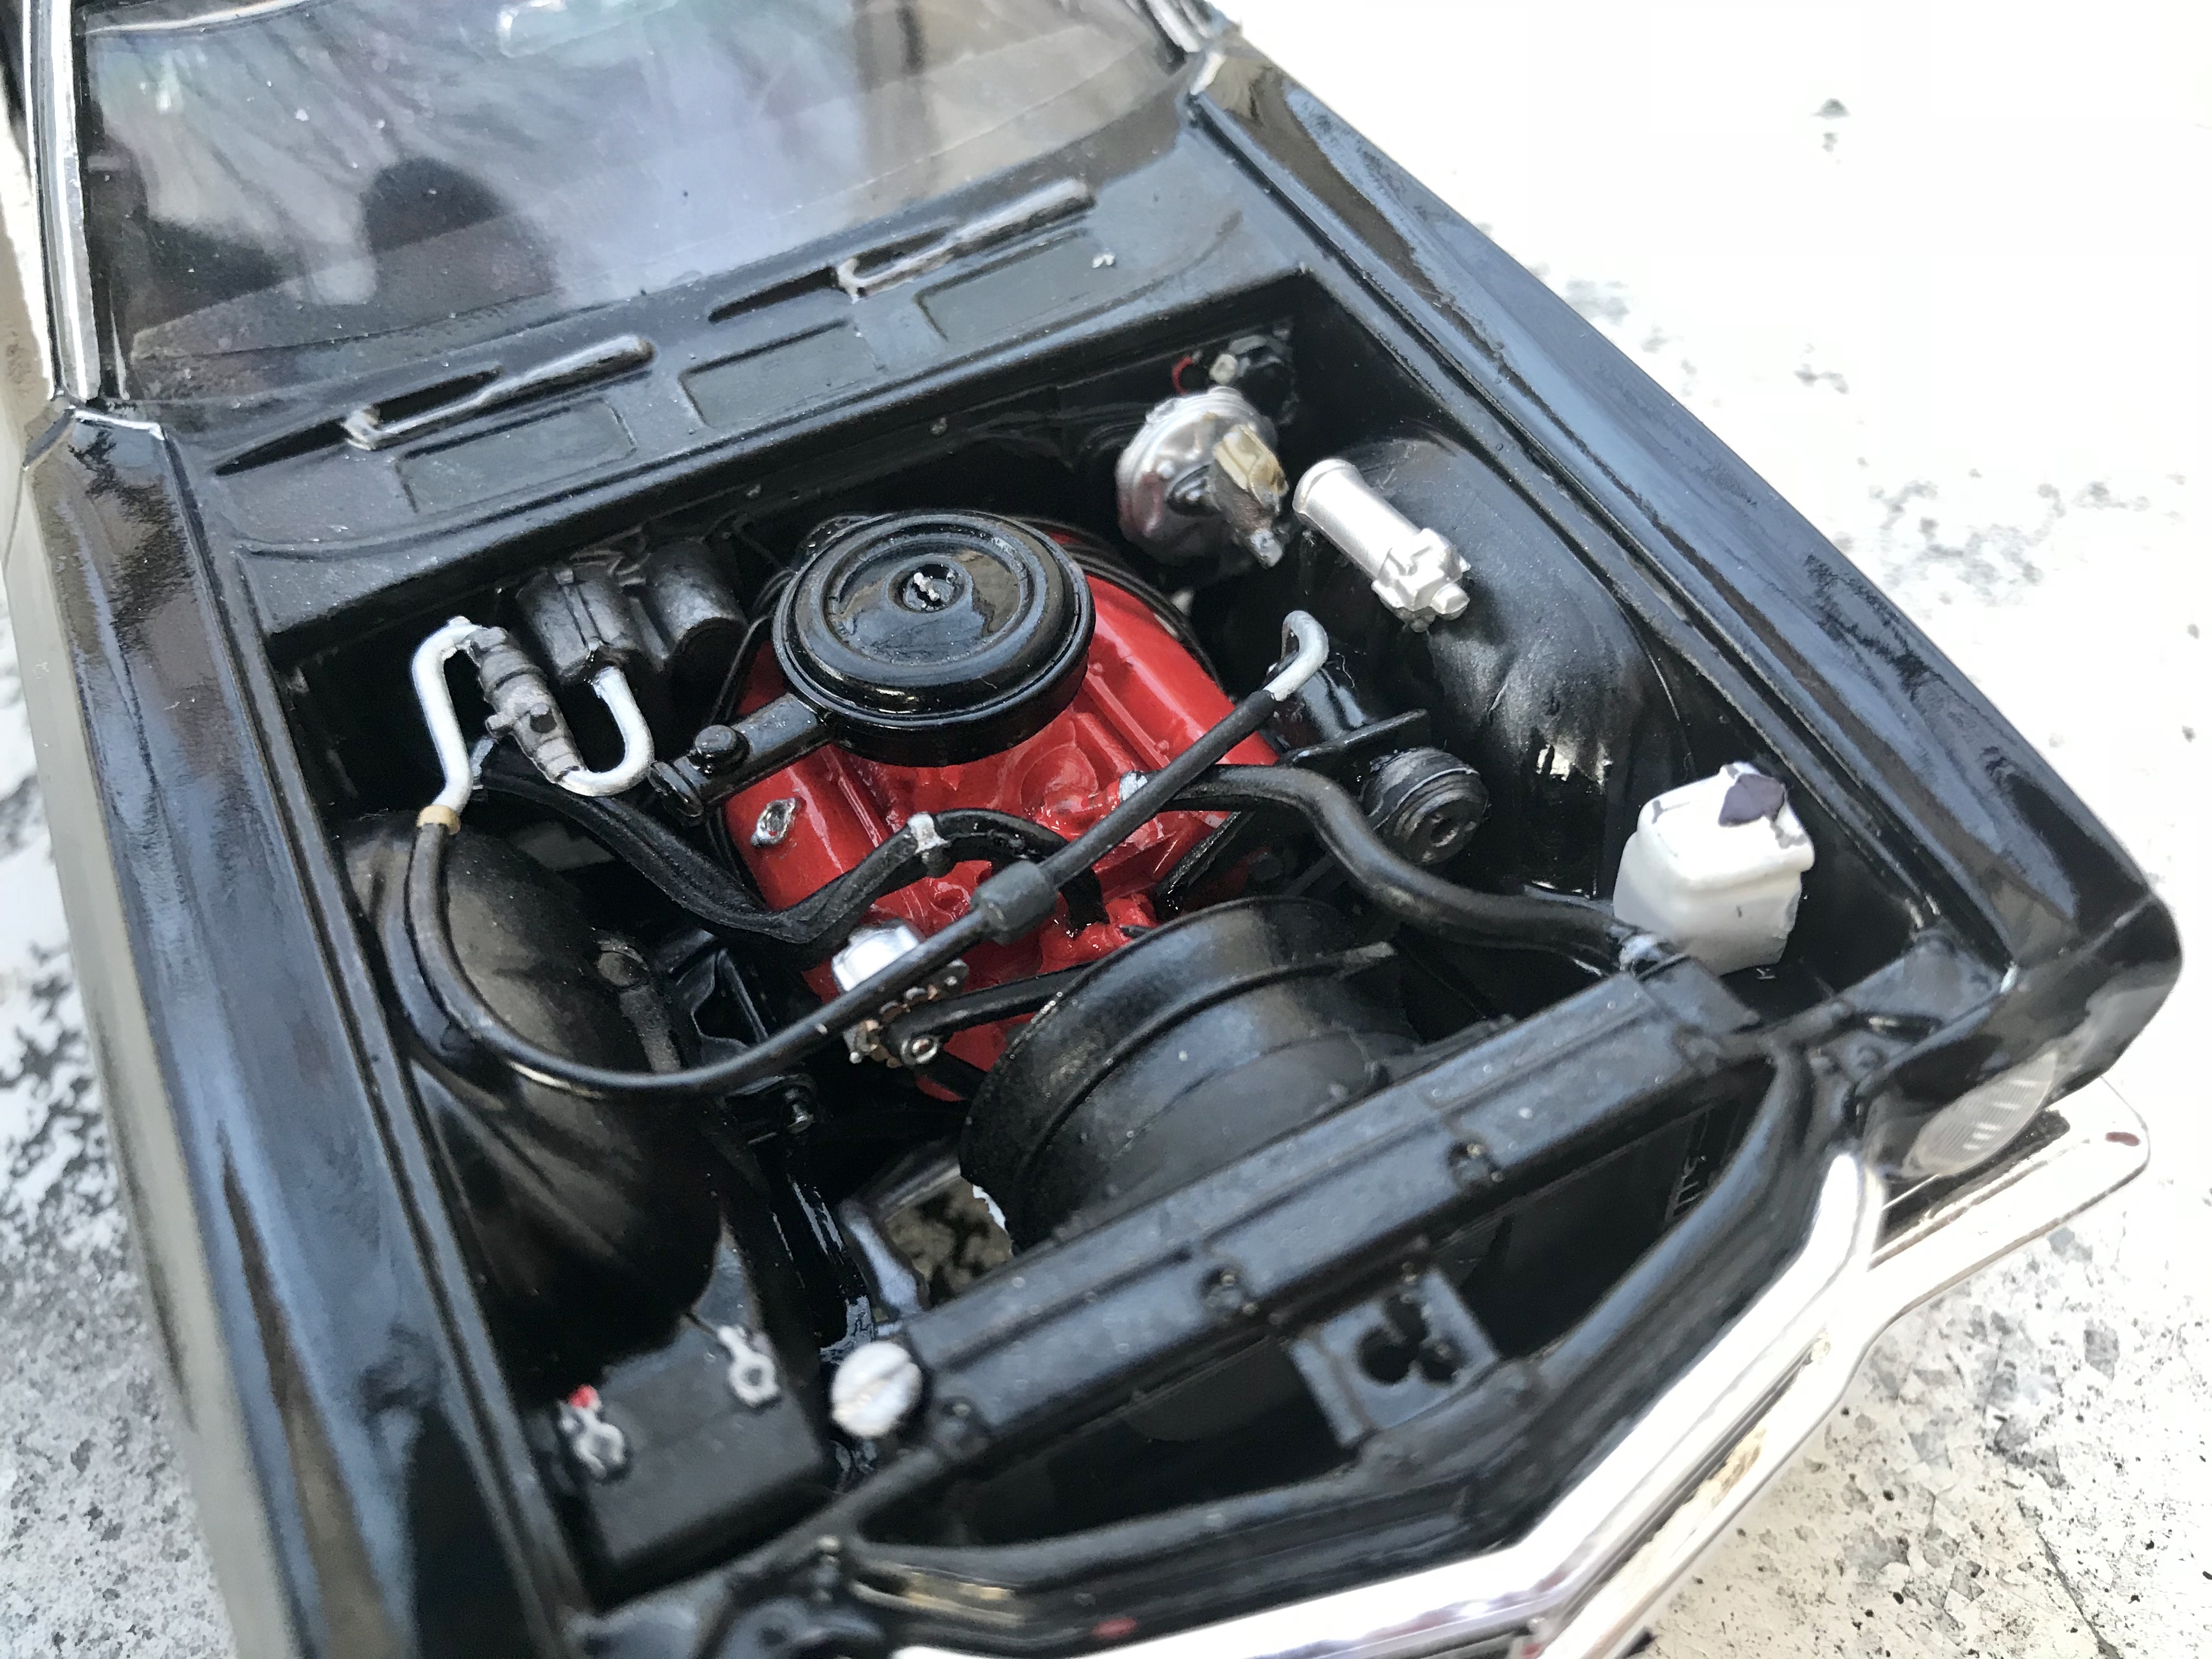
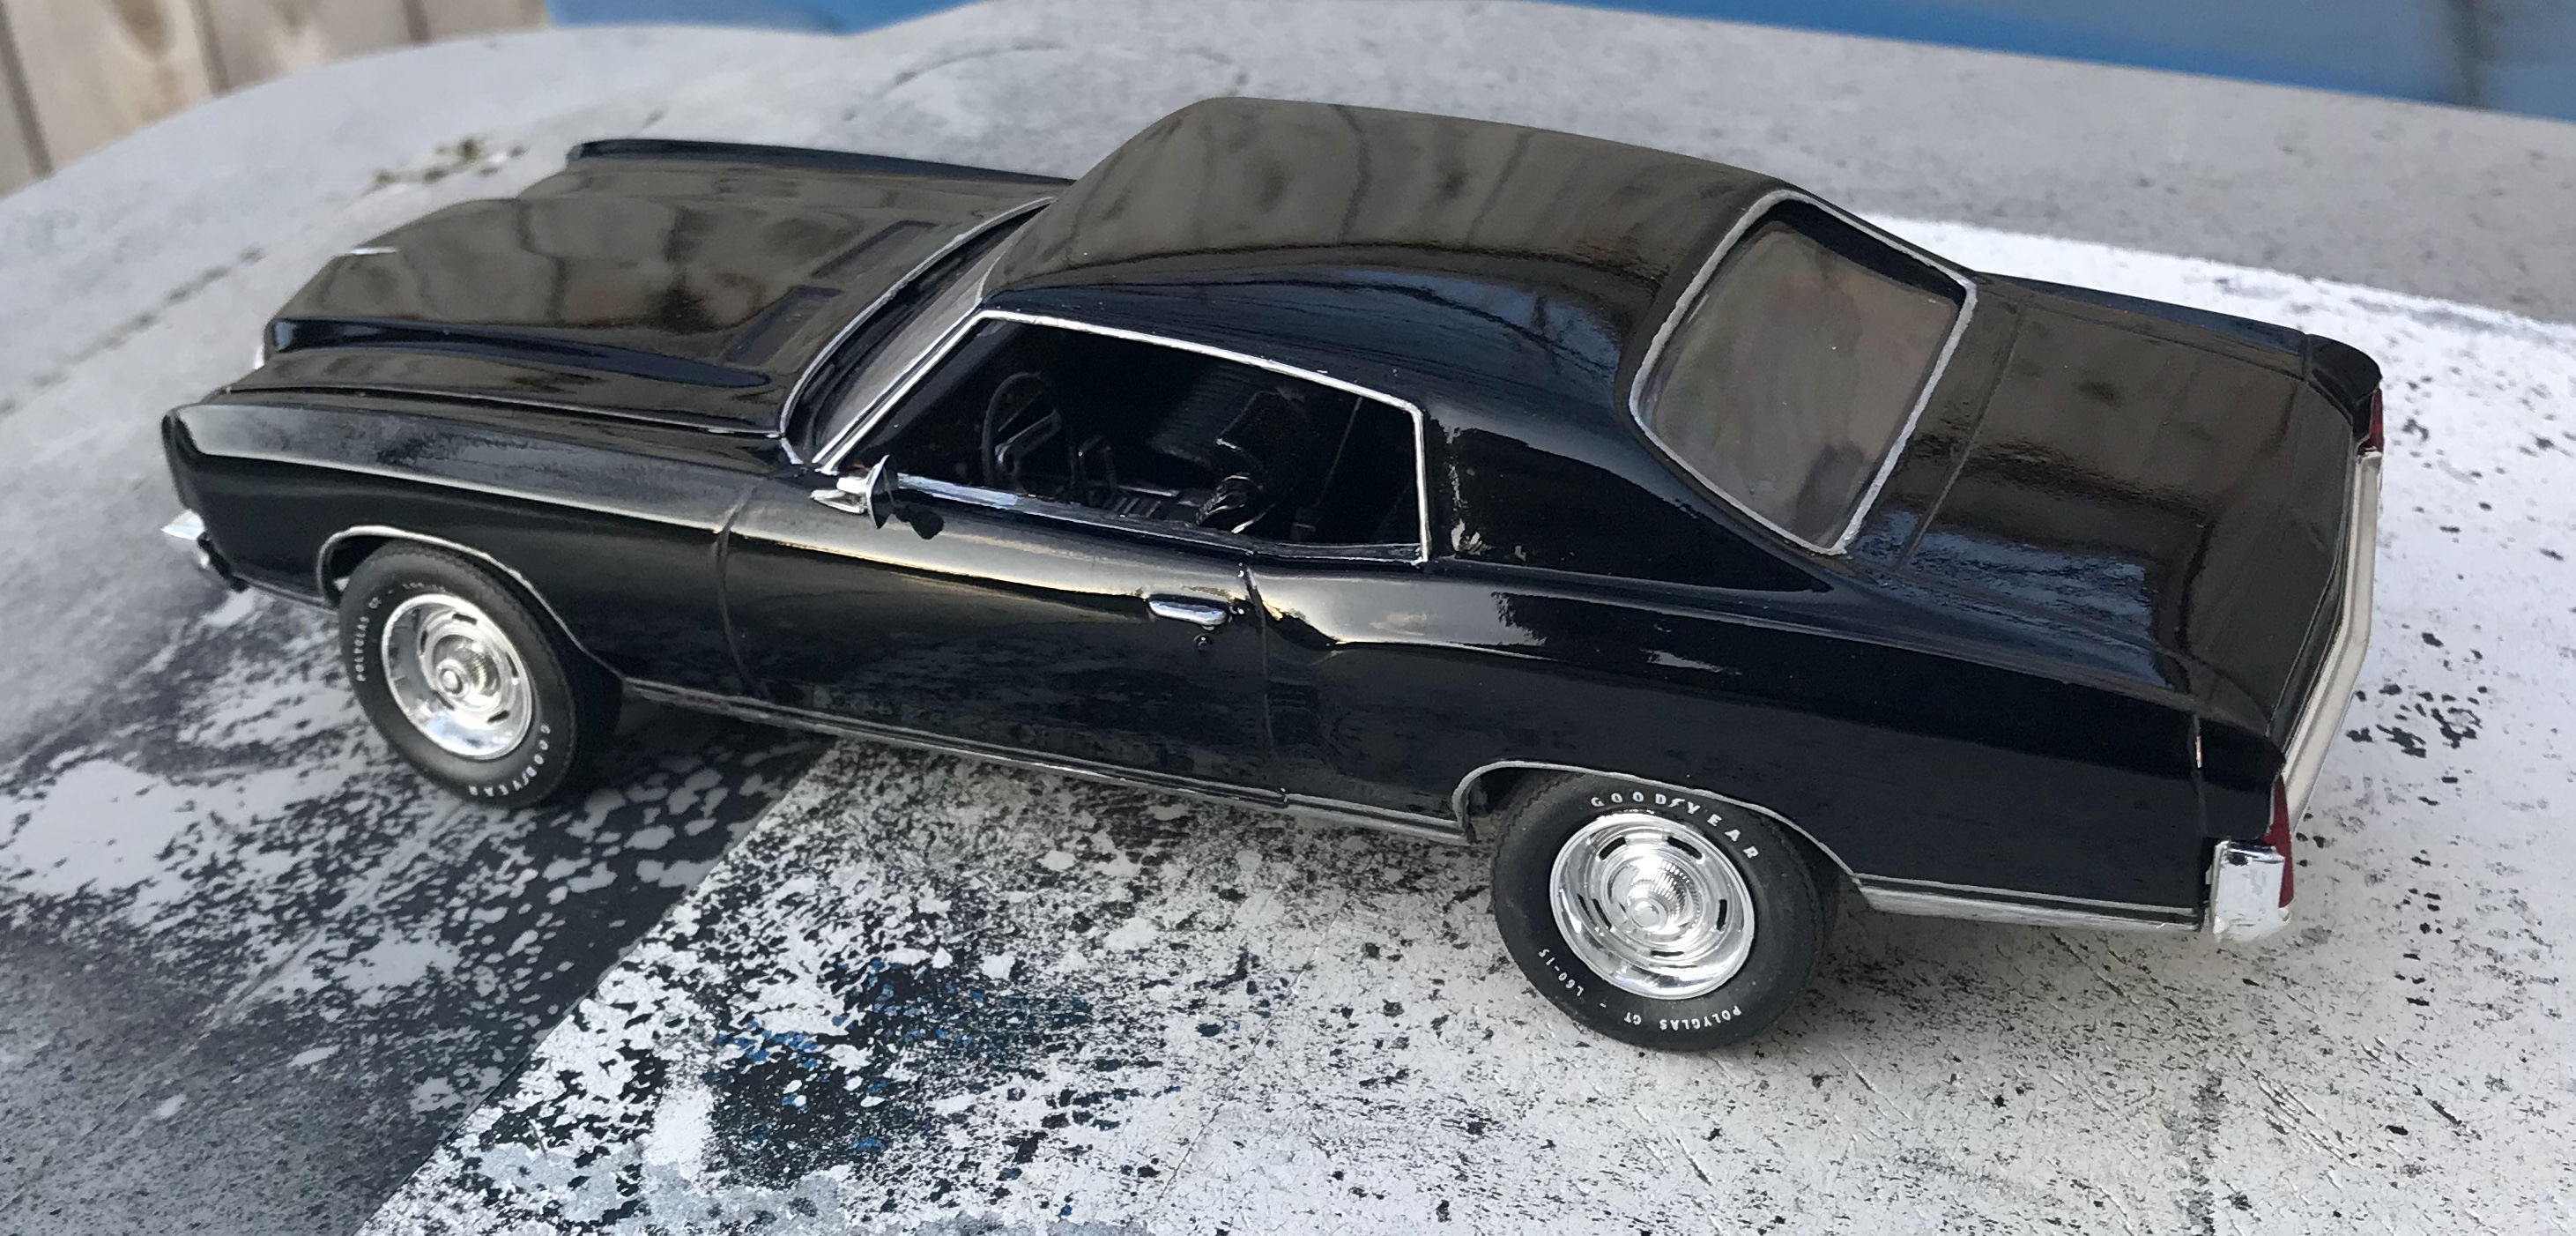
I found a kit I’d been looking for at Fred’s Model World far cheaper than other places. His prices are low enough that it actually made more sense to buy two kits in order to justify the shipping cost. There were several others of interest, but most of them were gone, except one: The Vanishing Point Challenger. I have two Cudas, but I don’t have a good Challenger in the collection, so I figured I’d try it. I was fine with the separate roof, as I wanted to have a vinyl roof on mine. The kit I received was the older, first edition of the Vanishing Point kit. I don’t know if anything was updated in the new(er) release other than the pad-printed tires, but this kit leaves a LOT to be desired. I’ve never built a model before that not only didn’t have decals for the gauges, but doesn’t even have any molding/etching in them... they are just circles. The dash layout isn’t correct, the shifter is wrong... the interior is terrible overall. The engine isn’t much better... the carbs are just pegs to attach the air cleaner with, no starter, etc. The one thing this kit has going for it is a nicely shaped body... far better than the old slab-sided Revell kit. (Please take the 70 Cuda kit and make a Challenger body!!) Anyway, I added some wires and hoses to give it a little life, and some Fireball tire decals. The kit was sealed, but as it is an old version, I did have considerable warping in the windshield frame.. I got it to an acceptable state, but my roof doesn’t quite match up as a result. I painted the flat black on the hood... the color is Duplicolor Champagne Pearl. Not much to this one, but a decent shelf model. C’mon, Revell.....

-
Outstanding work!!!! I hope you still have the real thing, because that makes me want to get in and drive... it has to do the same for you. Beautiful job.
-
WOW, that’s just gorgeous!!!! I just finished this kit myself... I “COPO’d” mine. I wish it had come out this nice. Just tremendous work!
-
It’s Testors Medium Green... I used it in an interior for my 70 Torino... I wish it was a little bit darker, but I had 90% of the can and nothing else to use it for, so it will do.
-
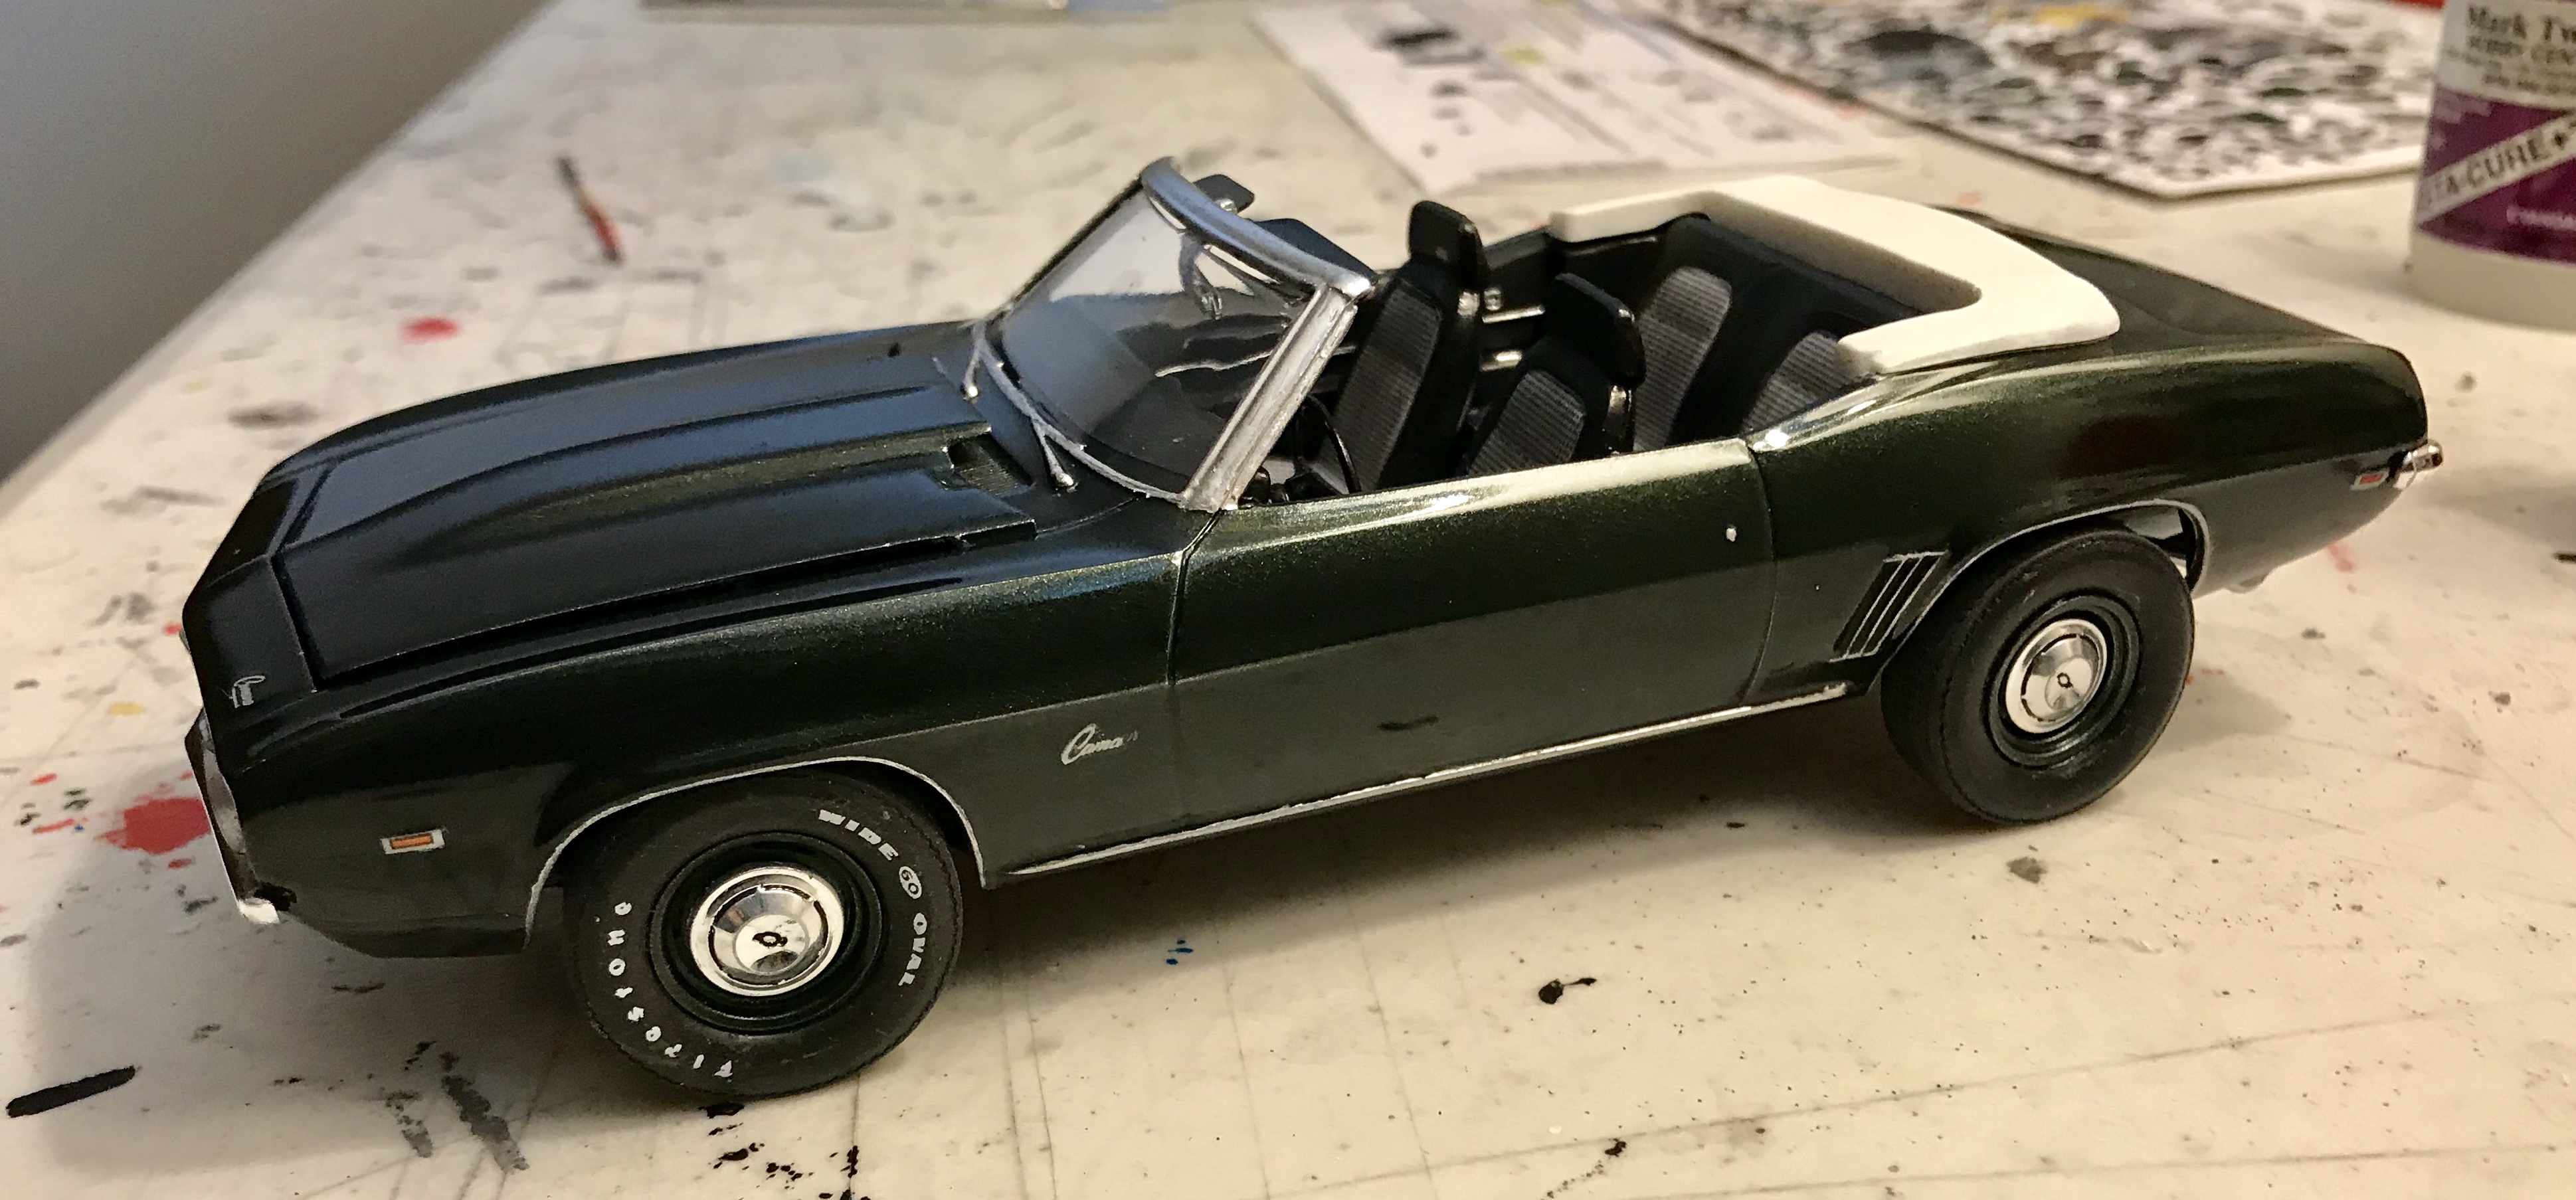
I’ve gotten the convertible basically done. These limited decals have given me fits... each of the Camaro emblems on the side of the body have fallen off.. the right one twice. Luckily I have found them and been able to get them reapplied. The right front blinker decal has also fallen off twice, as well as the Chevy symbol on the grill, and both of them have been lost. I laid a spot of chrome where the blinker was, and will touch it with amber shortly. The rear wheels sat far too low, so I drilled another hole in the wheel backs to push the stance up. I’m still awaiting my tire decals (I had one leftover that I used) and need to put the door handles and rear view mirror on, but then this one will be done. I ordered the Frost Green, so I’ll be digging into that next. More to come.
-
WOW, Bogger... that wait all these years in your stash was totally worth it. That thing is STUNNING!!!!!!
-
I’ve got a simple one for them, because they have already been produced... These BFG Radial TAs were pretty awesome muscle car tires. I think it was MPC who made them originally, so they have them... just paid print them and release as a separate parts pack.
-
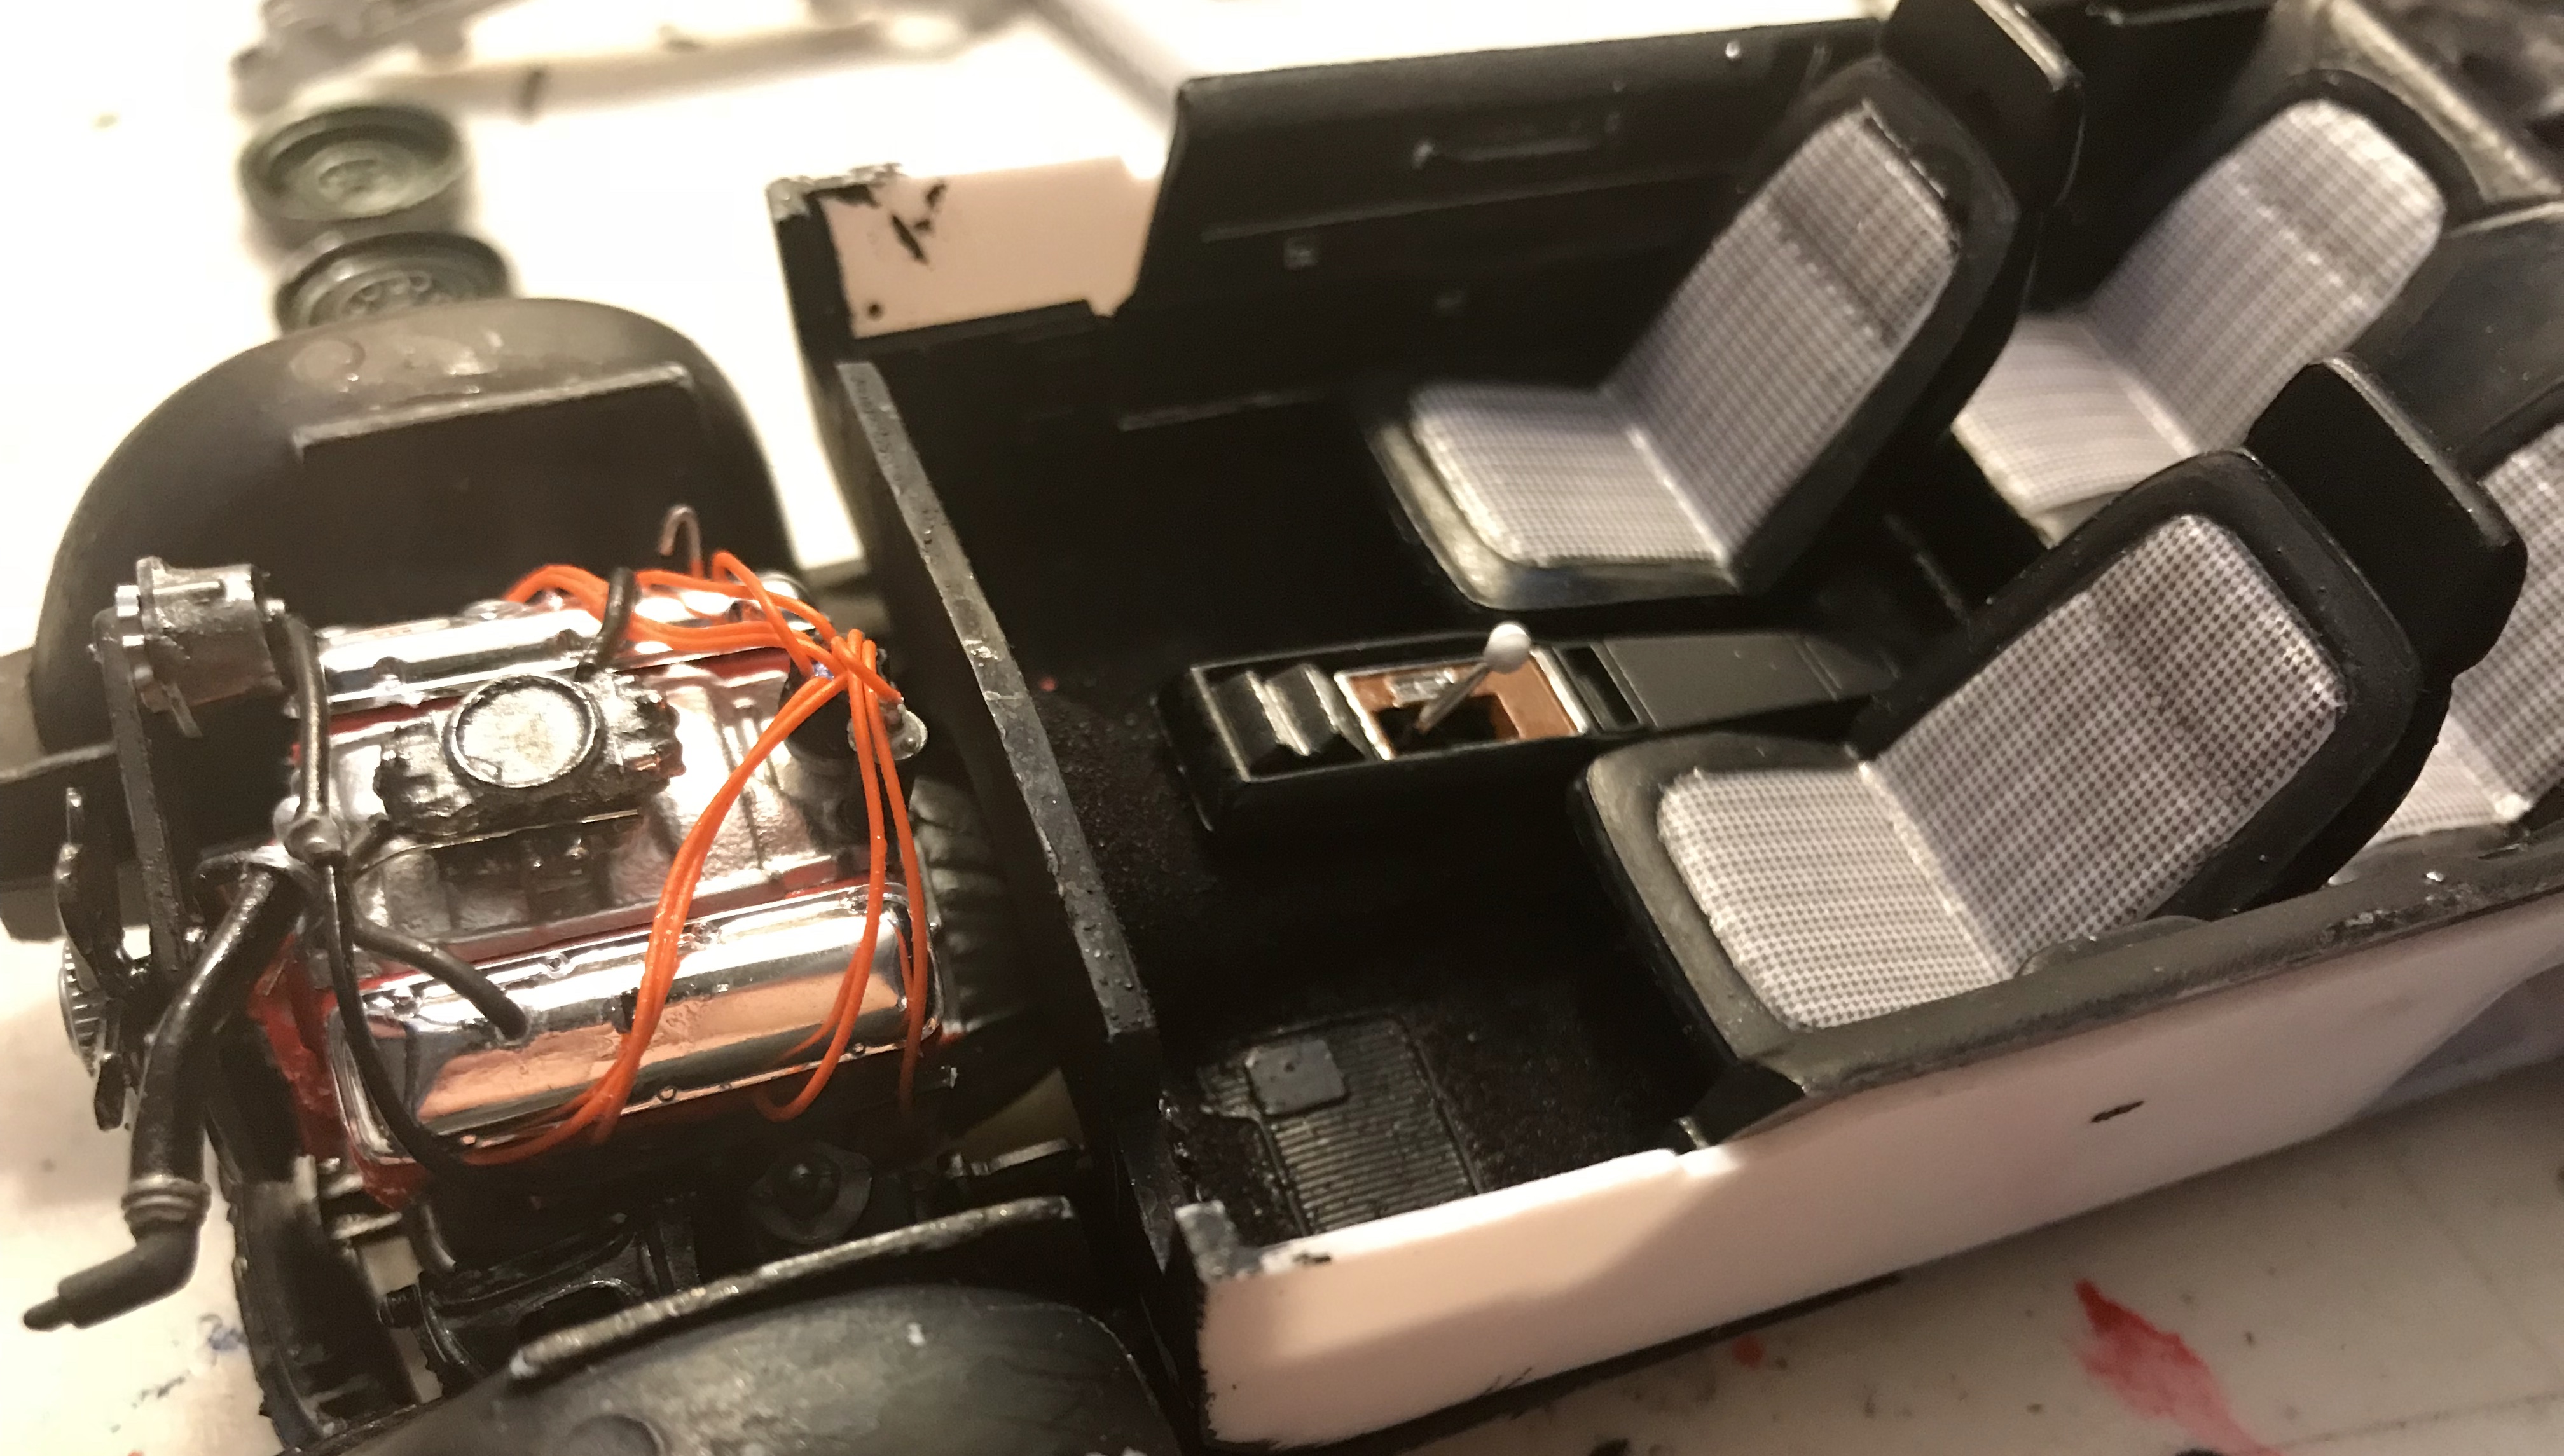
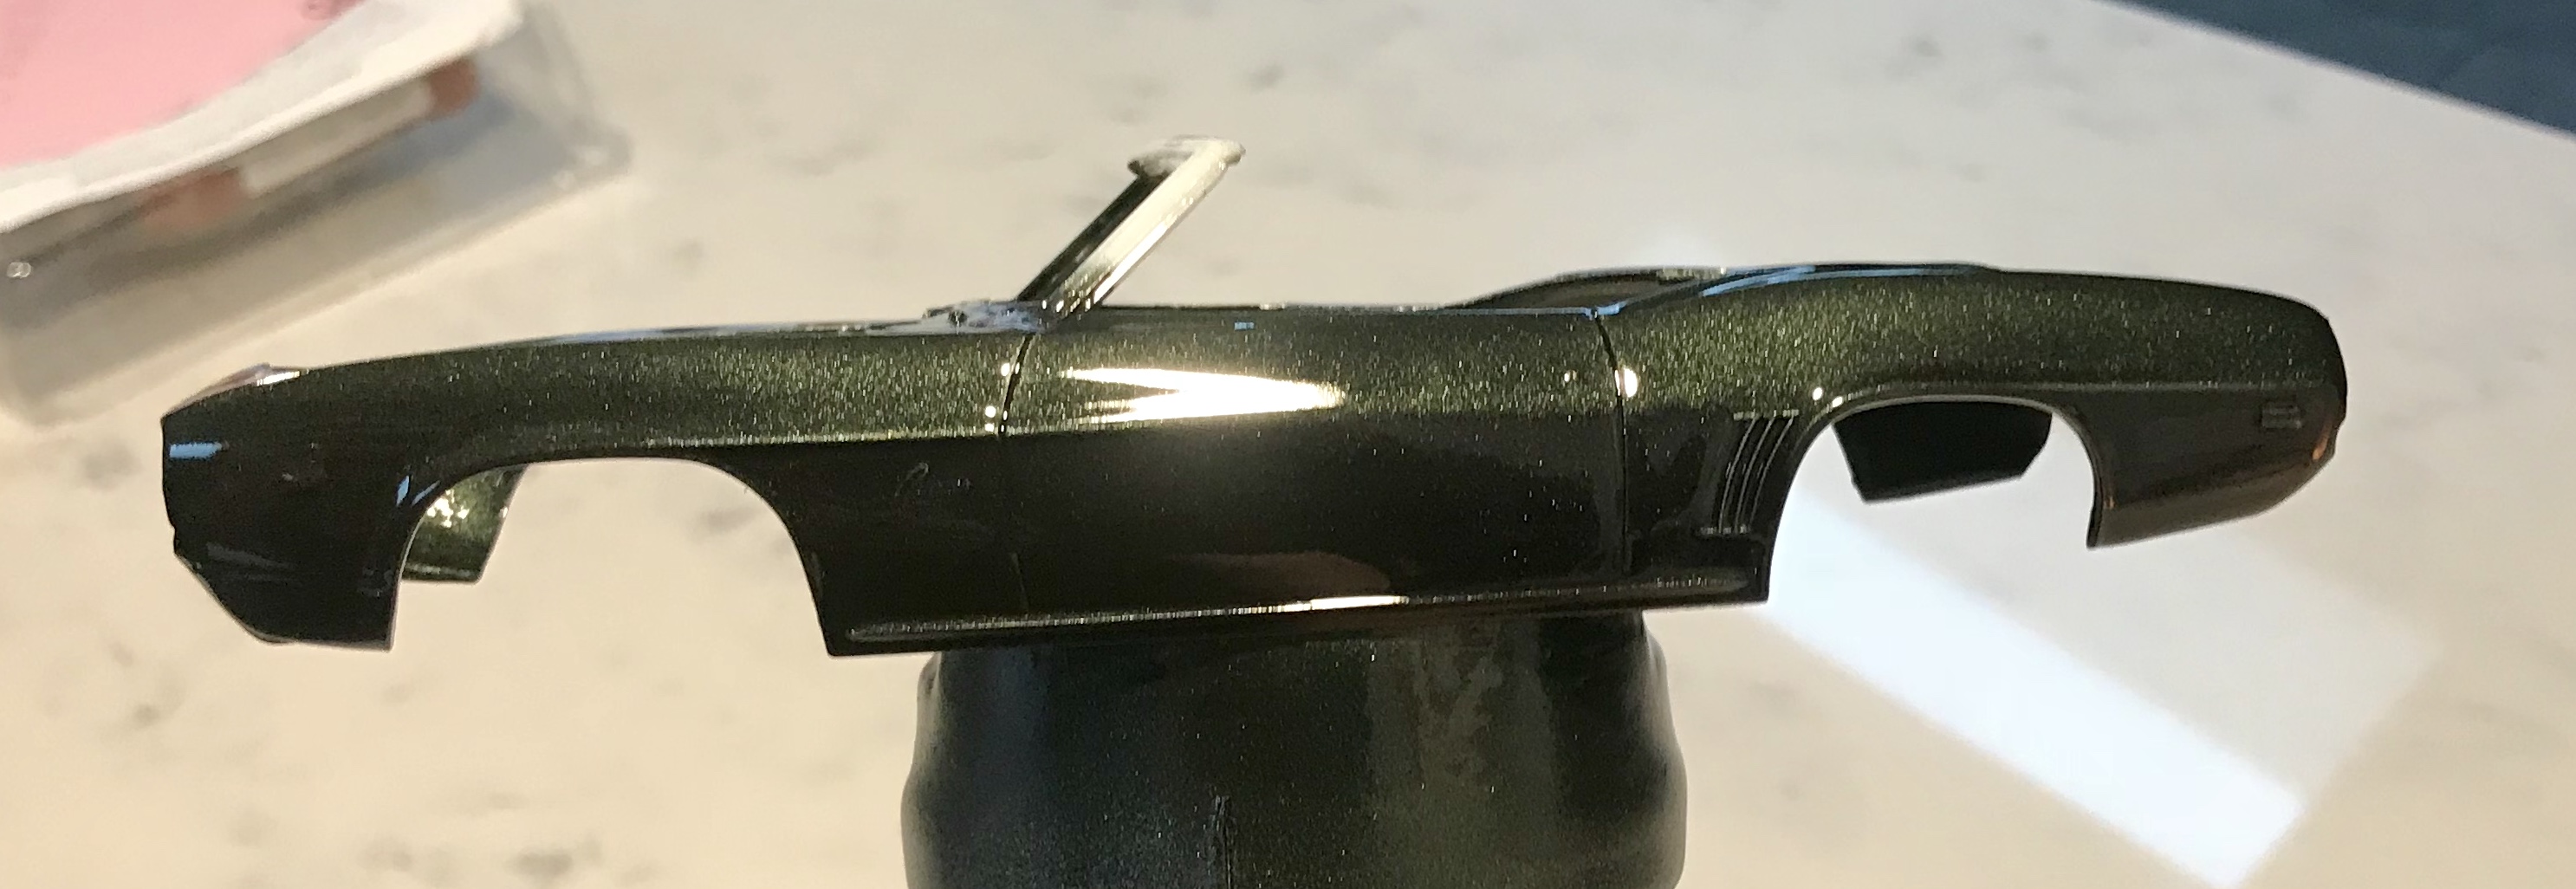
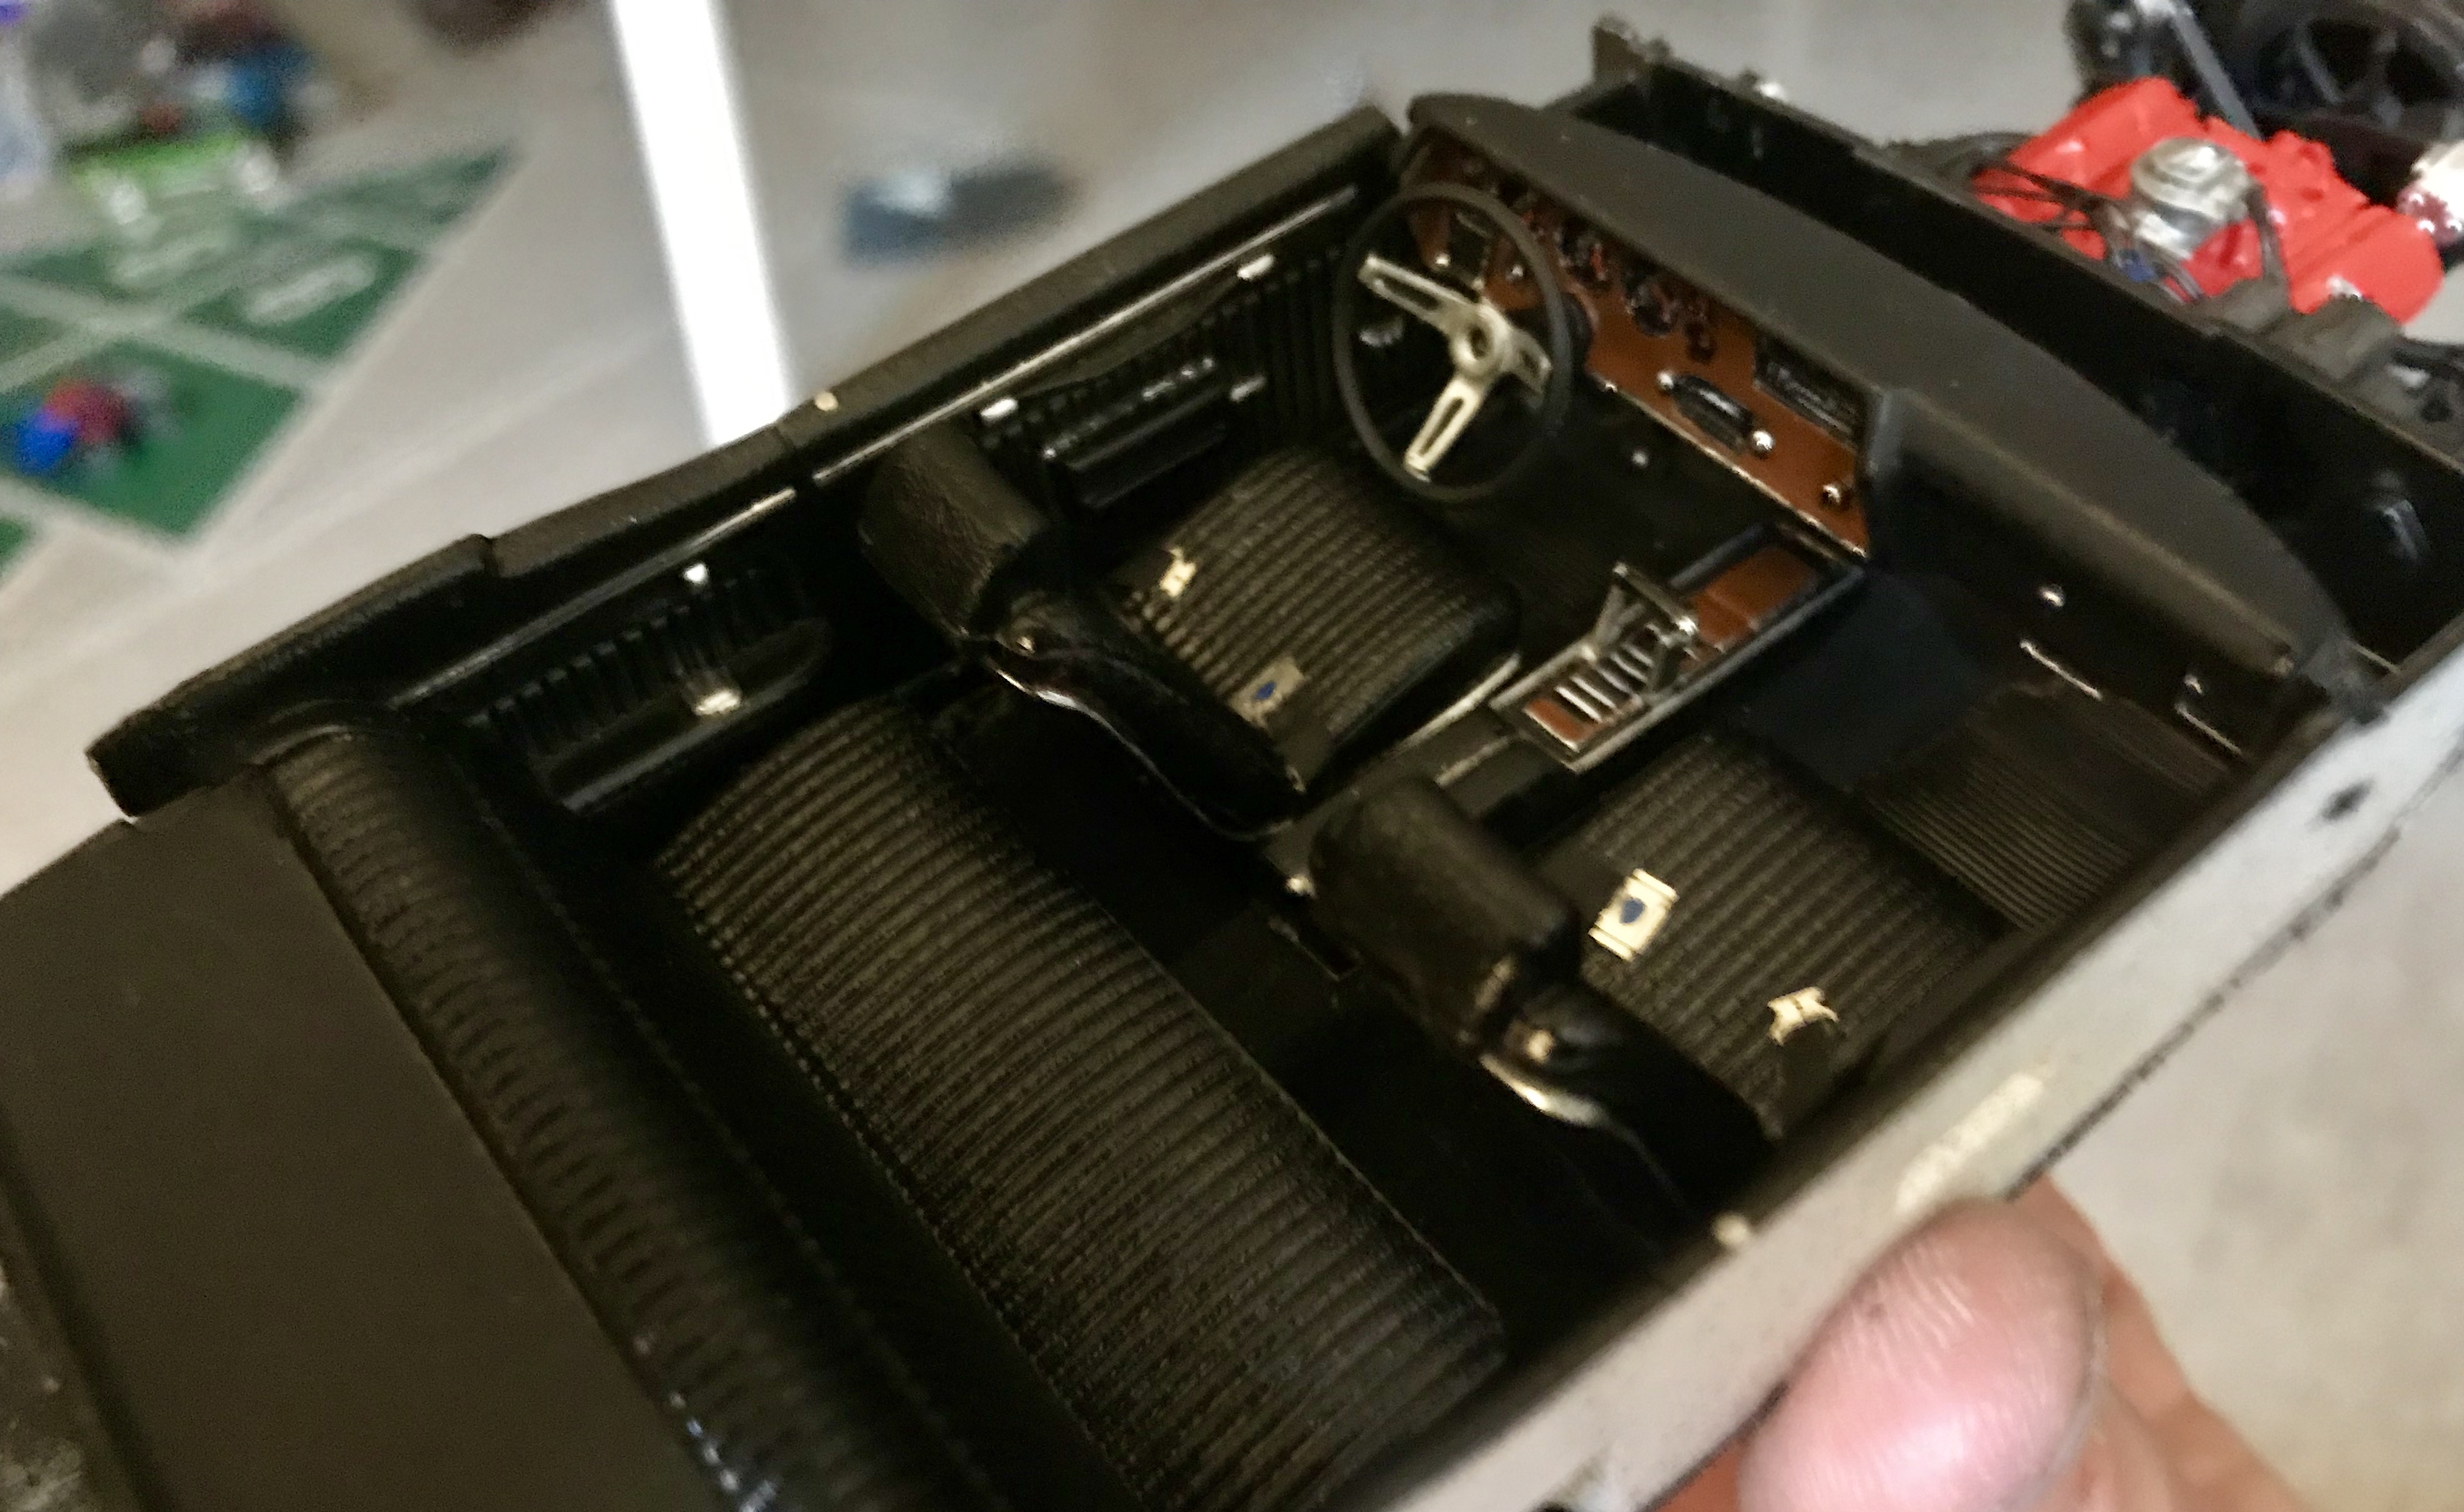
It’s been a crazy week, but I got a few good things done on the Camaros. Mind you, most of the progress has been made to the convertible, as I still have to order the Frost Green paint for the other. I got my interior assembled other than the dash, finished the chassis and got the engine mounted. Got the dash painted and decals on. I need to work on the steering wheel. I was going to use the deluxe wheel on this one, but one of the spokes had a defect, so I have to either use the COPO decal for the standard wheel or do a much better job than I currently have at painting the wood grain and chrome trim to match the dash. Moving back to the engine bay, I got my radiator assembled and battery cables in. I still need to drill a hole in the washer bottle cap and run a “hose” to the wiper motor. I also added the air cleaner, then put Last of the decals on the body and battery. With the body detailed other than most of the windshield frame, I installed the tail lights and the grill, and used my Molotow pen for the rest of the chrome trim other than the fender trim rings, which I’ll do tomorrow.I need to get the steering wheel done and paint/detail the firewall, and this one will be done. Next, I’ll repeat everything for the coupe. I did make one good piece of progress on it... I primed the body, then masked and shot the vinyl top. First time trying this technique, and I’m pretty happy with the results. I can’t wait to get my Frost green and see this one done! More to come.
-
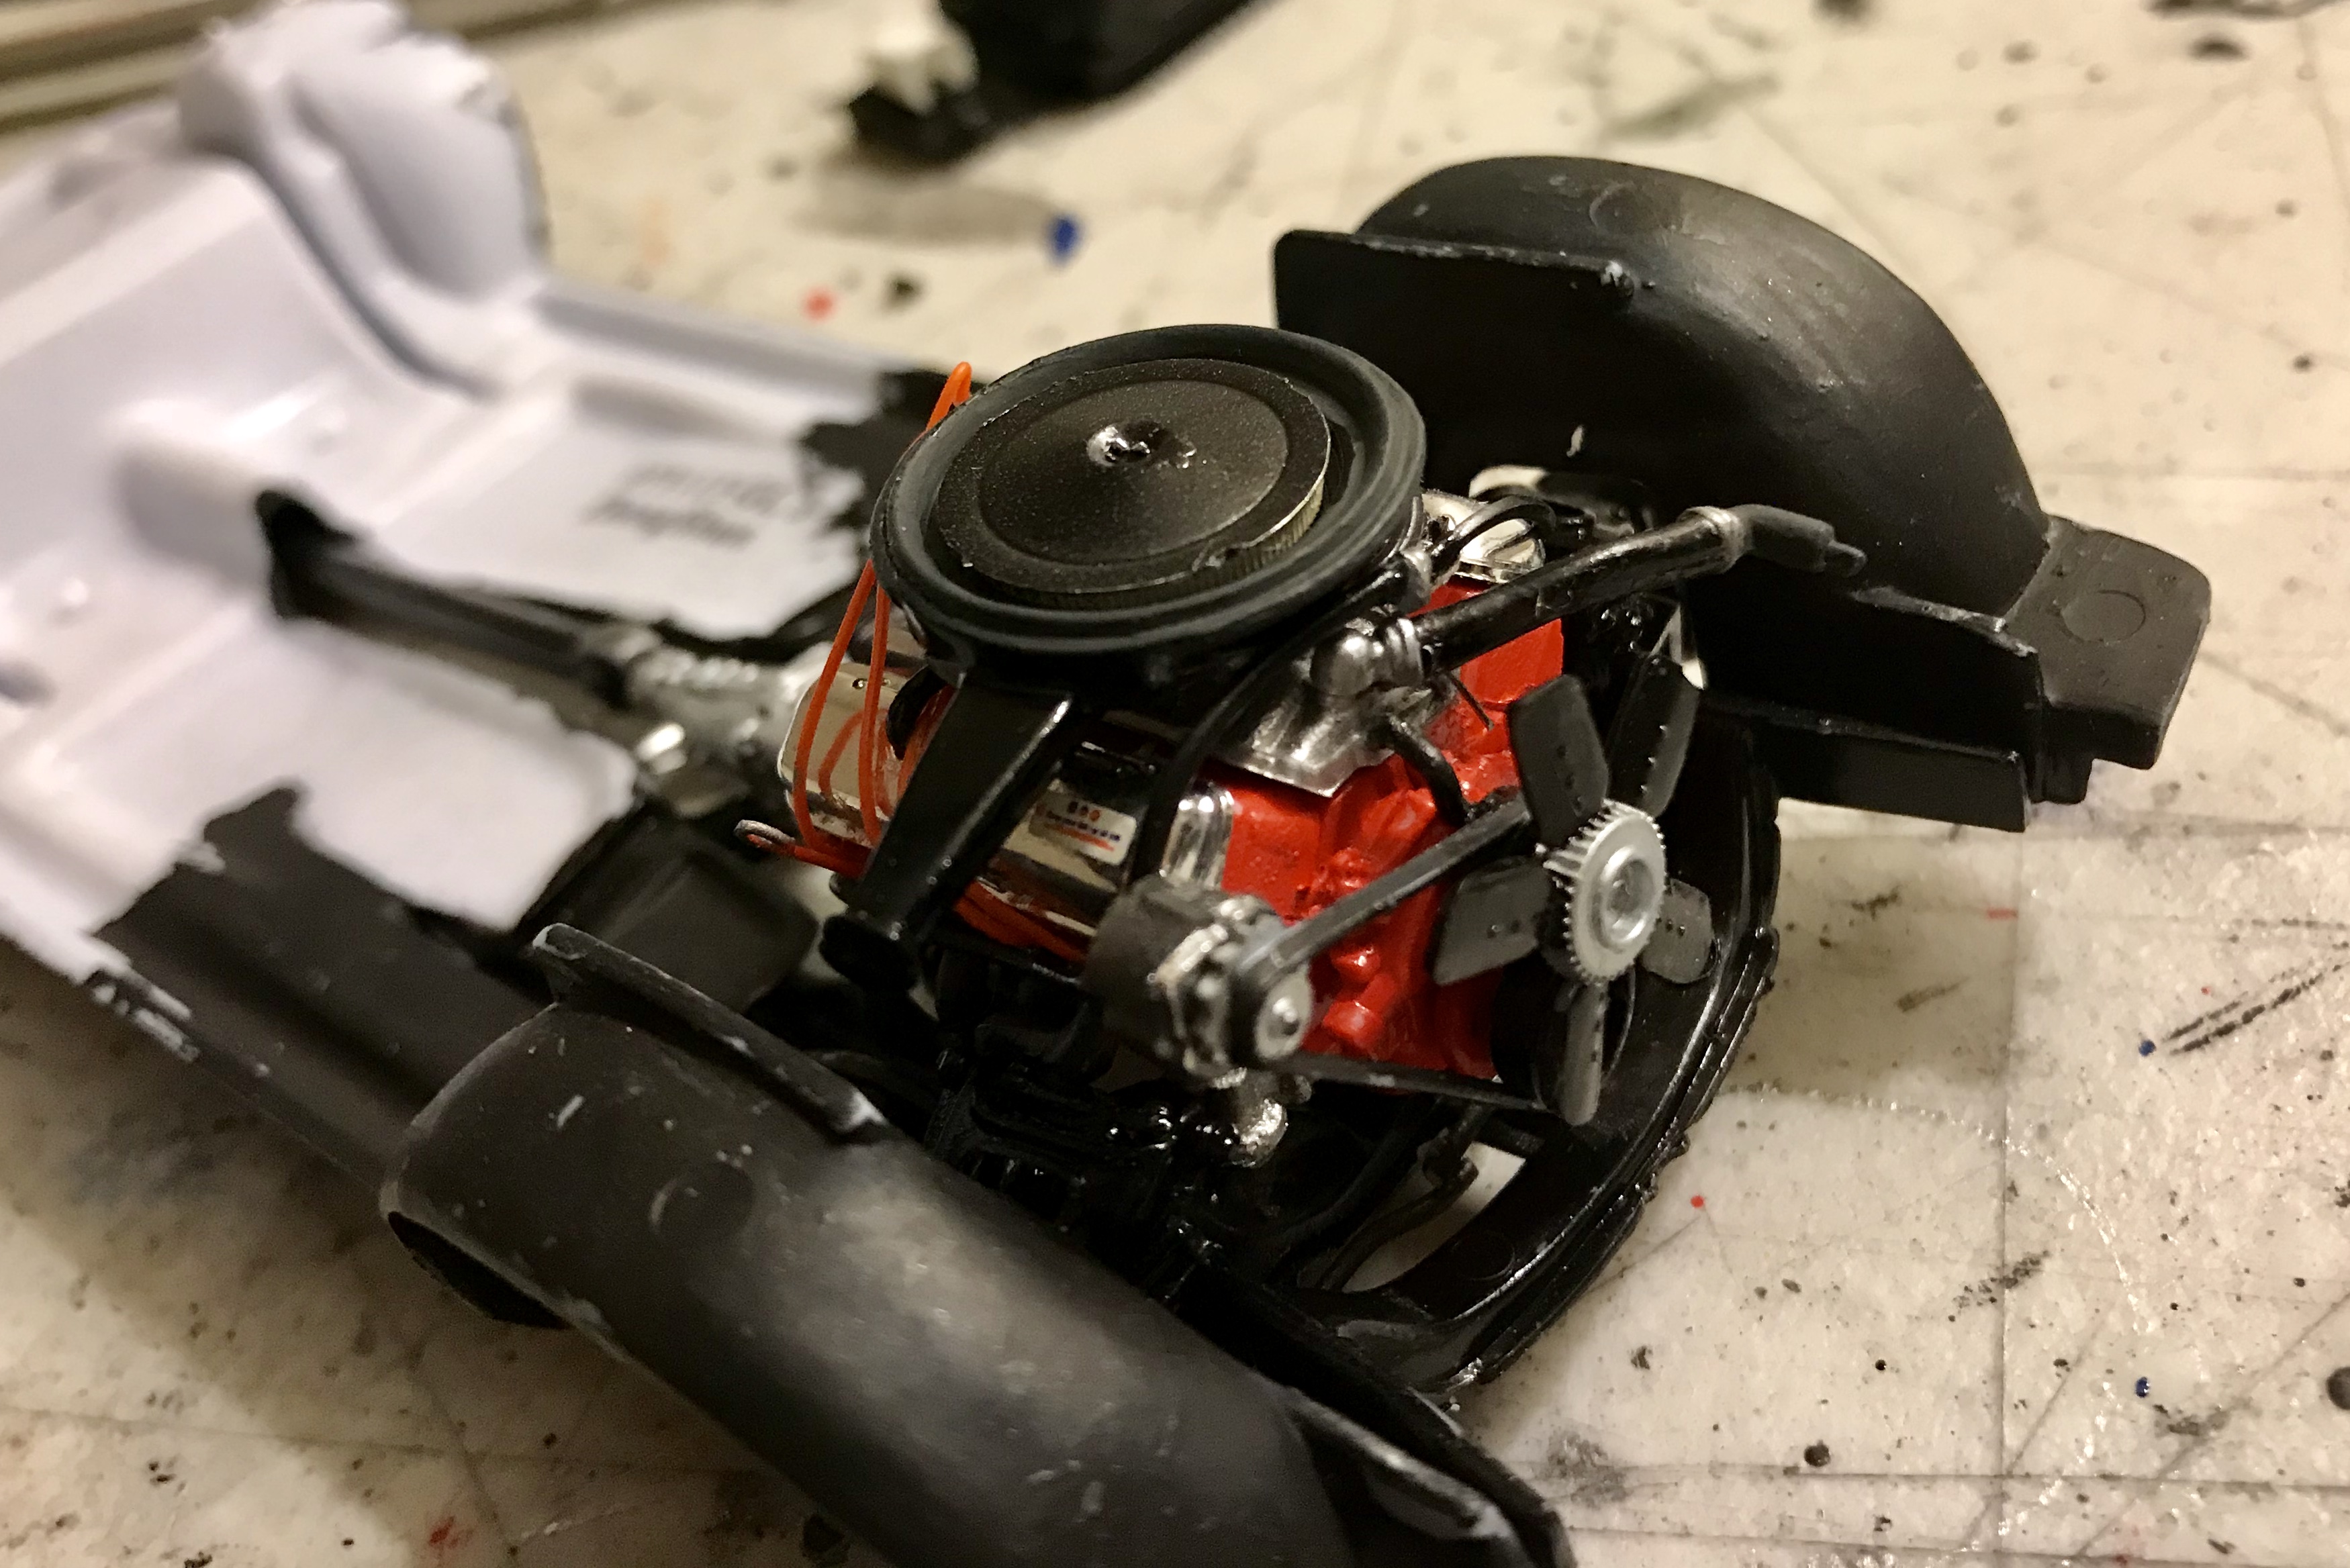
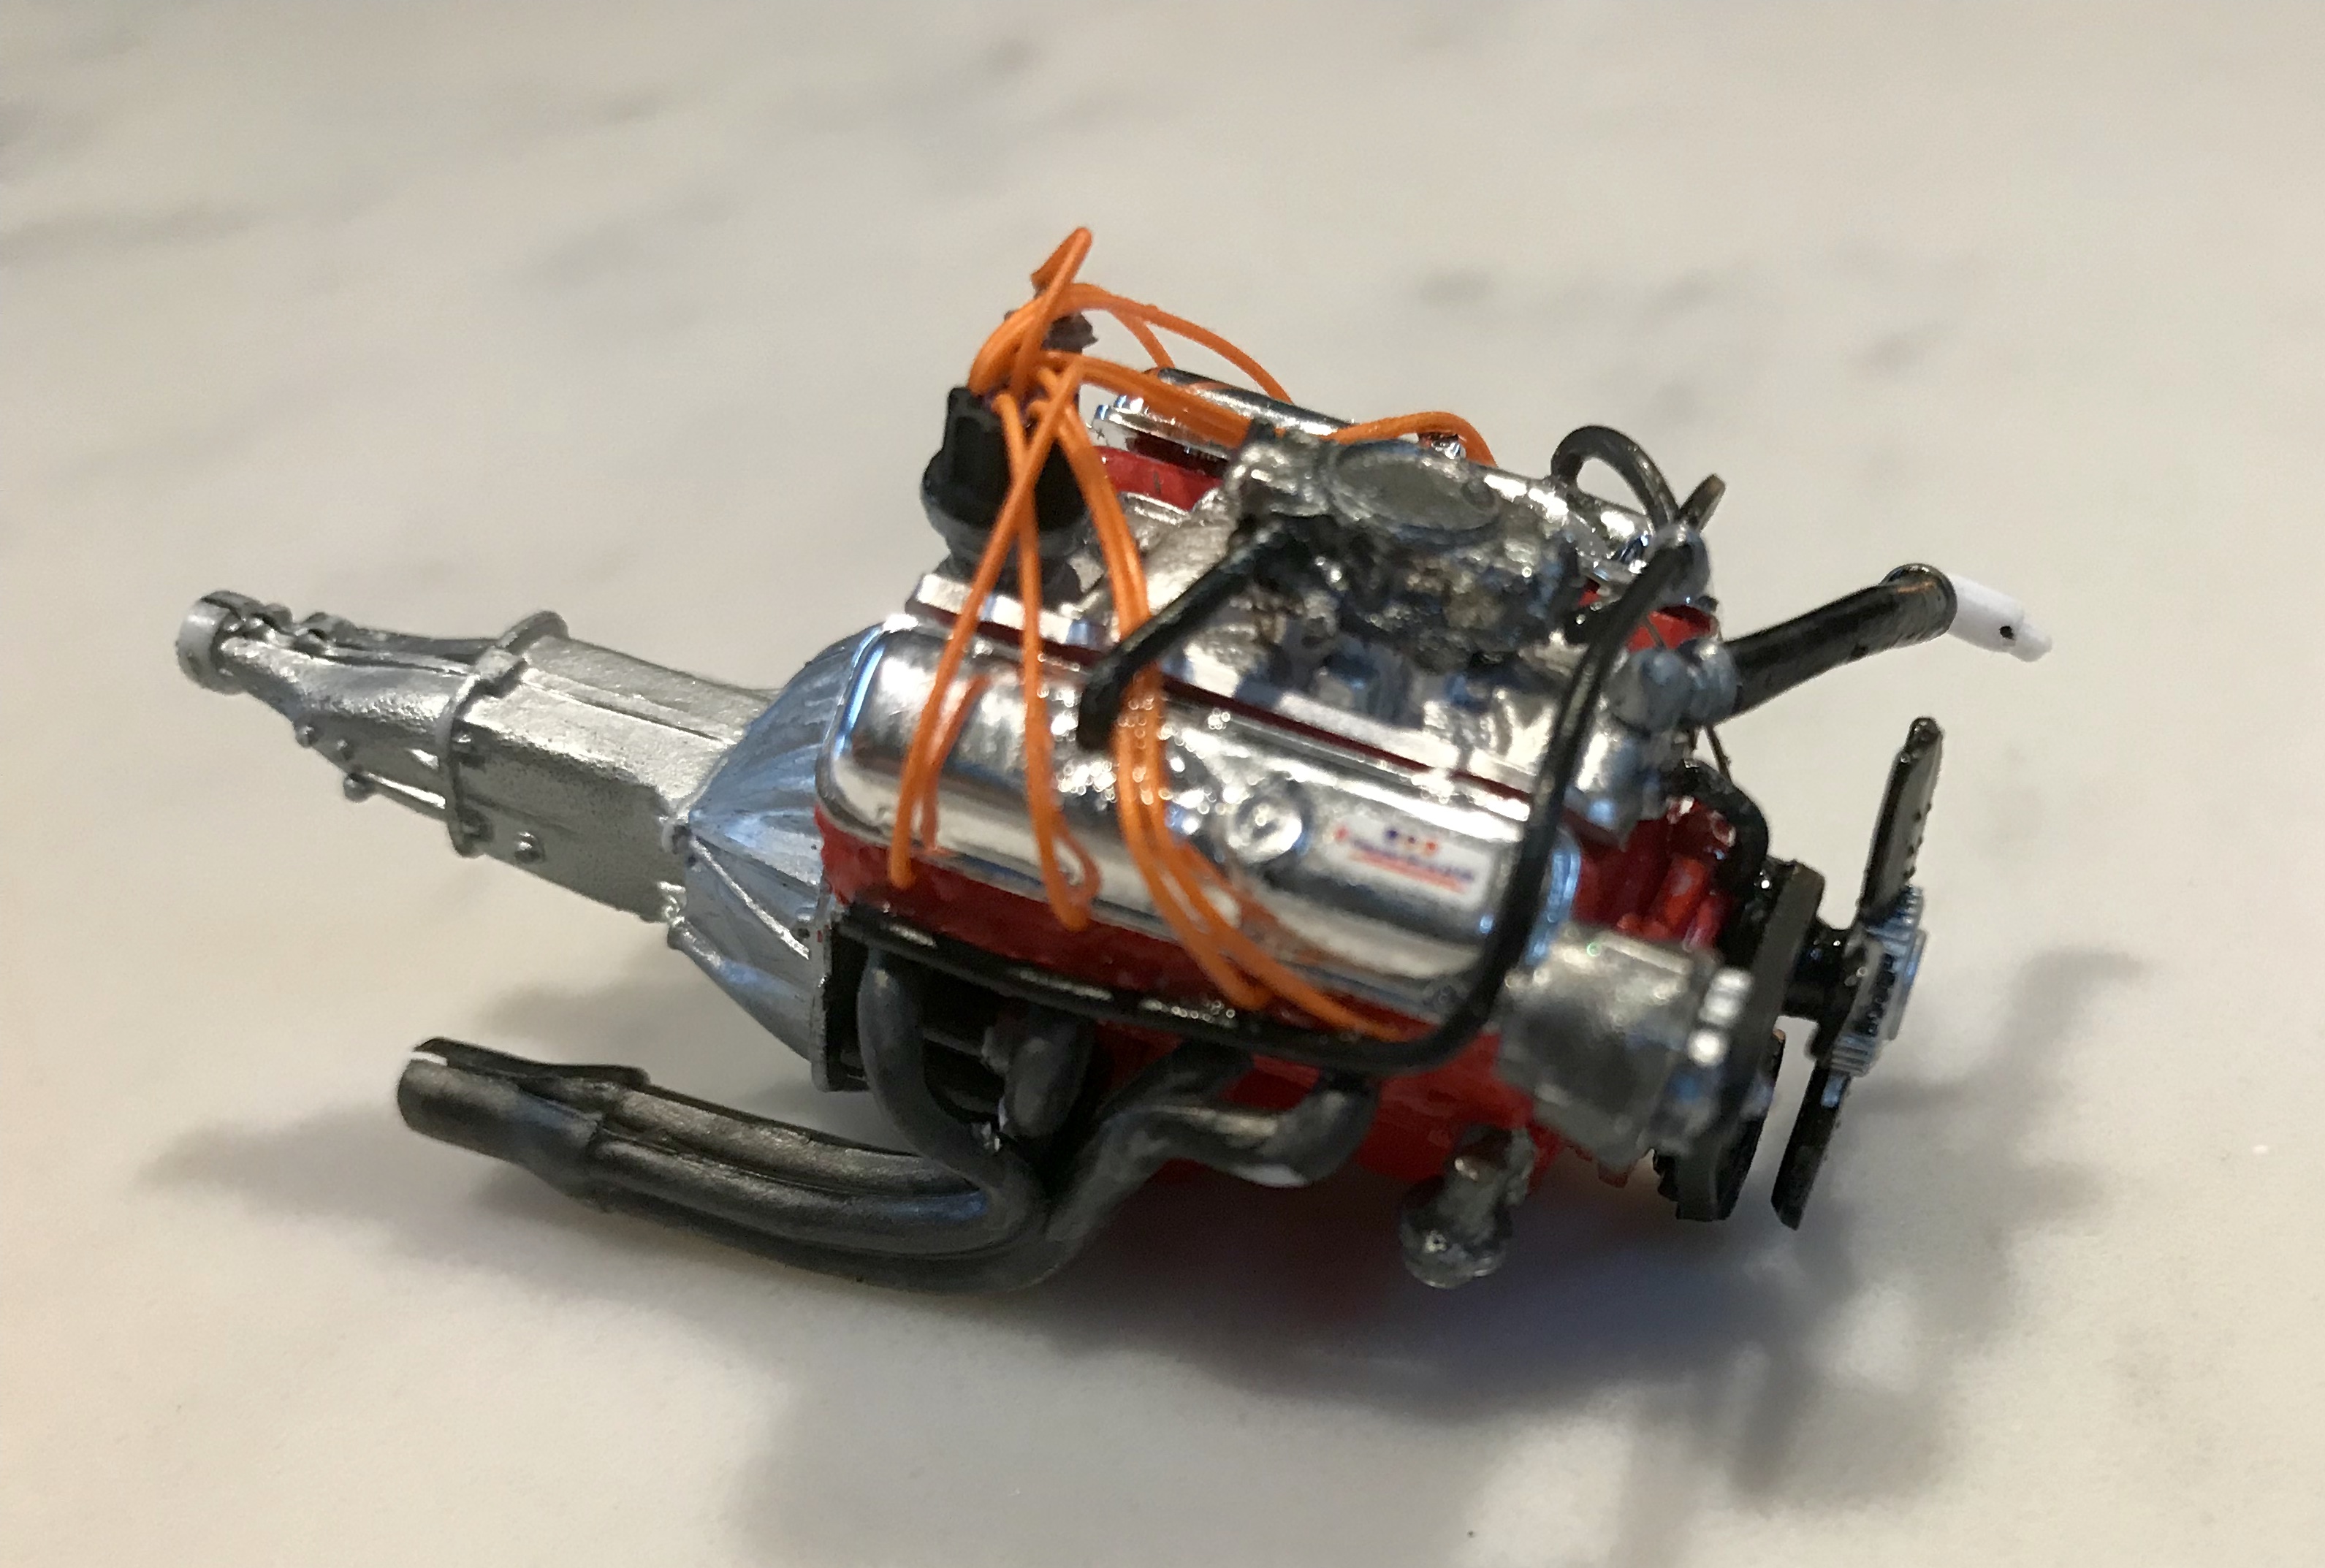
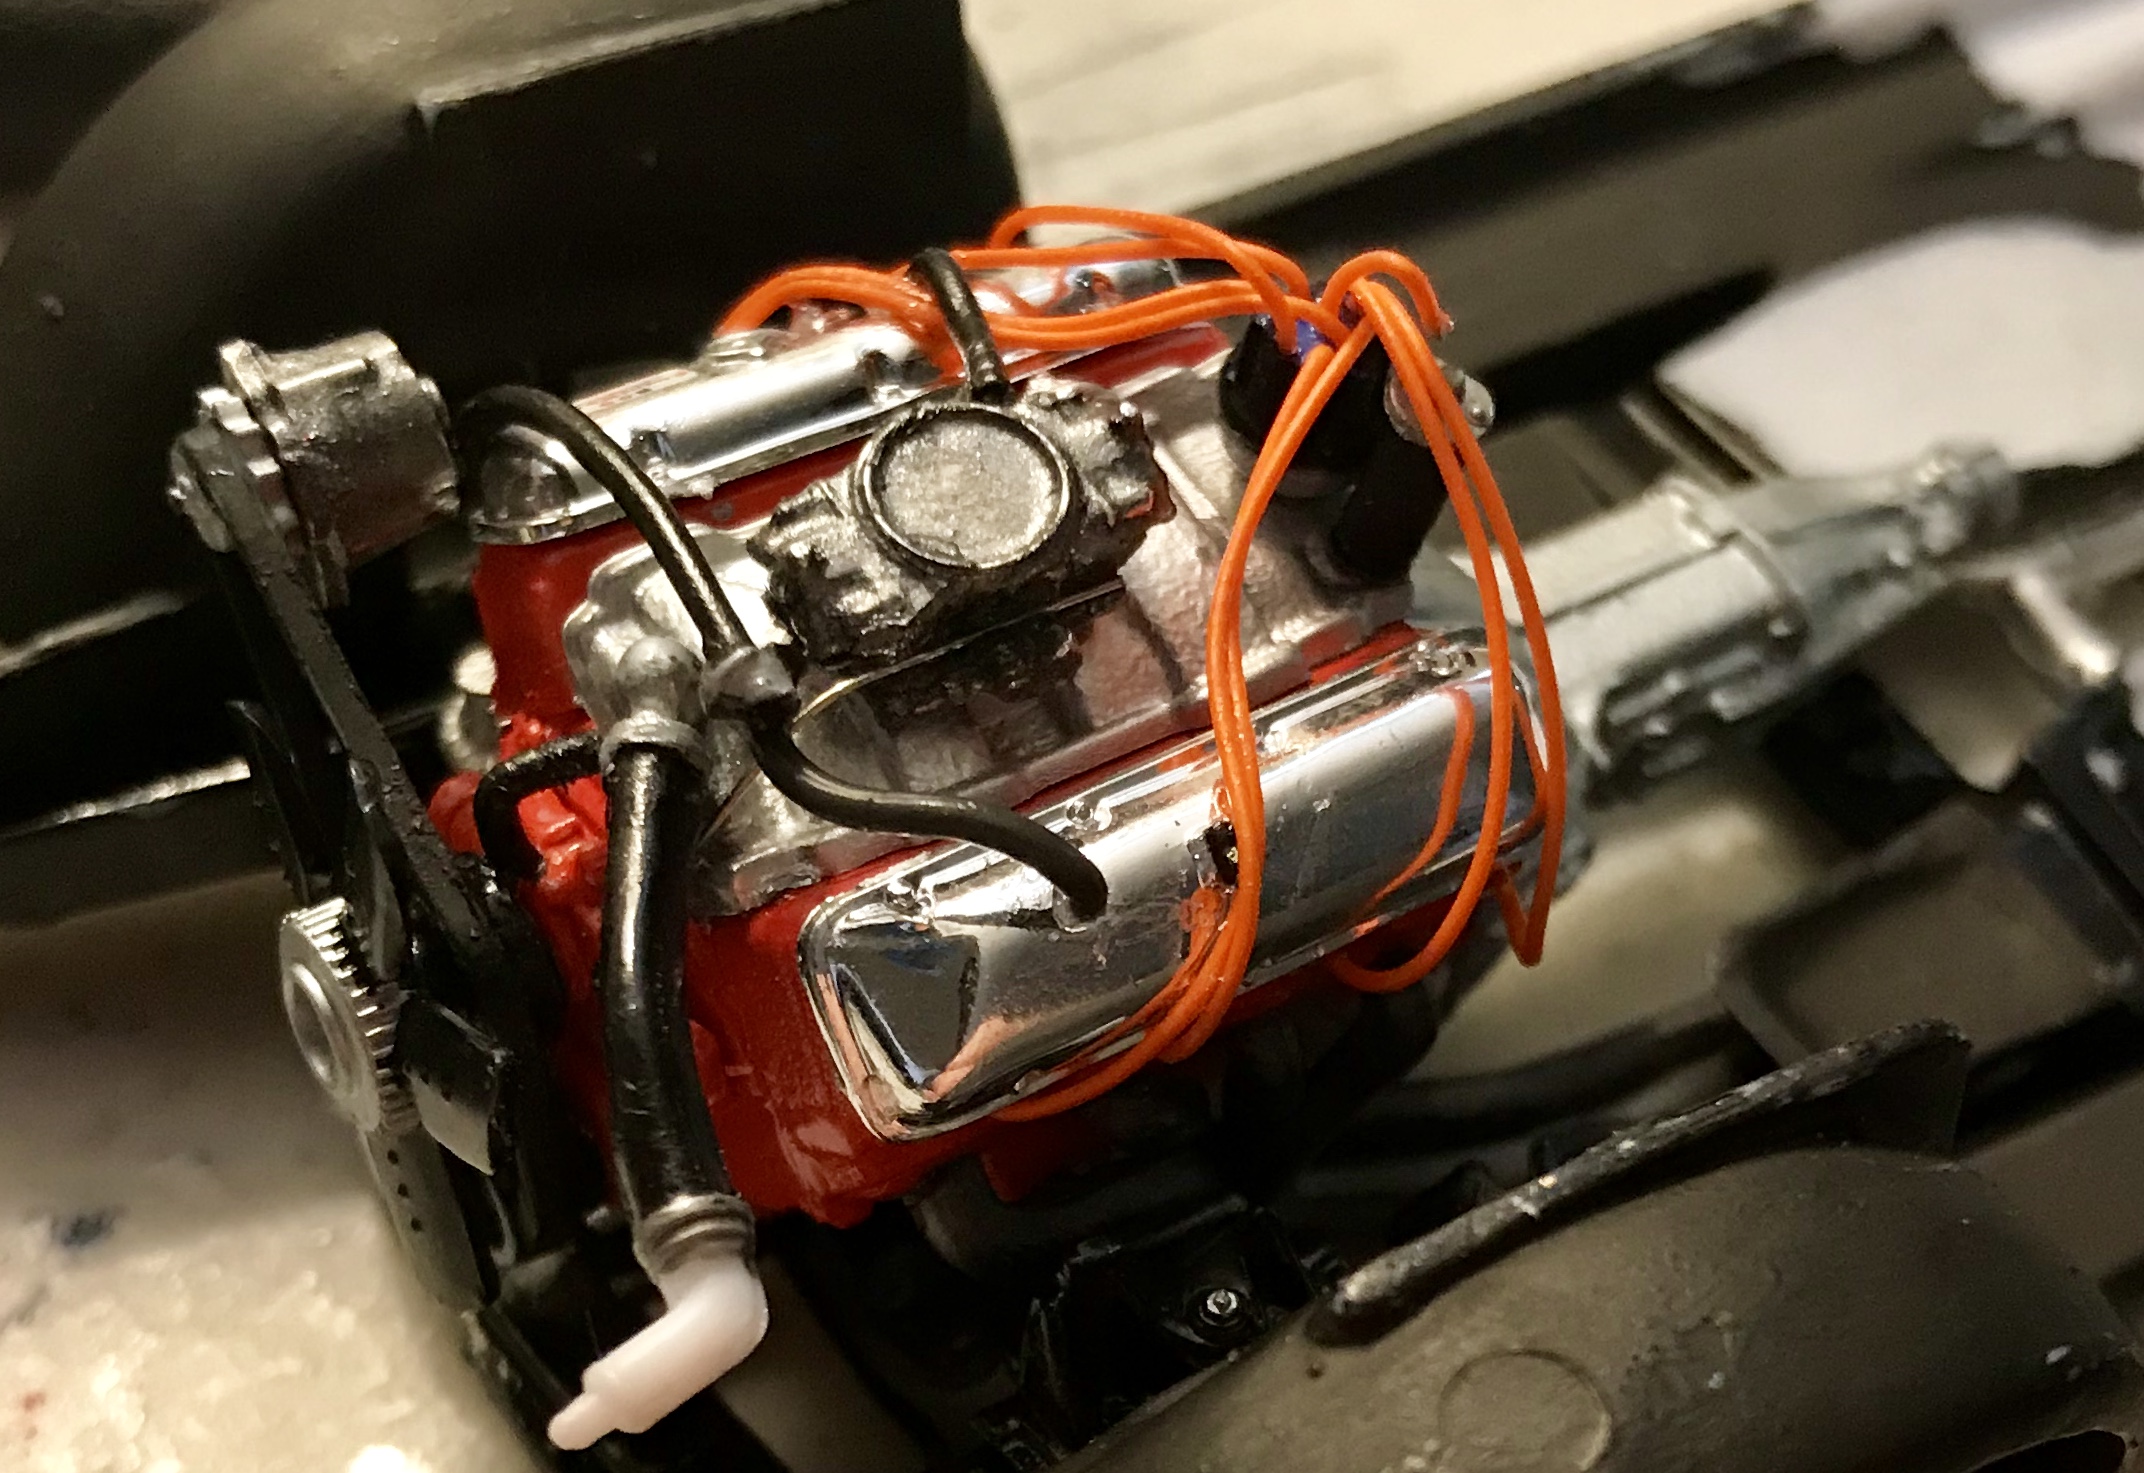
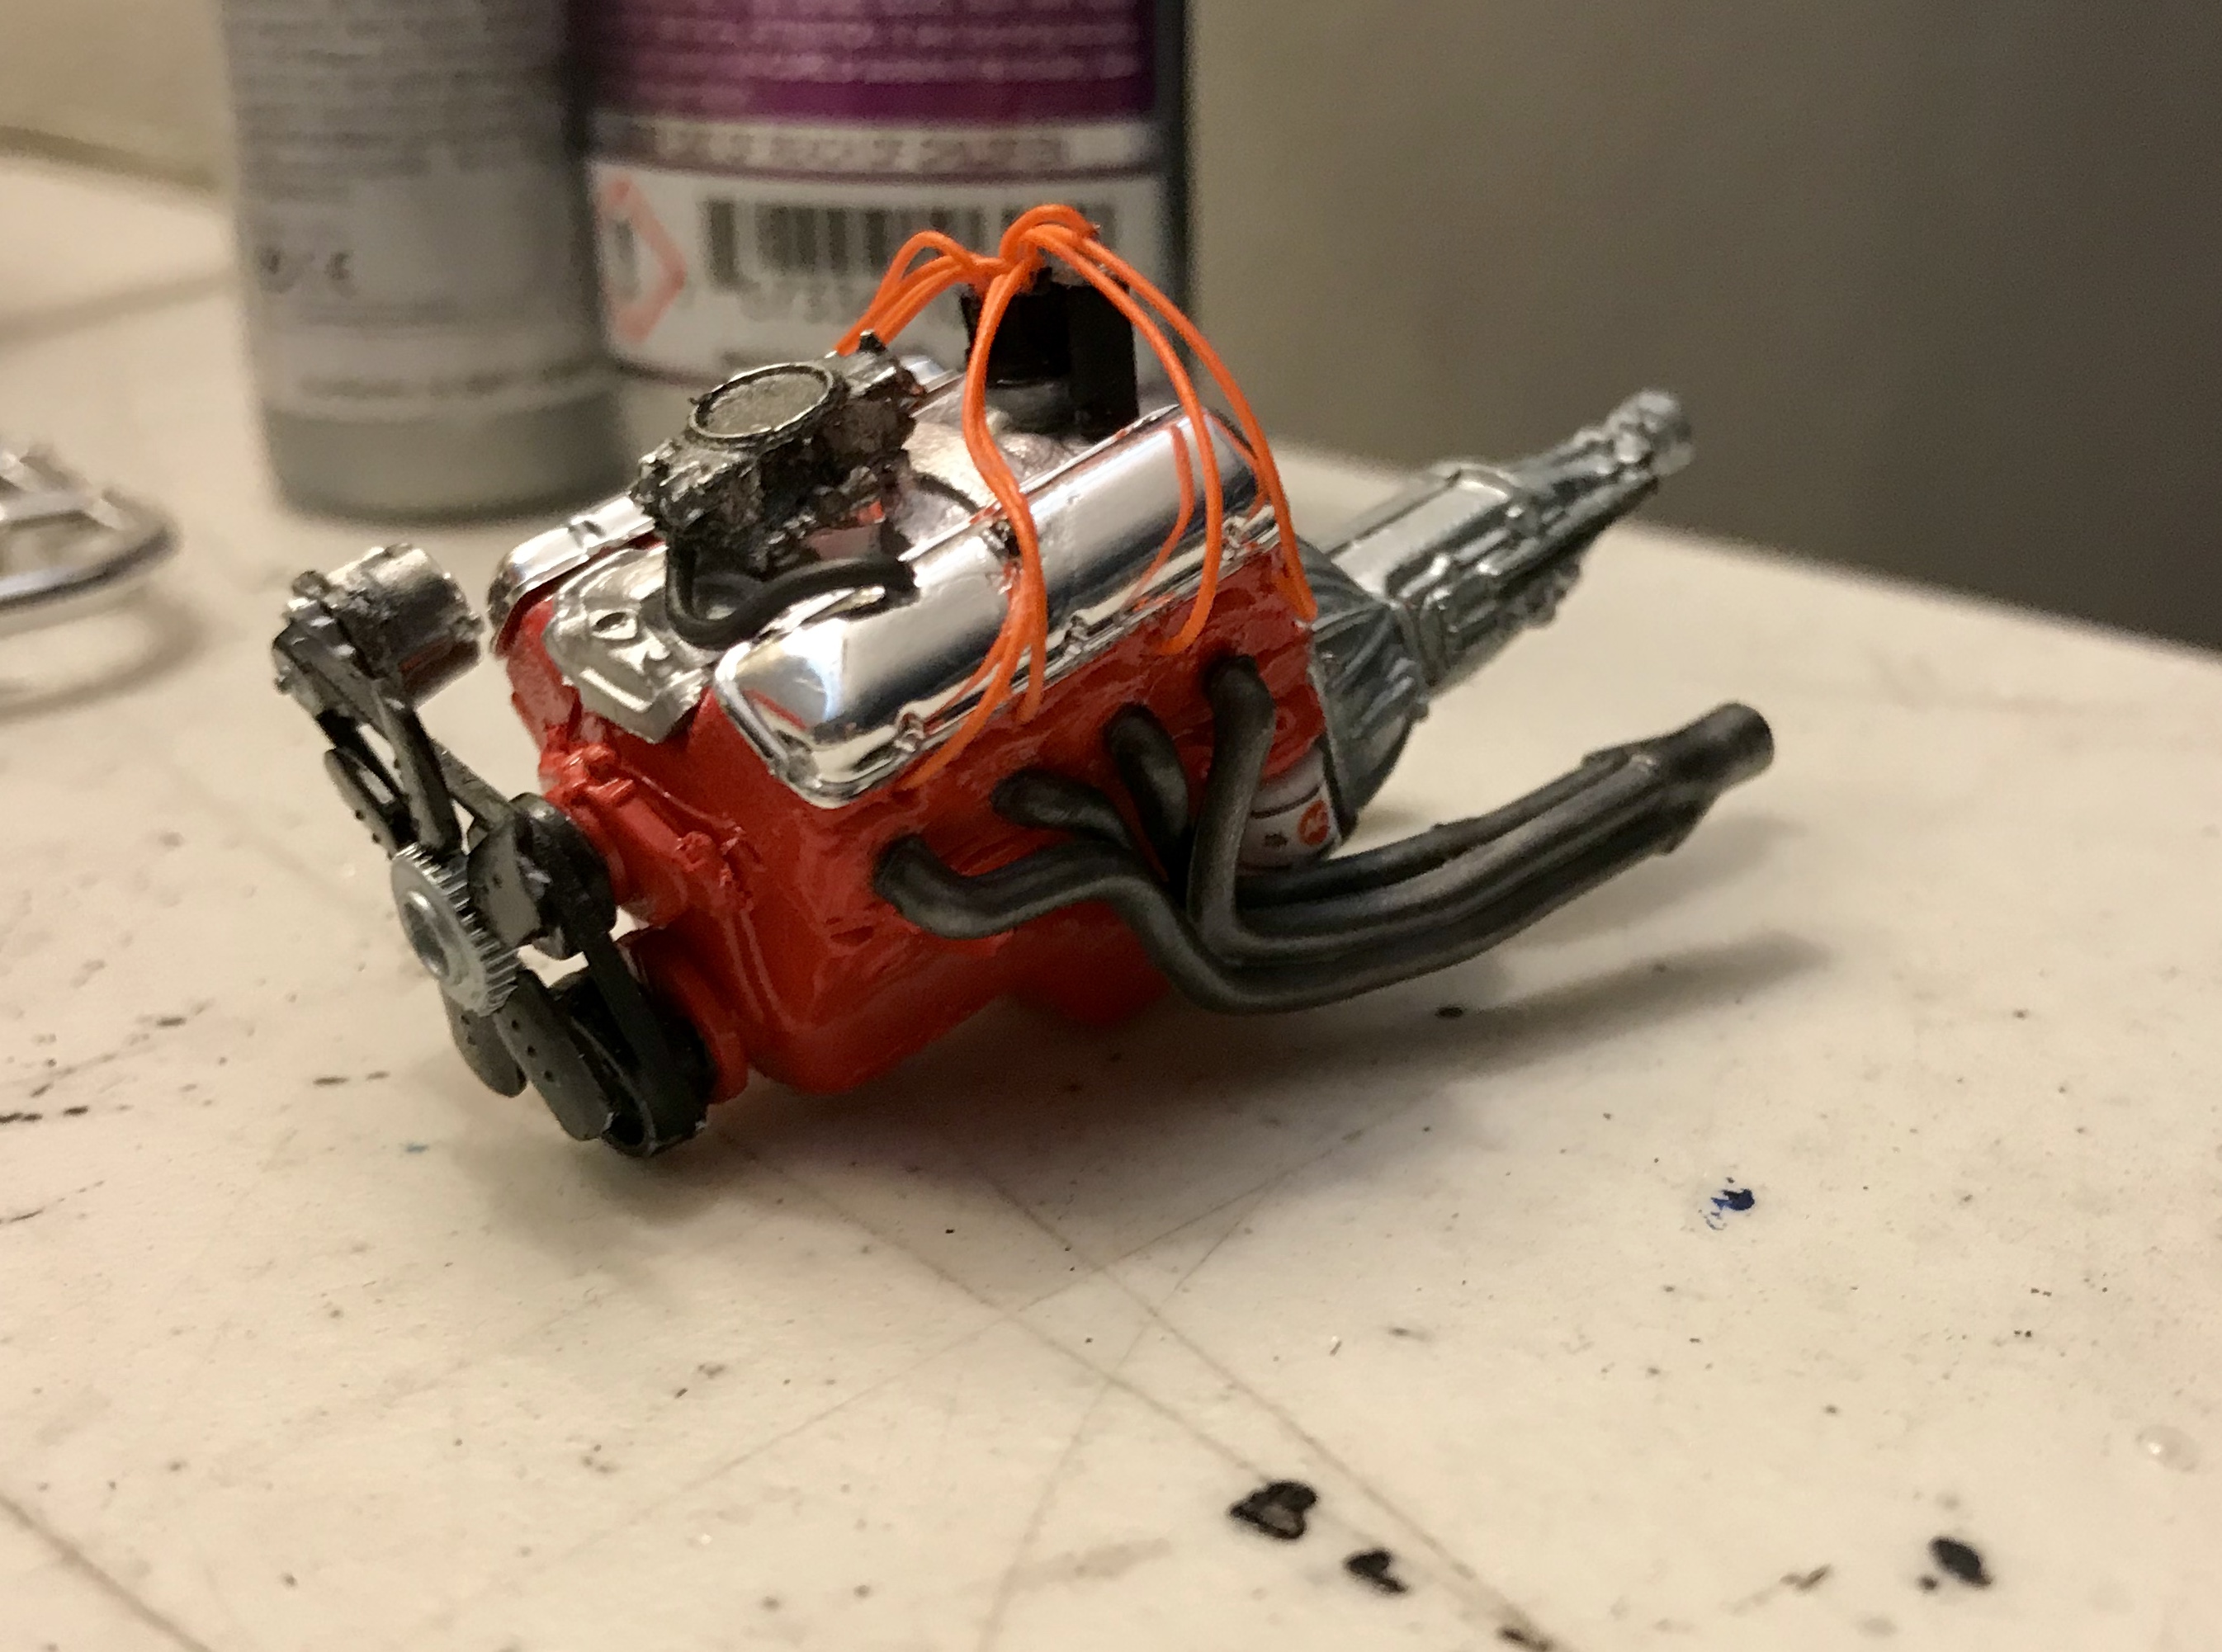
Well, I tried to move the valve cover, but the Superglue bond threatened to crack the block before the cover came loose, so I had to leave it. I did complete the other side of the smog system. At this point, the engine is pretty much done, other than heater hoses and parts that will connect in the engine bay. I could potentially try to add a few more details, but the air cleaner is pretty large and obscures a lot, so I’ll probably focus on detail that can be seen on the shelf. Moving on, I got clear on the Fathom Green body. I love this color. I’ll polish it out and wax it in the next day or so. I actually had put the white SS hockey stripe on the left side of the body, as I really liked that look in the reference pic above, but comparing it to the other side, I decided to leave it off.
-
A-HA!! Thanks so much for the input. I’ll see what I can do here... at the very least, I can make sure the other engine is correct. I can fill the hole and use my Molotow pen to fix the chrome, but I also had superglued the spark plug wires to the clip that’s molded in. I don’t want to trash my whole engine, but will try to fix this. Good catch!!
-
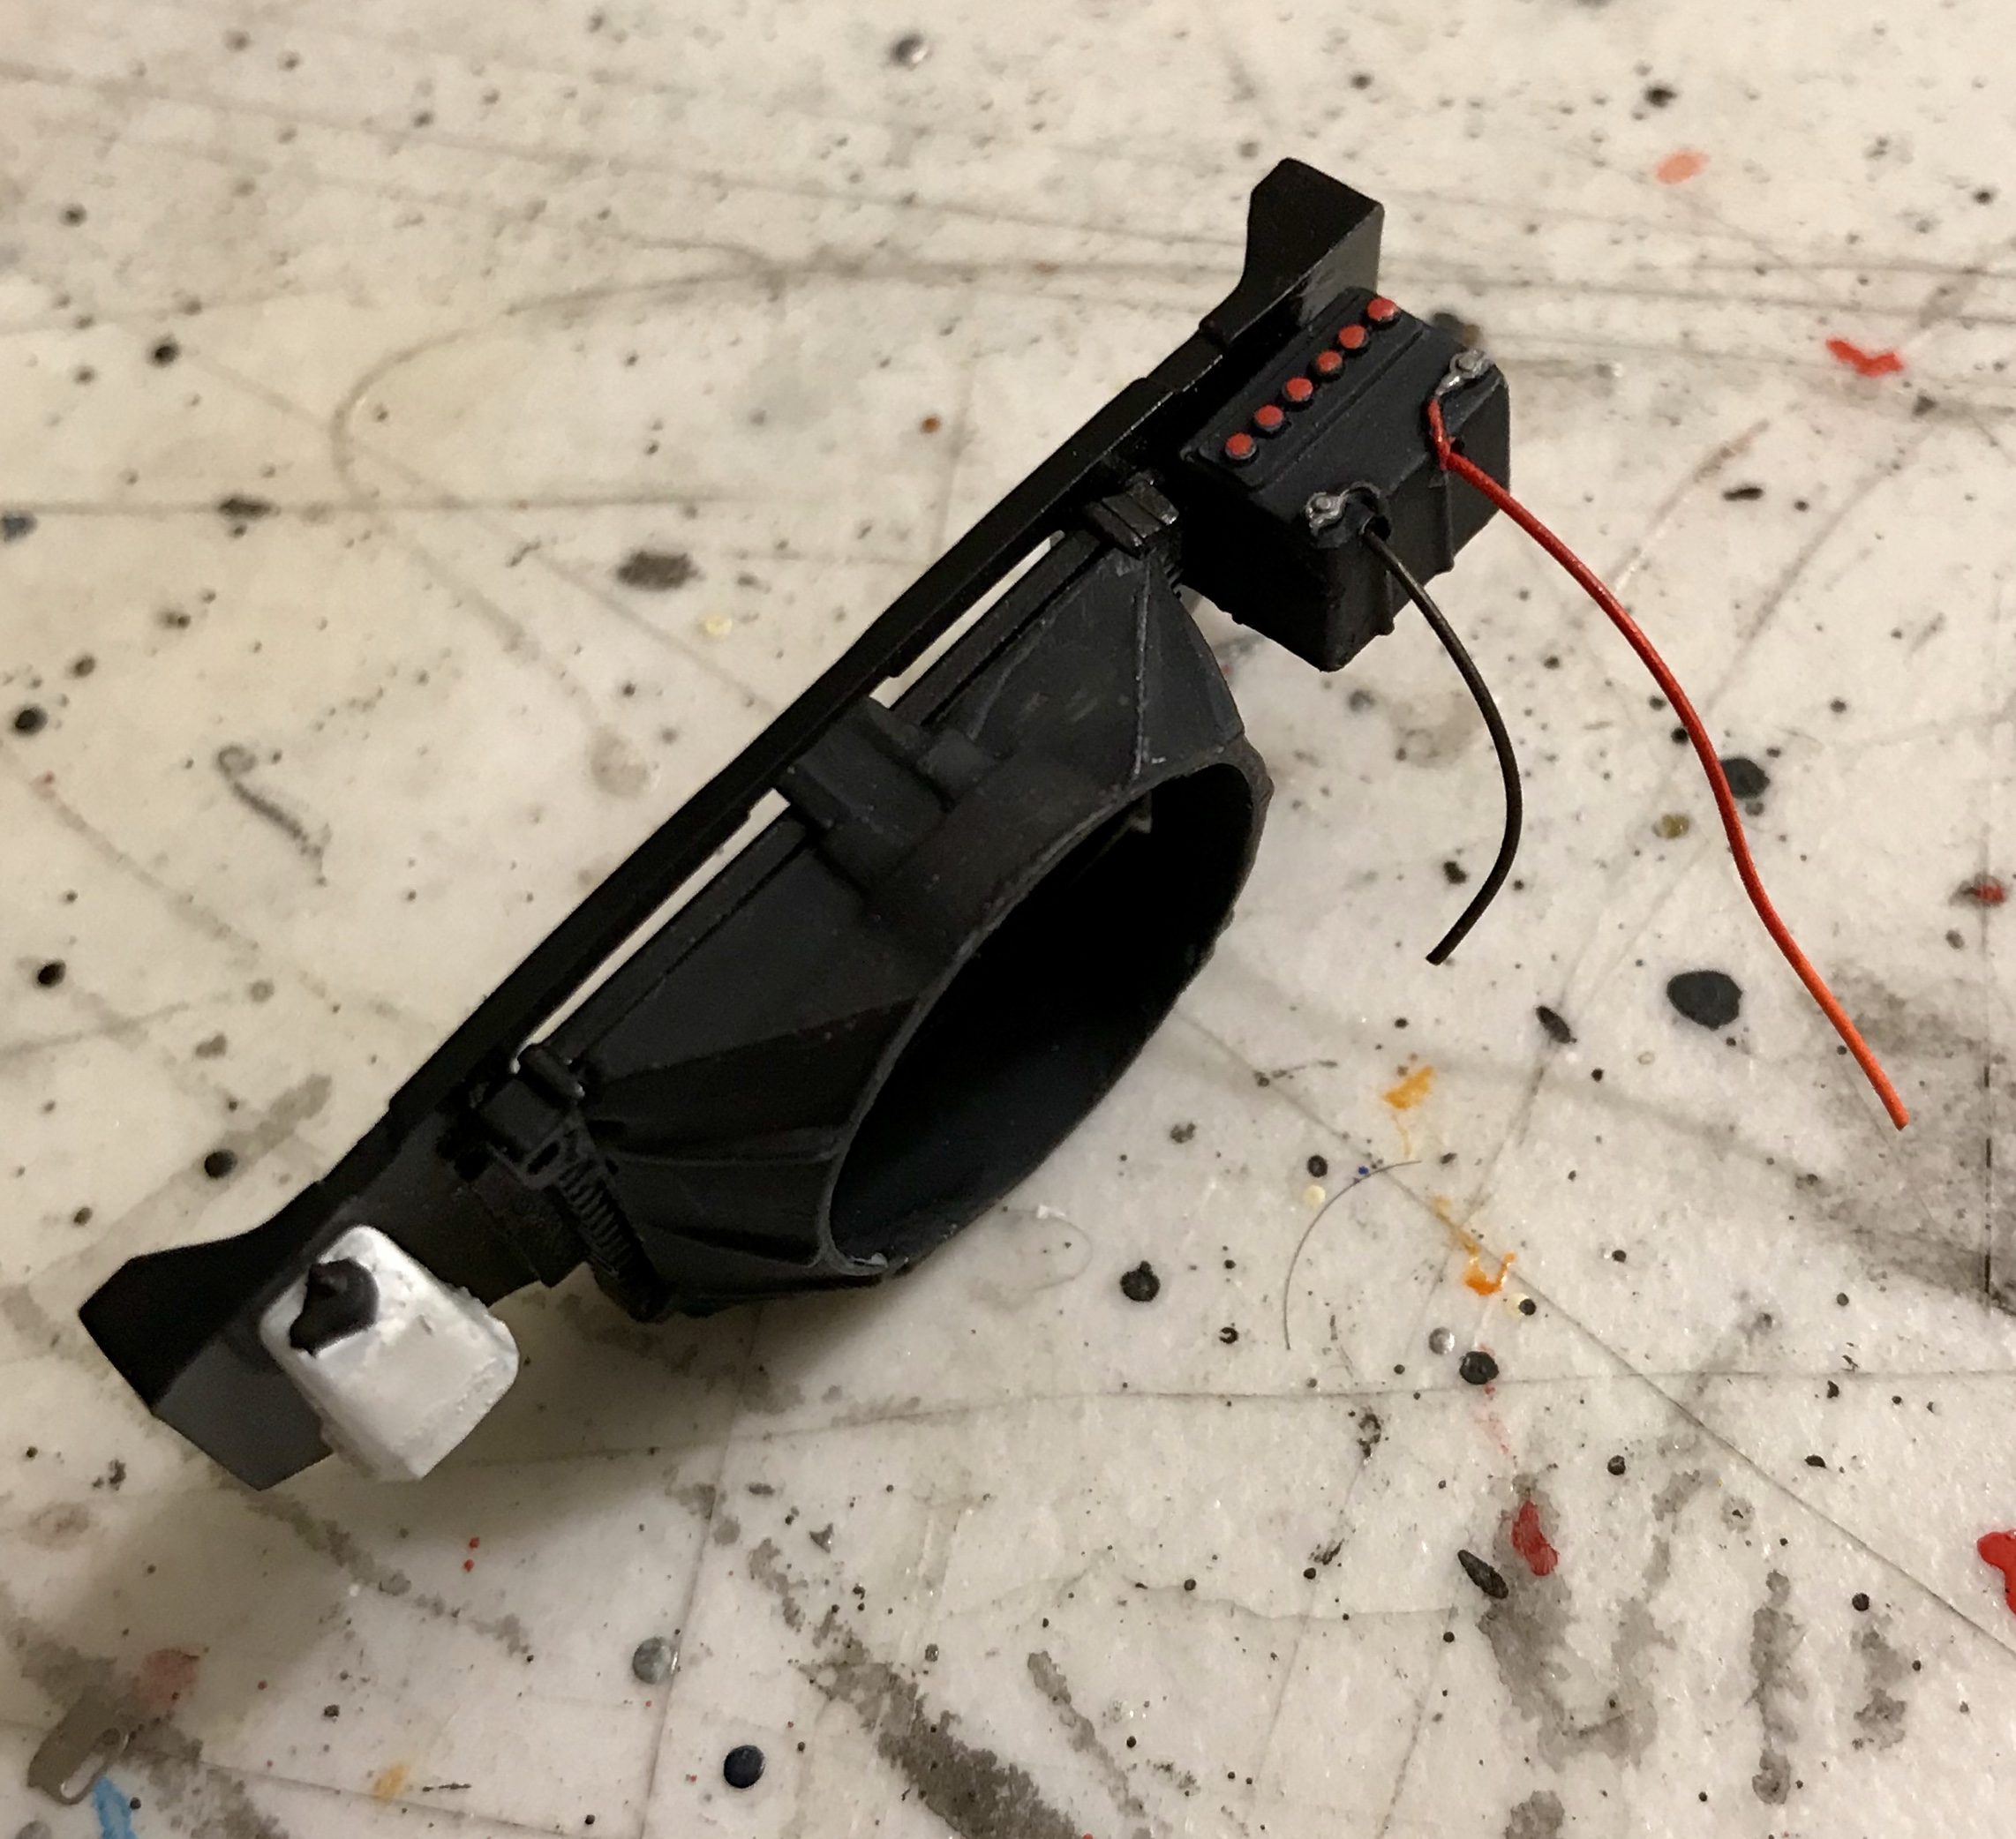
A little bit of progress last night... still working on engine #1. I started adding a few details. I made the tiny hose that runs from the front of the intake manifold to the water pump, used a little piece of guitar string to create another cable nobody will ever see, and got half of the smog system (?) done. I ran a piece of hose along the side of the block just above the headers, then shaped it up and over the manifold just past the halfway point. Then, I shaved the vacuum advance off of the kit distributor and glued it to the end of the hose, then painted it steel. My thought is to use my .07 styrene rod to do the other side and glue it to the other side of the vacuum advance, as this went from a hose to a metal runner on the real car. I think it’s going to work, but the black dot on the steel piece shows the first attempt failed. Everything that is done to this engine will be done to the other. I did make one purposeful error here. There is a “built by” decal on the right valve cover, but while the convertible kit has it, the COPO kit doesn’t. There is another decal that is nearly the same size and colors that goes on the side of the air cleaner, and the COPO kit has that. Having built that kit already, I know that I don’t see that decal at all, as the cowl seal hides it. So, I used the decal for the air cleaner as the valve cover logo on this engine. It’s not correct, but looks better than having nothing there. The other one will be done properly. I’ll try to get the other half of the smog system done today.
-
Wow... 12?! That’s awesome... you should post them as a group.
-
A-ha! That makes sense... I just expected some visual differences, even minor. Then my debate will be do I slap a 396 decal on the convertible and use the SS decals or keep it plain? I’ll make that call at some point. I got some color on the convertible last night, and laid .07 styrene to outline the vinyl top for the coupe.
-

1967 Pontiac Bonneville, More Mediocre Pics.
Kmb0319 replied to StevenGuthmiller's topic in Model Cars
What he said x2... amazing work, Steve!! -
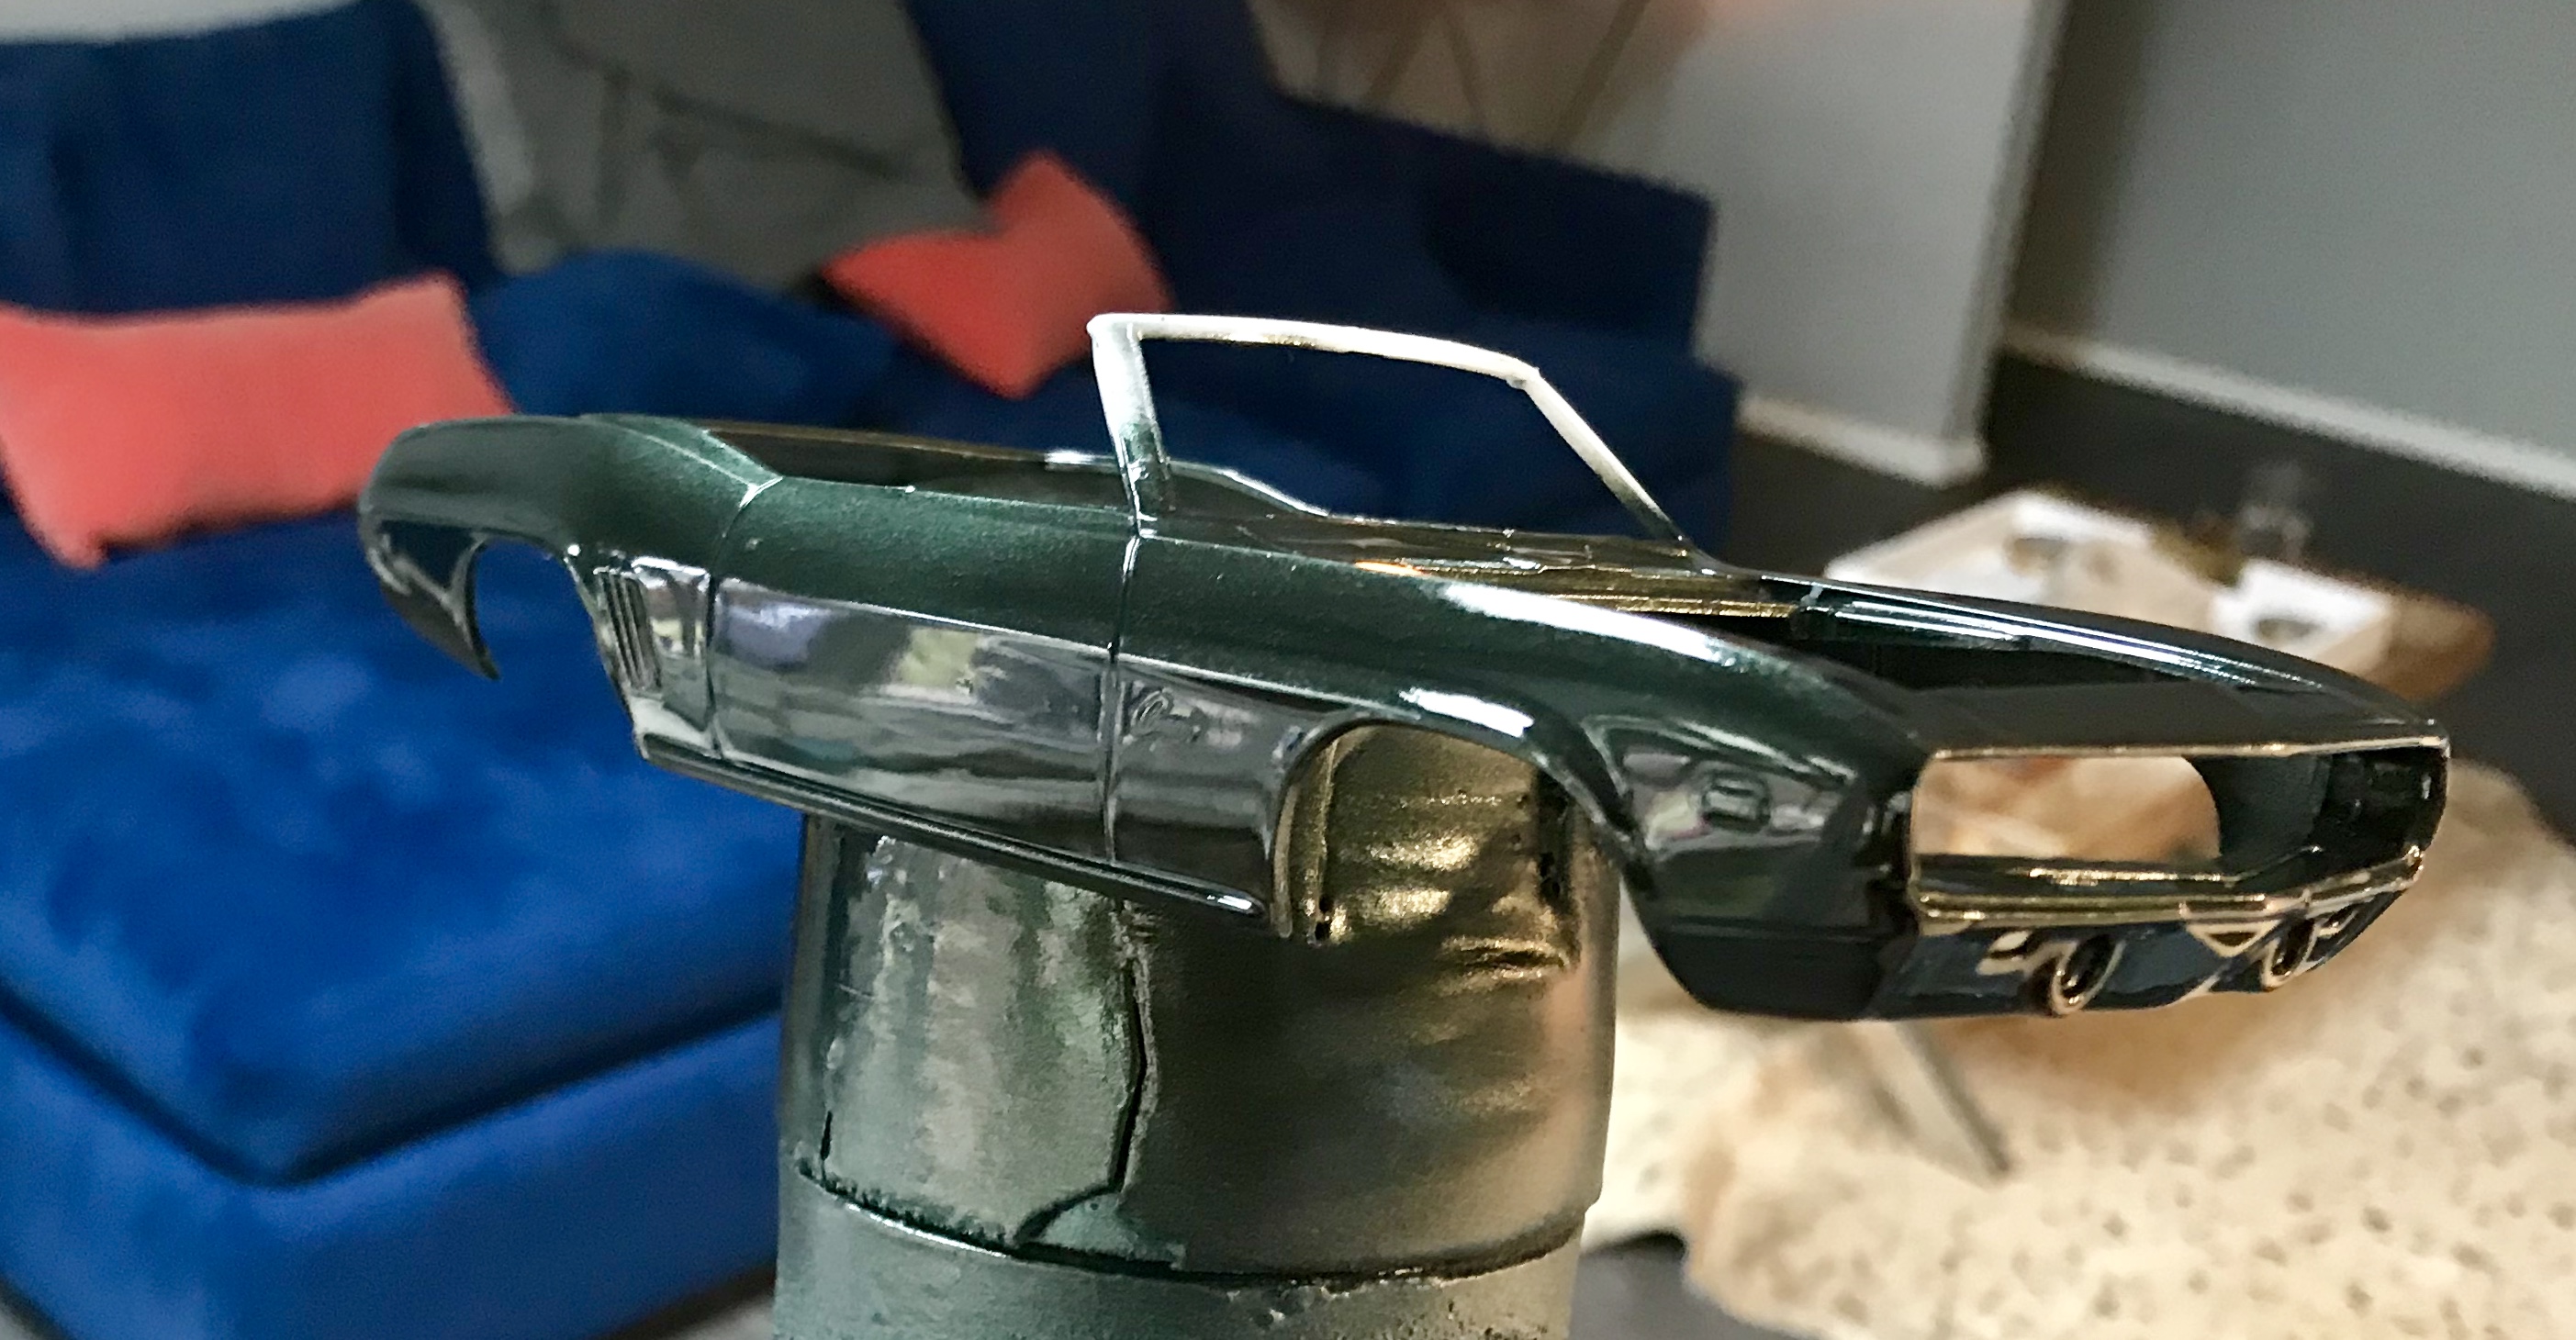
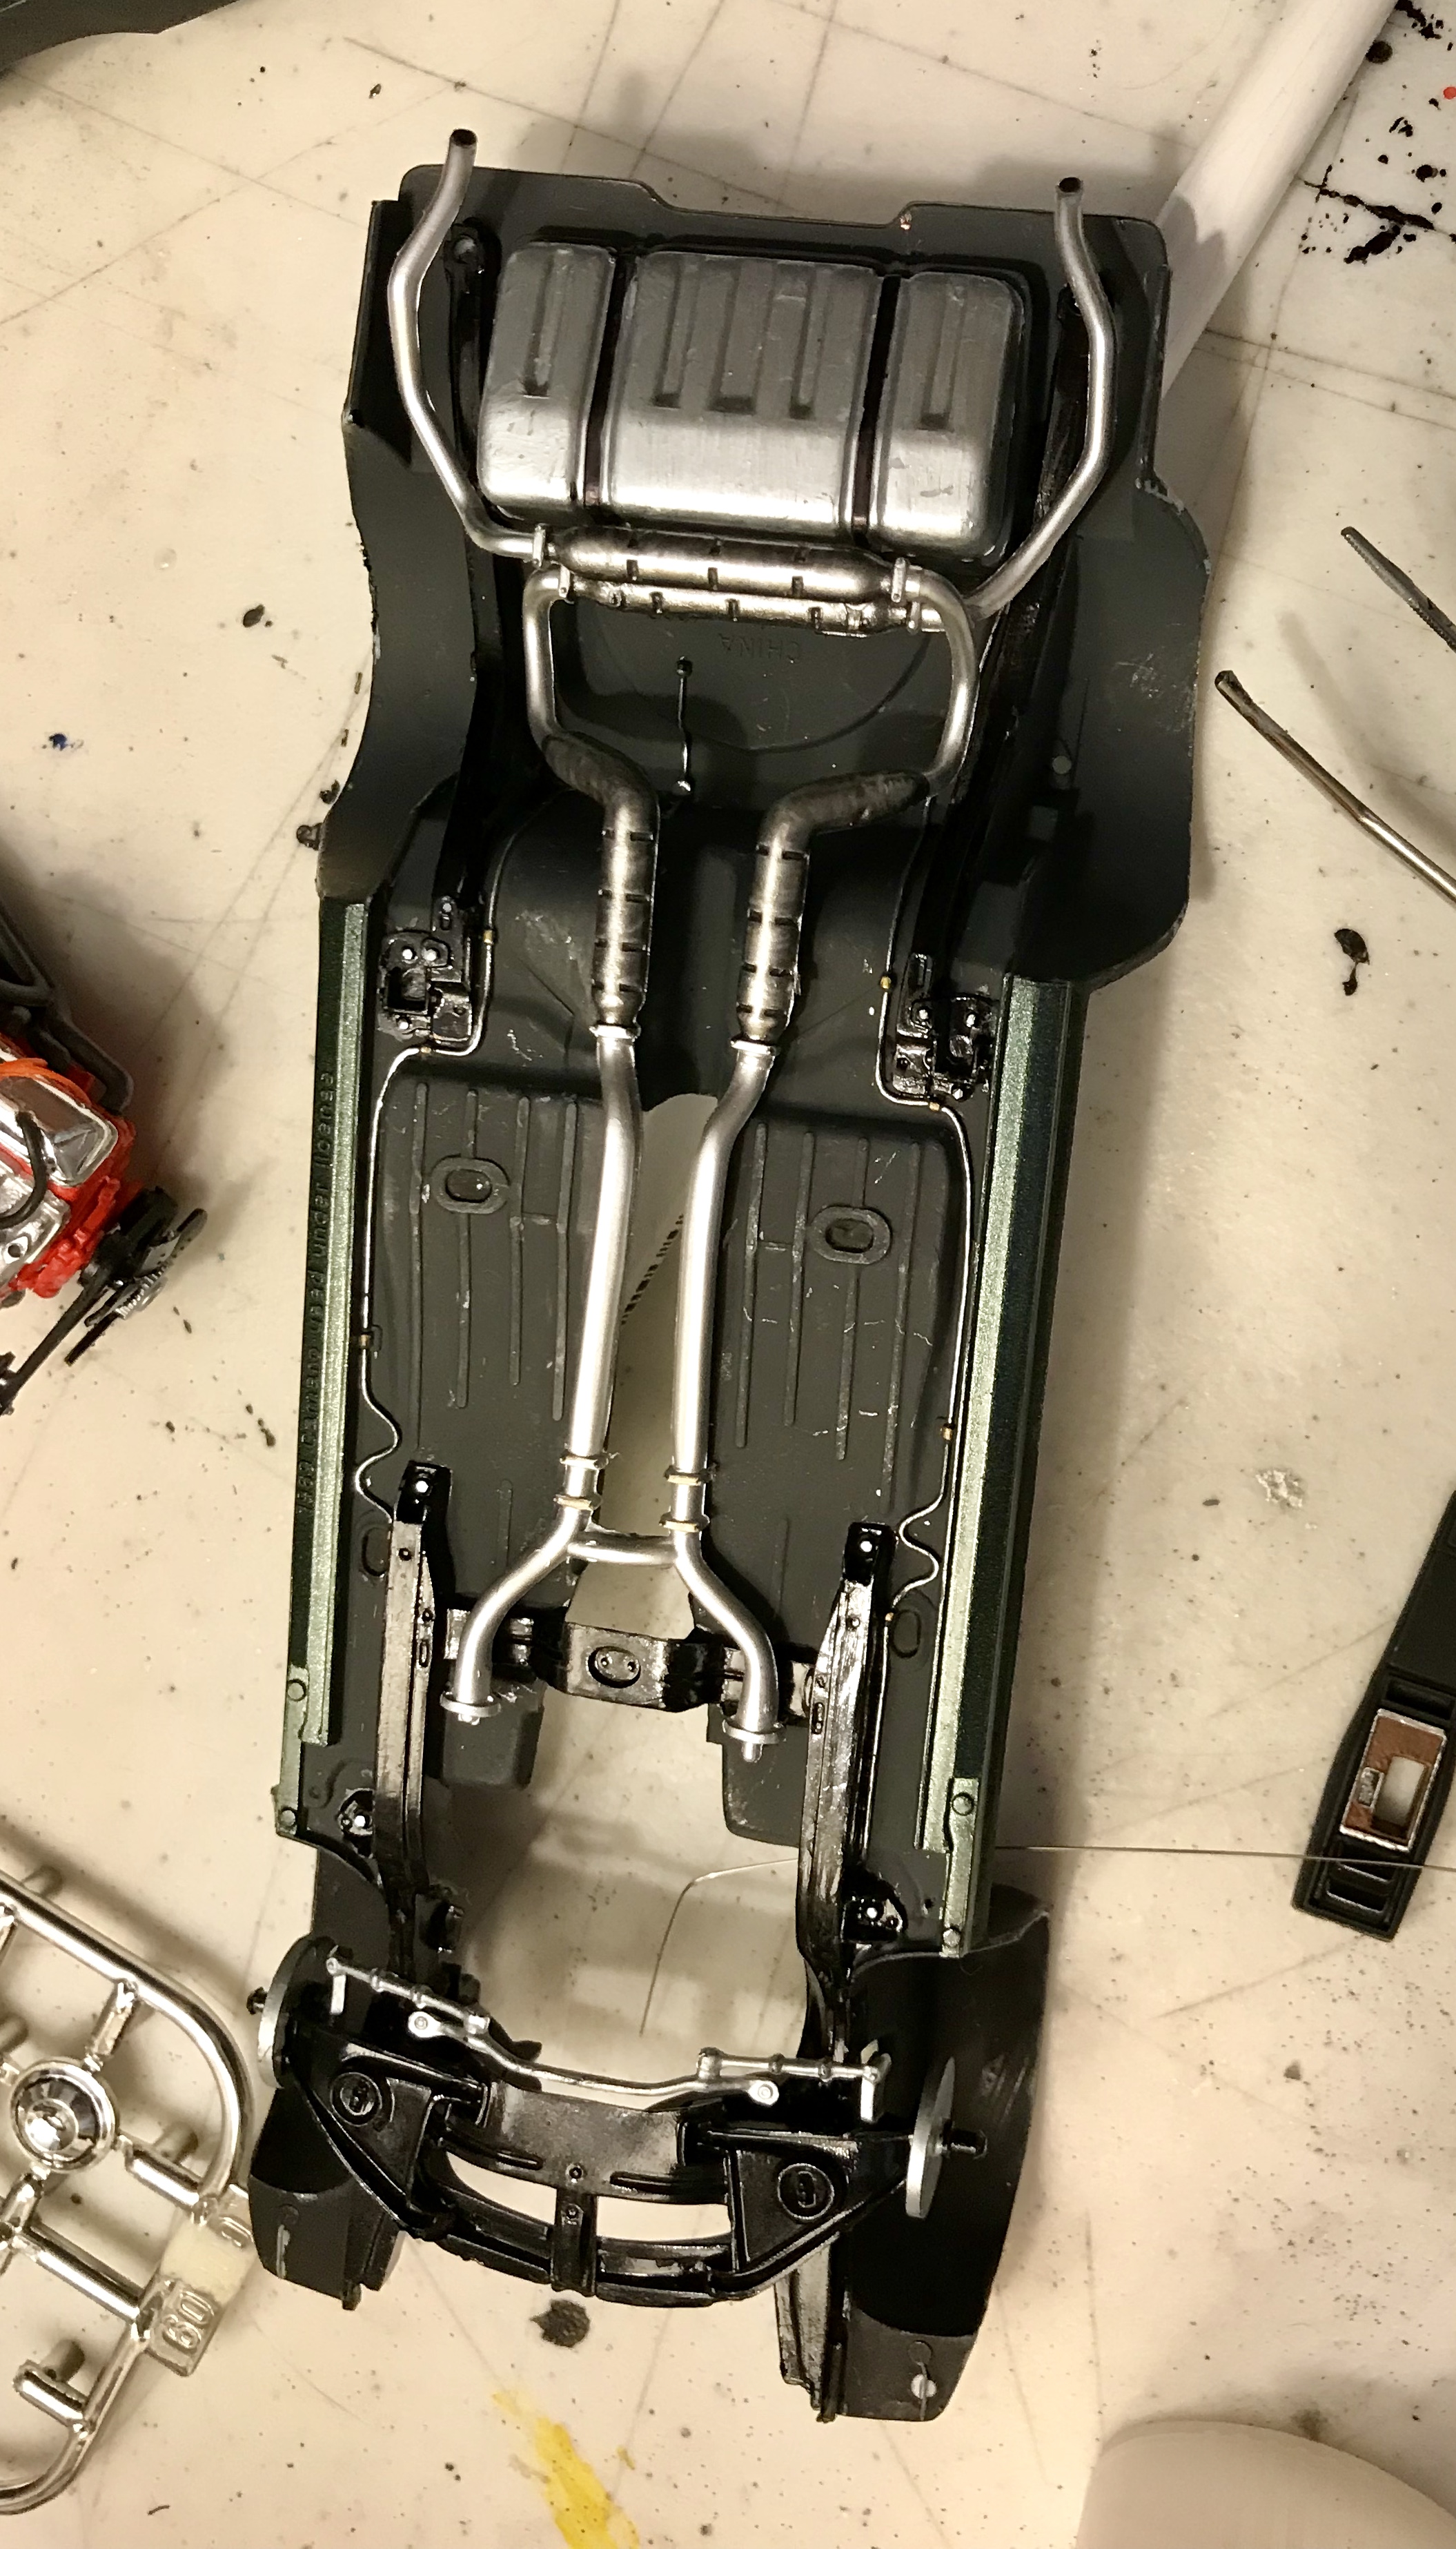
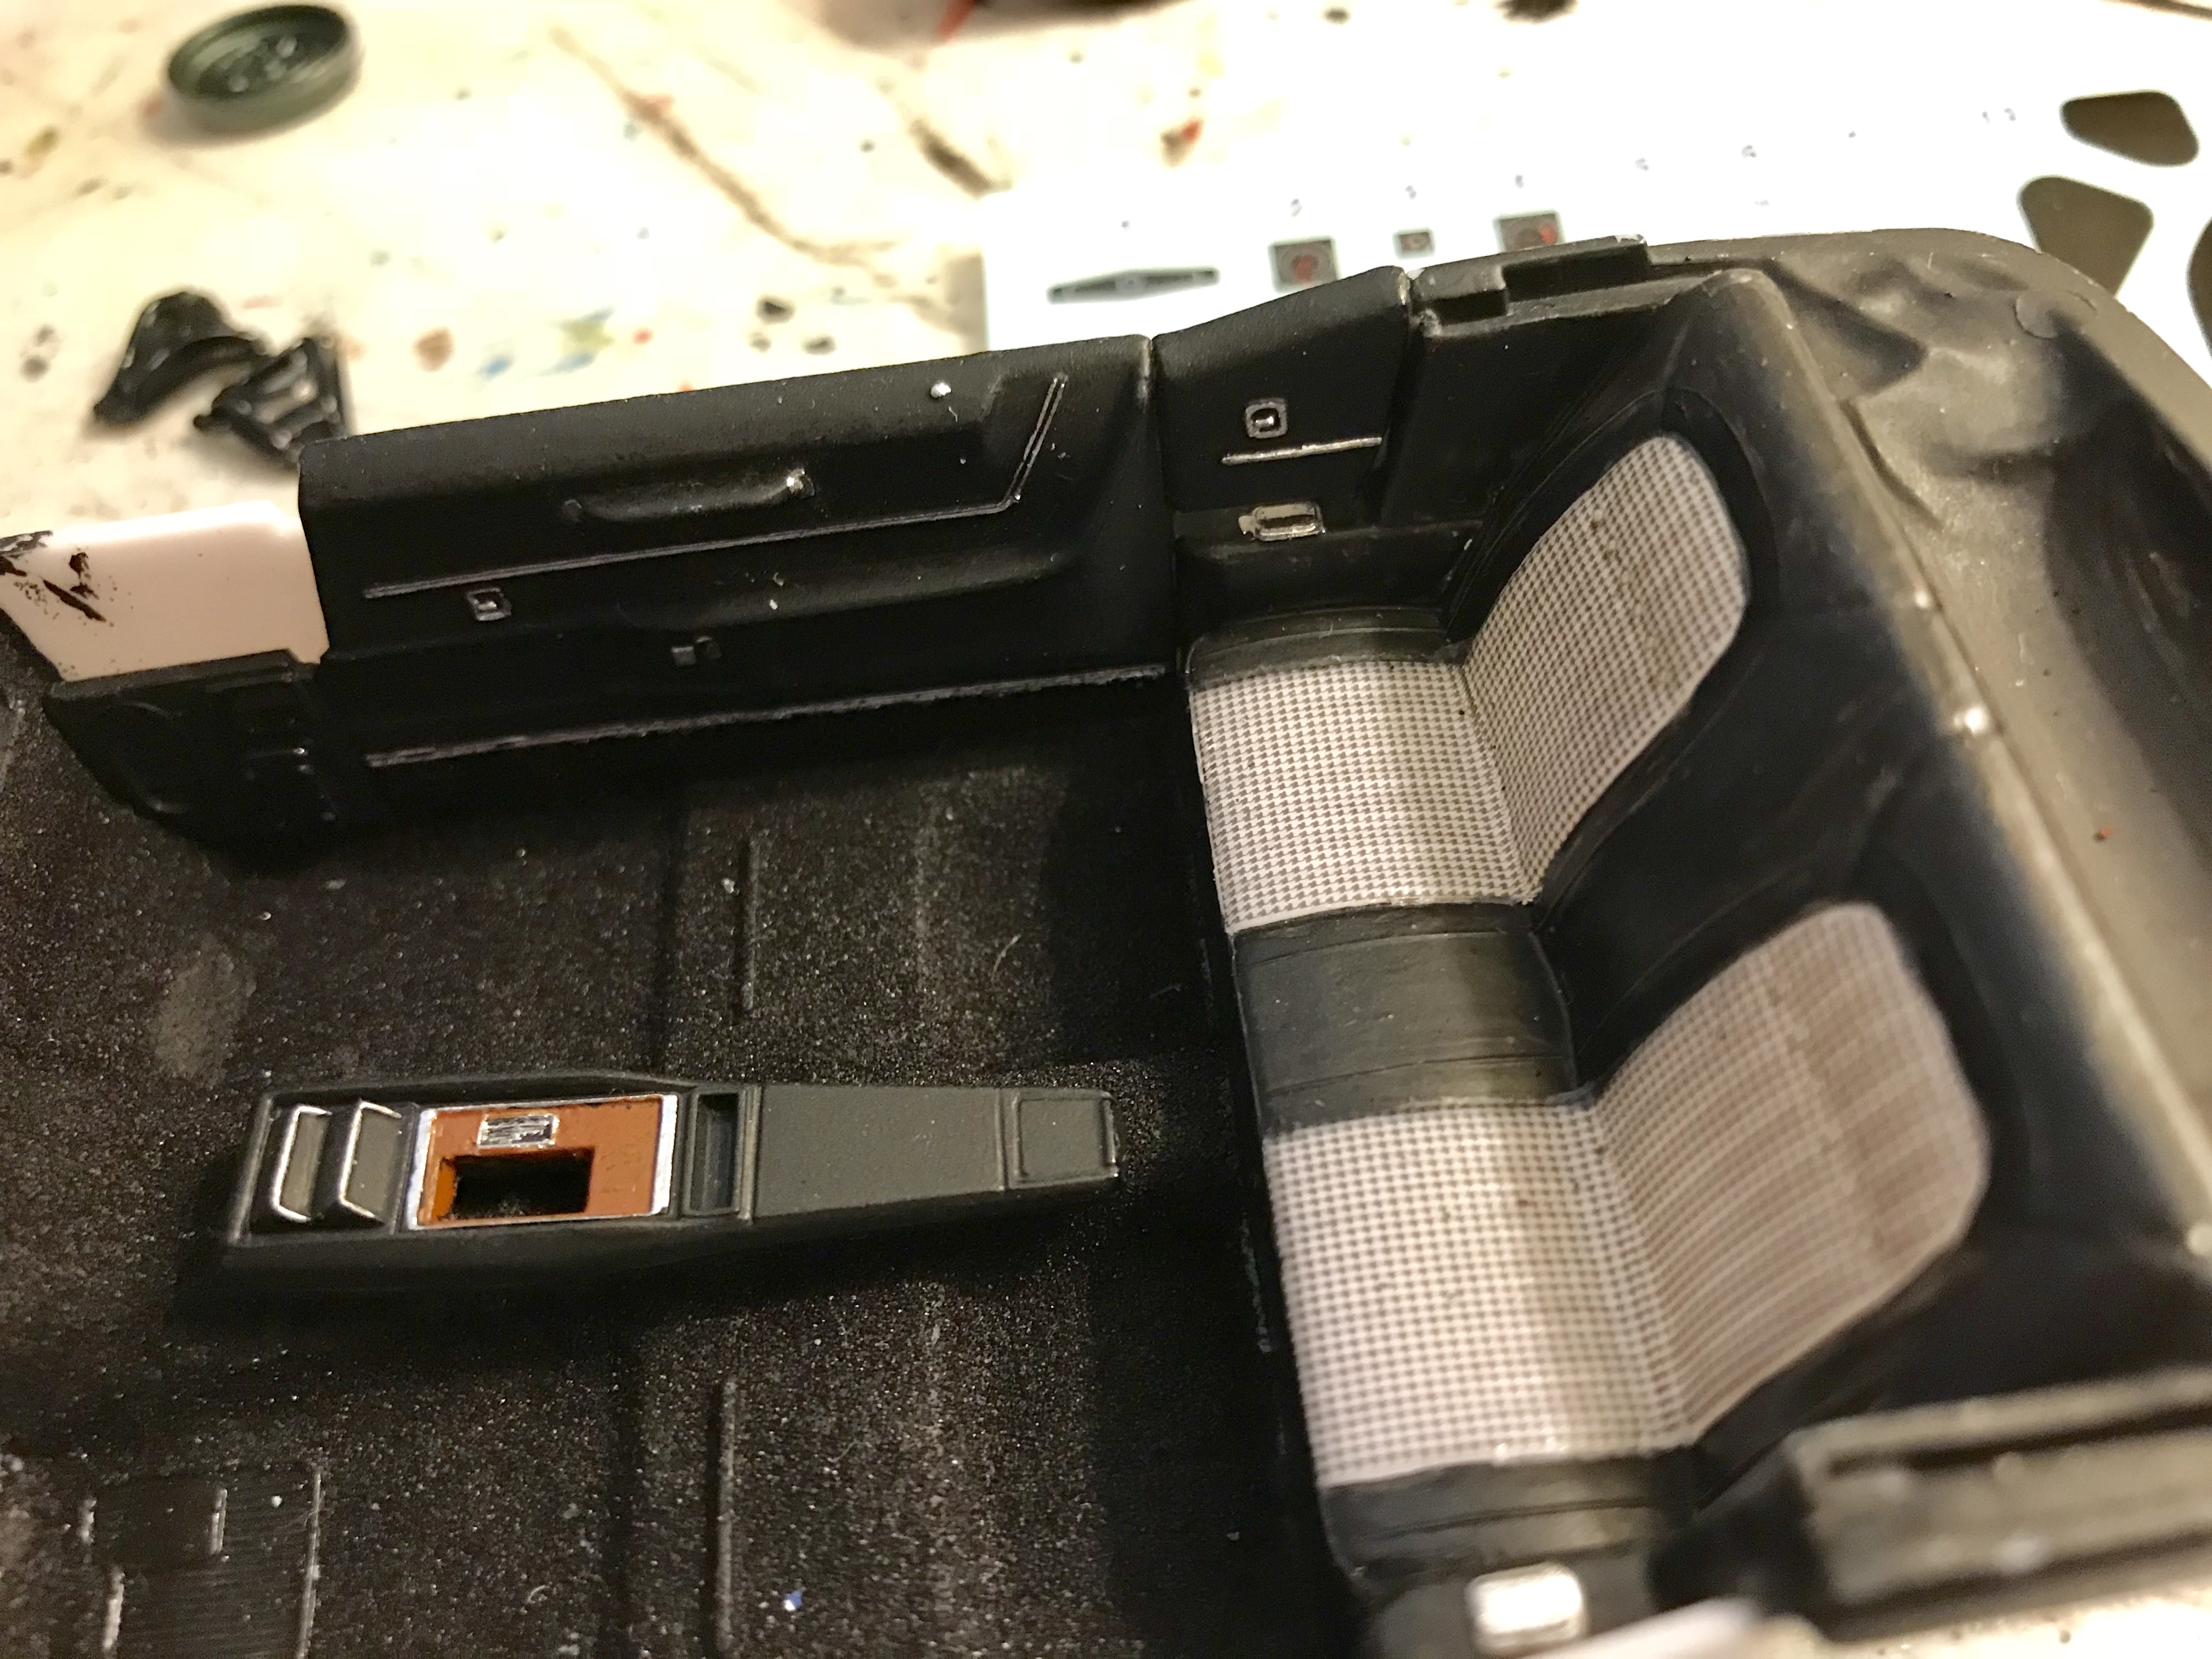
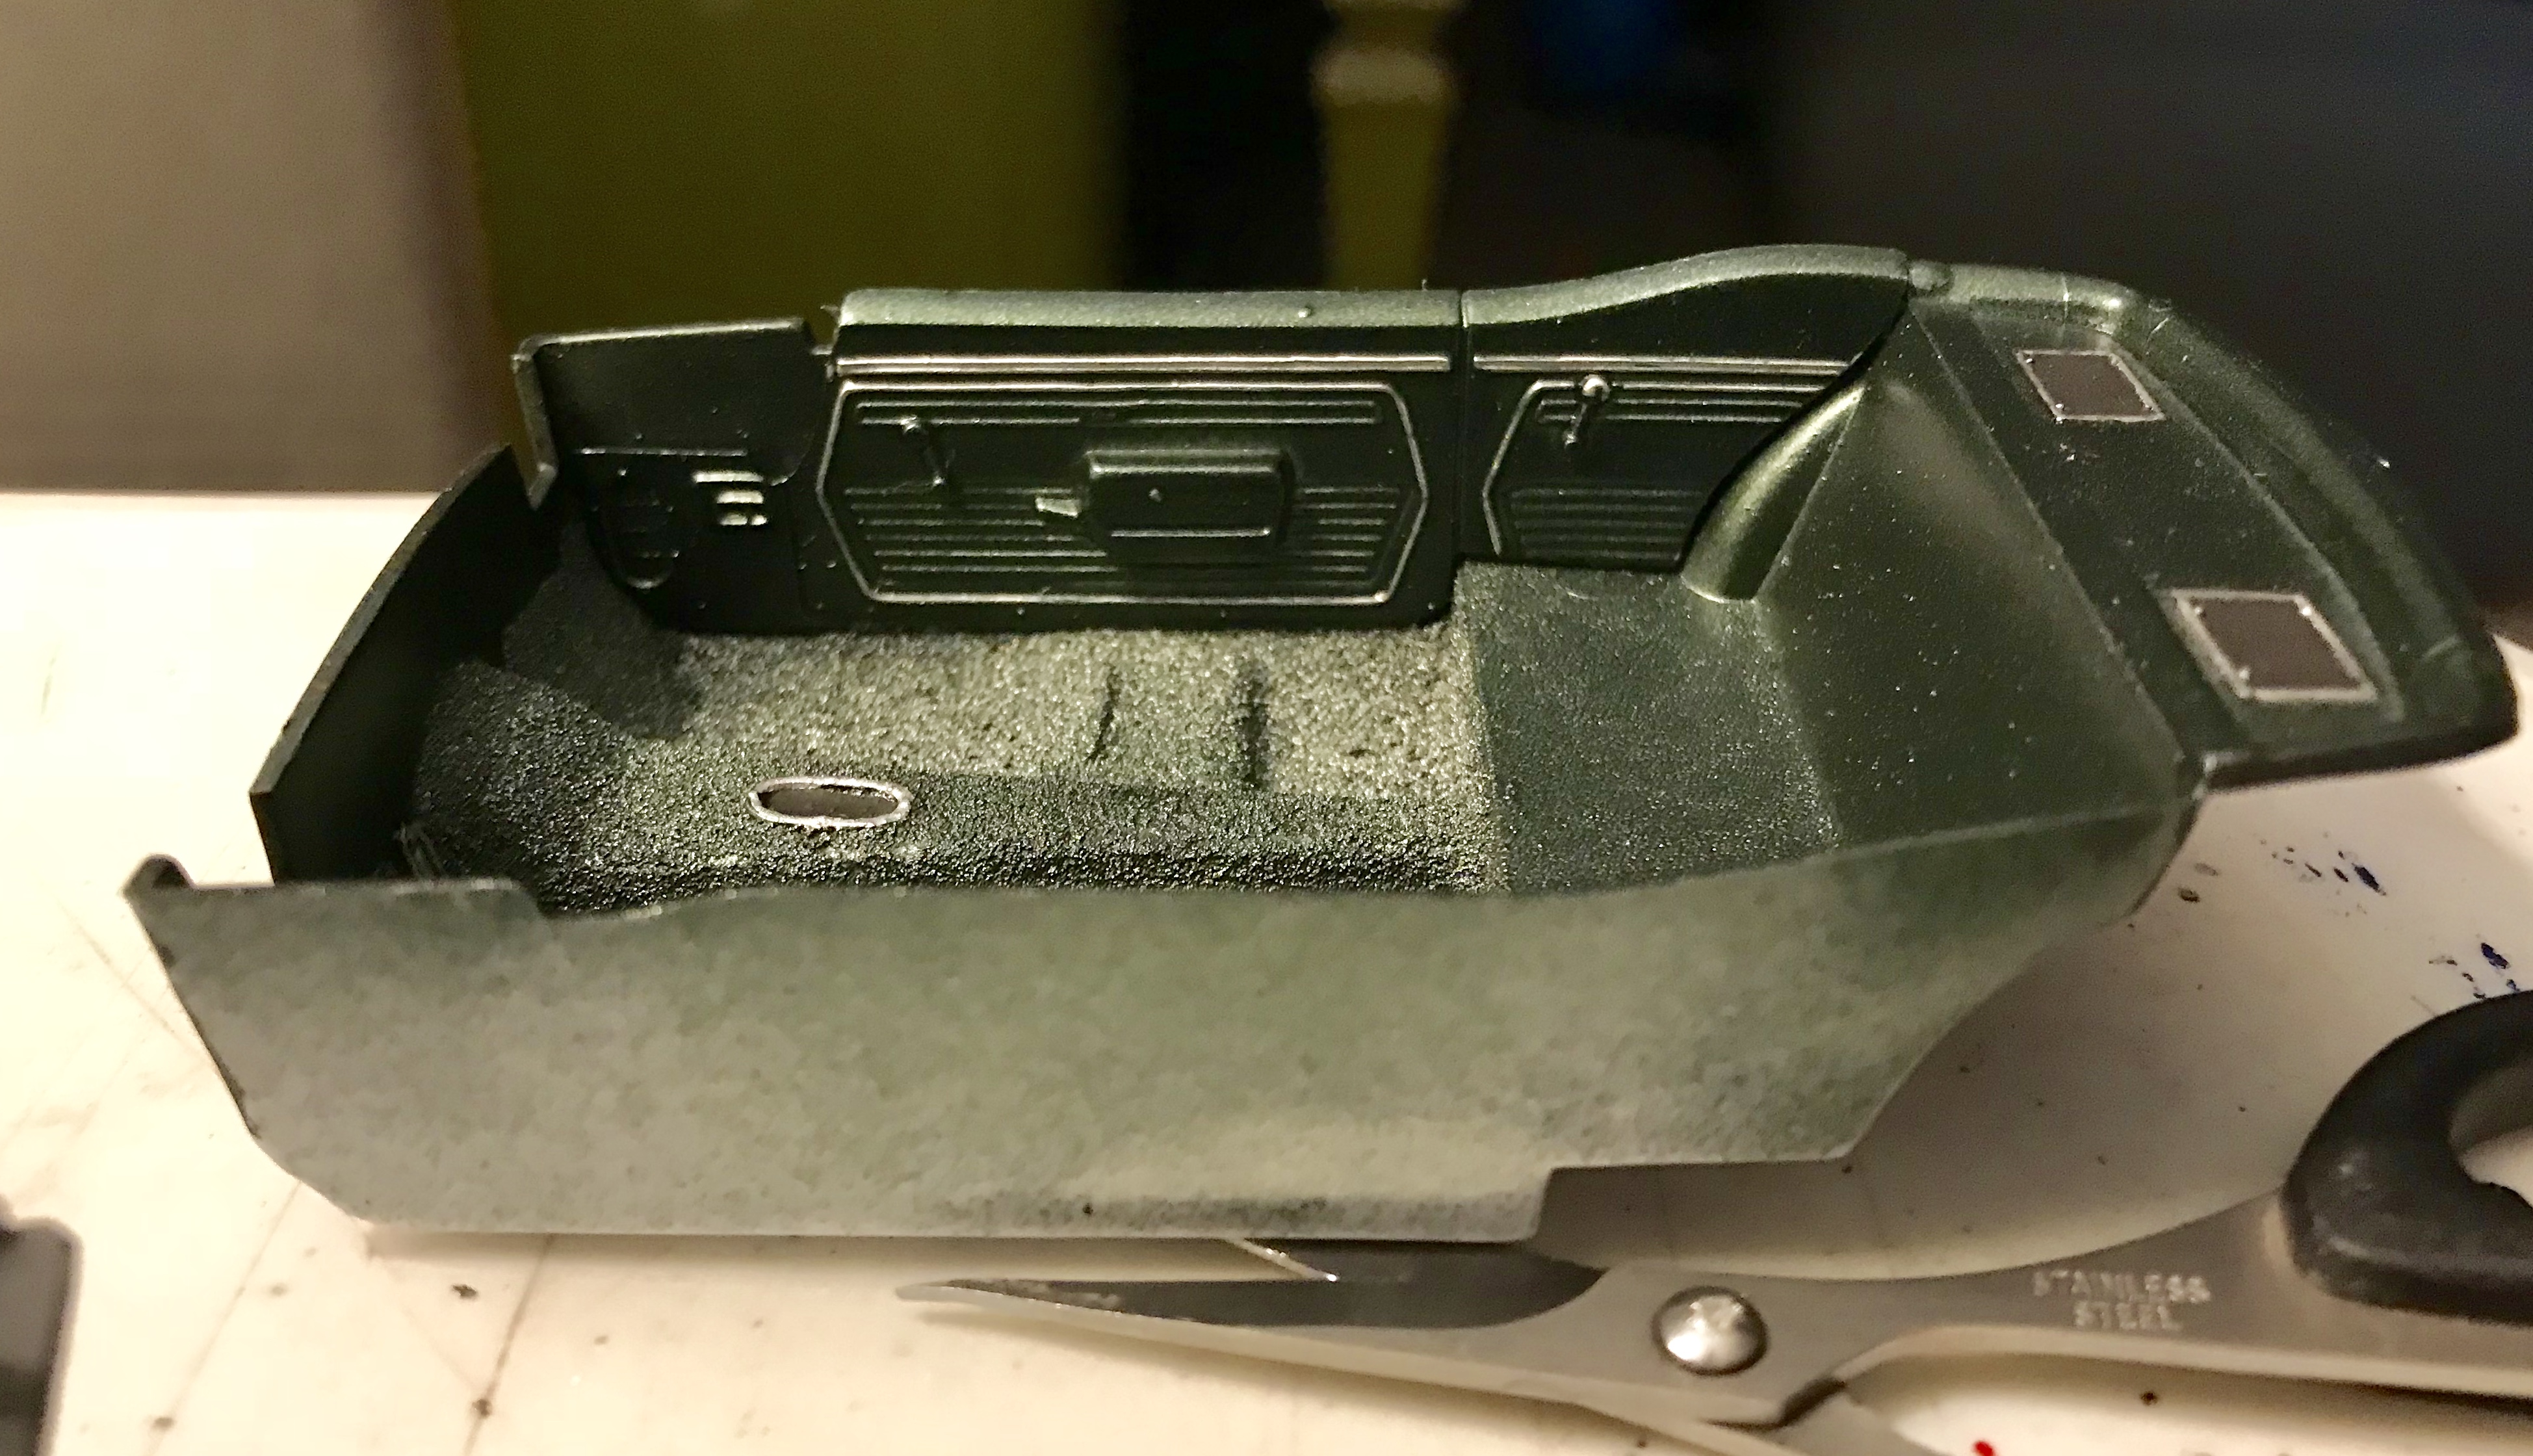
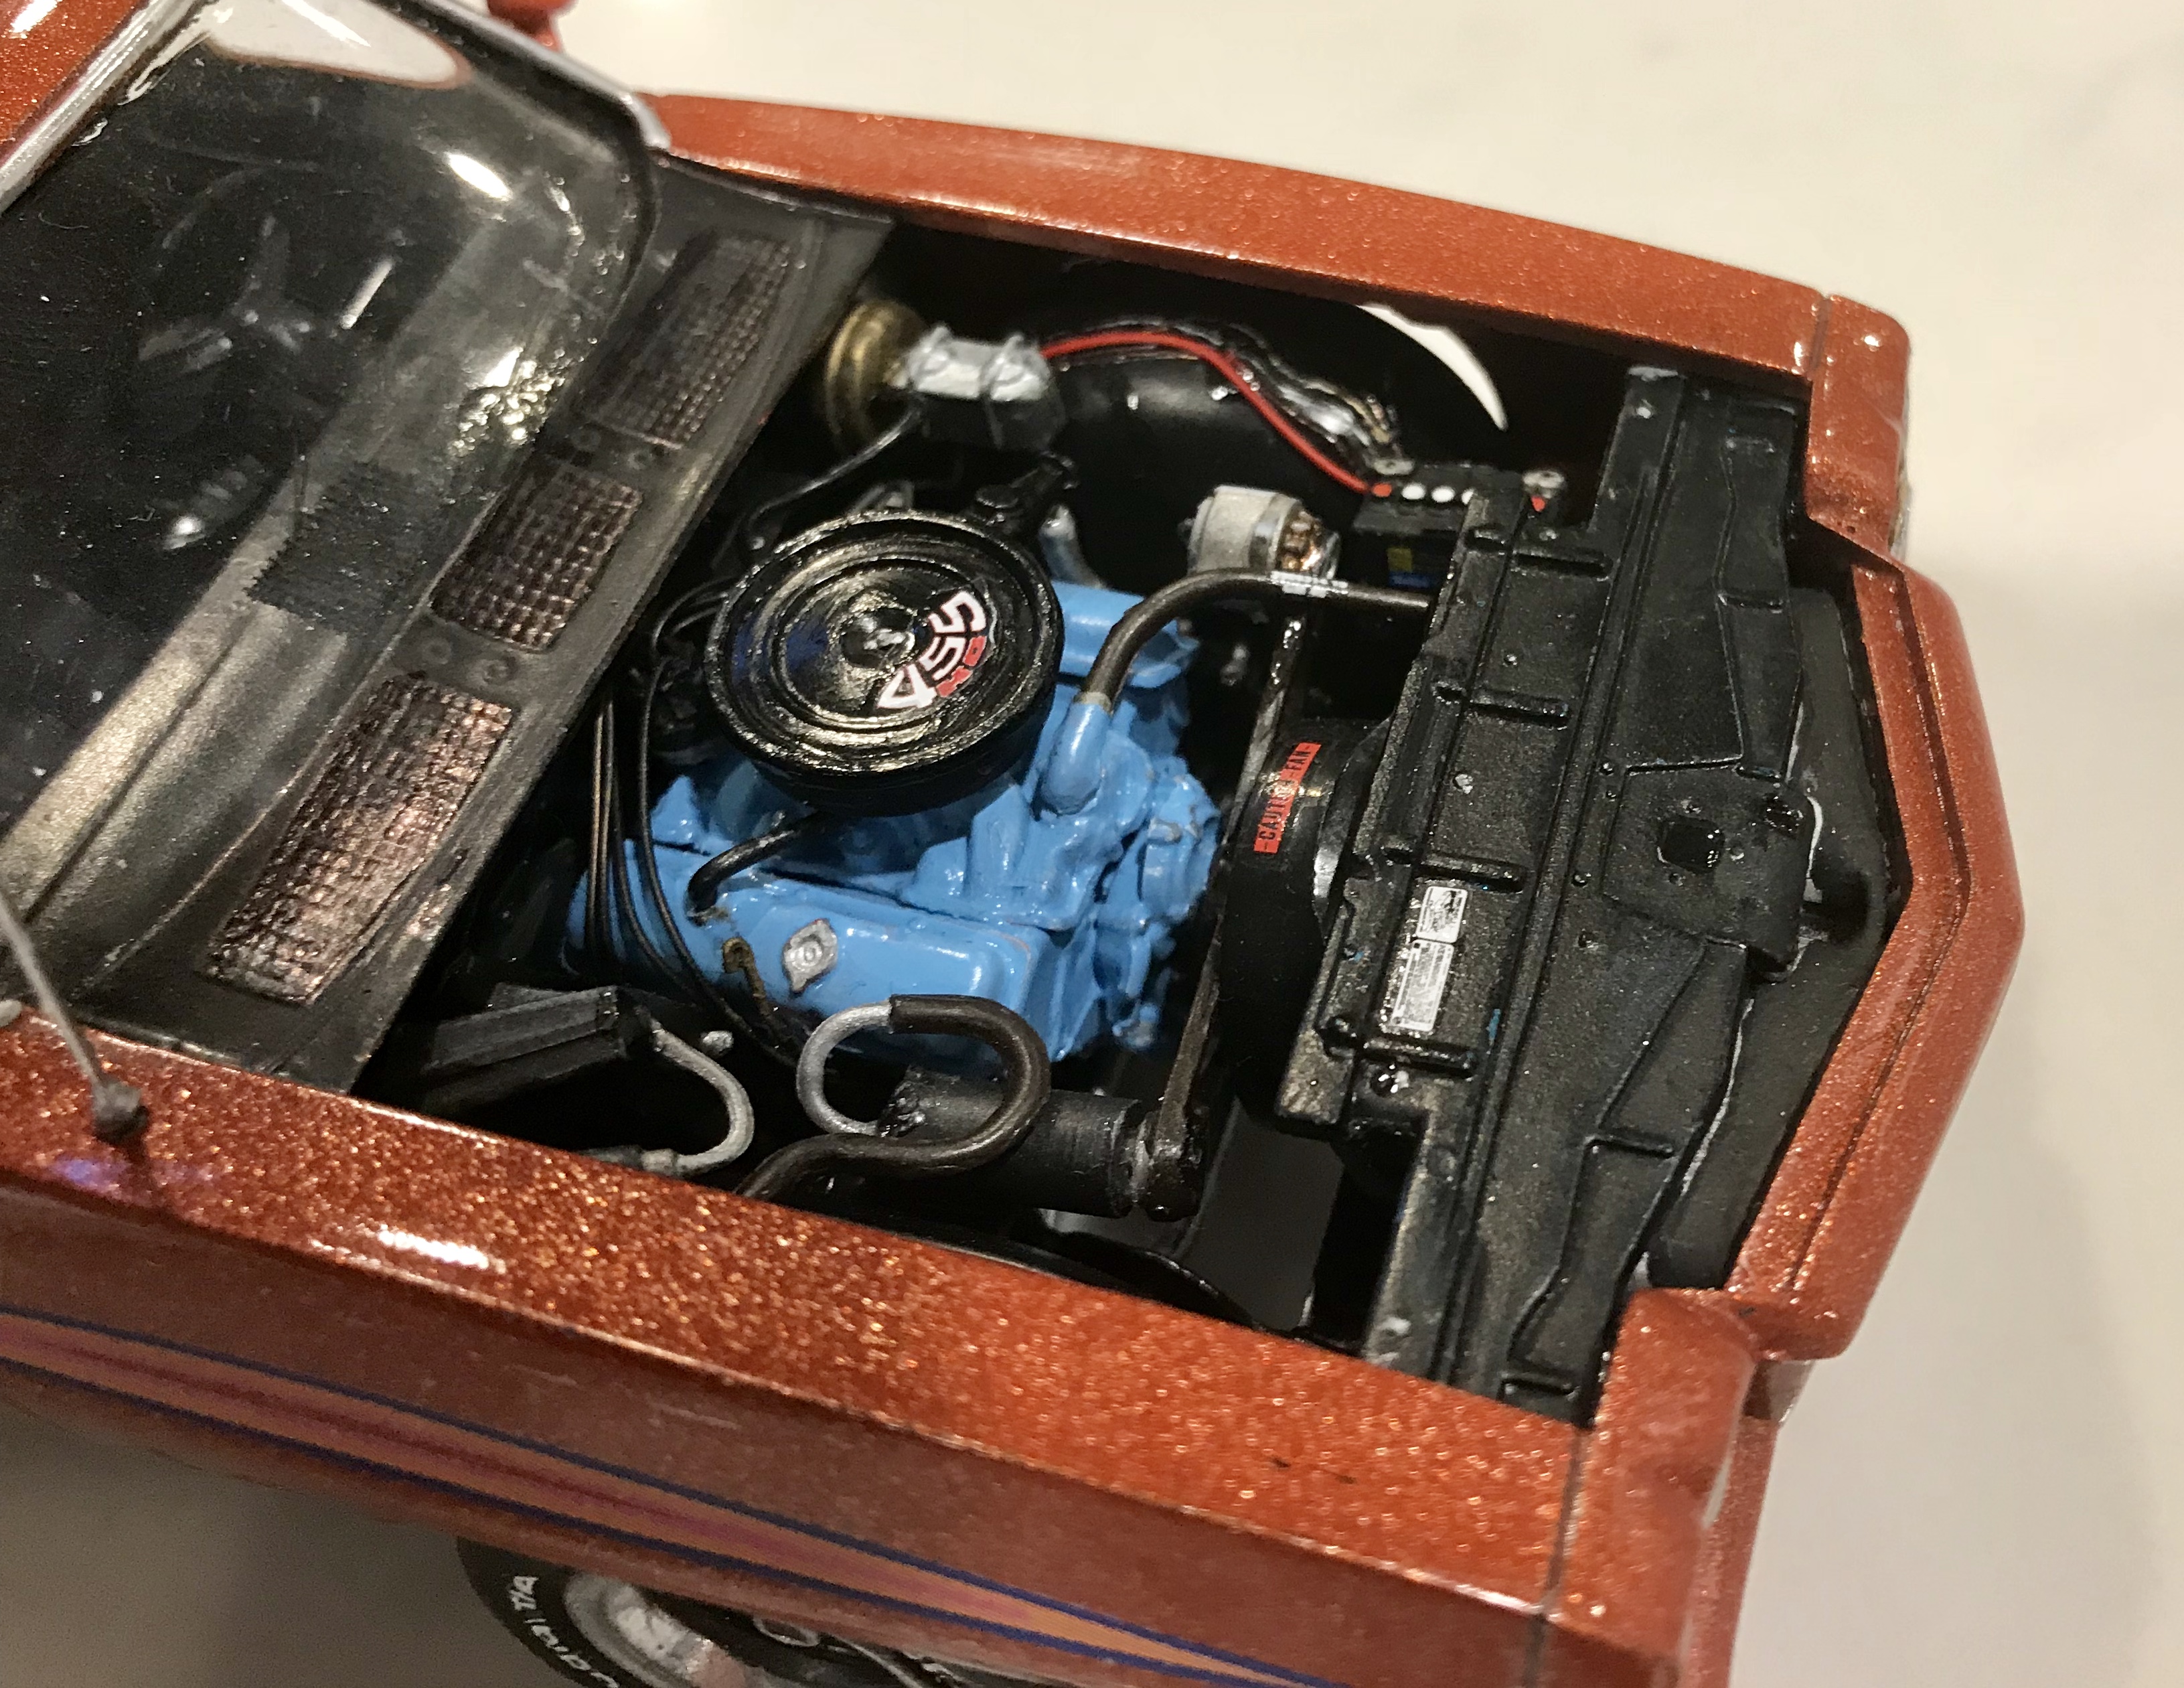
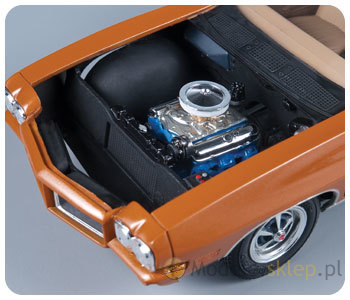
I’m getting to the end my list of kits to build, and have wanted to this project for a while. I LOVE first generation Camaros. I’ve built two Revell 67s.... one as a Tahoe Turquoise SS, the other as the Better Off Dead car, and a 69 COPO. I wanted to build a basic 69 SS, but that isn’t offered in Coupe form, only the convertible kit. So, I had an idea... I don’t have a Camaro convertible, and I’d like to add one, so let’s mix and match parts to get an SS coupe. I thought about getting a Z28 coupe and making the convertible into a base 307 model, but I wanted both the standard front grill and the dog dishes, so I bought another COPO. My initial plan is a SS 396 coupe and a “what if” COPO convertible. I originally planned to swap interiors, since the convertible comes with the deluxe and COPO has the standard, but the interior buckets are different and the deluxe interior has the rear seat molded in. So with a 427 and a deluxe interior, this convertible is an expensive one- off! As far as colors, I knew one of them would be Fathom Green, my favorite color. I thought it would be the coupe, until I started researching. Surprisingly, I was really taken by the unique vinyl roof of the 69 model, and decided to try to replicate it. This one was IT: That left the convertible to be Fathom Green, and I want to do a white top and the black houndstooth interior. This one is an RS, but you get the idea. I wasn’t necessarily planning to have both of them end up green, but the Frost with dark green vinyl was too good to pass up. Since I’m “COPO-ing” the convertible and I already have a COPO coupe with the standard front end, my coupe will be an RS. I’m going to add some extra detail and take my time with them. Should be fun! Initial progress has been mostly painting. I’ve painted both chassis: This one has the cross member and front suspension in, the other doesn’t. The exhaust is painted but just sitting in place. I still have a little more detailing to do, but it’s close. I started assembling the 427... it might be a little wider, but the parts look identical to the 396. I’ll get a better comparison when they’re both assembled. I also started painting interior components after using embossing powder for carpet. On the deluxe interior, I laid the houndstooth decals and shot the seats with some flat clear. For the midnight green, I used Fathom Green with no primer to keep it slightly lighter.
-
Beautiful job, Steve!!! I love everything about this build. This one deserves a standing ovation!!!
-
Anyone who’s working on one or built one got pics of those steel wheels??
-
Duplicolor black, wet sanded with the full 400-12000 grit pads, then compound, then 3 coats of automotive clear and Zymol wax.
-
Utter perfection!!!! Incredible job... looks like you can drive off in it.
-
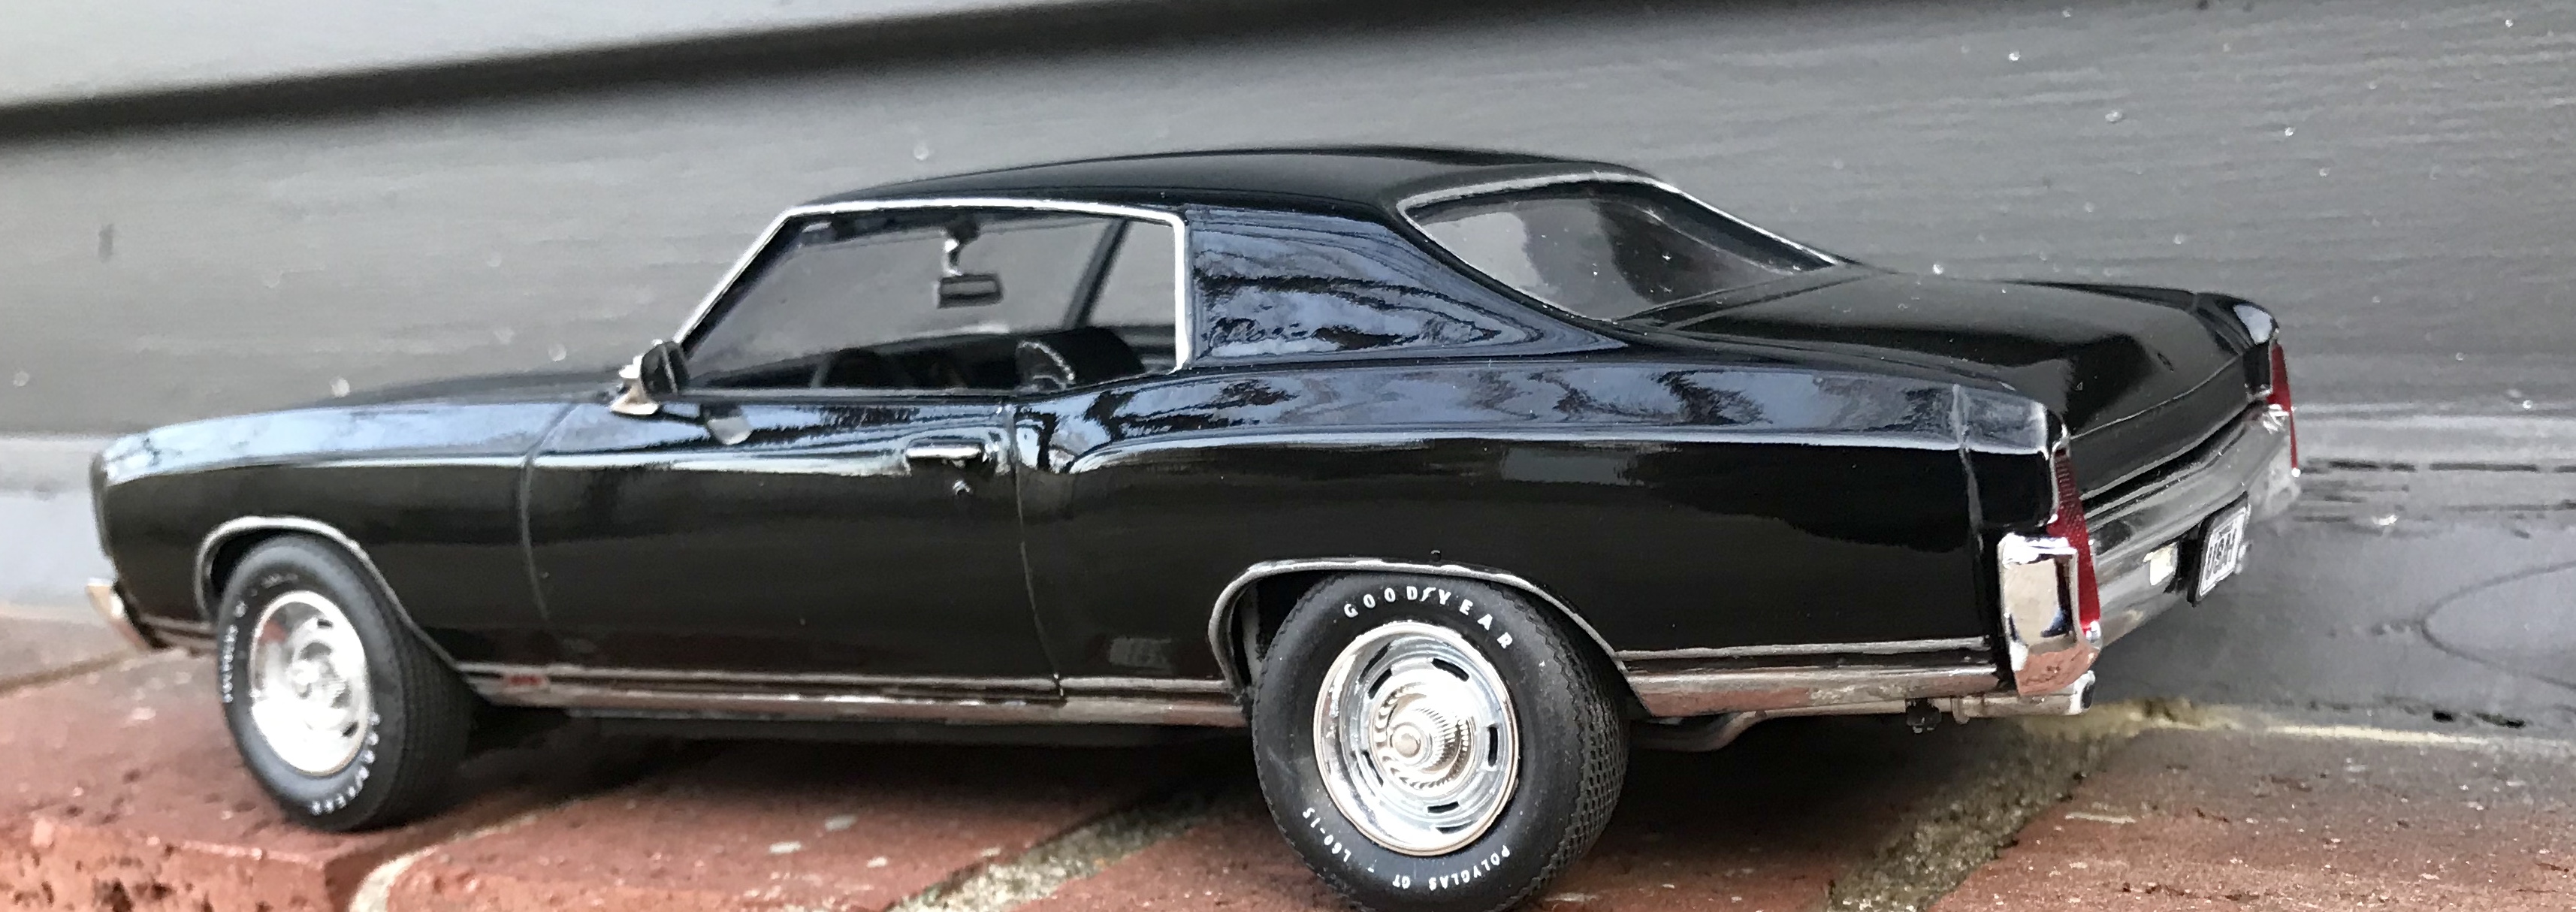
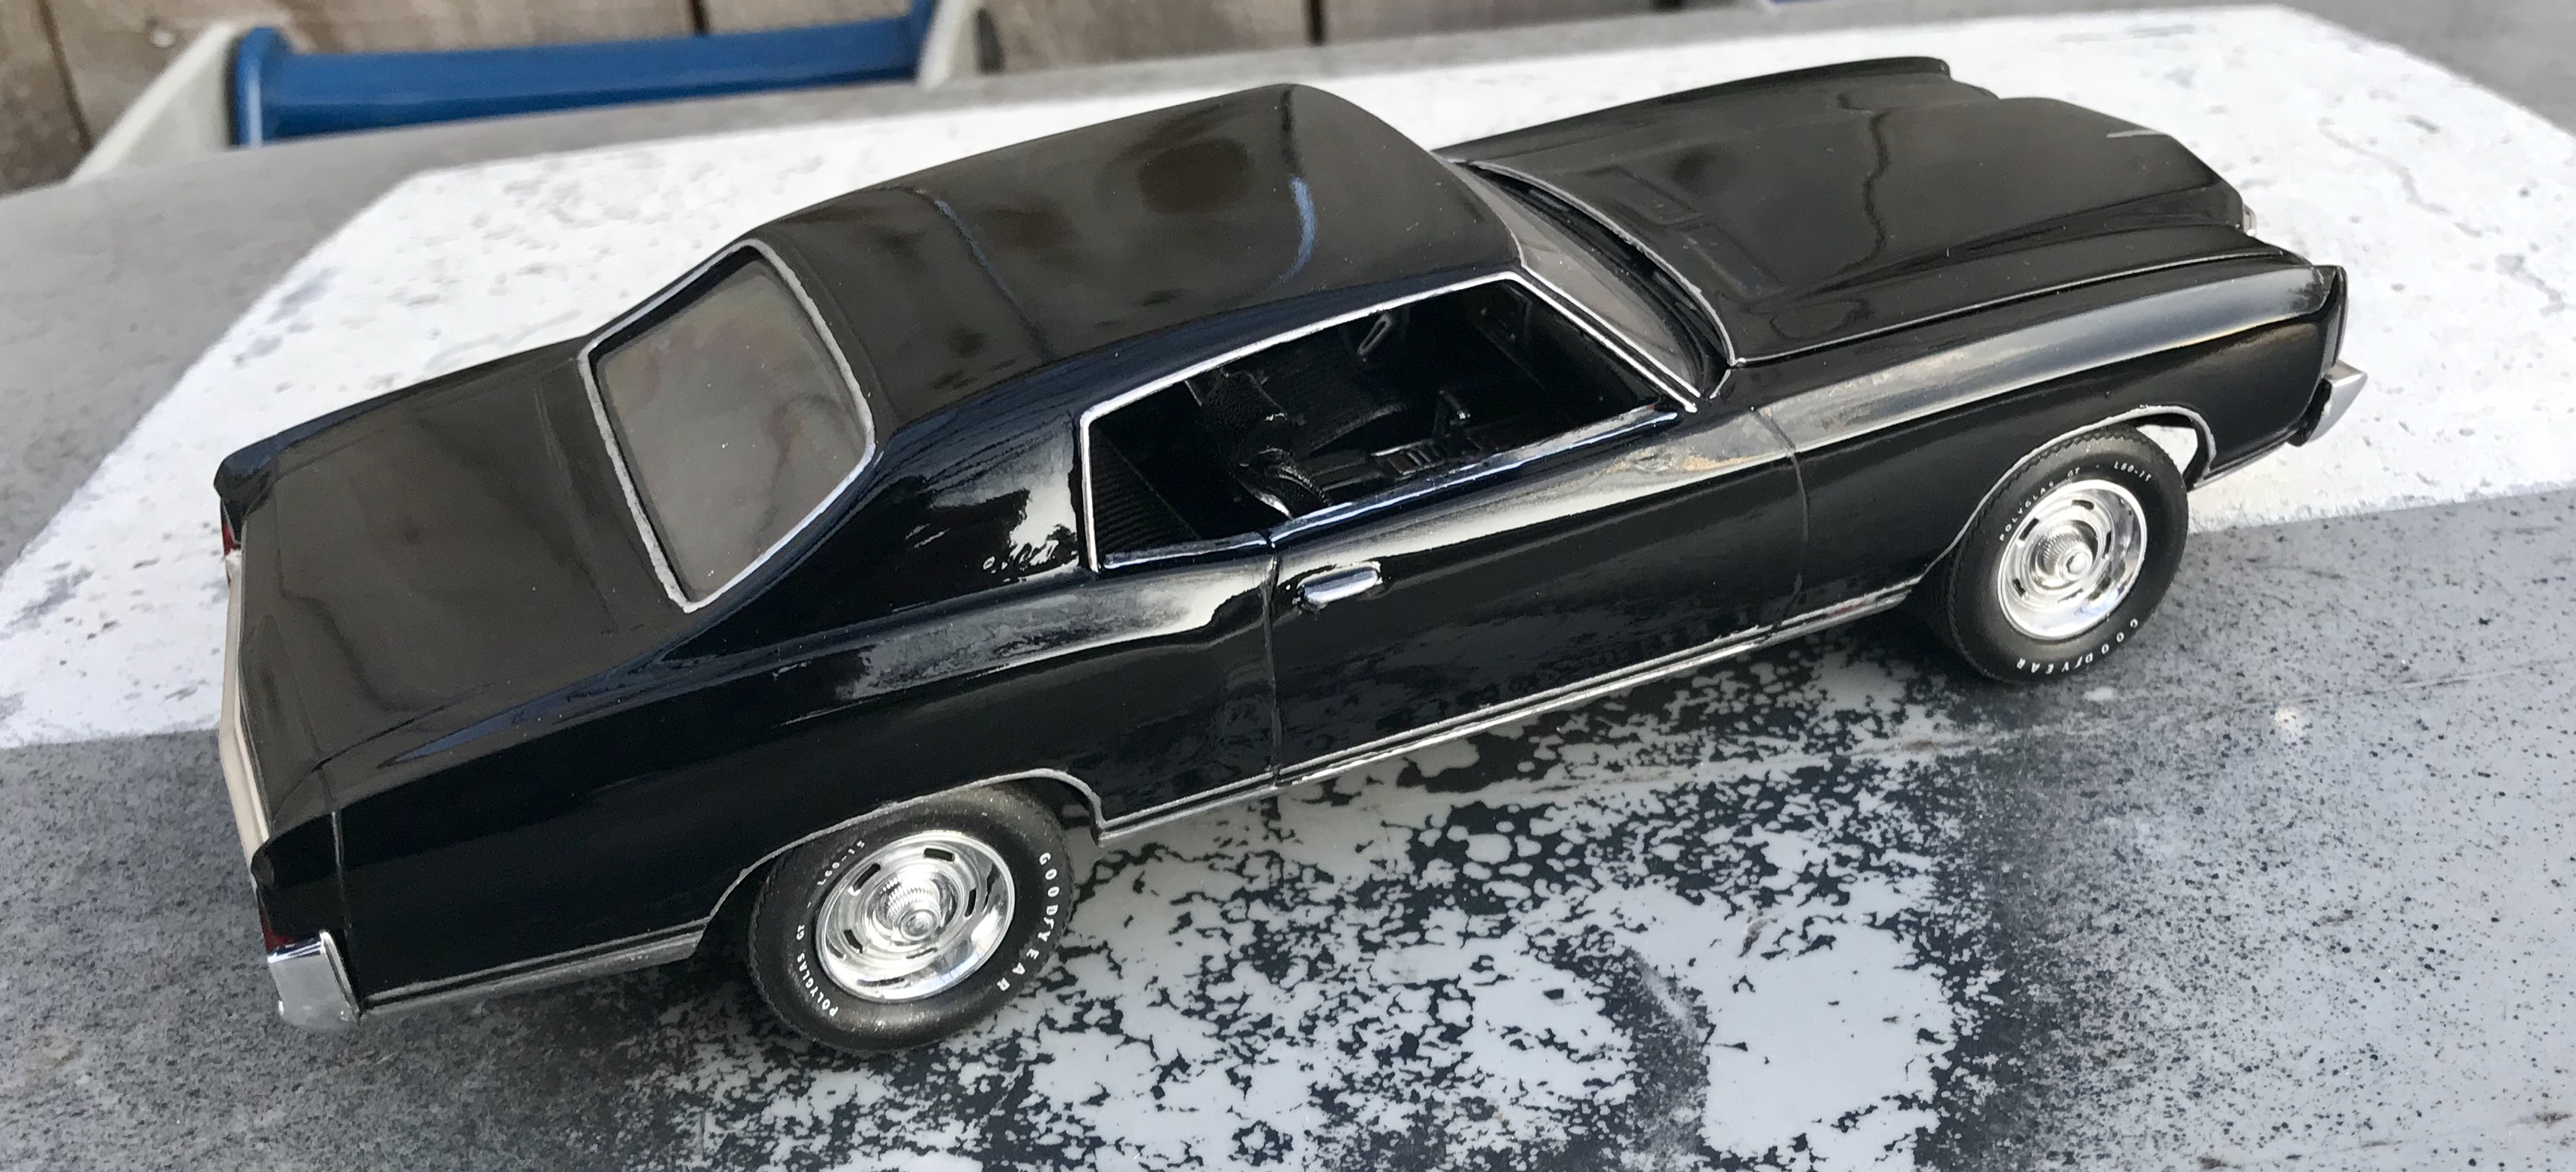
I built the AMT 70 Monte Carlo almost exactly one year ago. It came out fairly well, but every time I looked at it on the shelf, it stuck out as one I’d redo. But, I also couldn’t see tearing it apart. So instead, I just got another one. The first one was dark blue with a saddle interior... good, but something didn’t quite hit. The Monte, Grand Prix and Cutlass ushered in the “personal luxury car” era for GM. They had muscle, but they were two-door limousines. So, I went full limo... black on black. Wired the engine, and made seat belts, but only in front... these are personal luxury cars... the rear seat belts are tucked down inside the seat until the rare occasion they’ needed! The only other change: I didn’t use the kit wheels and tires. I used a set of Chevy rallys from Revell and put them in the pad-printed Goodyear Polyglas L tires. As of my post, I see a couple touch ups and I still need to fill in the logos, but I’ll get that done. I’m happier with this one... hope you like. Interior first: complete:
-
????. I typed my message from my phone... it autocorrected Bogger!!
-
Just BEAUTIFUL!!!!! Fantastic restoration and great color choices. Man, I wish this kit could/would come back... especially a new tool from Moebius or Revell!!
-
Bigger, Ive been waiting 3 years for that Revell Daytona to come back. I can only dream of getting it anywhere close to what yours looks like. That thing is INCREDIBLE!!!
-
OK, since this is back at the front of the Under Glass section, I’ll throw one in. Maybe not my best engine, but my biggest conversion. The MPC 72 GTO. This is the box art of what’s in the kit: After a lot of research, raiding the parts box, a couple aftermarket purchases and some surgery, here’s my engine:
-
1/24 Tamiya Ferrari 360 Modena with Hoby Design PE detail set
Kmb0319 replied to Tiago Malafaya's topic in Model Cars
Ummmmm..... WOW!!!!!! Amazing work.... perfect in every way.