Kmb0319
-
Posts
468 -
Joined
-
Last visited
Content Type
Profiles
Forums
Events
Gallery
Everything posted by Kmb0319
-
Moving to final assembly... got my interior done: And, she’s on wheels. The hood is standing up because I made heater hoses and haven’t attached them to the engine yet. The front end isn’t glued yet... just sitting on for reference.

-
A few updates. I got my engine wired up and decals on: Chassis: And finally, I started on the decals, including the body stripe. I think I might like it better without the stripe, but it does look good, and the stripe makes it even more “grandma-ish” to me. This pic is also better lighting to see the “primer pearl” color. Next will be all the interior details, getting the glass installed and starting to pull the components together.
-
Thank you! Yes, it has the bucket seats and the bench. I’ll go with the bench, as it’s a Nova, and when do you get a bench seat in a model?
-
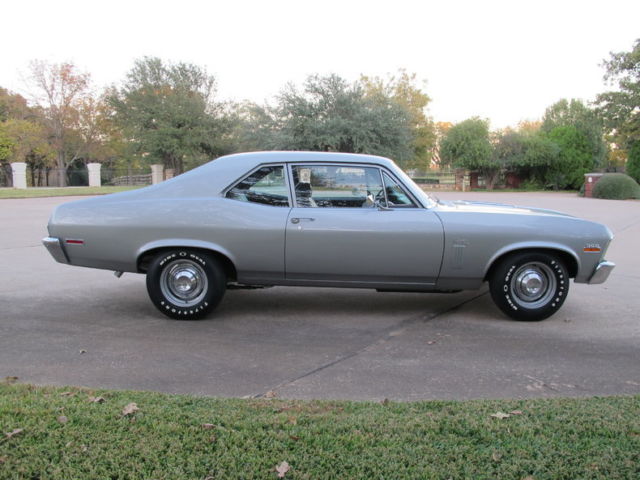
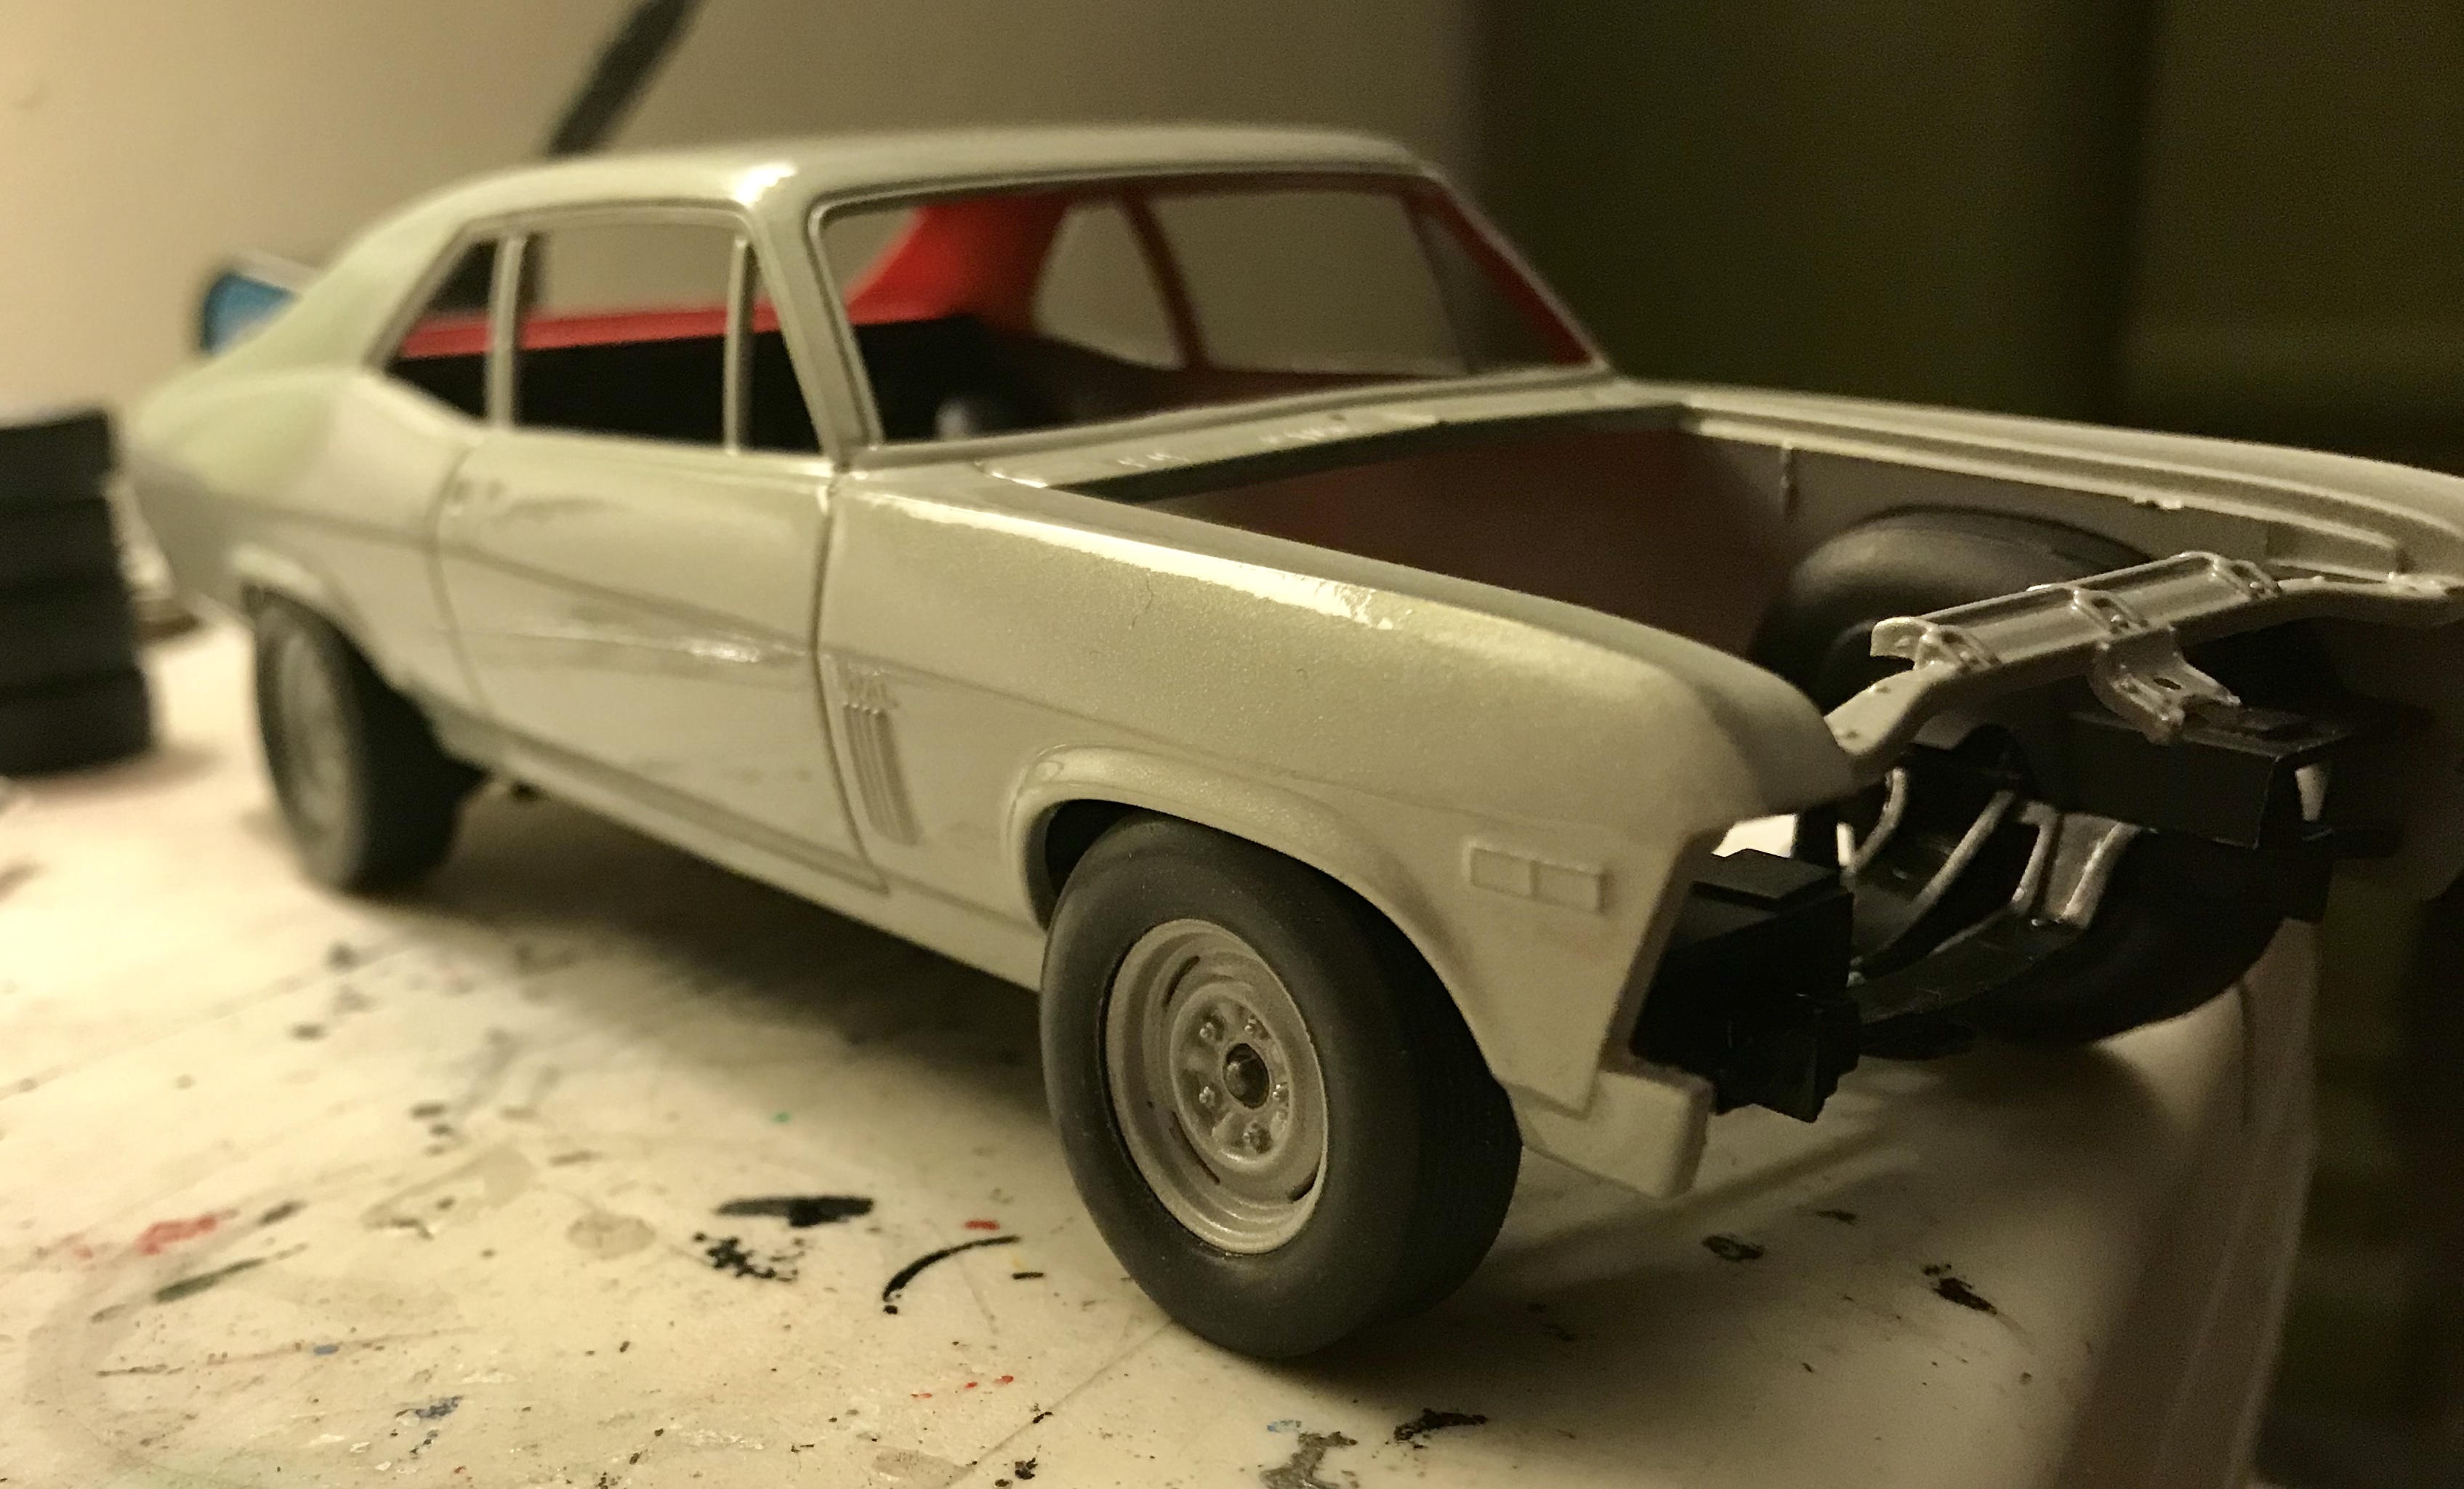
I built the Revell 69 Nova before... the SS 350 kit. GREAT kit, but my end result was less than I hoped. Mainly, it was my color choice... a Forest Green exterior with a pea green interior. The greens clashed. I also was very unhappy with the Chevy Rally wheels in this kit... shallow, small and while the holes molded open was nice, the holes themselves were too large and square to look good. A year later, I repainted it with Verdoro Green and switched out wheels and tires. I liked that much better, but it was a little too “pretty” for a Nova. I kept changing out wheels and tires... then it got stripped again and repainted a metallic red with a black interior. None of the changes made it more satisfactory in the end, and the last stripping process scarred some of the body, so it was destined to be replaced. This time I got the COPO kit. When I researched for this build, the color that really stood out to me was Cortez Silver. One picture that I really liked was this: This was the winner. But, also, this and a couple other pictures showed me a finish that wasn’t a very sparkly silver. I wanted to try to replicate that, but all the model paint and Duplicolor silvers I saw were a heavier metallic, and I didn’t want to invest in a $25 can of auto paint for this build. I got an idea. A friend had asked me to try and fix a paint issue on their family car last year, and had bought some paint from Automotive Touchup for me to work with. Their car is an Infiniti that’s pearl white, and the paint came as a two-stage process: base white and a pearl midcoat before clear. I just put the pearl midcoat directly over my gray primer and viola! It’s a tiny bit lighter than I wanted... my clear coat actually lightened it a little, but I’m happy with the finish. My other change from any pictures I reviewed was the interior. Everything I saw was black, but red was an available color option on Nova interiors for 1969. If that combo could look good on every Porsche and other sports car of that era, it could work on my Nova. Please excuse the terrible pictures, as I took them late at night in poor light, but here’s my progress so far: One shot with the flash on to see the “primer pearl” I'm using the kit tires in front, and the “NASCAR” tires left over from my 69 Daytona in back. I raised the rear a little to improve the stance. Also, as much as I love white lettered tires, especially with dog dish hubcaps, these will stay blackwalls to keep the pure sleeper look. More to come.
-
I miss those days! My first car was a 71 Chevelle. It wasn’t an SS, but a basic 350 4-barrel Malibu coupe. Some rust but solid, 120K miles, light green with matching interior and a black vinyl roof. I paid $250 for it!! Drove it for a year, and had done the body work myself to get it ready for a repaint, but an oil line ruptured driving home one night, which seized the engine. After a few weeks of car shopping, I bought a 73 Plymouth Road Runner... a few rust bubbles, but shiny gray finish with black stripes, perfect black interior and a strong 360 under the hood for $1900. Had a body shop fix the rust and put it in some local shows... not bad for less than $2,000! Meanwhile, my best friend endured the hand-me—down car from grandma for two years, but right before senior year, found a 72 Cutlass Supreme... 350... orange with black vinyl roof and a cream interior. It had 71,000 miles on it, and was owned by an elderly gentleman who washed it every week... you could eat dinner off of the engine. He took it home for $3500. Crazy what $ those cars command now.
-
Beautifully grungy!!! That’s a perfect beater. Awesome work!
-
It’s the AMT kit... they just re-released it in February. There was an issue getting the body and chassis joined together. It’s a tight fit, and my left side wasn’t getting all the way up in to sit level. I used a little crazy glue to anchor the left side into place, and it popped the rear quarter window out. I tried to get it back in, but with the body and chassis now fused, I wasn’t going to mess with it. So it’s cruising around on a Friday/Saturday night... the left rear quarter window is down, but the right one is up! Anyway, that’s the only area to really watch out for... final body/interior/chassis is tight, but everything else goes together easily. C’mon... do it... I wanna see yours!!
-
Just finished mine and posted it a few weeks ago. Beautiful work!!! Fantastic color, too.. I love these things!!
-
?? That would be perfect!!! One guy in my neighborhood had a 73... it was originally brown, I think, but was mostly a hodgepodge of different color body panels and primer. Crager 5-slots and jacked up in the rear. I’ll always remember seeing it the first time, before he started working on it, and noticing the rust hole where the Plymouth logo was supposed to be. It had rusted out so much the chrome logo collapsed through.
-
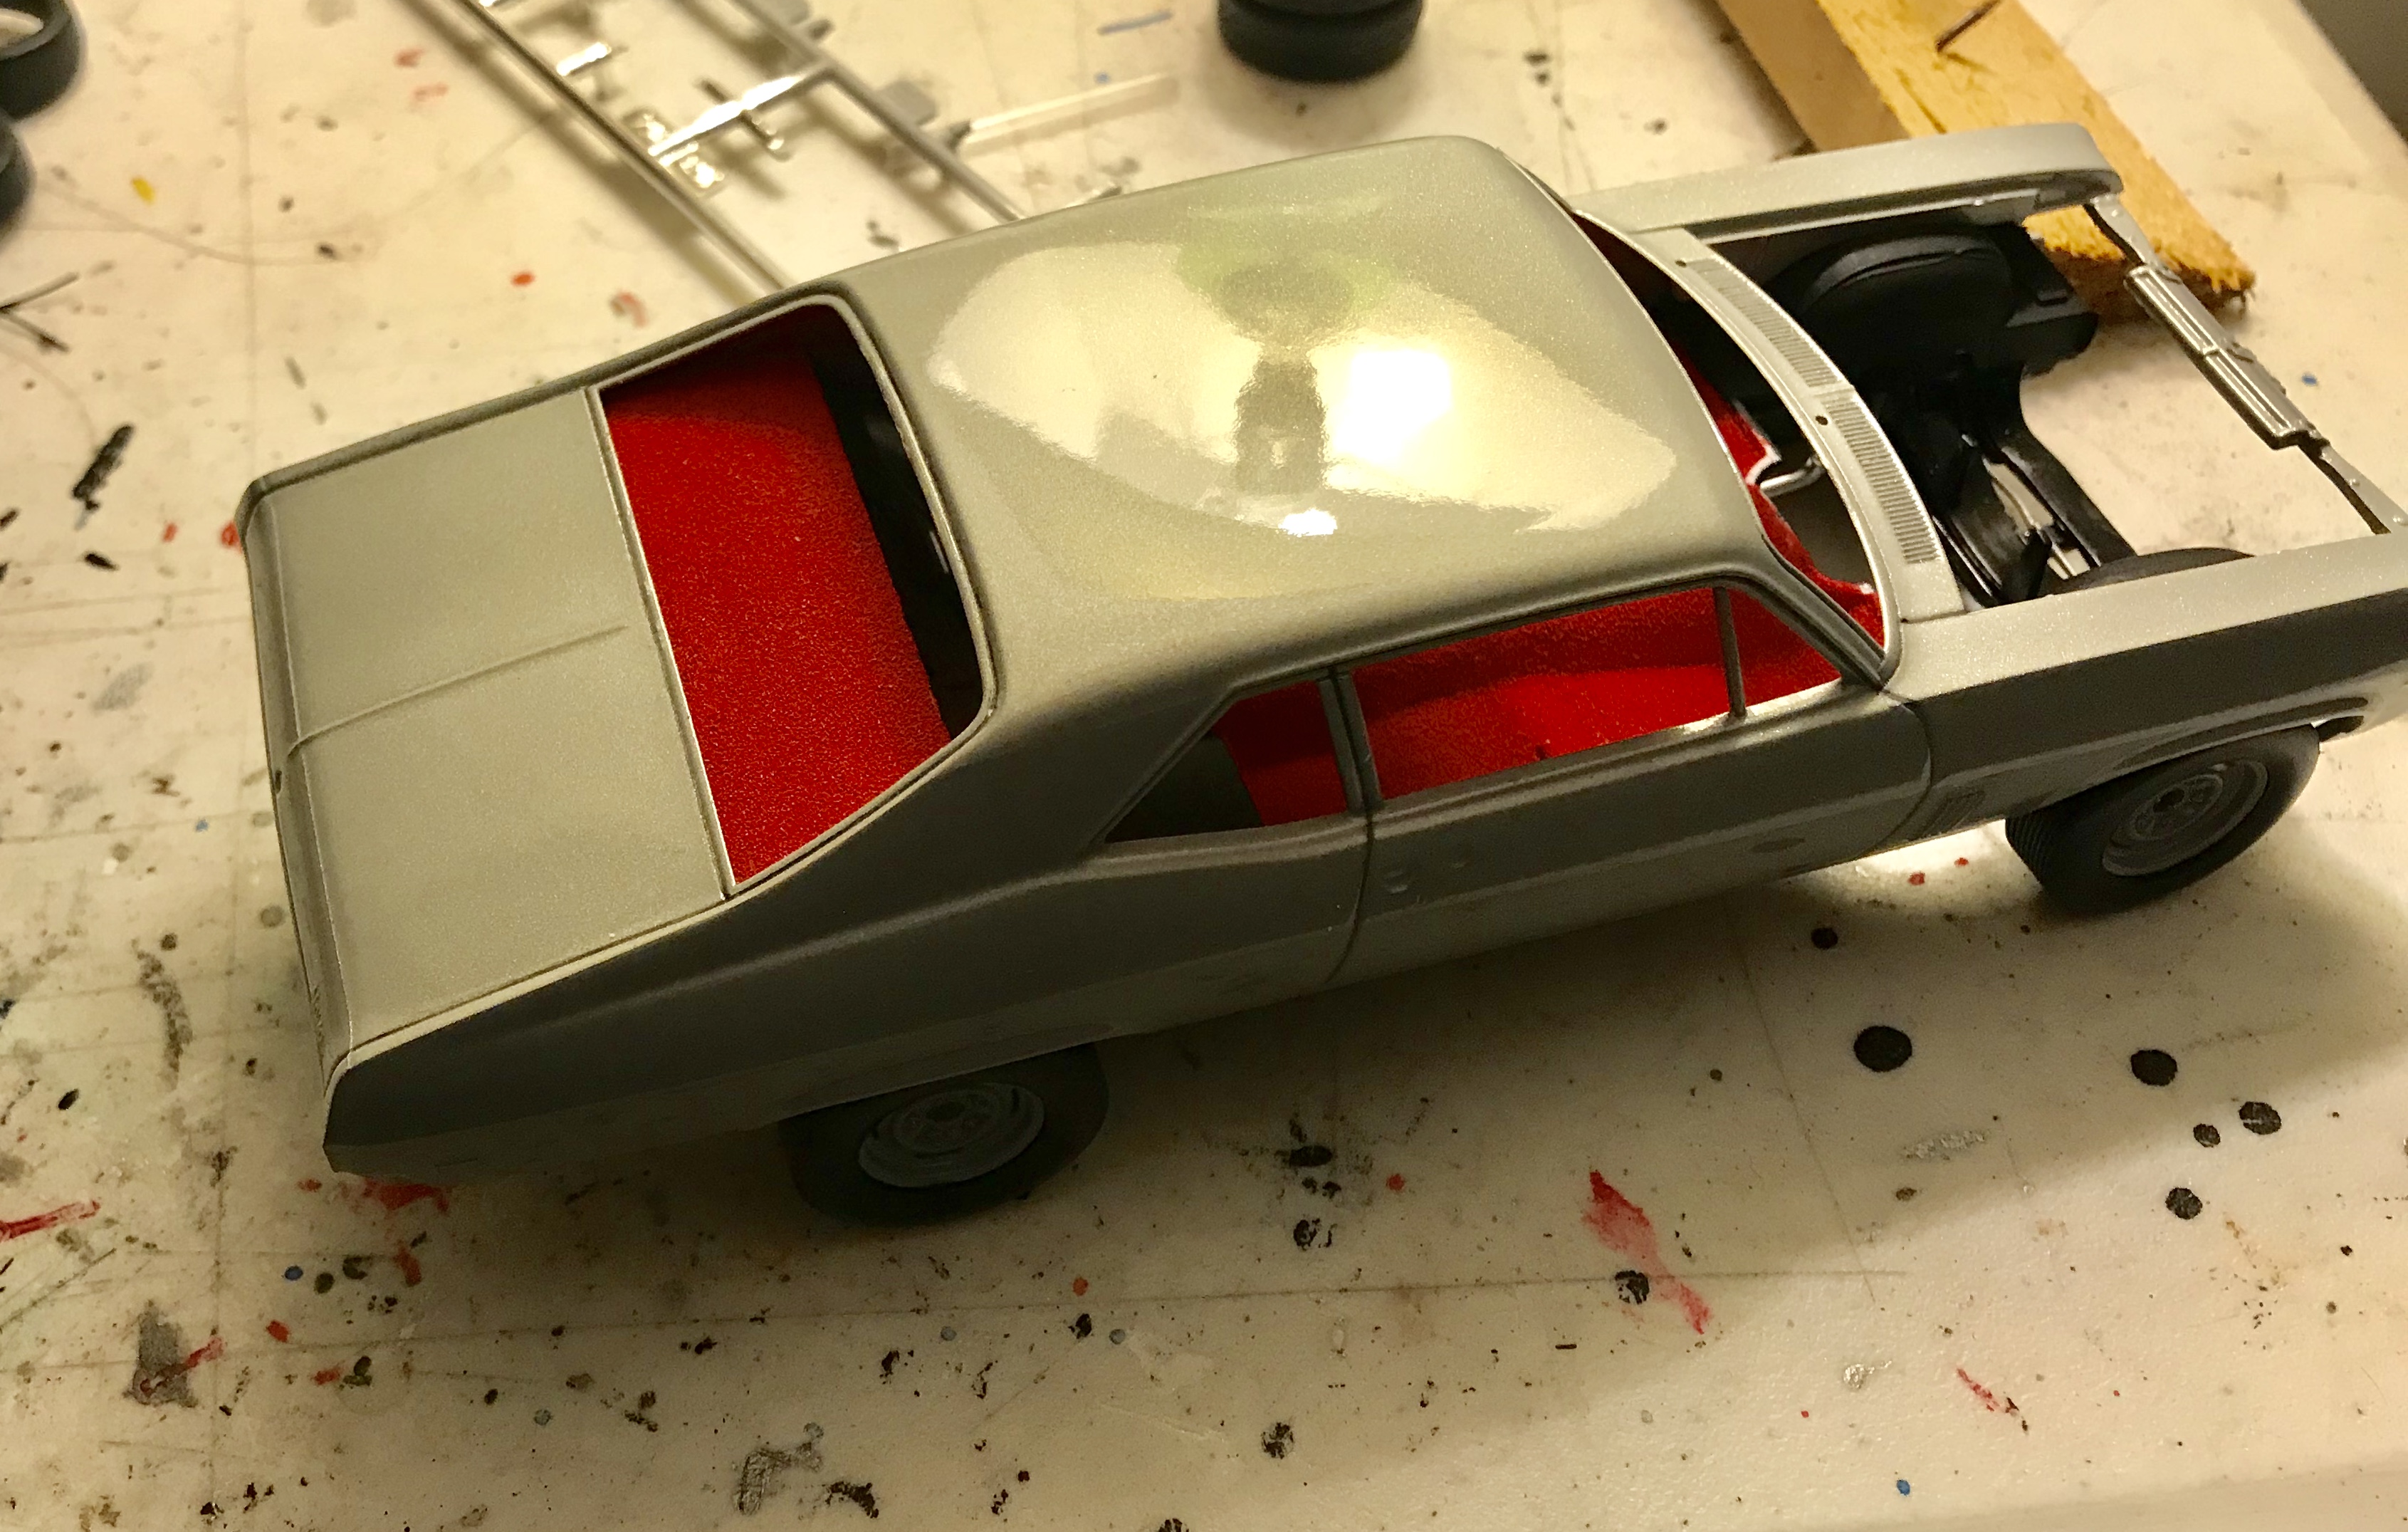
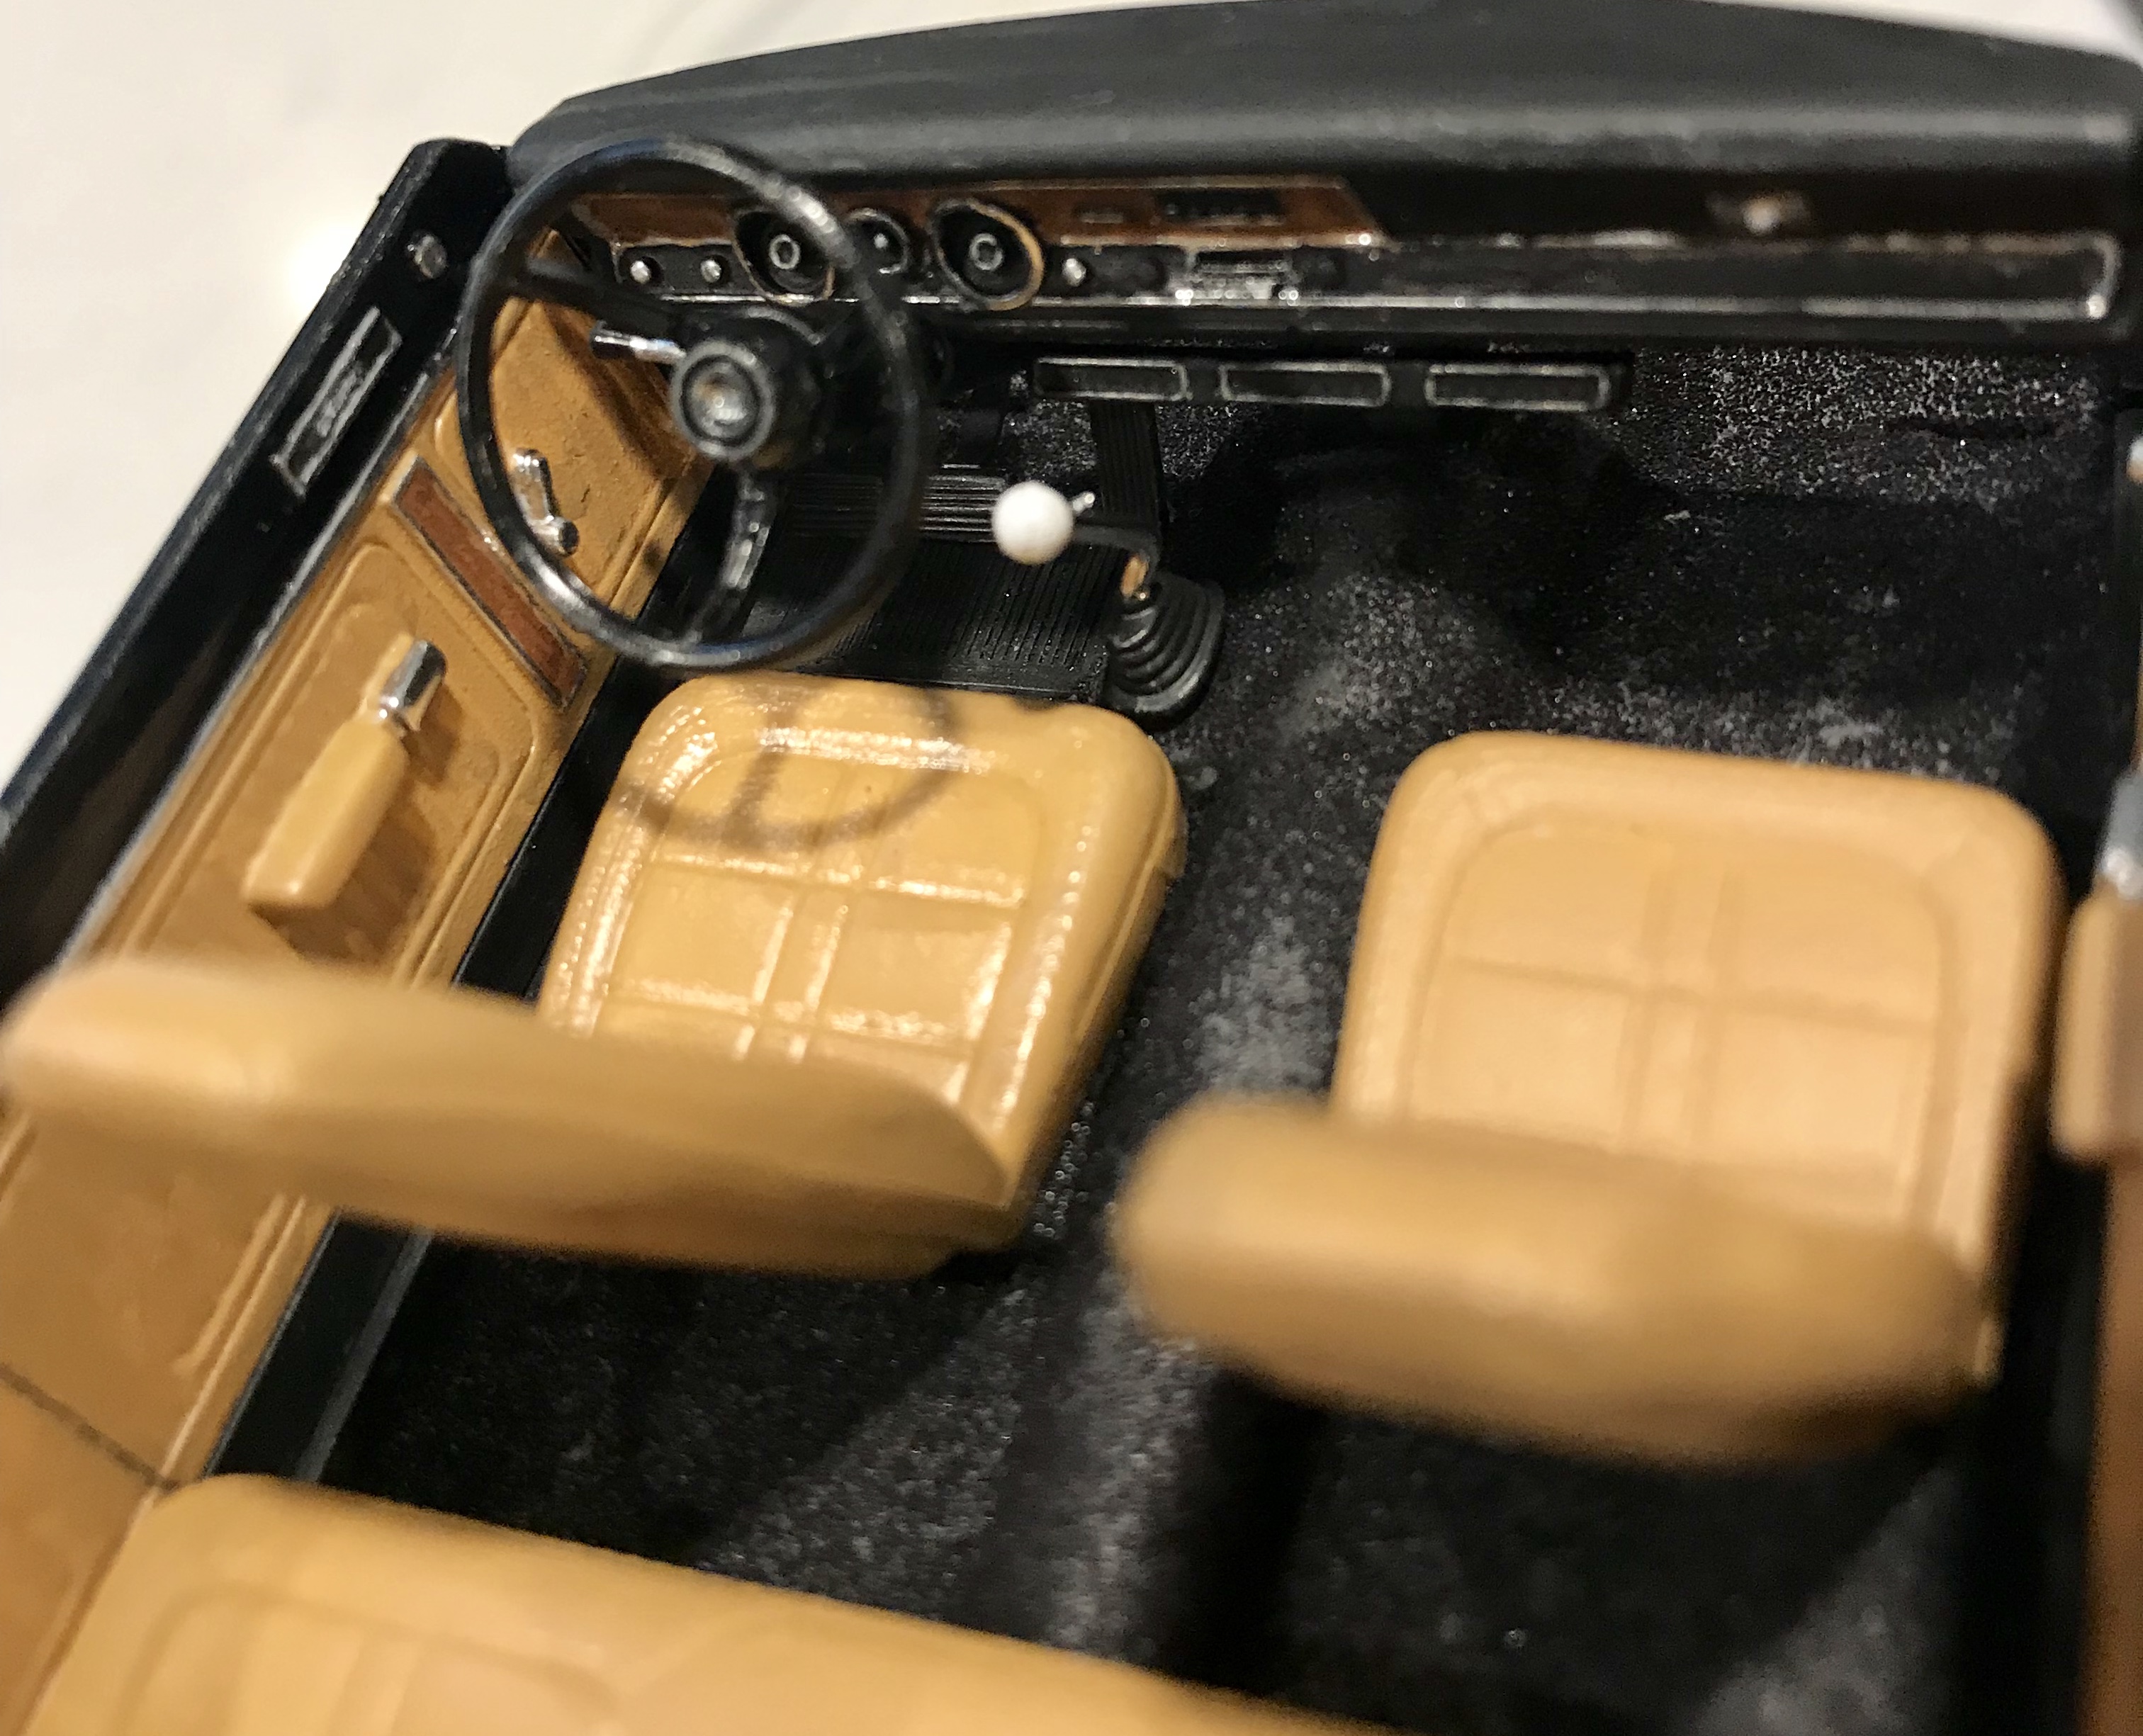
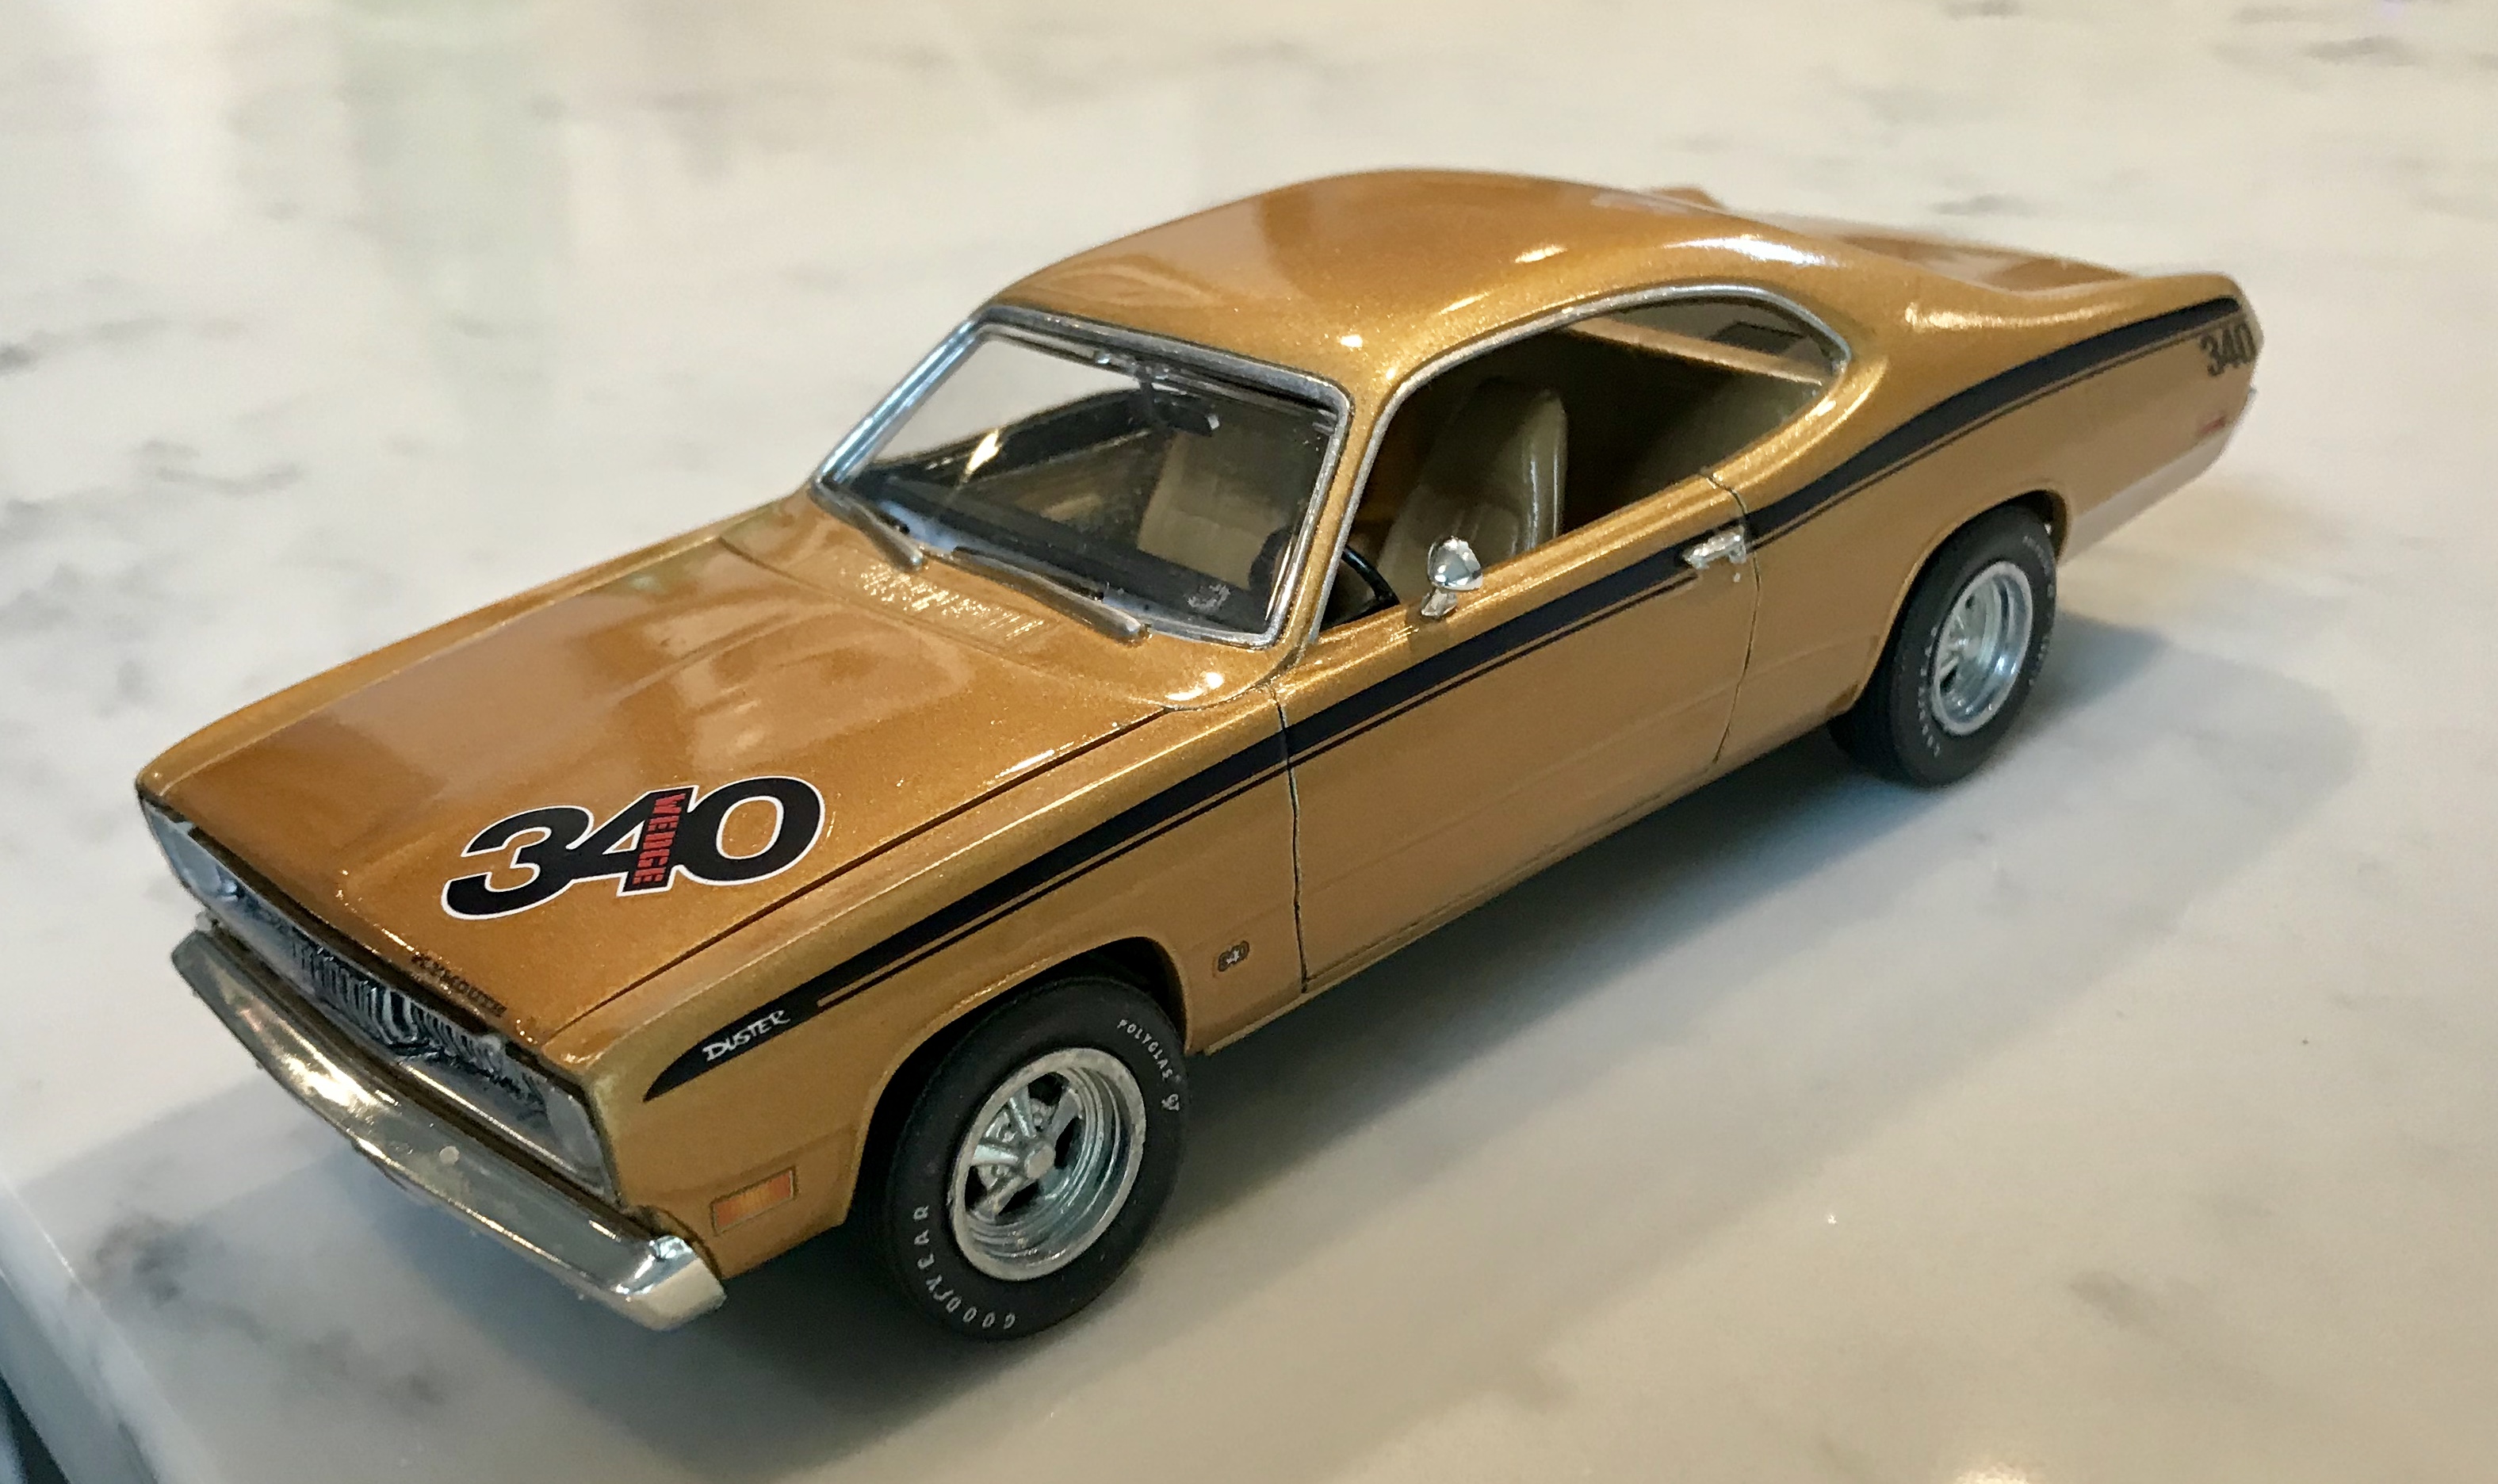
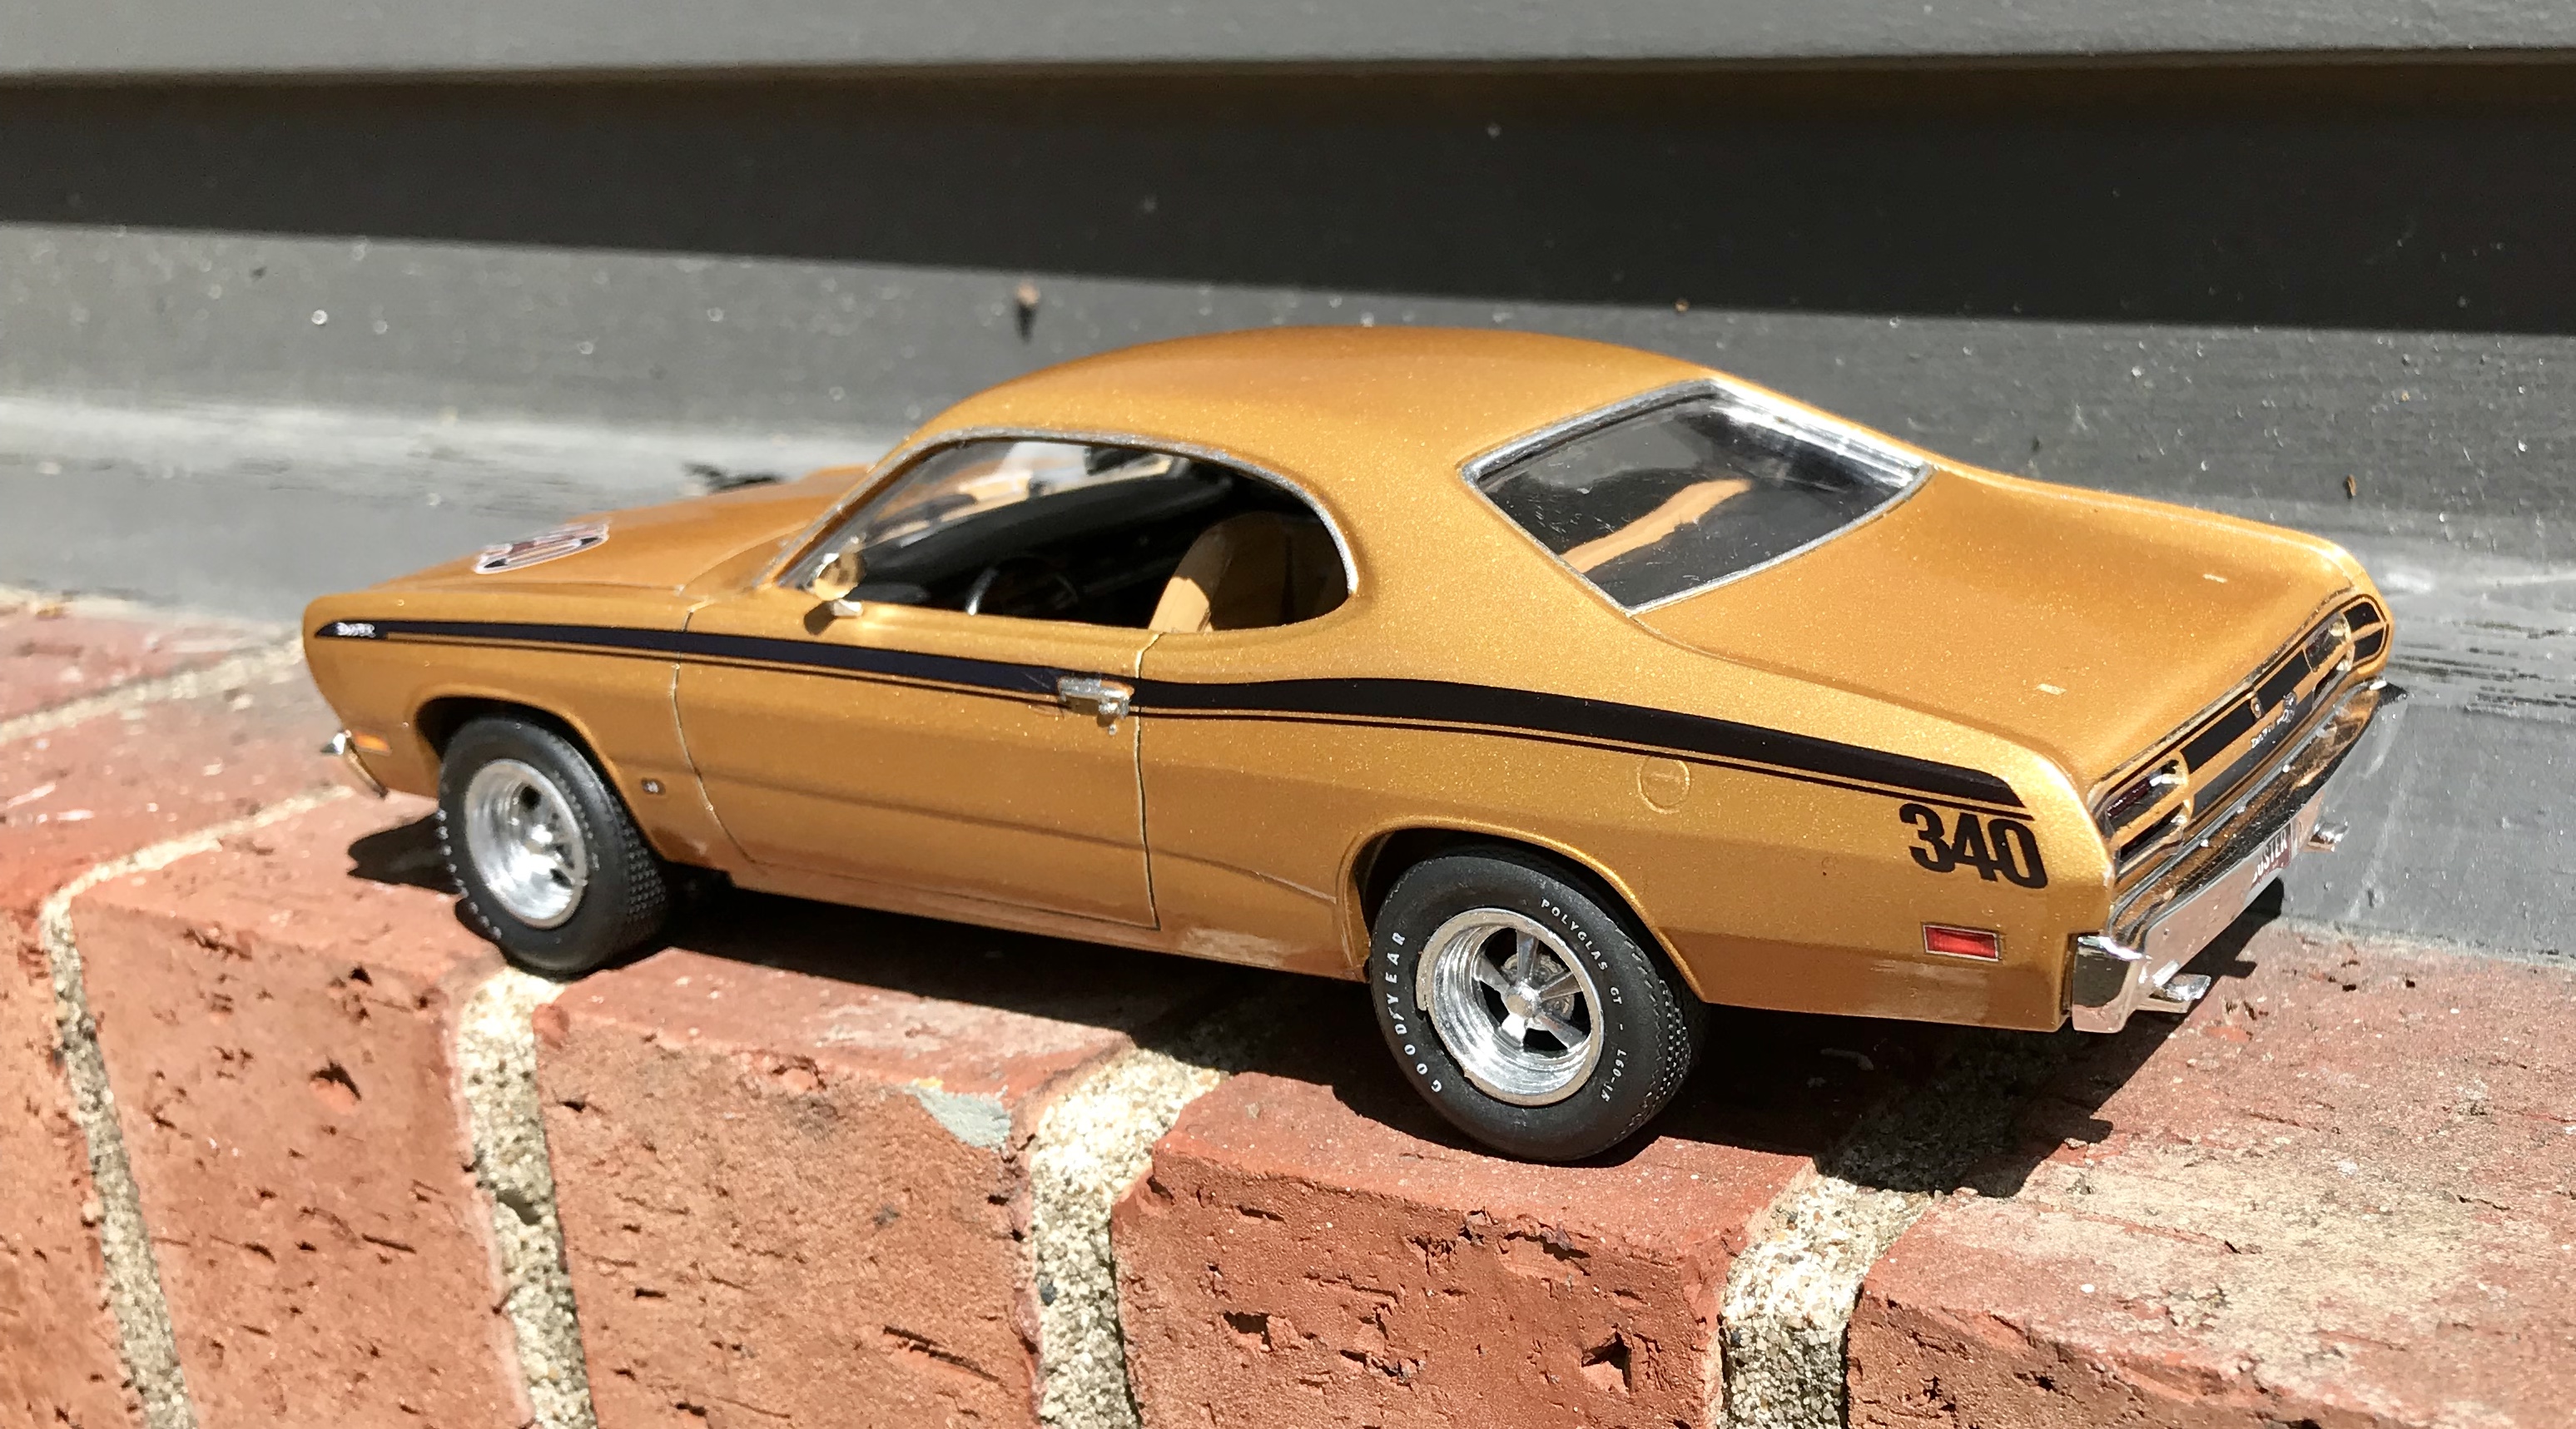
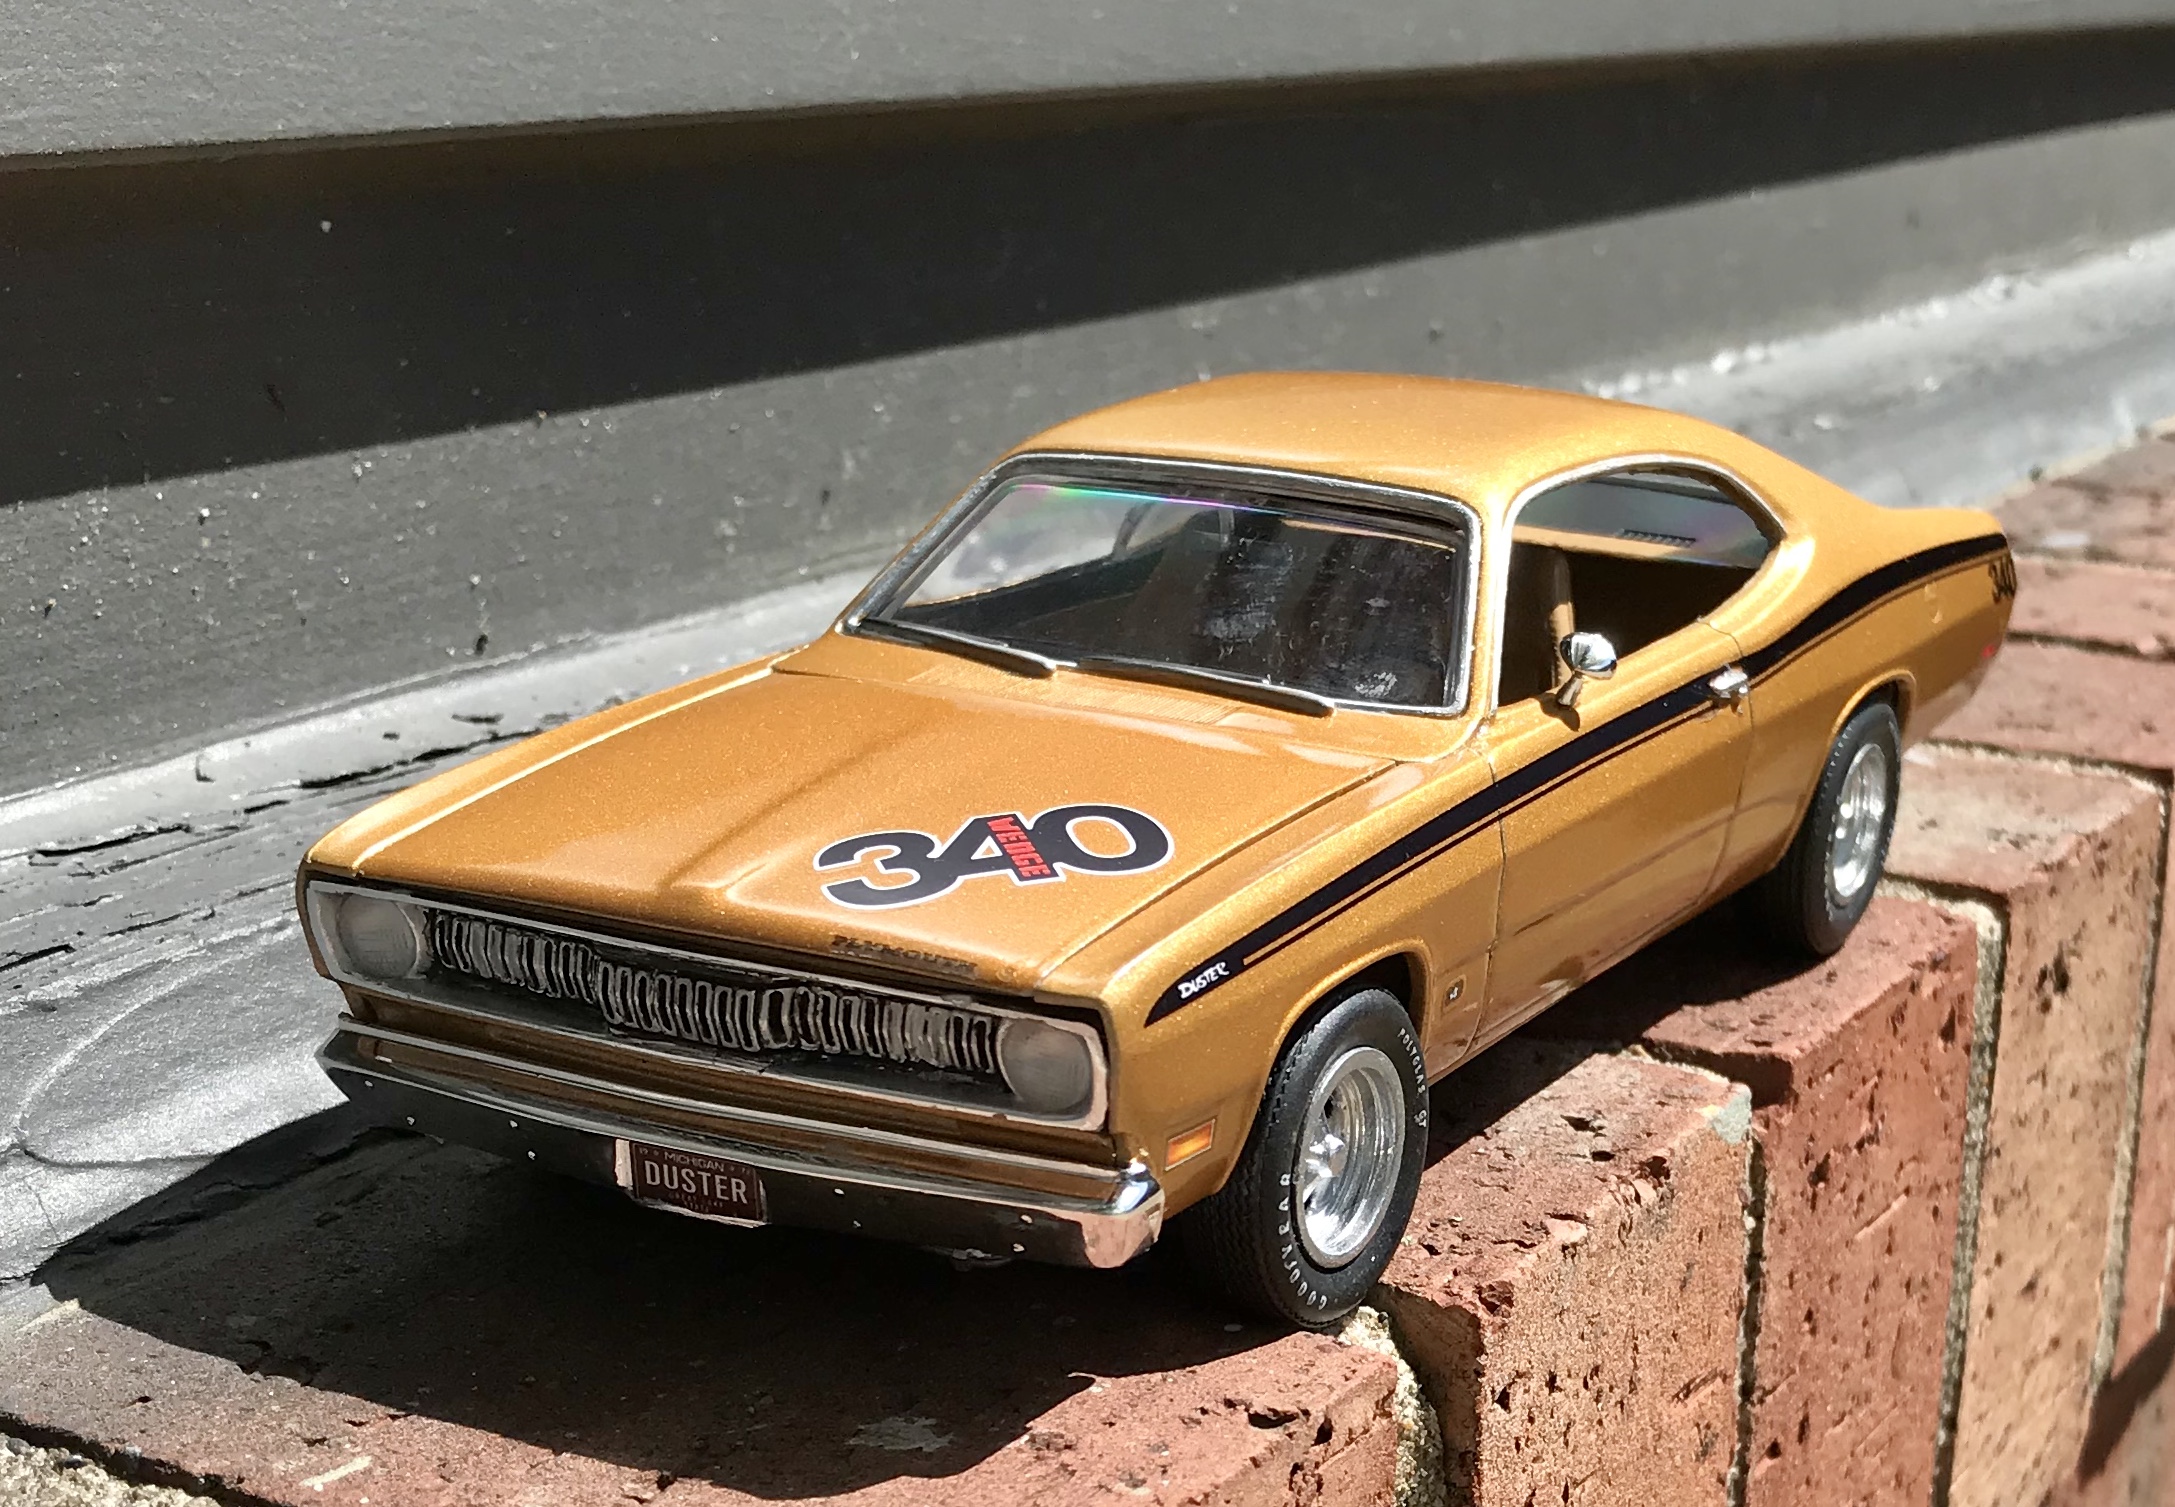
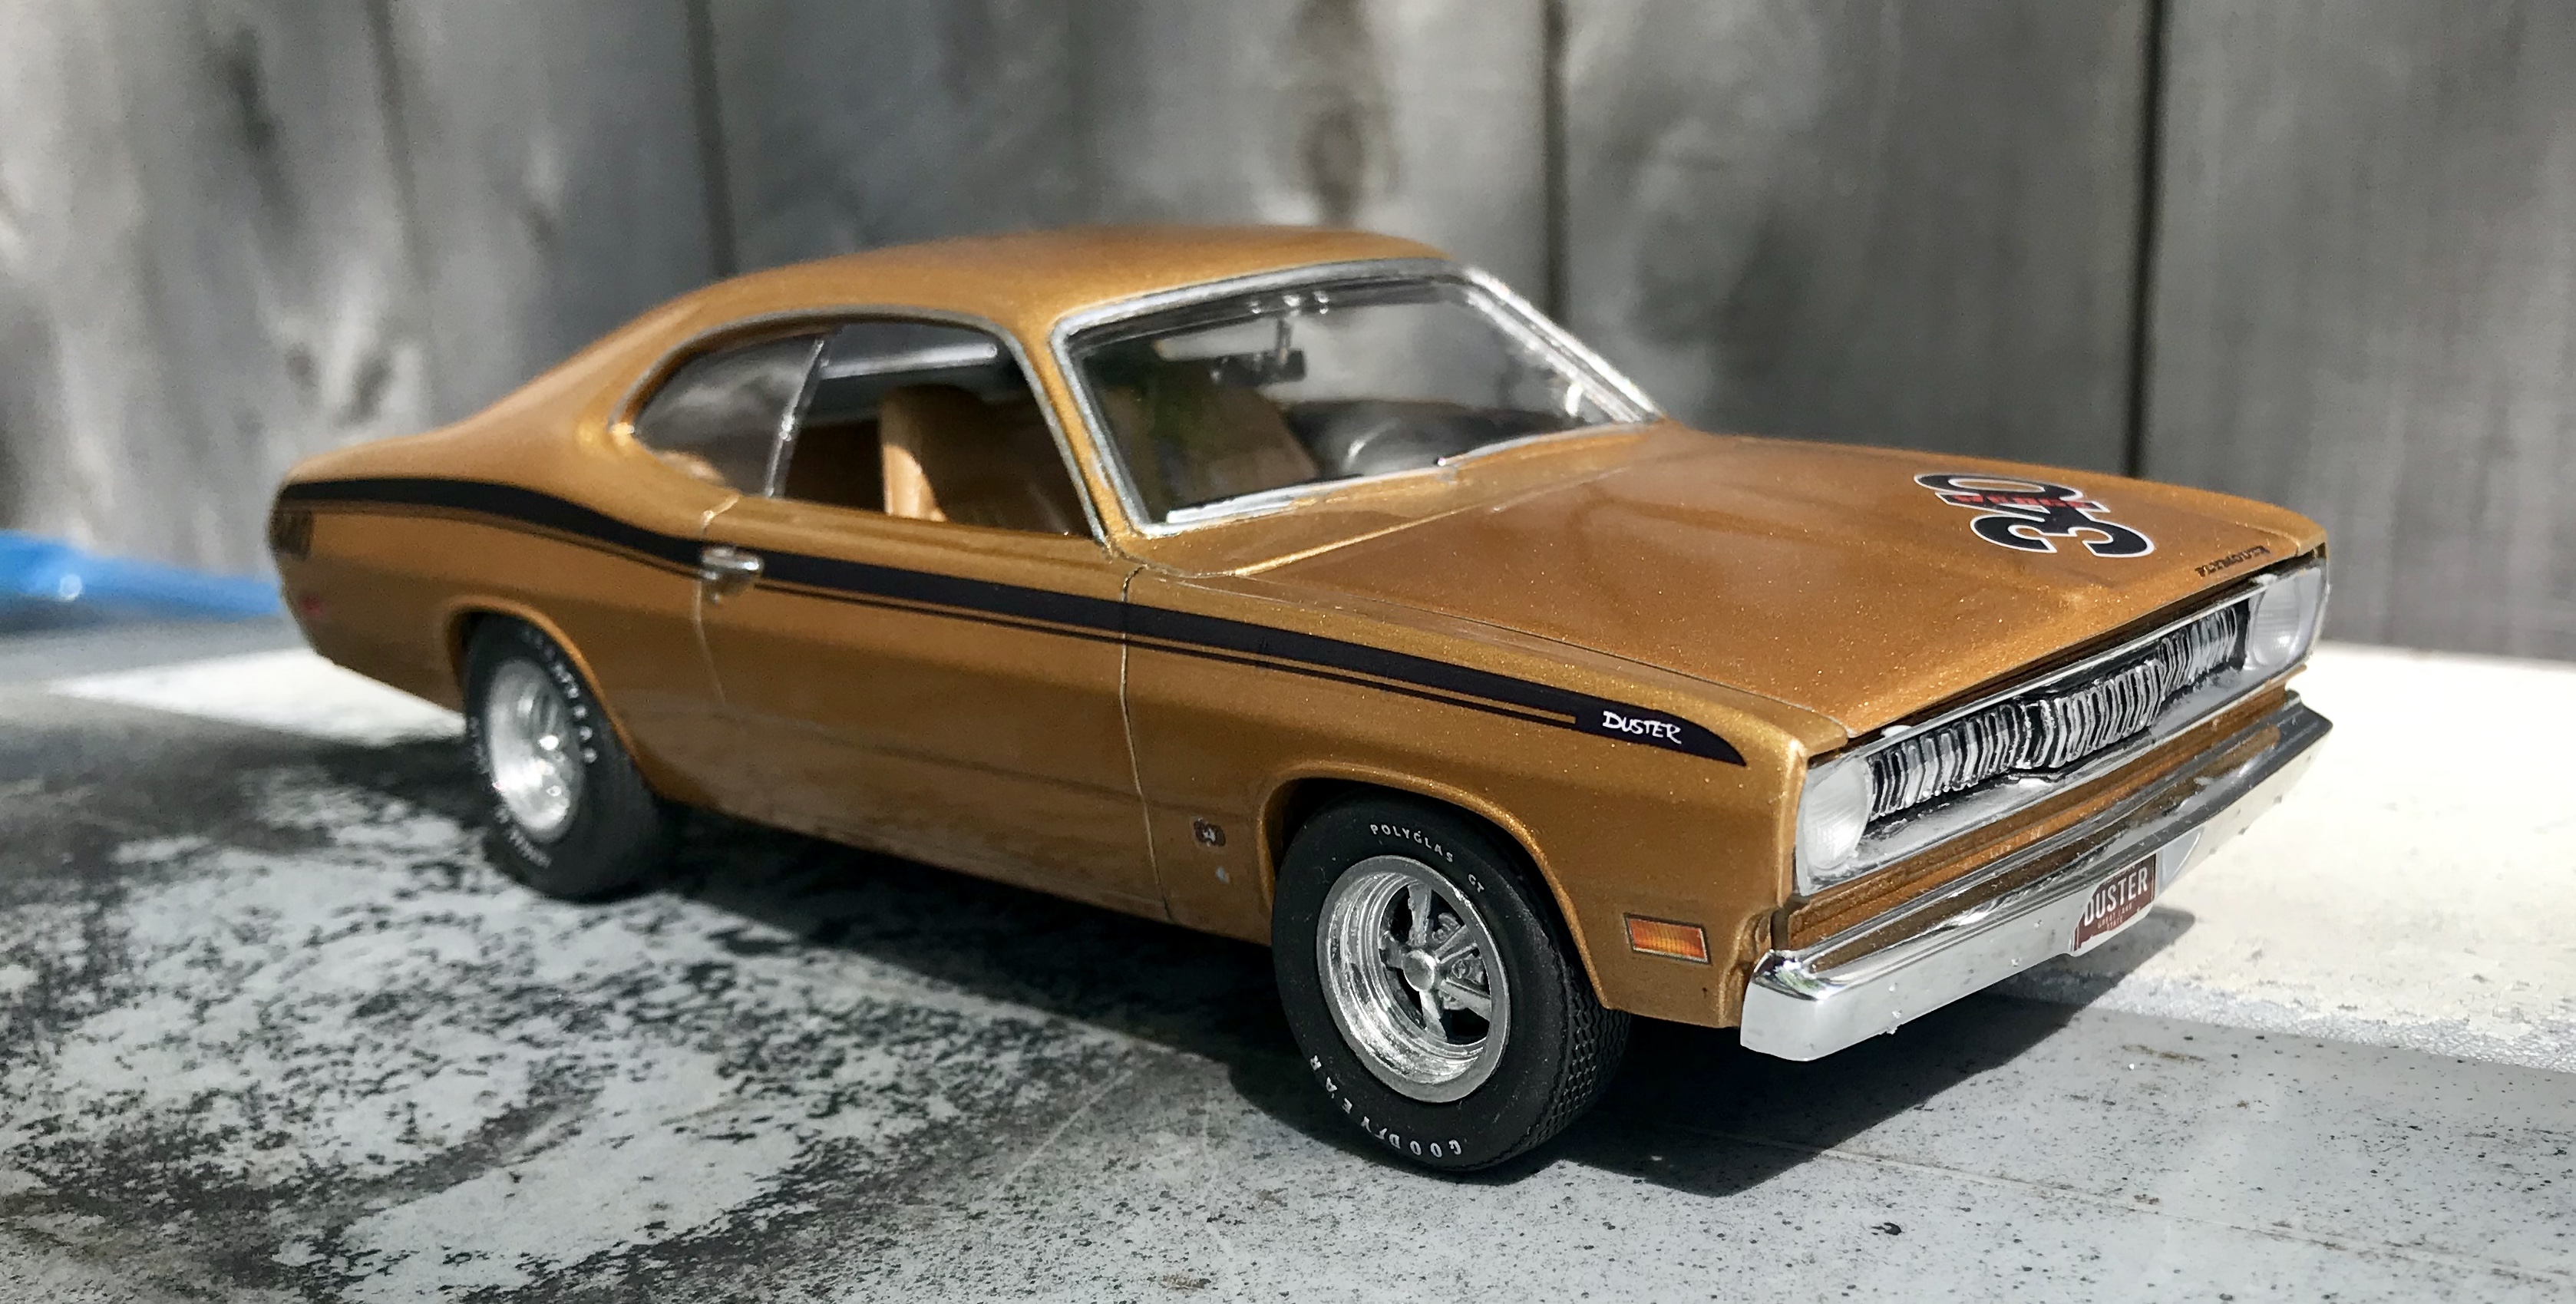
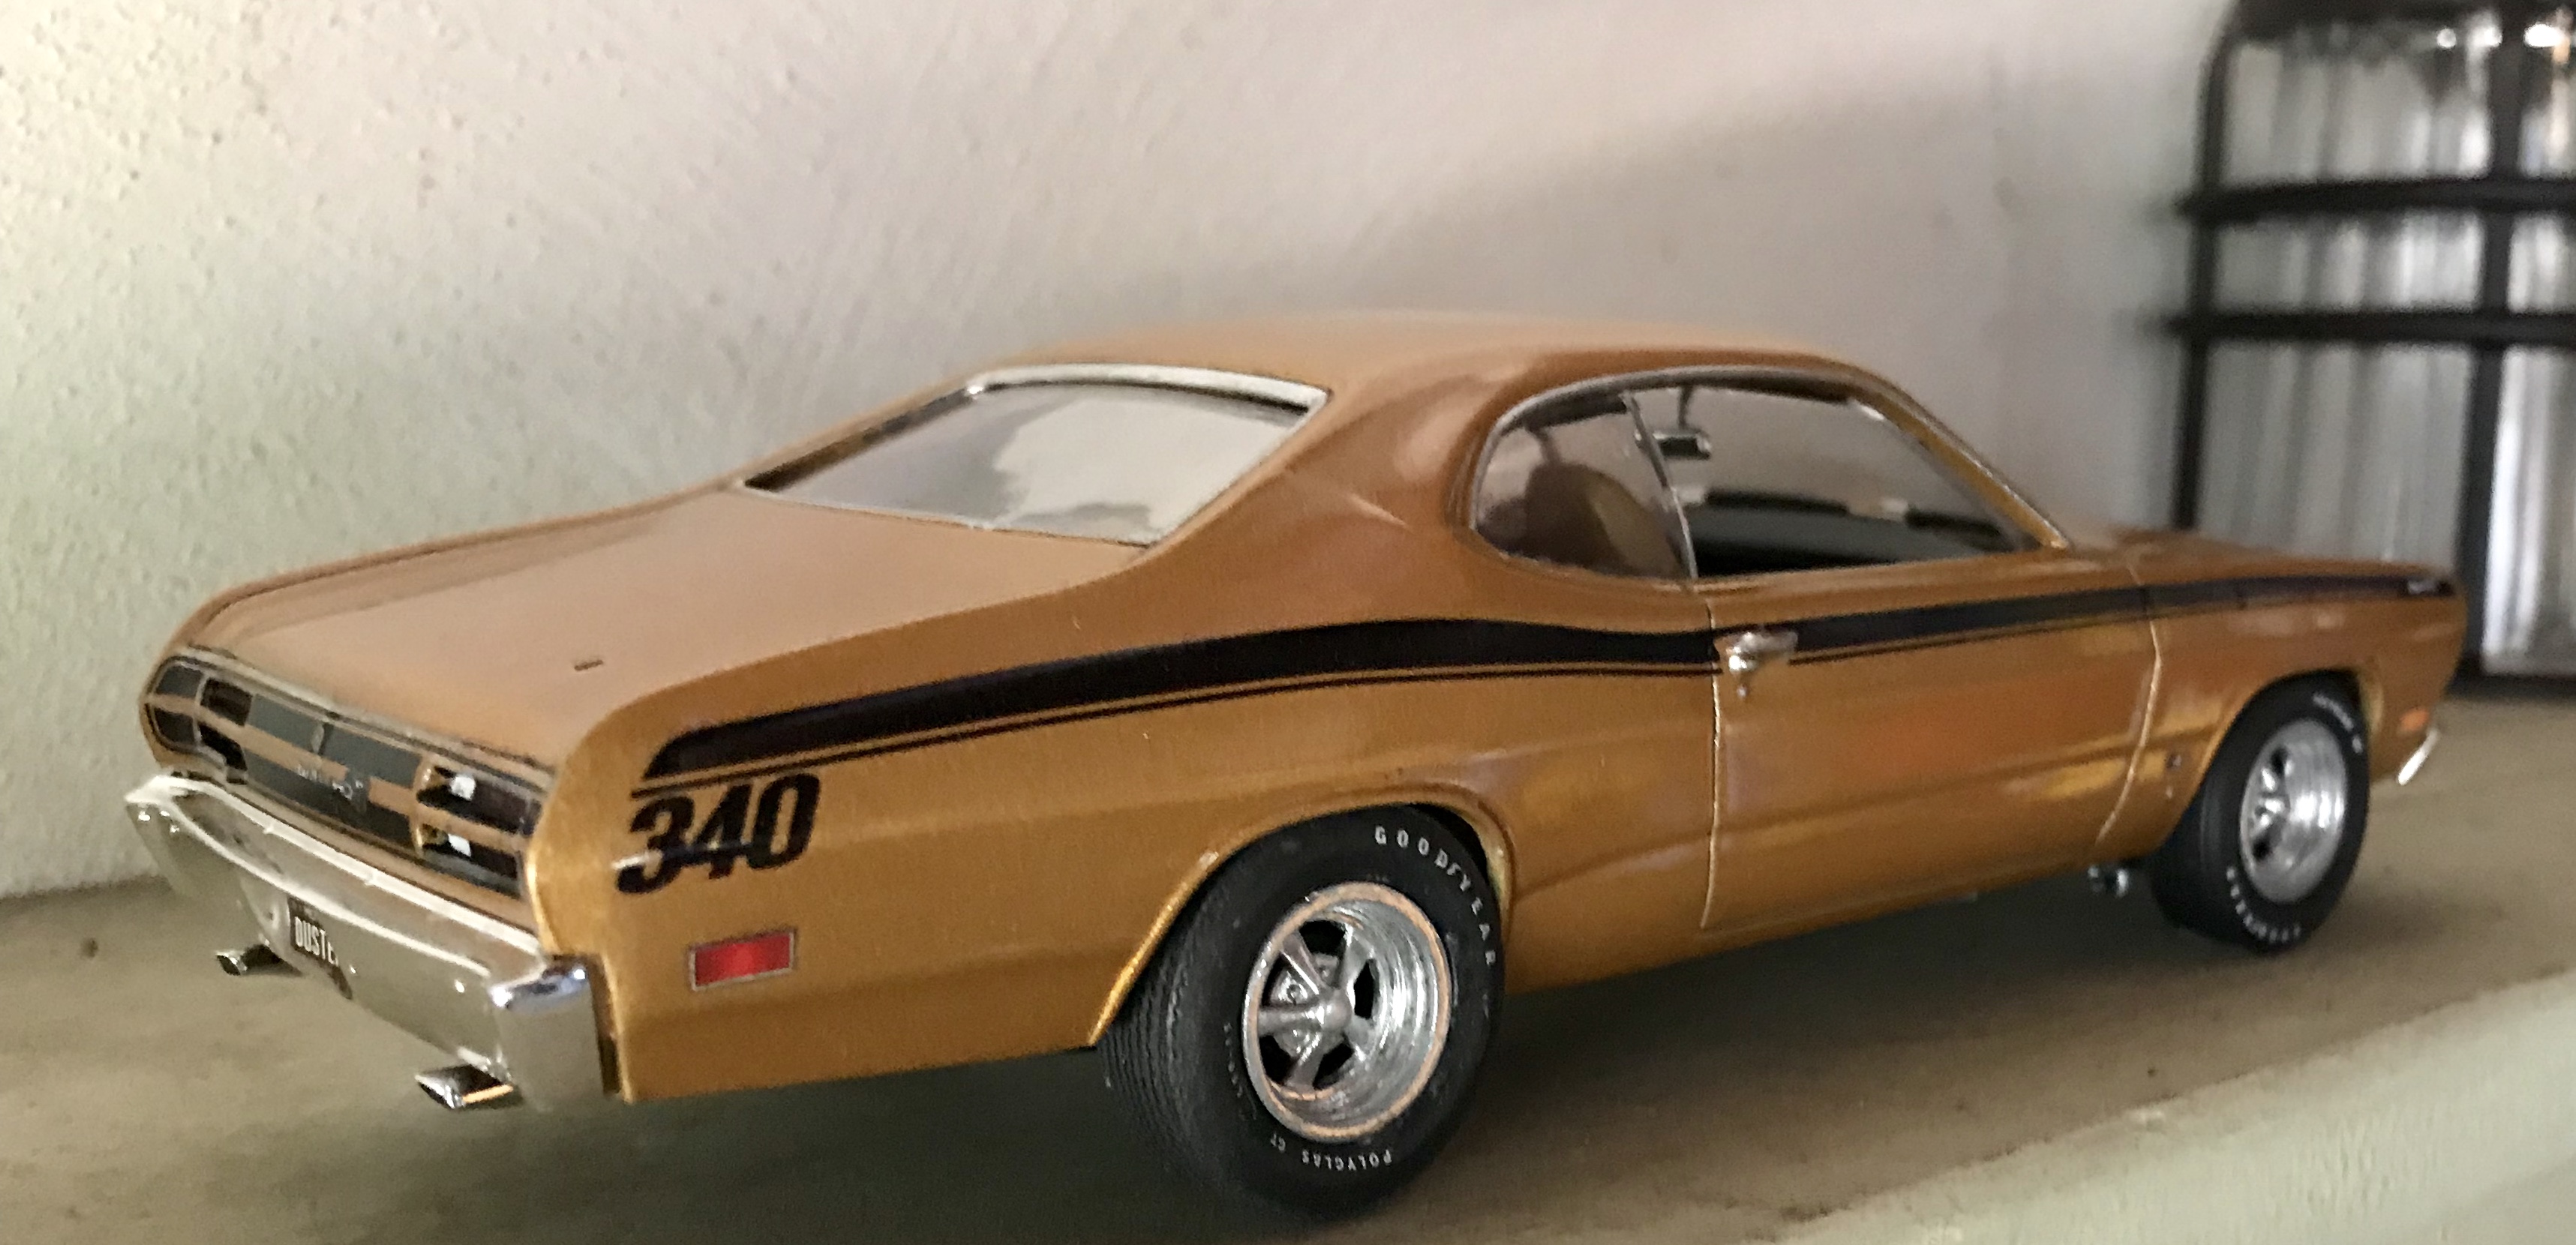
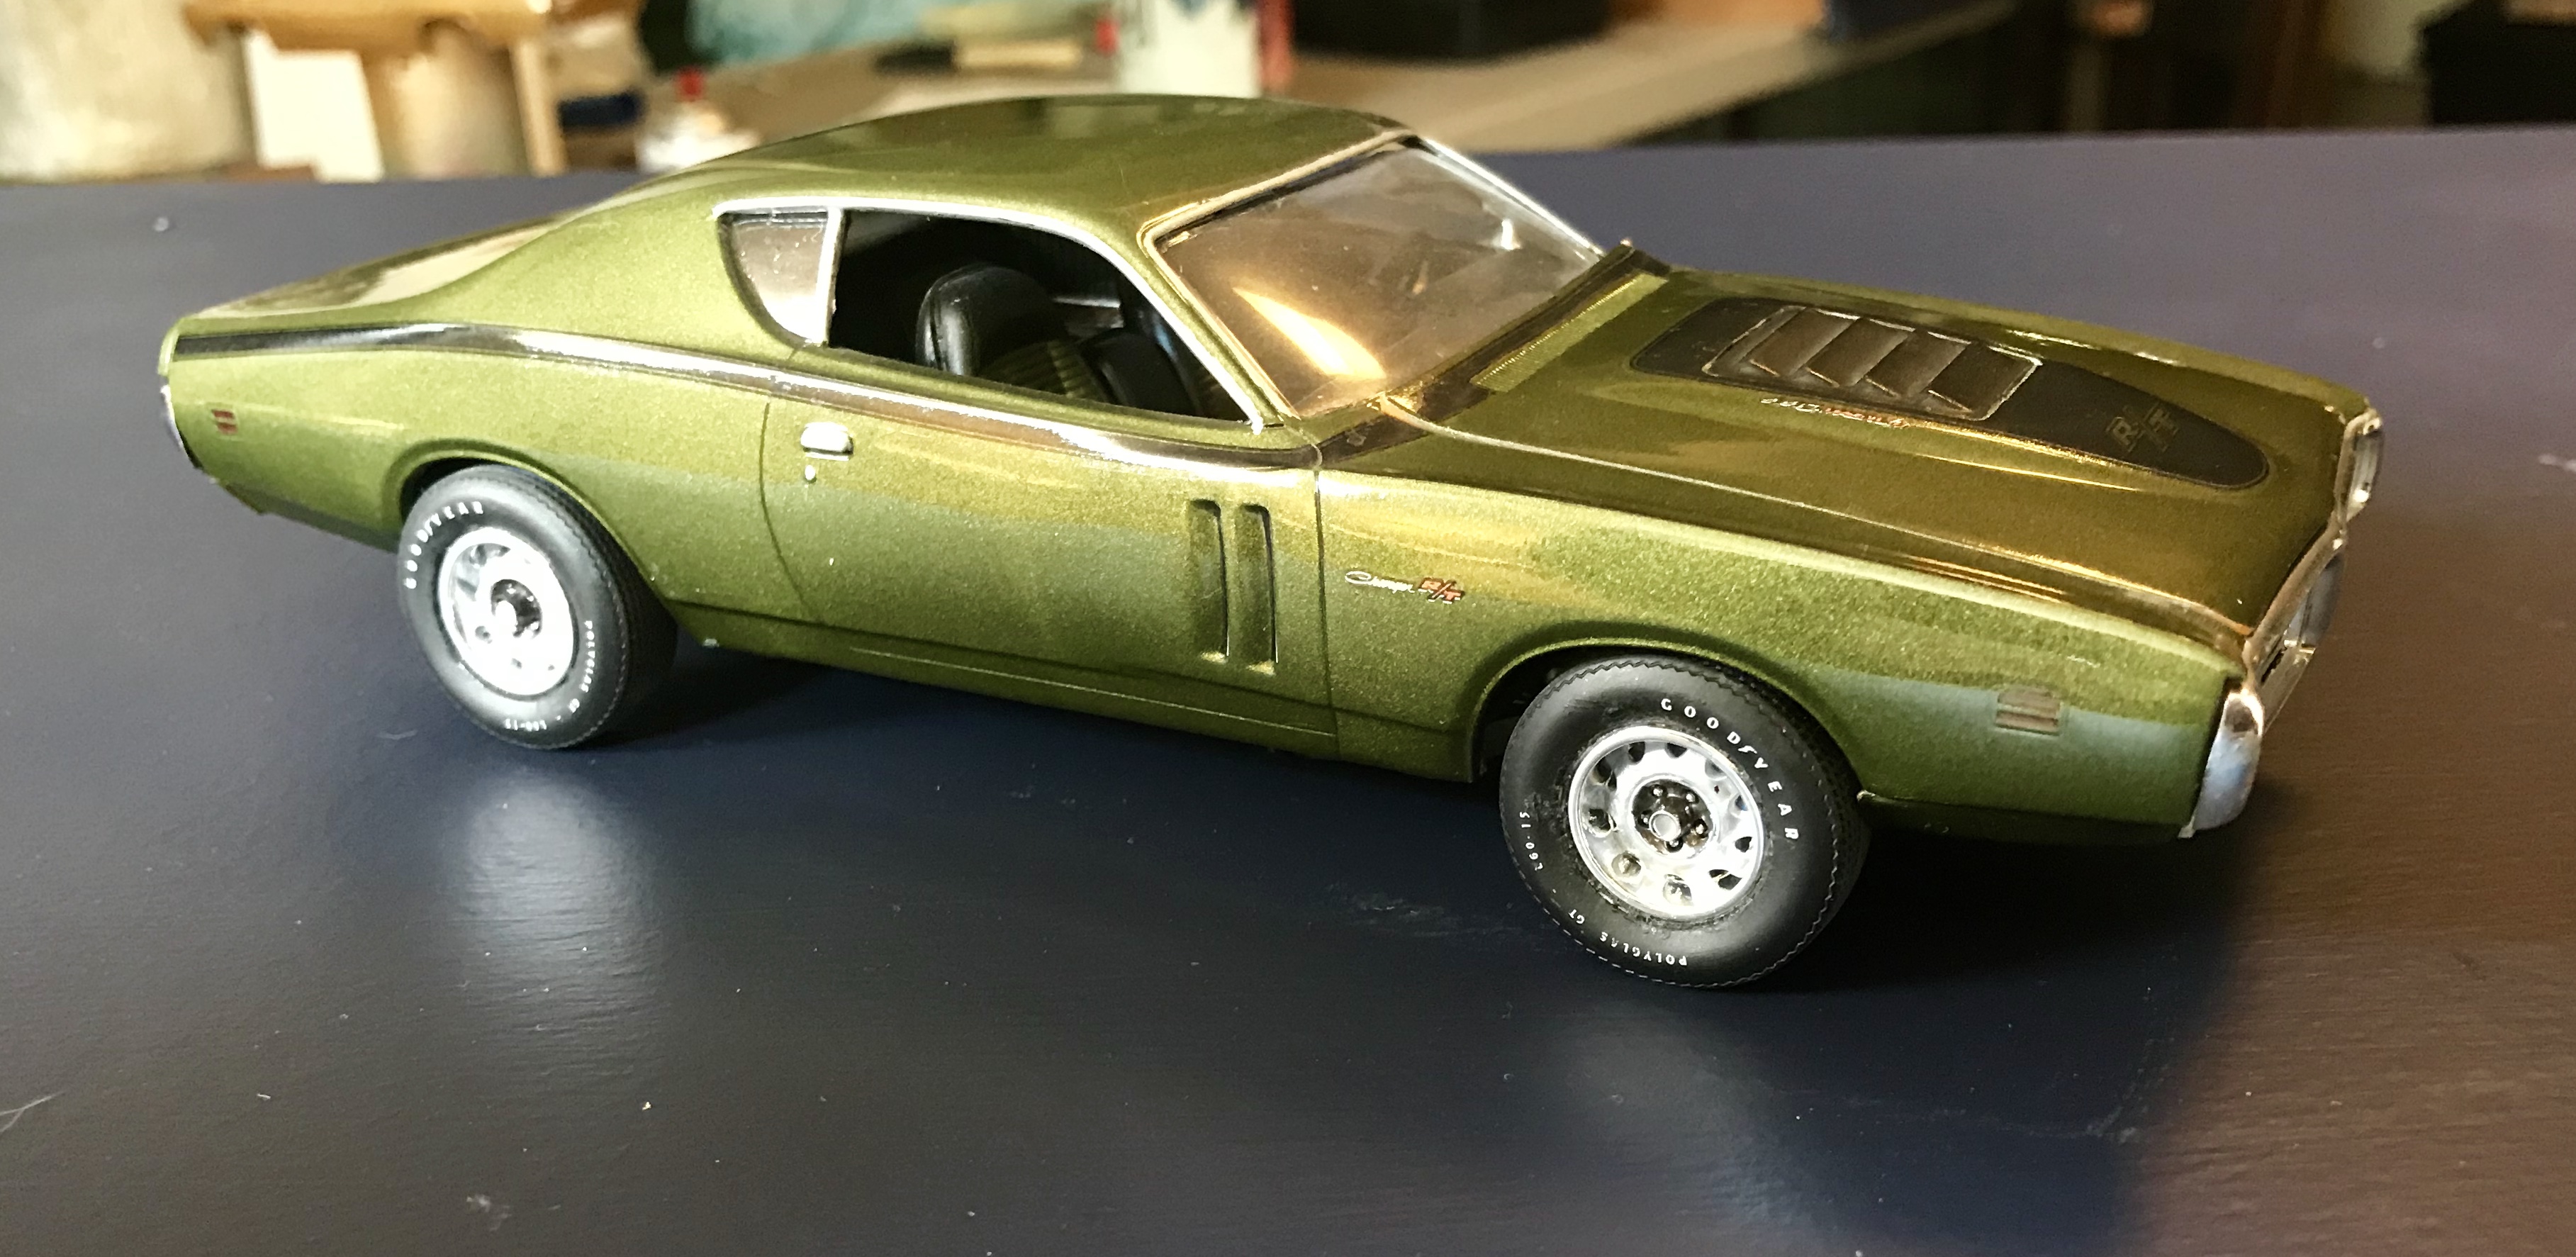
I was never a big fan of the Duster, but there were a lot of them around when I was a teenager, so it was a little nostalgic to build one. Simple build with some added details. Paint is Testors Pure Gold. One departure for me: the wheels. I always build everything stock other than wider tires. I might take a liberty with a color combination, but everything is based on factory available options and I’m building it as I would have ordered a brand new one at the dealer. However, part of the reason there were a lot of Dusters still around in my teens is that there were a lot of them in the first place. They sold a ton of them because they were cheap cars... Dusters were considered an economy model in the Plymouth lineup. Cheap new meant cheap used, leaving more cash to add stuff. I turned 16 in 1985, when muscle cars were mostly just cheap used cars. Two of the most common and inexpensive models to get were the Duster and the Nova, and it was highly unusual to see them (owned by a young person) without a set of wheels and tires slapped on them. For nostalgia, I had to replicate that. Thanks for looking! My 340: Interior: Ready to cruise:
-
That looks fantastic!!! Really beautiful work and a perfect color for this car!
-
Sweet!! Looks like it came out of Richard Petty’s personal collection. Nice job!
-
Oooh, I like that!!! She looks MEAN, which is difficult with these mid 60s more formal, upright vehicles. Nice job!!
-
NICE!!!!!!!! That looks amazing and ready to hit the strip on Friday night.
-
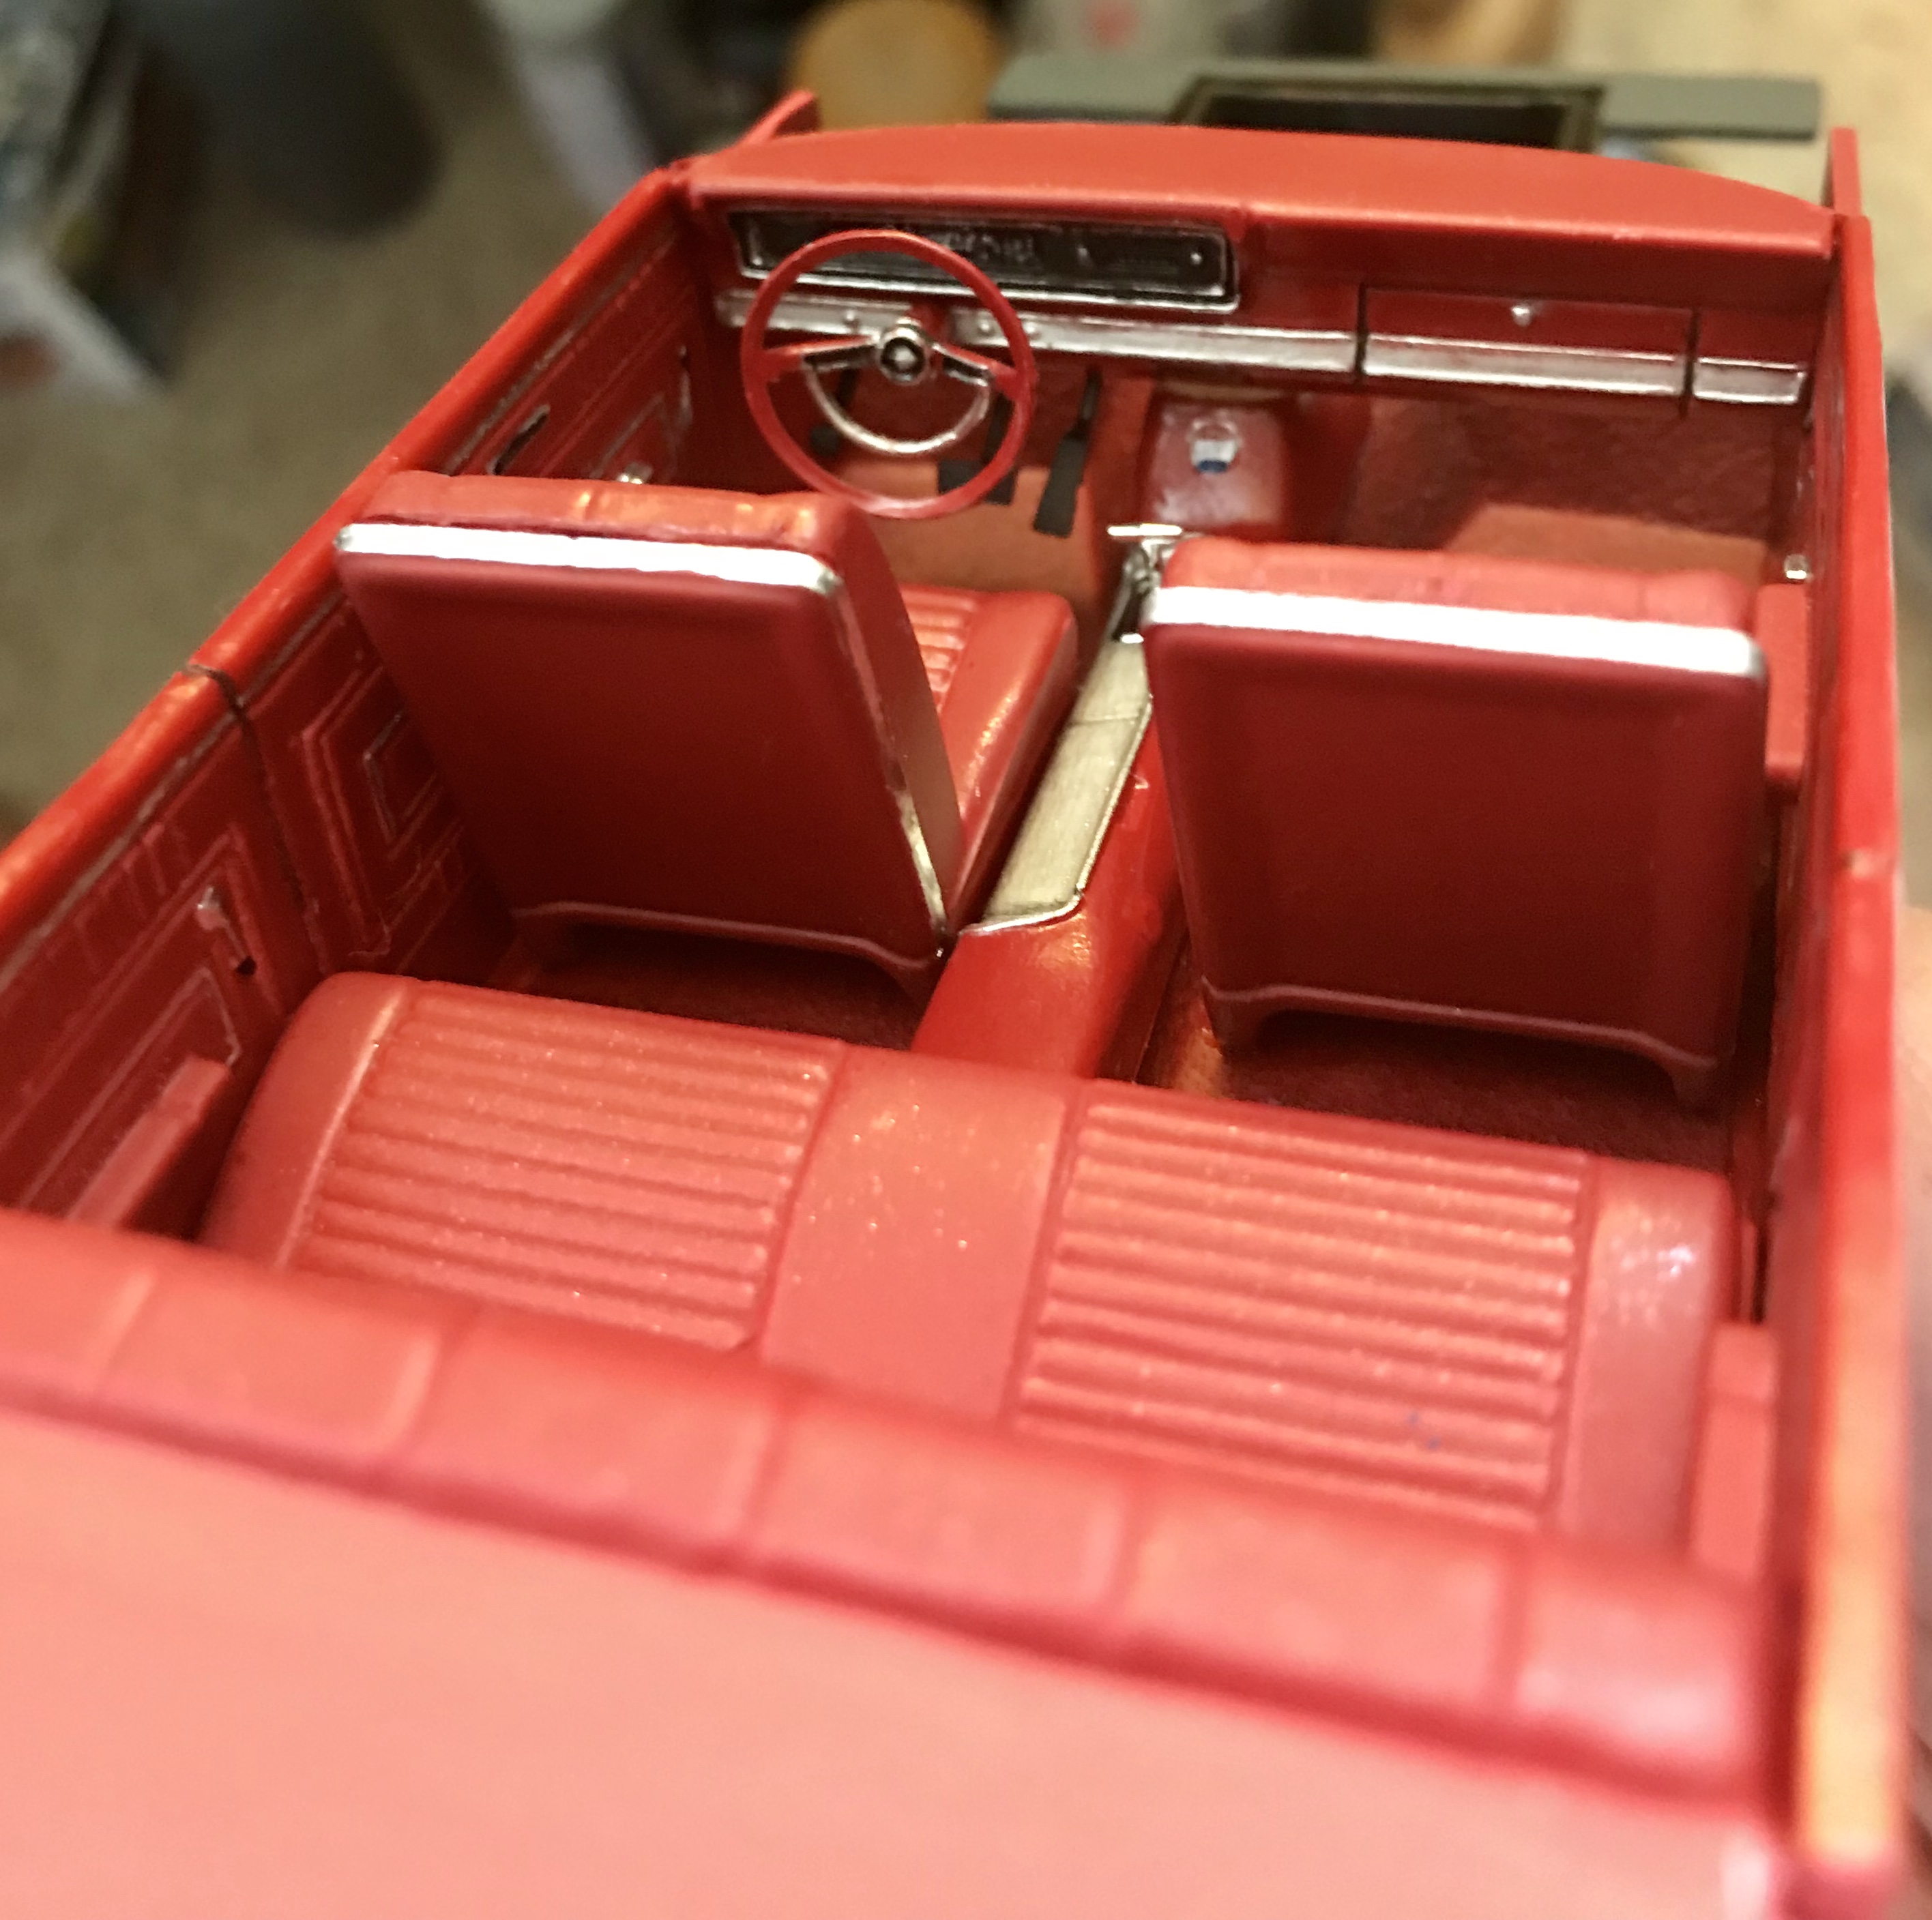
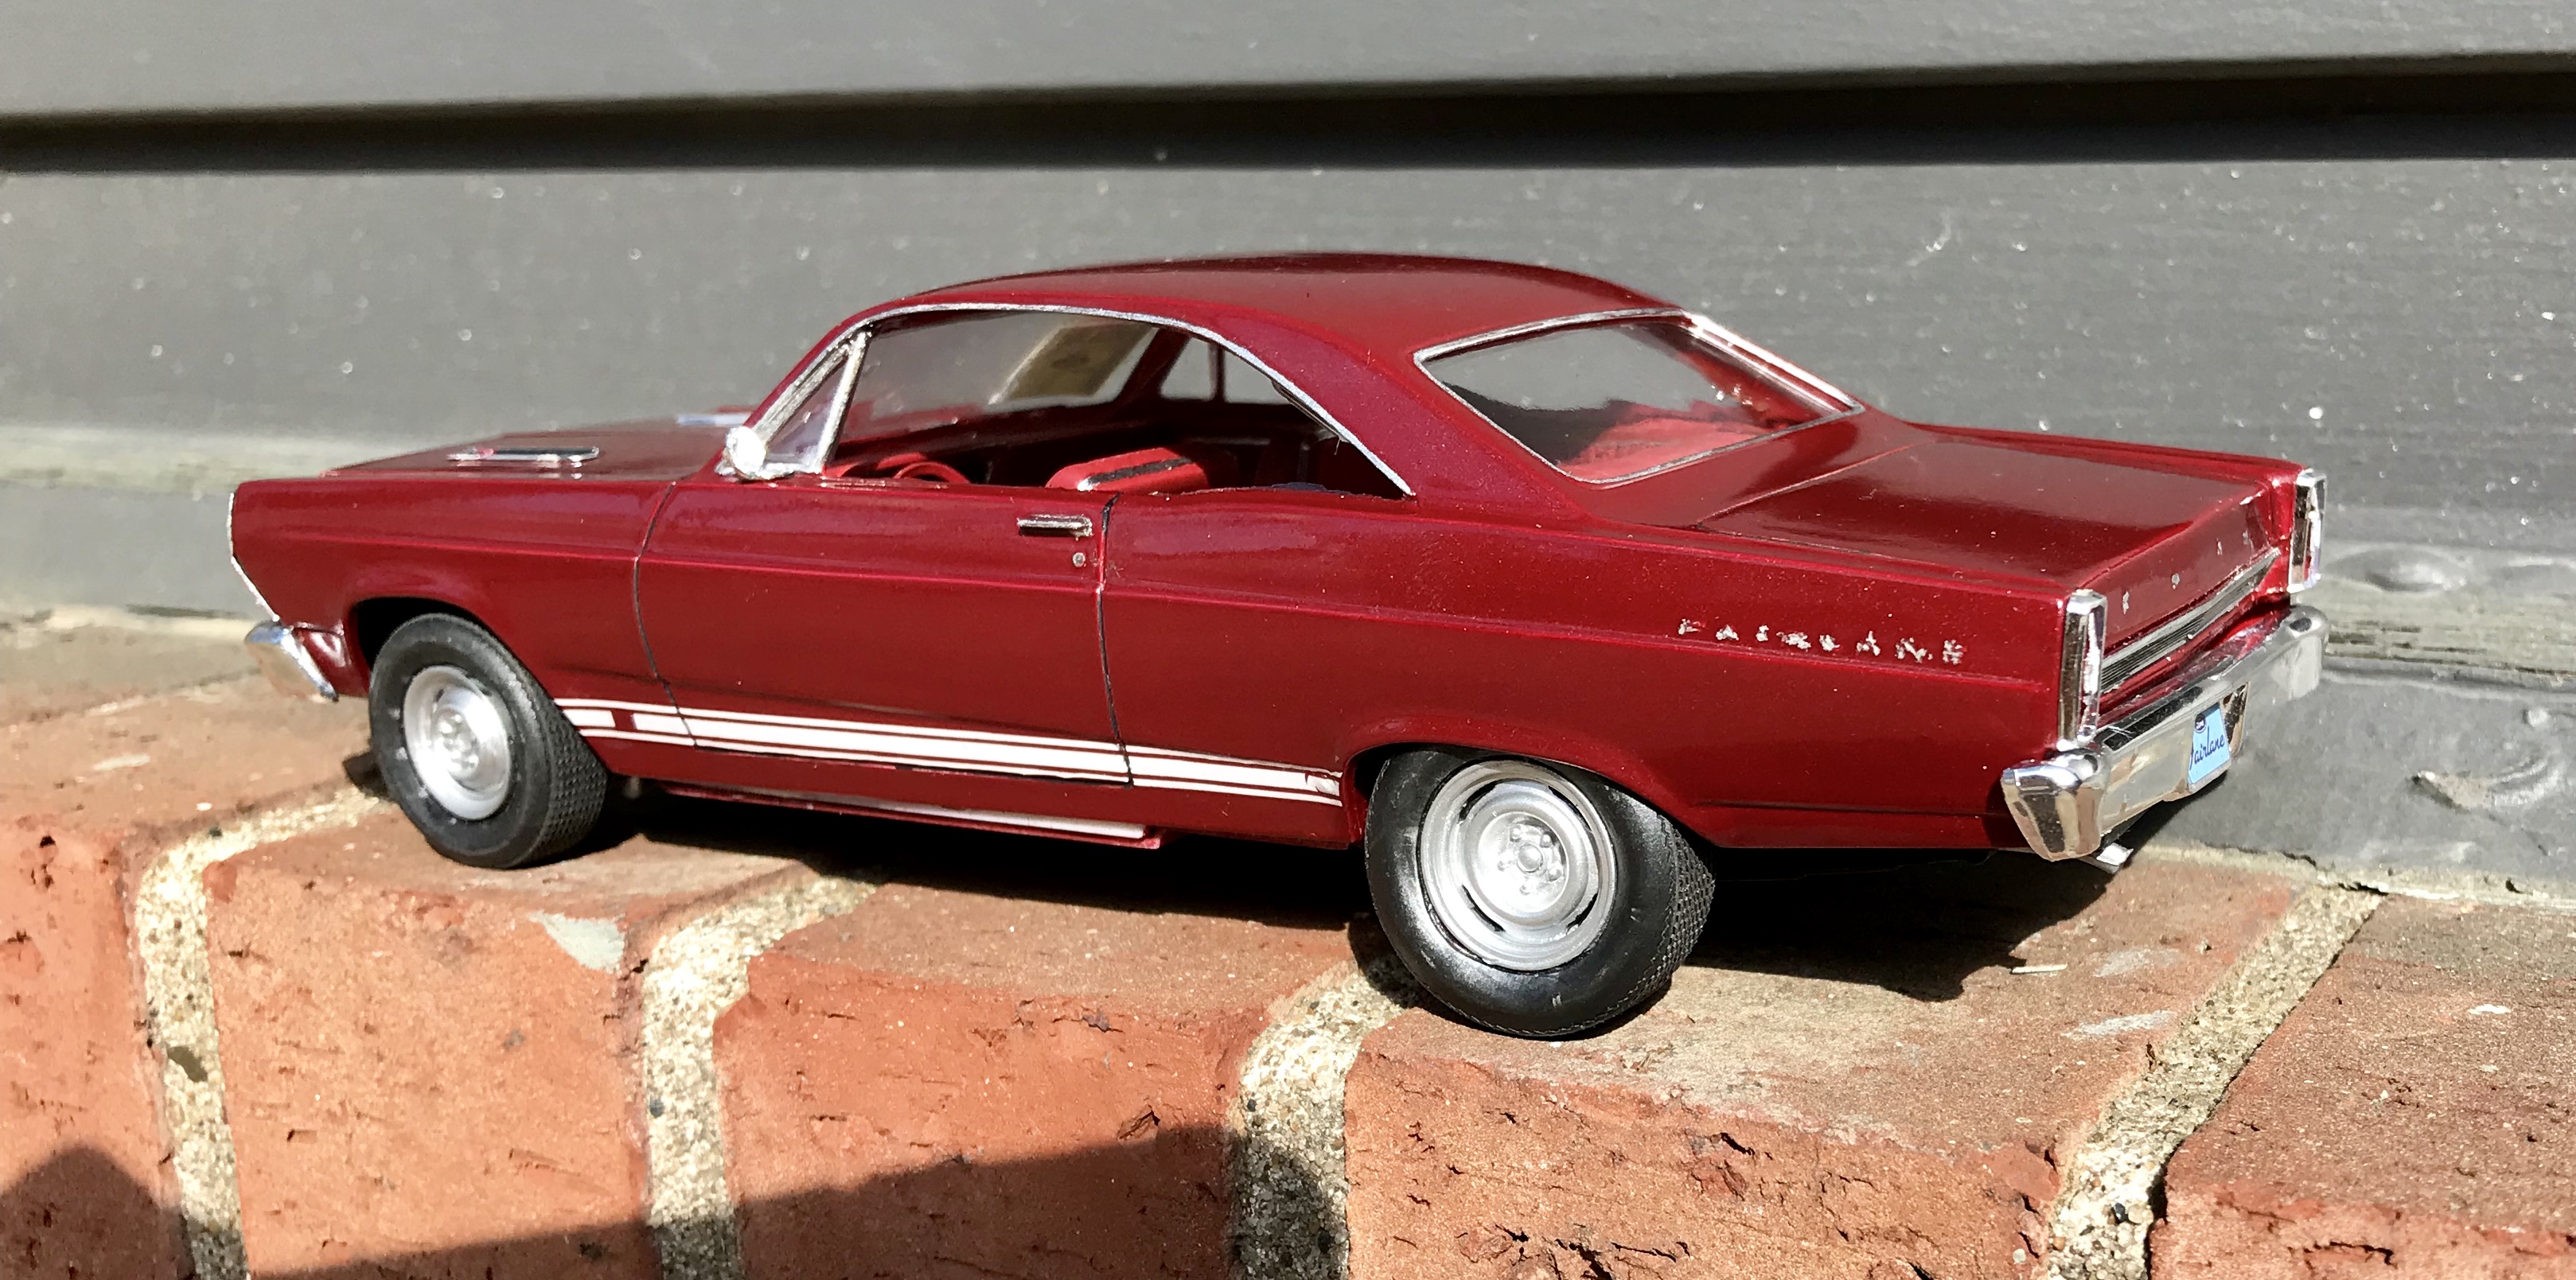
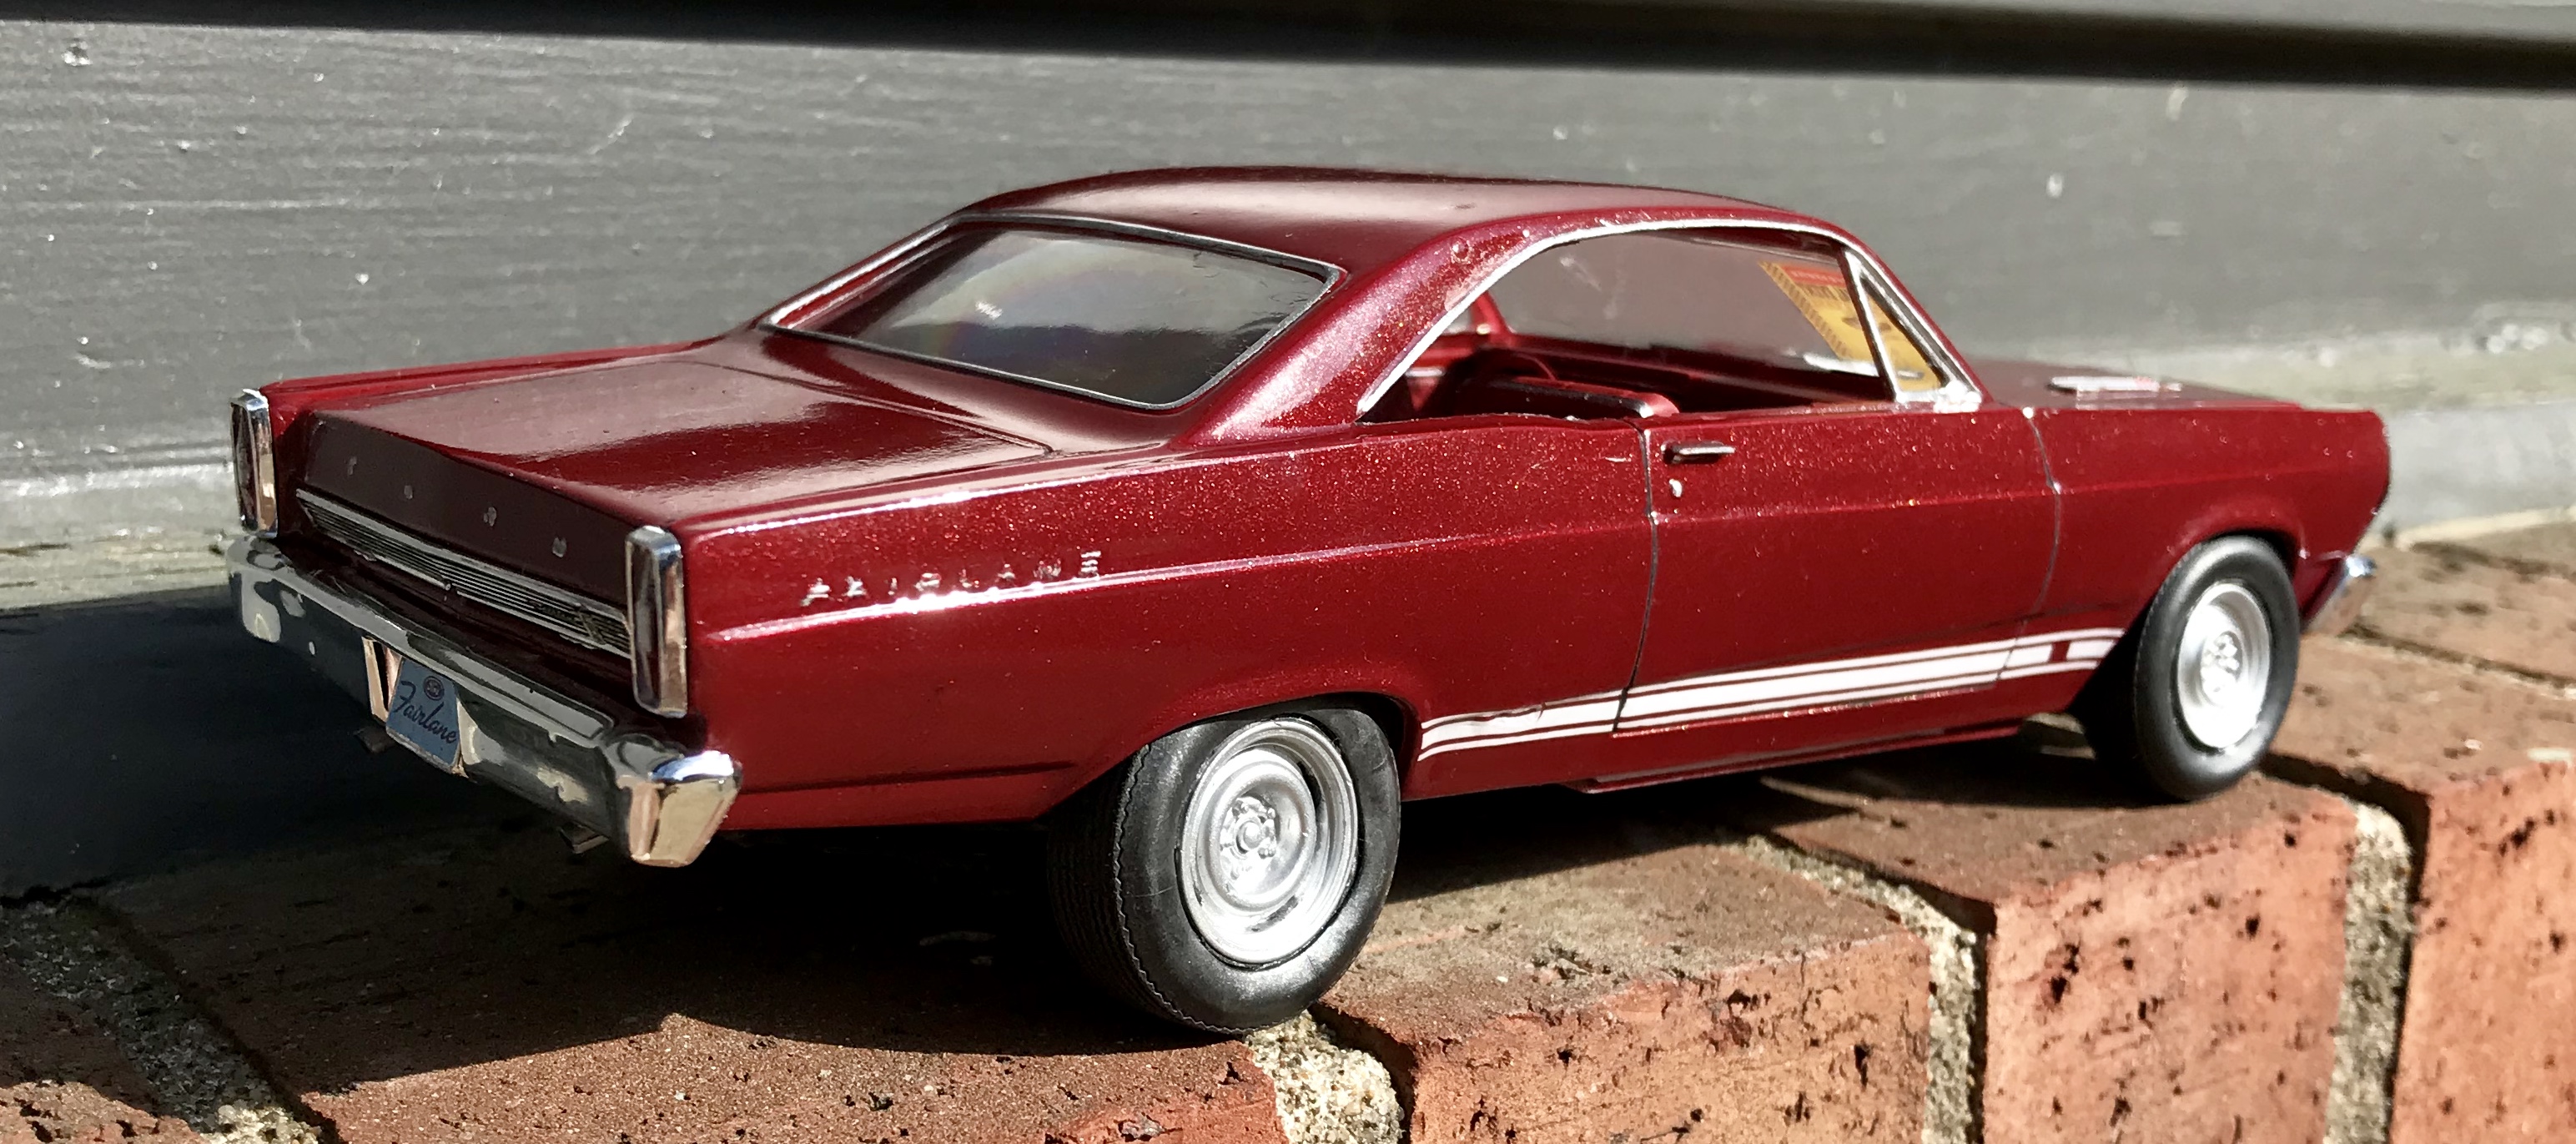
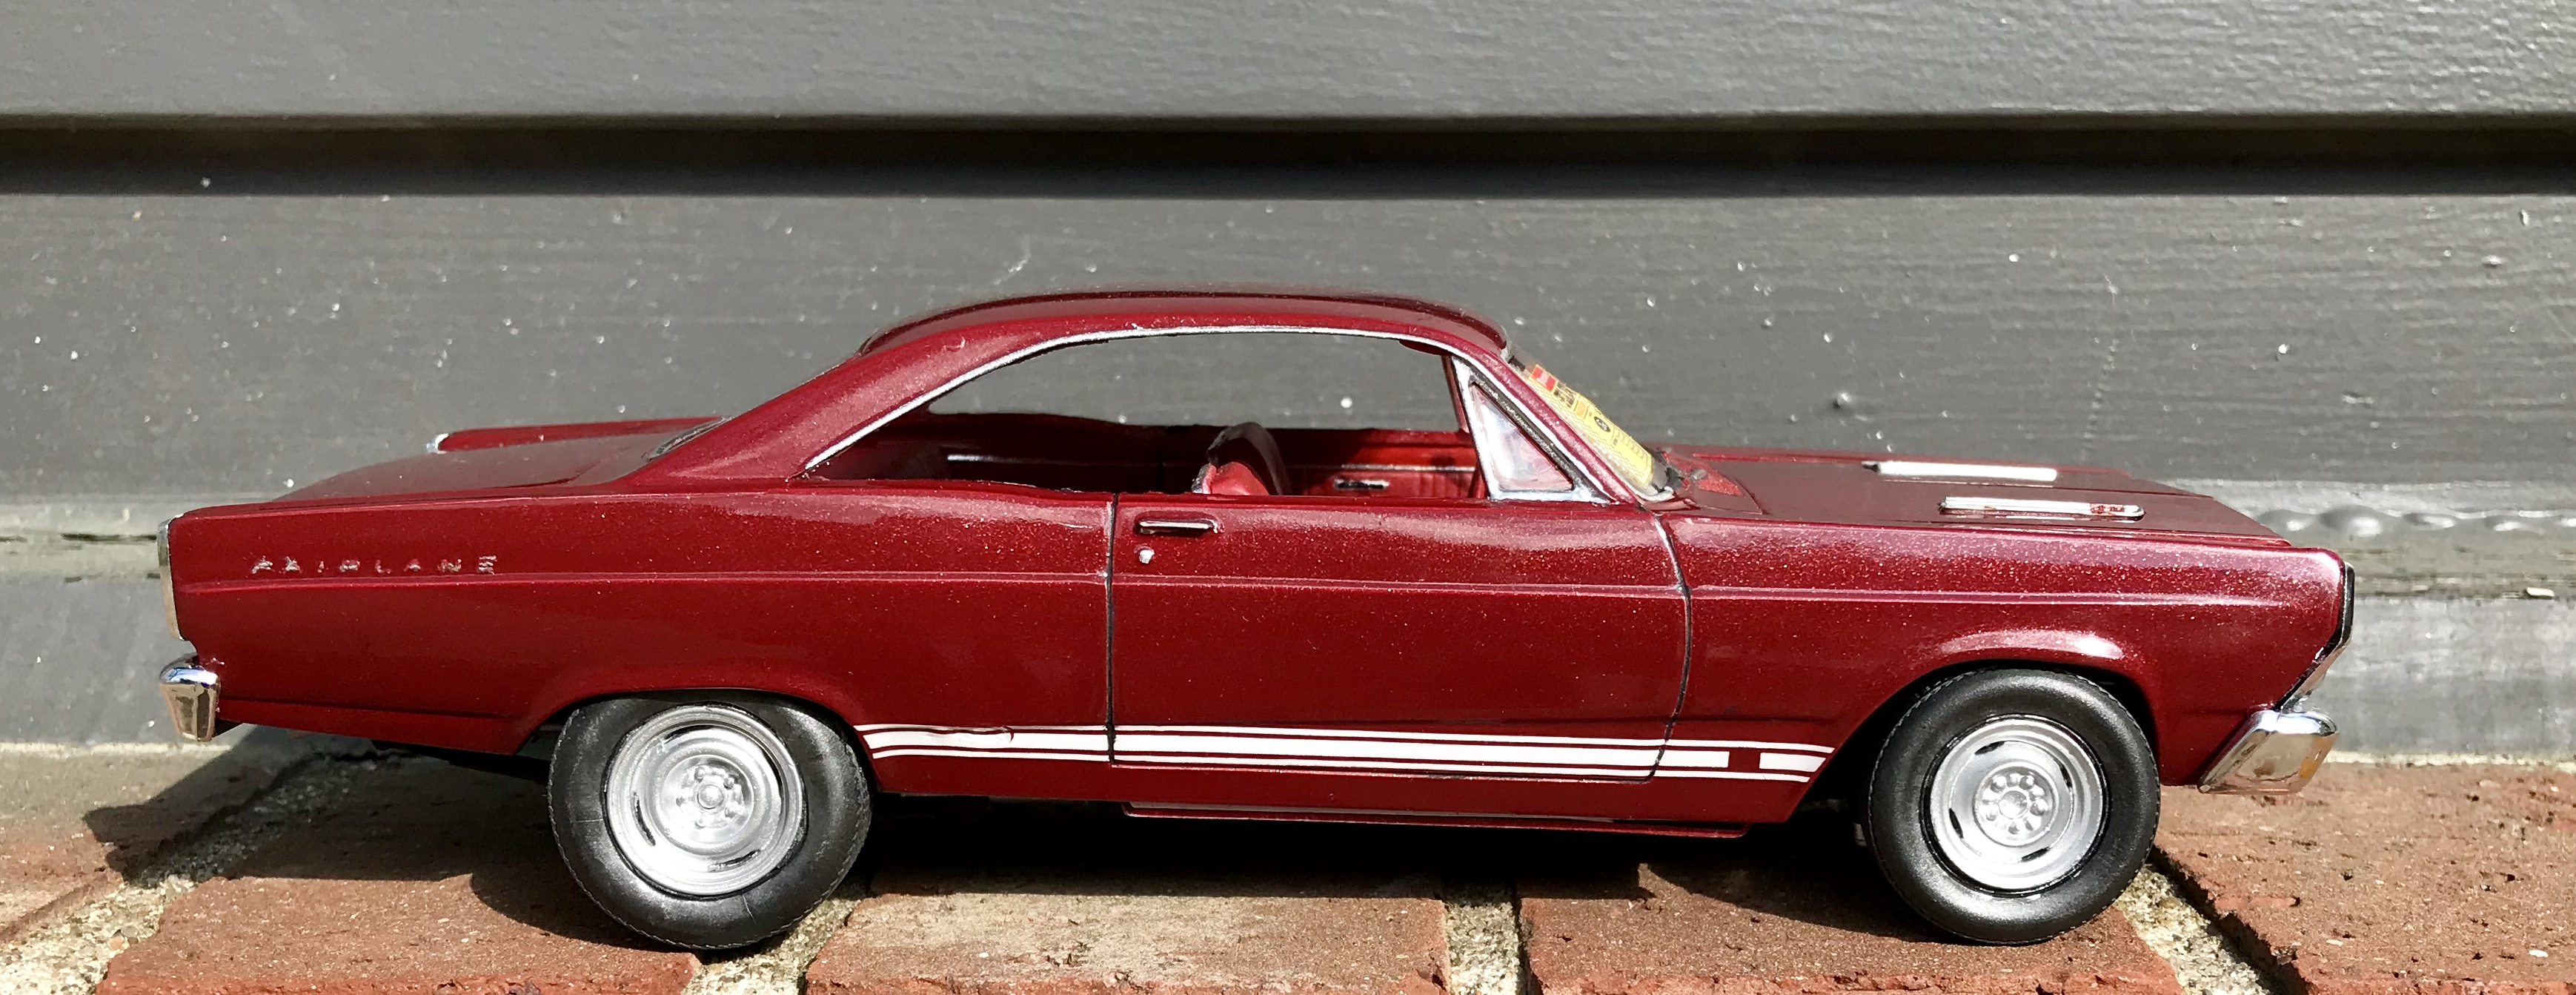
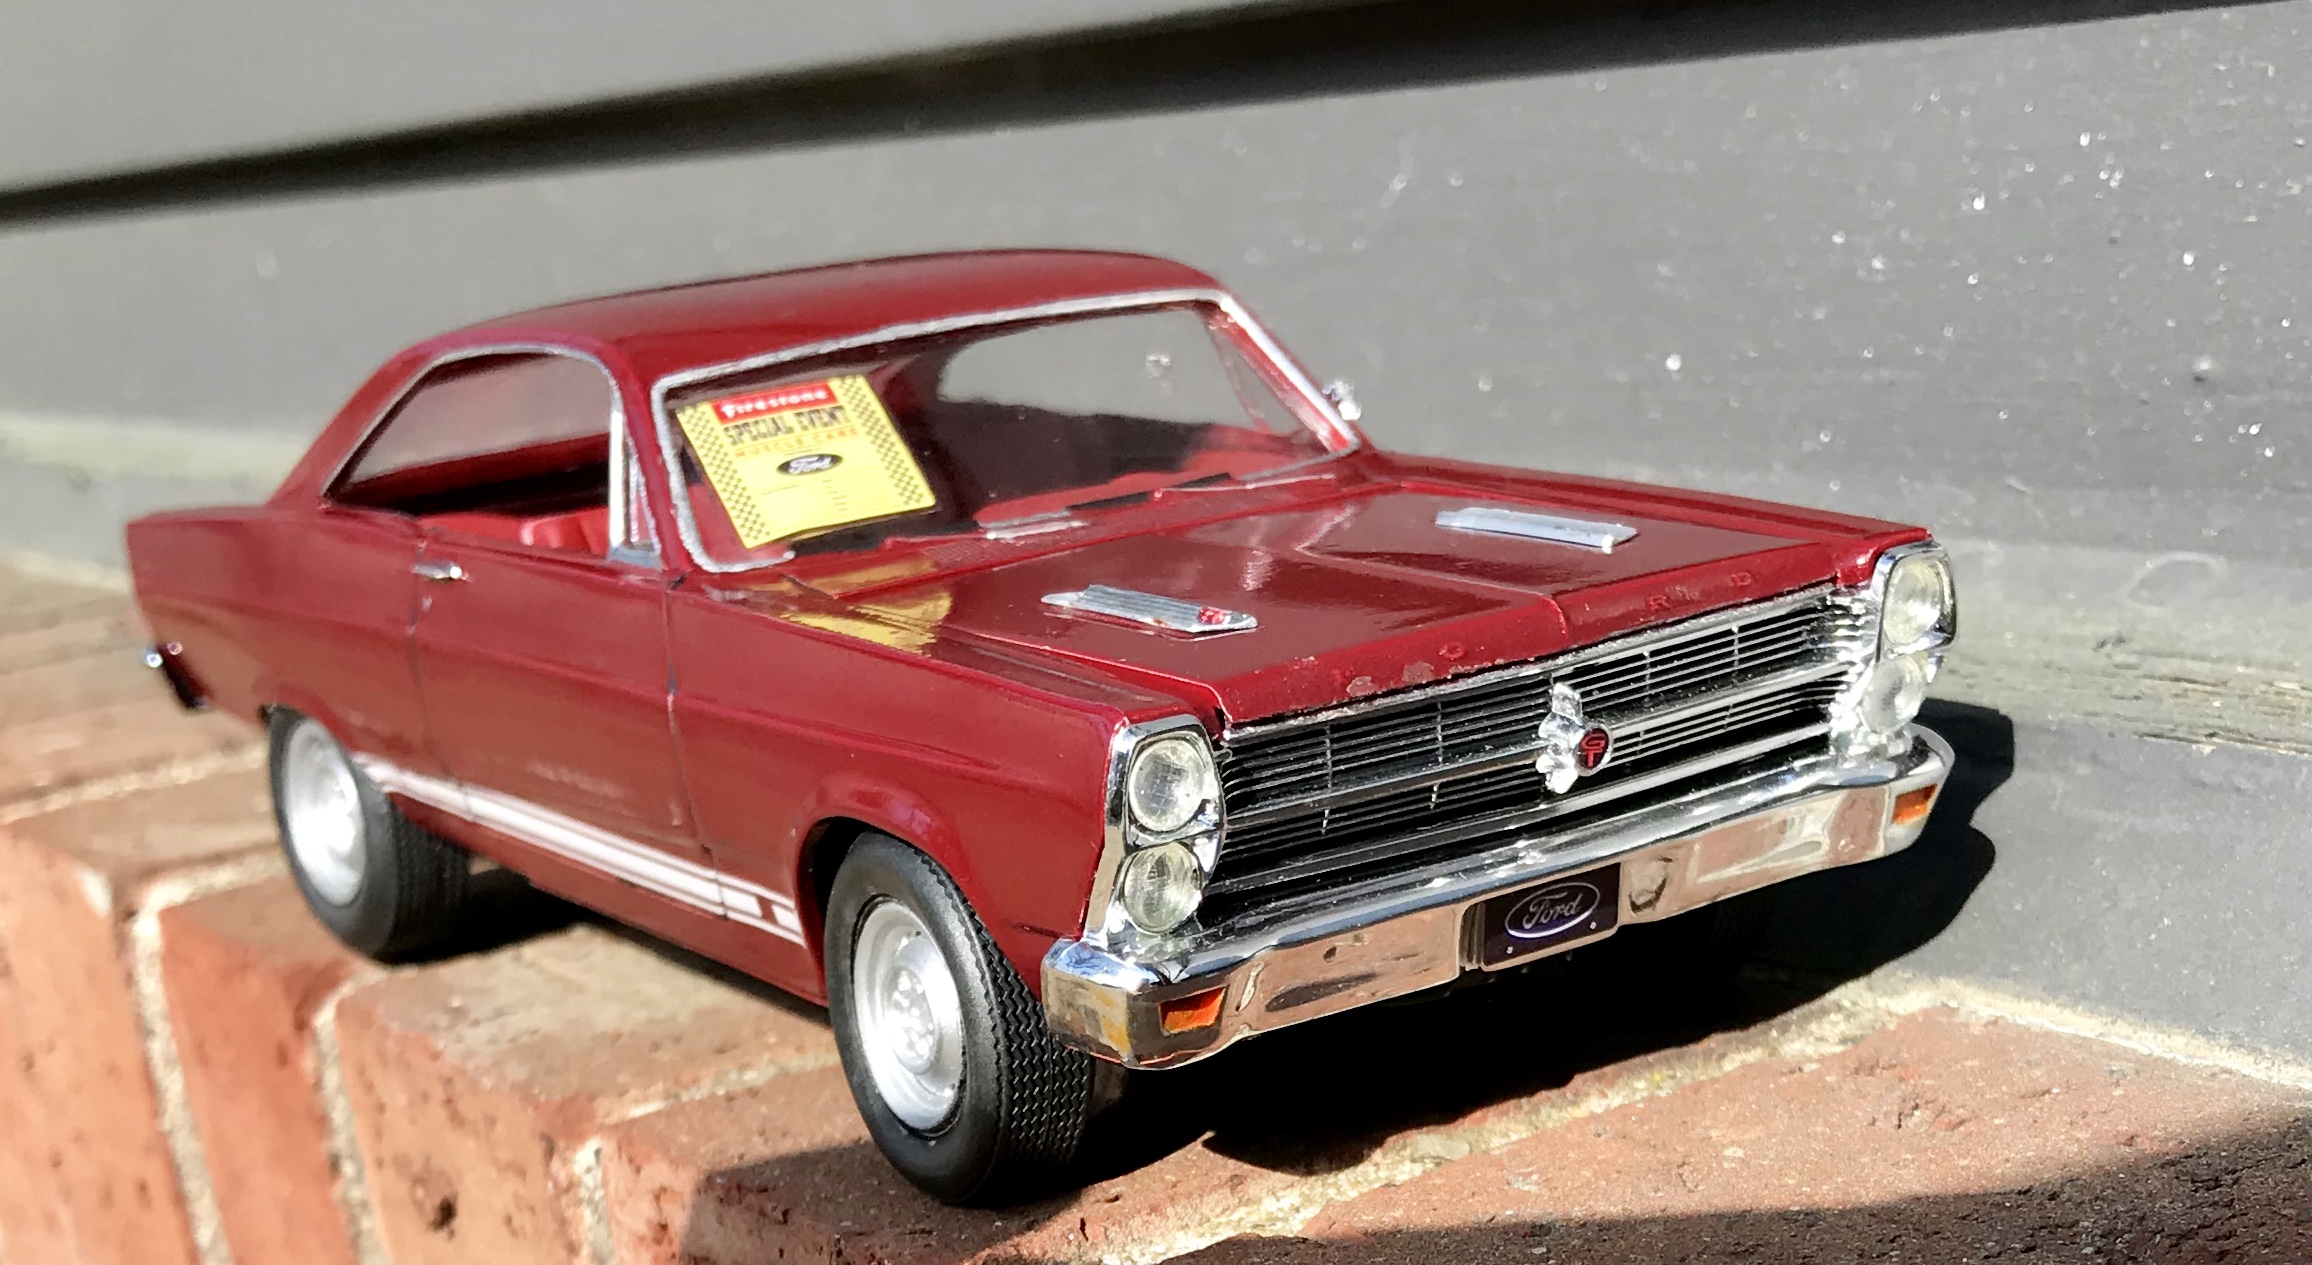
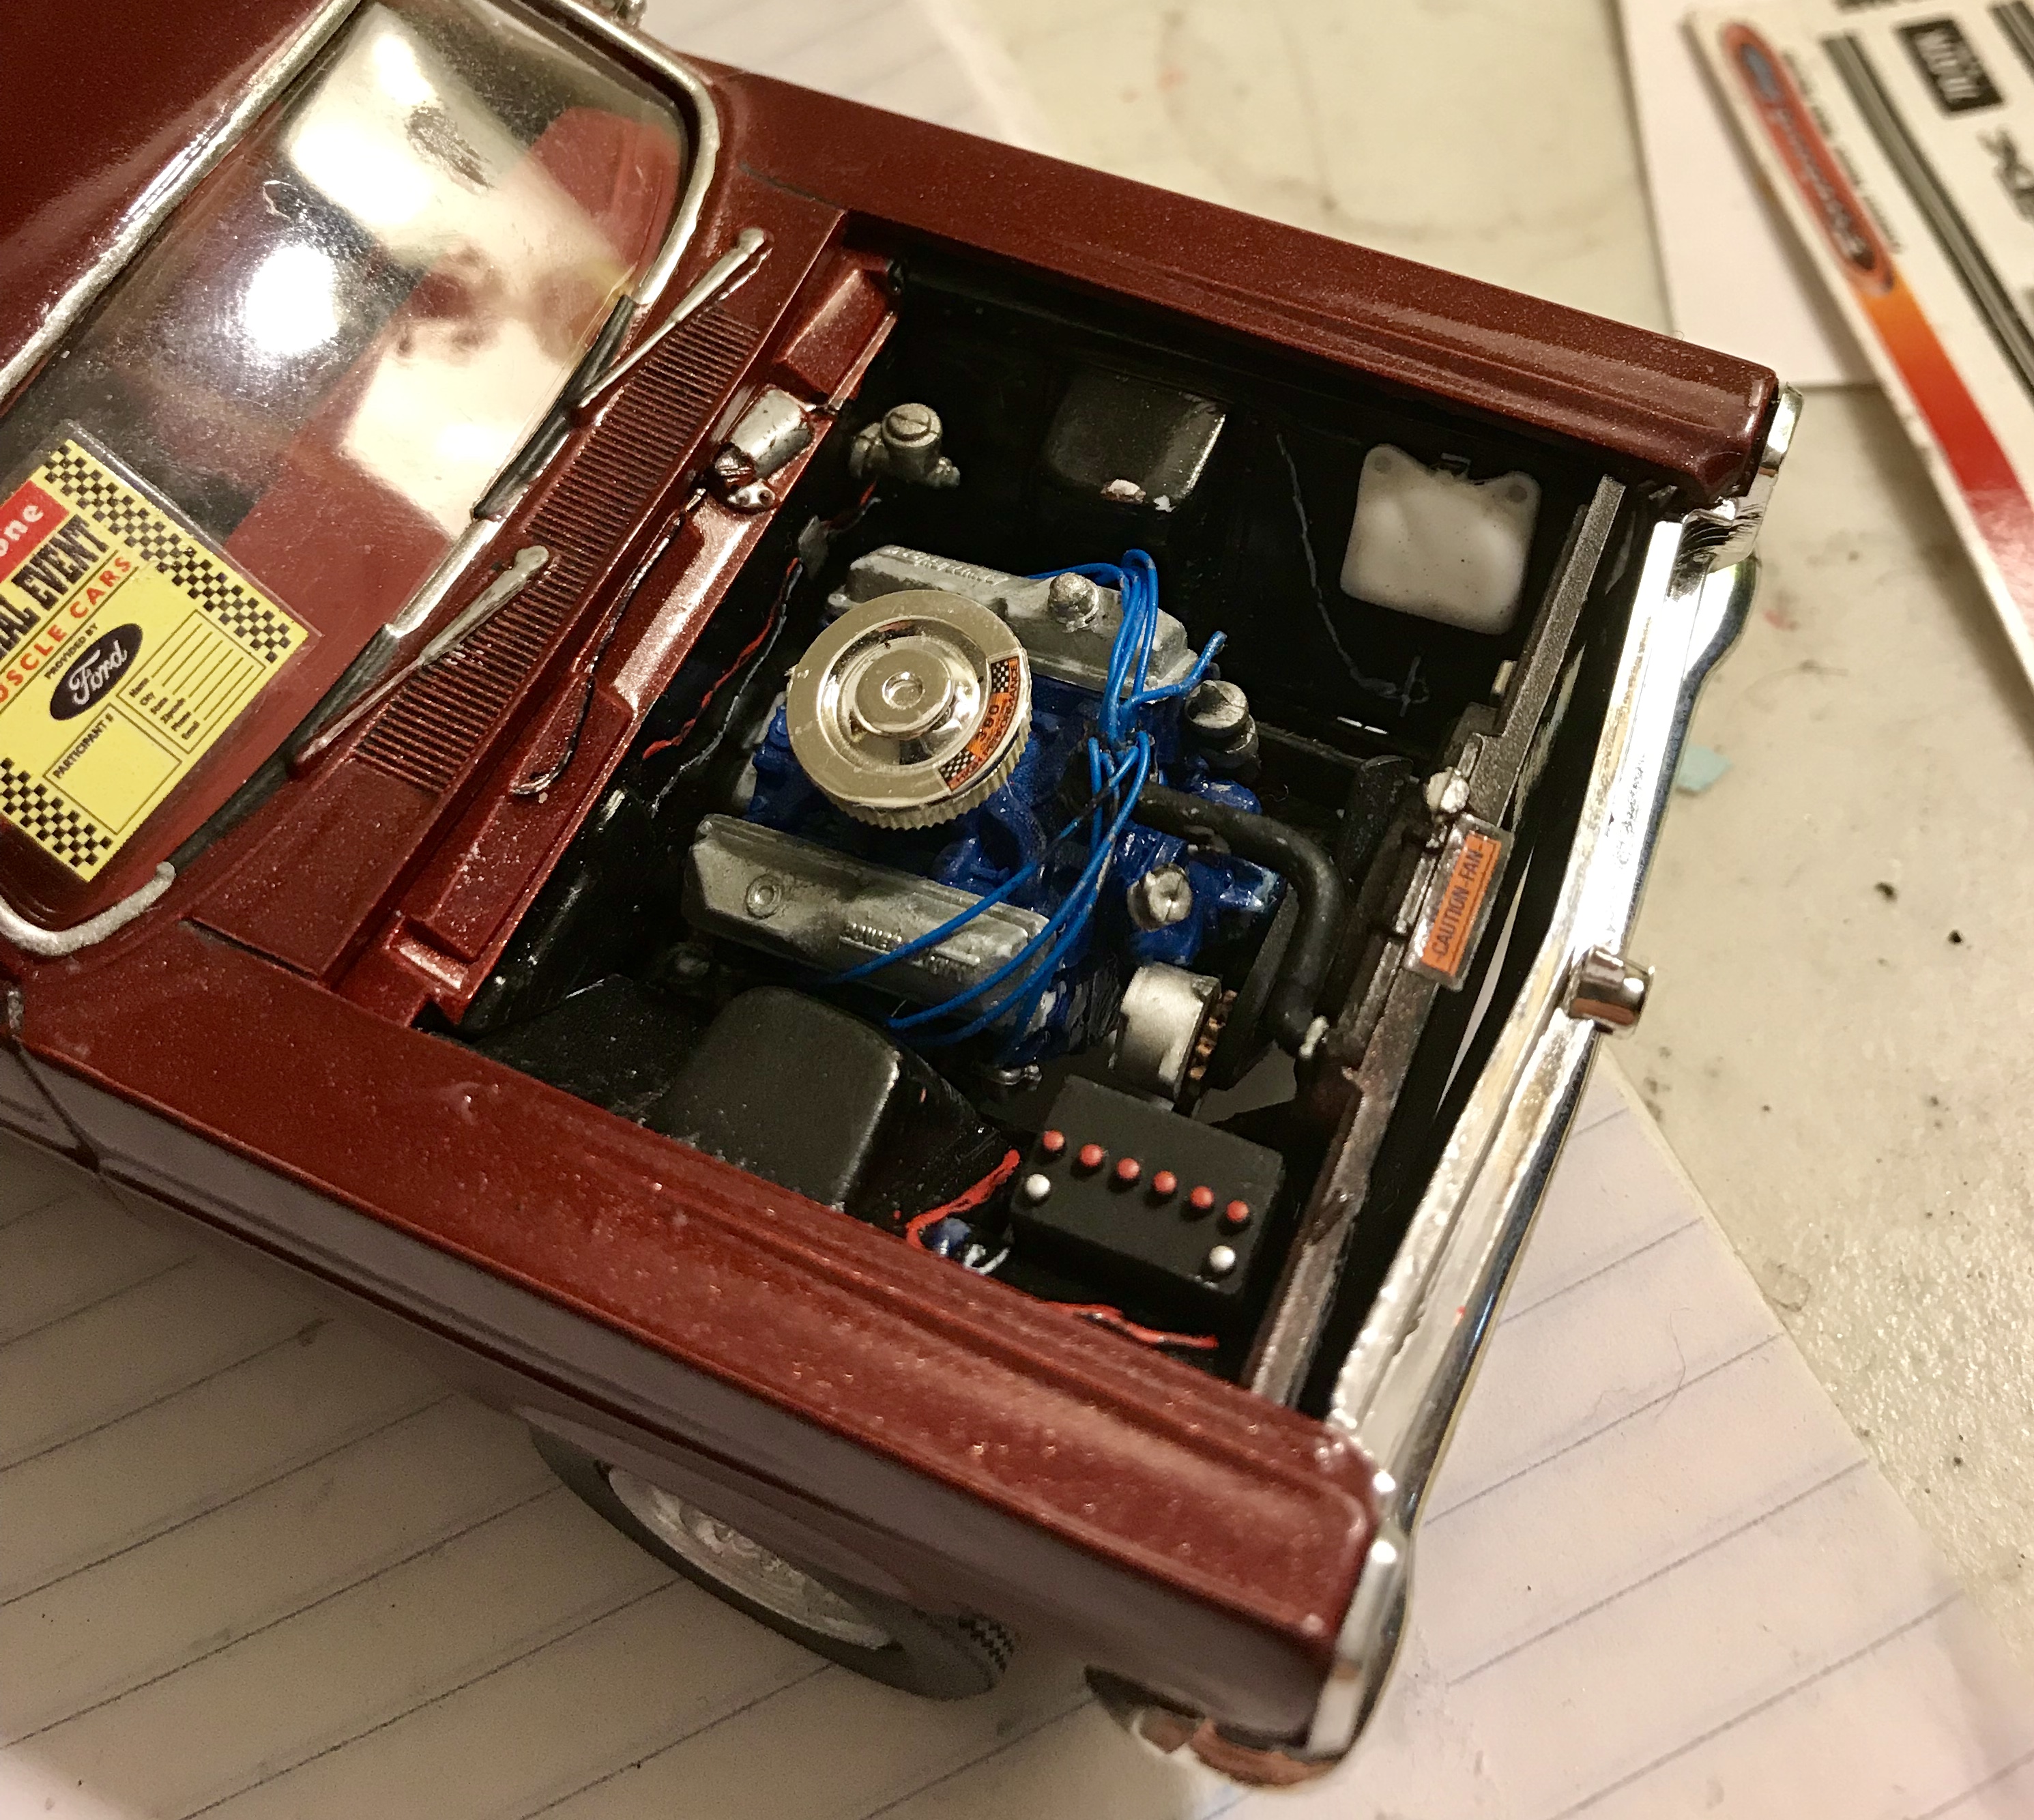
My interests in cars are mainly 1968-1973 muscle cars, with the occasional classic sports car here and there. I like others, but to really put the time and effort involved into a build, those are the cars that make me want to do it. In early January, I was at HL, seeing if they had anything new, and saw the rerelease of AMT’s 66 Fairlane. It seemed like a decent kit, something different, and it had the new pad-printed Firestone Wide Ovals, which I was curious about, so I grabbed it. The tires were a disappointment. They were (not unexpectedly) the L Goodyear Polyglas with different lettering... but brand new out of the box, the printing was all messed up, and what was there was flaking off. Within 2 days, they were almost complete black walls. As for the kit, it wasn’t doing it for me. Looking at reference pics, nothing stood out as something I’d want to do, the car itself wasn’t really exciting me, it didn’t have internal or external rear view mirrors in the box, there was no detail on the front shock towers, and my kit was somehow missing the steering column. My whole reaction was “meh,” and it sat on the floor while I worked on other things. I made a color choice... one of those 60s only combos.. Maroon with a red interior. I painted it to see if that would get the excitement going... nope. A couple weeks later, I resigned myself to the fact that I didn’t care about this enough to build it, and maybe I would use it for parts. Then, a couple weeks ago, I picked it up and decided to go ahead with it. The Fairlane wheels are nice, but might get used for a Mustang I’m working on, so I dug through the parts box and found some steelies. Rather than paint them black or body color, I painted them silver. The rest of the build is box stock other than the spark plug wires. I didn’t do any of the other detailing things I generally do under the hood. Paint is Testors Mythical Maroon, interior is Rustoleum Cardinal Red with dull coat. As of my photos, I still needed to put the little GT emblems on the lower body, pick out the FORD across the hood and detail lug nuts and hubs on my wheels. Found a side view mirror in the parts box. In the end, it was fun and made a decent shelf model. It’s funny that we have all the MOPAR and Chevy kits, but outside of the Mustang, not much Ford representation in the muscle car era when it comes to models. Still waiting for Revell or Moebius to give us a good 72 Torino.... dream on. Anyway, hope you like it.
-
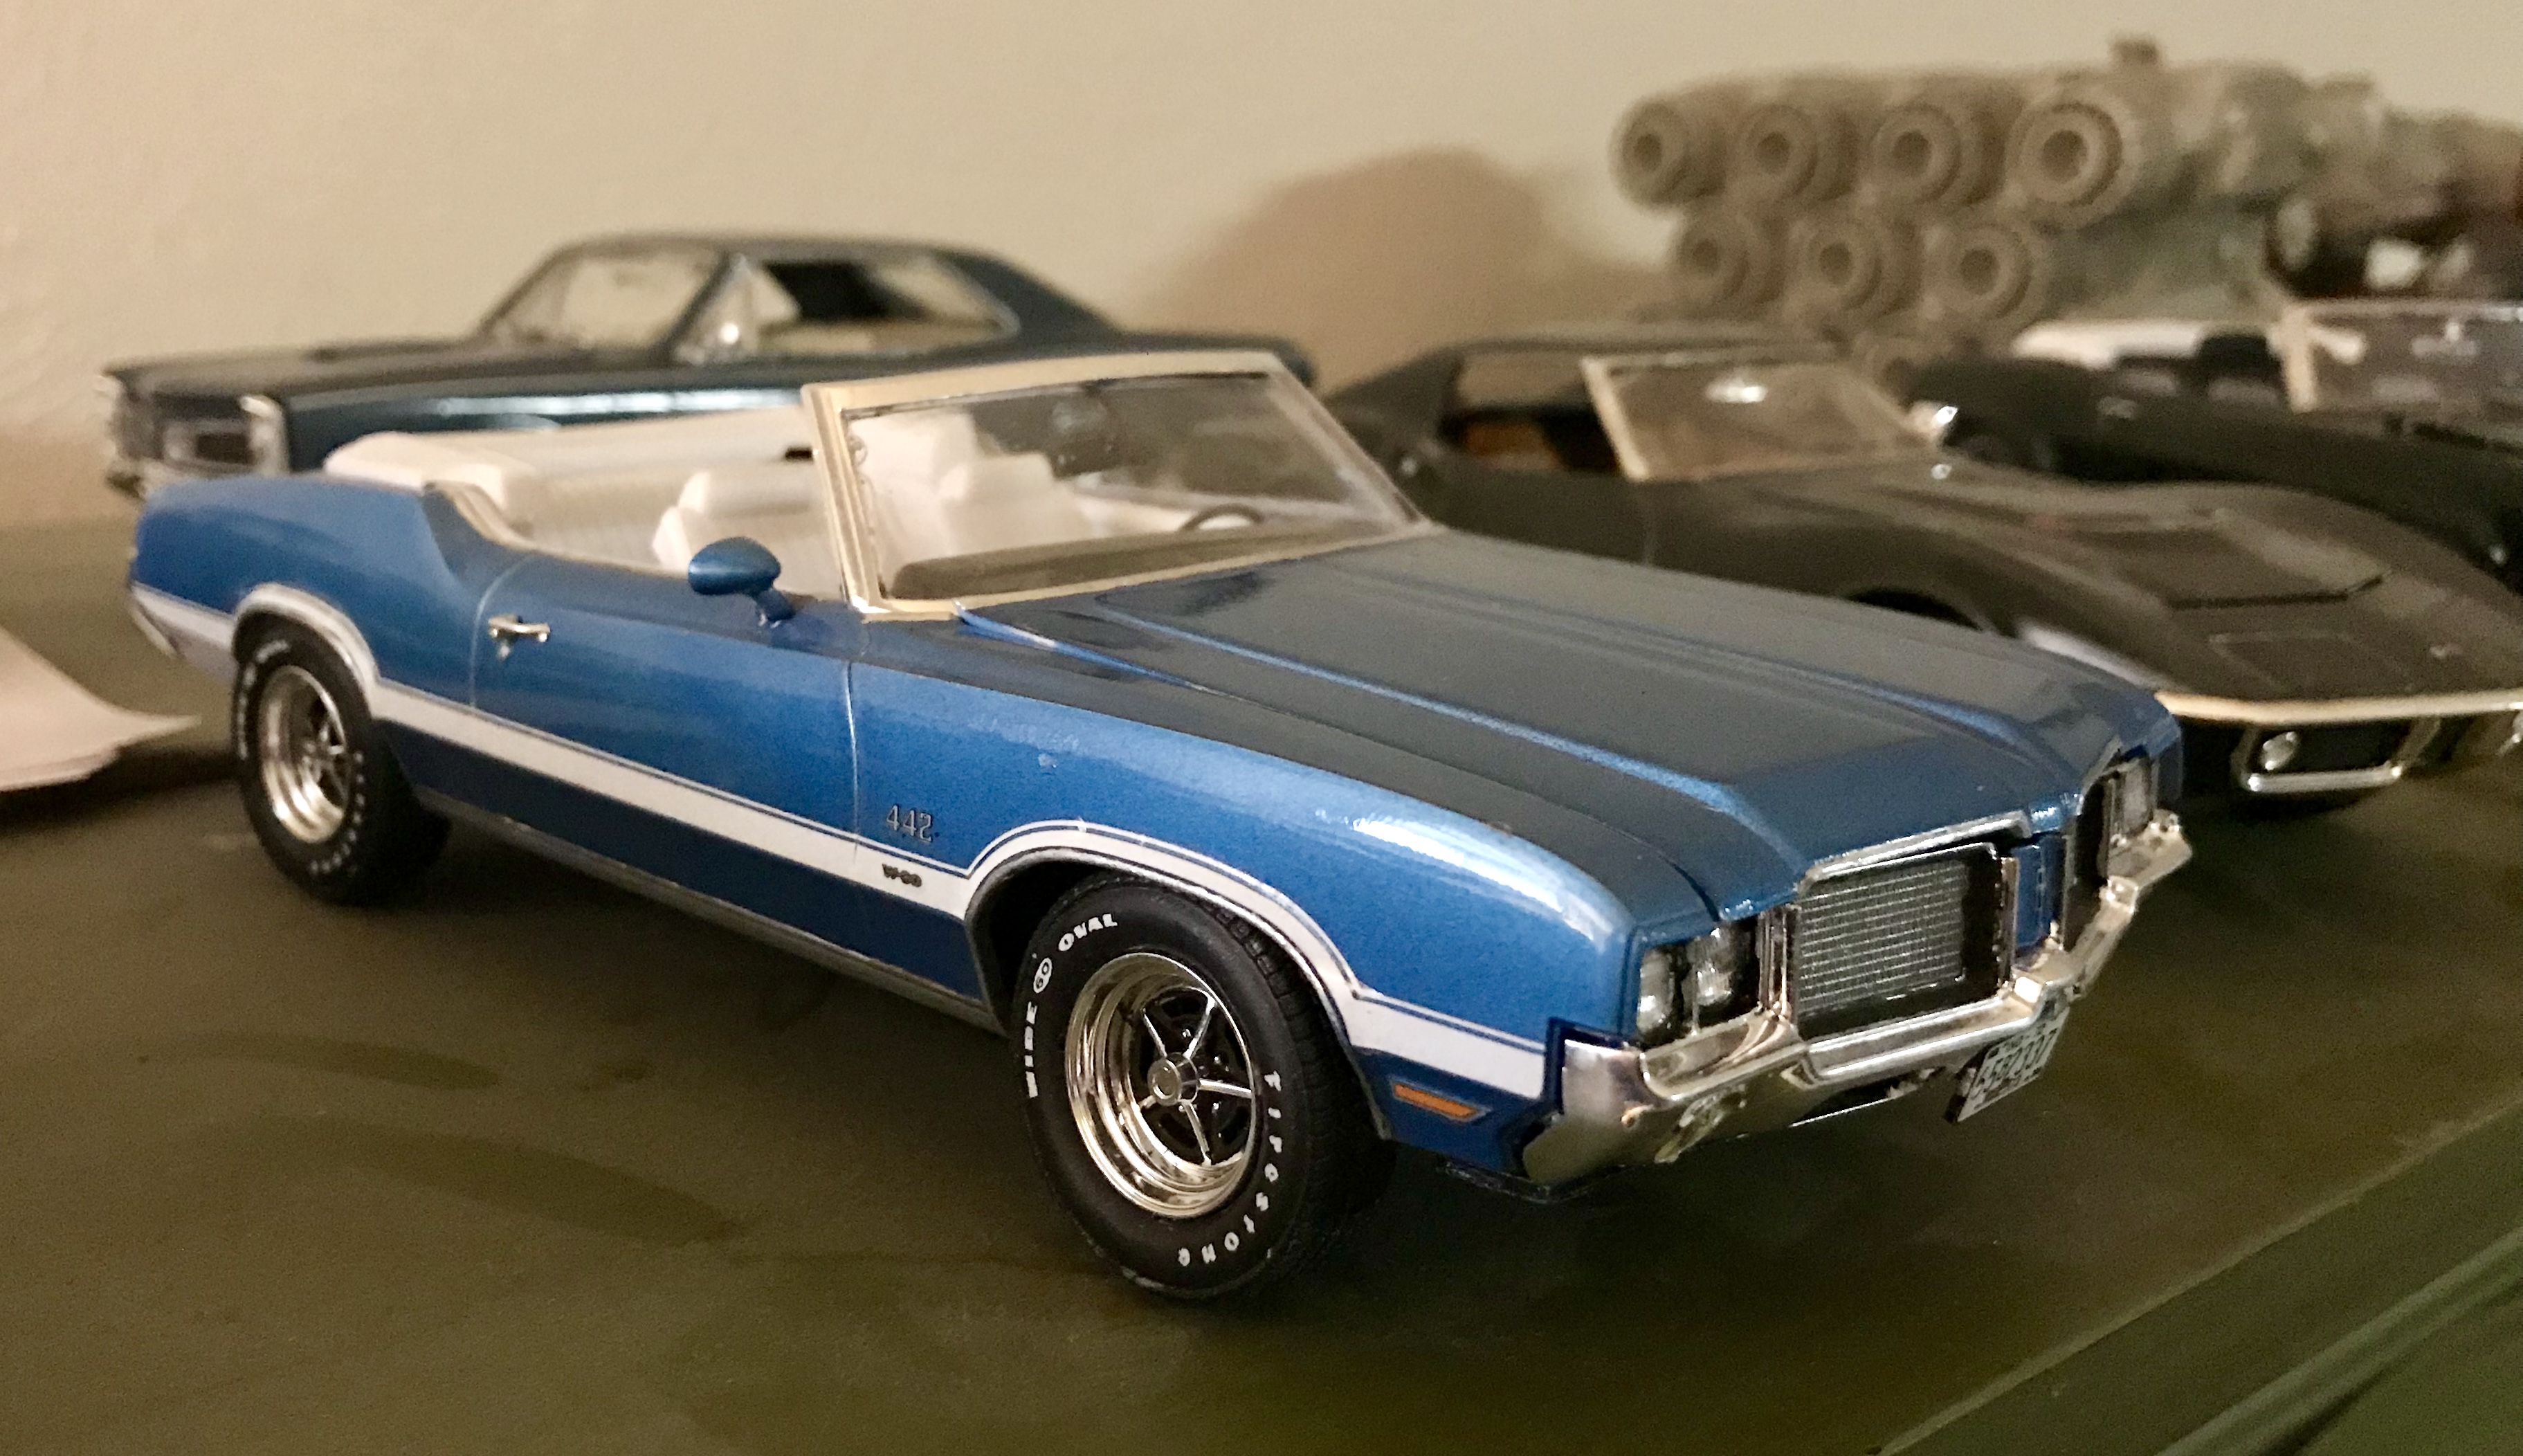
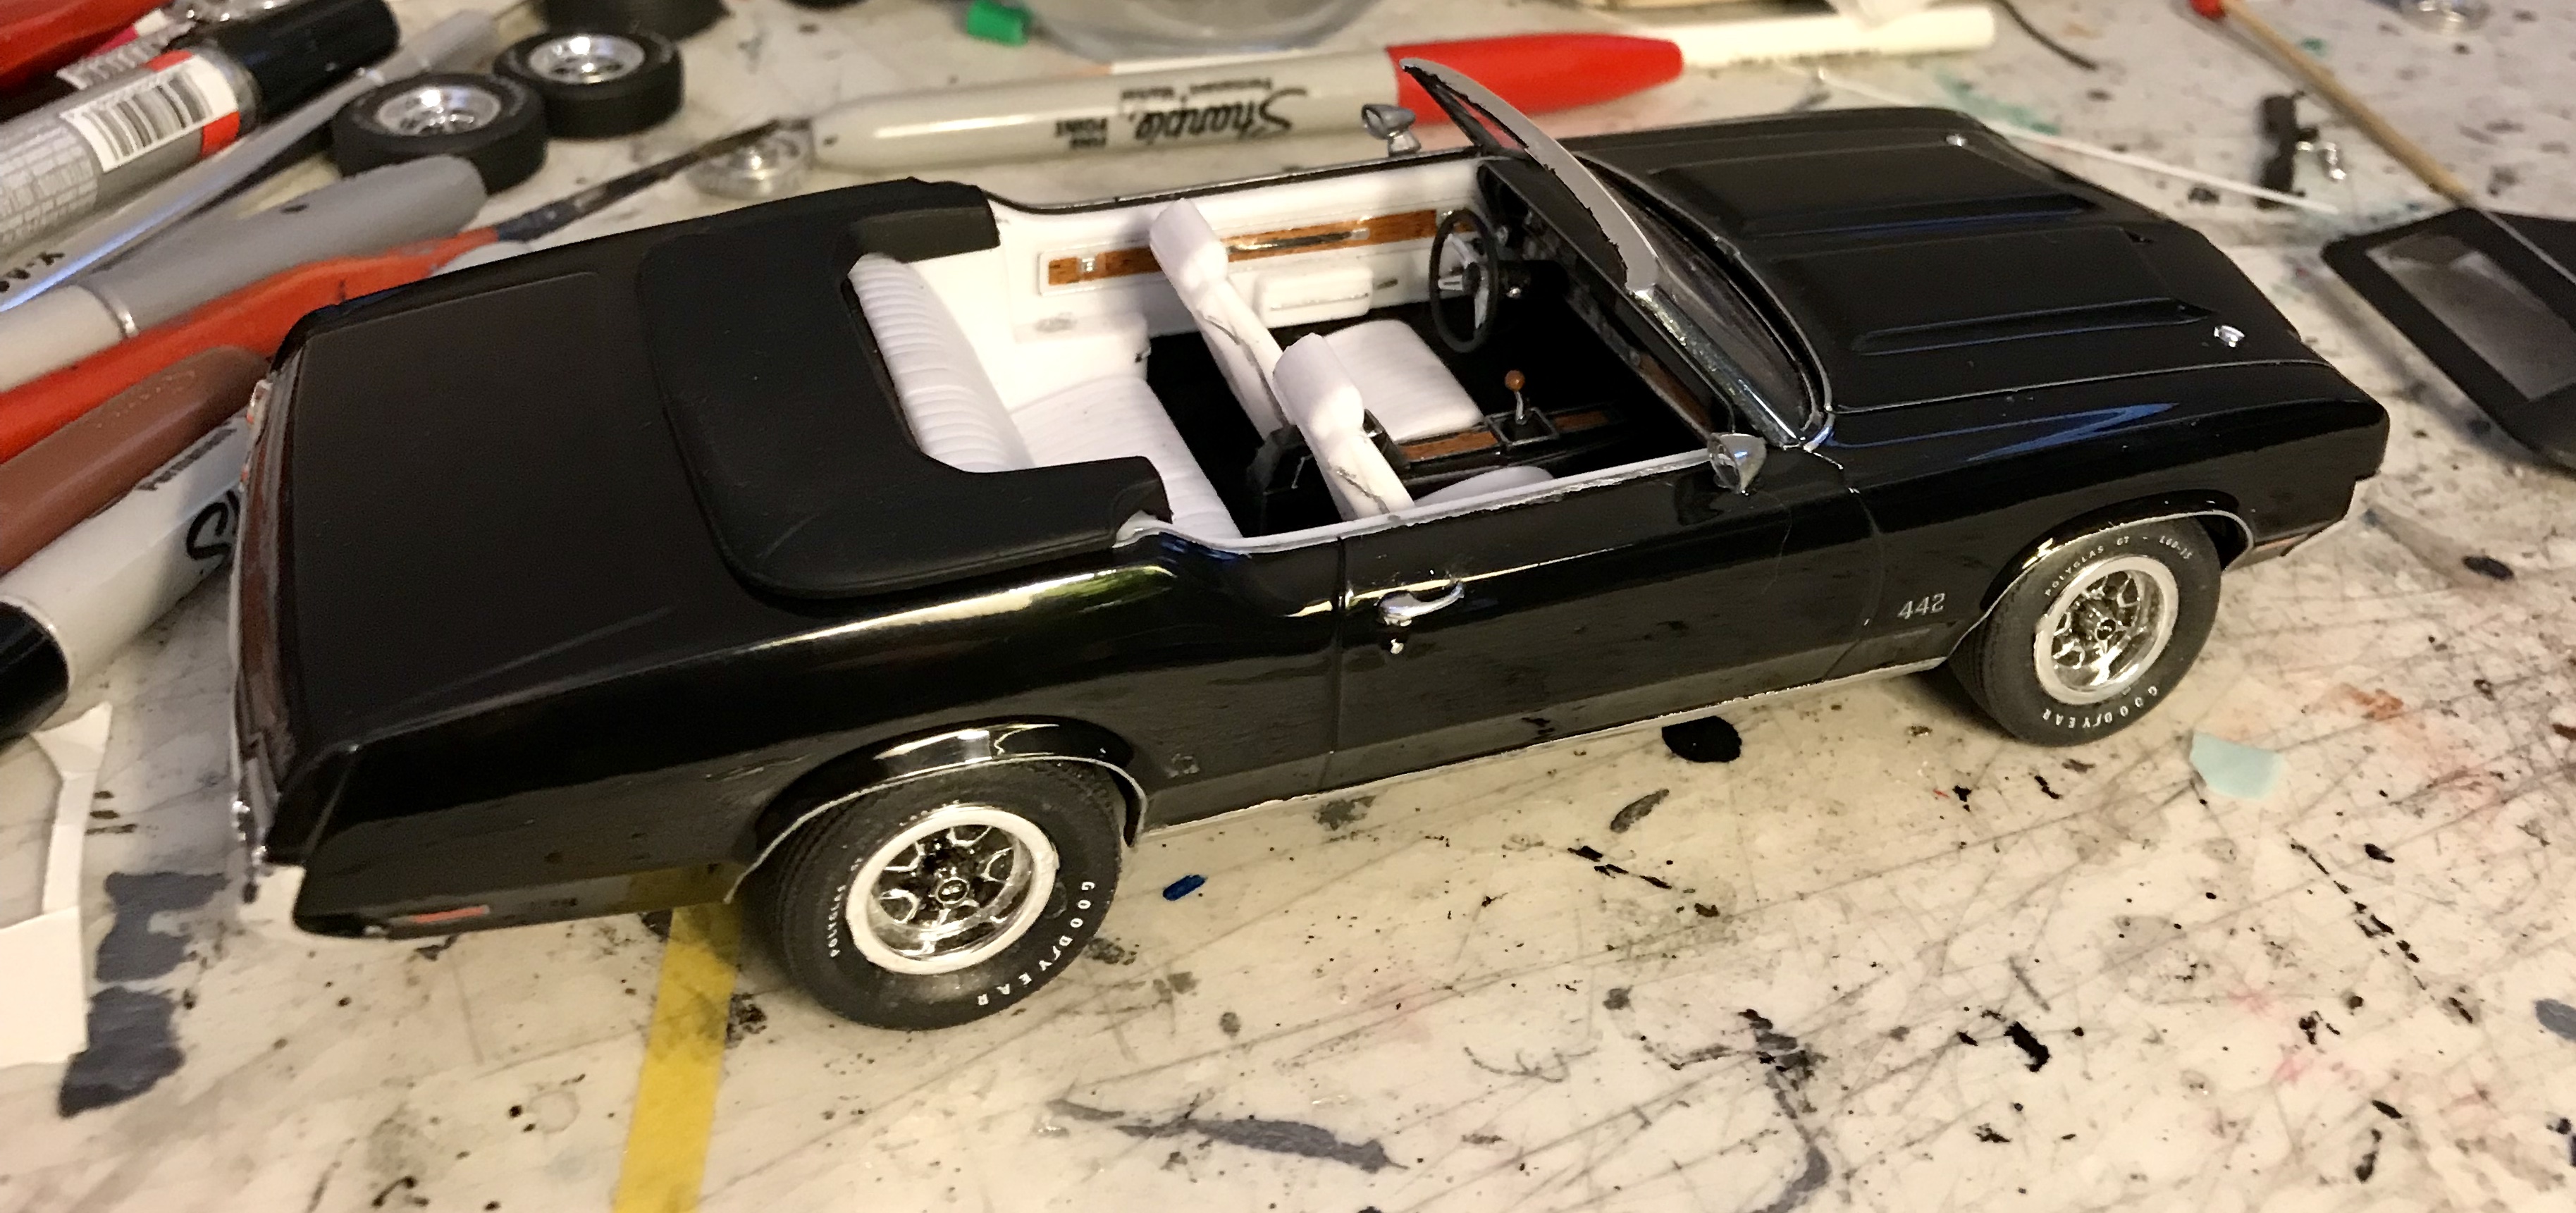
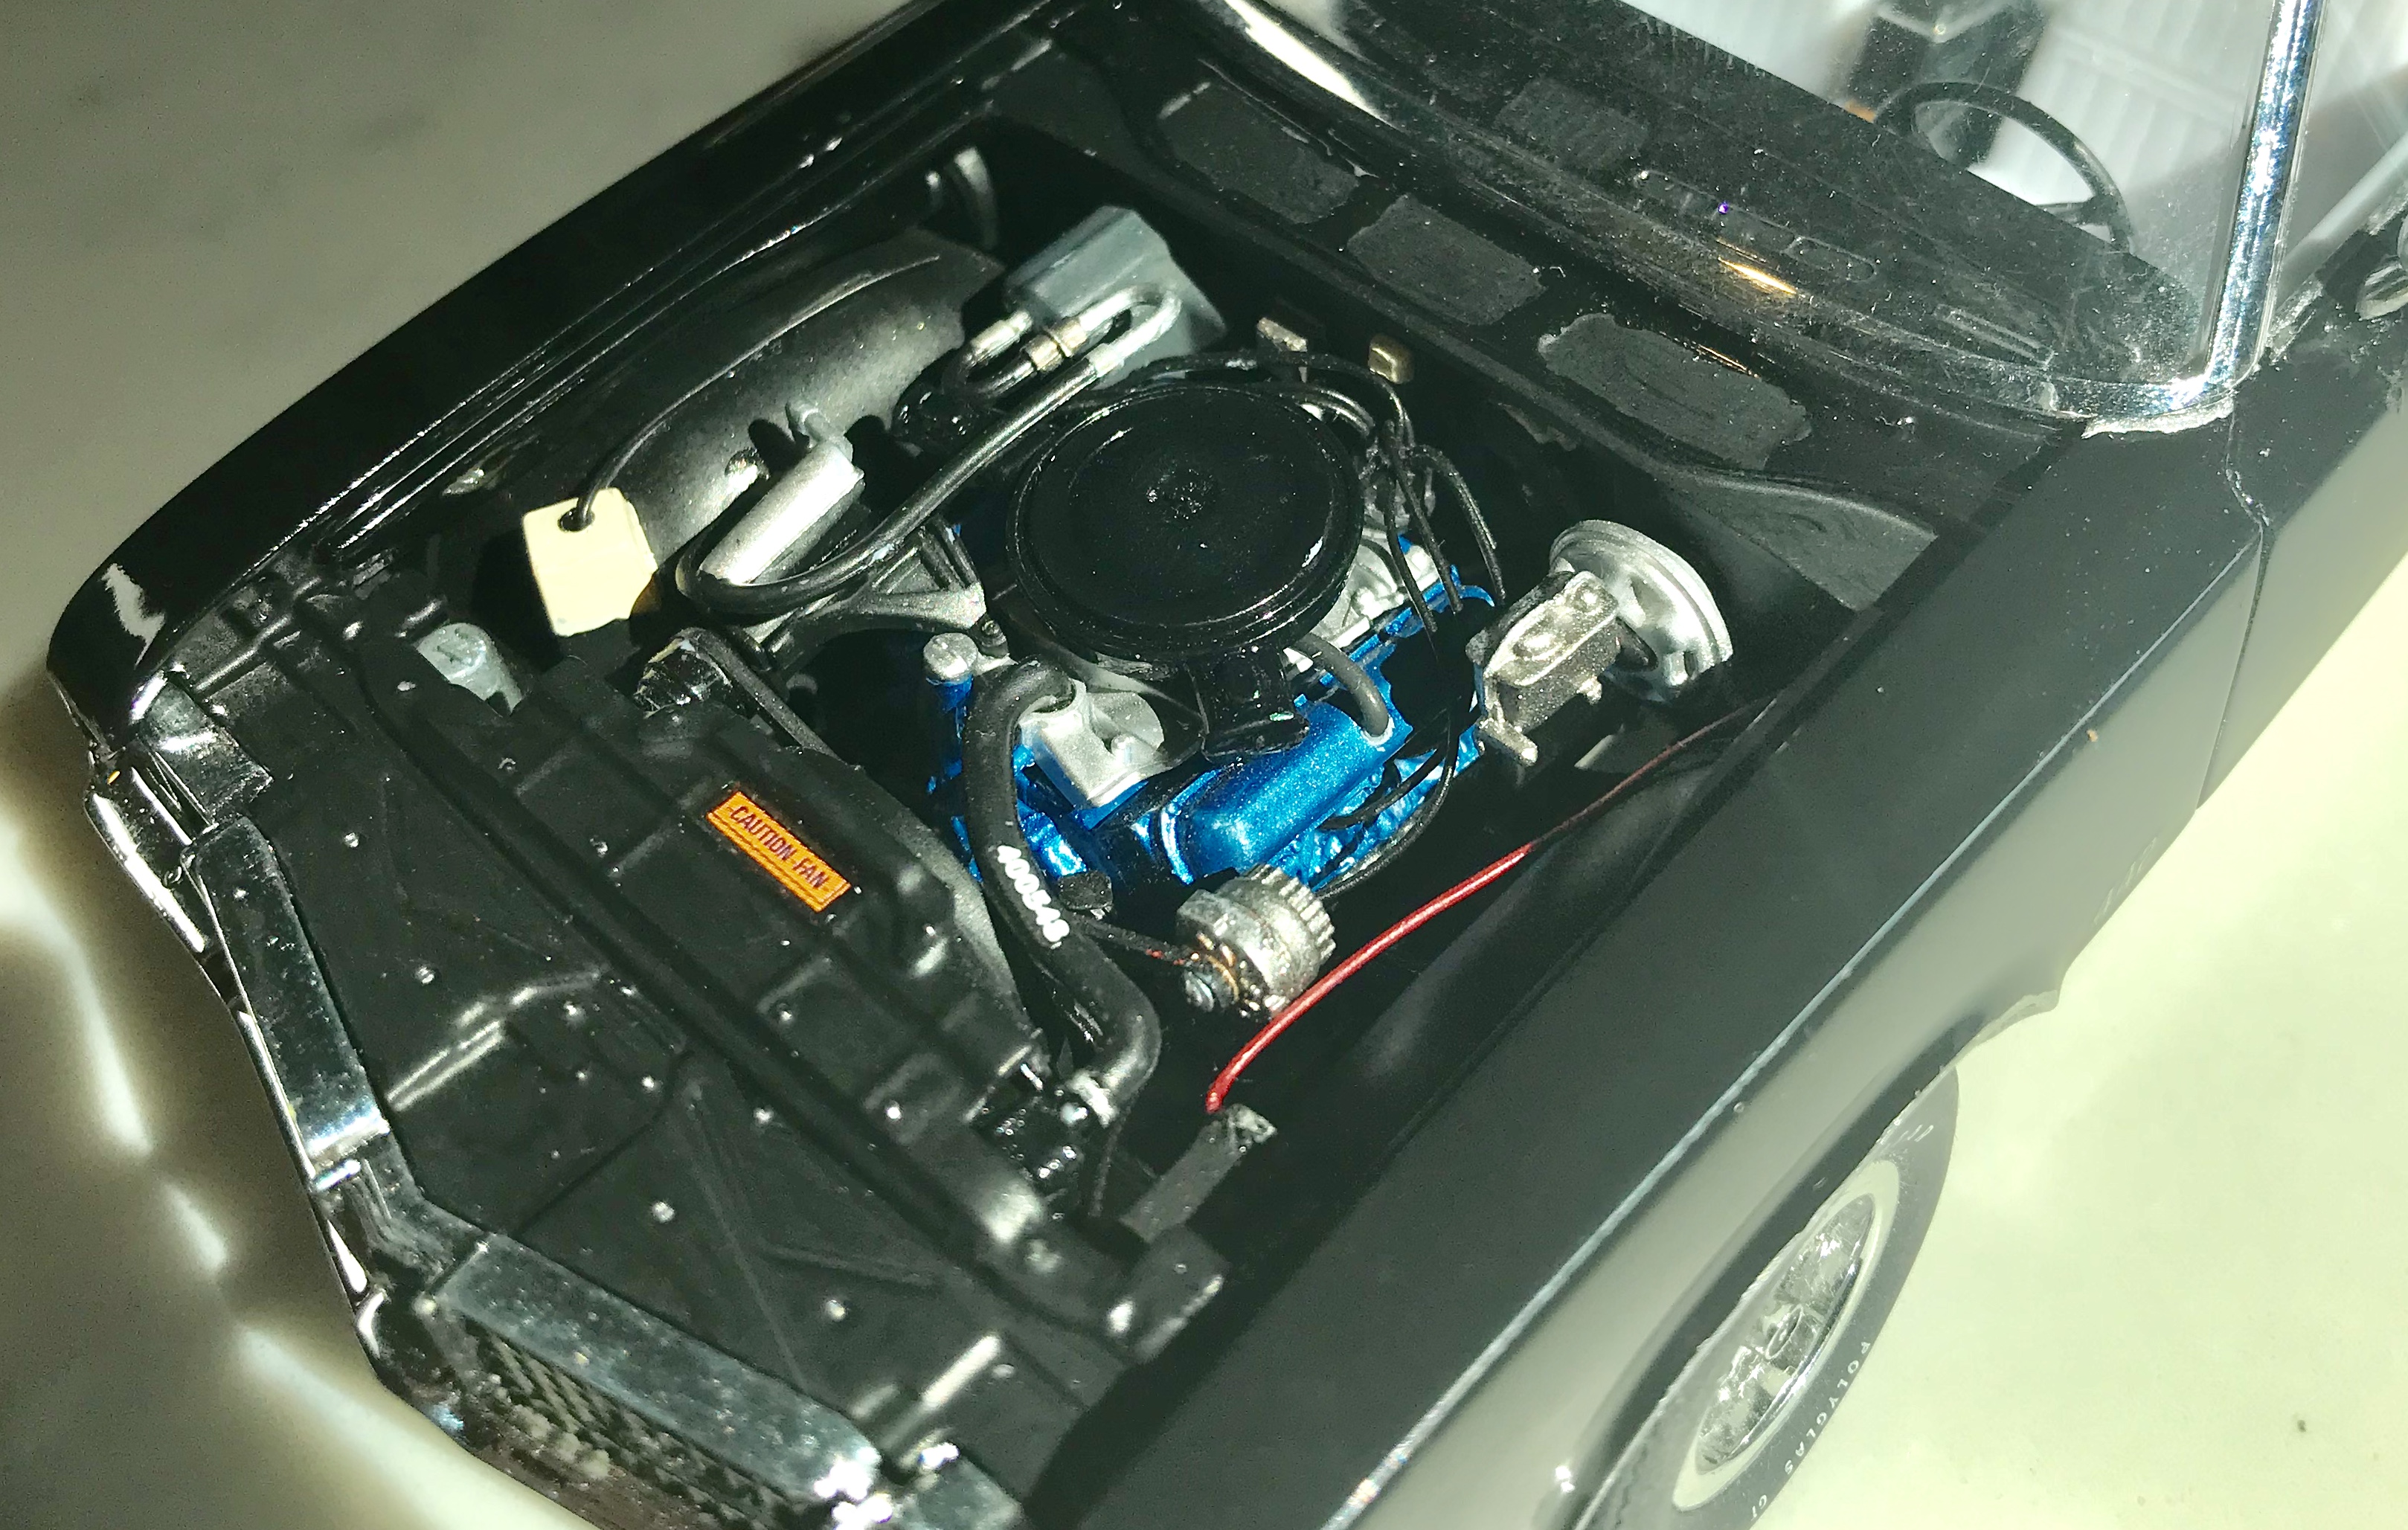
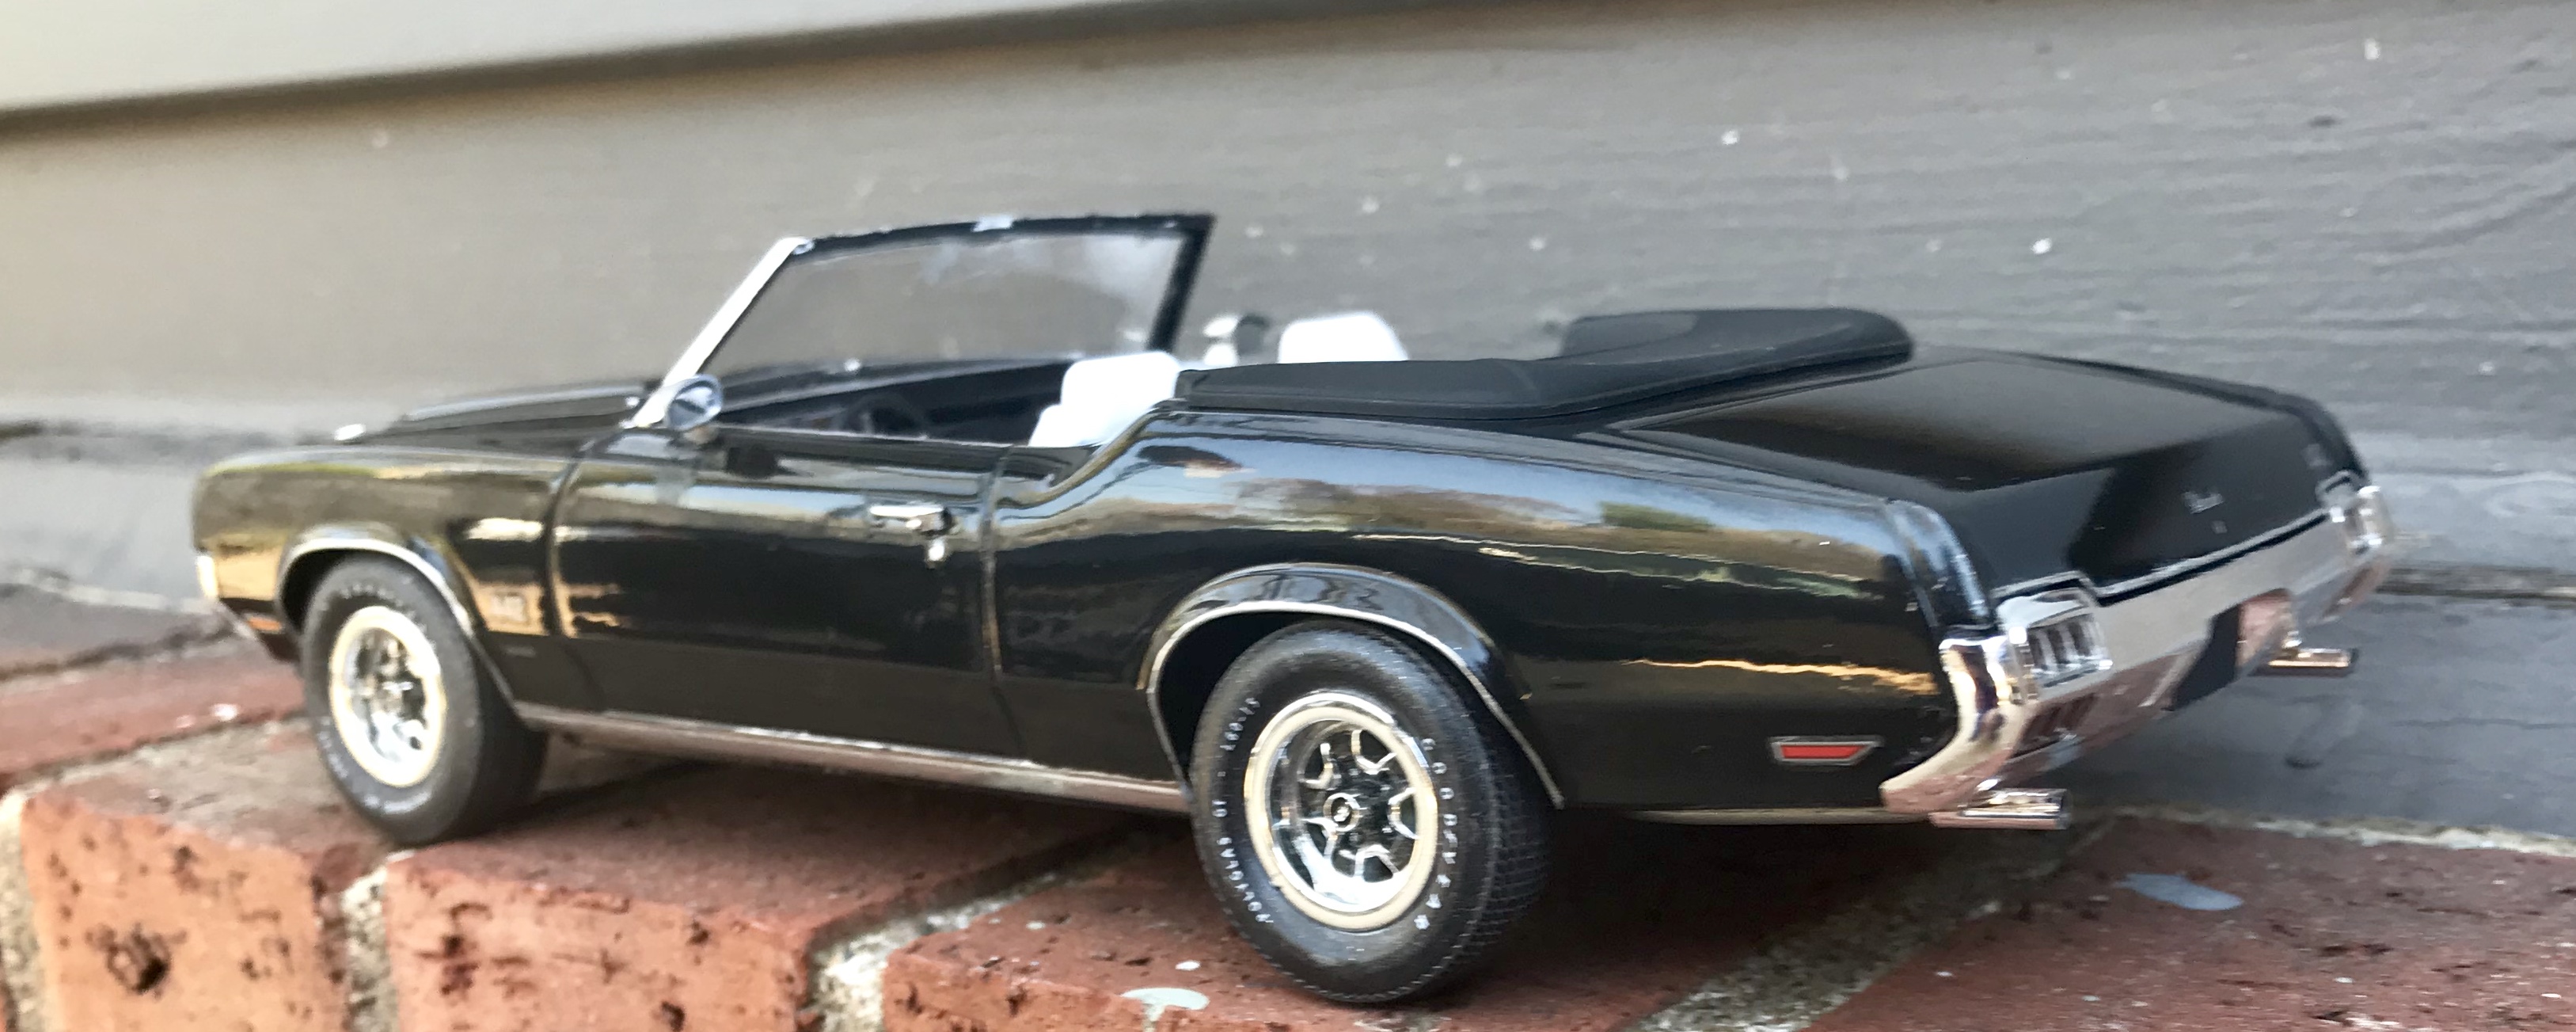
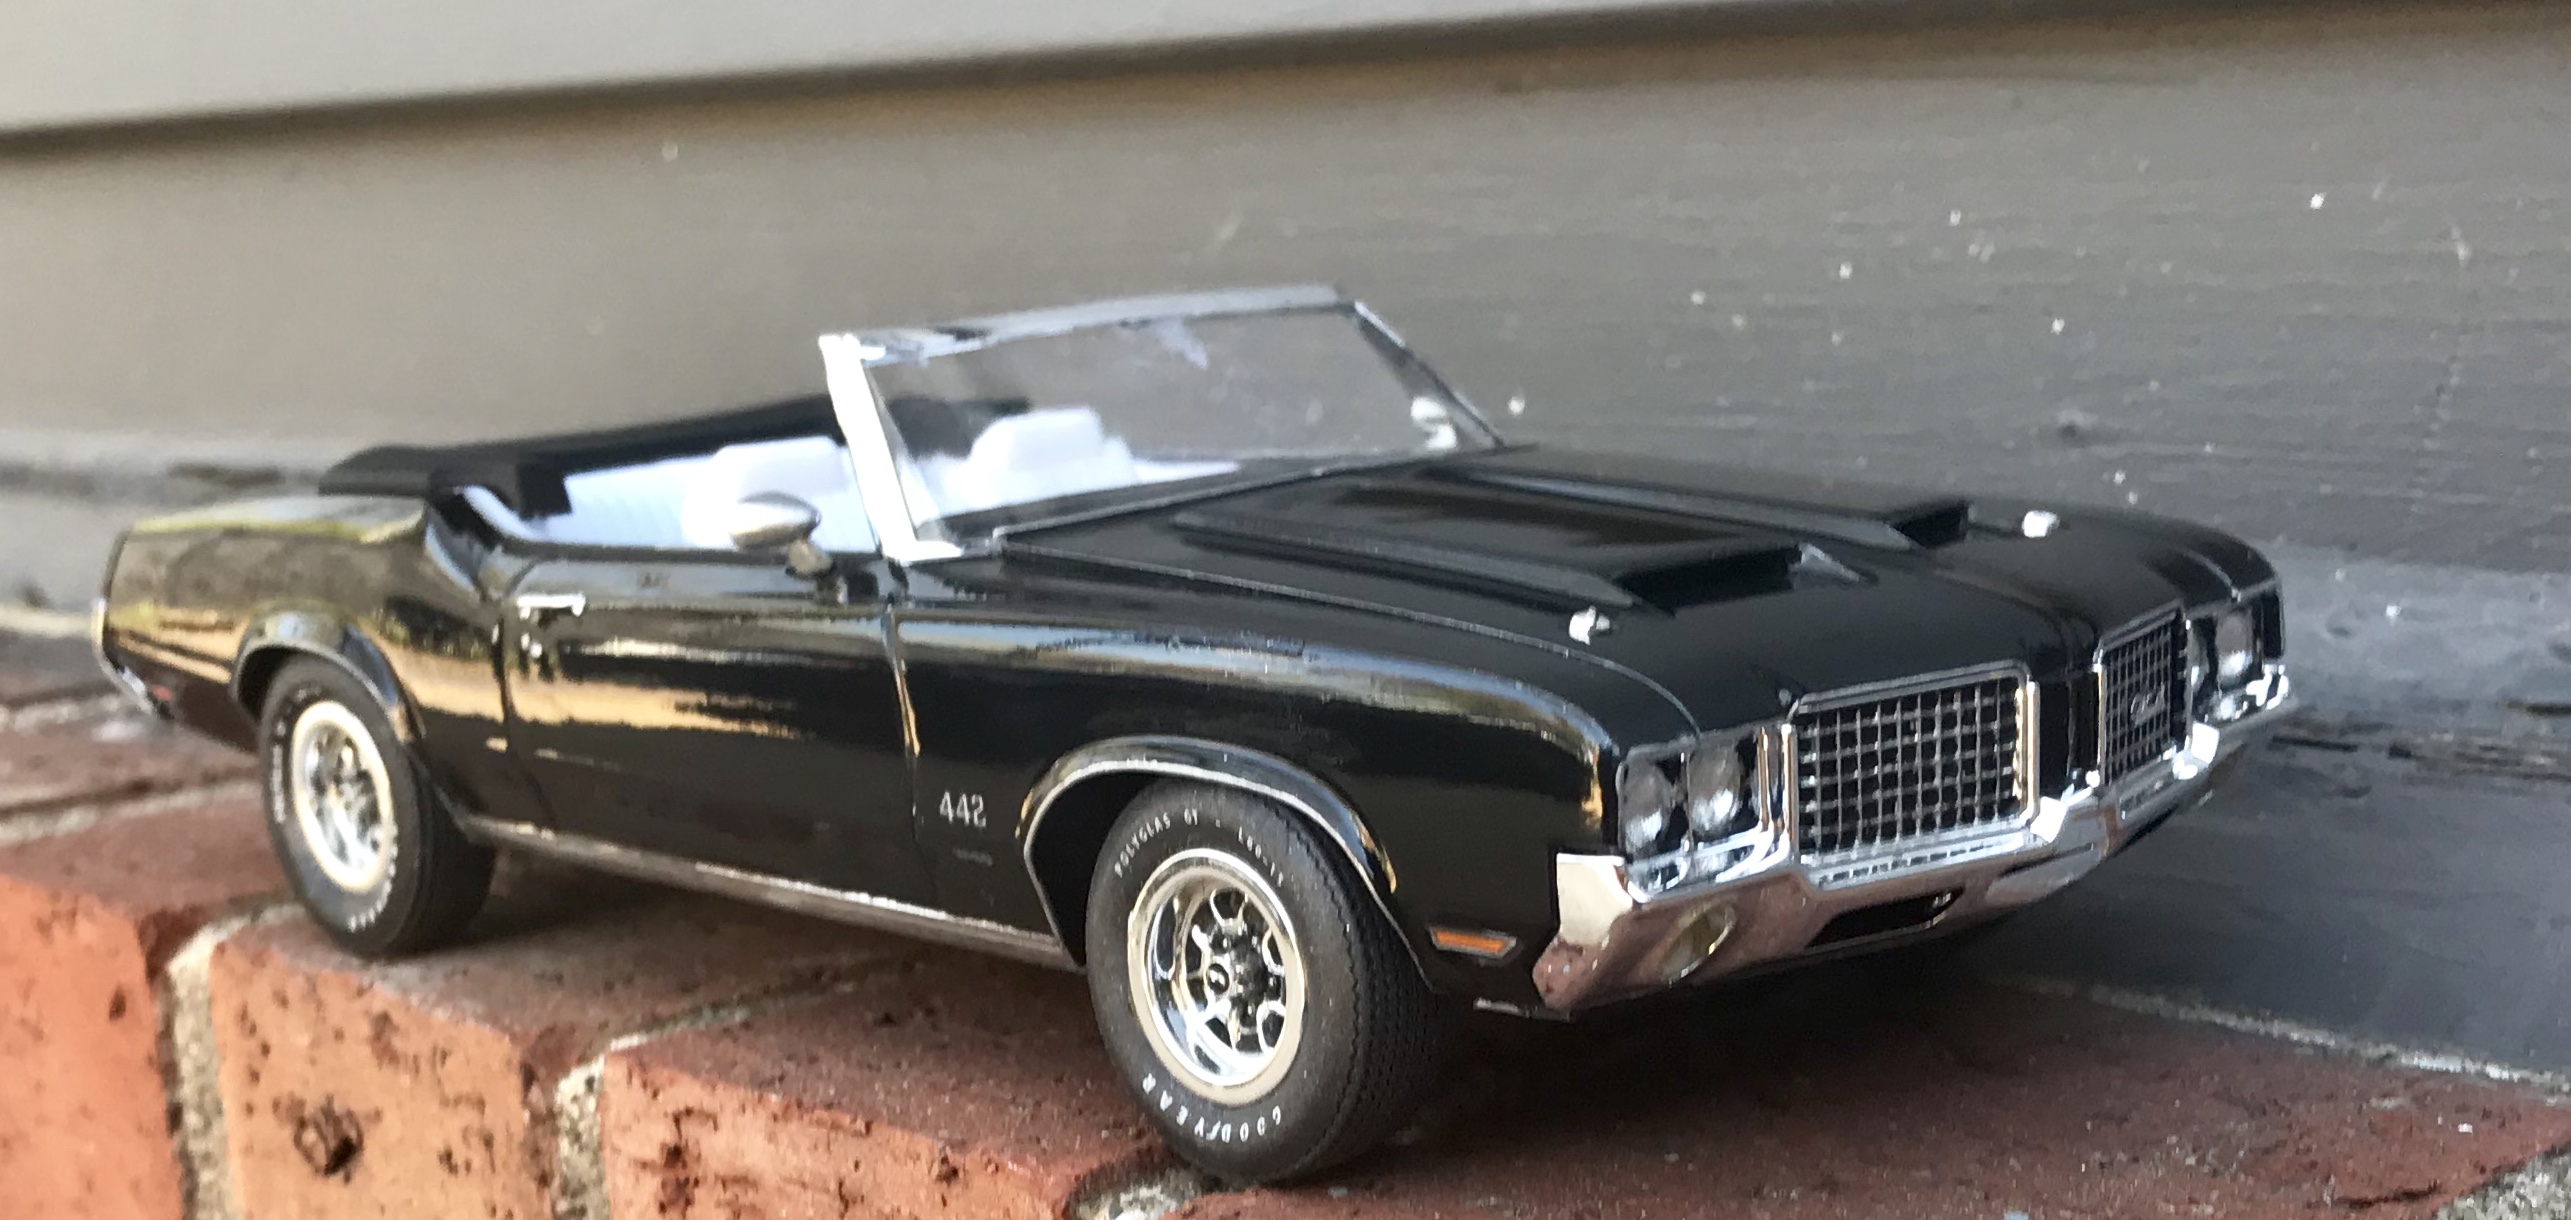
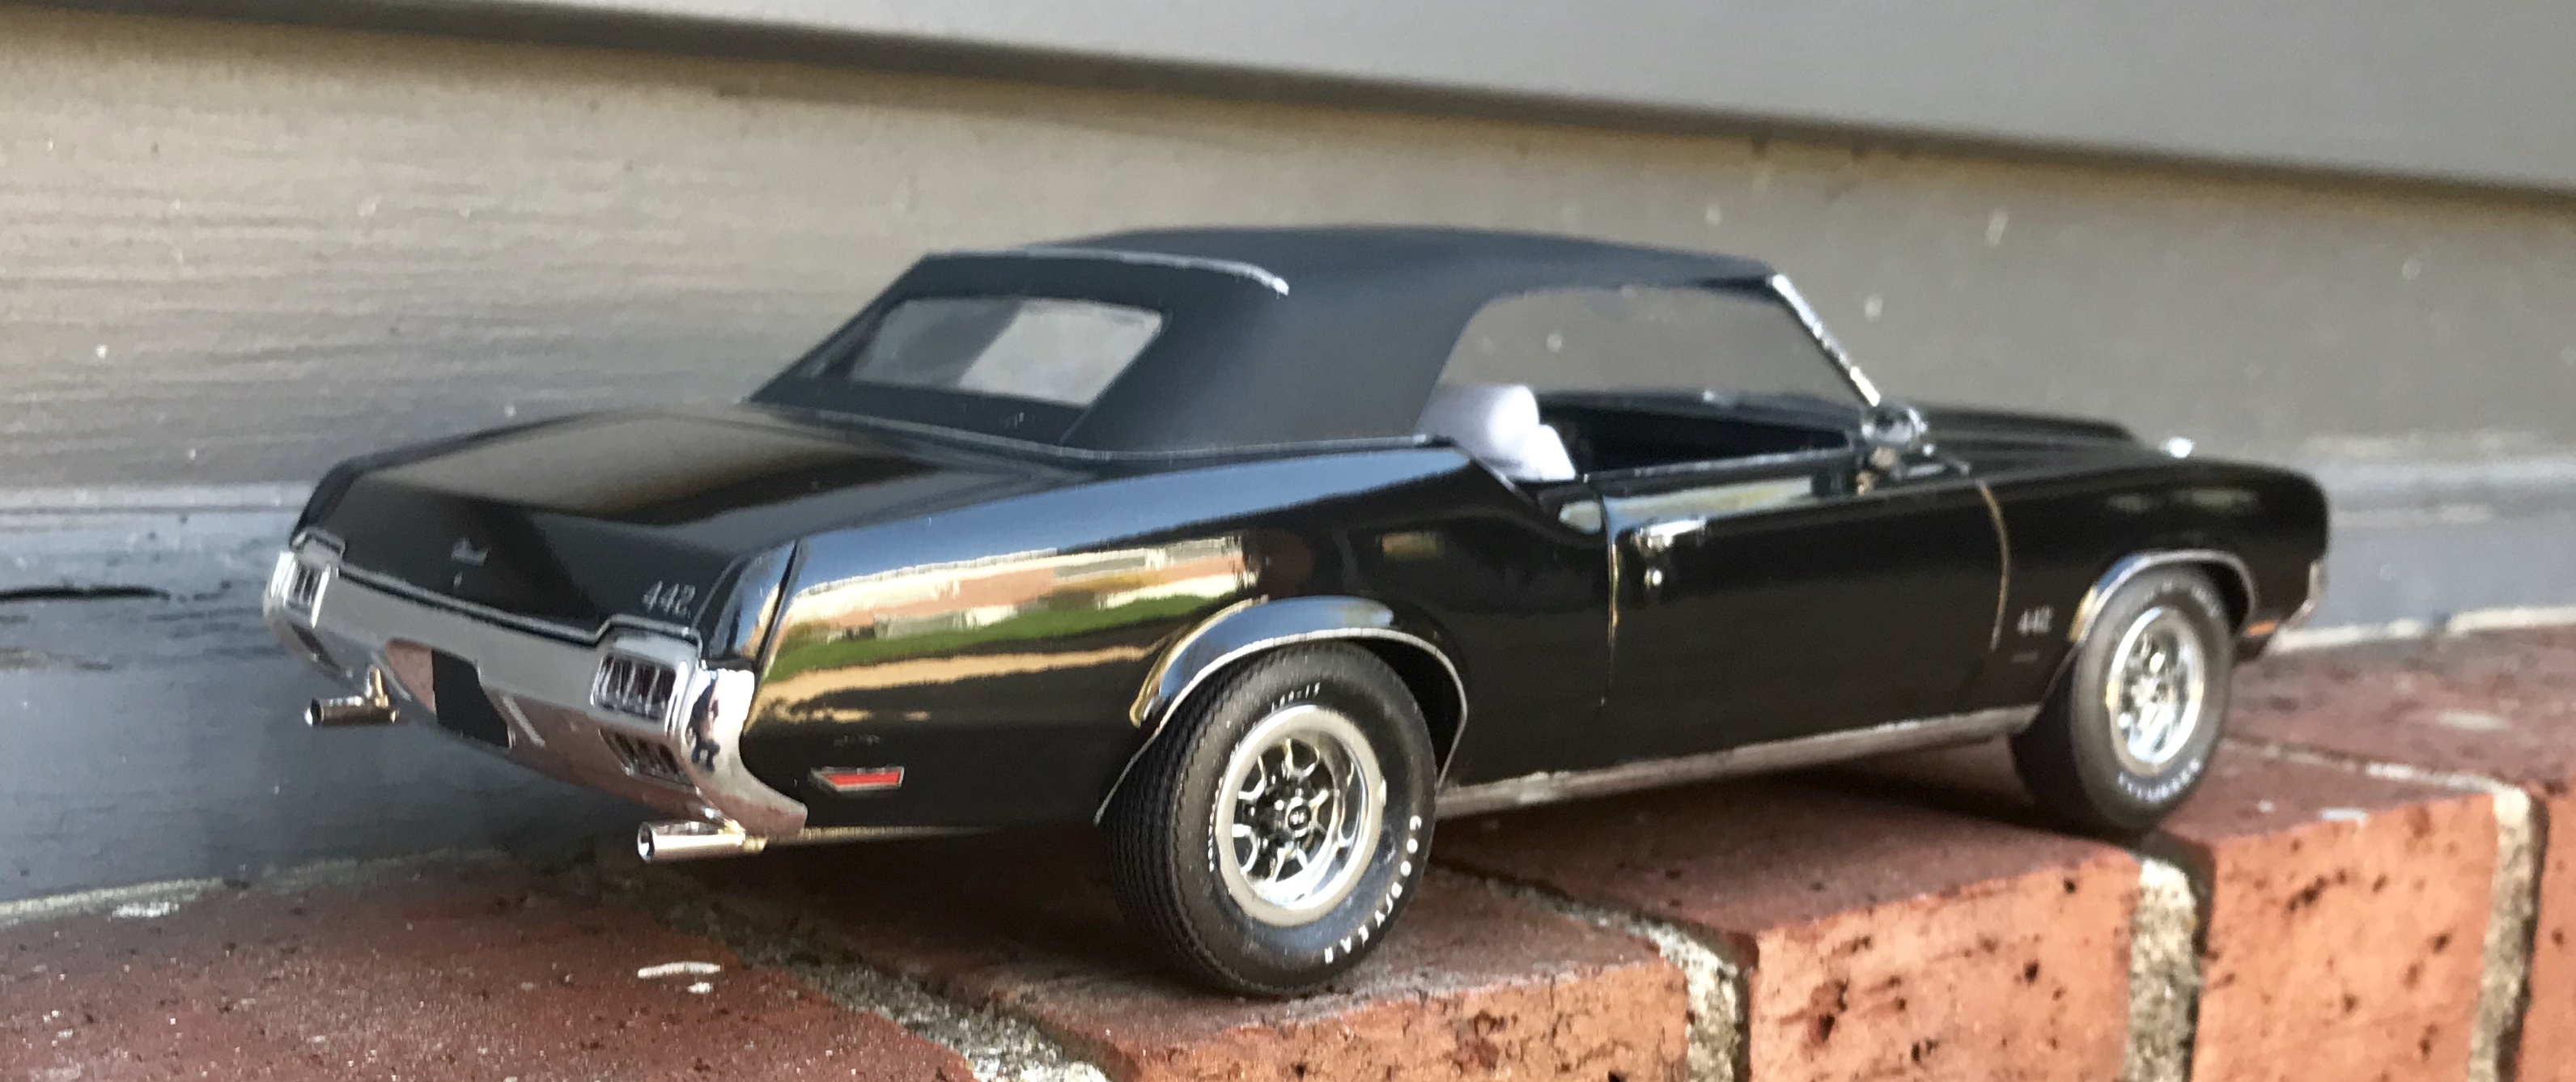
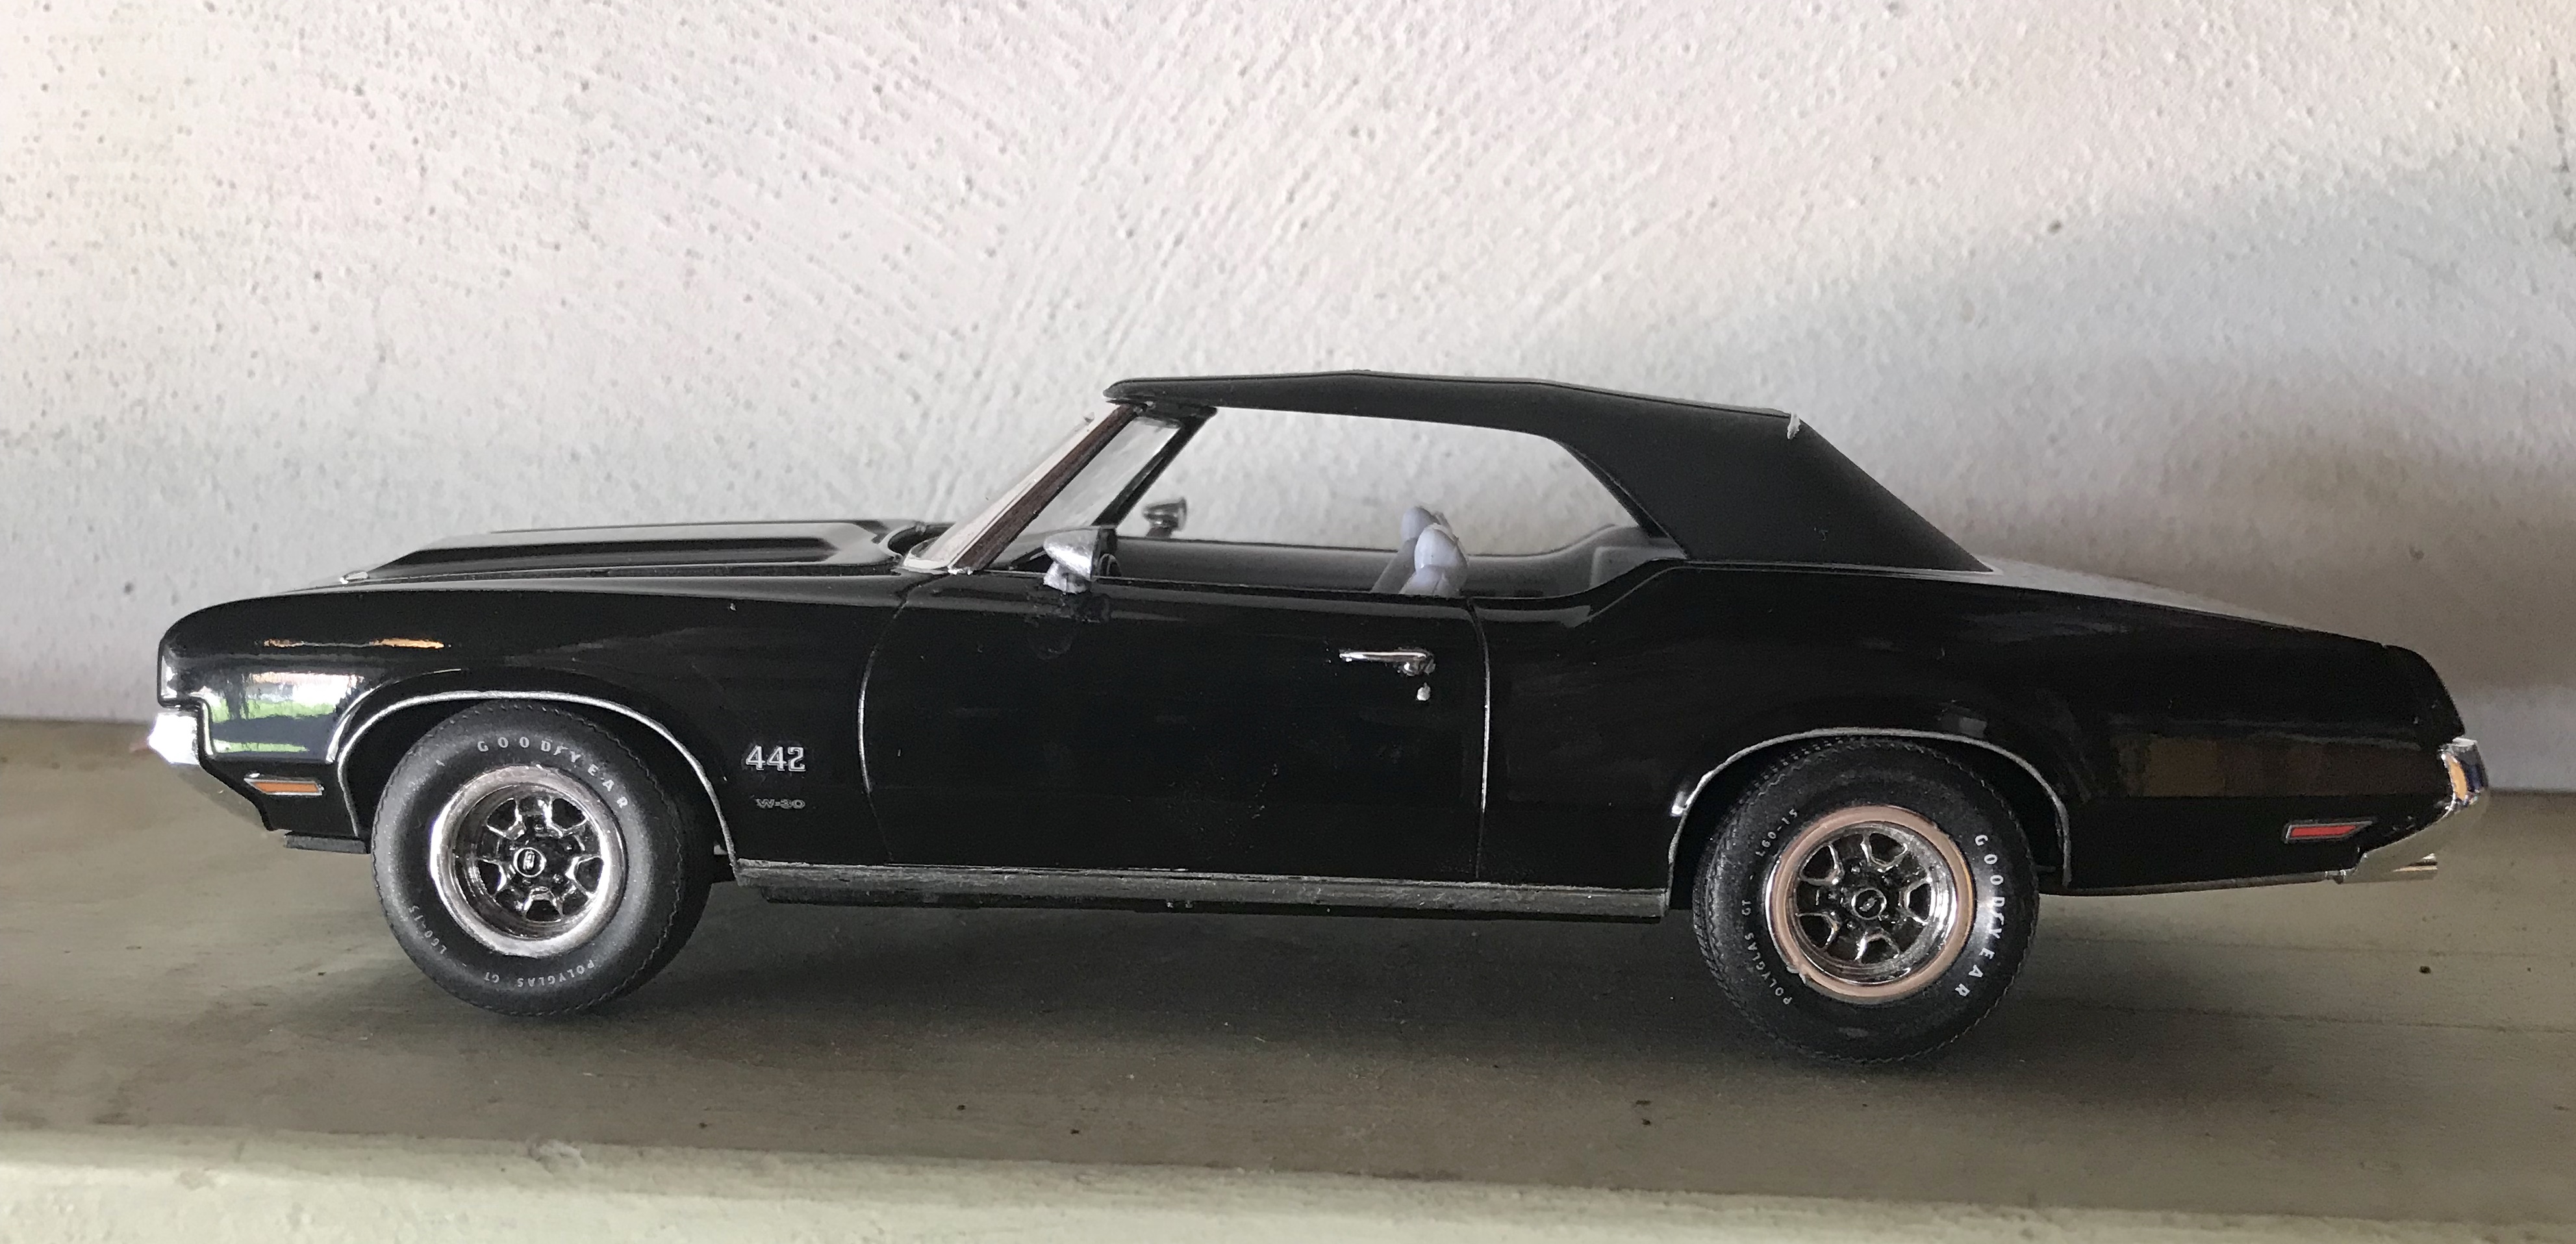
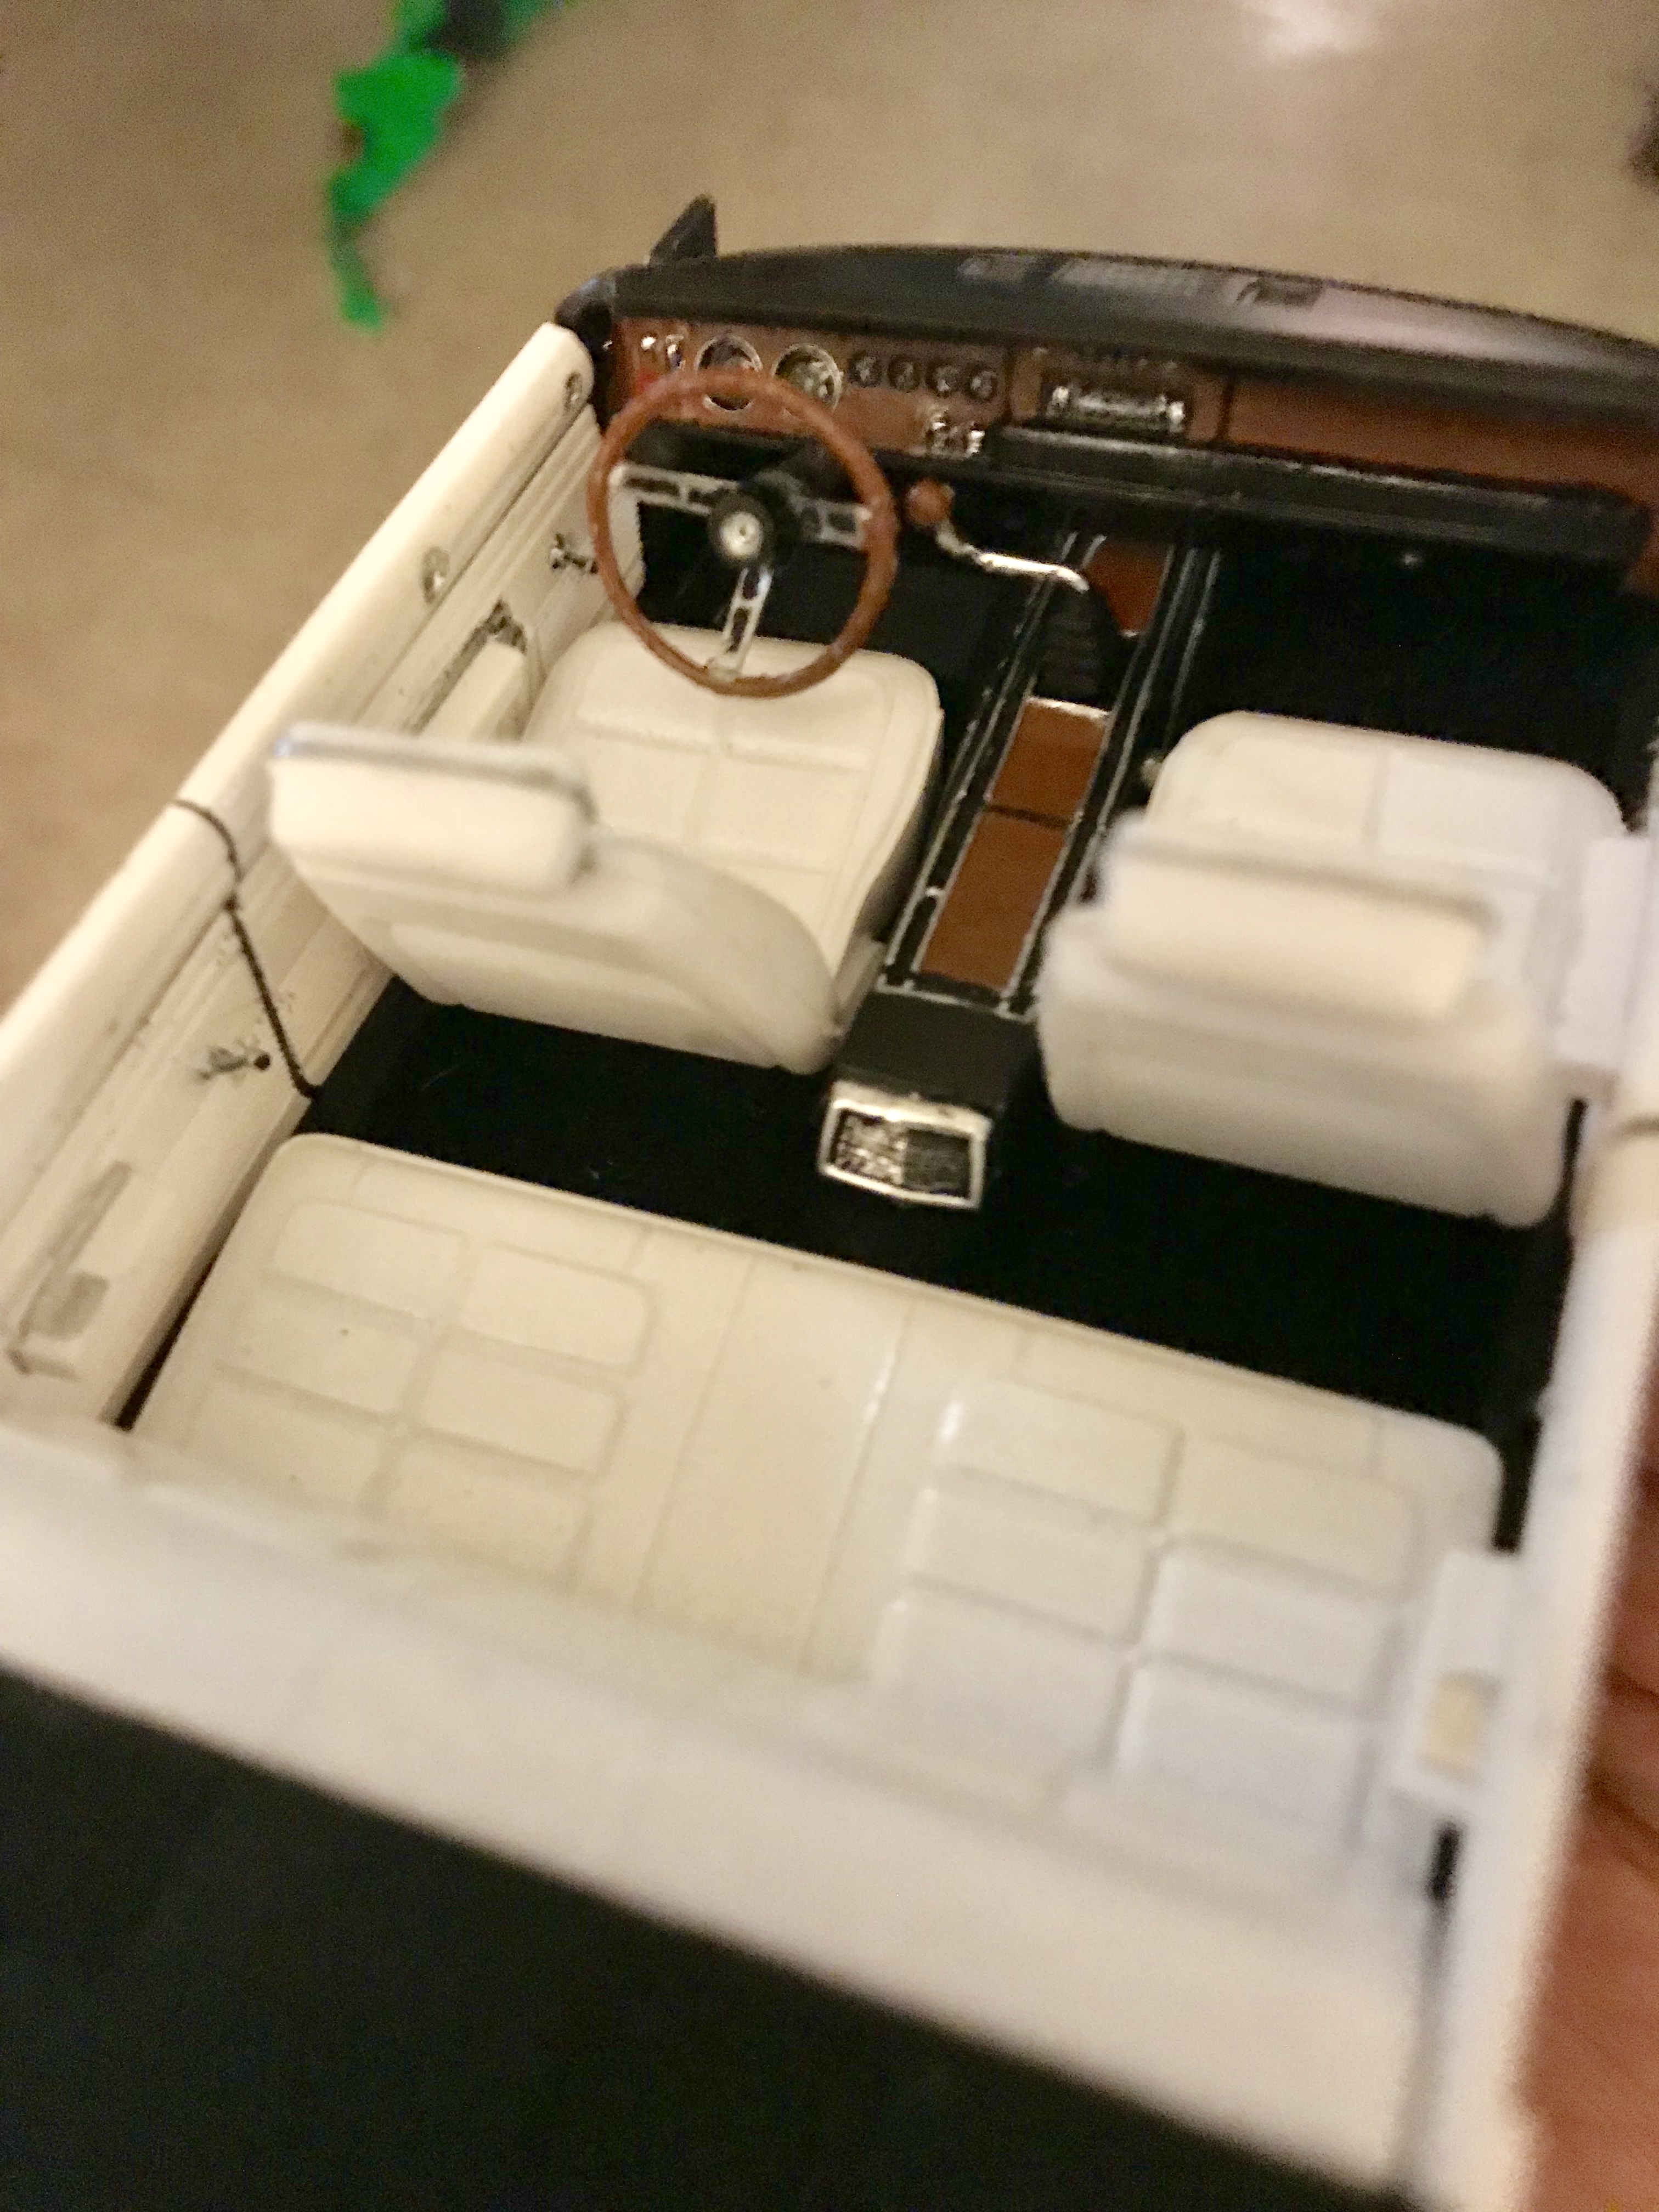
I built the 72 Cutlass 442 convertible in 2016. I was happy with it, although I’ve changed wheels/tires on it several times. But I remember it being a great kit and with several options... both grills, both hoods, etc. So, as I’m getting to the bottom of my collection as far as things I want to build, I wanted to take another shot at this and 1) see if I could do better than the first time and 2) use the other front end pieces to change up the look. I didn’t want to build the pace car, but I had to go with the egg crate grill and the 442 twin scoop hood. As this was a luxury vehicle, I decided to go with “limo-like” black as the body color. I was going to paint the interior to be saddle, but felt it was too close to the colors of the wood decals, so I duplicated the white from my previous build. I wanted to use the W-30 air cleaner, but it got in the way of the engine wiring, so it got the standard. I started with a couple coats of Tamiya TS-14 Black, but it wasn’t drying with any shine whatsoever, and then I would try to polish it out and it would come off and leave primer along the edges. So, I added 2 coats of Testors Black enamel. After letting that cure for a week and a half, I polished it out and then just waxed.. there’s no clear on this one. I also left the 442 stripes off, as I used them on the previous build, and I wanted this one to just be jet black. Other than my usual wiring and embossing powder for carpet, everything else is from the box except the wheels. I found the kit wheels to be ever so slightly off... something just doesn’t look quite right... so I pulled a set from the AMT 69 442 and painted them up. Did it come out any better than the previous one? Probably not, actually... I didn’t make a few of the errors I did last time, but I’m not sure if the end result is better or not. Doesn’t really matter, I enjoyed the build of a great kit. Hope you like it and thanks for looking! My engine: I didn’t glue the top or boot on so I could display it both ways: Now she’ll be parked next to her sister:
-
I’ve completed 4. Two 68s, a 71 and a 69 Daytona:
-
I had never heard of him before, but I’m OBSESSED now!!! That detail and craftsmanship are just out of this world!!!!
-
STUNNING!!!! Museum quality.... wow!!
-
Thanks!! Well, I mean, c’mon... how good is this??
-
It looks like Kitt’s meaner, better looking and more badass brother. I dig it!
-
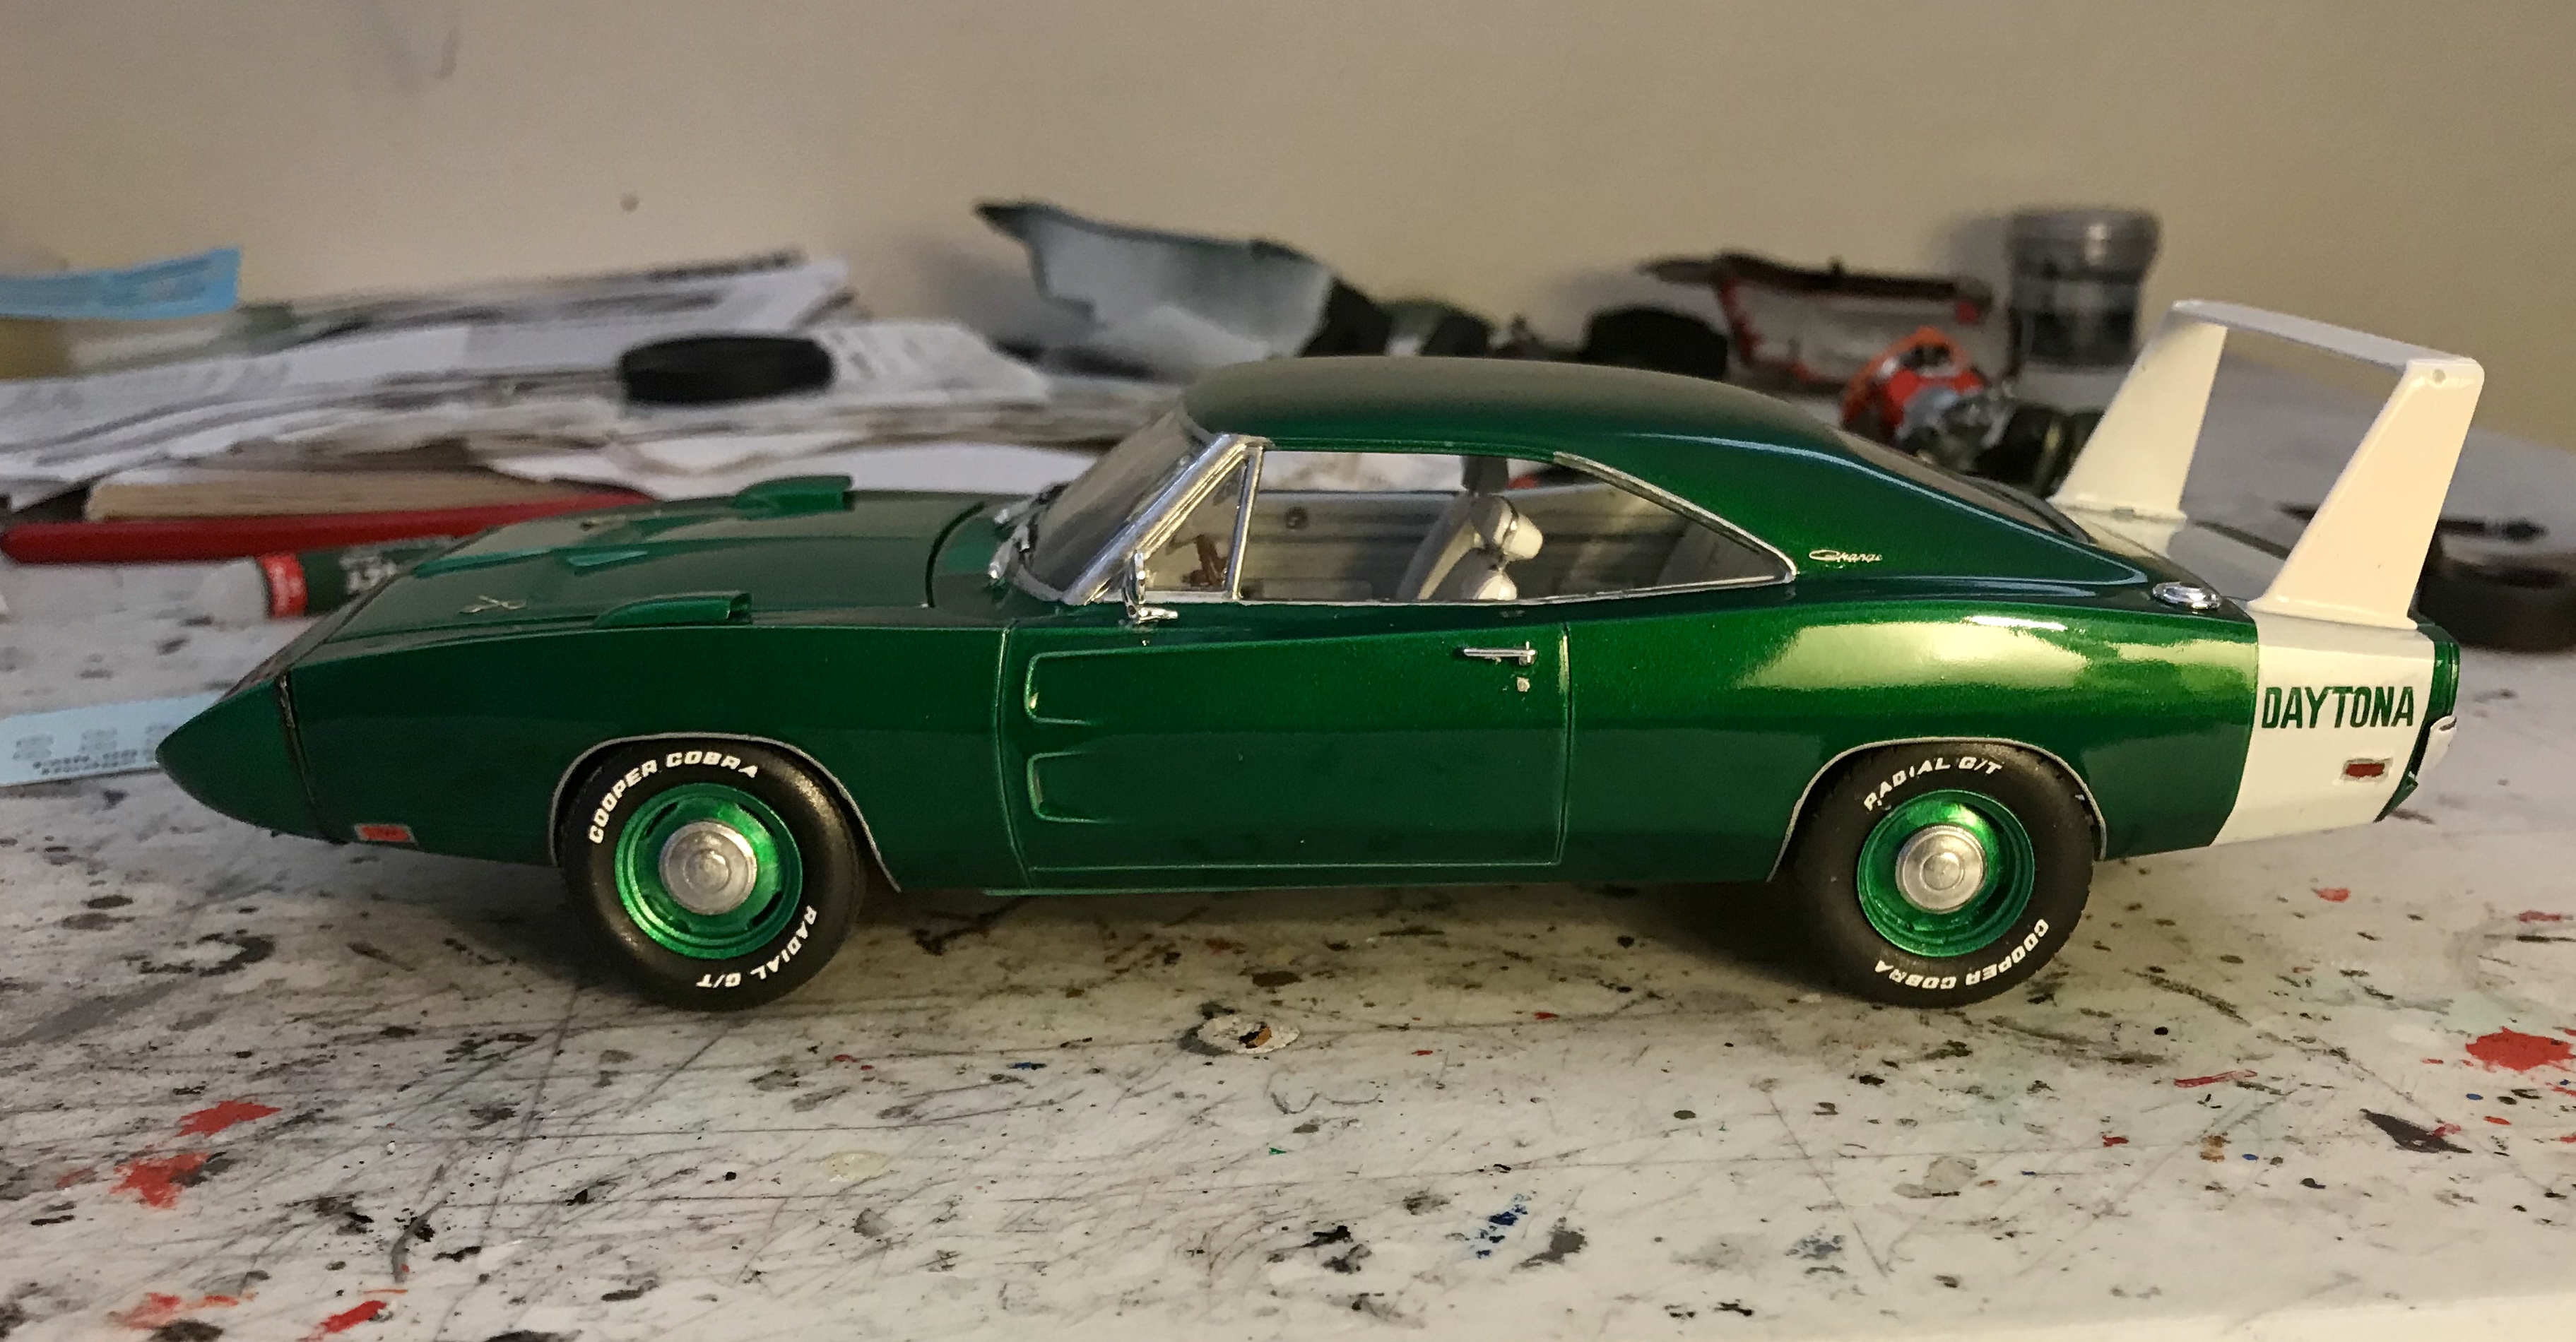
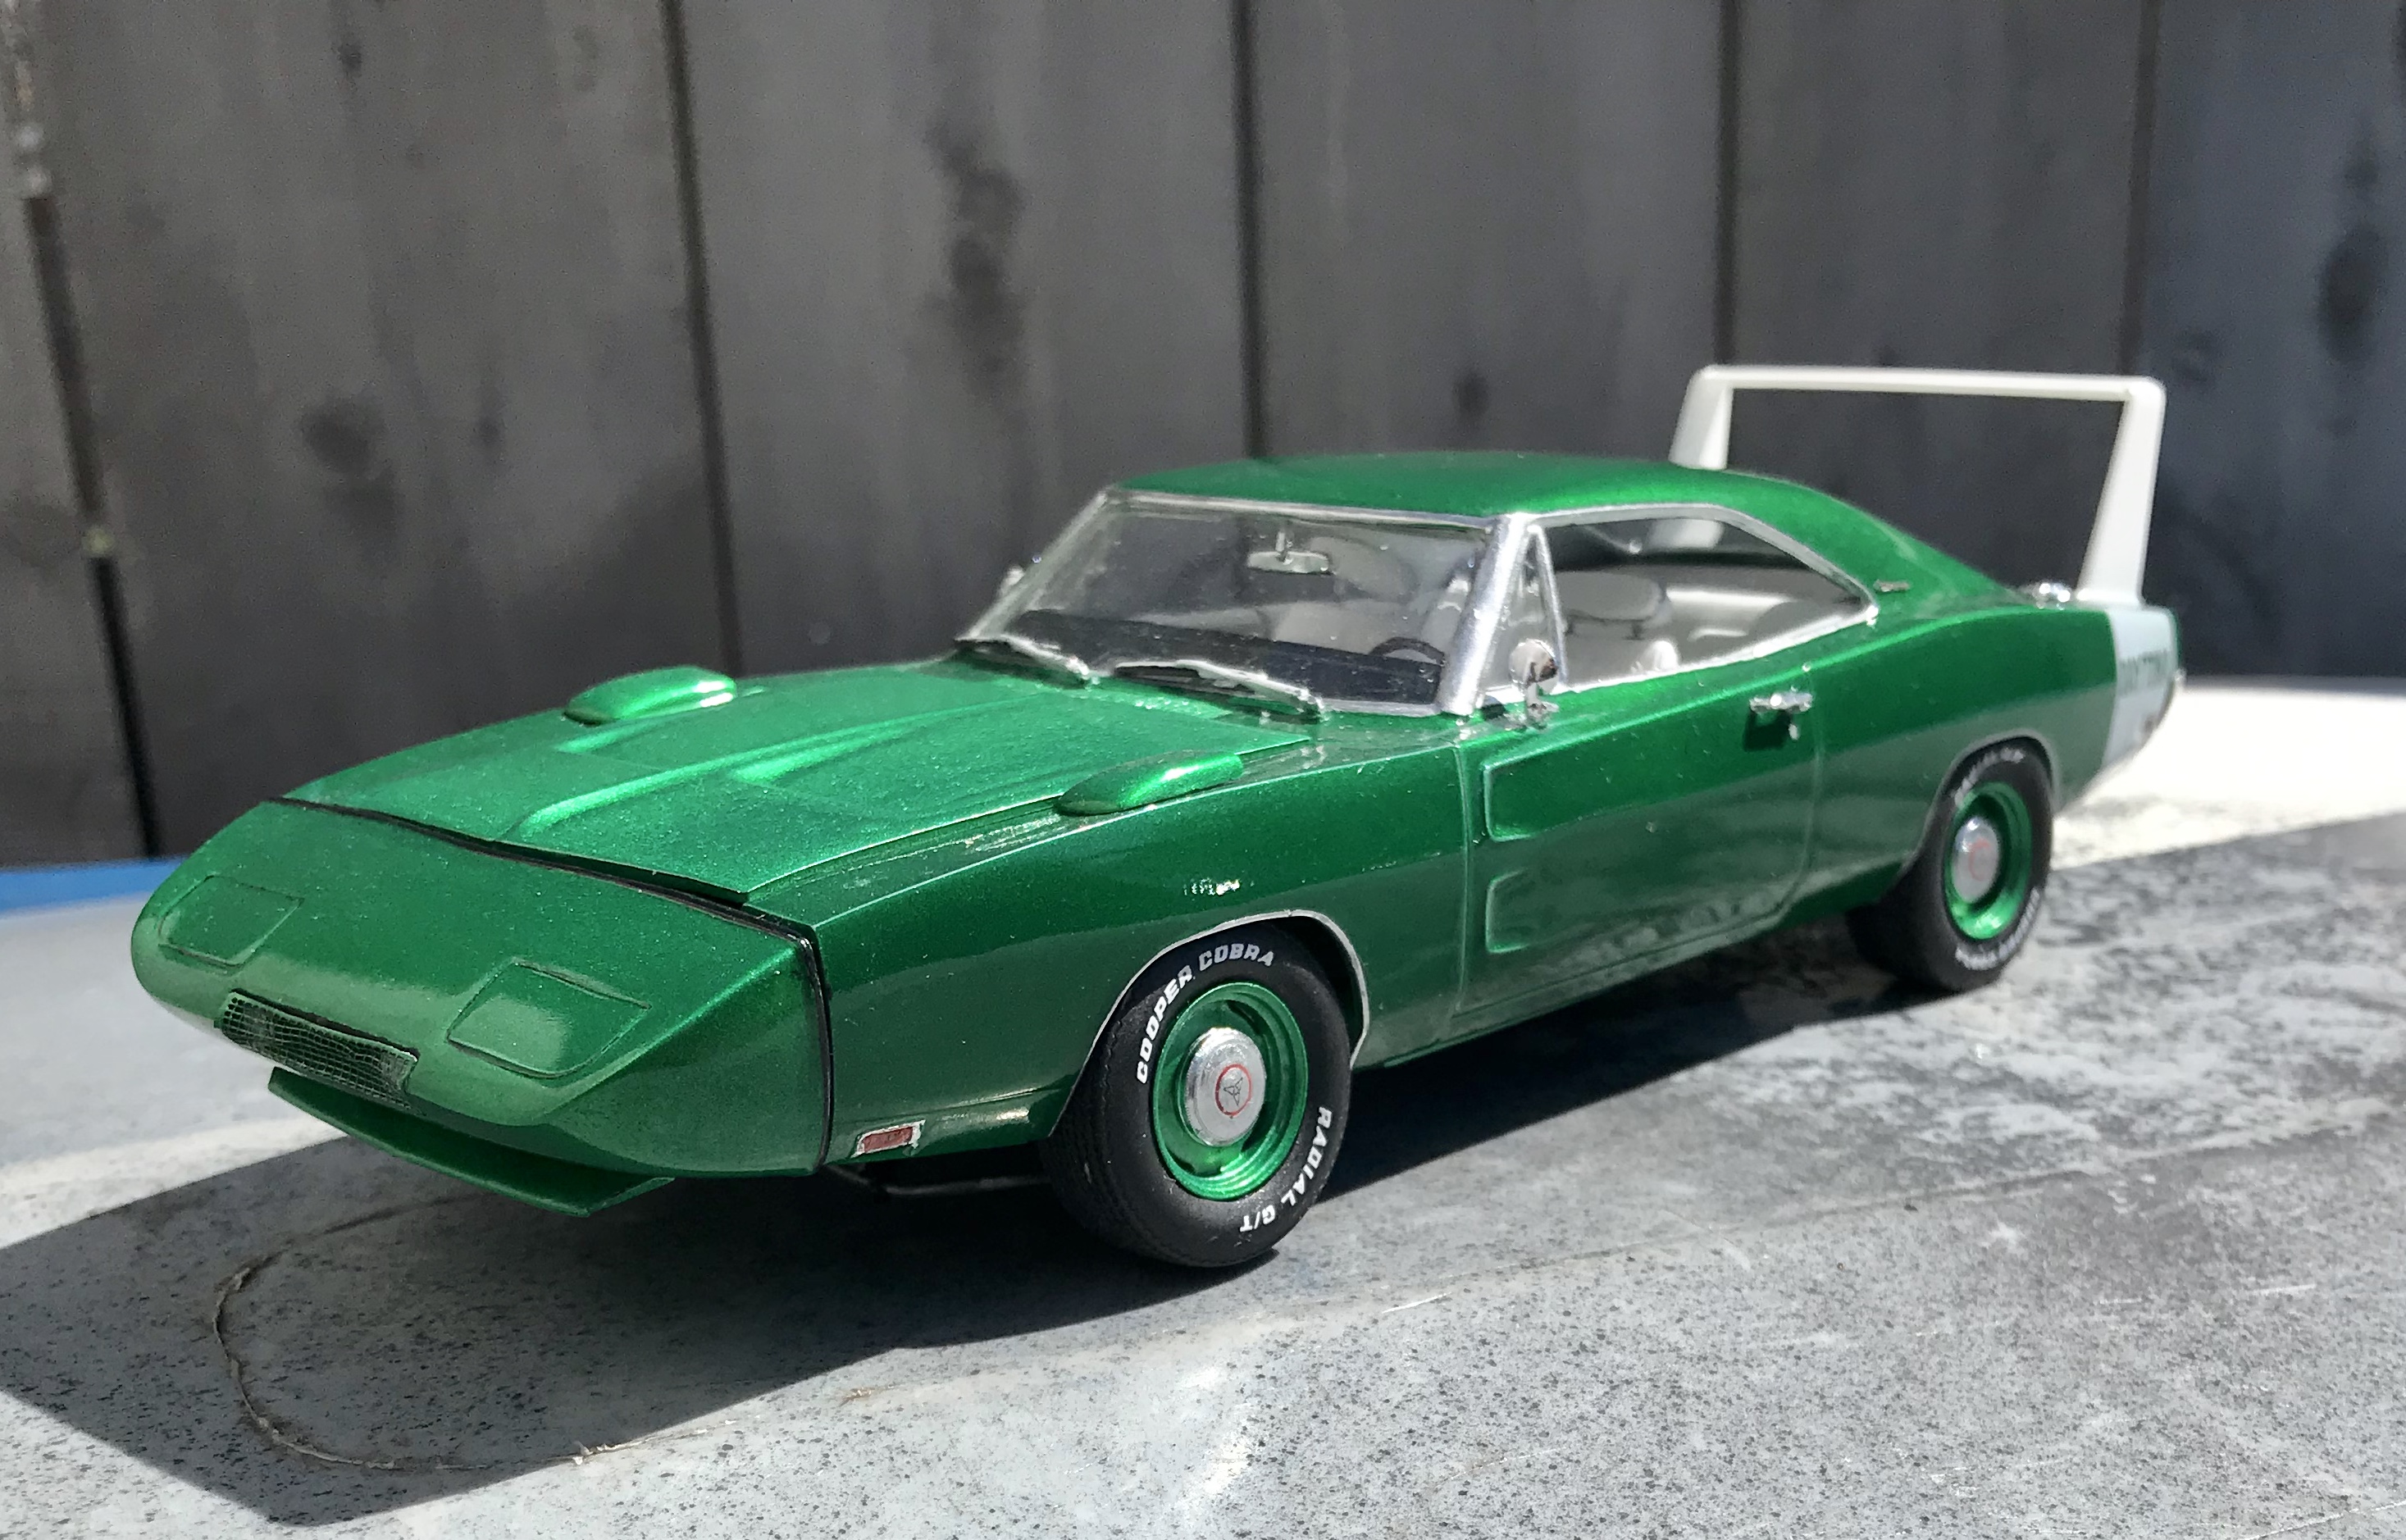
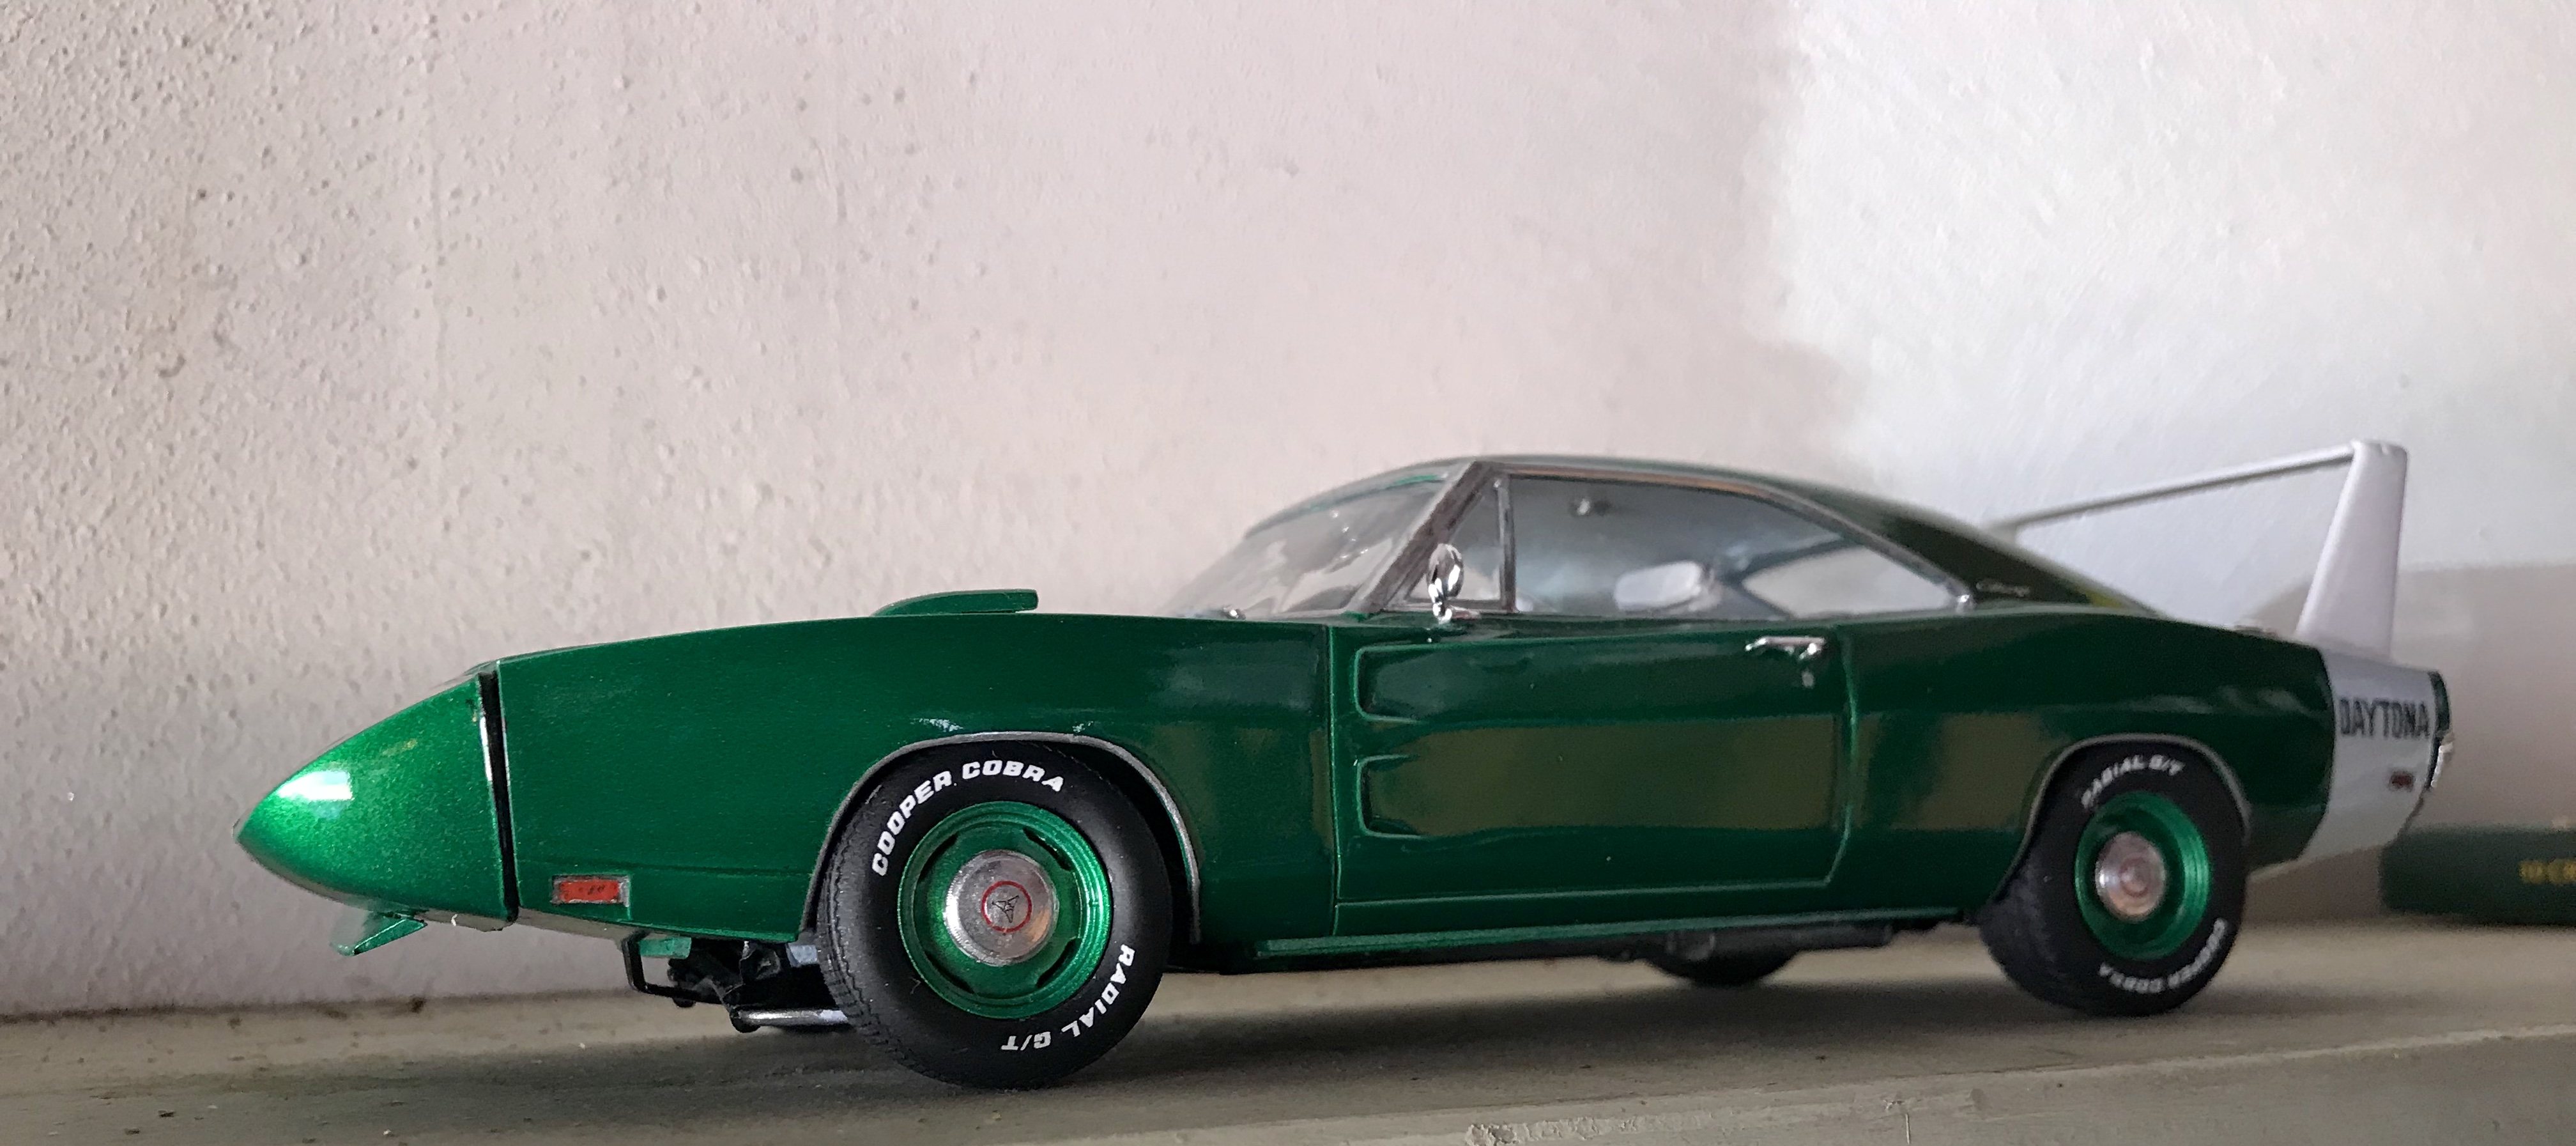
I was kinda thinking that, too! But I wanted the slight color variation to be just for the nose cone, not the hood, as I’ve noticed a few 1:1s where the fiberglass nose is just a little off from the rest of the body. The hood was painted with the original can, but obviously had to be redone when it broke in half. In the end, not a big deal. Thanks!!!
-
No, Revell rereleased the kit this past January, so it’s readily available at normal kit price of around $25.
-
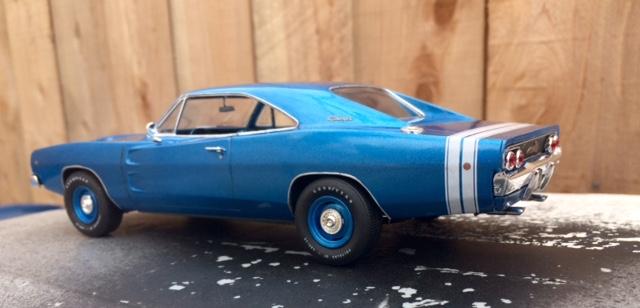
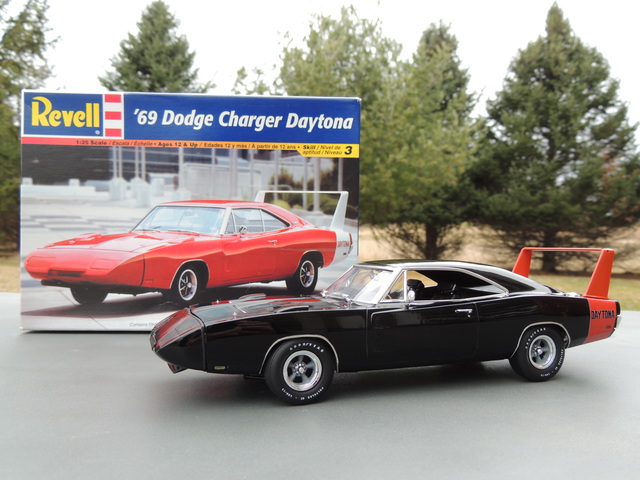
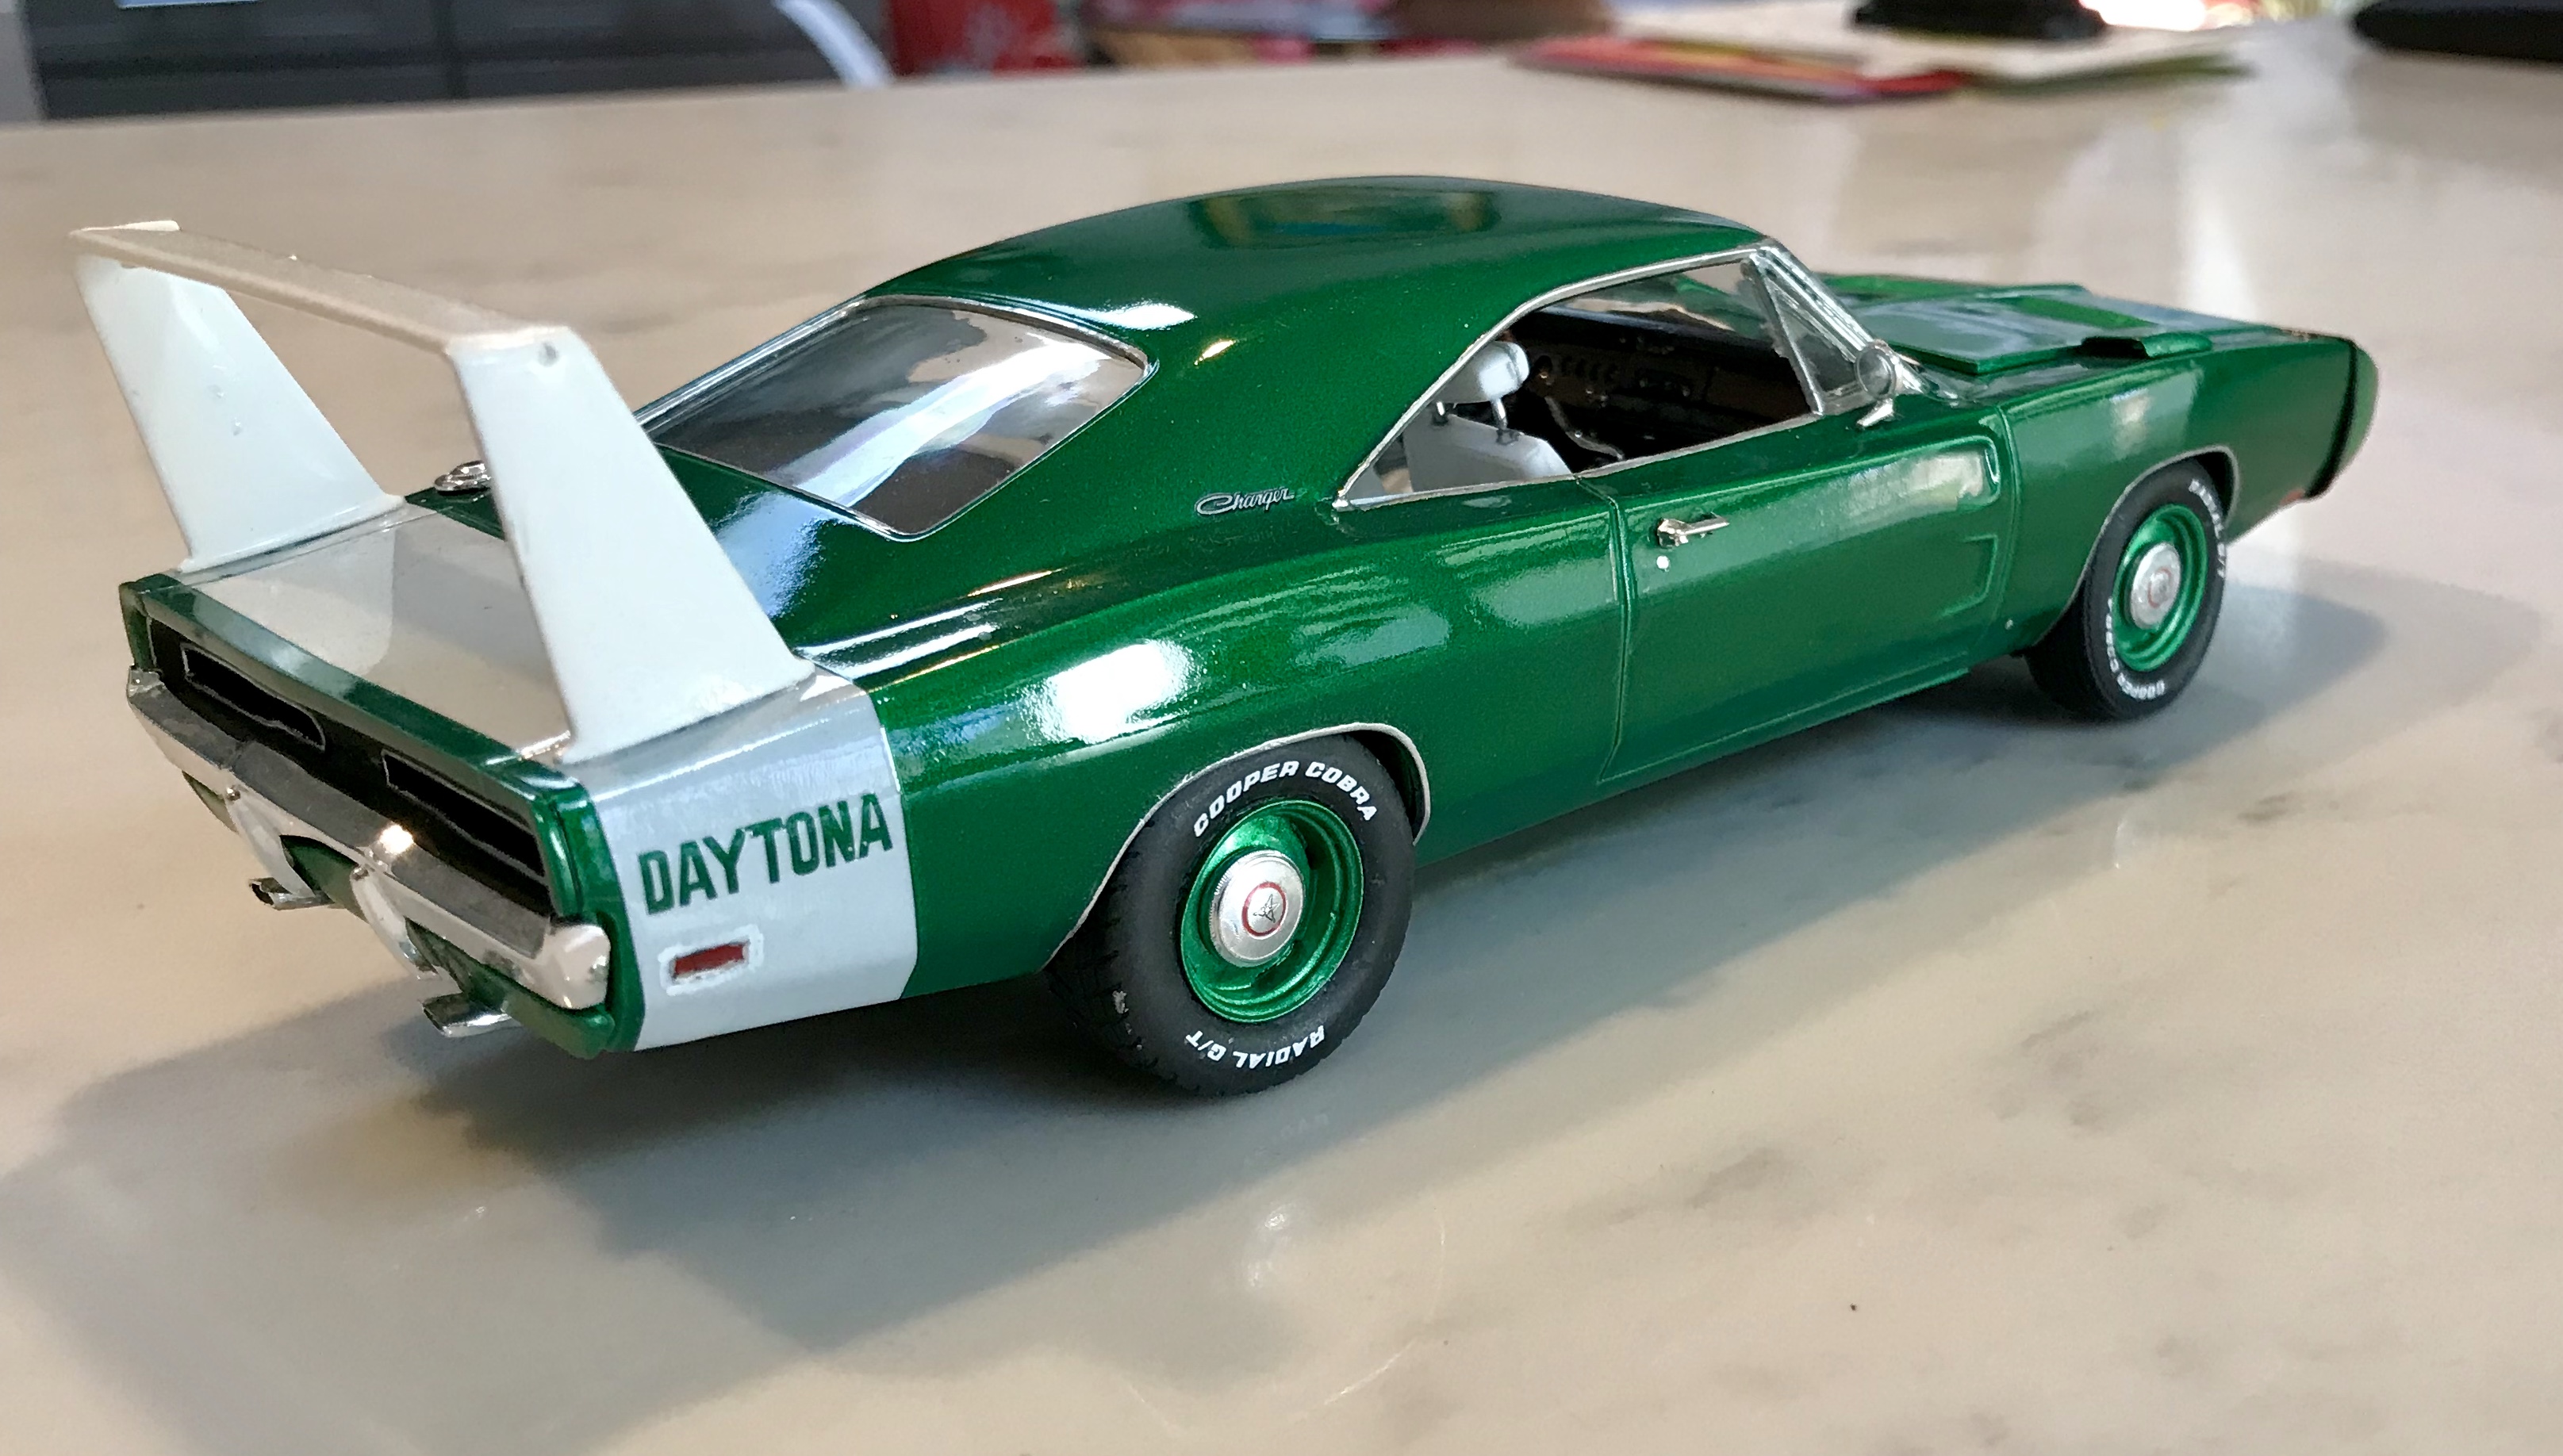
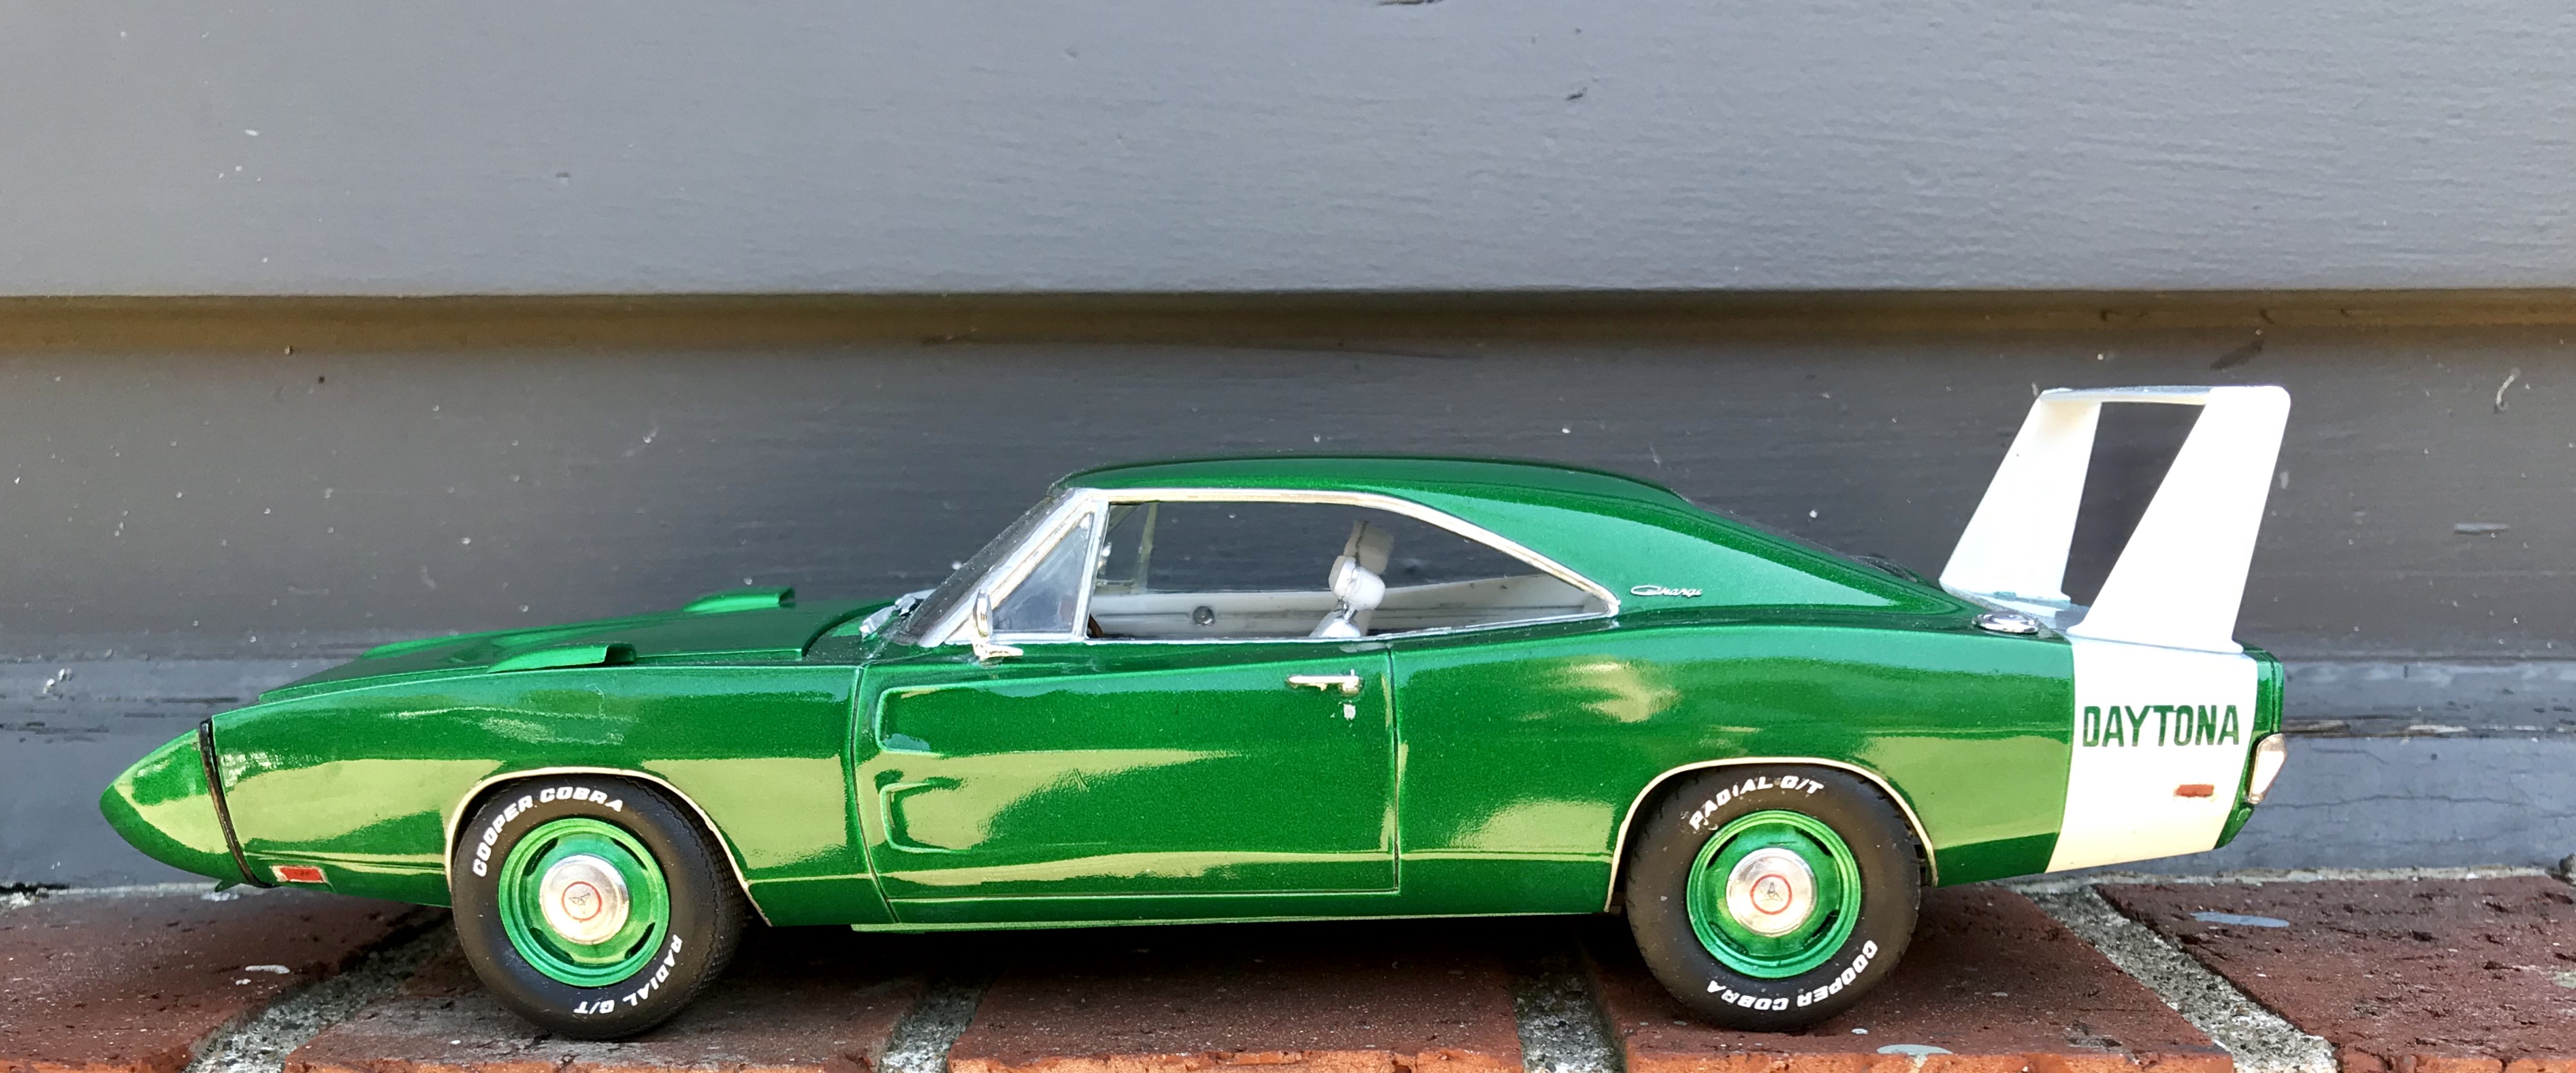
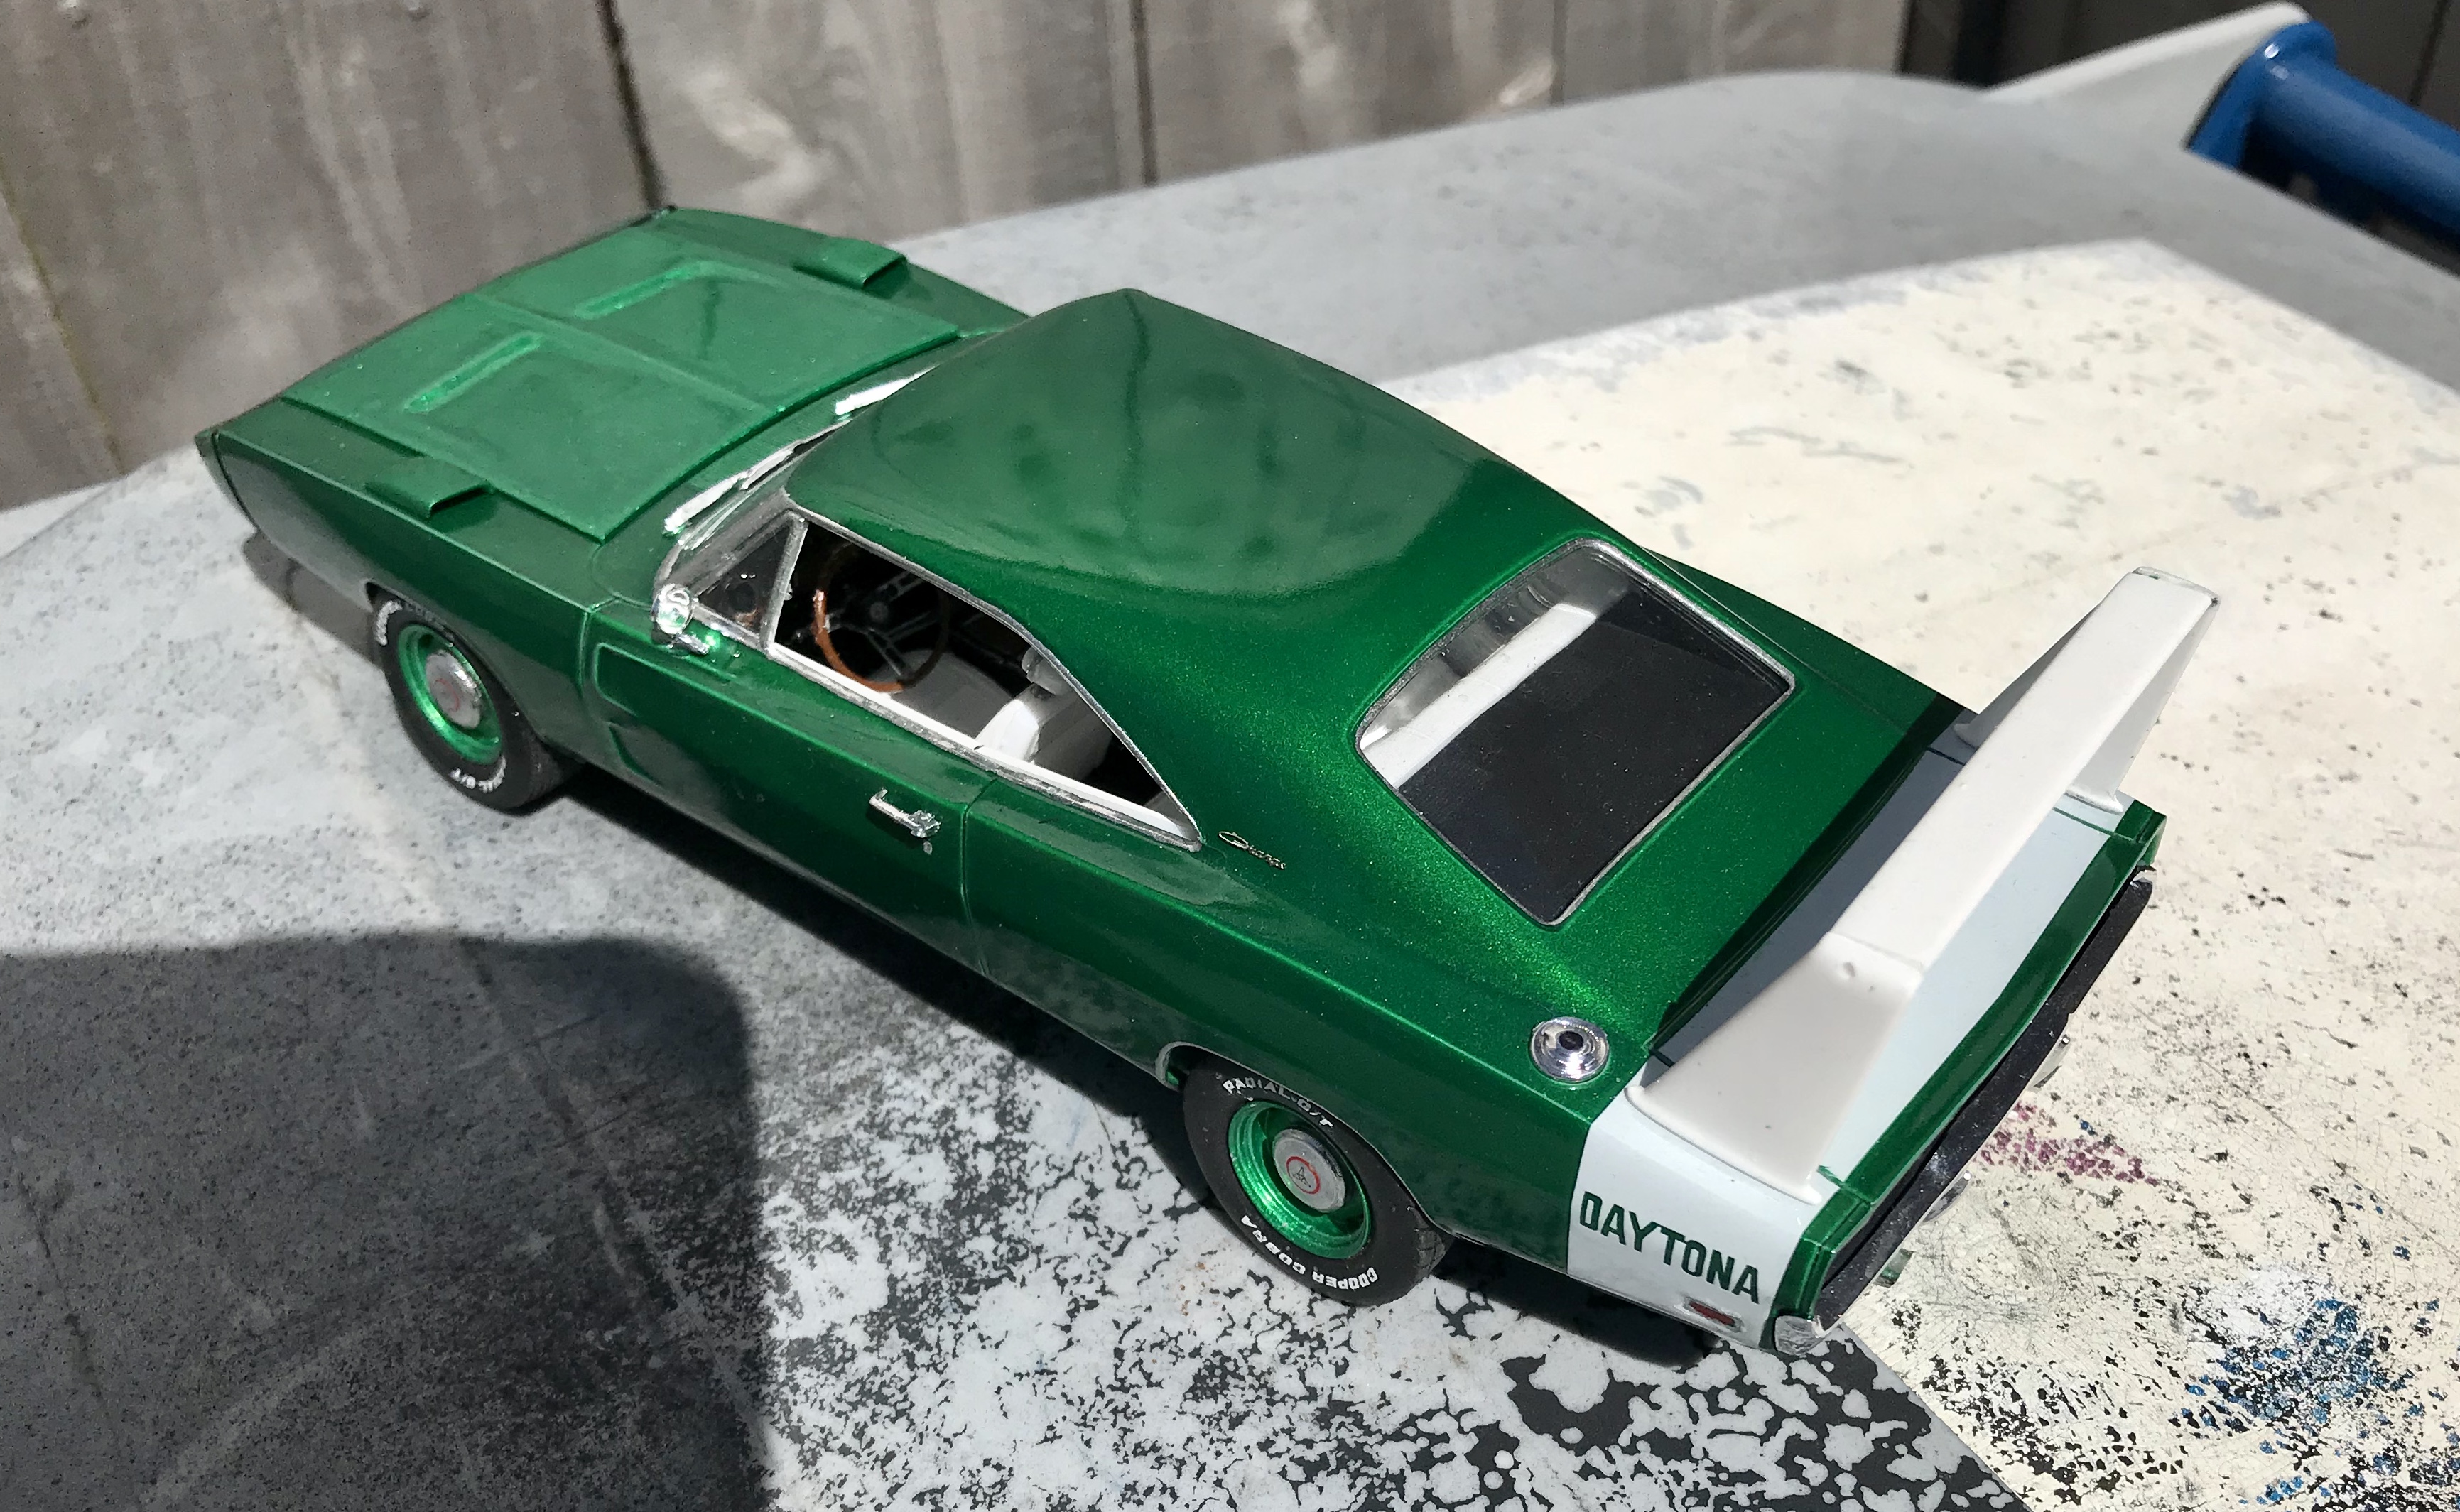
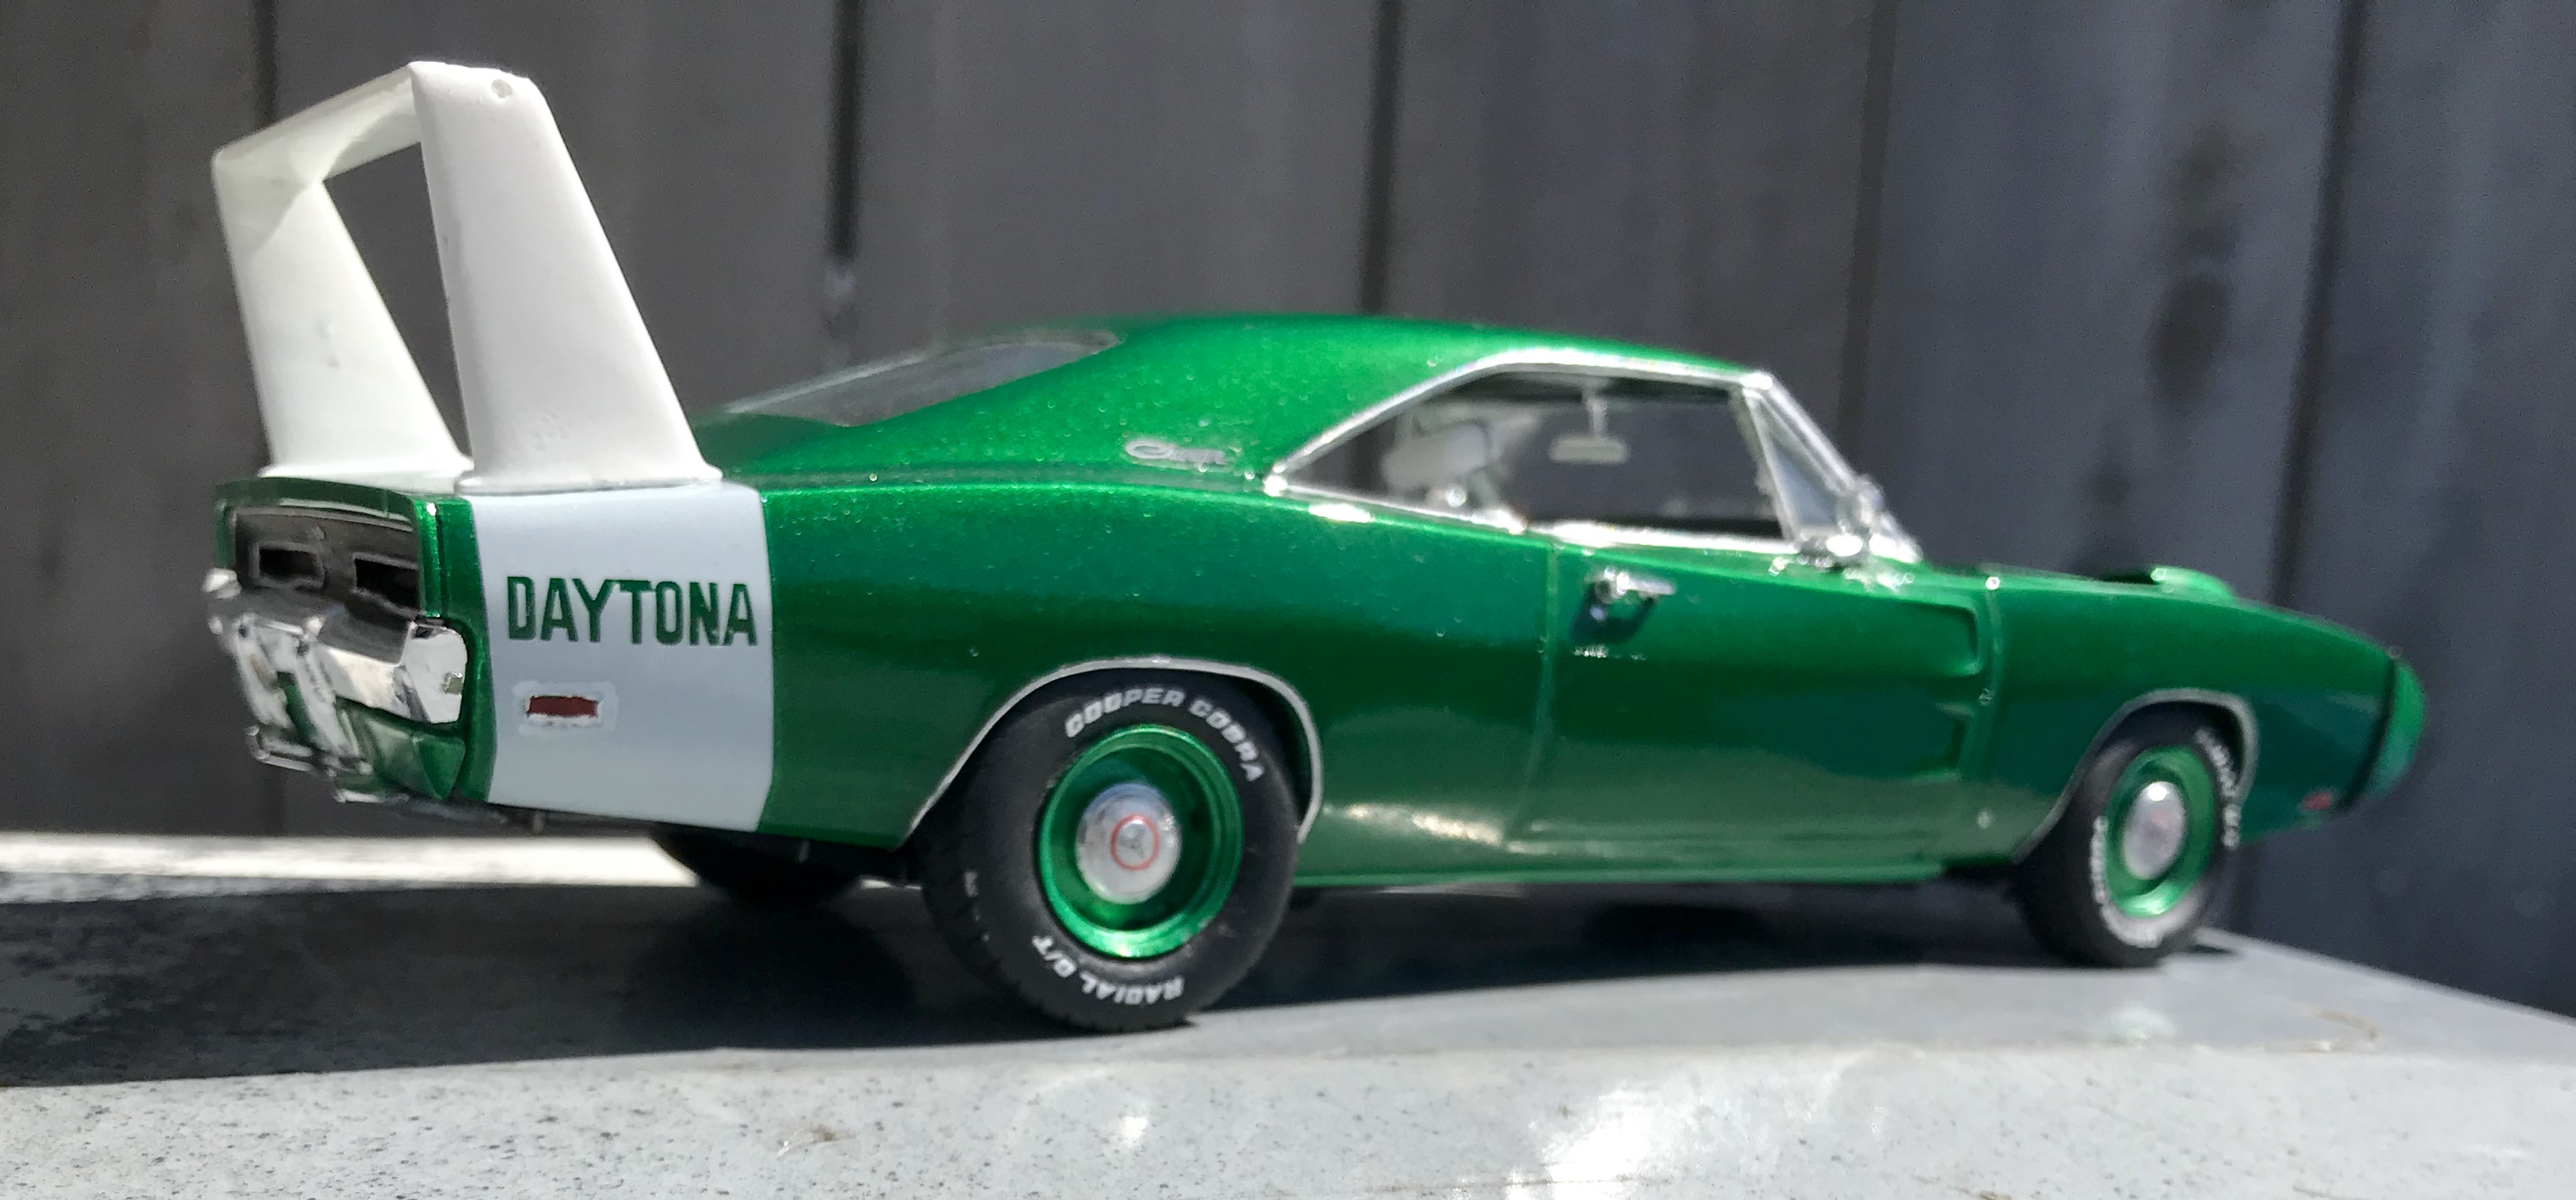
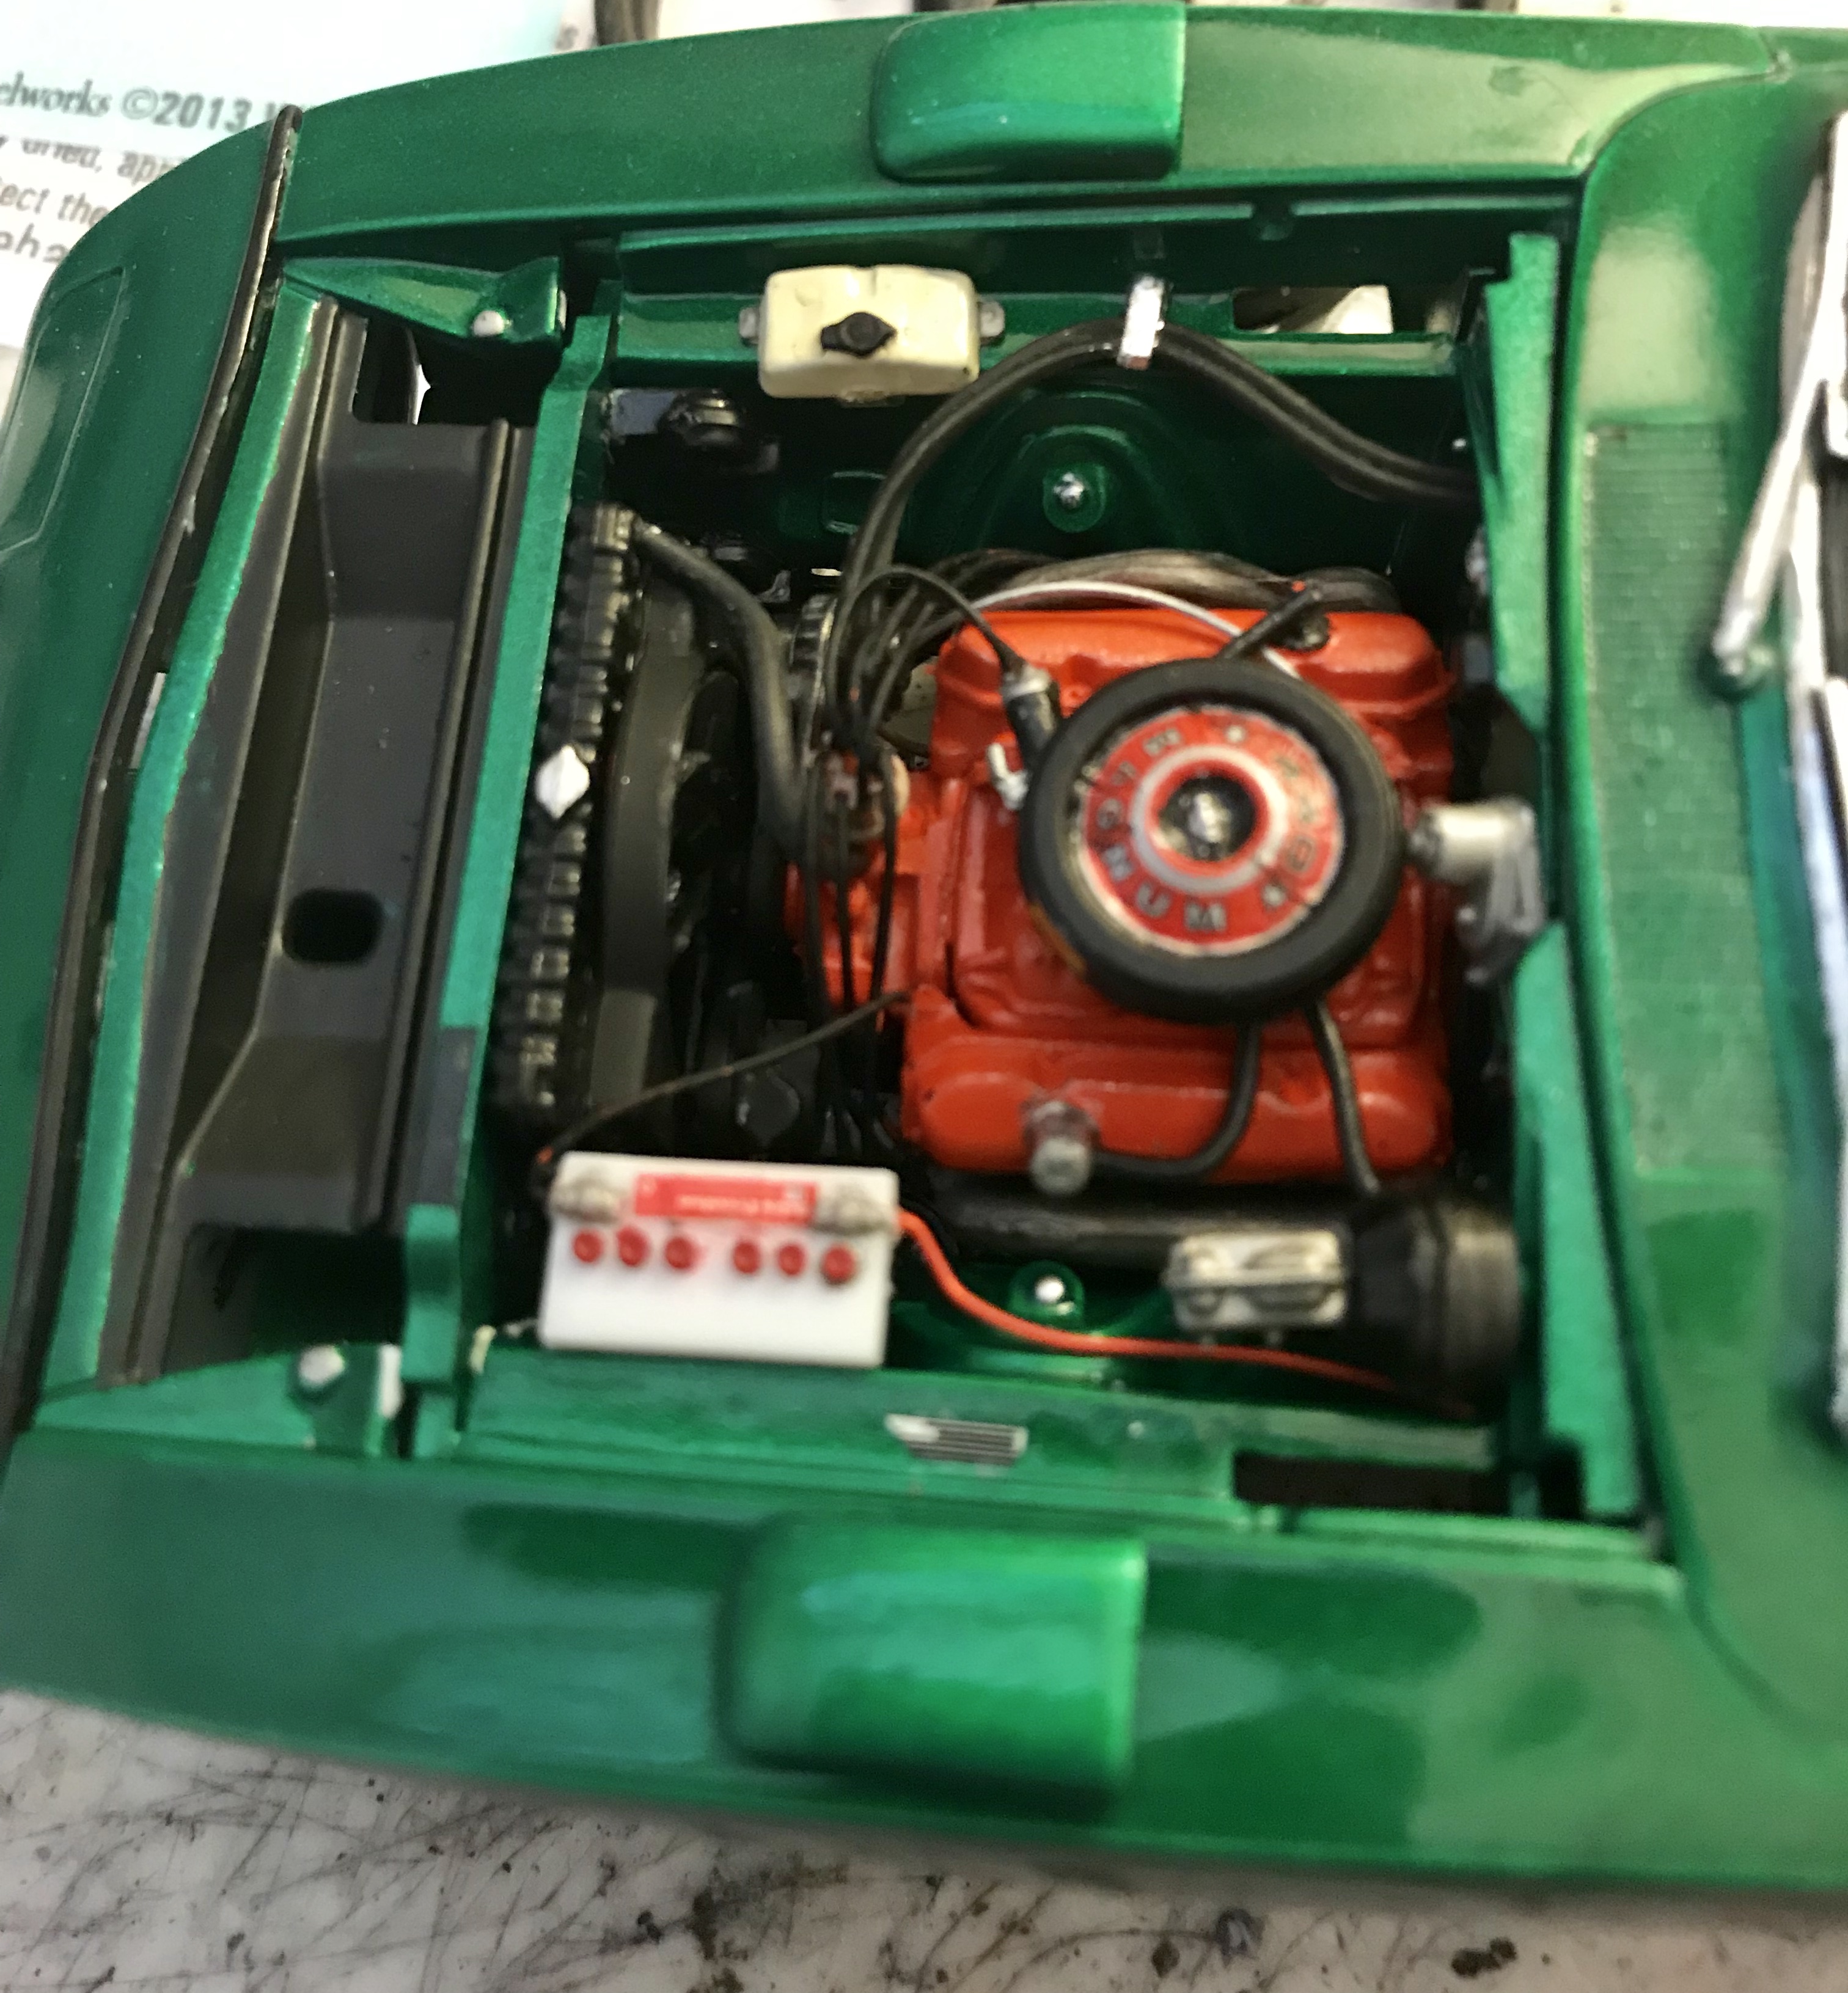
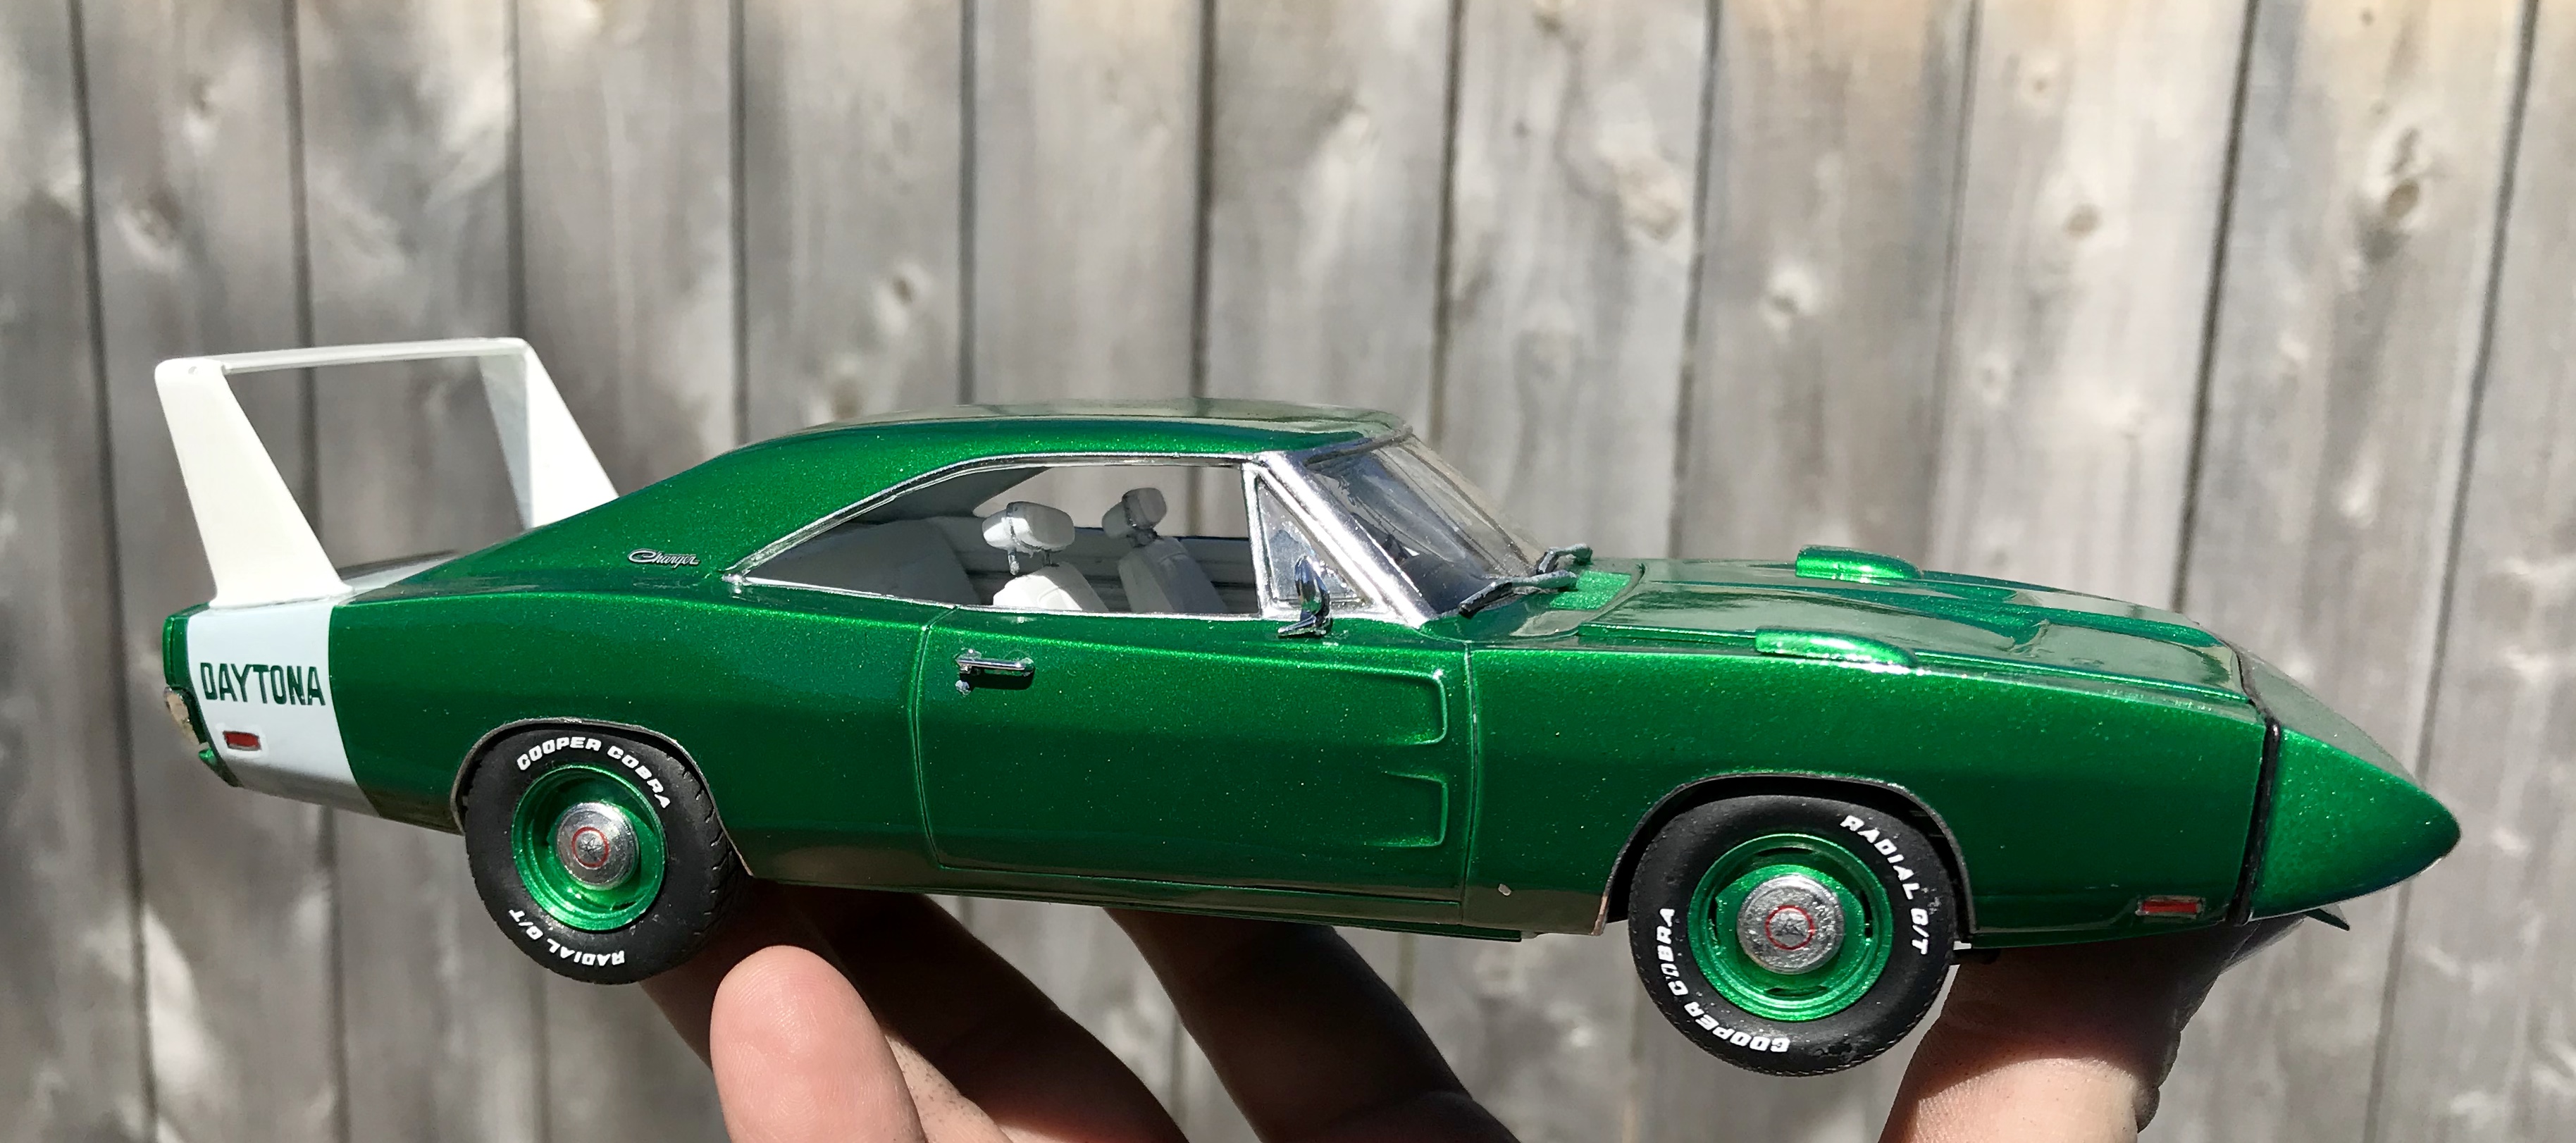
The 1969 Dodge Charger Daytona has always been one of my favorite muscle cars. I built models from age 8 to age 20 or so, which put my last build the first time around 1990. I got back into building about four years ago. When I did, I saw the Revell Pro Modeler kit, and WANTED it. Then I saw some of the finished builds of the kit, (looking at you, Bogger44) and wanted it even more! But, it had gone out of production, and was getting to that $50 range, so I didn’t pull the trigger, as I had plenty of other things to build. Finally, after years of waiting, it was re-released! I snatched it up right away in January and got started. At first, it was a little anticlimactic... I’ve built the Revell 68 Charger 4 times (one I threw away because it was completely screwed up, one I finished but did a terrible job on, and then I bought a third and decided to try and redo/fix the 2nd one at the same time) so it all felt a little repetitive. Plus, I couldn’t settle on a color. My original plan of black/white was no longer appealing, as I felt it would obscure some of the details, but I couldn’t settle on anything else. I guess I unwittingly followed the herd, because most of the Daytonas I’ve seen on here lately have been green. I had a partial can of Testors Mystic Emerald sitting around, and decided to use it. The kit itself is GREAT!!! Everything fit together beautifully, and the PE pieces are a fantastic touch. I decided to use the 440, and ordered some steelies and hubcaps from Joseph at Fireball. For tires, I got a pleasant surprise. I was going to use L-size Goodyear Polyglas all around. I had a set that the lettering had worn off of, and bought some Fireball decals along with my wheels. But, in doing some last-minute messing around, I discovered something I liked better. I still had the two large drag radials that were the optional rear tires for the Moebius 65 Satellite. I had tried them on a few builds, but they were too big, looking a bit truckish, so they were never used. I tried them here because the wheel backs were falling through the L Goodyears, and they were perfect to me! With the Ls up front, they didn’t look that much bigger, the wheels compressed the sidewalls enough so they didn’t look like truck tires, and they fit the wheel wells perfectly. What didn’t go right on this build? A couple things: I ran out of the emerald paint before getting all of the body completed. I bought a new can, but it didn’t match the old one perfectly. However, I had already cleared the body and was very happy with the outcome, so I wasn’t going to repaint. As such, my hood, nose cone and wheels are ever so slightly lighter than the rest of the car. Then, as I was putting the PE emblems on the side of the C-pillar, the right one dropped. It seemed like no big deal at the time, as it fluttered straight down, but I crawled around with a flashlight every time I went downstairs for the next 5 days and never saw it again, so I had to use the decal on the right side. Finally, my big tragedy came as I was finishing. I was DONE other than the Dodge decals for the hubcaps... I turned the car on its side to apply them, and the hood slid off. Worried about the paint getting damaged as it hit the floor, I tried to slam my legs together and catch it before it landed. I missed it with my knees but caught it with my boots, snapping the hood in two. After carefully glueing it back together and repainting, the same clear coat I’d used all along suddenly curdled when I applied it, and in stripping the paint to start over, it stripped the glue and broke again. As of these photos, the hood has been polished but not cleared, so I haven’t reattached the PE hood pins, but it was a beautiful day today and the next few are supposed to be rainy, so I wanted to get the pictures done now. Once I get the hood done, this will definitely have a place if honor on the shelf. I’m so glad I finally got to build one of these and I’m pretty happy with the end result. Thanks for looking and I hope you like it. Interior: Engine: And she’s ready to hit the street: Take her outside:
-
Gorgeous work!!!! And, I guess we think alike... I haven’t posted mine under glass yet because I dropped the hood and broke it in half. Getting it repainted now. Other than the tail stripe/interior, we had the same concept. Your build is beautiful, and that is some impressive work on the headlights!!!!