Kmb0319
-
Posts
468 -
Joined
-
Last visited
Content Type
Profiles
Forums
Events
Gallery
Everything posted by Kmb0319
-
AMAZING work!!!! I absolutely love everything about it and you did a phenomenal job!!!
-
That looks fantastic!!! I love the steelies... she looks mean. How did you apply the craft paint?? Did you mix it into your airbrush? And what clear did you use that was safe for the acrylic base? Great work!
-
I LOVE this kit... I’ve got to find one. My car from my senior year of high school through college was a 73 Road Runner. Your redo looks great so far! Looking forward to seeing more.
-
Oh yeah...... this is looking fantastic so far!
-
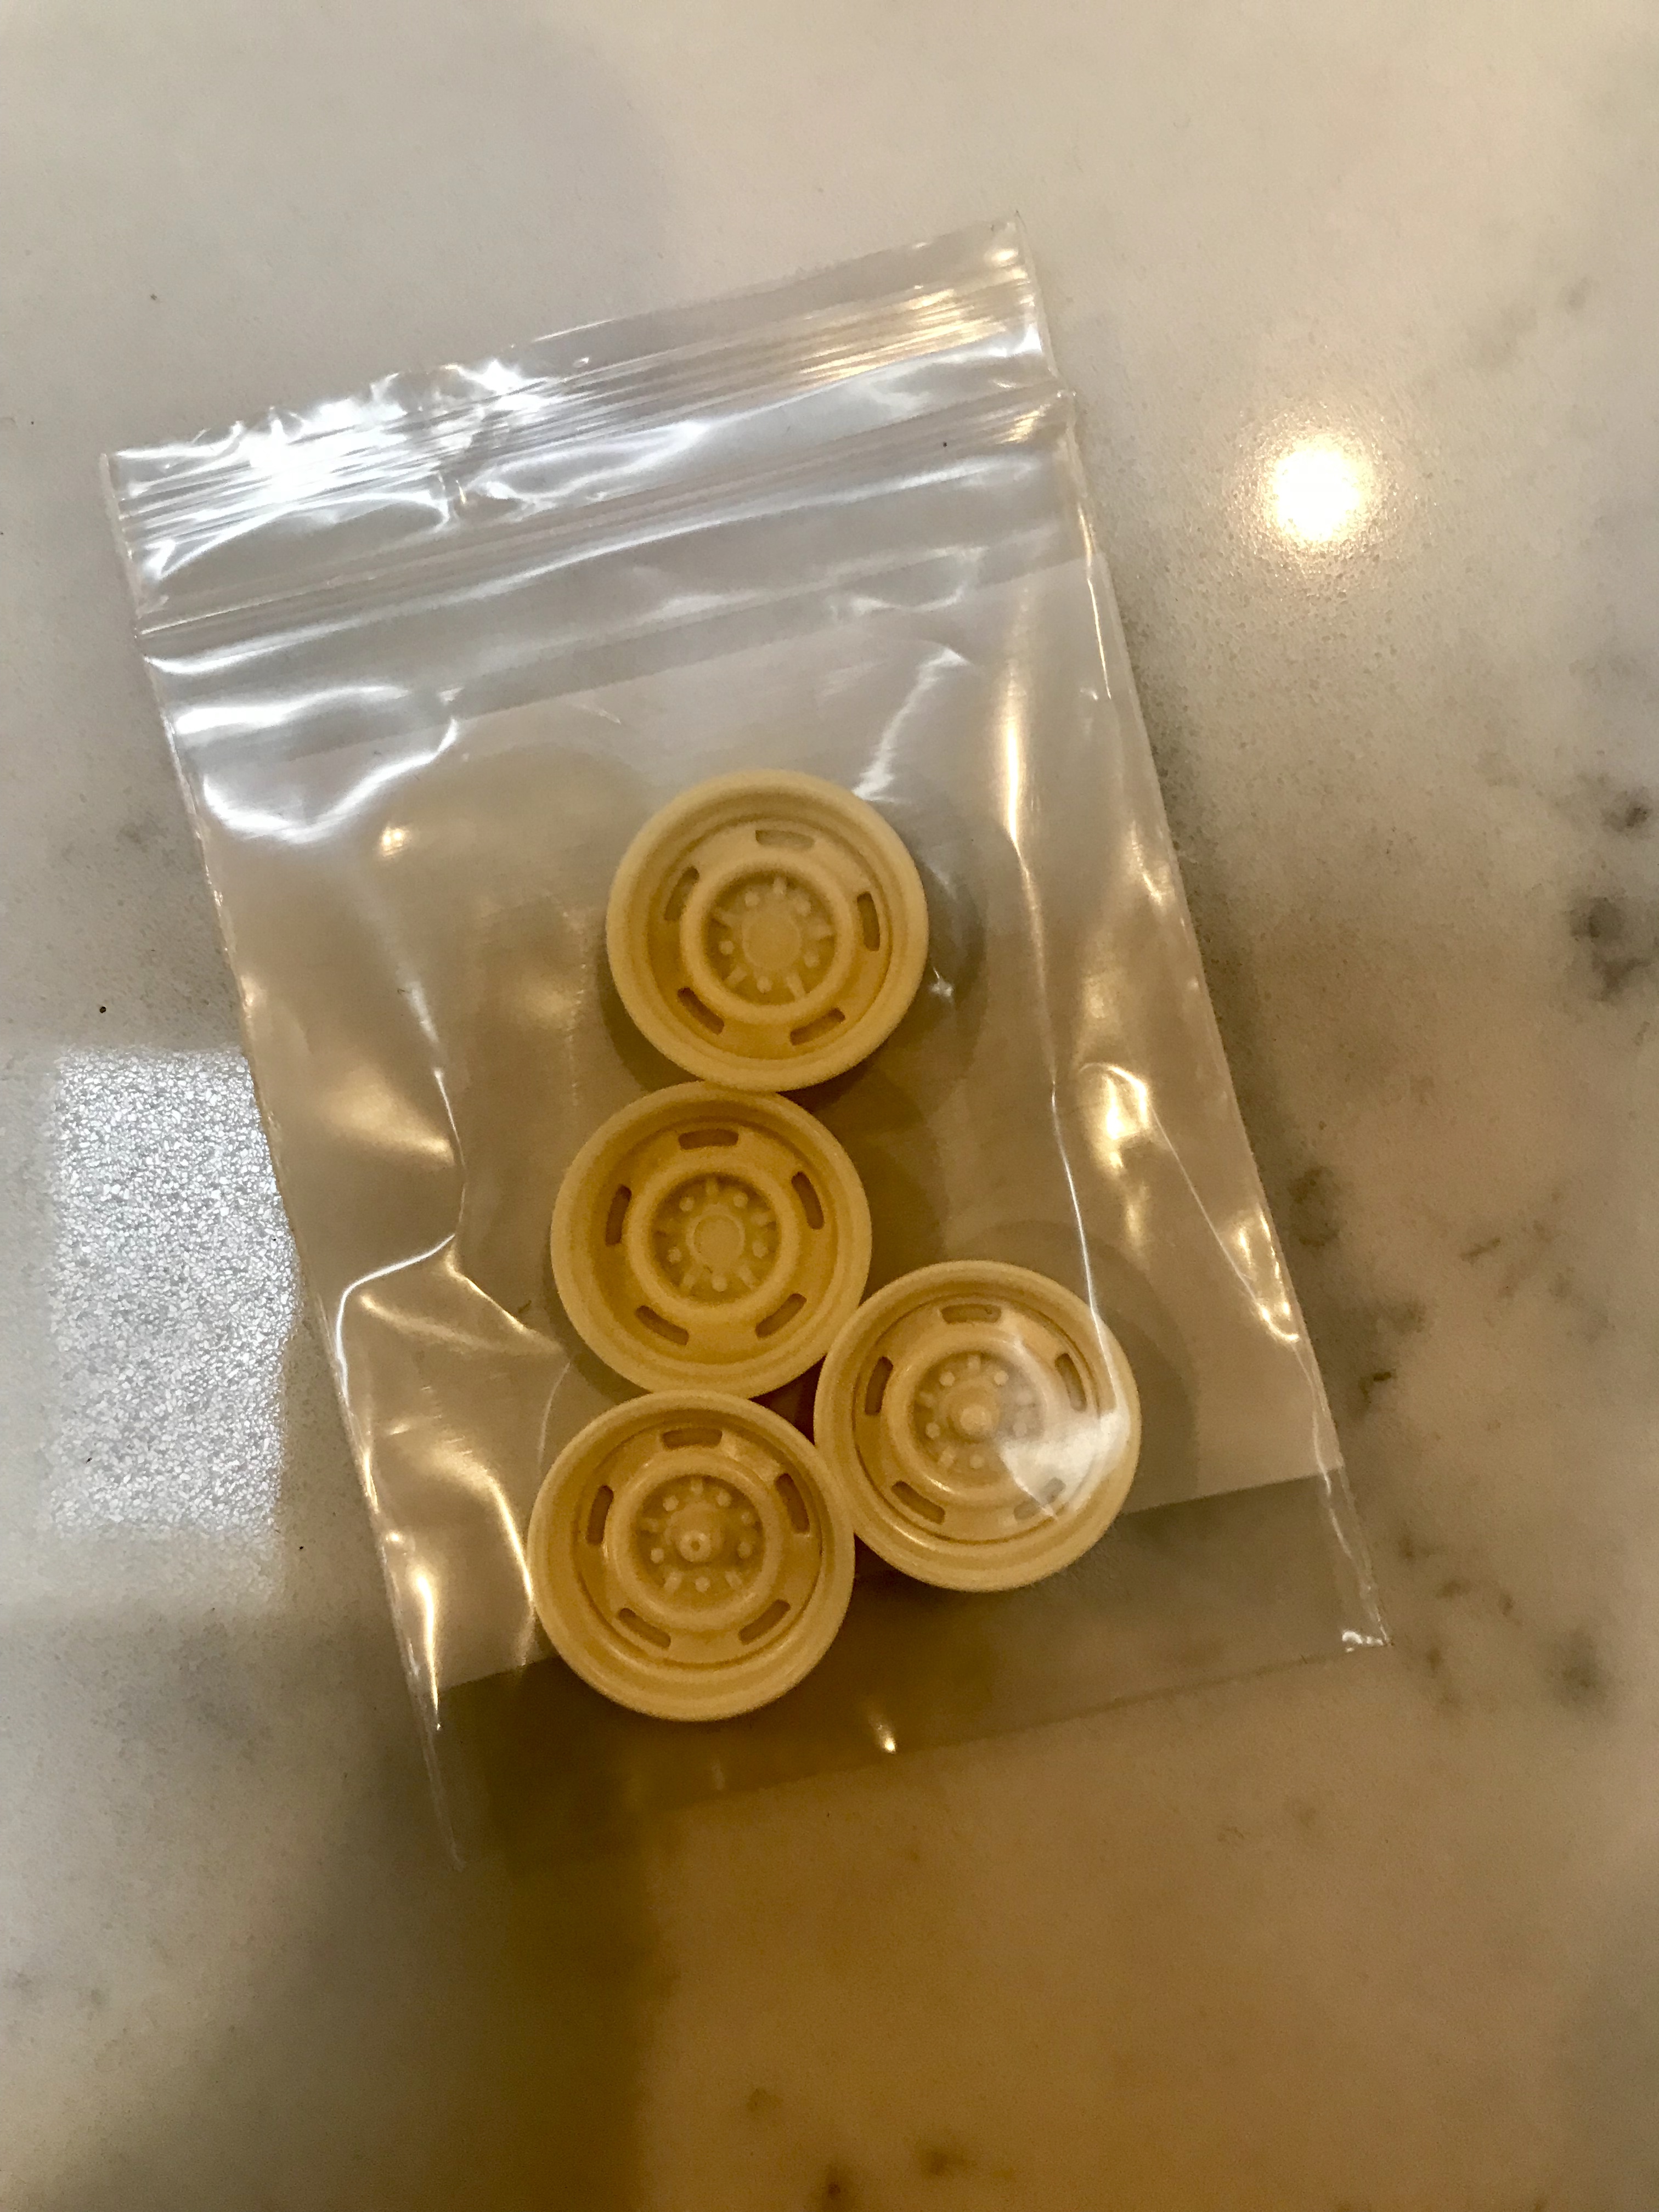
I got them off of eBay for $7.99. The seller is Forward Resin. Link is below https://www.ebay.com/itm/Resin-1-25-15-Bare-Chevy-Rally-Wheels-/323627522953
-
A new entry.... not Under Glass yet....

-
Thank you! I looked at research pics and thought the positive cable was on the fender side, but will go back and check again. If I have them reversed, I’ll paint them. Either way, thanks for following along and the comments. I’ve been blown away by some of your work, (65 Shelby jumps to mind immediately) so I can’t wait to see what you do with this kit!
-
Oops... good catch. I will repaint them for sure!
-
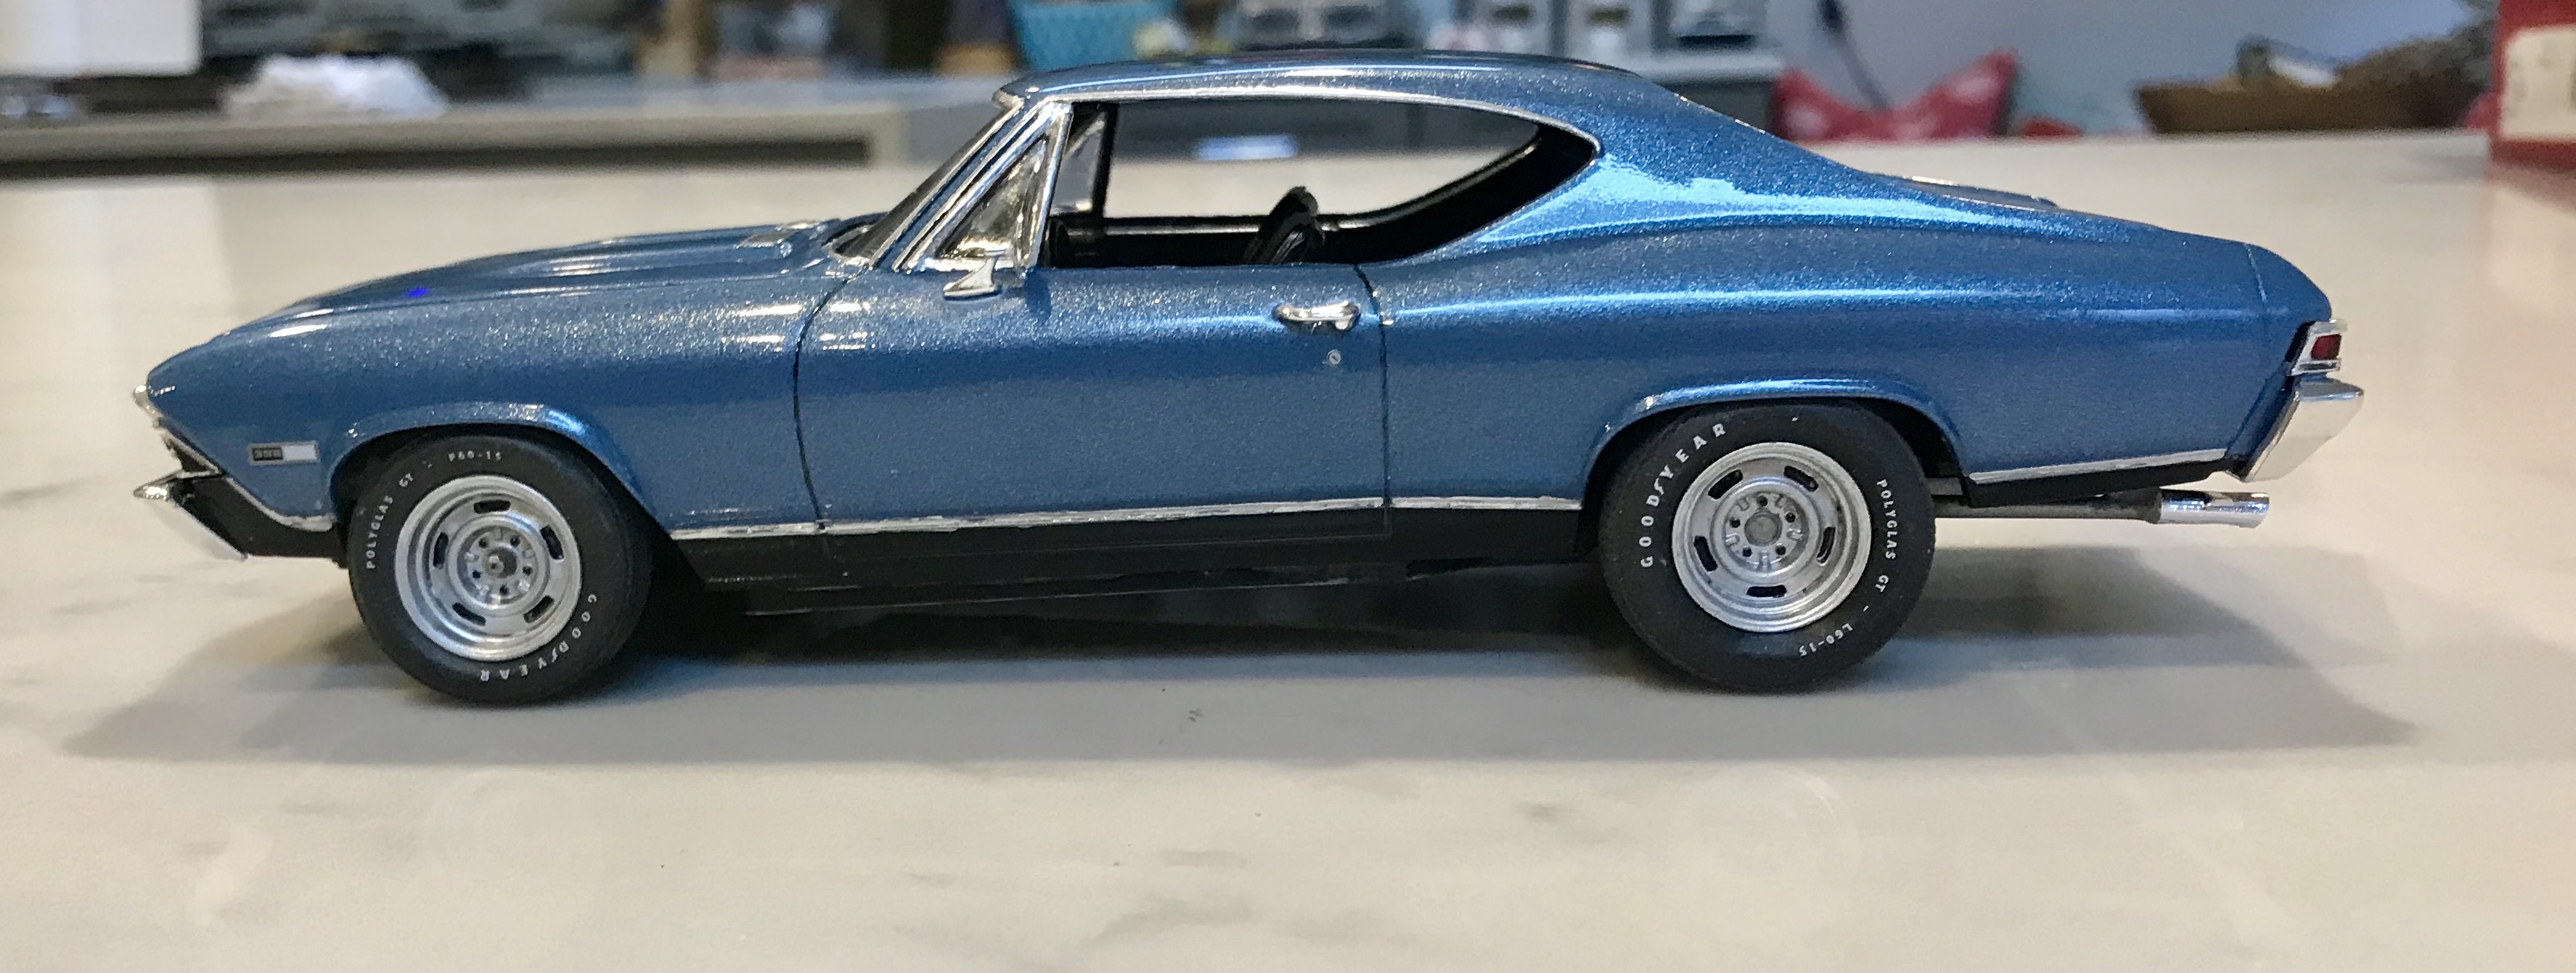
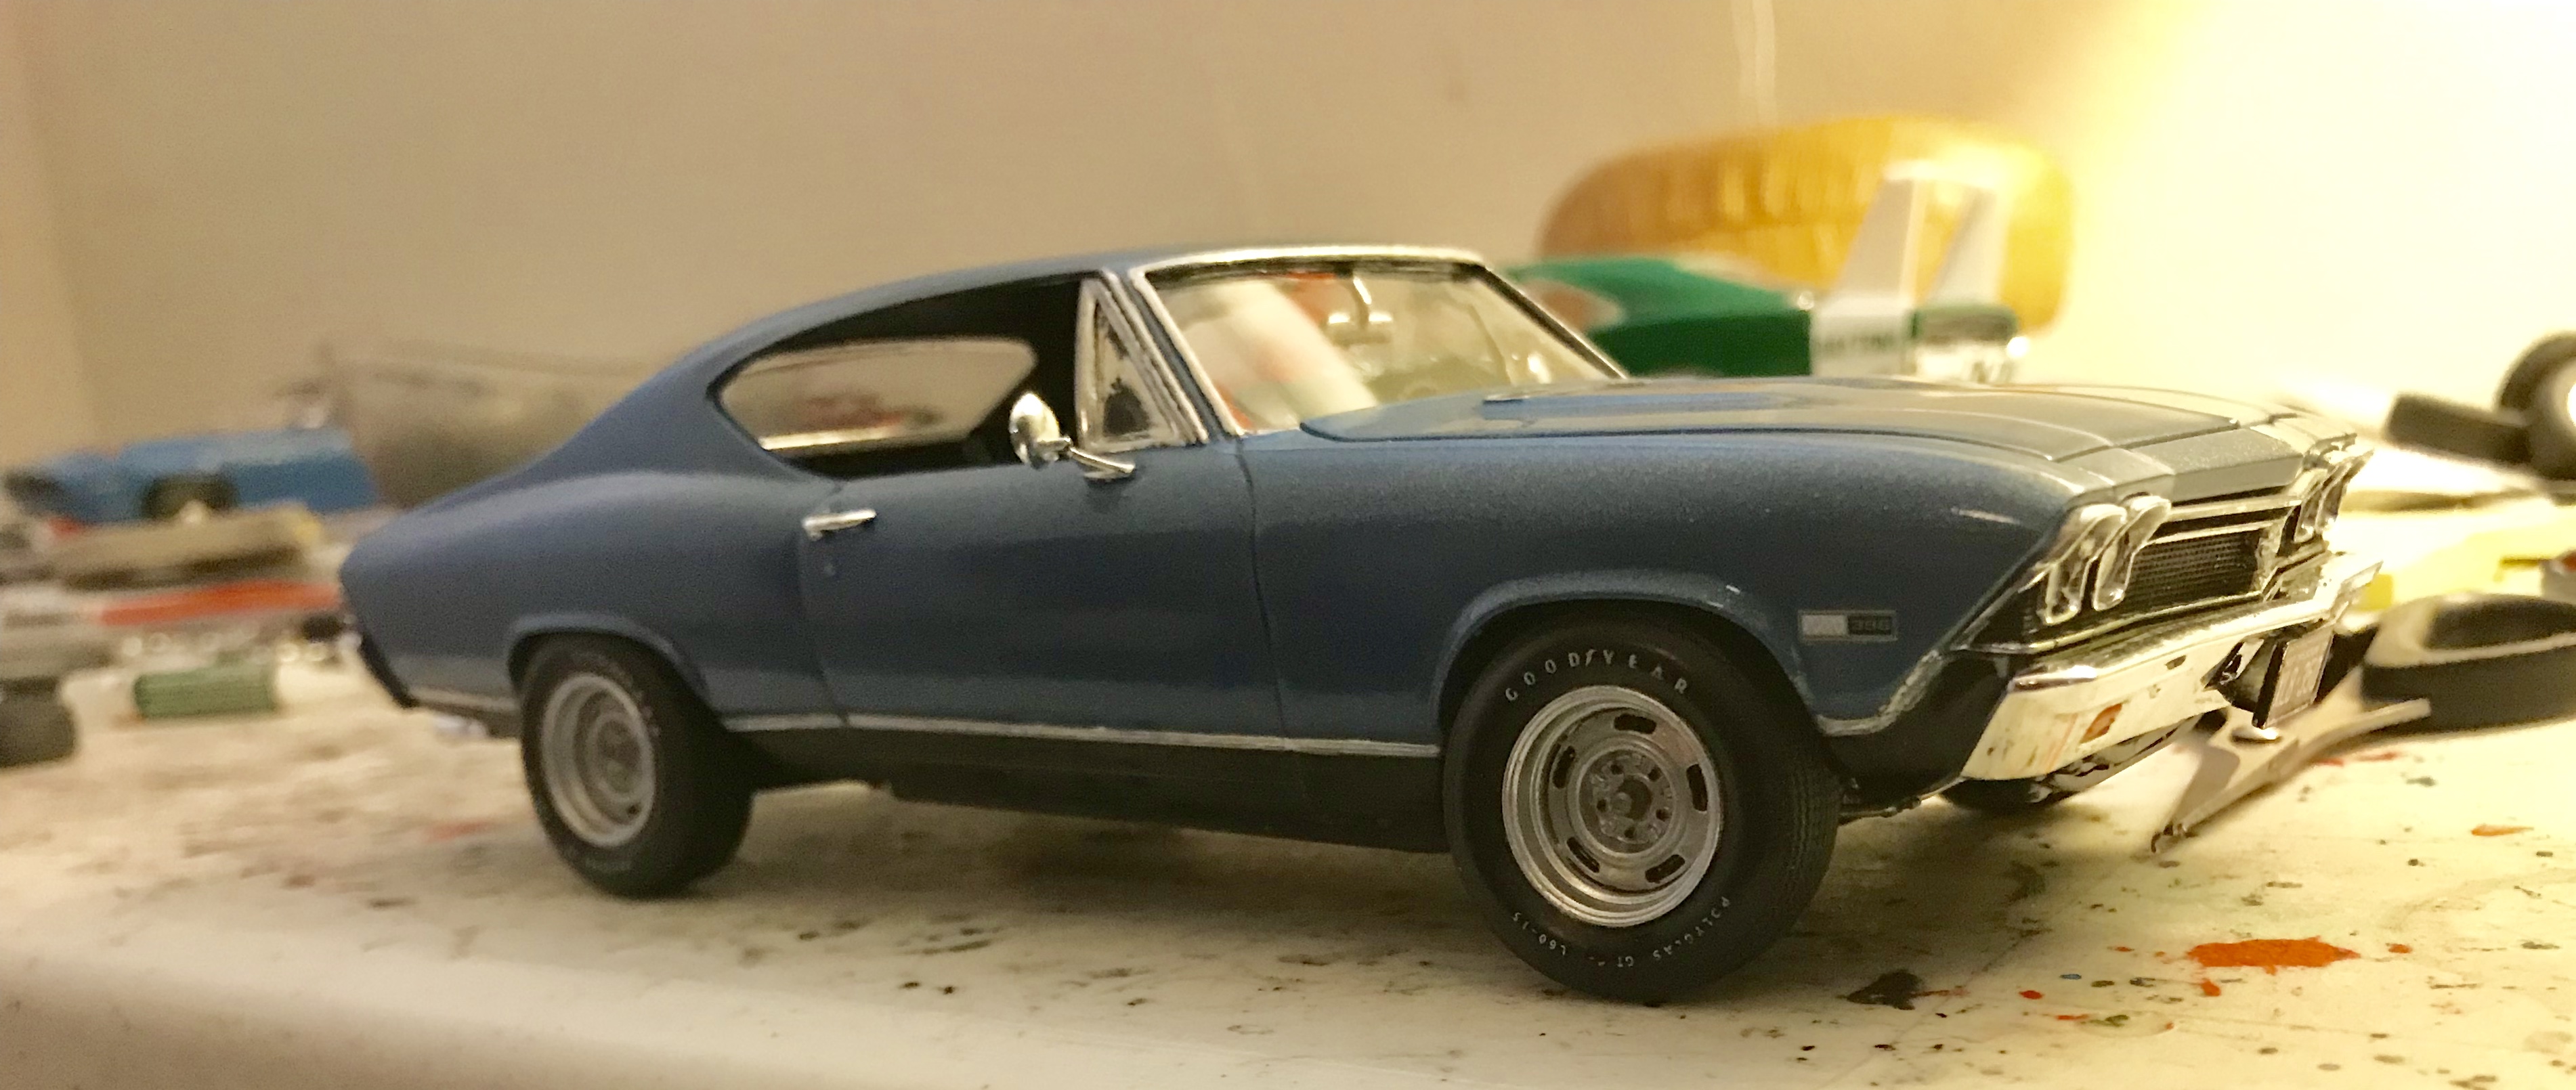
I had to get this kit shortly after it came out, and couldn’t wait to get started on it. It’s a great kit... well designed and fits together perfectly. I have two niggling complaints: it could use some more detail pieces, especially in the engine compartment, and I don’t like the wheels and tires. The tires dictate it, because they are the same too skinny/too small tires Revell has been putting in their muscle car kits for years, just with a printed redline. Revell made new tires that were a much better size for the 70 Cuda kit, and they’re in the 70 Charger and the 80s Cutlass kits among others, but they used the old ones. The rally wheels in this kit are the ones from the 69 Nova, which I’m not a fan of. Too shallow, small and while the slots are open, they’re poorly shaped as they’re rectangular. The rally wheels from the 69 Camaro kits are far better and would fit those newer Revell tires, IMO. In the end, I did my own thing. The paint is a Duplicolor Chevy Light Blue, which is a pretty good match for Grotto Blue in 68. The interior got embossing powder for carpet and lots of detail work. Other details I added include: - Spark plug wires - Vacuum hoses - Bypass hose at the front of the block to the water pump - Battery Cables - Ran a hose from the washer tank to the wiper motor - Heater hoses - Tires are AMT Goodyear Polyglas, Fs in front and Ls in back, and the wheels were an EBay purchase In final assembly, I found and used other wheel backs, as the kit ones are so small my tires kept either falling off or falling over the wheel back. But other than engine details and tires/wheels, this is OOB. I decided against the SS stripes, as they tend to make the headlights look droopy in many cases. Maybe I’ll change my mind and throw them on at some point, but I’m happy with how it turned out and looking forward to seeing more builds of this. Thank you Revell for putting this out, and I hope to see a 69 soon! Thanks for looking... in to the pics. Interior Engine Done... mix of indoor and outdoor shots
-
$7.99 on eBay. They’re awesome!
-
That’s SWEET!!! I haven’t posted mine Under Glass yet... hoping the rain will let up and I can get a few outdoor pictures before I post, but I just finished my 68 this morning in Grotto Blue. I’ll get a full post on it up in the next day or so. Yours looks great! I saw one pic of a Rally Green one that I liked, too, but it was too close to the color for my Charger Daytona, so it ended up blue.
-
Small change as of last night... playing around with different wheel backs in my spares box, I found ones that worked perfectly with the F Goodyear Polyglas up front, so when it goes under glass, it will have Fs up front and a little better stance.
-
Great job!!!! This literally looks like photos from a 69 Dodge sales brochure. I’ll take a test drive!
-
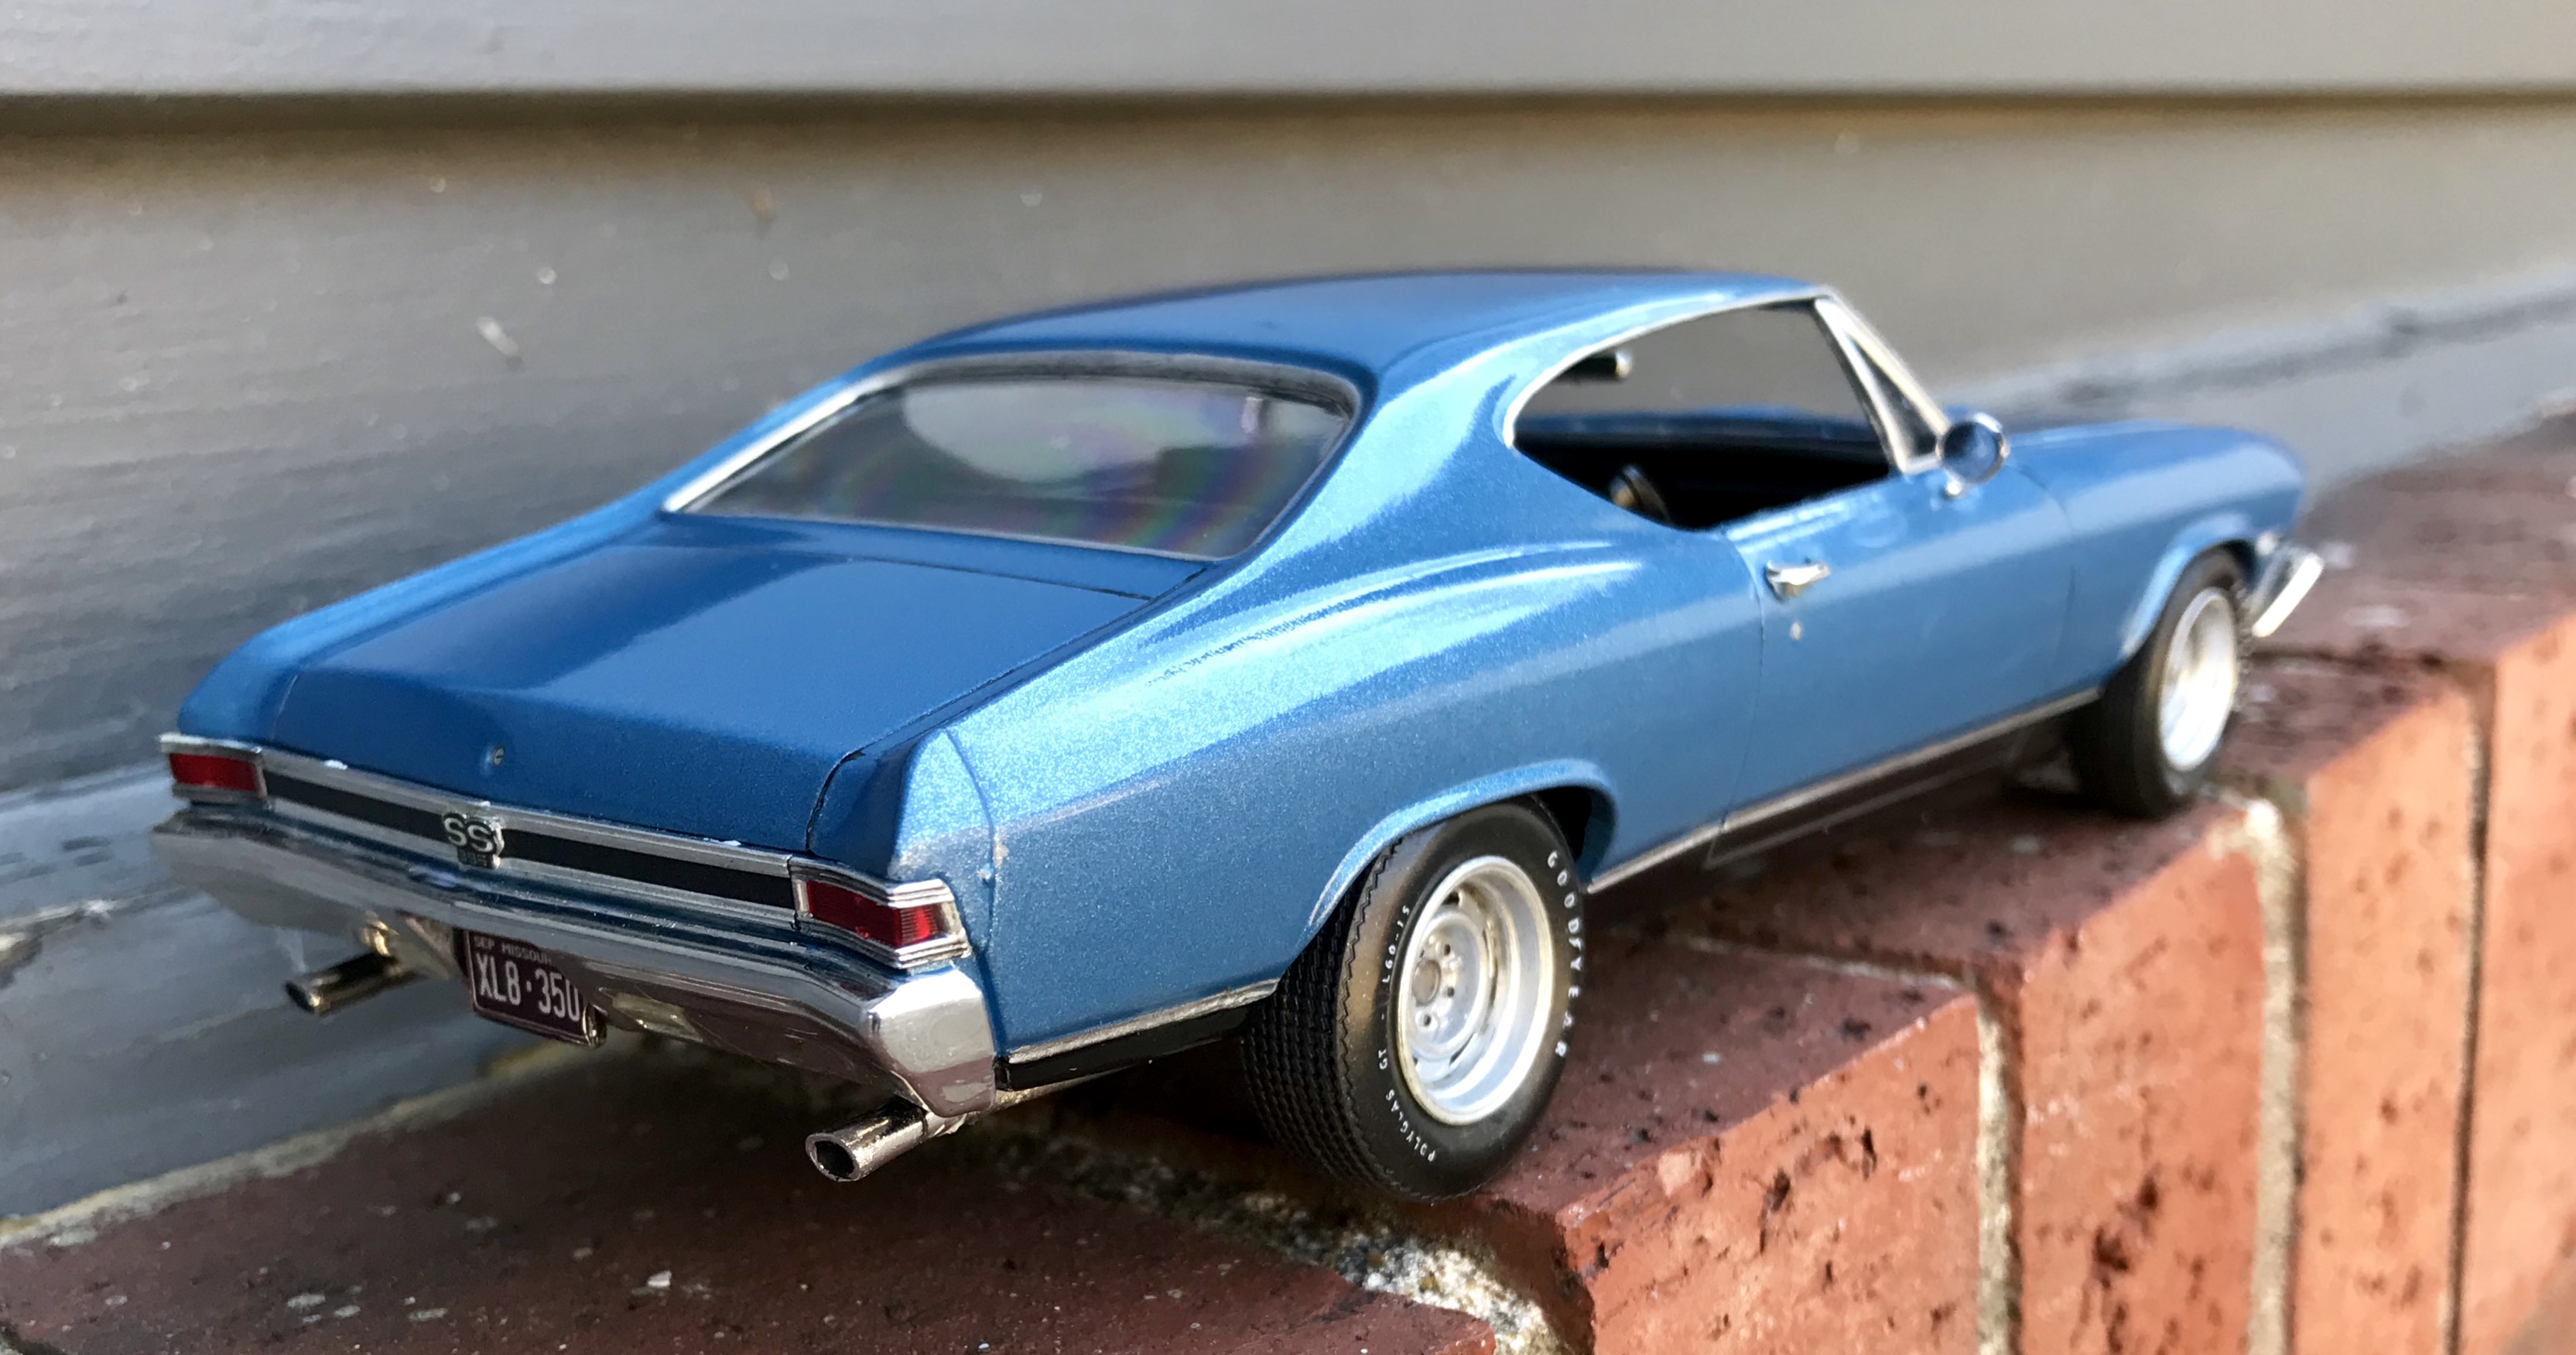
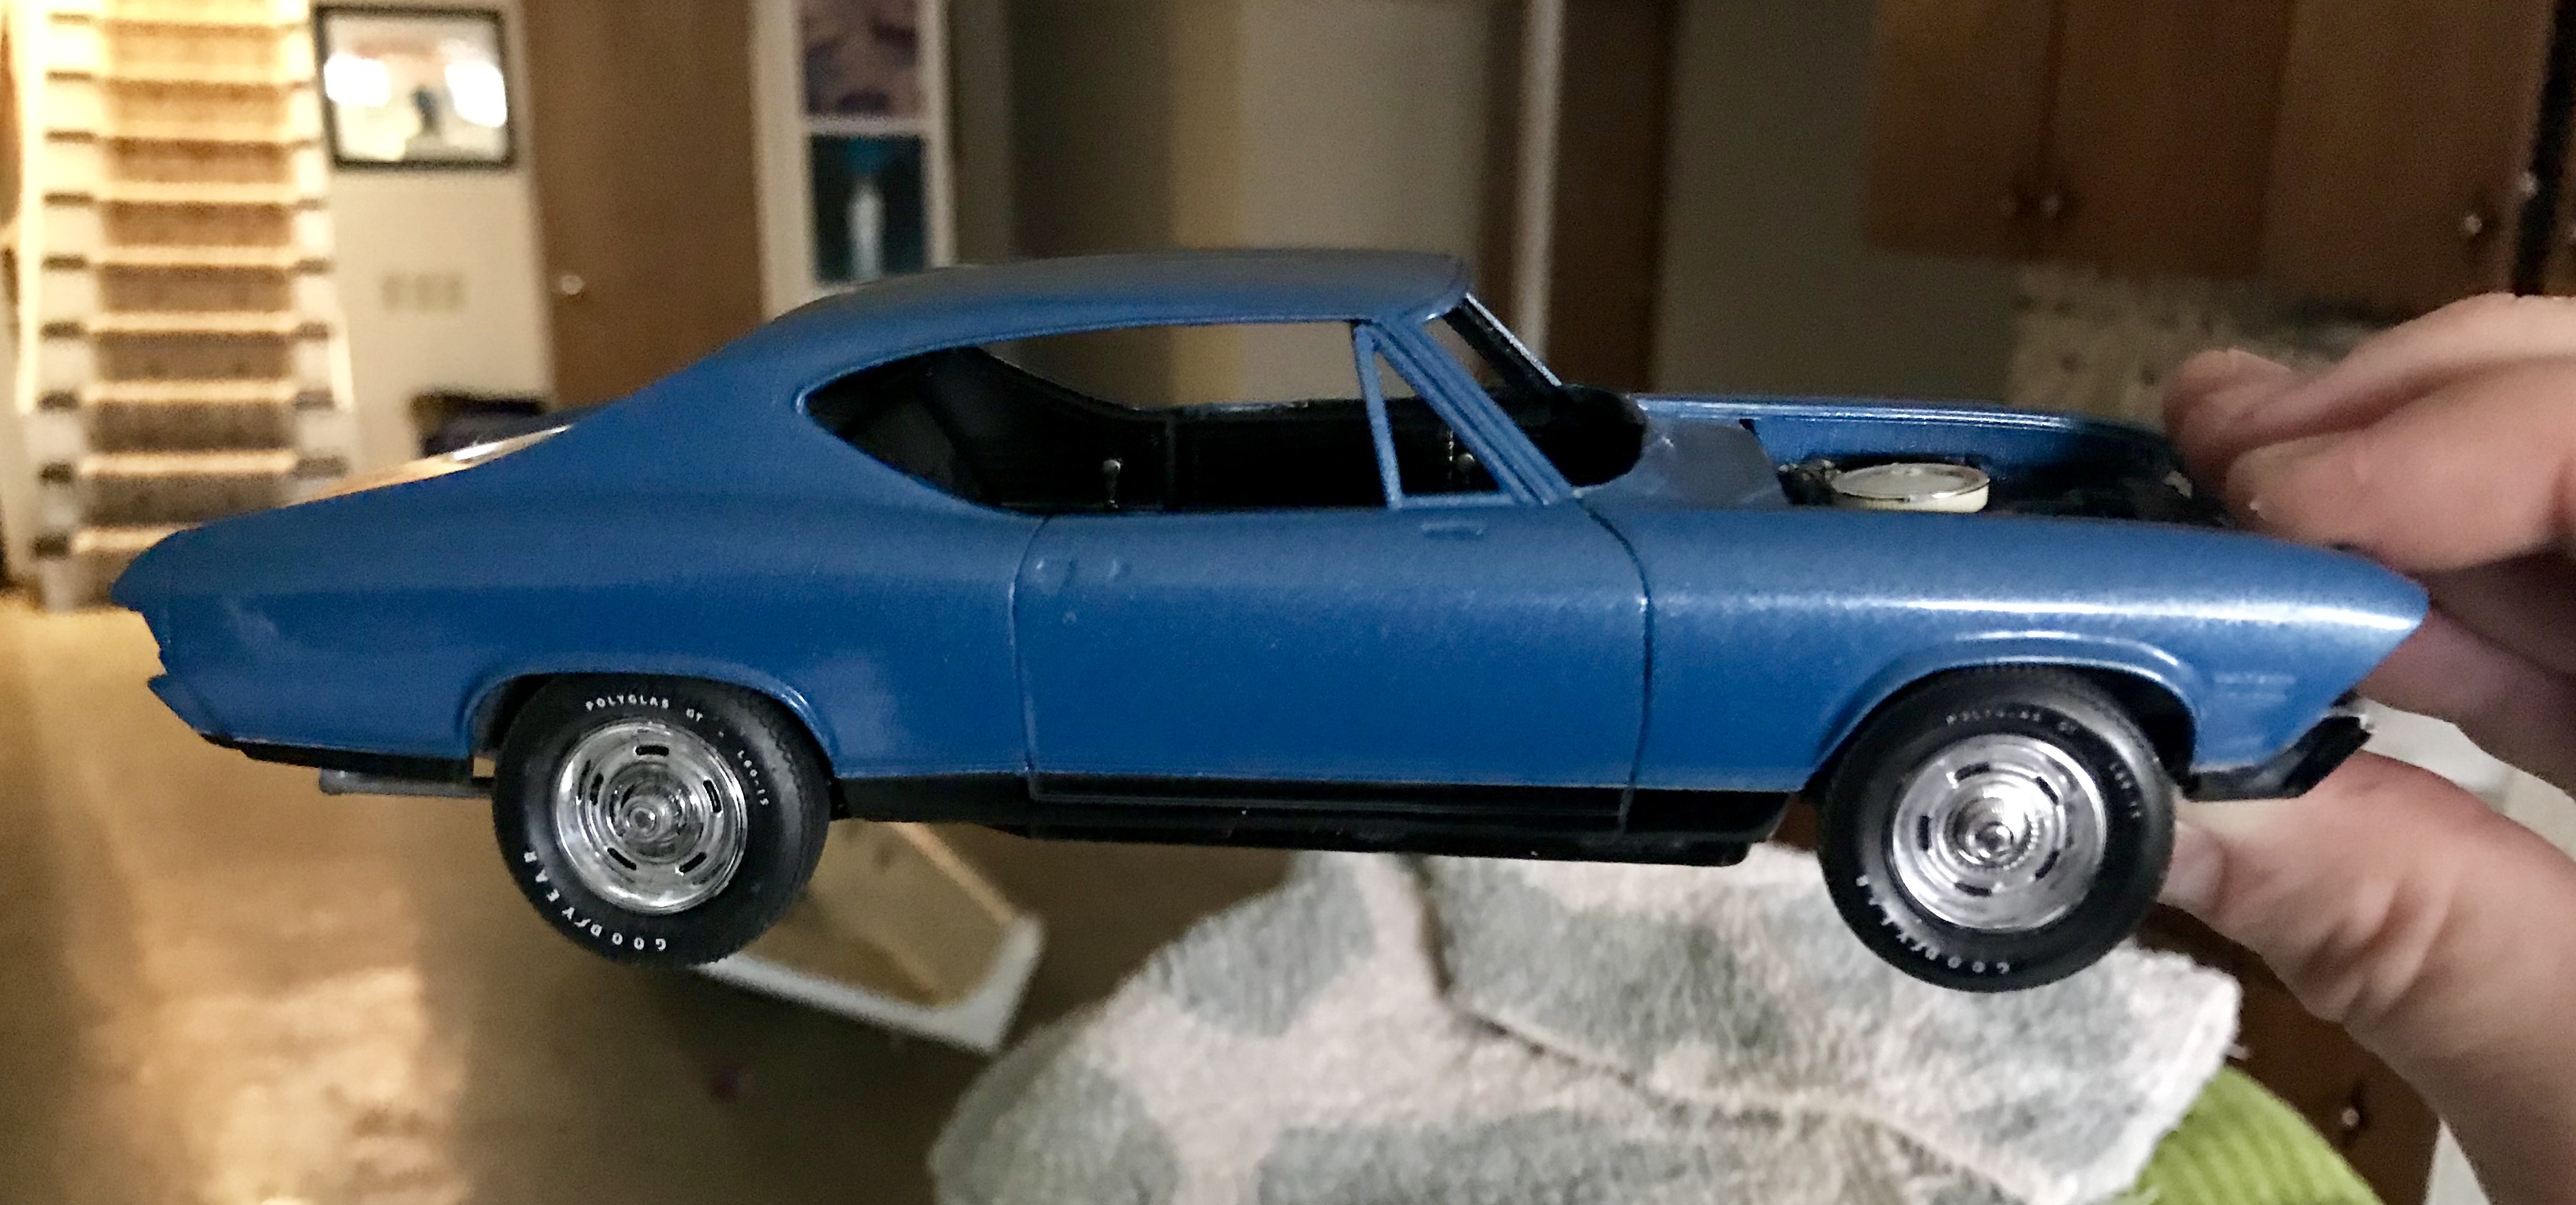
Well, she’s done except for finishing the chrome trim along the sides of the roof, as that’s where I handle the body. These wheel backs are too small to hold these Polyglas tires. I already used spare wheelbacks in the front tires and glued them to the kit wheelbacks, to get my front tires lowered a little and pushed out slightly, as they were way inside the fenders. The rears are barely hanging on, mostly because they’re pinched in by the top of the fender. I might sift through the parts box and see if I can find something that fits the tires to hold them in place more firmly, but that would be the only other thing to do. I’ll post it Under Glass as soon as I can get some decent outside shots, but here’s a couple before the trim is done. I love the bare rallys on this car. With the black lower body, the bare rallies give it a little menace. This build was an absolute blast. Thanks everyone for following along.
-
That is just AMAZING..... I’m speechless. ????????
-
OK... interior is done..... I installed the glass and visors this morning, did the chrome trim on the body, and put the last few decals on. This afternoon I joined the body and chassis, and got the door handles, militaries, exhaust tips and the rear bumper on. Later I’ll get the front radiator assembly attached to the body ( helps the stance) and put the front end on. Finally, I check the mail a few minutes ago, and look what arrived! So this will be wrapping up quickly from here.
-
Hopefully you’ll do a thread on yours when you build it! I seem to have a lot of blue, as well... blues and greens are my favorite. But I had laid off of blue for a while, and this one called for it. The funny thing is as much as the “ultimate” finish is a clean black car, but I only have 3 black models in my collection. Partially because it’s harder to get it to really look right, but partially because in small scale like this, it can obscure small details. But I’ll need to add another black vehicle to the shelf soon. The kit wheels are terrible. They are the wheels from the 69 Nova SS... smaller diameter, very shallow, and the slots are poorly done. I like that they’re open, but they’re far too square and a little too large, so they don’t look accurate. I’ve got some leftovers from a 69 Camaro kit on in in the pictures throughout this thread, and have ordered some bare rallies off of EBay that will most likely be on the finished model. Funny, that’s exactly what I ended up doing with the seats. I used the Molotow marker on the inside edge of the back half of the seat, wrapping it just around that edge as I went. Tamiya makes a Pearl Green that is a pretty good match for Grecian Green, a 68 color. Any turquoise will look great and be period if not factory correct. The 60s cars were all about light metallic and rich jewel tone colors. Good luck with your kit!
-
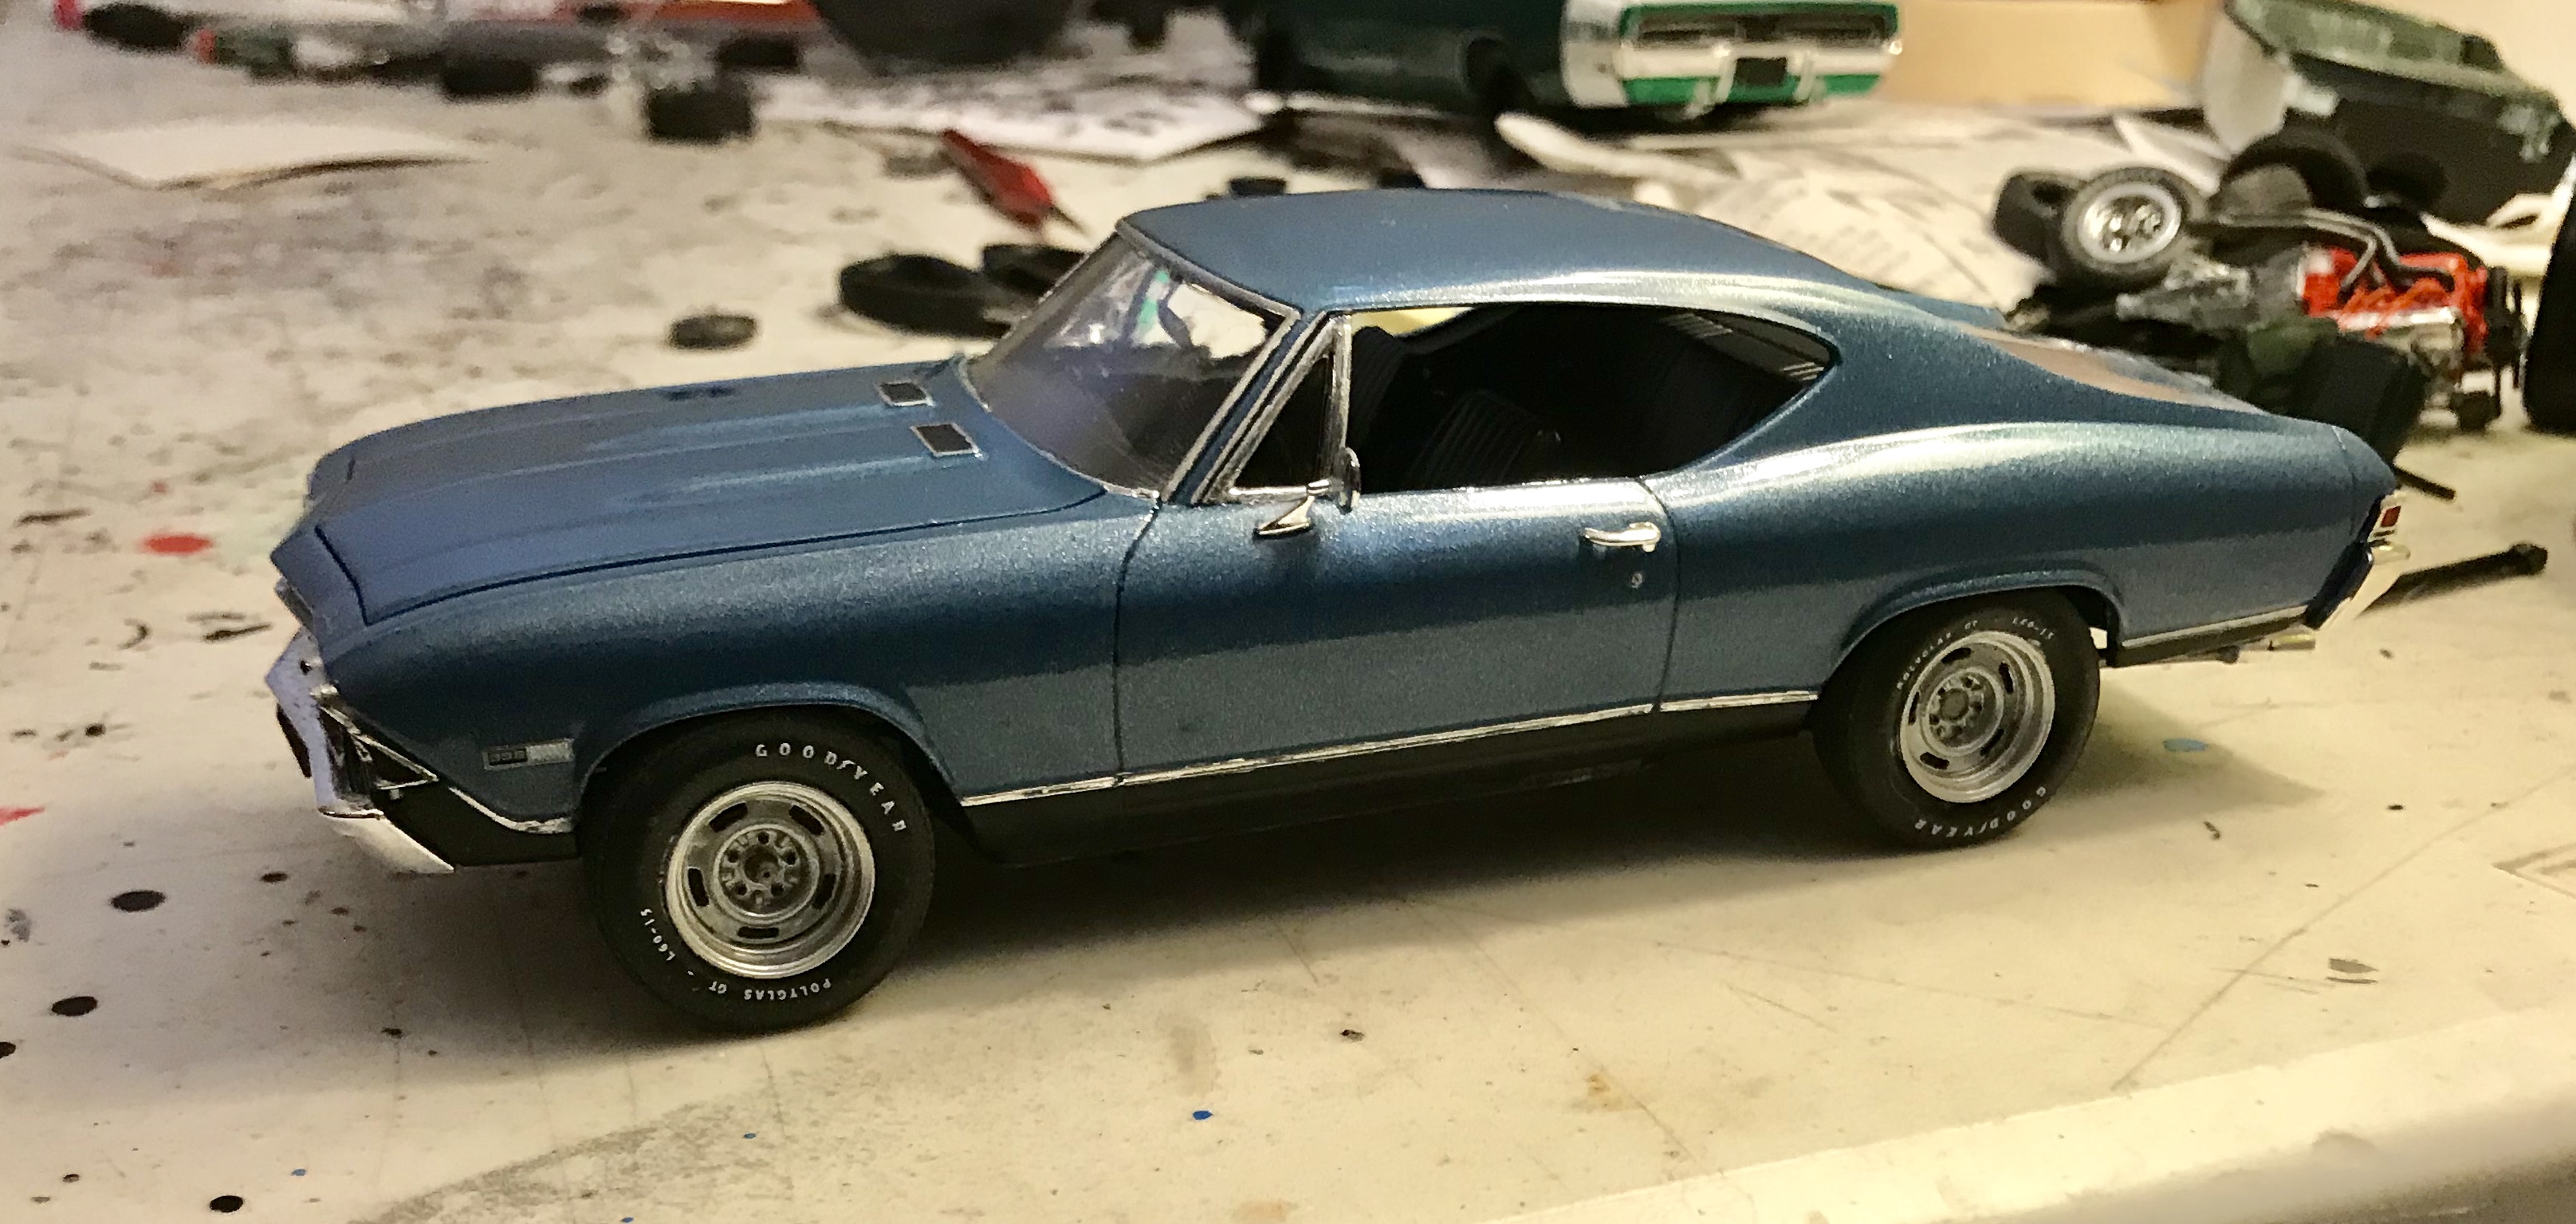
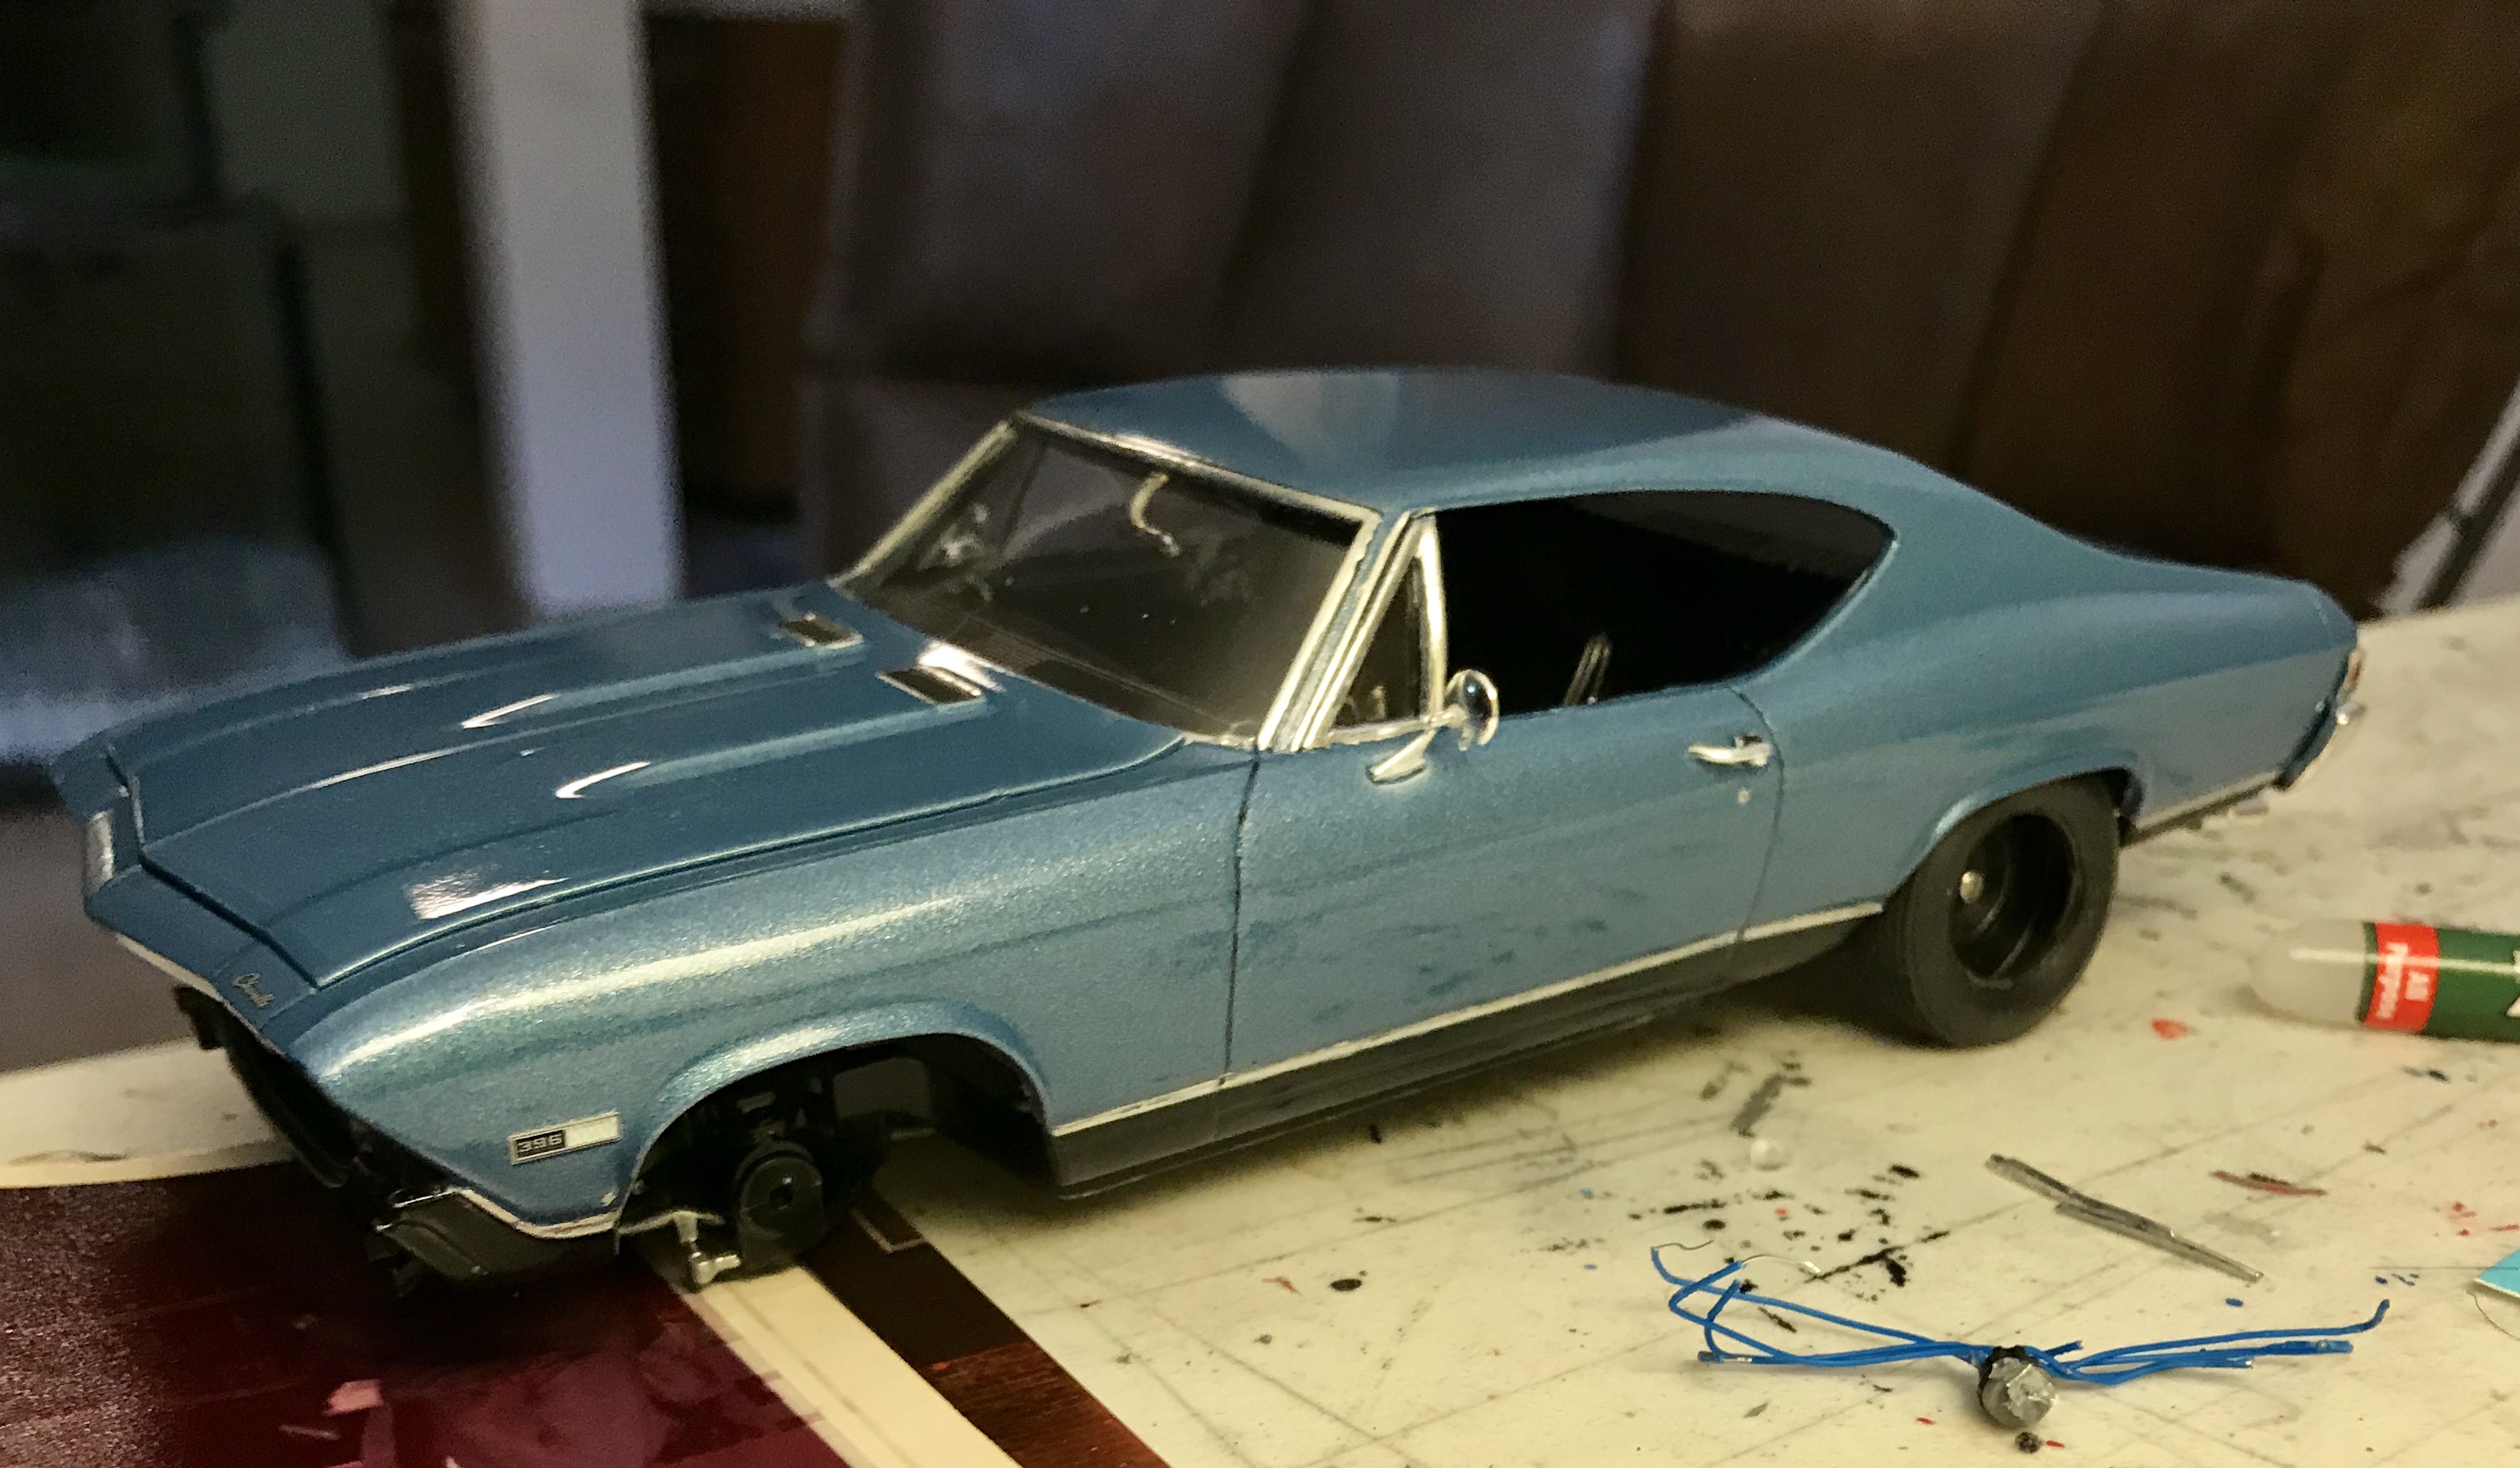
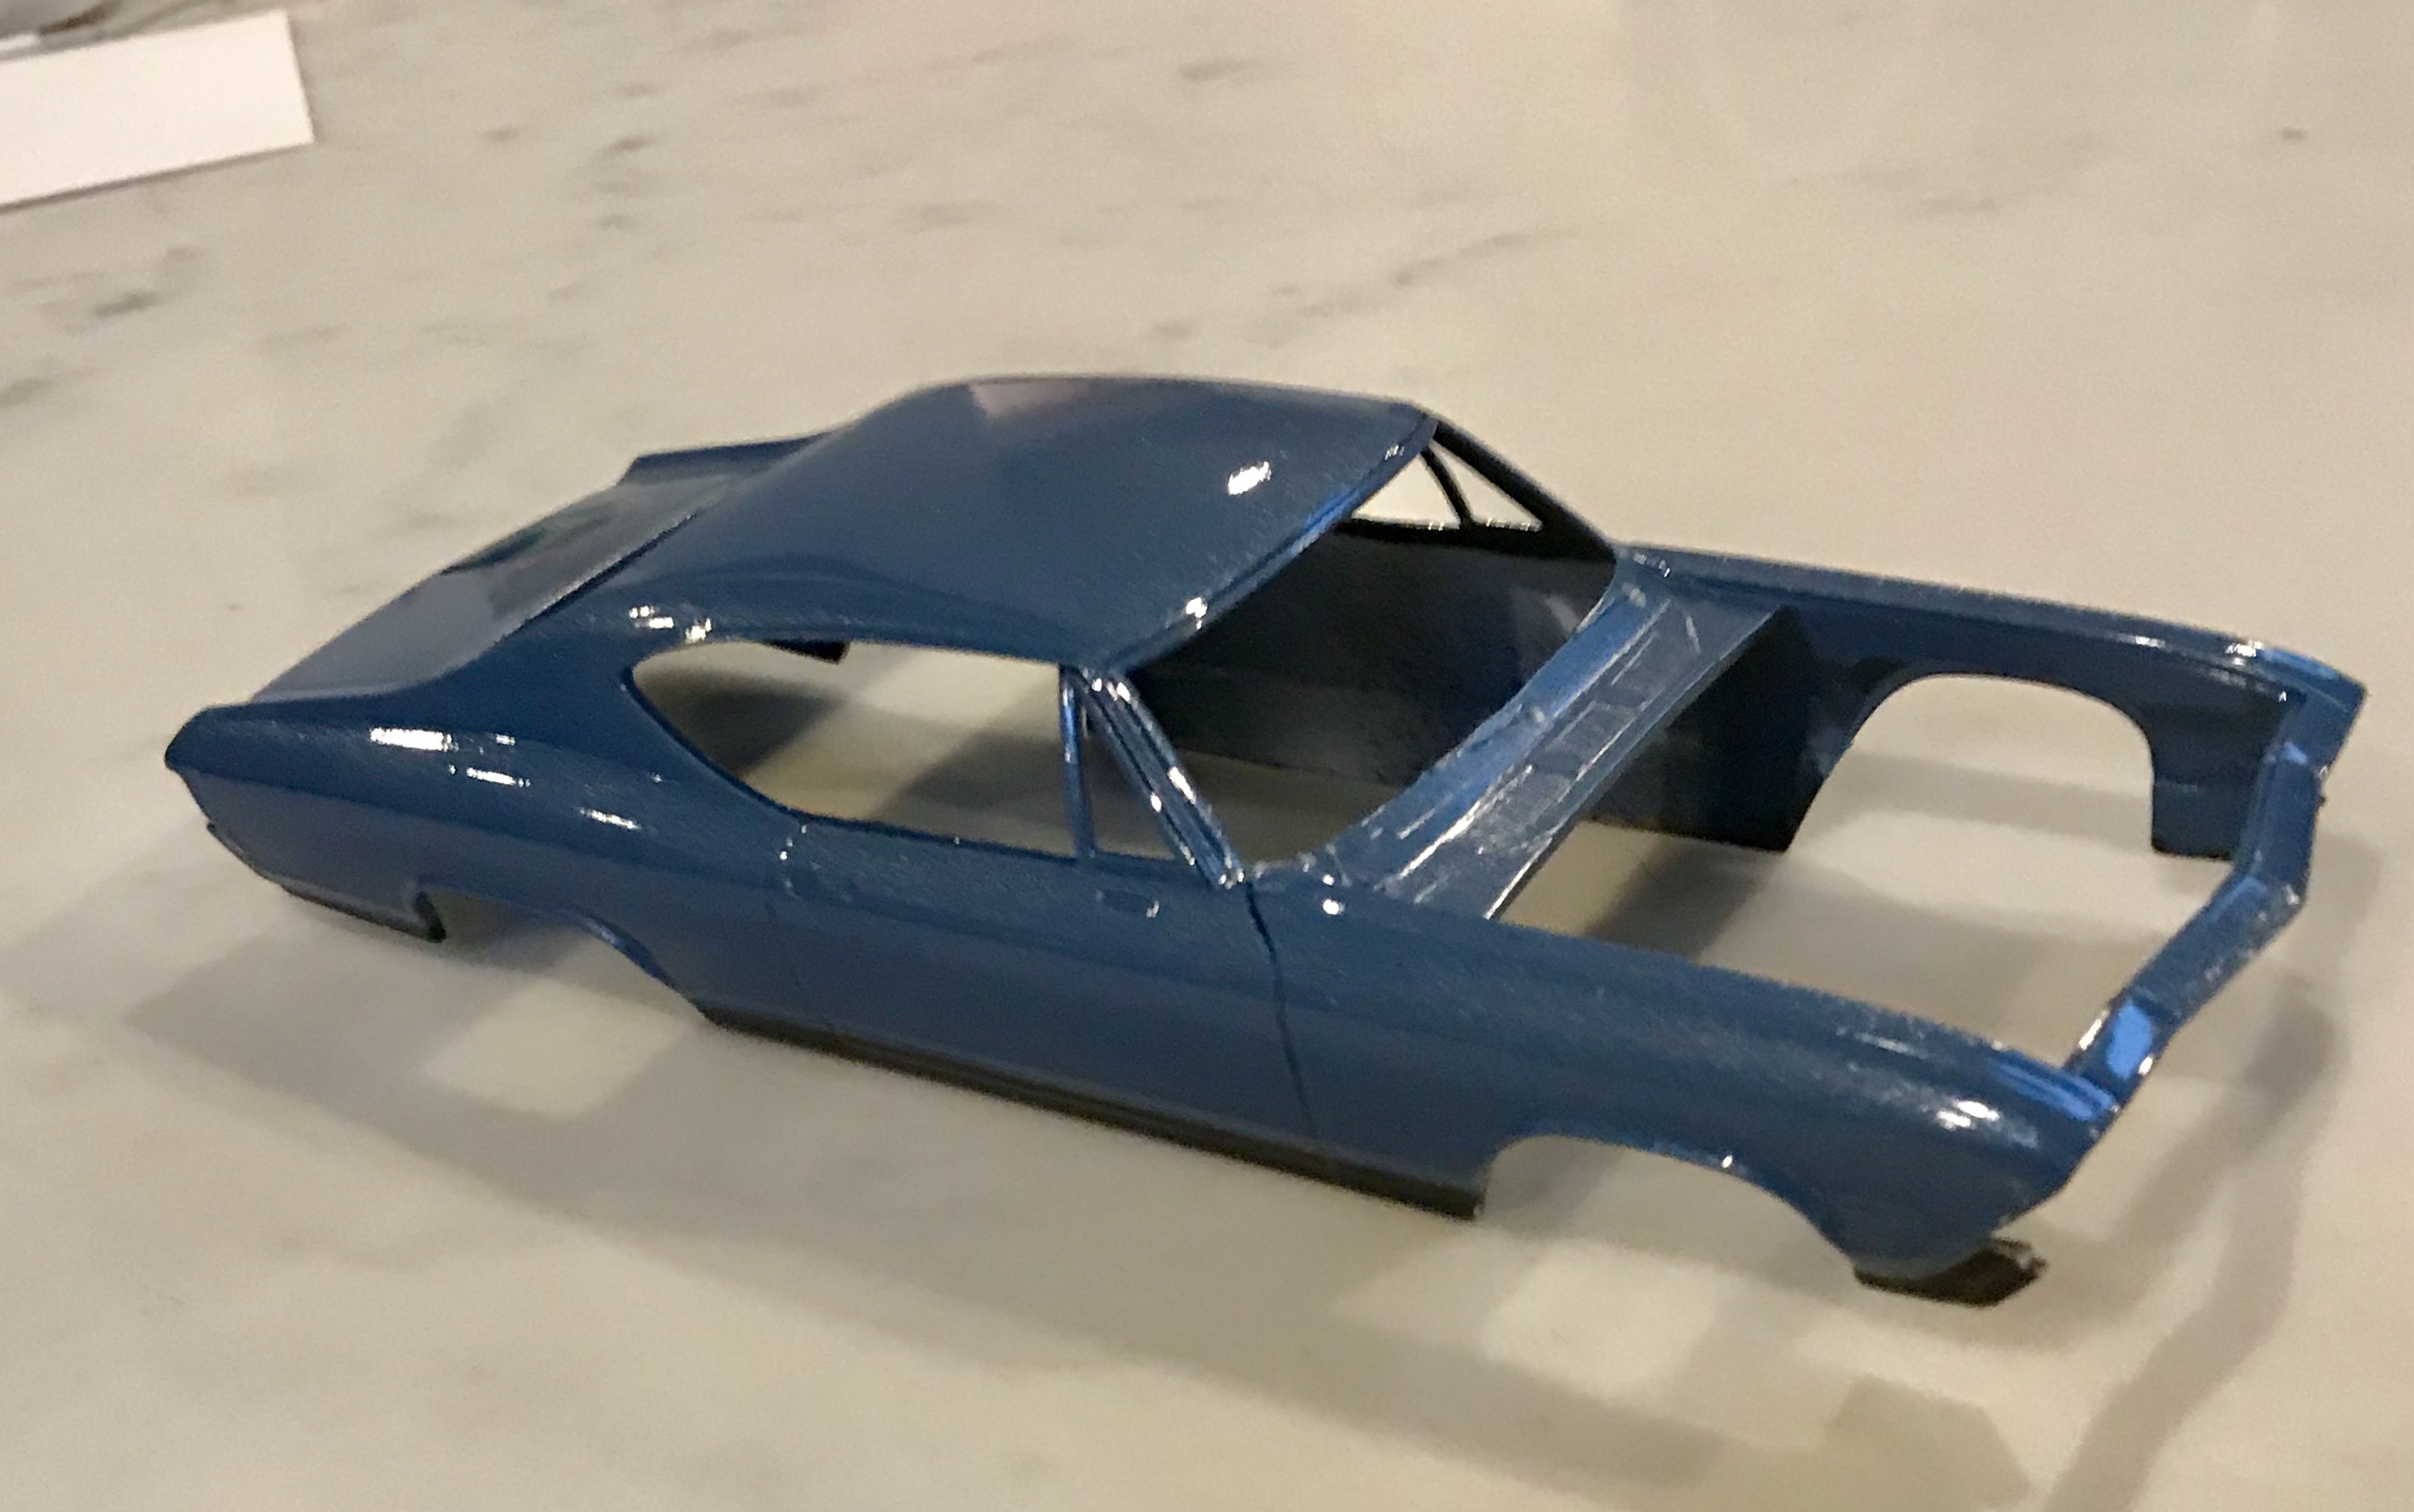
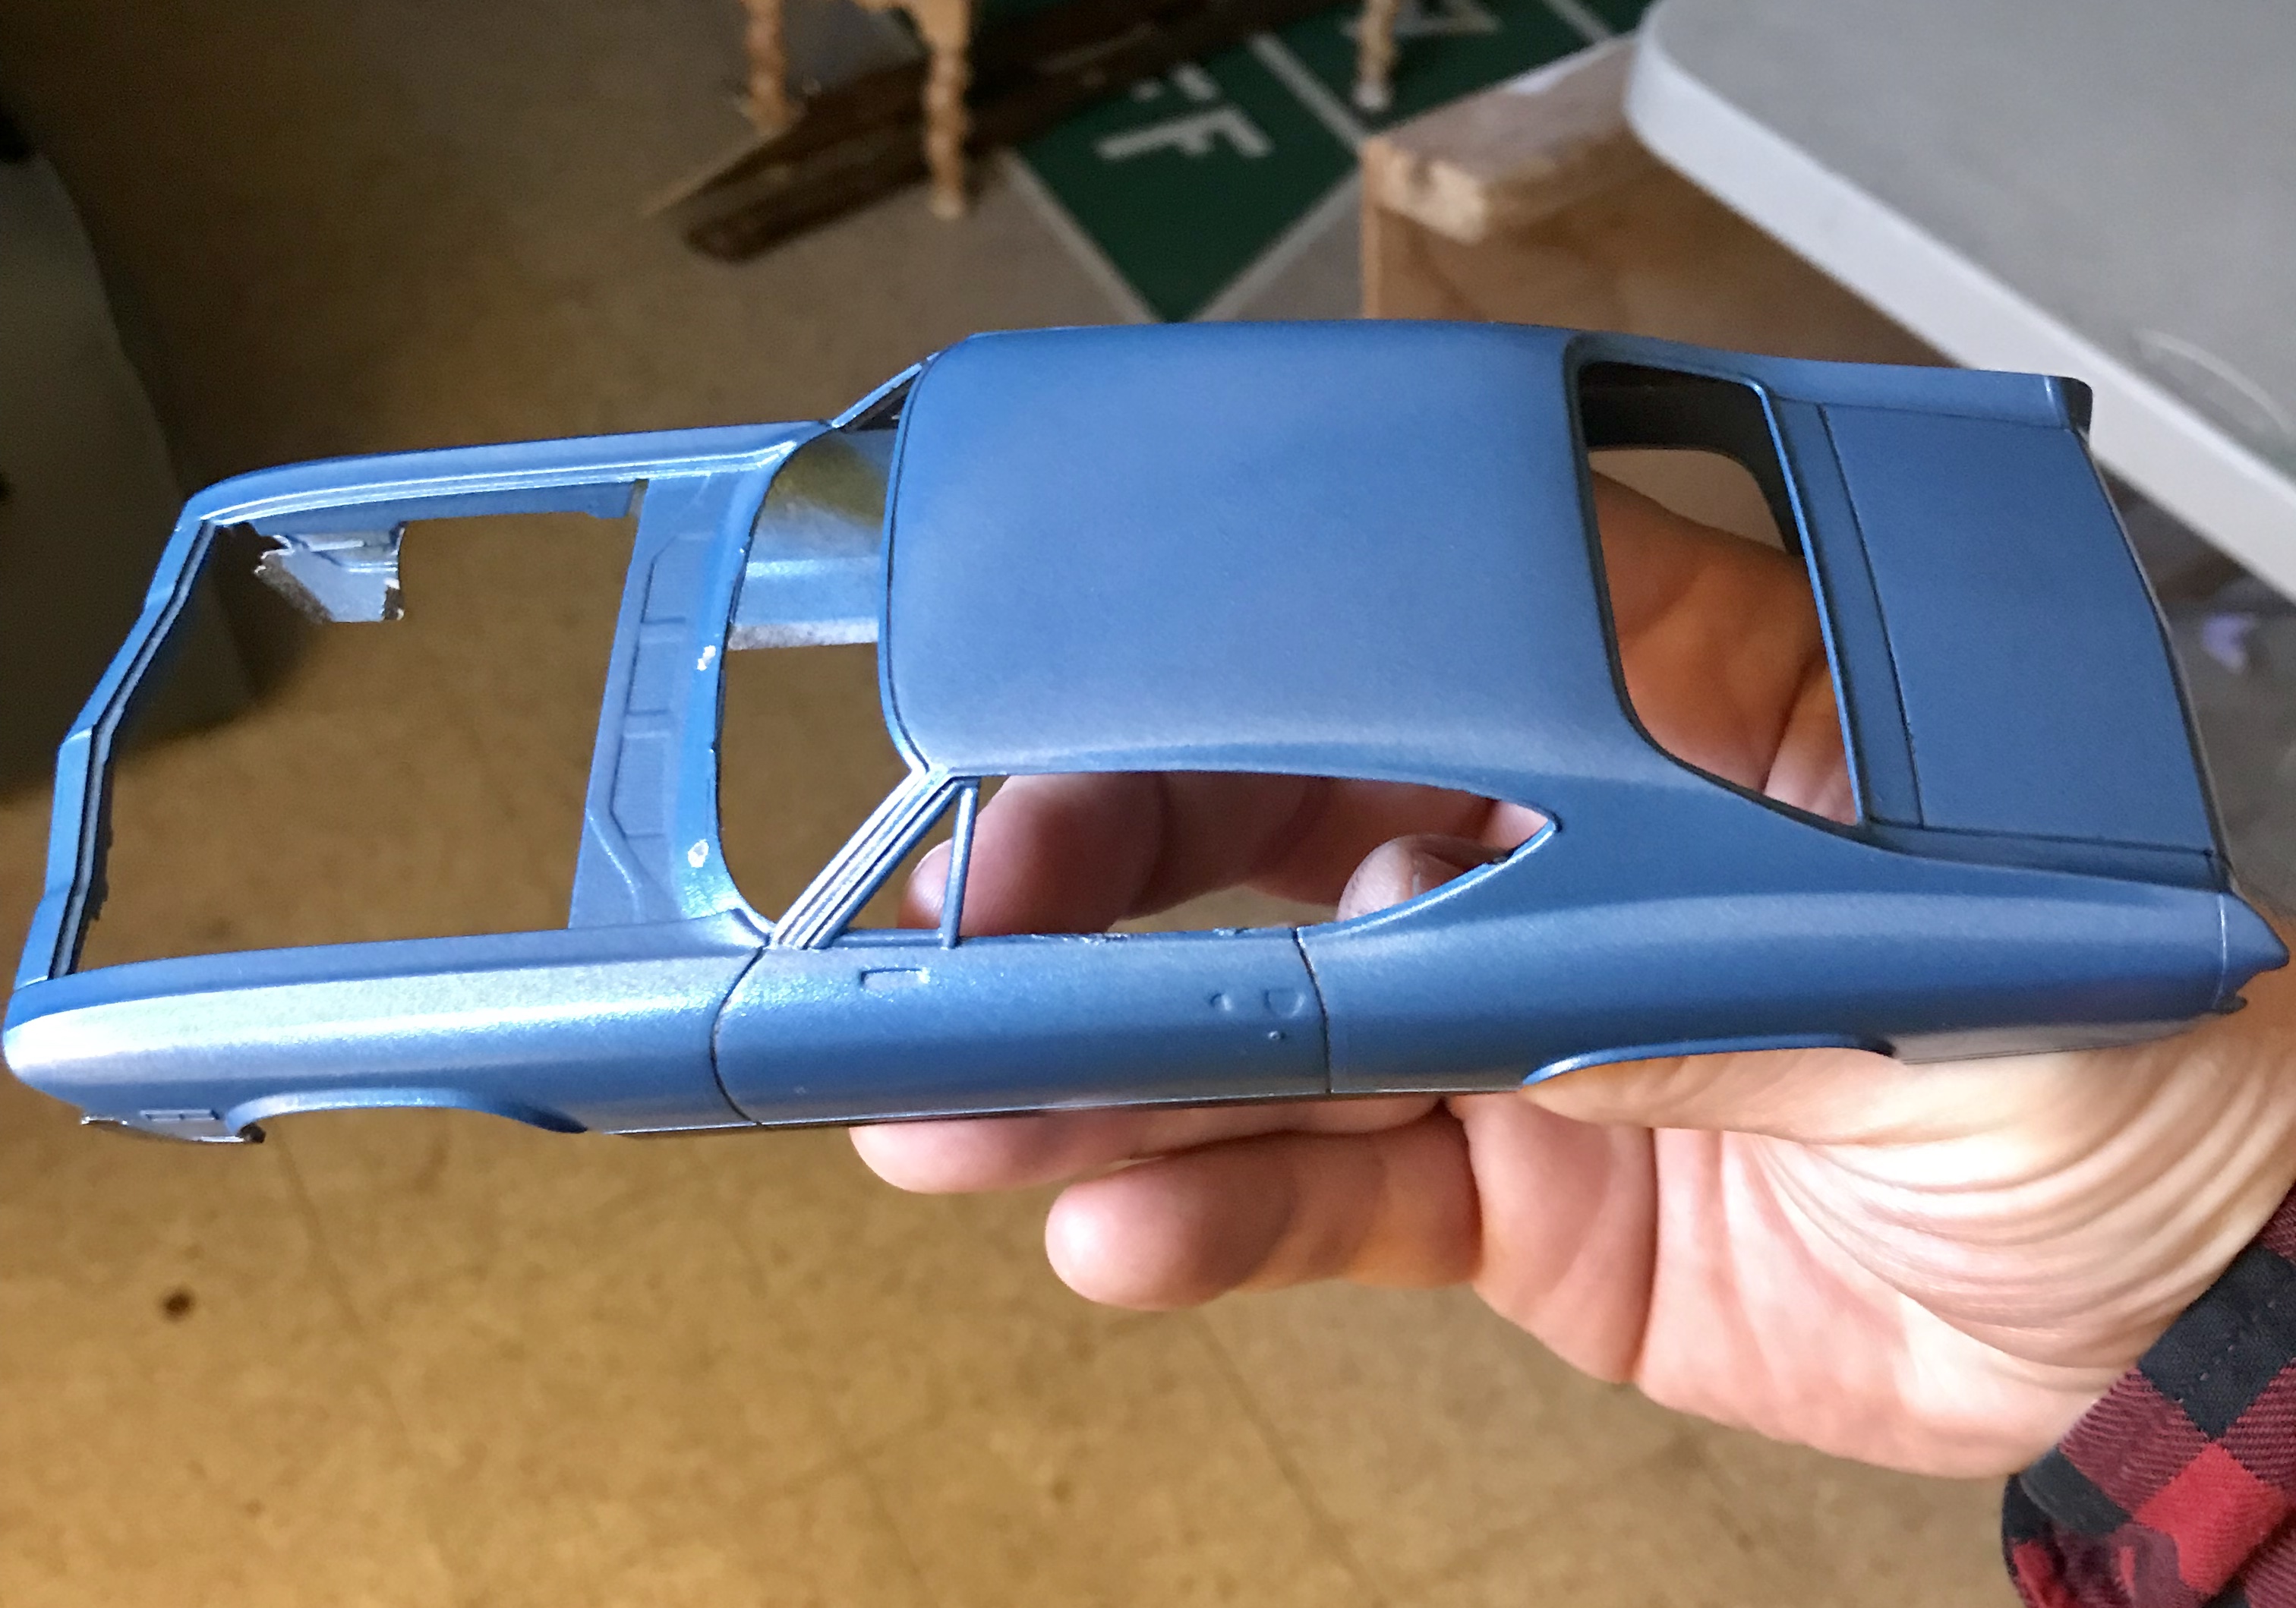
Made more progress today... got the body polished and waxed. I used some old Testors carpet material and laid it in the hood insulation spots, a detail no one will ever see. I also got my frame reset into the groove it was supposed to be in. With that fixed, I wanted to test my stance. I’m happy with it. It definitely looks better to me with the L Goodyears. I usually like to the Fs in front and Ls in the back, but I put the Fs on the front and they looked so small on this car. The Ls fill the wheel well nicely and don’t overwhelm anything. I’ll check again when I have everything together, but I think this is the way I’ll go. Also note how different the blue looks in different light. And one with the hood on: I painted the base of the windshield/firewall this afternoon, and got the front and rear windshield trine chromed. Once I finish the trim around the quarter windows, I will install the glass, mirrors, door handles, do the chrome body trim and final decals. The last thing I’ll do after everything else is done will be the side window trim so I have a place to handle the body while I’m still working. From this mock-up, I’m really happy with how this thing will look when finished.
-
I will. I noticed one error to correct last night. The frame didn’t snap into the underside at the left front, so a test fitting had the frame hanging well below the body. No big deal, but I used crazy glue to lock it in place... it won’t be fun or easy to break it apart and then get it to sink back down on the redo.
-
Sweet!!!! We have similar thought processes. Mine is just waiting on some steelies and dog dishes I ordered....
-
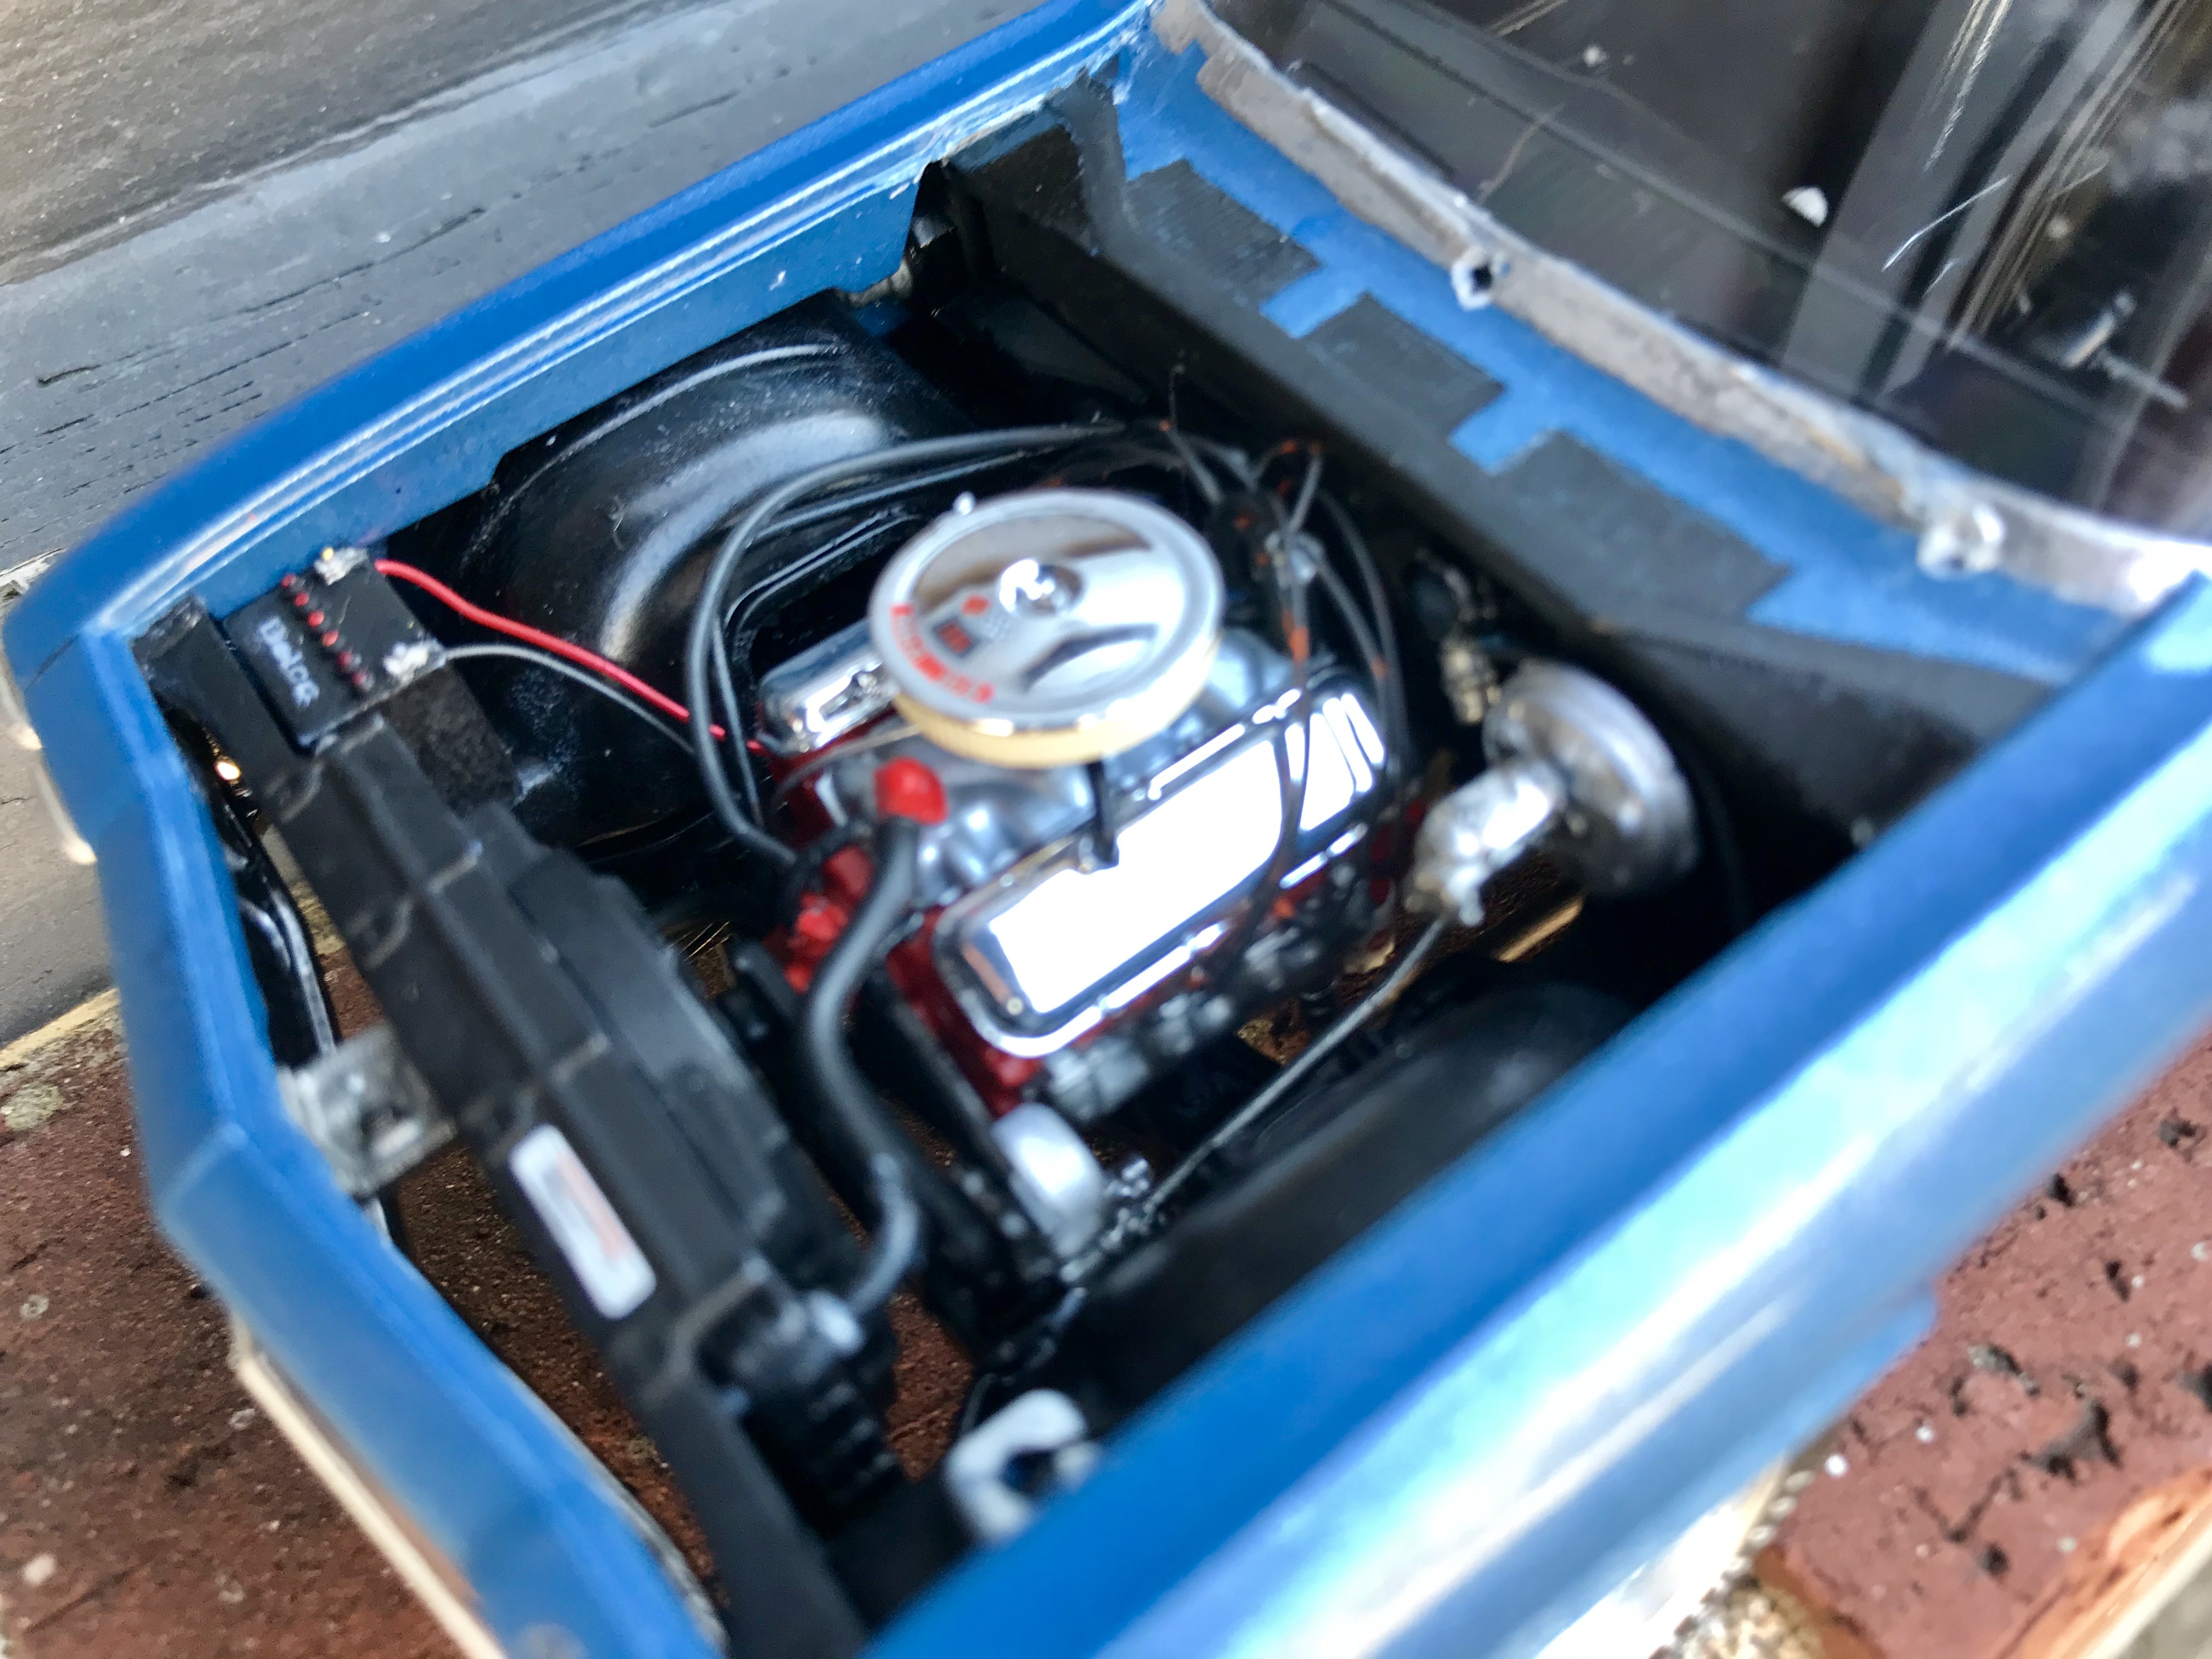
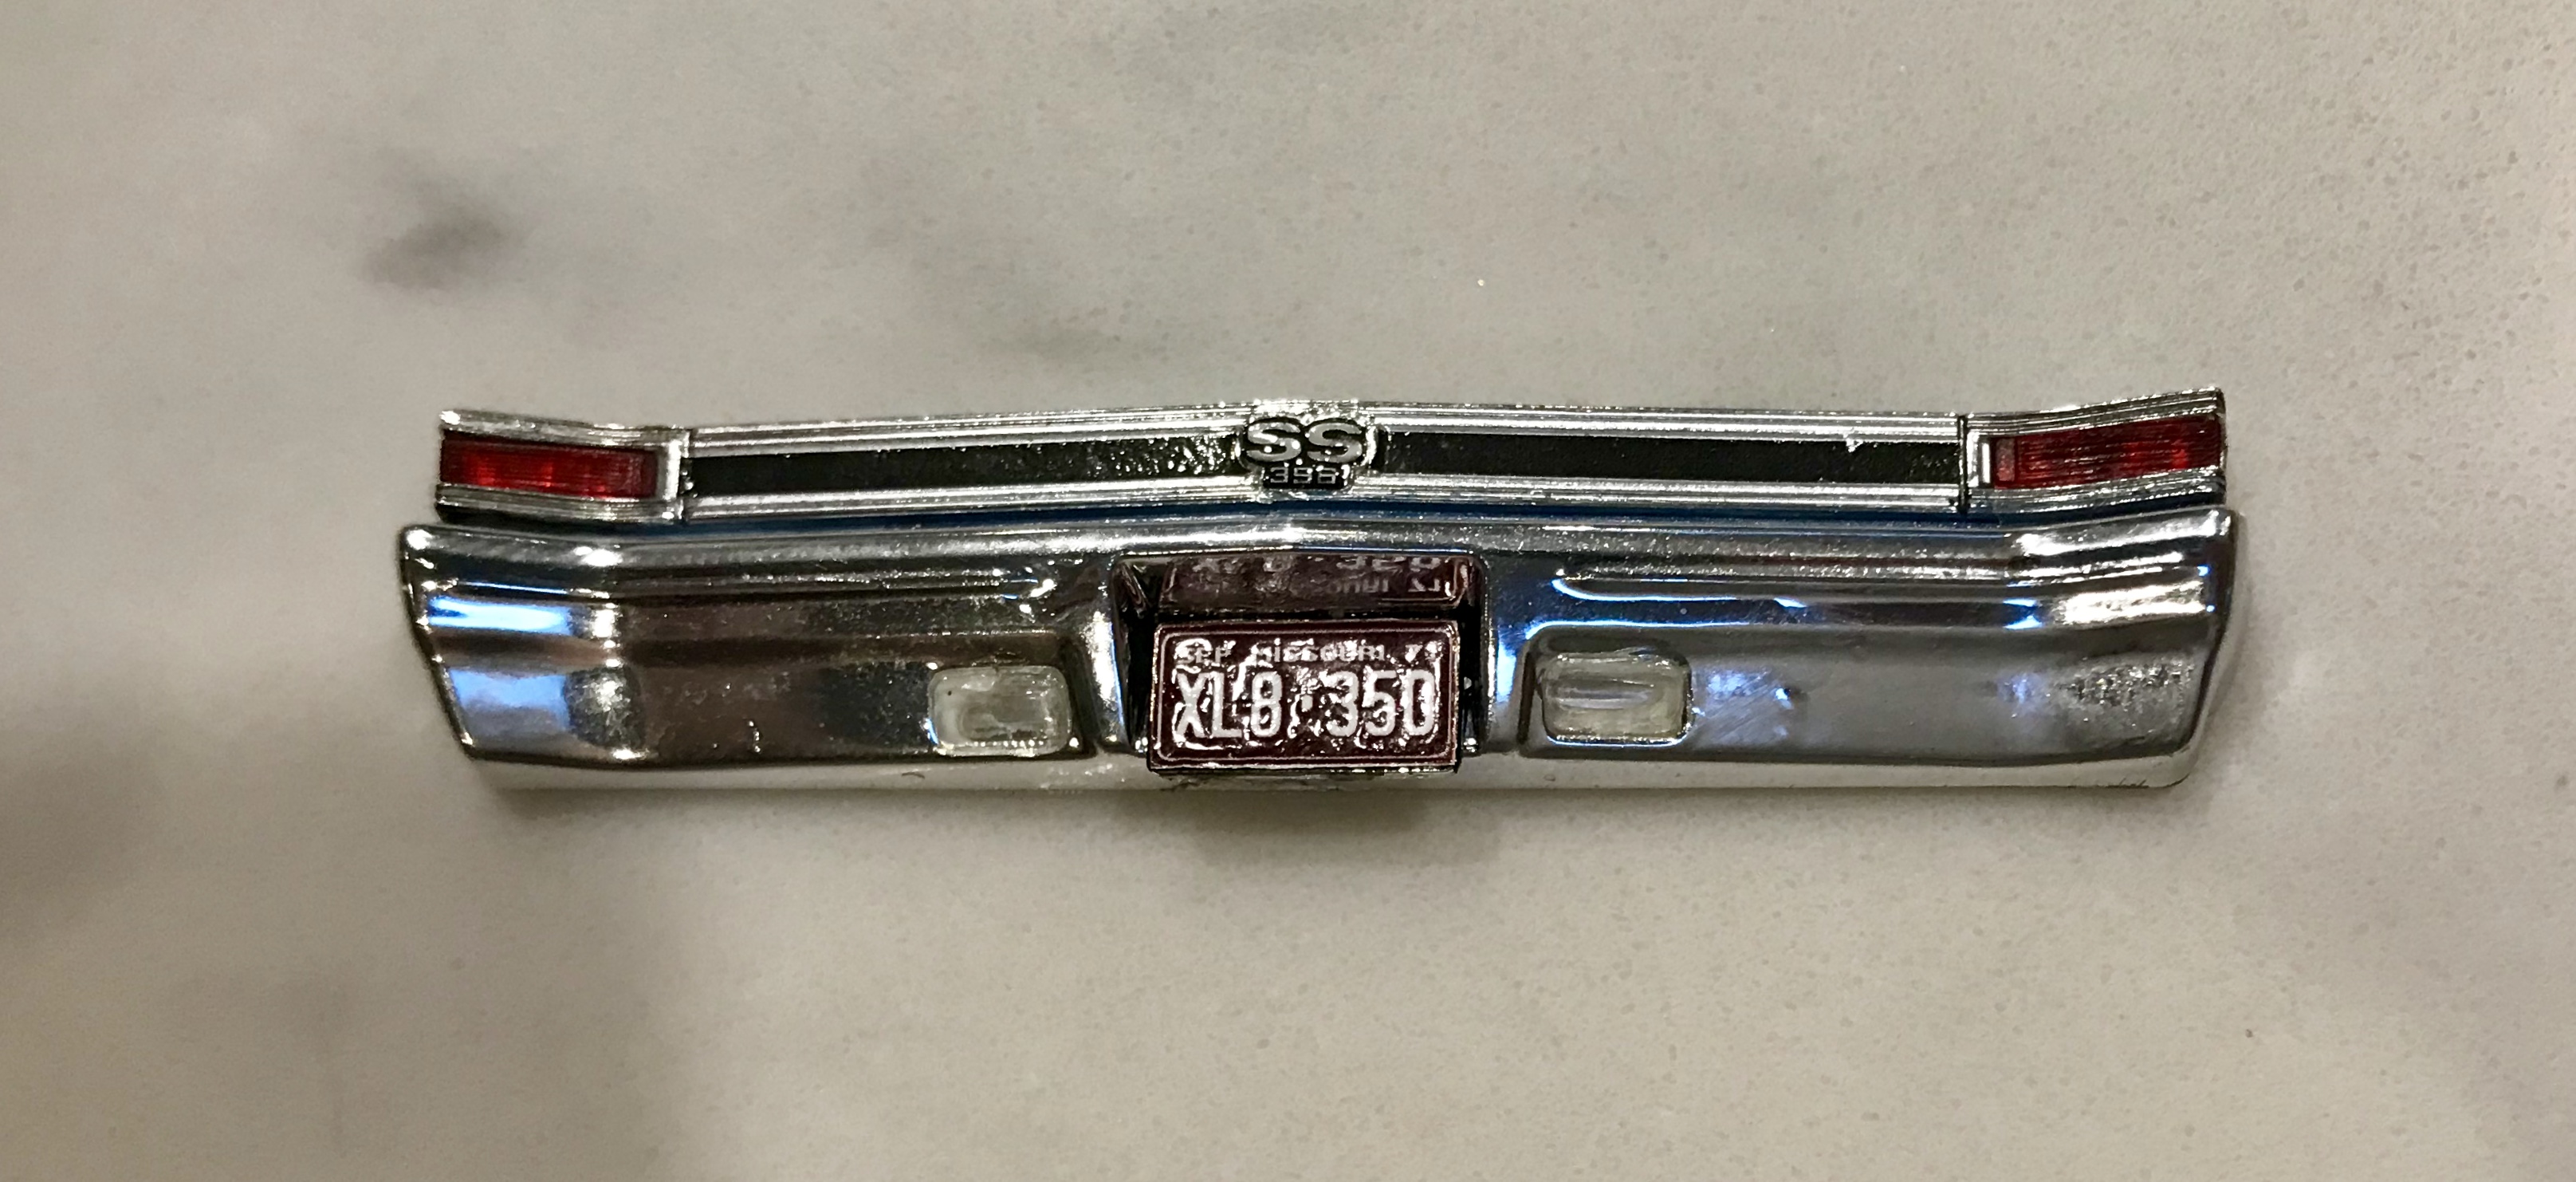
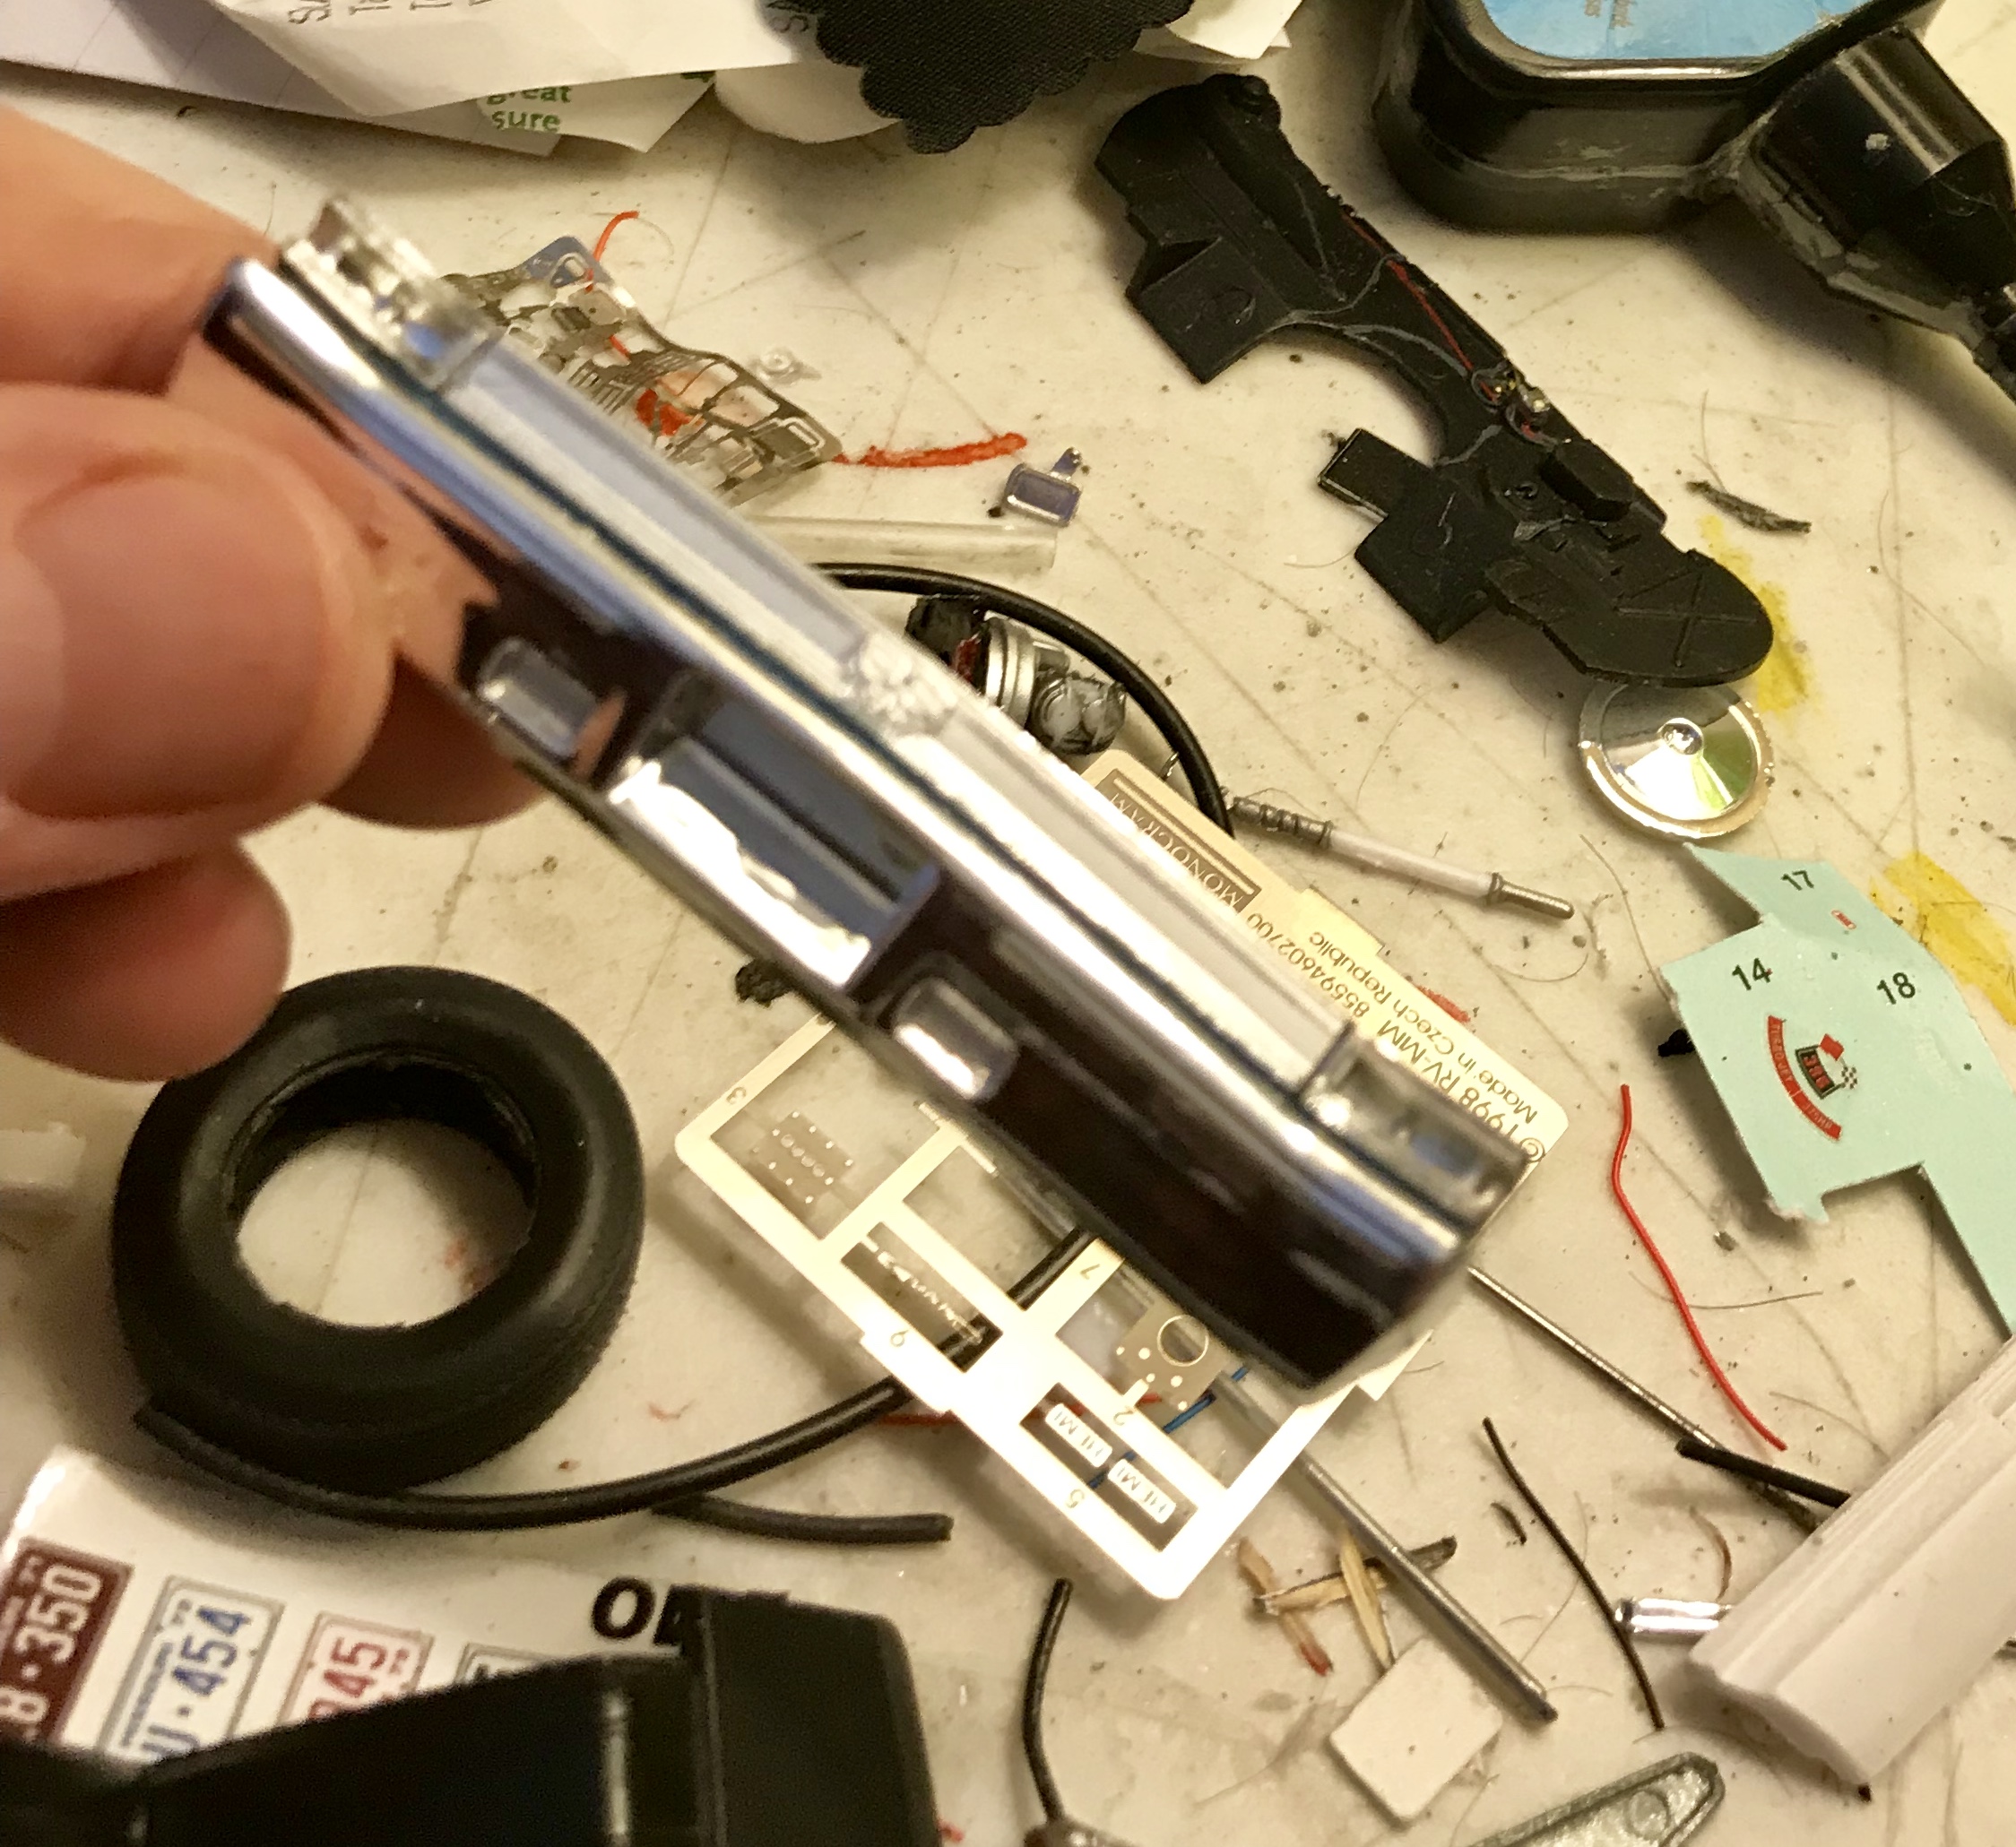
This is starting to come together. Over the last two days, I got the body clear coated. I haven’t polished yet, but that will happen later today. I got the seat trim figured out. I was going to buy some wire, and I also had some .07 styrene strips that I could possibly use, but the curves and bends are pretty complex; I was worried about anything being able to adhere all the way around the seat. Working with the styrene, it cracked and broke twice. I didn’t want to end up with glue all over the seats and still not have the trim on, so in the end, I just did the trim freehand with my 1 mm Molotow pen, doing a little section at a time. It’s not perfect, but it’s there, at least. I got my battery painted and wired, and finally joined the frame to the underbody. I finished my engine compartment detailing, including making heater hoses and running a wire from the washer bottle to the wiper motor. I also installed lights, emblems and the rear black panel decals, attached the license plate frames and found some Missouri plates to put on, as I’m in St. Louis. What’s left? After polishing, painting body details, installing the glass and dome light, and final assembly. It’s fitting together perfectly so far, and has been a blast. I did order the bare rally wheels... have to wait for them to arrive to finish up, but I’m loving this kit. Progress pics: Seat trim Rear bumper Cleared body Engine compartment Getting really close now... I’ll get the rest done and then wait for the wheels to show up.
-
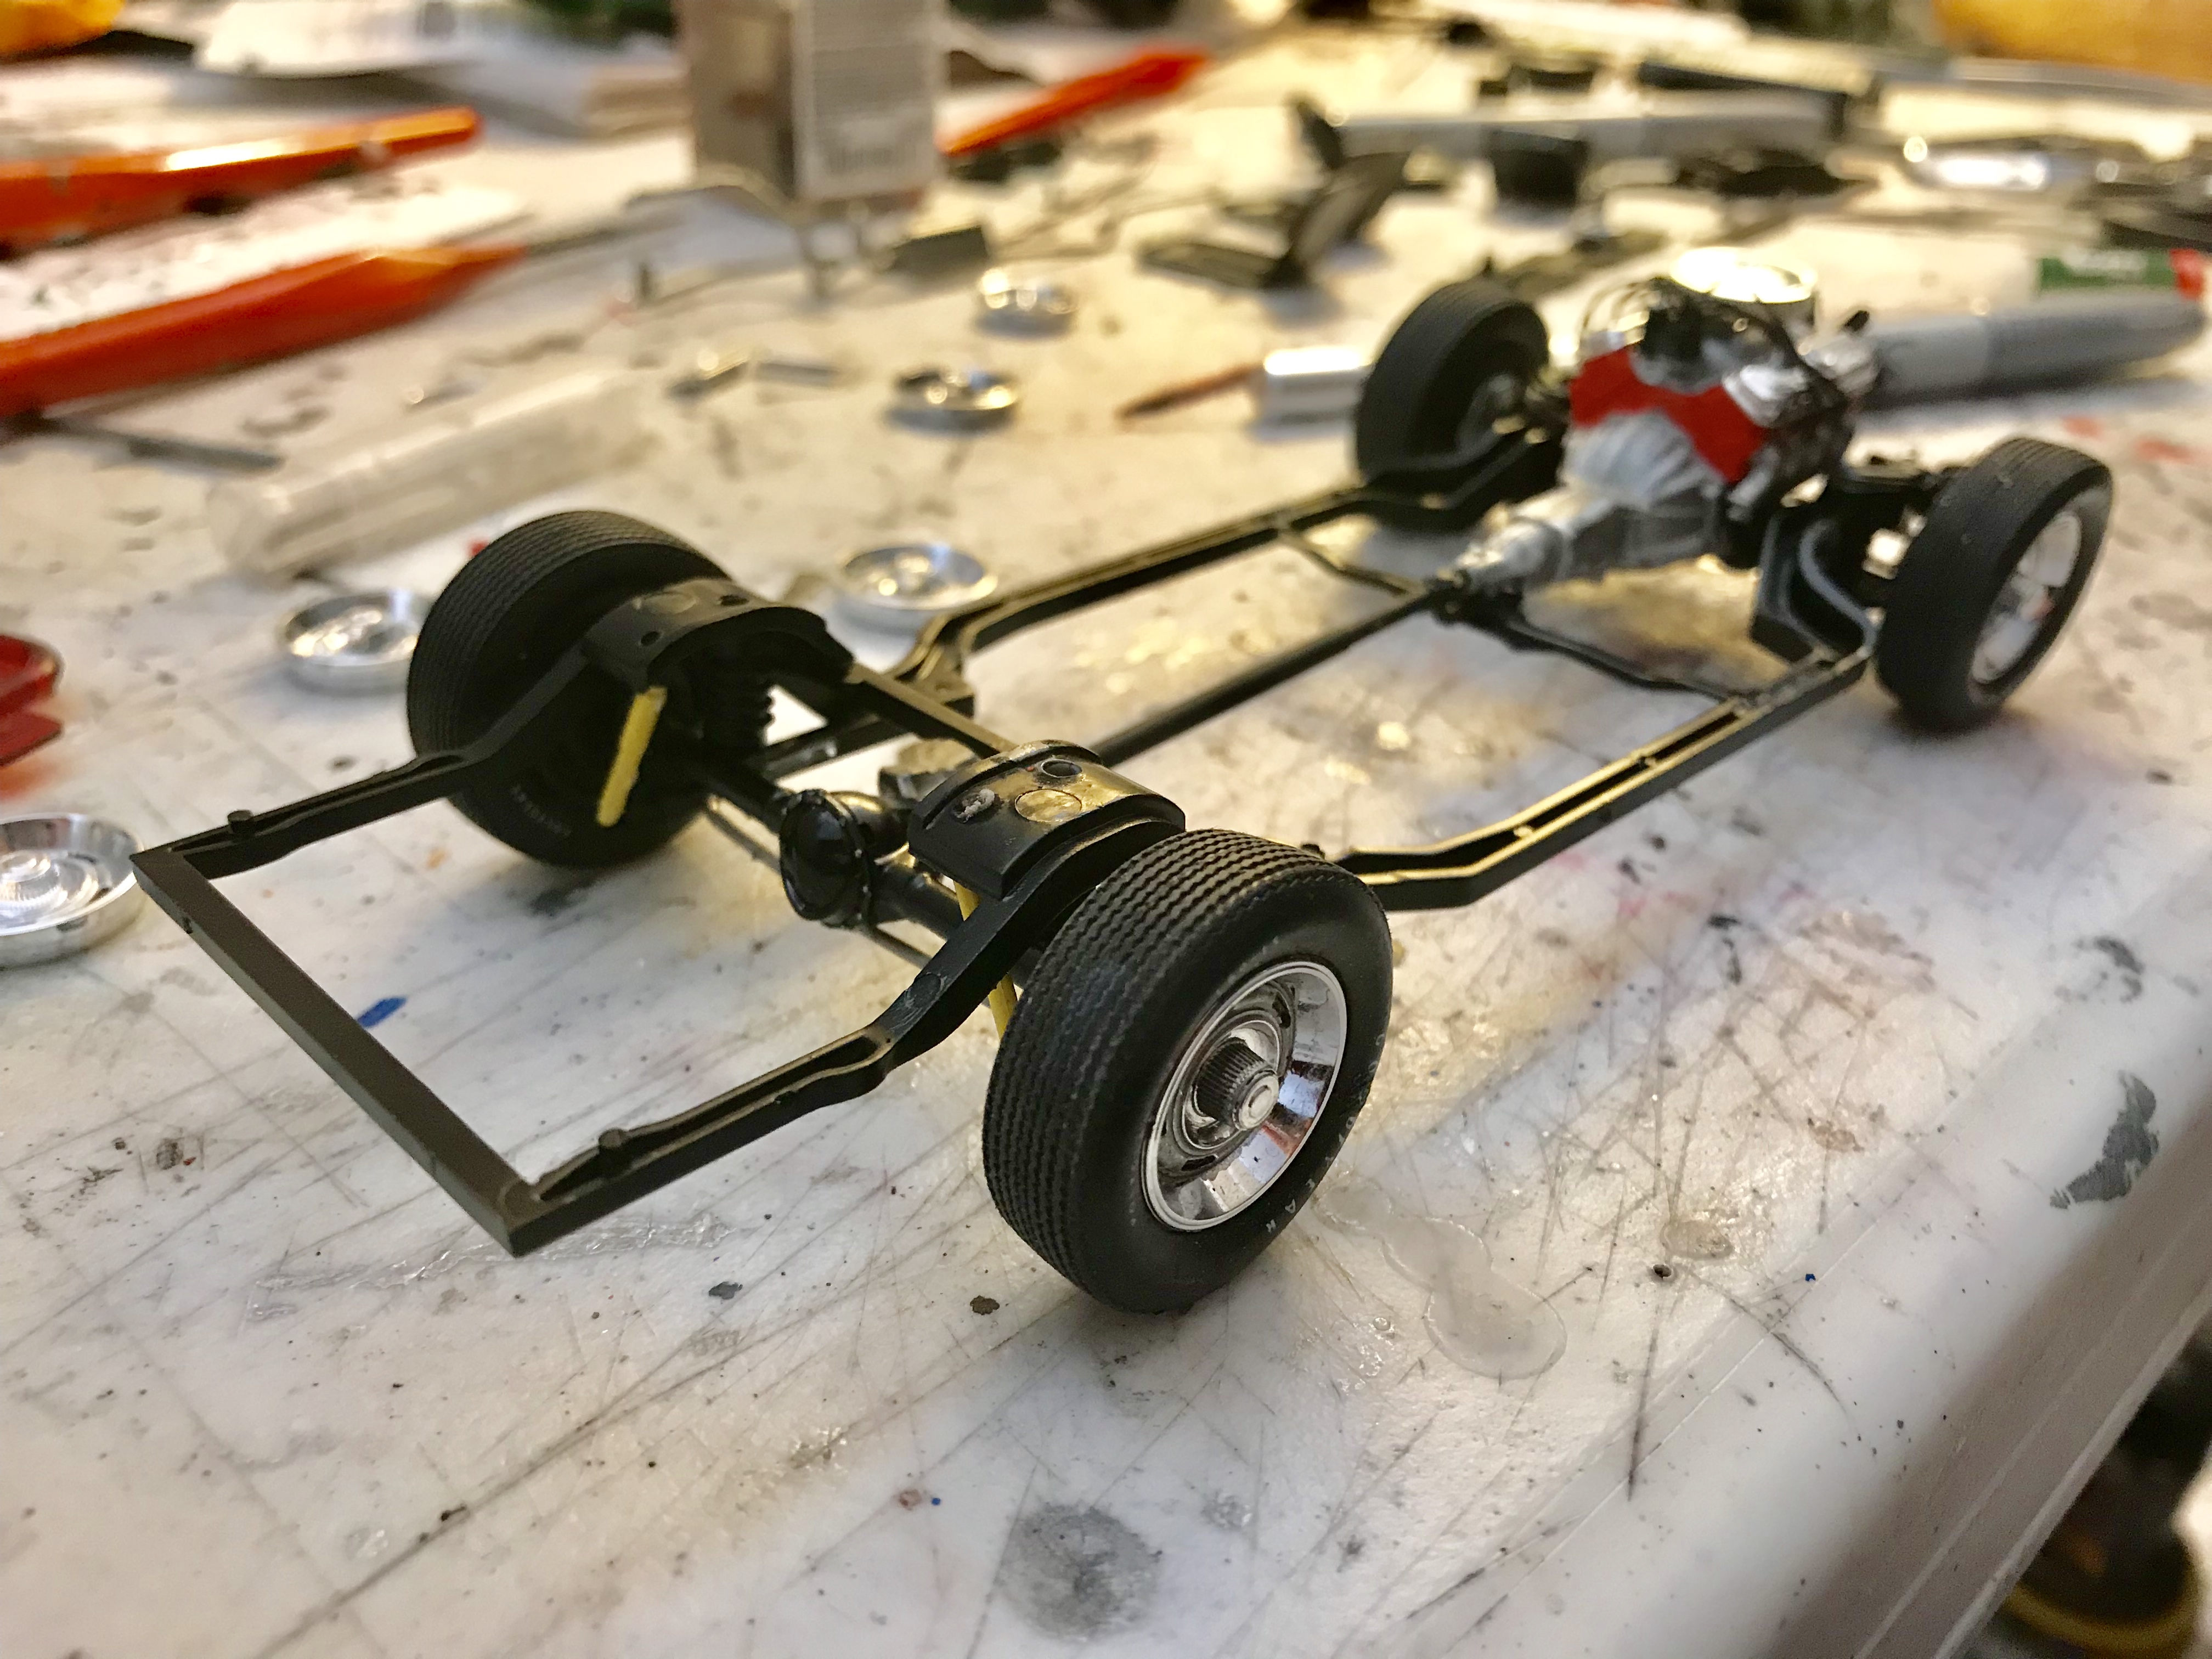
OK, a little more progress today. My chassis is pretty much done. Wheels are just setting on for the moment. I did attach the radiator after this pic. Then I worked on my rear bumper.. sprayed a little of the body color into the cap of the spray can, and used a detail brush to fill in the recessed panel in between the taillight panel and the bumper. I already hit the taillight panel with dull coat, but looking at reference pictures, it seemed that the taillight trim had the tiny gaps between the chrome ribs filled in black, but the trim across the trunk didn’t. I used a little black wash and did that. Sorry for the bad pic... it’s really hard to see. Finally, I took the rest of the black wash and filled in panel lines. I have a few other little details I’ll mess with over the weekend... the battery, painting the washer bottle.... and this week I’ll start clear coating the body and move into final stages..
-
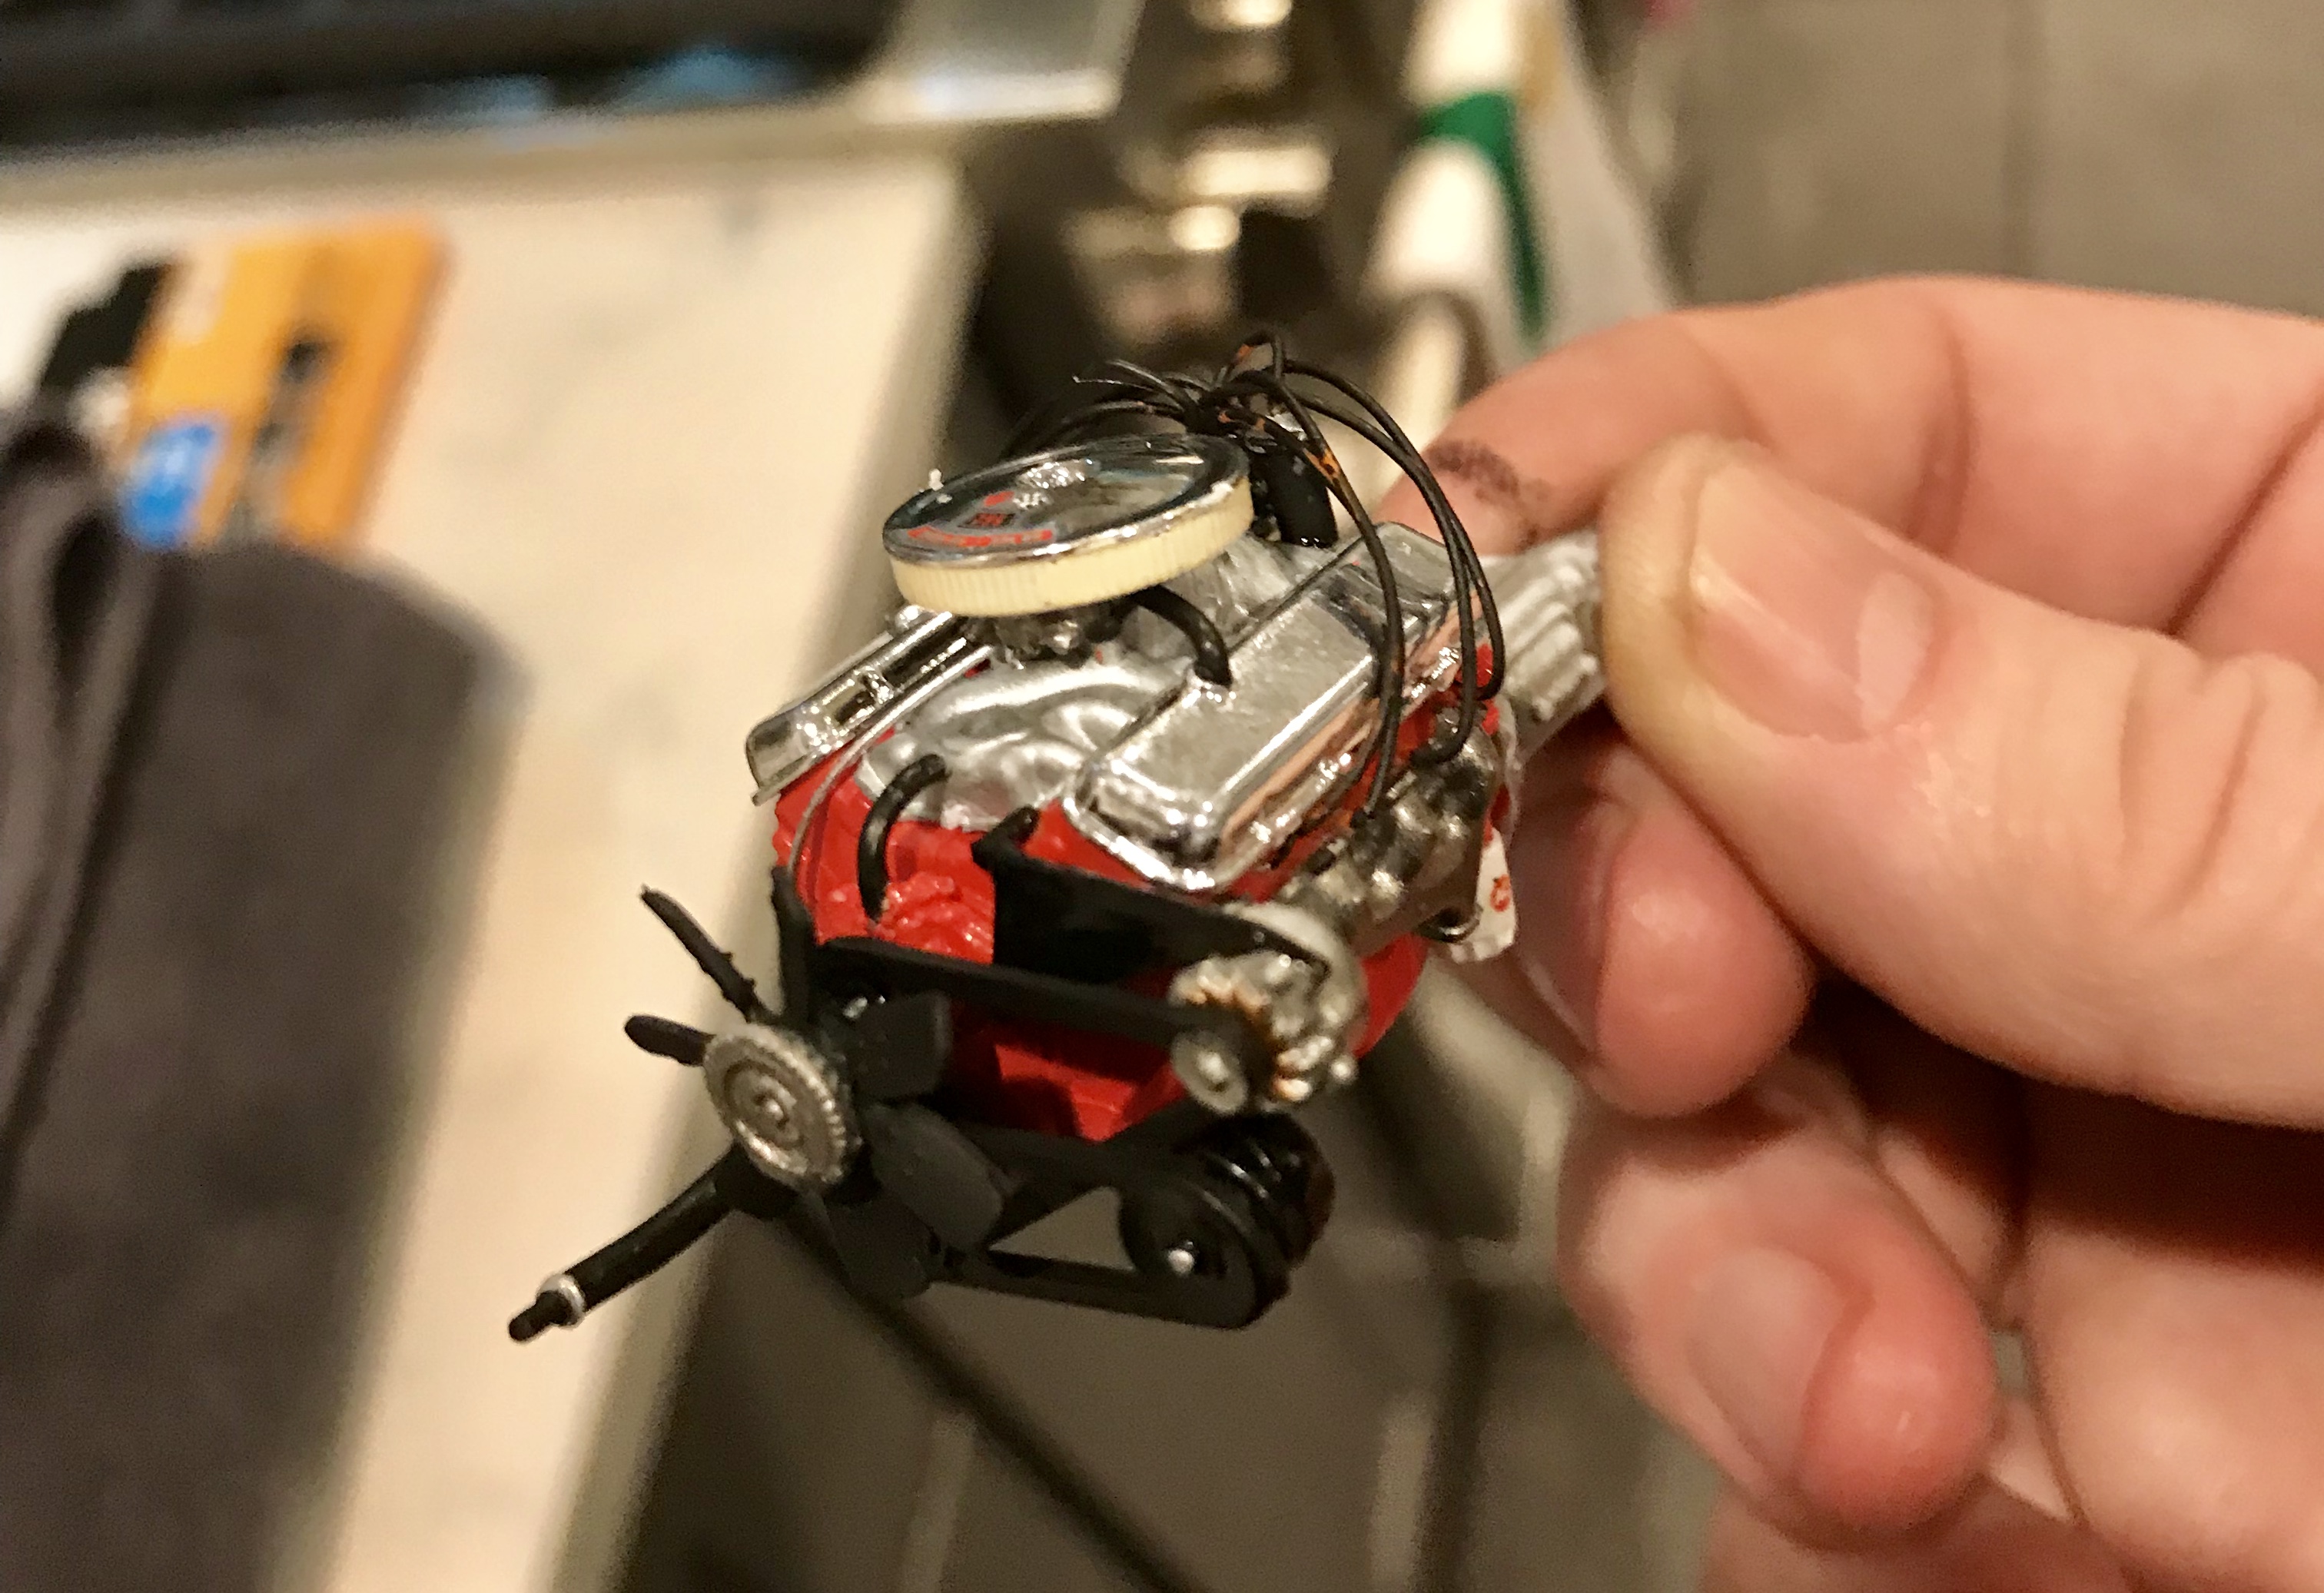
Hmmm.... that’s a great idea. I don’t know if I have or can find wire that is the right size and flexibility, but I’ll look into it now. Still progressing... I have finished my engine. This one is nicely done... it has the alternator bracket (and the alternator isn’t chrome... YES!!!), everything goes together perfectly, and it comes with the decal for the oil filter, so it passes all of my Revell tests. I added spark plug wires, a few hoses and a throttle cable for realism. One tiny nitpick with the engine is that the little hose/tube that runs from the front of the intake manifold to the water pump (bypass hose, I believe) isn’t molded in, and I’ve had it on a couple Revell kits. But, I added it myself. Tomorrow I’d like to assemble the suspension and get the frame together... it’s been a really enjoyable build, and we are starting into the home stretch.
-
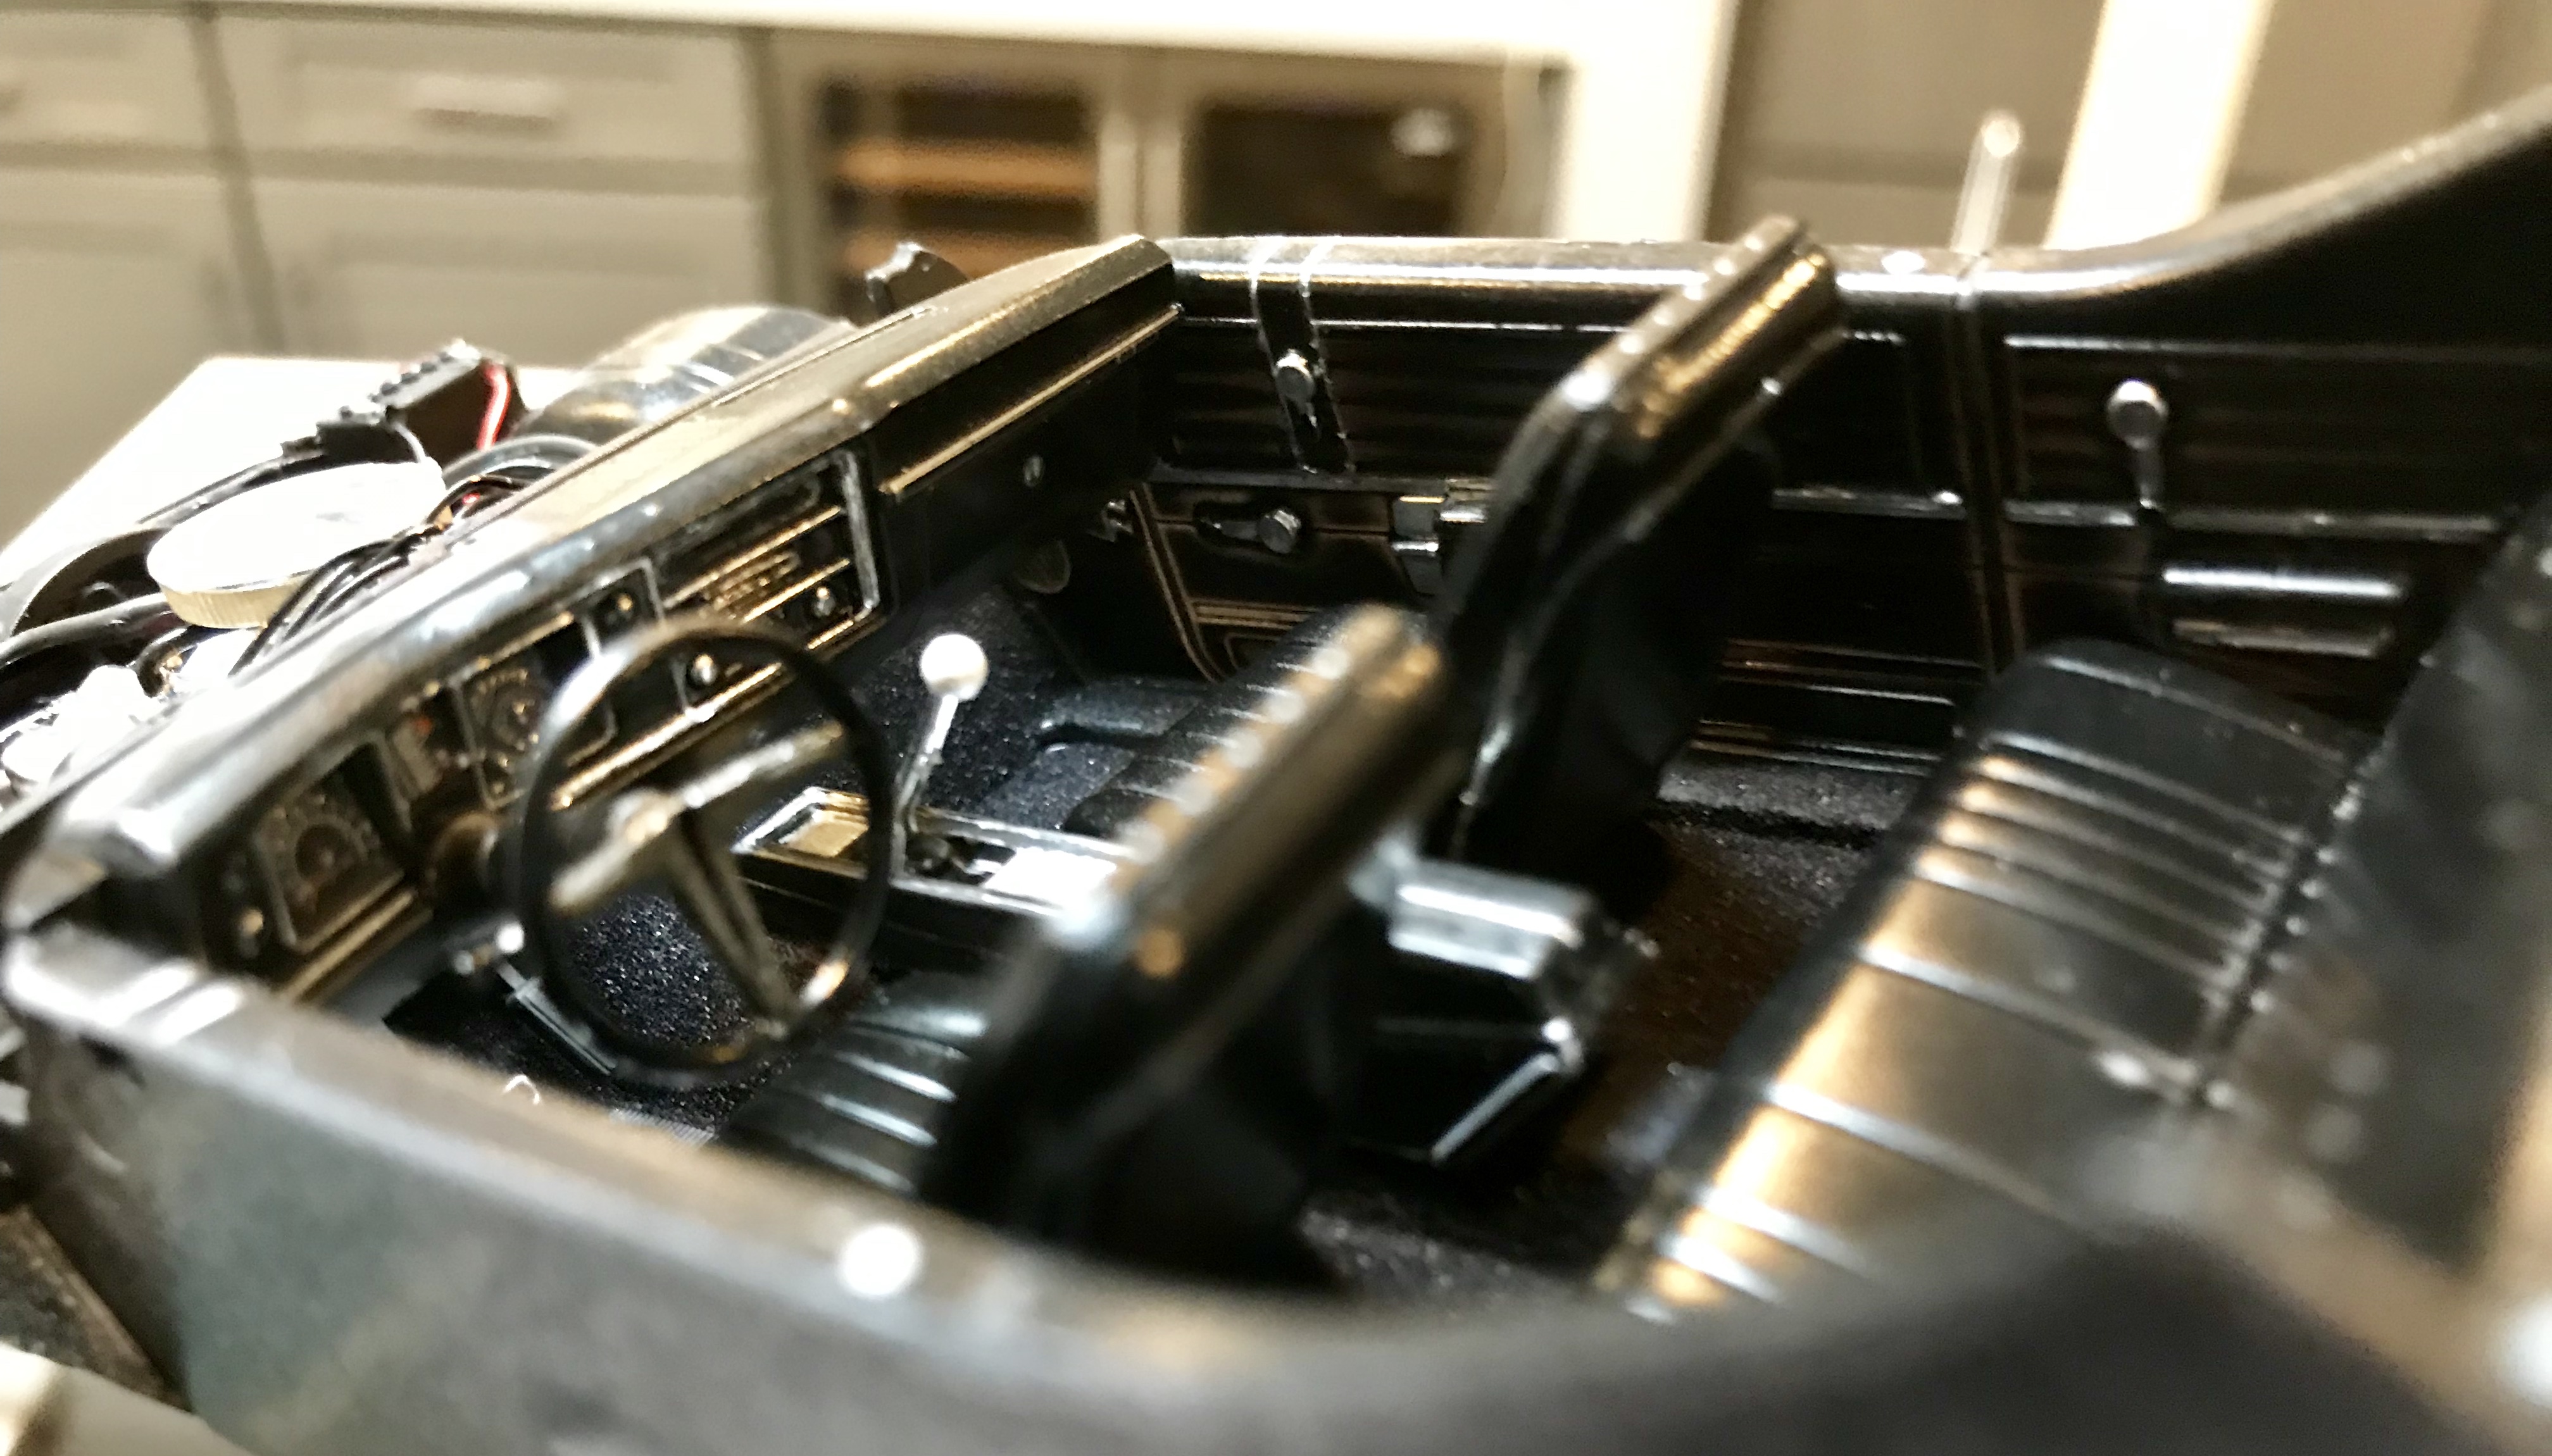
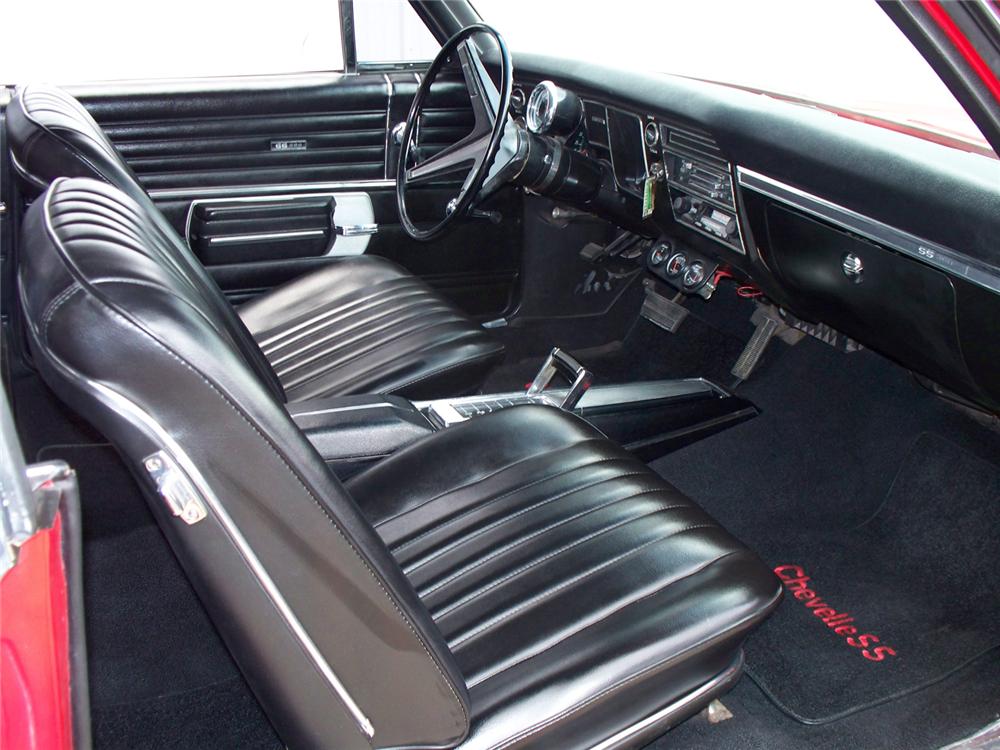
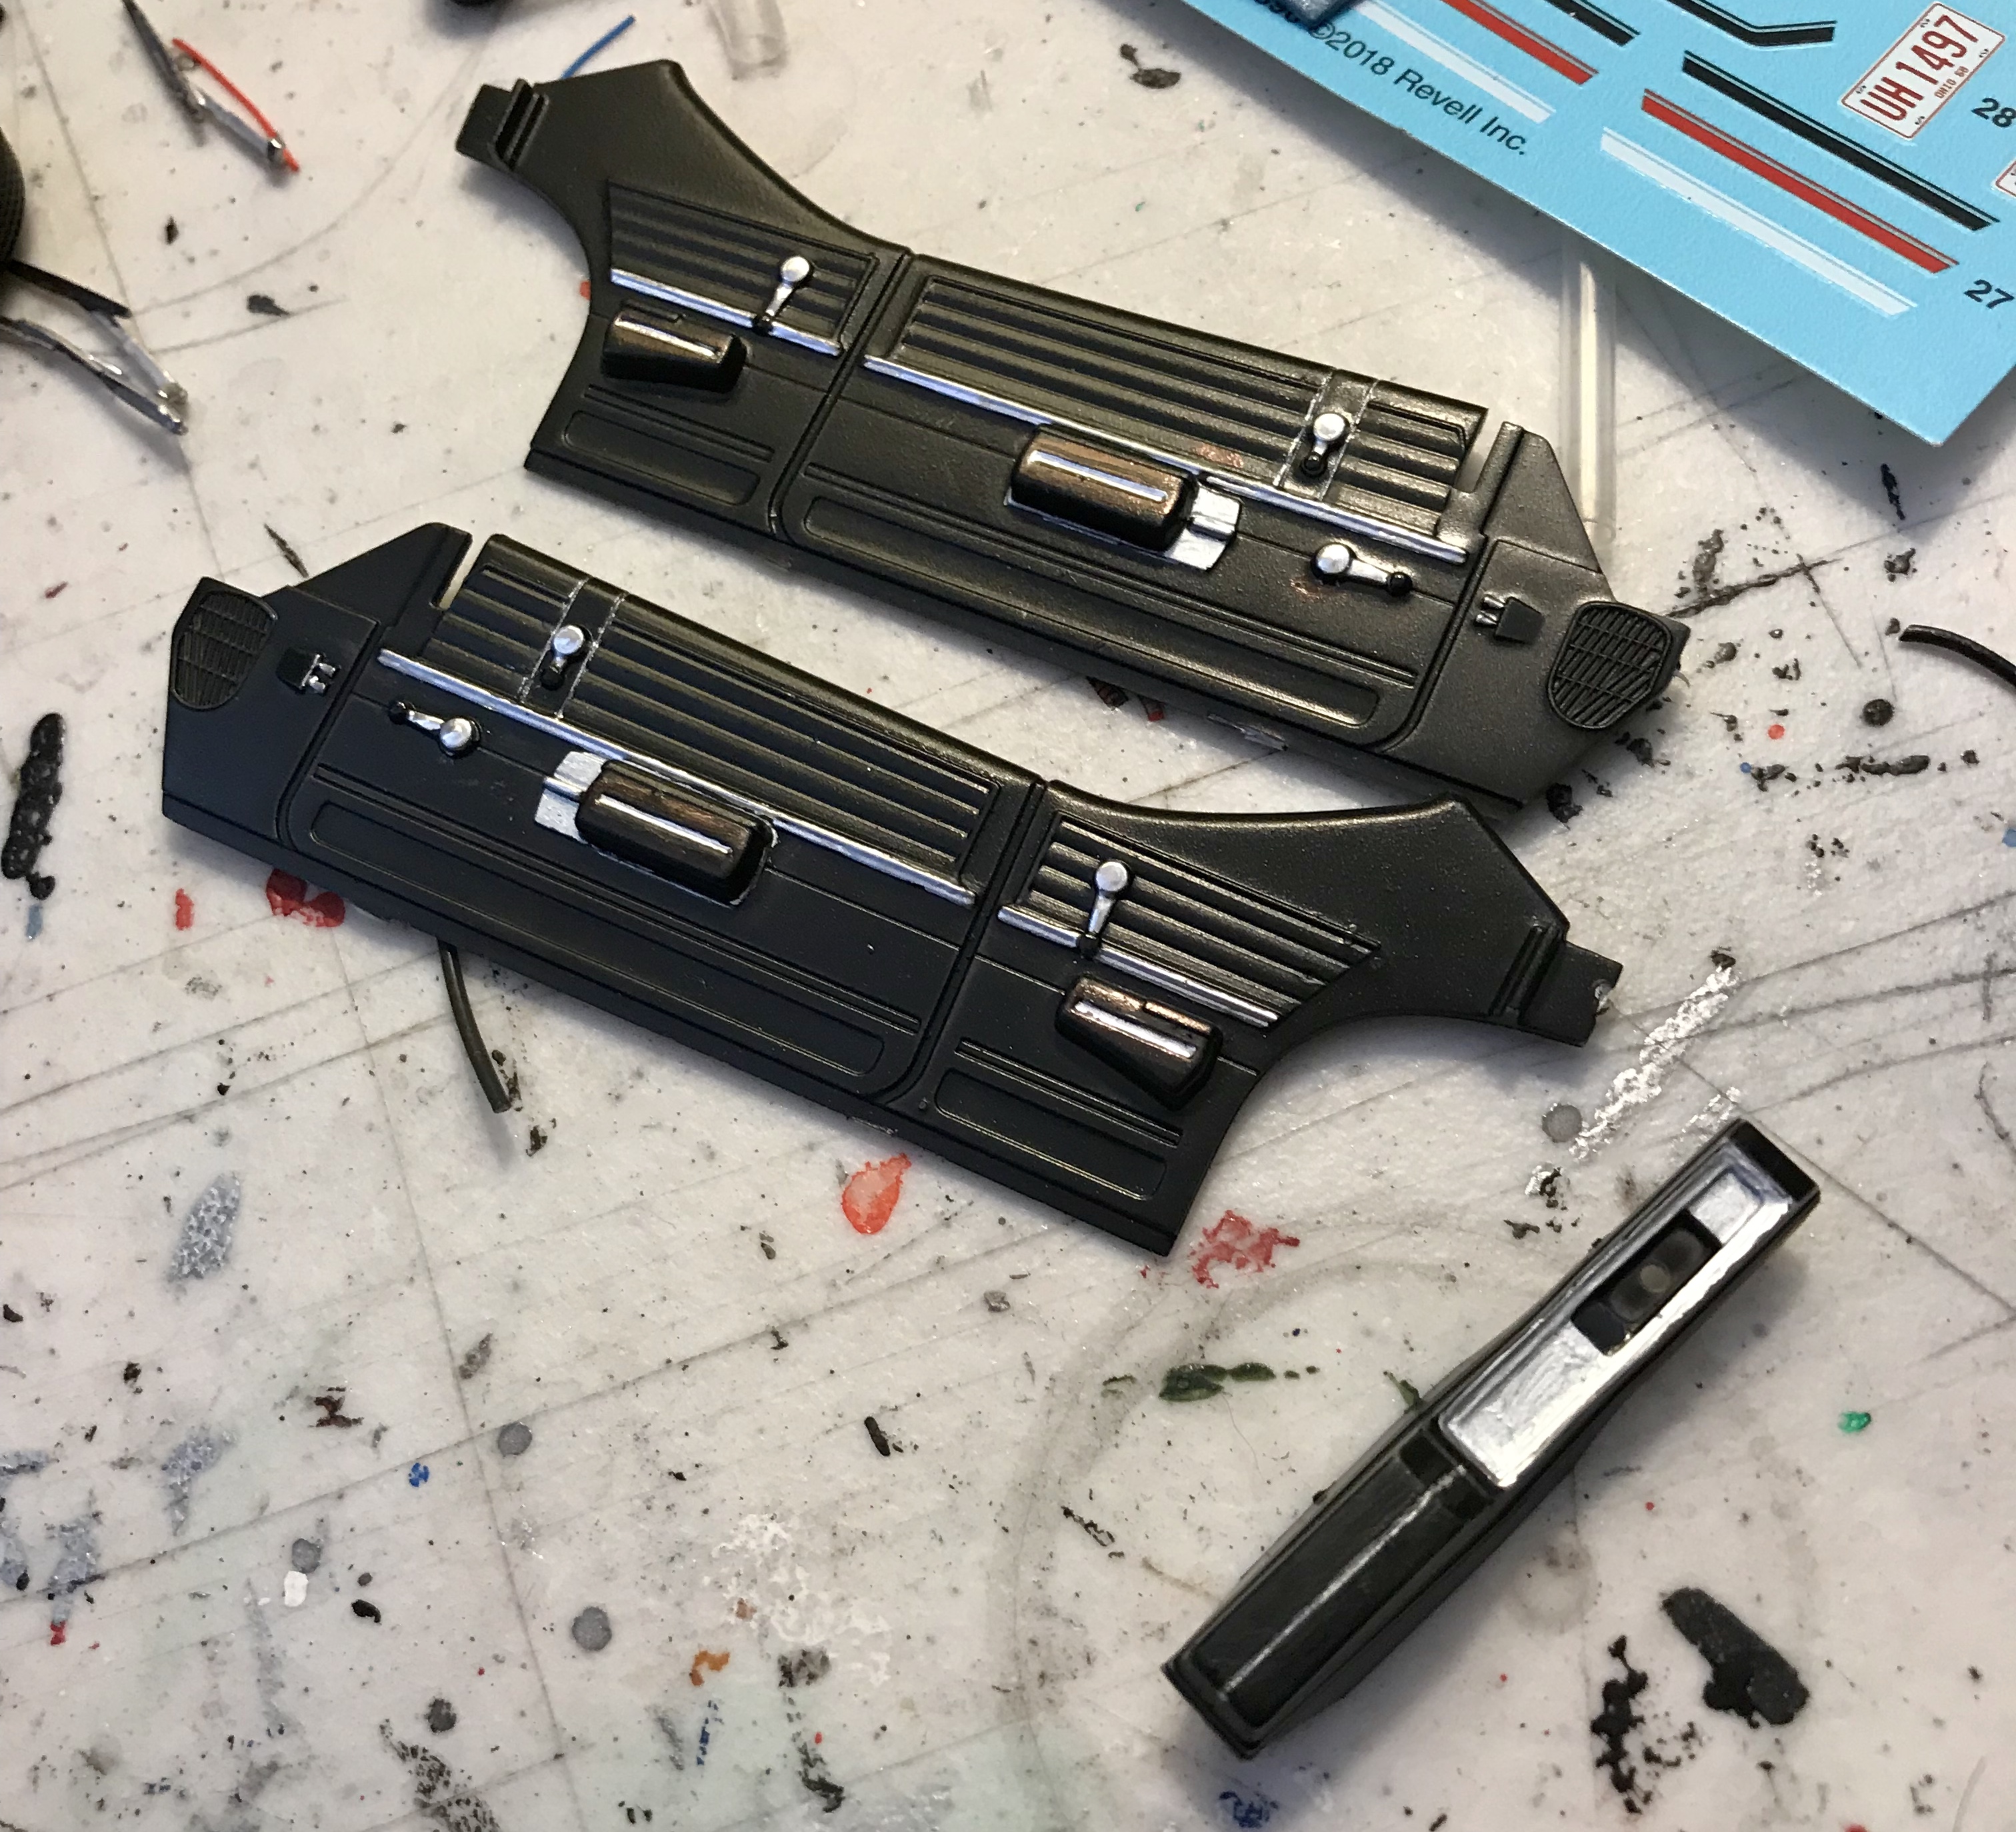
A little more progress. This kit is really good, and it has a lot of the same Structural elements and easy design for pieces to fit together like the 69 Nova kits, but it isn’t a very high piece count. Molding is outstanding, though, so getting a good result will all come down to details. I started working on the interior, which is the make or break of this build. Since I’m doing a black interior, there’s a lot of detail that can get lost, or really stand out if you screw it up. My dash is close to done, but needs some more work. In the meantime, I took to the door panels and the console. The hardest part of these are the two thin vertical trim pieces that run from the quarter window down to the main chrome trim. On the kit, instead of being raised, they are tiny grooves. The same is true for the thin strip running down the center of the console armrest. Even my 1mm Molotow pen was going to be too wide for those areas, and I didn’t want to end up with chrome all over the sides of those grooves. So, I took a little acrylic silver paint, watered it down slightly, then painted with my smallest brush and scraped the sides with a toothpick to get the excess off. It isn’t perfect.... this is when I wish I had better detailing skills, but it worked. I also used the silver for the plate that surrounds the door armrests and the door handle to give a little contrast from the chrome. The final detail was to do the knobs on the window cranks in gloss black... again, a little contrast in a sea of black. One nitpick: why didn’t Revell mold the seat trim in?? This is what I’m talking about. That trim around the seat is nowhere to be found, and it makes a difference in all the black. Anyway, here’s where I am with my interior trim so far. More to come...
-
Man, this is looking awesome!!! Love the wheels, the gray/red combination and the vinyl top. Keep going!!!