Jhedir6
-
Posts
1,440 -
Joined
-
Last visited
Content Type
Profiles
Forums
Events
Gallery
Everything posted by Jhedir6
-
Looking good Brian. Nice big fuel cells in the trunk will make for minimal stops. I'm debating adding some to my 'stang as well. I don't plan on opening up the truck for the final display but I may still add them so I know they're there. I plan on getting back to mine later tonight. Got some new details to add....finally.
-
Decals are basically done. I have a few more detail decals I want to add off of Powerslide's Goodies sheet. I also need to add some yellow decals to the roof rails, then I'll be ready for clear.

-
WalMart has new AMT shipper July 2021
Jhedir6 replied to Dave Van's topic in Tips, Tricks, and Tutorials
I get model kits from Japan/Hong Kong to Canada for about $15 US. I just ordered a set of decals from the US and it cost me, $15US to Canada....shipping times, faster from the Far East.....go figure. -
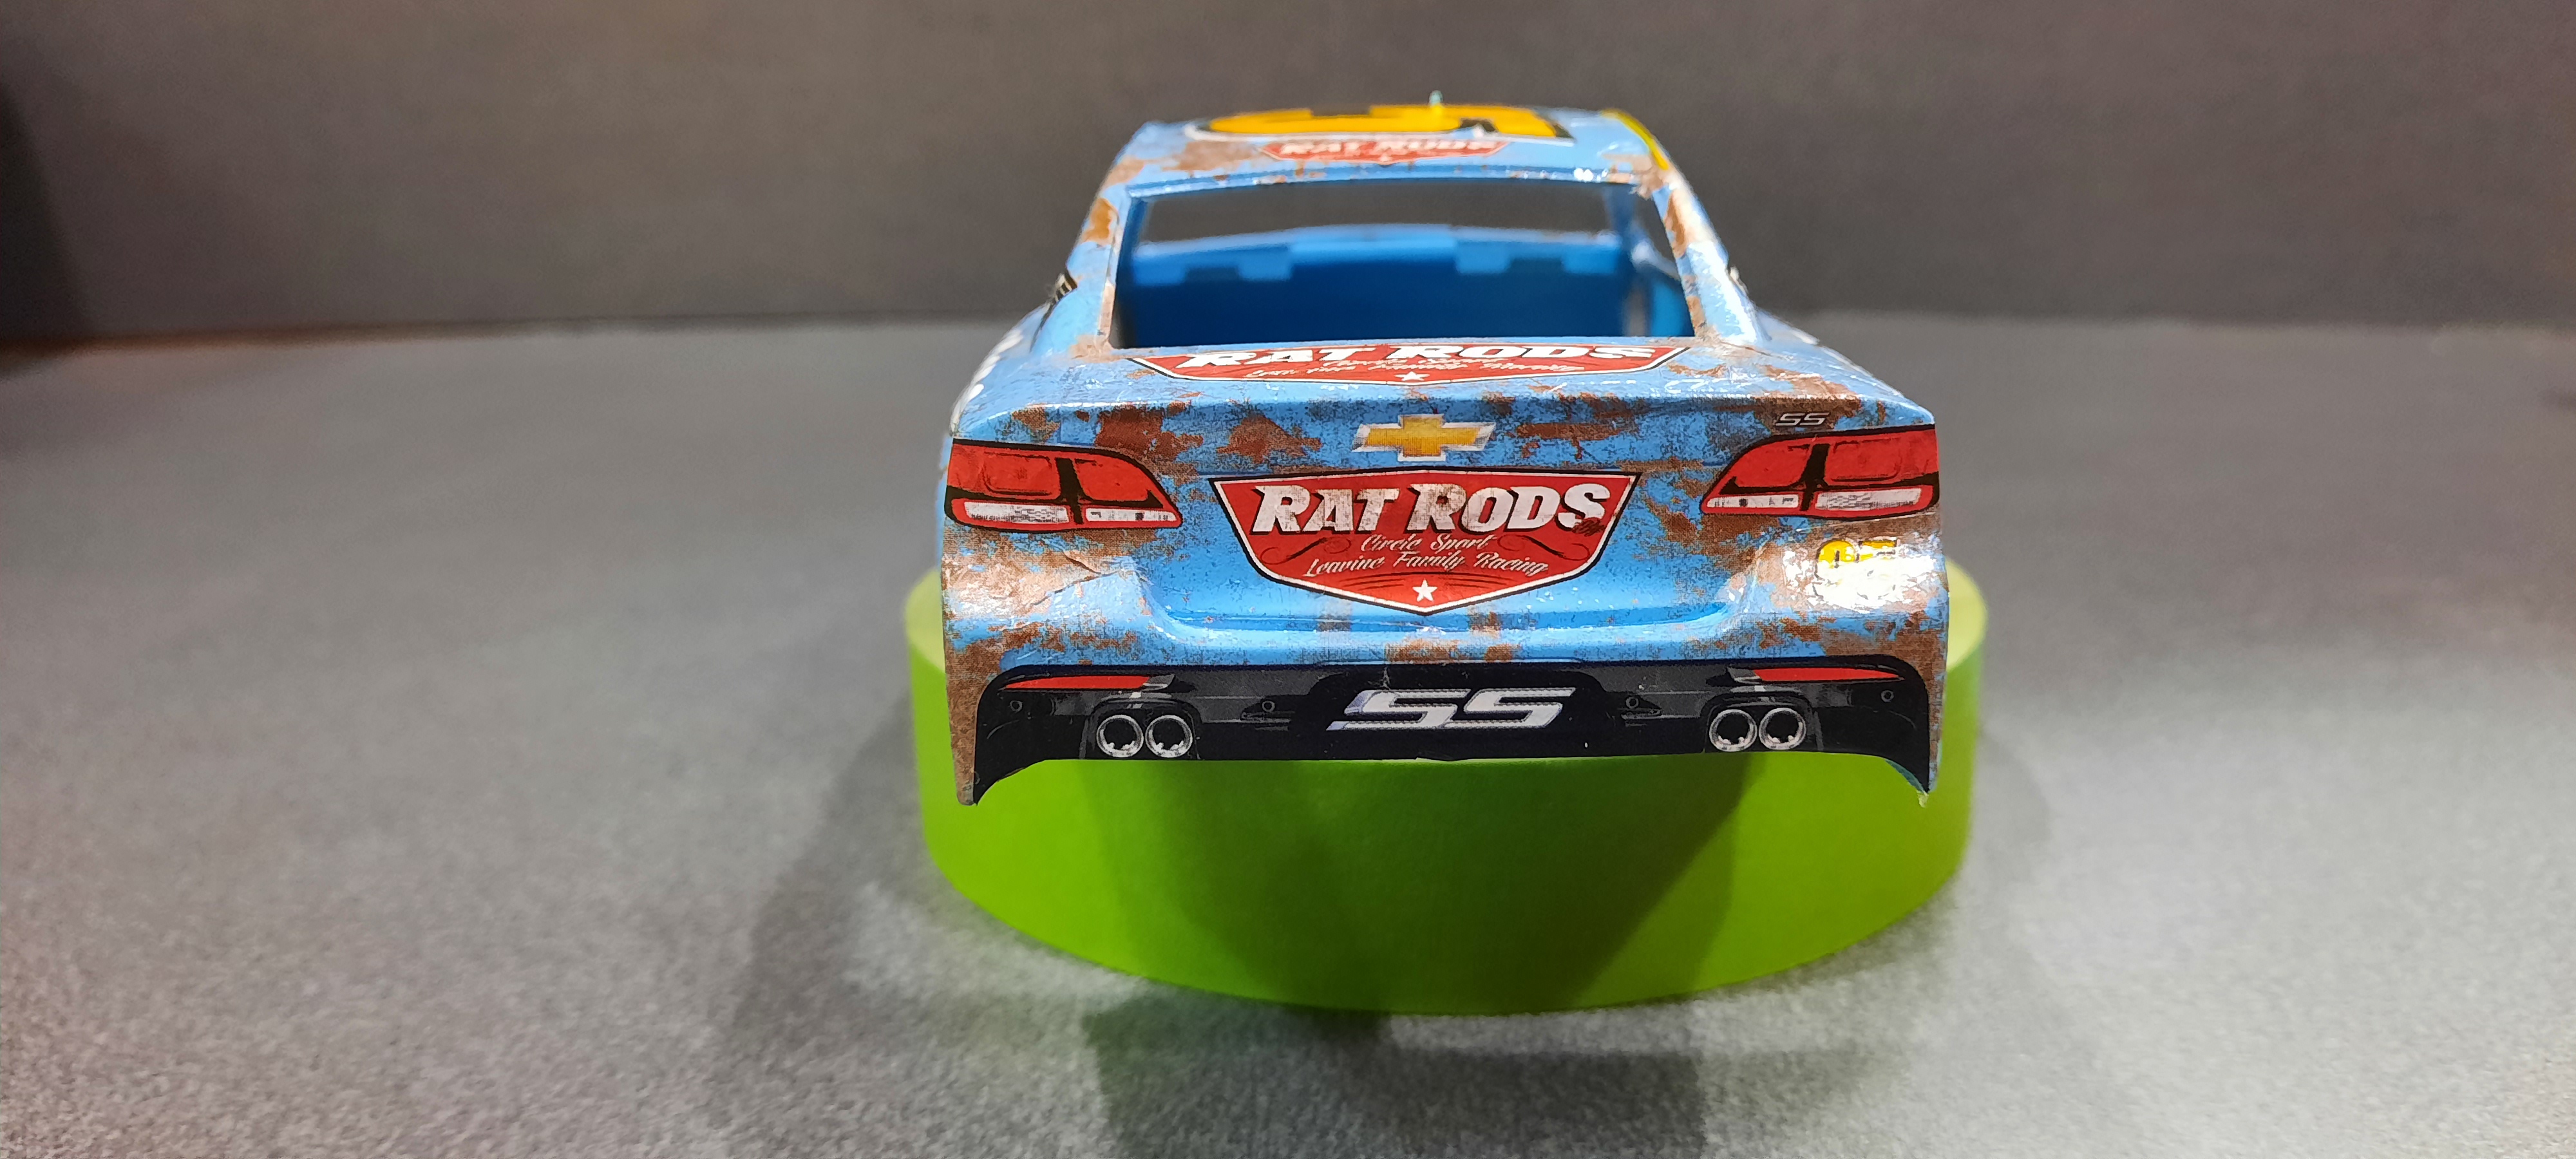
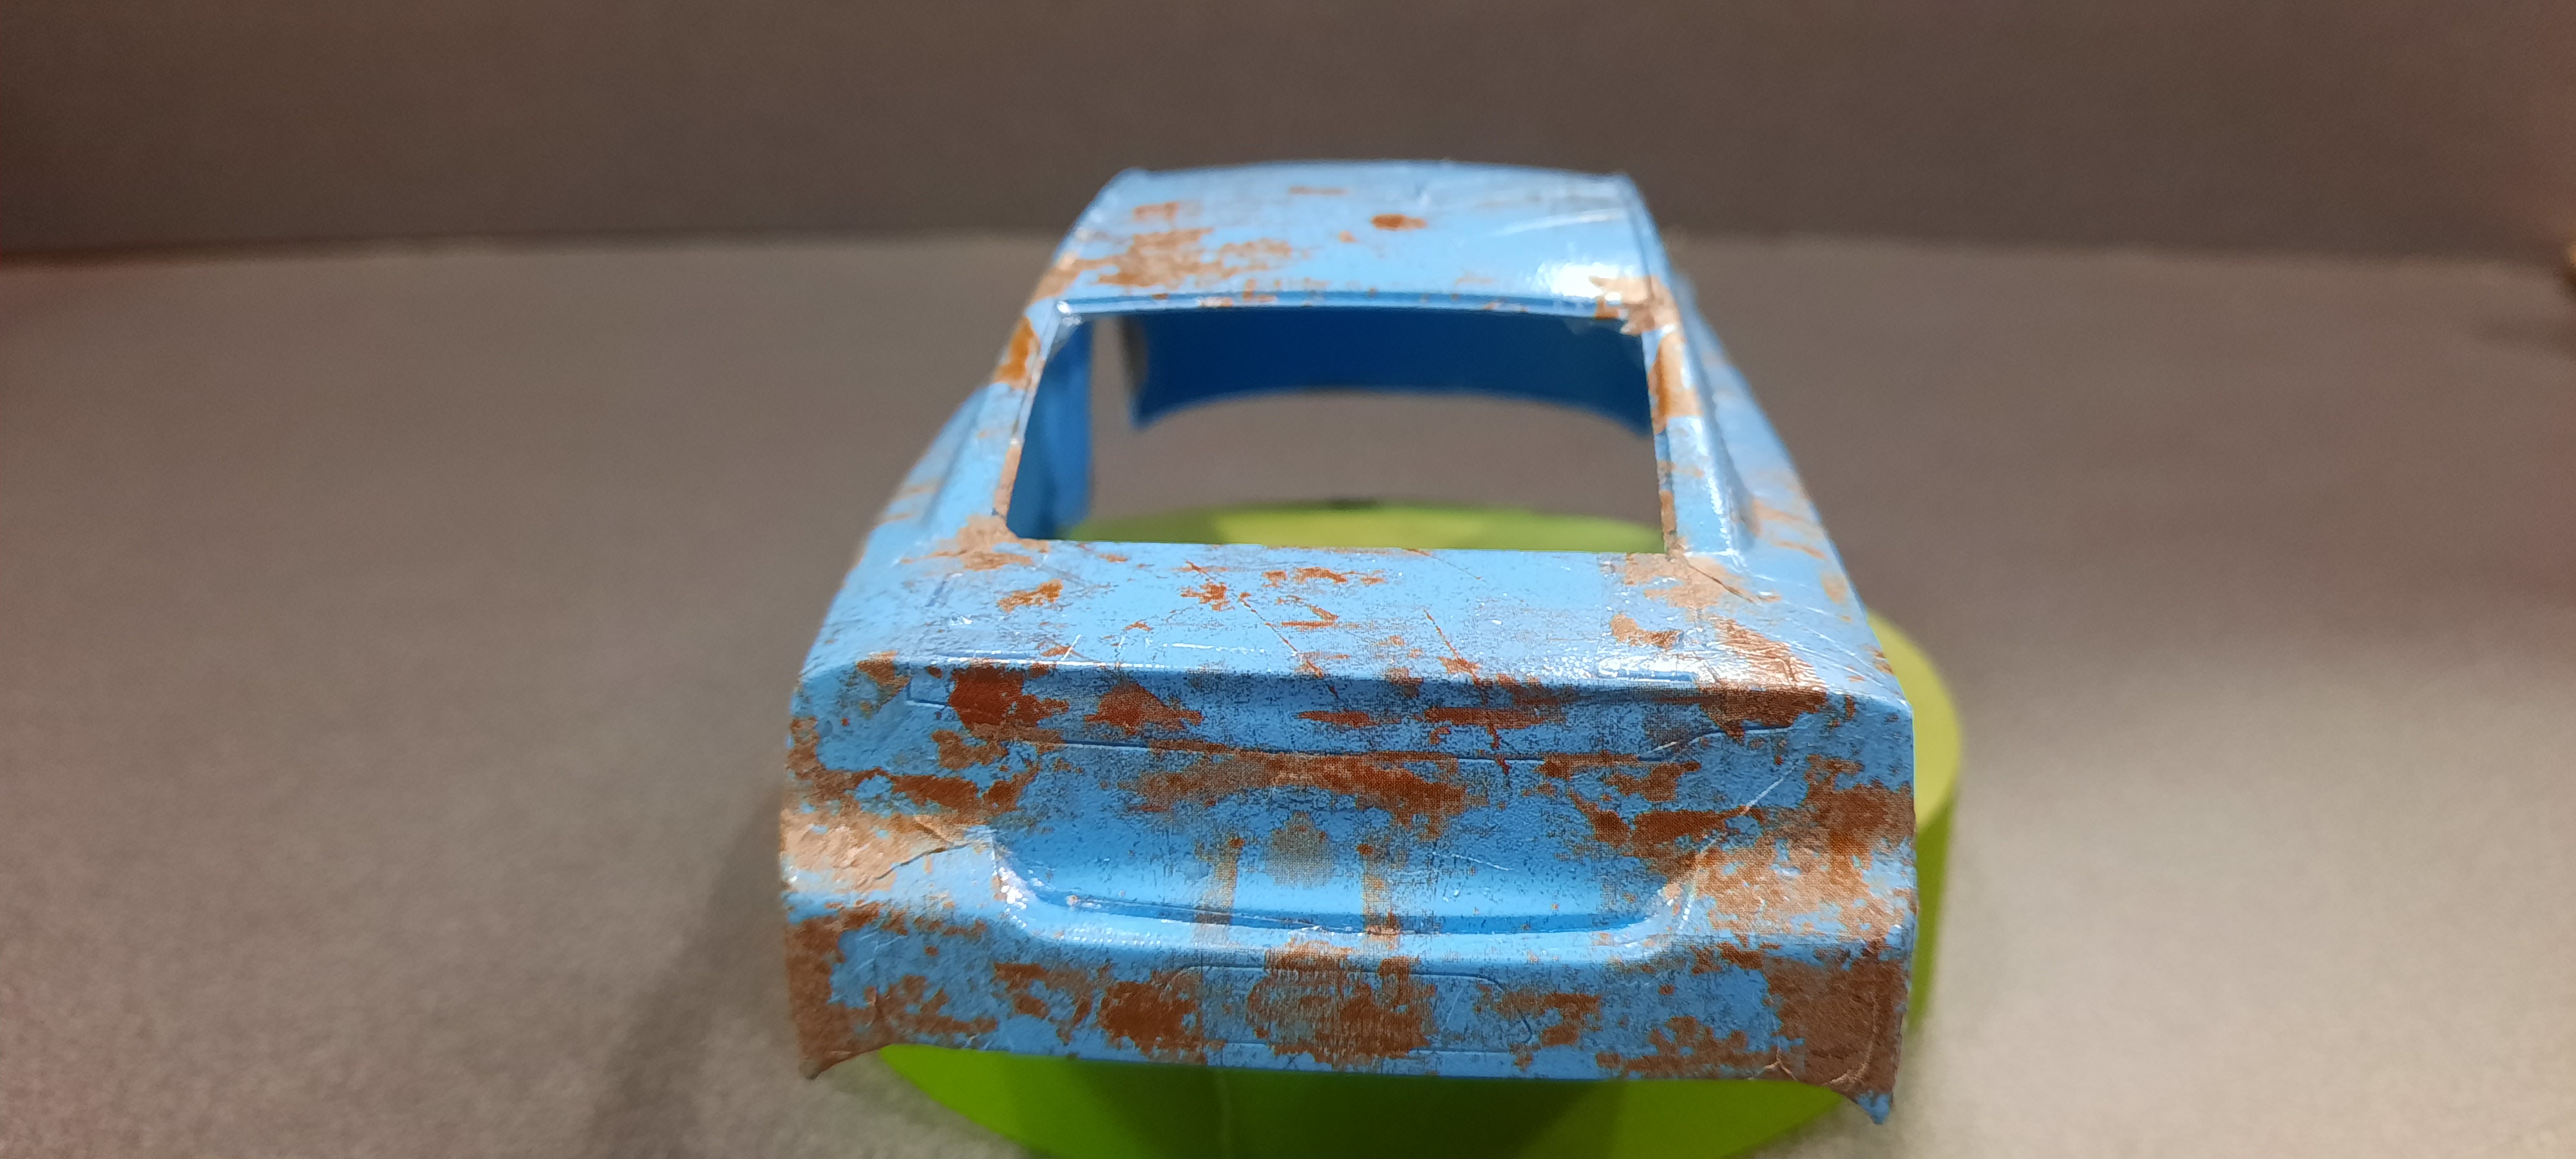
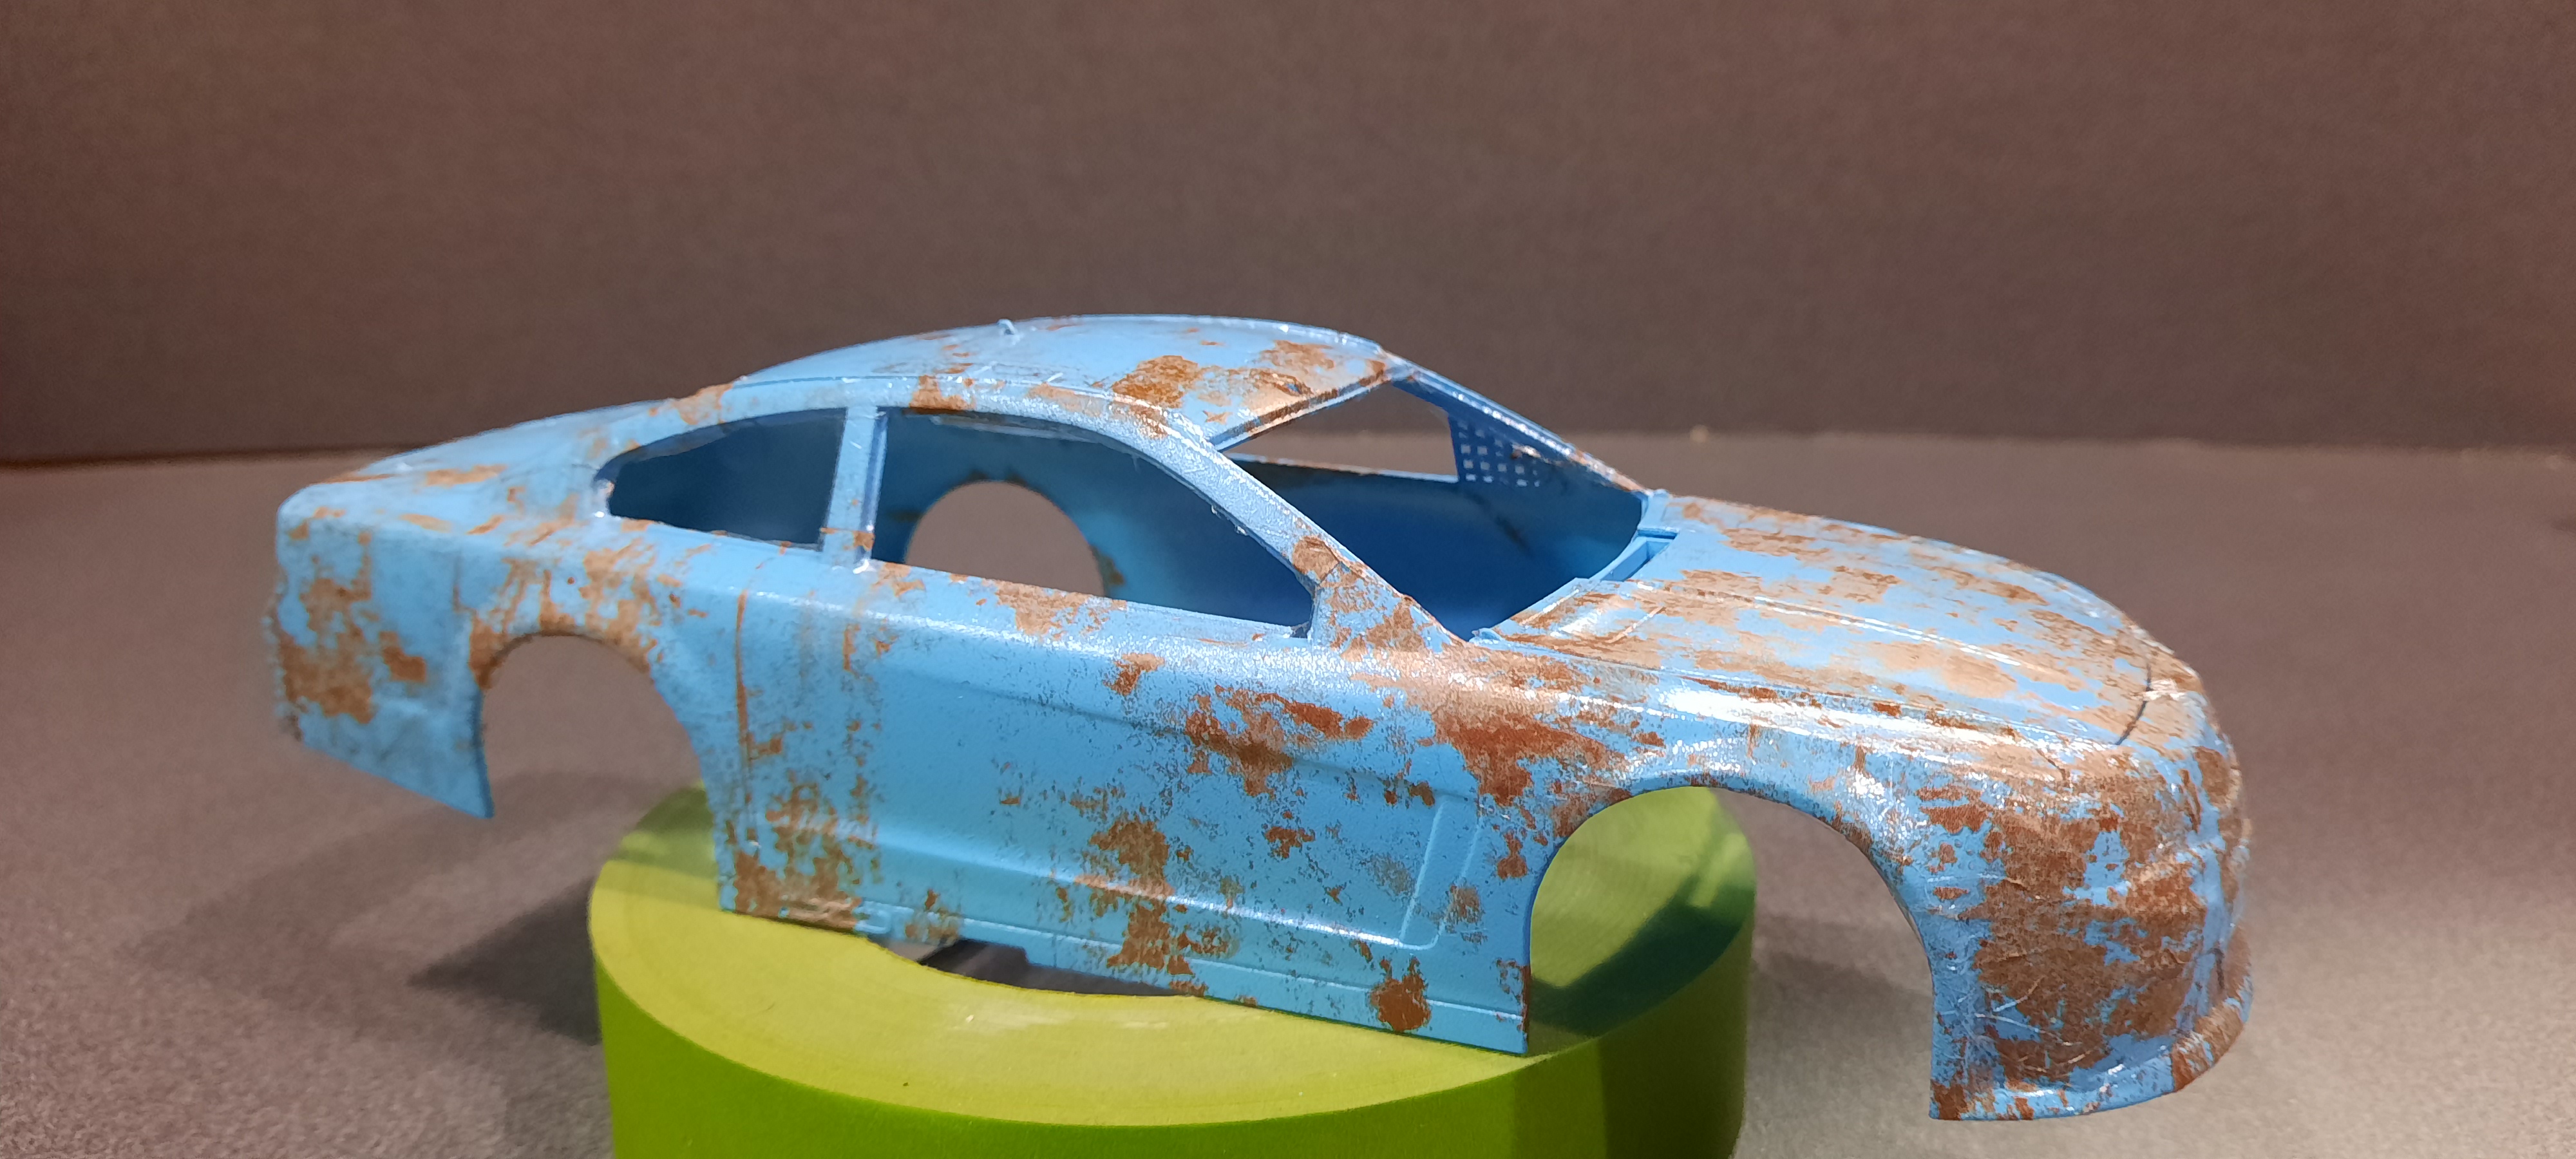
Update. Got the "patina" decals on. Sponsor decals to follow.
-
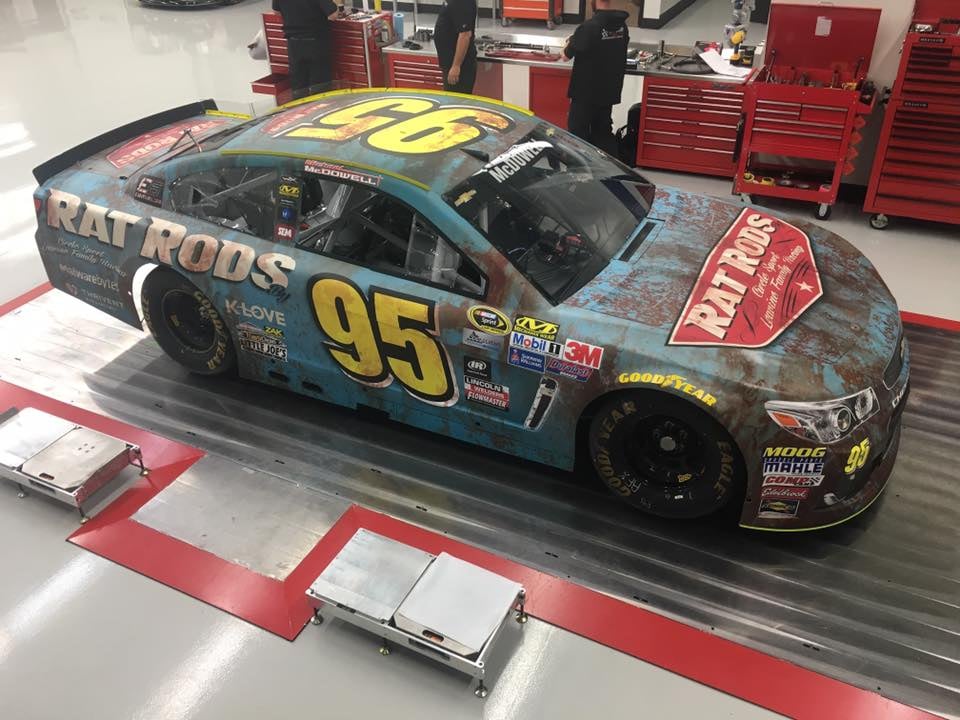
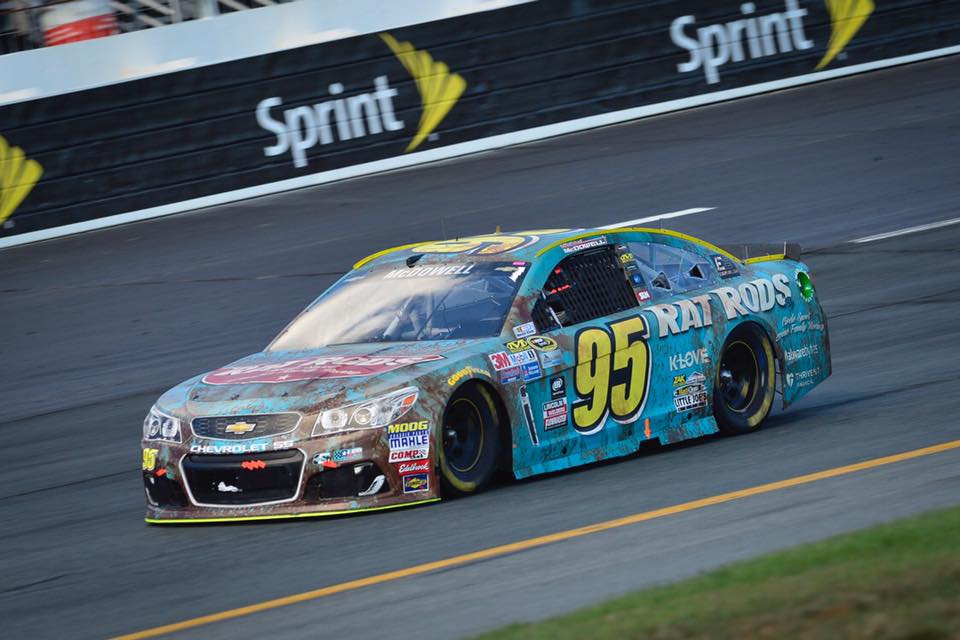
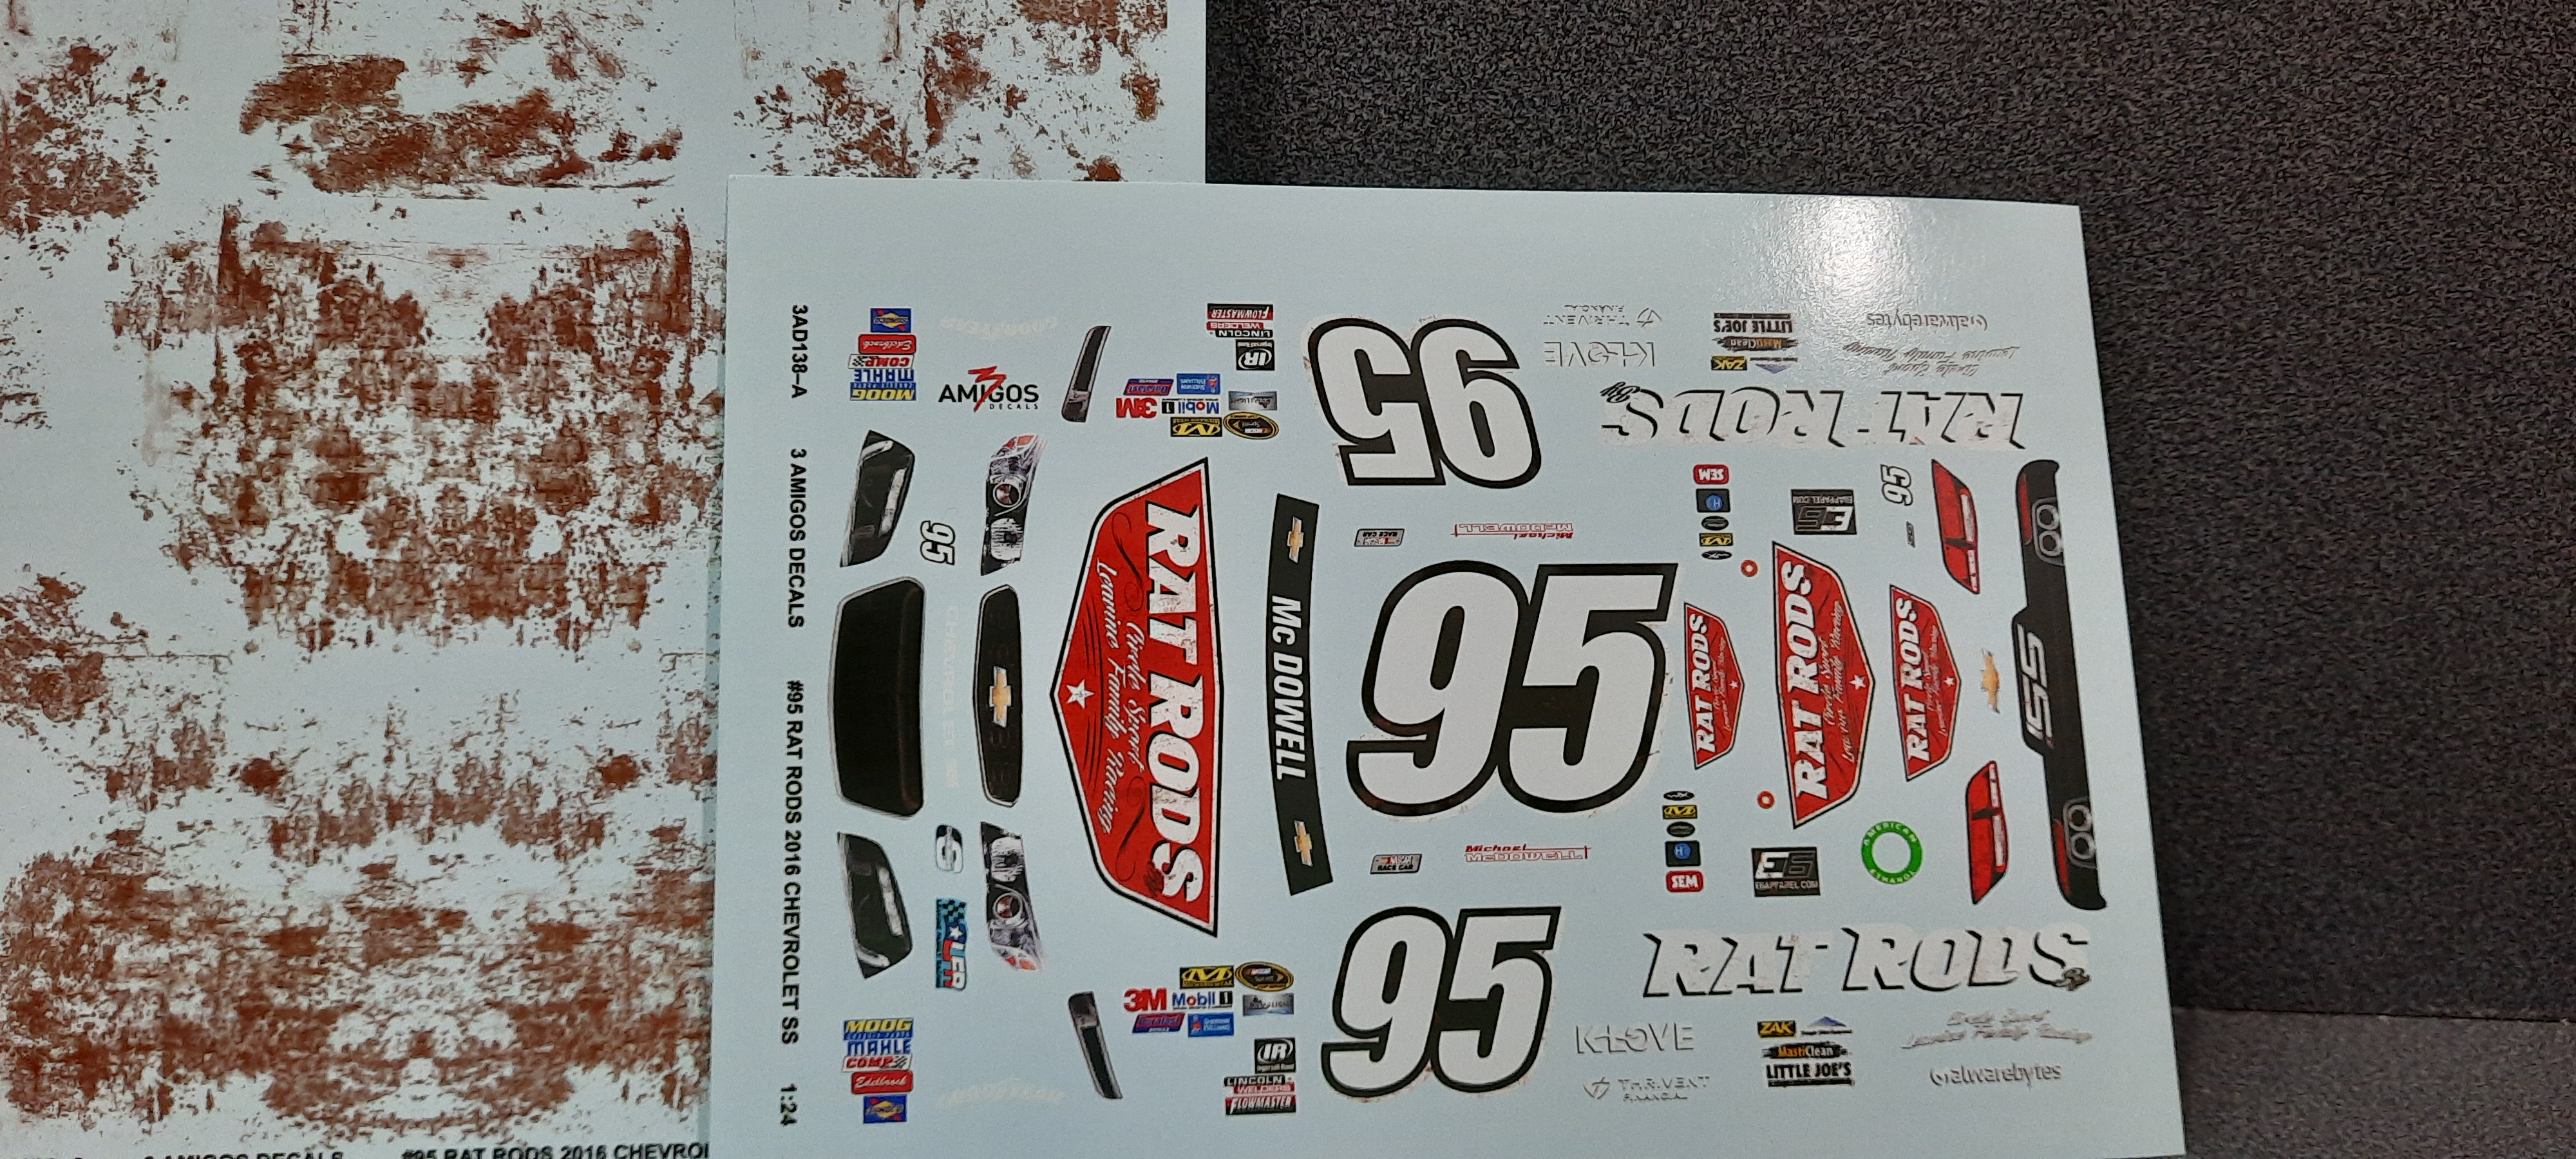
OK change of plans. Recently I found a really interesting livery I like and have decided to swap over this build. I hadn't painted the body yet so it was an easy switch. The new build will be Michael McDowell's 2016 New Hampsire "Rat Rods" livery. This is a livery the team made up as they didn't have a sponsor for the race. Decals are from 3 Amigos and you can find them here. Paint is Tamiya LP's, I took White (Lp-2) and dropped in a few drops of Blue (LP-6) to get the correct colour and then thinned it out with some Mr. Hobby leveling thinner. It's not my best paint job as I had to take a few swings at it to get the colour I wanted, but after the decals are done and a matte clear is added I don't think it'll be that apparent. The colour in the photo is actually darker than the colour on the car. The colour on the car is spot on for the pics I have. Plan is to get started on the decals here at work tonight, so I hope to have a few updates as the night progresses. Comments always welcome.
-
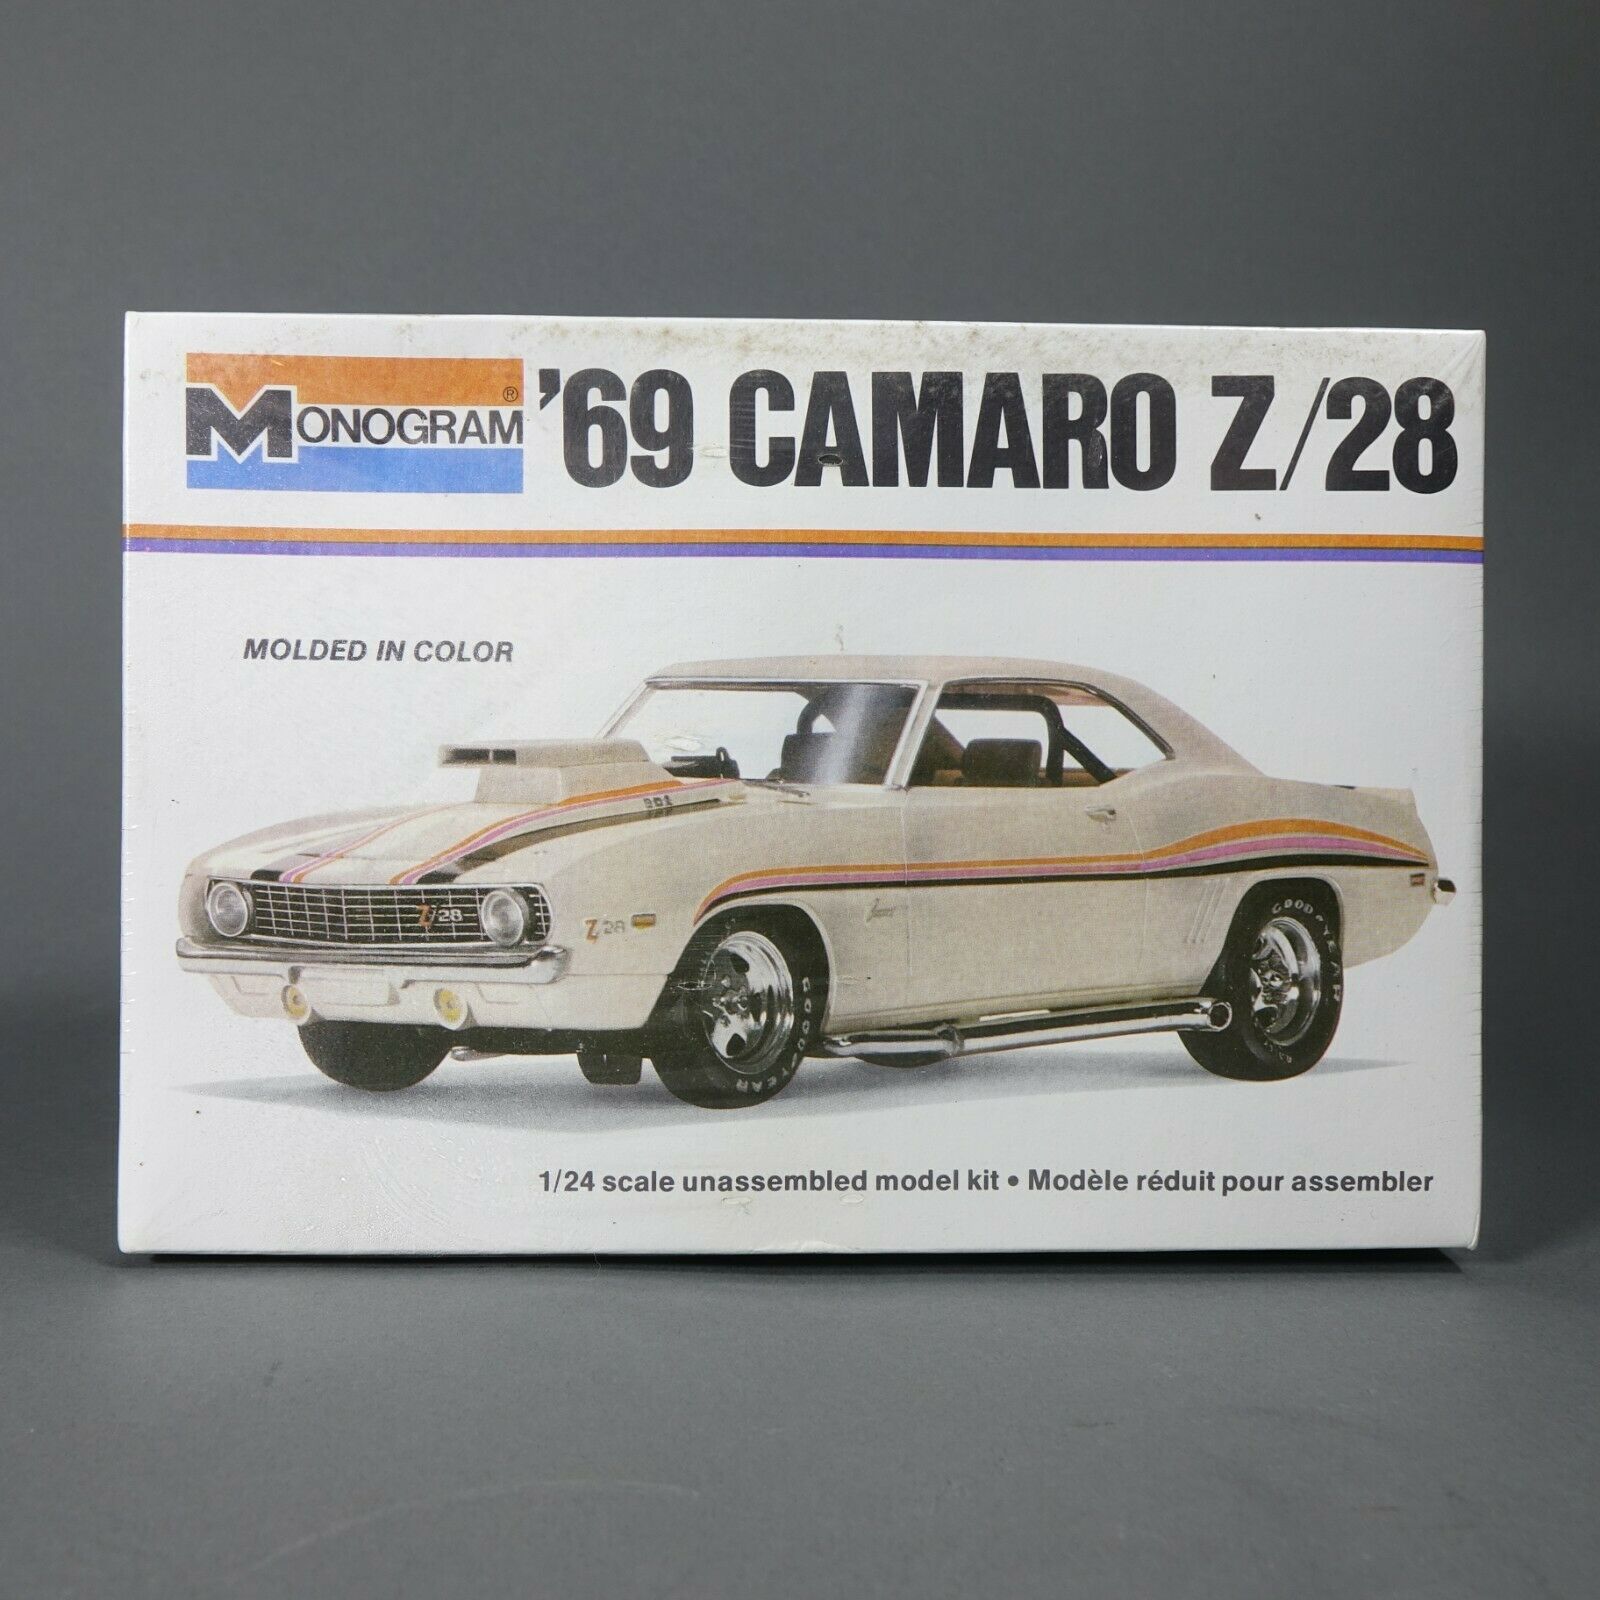
I like this idea to be honest. I've been wanting for a long time to do a "rebuild" of my first every model kit I remember building. It's long gone, but been thinking for a long time now I should redo it. Now the trick will be to find one at a reasonable price. I've checked a few times on Ebay, but haven't found one at a price I'm willing to pay. Hopefully others might find interest in this too.
-
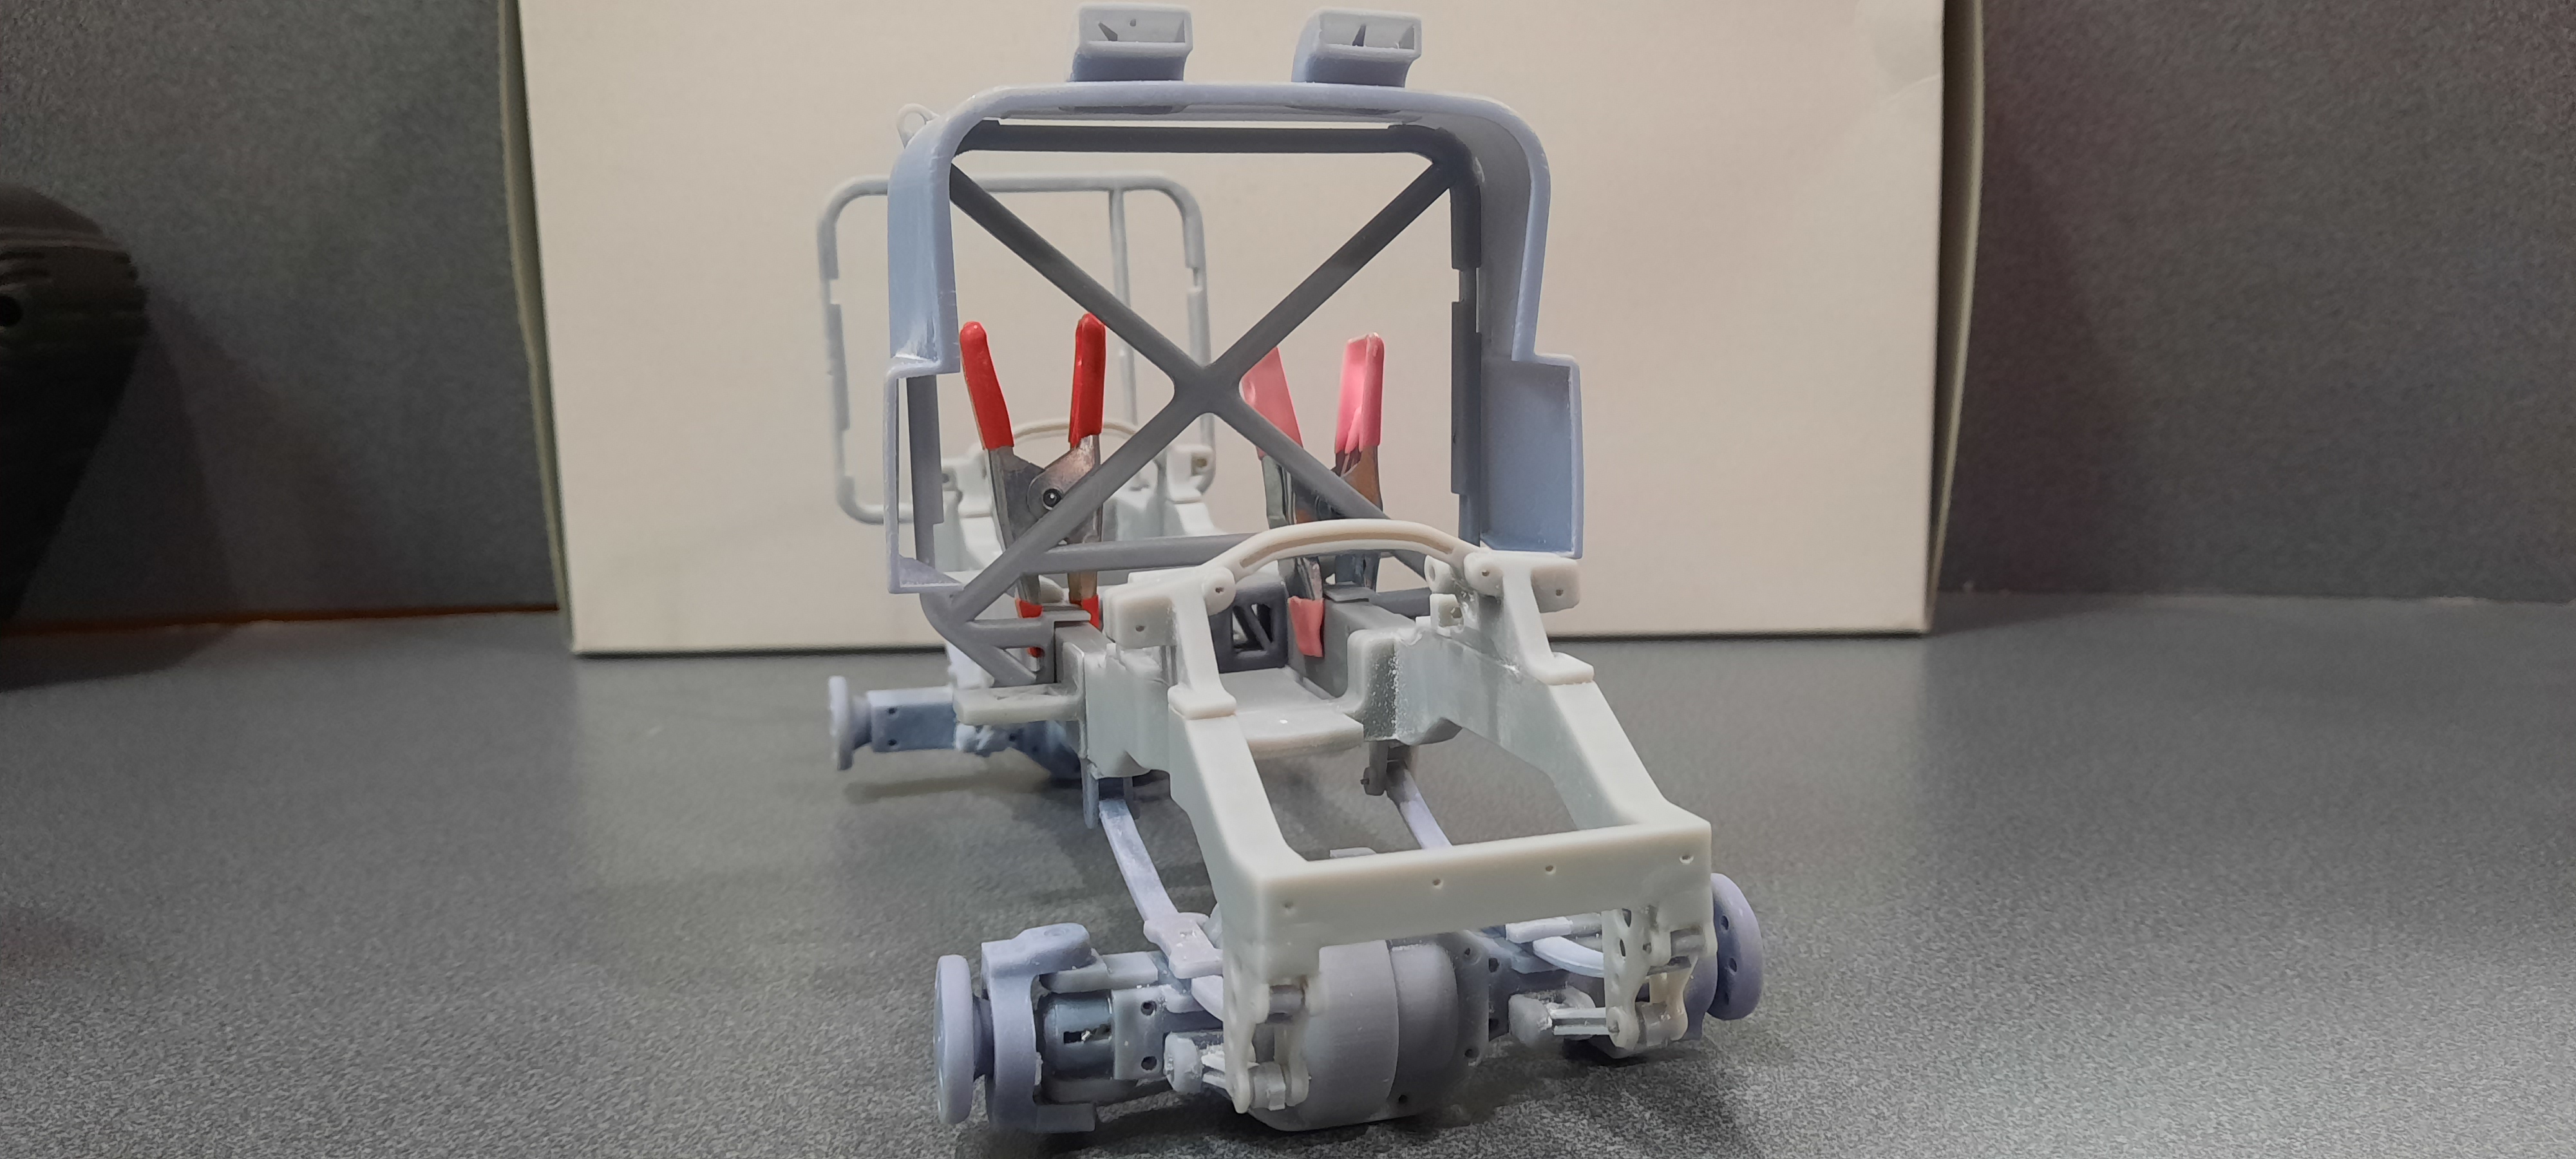
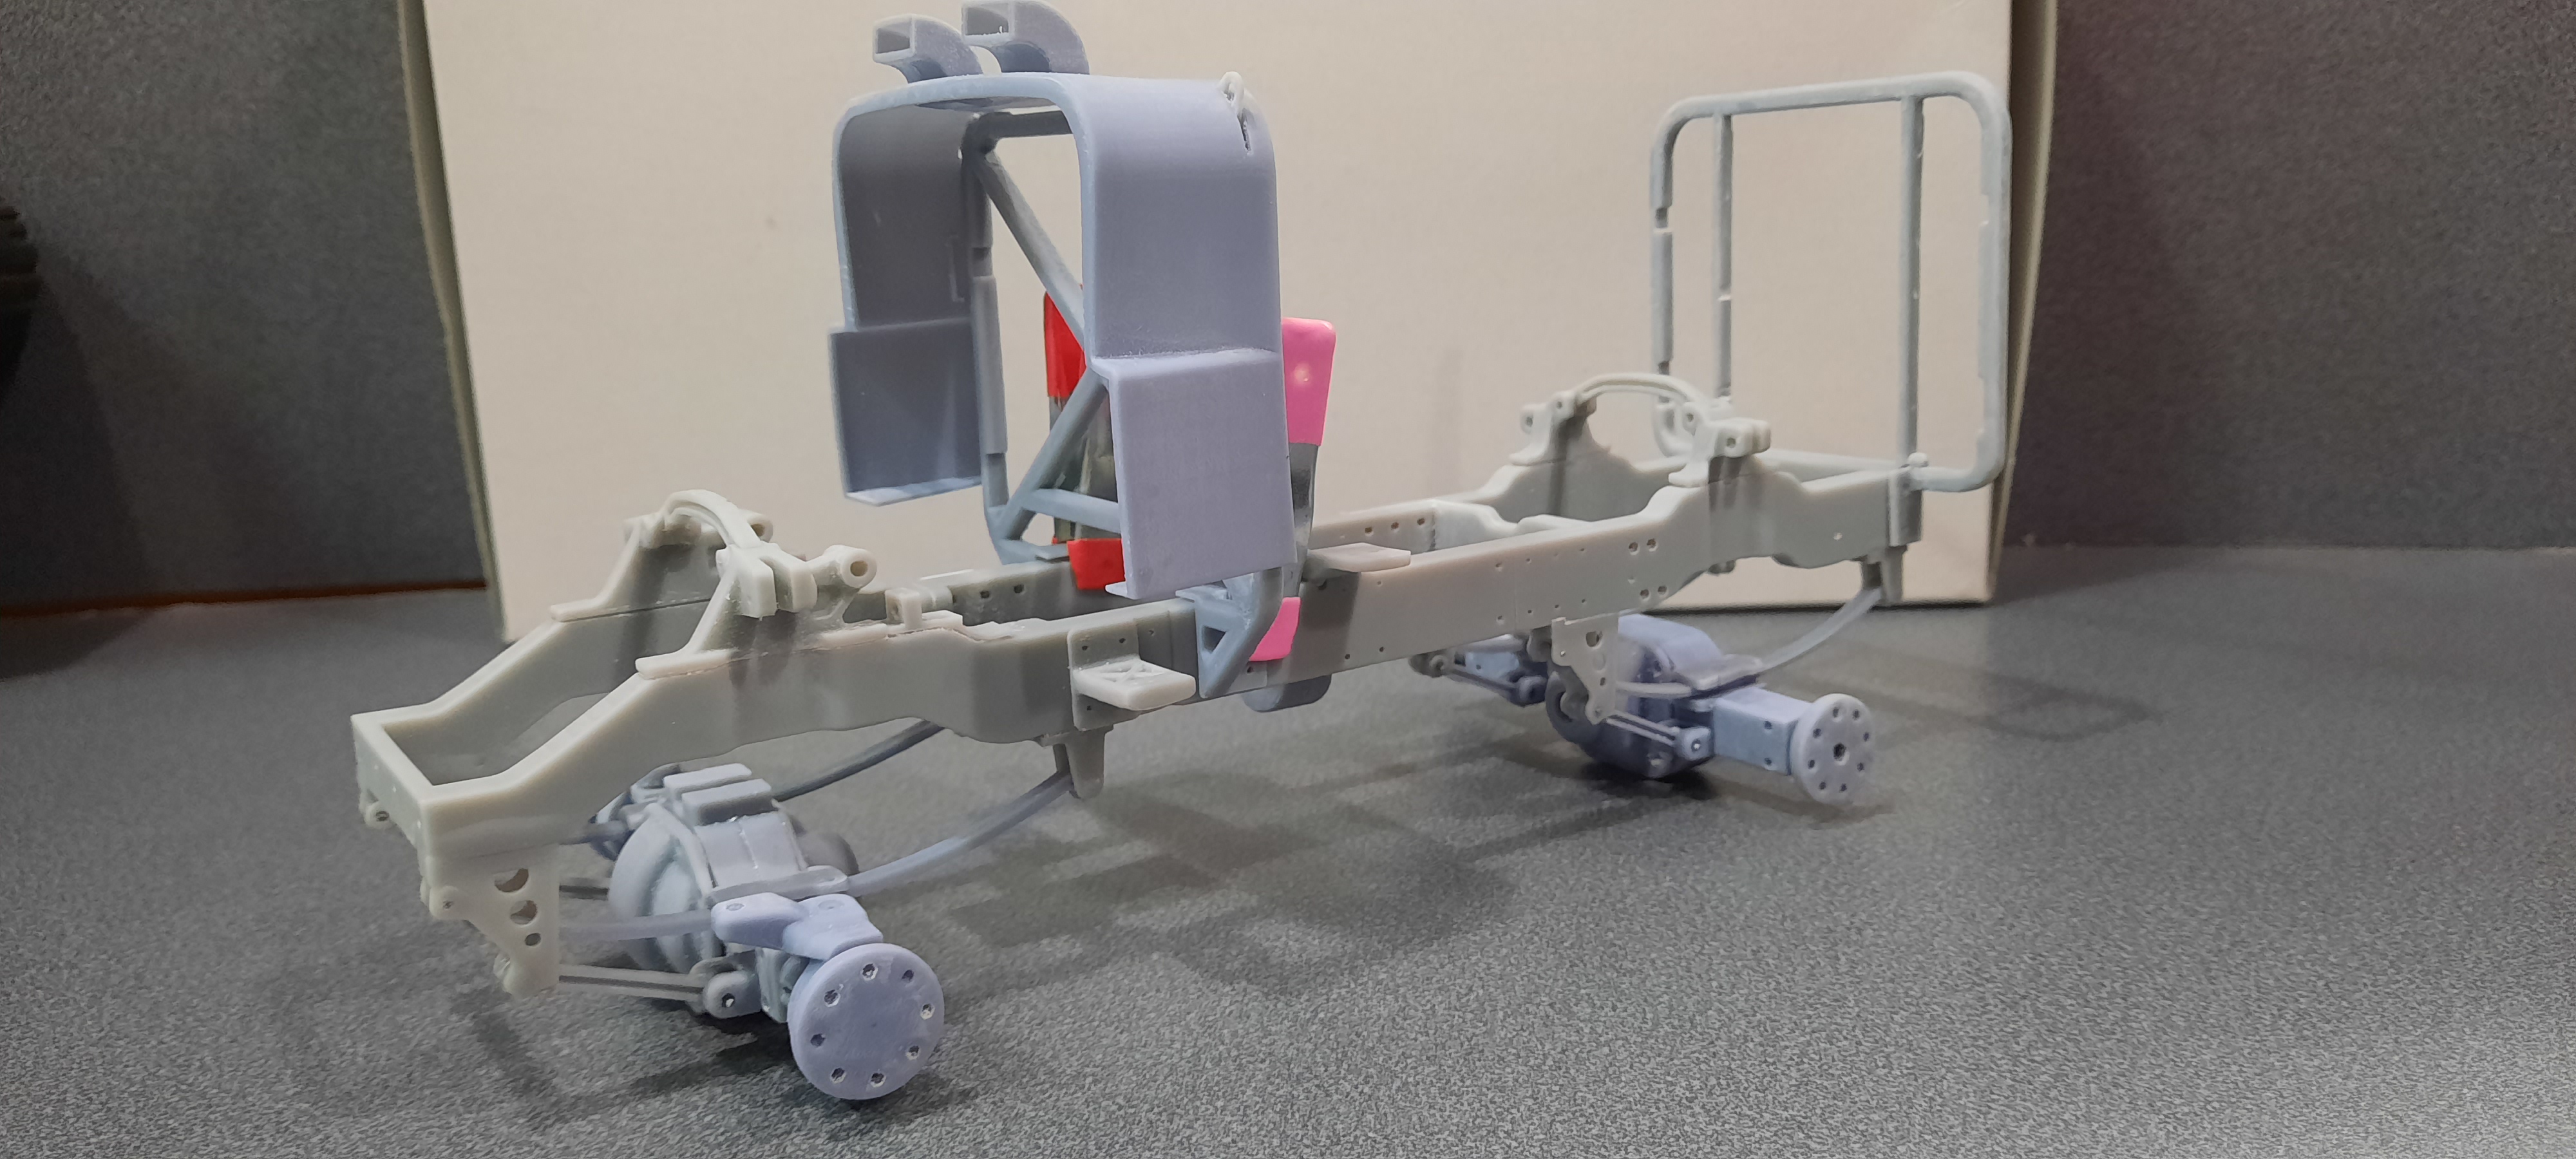
Update. Chassis is almost complete. I still need to figure out what to do for the shocks, the model is designed for RC shocks but I'm going to have to scratch something or try to find some I can print. The upright frame work, which holds up the rear cargo sections of the truck are not yet attached. I was not happy with the roof panels so I'm reprinting them. One of the issues with scaling down the files is that some of the parts become too thin and just don't print as well as you'd like, so I've reprinted more than a few parts. Also the differential casing are over sized, again due to the fact that the original design was for an RC chassis. They won't be perfect looking but I can live with it. At this time I have not printed out the engine file I have, I wanted to get the chassis complete so I can figure out how big I need the engine and transmission to be to fill up the space inside the chassis as the file I have does not have a listed scale to it, so it will be trial and error. I'm hoping to print the file off this weekend and see where I'm at for sizing. After that I have some more detail parts for the rear cargo area I want to print off as well, some fuel tanks and some air tanks that are on the rear truck. I also need to print off some wheel and tires well. I plan on printing off not only the 4 driveline wheels but 2 spares for the cargo area as well. For the cabin (cockpit) I have the main panels completed as well as the exterior details. I still have to print floor as well as figure out an interior. More files to print off over the weekend. Some of the print layer lines are still visible but sand away easily. I plan on getting some primer on some of the parts by the end of the weekend. More to come. Comments welcome. Thanks for looking in.
-
Dan, it took about 1.5hrs for each of the frame sections, they weren't very tall on the build plate. The rear supports for the body took around 3.5hrs each cause of their height and all the brackets were around another hour. The files for the front and rear axles were another 2hrs each and the extras that go with them were just under an hour. So far I've pretty much been printing since I Friday around noon, tho I did miss a few hours while sleeping. The big files, the body panels will be started on shortly, I'm guess I'll be printing on and off till around Wednesday.
-
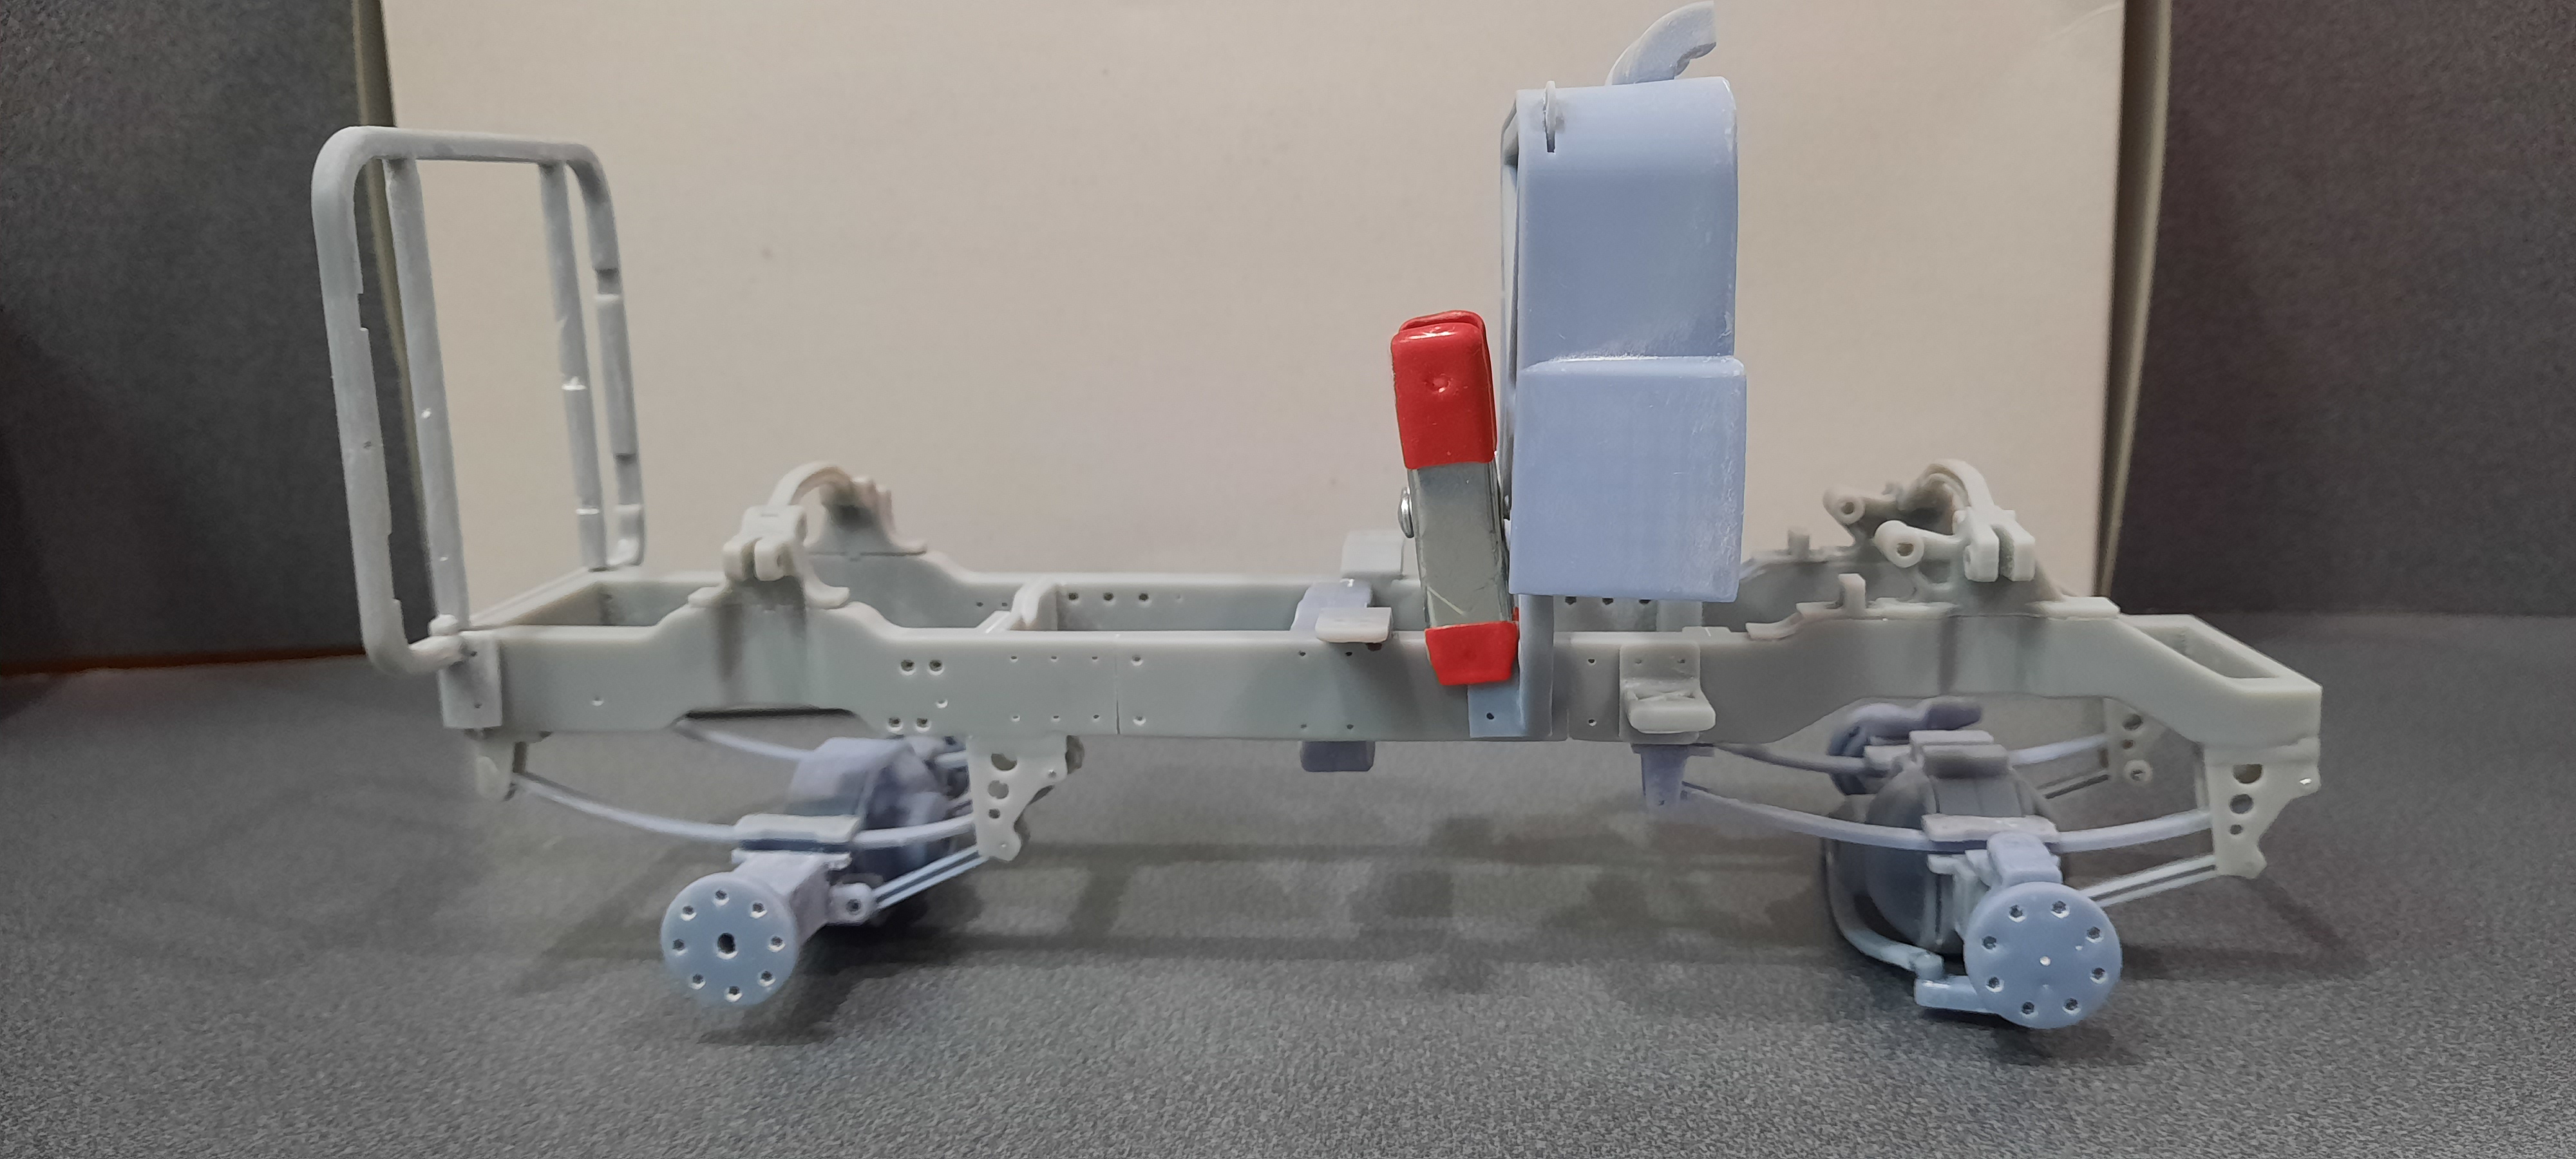
At some point, you may be right. I would bet there is or will be soon a rubber like resin that will be good for printing 3D tires. Decals files can be sold too as part of the kit files as well. Time will tell. Frame update. All six files have been printed and are ready for clean up. And here's the frame assembled, minus the two large brackets in the back of the pic. These are the supports for the rear body work. I'm going to leave them connected to the supports till I'm ready to glue them to the frame to avoid any chance of warpage. The holes in the frame are where the machine screws go to hold the 1/12th scale RC kit together. I will print off some bolt heads to add in some detail before I paint. I'm working on the front suspension now, more updates tomorrow. Thanks for looking in.
-
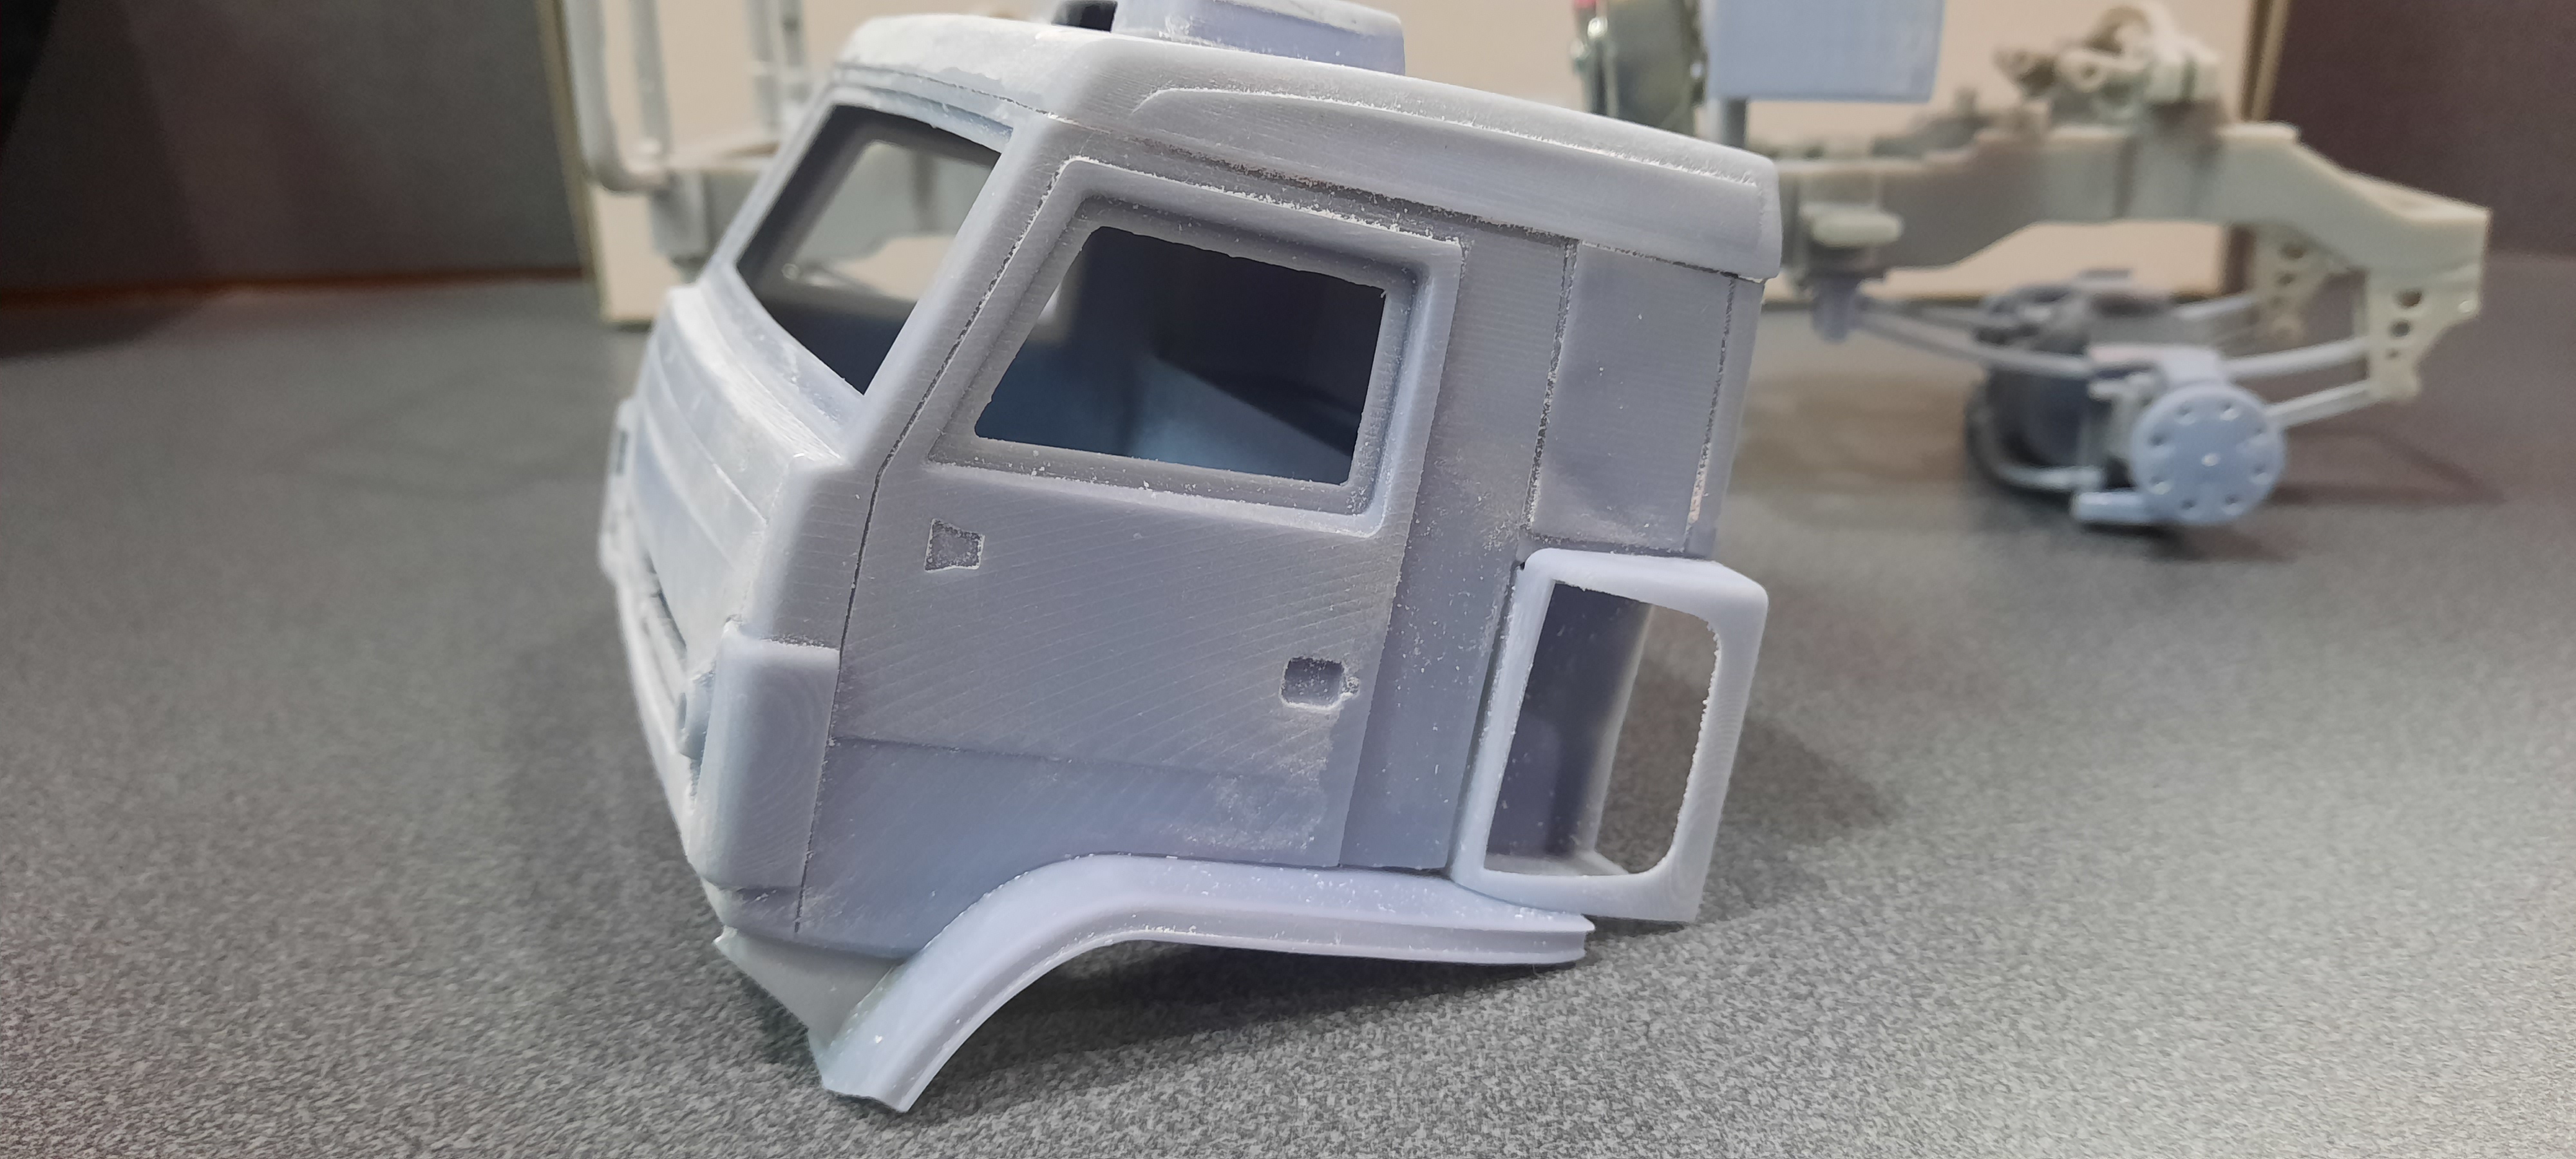
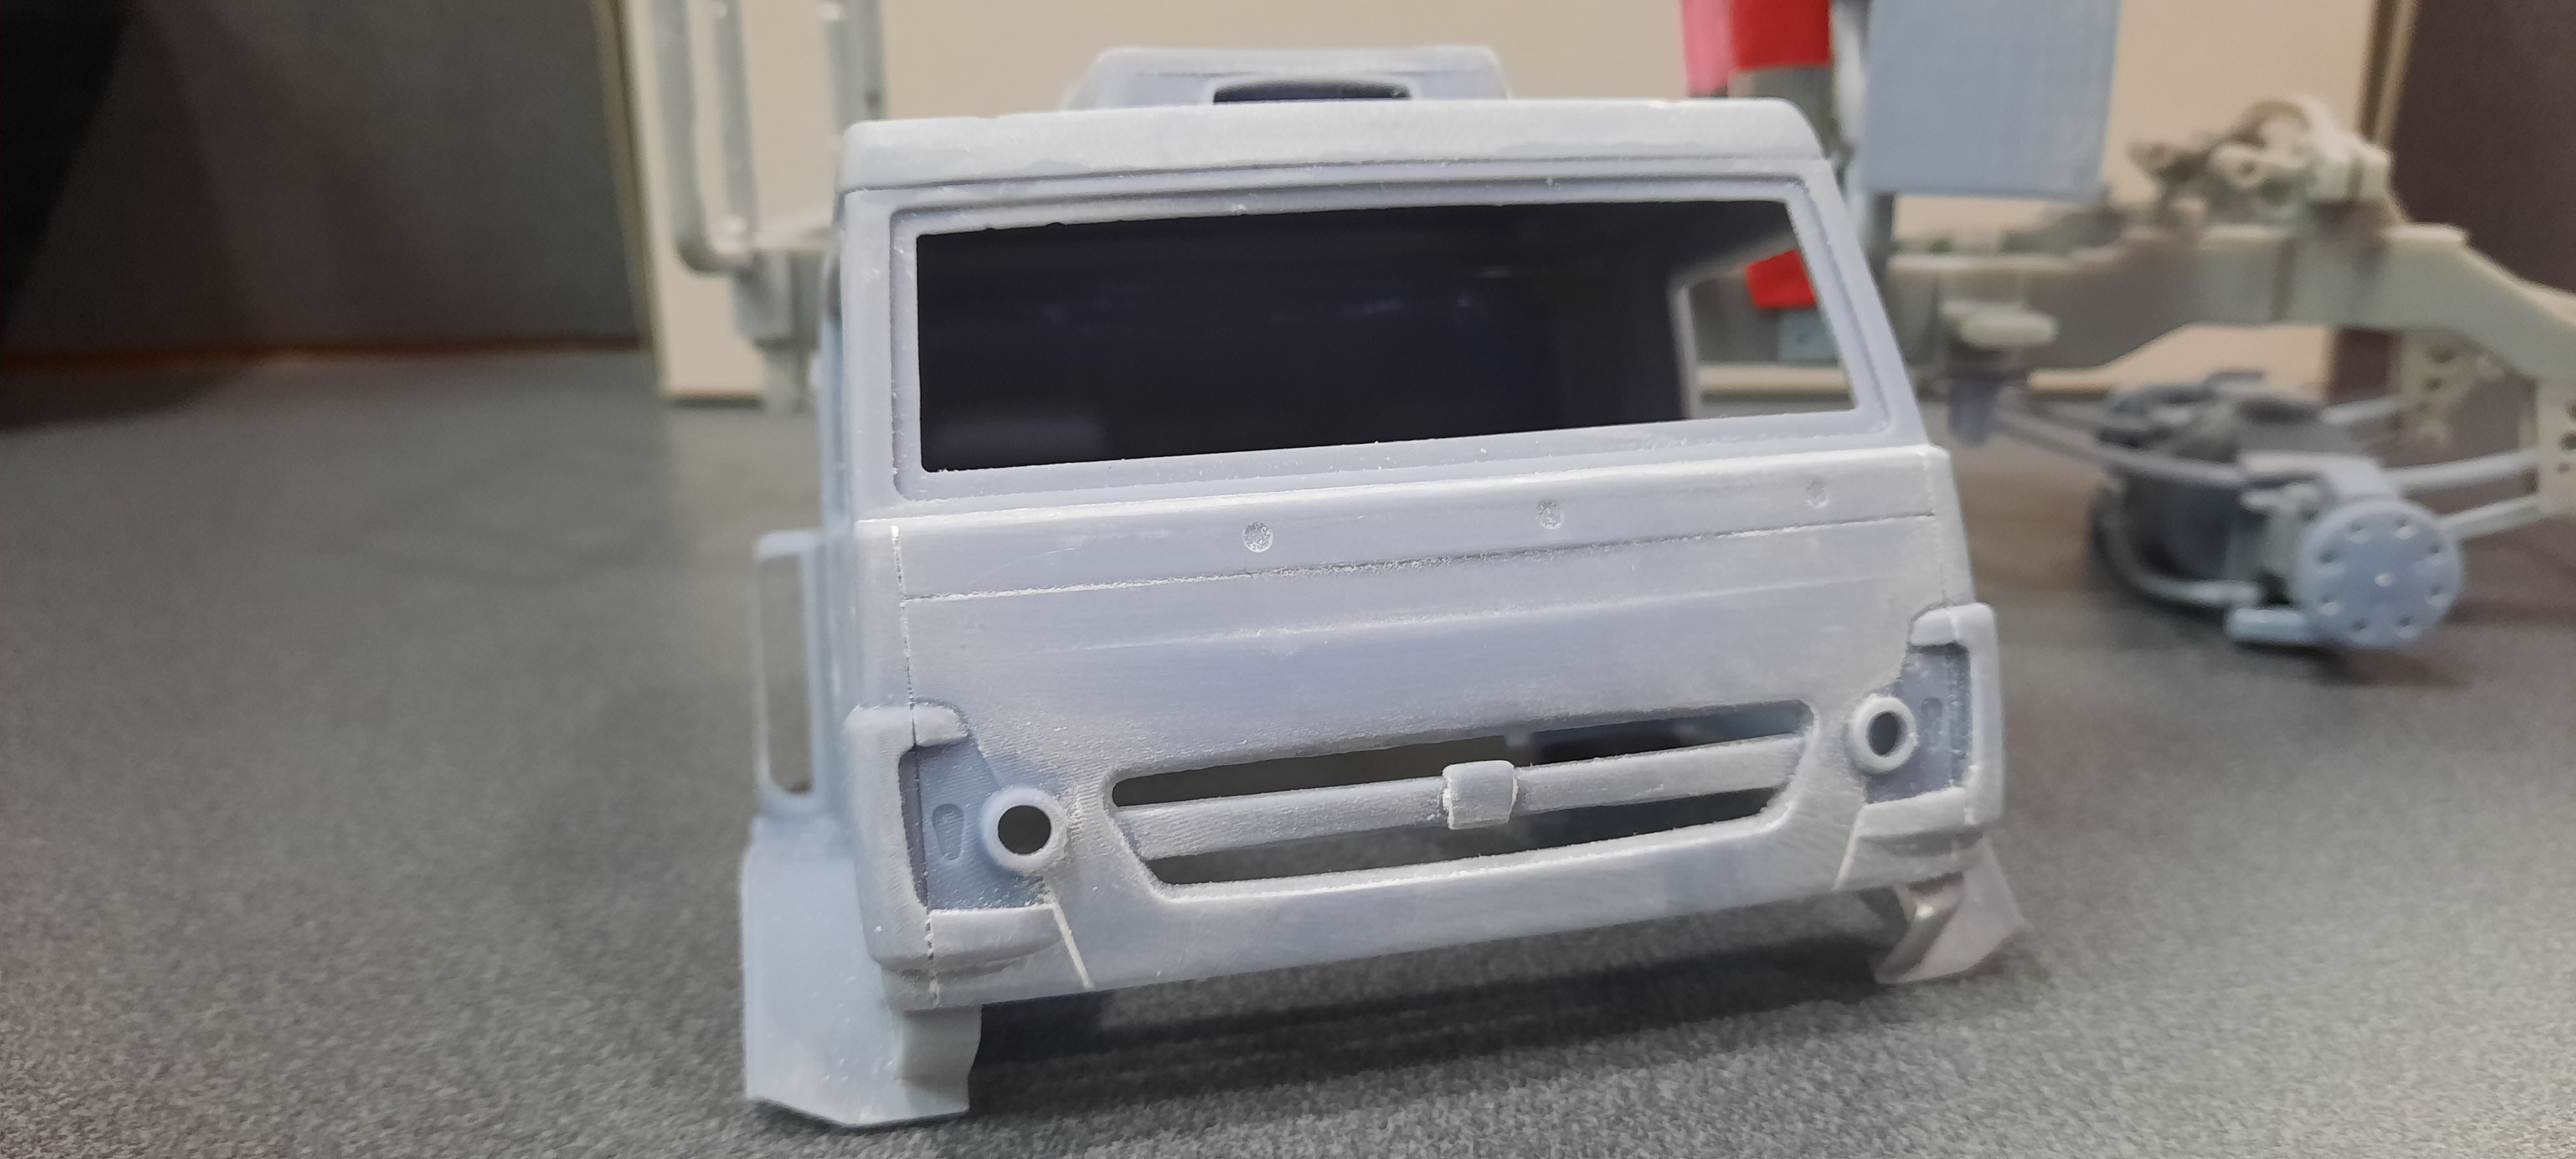
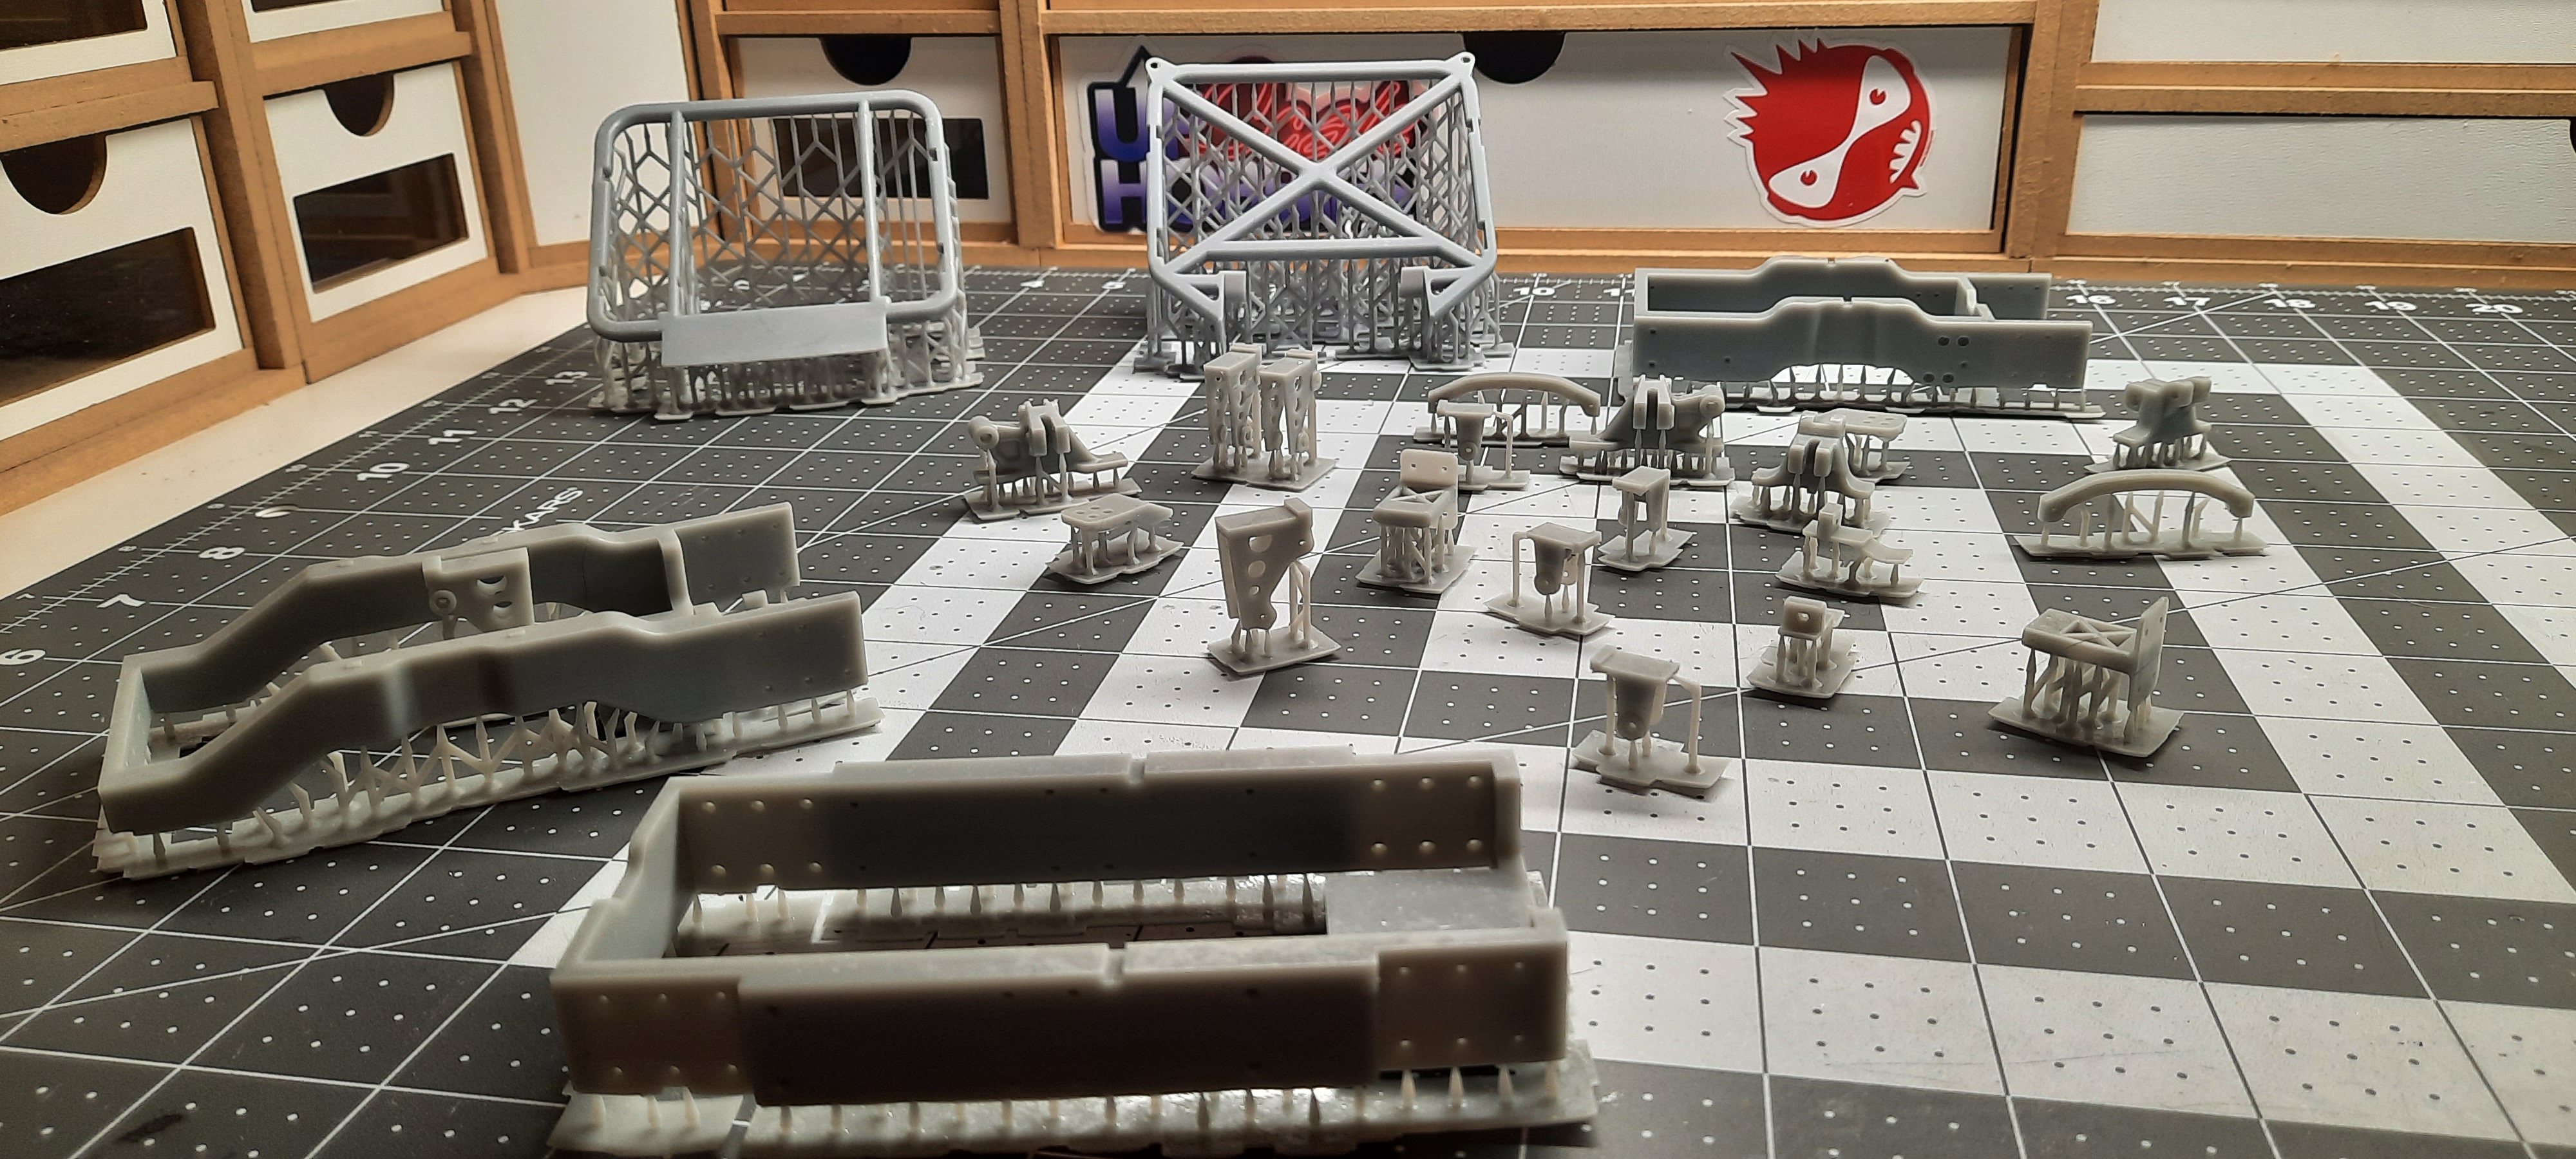
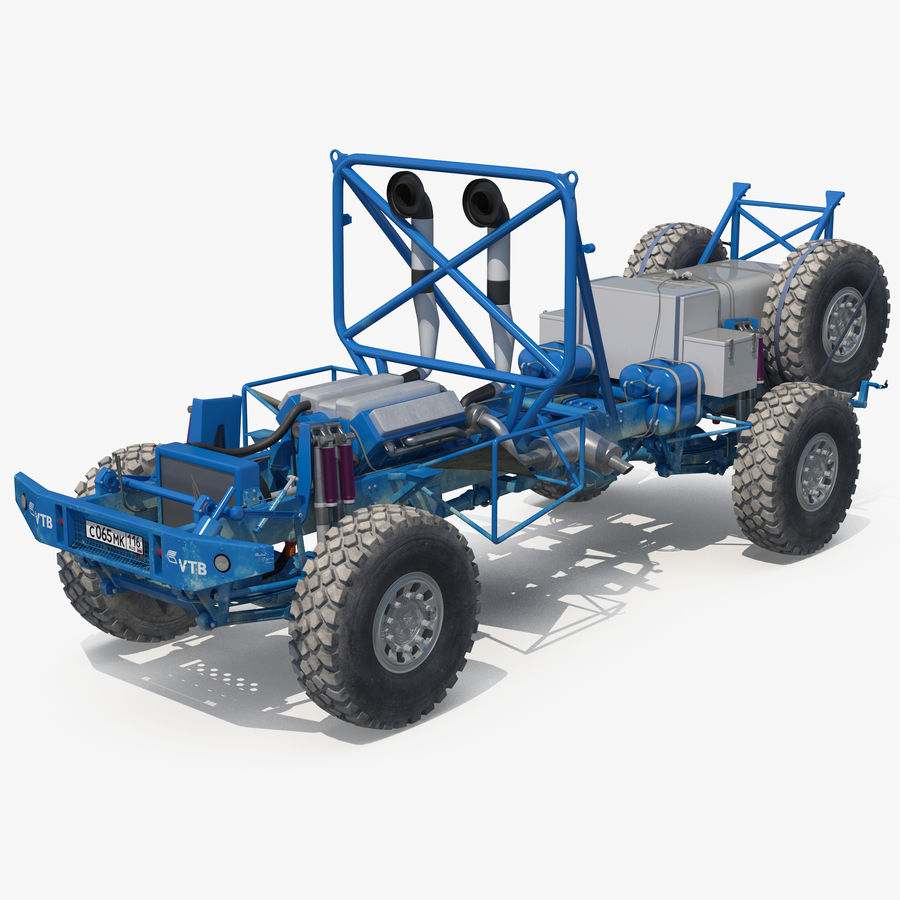
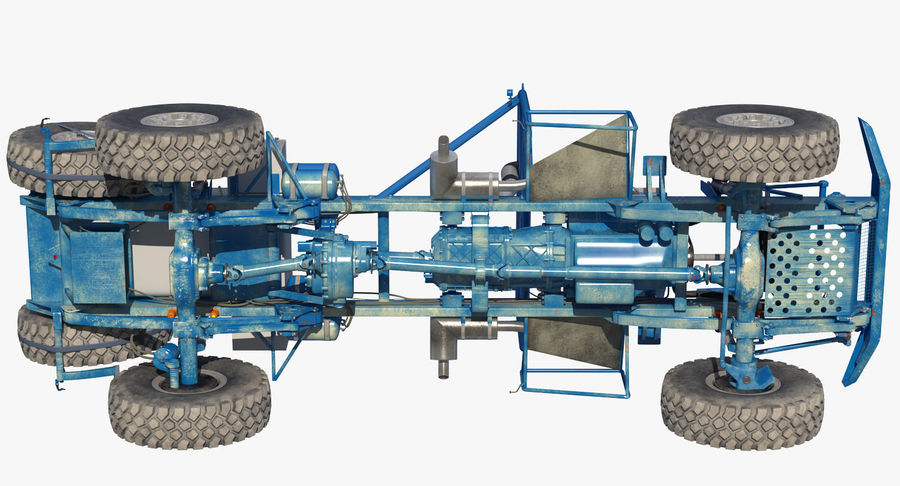
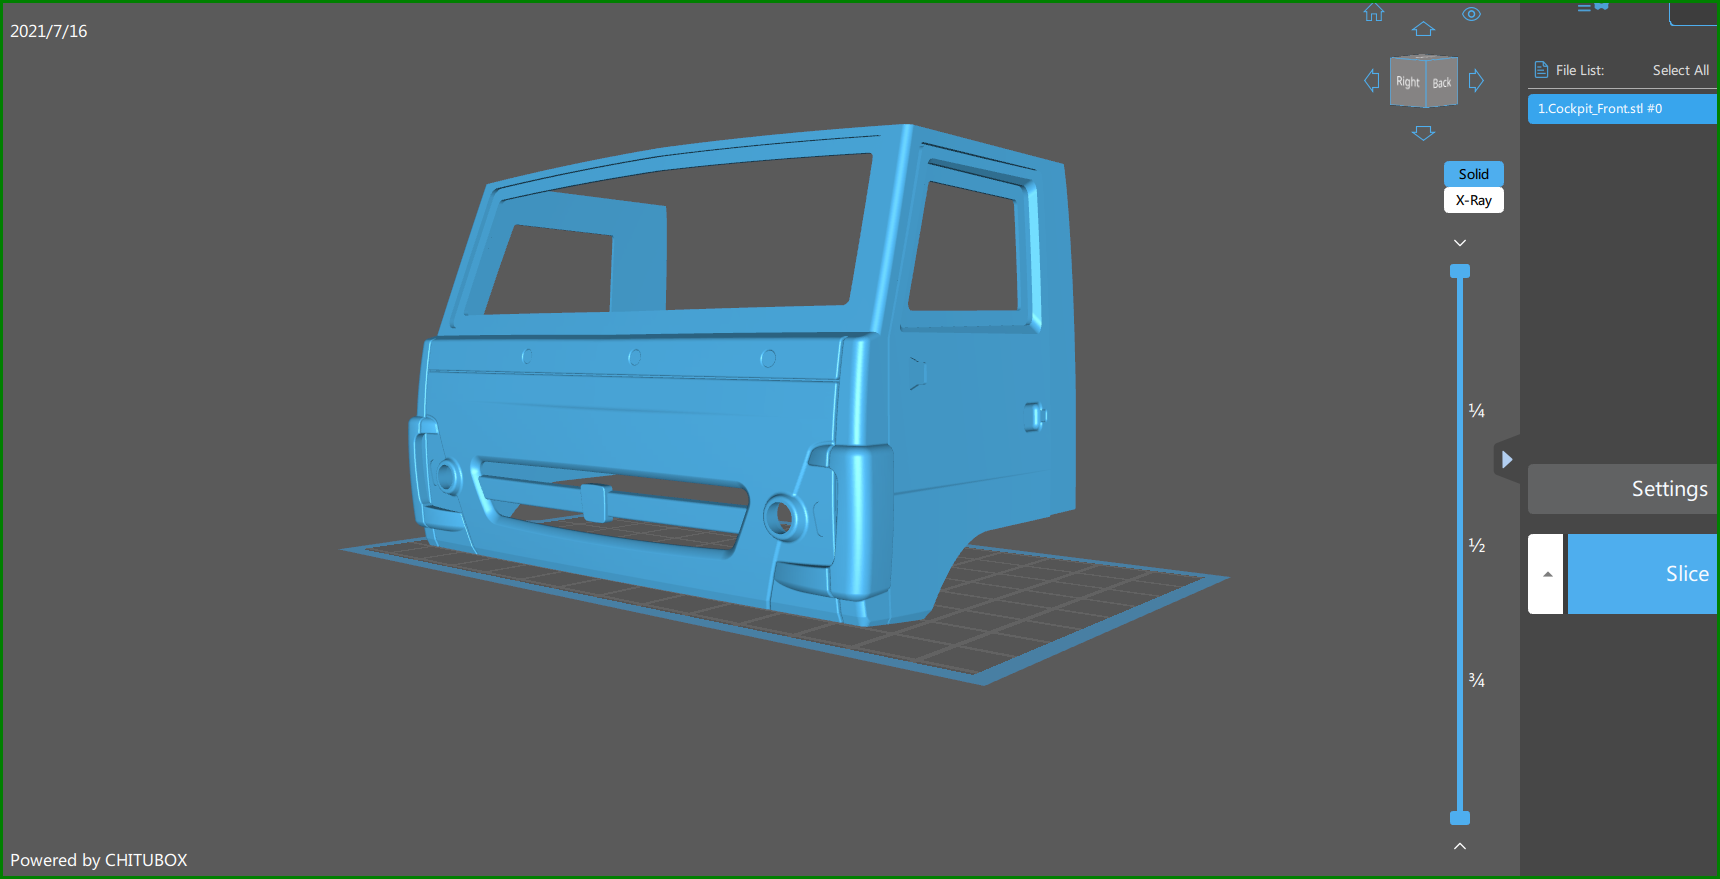
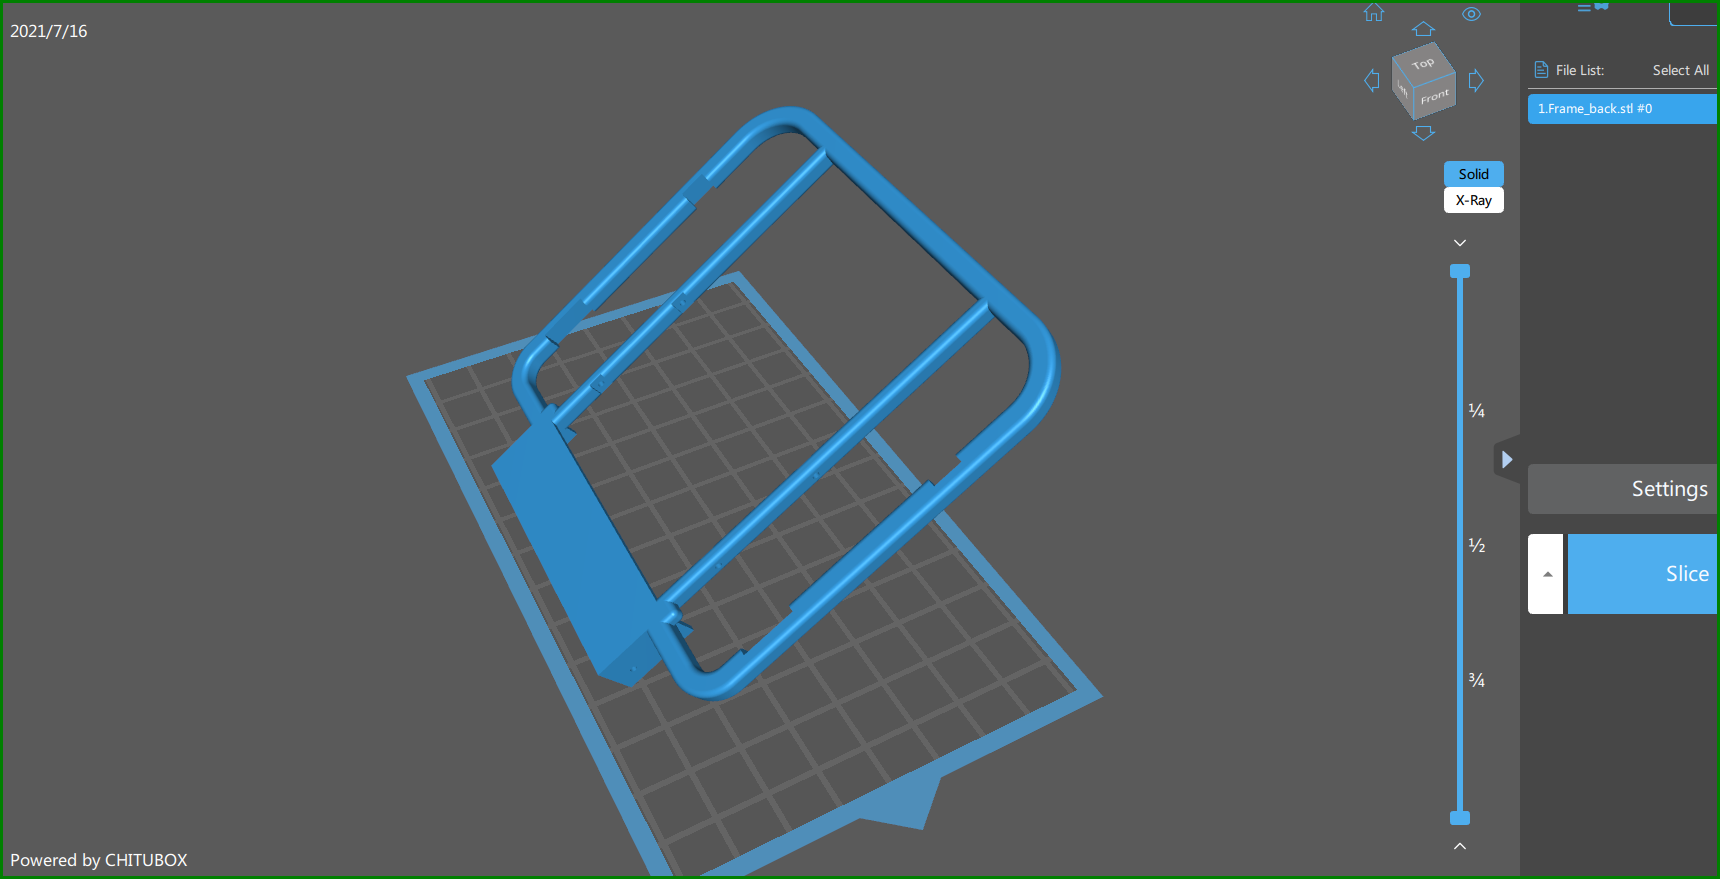
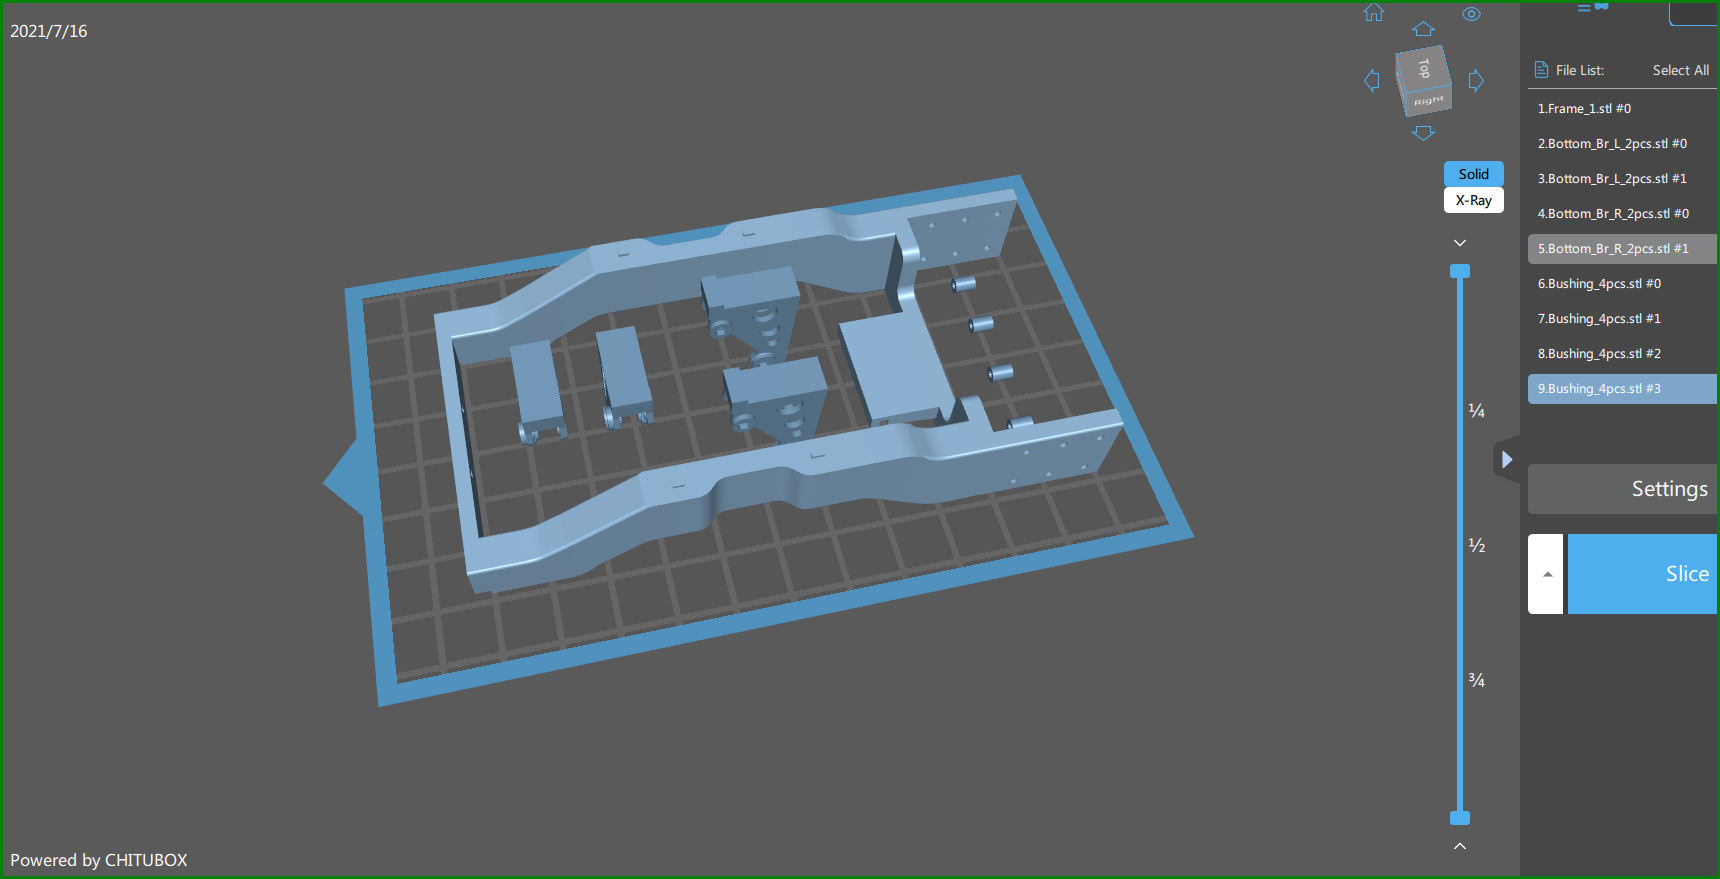
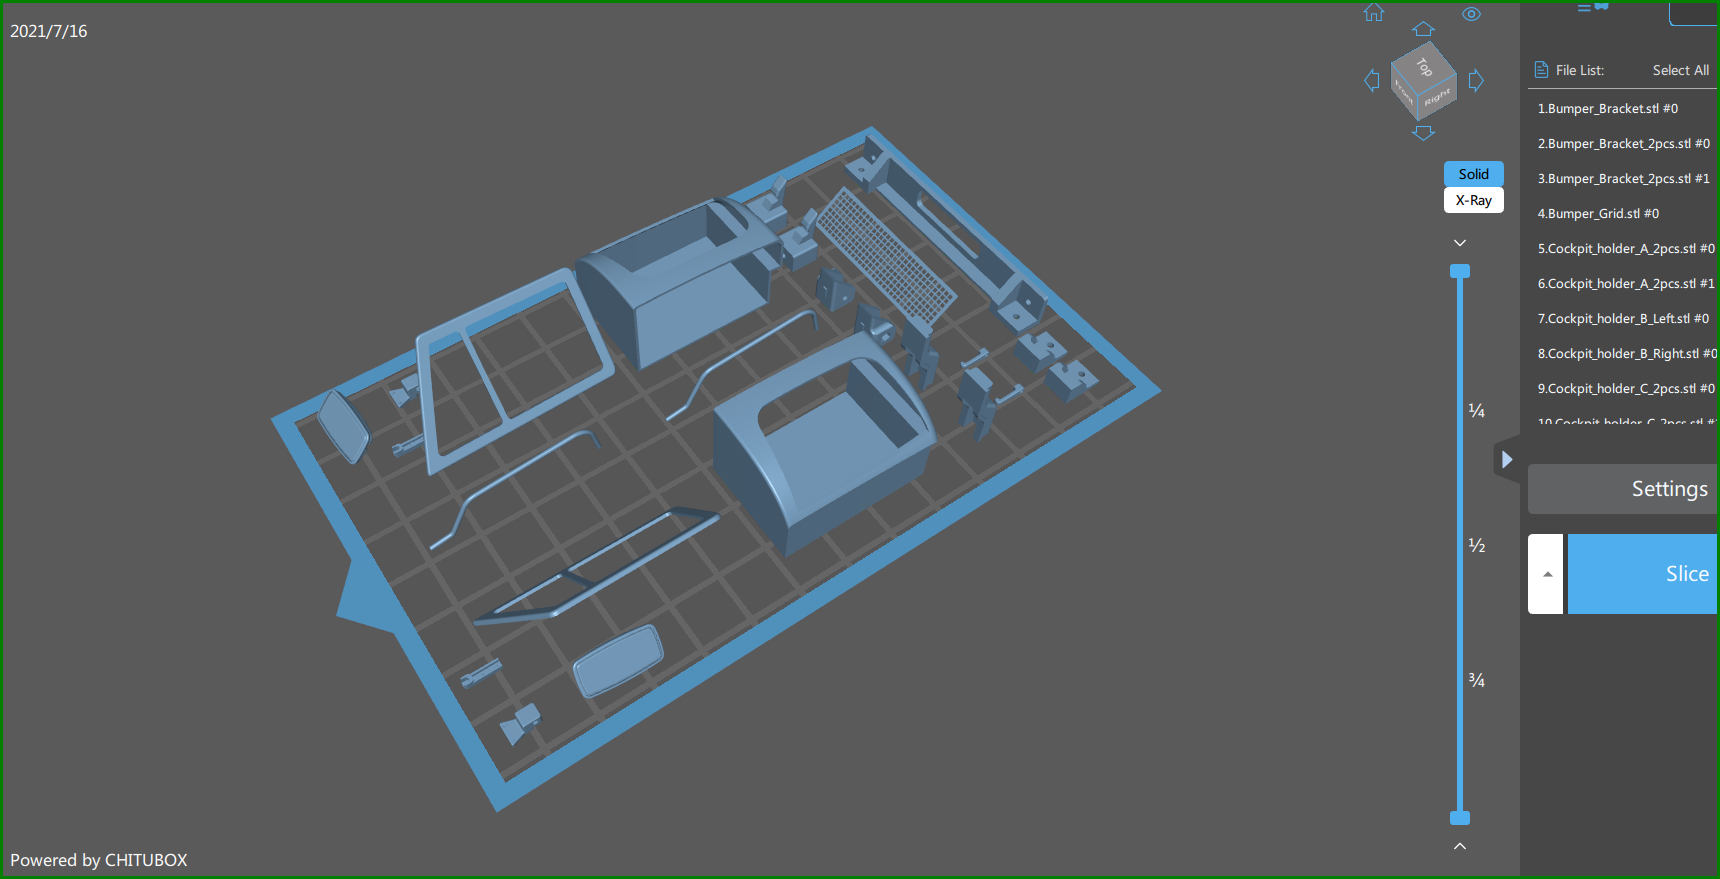
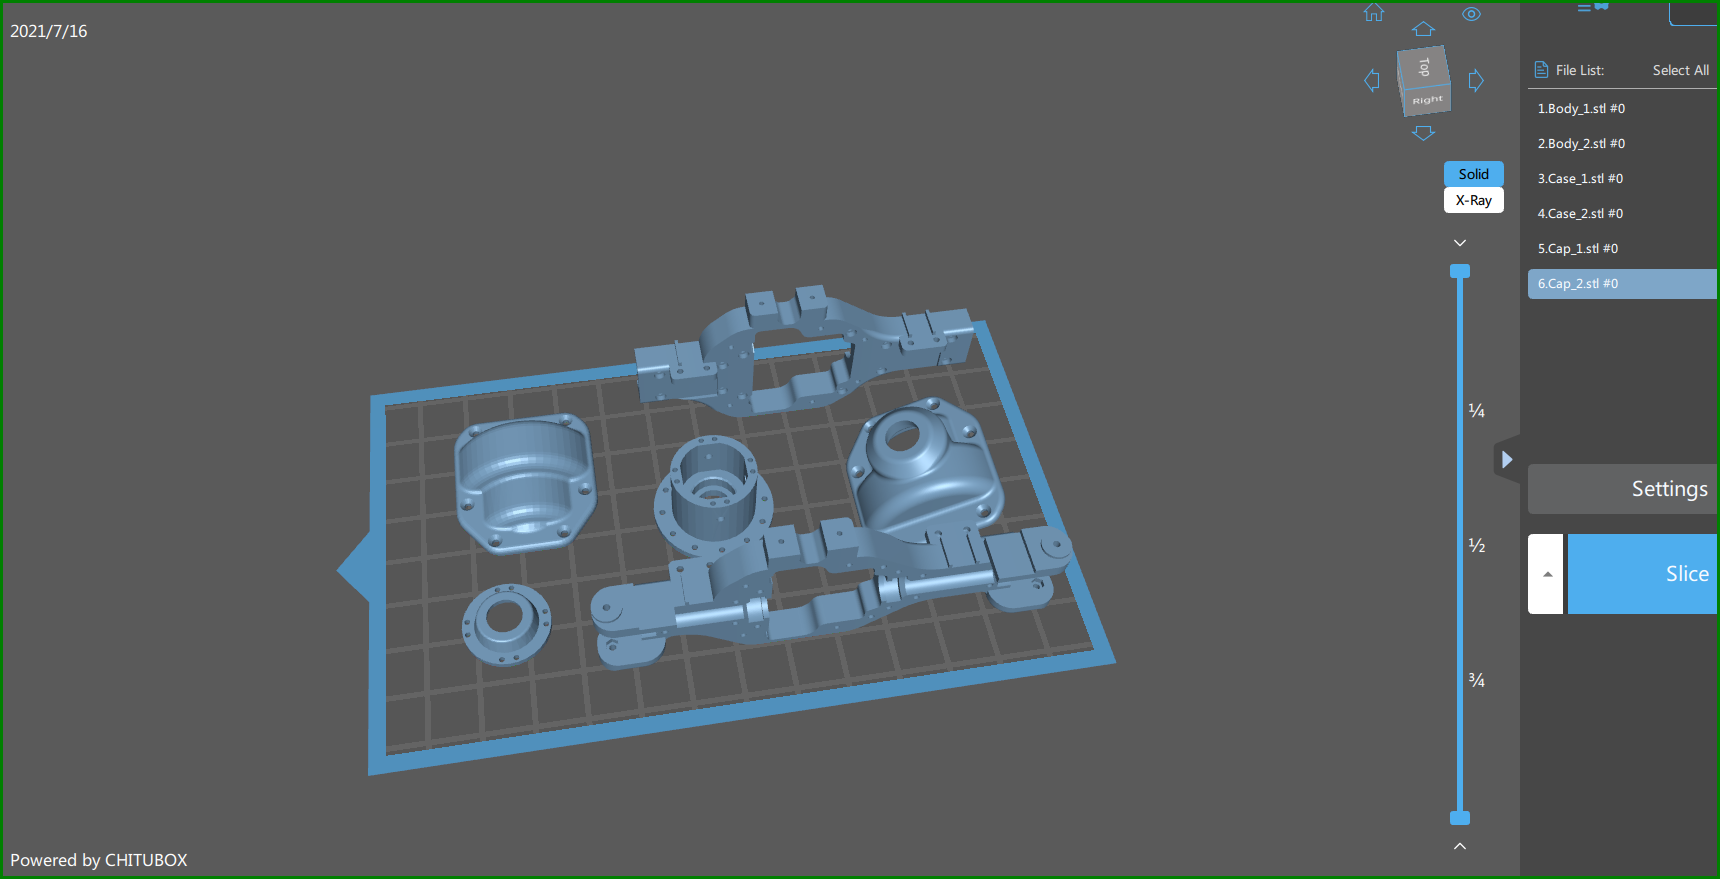
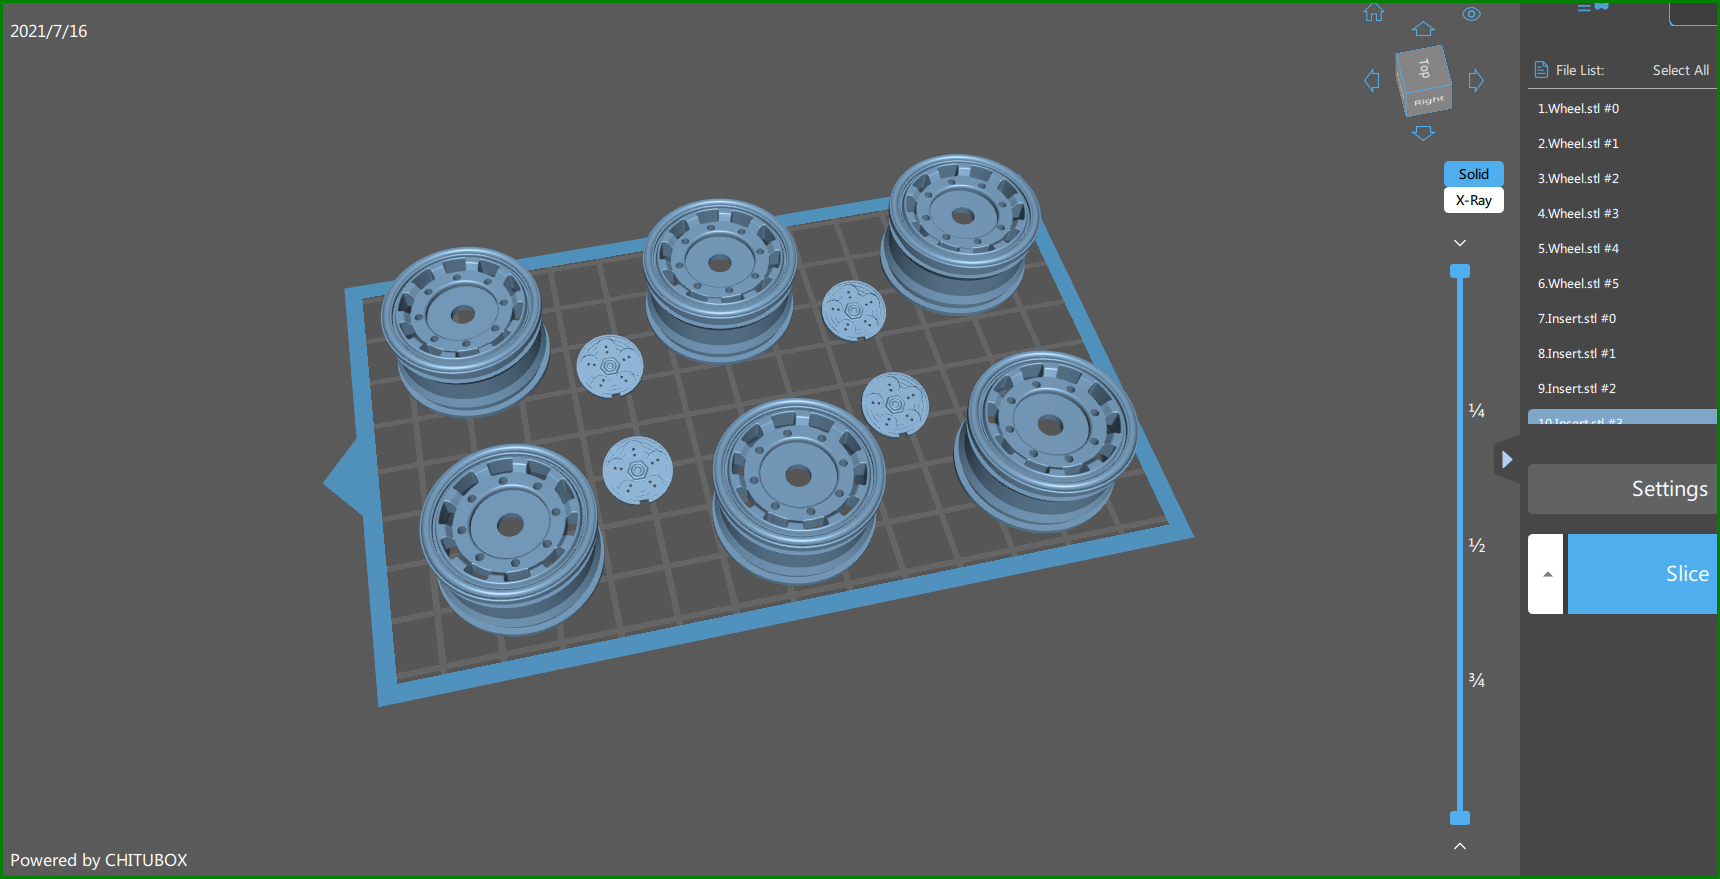
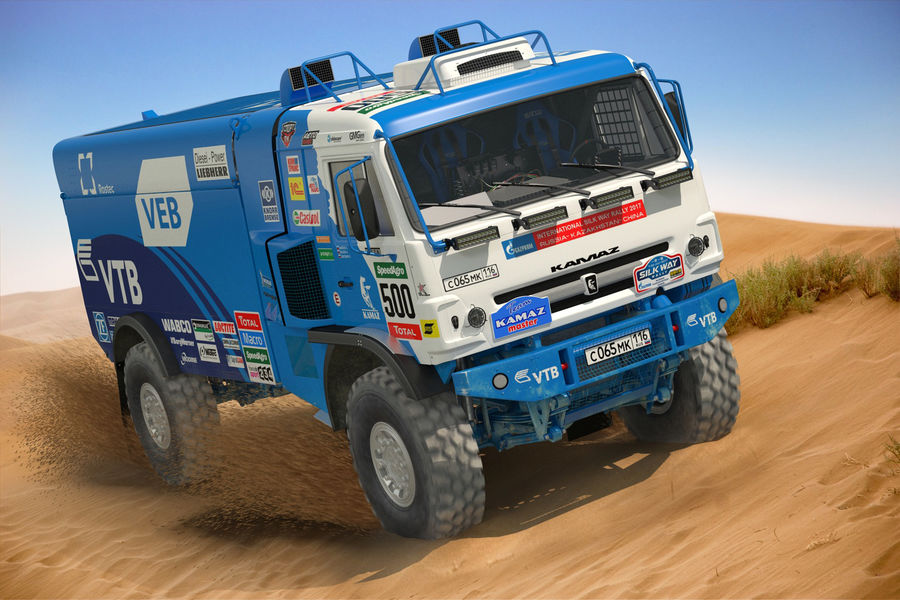
As the title states I'm starting another 3D print project today. This time around I'm going for a Big Rig..of sorts.. a Kamaz Dakar Rally Truck. If interested you can buy the files HERE. You only need to buy three files, cab and front and rear axles, the rest the author supplies free of charge. The total cost was around $27CDN for me, not including what resin I will use. I'm figuring it's going to be right around 1kg of raw resin, assuming no misprints or fails. I'm not 100% certain on the exact year the truck is to represent but I believe its in the mid to late teens, somewhere around 2016-17 based on some of the features. Unfortunately not all details are present on this truck right now, lights, interior, engine, exhaust as this is actually meant to be printed in 1/12th scale and used an RC vehicle. I'm scaling down to 1/24 scale and will be either scratch building, kit bashing or, if I can figure it out designing my own parts and 3D printing those. I'm shooting for the later on most items. I have some reference photos already that will help with chassis details as well as a 3D gaming file with some pretty decent chassis detail I can replicate. I just finished getting all my files prep'd for printing last night at work, and this morning a new batch of resin was delivered so I'll be spending most of the weekend printing files. My first frame file is completed now but I won't start assembly till I have all the files of a given section finished so that I can begin building to hopefully avoid any warping as some of the pieces are fairly thin and could warp. Here are some random file pics of the 3D prints. I didn't count how many pieces there are but right now I'm thinking it's upwards of 100 pieces currently, and that will change as I add in more details. First up the Cab. Some of the parts that attach to the cab, including window frames and airbox vents. This is one of the six files for the frame itself. I am currently printing the frame sections and will be building this mostly from the ground up. The driveline is set up to run off of an RC motor, I plan on printing out all the components to see if I can get it to work in a smaller scale but I will not be putting in a small RC motor. I'm hoping to print up a motor to use and then figure a way to connect all the shafts and transfer cases to the engine to have a fairly realistic look. Here's the front axle. The 1/12 model is designed to be put together with machined screws. I'll just be gluing or resin welding my parts together and then capping the holes with some 3D printed bolts for some detail. Another issue I'm going to have to tackle is the wheels and tires. The wheel design is set up to use a purchasable set of rubber RC tires in 1/12th scale. I did the file up for the wheel but I won't be printing them right now, I want to find a set of tires I can 3D print with some nice details then alter the wheel file to match up the tires....I hope. I will also have the same issue with the shocks, again, set up to use RC shocks I'm going to have to design my own. I'm still a neophyte at this so over the next few weeks I'm hoping to teach myself some of these skills so I can design my own parts for a better looking model. I'm hoping to have enough of the frame printed off by late tonight that I can start on some assembly and have a progress pic or two of that late overnight. Thanks for looking in and all comments and criticisms appreciated.
-
Update. I lost the photos I took right after I finished printing....I've got no idea where they went. Anyways, there some pics of the assembly underway. I'm going to attach a lot of the parts so I dont mess up the paint . It'll require extra masking but I'd rather that than messing up a painted surface. Close up of the wheels showing the details. These are 95% untouched as far as finishing goes. After removing the supports all I've done is sanded the back side of the wheels/tires to remove any nubs left from the supports. The tire tread surface and the front sidewalls are baby bottom smooth right out of the printer. Nothing has been done to the wheels. A shot from head on of most of the parts ready for primer. The suspension pieces need some tweaking to get the to fit better. The tolerances are really tight. The tape on the bottom of the floor is just masking the center board so I can fill in the seams from the different prints being glued together. I had to print the rear engine cover and the airbox and the back of the cockpit as different files so the seams are visible from gluing them together. Unfortunately there are no panel lines in the model for the engine cover, so I'll either have to scribe them in or use decals to add them in, or just leave them out. I'll have to see what will work best. The mirrors are attached and there is an imperfection to fix. The halo has not been attached yet, it needs some more sanding to fit better. My hope is to have the parts ready for primer on Friday and then start painting parts this weekend. I have some Aston Martin green but its not 100% correct but I may try mixing it with some other colours and get the correct colour I need. Thanks for the replies.
-
Unfortunately the original designer didn't include the panel lines in on the engine cover. It is possible to take the files and load them into MeshMixer and add them in, but I have no idea how to do it. I've used MeshMixer a few times but for pretty simple things. Adding lines like that would be beyond me right now. I think what I may do is just use some fine line decals to recreate the panel lines, or maybe make templates to scribe them in manually.
-
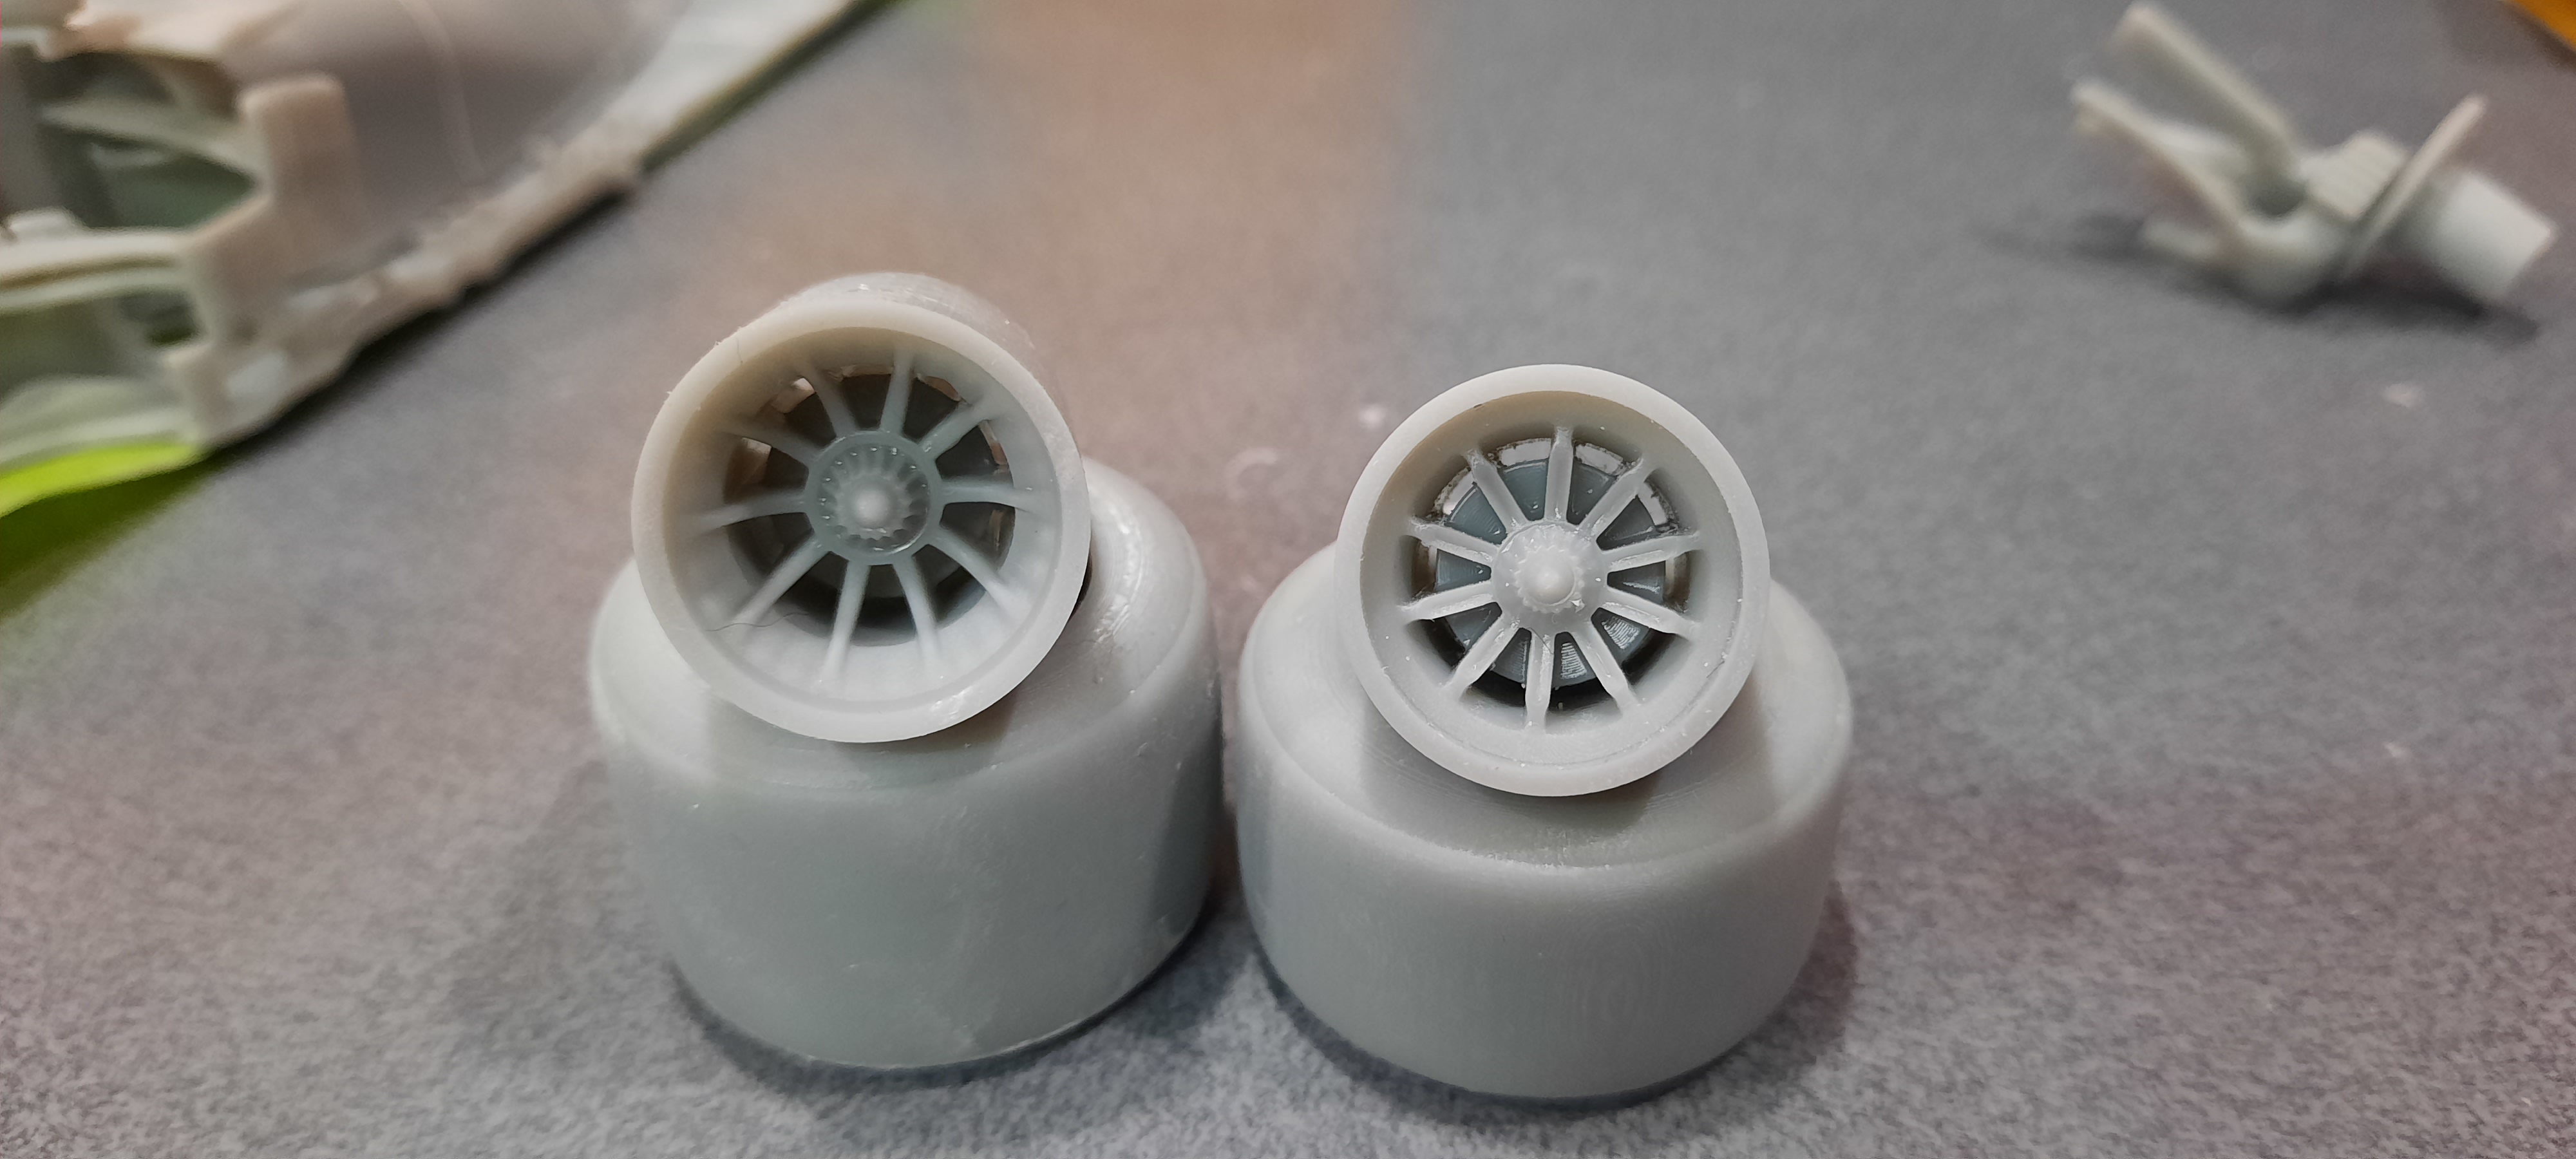
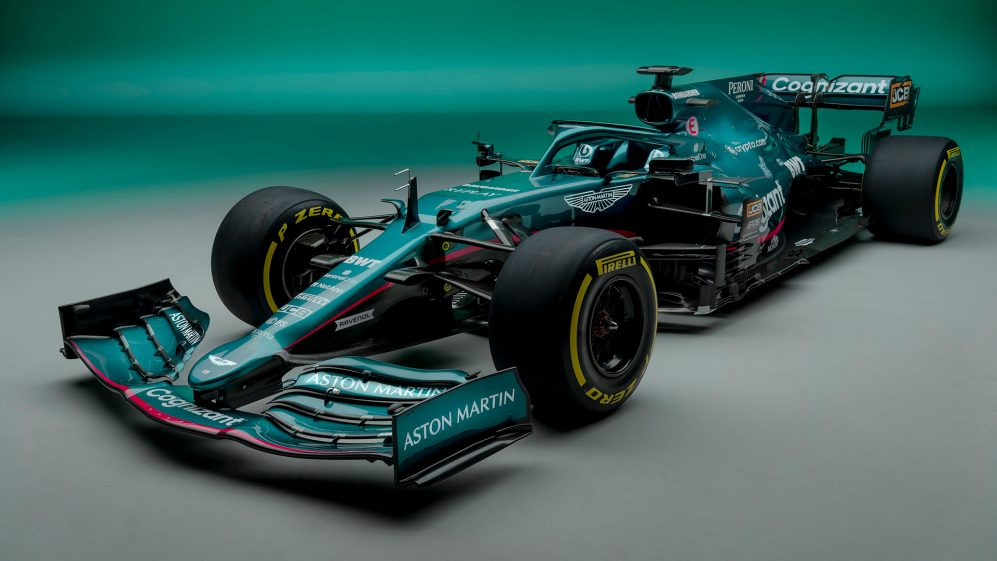
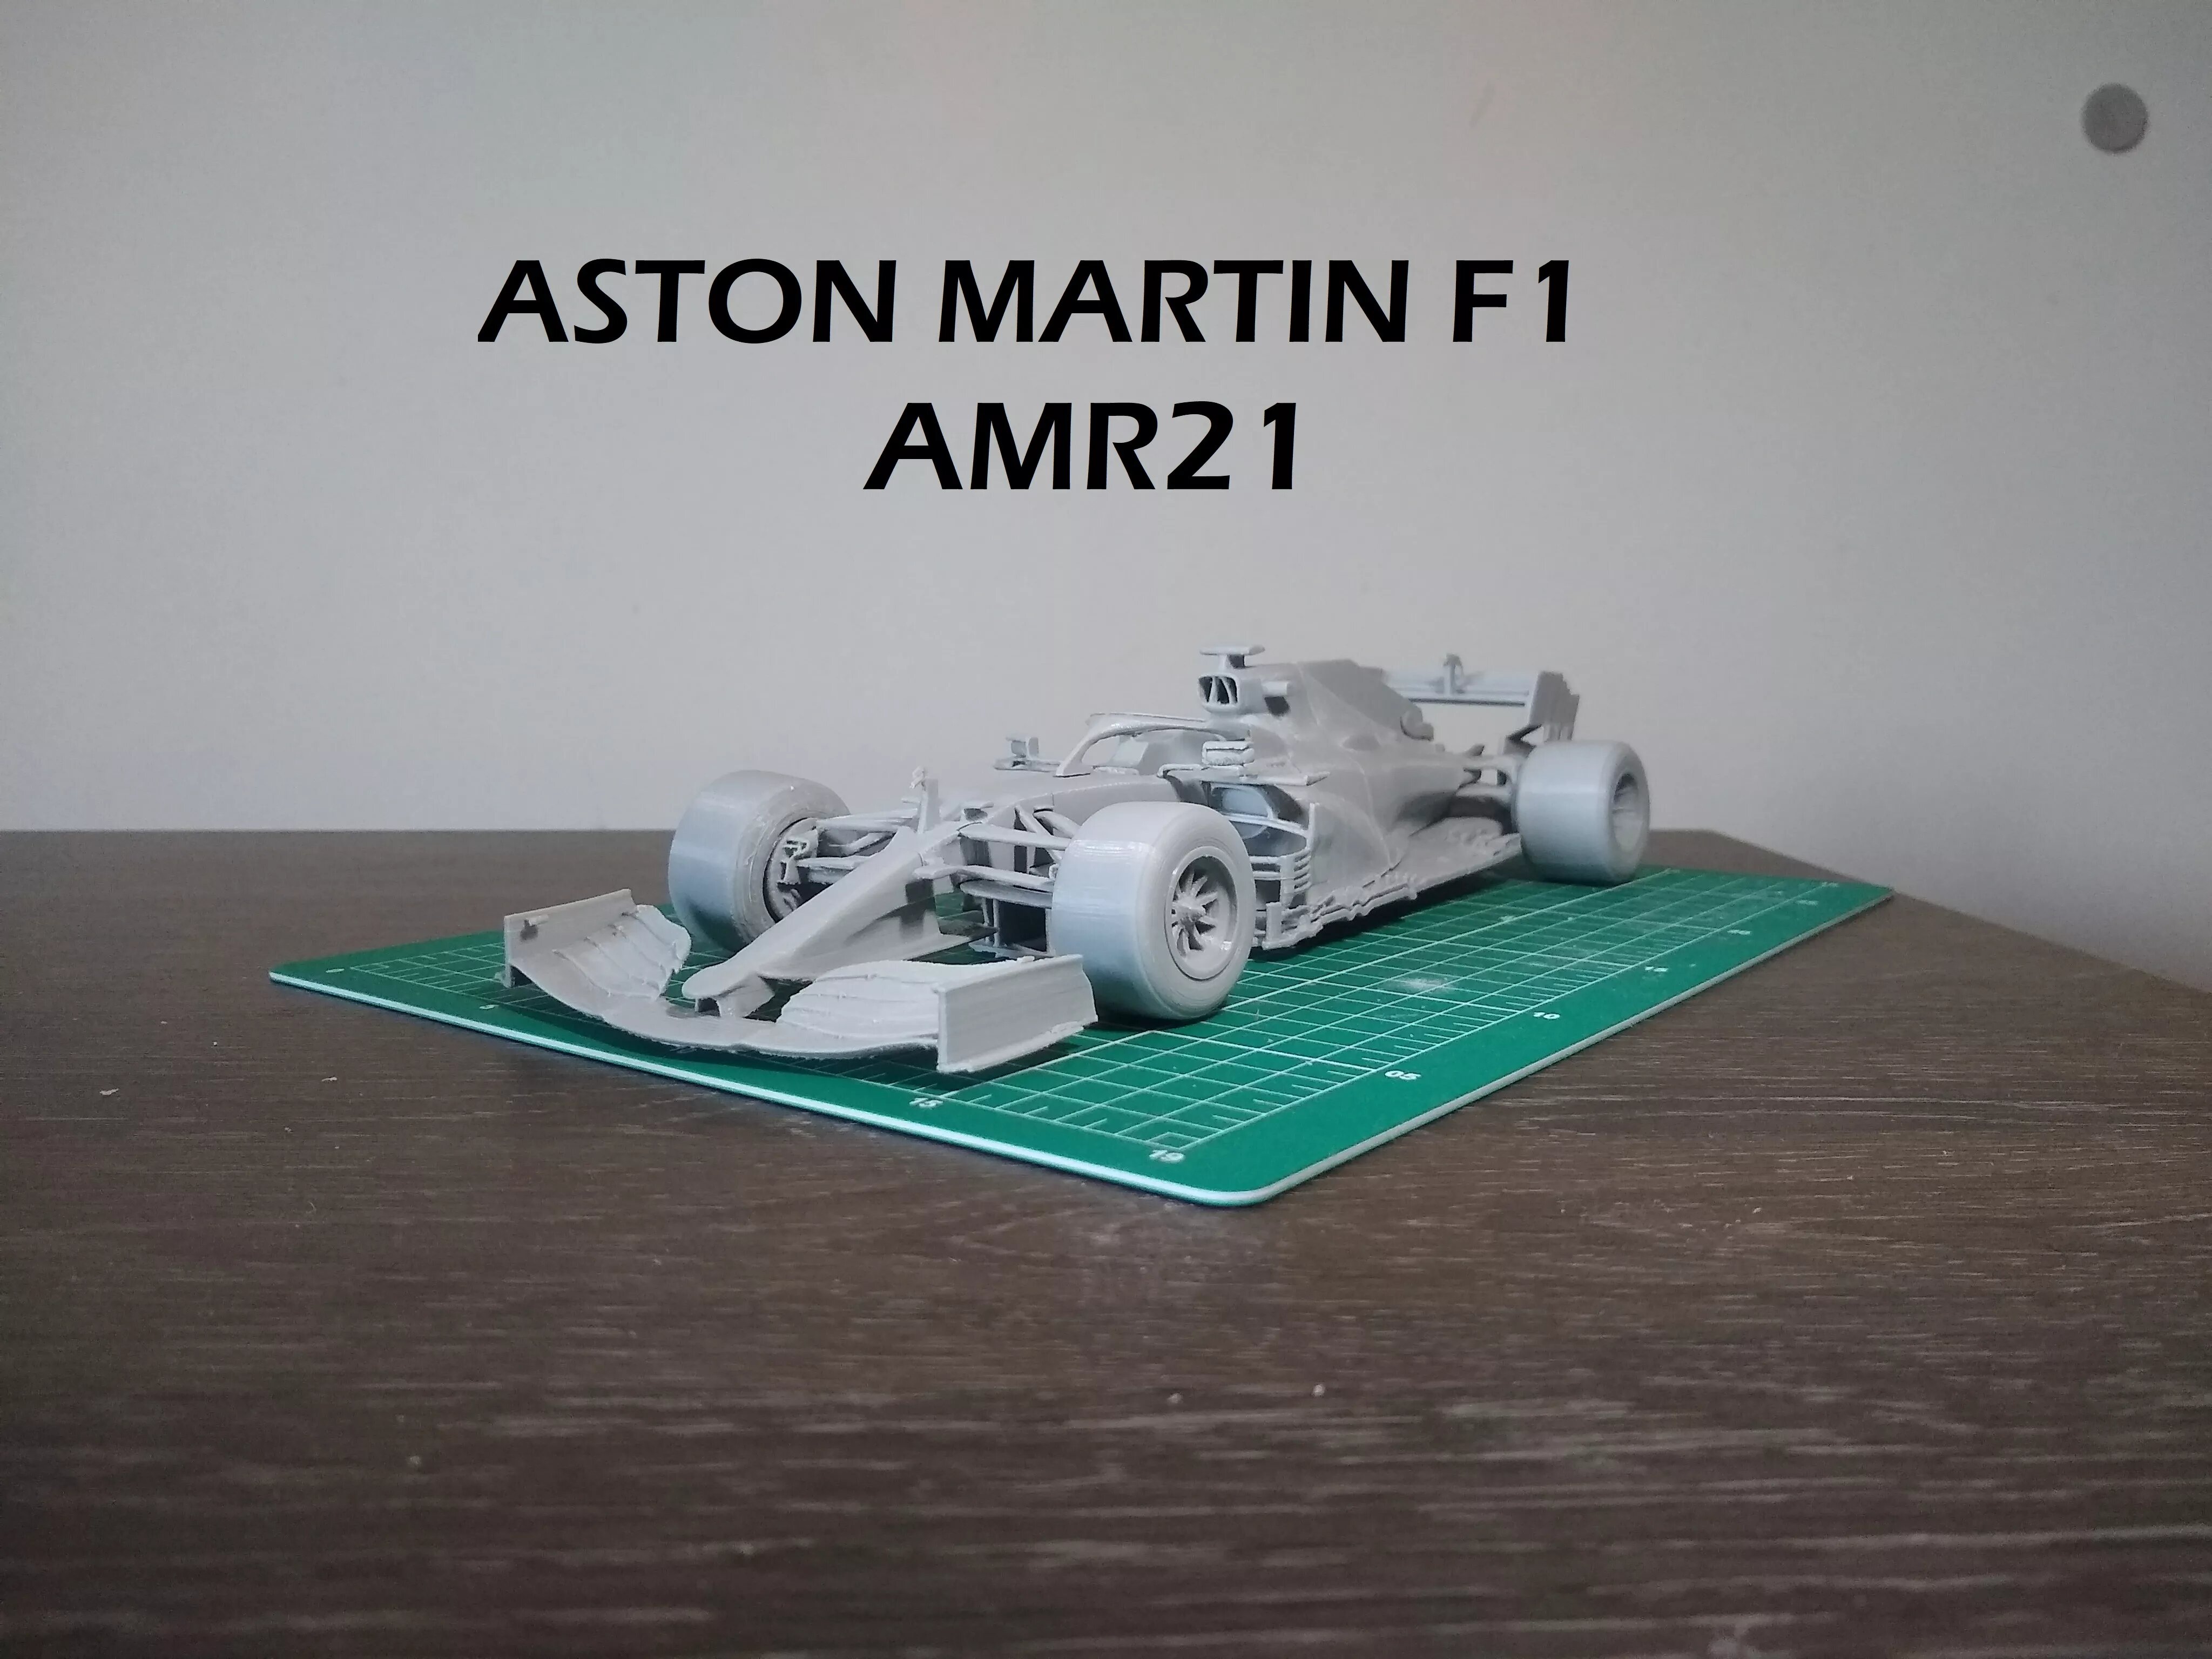
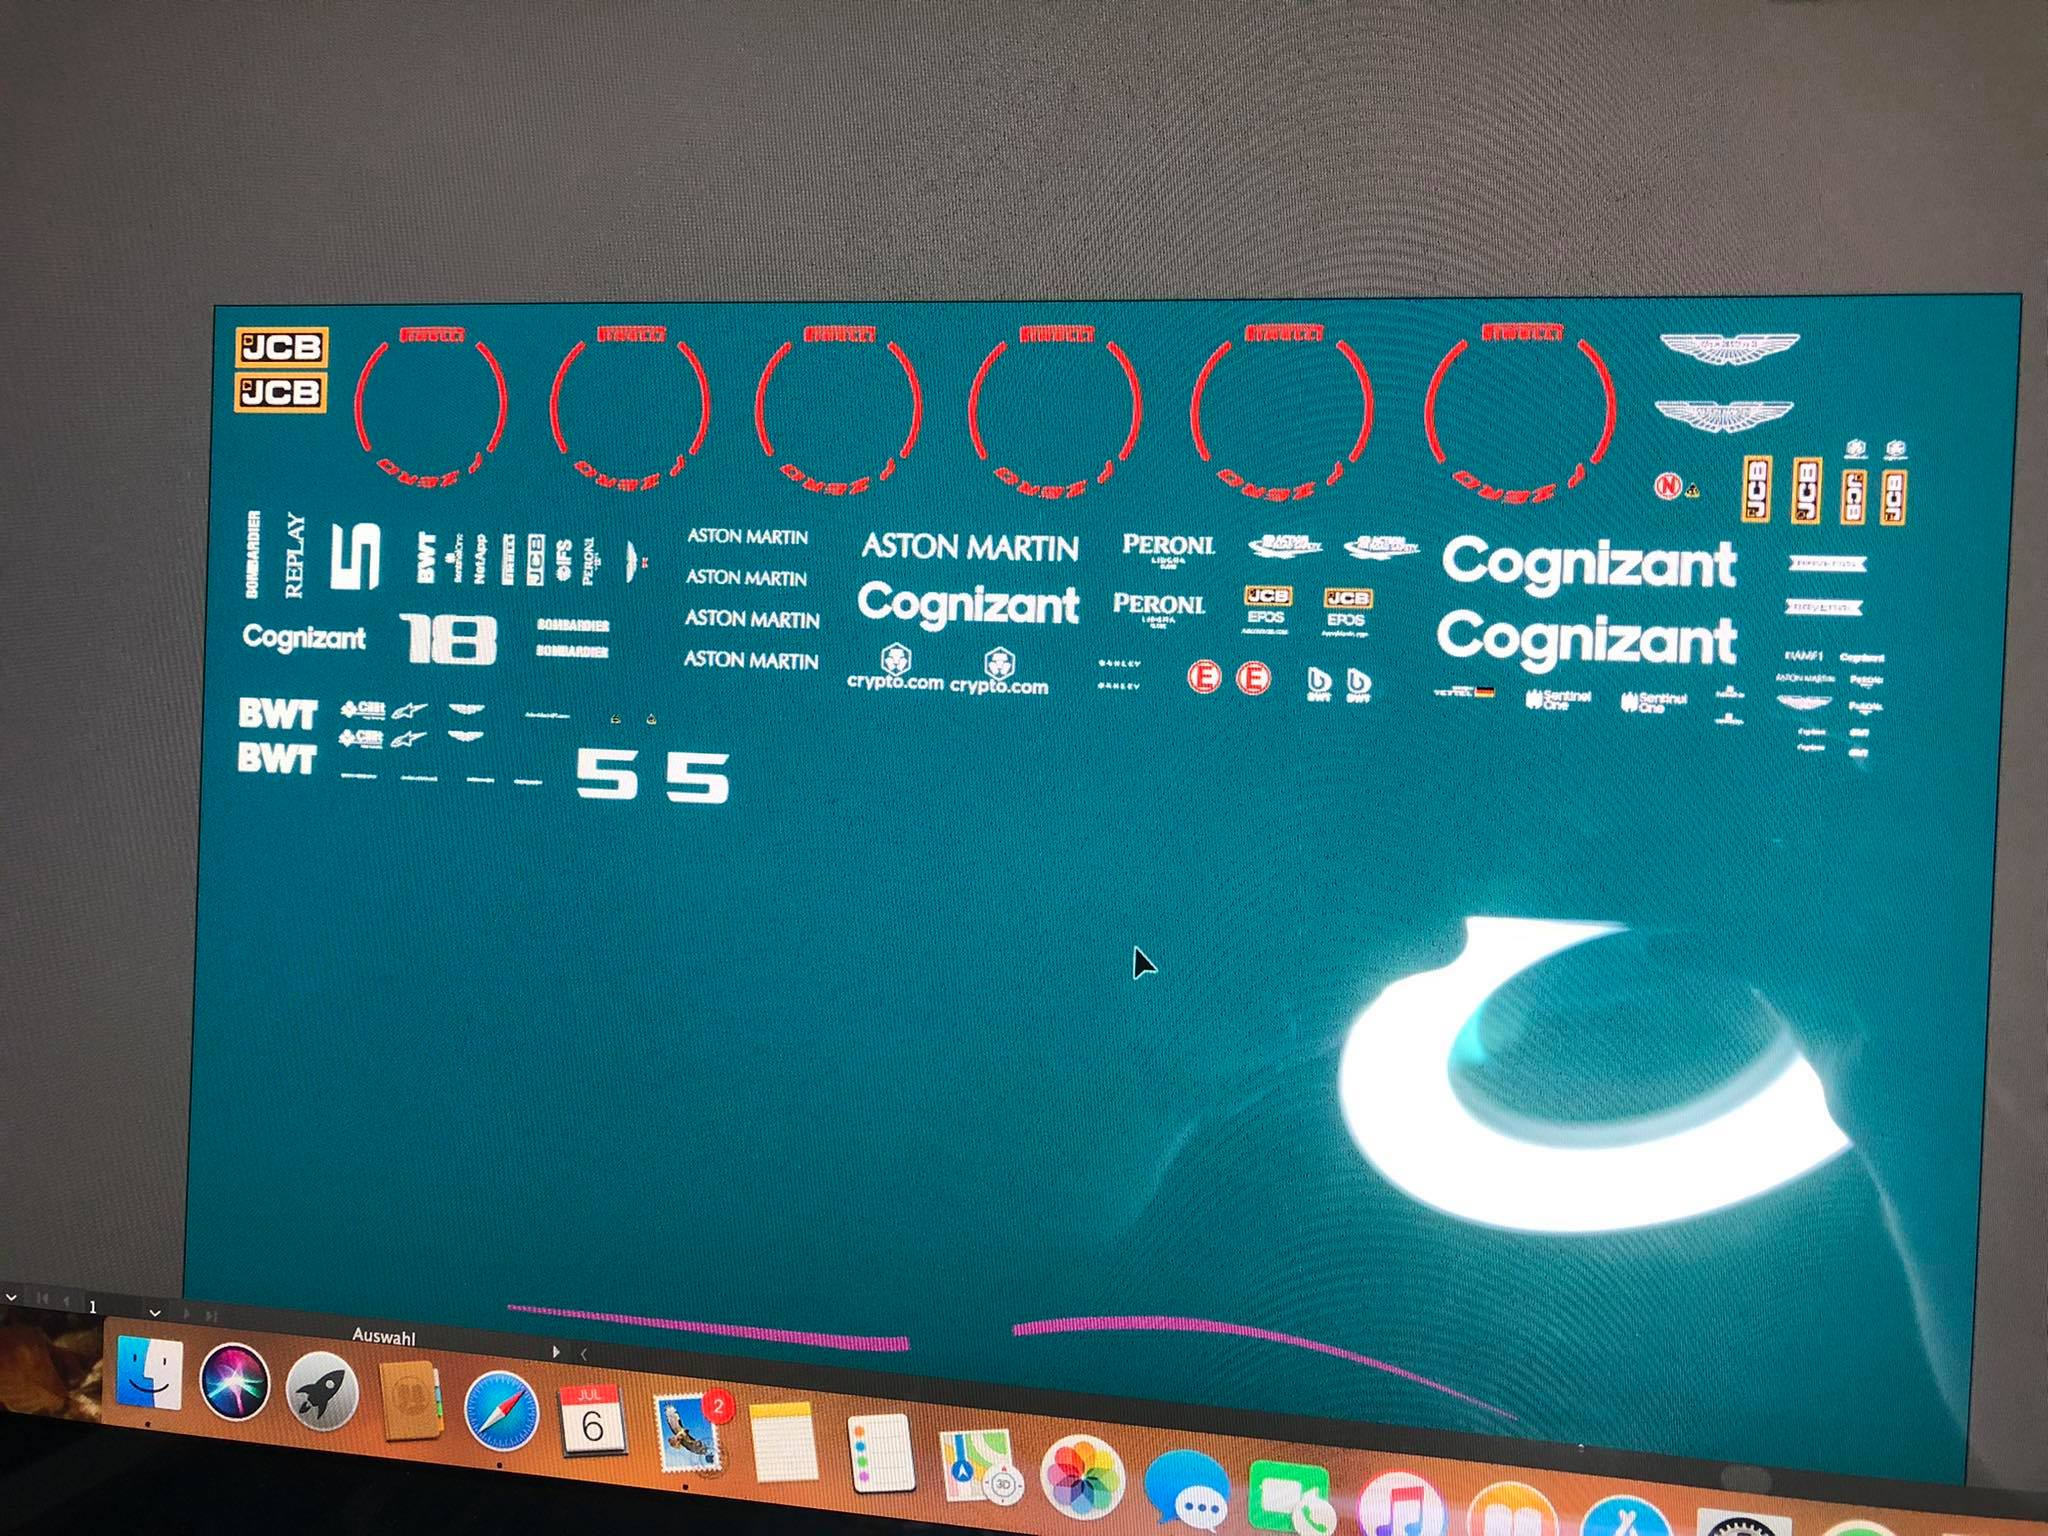
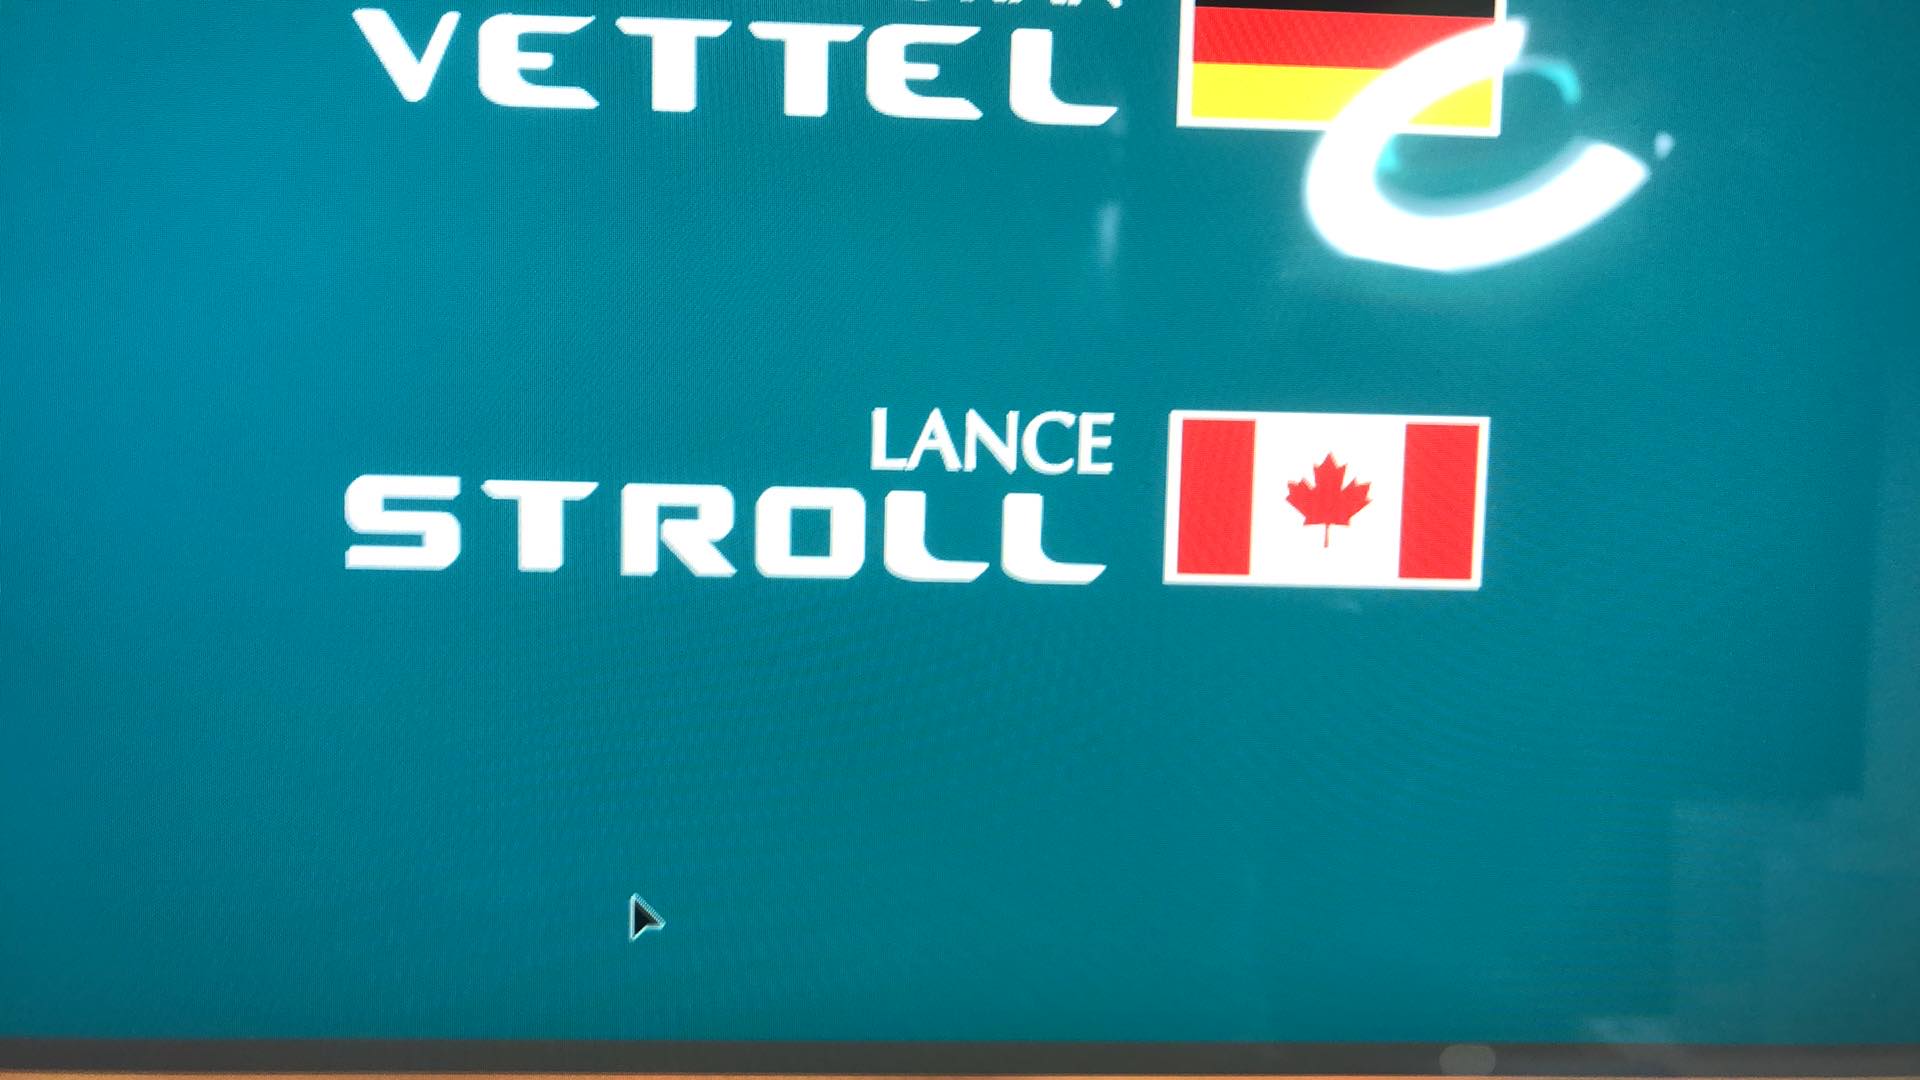
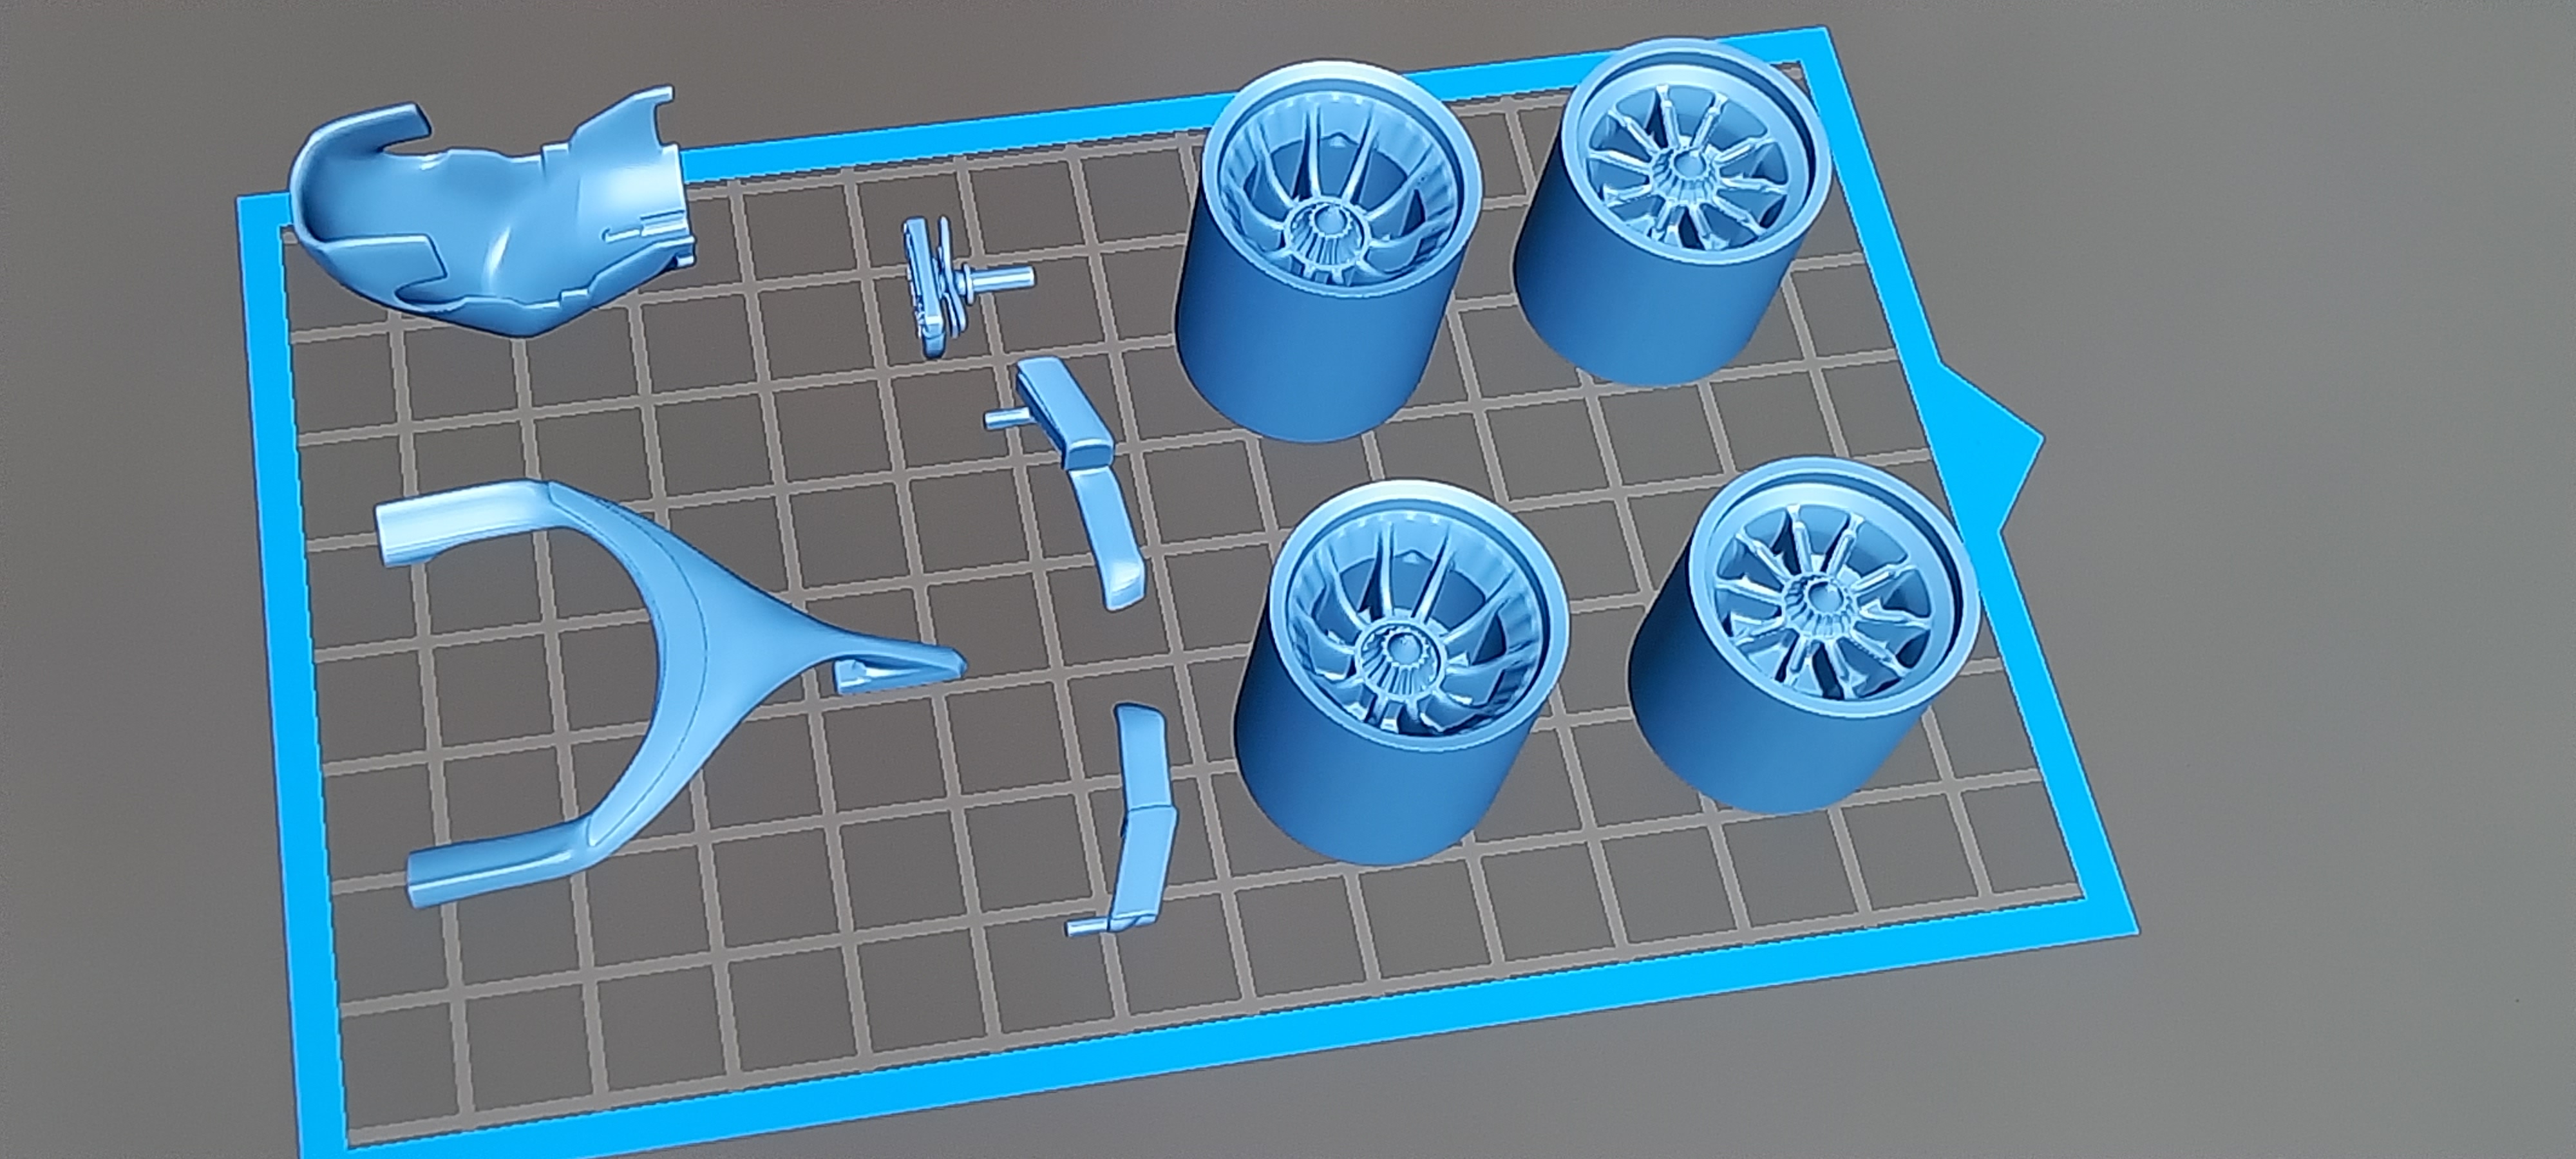
I started another 3D print project his week. Up next is Aston Martin's new AMR21 F1 car. For this project I purchased the files from a designer here . The next pics are of his 3D print of the files on an FLA or filament printer. I don't find them to be as clean looking as resin printers for fine detail. On large scale items they're great but I think resin printers are more detail oriented and give a better result for things in smaller scales. His files are set to print in 1/18th scale but I scaled mine down to 1/20th so I can include it with any other F1 builds I might do in the future from Tamiya etc. In this pic you can see the part count, not excessive( 27 pcs or so), but enough to build a decent curbside model. And another shot of the test print he did. You can see there is a lot of clean up to do on FLA prints, my resin prints are much cleaner with a lot less surface imperfections. Tho the level of detail is amazing. My friend Thomas from Germany, is working on a decal set for the Aston Martin cars right now. He's also printing this out and is building Sebastian Vettal's #5 car and is also adding in Lance Stroll's details to the sheet for me so I can do the #18 car. The decals are still in development but I think Thomas should have them ready to send to the printer by the end of the week. At the moment I do not have any pics of the printed files, I'll take some in the morning when I get home. I have two files left to print in the morning but for now, here are a few of my files from the slicer software and just about ready to be exported to the printer. Here we have the back part of the cockpit along with the front wing. This is the barge boards (the front of the floor just under where the driver sits and where the front nose begins and the rear wing. And finally the wheels, seat, steering wheel, side mirrors and the halo. In total there are nine files to print, a couple pieces, like the floor sections I printed by themselves. I plan on having some of the real prints photo'd and uploaded in the morning. Thanks for looking in.
-
2020 Shelby GT500 TK--Coming Soon !!!
Jhedir6 replied to Jhedir6's topic in Car Aftermarket / Resin / 3D Printed
I wouldnt be surprised if they do a GT350/R cause if you look at the initial 3D models they posted, there are two center consoles, one with no shifter and one with a manual, since the GT500 only has the dual clutch, I assumed they were planning on doing a 350 version as well since really the only body work difference other than, spoiler and the front upper grill and rear trunk center piece is the hood and glass, The glass for the 500 should be the same as the 350 so they have that already. The floor pan, rear seats and door panels should be also the same or almost, just the seats are different inside. -
Thanks for sharing Simon. The kit is way more detailed than I originally thought. Alpha hasn't posted any pics that I have seen of the engine, PE or decals so this is the first I'm seeing them and I'm impressed. Mine's enroute and can't wait for it to arrive. I too won't be using the kit supplied schemes either, what are you planning on? Looking forward to your WiP thread.
-
2020 Shelby GT500 TK--Coming Soon !!!
Jhedir6 replied to Jhedir6's topic in Car Aftermarket / Resin / 3D Printed
It does seem a bit high, but there's like 52 pieces to the TK, not including decals. Meaning you're paying like less than $2 per piece. I think they should drop the 2 sets of wheels and tires and give you the option to pick which set you want. That would drop the price by like $10-12 or more based on their wheel/tire sets. I'll be ordering one, but would definitely like to see the price a bit cheaper. The quality looks good. -
2021 AMG GT Black Series-An Adventure in 3D Printing
Jhedir6 replied to Jhedir6's topic in WIP: Model Cars
Thanks Doug. Great tip.....where were you when I was trying to figure this out....just kidding. This was my first attempt at something like this so now I know for the next time. I found another file of another car I want to print now, and the plan is to work on it tonight at work ( covering for someone so I've got a 12hr shift tonight), and maybe set it up for a print on the weekend. The file is in 1/20th scale so I'll have to scale all the pieces down to 1/24th. This new file has separate parts for wheels, tires, brakes, vents, grills, glass, pretty much everything on the outside of the car, but no interior. I'll either kitbash the interior or see if I can find some STL files for the interior. Should I have any questions could I toss you a message Doug? Thanks Dan, yes, I'll save them. I have a couple 1/25th cars I want to do as restomods and I think they might be ok for a 1/25th car, the wheels anyways, I might still have to print up some tires with a bit larger sidewall to fill in the space. Thanks for looking in guys, appreciate all the replies. -
2021 AMG GT Black Series-An Adventure in 3D Printing
Jhedir6 replied to Jhedir6's topic in WIP: Model Cars
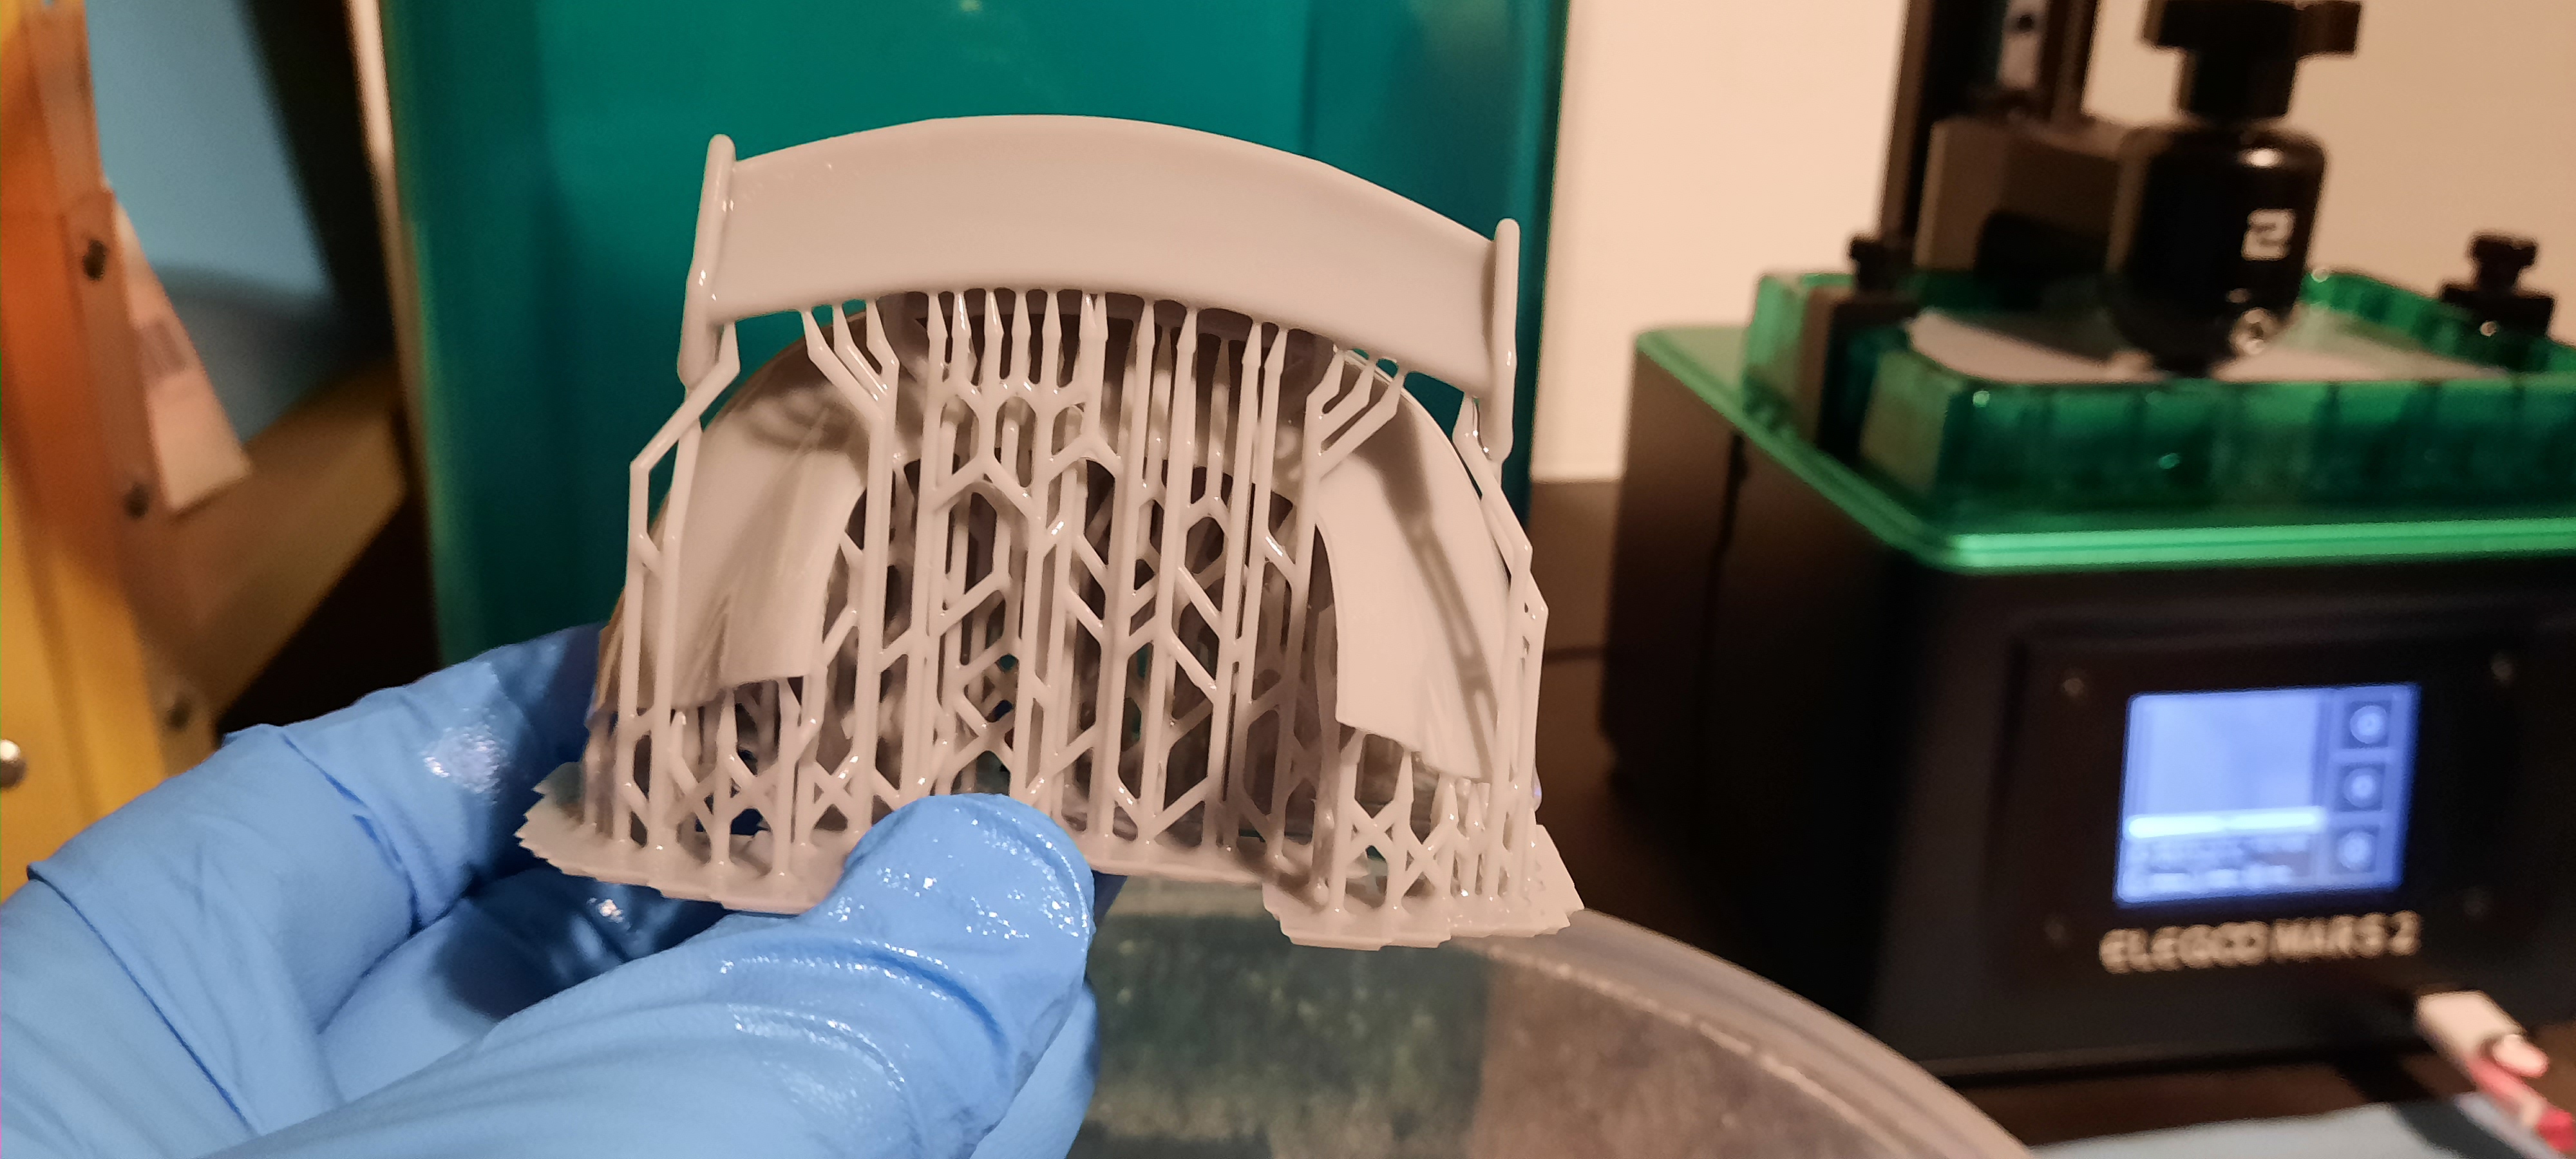
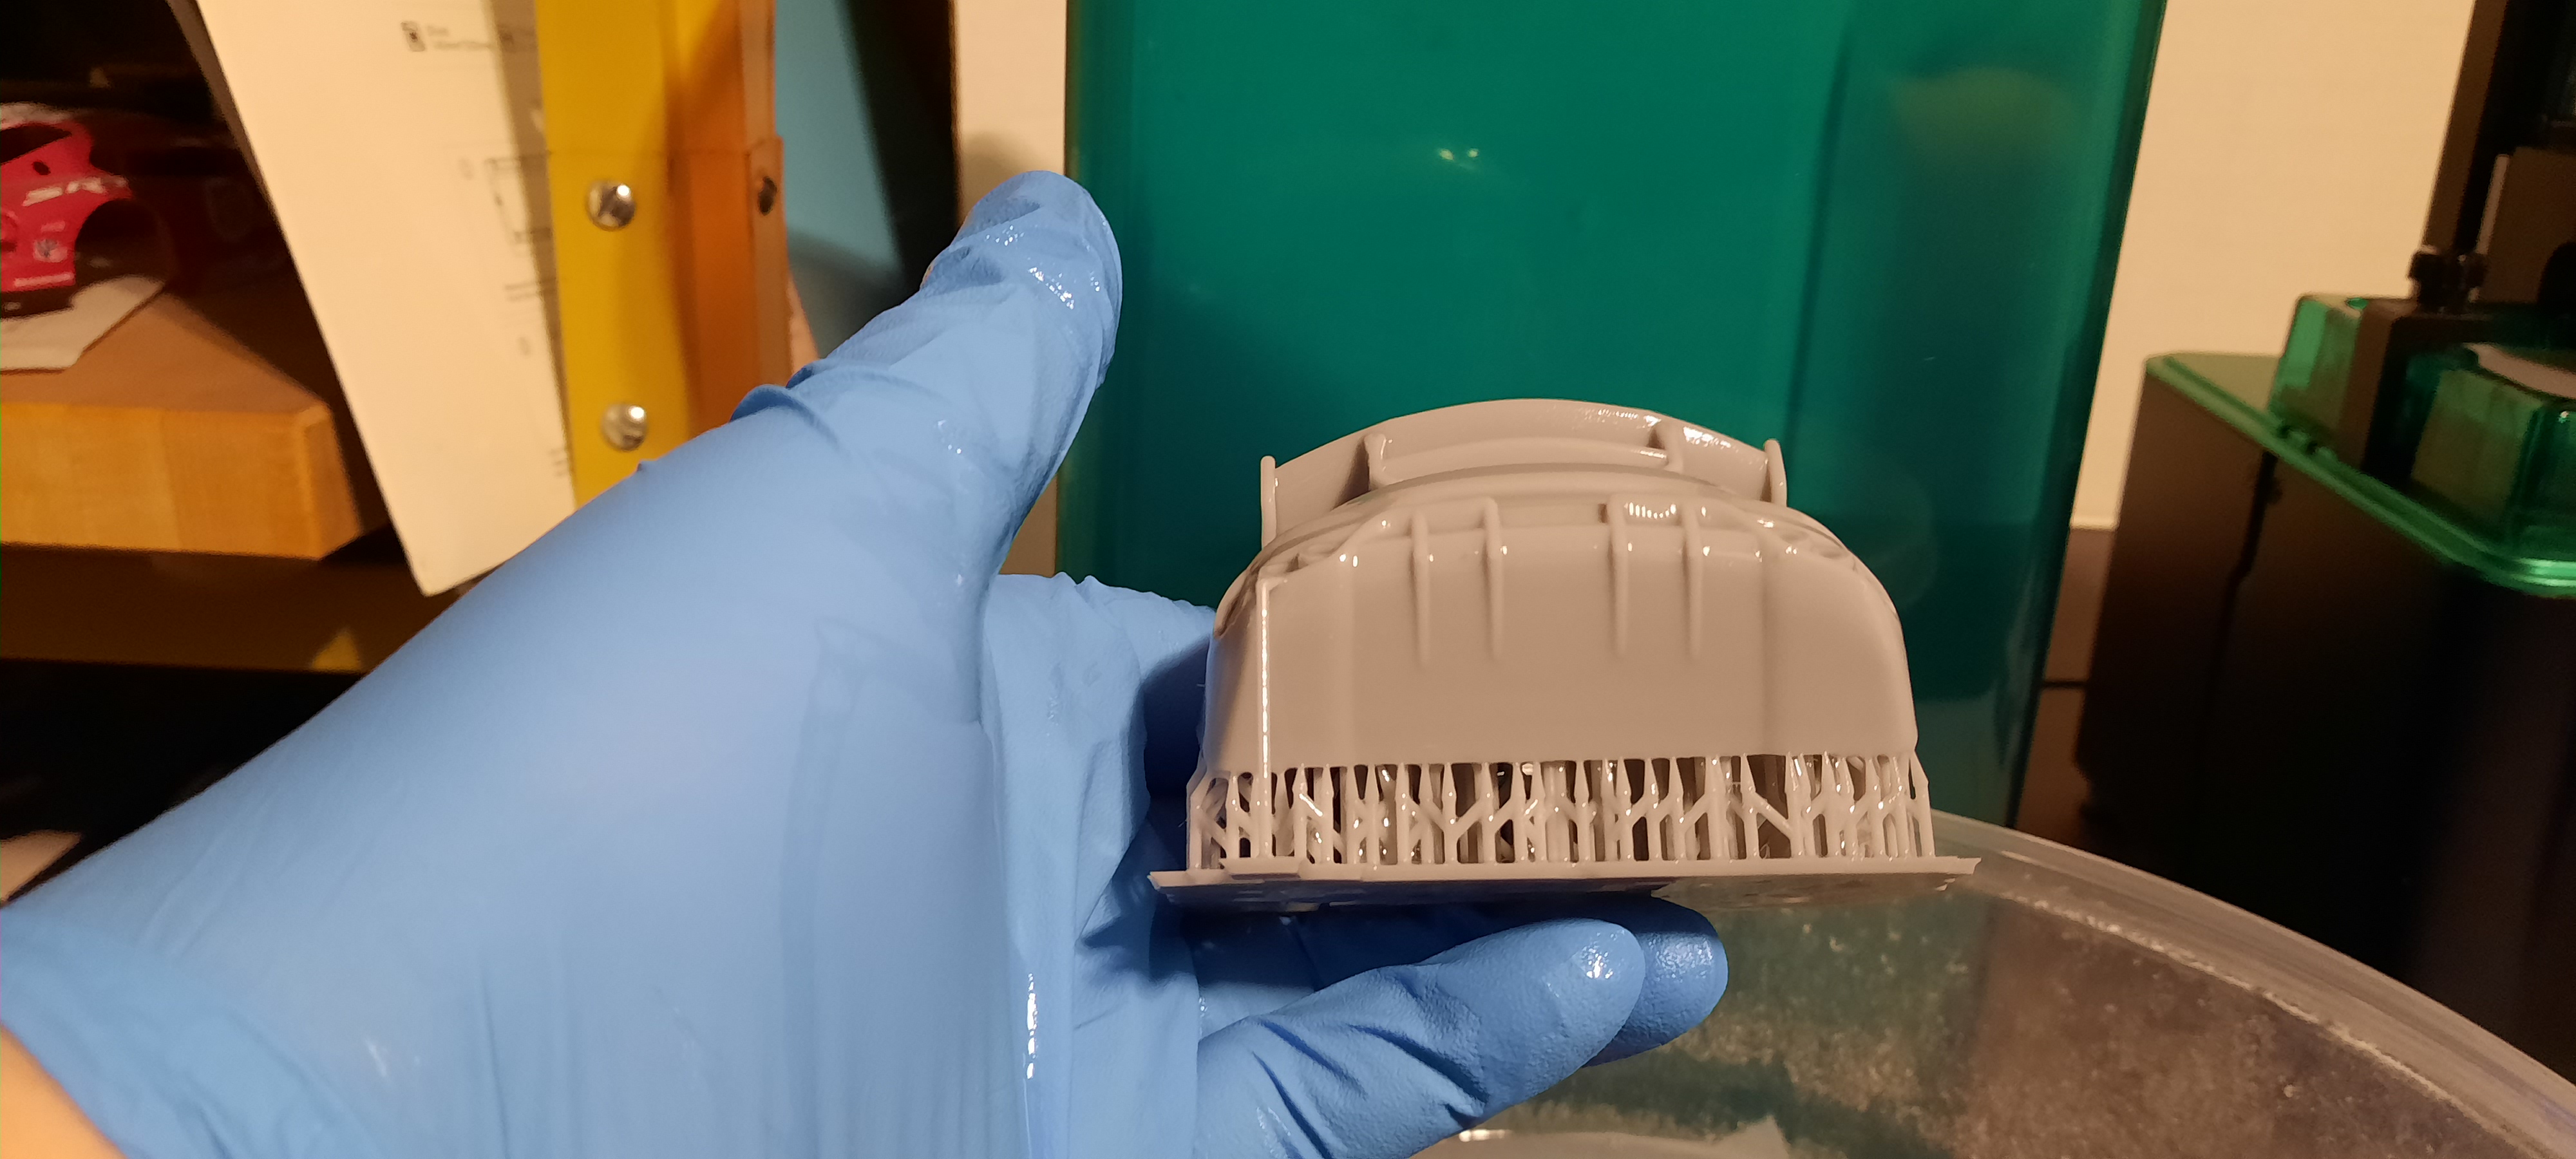
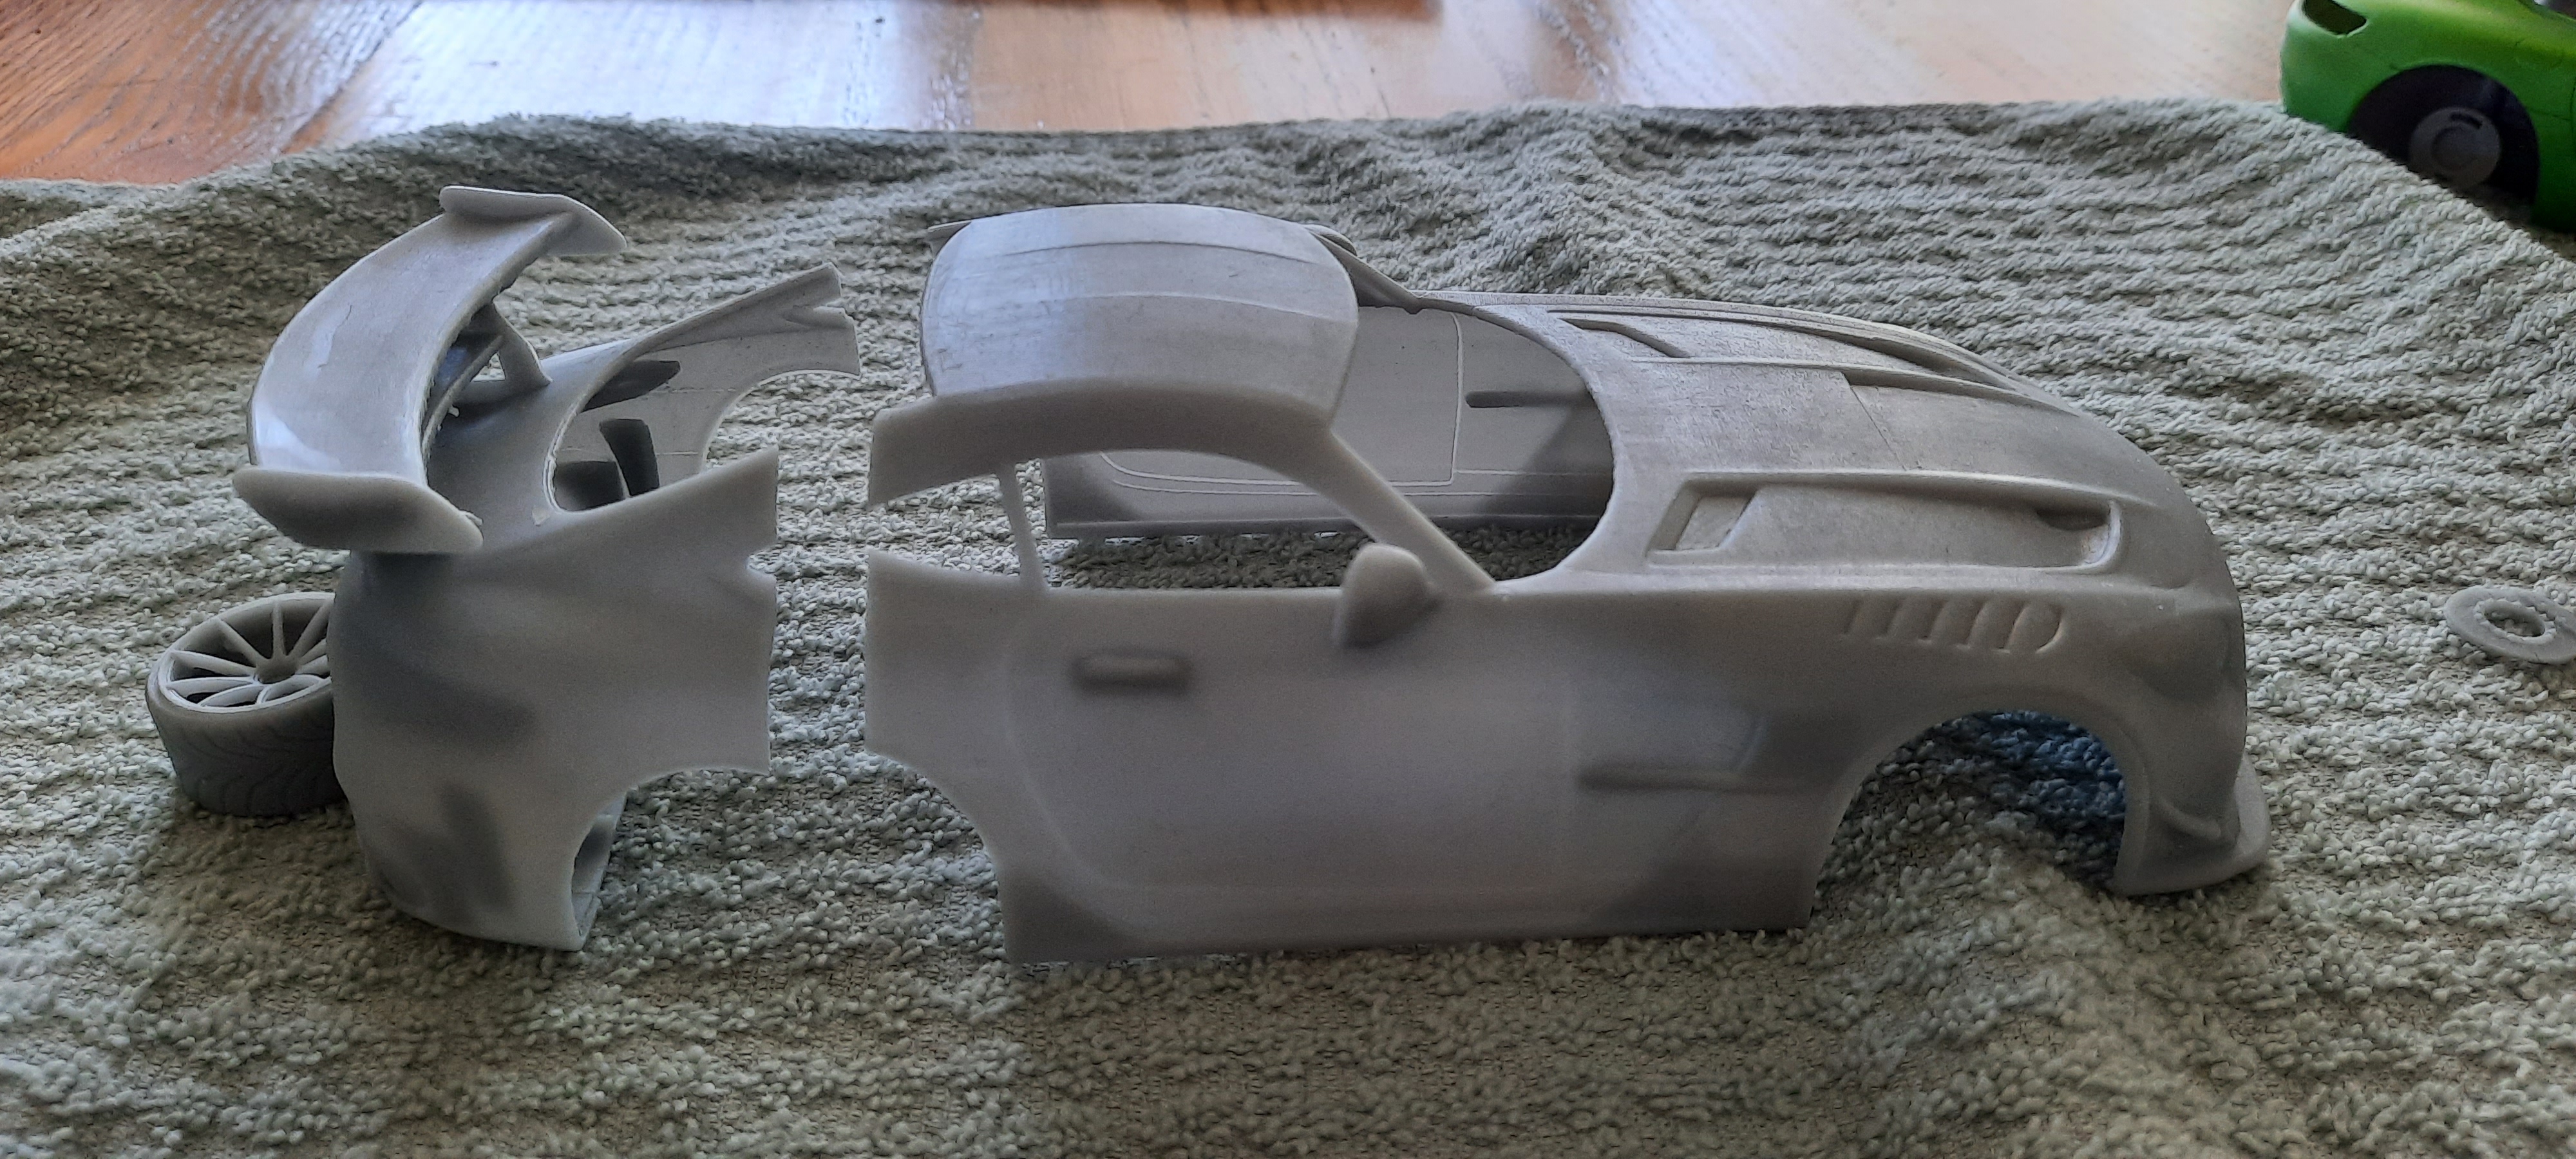
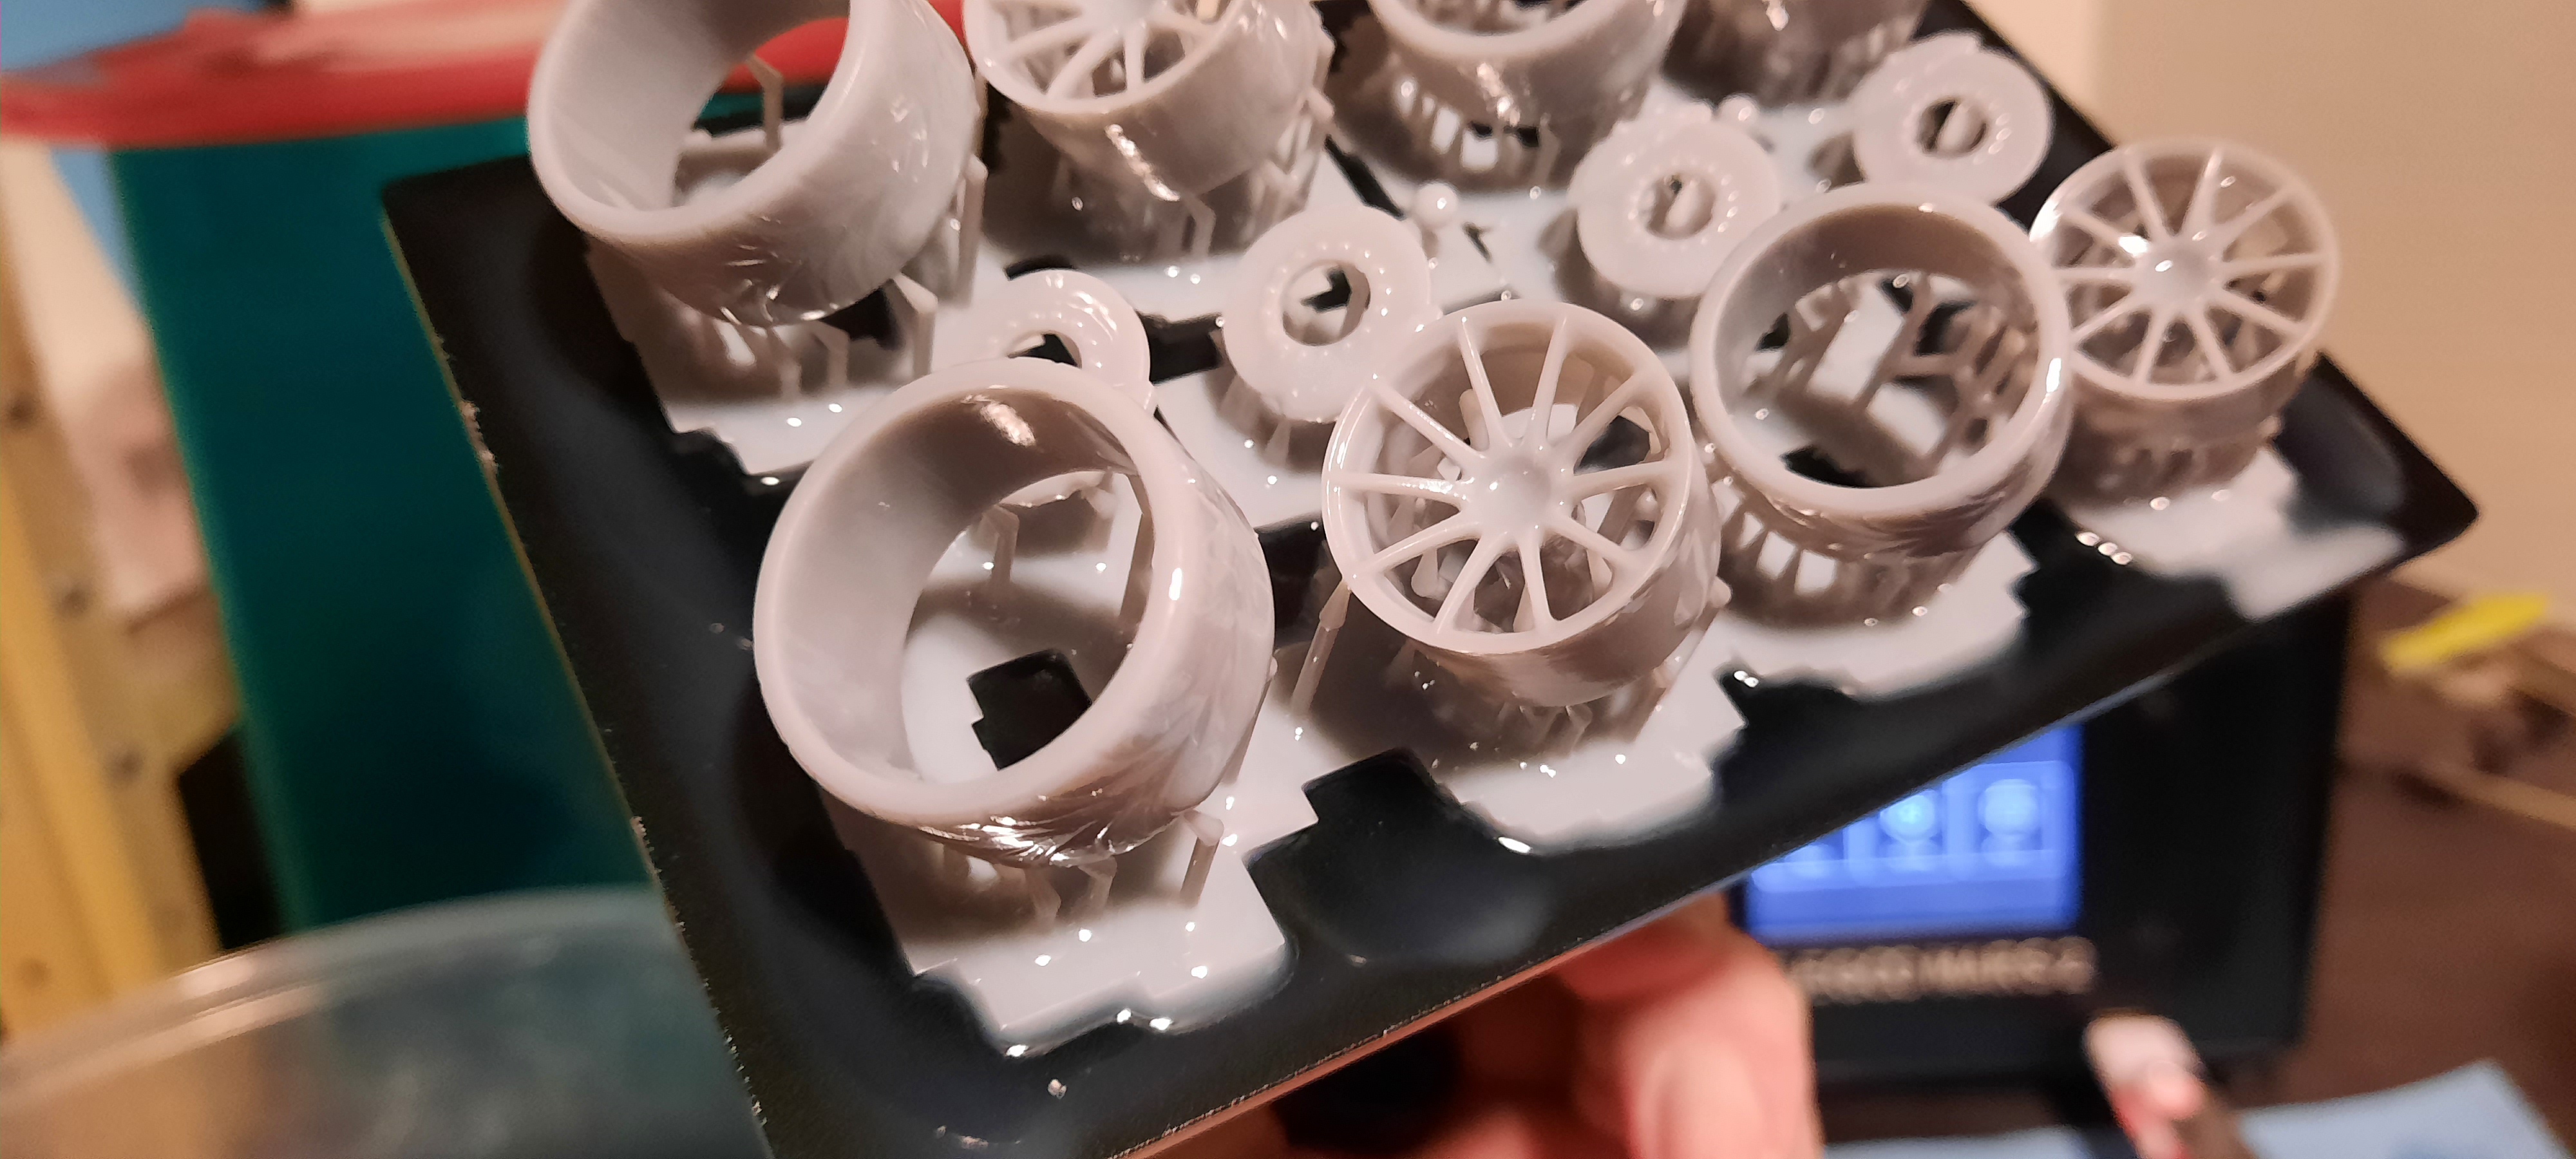
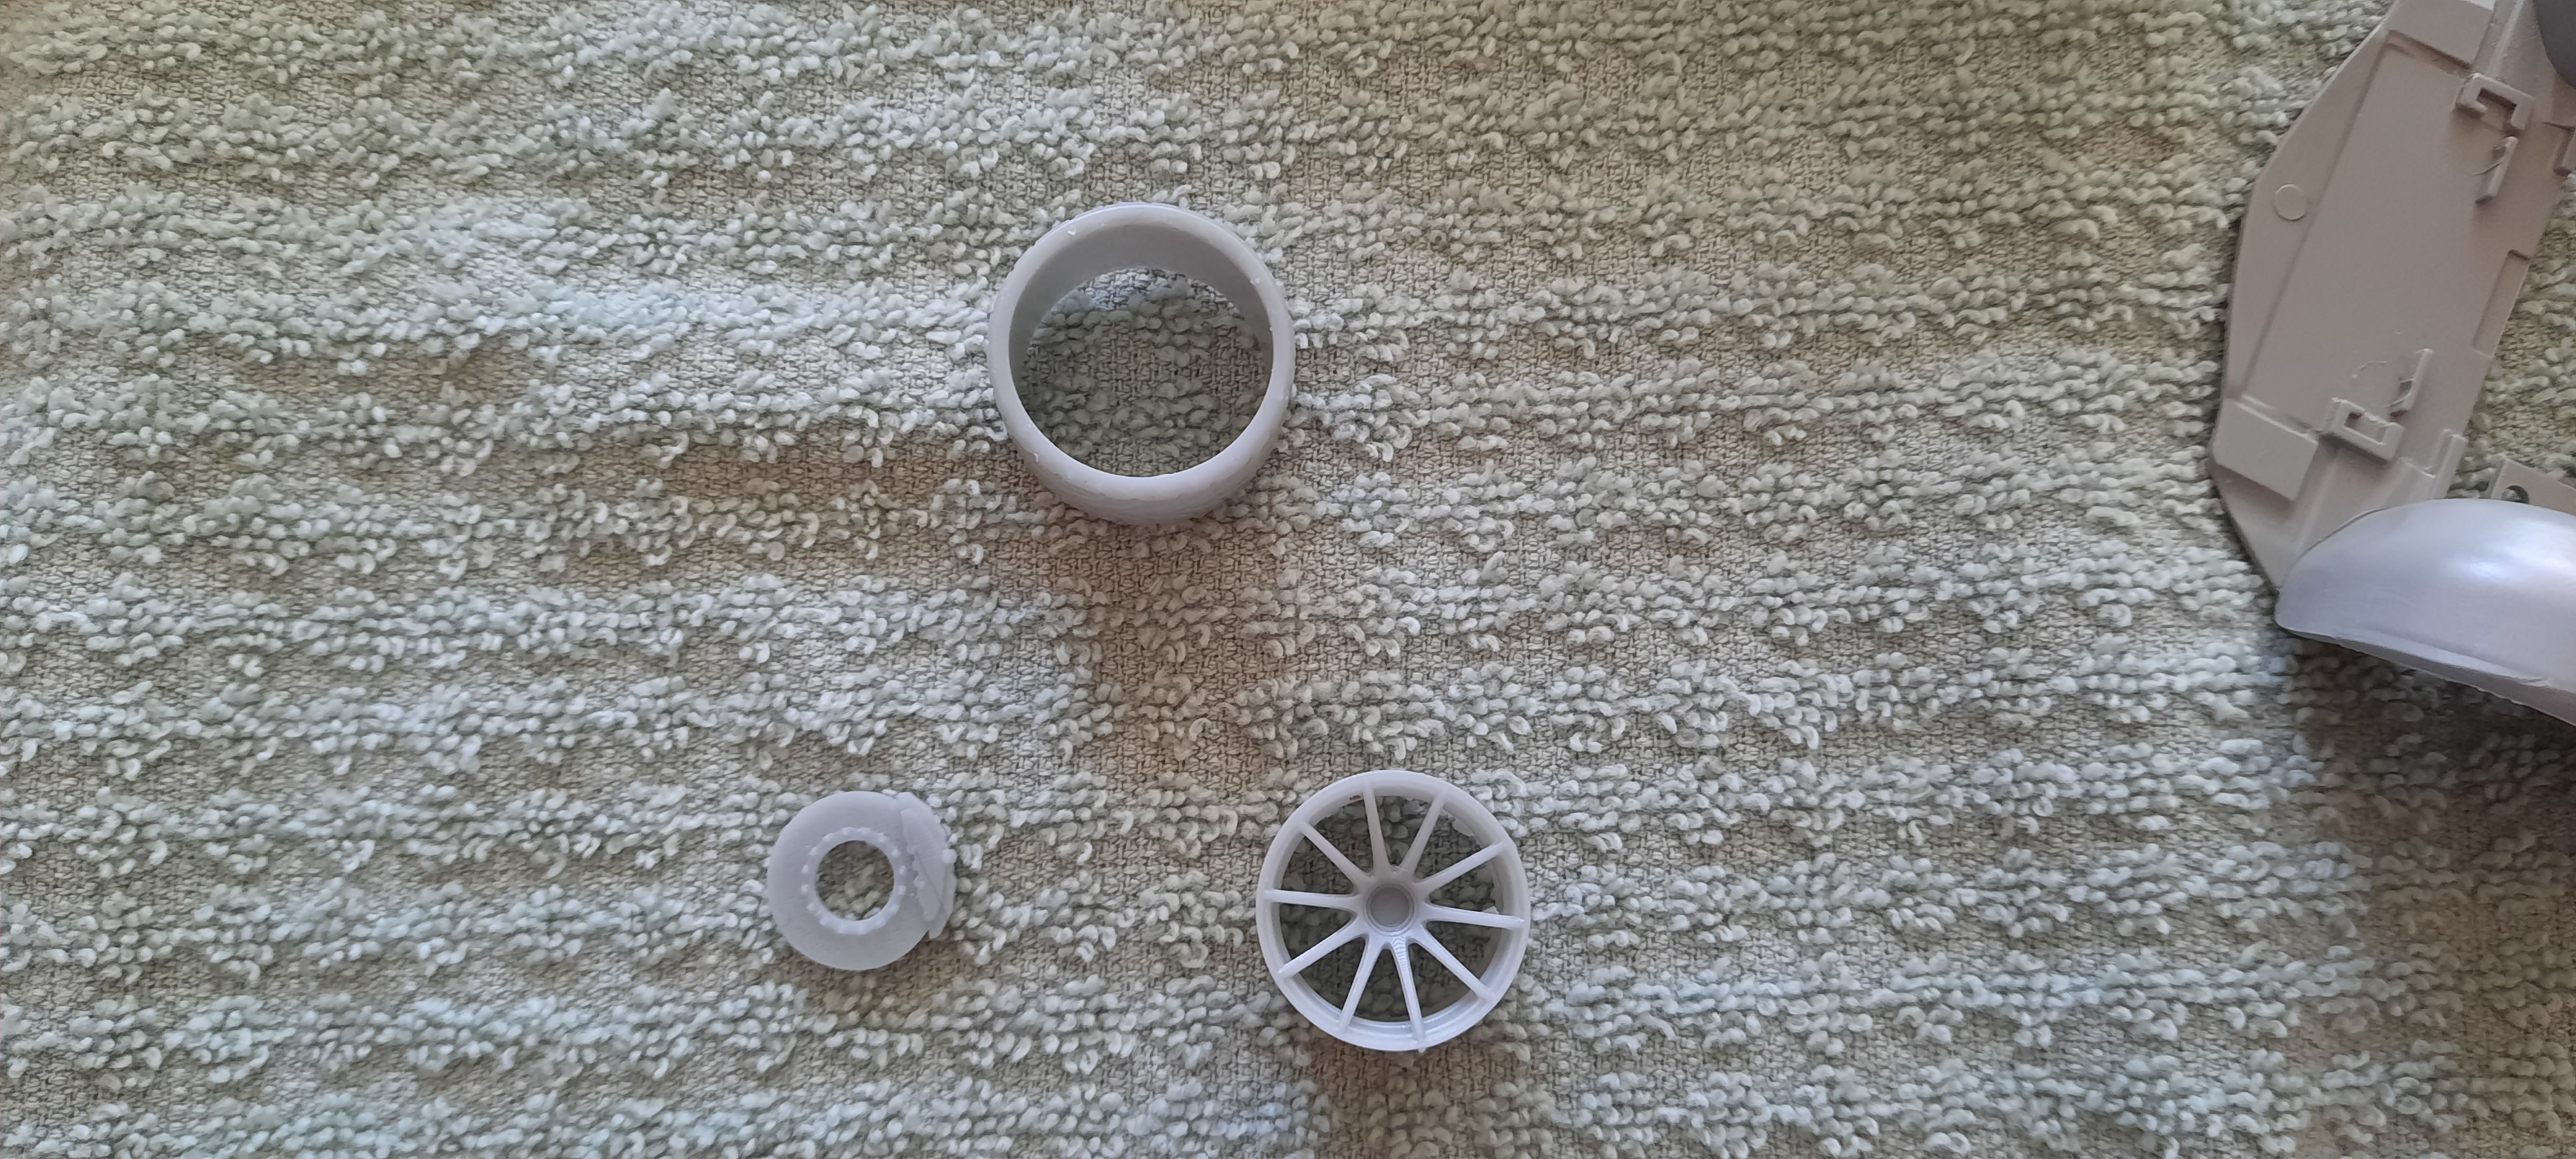
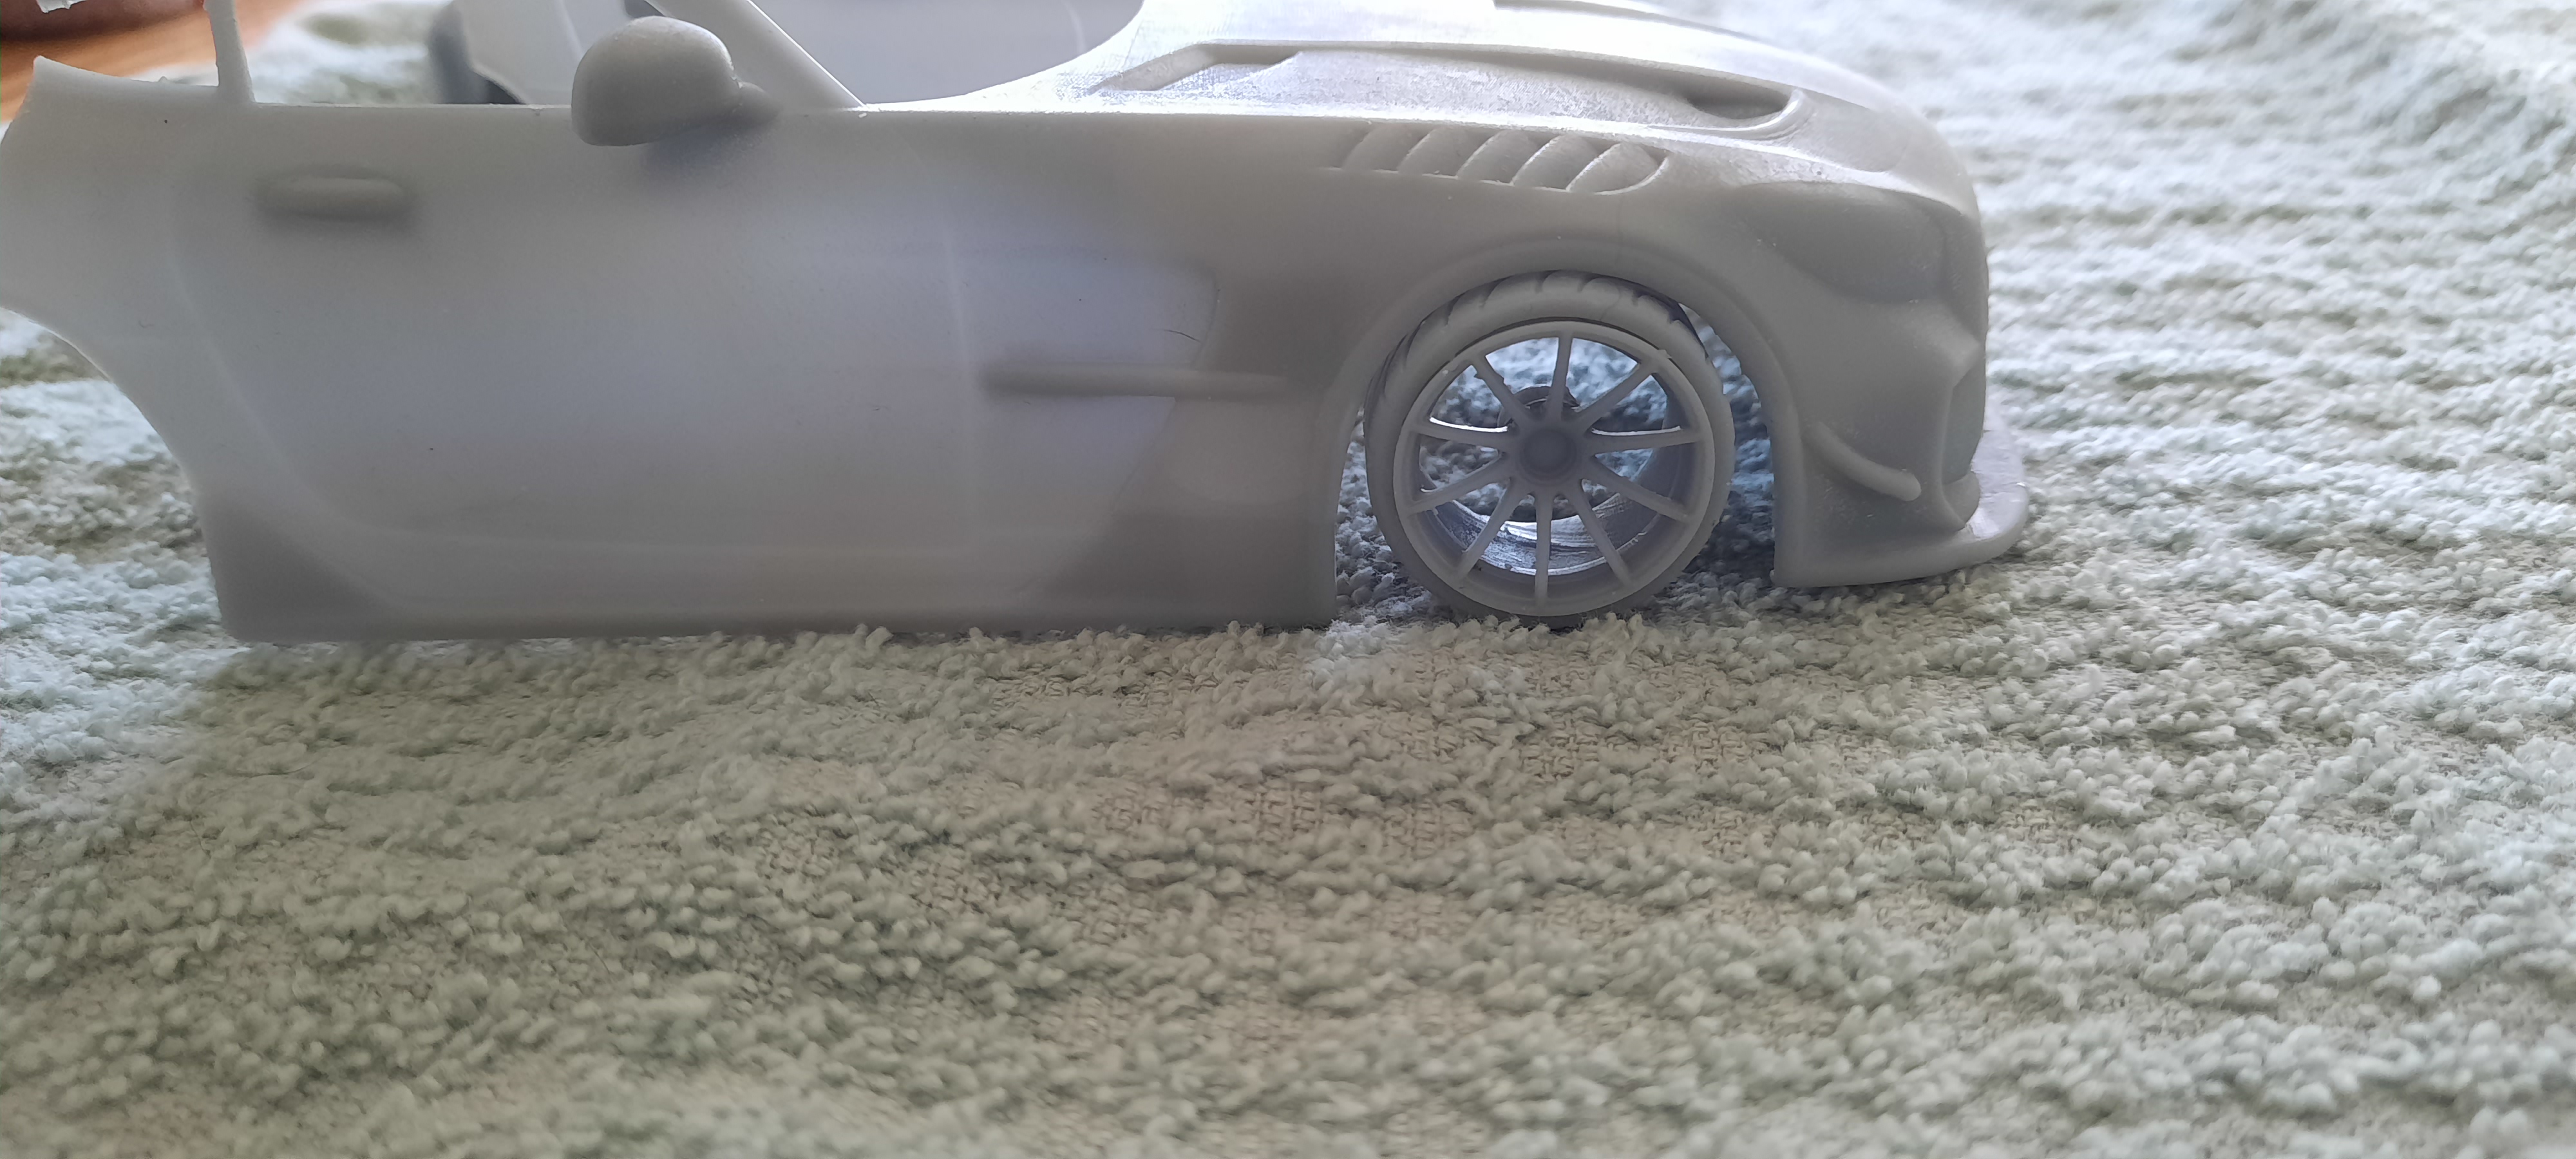
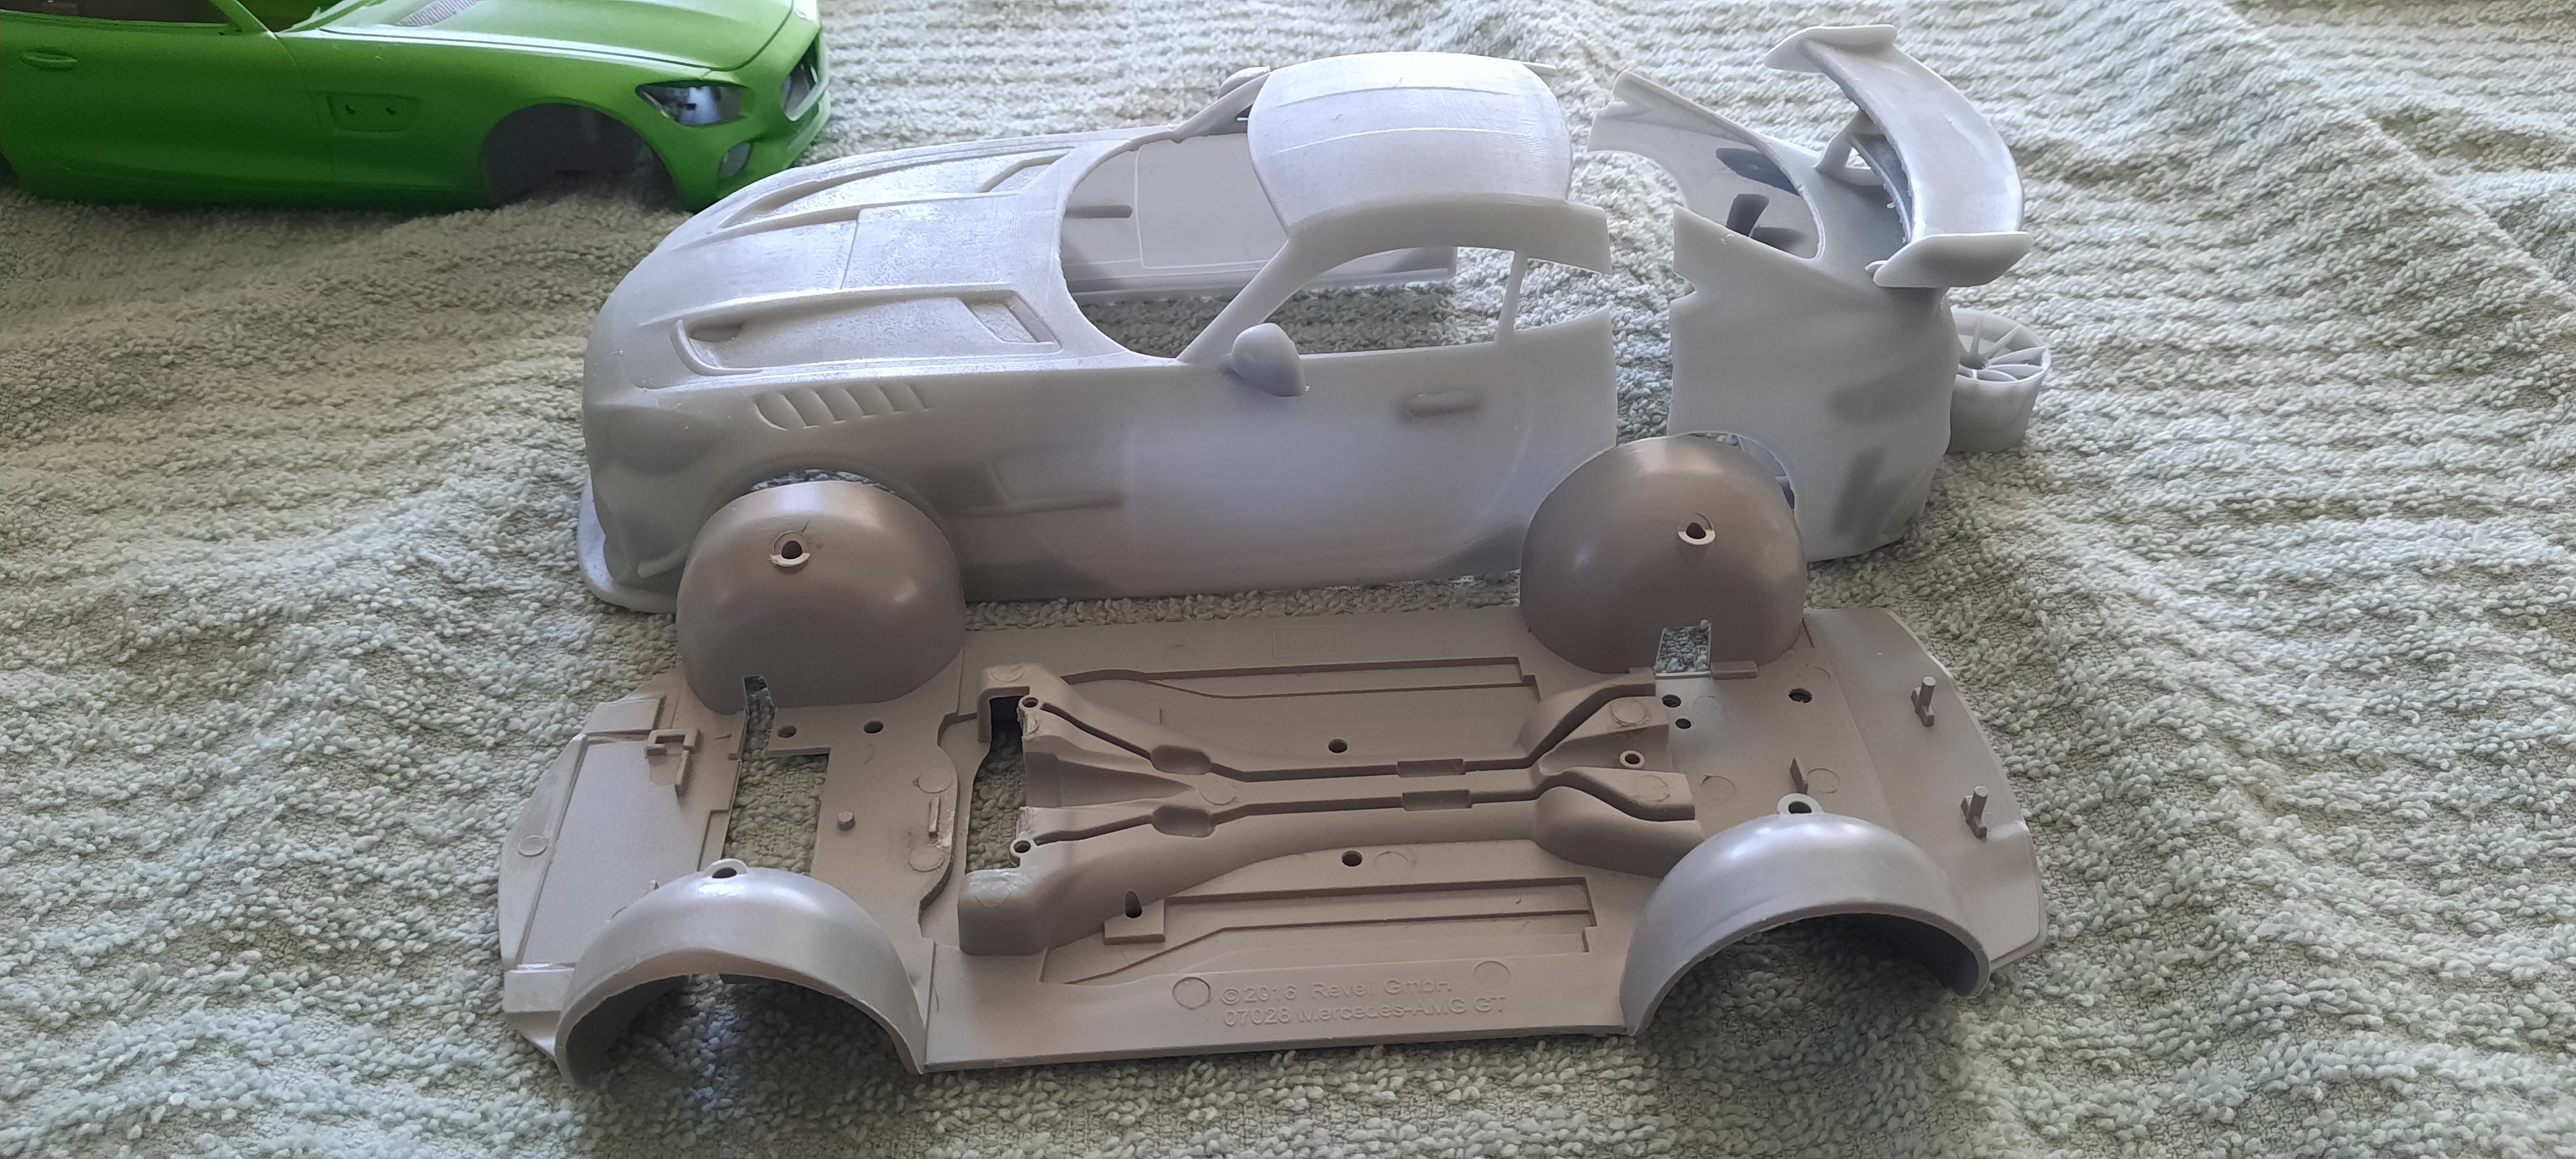
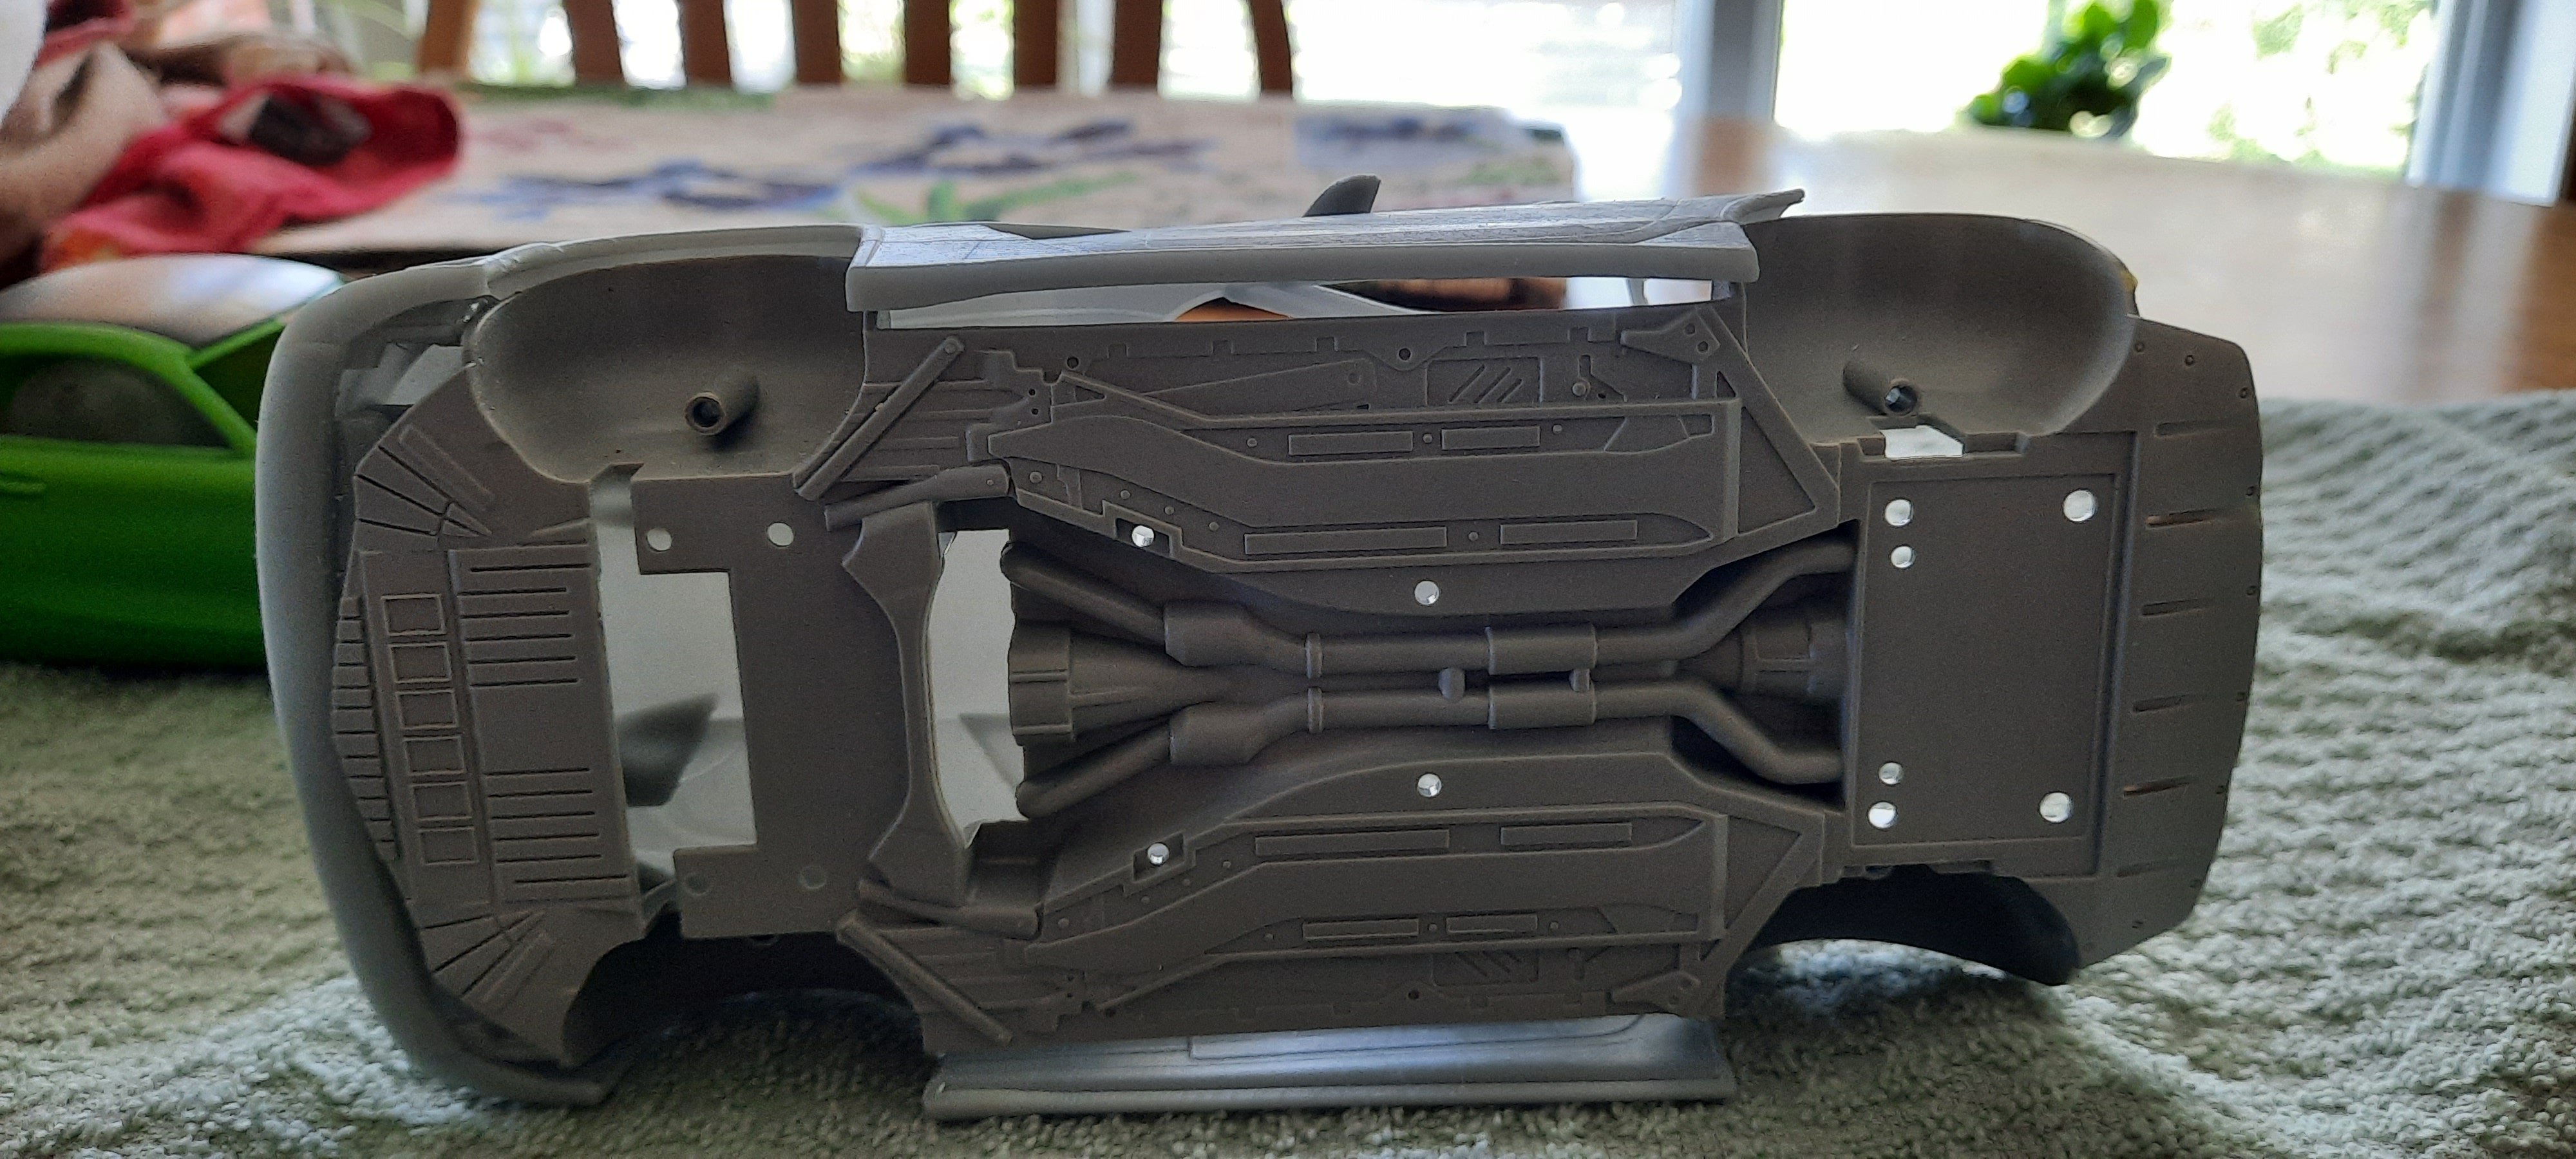
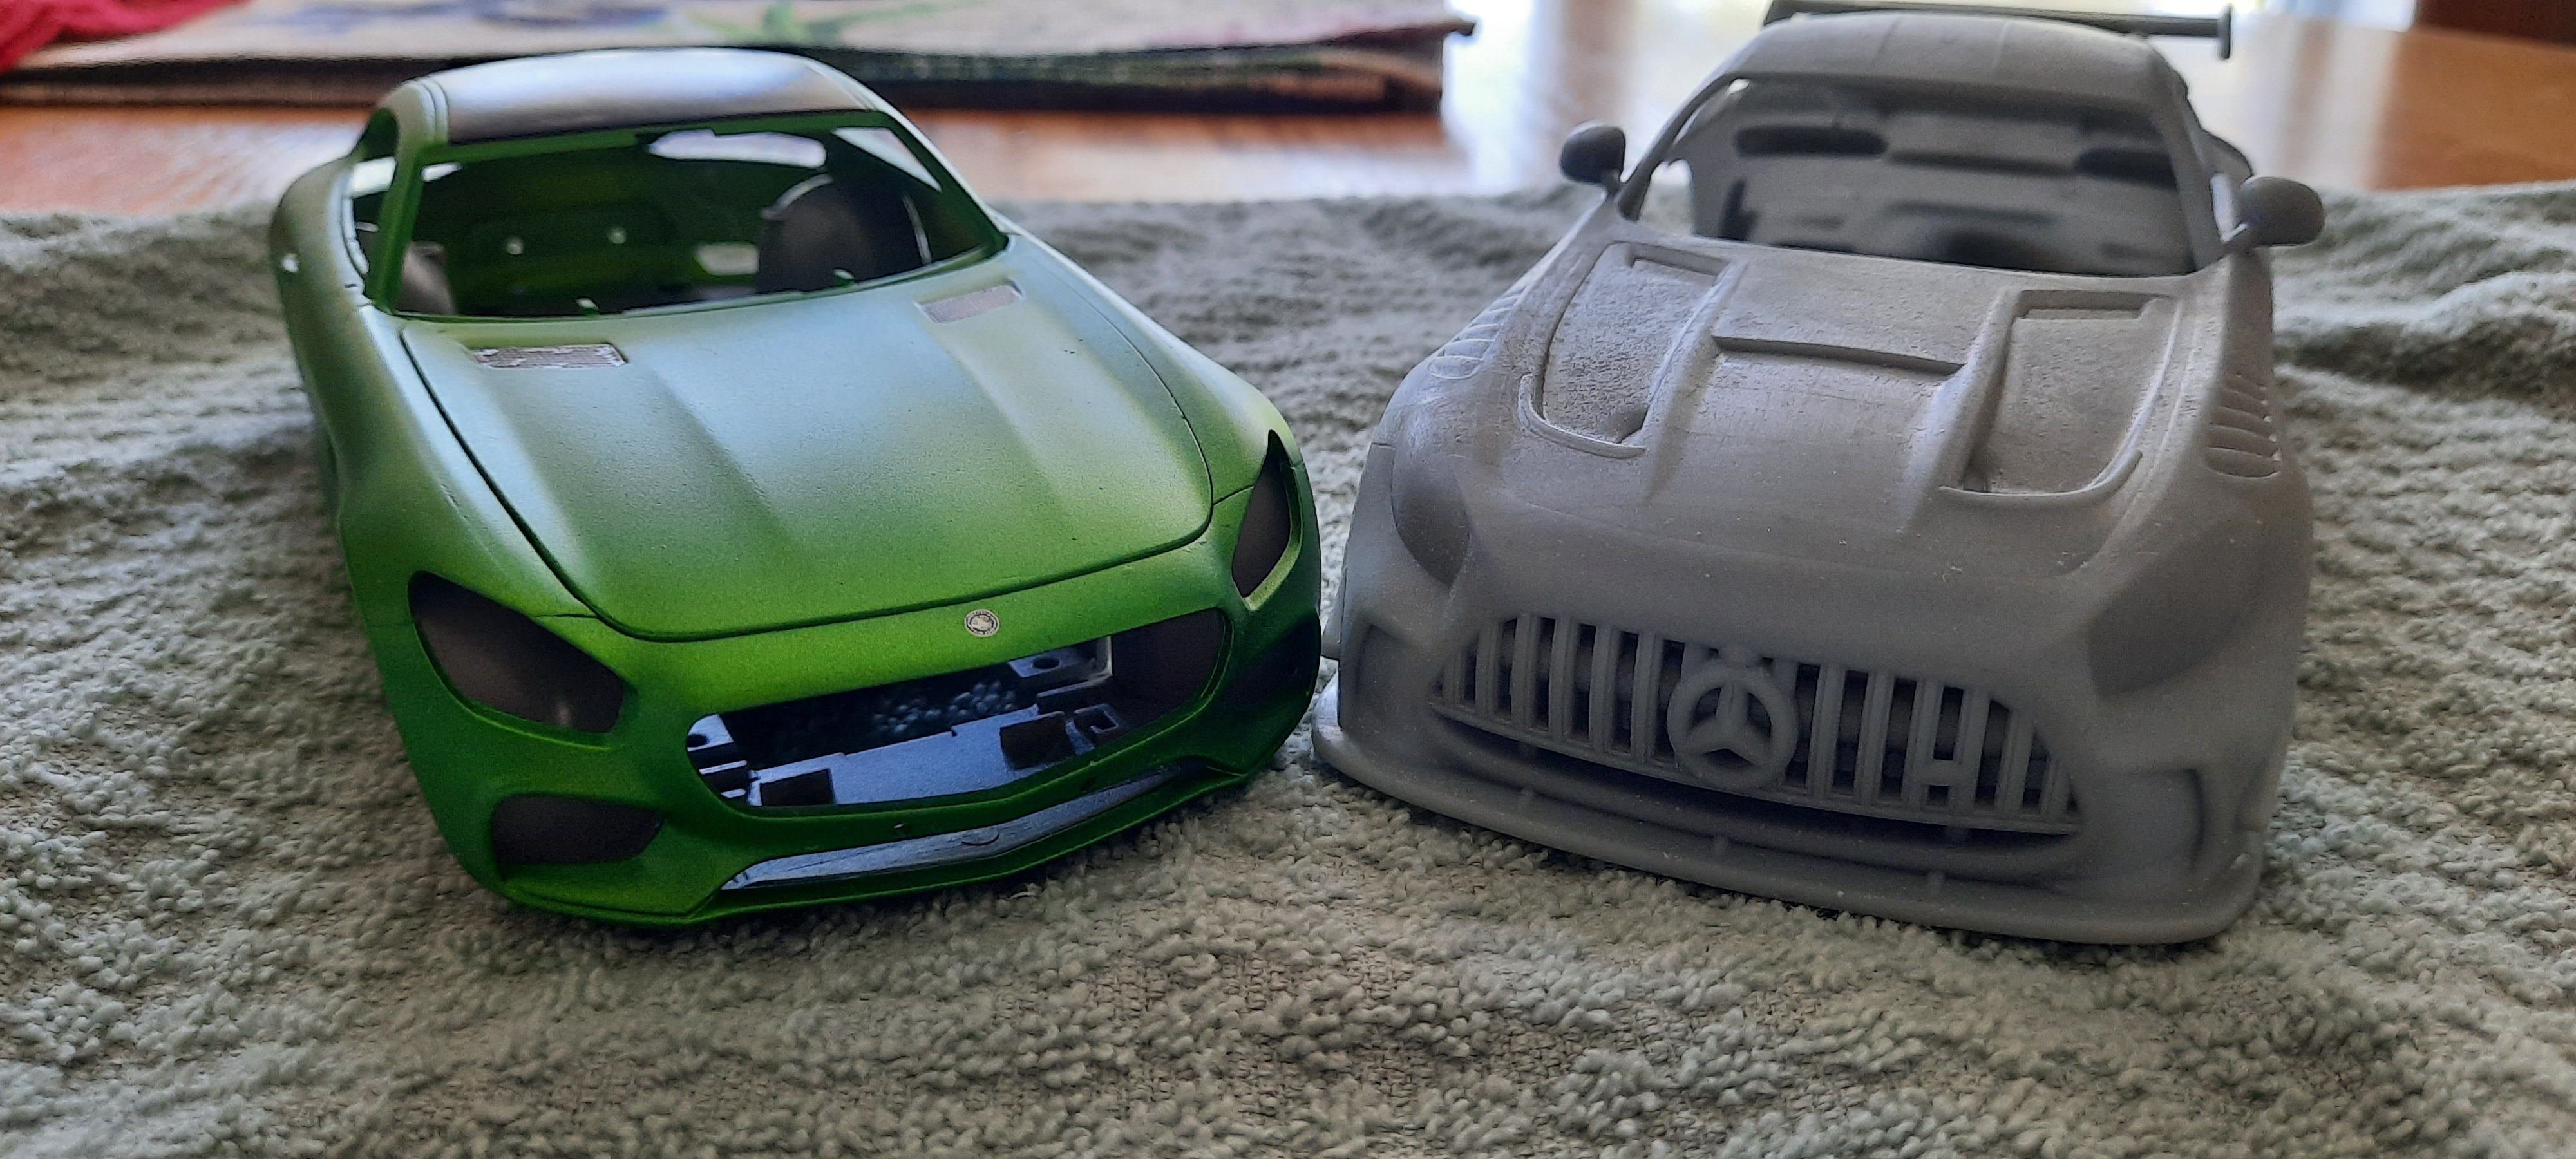
Another update....much later than I had originally planned on, but it's here. Finished printing the 3 files I have so far for this project this morning, and there's good, bad, and ugly..... The good, all three prints went off without a hitch. The rear clip printed up nicely, fresh out of the printer The detail is excellent and the print quality excellent as well. The panel lines are not as deep as I'd like, but I'll just have to scribe them later on. The supports are a bit over done, I probably could have removed half of them and been fine, but I sided on the cautious and added in extra. The thickness on the rear wing is a bit too thick, and I might try to sand it down and thin it out at some point. Now the bad. When I sliced the model in two in Meshmixer, I didn't account for the fact that when you prep the print in the printer software, it "lifts" the print off of the build plate and adds in supports. So when I cut the print, I cut it at the very maximum edge of the printable field, then imported it to the printer software which then lifted the print and shortened it by about 2mm, so now when I but the front and rear clips together, the rear of the front clip is too short giving the rear wheel well a weird look. Not the end of the world, I can fill the gap, but something I didn't account for.....lesson learned. The gap is over exaggerated in this pic, but you can see I really don't have to fill in too much, just two points on each side of the body. Otherwise it shouldn't be too difficult to merge the halves back together. And now for the ugly..... well it's not really ugly, the print was perfect, just way to small. I printed the wheels at 1/24 scale based off the actual wheel sizes for this car, fronts are 19x10 and rears are 20x12. I scaled them down put the measurements in the software and got a perfect print.....at around 1/28 scale for some reason. They look great but I'm going to have to reprint them unfortunately. As you can see in this pic, I put the rear wheel inside the front wheel well and it's way too small. It might just be the low profile tires but either way I'm going to have to resize them. Not a huge deal, but I hate that I wasted the resin. Another lesson learned. So, I had hoped to use the chassis and other bits from Revell's AMG GT kit and it looks like that might just work. Here's a shot of the body lined up with the Revell chassis. You can see that it lines up really well. There will have to be some chopping, the rear pieces on the Revell chassis needs to come off cause of the diffuser on rear clip will replace it and it does line up about perfect with the hard line on the chassis itself. I'll have to add some flat stock to the front of the chassis, again, no real issue there. I'm not sure about the sides yet, in the above photo there are some gaps but the body isn't sitting 100% either. The inside of the front clip has some extra built in detail from the original designer that I can remove to allow the body to sit down better on the chassis better. And finally a shot the body with the Revell AMG GT kit (still in progress). The scale of the car looks spot on and the details on the print are very good. Once painted and detailed I don't think anyone would know it was not an actual model kit. Please note, none of the parts have been sanded yet, so there are some rough spots. Plan is to get the body into one piece on the weekend, till then, thanks for looking in.
-
2021 AMG GT Black Series-An Adventure in 3D Printing
Jhedir6 replied to Jhedir6's topic in WIP: Model Cars
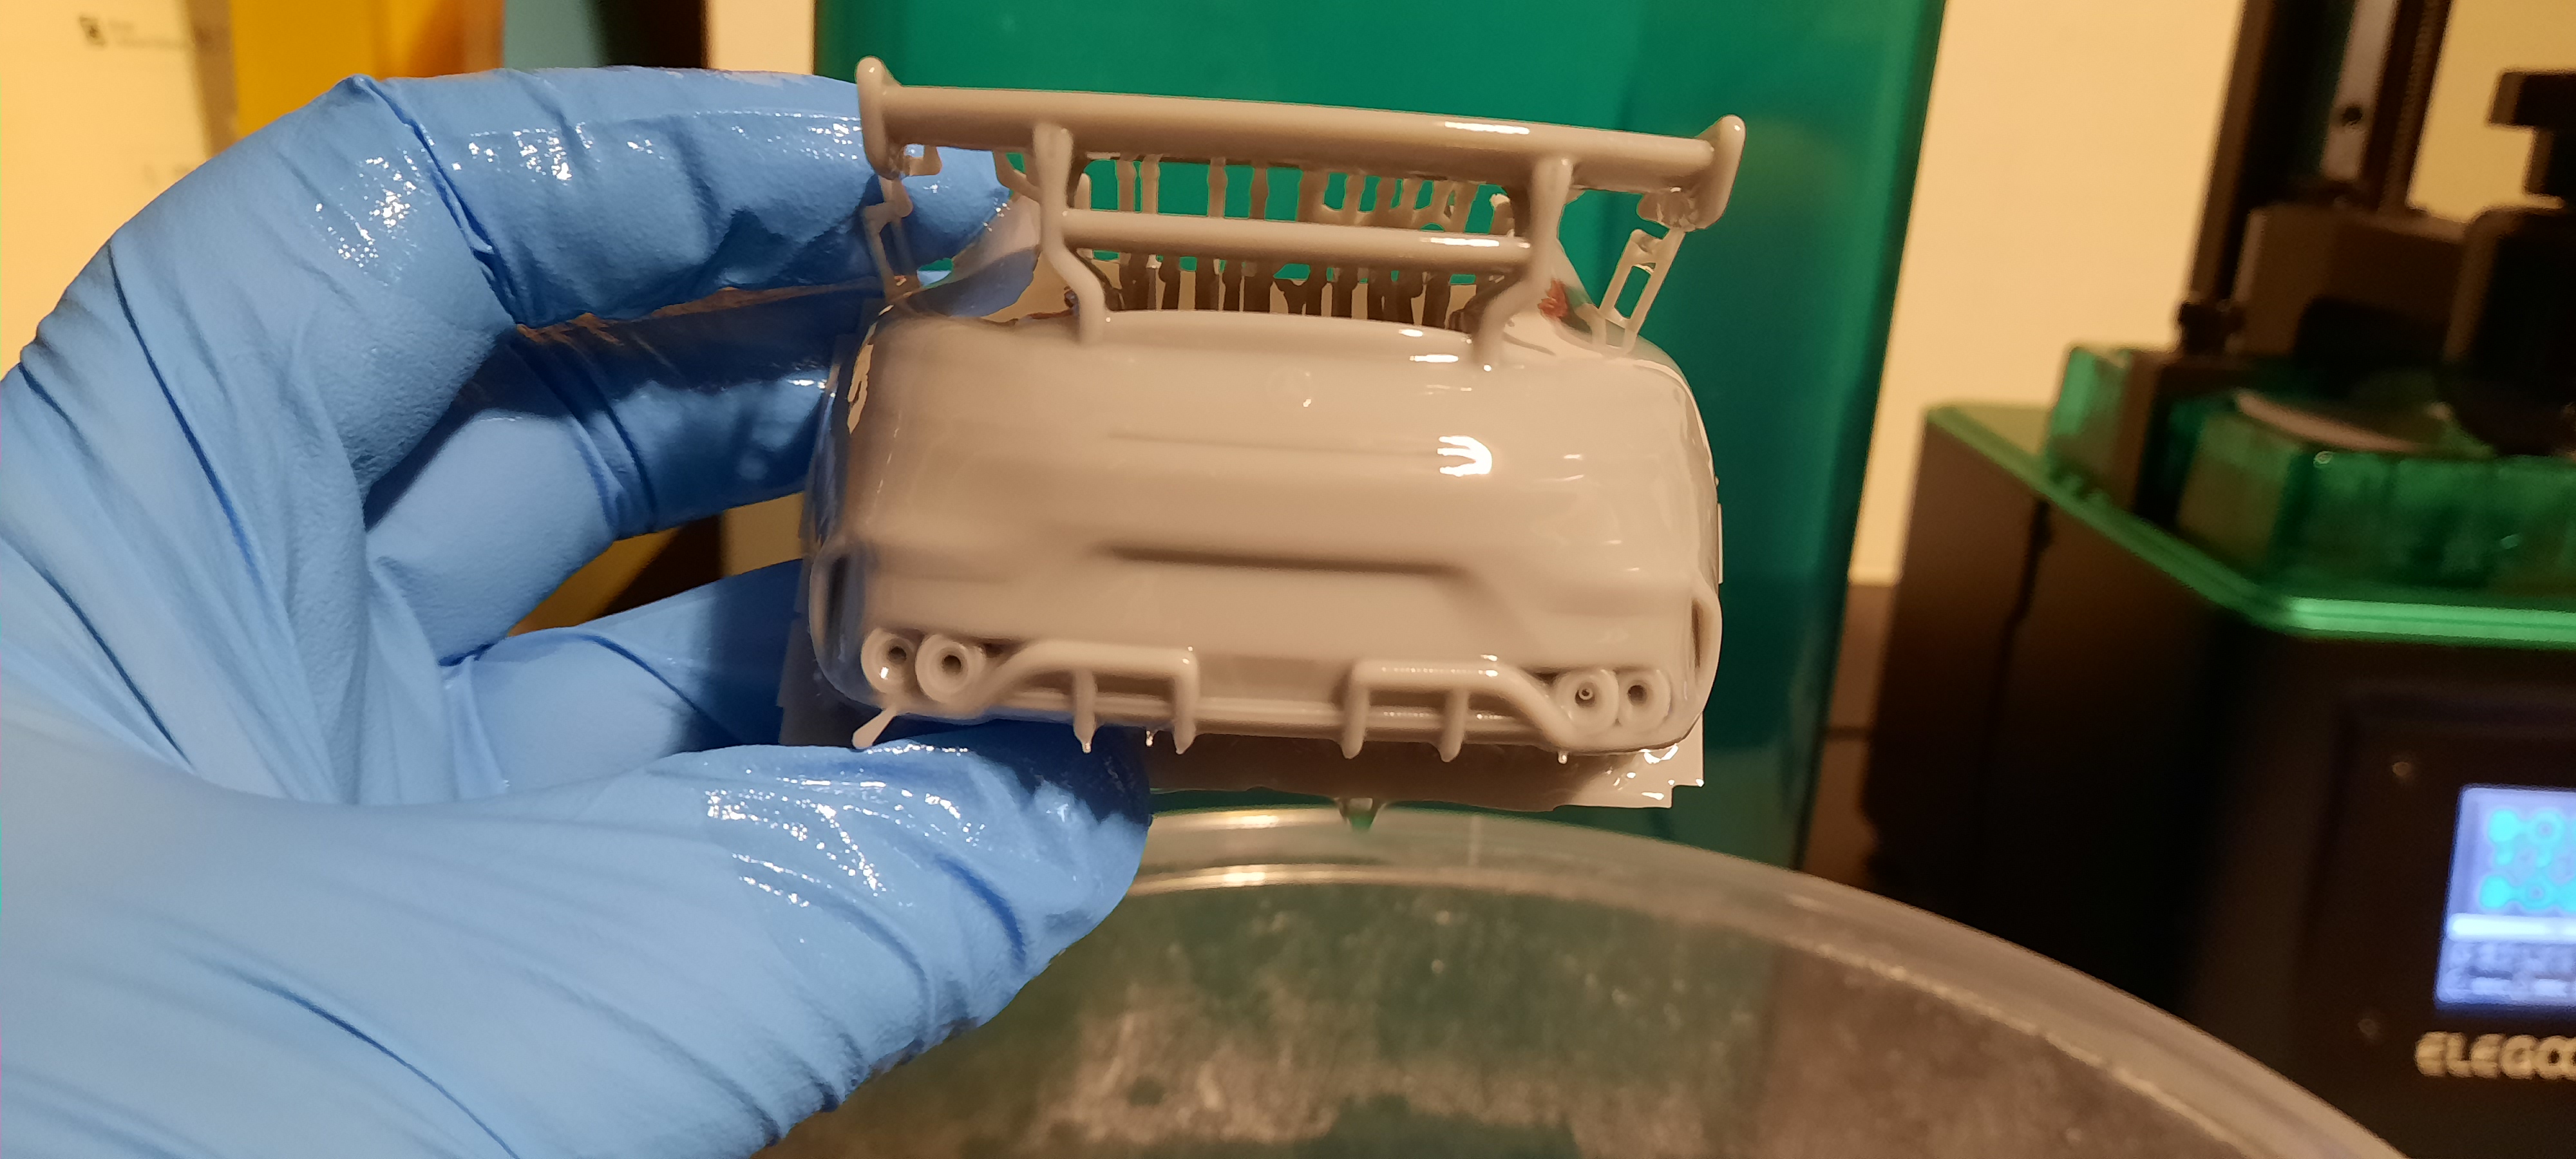
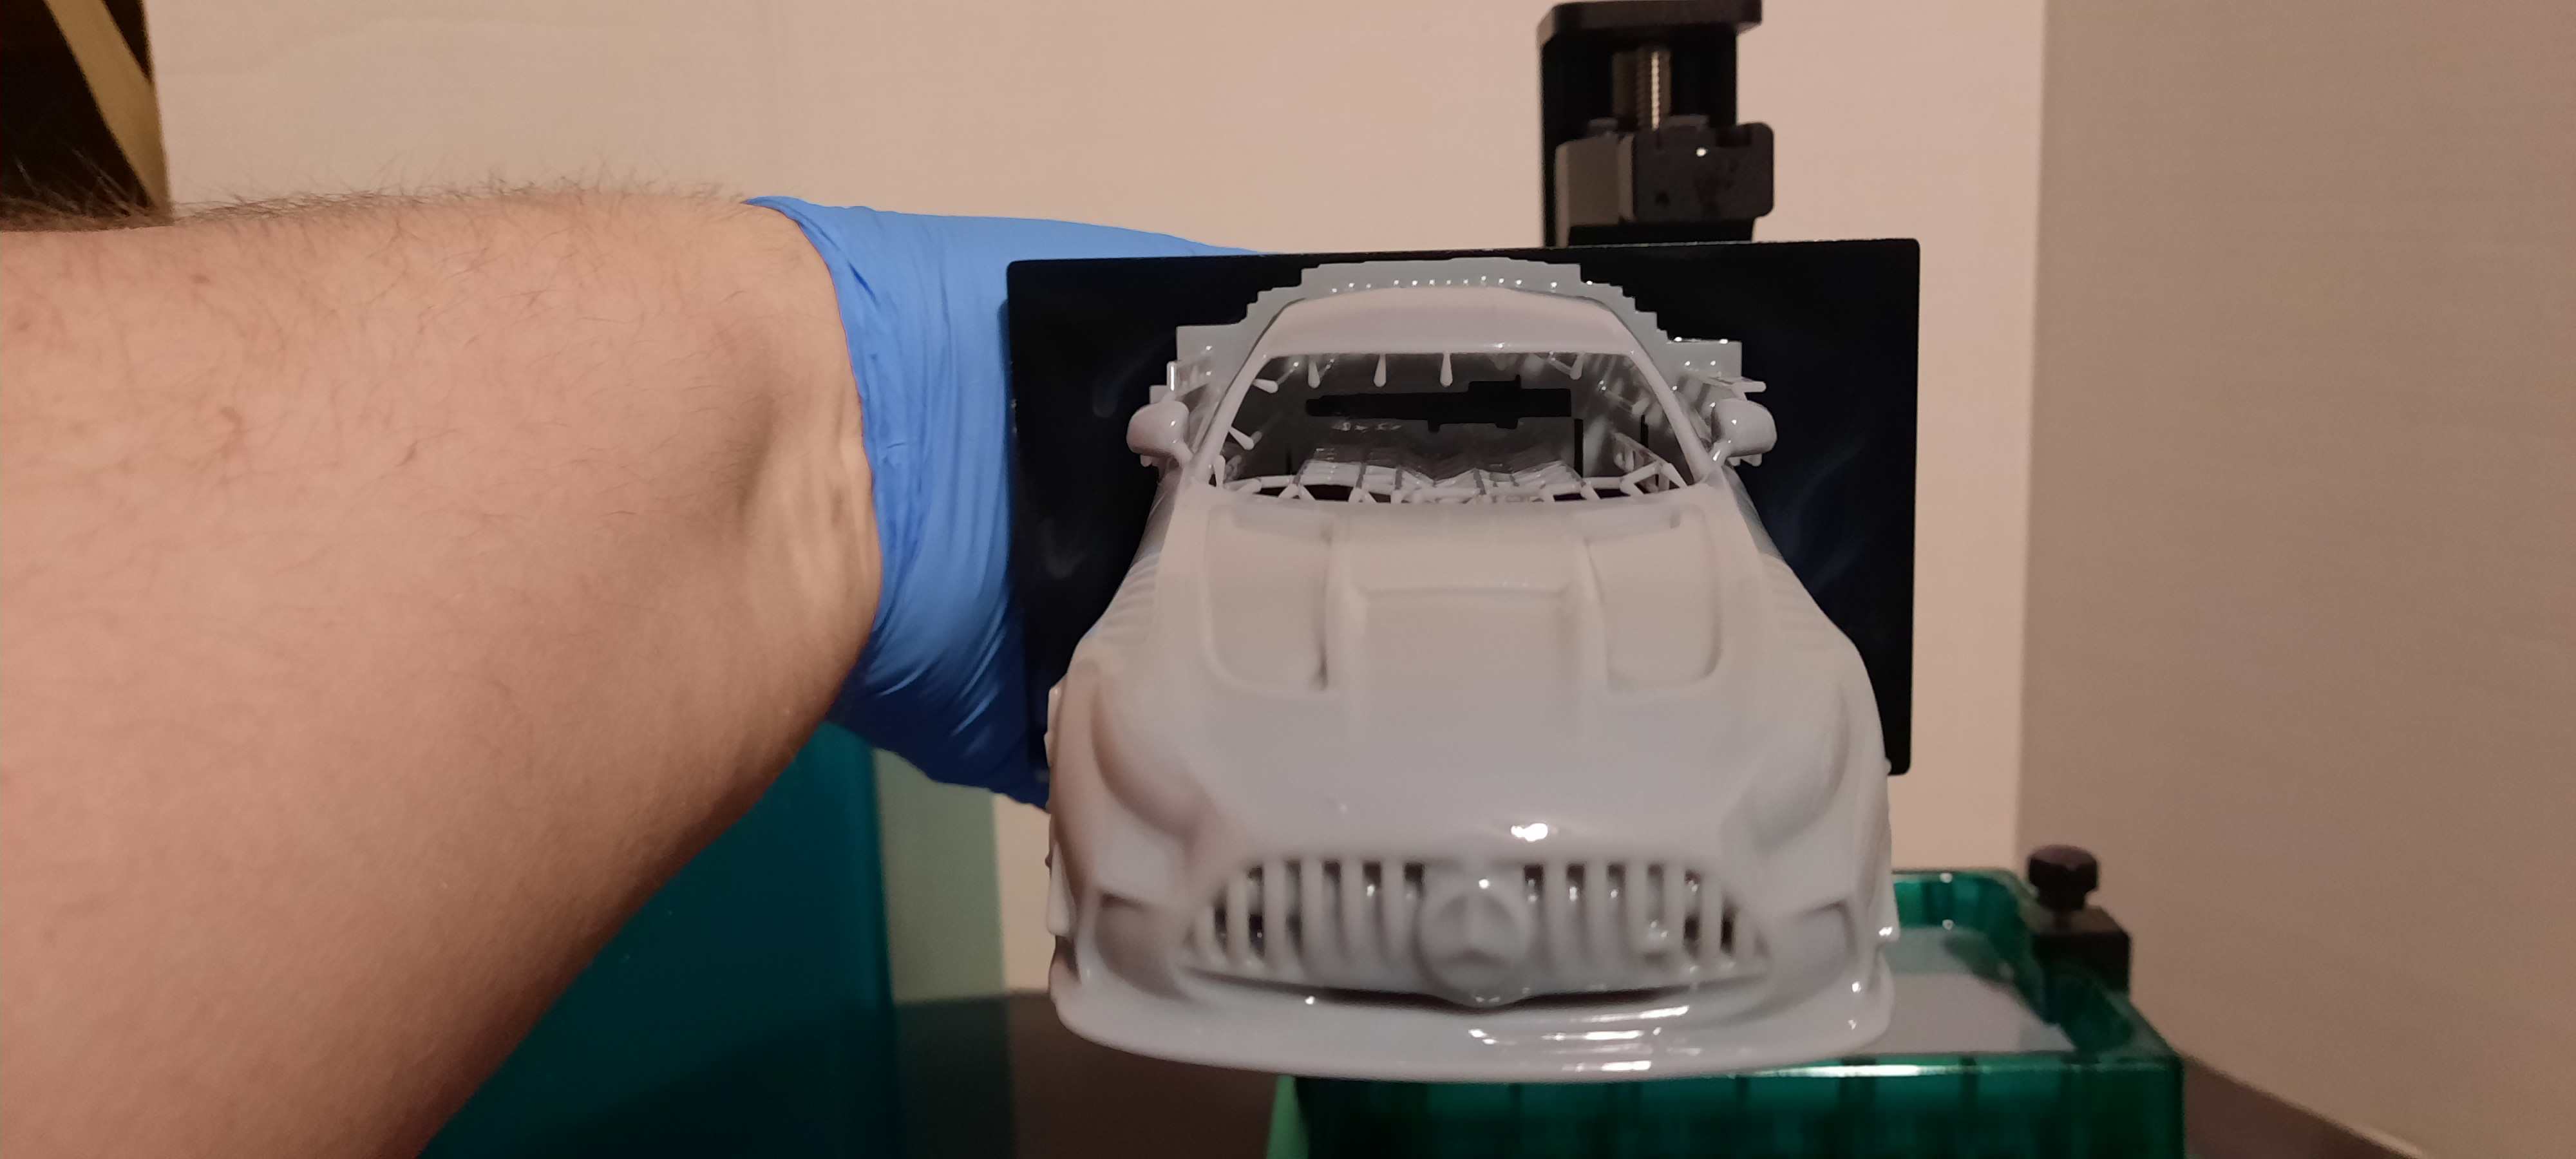
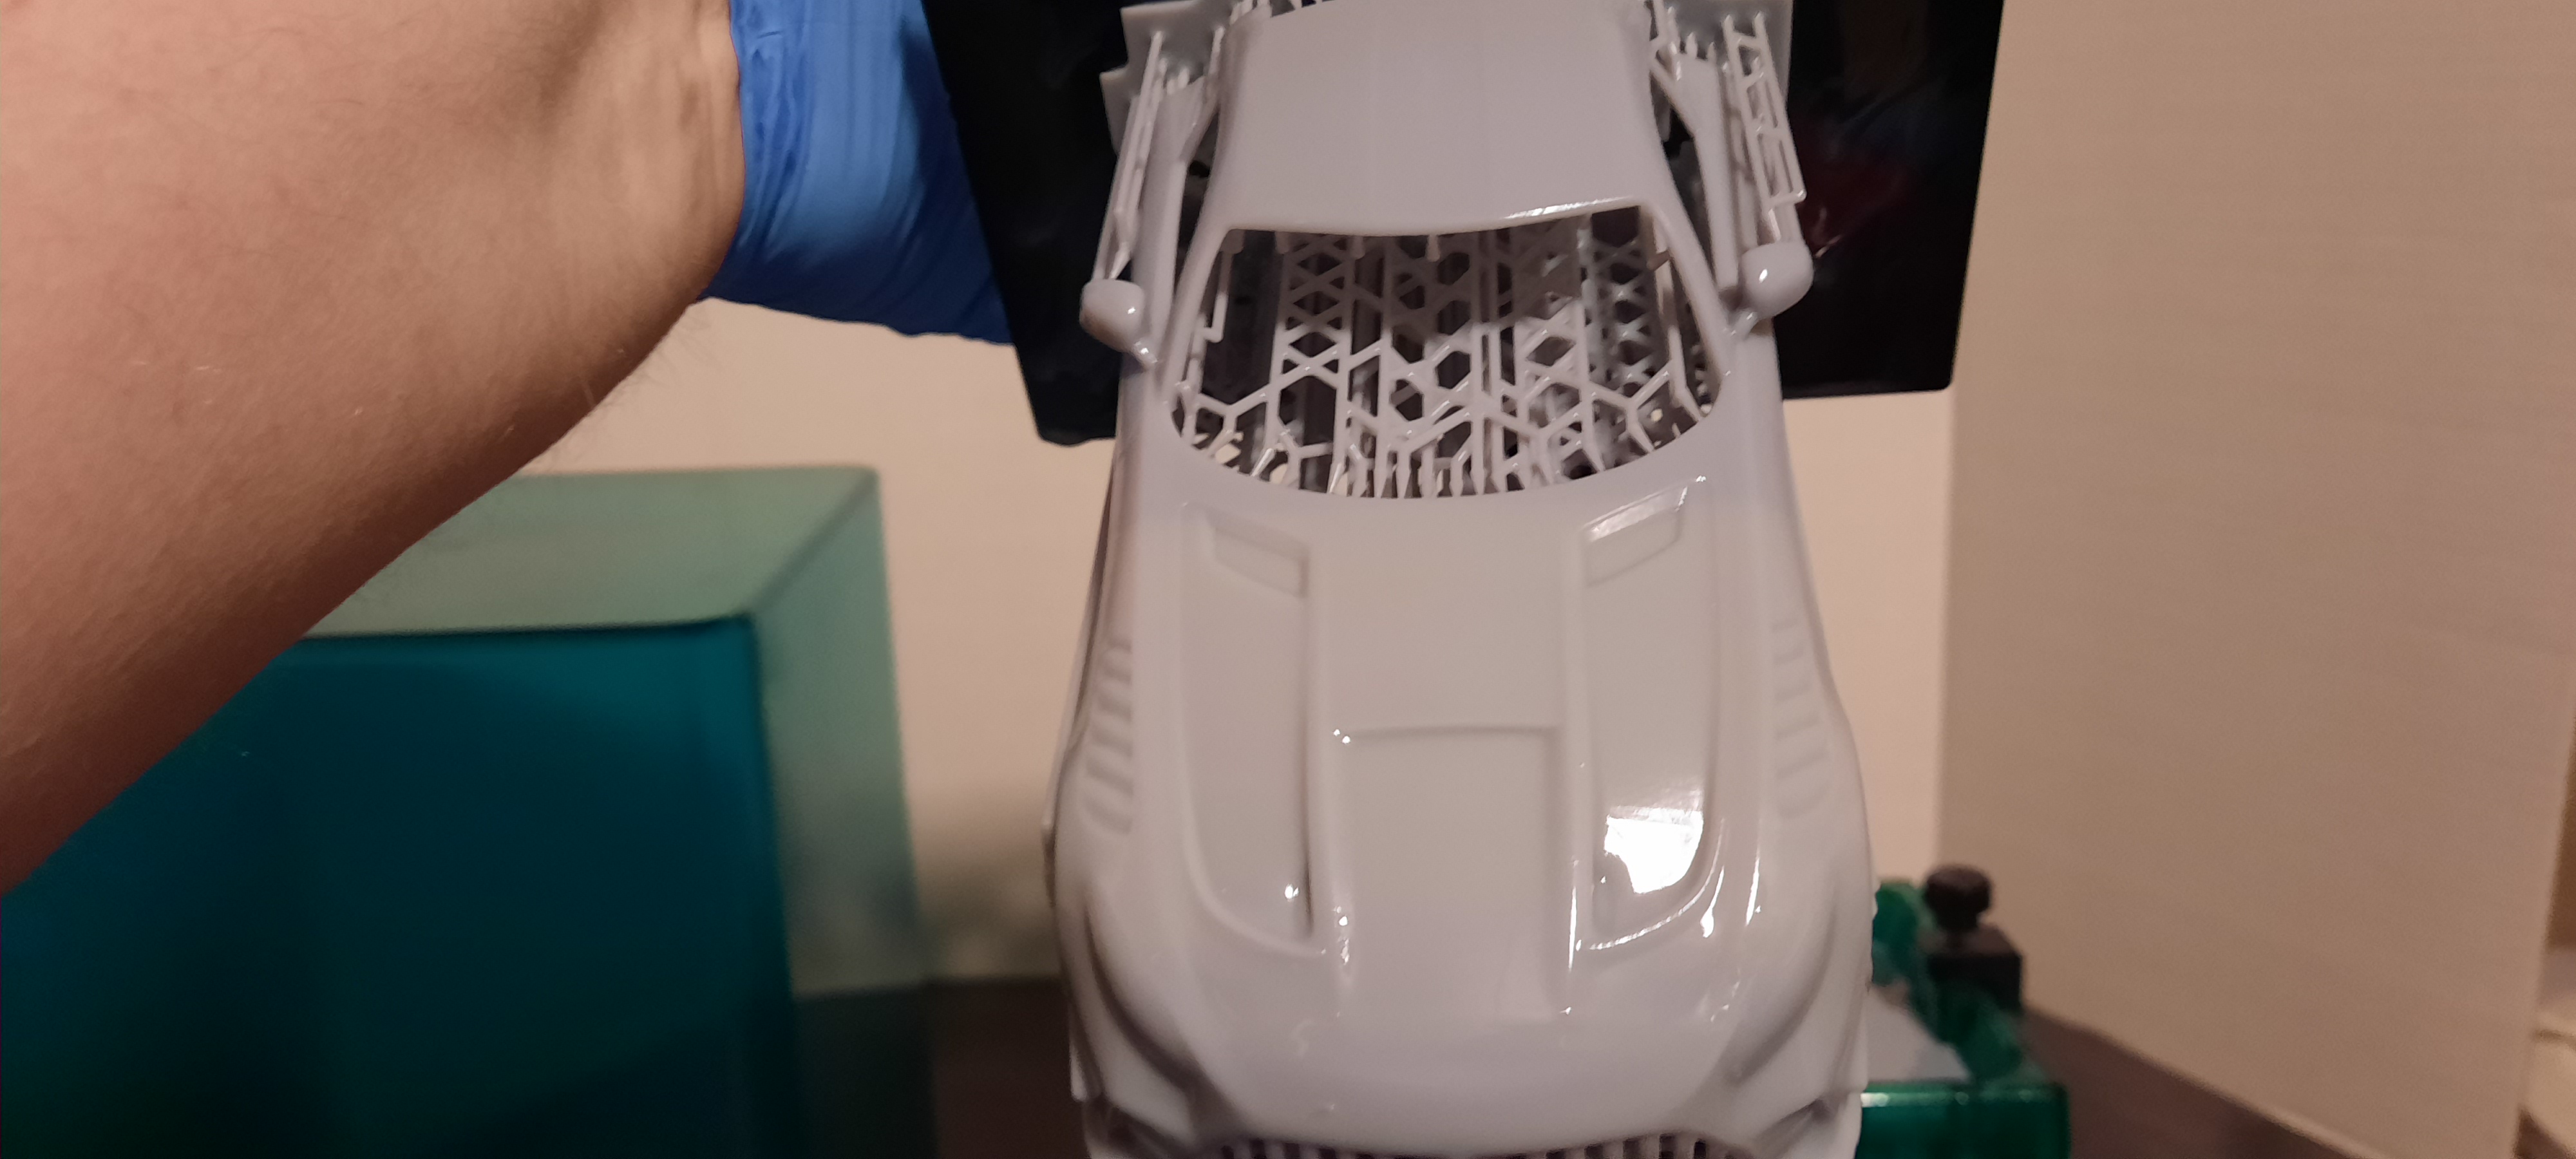
Small update for tonight, First, thanks for the replies, second, my resin did come in this morning so I was able to set a print up before heading off to bed. First print was the front clip of the body, it's actually more like 3/4 of the whole body. I "sliced" the body at the back wheel arches, and across the C pillar and just below the top of the rear window to minimize and details being "cut" by the slice. So the print took about 11 1/2 hours and finished about 5 mins before I had to run out the door to work, leaving me just enough time to remove it from the build plate, quickly wash it in IPA and then leave it to soak in some clean water over night. There wasn't much time for inspection but I'm pretty happy with how it looks but tomorrow I will have time to go over it and see whats what. The only issues I see so far are that the panel lines are not as crisp as I'd like so they'll need to be scribed out some and I'm not 100% sure on the scale. I took published dimensions of the real car and then used a conversion calculator to get them into 1/24 scale. It looks close, but I didn't have a chance to set it up beside another car to see how close it really is. Anyways, here are some progress pics of the first print. Sorry the pics aren't great as I was really rushing to get the second print set up and not be late for work. Backside, man, I think there's more resin in supports than in the actual body so far... Here's the front end, looks good so far....if the scale checks out I'll be really happy even if it just ends up as a very underdetailed curbside, but my hope is to use the Revell AMG GT kit to detail it up. Some of the details are obscured because that is fresh resin coating the front I had just pulled it from the vat and had not washed of any excess resin. Ideally I should of let it hang overnight to allow all the resin to drip back into the vat but I really wanted to get the other half of the body printing overnight. A shot of the hood, the vents on the fenders need to be opened up and the two at the front of the depressions on either side of the hood as well but over all the detail is pretty nice looking. I did not remove the headlight or taillights that the original designer left filled in as I want to use the glass from the Revell kit to sketch out what needs to be removed. More pics in the morning once I get home and check on the back end. Thanks for looking in.
-
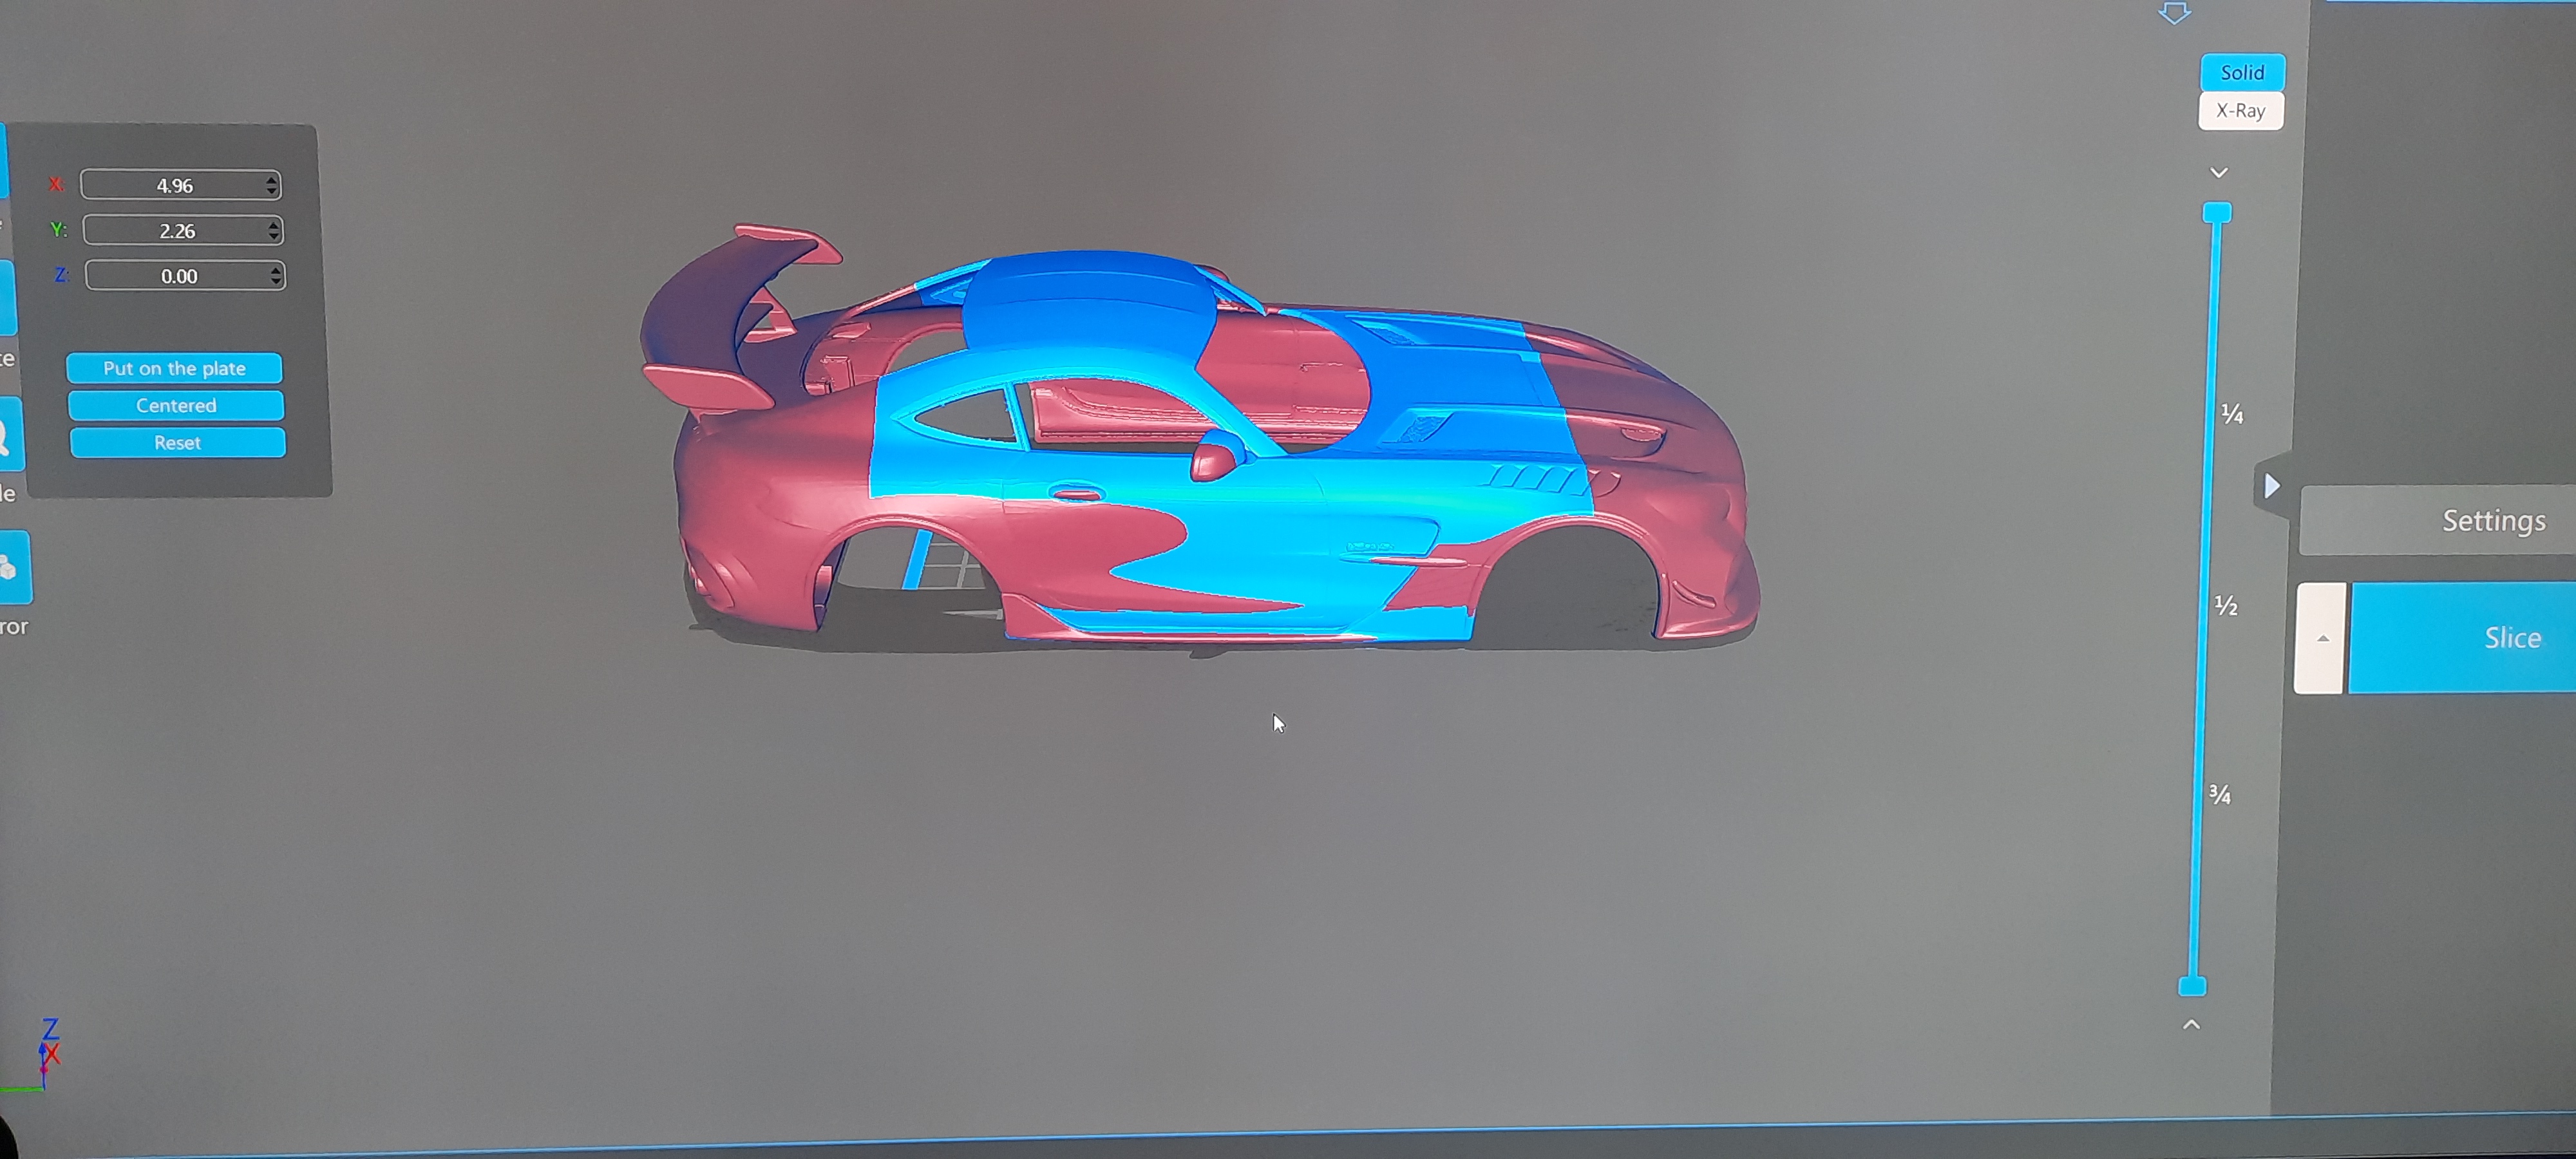
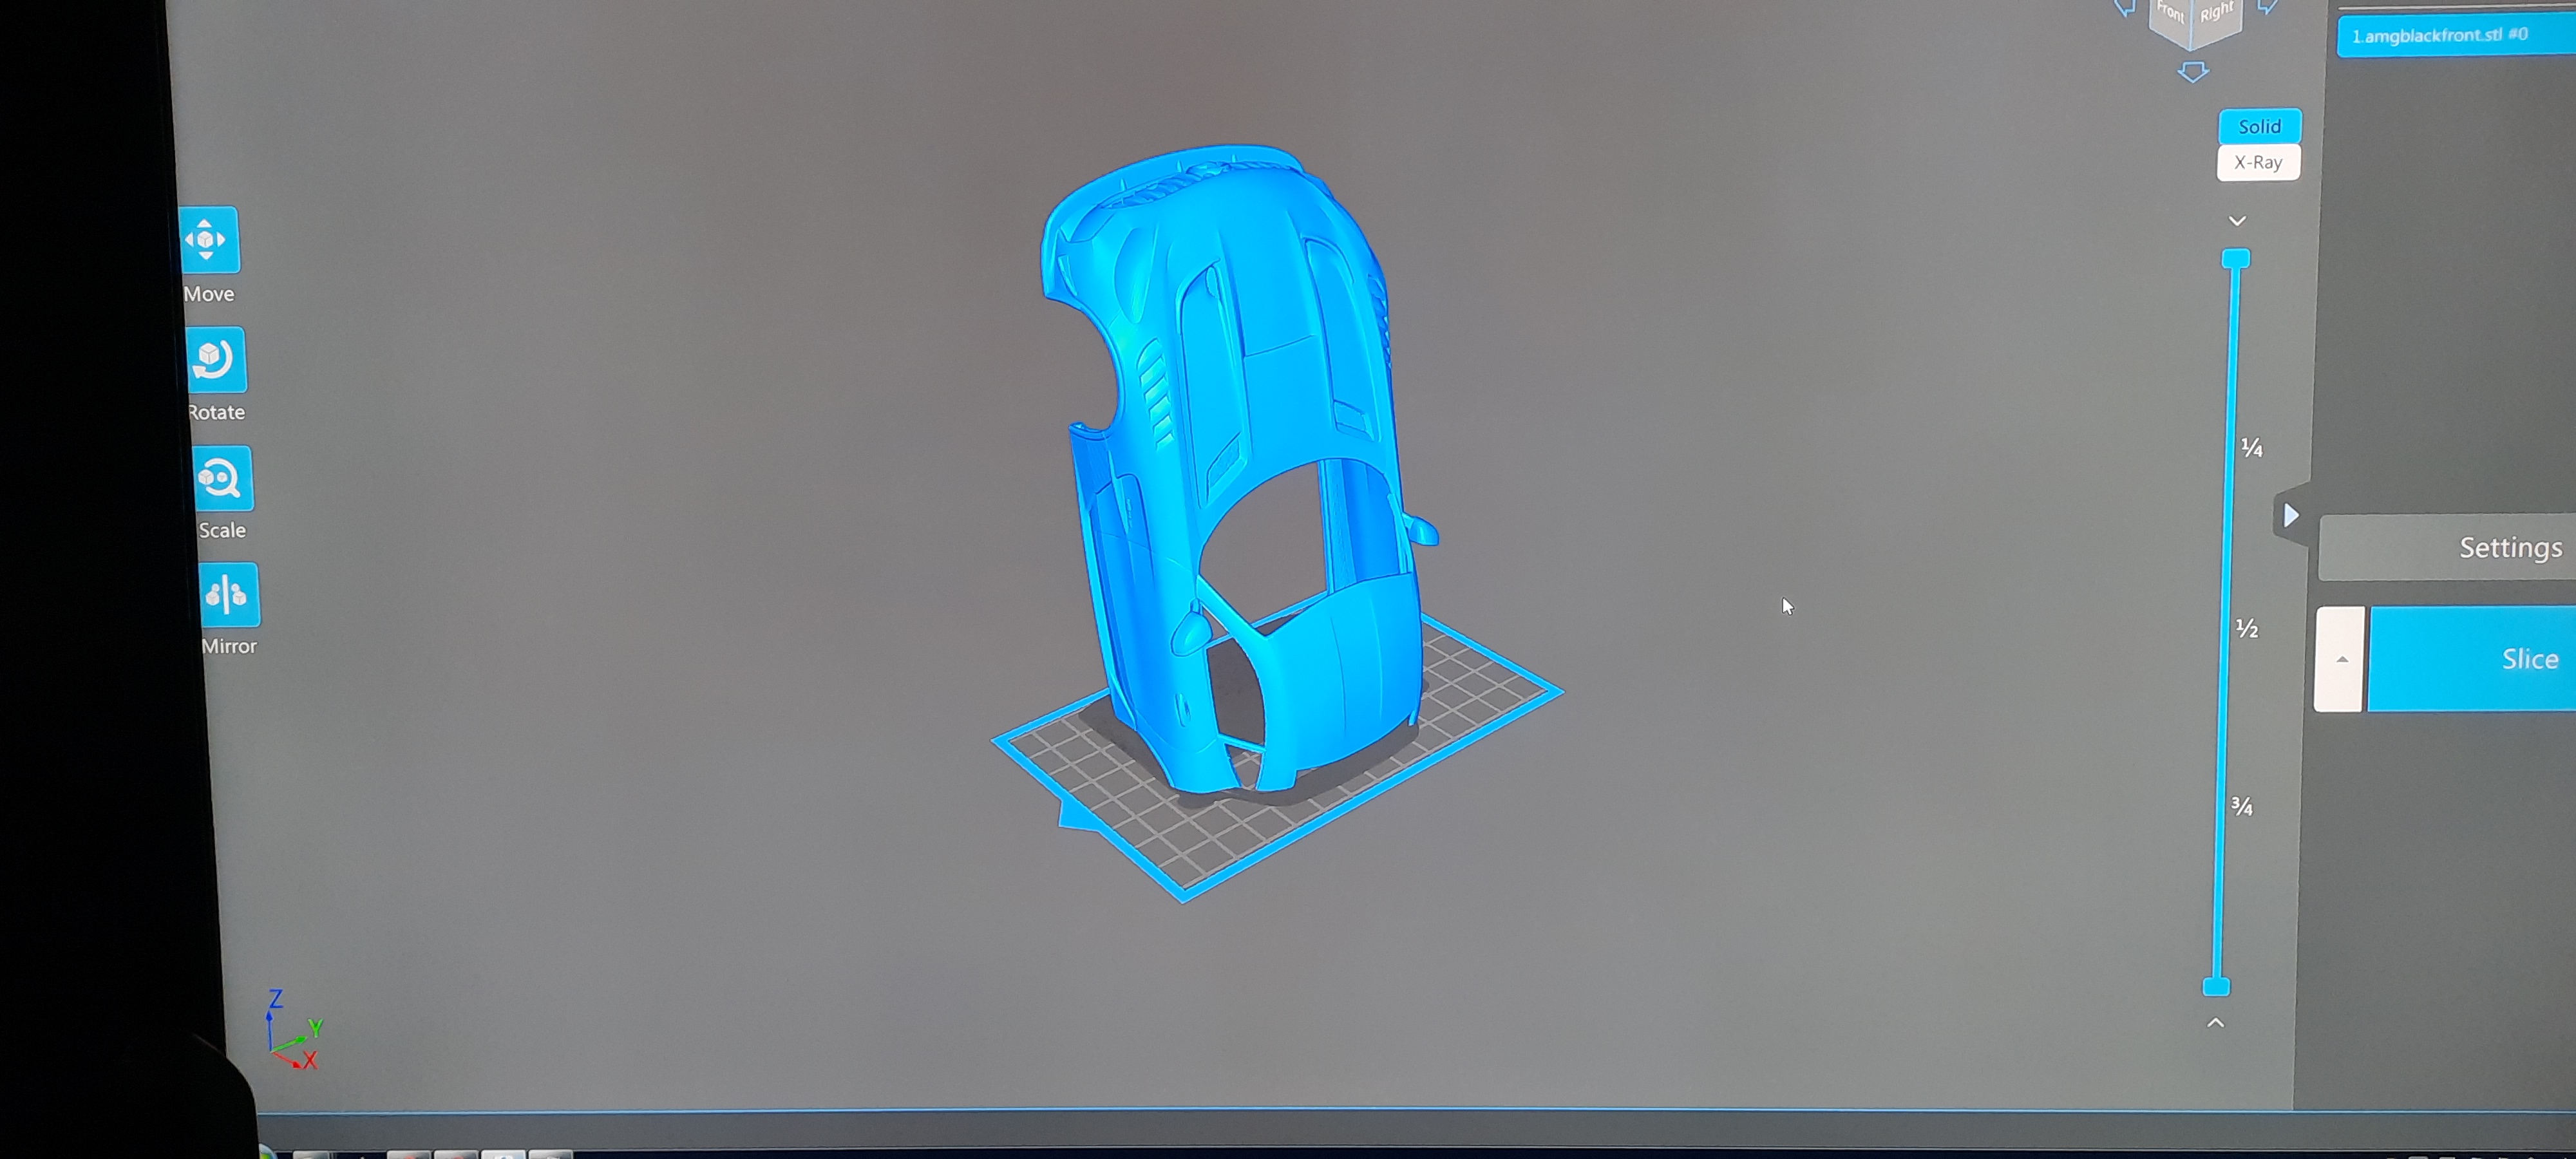
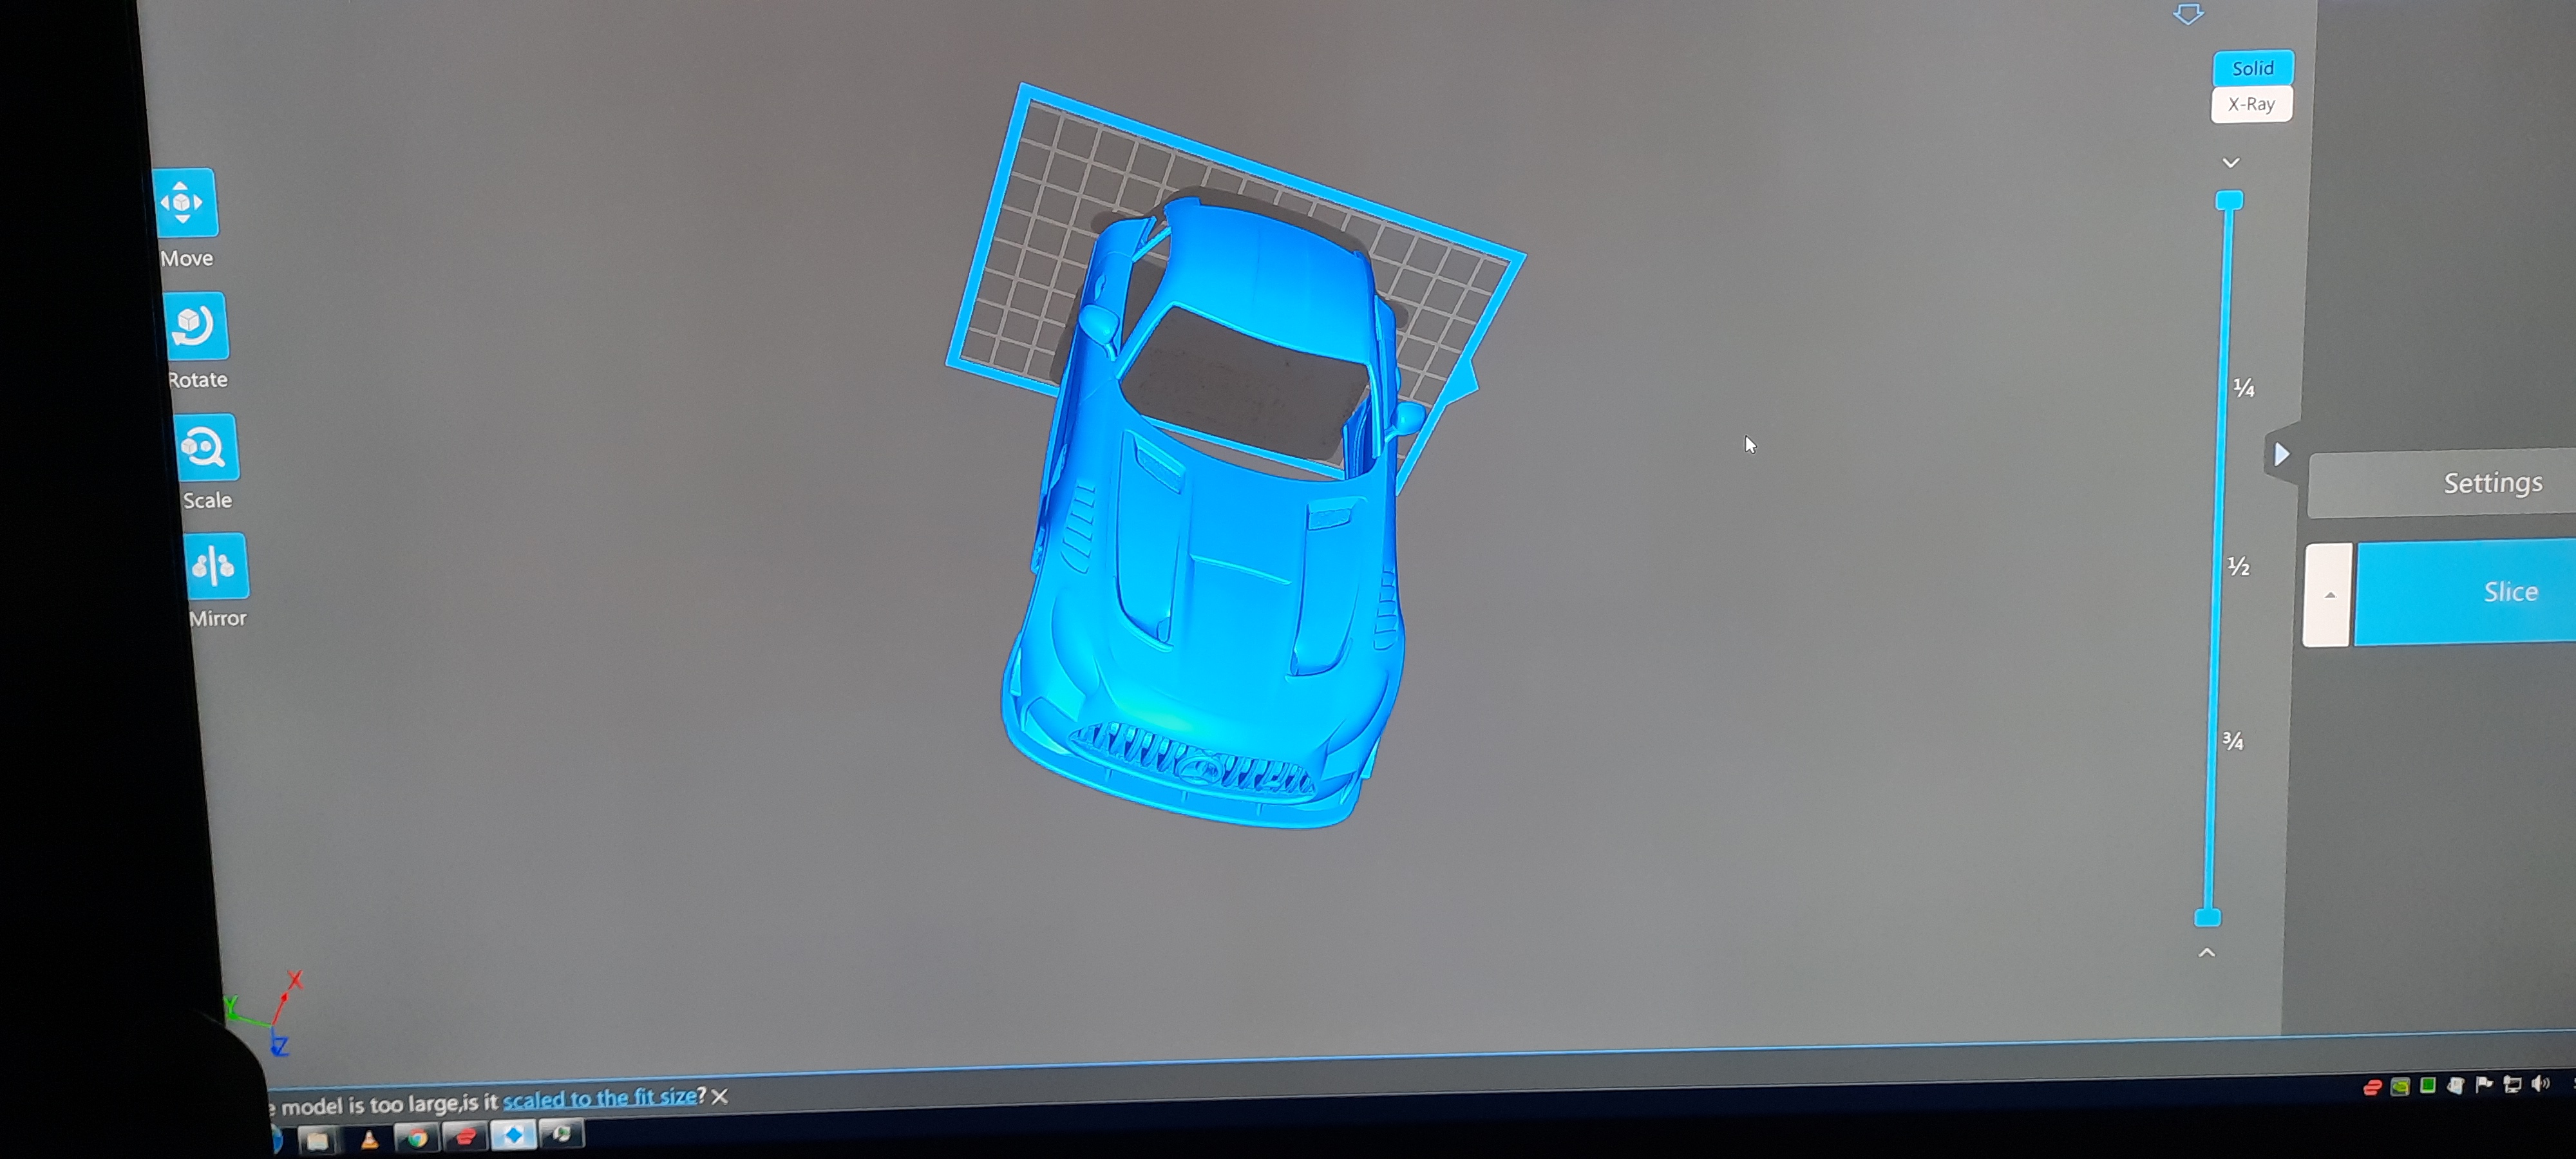
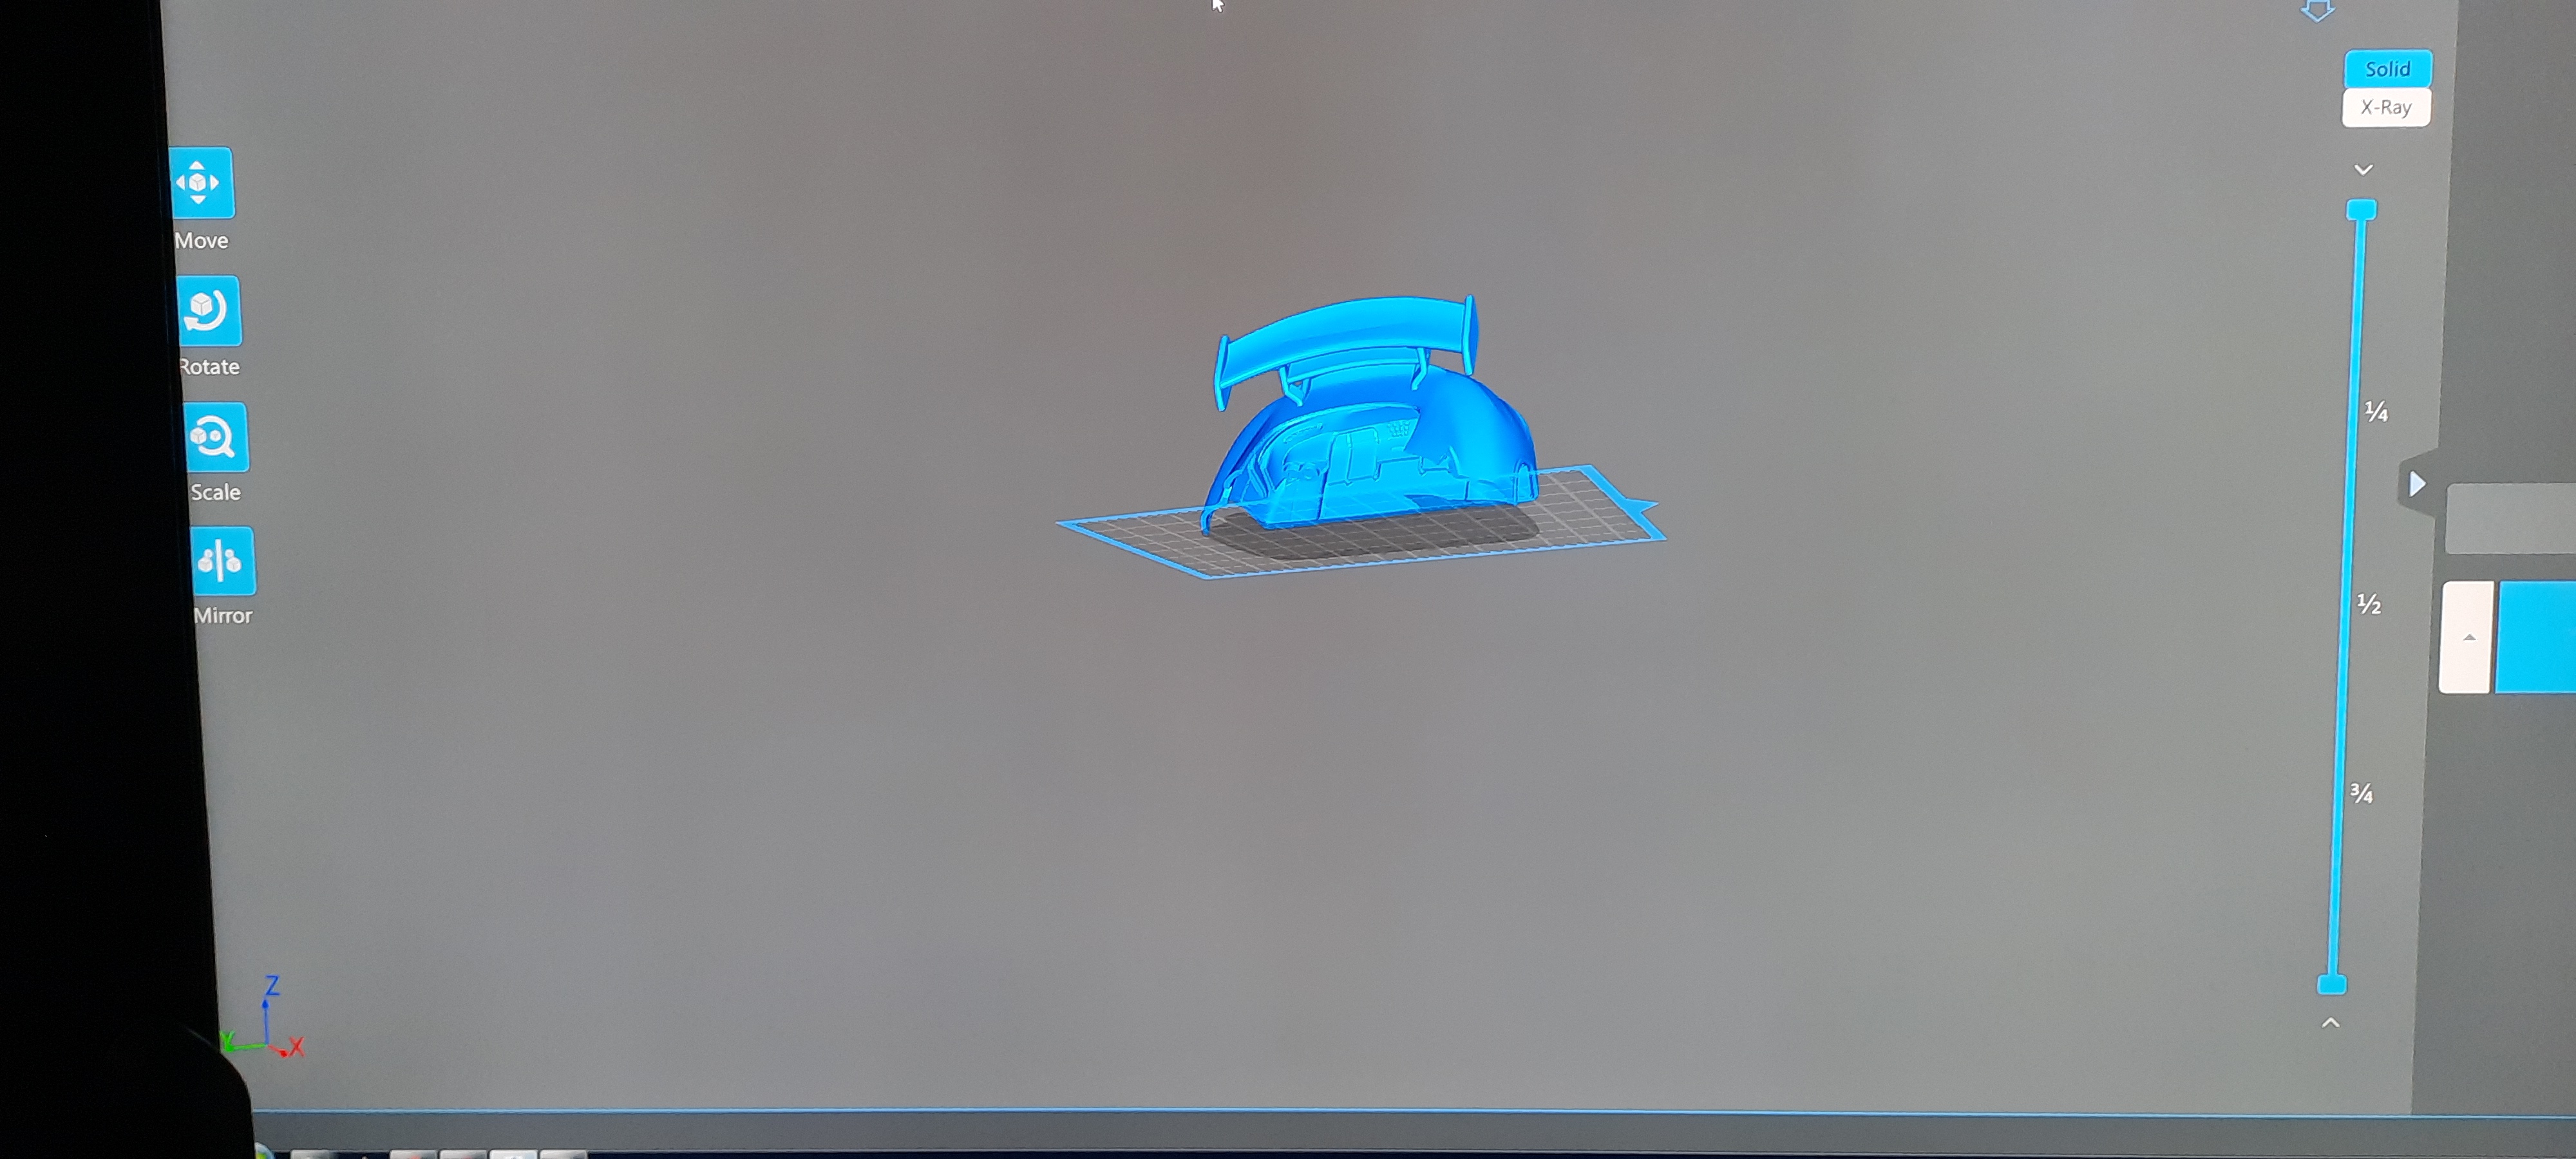
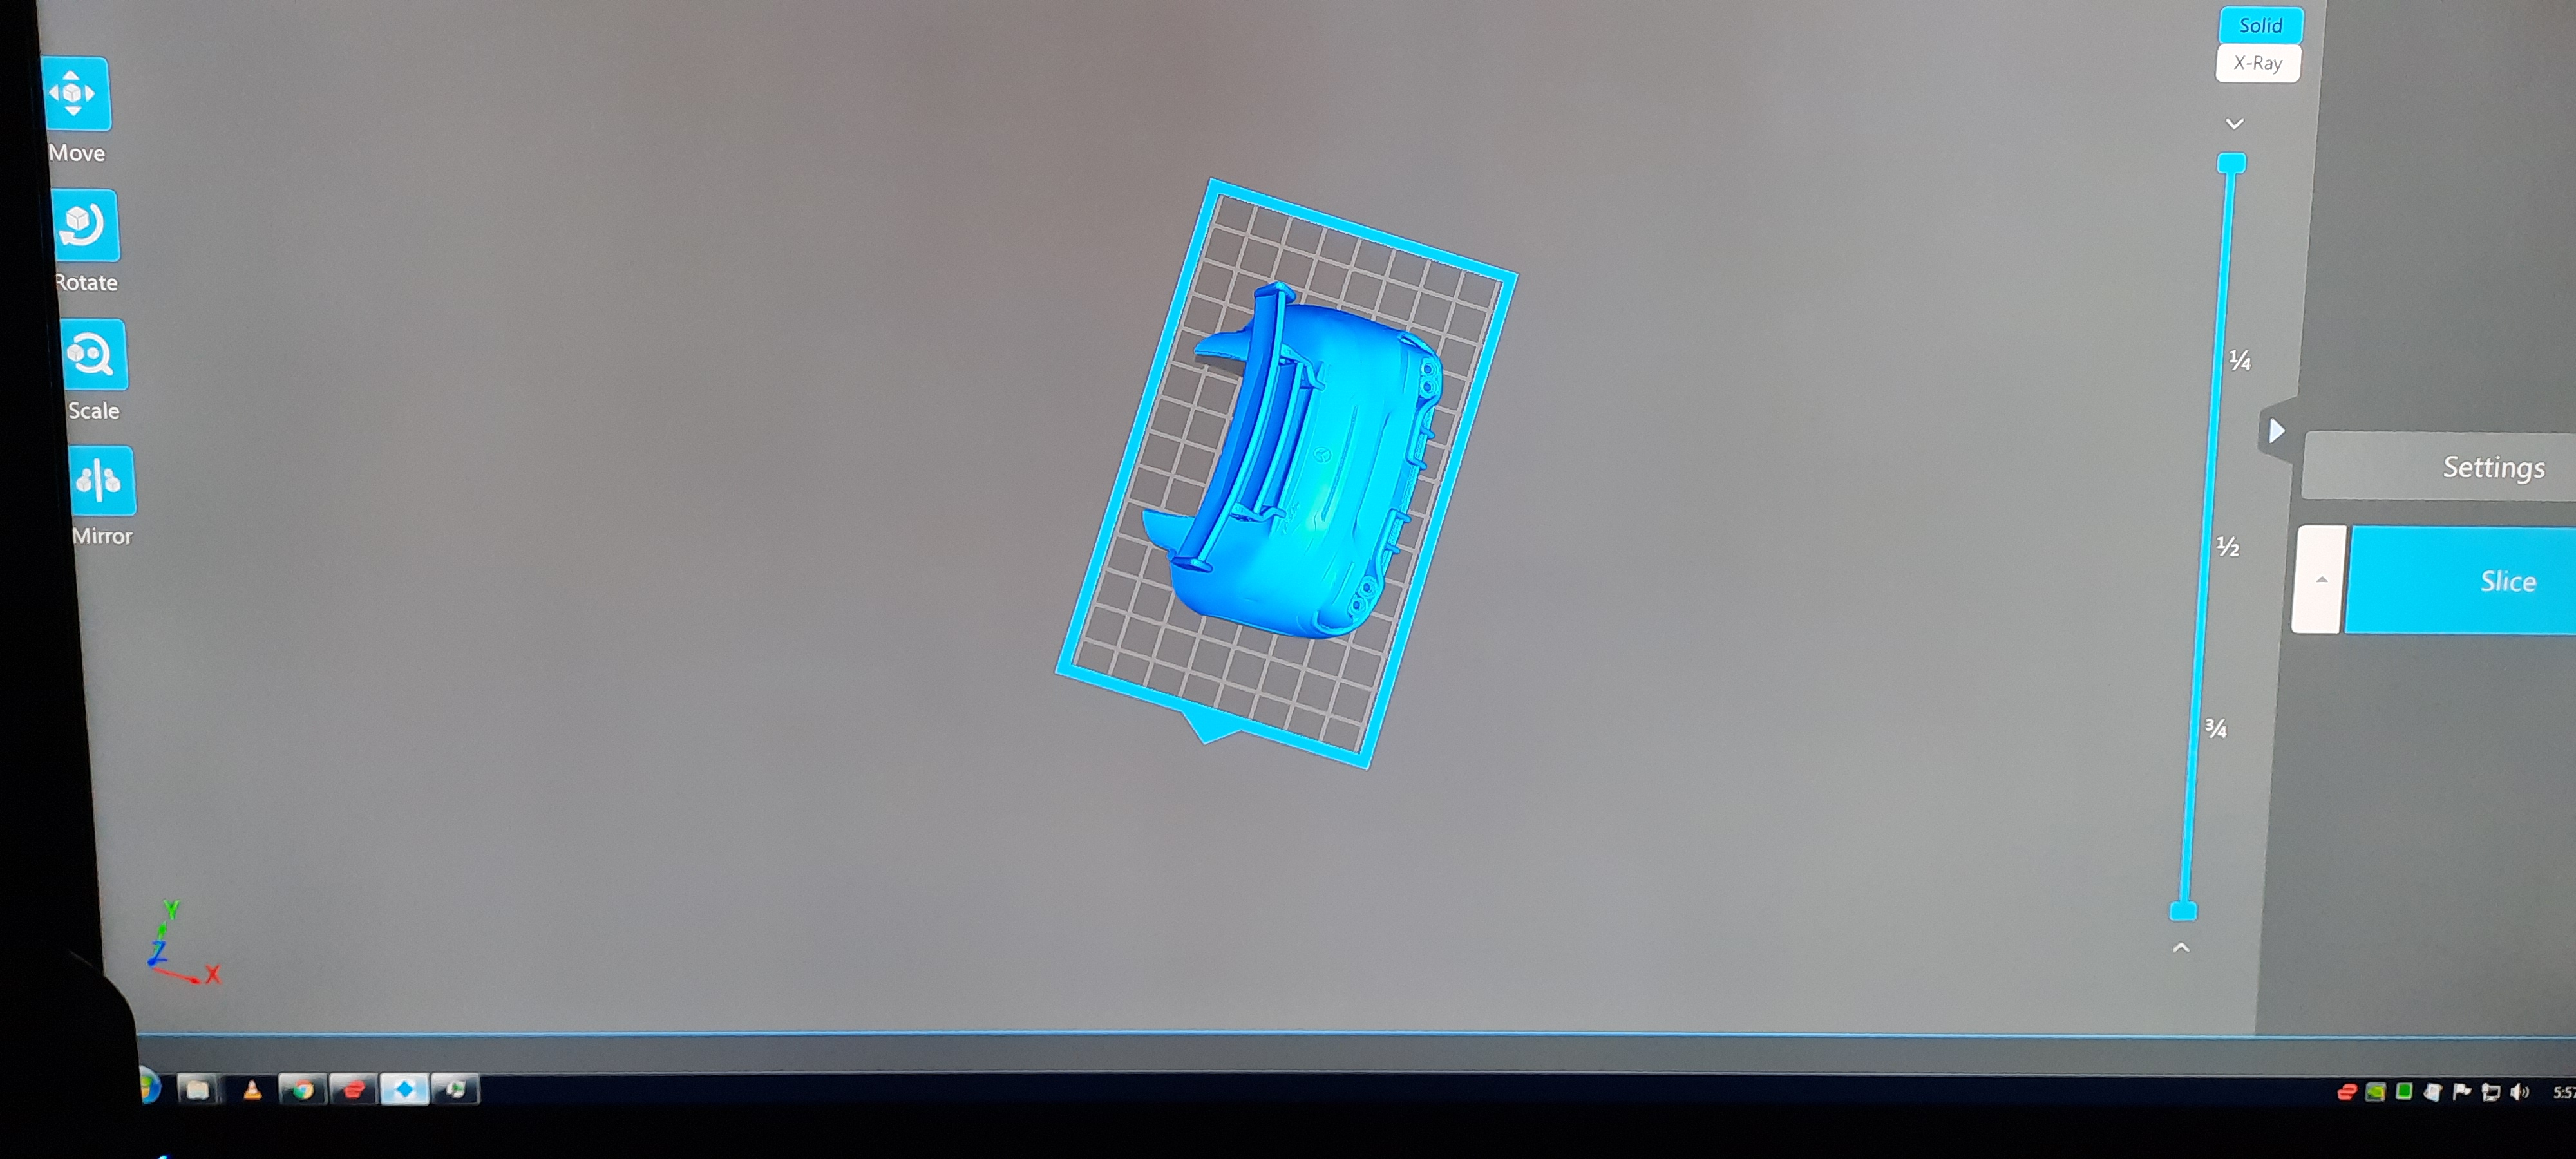
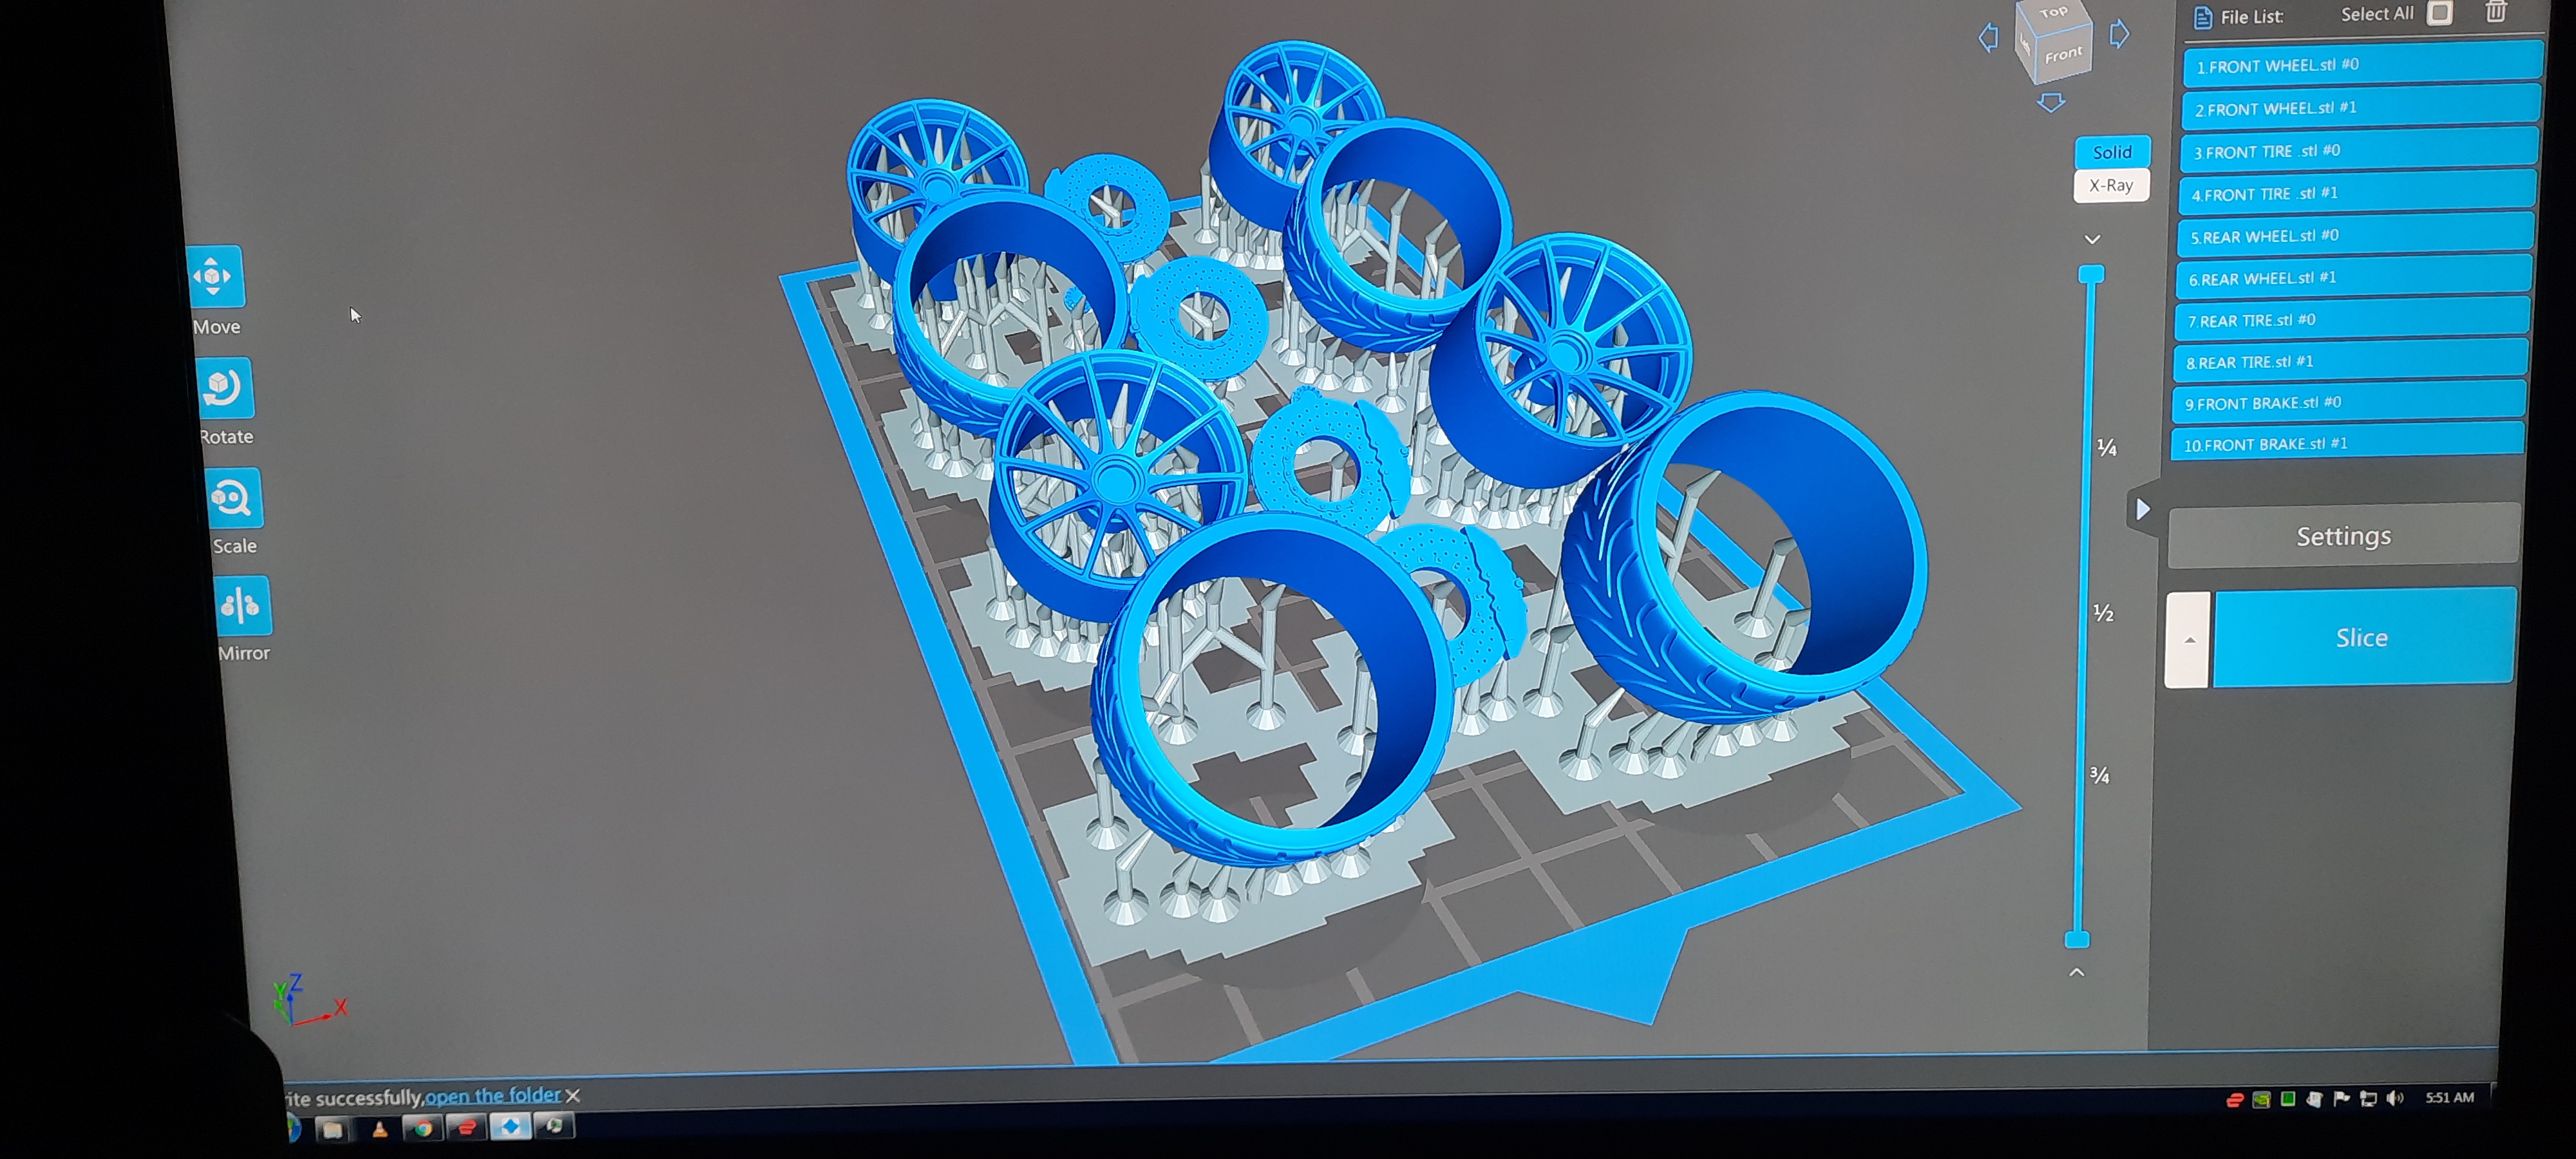
So as stated in the title, this will be (fingers crossed) a 3D printed car in 1/24th scale. My plan is to use either a Tamiya AMG GT3 chassis for the base or a Revell AMG GT, I"m not sure which I'll use yet as I haven't officially started printing any of the files. I bought the files for the body and wheels off of a couple different designers on the web, I'll link to each down below. I have software to design my own items, but I'm not there yet, still teaching myself how to use the different versions I have but the ultimate goal is to be able to design and print my own items.....eventually. So for starters we have the body for the 2021 AMG GT Black Series from HORA80 https://cults3d.com/en/users/hora80/creations So from this pic, you can see the basic model shape. The parts in blue are what will be printed and the red is what is outside of my printable field. My printer is an entry level printer and on the small side, larger printers would easily be able to print this file in one shot. I will definitely be buying a bigger printer down the road. In order to print this car on my printer I needed to "slice" the file into two segments using a program called Meshmixer, sorry didn't take a pic of that, but here are the two halves imported to the printing software. Front clip Rear clip The blue grid is the actual printable area of my build plate. Apologies for the pics, I took some pics of my computer screen as I was slicing the files in Chitubox, which is the slicing software that comes with my printer. There are many other slicing programs out there, but I'm still working on learning them so I stuck with Chitubox for this project. And for the wheels I am using a file from another designer, Black Box, https://cults3d.com/en/users/BlackBox/creations, the wheels are not exactly like the AMG GT's but they're really close, close enough for me right now. In this pic, you can see what the file looks like when supported. All the grey will be supports leaving the blue as the actual printed file to keep. I will try to remember to take pics of the actual prints when completed. I am hoping to get to some printing later this morning, I ran out of resin and a new shipment is due to arrive today, knock on wood. Comments, criticisms and questions always welcome.
-
Mine are taking that 90hr flight from HK to Canada. Pretty sure the flight hits Saturn and Uranus before landing in Toronto.
-
It could be. GT3 racing is gaining popularity around the world by leaps and bounds over the past few years. Covid hurt it, like many other forms of racing, but what amounts to a global spec class, most of the GT3 categories around the world have almost identical rules, driver's are able to hop from race to race and series to series and know the car is going to be the same as the last race (since most of the guys are factory drivers..the pro guys that is) make for very entertaining racing. The BOP in GT3 spec cars are very balanced and dialed in everywhere they run. Seems a different car is winning all the time, no monopolies like in F1, which make fans very happy and interested. I'm sure the driver's like it too. Seeing the Revell name pop up on some cars could definitely be a sign that Revell Germany is working on some kits and seeing that no one has kitted a GT3 Ferrari 488 or a newer Porsche GT3 could be good for us, very good. We can hope.
-
For any GT fans out there, the NuNu brand new tooling of the BMW M8 GTE(GTLM) has FINALLY dropped along with their detail up sets they do. Mine just shipped today from Hong Kong. A few of the aftermarket decals guys already have decals sets available as well. Racing 43 and SK both have several different versions already on sale. https://www.hobbyeasy.com/en/data/gfgncfaoe4t770u6ir7g.html https://www.hobbyeasy.com/en/data/jmvpt5svpiaghukl4p7f.html https://racingdecals43.com/en/ https://www.facebook.com/Skdecals-1557454941209426/ you can message him direct to buy or check out places like Spotmodel or Hiroboy or Hobby Easy for SK Decals. Also out this week is the reissue of the Tamiya Sauber-Mercedes C9 with the PE and seatbelt set included.
-
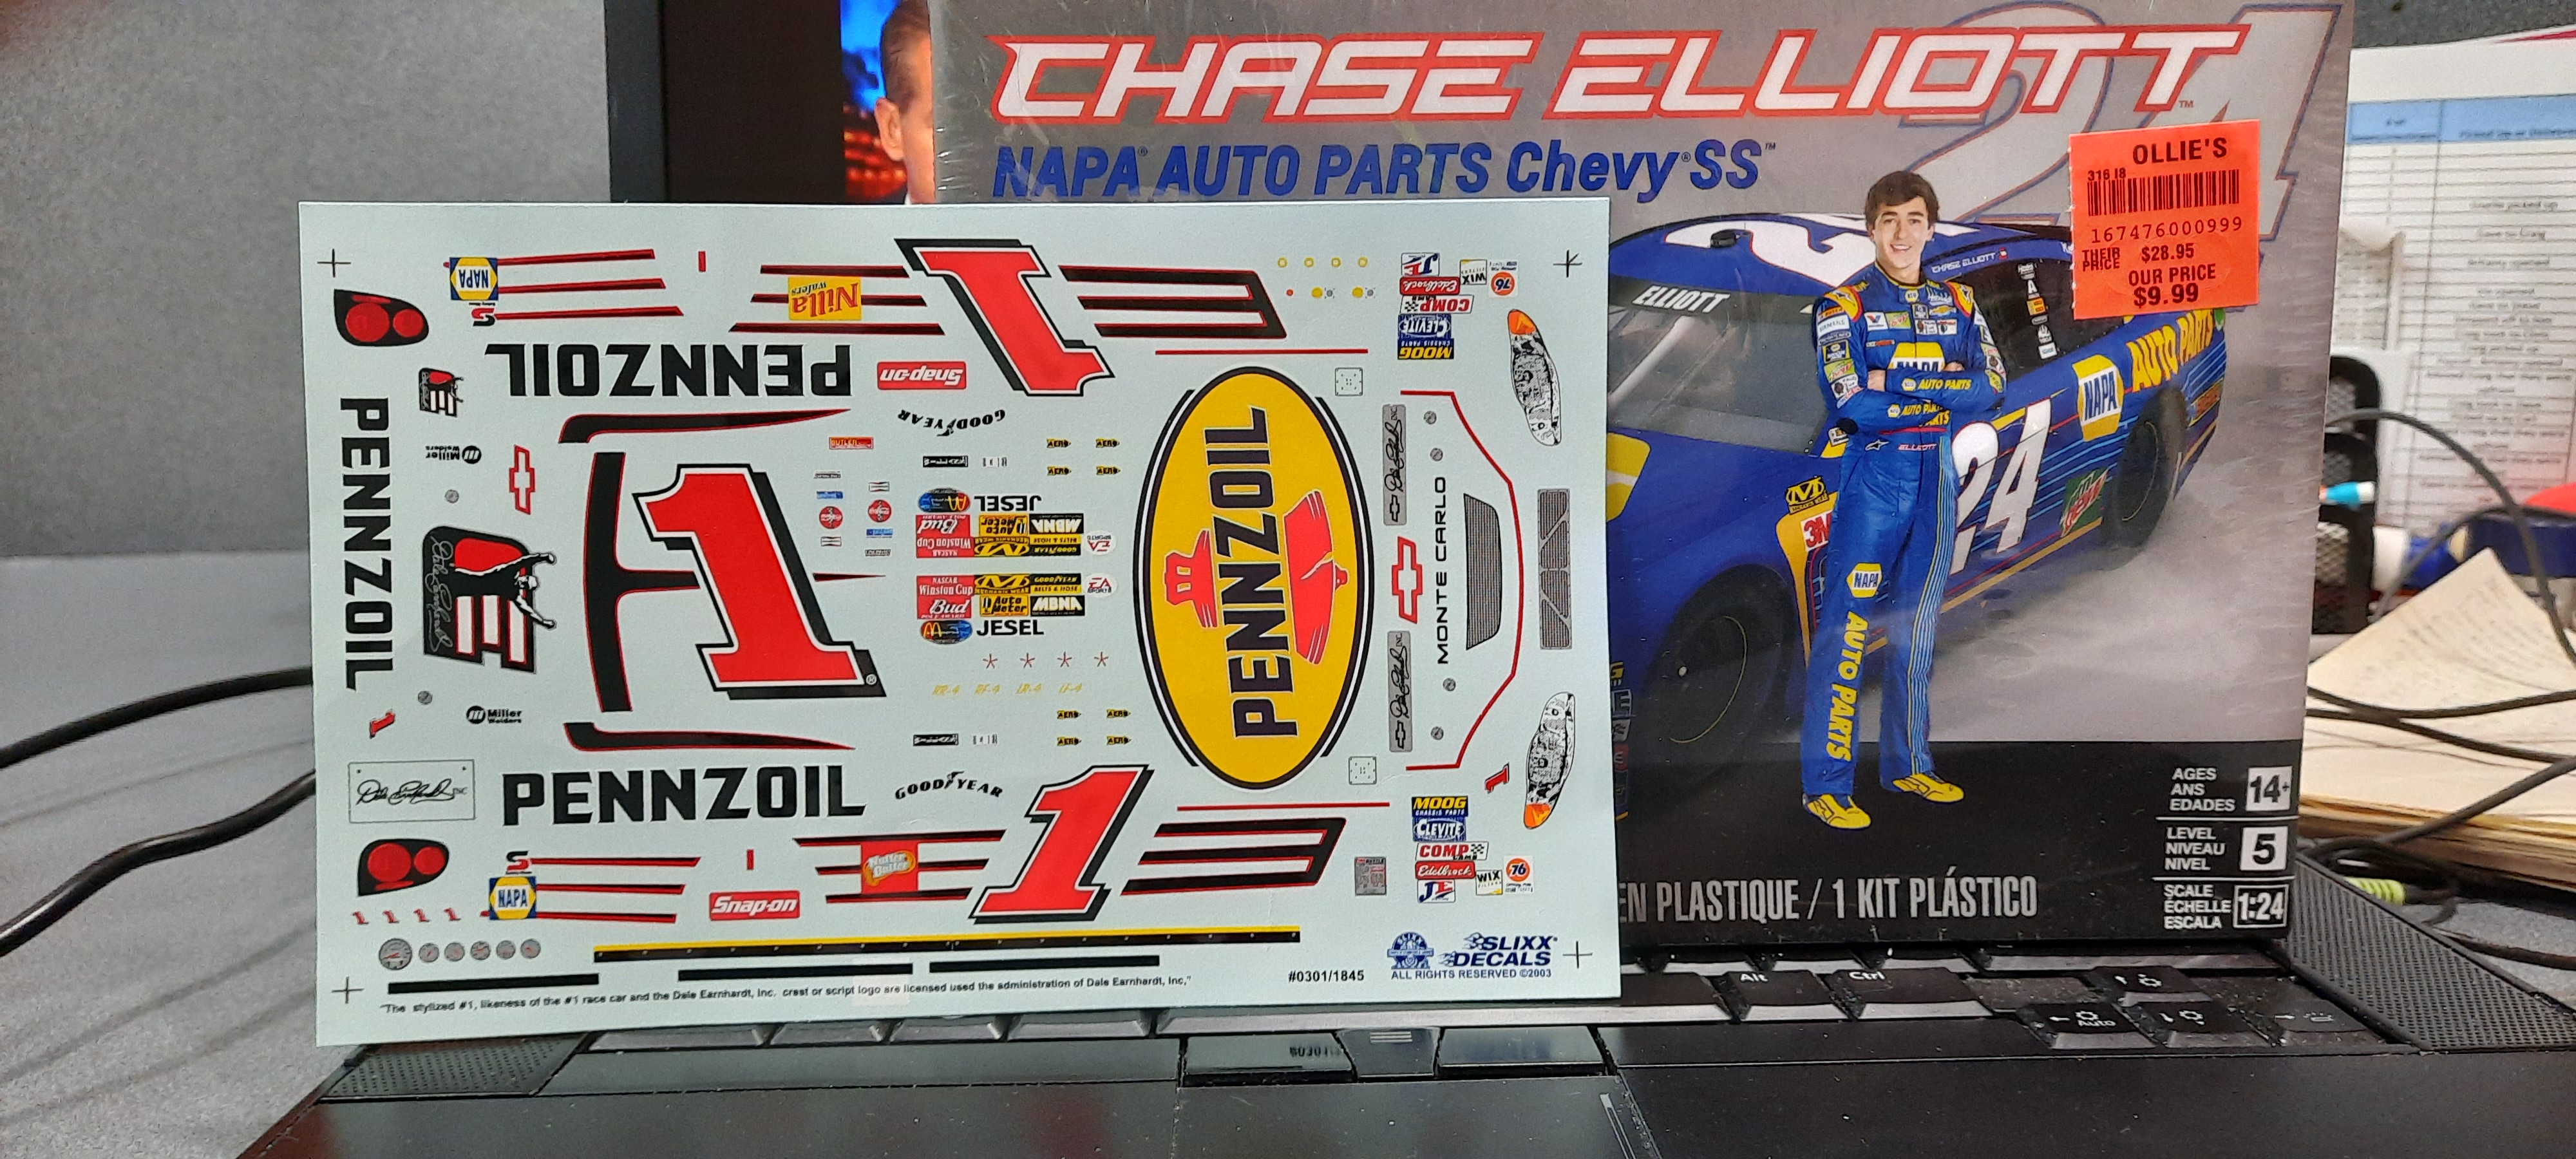
It's been a good long while since I've worked on a NASCAR project so it's about time to bring out a new one. I'll be using a Chase Elliot Chevy SS and will be doing an updated fantasy Pennzoil livery. I know the car never ran with this livery, but I don't care. I'll mix in the Pennzoil decal set (Slixx) with the kit decals to make my own livery. I'll be using Powerslide's Goodyear tire decals and some other details along with the stock kit decals. I'm at work and will be starting the project here, but with it being a long weekend here in Canada this weekend I'm hoping to get some primer and paint done. Paint will be from Gravity Colors (Pennzoil Skyline GTR-R34) pearl yellow. Not sure how detailed I'll go on the chassis, since it's not going to be an actual car I'm replicating, I may just go for a quick build. We'll see...more later tonight I hope.
-
Hey Dan, The printer comes with editing software that allows you to scale up down, rotate, hollow out, add holes(drainage, I hollowed out the chest so it wasn't solid, and added holes to drain out the resin inside) and add in supports for the print. The software is by Chitubox and if you search it on Youtube you can find videos that explain it a lot better than I can. But yes, you can scale down to 1/24 but you'd have to have the measurements to do so as the scaling feature is done on %. I used the FLA files which have a base size of 1/8th scale, as set by the designer of the model. I scaled my up to 120% so my model will be around 1/7th, 1/6th in the end, about 2"'s taller than the default. I used the FLA files cause many of the armour pieces were separate files so I can paint the Beskar armour in the bright chrome a lot easier. So it would definitely be doable, how well it would print, using these specific files might be worth a try. Yes, the quality of the print is outstanding. Once I start painting the washes will really bring out the details that are hard to see in pics, but in person this thing is outstanding. I had a couple of failed prints yesterday so I'm behind my schedule now, so hopefully tomorrow I can lay it all out and get some pics of where I'm at with the build, but right now the main character is done, I just have some more armour details, the child, cloak, rifle and base left to print. The base and cloak are the largest prints and I'll print those all last so I can start painting the figures while those items are printing, which will be days.....