Chariots of Fire
-
Posts
2,781 -
Joined
-
Last visited
Content Type
Profiles
Forums
Events
Gallery
Everything posted by Chariots of Fire
-
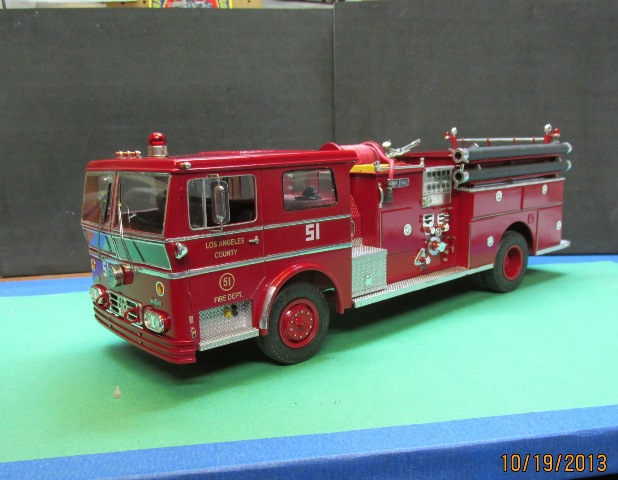
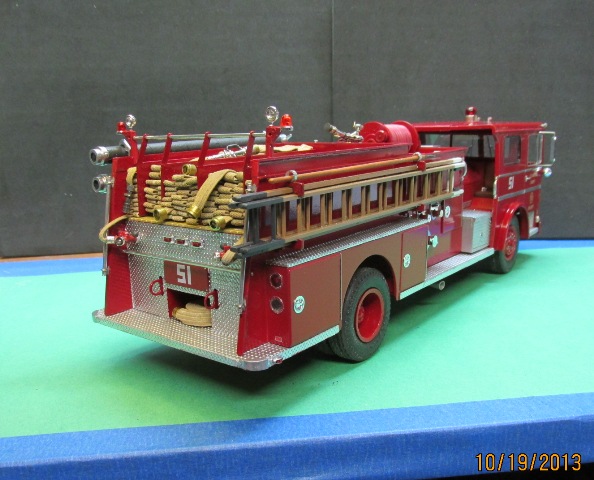
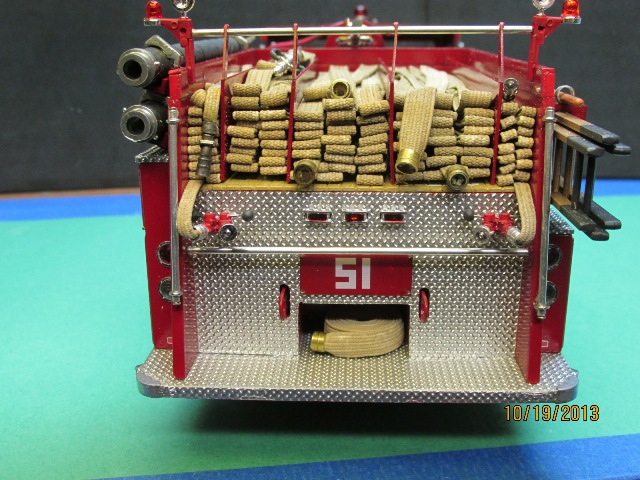
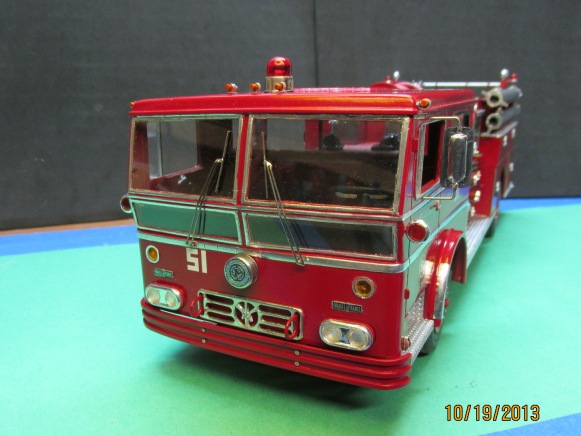
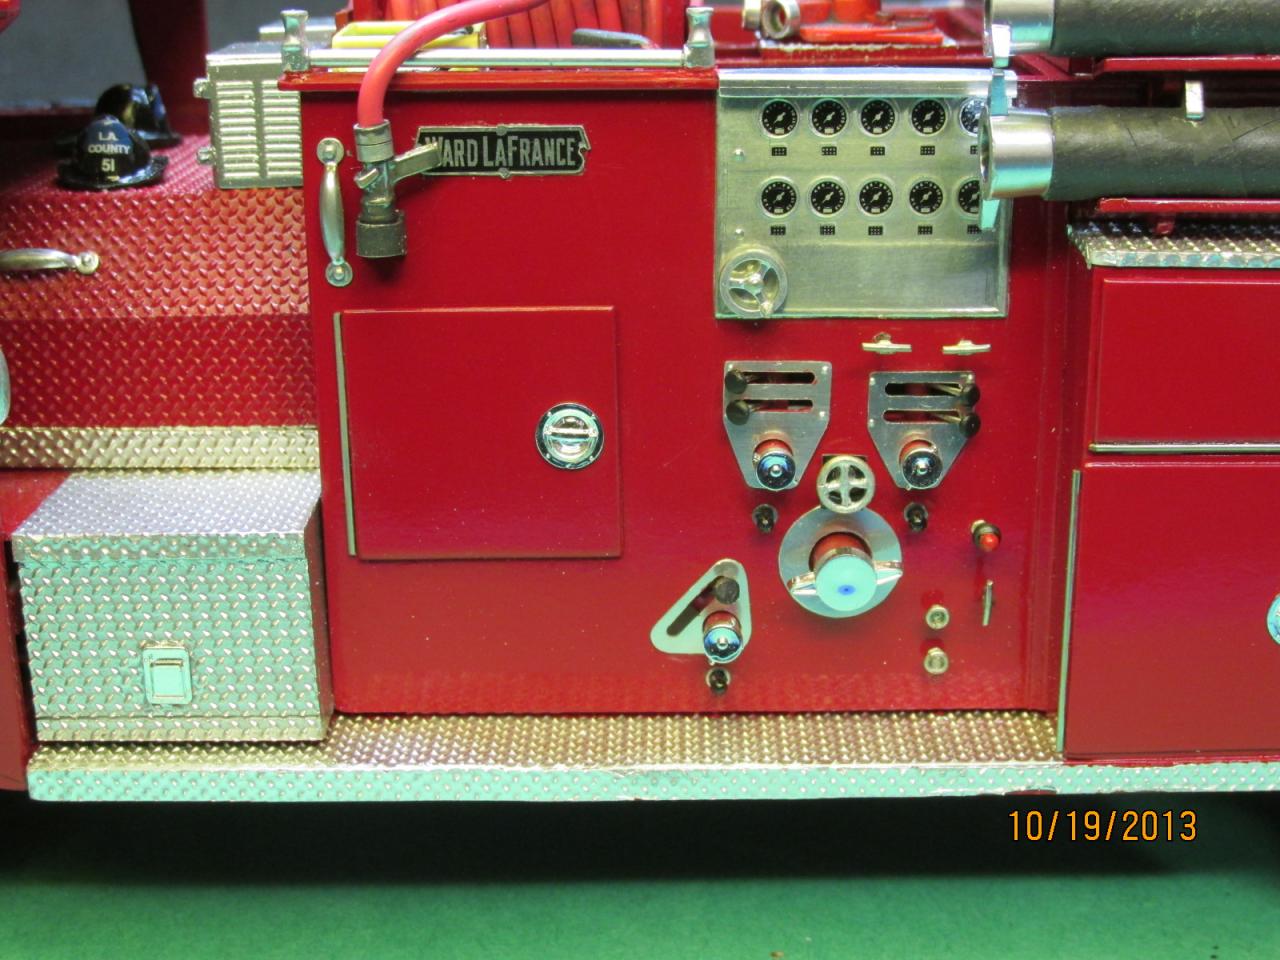
After a brief hiatus away from this build I was able to get over the hurdle of having to rebuild the air intakes located on top of the engine cover. The first ones were about twice as big as they should have been. With that done the shops could finish the work and get the rig ready for assignment. "Rampart! This is Engine 51. Do you read, over?"

-
-

US Navy FFN-3
Chariots of Fire replied to Chariots of Fire's topic in Model Trucks: Pickups, Vans, SUVs, Light Commercial
If I scull them up the paint will come off. Those are resin tires with Floquil flat black paint. I suppose I could use a weathered black or some weathering powders to make them look older. Thank you Dan! Been a long time since we've talked! -
US Navy FFN-3
Chariots of Fire replied to Chariots of Fire's topic in Model Trucks: Pickups, Vans, SUVs, Light Commercial
Yes. Sheet brass was used for the front fenders and hood. The grill is brass strip stock. Fender edges are brass strip also soldered to the fender edge. So are the springs and front bumper. Nice stuff to work with but soldering is not the same as glueing!! -
Nice looking work, Brandon! BTW Please! Don't change the Chevy's color scheme! I like!!
-
US Navy FFN-3
Chariots of Fire posted a topic in Model Trucks: Pickups, Vans, SUVs, Light Commercial
My most recent build, a US Navy FFN-3 fire apparatus. The real truck was constructed by International with firefighting equipment supplied by a number of small companies including the Gorham Fire Equipment Company of Boston, Mass. who supplied the equipment to a real rig on display at Bangor's Maine Air Museum. Model is 1/25 scale. -
Hi, Gordon! Jeff is working hard to finish his build in time.
-
Yes. I'd use it again. Great stuff. Brass screen from K-S. Just some small photoetch with round holes. Most hobby shops carry it but I've noticed that it is becoming scarce.
-
Last October I mentioned that JeffH was working on his version of the Boulder Dam AP. Well here are some pix of his work. A lot of progress in a relatively short time. He's shooting for NNL East to display it. We expect to prepare a backdrop of the dam construction site to go along with both trucks. Here is the beginning of the two mixers that will be on the back of Jeff's rig. And a bit more progress on the drums. Here's what the truck looks like with the mixers mounted. Jeff borrowed my truck to take off some of the detailing. When Boulder Dam was built some of the dumps were converted to haulers for the mixers.
-
Actually I did just that. I cut out the grill area and installed some brass photoetched mesh. I did paint it black, however.
-
The newer release is a problem child. The biggest challenge is to get the cab to sit properly on the frame. The two mounting points have to be glued on and if they are not perfectly alligned the cab won't be either. Also there have been problems with the frame not being straight even after it is put together. Look these pieces over carefully before you begin construction in case you have to do any adjustments to the frame rails. Here is a photo of one that I build last year after extending the frame for the rescue style body.
-
Hudson Highway
Chariots of Fire replied to Chuck Most's topic in WIP: Model Trucks: Big Rigs and Heavy Equipment
Fender flairs, maybe!?! -
Scratch built RS700L !
Chariots of Fire replied to 72 Charger's topic in WIP: Model Trucks: Big Rigs and Heavy Equipment
That looks nice. What is the scale? But why the mudflaps in the front? -
I've done a few decals myself. In order to save expensive decal paper I first print out the image on a piece of white paper. Then I cut a piece of decal paper large enough to cover the image along with enough to tape it down on the white paper with cellophane tape. Then the whole thing goes back into the printer to be printed again on the decal sheet. You just have to make sure the edge of the tape is far enough away from where the image is so that the printing doesn't end up on the tape itself.
-
Pre Build Prep Question
Chariots of Fire replied to raildogg's topic in WIP: Model Trucks: Big Rigs and Heavy Equipment
If it's a day cab it won't have a sleeper will it? -
Thank you, Bill. It's given me a whole new prospective on the ingenuity and drive of all of the people that built the dam. Inspiration, really. Not only did I learn something about the truck but a lot more about the project as a whole. I visited it as well a few years ago when my daughter was living in Henderson, NV.
-
Nice job! Like the paint scheme!
-
Matthew's Ford AeroMax120
Chariots of Fire replied to Jim B's topic in Model Trucks: Big Rigs and Heavy Equipment
:) :) COOOOL! -
Glad to see ya, Dave! How's weather down there in the Sunshine State?
-
A bit of a haul, Casey! We will be showing the trucks on a small diorama once Jeff gets his built.
-
AMT Autocar A64B
Chariots of Fire replied to Tyson's topic in WIP: Model Trucks: Big Rigs and Heavy Equipment
I like old trucks. You've done some nice work restoring an old piece to an even older appearance! -
Hah! Not me!! Wait until you see its companion piece, the AP with the cement mixers on the back! My colleague, Jeff Harper is working on that part.
-
Well my half is done. Now when Jeff Harper gets his done we will have two for display. His will have two cement aggitators on the back (small cement mixers) that were used on the Boulder Dam project. Here's what the dump looks like with some dirt and grime on the body. This has been a fun project and it's going to be even better when the mixer version is part of it. We plan on setting both up on a small base of that red rock that lines the canyon walls.
-
Pro Star and 53 ft Great Dane reefer
Chariots of Fire replied to Dave Metzner's topic in Truck Kit News & Reviews
Maybe I can make up a Workstar out of this one! Got new project in mind!