Chariots of Fire
-
Posts
2,781 -
Joined
-
Last visited
Content Type
Profiles
Forums
Events
Gallery
Everything posted by Chariots of Fire
-
 It's good to see some out of the box ideas for creating those extra details. Great beginning! Will pop in from time to time to see how you are progressing!
 -
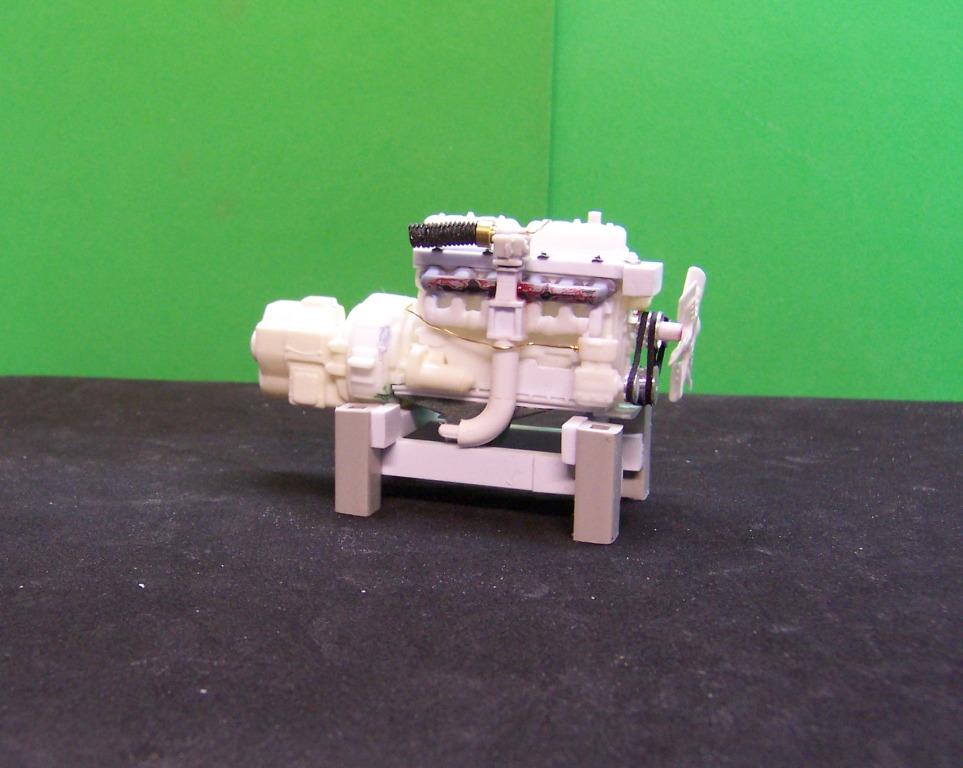
It finally caught up to me. Had to get some paint on the engine! Now it is more than just bits of plastic and wire.

-
The Continental engine is beginning to take shape. Details from just tubing, wire, bolt heads, hex rod and a few odds and ends from the parts box. The flex hose from the carb to the air cleaner is a section of fishing lure called a "wiggly worm". Very soft plastic material. Spark plug wires and some other wiring still to go but won't be added until after the engine is painted and ready to install. Fan belt pulleys are turned aluminum. Fan belts are small strips of a finger from a latex glove.
-
Try AITM (Dave Natale) for truck parts. He should have a web site.
-
I think they are just that much wider. The body builders book shows the plan view of the cab so you can get the right width.
-
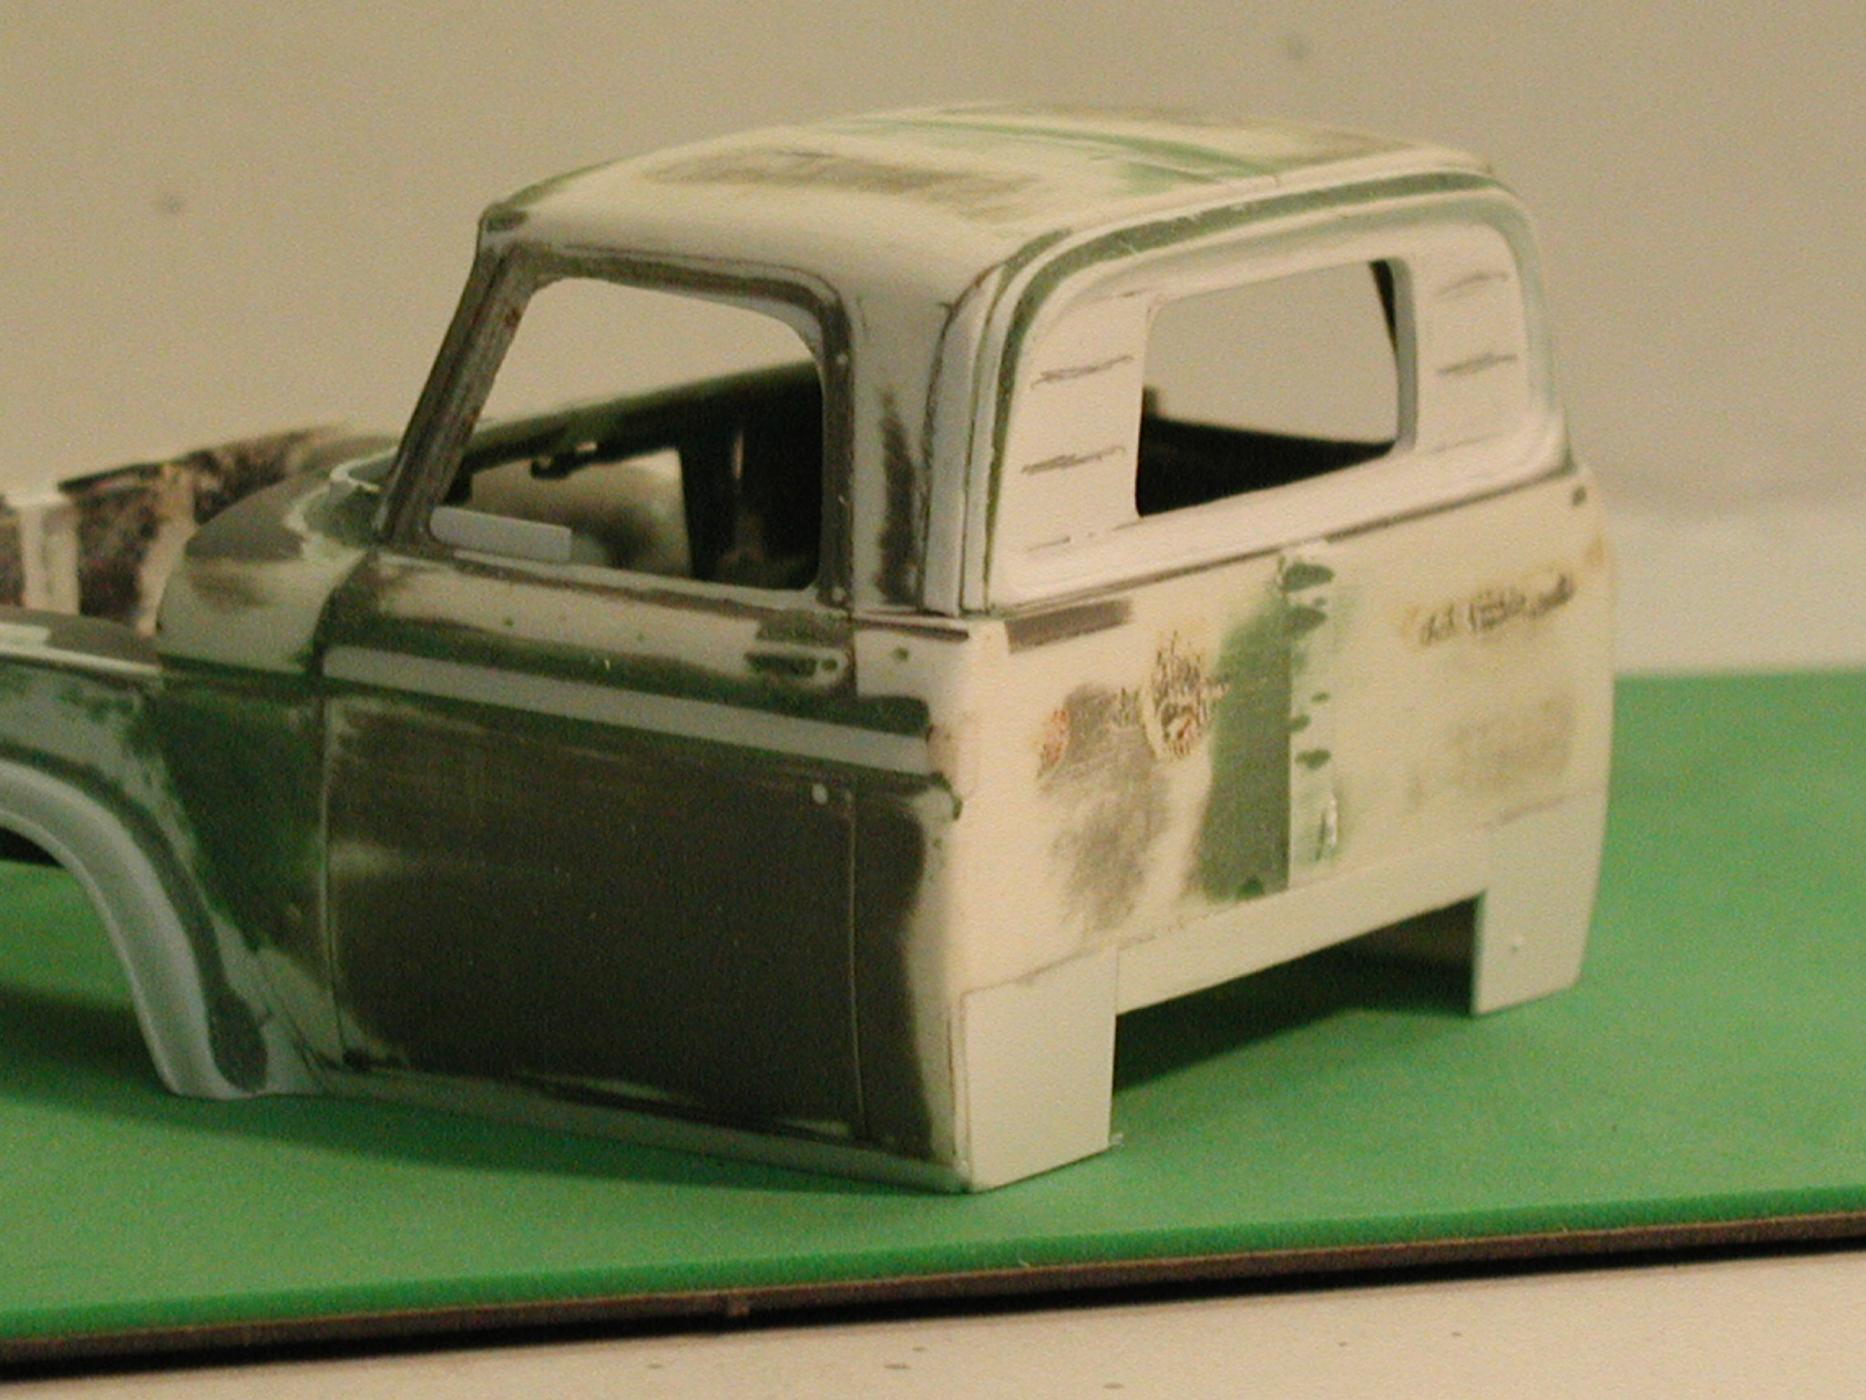
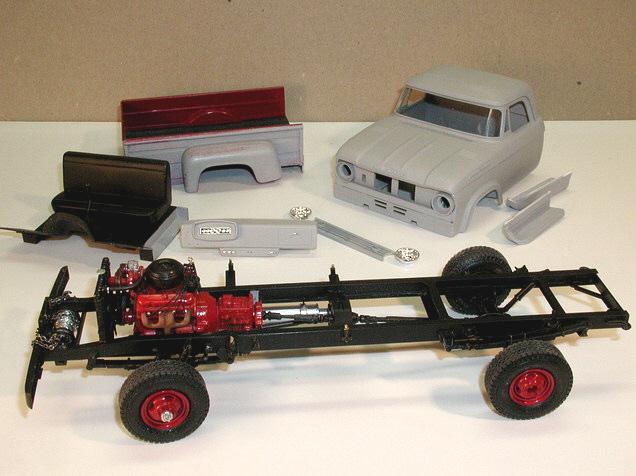
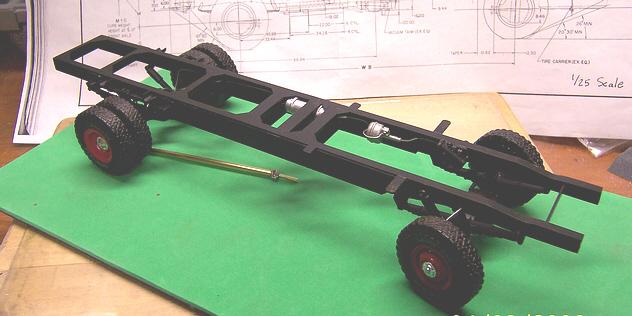
Here are some additional in progress photos of the W300. This photo is of the first resin pop that Tom Coolidge did back around 2004. It is sitting on the frame that is in the photos above. These last two photos are of the FORD that I started with to build the Dodge. The top of the cab and windshield lines had not been finished when the photos were taken. A 1/4" wide plastic strip was run down through the middle to make the entire cab wider.
-
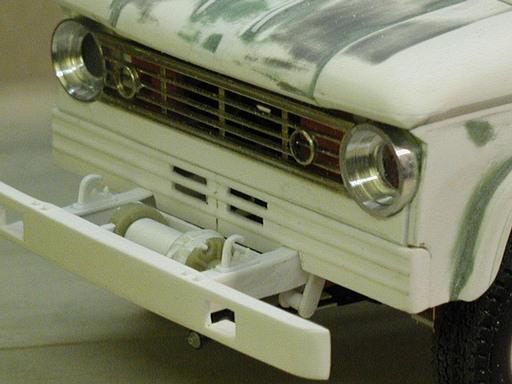
The grill is slightly different for this one as the vertical directional light is not there. Also the hood is not the same at all. Requests for cabs, etc. should go through Finks Garage.
-
I made both frames. I was fortunate enough to obtain a Dodge body builder's book and they have line drawings of the frames for both the D series and the W series in each of the different classes. The fender flairs on the W500 are indeed wider but the panel below the grill is the same for both. The W500 also has a large rear window.
-
Tom: Here are some in progress photos that I still have of each build. The first three are of the W300 (66) and the last three are of the 68 W500.
-
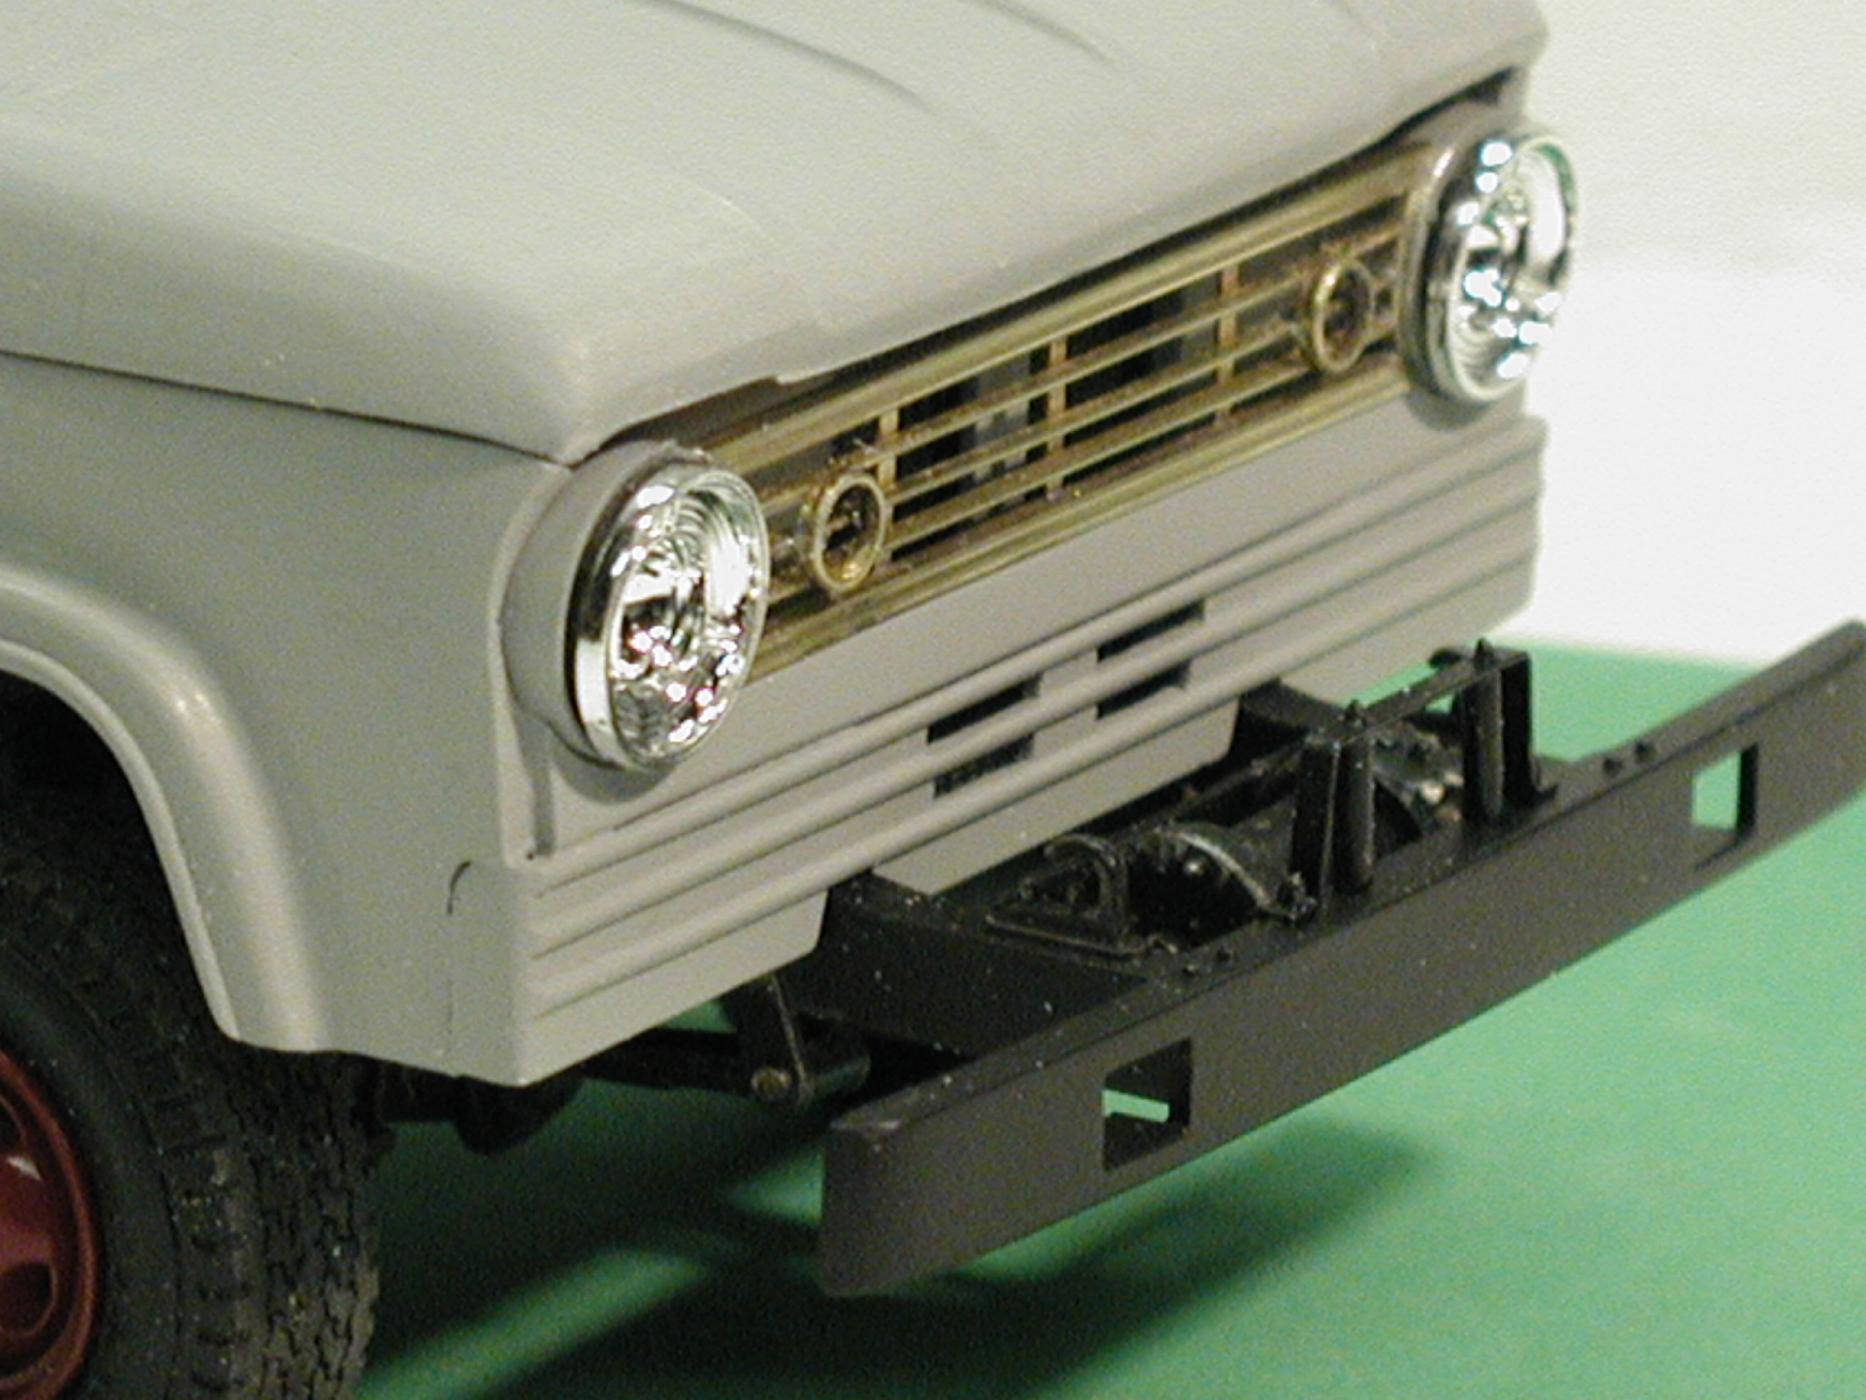
Hi, Tom. You would have to change the front clip slightly to have the 68 grill fit the 66 cab because of the difference in the headlights. If you notice the bezels for the lights on the 66, they are the same as on the L-700. The part behind the chrome ring would have to be ground out (not a big job particularly) and the hood is slightly different in that the 66 hood has a small area above the headlights that is cut out. The 68 hood is straight across. Notice also that under the 66 headlight bezels the flat area has been cut out slightly. Again, not a big deal that couldn't be fixed with a small piece of strip stock. If you are familiar with Scale Firehouse you may still be able to find some in progress photos of each truck although they go back a way. Look under the "In progress" section of the Forum. If you don't find anything let me know via a PM.
-
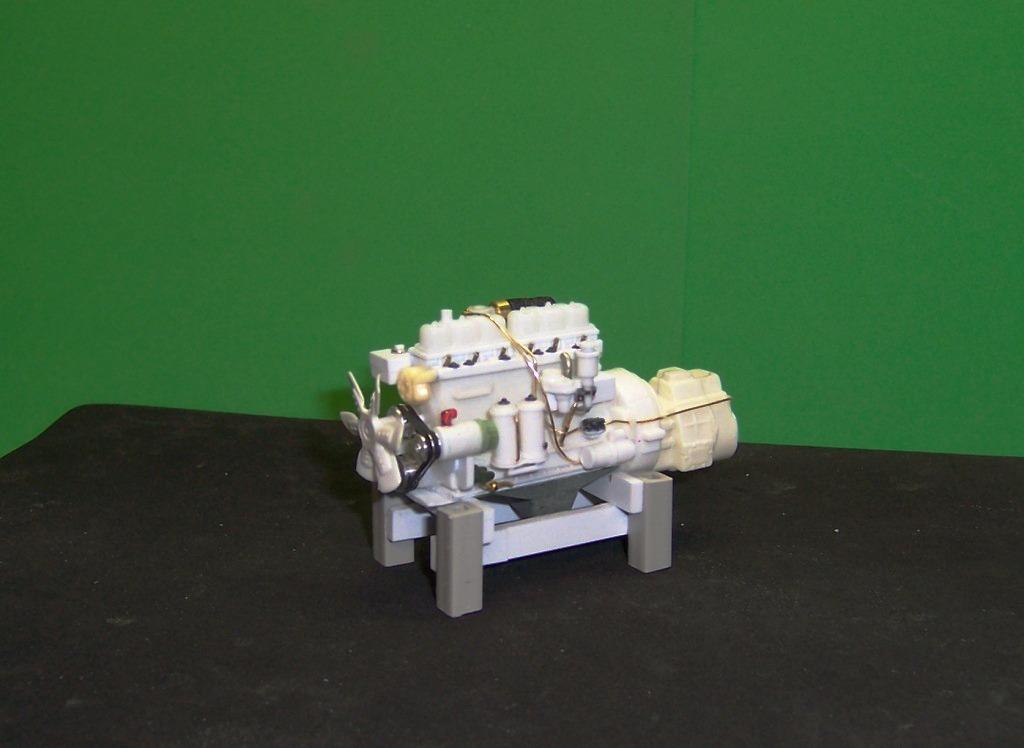
Make some more progress and began work in the Continental R6602 engine yesterday. I have plenty of info on the left side but limited information for the right side. If anyone has a good right side photo I sure would love to see it. In the meantime here is what we have so far. that is the transfer case to the right. The one I first had ended up being way to big so I cast a copy of the one that is in the Revell 1/32 scale wrecker kit and added some detail for the parking brake.
-
Doing a little bit every day lately seems to yield results. Worked on the front fenders yesterday and today. The back of the fenders as you can see are bobbed. That is because the rig I am building had them cut off and heavy steel side panels took their place. Lots of tinkering to get them right and close to the measurements I took of the real thing. Next is to make up the radiator and shroud and begin the engine.
-
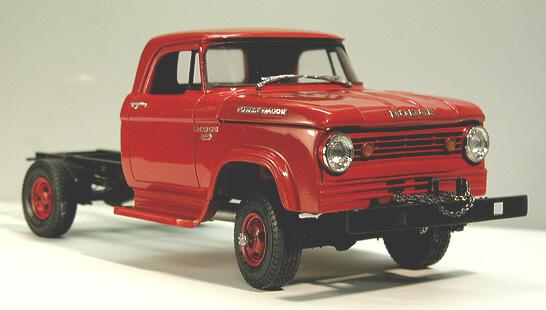
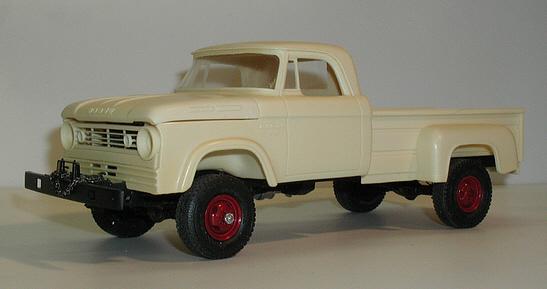
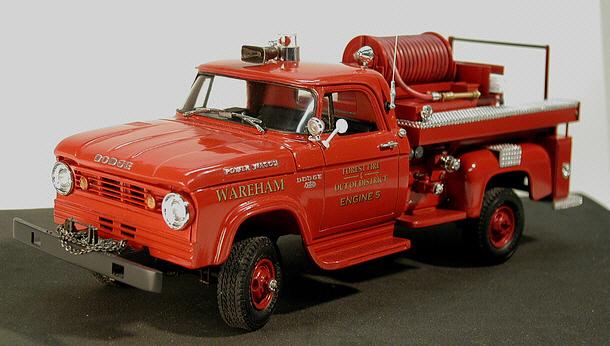
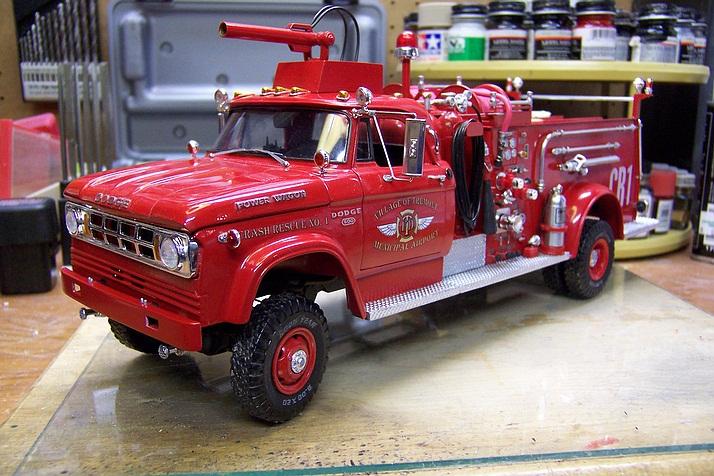
I'm the guy who first did the 1966 W300 and 1968 W500 single cabs. There is a template from which you can make the windshield out of simple clear sheet plastic. When I did mine I used the plastic that used to come with new shirts around the collar! If you clean the edges of the interior of where the windshield goes it will just pop in with no glue. All you have to do is warm the plastic and put a slight curve in each end so that it snaps in place. Here are the two originals as models.
-
And here are a couple more of progress made on the grill guard. It is all soldered brass except for two small pieces of plastic strip stock at the bottom. The large plastic pieces are temporary supports.
-
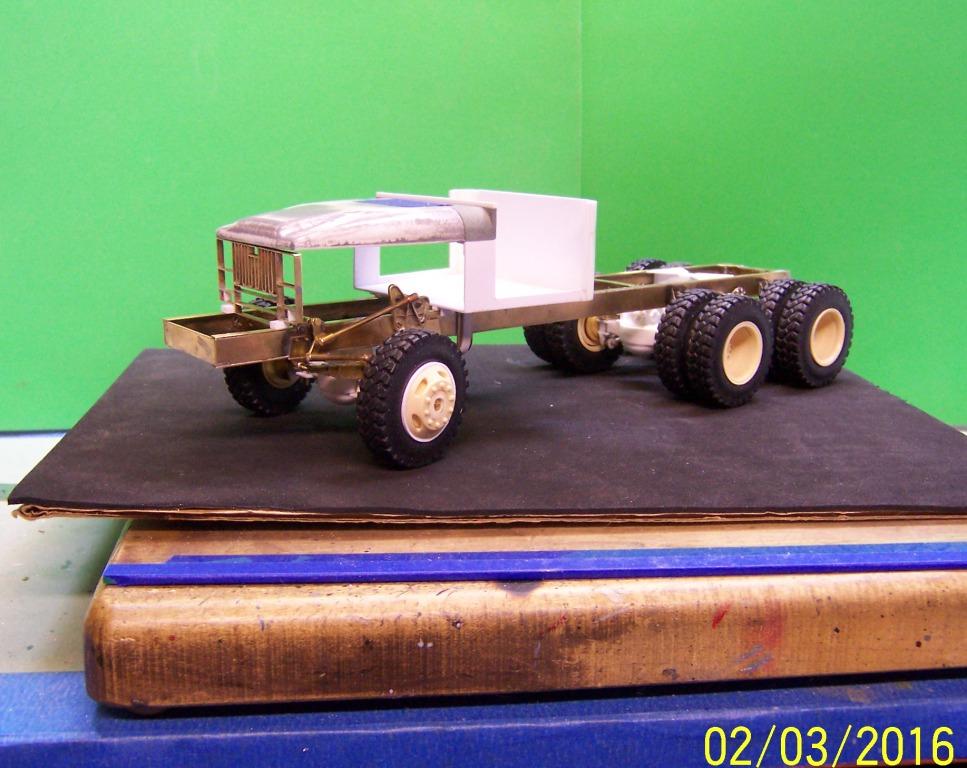
With the hood done work was started on the cab. The back of the hood sets the curvature for the cowl so that piece was done first with other plastic stock cut to shape. It sits on the frame about where it will be when it gets mounted.
-
dodge ls1000
Chariots of Fire replied to jacobus's topic in WIP: Model Trucks: Big Rigs and Heavy Equipment
NIce work, Jacobus! Where did the Dodge letters come from? -
Ahh, winter weather and retirement! Go together pretty well when there's a model to be built! Got some more done on the M-52 in the last day or so. Decided to get away from the frame for a while and tackle something else. Figured the hood was a good place to start seeing as I had the dimensions and some good photos. So here we are with several components. I started out with a block of extruded plastic that is used for planks and decking. The plain block in the middle left is the overall shape of the hood. To the right is a similar block after it was sanded to shape and cleaned up. This stuff sands beautifully and is very easy to carve. To the right of that is my attempt at using the carved hood as a buck to shape a hood from brass. Not too good....! So I moved on to option B and that was to take the buck and make a two piece mold. That is what those bright blue things are at the top of the photo. I hollowed out the plastic master so that it is about 1/16" thick overall. The top surface was molded first and then the mold box was turned over and the underside of the hood was molded next. Using the new mold, I was able to cast a two part resin hood and that is what you see in the bottom of the photo. I did two so you can see the top and underside as well. I primed the one on the left so I could see the imperfections and smooth them up. All in all a successful venture.
-
It's good size. Get's tucked up under the back of the cab. Has to be high enough so the front driveshaft clears the U shaped frame bracket. Am waiting for Shapeways to ship me some universal joints so I can do up the shafts.
-
An update on progress. A trip to the local fire department where this rig ls housed helped in locating the steering arm, pivot rod and connecting arm. A few #90 bolts and nuts hold all together.
-
There's not much chance of making duplicates of the rig I've started. Lots of hours in it already and the engine, drivetrain, cab, front end, winch, body, brush bars and pump are still to go! The cab is not hard to scratch build. The biggest problem is going to be getting the hood right. The M series hood has two reverse curve sections at the front corners o they have to be figured out. The rest is basically square pieces to make up the fenders, doors, windshield and cab sides and back. Best way to do that is make up a drawing to scale and use it as a template for the various pieces to be glued up.
-
Too bad there isn't a decent kit out there as well. There is a Czeck company, I believe who did a CCKW in 1/25 scale but it predates the M series by a lot. I don't think it would even come close. The resin parts in some cases were very brittle. A friend built one a while back and had some issues with it. Ultimately it came out ok but not without a lot of tinkering. 1/35 scale seems to be where it's at. Wish I had a plastic enlarging machine!
-
Tom: You familiar with a company called V-Tech? Think they are in Brattleboro. They have built a lot of brush rigs for towns in our area. They took over where Farrar and E. J. Murphy and Maxim left off.
-
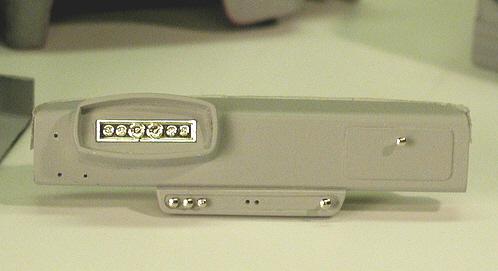
This may not seem like much but there are many pieces that went into each front hub assembly. There is the hub itself with a brass tubing insert that acts as a bushing. I filled the inside with some two part resin to sturdy it up. The center of the original mounting had to be drilled out to accept the tubing and otherwise would have left it very weak. In addition there is the main internal hub assembly that acts as the pivot point for turning the front wheels. The brass pieces in the center go together and fit inside the white plastic tubing just to the right of center in the photo. The other one is fully assembled and is on the long brass axle insert. In front is the tie rod that attaches to the arms on each hub assembly. The small screws and washers fit inside each hub and hold it on the brass axle of the assembly. Two pieces that do not show here are the guards that fit on the front of the hub assembly. On the real truck they help to deflect debris away from the hub where there is a rubber boot to keep out dirt and mud. (I tried but I'm not adding the rubber boots!)
-
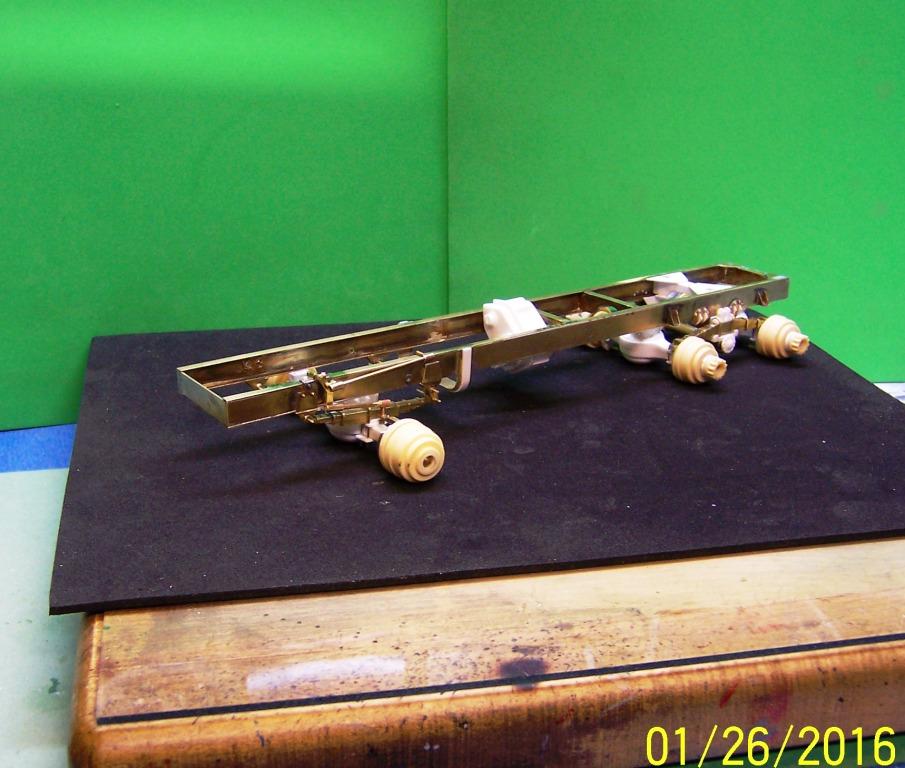
Got a bit more done in the last few modeling sessions including the front axle. There is a small amount of warp in the frame which I attribute to my soldering surface not being flat any more. It's enough to make it aggravating but I think with enough weight finally on the frame and all it will settle down ok. With the front axle set in position the ends were made up to allow the front wheels to turn. There is still much to do around the hubs to include the brackets for the tie rod and steering arm. Fortunately I have photos and TM drawings that give me enough information to do a reasonable job of replication. As with the rear hubs, the front ones are held on with a small screw and washer that sit inside. They will eventually be covered with the center hub cover.
-
Nice job on the plow, Alain. Do you have any photos of old V plow and wing plow frames that you could post? I have a couple for the Coleman but not nearly enough detail to do a creditable job. Charlie