Chariots of Fire
-
Posts
2,781 -
Joined
-
Last visited
Content Type
Profiles
Forums
Events
Gallery
Everything posted by Chariots of Fire
-
 Alain: I can attest to how you must feel. I have had that happen, not once but 3 times on 3 different models! All you can do is watch it go and then when it hits it is like a bomb explodes under it! Parts go every which way. That having been said, I know you will put it back together. That's what modelers do.
 -
The little shroud over the windshield is a nice touch. Blends in with the roof! Real fiberglas in miniature! What will they think of next!
-
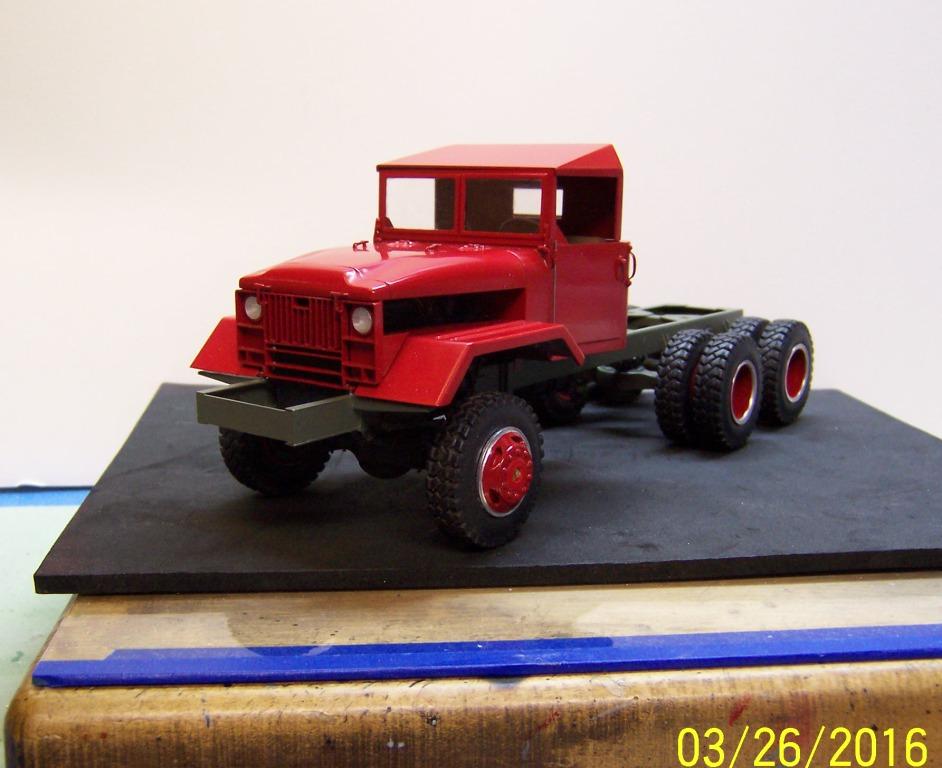
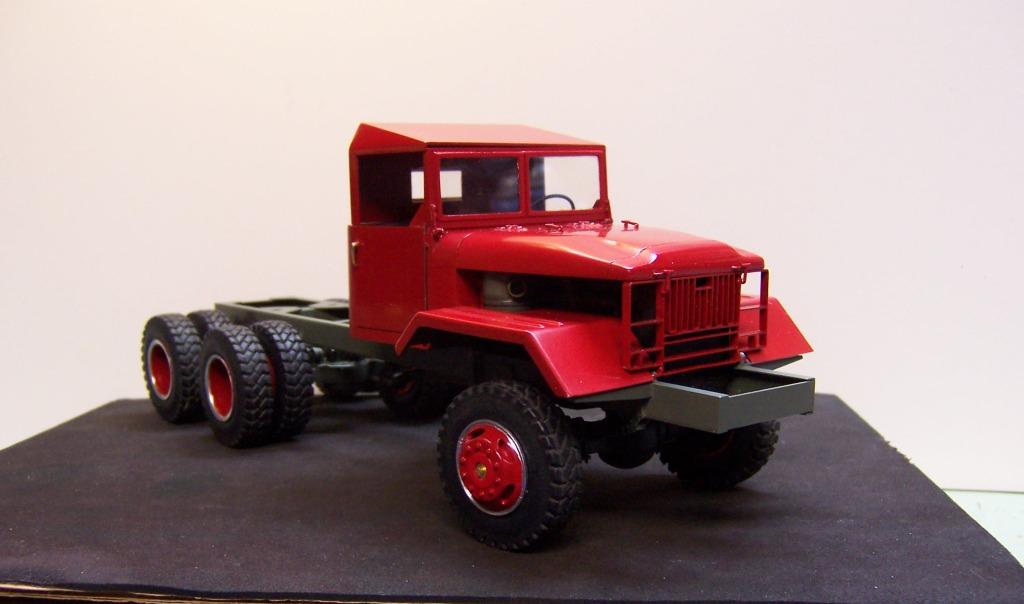
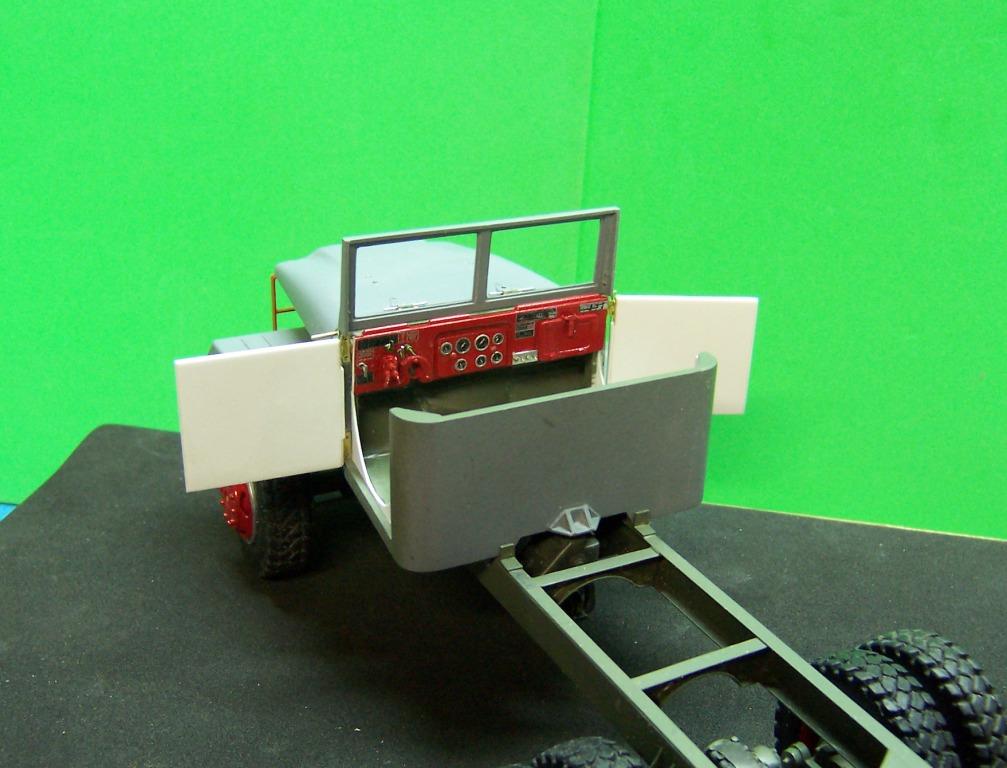
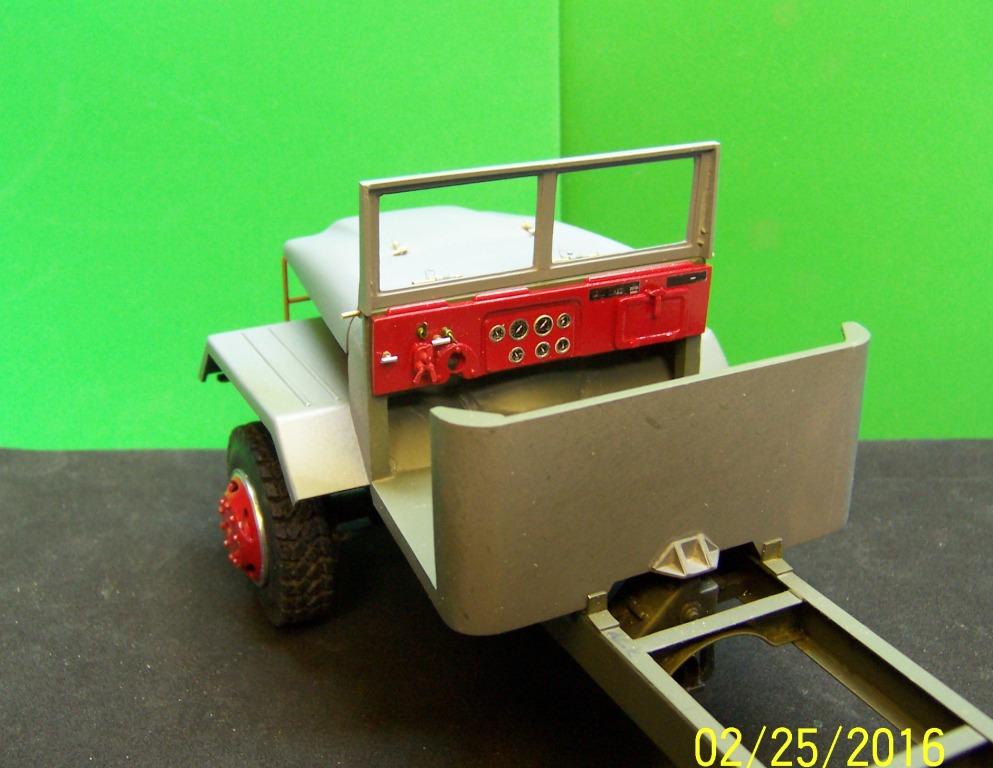
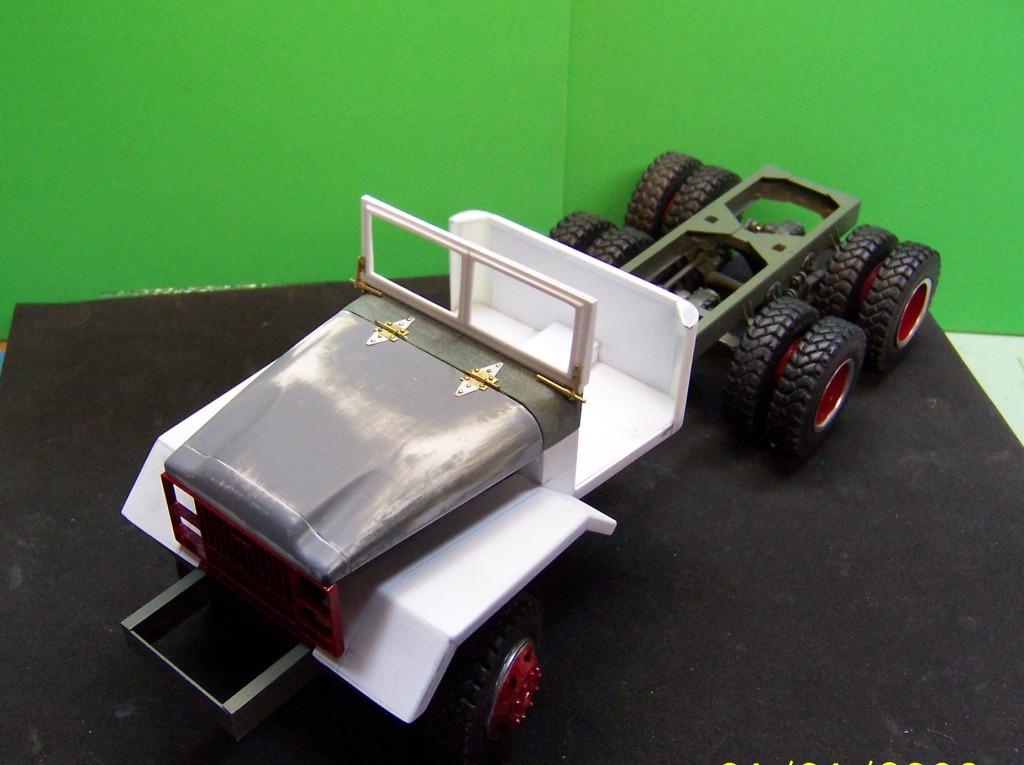
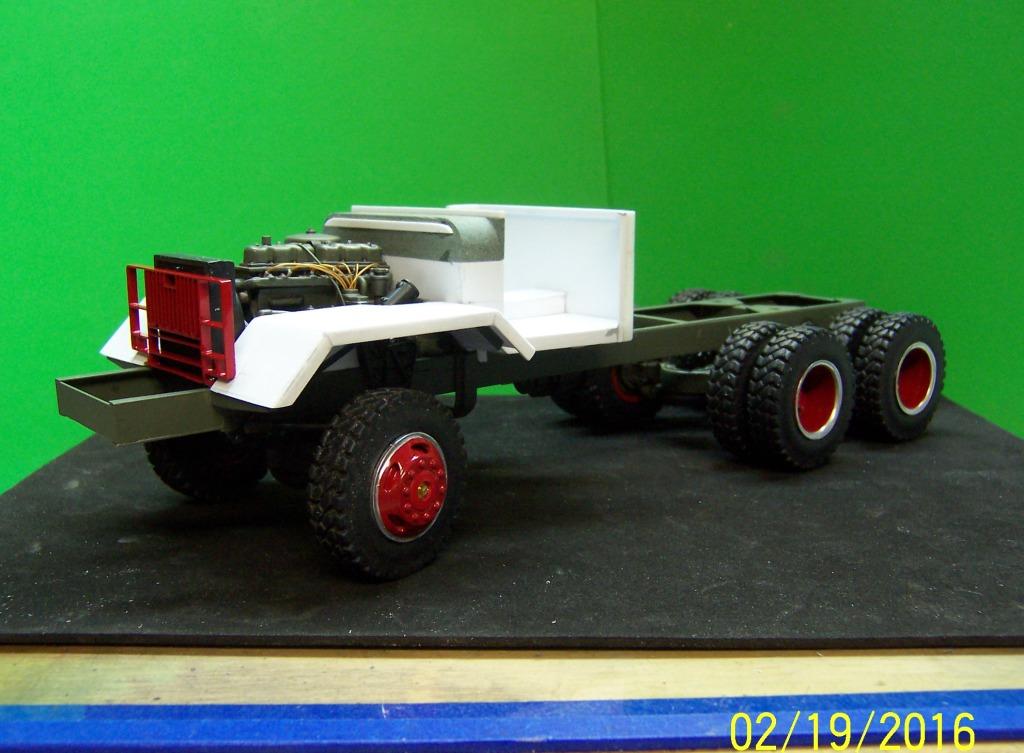
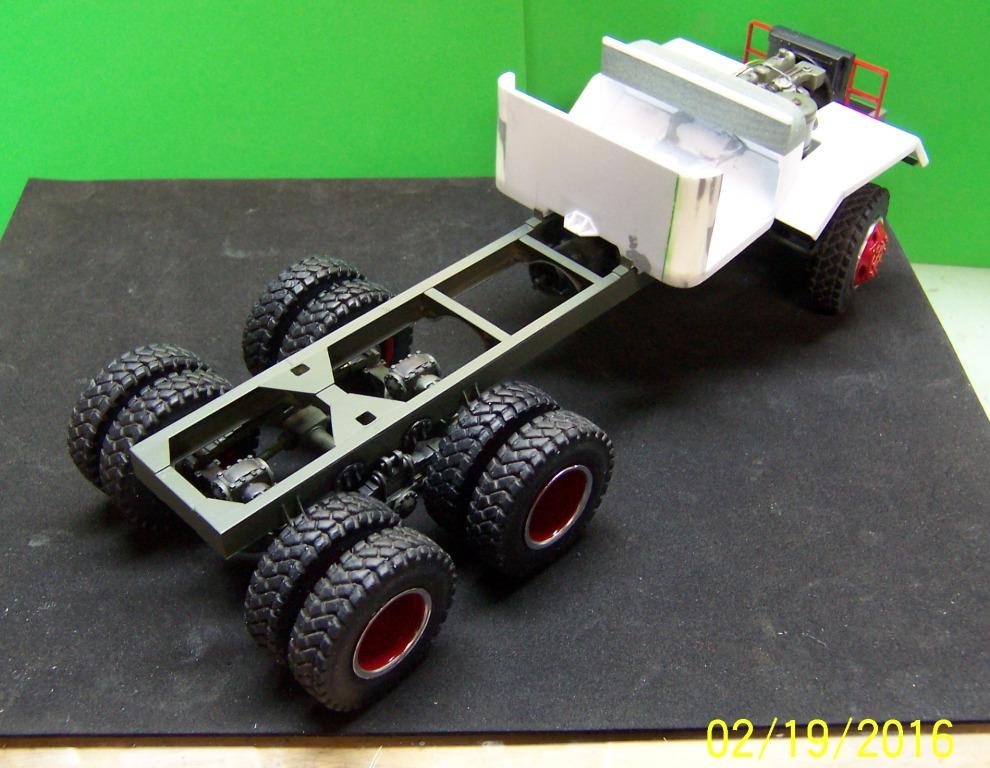
An update with a few more details added. Under the headlights are a pair of hi intensity lights that are used for night driving in a woods fire setting. To the outside of those are the red emergency lights. The winch is now installed. The cab interior is finished and the big red box that sits in front of the grill guard is to ward off tree branches from poking holes in the radiator when in the woods. it also covers the winch for added protection. Won't be long now and work will start on the body.

-
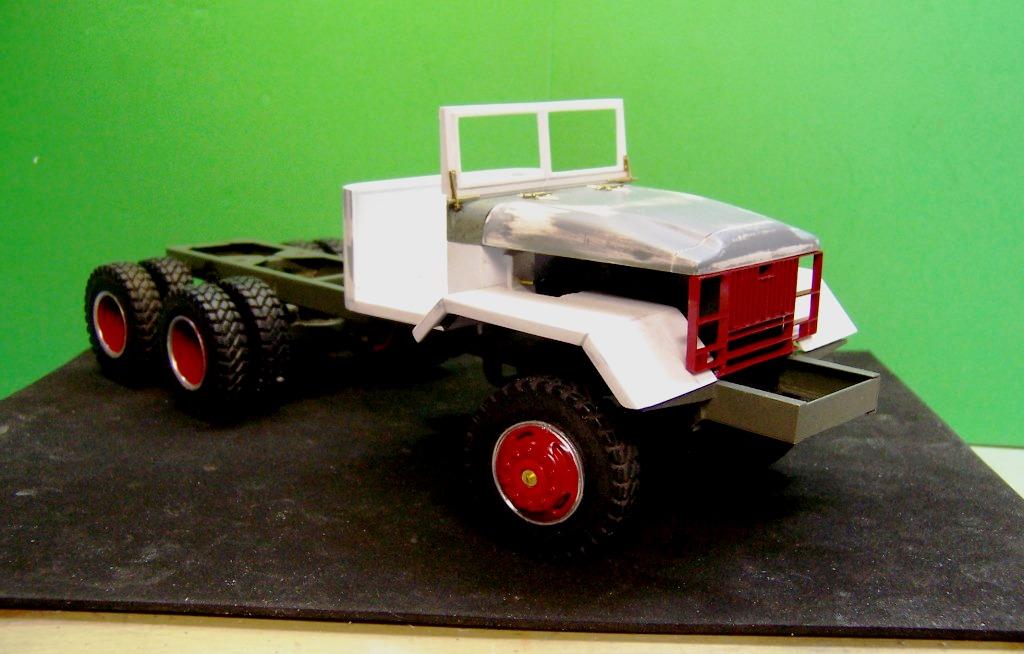
We're making one piece at a time but with every one it gets that much closer to completion. Here's what it looks like with the headlights installed in those open spaces. Once I set the grill in place permanently the side pieces will fit the slope of the fenders better. And here's a look at the decals that will go on the hood sides and doors. They've been created by computer and printed on an ALPS. I always print more than I need in case one gets messed up.
-
Thanks, guys. Got a ways to go on this one. So I will be posting additional work as it gets done.
-
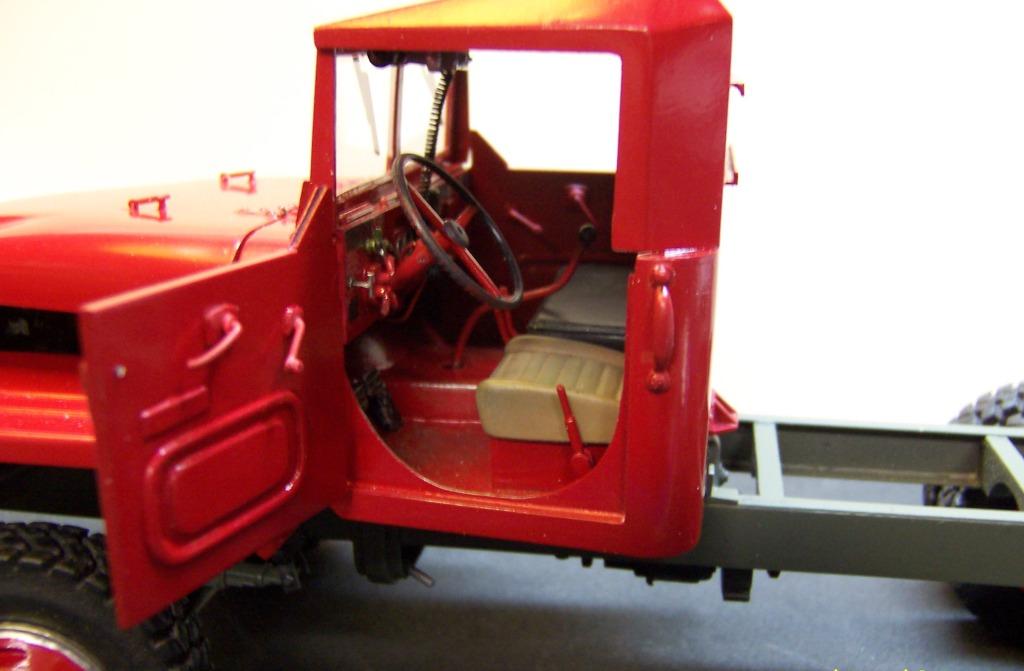
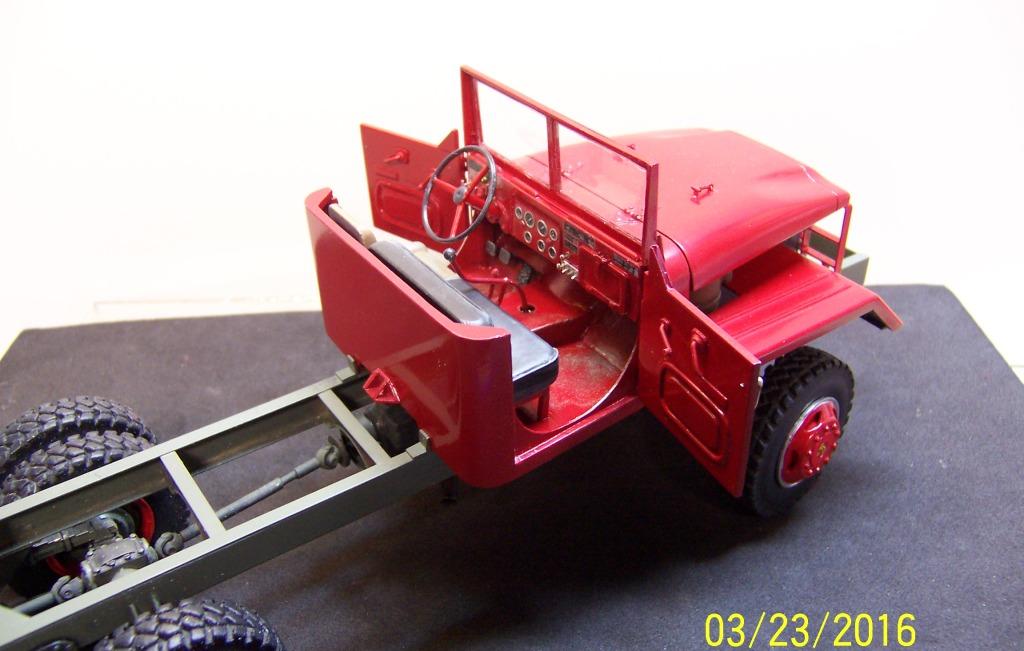
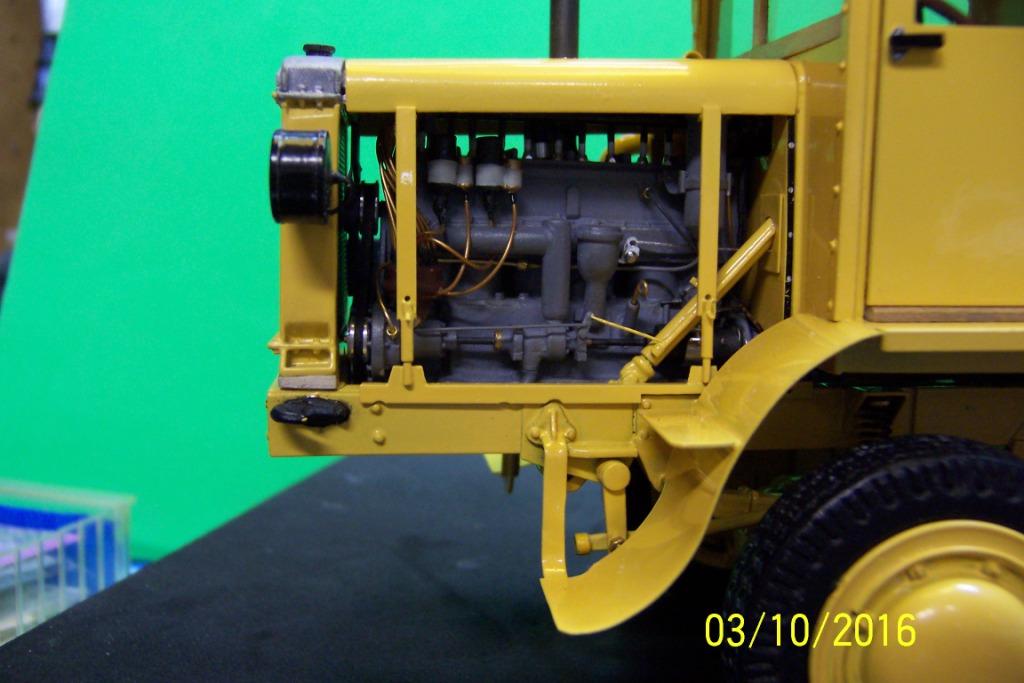
Well, the Coleman is now back in the display case and finished! Now it's back to the M-52 with quite a bit finished since the last posting. The cab top is done and ready for permanent installation. The inside details of the cab are nearly complete with a few details like the radio, windshield latches and some other fire equipment still to go. The doors are now complete with interior panels, door handle and window crank. Clutch and brake pedals, gear shift, transfer lever, low range lever are in place. Seats are not original and mimmick the changes made in the actual truck. The cab roof is only in position and sits a bit high on the passenger side. But with a little persuasion and some super glue it will settle down where its supposed to be. Still to go are the hood sides and headlights. Other lights will be added to complete the fire theme.
-
Celtic Thunder Kenworth
Chariots of Fire replied to Tesla's topic in Model Trucks: Big Rigs and Heavy Equipment
Very nicely done Dennis! Clean work, great paint scheme. Love it! -
That is a beautiful job! A wonderful project of scratchbuilding!
-
1929 Coleman
Chariots of Fire replied to Chariots of Fire's topic in Model Trucks: Big Rigs and Heavy Equipment
Hope to see you at NNL East! Will bring this one along with another piece of fire apparatus. -
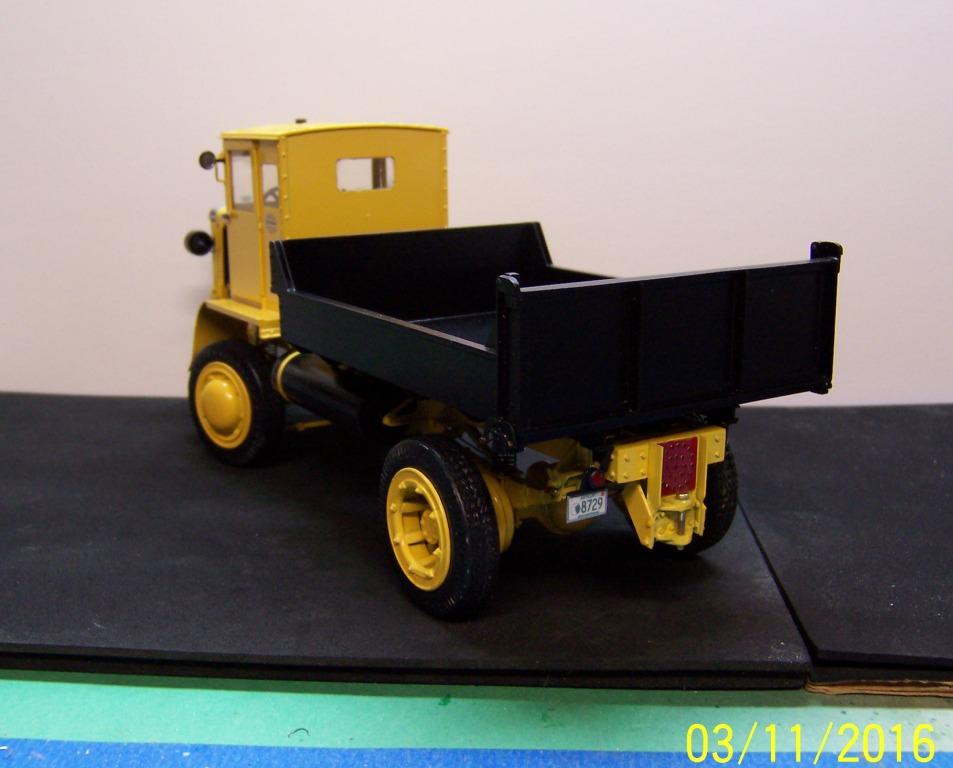
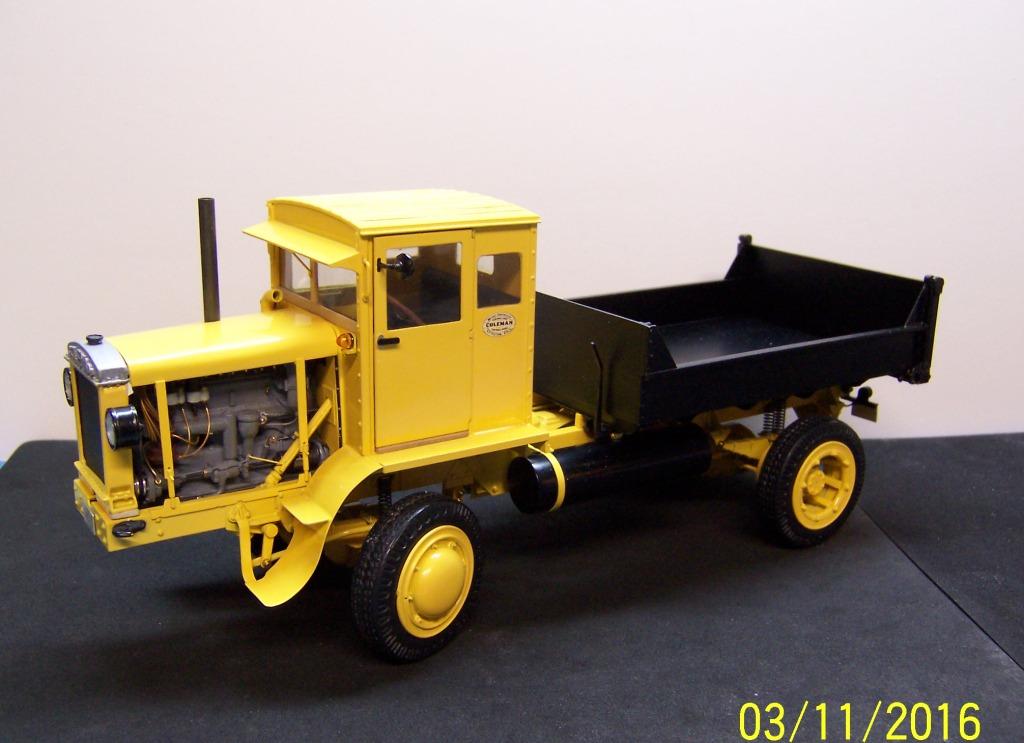
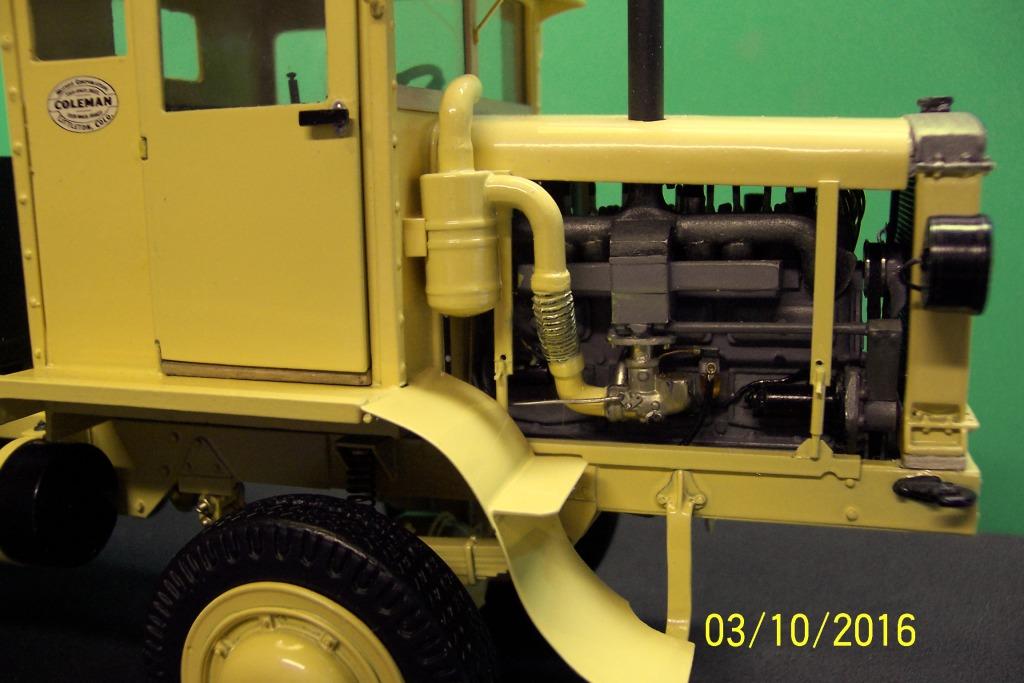
A year ago November I made a trip to Bridgewater, NH to see this Coleman truck and take photos and measurements. This rig really intrigued me because of the extended location of the engine and the narrow track. I had the pleasure of hearing the 6 cylinder Buda engine start and run. What a great sound! Now I have it in miniature along with a nice album of photos of the truck and the build. The model is 1/25 scale and is a combination of brass in an assortment of sheet and strip stock, two part casting resin and plastic of all shapes and sizes. Turnings of aluminum were made for the headlights, the rollers for raising the body and for the front wheel hubs. The rear wheels have more than 55 pieces each and consist of plastic and two part resin castings. The top of the radiator is made of plastic stock that resembles a wood texture. Since it has no grain, it is very easy to carve. The raised "COLEMAN" on the front of the radiator is part of the plastic block and was carved using small mill bits and an Xacto knife. The color is Krylon Bauhaus Yellow, a close match for the Catepillar yellow of the real truck. Body is Duplicolor Satin Black. Decals for the model were made from scans of the photos, traced in a graphics program to the proper size and color. They were printed on an ALPS dry printer.
-
1929 Coleman 4wd
Chariots of Fire replied to Chariots of Fire's topic in WIP: Model Trucks: Big Rigs and Heavy Equipment
That's the "trouble" with these kinds of builds. Not actually trouble as they are a lot of fun to do but on these old rigs the details are hanging out there in plain sight! Leaving the details off leaves the job half done. -
1929 Coleman 4wd
Chariots of Fire replied to Chariots of Fire's topic in WIP: Model Trucks: Big Rigs and Heavy Equipment
I don't think they saw this type of truck as a big hauler, although it certainly is beefy enough. A lot were built for snow plowing and working in areas that had less than great road networks. This truck as a very narrow track which would be of significant benefit in traveling unimproved roads. The actual truck that is the basis for the model came from Maine and was at one time a snow plow. I also found out that the bodies were set back from the cab so that either a body hoist could be mounted there or a wing plow frame could be mounted there also. The body would simply have been there to support additional weight for traction and plowing. You are right, though concerning the improvements. Just think of the improvements in air travel from the end of WW 1 to the beginning of WW2 a period of less than 25 years.. It was astounding. -
1929 Coleman 4wd
Chariots of Fire replied to Chariots of Fire's topic in WIP: Model Trucks: Big Rigs and Heavy Equipment
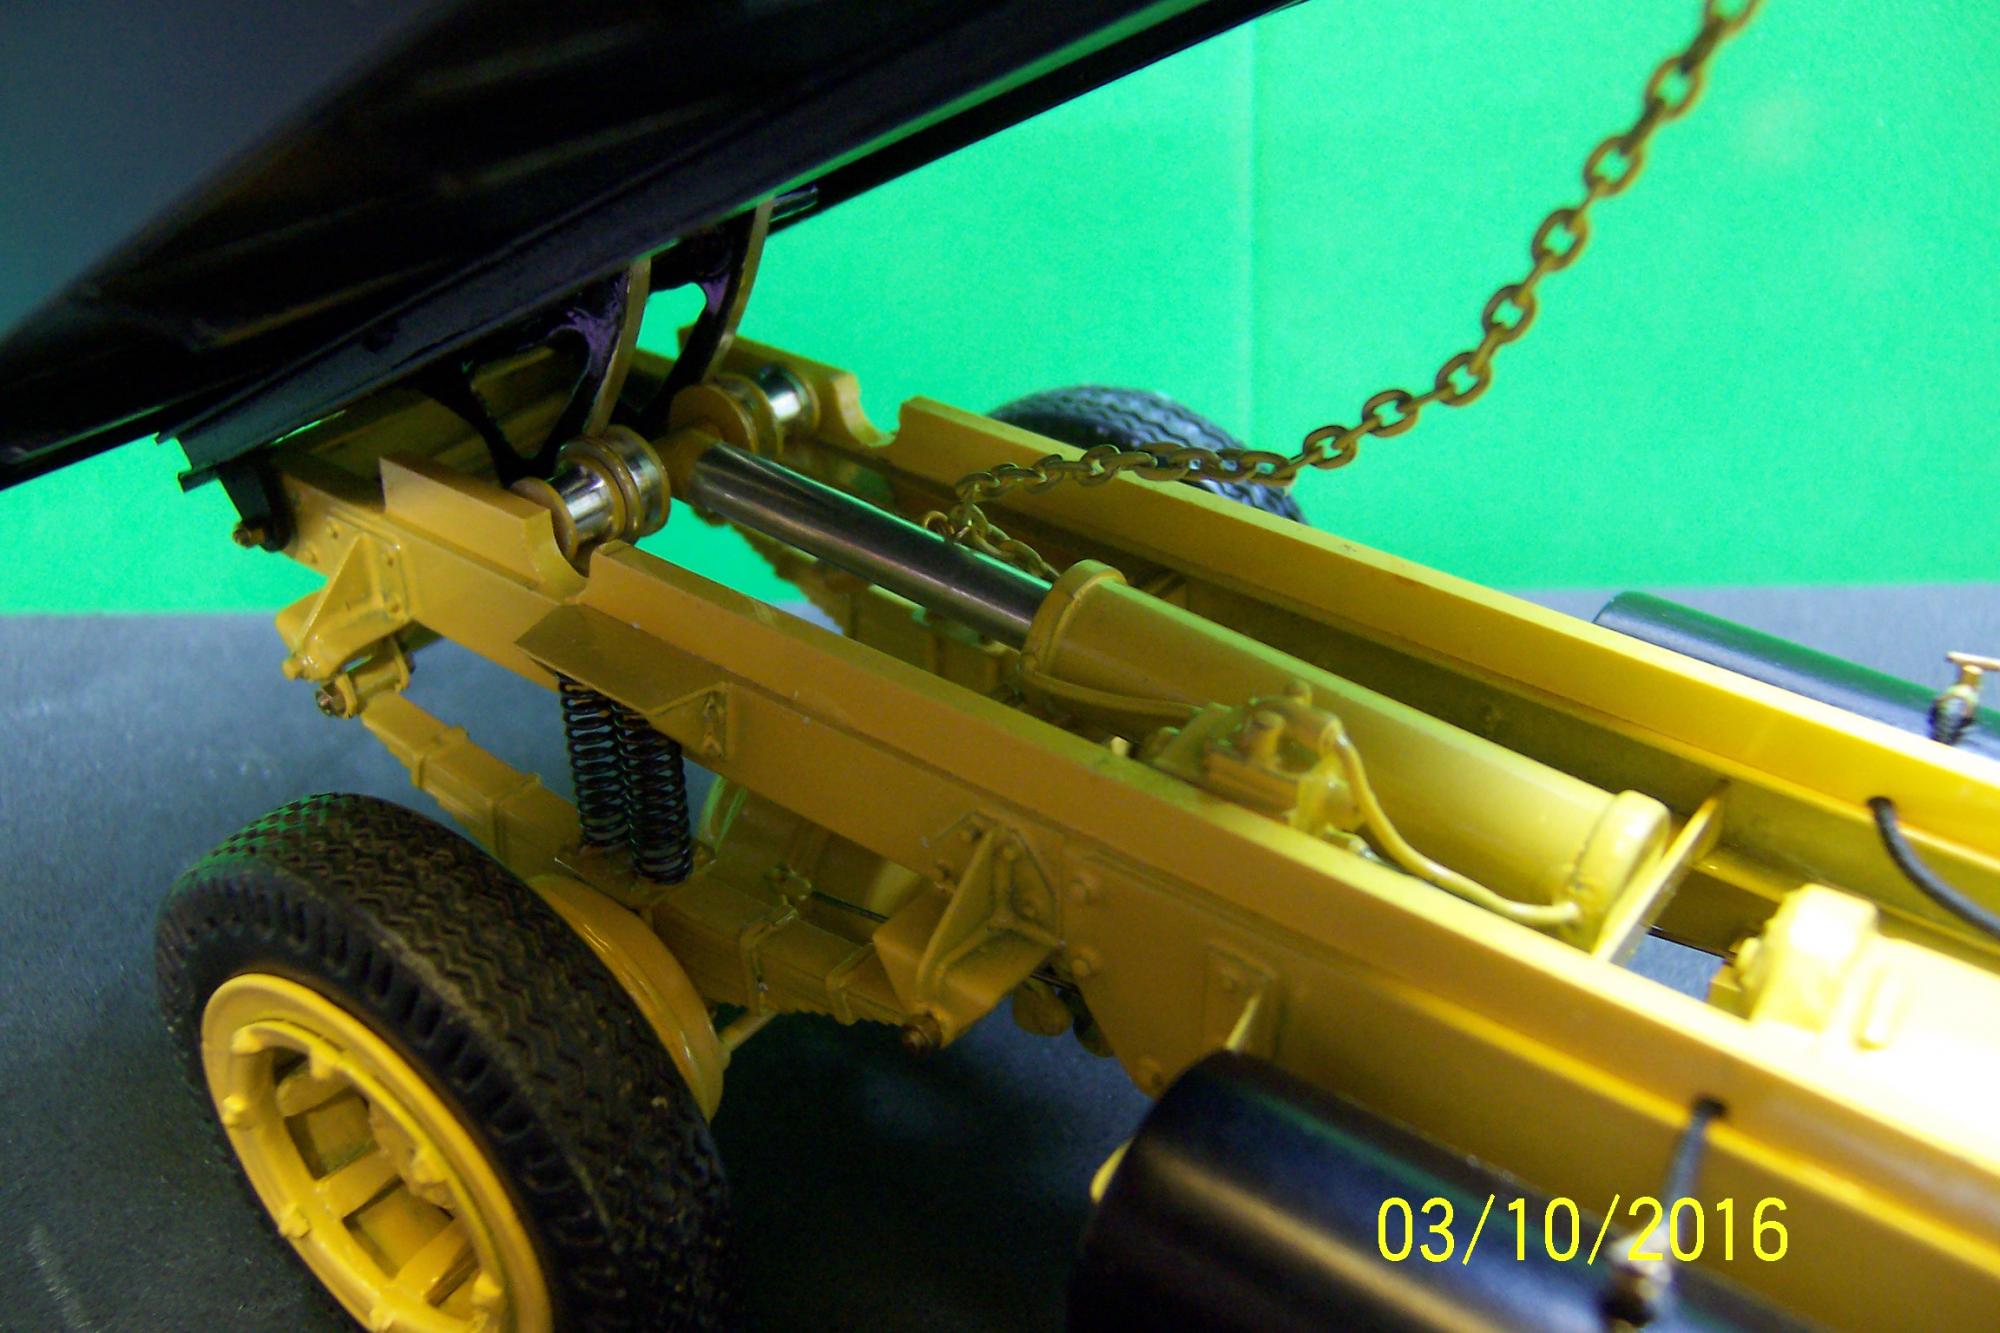
Here's an update on the build. The body is now secured with nuts and bolts to the frame. Inside the frame is the hoisting cylinder and rack to raise the body up. The lever to lock and unlock the tailgate is connected by rods and cams to the rear of the body. They work but not exactly like a well oiled machine. They need a bit of help to get the tailgate to open.
-
1929 Coleman 4wd
Chariots of Fire replied to Chariots of Fire's topic in WIP: Model Trucks: Big Rigs and Heavy Equipment
Since last December the Coleman has been on the back burner. But there are a couple of model show in the near future including NNLEast and it's time to get going to finish it up. The last two days have been dedicated to the body of the rig. It looks small on the truck but the reason is to leave room for either a mechanical hoisting rig or a frame for a snow plow. Still to go are the in-frame hydraulic cylinder and raising mechanism for the body. Here's the body in position and basically is what the truck will look like in its finished state.
-
The doors are nearly complete. Just the door handles and window cranks to go. The dashboard is complete except for a couple of switches that I forgot. Couldn't resist trying the paint on the hood to see how it looks. Those are ALPS gold letters with black shading on the sides. Pretty soon the windshield will get some paint but I want to get the cab top done before that so I don't mess the paint up. Progress is beginning to show now.
-
Update on the dash board and some work on the cab doors today. Dash is about finished except for mounting a radio under it and a mike clipped to it. Doors are secured with butt hinges from MicroMark. Right now they are temporarily in place using a stainless rod. Much easier to thread through the small hinges than the actual pins. The hinges are held in place with superglue and real small nails that come with the hinge pak. Inside the door openings are those rounded steel plates that you sometimes see on military trucks when the doors are off. They also act as stops for the doors and will be a place for a simple tab to catch the door when it is closed. The tab will be attached to the future door handle.
-
Continuing work, I spent some time working on the dash board, taking information from the truck itself as well as from the TM for the M52. The resulting dash is painted red like on the truck that is being replicated. Additional decals have since been added and the switches were changed slightly. Also there is a small bank on switches to the left of the glove box. The two tee handles have also been replaced with ones that are slightly smaller and in a vertical position. Every little bit gets us closer to the end of the build.
-
B.R.B.O Peterbilt Firetruck
Chariots of Fire replied to Jonj238's topic in WIP: Model Trucks: Big Rigs and Heavy Equipment
It may look complicated but it is just another truck build when you come down to it. The fire part of it is just some add on stuff. Forget the plastic strips for hose to fill the bed though. I have a much better way that I can post if you are interested. -
dodge ls1000
Chariots of Fire replied to jacobus's topic in WIP: Model Trucks: Big Rigs and Heavy Equipment
Coming along nicely! The scratch built trailer is neat also! -
I learned a long time ago that if you leave them out in the sun long enough they will ripen!
-
Claiming Ignorance
Chariots of Fire replied to Chariots of Fire's topic in General Automotive Talk (Trucks and Cars)
Thank you! -
Ok, Just call me old fashioned. Not up to speed on these new fangled abbreviations. What is B.R.B.O.????
-
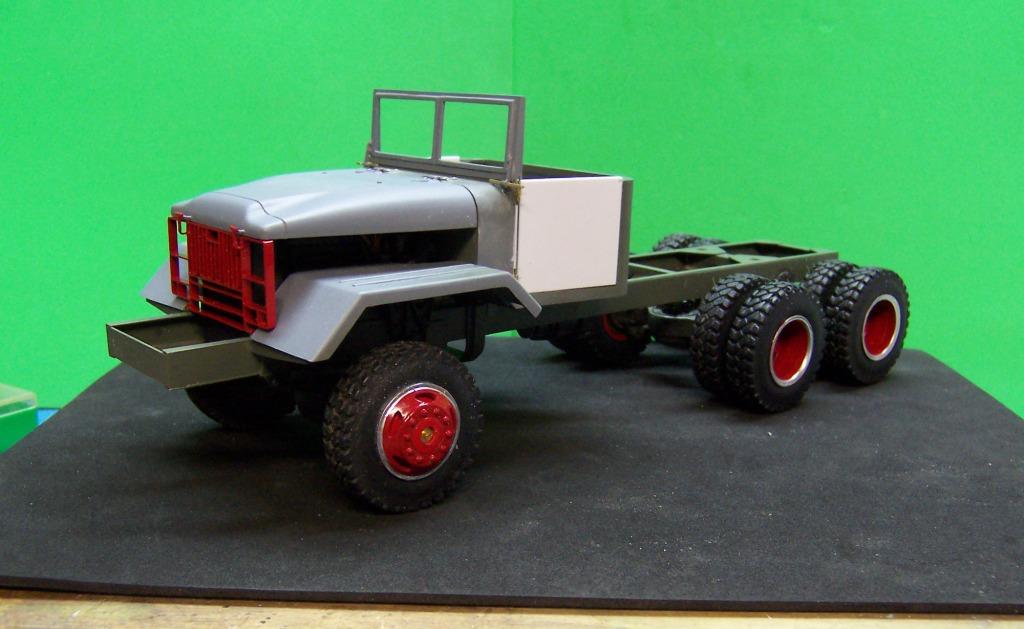
Got more done today. The hood is hinged and so is the windshield. They are temporarily pinned but will be dressed up after paint is complete.
-
Outstanding work! You have made it look like a real rig. I'll bet if you took a photo outside with the right background you could not tell that it is a model. Great job!
-
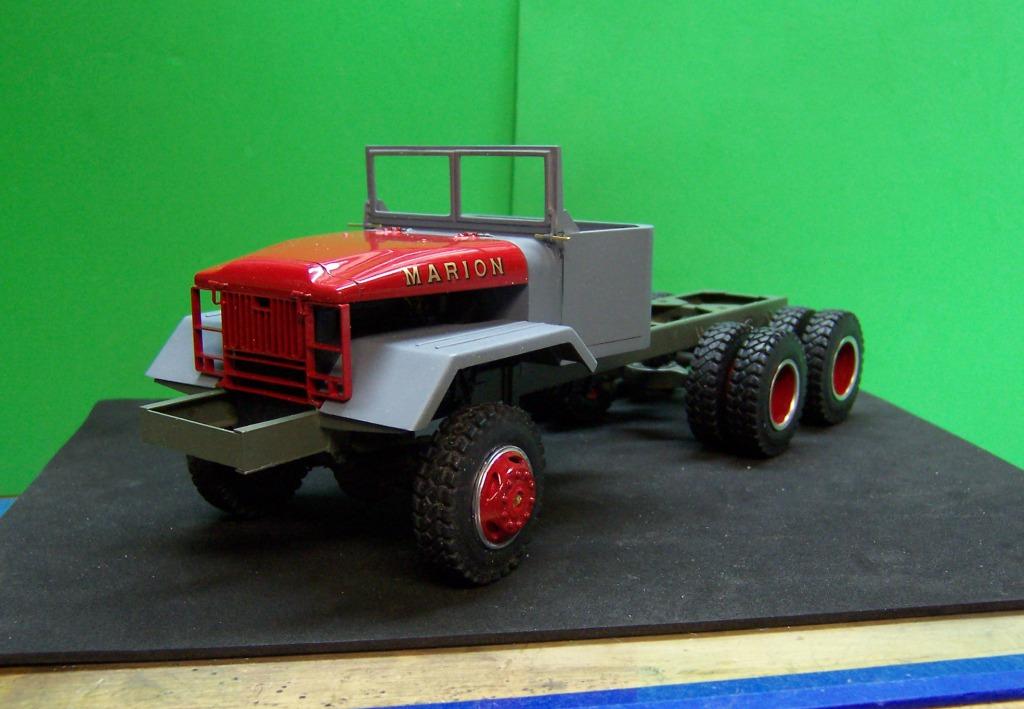
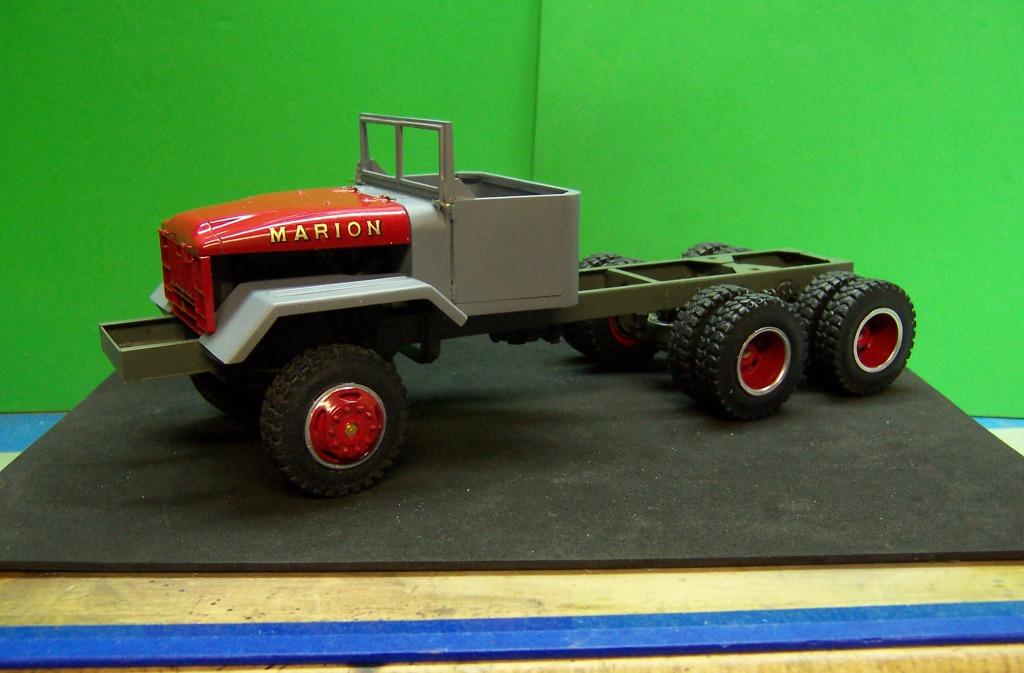
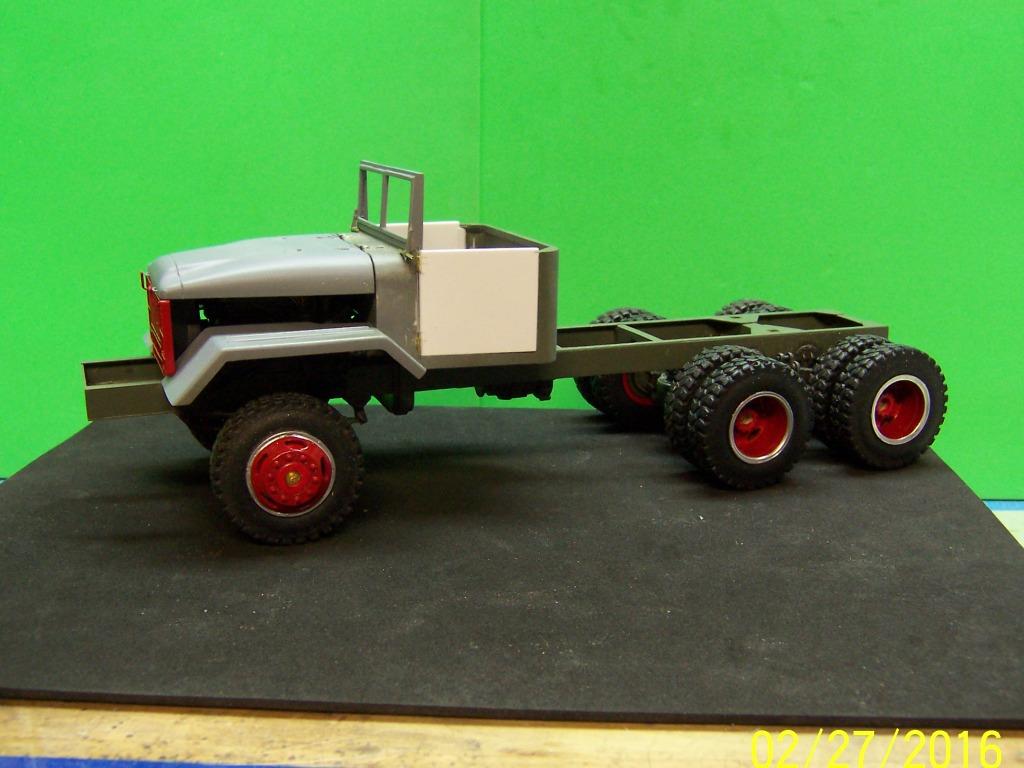
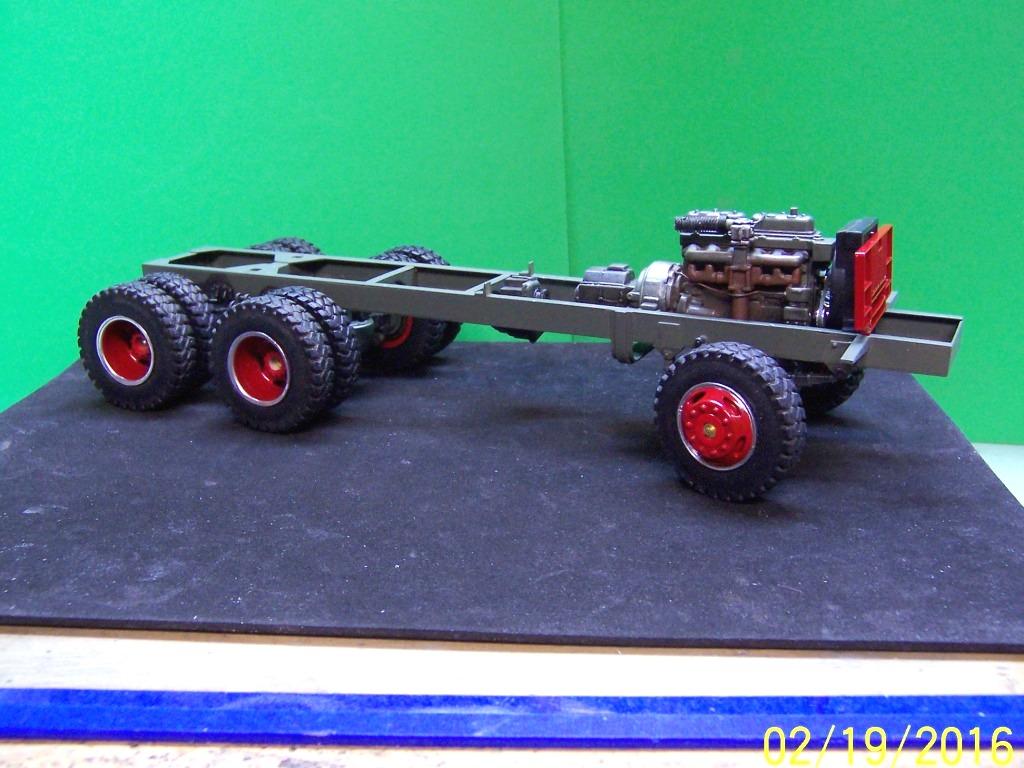
Sometimes it seems as if things start to come together all at once. In this case the painted frame and finished tires and wheels get this project one step closer to the finish line. Still waiting on the 3D u-joints to come in so the drive train can be finished but now more work can begin on the cab, cleaning up the hood, developing hood and door hinges and making up the windshield. Why the red grill guard and red and silver wheels on an M-52? Remember that this was turned into a 5 Ton brush rig. There will be lots more red before this project is done.