Chariots of Fire
-
Posts
2,781 -
Joined
-
Last visited
Content Type
Profiles
Forums
Events
Gallery
Everything posted by Chariots of Fire
-

HELP HARRY
Chariots of Fire replied to sjordan2's topic in General Automotive Talk (Trucks and Cars)
This was in my e-mail this morning. Looks very suspicious to me. Came from harrypri@outlook.com Hello,I am very sorry I could not inform everyone about my trip to (Manila,Philippines) for a program because it was impromptu, the program was successful but my journey has turned sour I was mugged at gun point and all my valuables were stolen cash, credit cards and phone, where I went for sightseeing before leaving to the airport since my return flight is in few hours. Luckily I had my passport in my hotel room to get me home.It's was a bad experience I need your help financially to get back home, I need to settle some outstanding hotel bills and also take a cab to the airport, I have contacted my bank but the best they can do is to mail a new card which will take 3 days to get here, Please let me know if you can help me out? I promise to make the immediate refund when i get home.All hopes on you.Harry -
A little tip on how you formed the fenders, please!!
-
1/25 Truck Snow Tires
Chariots of Fire replied to Warren D's topic in Truck Aftermarket / Resin / 3D Printed
Check out Shapeways. I had a tire made for a 11:00 x 20 application. They have them on their website. it has a mud/snow tread. -
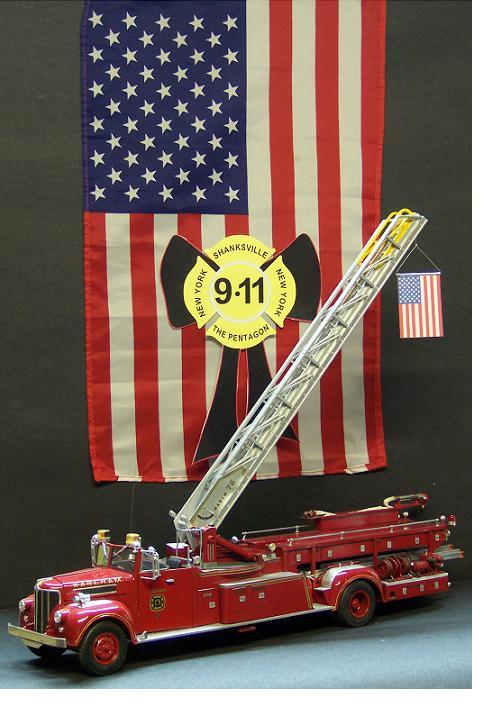
Lest We Forget
Chariots of Fire replied to Chariots of Fire's topic in Model Trucks: Big Rigs and Heavy Equipment
I was at my office beginning to settle in for the day's work when my oldest son called and said we should look at TV. My wife who was also office manager went home and got our small portable TV and we were aghast at what we saw. We got the TV at the office in time to see the second plane actually hit the second tower. And who could possibly forget Todd Beamer and the people aboard the plane that went down in Pennsylvania. "Greater love hath no man than he lay down his life for his friends". Jesus said that. -
Lest We Forget
Chariots of Fire replied to Chariots of Fire's topic in Model Trucks: Big Rigs and Heavy Equipment
Do you remember where you were on September 11, 2001? I do. I can't believe it has been 15 years and it seems like it was yesterday! -
Tomorrow is September 11. A second Day of Infamy. Pray that it will be a day of respectful remembrance and that the memory of those that were lost in 2001 will not be disrespected for their sacrifice.

-
Tom is no longer doing any casting work due to some lingering health problems. He lives in Colorado.
-
In my opinion it is. Duplicolor dries fast and hard. Rustoleum in my experience can remain soft for quite a while.
-
Wrecker / Rollback 'steel' cable ?
Chariots of Fire replied to 57peppershaker's topic in Model Building Questions and Answers
Try Beadalon nylon coated stainless steel beading wire. It looks like real winch cable and is 0.015" diameter. Only drawback is that it is very springy and if you don't keep a tight rein on it when you wind it, it loosens up and you have to rewind it. Use some superglue sparingly to hold it in place. Here's an example of how it looks.
-
Is clear coating always the way to go?
Chariots of Fire replied to I'm_PlanB's topic in Model Building Questions and Answers
Not in my book. Nothing makes an otherwise good looking model look bad as with a poor clear coat. And nothing beats a good in between coat sanding and final polishing out. When done right clear coats aren't necessary except for may some of the exotic paints that are used on real cars. -
Gel Pens for Custom Decals?
Chariots of Fire replied to Snake45's topic in Model Building Questions and Answers
Depends on what kind of a decal you are trying to make. For fine detail or making more than one of the same thing gel pens would be a hard way to go. I don't know about you but my hand is not that steady for making nice clean decals. I've done it but the effect is never the same as getting one printed out. -
What makes a model "show quality"?
Chariots of Fire replied to SamBred's topic in Model Building Questions and Answers
Plenty of good advise above me. But here's my take on your question: First, build what you like and give the best effort you can with the experience you have. The more you build and observe what others do you will find out soon enough what works to build a good looking model. Secondly don't worry about building a contest winning model. It doesn't quite work that way. I liked what Tom Geiger said. Keep model building fun. Ask questions of other modelers, especially those who have build really good looking models that are on the contest table. They will tell you they didn't always do clean exceptional builds. They had to follow a learning curve. Find your own and stick with it. And lastly learn as much as you can about the actual 1:1 piece you are modeling. It will help you understand what you are building and will help in adding those little details that will make the model you build one of a kind. Oh, yeah! Sand the flash off of those tires!! -
I agree. Use the model as a learning experience. There is really no need to clearcoat the glass. Novus plastic cleaner and polish is all you need to get a nice clear piece of "glass". Install it as one of the last things to avoid fingerprints and otherwise messing it up.
-
El Cheapo modelling machinery
Chariots of Fire replied to Davoski's topic in Model Building Questions and Answers
I would not waste my money. Save up and buy something better. I've used a Sherline lathe for years now and it has served me well. When I bought it I think it was around $400 but that was quite a while ago. As far as the 3D printer is concerned forget it. You won't get anything that is worth printing for model building. Your best bet is to go on line to a place like Shapeways and see what is offered there. There are many 3D designers out there who have the software to make just about anything. They then send it to Shapeways for printing. I had some 1/32 scale front end loader tires and some 1/25 scale 11:00 x 20 truck tires made that way and they turned out great. BTW the printer is not all you would need. You need a 3D graphics program as well to create the proper images. -
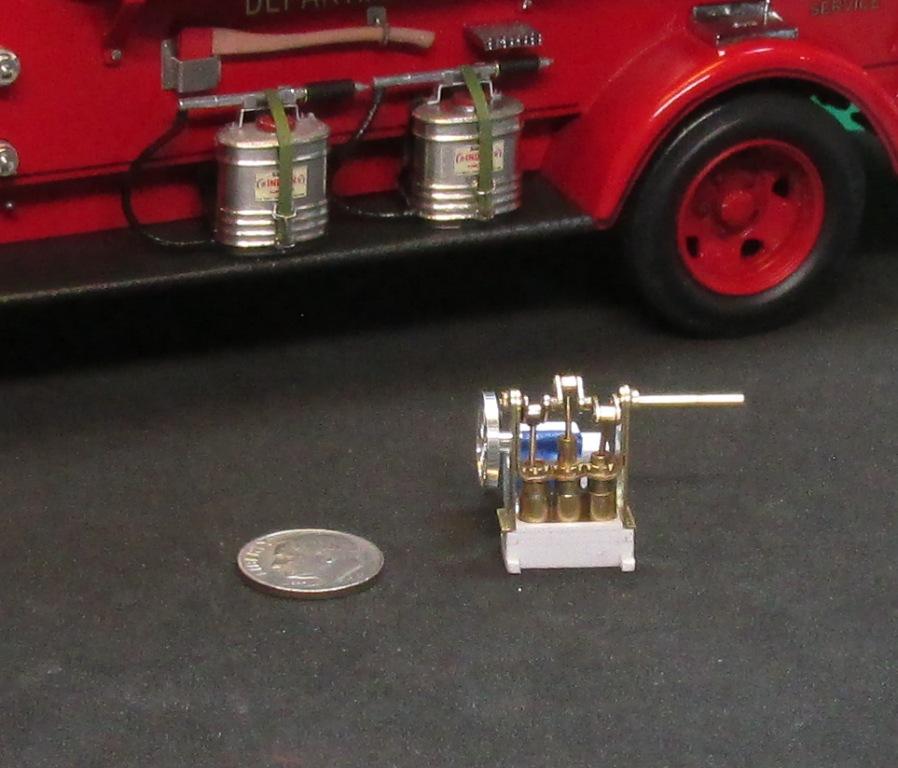
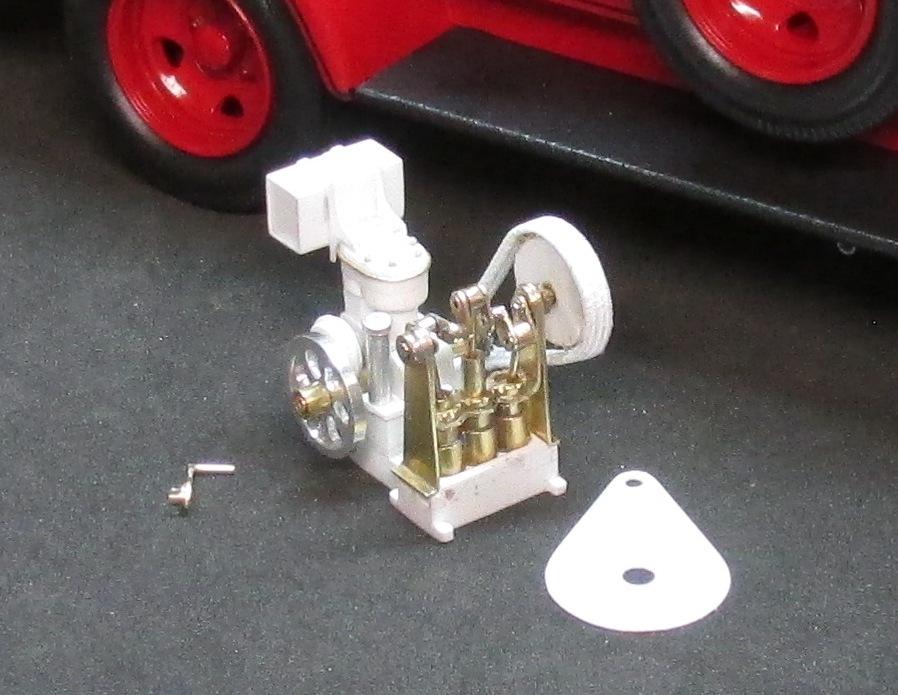
Hmm.! Never knew this particular part of the forum existed! Anyway here is one small piece of scratchbuilding I did for a 1938 Ford fire truck. It is a Fitzhenry-Guptil pump done in 1/25 scale. Made mostly of brass and plastic with some odds and ends here and there for wiring, etc. The flywheel is made of turned aluminum and is connected to a shaft that turns a small gear at the back. The large and small gear are connected by means of a piece of 1/8" sewing elastic that was superglued together and stretched over the gears. It turns the crank shaft and the 3 pistons go up and down.
-
Ford LN8000 Car Hauler
Chariots of Fire replied to OldCountry's topic in Model Trucks: Big Rigs and Heavy Equipment
That's a pretty nice paint job. What color and brand is it? -
Diamond Reo "Texaco" (Amt 1/25)
Chariots of Fire replied to Pavel A.'s topic in Model Trucks: Big Rigs and Heavy Equipment
Very nicely done! Clean work, lightly weathered with just the right tones. Grime on the firewall is really nice. This looks like a real truck might look after several years on the job; well taken care of but well used also. That is the way a first place build should look. Excellent work, Pavel! -
Seen that one before, eh?
-
Hey, Tom G! Like I said it's been a while since I had a serious inclination to do any complex project. So rather than get fancy with something that wouldn't keep me really into it I decided on something simple! The last rig I did was a complete scratch build and when it was done I was ready for a break! I like your avatar! Would be a good substitute for the two wannabe's that are currently running! At least Yogi is "smarter than the average bear"!
-
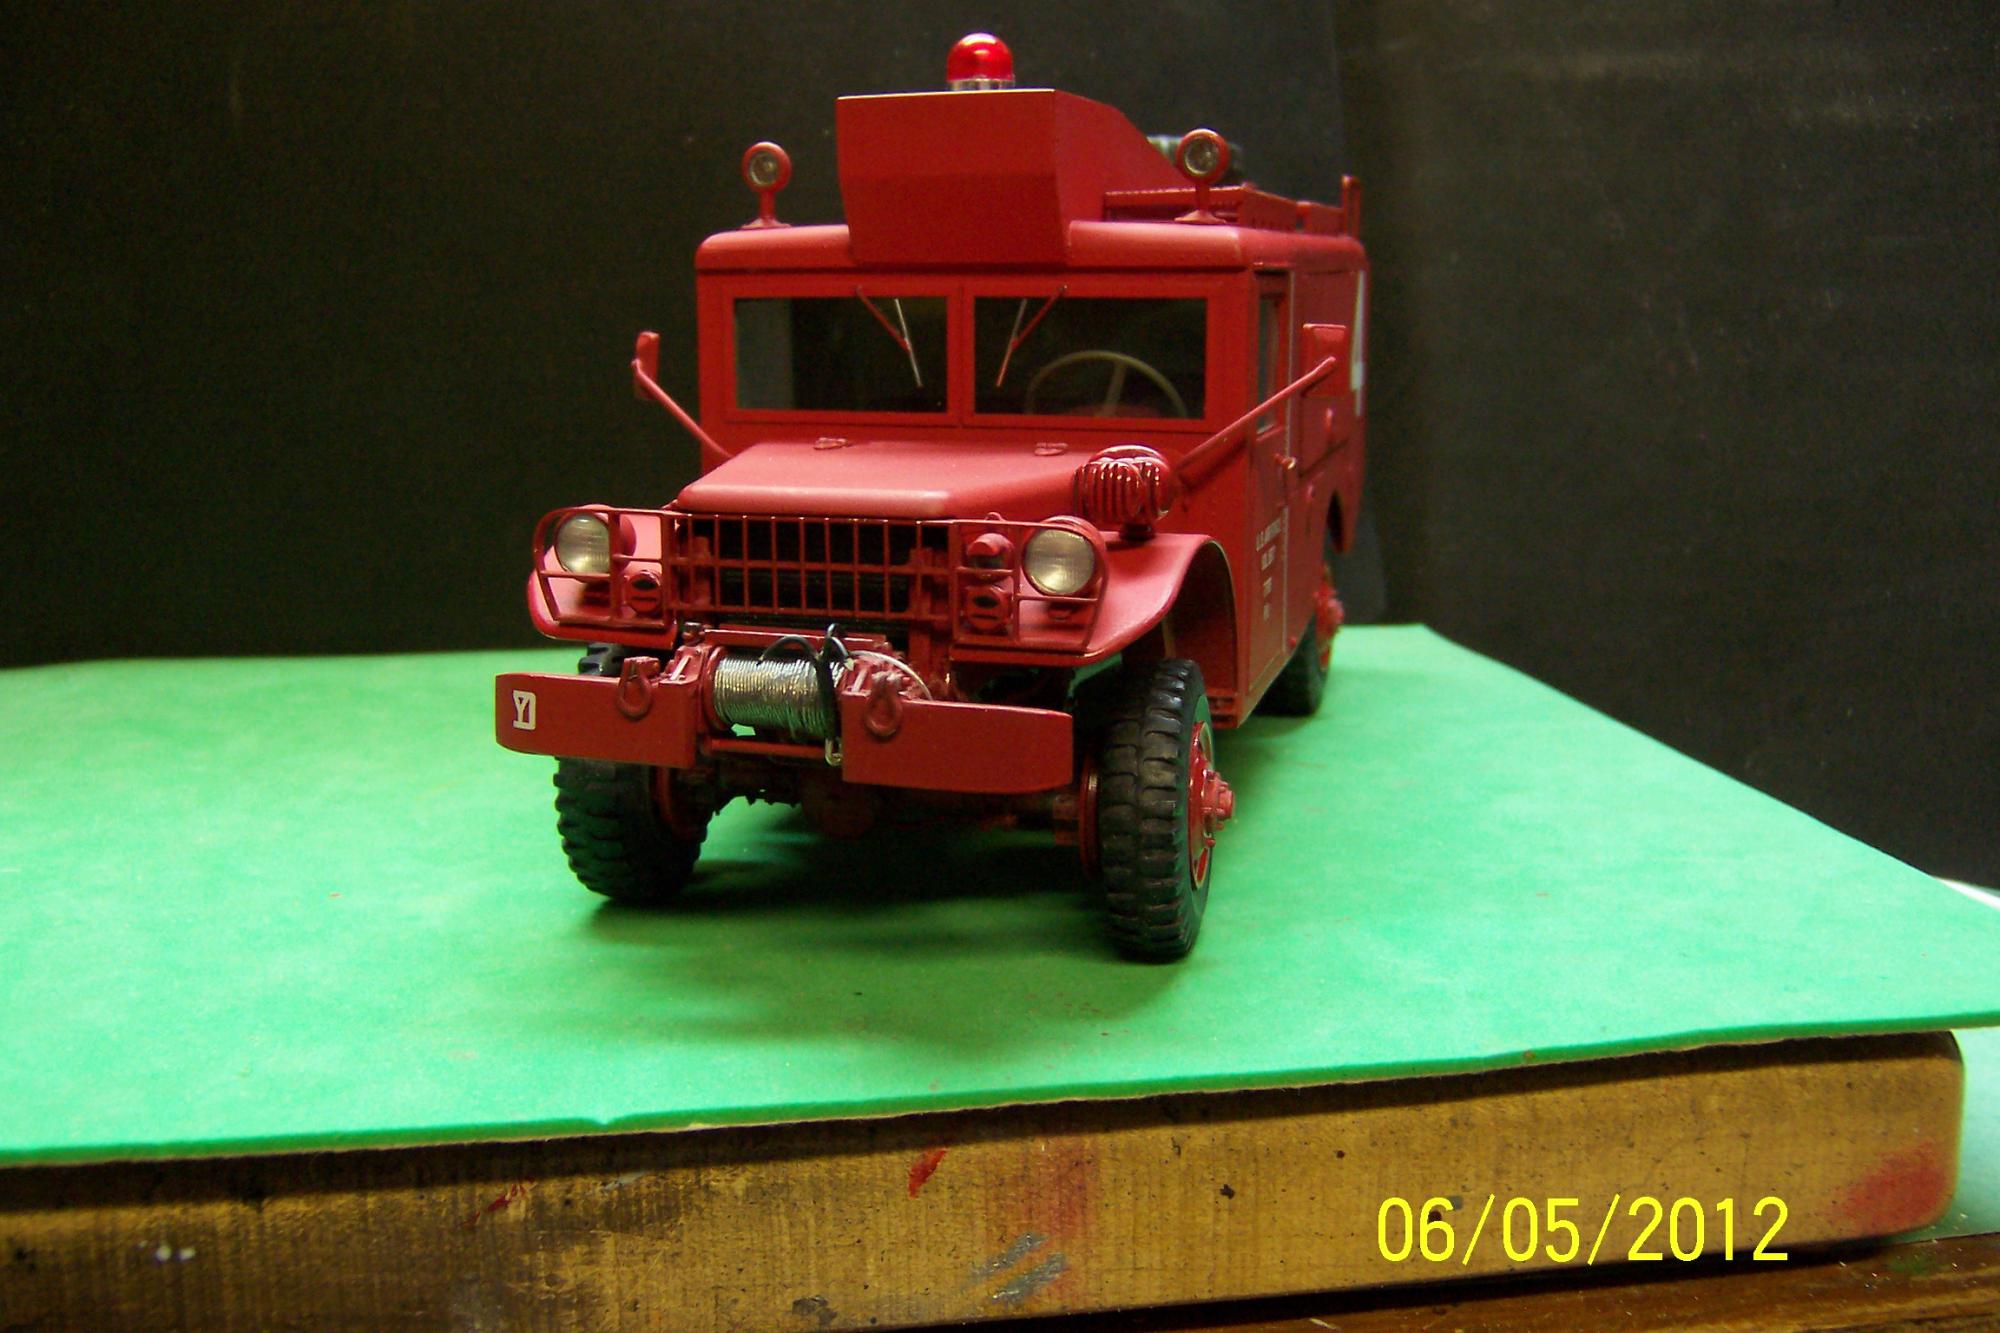
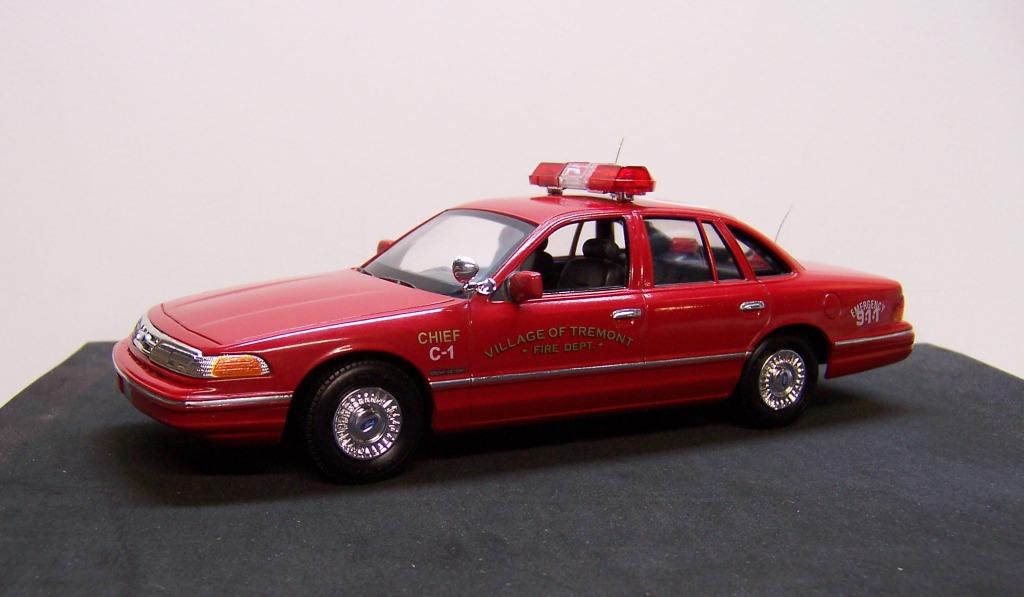
This is just a snap kit but when you need something quick just to keep the juices flowing sometimes it is just the thing. A gray primer with Duplicolor bright red (#398) on top is the paint. Computer generated decals ALPS printed. BMF for the chrome body trim. Light bar came with the kit. Not counting the time to let the paint dry, a couple of easy nights' work.
-
1938 Ford COE
Chariots of Fire replied to BIGTRUCK's topic in Model Trucks: Big Rigs and Heavy Equipment
MIll City Replicas is right. I did up one of those as well. The resin grill was no good though so I ended up making a new one from brass. i used the Yat Ming partially damaged open cab Ford for the headlights and front bumper. Minor flaws in the casting but not enough to really criticize. -
Eisbrenner Seagraves
Chariots of Fire replied to Chariots of Fire's topic in Model Trucks: Big Rigs and Heavy Equipment
Thanks for the information! I guess that is why most of the resin castings you see today in the model world are based on two part molds. I know that is how Tom Coolidge did his castings and they came out flawless. -
Eisbrenner Seagraves
Chariots of Fire replied to Chariots of Fire's topic in Model Trucks: Big Rigs and Heavy Equipment
Having worked with it, Bill, how did Mike end up with such a smooth exterior? Did he coat it (the mold) first with a thin skim coat and then build it up a bit at a time? -
Yep, better get crackin' JT! Now that it's done I think I should have tried to blend in a more modern fleetside body. Somewhere I have pix of the trailer that goes with it. Will have to dig them out.
-
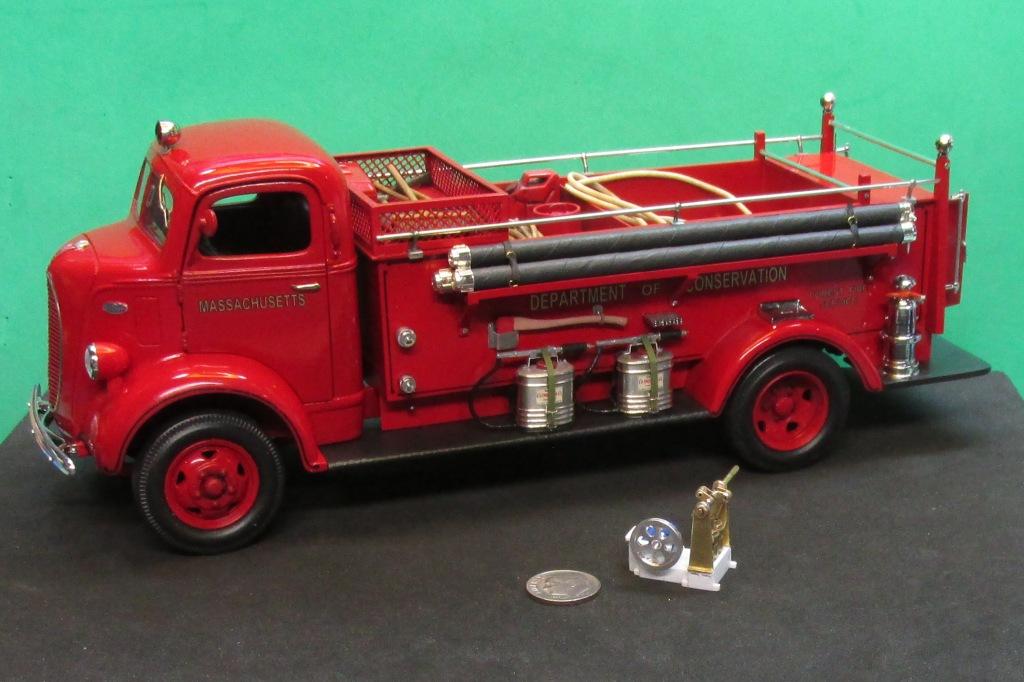
That's a '66 Chevy fire tanker I was working on at the time. Holthaus resin cab. Here are some pics of it. (I know they belong in the big truck listing but here they are anyway!).