Anglia105E
-
Posts
3,487 -
Joined
-
Last visited
Content Type
Profiles
Forums
Events
Gallery
Everything posted by Anglia105E
-
Sorry to hear you dropped the building structure Yordan, and I hope it is easily recovered. David
-
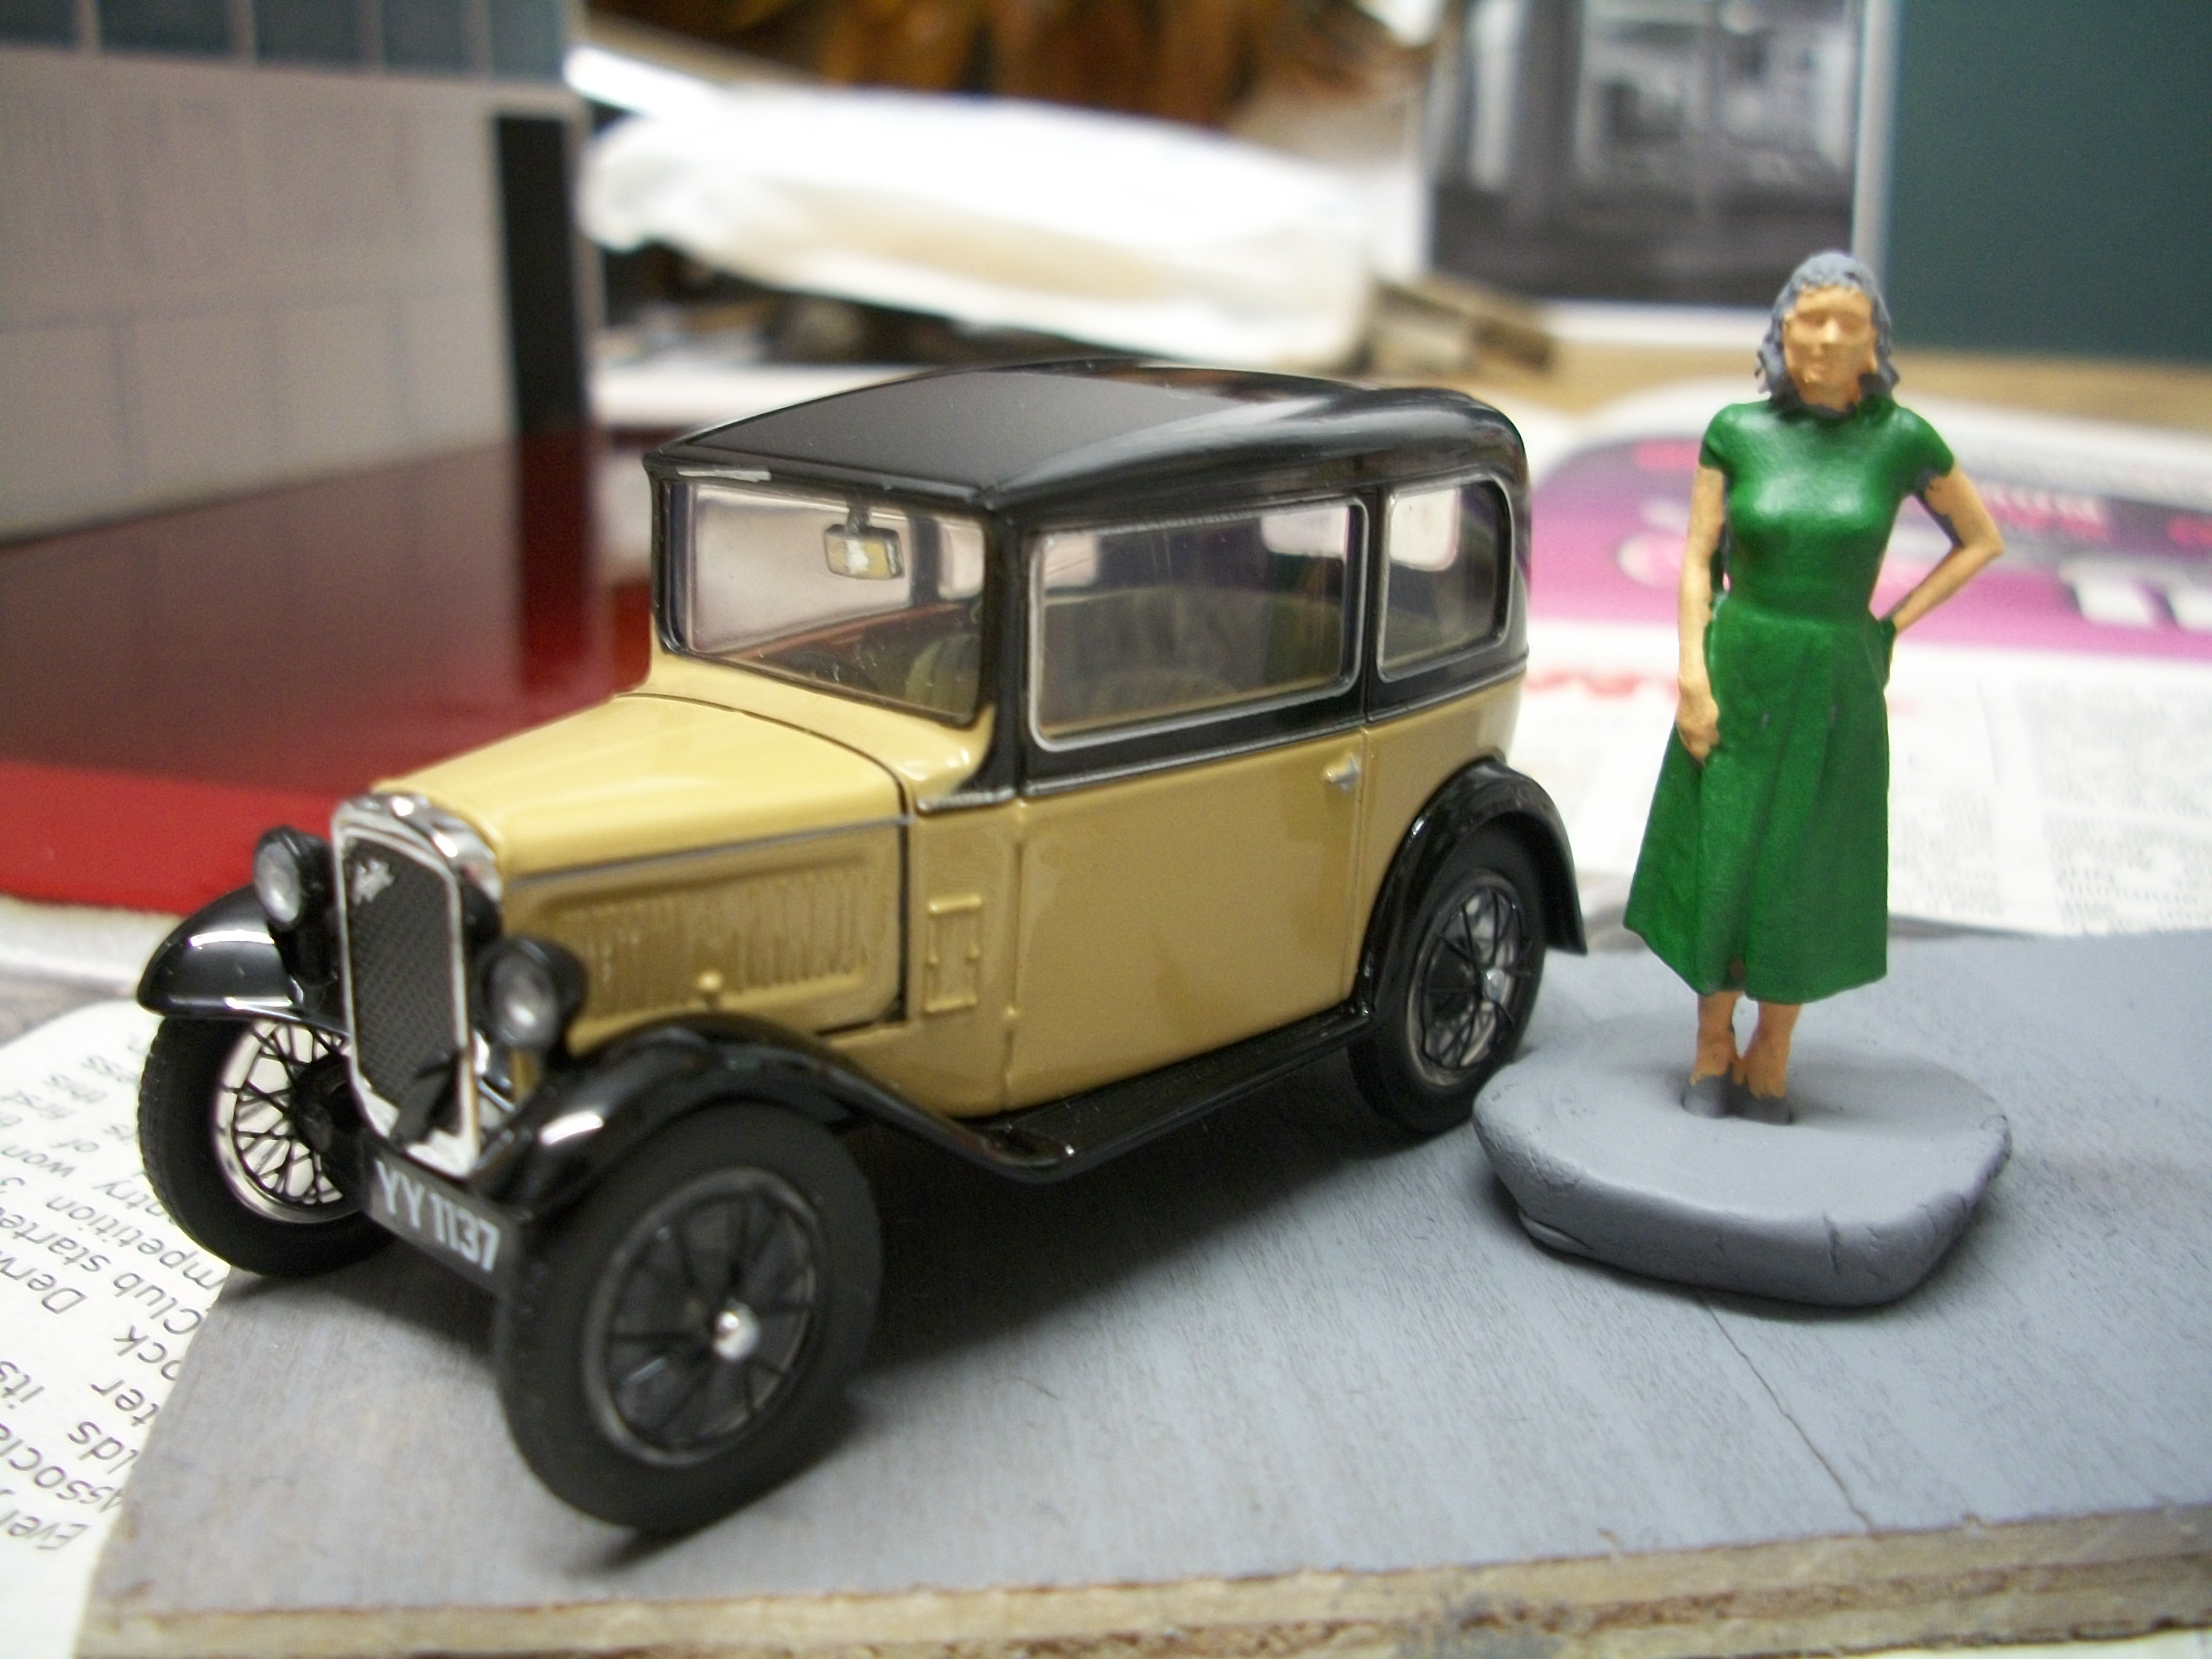
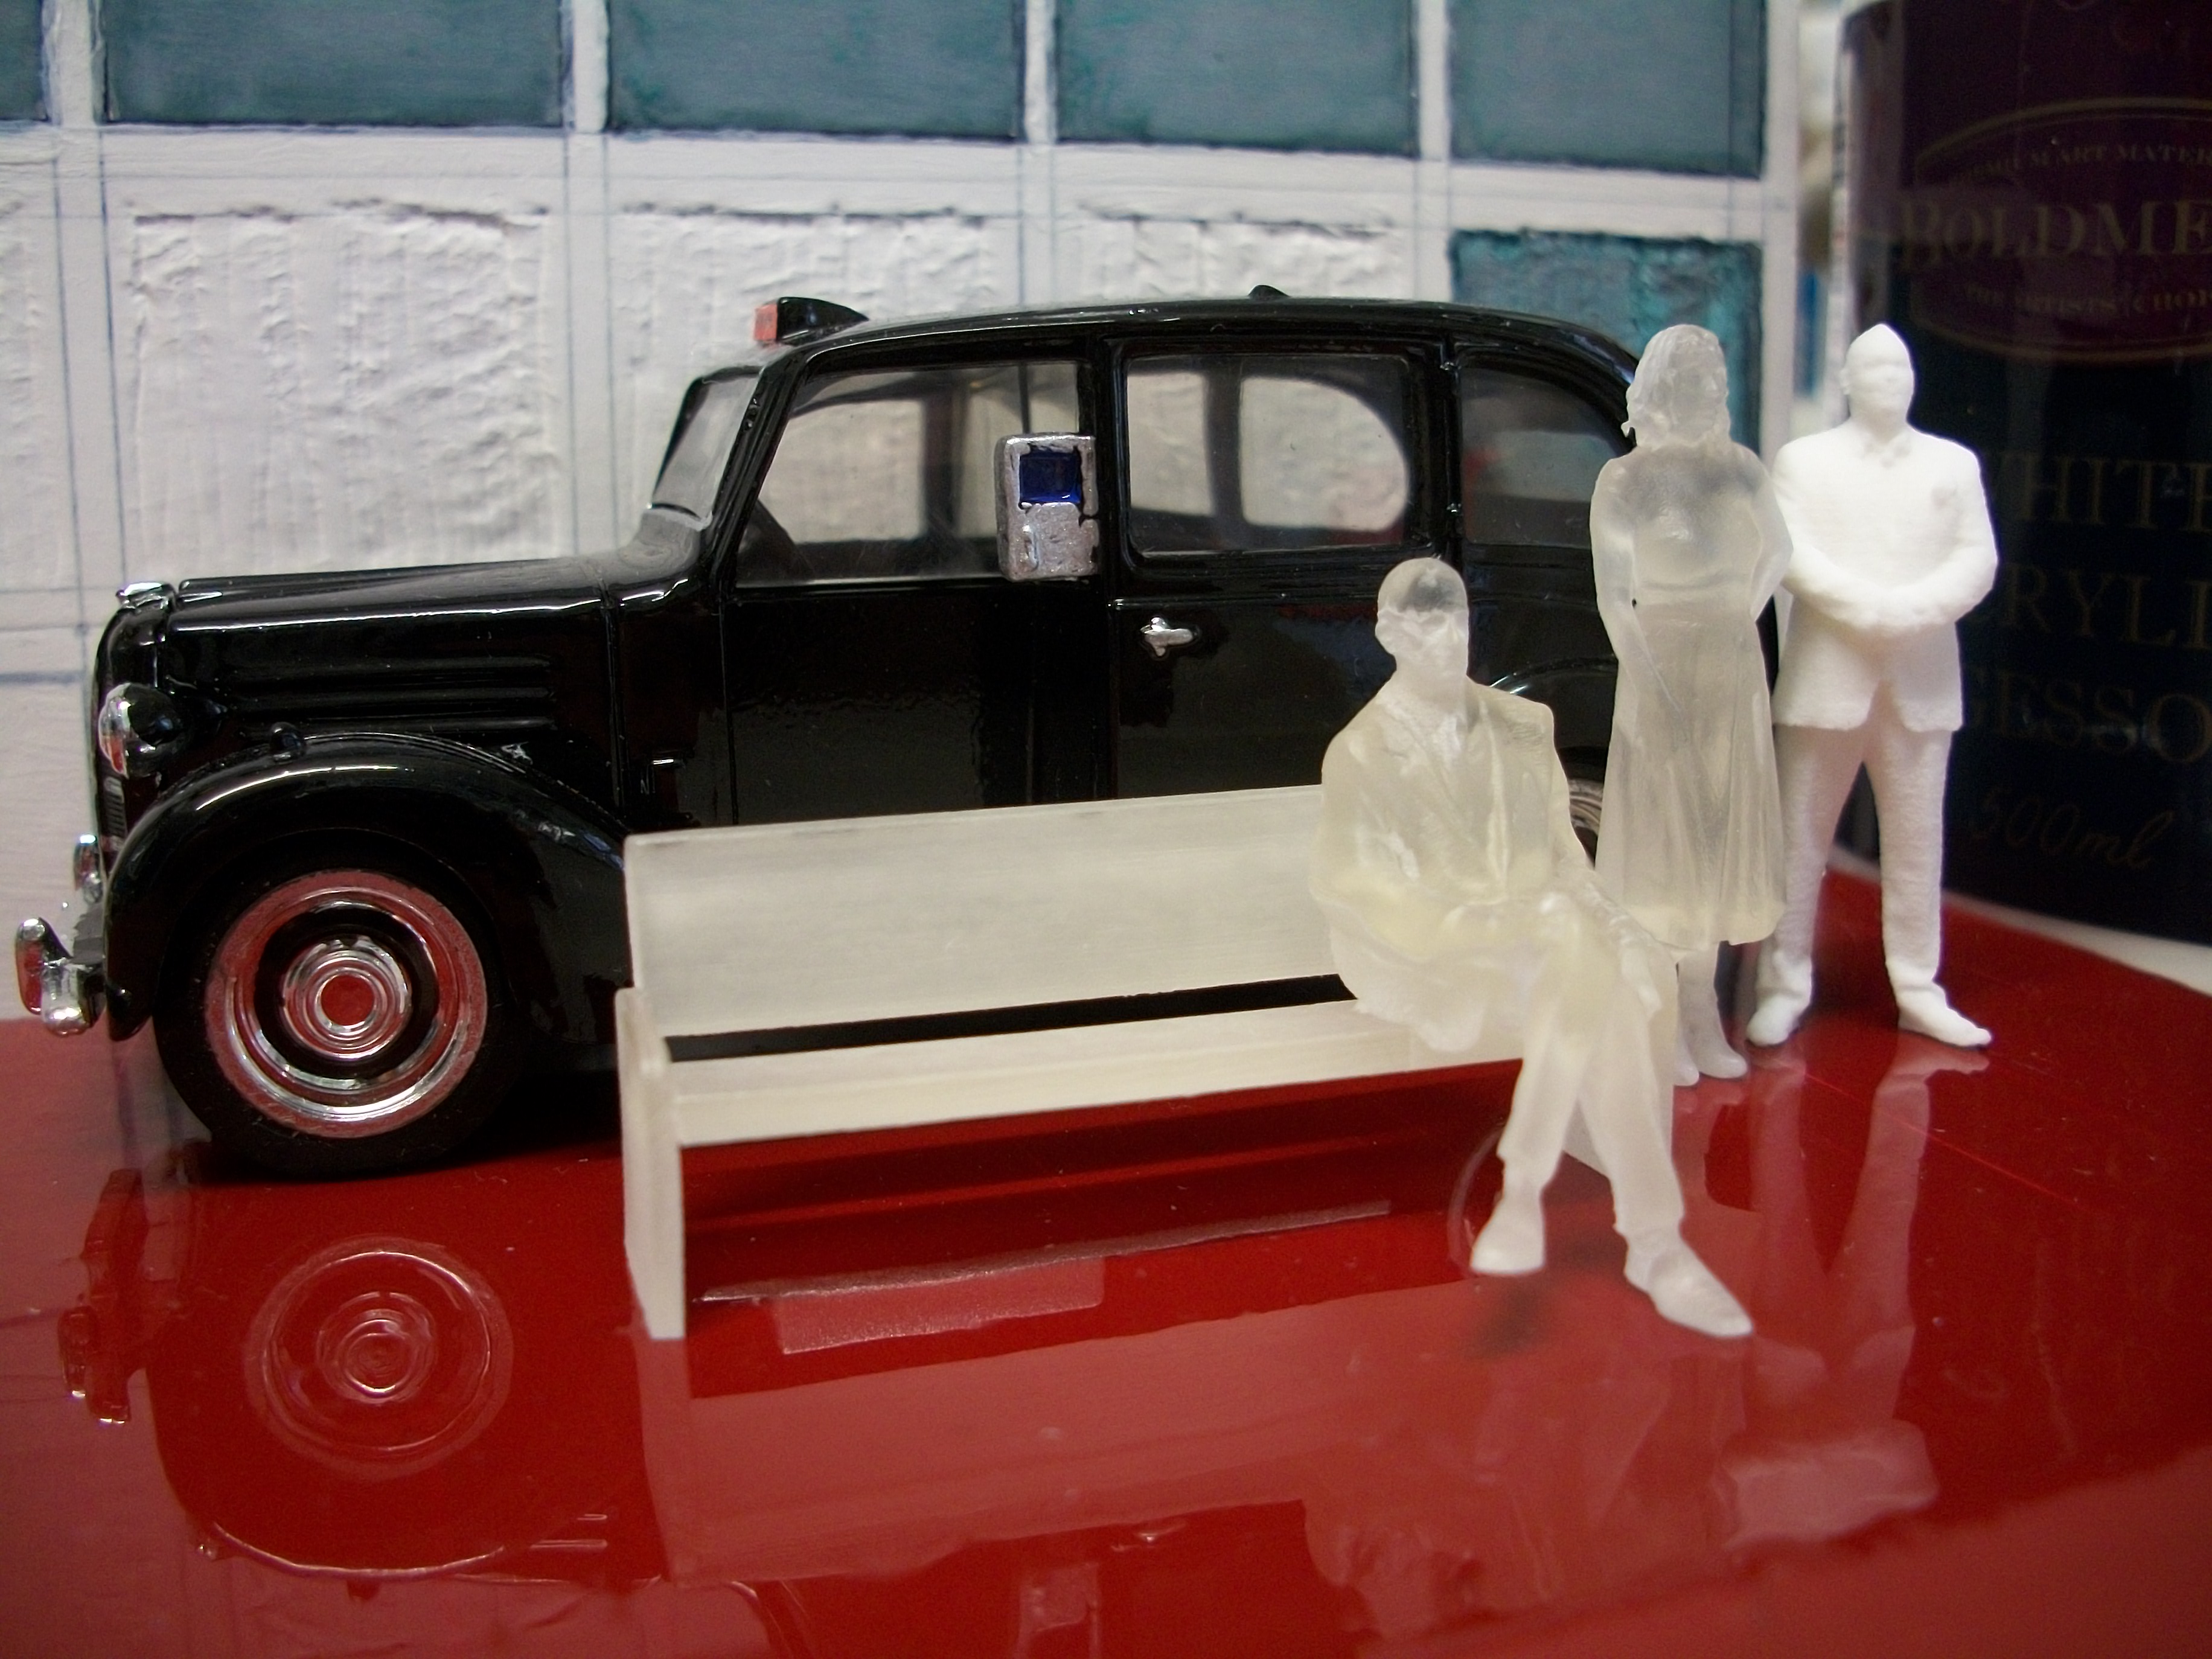
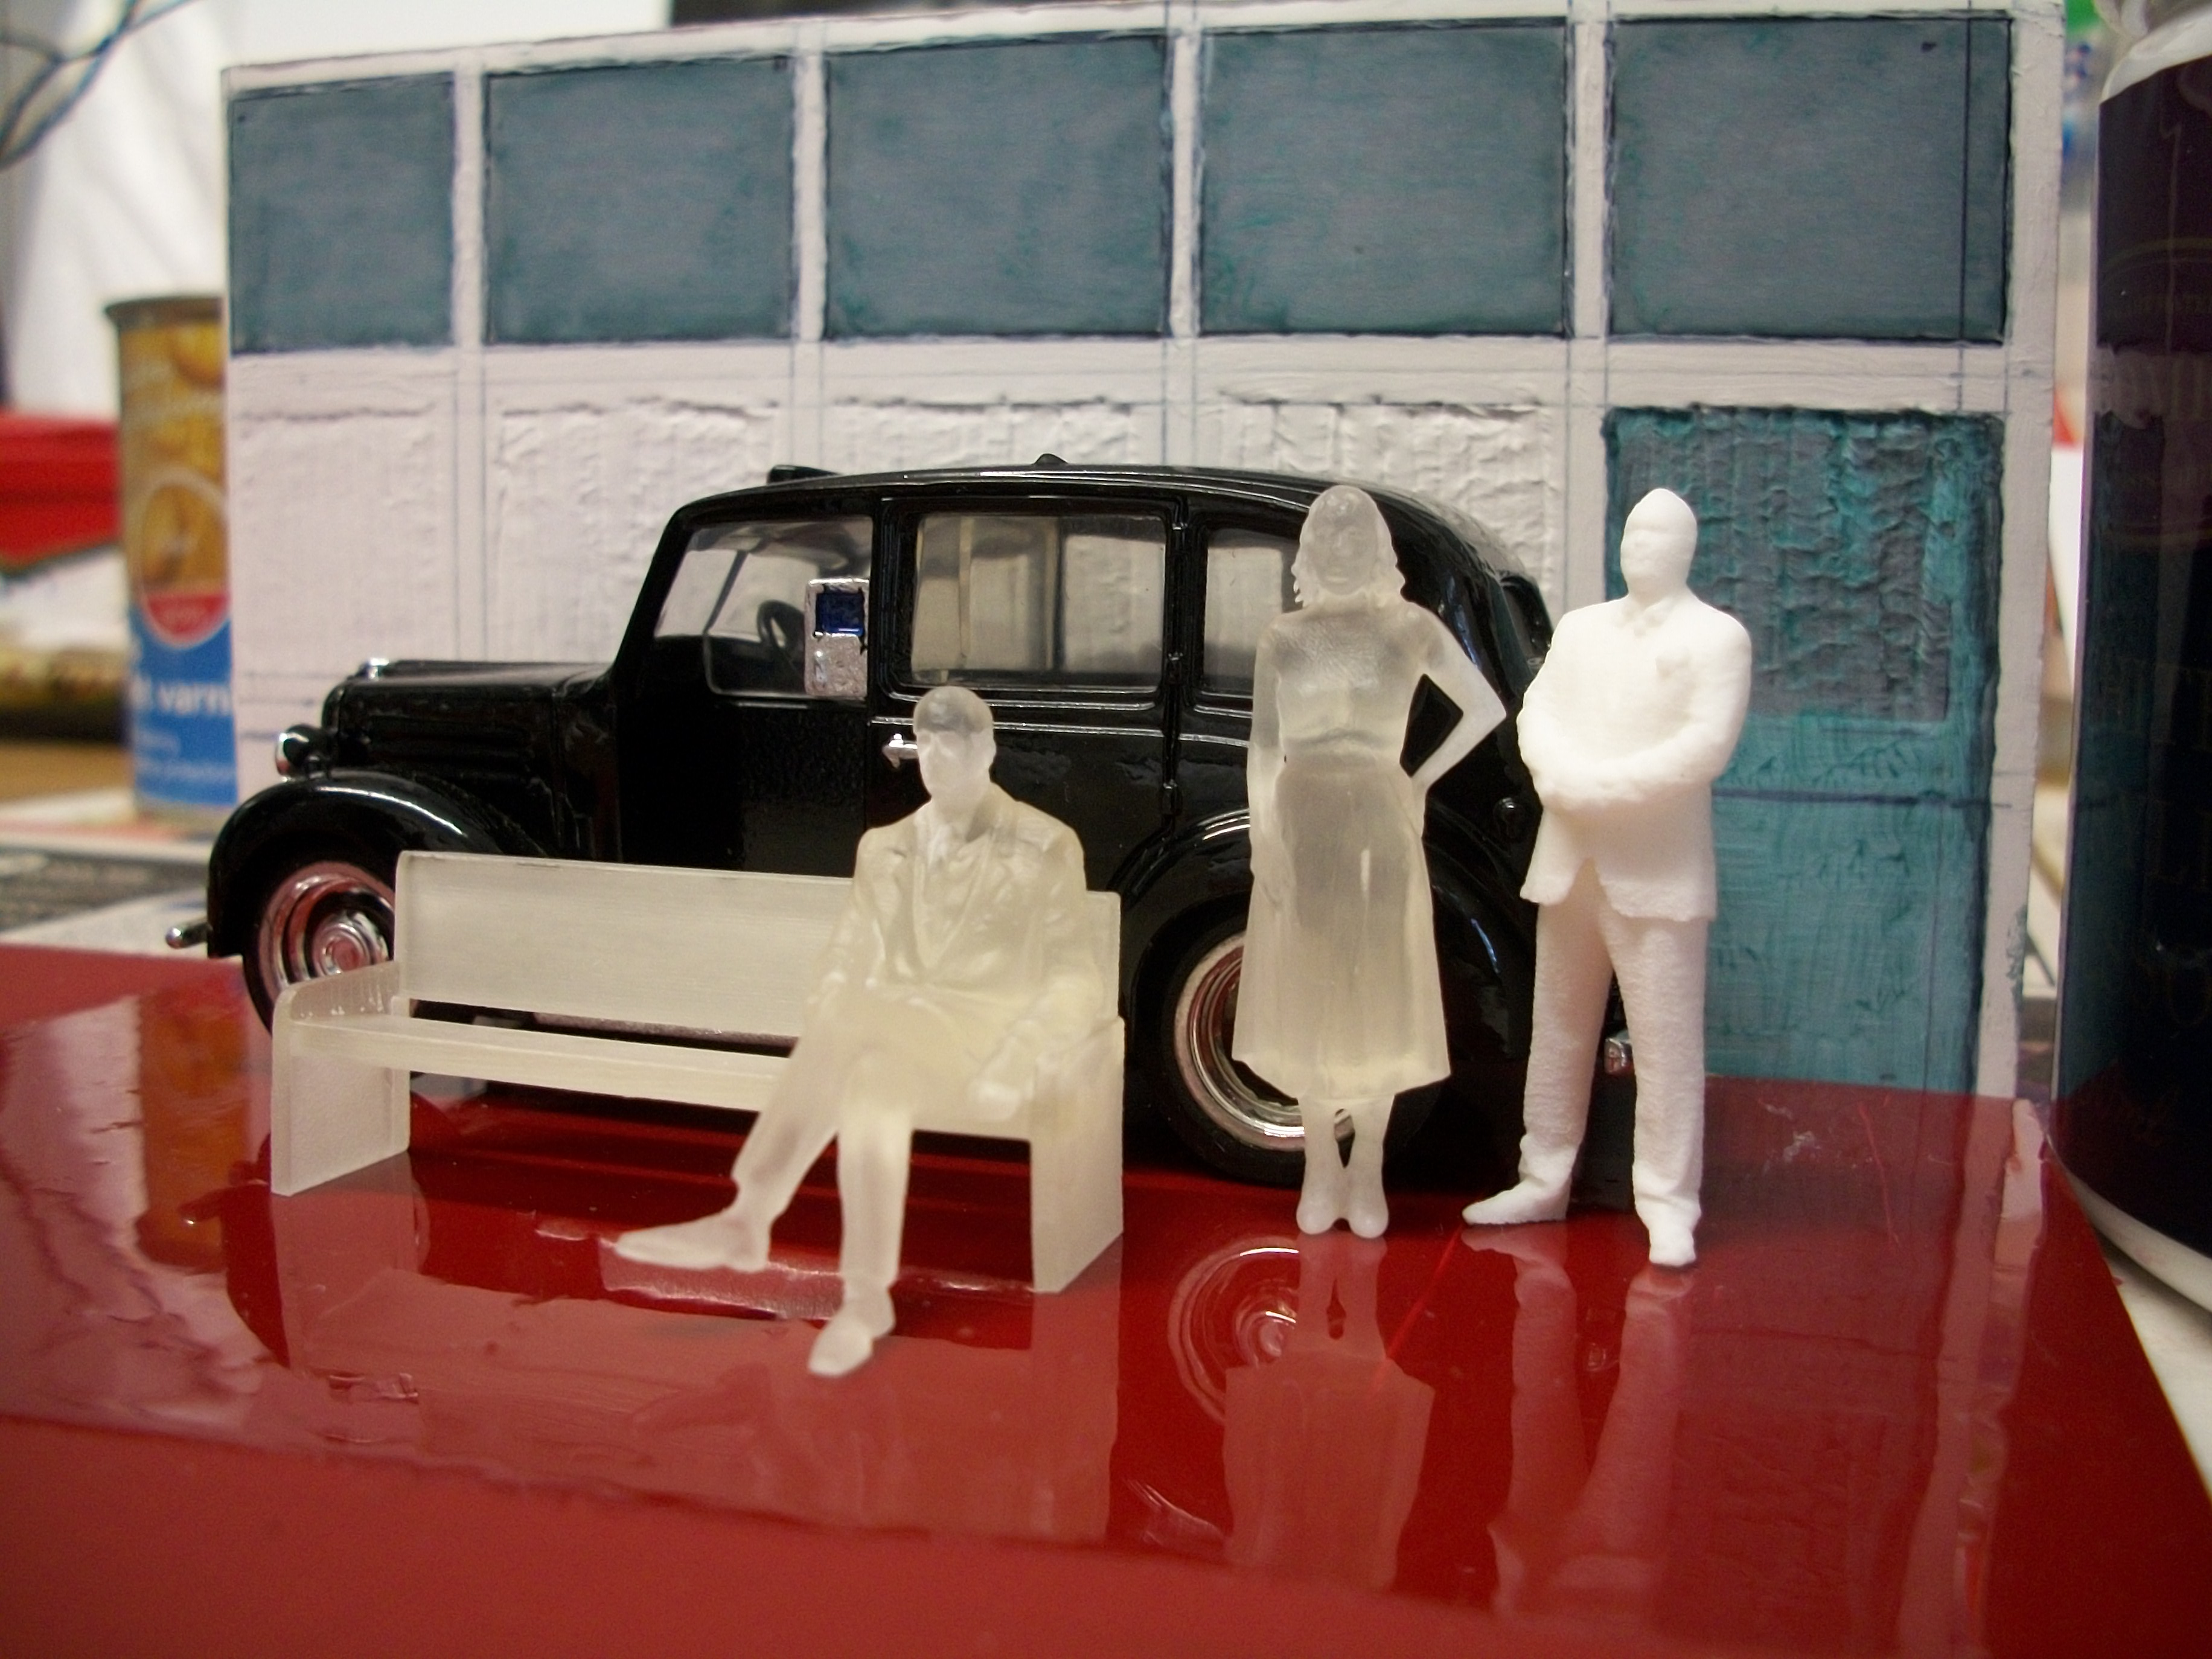
Yes Pat, the figurines are from Shapeways Printle Shop, which I have found to be a good supplier of nice accurate figures in both 1:24 scale and 1:43 scale. The reason the floor surface appears to be so highly polished is because I have used Yacht Varnish, and this is my favoured method of producing a high gloss shine. Previously I have even coated a Rolls-Royce Phantom I diecast 1:24 and a Rolls-Royce Phantom III diecast 1:24 with yacht varnish, over Revell Aqua Colour acrylic paint which has a matt finish when dry. Having seen photos of polished red flooring in showrooms I decided I wanted Hooper's to have the best! David
-
Perfect on the grass base Shawn....... well done for building this family car and trailer from scratch. Your scale model really photographs nicely. David
-
The two highly polished crimson flooring panels are ready for the showrooms and today the Austin Seven RN Saloon arrived. This is a very nice 1:43 scale Oxford Diecast model in black and fawn paintwork. The car is a 1932 Austin, so in the 1959 diorama setting this car will be only 27 years old. David

-
Stitching to the steering wheel...... I think I need to go and lie down for awhile and consider this..... David
-
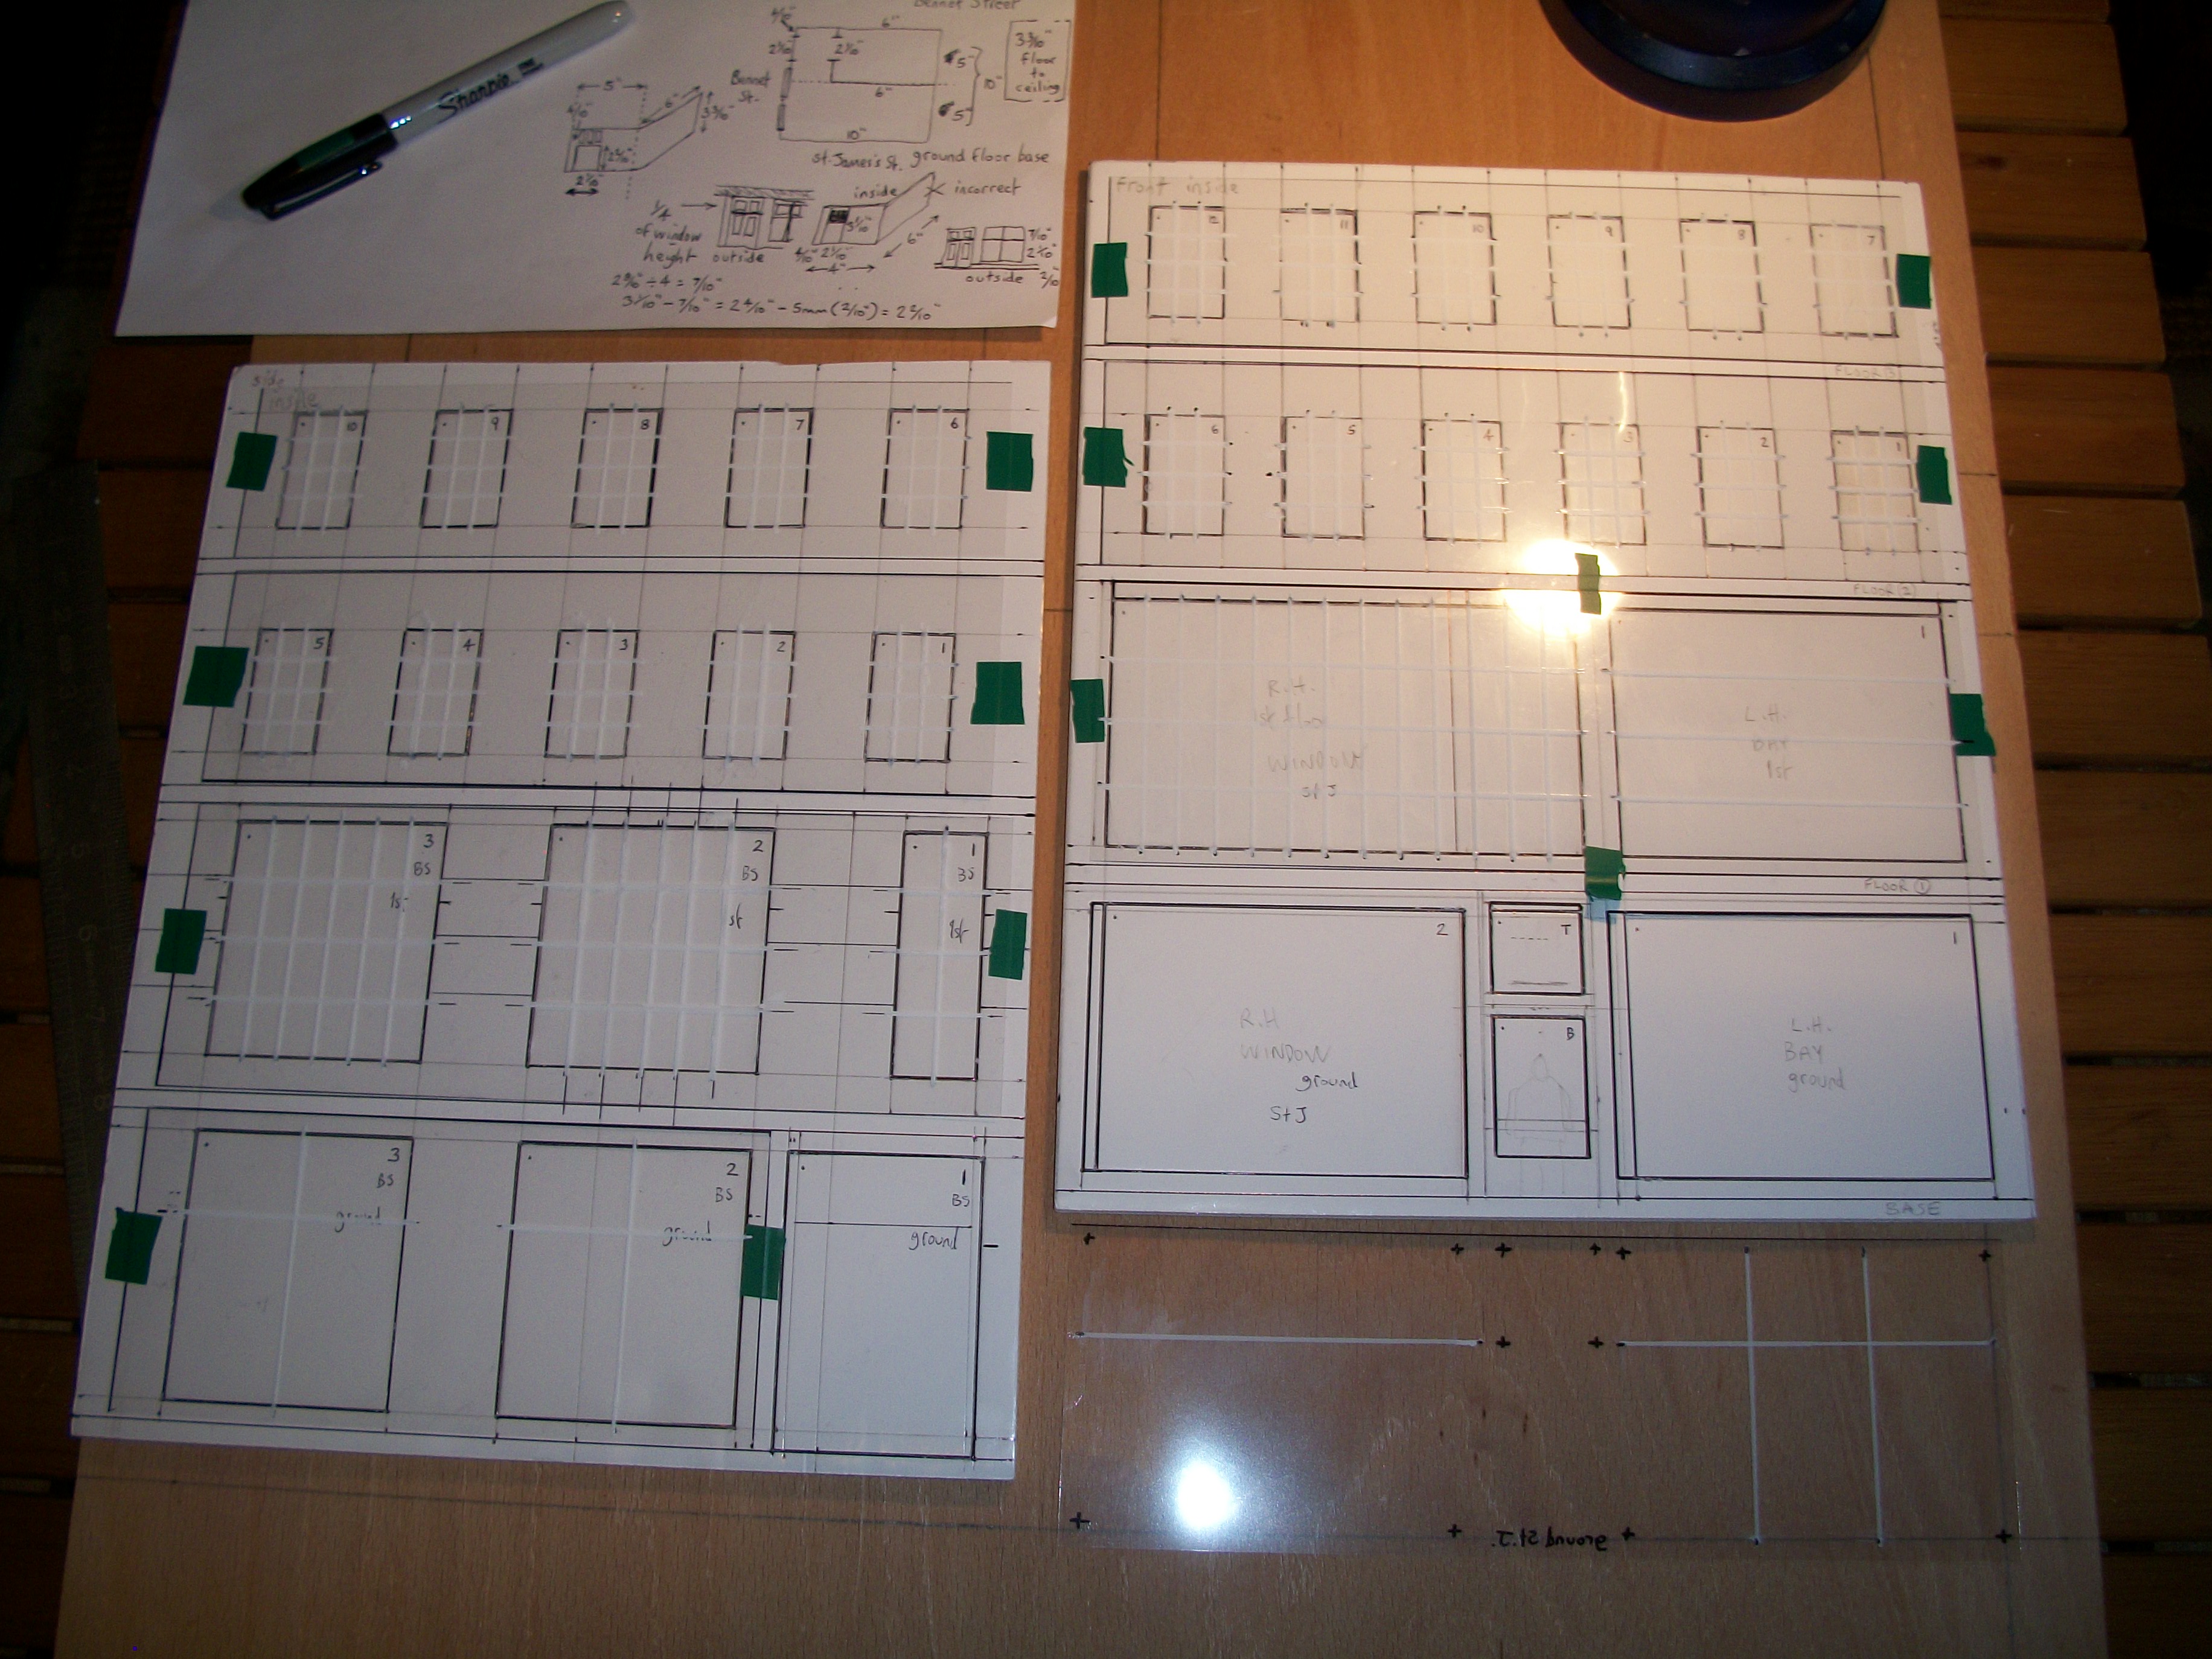
Yordan..... Usually I make use of discarded cake packaging from an up market British food store, which provides good quality acetate sheet in a good size, as long as it is a big cake! However, for this second smaller diorama I have used transparency sheets that are intended for printing reverse images. The transparency sheets are rough on one side and glossy on the other side. Previously I had purchased these transparencies to print the lettering for the walls of the 1:24 scale building, but the idea came to me that I could use them for the windows on the 1:43 scale building as the glass is half the thickness of the larger windows. For the lower showroom floors of the 1:24 building I did use polyester sheets from the local Hobbycraft store, which are around two millimetres in thickness. David
-
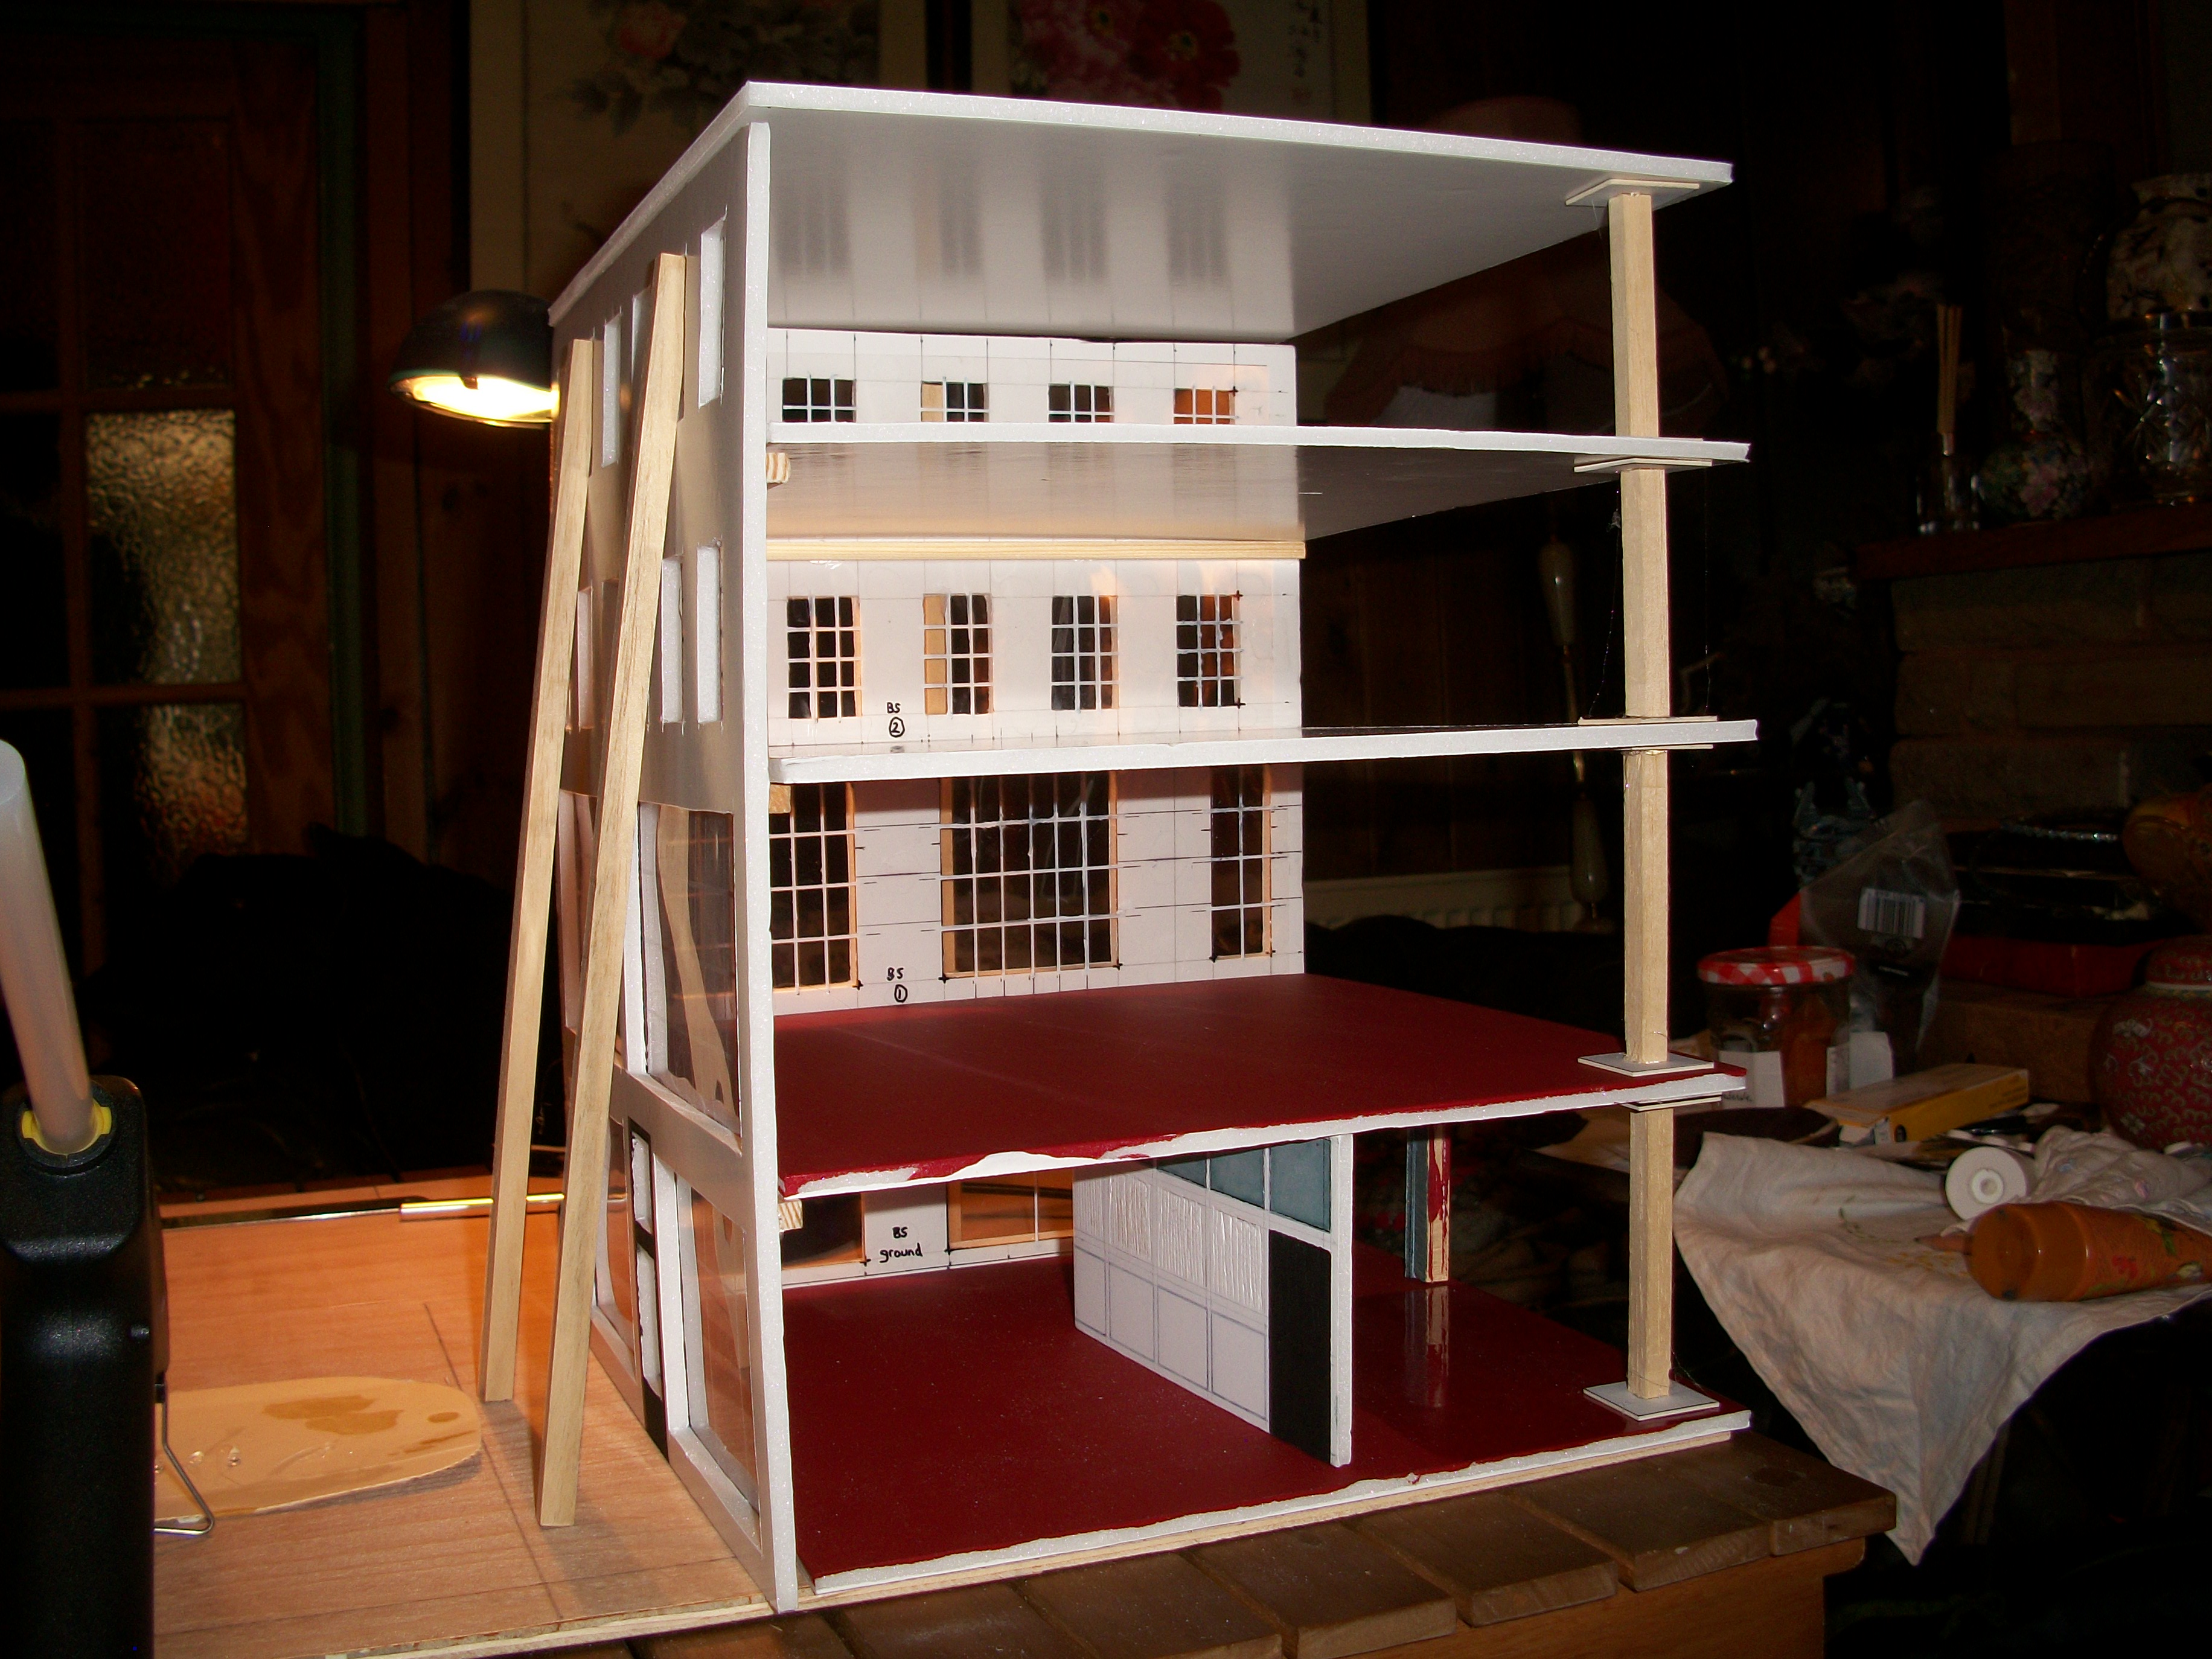
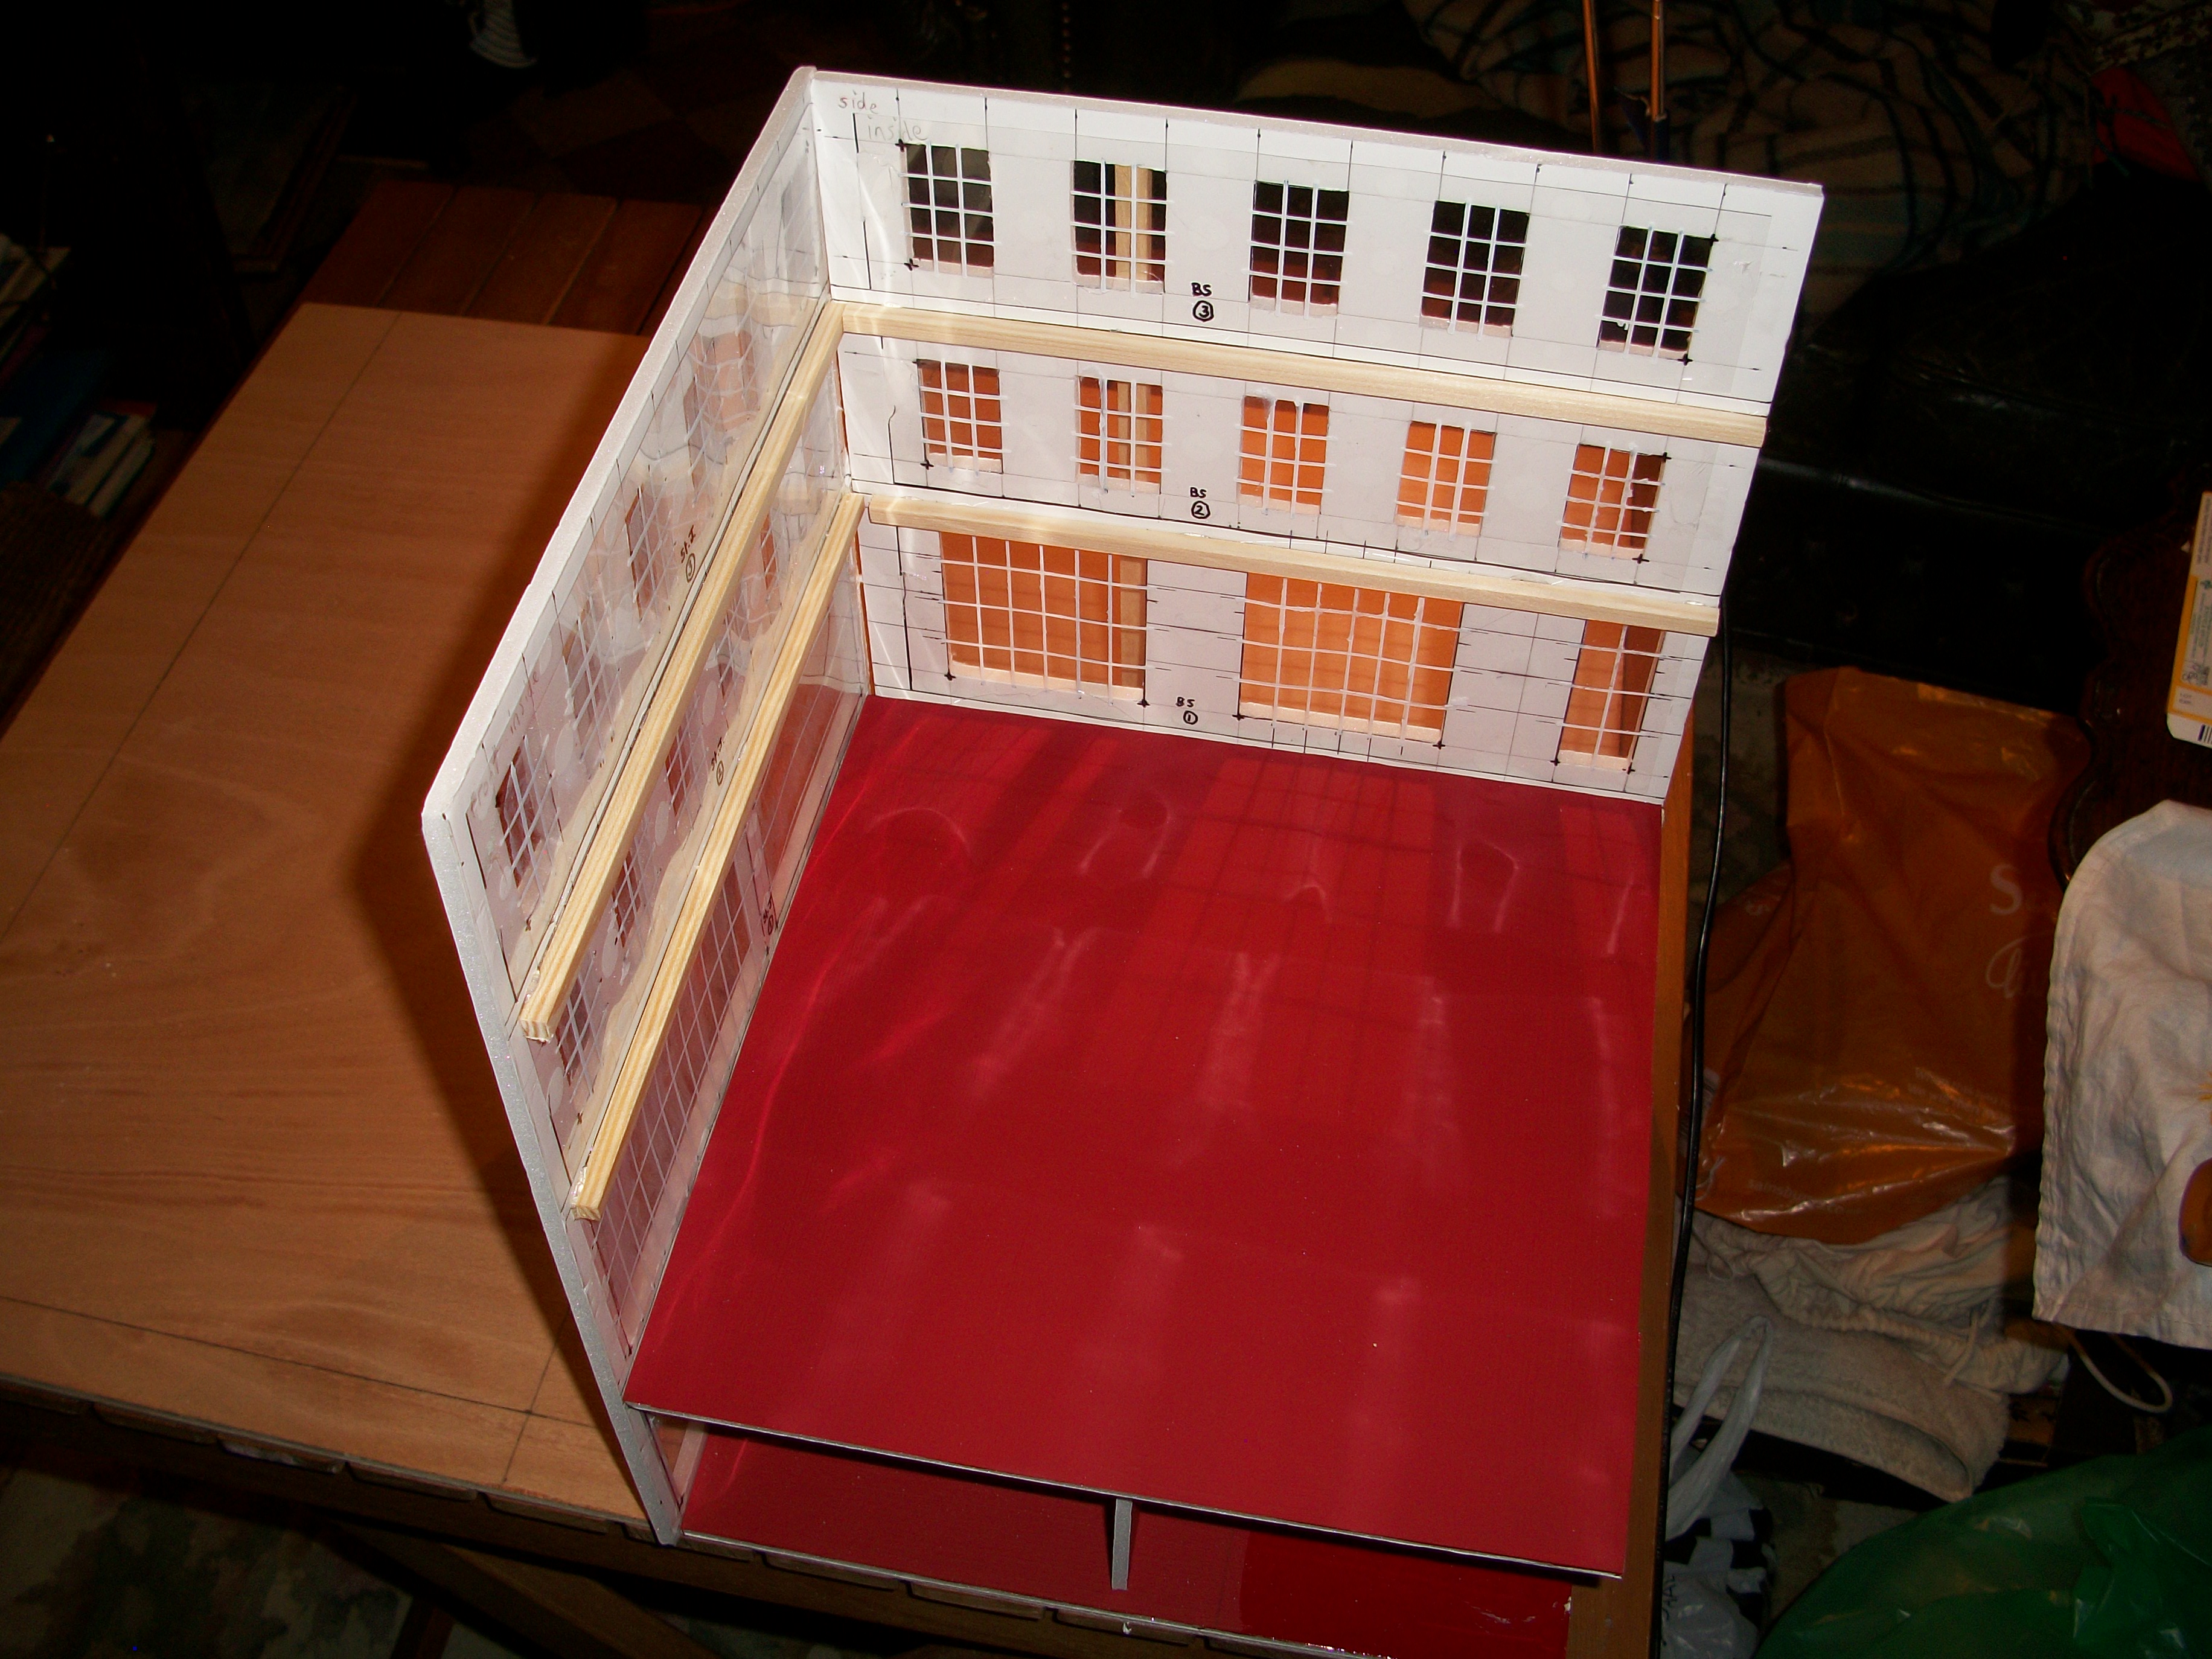
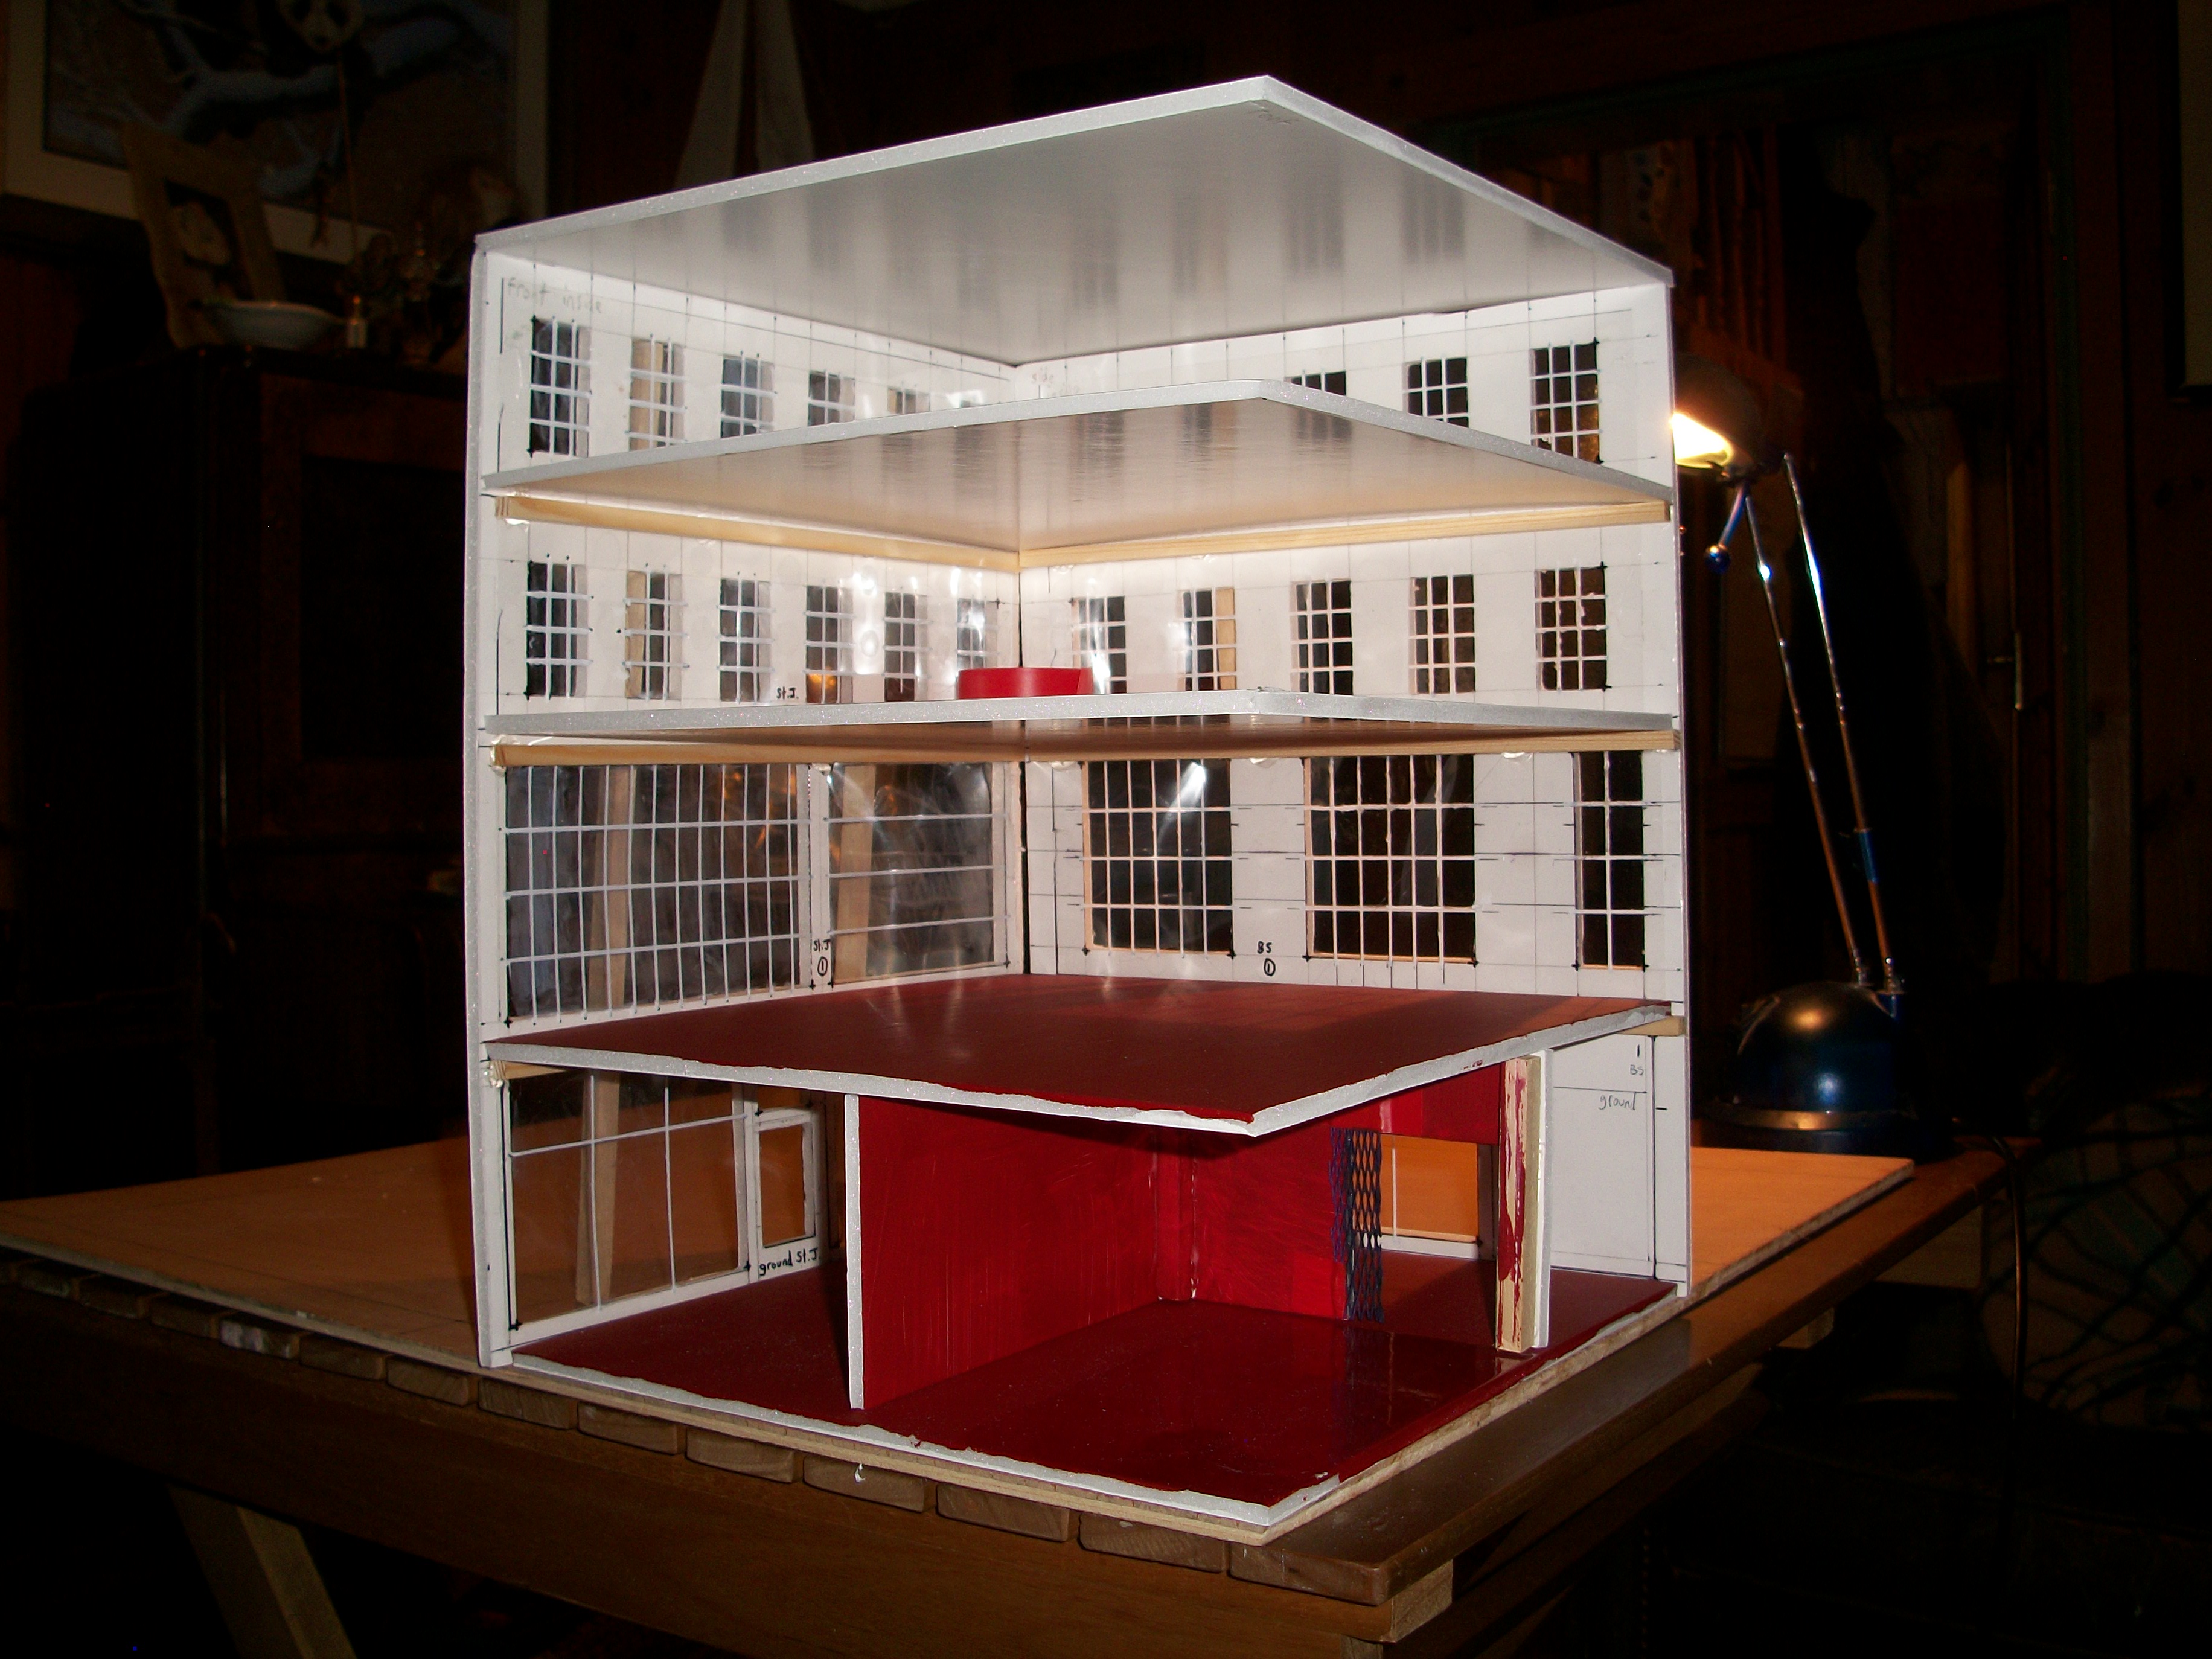
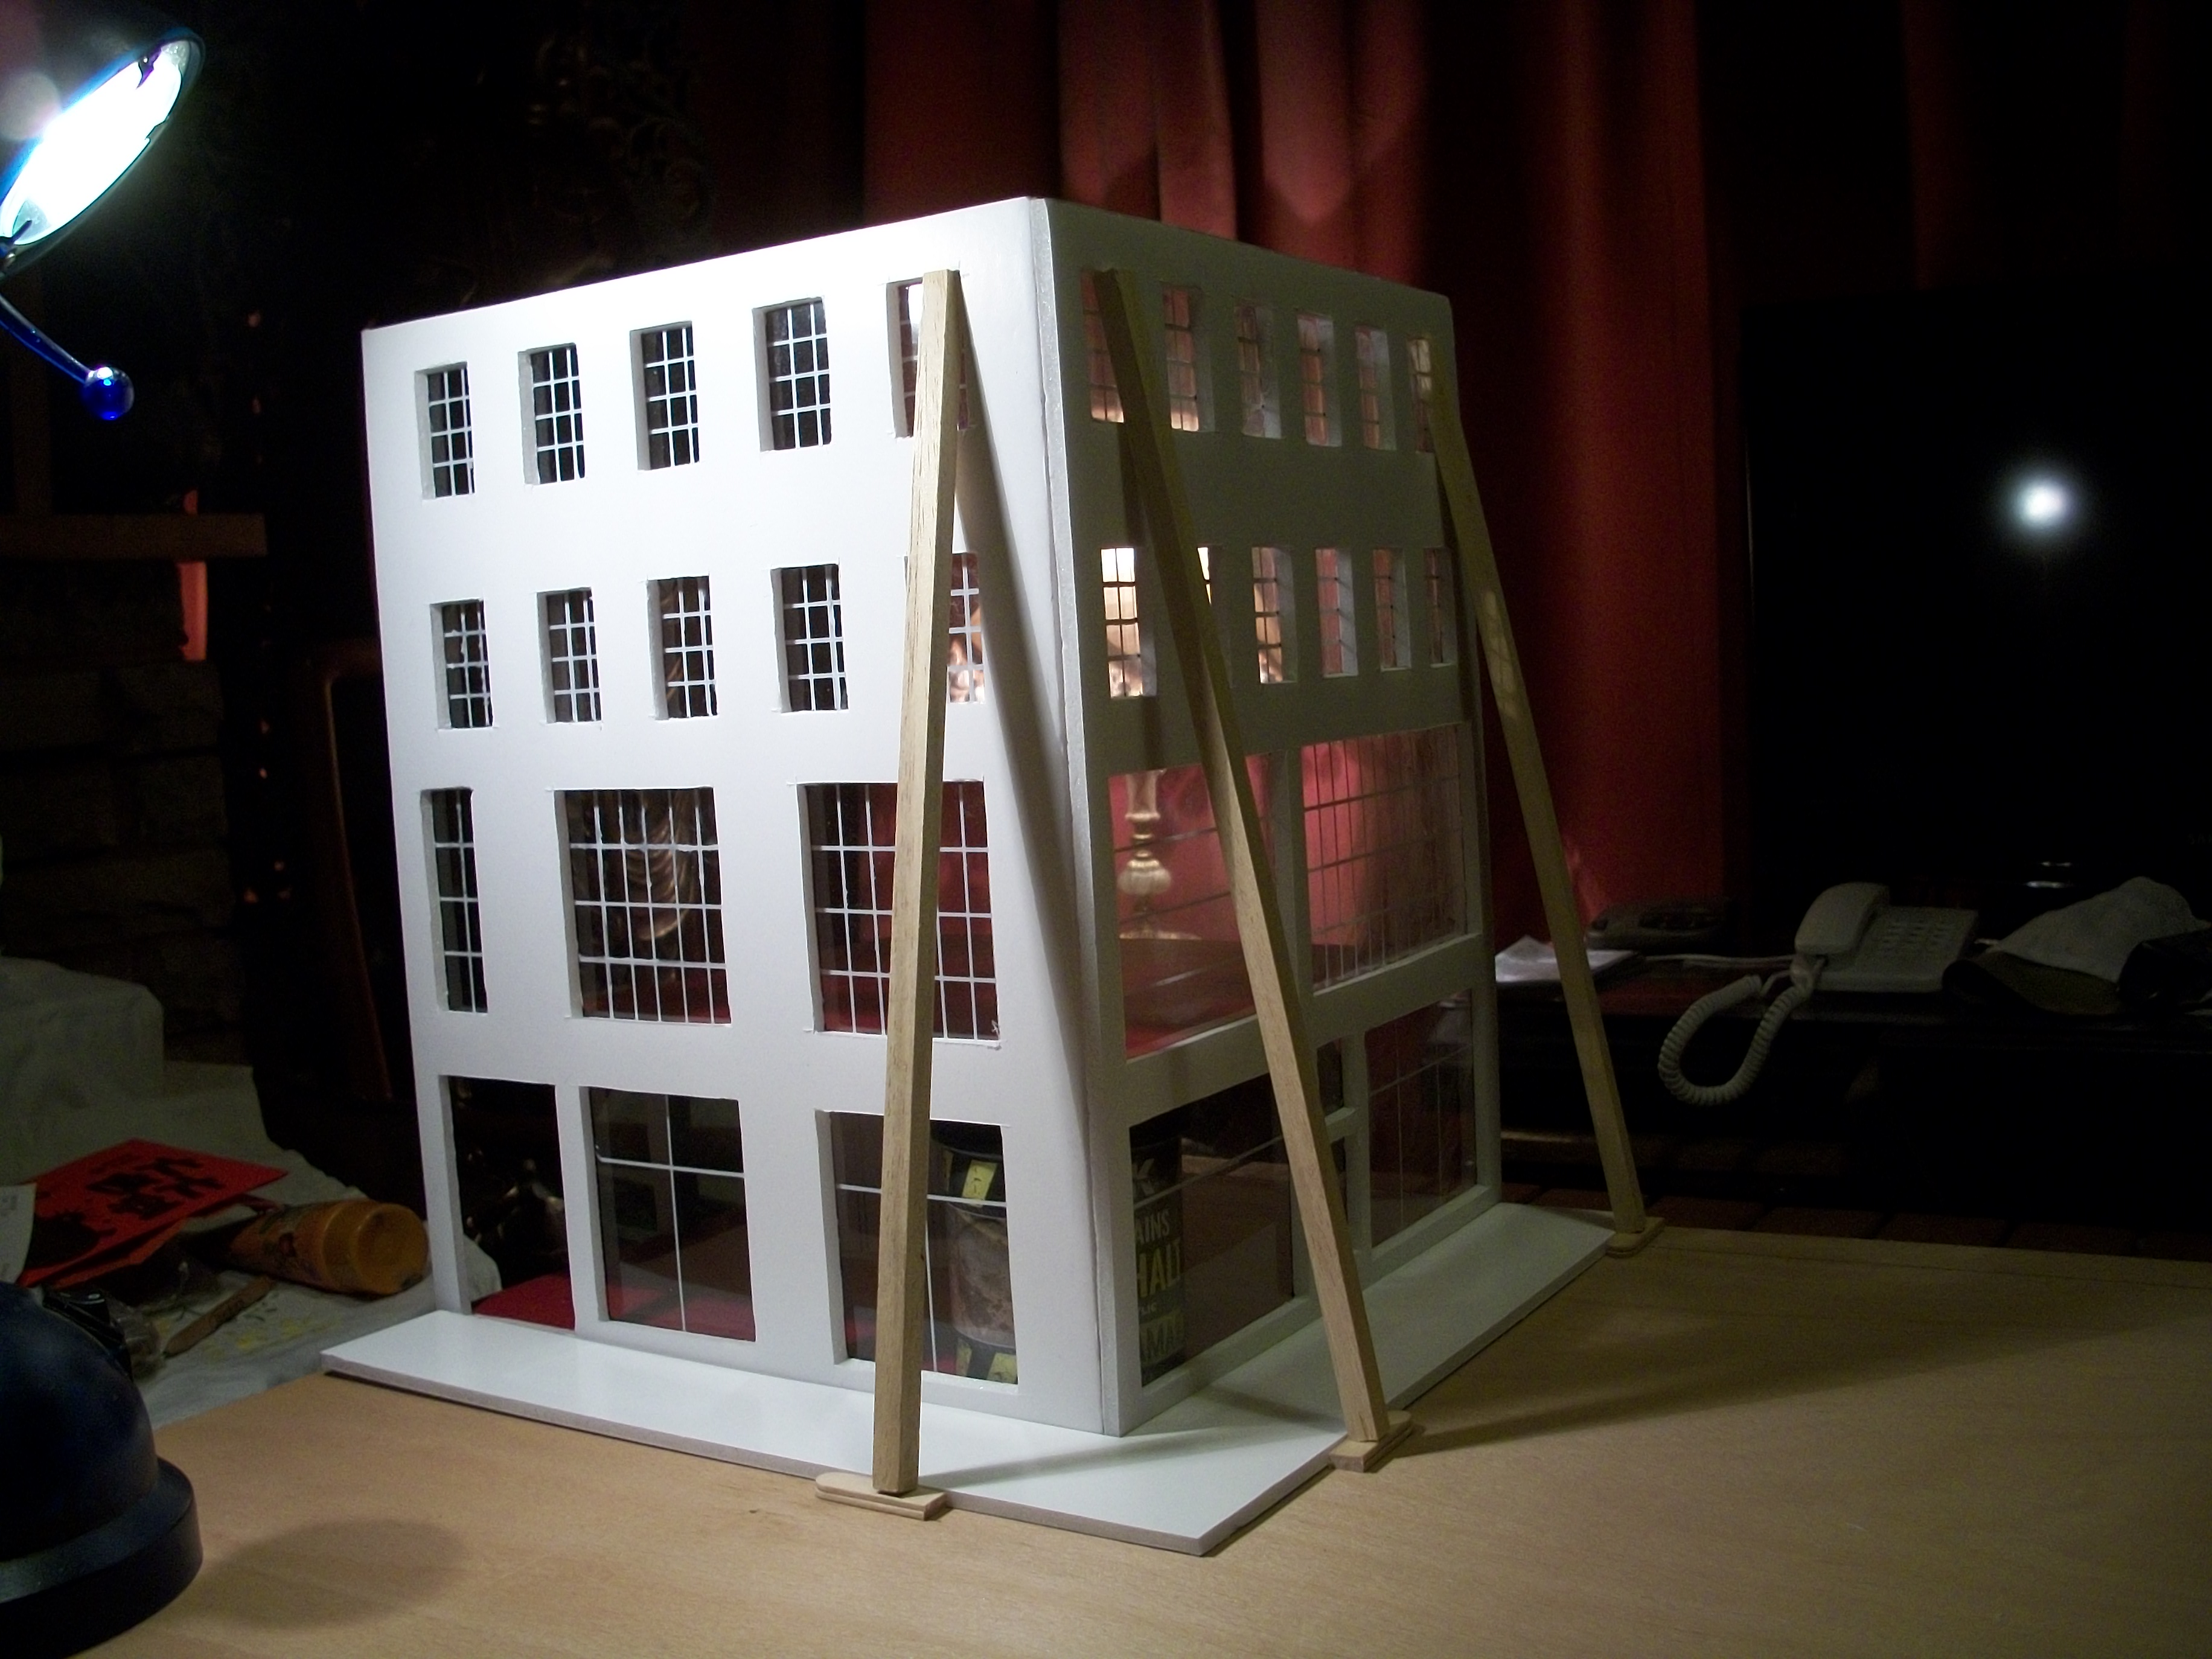
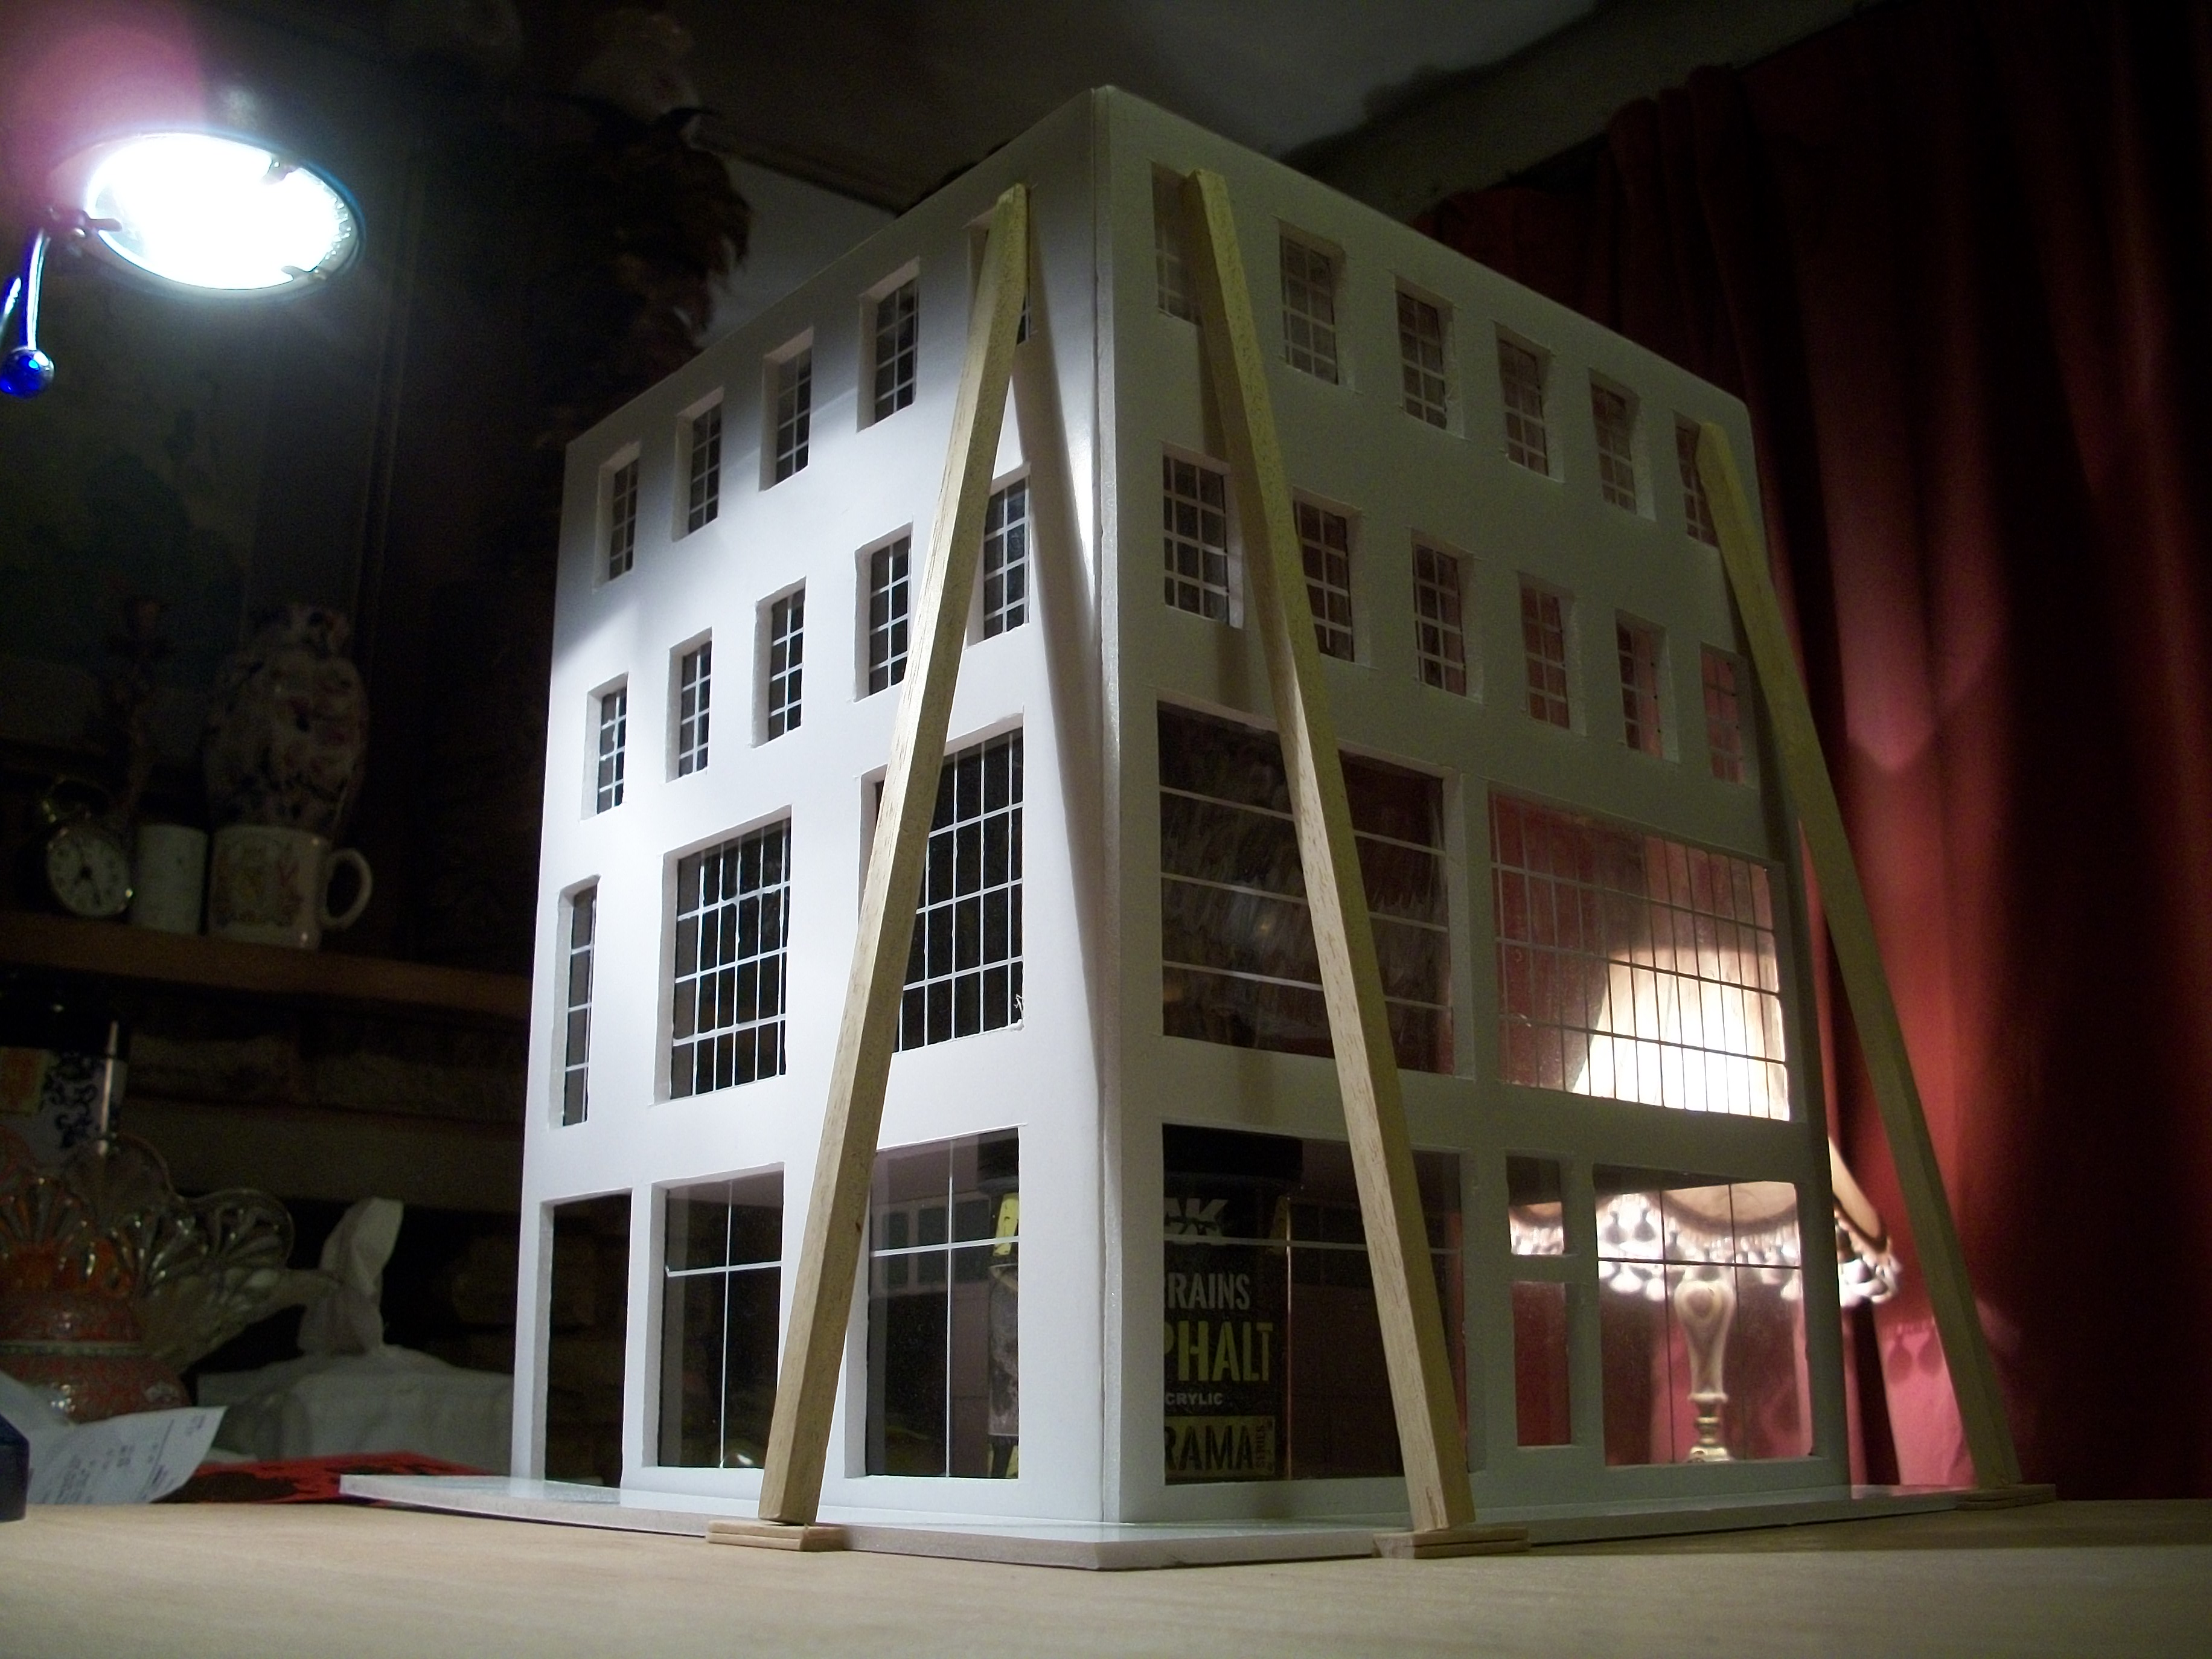
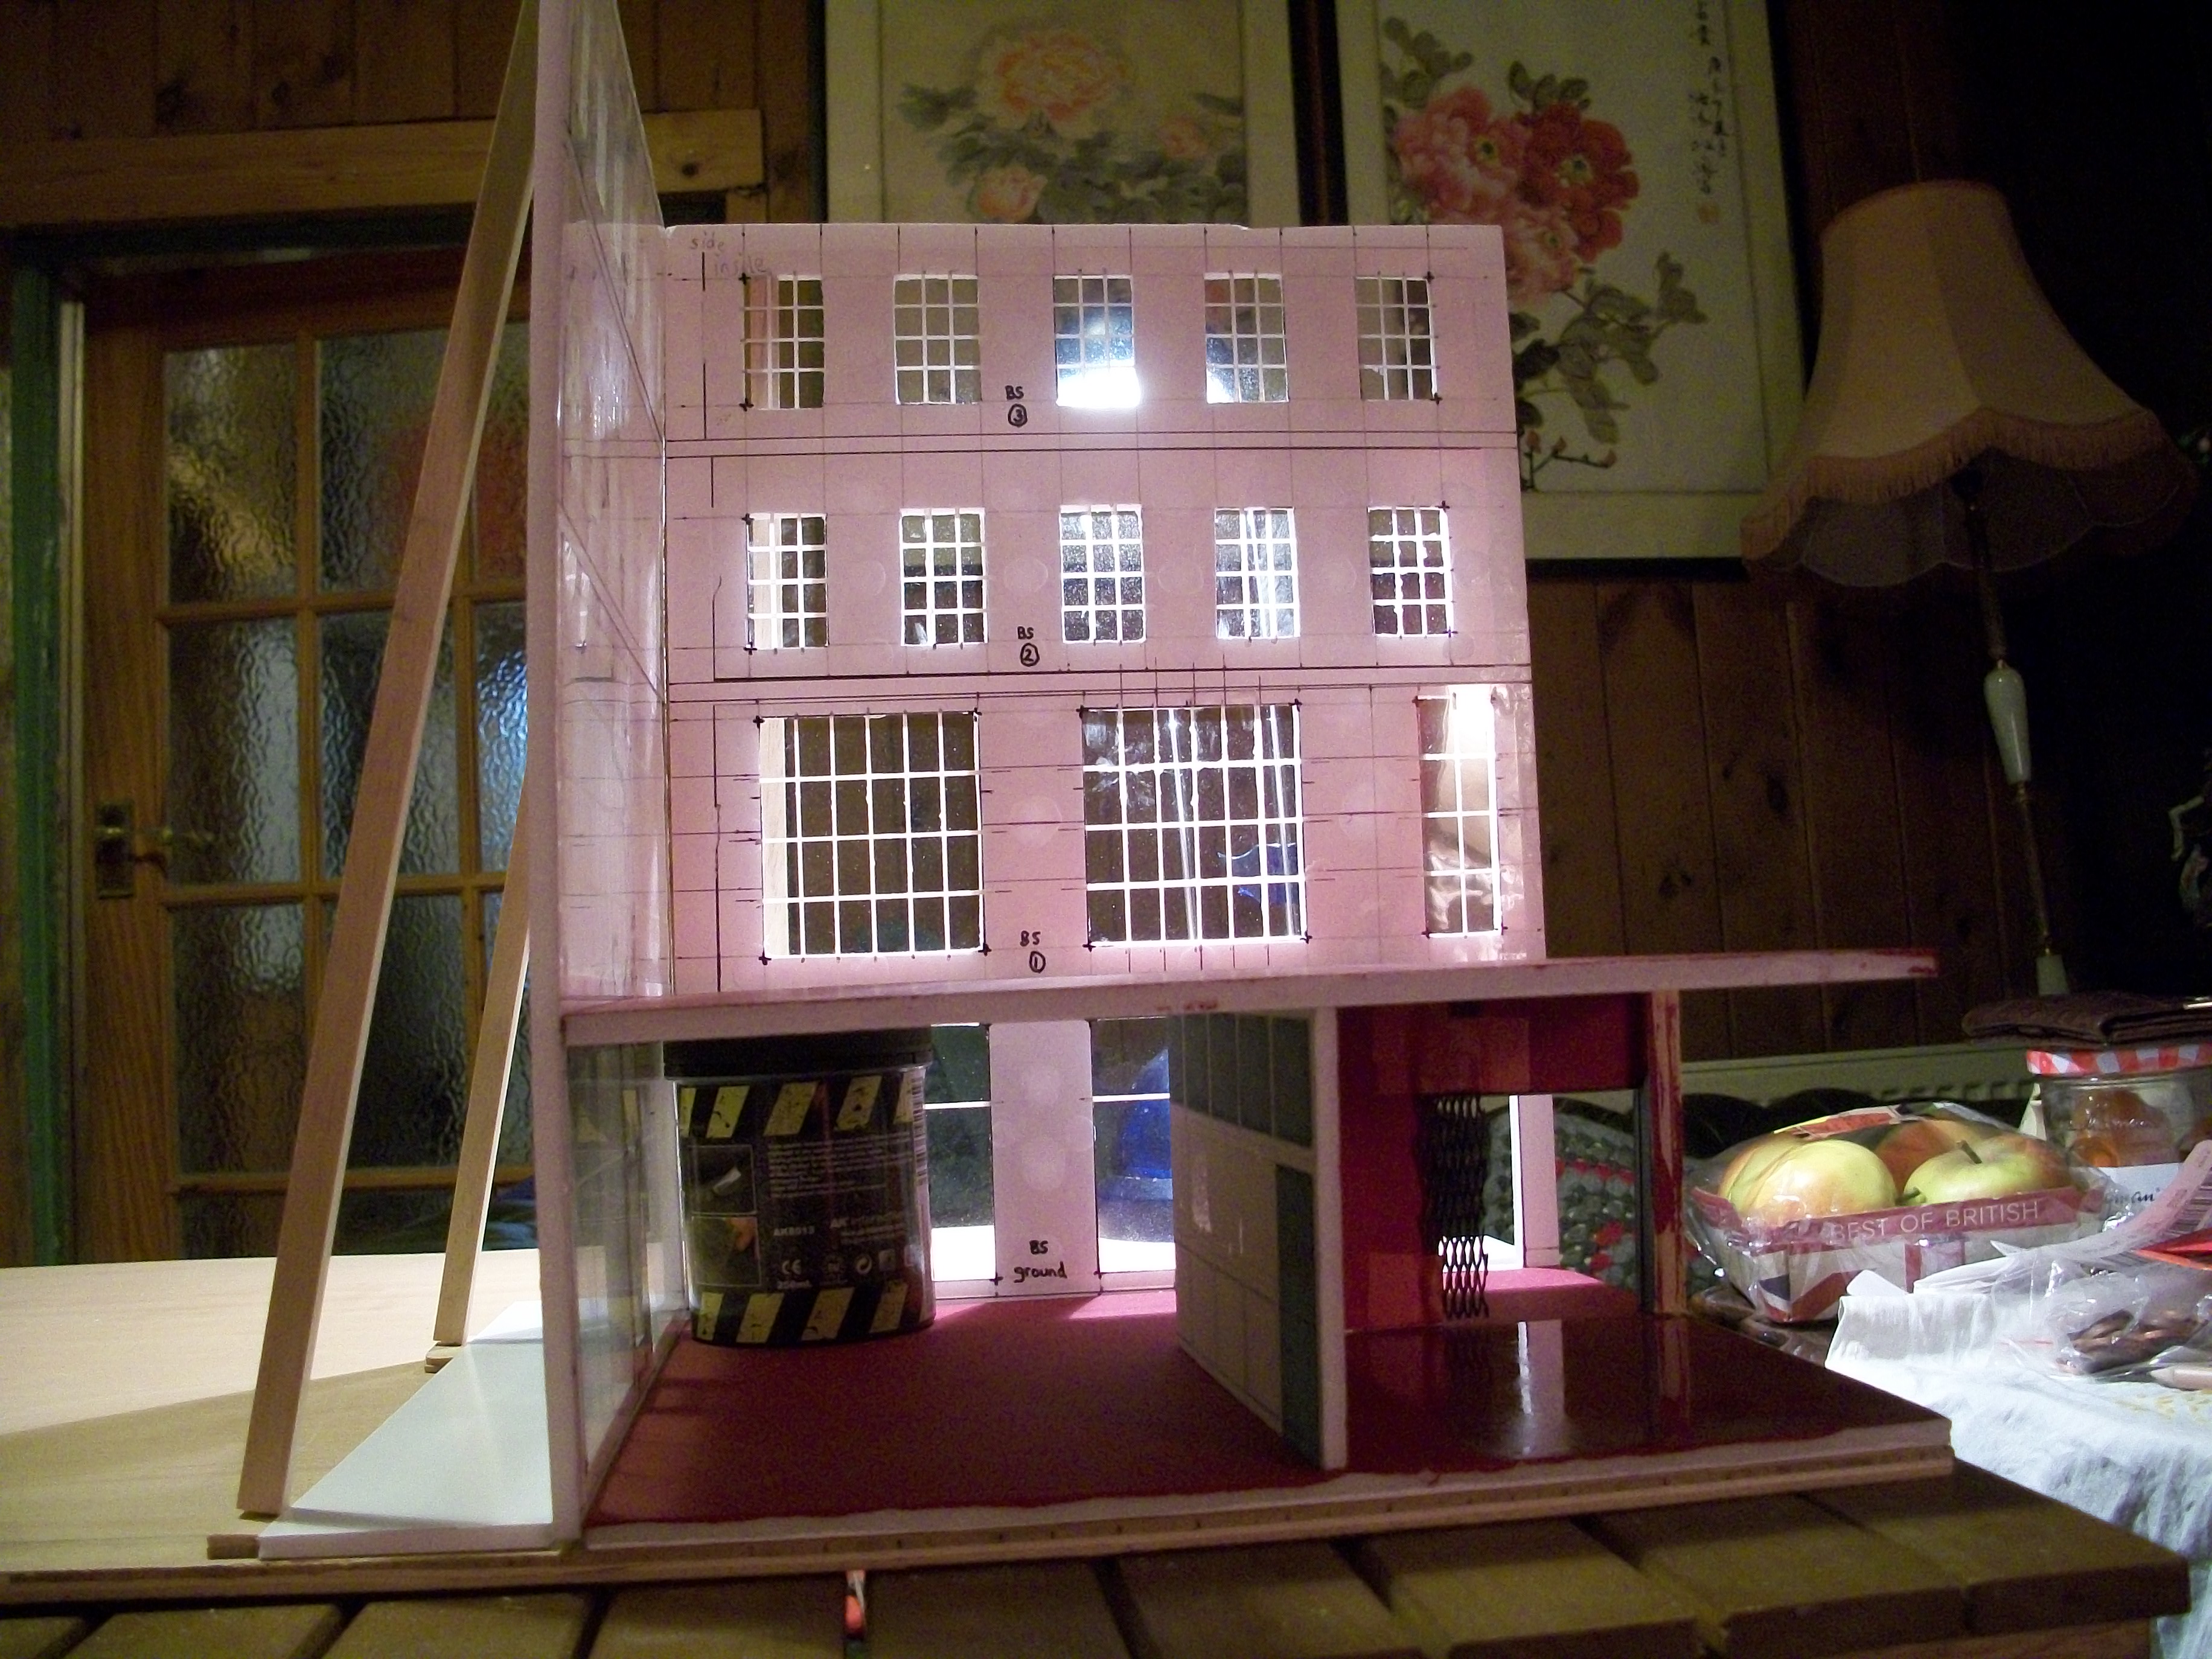
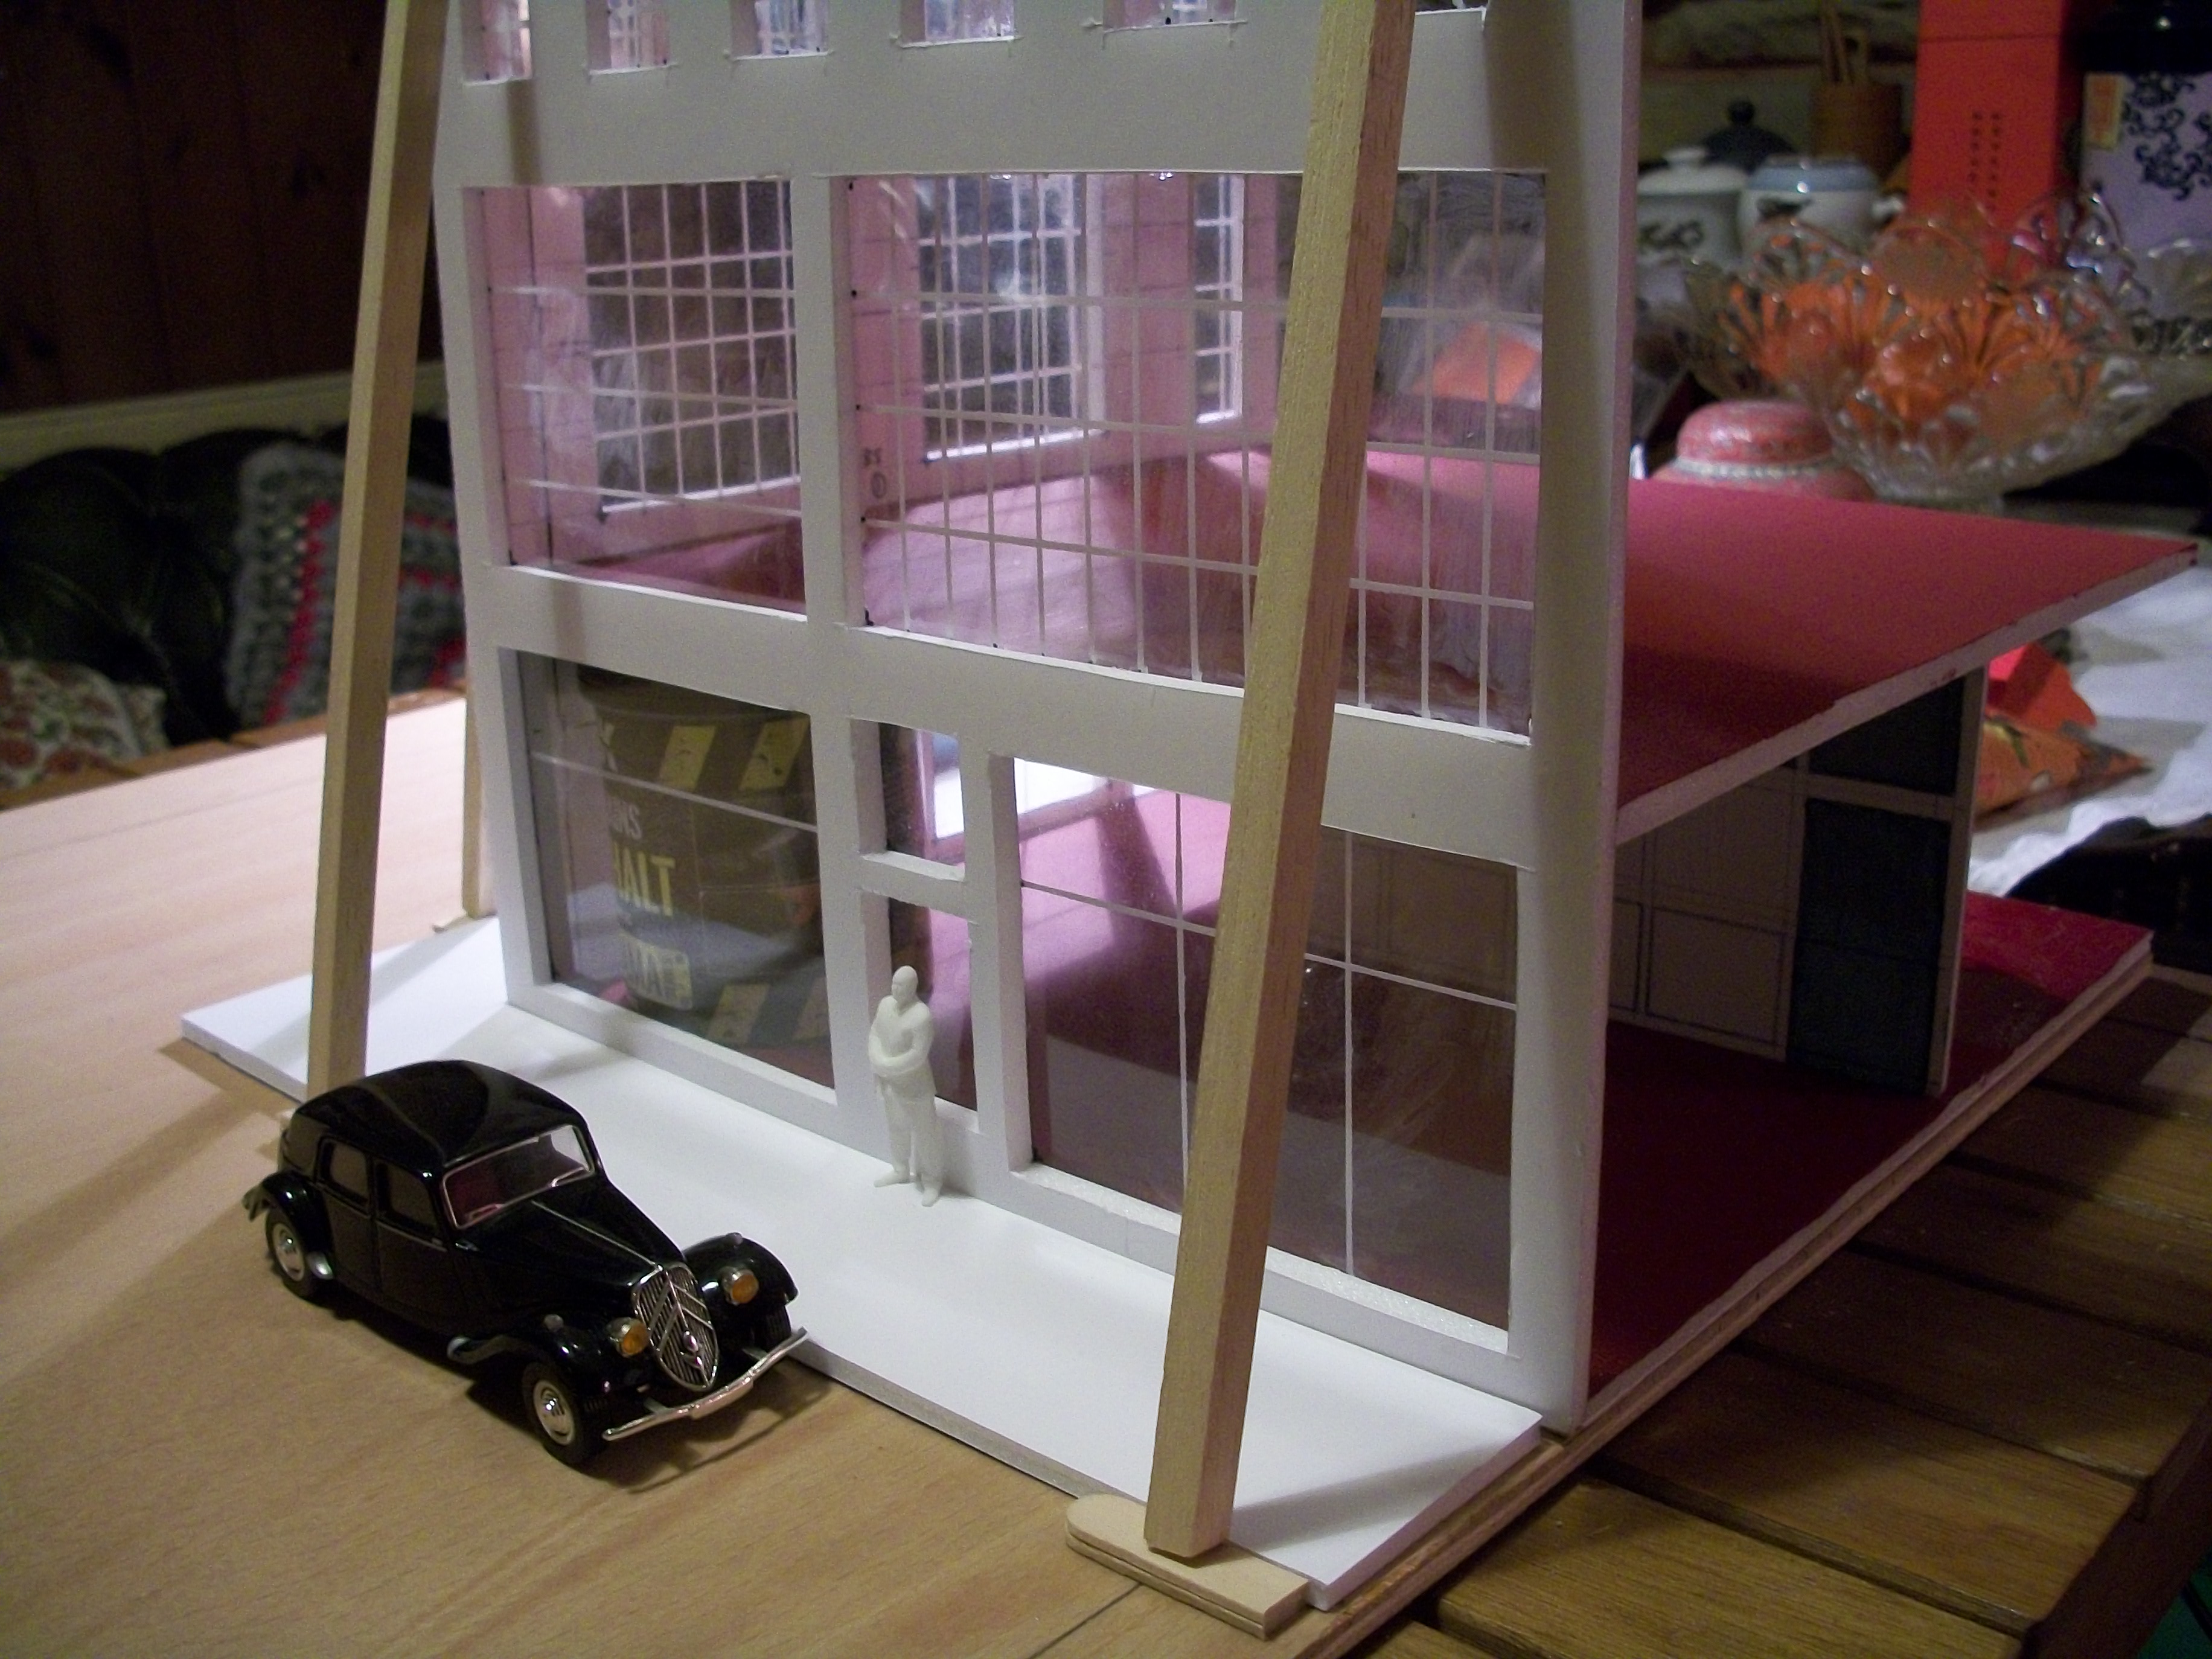
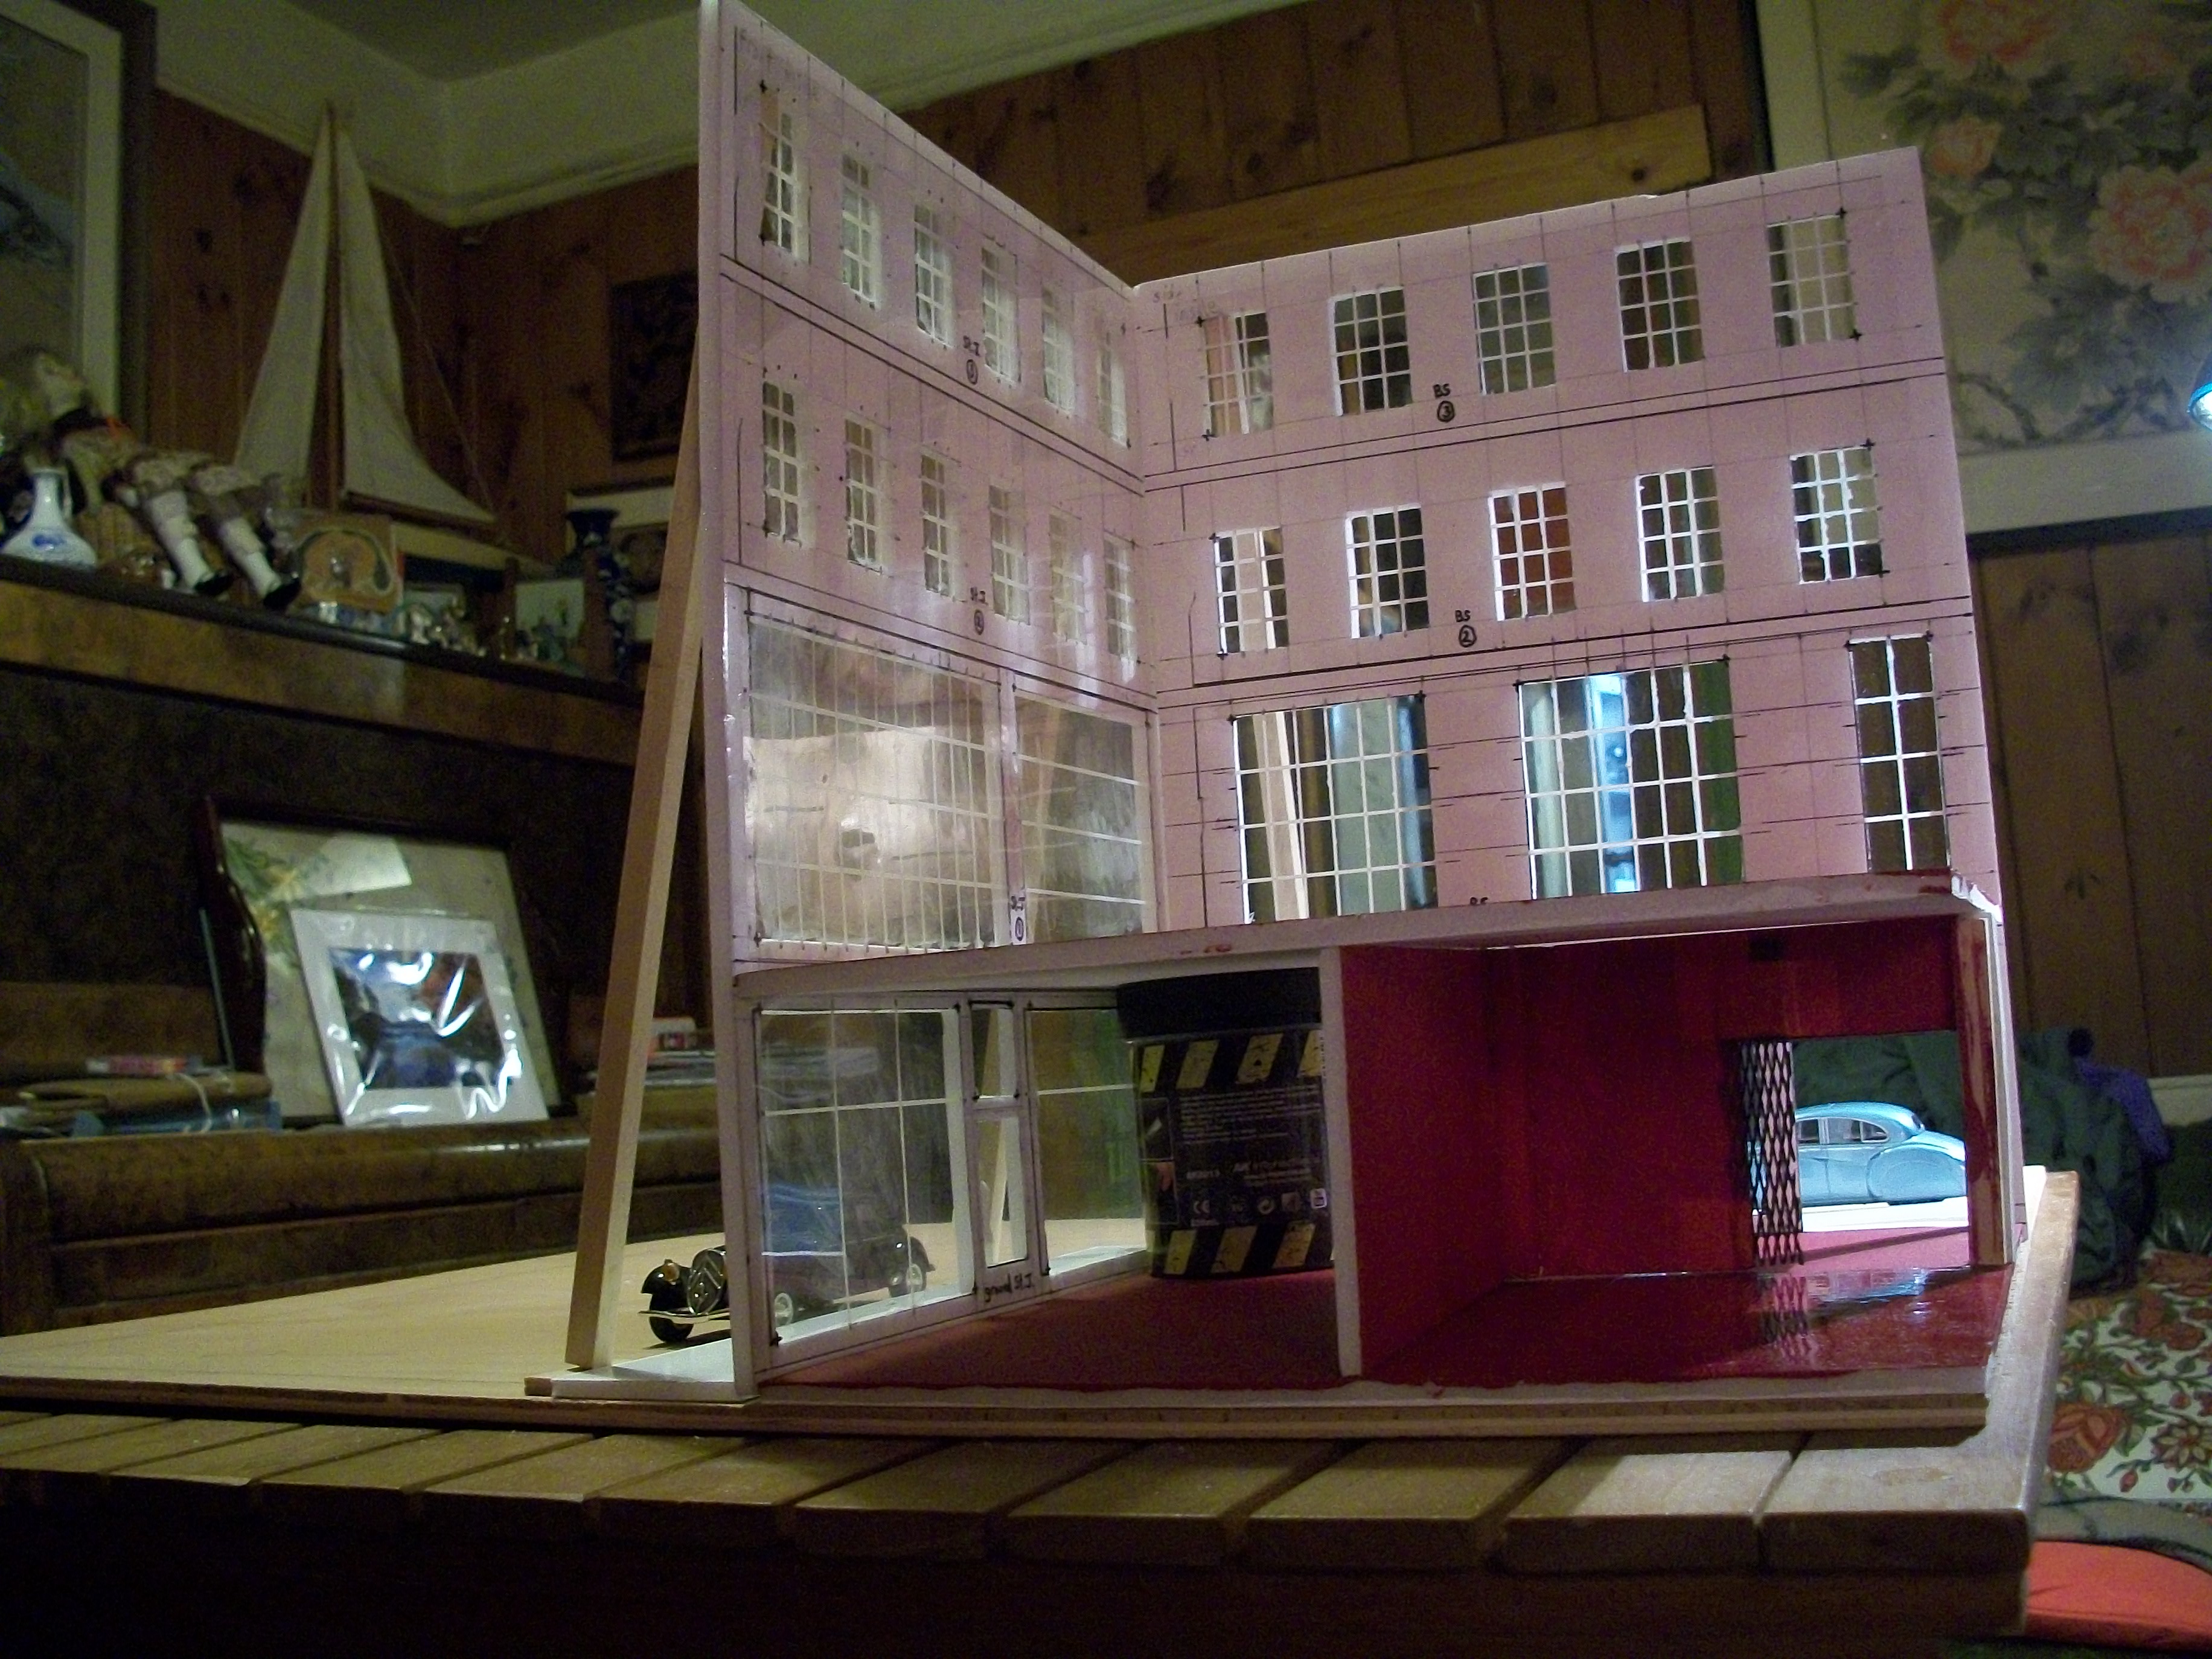
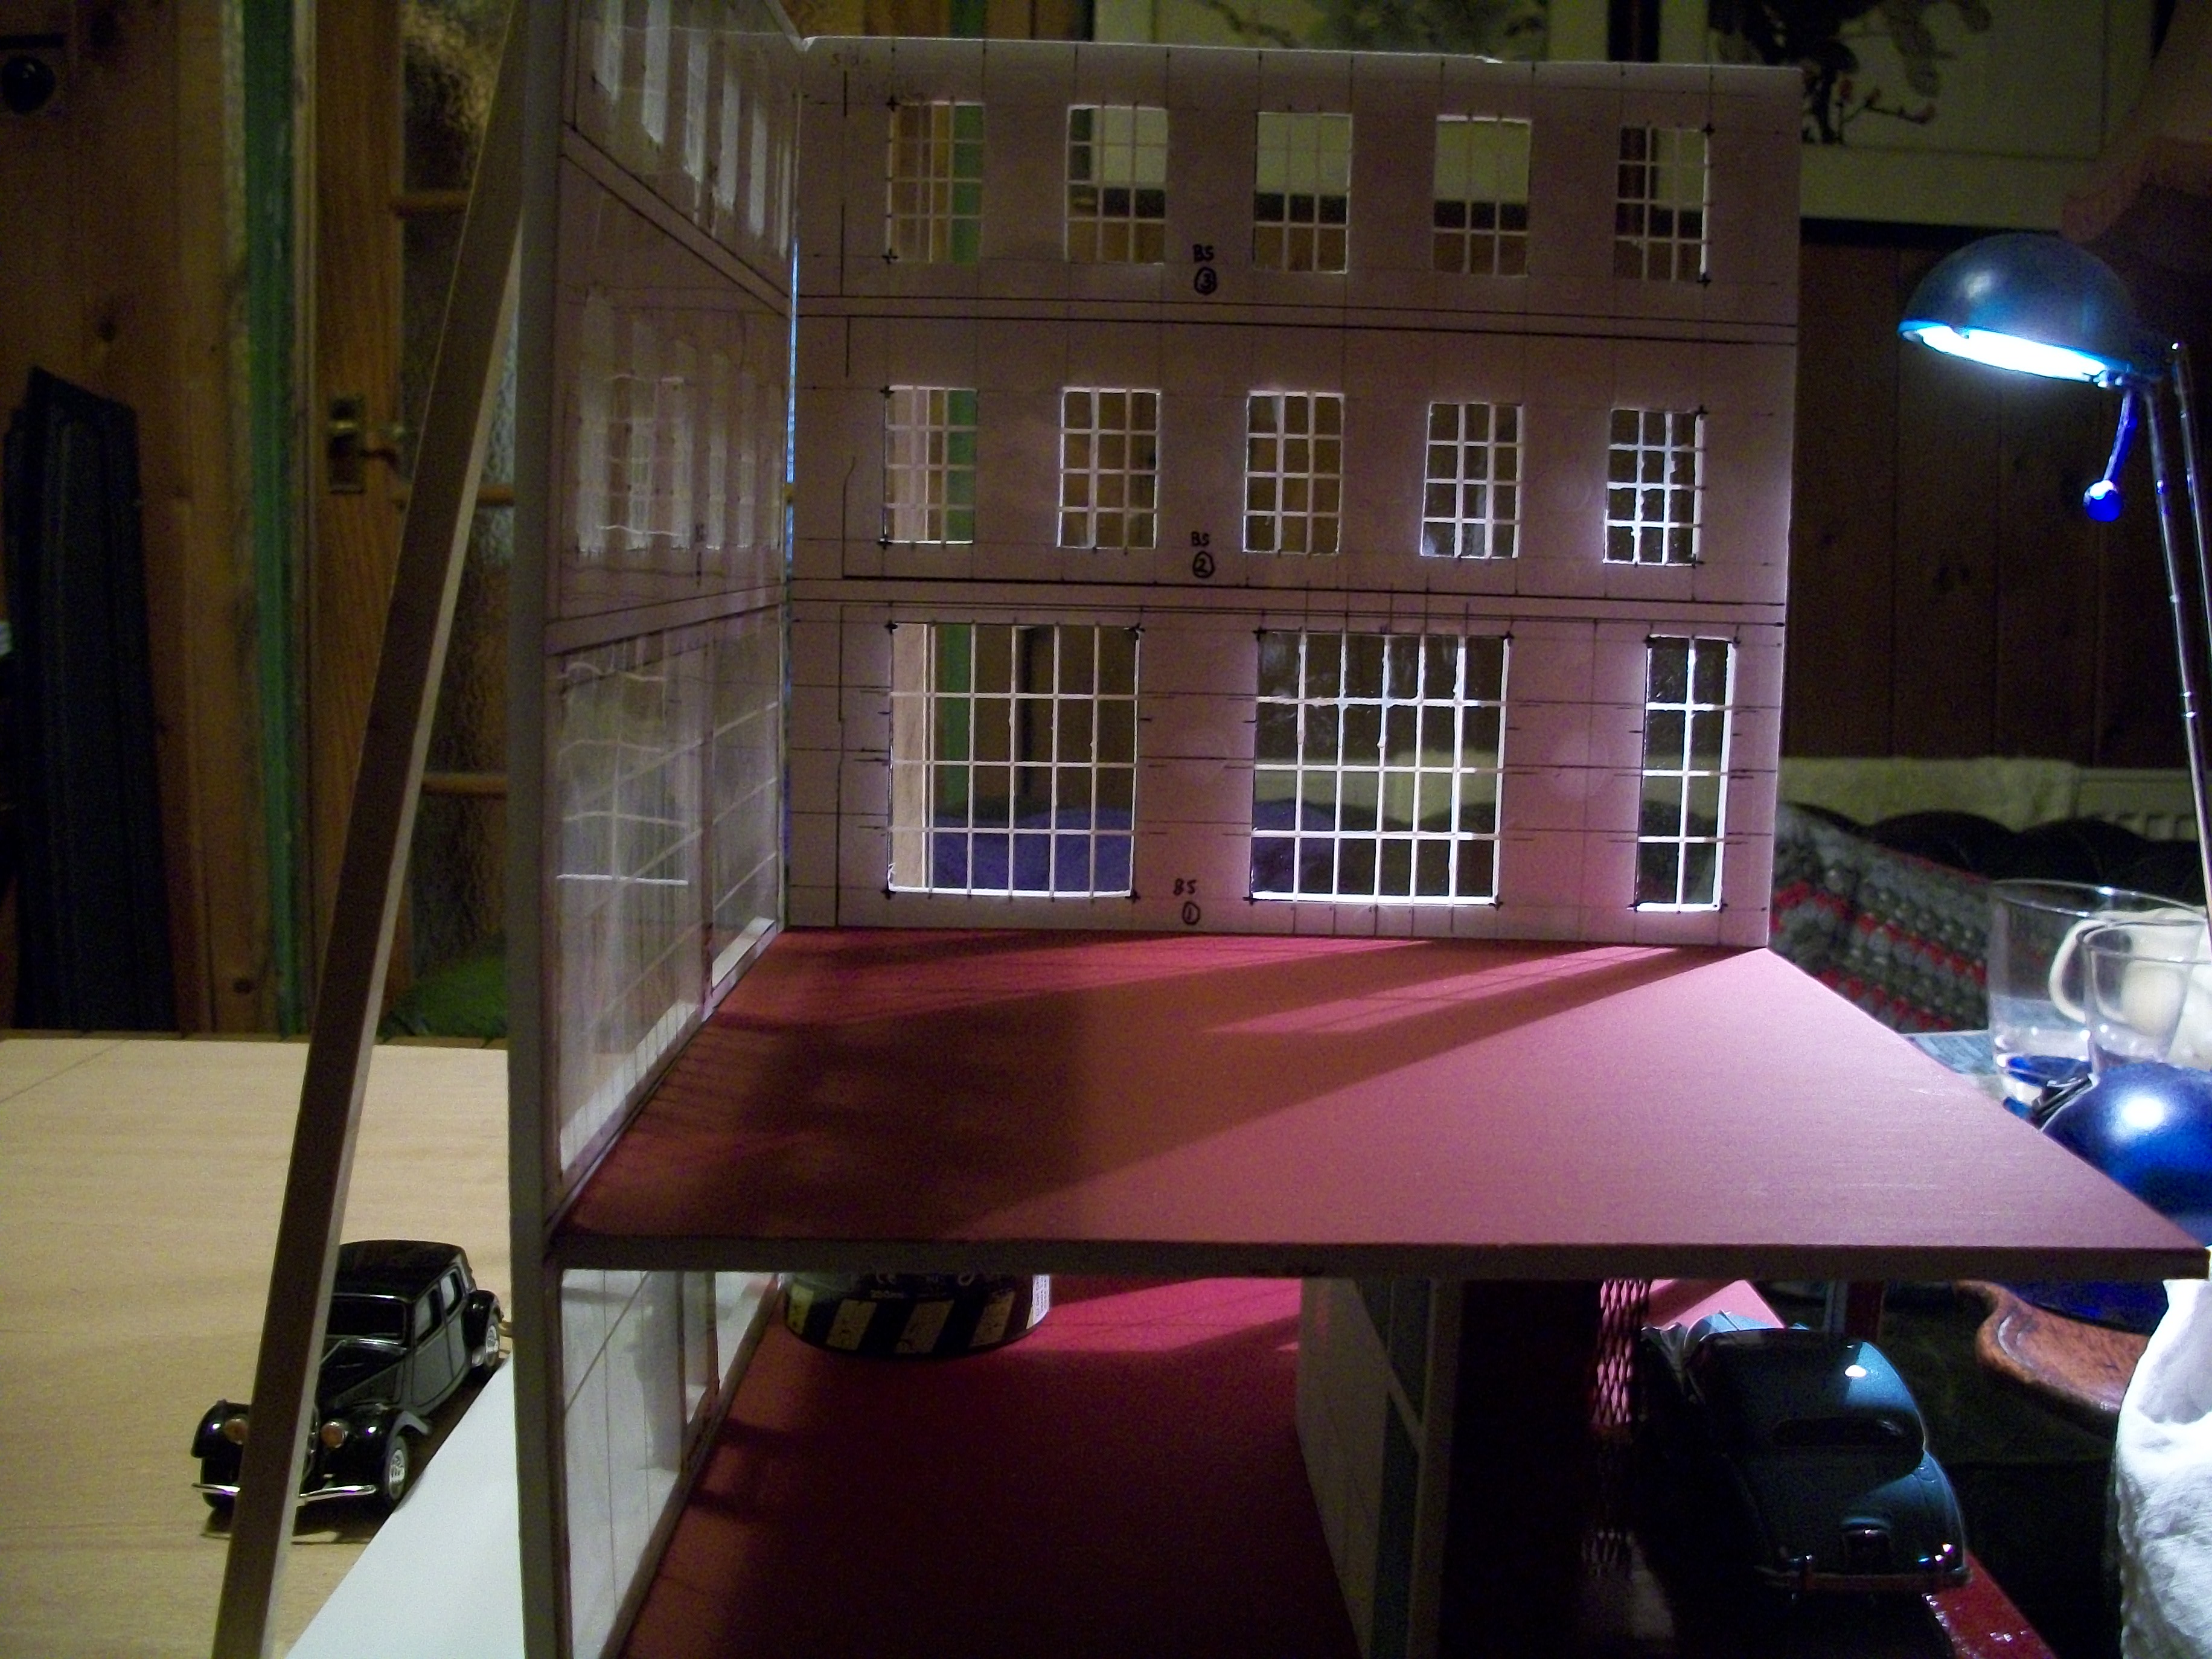
Worked out how I wanted to support the rear opposite corner of the building, using wooden posts and square footings. This building has no rear wall, or a right-hand side wall, and there is no opening wall like on the larger diorama building in 1:24 scale. The 1:43 scale building has only a left-hand side wall and a front wall, which means that I have free access to the showroom floors in order to place scale model cars and figures in that space. When this diorama goes to exhibition venues later, there will be large plain white backing boards in place, so that you cannot see what is behind the building by looking through the windows of the showrooms. Both the front and side walls have been coated with gesso on the inside and the outside walls will also be getting a coat of gesso once the yacht varnish has dried on the black doors. The next stage of the construction is the bay windows for the ground floor and the first floor. Today the office partition wall was hot glued to the ground floor and yacht varnish was applied to both crimson acrylic showroom floors. Figure painting has started well, using Vallejo acrylic paints this time, rather than Humbrol and Revell enamel paints. Some of the sign writing is now in place, including number ' 54 ' on the main entrance door upper window pane. David
-
I think it is a good idea to use white acrylic gesso as a base for other colours that you decide to add later, because the gesso lays down the textured surface. Also, you are mixing ink or acrylics with the gesso to achieve some interesting shades. Your stone work is highly realistic and these walls have a nice feel about them. David
-
Nice build up of textures and materials there, Yordan...... as well as ' Over the Creek ' this is also a topic I am following closely.... ' Oak Barrels Whisky Club ' David
-
Raymond Federowicz...... Thank you for the detailed information regarding foamboard, and although I have heard of Gatorboard it is not something that I have researched yet.... it is time I did read up on it of course. The same goes for shellac really, which I know very little about. One MCM member did point me in the direction of Gesso as it is a well used primer for artist's paintings, so I went out and purchased two 500 ml tubs of gesso. All of your suggestions are welcome Raymond and every piece of information is most useful when dealing with unfamiliar materials and products. This is what makes our hobby so interesting. David
-
Many thanks Pat..... this is all new to me, I mean dealing with foamboard as a scale model building material. The 1:24 scale diorama seemed to come from nowhere, so I just woke up one day and started building something out of nothing, and it all came together somehow quite naturally. I chose balsa wood, plywood and four strong corner posts for the Hooper building and then just went with it. The idea to try foamboard is purely due to me watching a You Tube video of Adam Savage in the United States as he threw together a one day build of his childhood home. He whizzed through the process of slicing and dicing foamboard with his trusty X-acto knife and made the whole thing look very easy. The huge four floor house exploded onto the screen before my eyes, and I knew I had to give it a go myself. For the most part, I do like the material that I am dealing with and the only downside would appear to be the way it warps and goes concave at the slightest hint of paint. Now that I understand how to counteract this warping tendency, some sort of order is restored. By coating BOTH sides of the foamboard with acrylic paint, or even better, by applying Gesso to at least one side the foamboard panel remains flat and level. The Hooper building will have white acrylic Gesso on both the inside walls and the outside of the walls also. I get into the routine of having heavy books placed on top of the panels overnight, which helps keep them flat. David
-
Thanks Yordan.... and I shall continue to follow ' Over the Creek ' David
-
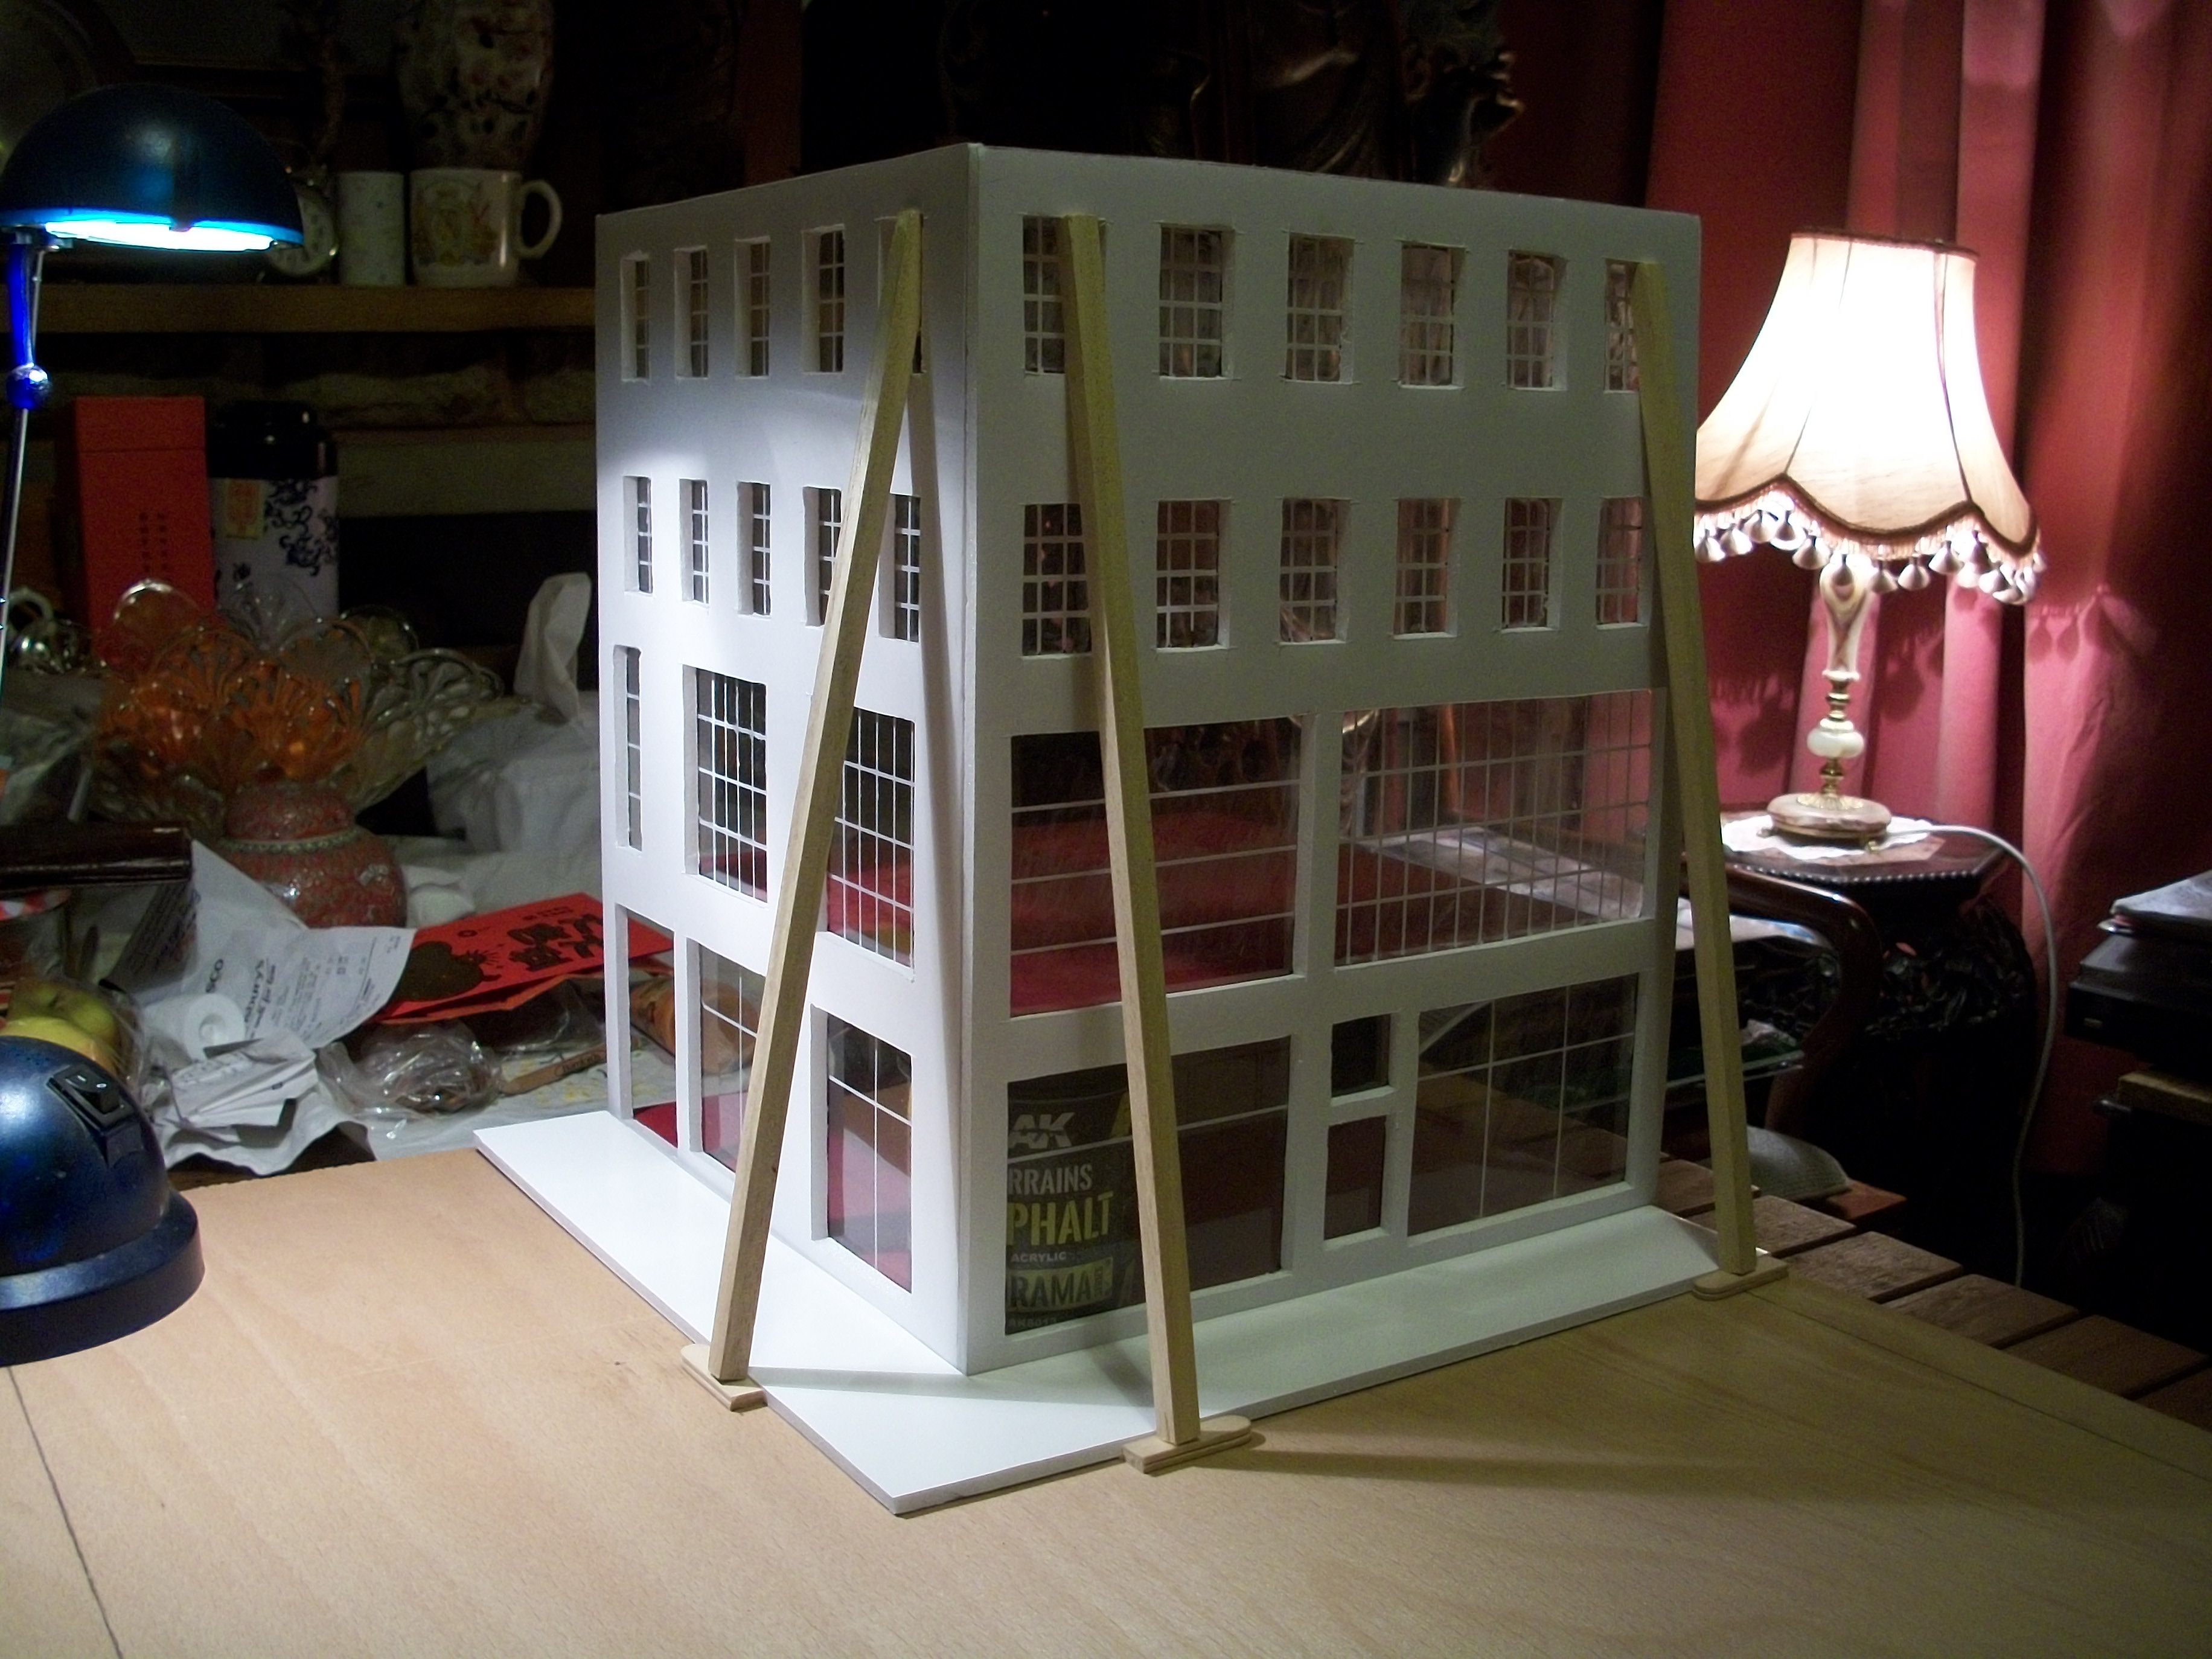
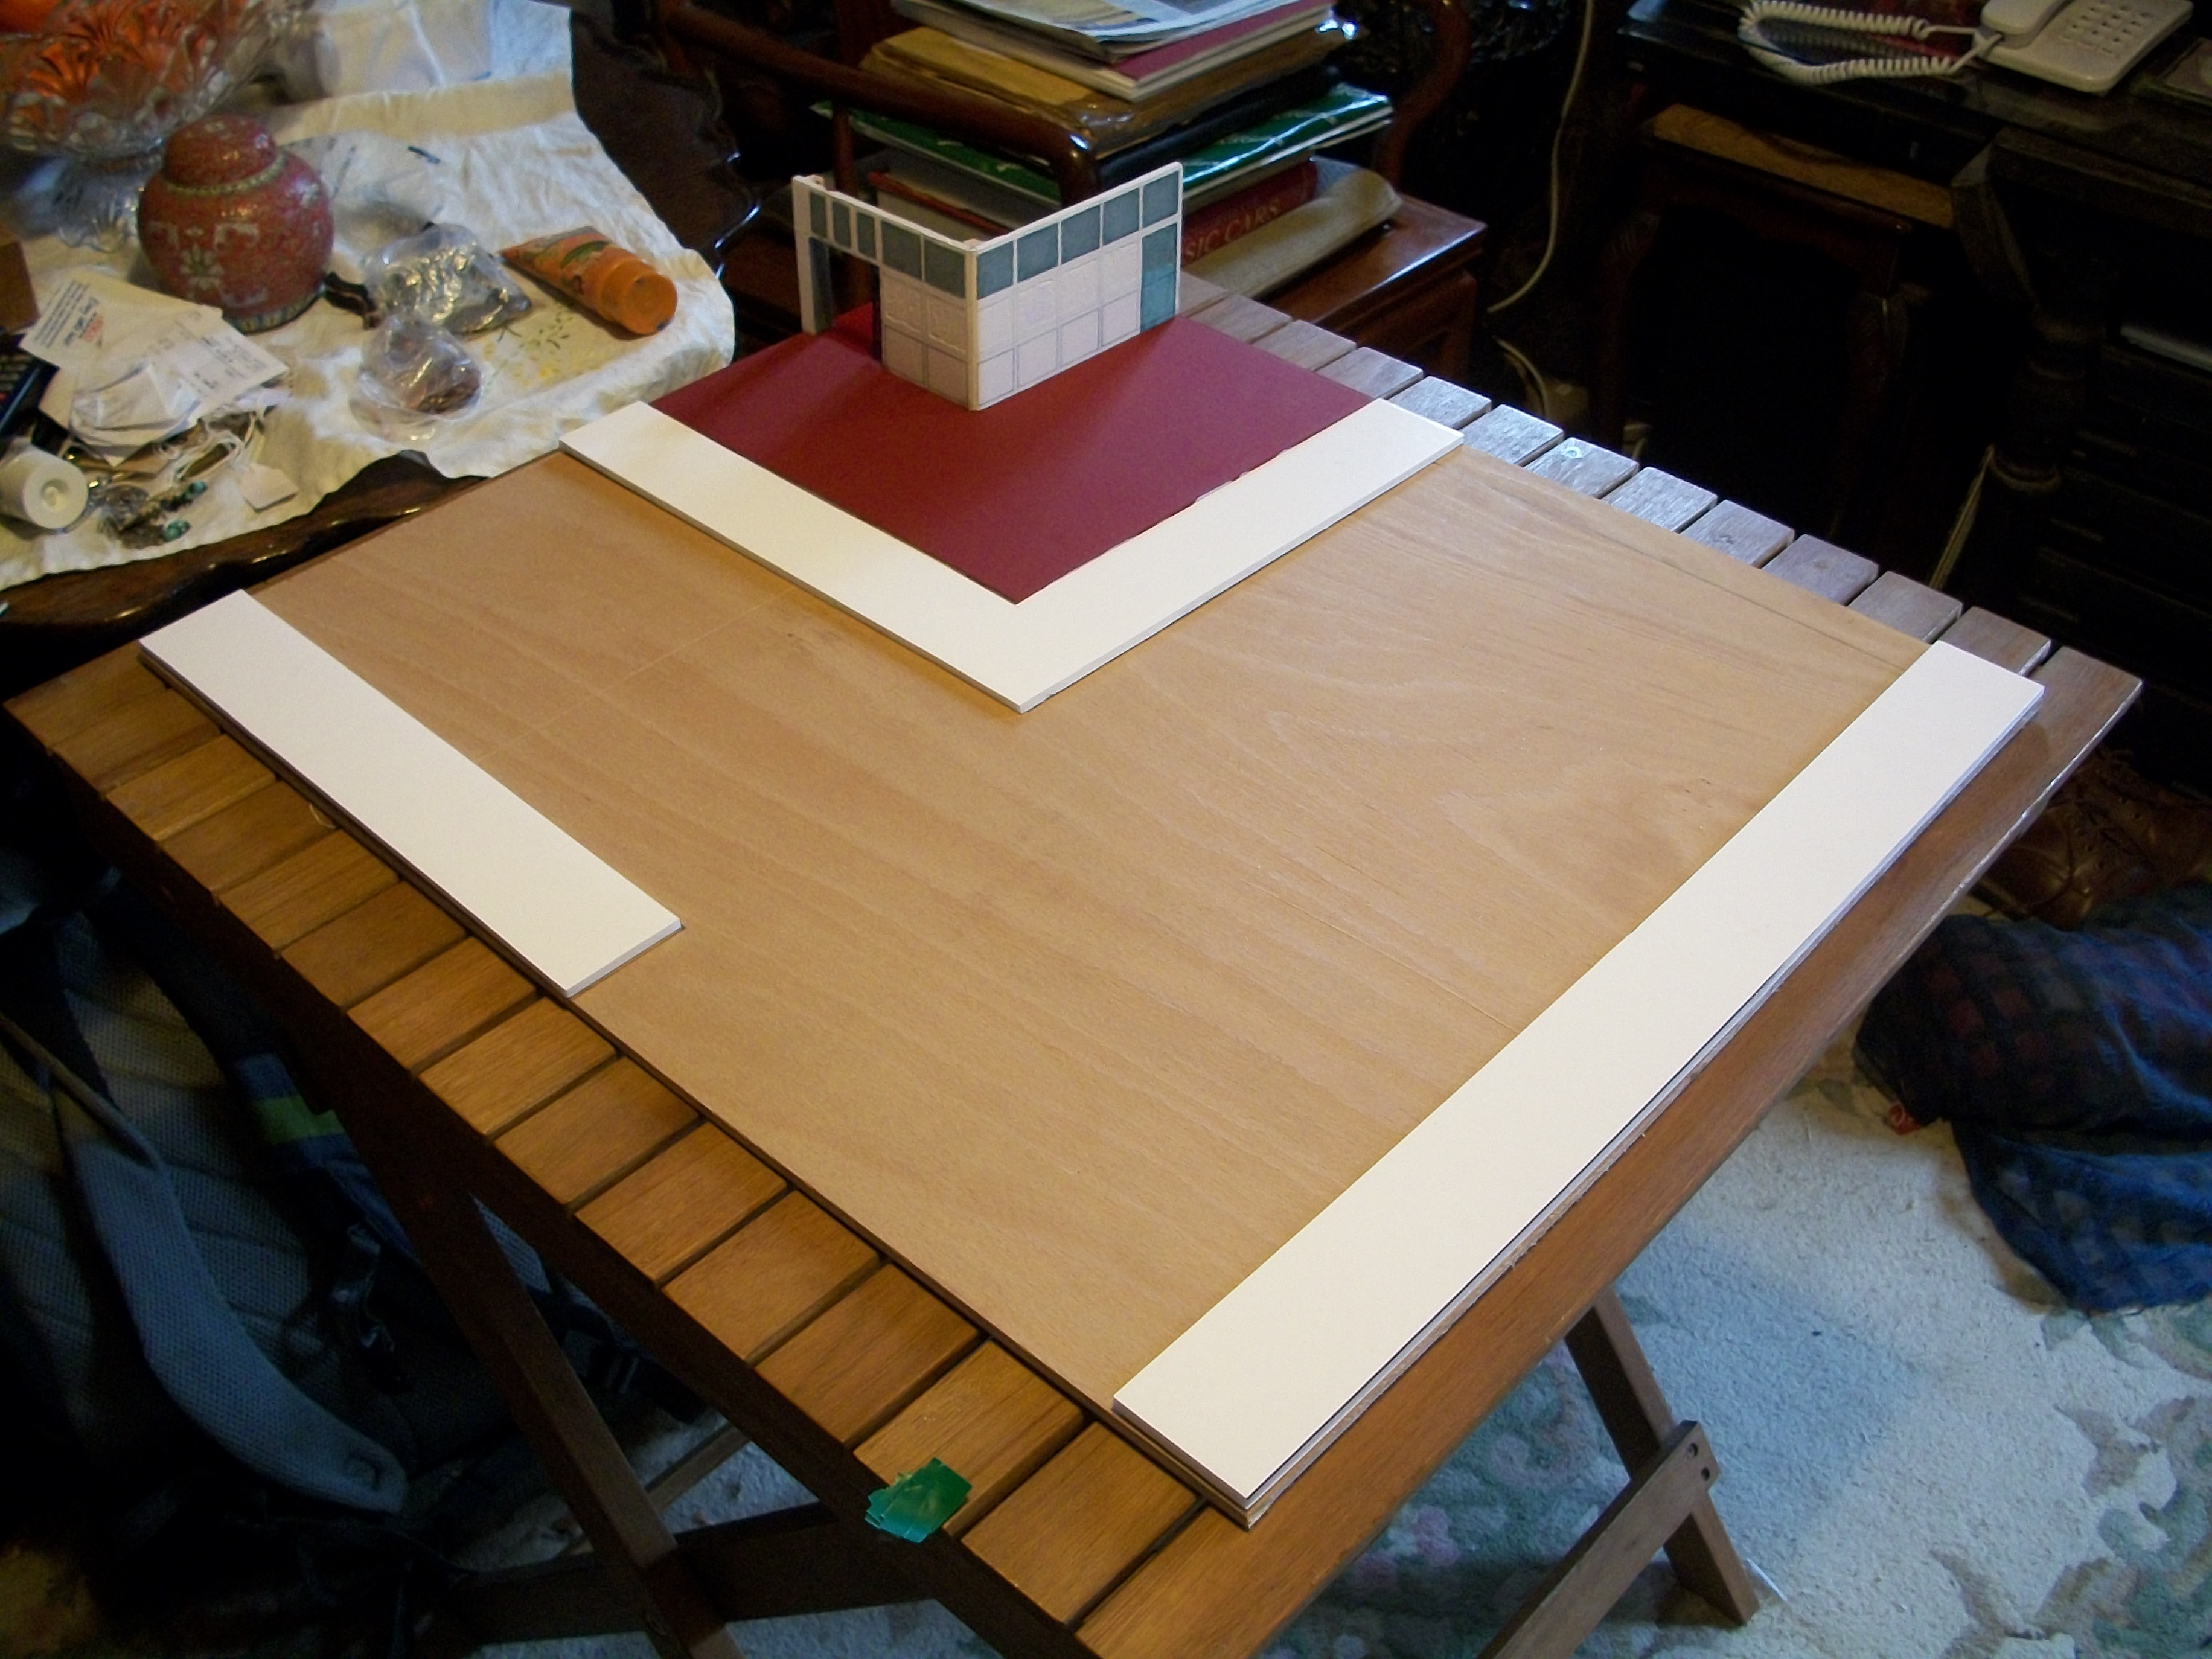
Decided to add six wooden beams to support three of the floors. The ground floor and the roof are supported anyway, so this is to provide some means of support and to add an element of strength to the structure. Began painting the black main front door, also the black vehicle lift door and the opening into the ground floor office. Sign writing and white acrylic Gesso are scheduled to happen over the next couple of days. The following mock-up shows the five floor levels in place but not fixed yet. I think the photo number 4495 does have quite a realistic look to it, considering this is a 1:43 scale diorama model. David
-
Picked up this 1:43 scale Corgi Royal Mail Vehicle Collection Morris Minor Post Van today..... the model is eighteen years old and in mint condition, with original box ( the box is slightly worn ). David
-
Yordan..... you seem to know about all sorts of products and materials, many of which I have never heard of. To my surprise, Mod Podge is actually available here in the UK, and is on the shelves of my local Hobbycraft super store, which is only 10 miles away from where I live! I might have a use for this Mod Podge product and it does sound like it is easy to use from what you say. David
-
Thanks Gary...... There should be some major progress during this coming week if all goes to plan. I am beginning to see this model as a building now, rather than a collection of random parts. David
-
You must be really pleased with those ripples, Yordan..... and I didn't realise that you added the ripples after the resin water had already dried? I assumed that you would have to add the ripple effect while the water resin was still wet. The bird's nest looks just right, as does all of this diorama setting. You are giving me some serious competition here Yordan! David
-
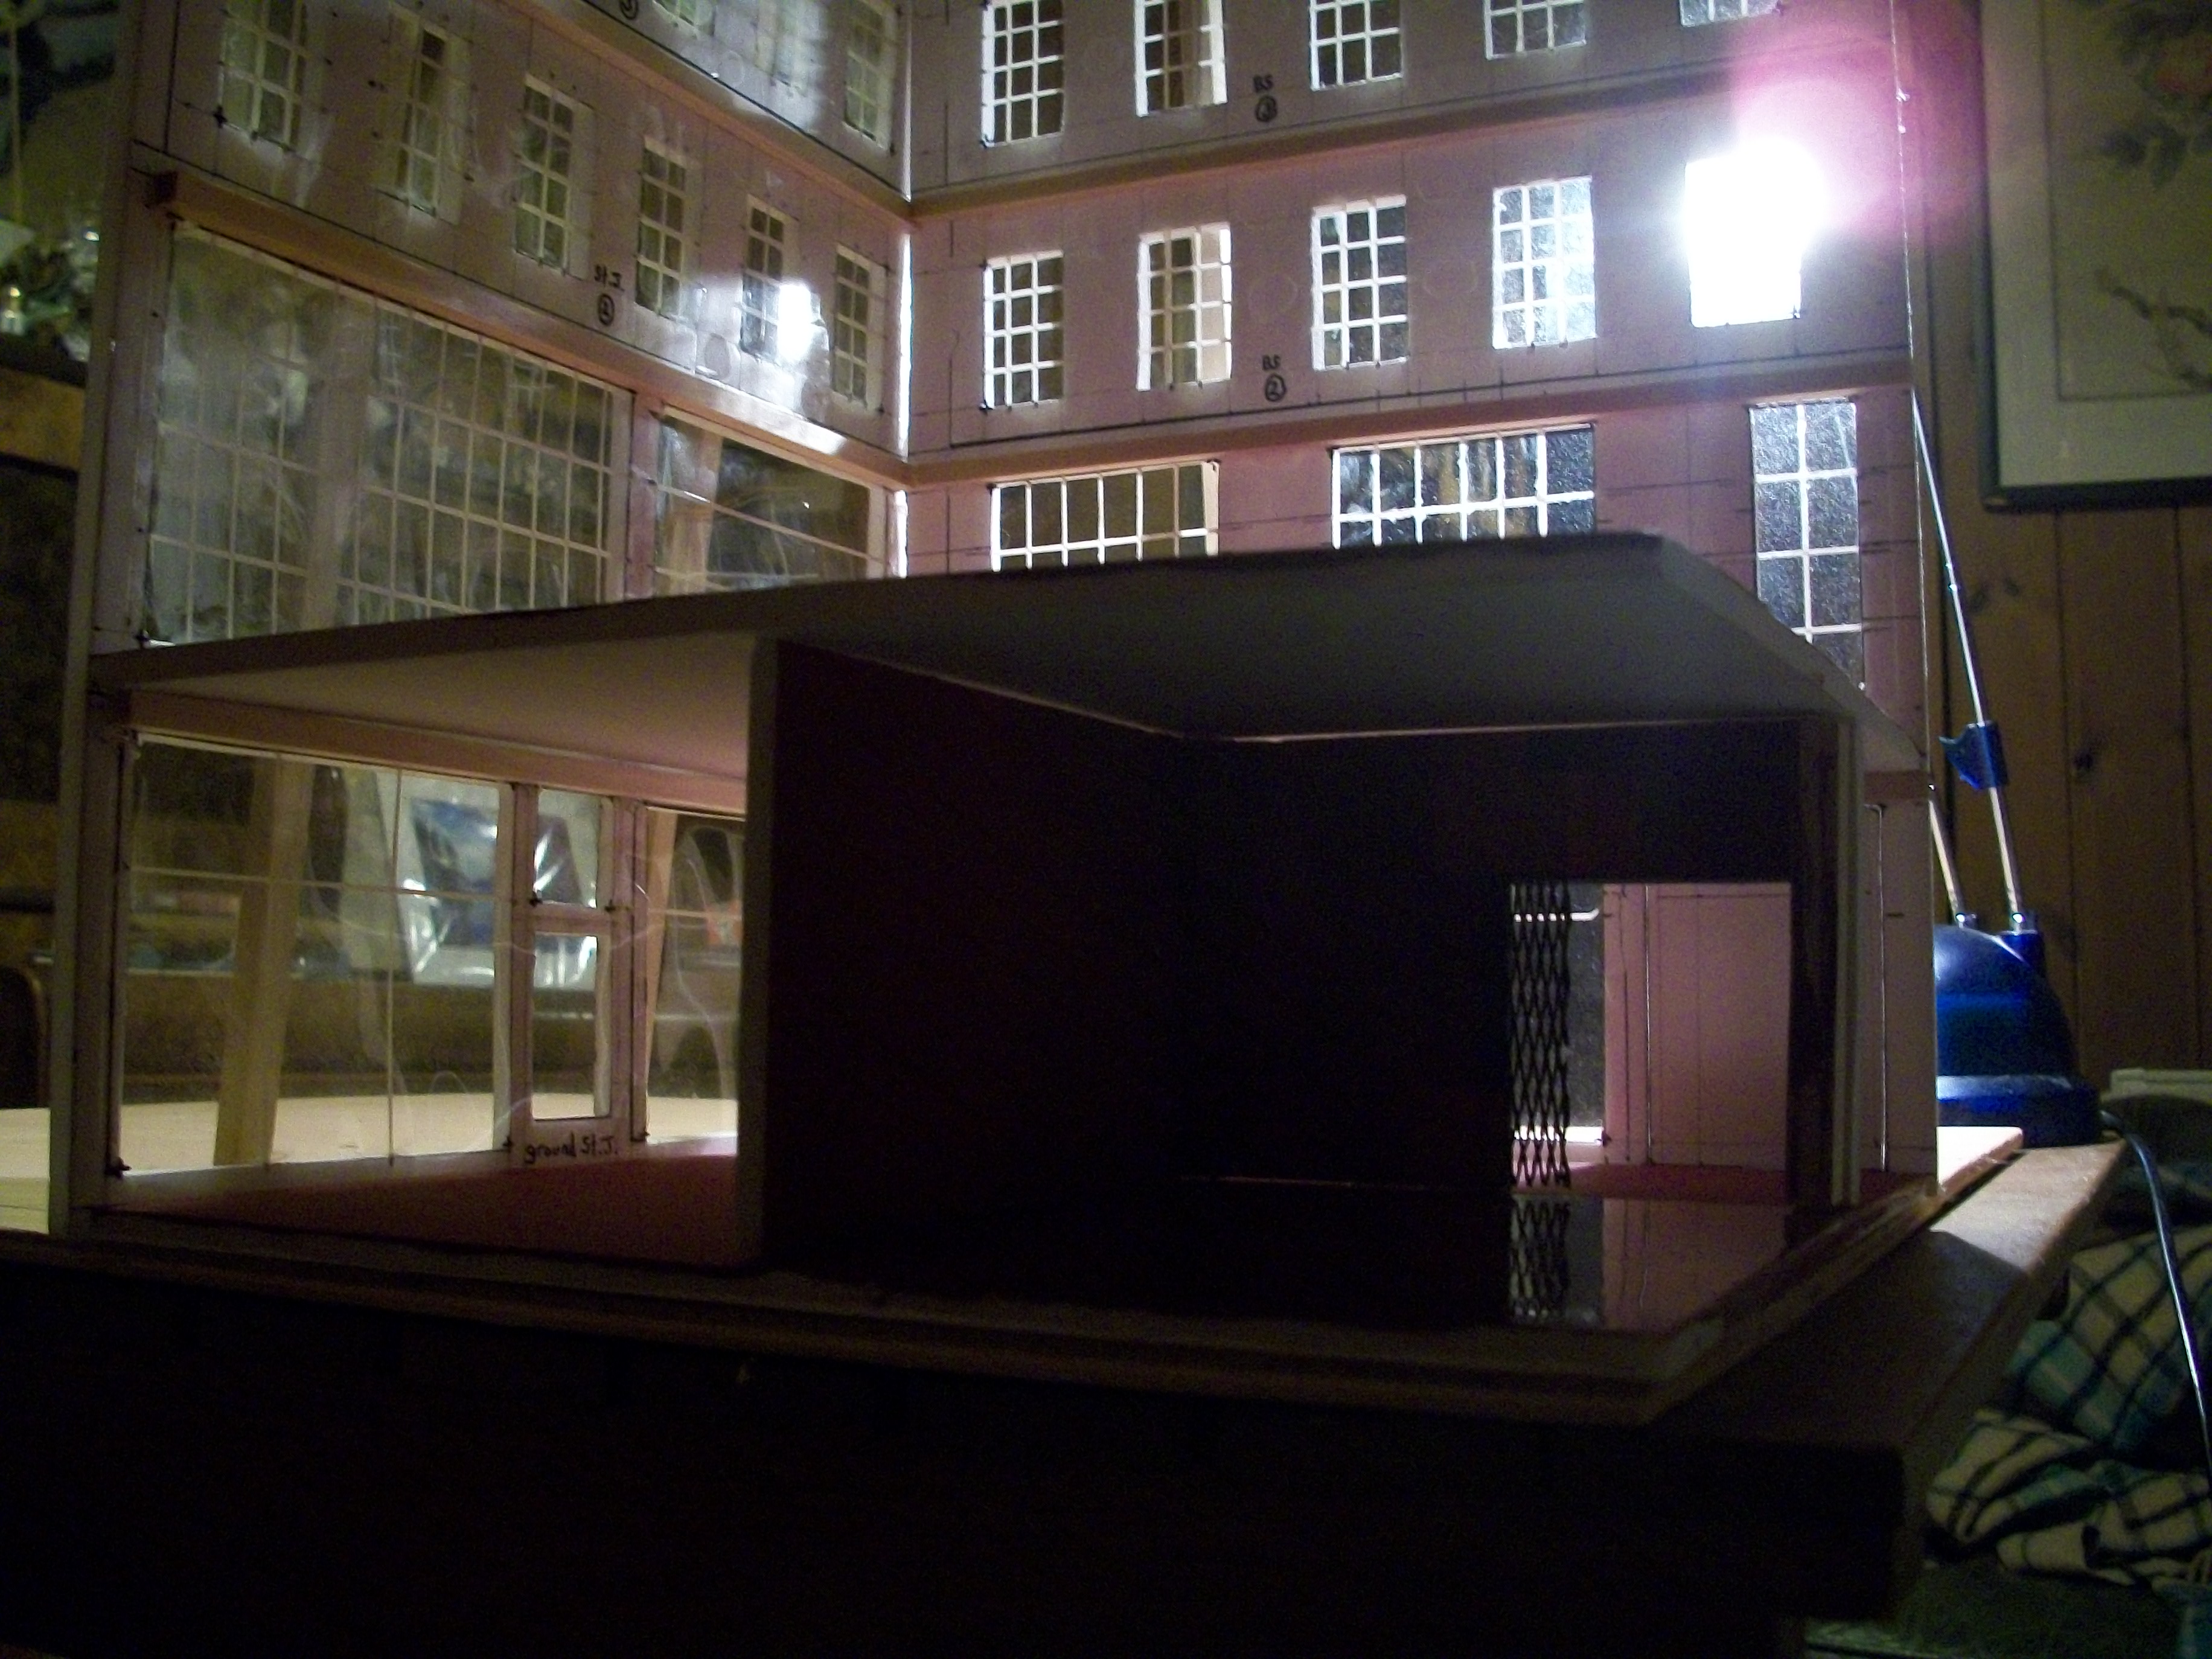
Reached the mock-up stage today, where I could visualise the scale model building with the two main walls standing in place, the ground floor base with the partition wall and the first floor, along with the roof placed on top of the structure. The lighting effect is quite interesting by accident, showing the reflected crimson light on the white walls inside the building from behind. The vehicle lift entrance seems to work, but I'm not sure if I should have the vehicle lift coming up out of the first floor, as I don't have any reference photographs to work from. David
-
Brave move with adding the water Yordan...... and I do remember how I was feeling as I sprayed real water onto months of careful detailing work with my diorama streets. Having taken the plunge ( excuse the pun ) you now have a marvellous effect that really works. First time experiments on the actual diorama are right up there on the bravery scale for sure! David
-
Very well put together concept idea Kurt, and it's good to see a well intended constructive comment from a professional movie camera guy. Now you could add figures if you wanted to, based on the information supplied by ' mitchy '...... not sure if you plan to add figures to this build? David
-
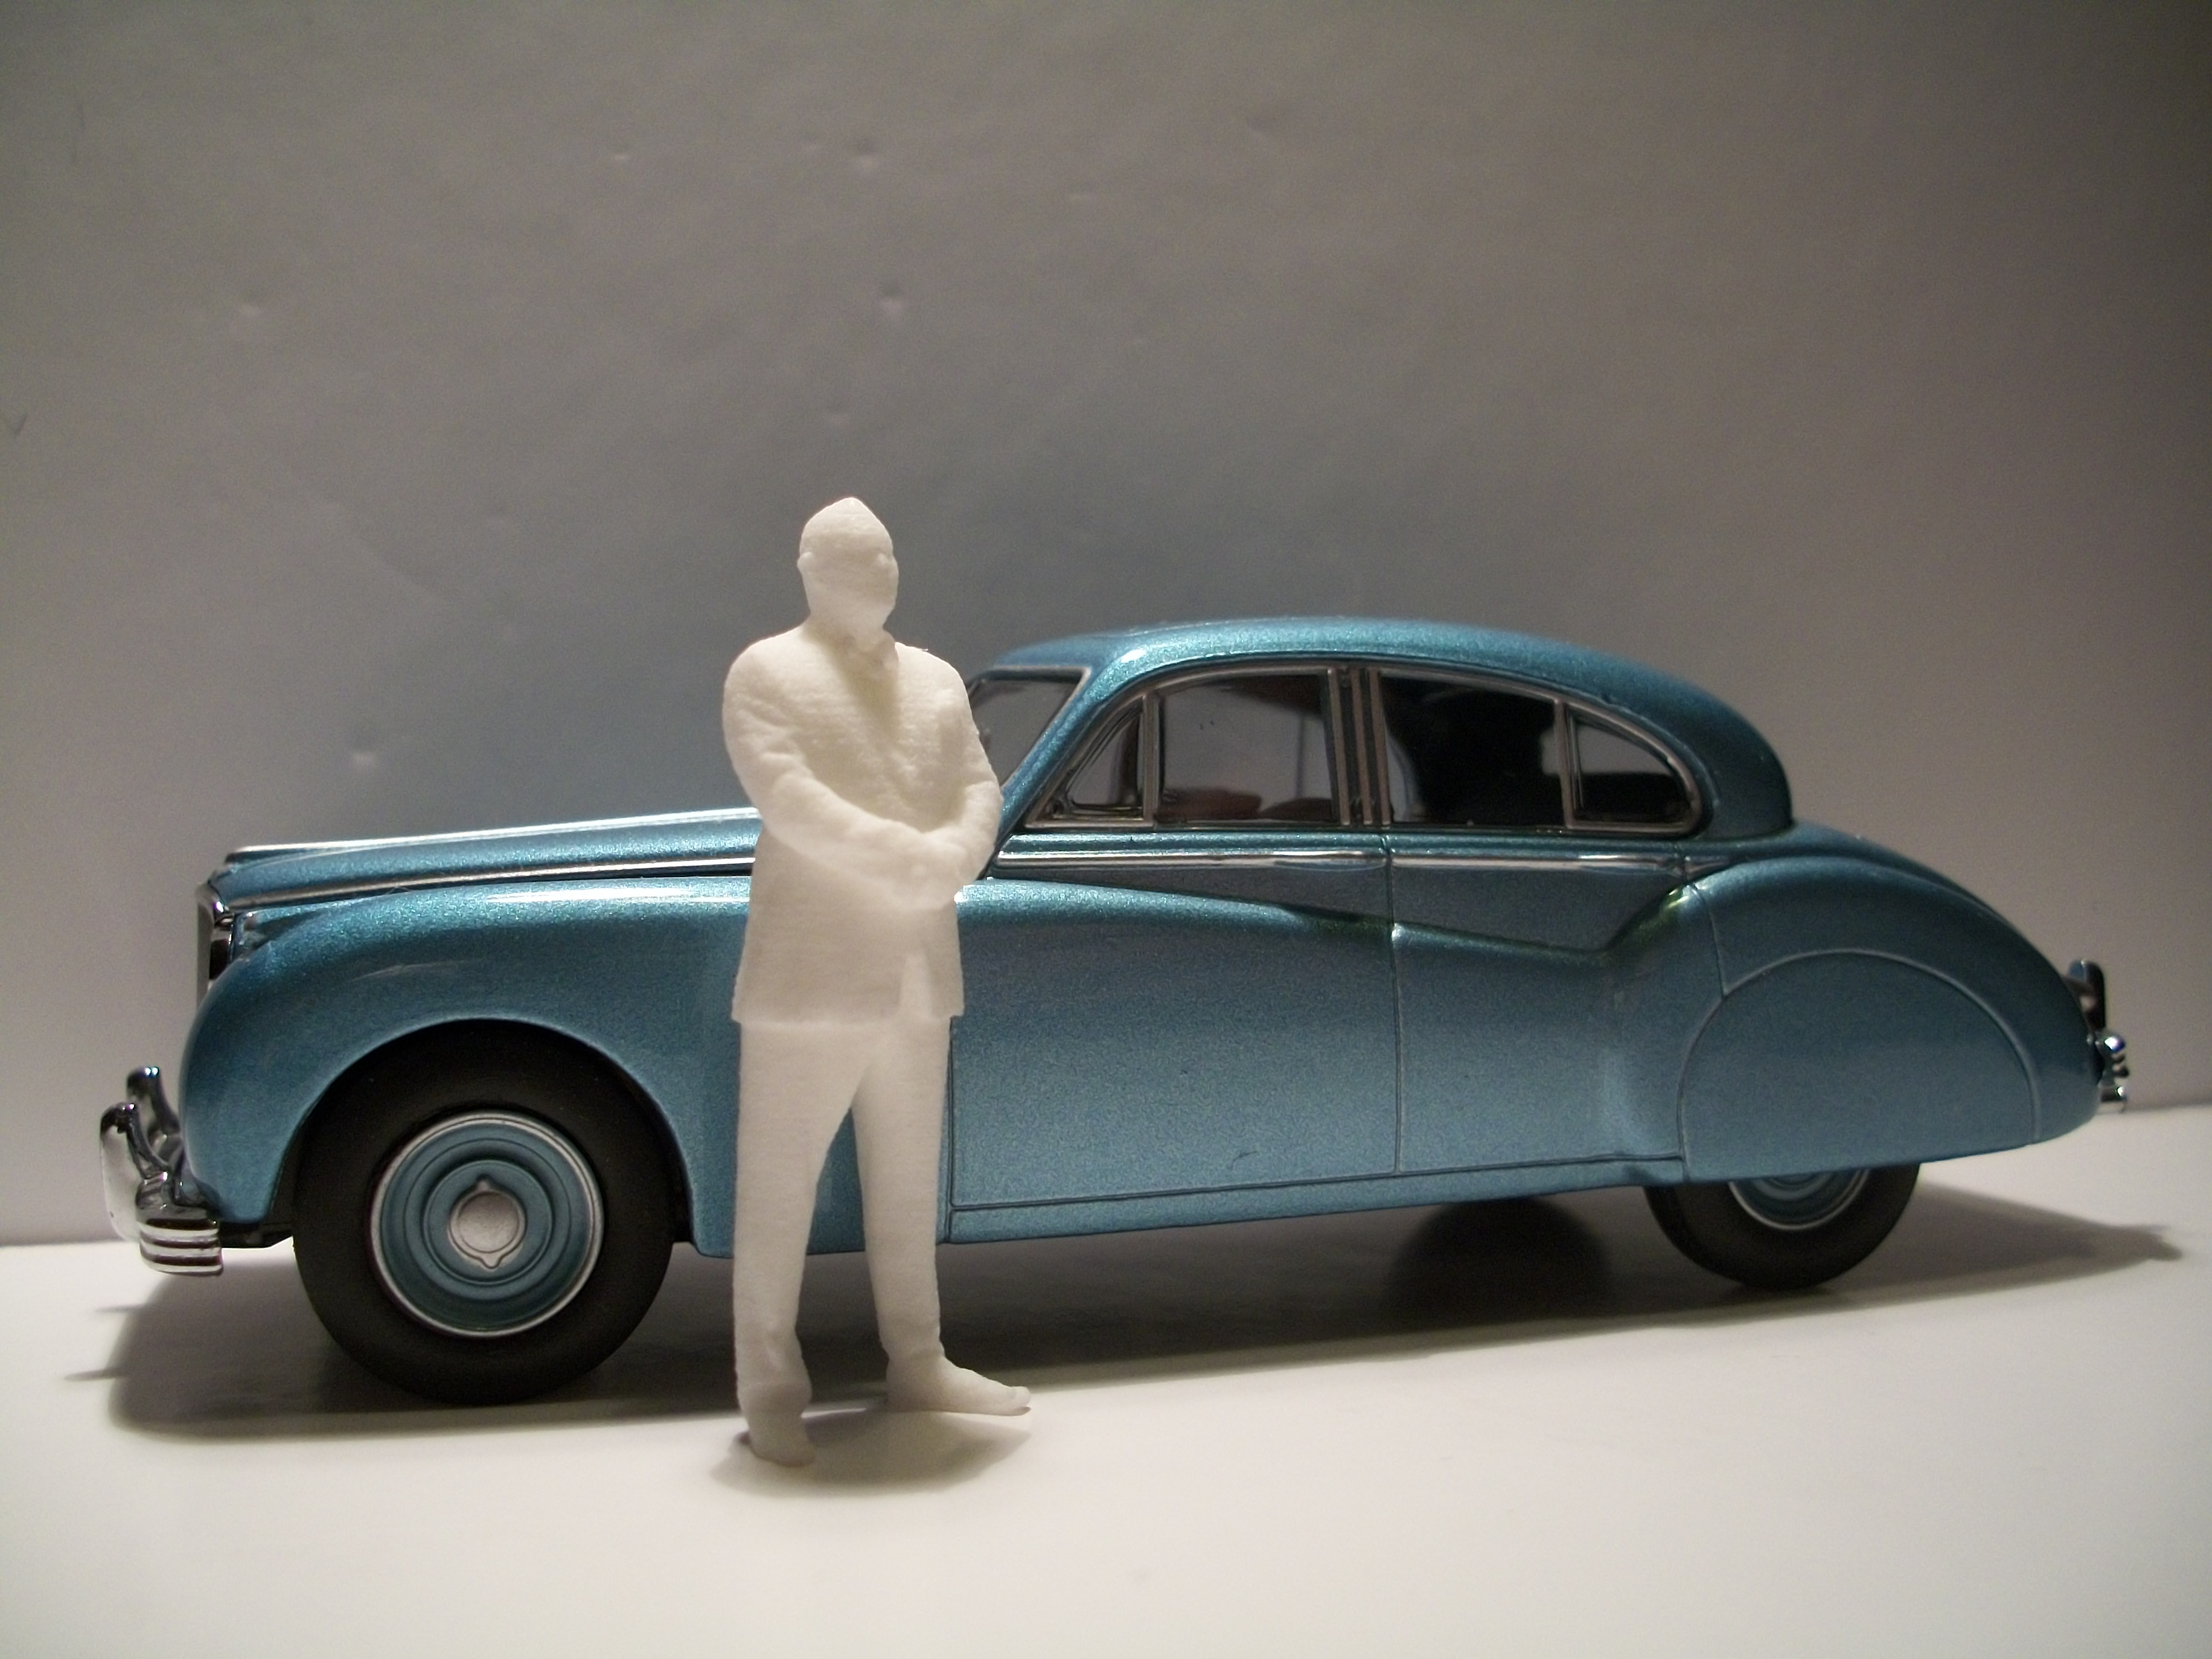
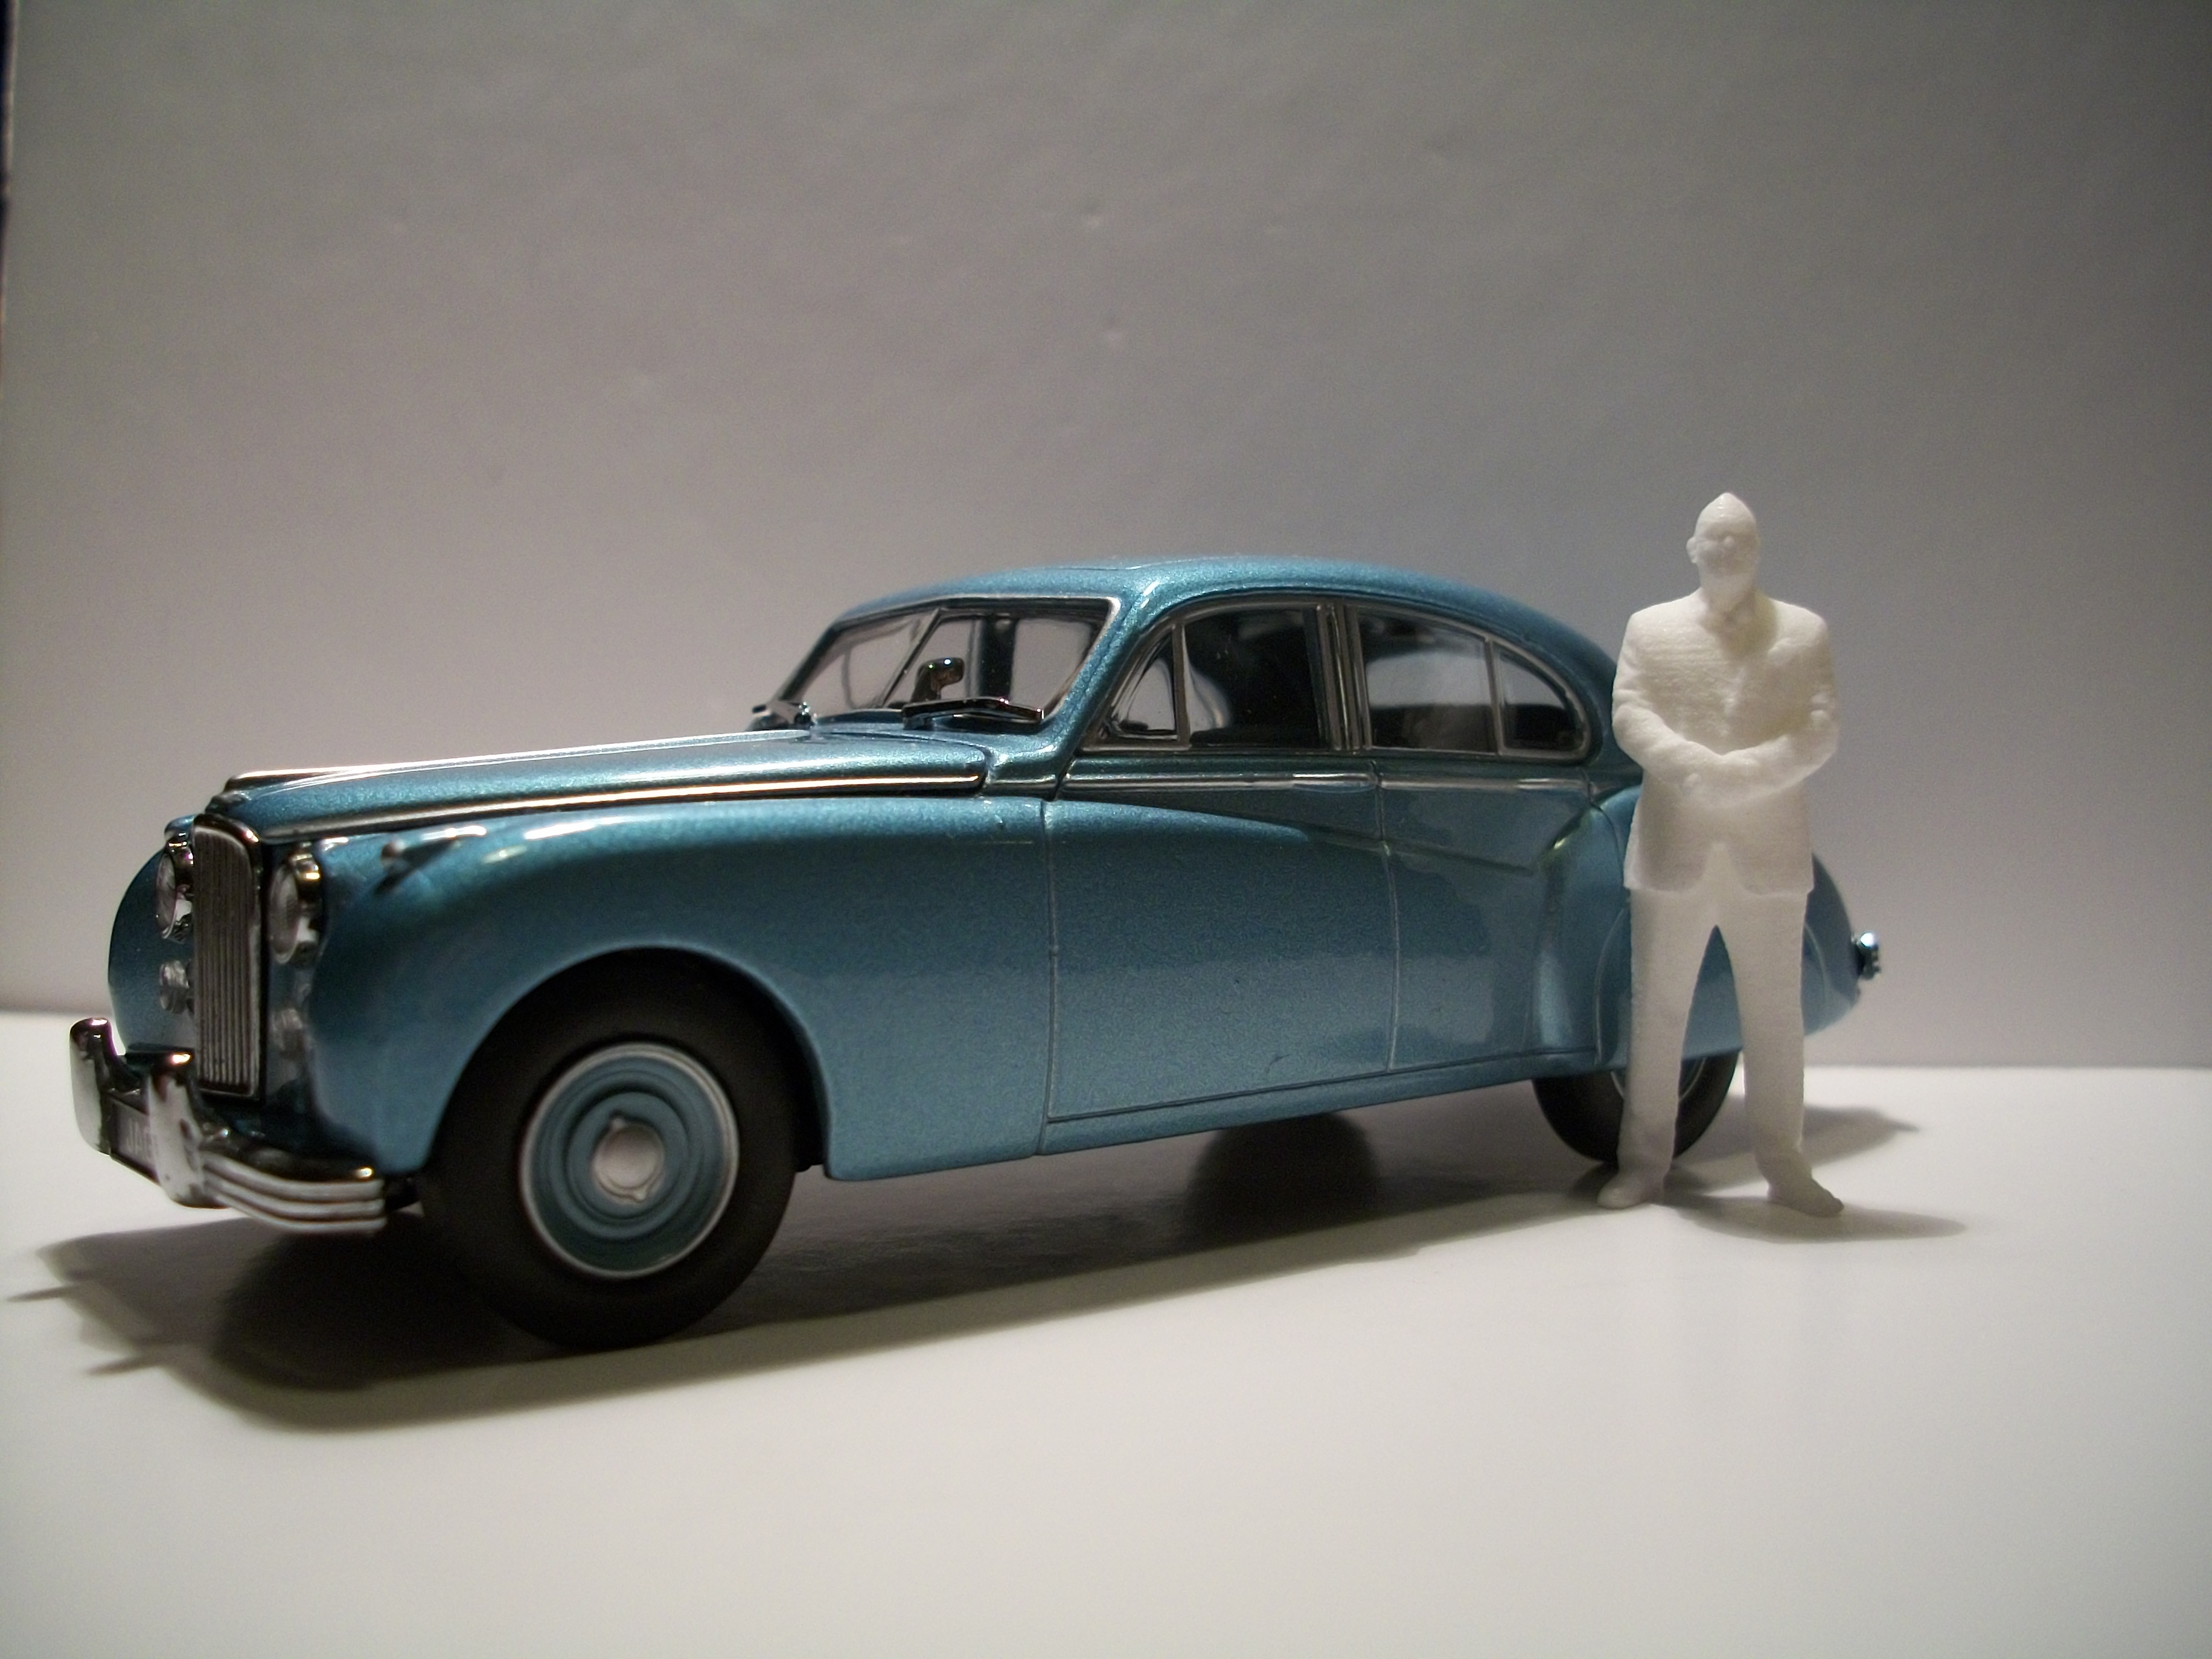
Thanks Yordan, Gary and Pat..... no I don't have a background in engineering or architecture, but when I was a young boy I dreamed of becoming an architect or possibly a car designer one day...... neither of which happened. I thought I needed a Jaguar MK IX or maybe a MK VIII, but decided I wanted the MK VII as it has spats on the rear wheel arches, in the very same style as the Jaguar MK I. Completed the white lining work on all of the window apertures for the two main walls of the building, so now it's all about mounting the acetate transparencies in place, over the window apertures and then applying white acrylic Gesso to the interior of the walls. Sign-writing boards of lettering need to be made up, before the Gesso can be applied to the exterior of the walls. Not too far away from hot glue fixing the partition wall onto the ground floor base. David
-
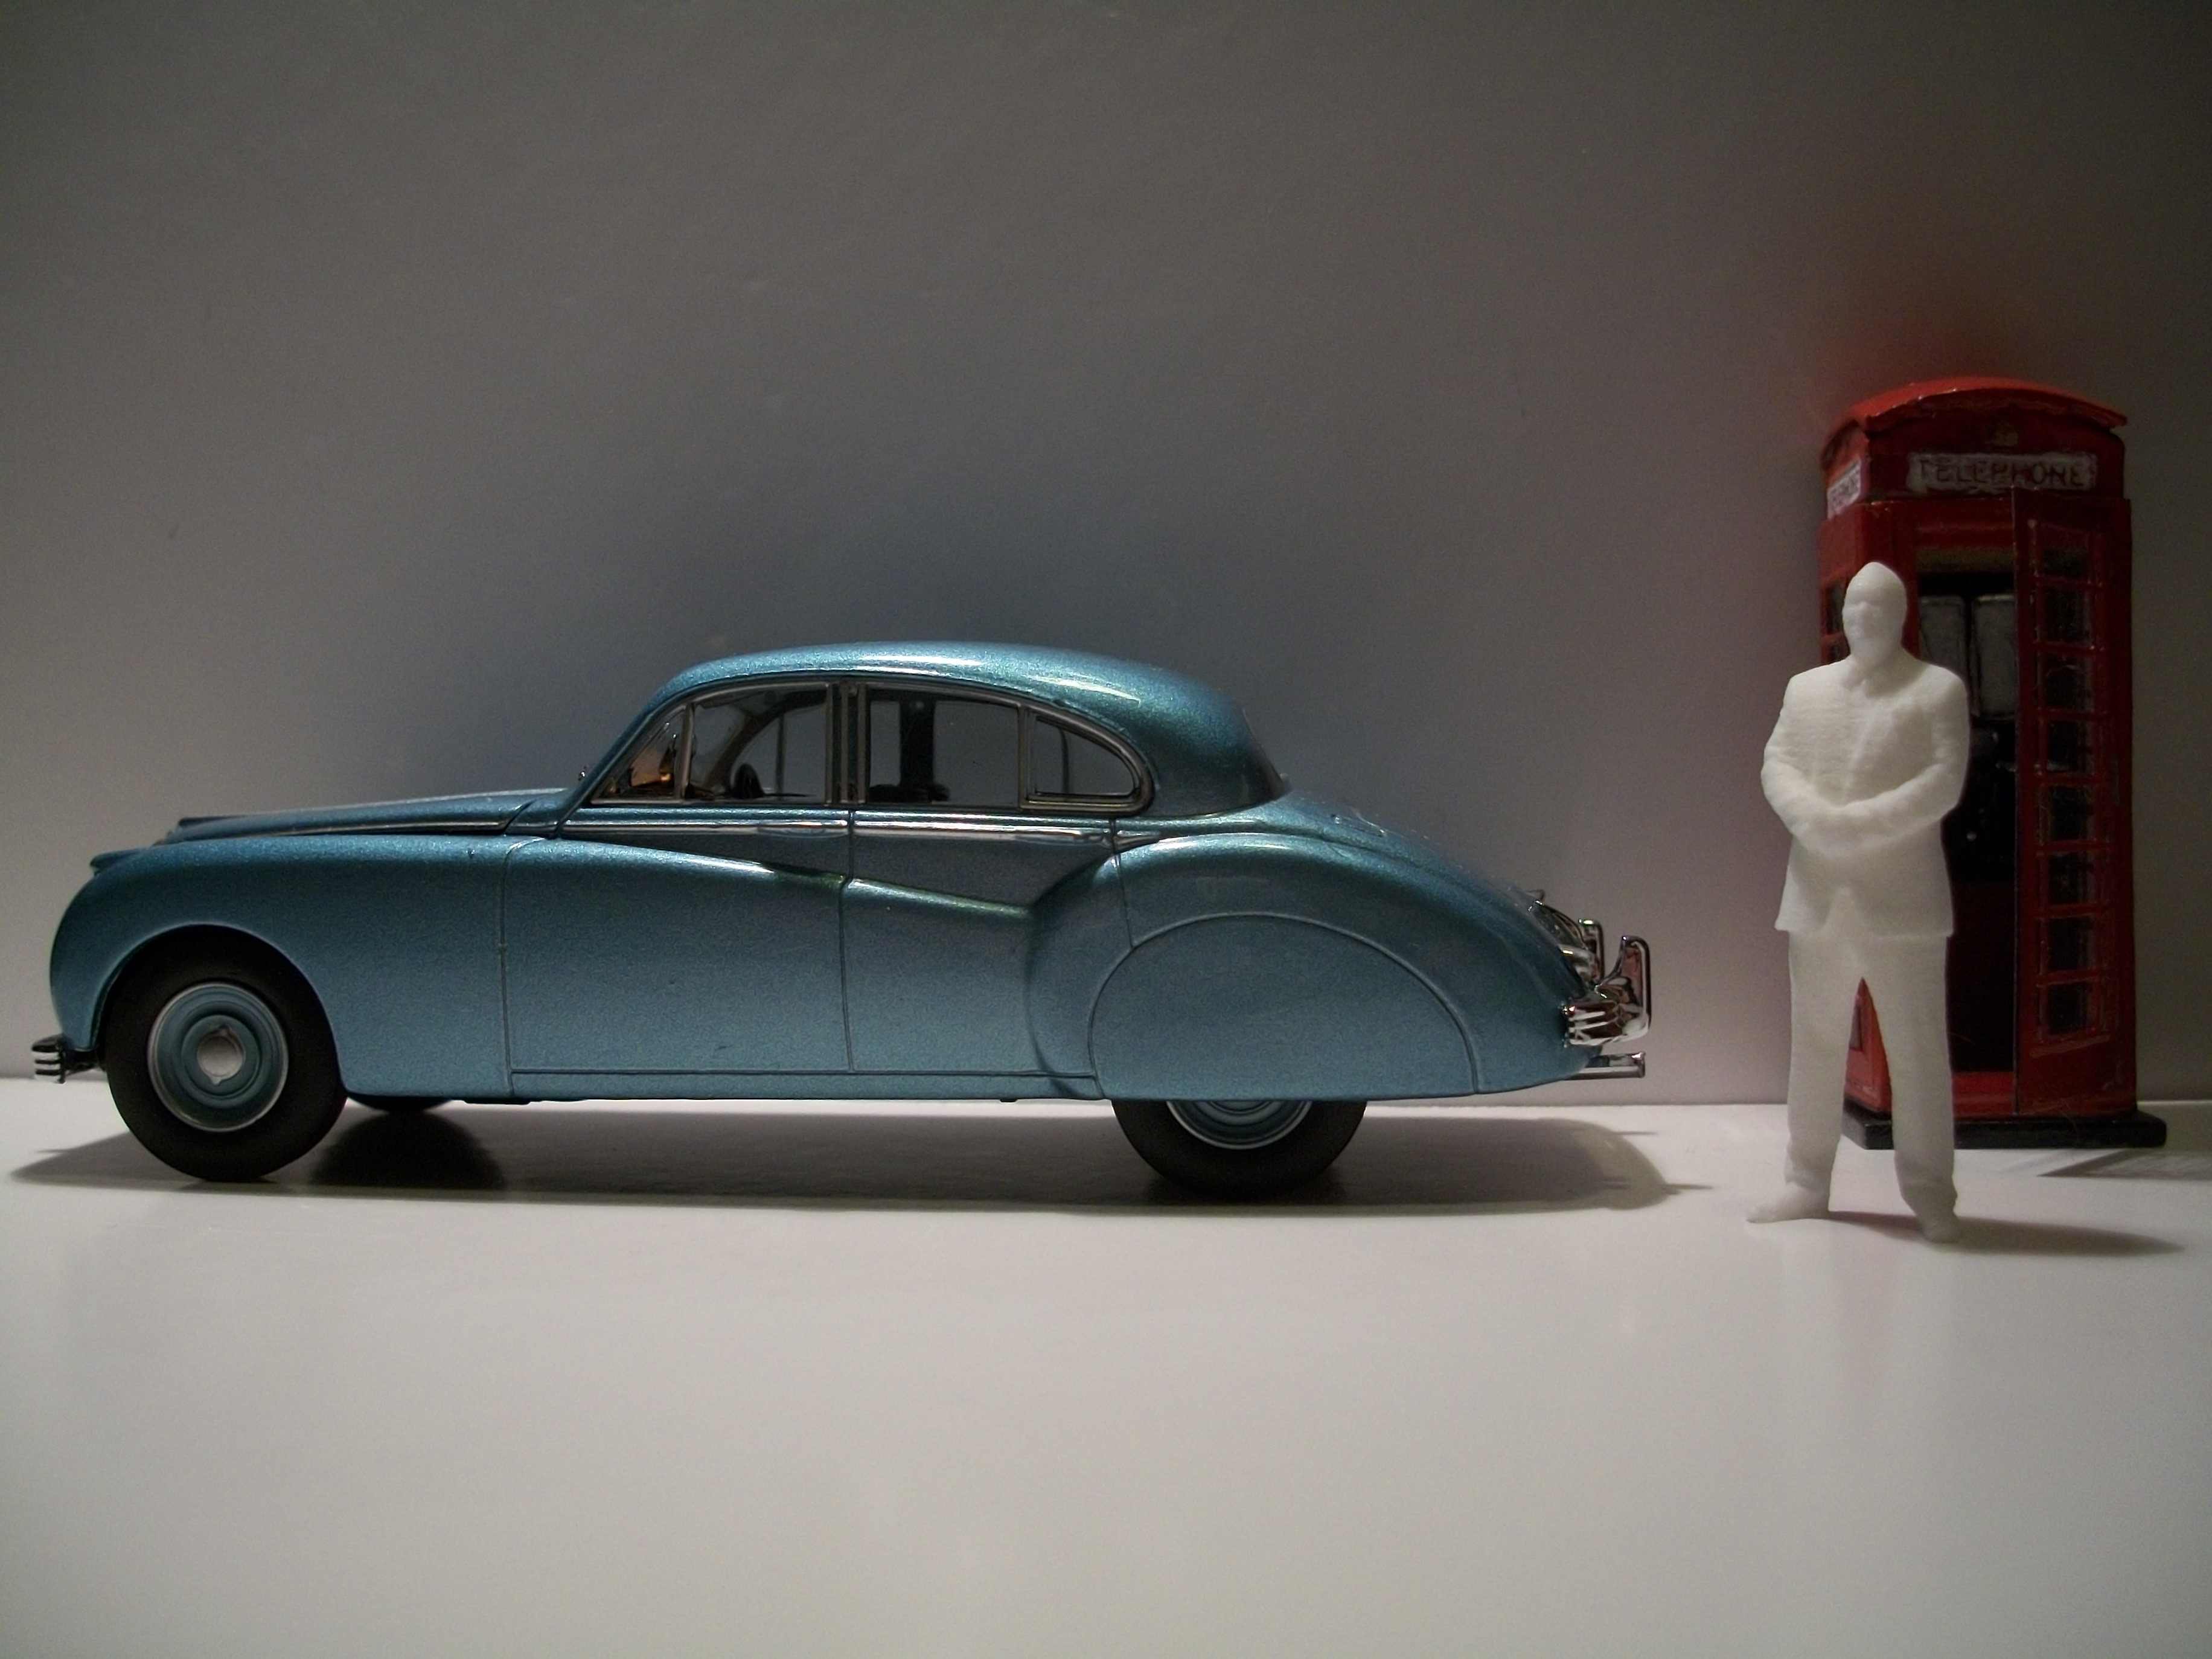
The 1:43 scale 3D-printed figures have arrived from Shapeways in the Netherlands, and these photos show these figures before any painting is carried out. The bald man standing, does fit nicely inside the telephone kiosk and he could turn out to be the proud owner of the Jaguar MK VII in Twilight Blue. There is a seated man on a bench and also a standing lady figure, both of which are printed in smooth fine detail plastic, and this material has a semi-transparent appearance to it. Painting the 1:43 scale figures will be quite a challenge for me I think, as I found painting the 1:24 scale figures fairly difficult. However, I do want these smaller figures to be an important element of the smaller scale diorama so I must find it in me to produce some realistic scale replicas of real people. David
-
This is thinking outside the box....... interesting and original. David
-
Now I am lost for words, Mark...... David
-
I don't see my diorama ever being completed, or finished..... instead I prefer to think of the project as something I can keep adding to or modifying as time goes on. Sometimes I sit and look at the diorama ' site ' while I am having a coffee, and some small detail comes to mind..... yet another idea that leads to further creativity. Also, there are some contacts I have who will occasionally send me information about an element of the scenario that might be worth considering.... maybe a new found photograph from the distant past..... David