Anglia105E
-
Posts
3,487 -
Joined
-
Last visited
Content Type
Profiles
Forums
Events
Gallery
Everything posted by Anglia105E
-
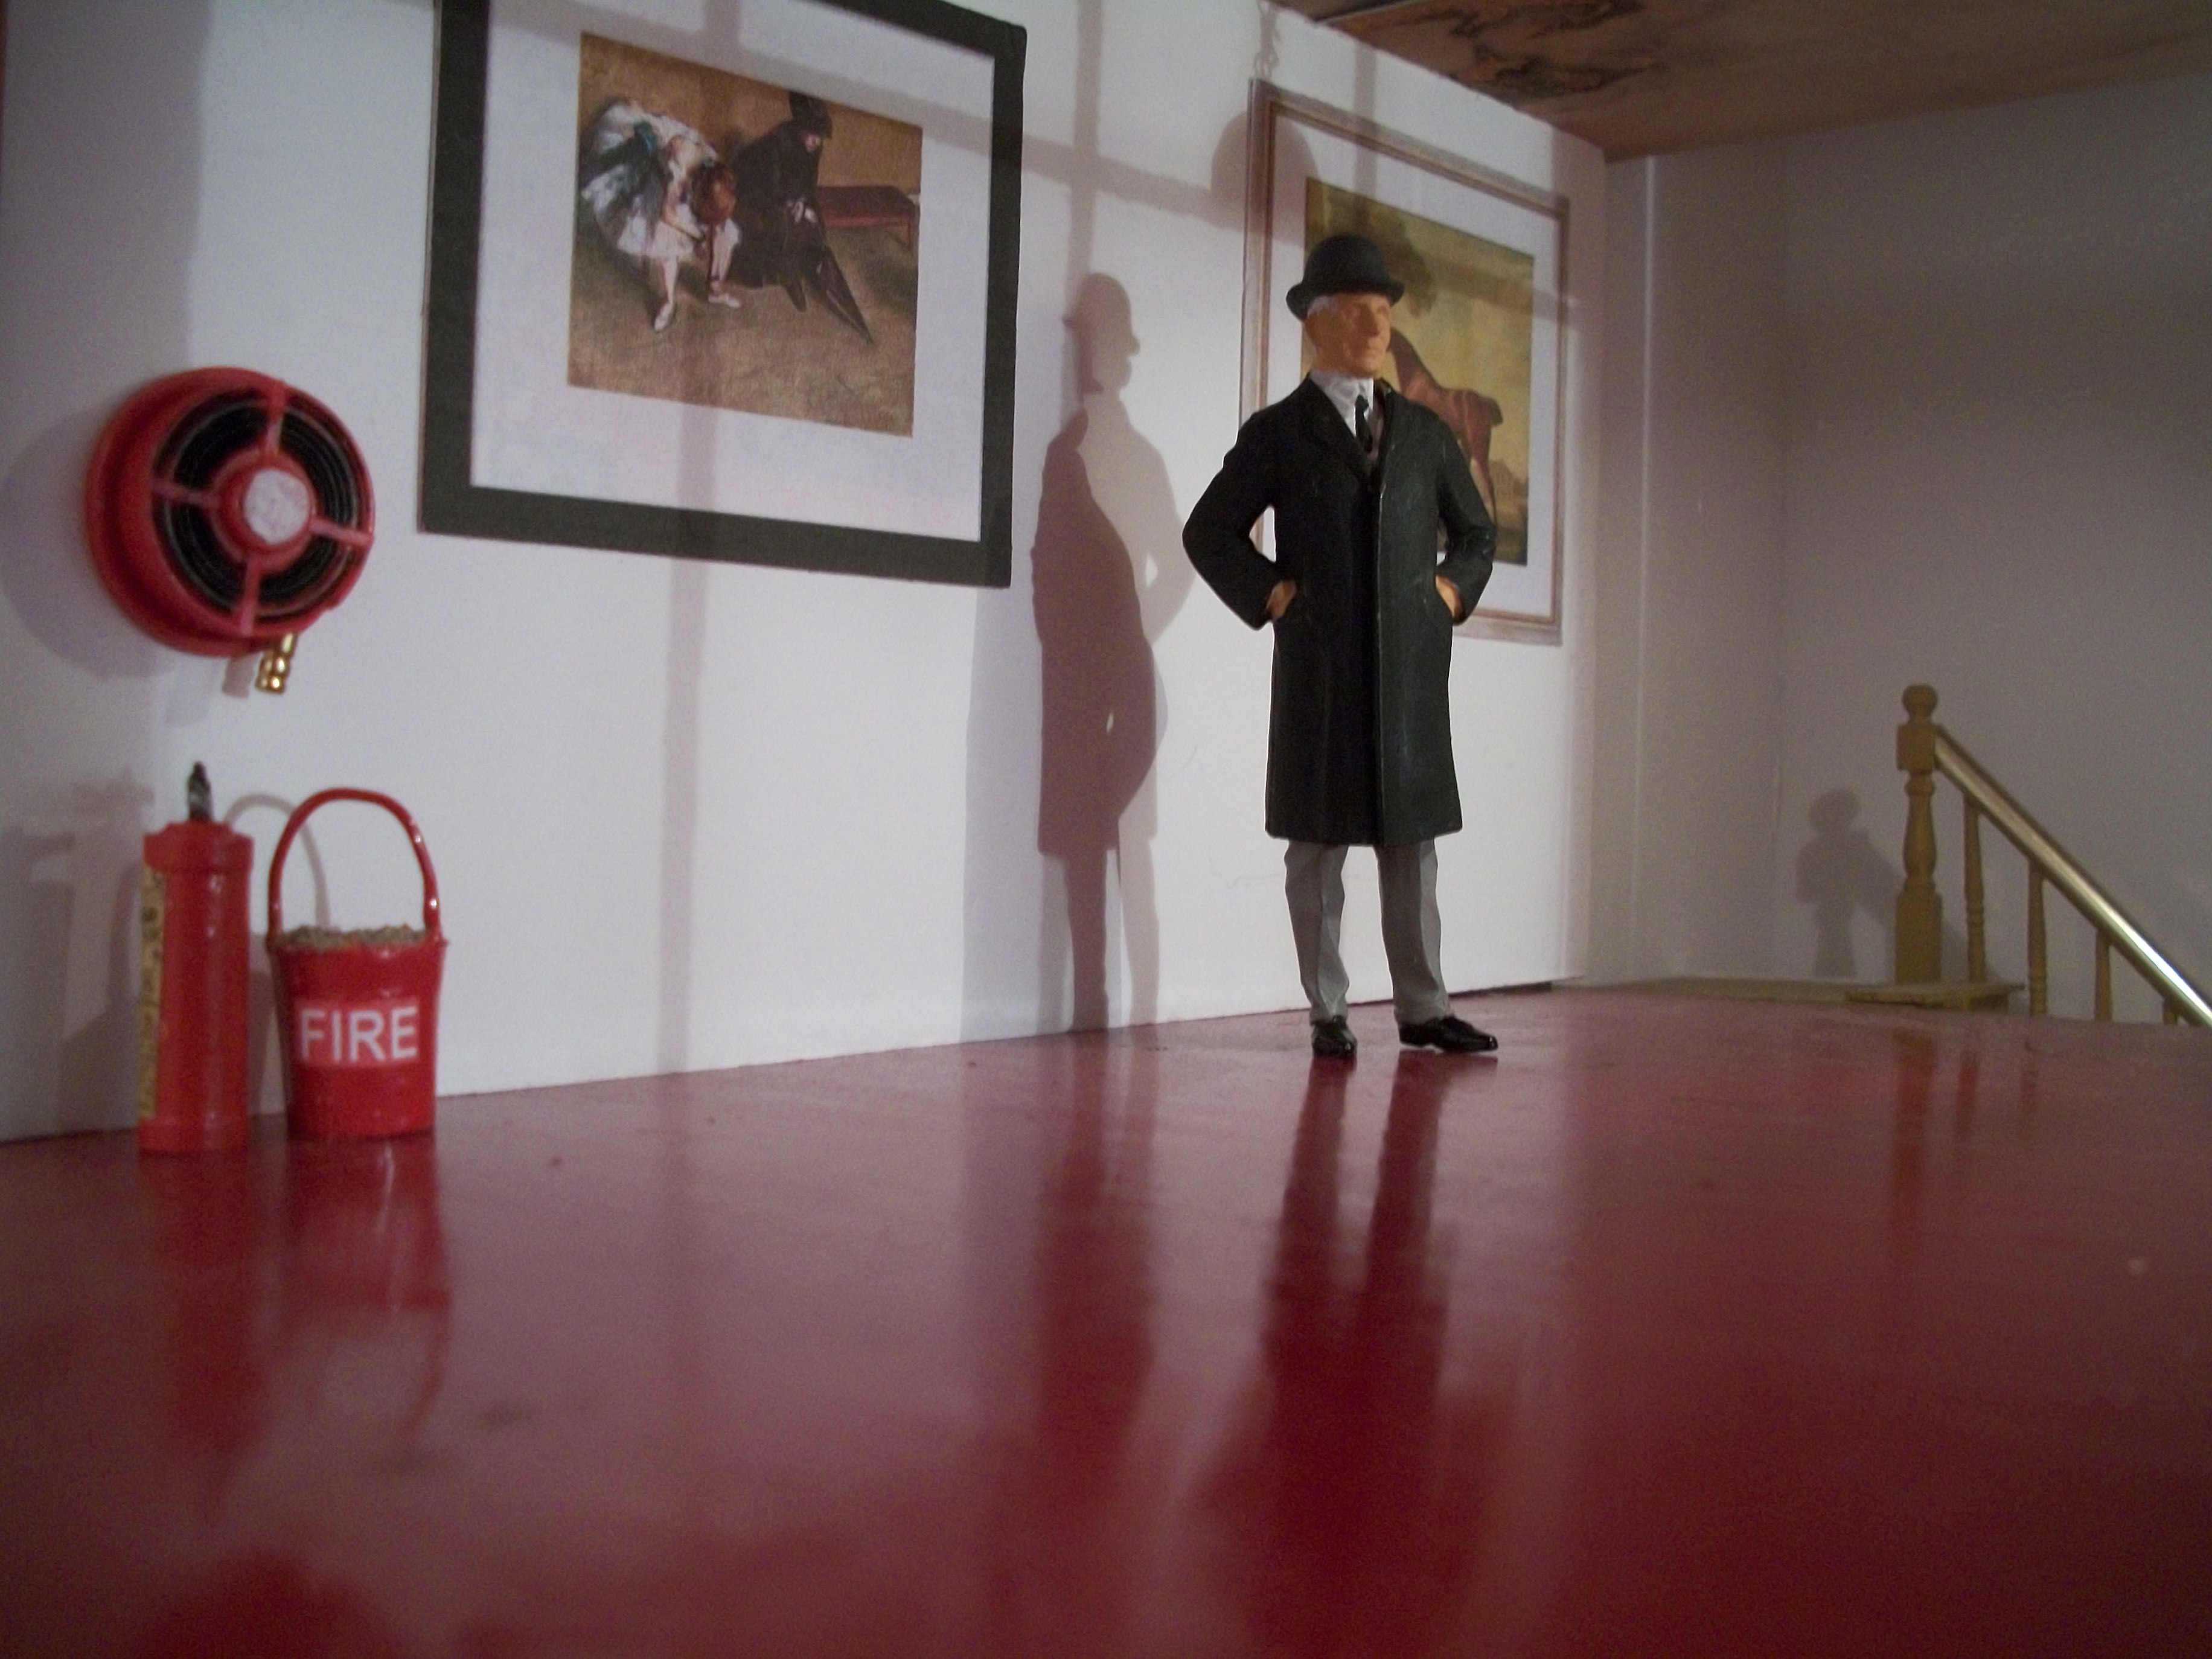
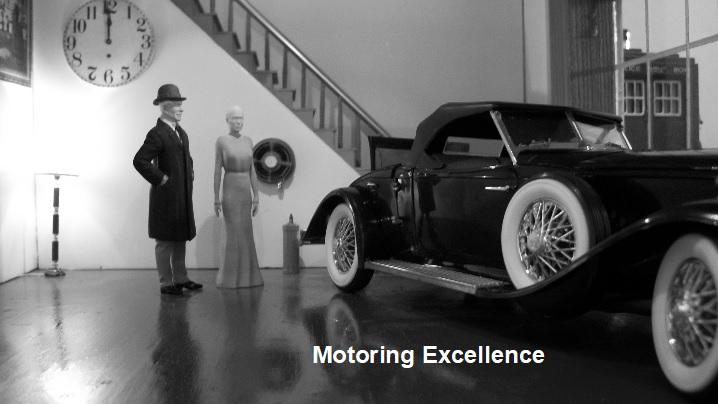
Just playing around with some showroom interior shots, and making use of the 1931 Rolls-Royce Henley Convertible, which is undergoing extensive repairs at the moment. A model builder friend of mine who lives locally, pointed out that a gentleman would take off his hat whilst inside the building..... a valid point indeed. David

-
 That would be my preferred method also Jim..... using ' choose files ' , just to the right of the paper clip thing. David
 -
As well as Photobucket you can also use Flickr of course. ( JC ) Great work on the heavy dyno Pat, and one more detailed machine tool for the workshop. David
-
Great Gatsby Peterbilt 7 stained glass and furniture tests
Anglia105E replied to olsbooks's topic in WIP: Dioramas
JC..... Your work on the Peterbilt truck is excellent, and I hadn't heard of chrome duct tape.... possibly not available in England? Myself, I do like the Molotow liquid chrome pens and I have found that for best results you need to apply the liquid chrome over a high gloss surface. This can be gloss paint, or highly polished plastic or the best finish is Yacht Varnish. Interesting technique with the OpenOffice drawing program, and I agree that finding the most suitable figures in the scale required is very difficult. Painting figures to look like real people is a very precise skill that not many of us can master ( myself included ). Also, you make a good point about the finish on the painted truck not needing to be showroom quality, and this applies to models that I build and paint, apart from the Rolls-Royce motor cars that do need to be as near perfect as humanly possible. I did apply two coats of clearcoat for several of my early model cars, but I discovered later that the finish wasn't as expected so I tend to wait until the final matt coat has dried for around one week, and then polish the bodywork with Meguiars Carnauba Wax polish, using microfibre cloth and yellow duster to finish off. David -
I can see that you and I are probably on the same wavelength JC, and thanks for the complimentary comments. Each time I put together a scene, I find myself looking at the setting afterwards and asking myself these questions..... what is going on? What are the people in the scene doing there? What could possibly be about to happen? This fits in with your theory of ' safe escape ' because it is almost as though I am withdrawing into a 1:24 scale world and walking around the streets outside the Hooper & Co building, where it allows me to think from the perspective of a 3" tall 1:24 scale man. Hopefully, this process should help put together the whole collection of vehicles, buildings, street furniture, lighting and figures. I see the exhibition diorama as the big container, in which there are smaller containers that are like mini dioramas, and these can be moved around and changed on a regular basis. There might be the lorry unloading or loading materials, or a fuel tanker selling cheap fuel from jerry cans, or a chauffeur taking out the luggage for the owner of a Rolls-Royce motor car, or perhaps several people queueing at a bus stop...... a Police constable standing near to the Police public call box, a lady or a gentleman with a motor scooter or a bicycle..... these are all ordinary everyday things that are going on when you look around a typical city environment on a daily basis. I have studied the work of Michael Paul Smith, who has sadly passed away very recently, and his work certainly inspired me to start this project. There are obvious differences between Michael's work and mine, such as there are no people in Elgin Park.... no figures at all, also he used diecast Danbury Mint model cars whereas I tend to use plastic kits that I have built myself, mixed in with a few diecast Franklin Mint and Danbury Mint models where appropriate. Michael set up his small table outdoors and he was a master of the forced perspective technique, as well as using his brilliantly constructed scale buildings indoors and outdoors. My diorama is always indoors, so I make use of 100 watt daylight bulbs, as well as both black and white and colour photography. Some of the photographic scenes have been captured from within the showrooms of the Hooper building. David
-
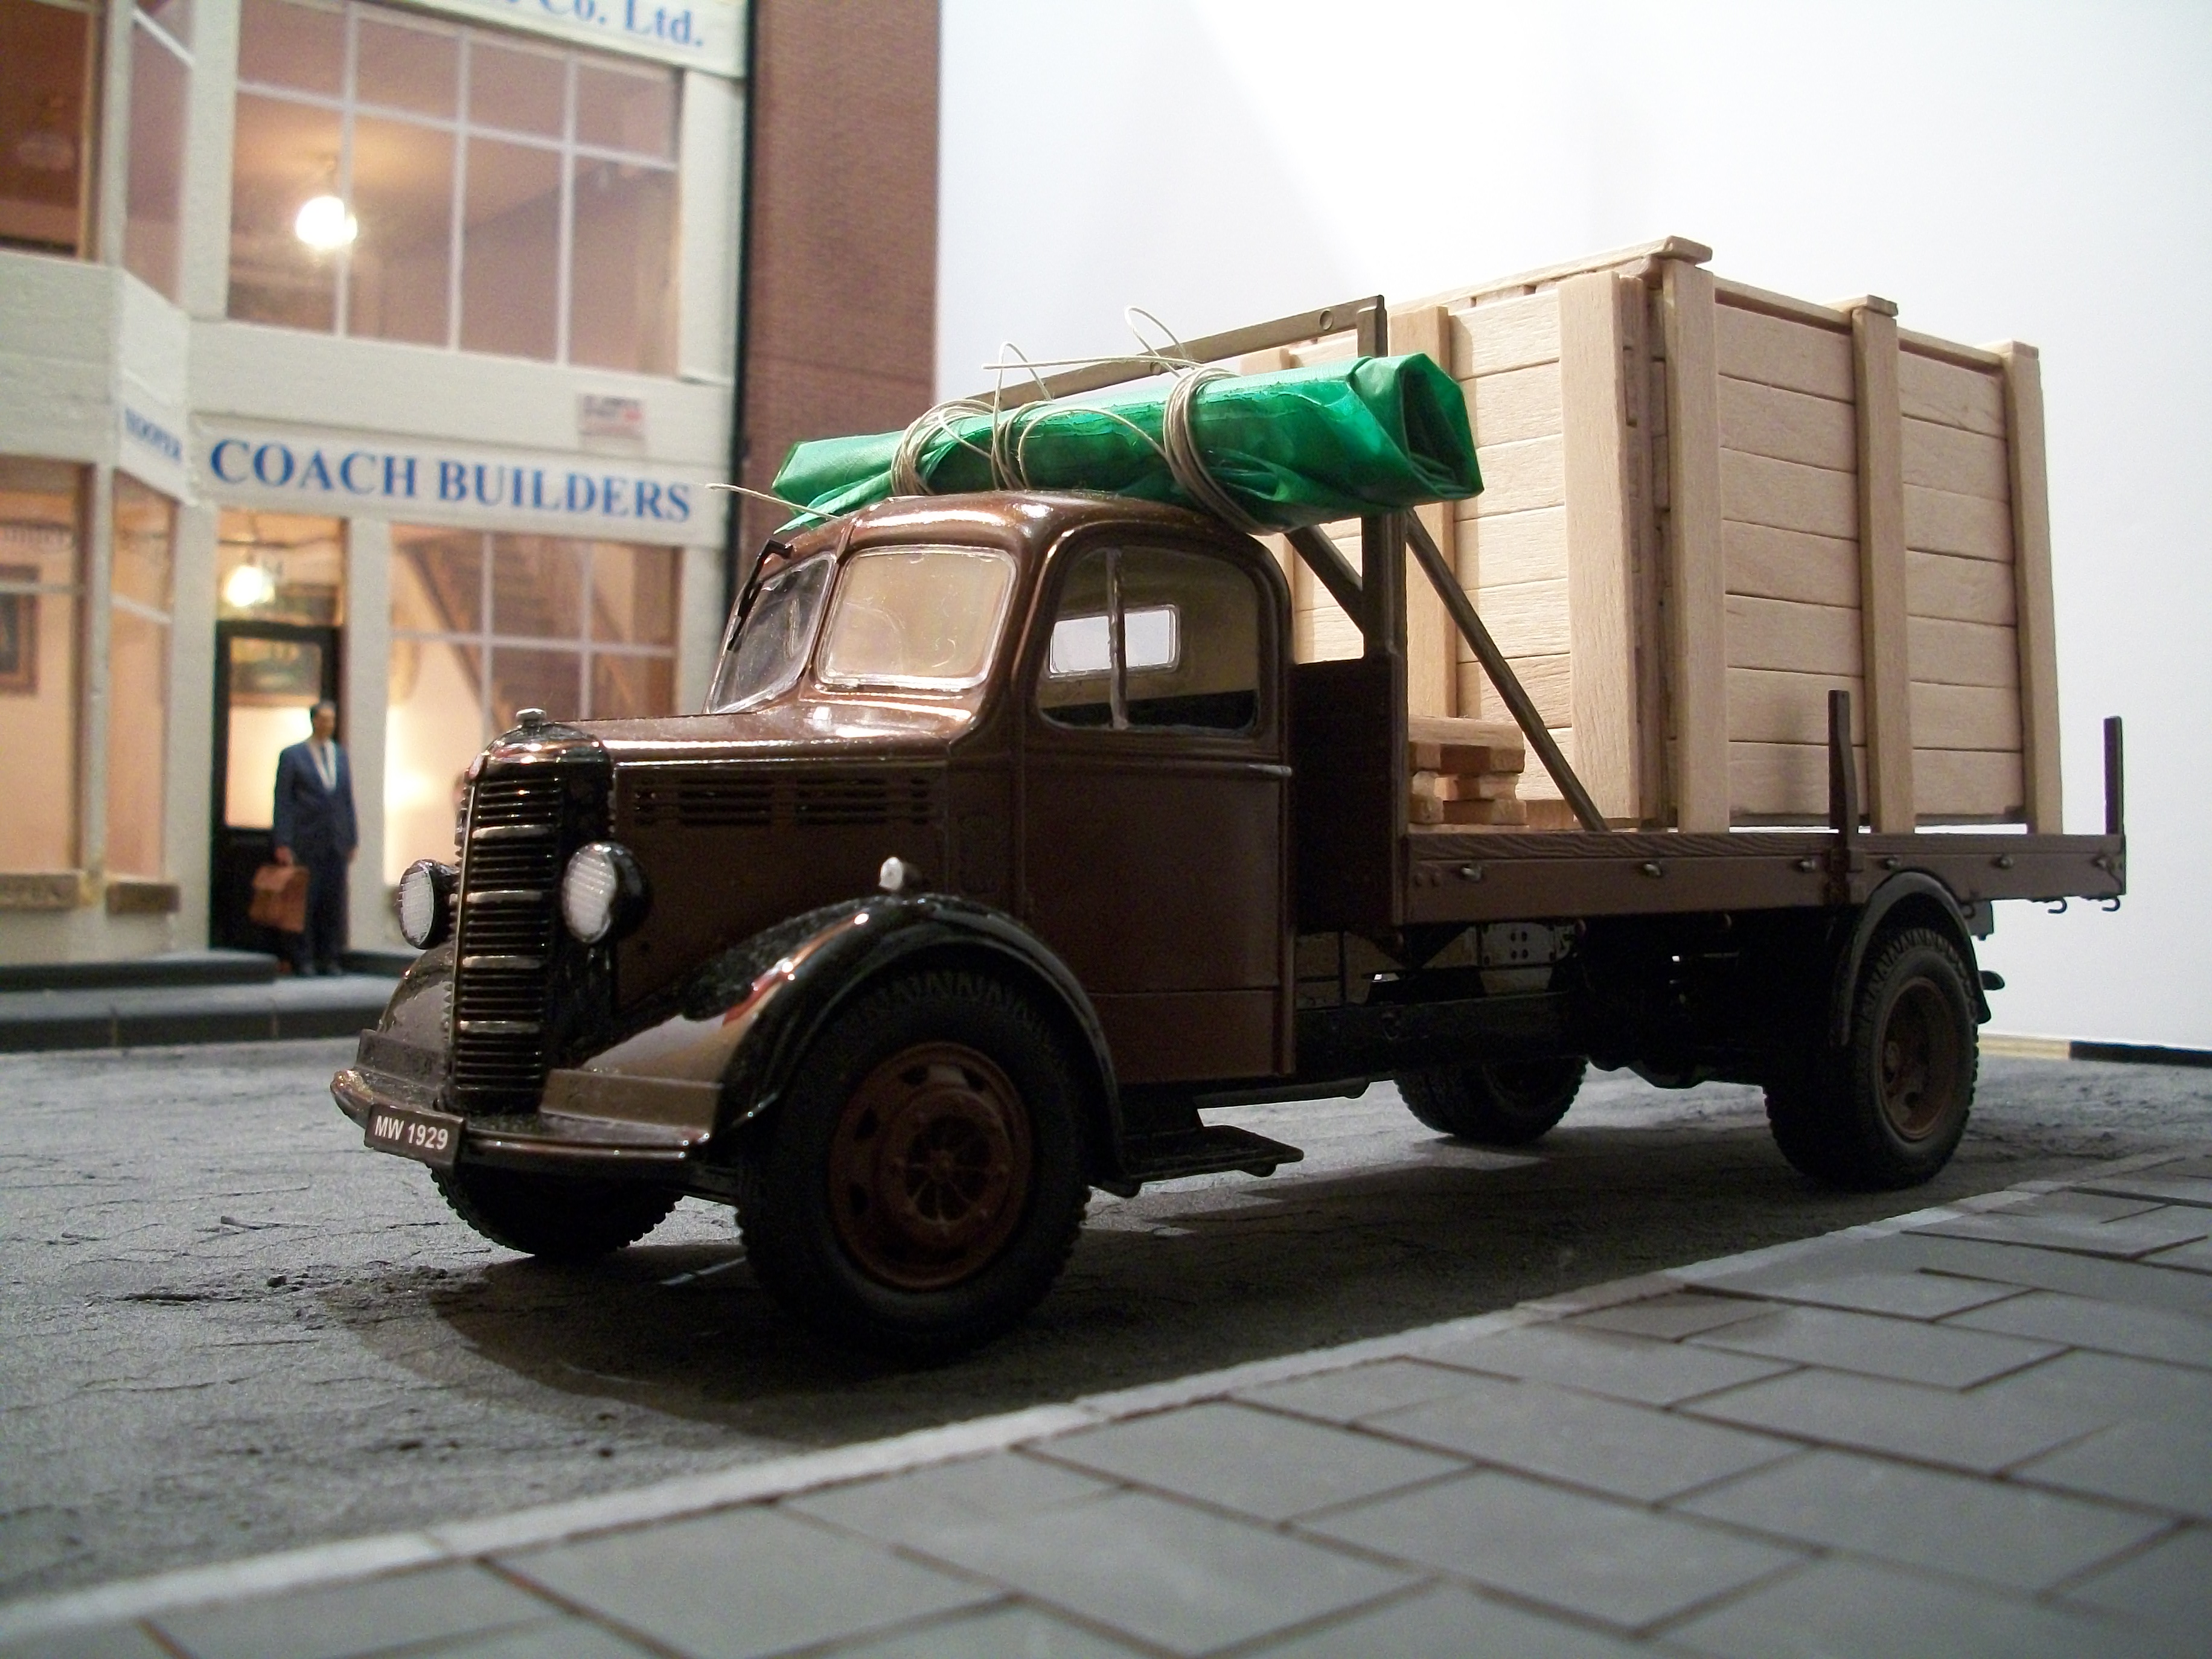
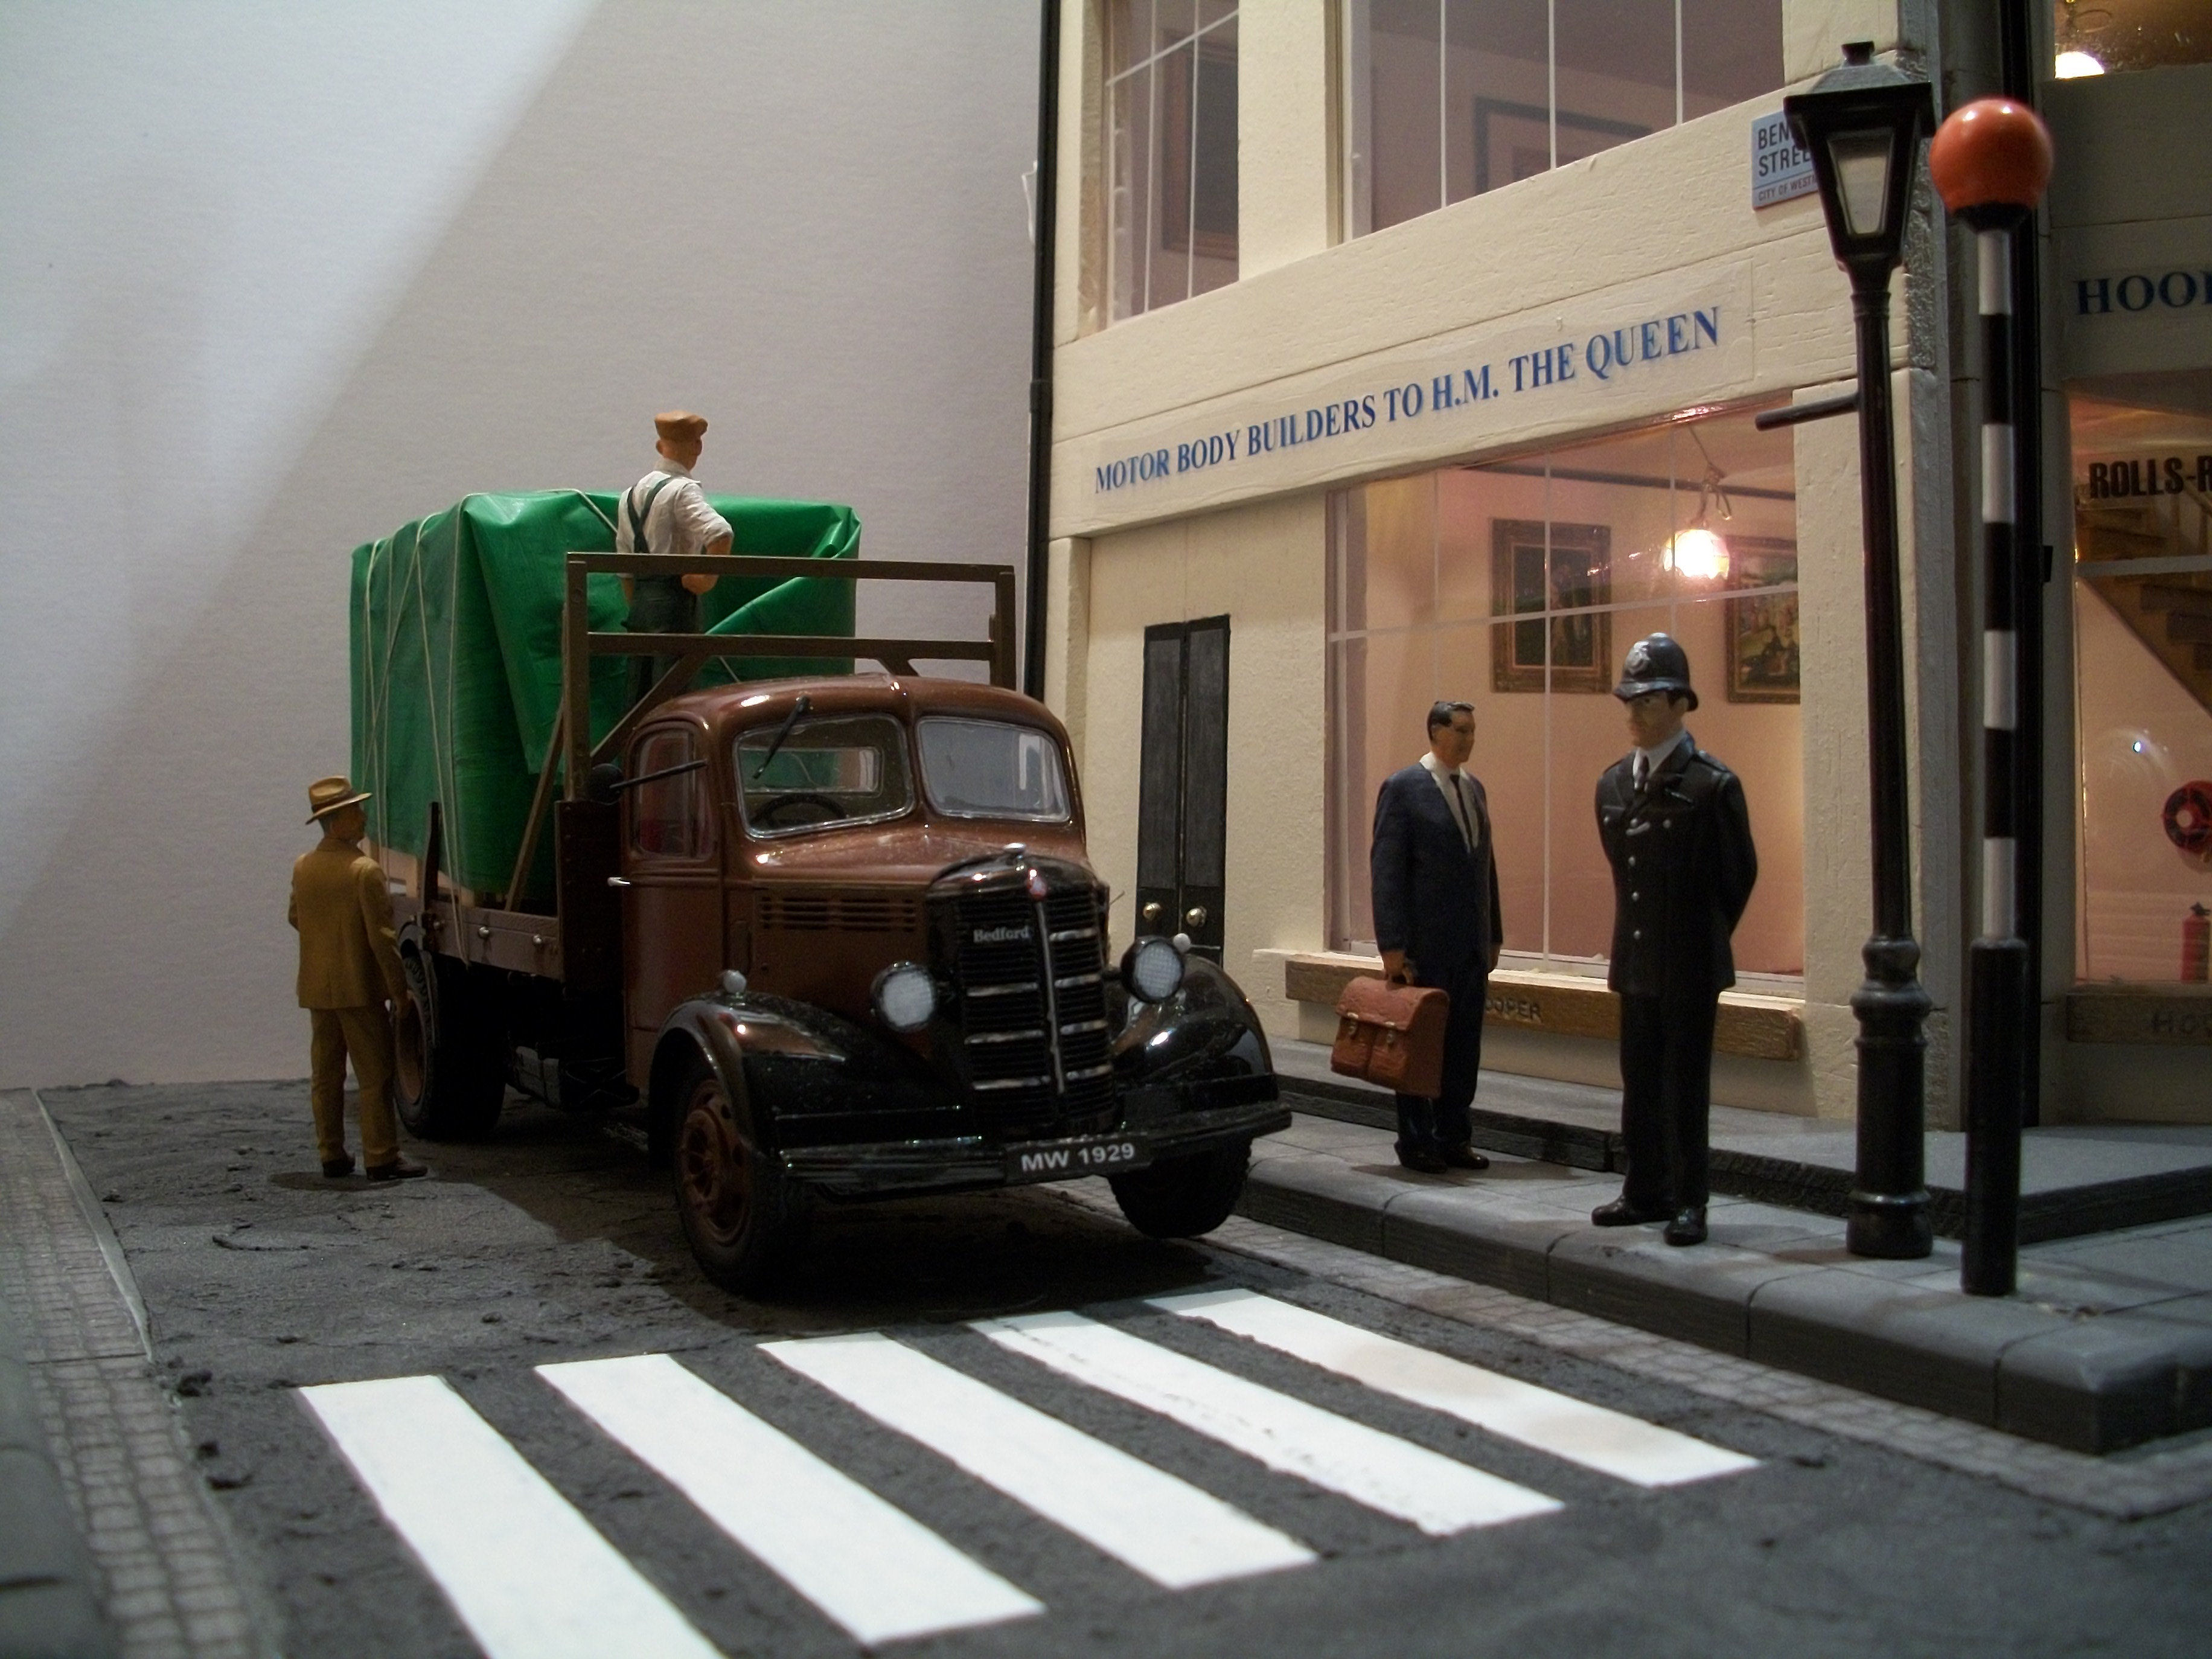
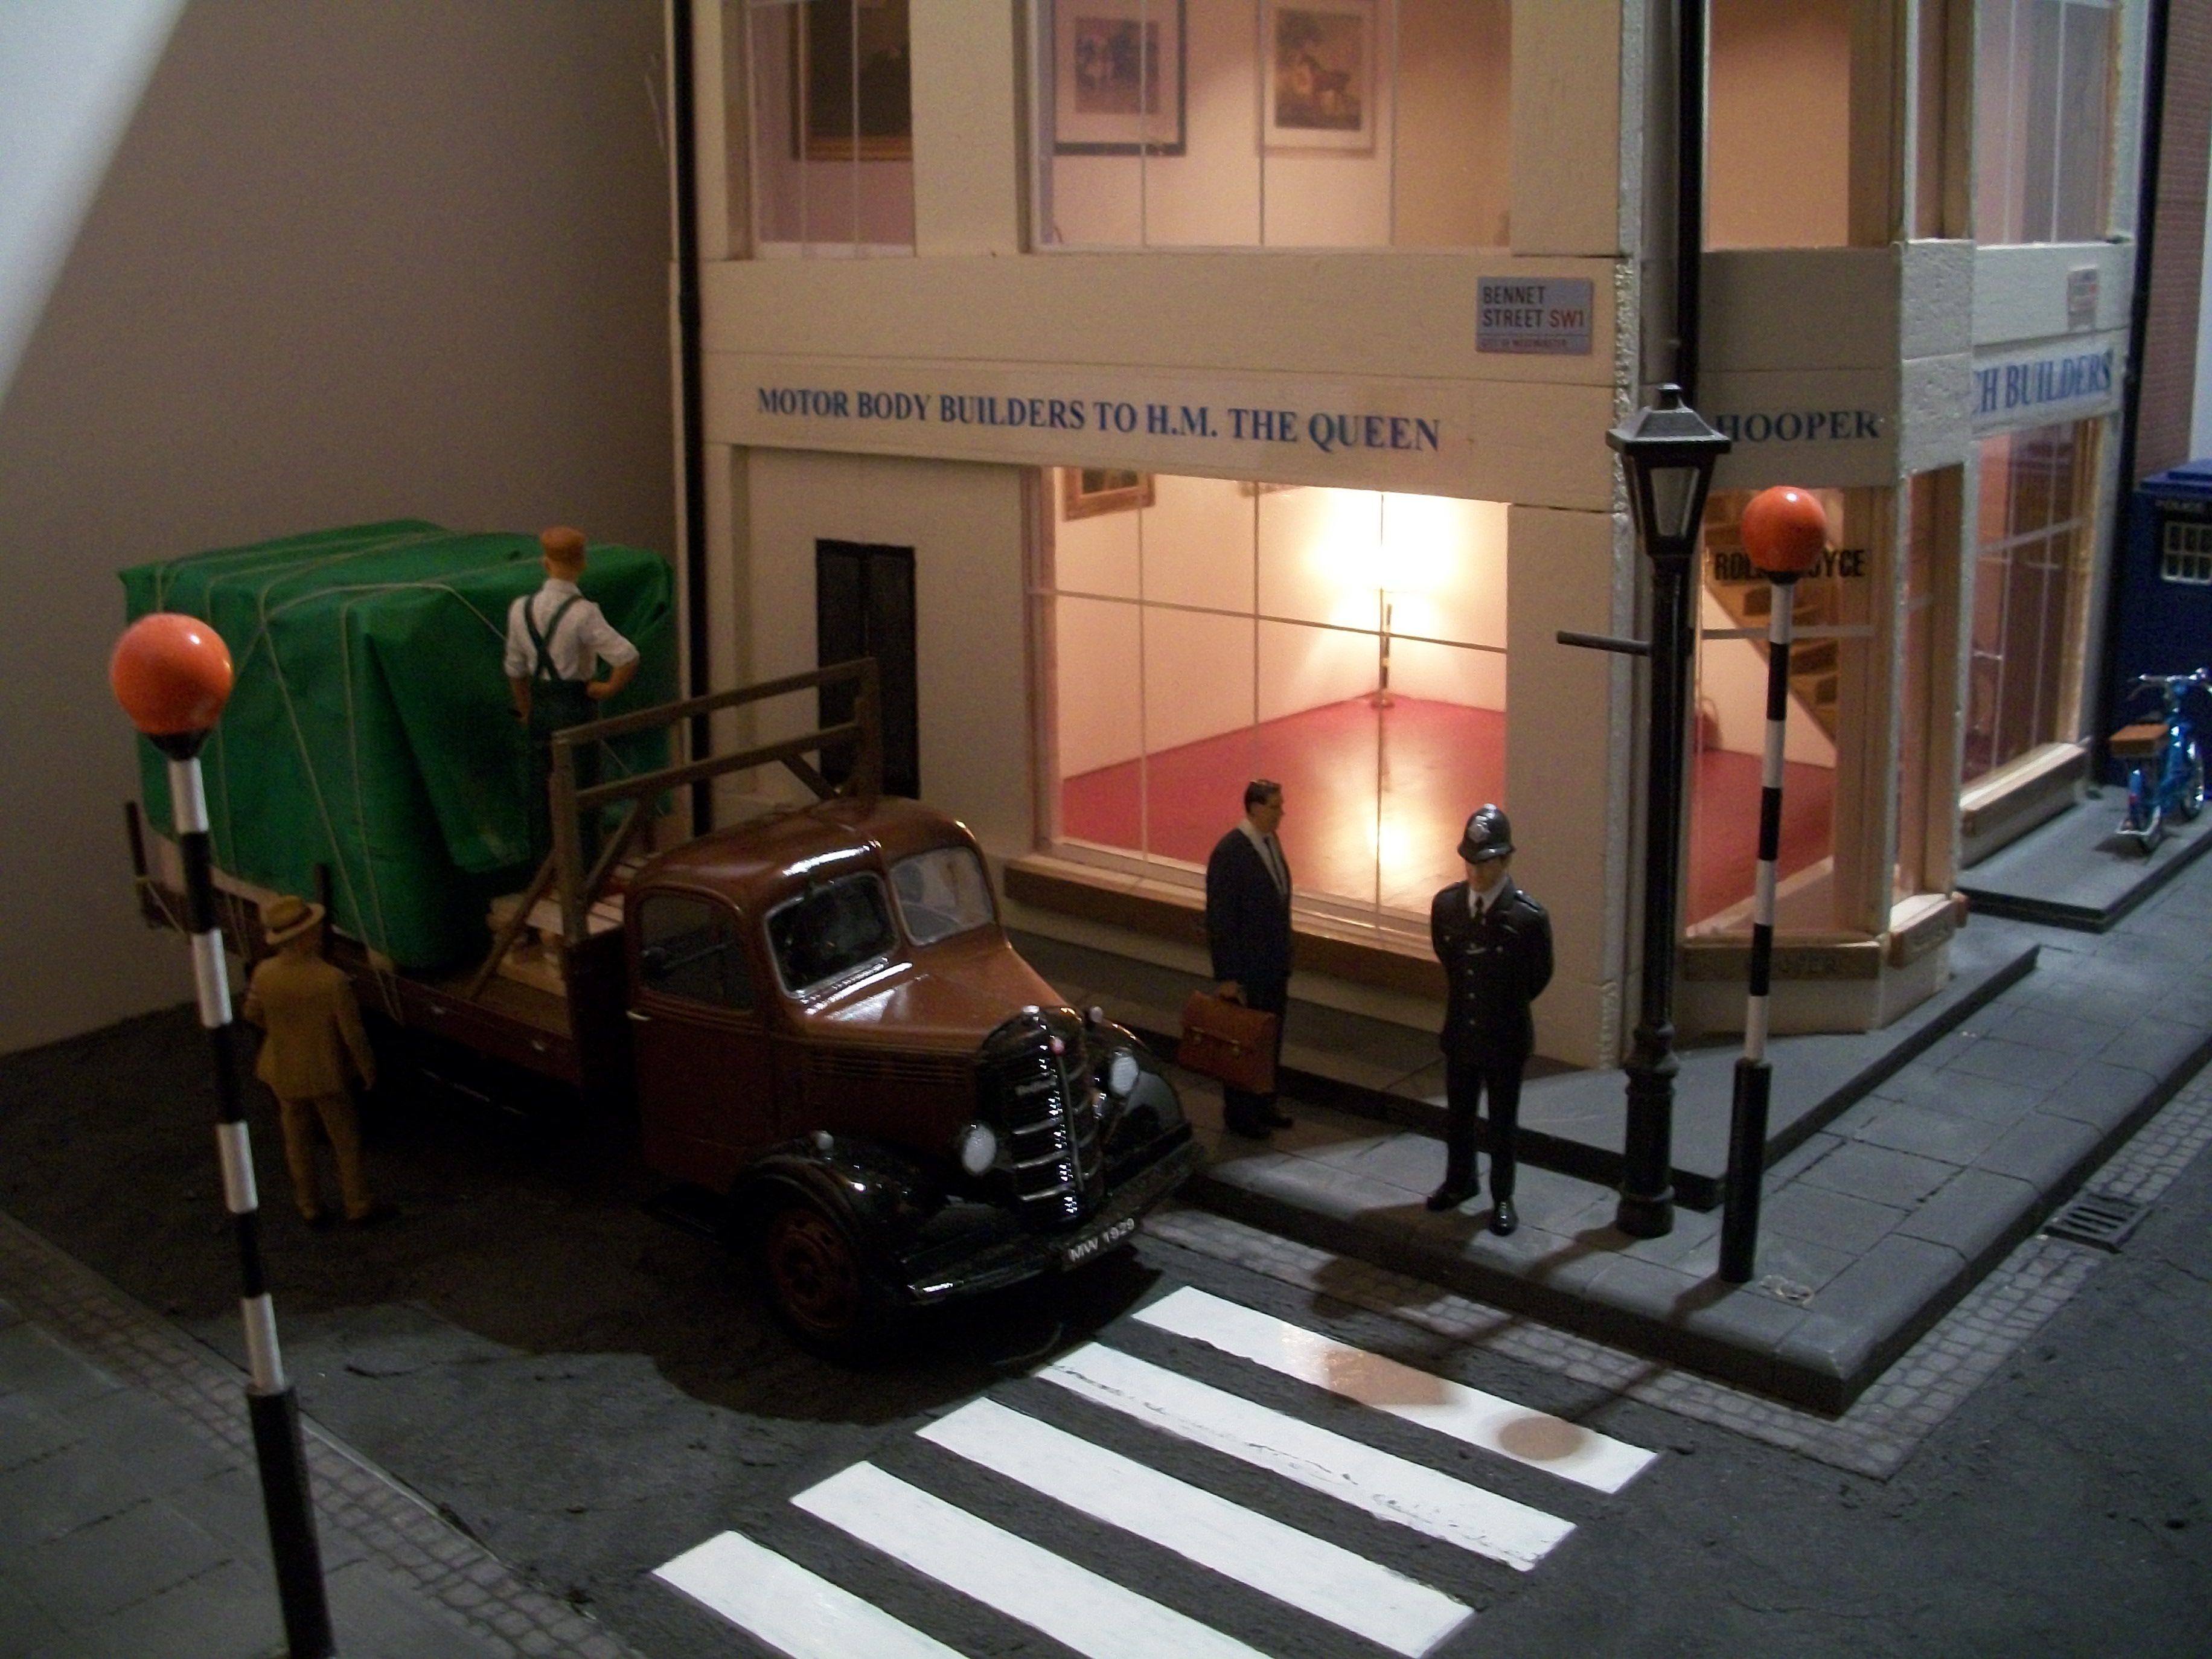
The large wooden crate has been loaded onto the Bedford OLBD dropside lorry, which has been covered with a green tarpaulin and secured with hessian rope. We see the driver of the lorry getting ready to leave the premises of Hooper & Co with his important load.... the contents of the crate are unknown to us. As you would expect, the managing director of Hoopers is keeping a watchful eye over proceedings. This is probably very early in the morning and well before the rush hour traffic builds up on St James's Street. The haulage firm has been instructed to proceed without further delay with this valuable cargo..... bound for a far off destination..... many miles from London. David
-
Updated - 12/06/18 - 1/18 1969 IMSA Big Block Road Racing Camaro
Anglia105E replied to ibj40's topic in Diecast Corner
Well I must say Jim, this is one hell of an almighty project....... and your build skills are something to admire. While following your explanation and studying the photos, I have to keep reminding myself that this is 1:18 scale you are working in. This sort of detail would be typical of a 1:12 build I reckon, and obviously a lot easier in 1:8 scale Pocher type kits. Myself, I like the whole concept of modifying diecast scale model cars, which I have done with a 1:24 scale Franklin Mint Rolls-Royce 1929 Phantom I Cabriolet de Ville, converting the standard car into the 1927 version as owned by Fred Astaire. Currently I am building a ' hybrid ' Rolls-Royce Silver Cloud II from a plastic chassis Revell or Minicraft kit and a diecast Franklin Mint 1955 Silver Cloud, which involves changing the 4.9 litre 6 cylinder engine to the 6.2 litre V8 engine. Keep us up to date with your progress, which I am following closely. David Watson ( England ) -
Now that's a proper scale model car engine Mark........ there is no finer detail that you could add to that engine, beyond the level you have taken it to. When I first assembled and painted an engine, I applied a ' dot ' of liquid chrome, and in my mind it was a bolt head or a nut...... but what you do is to use an actual bolt head or a nut, and not just a ' dot '...... Maybe I need to re-think my crude approach to some aspects of my scale model car building ! David
-
Great Gatsby Peterbilt 7 stained glass and furniture tests
Anglia105E replied to olsbooks's topic in WIP: Dioramas
That Robert E Lee kit of yours is indeed a nice one, and I particularly like the staircase rising up from those decks with which you have done a fine job. Some clever stuff going on there with the on/off switch and the lights in the windows are just right. The only paints that I haven't tried are the Vallejo colours, and I do have a local stockist of Vallejo now so there's no reason not to give them a try. Your colour mix is rich and interesting. Weathering and ageing is certainly an acquired skill that not everyone can get right without a great deal of effort. If it's anything like portrait painting, which I used to do when I was younger, sometimes you can ' accidently ' hit on the right formula after many hours of struggling to achieve a realistic likeness. From what you have said, and shown in these recent photos, you have made good progress with this project and it will be exciting as it evolves along the way. David -
Diorama maker passes
Anglia105E replied to lordairgtar's topic in General Automotive Talk (Trucks and Cars)
I kind of thought in my own mind that Michael Paul Smith would be around for many years to come....... so it is with great sadness that I hear of his passing, only eight days ago. The world has lost an extremely talented man, and not just the scale model world but the wider community worldwide. His work will be viewed and studied for many years I'm sure and we can all learn something about the whole concept of Elgin Park........ This sad news has made me realise that I must continue, in my own small way, to try and create something that more than likely will never get anywhere near the monumental achievement that Michael has left behind for us to enjoy...... you have set the bar very high Mr Smith........ R.I.P. David -
Great Gatsby Peterbilt 7 stained glass and furniture tests
Anglia105E replied to olsbooks's topic in WIP: Dioramas
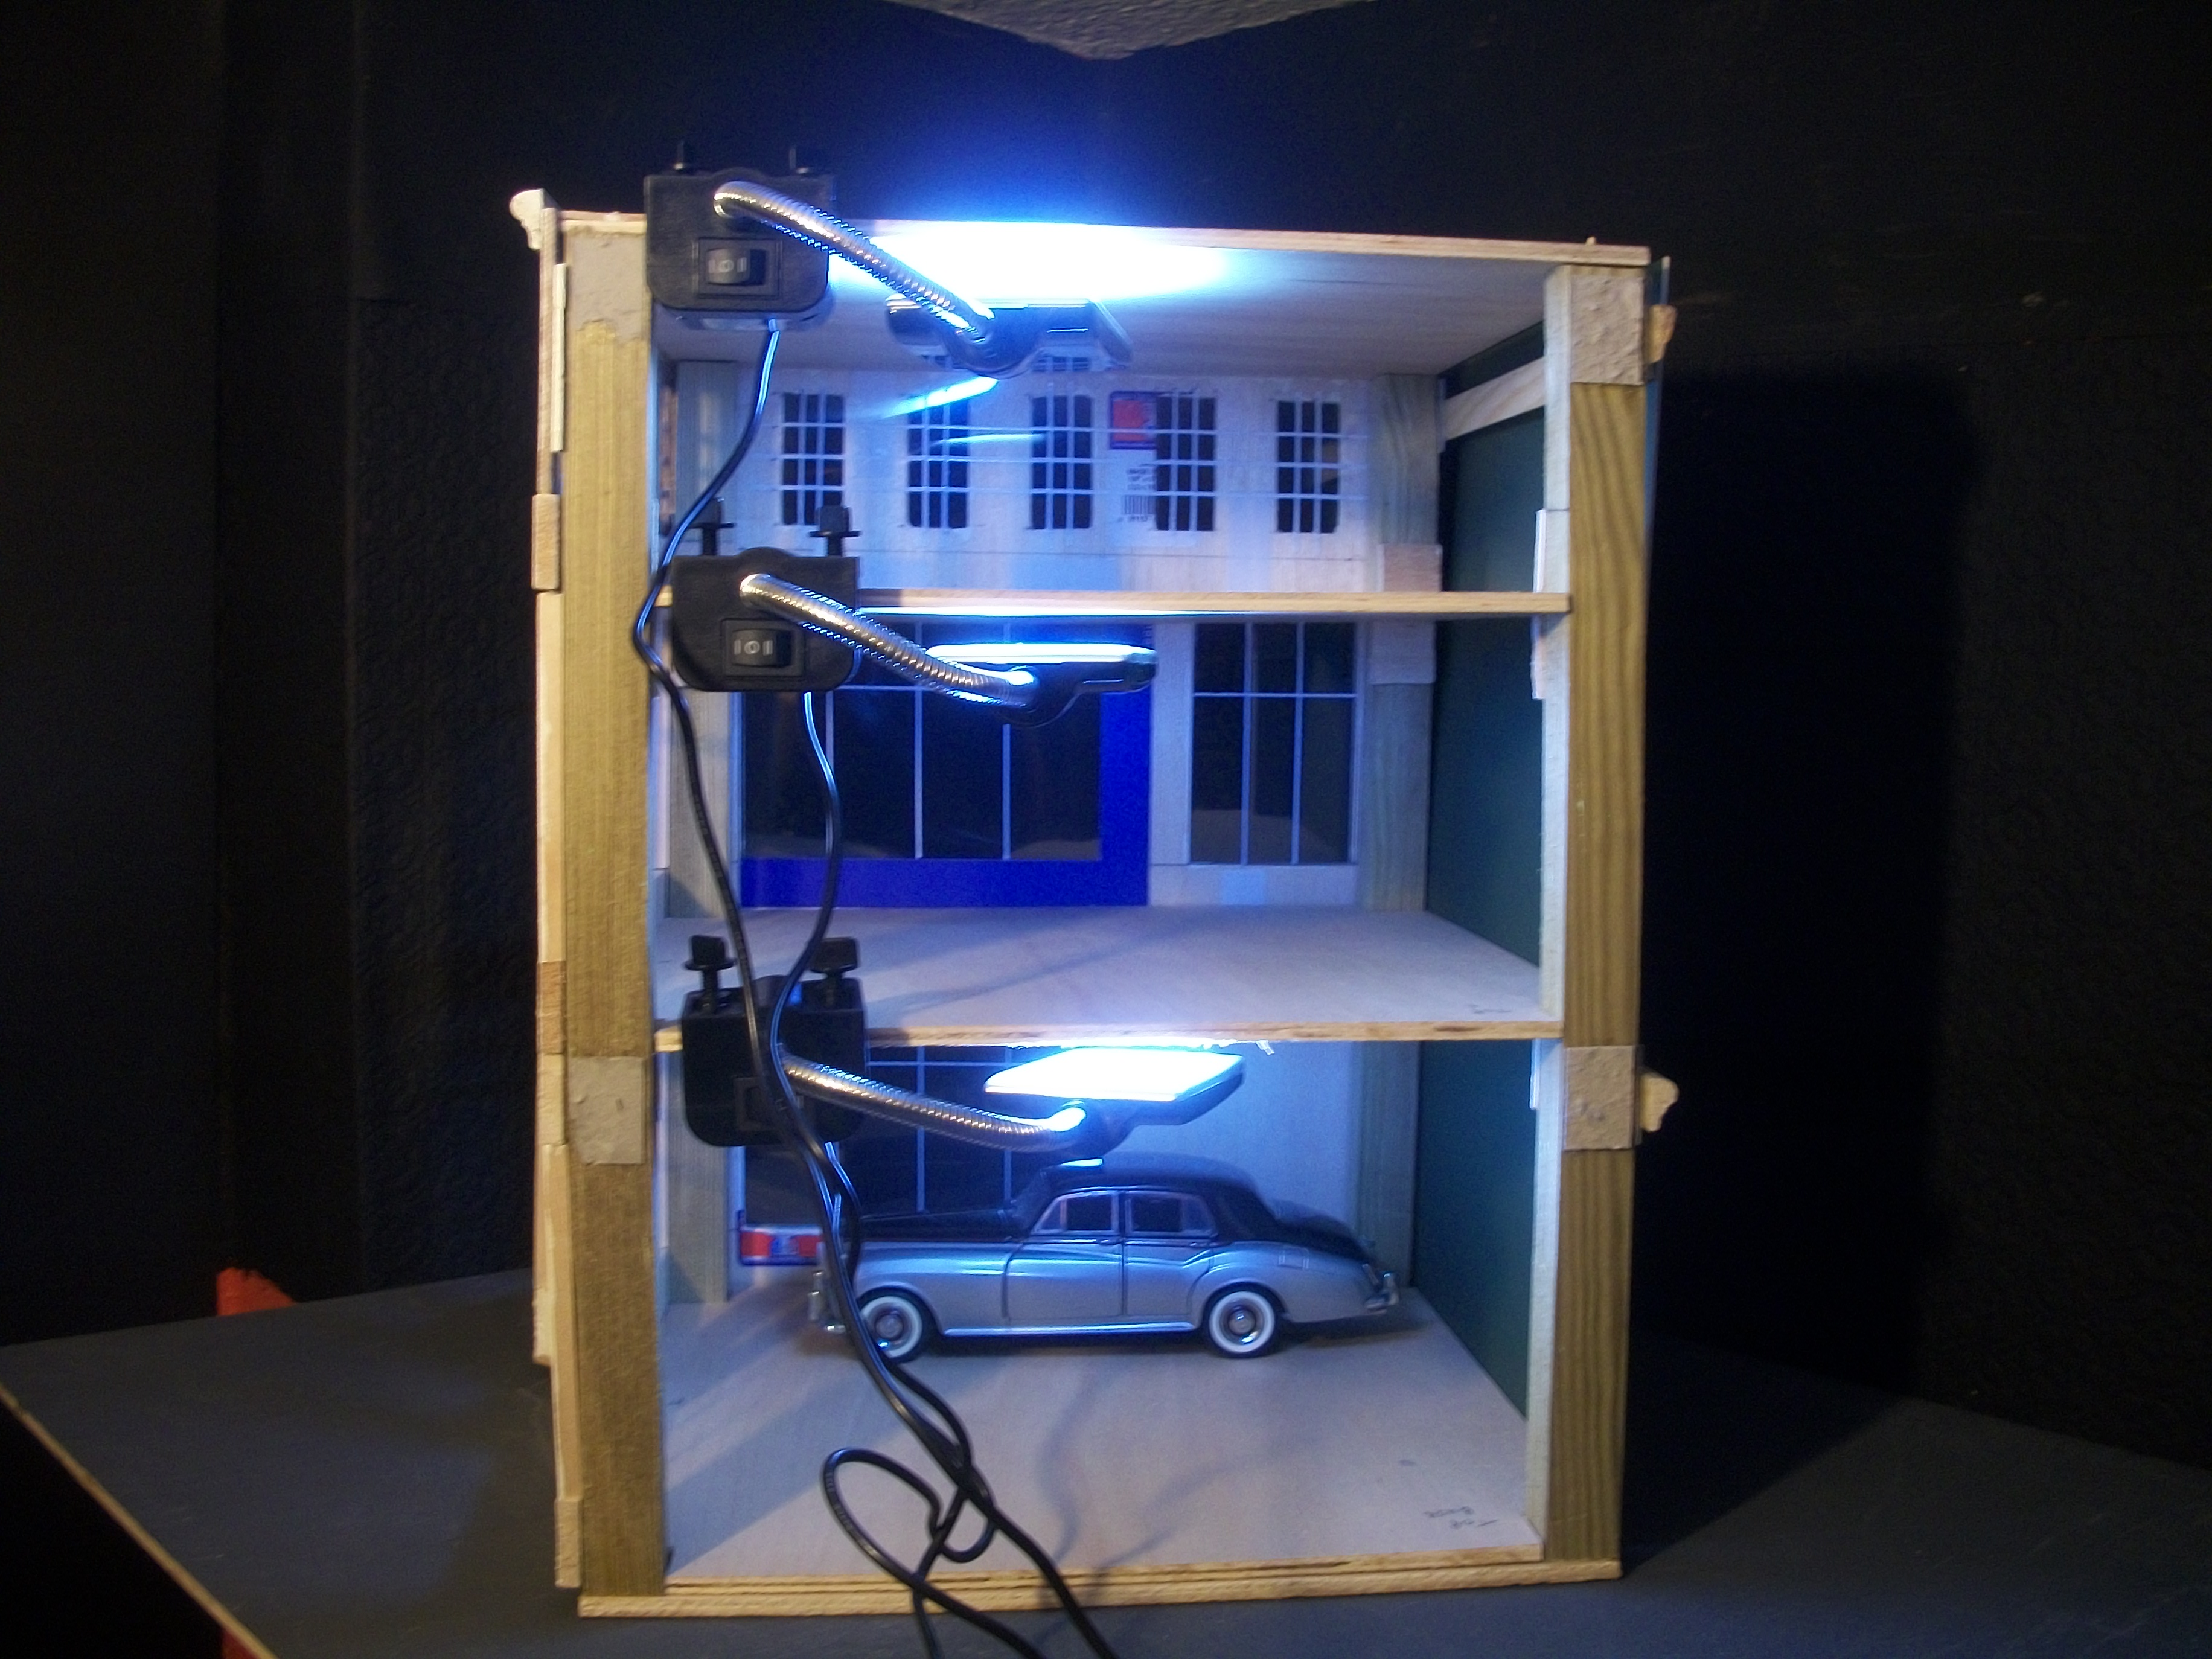
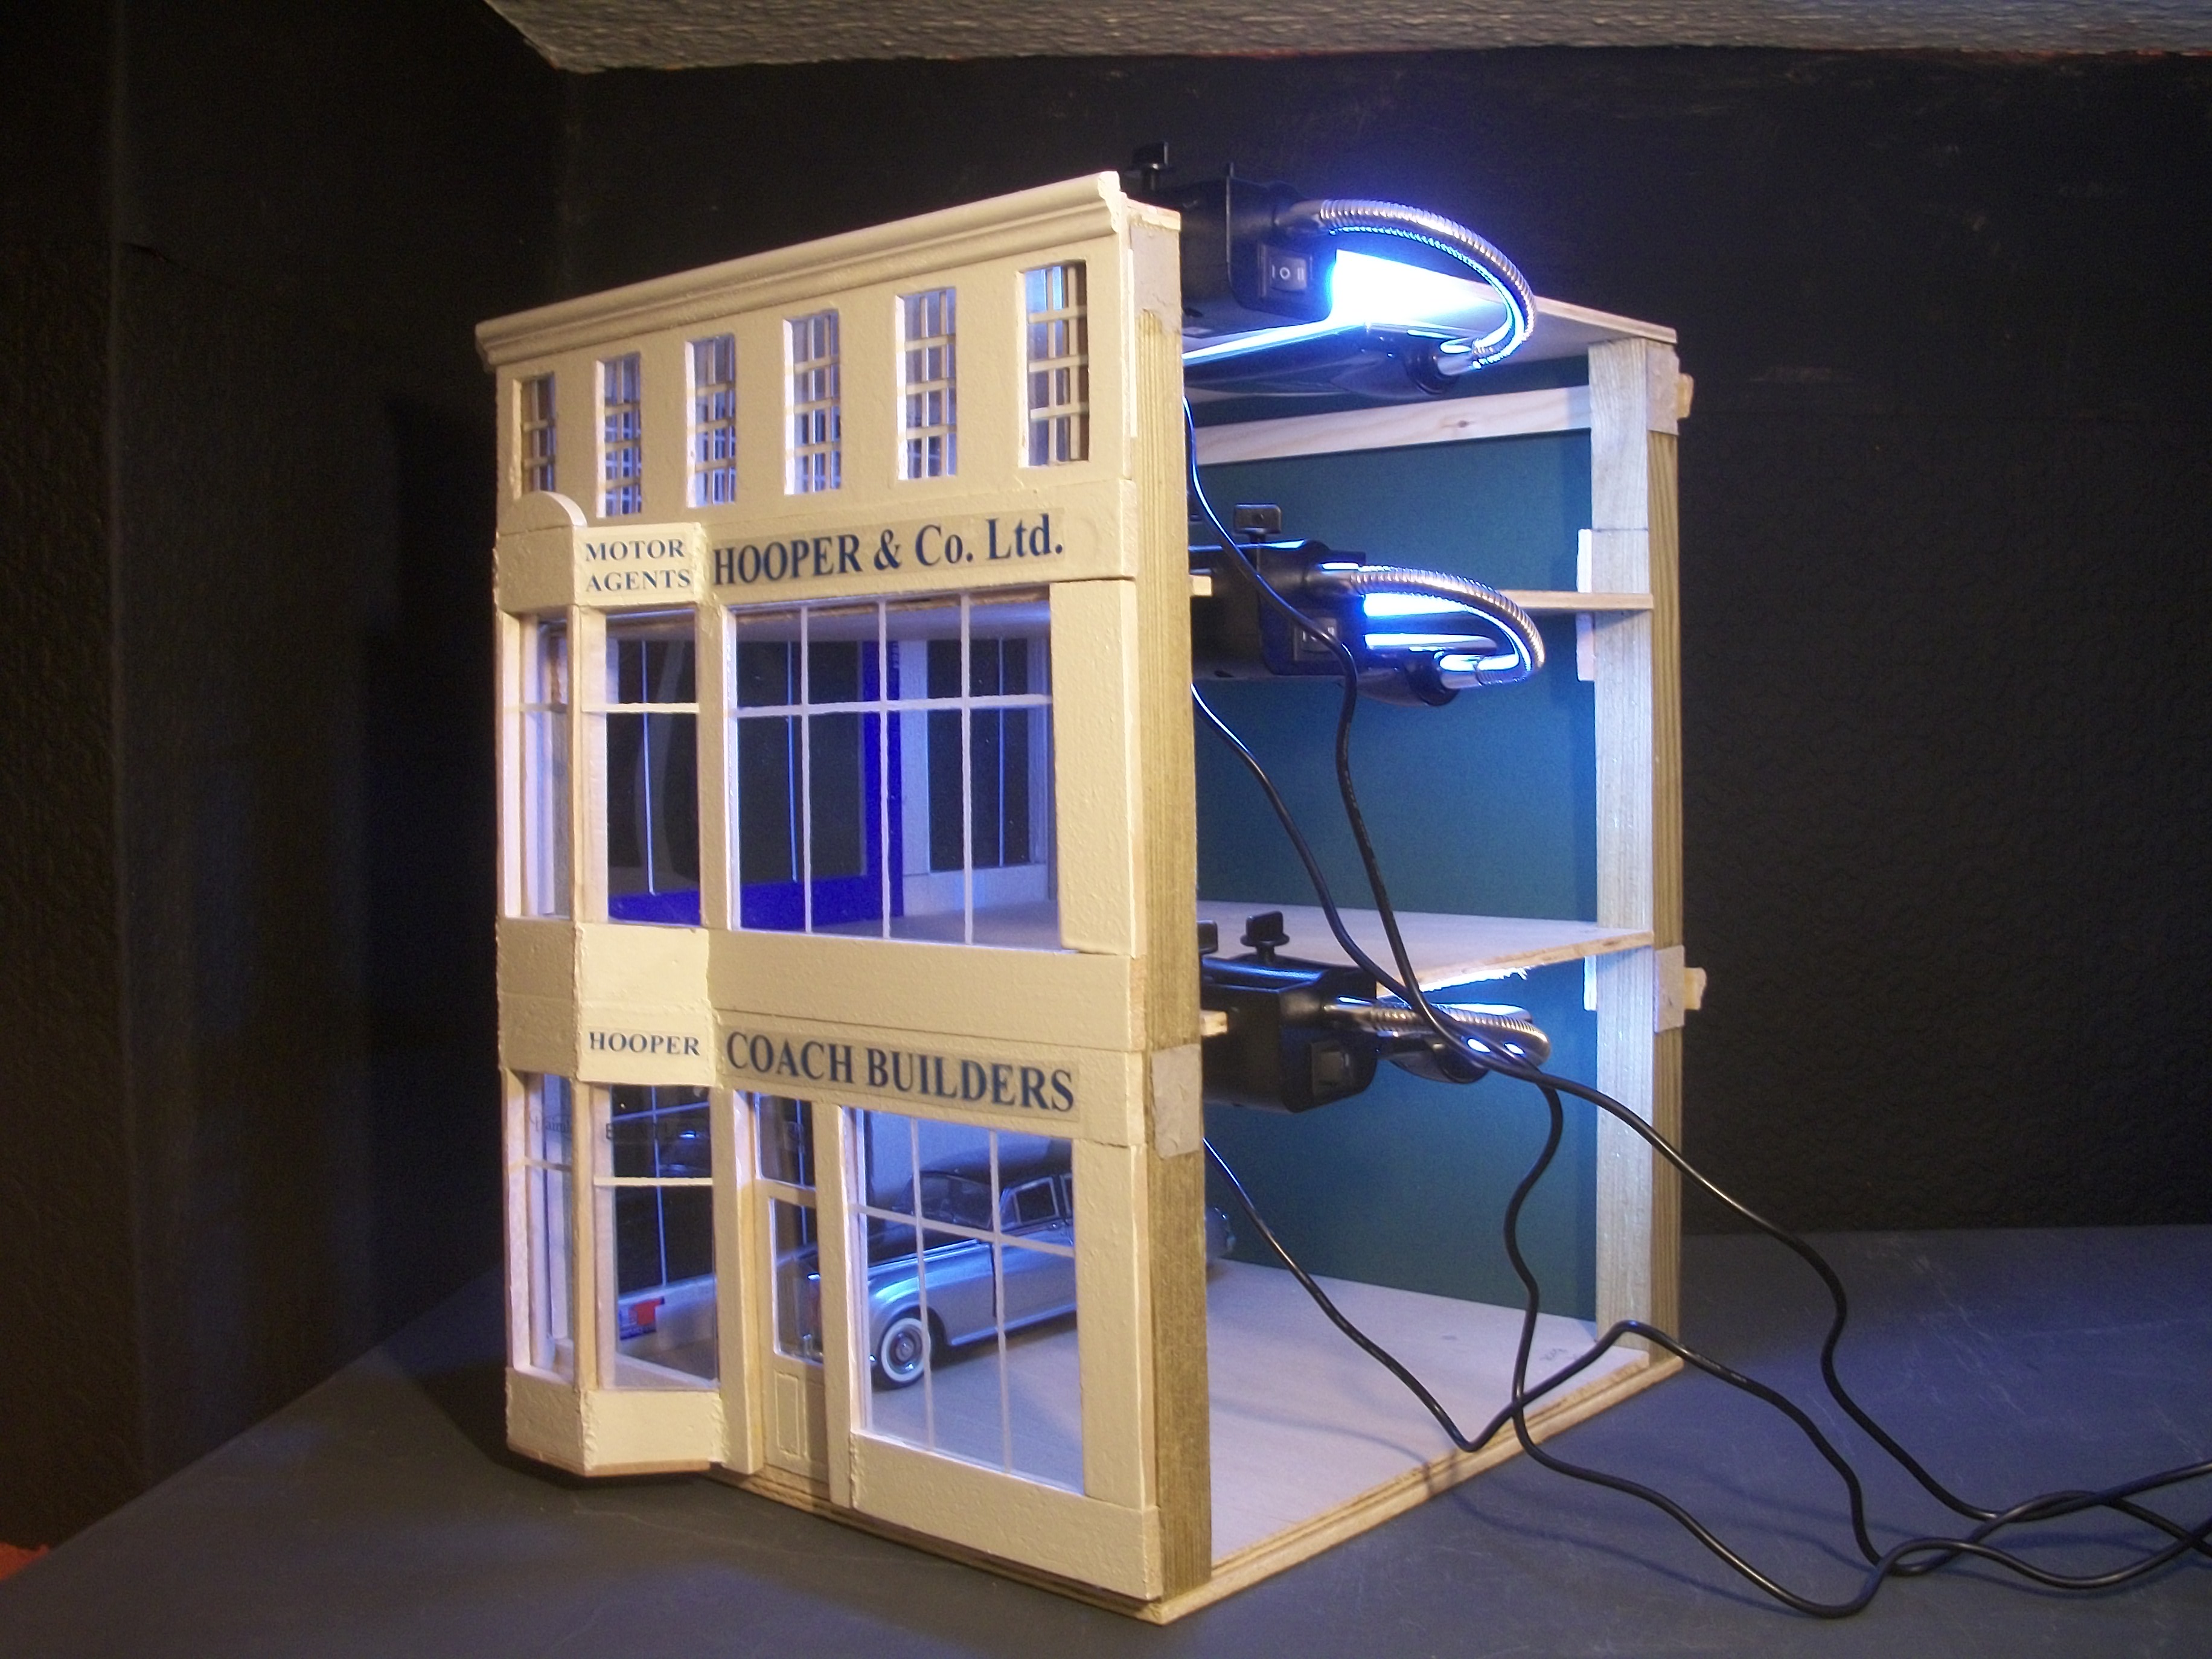
Not sure if masking tape would have warmed these LED's that I was using at the beginning of the project...... only joking, as they were quite powerful aquarium lamps, and one lamp on each floor! David
-
Great Gatsby Peterbilt 7 stained glass and furniture tests
Anglia105E replied to olsbooks's topic in WIP: Dioramas
JC..... from the first of your two photos I can see how this is going to work, and of course camera angle, camera height and lighting are critical here. When taking photographs within my diorama I set up the camera on three wooden blocks, which corresponds to a height of 3 inches and this gives eye level view as seen by a 3" tall 1:24 scale figure. Also, I previously tried using LED lighting, but this produced a strong blueish hue in the resulting photos. Now I have dolls house lighting which is much nicer, and produces a soft warm glow somewhat like vintage lighting. The LED's produce no heat, whereas the dolls house lighting bulbs do get warm inside a scale model building. Your second photo does show clearly how you need to arrange your models to achieve the desired effect. I am sure this can be done, and you obviously know what you're doing. Following your thinking, I might try out some ideas with different scale models in my settings. For example, I have a 1:16 scale Daimler-Benz carriage that is too large for the 1:24 diorama, but using your concept maybe I can have the carriage at some point in the background and make it work visually. David -
Thank you jc....... and work continues on the Hooper & Co diorama, which is now approaching 2 years in the making. David
-
Thanks for the comment, David Mitchell...... nice to see you back here. David
-
Well spotted Gary..... there are two bicycles in this diorama now, the most recent being the gent's Fujimi bicycle from the garage tools set, and the other one is a 3D printed lady's bicycle from Shapeways. David
-
Thanks for the comment Gary, and let's hope the next load for this truck is way more secure! David
-
Dax..... That is a very nice looking kit of the '47 Chevy, and I had a look on Ebay to find there is only one listed, which is an Aerosedan. Seems to have wooden panels on the doors and the kit is priced at £31.01, which is around US $. 39.76 and quite rare now. Here is the link for you.... https://www.ebay.co.uk/itm/GALAXIE-13012-1947-CHEVY-FLEETMASTER-AEROSEDAN-1-25-Model-Car-Mountain-FS/142941461718?epid=7023859159&hash=item2147f99cd6:g:MUAAAOSwFpVbUNeb:rk:26:pf:0 David
-
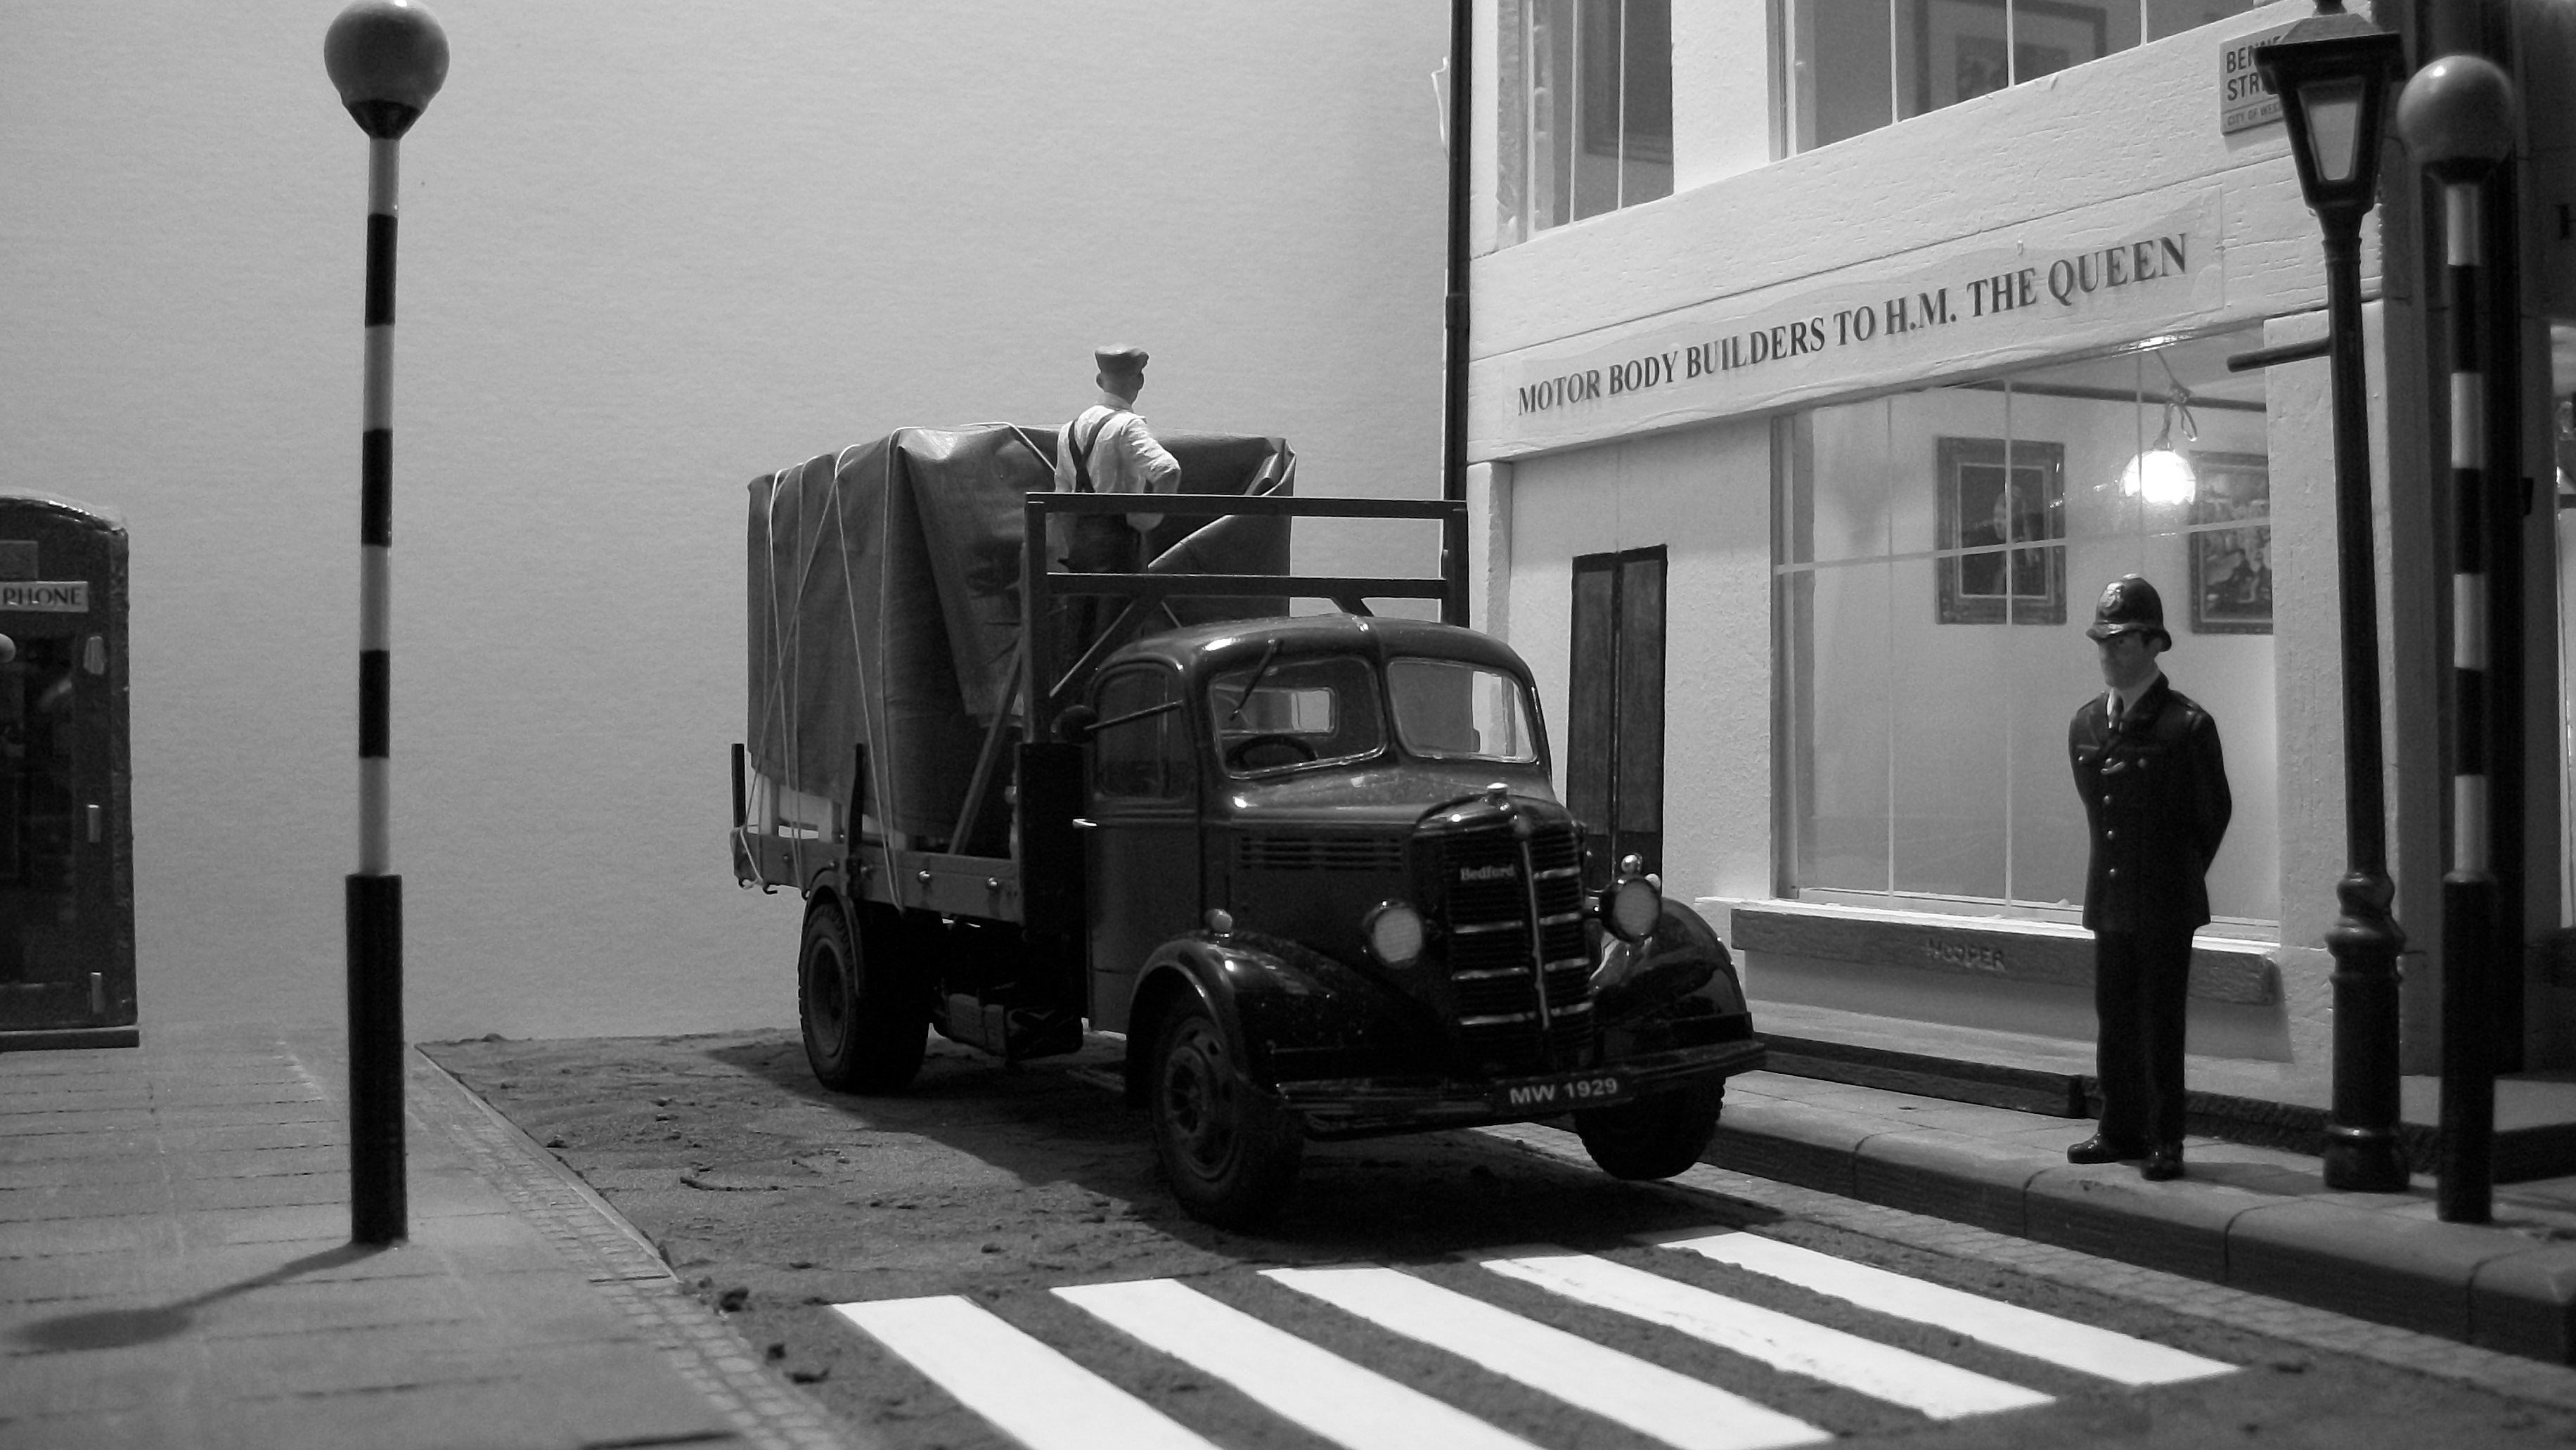
Here is the 1953 Bedford OLBD dropside lorry, which is now completed, and I have scratch built a green tarpaulin, a wooden pallet and some ropes to go with the vehicle. These photos show only the initial stages of setting up the idea to see if it works, so the roping and sheeting is not correct yet, and the really interesting photography will come along later when the Bedford gets to the diorama setting. PC Dixon is having a quiet word with the Mr Watson, the lorry driver about his dubious roping and sheeting, and the Police constable is not happy with the insecure load. Furthermore, he is equally concerned about the kettle and the bricks, not to mention the ladder. The tarpaulin is green garden refuse sack material in PVC, with Sap Green acrylic paint applied with a dry toothbrush. The pallet is constructed from balsa wood and the ropes are 1:24 scale rigging for model ships. The rope size is correct at 0.5 mm to represent 1/24th of 12 mm rope in full size. David
-
Every little piece comes from some donor object..... and there's a chuck ! What an eye you have for reusing materials and objects that might otherwise go to waste. David
-
Looks good in orange paint, and that is one more engine saved ! David
-
Nice detail to the inside of the V8 crankcase. I like the random objects on the workbench to the left, including tools and an aerosol can. David
-
I can see that you enjoyed building that one...... good result too. Like it ! David
-
JC..... Without a doubt, it is the figures that have been the main issue with my diorama project too. I realised at the beginning that I had to decide, do I go the way that the well respected Michael Paul Smith chose to go, which is to have no people whatsoever in the setting, or do I attempt to include VERY realistic looking people? Adding figures to the scene, especially for the purposes of close up photography, is a risky business at the best of times. It sounds like you will need 1:25 scale figures for your foreground position, and they need to be in keeping with the vintage period. So far, the best figures that I have found are the ICM 1:24 scale Henry Ford & Co set. The kit is a set of three figures, made in Ukraine and very cheap to buy, just over £11.00 here in England so around US$ 14.00. The kit includes an engineer, a businessman and Henry Ford himself wearing a bowler hat, and they are easily assembled from 8 - 10 pieces of plastic. Once painted carefully they can be very realistic and seem to be suitable for 1910's, 1920's, 1930's scenes, and even 1950's for my diorama. There are literally thousands of 3D printed figures listed on the Shapeways website, some of which I have used, but it does take some time and patience to go through the many pages of figures listed, all shown as white on white. Why they show a white figure on a white background I don't know, but it makes no sense to me. For you, 1:24 scale would not be a problem, being so close to 1:25 David
-
Nice looking tractor build Pat, and it is a good example of the unusual subject matter that Heller come up with. Maybe the words ' delicate ' and ' tractor ' don't exactly go together in the same sentence? Every once in a while it is a good idea to build something that is not part of your usual theme. That's why I built the Aoshima Mitsubishi Pajero SWB. David
-
Mark...... that exhaust system of yours is perfectly accurate to the 1:1 exhaust system, and from your photo you couldn't tell the difference I bet. Good results from your 3D printer guy and clearly you got the 3D design files right. David