Anglia105E
-
Posts
3,487 -
Joined
-
Last visited
Content Type
Profiles
Forums
Events
Gallery
Everything posted by Anglia105E
-
Thank you, Steve Martin . . . David
-
Four excellent builds of yours Mr Guthmiller, and some expert chrome work too ! Thanks again . . . David
-
You have made a good point there, Steven Guthmiller . . . I was thinking it made sense to apply the clear over the revealed script, once the script has been cleaned up. Having not used clear before on my painted model cars, I was overlooking this step, so thank you for pointing that out ! I particularly like your script work on the yellow car, the black one and the pink ( is that a Pontiac GTO ? ). David
-
Thank you Steve . . . I probably need to use either Humbrol Enamel Thinners, or maybe Isopropyl Alcohol . . . David
-
Thanks, Philip ! David
-
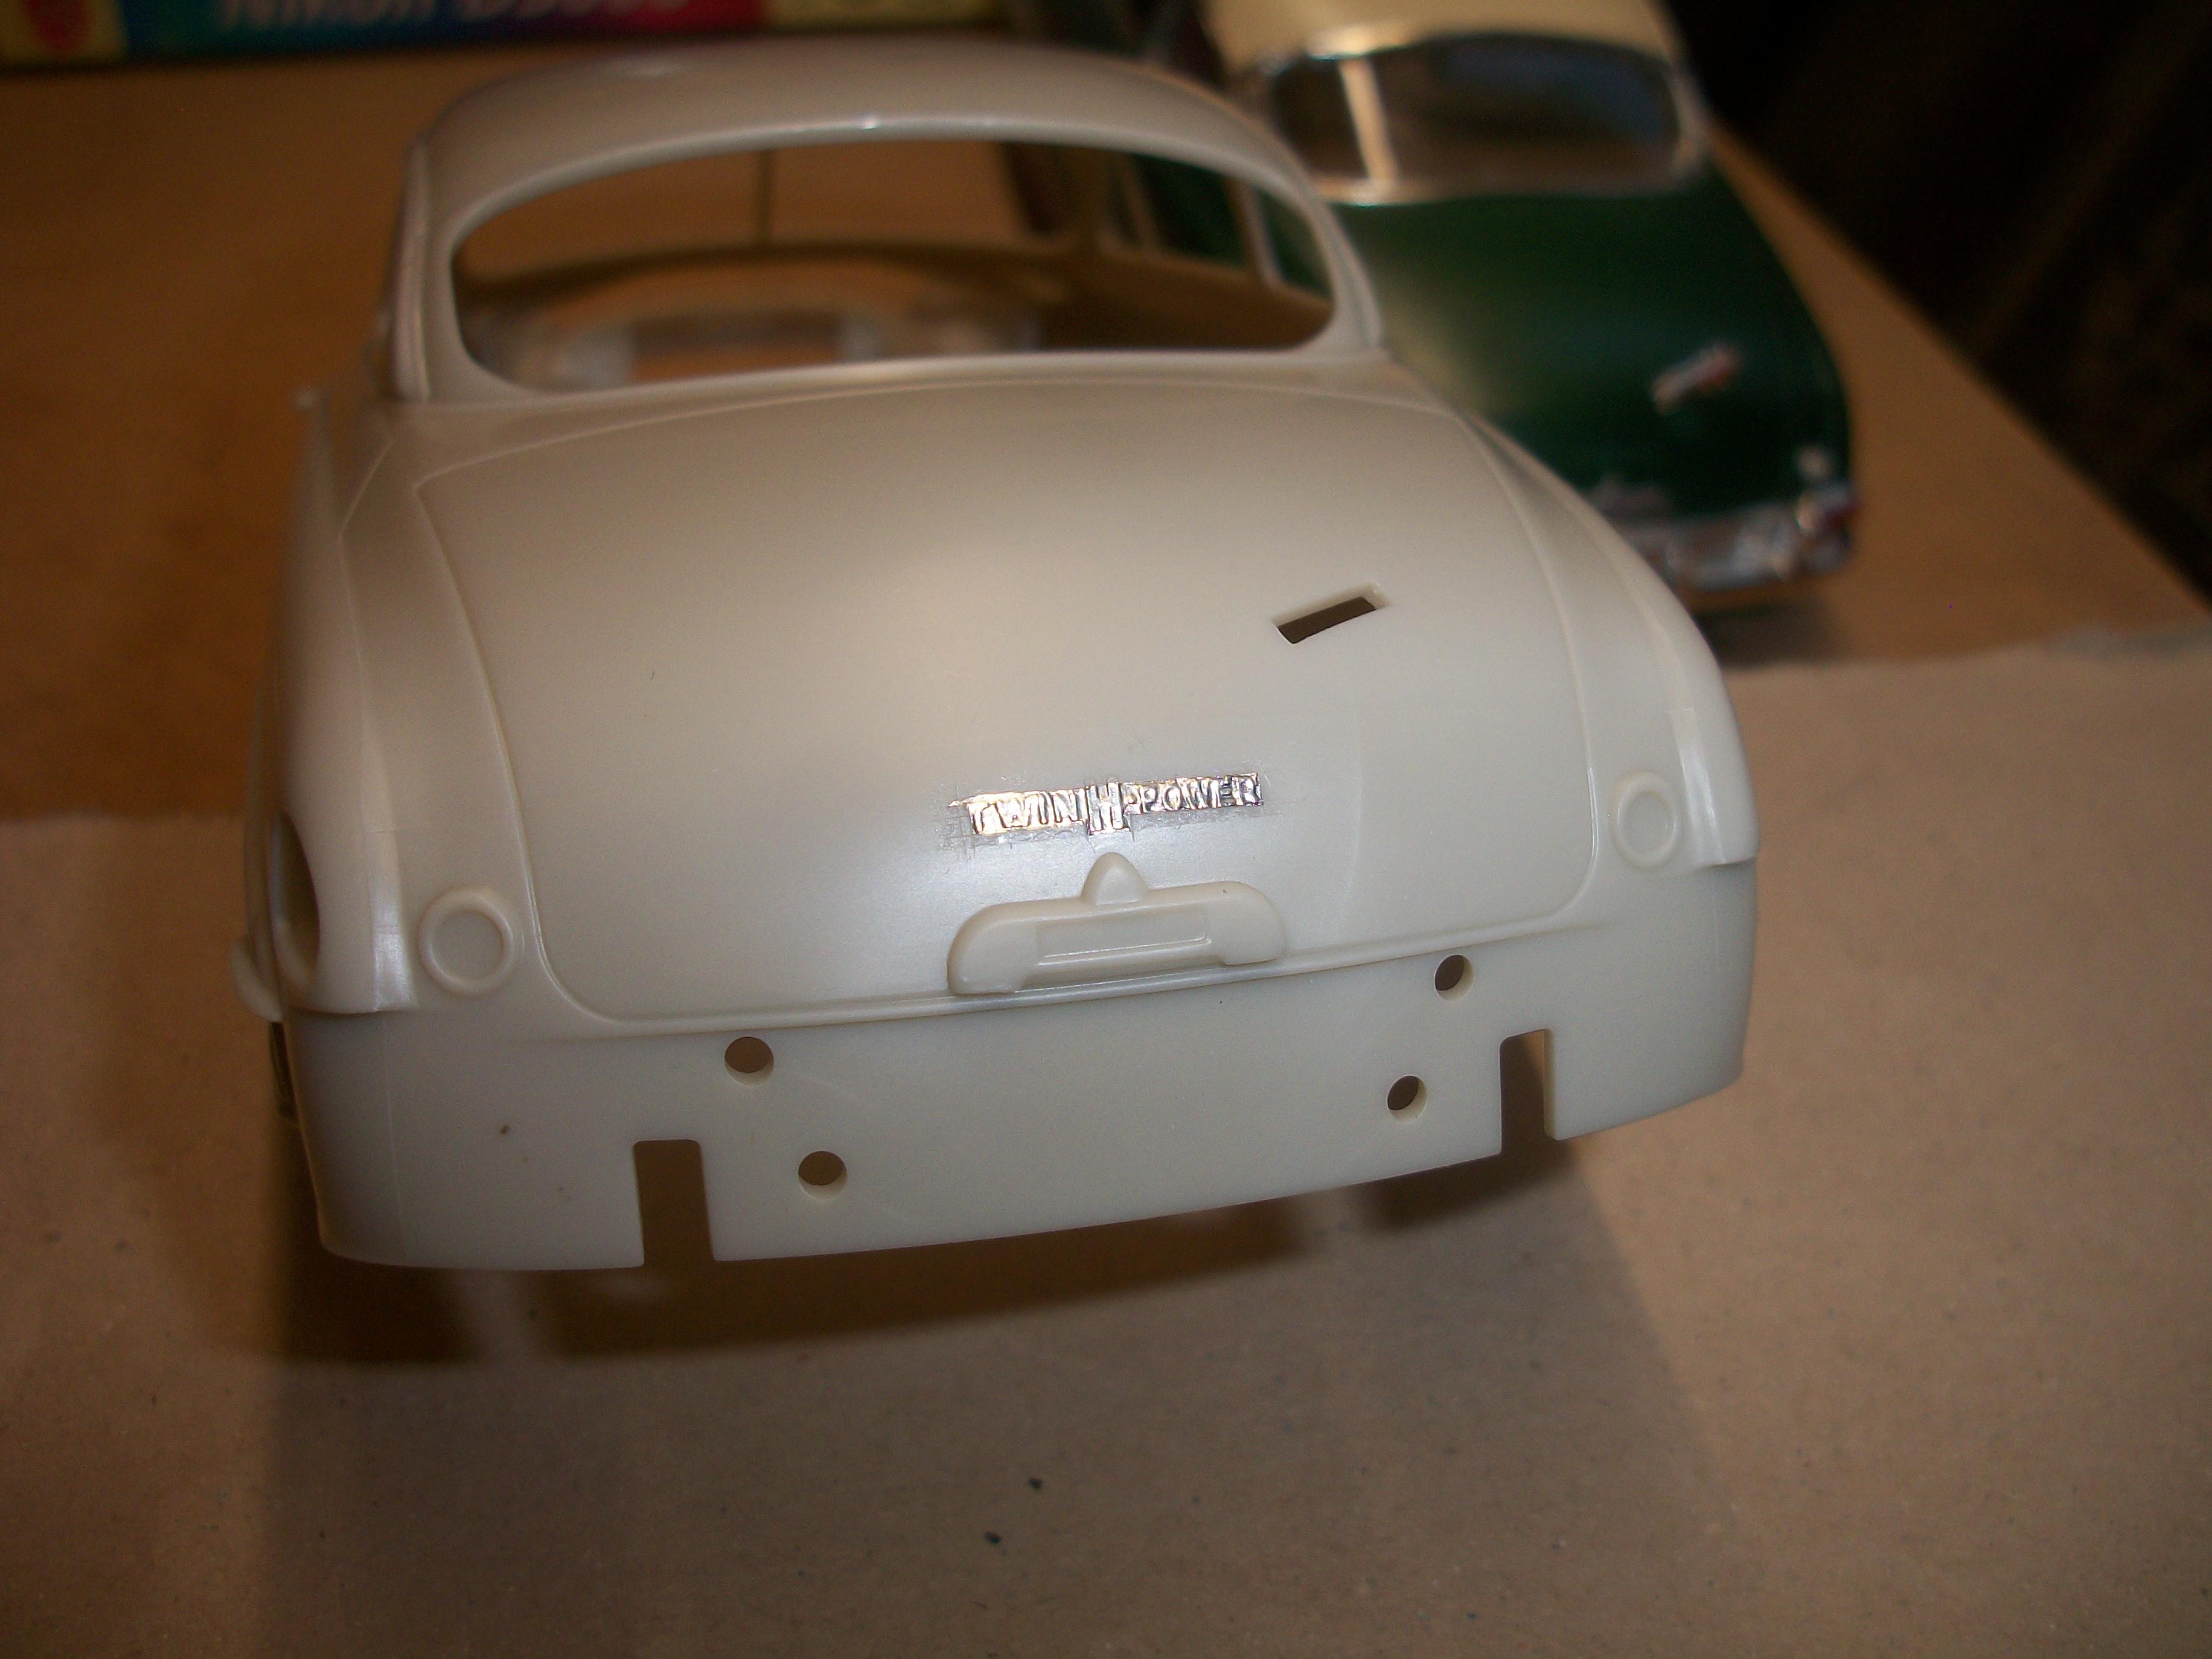
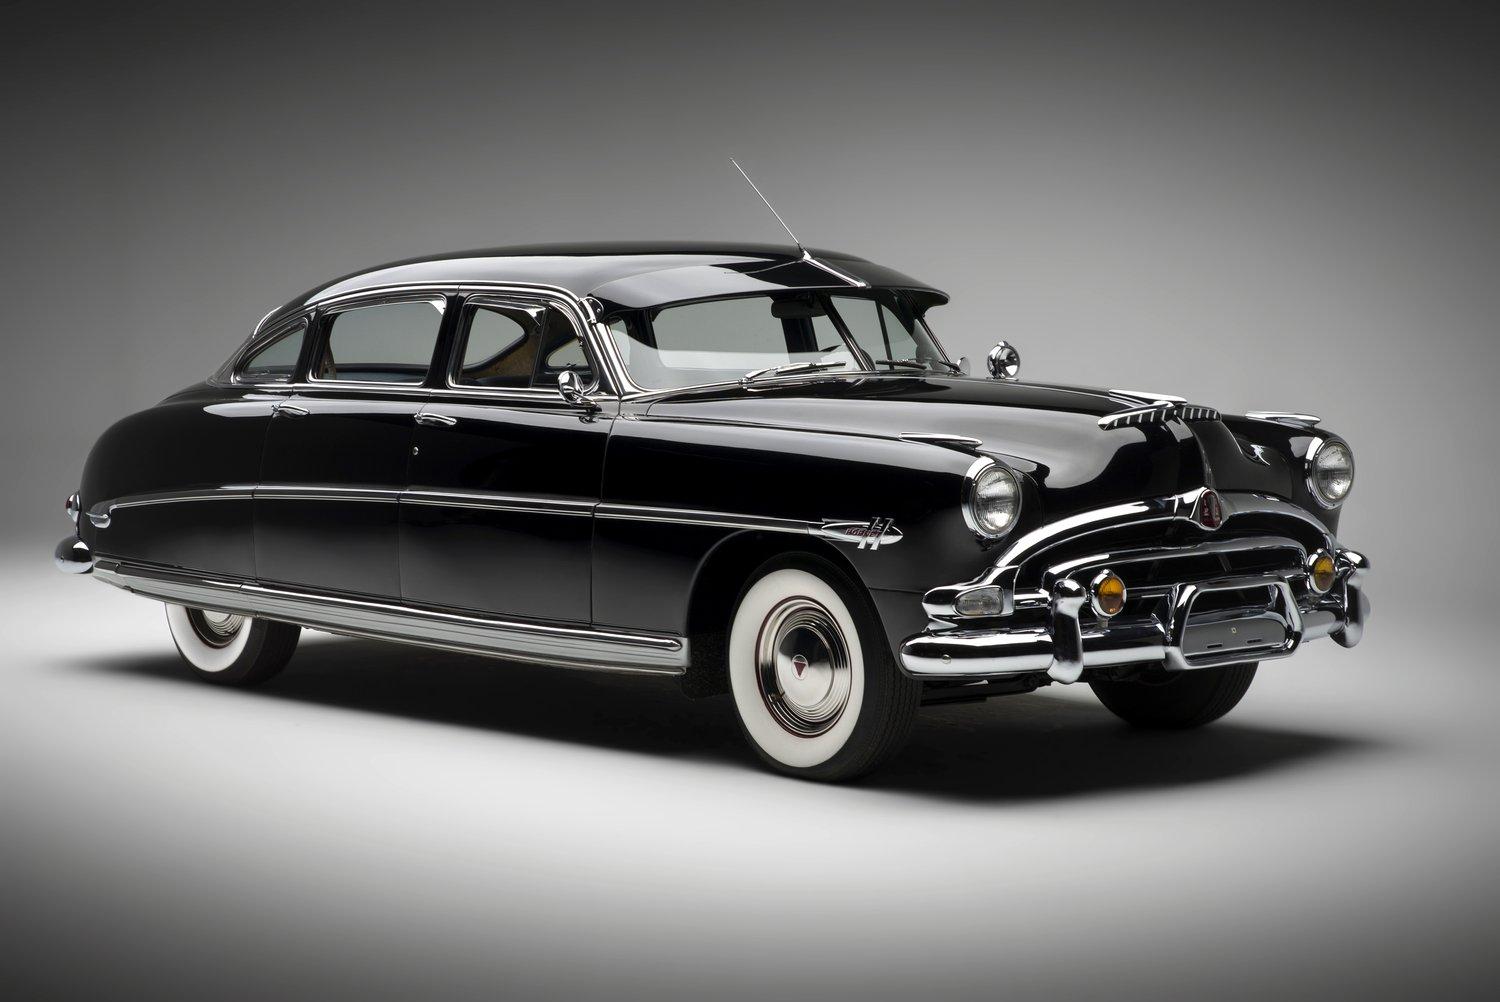
Preparation is under way to commence building my second 1:25 scale 1953 Moebius Hudson Hornet . . . This is such an enjoyable kit to build, and both the quality as well the fit of the parts is outstanding. Whereas my first Hudson was finished in a two-tone paint scheme, this one will be single colour, using Tamiya Fine Surface Primer Light Grey, Tamiya TS-14 Black, and Tamiya TS-13 Clear. At the moment, I just have one question, which I am sure has been covered previously . . . The ' TWIN H POWER ' script on the trunk lid is barely visible, and although I did not apply chrome to the first build, this time I have applied BMF to the script, before the primer stage of the painting. Please remind me, how do you reveal the chrome script, after primer, black and clear have been applied later? Thanks . . . David

-
Here are my three 6 -cylinder engines . . . Moebius Hudson Hornet, Rolls-Royce Silver Cloud with Franklin Mint diecast engine, Tamiya Jaguar MK 2 and Rolls-Royce Silver Cloud with my designed engine, as 3D printed by Shapeways . . . David
-

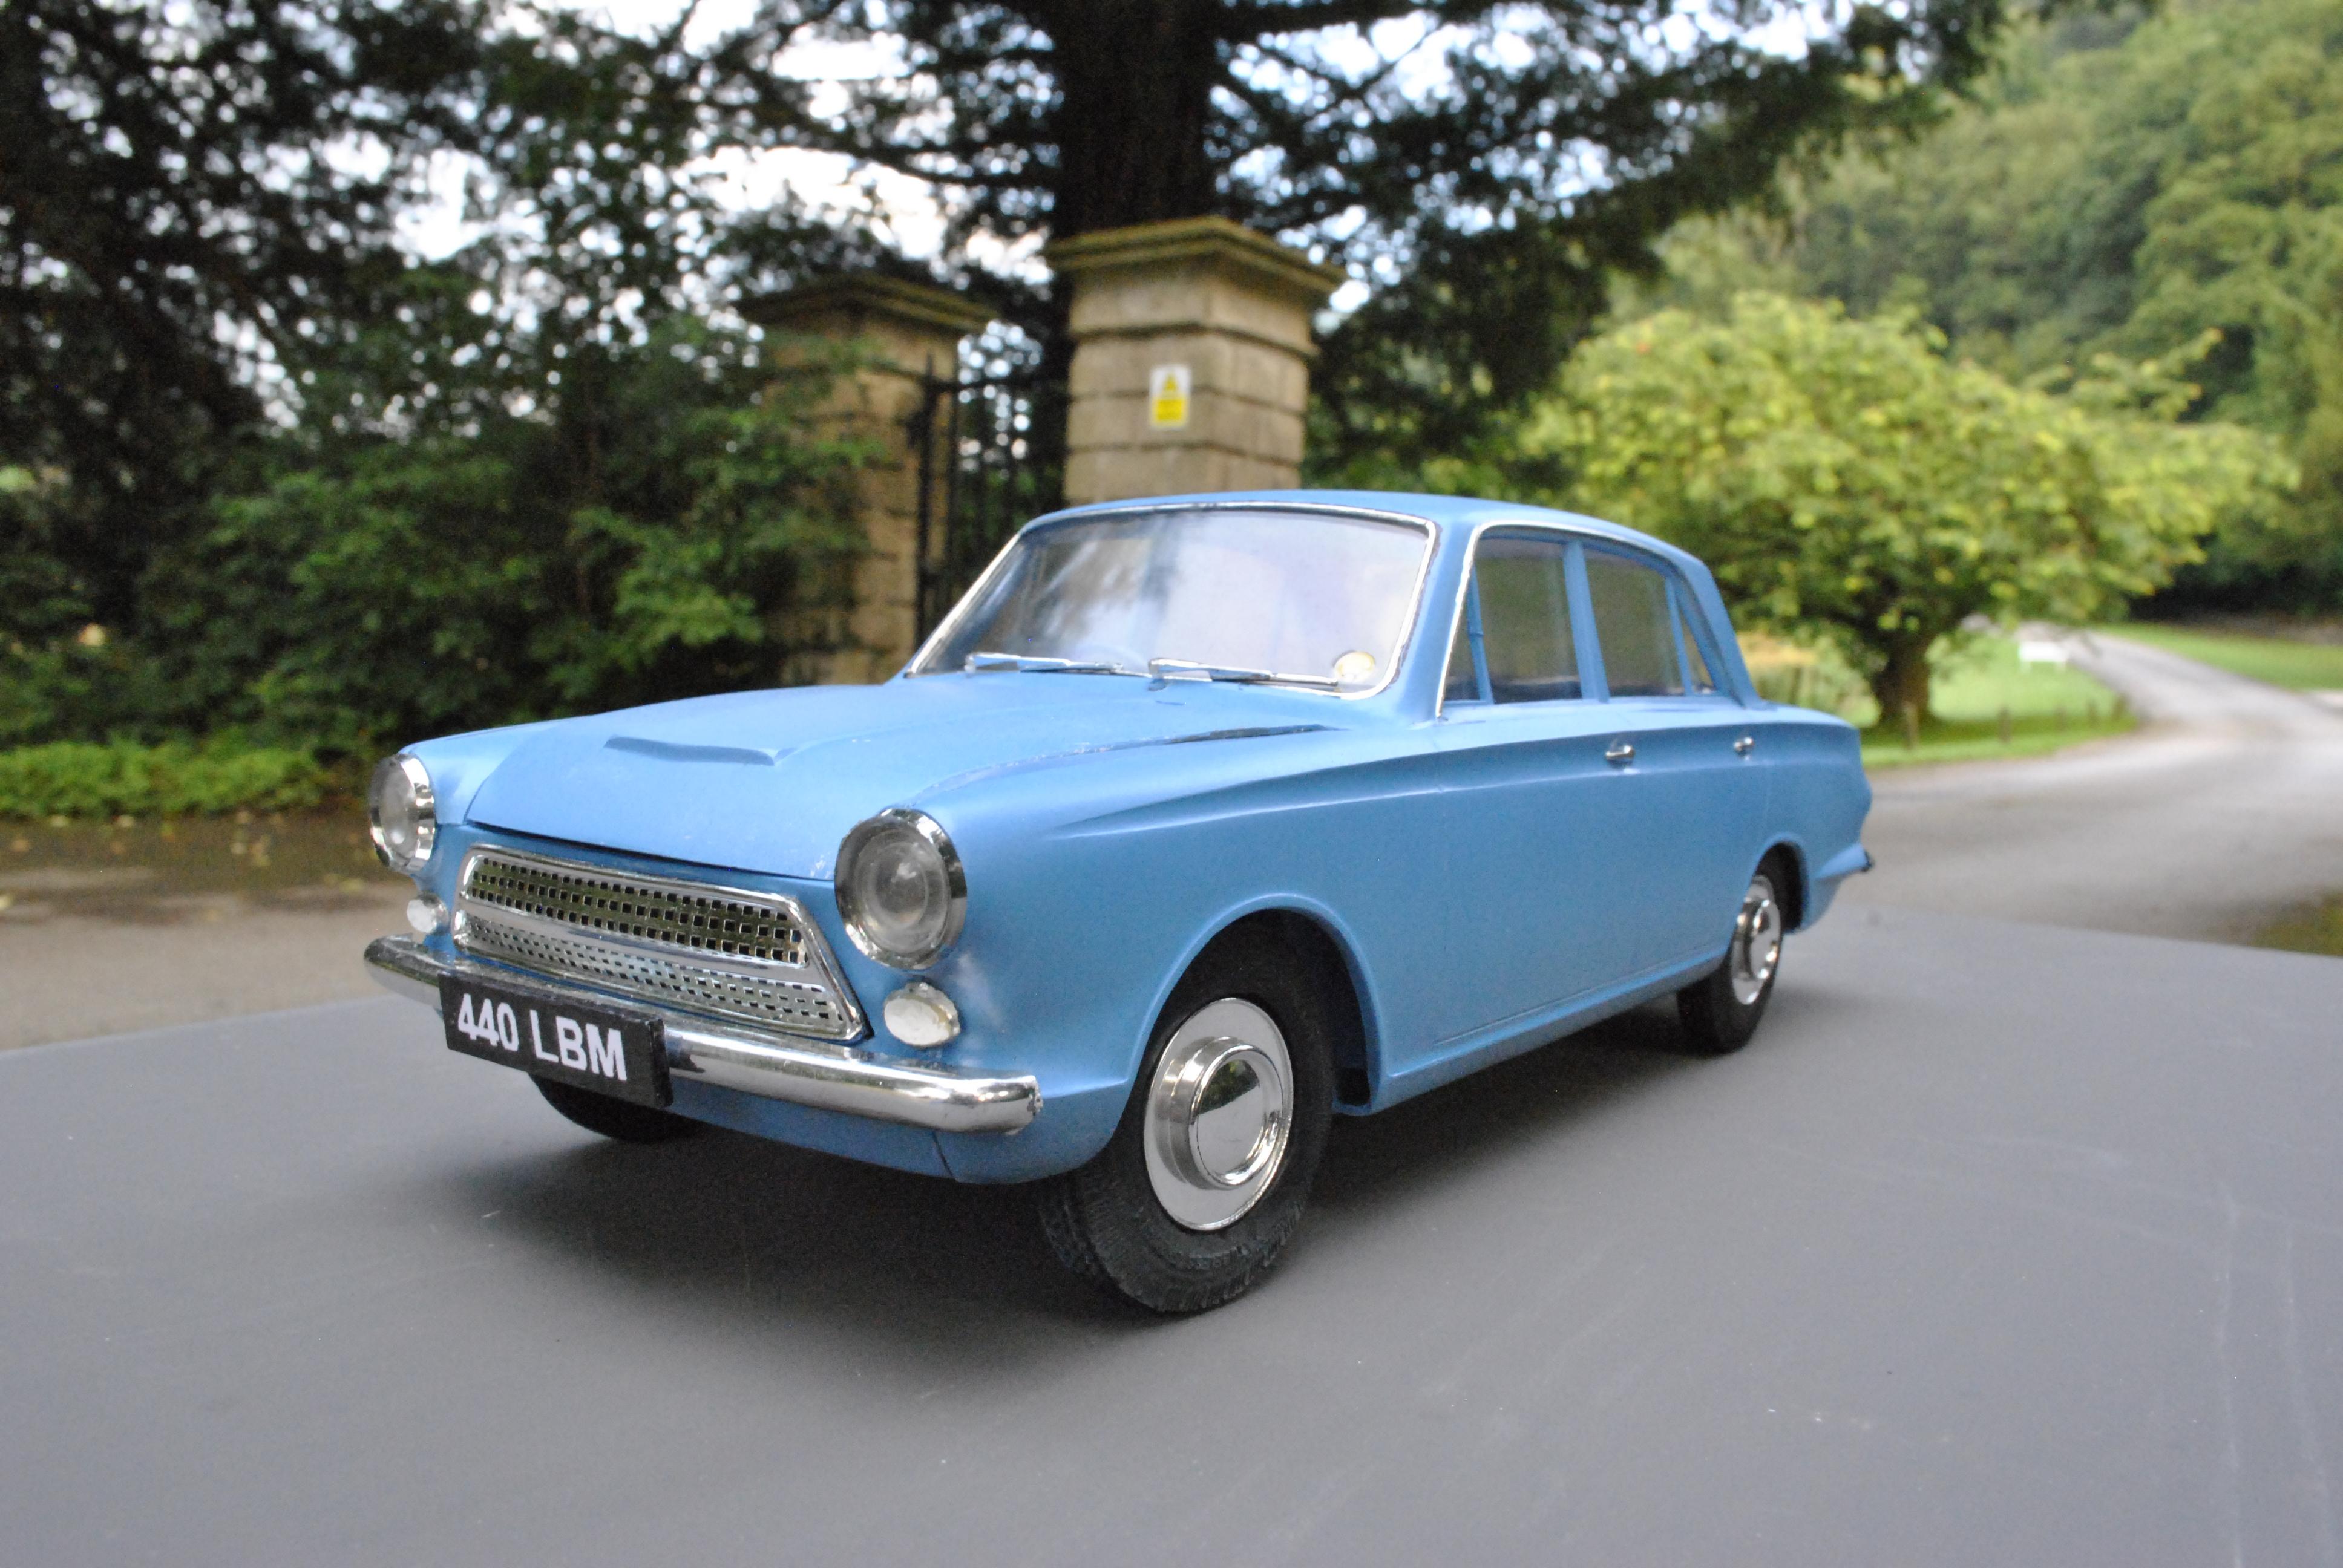
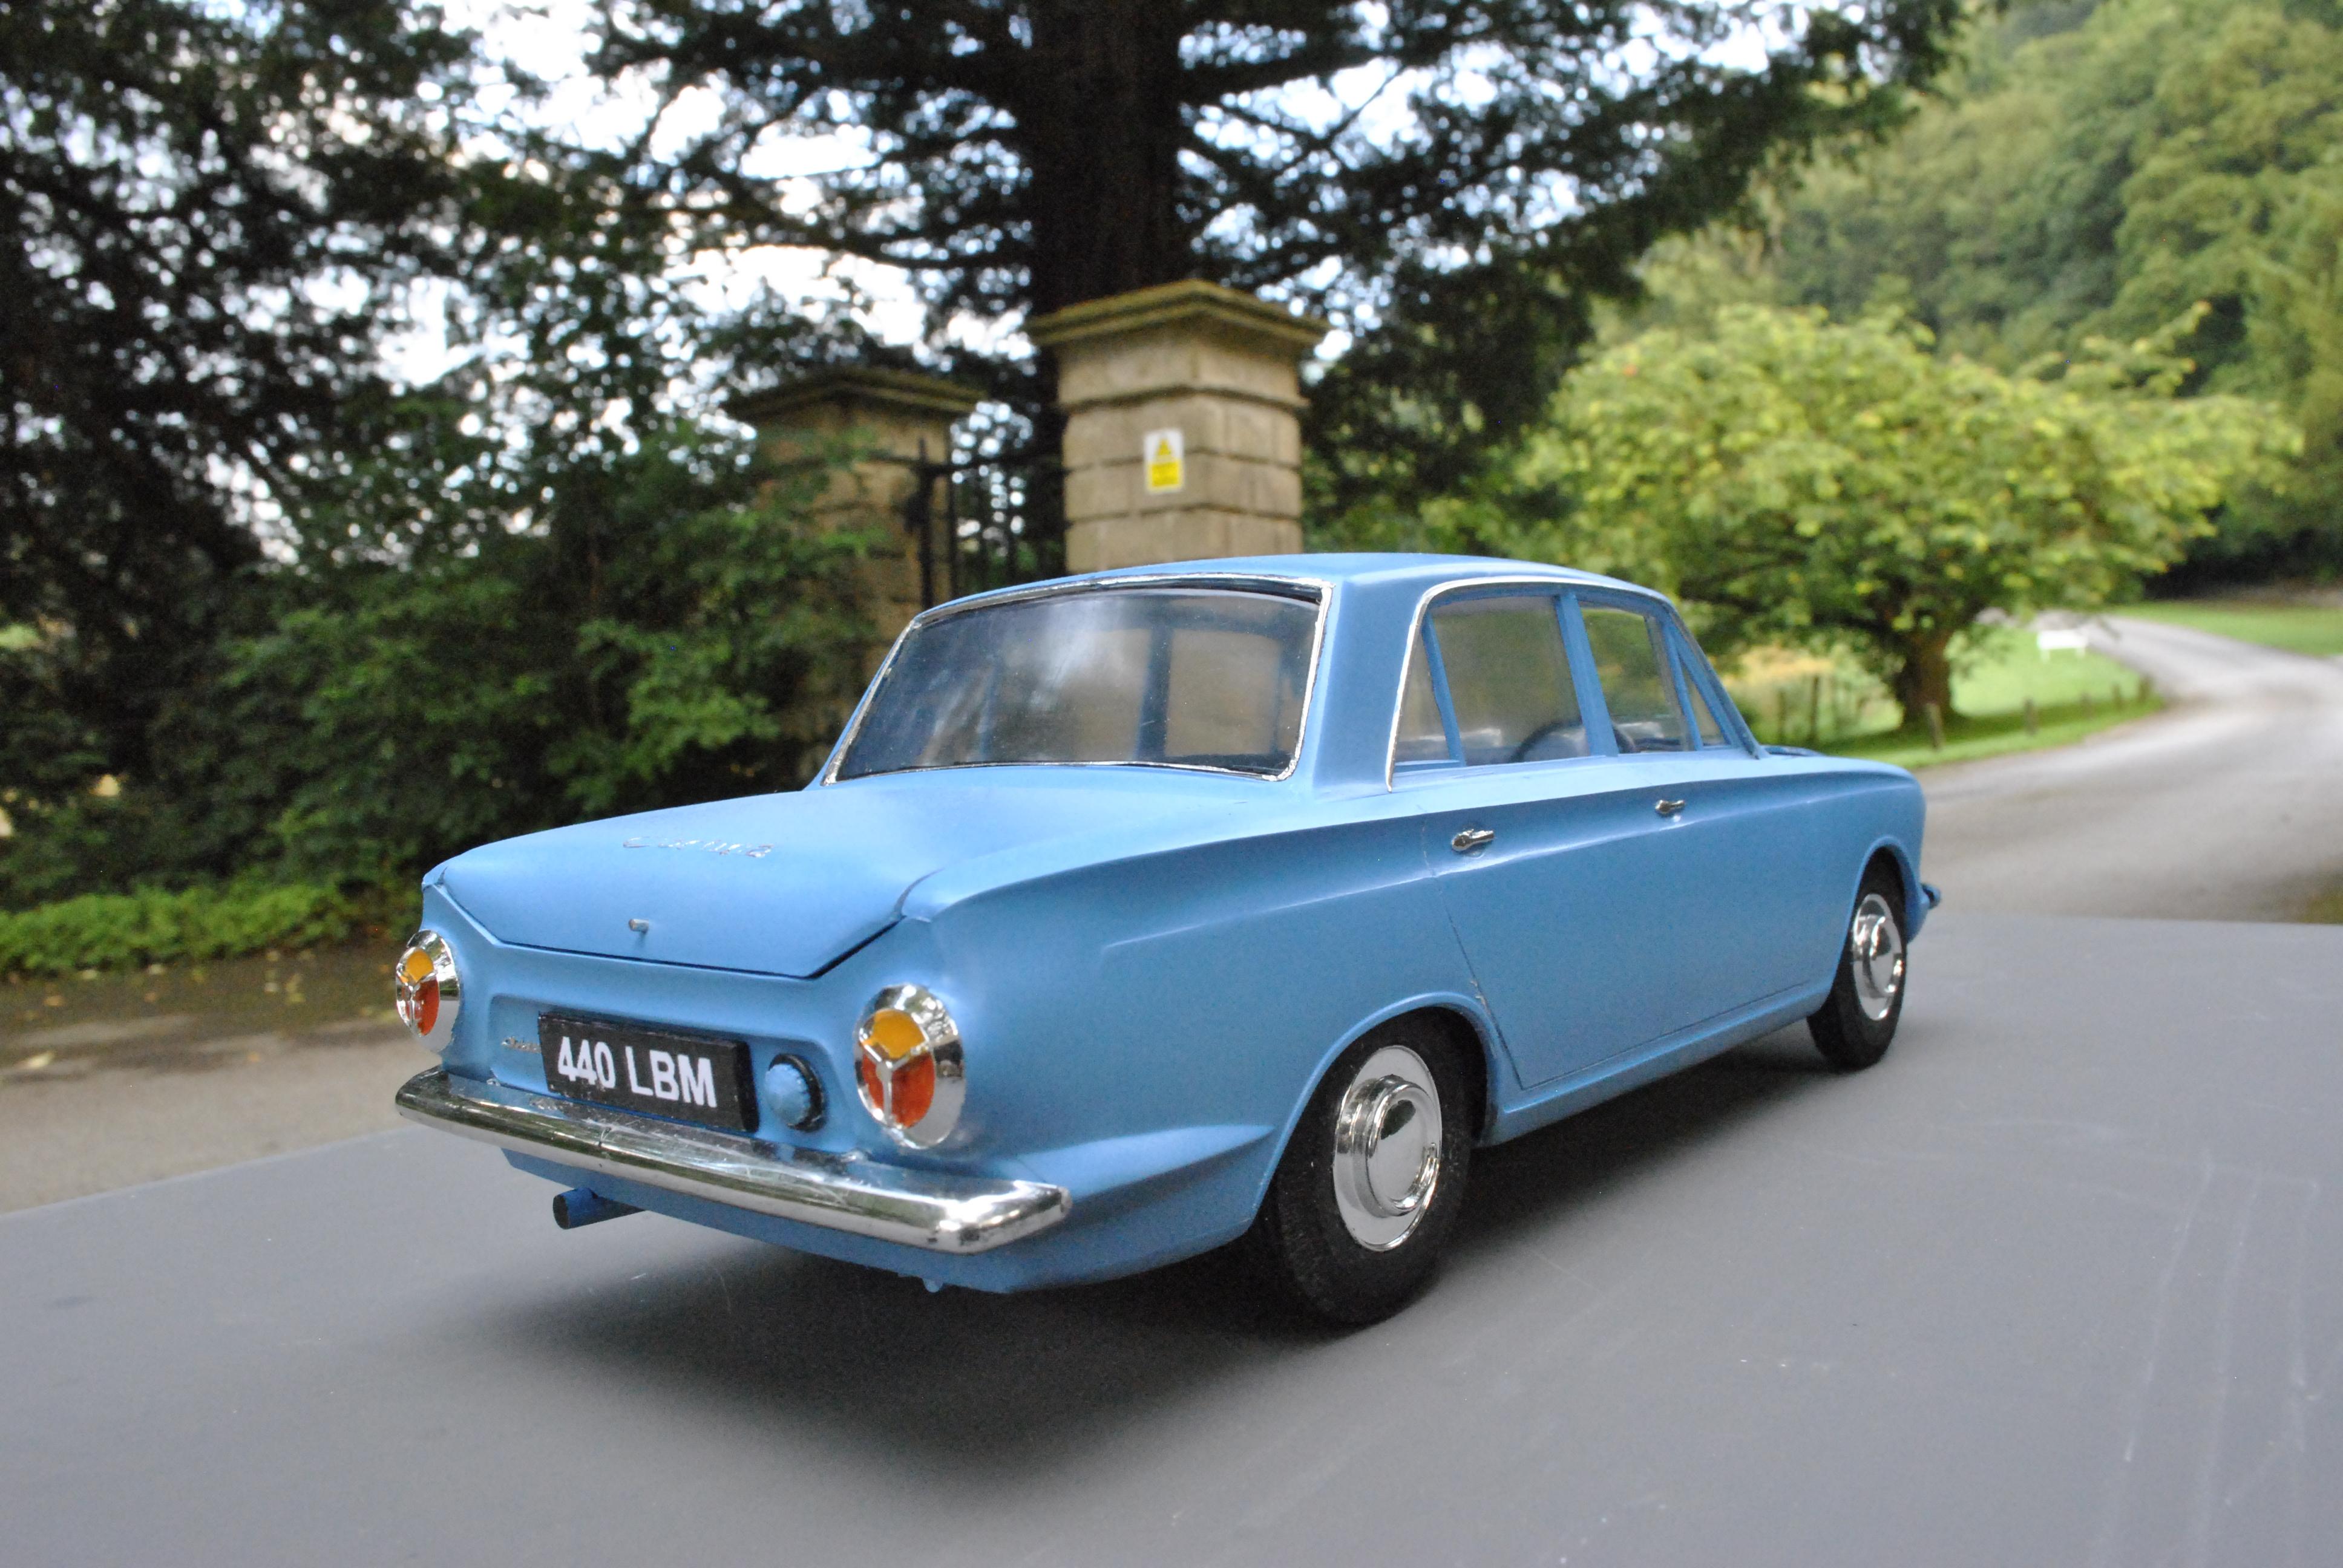
1963 Ford Consul Cortina MK 1 - 4 Door DeLuxe
Anglia105E replied to Anglia105E's topic in Model Cars
Many thanks, Larry David -
1963 Ford Consul Cortina MK 1 - 4 Door DeLuxe
Anglia105E replied to Anglia105E's topic in Model Cars
Cheers, Chris David -
1963 Ford Consul Cortina MK 1 - 4 Door DeLuxe
Anglia105E replied to Anglia105E's topic in Model Cars
Thanks, Donato David -
1963 Ford Consul Cortina MK 1 - 4 Door DeLuxe
Anglia105E replied to Anglia105E's topic in Model Cars
Thank you, Hanjo David -
1963 Ford Consul Cortina MK 1 - 4 Door DeLuxe
Anglia105E replied to Anglia105E's topic in Model Cars
Thanks David . . . That is true what you say. I am extremely critical of my own builds, which is what drives me to improve ! David -
1963 Ford Consul Cortina MK 1 - 4 Door DeLuxe
Anglia105E replied to Anglia105E's topic in Model Cars
Cheers, Glen David -
1963 Ford Consul Cortina MK 1 - 4 Door DeLuxe
Anglia105E replied to Anglia105E's topic in Model Cars
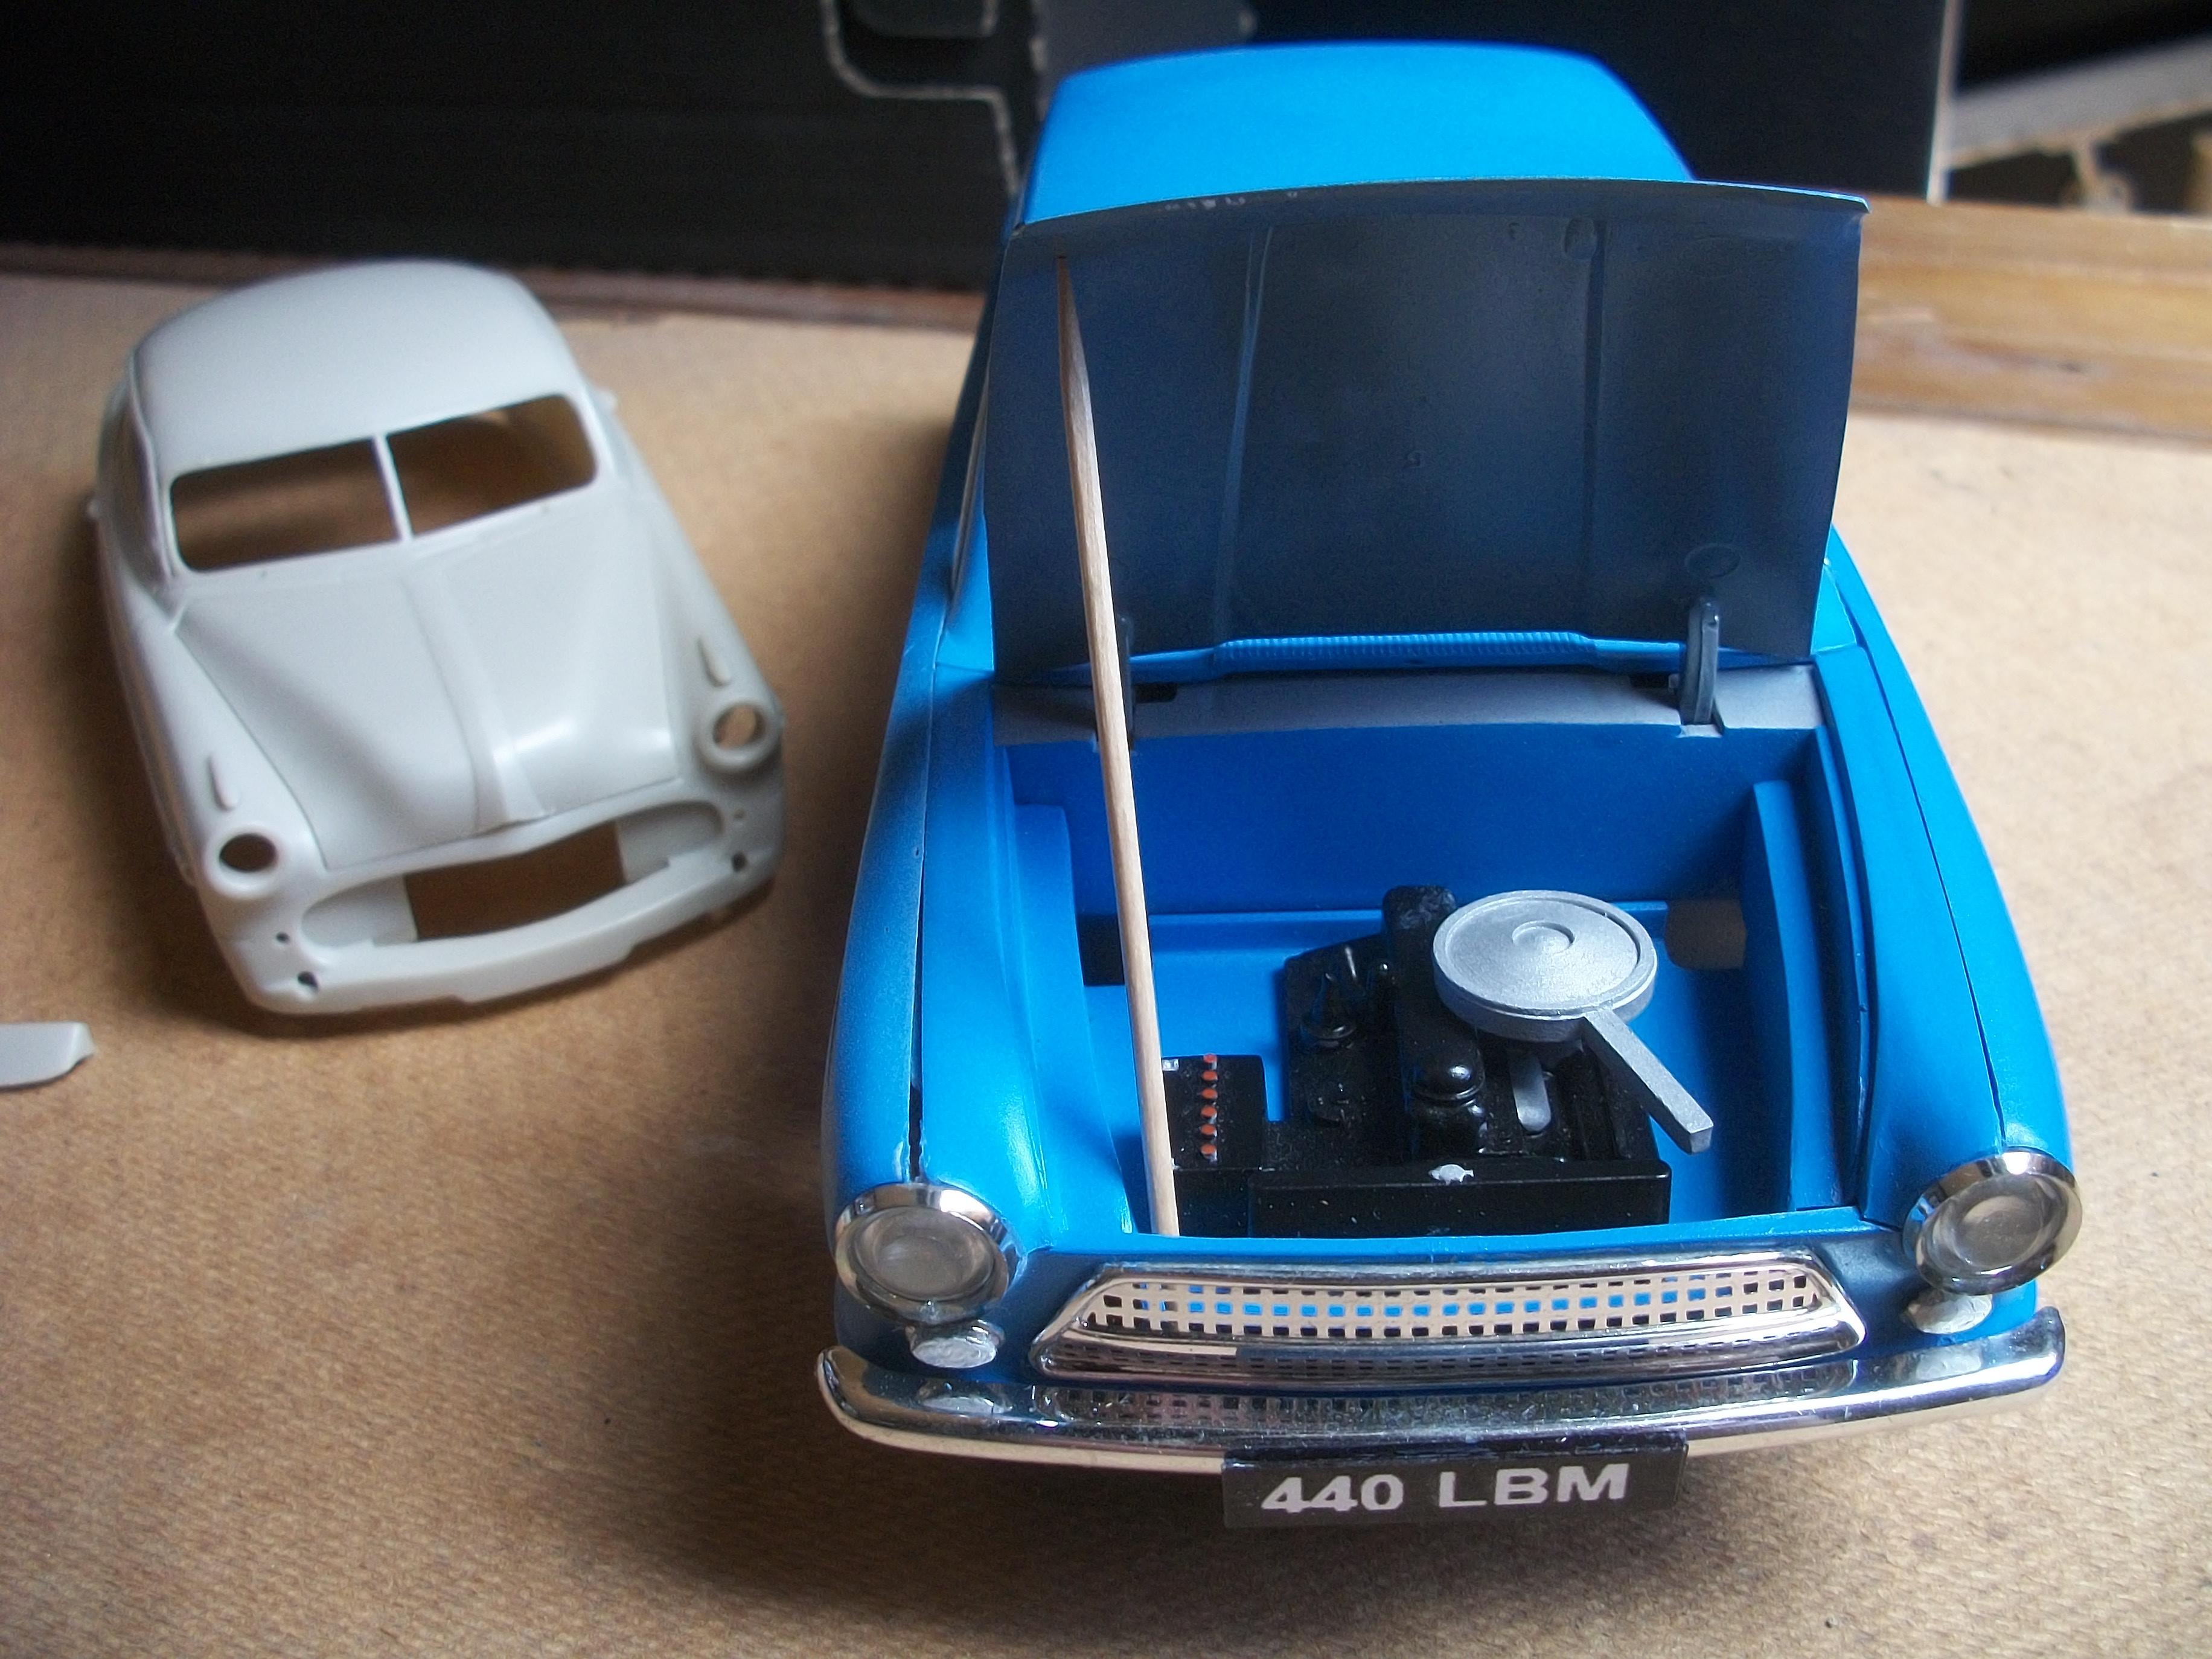
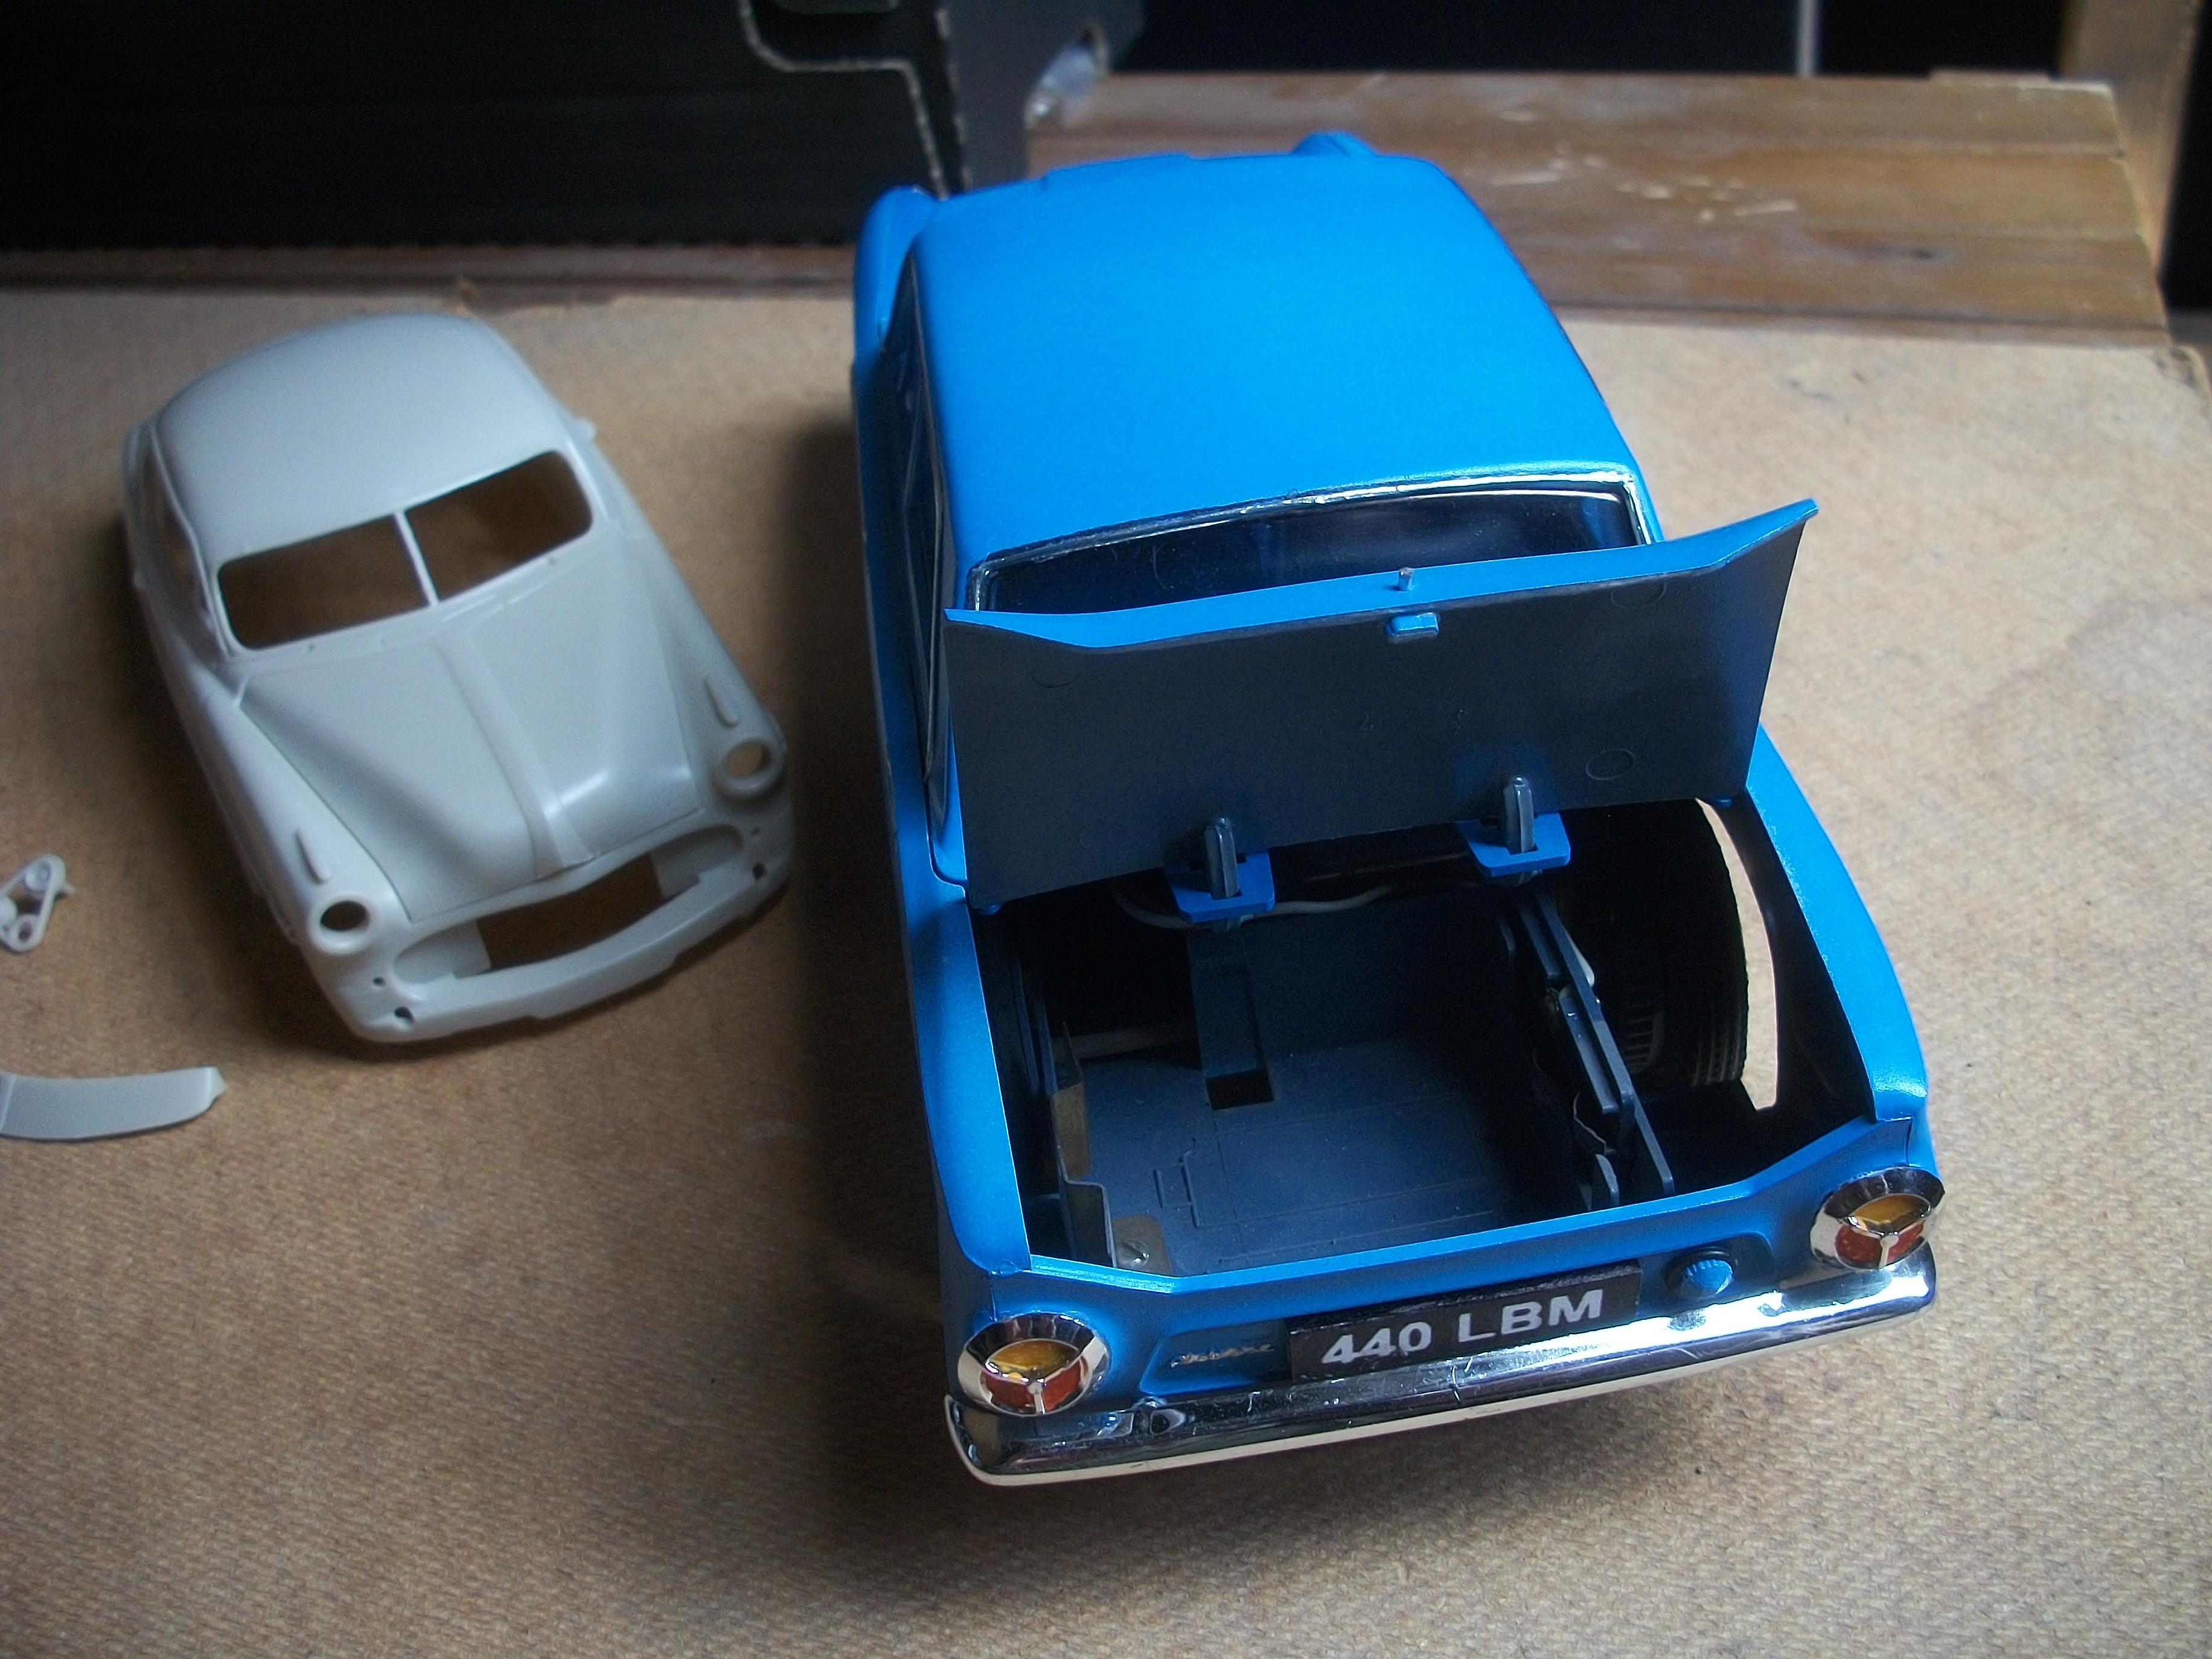
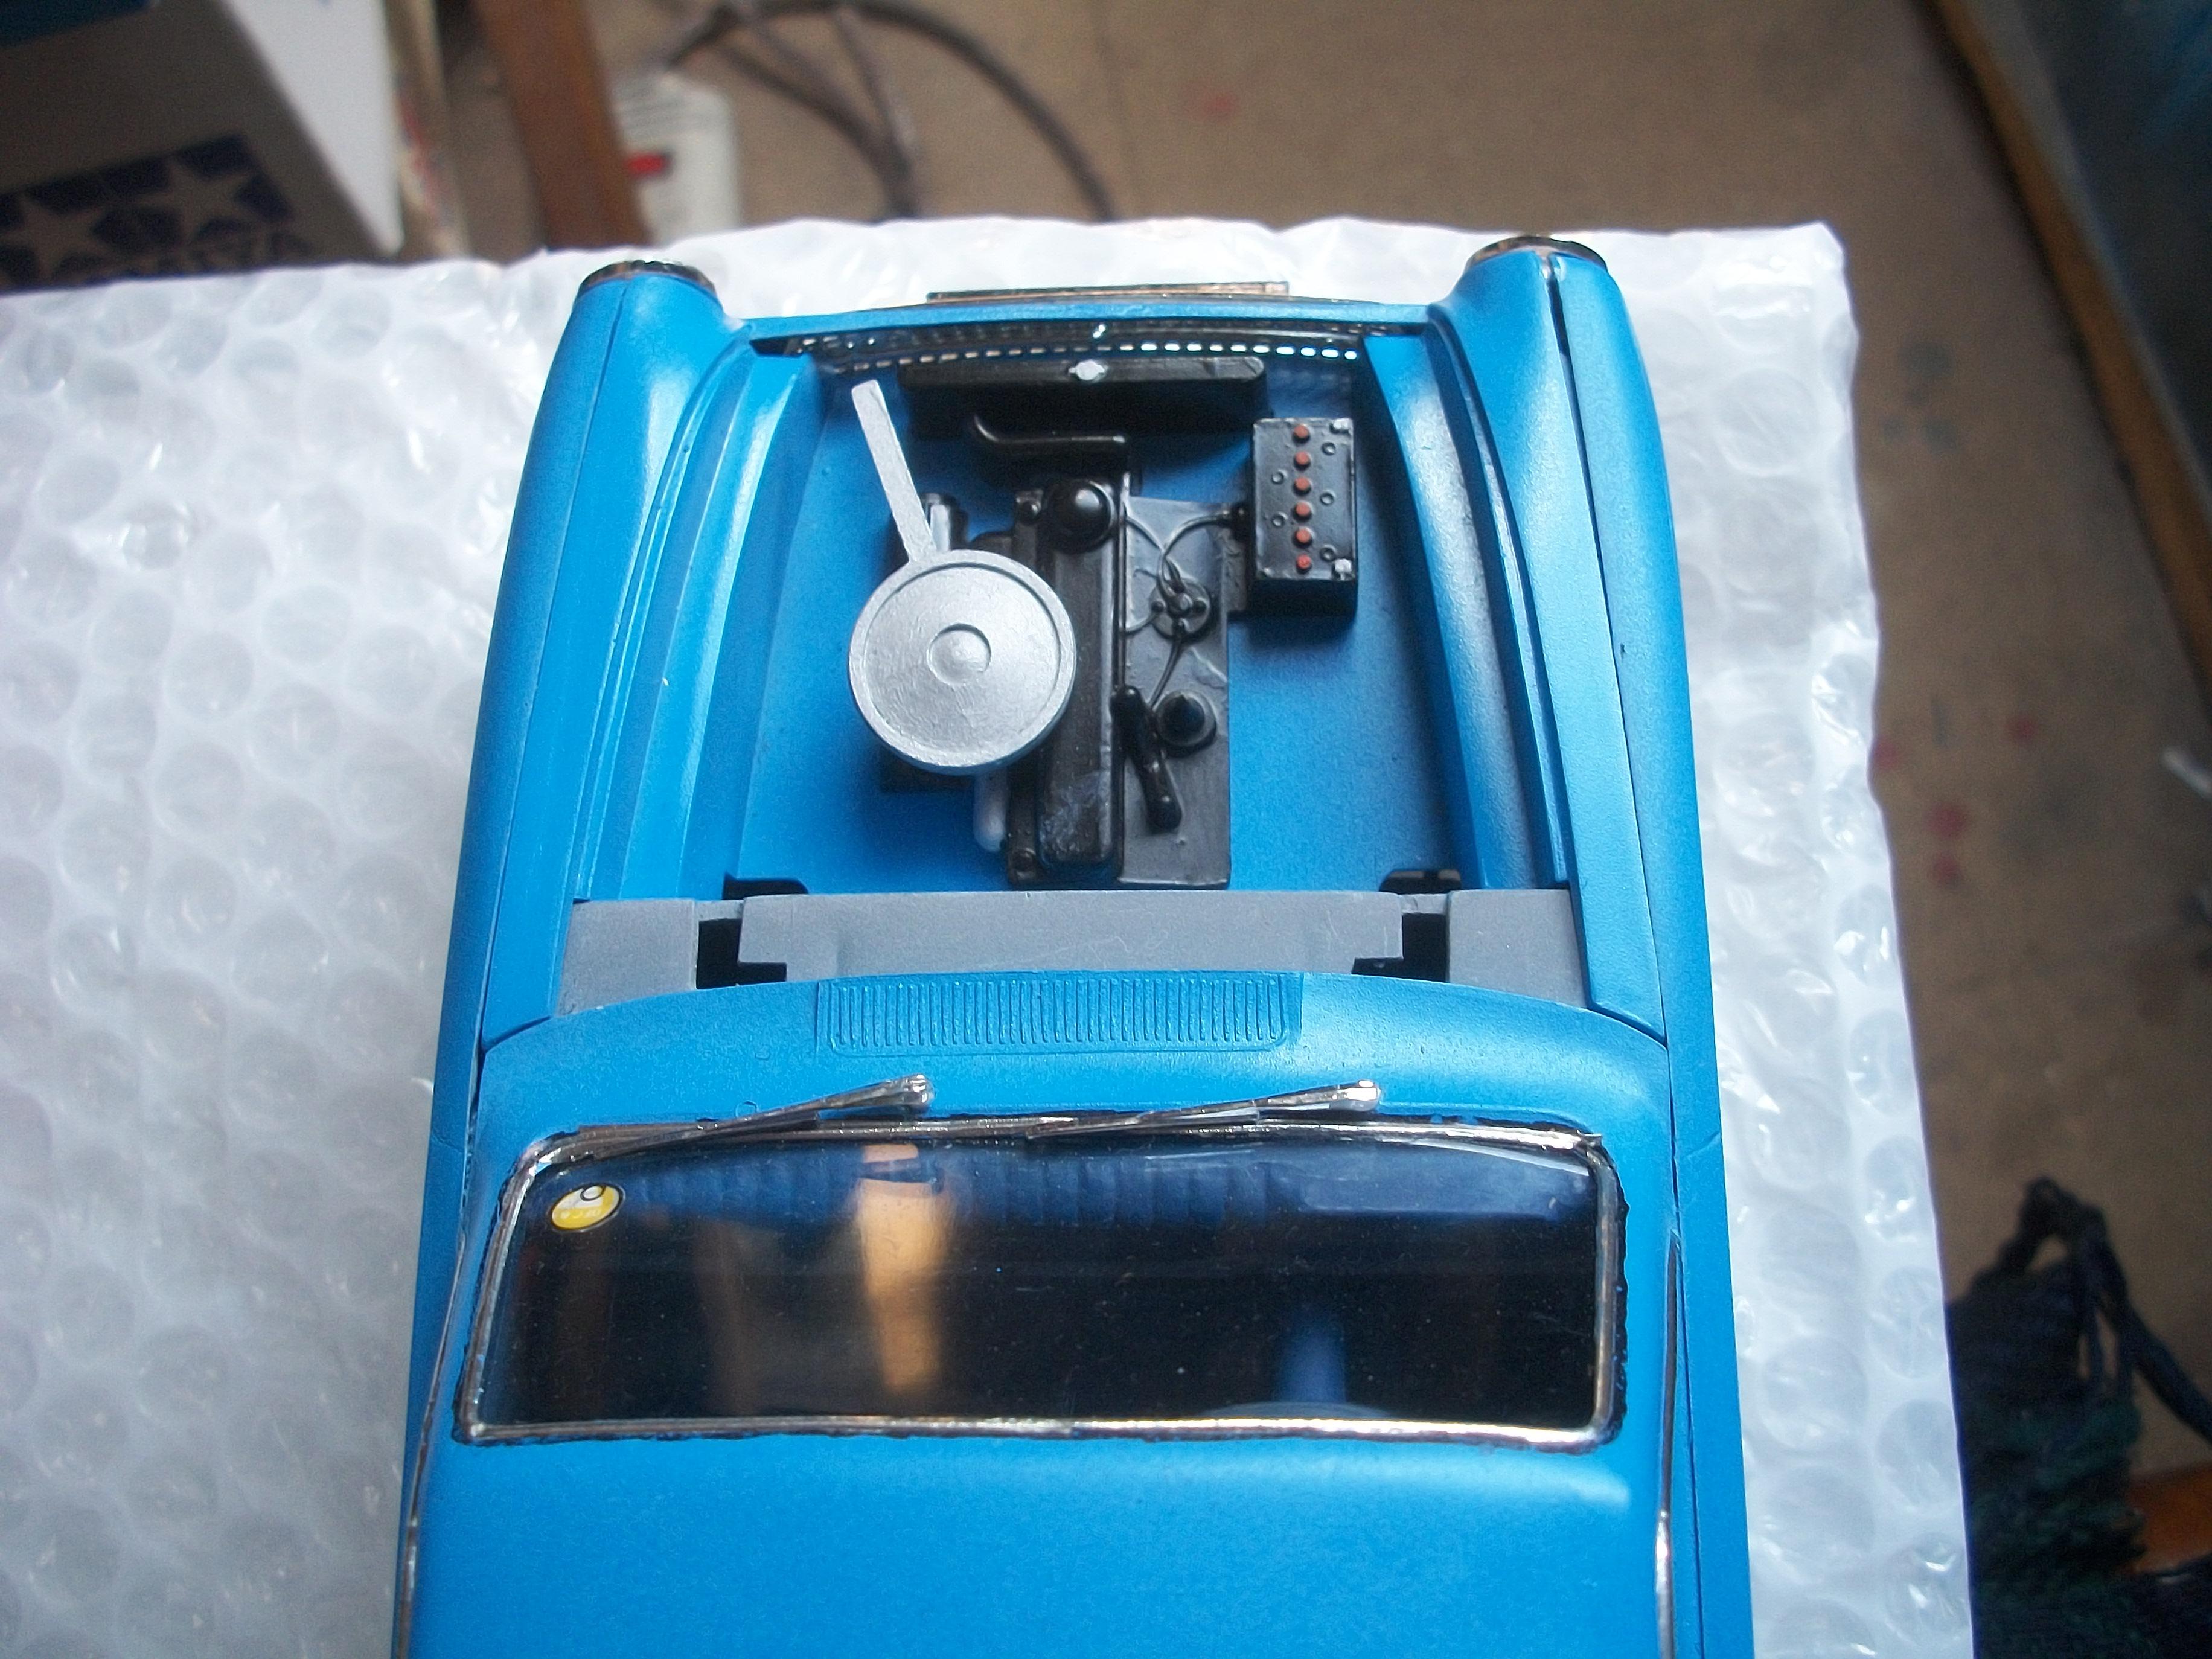
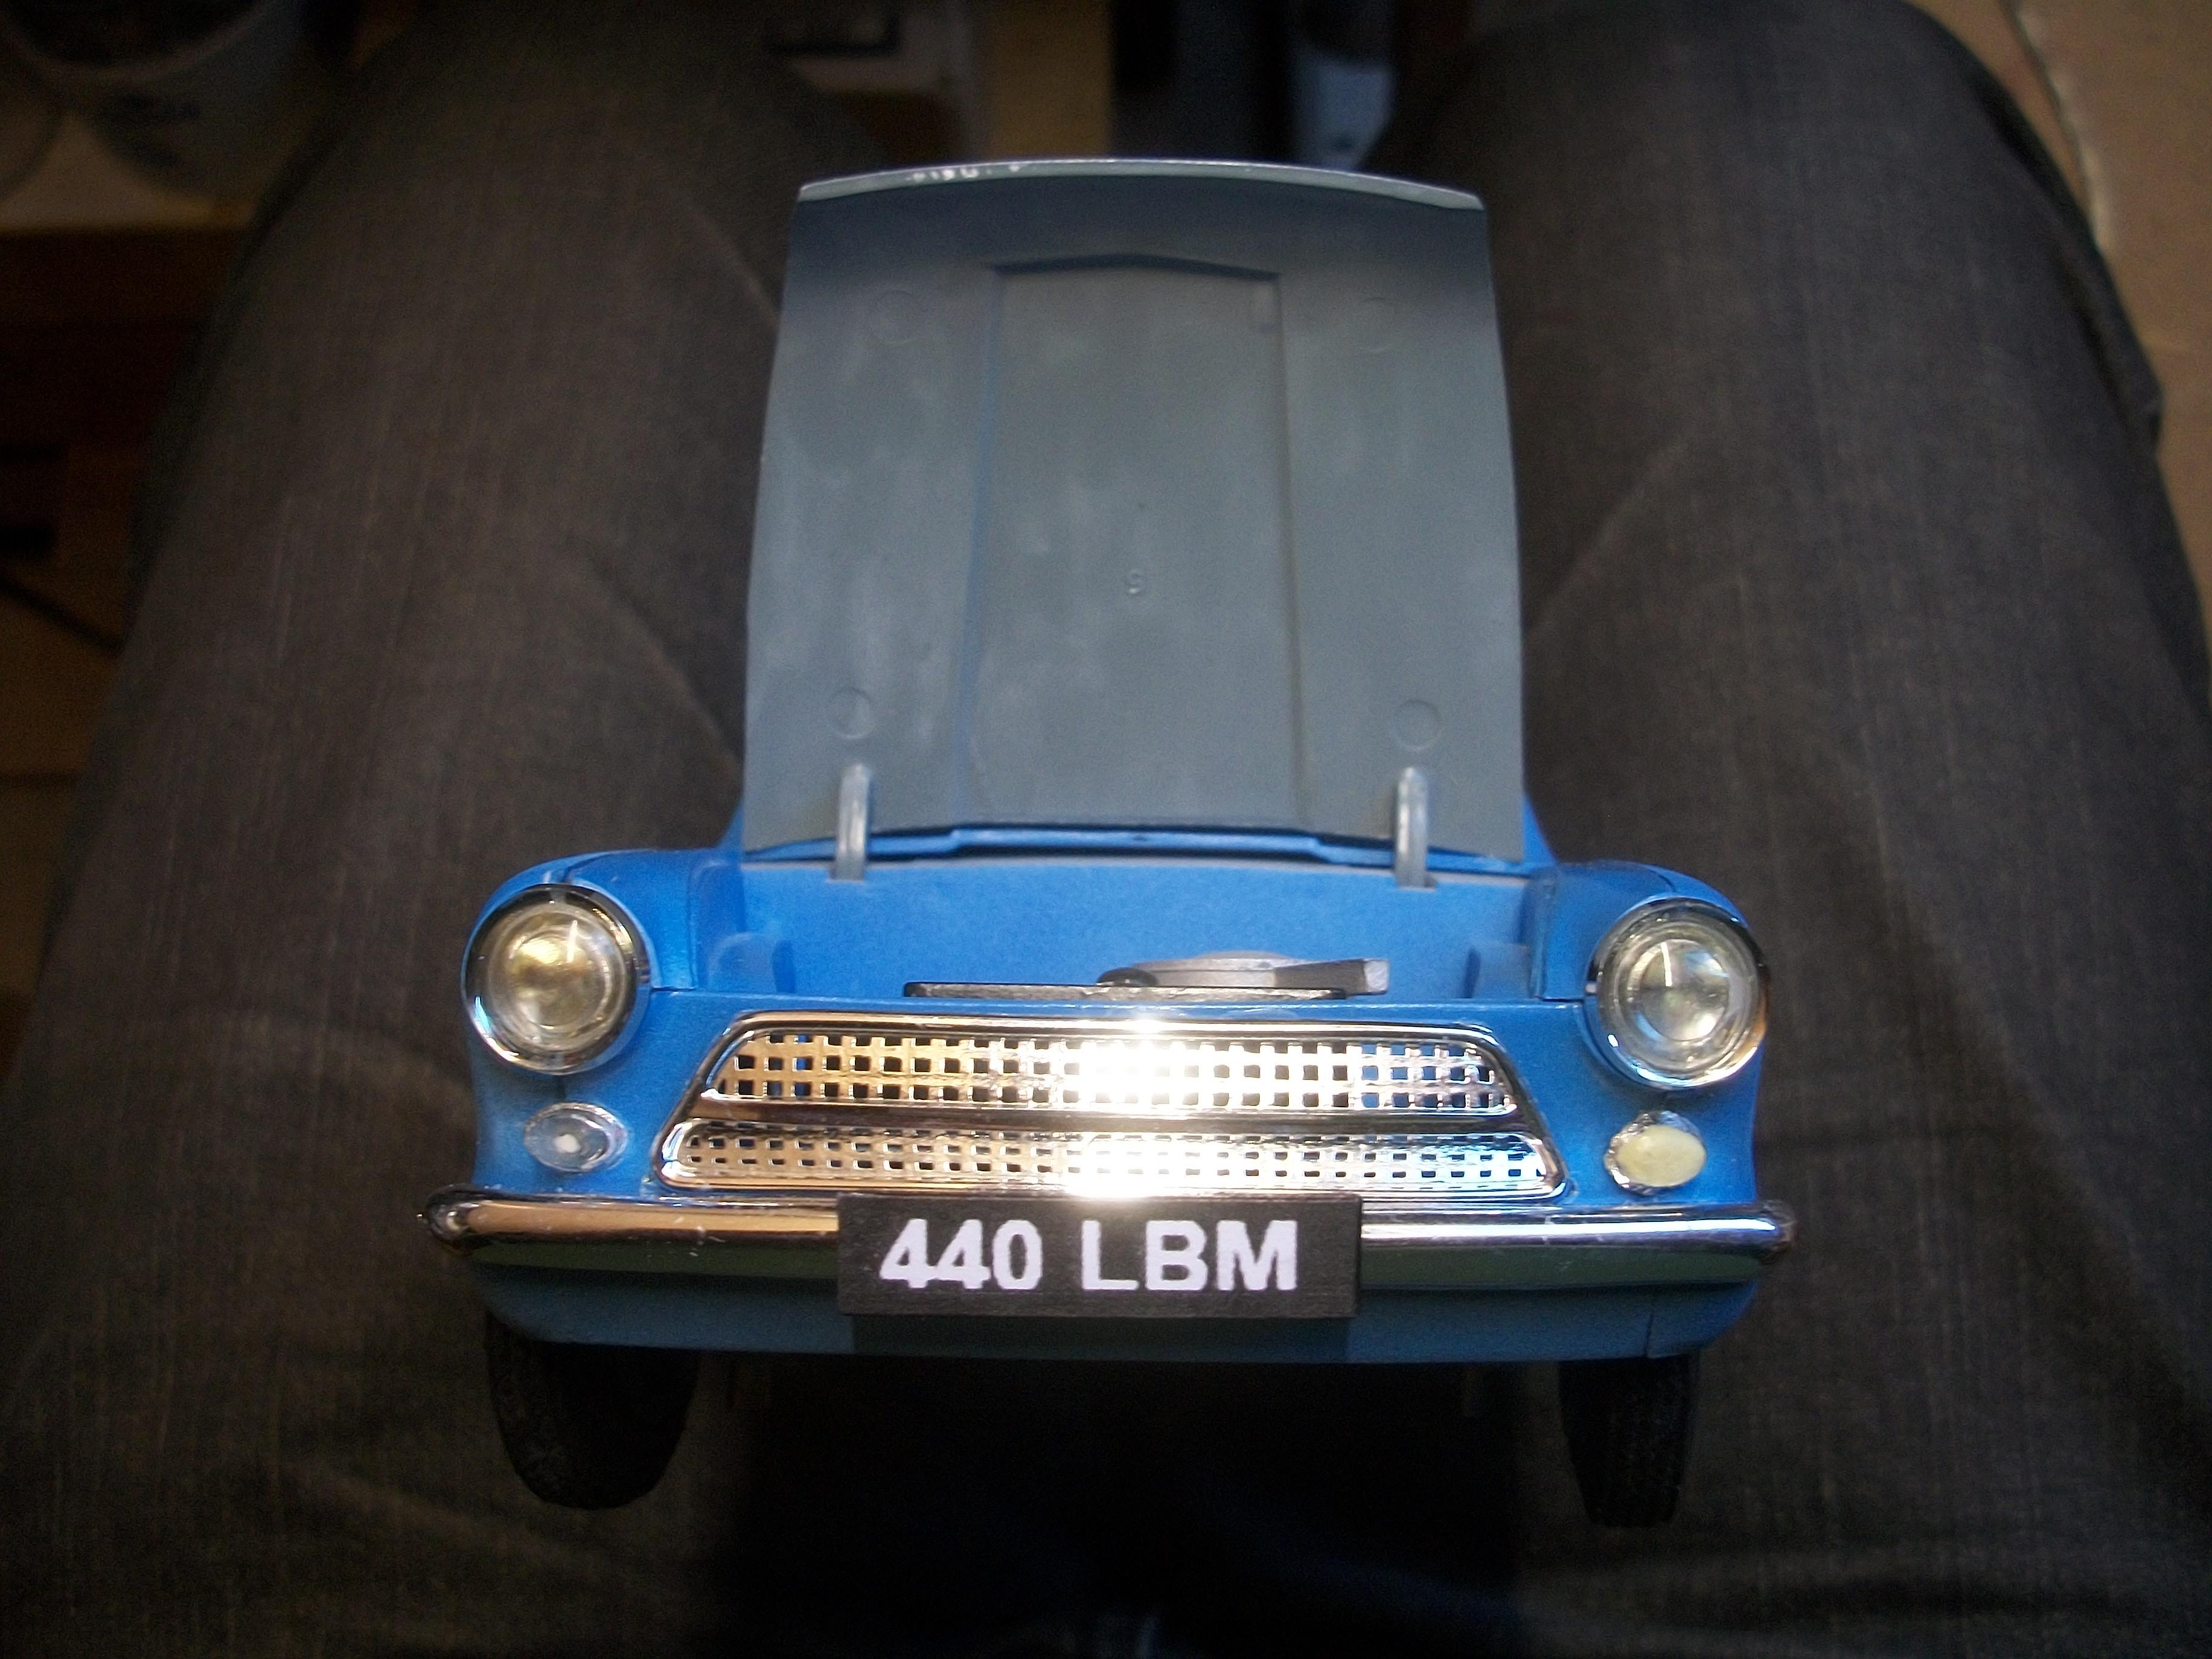
Thanks Lee . . . There's not a great deal of engine detail, but here are a couple of photos with the hood raised, and boot lid raised . . . The driver's side front wing / fender has prised itself apart, despite using super glue. This cannot be squeezed together, due to the headlamp. Also in the photos is my second Moebius Hudson Hornet build which is just getting under way. David
-
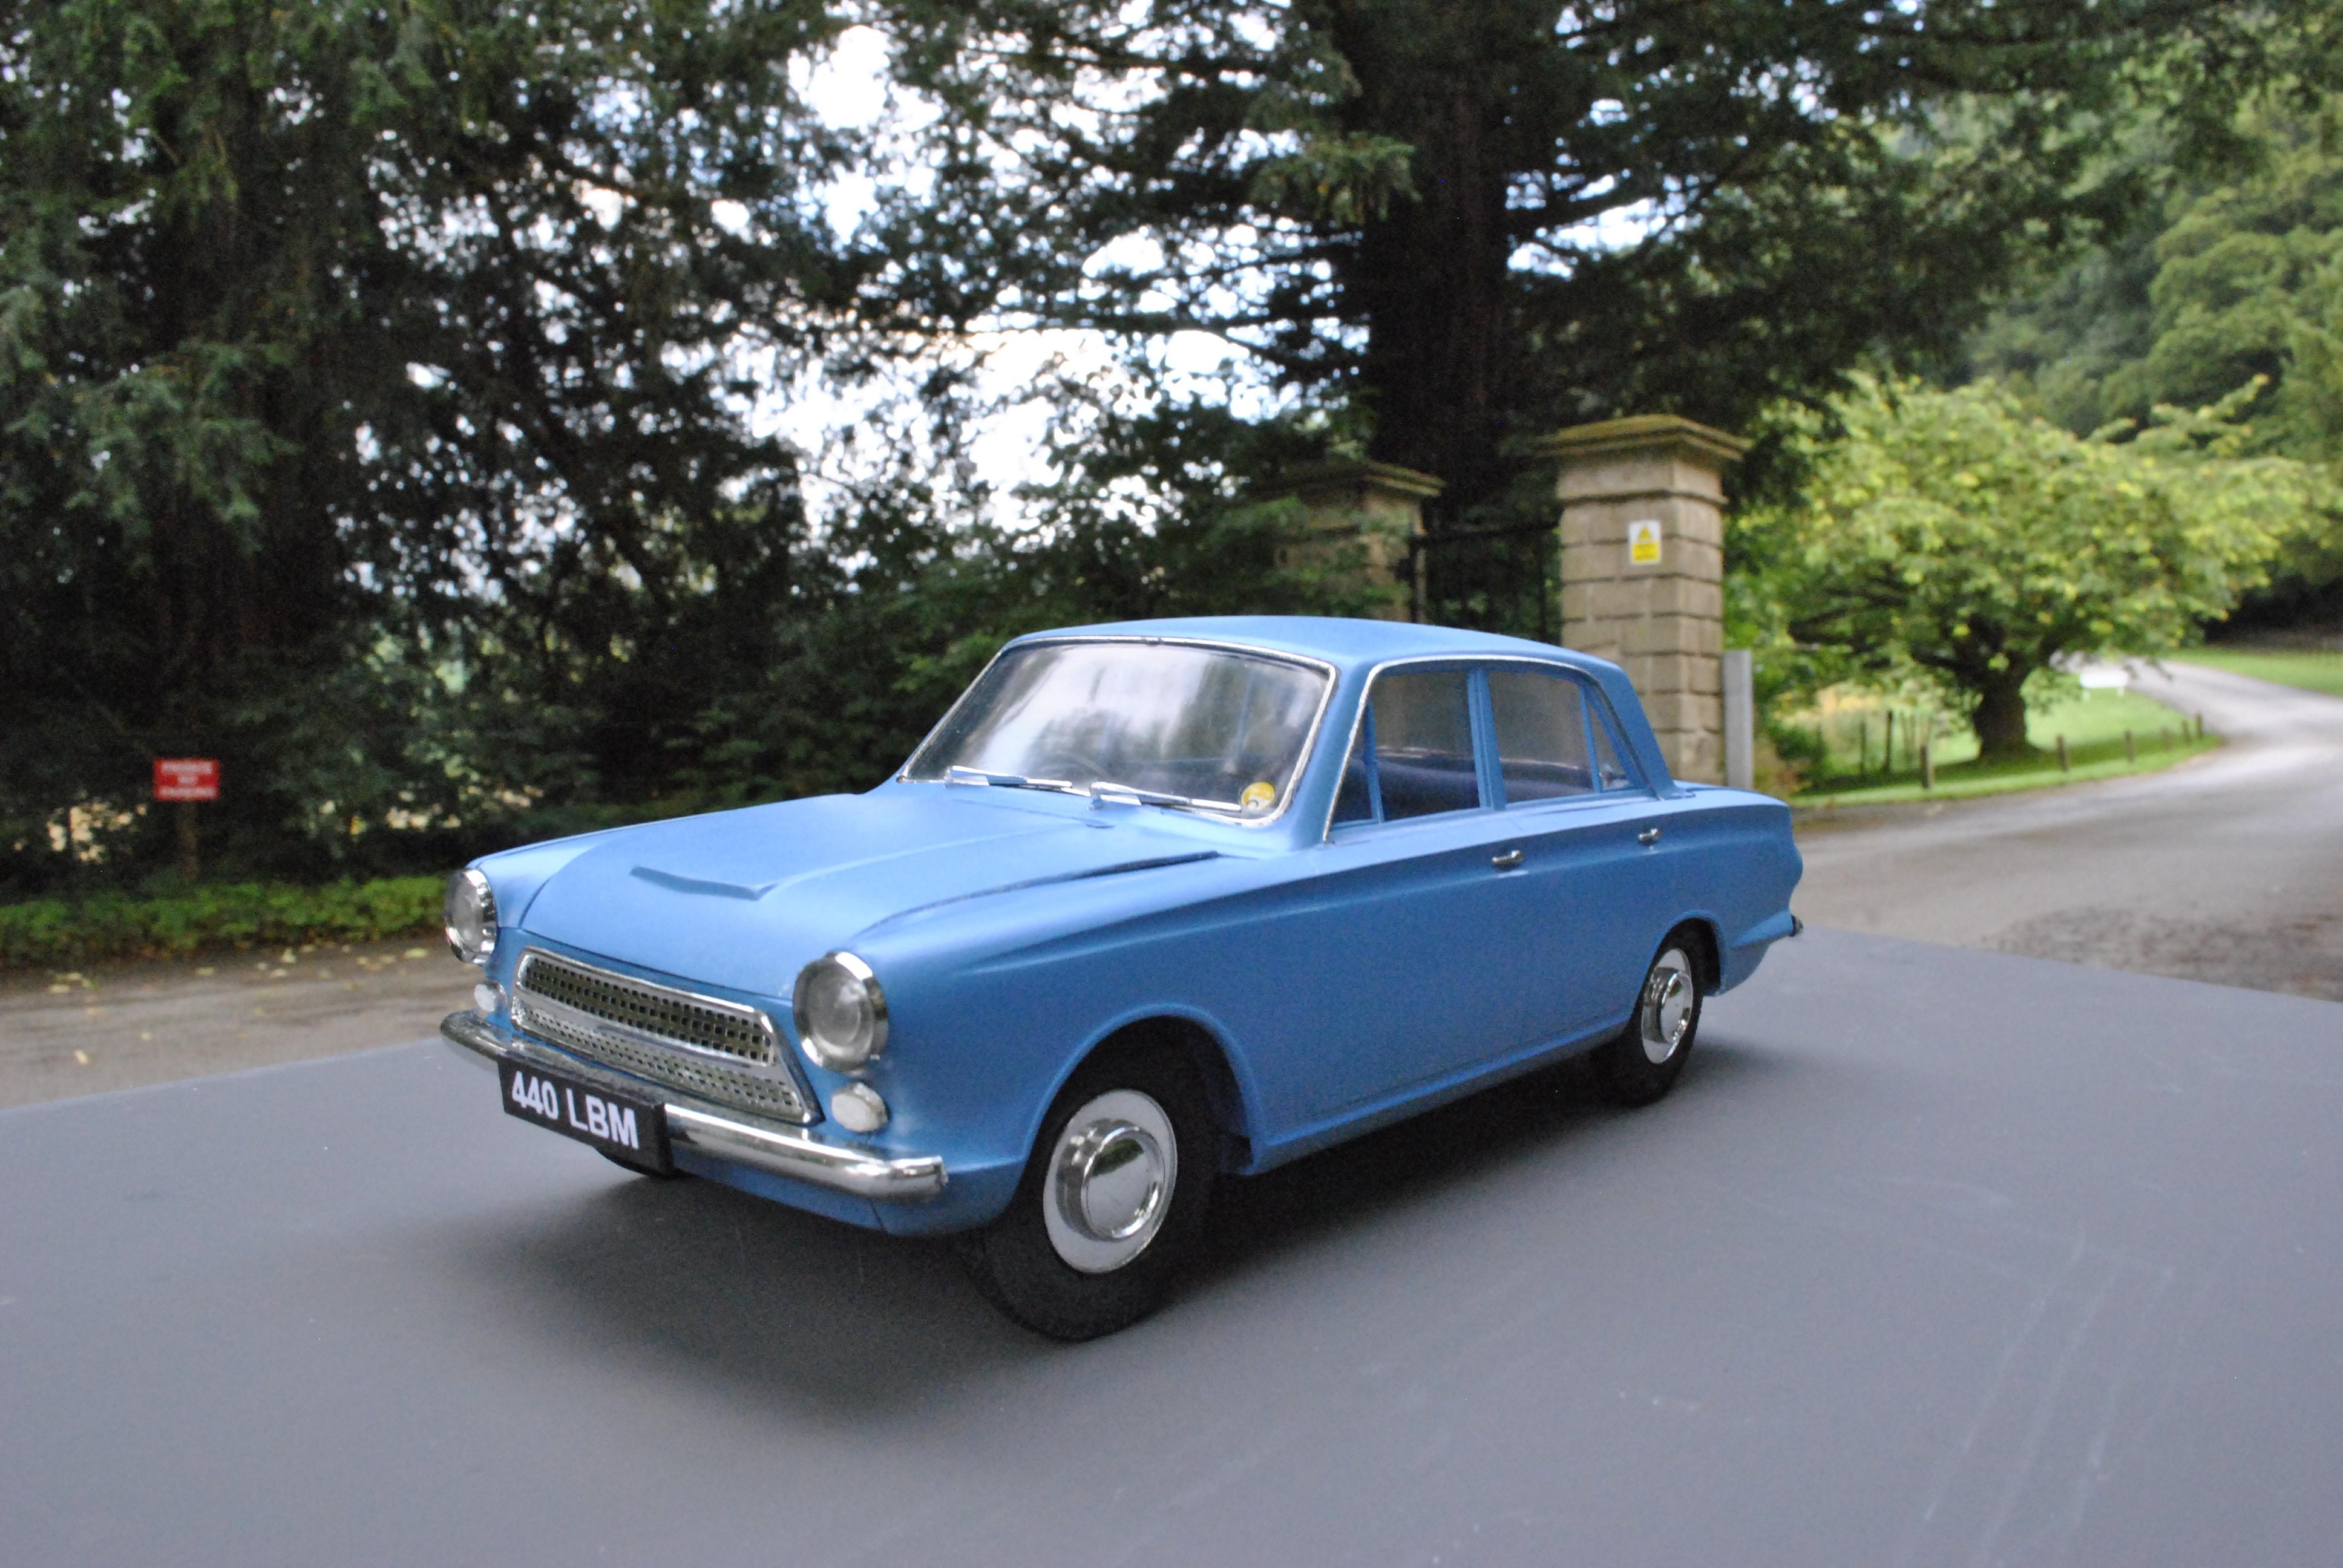
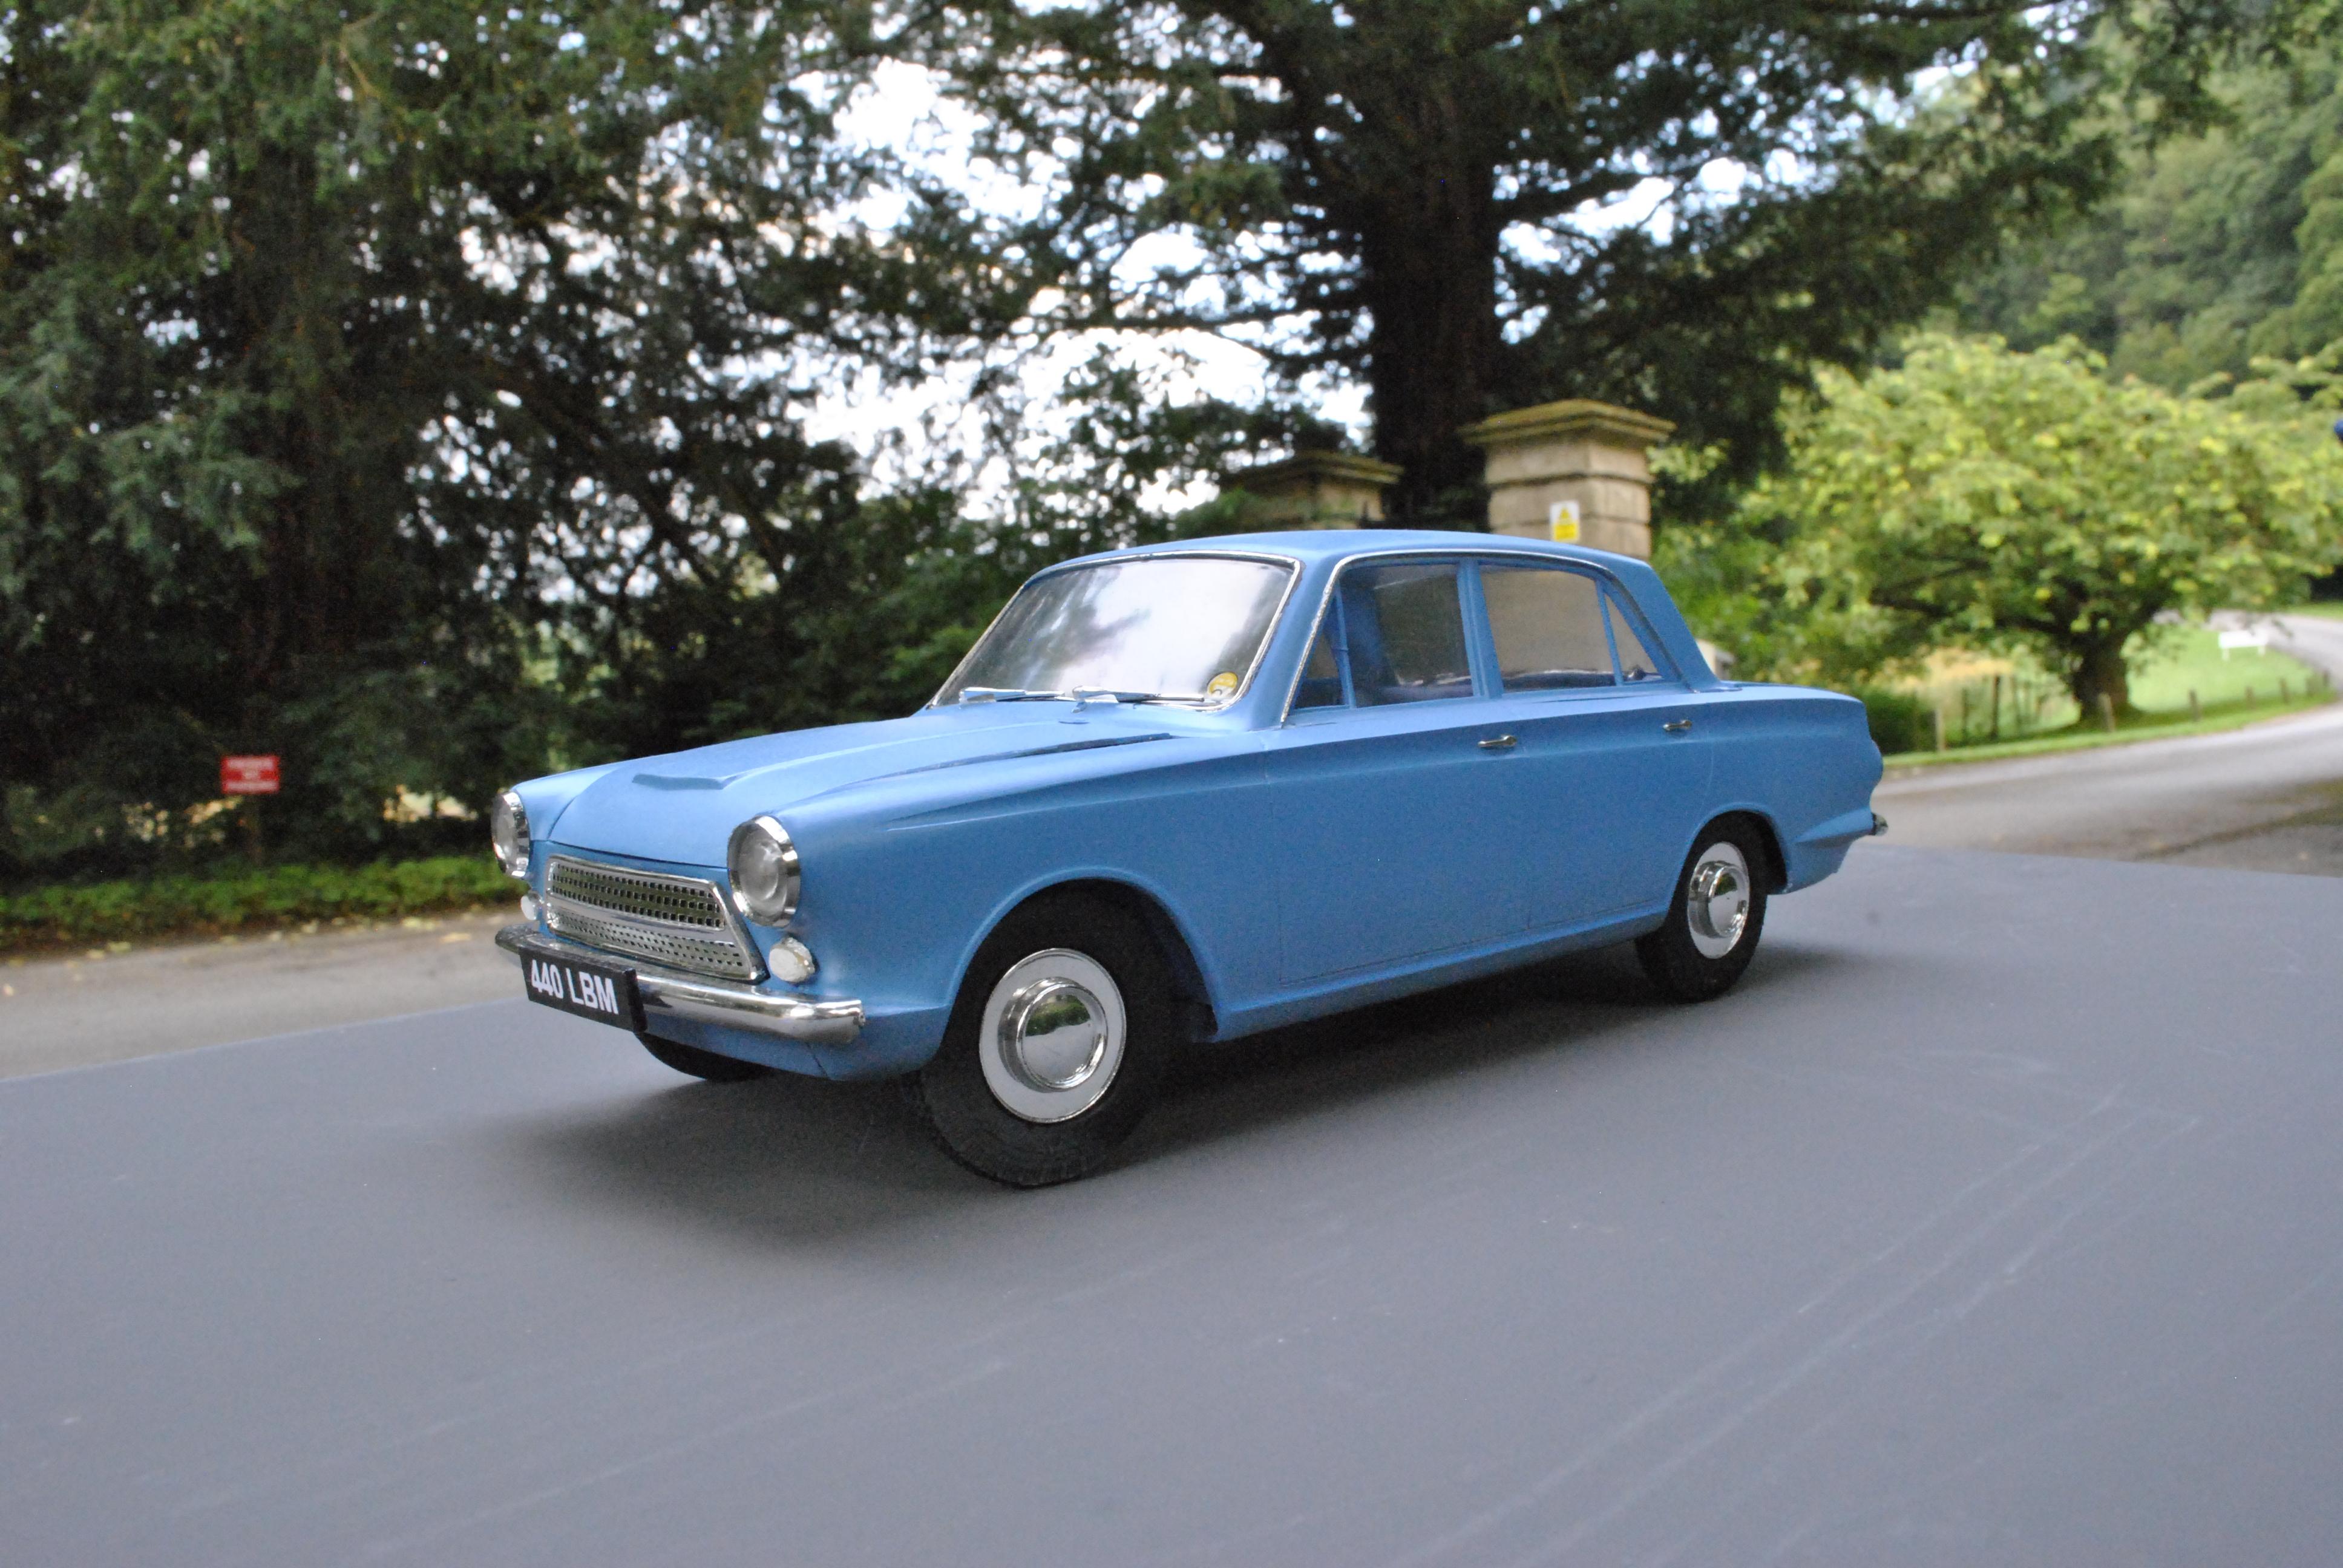
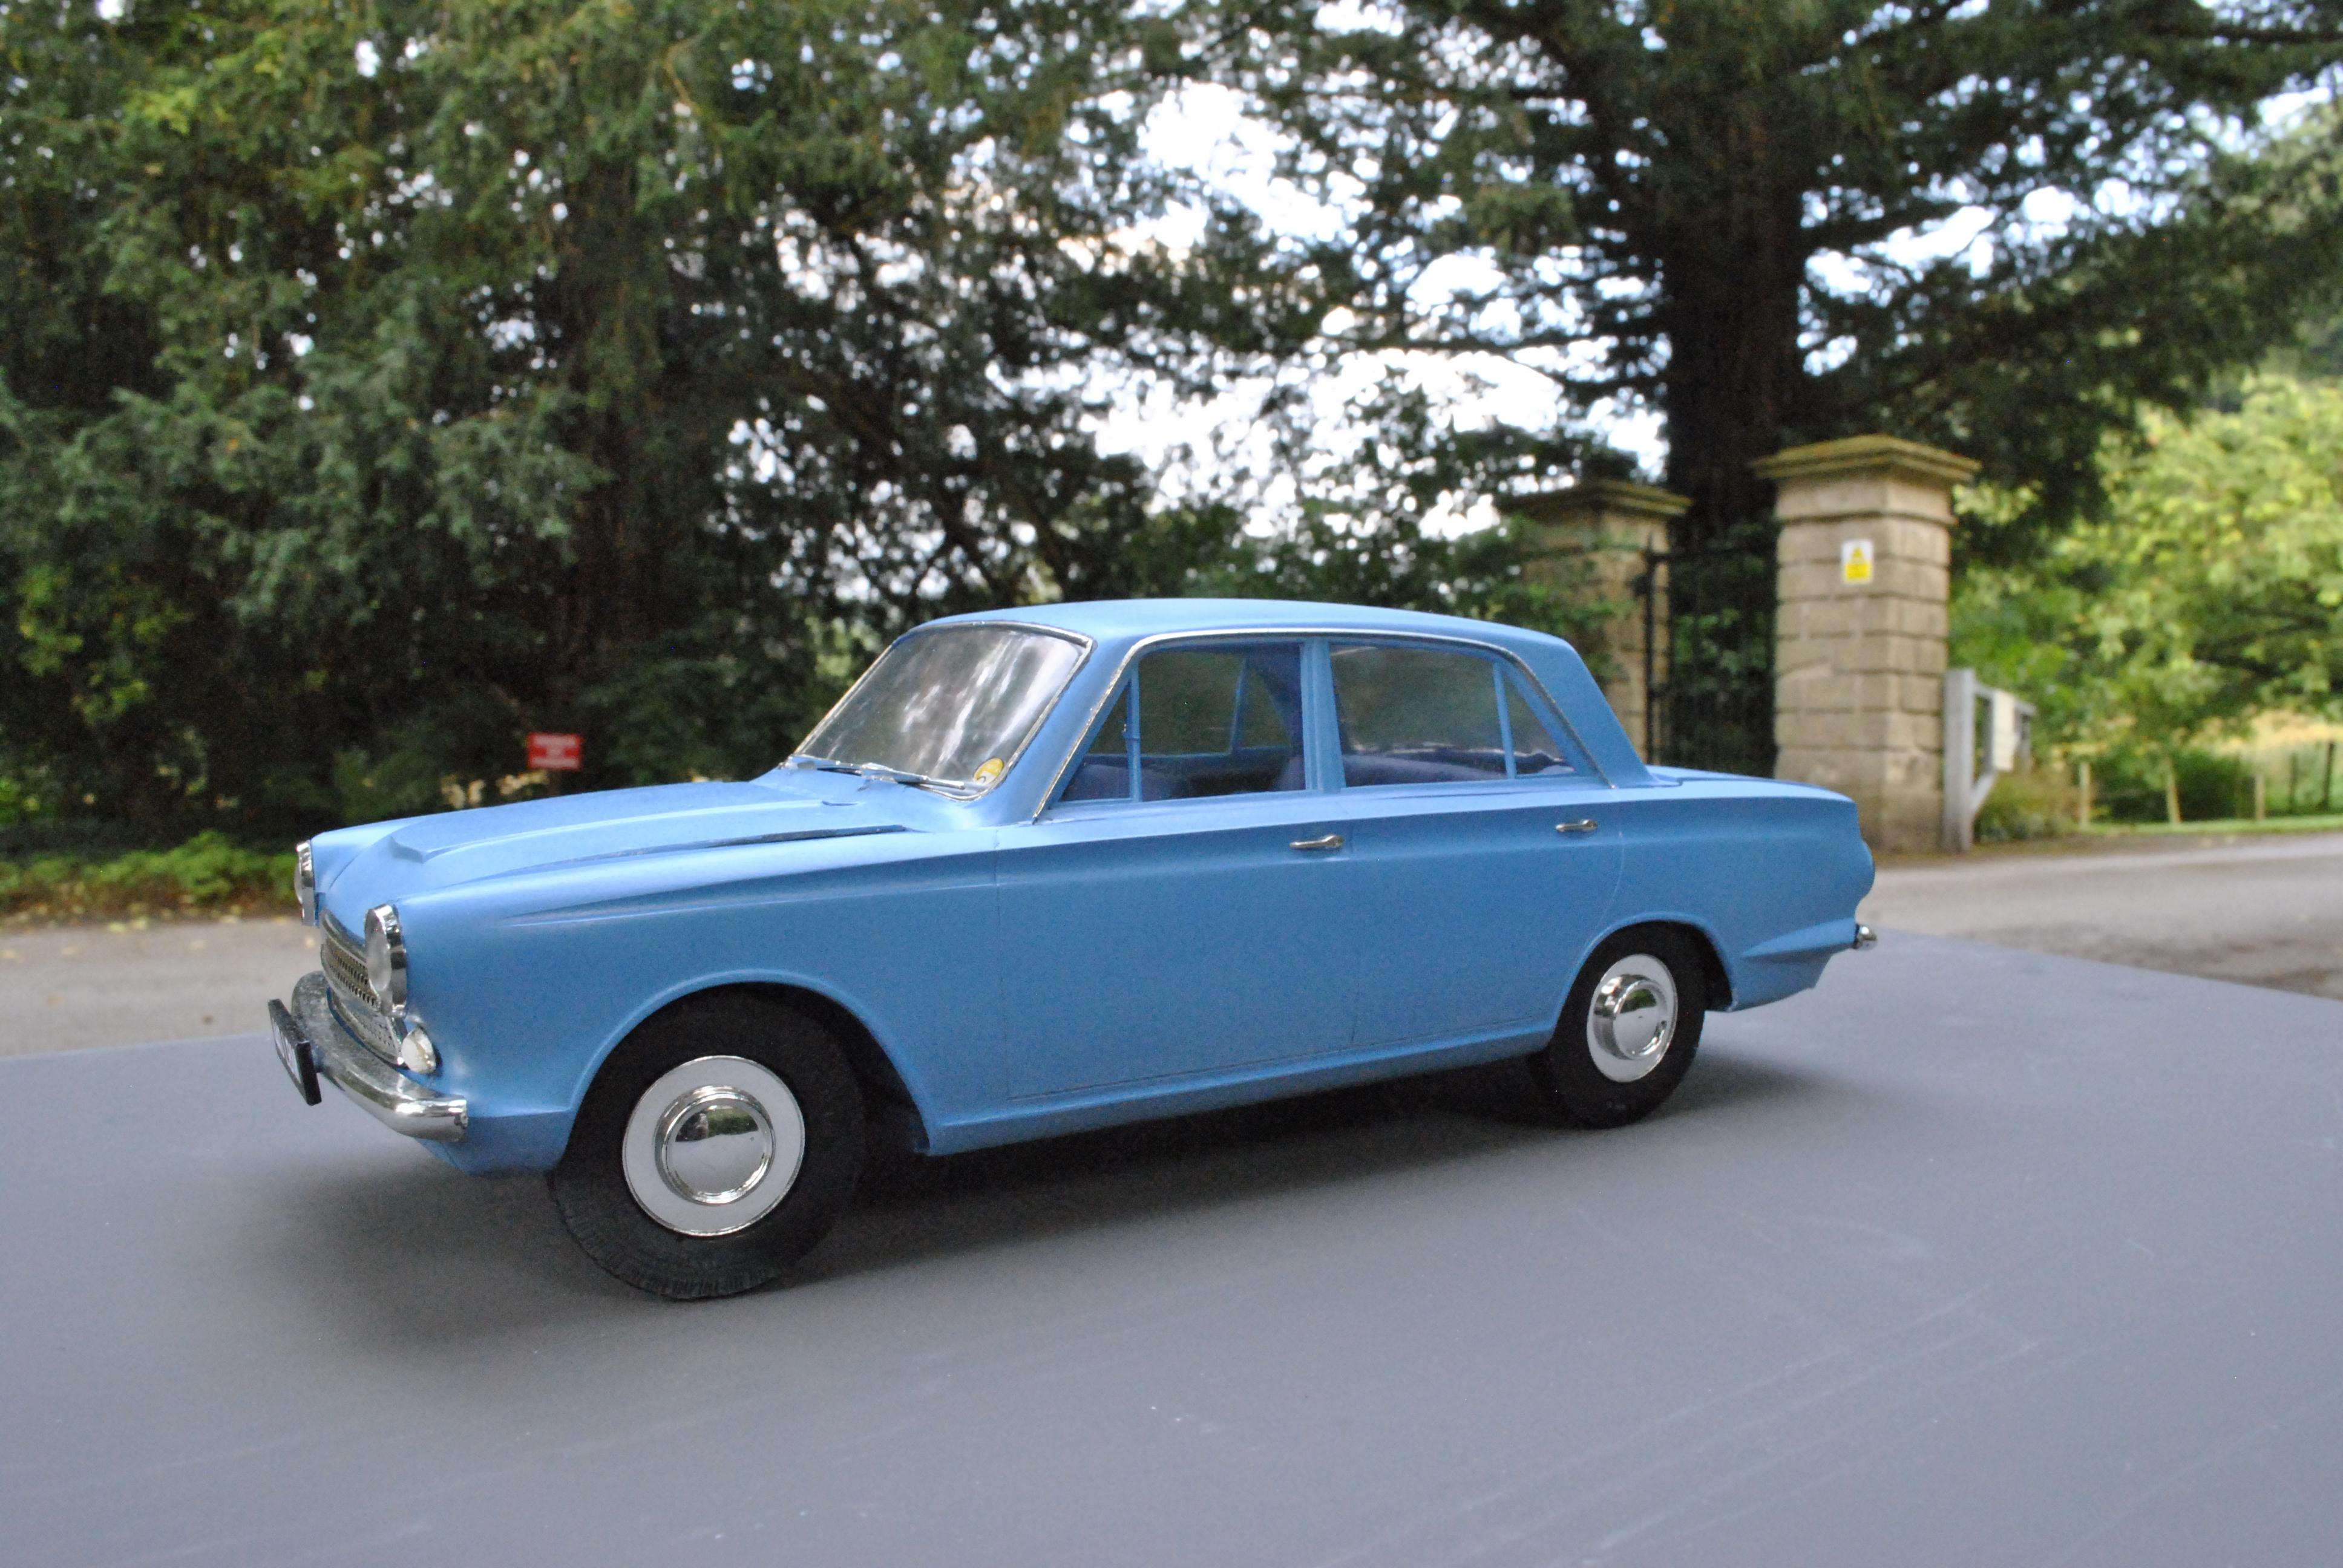
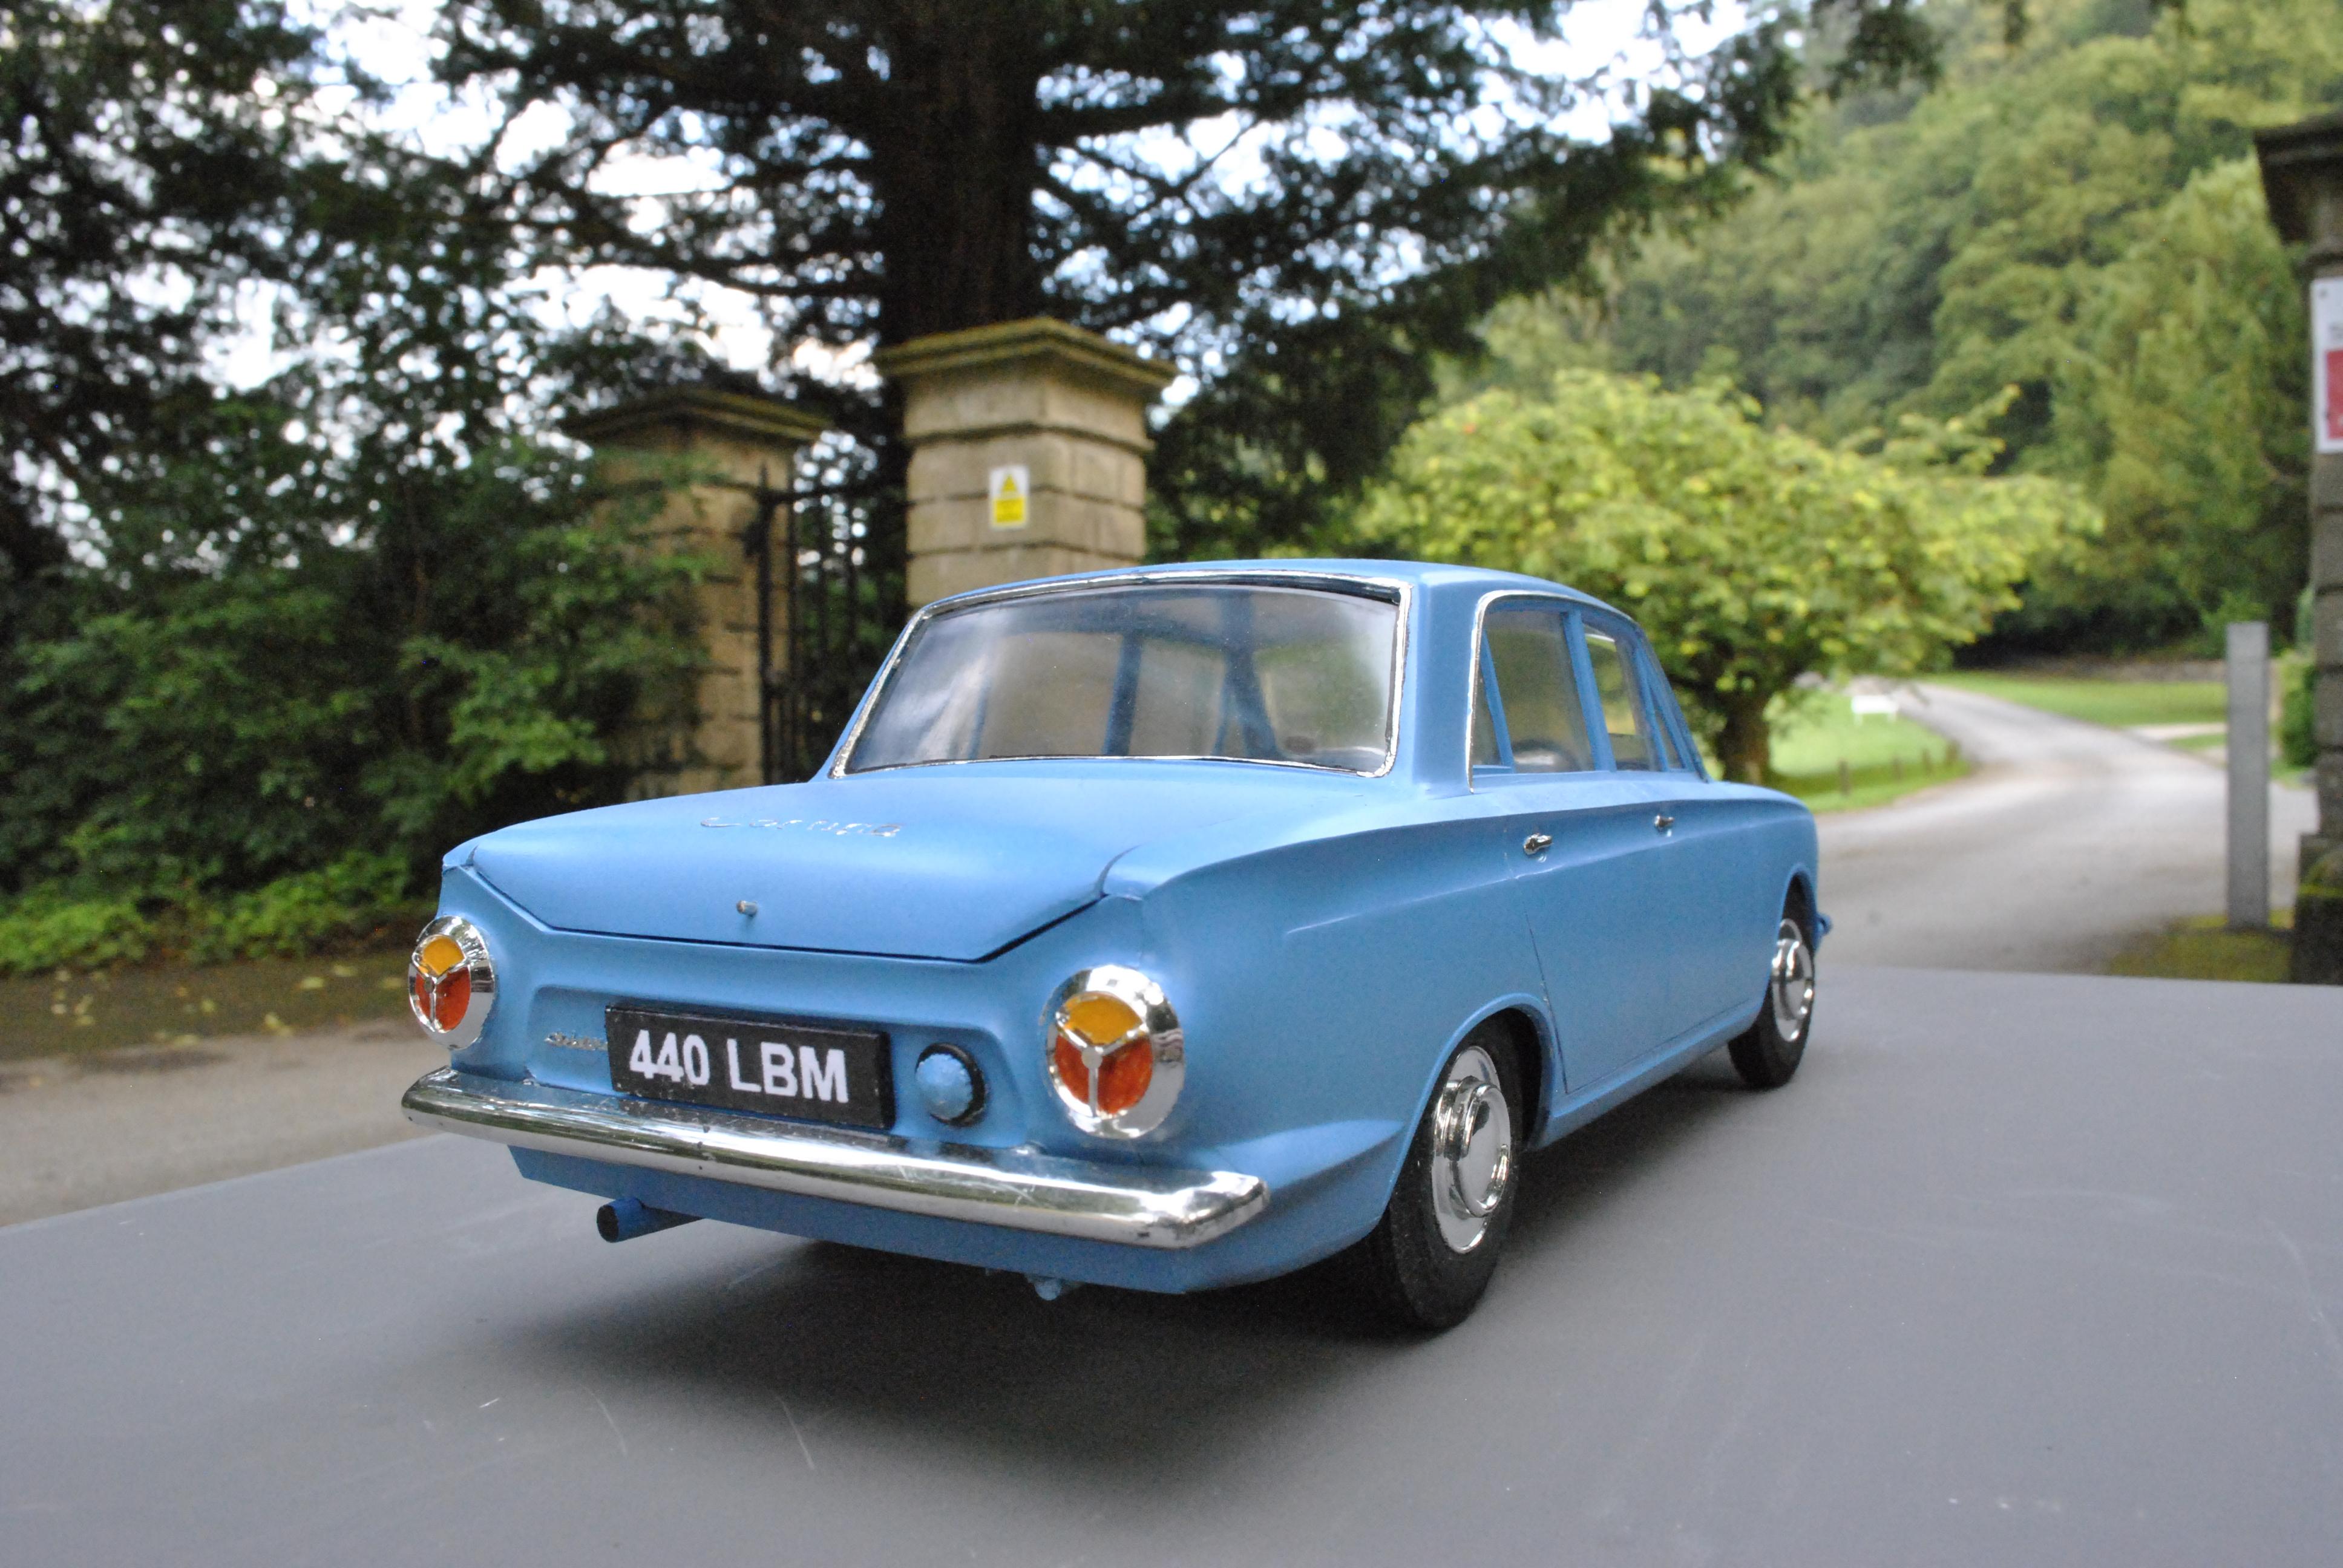
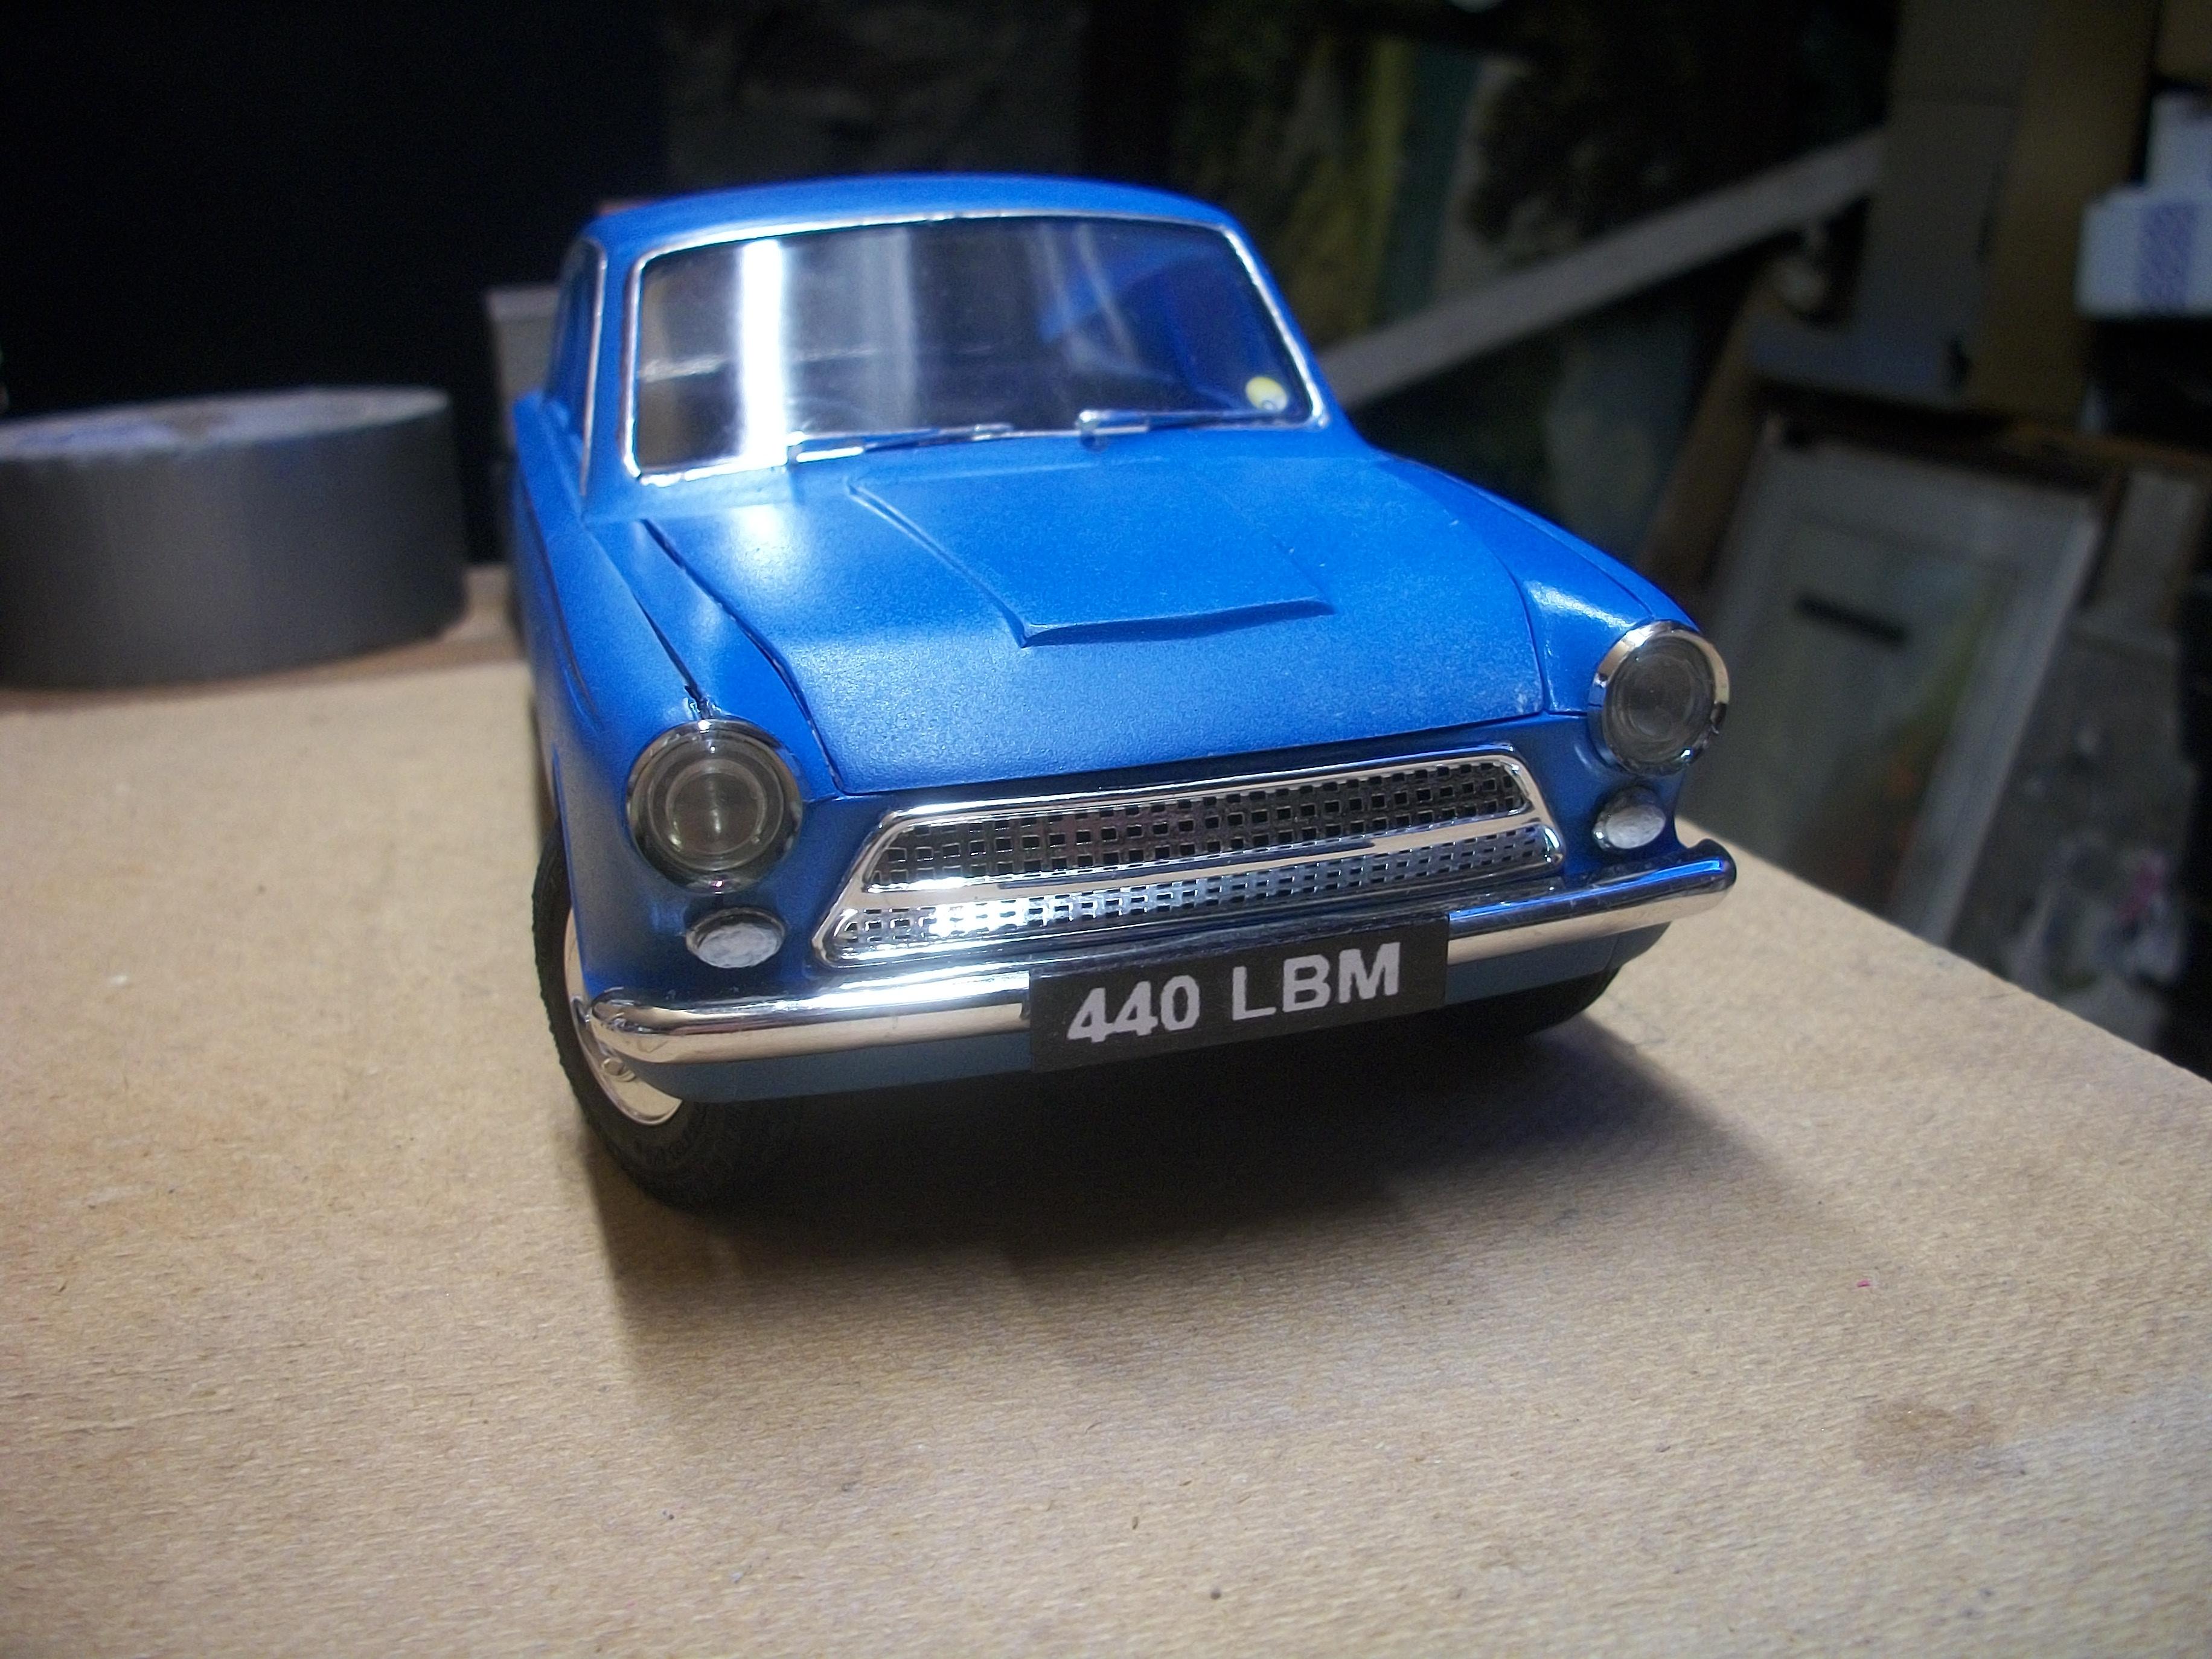
Here is the 1:16 scale Cortina, built from the FROG kit, which is 60 years old and quite rare these days . . . The paint finish is Tamiya French Blue, and there is some Bare Metal Foil chrome work as well as the kit chrome parts. The whole build has taken only 38 days, and one of the 82 parts that was missing from the kit box was moulded and cast, using Milliput Two Part Putty. The original kit is intended as a motorised model car, and although I found the battery operated motor was actually working, the gearing was stuck in reverse so I decided against having this car motorised. I would certainly build another FROG kit from 1962, although they are increasingly difficult to find on Ebay, and are usually expensive.. The following photographs were taken outdoors, during early morning with no sunlight. The colour of the grey board does not quite match the colour of the real road, and I didn't manage to get the forced perspective absolutely right, as the background is slightly out of focus. This one is for my Dad . . . David
-
Now this is the sort of diorama work and photography that I like to see Douglas . . . I find the first of your three photos particularly interesting, with the trees, the background and the rain being most effective. The scrap cars work really well, and when you show the contrast of the junkyard in sunshine later, there will be a feeling of the weather clearing . . . ' After the rain ' . . . David
-
Hudson Hornet Colour
Anglia105E replied to Anglia105E's topic in Model Building Questions and Answers
Thank you David E . . . My process would be to wash the body parts in warm soapy water, rinse and dry, then wet sanding with 600 grit, spray the grey primer from the can (2 coats, 5 minutes between coats), further wet sanding with 600 grit, then spray the black from the can (2 coats, 5 minutes between coats), no further sanding, spray the clear from the can, leave to cure for between 5 and 7 days, then Tamiya Polishing Compound in 3 stages, Coarse, Fine and Finish. Your Hudson looks great, and it shows me what to expect, so thanks again. David W. -
Hudson Hornet Colour
Anglia105E replied to Anglia105E's topic in Model Building Questions and Answers
Well that Hudson of yours looks really classy David E . . . My choice would be Tamiya TS-14 Black, TS-13 Clear and Fine Surface Primer (Light Gray). Plenty of BMF work there too ! David W. -
Hudson Hornet Colour
Anglia105E replied to Anglia105E's topic in Model Building Questions and Answers
Yes Bruce . . . The thought had crossed my mind that black does require more preparation, and the whole process has to be absolutely perfect to get the best finish . . . All of my previous Rolls-Royce builds have tended to be dark greys and dark greens, rather than black. I shall most likely go for it, and thanks for your advice ! David W. -
Hudson Hornet Colour
Anglia105E replied to Anglia105E's topic in Model Building Questions and Answers
Thanks Dave G . . . I agree, that the 4-door would be nice to have as a model, but of course the Moebius car for 1953 is a 2-door. Sounds like your Dad's gold 4-door Hudson was a really special motor car. David W. -
I am considering building a second 1953 Hudson Hornet by Moebius in 1:25 scale . . . For the previous build, which turned out very nicely, I chose the two tone paint colour combination of metallic green with a cream roof. I am leaning towards a single paint colour for this second build, which could possibly be black . . . Here are a couple of photos of a black Hudson Hornet, and I would be using Tamiya paint products. Do you have any thoughts and opinions on this please? David
-
1:16 Scale 1962 Ford Consul Cortina by FROG kits
Anglia105E replied to Anglia105E's topic in WIP: Model Cars
Thanks Ray David -
1:16 Scale 1962 Ford Consul Cortina by FROG kits
Anglia105E replied to Anglia105E's topic in WIP: Model Cars
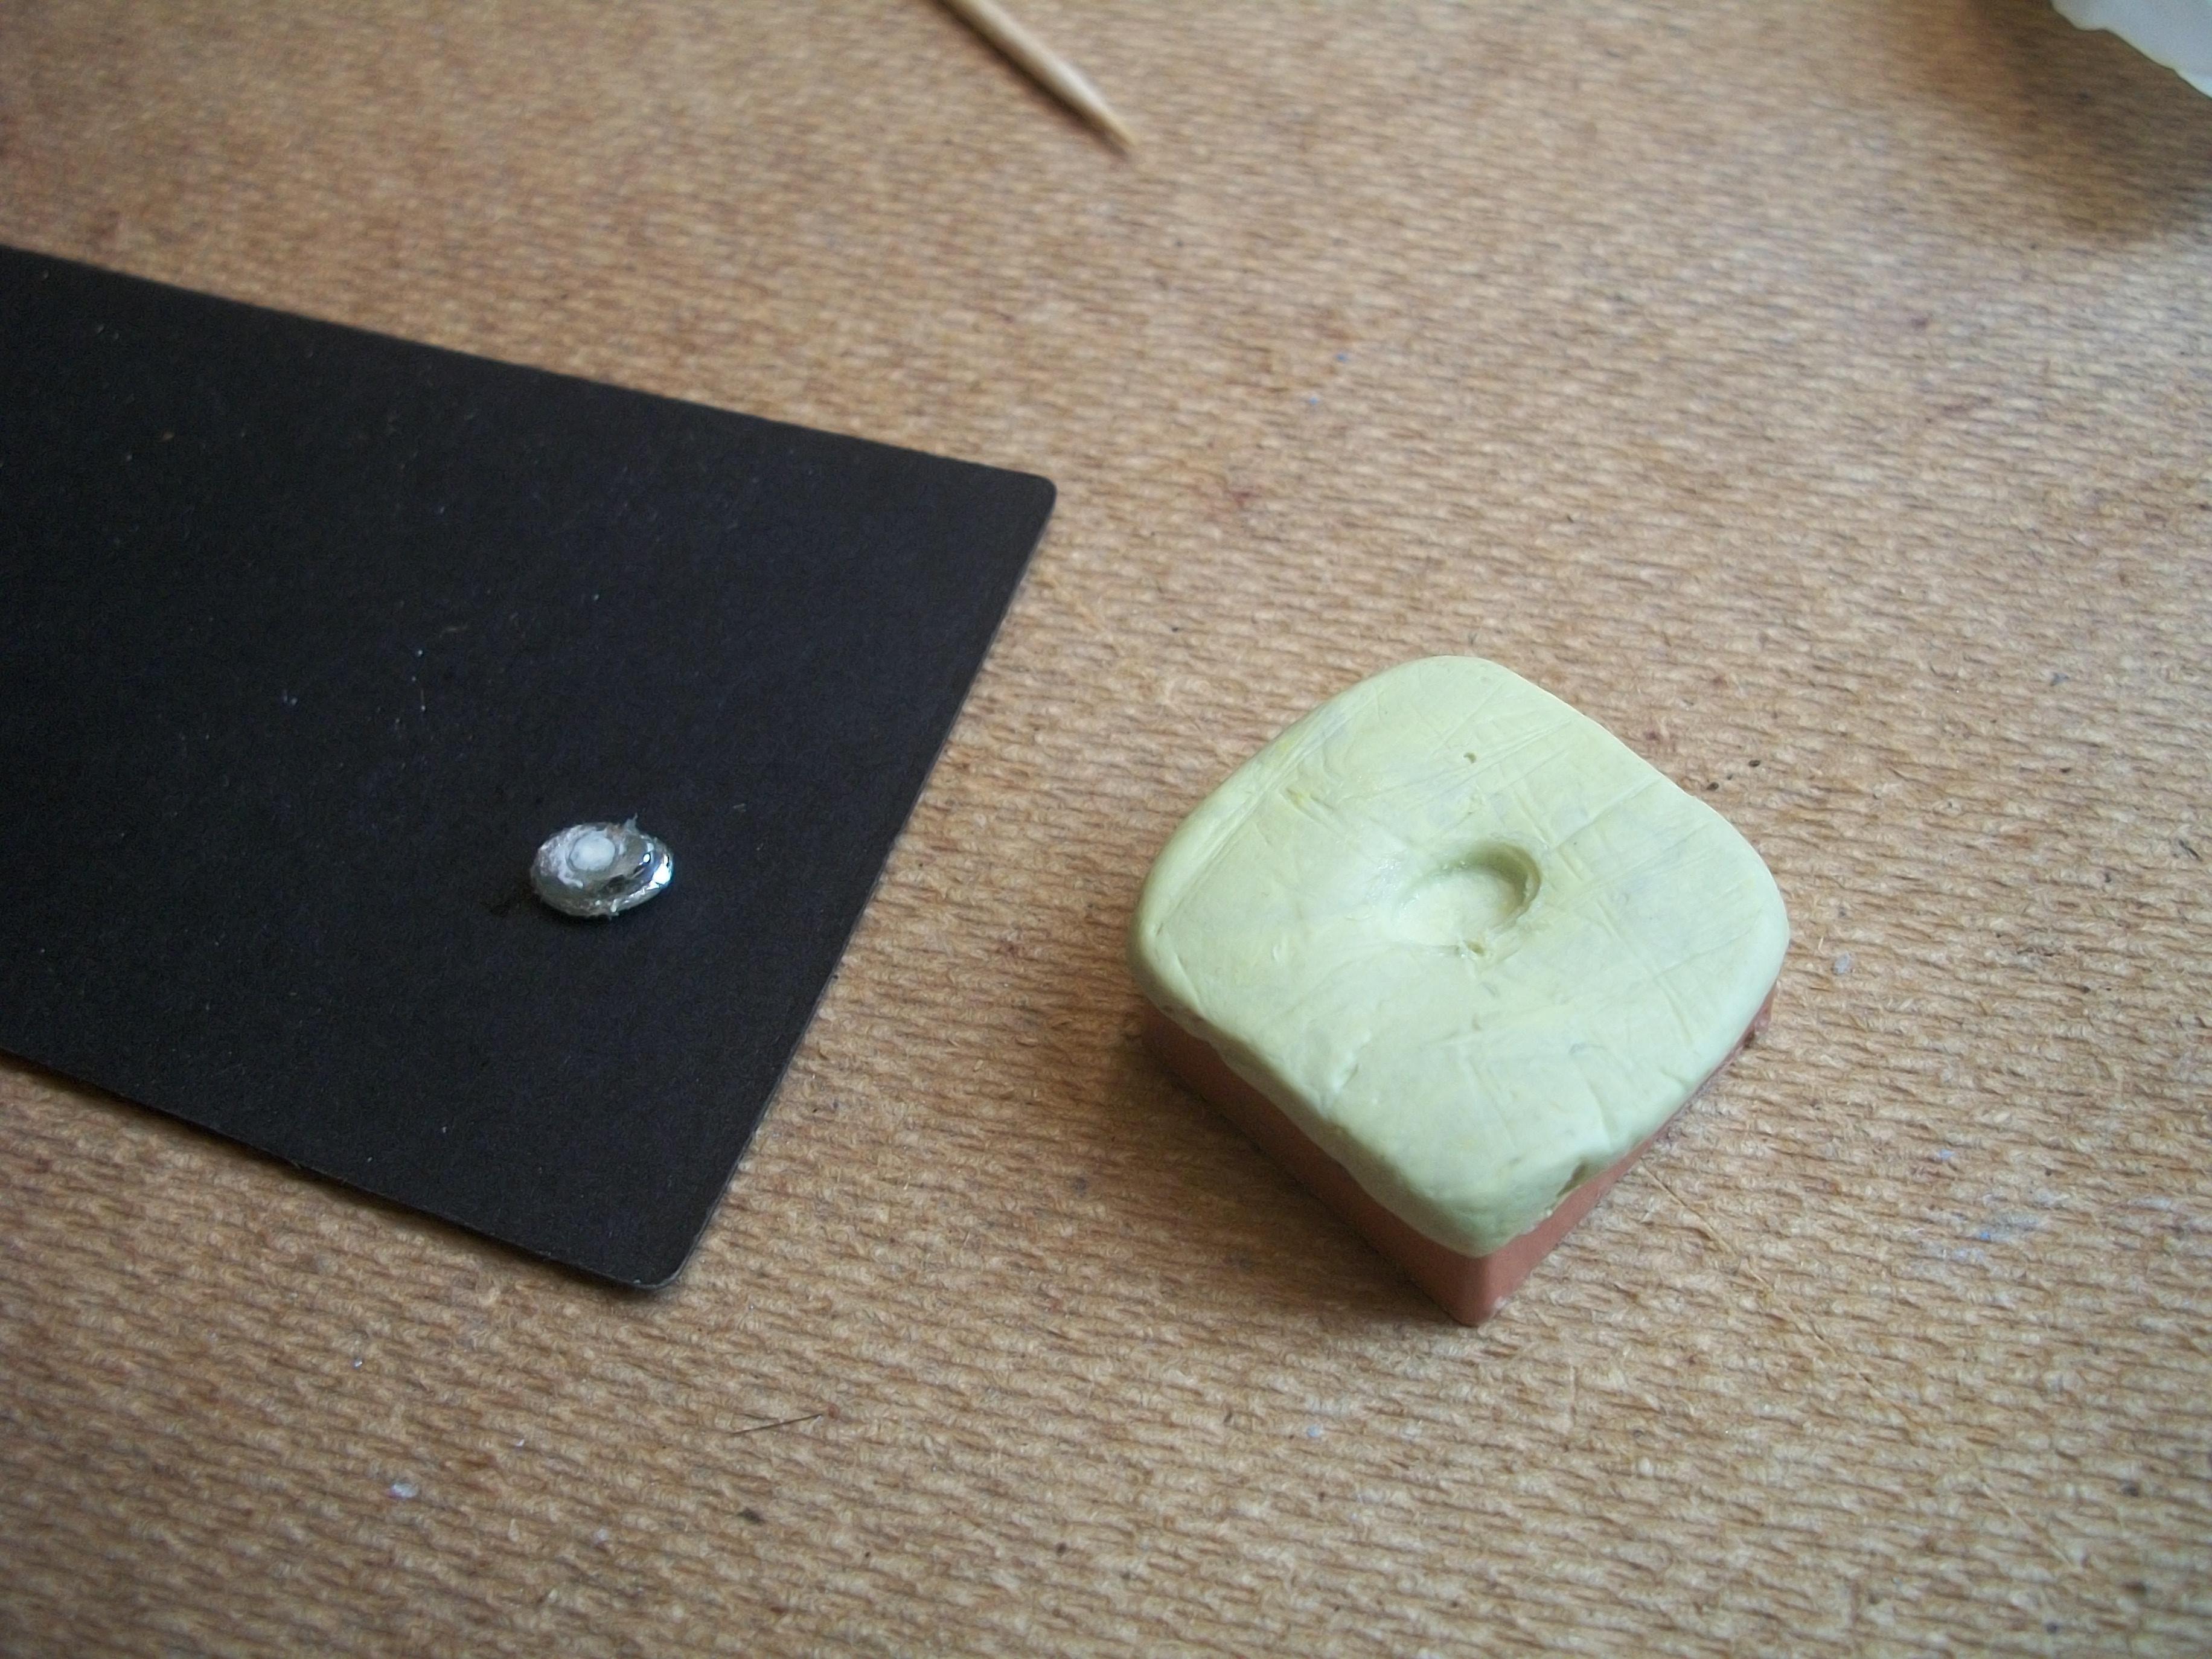
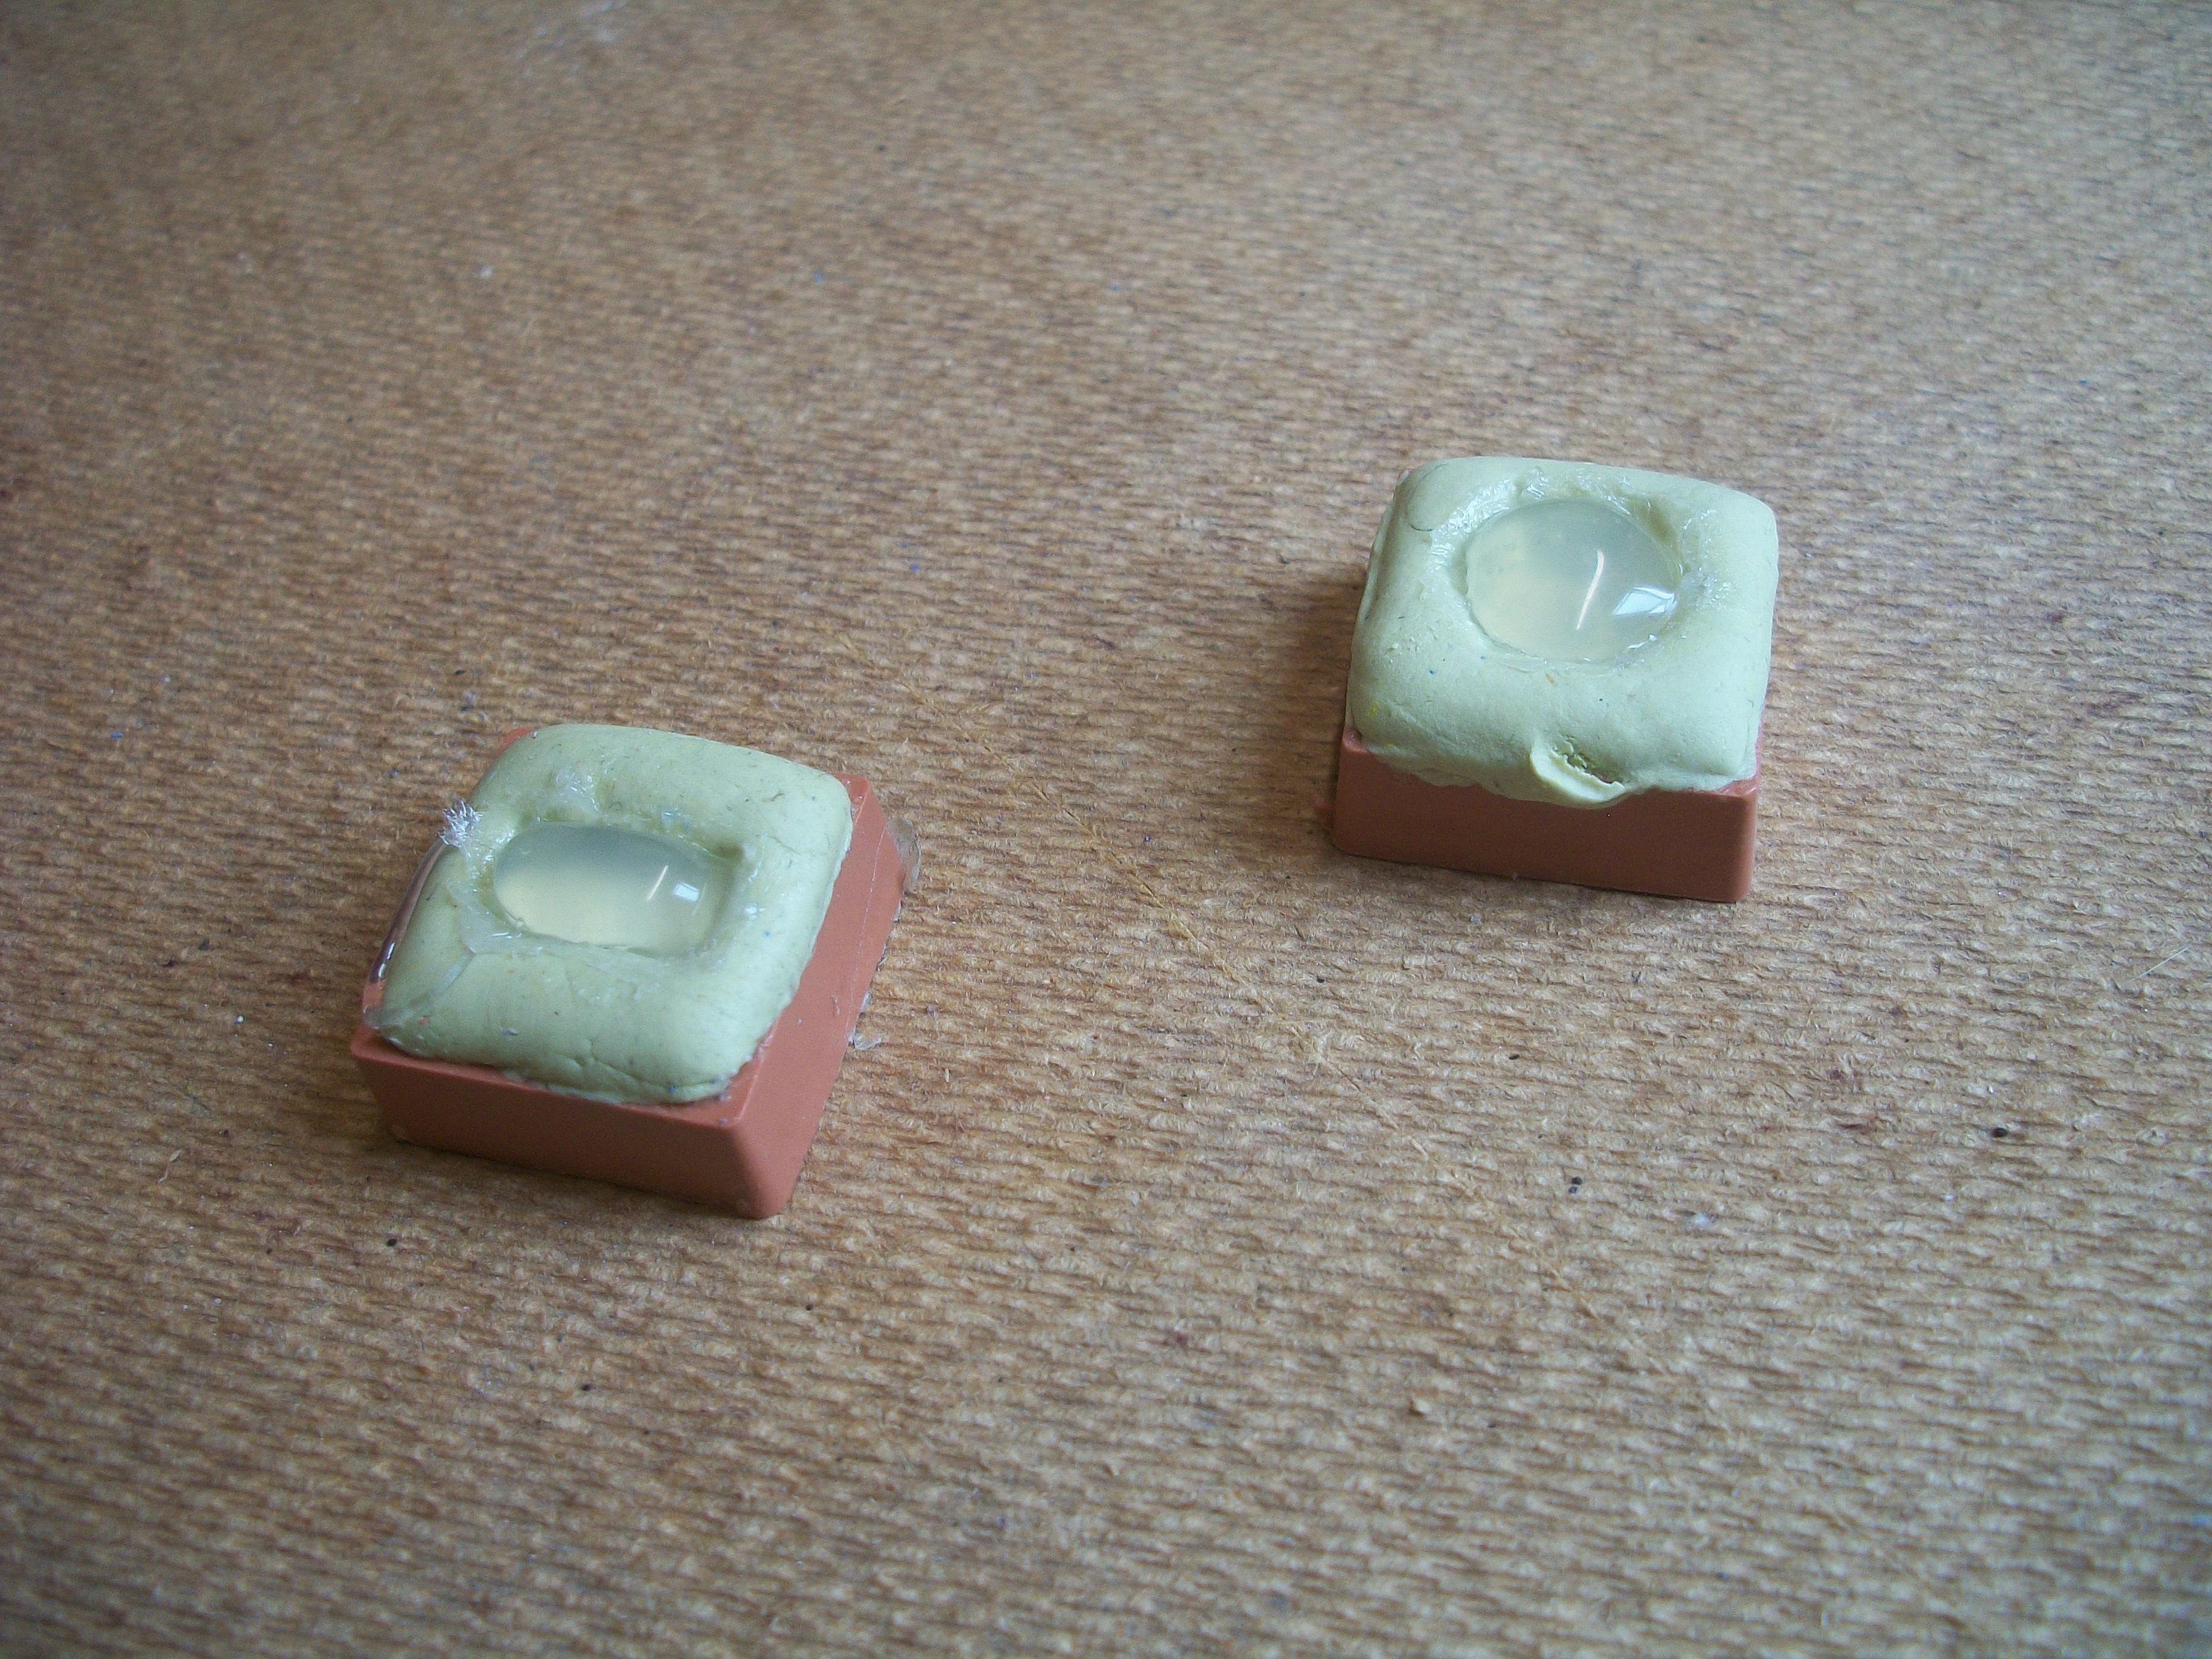
As things turned out, the hot glue version of the side light part was not good enough, so I decided to cast the part in the same Milliput material. By marking the outline of the mould with a black Sharpie, I was able to see the join, because both the mould and the cast part are the same colour. The Vaseline acts as a very effective release agent. The Milliput side light part is much better, and both front side lights are now glued in place on the car. Also, I have used Molotow Liquid Chrome from a refill, to brush onto the bezel around the side light. Both lenses have been painted with Humbrol matt white The side lights are on the car and done. There are no further parts to be assembled or painted. When the outdoor photo shoot takes place, subject to weather conditions improving, I shall be using my daughter's Nikon D3000 DSLR camera, which should be capable of handling the forced perspective that I am aiming for. I think this model is just about ready to post in the Under Glass section of the forum . . . This build has taken 38 days to complete. Many thanks to all fellow members who have kindly viewed my topic, and offered me valuable advice. This has to be THE best model cars forum ! David
-
1:16 Scale 1962 Ford Consul Cortina by FROG kits
Anglia105E replied to Anglia105E's topic in WIP: Model Cars
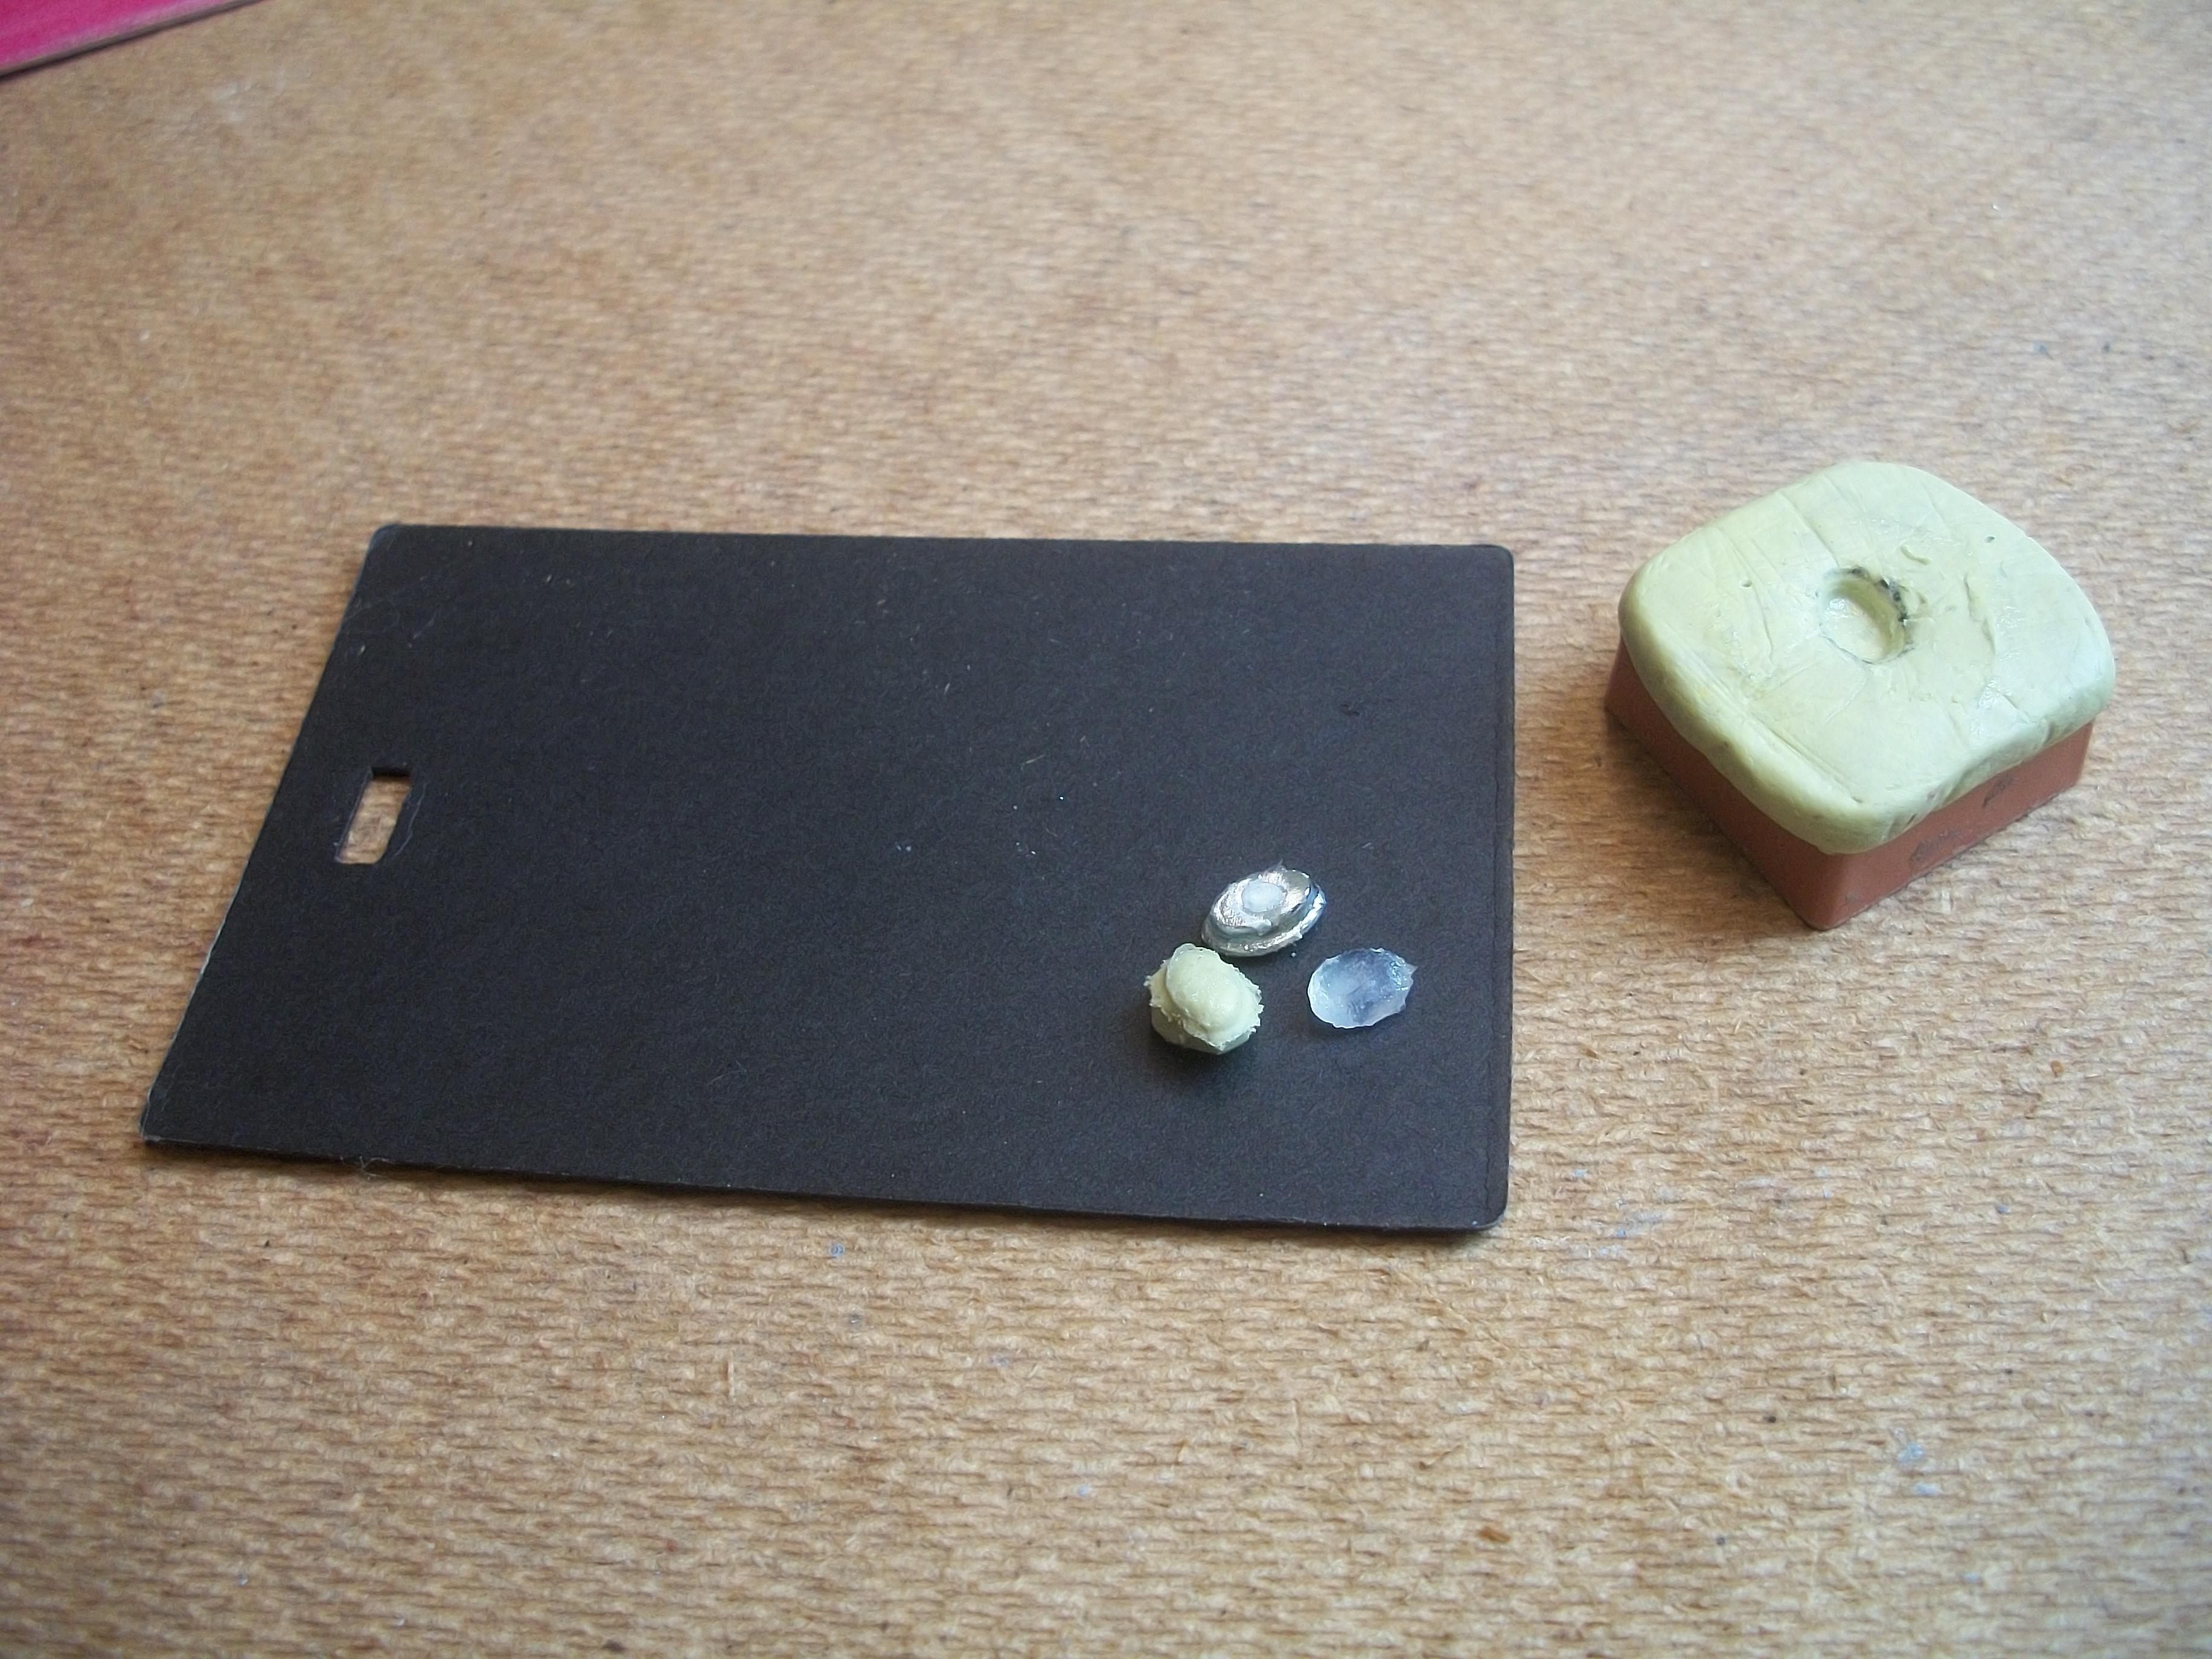
To continue with the moulding and casting tests, in order to produce a front side light for this Cortina, I have used Milliput to create the mould for two test parts . . . Vaseline was applied to the inside of the small plastic box, and also to the surface of the part. Following overnight setting of the Milliput, I have filled each mould with hot glue. This has turned out successful, and the part cast in hot glue was easily removed . . . This process is being repeated tonight, using the original side light part from the FROG kit. One more photo of the 1:16 scale Ford Cortina, and the smaller 1:24 scale Ford Anglia. David
-
1:16 Scale 1962 Ford Consul Cortina by FROG kits
Anglia105E replied to Anglia105E's topic in WIP: Model Cars
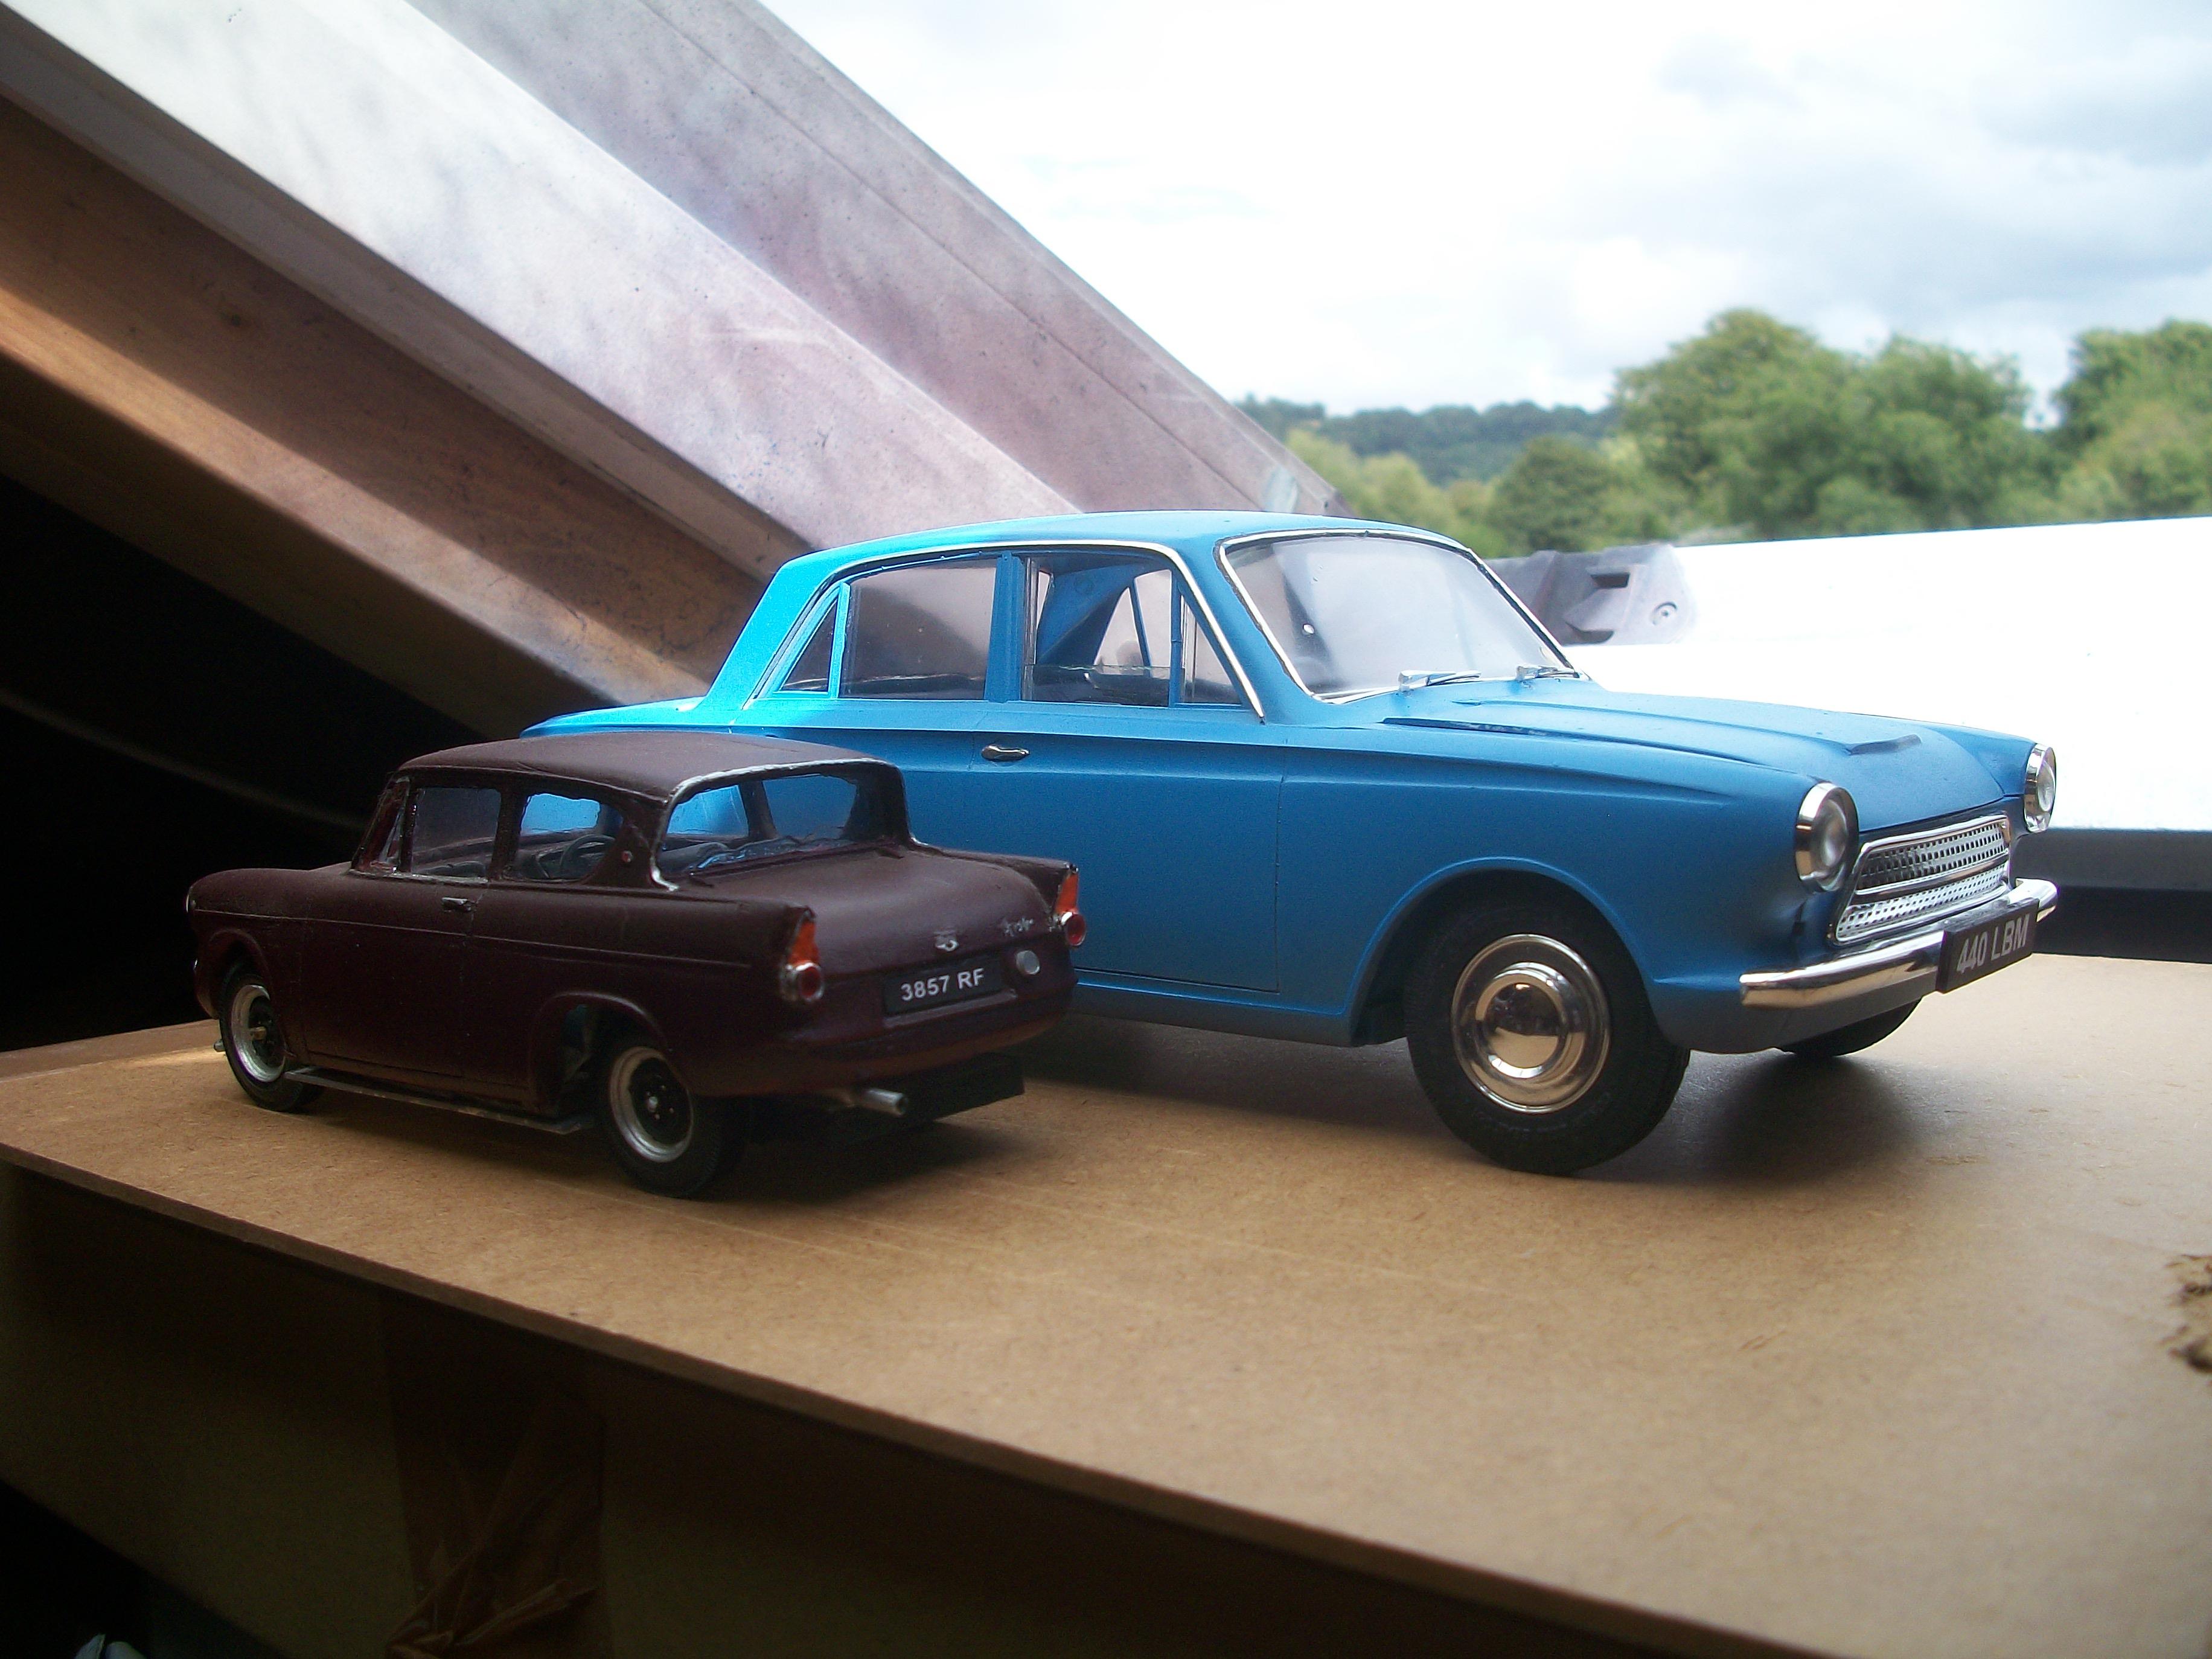
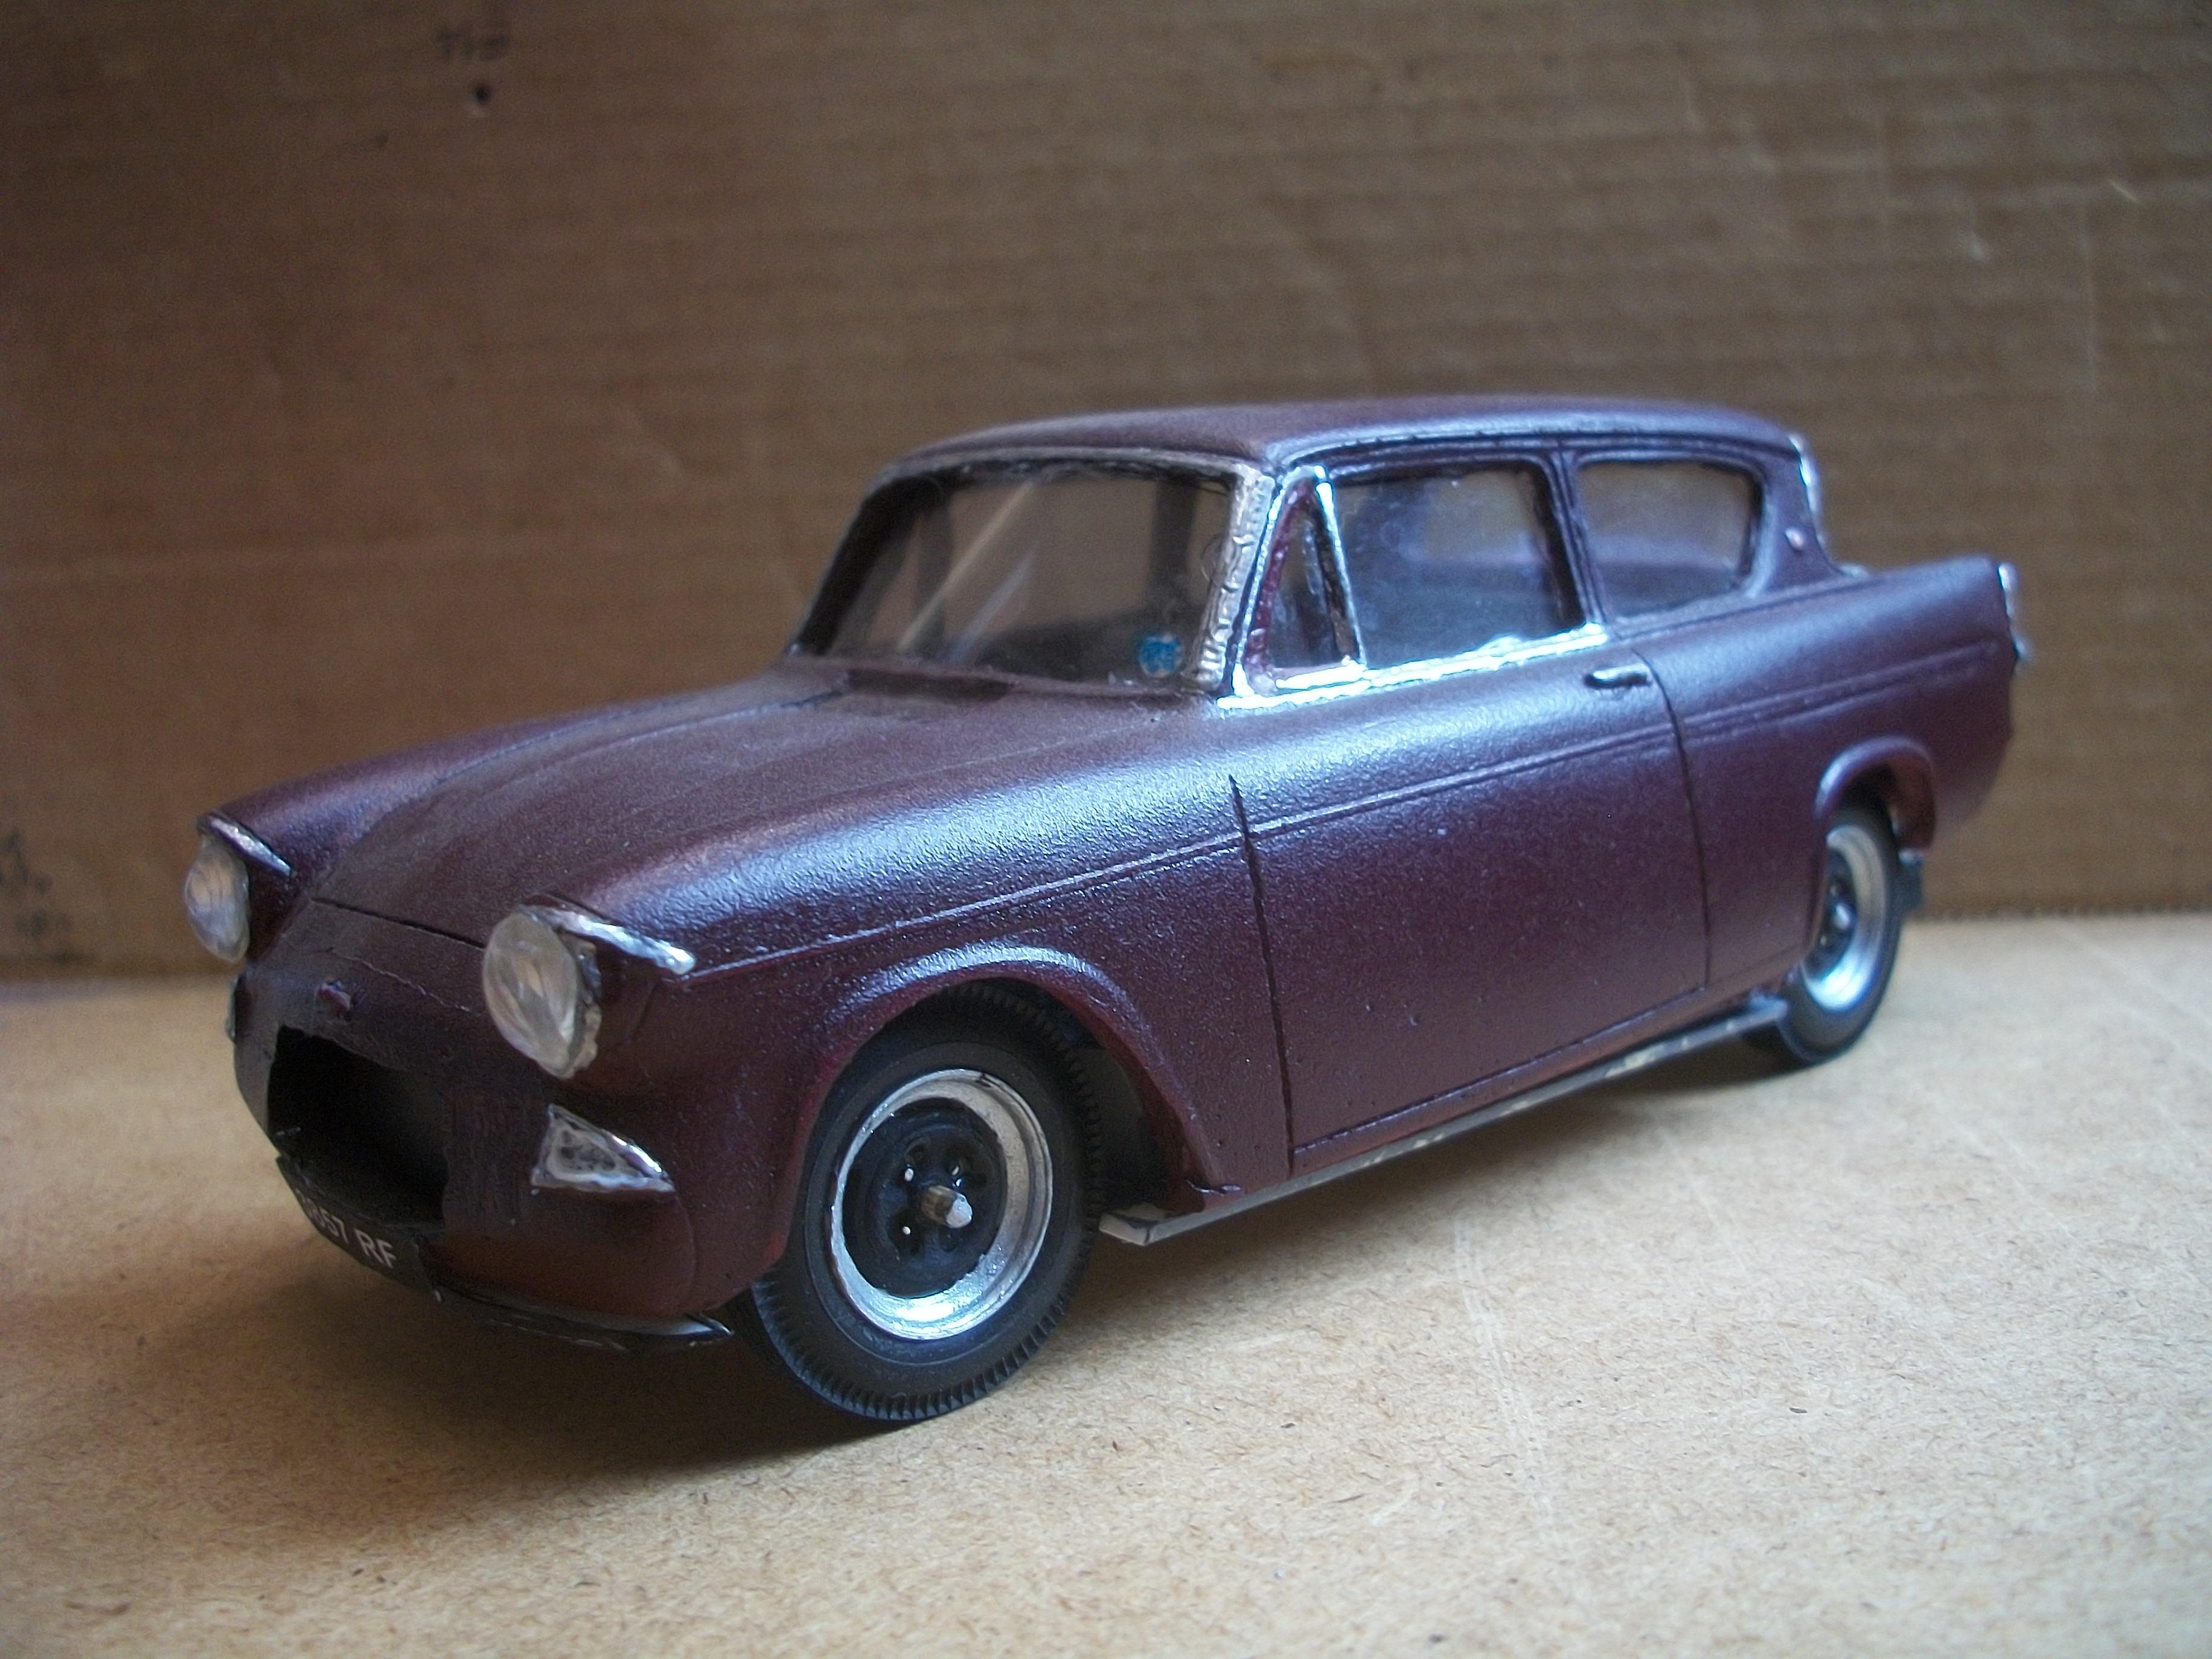
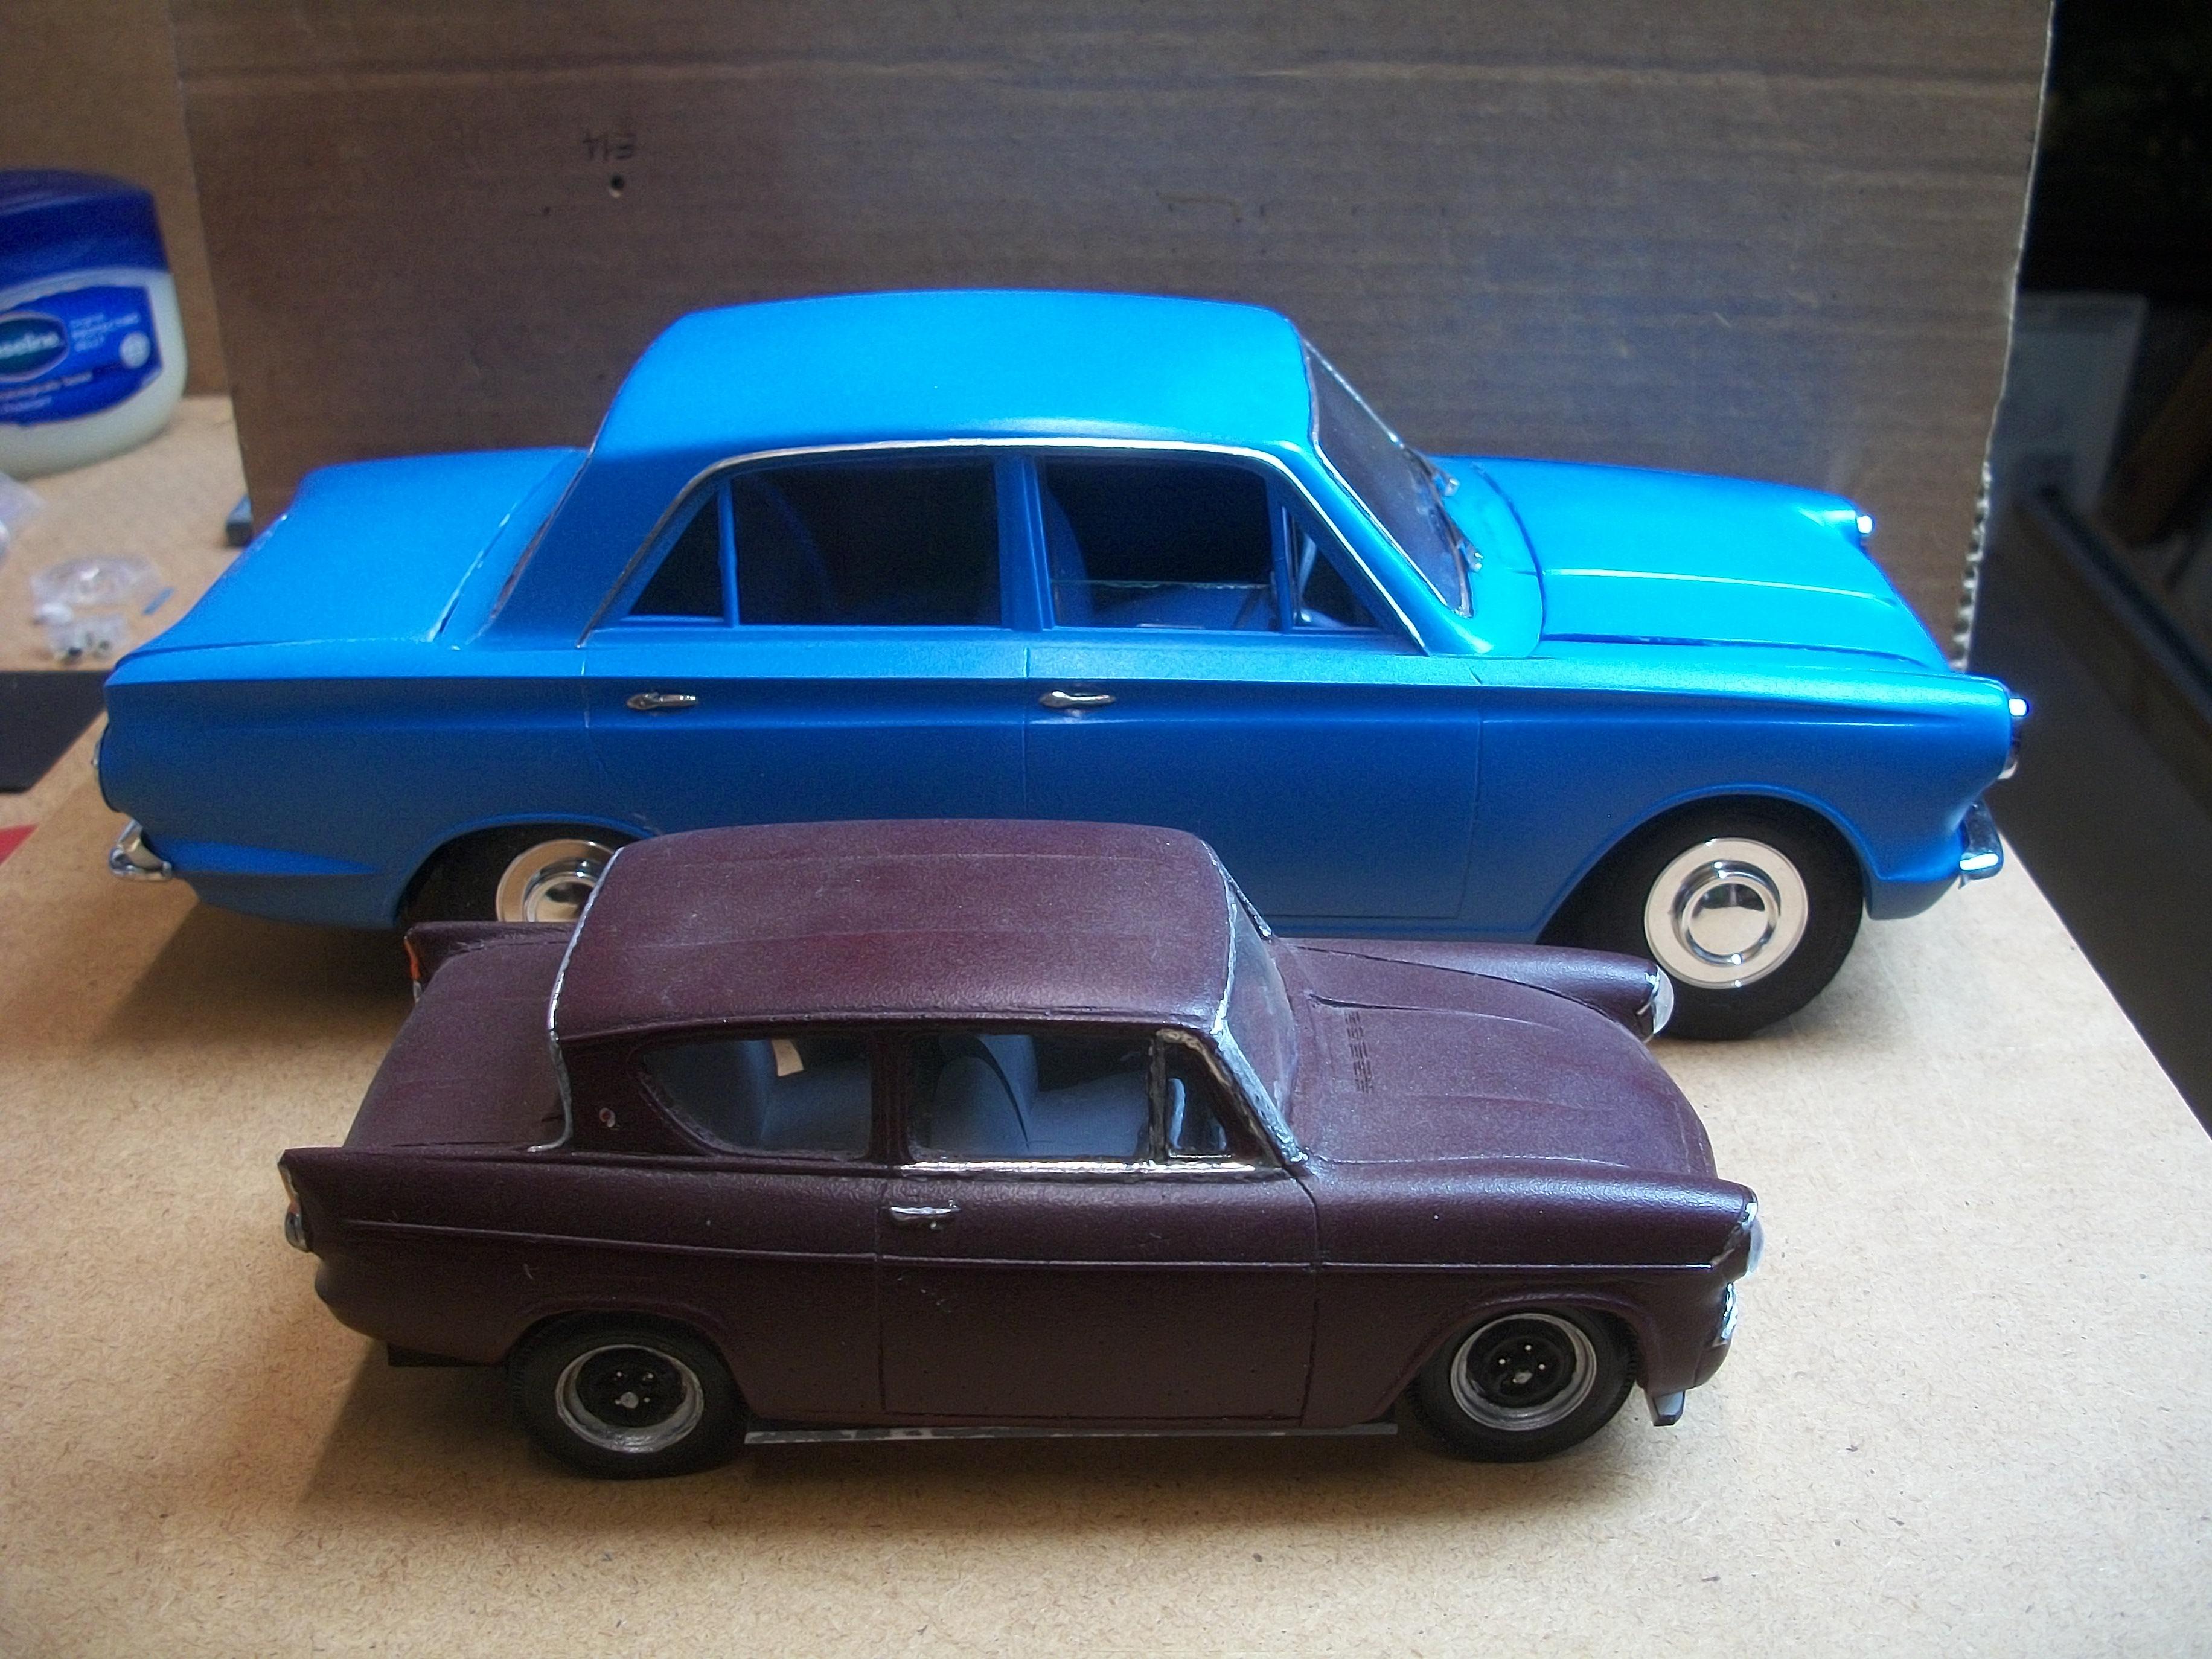
A coincidence indeed Noel . . . and talking of coincidences, I was reading an article about George Harrison of the Beatles and how the first car that he owned was a dark blue 1959 Ford Anglia 105E . . . My second car, after the 1960 maroon 105E, was a dark blue 1959 Ford Anglia 105E which I painted black in due course ! I have already built a resin bodied Ford Anglia 105E some years ago in 1:24 scale, for which I scratch built a chassis, fitted some clear plastic windows and sprayed the car with the Ford colour Imperial Maroon. Here are a few photos of that model car . . . The 1:24 scale diecast Anglia 105E, the Harry Potter one, is quite good but somewhere I did read that it was slightly out of scale? David