Anglia105E
-
Posts
3,487 -
Joined
-
Last visited
Content Type
Profiles
Forums
Events
Gallery
Everything posted by Anglia105E
-

1:16 Scale 1962 Ford Consul Cortina by FROG kits
Anglia105E replied to Anglia105E's topic in WIP: Model Cars
Many thanks for your kind comments Bob . . . I would agree that the way this kit goes together, and particularly the body, makes for some interesting model building challenges, which is all part of the fun for us of course ! David -
1:16 Scale 1962 Ford Consul Cortina by FROG kits
Anglia105E replied to Anglia105E's topic in WIP: Model Cars
Absolutely Noel . . . The Consul Cortina MK 1 was a huge success for the Ford motor company at the time, along with the Ford Anglia 105E, which was my very first car that I owned . . . Shortly after I had passed my driving test at the wheel of my Dad's Cortina, he bought me the maroon Anglia 105E for the modest sum of £50 (GBP) . . . During 1970 my first job after leaving school was as a trainee apprentice Partsman in the stores of a local Ford dealership. David -
You must be very proud of this 1:8 scale Cobra build Ray . . . The pile of printed instructions is something to behold, and those lights work ! No-one knows better than you yourself when is the right time to move on to a different hobby, but I wonder if you might get the urge to do one more Cobra, maybe when you see a kit advertised for sale ? Good luck anyway . . . whichever way you choose to go . . . David
-
1:16 Scale 1962 Ford Consul Cortina by FROG kits
Anglia105E replied to Anglia105E's topic in WIP: Model Cars
Here are a few photos showing the drip rail mouldings and the door handles after the BMF was applied yesterday. I made a couple of wiper spindles from 1 mm square styrene rod, and then glued them in place. The wiper arms and blades are glued to these spindles. Also, I am experimenting with methods of moulding and casting the front side light, by testing materials with a part from a Jaguar kit. David
-
1:16 Scale 1962 Ford Consul Cortina by FROG kits
Anglia105E replied to Anglia105E's topic in WIP: Model Cars
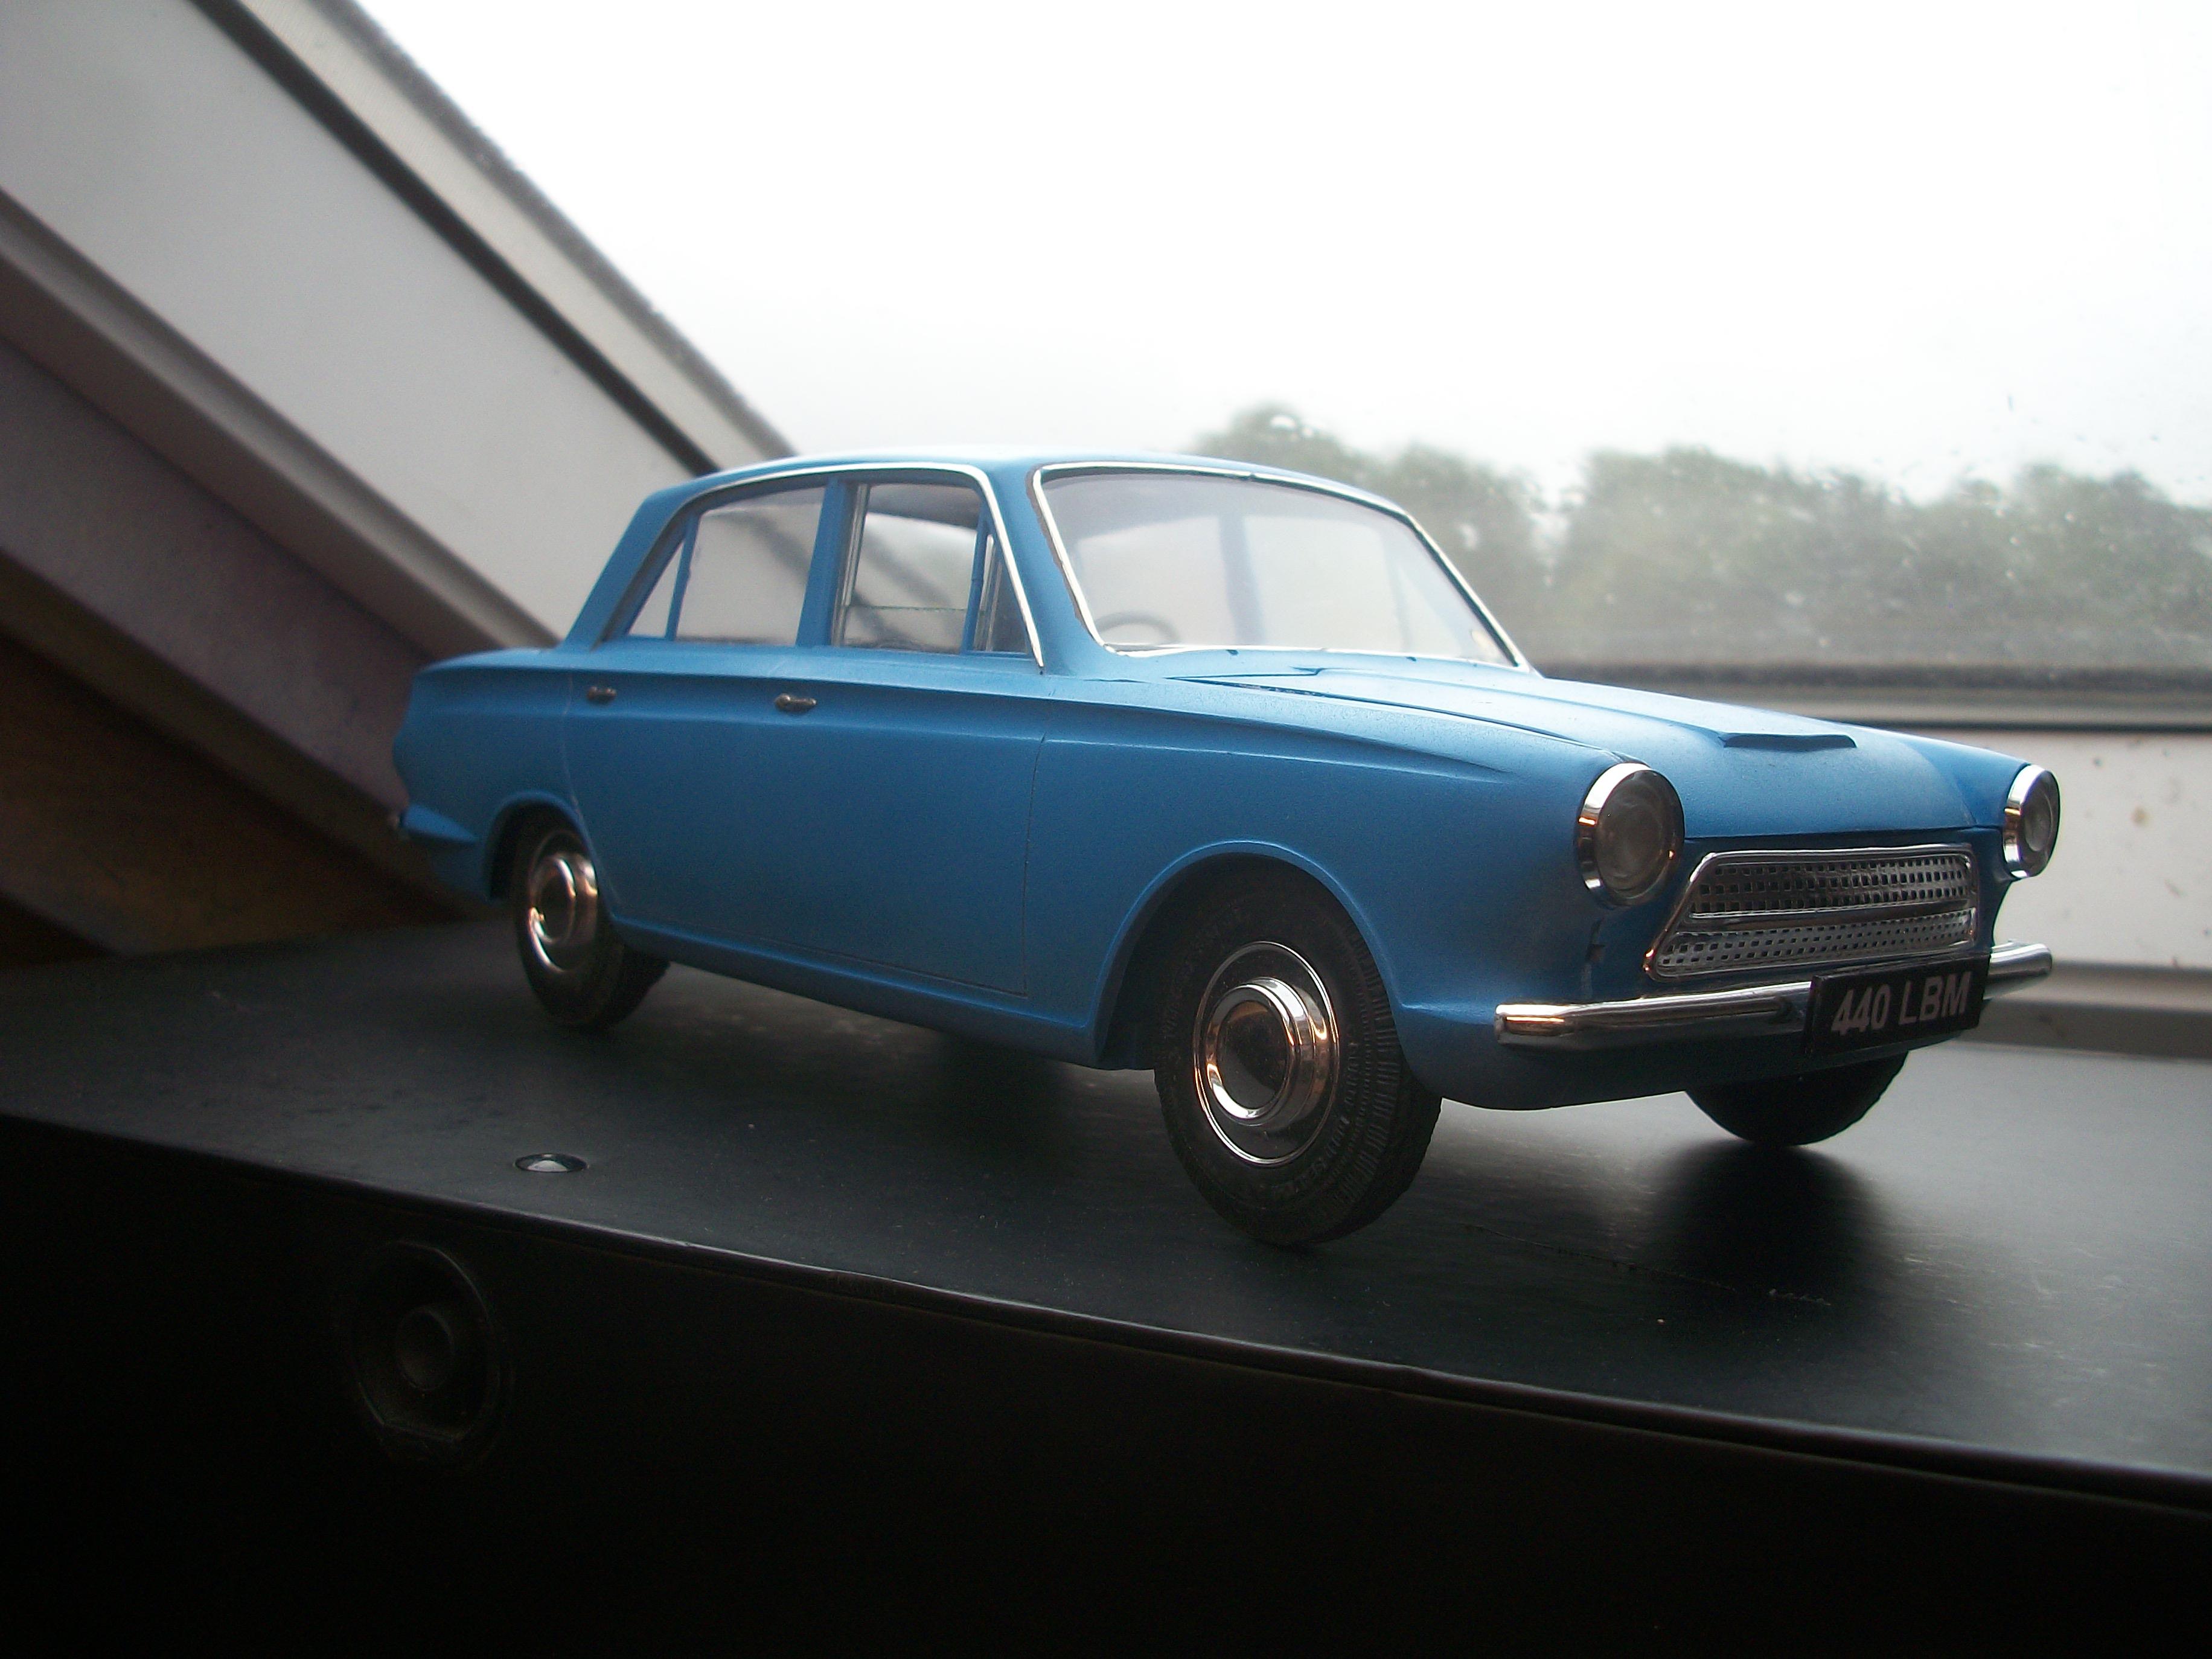
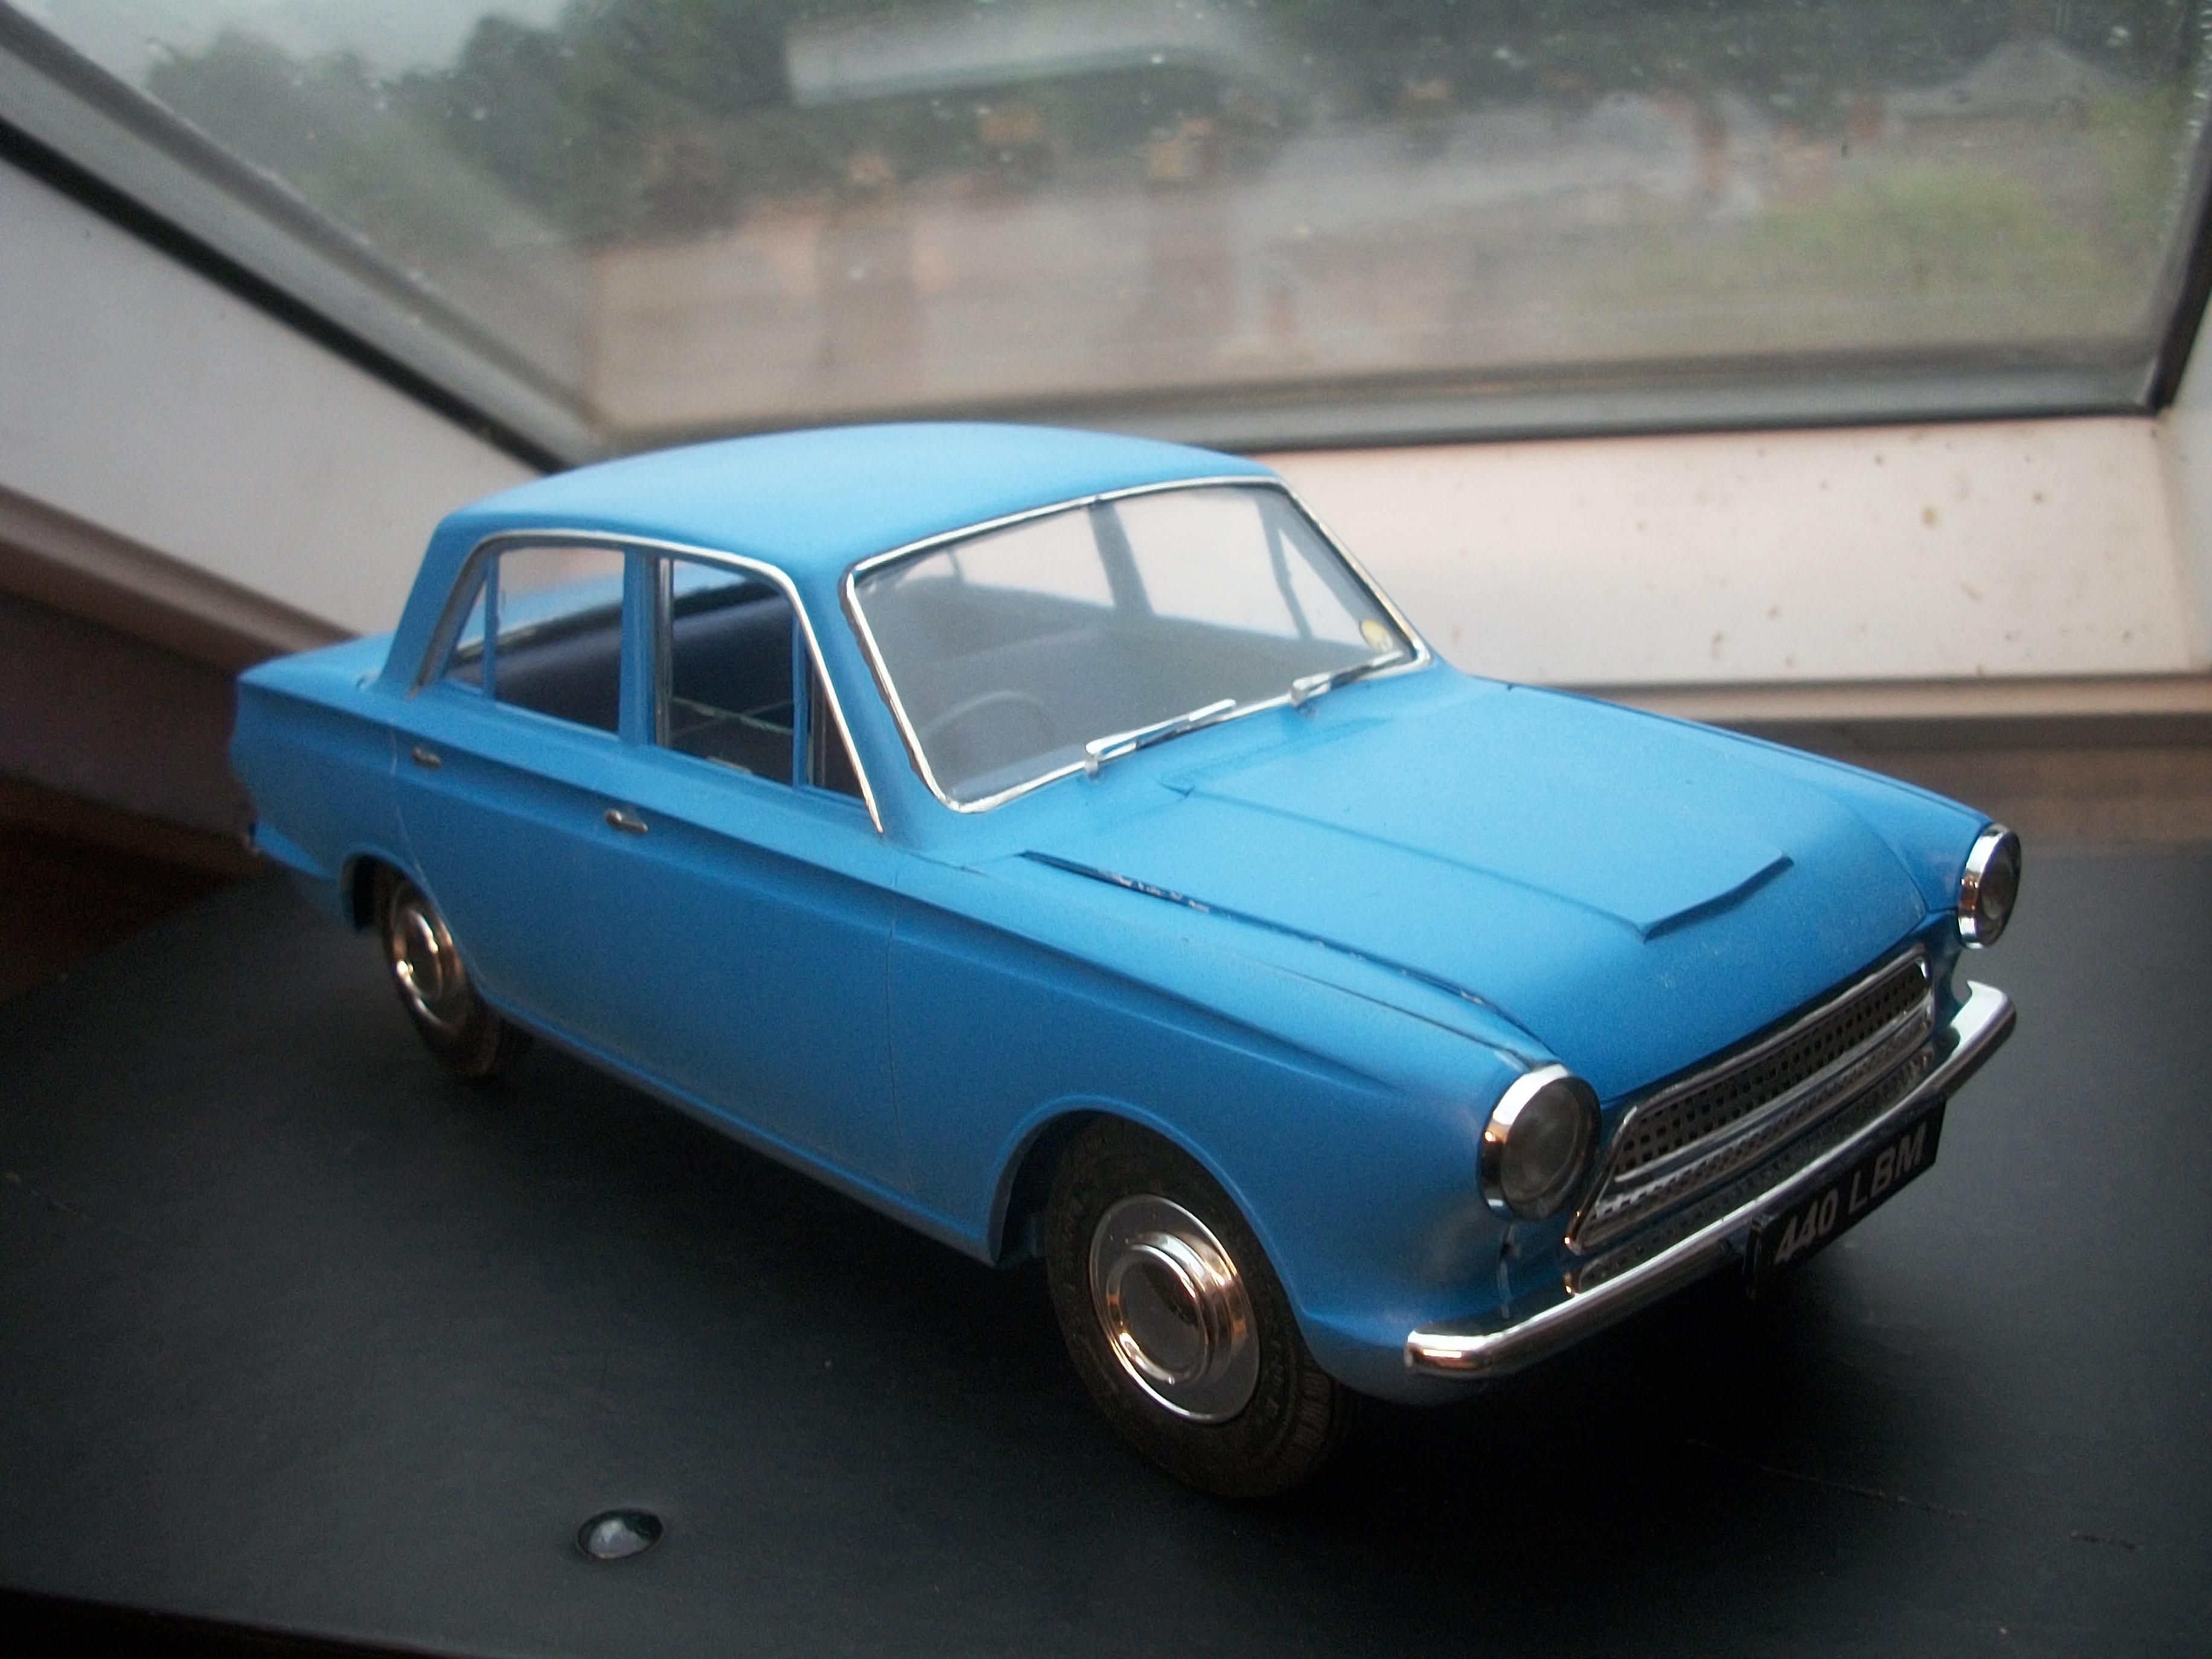
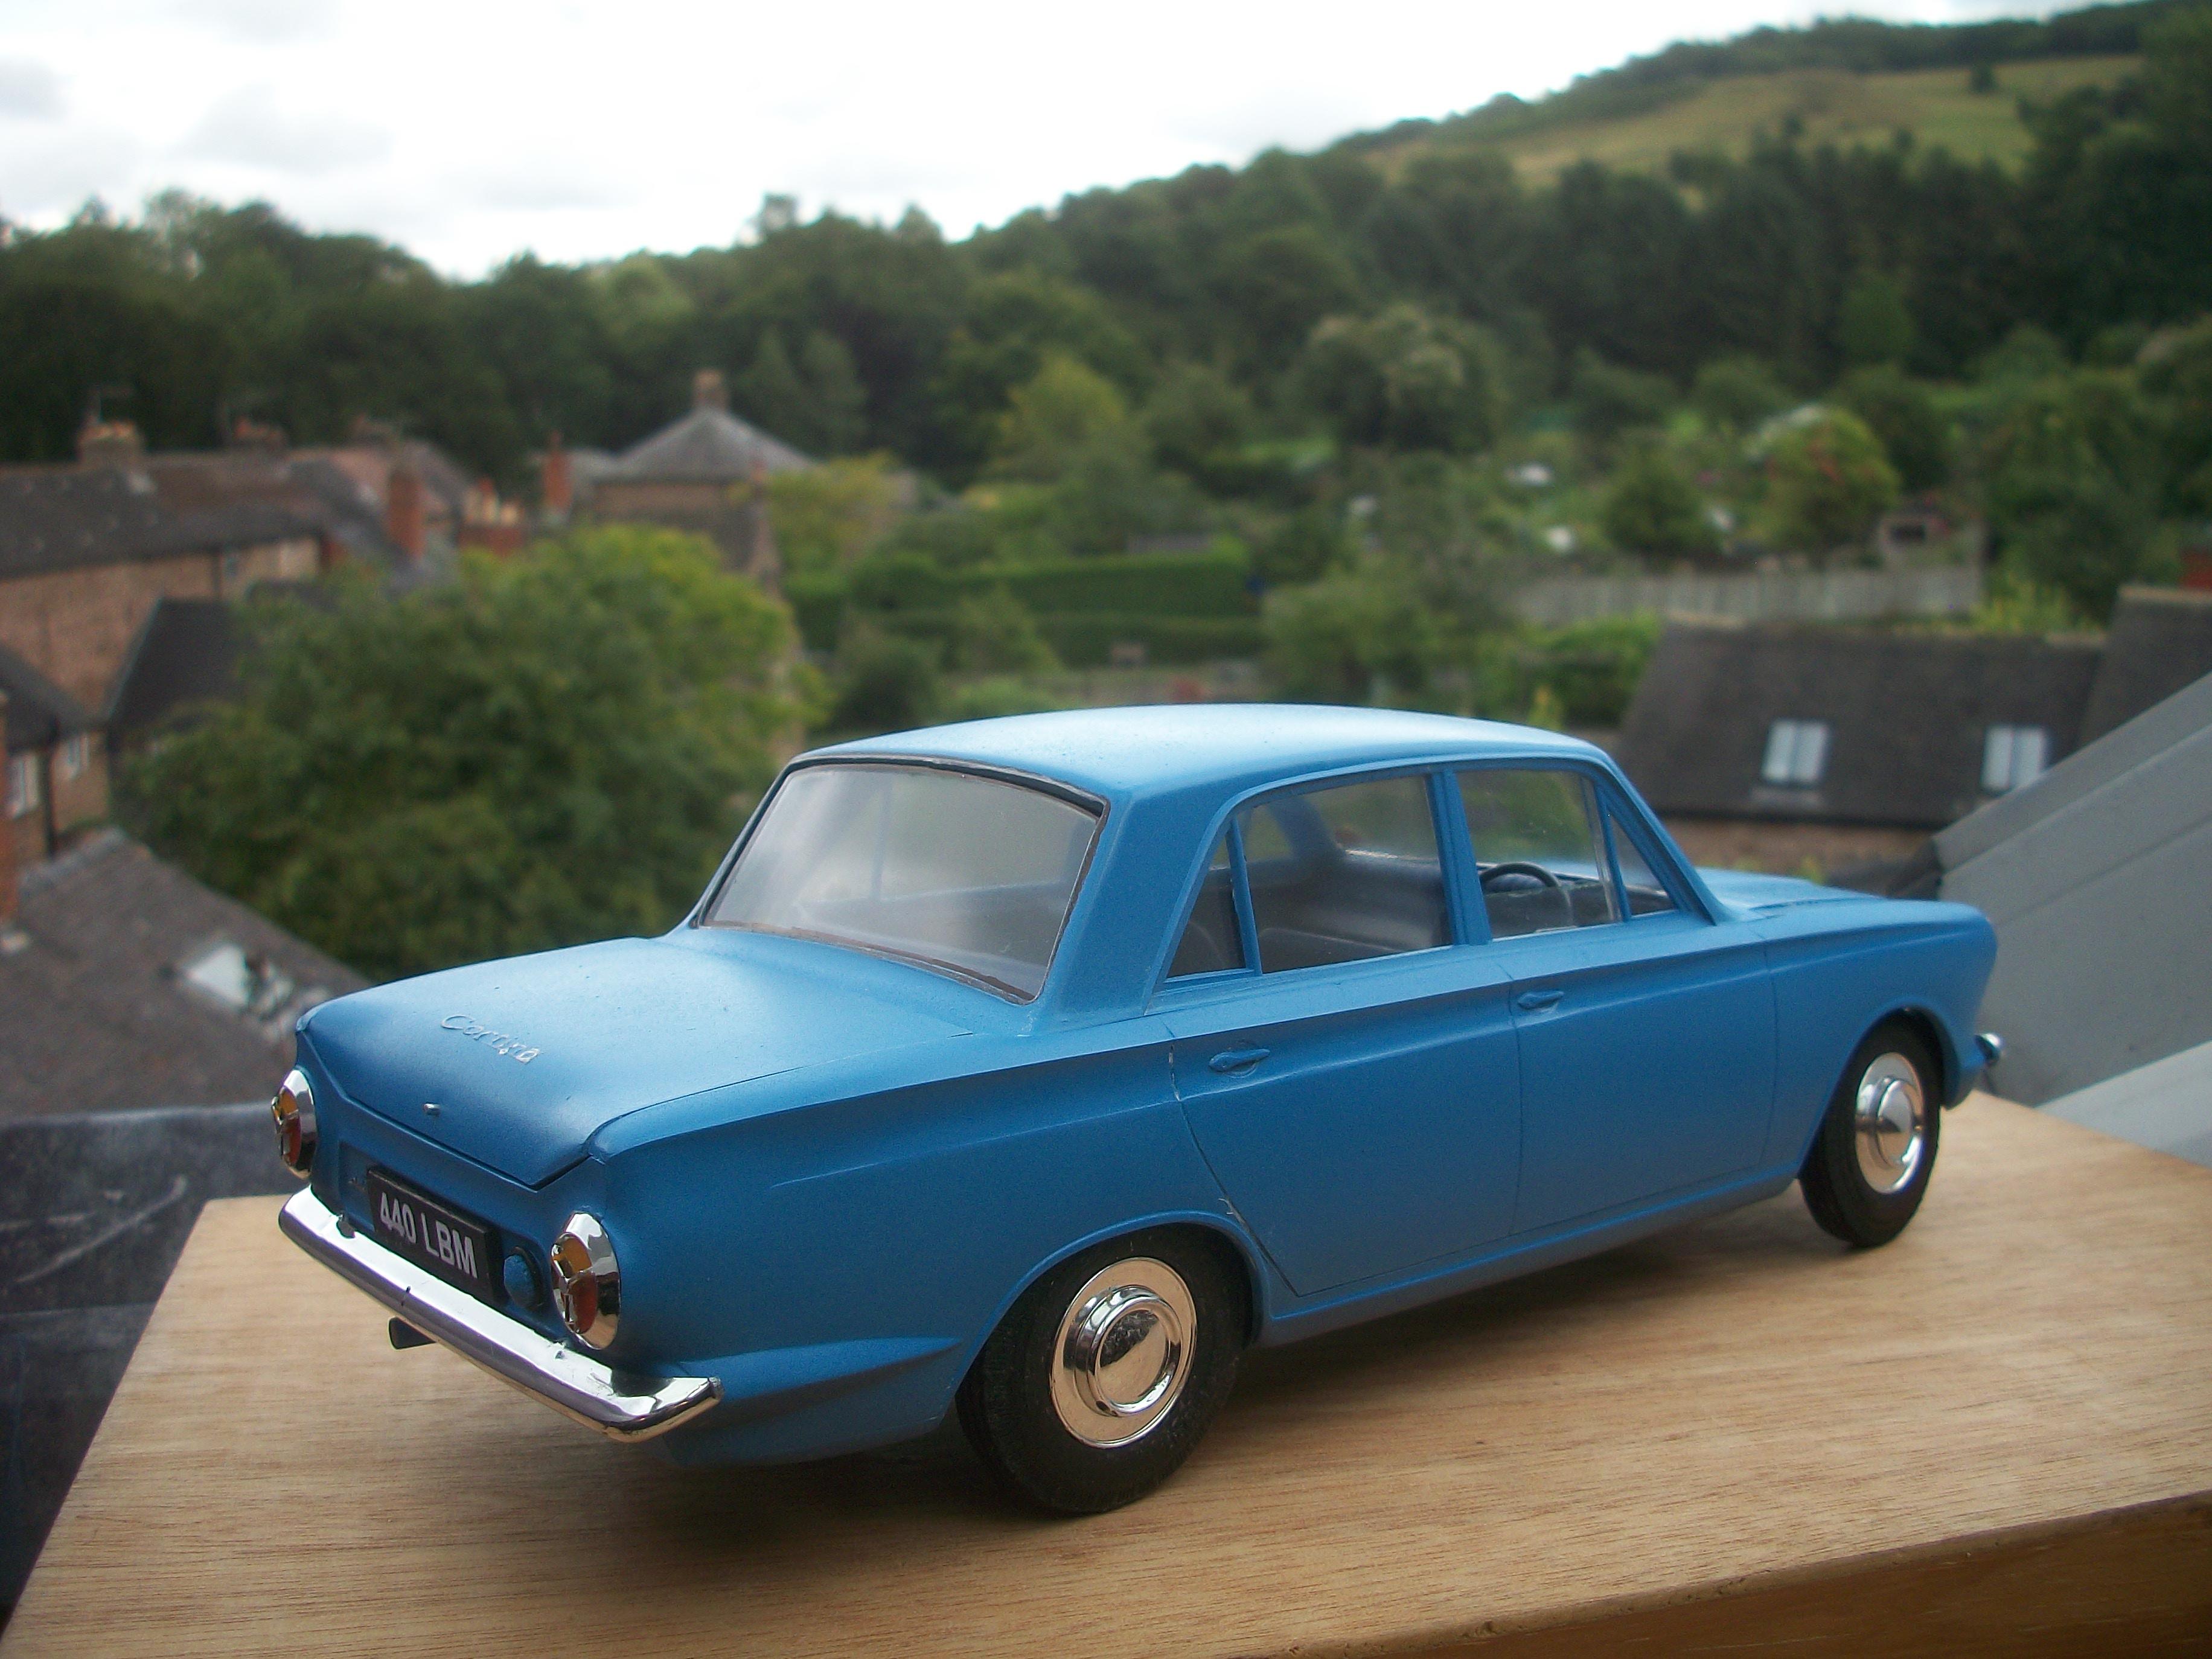
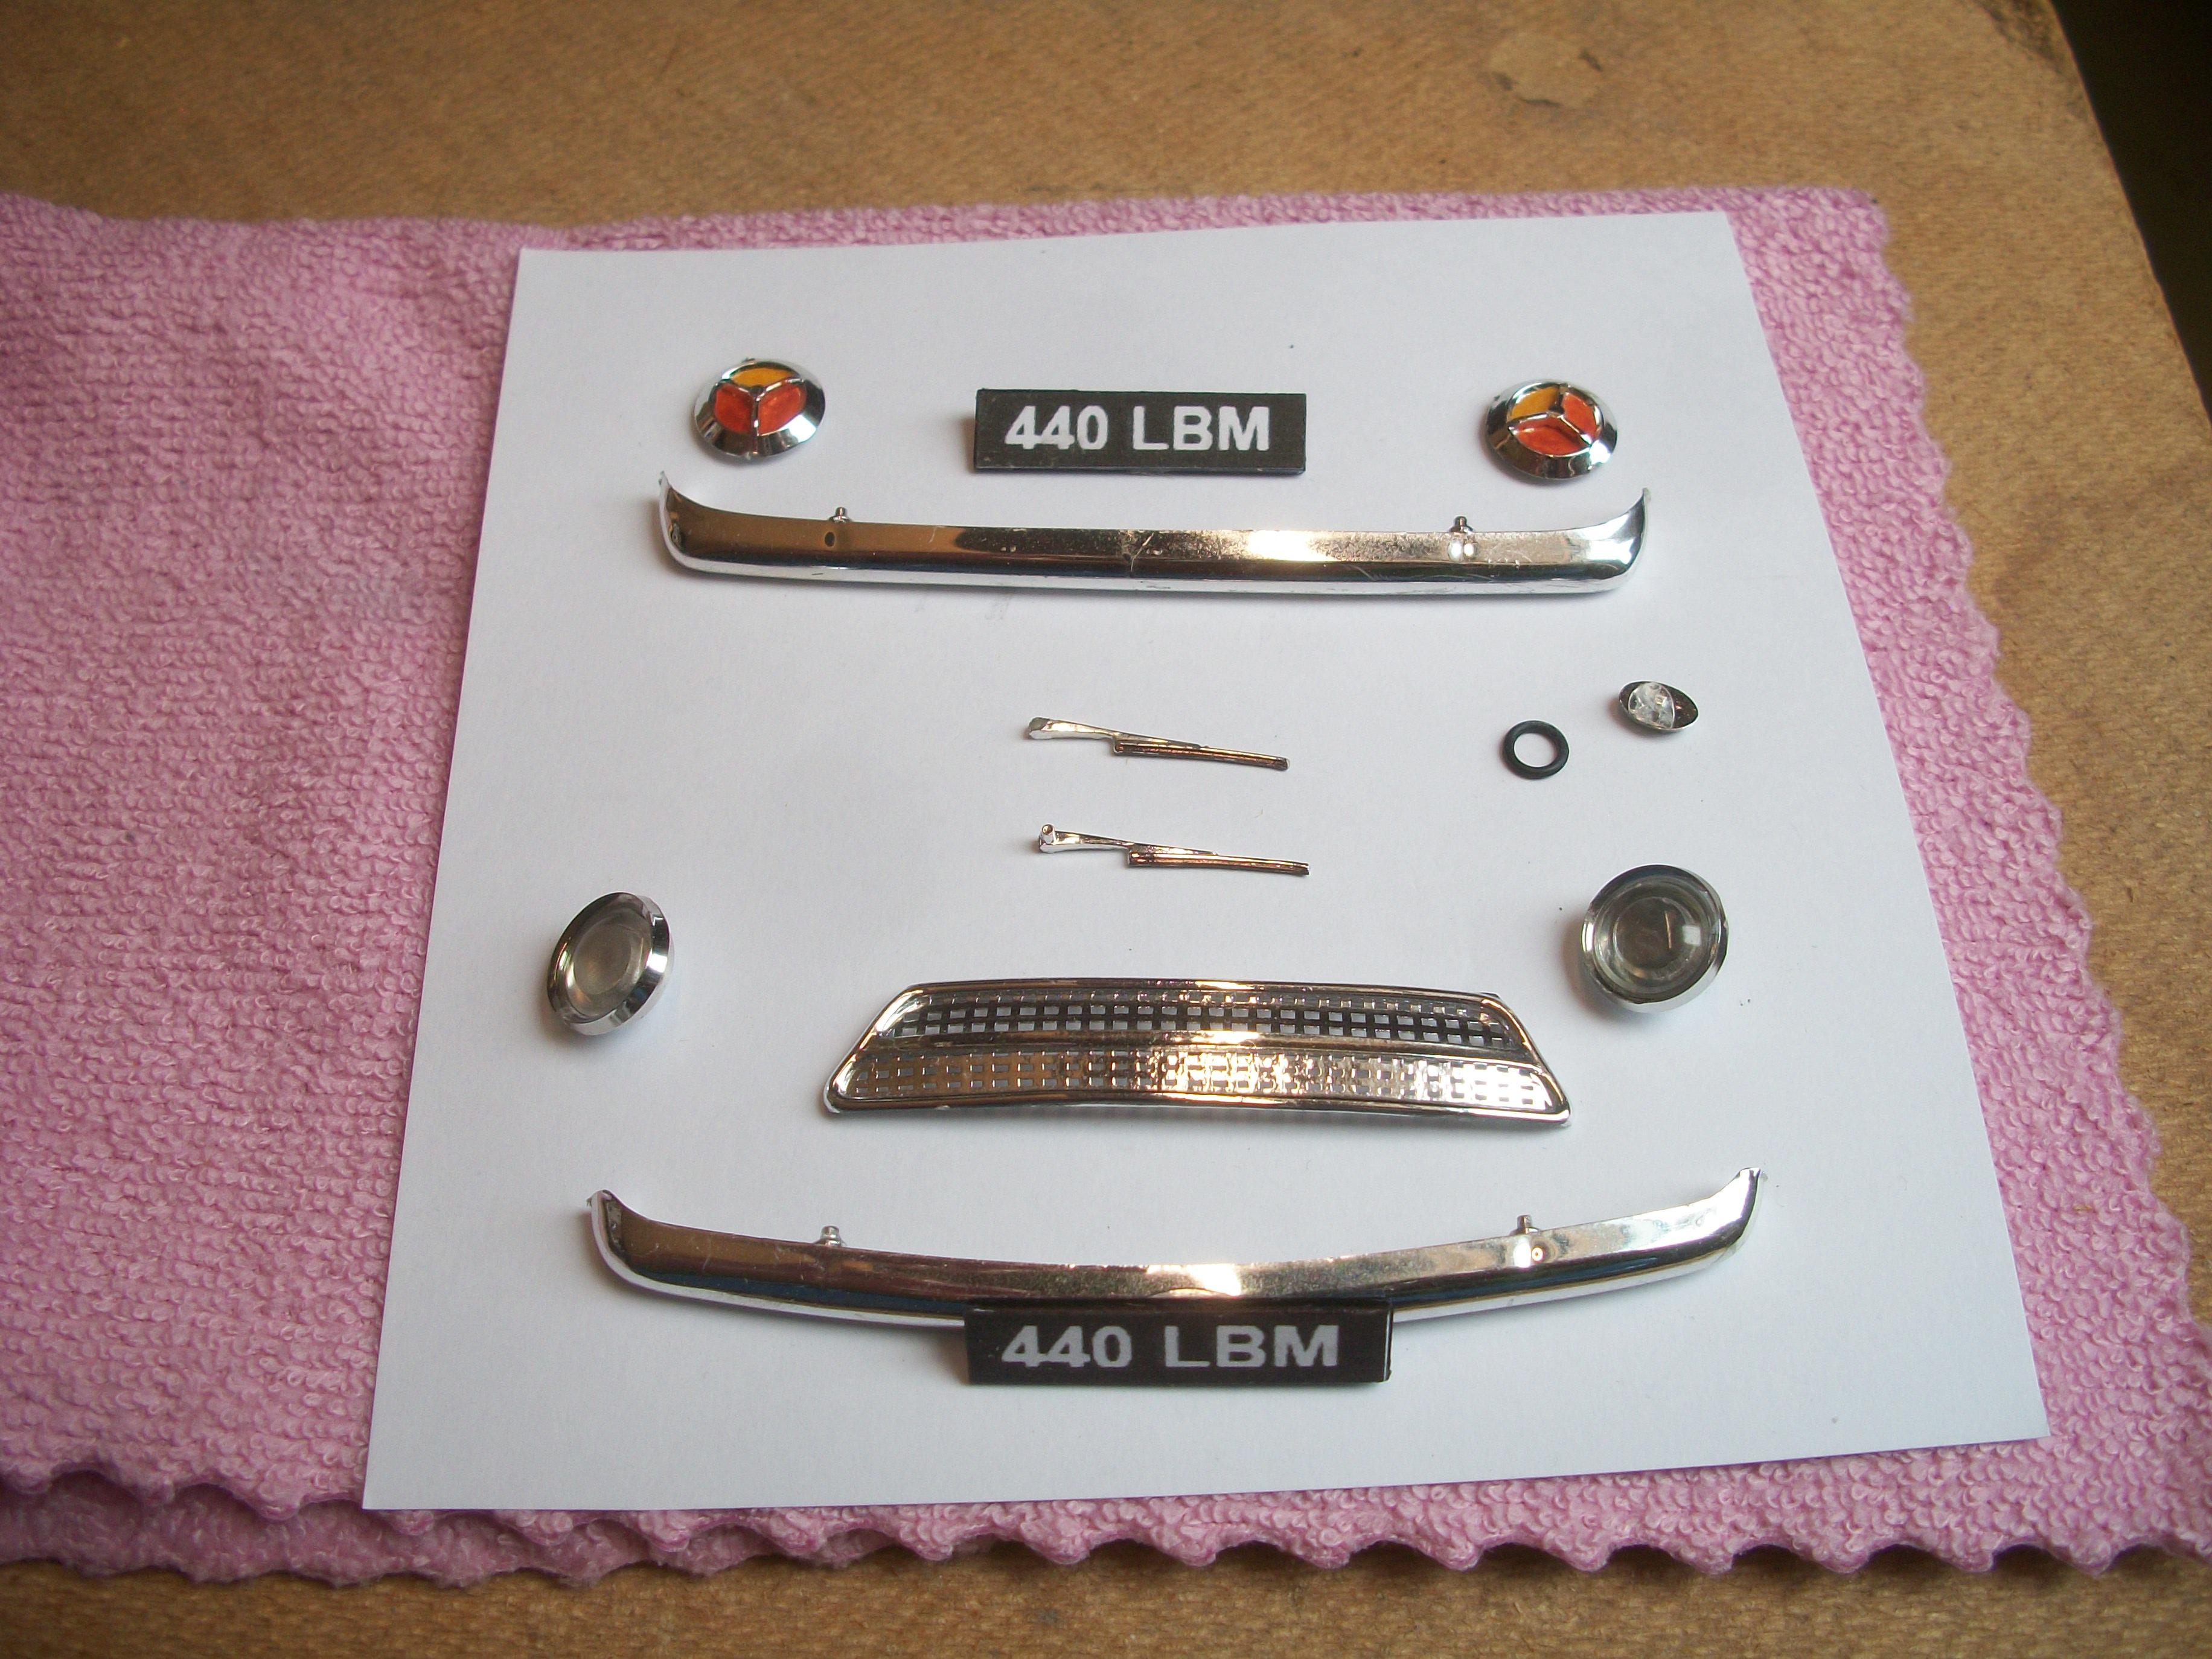
Recent work over the past three days has included assembling the rear bumper, rear tail lights, and also the front radiator grille, headlamp reflector bowls and lenses, front bumper and number plate . . . I decided to use Bare Metal Foil for the windscreen surround moulding, also BMF for the rear window surround moulding, after using a black Staedtler pen to define the window seals. Having applied bare metal foil to the four door handles, there are only two further mouldings to BMF, which are the long side mouldings for the roof drip channel. I need to glue the wiper arms and blades in place and also fabricate a second front side light, as I only have one side light. Plans are moving forward to do a couple of outdoor photo shoots with this Cortina, one using my Kodak M340 camera that I use for all these MCM forum topic photos, and one using my 35mm Zenit SLR camera when the film arrives in the post. Considering the Kodak camera will have difficulty with the forced perspective technique as it cannot get both the model car and background in focus at the same time, I should be able to achieve better results with the old Soviet SLR camera. This will allow me to make use of an f/16 stop to give a narrow aperture and a greater depth of field. David
-
1:16 Scale 1962 Ford Consul Cortina by FROG kits
Anglia105E replied to Anglia105E's topic in WIP: Model Cars
Thanks a lot Martin . . . I find myself really enjoying this build, despite the difficulties along the way. One more week, maybe two should see it completed. David -
1:16 Scale 1962 Ford Consul Cortina by FROG kits
Anglia105E replied to Anglia105E's topic in WIP: Model Cars
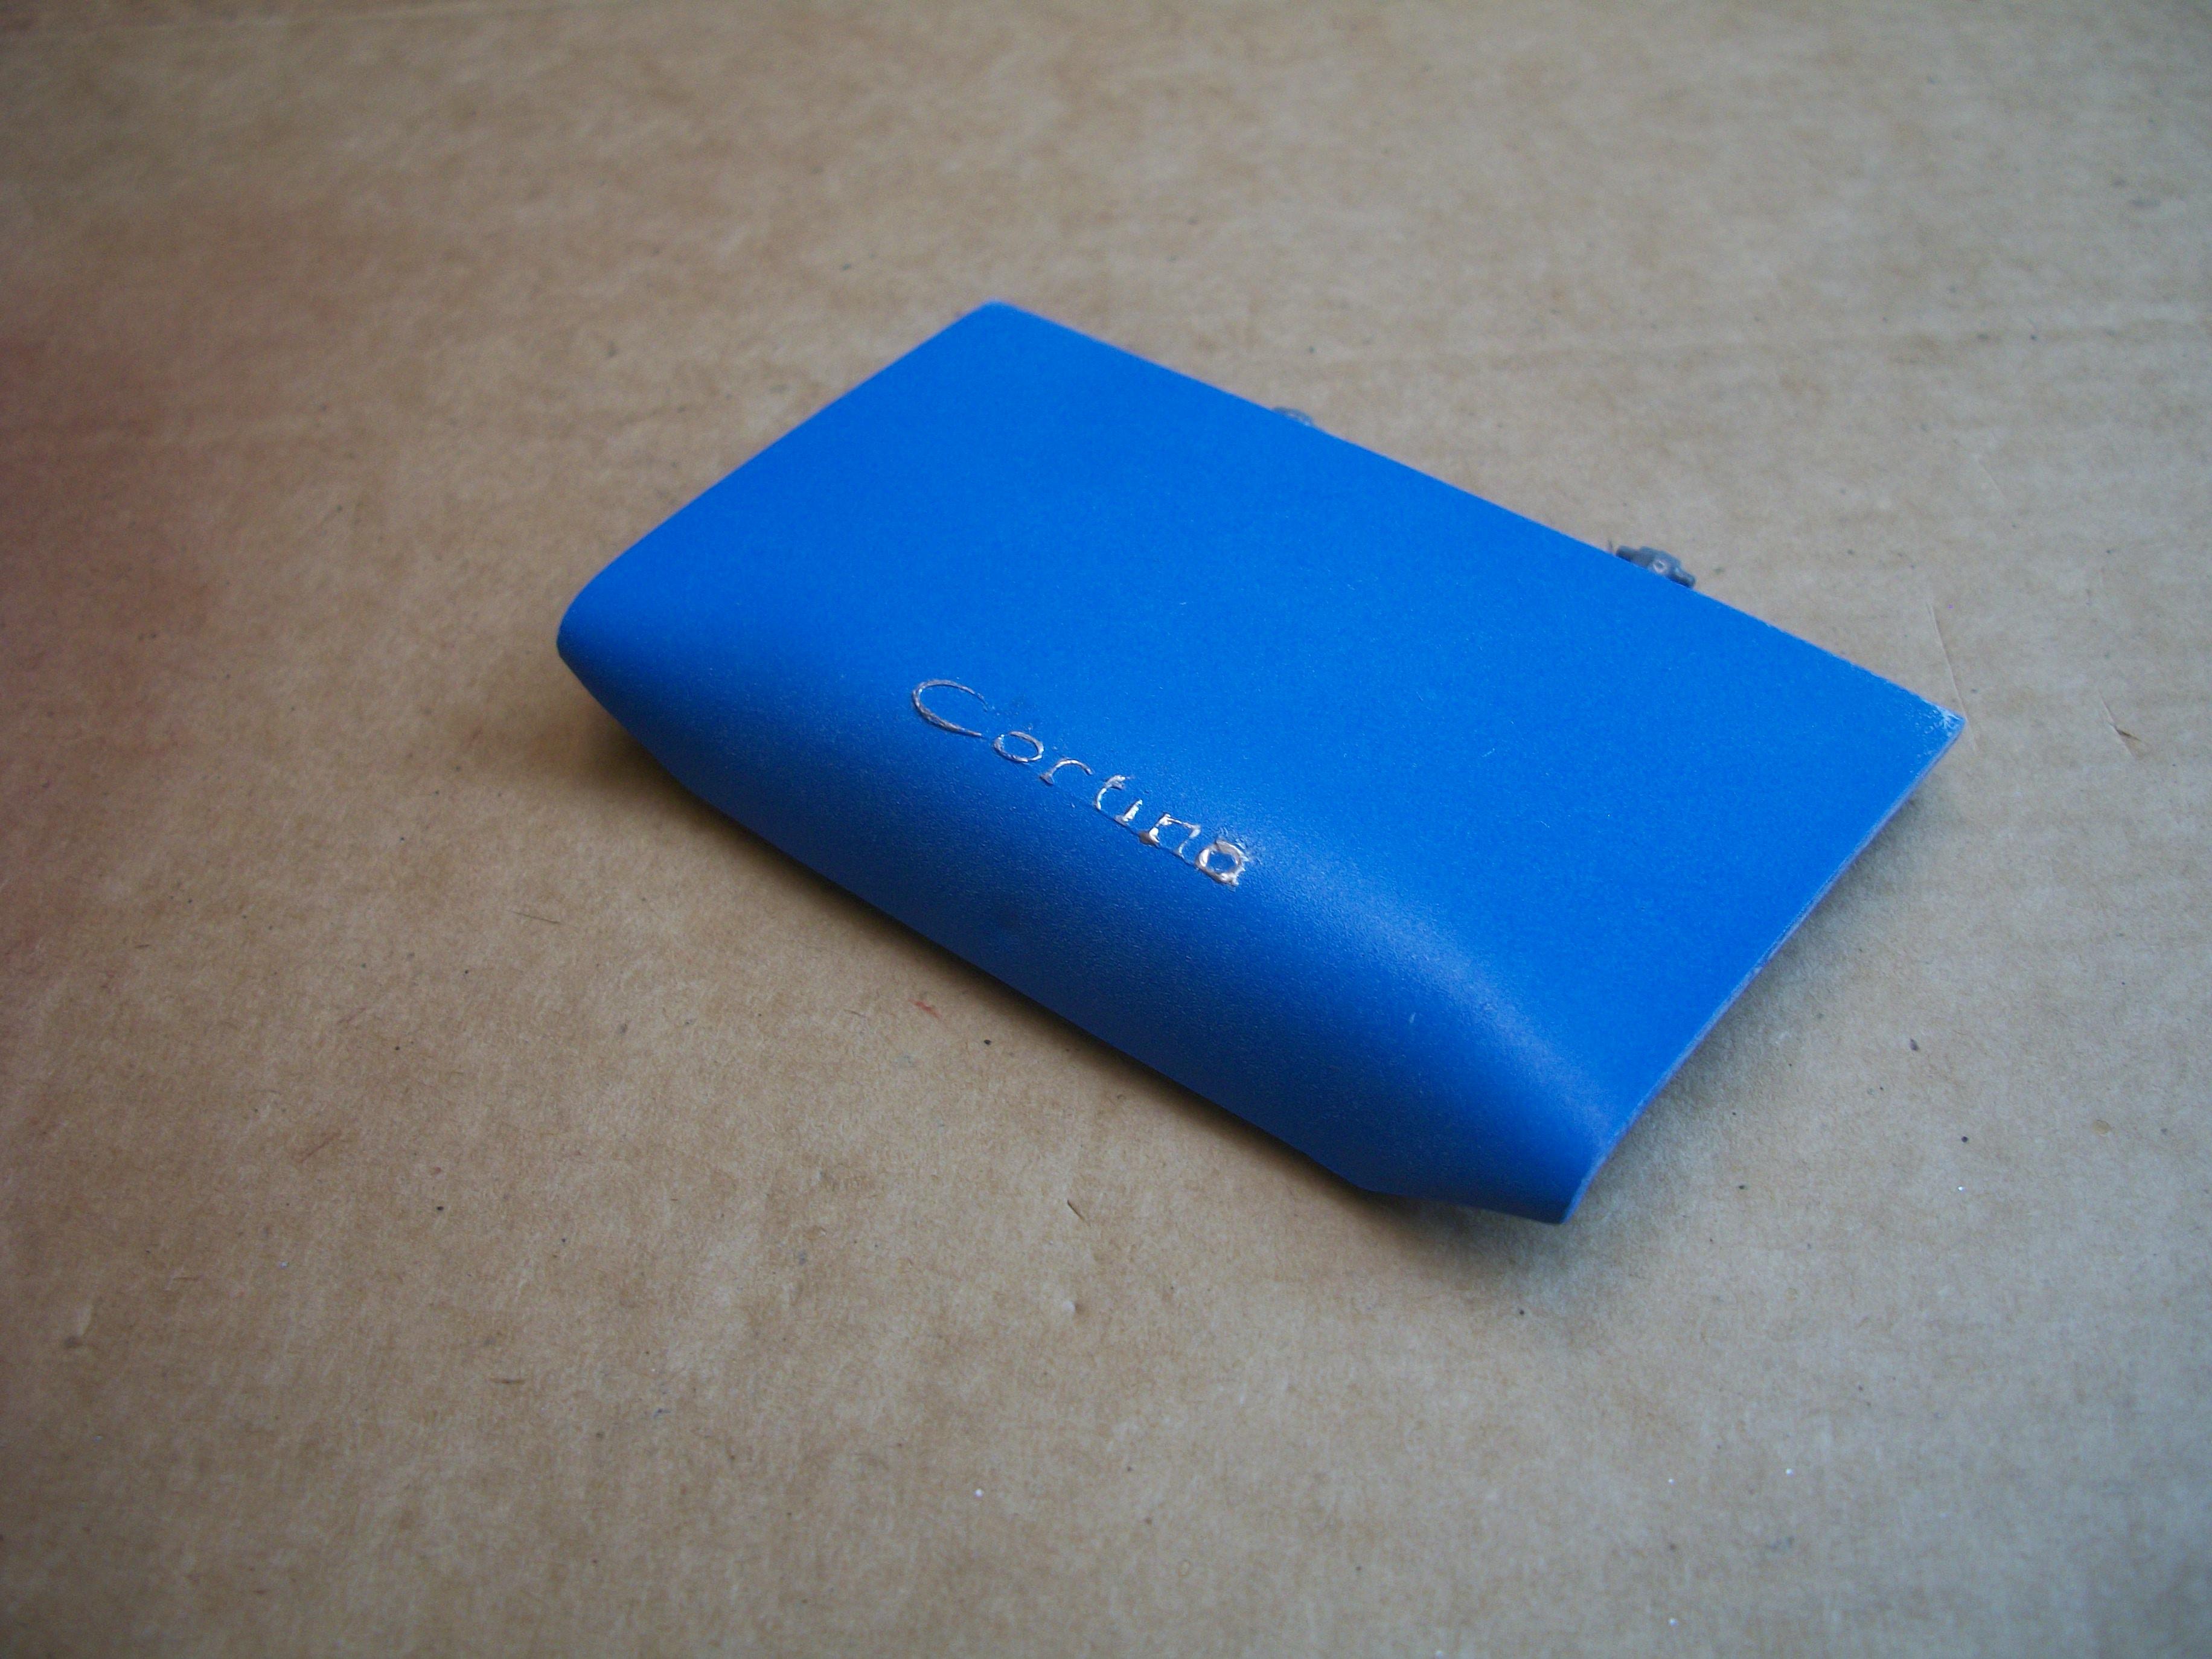
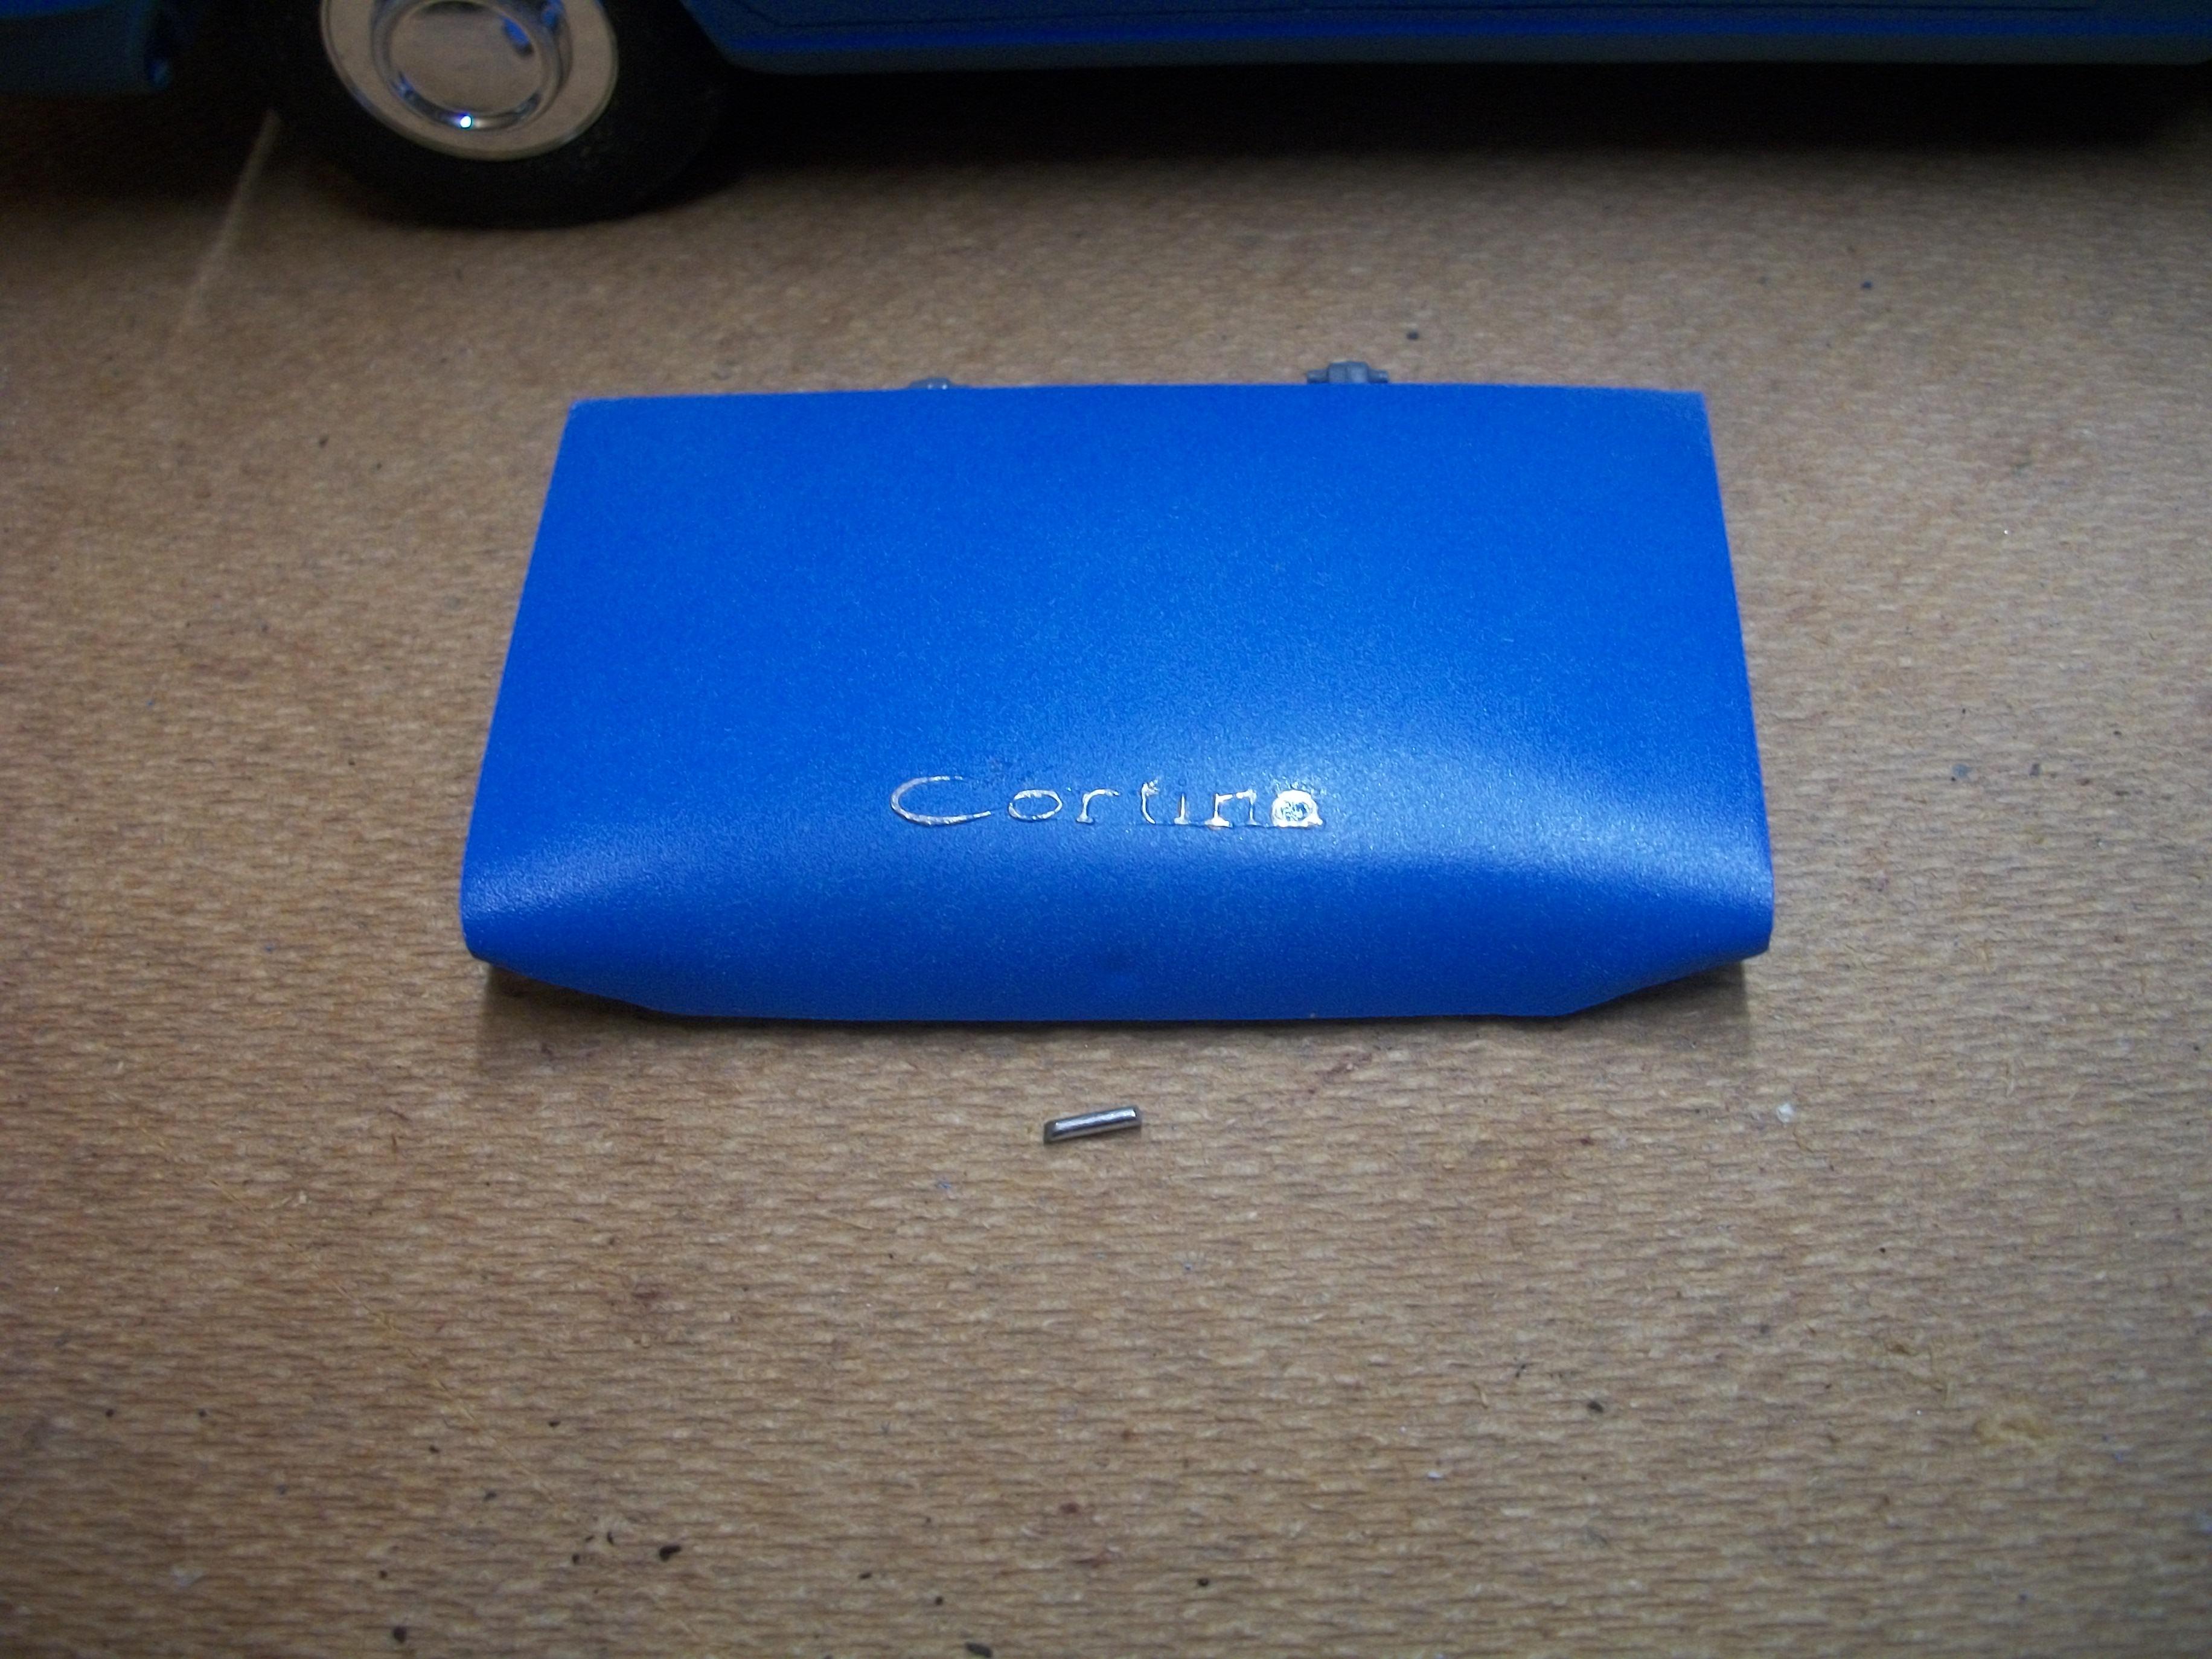
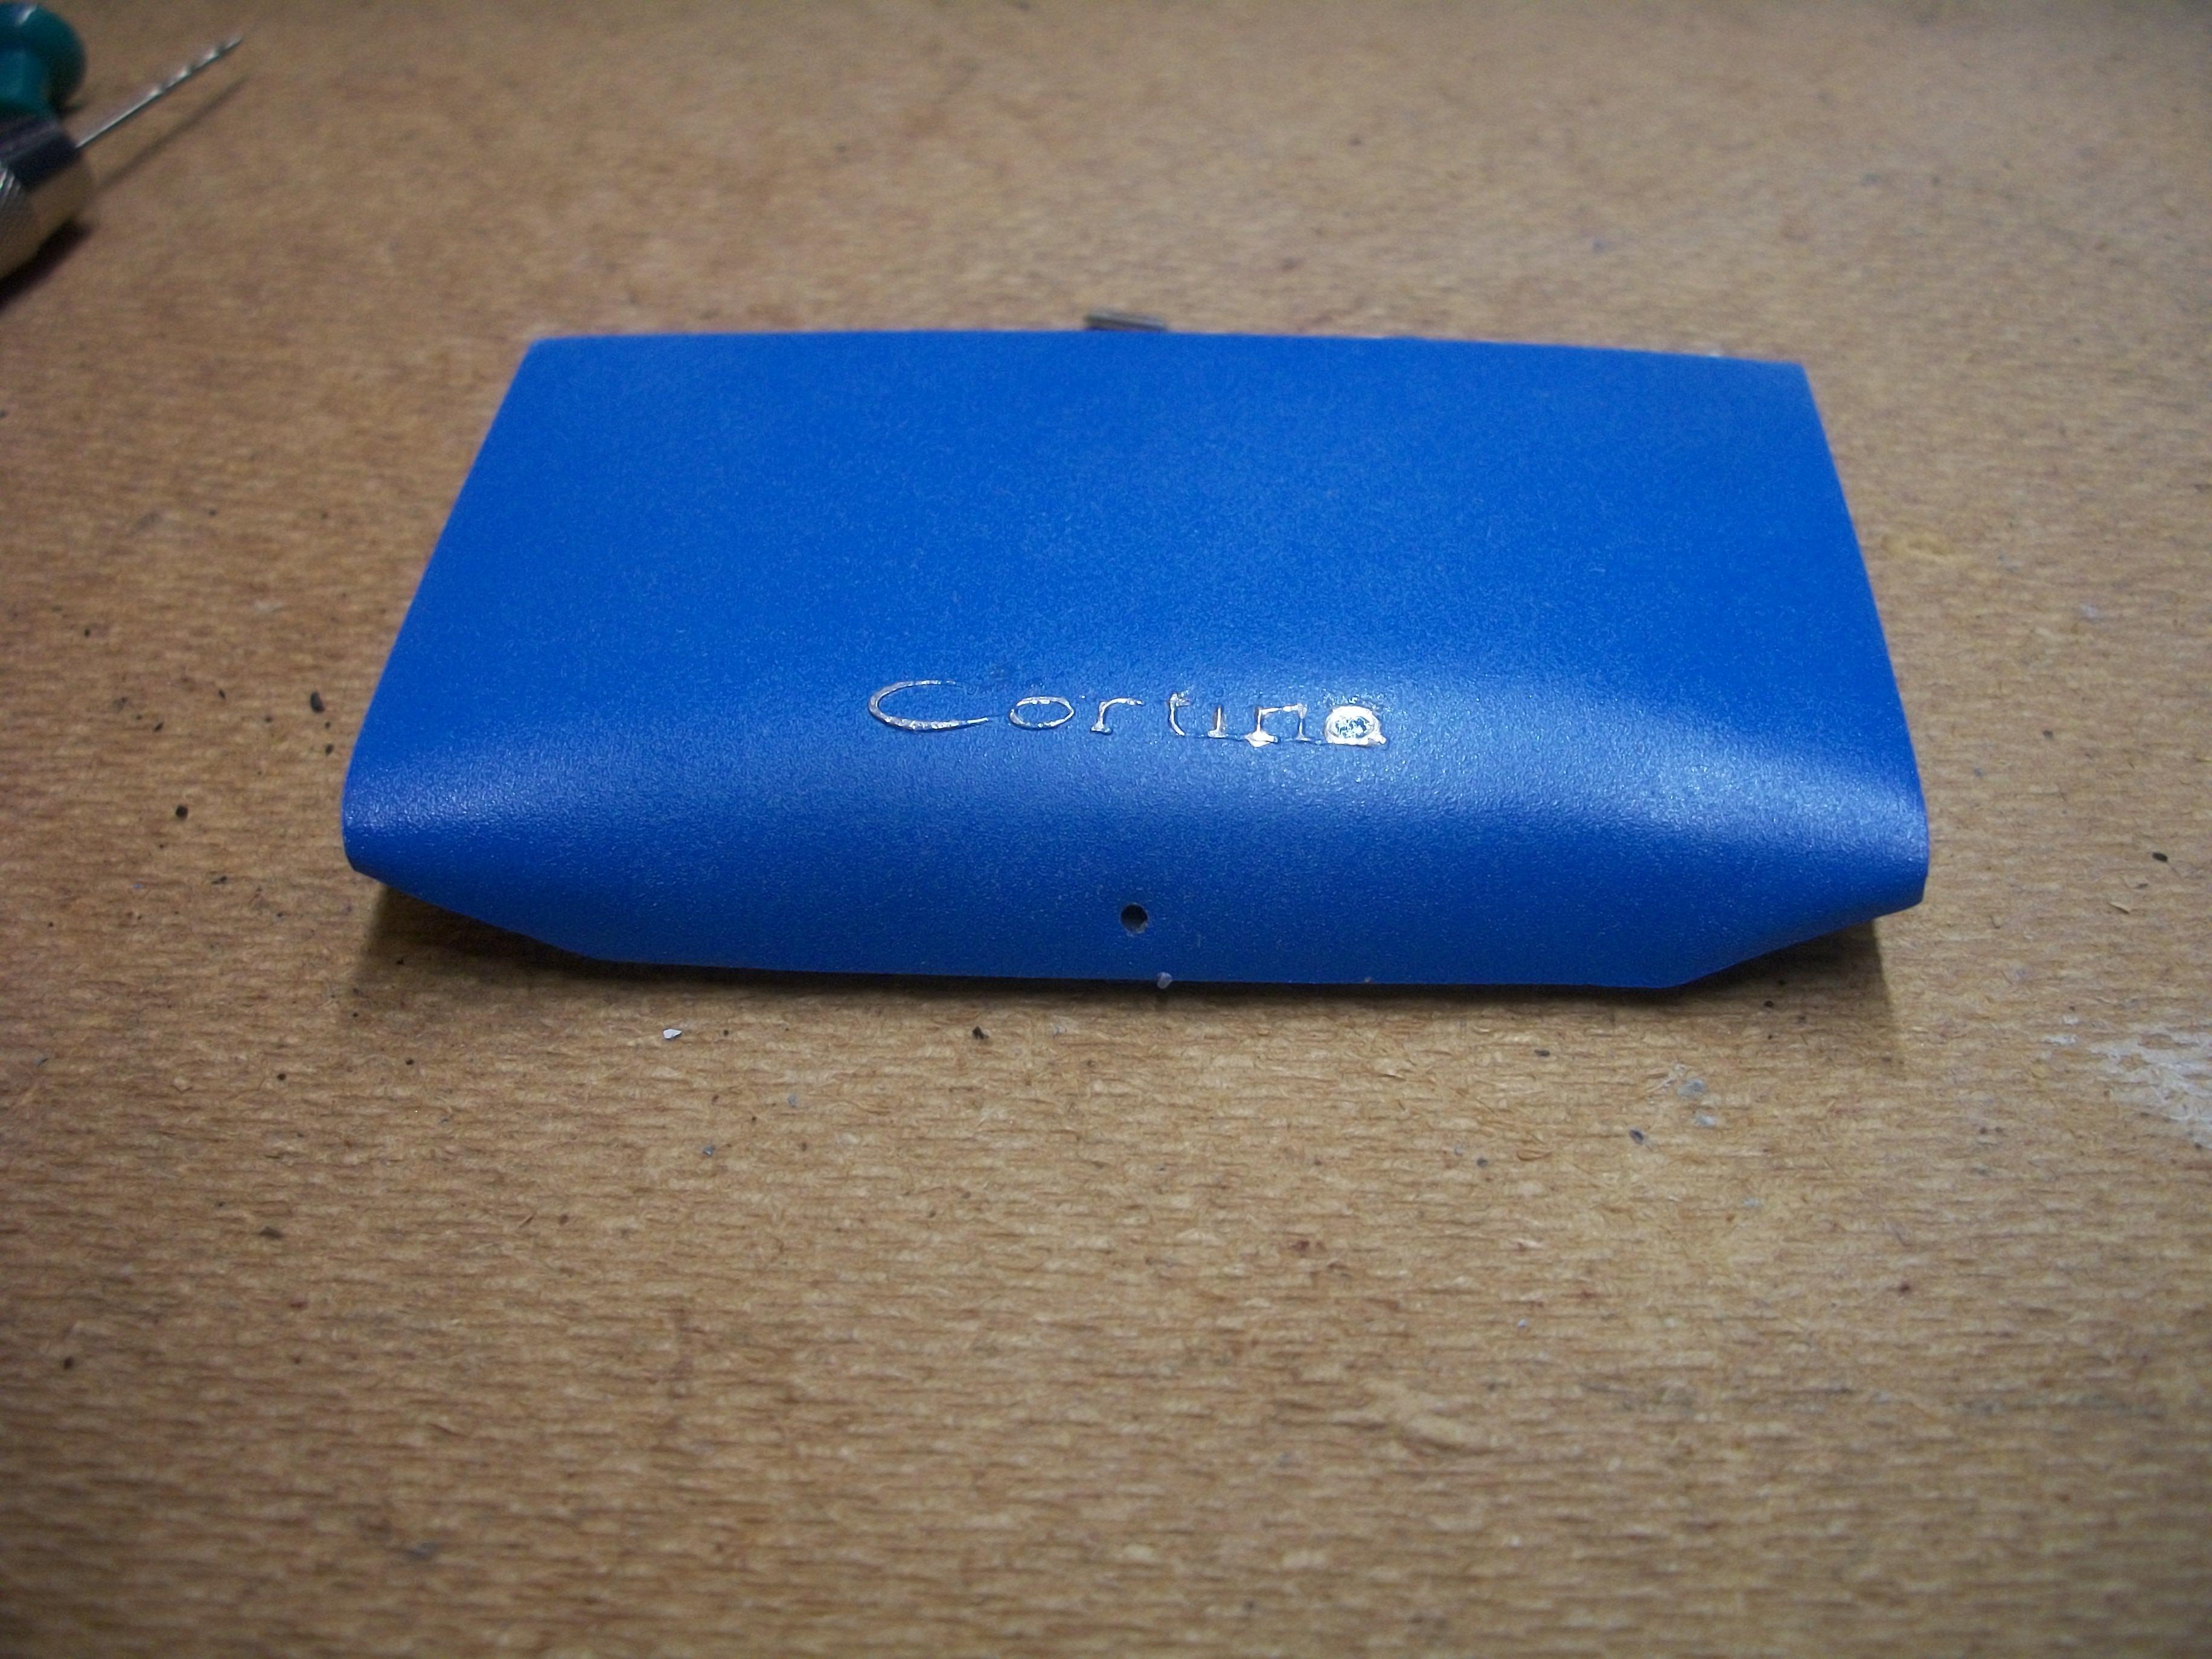
The liquid chrome was applied very carefully onto the slightly raised scripts, using a pencil eraser. For the most part, this was successful, but the letter 'a' at the end of ' Cortina ' was not right., and there were a couple of small areas of excess liquid chrome around the ' deluxe ' script. To correct these errors I sprayed a tiny amount of Tamiya TS-10 French Blue into an aerosol cap, and then I used a fine brush to cover the blemishes with blue paint. The result is acceptable, if not great. The rear number plate was glued in place, and the boot lid attached to the body. I then drilled a hole in the centre of the lower edge of the boot lid, so that I could insert a tiny piece of silver wire to represent the barrel key lock. This fitted tightly in the hole, so no glue was needed. Some further polishing was carried out today and more will follow. The rear end of this model car is looking good, and I shall work on the front end shortly. David
-
What did you see on the road today?
Anglia105E replied to Harry P.'s topic in General Automotive Talk (Trucks and Cars)
Difficult decision to let the Electra go Steve, but you did the right thing ! David -
1:16 Scale 1962 Ford Consul Cortina by FROG kits
Anglia105E replied to Anglia105E's topic in WIP: Model Cars
Sound advice Noel . . . This may well turn out to be my only scale model car that has it's own private display case ! Now it is well past midnight, and the two raised scripts have had chrome applied earlier today, so I shall post on here during Sunday sometime. David -
1:16 Scale 1962 Ford Consul Cortina by FROG kits
Anglia105E replied to Anglia105E's topic in WIP: Model Cars
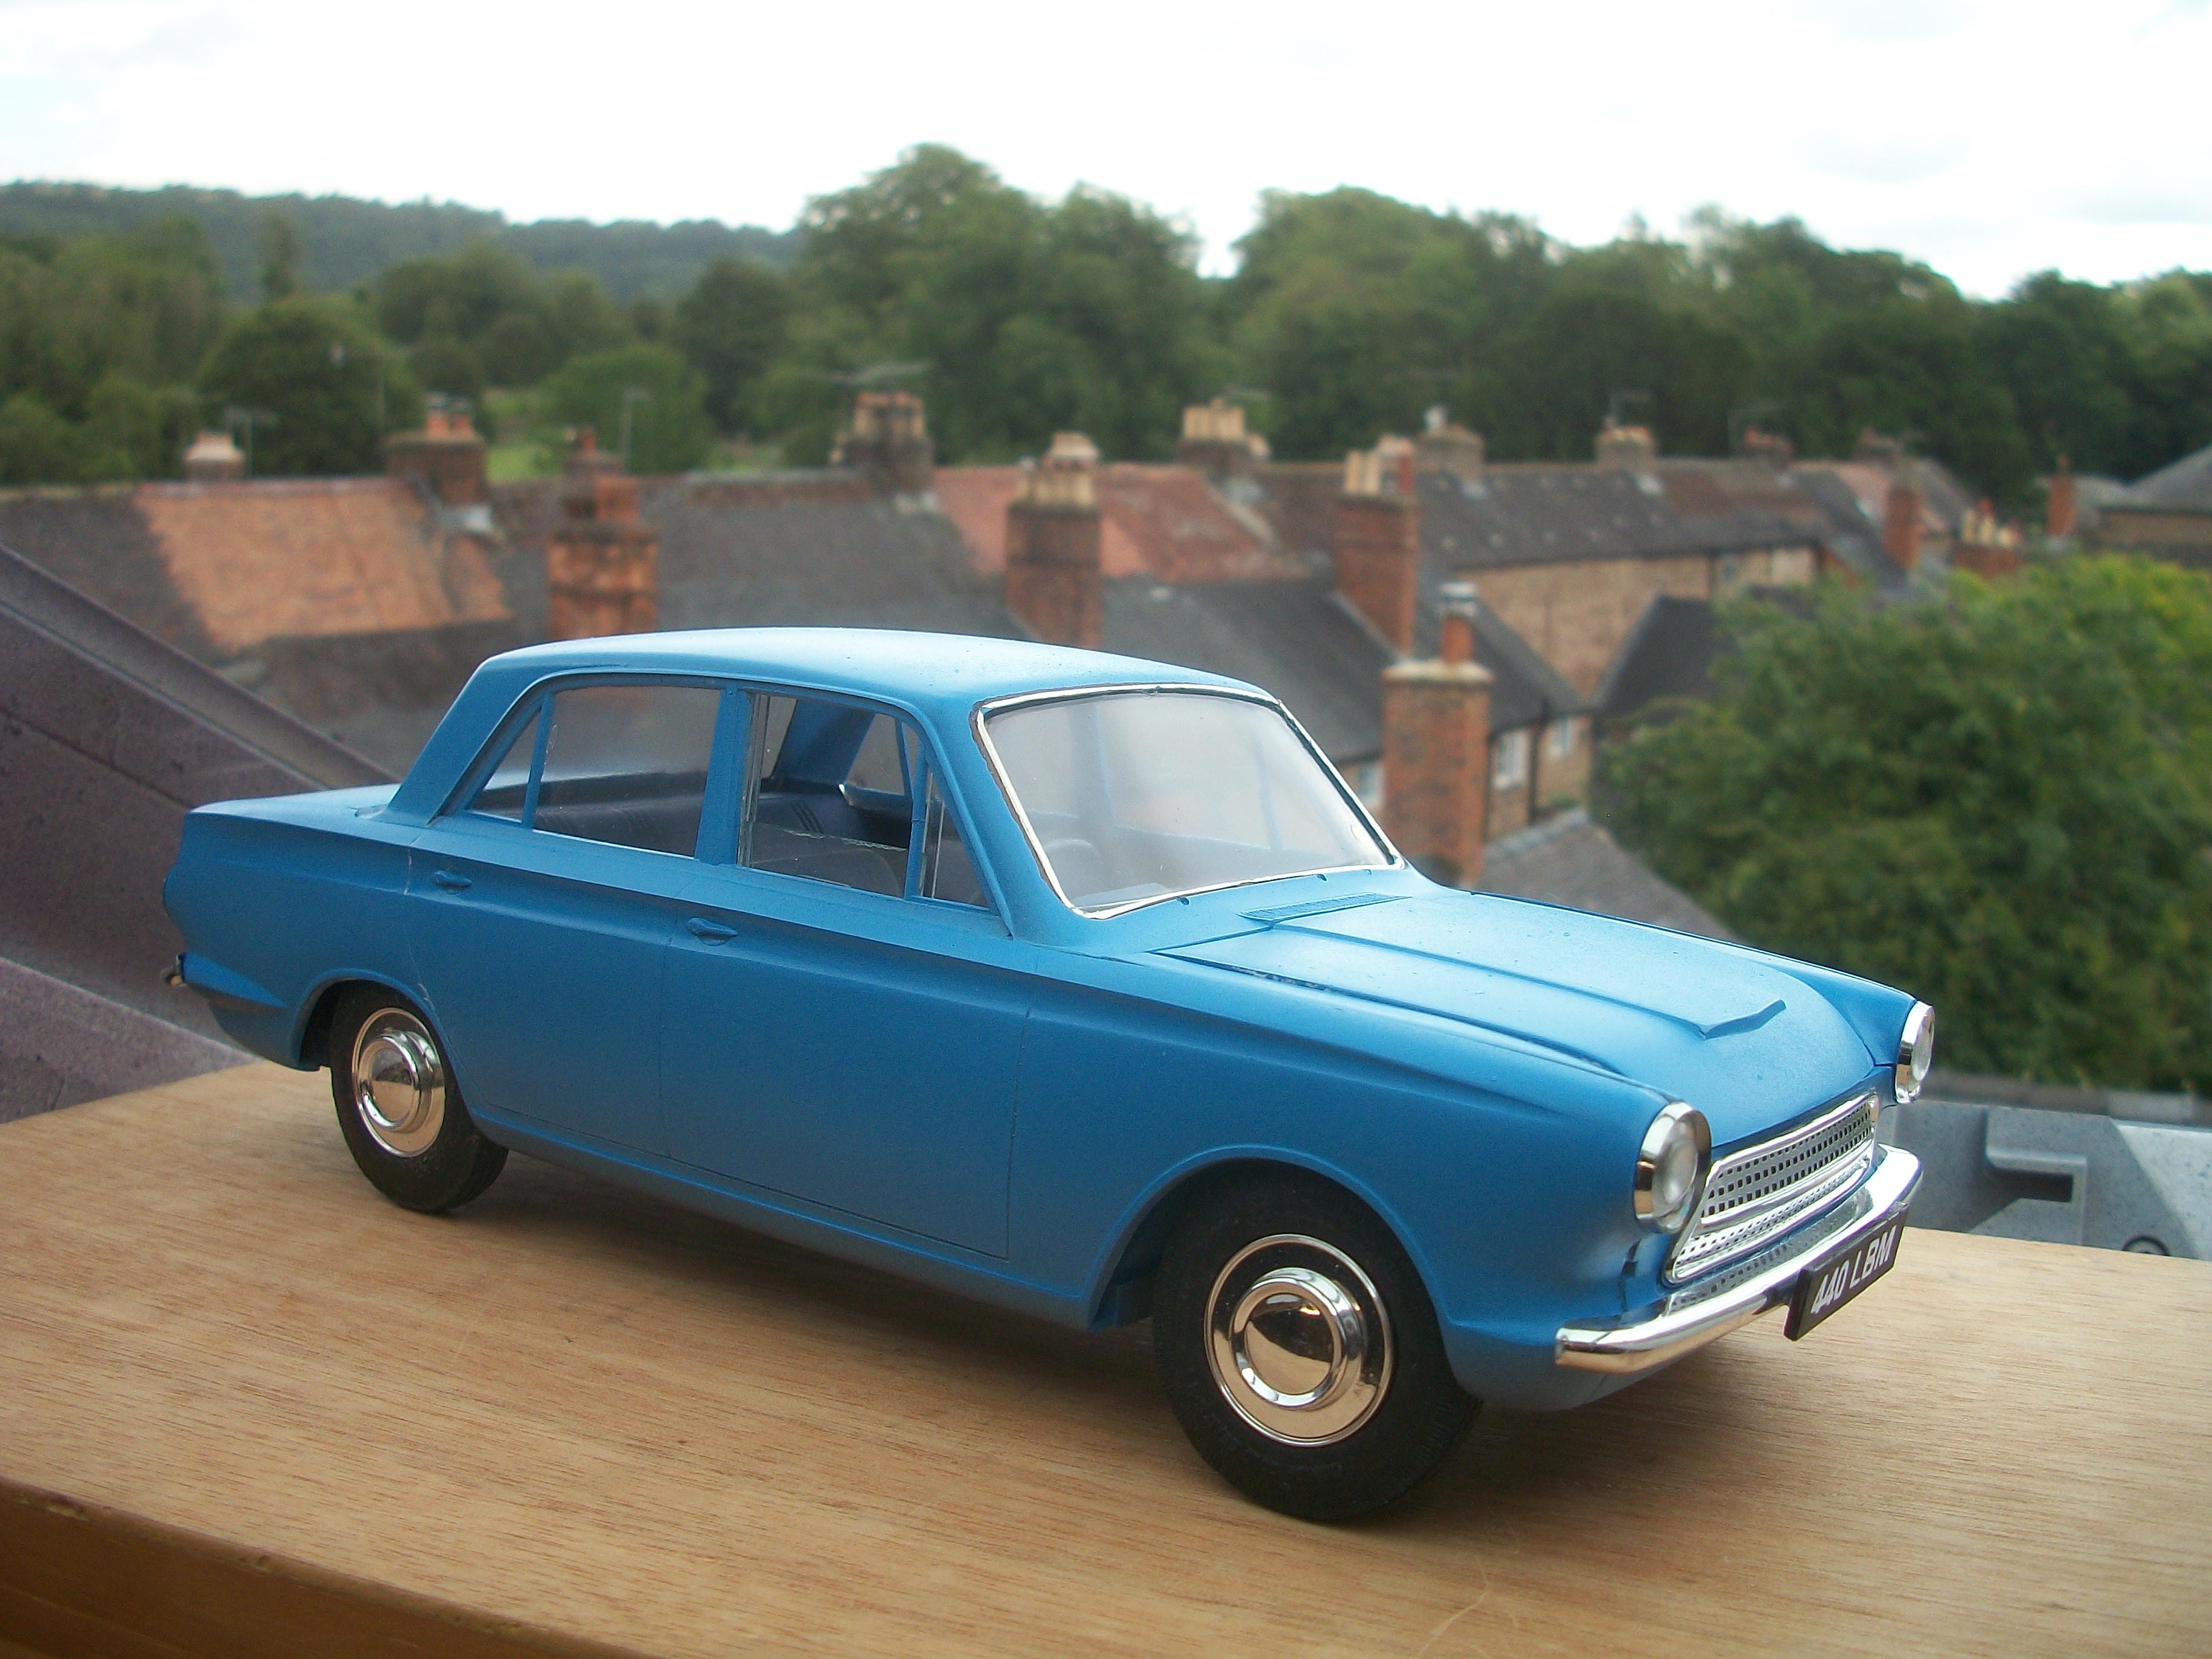
The ' deluxe ' logo is raised quite a bit on the rear panel, whereas the ' Cortina ' script is not raised as much on the boot lid . . . I shall keep the dry brushing technique in mind of course, but I am leaning towards Greg's suggestion about using an old pencil type eraser, by tamping a small amount of liquid chrome onto the raised scripts after allowing the paint to set for a minute or two on the eraser. This was a technique that I had seen used on MCM forums some time ago, but couldn't remember seeing the topic. I like your idea of the acrylic display case Noel, although you may have noticed that I do not usually mount model cars in display cases, as I much prefer to show them in a diorama setting, as well as in realistic photographs. My Dad sadly passed away in 2005, so 18 years ago now, but it feels like yesterday. During this build of his Ford Consul Cortina and the car in which he taught me to drive, I get the warm feeling that my Dad is watching over me and hopefully approving of the care that I am taking to make this a good model. There will be some outdoor photography taking place once this car is completed, for which I have already chosen a location close to where I live, as well as preparing a small fold up table and a grey board. My intention is to follow the forced perspective techniques as used by the late Michael Paul Smith, whom I admire greatly. David
-
1:16 Scale 1962 Ford Consul Cortina by FROG kits
Anglia105E replied to Anglia105E's topic in WIP: Model Cars
That is exactly the idea that I was trying to remember Greg . . . I have a pencil that has an eraser on one end of it, just like in the old school days, so it is a hard pink eraser. This might well be my best option, so thank you . . . Certainly I will try the technique on the ' Cortina ' script first, and if successful then apply the liquid chrome to the ' deluxe ' script. David -
1:16 Scale 1962 Ford Consul Cortina by FROG kits
Anglia105E replied to Anglia105E's topic in WIP: Model Cars
Here is a question for the experienced model builders on here . . . This has probably been covered previously on MCM forums, but I don't remember the answer, if there is one . . . Before starting this Cortina build I considered the idea of using BMF on the scripts that are on the rear of the boot lid, before moving on to the primer painting and topcoat painting . . . But foolishly I didn't do that. Now of course I have fully painted this model car, and applied polish on some panels, including the boot lid. My question is how can I apply chrome to these two scripts, having got to this advanced stage? I don't feel confident to use my Molotow Liquid Chrome pen, which has a 1 mm tip, and I don't fancy my chances using a very fine brush to apply the liquid chrome from the refill which I have. Could I still use BMF in this situation? ( probably not ). The two scripts shown in the following photos are ' Cortina ' and ' deluxe ' . . . This is a schoolboy error I know, and I should know better ! David
-
1:16 Scale 1962 Ford Consul Cortina by FROG kits
Anglia105E replied to Anglia105E's topic in WIP: Model Cars
Now that has me puzzled Mike . . . There was only one person inside the car, or so I thought, but there must have been a gentleman driver on the left hand side, out of sight. Well spotted Mike ! David -
What did you see on the road today?
Anglia105E replied to Harry P.'s topic in General Automotive Talk (Trucks and Cars)
Thank you Steve . . . Okay, so I don't know my facts when it comes to the lengths of American and Canadian cars. Guilty as charged . . . Sorry guys ! That is a nice Electra you have there Steve, and you must be proud to have the car in your family since 1974. David -
1:16 Scale 1962 Ford Consul Cortina by FROG kits
Anglia105E replied to Anglia105E's topic in WIP: Model Cars
Thanks Donato . . . Certainly, this FROG kit is quite unorthodox compared to modern day kits, but well made nevertheless. David -
What did you see on the road today?
Anglia105E replied to Harry P.'s topic in General Automotive Talk (Trucks and Cars)
Thank you Robert . . . and I stand corrected ! . . . My 1968 Pontiac Parisienne 4-door that I owned back in 1977 was 19 feet in length if I remember correctly. David -
1:16 Scale 1962 Ford Consul Cortina by FROG kits
Anglia105E replied to Anglia105E's topic in WIP: Model Cars
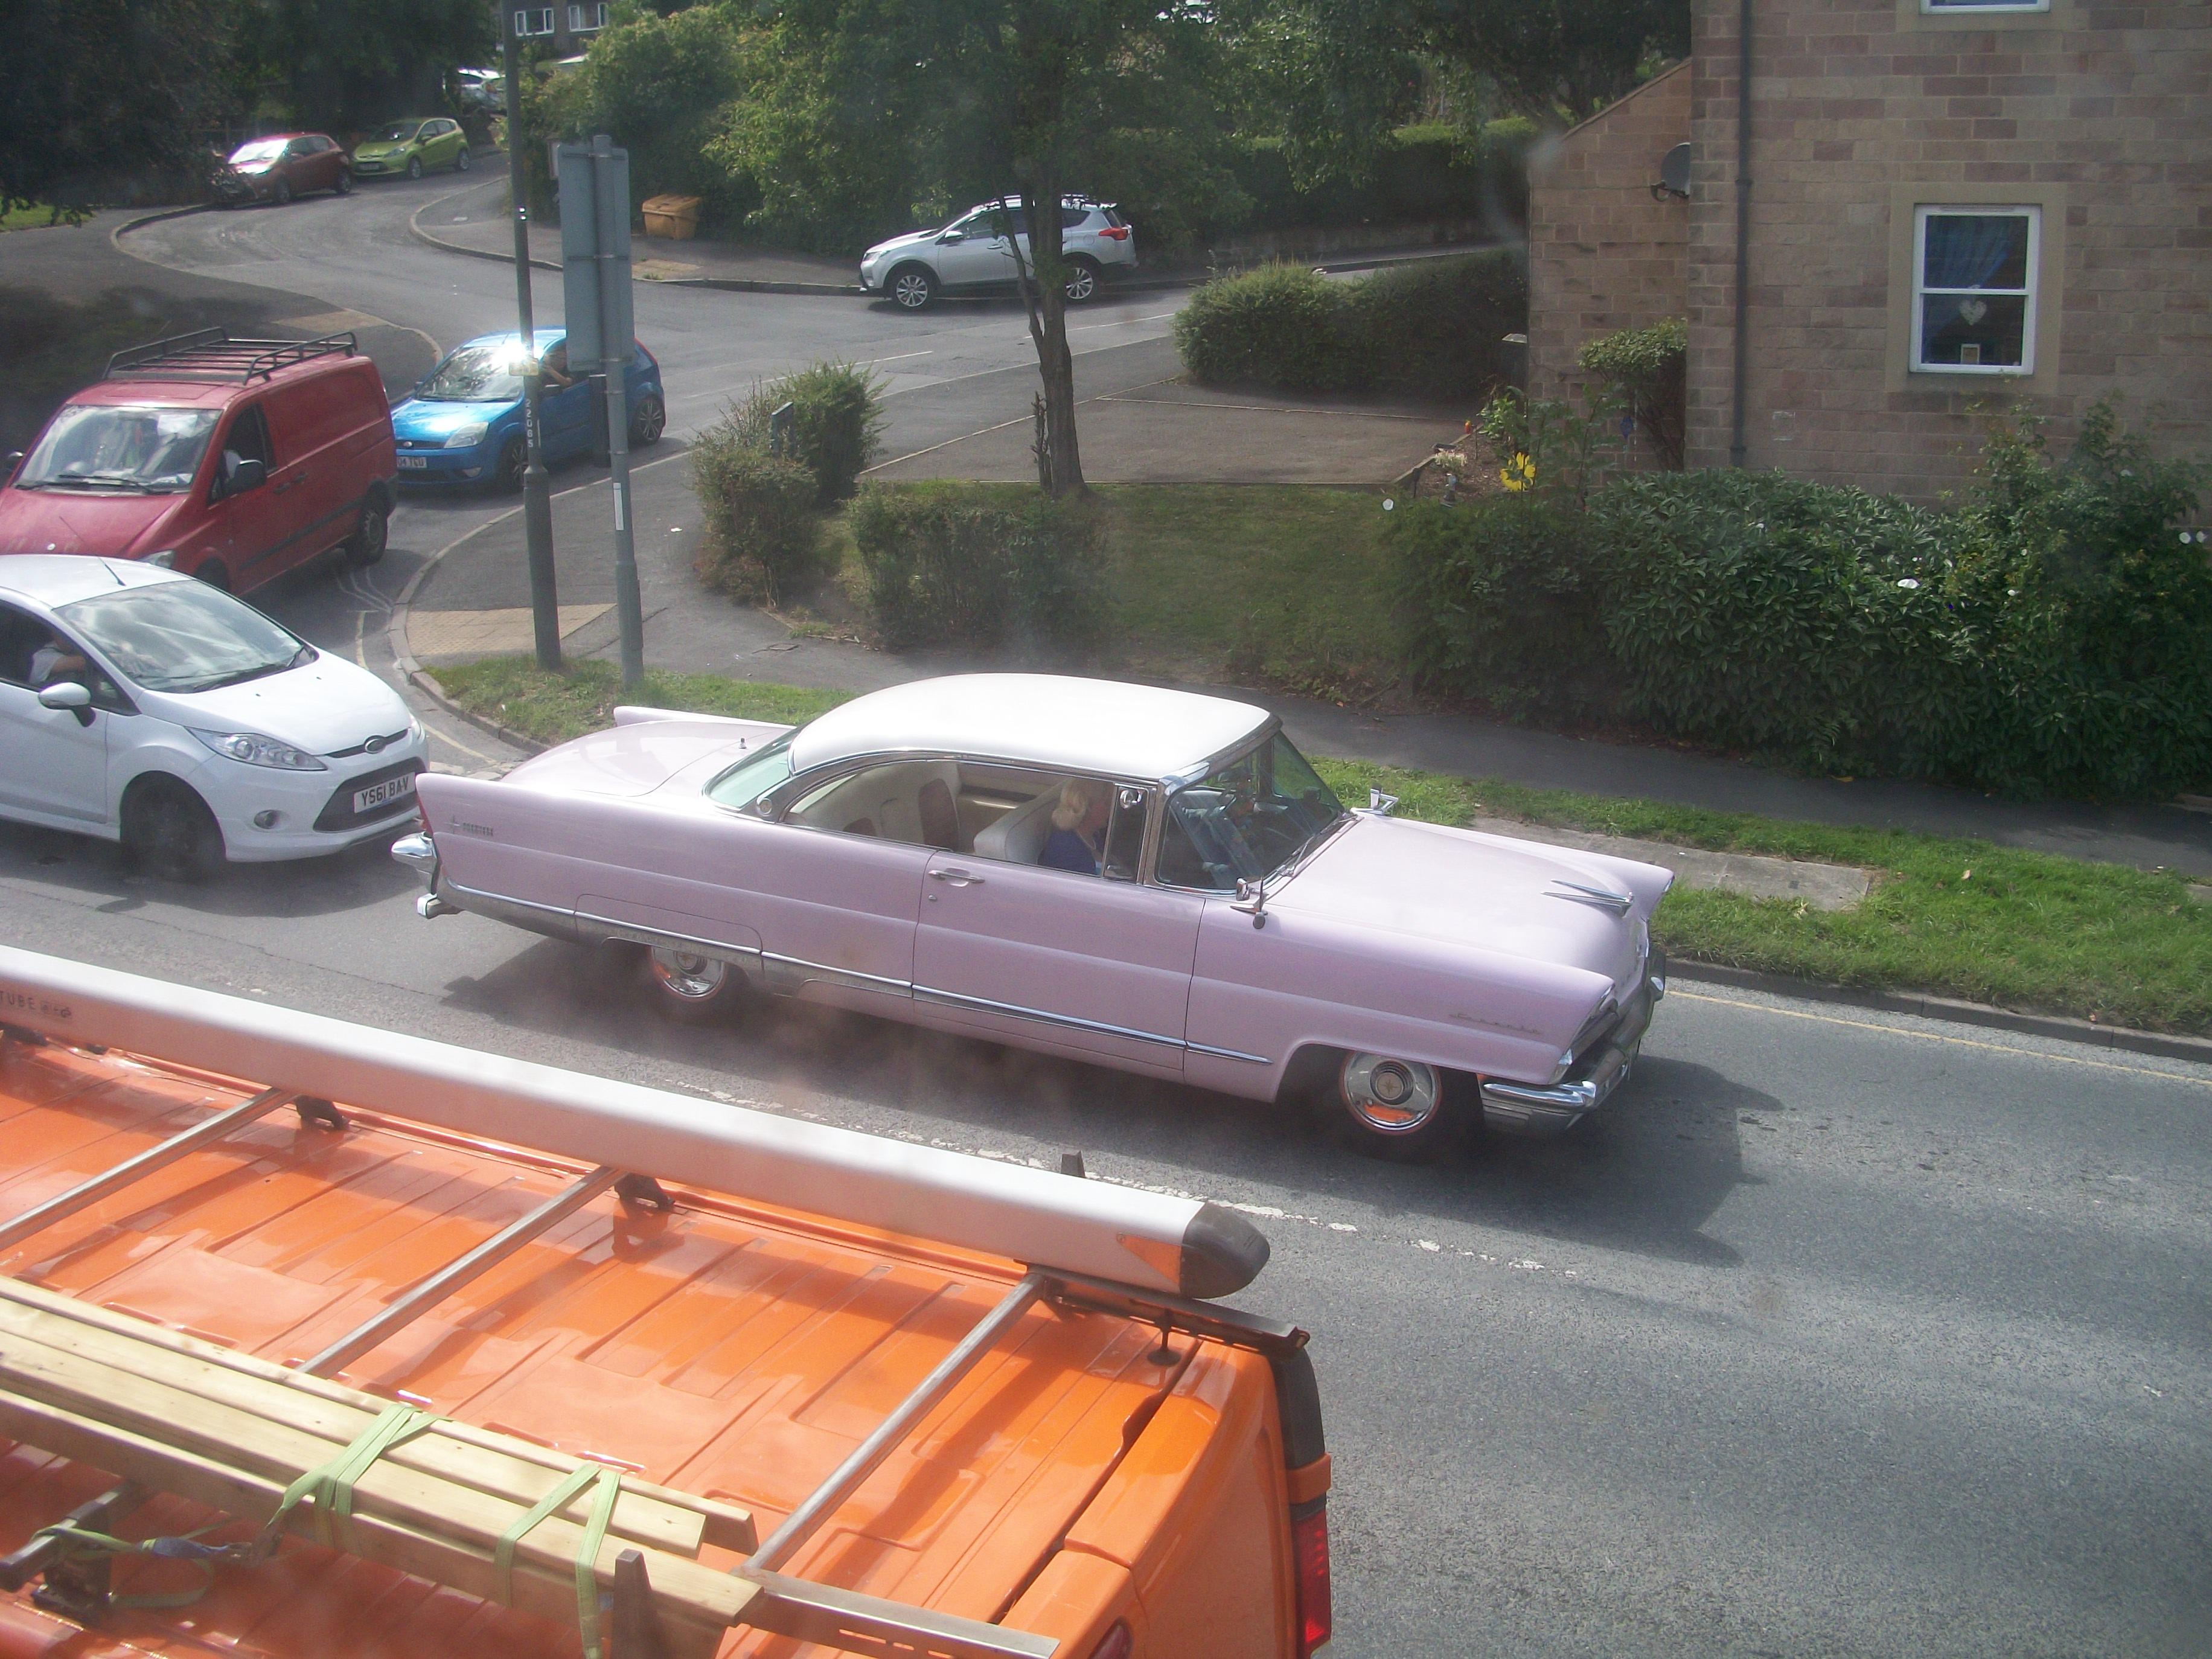
Having ordered a pack of rubber o-rings from Ebay, I found an o-ring that was just the right size to go round the petrol cap as a seal. There are 13 parts remaining to be assembled, which will be added after the polishing has been done. One part still has to be made from scratch which is the front side light that was missing from the kit. This afternoon I happened to glance out of the upstairs window of my house, and there in the standing queue of traffic was a huge 1950's American car. My first thought was a pink Cadillac, but it was actually a 1956 Lincoln Premiere in perfect condition, and being driven by a blonde lady. The Lincoln was a 2-door car, and 21 feet in length I think. Two of the following photos show this car. David
-
What did you see on the road today?
Anglia105E replied to Harry P.'s topic in General Automotive Talk (Trucks and Cars)
Sure Jim . . . Even for American cars of the 1950's . . . this is BIG ! ( 21 feet long I think ) David -
What did you see on the road today?
Anglia105E replied to Harry P.'s topic in General Automotive Talk (Trucks and Cars)
I saw this 1956 Lincoln Premiere passing by on the road outside my house today . . . David in Derbyshire, England, UK
-
Your clear and concise information is much appreciated . . . Plenty for me to think about and I feel more confident about the procedure. David
-
Okay Chad . . . and I agree completely with you. Why during the past 7 years of building and painting scale model cars I haven't once looked at trying Tamiya paint products, I do not know . . . I am already aware how good the Tamiya kits are, having built the Morgan and the Jaguar MK 2, so I really should have tried out Tamiya paints long before now. Anyway, I do like them and within a day or so I shall be using Tamiya Polishing Compound on the Cortina. I shall have to go gently with the Coarse grade of the compounds, because I don't want to go down to primer on this car. I have only applied two coats of the French Blue, and quite thin coats at that. I did use Coarse, then Fine, and then Finish on my Rolls-Royce Silver Cloud, but I did see the underlying primer coat appear during the application of the Coarse grade, which forced me to start the paint procedure from scratch. That was two applications of each grade of compound. David
-
Thanks Chad . . . So, at the risk of sounding stupid . . . Would the Tamiya paint products such as Tamiya TS-10 French Blue be ' Lacquer ', or alternatively would they be ' Acrylic Laquer ' ? ( and does it matter? ). Having applied the Tamiya paints to my 60 year old Frog model car kit styrene, I haven't noticed any unpleasant or alarming chemical reactions going on . . . What a relief ! David
-
1:16 Scale 1962 Ford Consul Cortina by FROG kits
Anglia105E replied to Anglia105E's topic in WIP: Model Cars
Thanks Nigel . . . I am sure this will be worth the extra effort when the model is completed. I would like this one to be a bit special . . . for my Dad. David -
1:16 Scale 1962 Ford Consul Cortina by FROG kits
Anglia105E replied to Anglia105E's topic in WIP: Model Cars
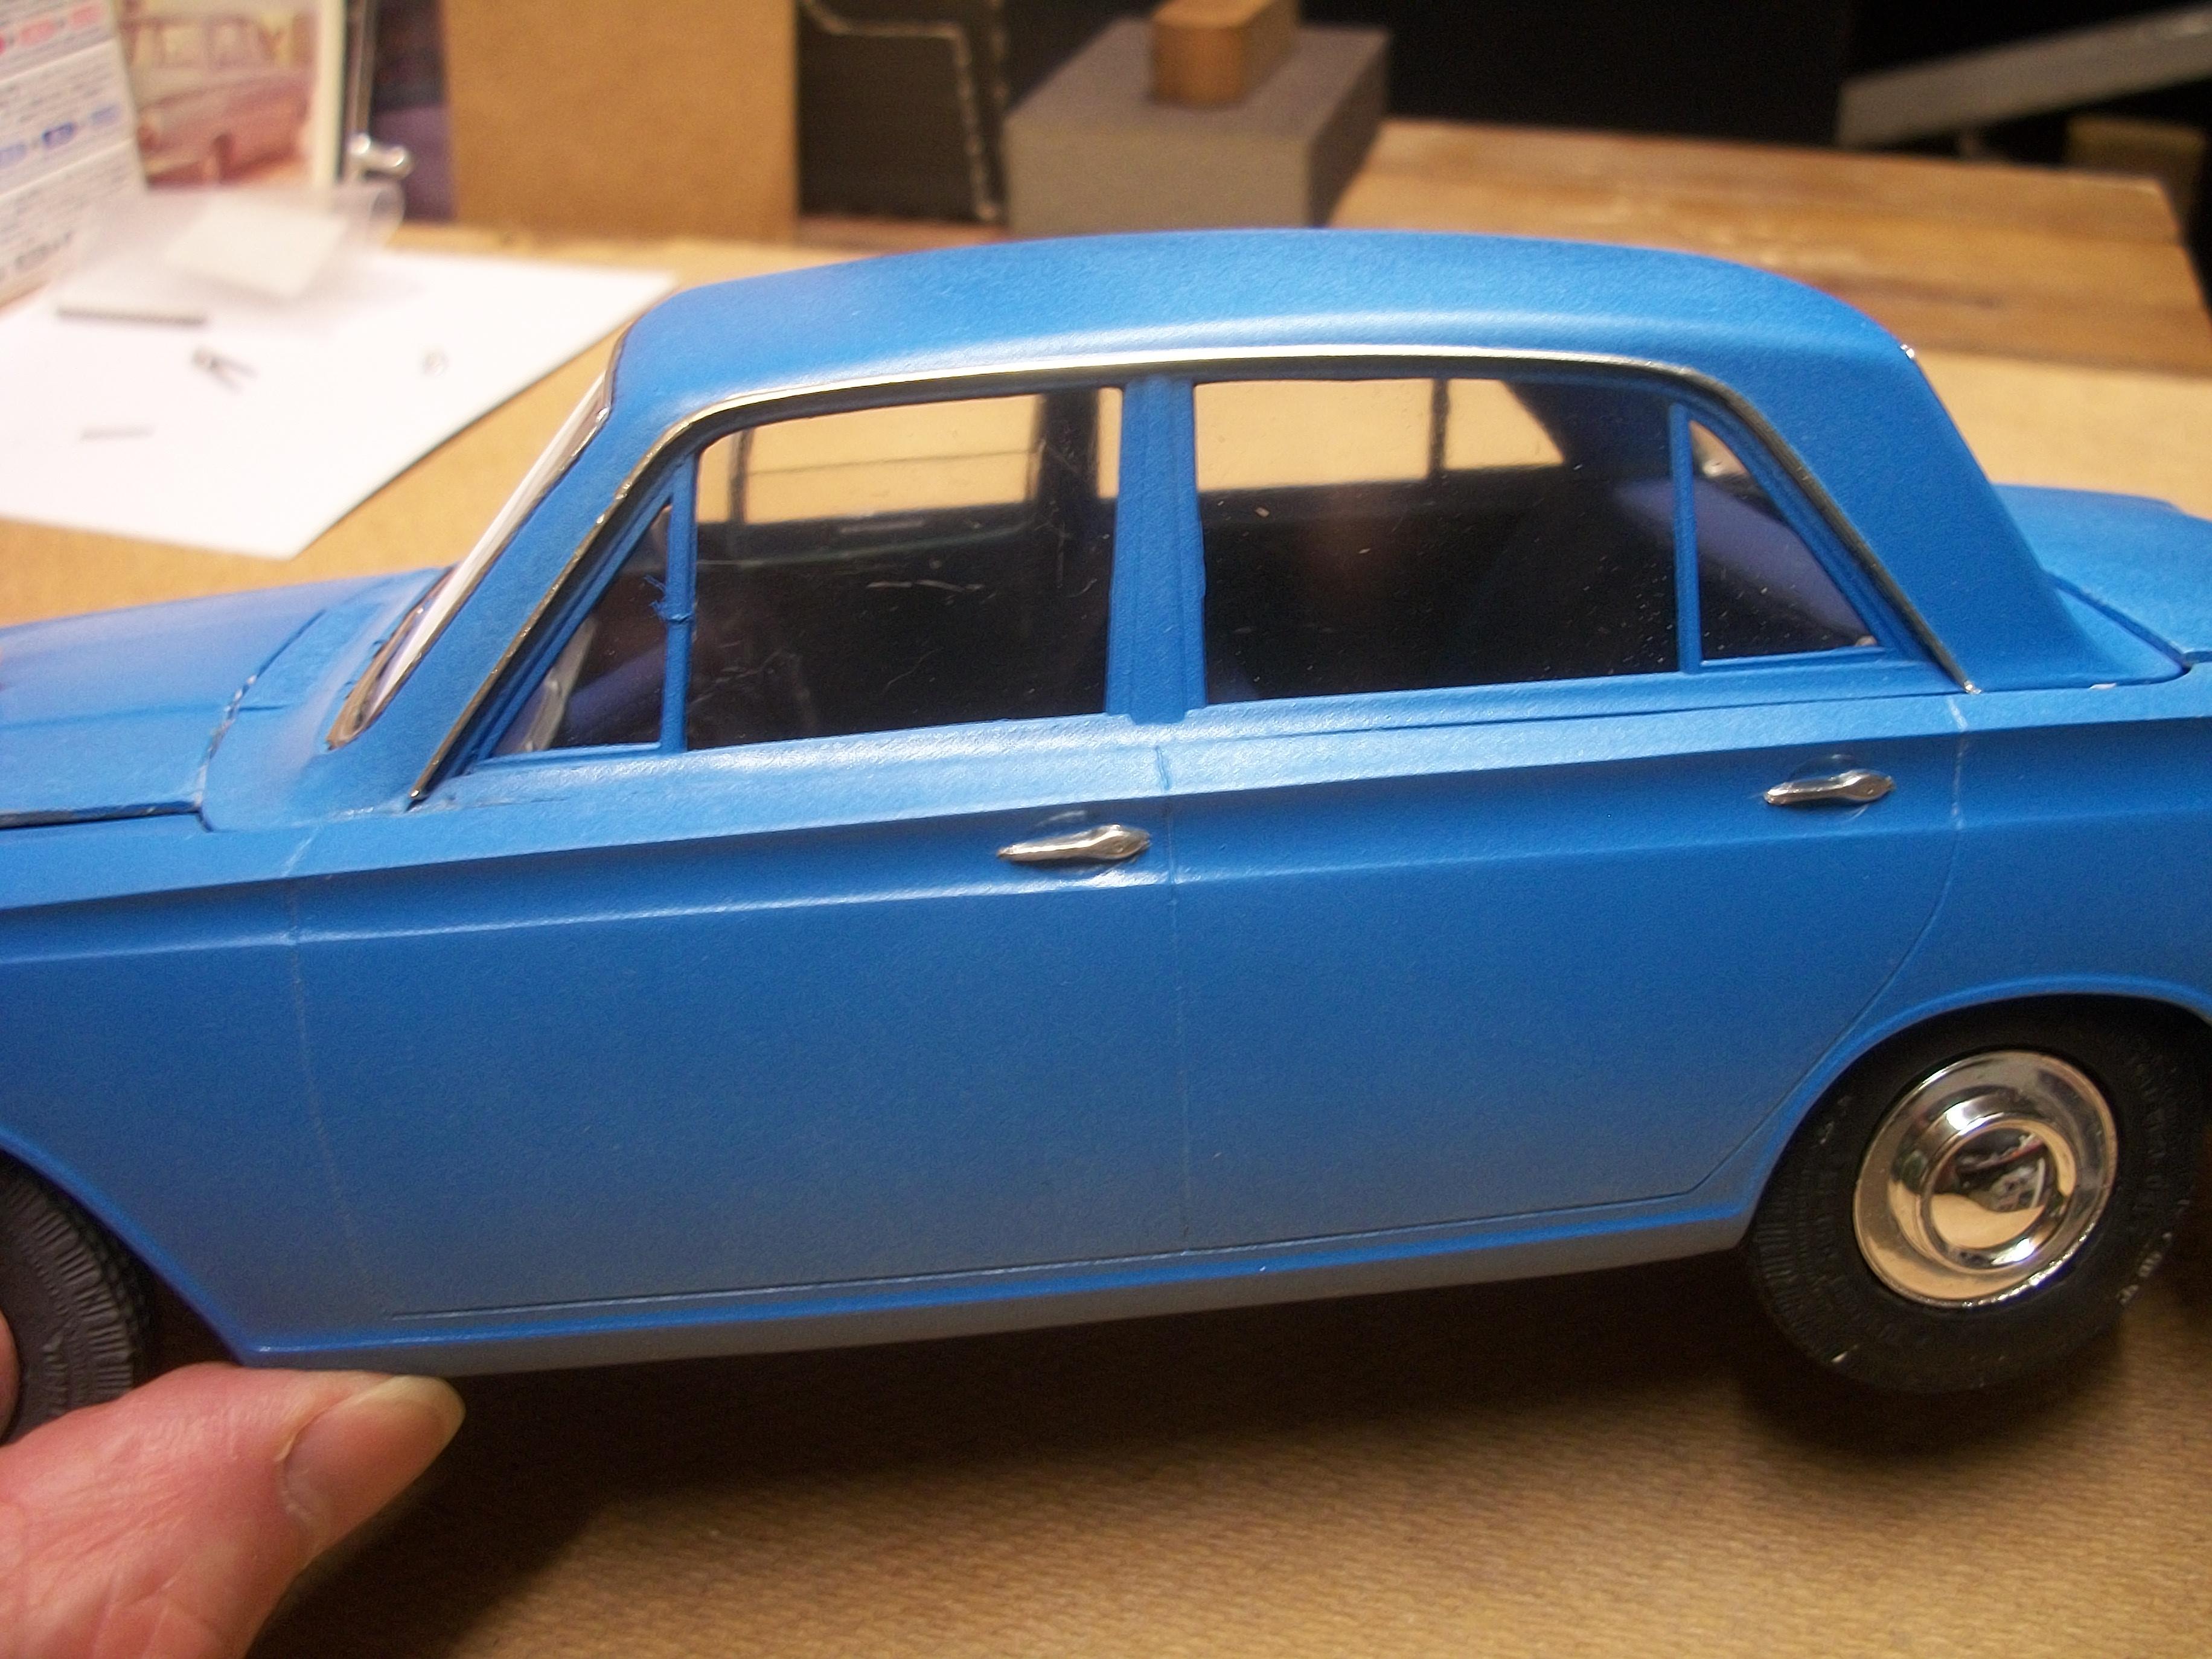
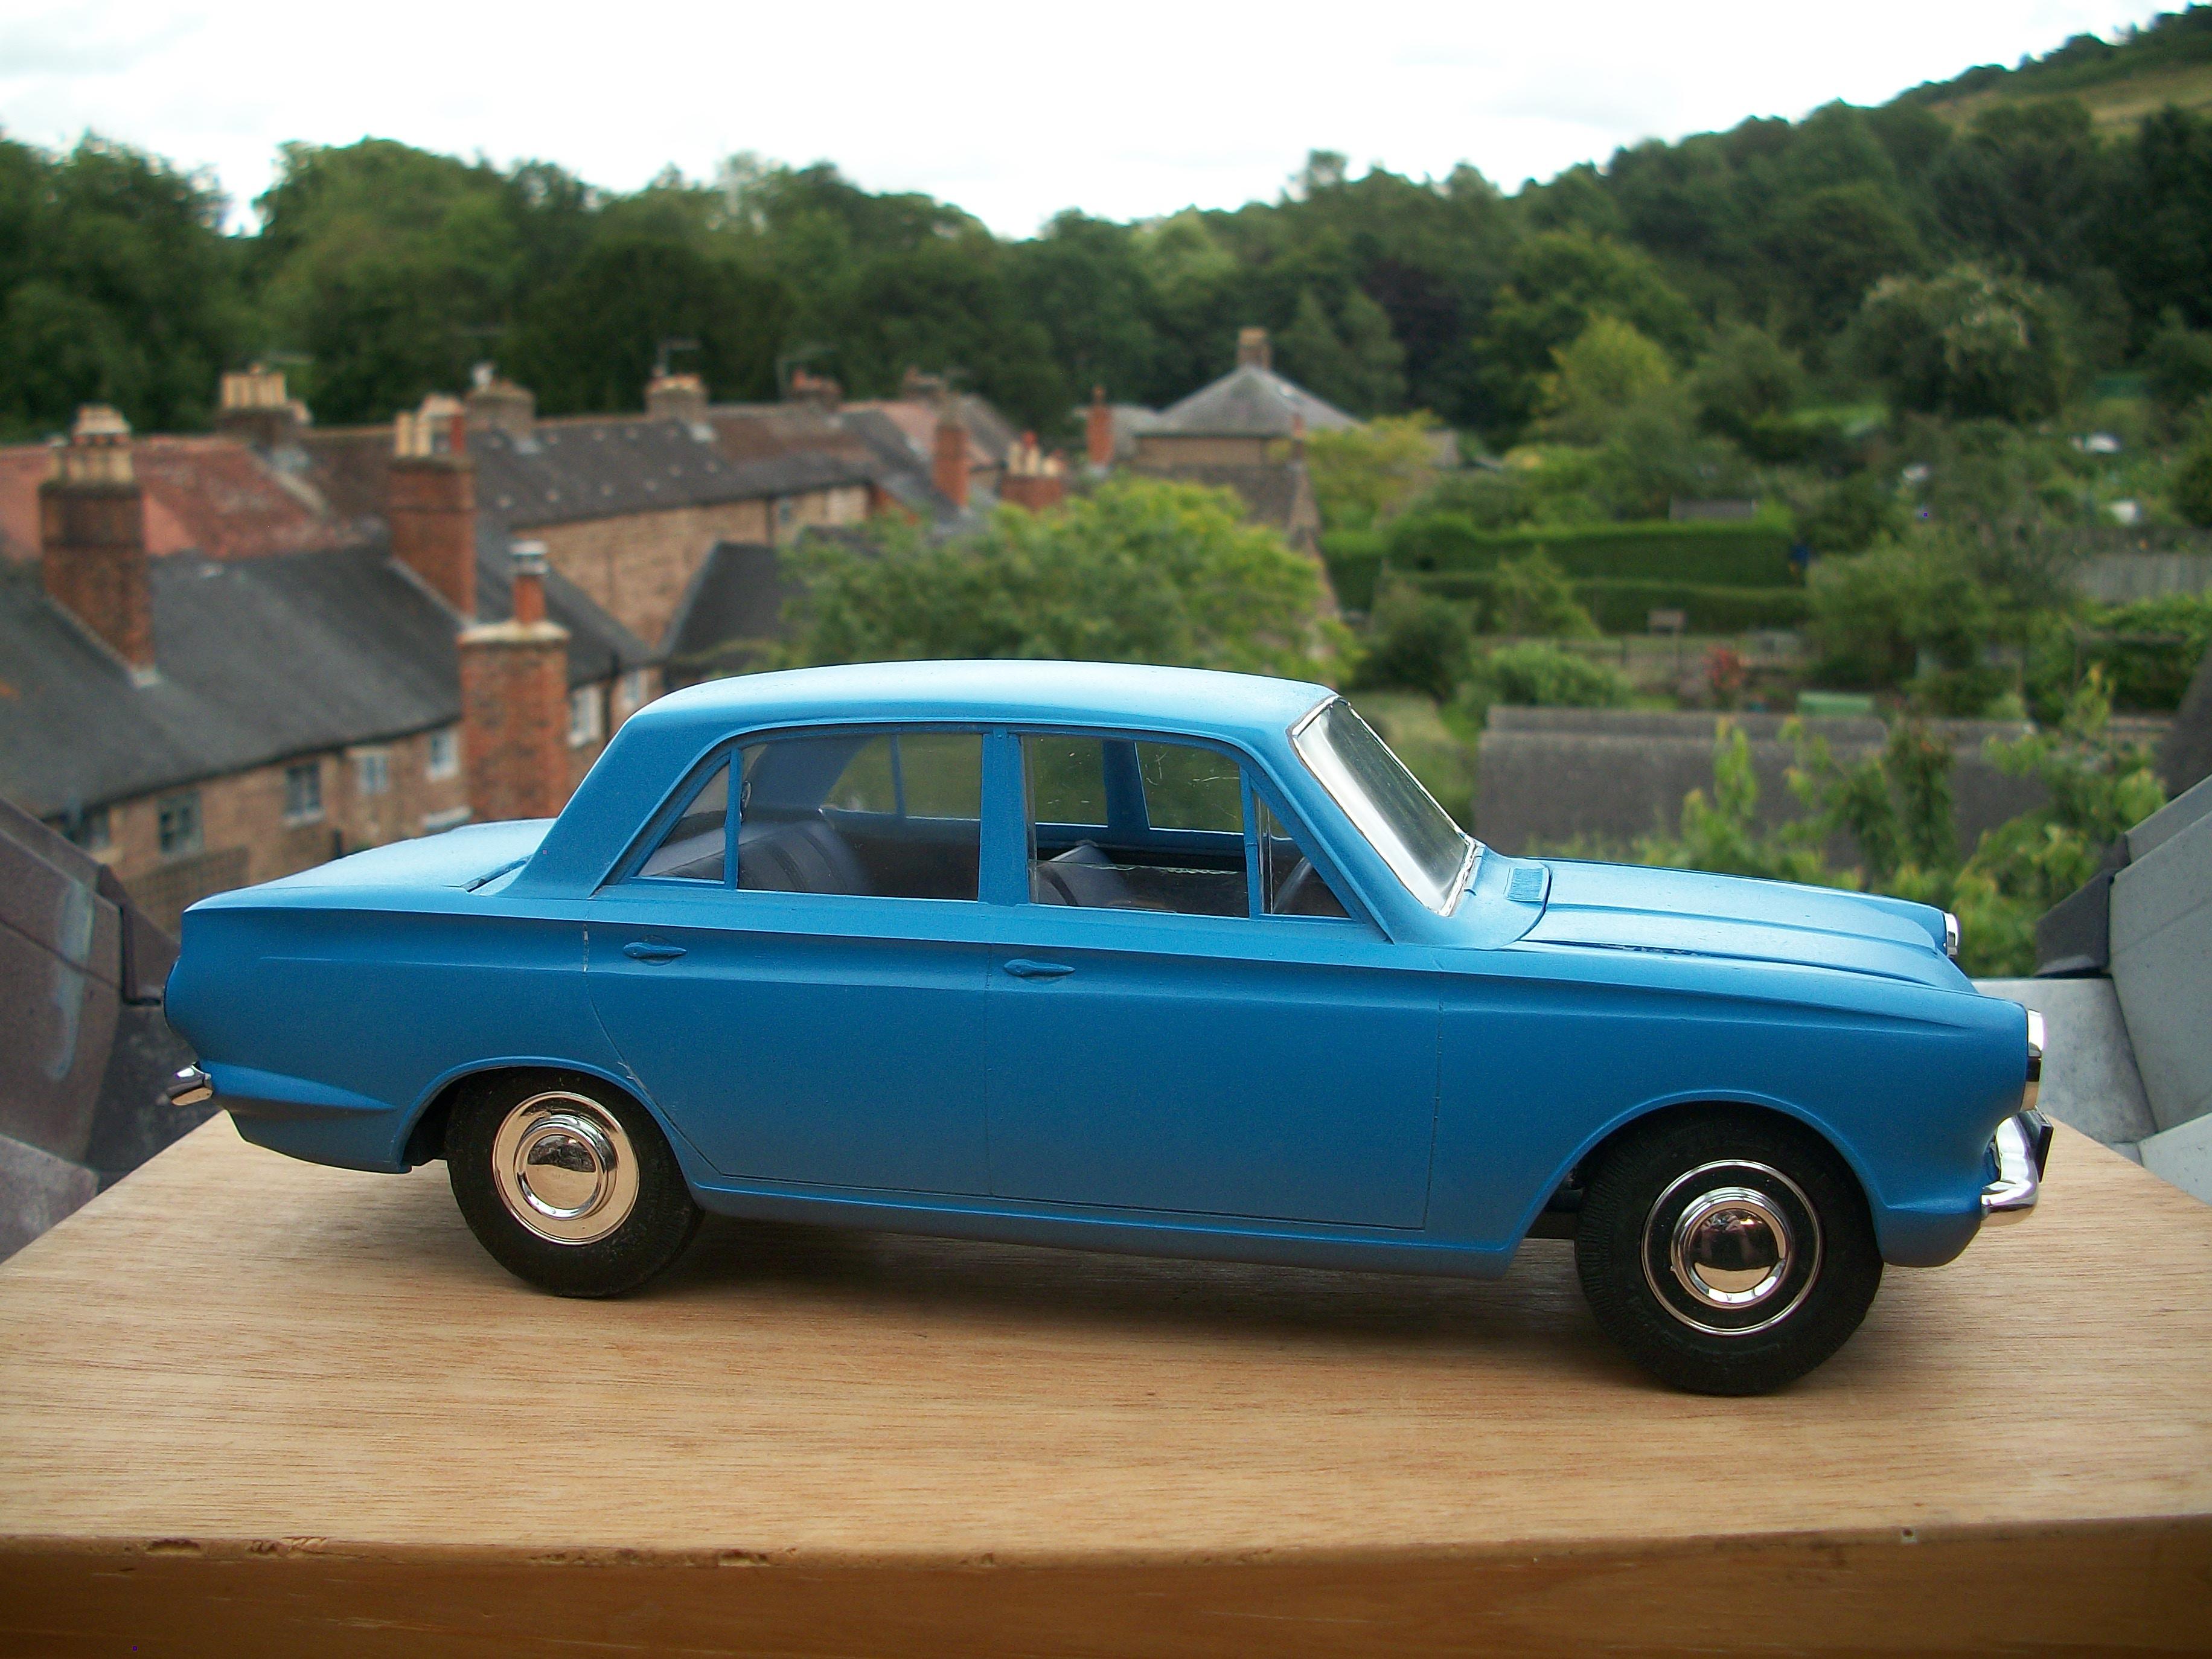
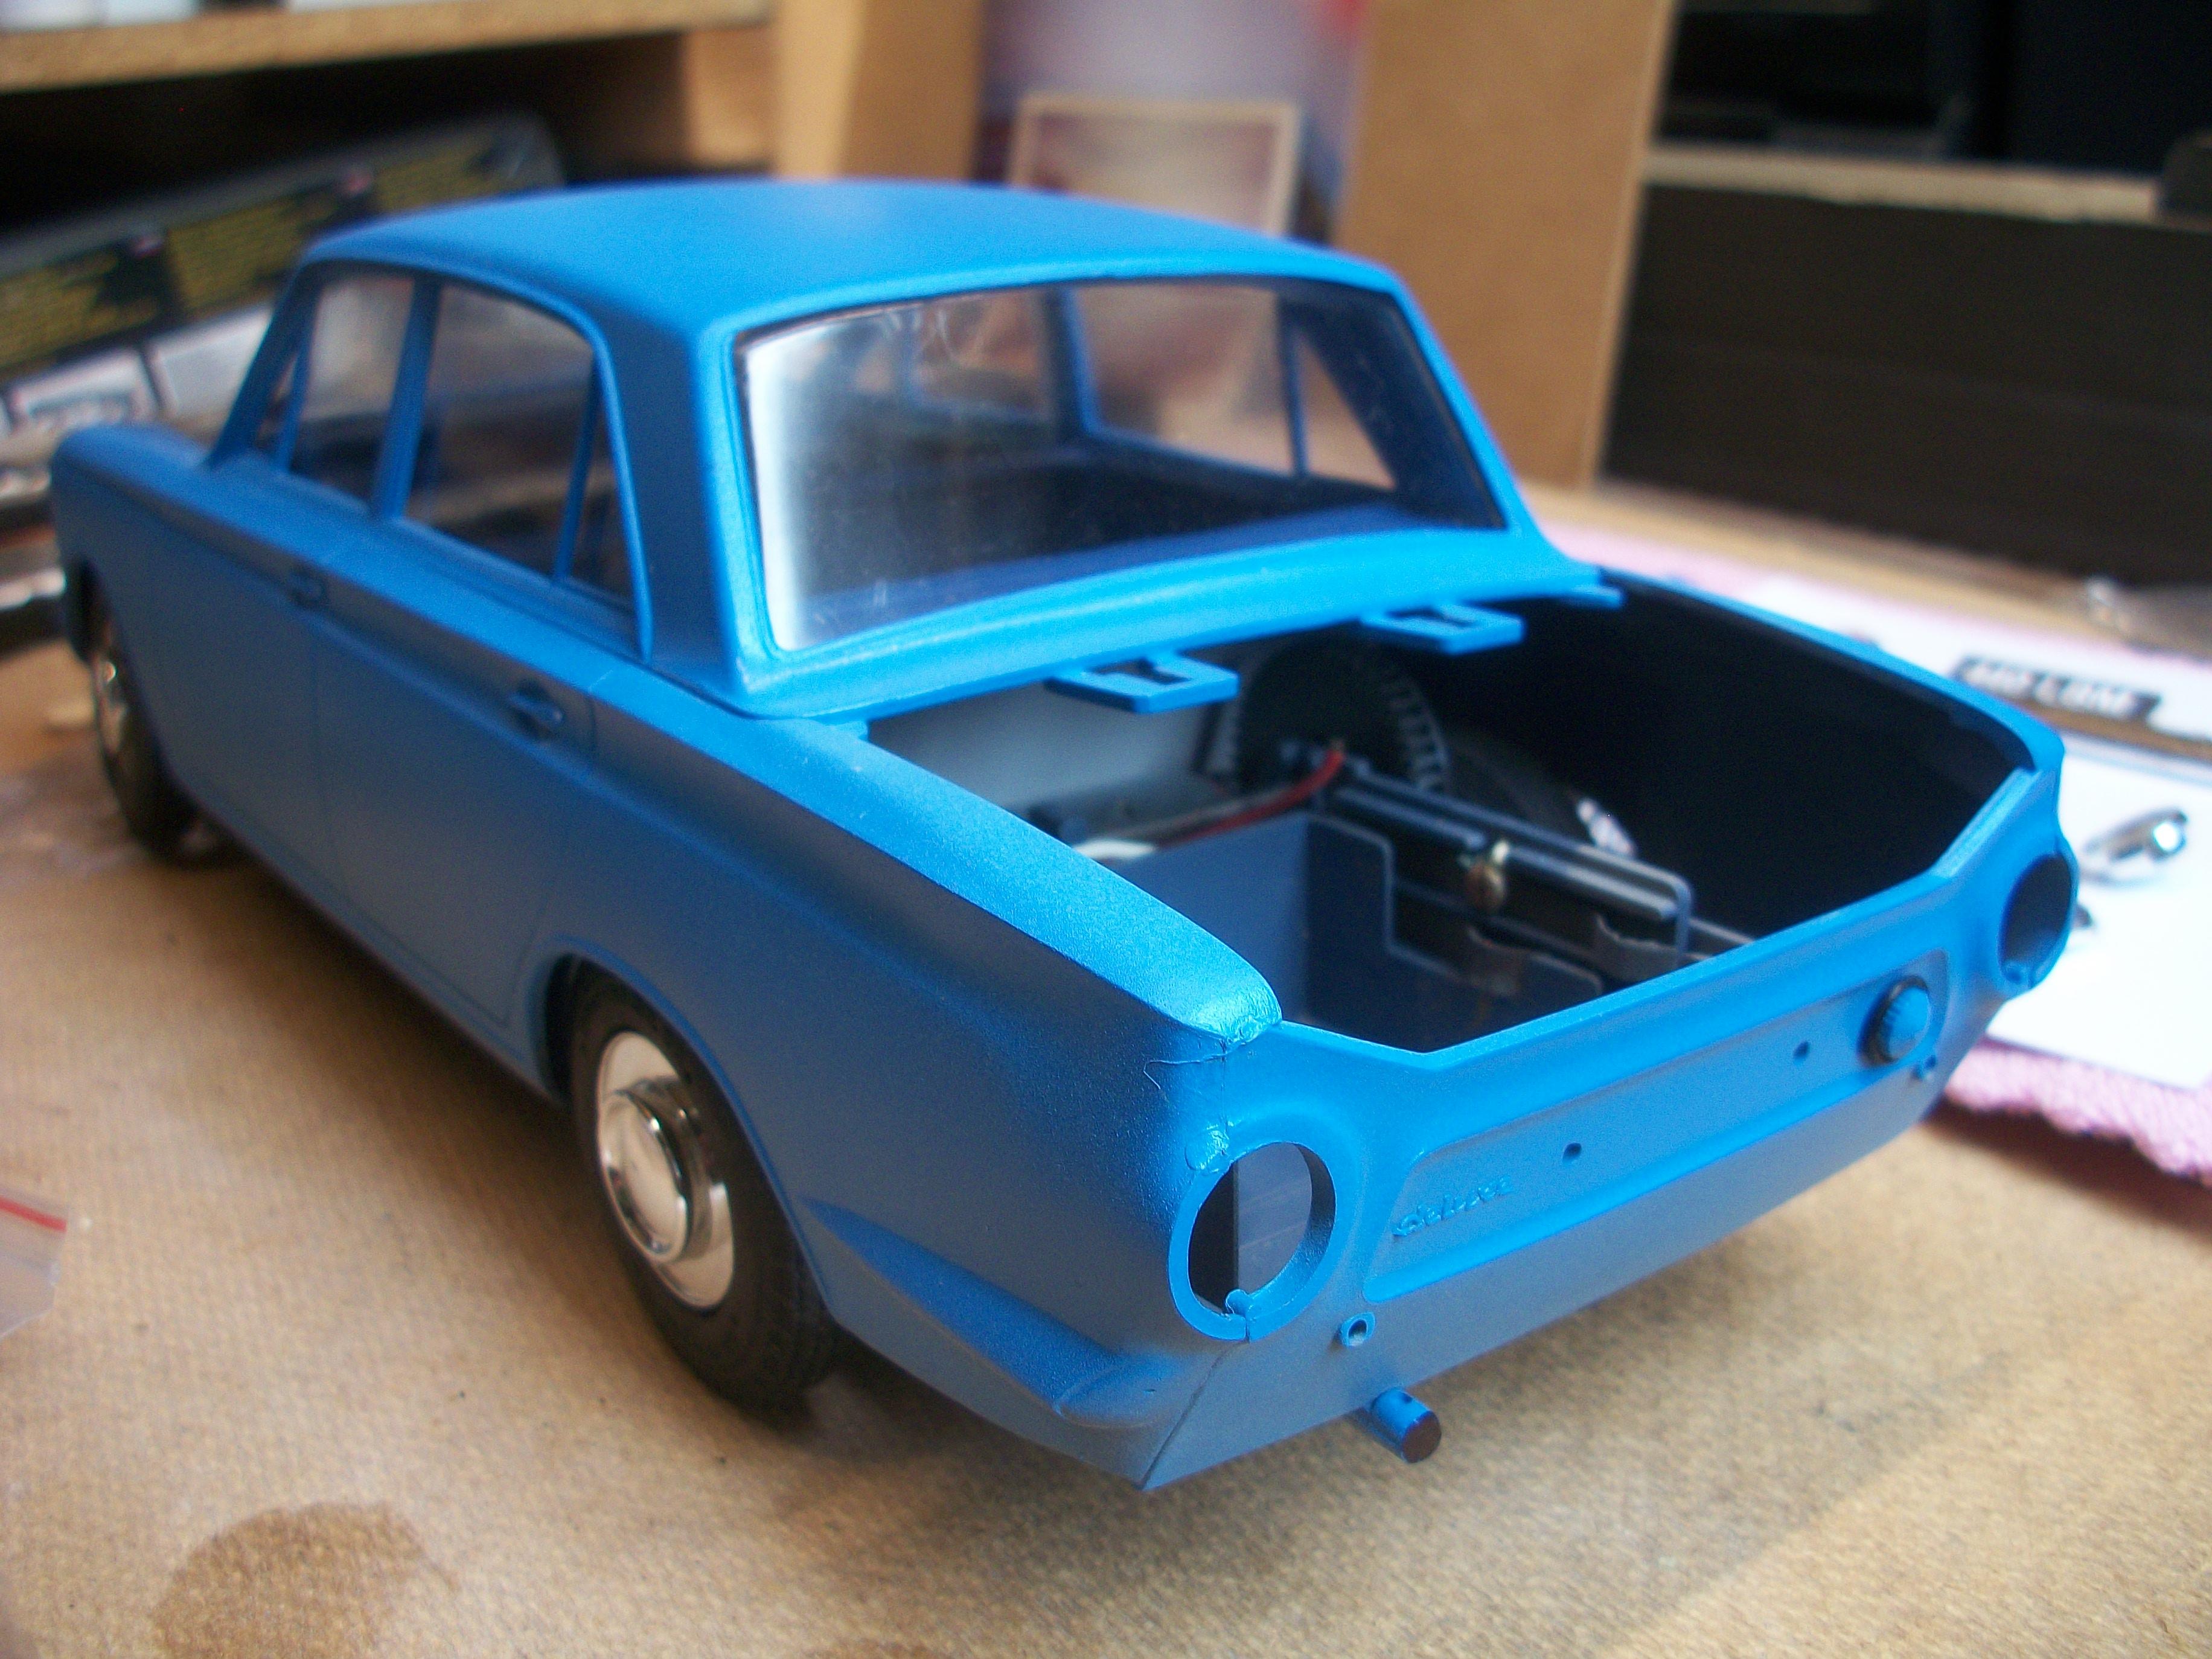
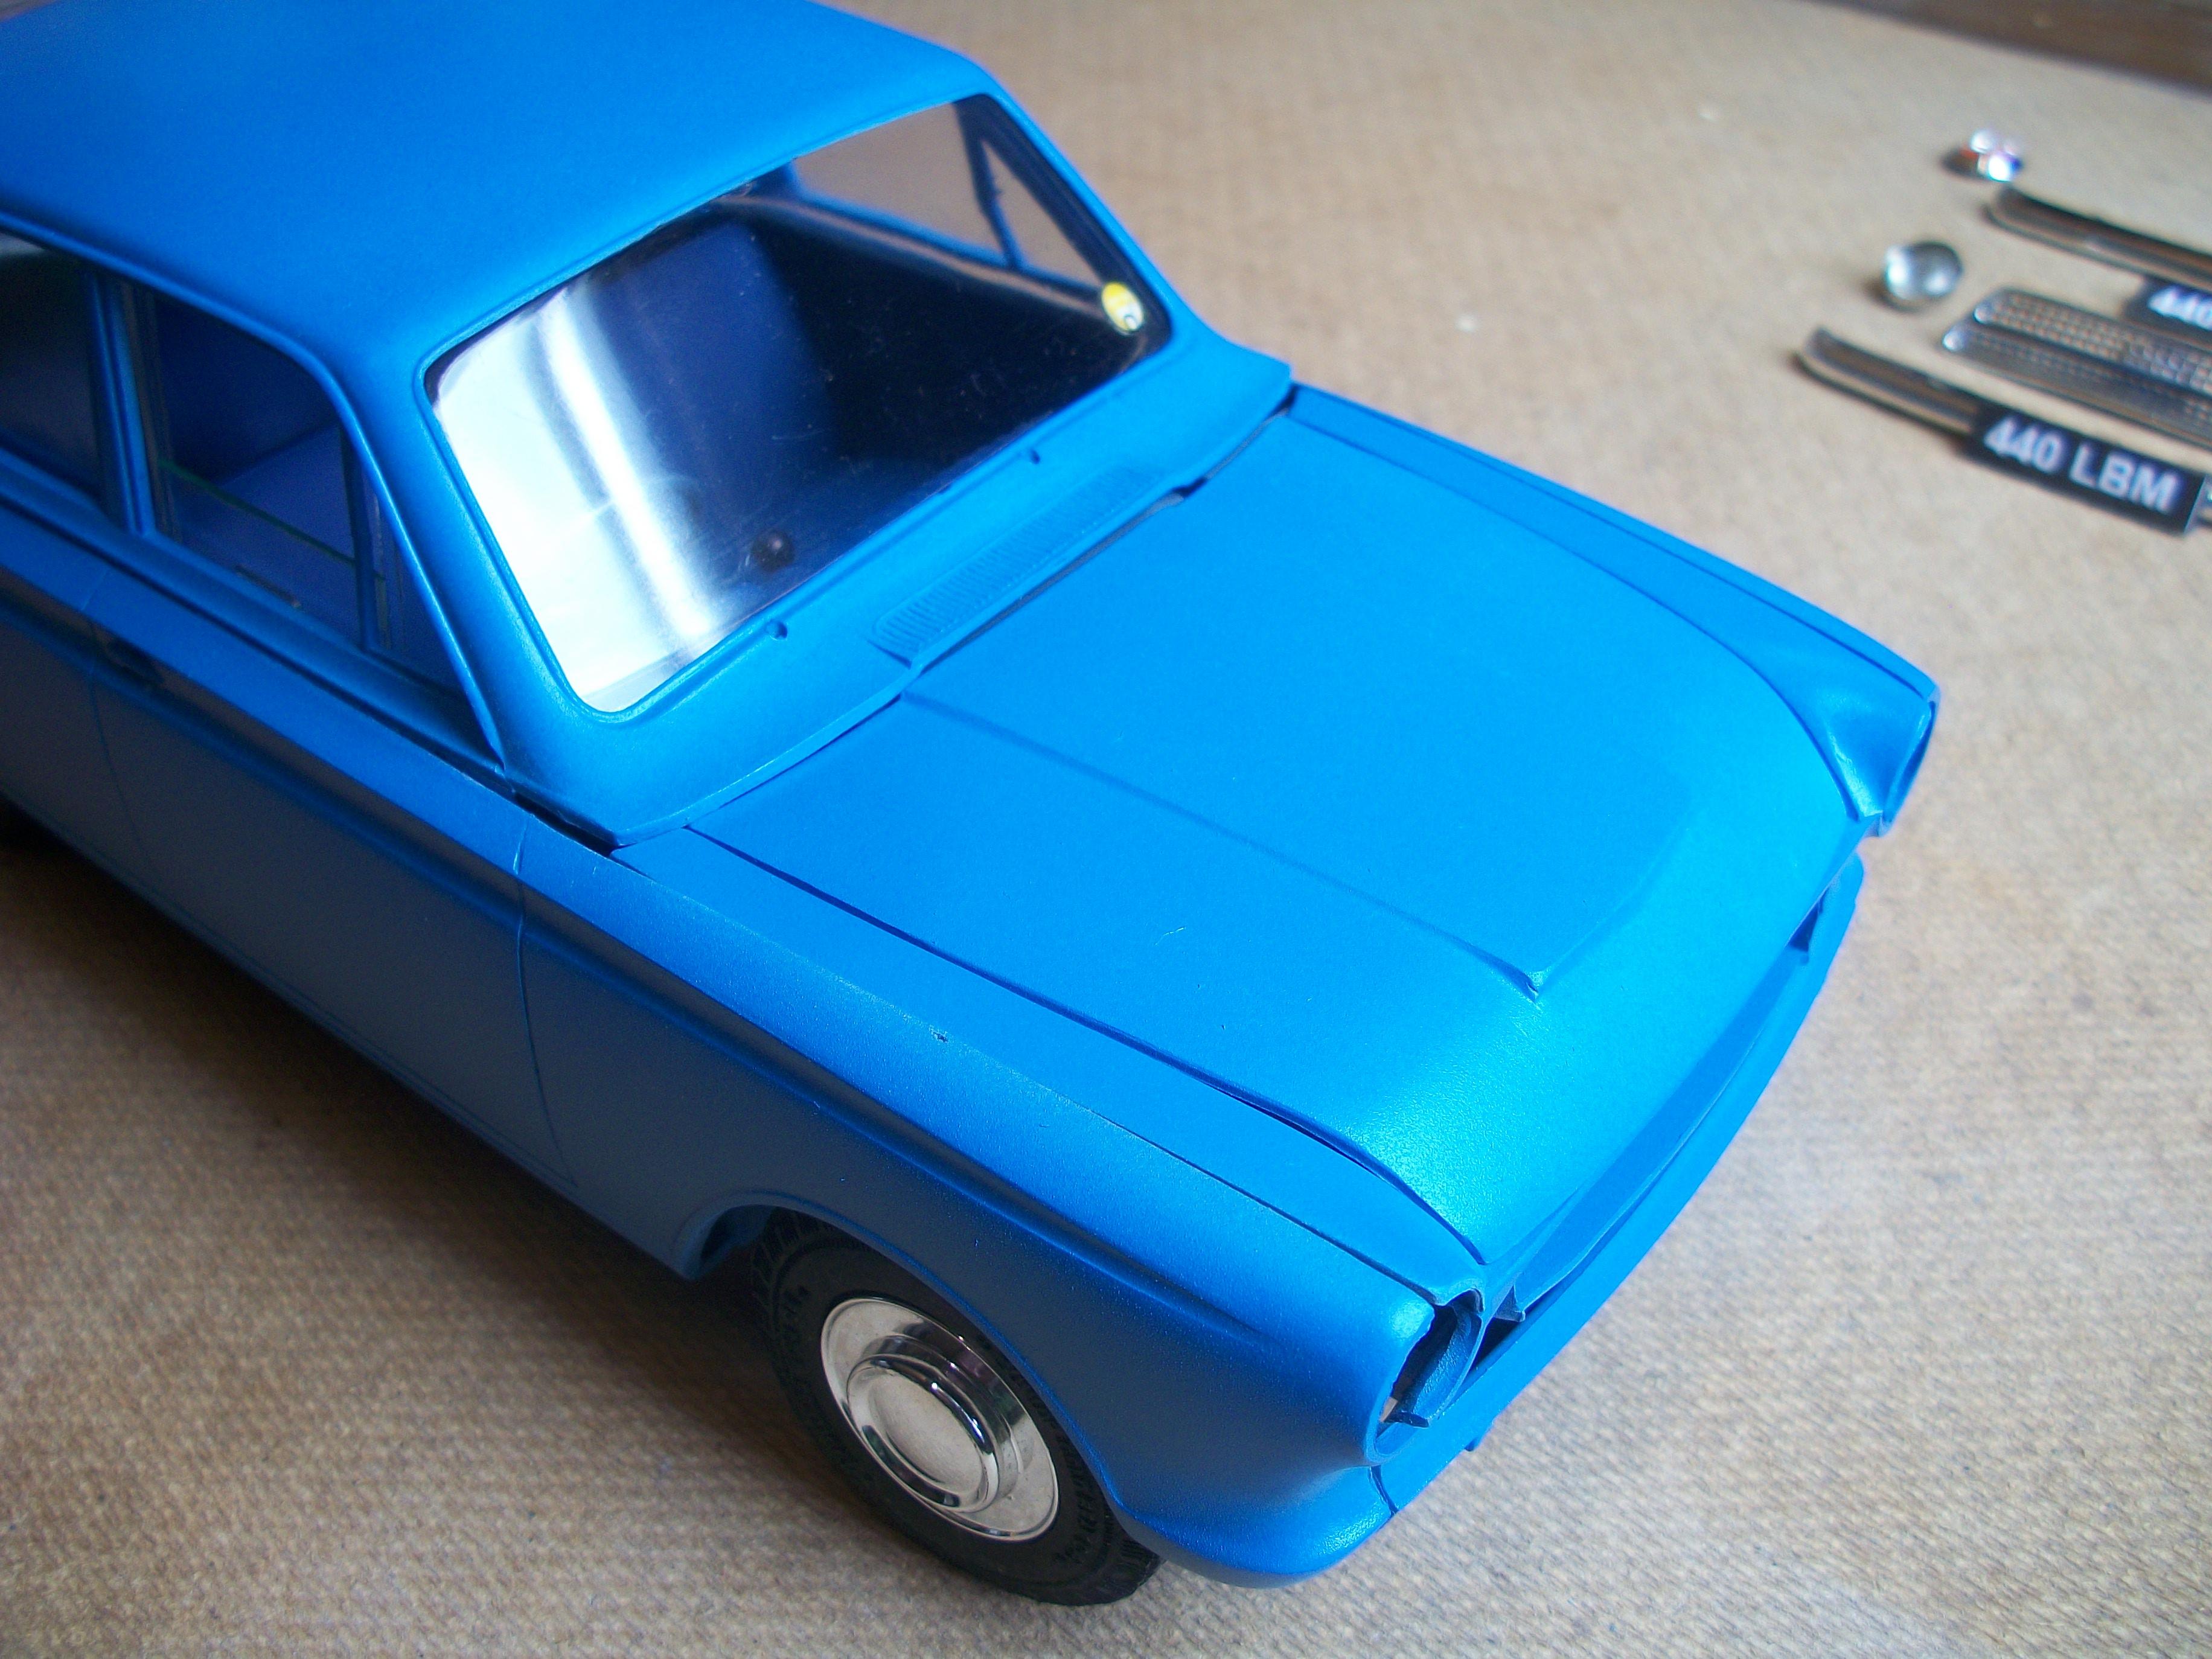
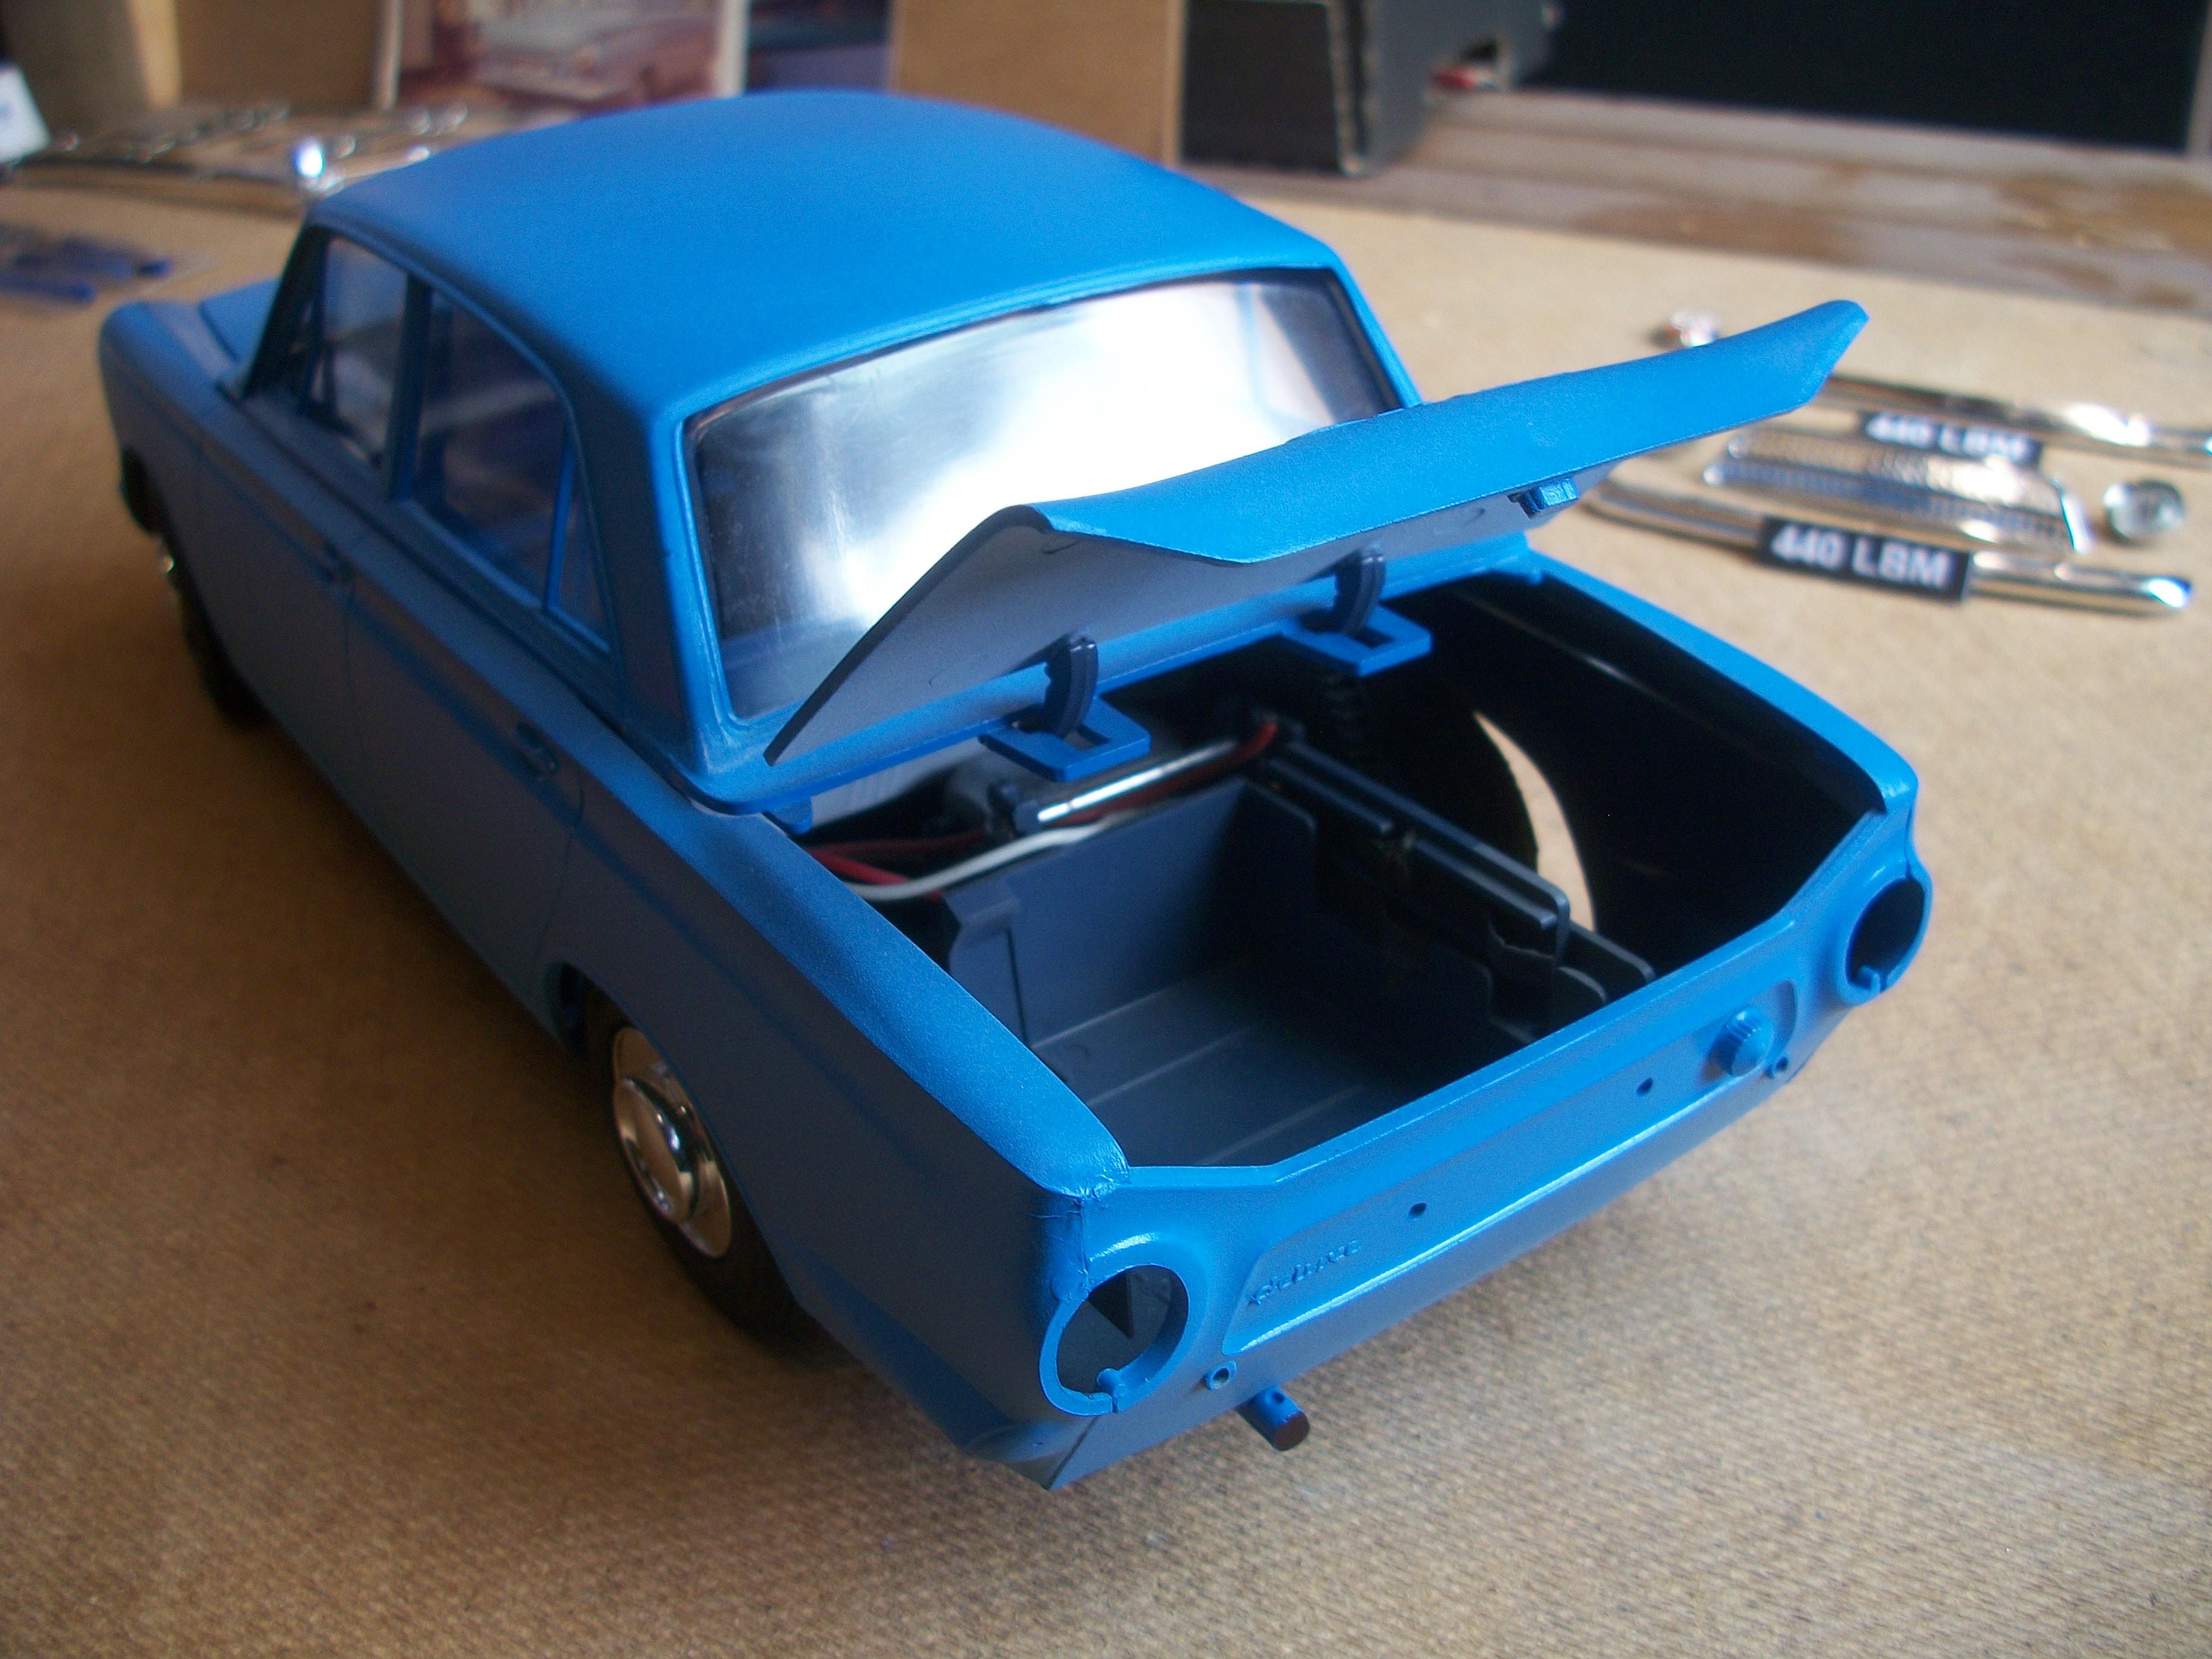
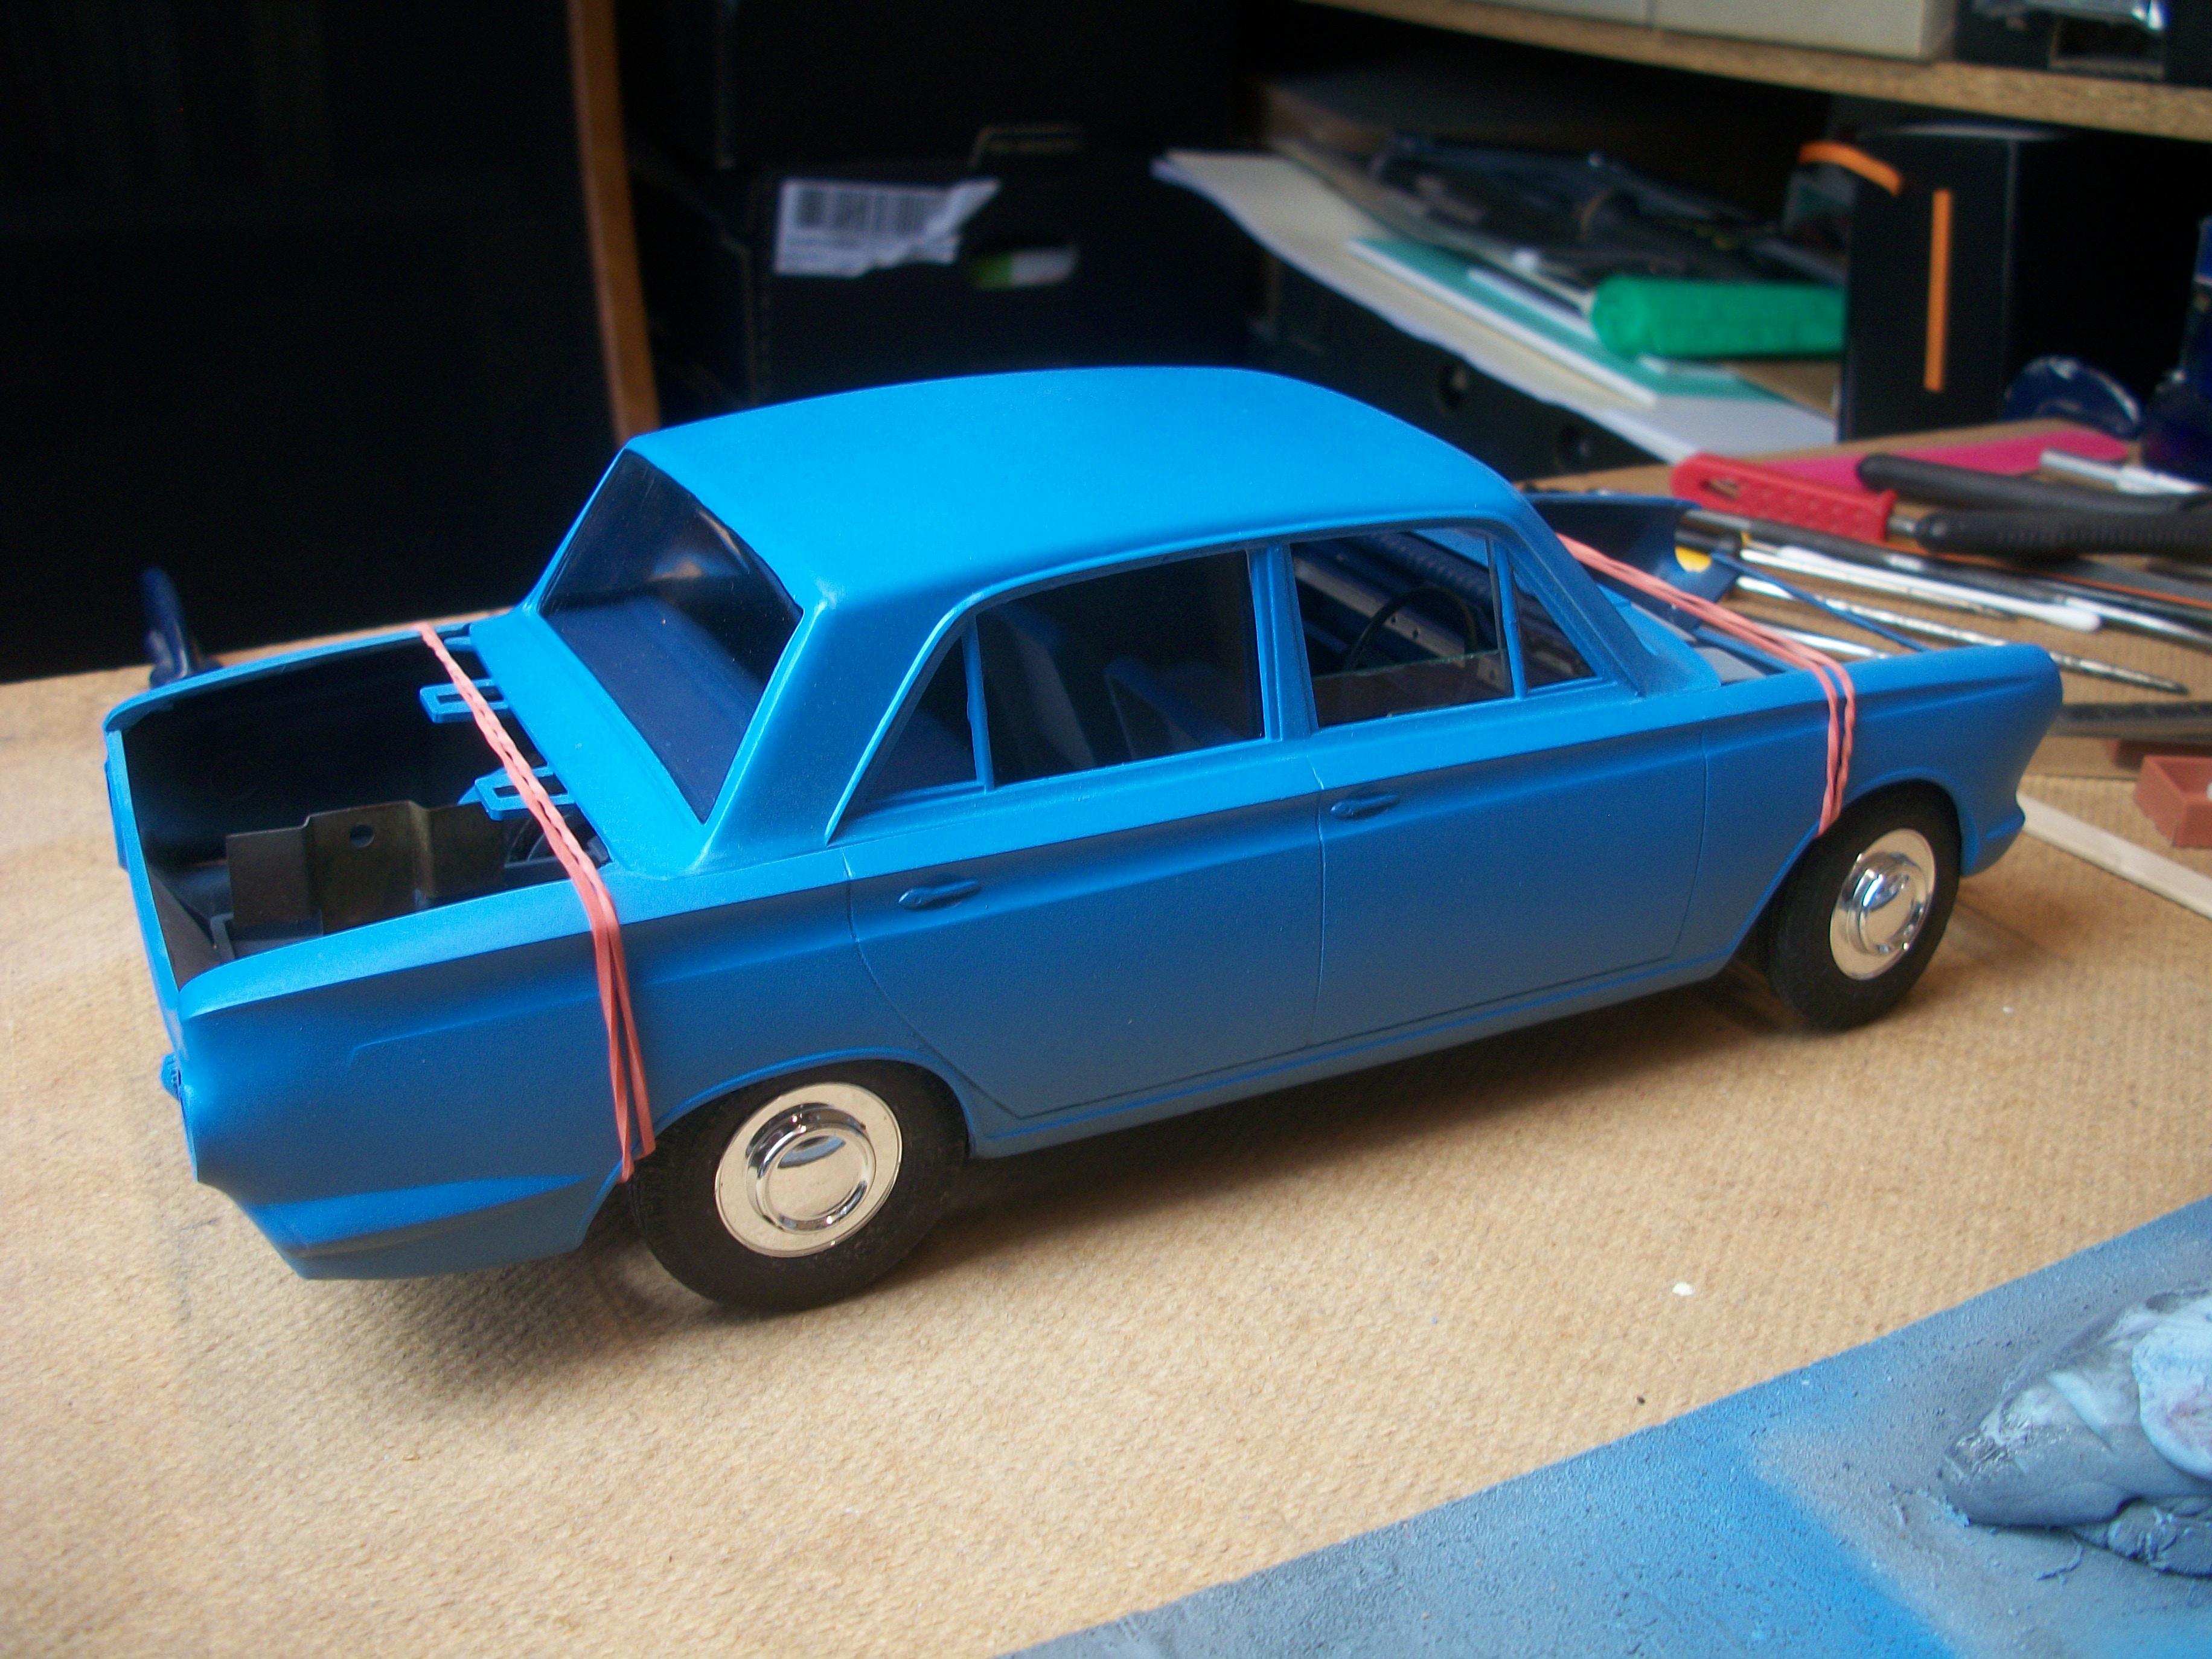
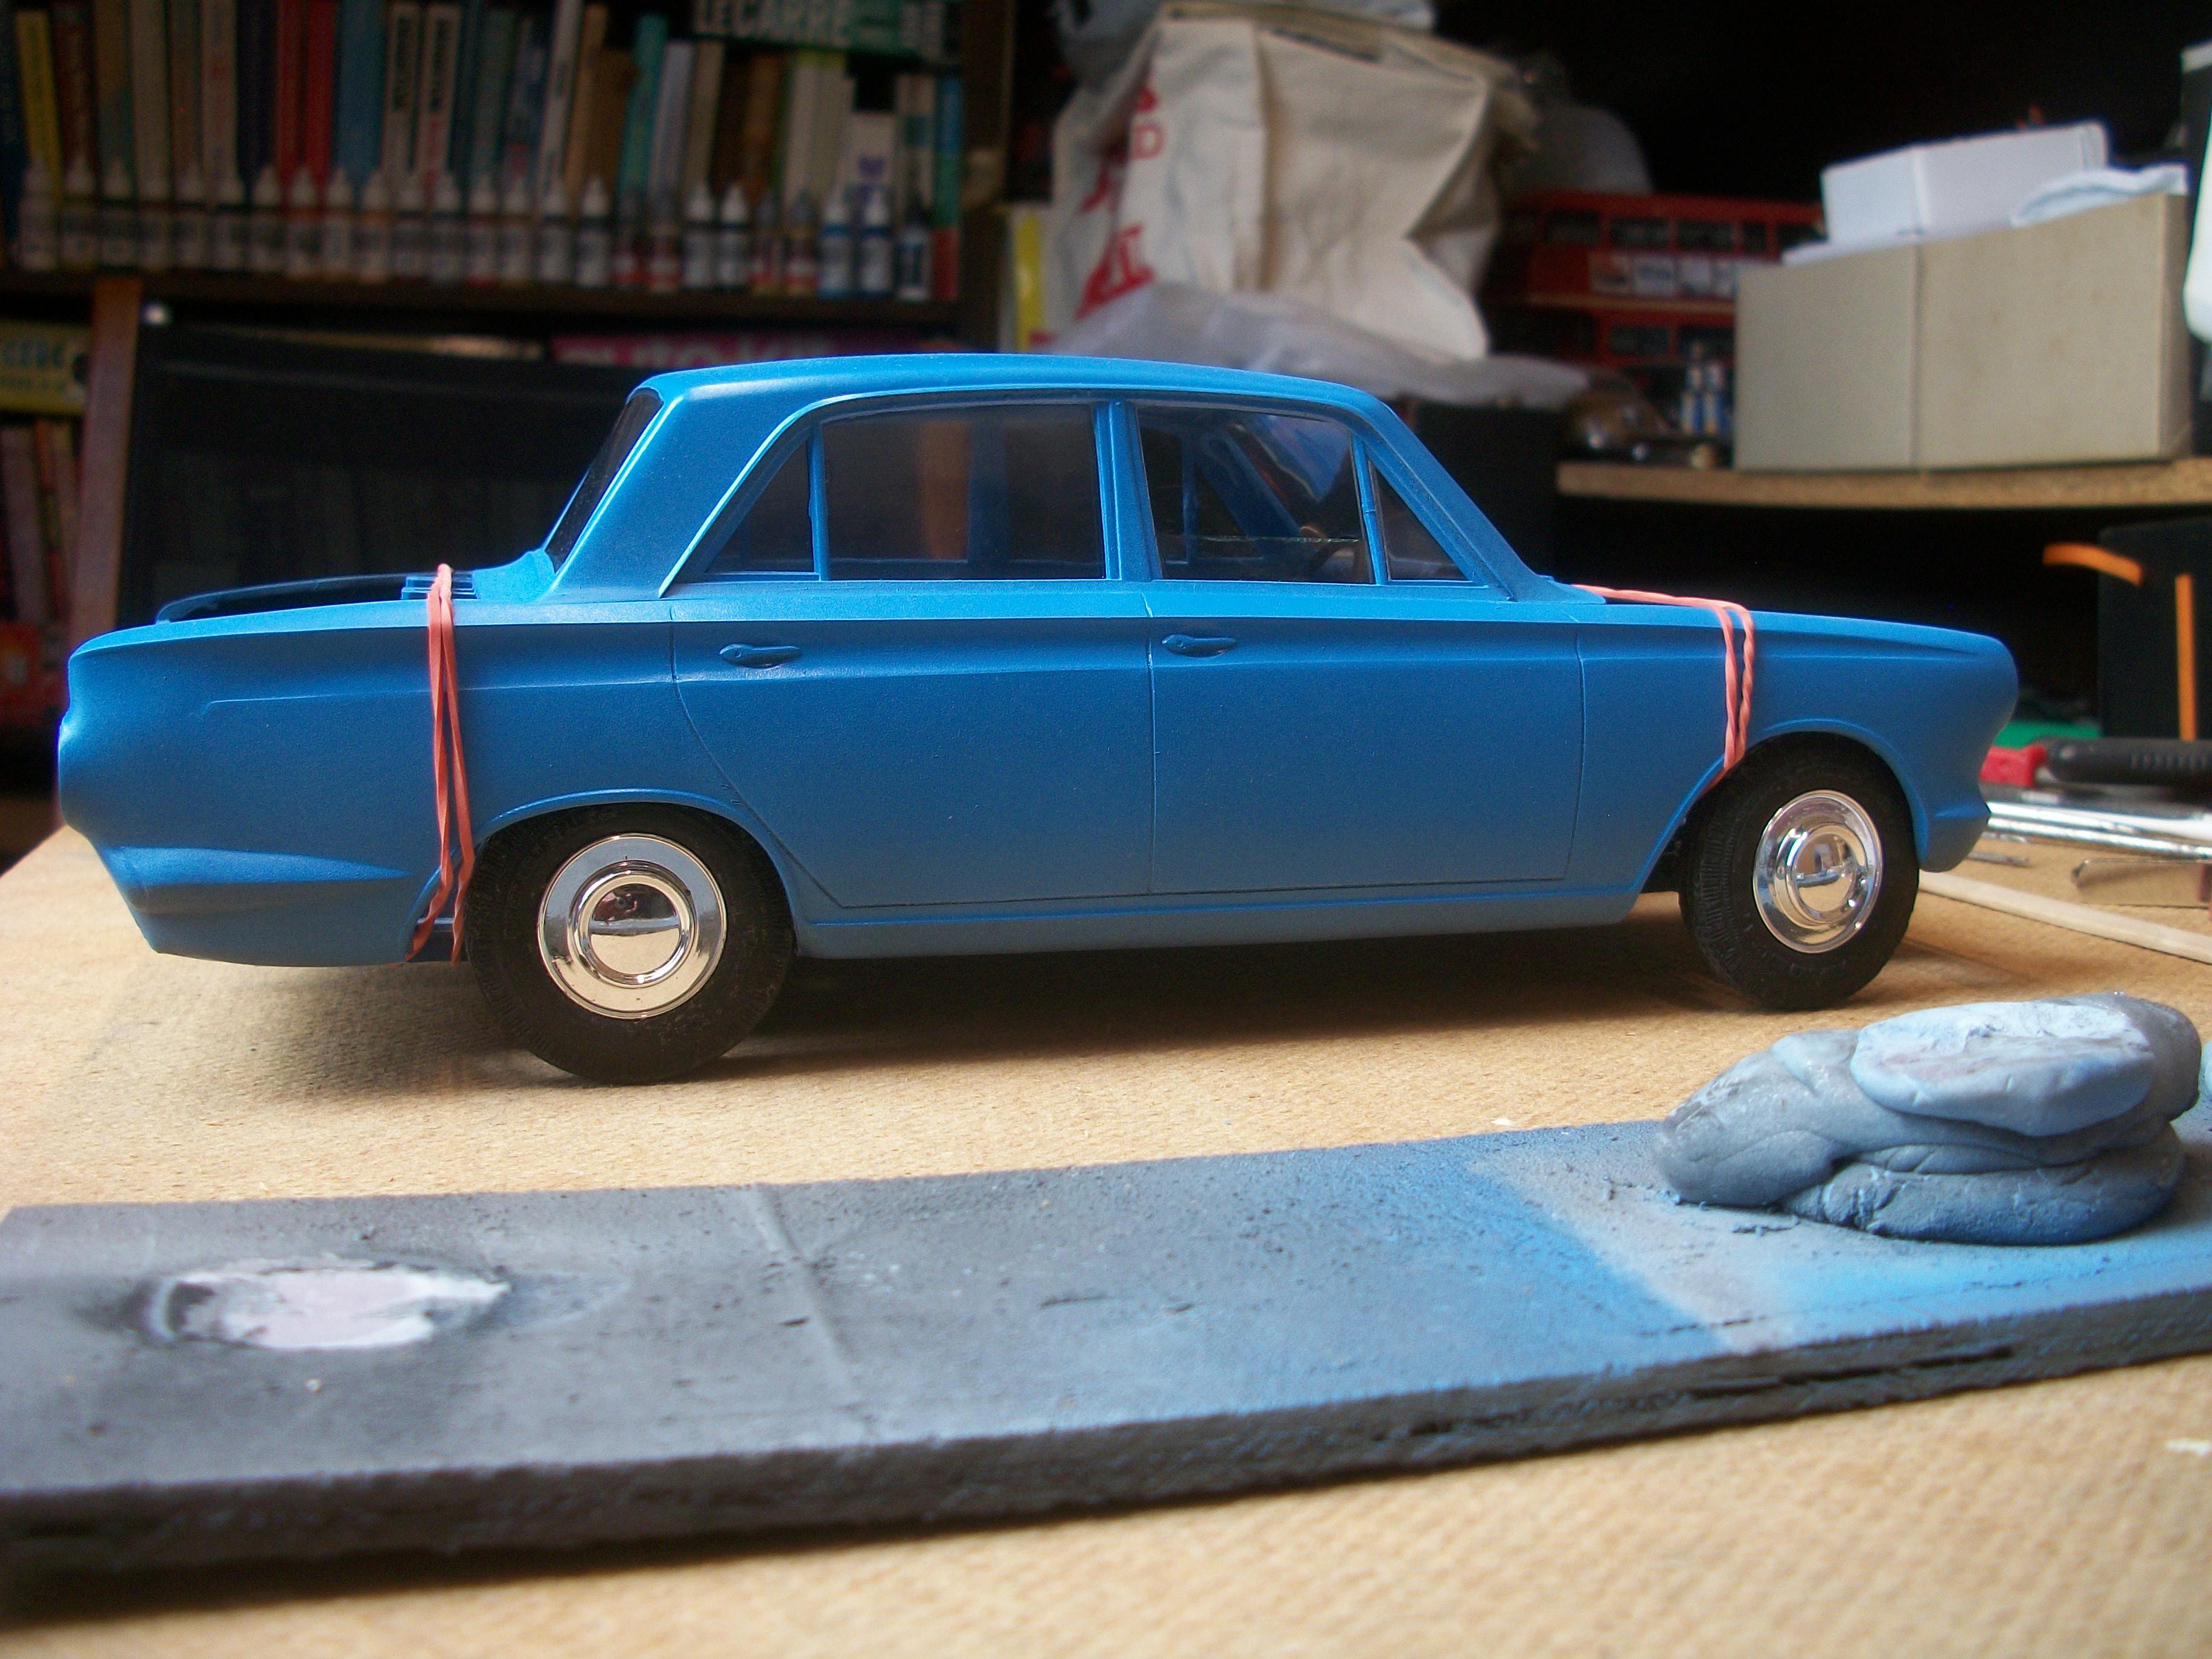
The bonnet panel and the boot lid seem to fit quite nicely on their hinges. Moving onto the next task . . . This was to align and glue into place the roof section, which locates along two narrow ledges, one on each body side panel. The right hand side of the roof fitted well, but over on the left hand side the roof would not easily press down inside the edge of the side panel. To allow this to locate properly before applying glue, I removed the bonnet, boot lid and engine bay panels . . . Then, by prising the side panel away slightly, the edge of the roof section dropped into place. A couple of rubber bands are holding the rear of the car together overnight and a couple more rubber bands are holding the front of the car together. This coming week is all about polishing the paintwork, and also dealing with chrome work. David
-
1:16 Scale 1962 Ford Consul Cortina by FROG kits
Anglia105E replied to Anglia105E's topic in WIP: Model Cars
Thanks Bob . . . We are getting there . . . Slow and steady ! David