
Anglia105E
-
Posts
3,487 -
Joined
-
Last visited
Content Type
Profiles
Forums
Events
Gallery
Everything posted by Anglia105E
-
All your hard work on the lighting for this car has paid off Harald . . . You must be enjoying this build ! David
-
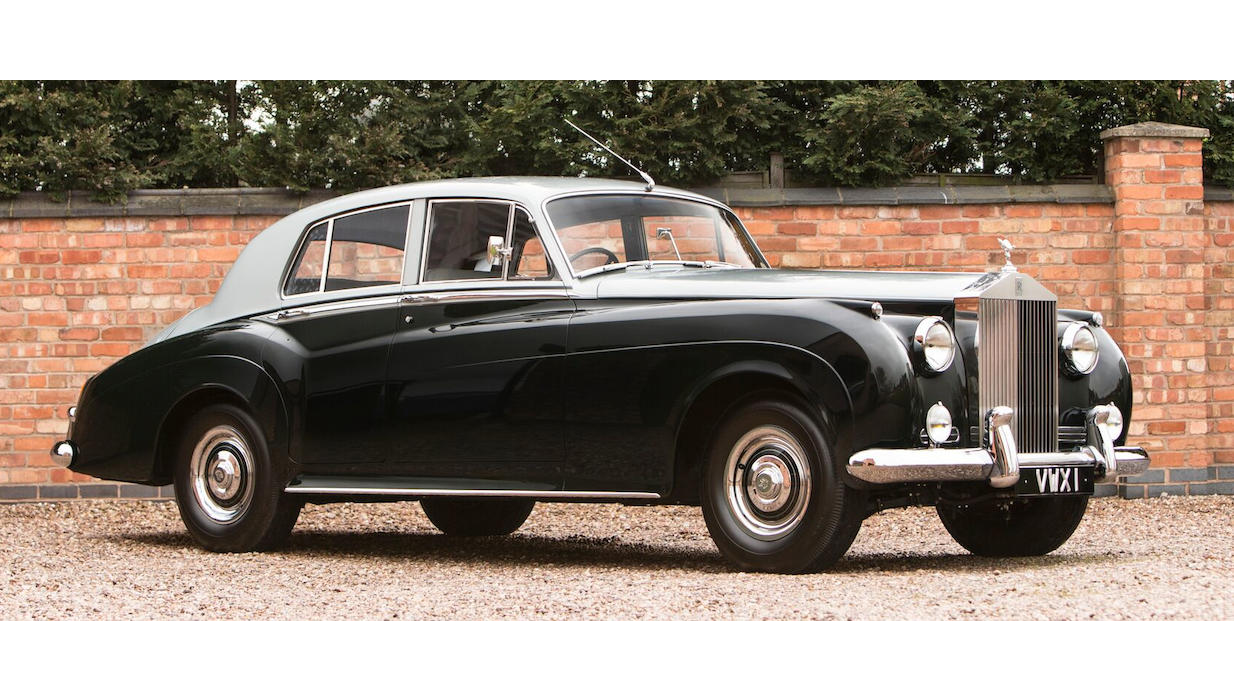
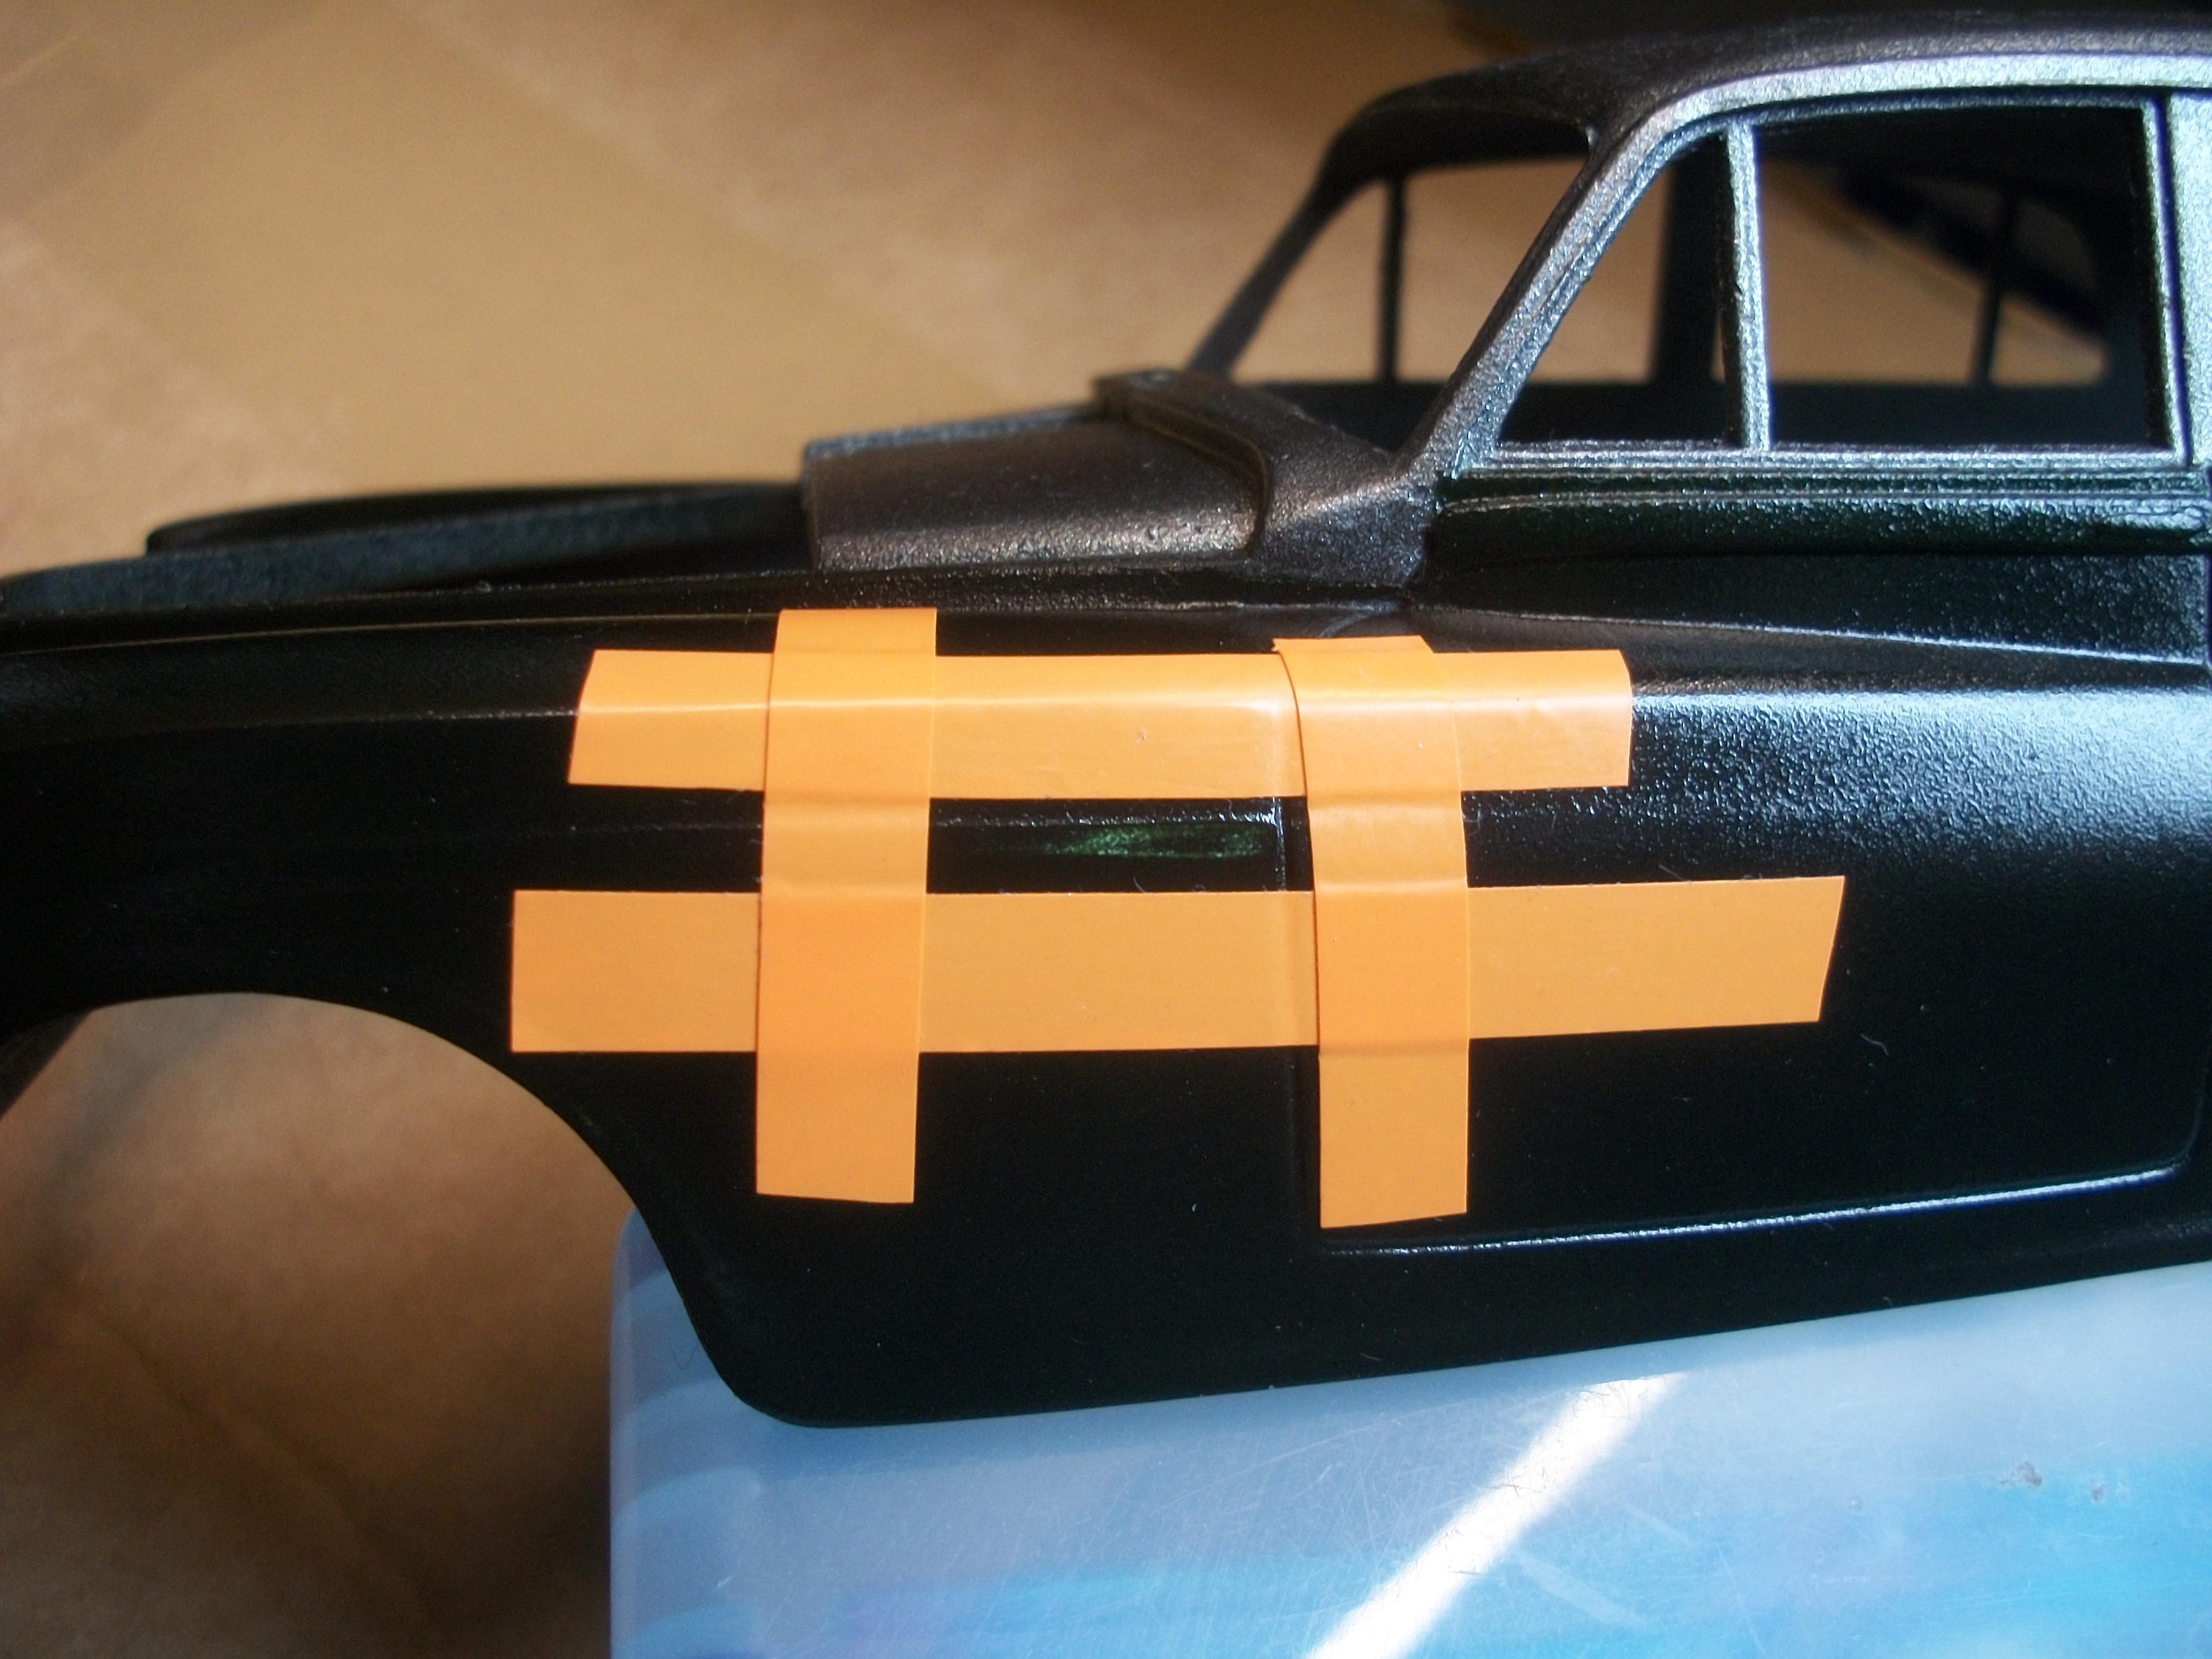
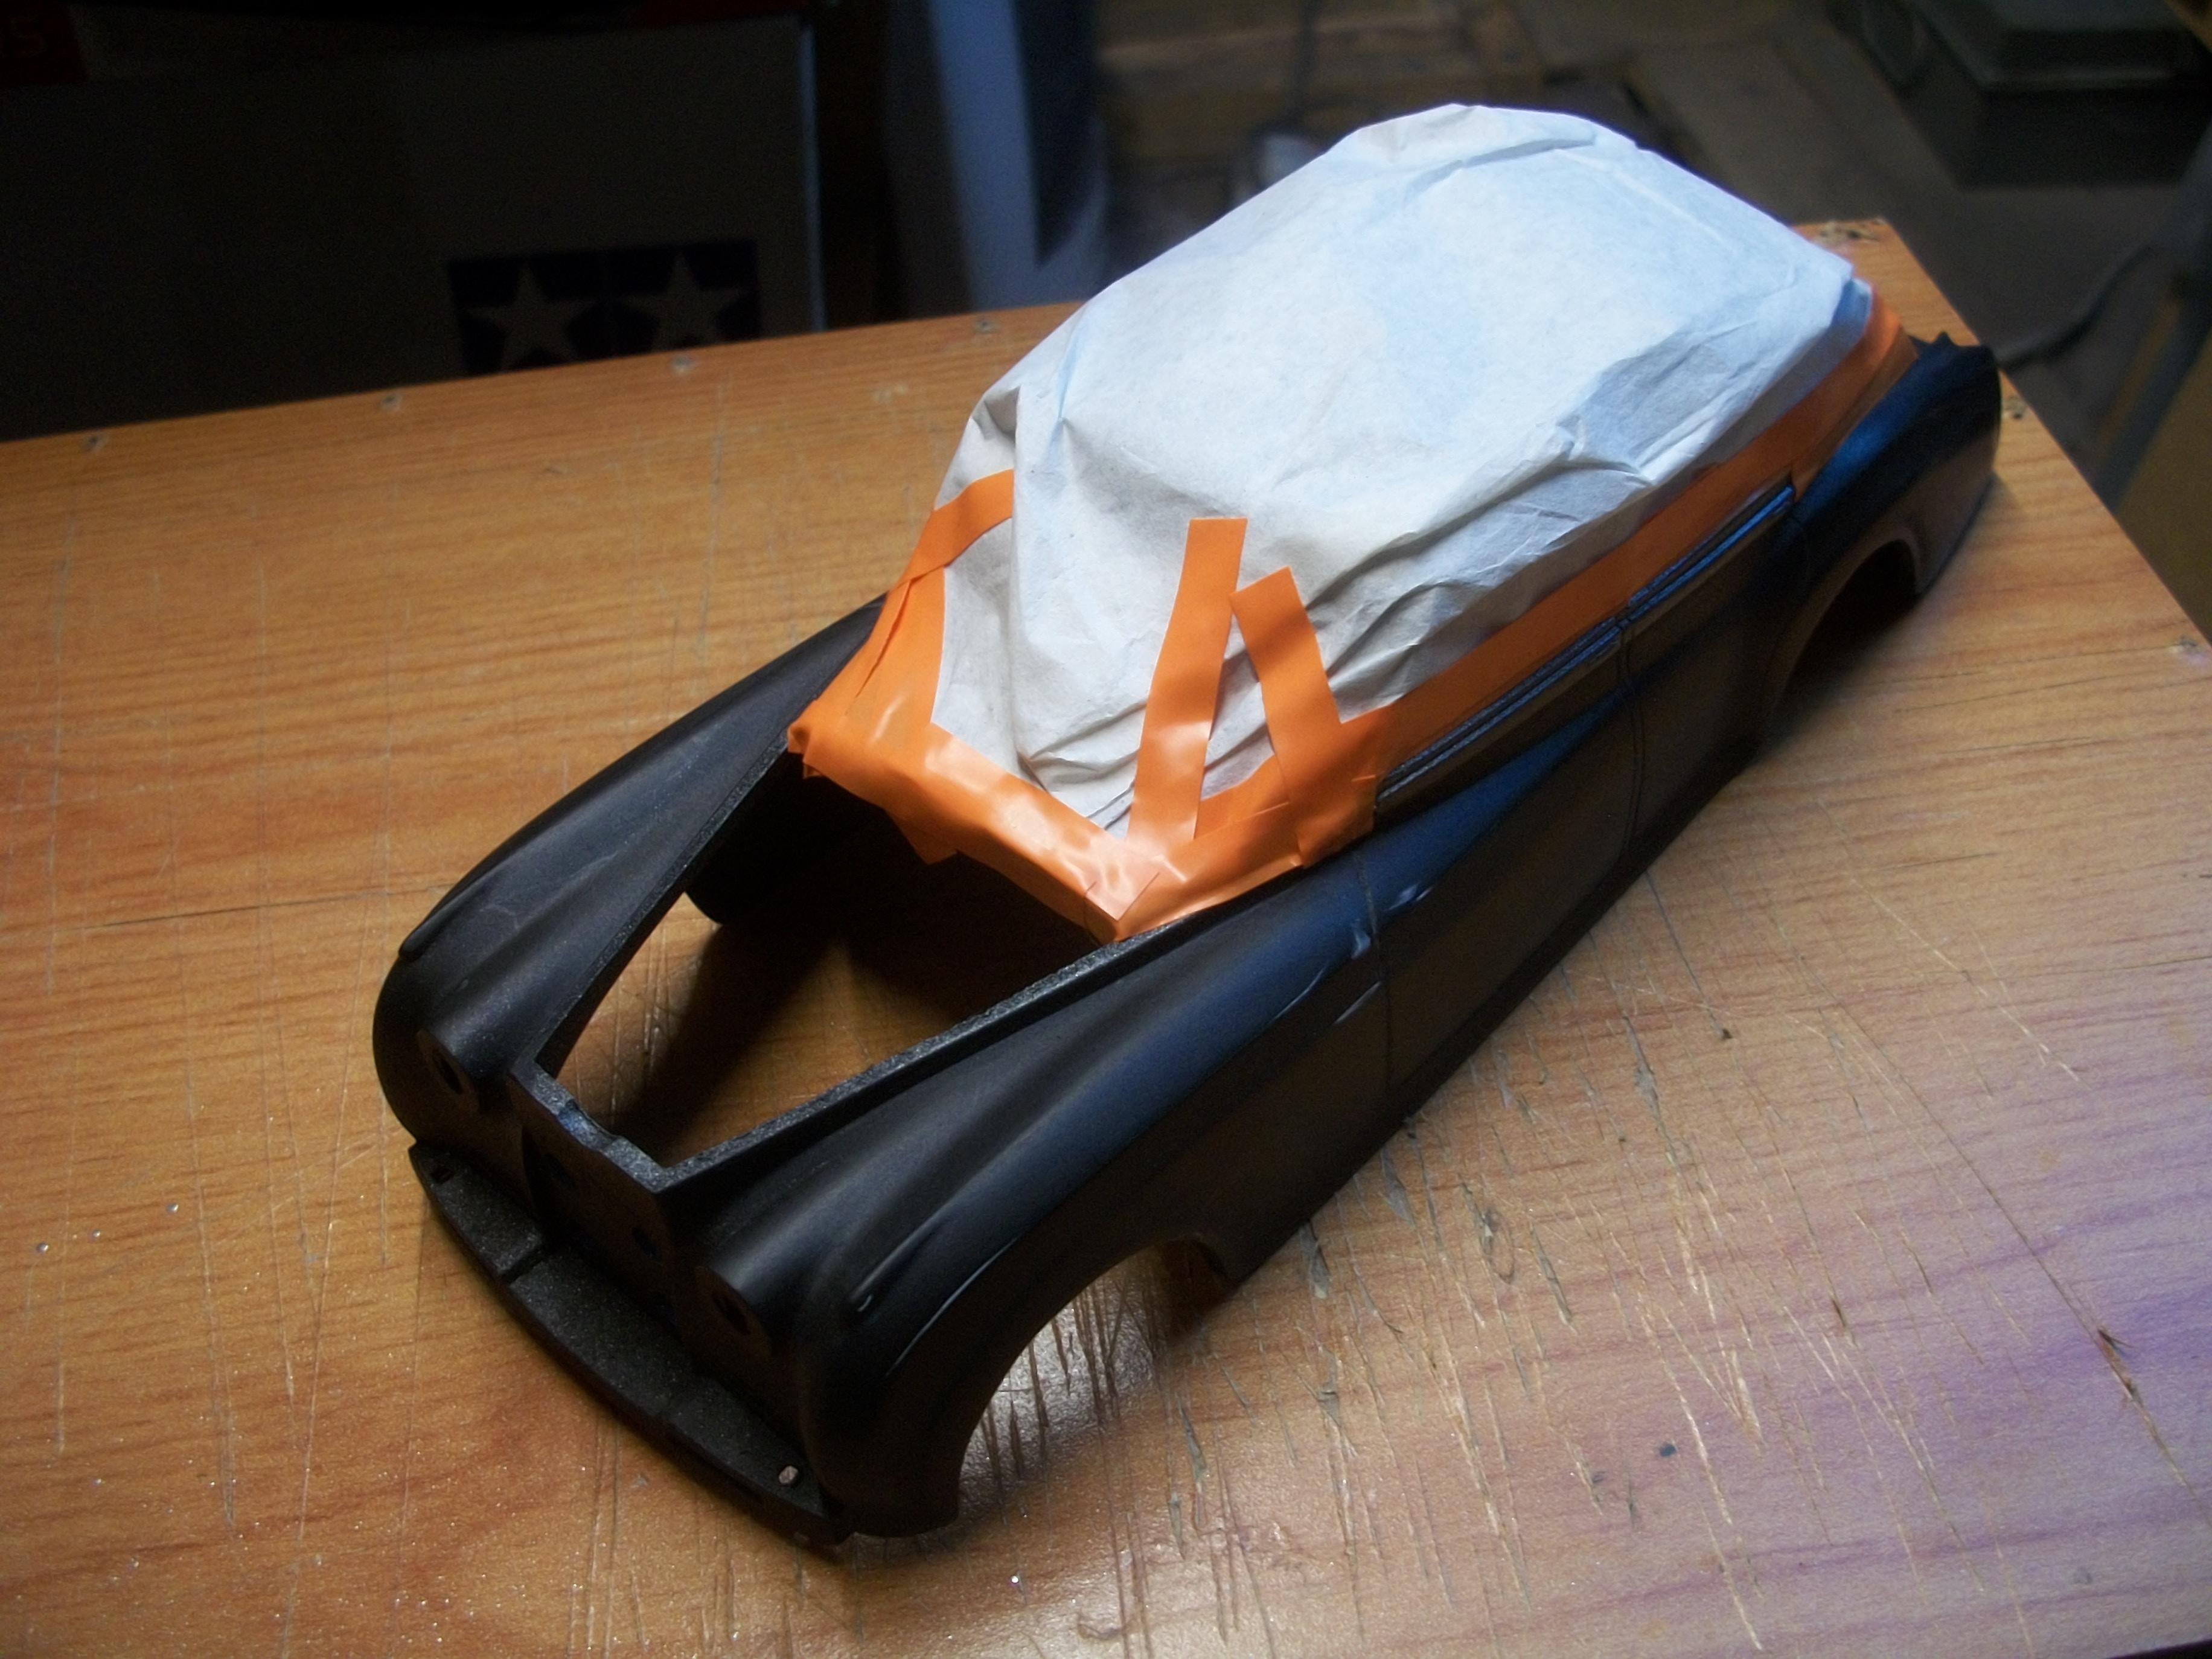
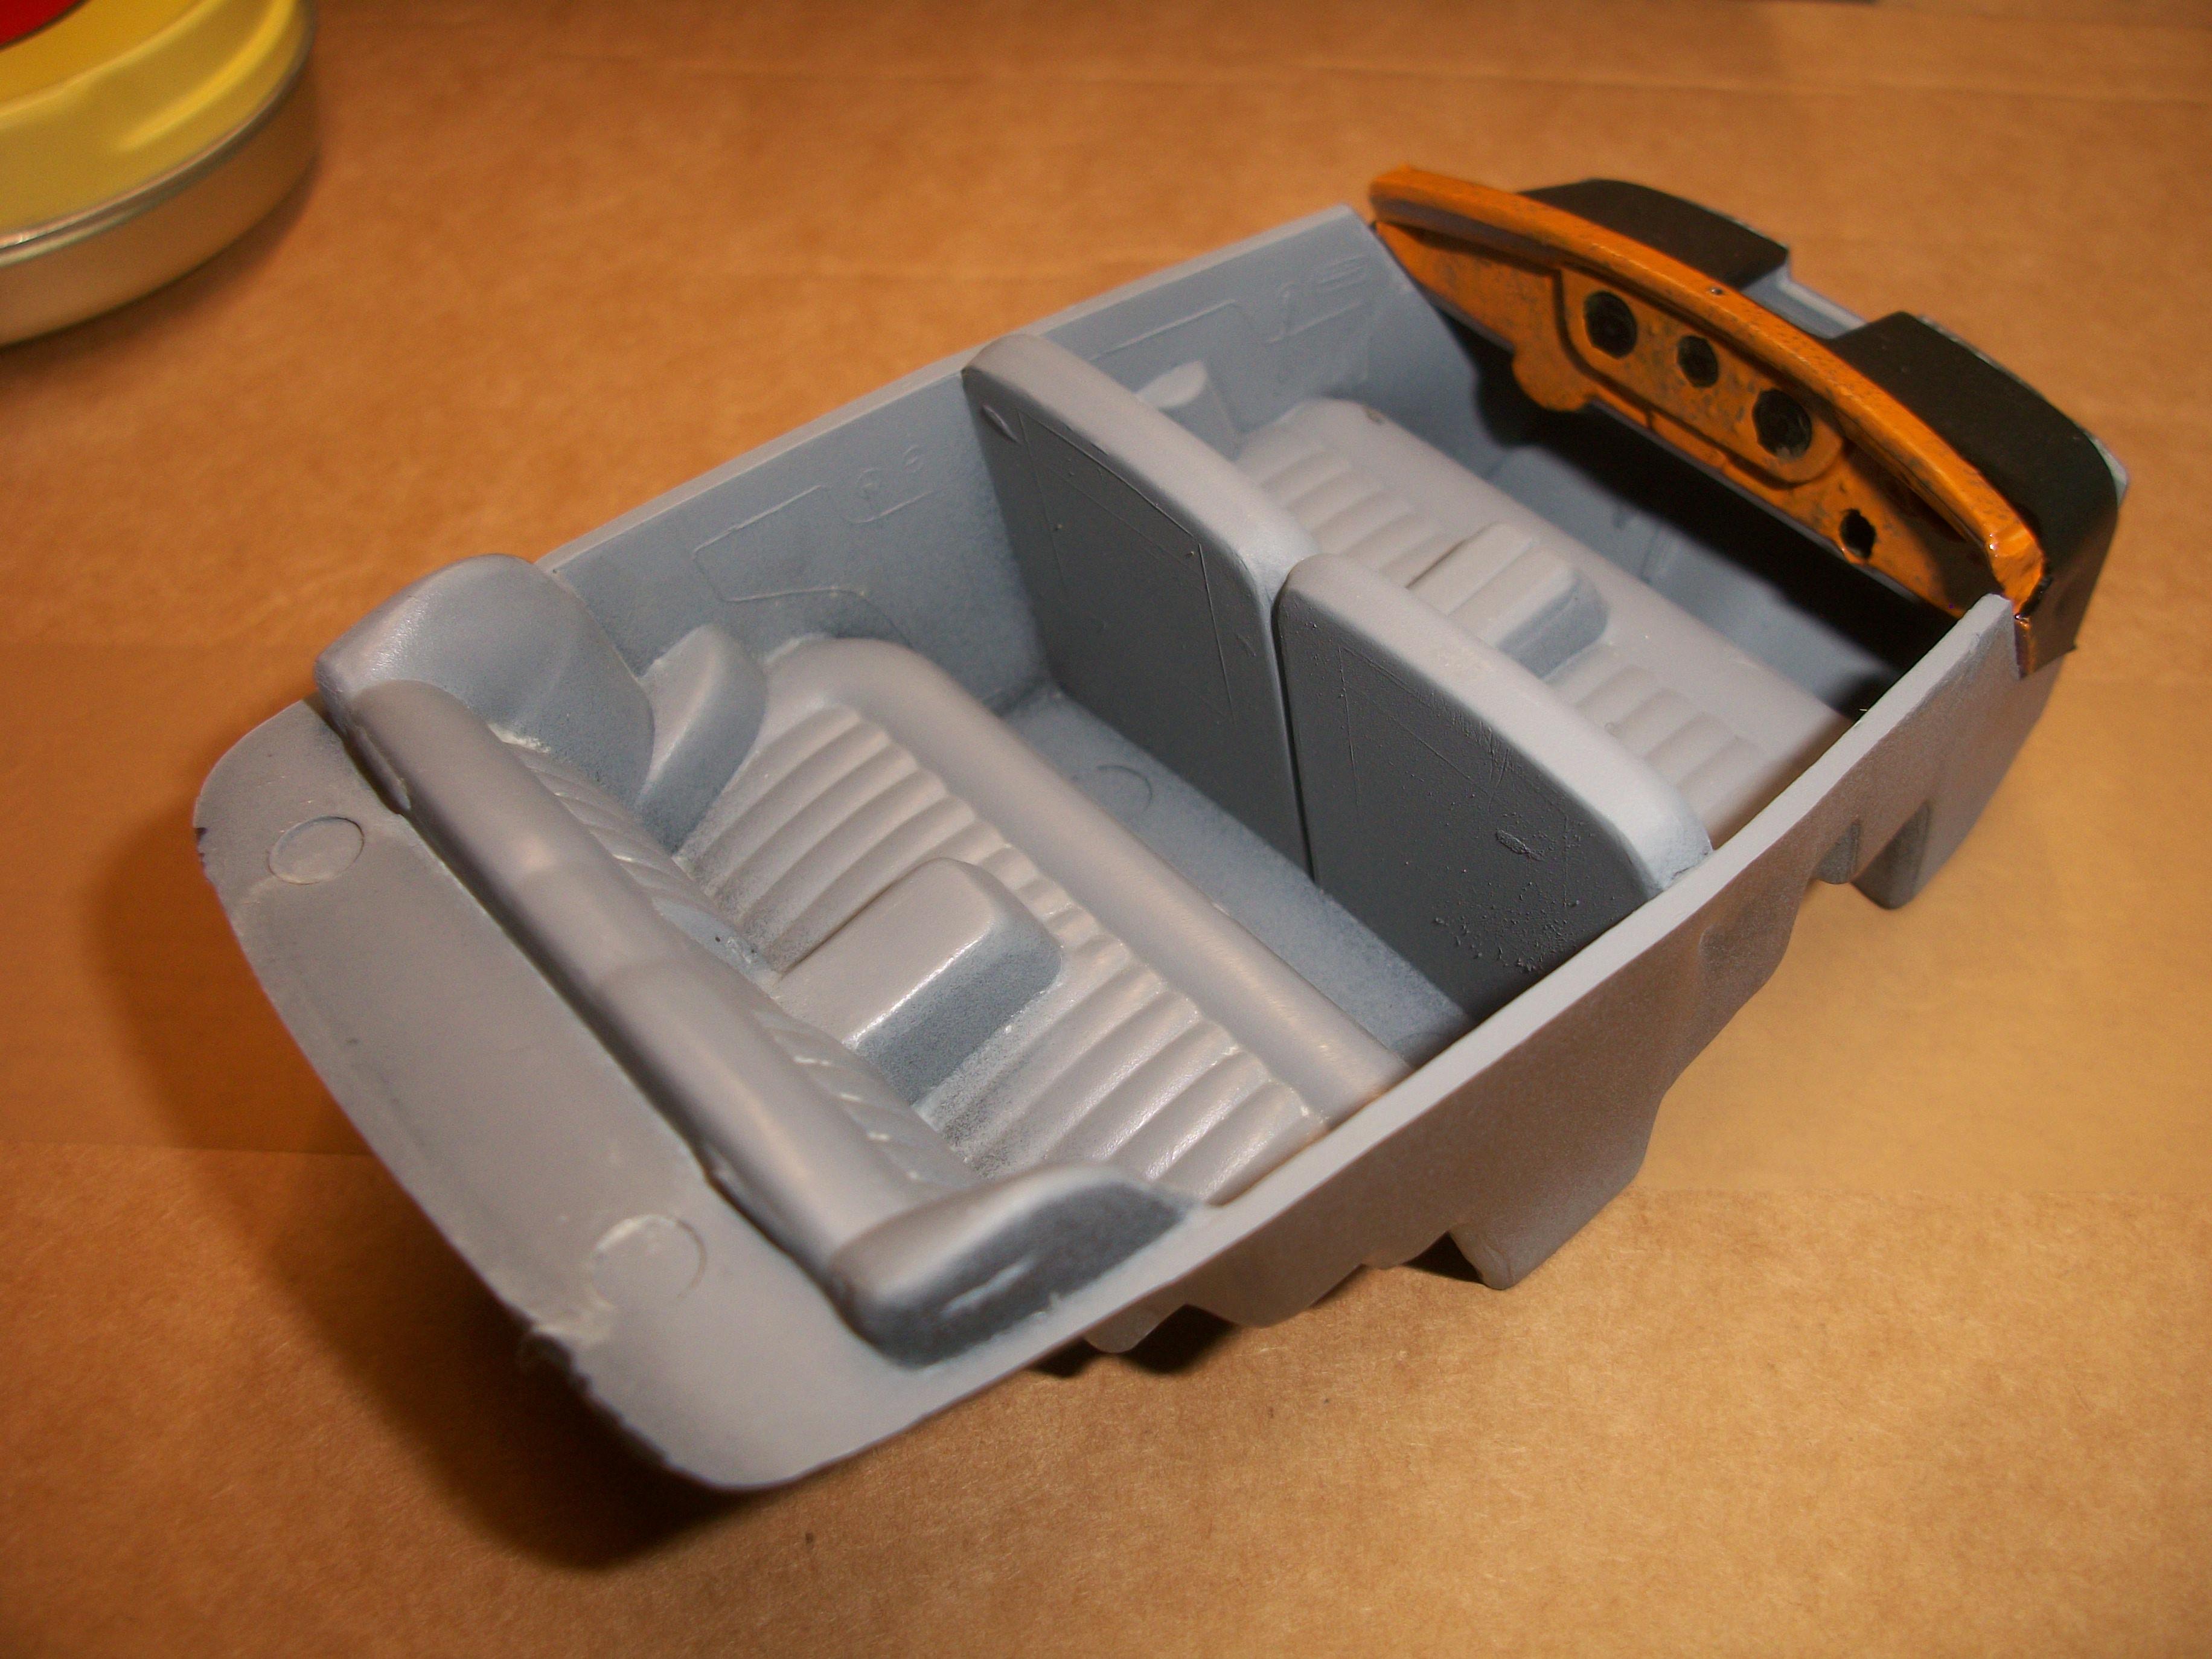
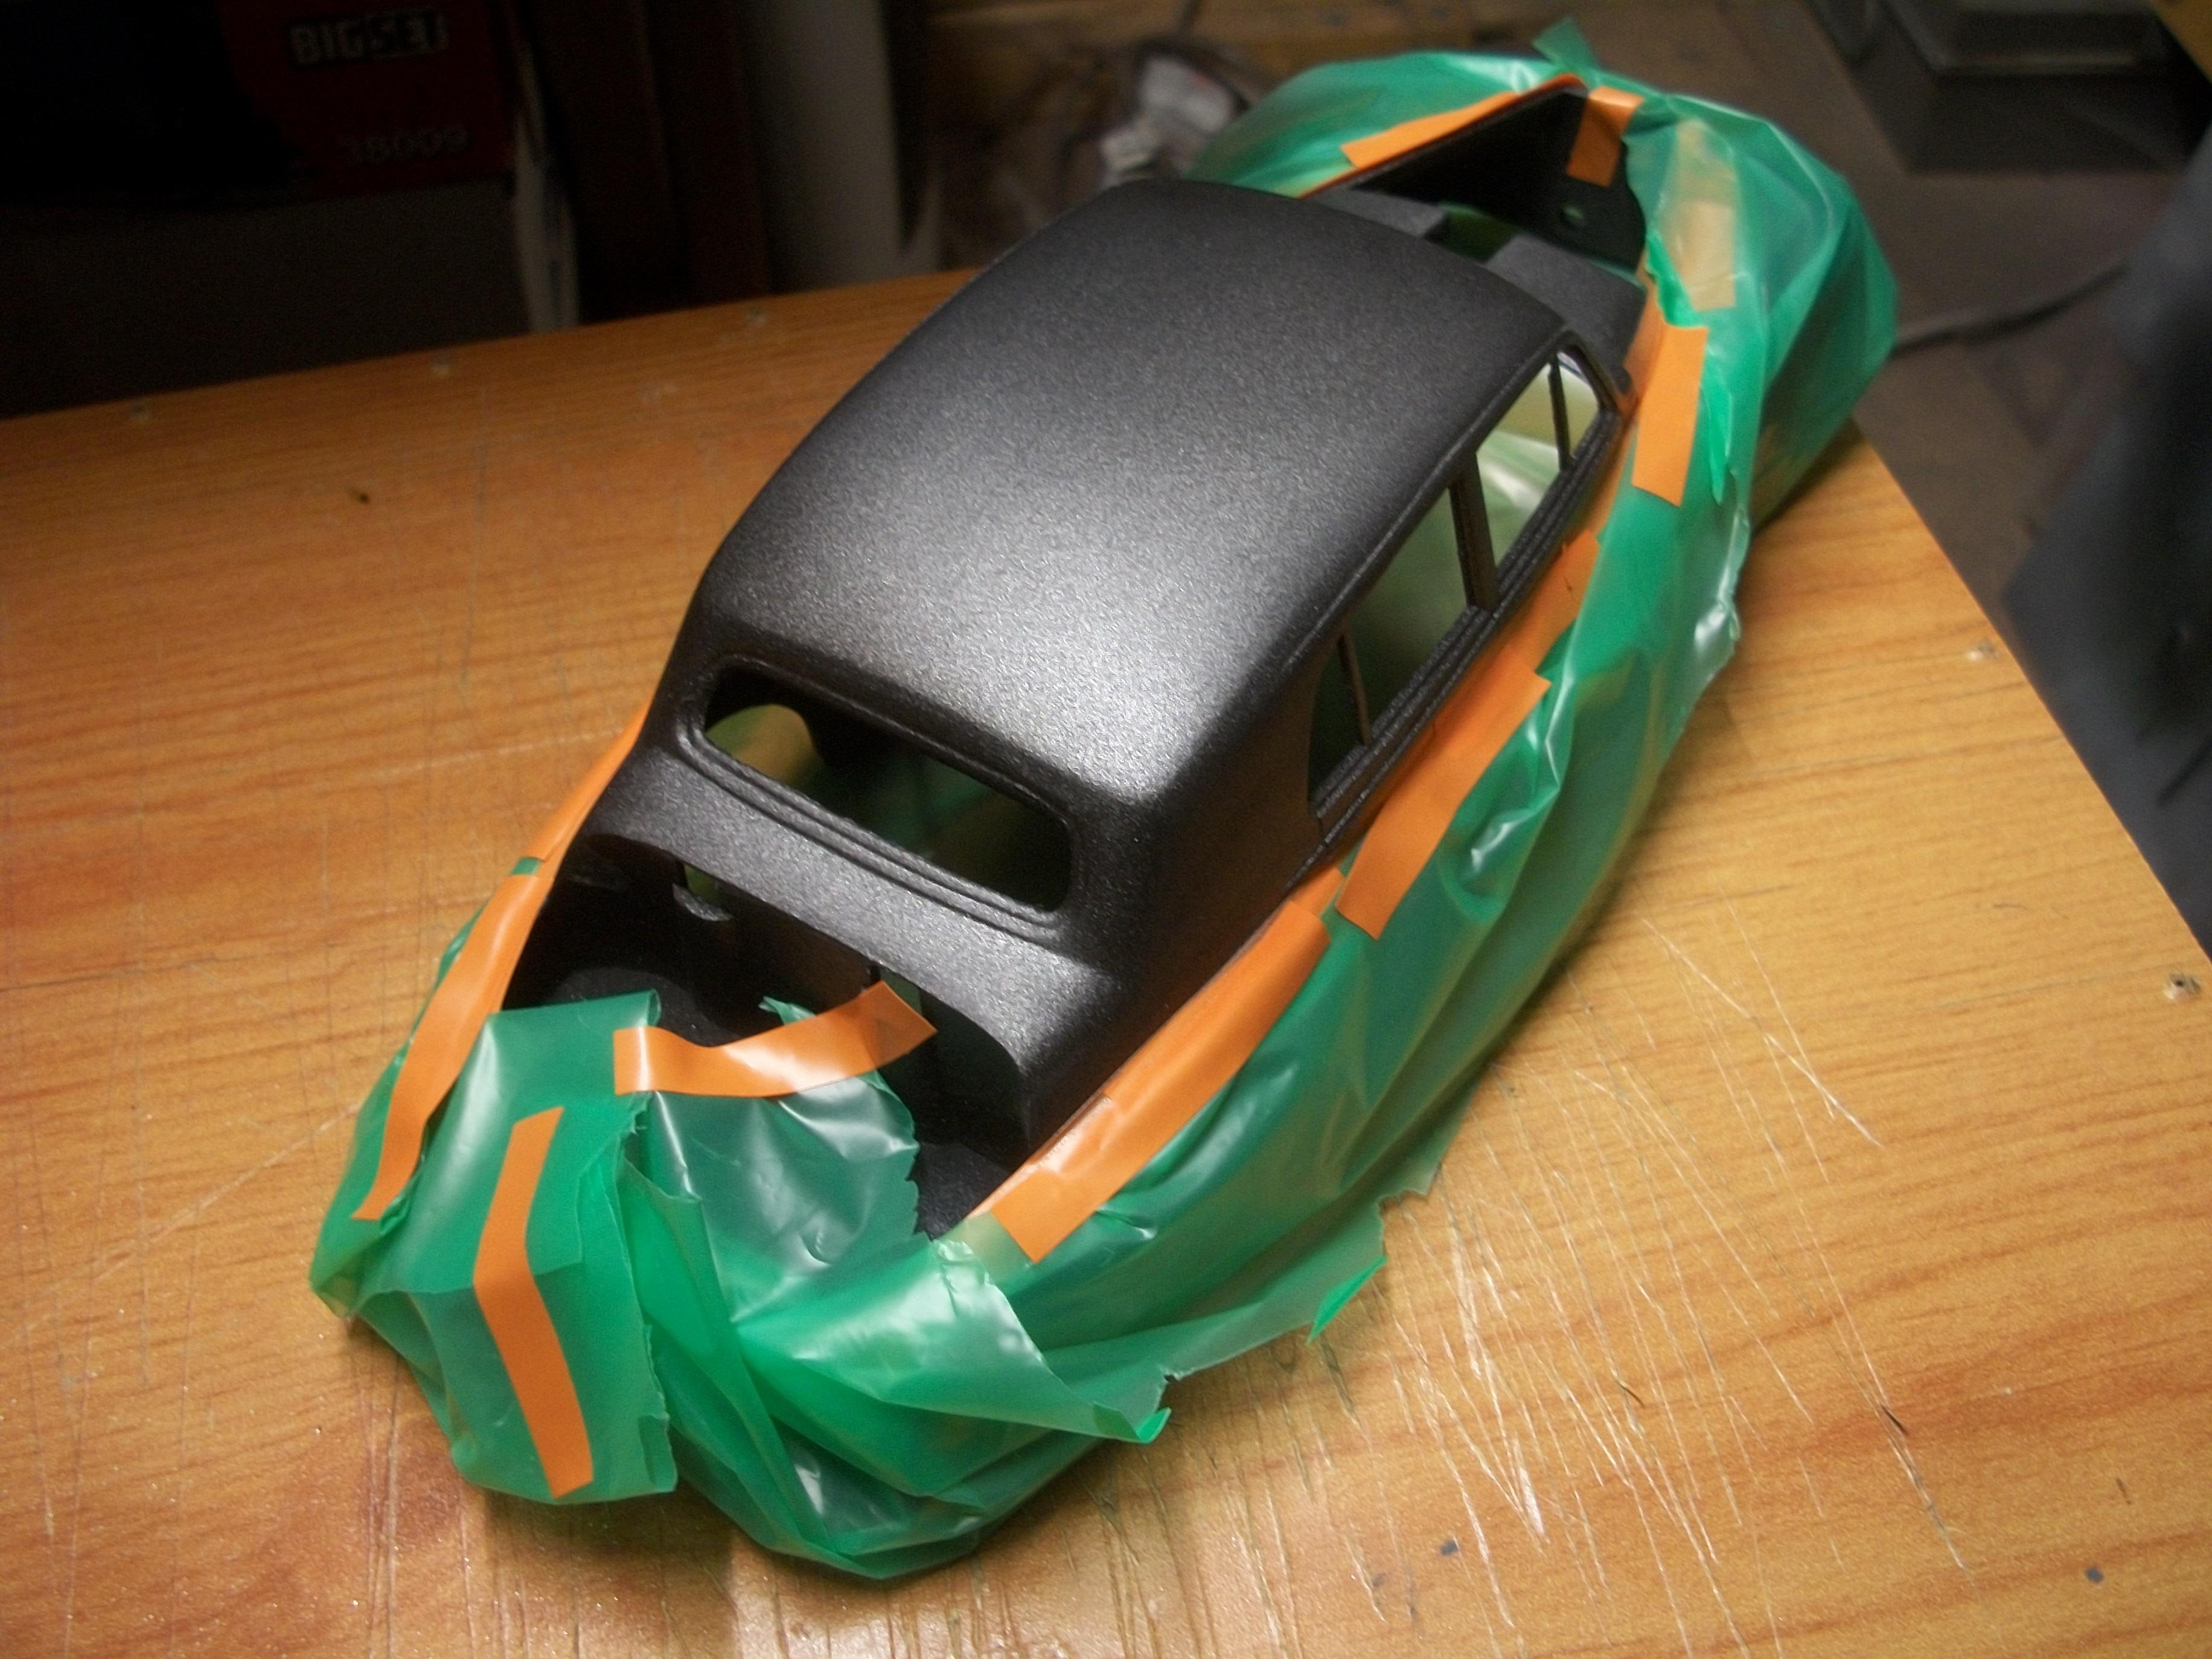
You should be okay Greg . . . and here are a few photos of a 1958 Rolls-Royce Silver Cloud I with a two-tone paint finish, which is Shell Grey (metallic) over Velvet Green (solid) . . . As Leroy mentioned above, use a good automotive pinstriping tape for the masking, like the orange tape in my photos. Both paints for my build were cellulose autopaint from rattle can (custom mixed by a good paint specialist). David

-
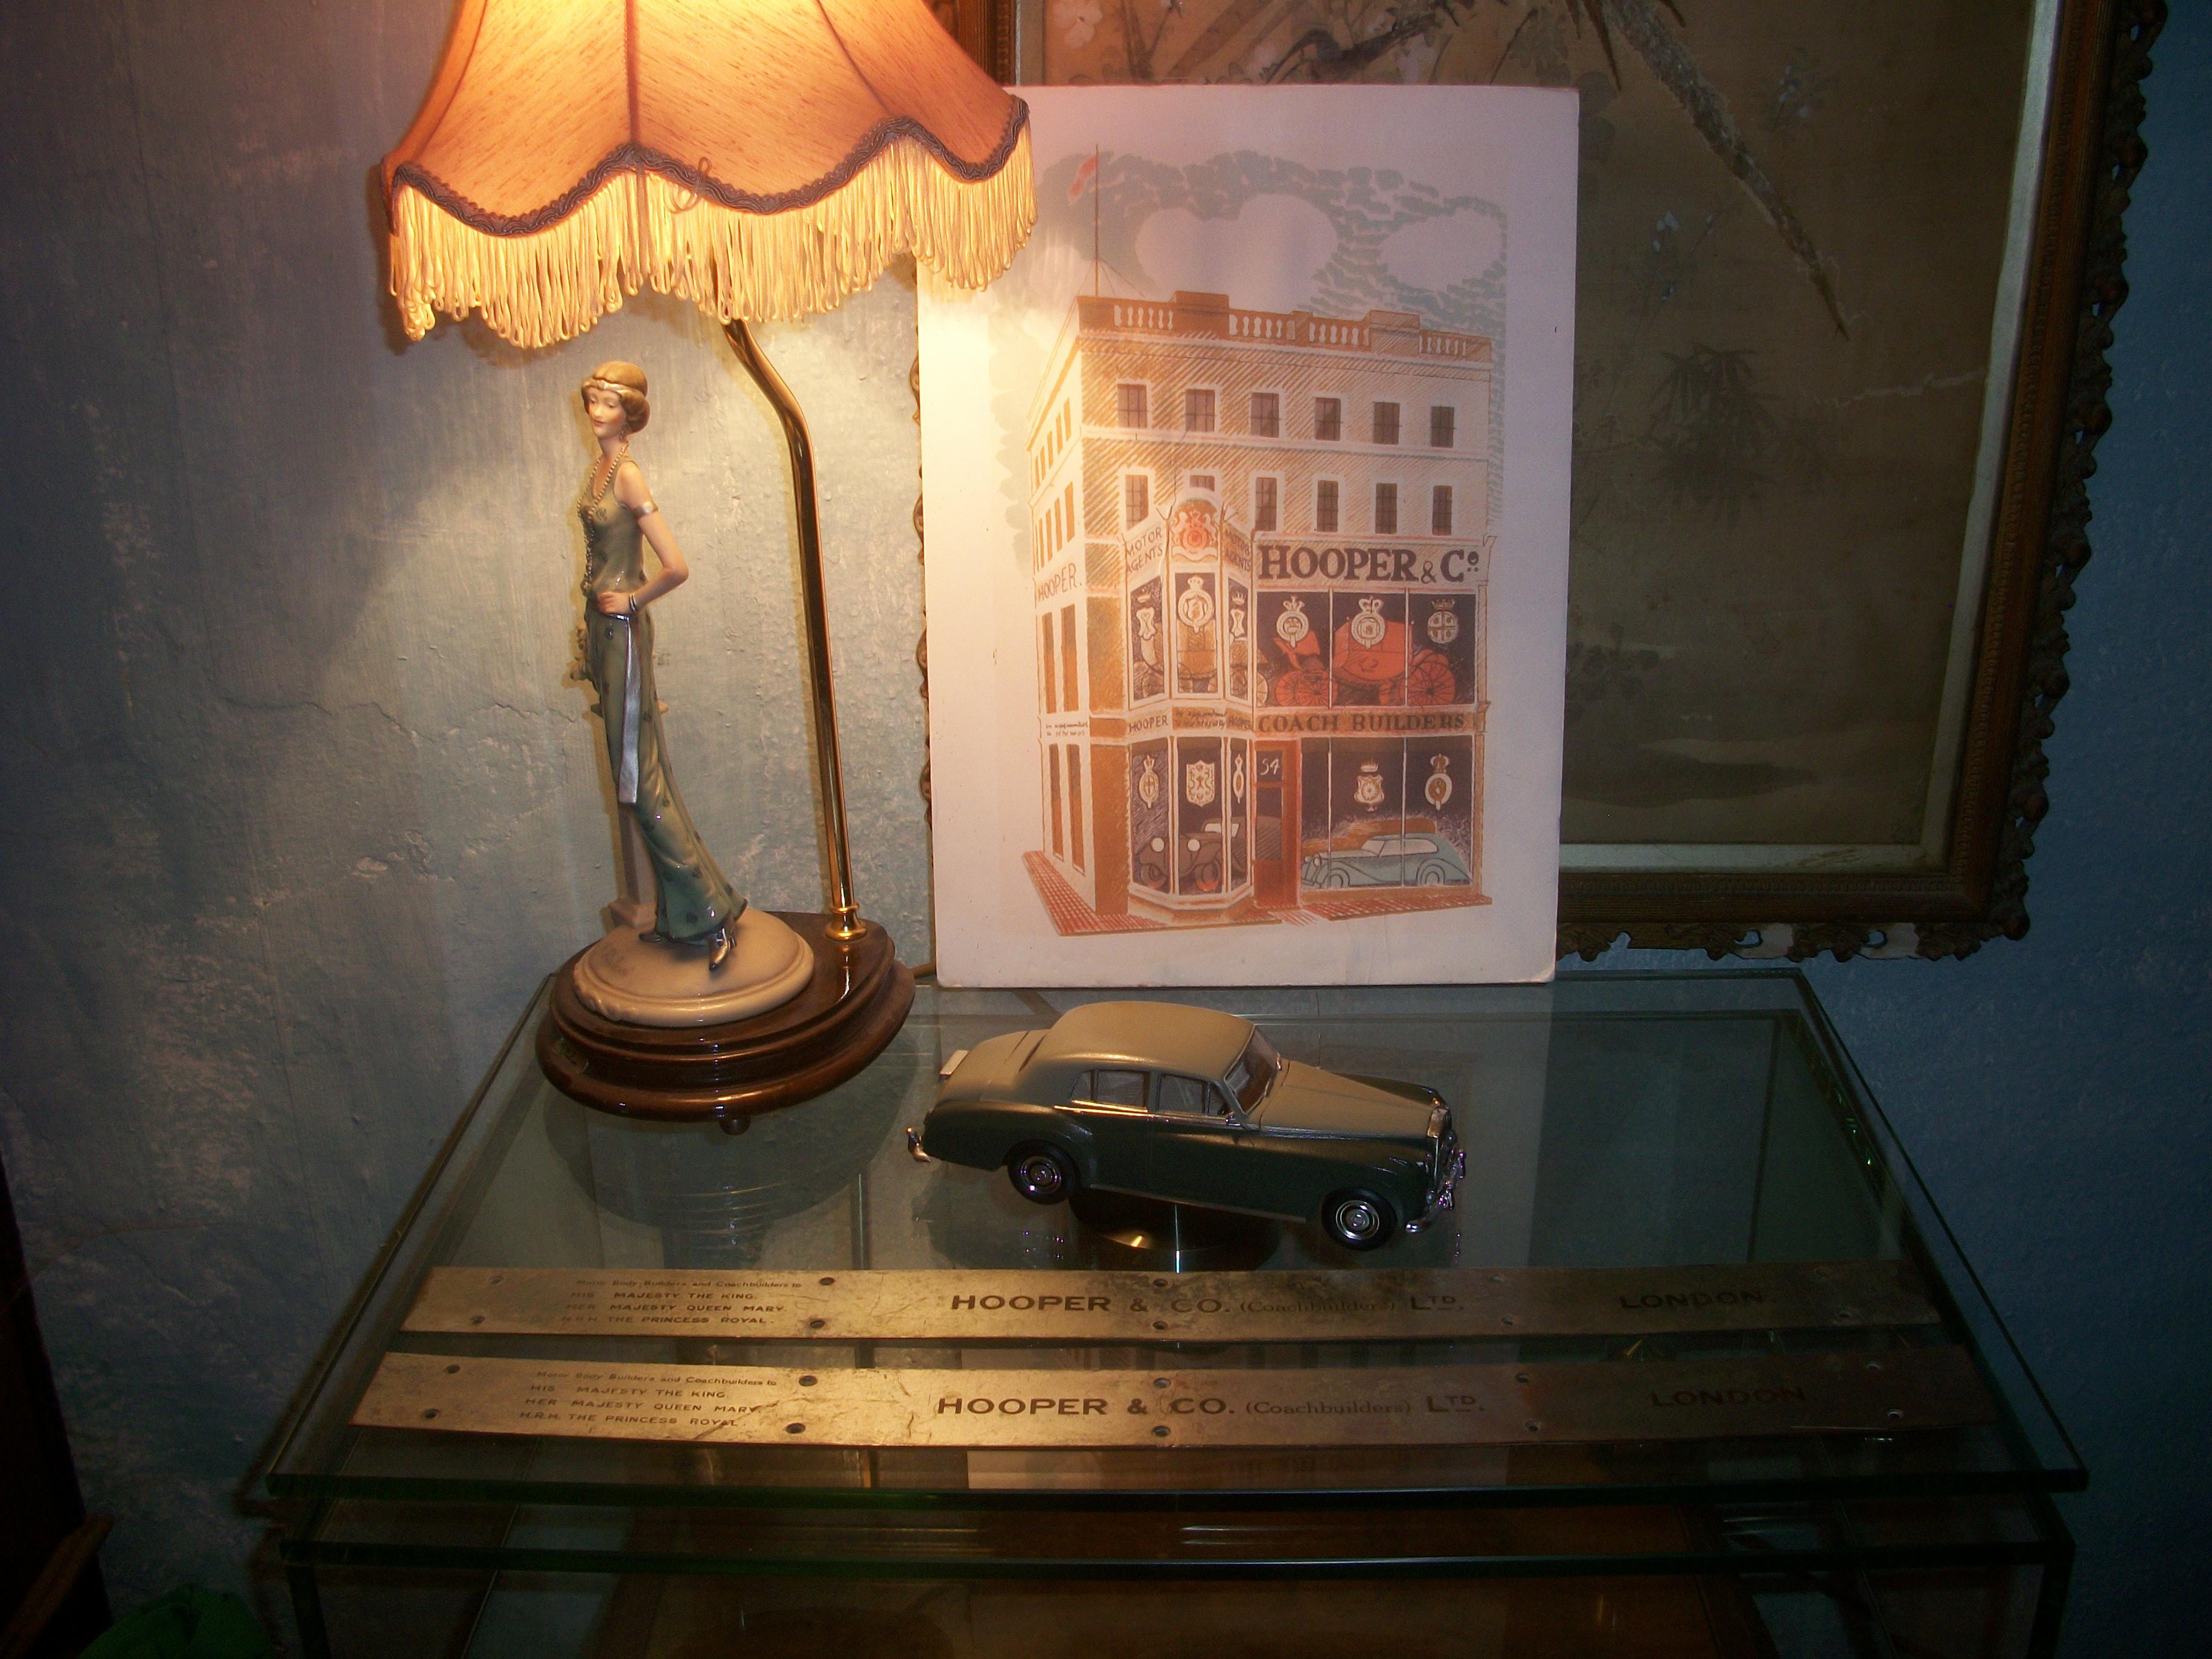
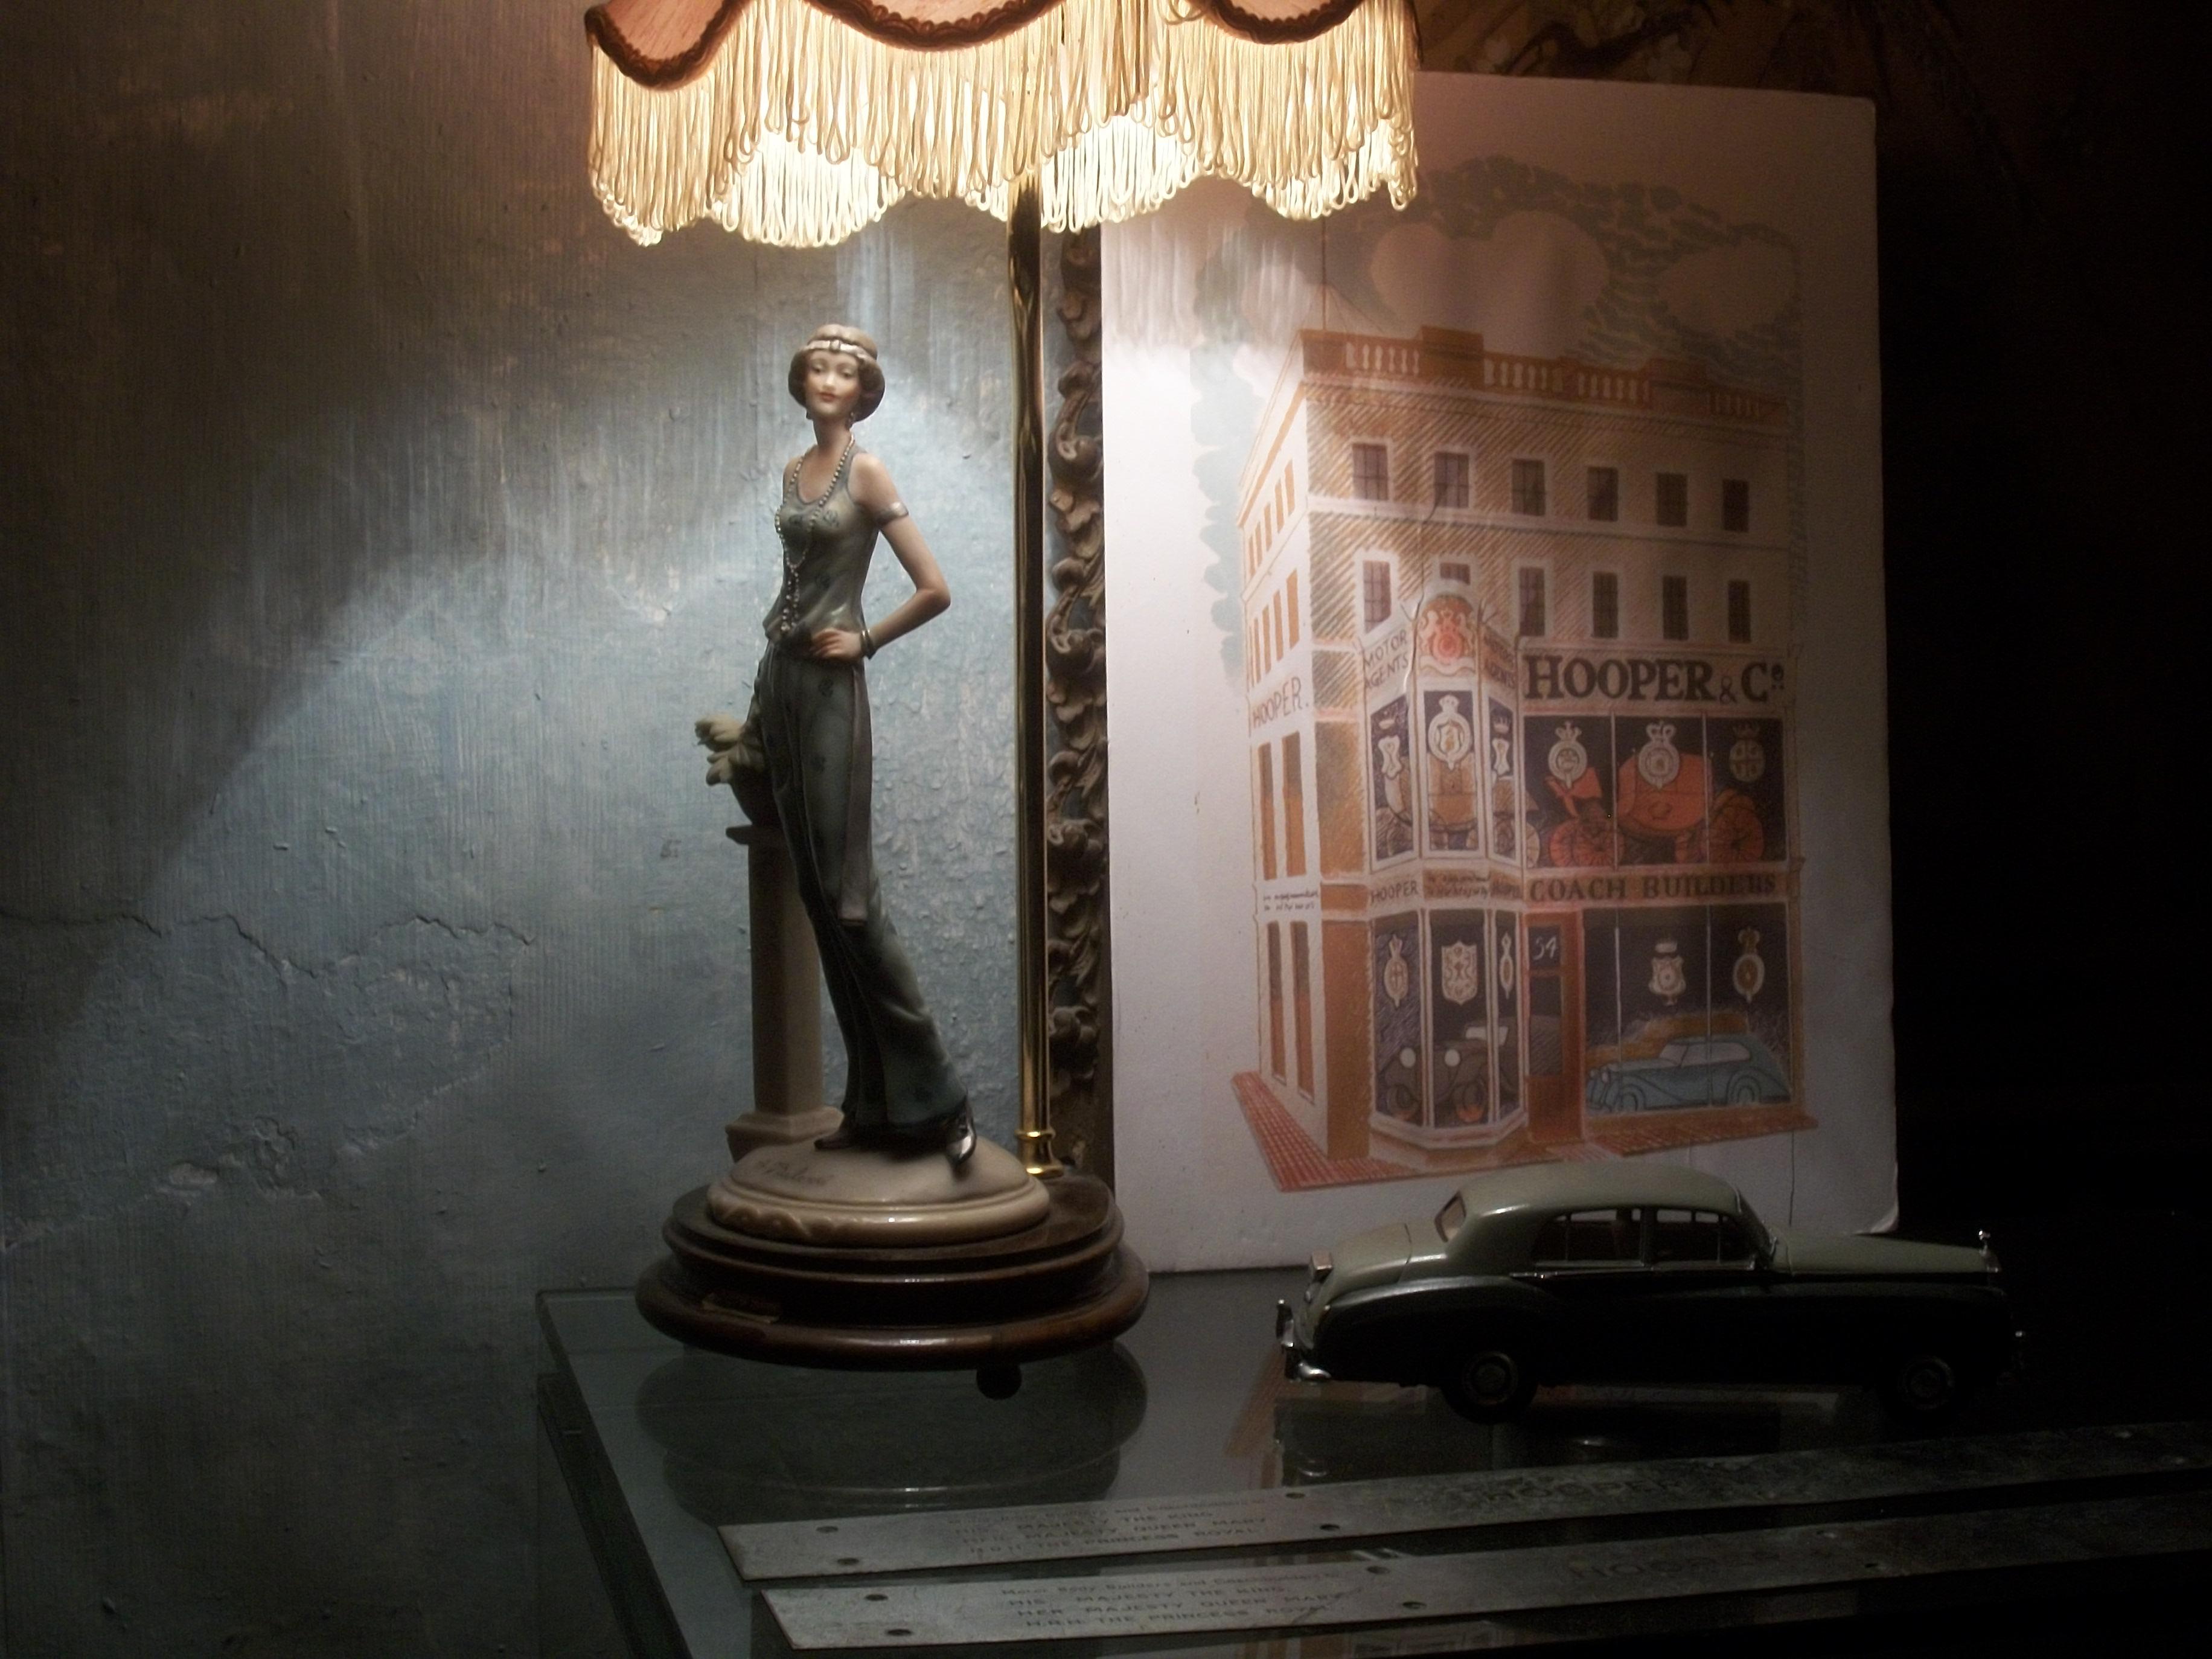
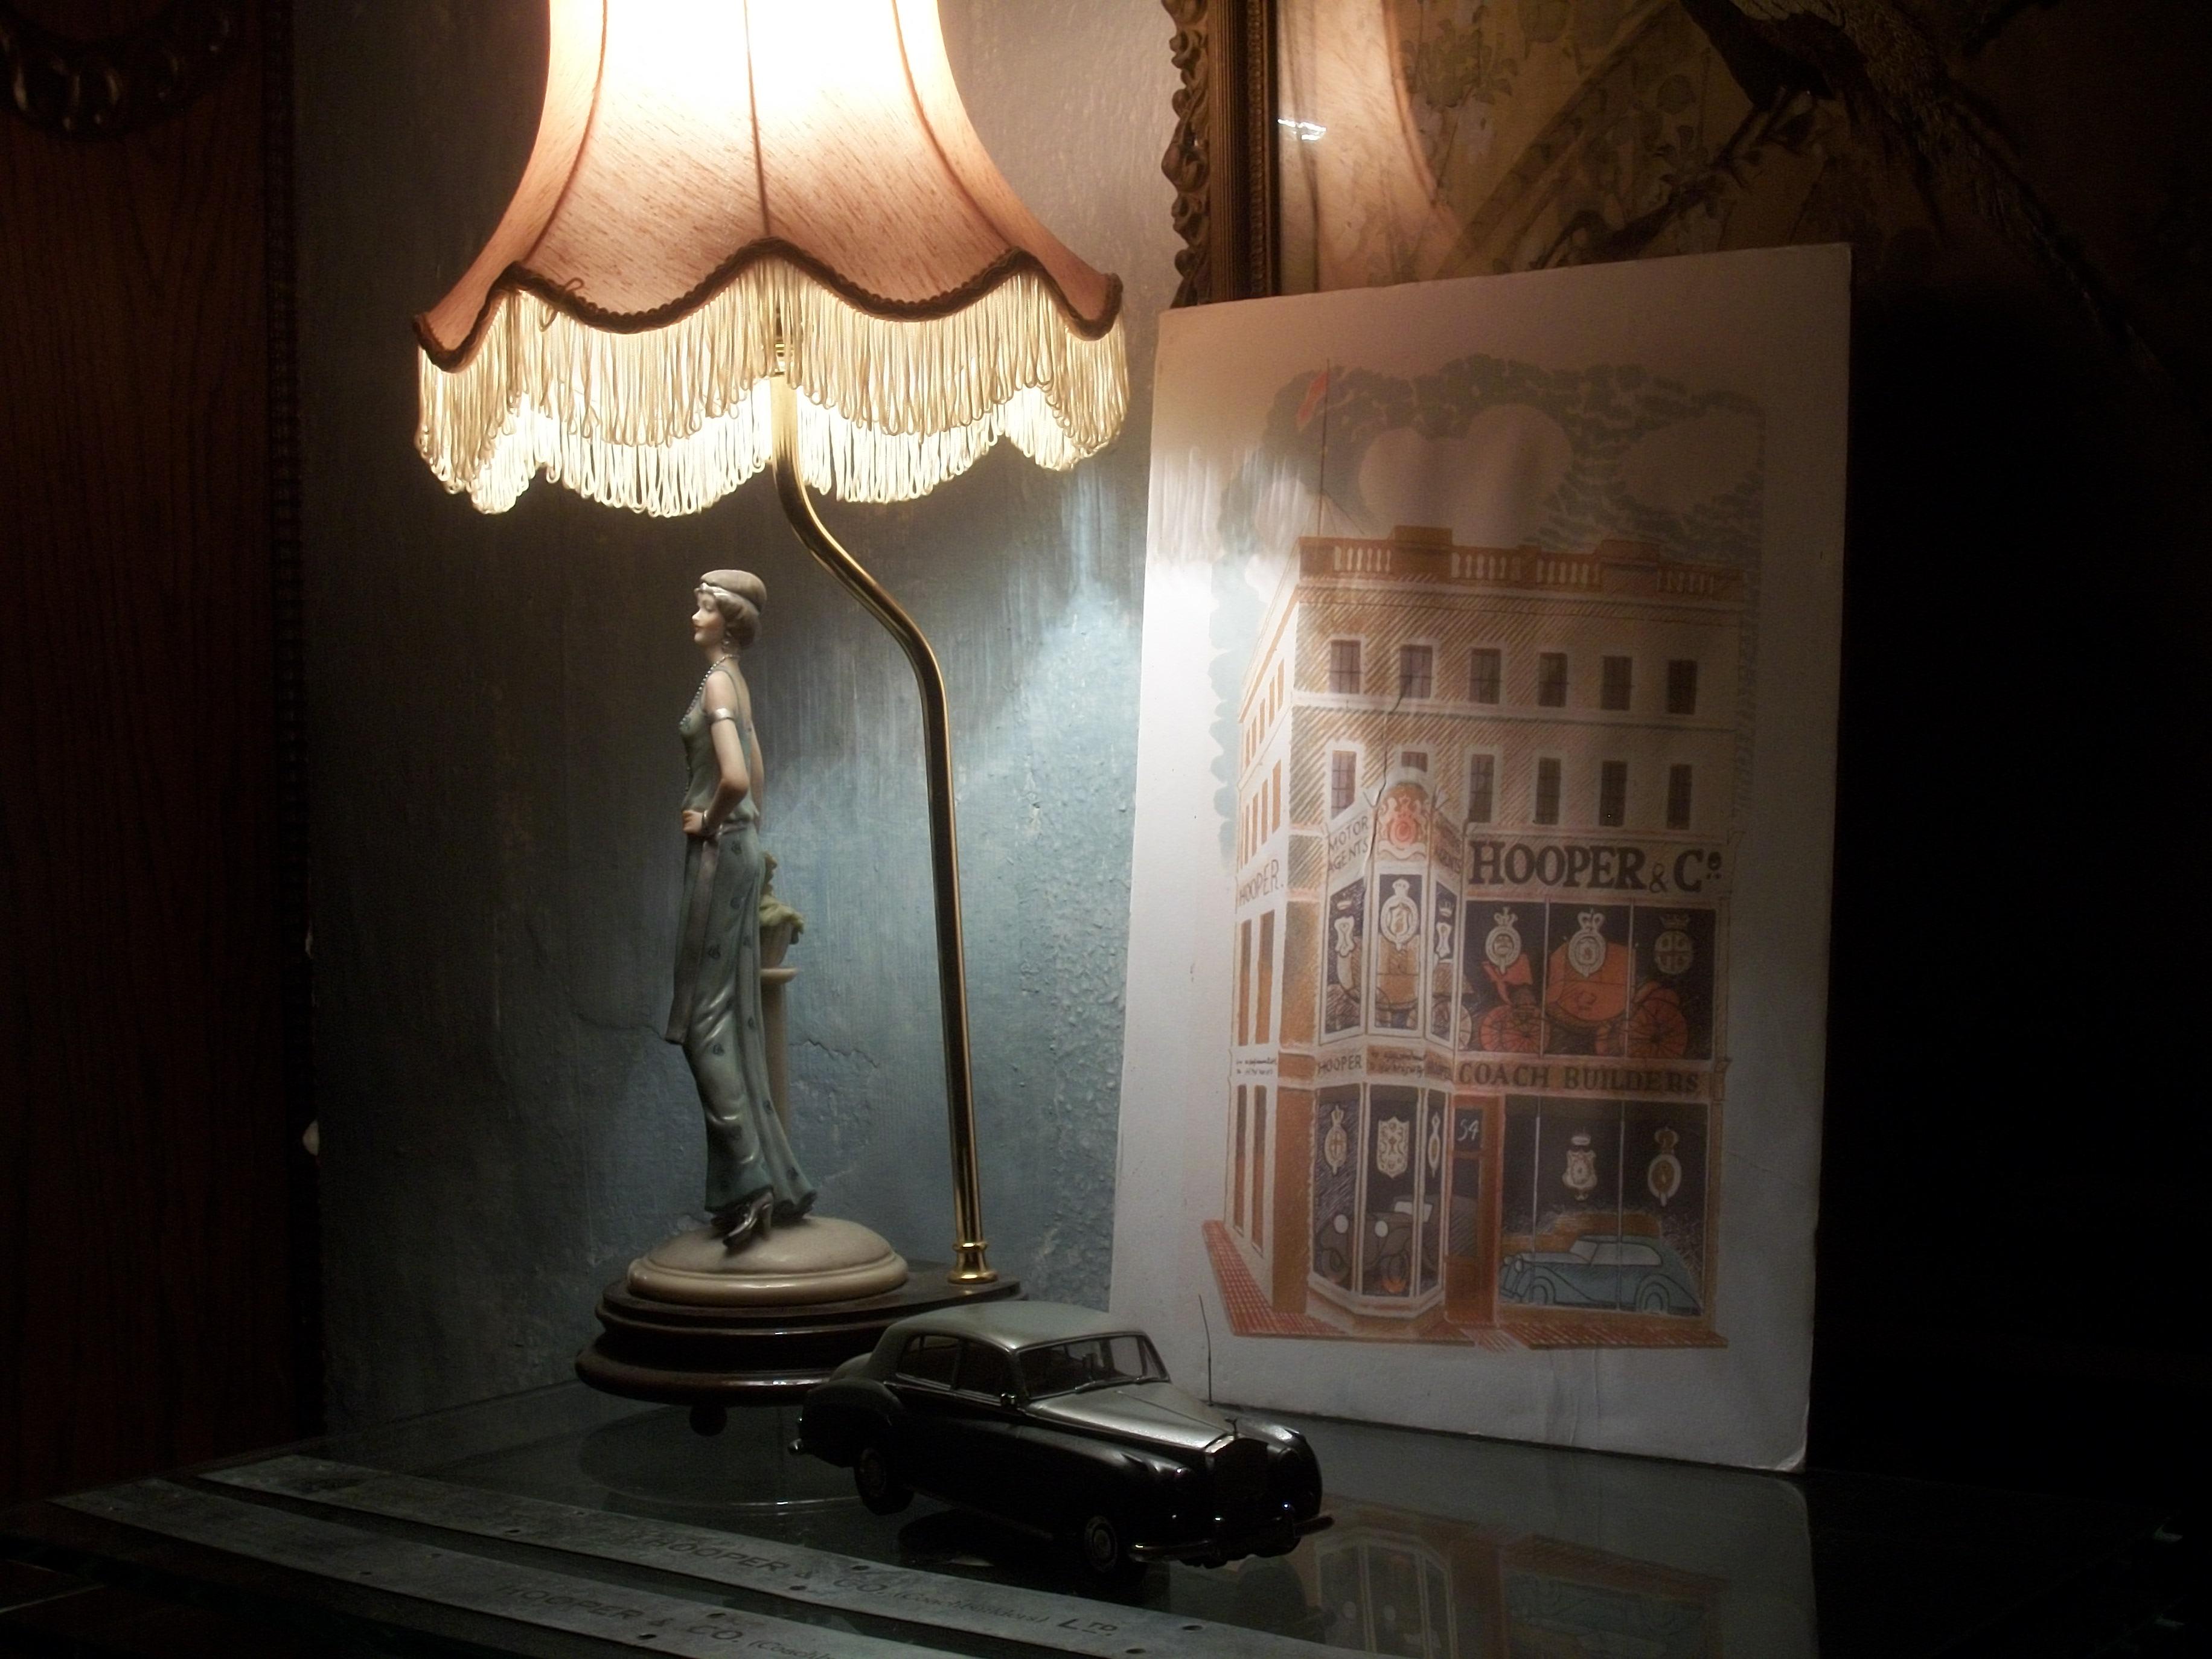
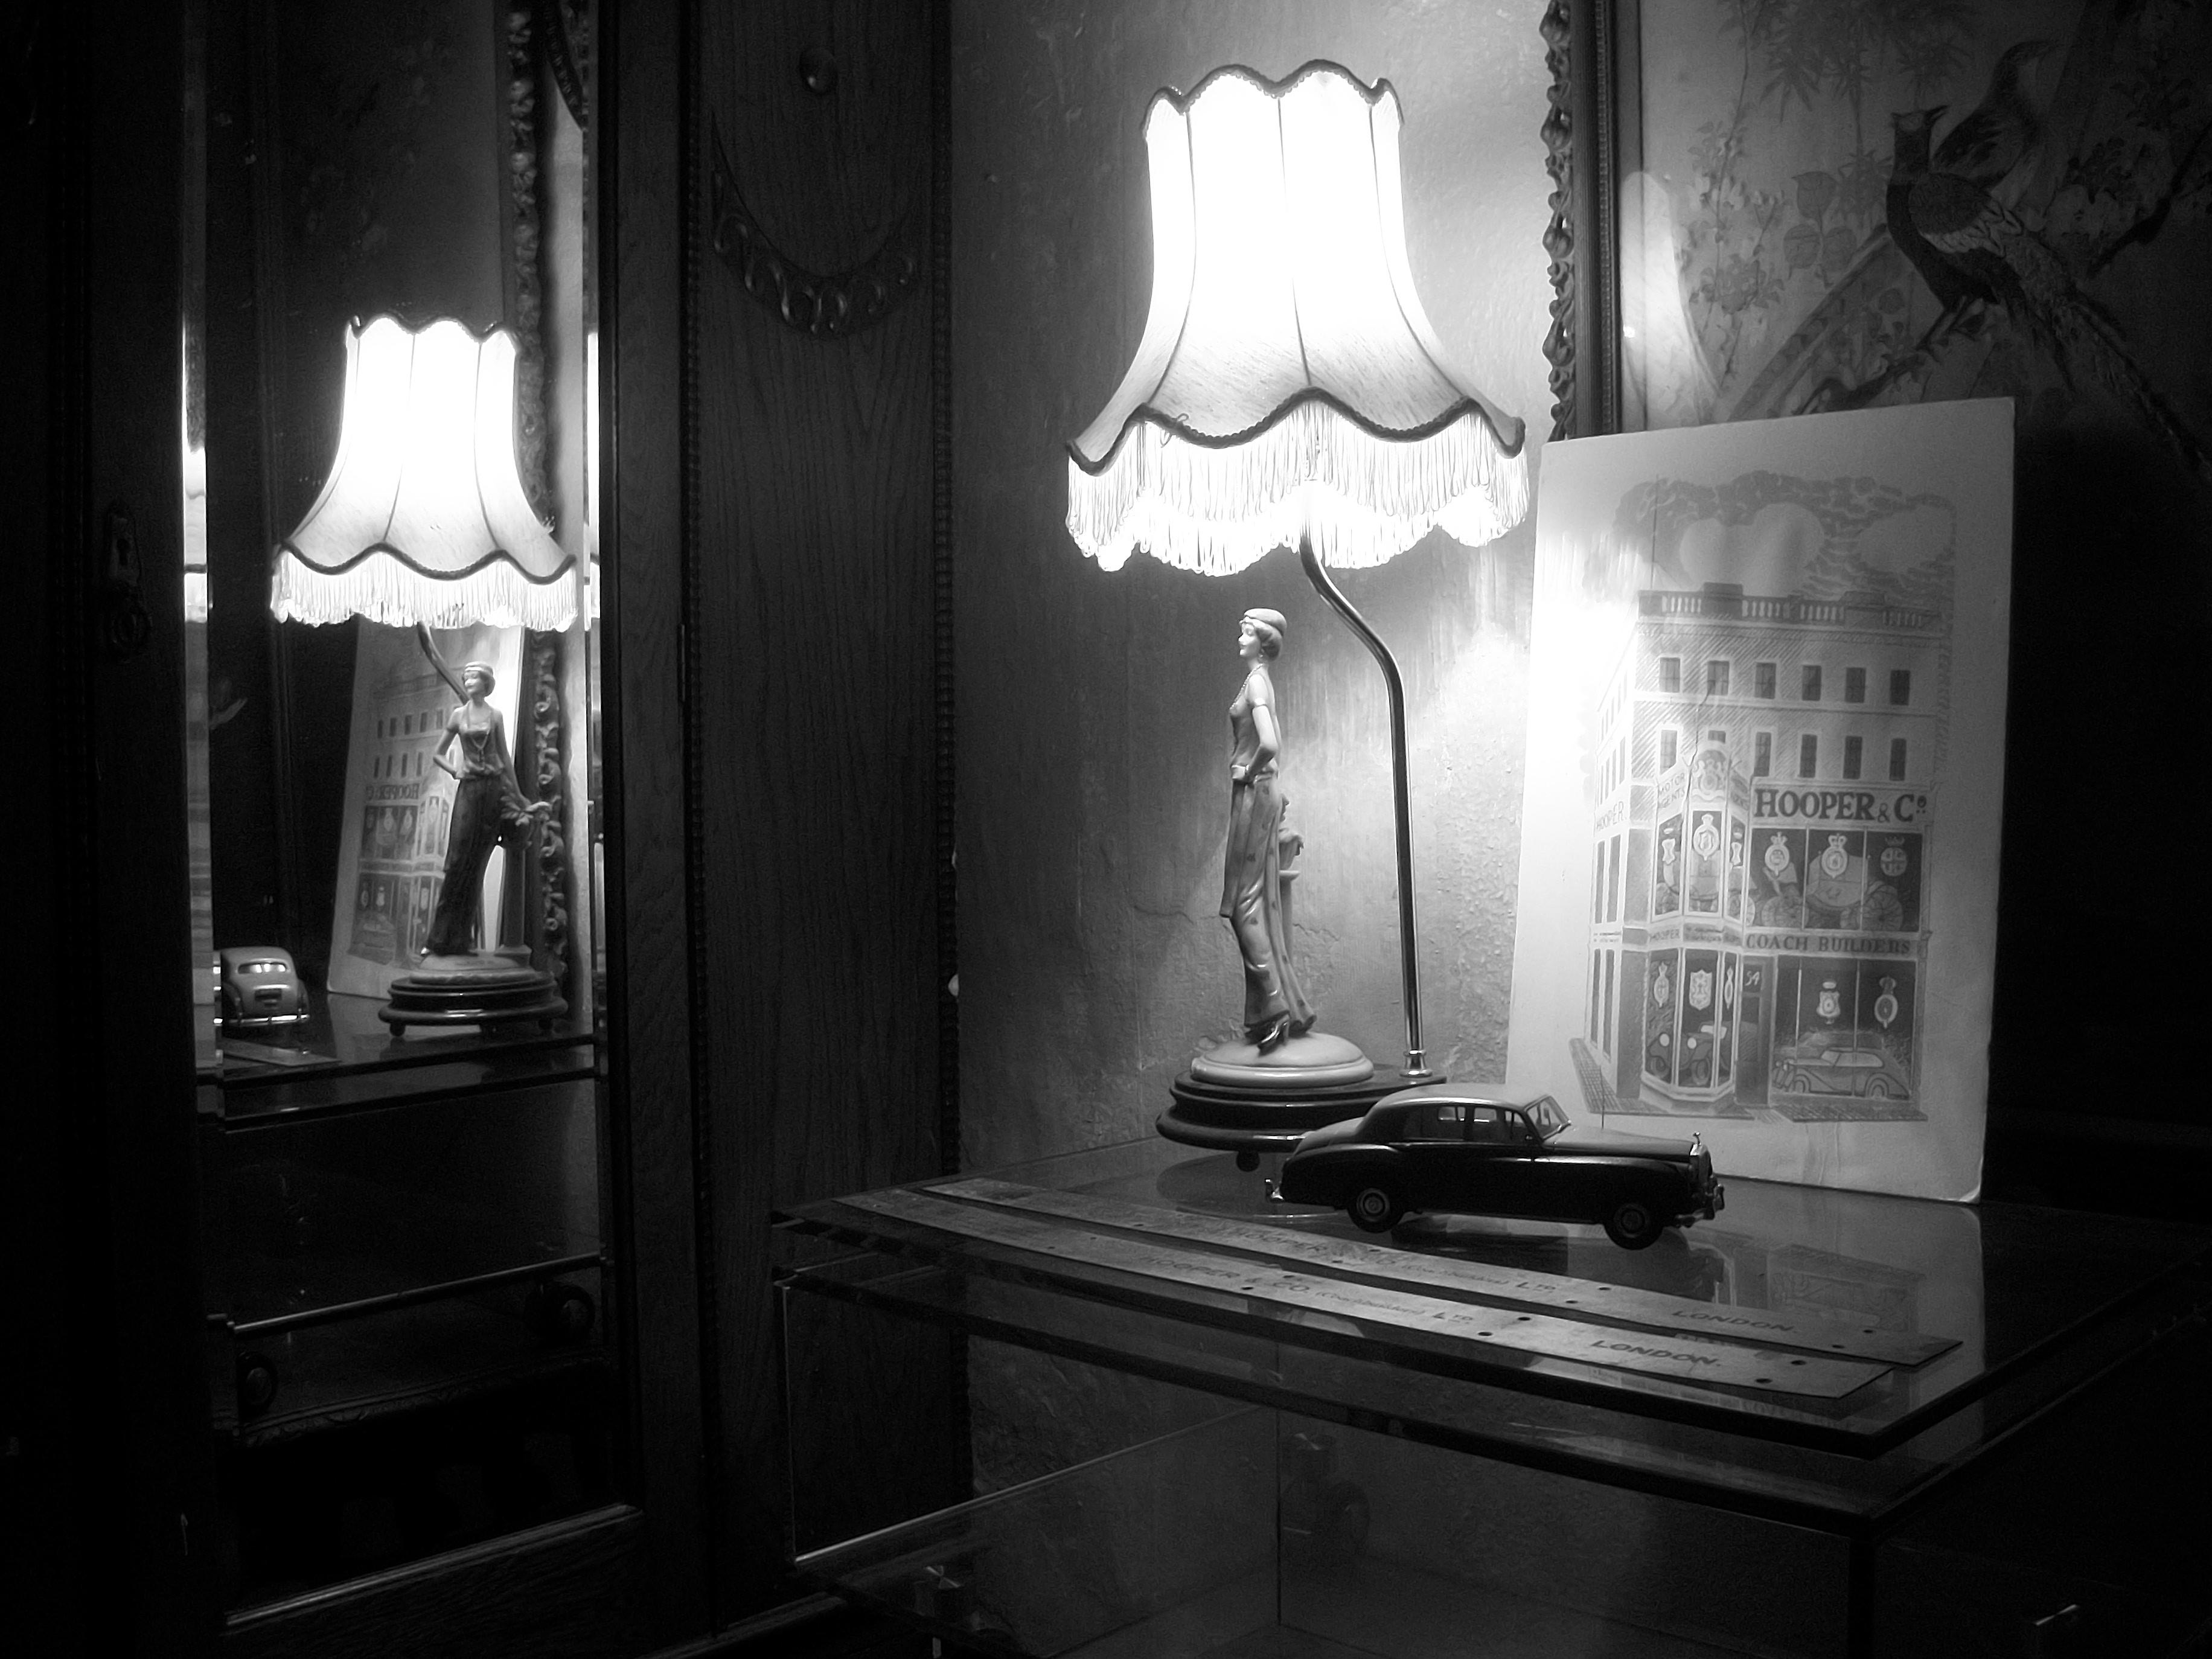
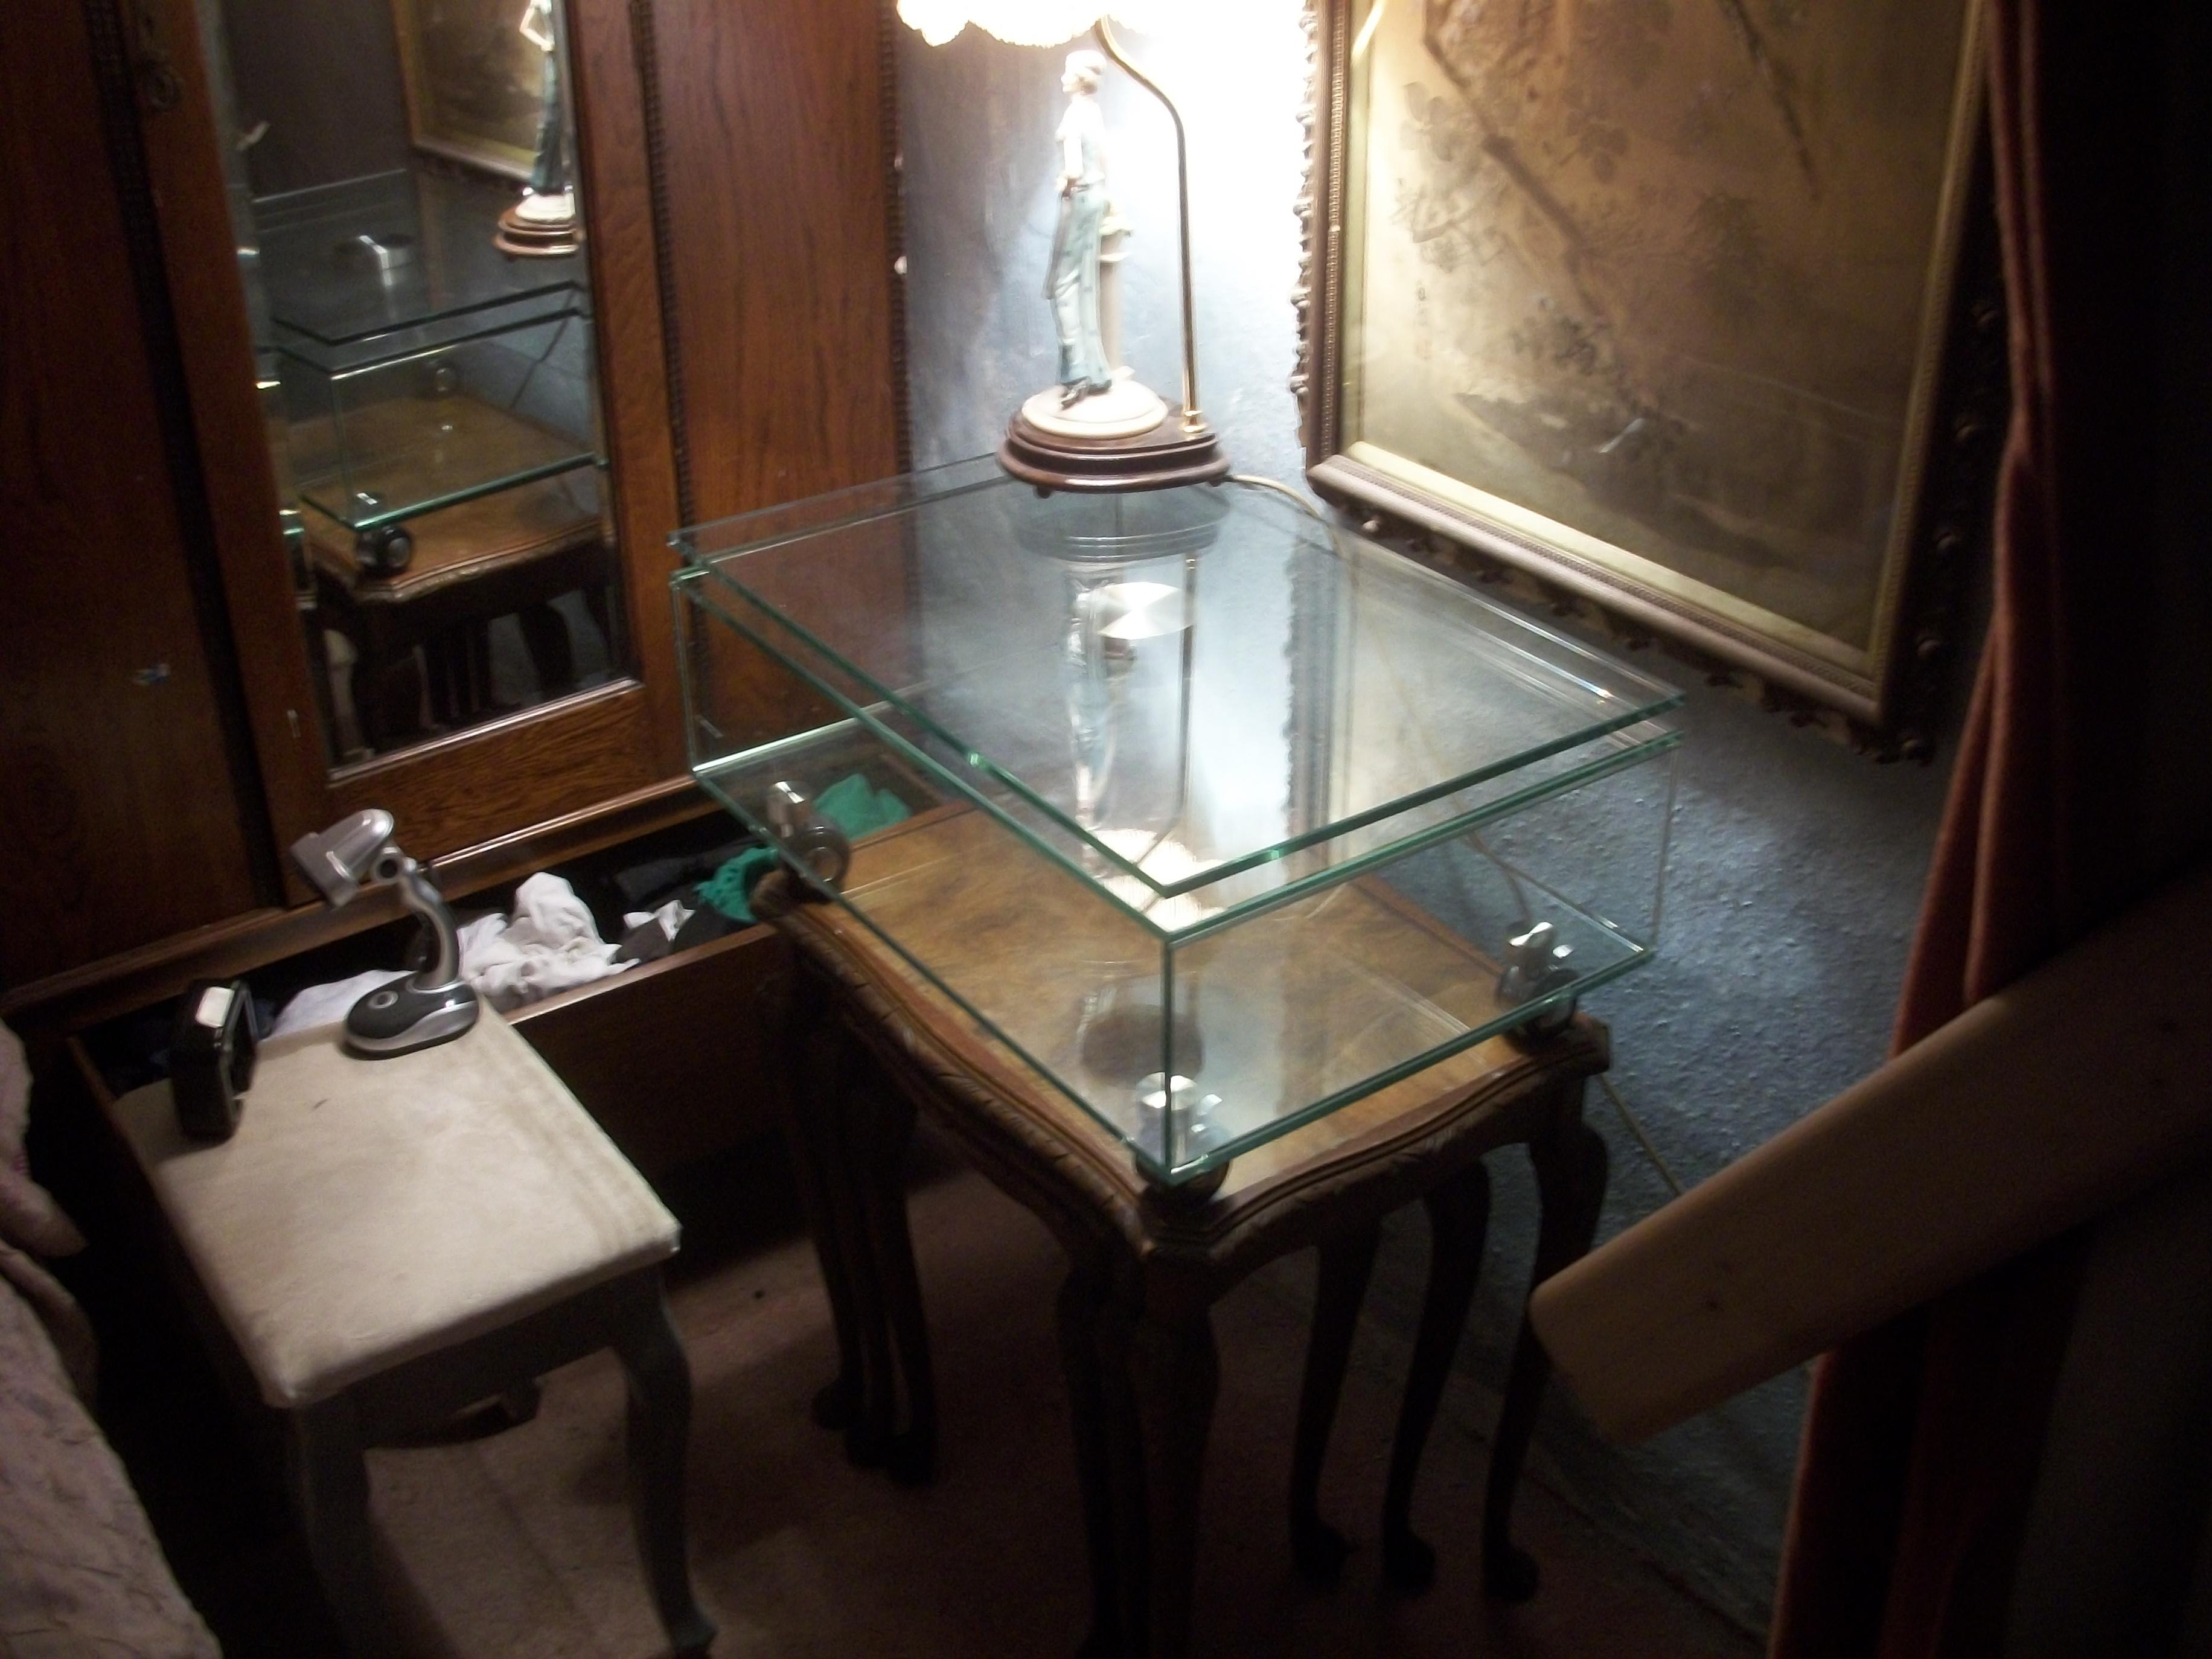
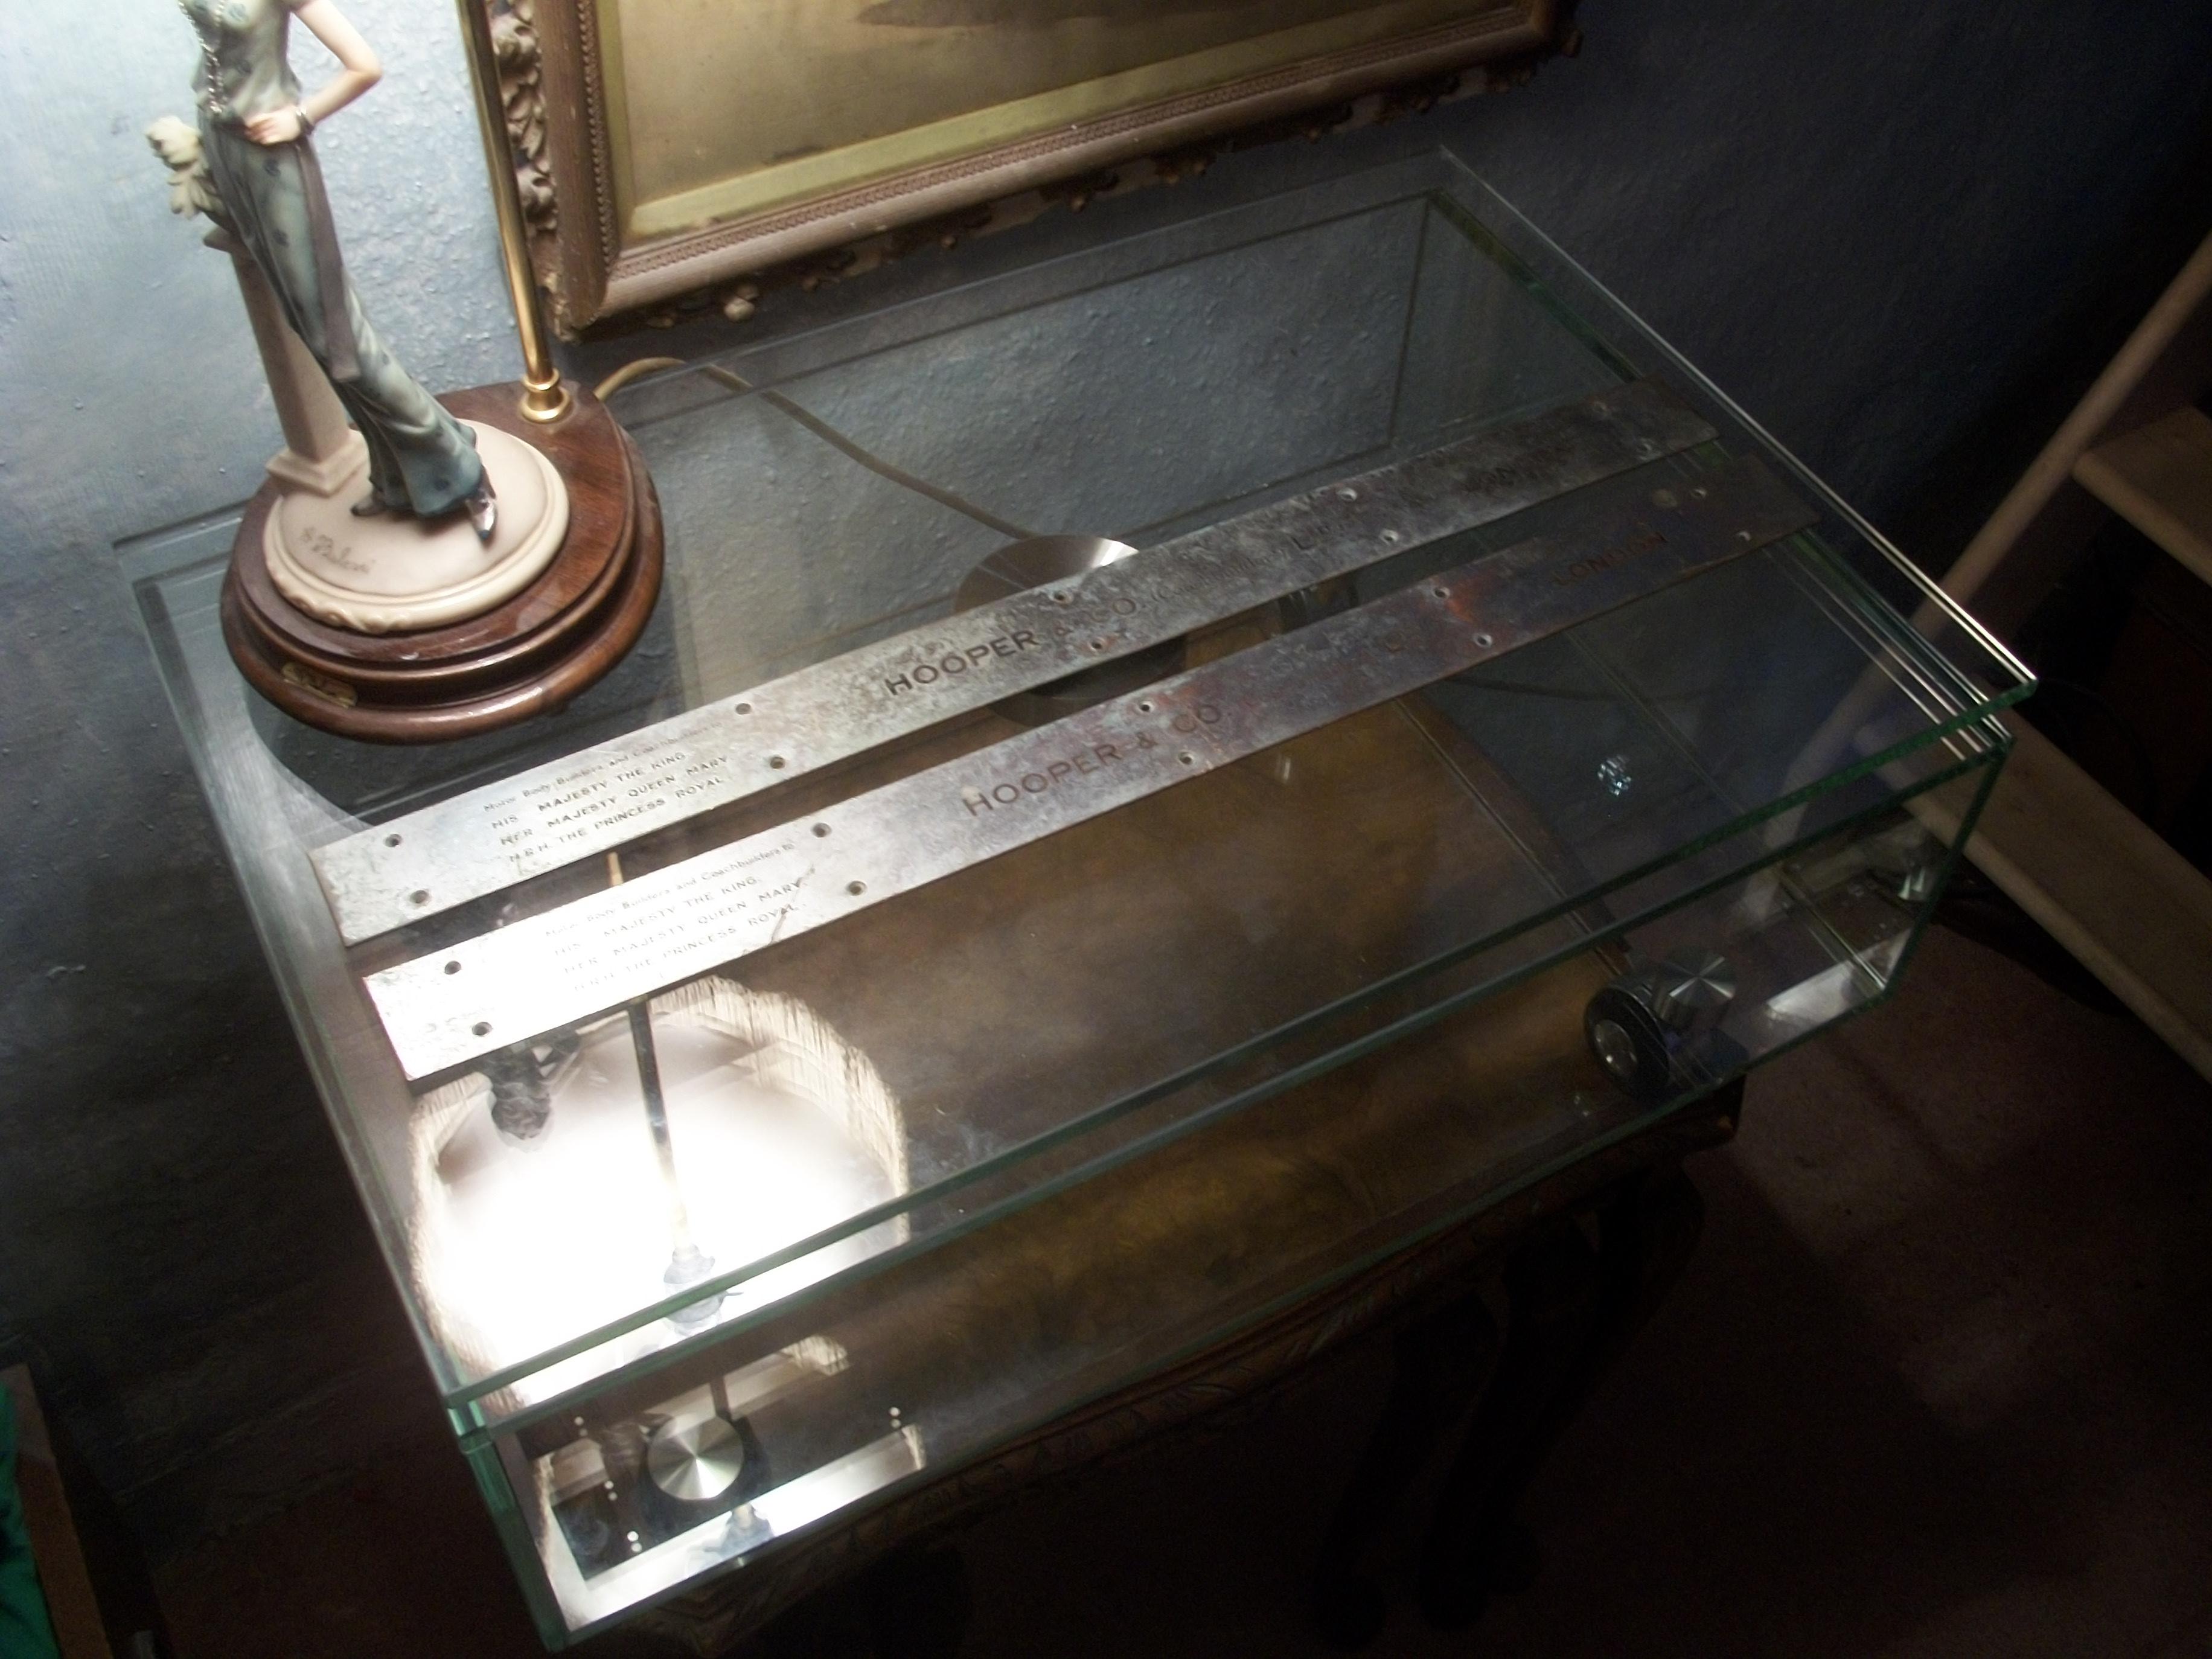
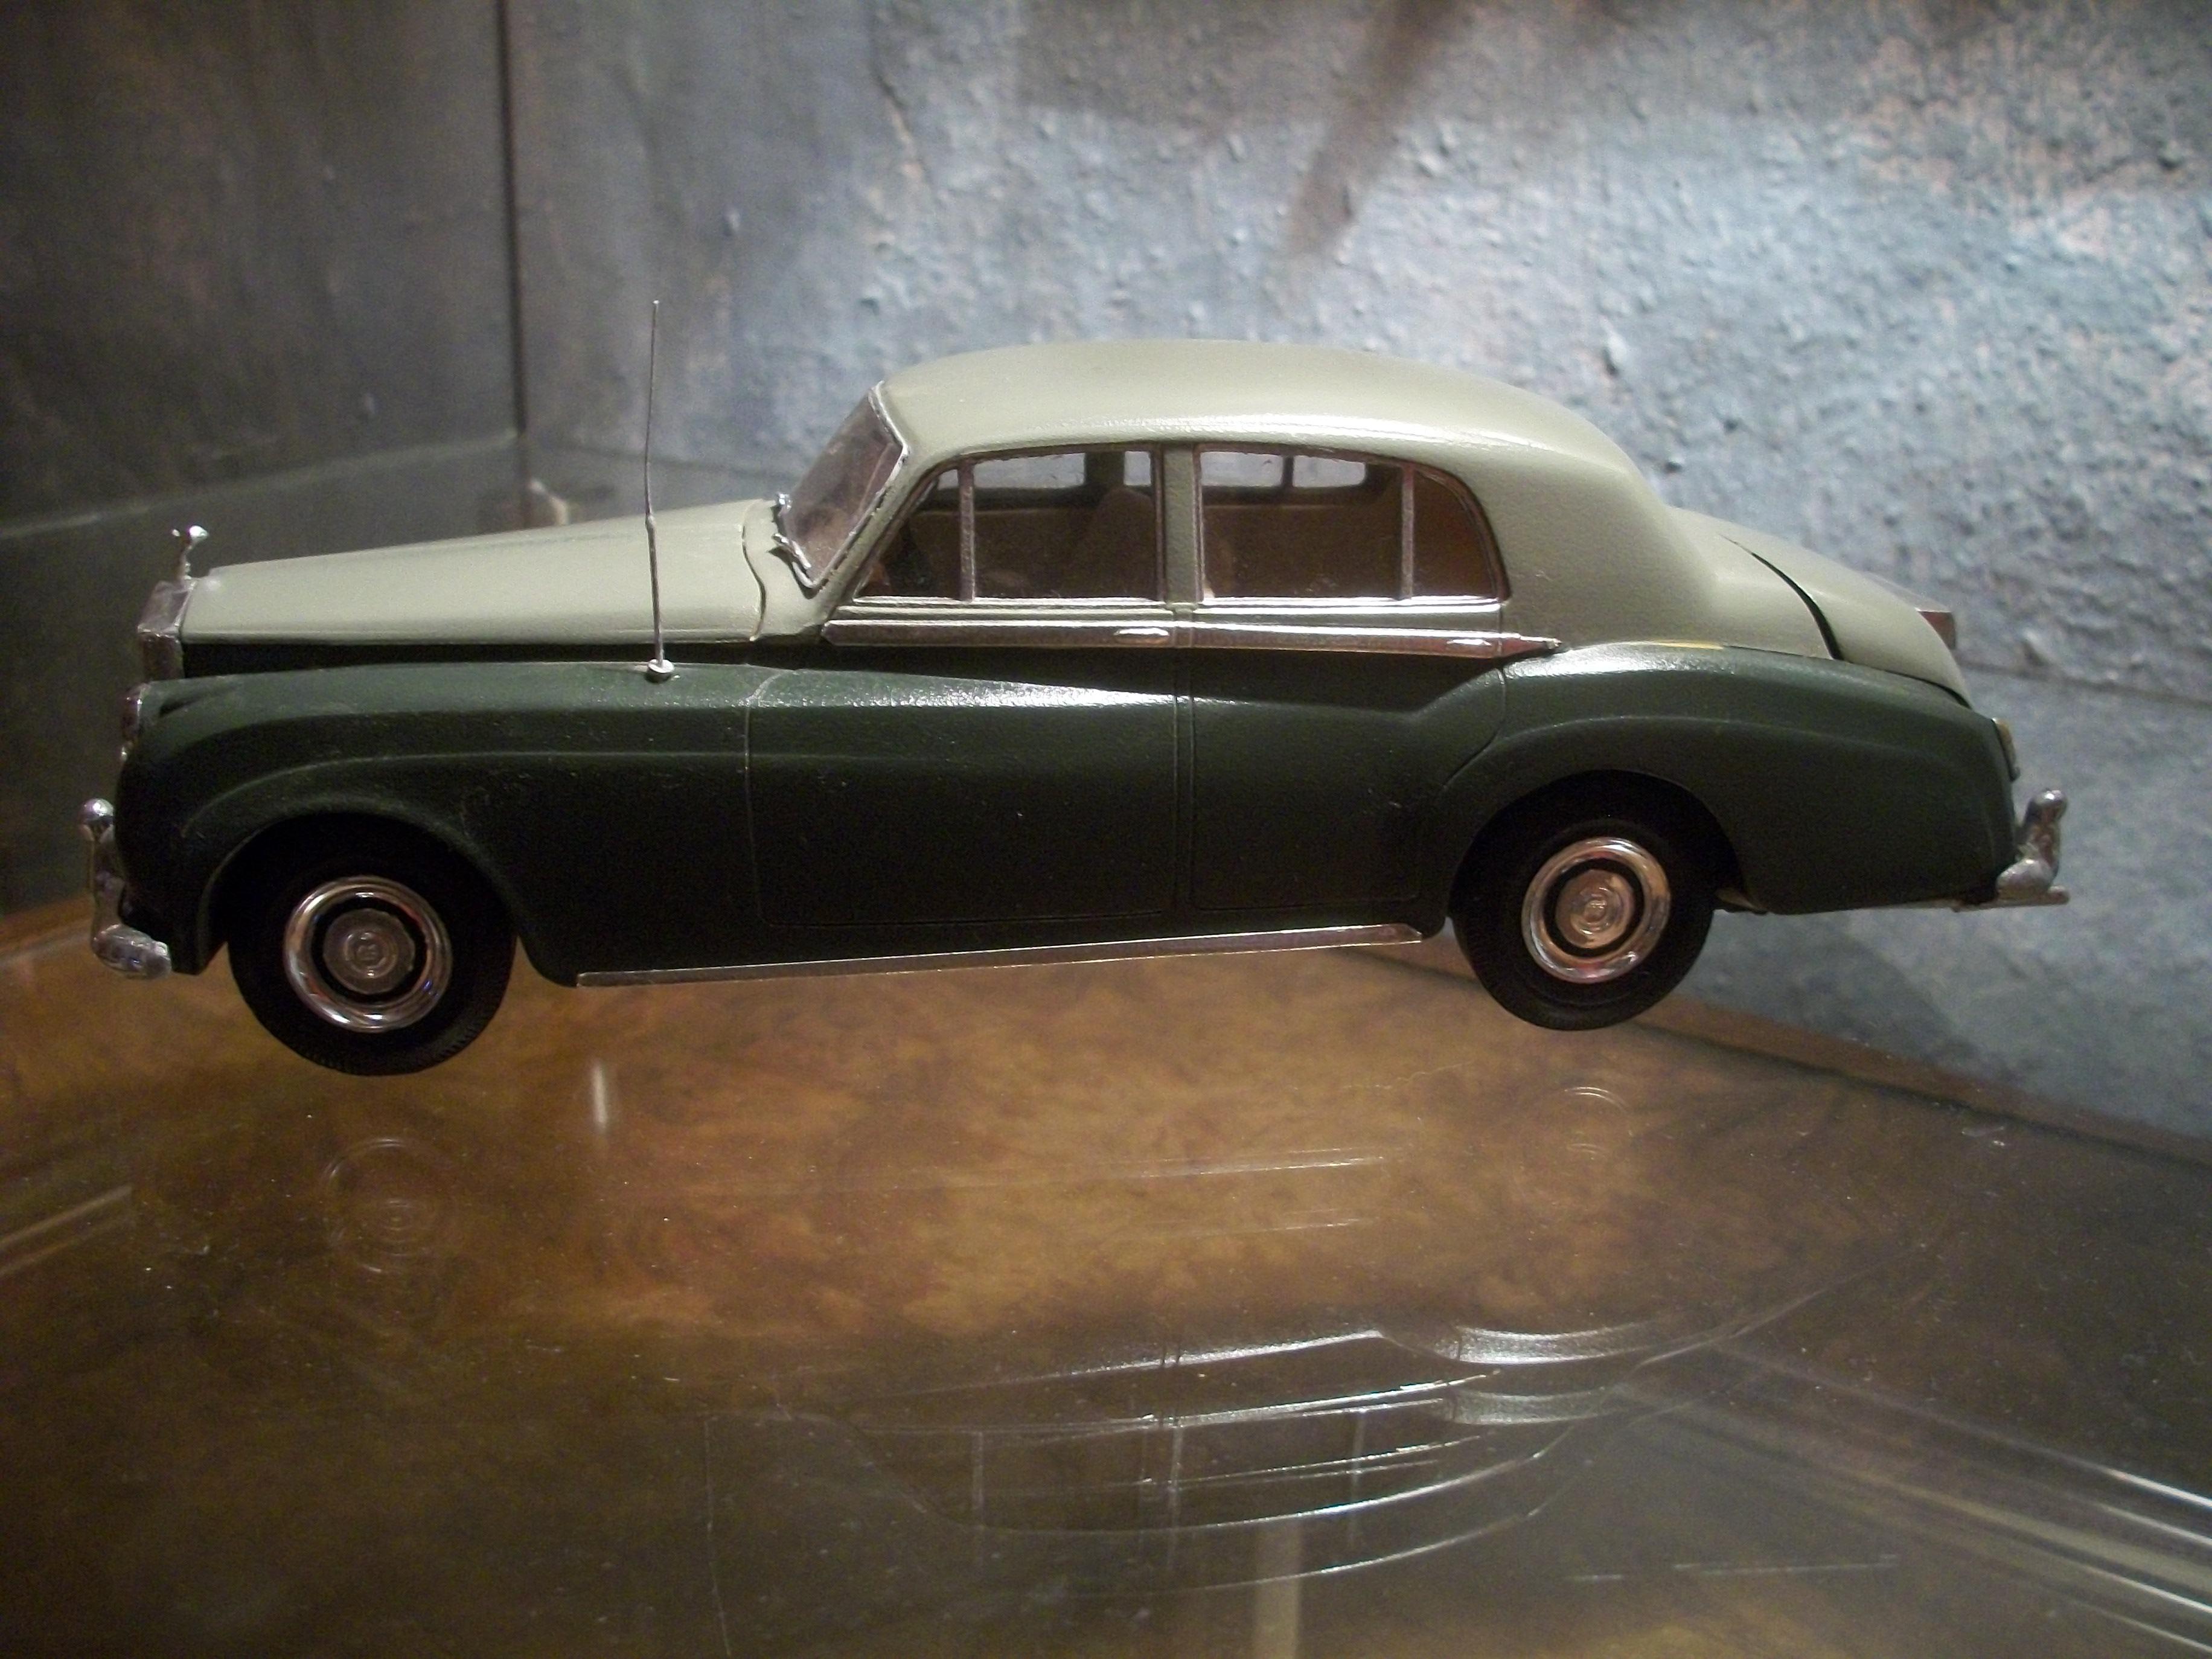
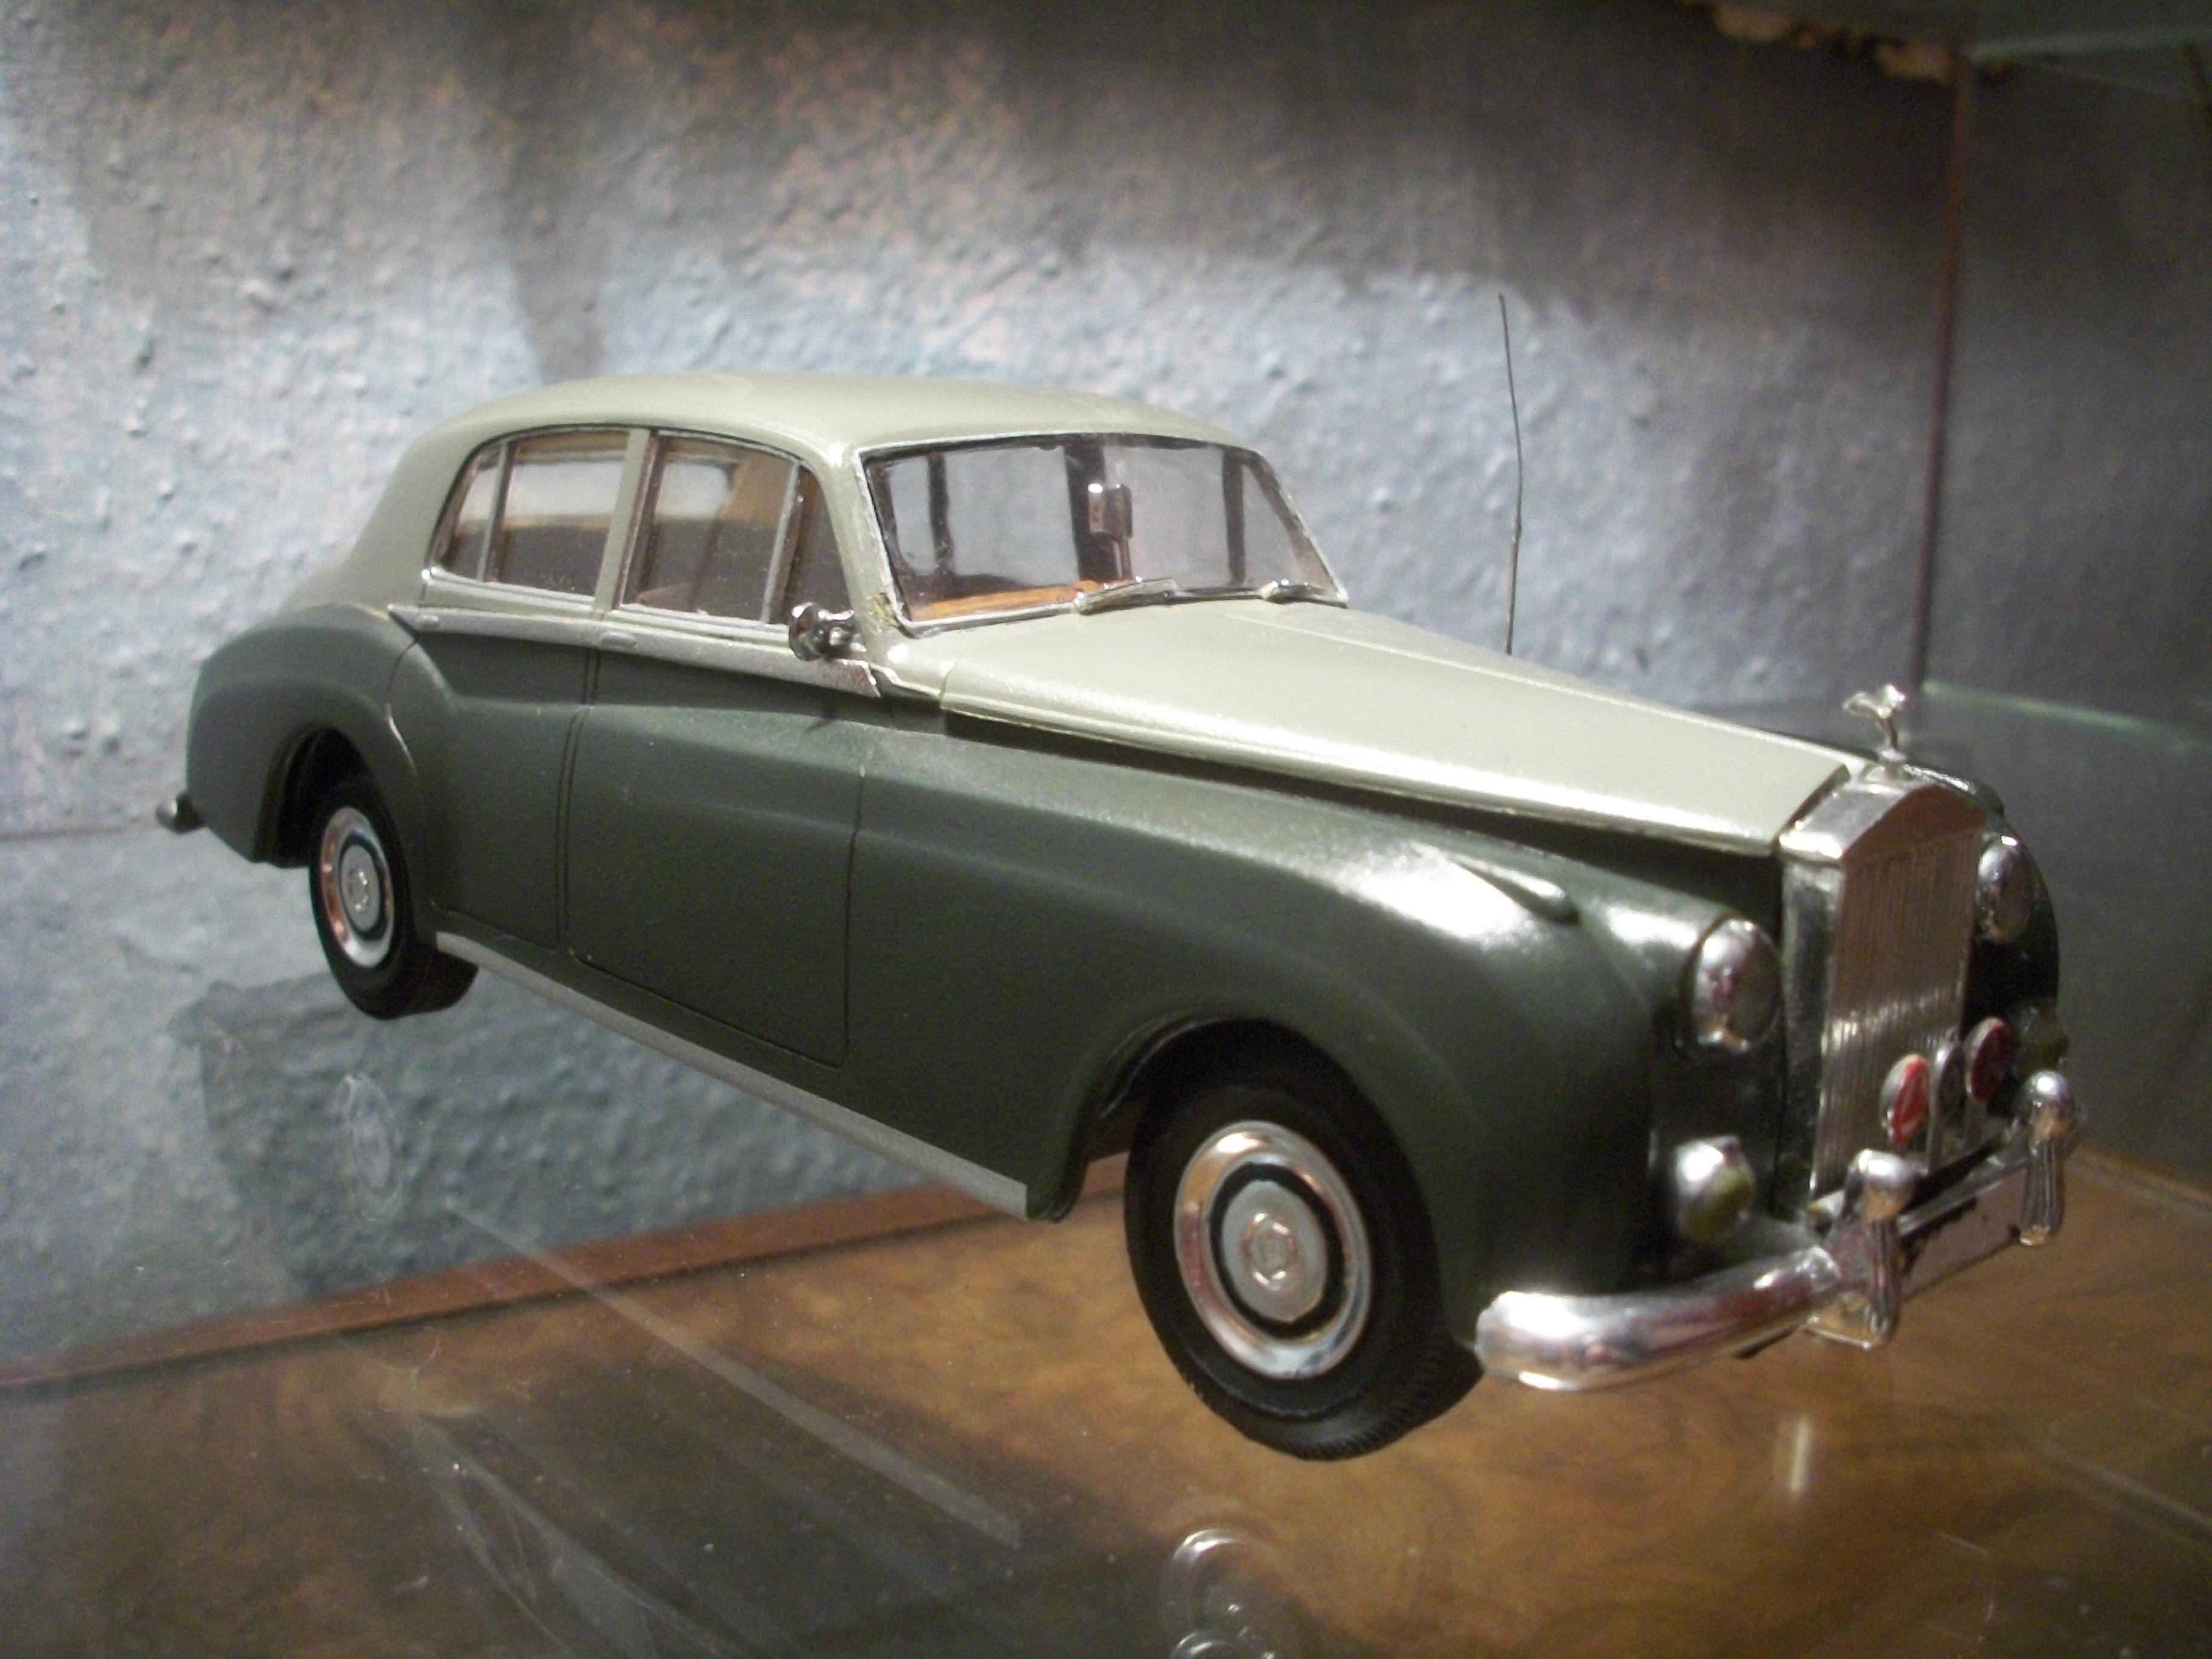
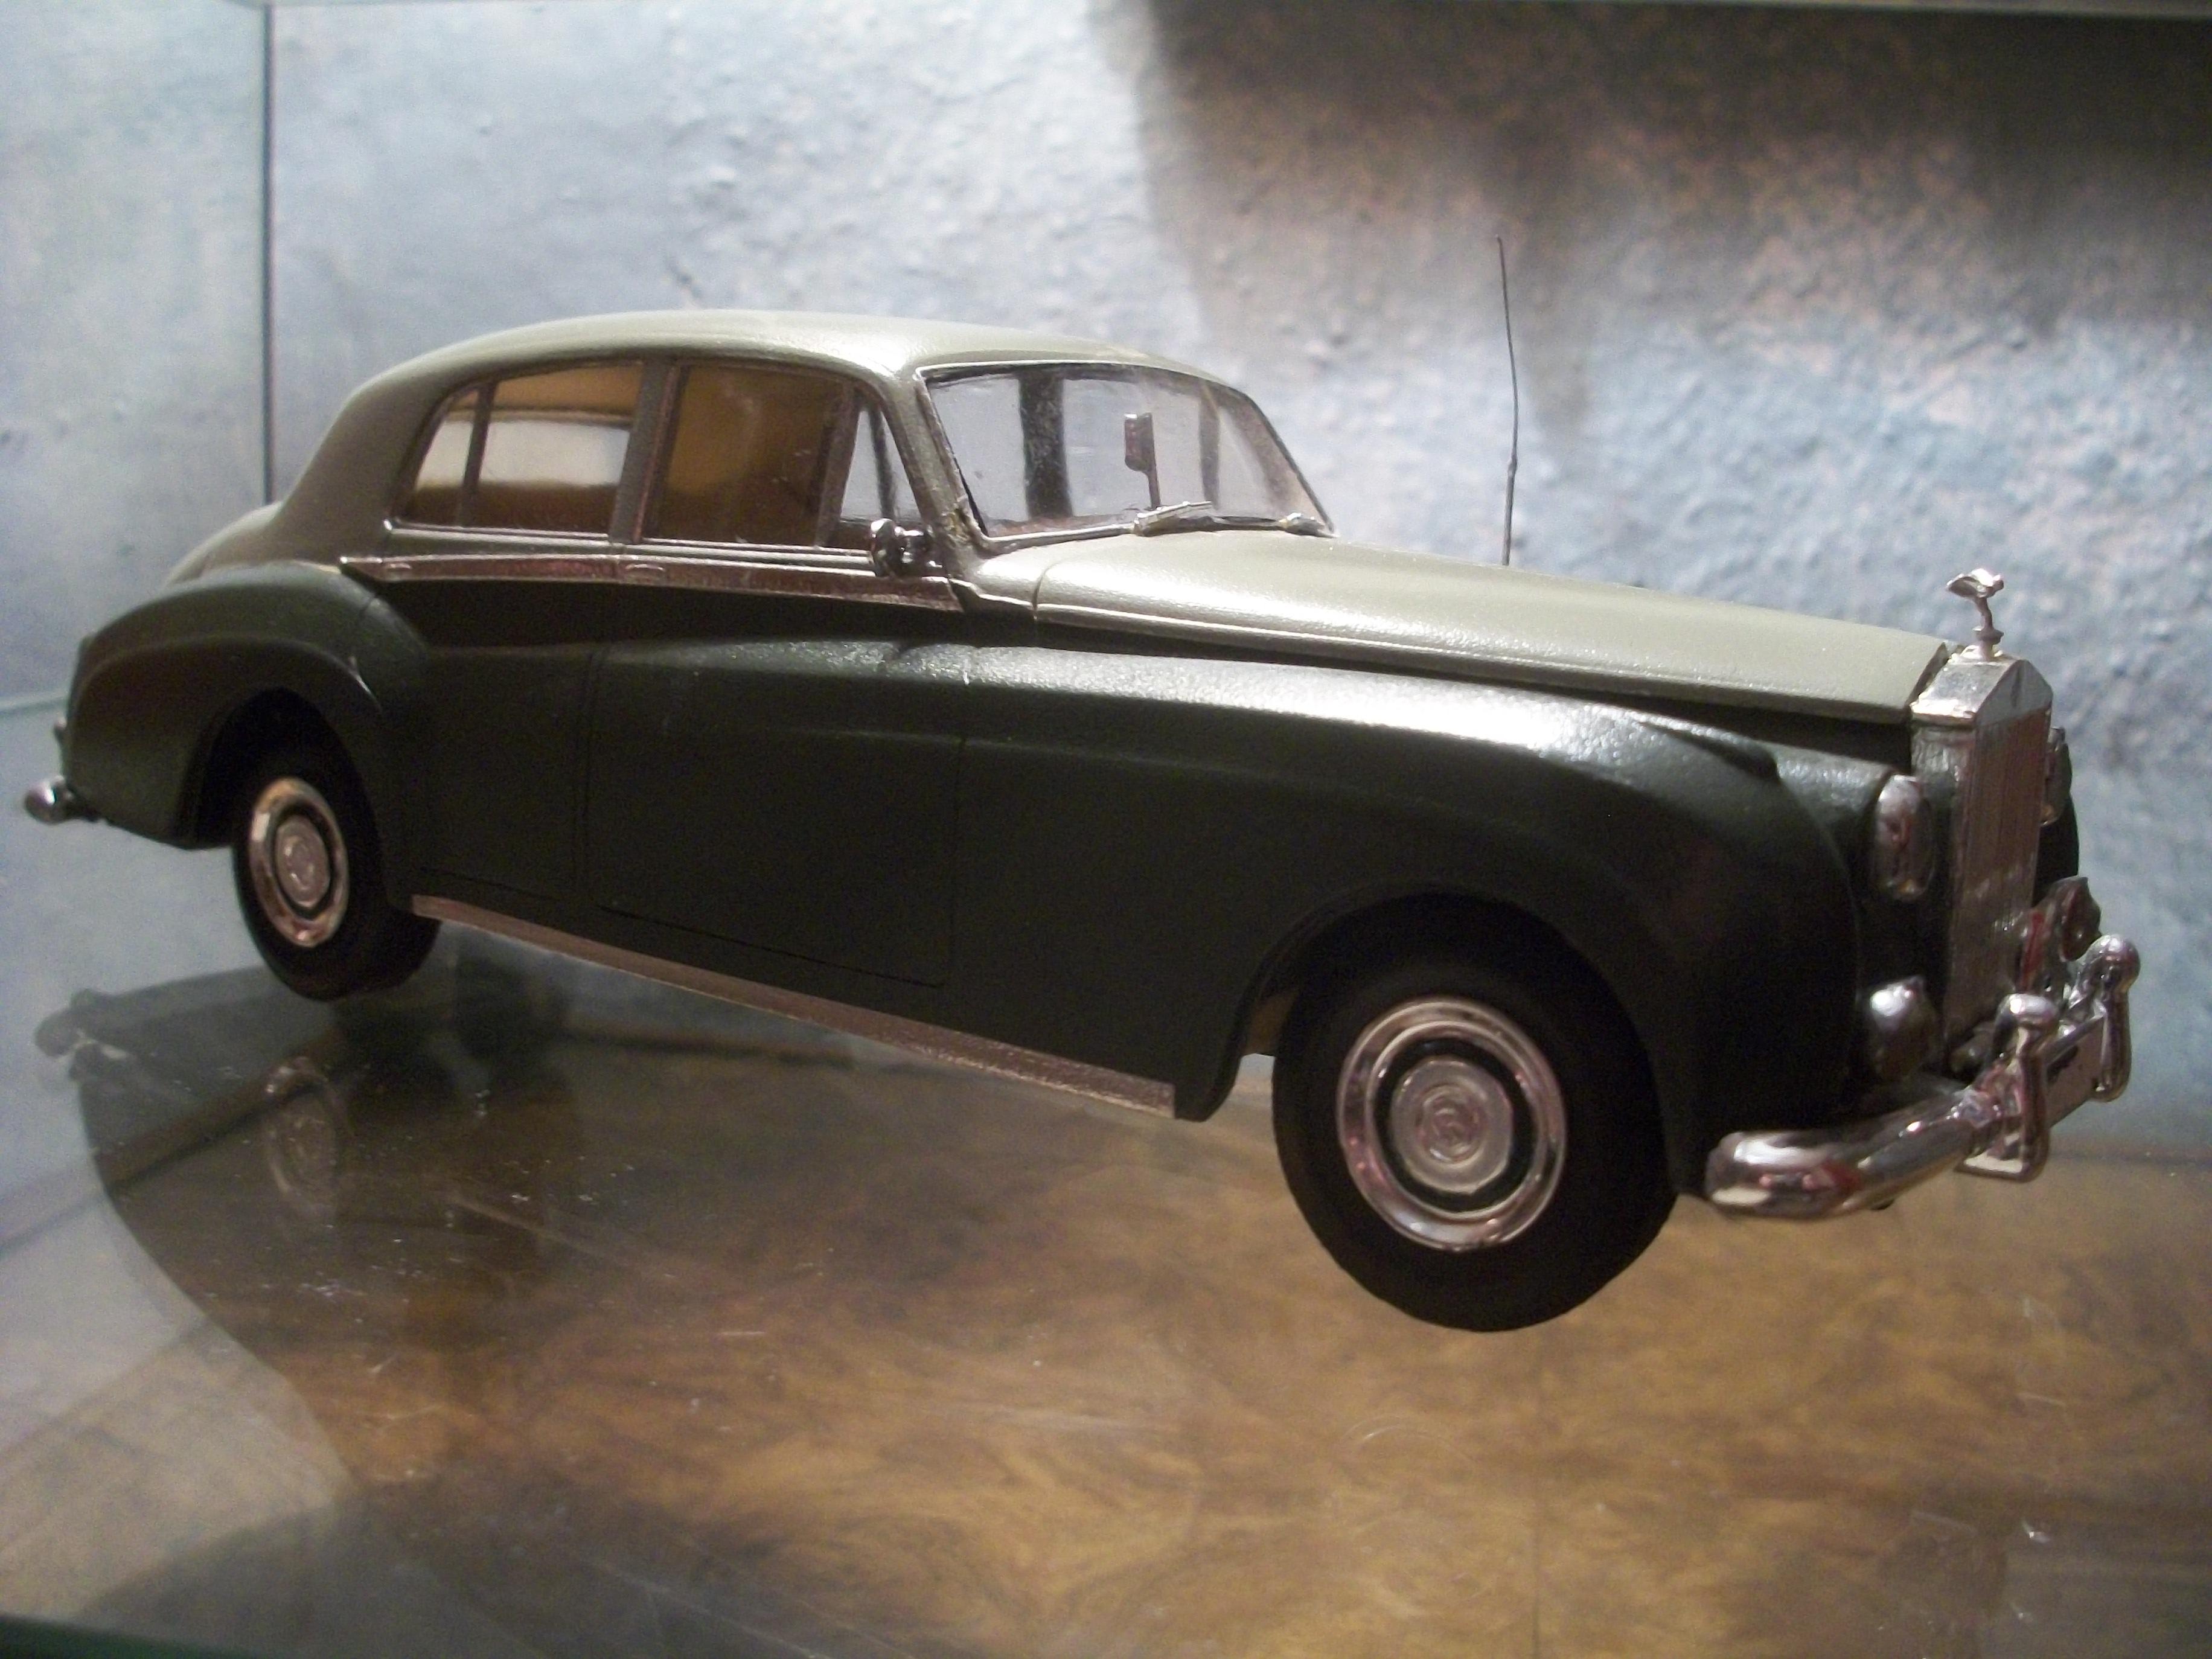
While the first coat of paint is curing, and also while the engine fitting is awaiting further cutting on the chassis, I thought I would change the mood slightly. The following photographs were taken in both colour and black & white, using an Art Deco lamp, an Eric Ravilious poster featuring Hooper & Co., the brass sill plates from a Hooper Rolls-Royce motor car and a 1:24 scale Silver Cloud model. These items are displayed on glass, with a burr walnut coffee table underneath, and a framed antique Chinese painting on the wall behind. Hope you like this. David
-
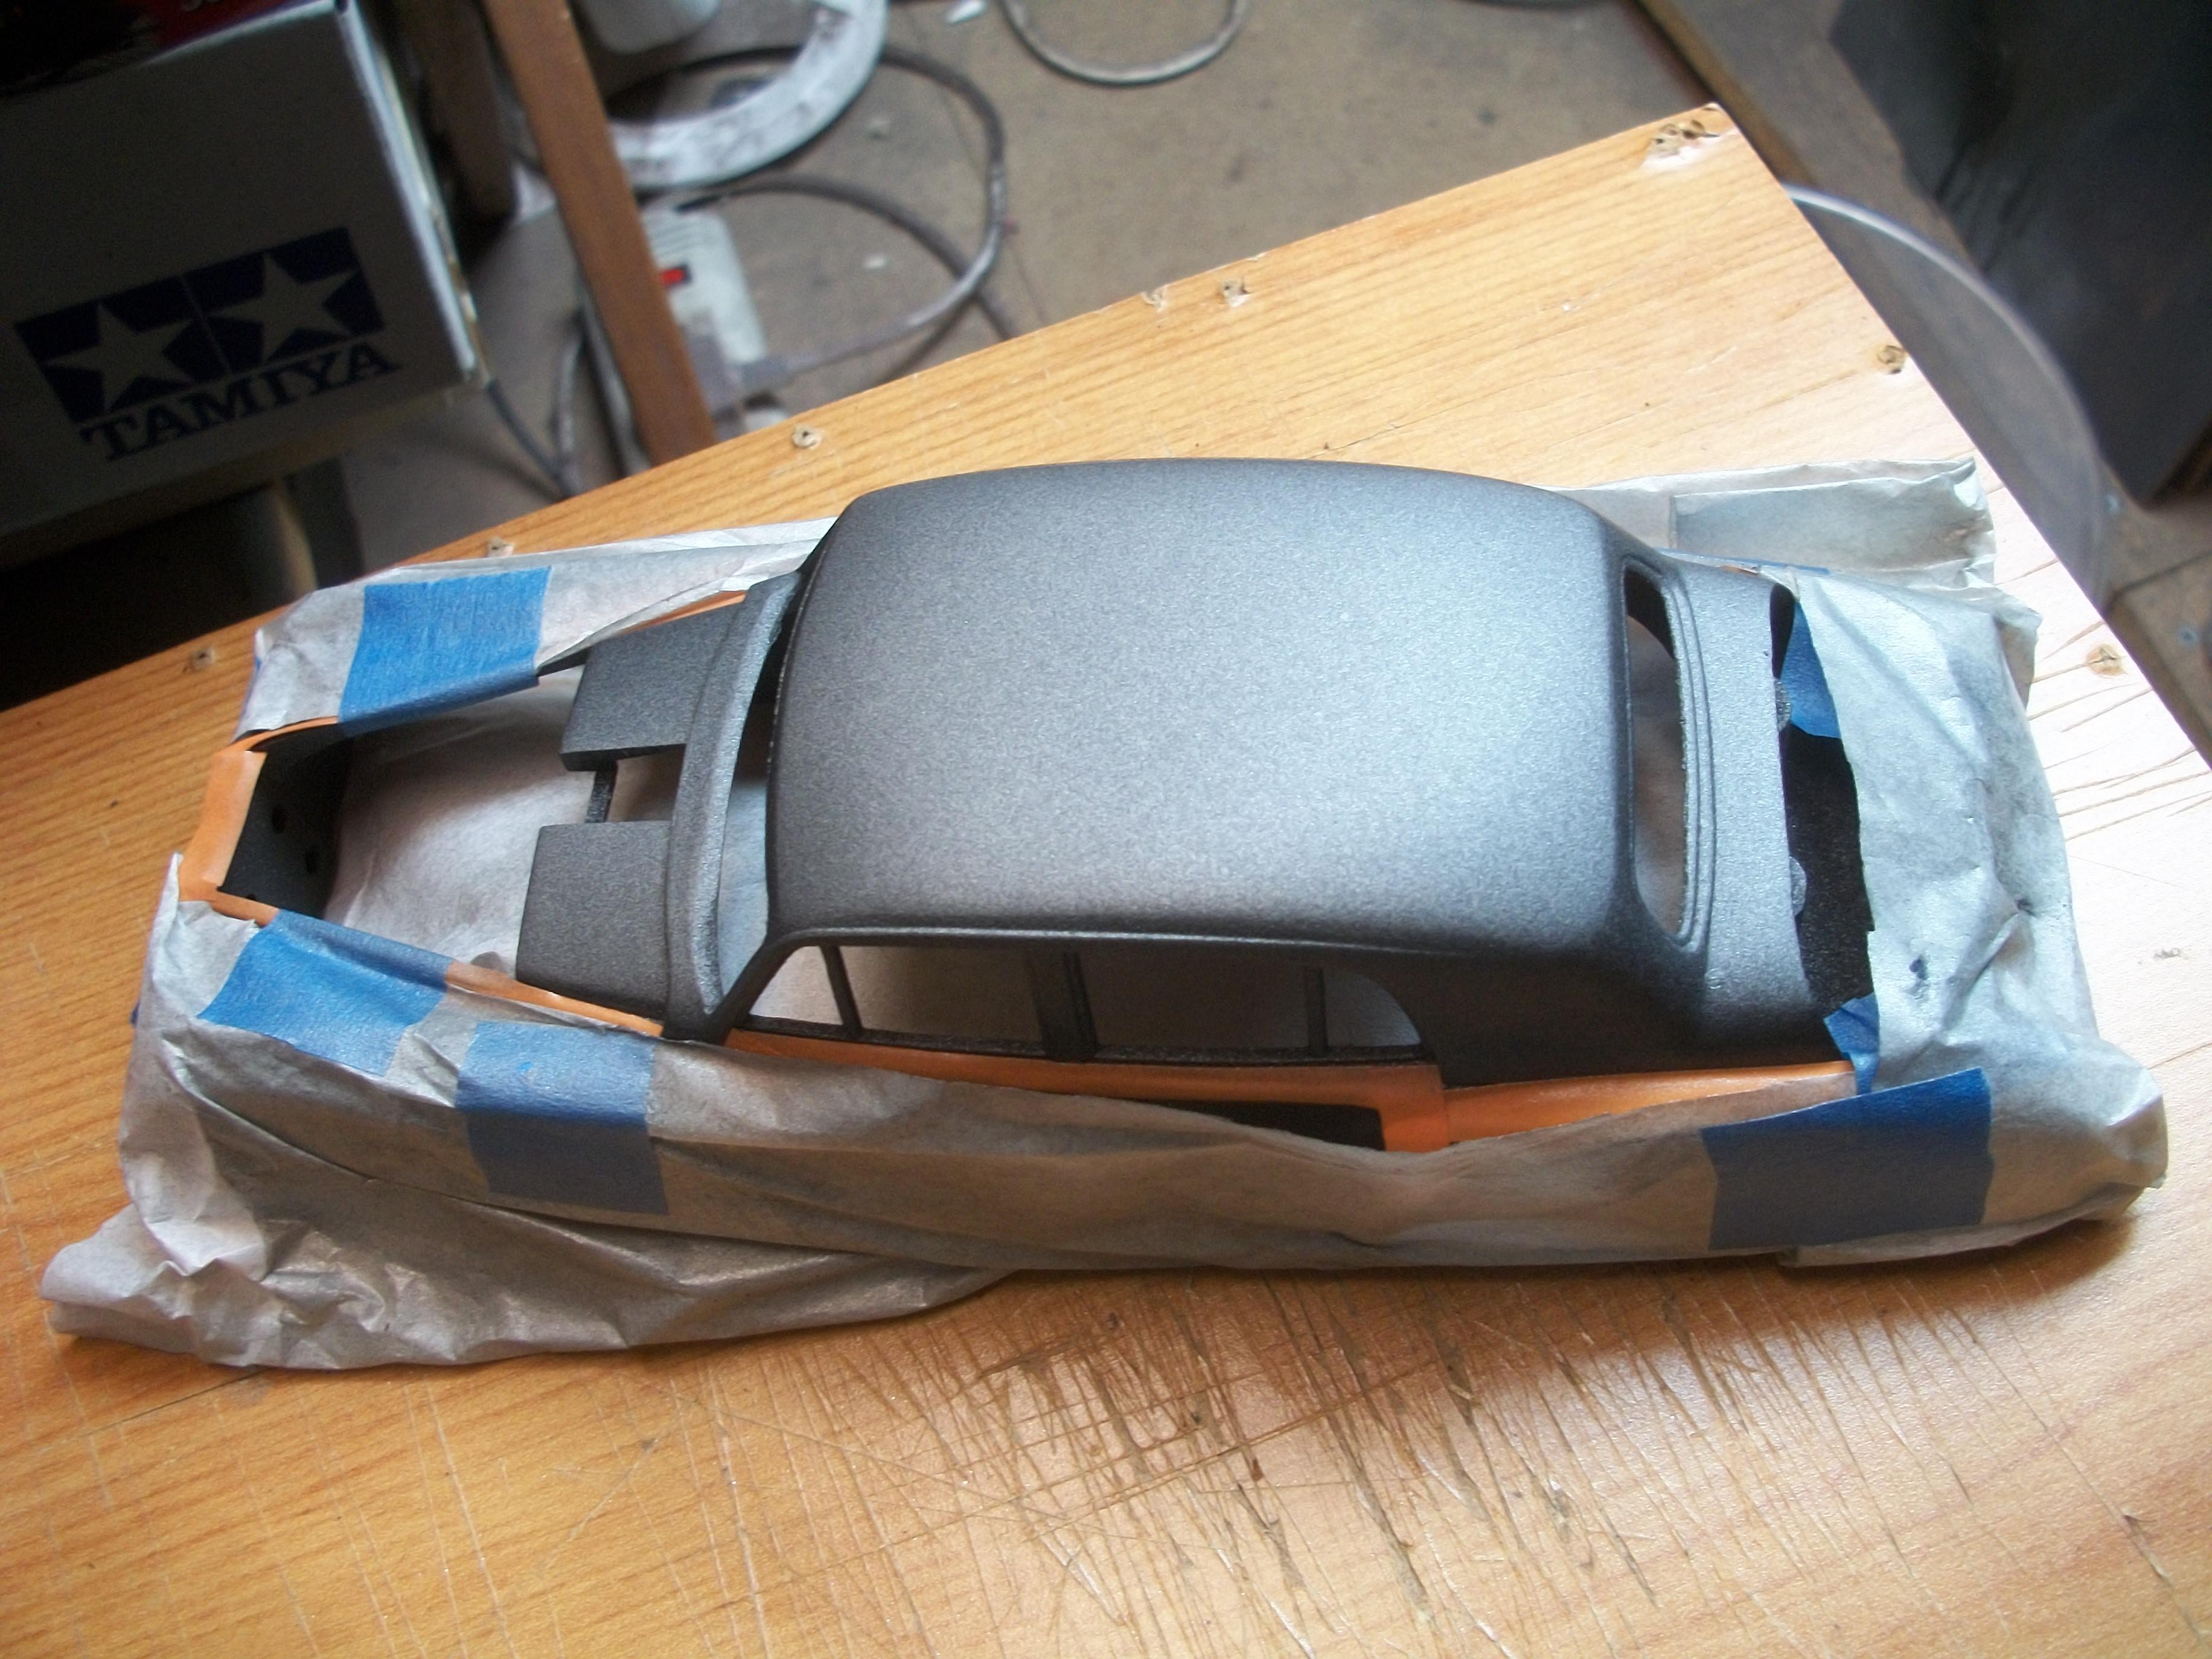
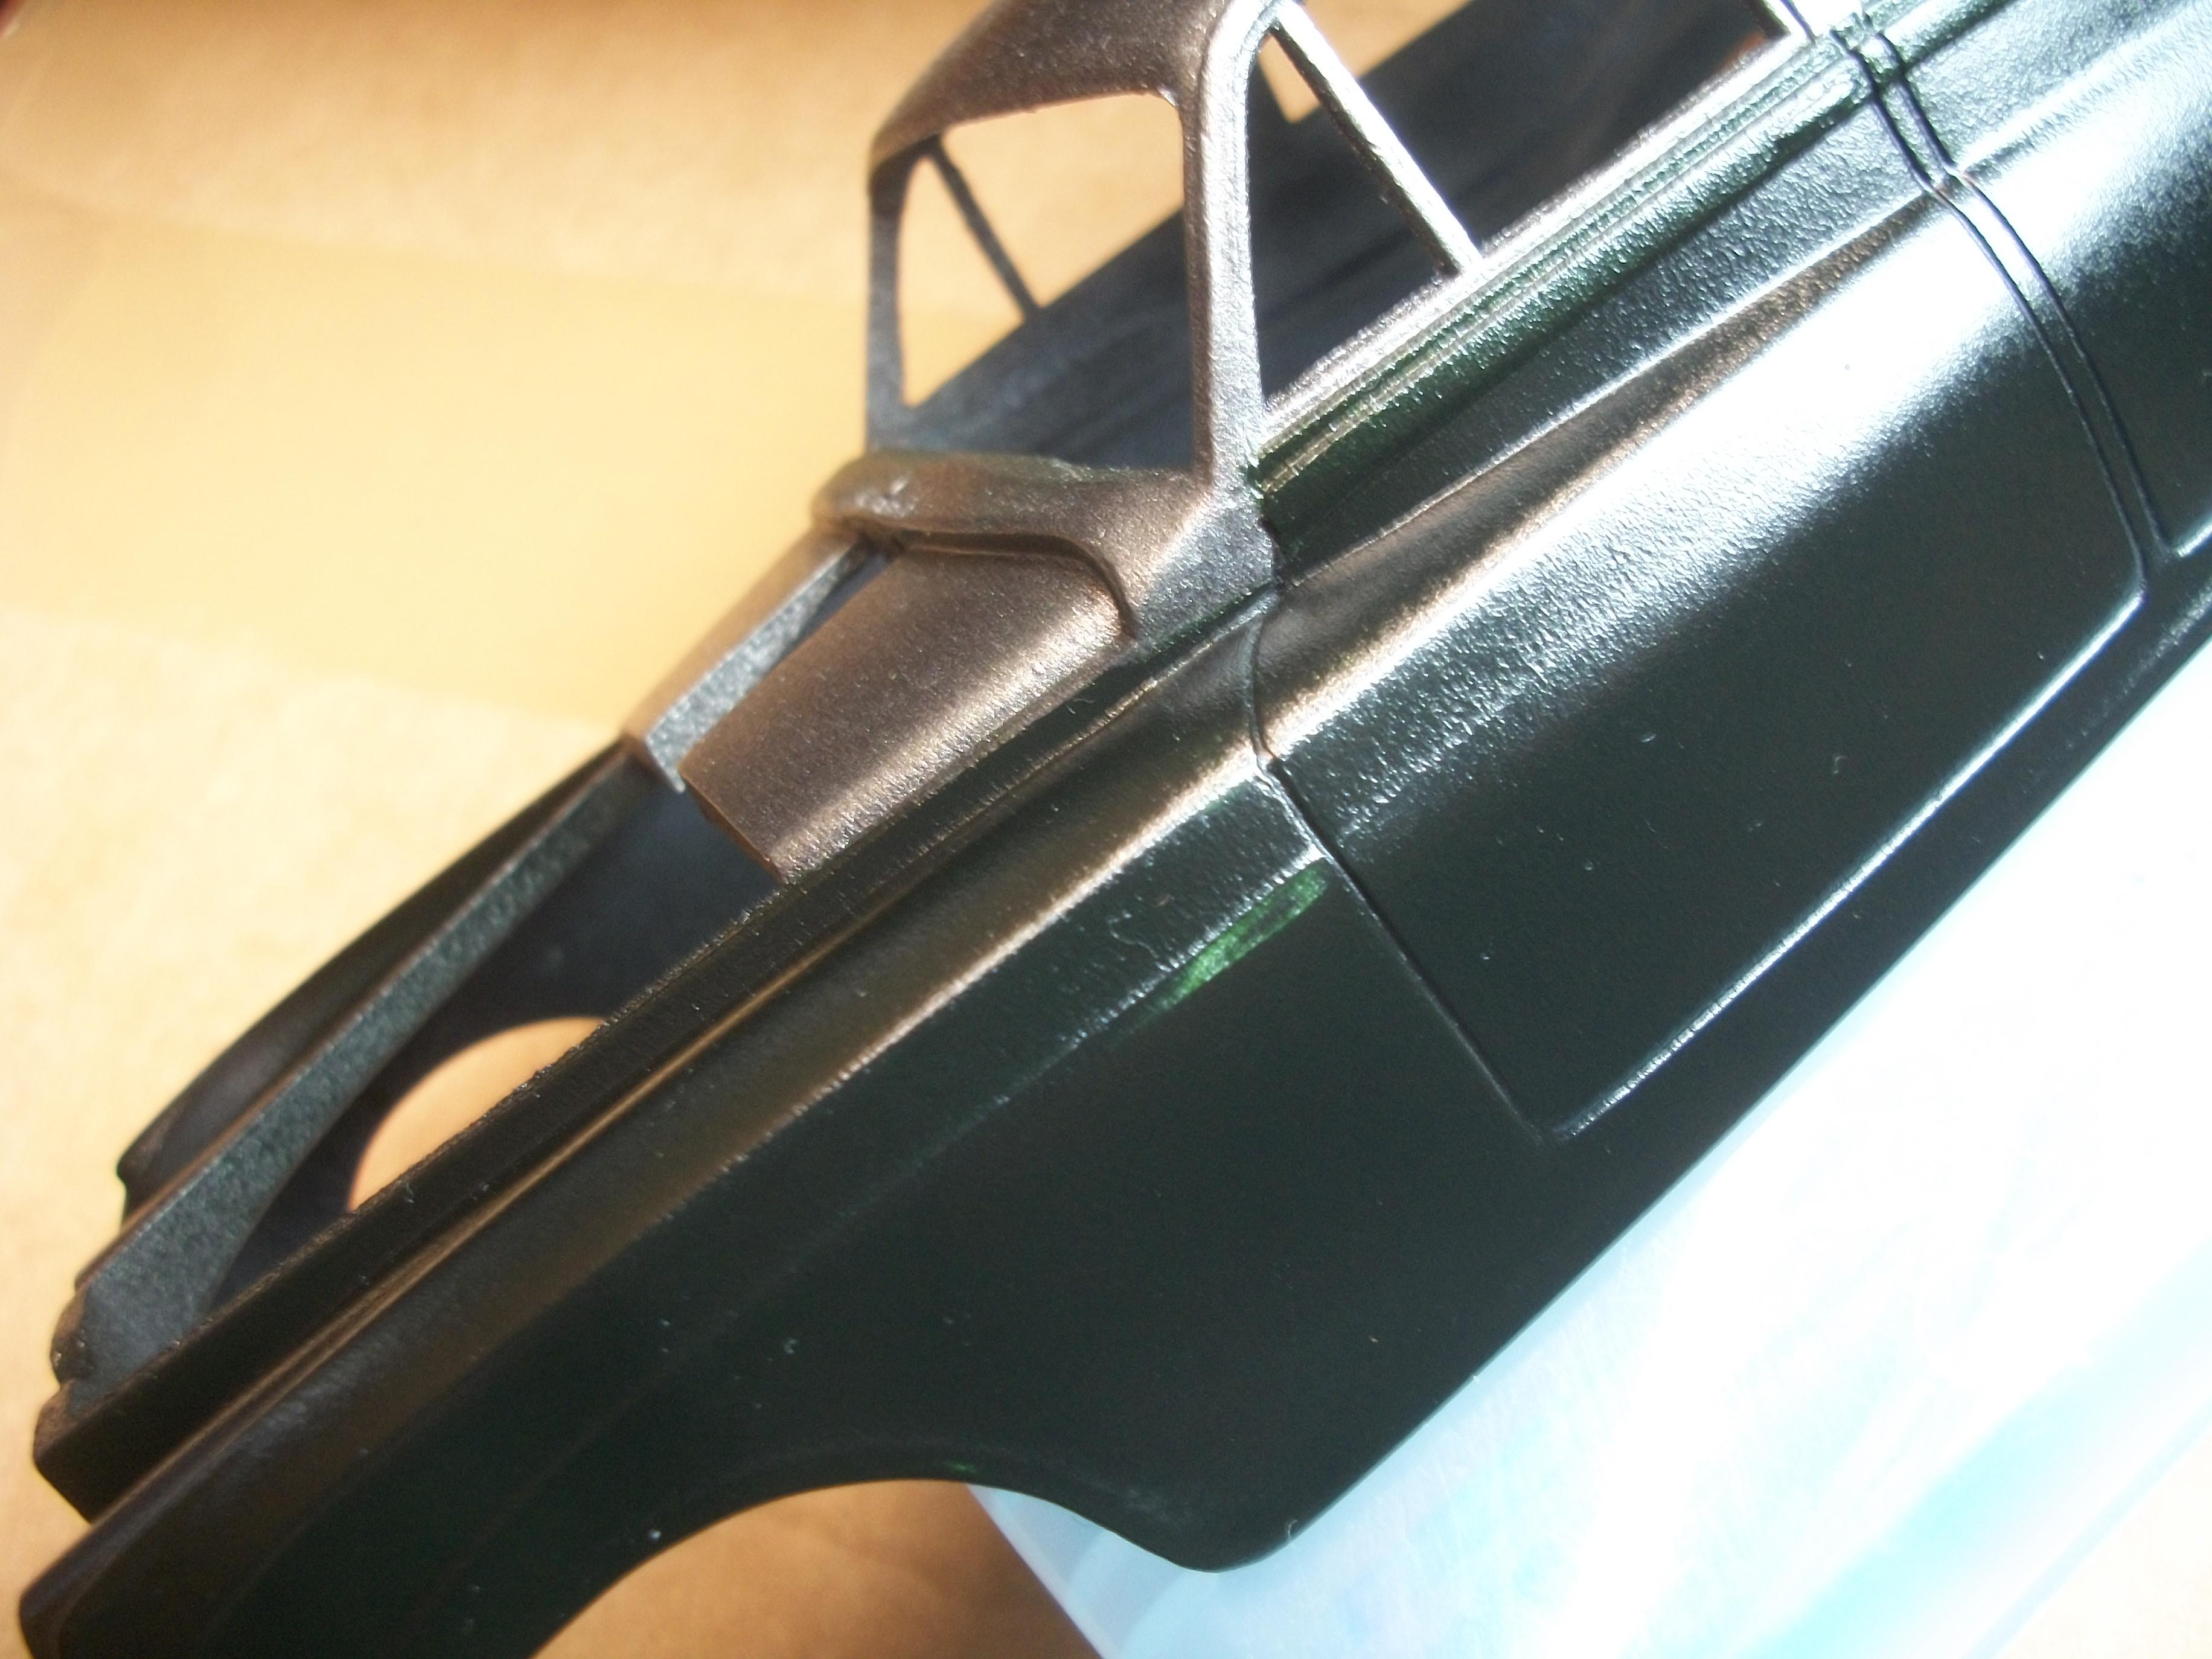
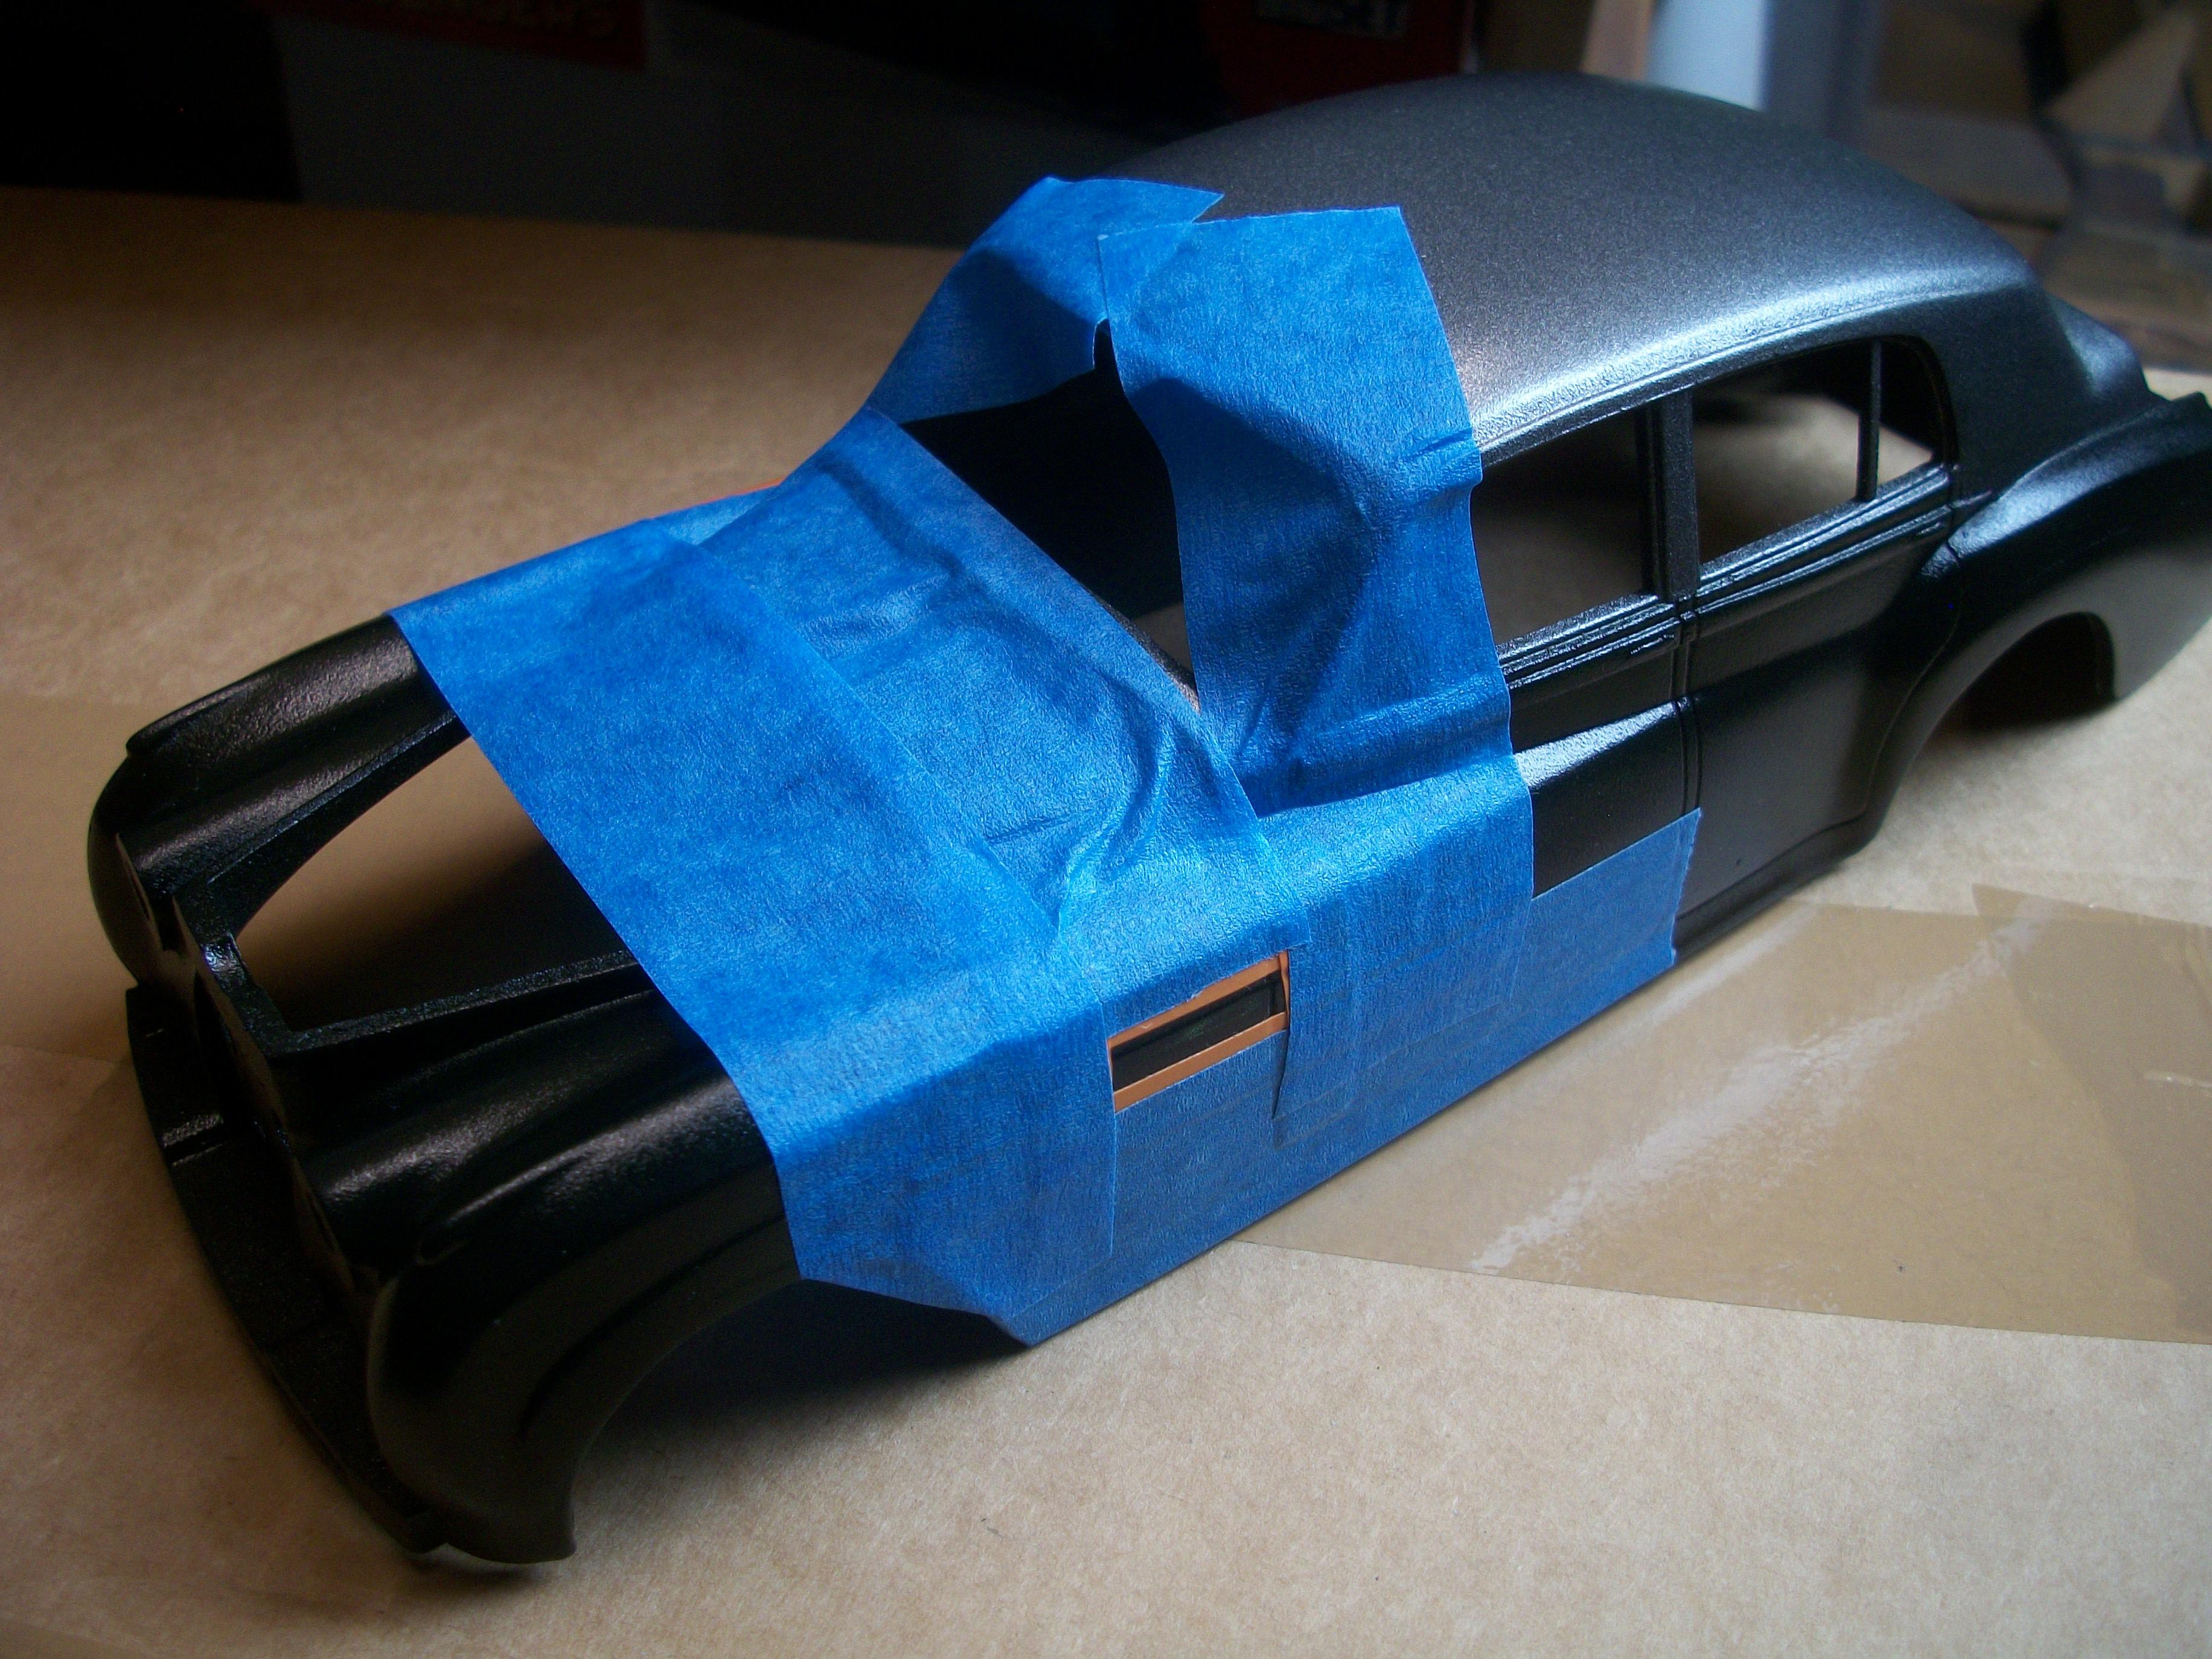
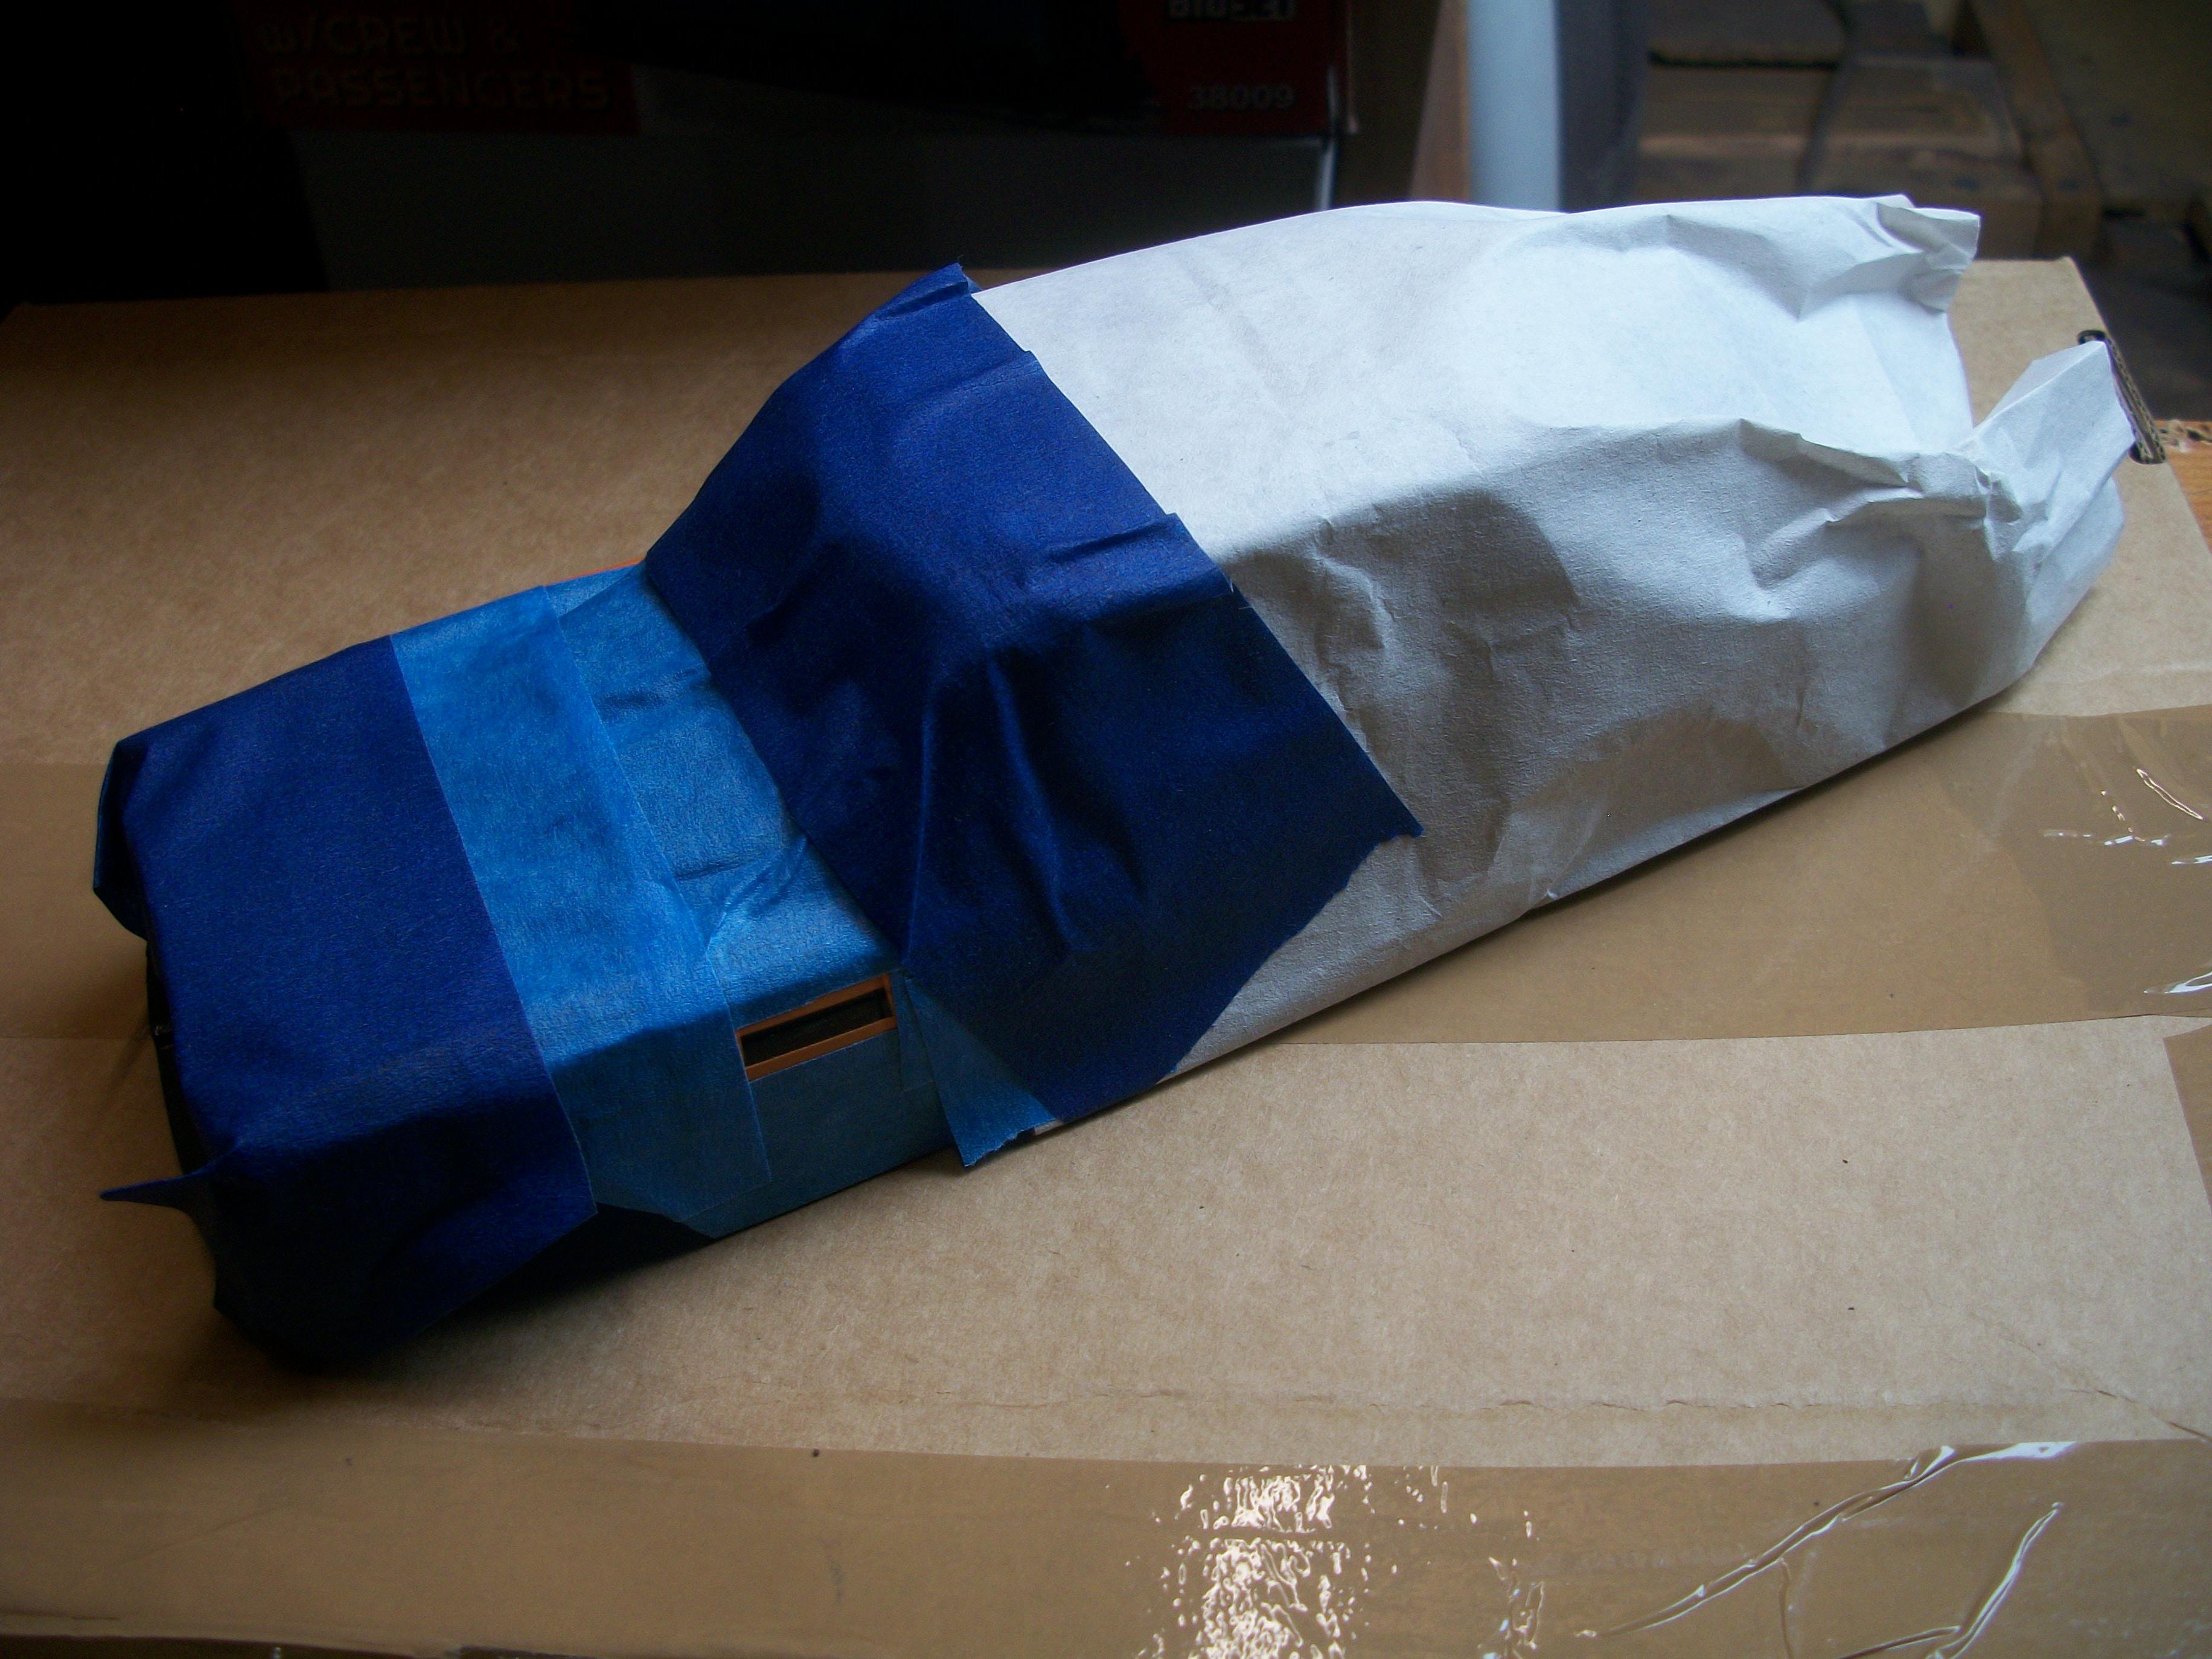
Disaster struck last week, when I decided to wet sand the polished paint finish, in an attempt to remove the ' orange peel ' effect. This took me through to the primer layer underneath, in one area of the roof and also on the wheel arch. It has become necessary to start again with the wet sanding, primering, painting, polishing process. Having wet sanded the body, boot lid and bonnet panels, I have given these a coat of black primer. This has been wet sanded after 28 hours, and I need to mask off the lower part of the body. Then I shall apply the first coat of the cellulose Shell Grey, and I might go to three coats instead of two in order to avoid wet sanding through to primer again. The engine detail is coming along nicely, and I am scratch building the rear number plate plinth. In between workbench stuff, I am doing some experimental photography, using the glass TV stand that is now on top of the burr walnut coffee table. Thanks for looking guys, and all comments are very welcome. David
-
Total realism Charles . . . Brilliant as usual. The detail such as the litter and plant growth at the back corners of the loading bays . . . Exceptional ! You must have enjoyed photographing this model, and that is on top of the sheer satisfaction of having assembled and painted the diorama. David
-
Good use of materials that you have lying around Daryl . . . Those two buildings look good, even at this early stage, and the daylight is good lighting. David
-
nice
-
You have posted one word comments on 13 topics that took 10 minutes of your time Stephen . . . Well done ! Have you not got anything better to do with your time? These 13 topics represent weeks, months, years of hard work and attention to detail by regular members of MCM forums. If you can't be bothered to string a meaningful sentence together, then go play somewhere else DUDE. ' Nice ' ( thanks for the detailed analysis of my project, and those 12 others ) Have a good day speedboy57
-
The past two days have been mostly about the polishing process, although I did add some further detail to the engine, and mounted the steering wheel and column to the dashboard. Having applied each grade of Tamiya Polishing Compound with microfibre cloth, and then buffed the surface of the body with a different cloth between each application, I can see the gradual improvement. A typical polishing session takes around two hours, and this is repeating the cycle of application and buffing maybe three times. The cellulose paint seems to be resisting all attempts at abrasive polishing. From starting off quite gently, I found that repeated swirling motions which involve a fair amount of pressure, do not damage the paint surface to any degree. I have produced quite a nice finish, but I am some way off from the ' mirror ' finish that I really want to aim for. The Velvet Green is responding better than the Shell Grey, but I think this is due to the Shell Grey being a metallic paint. There are plenty of YouTube videos showing how to use this Tamiya product, and the reviews are all good. I suspect that most modellers are using paints that are specifically for models, or if they are using automotive paints they are not cellulose. David
-
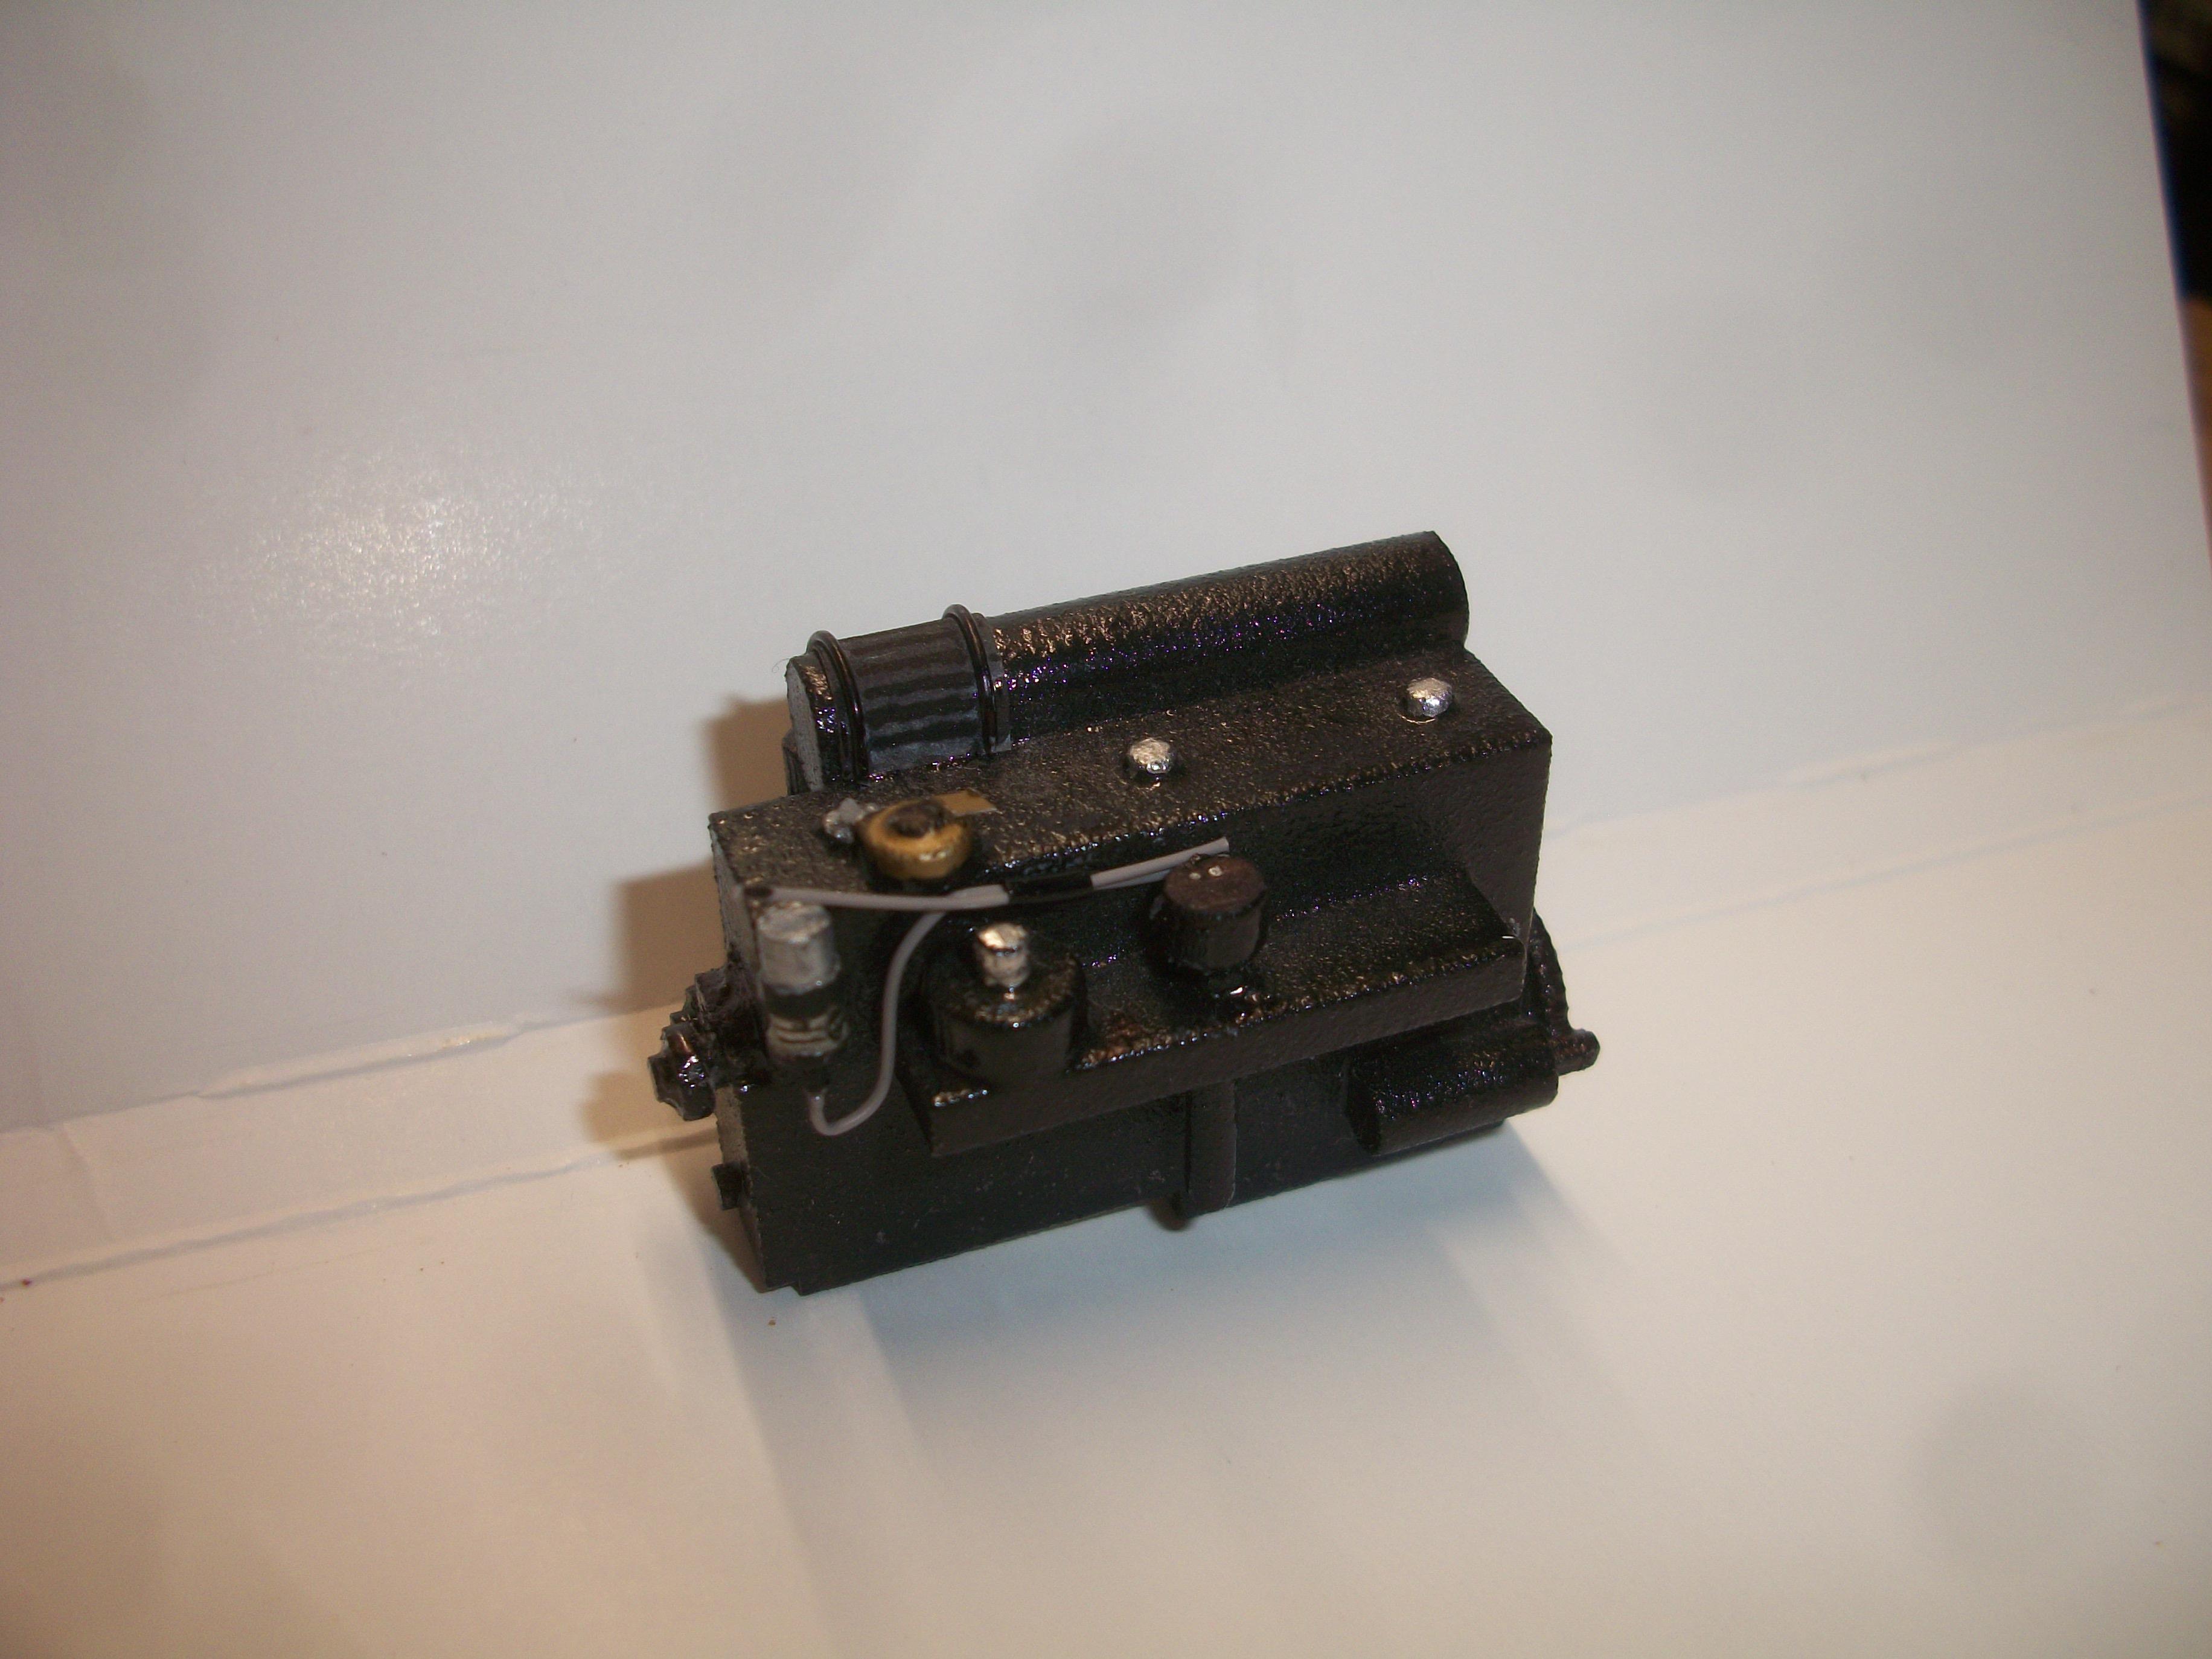
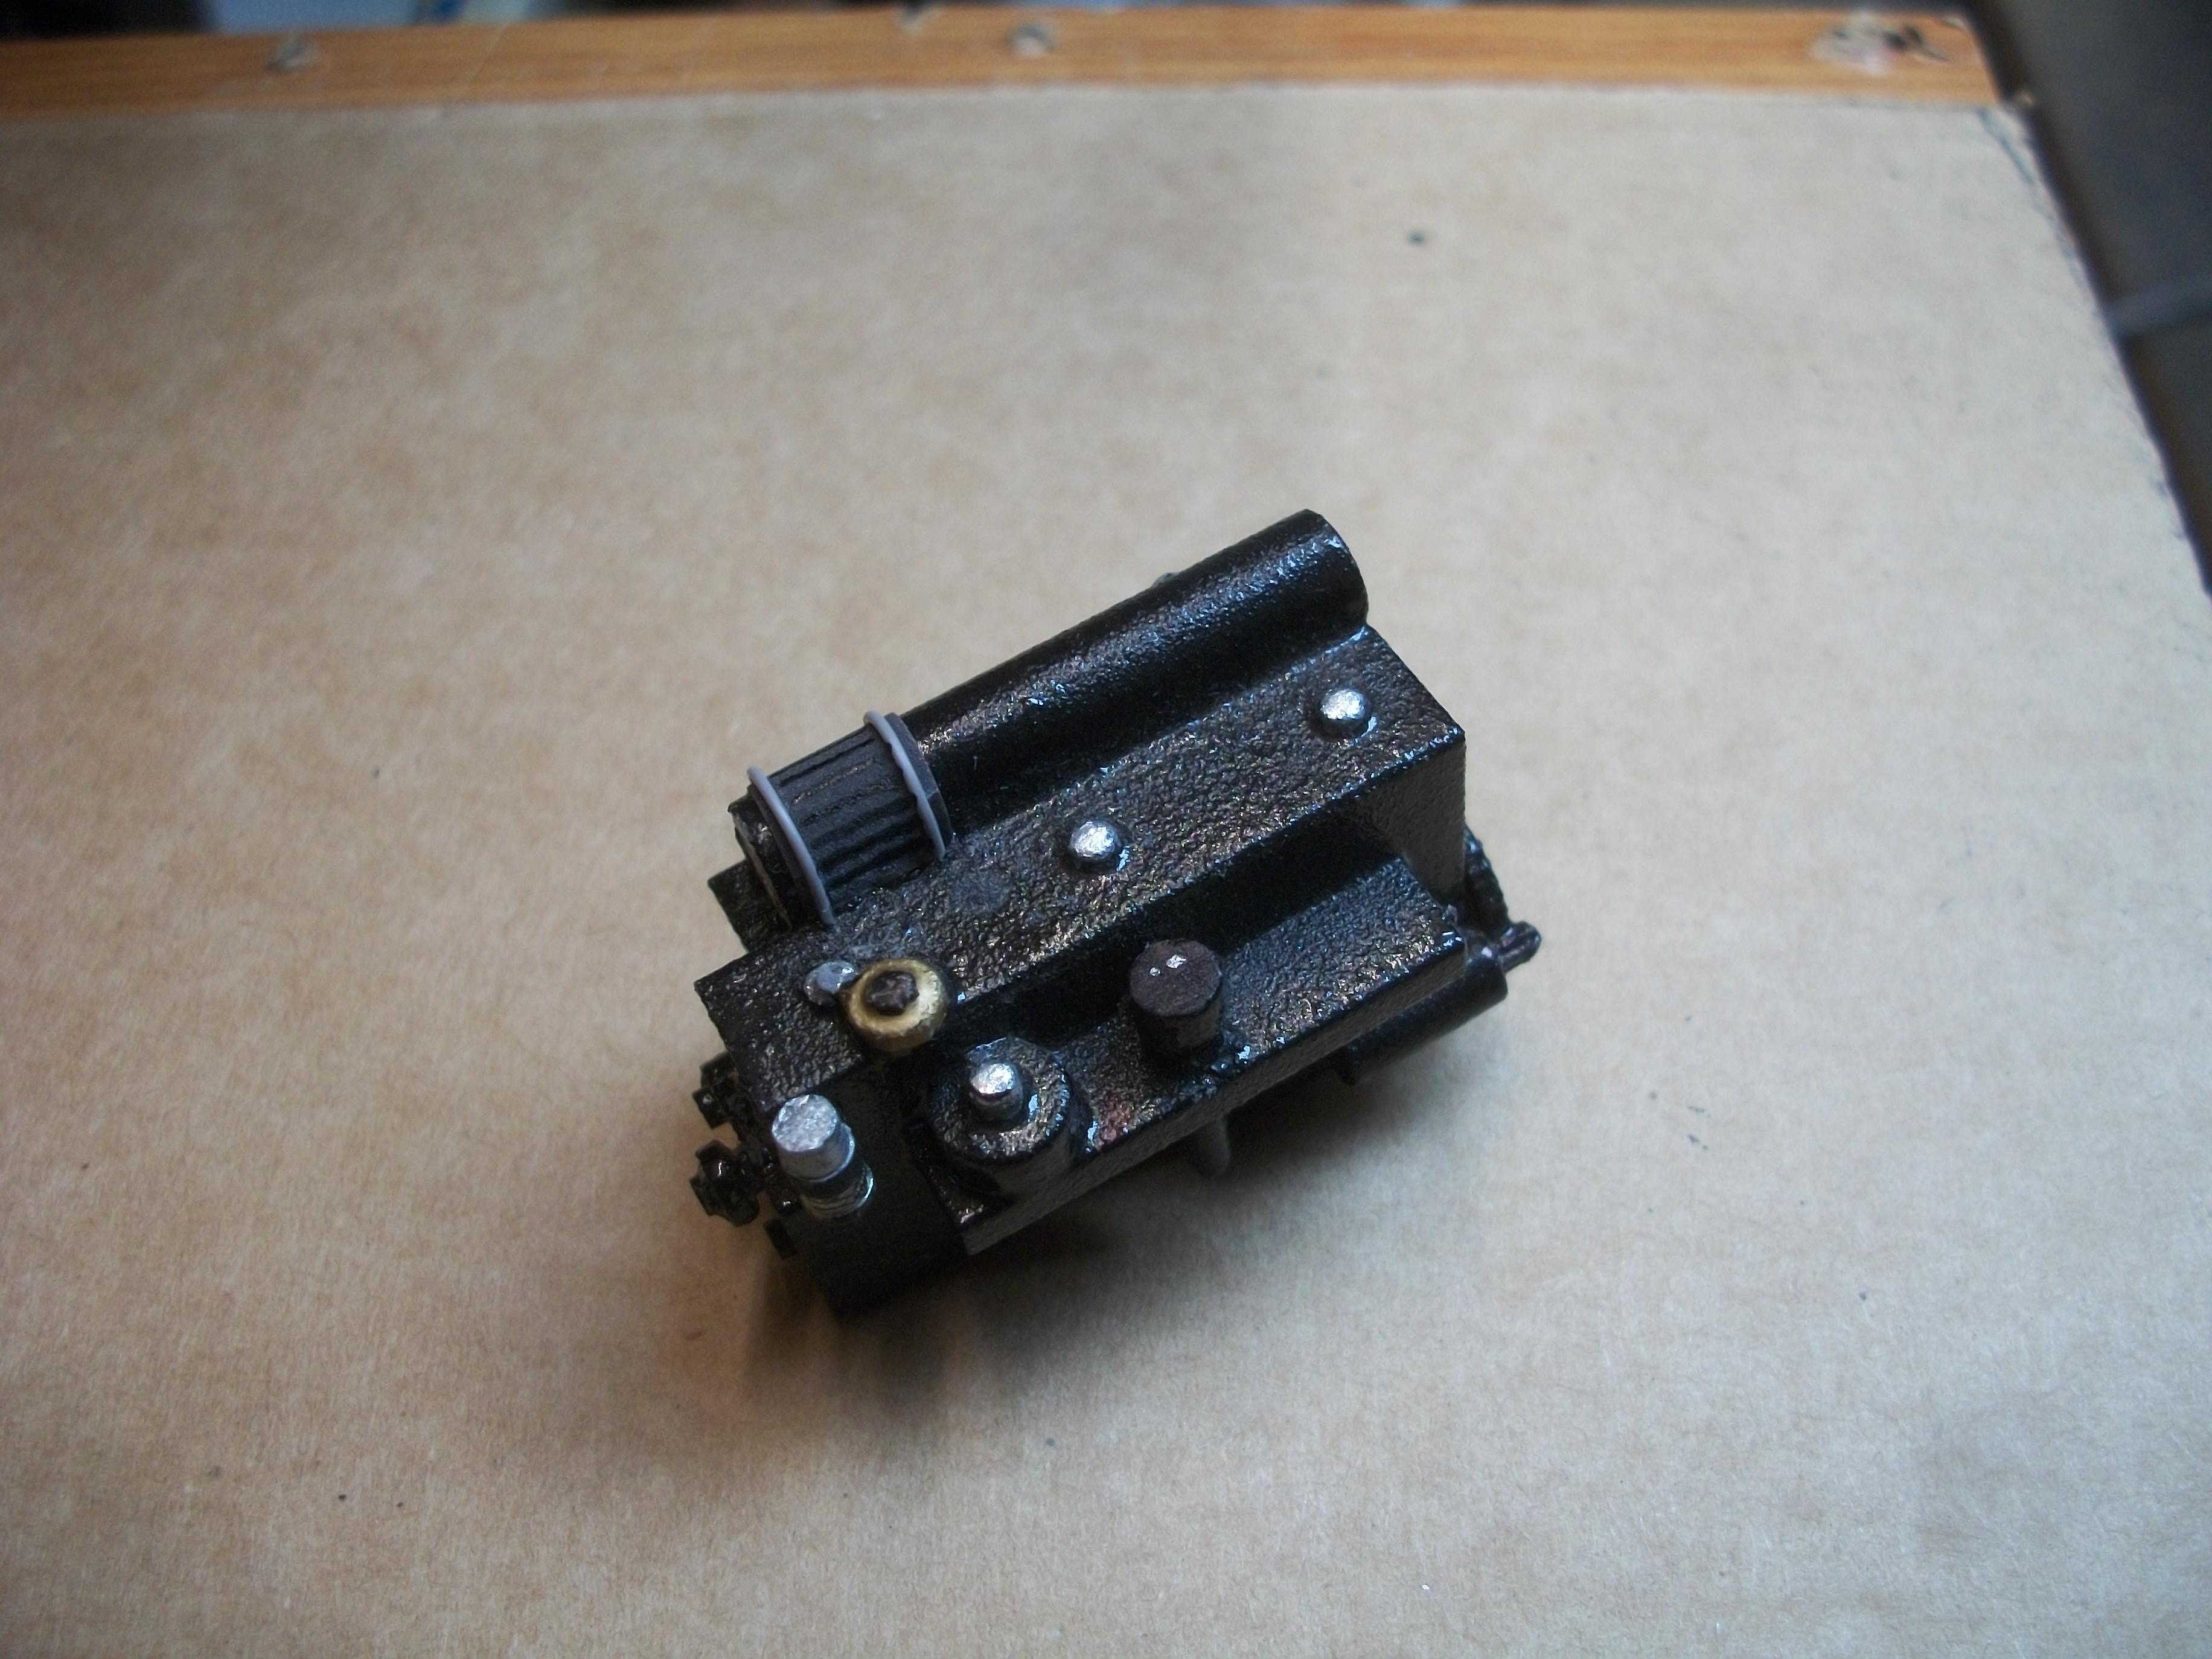
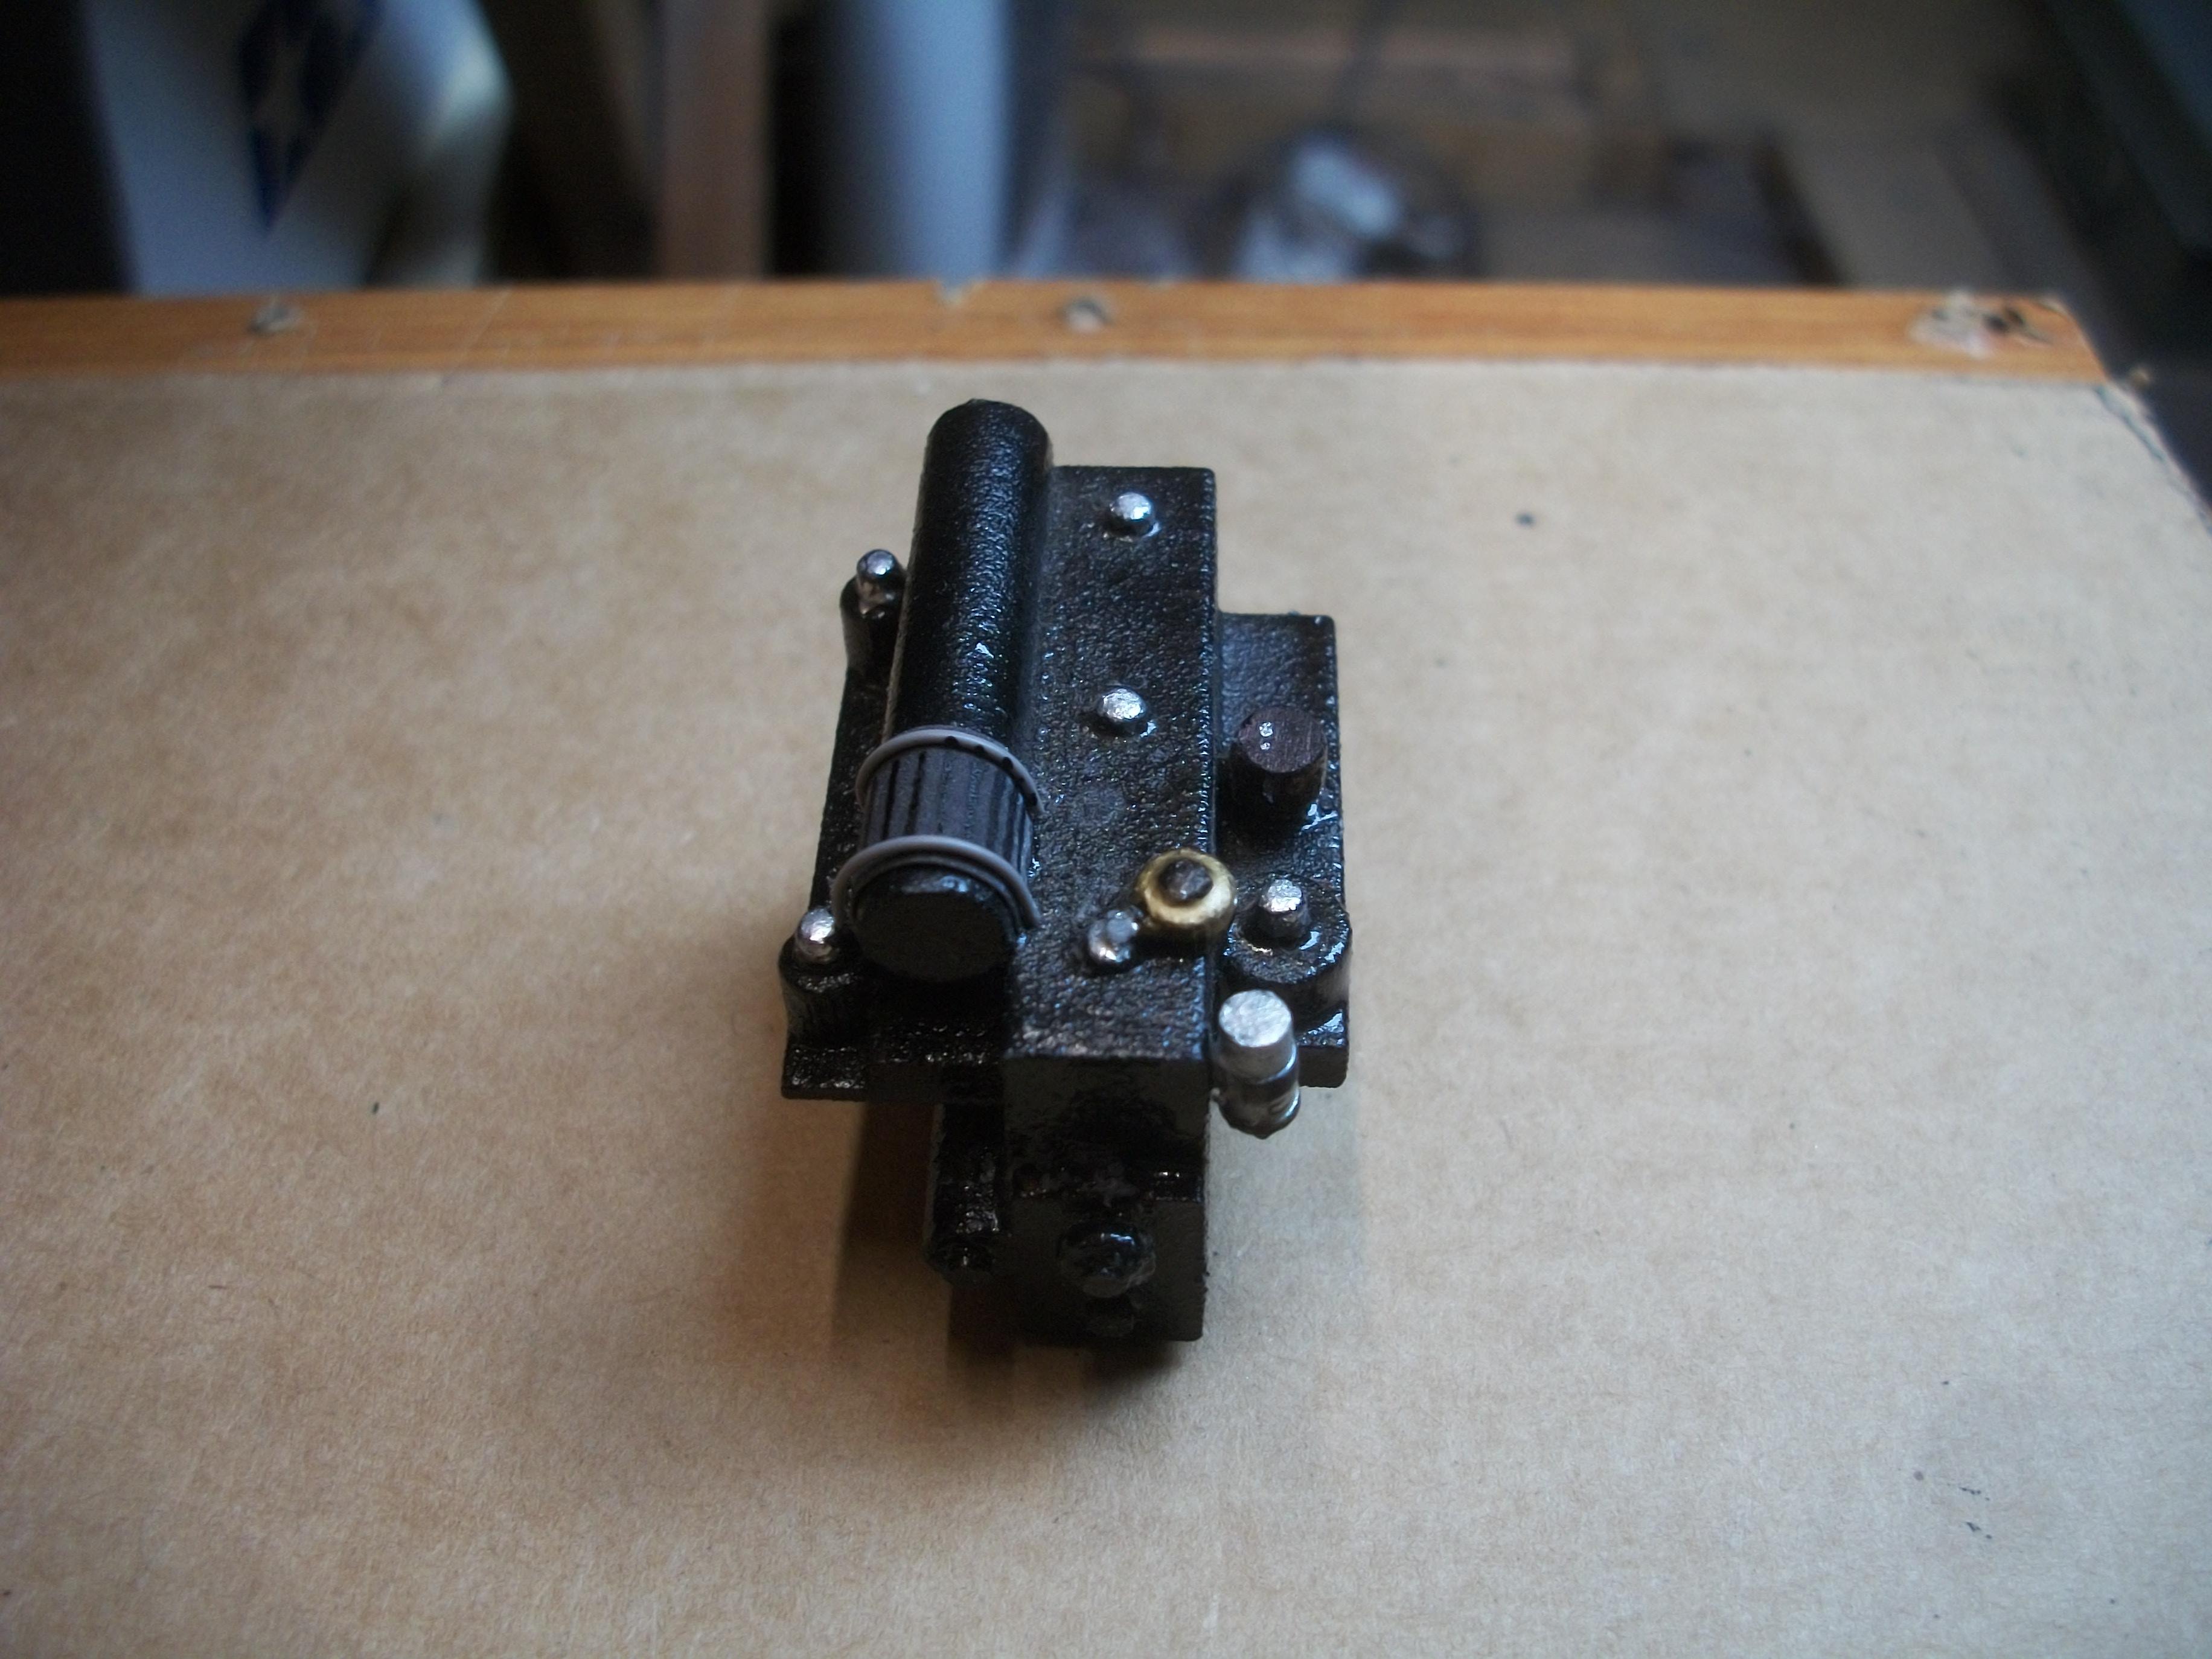
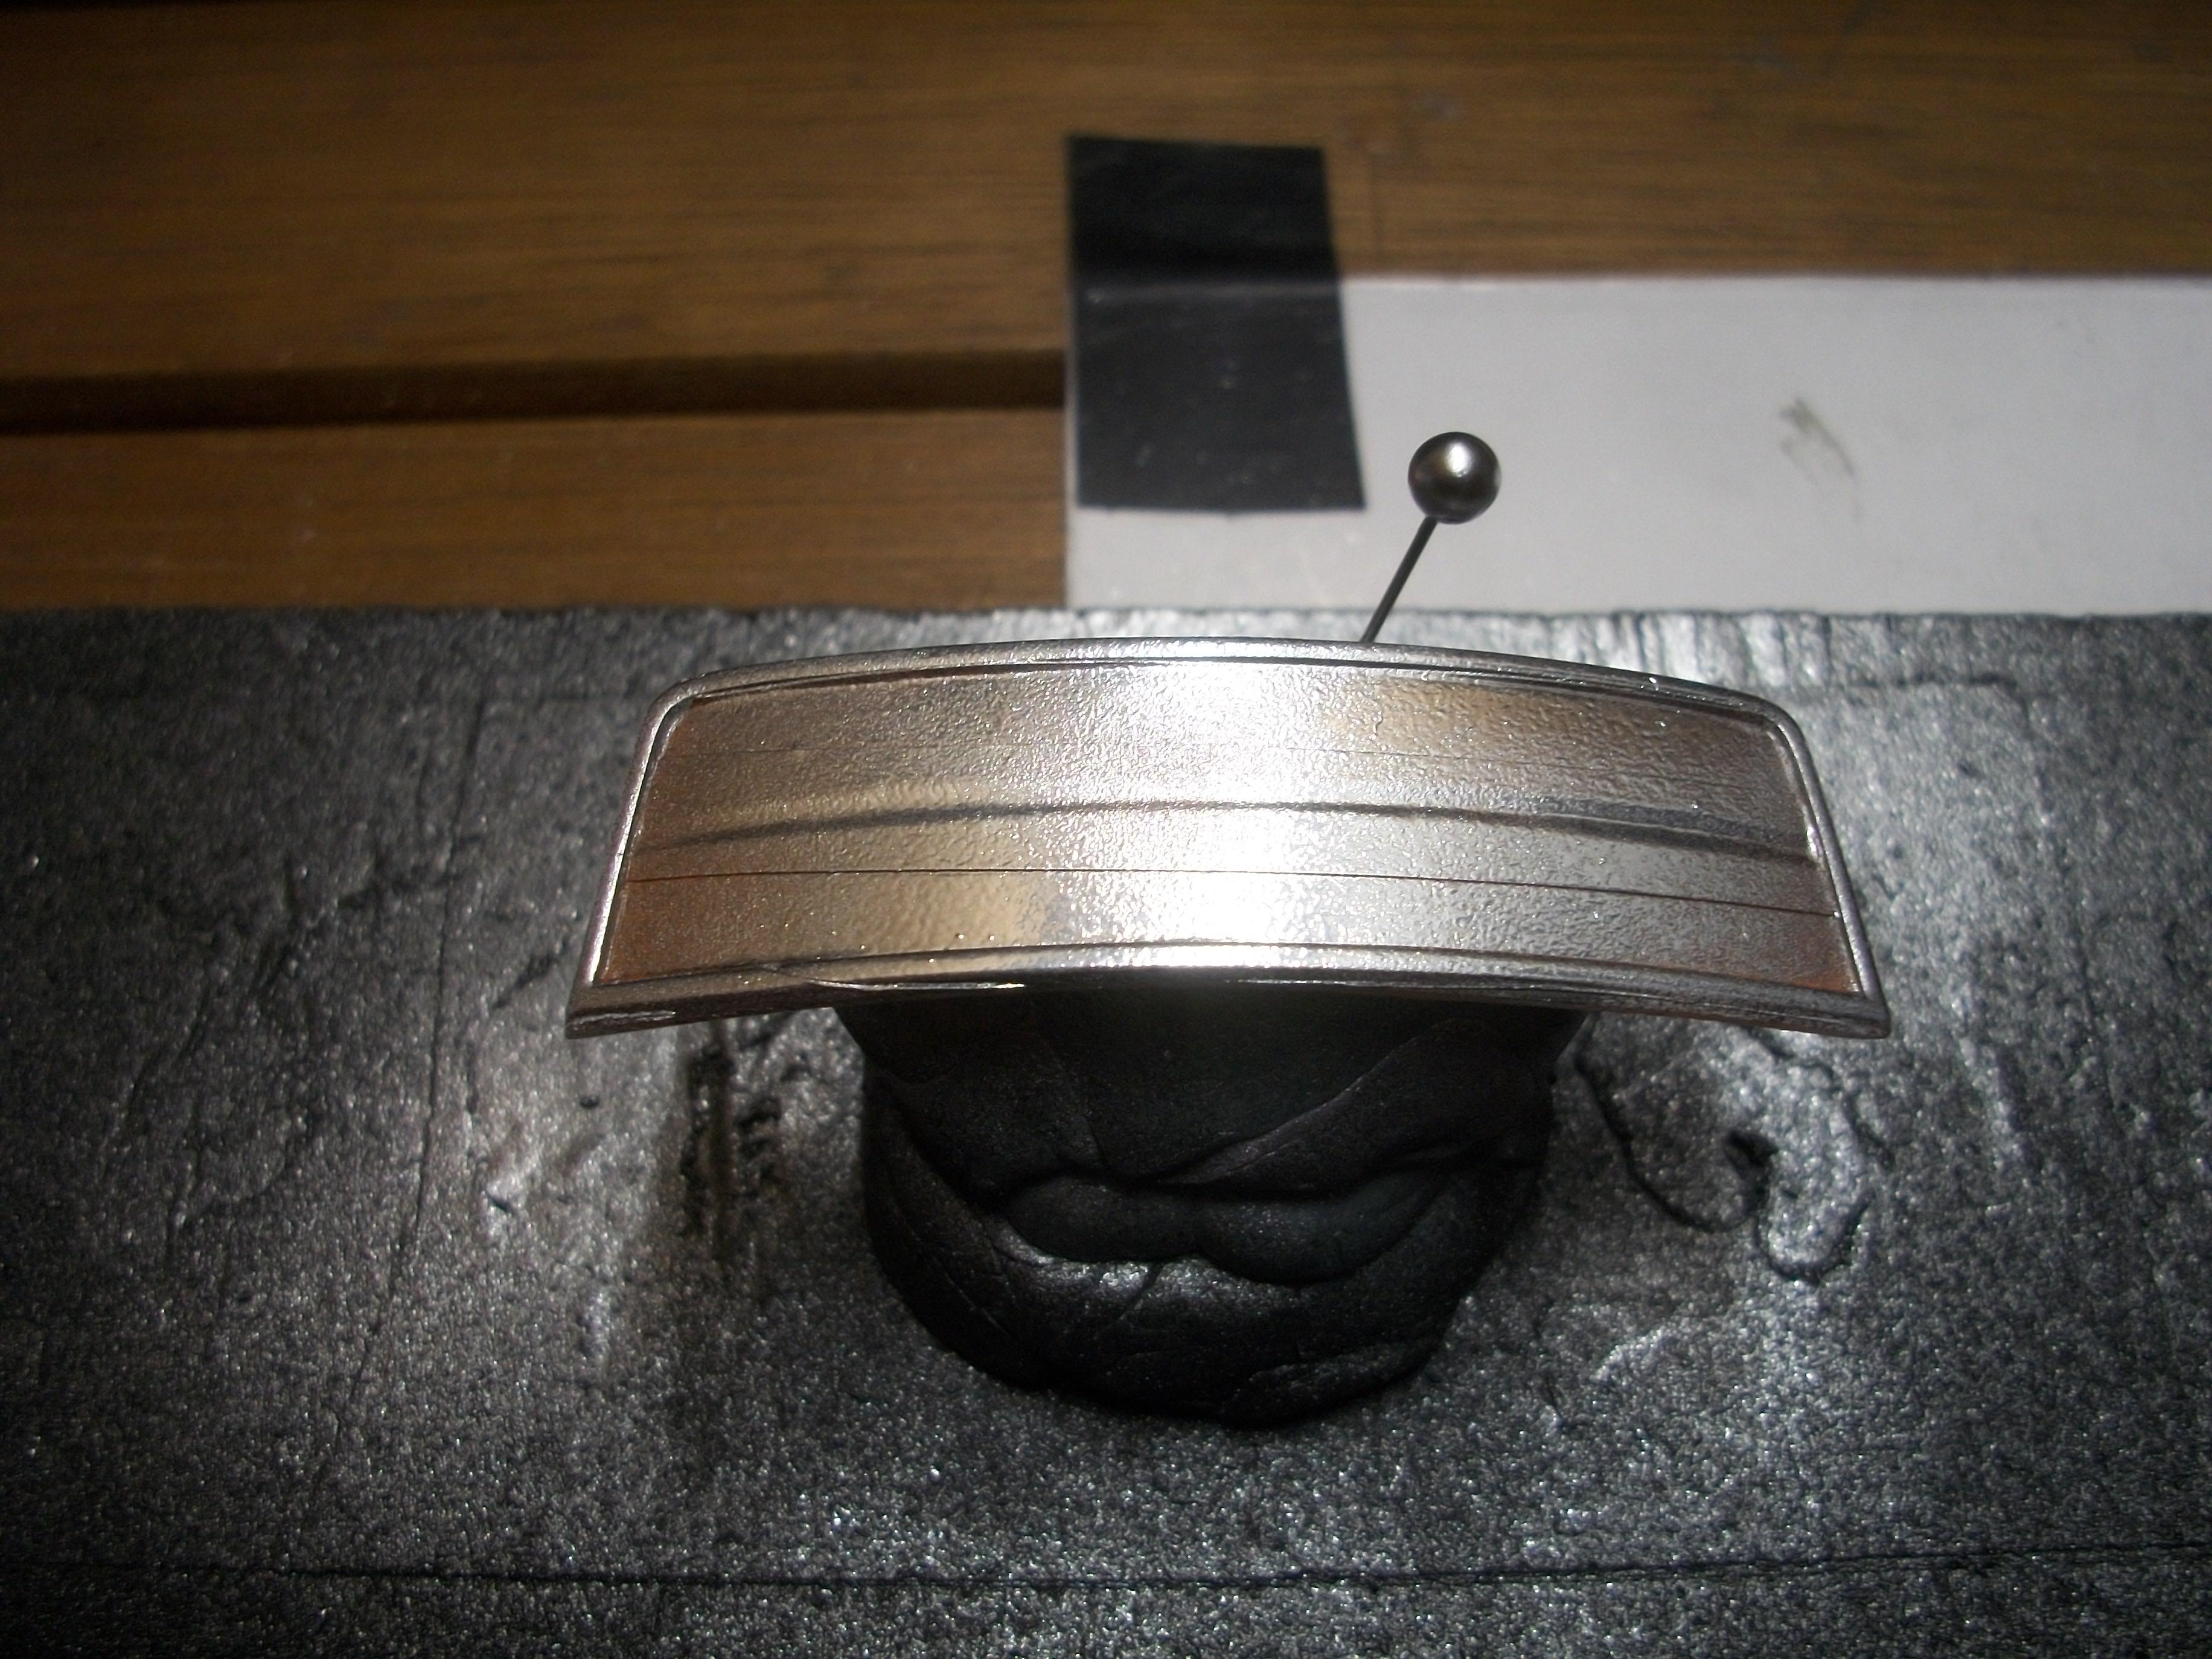
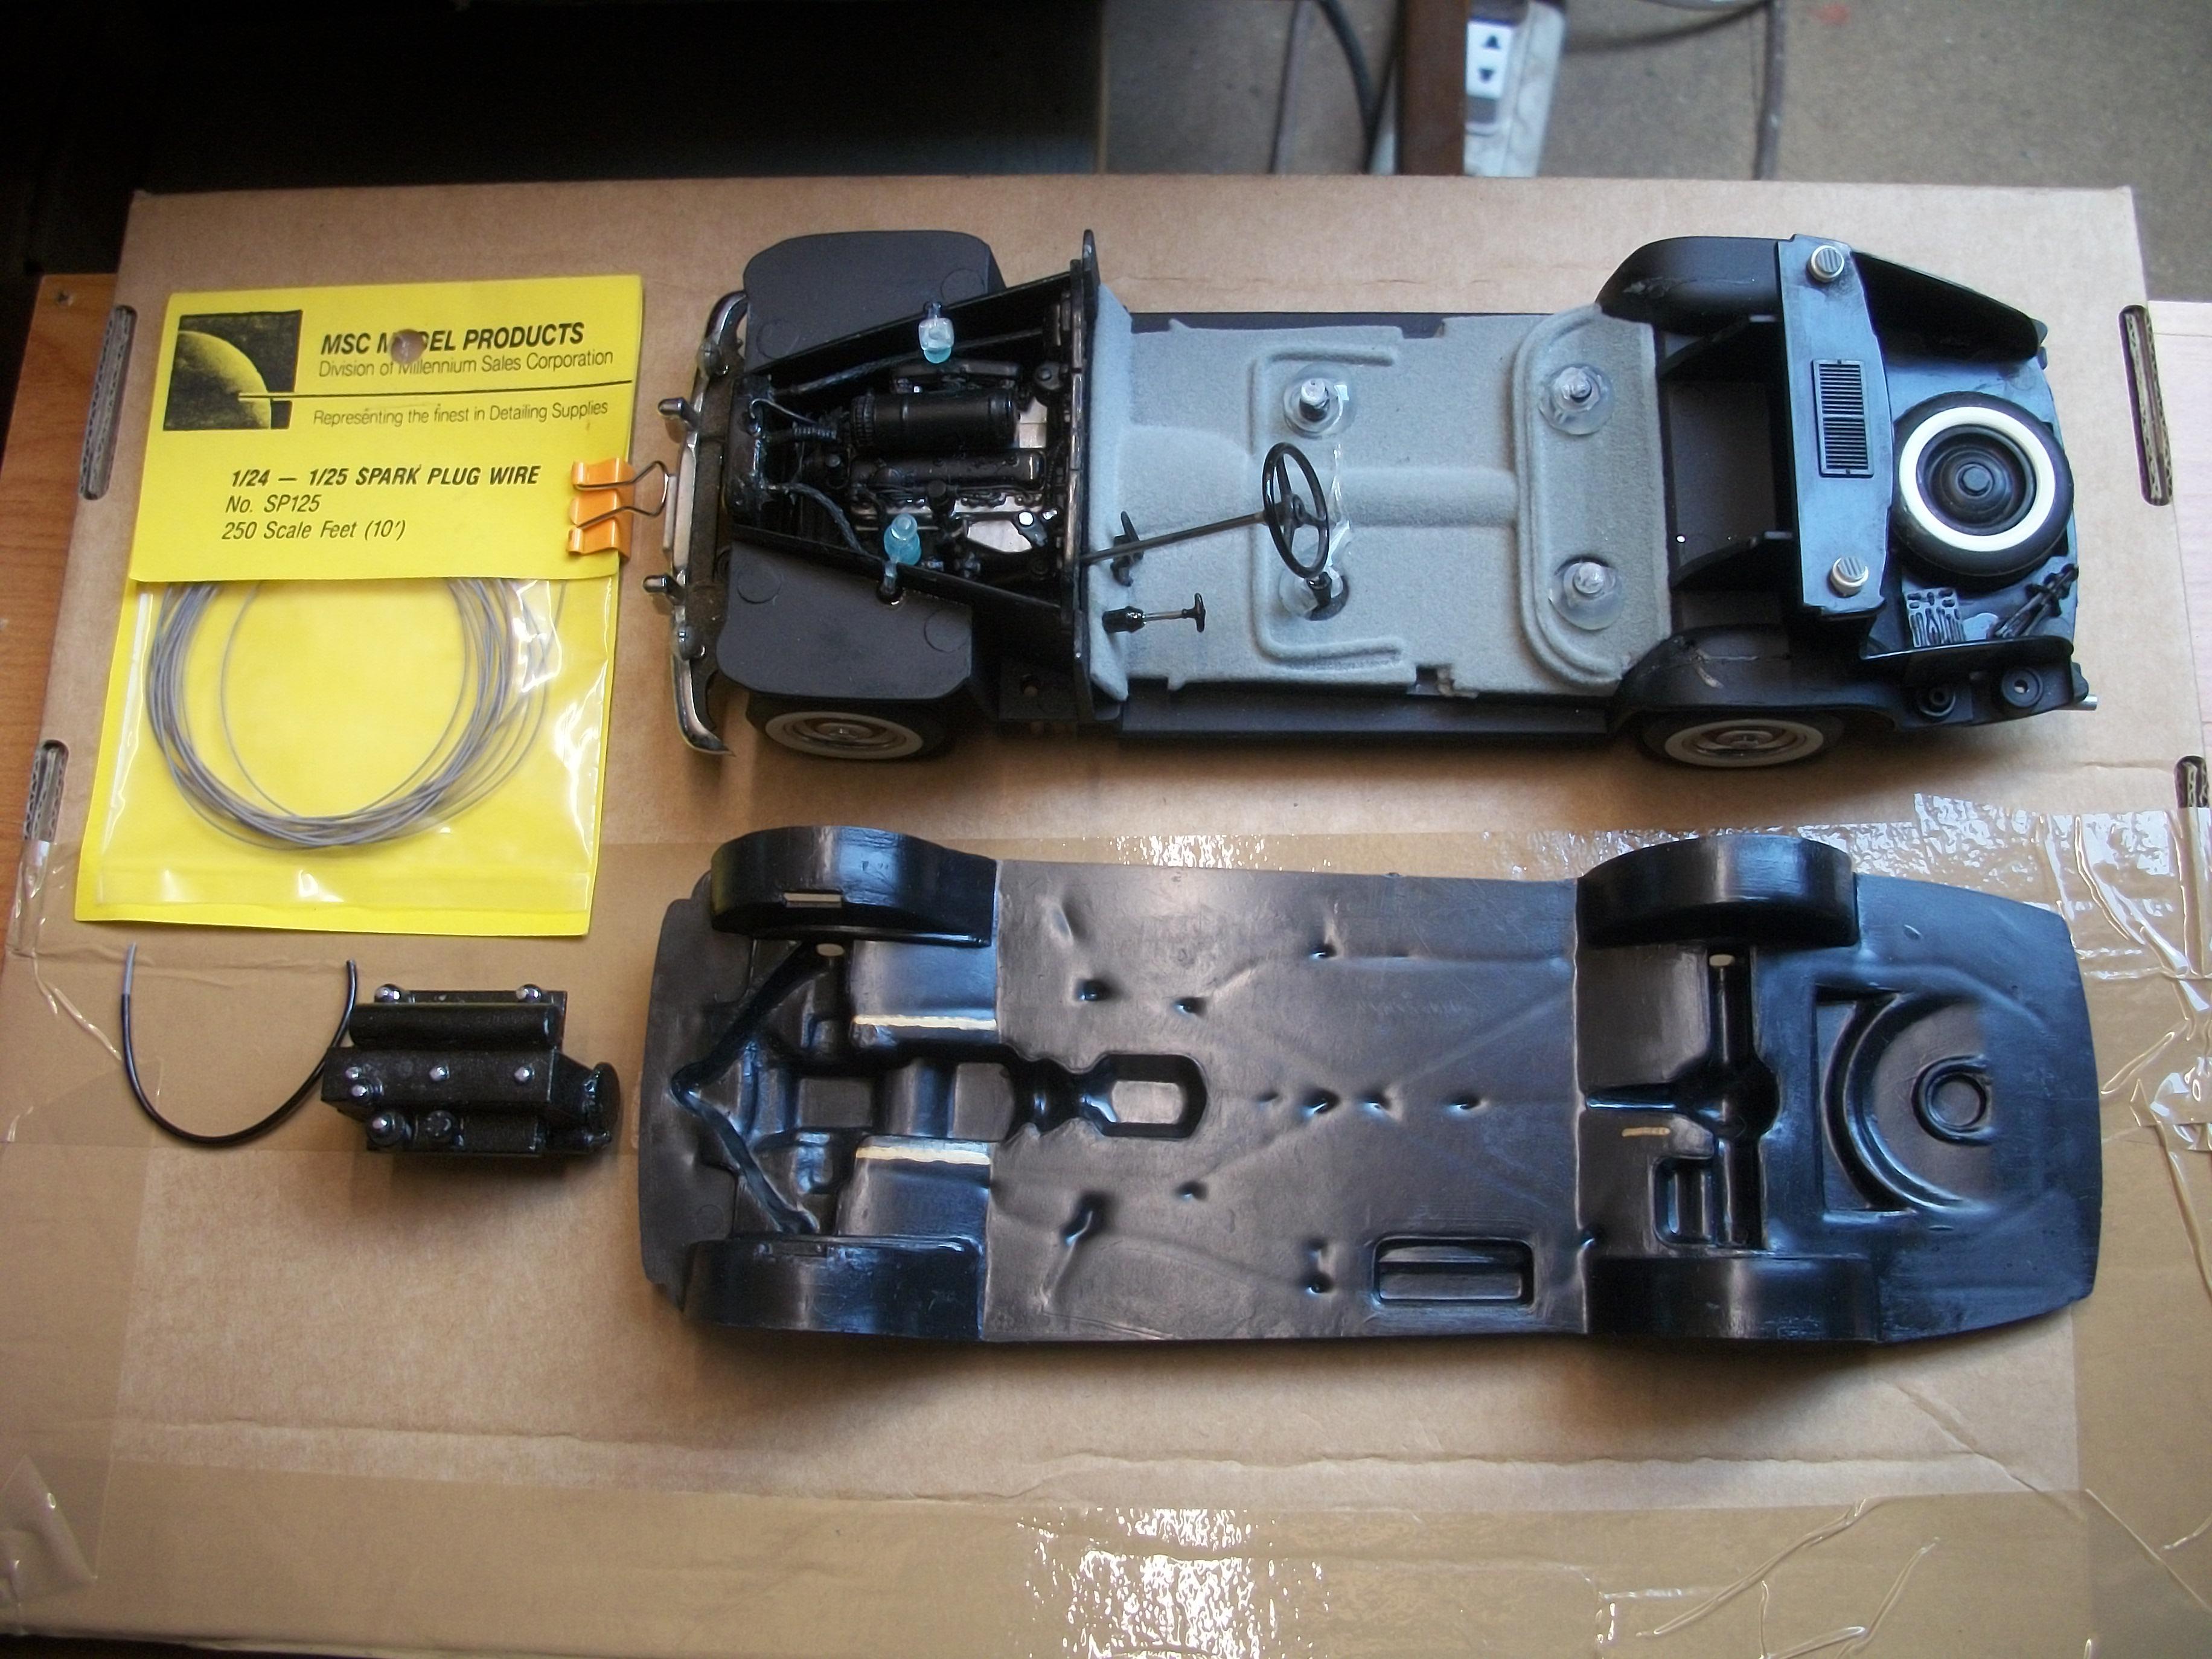
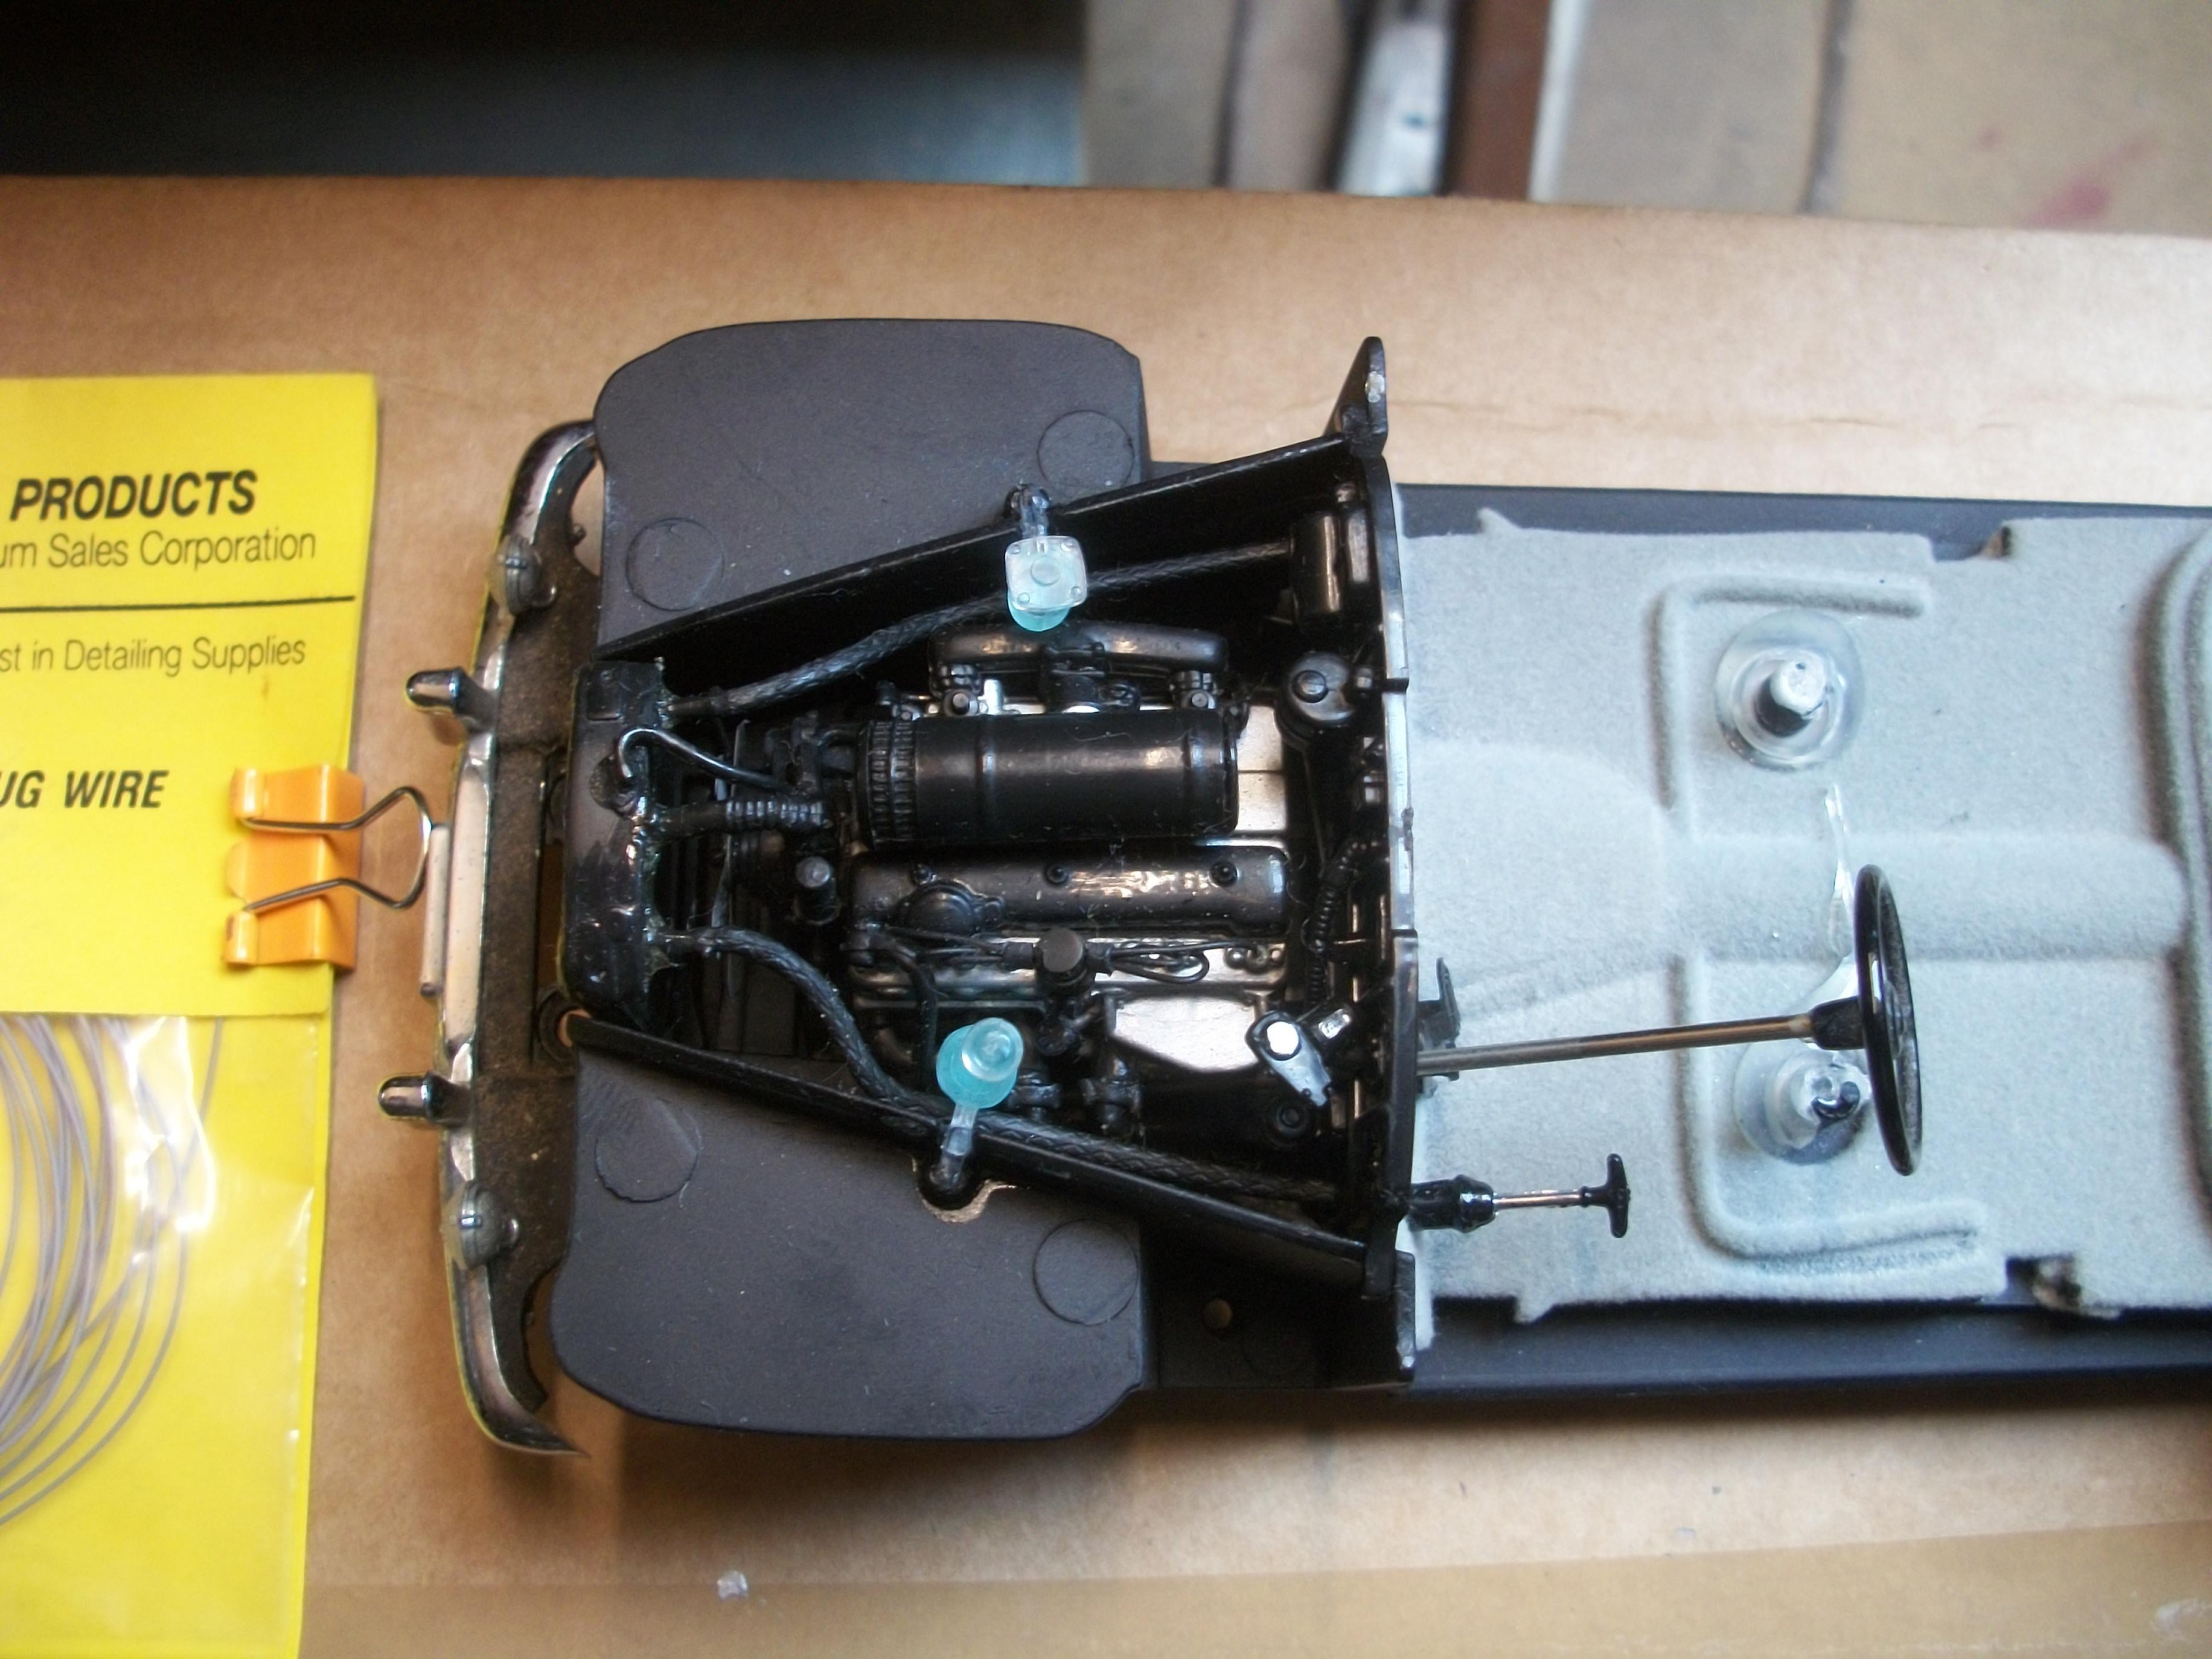
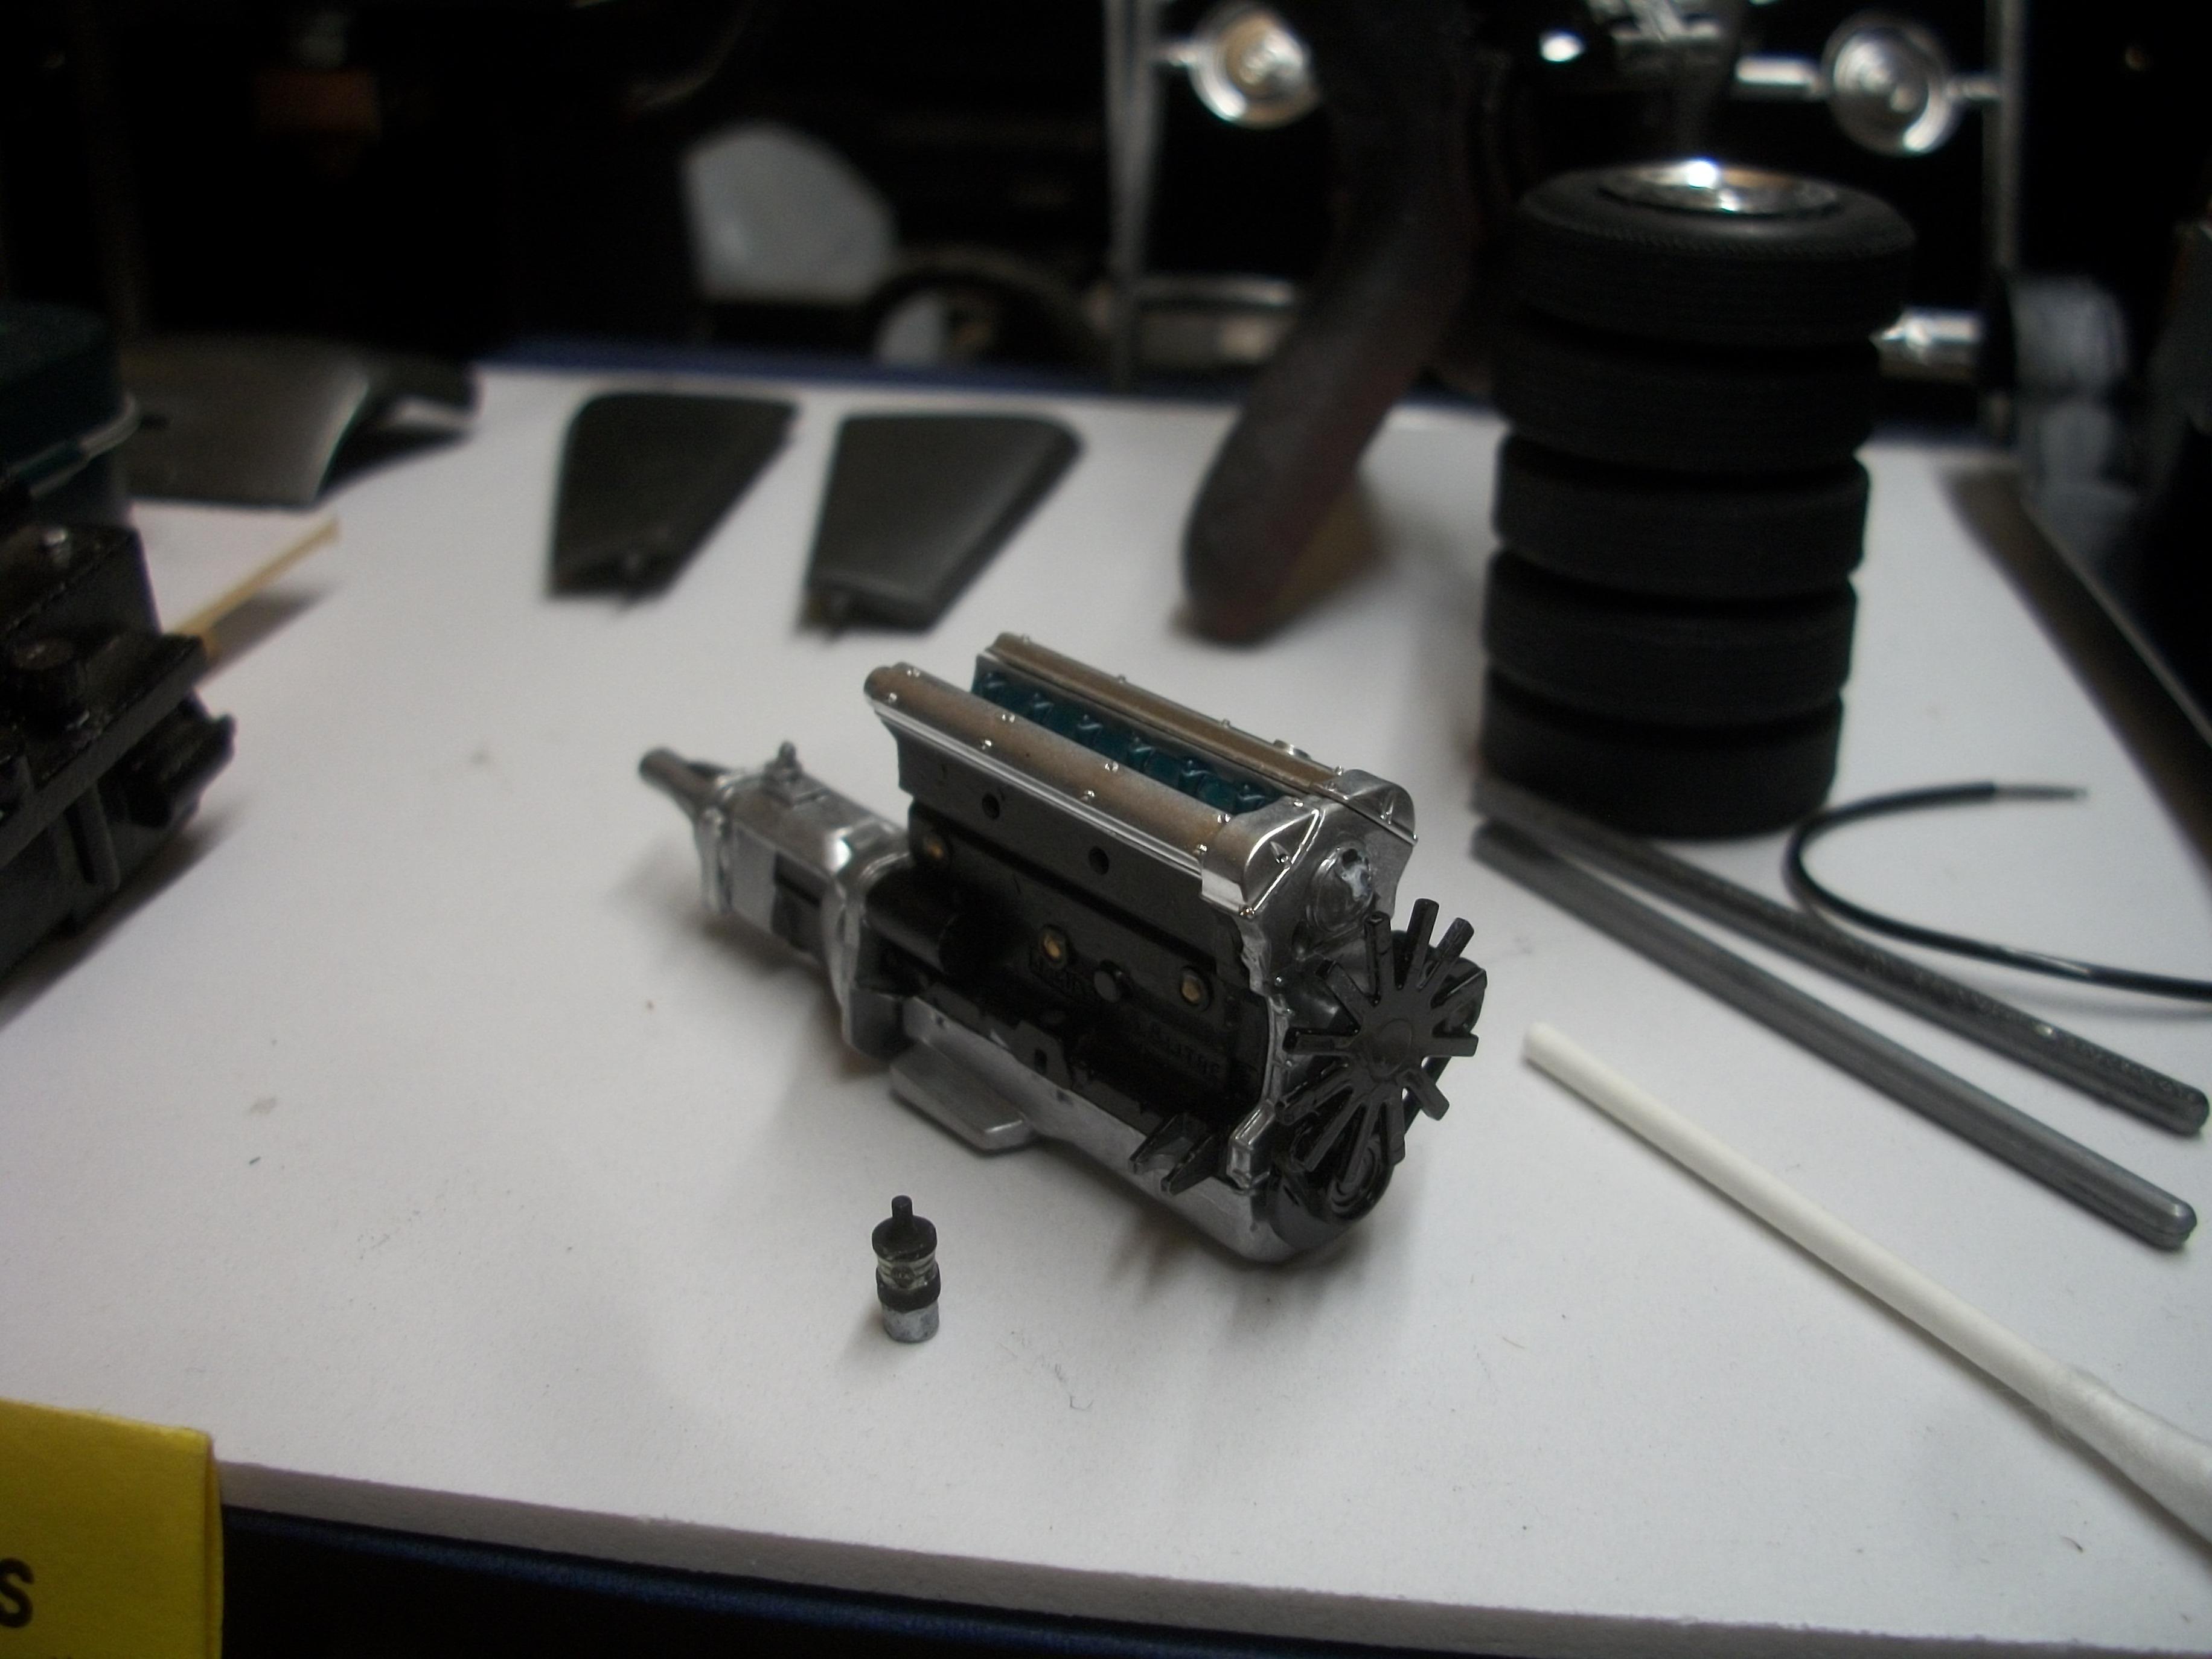
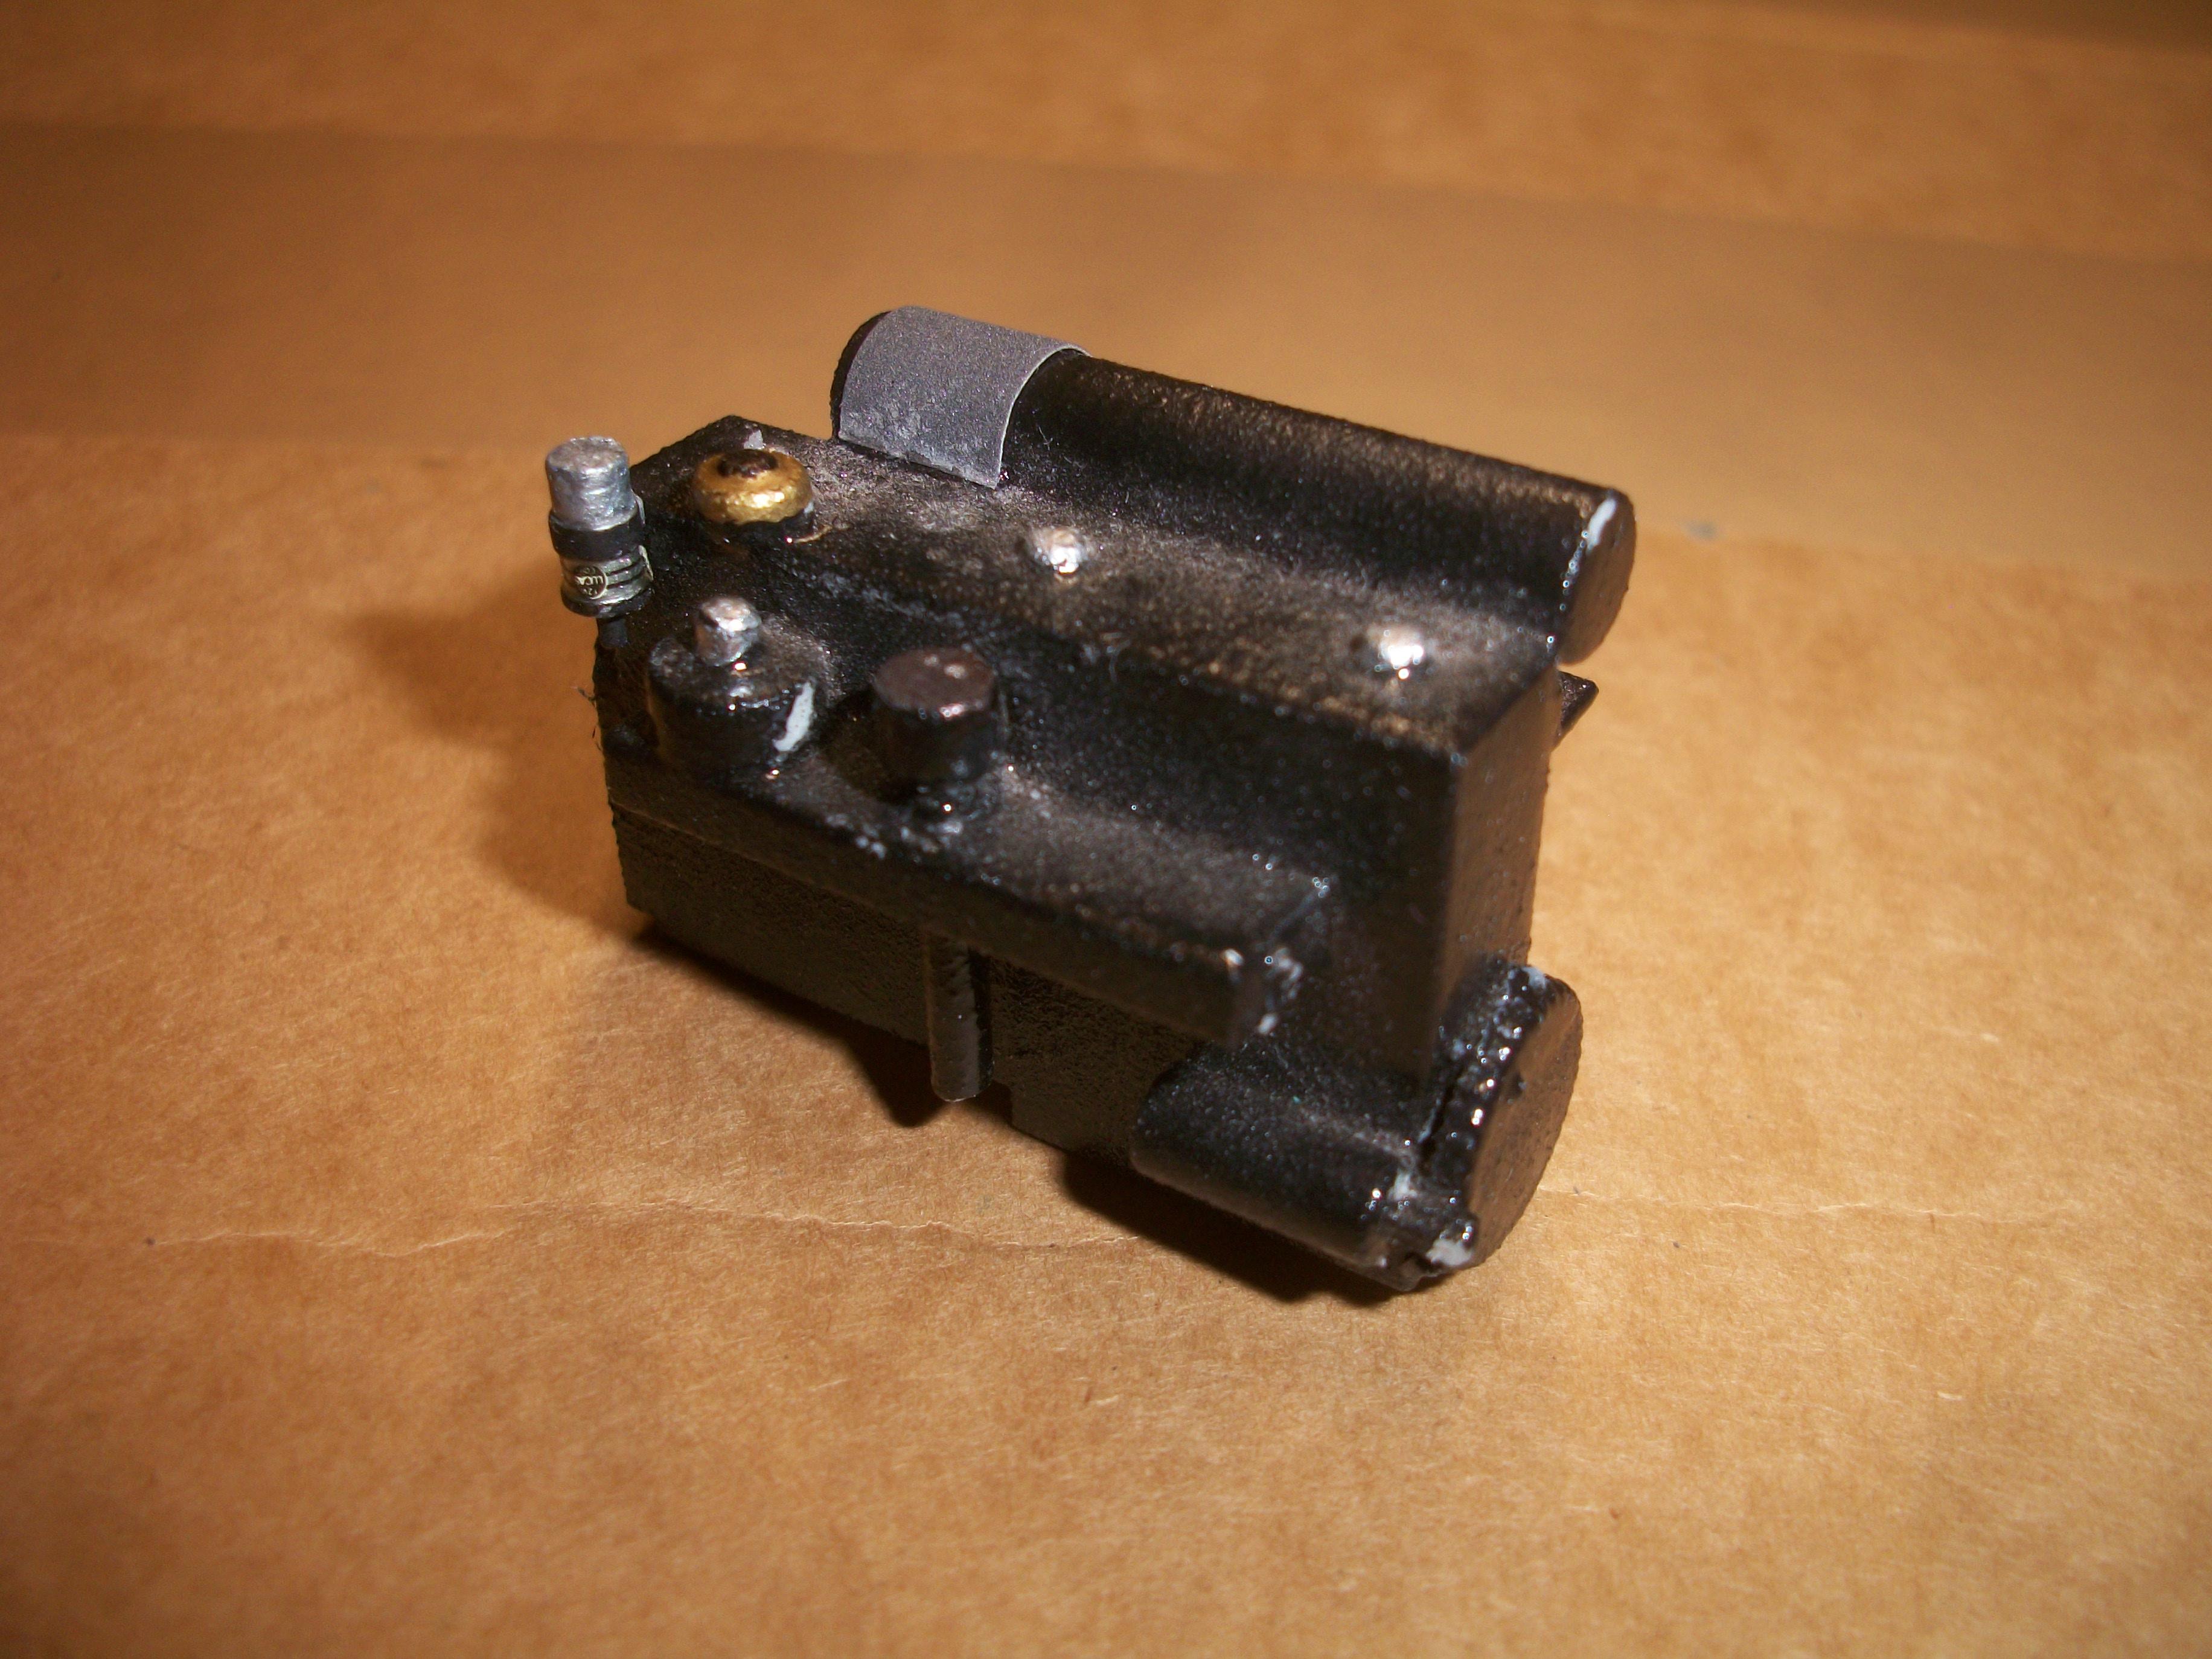
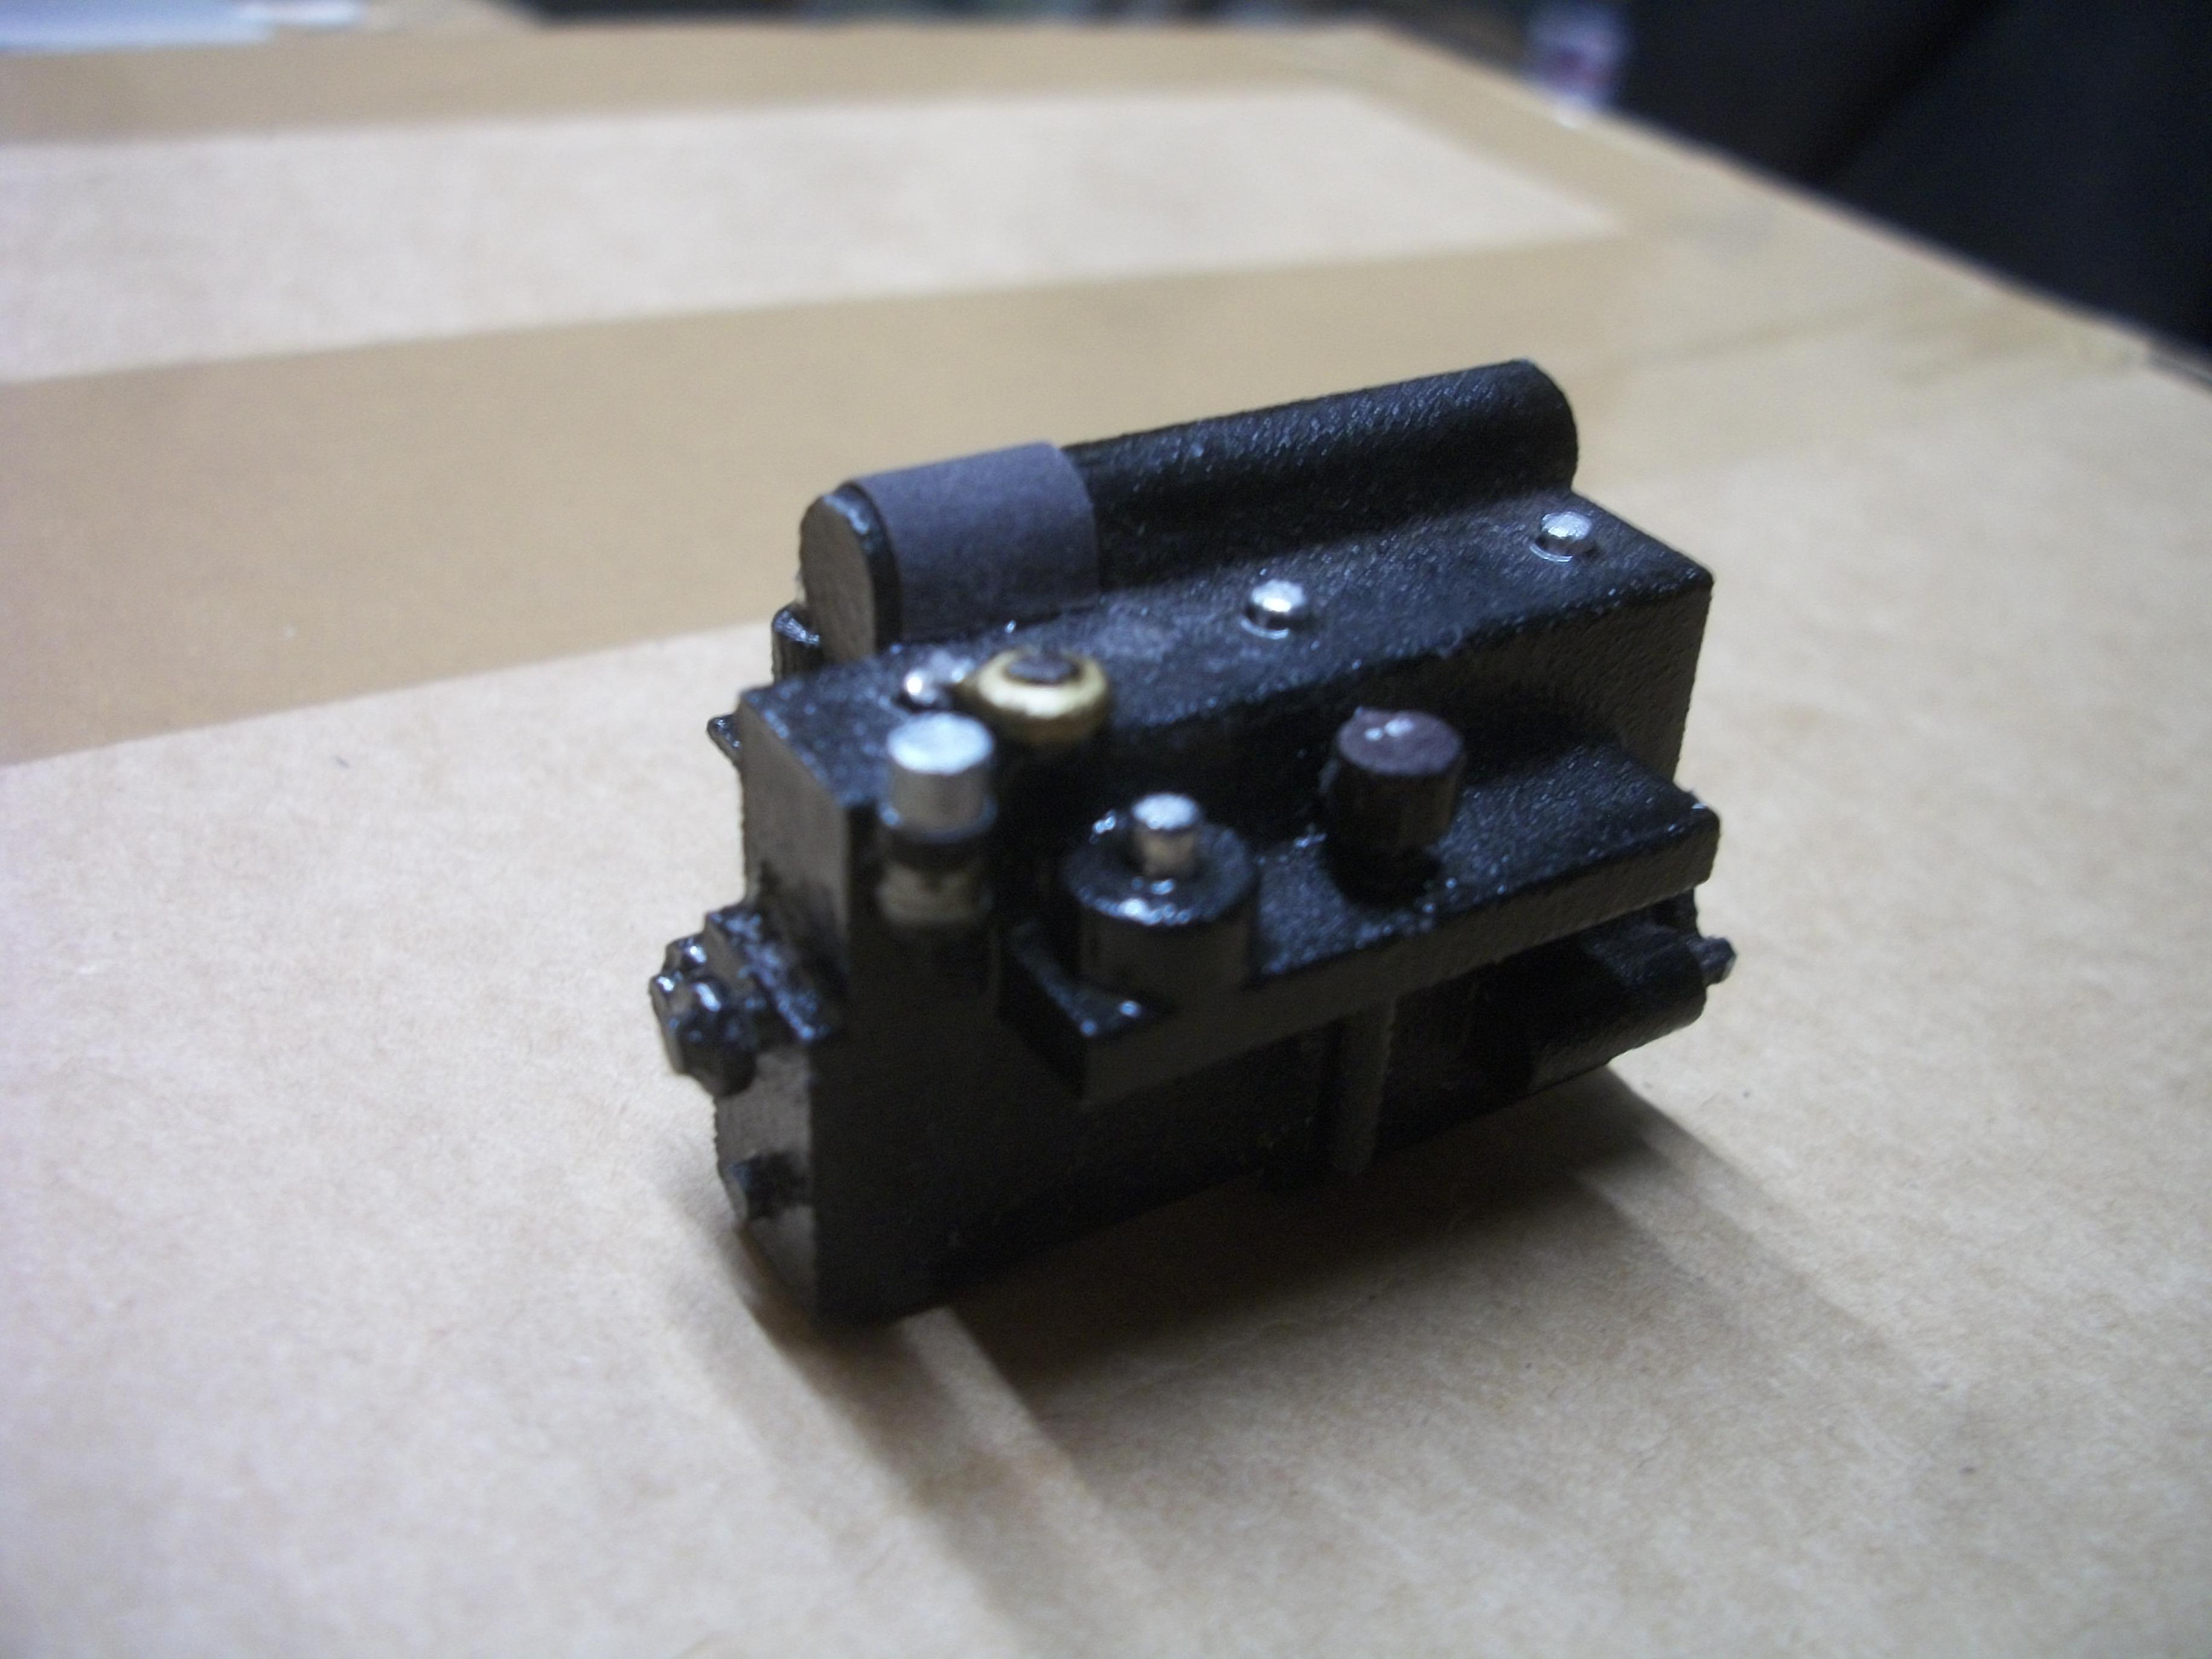
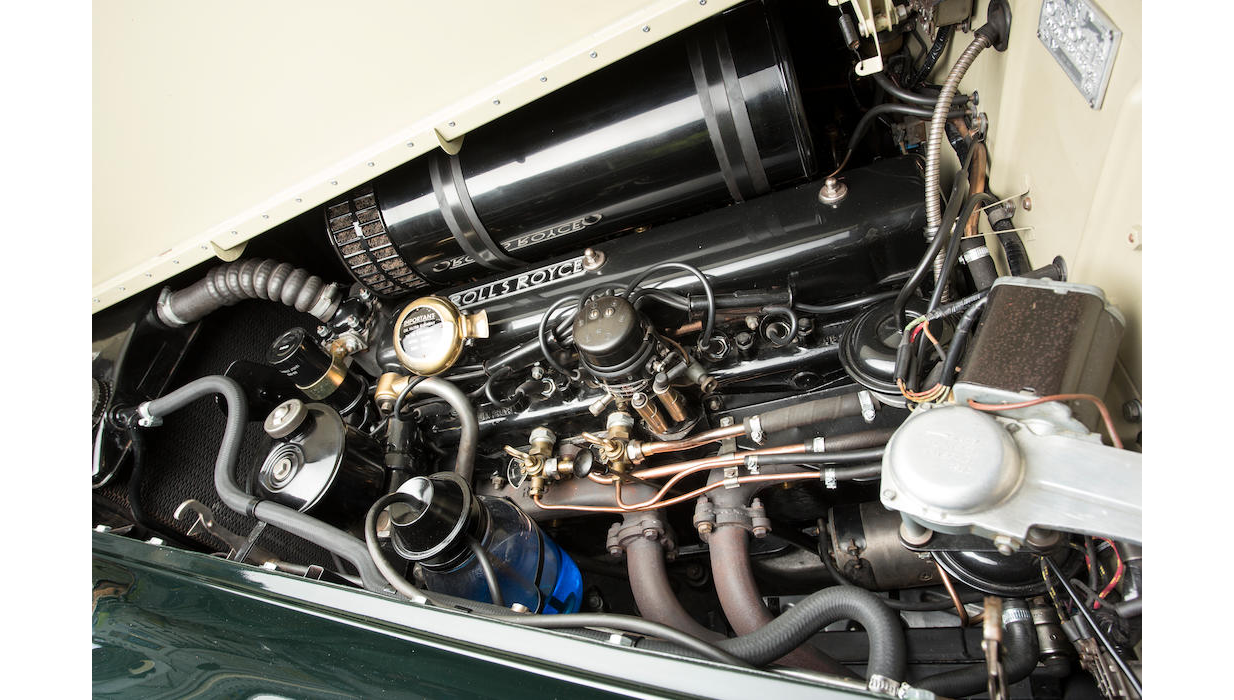
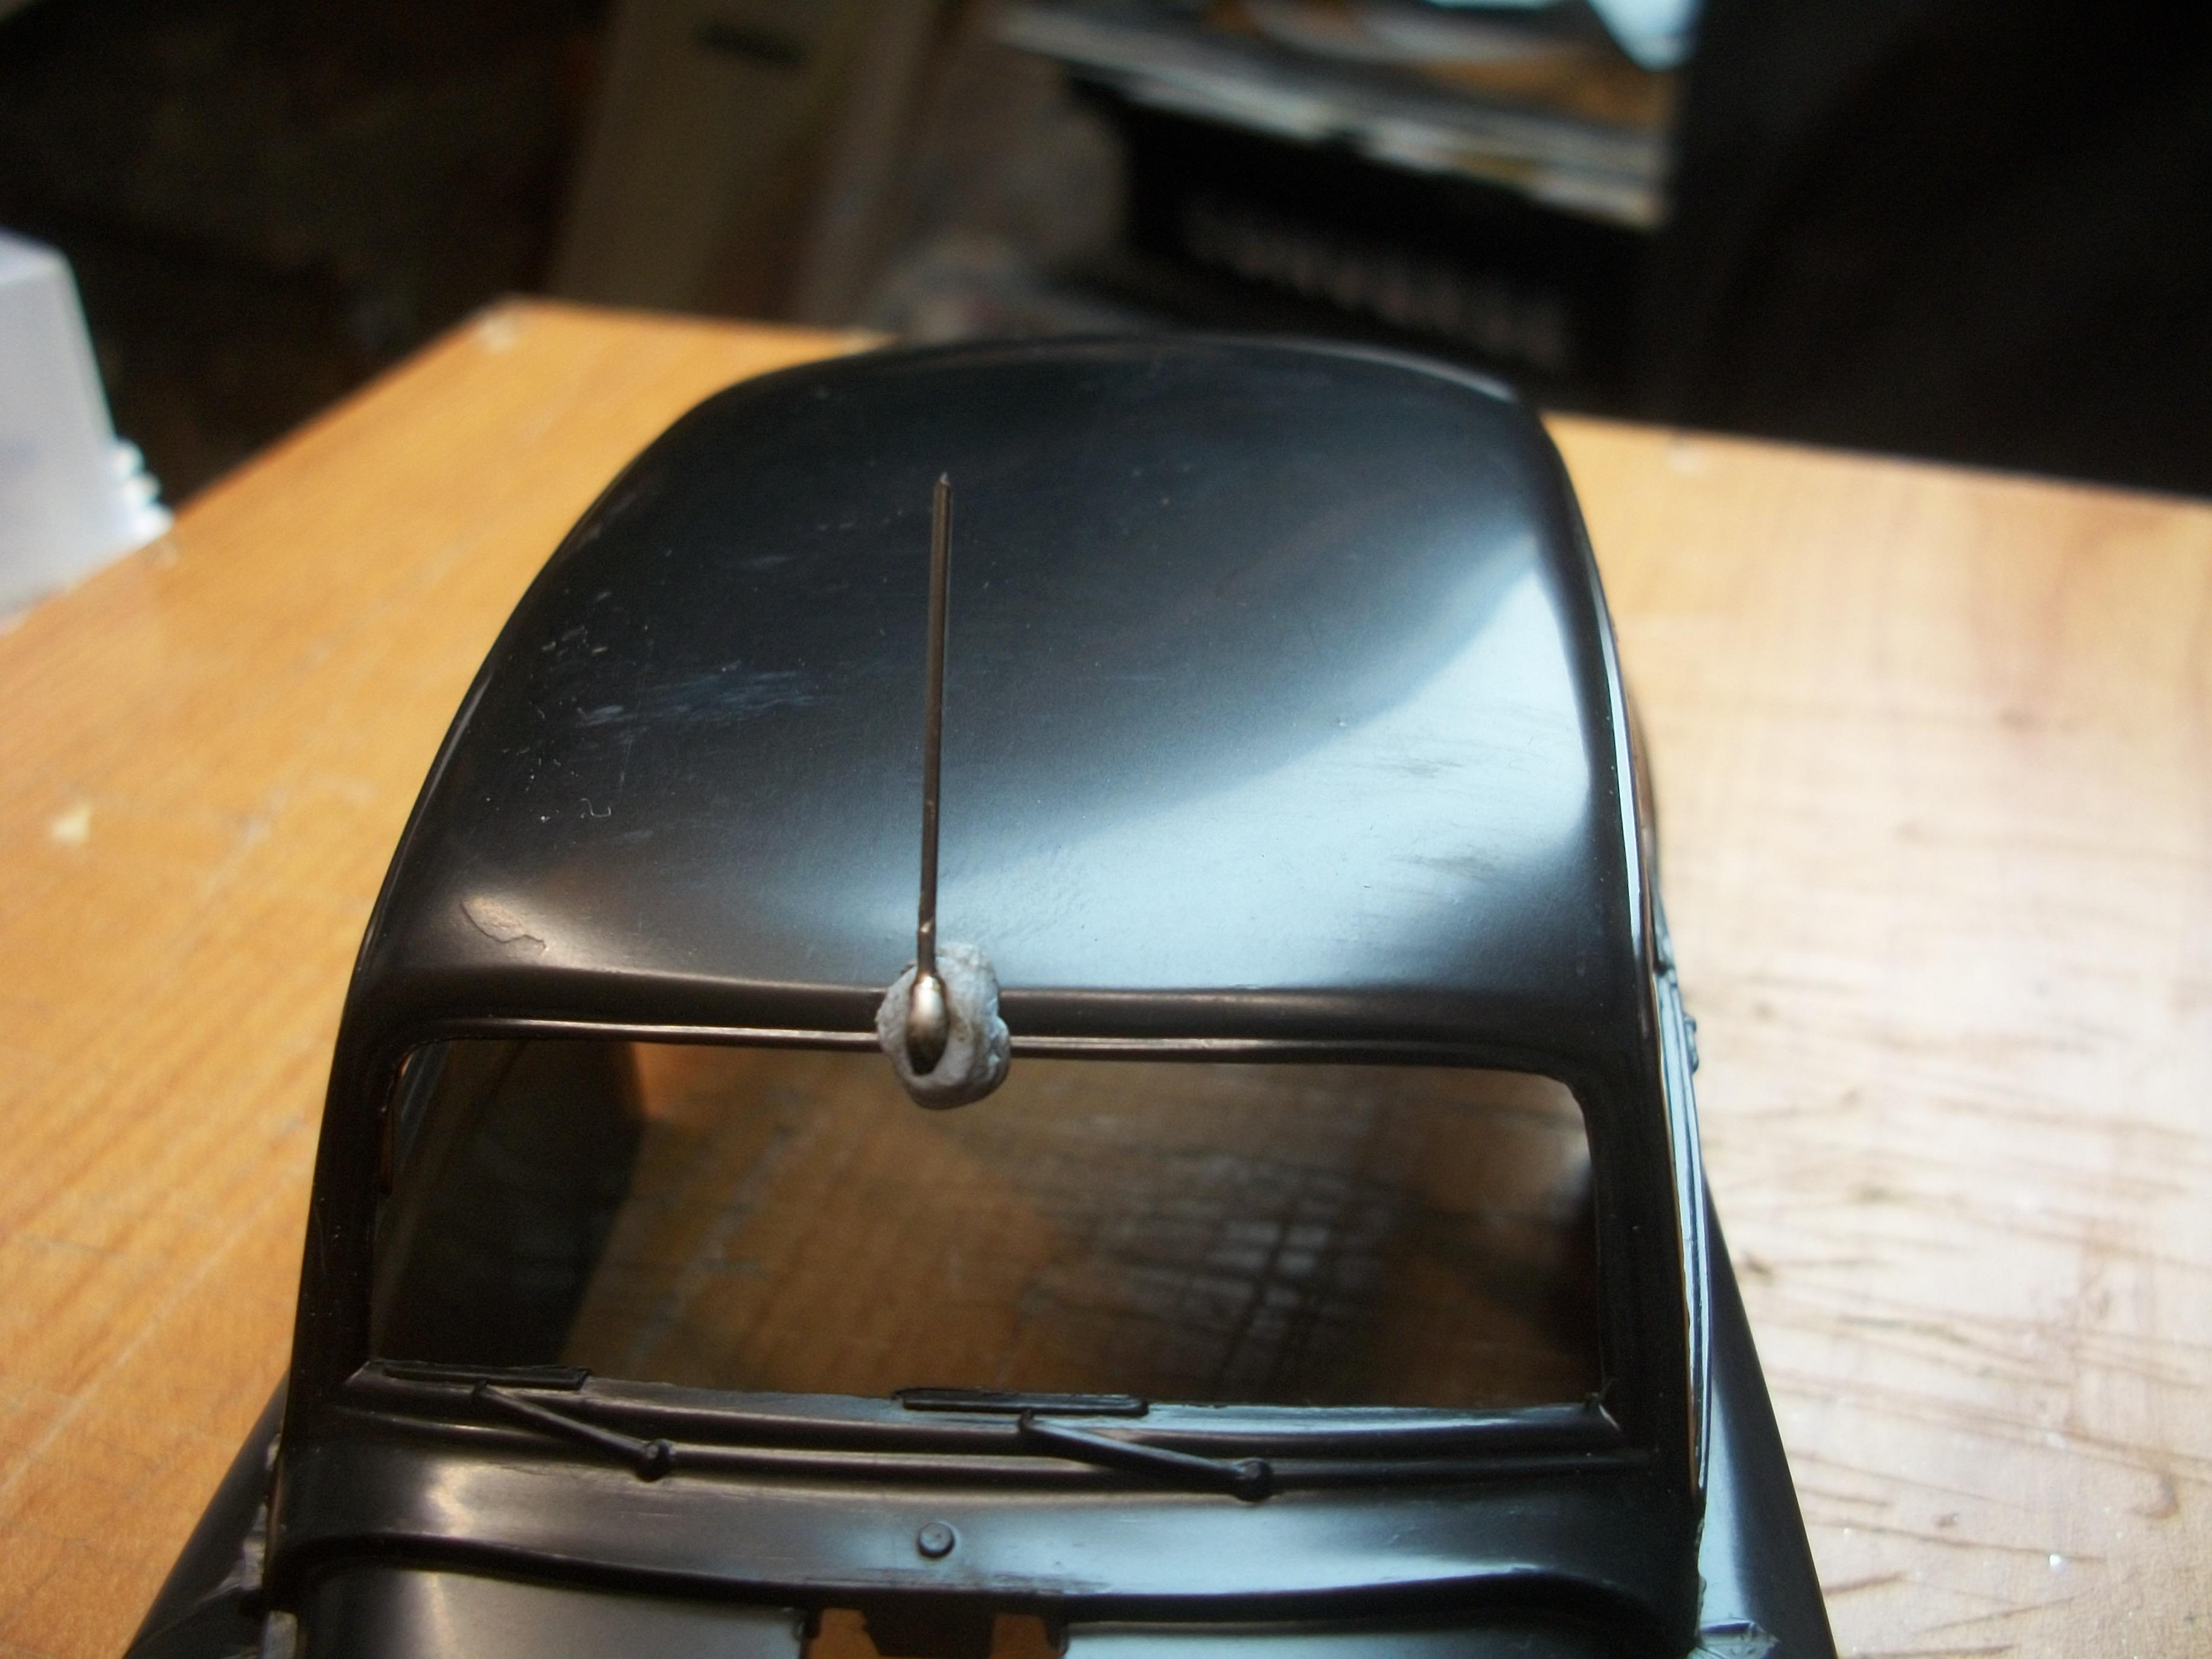
I airbrushed the windscreen moulding and the radiator grille was airbrushed again because it had some damaged areas. While there was some excess liquid chrome remaining, I dipped the roof aerial mounting in the chrome, and also touched up the top of the dashboard mirror. Started detail work on the 3D printed engine, and used an ignition coil from the Tamiya Jaguar engine. The distributor cap needed correcting, because the spark plug leads exit from the side of the cap, and not from the top. I have some plug lead material ready, as well as some tubing to run the leads through. The Franklin Mint engine is good for reference, as it has an accurate distributor cap and leads setup. Despite close examination, I cannot see a way of extracting the engine from the diecast model. All the other parts of the car I know how to dismantle, but Franklin Mint have been very clever with the engine. David
-
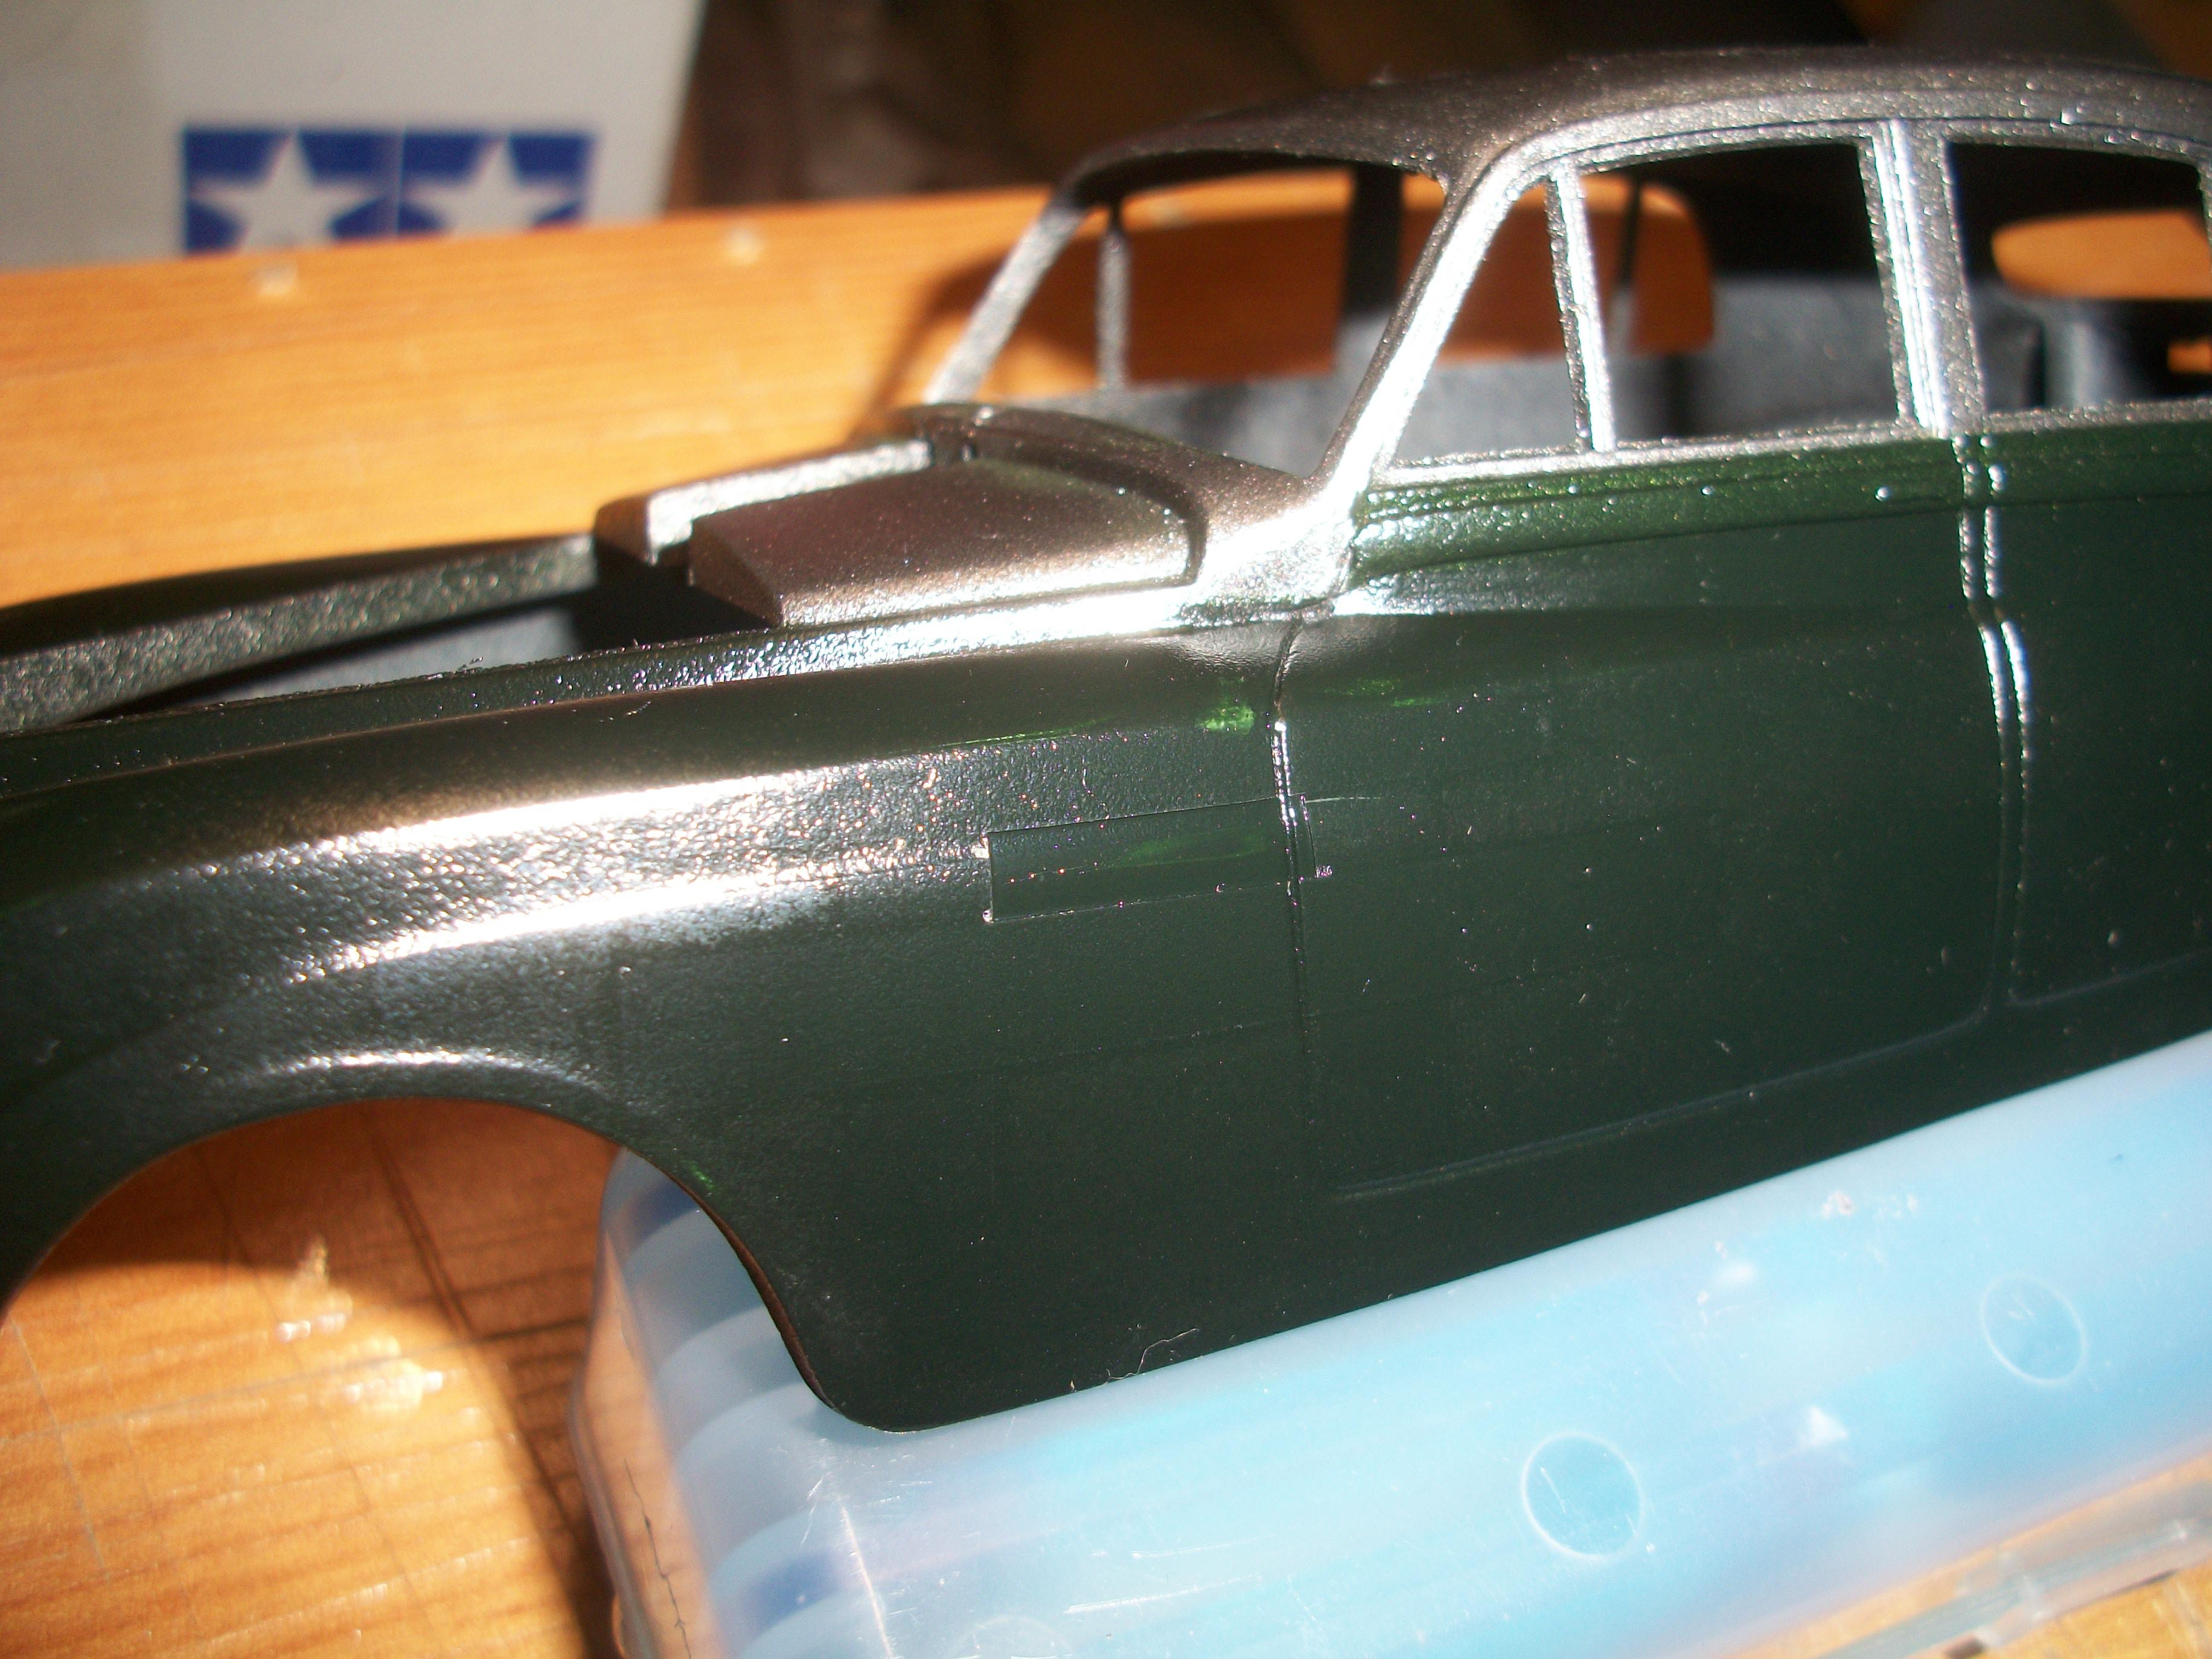
I was not happy with the blemish on the nearside front wing, which I think was caused by wet sanding down to the primer. I decided to mask everything off, leaving a small rectangular window around the problem area. There is also one on the offside front wing, but less obvious. I applied an extra coat of Velvet Green cellulose to both sides and removed the masking four hours later. The repair has worked, although you can see a rectangular outline where the tape has been. Hoping the polishing will remove the outline. Did some really good masking on the windscreen glass, and also the radiator grille, ready for airbrushing Molotow Liquid Chrome. The photo number 5480 is taken with flash, so it shows every imperfection. David
-
Many thanks Pierre, and your comments are most appreciated . . . These 1:24 scale Rolls-Royce model cars are well worth building, and you can produce a very accurate replica of the Silver Cloud I as long as you can improvise and scratch build to some degree. The Minicraft, Revell, Entex, Hubley and Masterkit versions of the kit are a good basis from which to start. The Franklin Mint diecast version is also useful for donor parts if you dare to dismantle them ! David
-
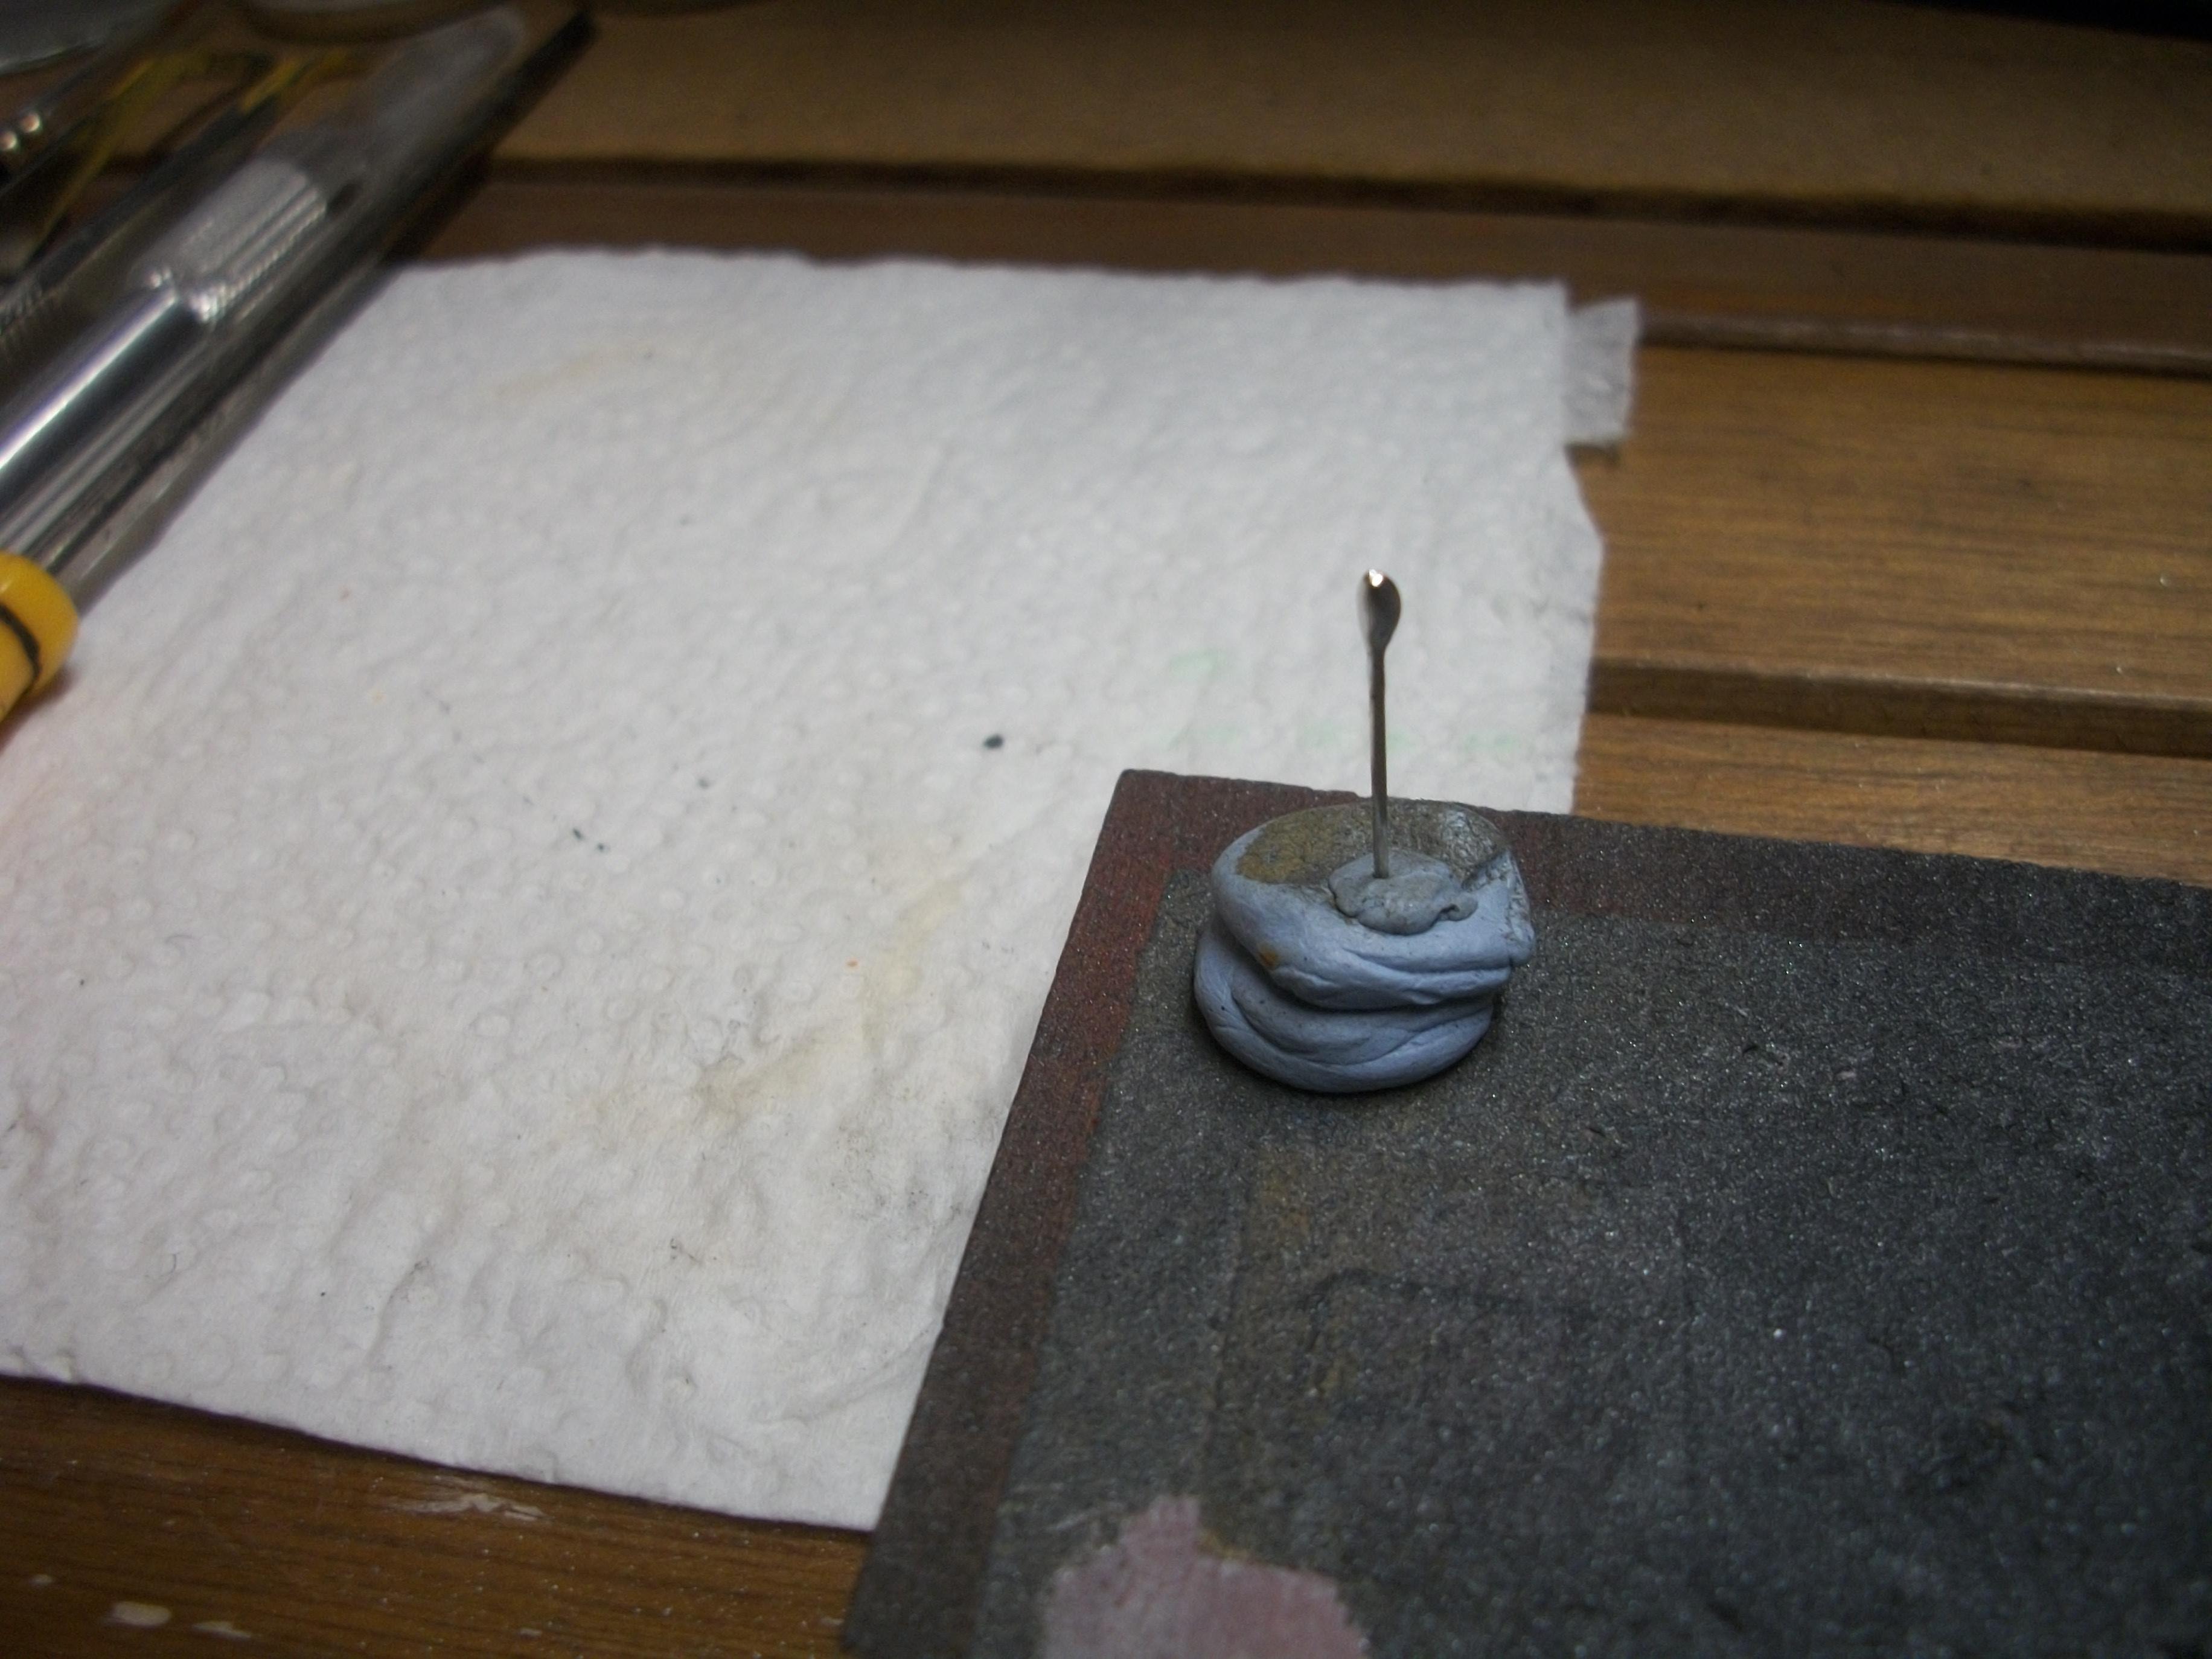
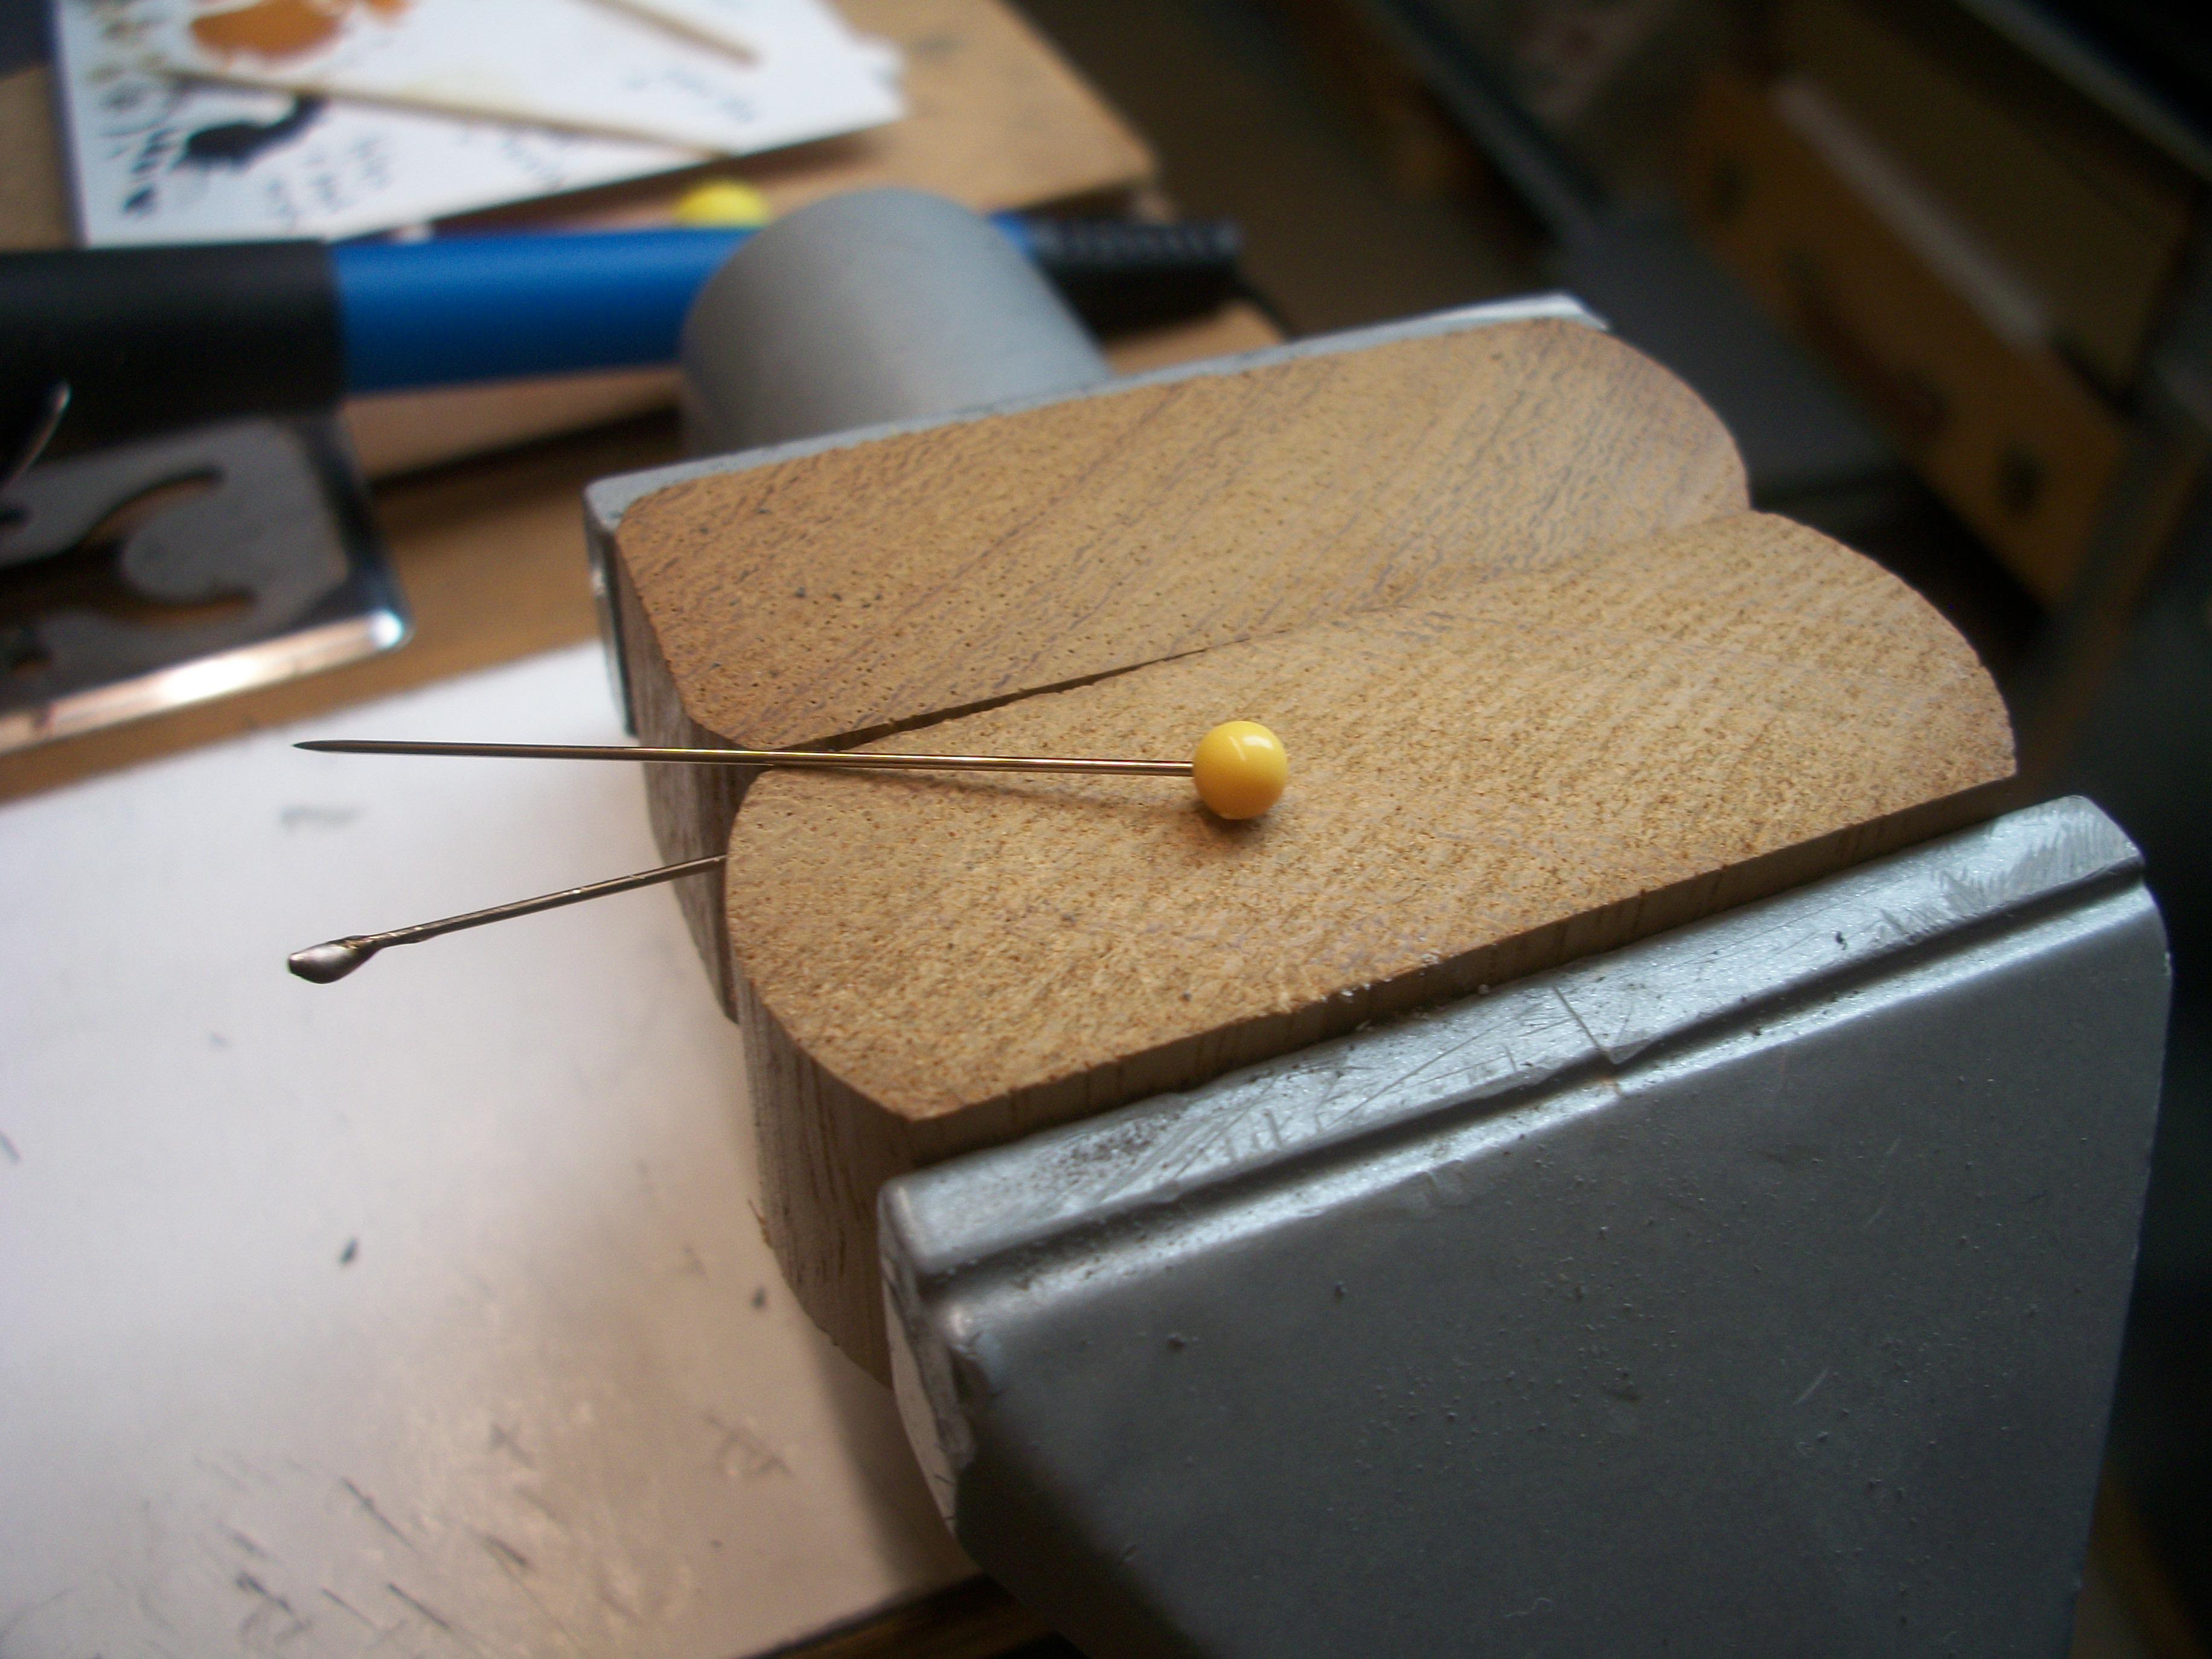
I do have a number of options for restoring the windscreen surround chrome. I can mask off the glass of the screen, then either airbrush the liquid chrome, or apply the liquid chrome with the pen. The other option is to use Bare Metal Foil, or I could use a windscreen from a different diecast model. All the Revell kits have only 4 tyres, and I do have two sets of four, so I can use one tyre from a second set, leaving only 3 tyres for the next build that would require 5 tyres. Certainly, it is worth emailing Revell Germany to see if they would send me at least one set of four. I have scratch built the dashboard mirror and super glued it in place. The roof aerial is also scratch built, and is ready for later. I used the same yellow head pins for the mirror stalk and the aerial. This morning I applied the second coat of cellulose Velvet Green to the lower half of the body, and this evening I removed all the masking. The two-tone joining line looks good, and I shall wait five days before using Tamiya Polishing Compound on the paintwork. David
-
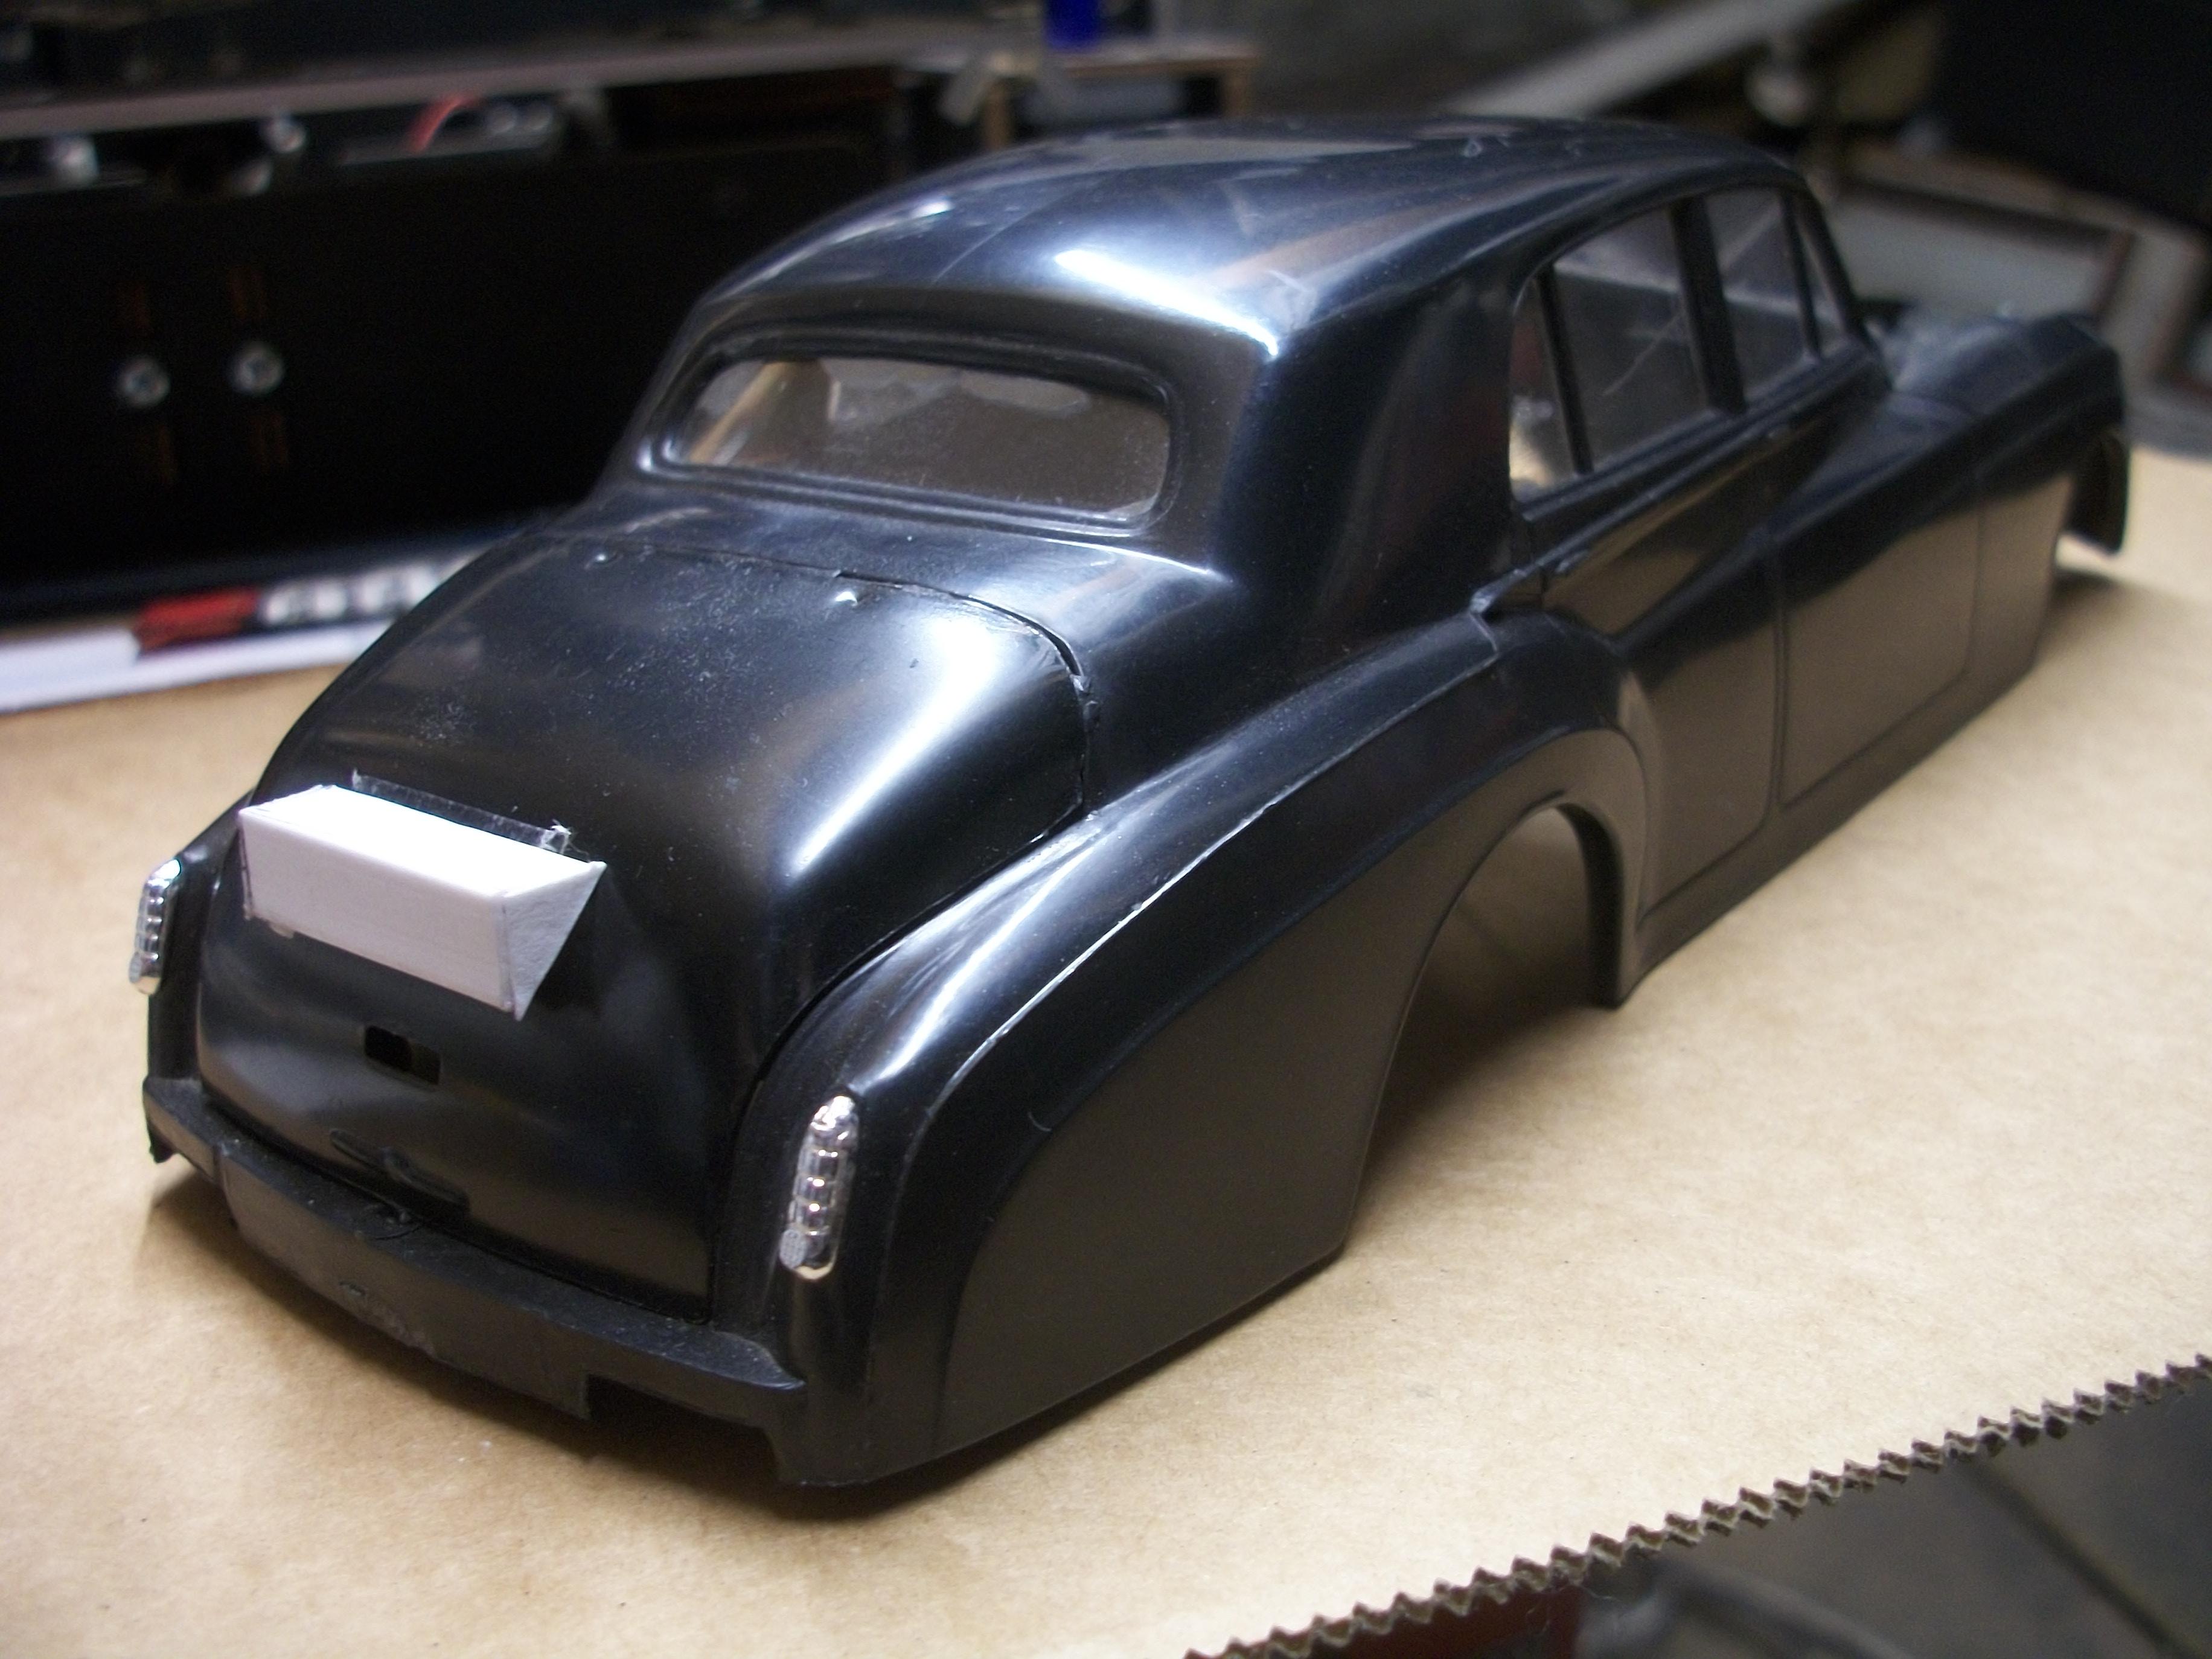
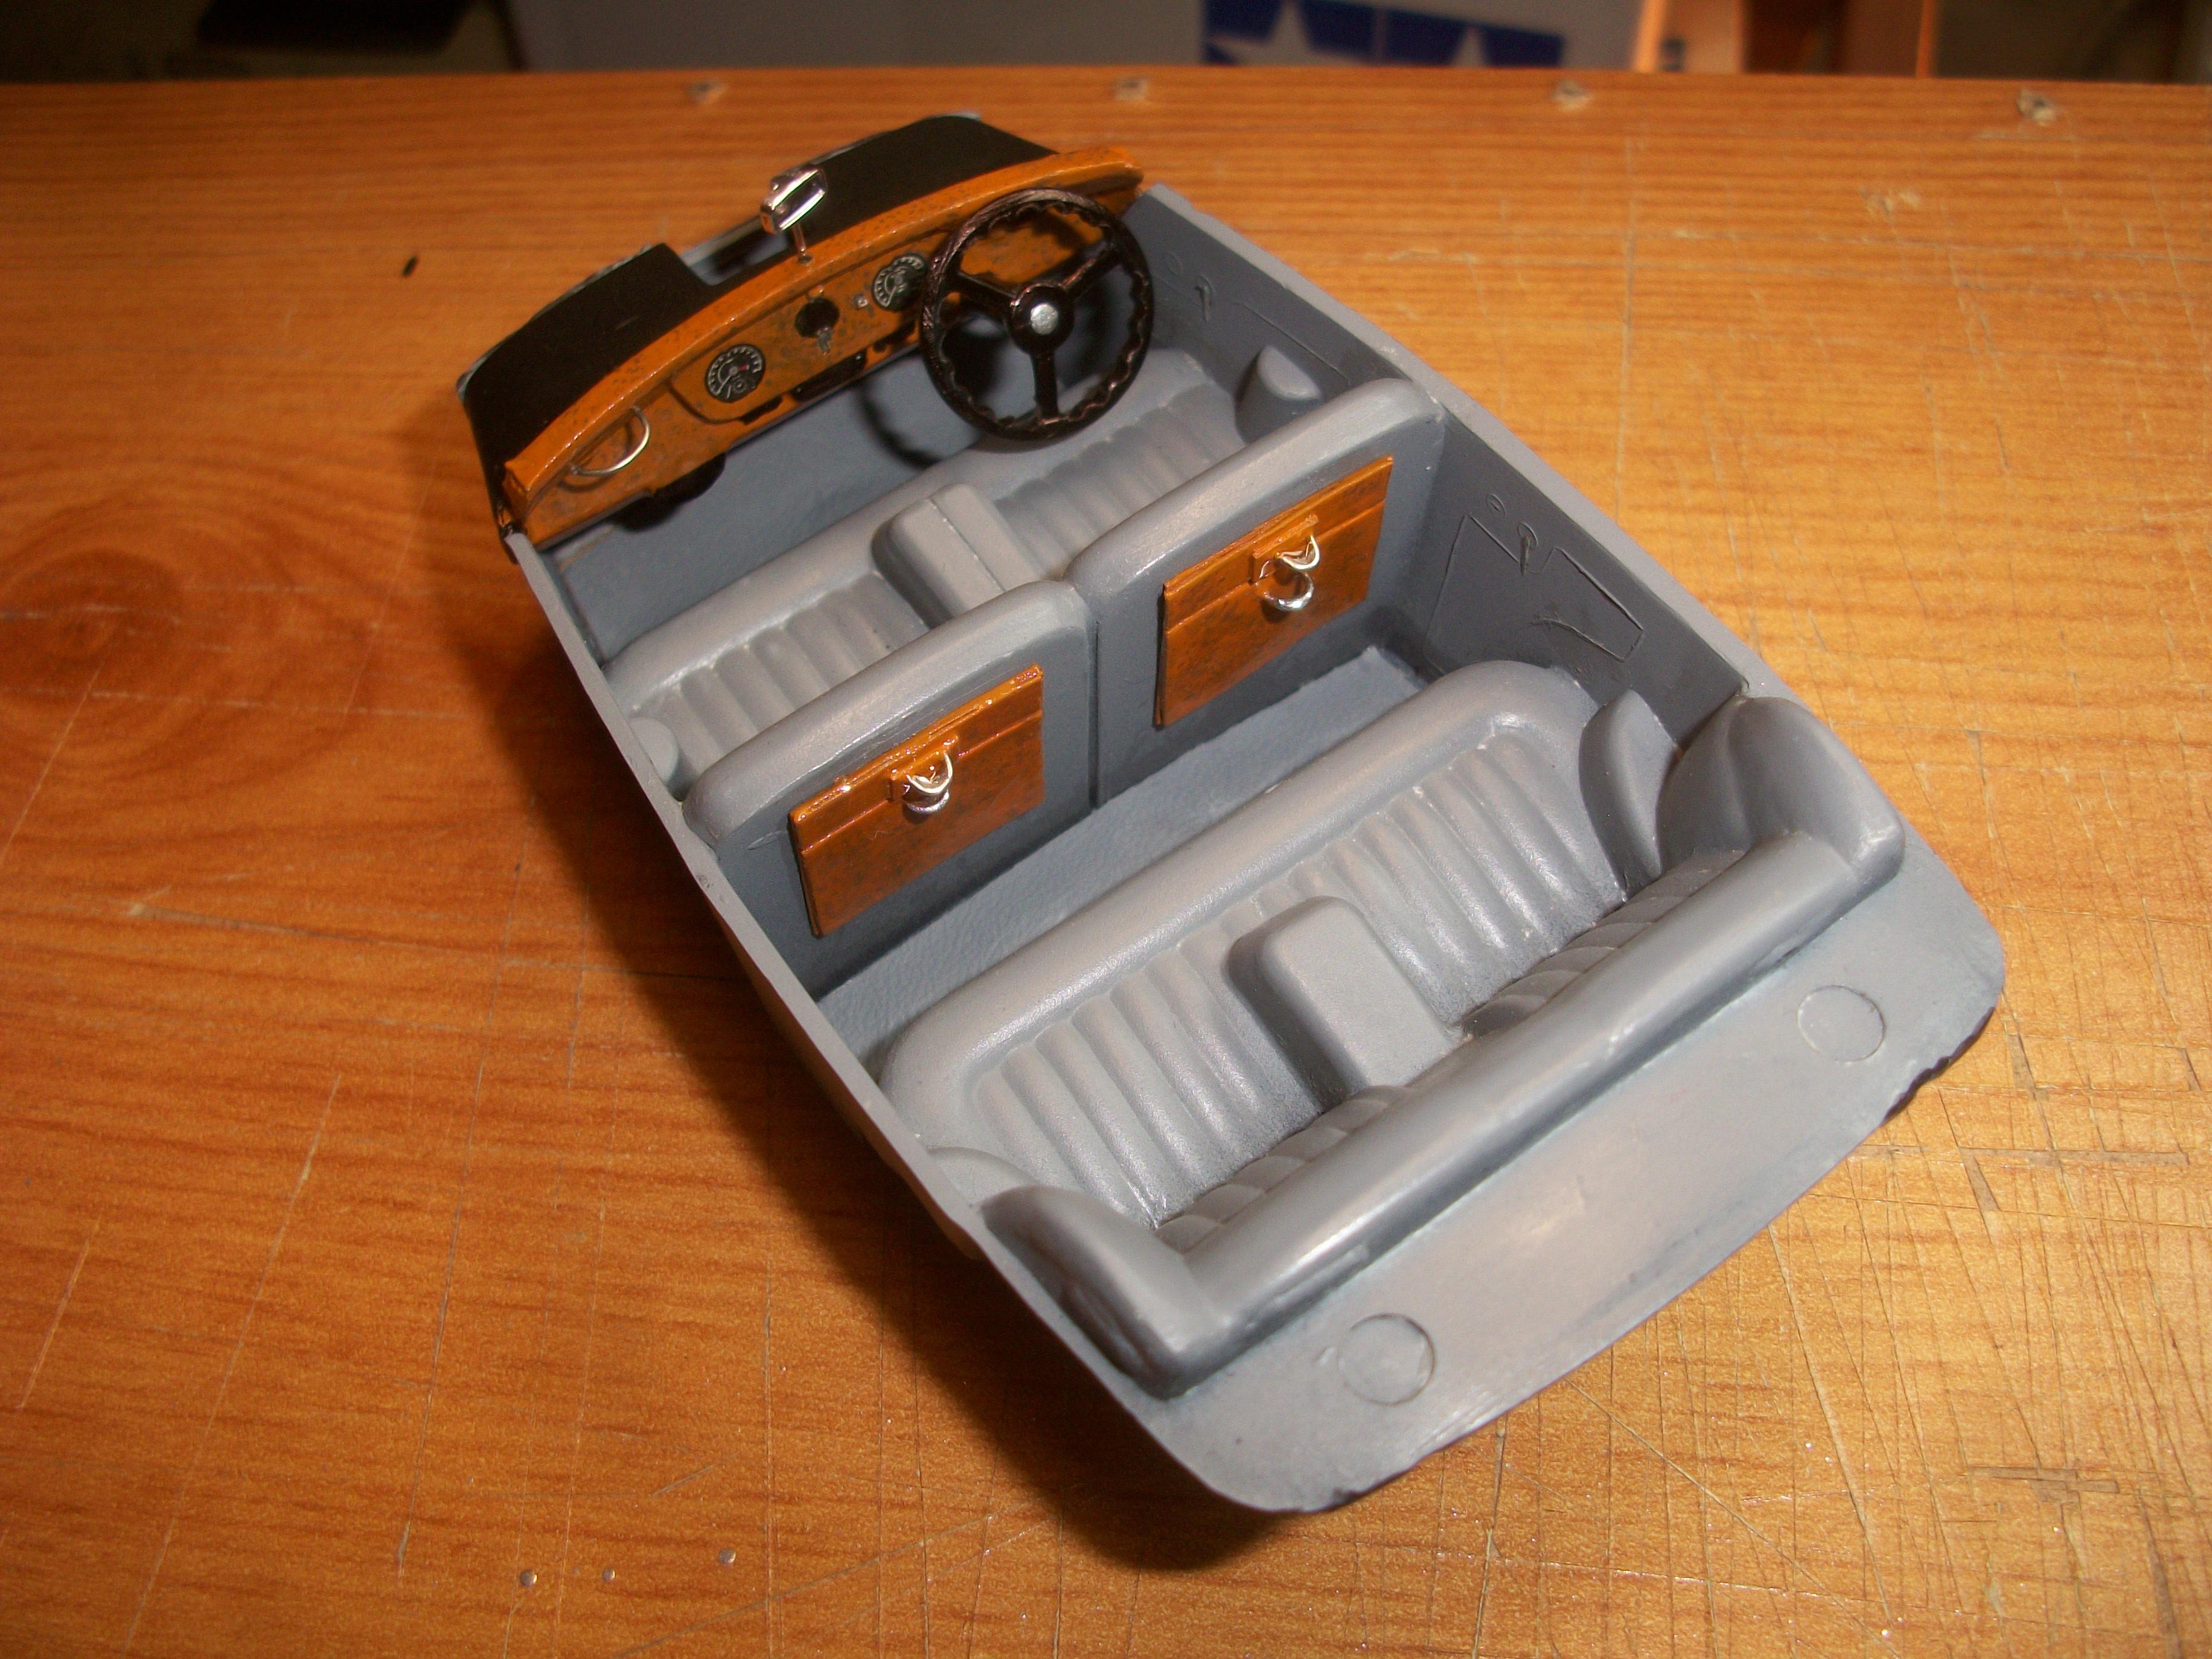
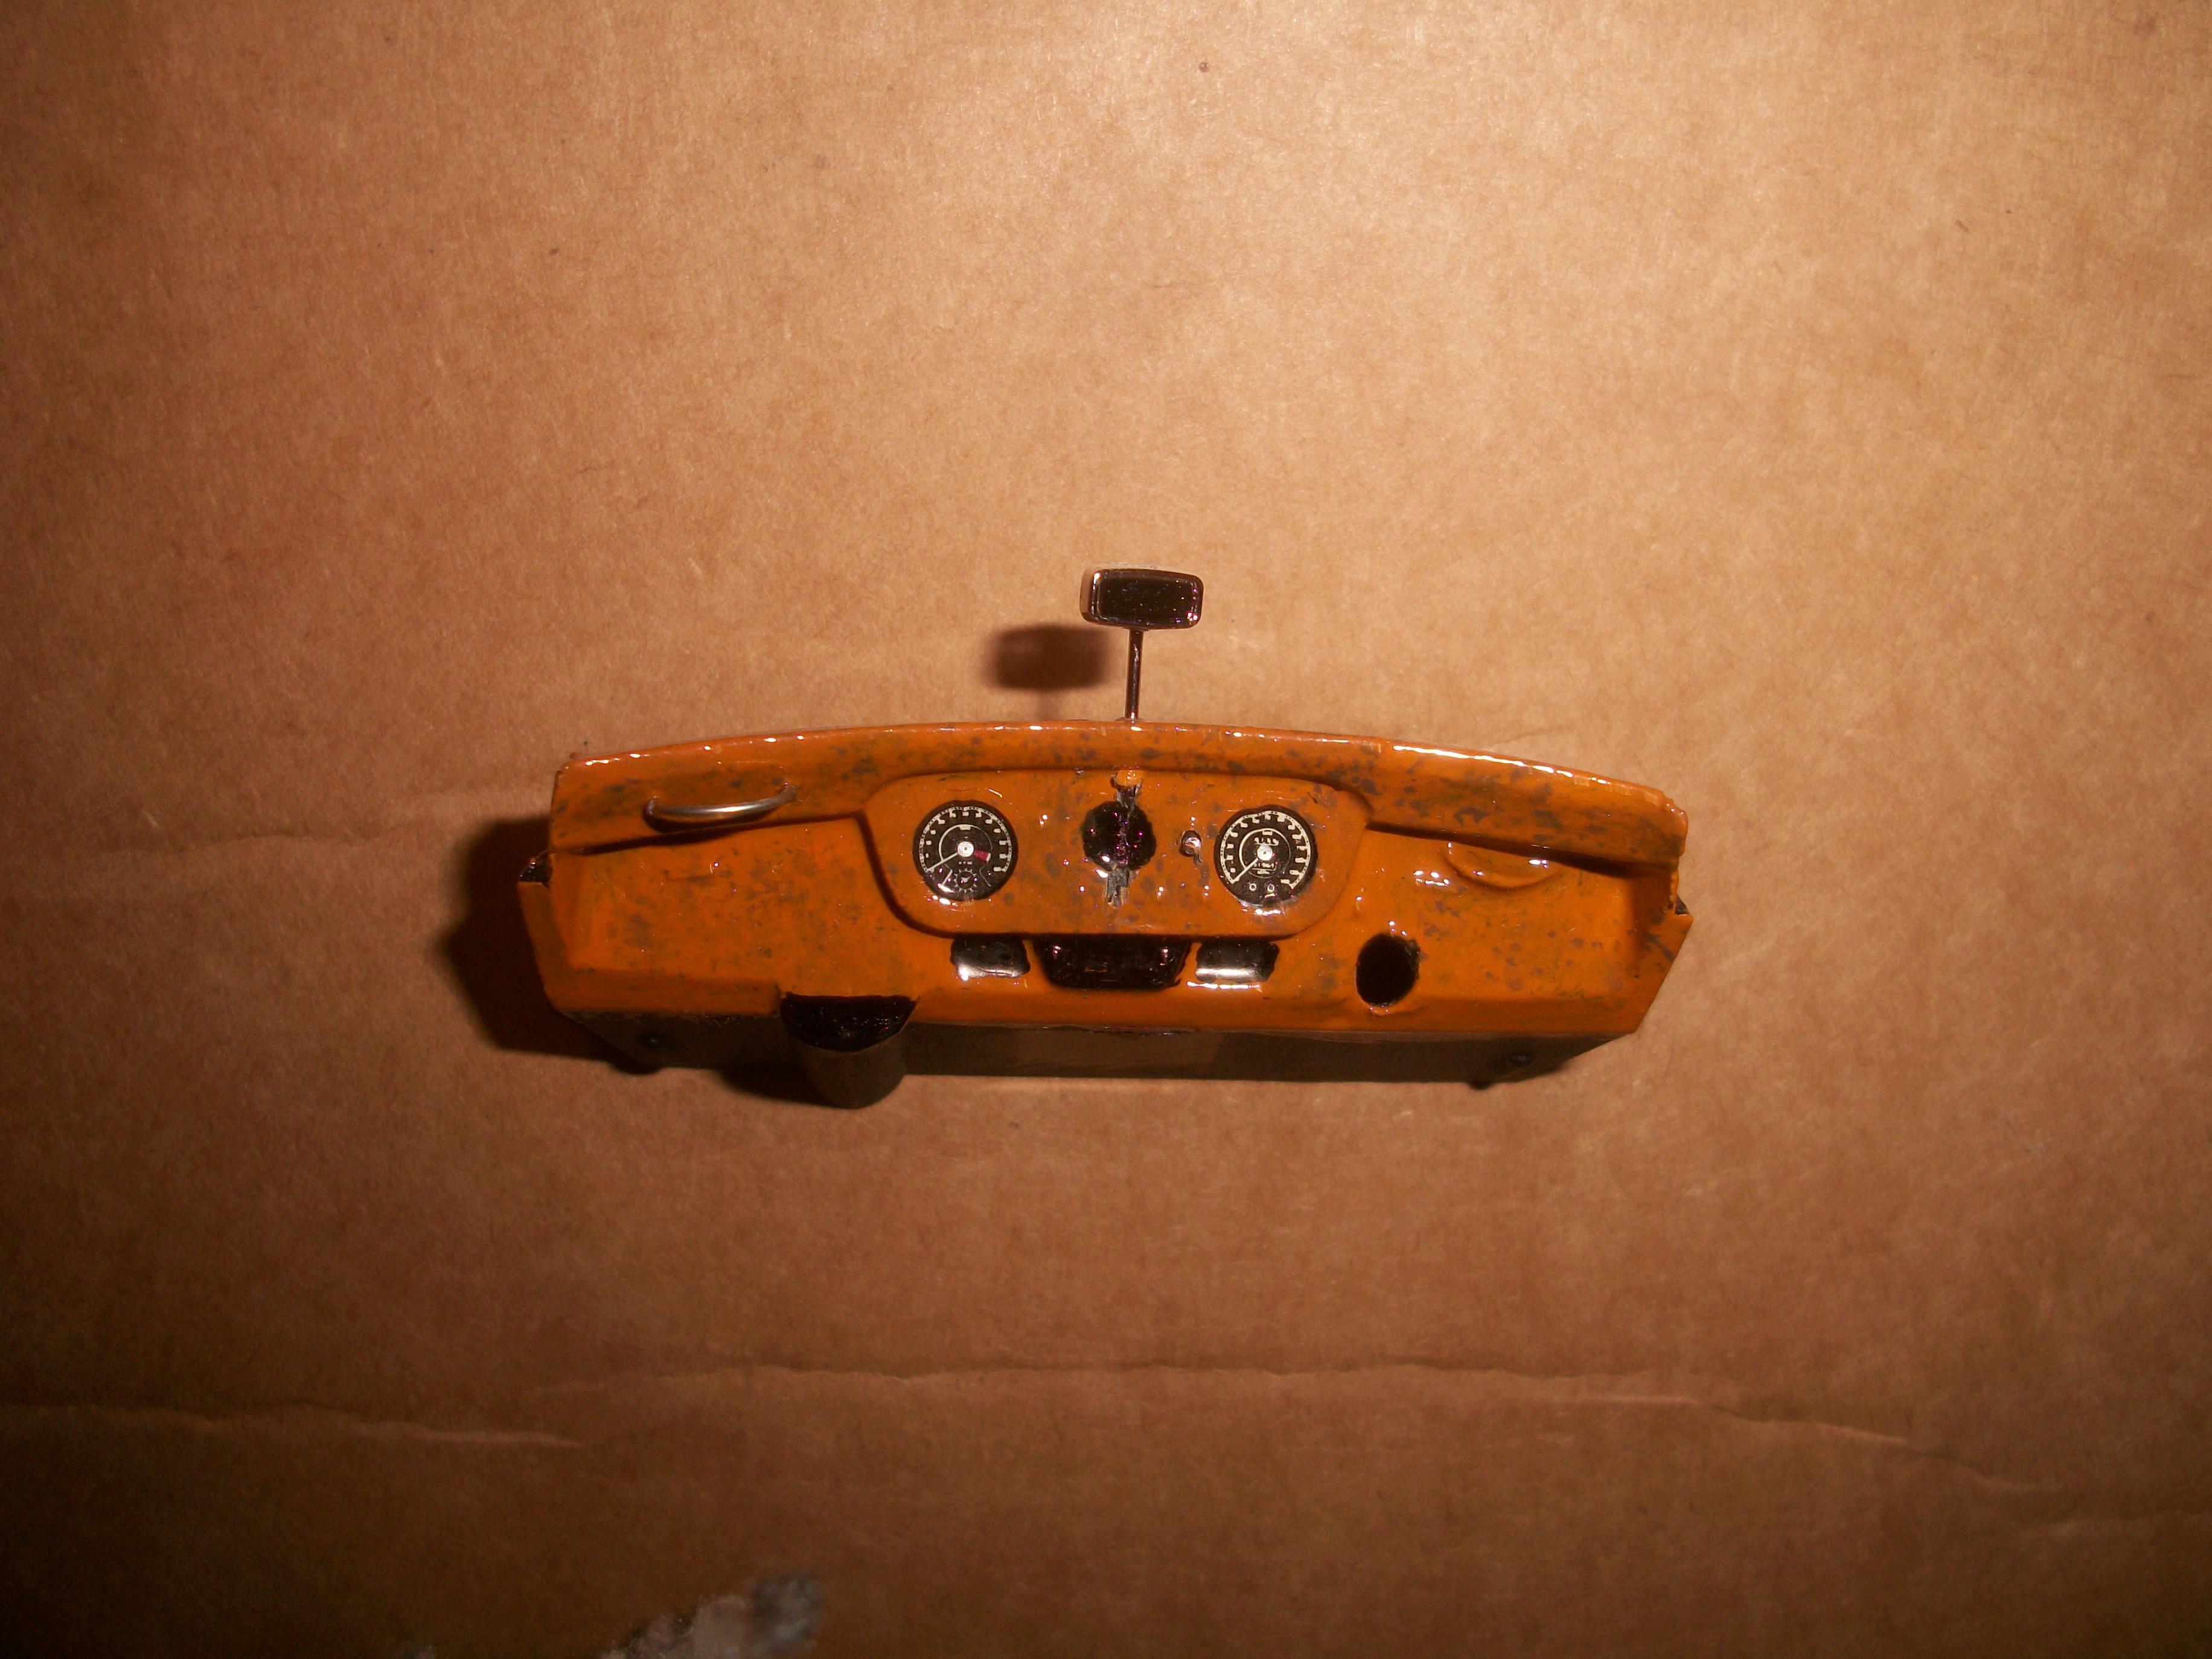
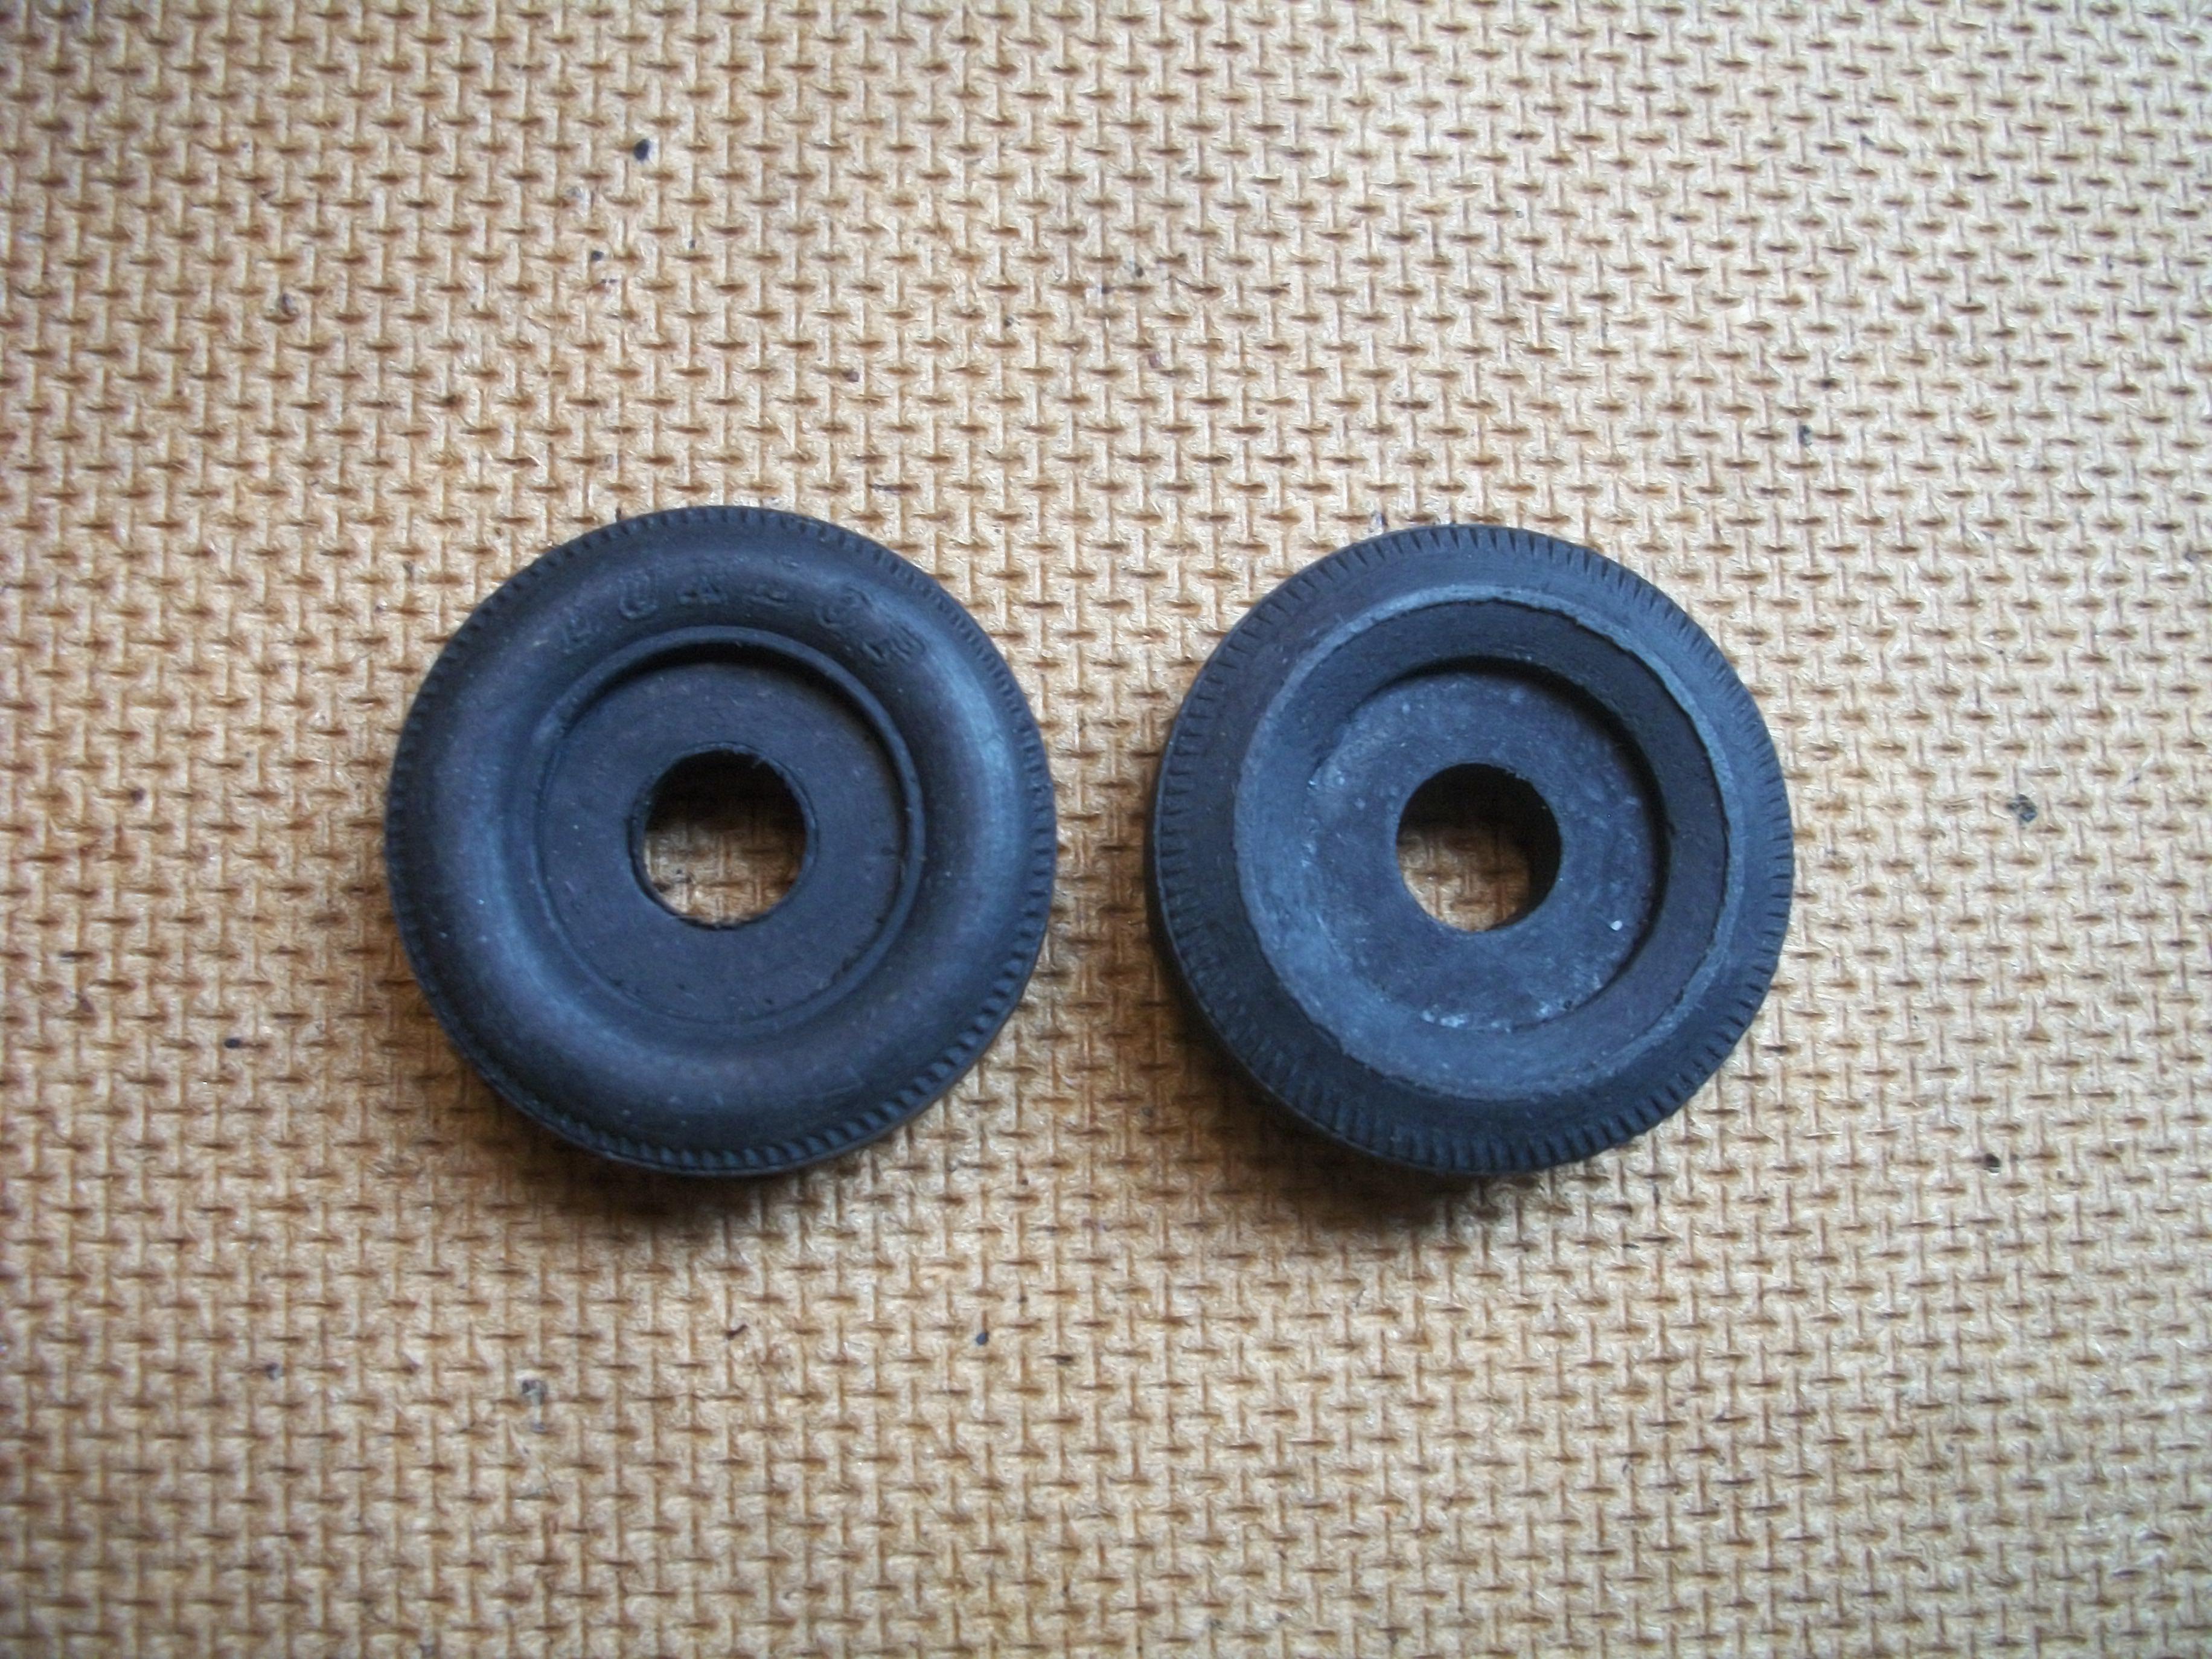
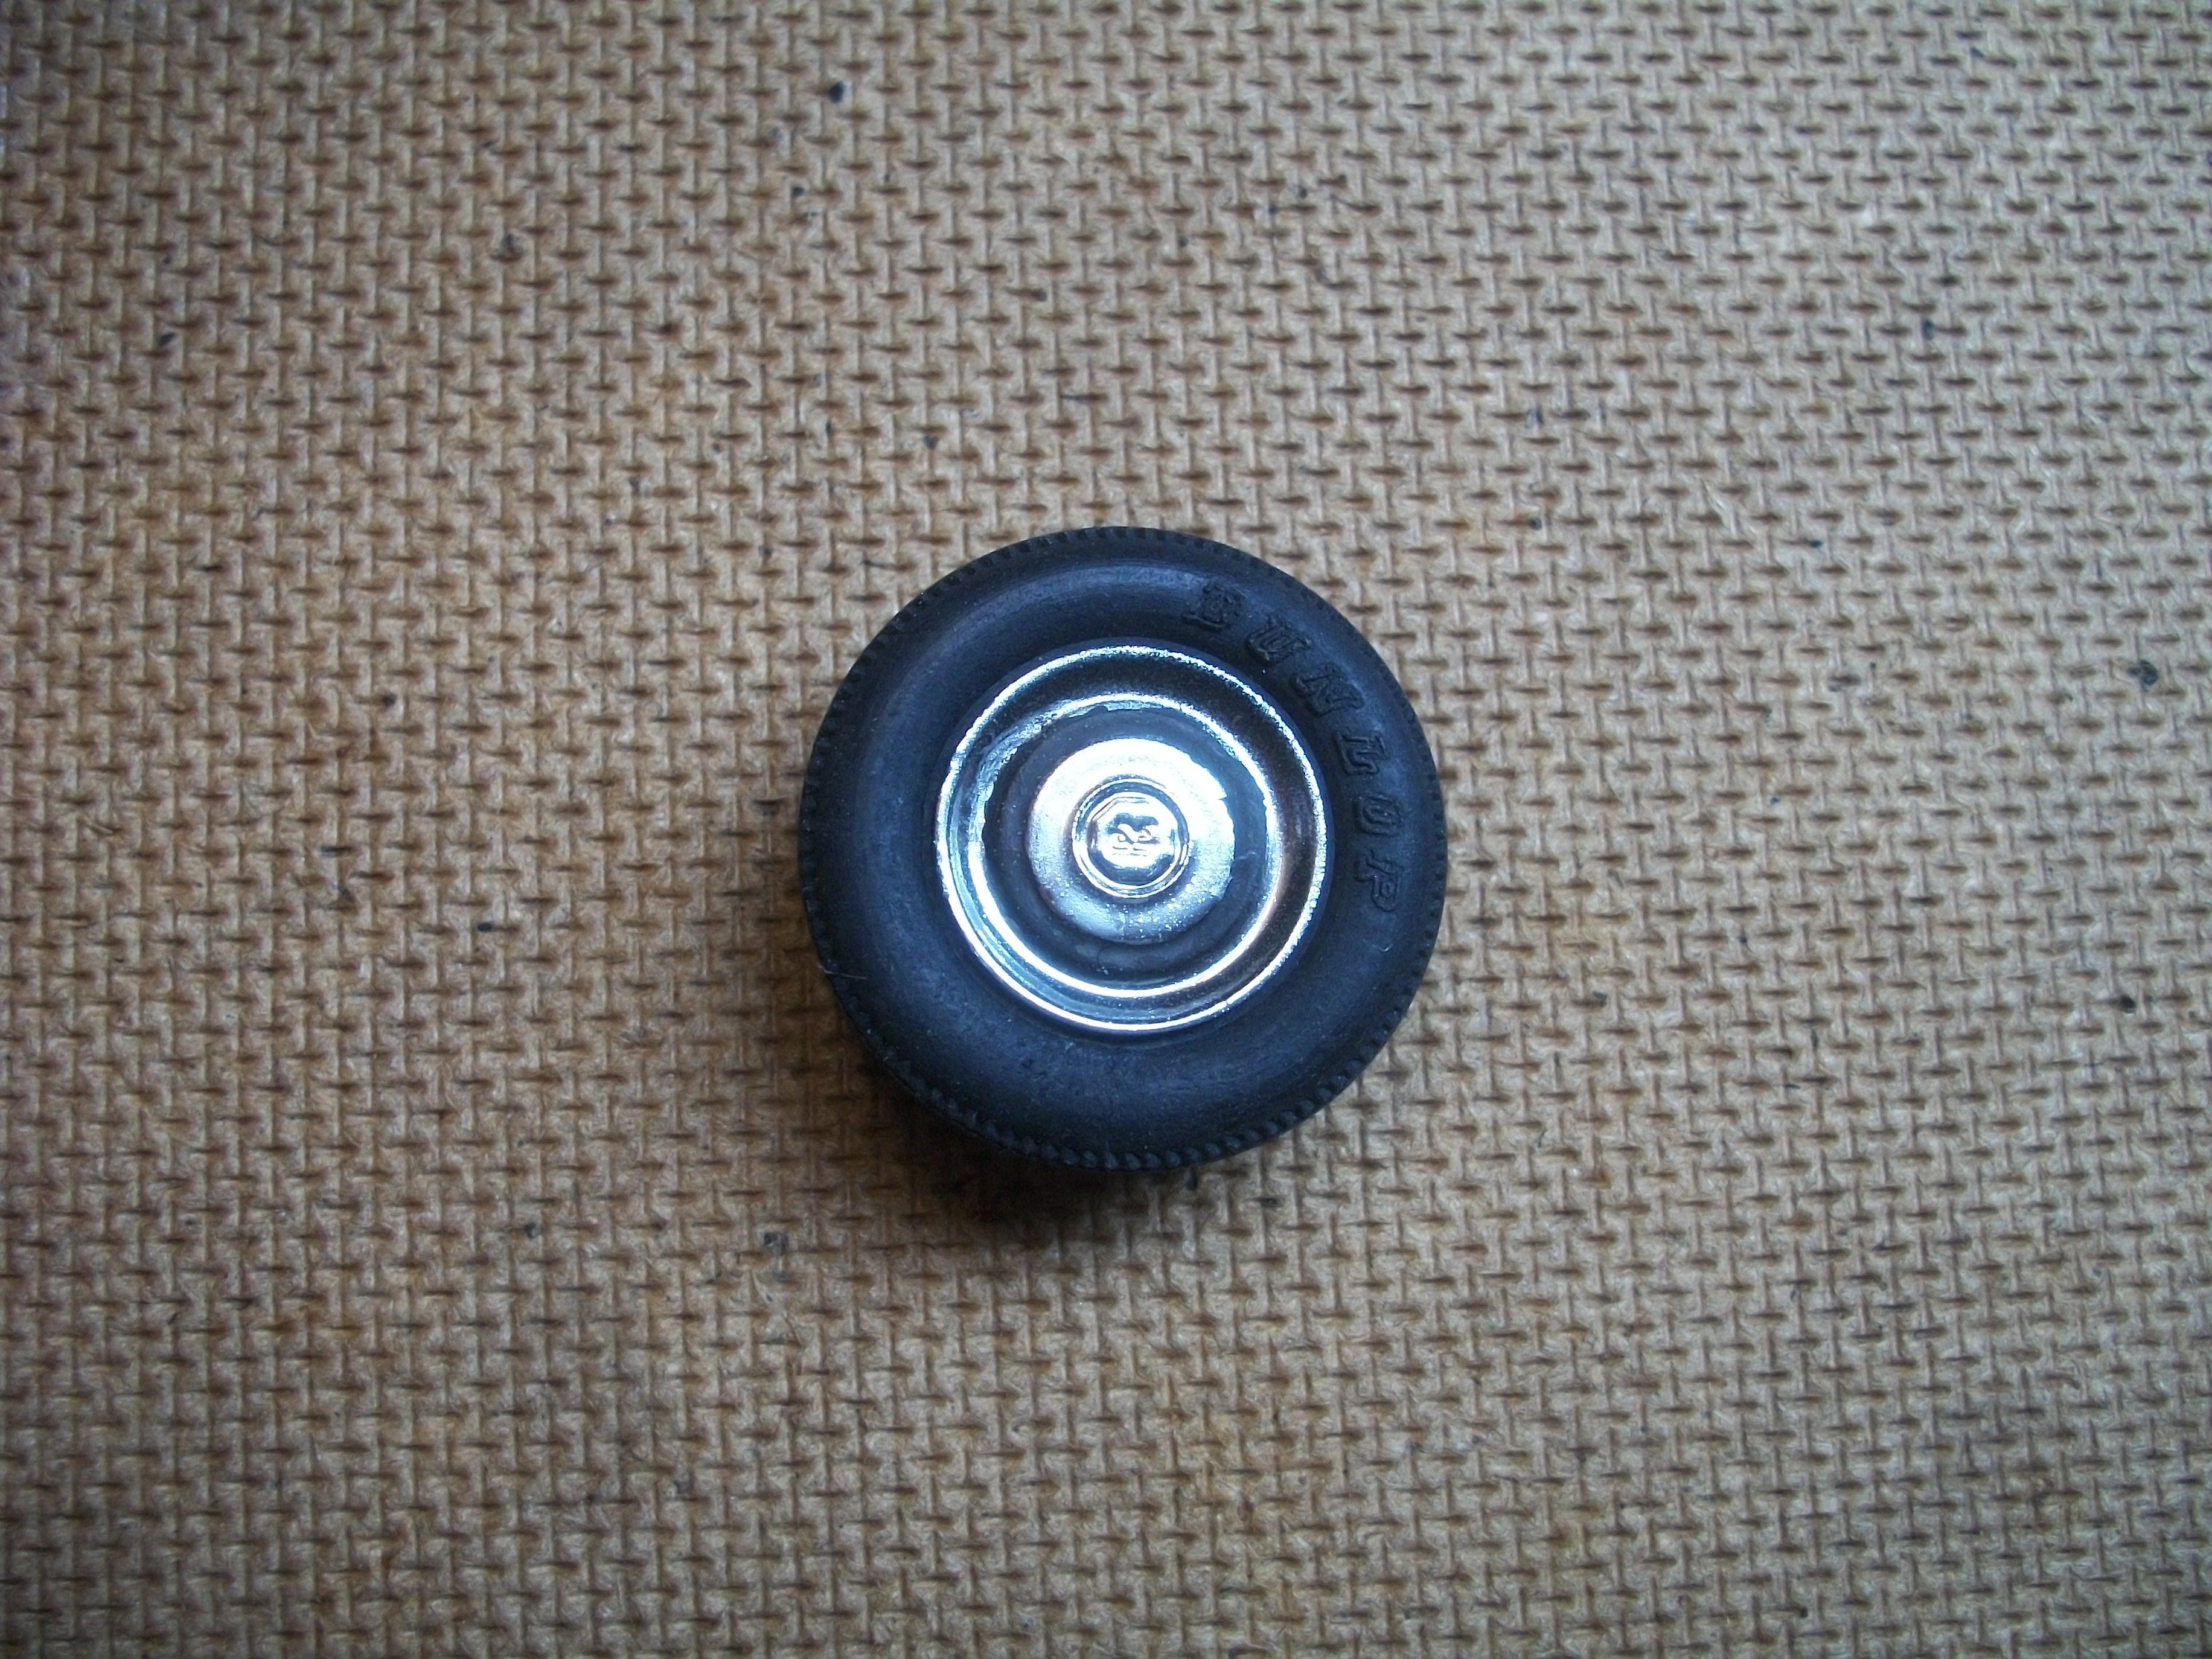
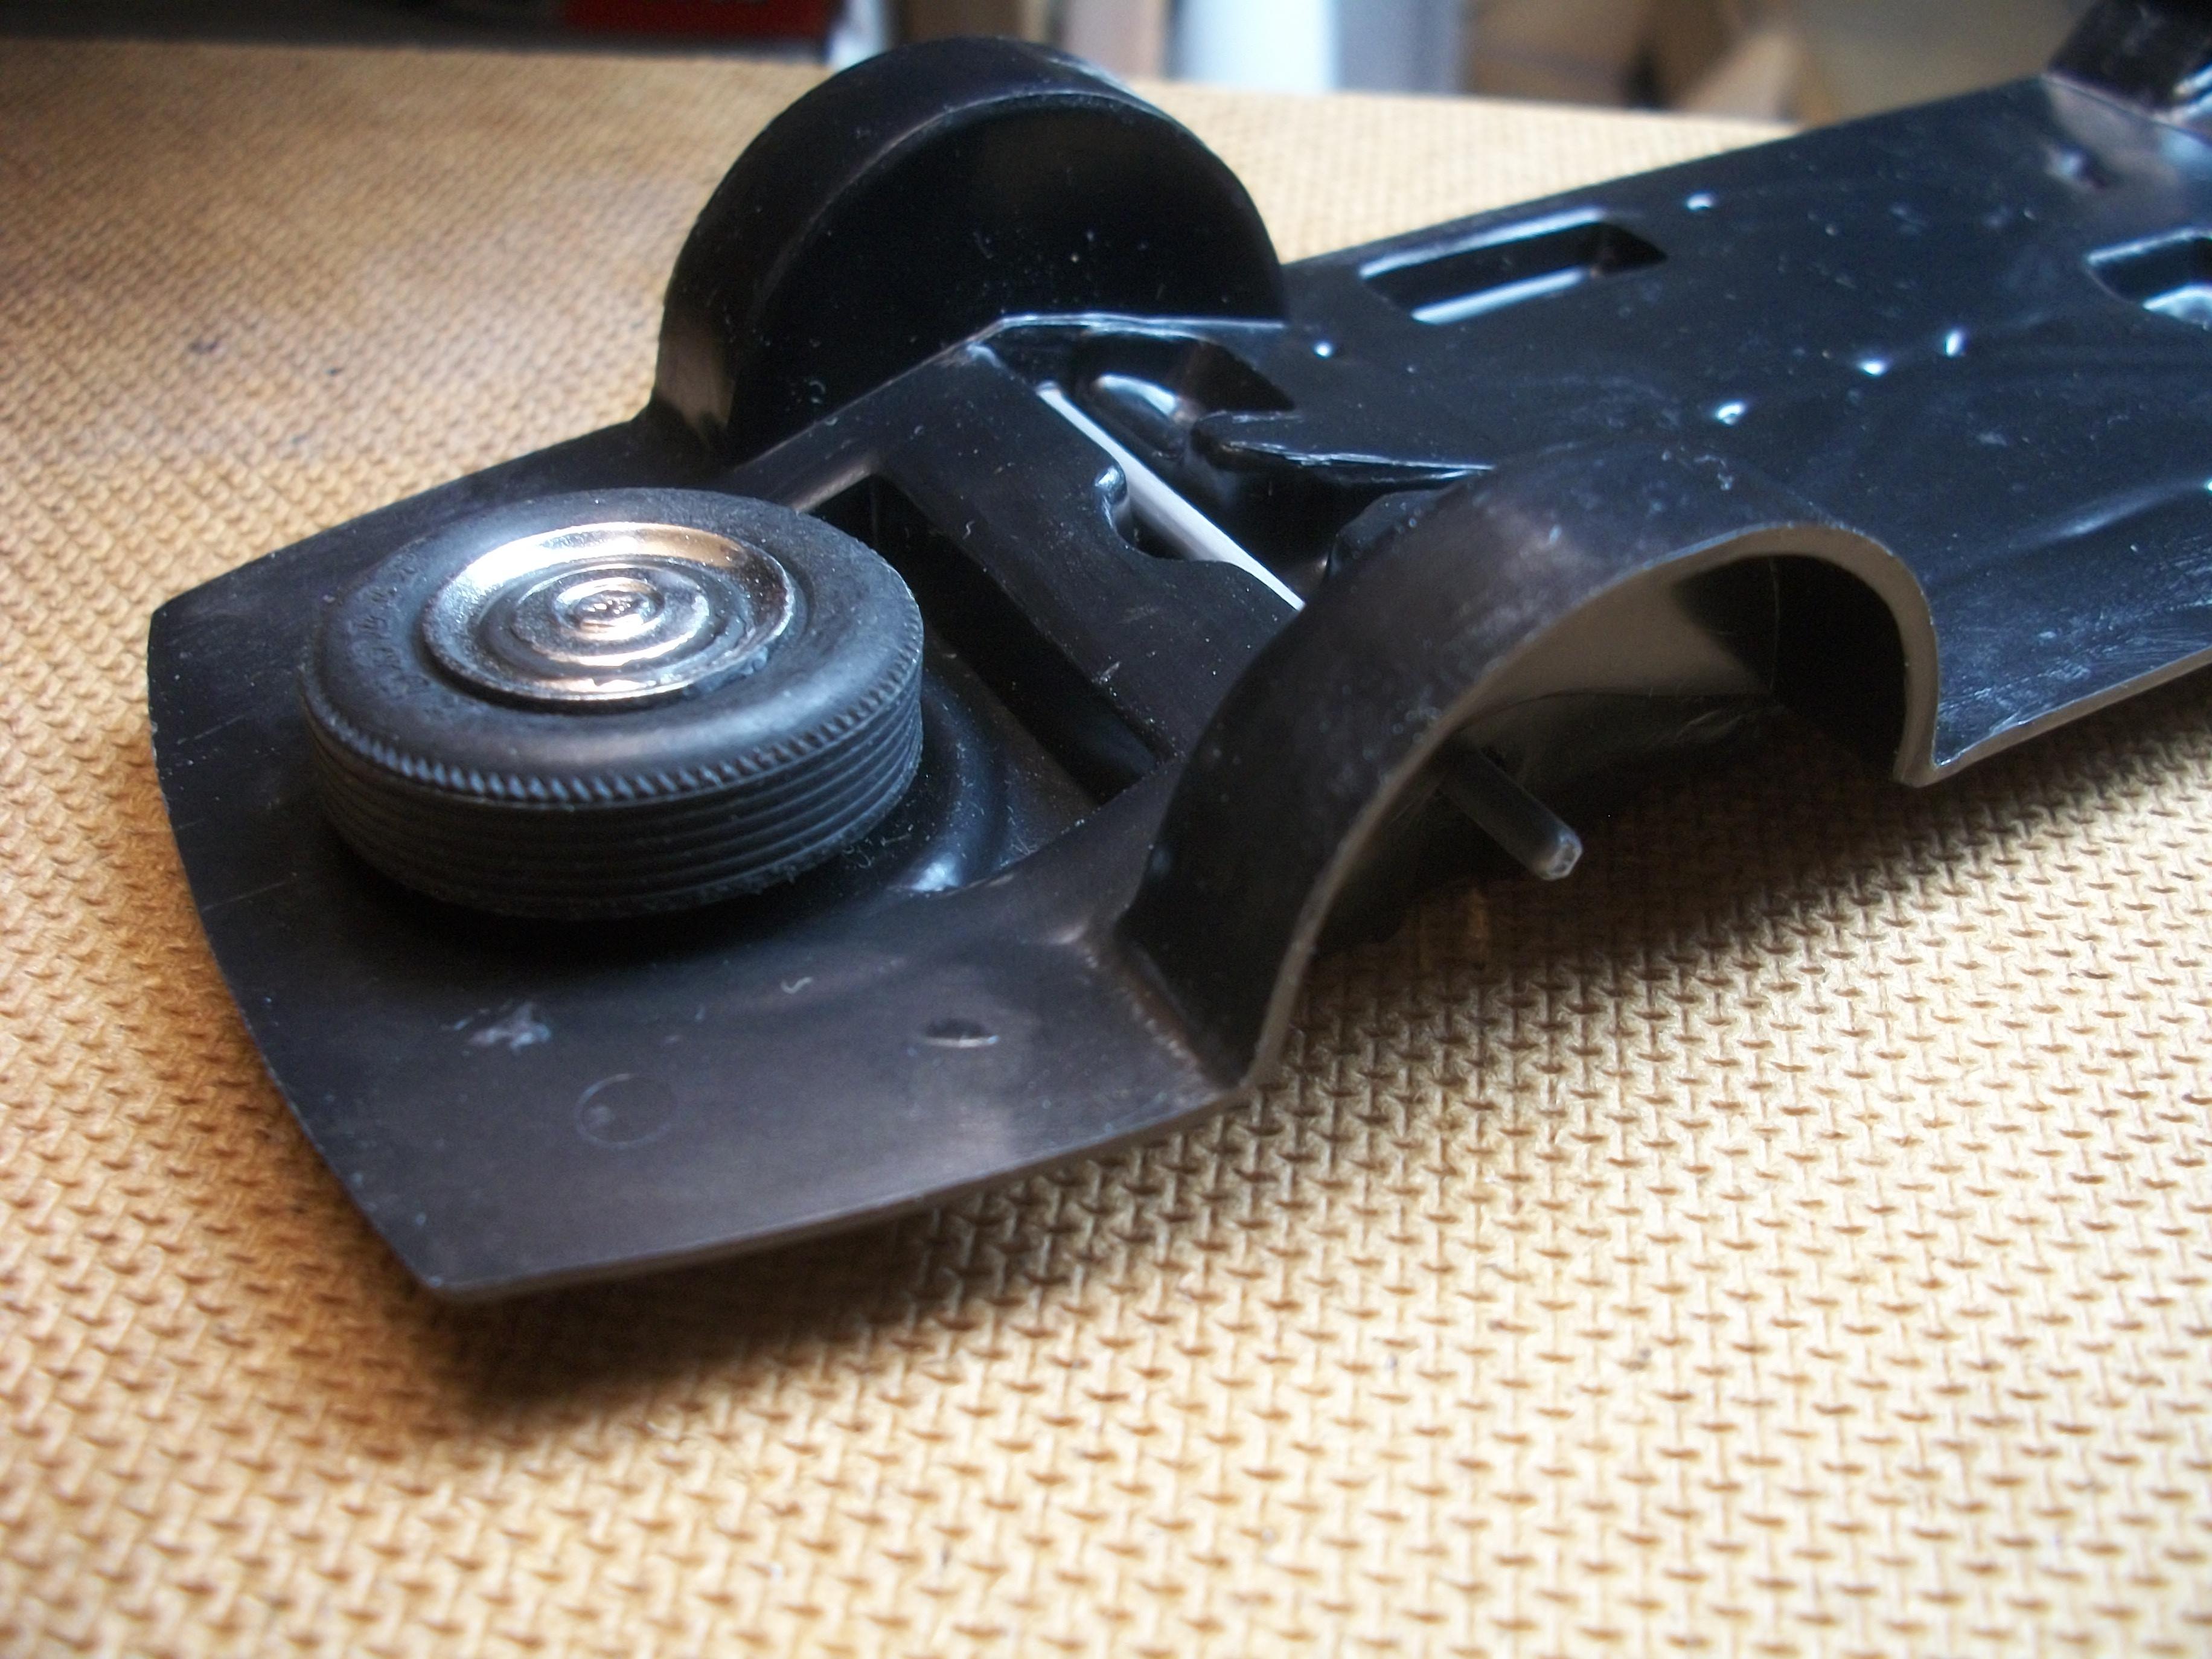
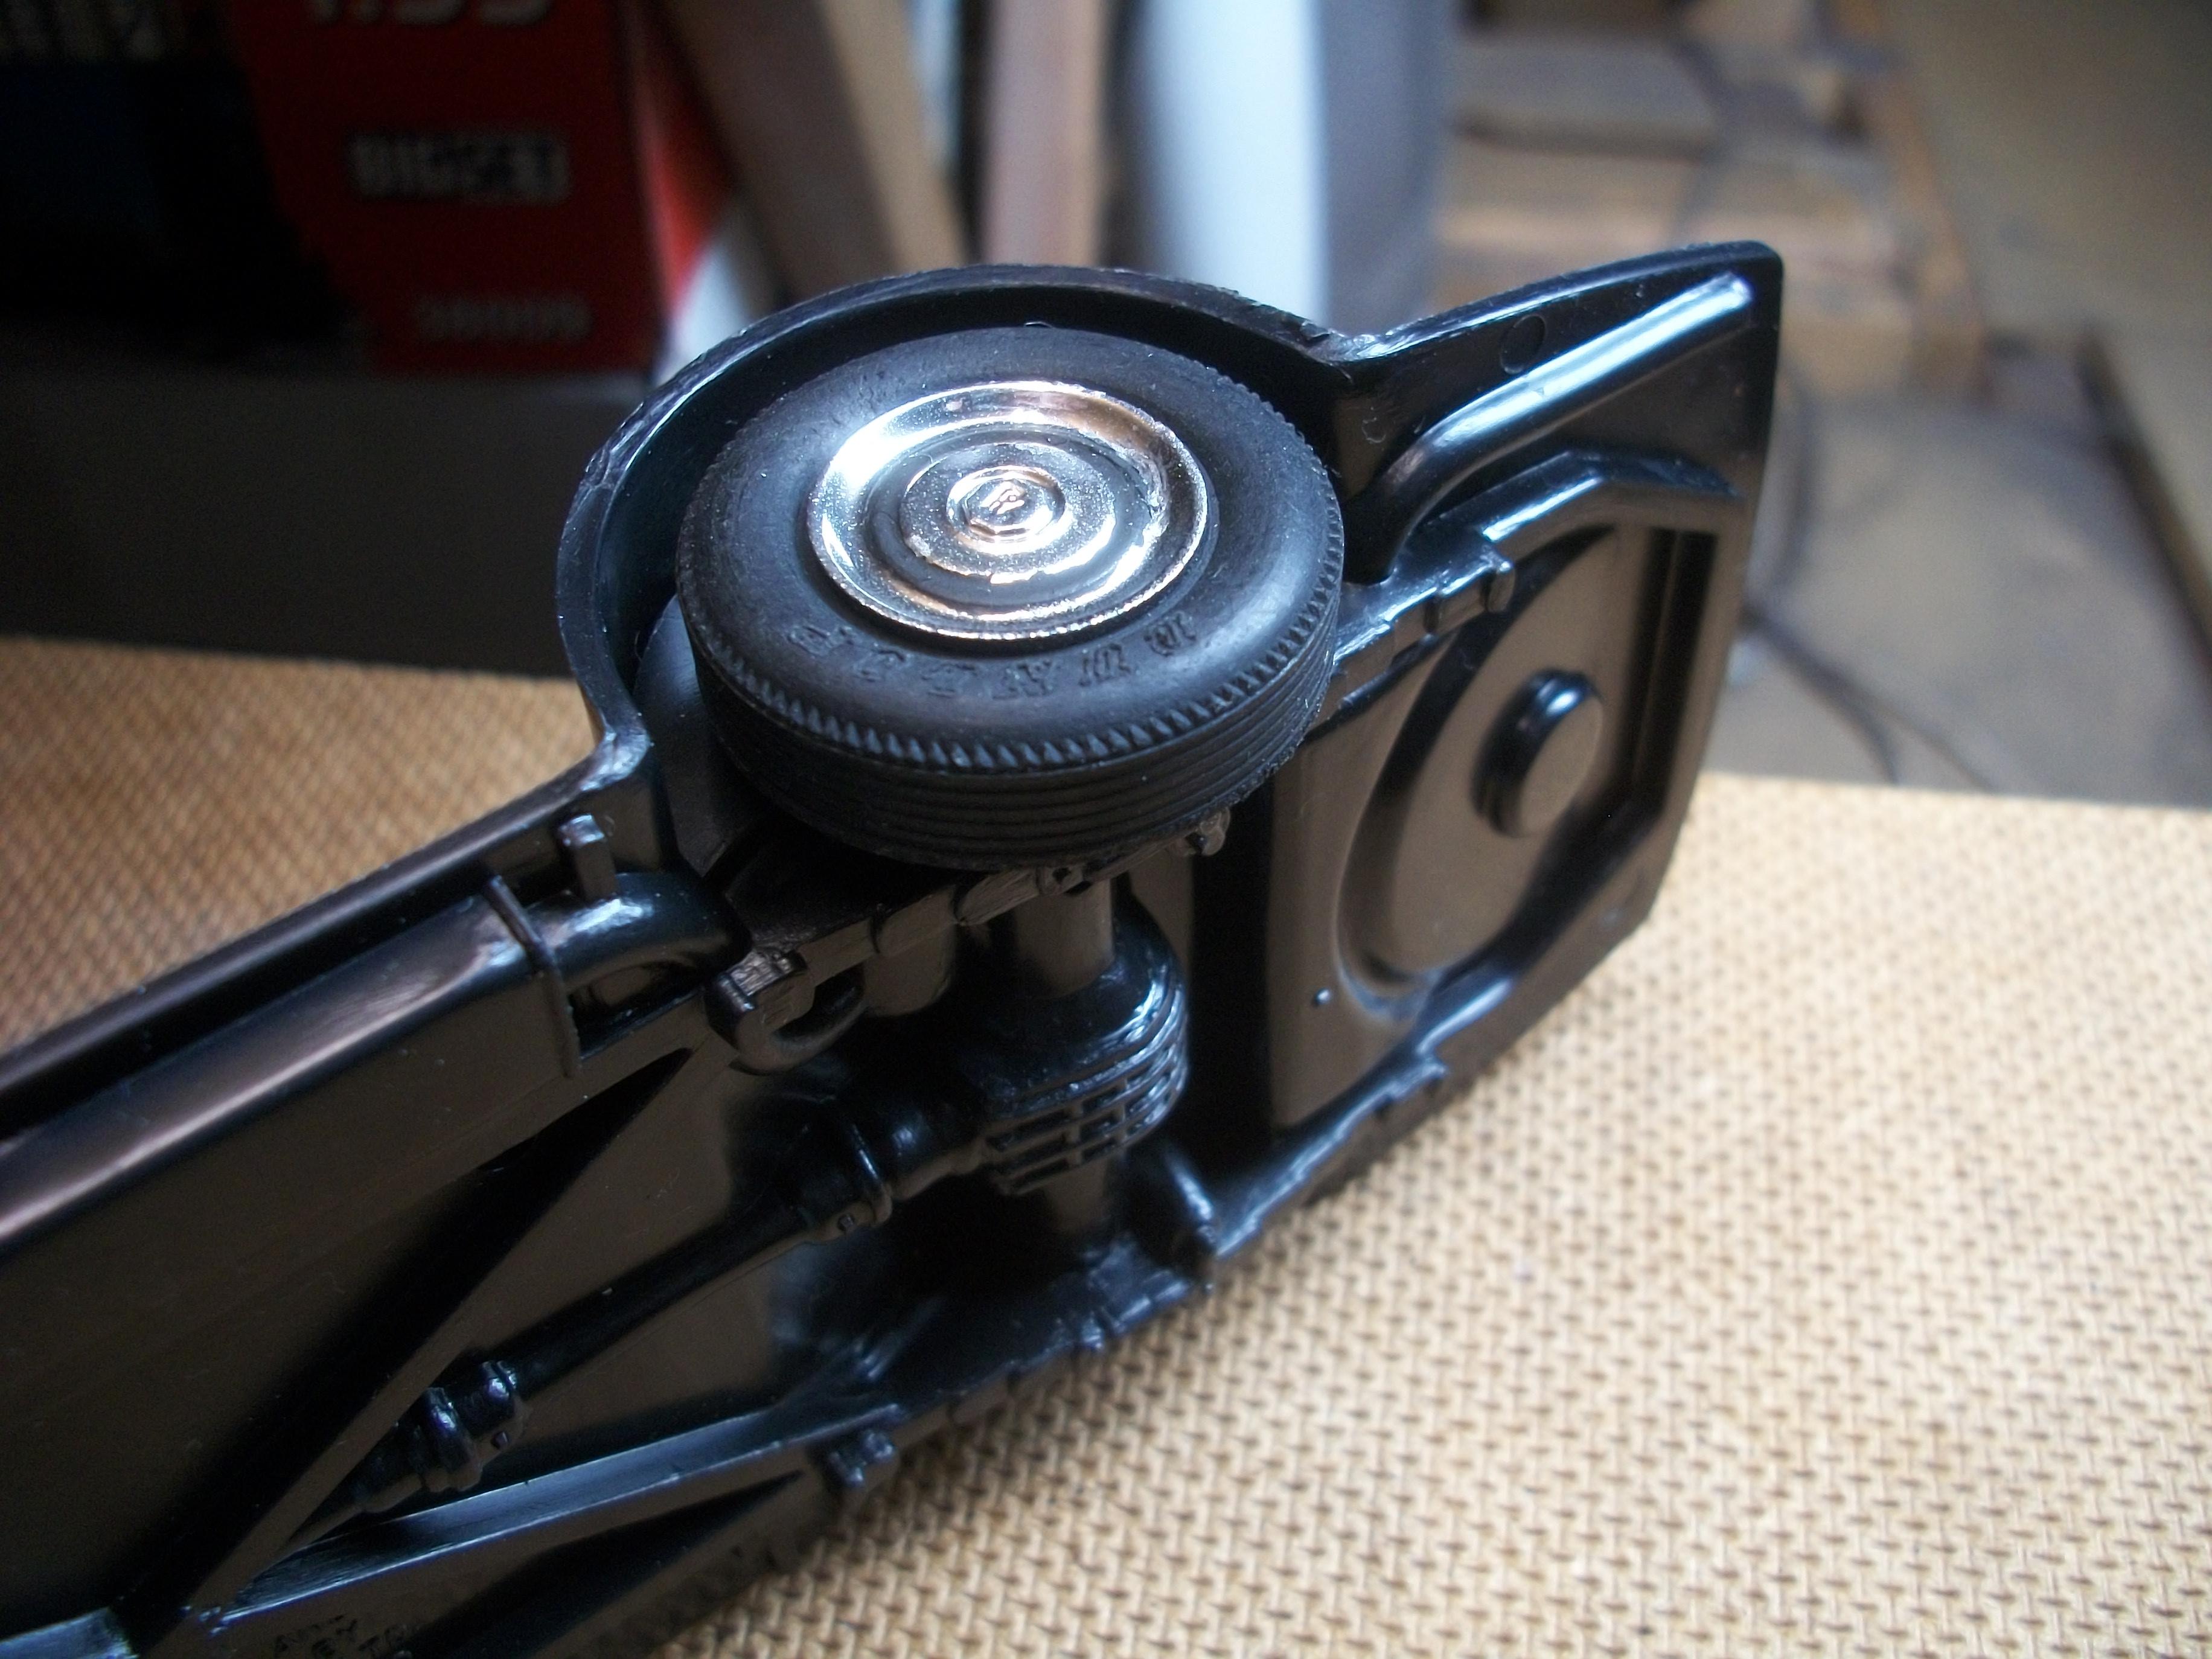
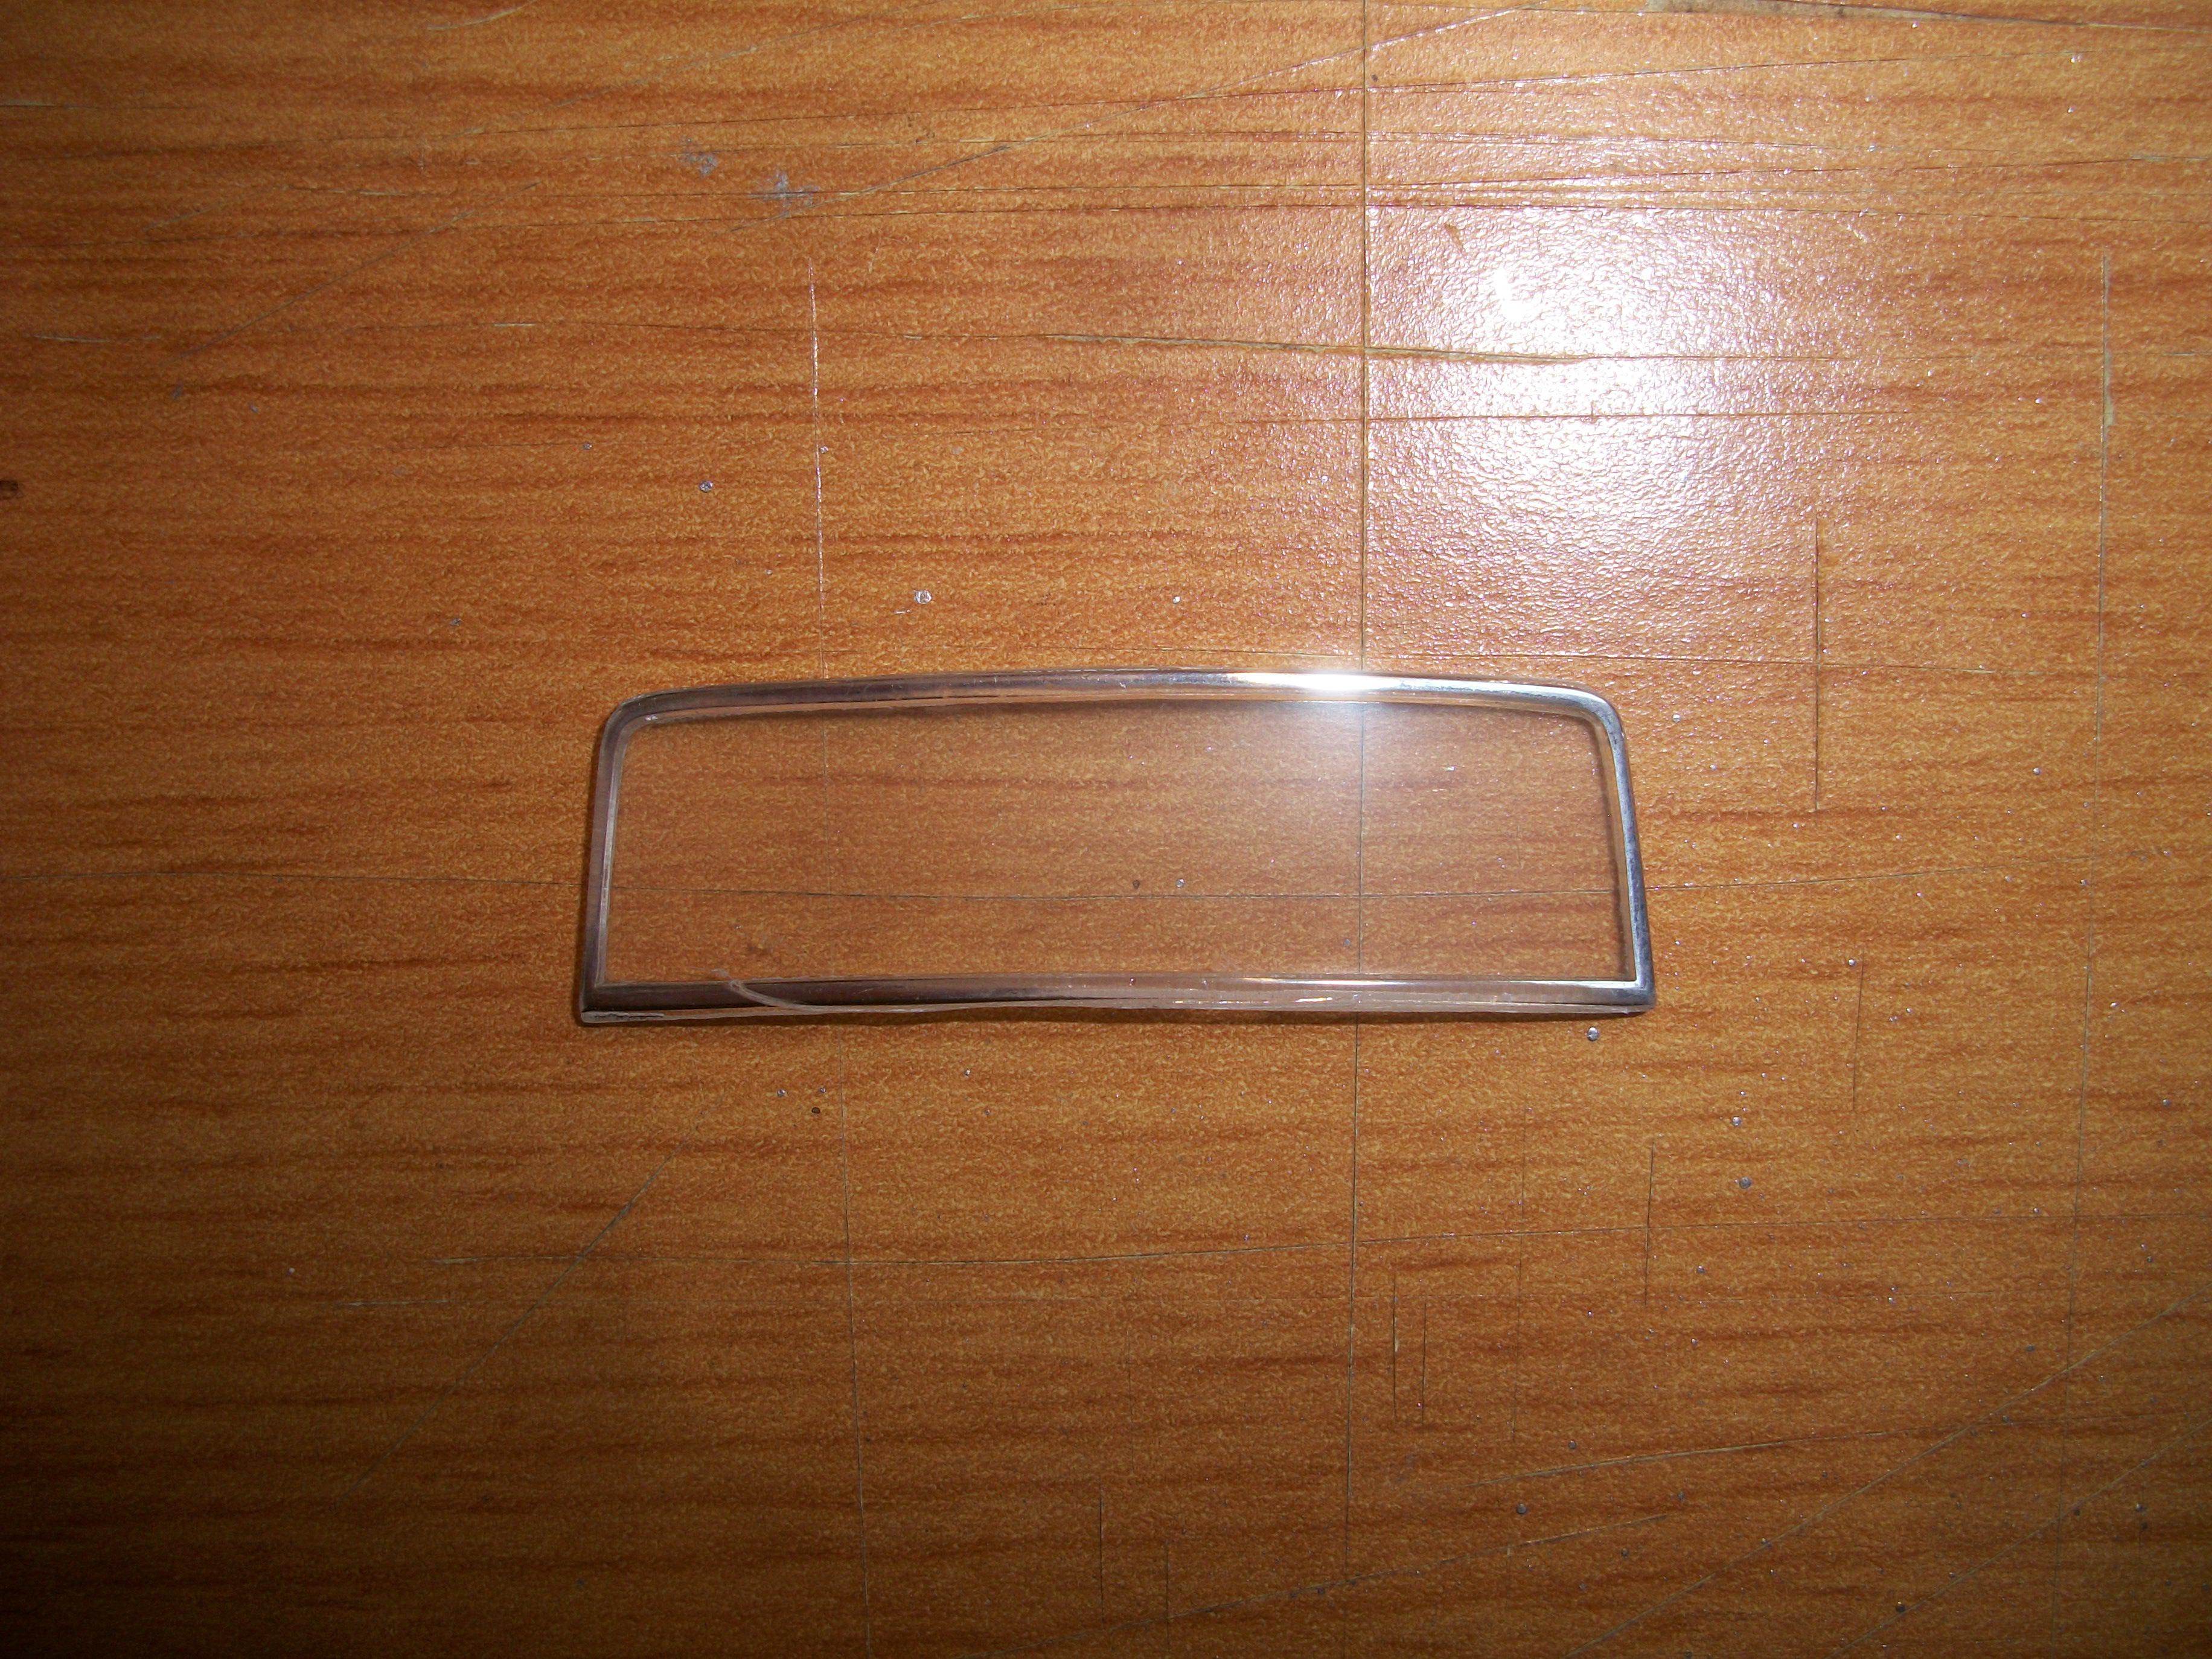
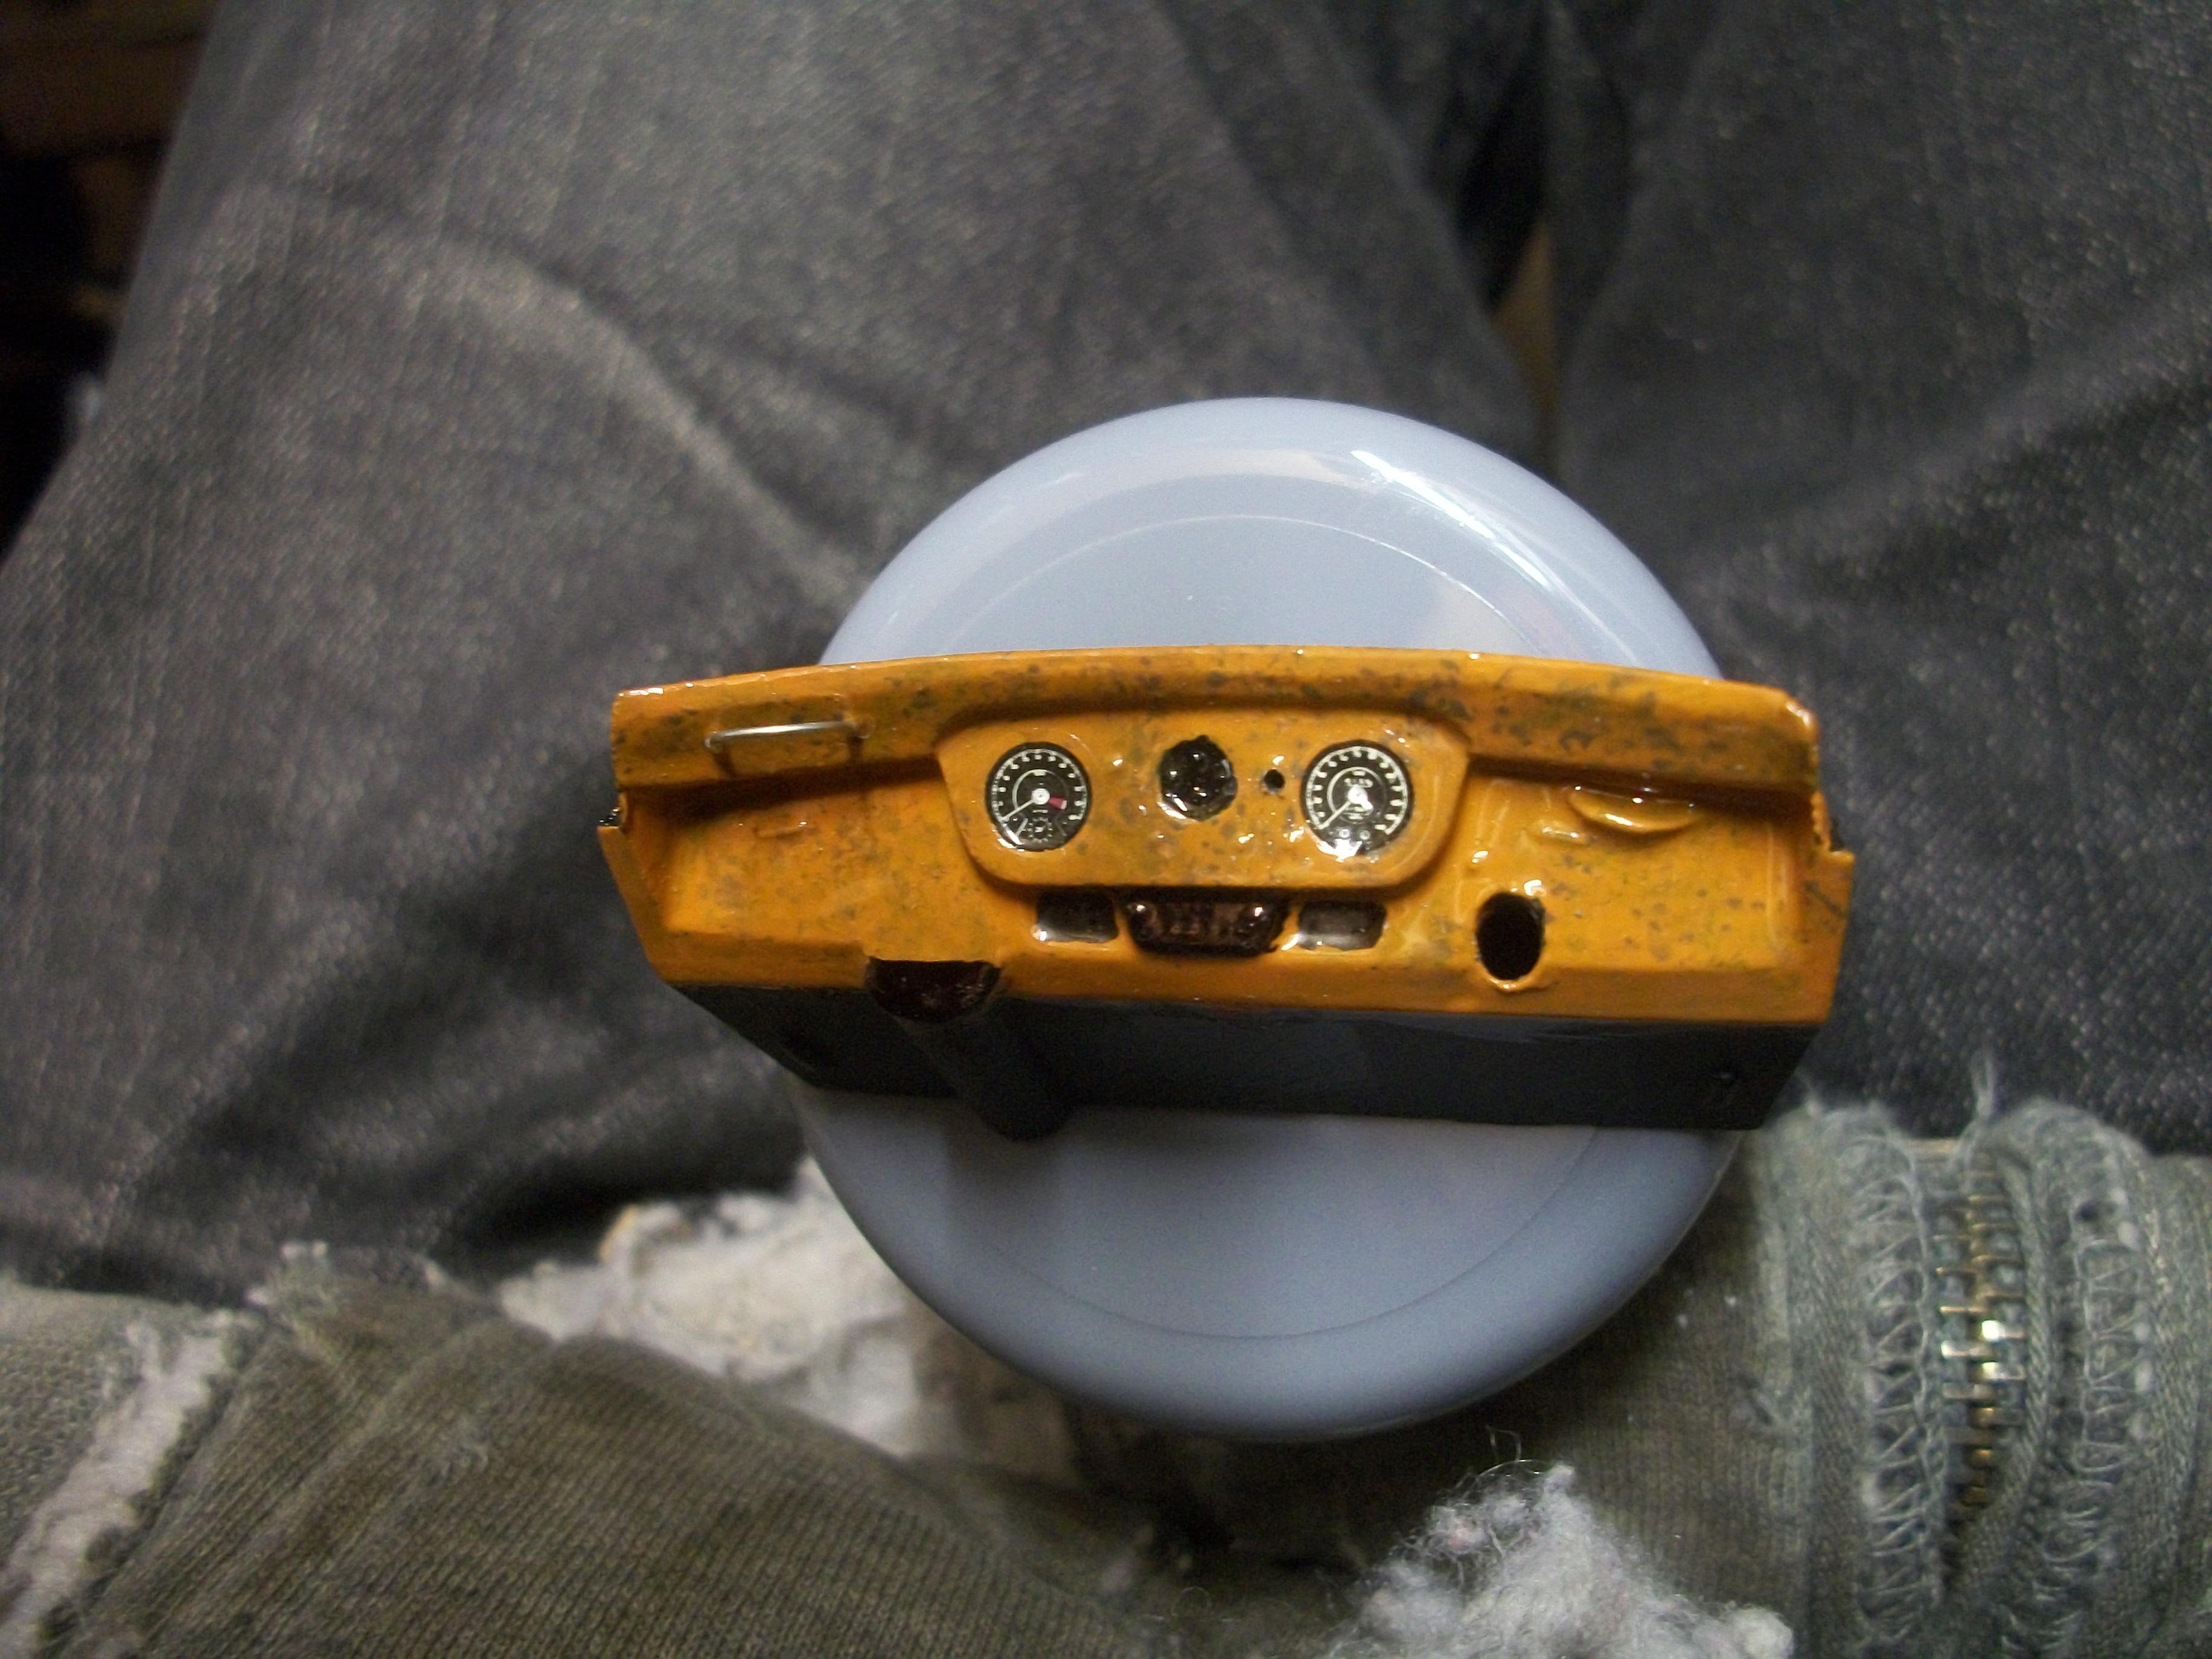
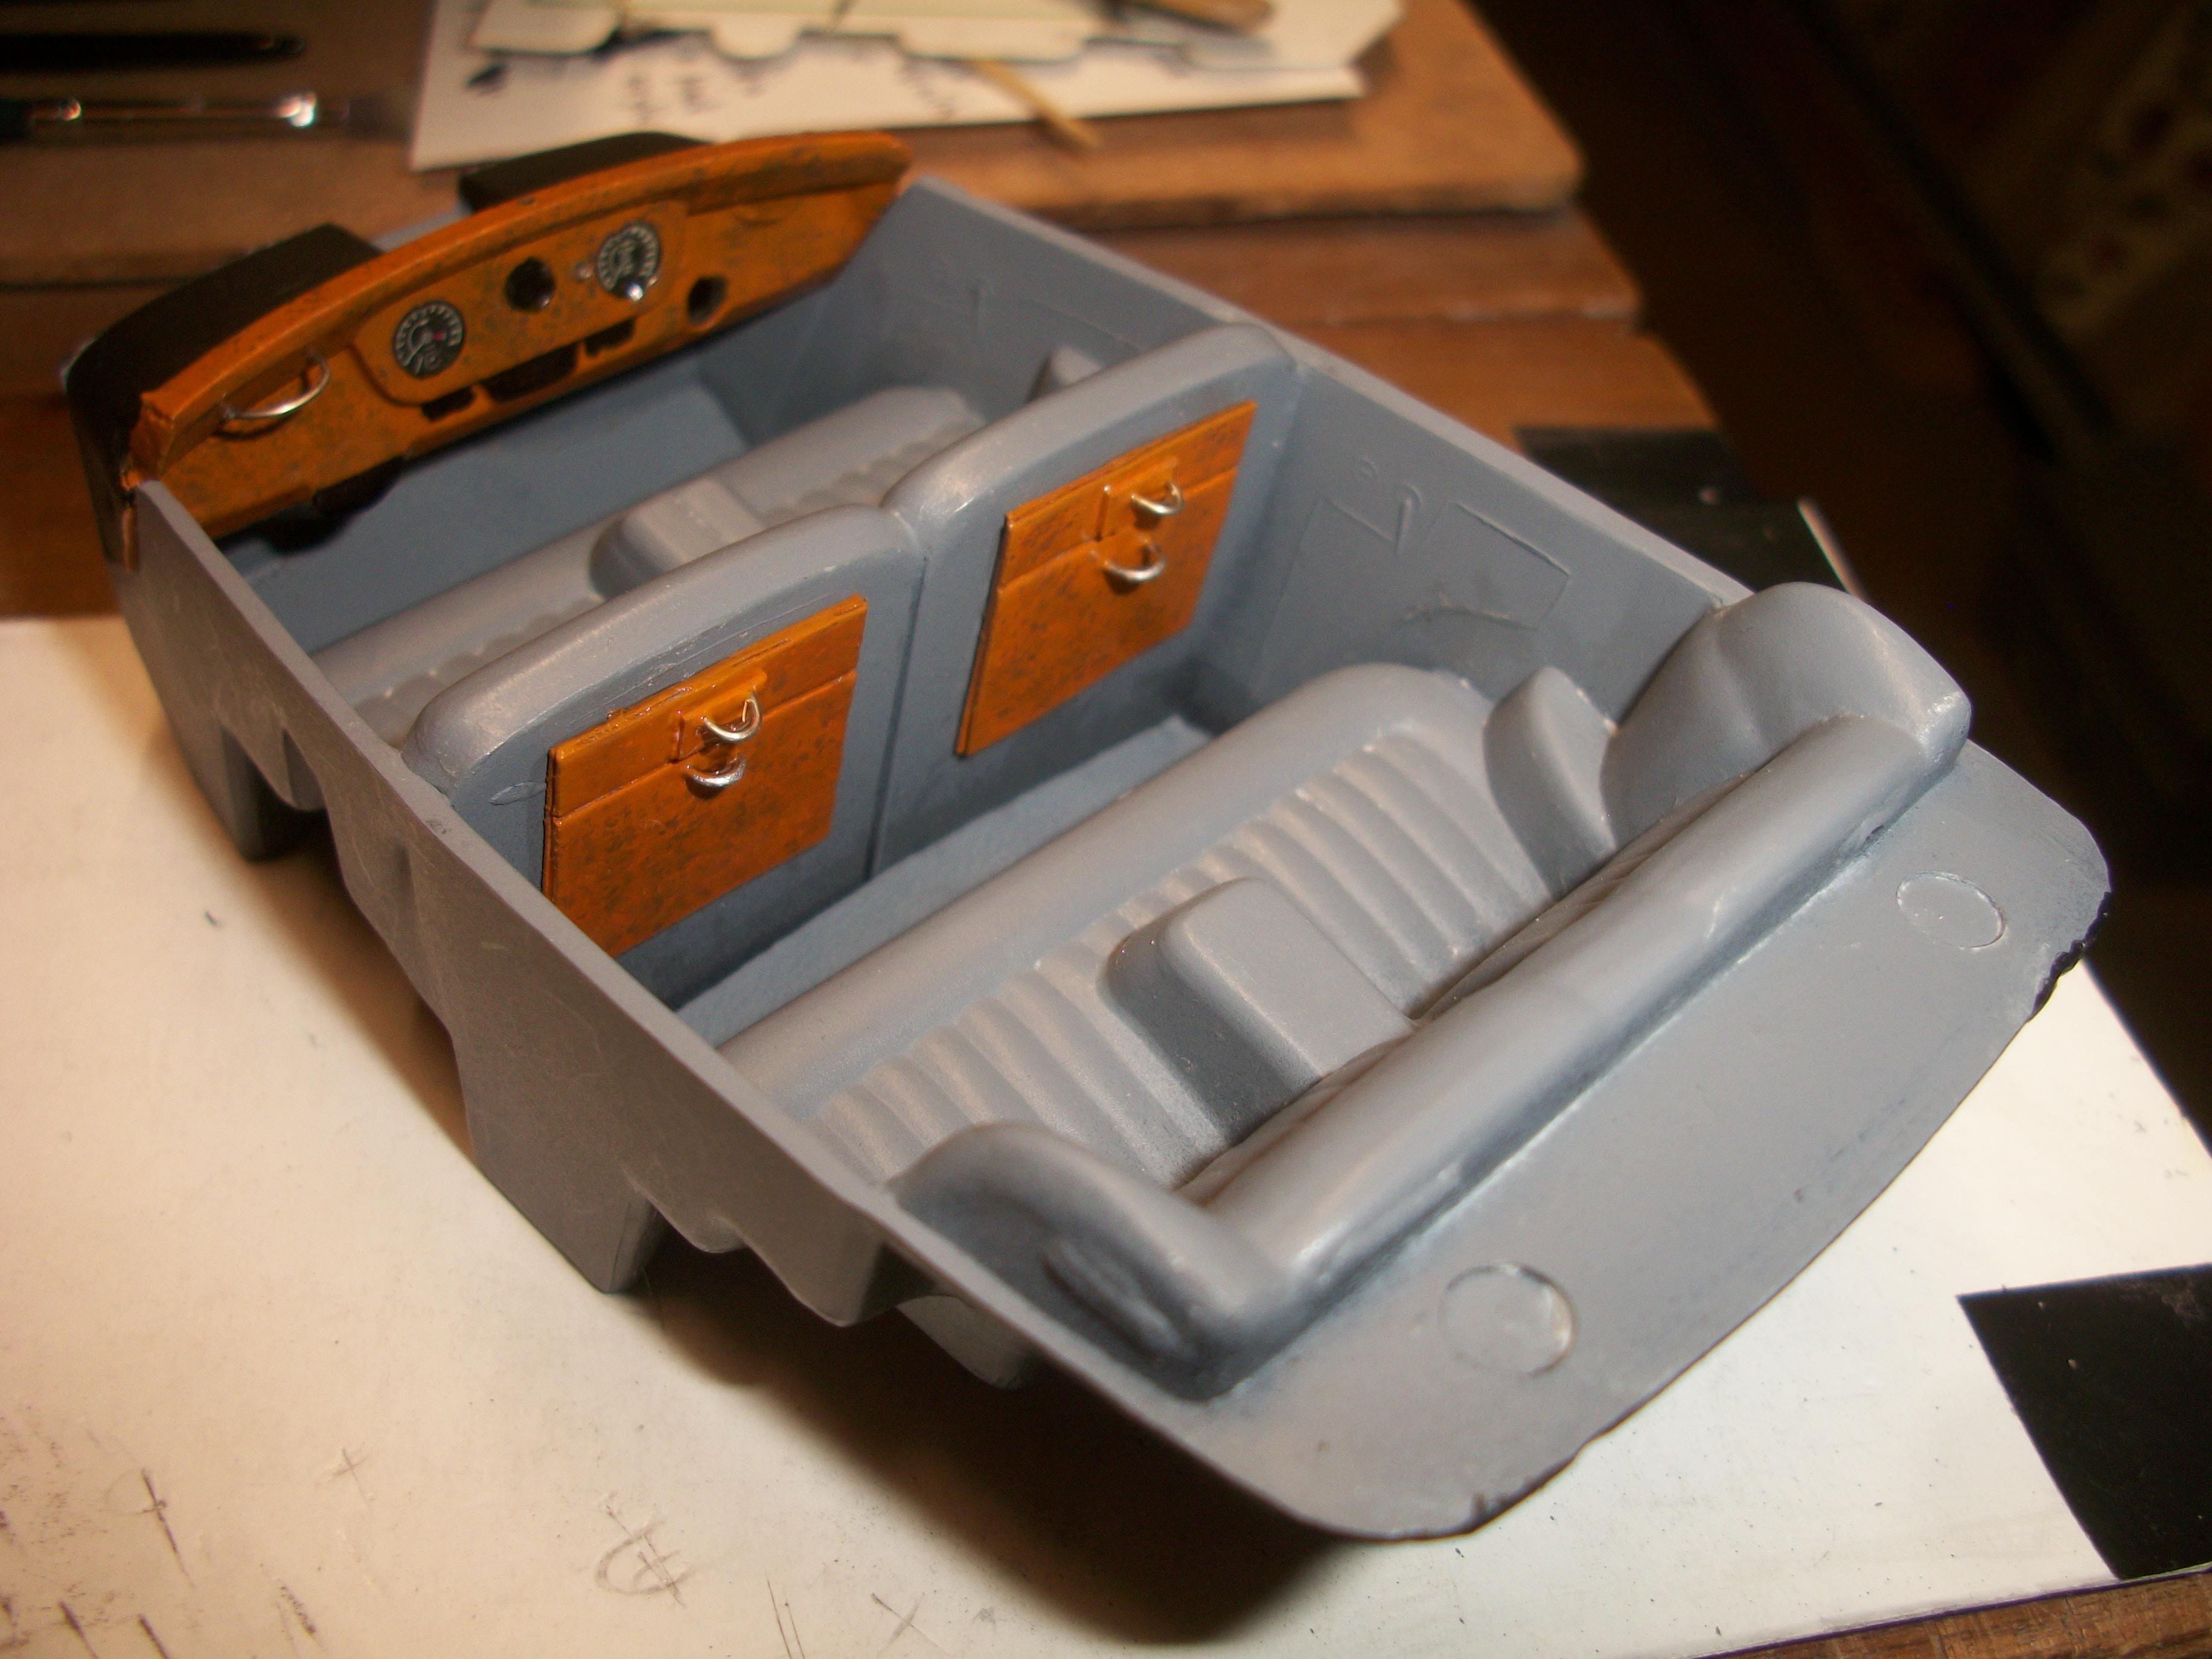
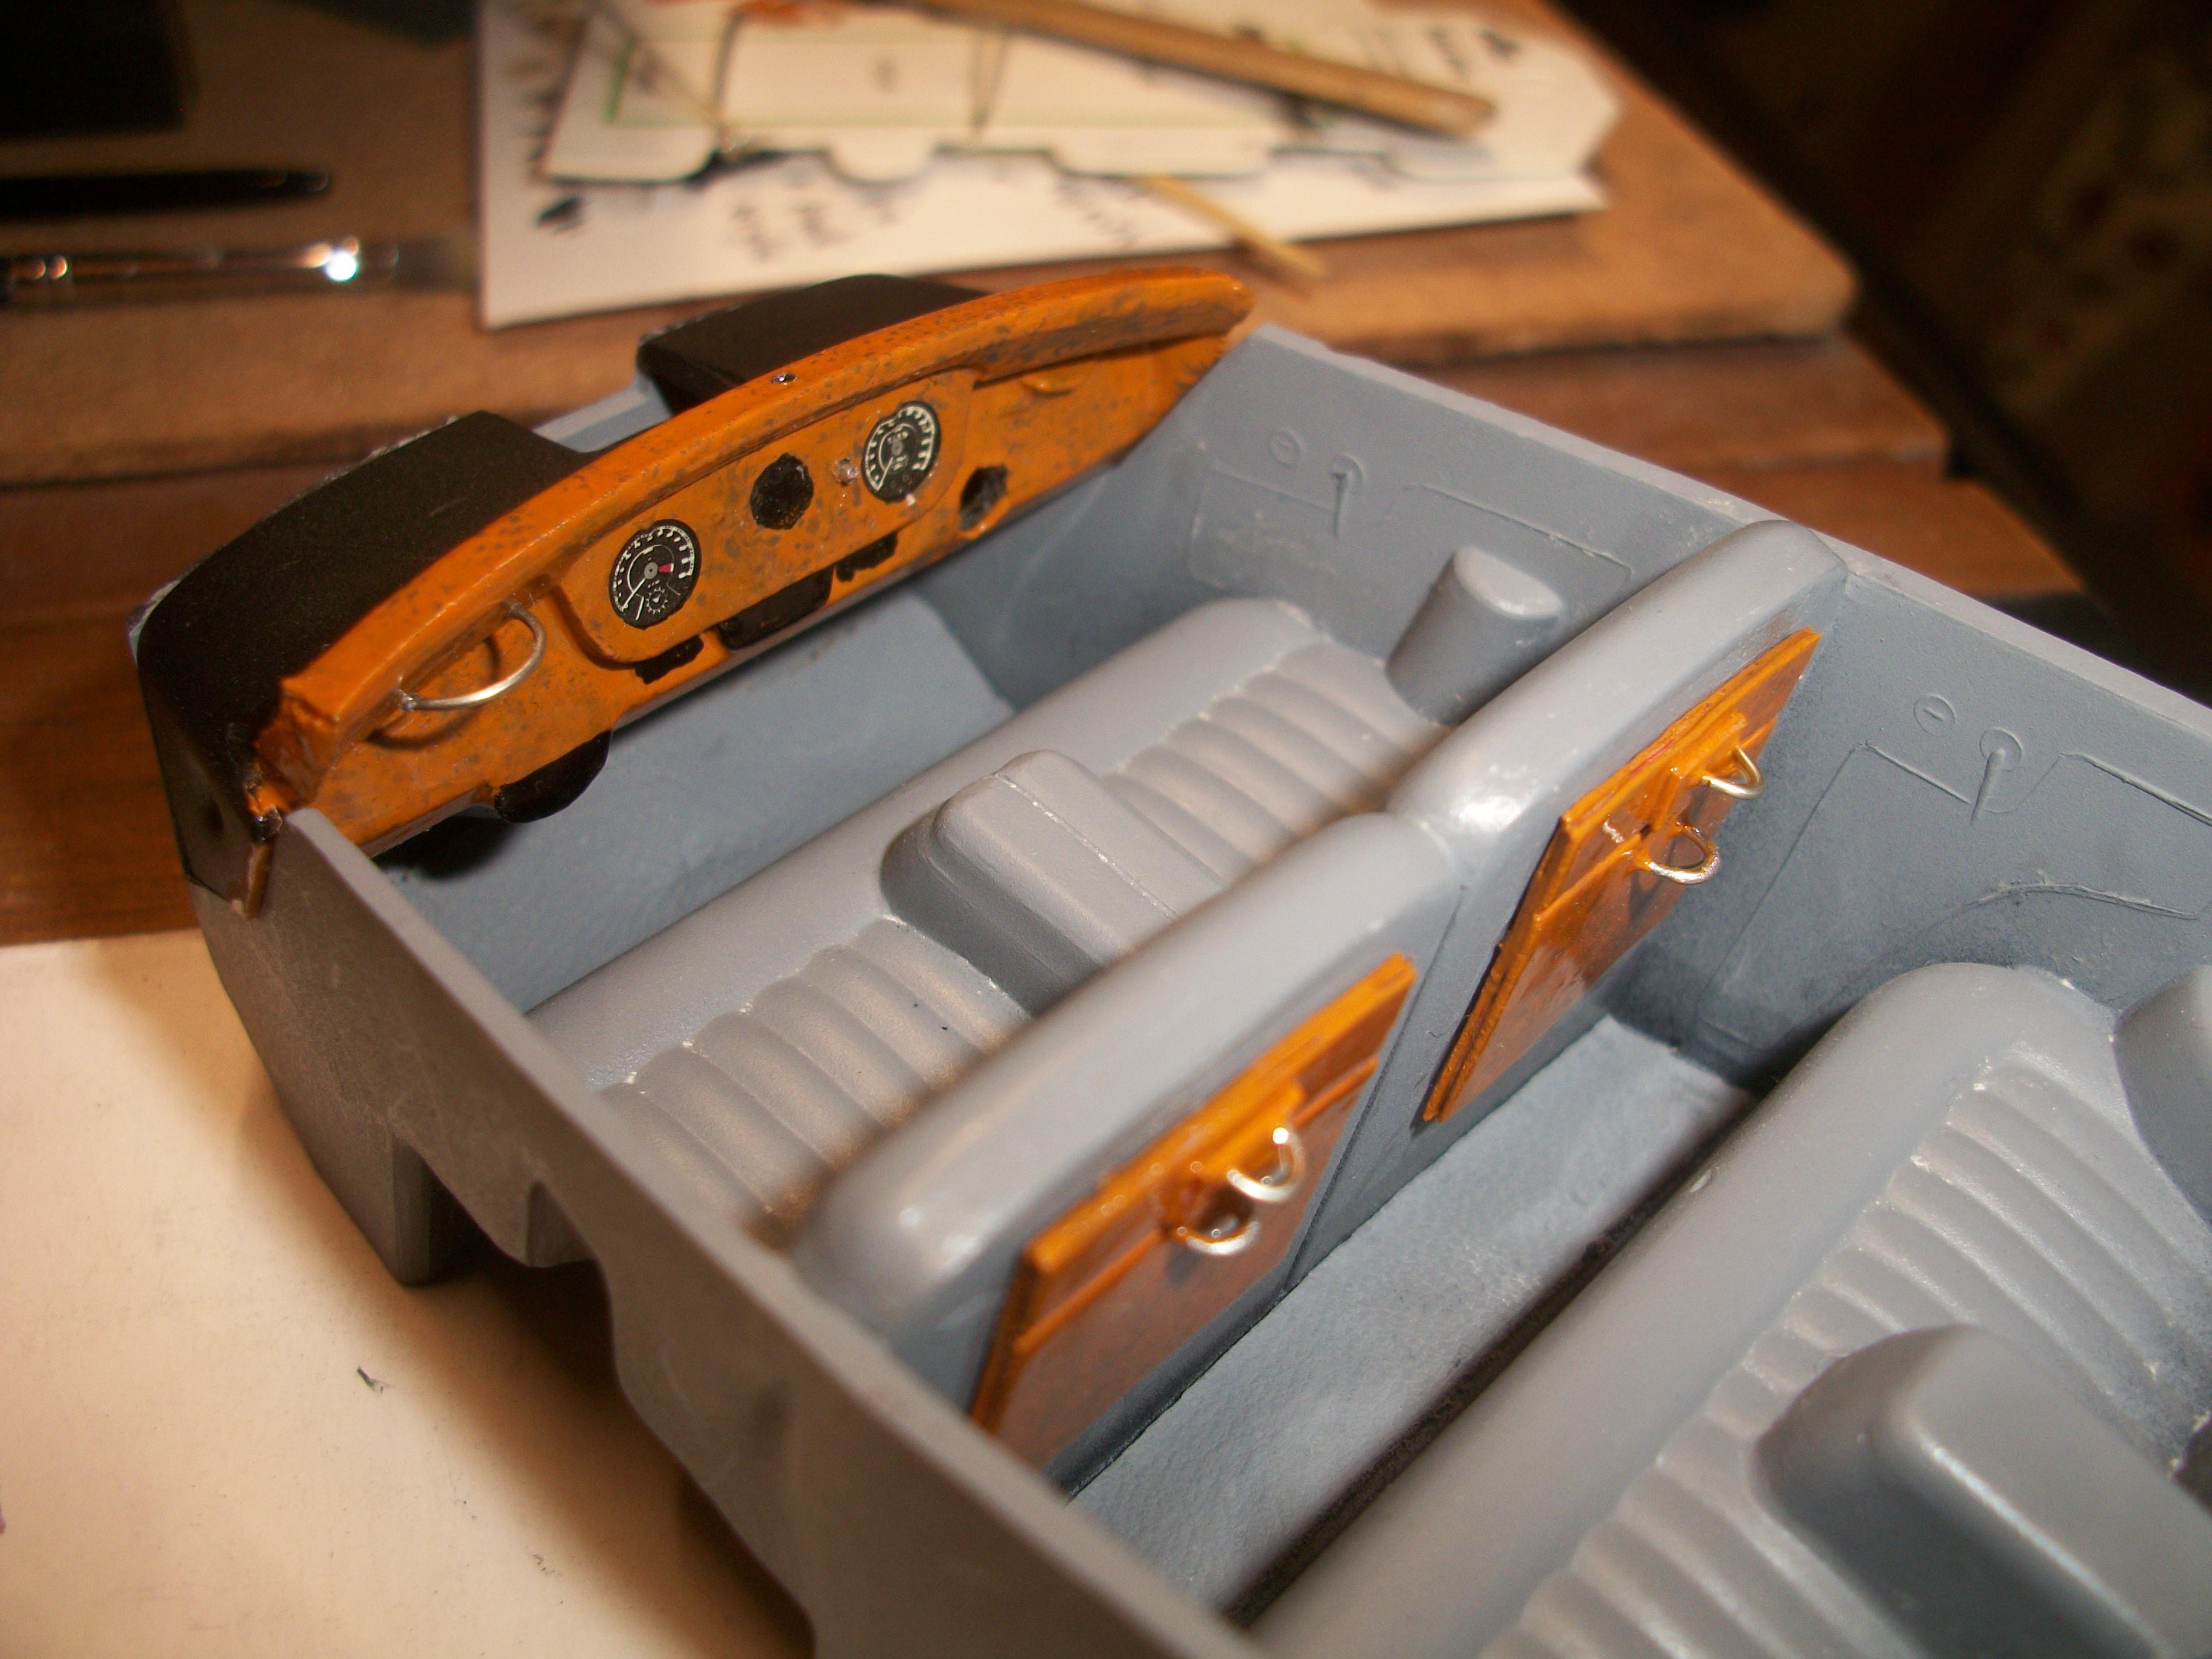
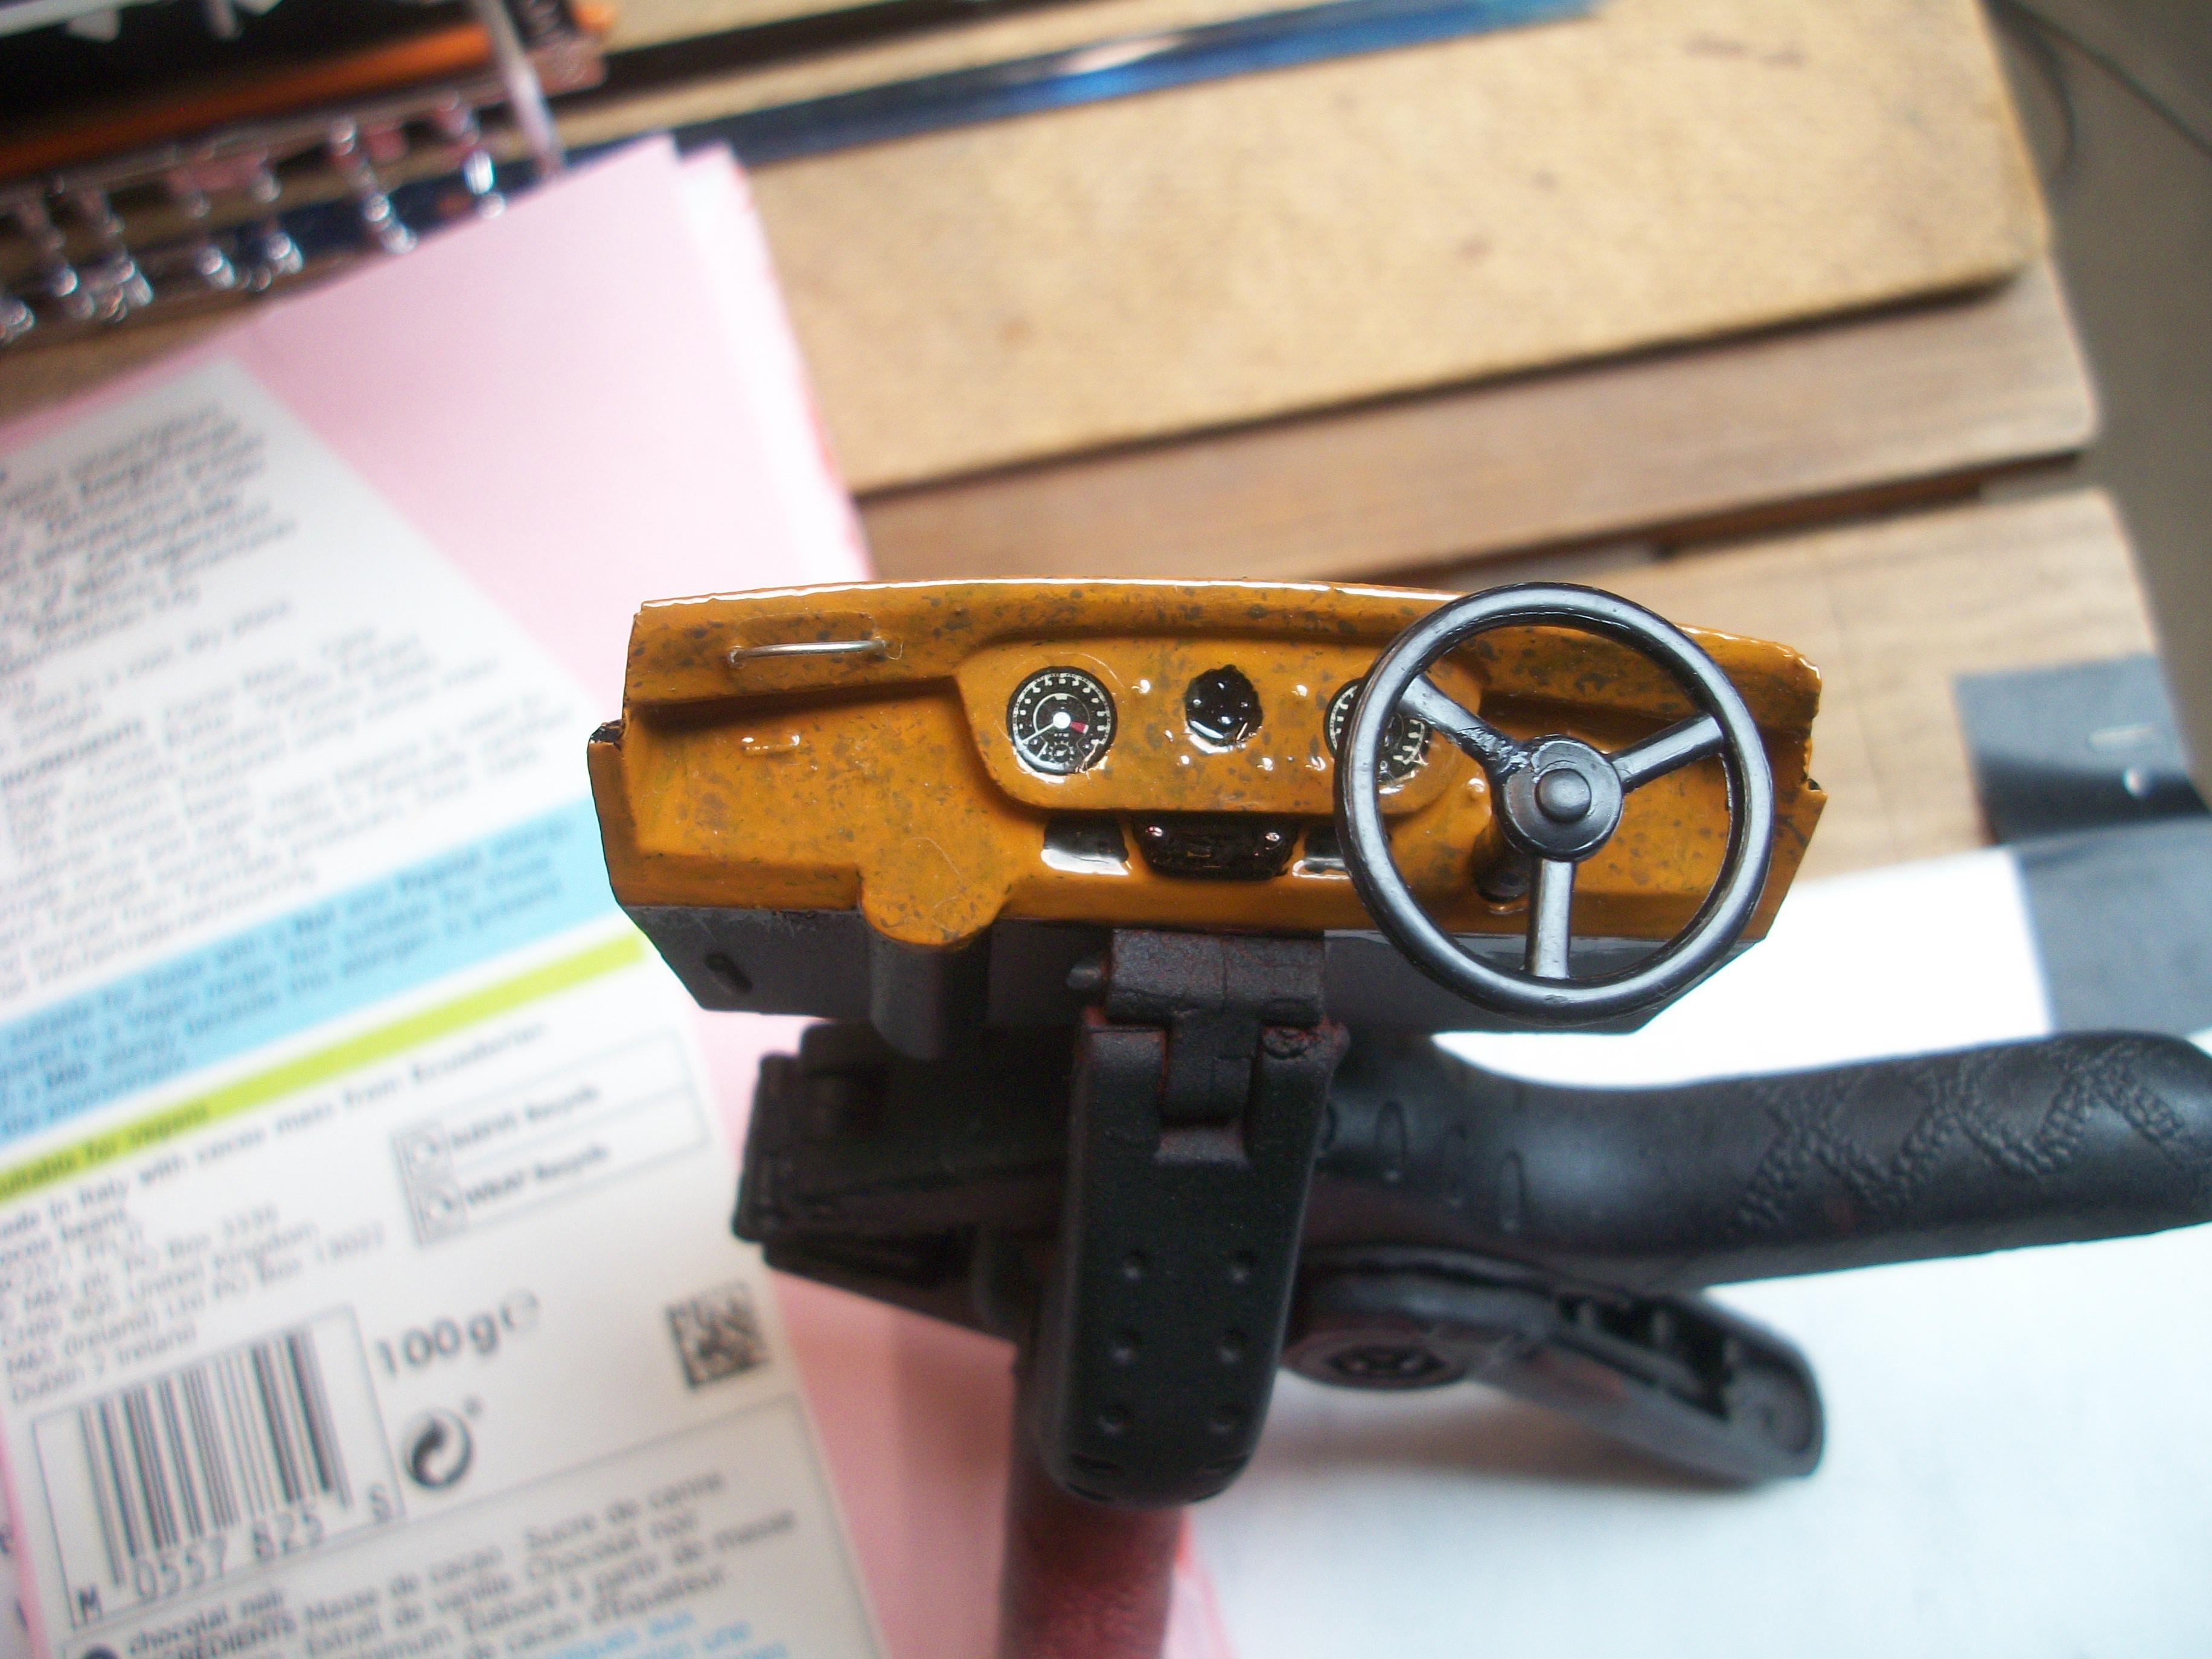
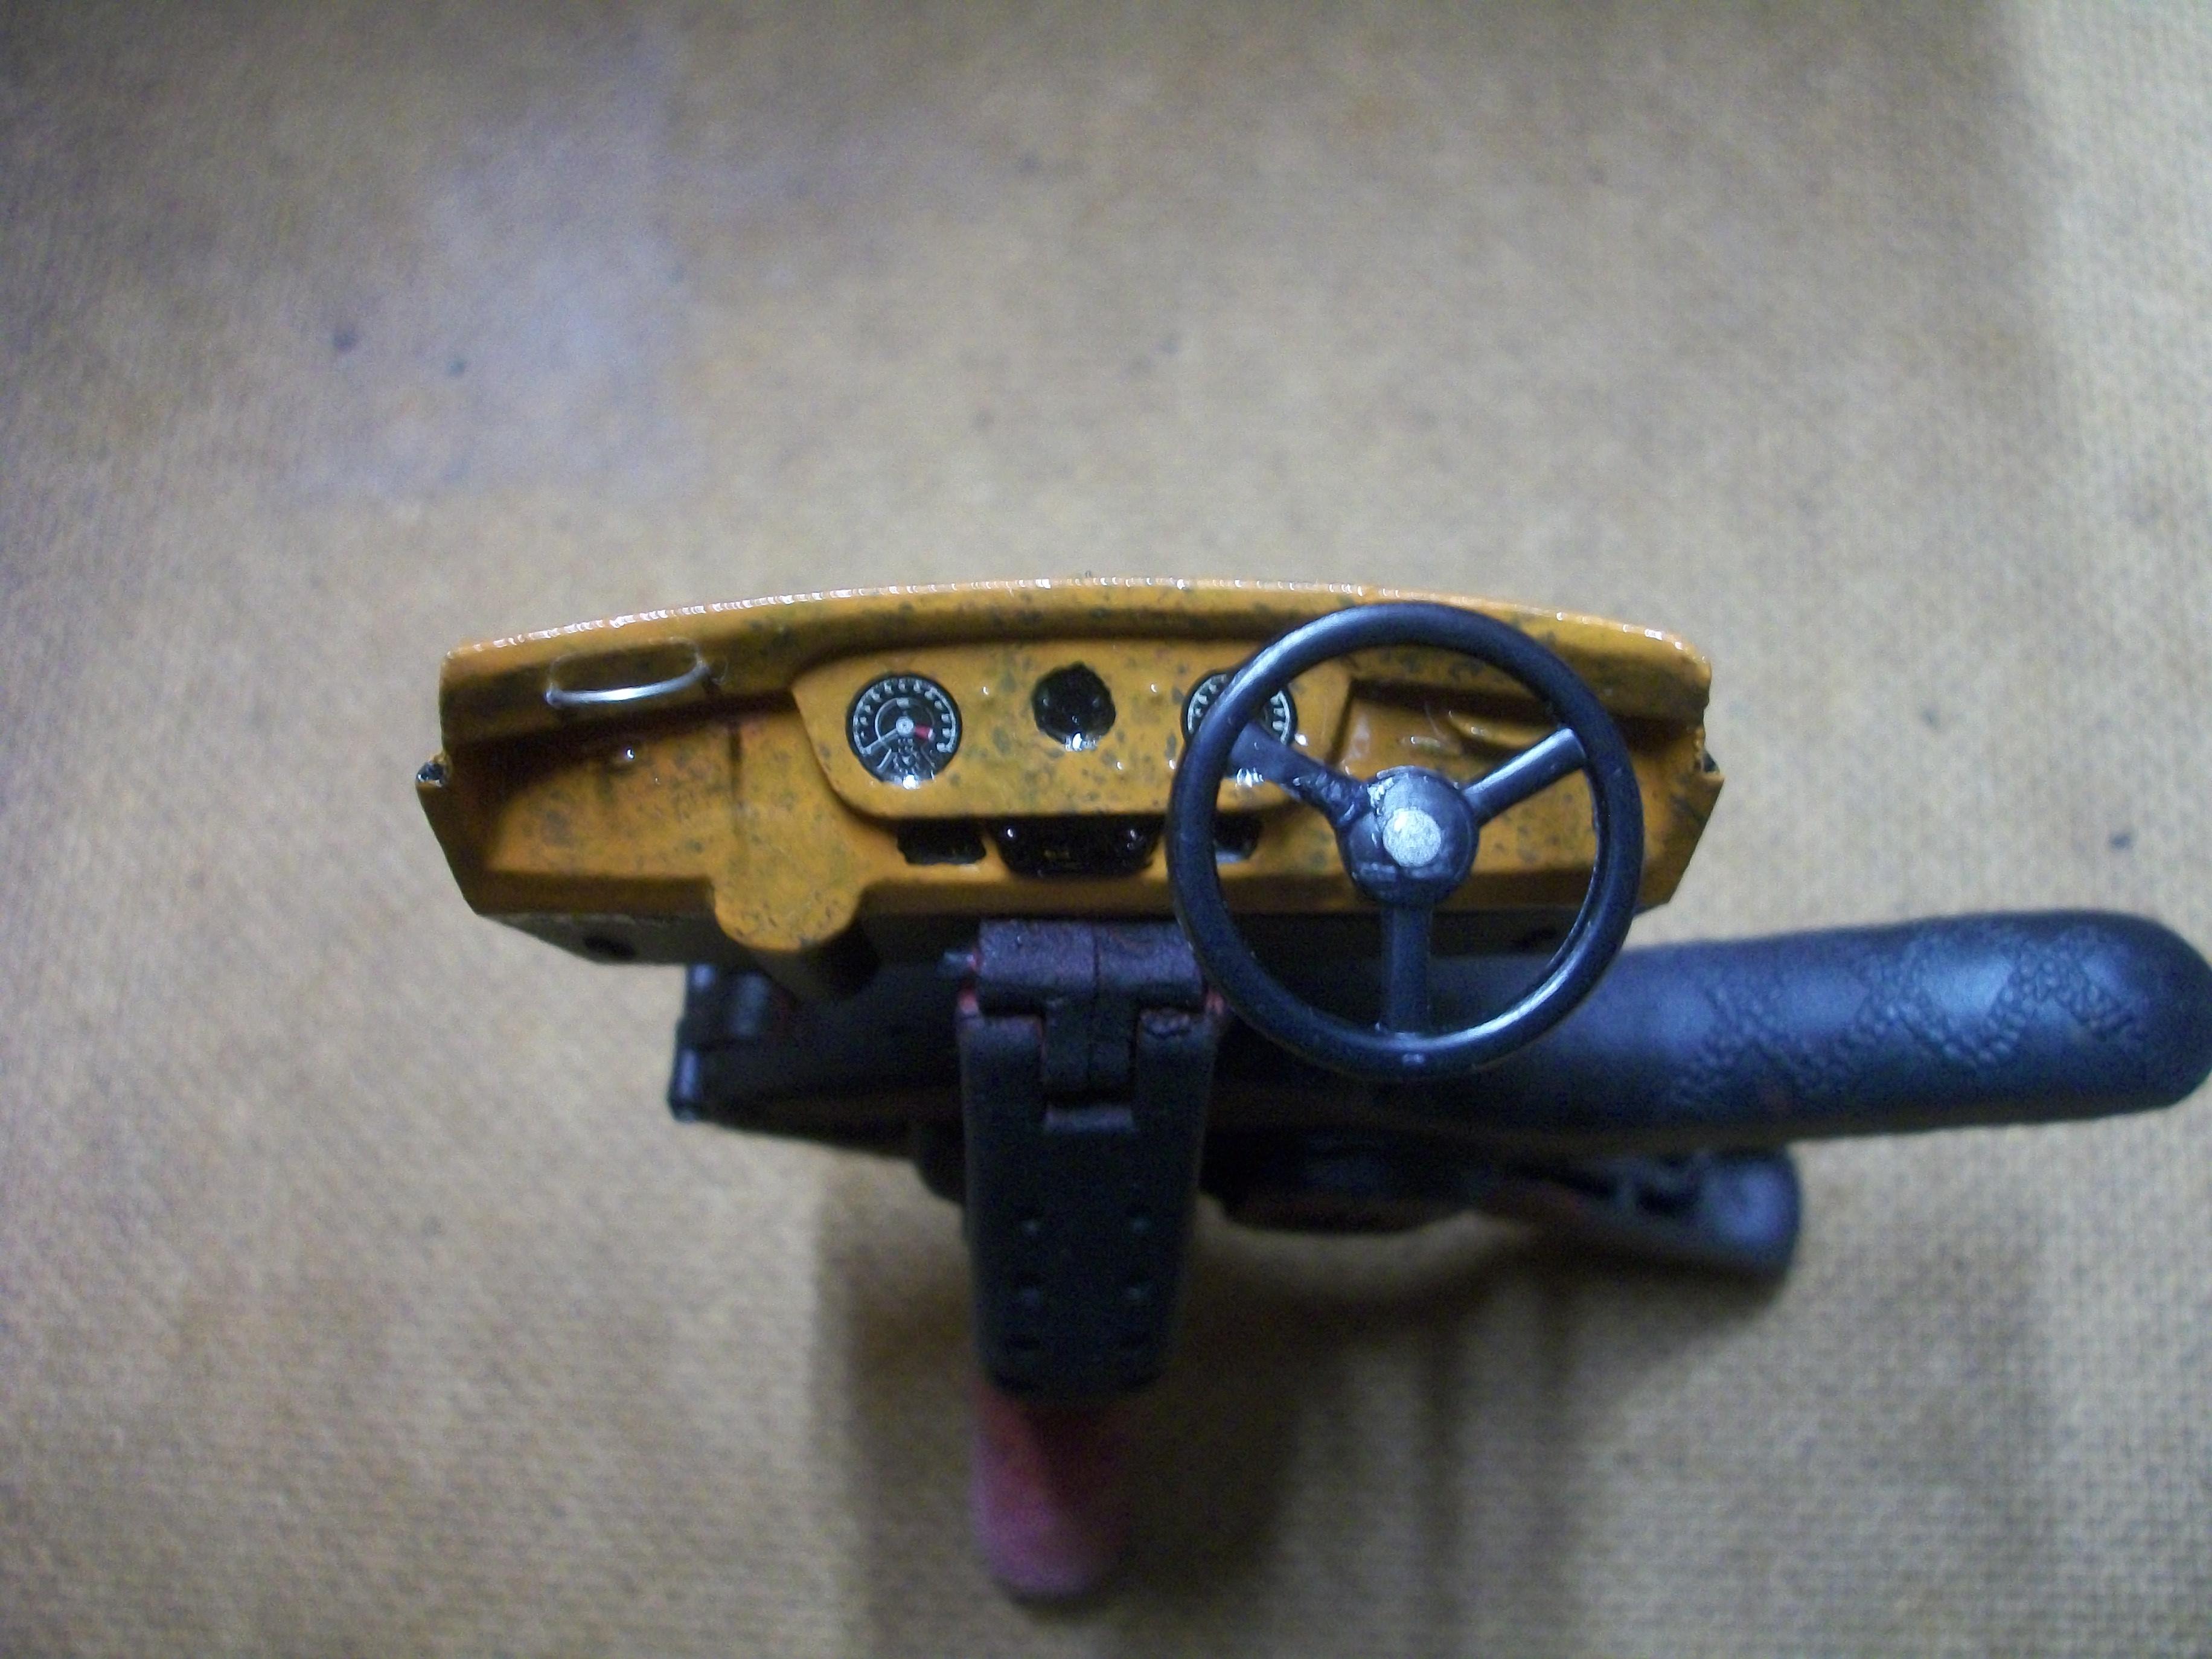
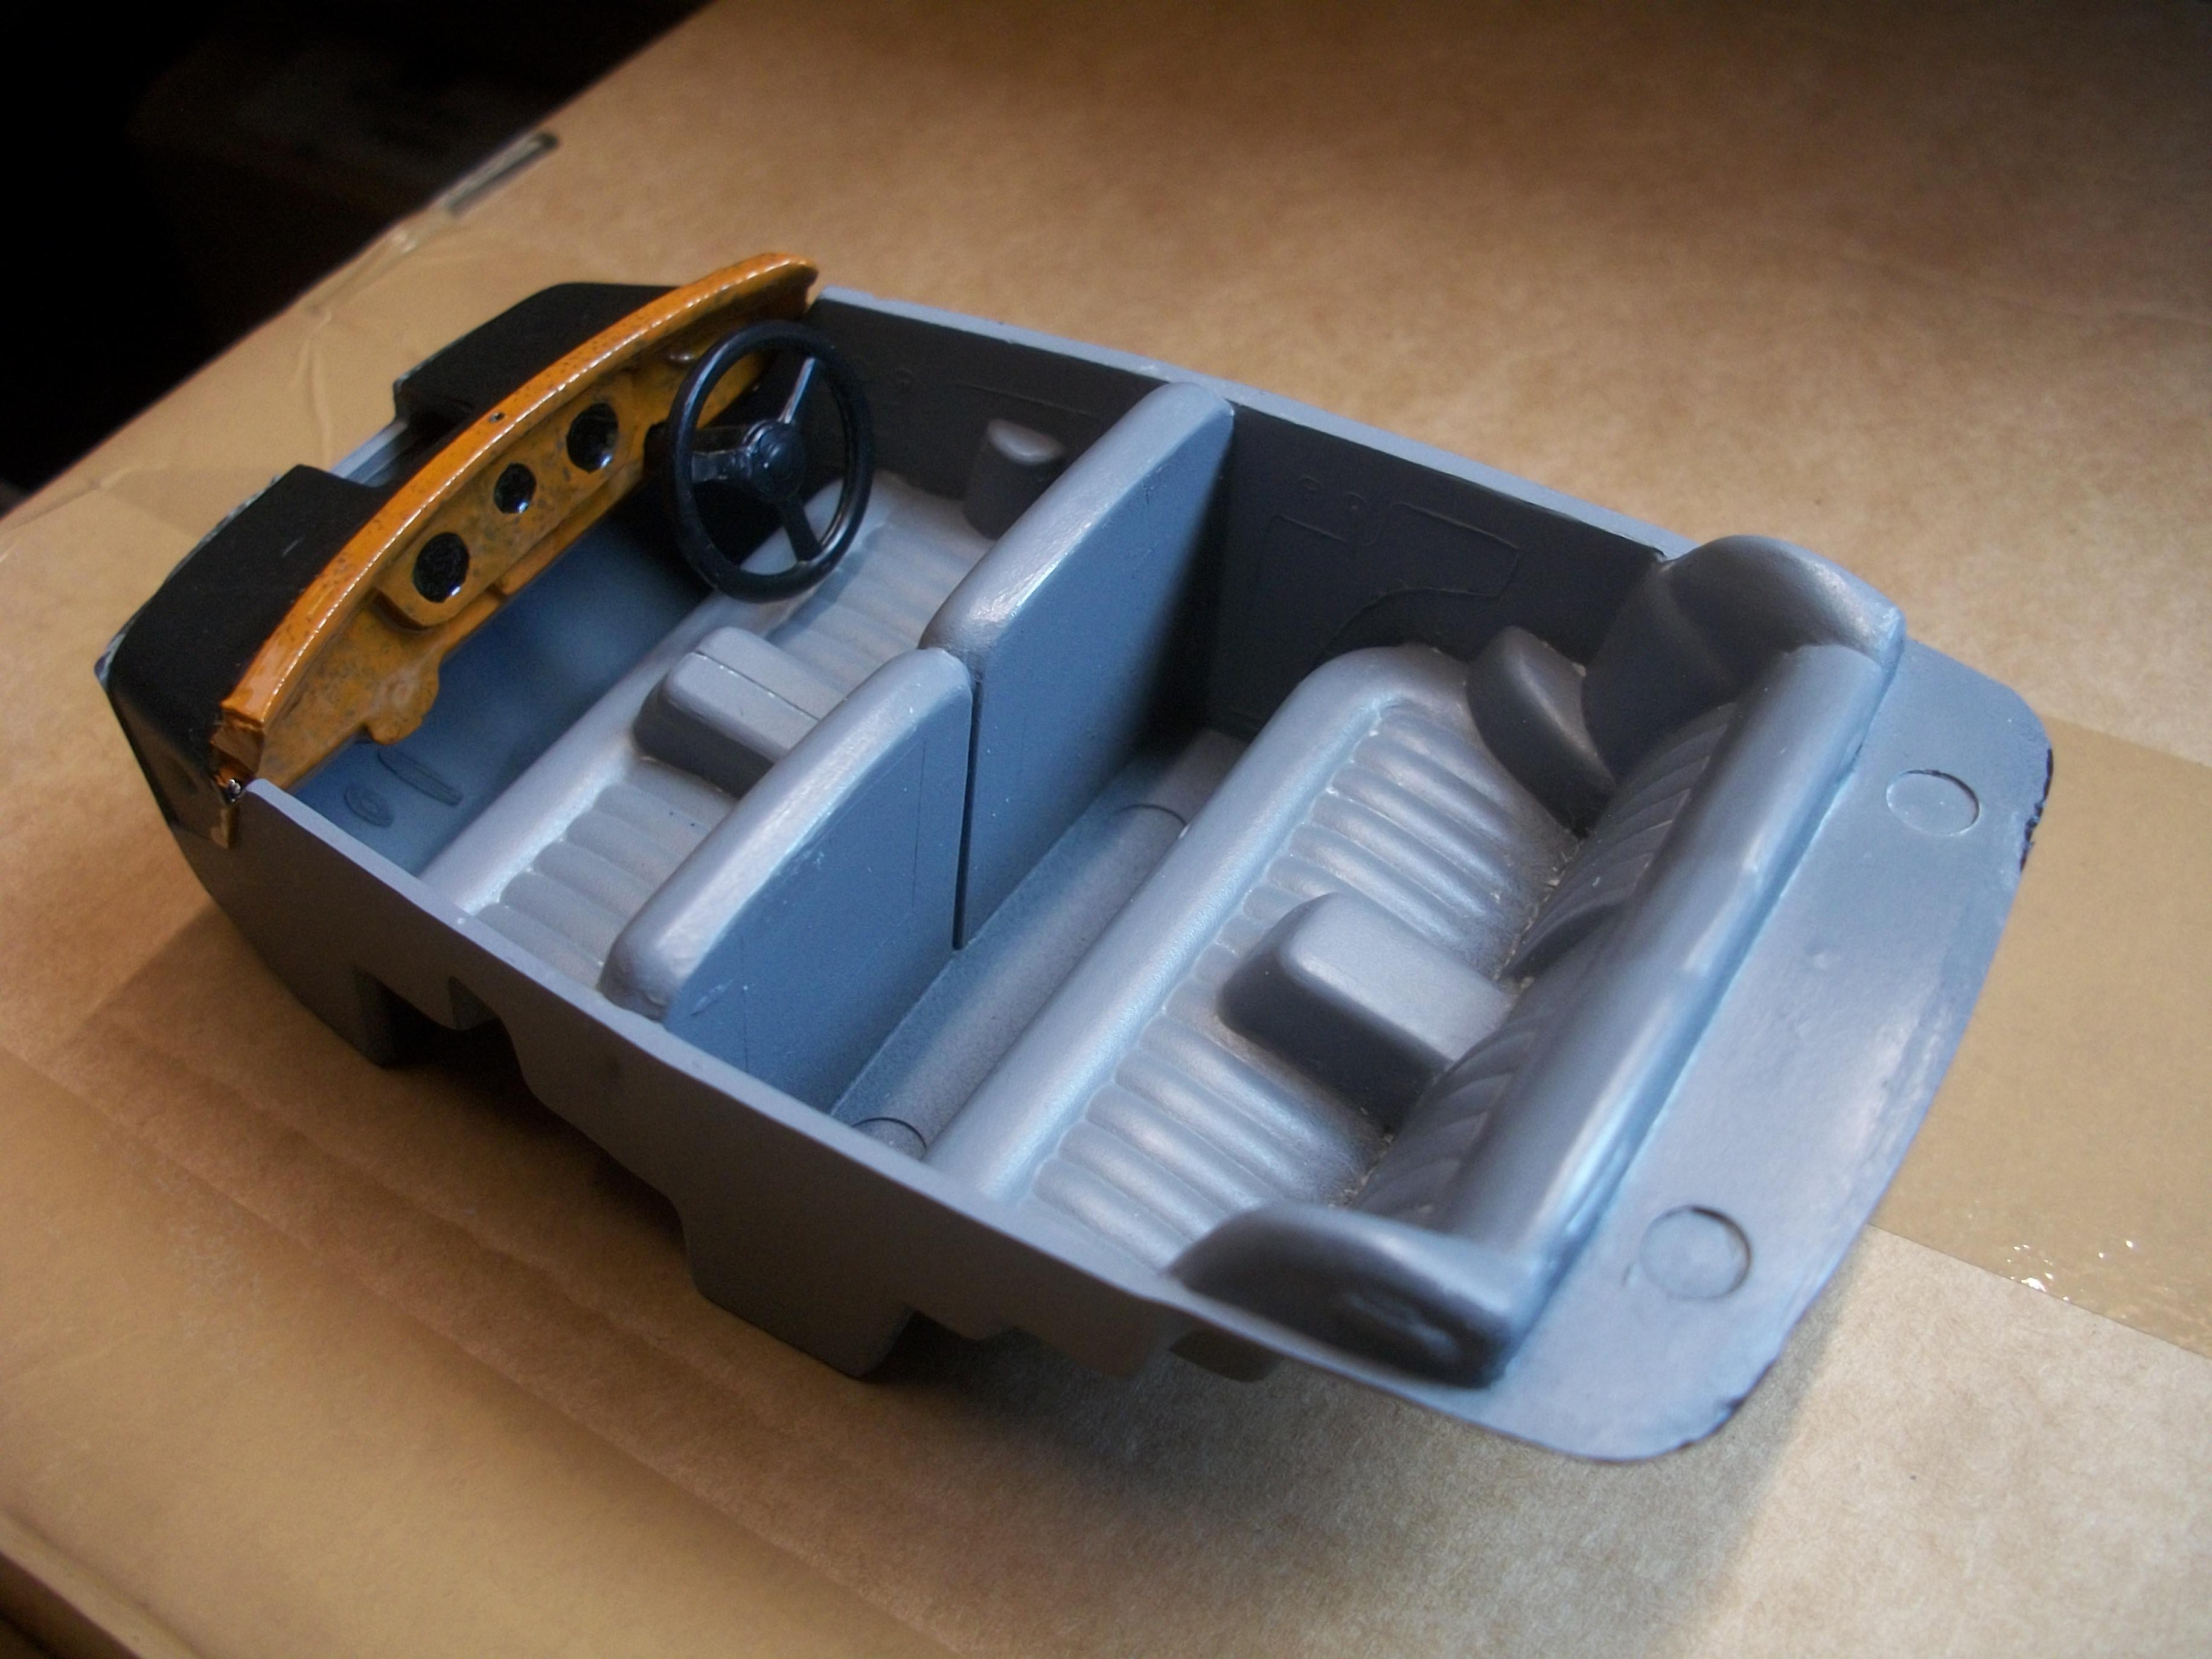
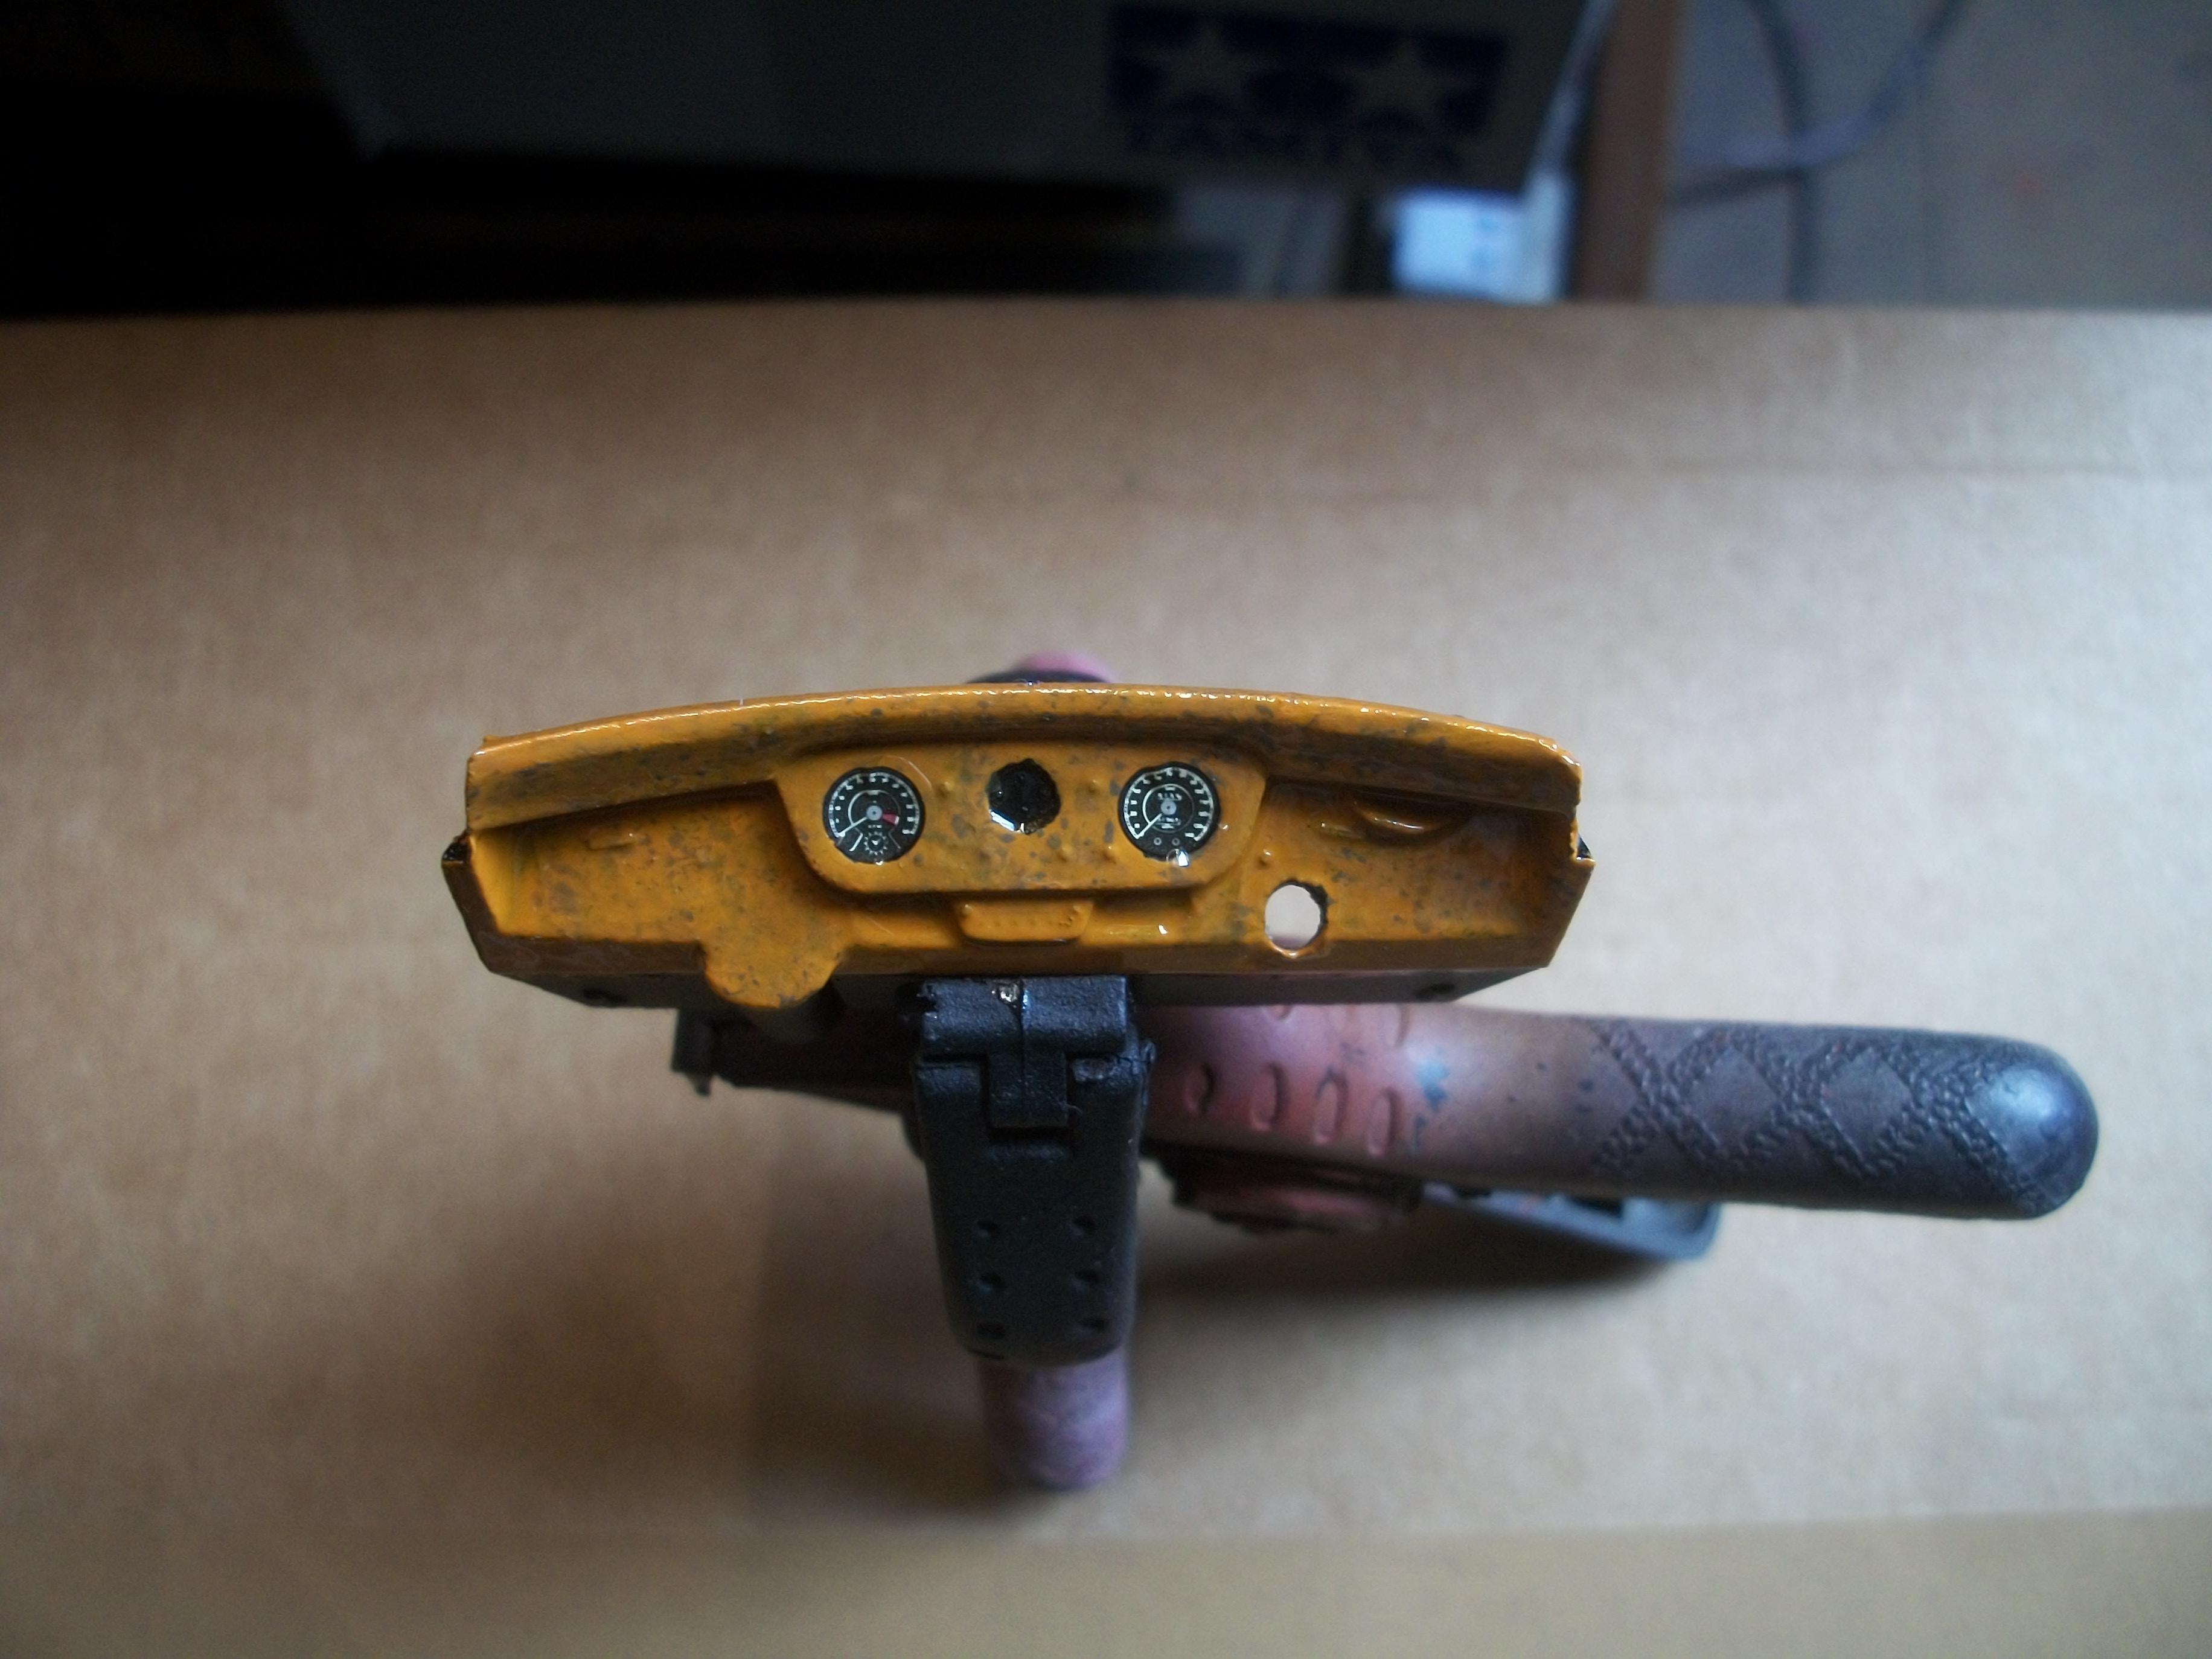
The Minicraft kit for this Silver Cloud gives you 5 wheels and 5 tyres, but the wheels are poorly chromed and the tyres are of a plastic material, not rubber. The Revell kit does give you 5 wheels, but only 4 tyres. How you are supposed to put a tyre on the spare wheel is beyond me. The Revell wheels are not chromed so you can do your own, and the tyres are very realistic rubber material. Also, the tyres have one side that is plain English, so no whitewall and have ' DUNLOP ' lettering, with the other side of the tyre having a narrow band for a whitewall, USA and Canada. The axles in the Revell kit are plastic, and the axles in the Minicraft kit are metal. This time I don't have any metal axles remaining. I carefully set about using Tamiya Polishing Compound on the Franklin Mint windscreen, only using Coarse and Fine grades, so not the Finish grade. The scratch has almost been removed, but the bad news is . . . the polishing compound has removed most of the chrome from the windscreen surround moulding ! This means that I have to re-chrome the windscreen surround. I can't really use the liquid chrome pen, so most likely it will be Bare Metal Foil, which I can cut cleanly to the glass with a scalpel knife. Maybe I should have left the scratch as it was? I attempted to create the knurled inner rim of the steering wheel with the mini grinder, but that went badly. Found a second steering wheel and used a round hand file to do the job successfully. Drilled a tiny hole in the dashboard, just to the left of the speedo, and inserted a short piece of 30 amp fuse wire to make a switch. This can be repeated for the other switches. The carpets are glued in place, also the picnic tables, using PVA glue. These finer details are proving tricky in 1:24 scale, and 1:12 scale would be a little easier. David
-
Thanks very much Douglas . . . . I do try to keep pushing the boundaries, and also hopefully improve my skills. Your comments are much appreciated ! Having built and painted seven 1:24 scale Rolls-Royce Silver Cloud I model cars, I would like this build eight to be the best by far. David
-
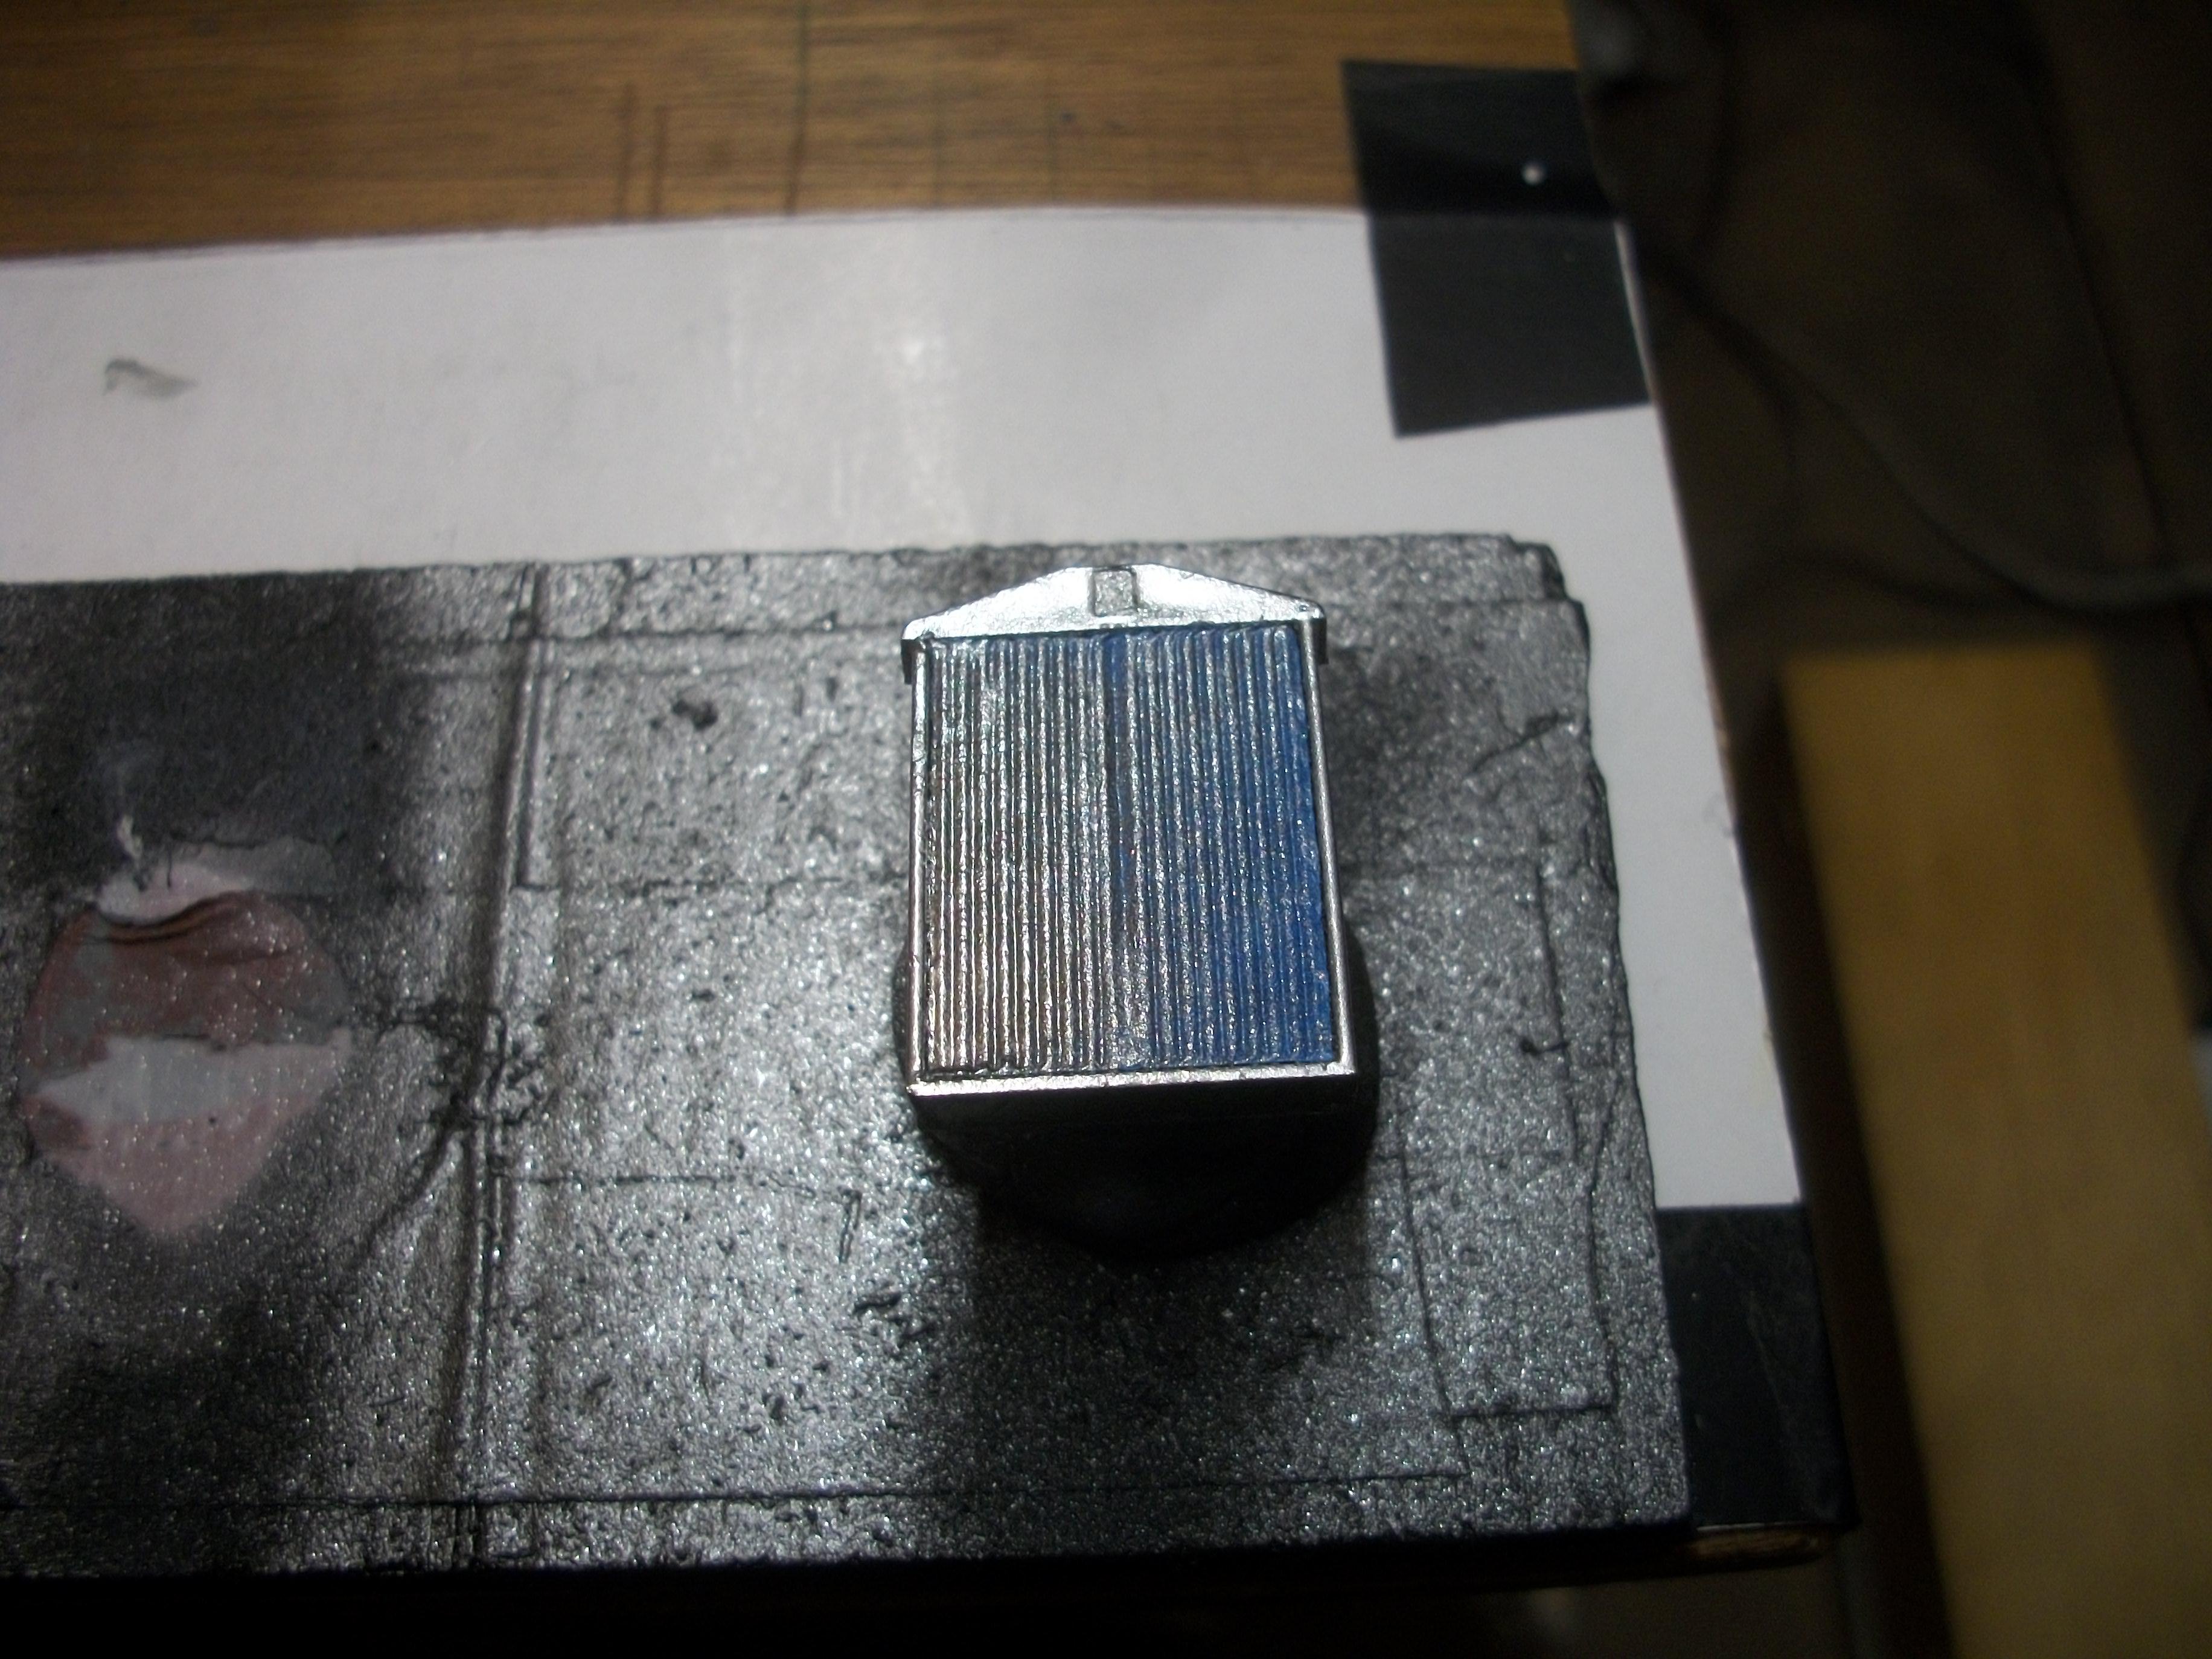
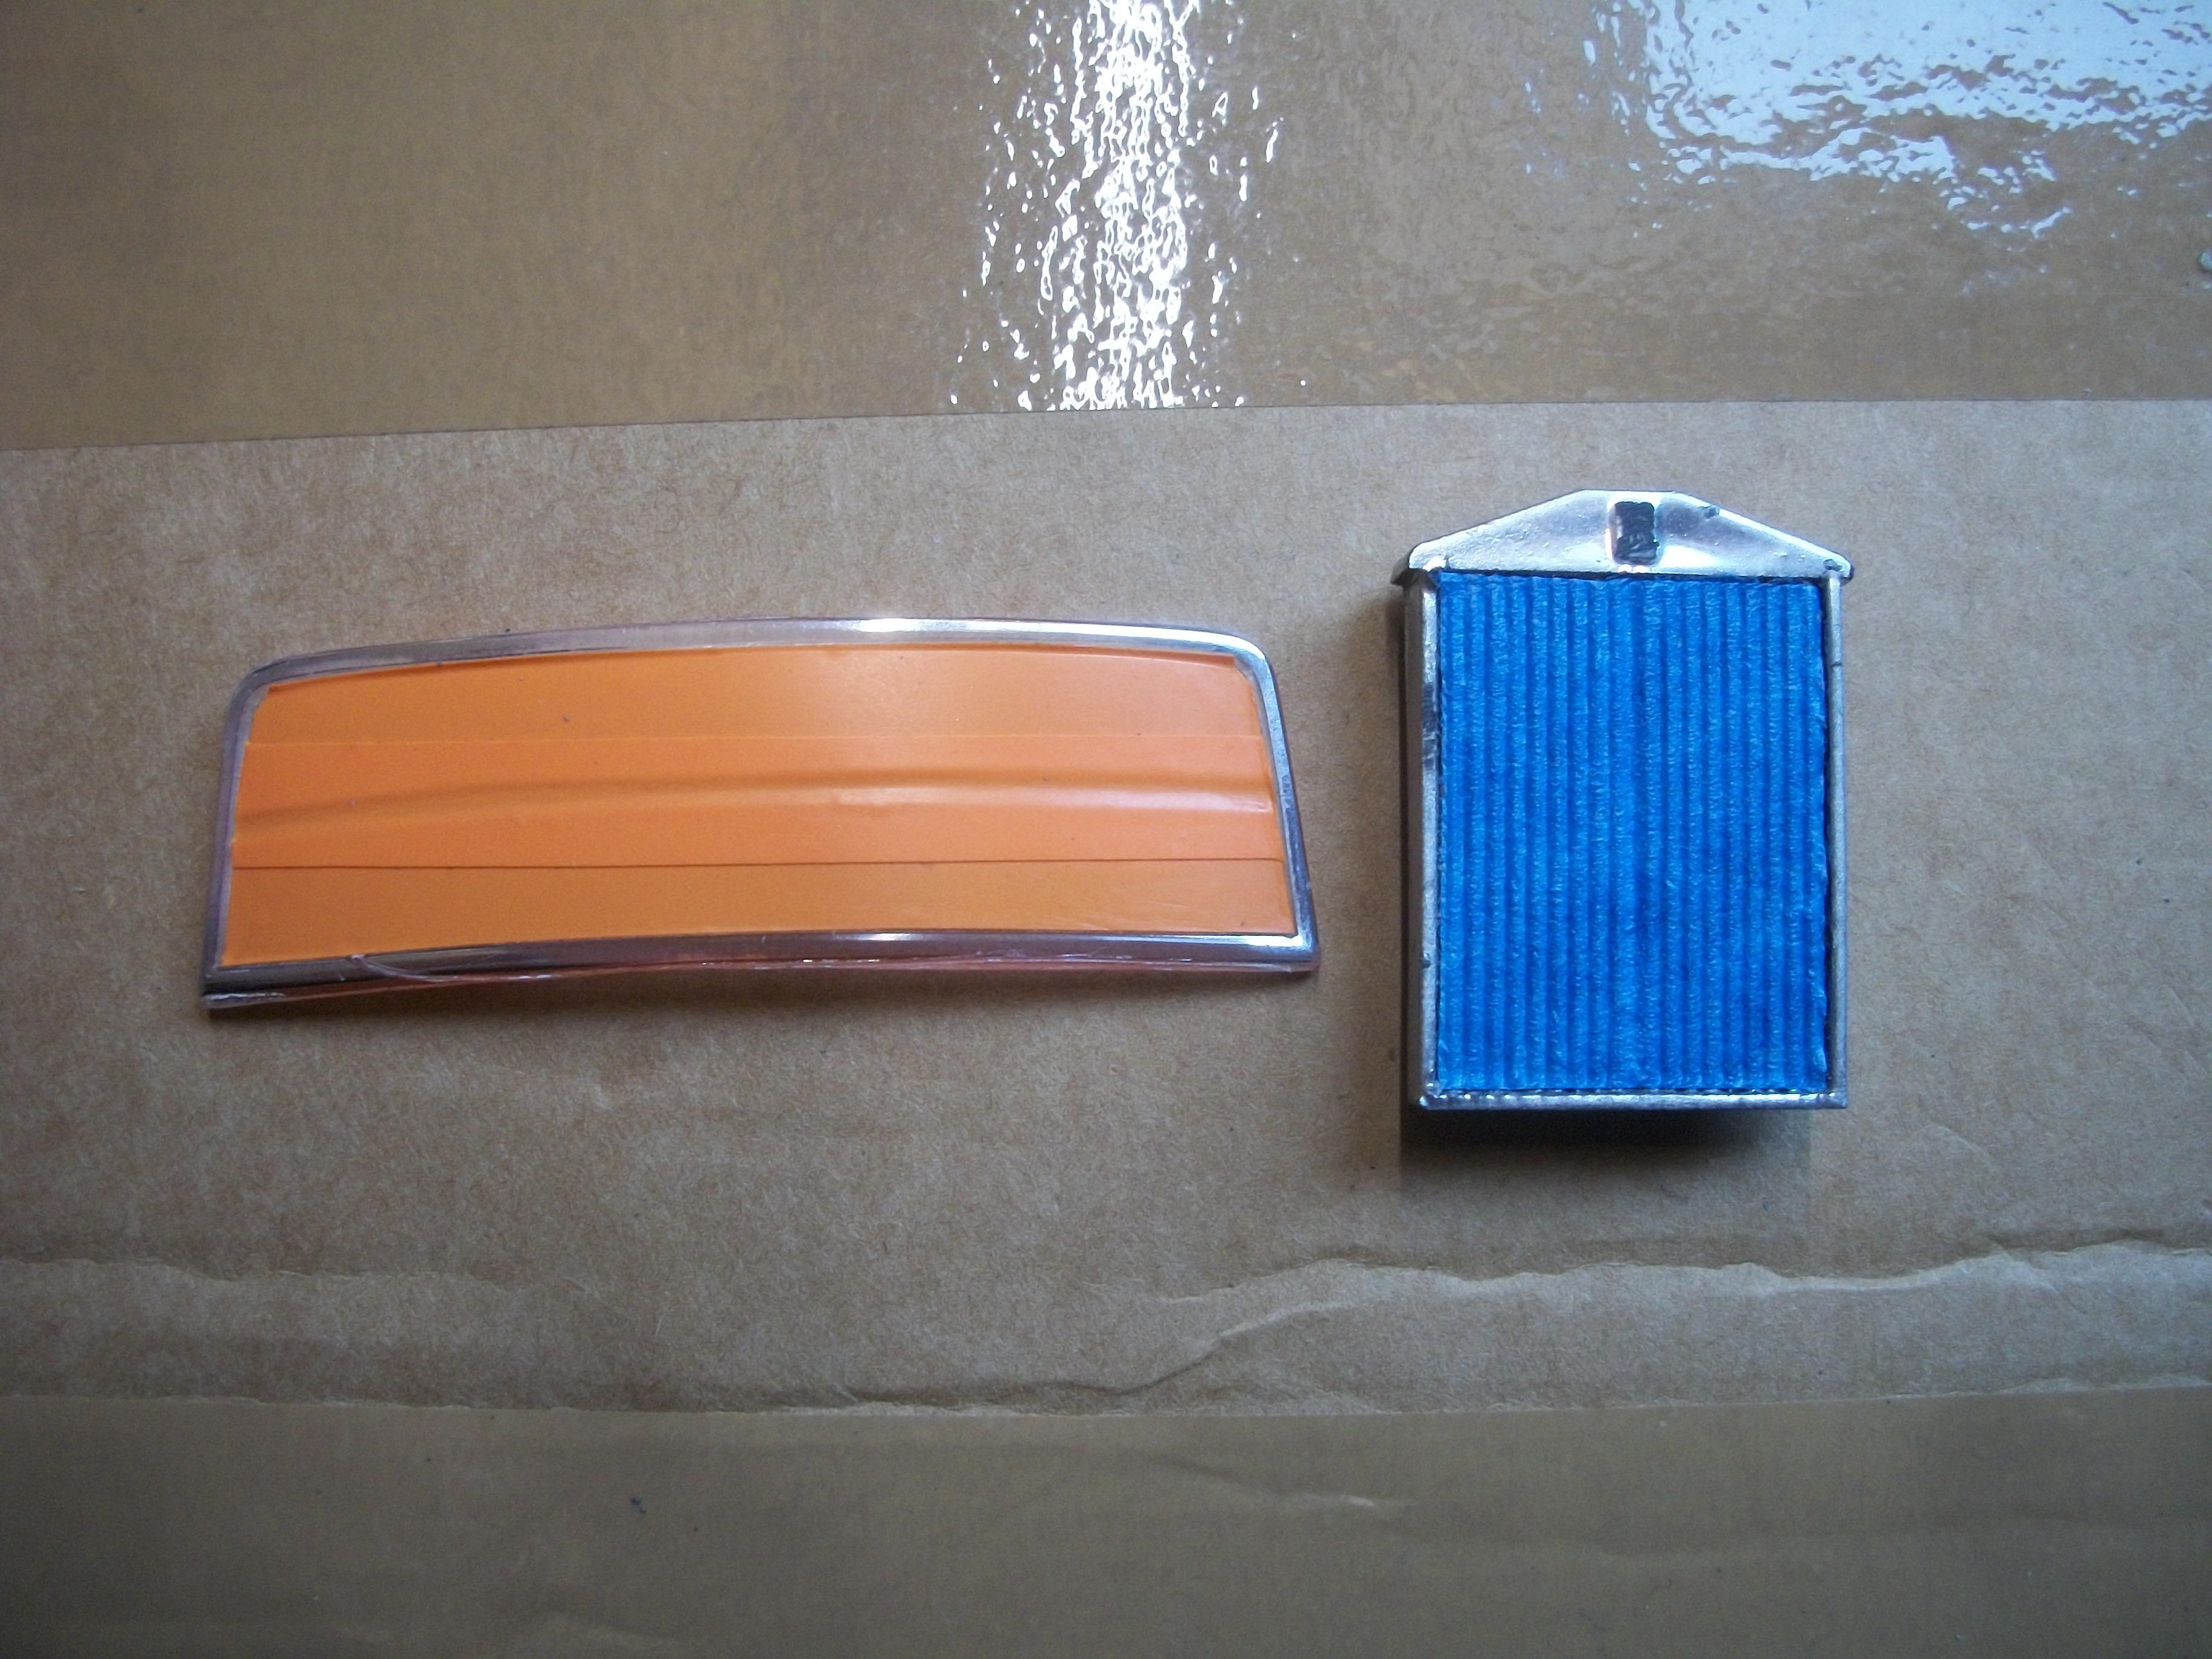
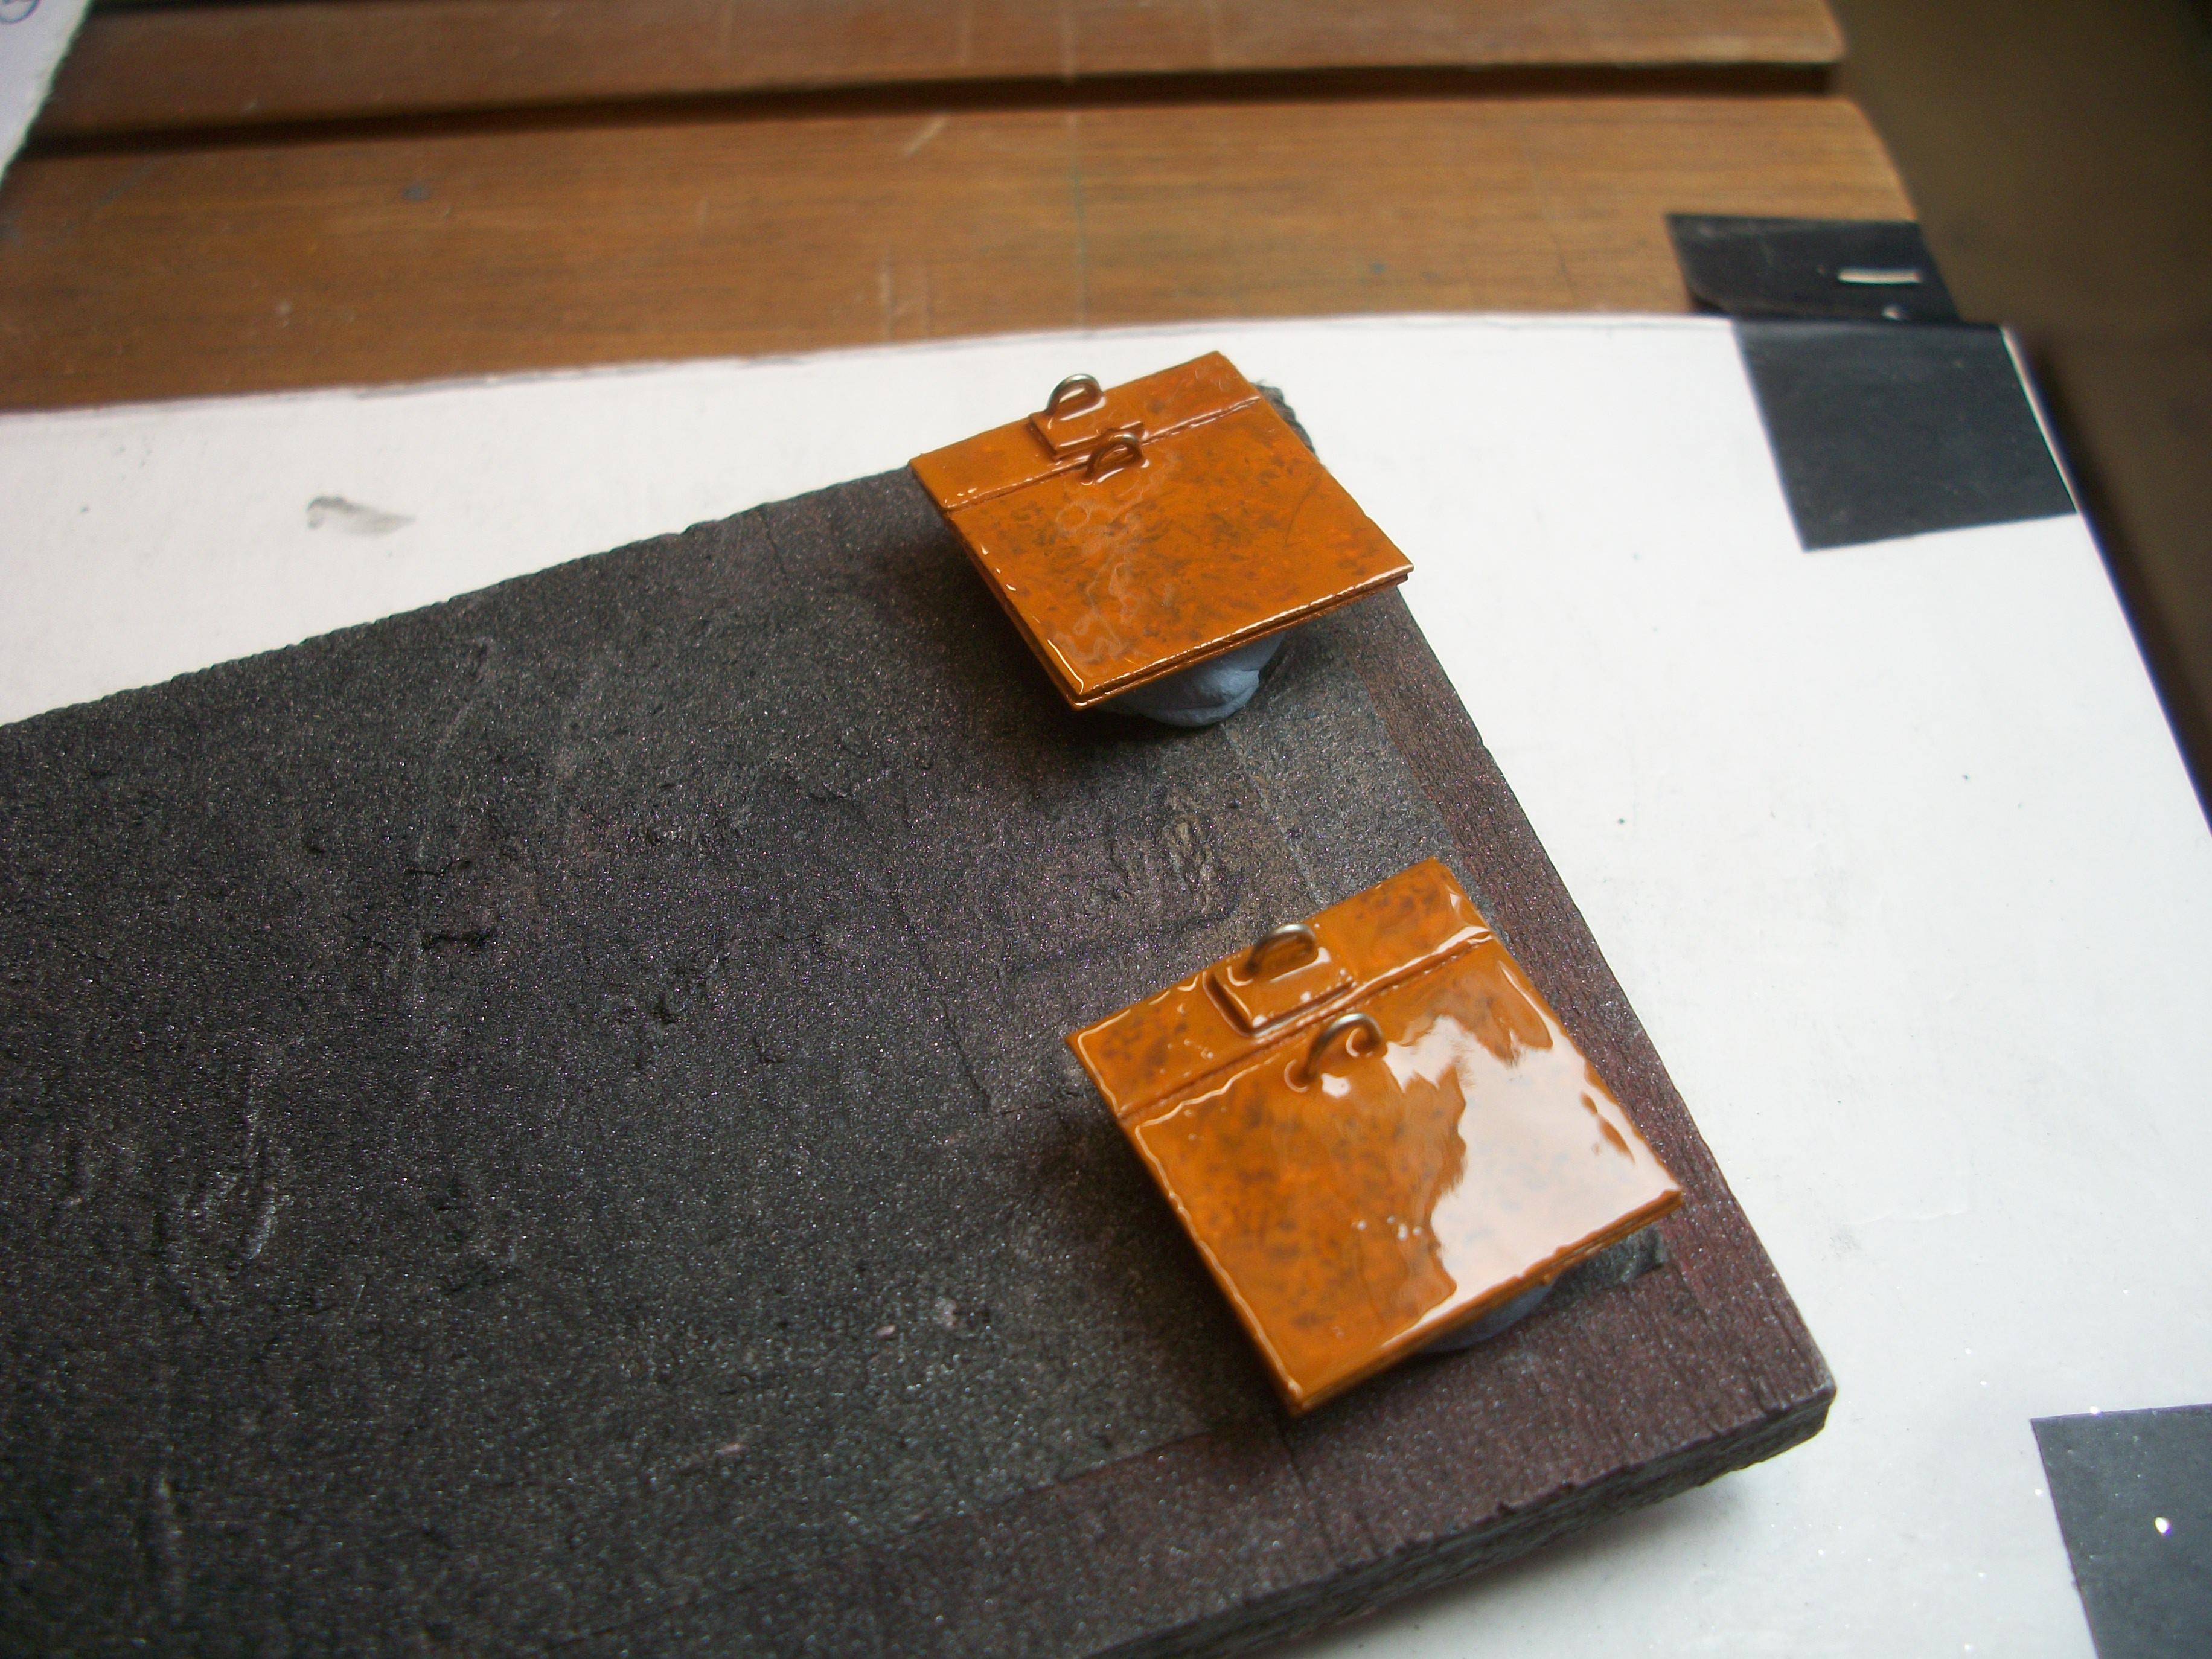
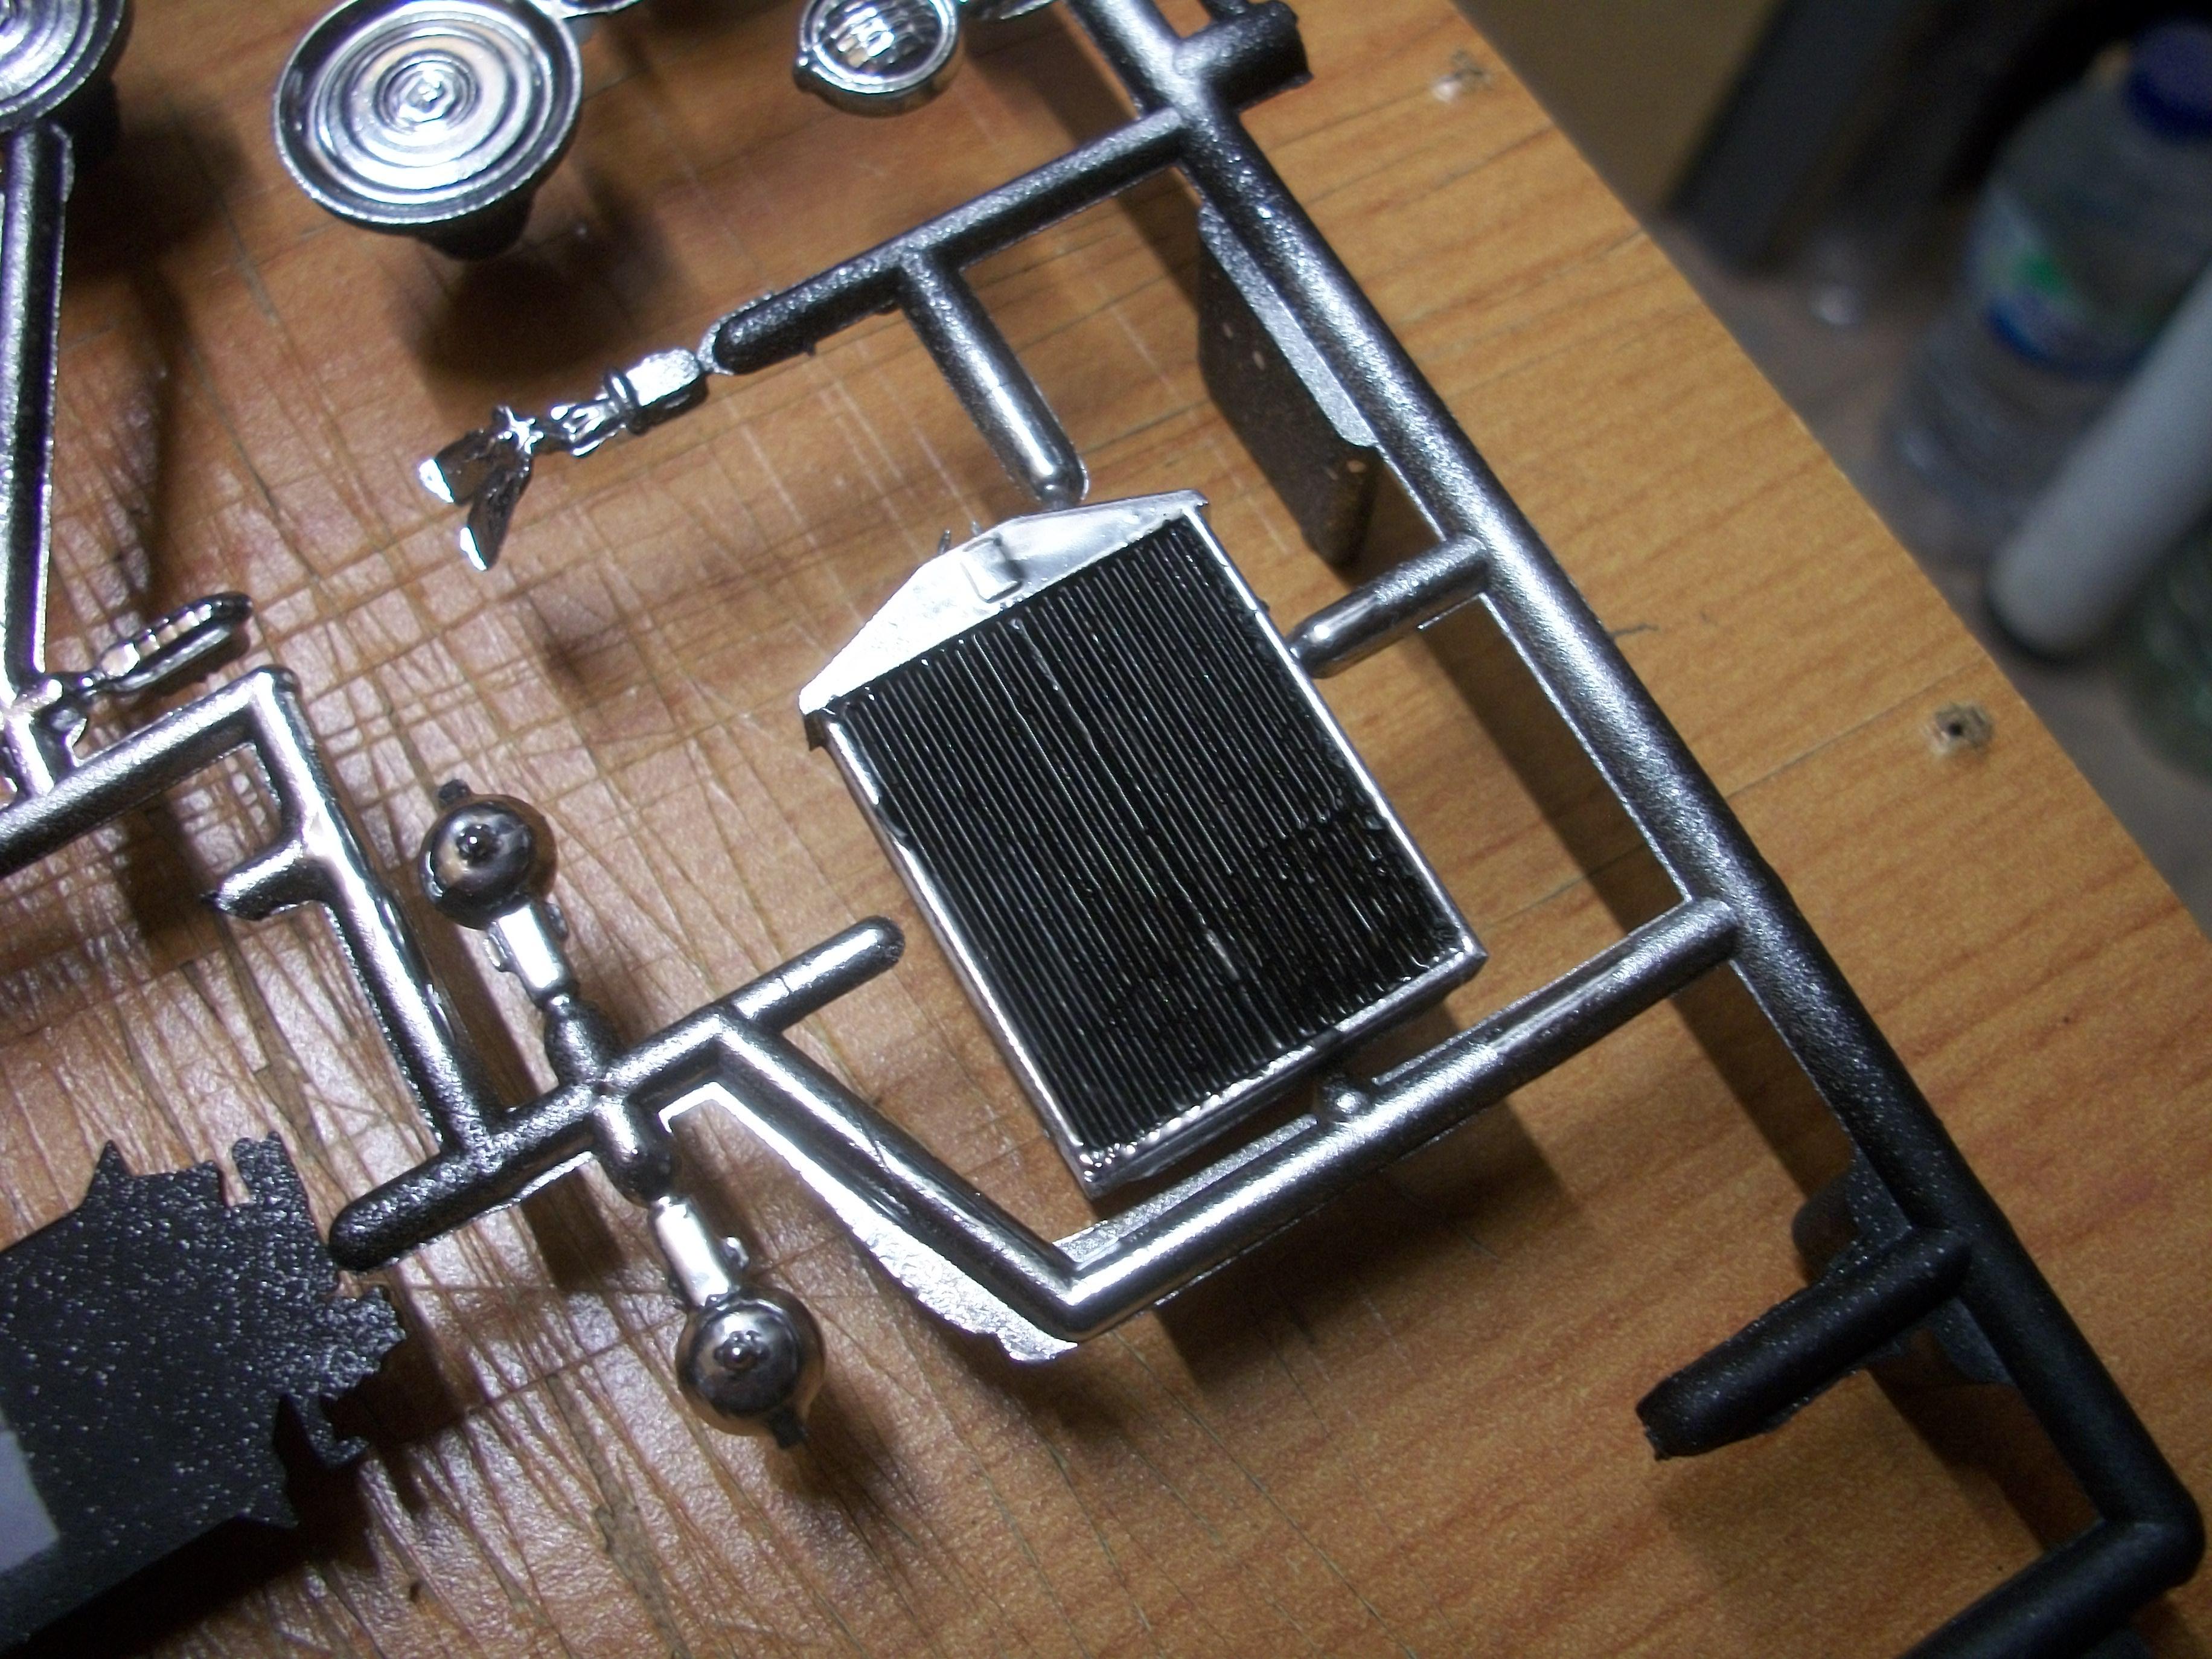
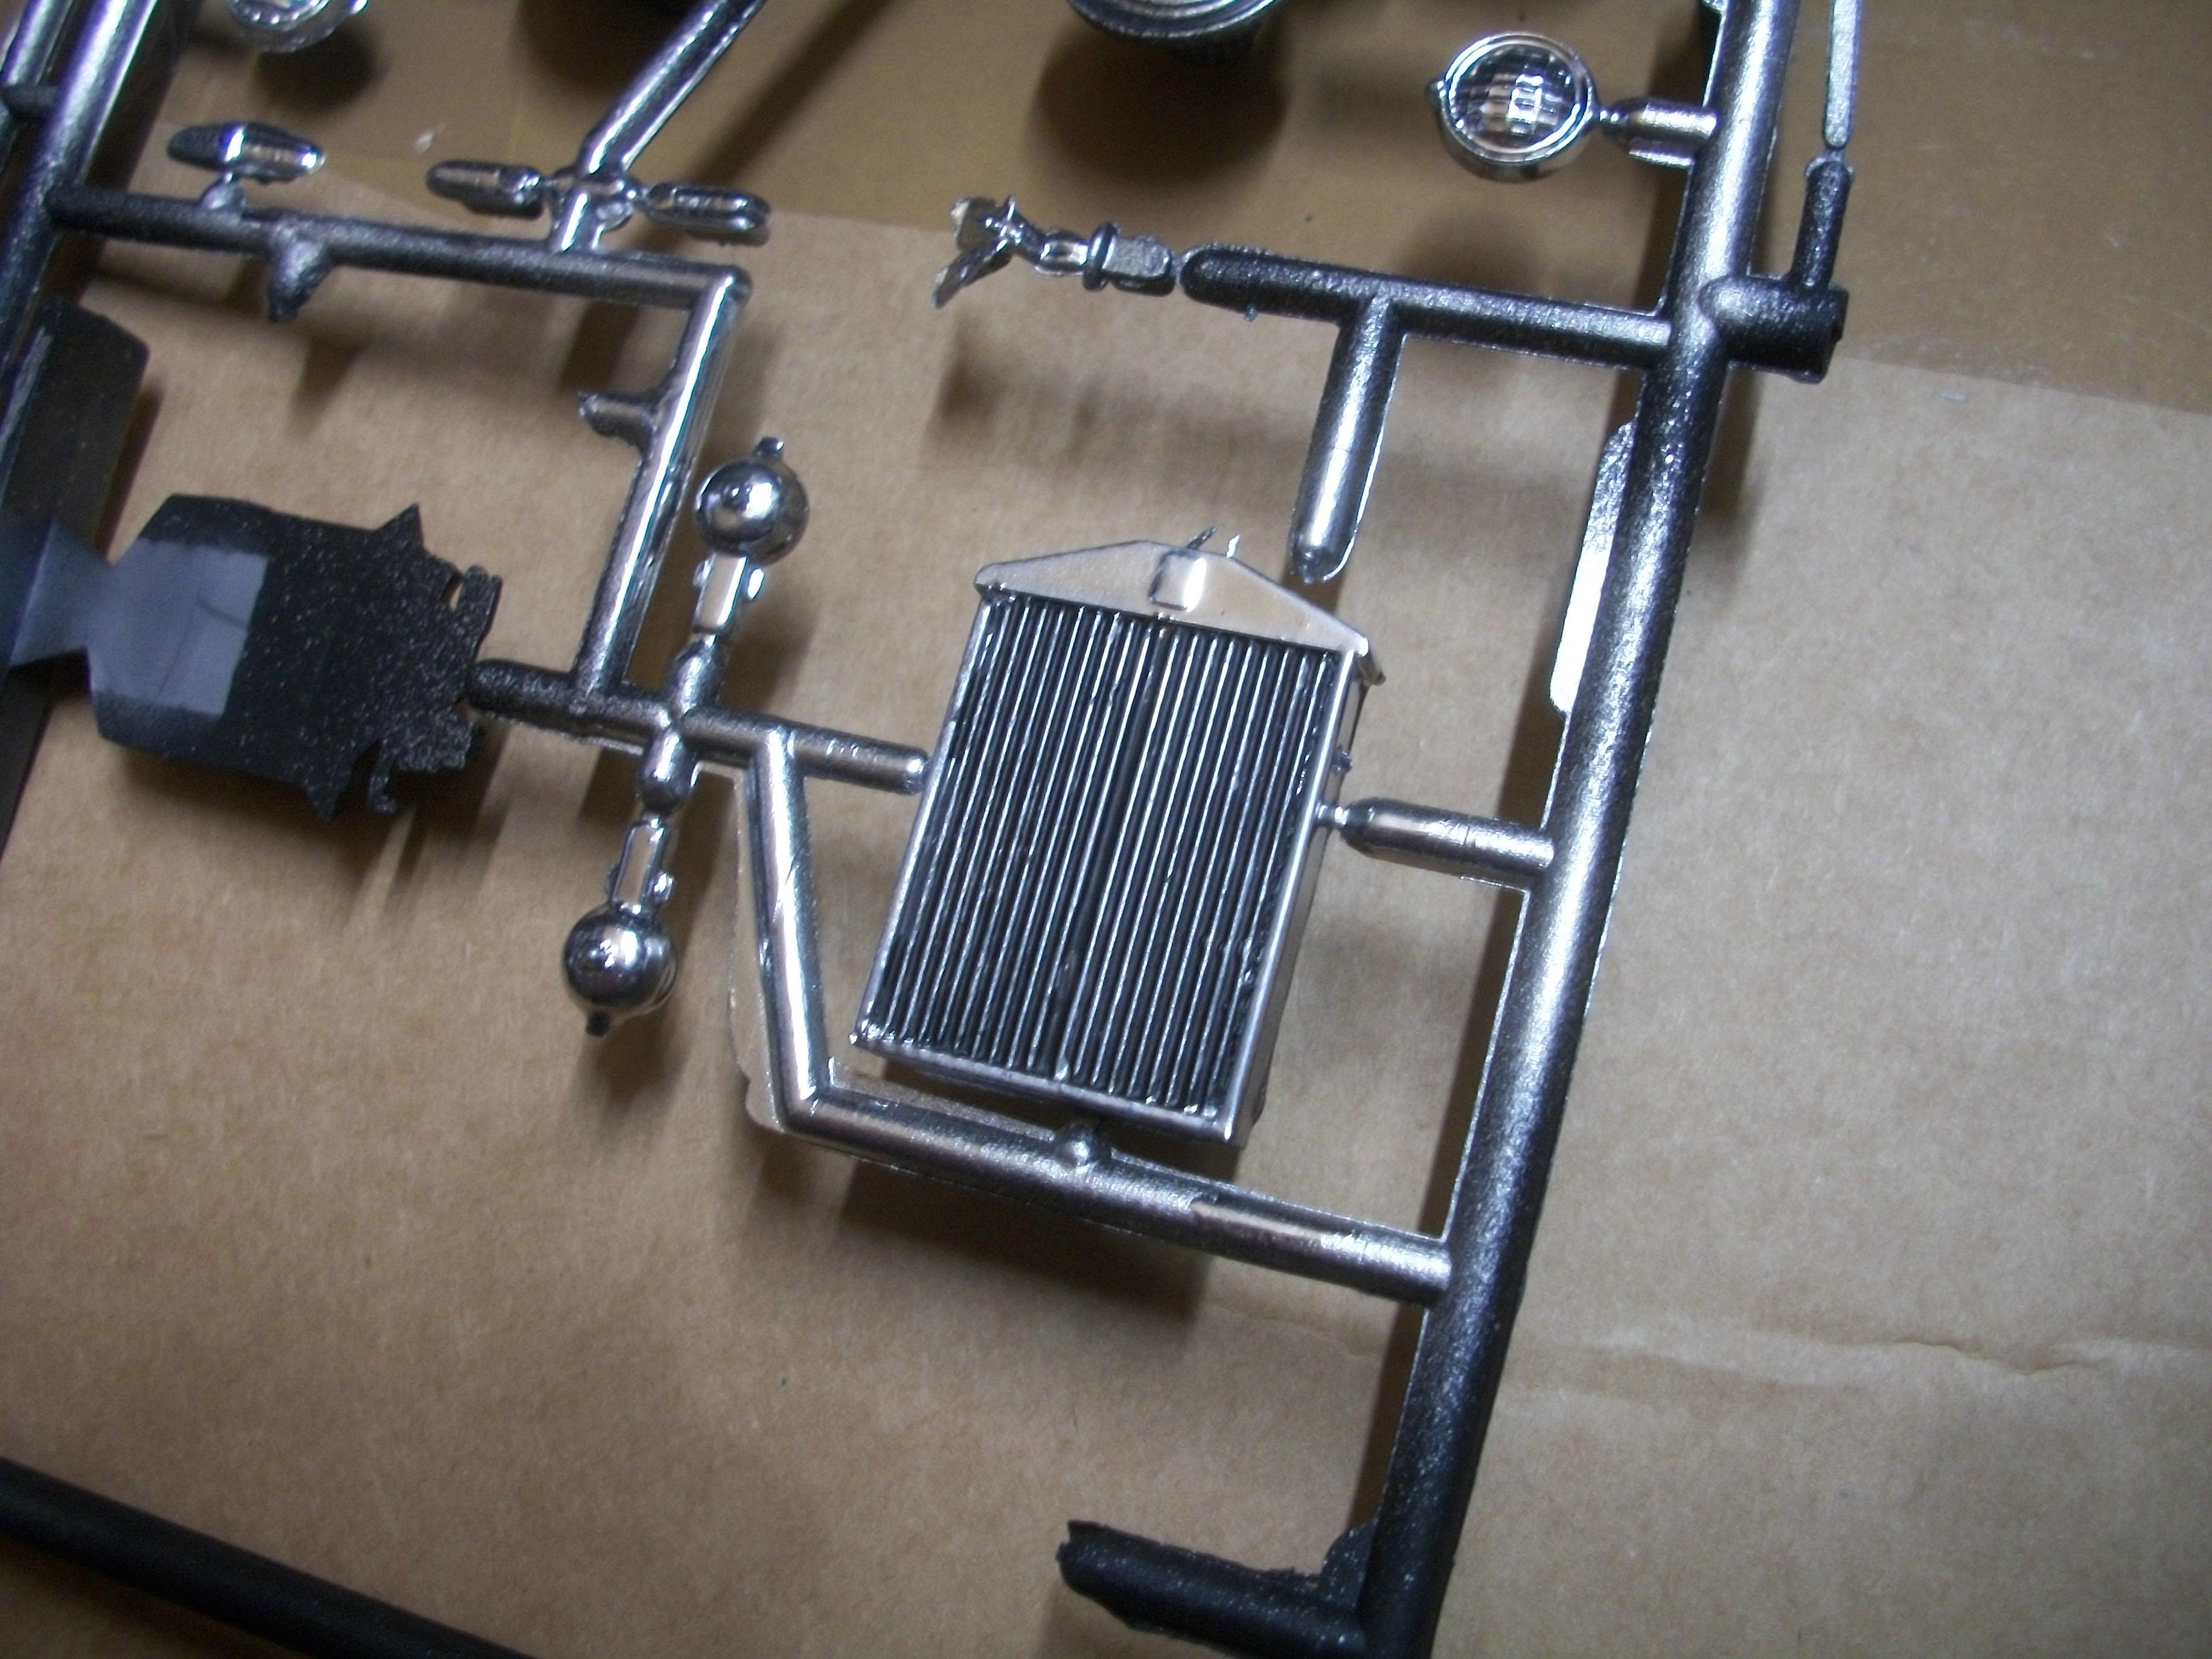
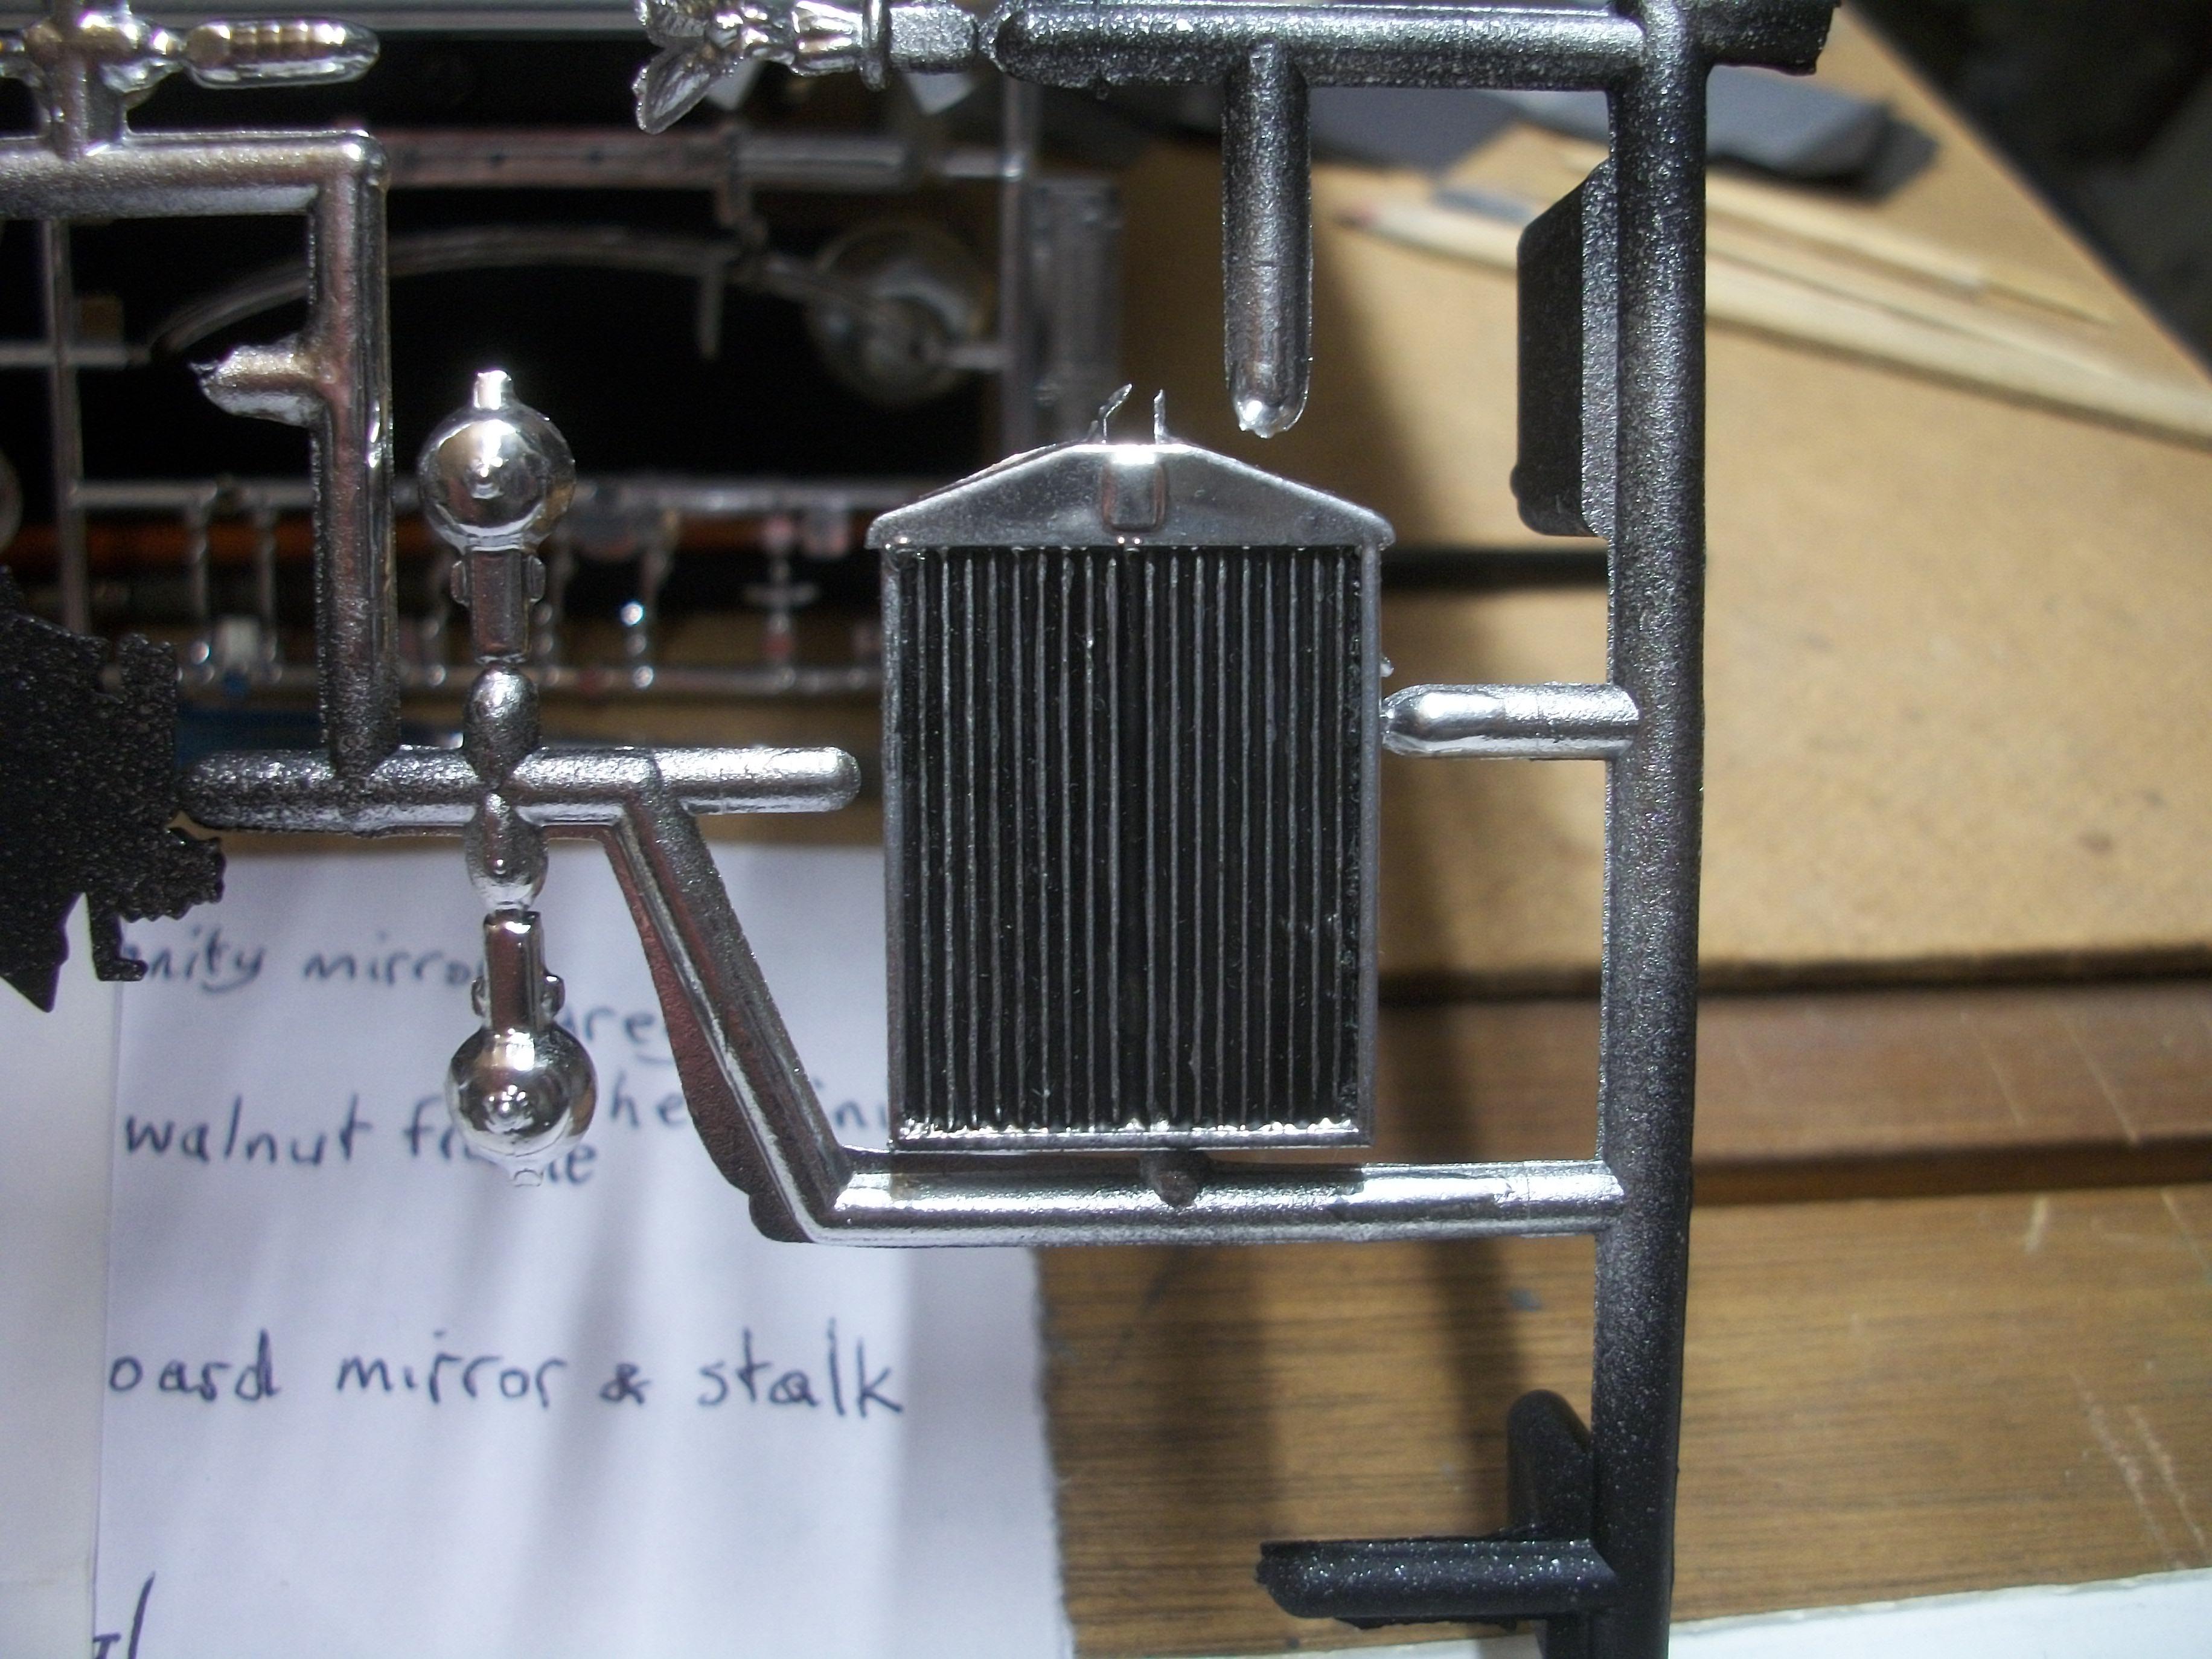
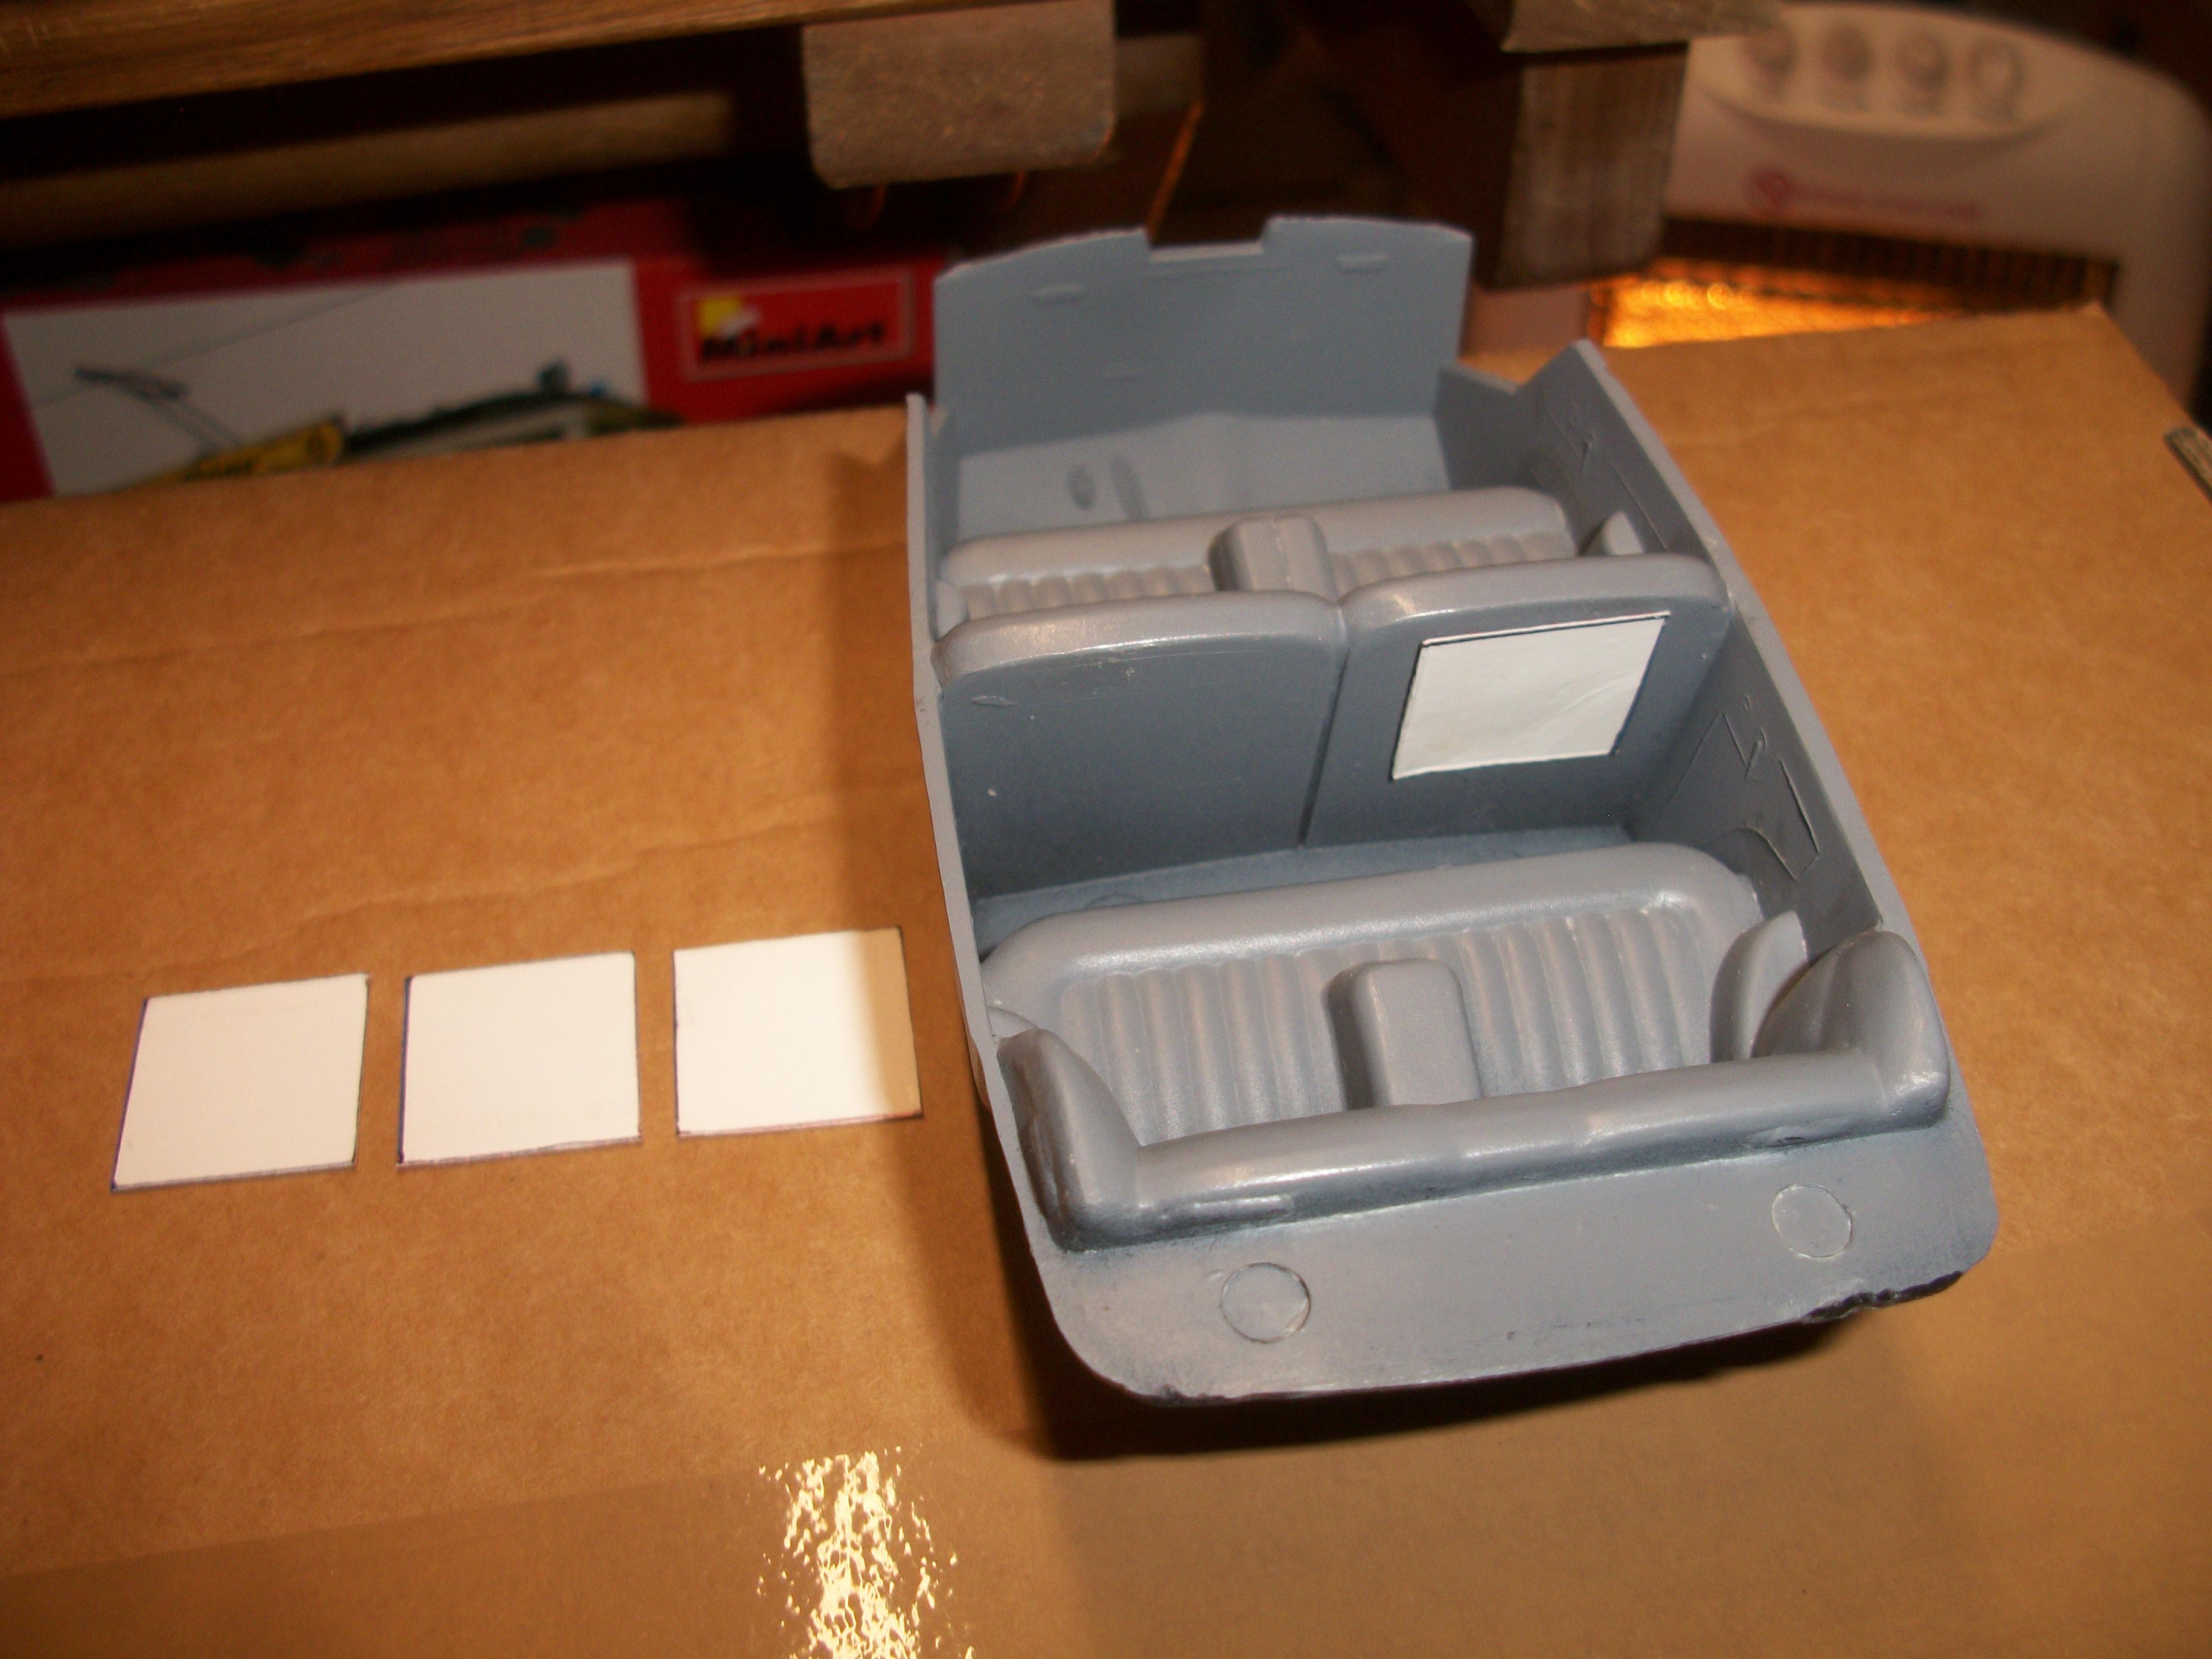
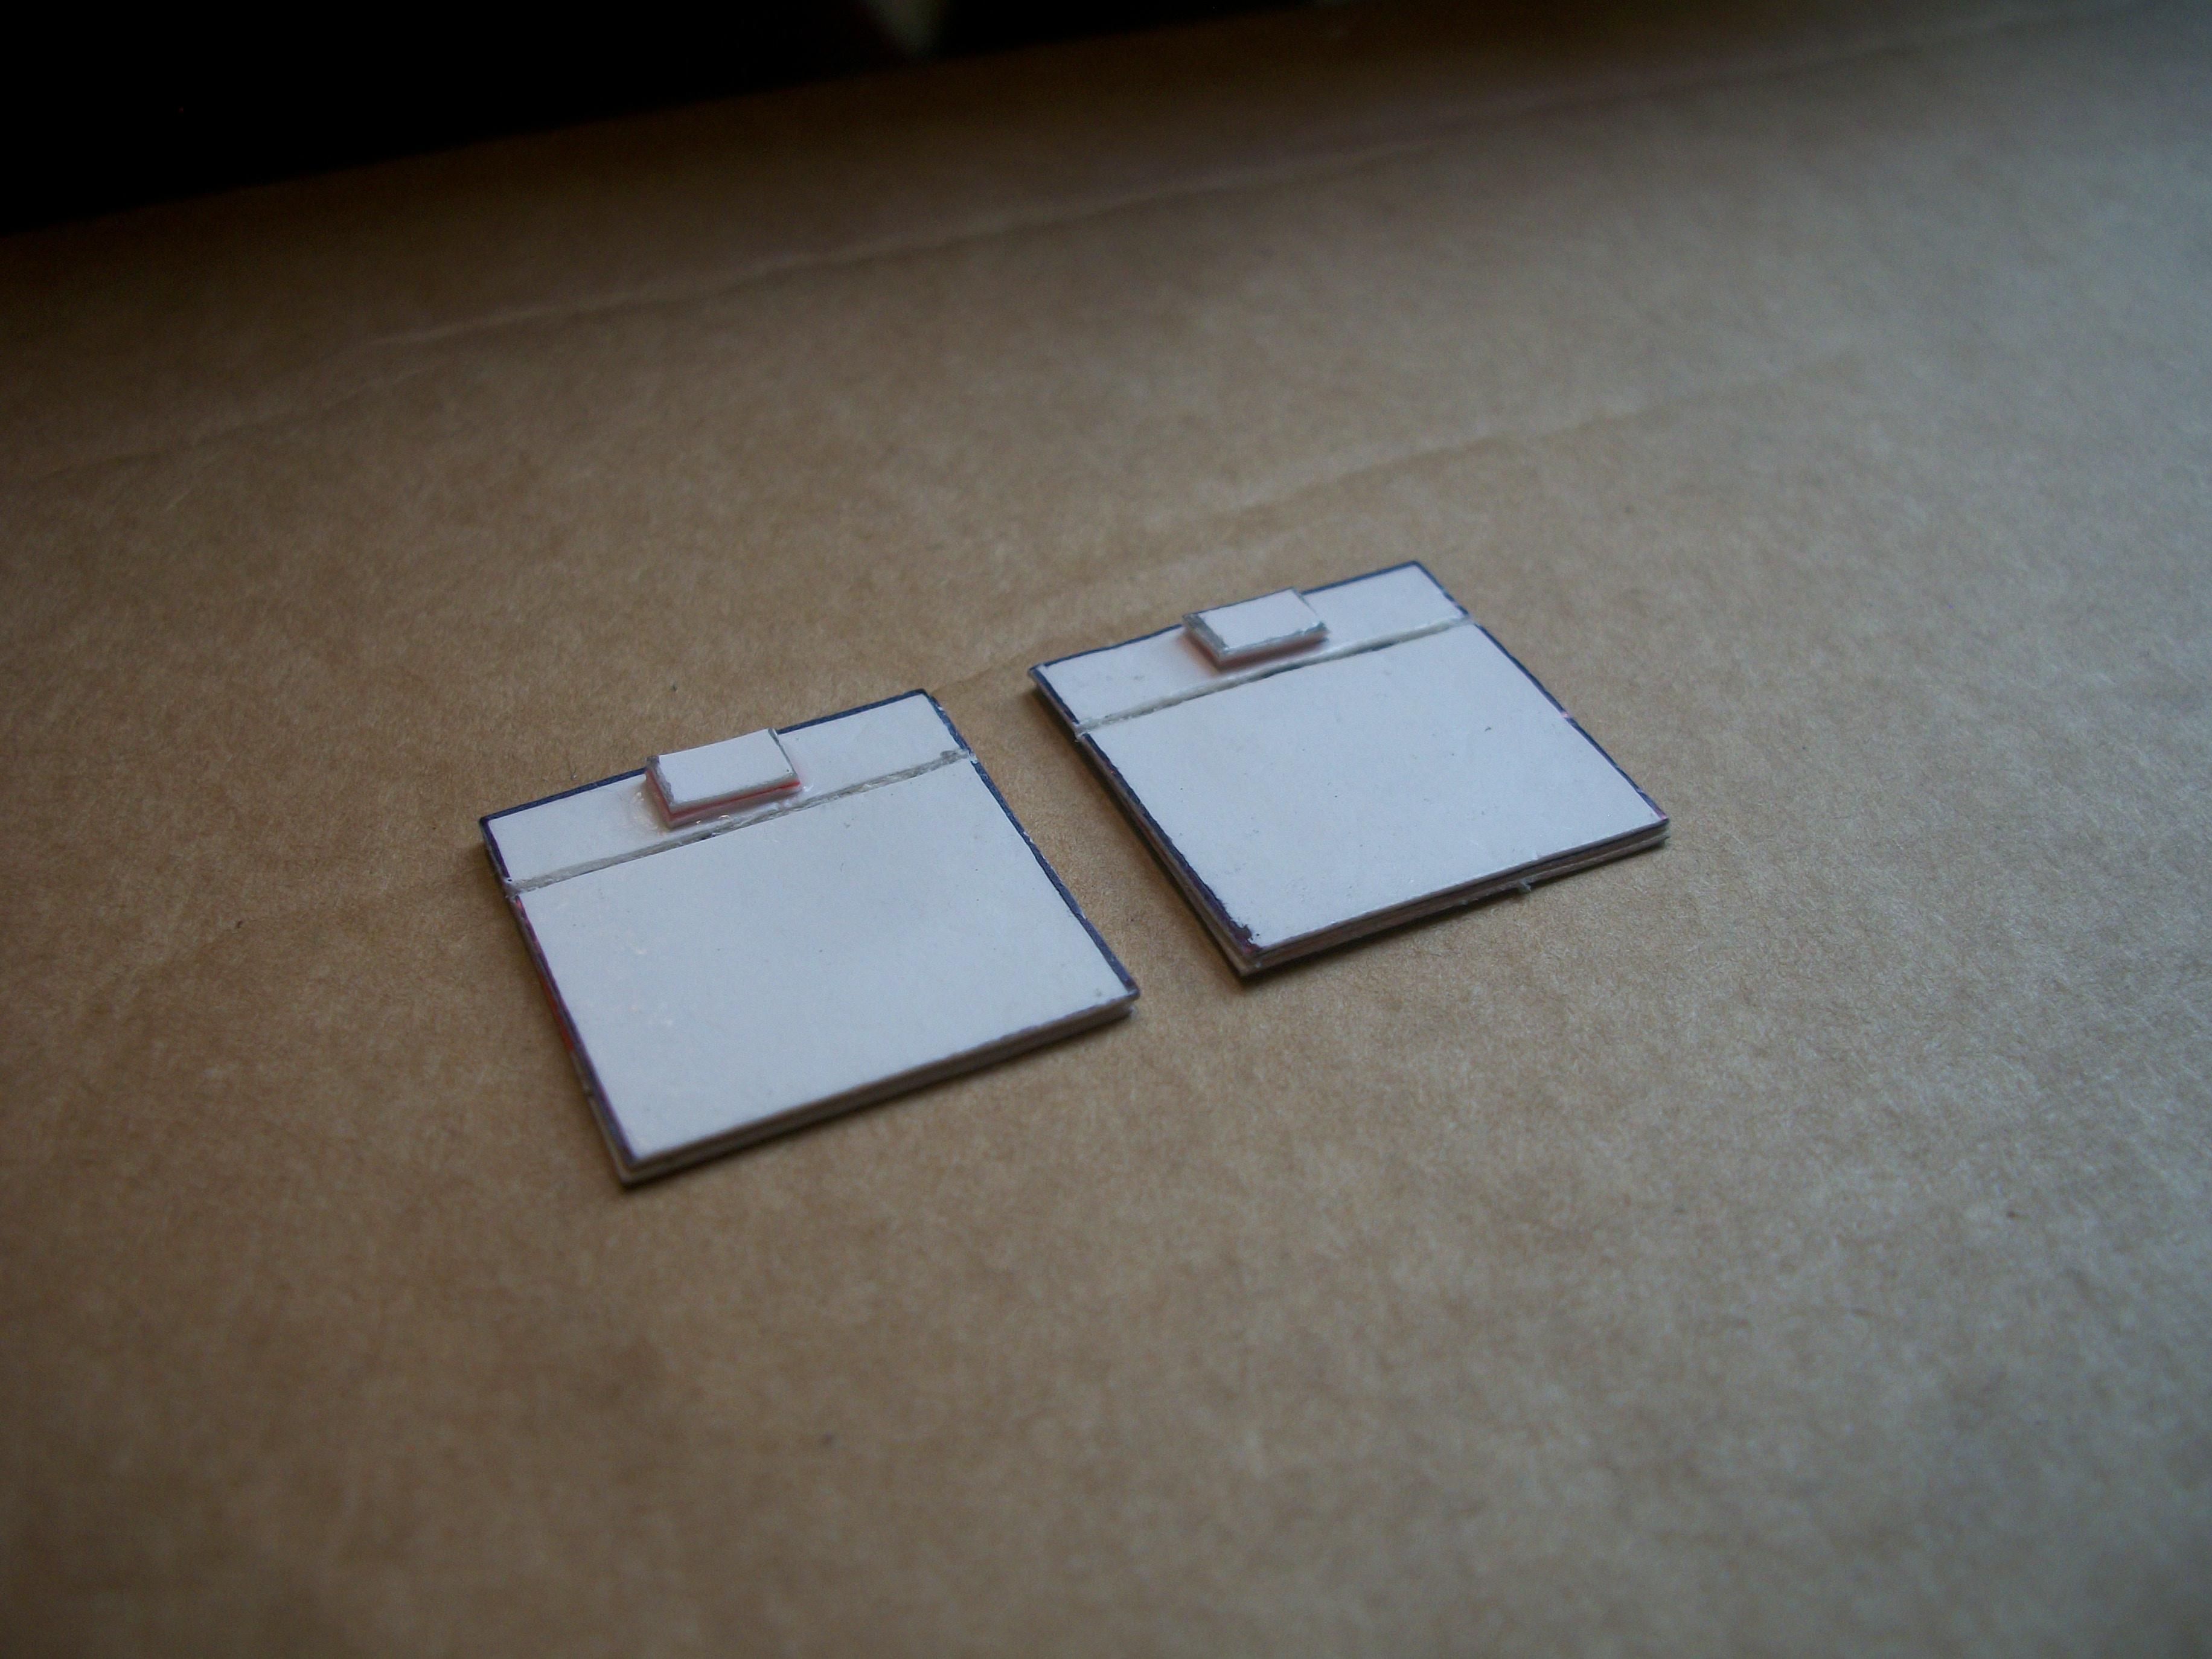
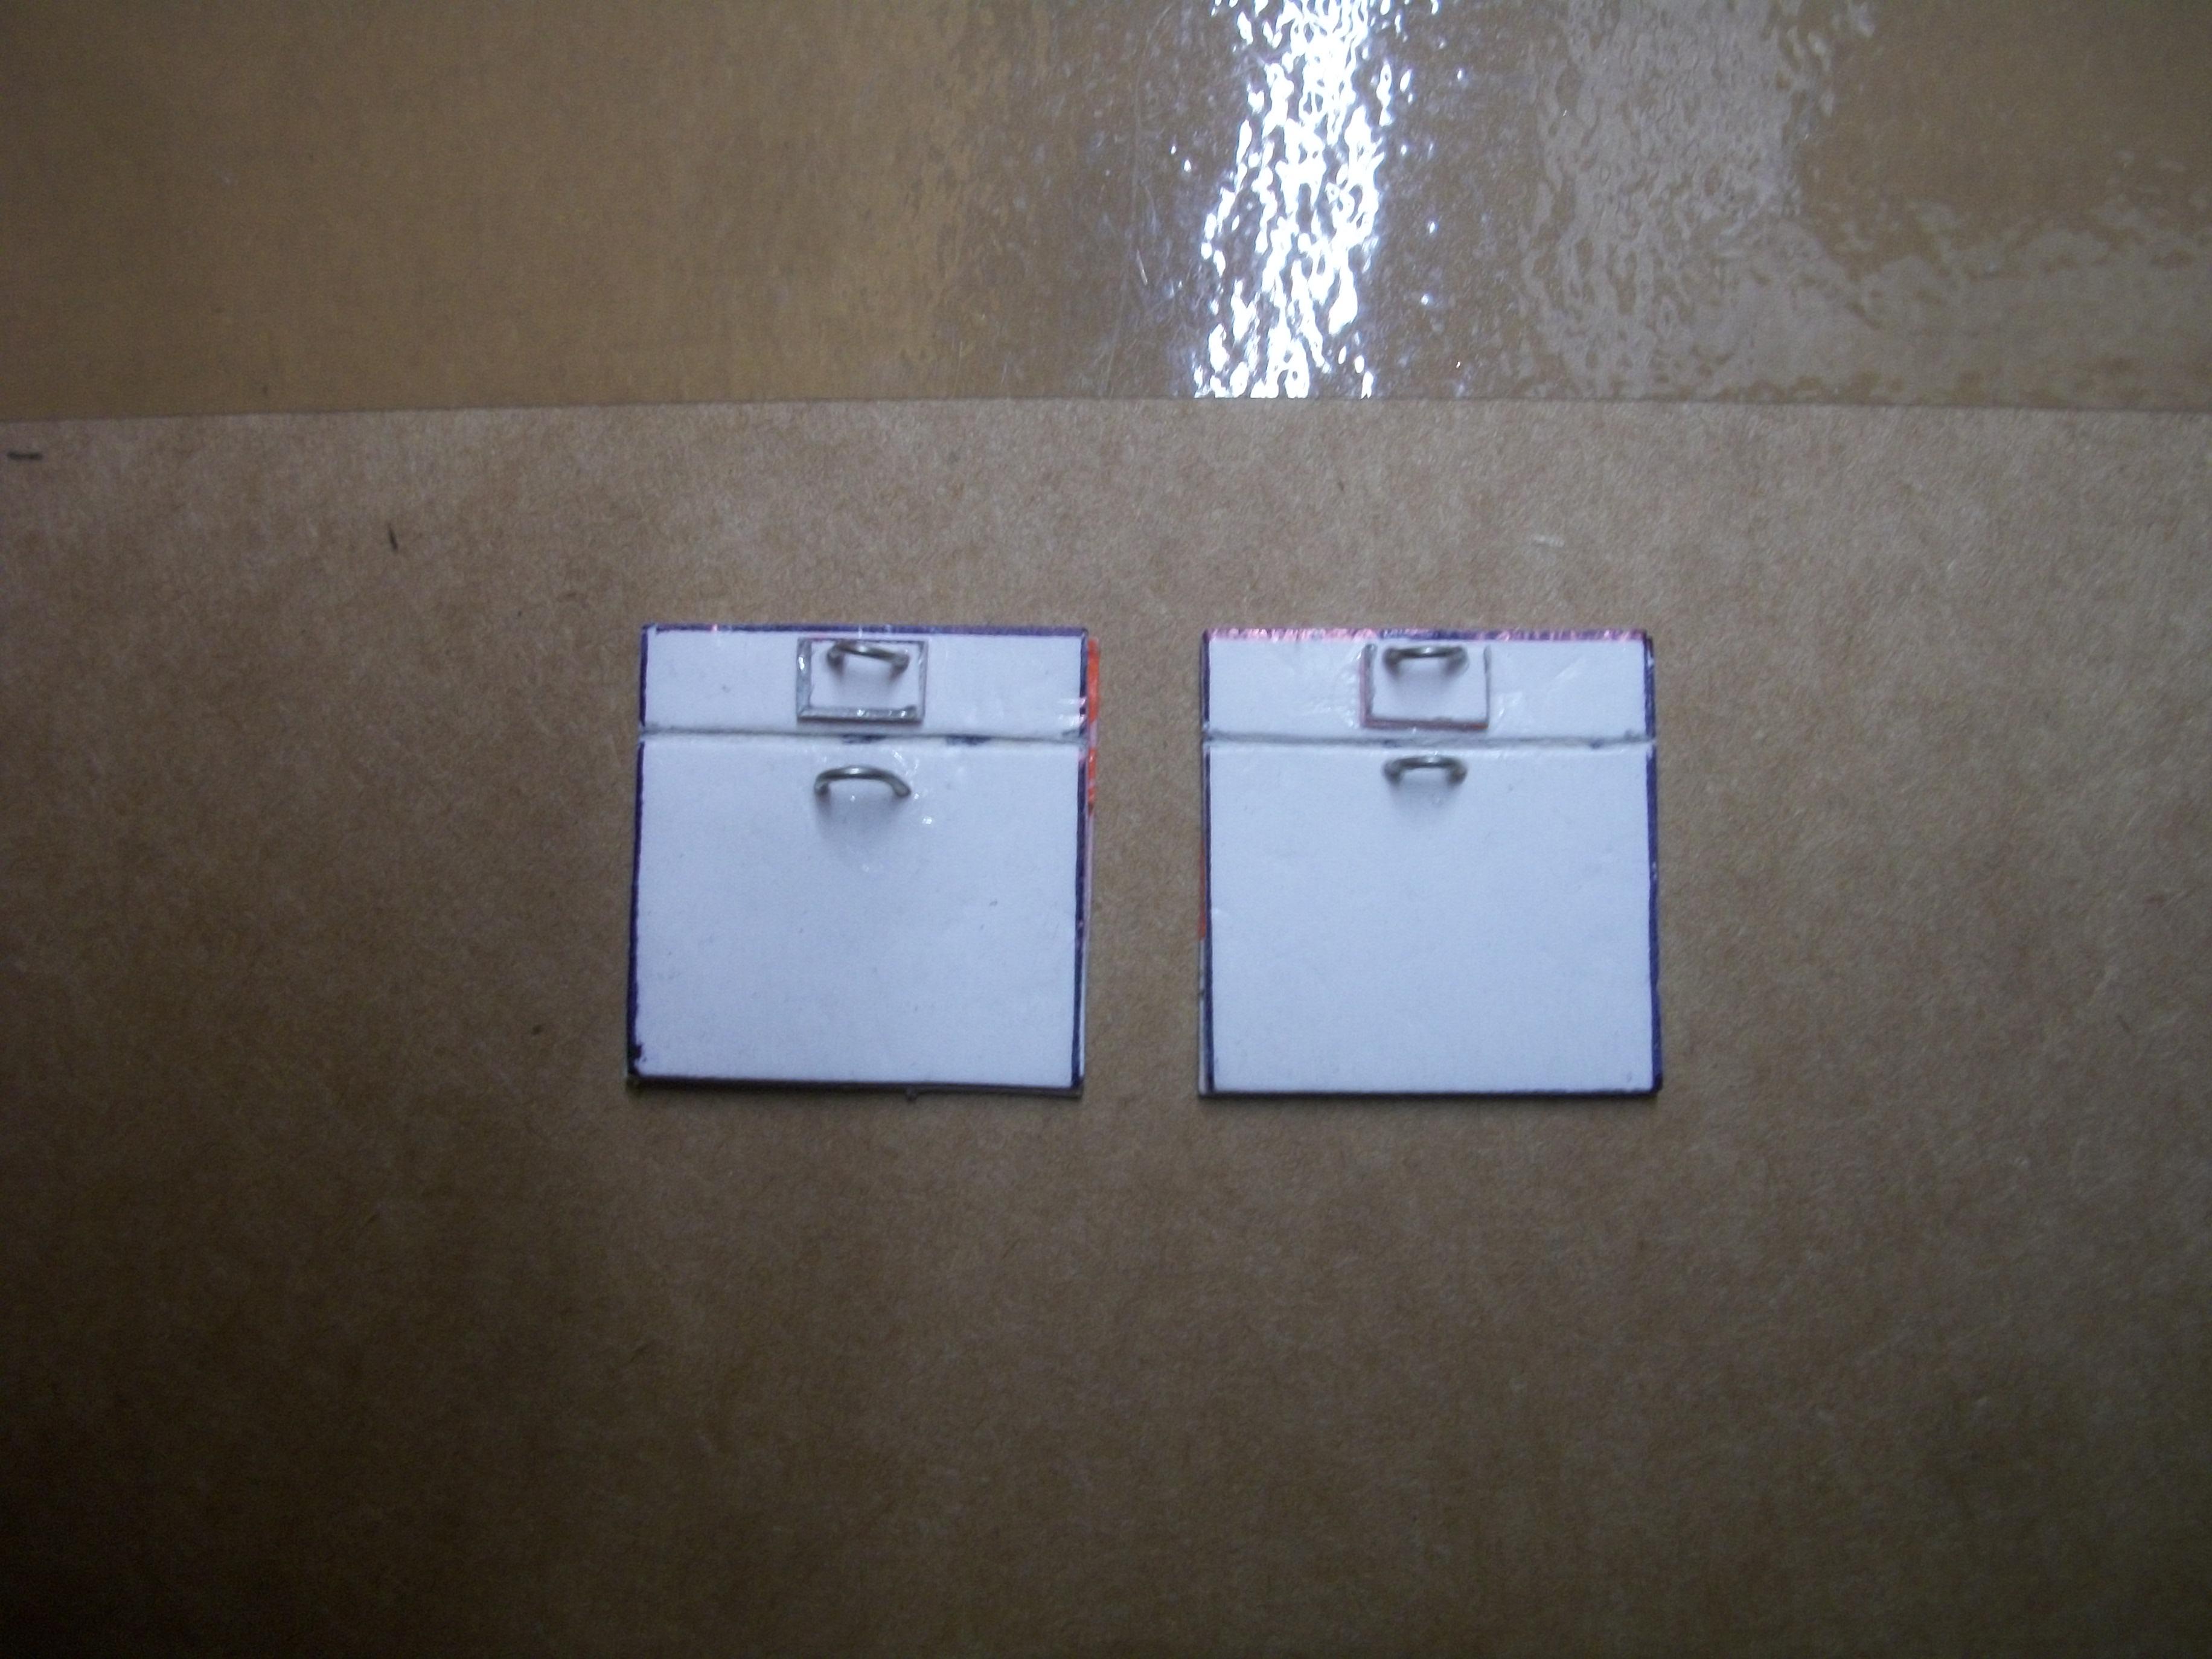
The picnic tables have had well over 24 hours drying time for the yacht varnish, so they are almost ready to glue to the back of the front seats. The chrome handle on the nearside of the dashboard was in the wrong place, so this has been put in the correct position higher up. The radiator grille has been curing for two weeks, so I have now coated the grille with Vallejo black acrylic, and after wiping away the excess black paint with a piece of kitchen roll while still wet, the vertical bars were touched up with liquid chrome pen. This creates the realistic effect of the black vertical gaps between the chrome. This is probably the most realistic radiator grille that I have produced during eight builds. The small rectangular badge at the top centre needs to be a black RR motif, which is embossed into the styrene part under the airbrushed liquid chrome. The upper half of the main body has now been masked off, ready for applying the Velvet Green cellulose paint to the lower half of the bodywork. I shall follow the same procedure with the Velvet Green as I did with the Shell Grey, and then wait 5 days before polishing. David
-
That is one very nice build of your Mercedes SL 320 Thomas, and the Zero Paints colour is accurate of course. Nice detailing also. Well done ! David
-
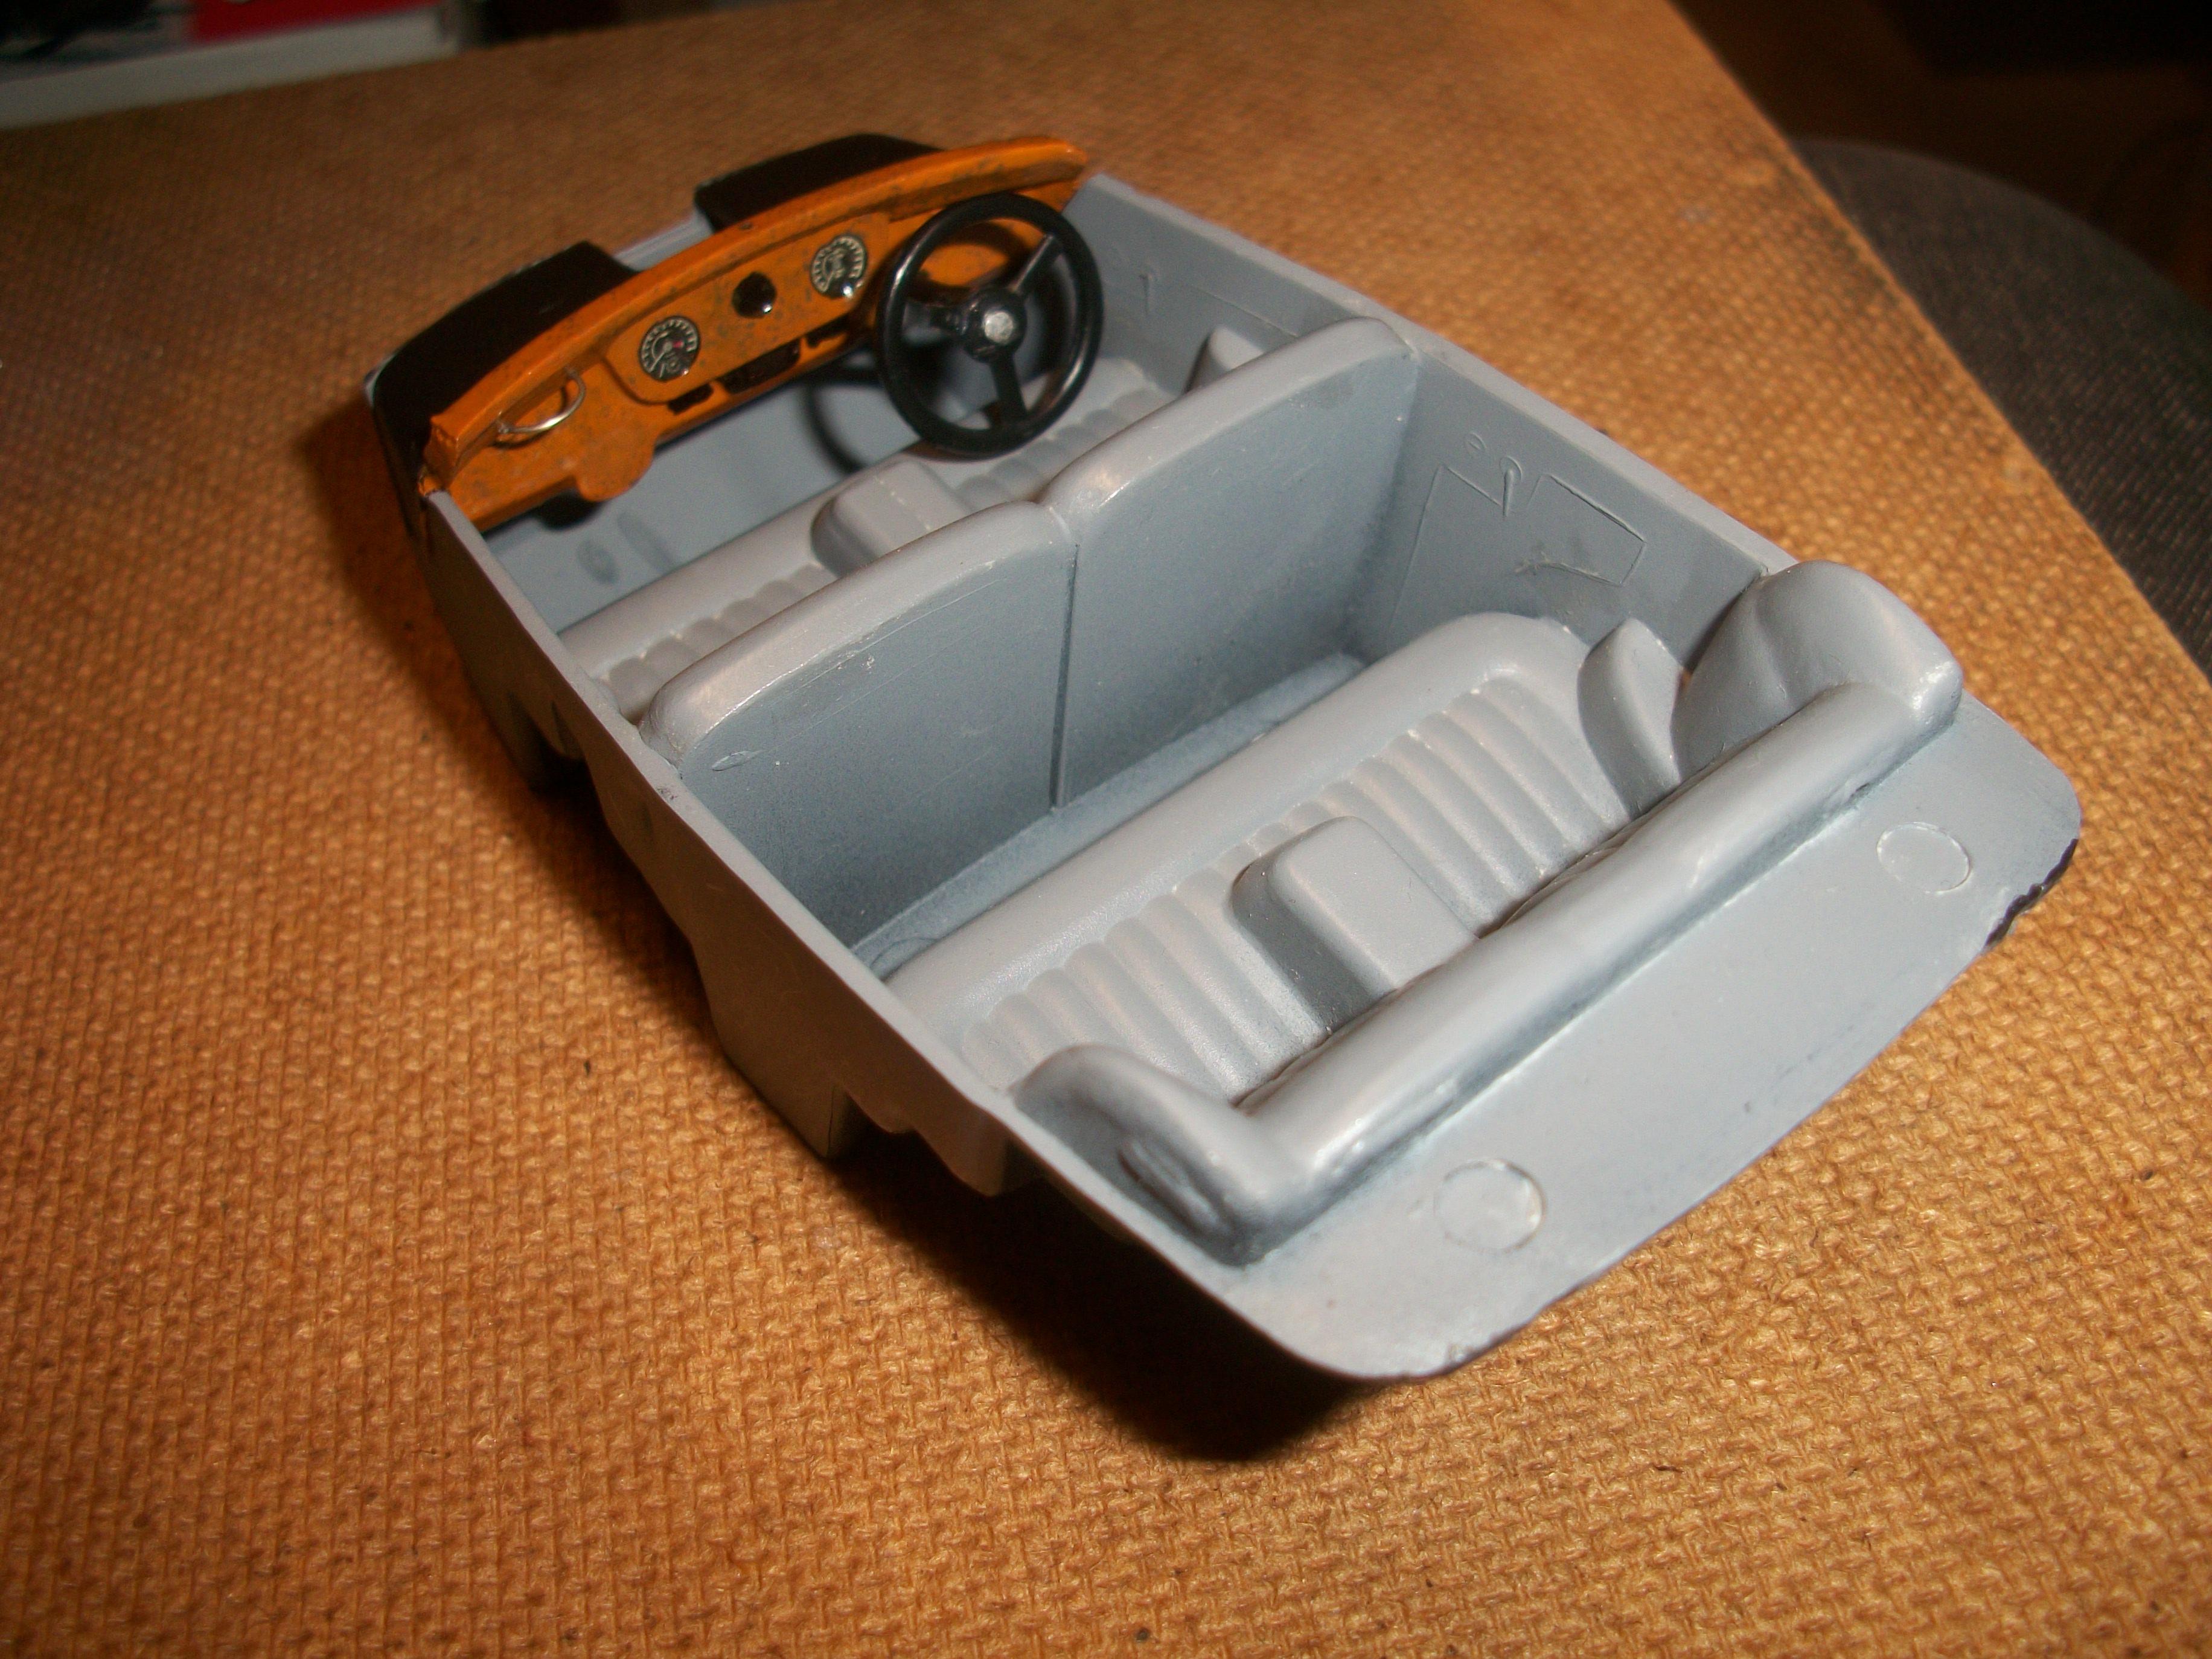
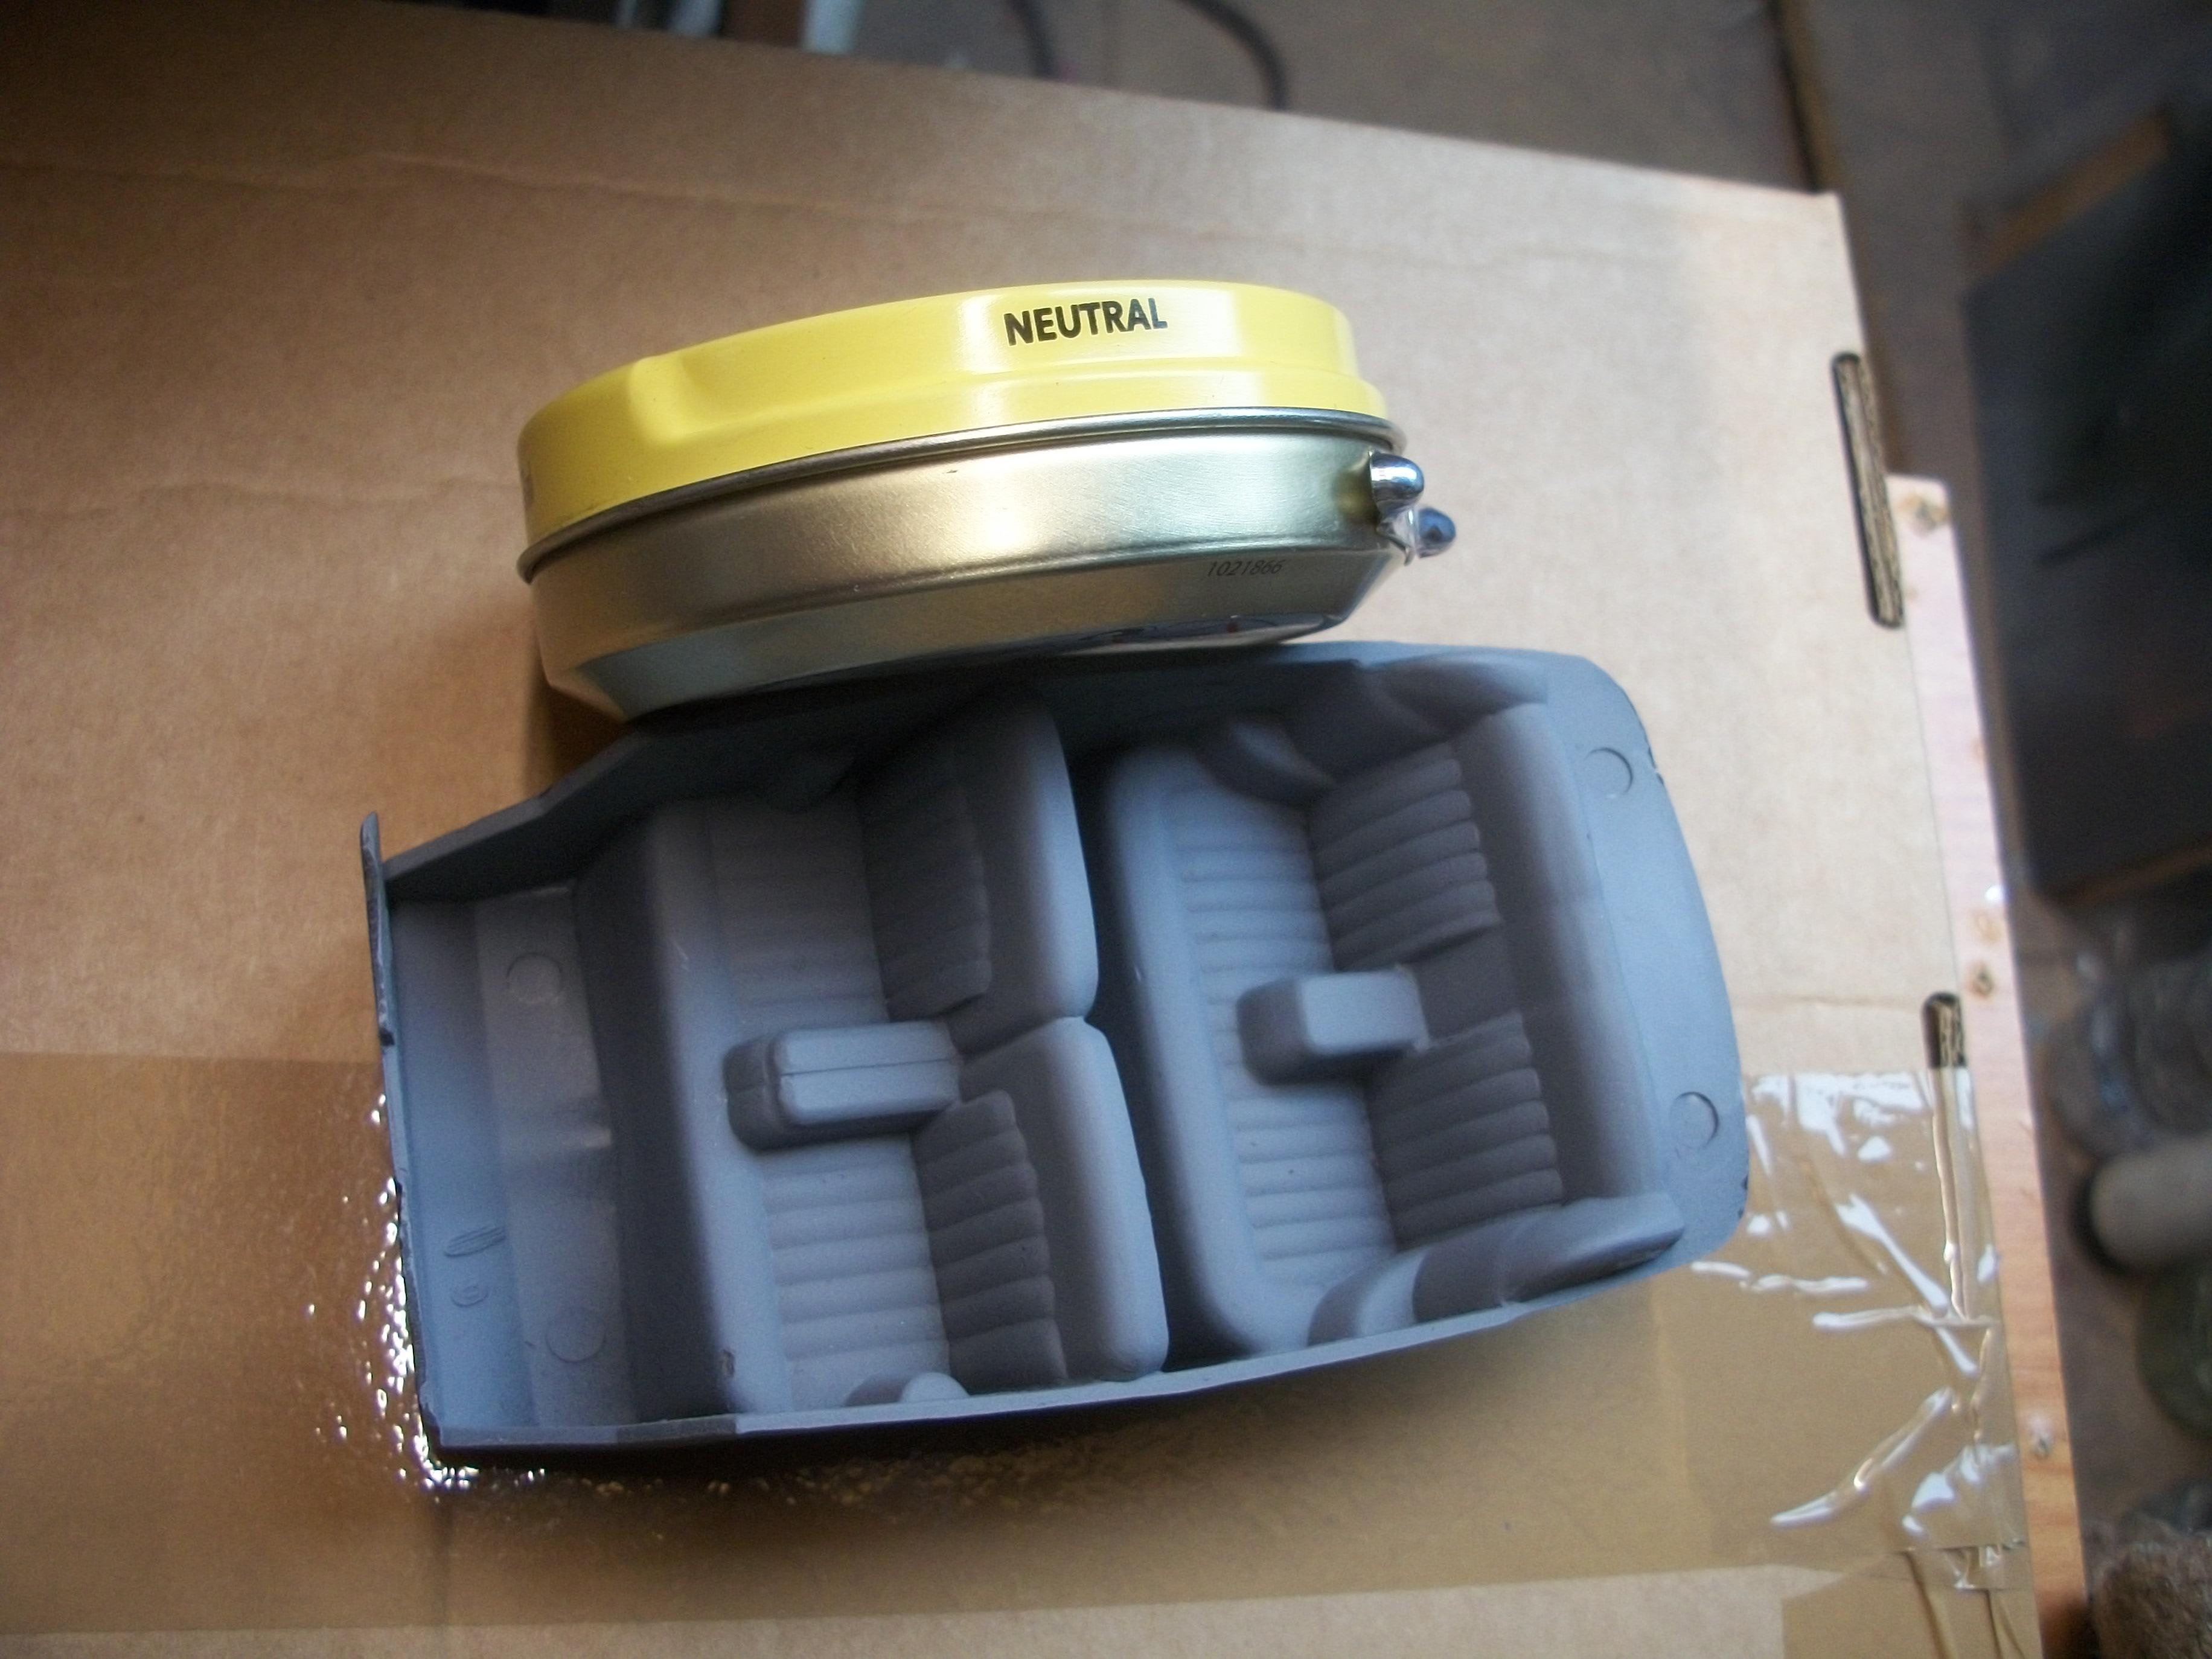
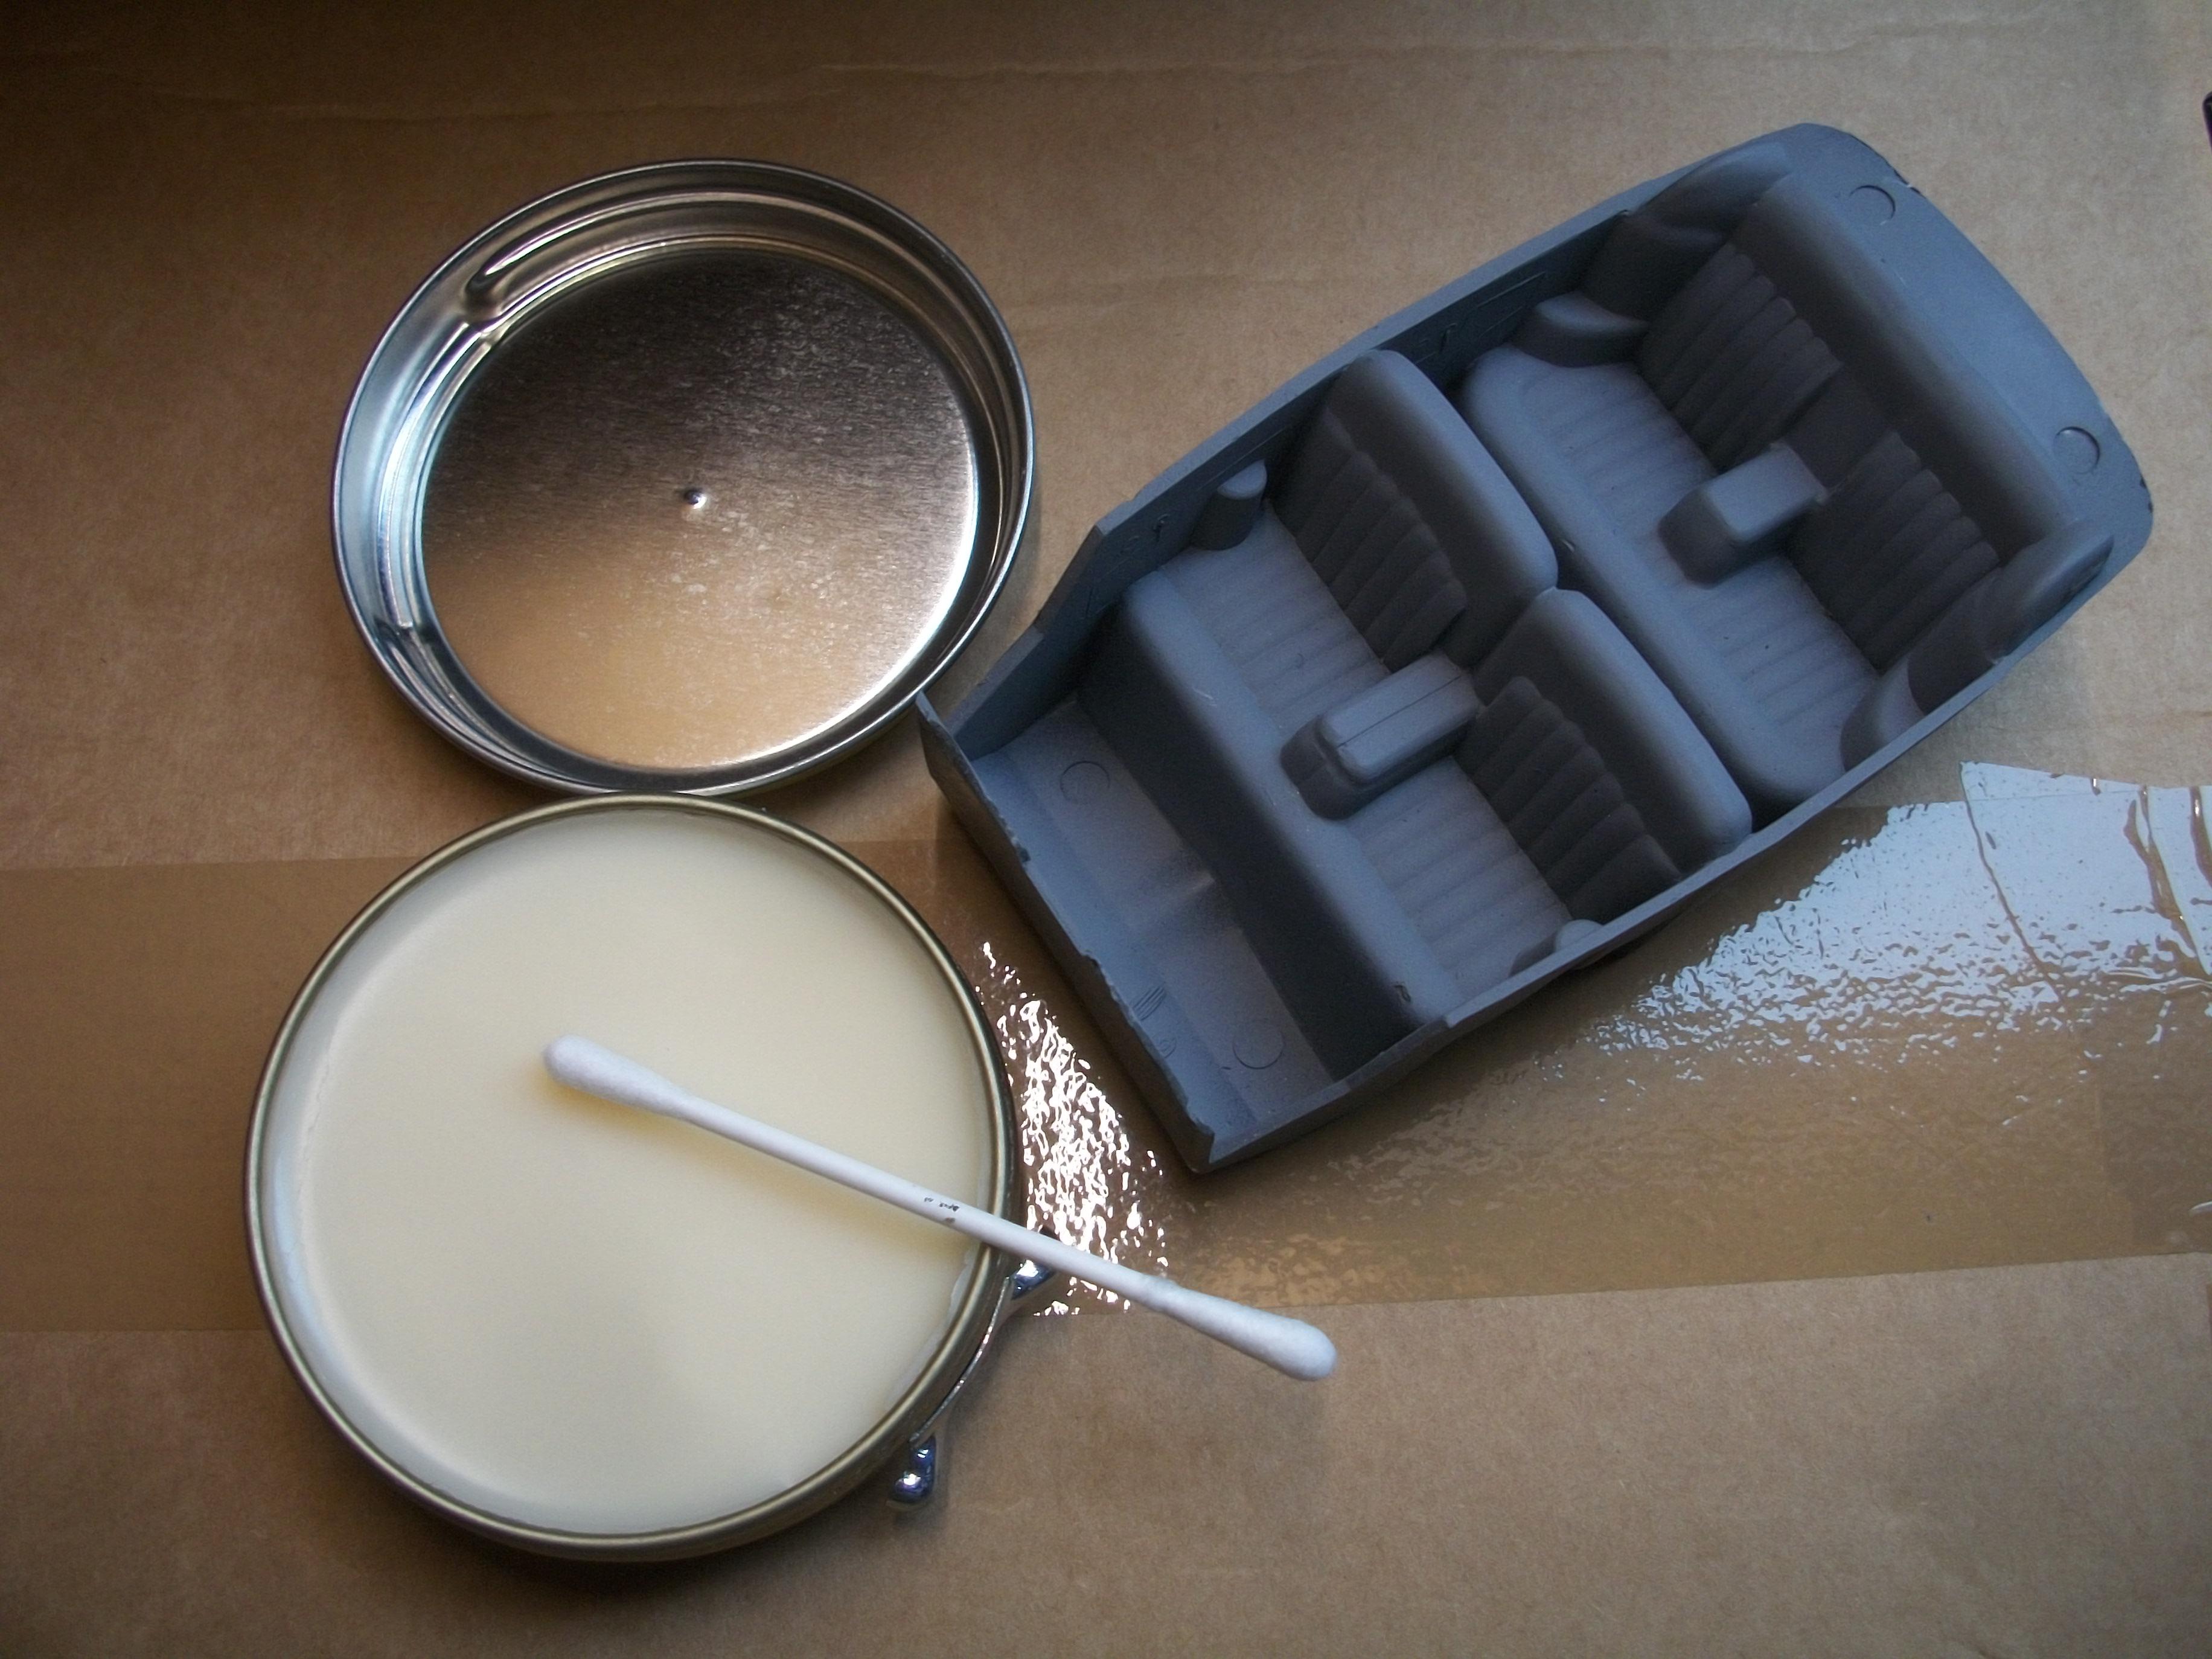
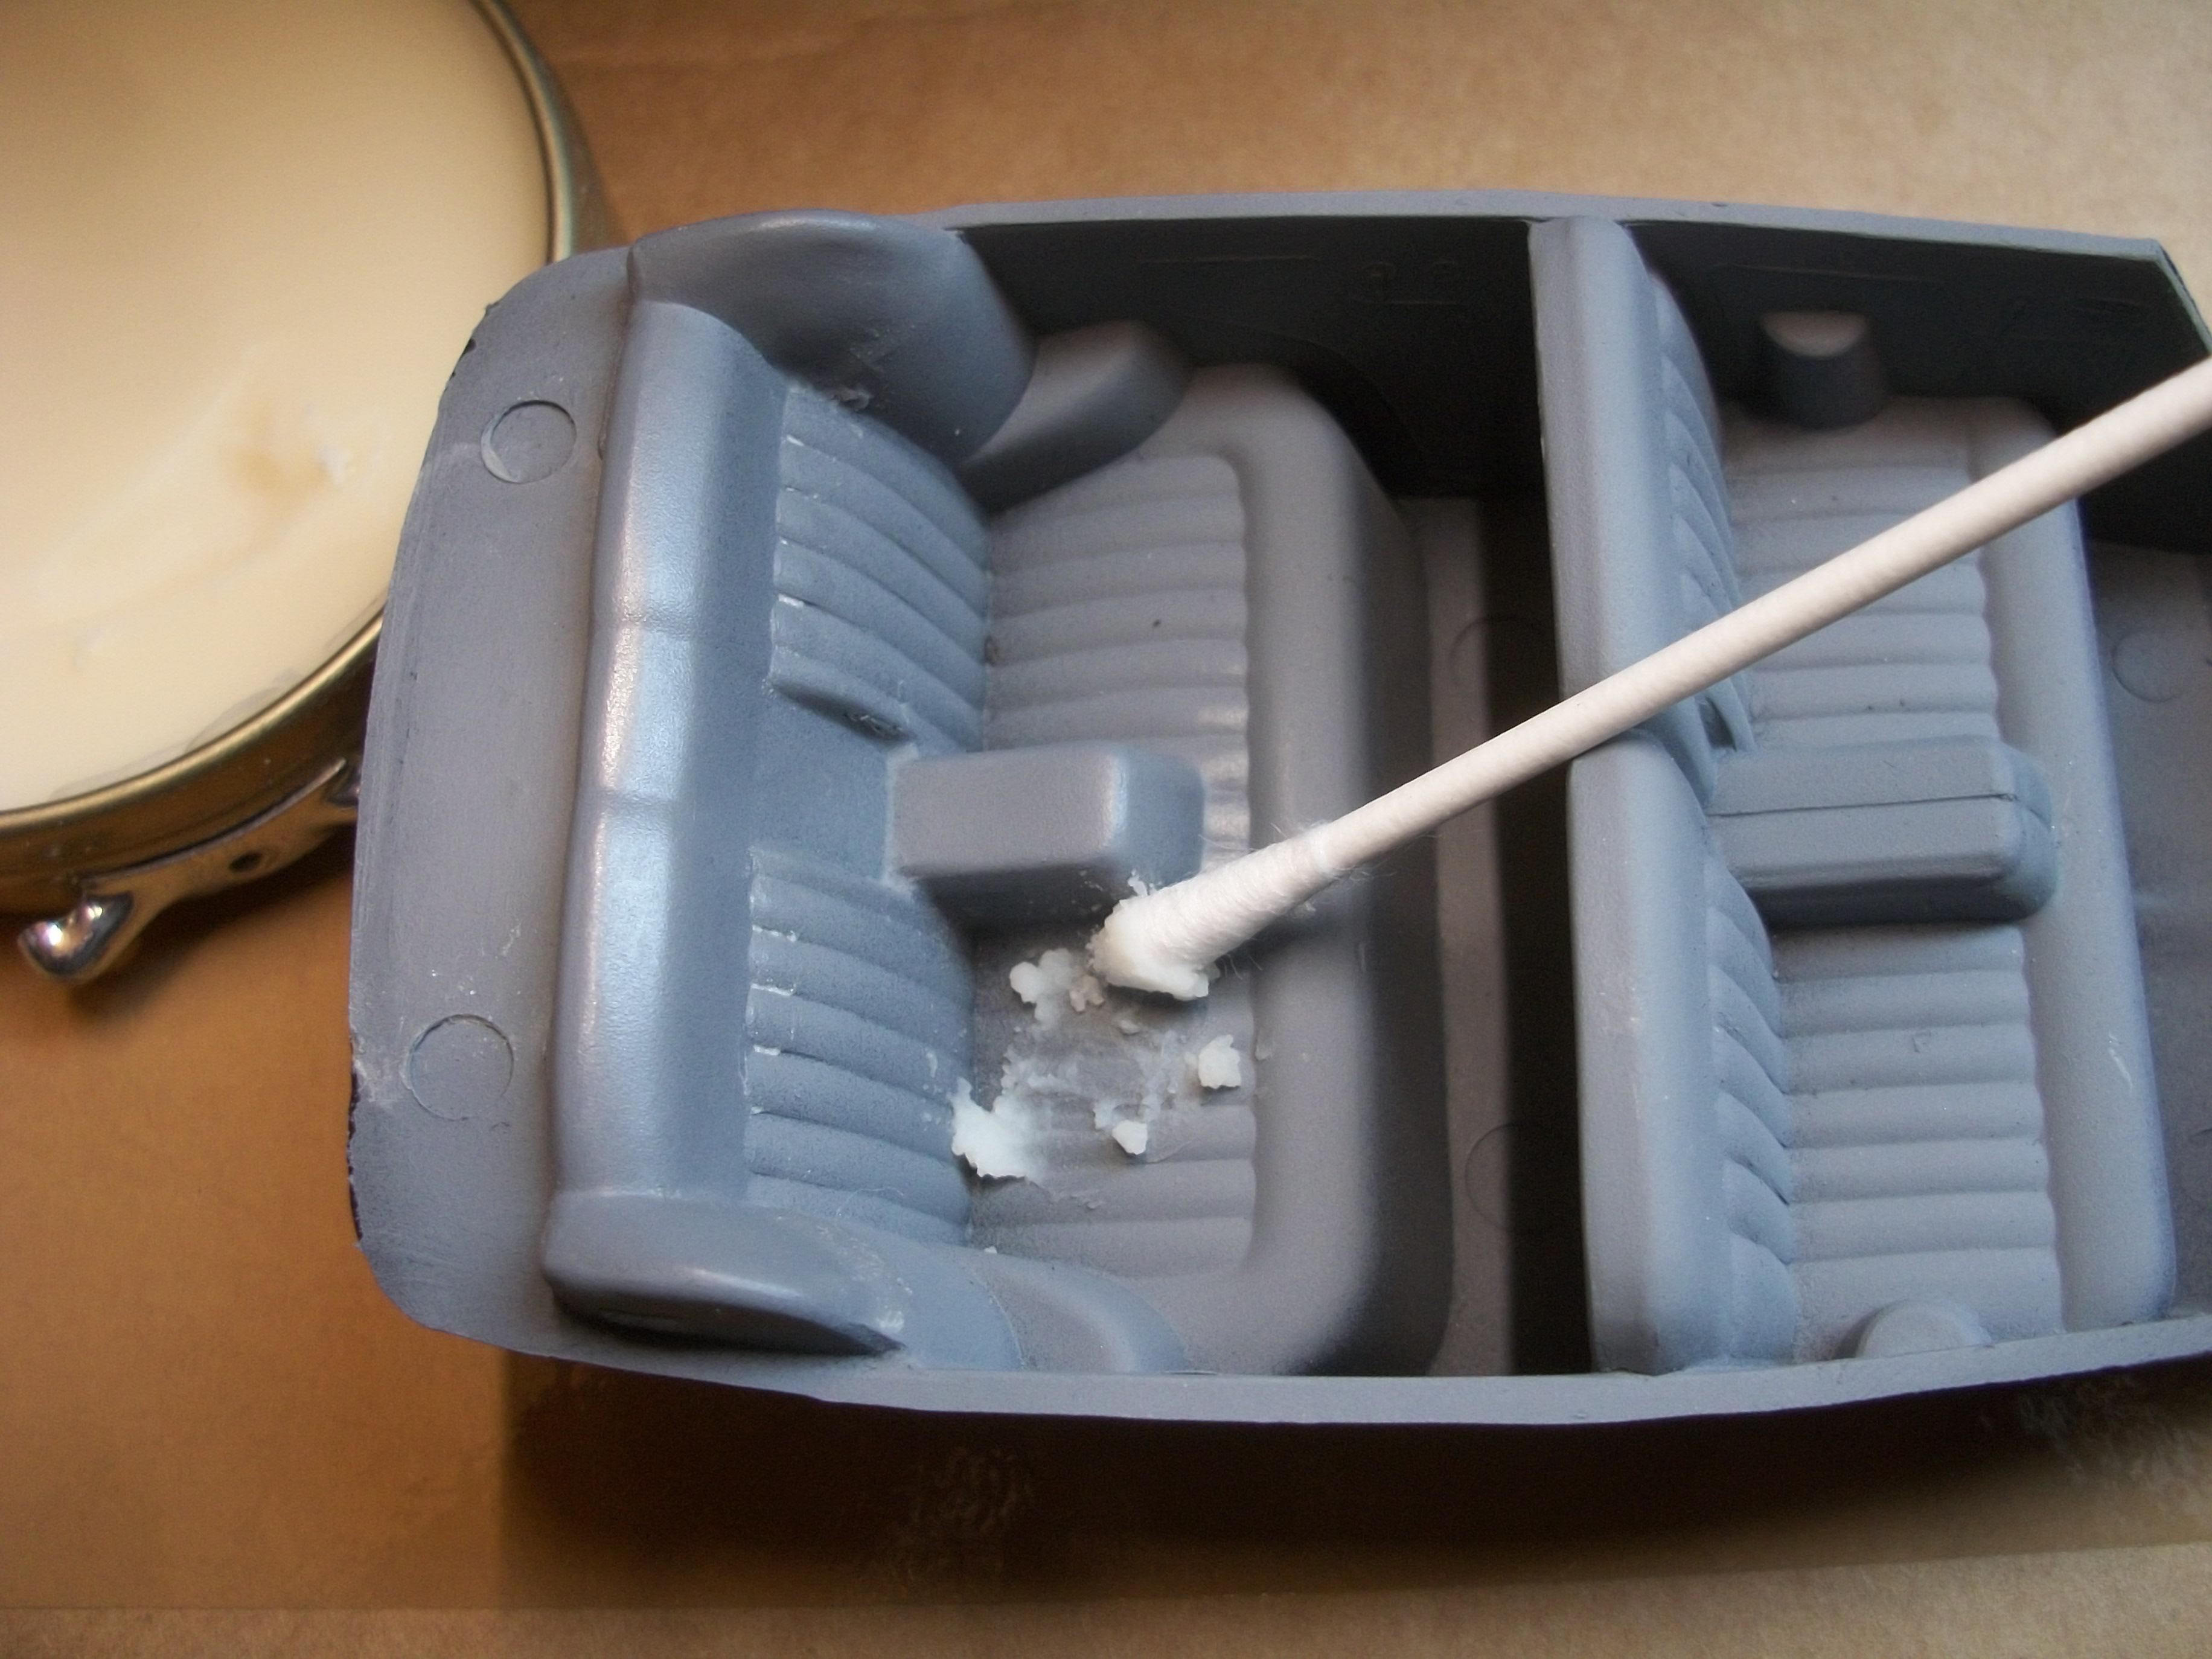
Thanks Tim . . . I have tried this method of applying shoe polish to a matt plastic surface previously, and as you can see, the finish is quite realistic. The front and rear seats have been treated, so now I am working on the detailing of the dashboard and also the picnic tables. David
-
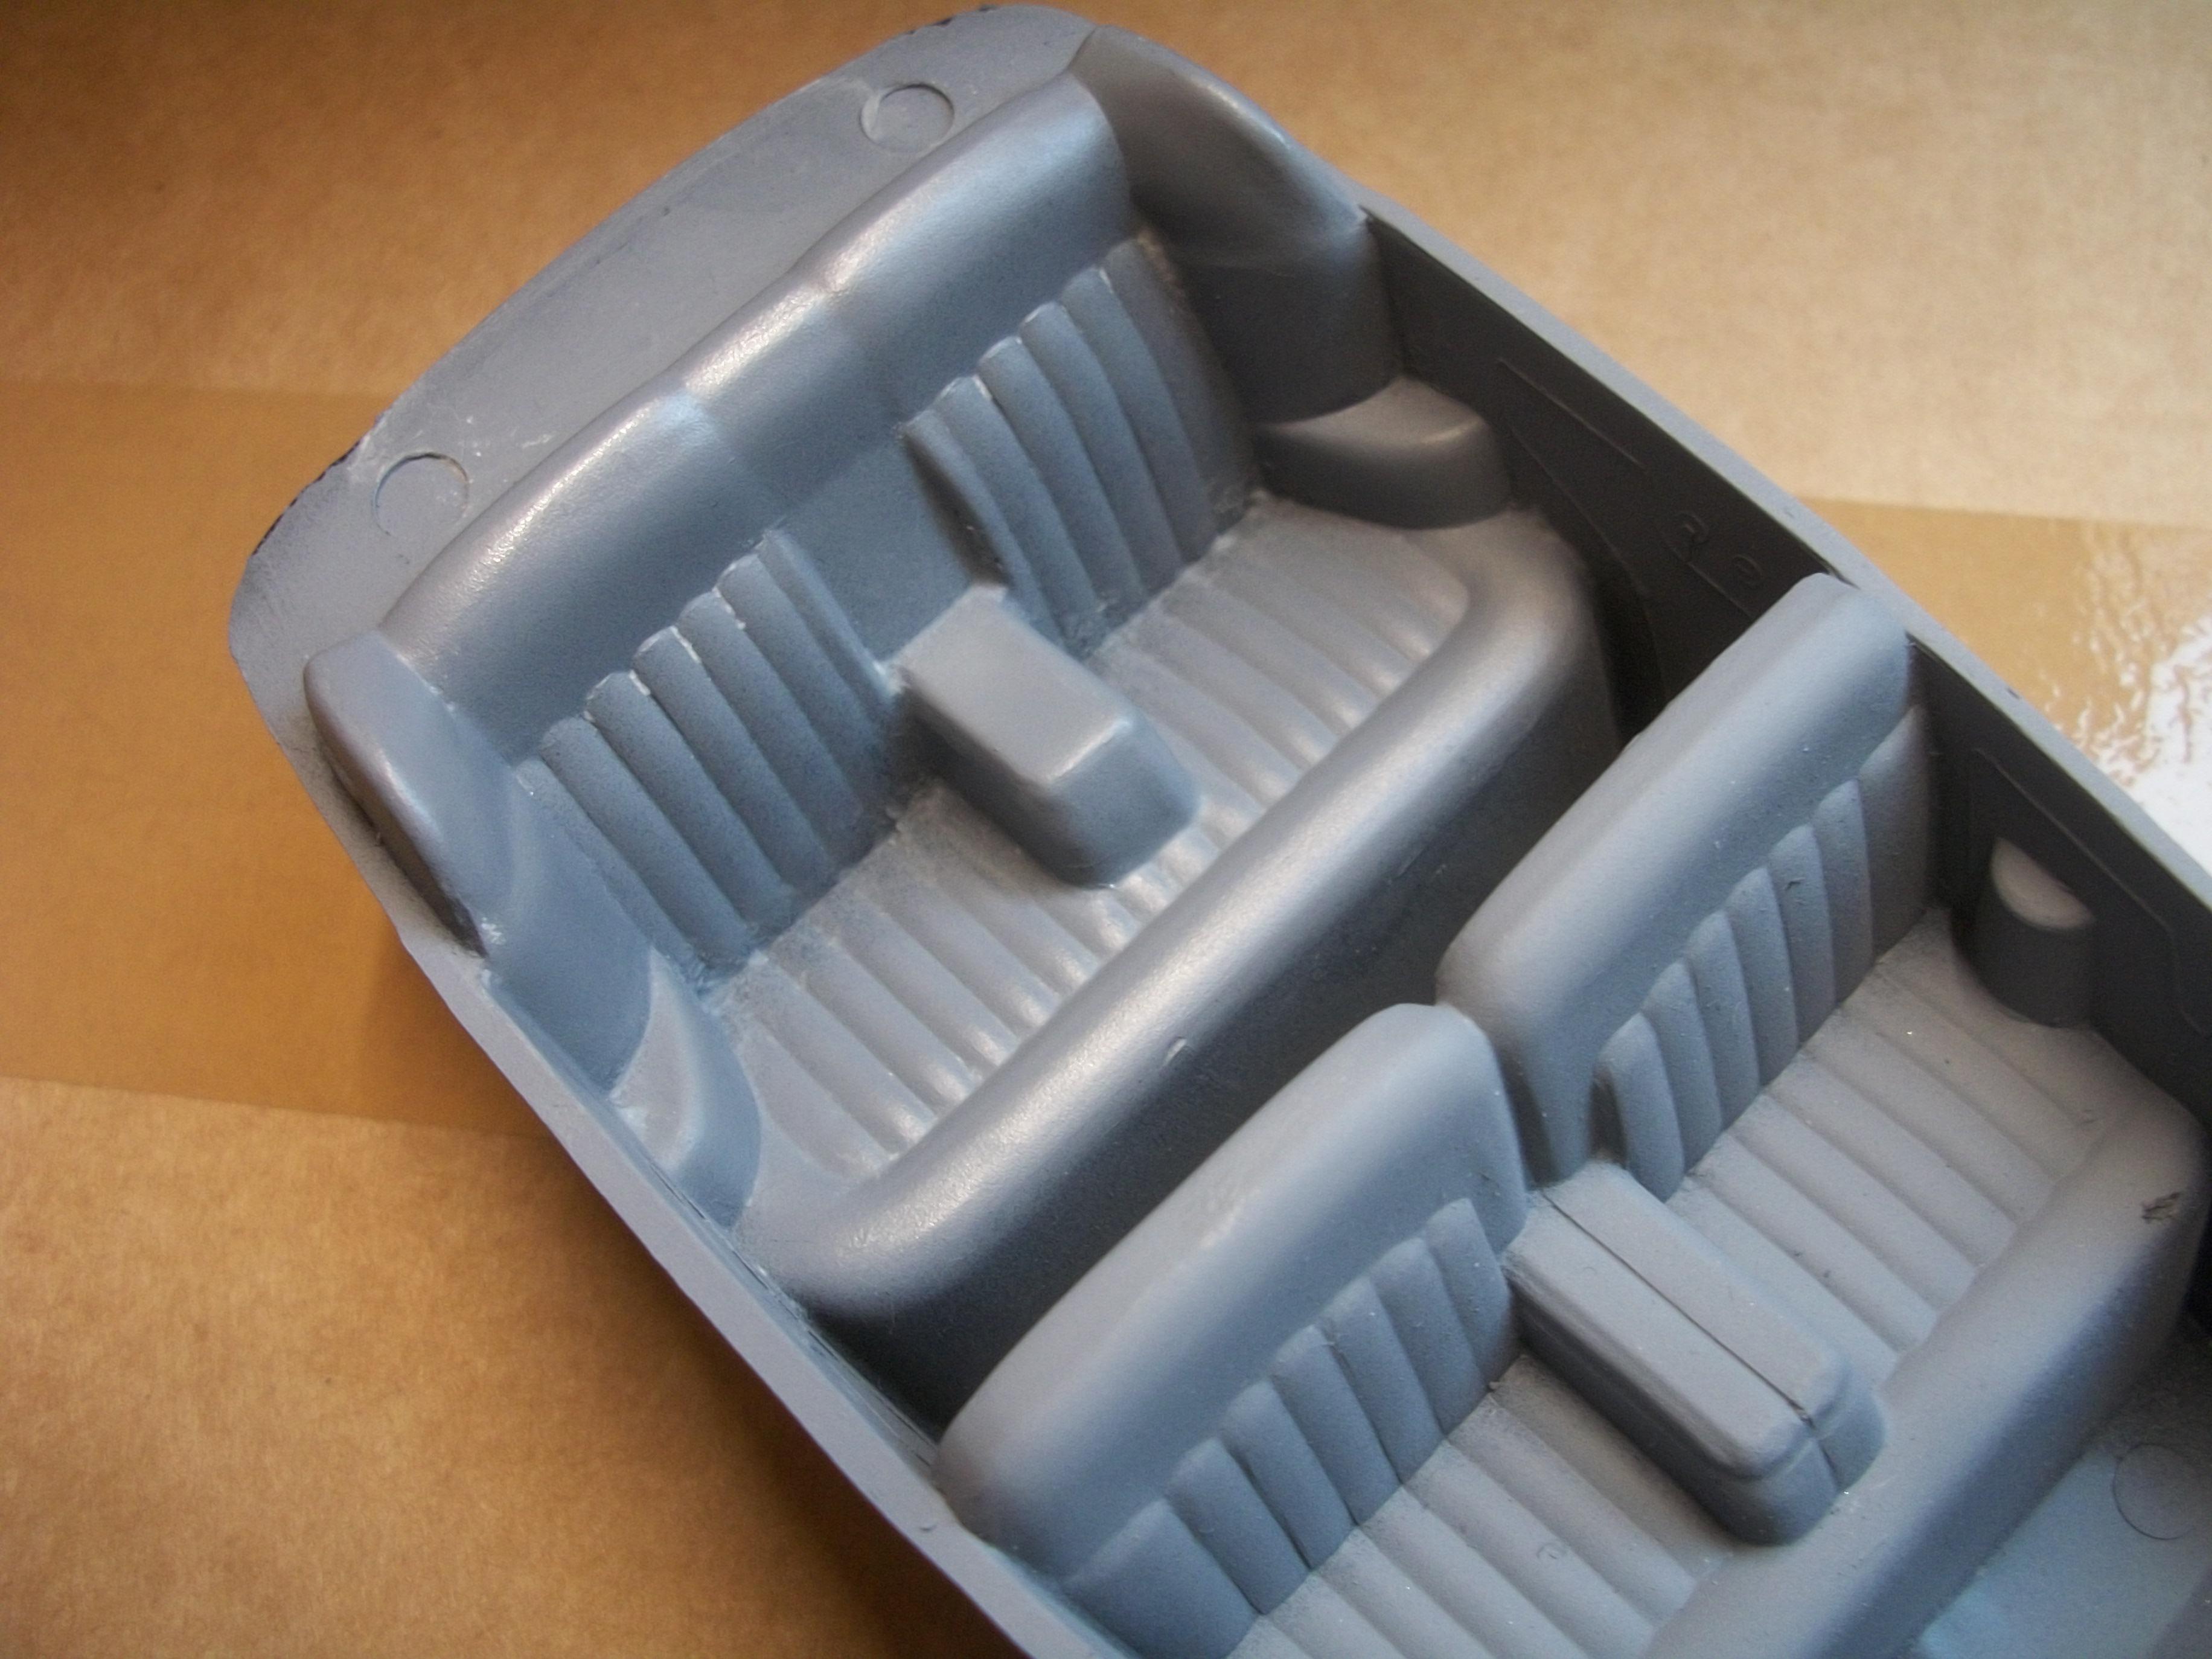
Yesterday I picked up some KIWI neutral shoe polish, which I have applied to the interior seating of this model, using a cotton bud. Then after allowing a few minutes to dry, the seats were buffed using a microfibre cloth. The leather upholstery effect is quite pleasing to the eye. This is shoe polish over matt grey primer (not sanded). So far, I have treated the rear seat with shoe polish, but not yet the front seats . . . David
-
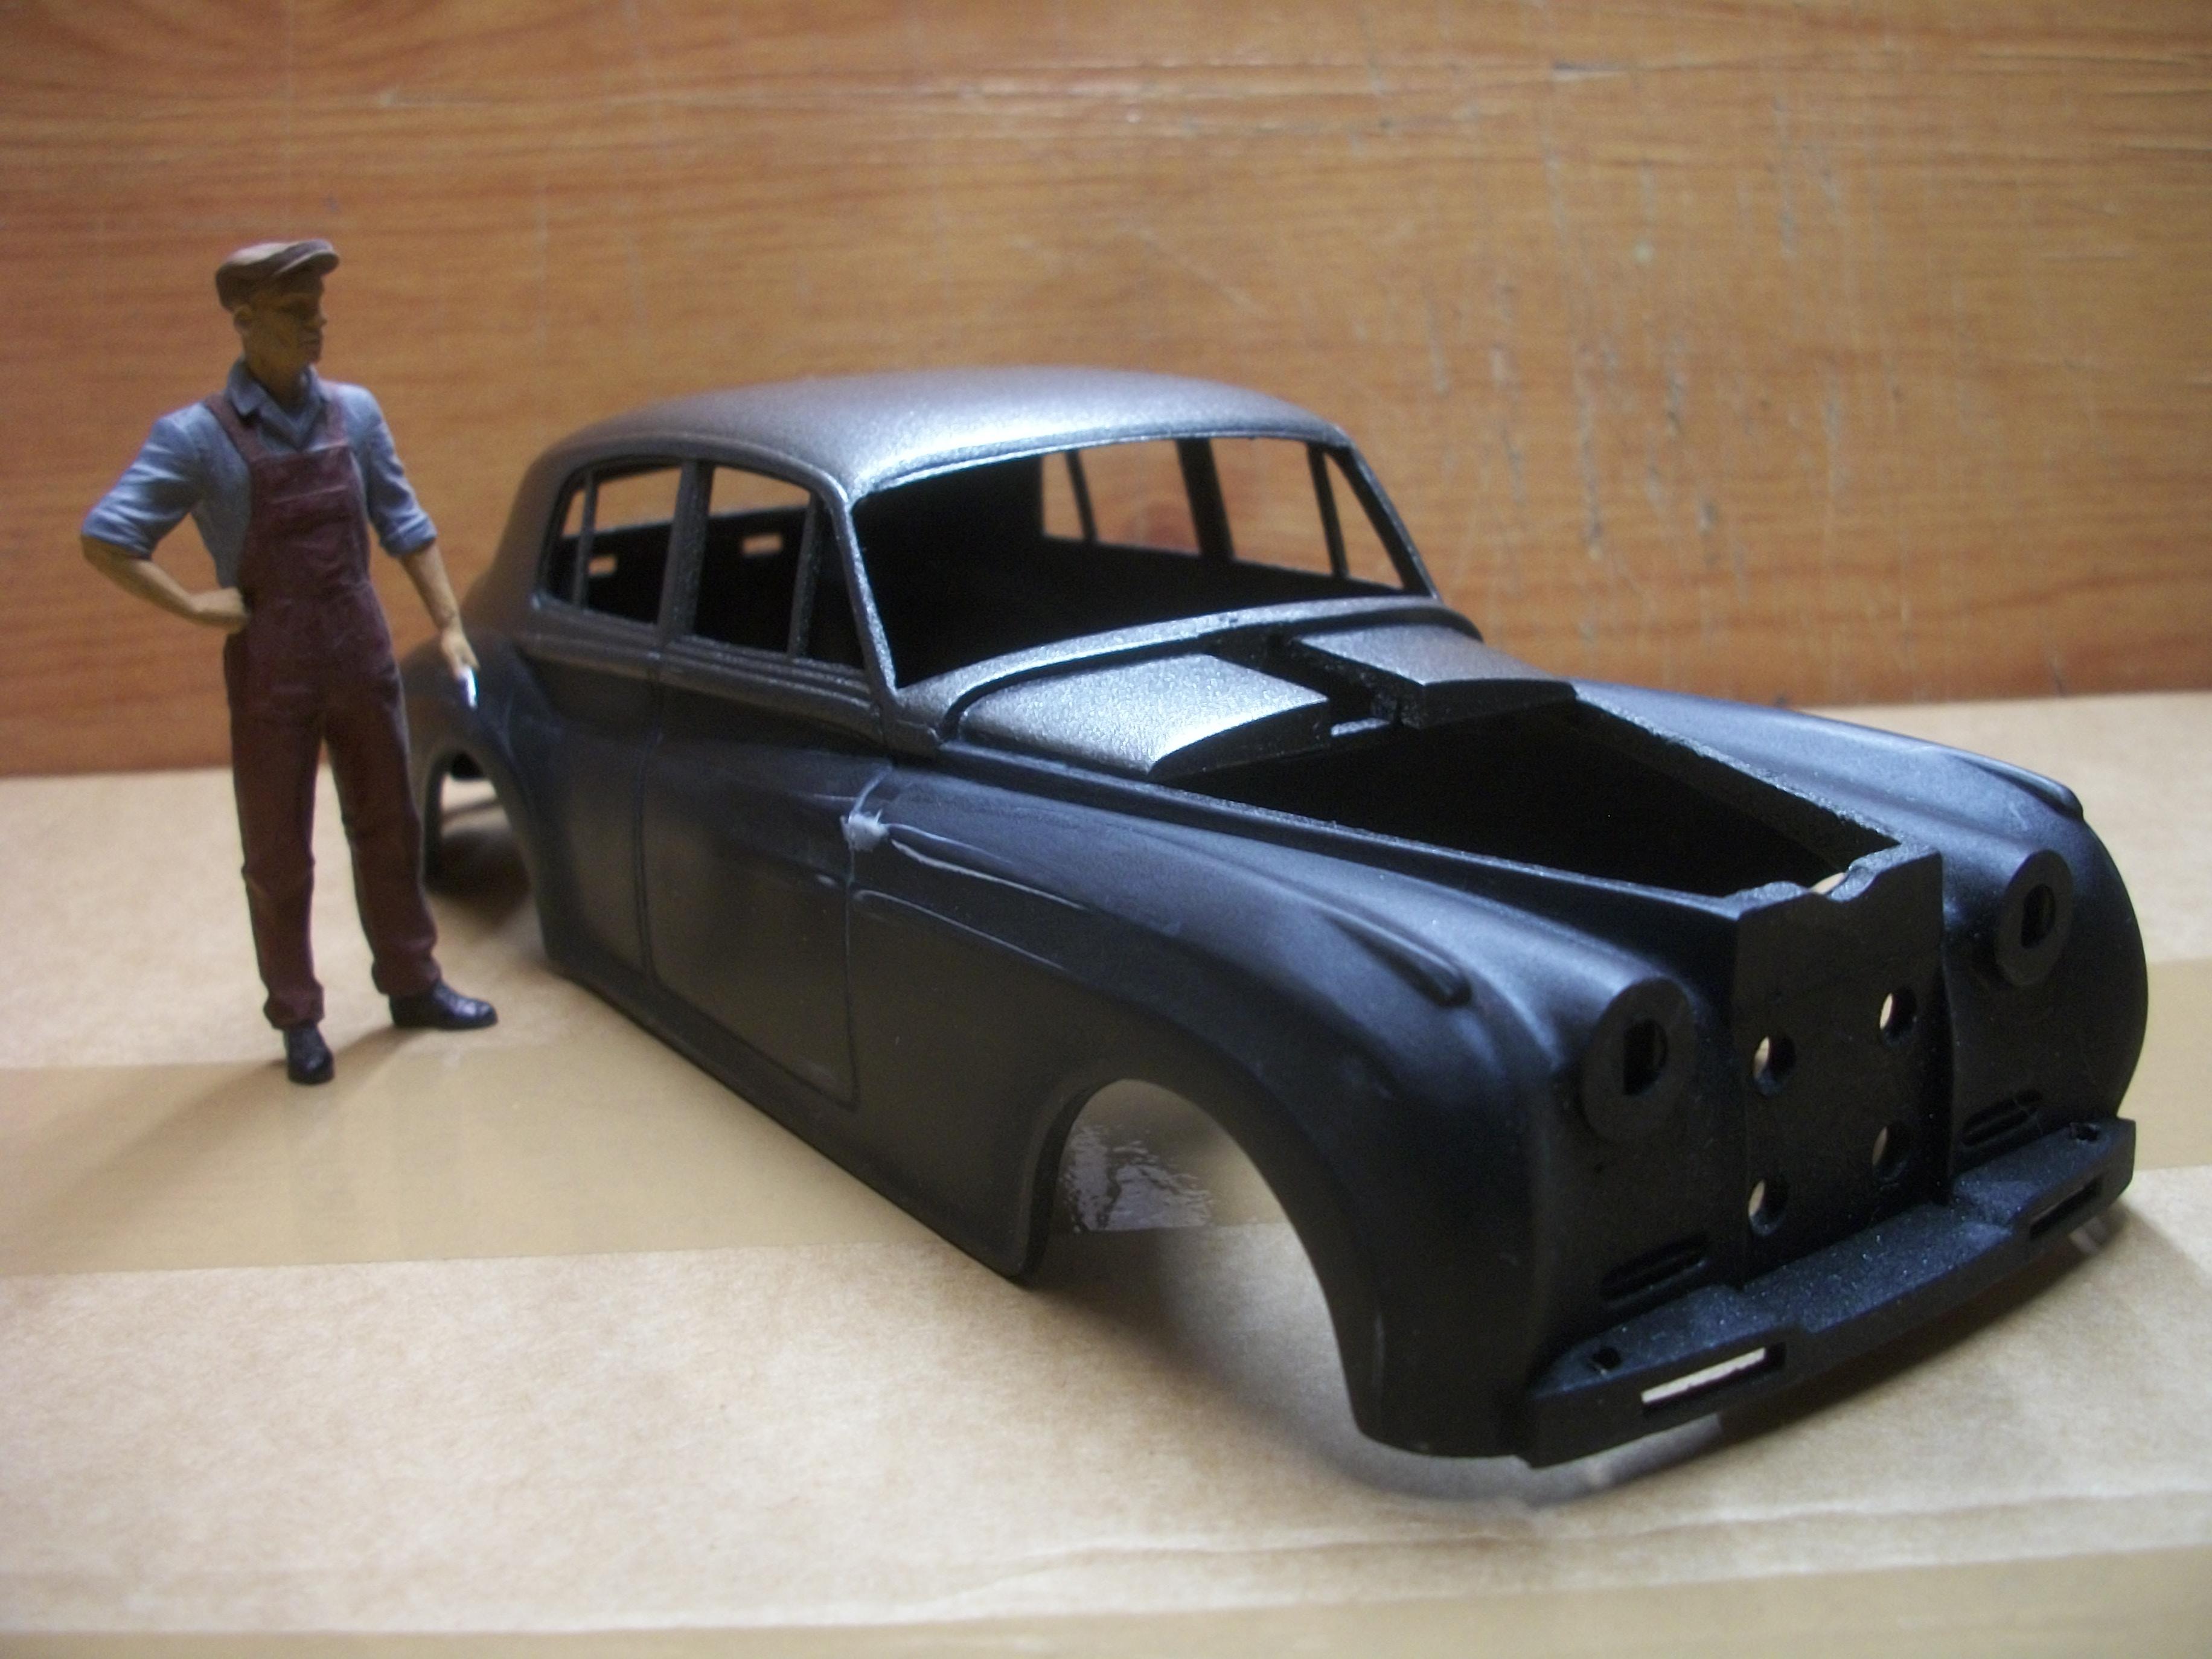
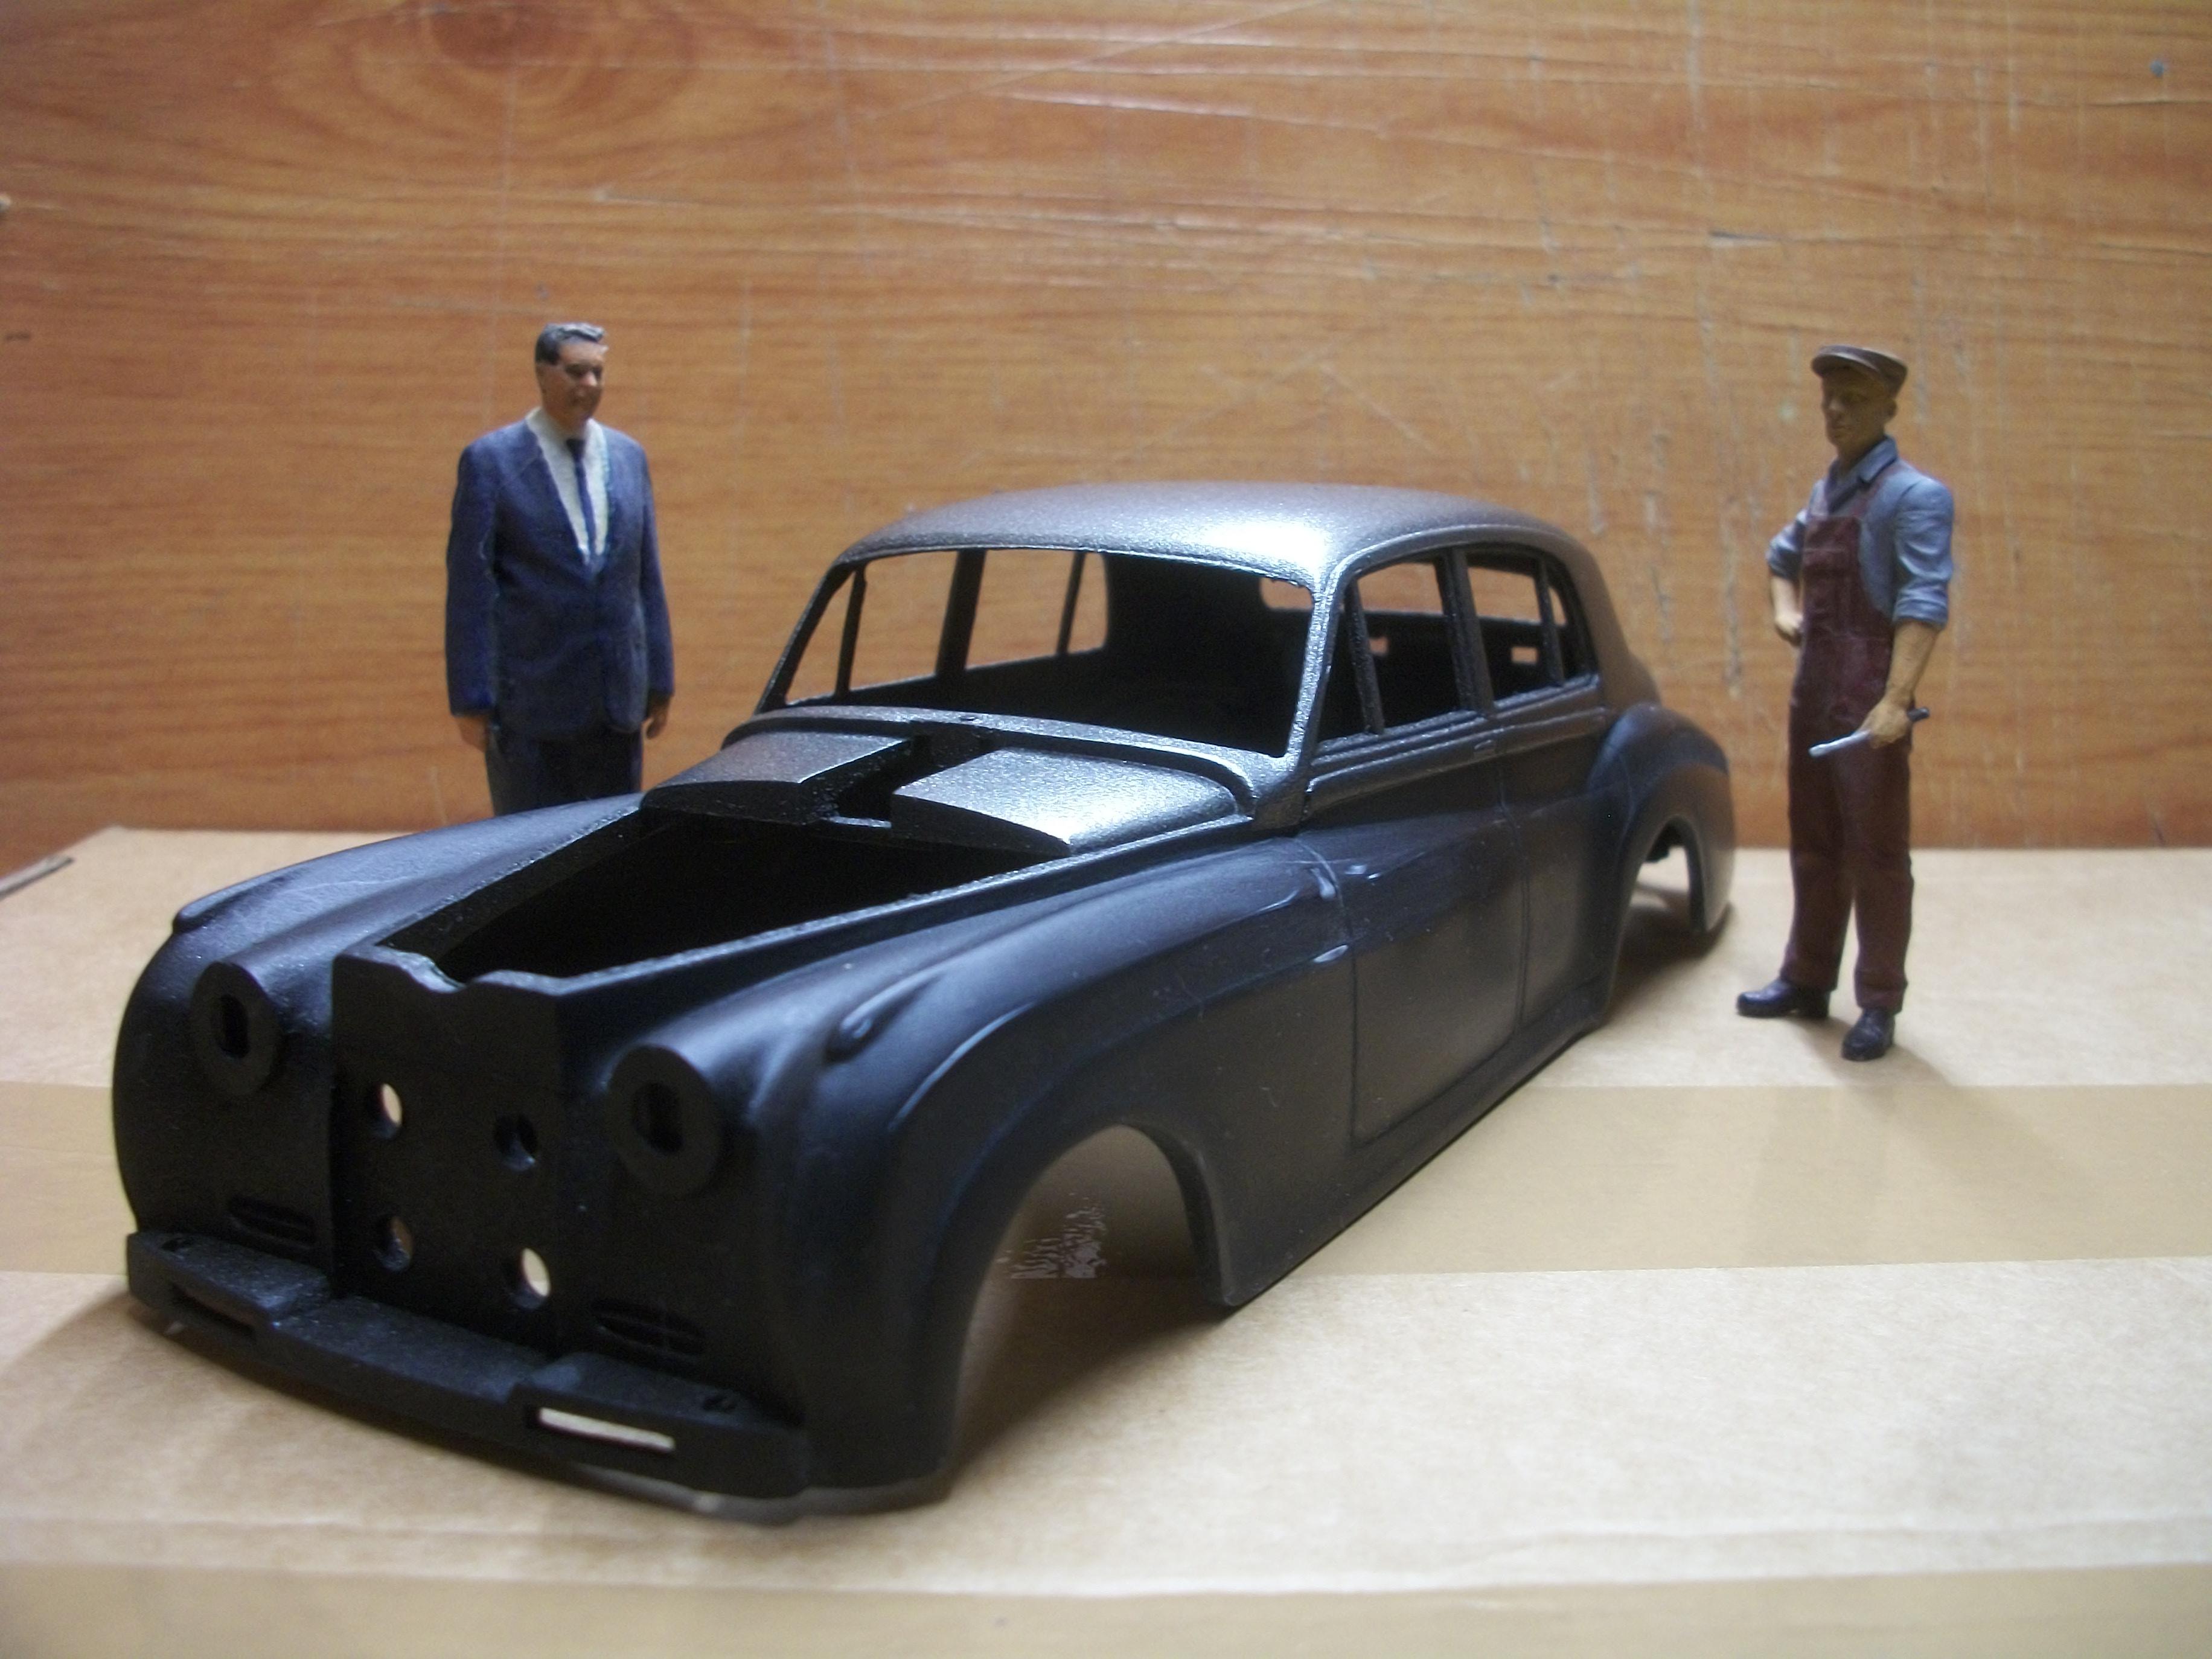
Over in the bodyshop at Hooper & Co., the second coat of Rolls-Royce Shell Grey has been applied to the upper body of the Silver Cloud. One of the bodyshop workmen and two of the managers are checking on the progress of the building of this fine motor car. The paint finish at this stage will be allowed to dry and cure for a further five days, before the polishing stage begins. Presently, the lower body is still in black primer, and ready for the top coats of Velvet Green. David
-
There's an enormous amount of detail in your diorama Steve . . . You have put all this together within a very short time frame, so you have clearly worked hard on this model project. I am sure you will get lots of comments on your topic . . . Well done indeed ! David Watson (England)
-
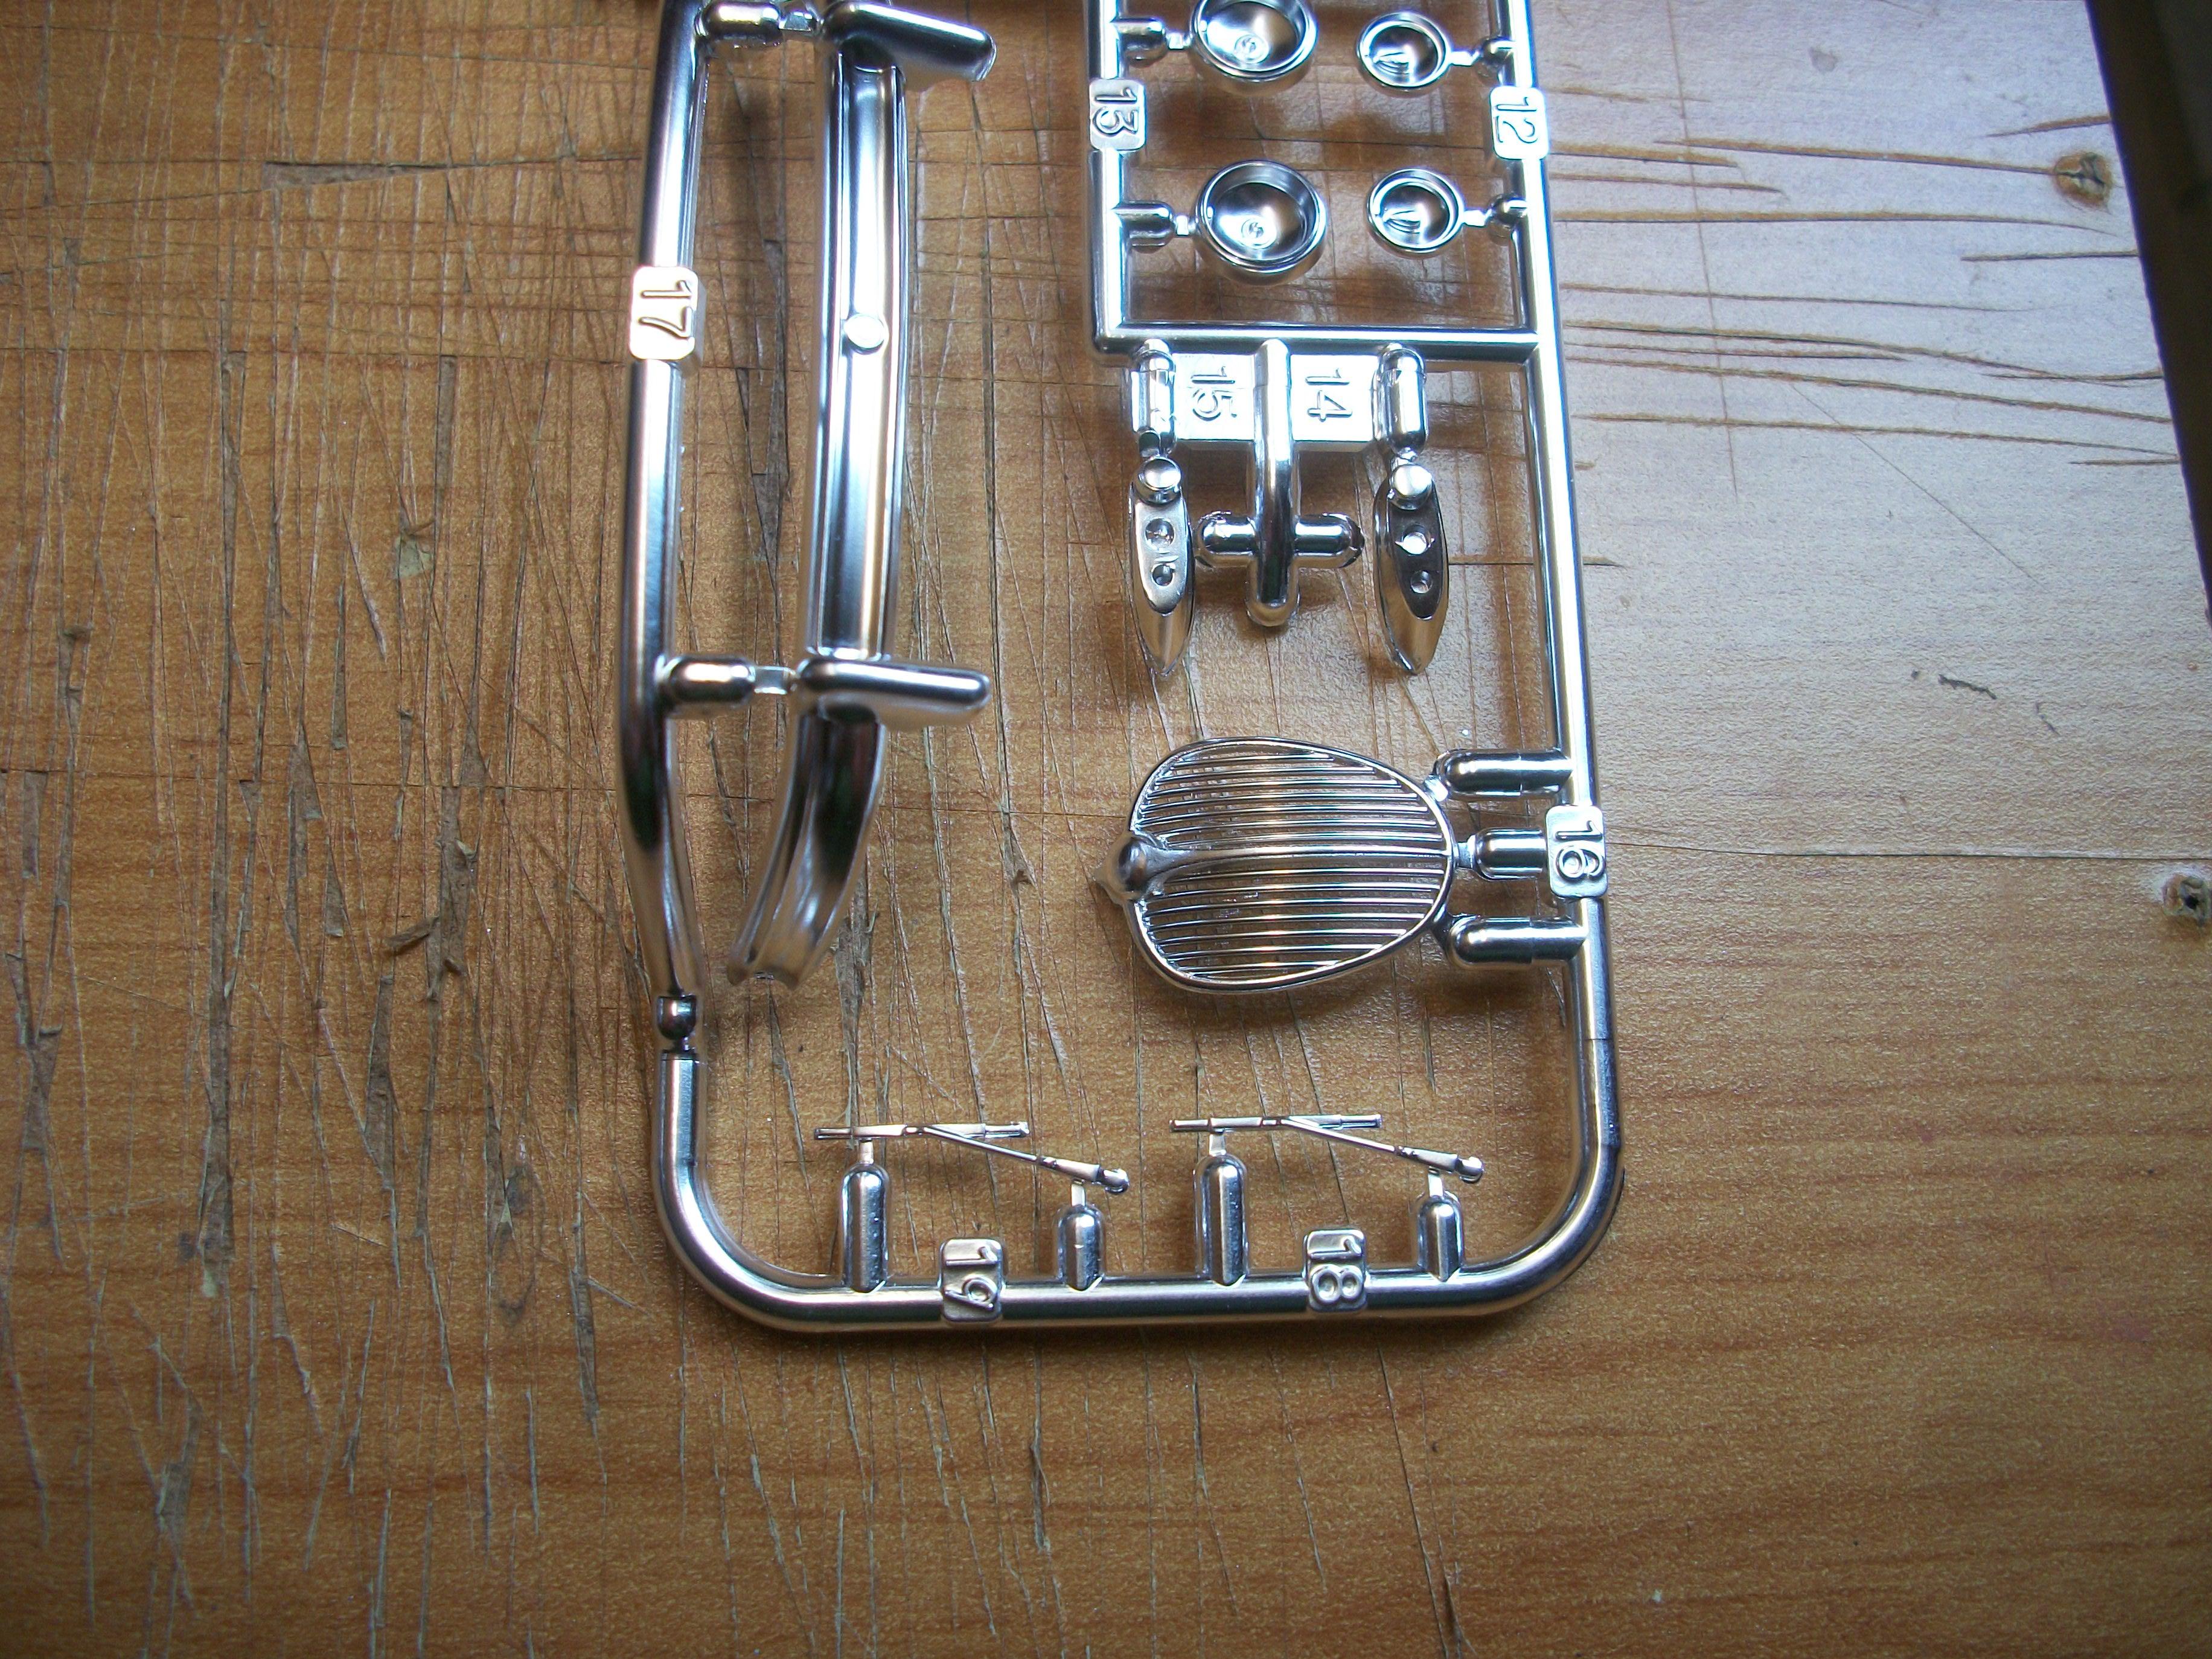
I have been quite busy with all sorts of things over the past week, but I am pleased to say that the progress with the Rolls-Royce build is nice and steady. The chrome parts that were airbrushed look really good, and I shall leave these untouched for the full two weeks. I have painted the dashboard in a ' burr walnut ' mix over black primer, and this will be coated with yacht varnish later. The body parts had a final wet sanding with 2000 grit before applying one coat of the Rolls-Royce Shell Grey on the upper body, boot lid and bonnet panels, with the lower body masked off. Following 48 hours drying, the Shell Grey has been wet sanded with 2000 grit, and is now ready for a second coat of Shell Grey . . . This procedure will be repeated for the lower half of the body, in Velvet Green. Probably after around 5 days the body parts will have Tamiya Polishing Compound applied, following the three stage process of Coarse, Fine and Finish grades. I intend to use the wiper arms and blades from a Tamiya kit of the Jaguar MK 2 for the Silver Cloud windscreen. These are nice quality chrome, and appear identical to the Rolls-Royce wipers. Certainly this will be a big improvement on the moulded wipers that were on the Revell body. The Autopaints of Brighton Shell Grey is clearly more accurate than the Zero Paints from Hiroboy, but then I am using an entirely different procedure for applying the paint this time. David
-
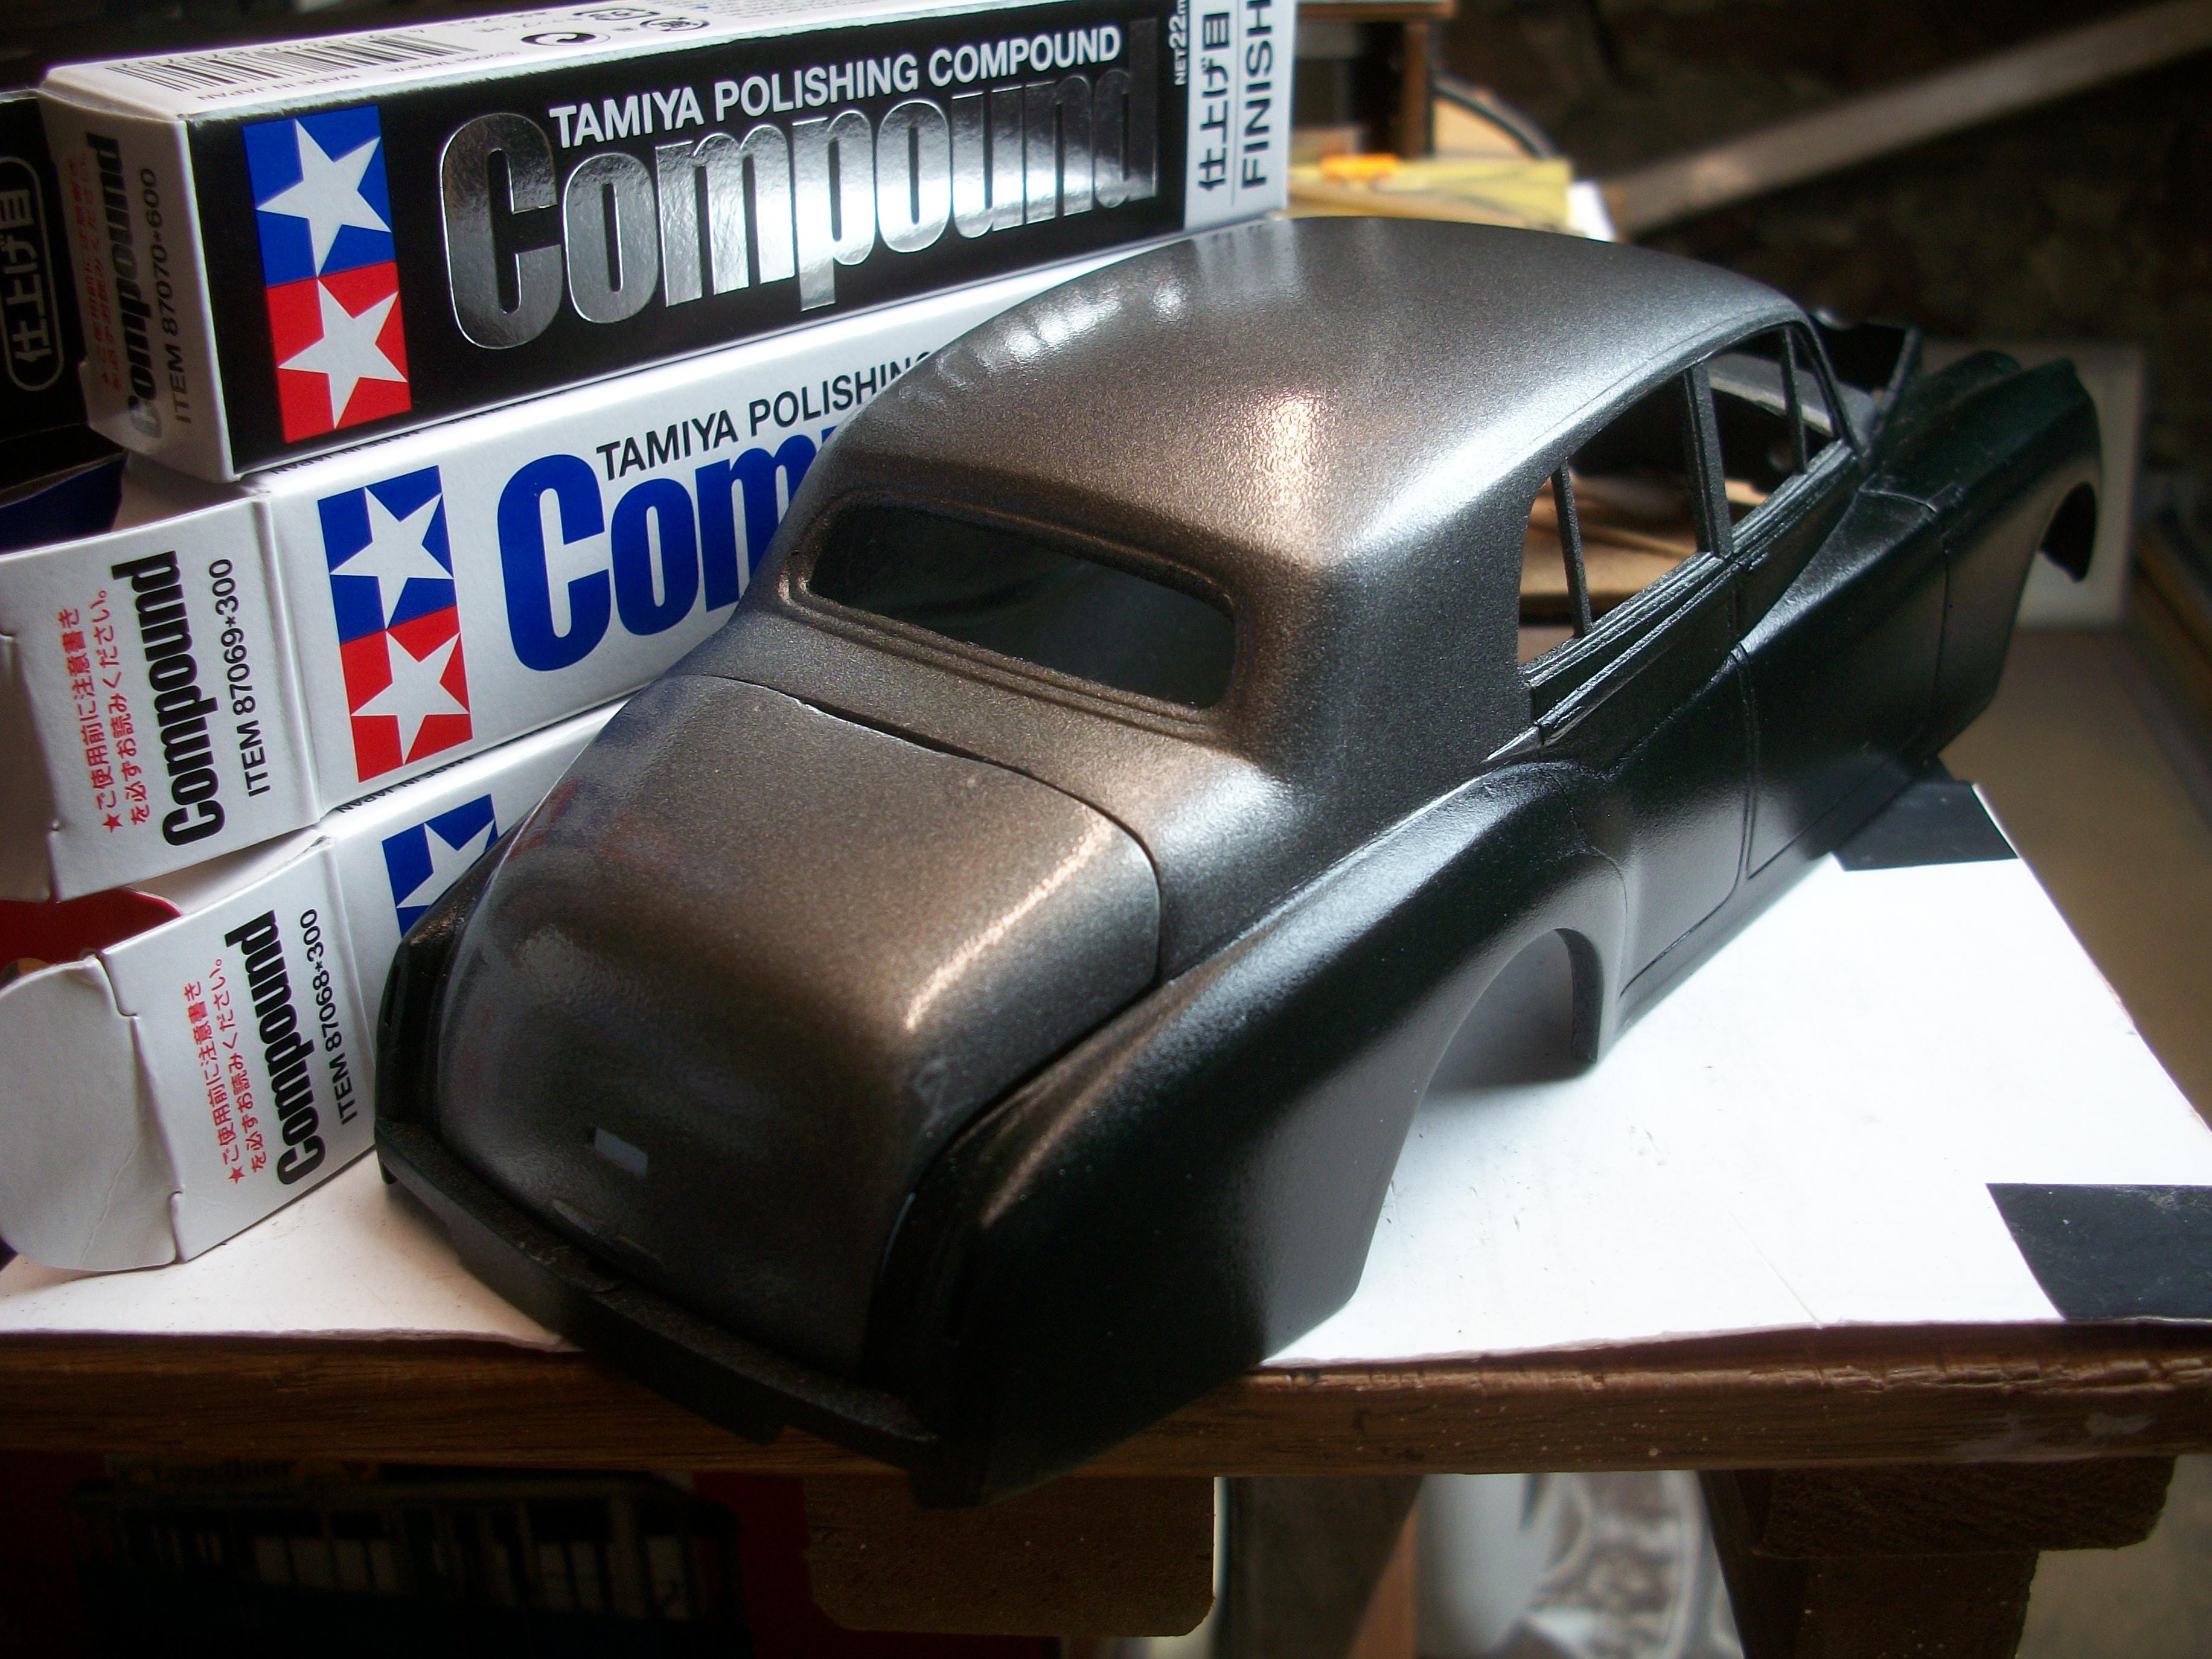
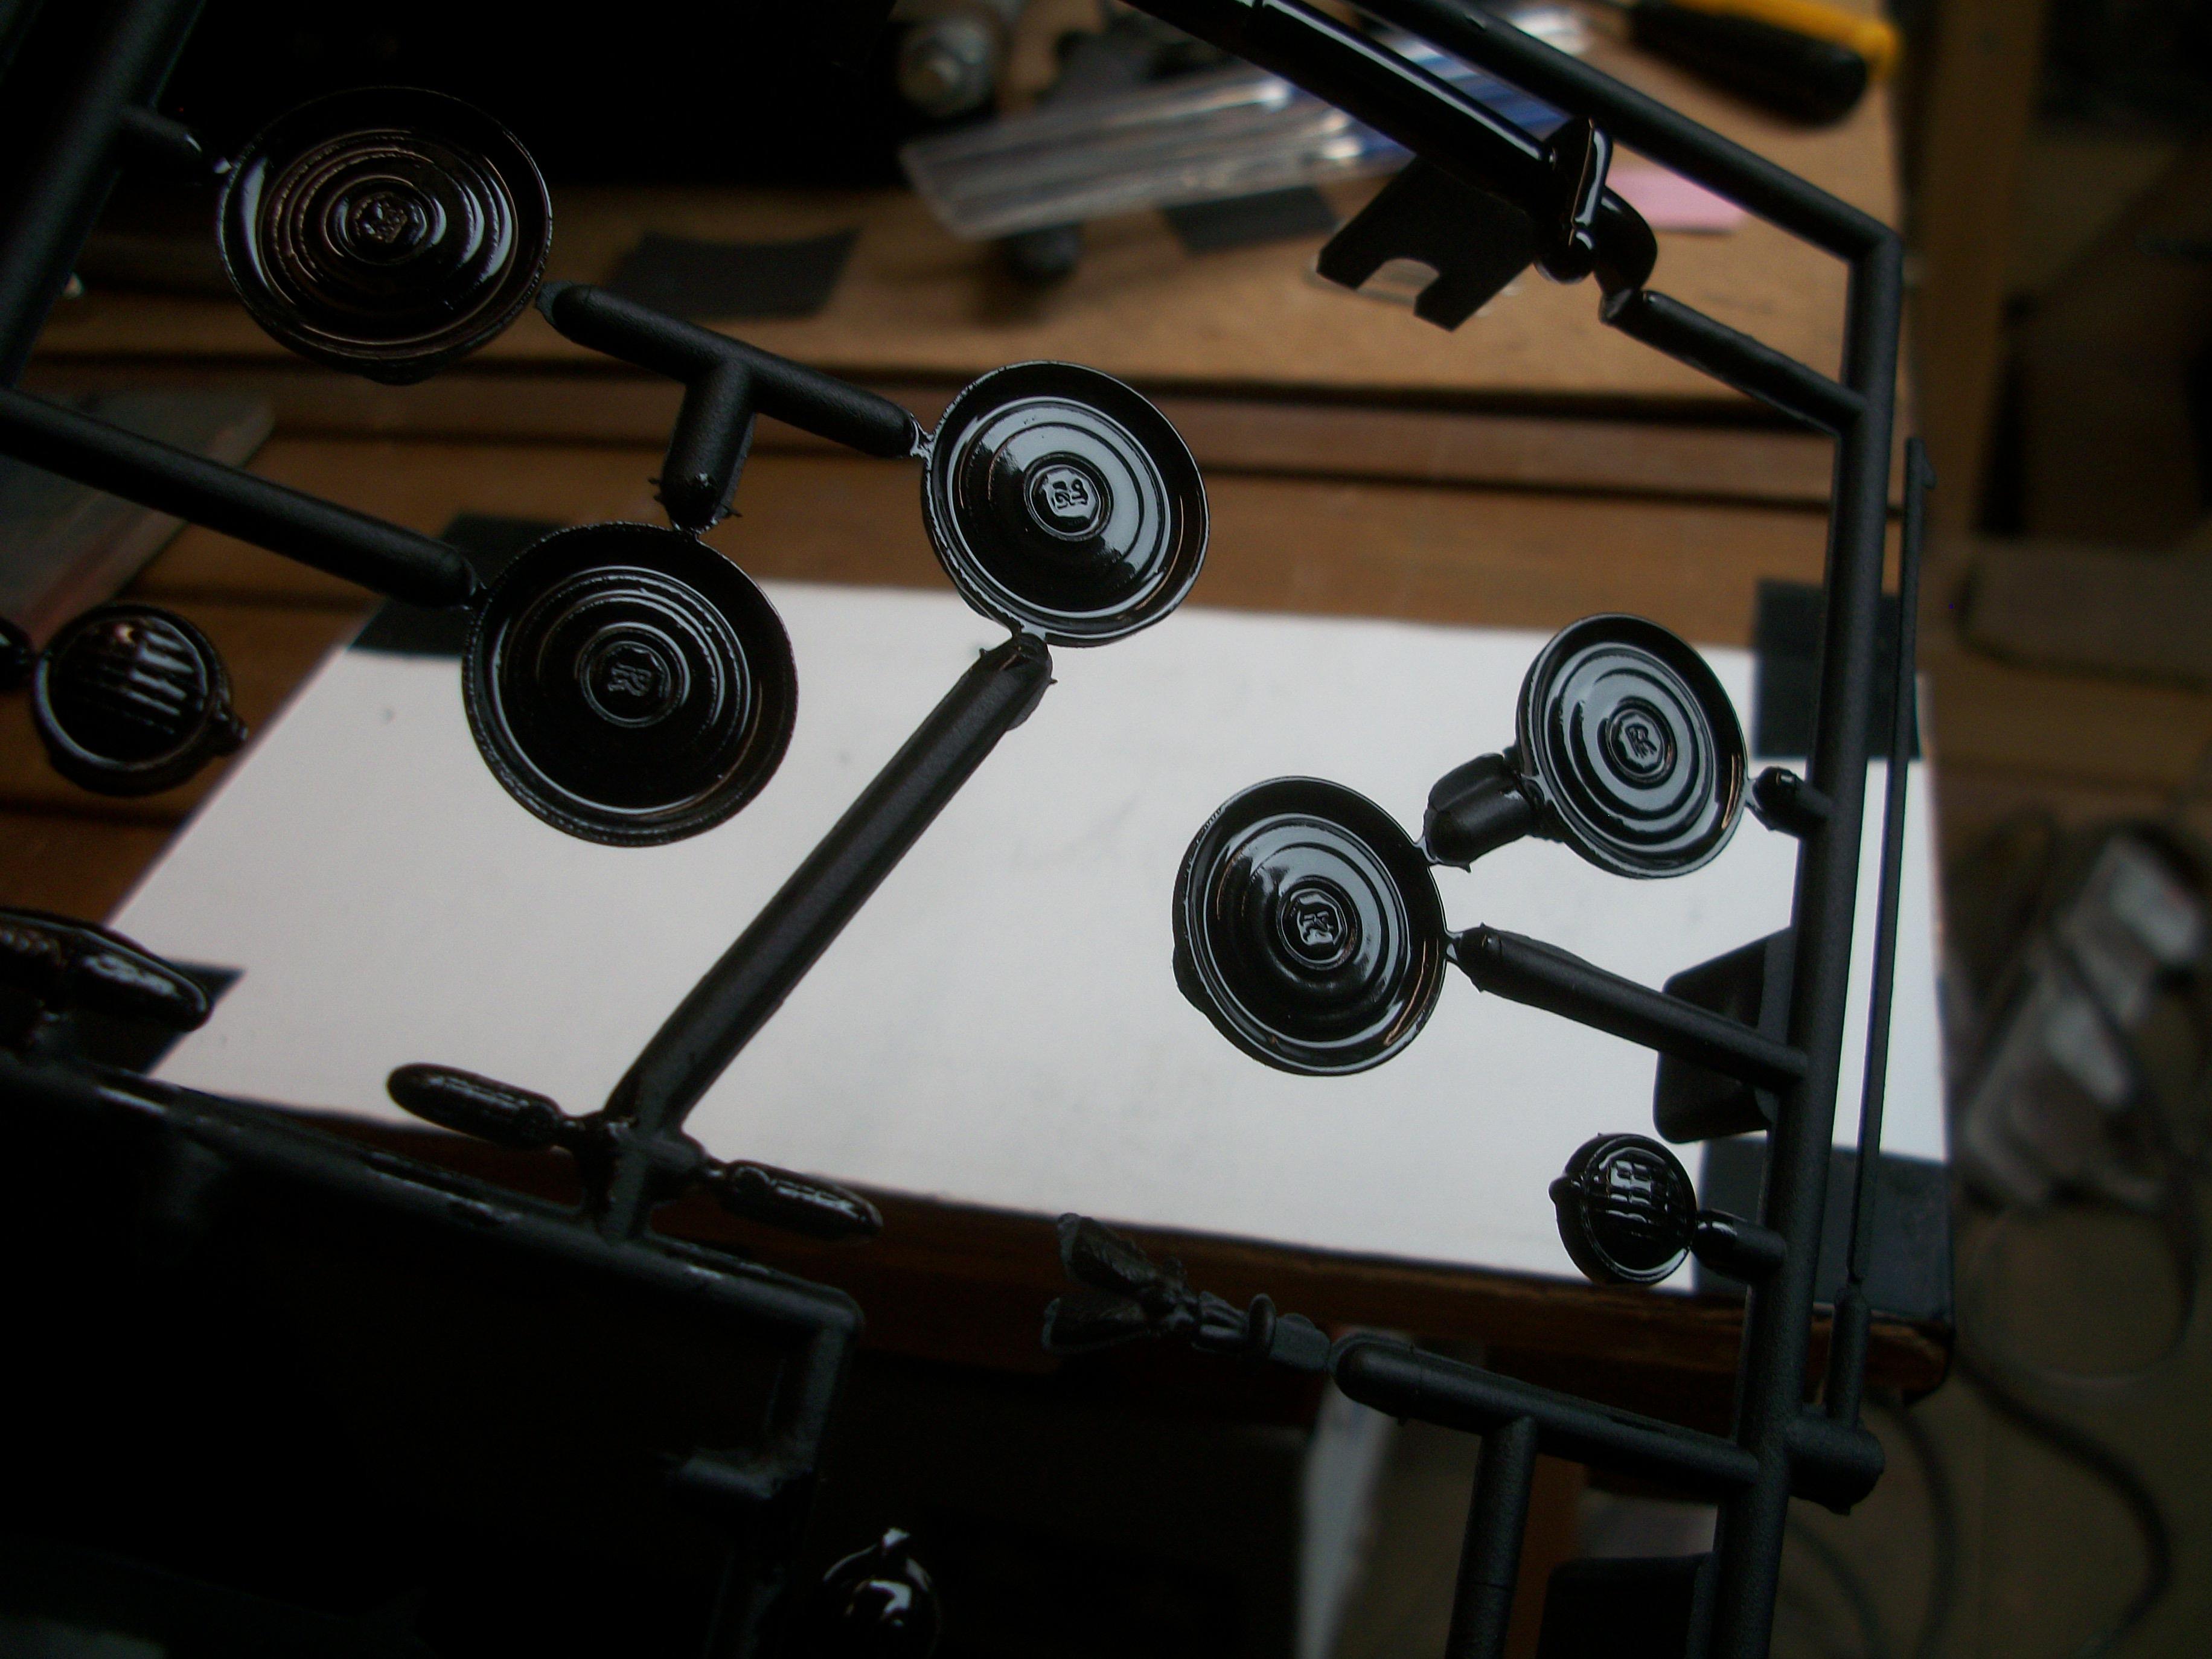
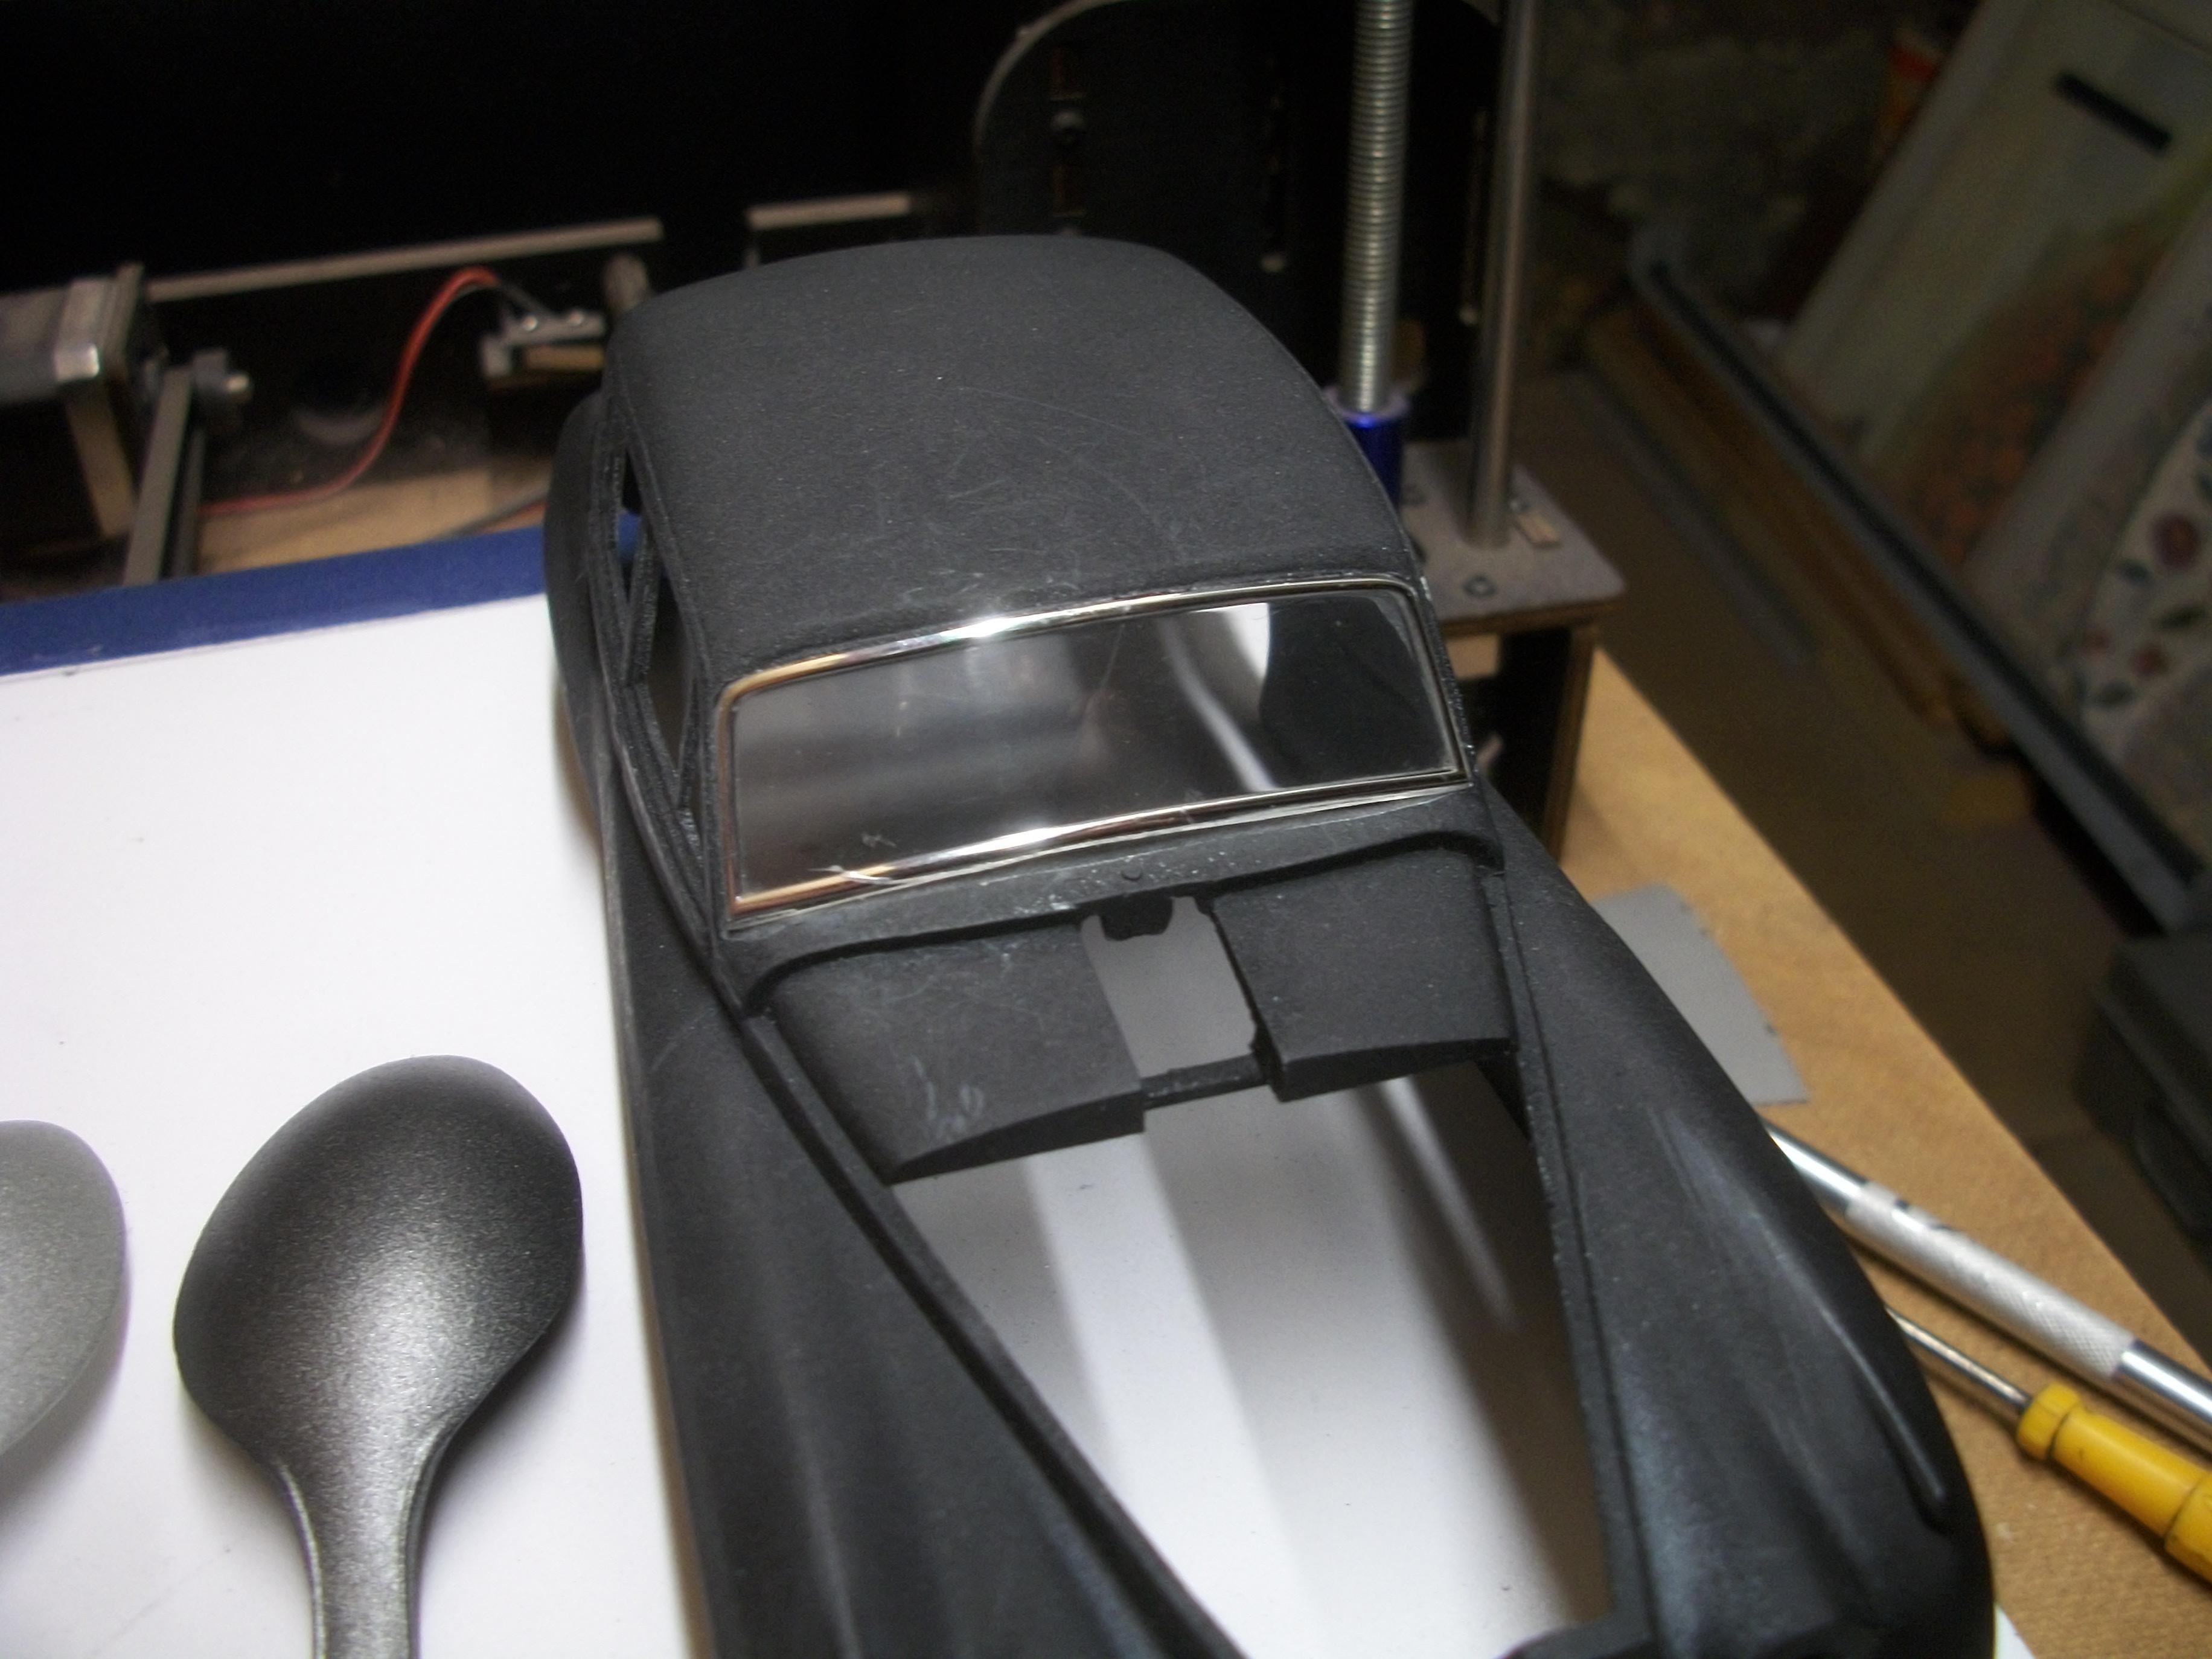
One of the following photos shows the windscreen of the Rolls-Royce Silver Cloud from the inside of the body, and this has turned out to be quite a nice fit. All of the grey styrene parts that need to be chromed, now have a coat of Plastikote Black Primer, as well as a coat of Yacht Varnish. The Molotow Liquid Chrome from a 30 ml refill will be applied by airbrush, over the high gloss black surface of the parts. Picked up some Tamiya Polishing Compound on Ebay, which is three 22 ml packs of Coarse, Fine and Finish grades. The polishing compound will be used over the top coats of cellulose paint, which is two-tone Shell Grey (metallic) over Velvet Green. Thanks for reading my posts on this topic guys . . . slow and steady is the way to go here ! David
-
Harry . . . Sorry to hear that your Mother has passed away, and my Mother has also passed away peacefully during June this Summer. I found that my continued building of scale model cars and dioramas helped me a great deal during this difficult time, so I do understand. The 1:32 Airfix kits are mostly very good, and I am pleased to hear that you found the Alfa Romeo that you wanted. Your work in this small scale is truly inspiring for me . . . I shall keep coming back to read your posts, and study your photos ! David Watson ( England )
-
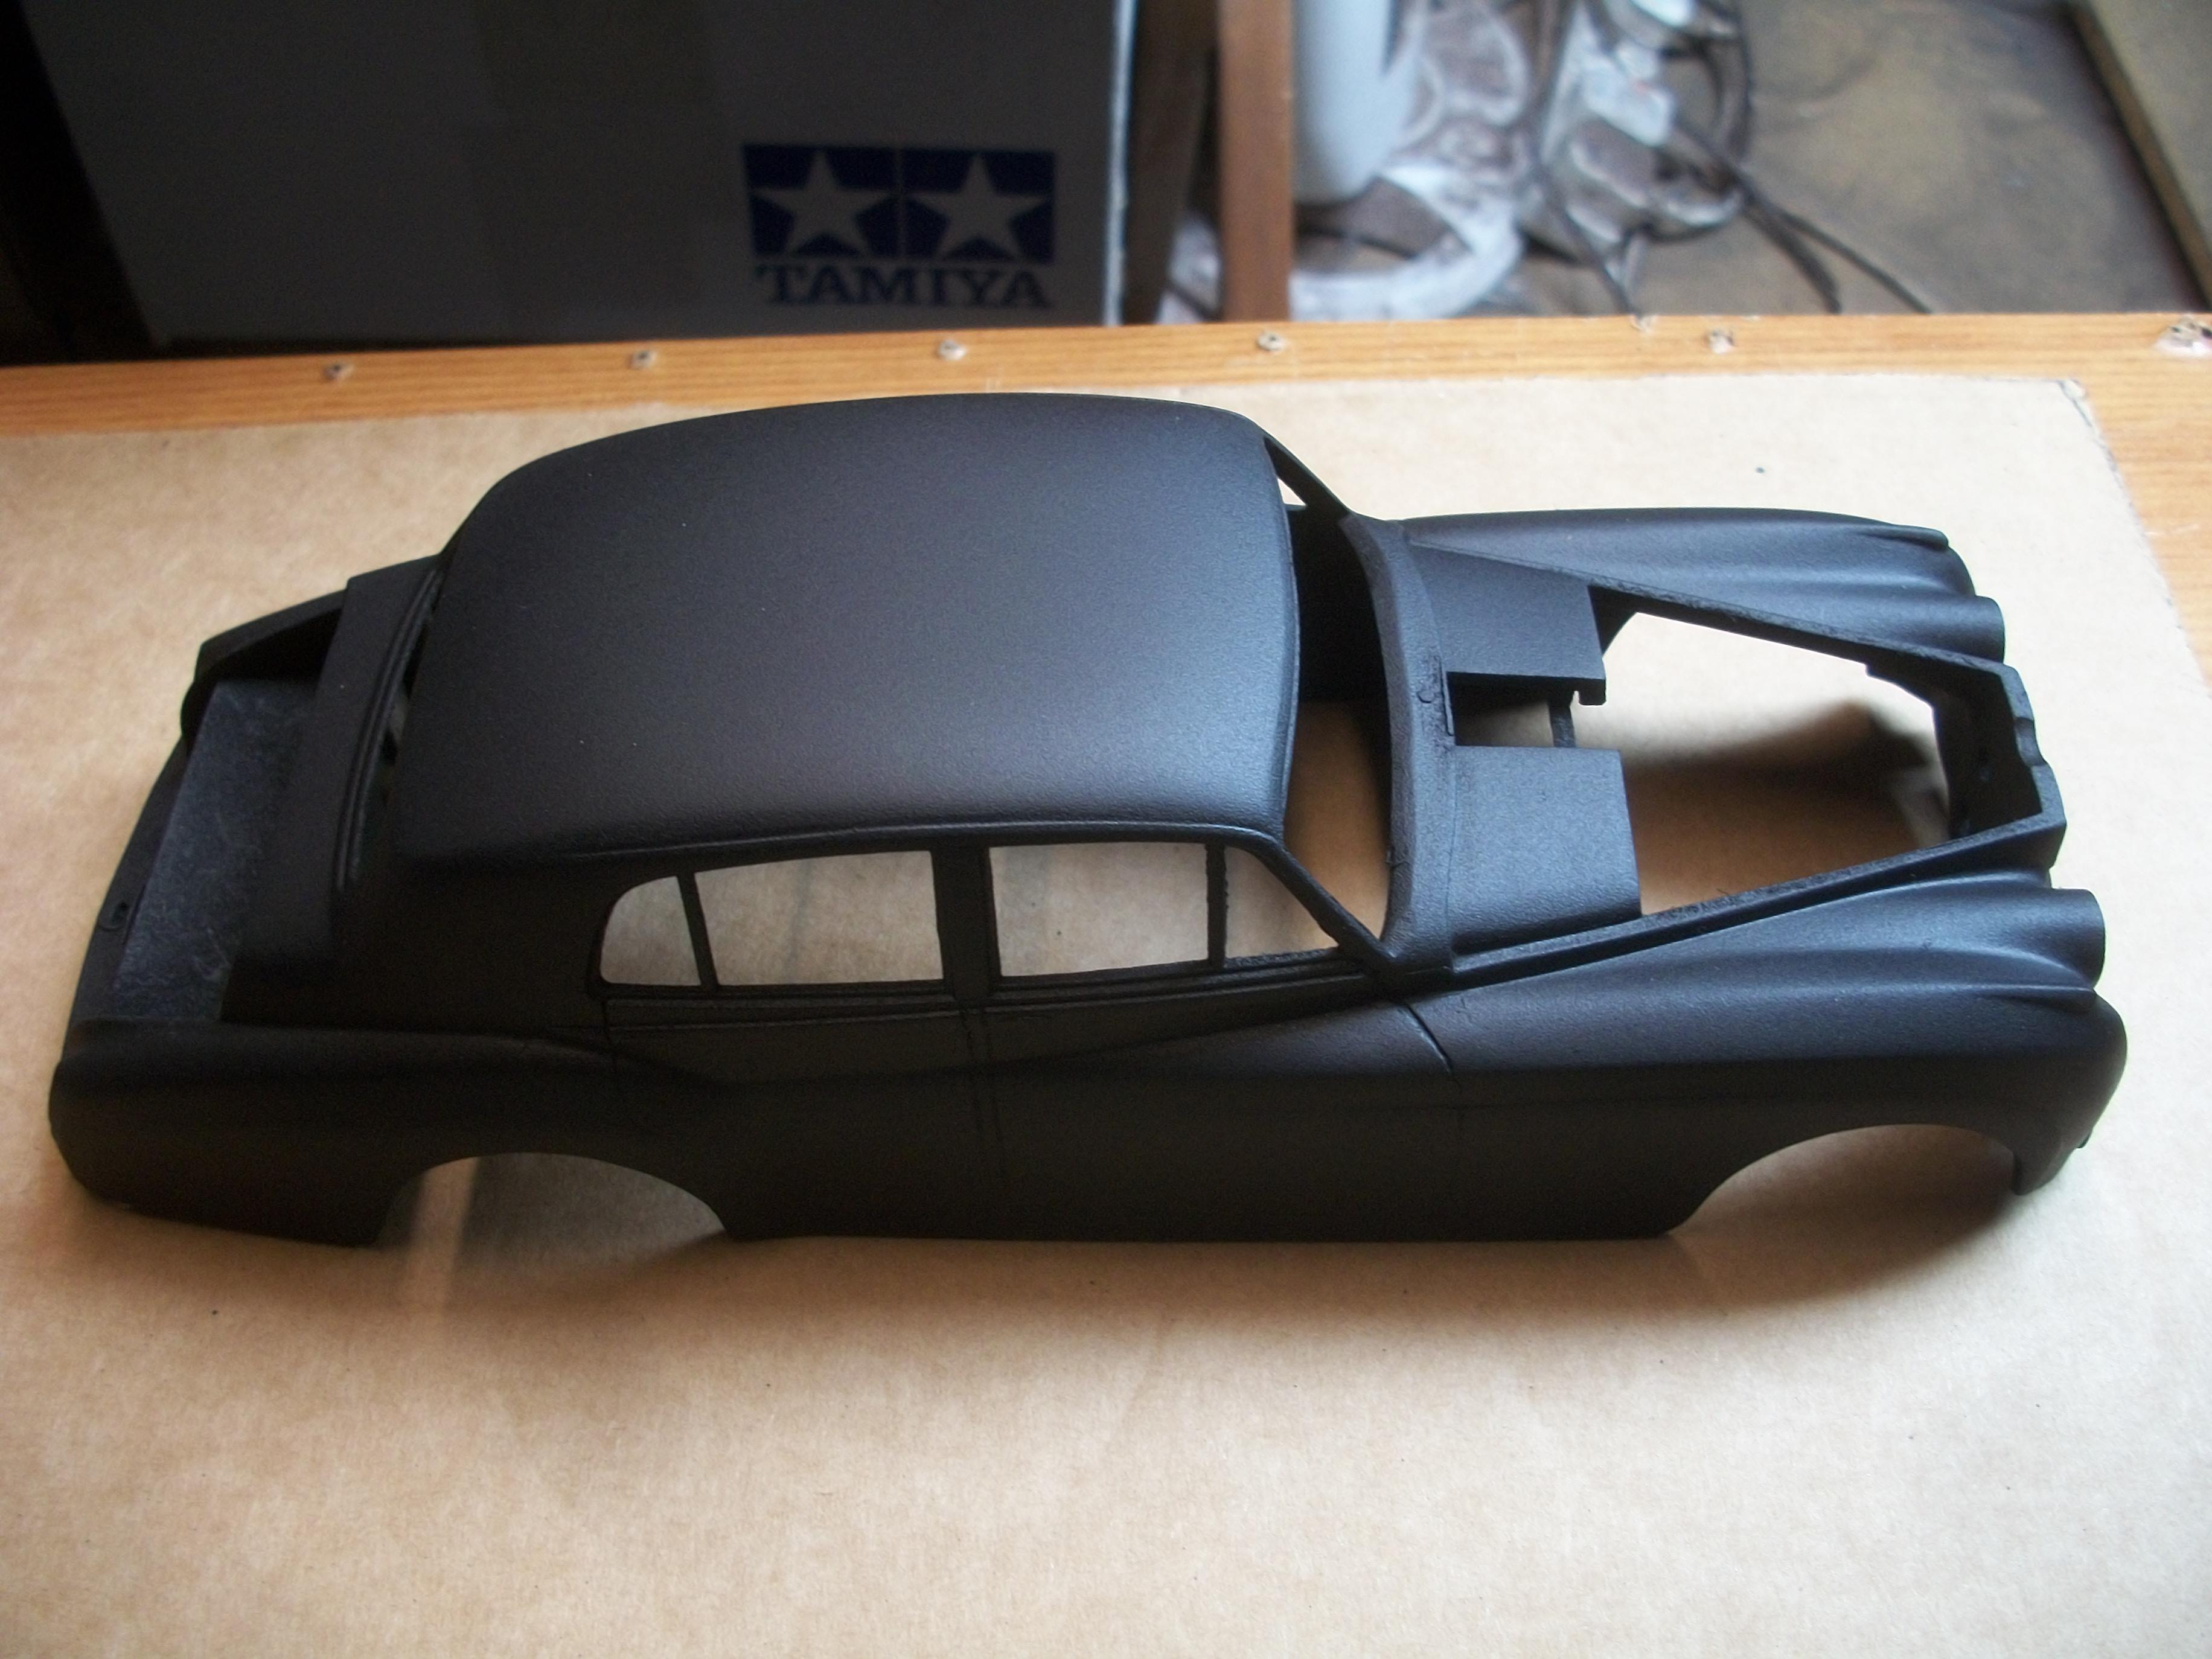
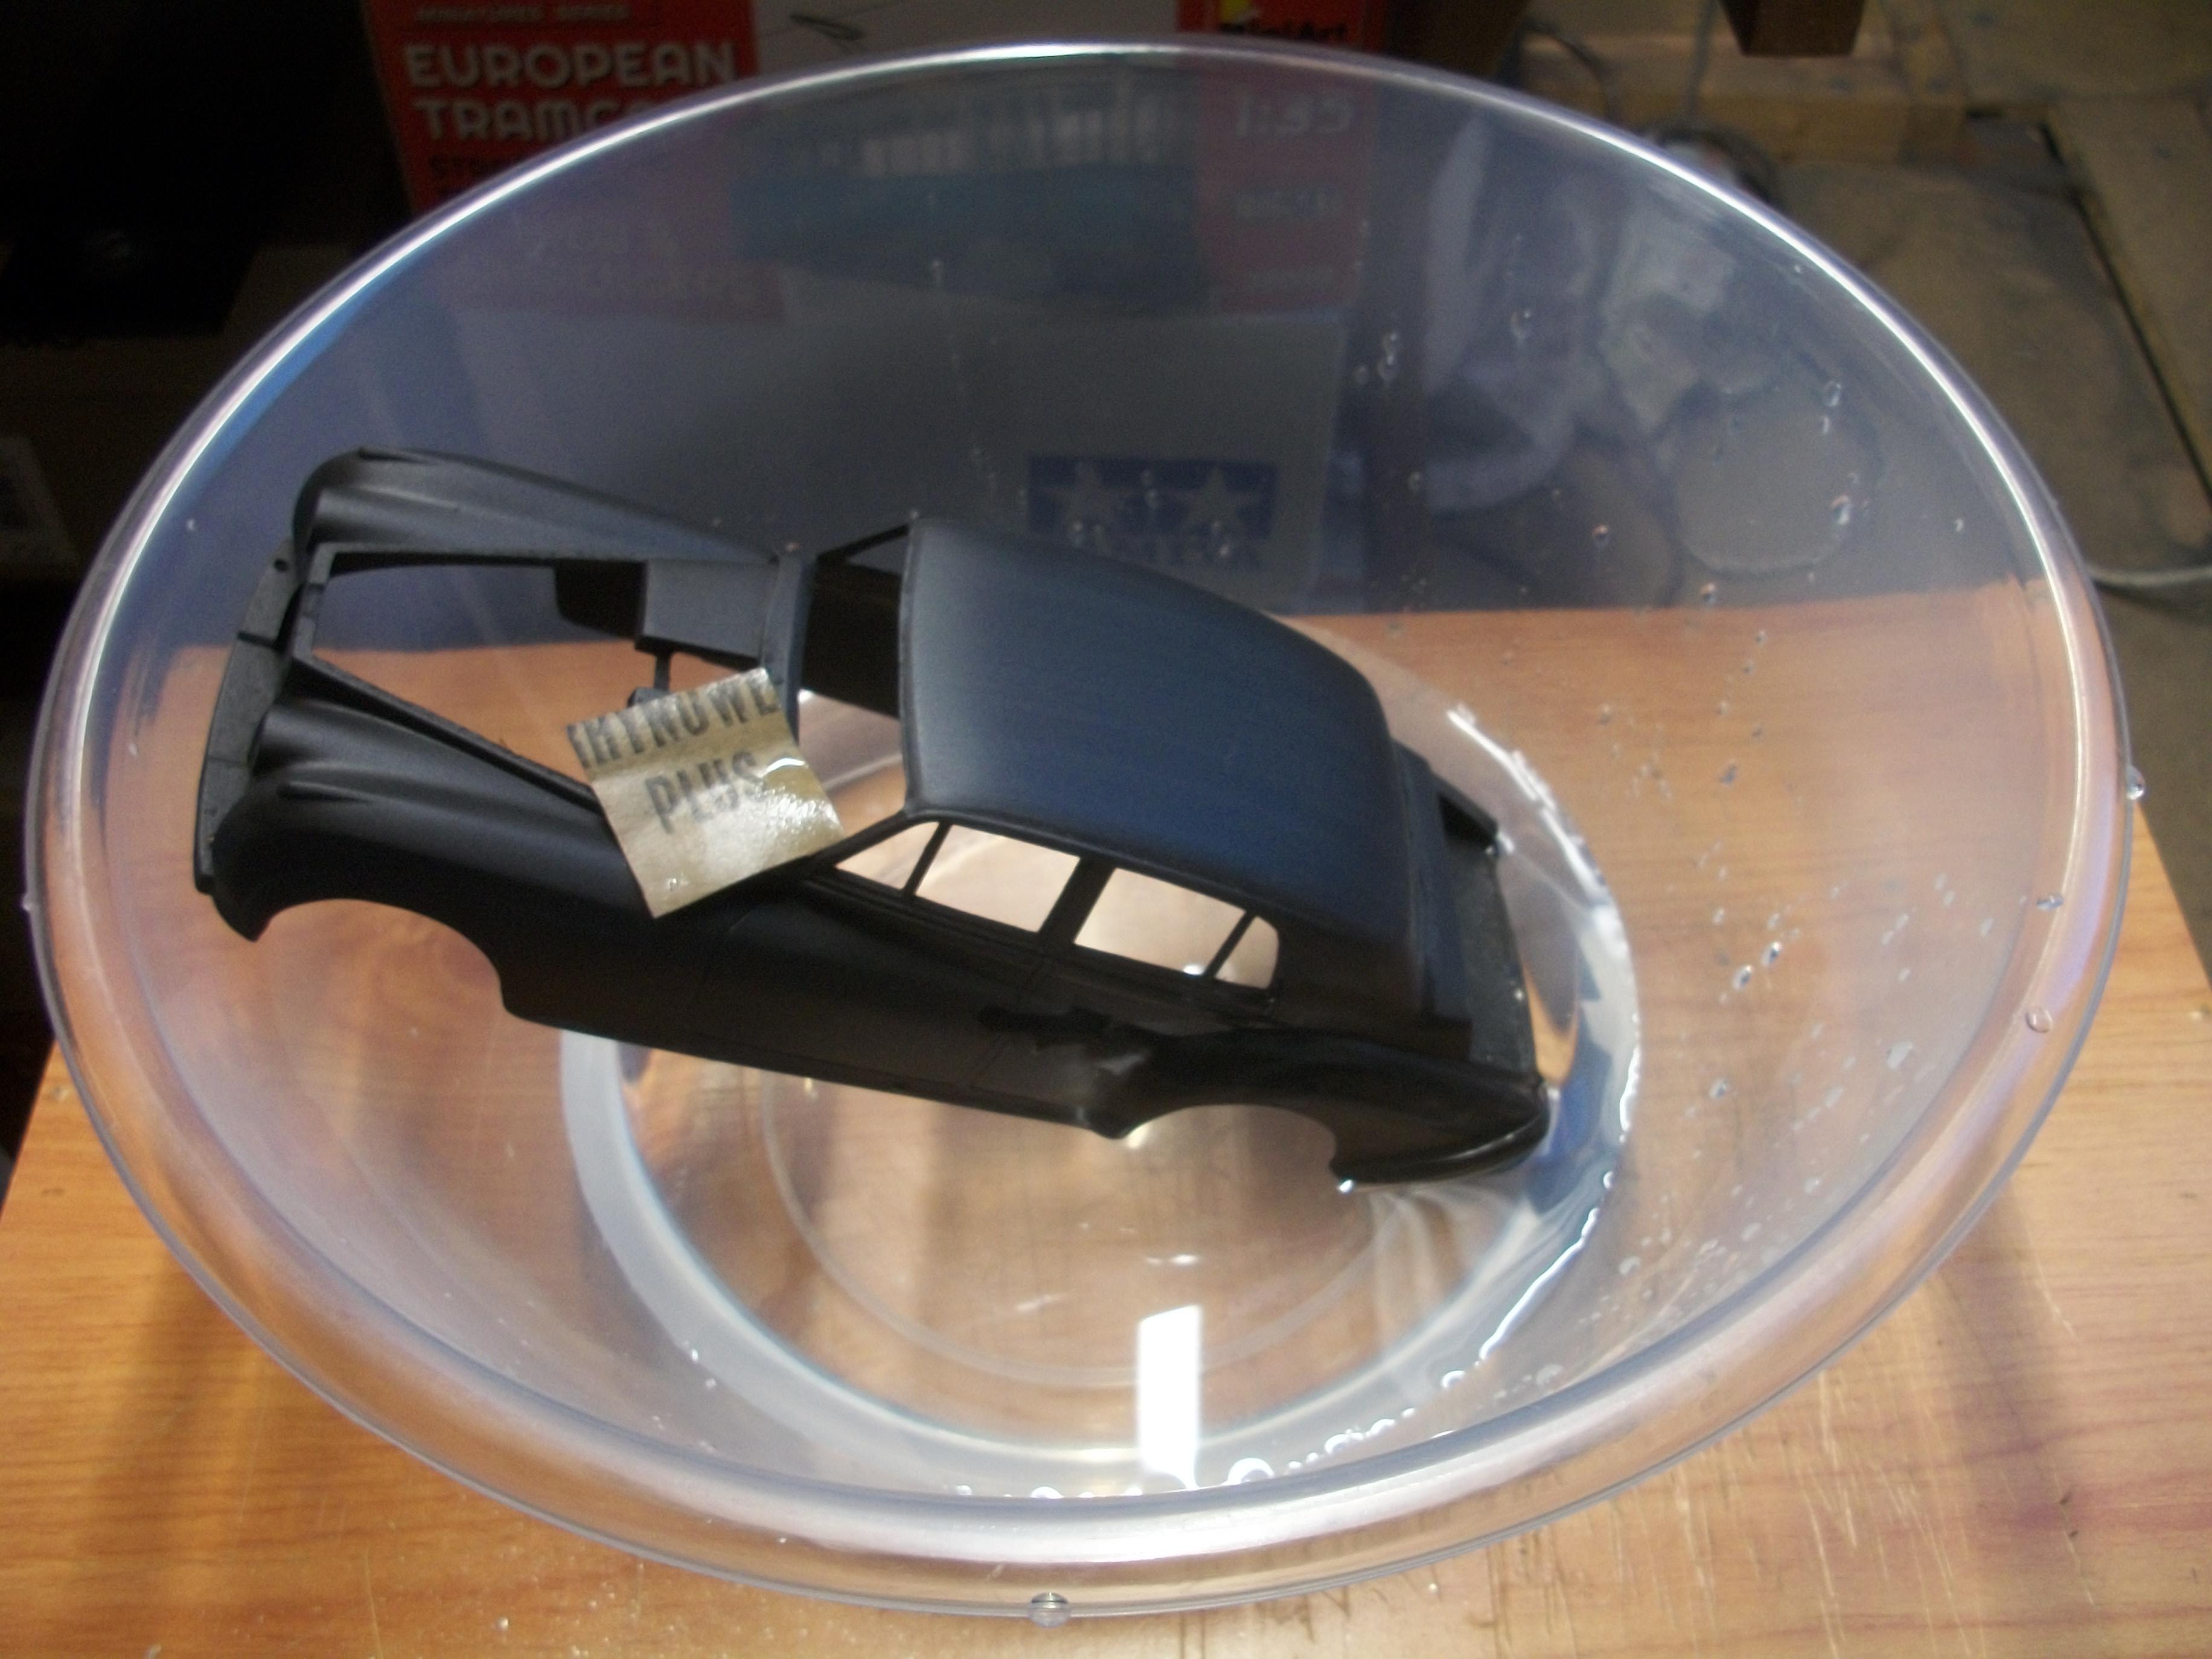
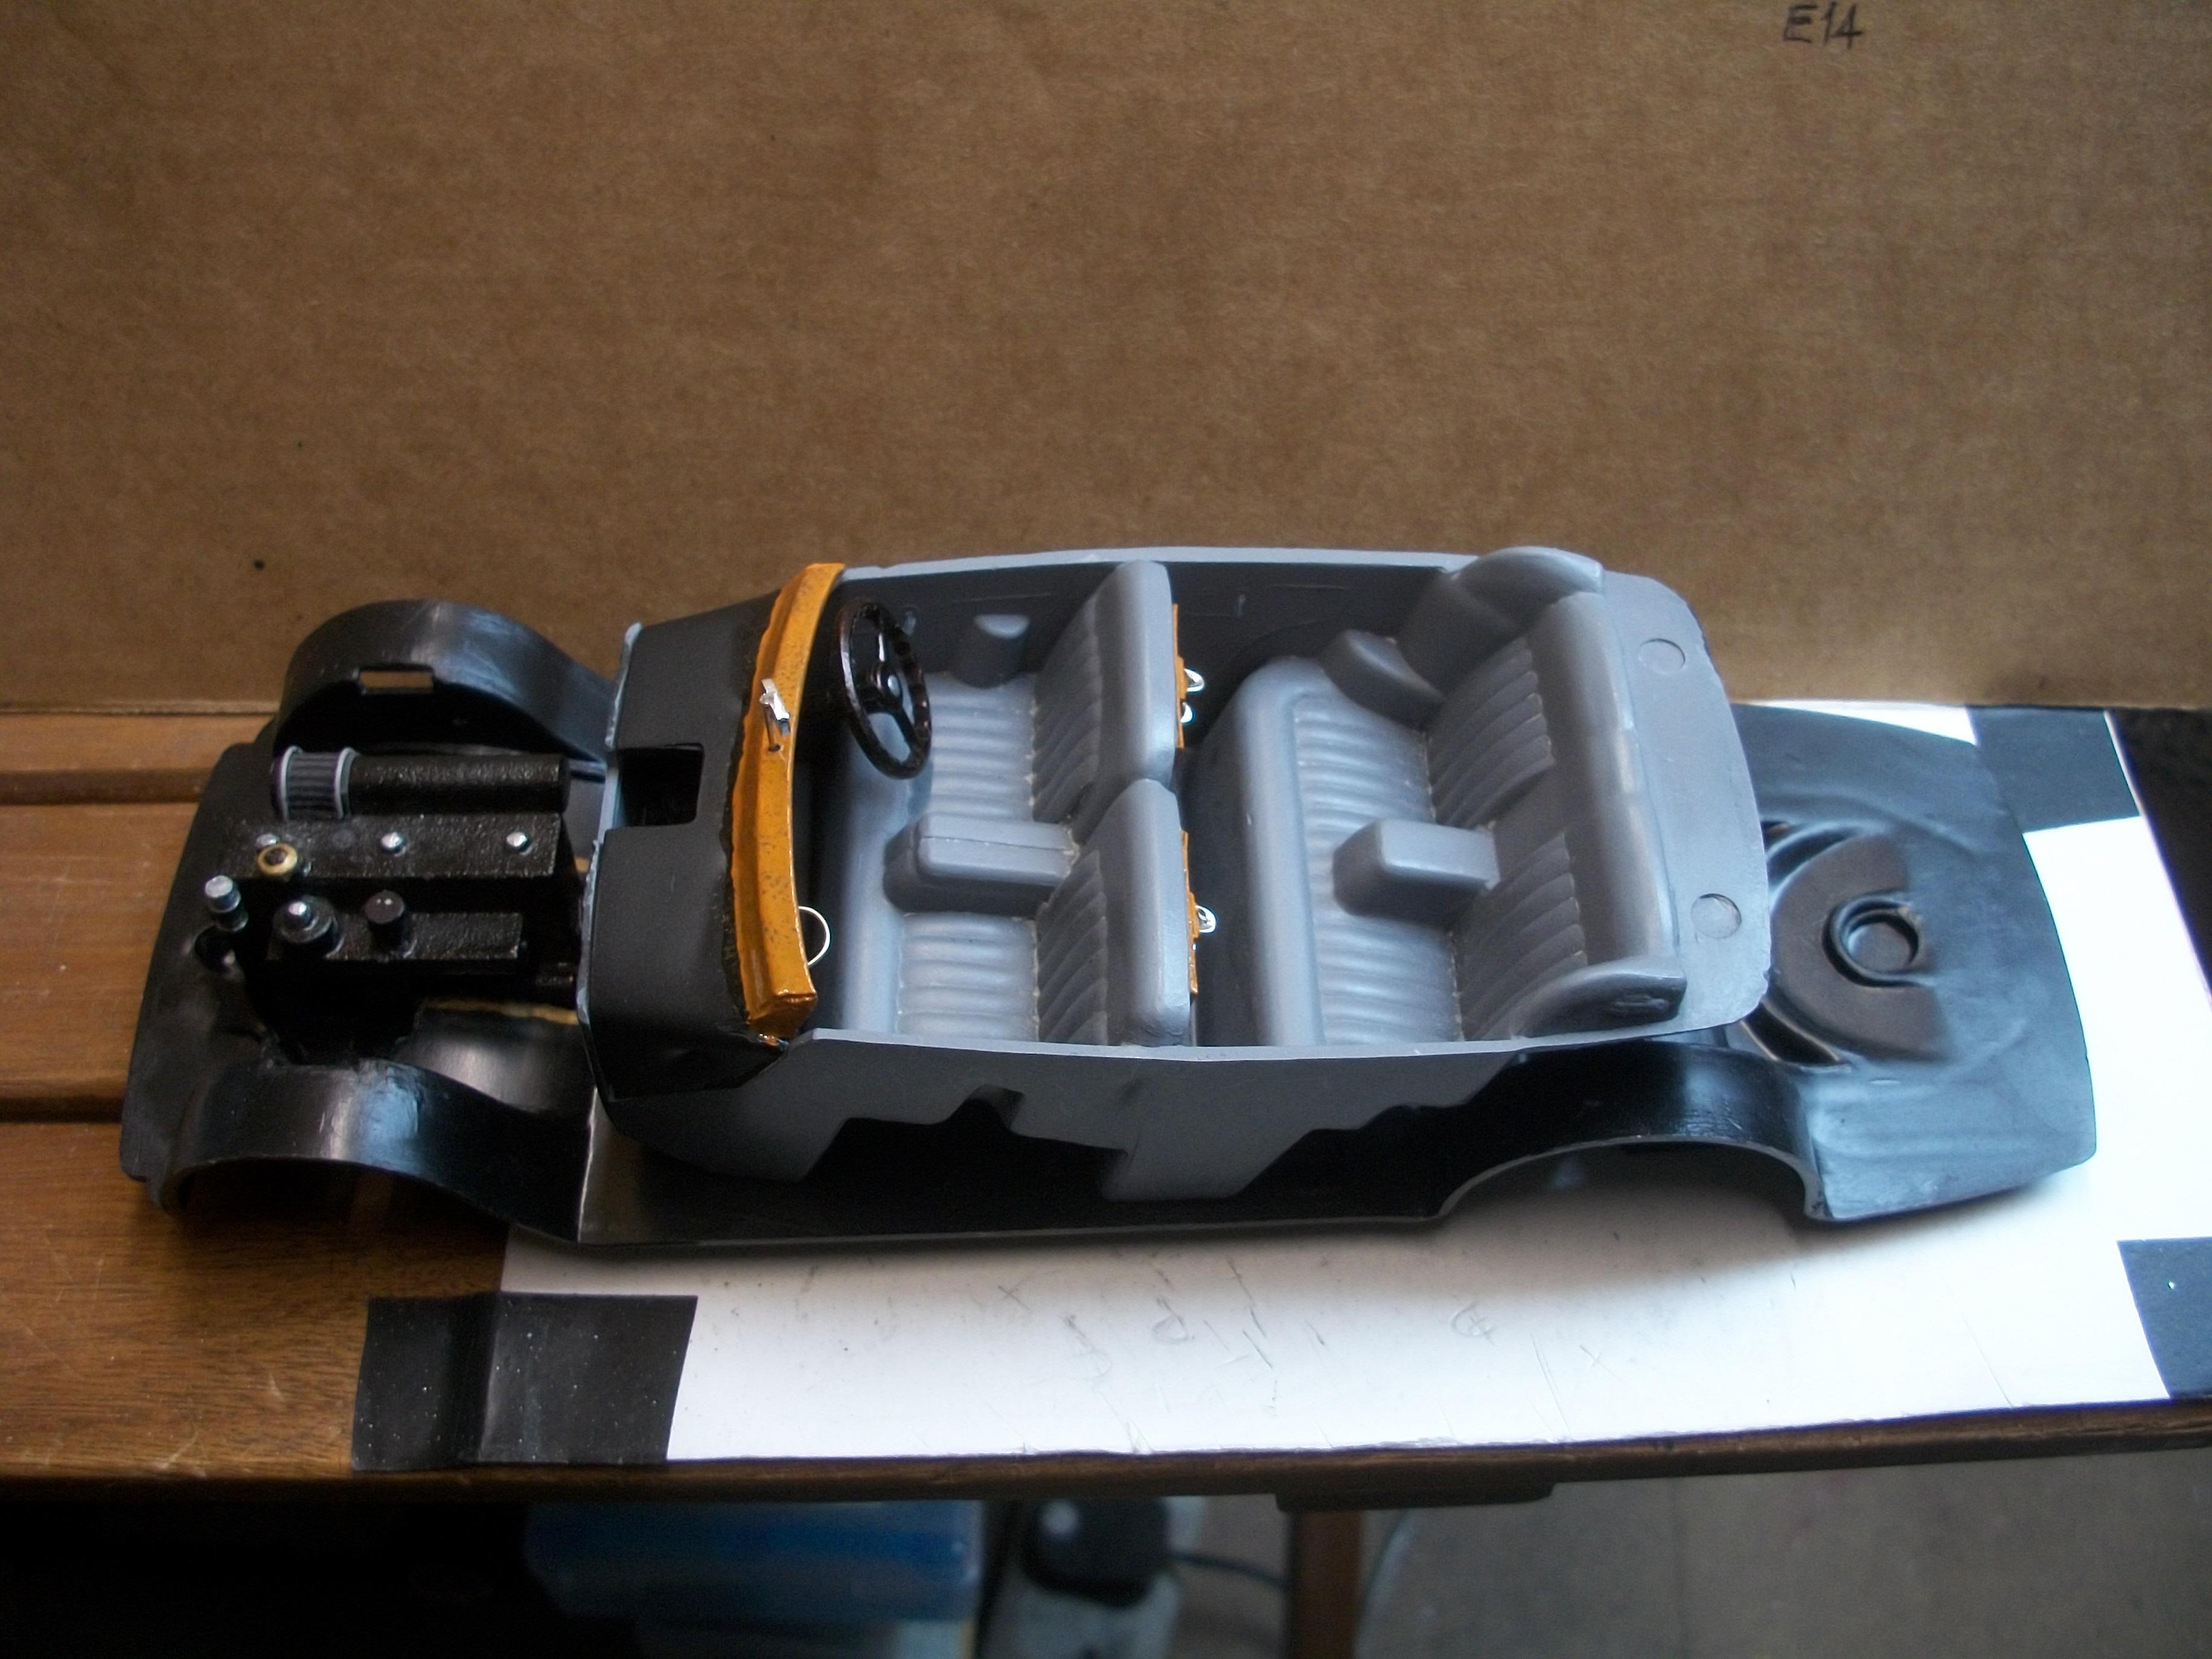
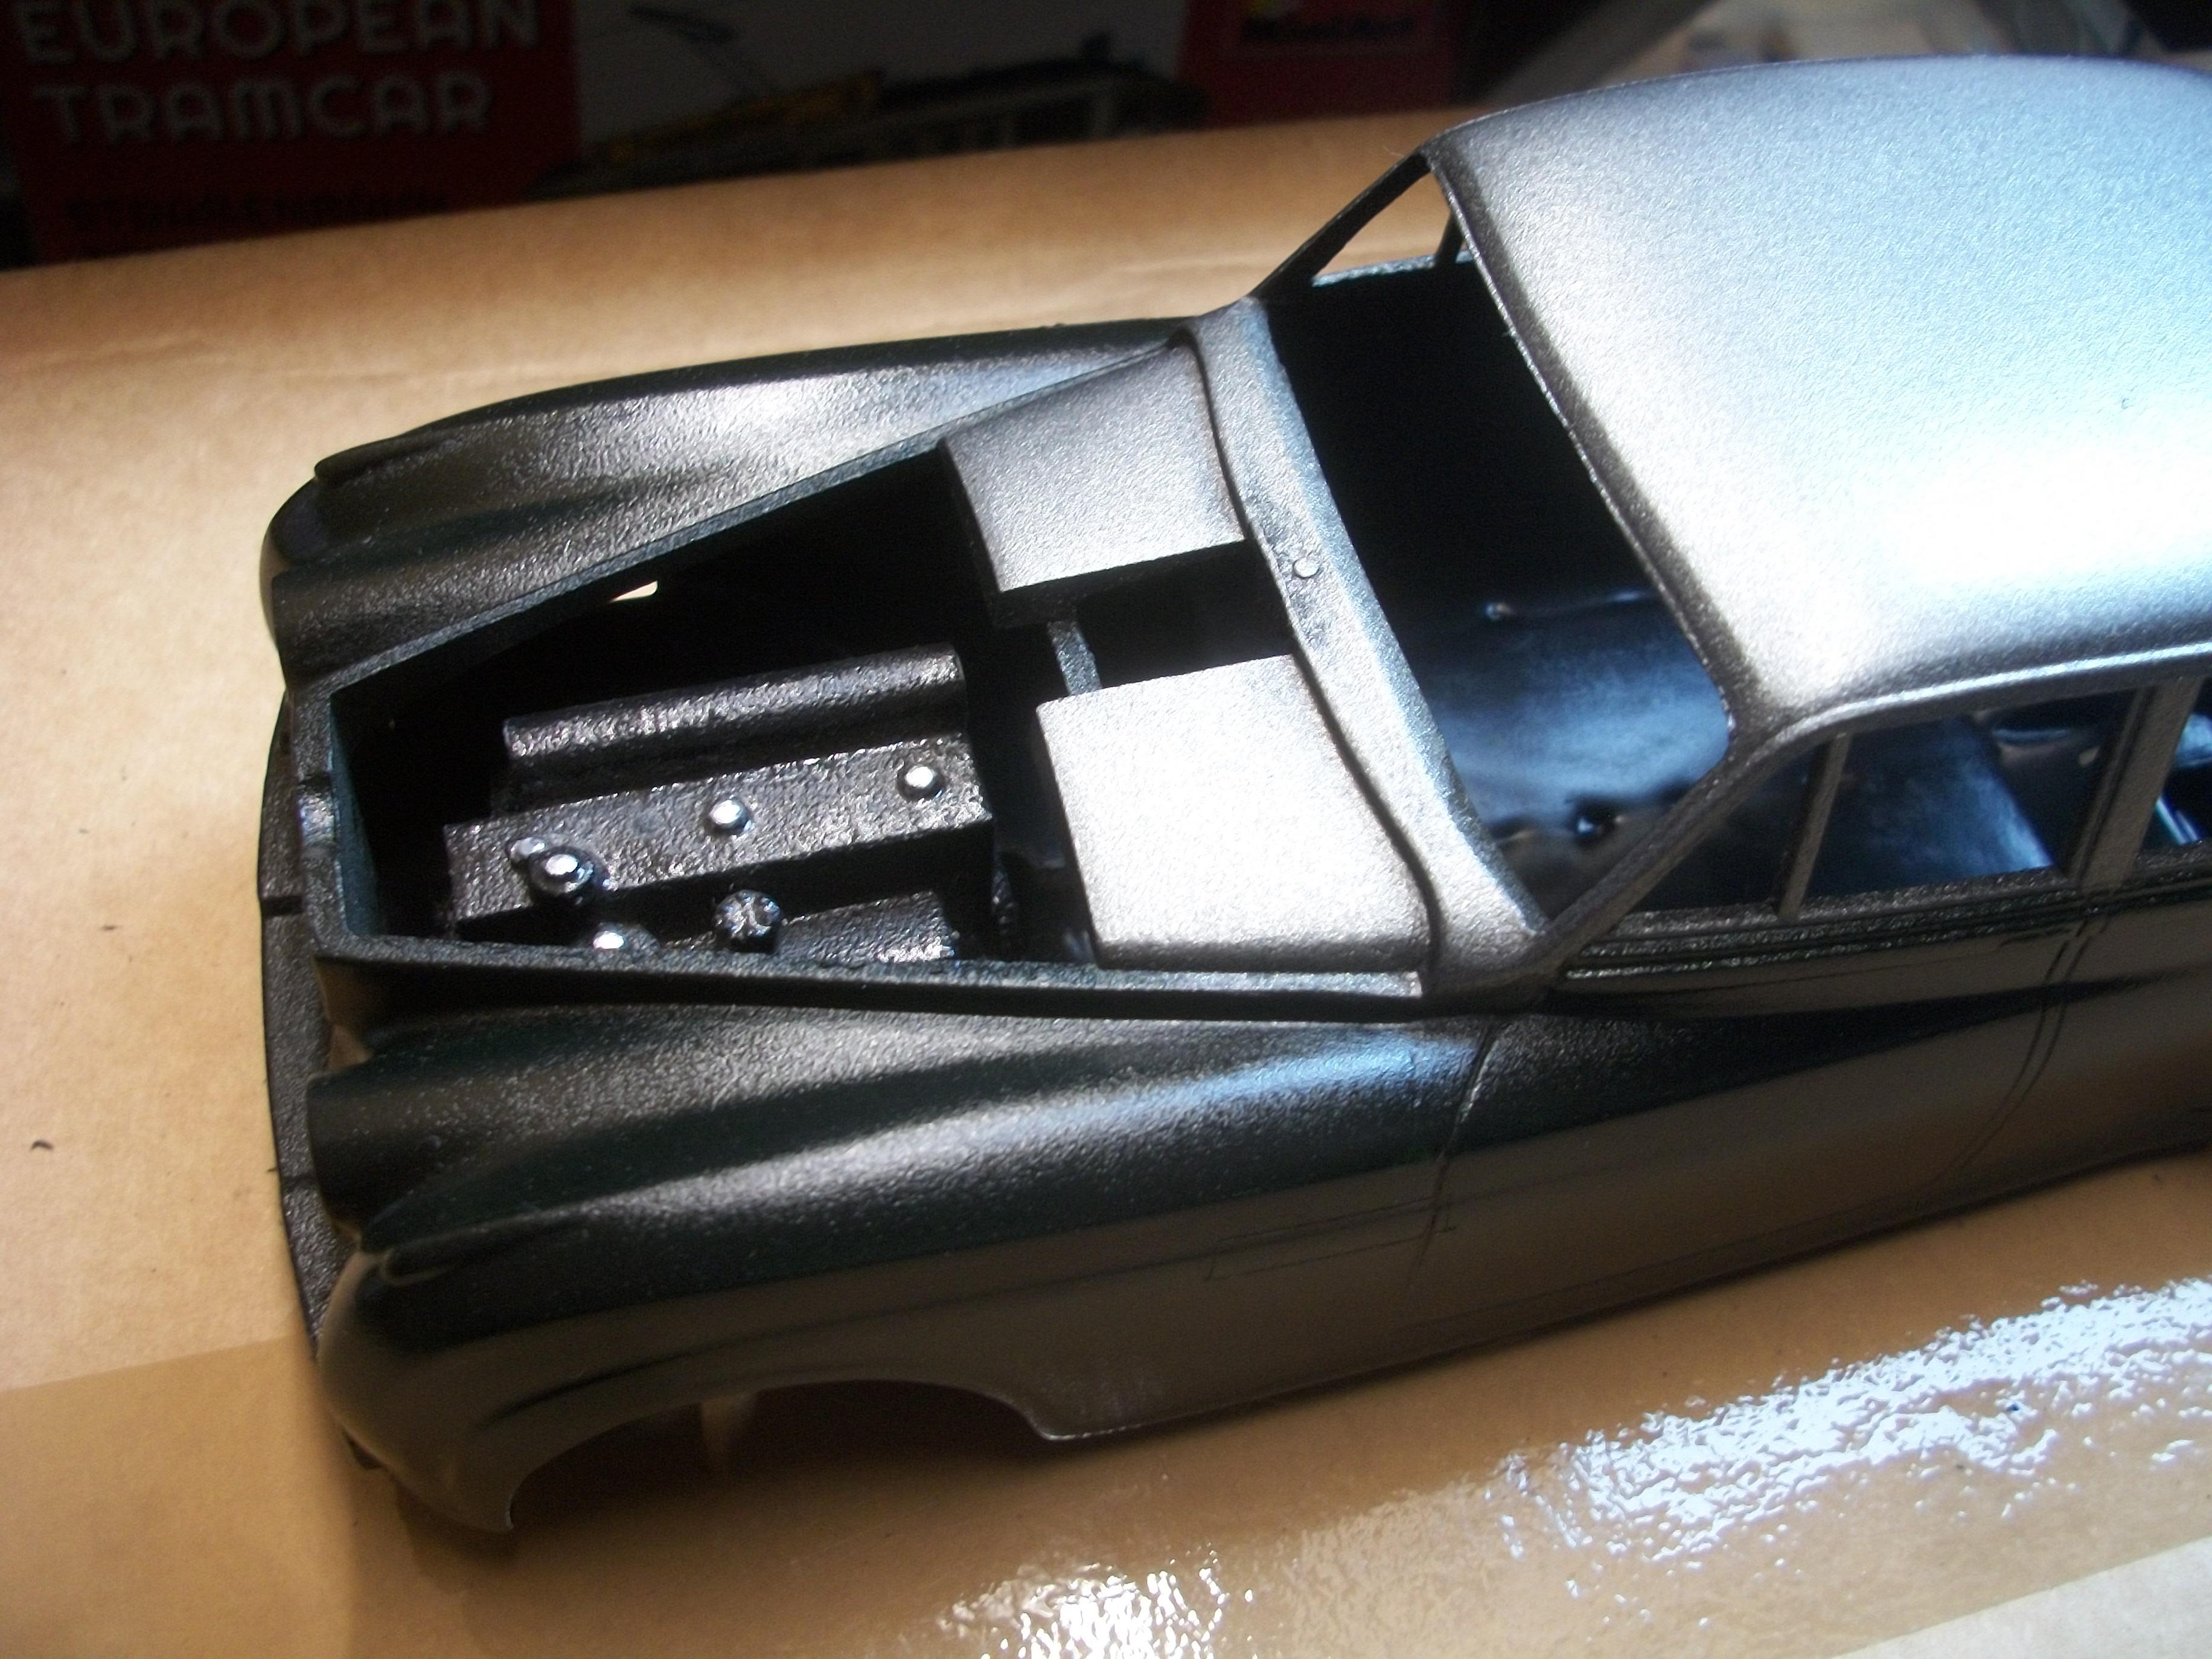
After dry sanding the body of the Rolls-Royce Silver Cloud with 600 grit, there was a single coat of Halfords white primer applied, followed by wet sanding with 1200 grit. . . I have decided to go with Plastikote black primer from this point onwards, but at this stage it was important to fit the windscreen, which will only be glued in place once all the sanding, masking and painting is completed. The windscreen part is not the one supplied in the Minicraft kit, or the Revell kit. I am using the windscreen from a 1:24 Franklin Mint 1955 Rolls-Royce Silver Cloud I diecast model car. This seems to be the most accurately proportioned windscreen at my disposal. Several lengthy sessions of filing by hand were necessary to enlarge the opening of the body to allow the Franklin Mint screen to fit properly. While Minicraft and Revell expect you to insert the windscreen from the inside of the body, I am of the opinion that the screen should be inserted from outside the body, just as it would be on the real full size car. Over the next few days there will be further wet sanding of the body parts, including the boot lid and bonnet (hood) panels, and continued application of the Plastikote black primer, with more wet sanding with 2000 grit. The grey styrene parts in the Revell kit that need to be chromed will have a coat of black primer, followed by a coat of yacht varnish brushed on, and then Molotow Liquid Chrome will be airbrushed over the varnish from a 30 ml refill. The liquid chrome pen tends to leave the odd streak here and there, so I shall try airbrushing this time around. David


.jpg.8fe7b475fbe757cd9540ebe72508f2a5.jpg)
