Anglia105E
-
Posts
3,487 -
Joined
-
Last visited
Content Type
Profiles
Forums
Events
Gallery
Everything posted by Anglia105E
-
Such a beautiful motor car, and you are building this one in 1:8 scale too ! Good luck, Bruce. David
-
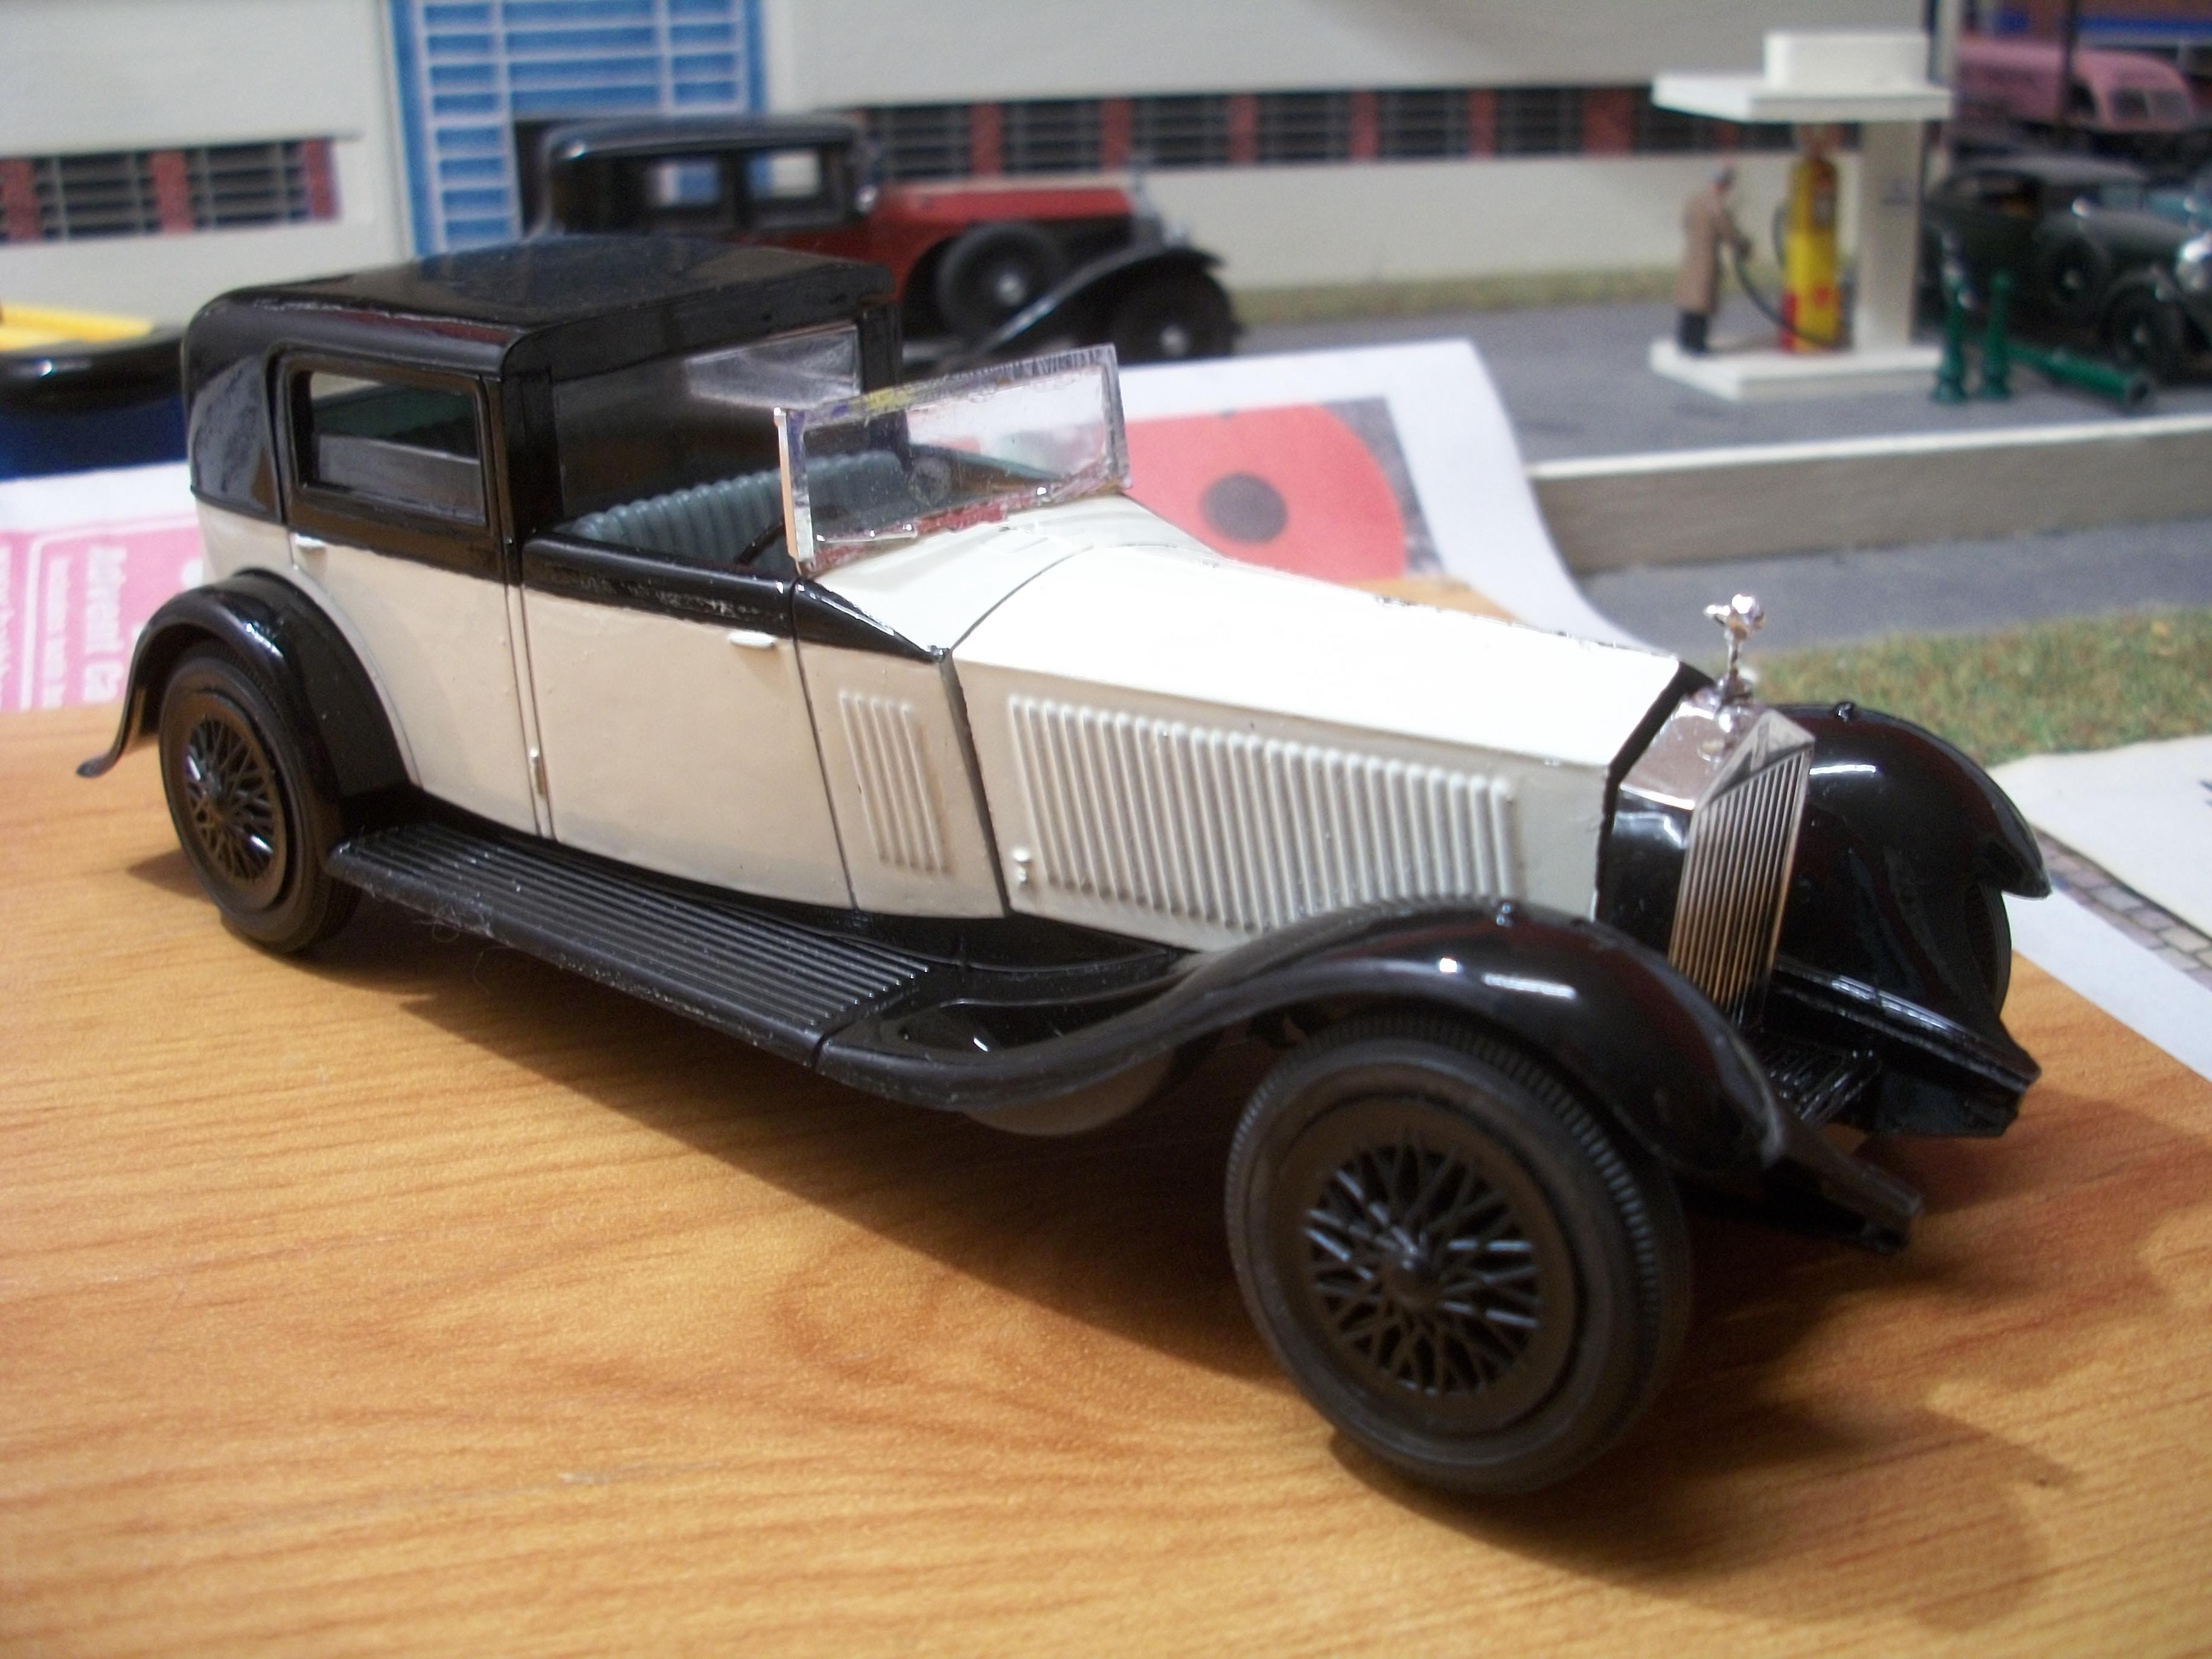
The 1:32 scale Pyro kit of the 1933 Rolls-Royce Phantom II ' Towne ' Car is nearing completion. Within the next day or so this model should be ready for the European Tram Car diorama. There are some finishing touches needed for the MiniArt tram car kit in 1:35 scale, and I am very much aware that these excellent MiniArt kits are designed and manufactured in Ukraine. The Pyro Rolls-Royce does have a partition window between the passenger compartment and the driver's compartment, which is a nice touch, and you don't get this partition window in the 1:24 scale Italeri Phantom II that I built. David

-
 Thank you Pat, and I didn't know that. David
 -
I might be wrong about the ' two ' stacks actually . . . . . There would have been only one stack if the engine wasn't a V8 or V12 ? David
-
I noticed the ' Diamond T trucks ' badge on the back wall in your two photos, and I remember the garage where I got my first job when I finished school at the age of 17 . . . . They had a Diamond T recovery vehicle and it was an absolute monster ! When the engine was started up for this truck to go out on a breakdown, the two vertical stacks were pumping out smoke and the sound was quite something. The engine was removed from that truck for an overhaul one time, and I had a close look at the internals of the engine. My job was partsman, so I had to source parts for the Diamond T engine. Happy days ! David
-
That is one extremely detailed diorama Conrad, and I can see that your wife has clearly put in many hours of painstaking work. Excellent ! There is so much to see in that wonderful model that I shall have to study it more closely ! David
-
You have some nice campervan builds there Carl . . . Also, you have packed a lot into a relatively small area of baseboard, which is a skill in itself ! Well done. David
-
Brilliant Pat ! The small group of standing figures looks very realistic in this shot. What a lucky find that TV camera was. David
-
Good idea to let her reduce the size of your kit stash ! David
-
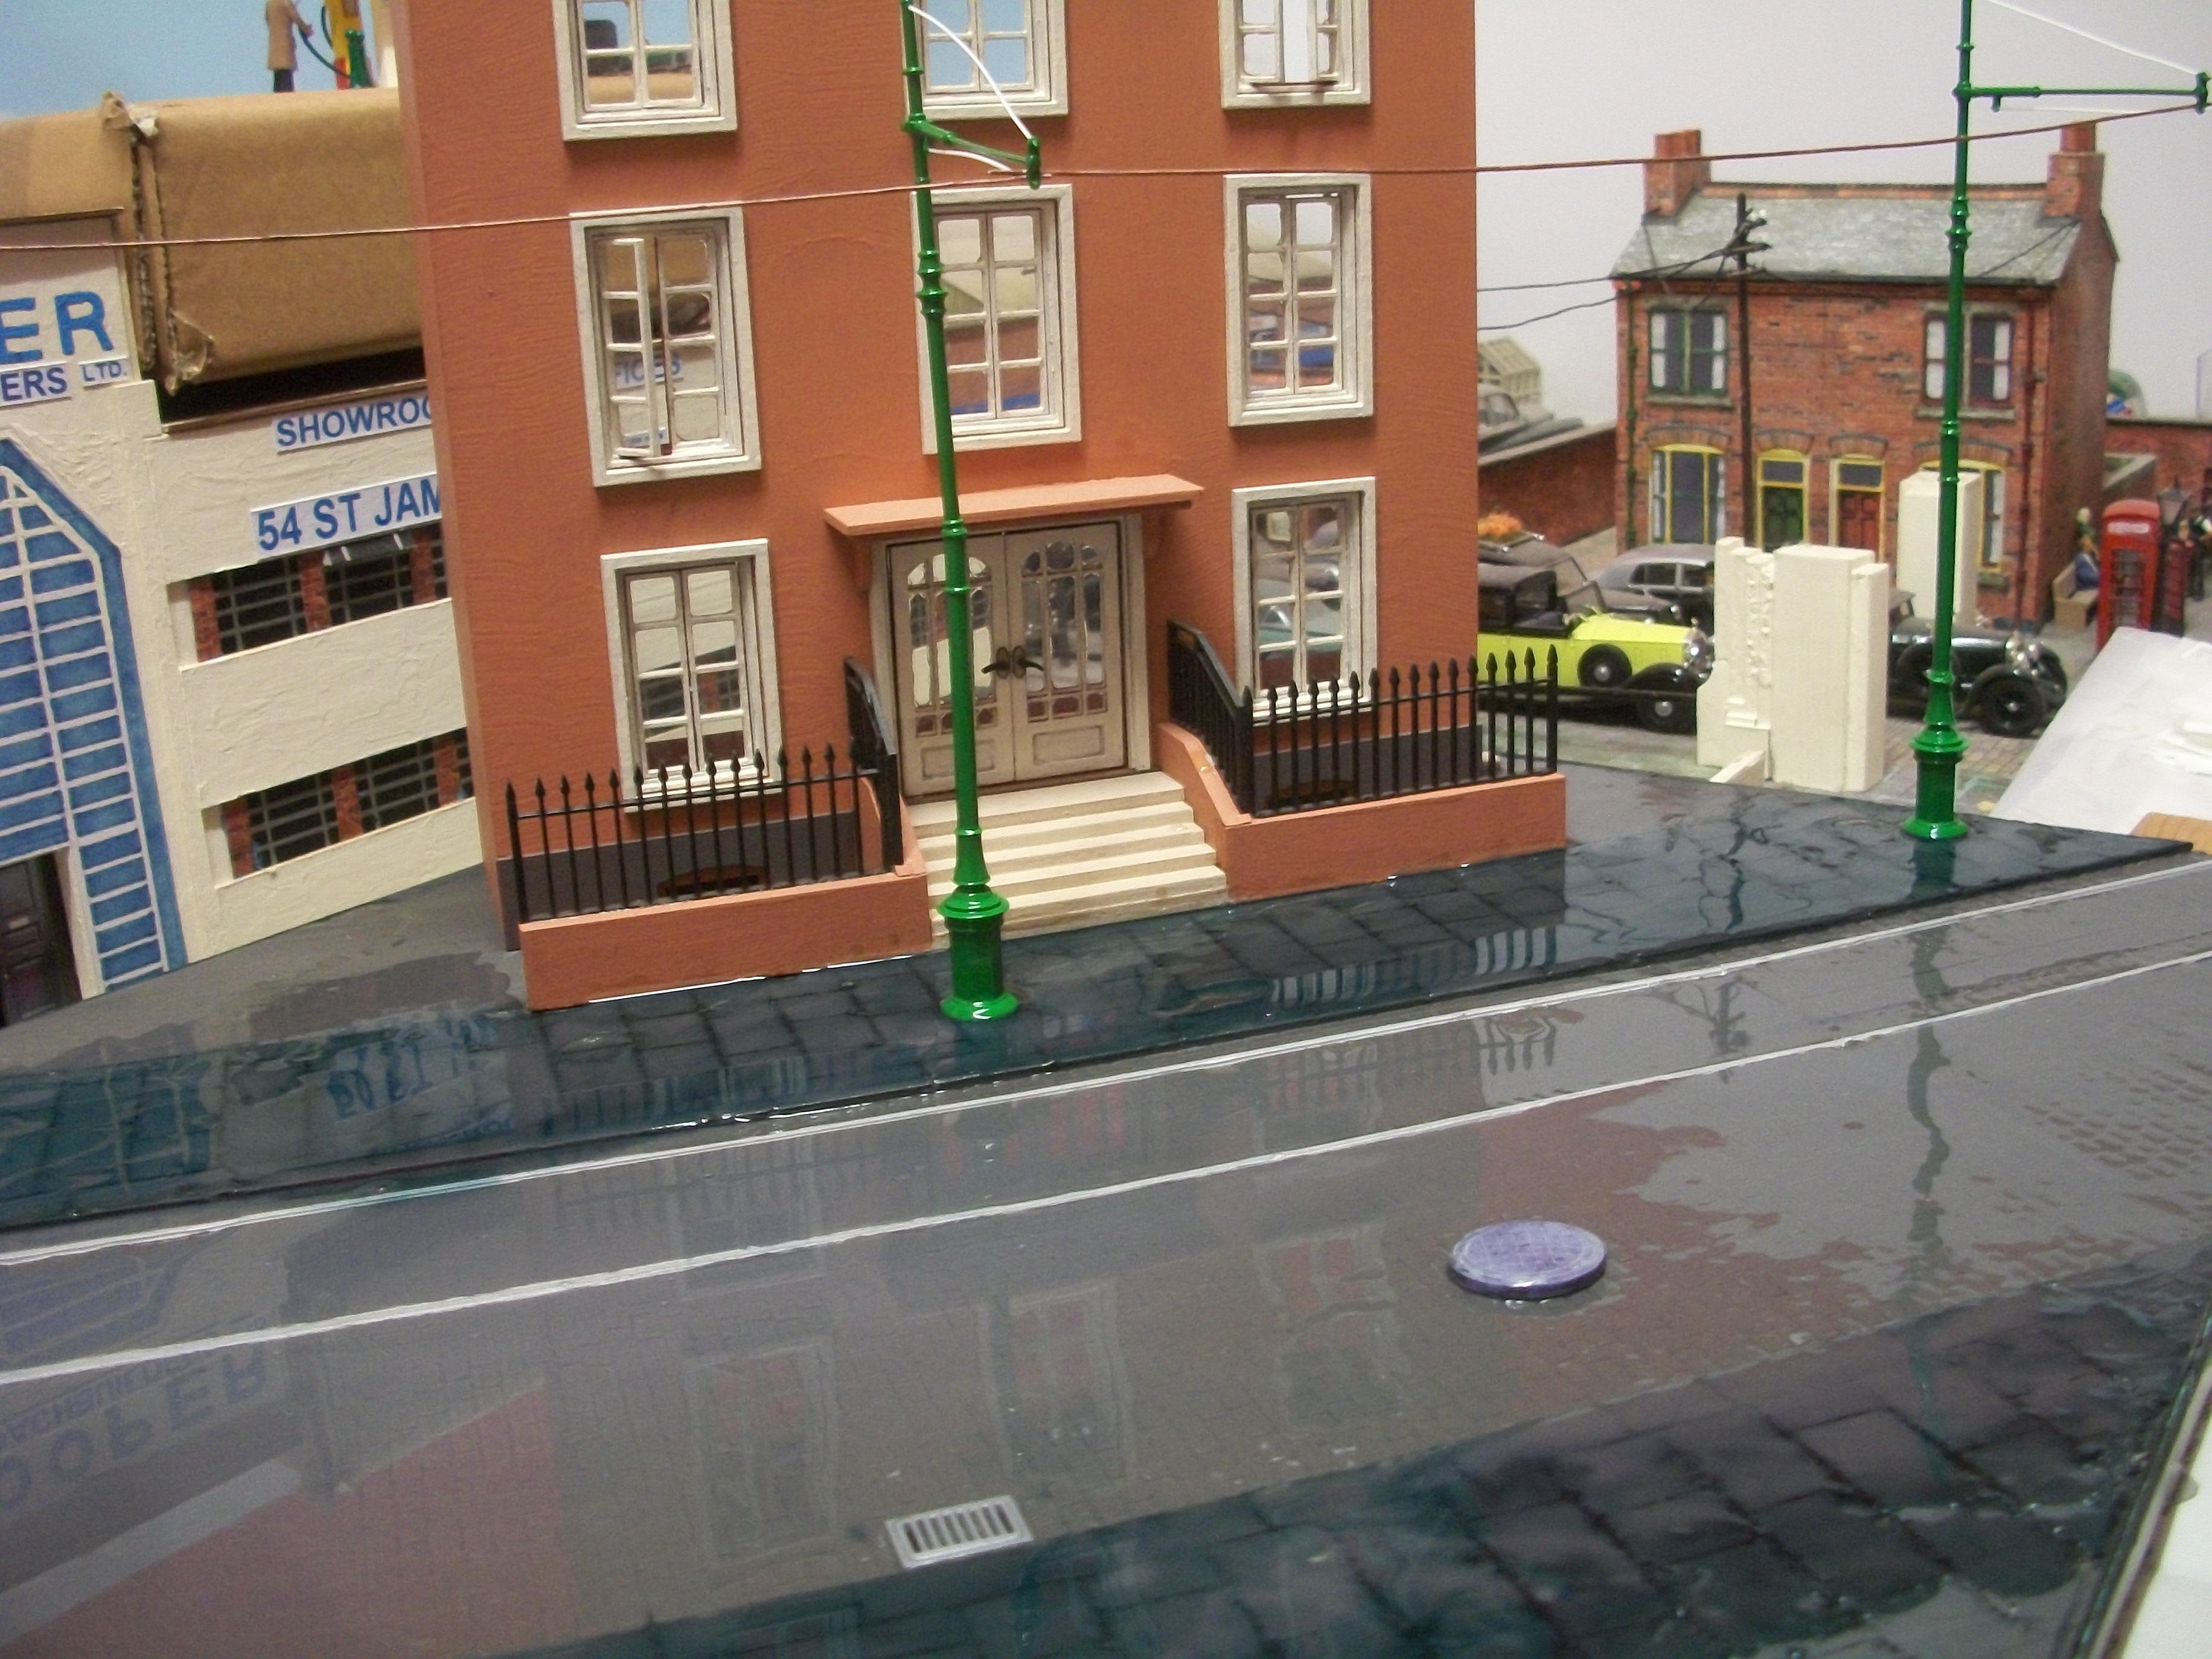
Thanks Pierre . . . . . The random patchy effect of the still water adds a great deal of realism to this diorama, and here is a sample photo for you : David
-
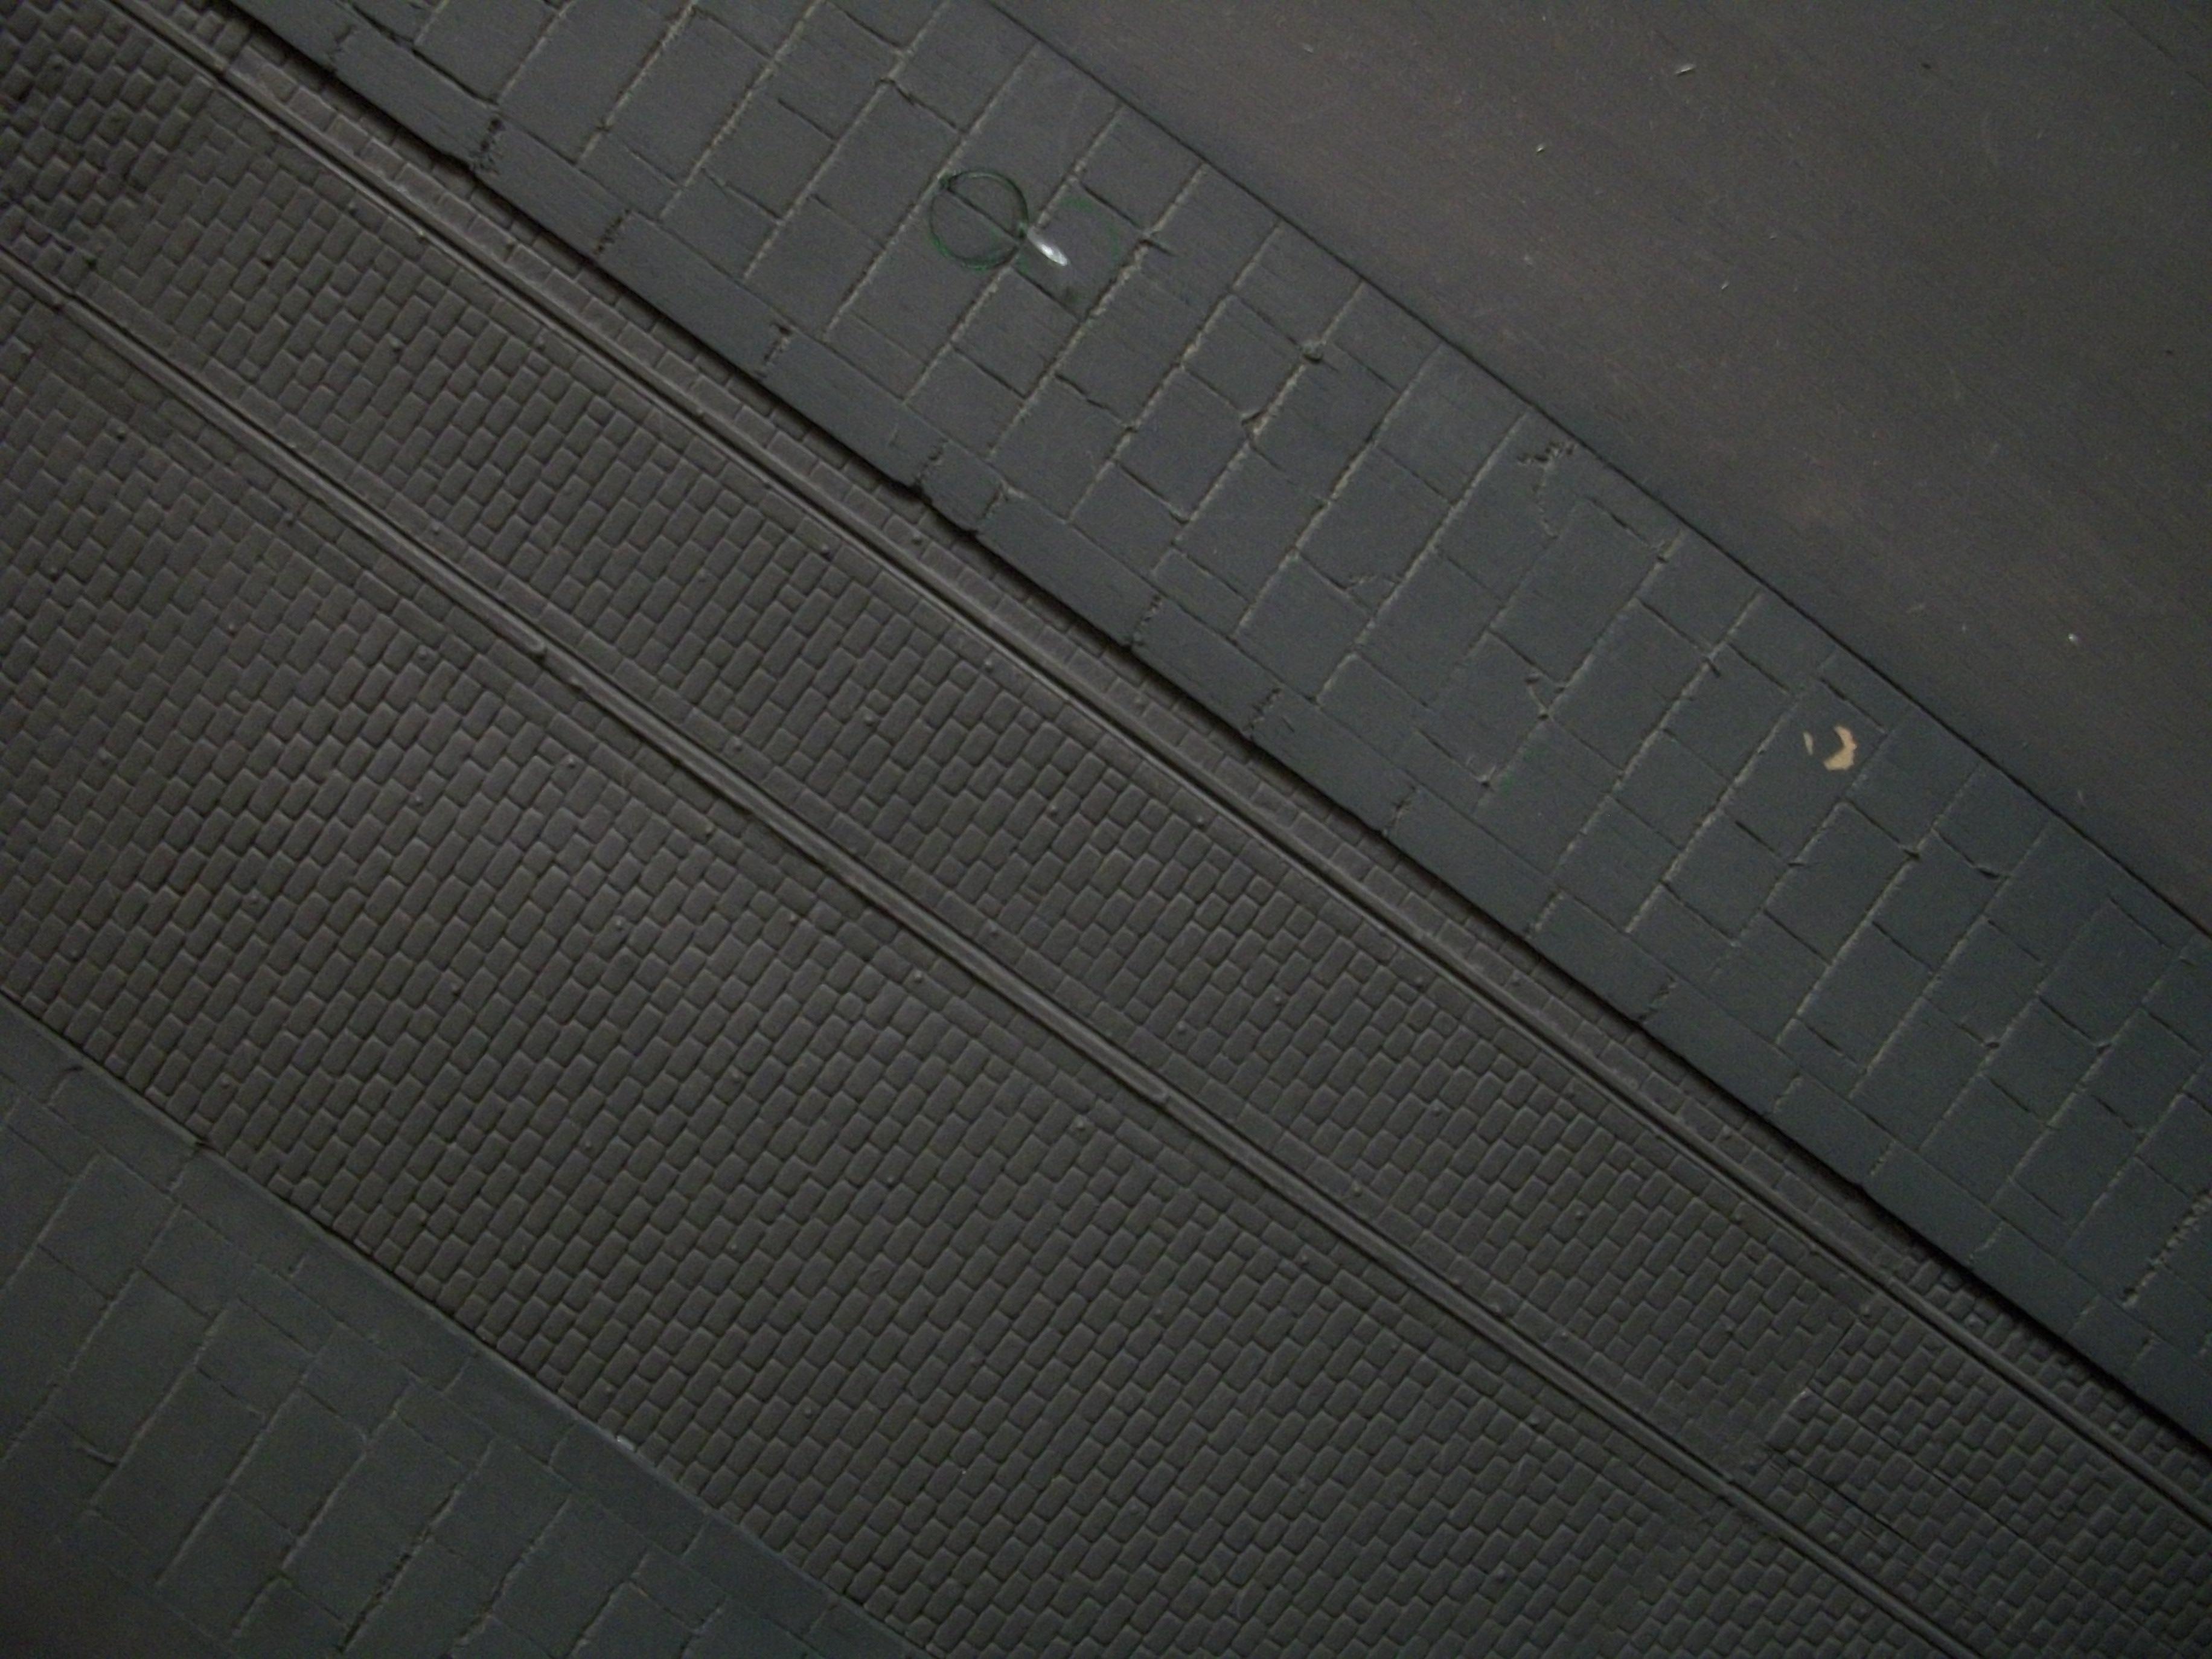
Thanks Pat . . . . . When I looked at the diorama base this morning after 13 hours overnight, some areas of the cobblestones were showing through. As you say, the realism is good . . . . ' Wetness ' David
-
The Vallejo Water Textures Still Water has been applied tonight, and the product was quite nice to use. I need to allow 24 hours drying time, so all night Thursday and all day on Friday until 10:00 PM., for the self-leveling to work. Here are 7 photos taken at 10:00 PM Thursday. Once this diorama has become a ' wet ' scene, there is no going back to a ' dry ' scene ! David
-
That has all come together very nicely, and you must be well pleased the result. I second the comment by Mark, and this should photograph well. David
-
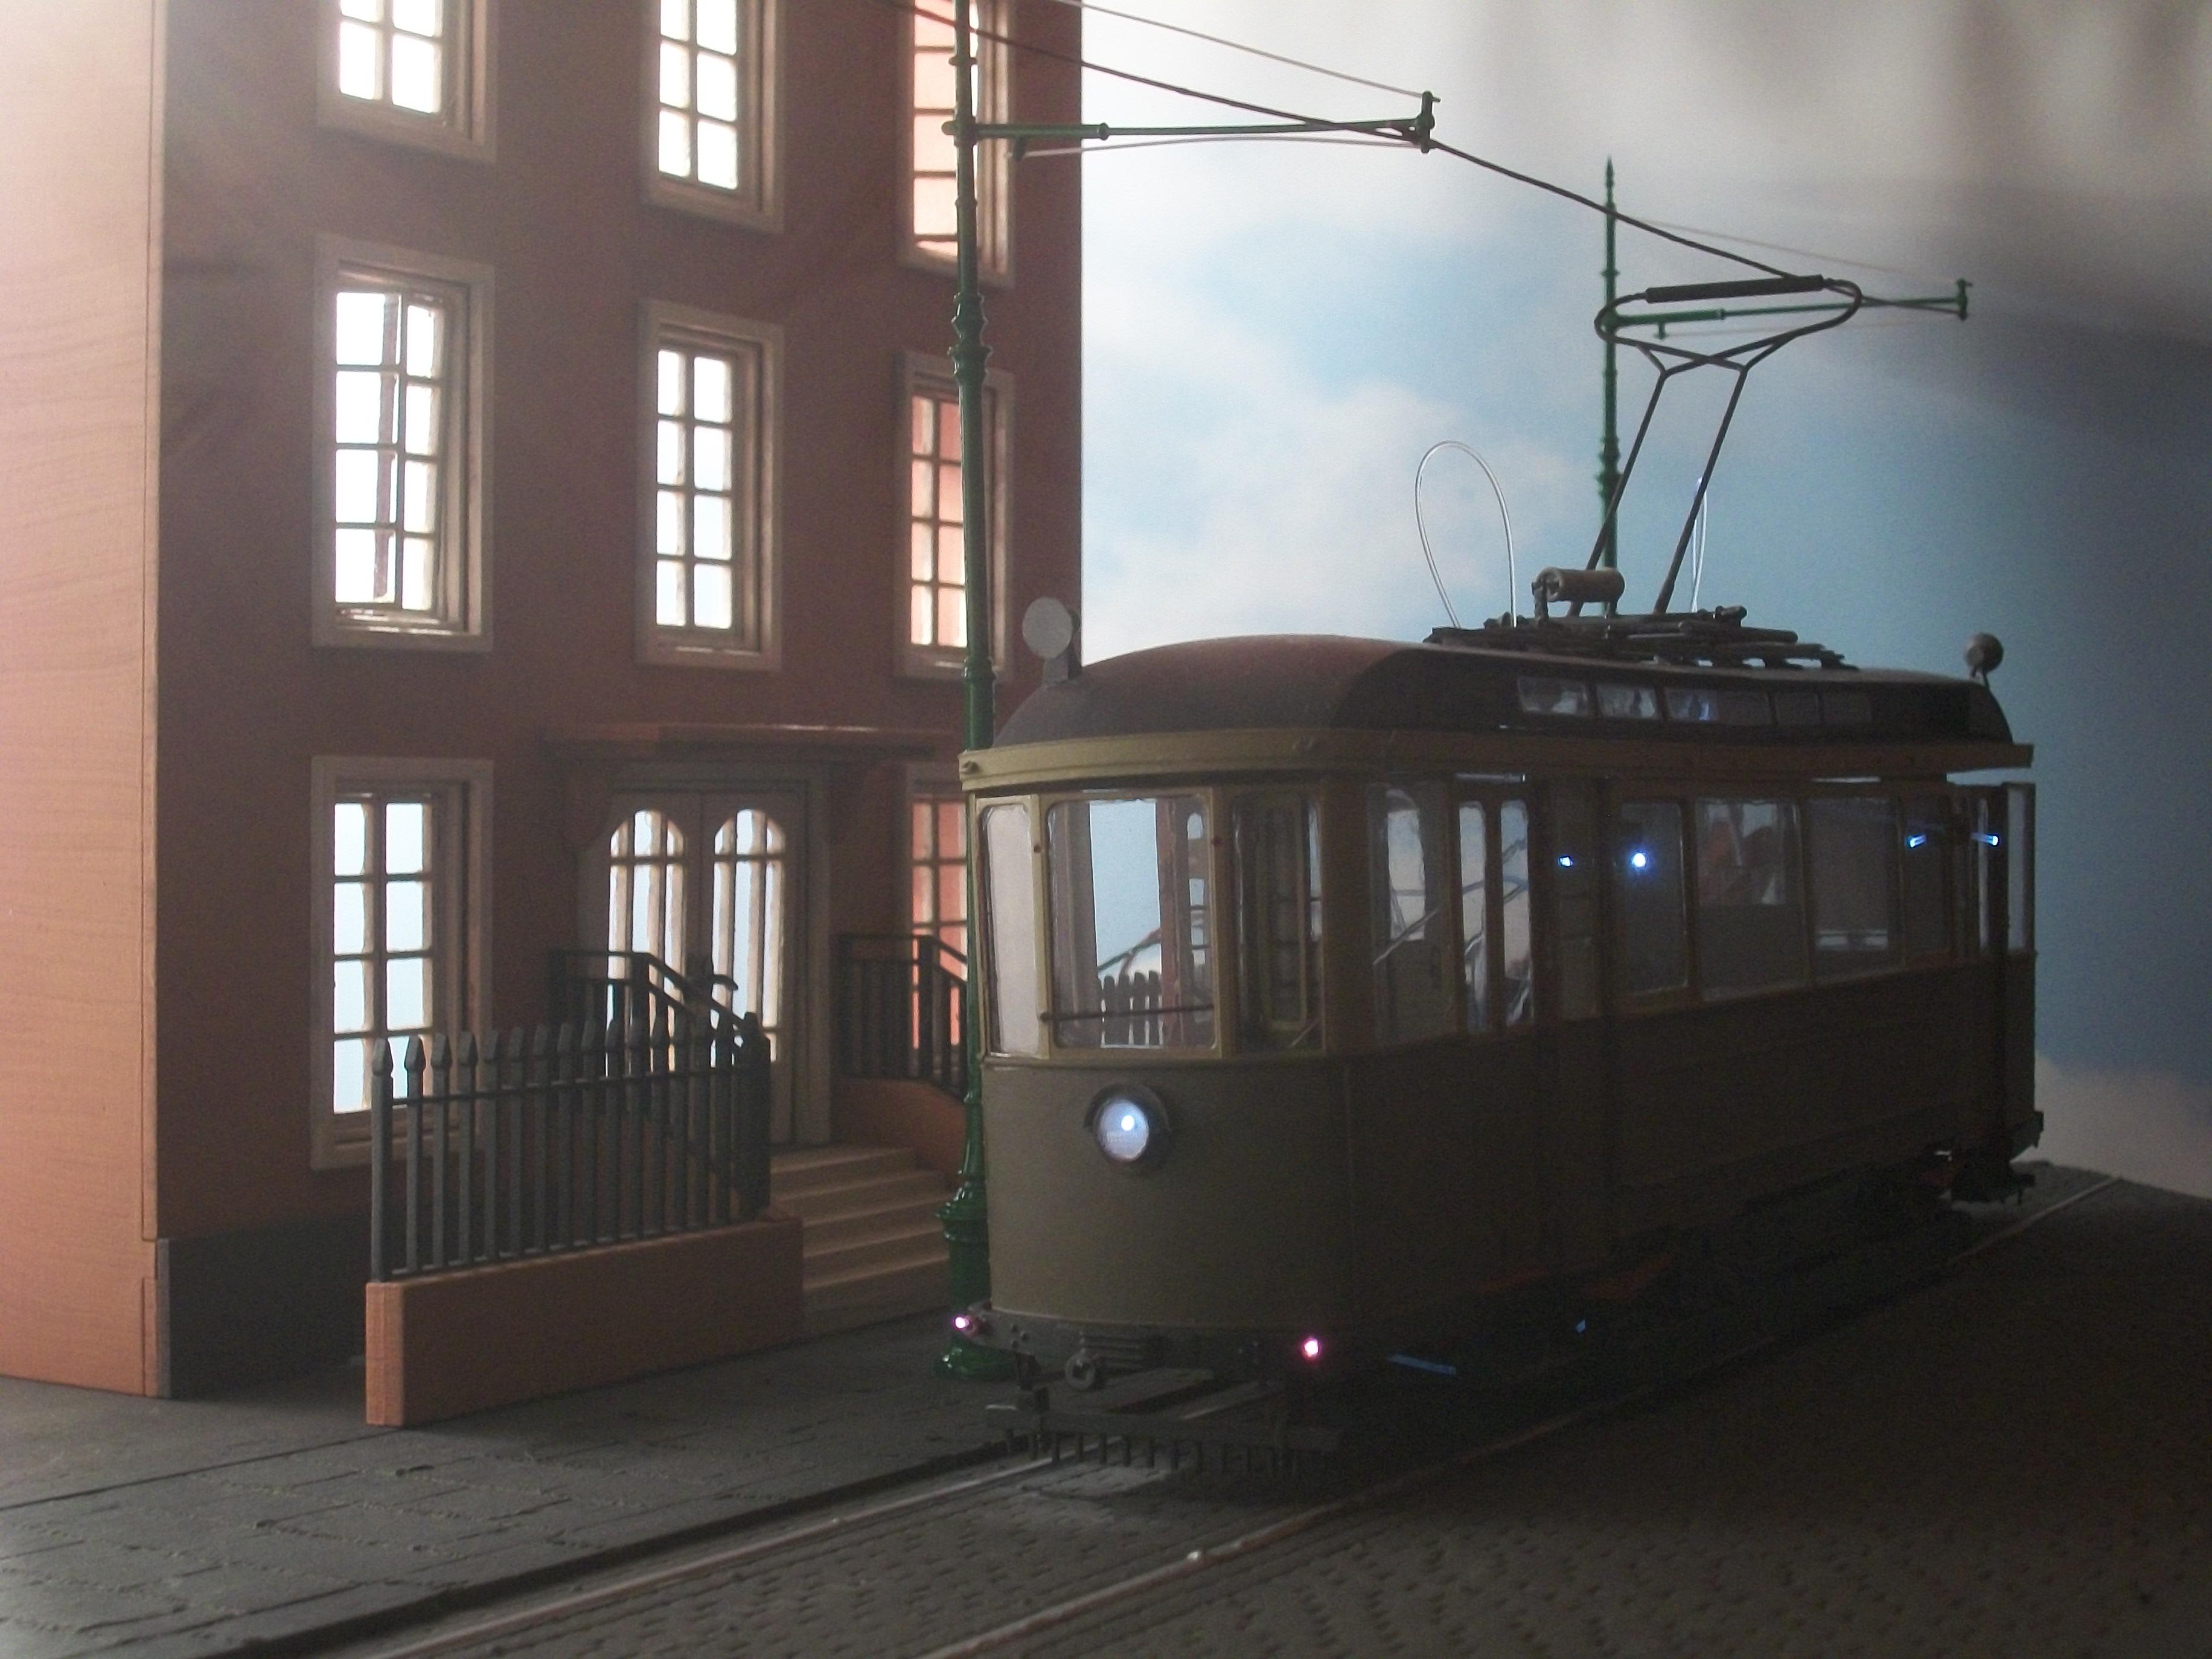
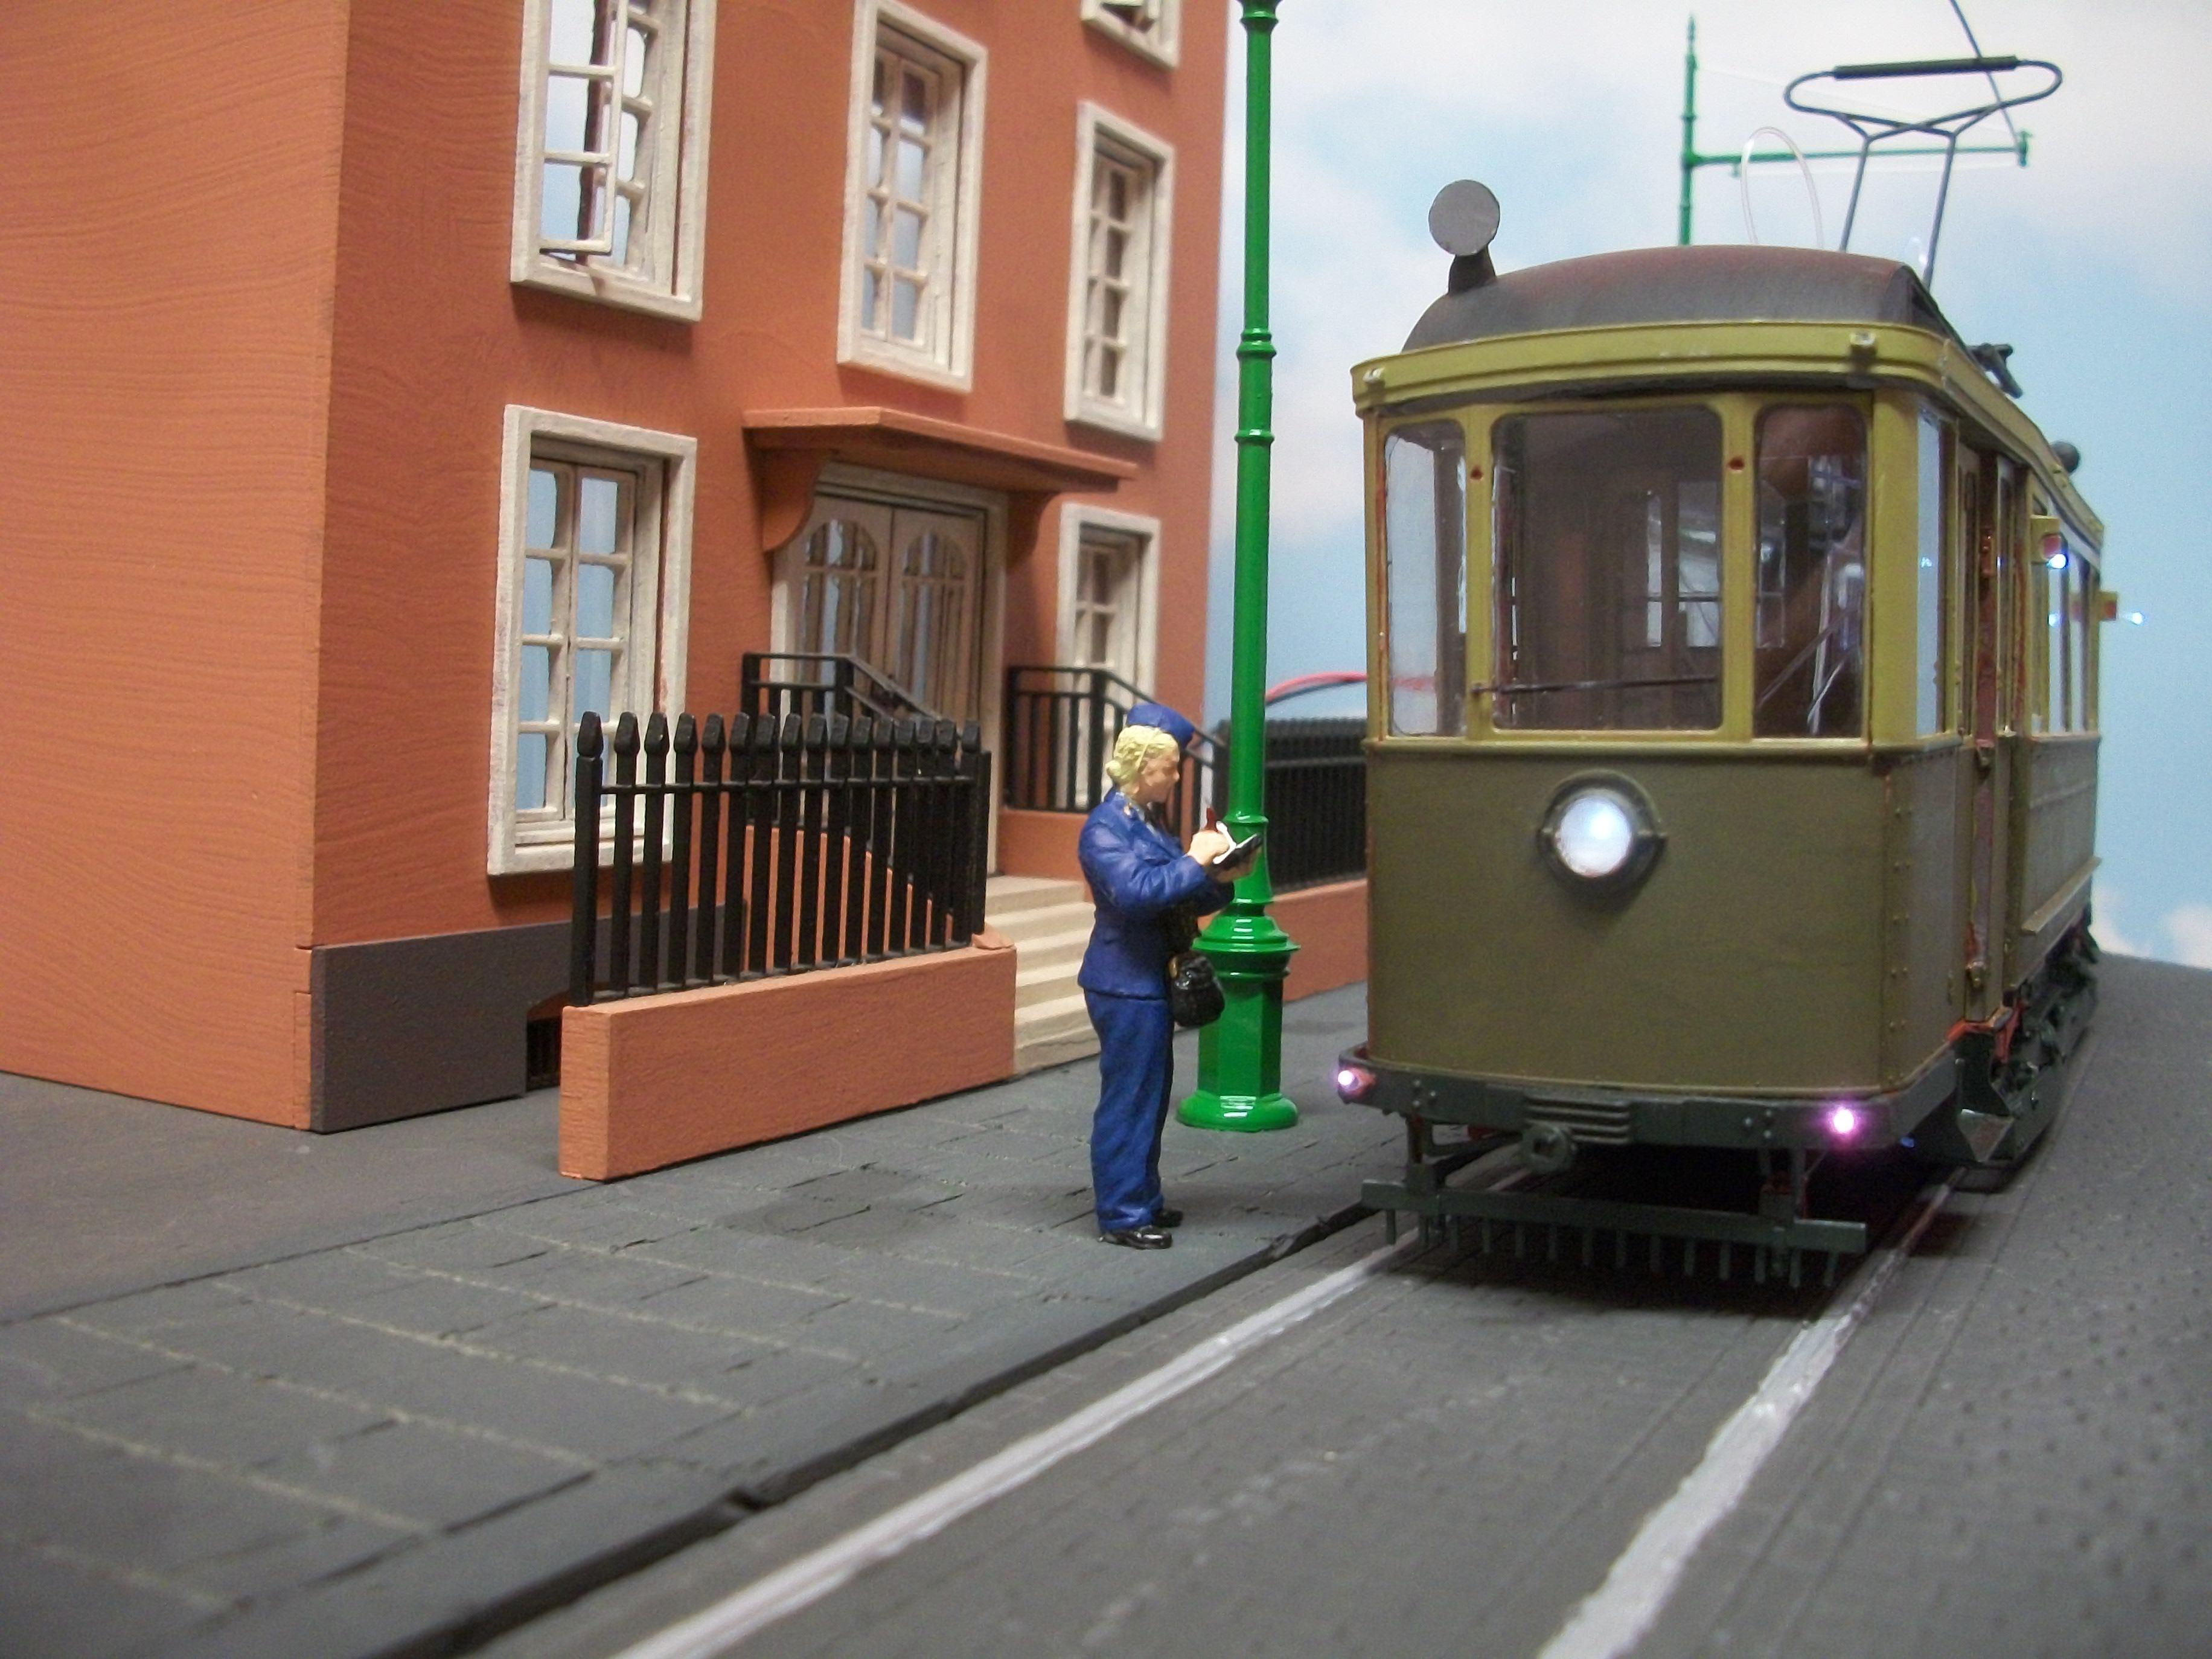
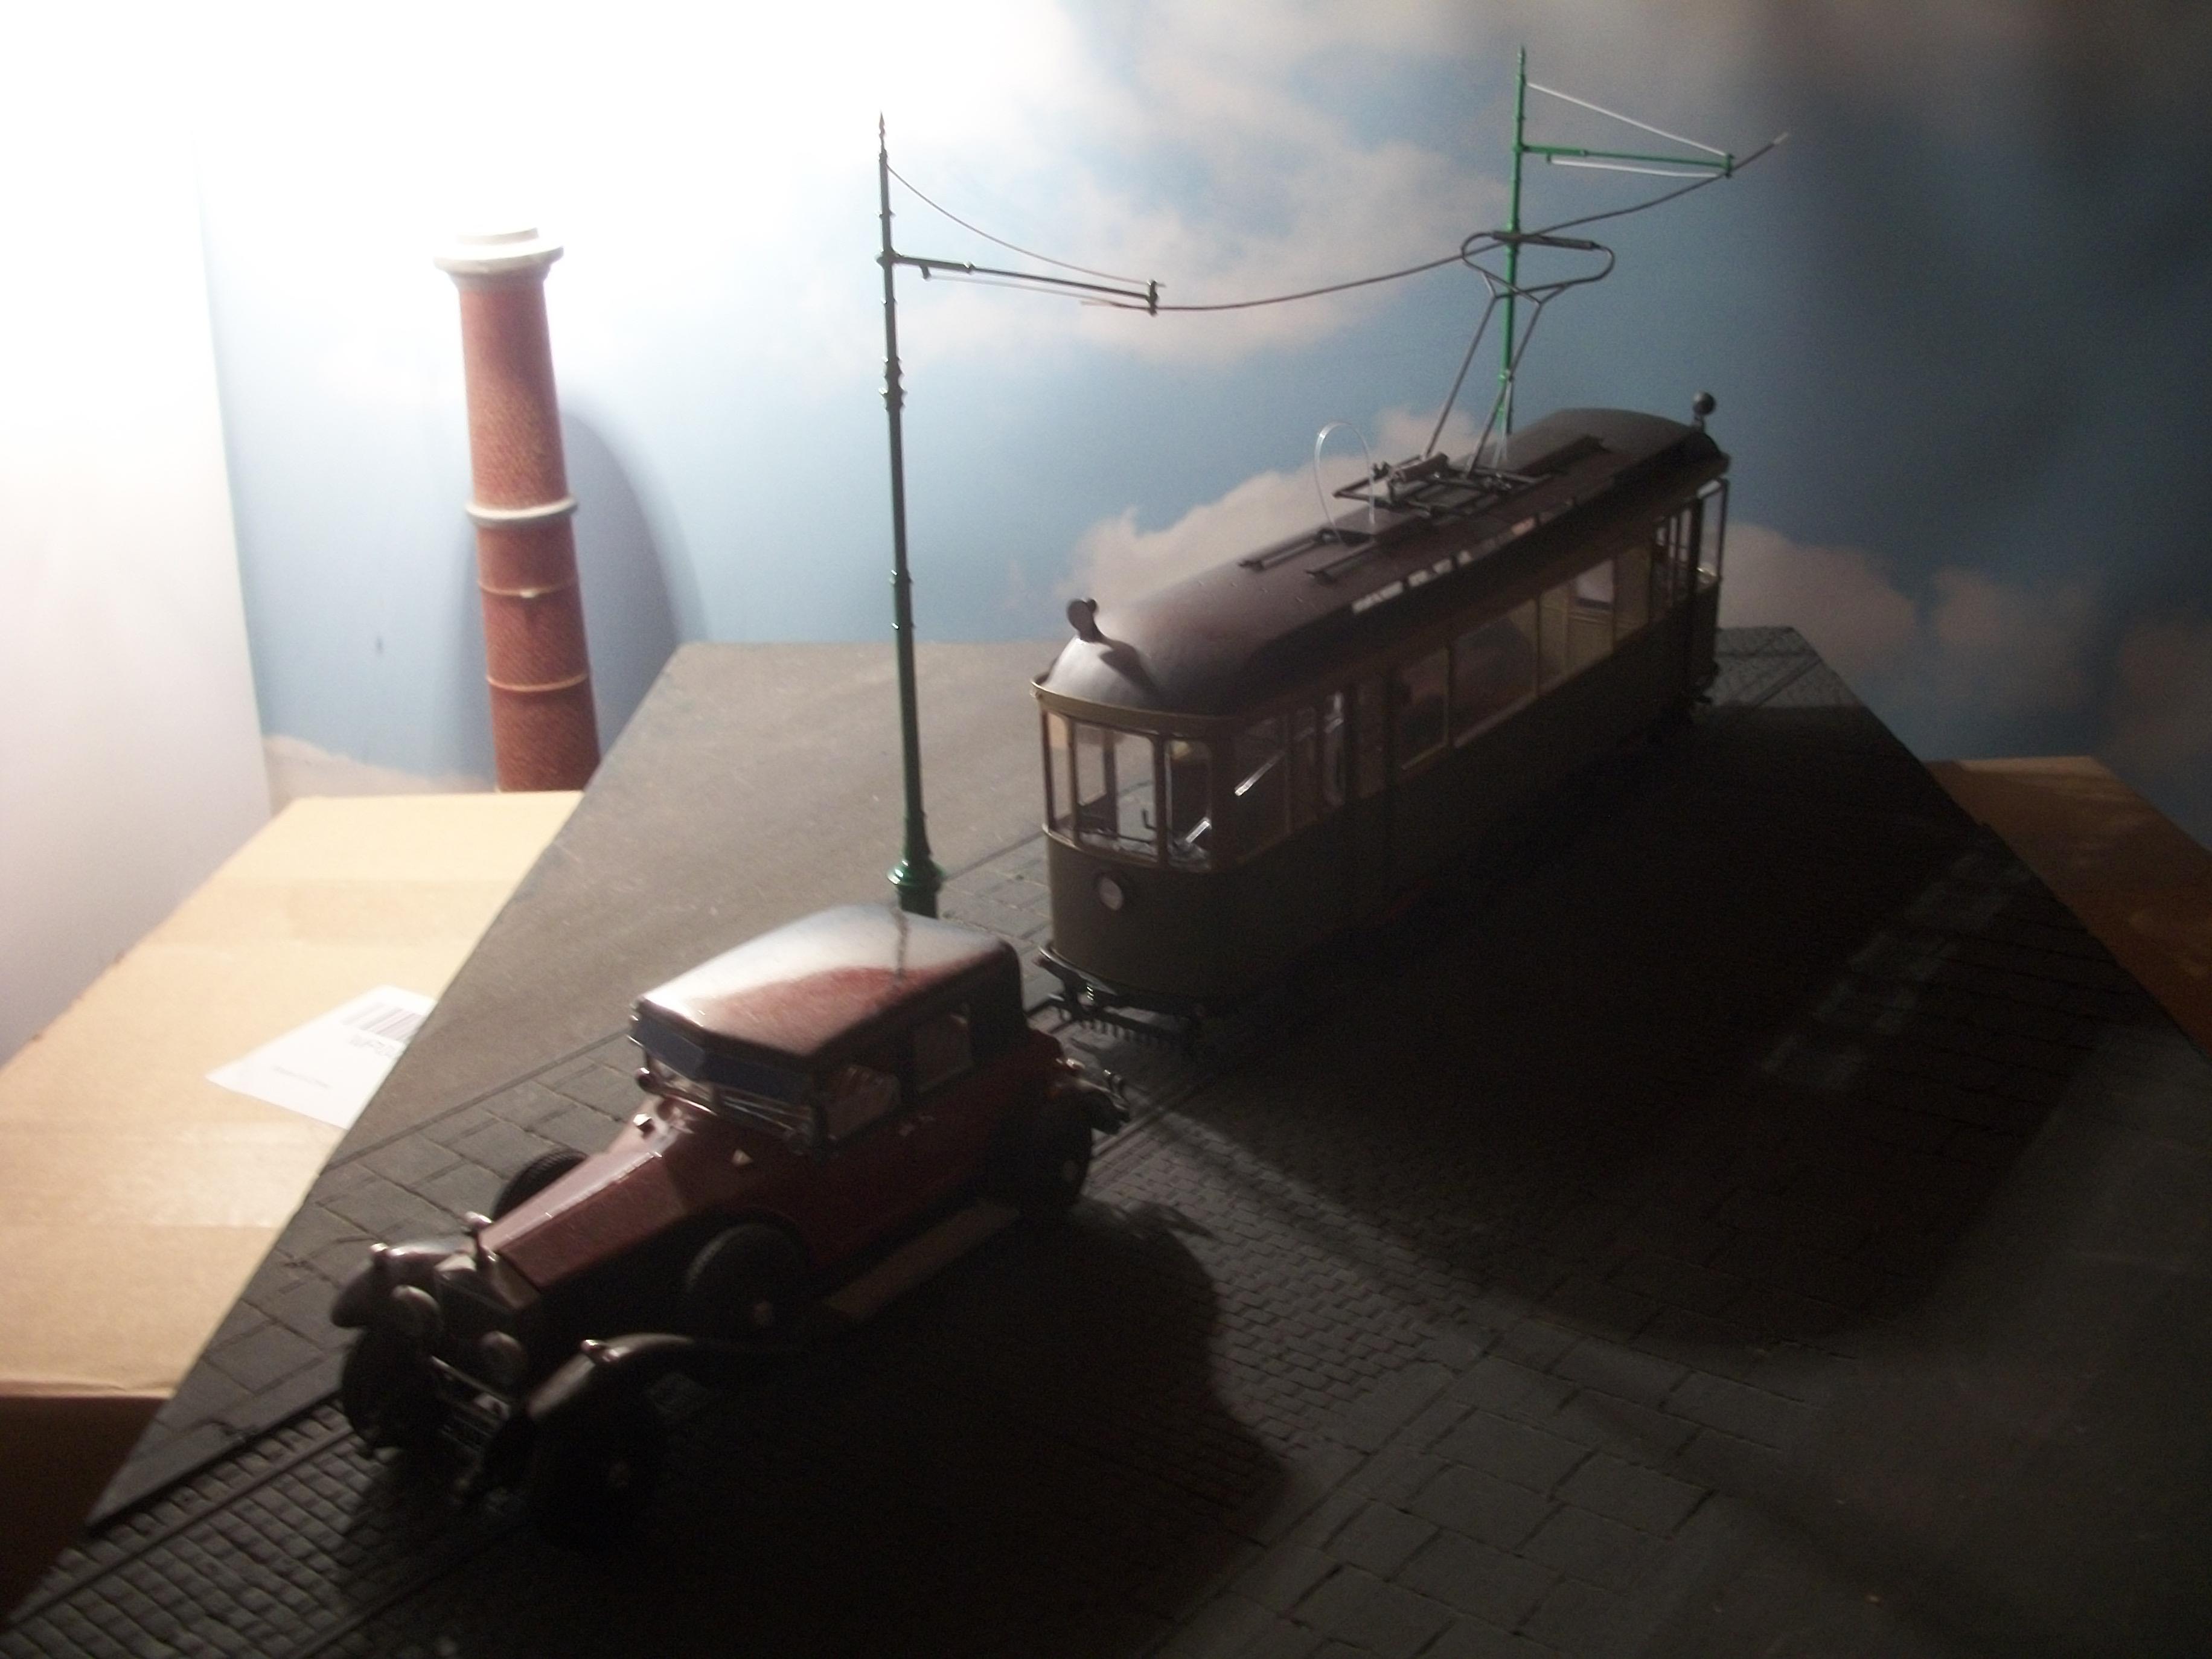
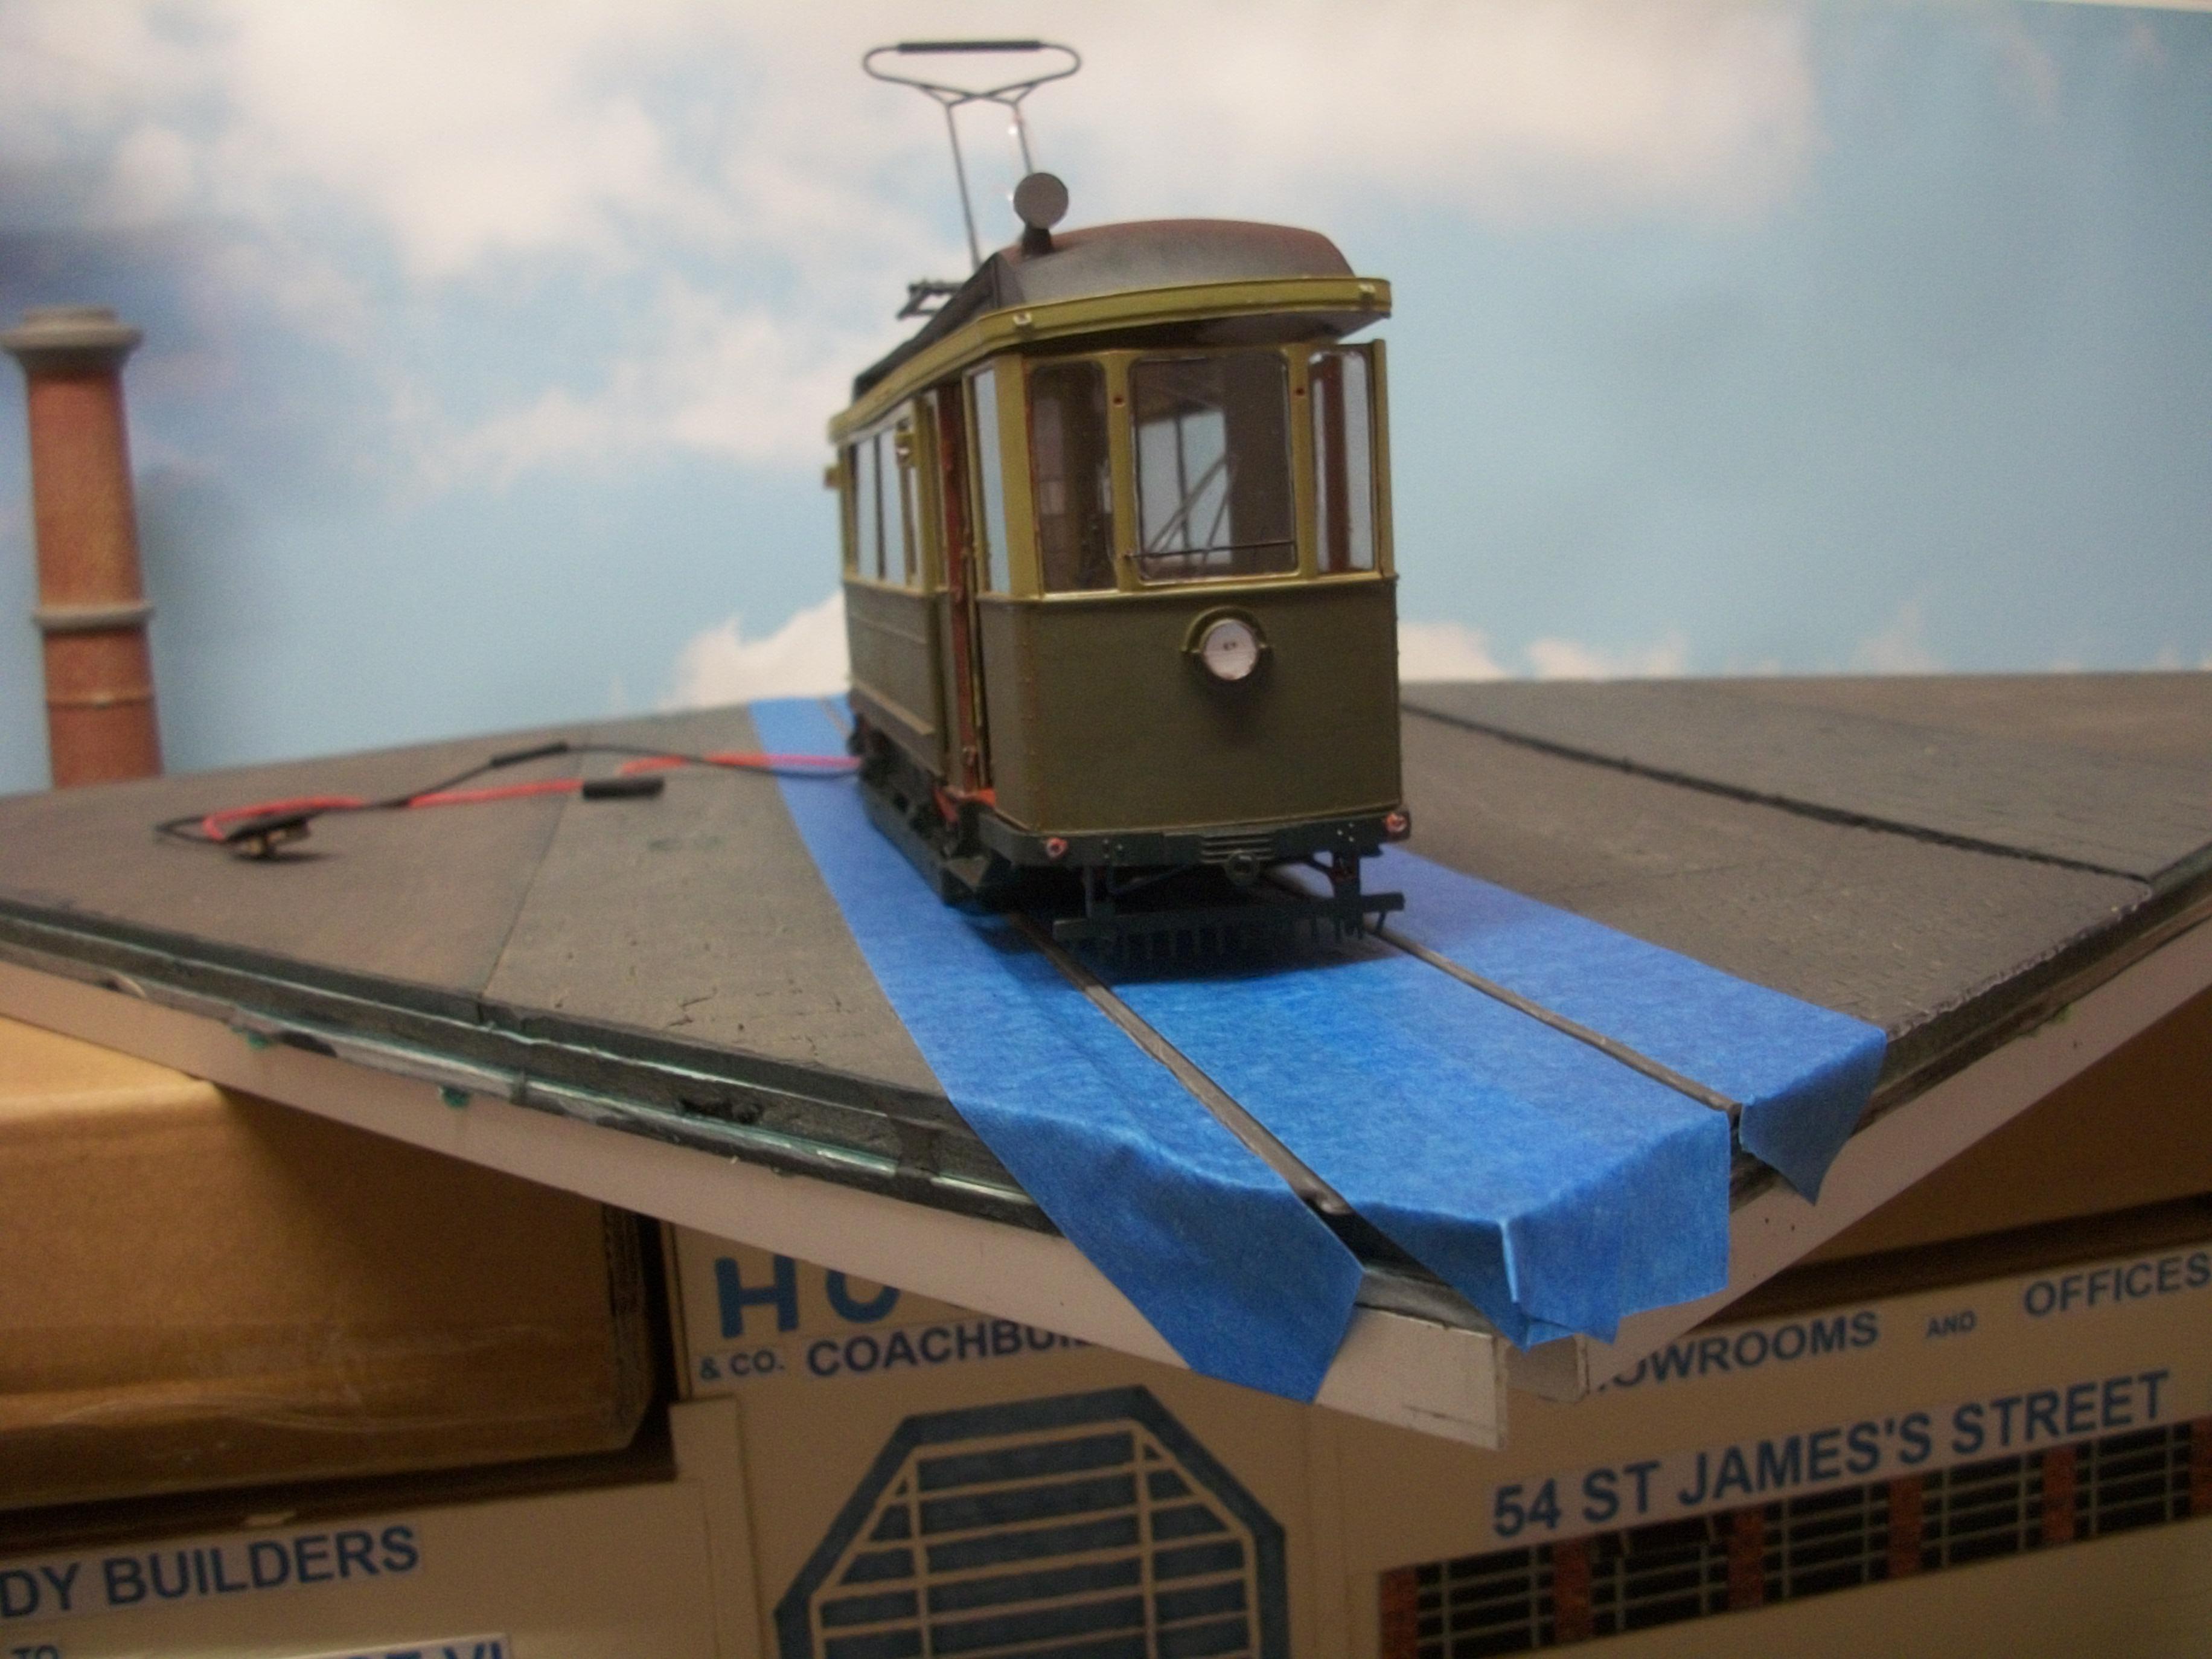
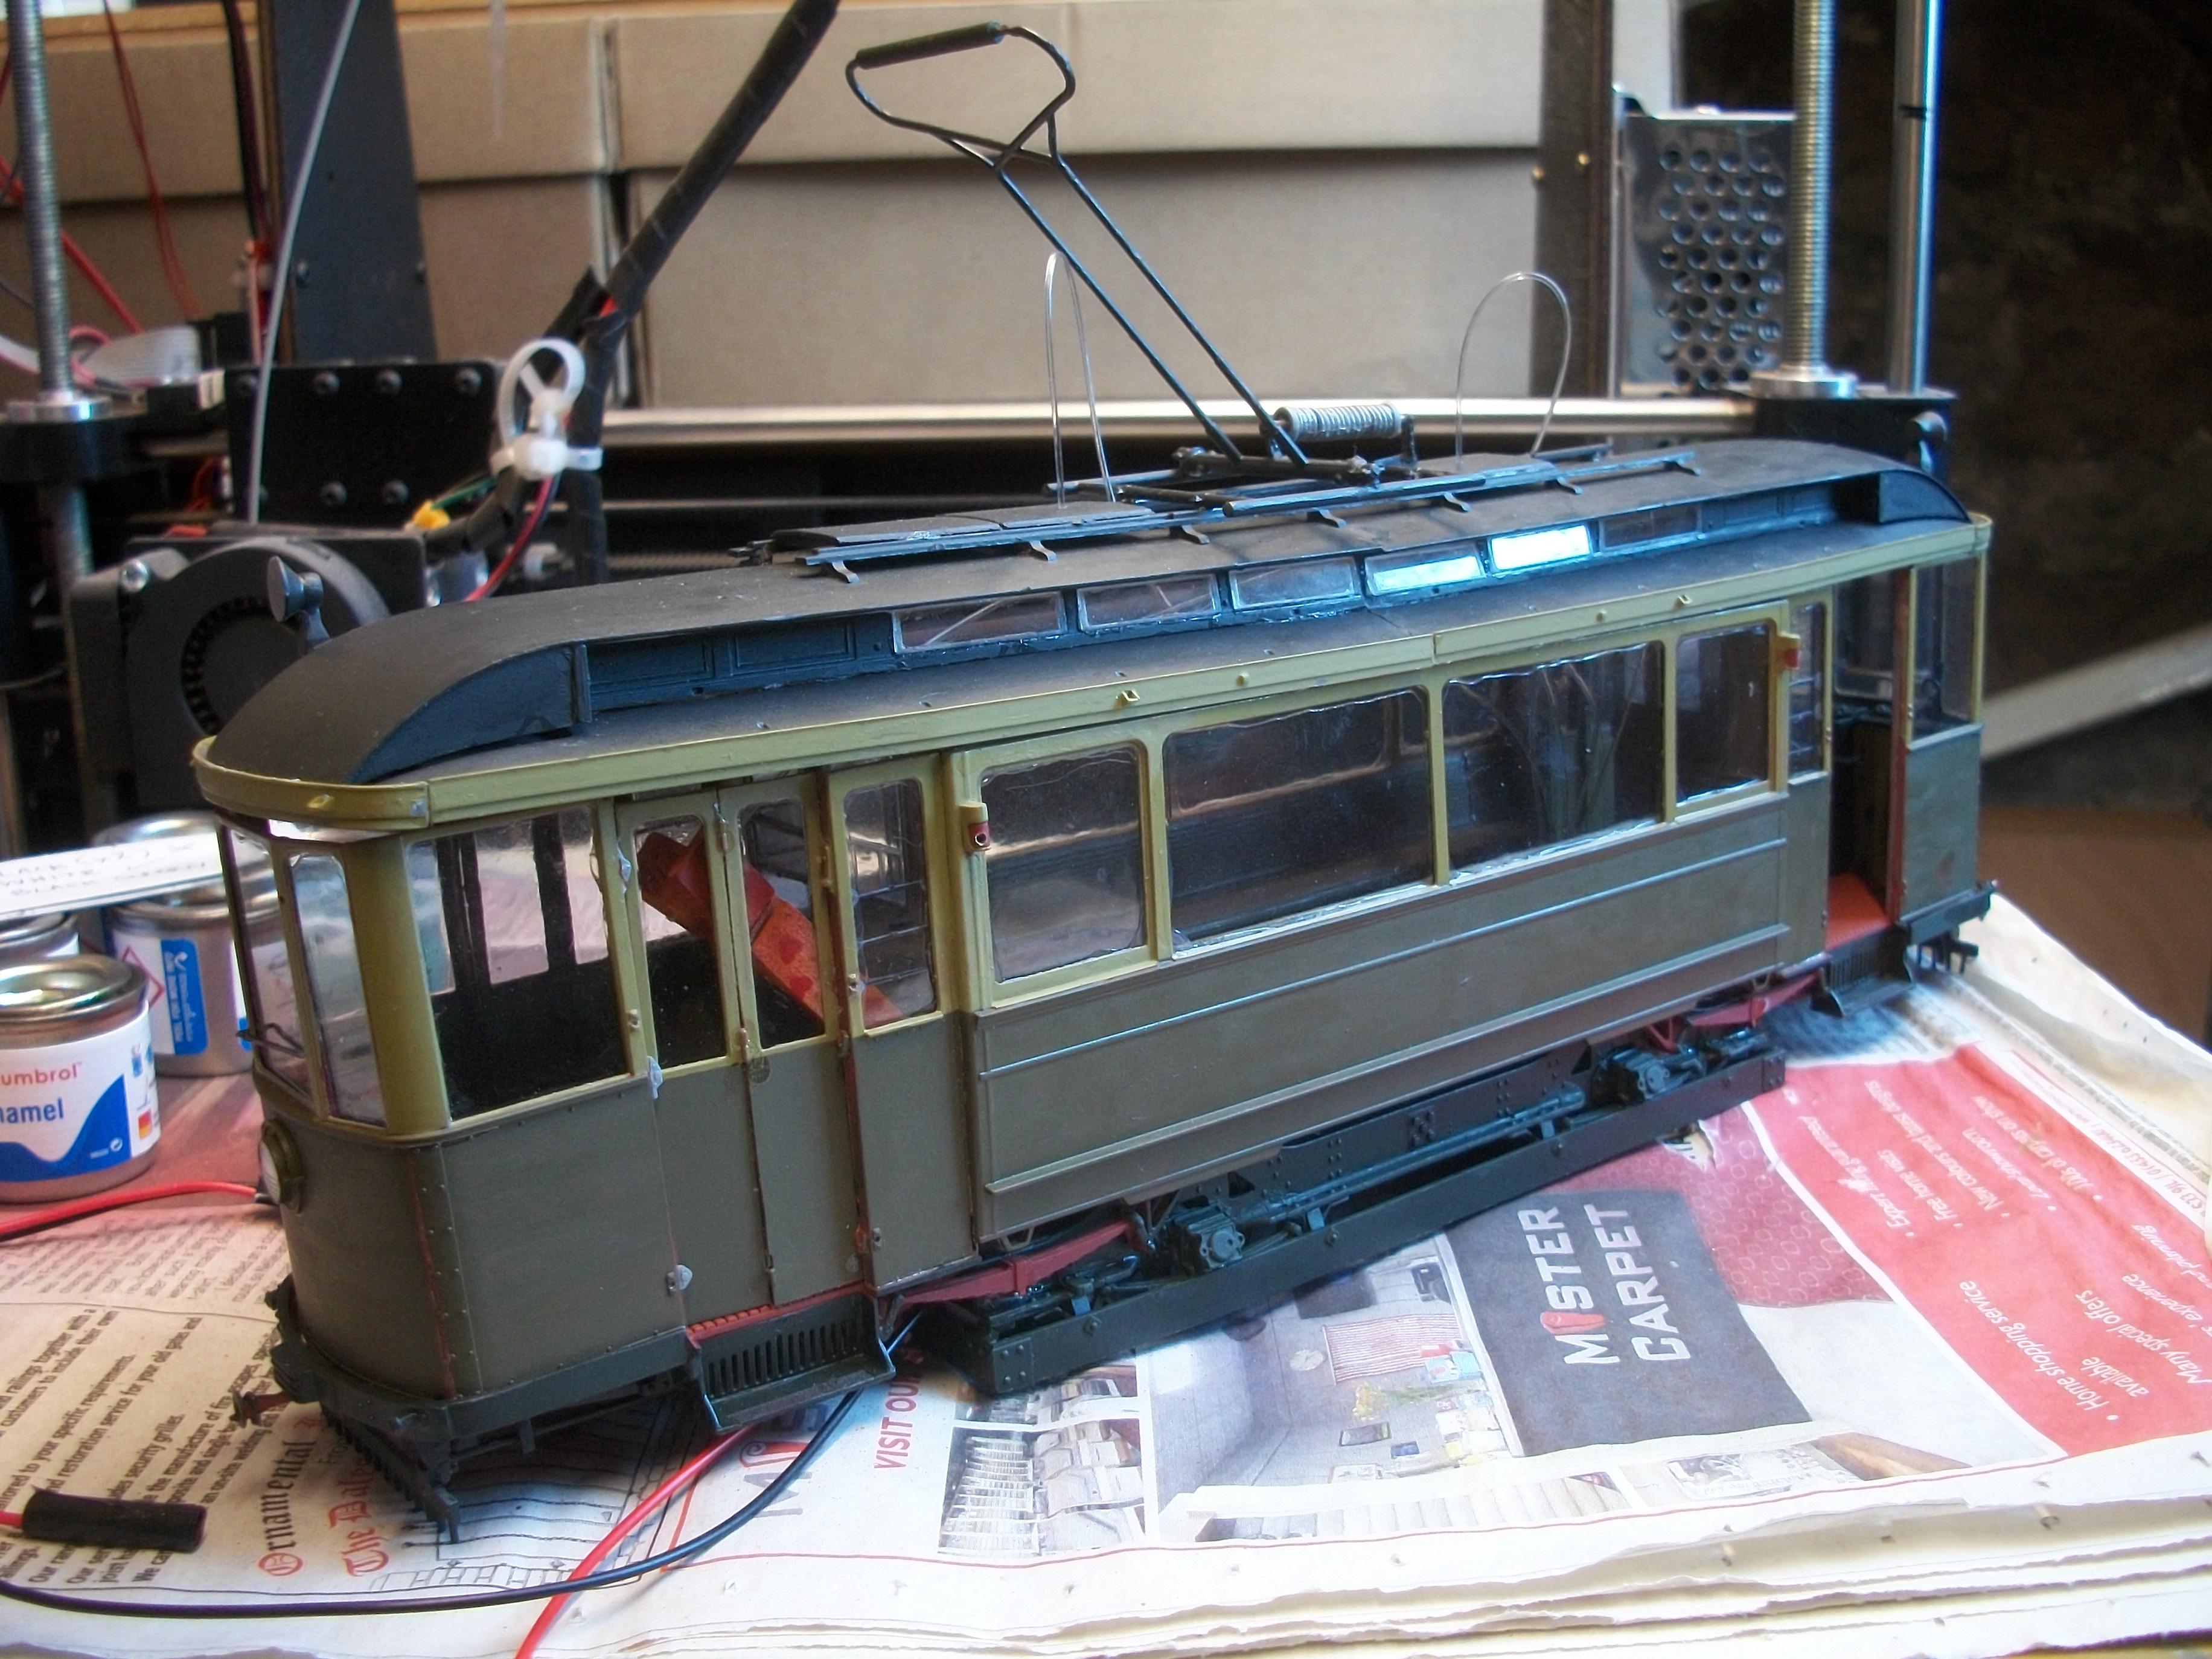
Apart from the Still Water application, the tram car diorama is getting close to completion. I have tested the Vallejo Water Textures Still Water on a section of 1:24 scale paving, and I am pleased with the result. The still water product will be applied within the next day or two. The three support posts for the overhead wire are super glued to the pavement, and the two lengths of copper wire have been super glued in place between the three posts. The two tram rails are now painted with steel enamel and the conductress figure is one of five figures completed. I haven't glued the roof onto the tram car yet, and if possible I would rather have the roof removable. Some passengers and crew need to be placed inside the tram. David
-
Get a cuppa java... This is my introduction...
Anglia105E replied to Raymond Gallant's topic in Welcome! Introduce Yourself
Welcome to MCM forums, Raymond . . . . . You have over 4,000 unbuilt kits in your stash ? !!! . . . . We thought we had a problem ! That is the most comprehensive and detailed introduction that I have ever seen on this forum. Thank you Raymond, and I feel that I almost know you ! David -
Many thanks, Pierre....... David
-
I am in the process of test fitting the three support posts for the overhead tram wires. Also, the two lengths of white styrene rod have now been painted with Humbrol Copper metallic enamel. Having masked off the edges of the two tram lines on the cobblestone road base, the tram lines have been painted with Humbrol Steel metallic enamel. The baseboard for this 1:35 scale tram car diorama is standing on top of the roof of the 1:43 scale Hooper & Co. factory building, which is why some of the model cars in the background will appear to be out of scale with the tram car, and that is because they are 1:43 scale. Started testing the Vallejo Water Textures Still Water product this evening, and this will be drying overnight. The plan is to pour or brush the Still Water onto the cobblestone road and the pavements, so as to provide night time reflections of the tram car lights for the diorama photography that follows later. David
-
The industrial heater is excellent, and also the wiring / wall socket as well. ( all scratch built ). David
-
Beautiful car Bob, and the paint colour is perfect. 1953 was a good year for the Ford Victoria . . . . Well done with your build. David
-
Pierre . . . . I like the workbench with the sink in the middle, and also the storage boxes in the rack. We used to call that metal racking ' Dexion ', but that is probably a British brand name. Your realism is off the scale (no pun intended). Well done ! David
-
Thank you Pierre . . . . I have used Humbrol enamel paints for the tram car, and other scale model cars, but I use Vallejo acrylic paints for the figures. Usually, I would use aerosol spray paint (rattle can) for my cars, and also airbrush with Zero Paints colours, but for some models I do brush paint them with enamels. I choose very often to have a specific paint colour mixed for me by a company in Brighton, UK which would typically be a Rolls-Royce colour. For this service I have to provide the exact year of the car, and also the manufacturer's paint code. They send me a 400 ml aerosol can, which is not cheap and the delivery is also not cheap, but it is worth it to get the genuine original paint colour of an old 1950's Rolls-Royce motor car. Some model builders are very good at producing a high quality paint surface with a brush, and they can achieve a finish that is as good as an airbrush or rattle can finish might be. There is a lot of work involved with the preparation, such as wet & dry sanding and polishing. Acrylics seem to be quite good, but I do prefer enamels myself. Having tried many different paint brands, I find that Humbrol are better than Revell. The overhead tram wire is Evergreen styrene rod in white, so I shall brush paint this with Humbrol Copper Metallic, as the real tram wires were made of copper. David
-
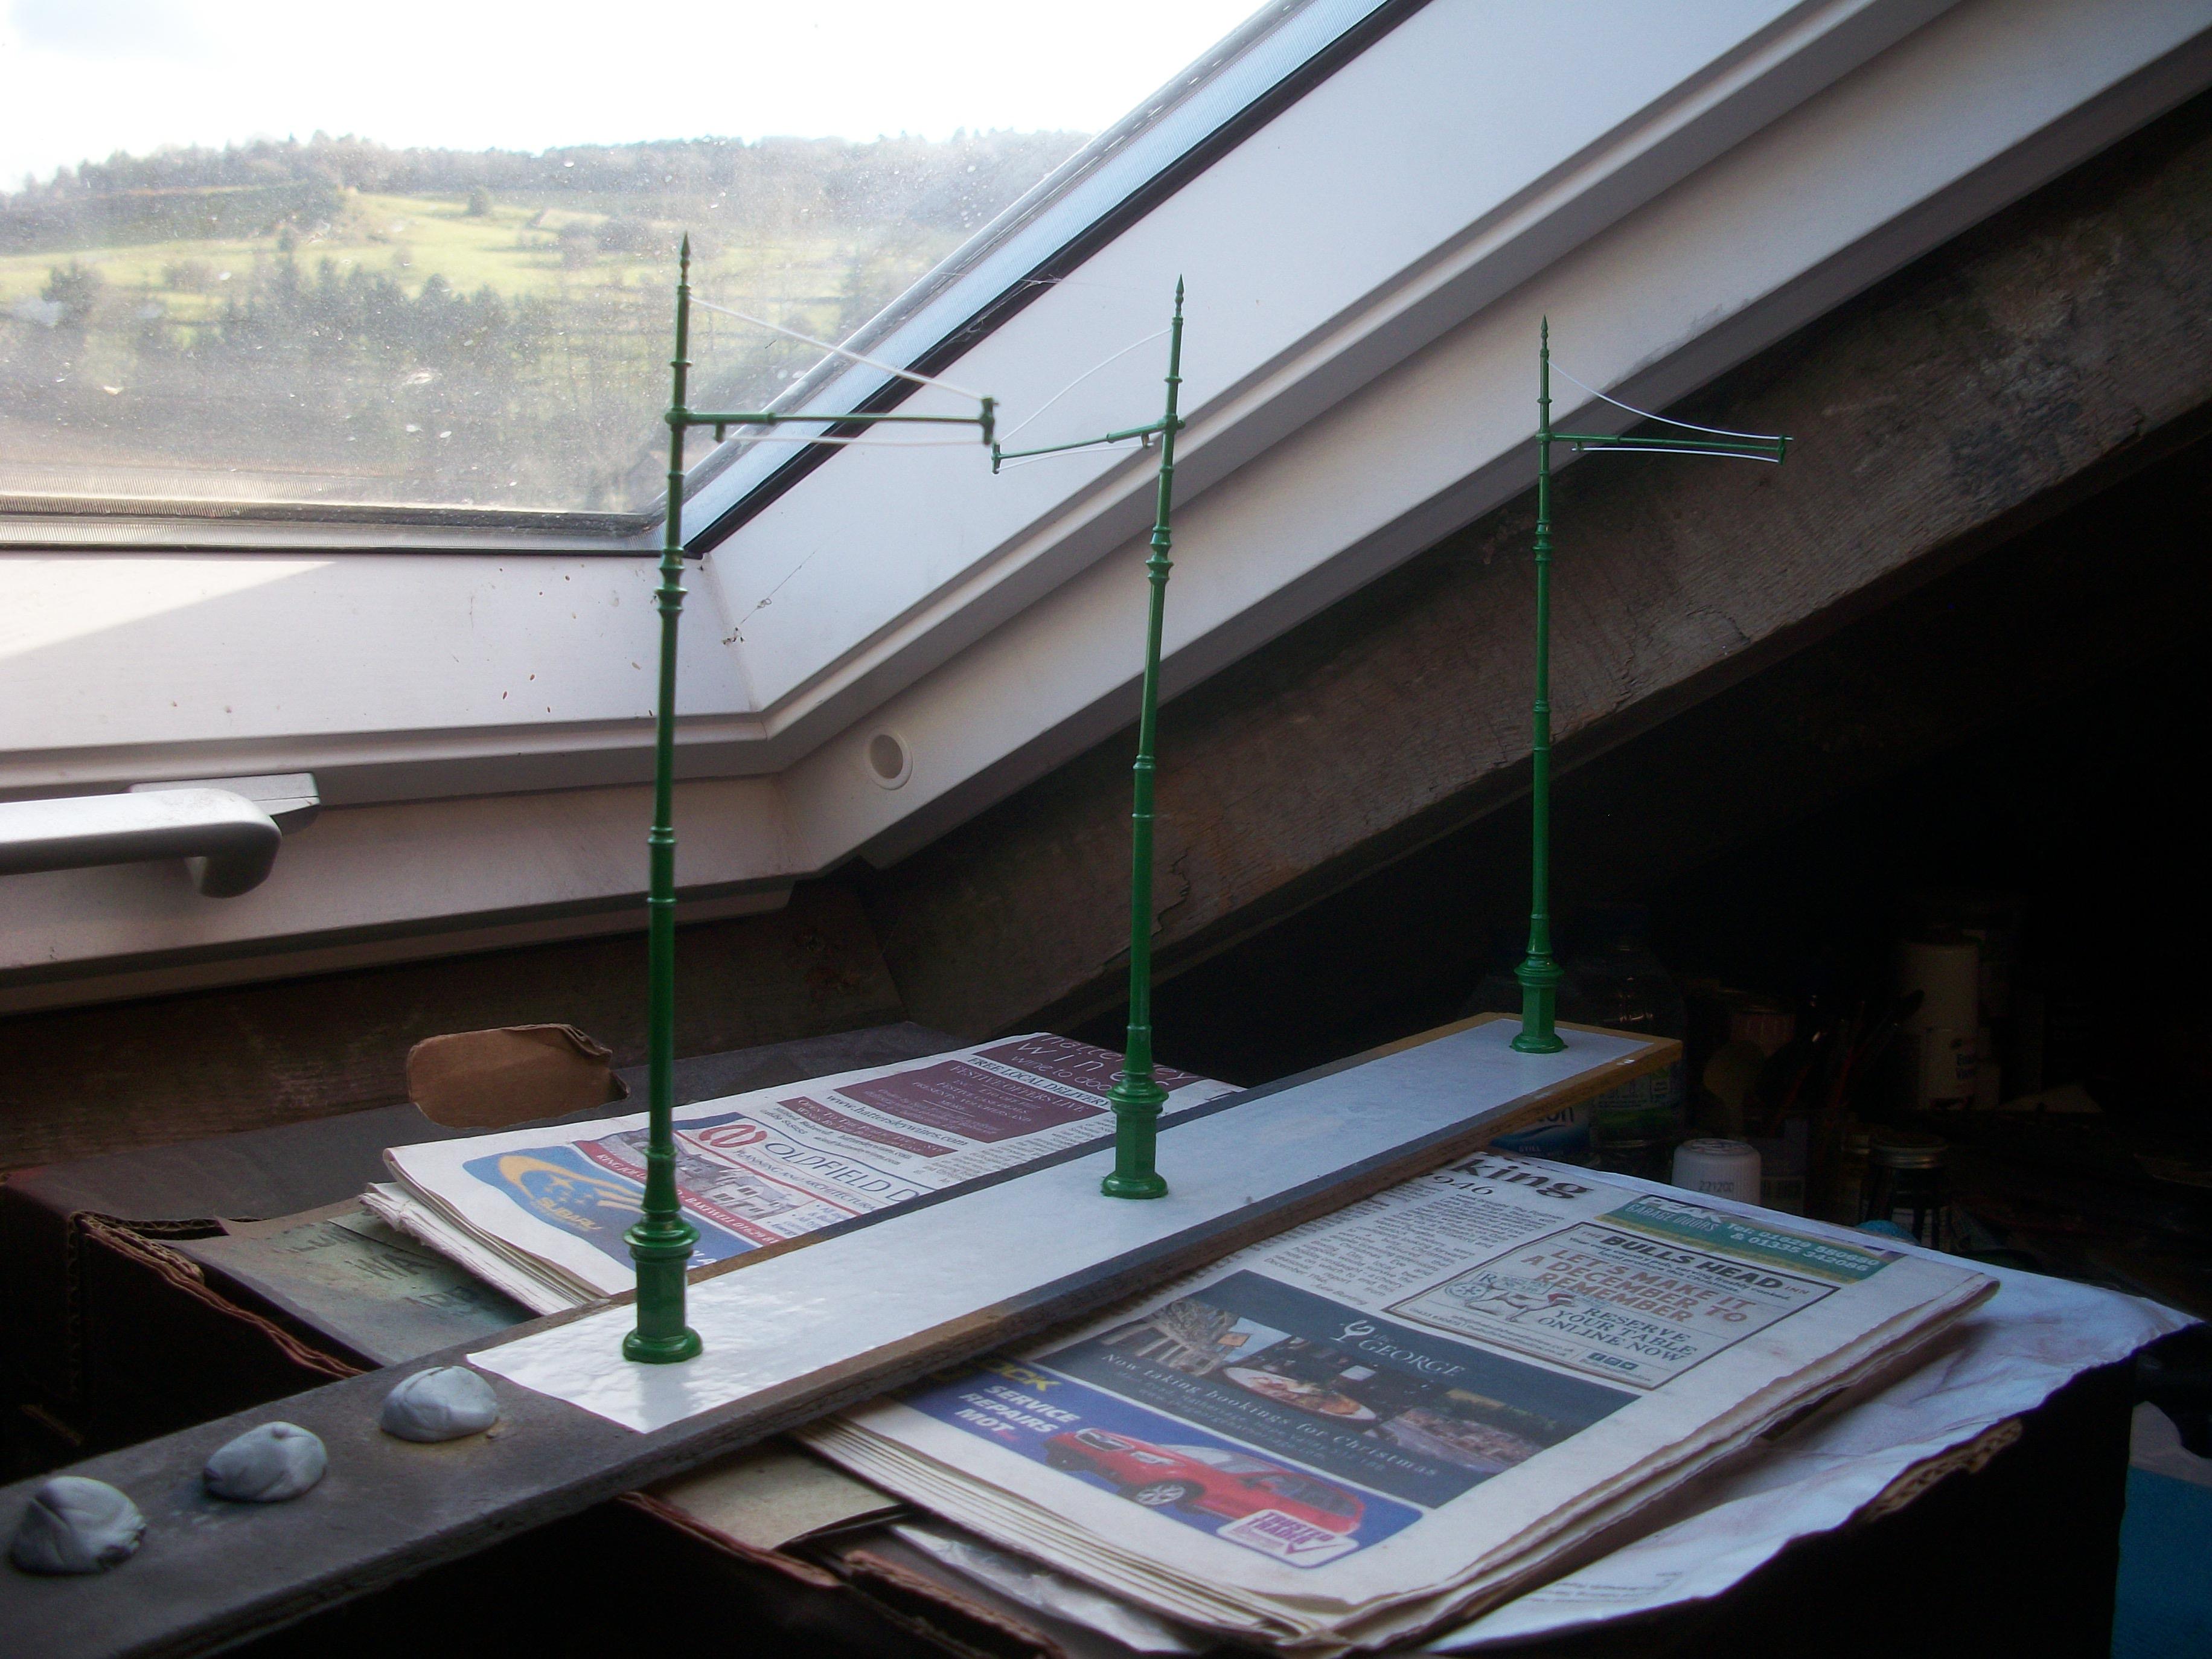
While allowing time for paint to dry on the tram line posts and the tram car itself, I have started painting the three figures. These include two seated lady passengers and the standing tram driver. I decided that the styrene parts of the upright posts and arms will not support the weight of the garden wire, and nor will the Evergreen styrene rod. What I shall do, is to use two lengths of Evergreen .025" styrene rod as the overhead tram wire. The ones in the packet are 14 inches in length, and the overall length I require is 24 inches. Now that I have assembled and painted three posts instead of only two, I can super glue two lengths of 12 inches of the Evergreen rod between the posts. There will be one post at each end of the tram lines, and one in the centre. David
-
Always like to see a good Pontiac, especially between 1965 and 1968 . . . . I built a 1968 Pontiac Parisienne 4 door 5.3 litre V8 in 1:25 scale, that I used to own as the real 1:1 car, back in 1977 . . . . Your green colour paint looks really nice Ken, and my Pontiac was a pale yellow colour with a brown vinyl roof, with Rostyle wheels and the license plate was ' FCK 33 '. . . . . What a dream it was to drive ! ( but only 12 miles per gallon on the petrol / gas ). The car was a right-hand drive from Canada. . . . . I do like the Bonneville as much as the Parisienne, so excellent build that you have there ! David
-
This diorama is just brilliant, Charles . . . . . and you haven't just filled the empty space, the tractor looks like it has always been there ! David
-
Now that is one serious engine hoist Pierre, and those tools look great ! As you say, these smaller parts in 1:24 / 1:25 scale are tricky to detail and handle. Currently, I am struggling with extremely tiny parts for this 1:35 scale tram car, some of which have proved impossible to cut off the sprue, and many that break while handling gently. Quite a lot of detail might have to be left out of this build ! One part was a working coil spring that had 19 contact points on the sprue..... sheer madness !! David