Anglia105E
-
Posts
3,487 -
Joined
-
Last visited
Content Type
Profiles
Forums
Events
Gallery
Everything posted by Anglia105E
-

1974 Camaro , continued
Anglia105E replied to MarkJ's topic in WIP: Other Racing: Road Racing, Land Speed Racers
The Camaro body looks good in primer, Mark....... I would not have thought to apply the primer by brush, as I always use rattle can grey, white, red or orange filler primer, but you have set me thinking now ! David -
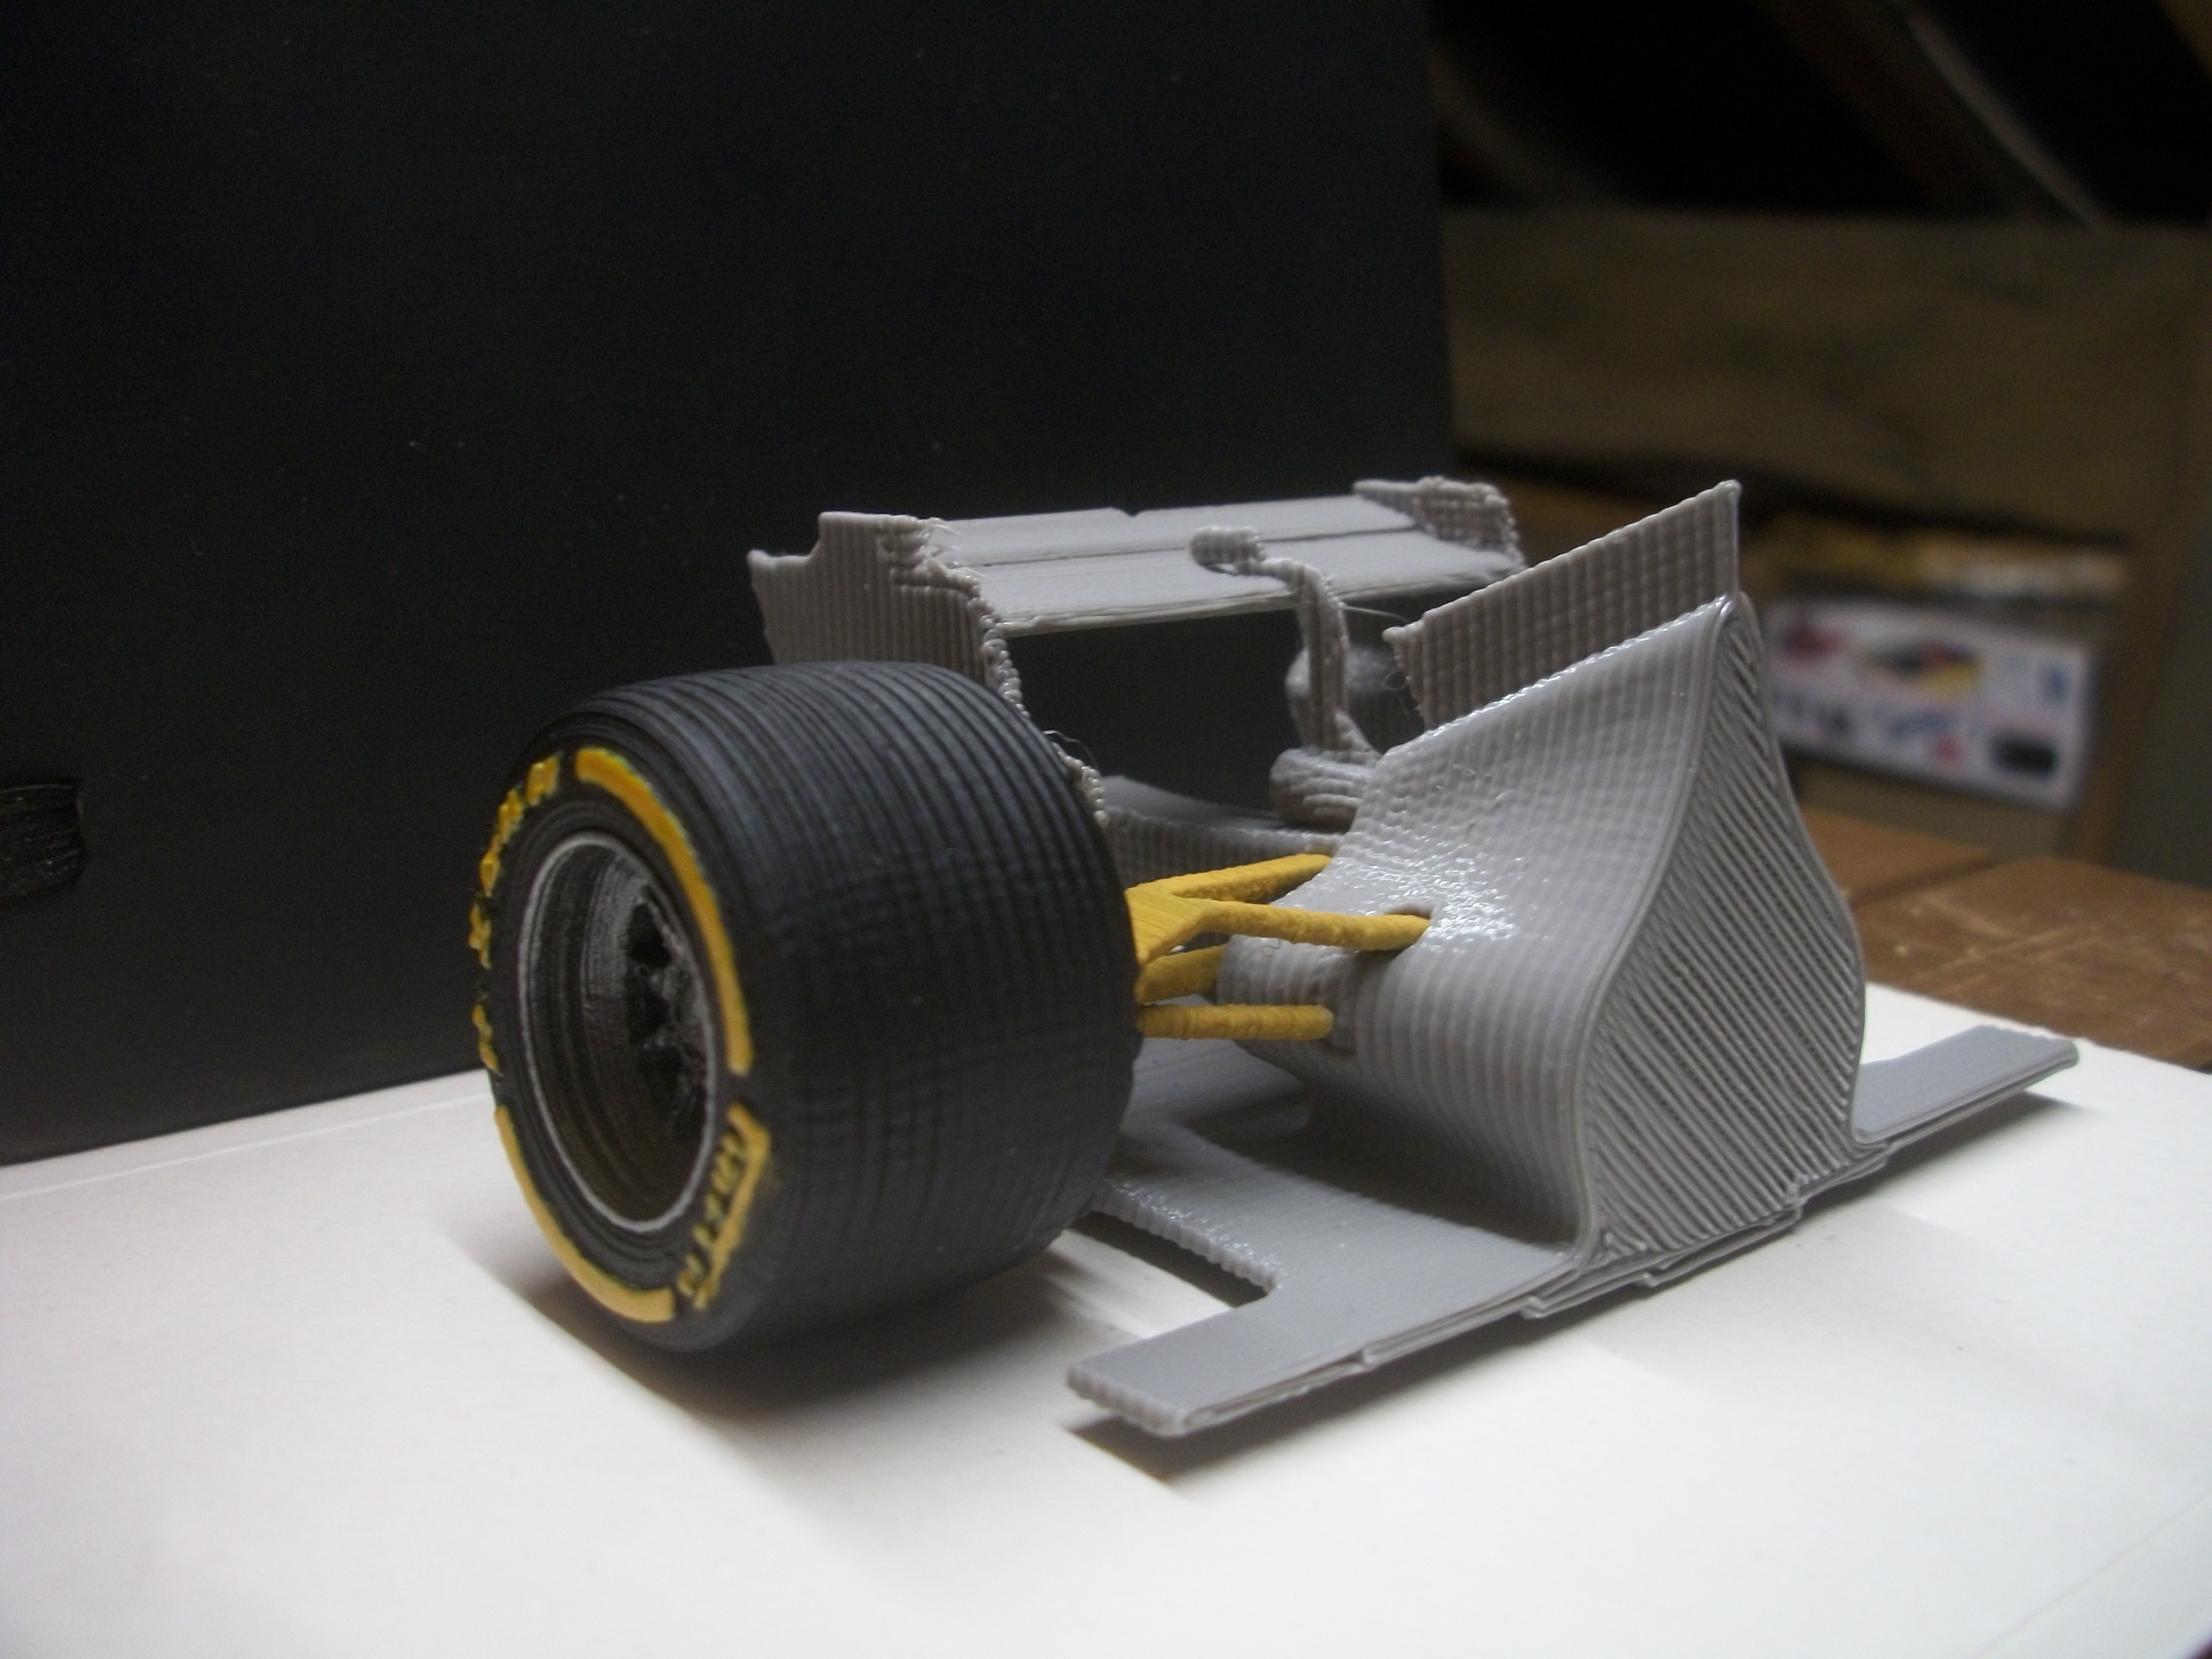
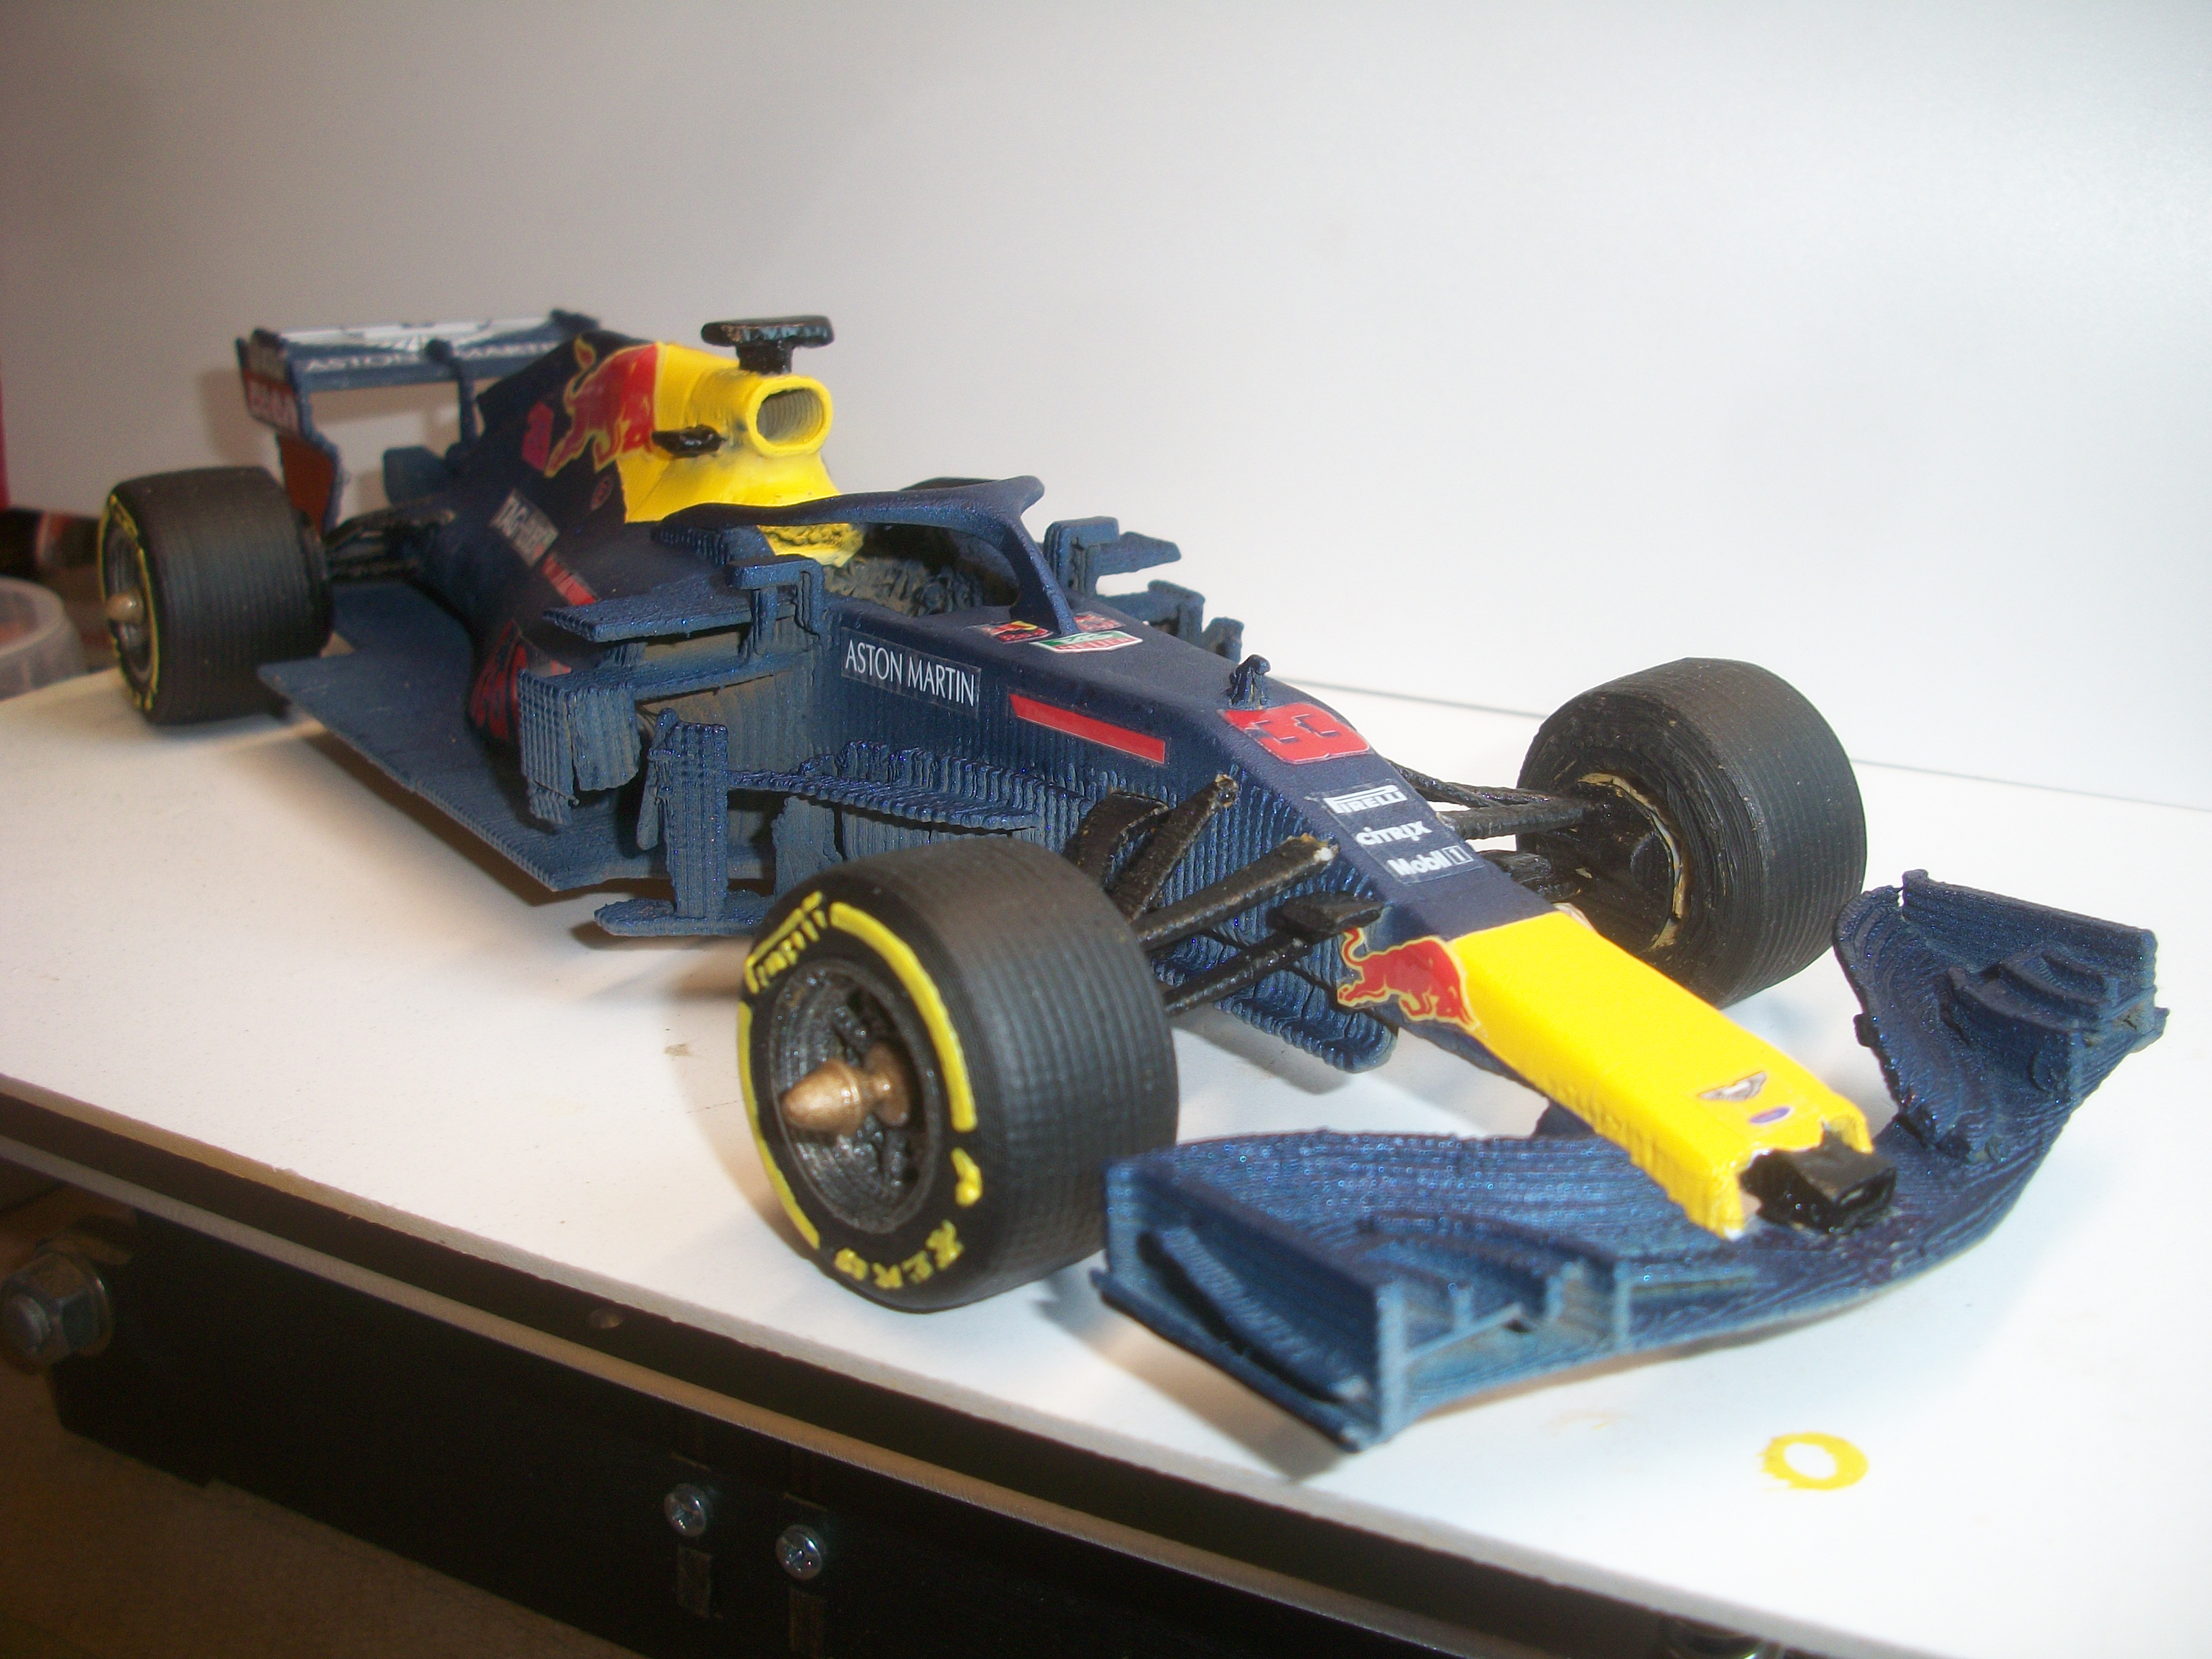
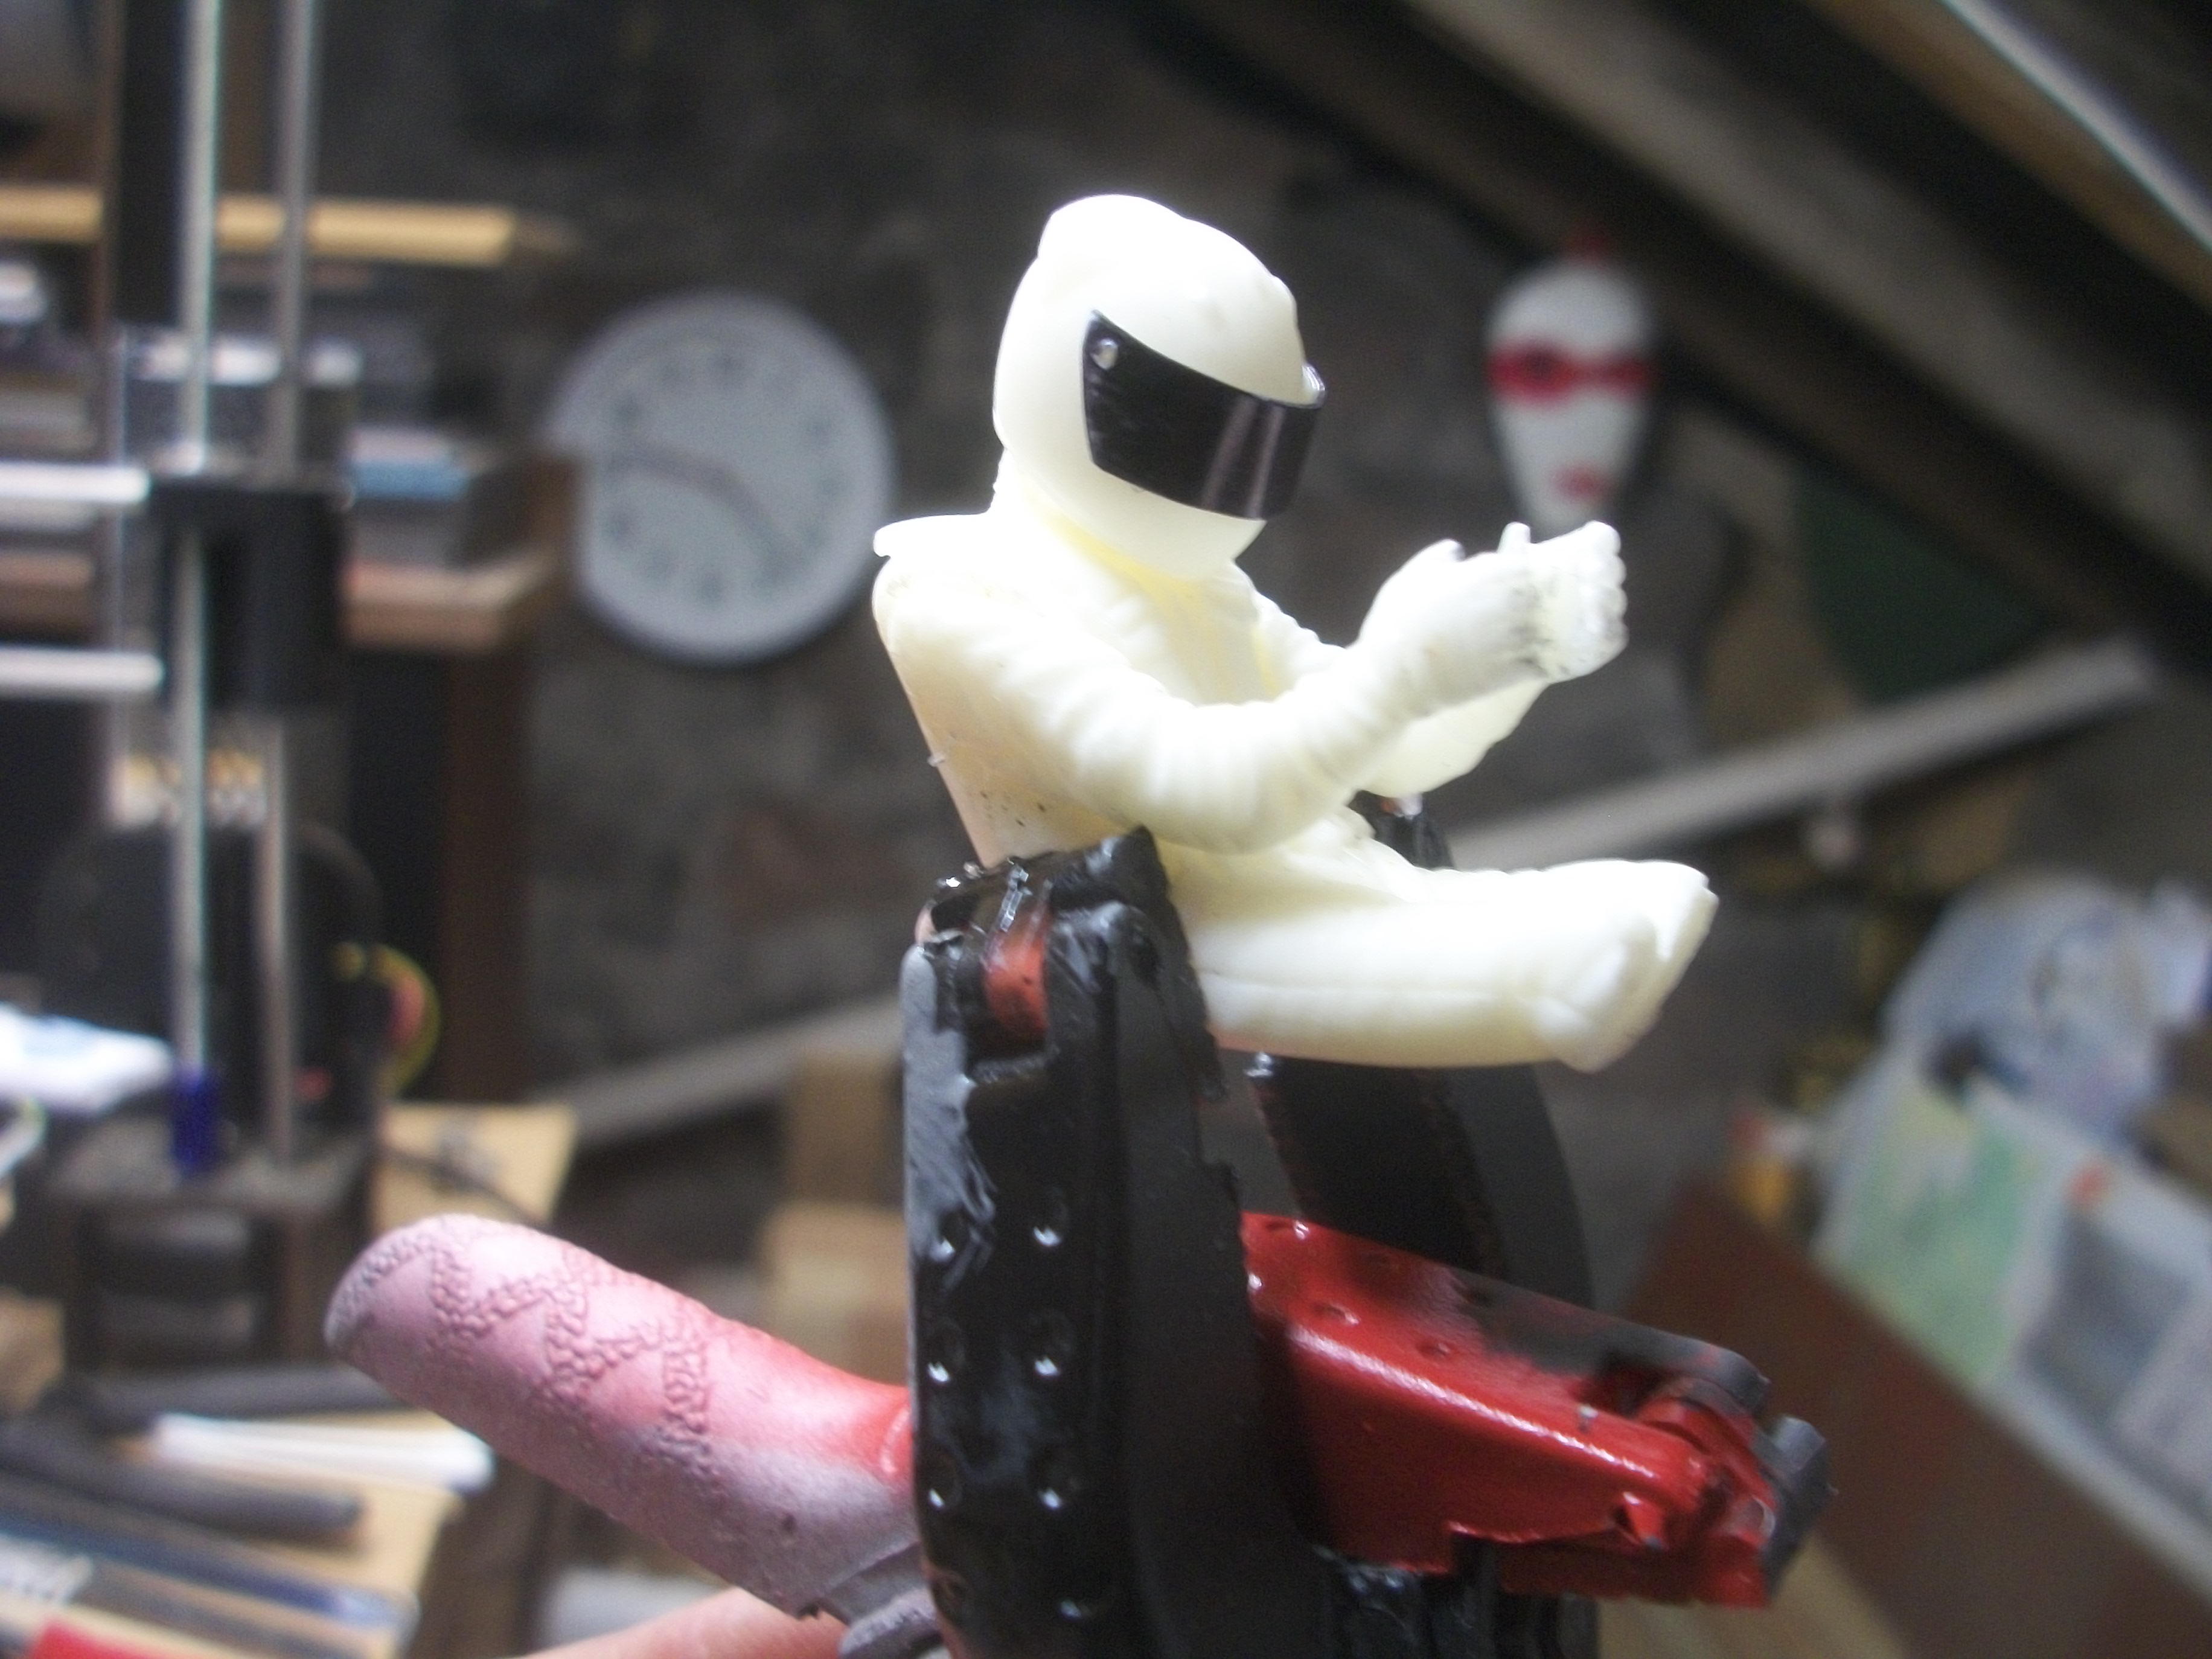
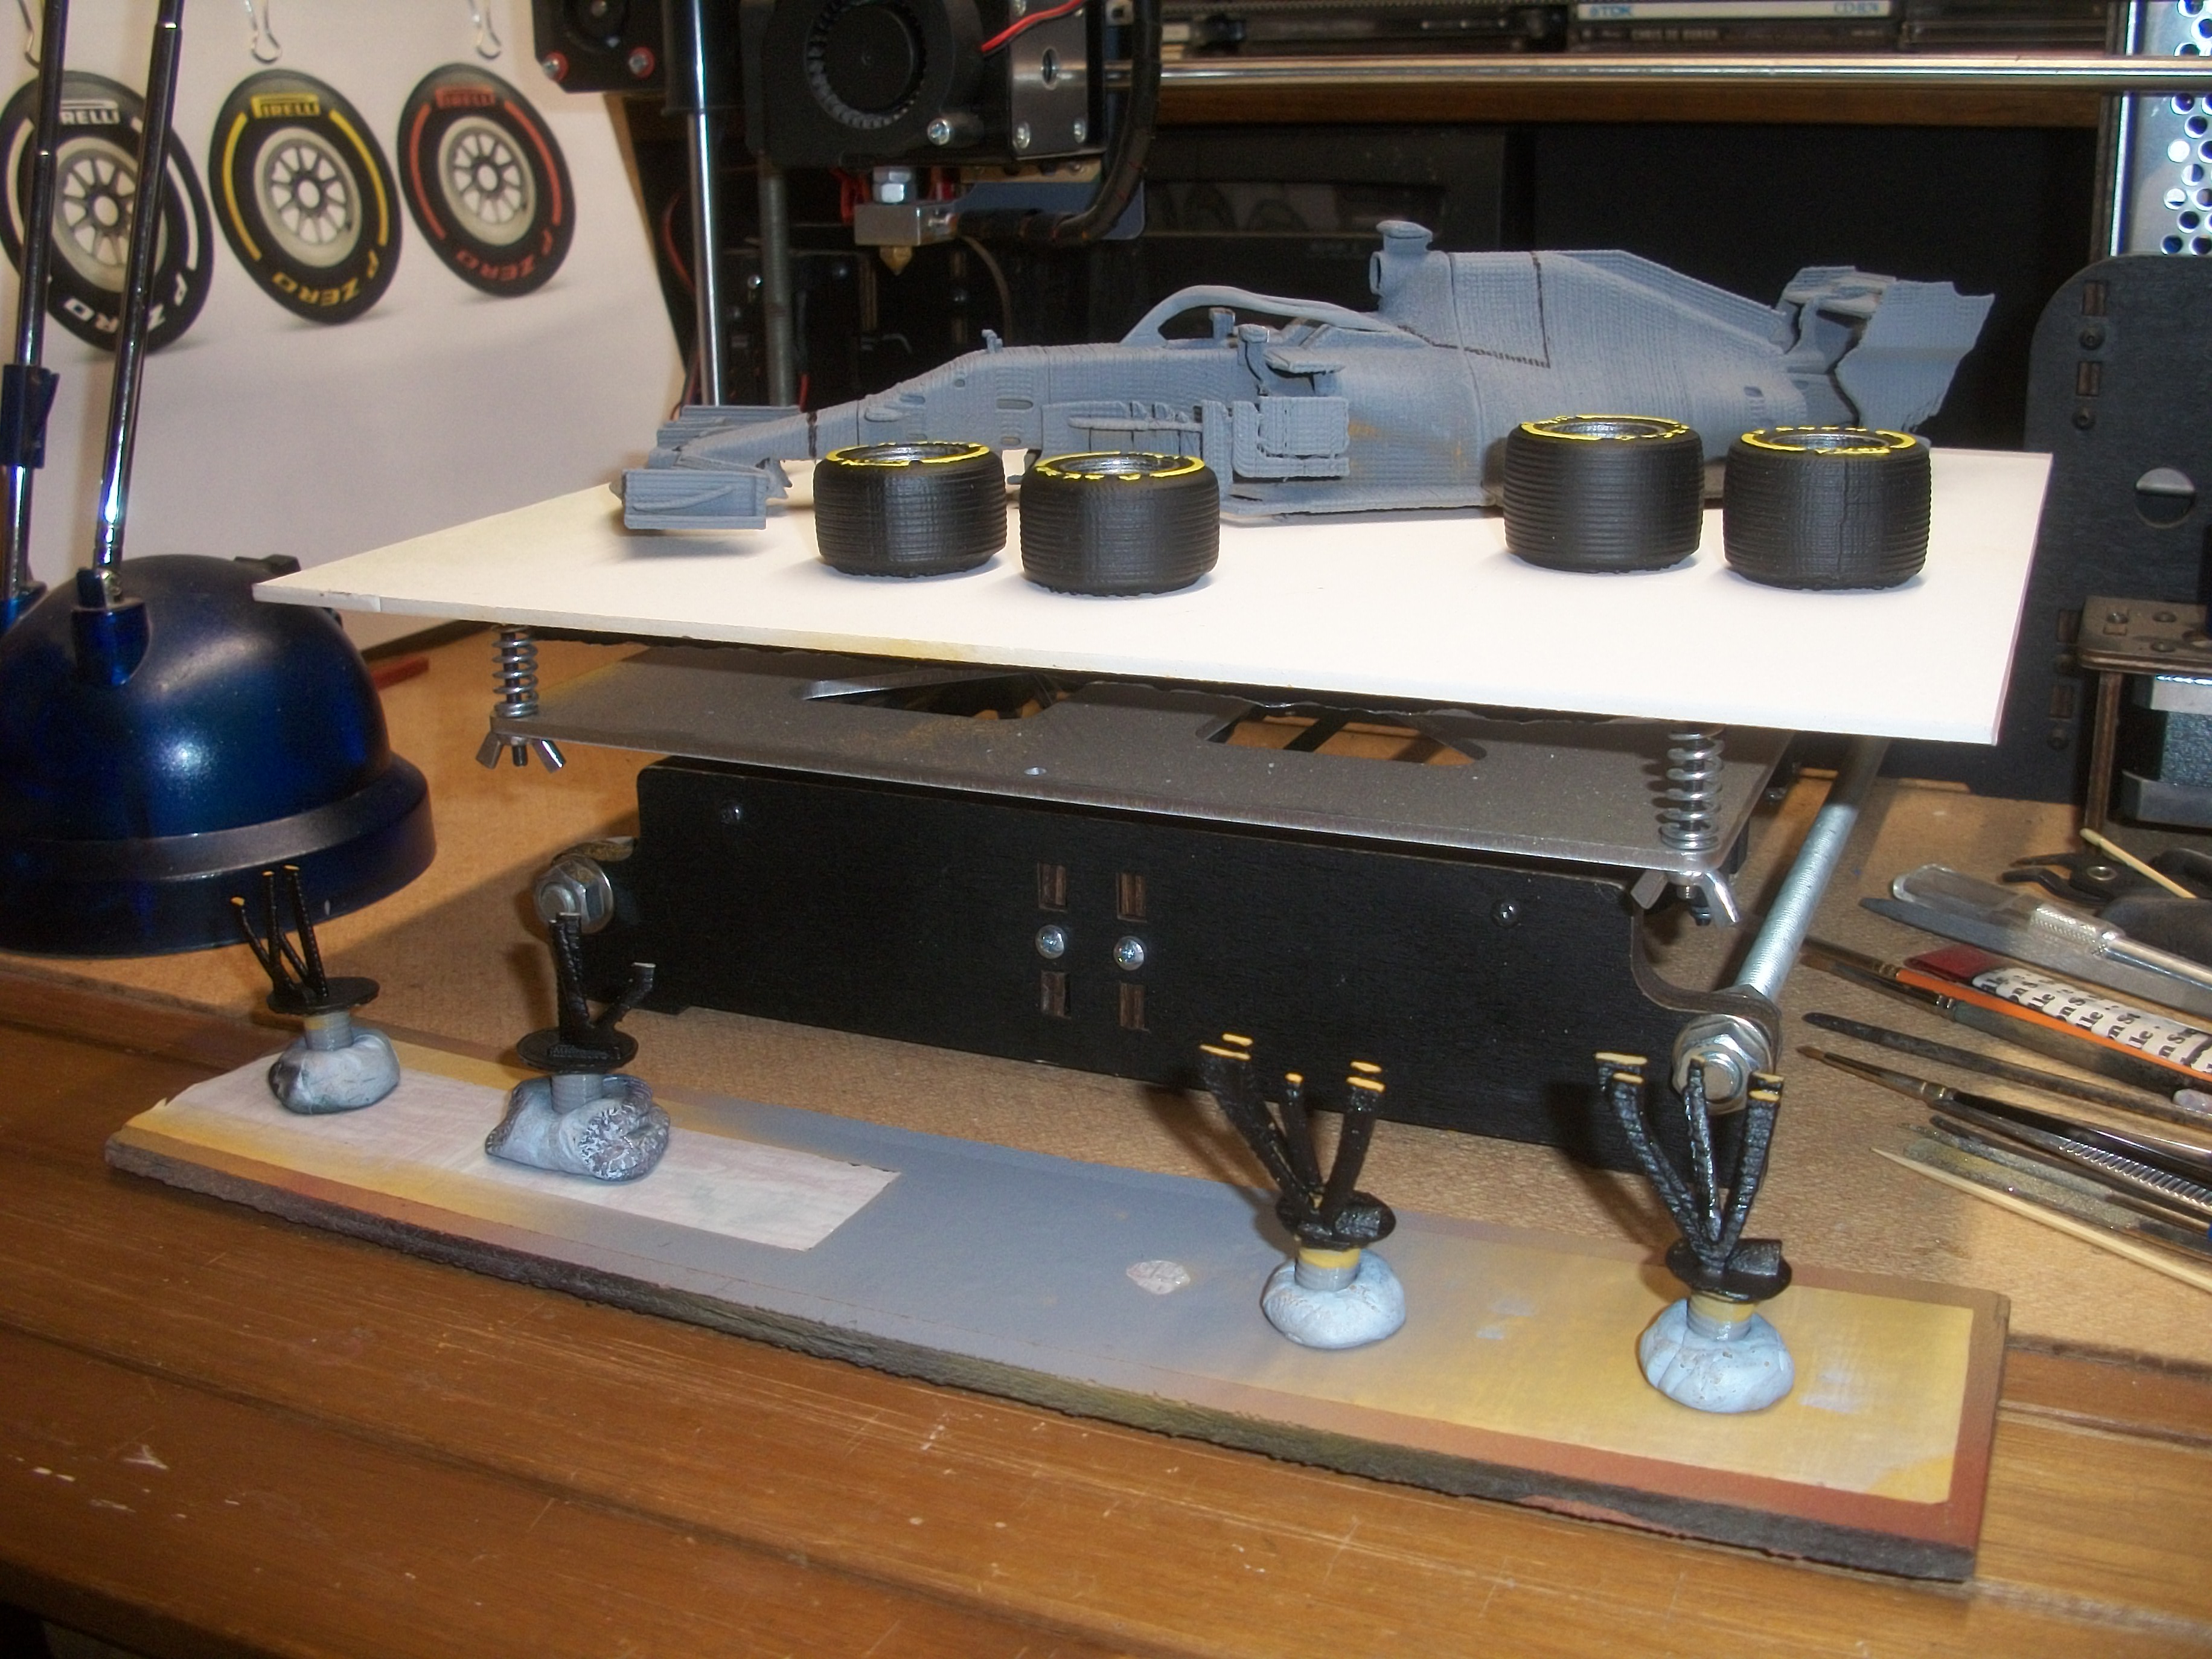
All the decals are in place, and today I fitted the front and rear suspension units. Wheels and tyres have been fitted, along with some scratch built centre wheel nuts. Next up, will be the driver's helmet detail painting, followed by the difficult task of easing the driver figure into the cockpit. This will be a tight fit, especially as I have to allow for the steering wheel to be located within the driver's hands. David

-
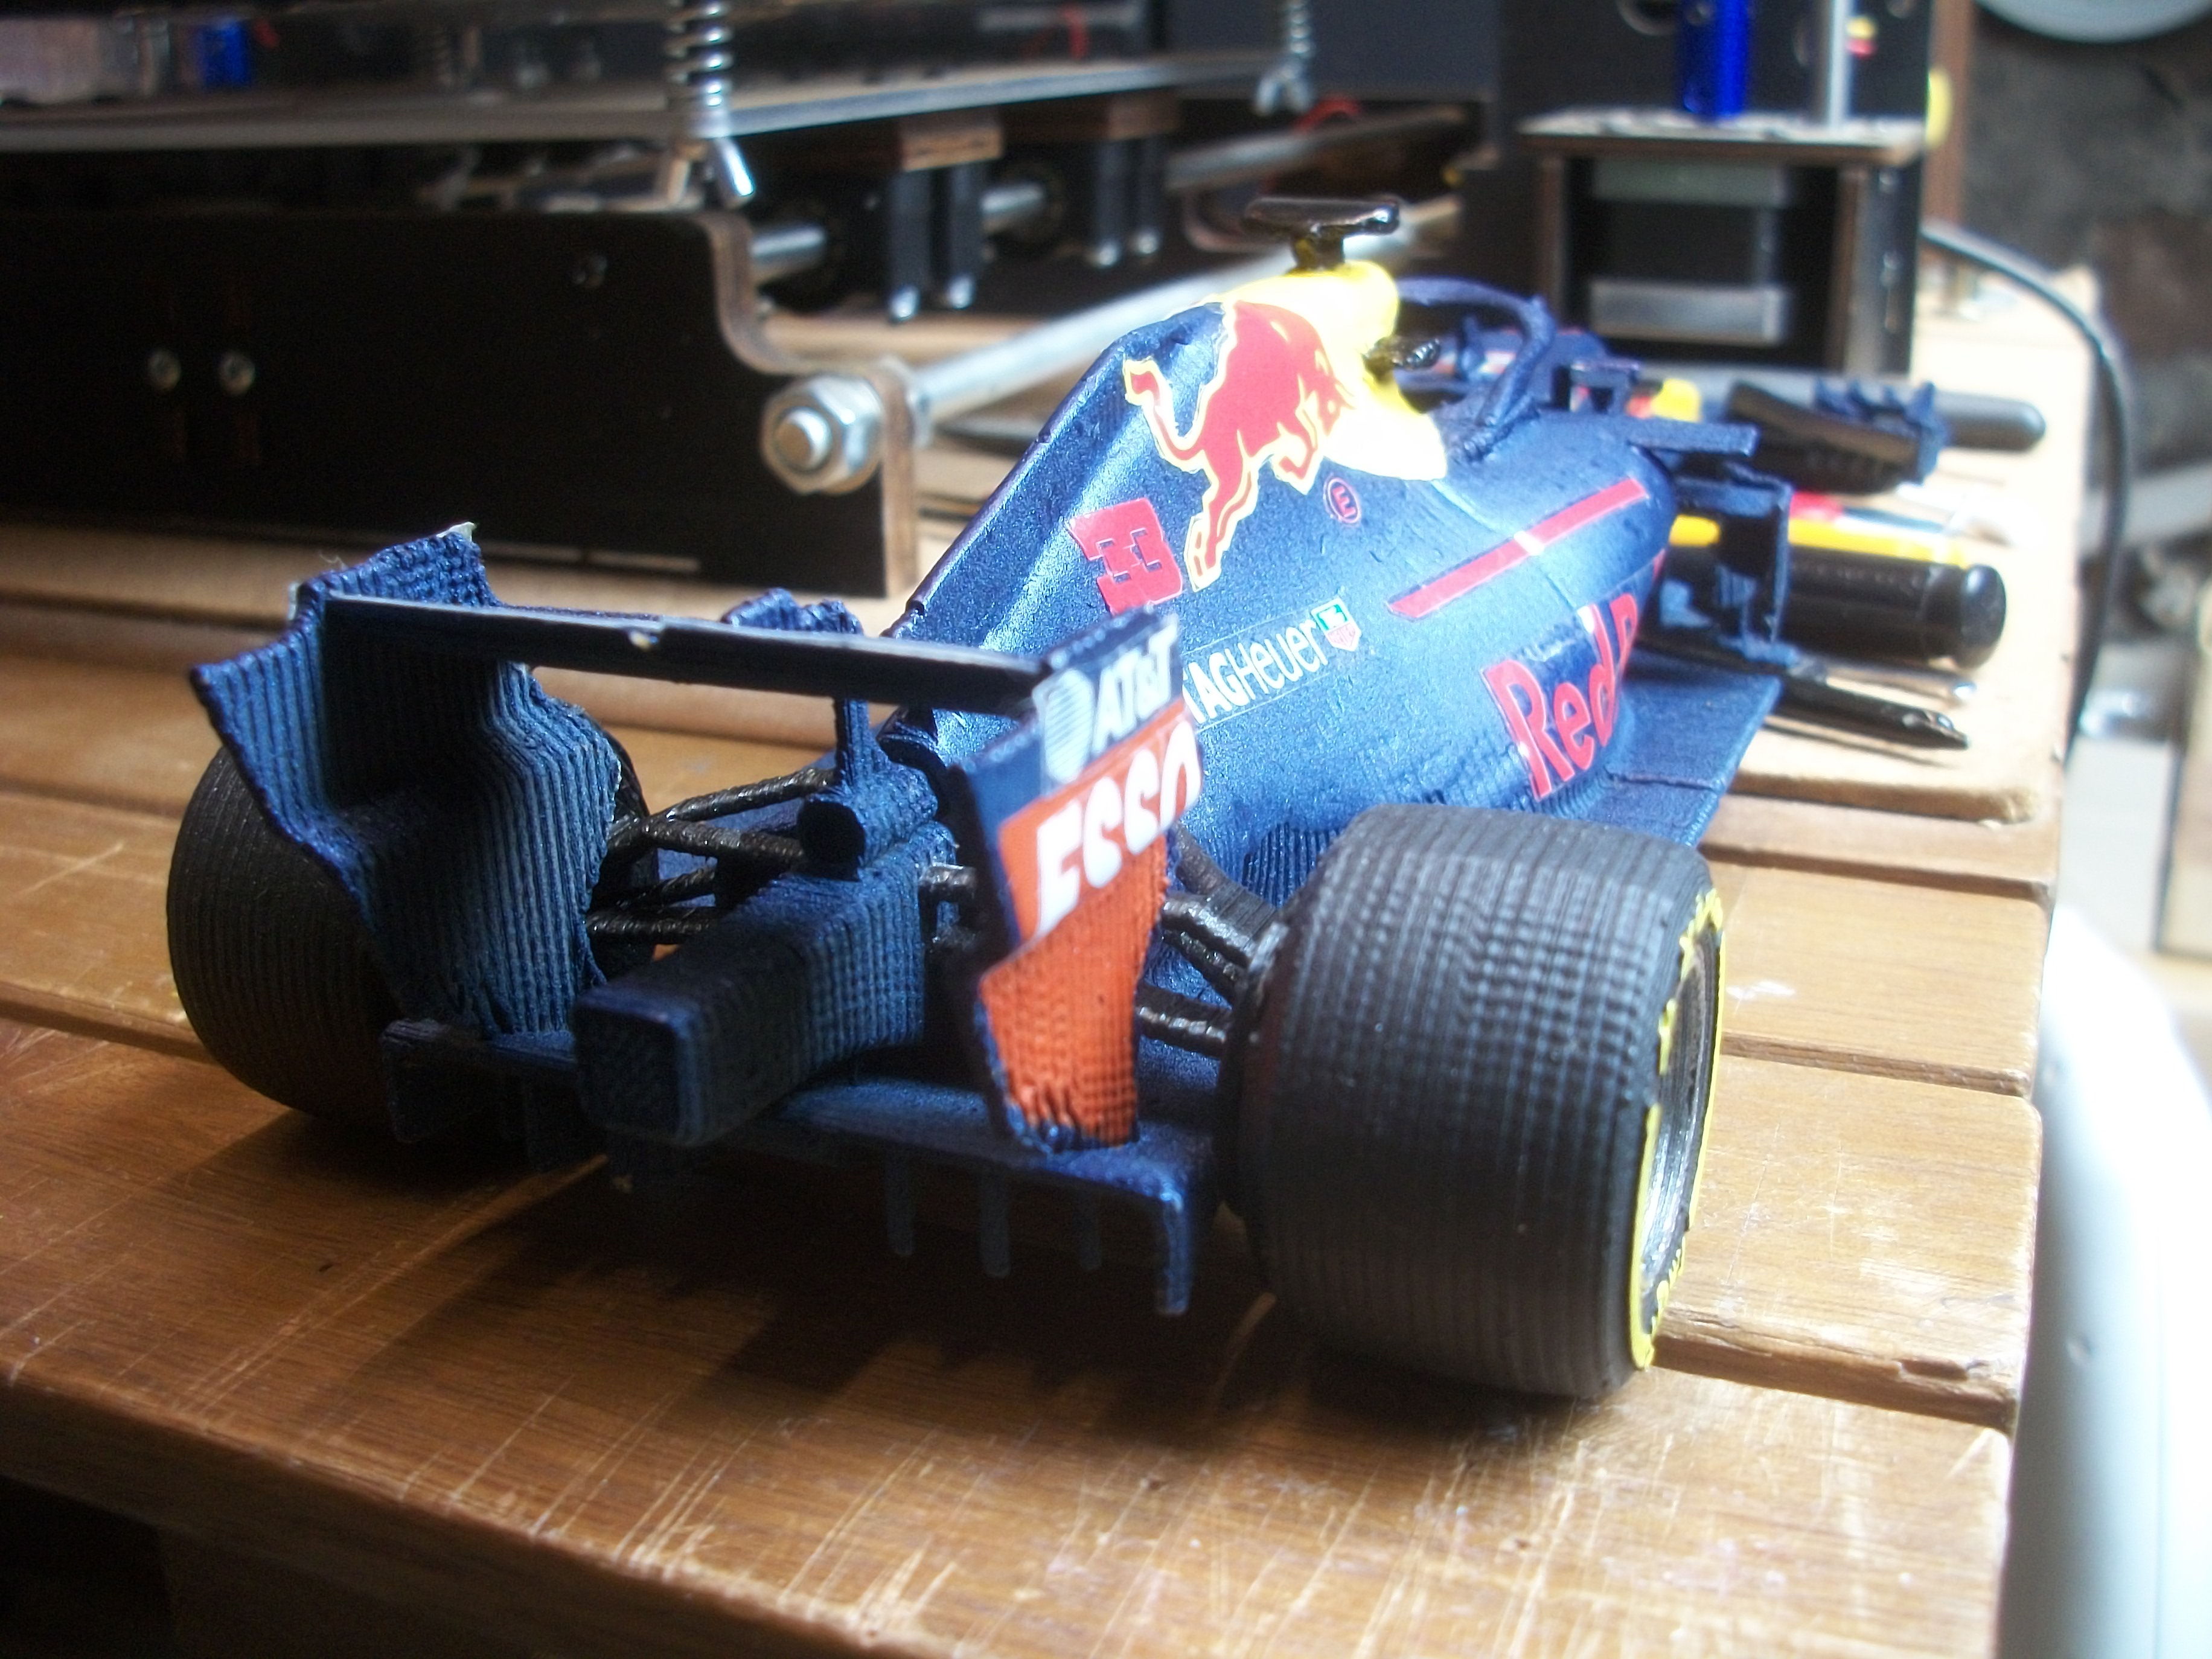
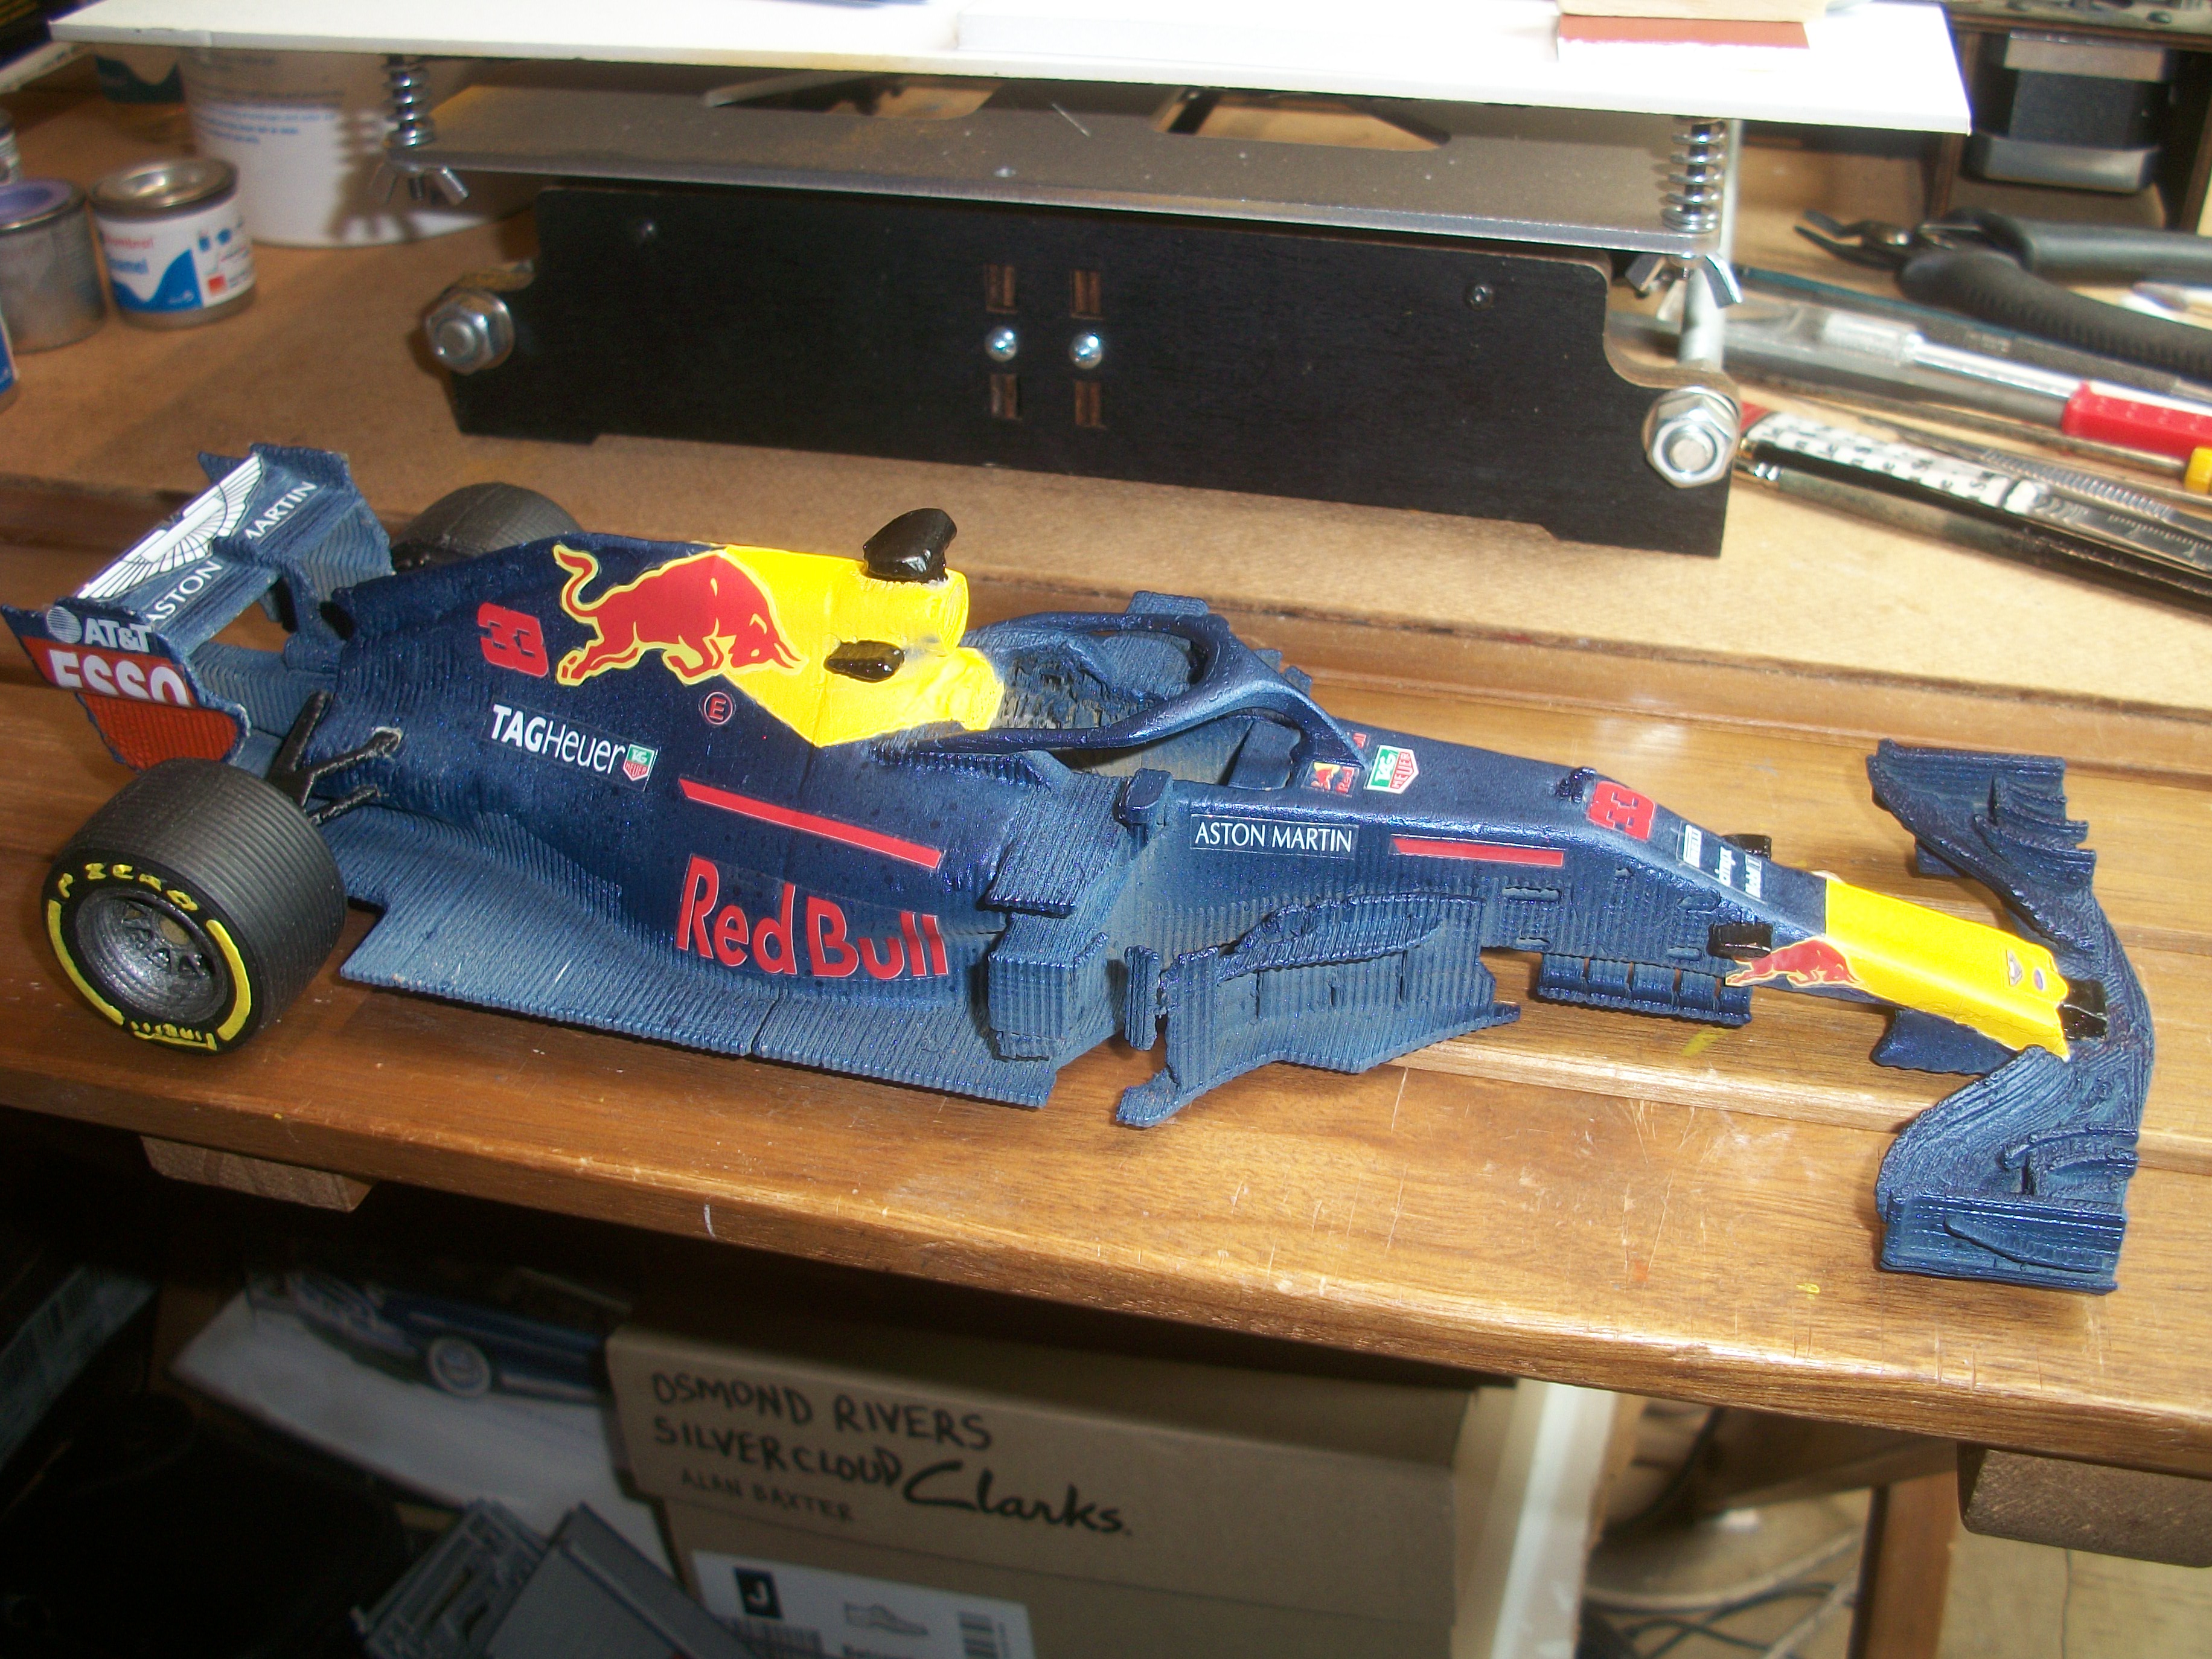
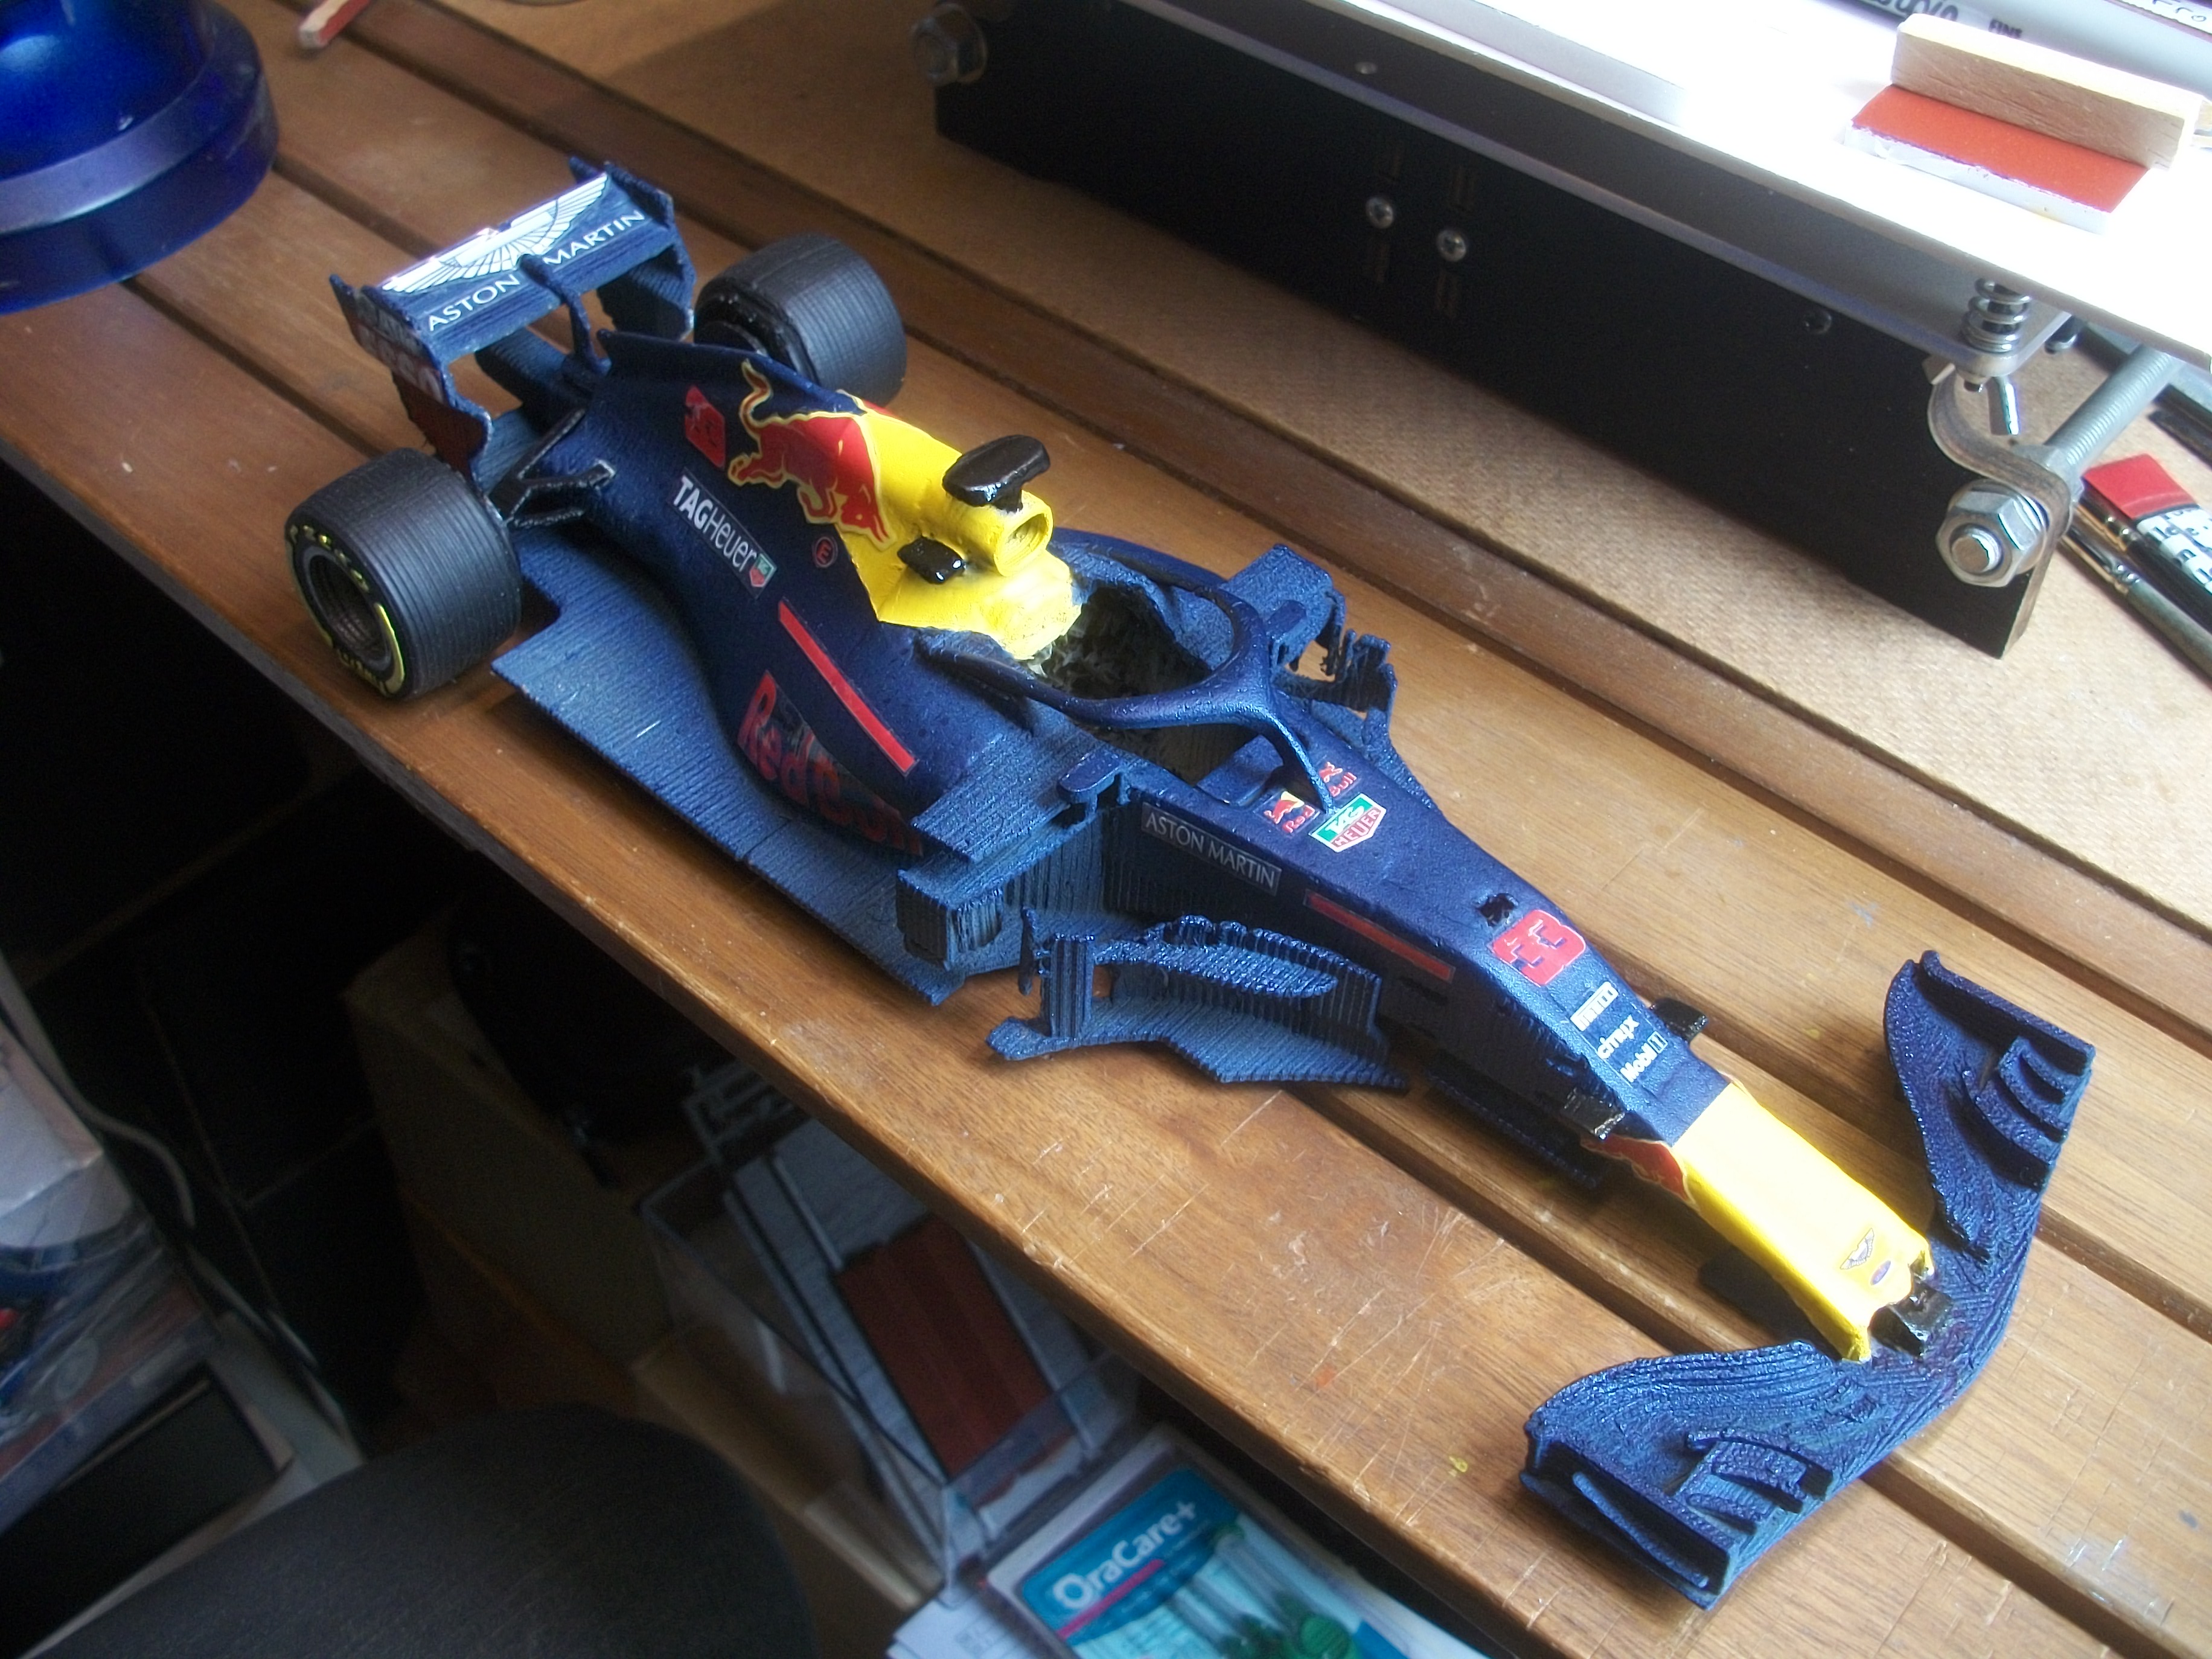
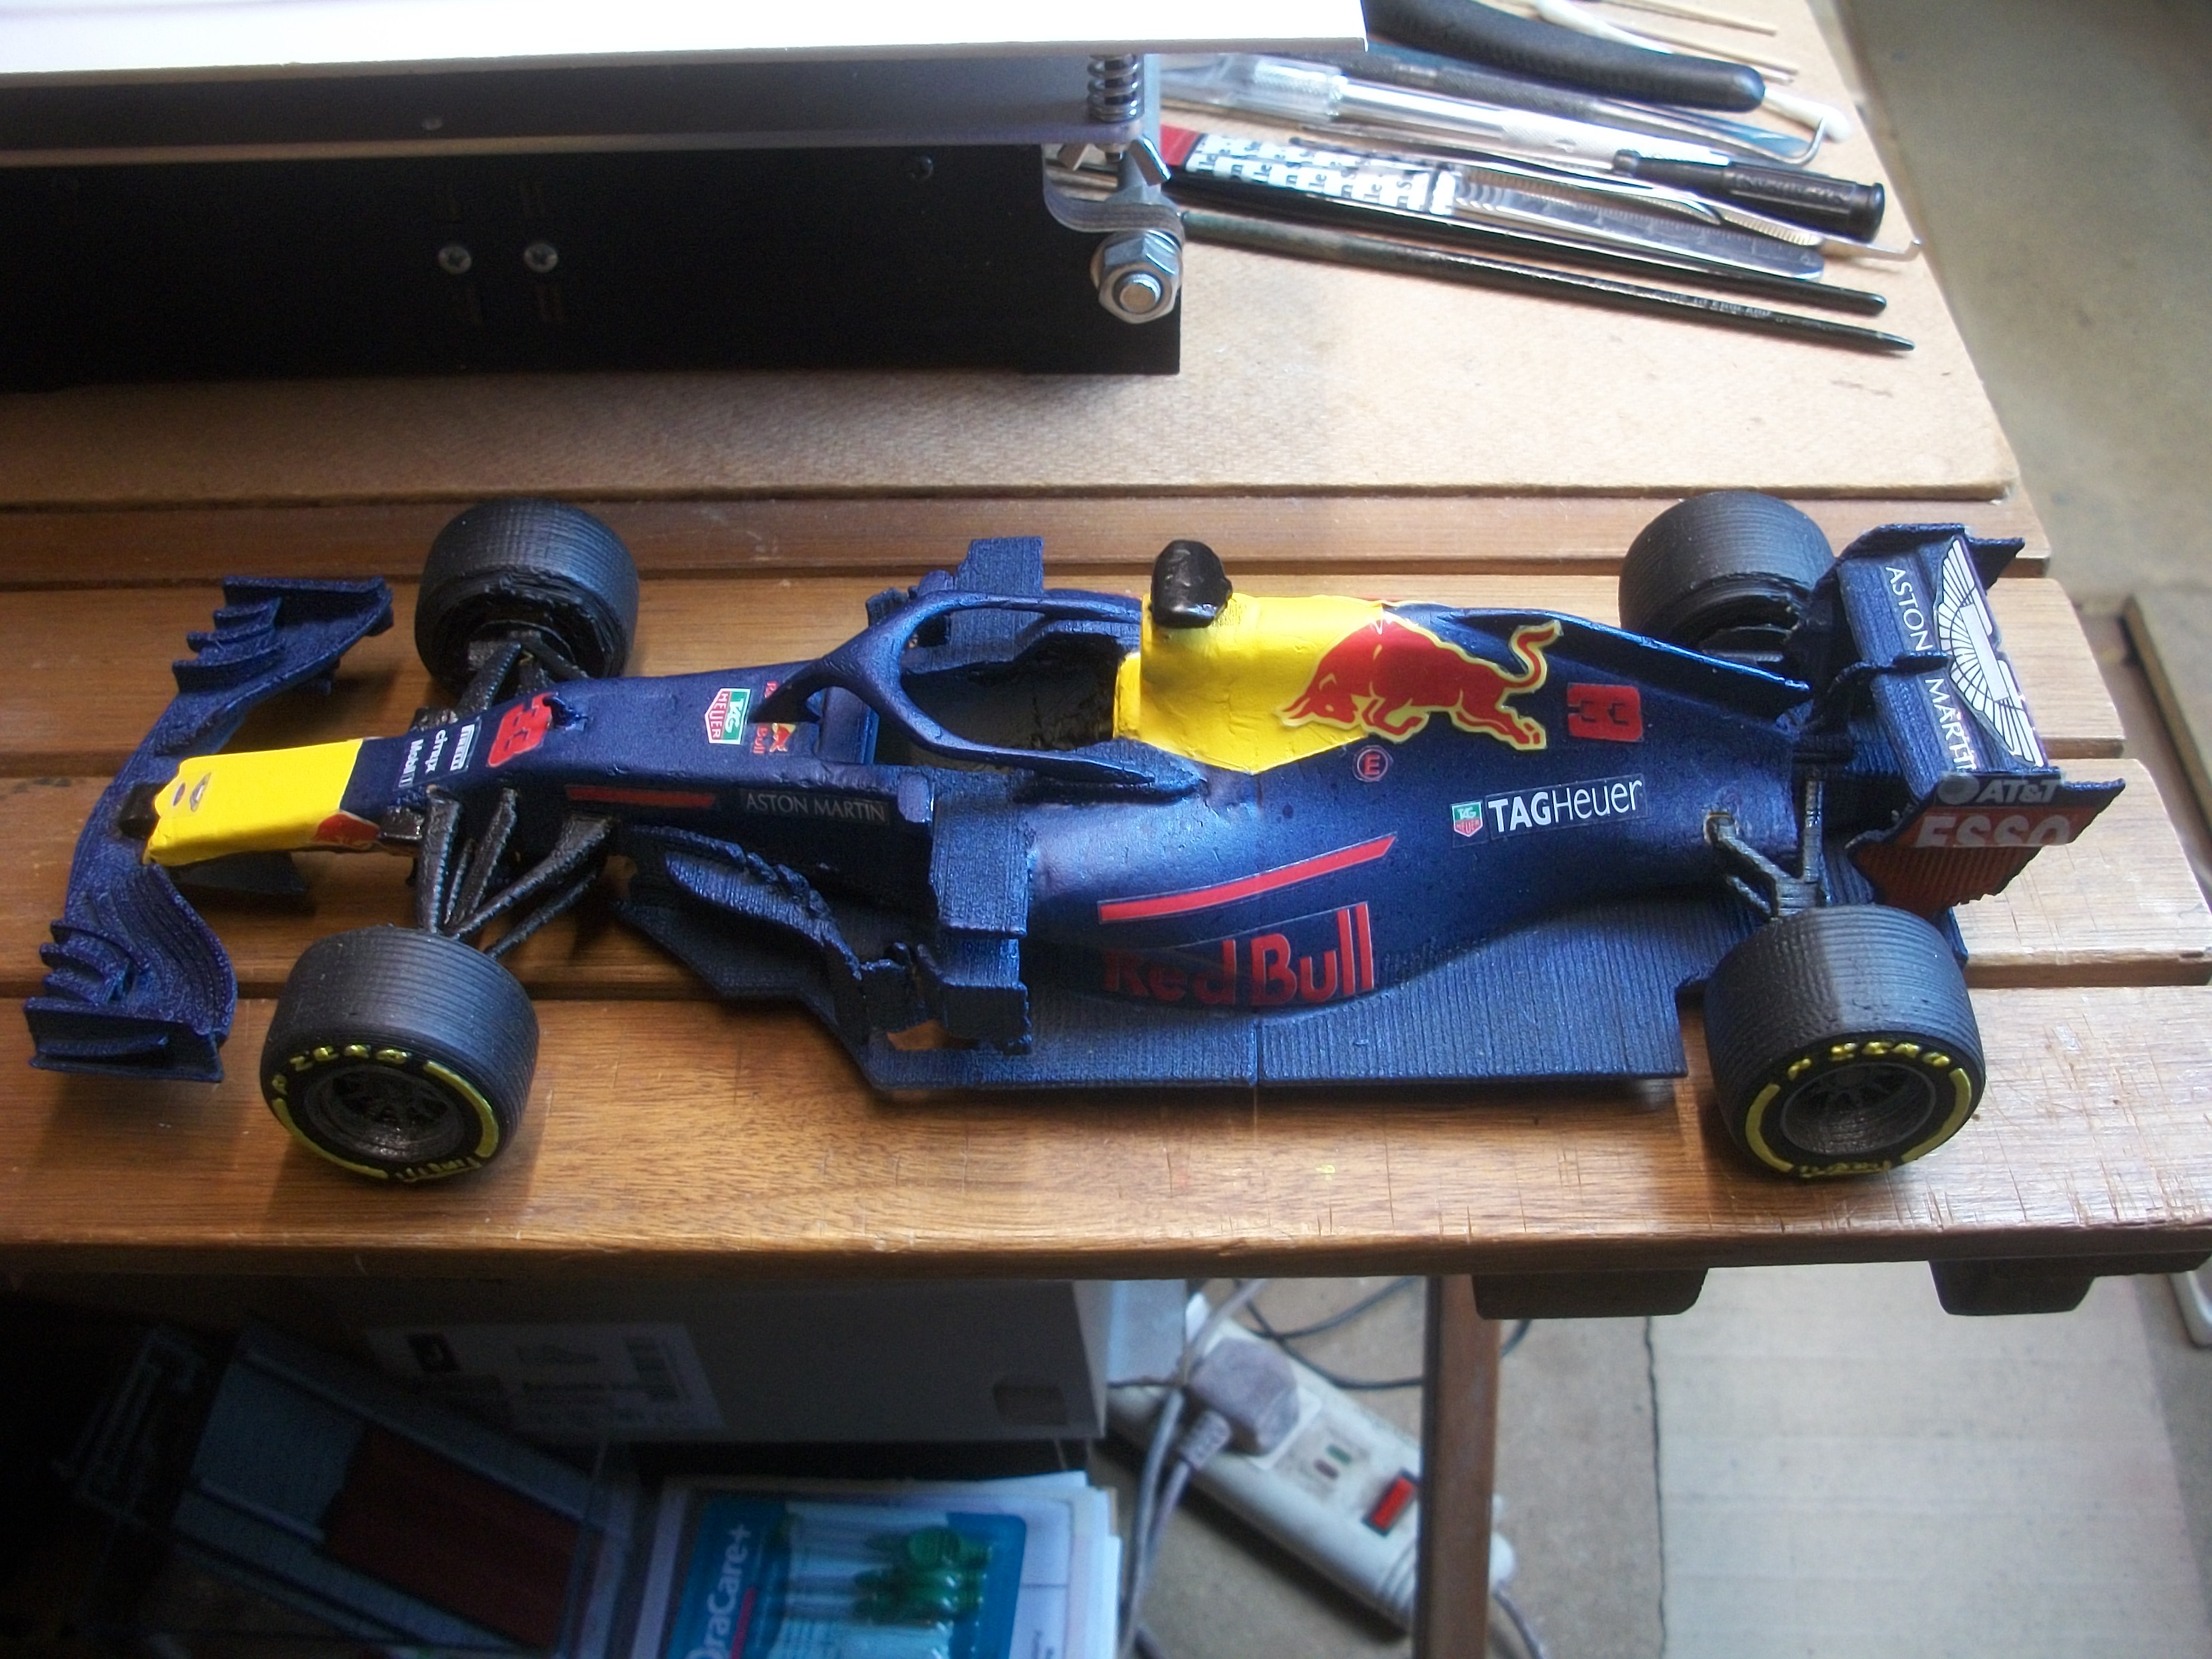
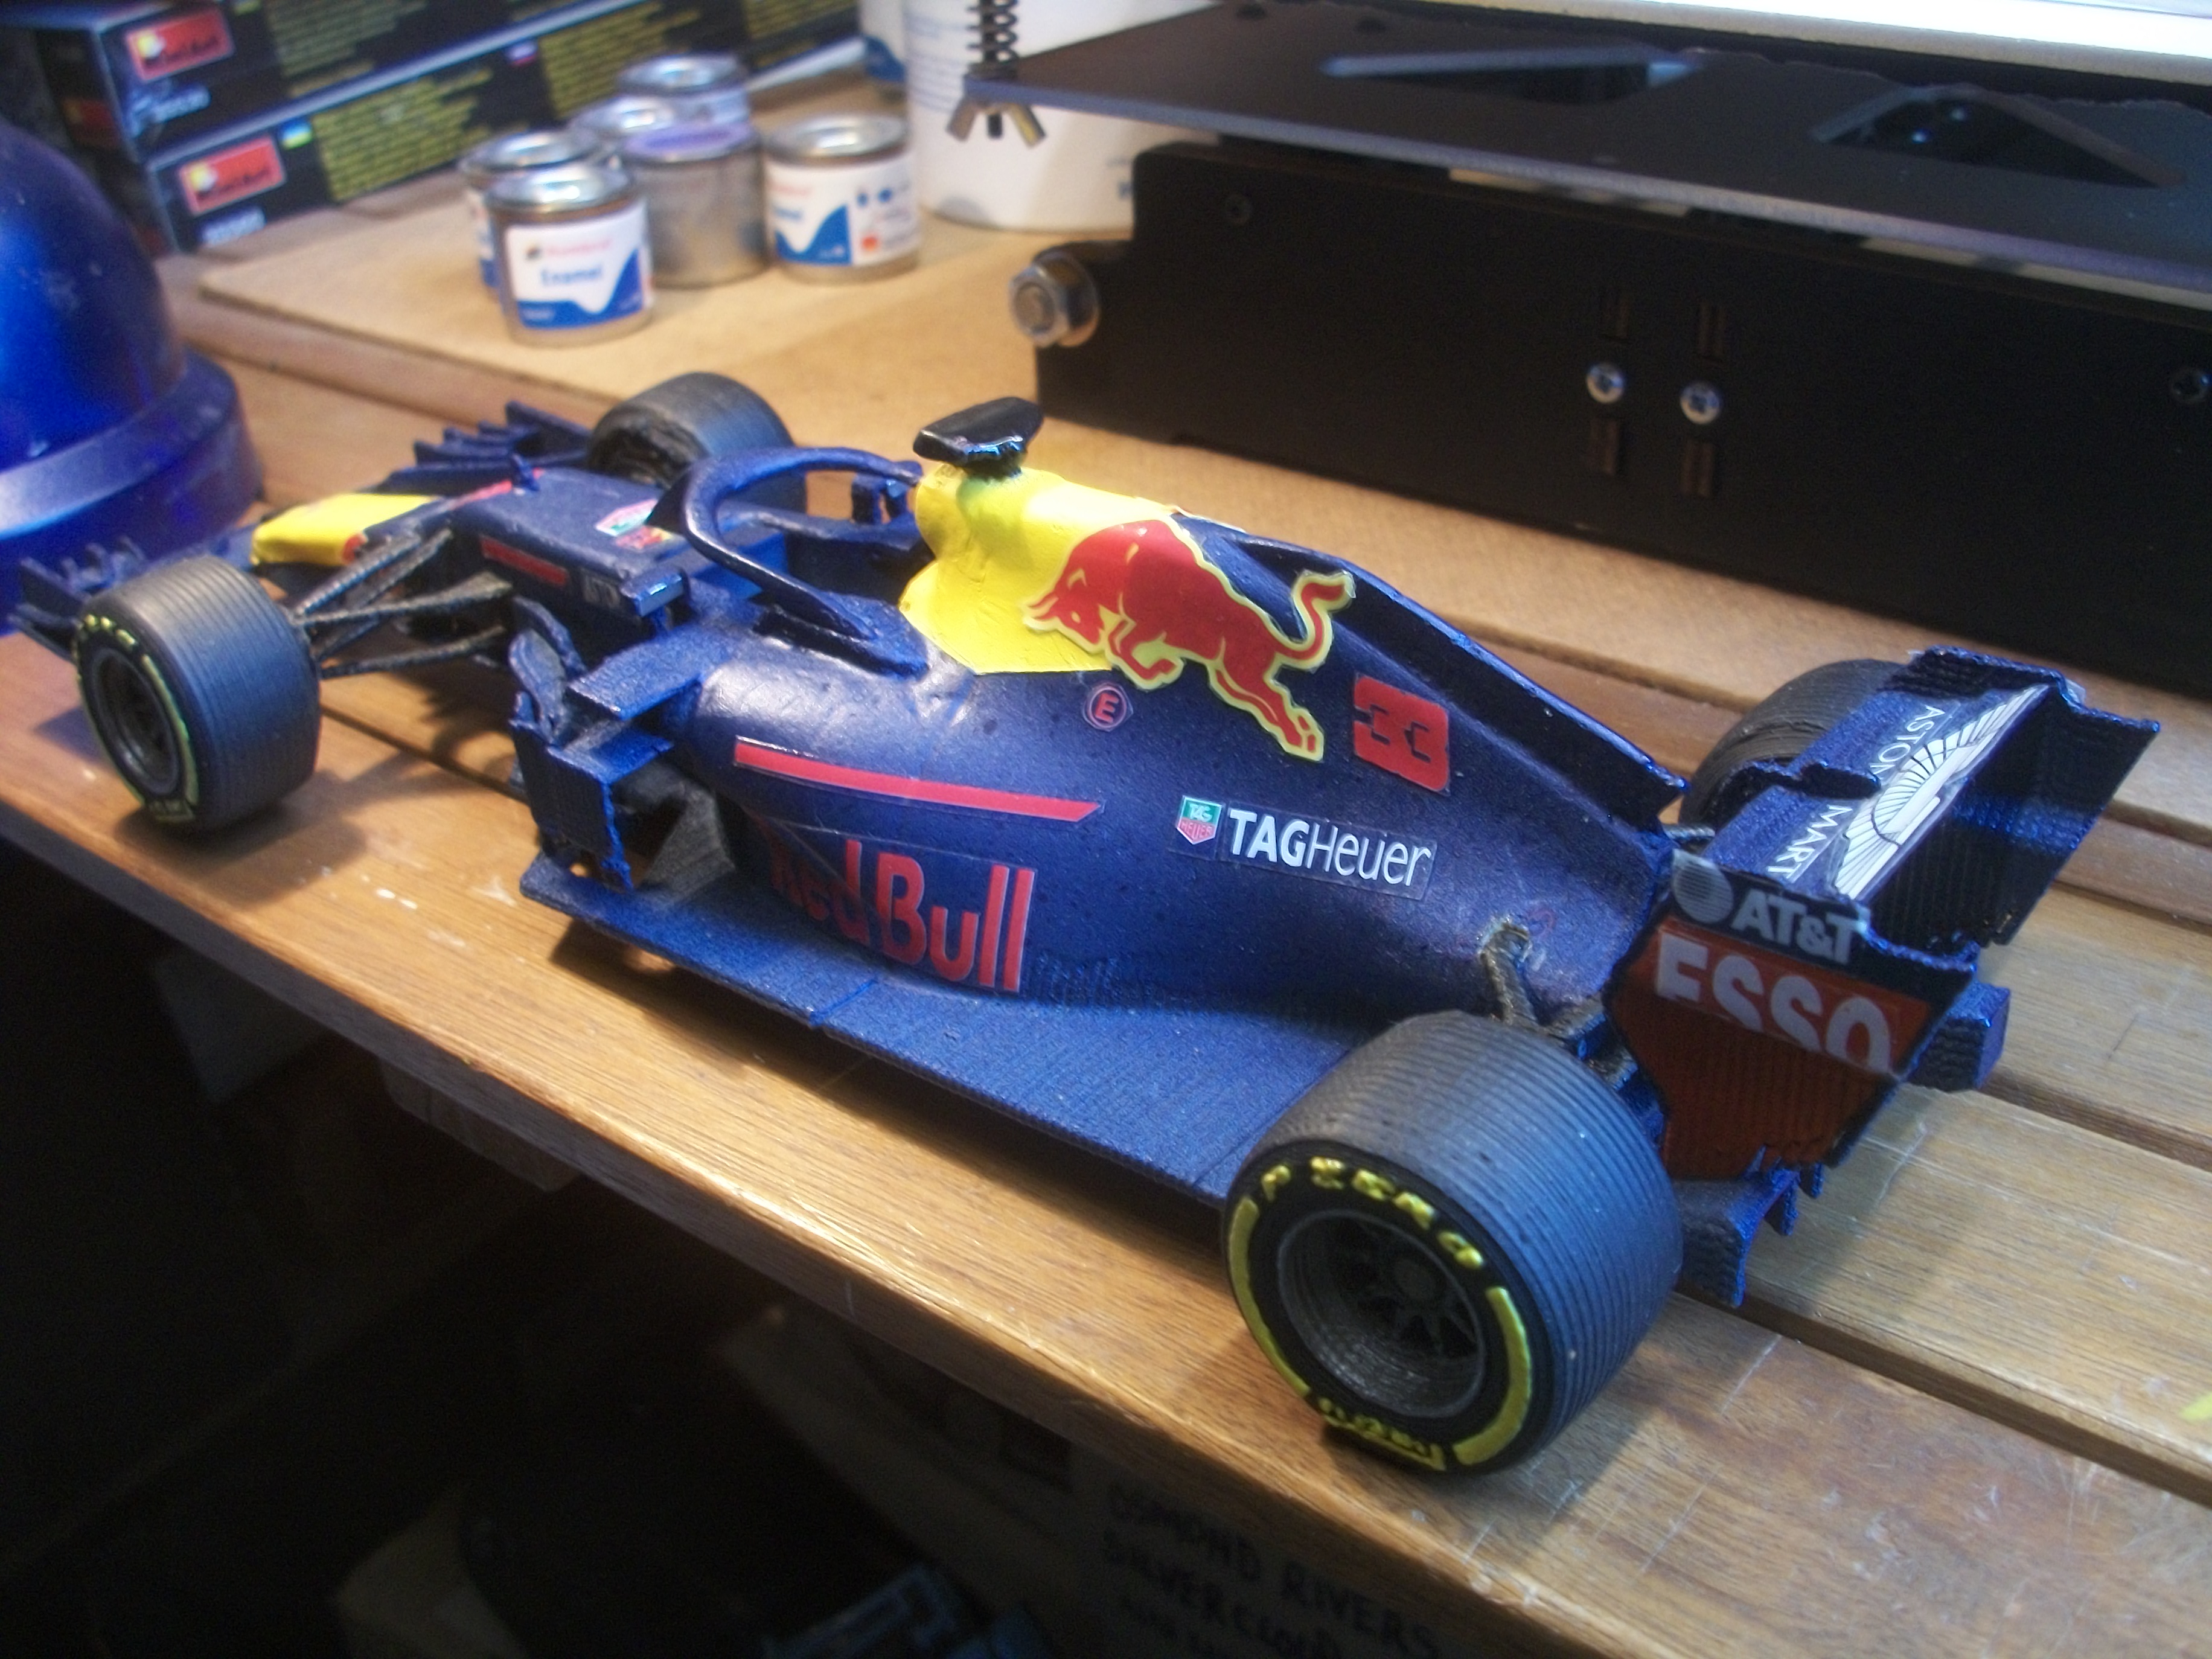
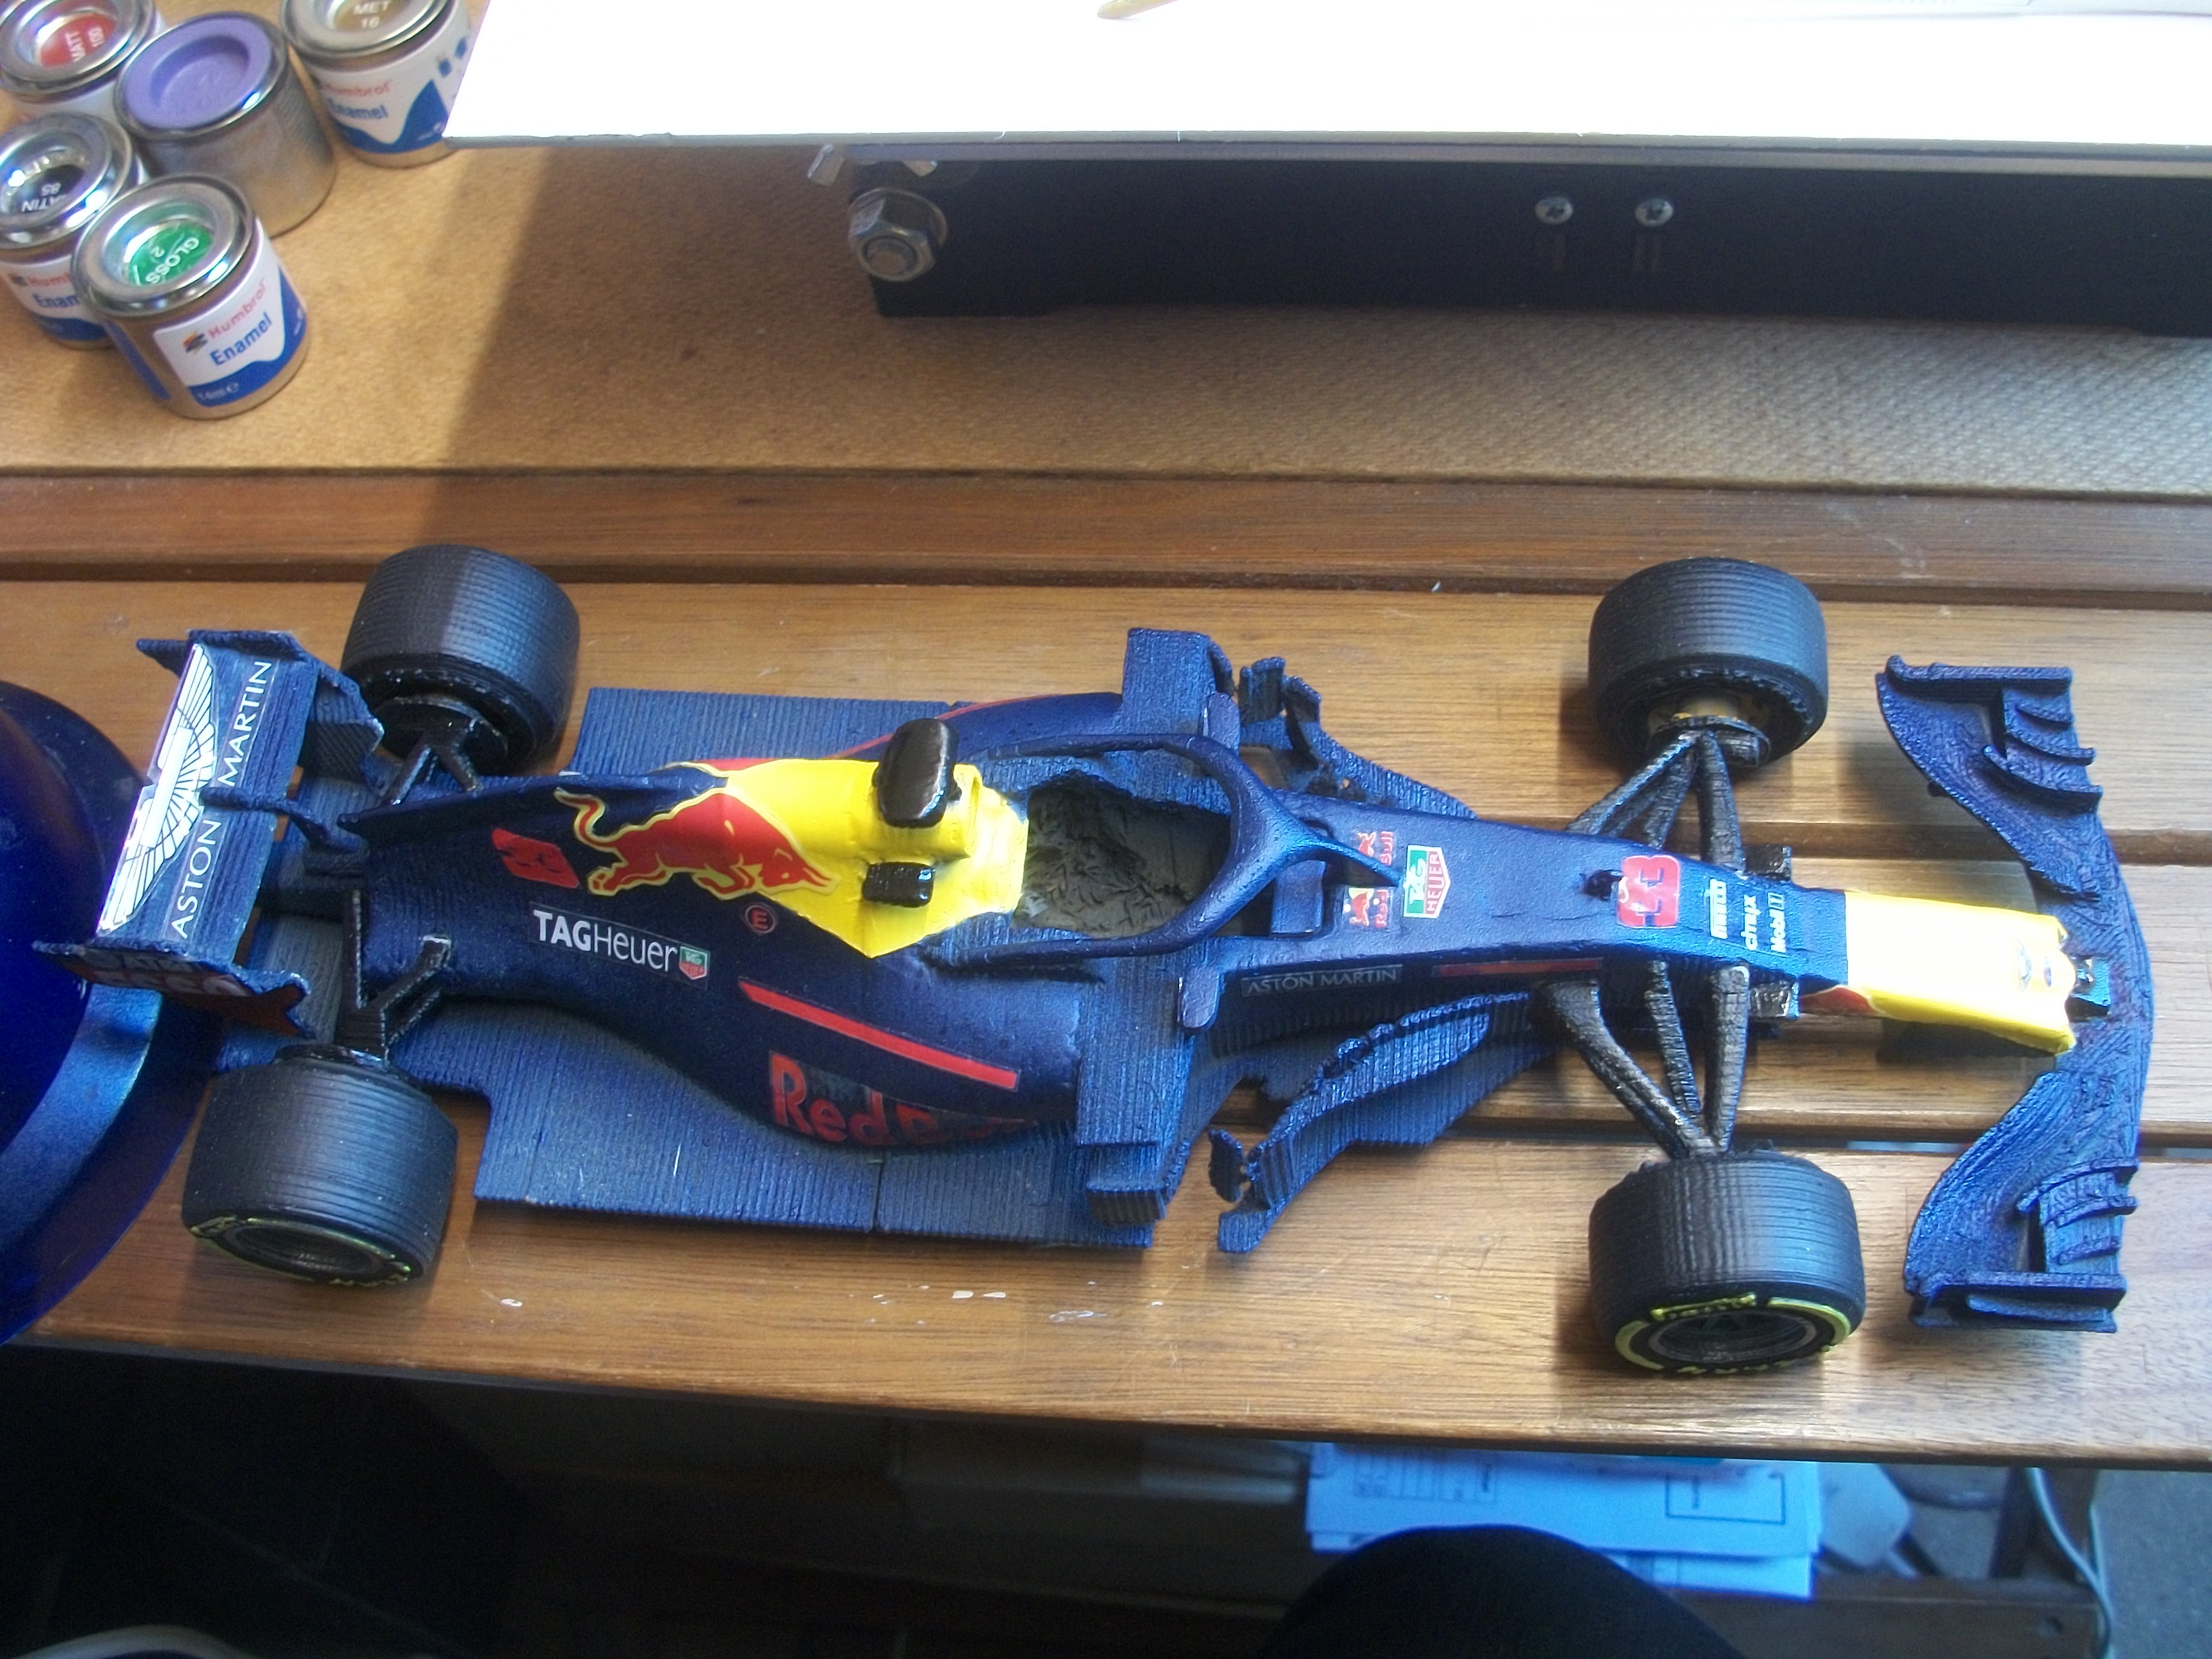
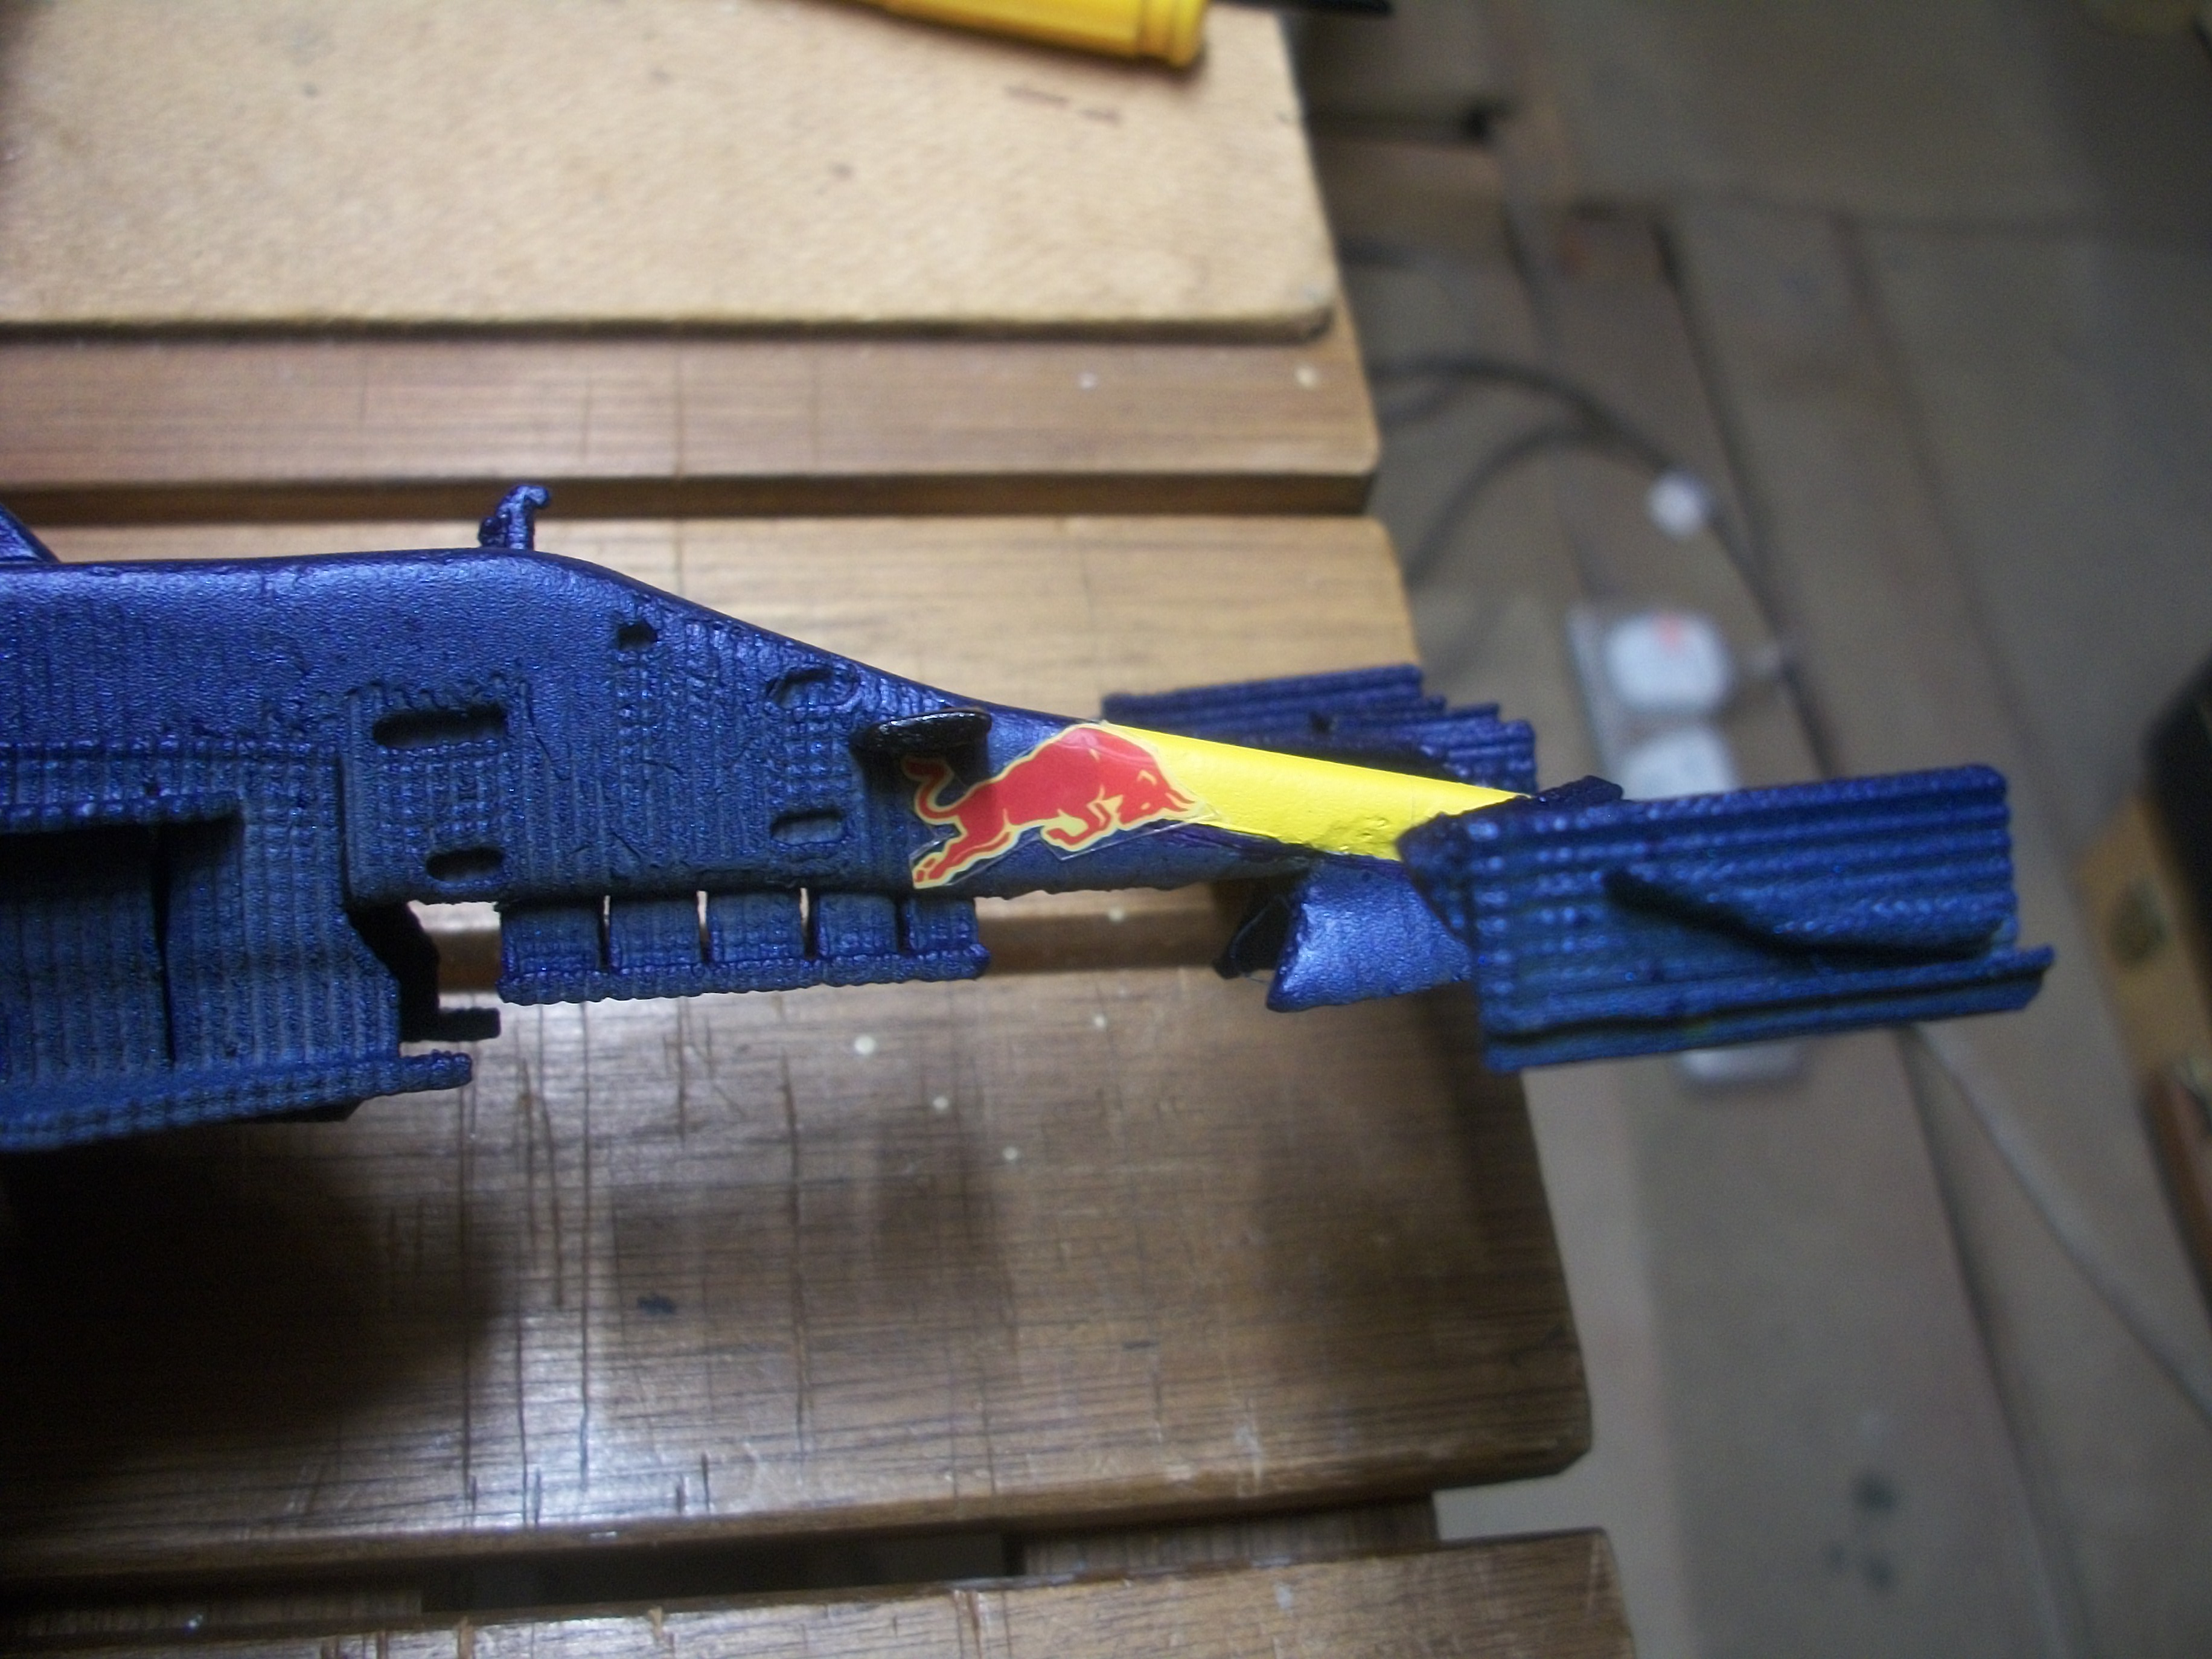
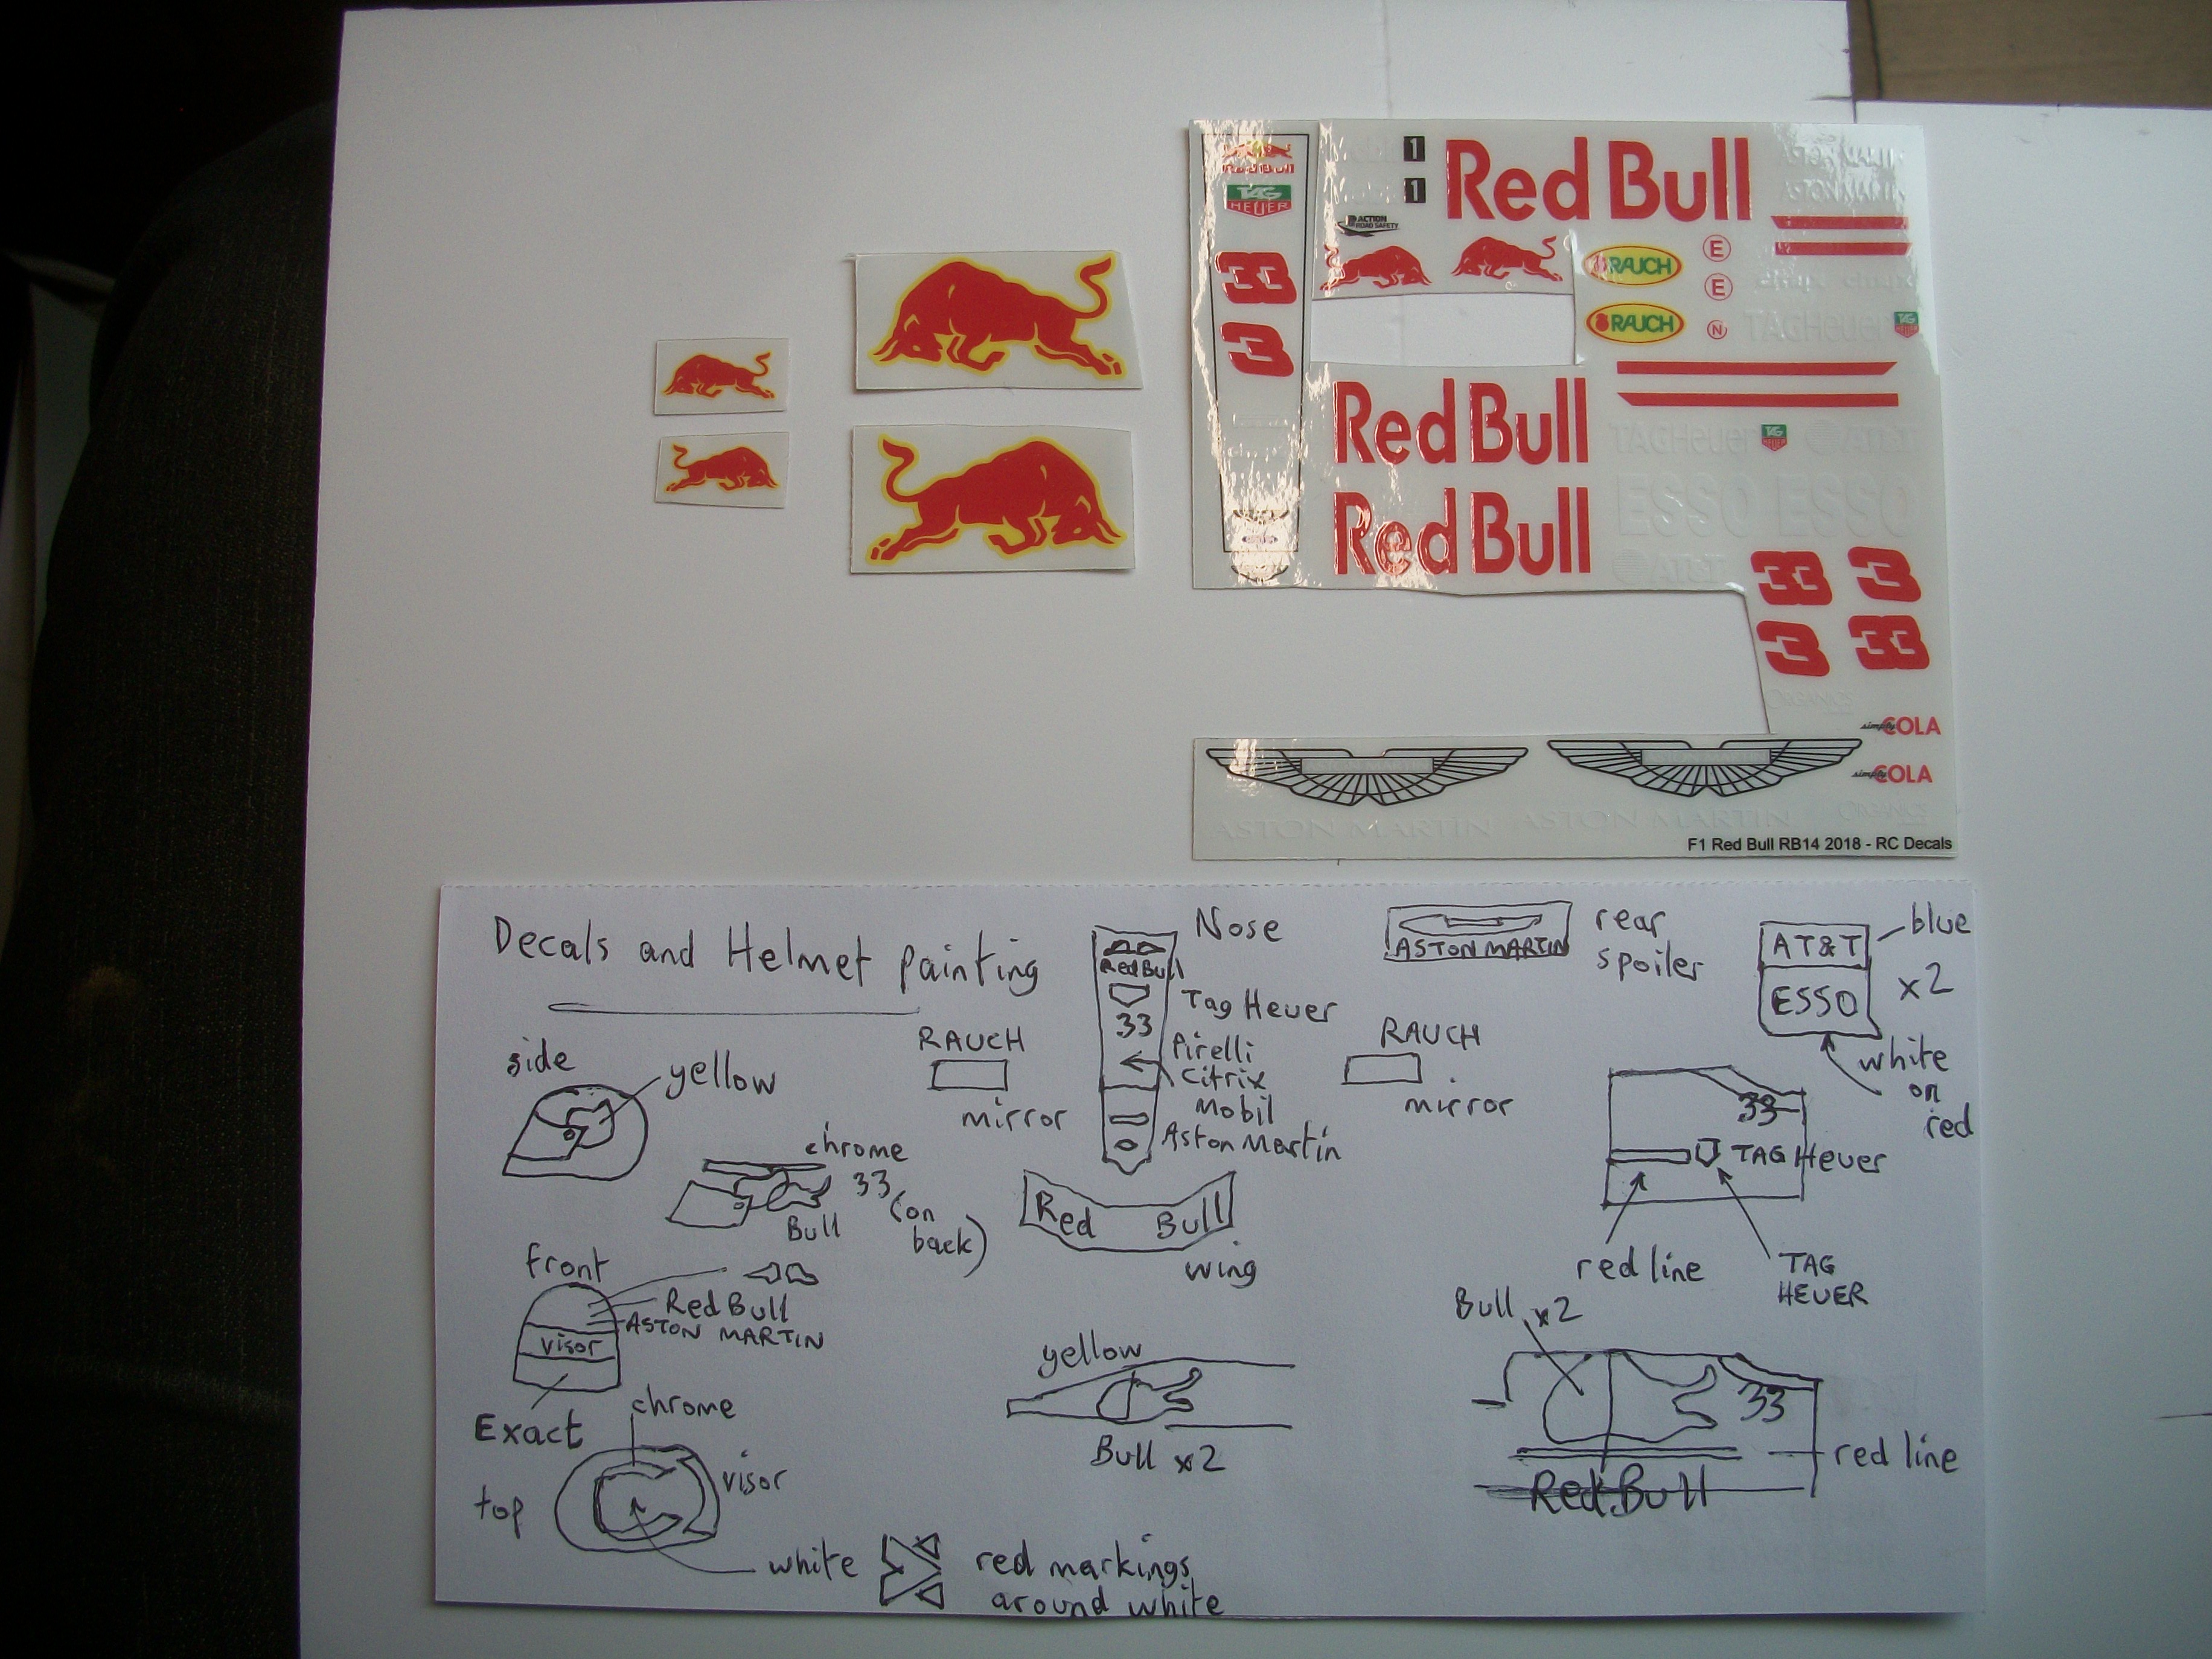
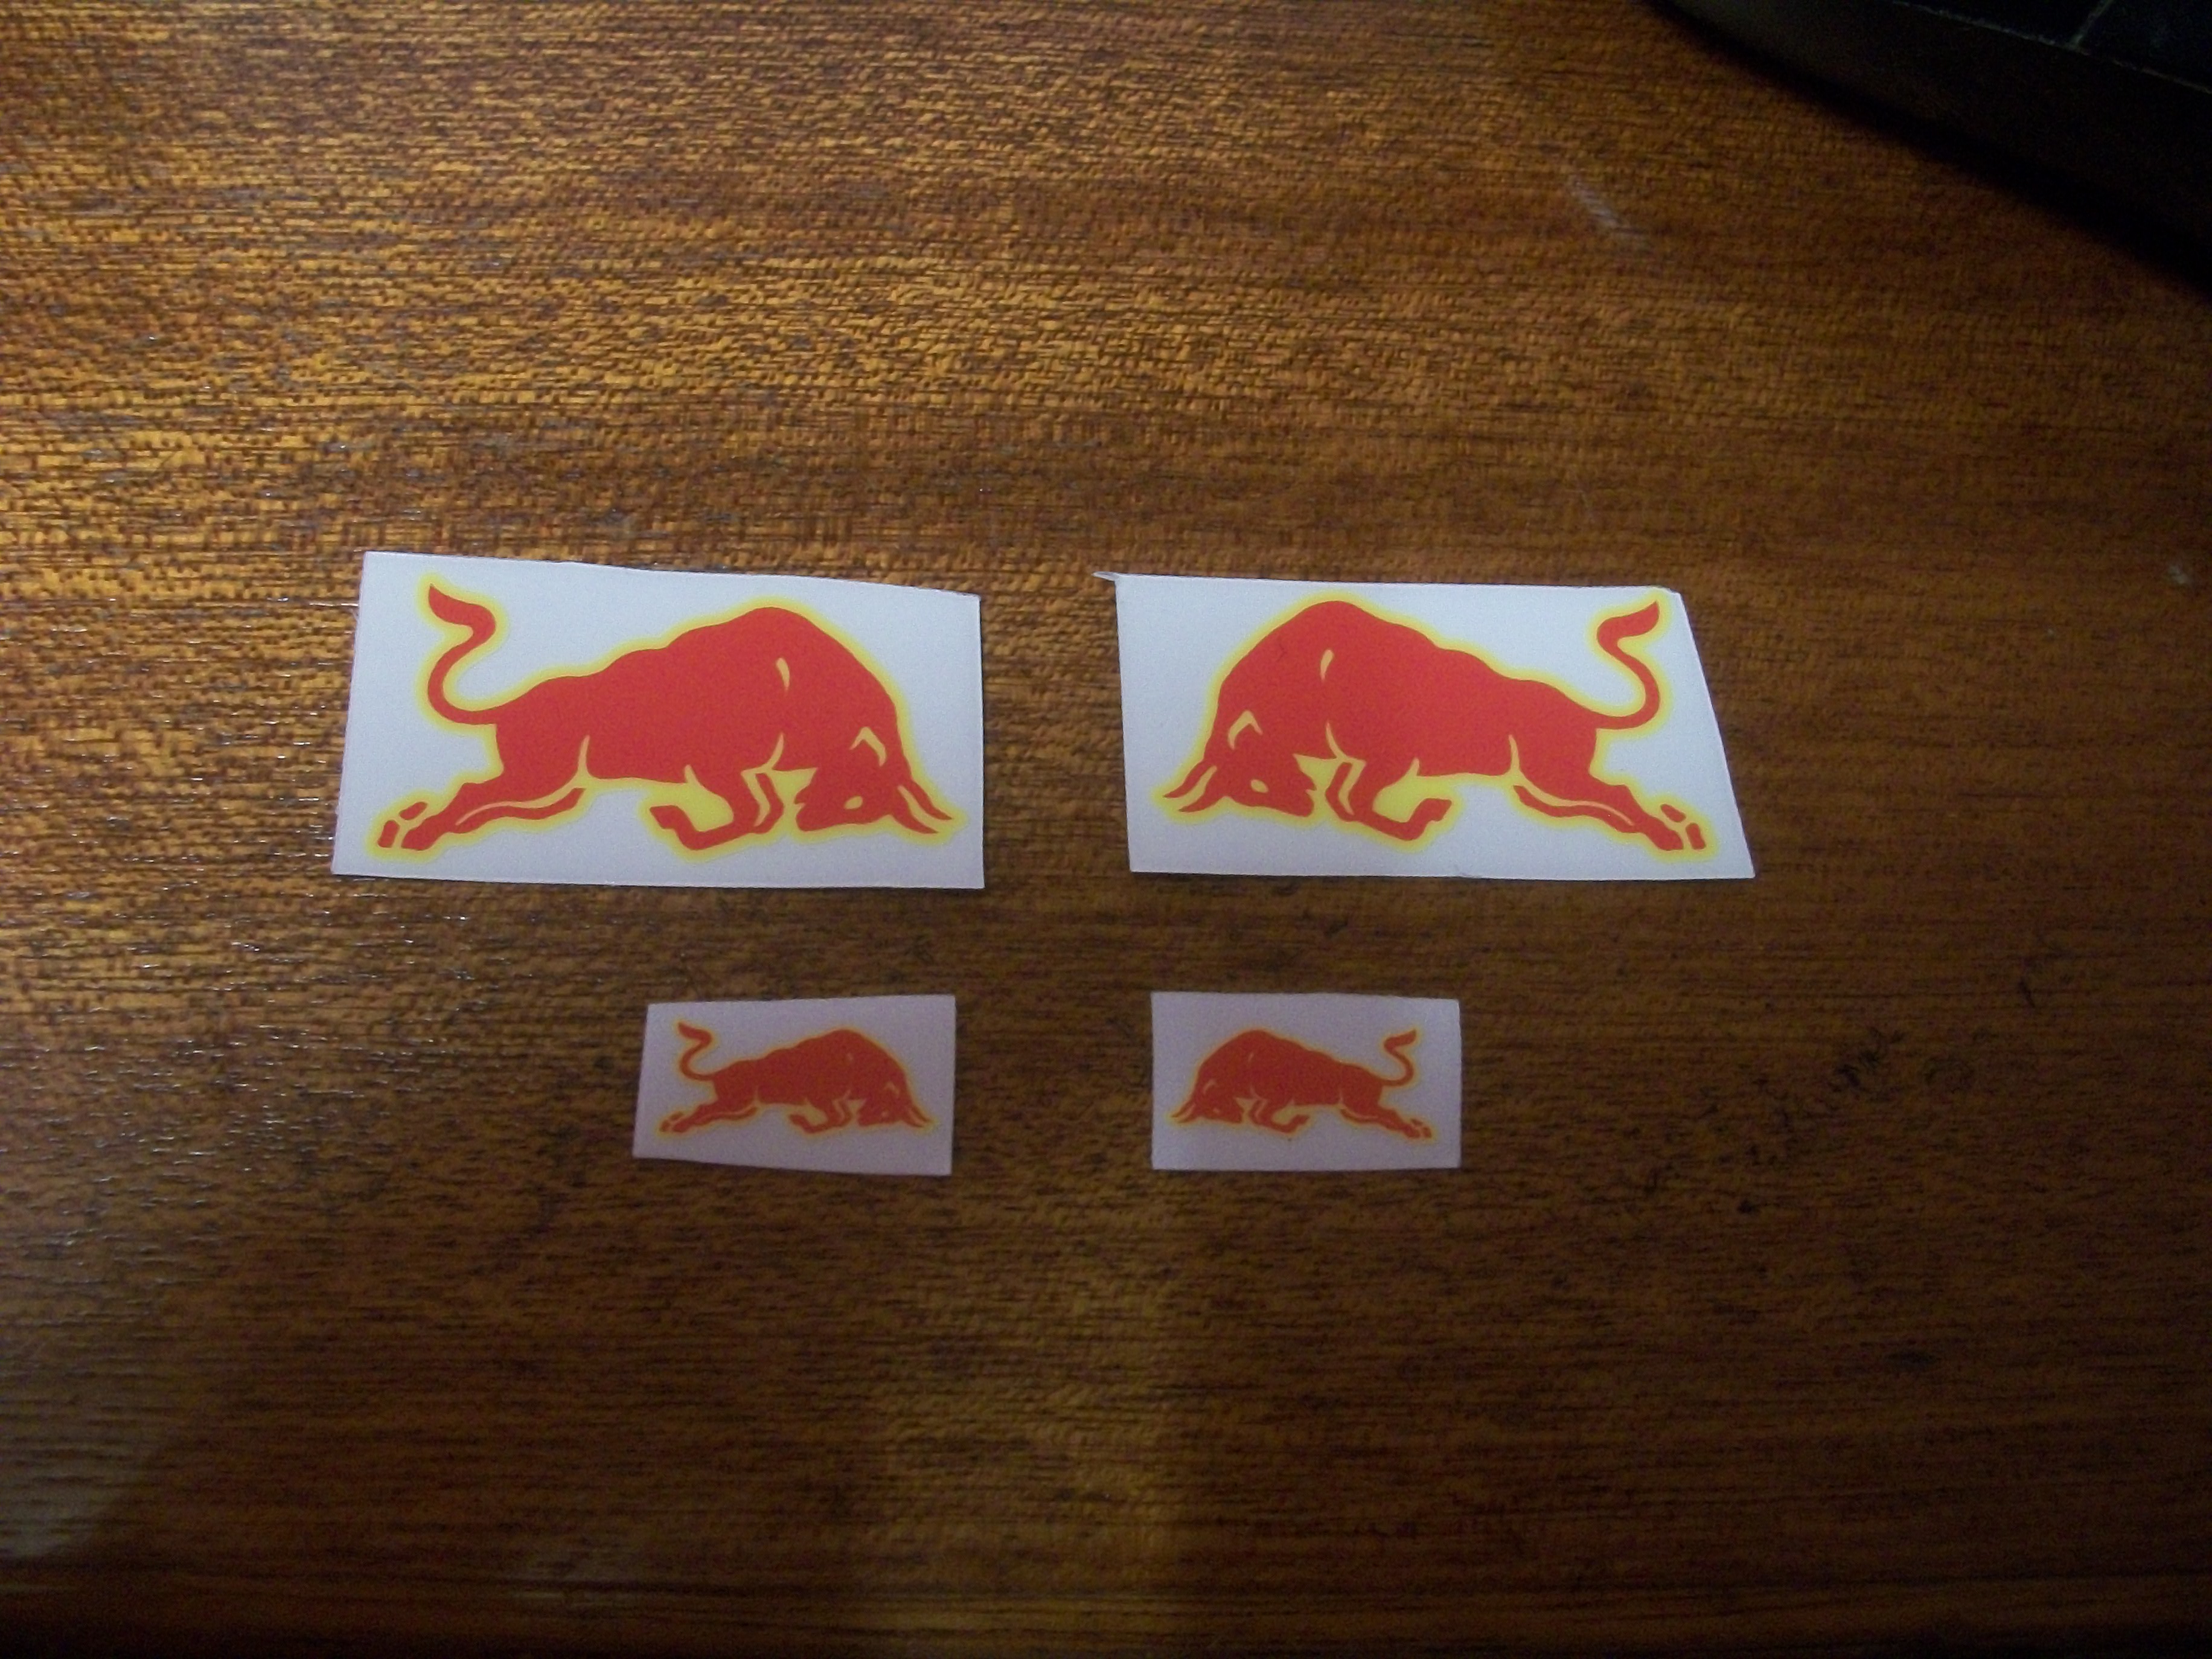
More decal work going on this evening....... These are 1:10 scale decals that have been scaled down to 1:20 for this Red Bull RB14, and they are peel off film type stickers rather than the usual water slide. Cutting each decal from the sheet is tricky, and I am using a scalpel knife to do the job as precisely as possible. Apparently, the 1:10 scale decals are supplied pre-cut, but not these scaled down special one-offs. The arrangement of decals on any F1 race car is always complex, and this Red Bull is no exception. Here are a few photos showing current progress with the decals. David
-
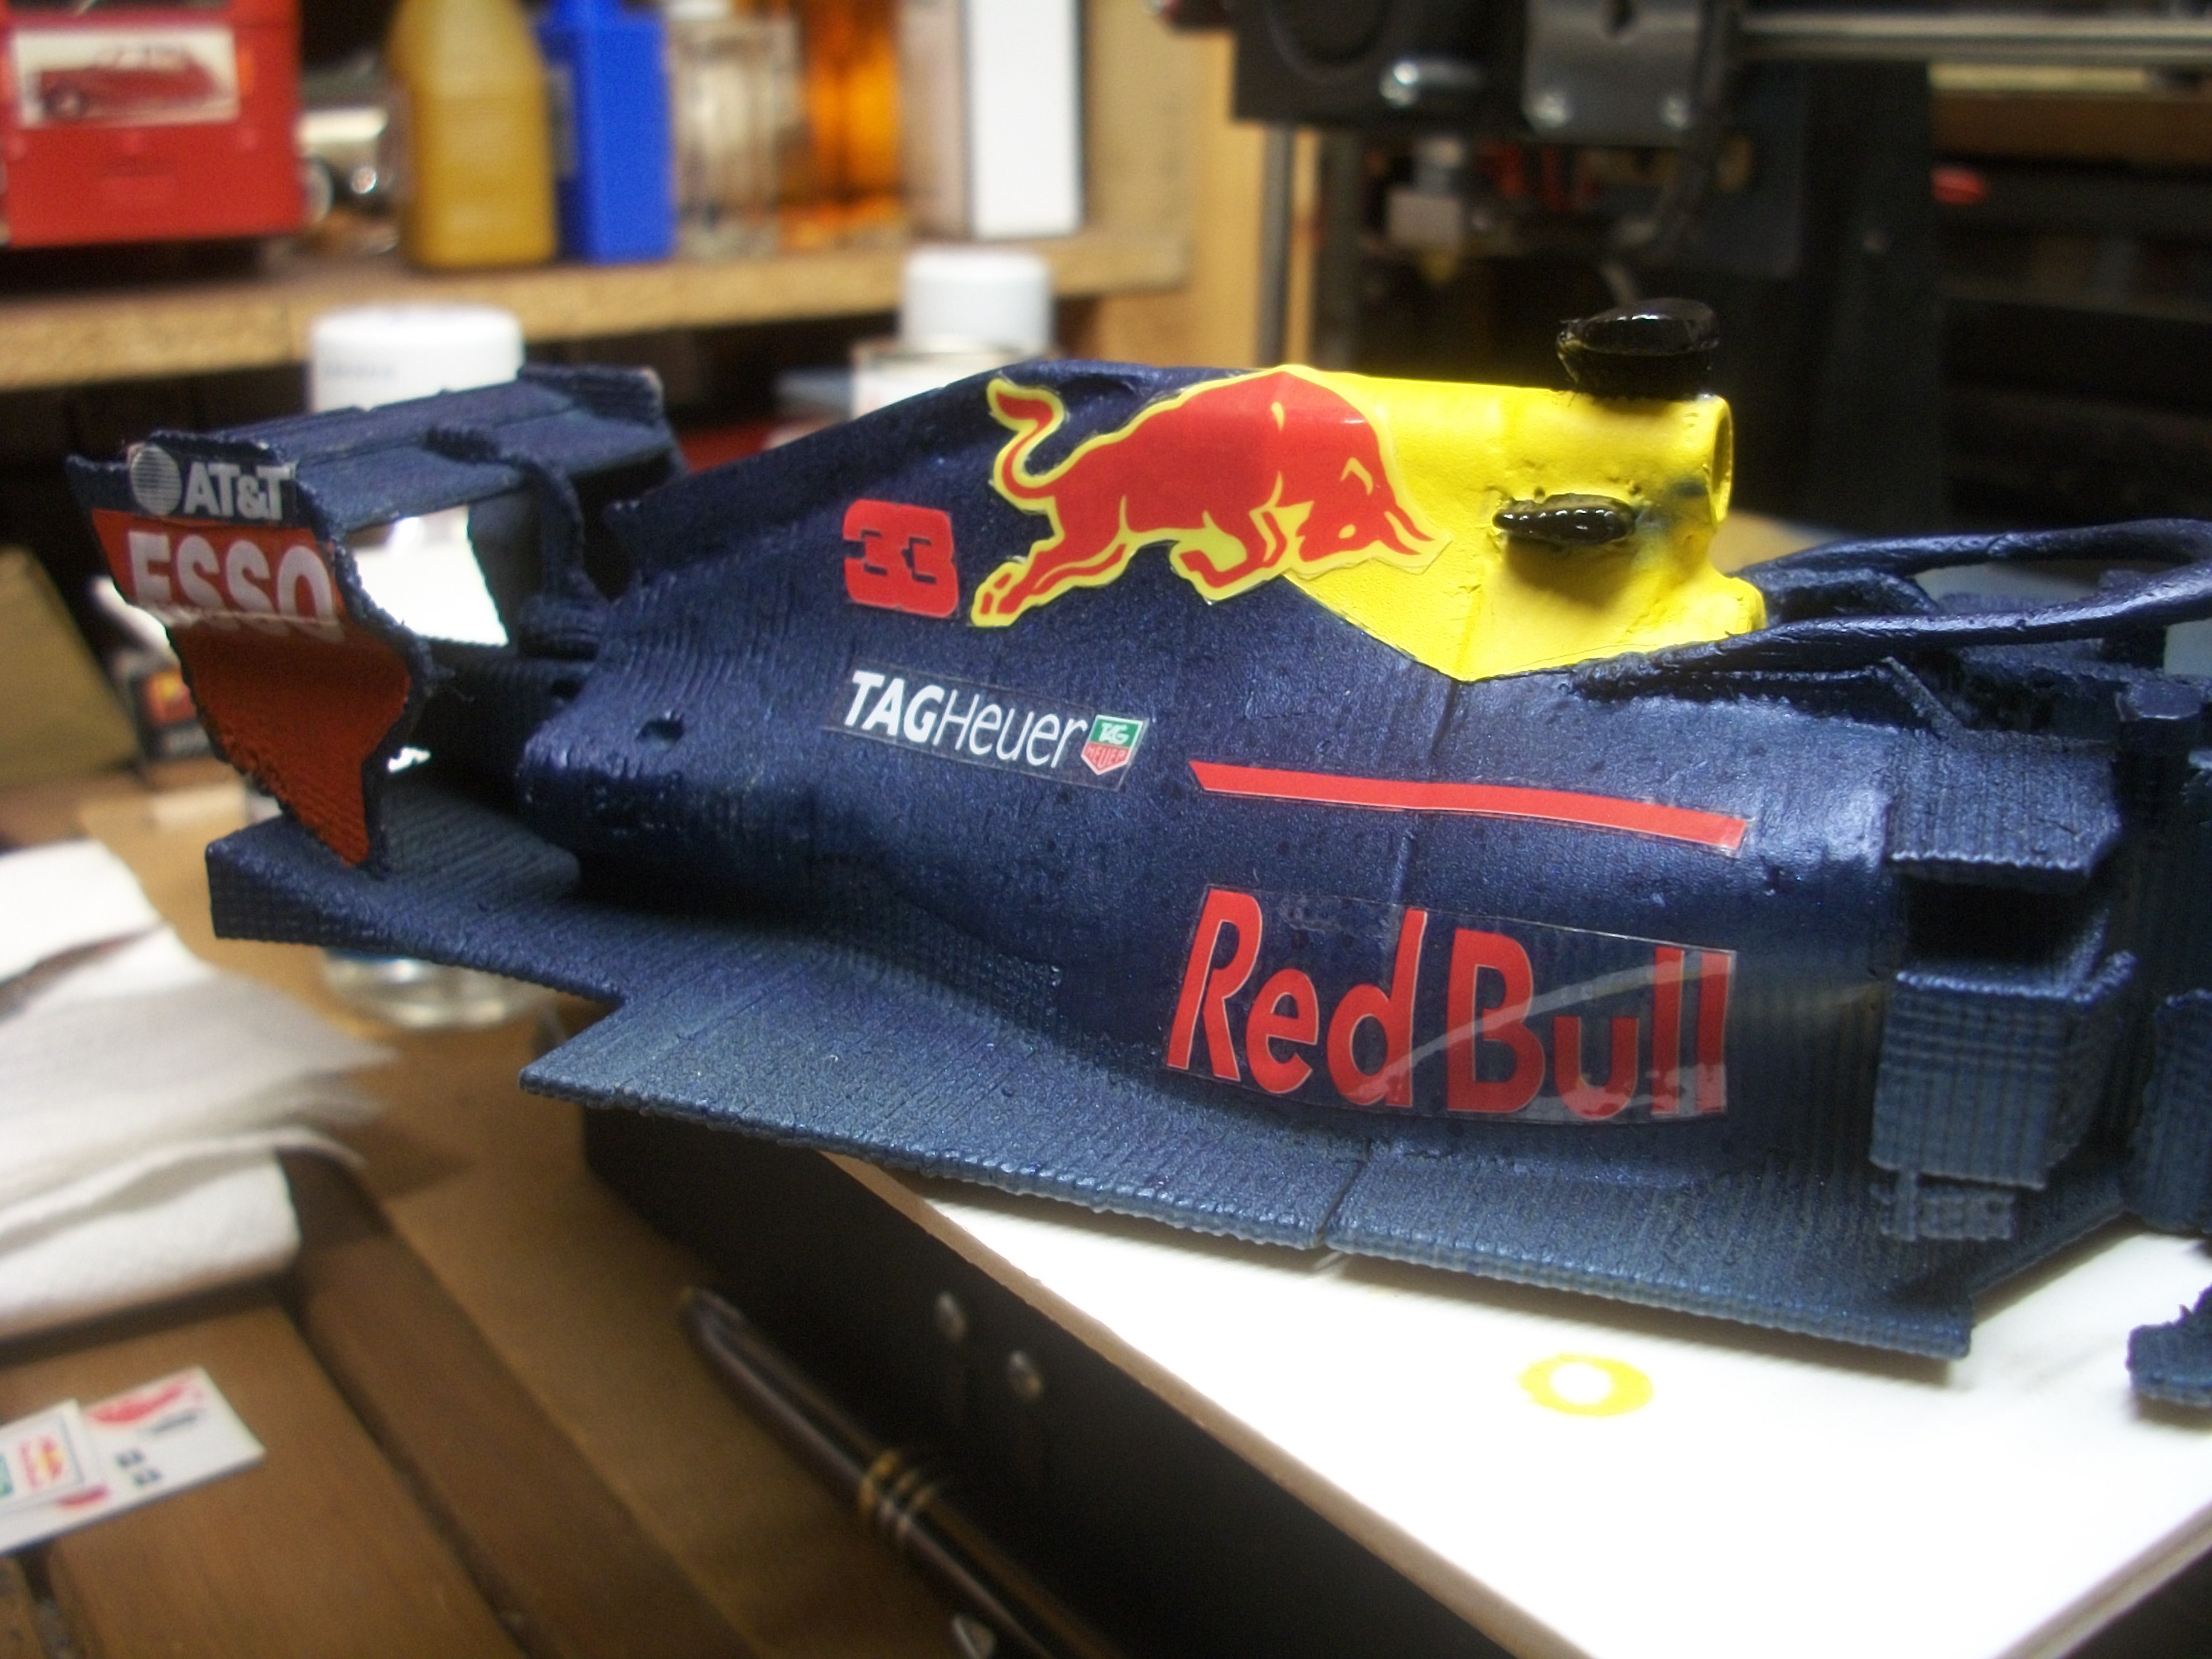
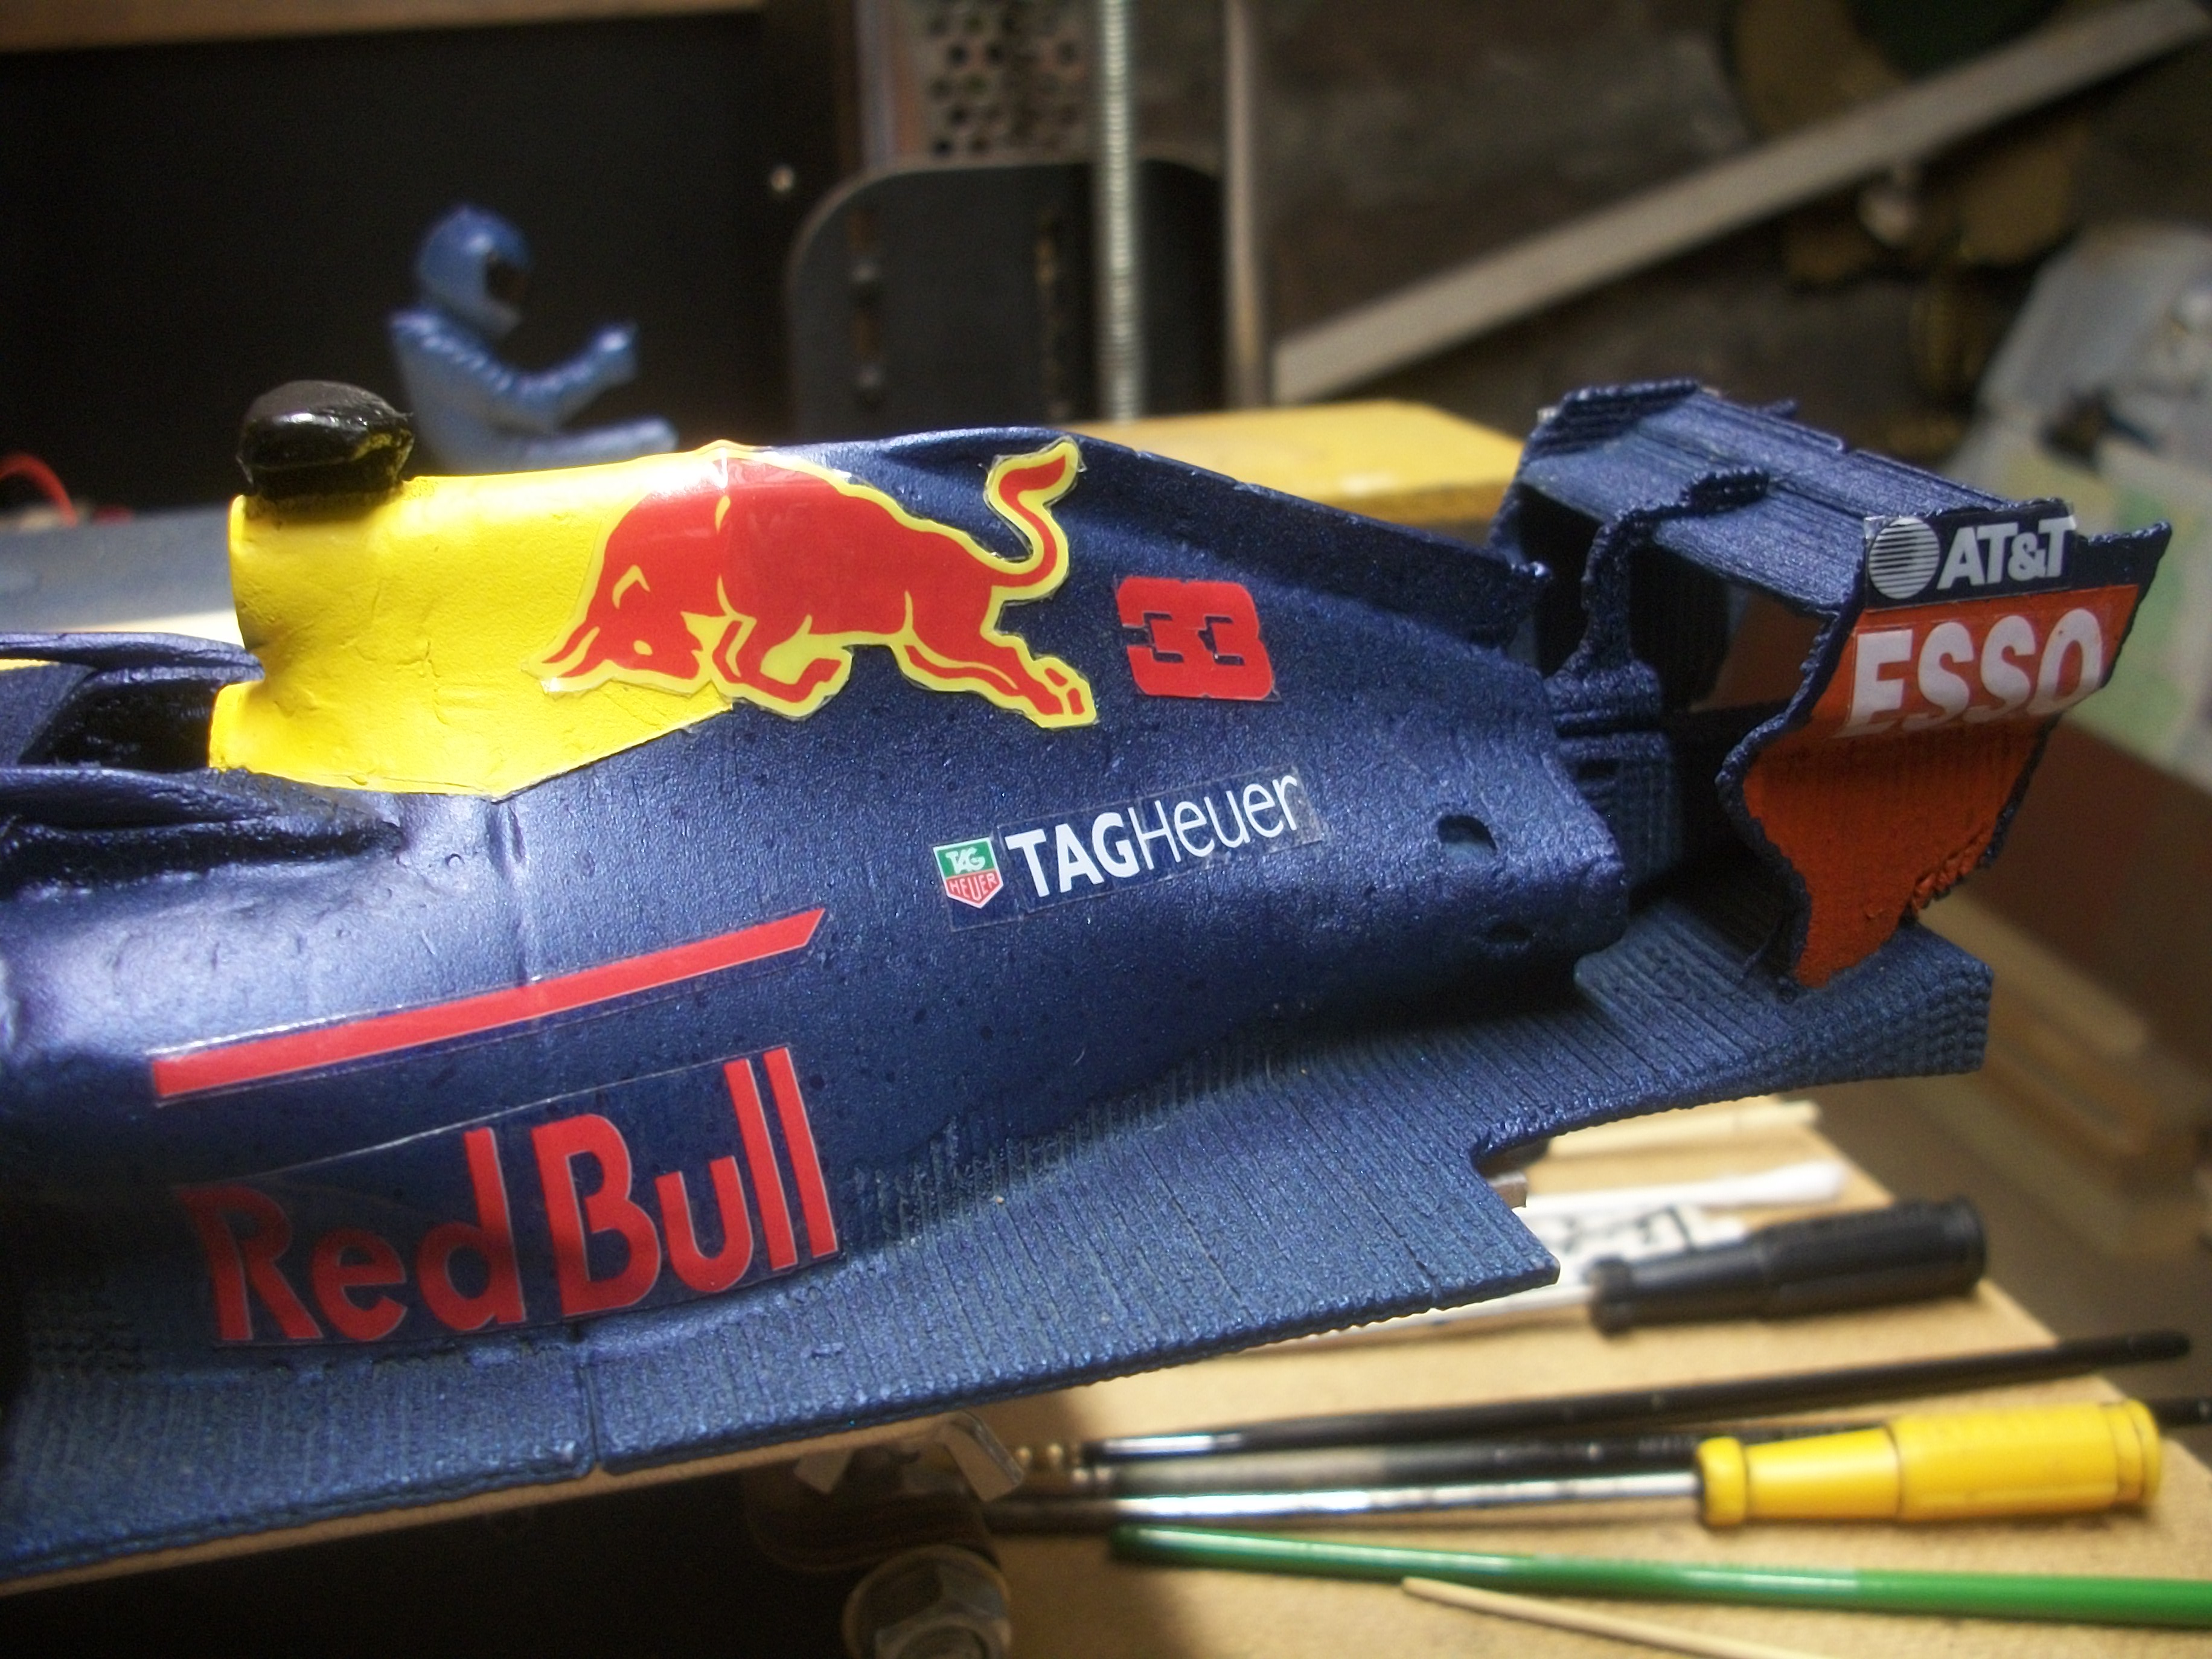
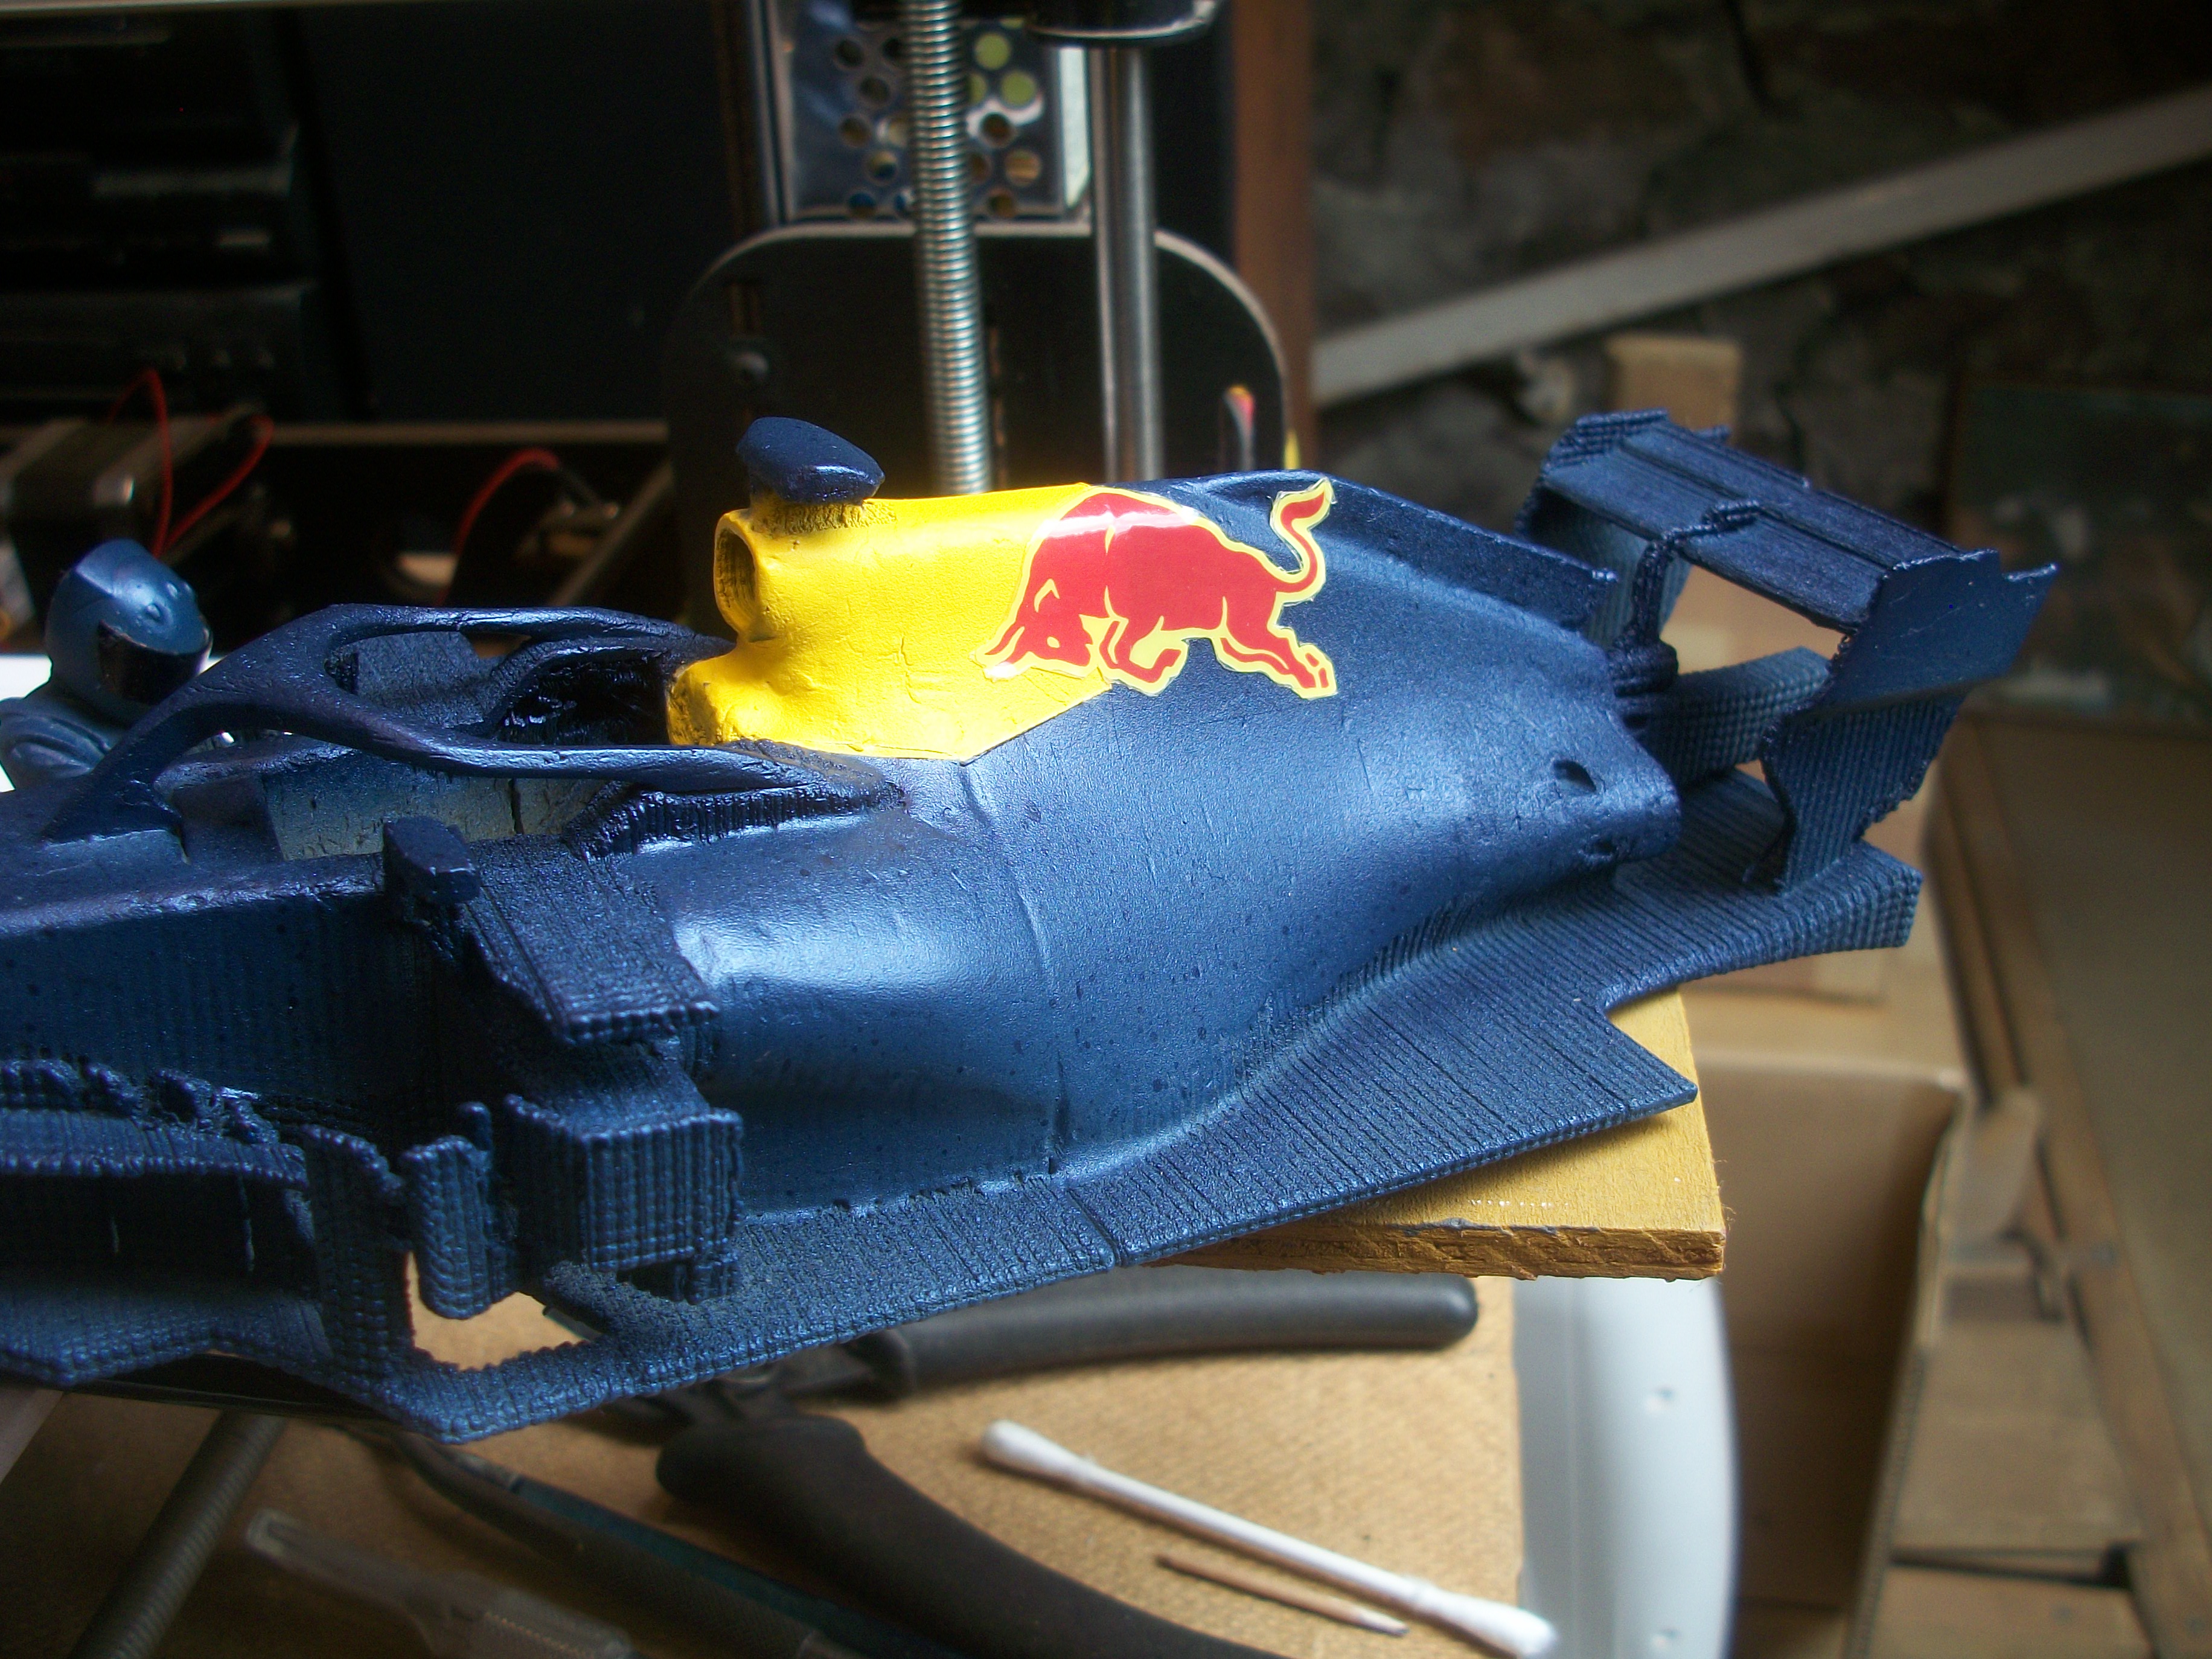
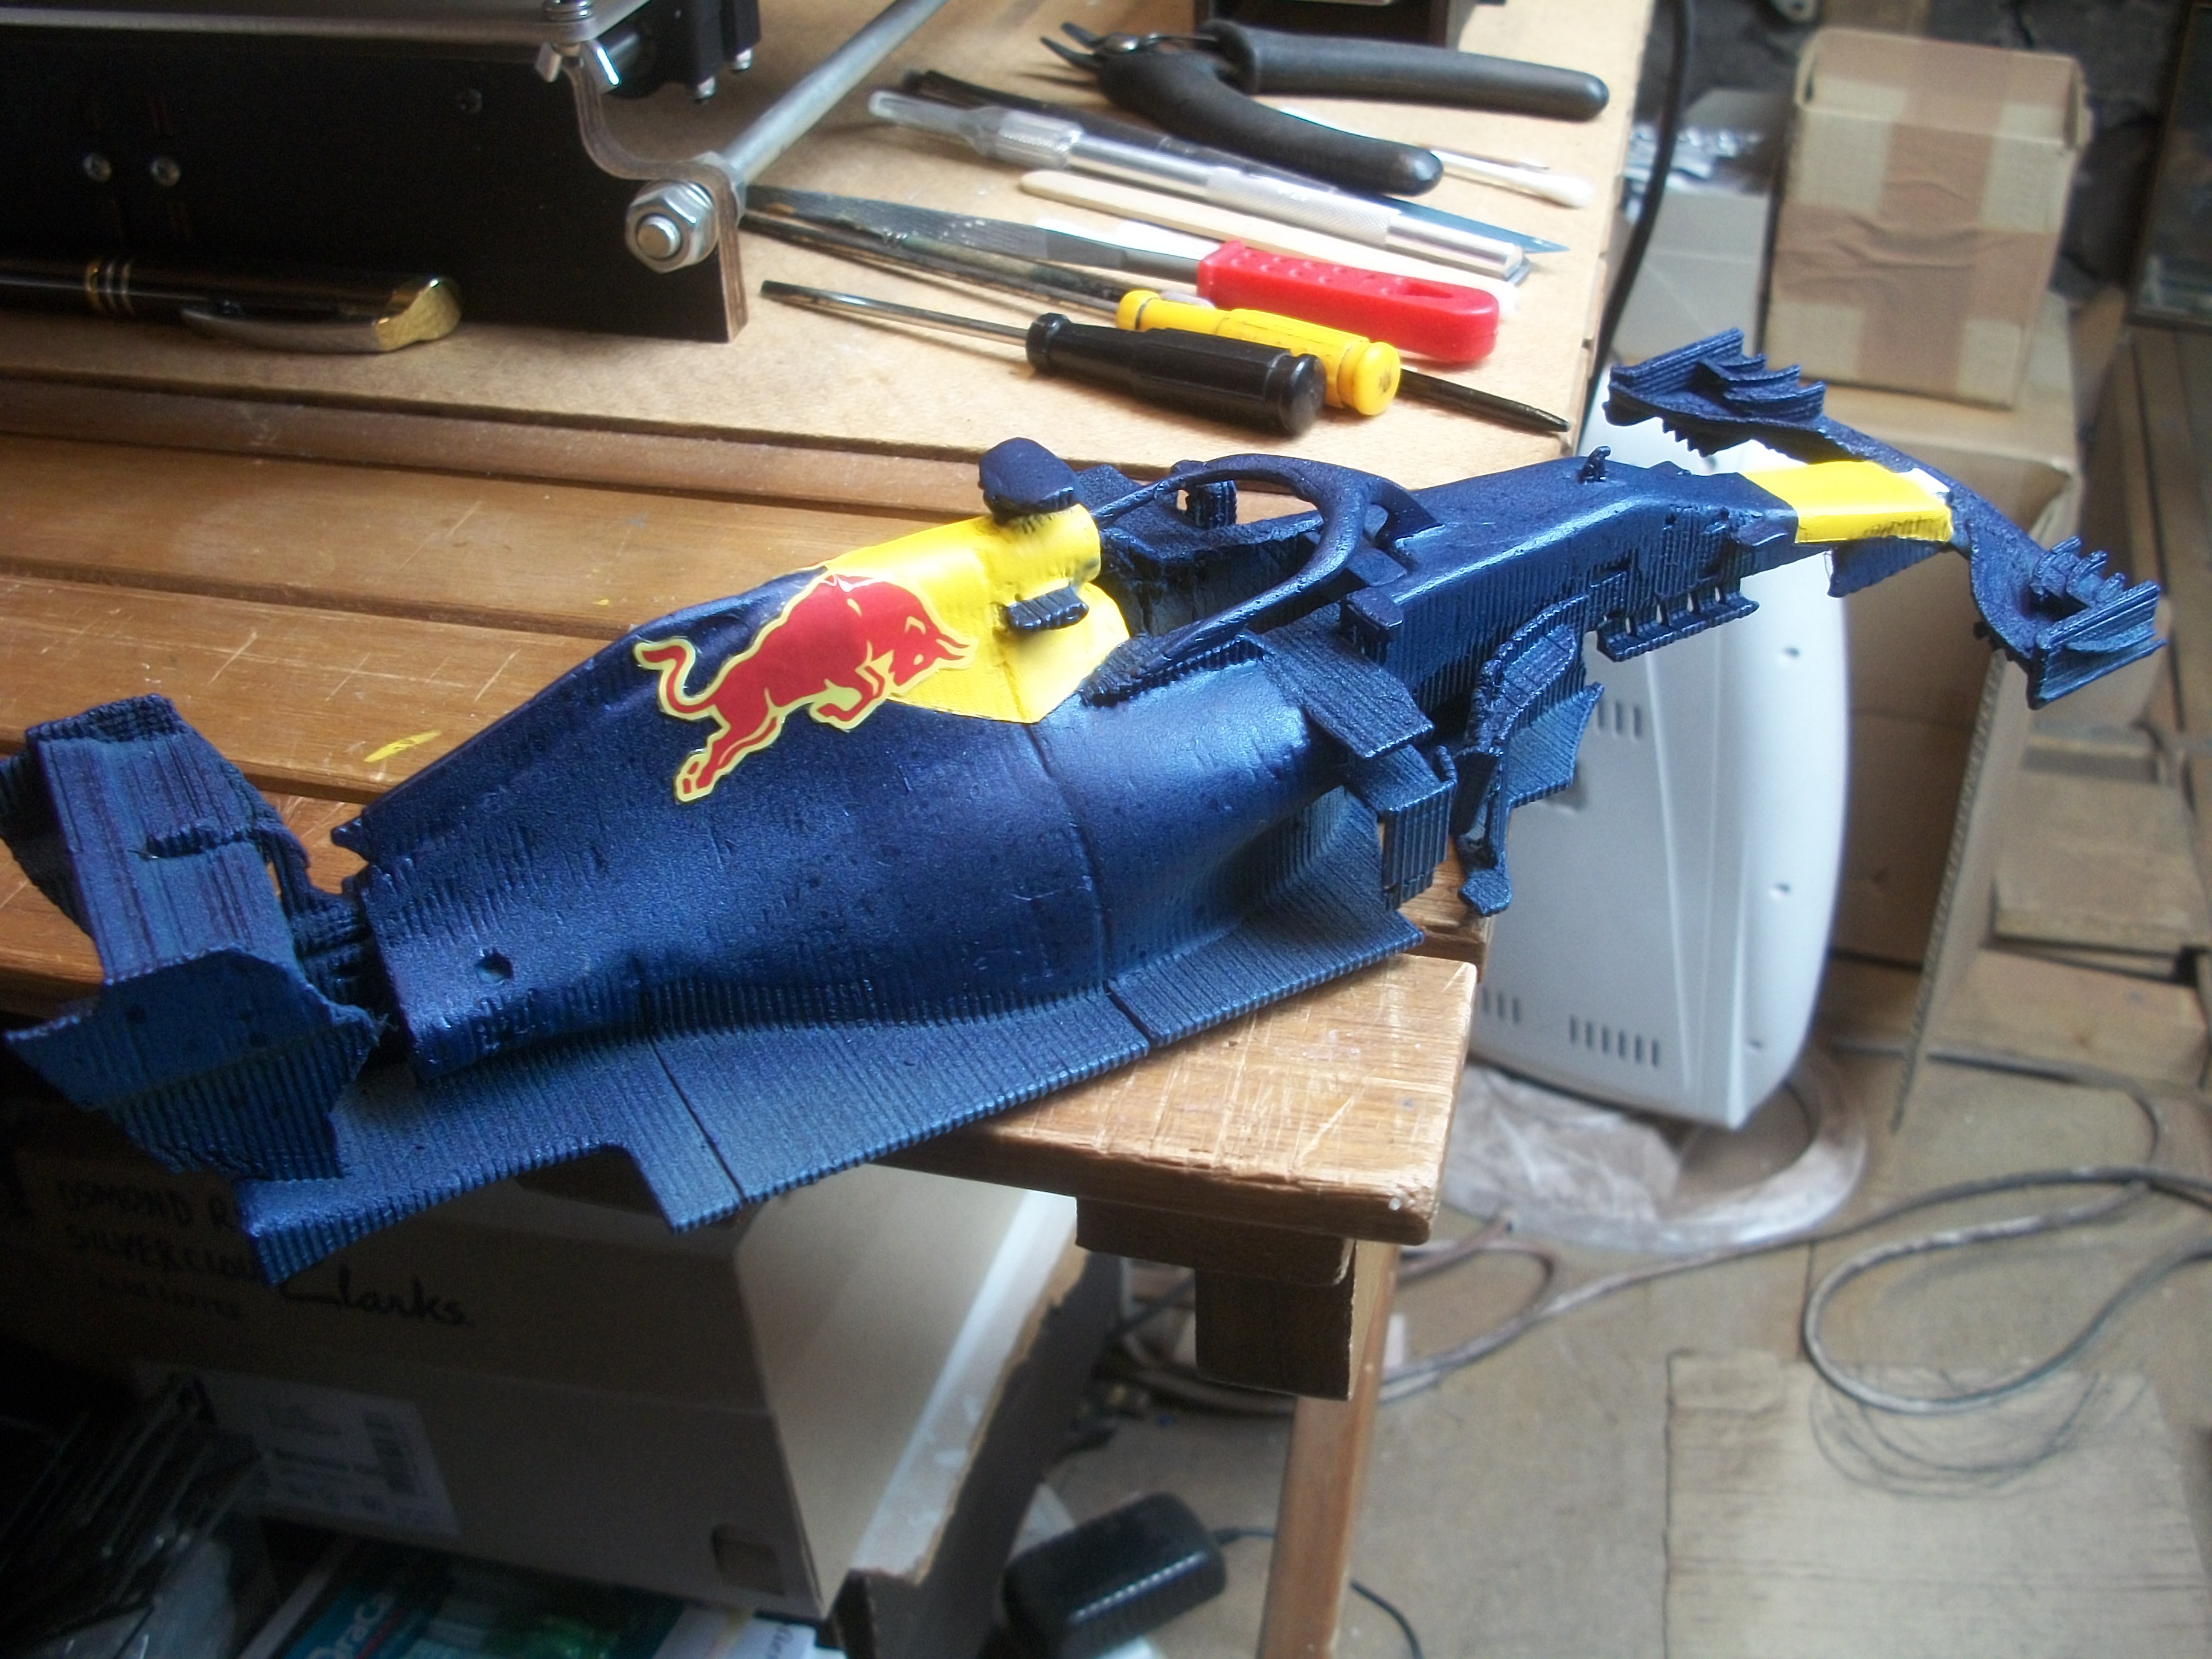
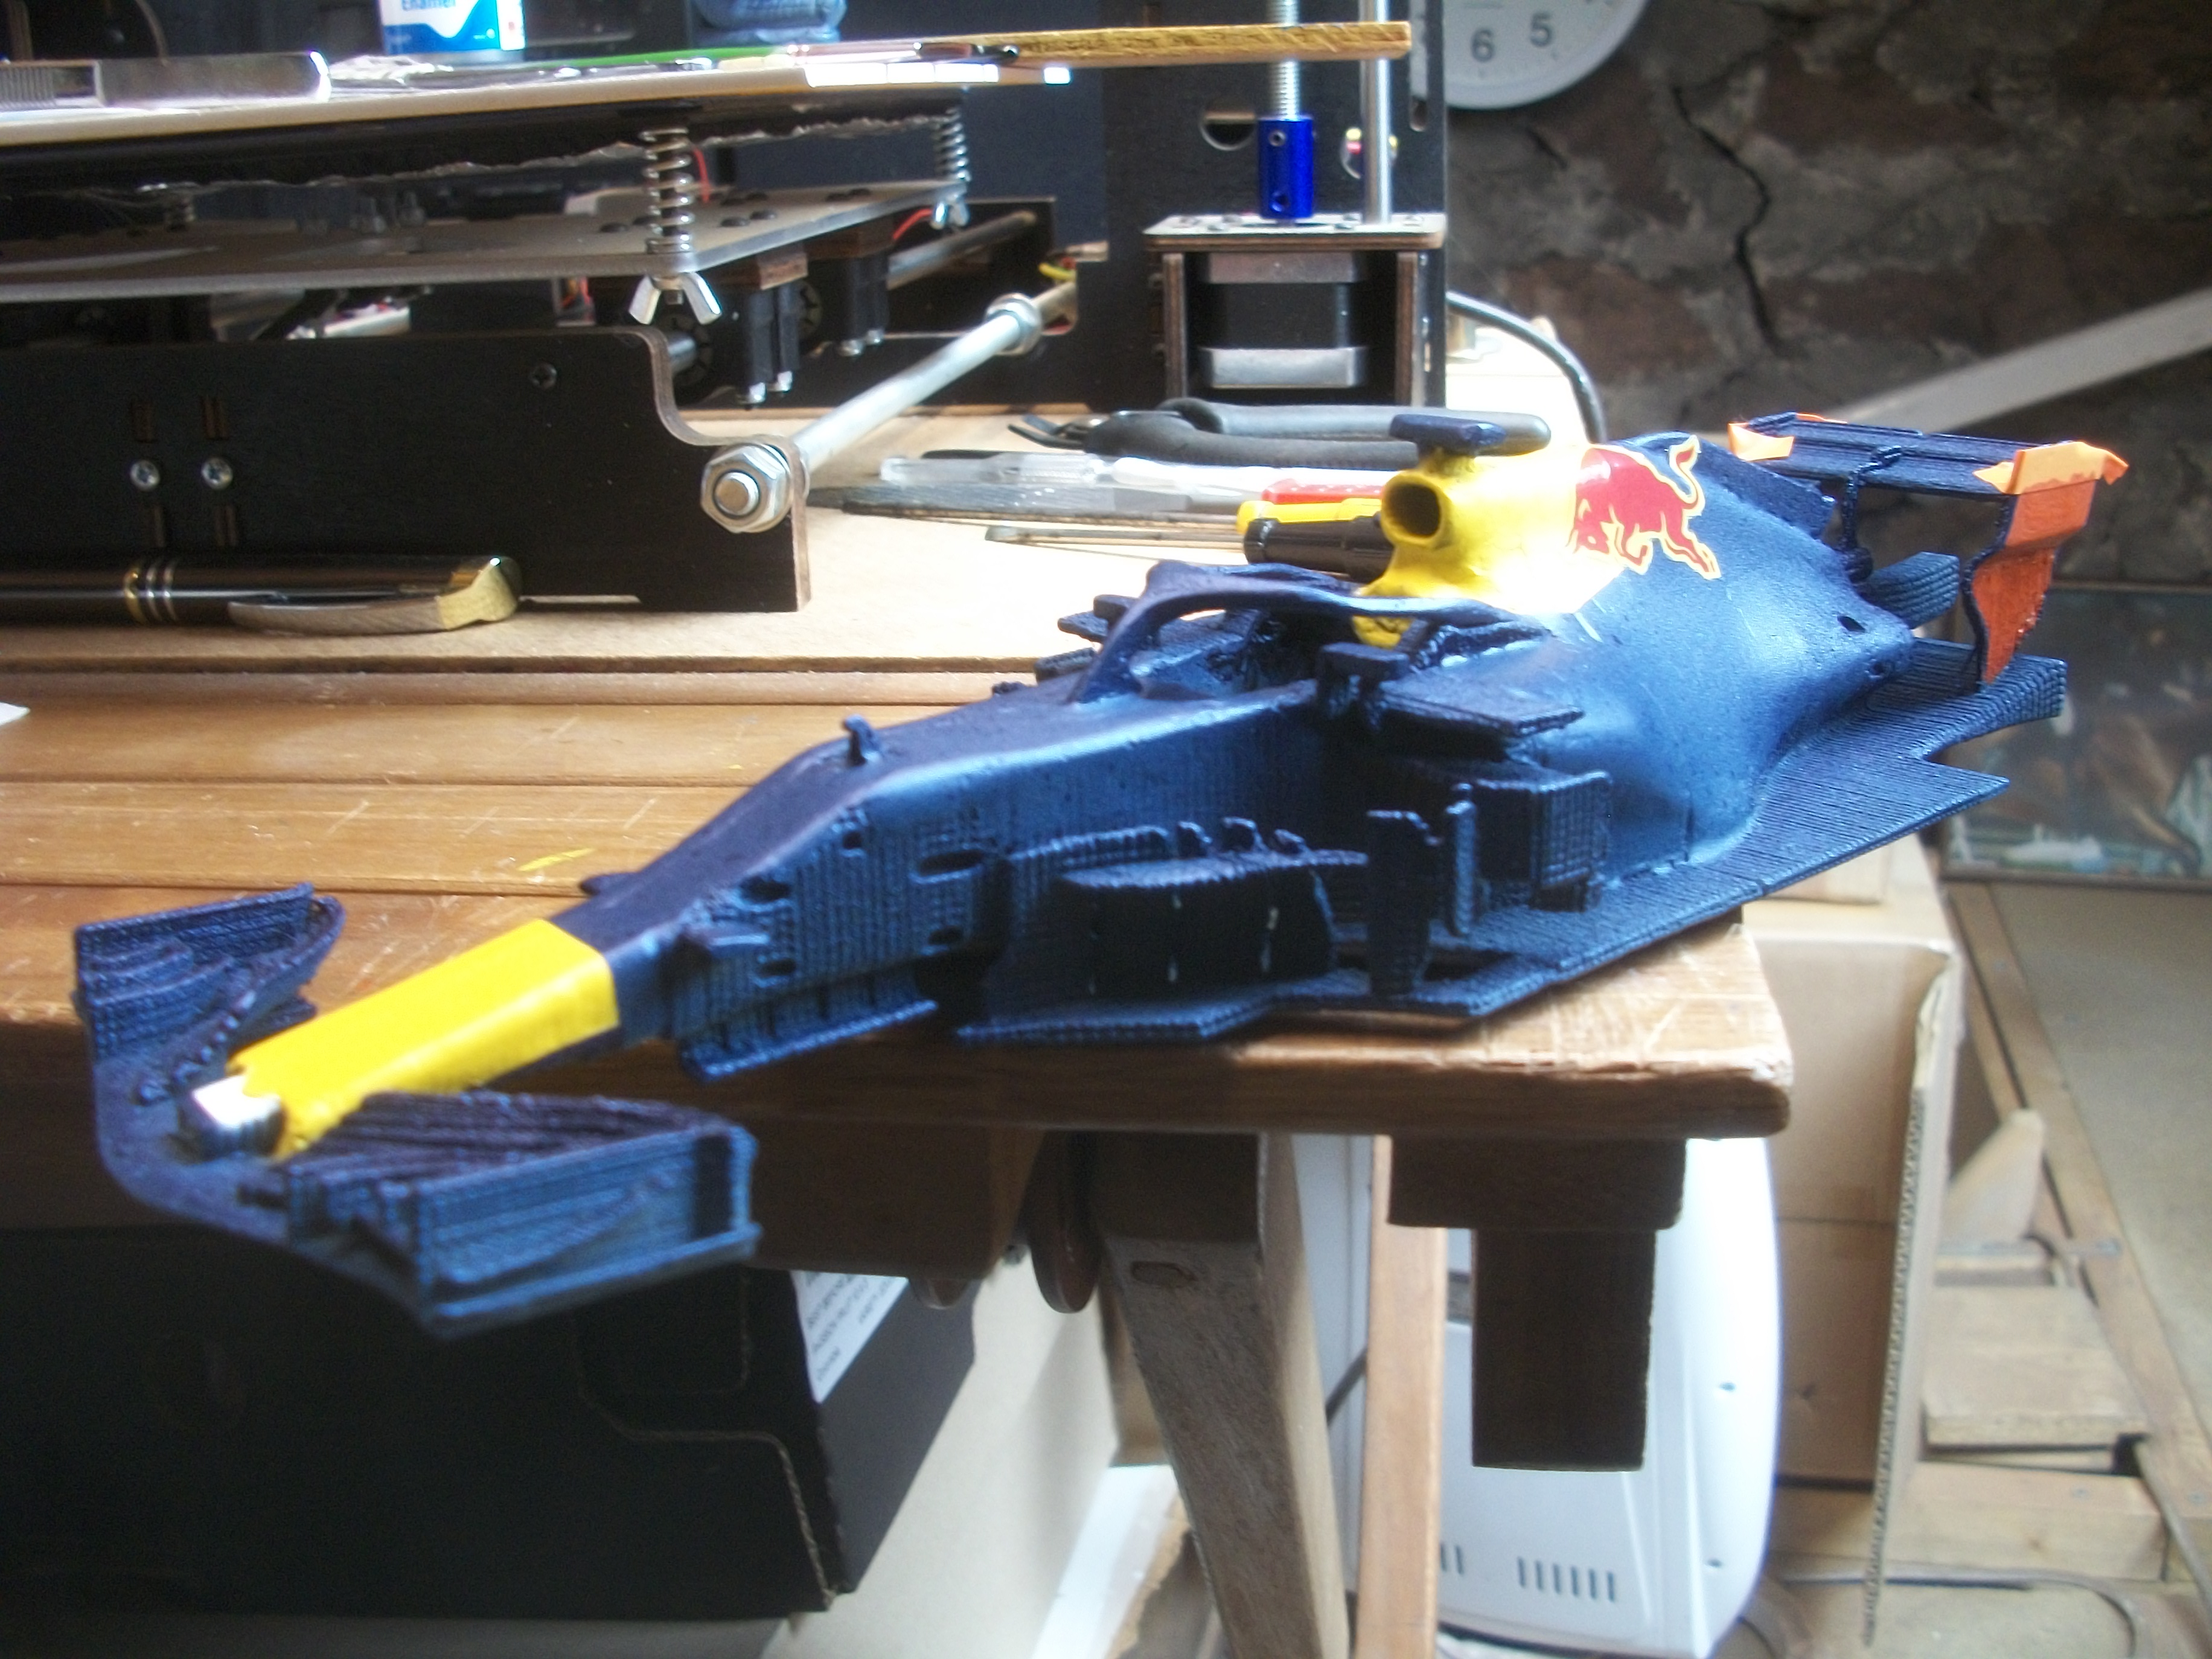
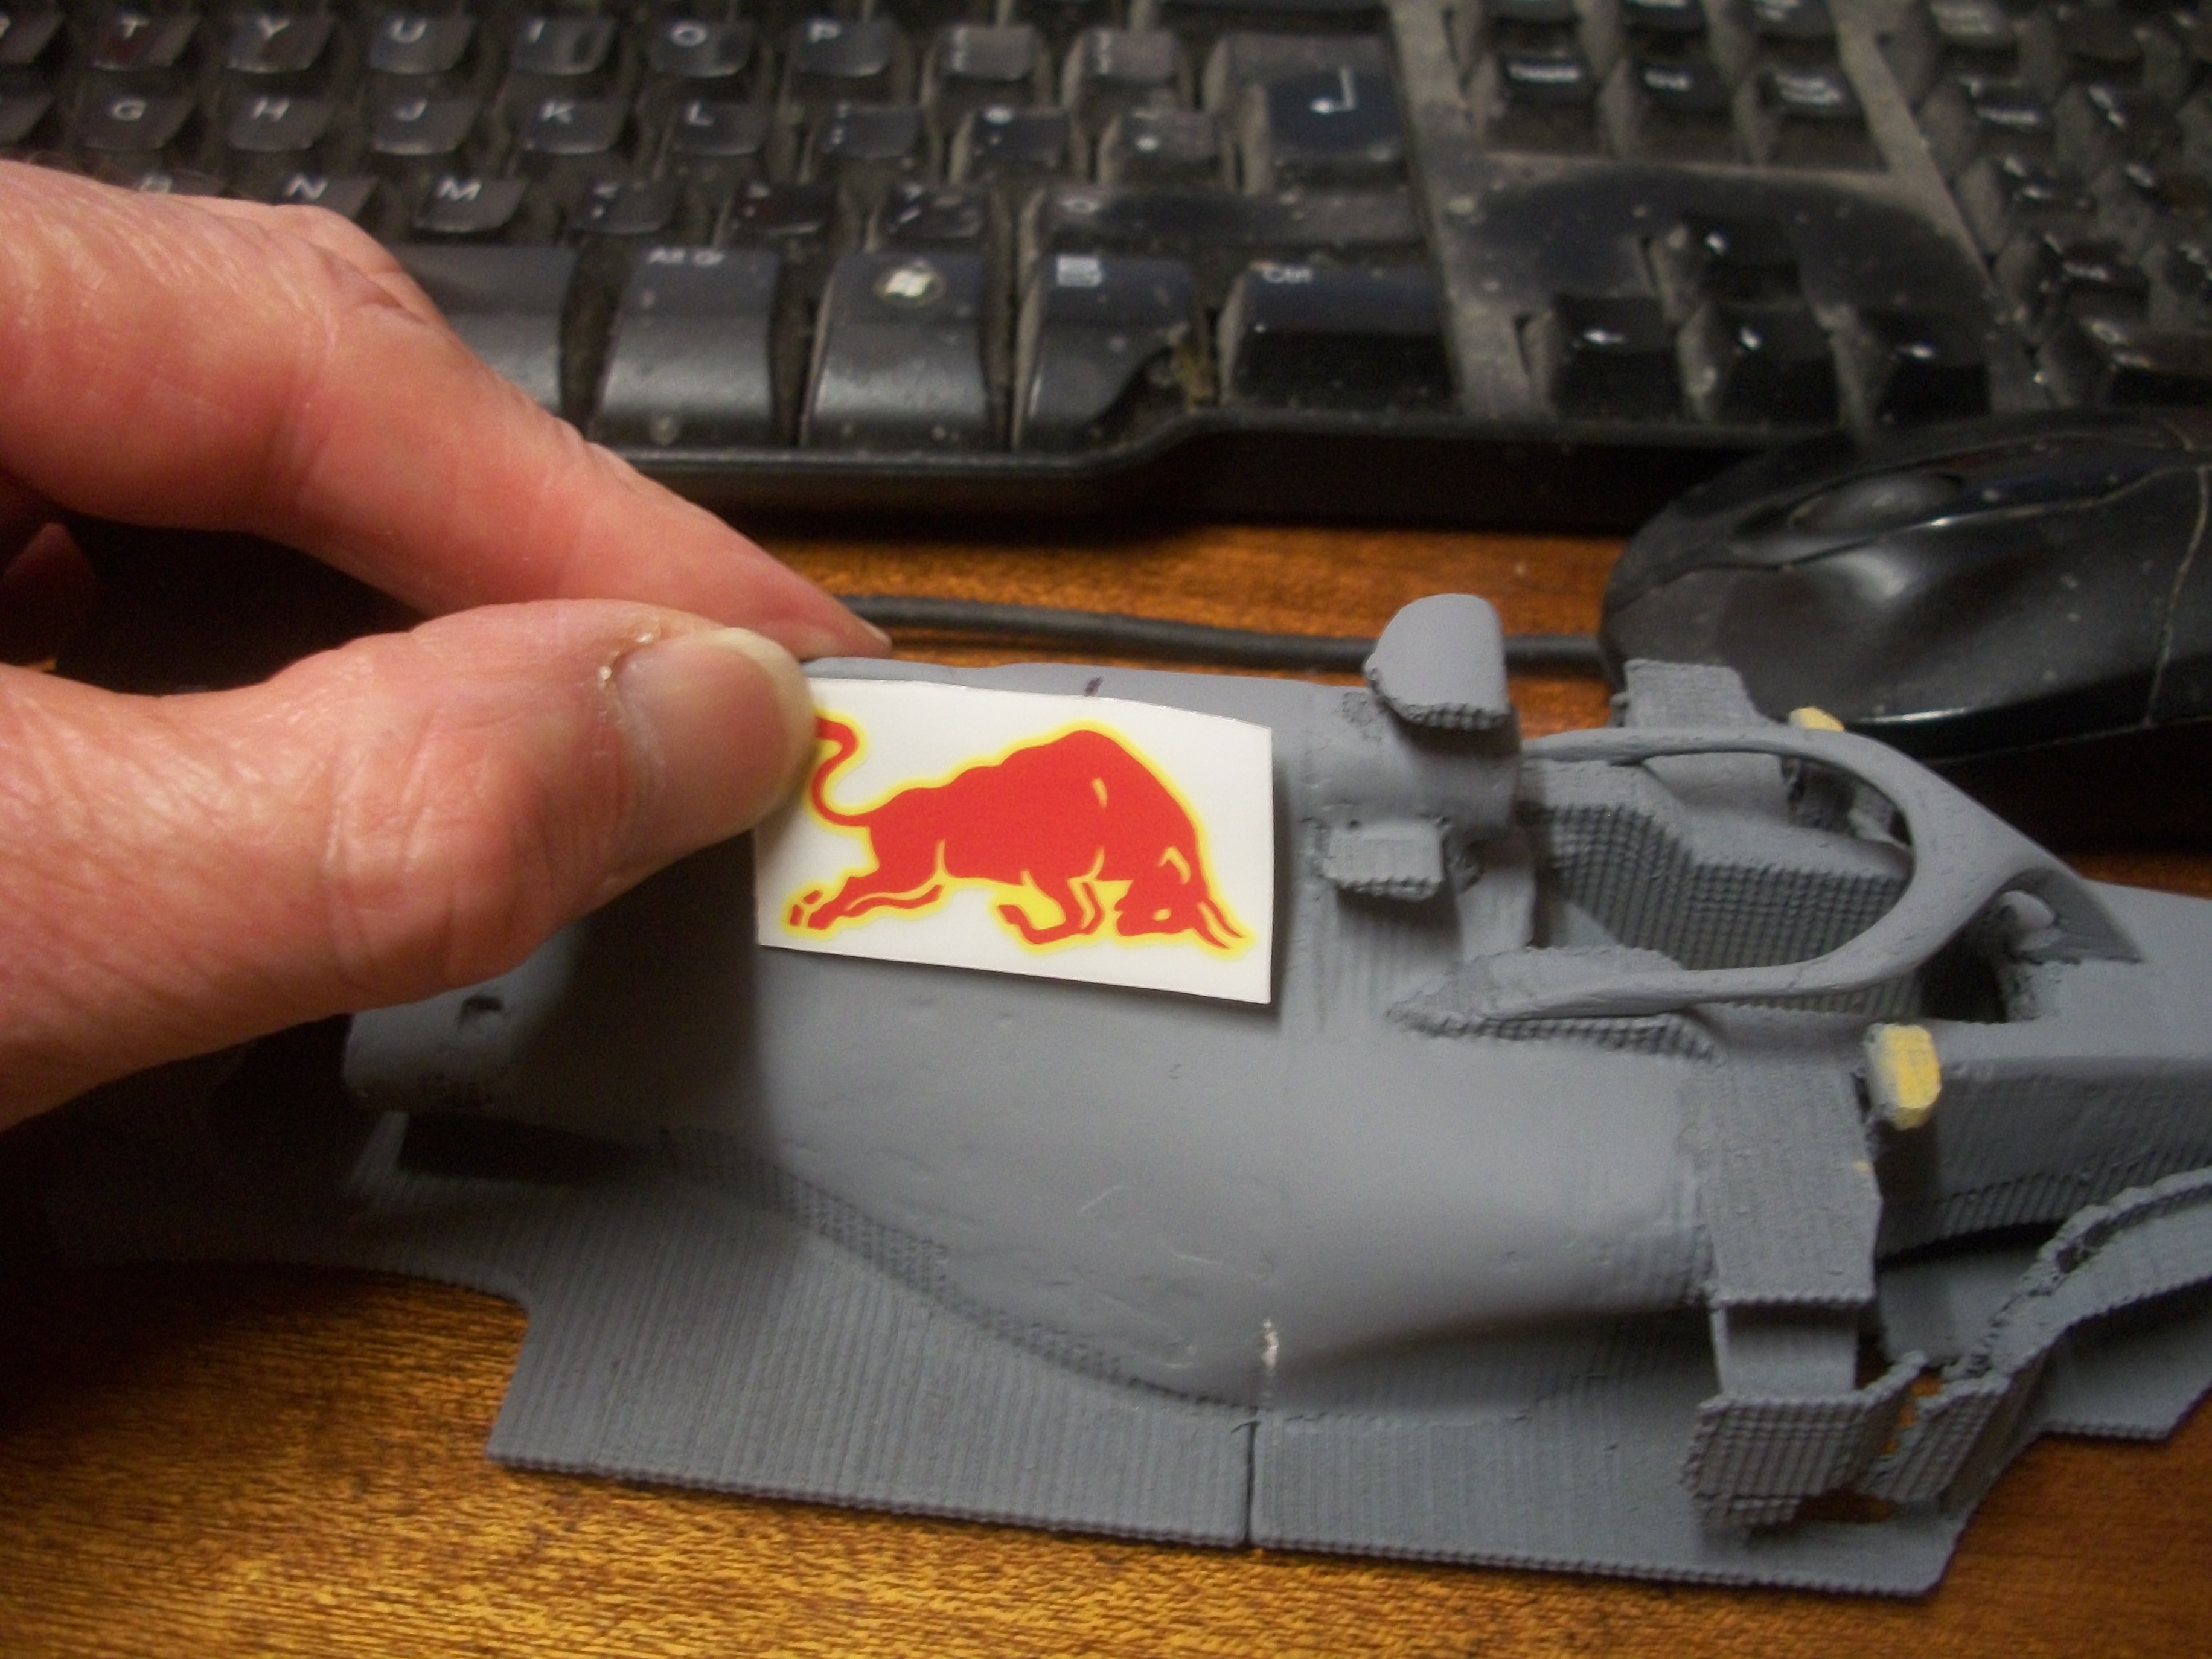
The Red Bull dark blue matte has been applied in two coats by airbrush, and the masking has been removed from the yellow areas of the car. The first two decals were carefully positioned, after cutting out from the decal sheet. These are the large ' BULL ' decals, either side of the induction cowling. I have painted the sides of the rear spoiler, ready to receive the ' ESSO ' and ' AT&T ' decals. This is to place the white ' ESSO ' decal over red, while the white ' AT&T ' decal will be placed over blue. David
-
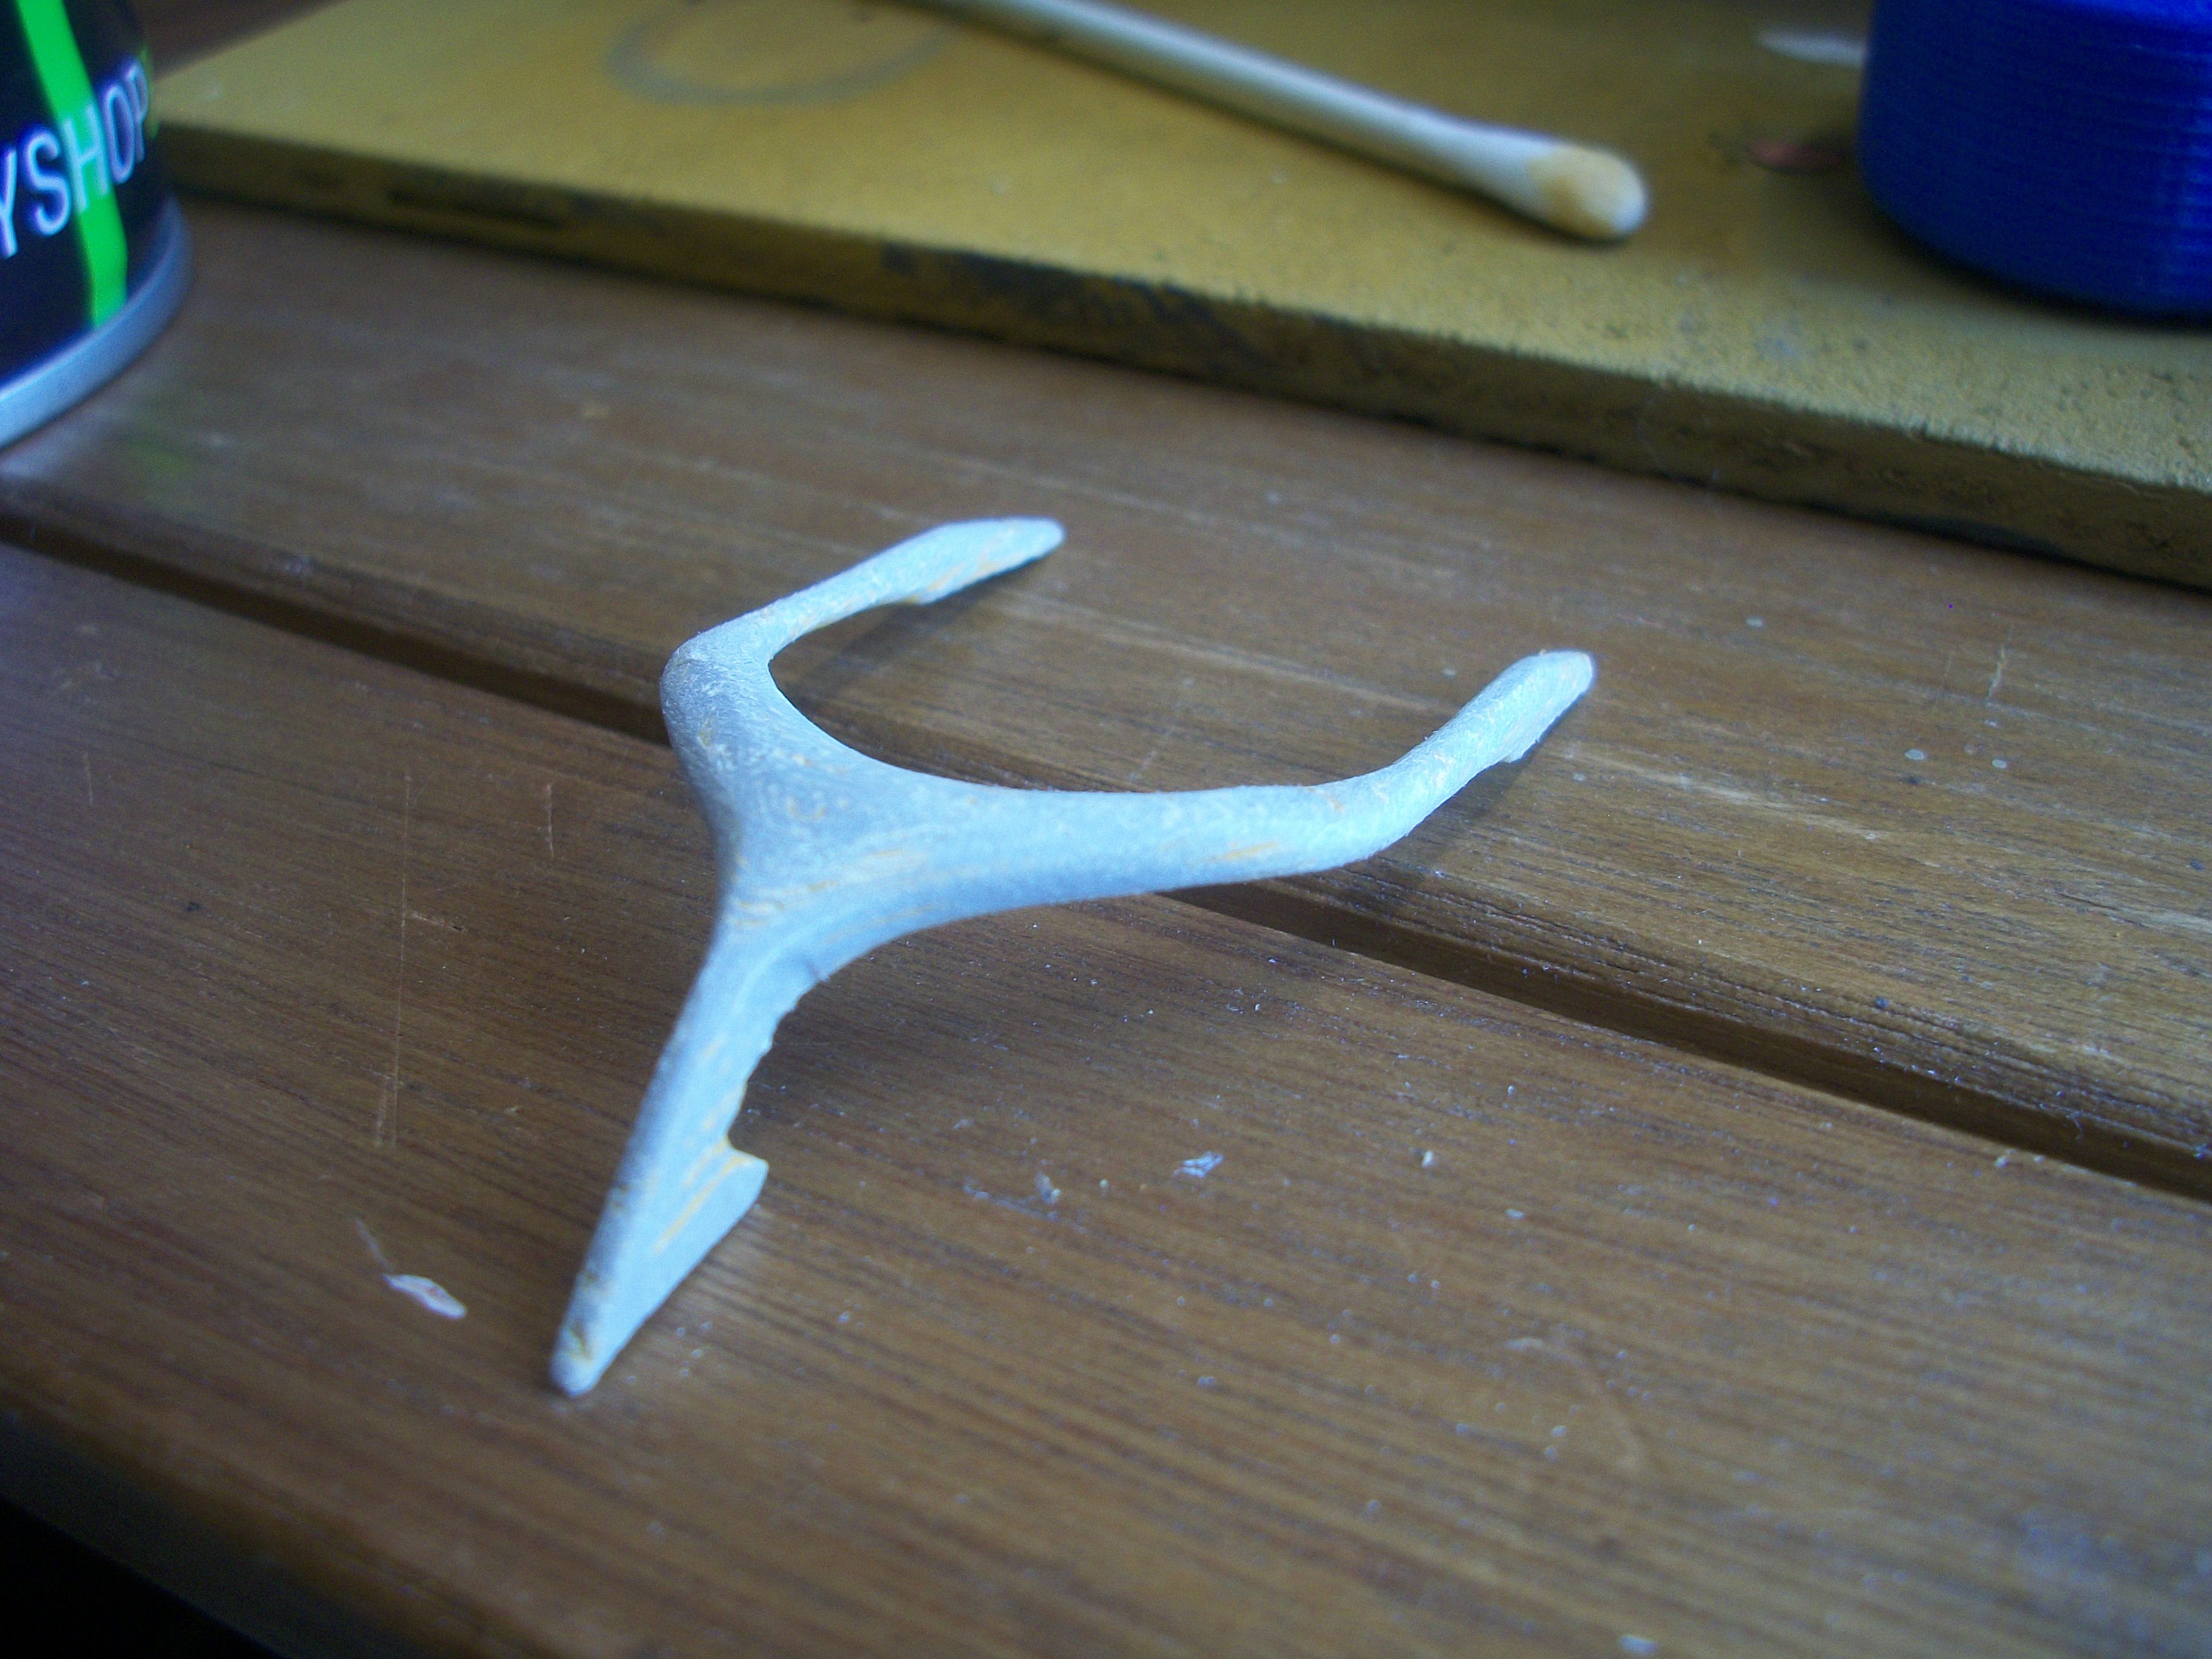
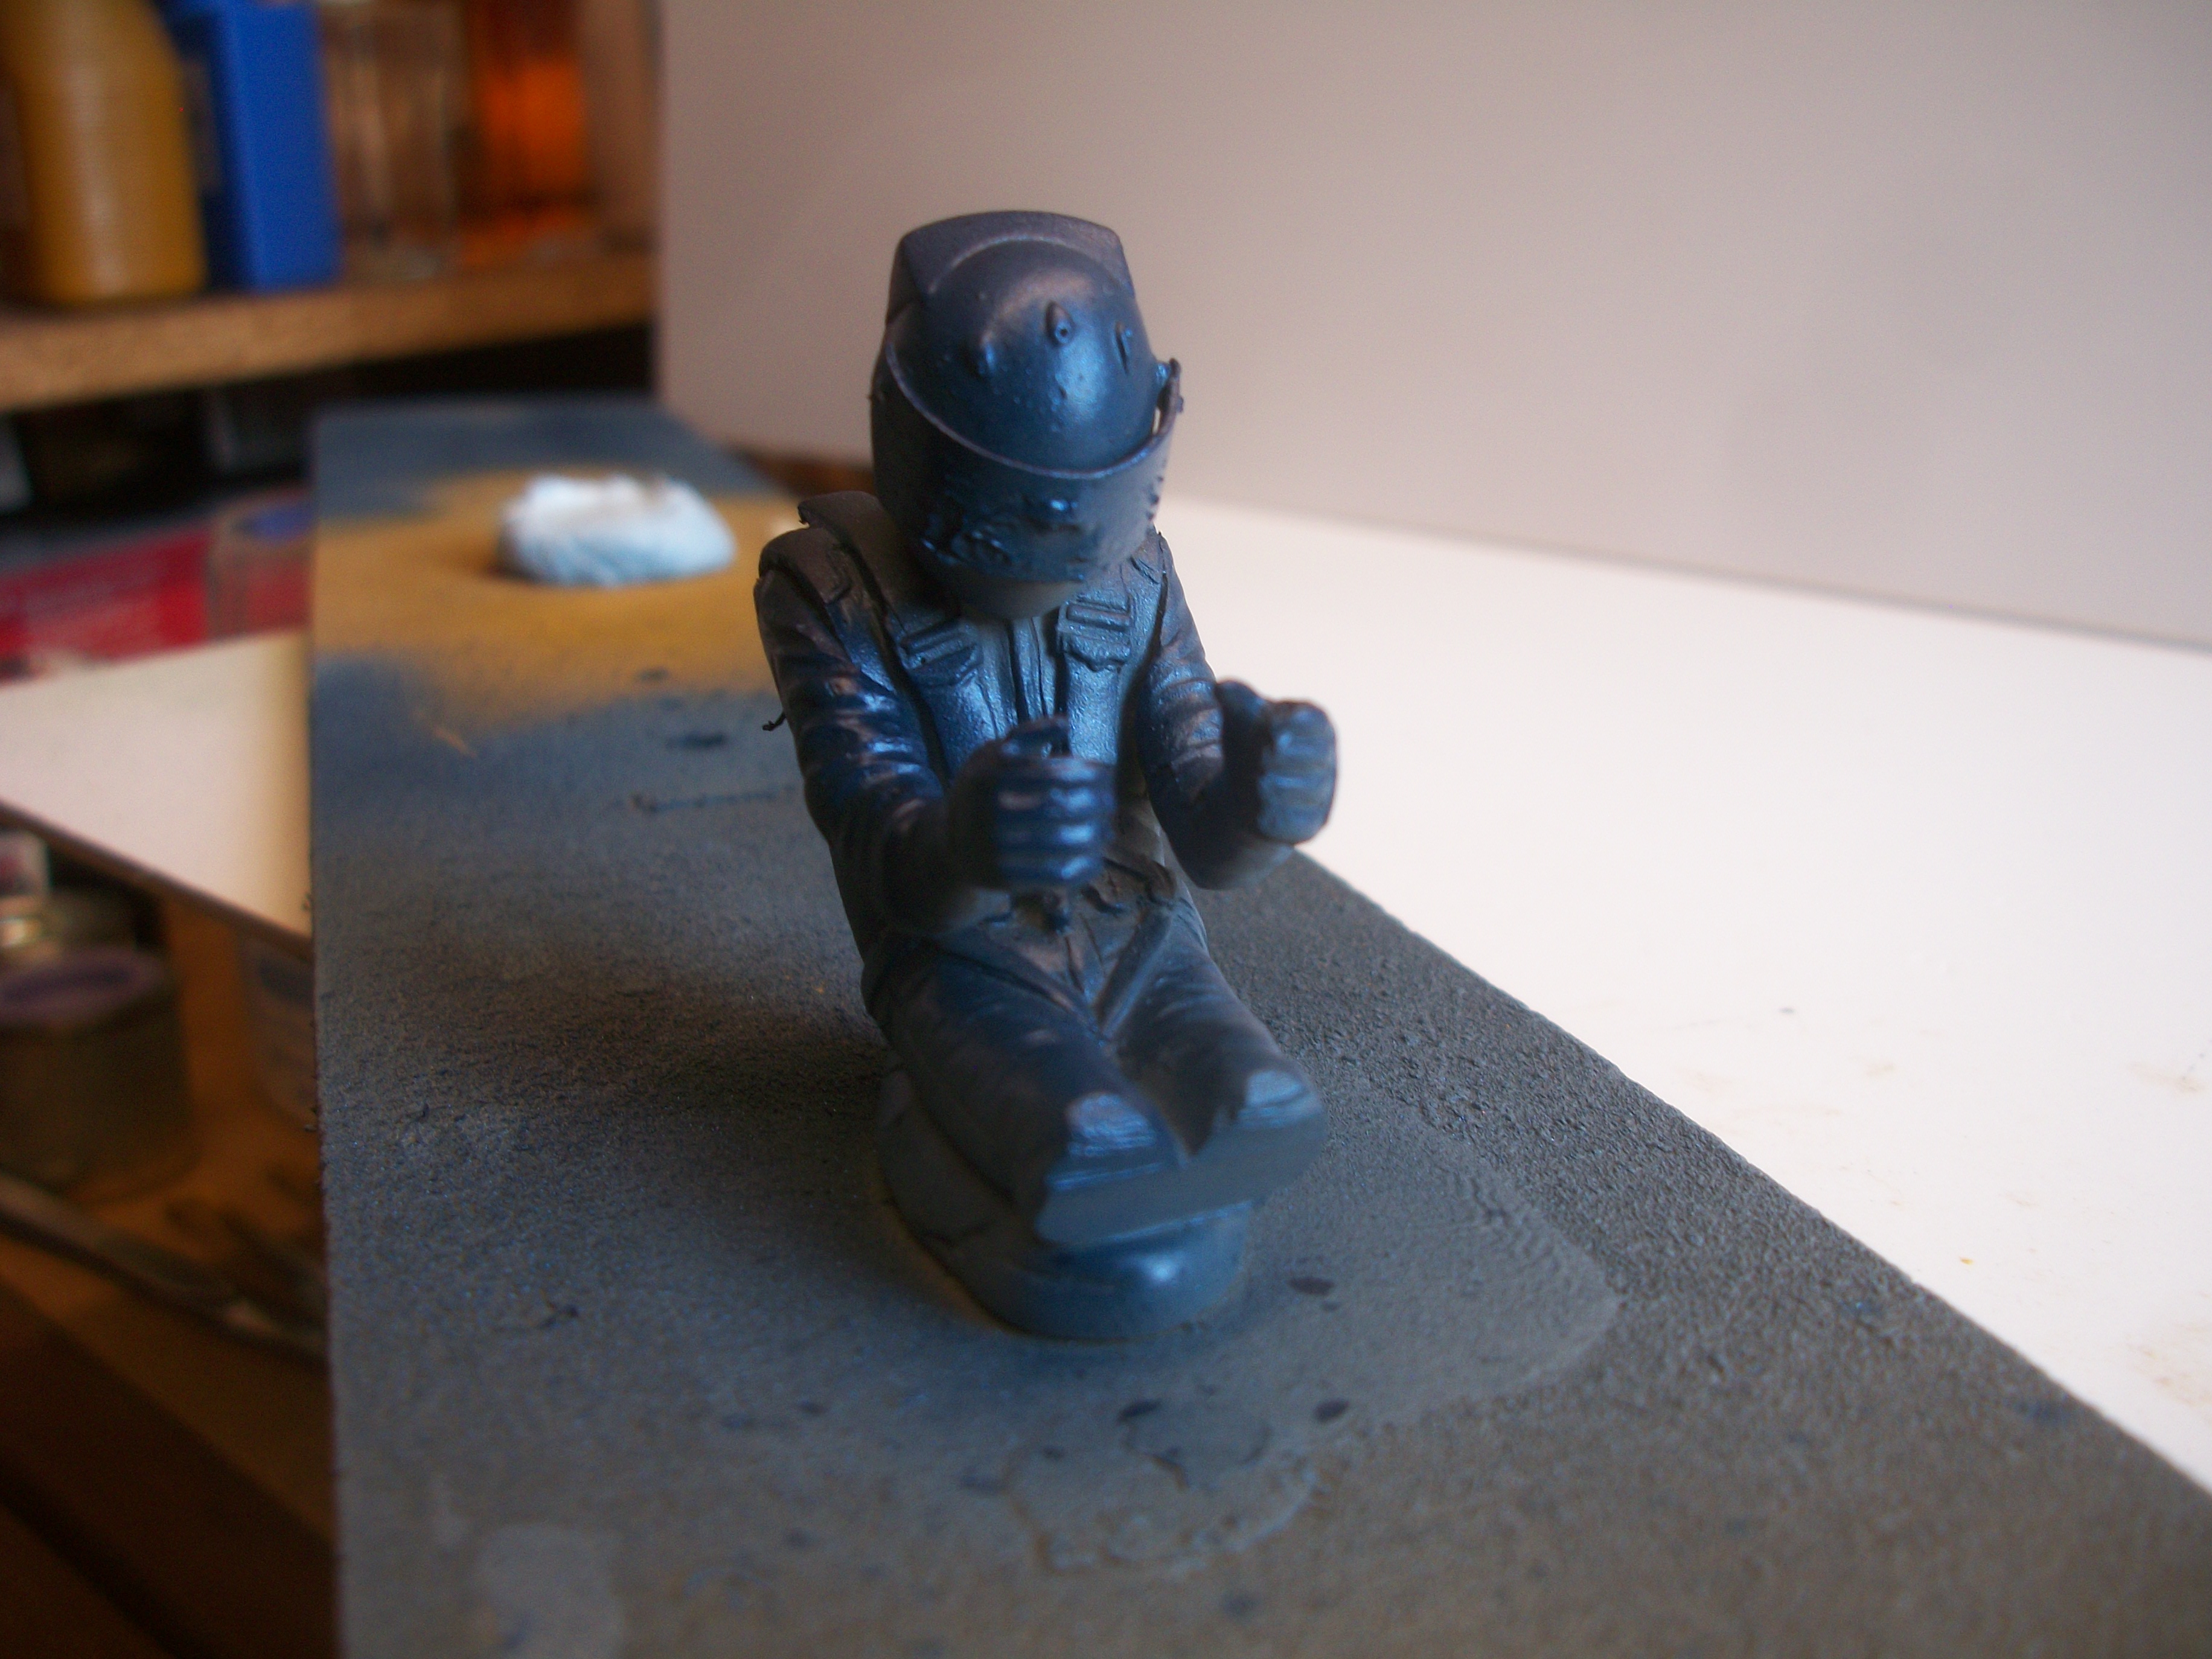
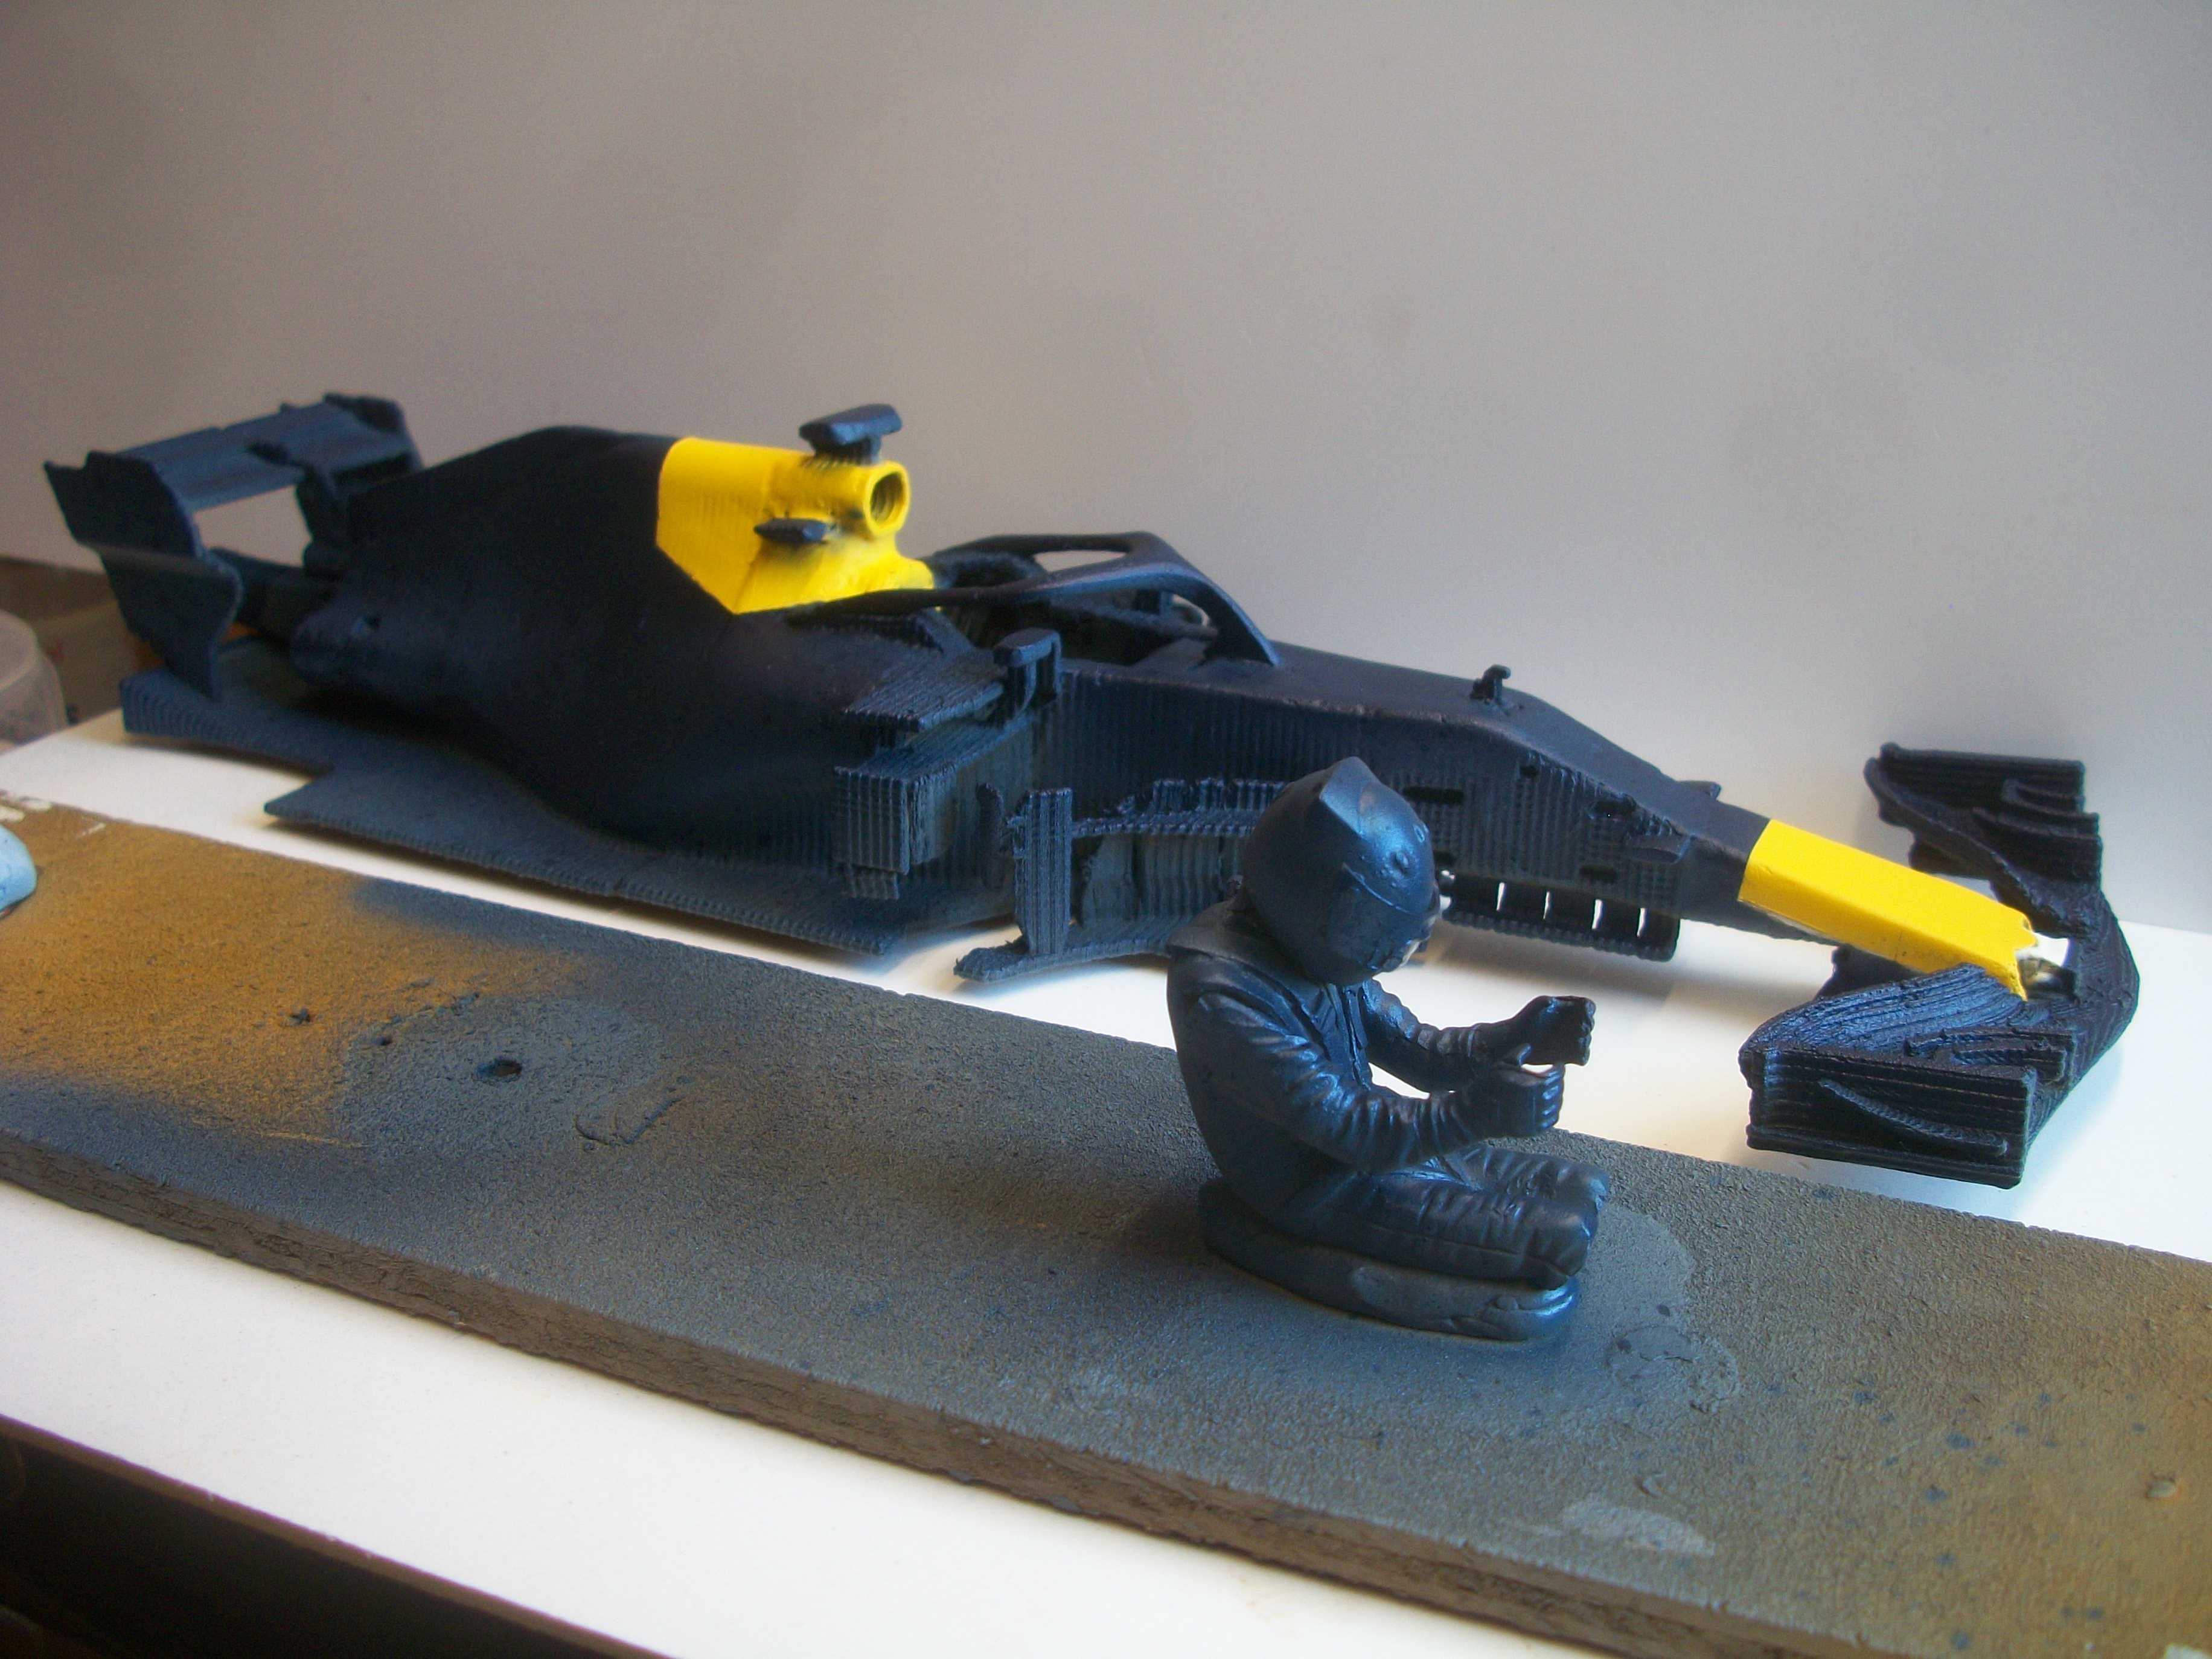
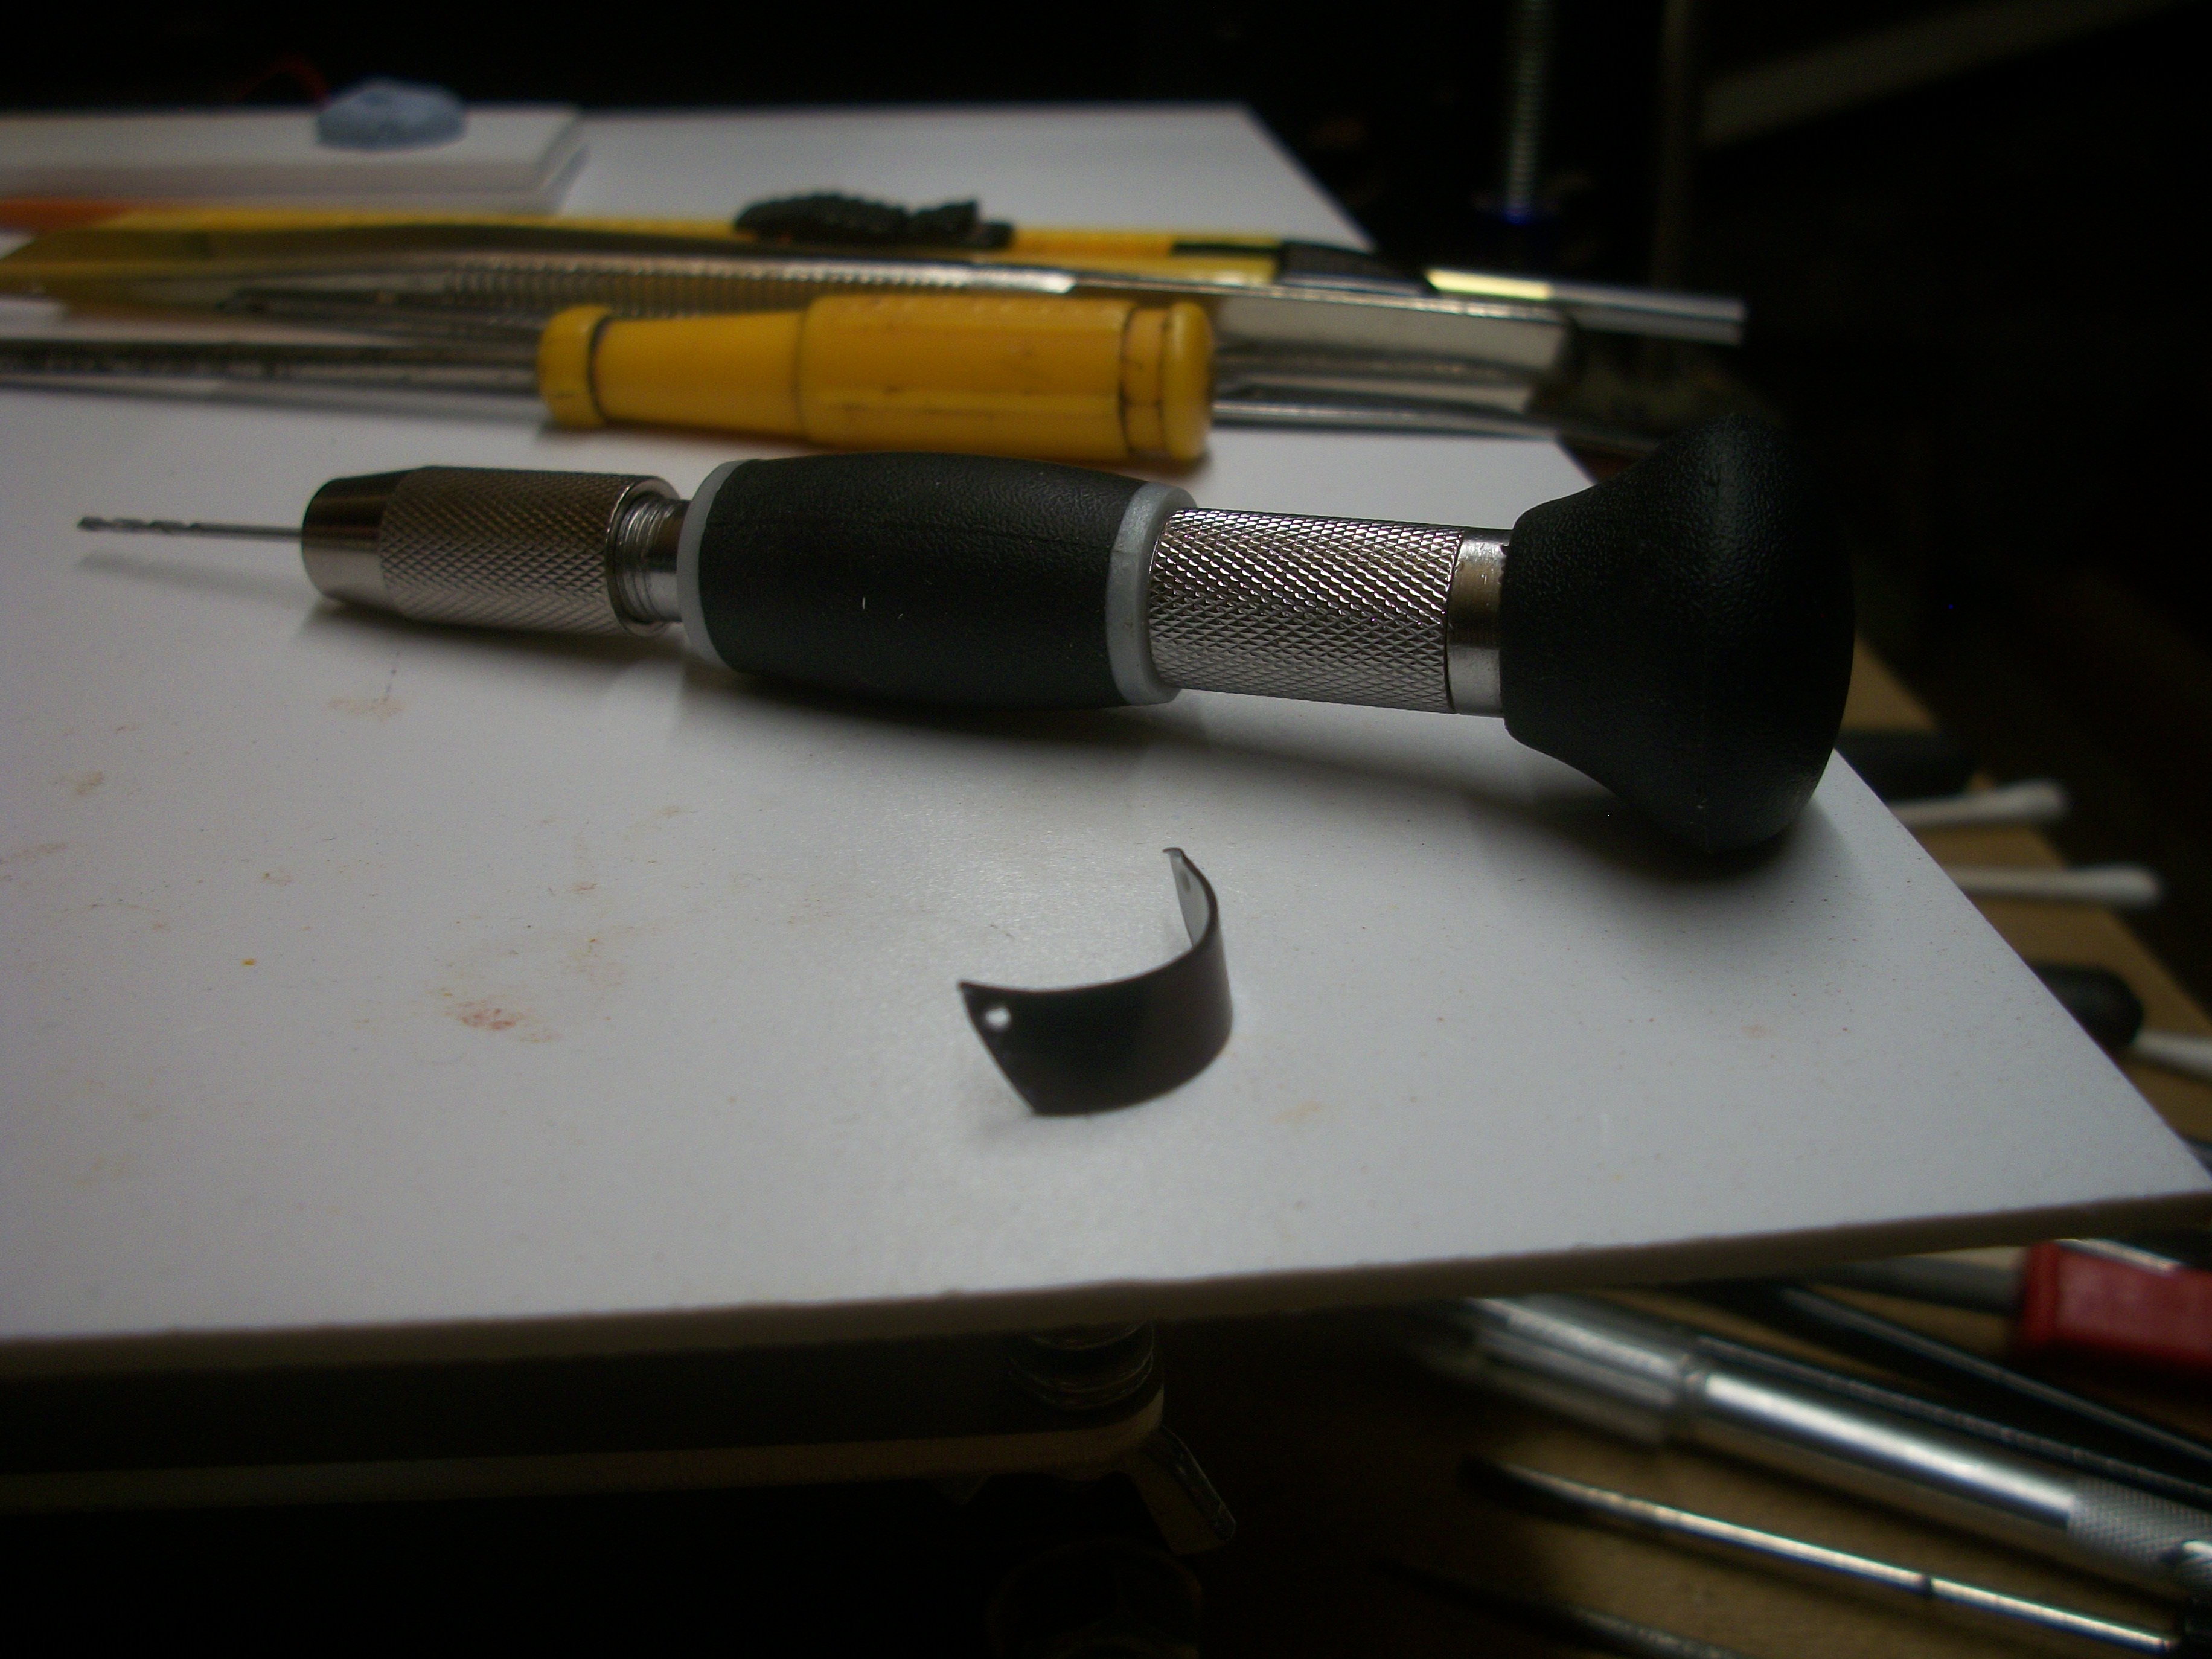
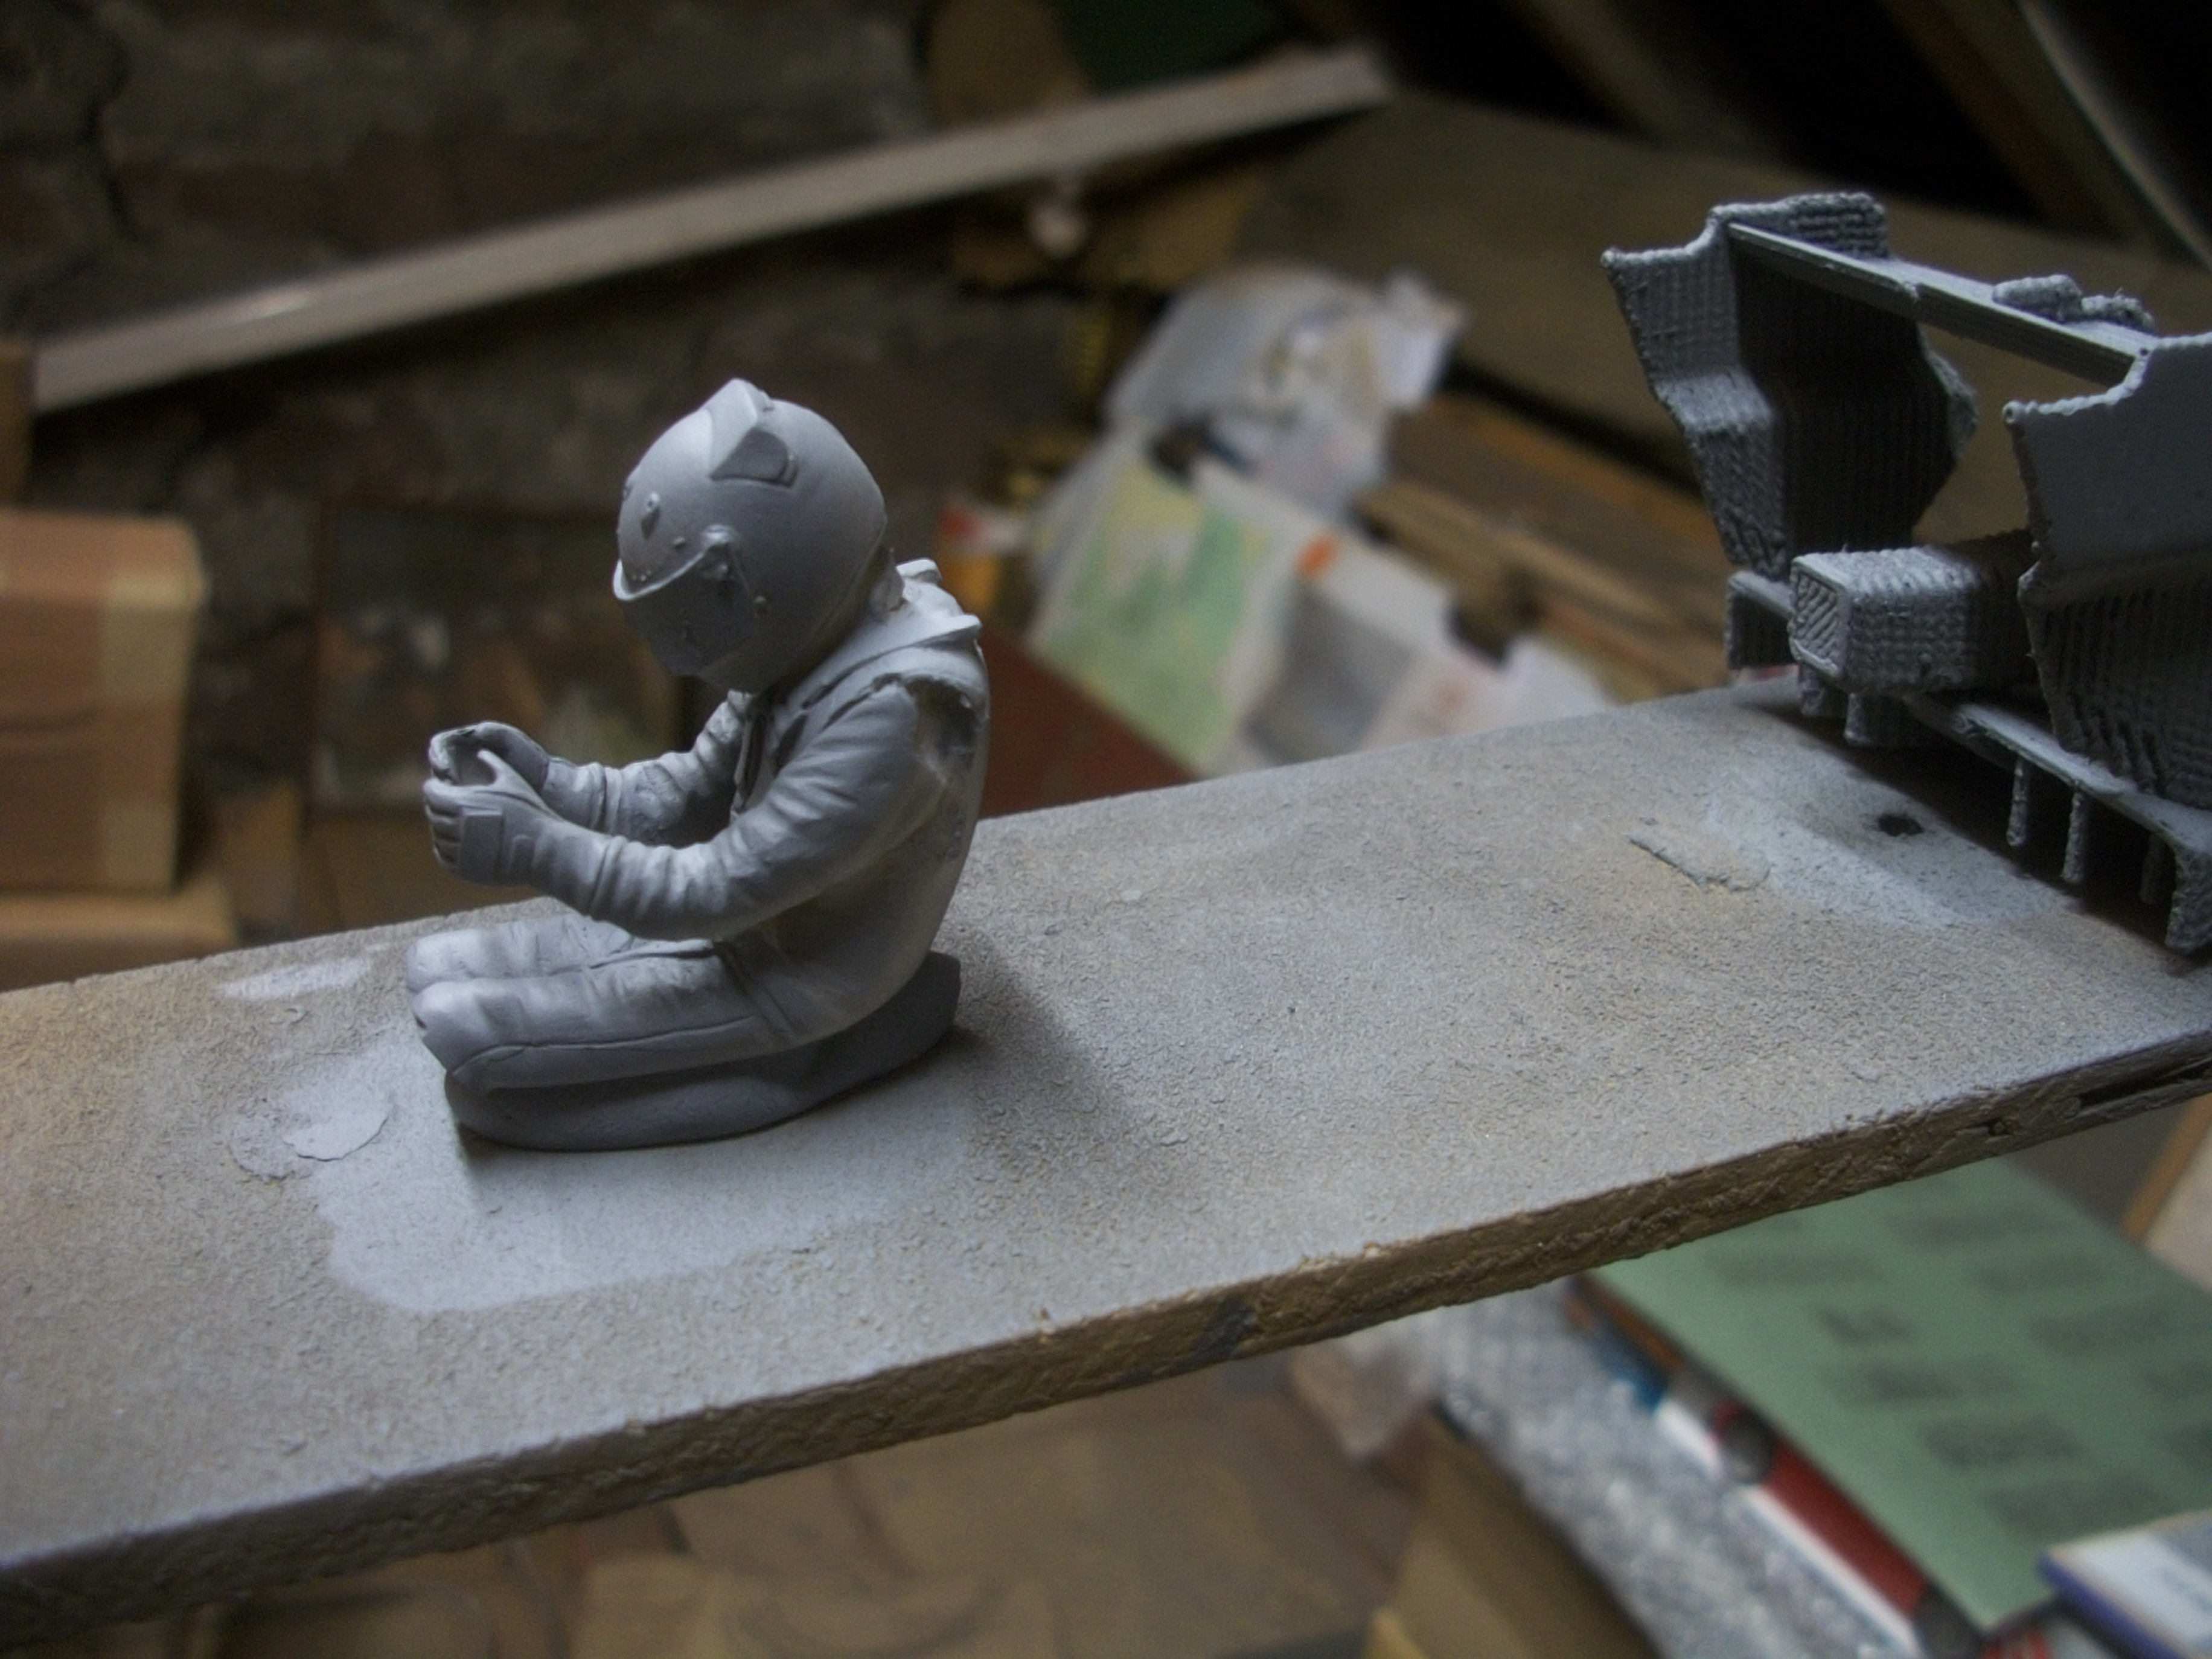
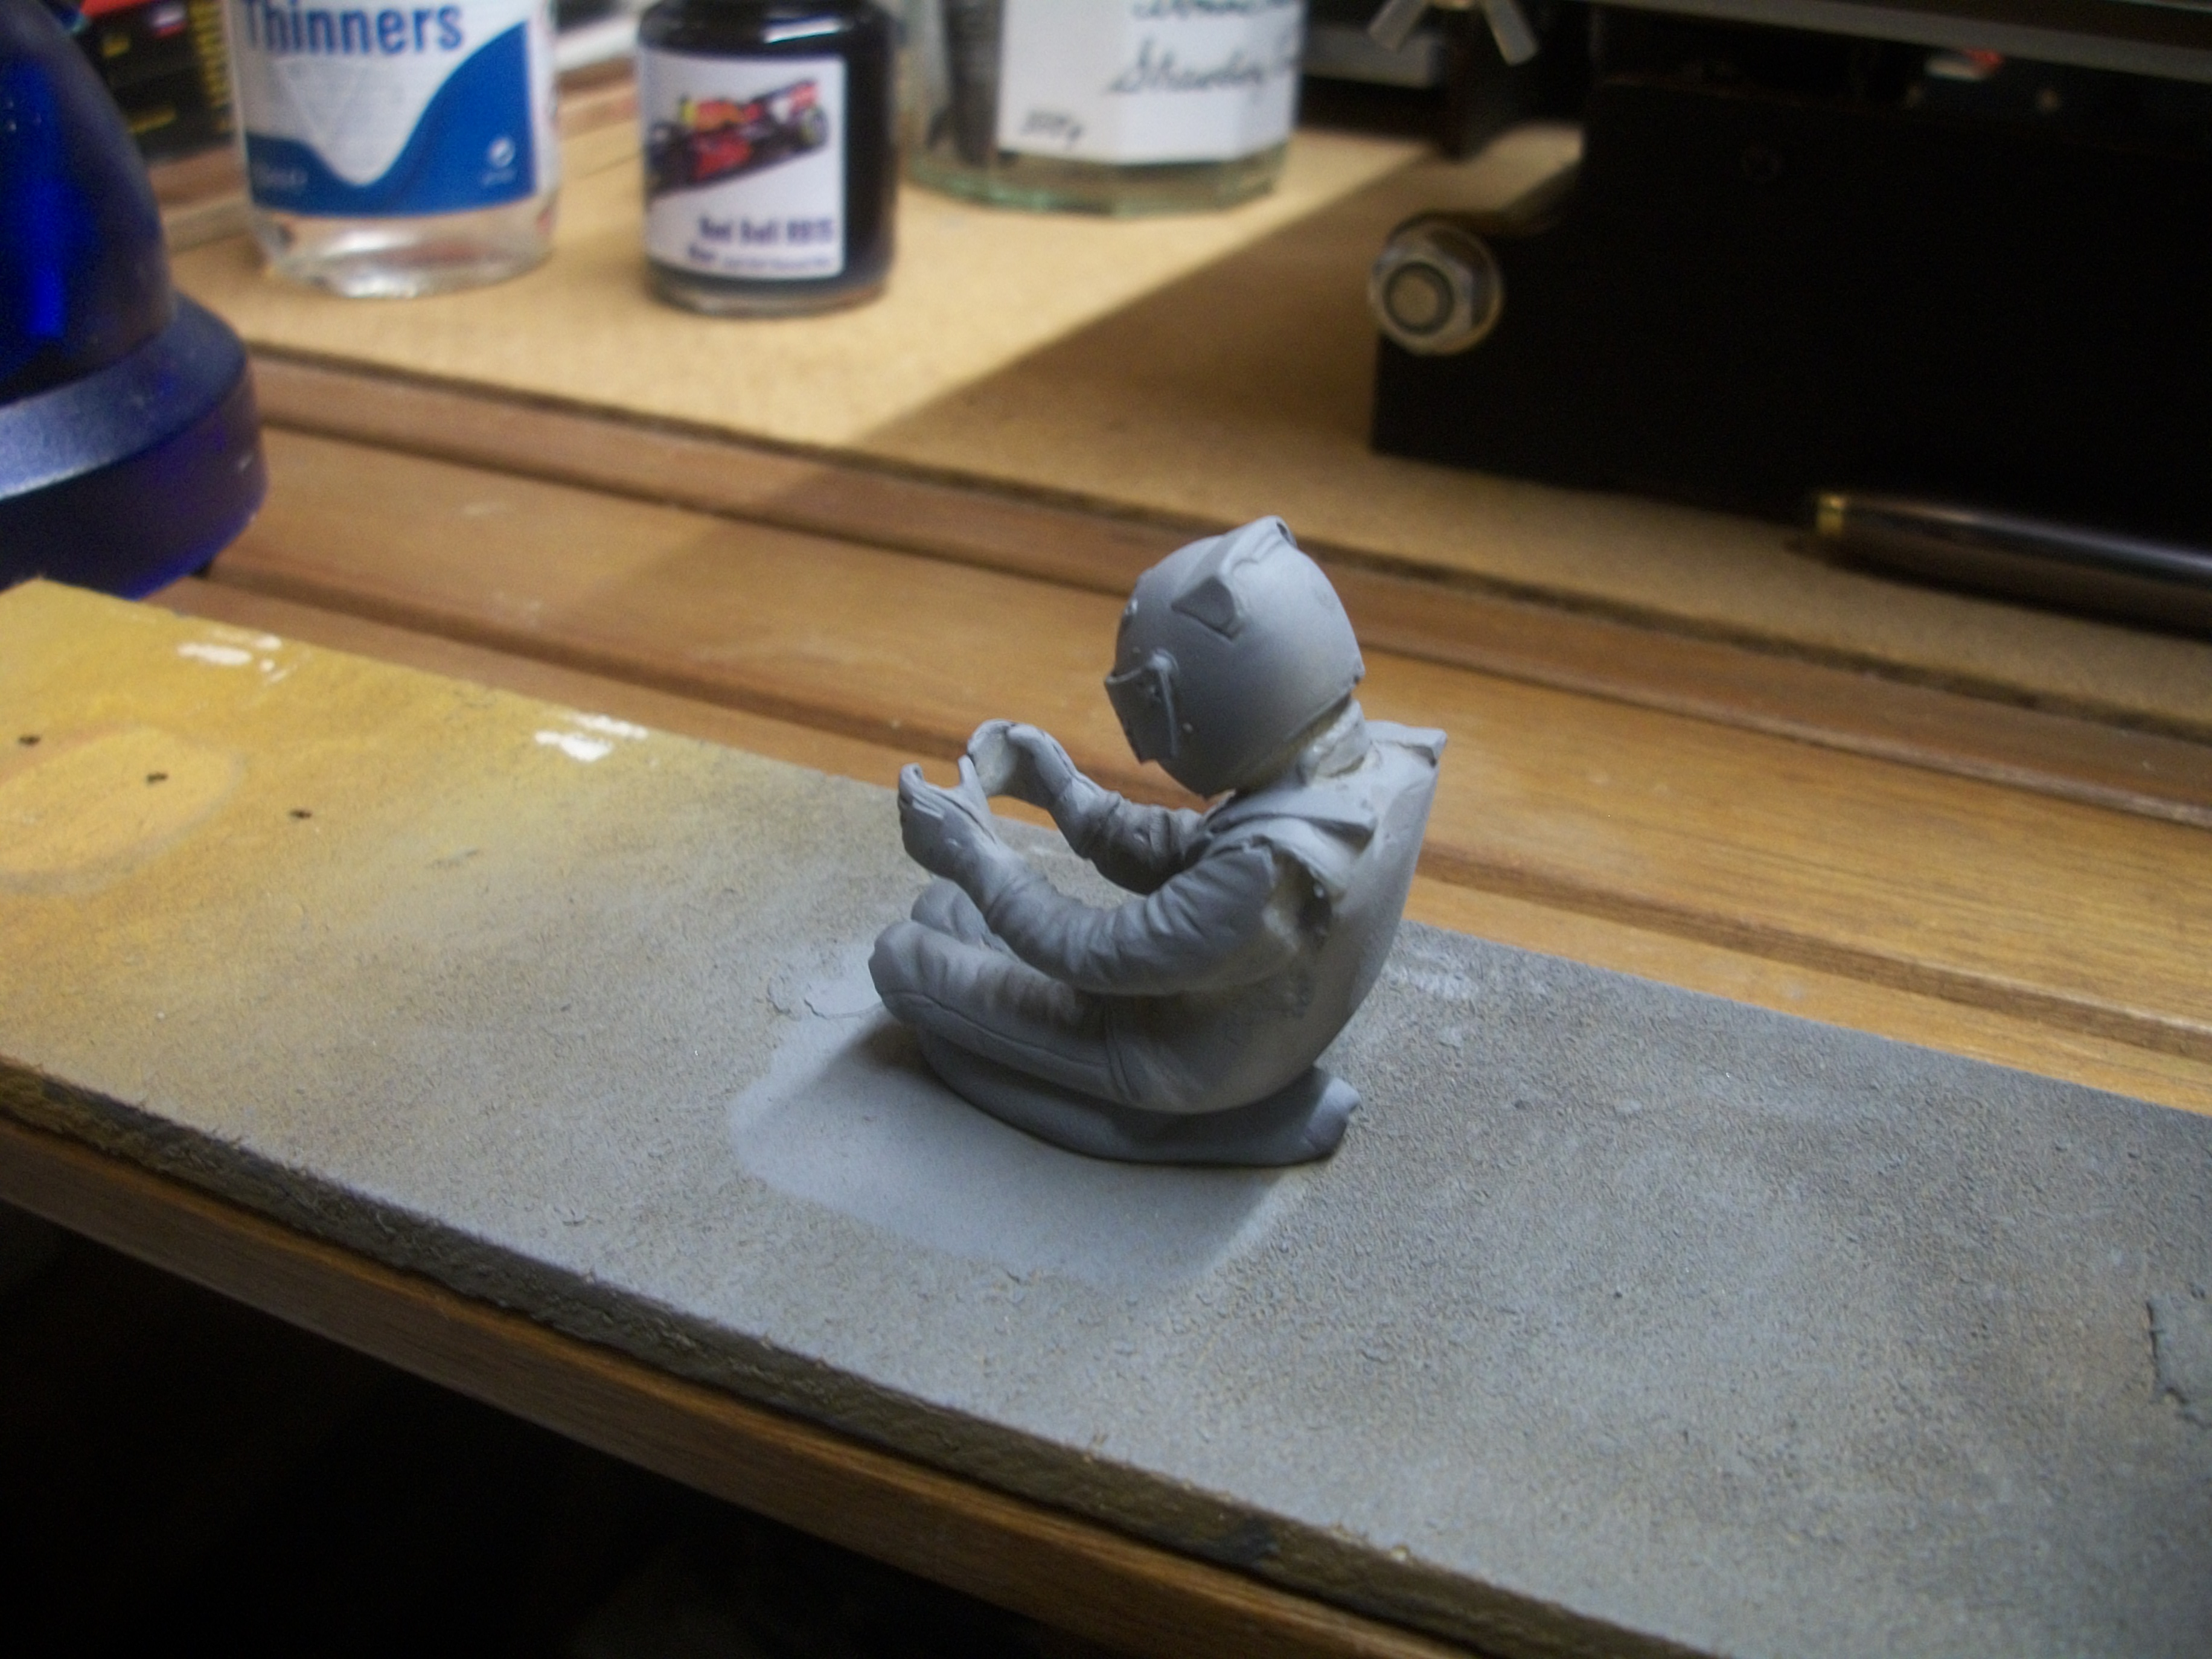
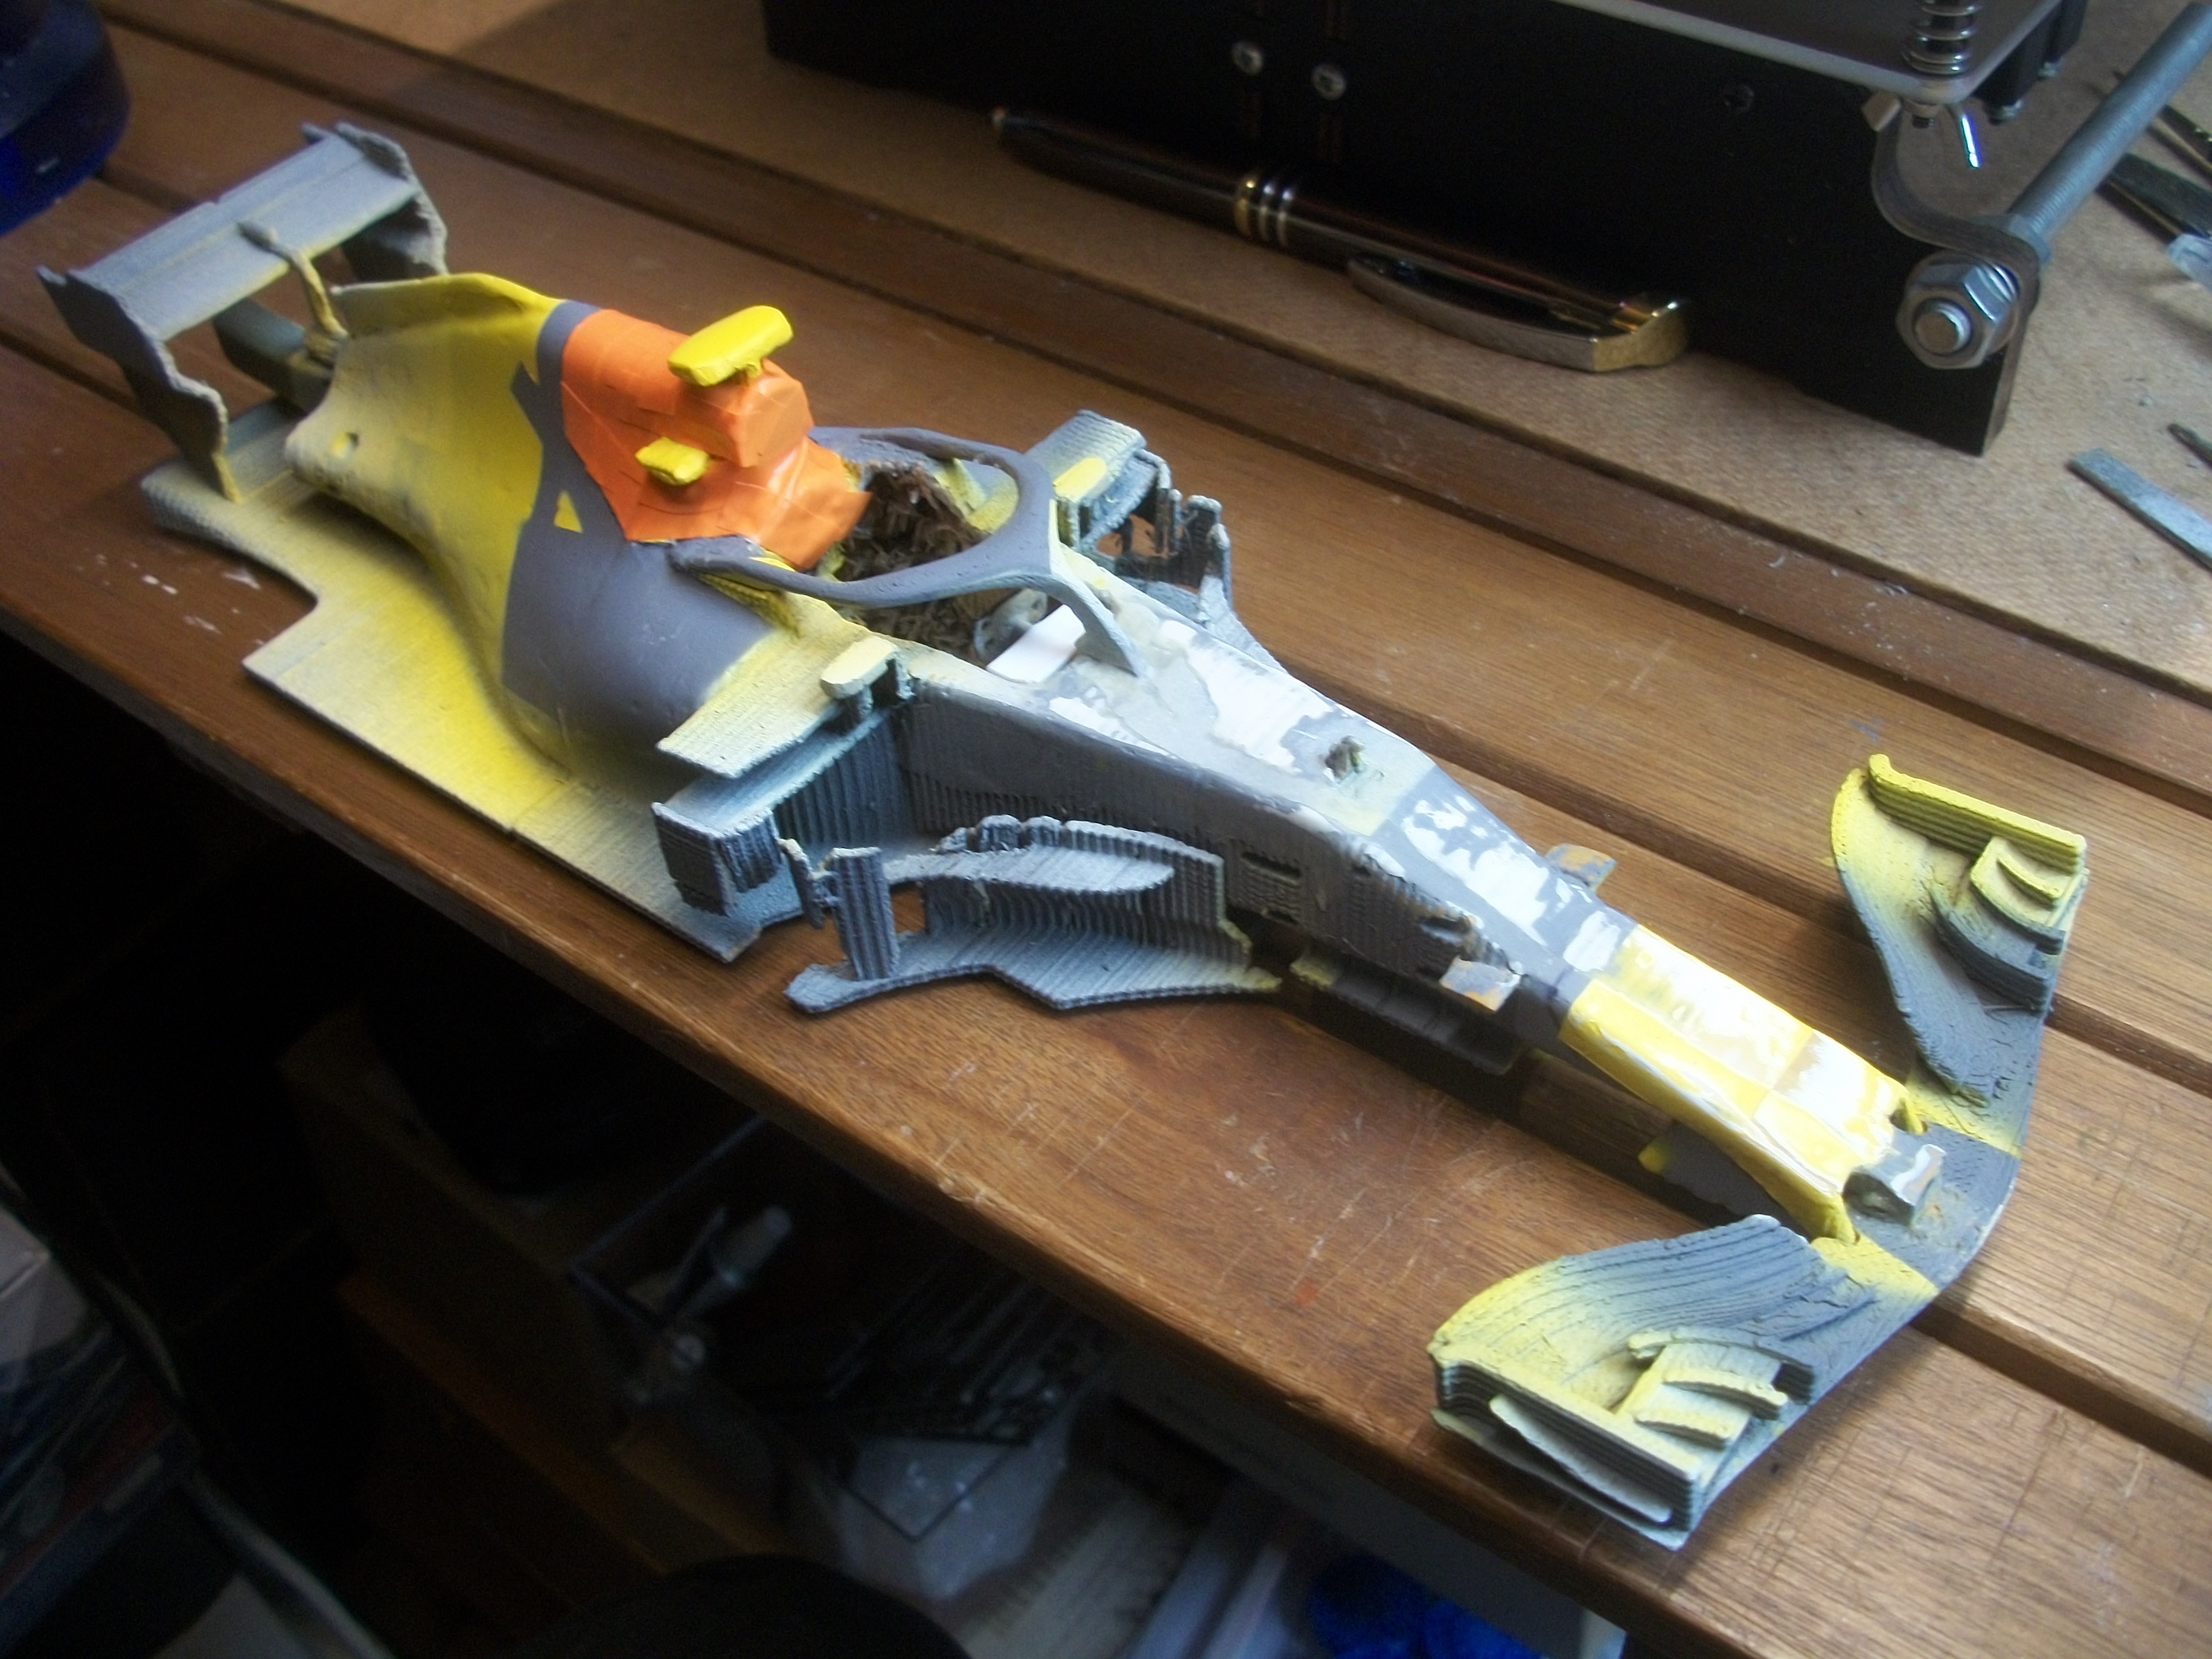
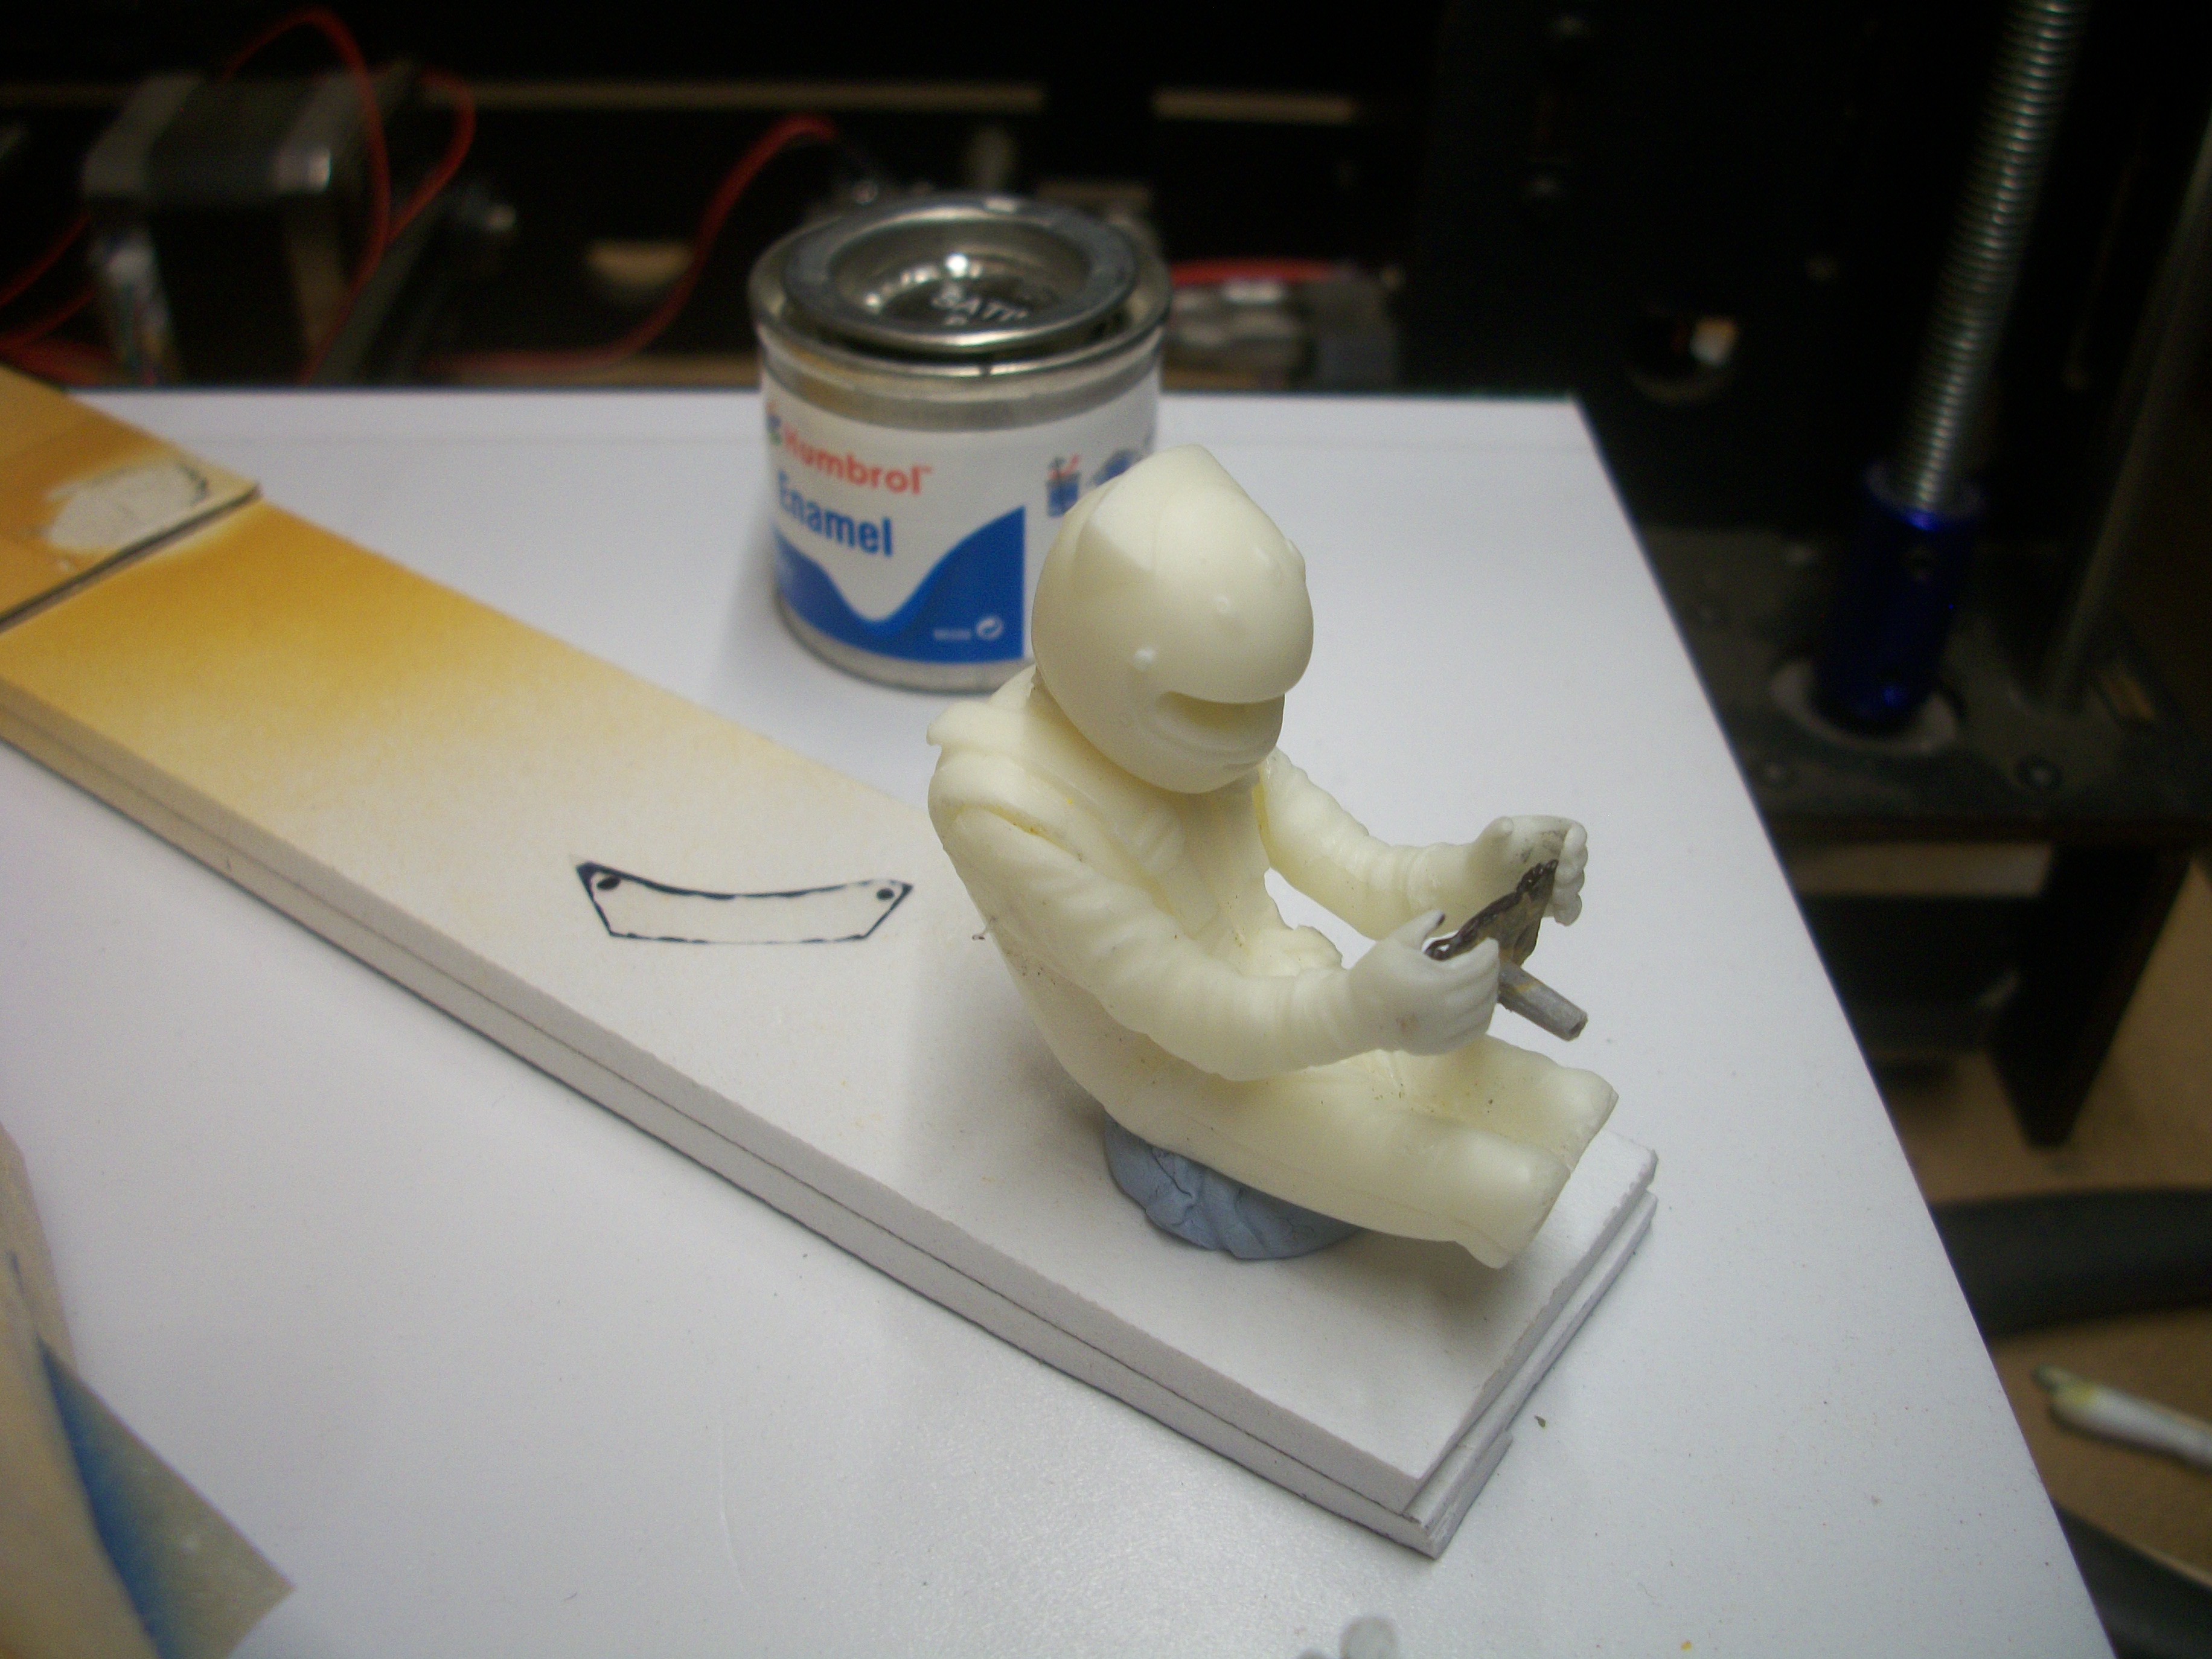
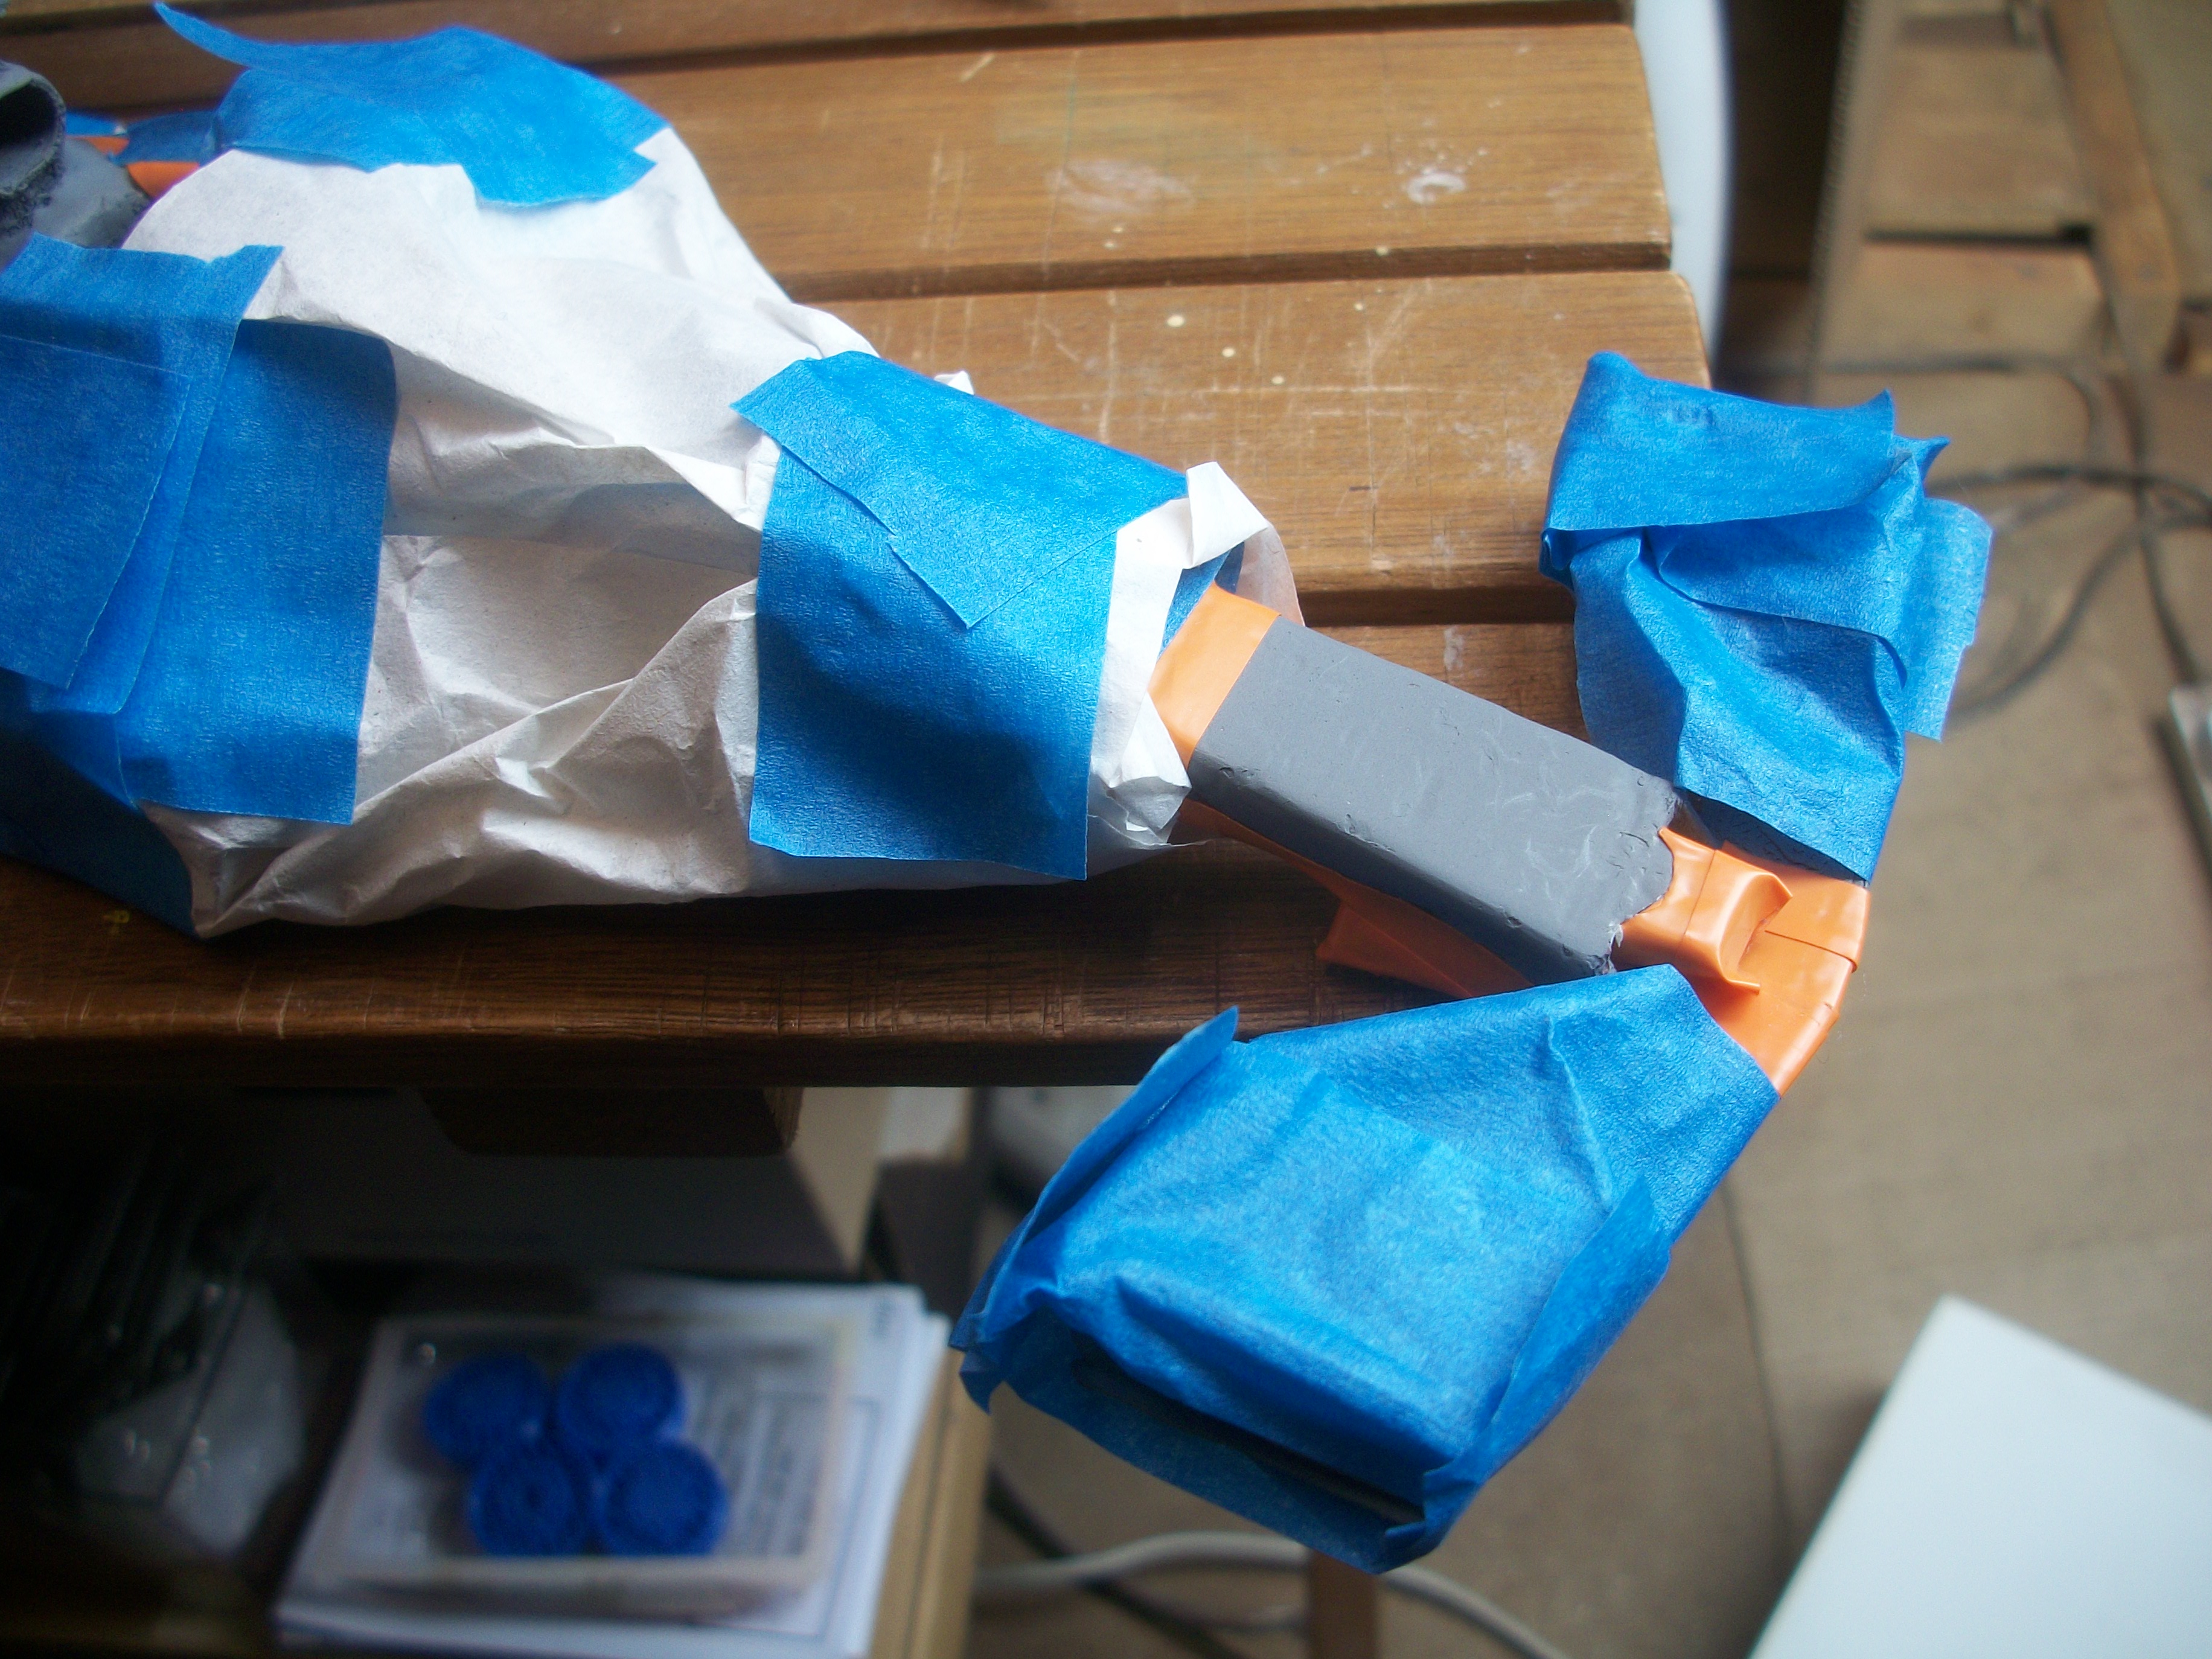
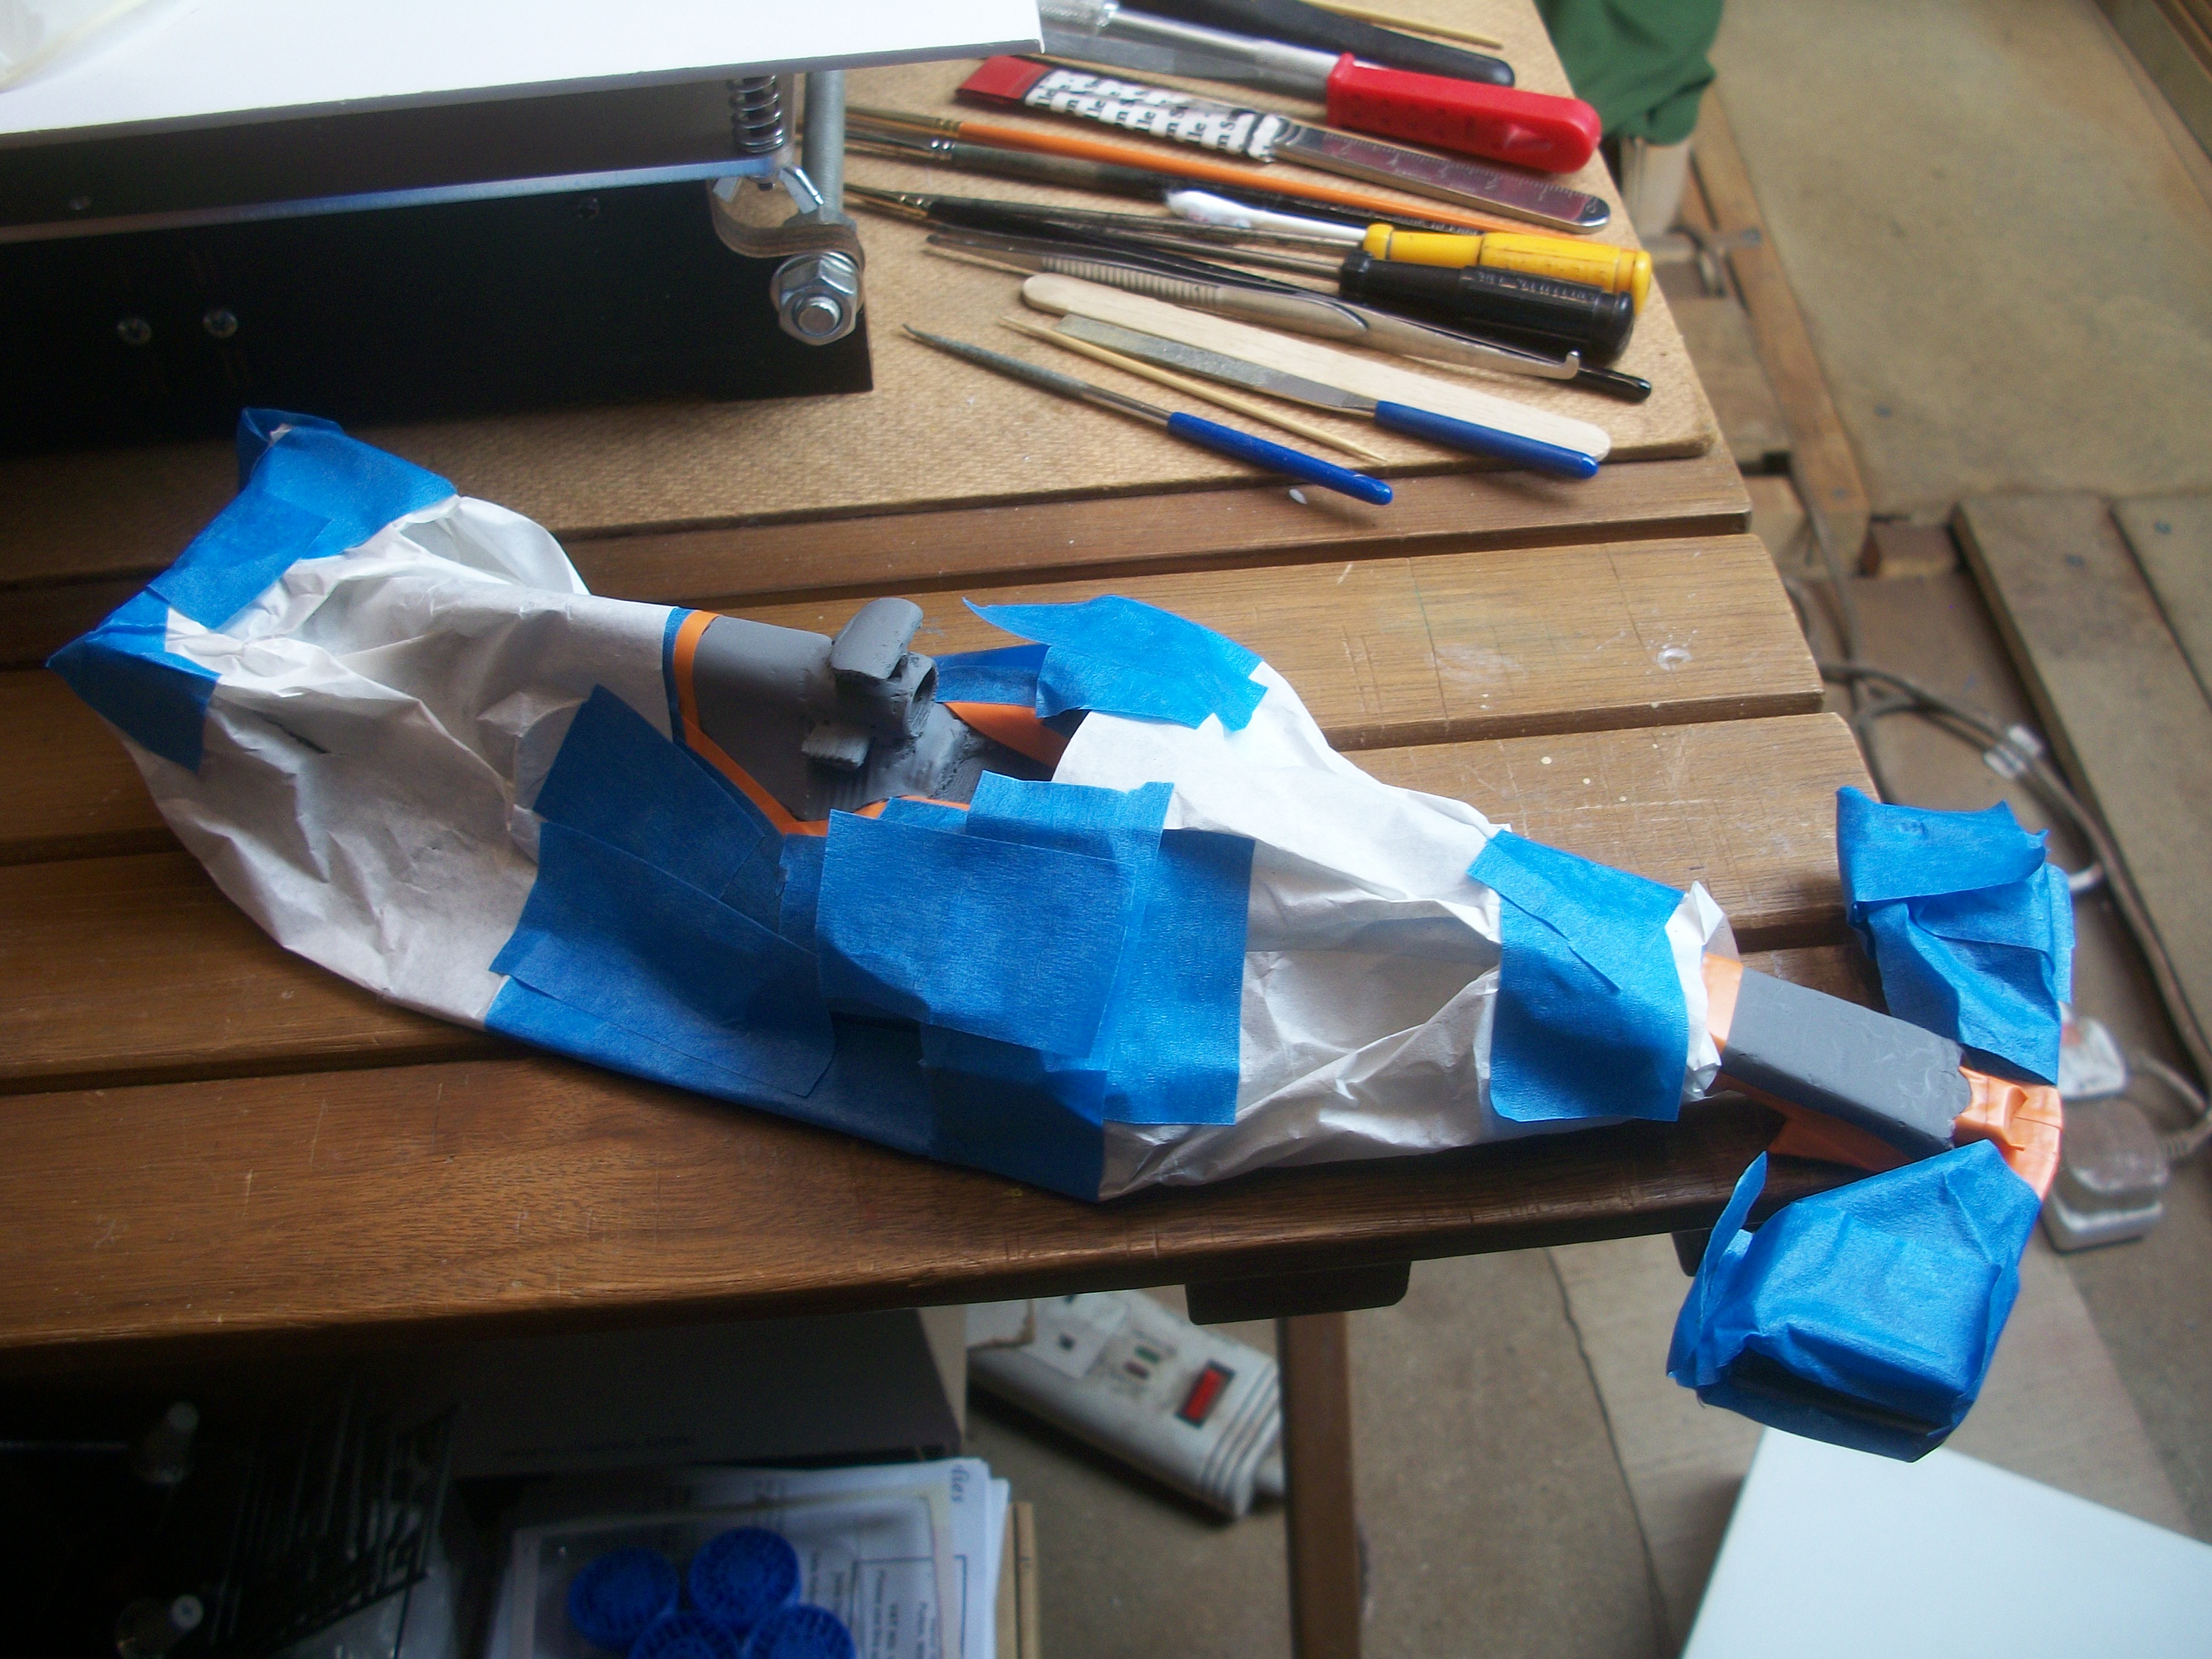
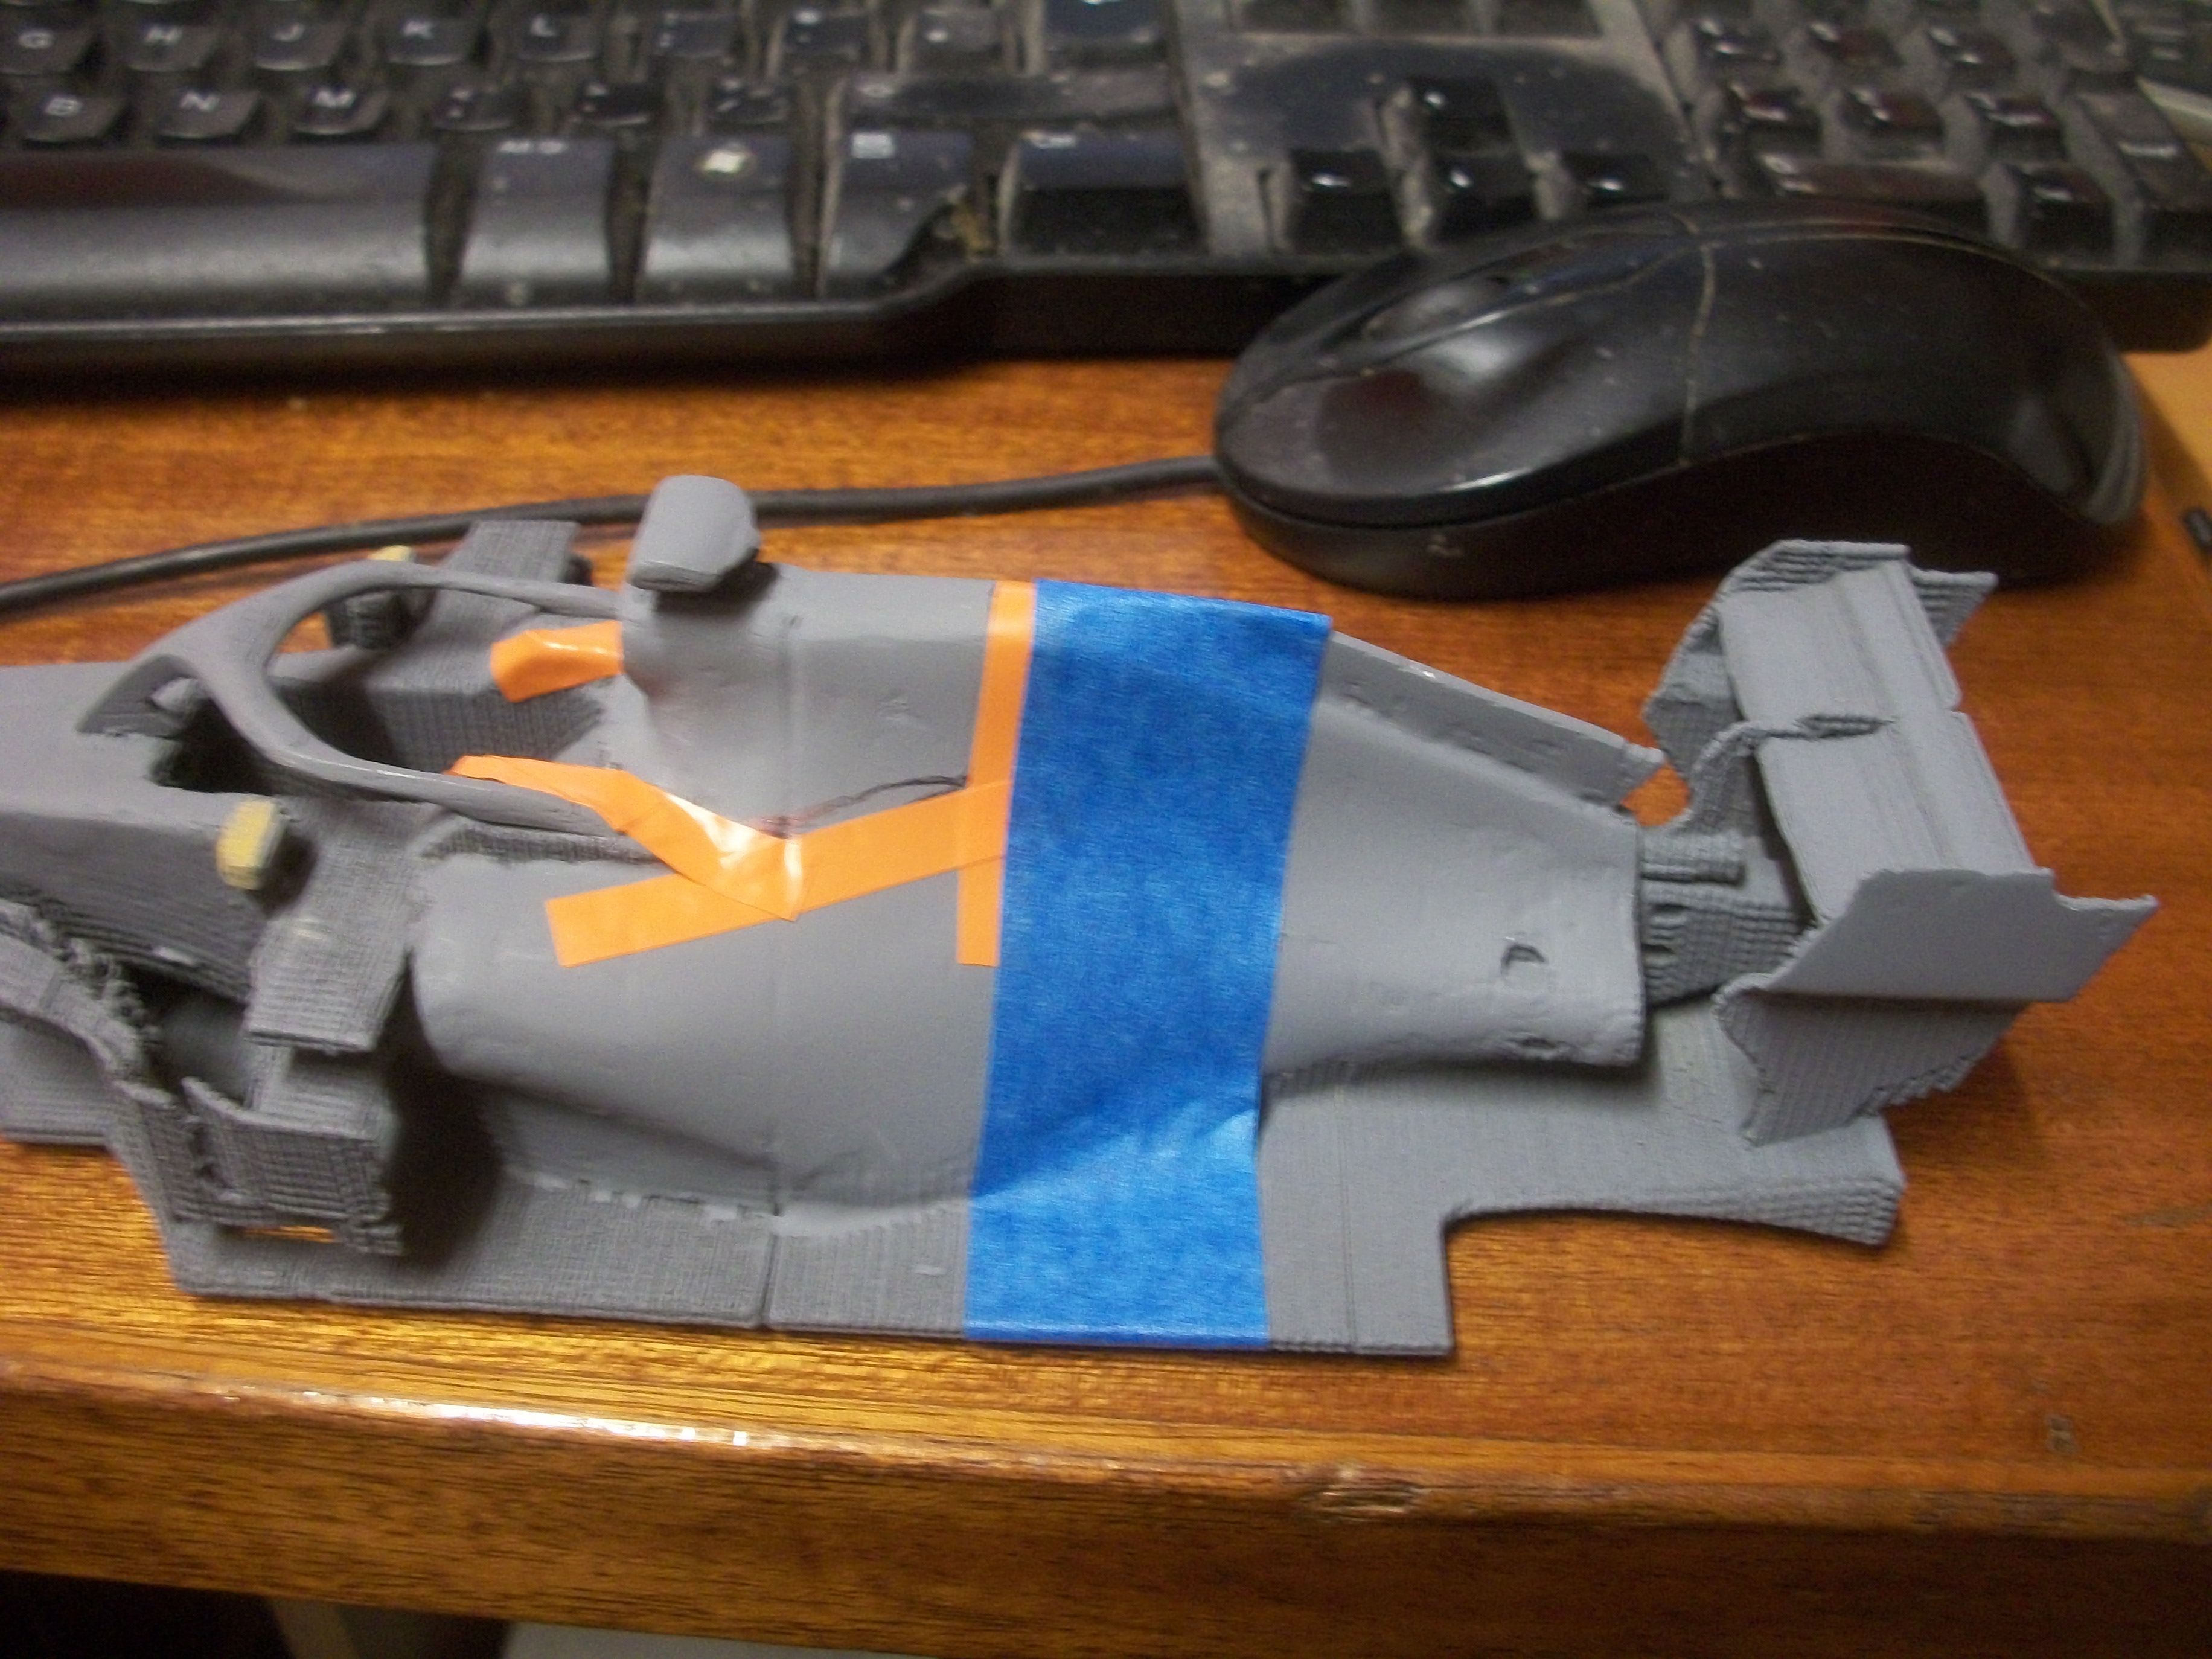
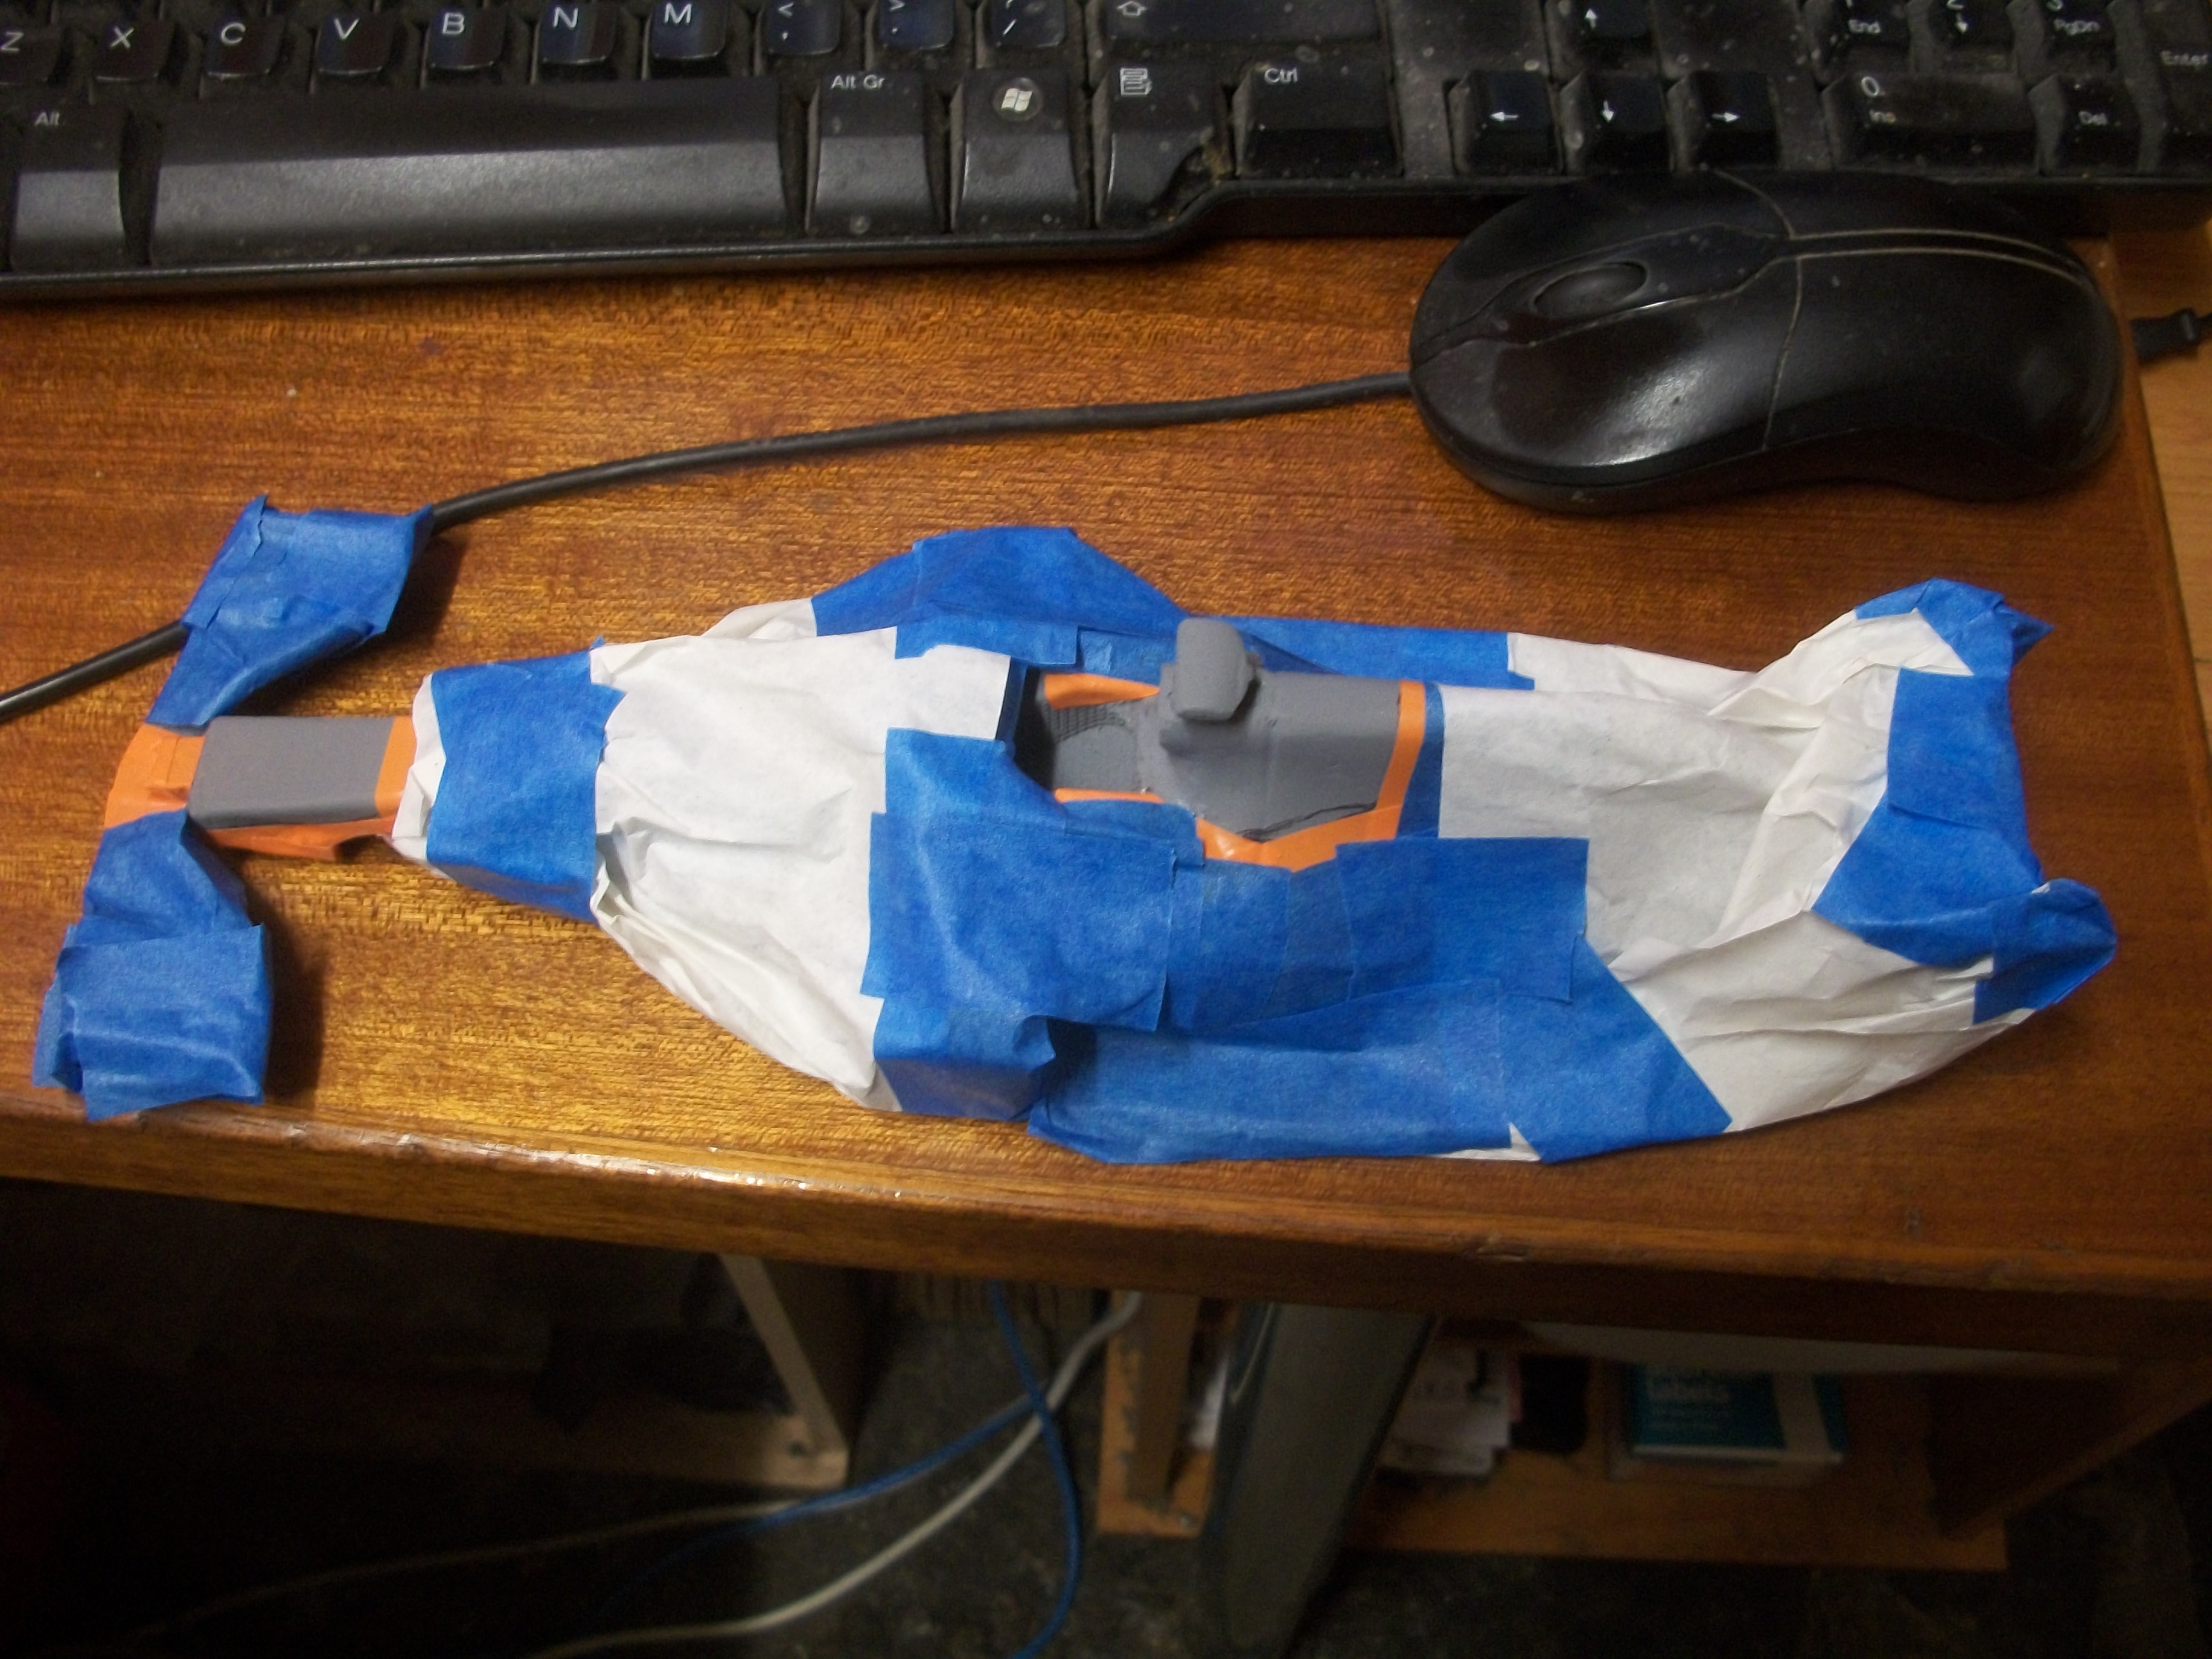
The two small yellow areas of the Red Bull have now been masked off, and a coat of grey primer applied to the car. The driver figure has the visor fitted to the helmet. This was drawn and cut from thin styrene, then bent round into shape and I drilled two holes in the extreme corners of the visor, using my Revell hand drill. Then I gave the outer face of the visor a coat of black Sharpie to reproduce the ' reflective ' look. Vaseline has been applied over the visor so that after the grey primer and the Red Bull dark blue has been applied, I can scrape away the Vaseline to reveal the black visor underneath. Once the grey primer has dried overnight for 24 hours, the dark blue Zero Paints will be applied in two coats using the airbrush, with 15 minutes between coats. Depending how the dark blue dries, I may apply Humbrol Matt Varnish if necessary, as I need a matt finish. David
-
This gentleman must be Harry Ferguson, the designer of the Ferguson tractor........... Henry George "Harry" Ferguson was an Irish-born British engineer and inventor known for his development of the modern agricultural tractor. He was the first Irish man to build and fly his own aeroplane. Ferguson also developed the first four-wheel drive Formula One car, the Ferguson P99. In 1911 he founded a company which included tractor retail. Ferguson recognised the weakness of having a tractor and plough as separate units, so set about developing a plough that could be rigidly attached to a Model T Ford car—the Eros. 'The Ferguson System' was developed over a 30 year period and is an automatic control system now employed by almost all tractor manufacturers worldwide. During the 1930’s the first Ferguson tractors were built by the David Brown Company. A prototype Ferguson System tractor, known as the Ferguson Black, was built to further technical development and for demonstrating to potential manufacturers. This tractor, the Ferguson Model 'A', incorporated Harry Ferguson's 'suction side' hydraulic control system. The combination of Ferguson's three point hitch, with his 'suction side control' valve is the key to the success of all subsequent Ferguson and later Massey Ferguson 'Ferguson System' tractors. In order to get volume production with reduced costs Ferguson met with Henry Ford in 1938 and the infamous "handshake agreement" took place – Fergusons innovations would be produced by Henry Ford. However Fergusons machines were not produced in Dagenham as agreed. Ford's grandson continued to use Ferguson's patented inventions without producing the machinery for Ferguson, which resulted in a lawsuit. By 1952 most of the significant patents had expired and Henry Ford II along with the rest of the world could use Ferguson's inventions. A year later Ferguson merged with Massey Harris to become Massey-Harris-Ferguson Co, later Massey Ferguson. Harry Ferguson remained Chairman of Massey Harris Ferguson until 1957. David
-
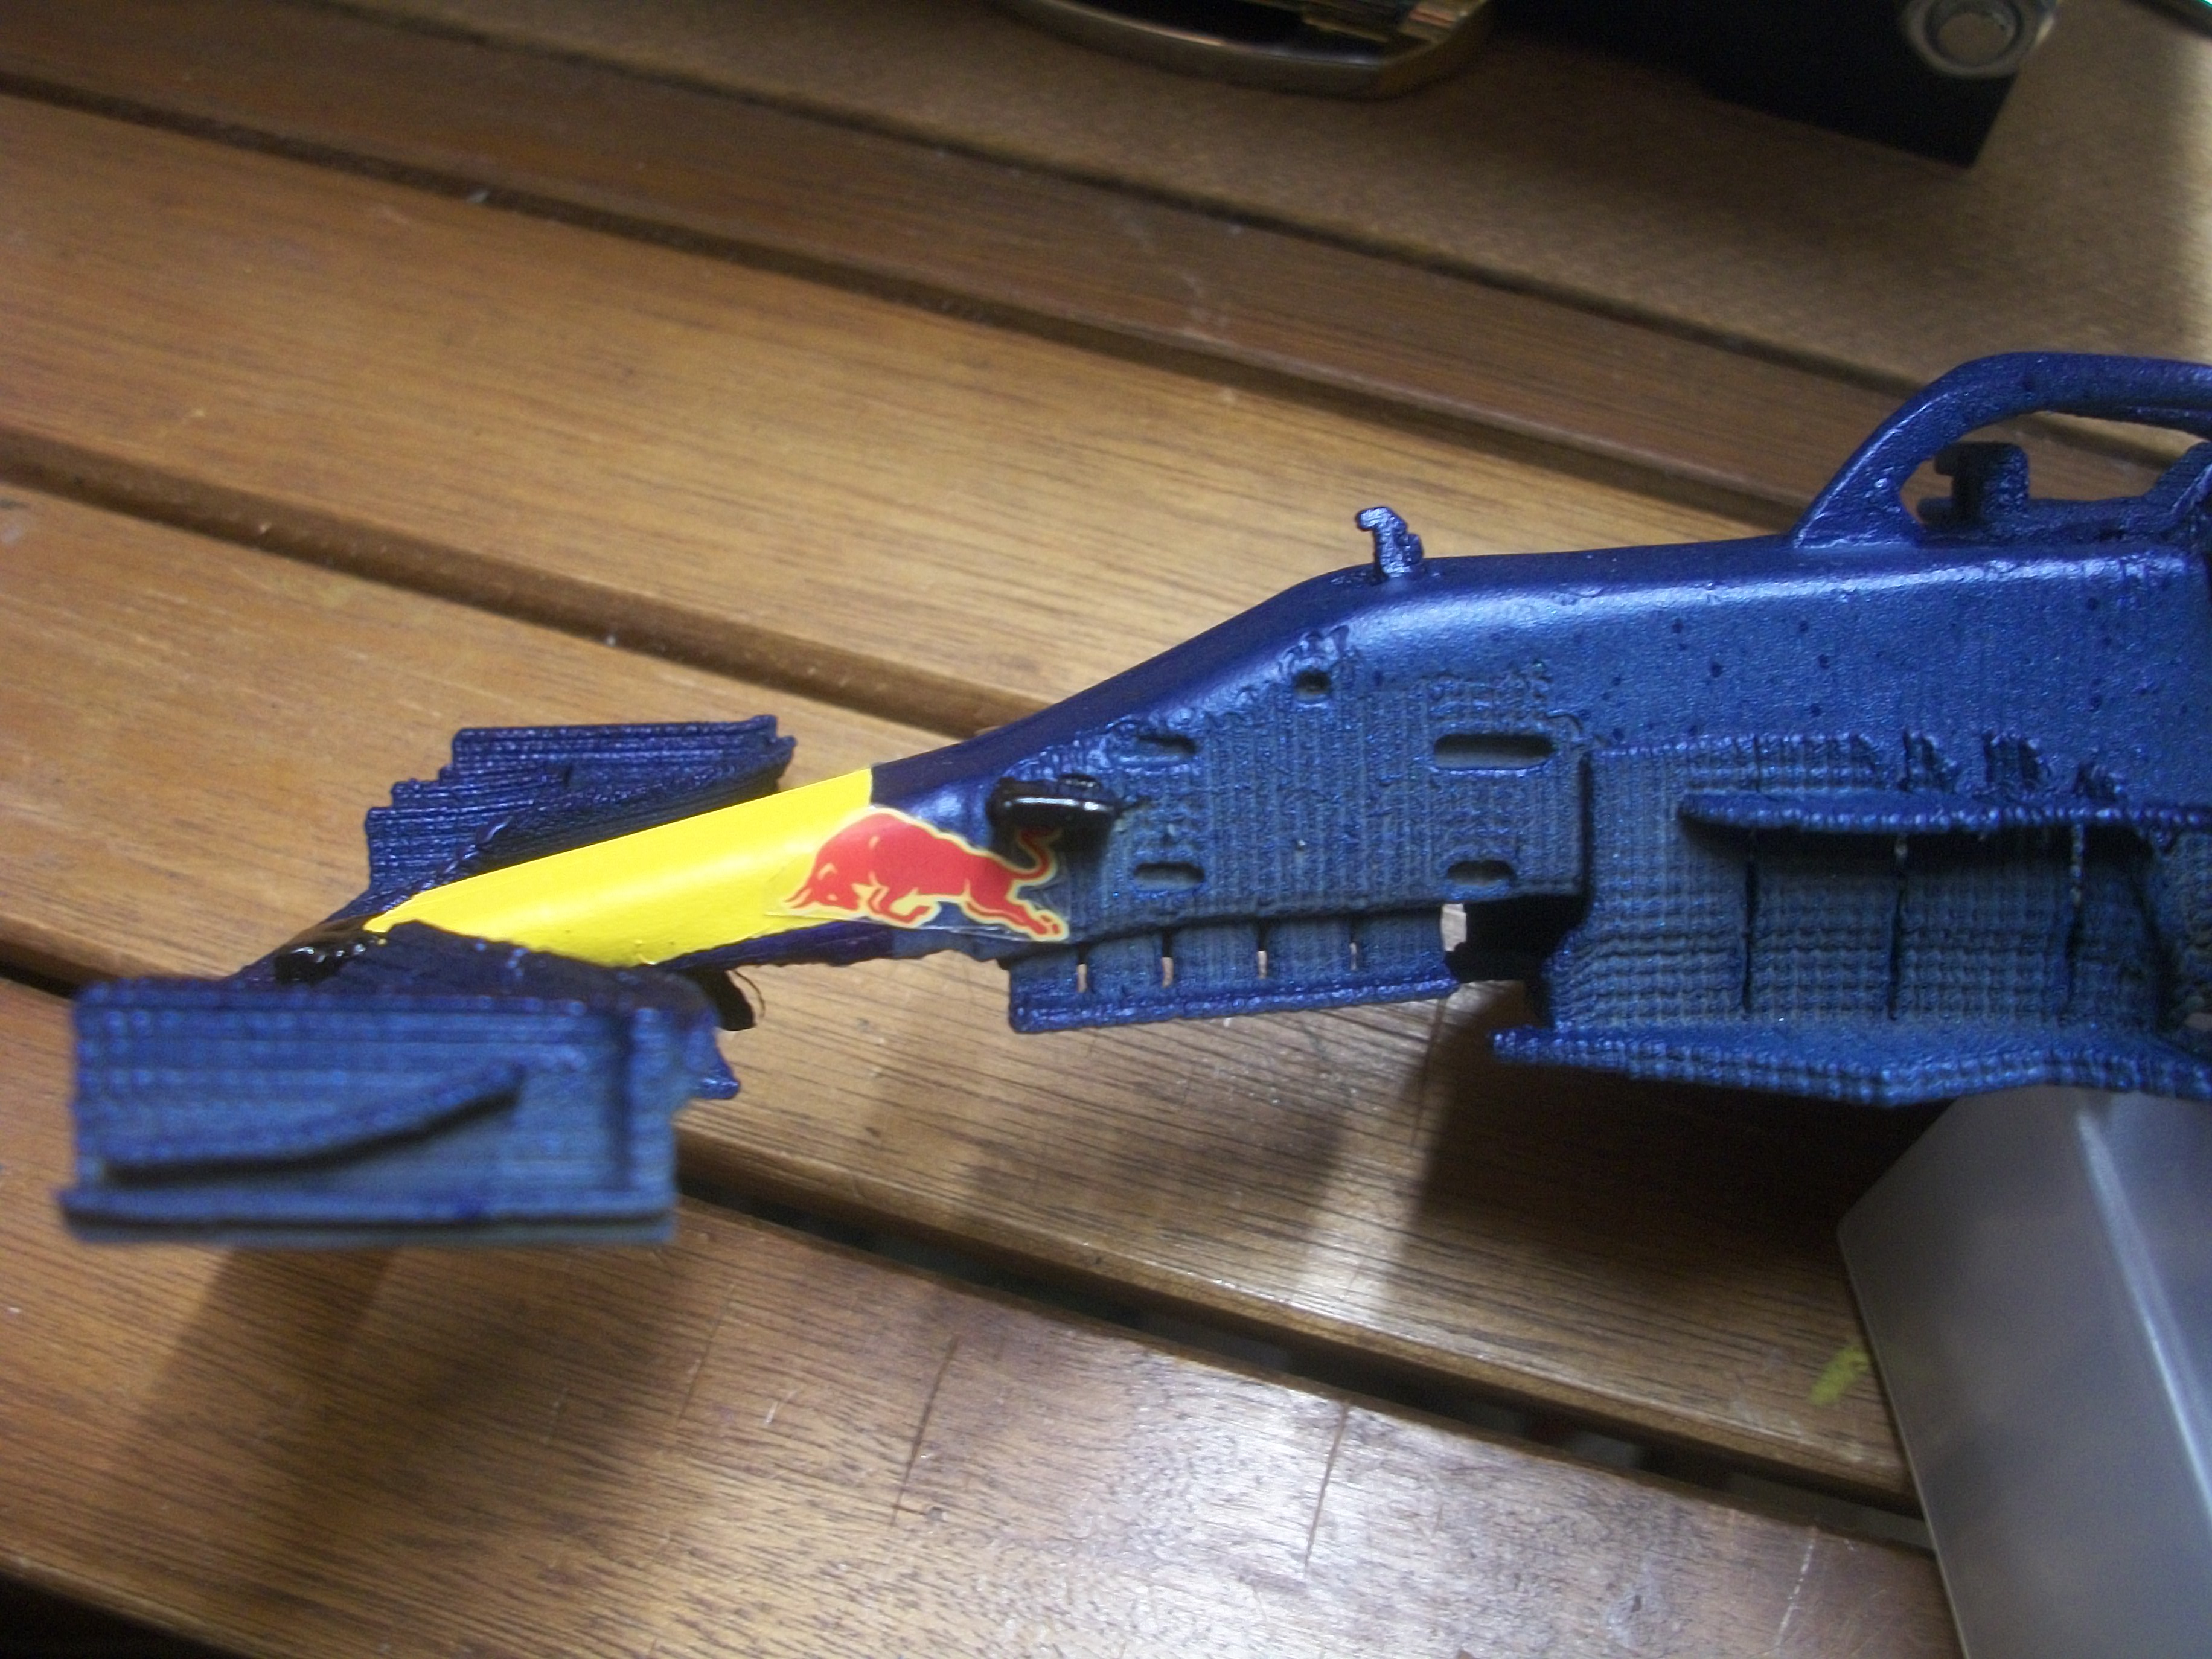
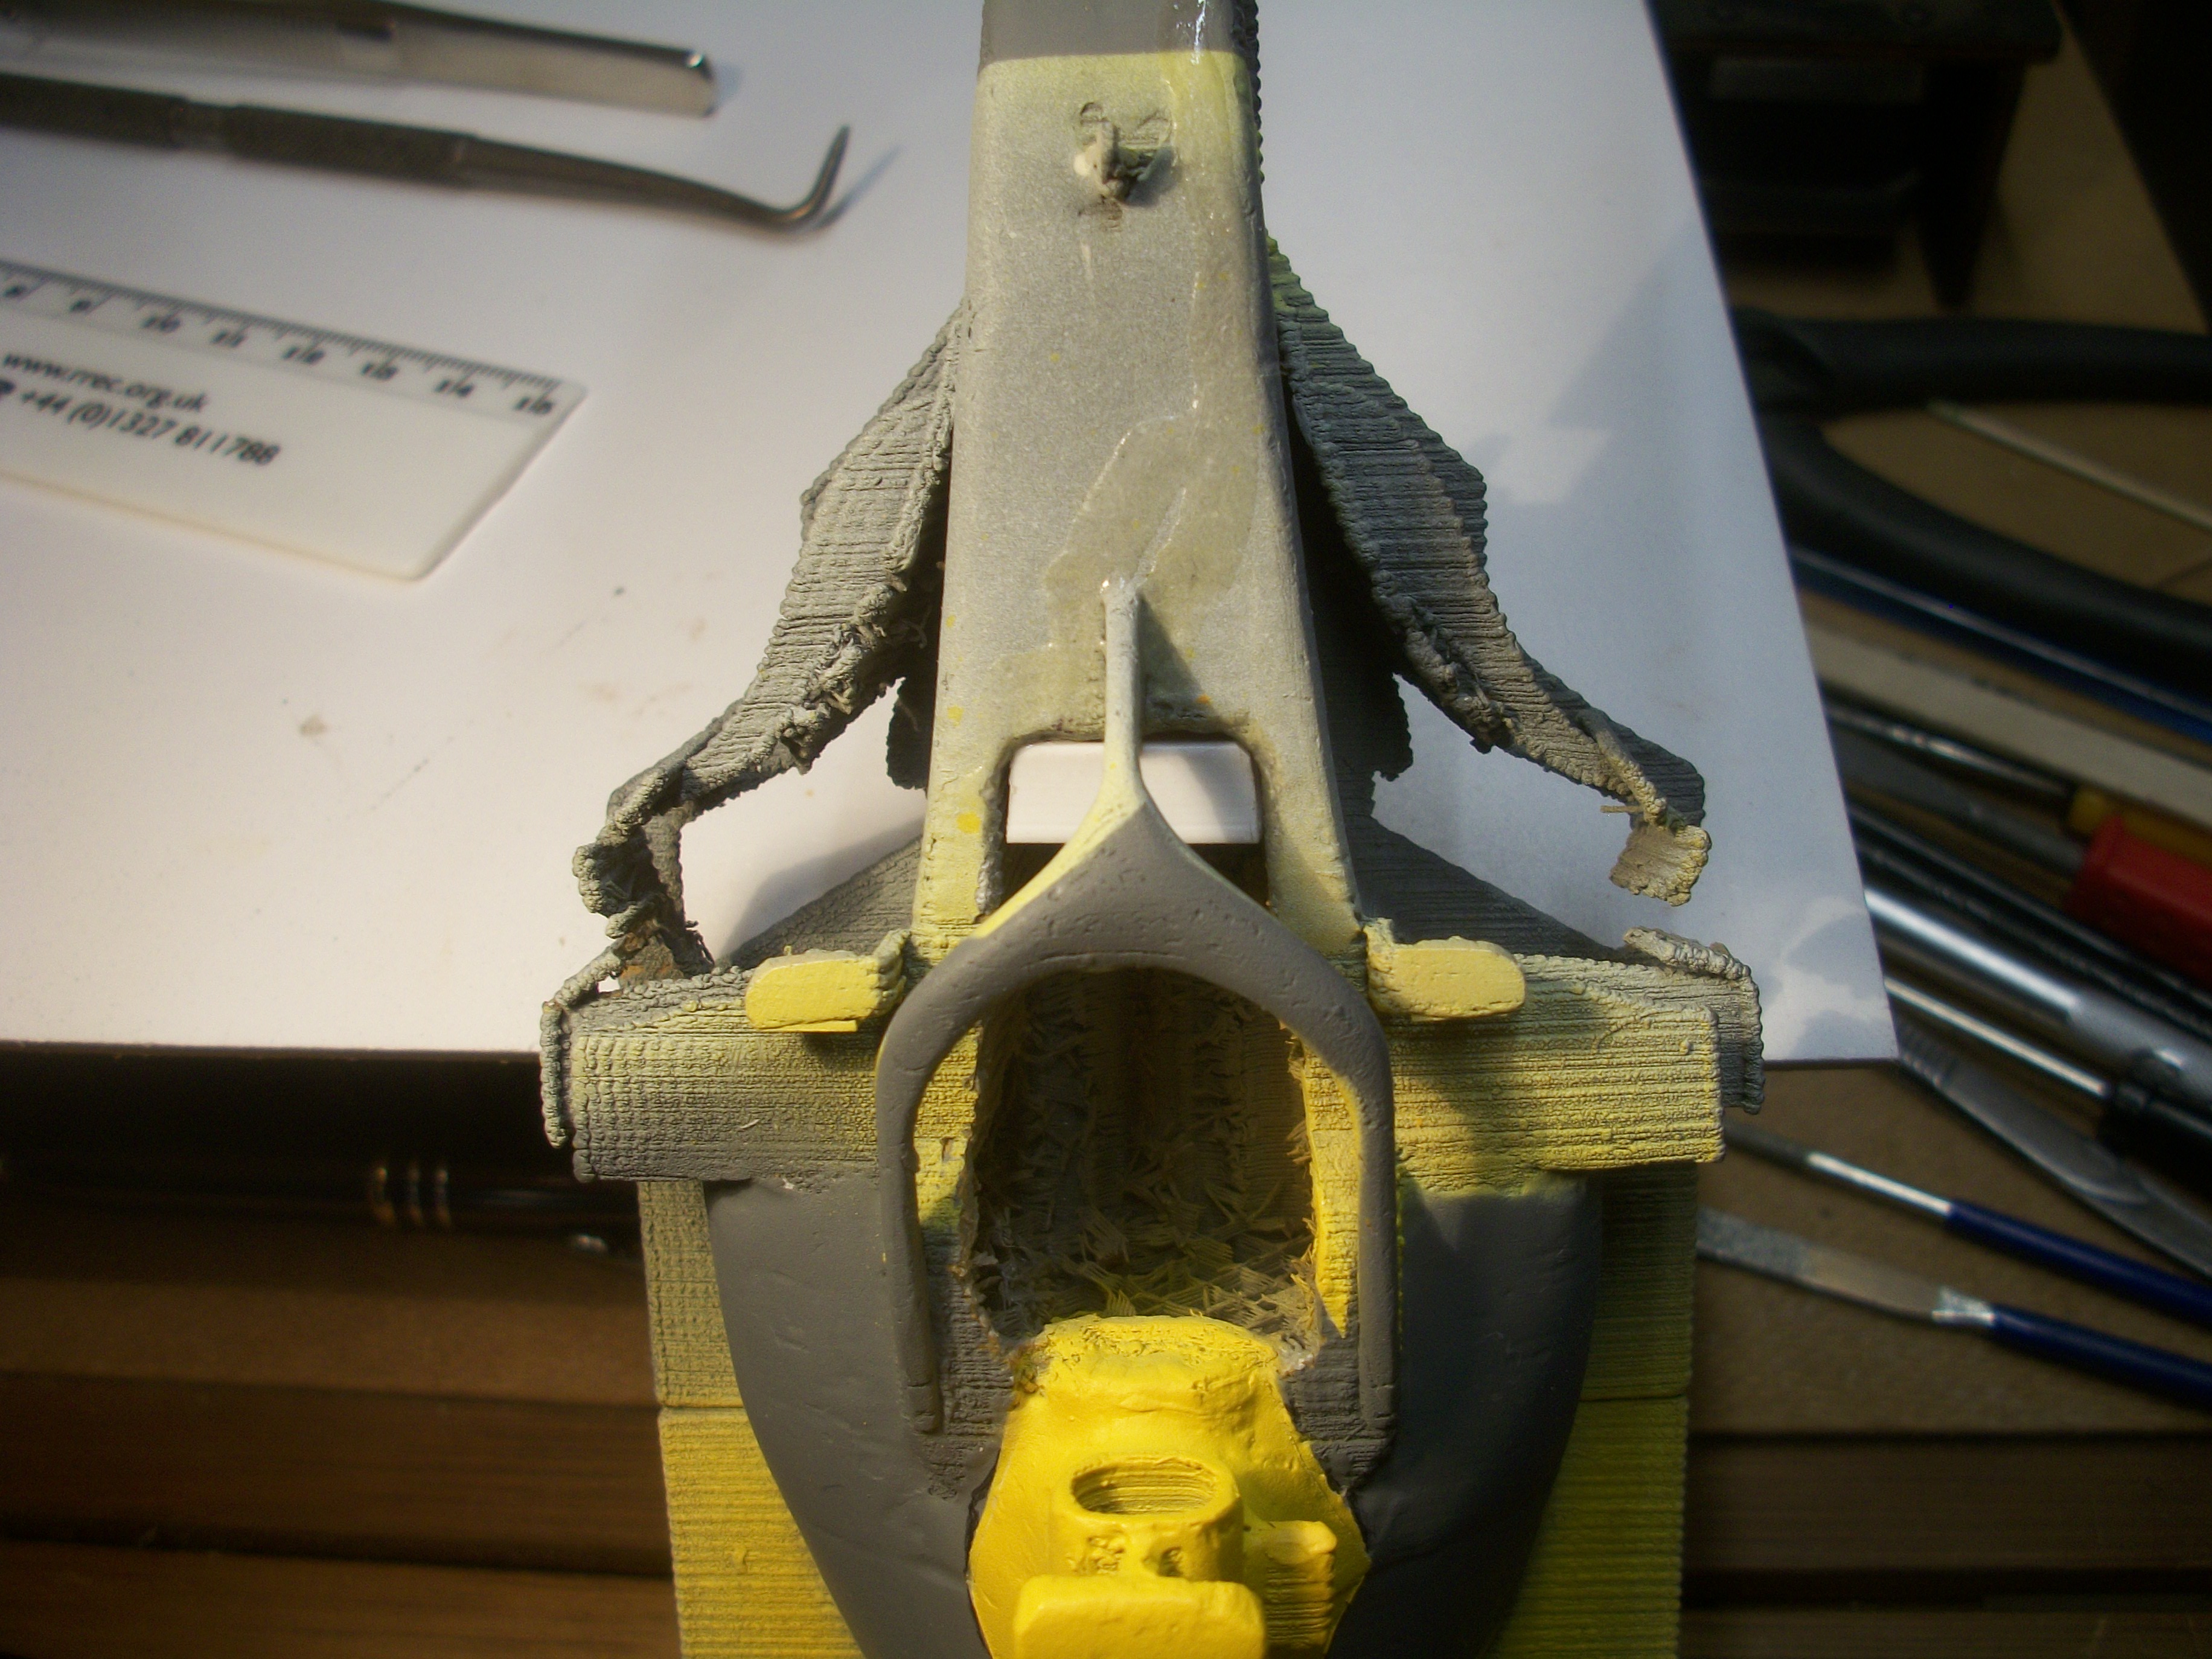
I thought I was back on track, but disaster struck again tonight...... I scratch built a piece of square styrene tubing, to extend the dashboard, as the steering column would not reach the hole in the dash. The super glue comes out of the nozzle in too large amounts, and as I tipped the model over to look at the fit of the new piece..... the excess super glue ran along the full length of the nose cone on top, and ruined the yellow area again. There was a stream of super glue from the halo all the way down to the nose. Today, I used pure acetone, applied with a cotton bud, to remove the super glue from the body of the RB14....... This also removed a small amount of paint as part of the process. More sanding has been done, and now there will be more coats of orange filler primer, white primer and grey primer. This model car has has so many coats of paint that I have literally lost count ! David
-
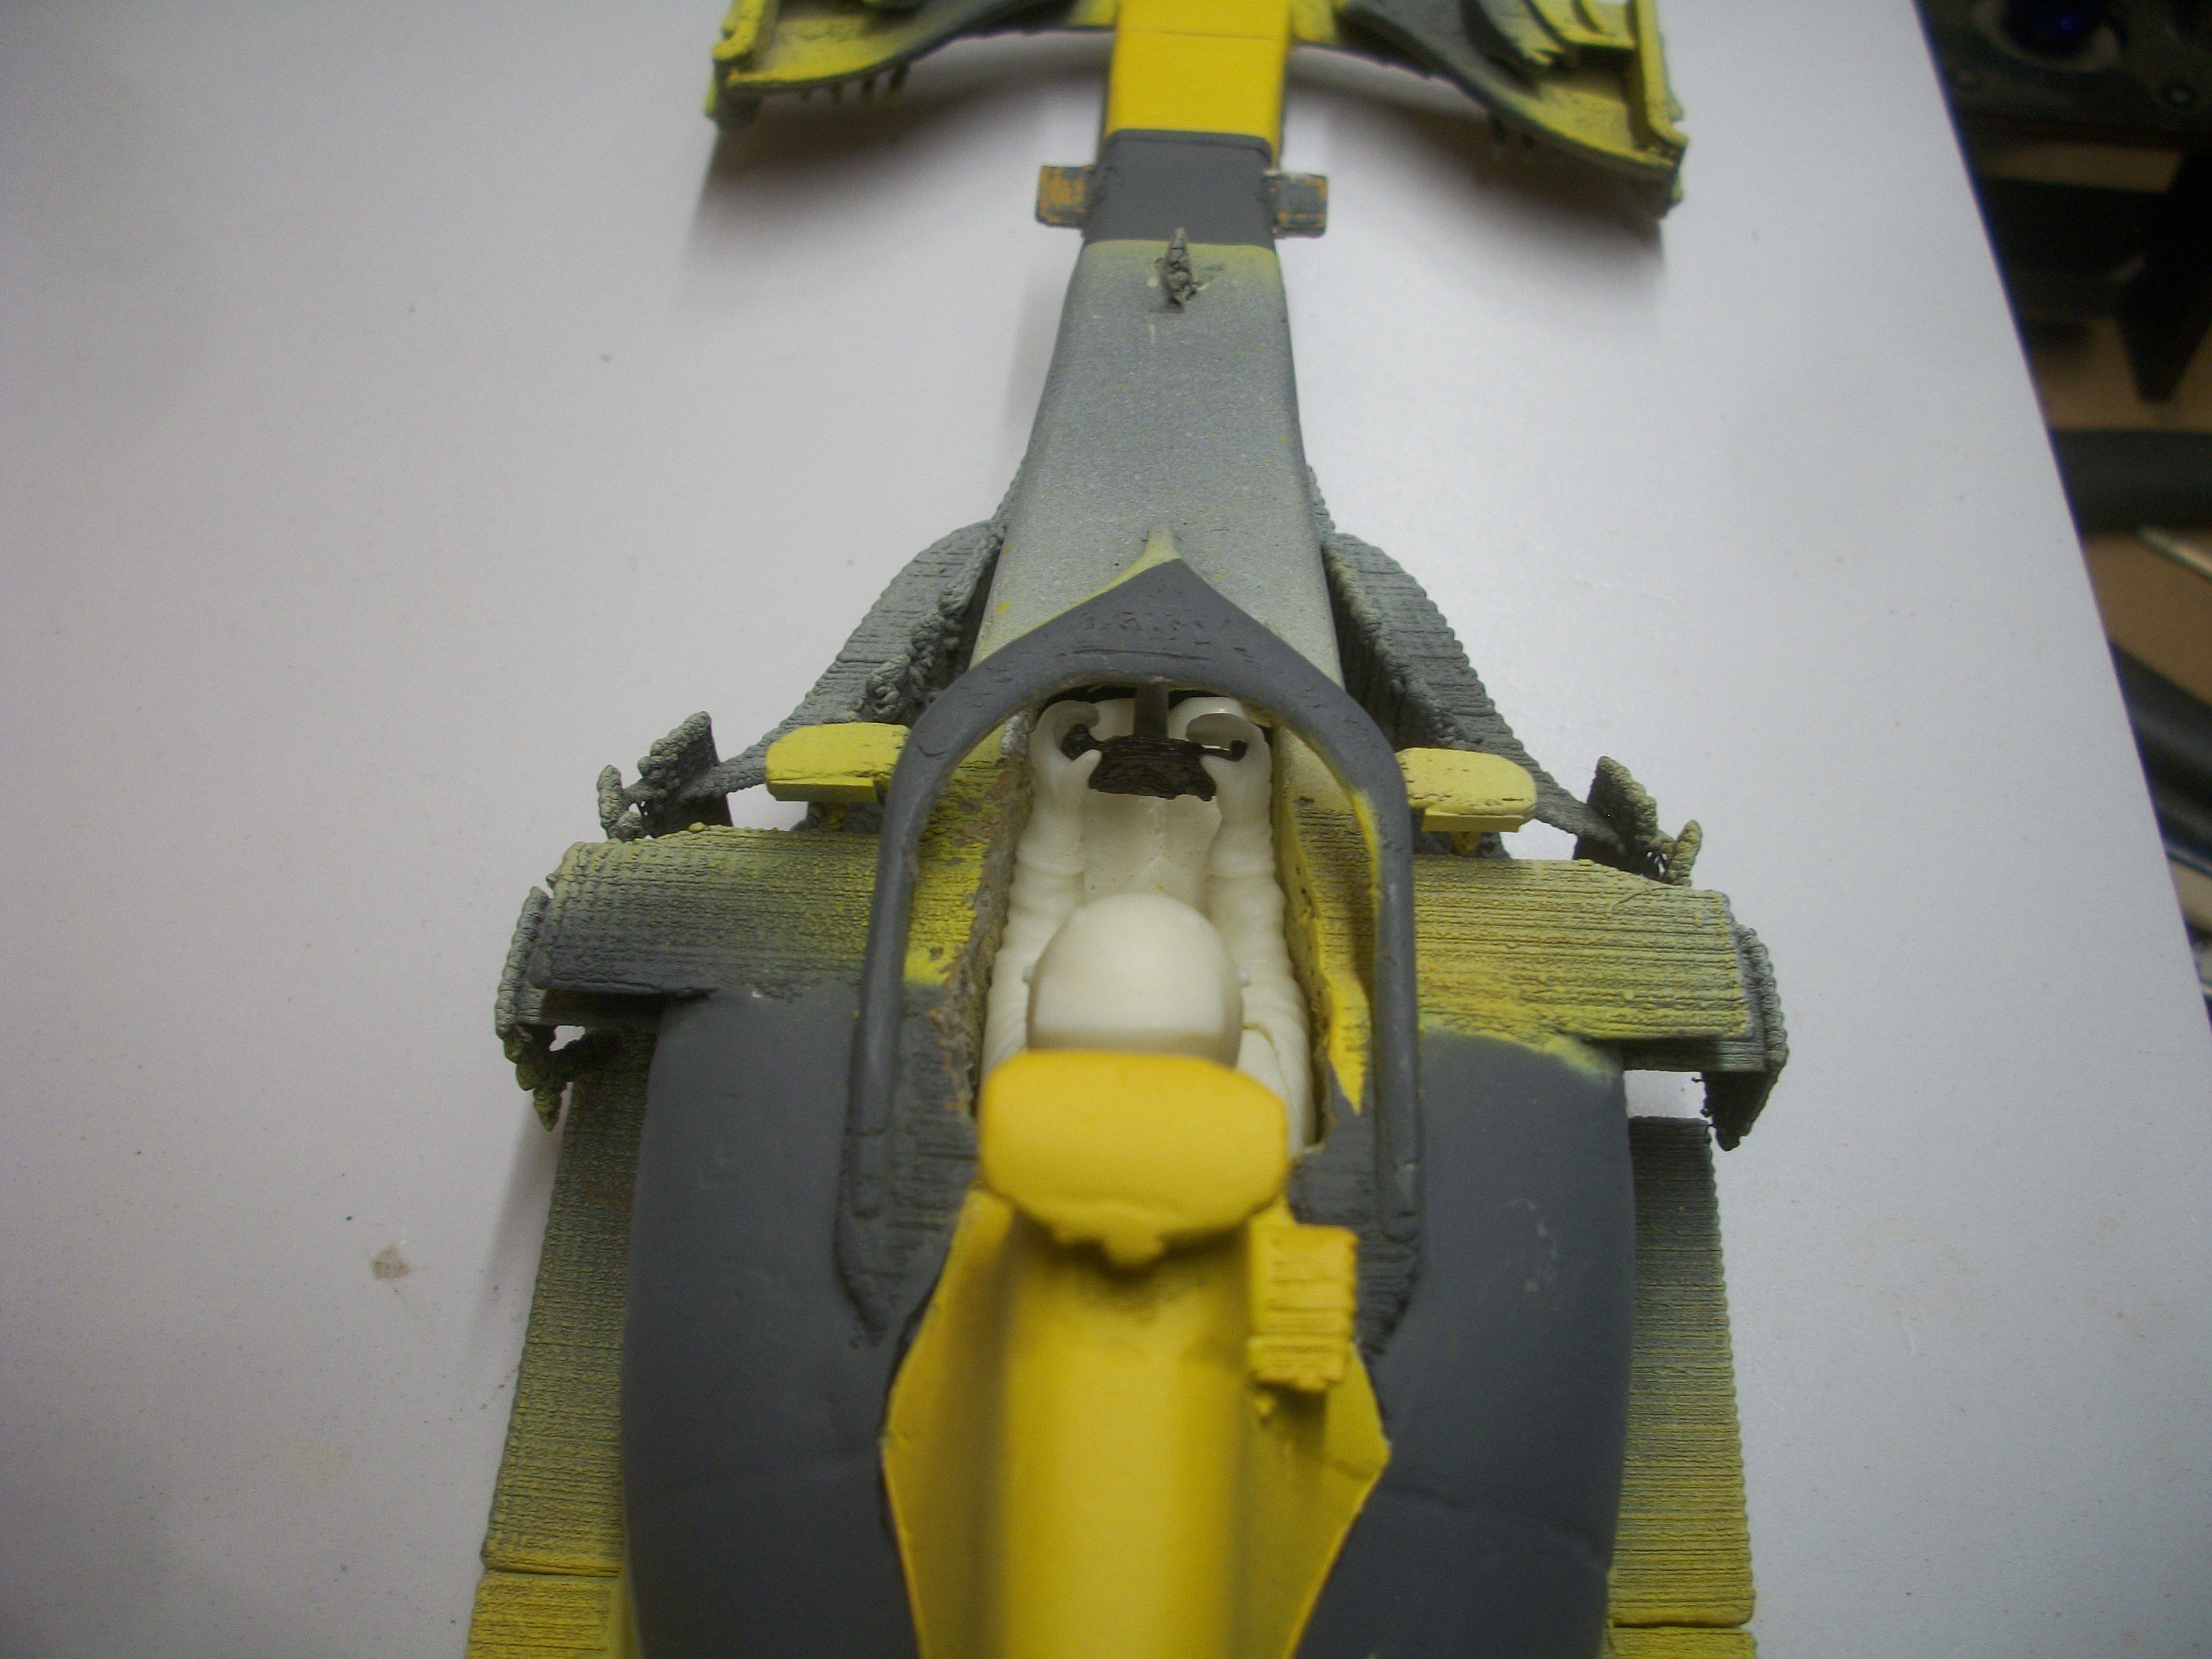
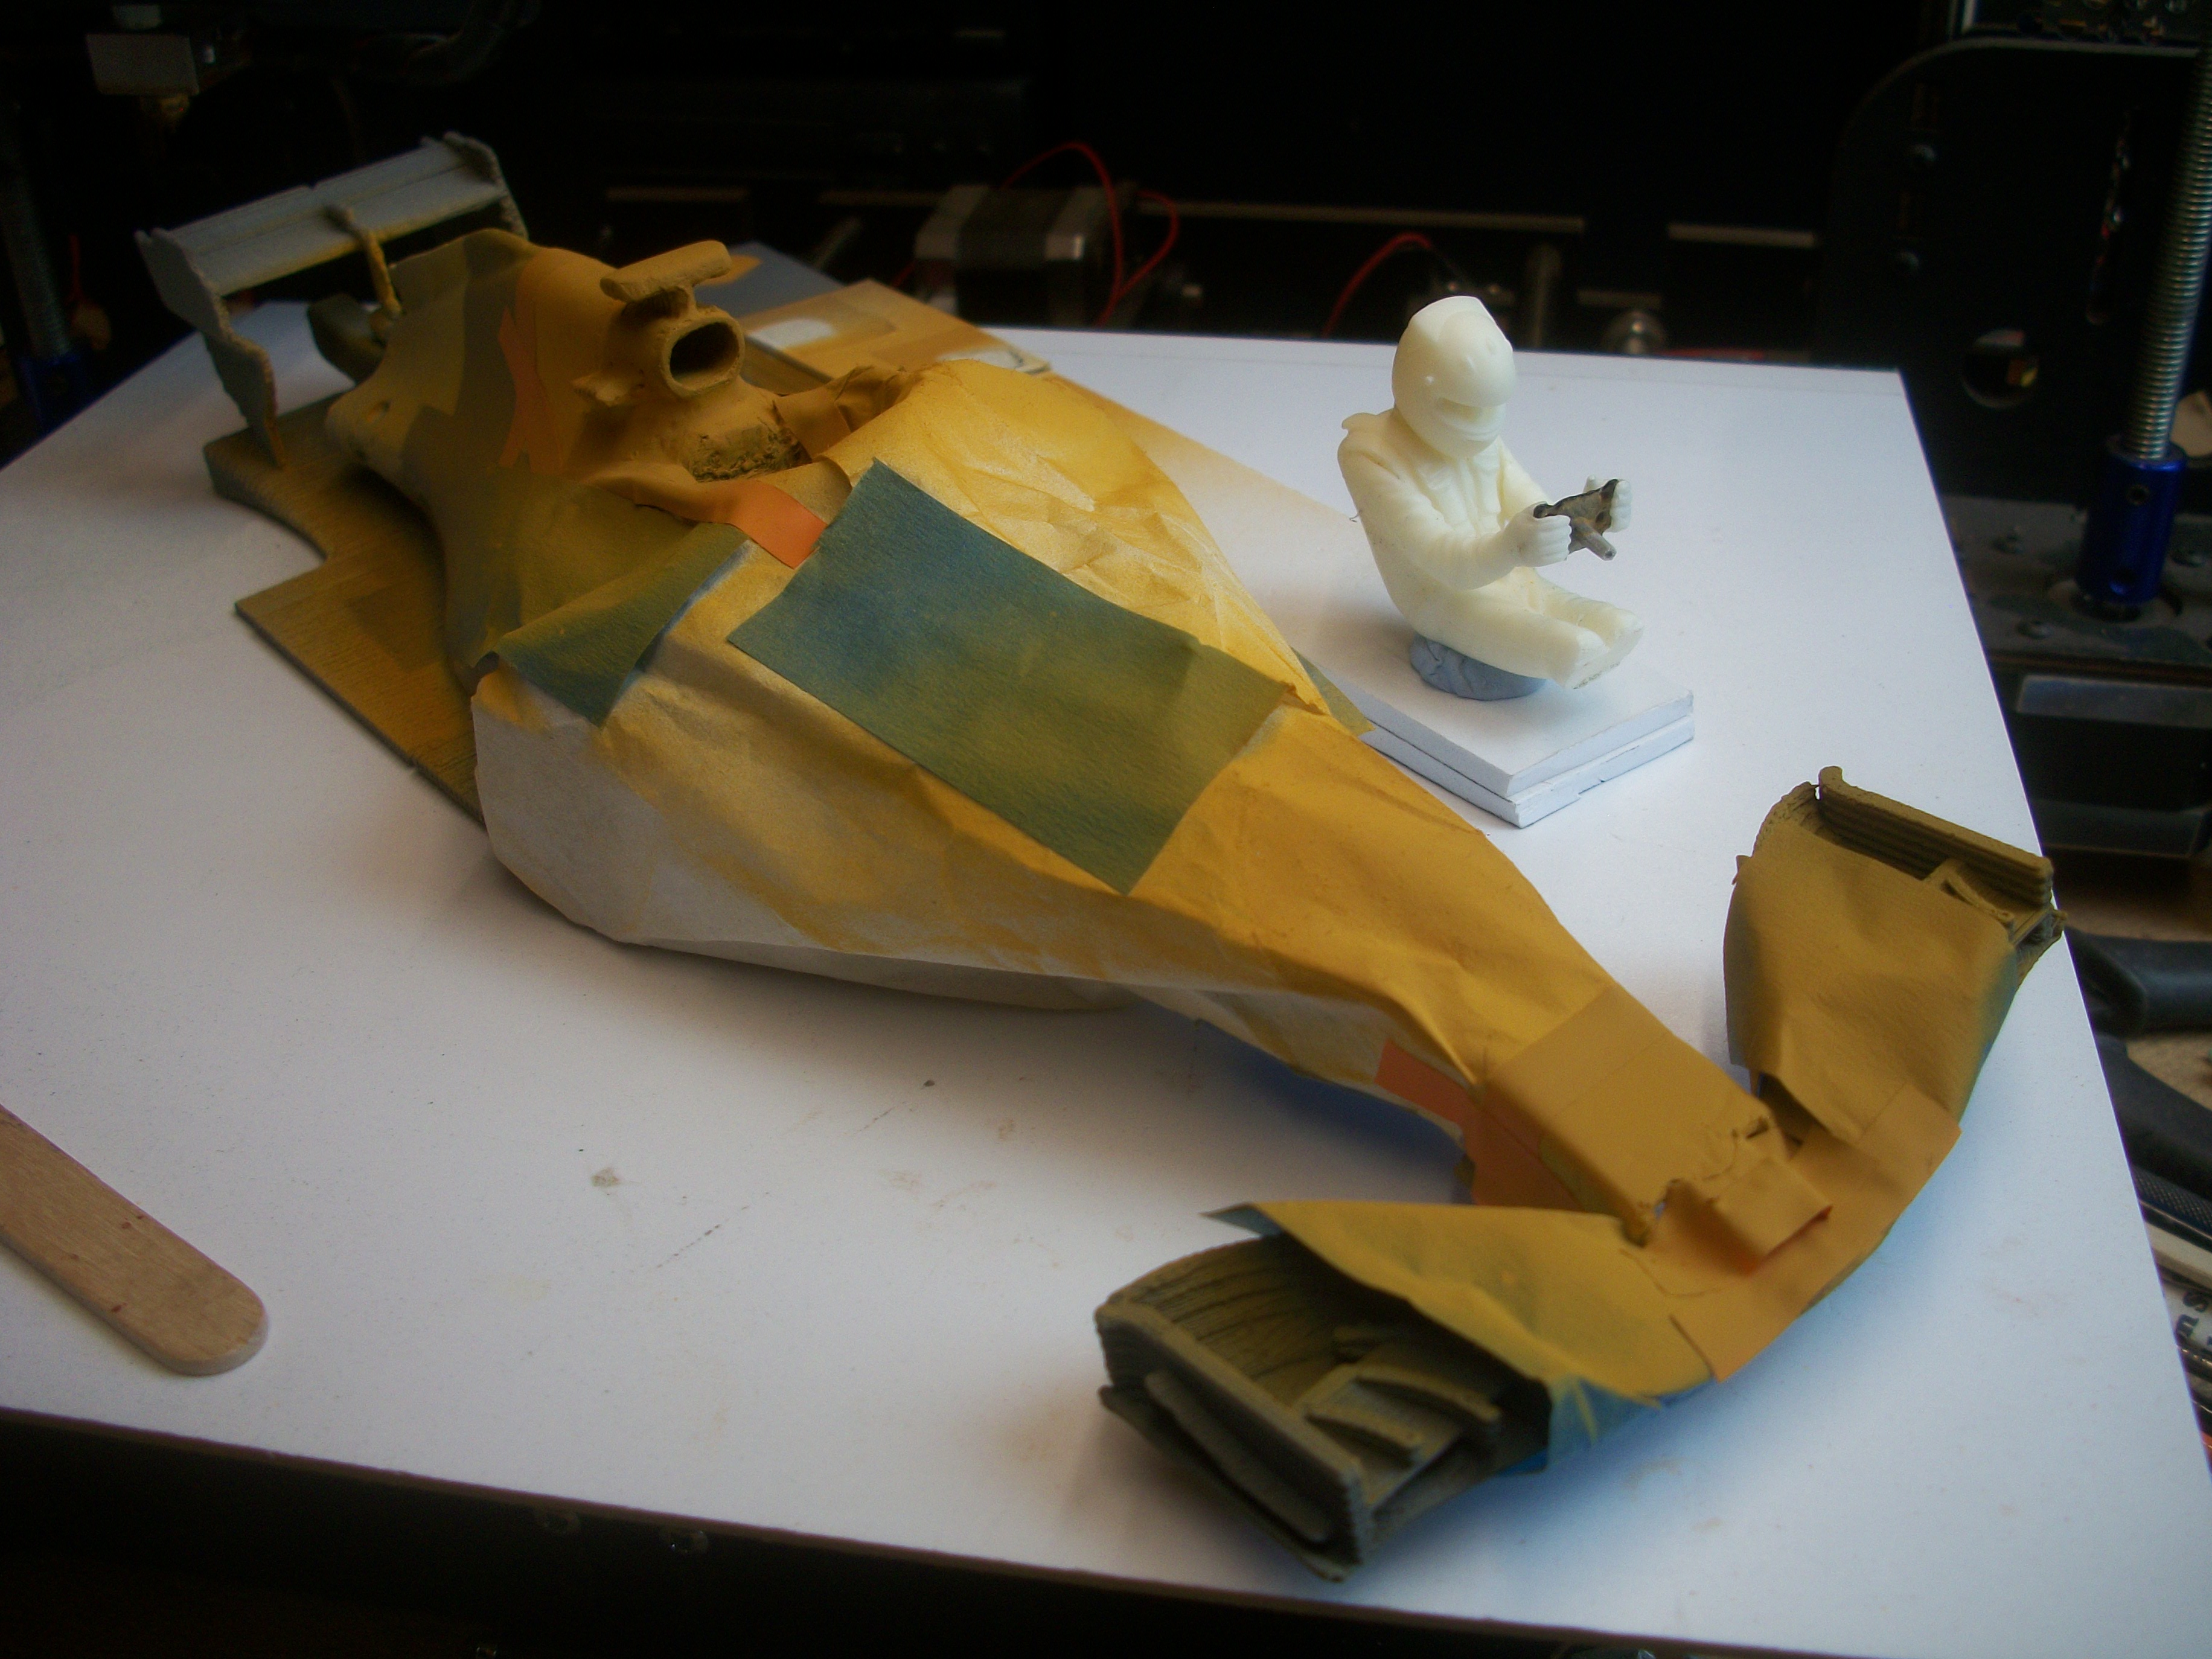
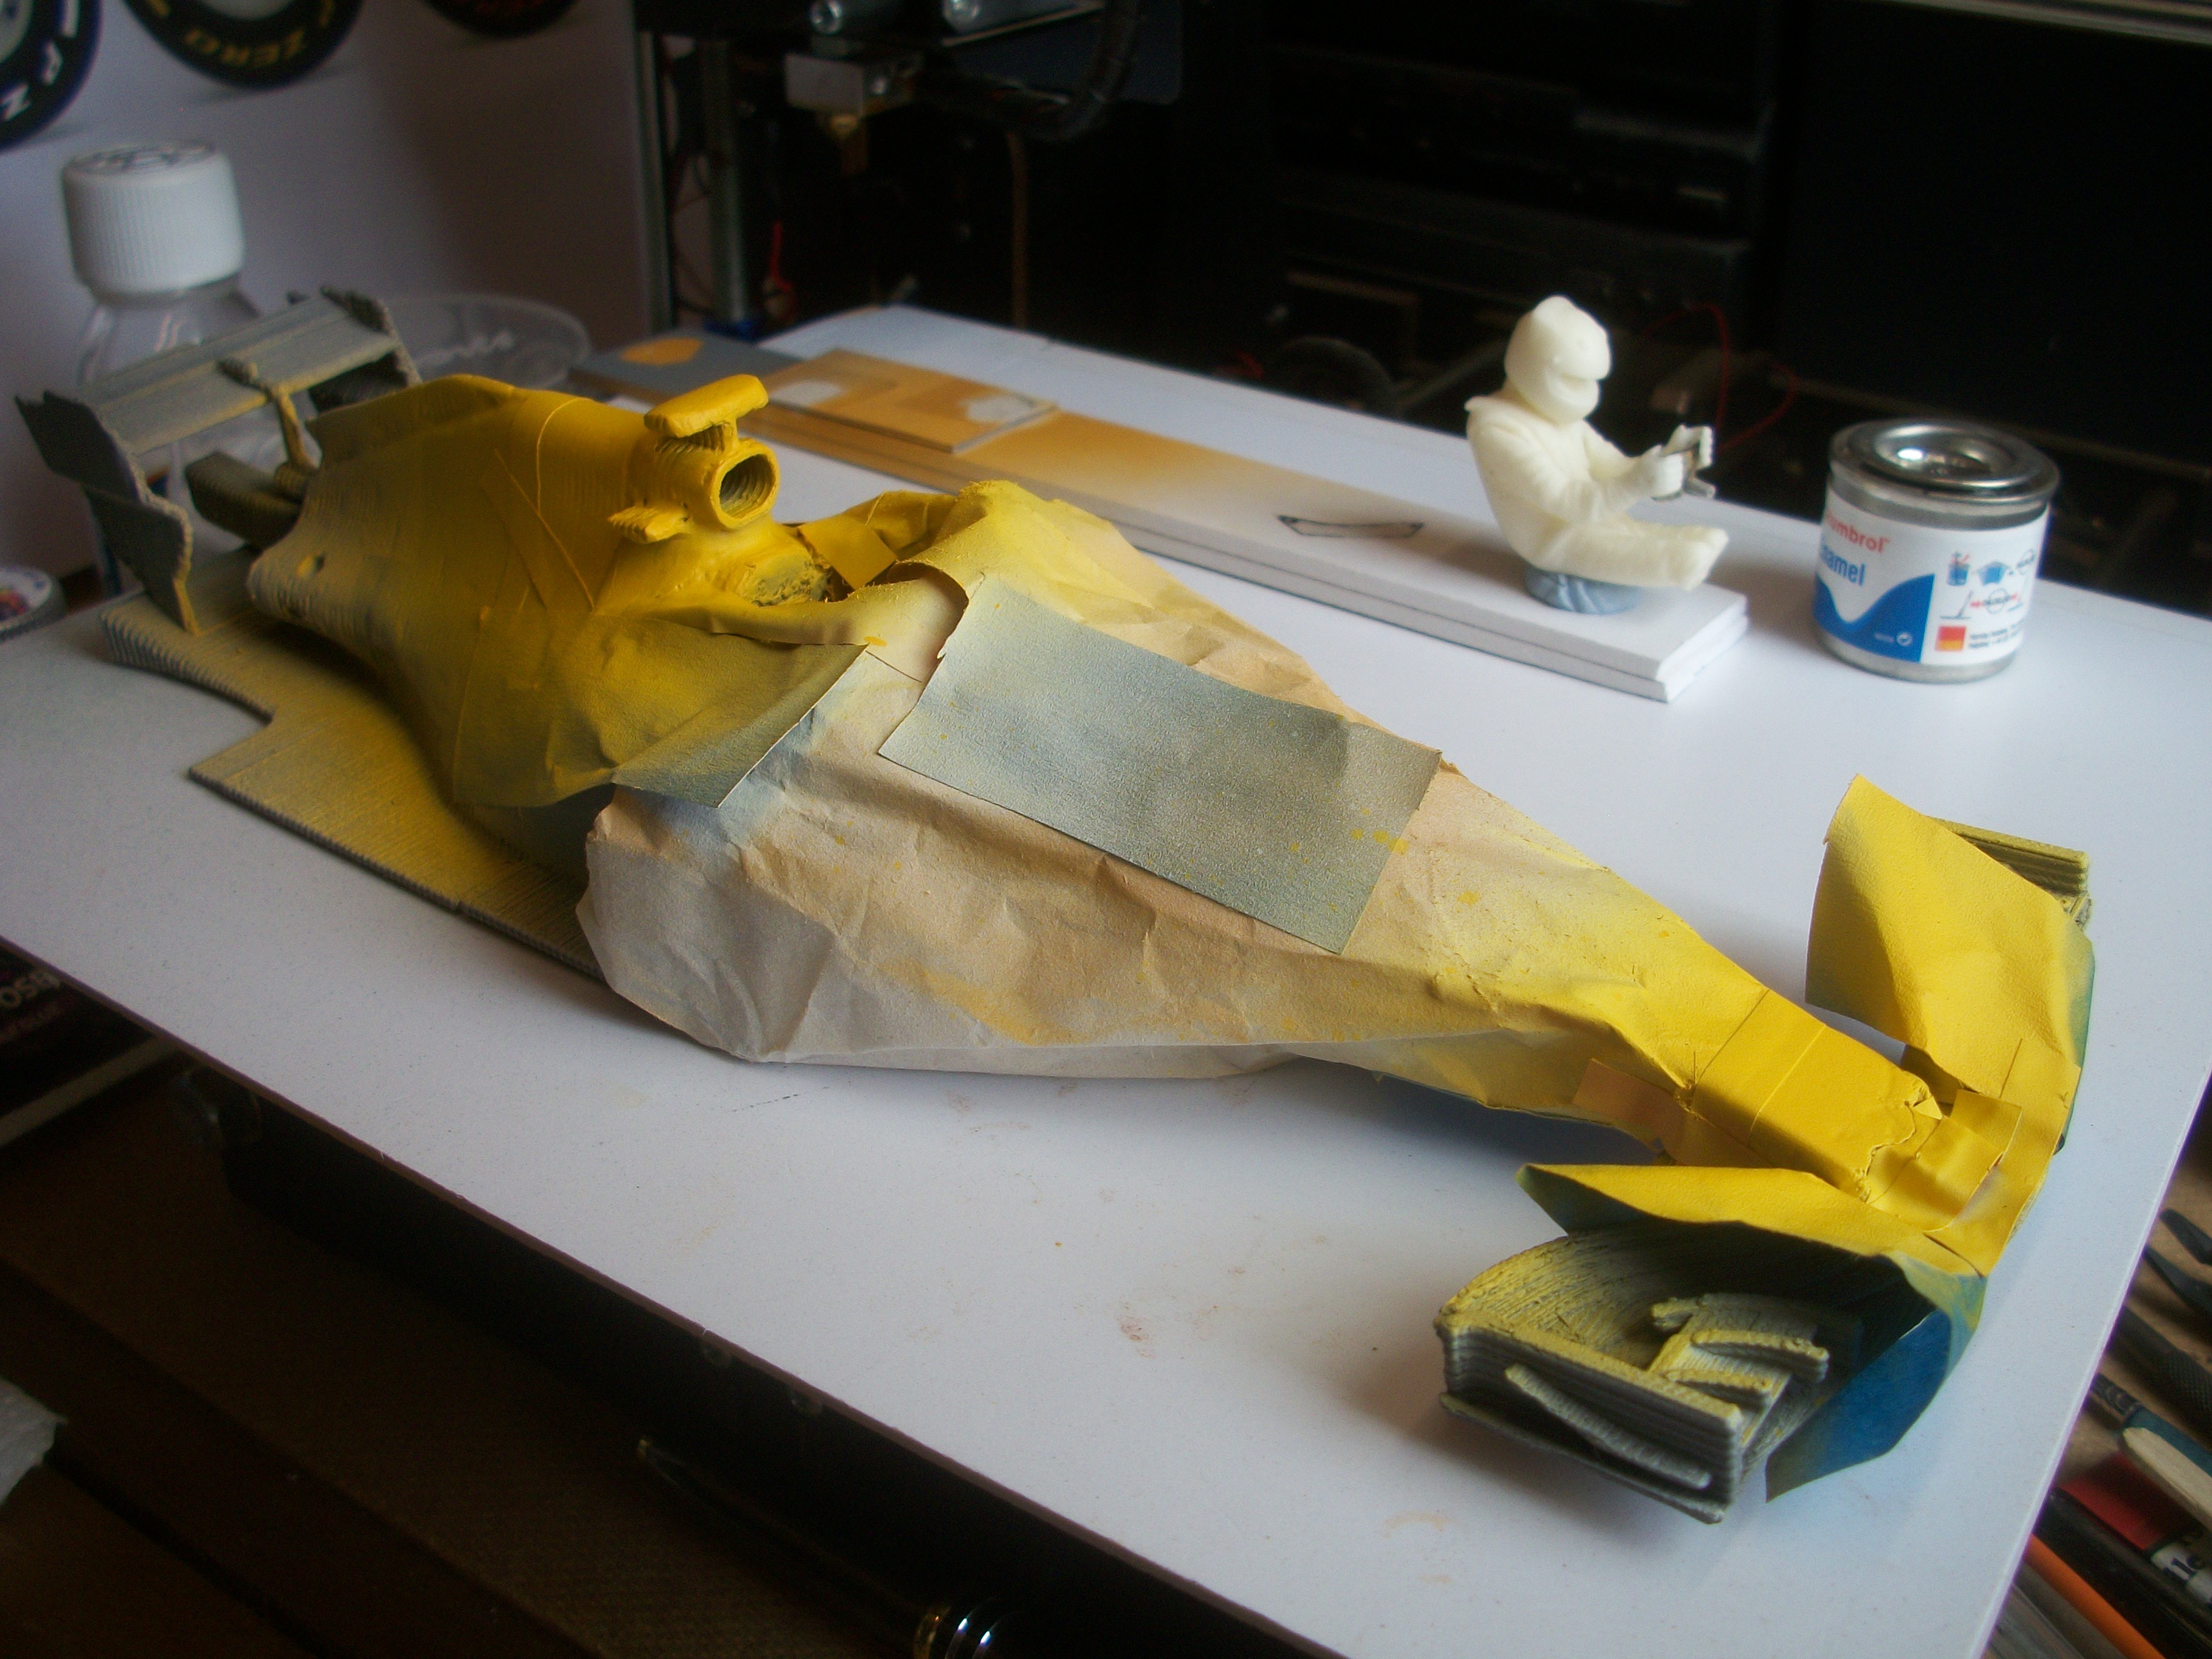
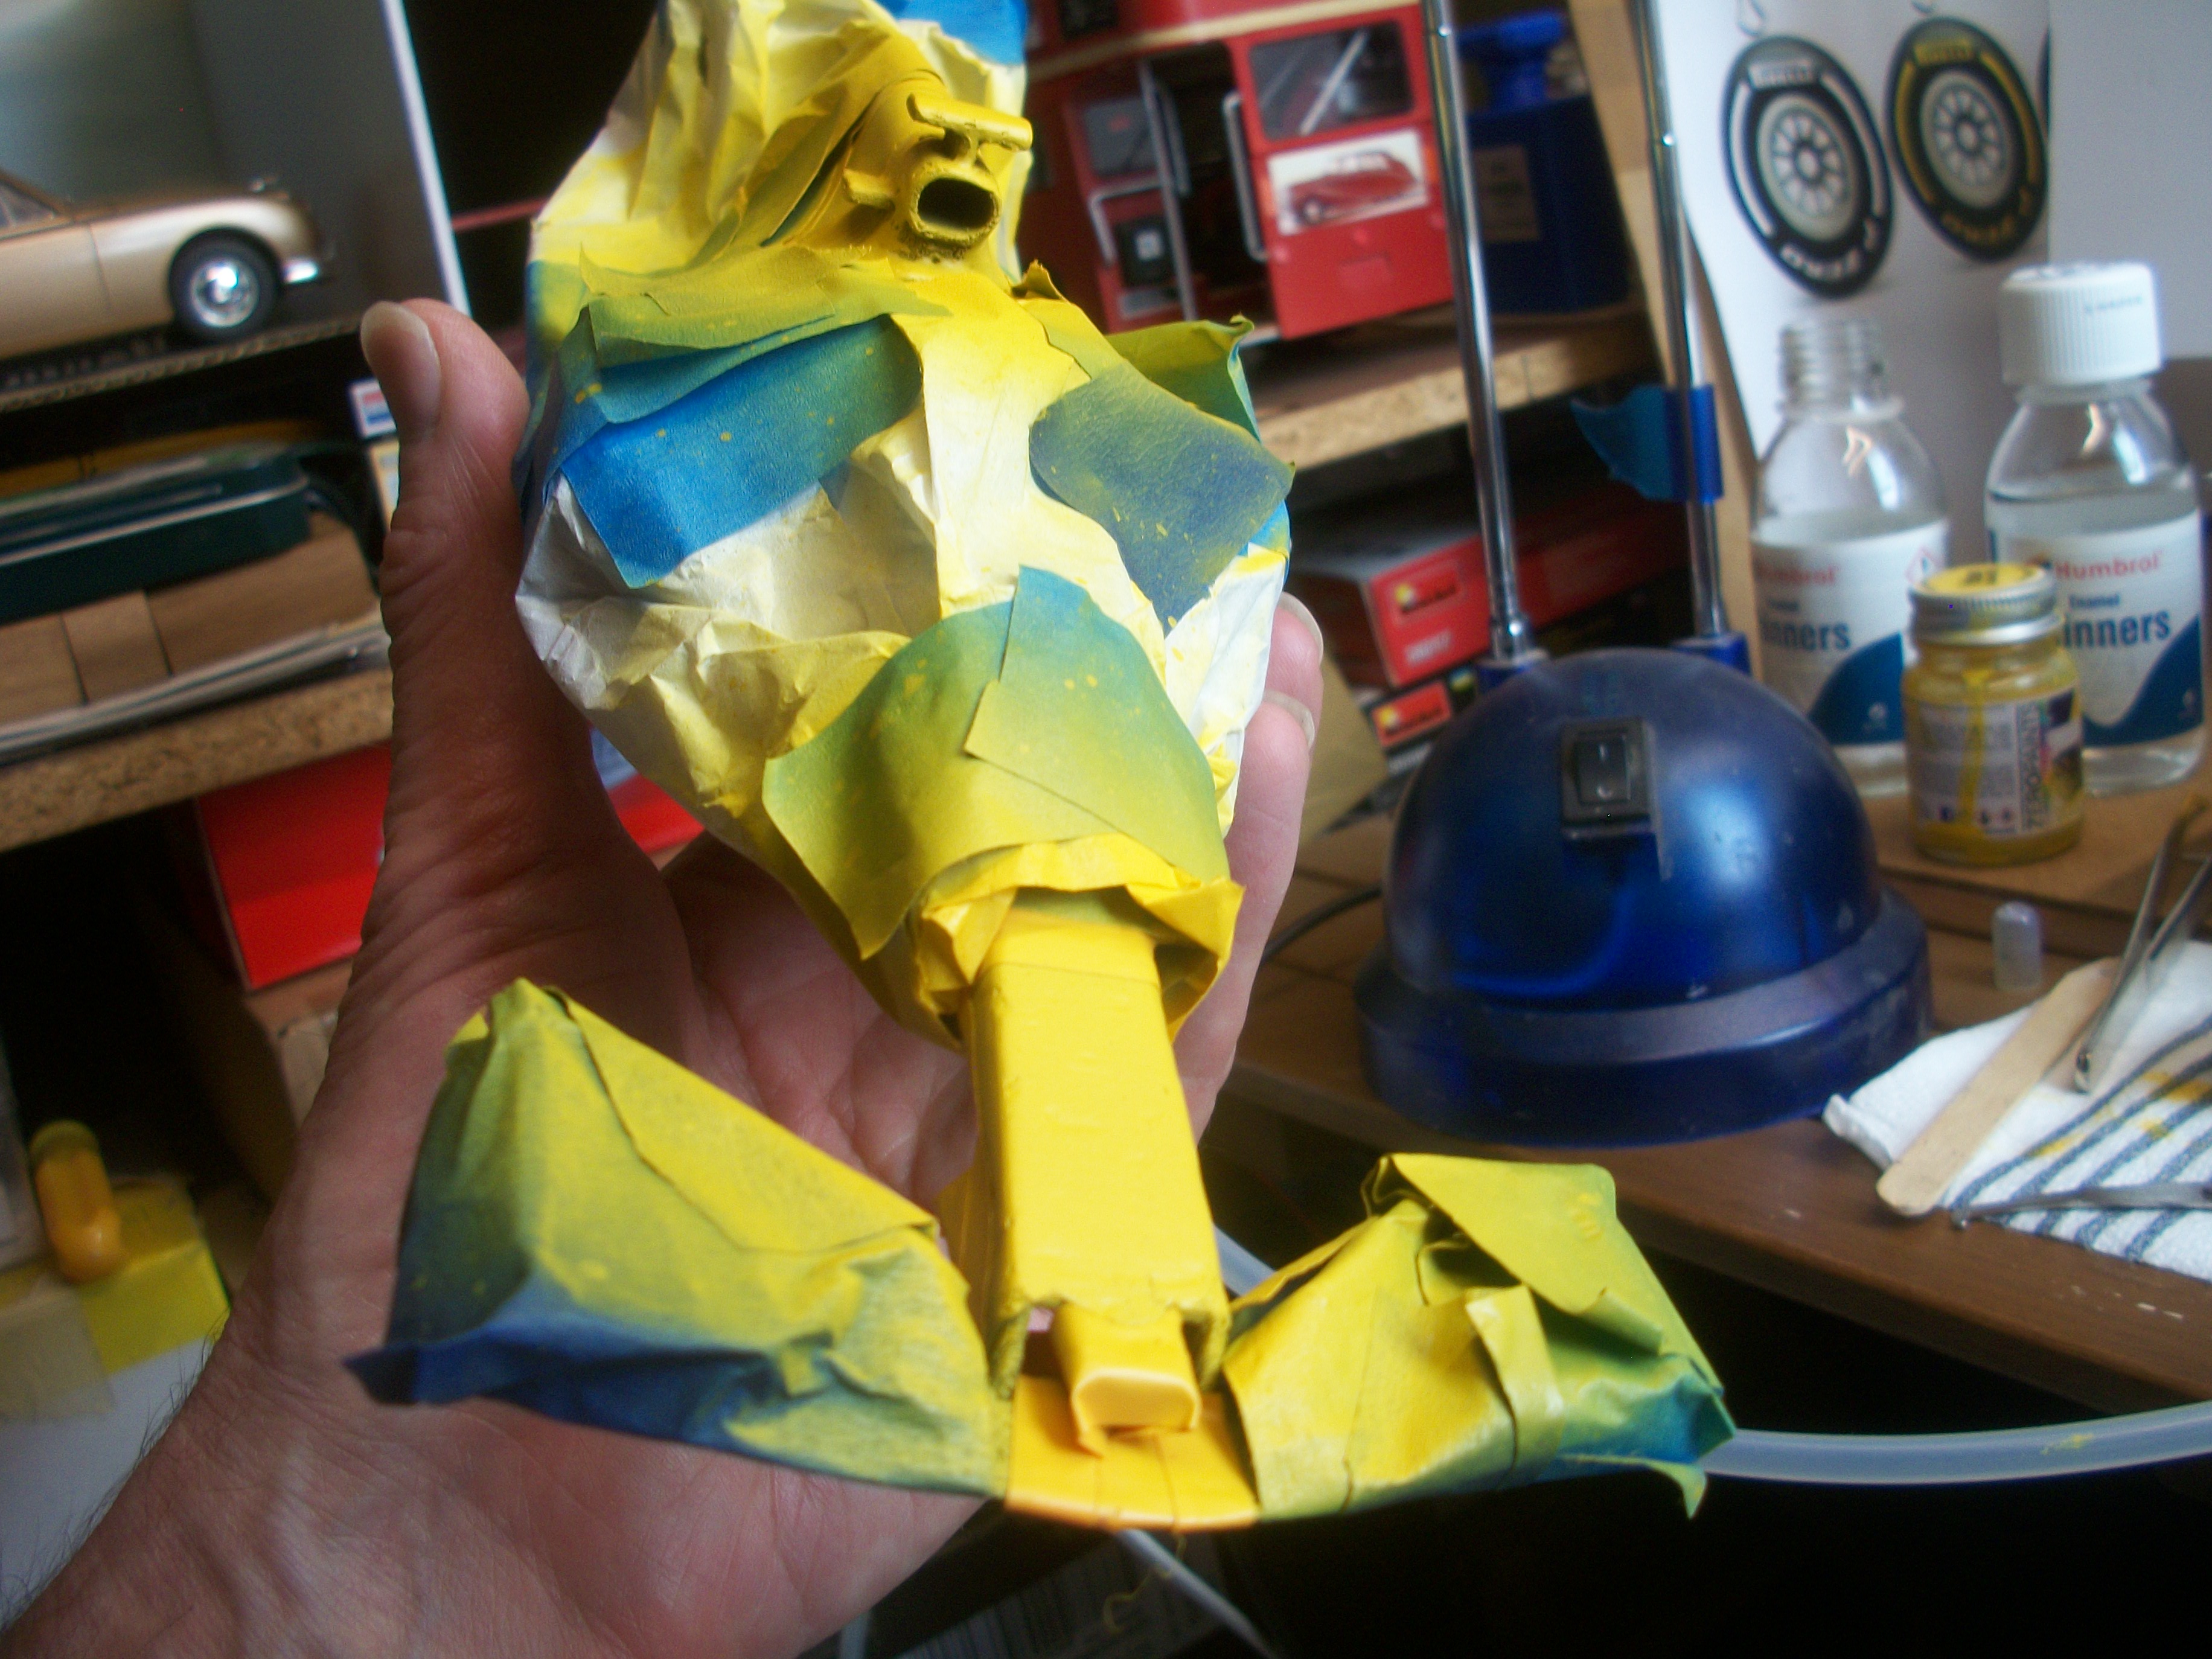
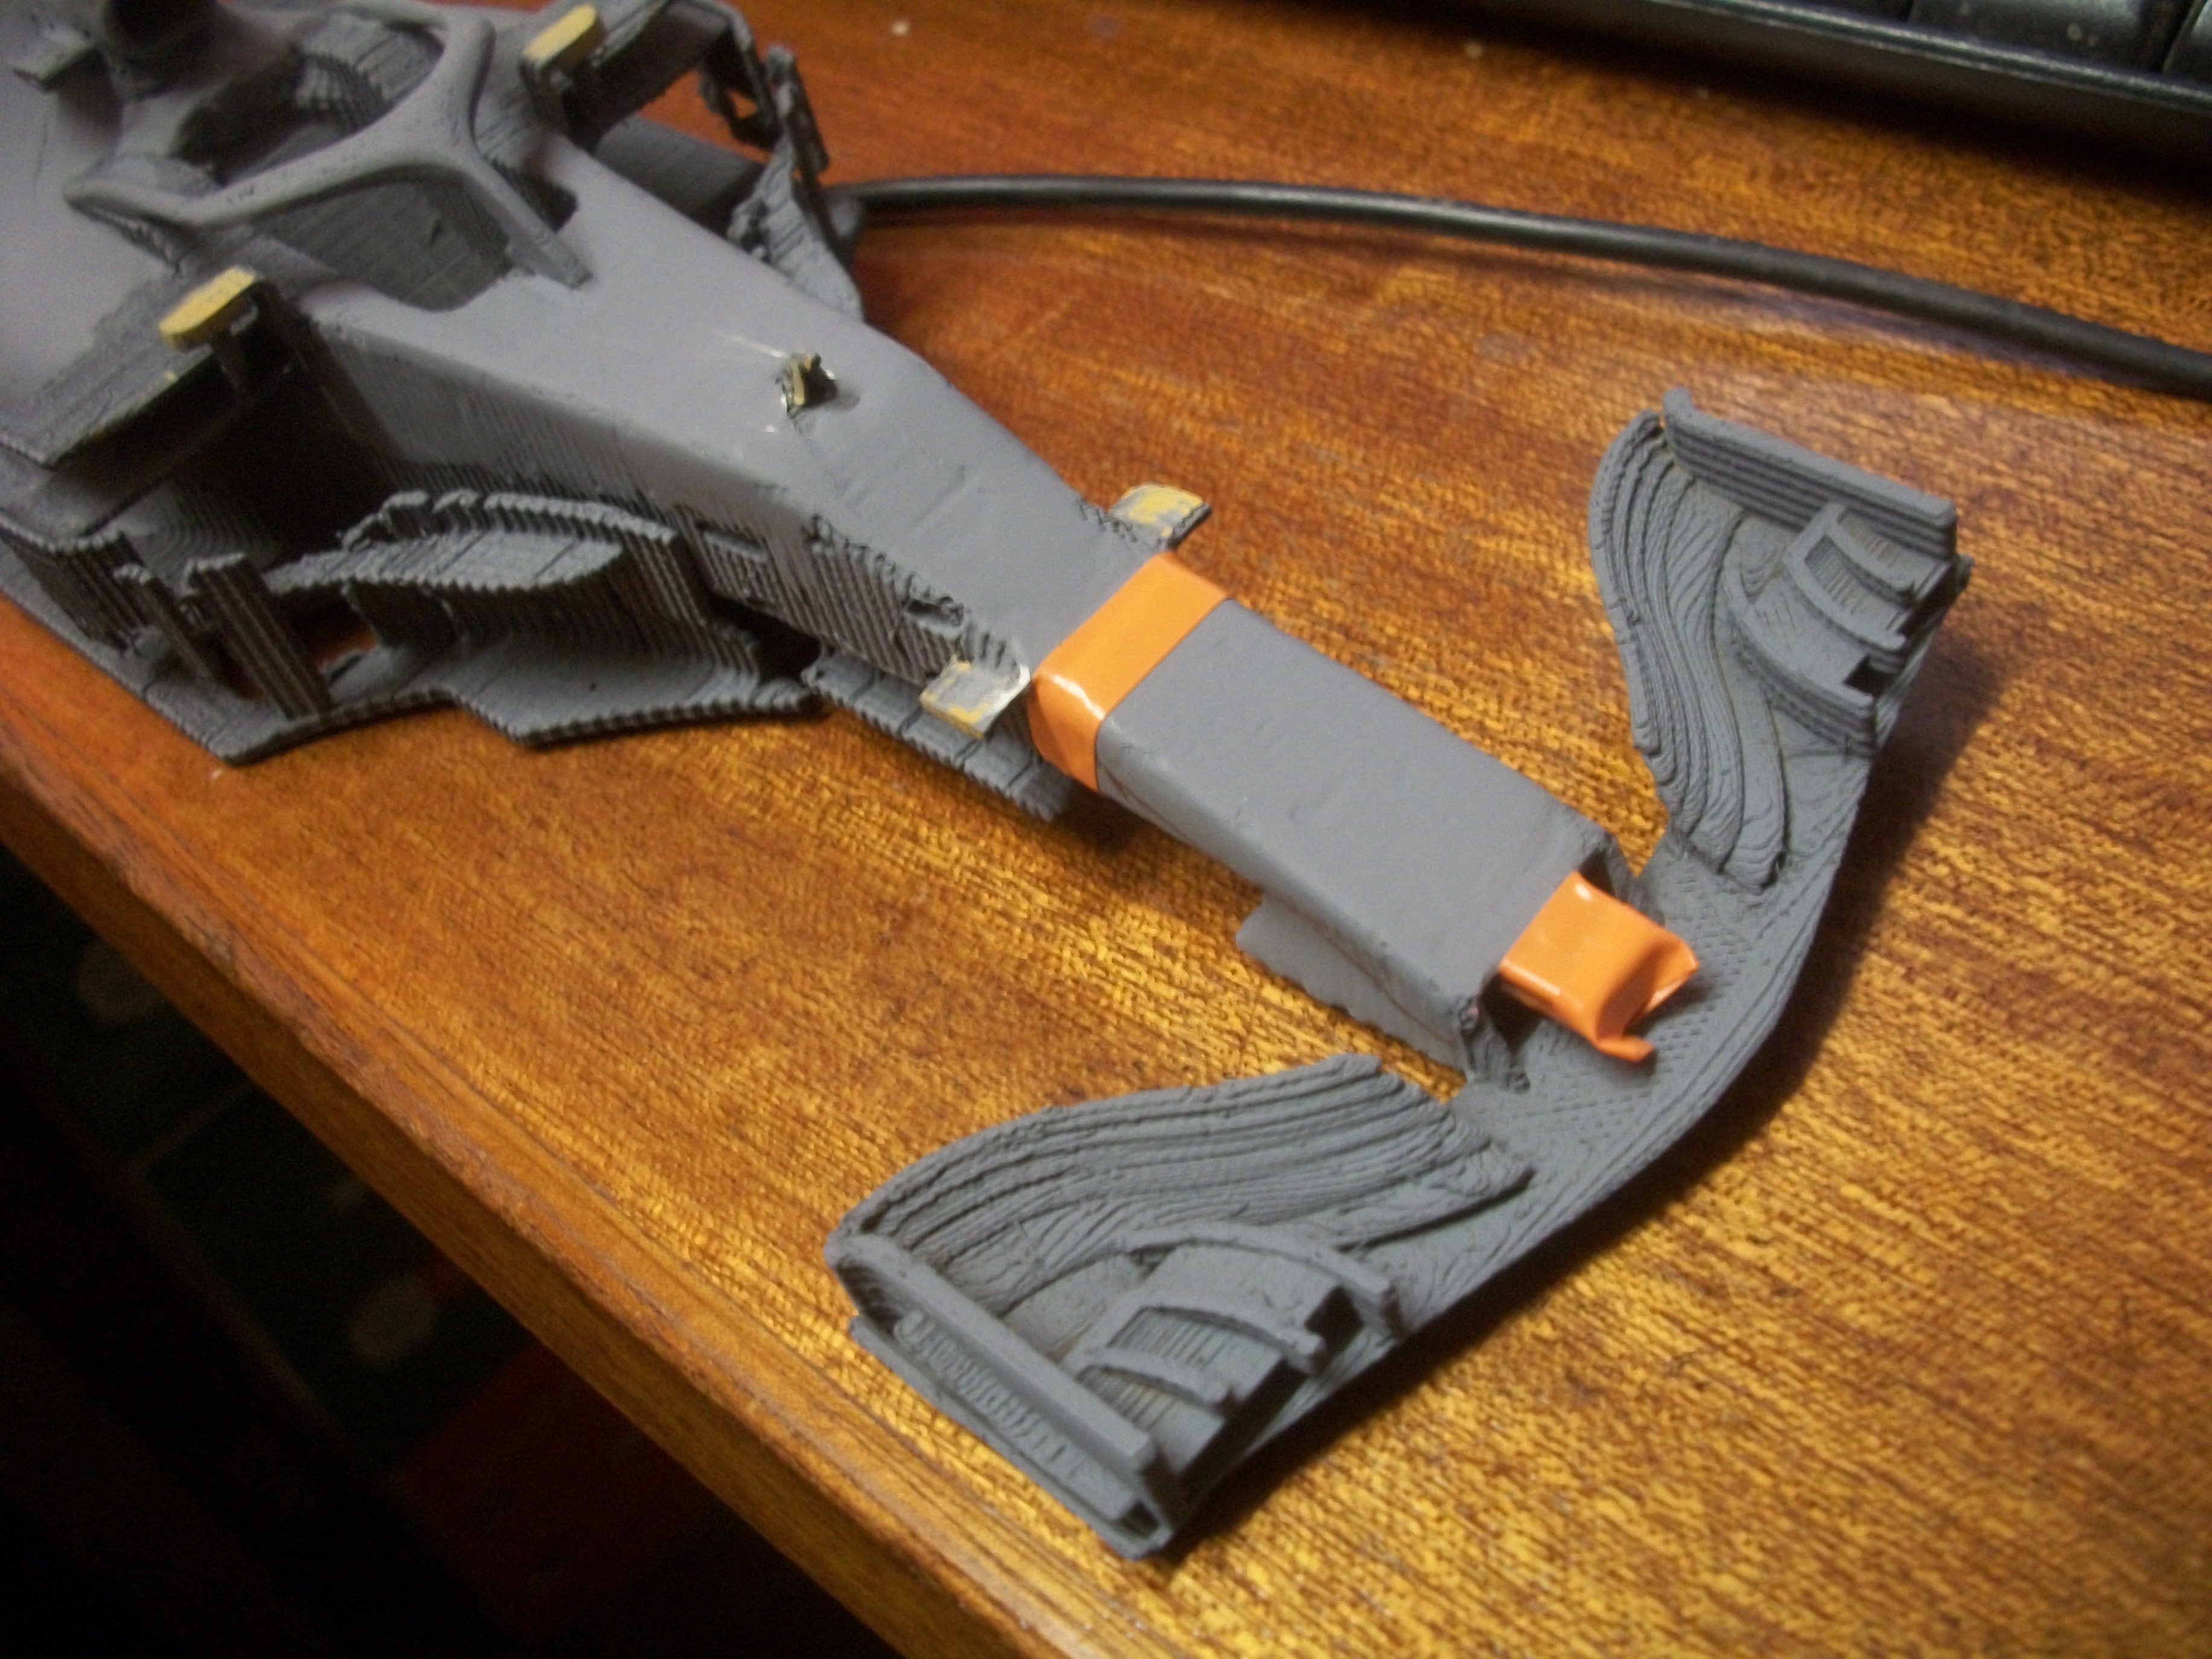
Okay guys, and to cut a long story short...... I messed up the yellow paint in both areas of this car, while spending most of last Friday attempting to get the seated driver figure into the cockpit of the RB14........ Ended up removing large amounts of PLA material to get the driver seated low enough in the cockpit, so that the top of his helmet cleared the induction cowling. Also, I caused the front wing to become detached, and then made matters worse by touching the yellow painted nose cone with glue on my finger ! Schoolboy error ! The driver was refusing to go into the cockpit, until I cut off his feet, and then had to cut off his lower legs as well, ( sorry Max Verstappen ). Anyway, all is well again today....... More masking, then applied some orange filler primer, let it dry, and applied more white primer. Airbrushed the FINAL coat of Red Bull yellow and leave overnight. Once the yellow has dried for at least 24 hours, there will be further masking and then grey primer applied, to both the body of the car and also the driver figure. Then..... I shall airbrush the Red Bull dark blue to the car body and driver figure, over the grey primer. The yellow paint was better when applied over white primer. David
-
Nice little batch of parts you have there, Pat......... The pump looks good, and the figure for the tractor too. Over in the WIP: Other Racing: section, I am building a 1:20 scale Red Bull F1 race car. Having a bit of trouble with getting the seated driver figure into the car at the moment. Good luck with your Background Diorama, Engine Rebuilders project ! David
-
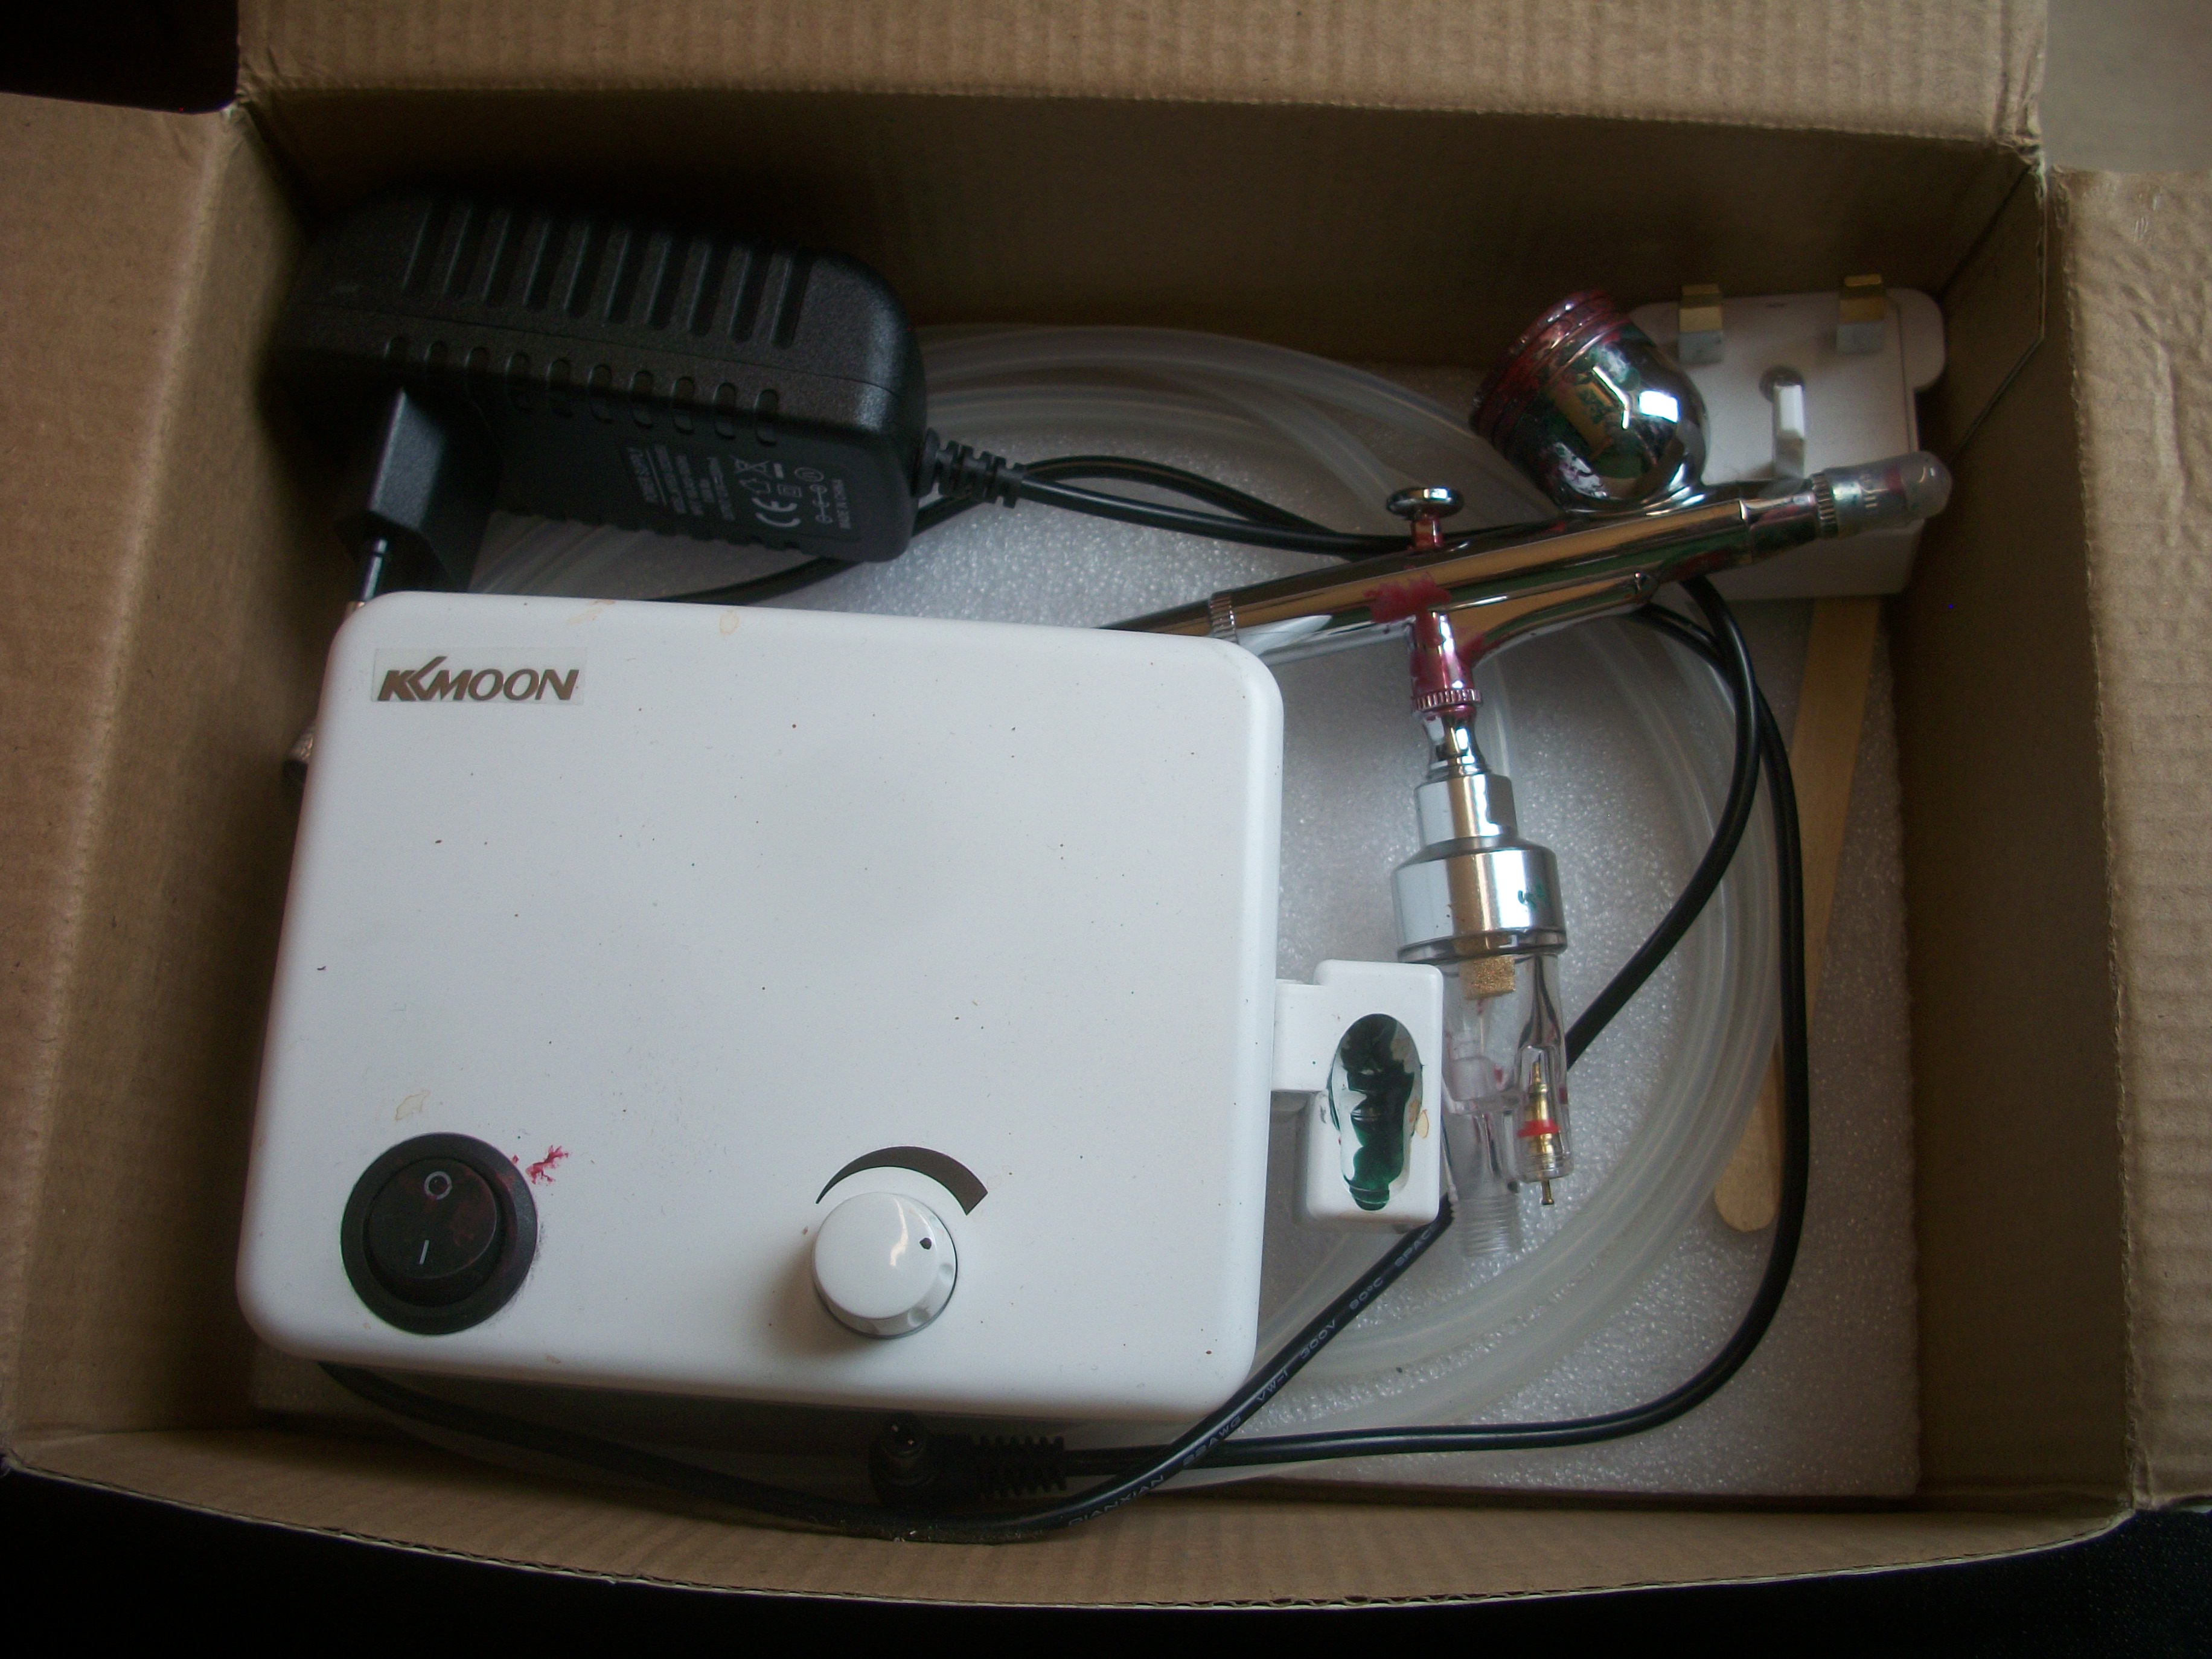
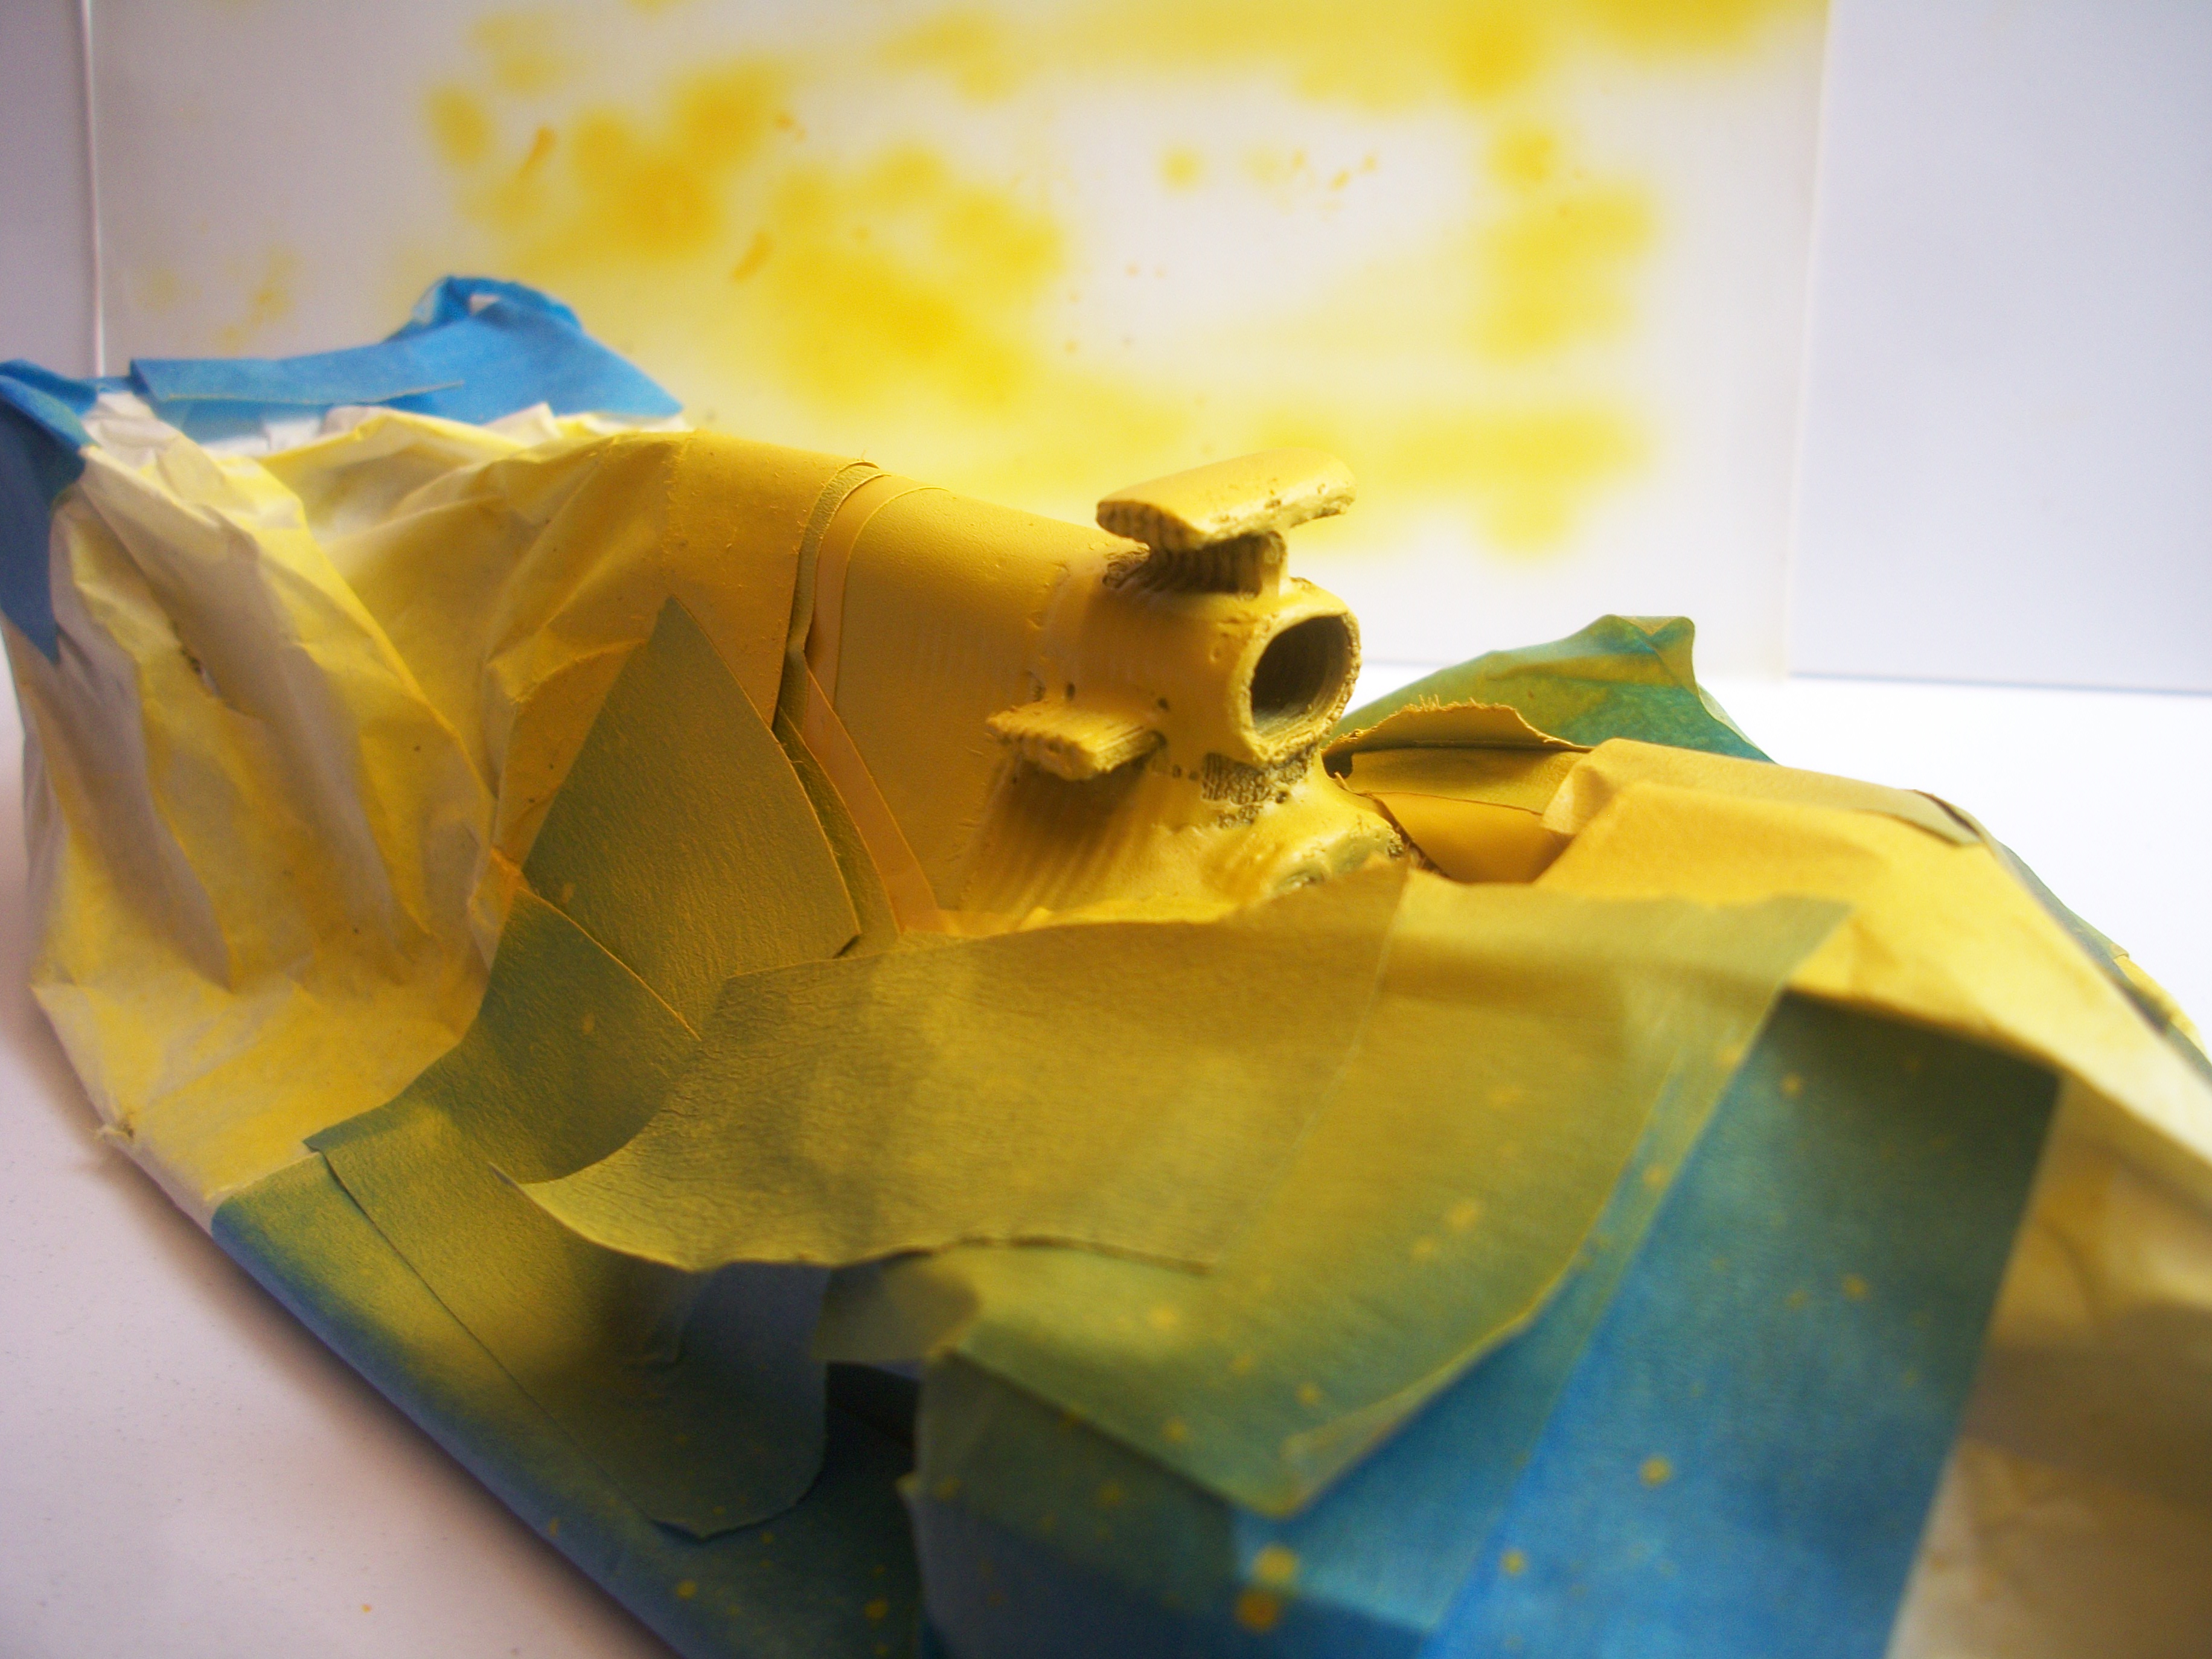
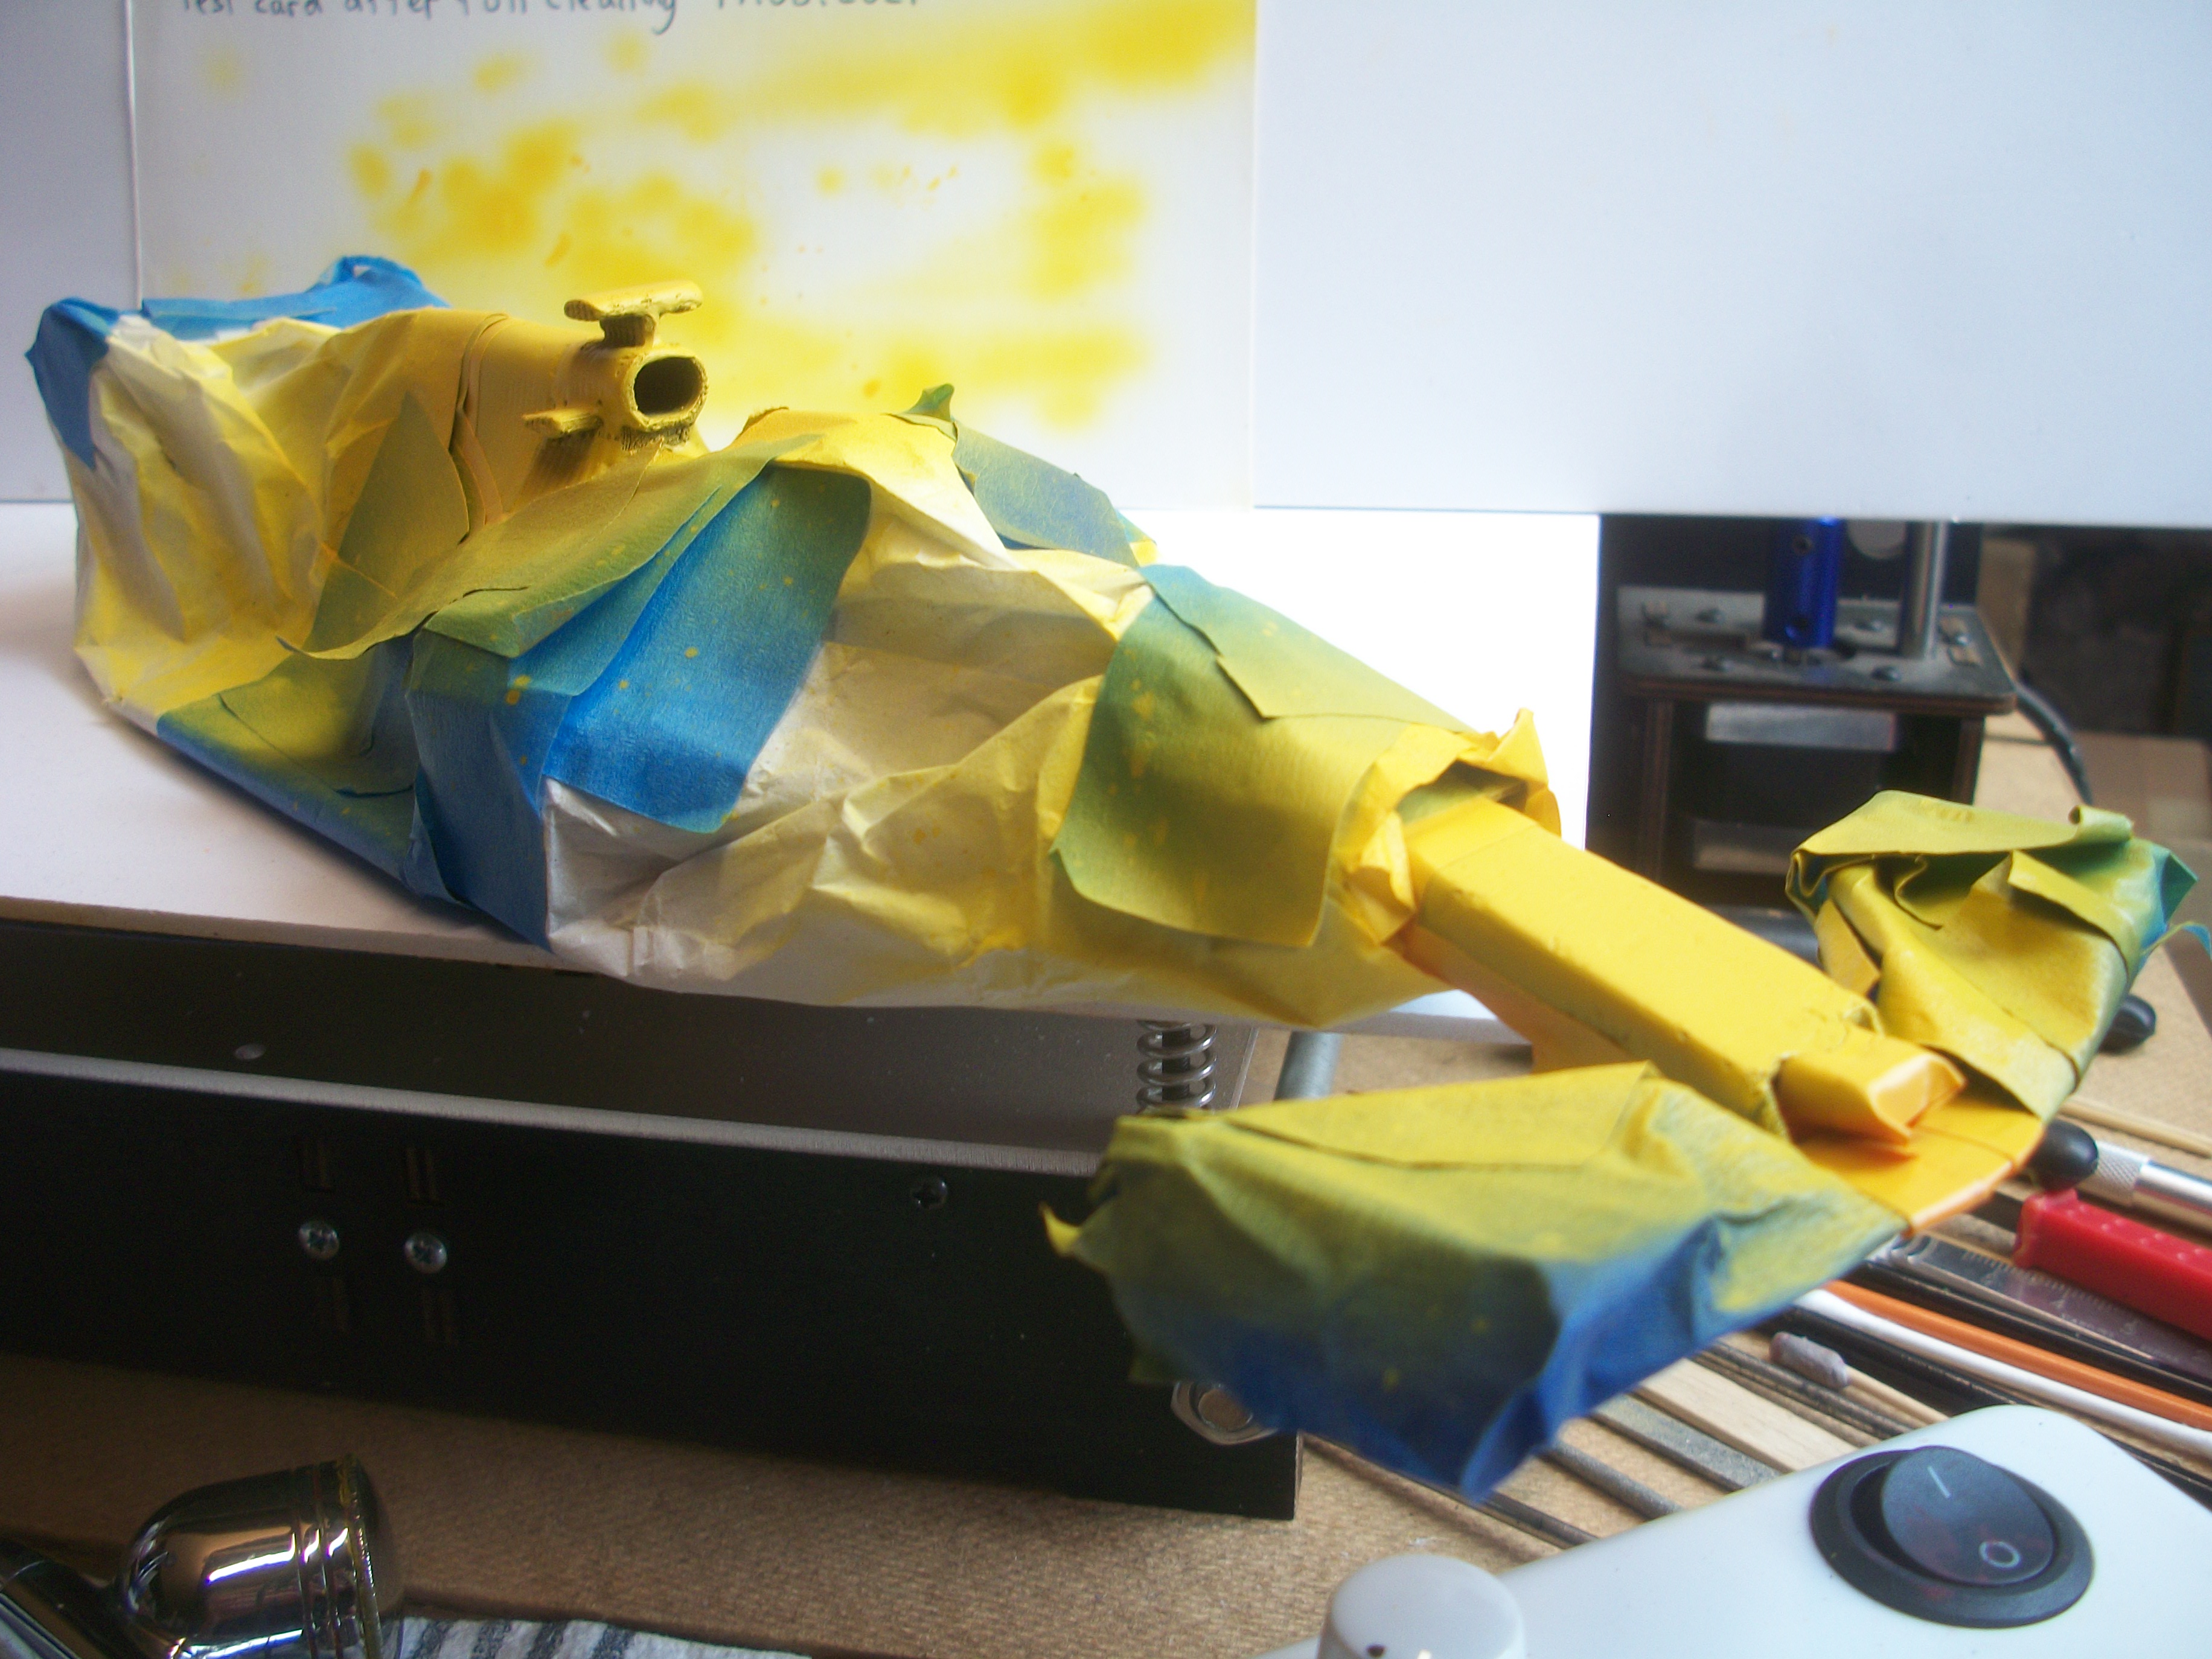
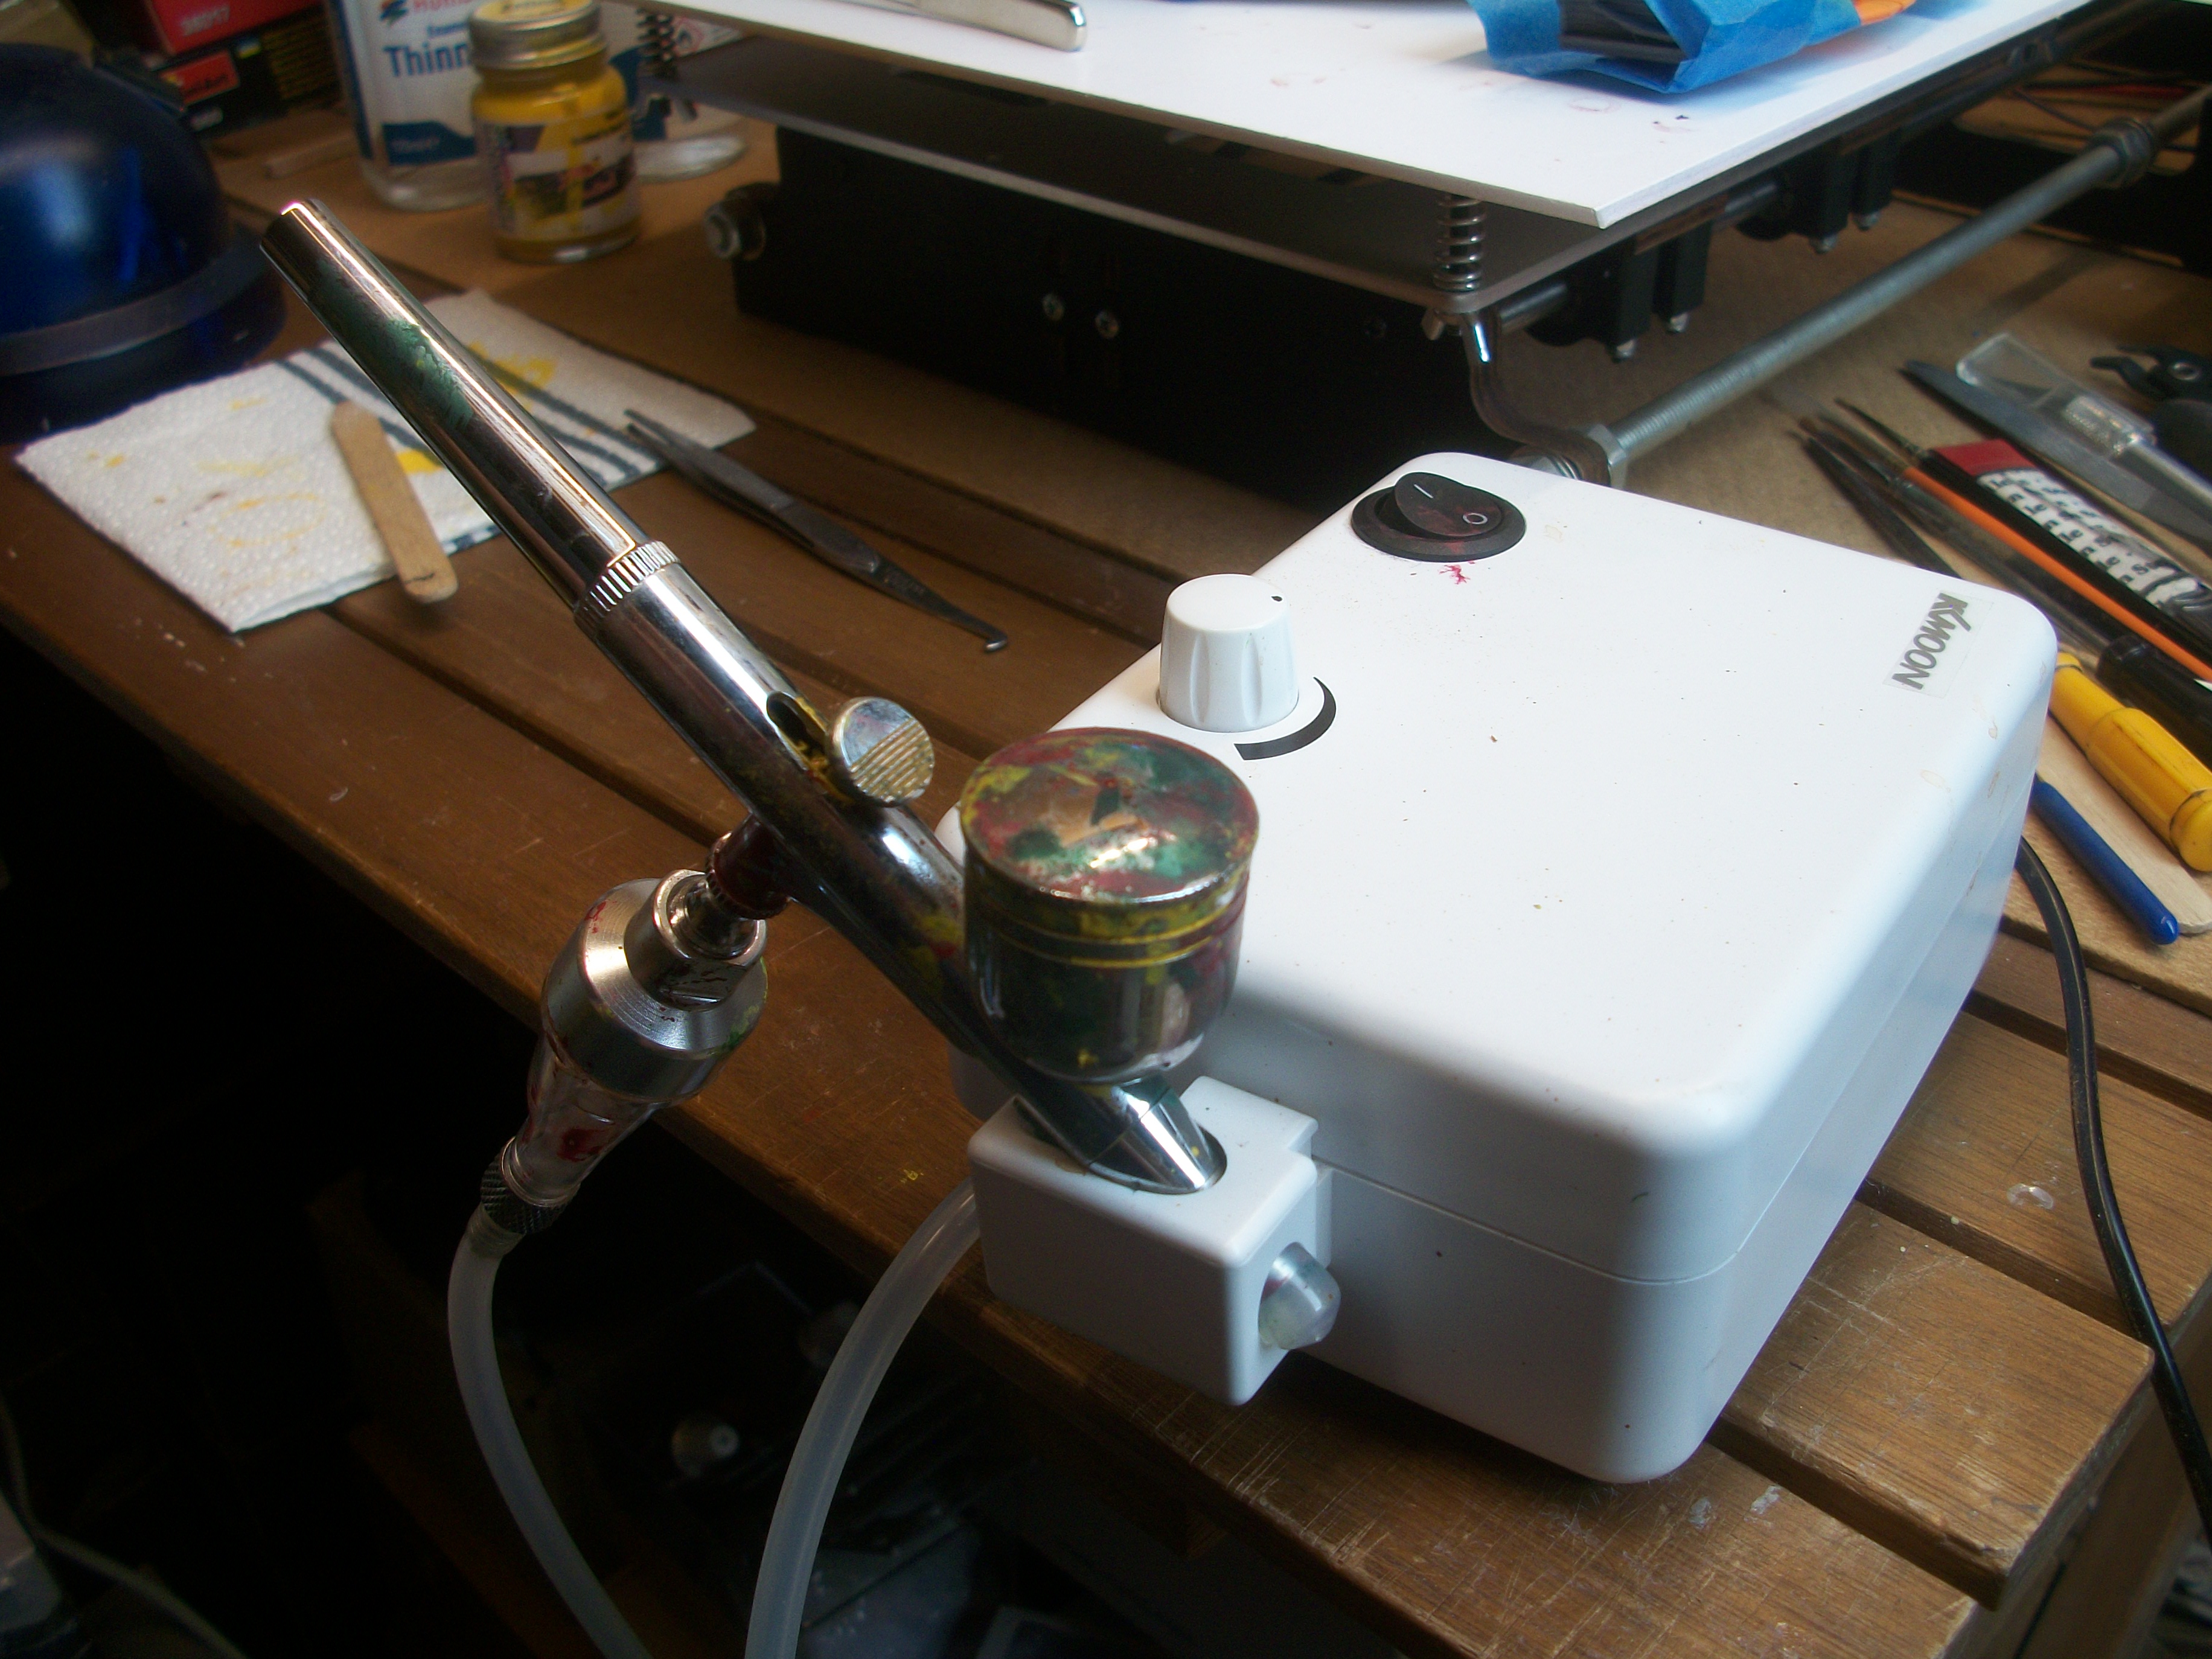
Okay, so now we are making better progress today...... After watching two YouTube videos by the same guy, who clearly explains how to clean an airbrush PROPERLY, the airbrushing part of the process seems to be back on track. Lots of paint clogs were hidden away in various areas of the KK Moon airbrush, and I spent two and a half hours fully dismantling the airbrush. Each and every part is now thoroughly cleaned like new. The Red Bull yellow paint has applied quite well, and is now drying for 24 hours. I discovered that I can use my thumb for operating the trigger, but not my forefinger as instructed..... I am just unorthodox ! Now I can see a horrible hole in the paintwork, immediately under the induction cowl and behind where the driver's helmet will be...... This should hve been filled and primered at the primer stage, not at the top coat stage. I could kick myself for missing this, and I shall deal with it. This yellow reminds me of custard........ Also, the RB14 car looks like it has it's pyjamas on ! David
-
Spirit of America Porsche 956
Anglia105E replied to Nacho Z's topic in WIP: Other Racing: Road Racing, Land Speed Racers
I have the very same Bentley Blower Haynes manual, Jason..... and although it does help in some ways with the 1:24 scale build, I would agree that the manual is lacking in technical info. David -
Spirit of America Porsche 956
Anglia105E replied to Nacho Z's topic in WIP: Other Racing: Road Racing, Land Speed Racers
Yes Mike, you would be surprised at some of the strange vehicles that have a Haynes shop manual for them........ Almost ANY vehicle in fact ! David -
1974 Camaro , continued
Anglia105E replied to MarkJ's topic in WIP: Other Racing: Road Racing, Land Speed Racers
Those pens look pretty good, Mark...... and especially the Deco Color pen. I tend to use both Molotow Liquid Chrome Pen and Bare Metal Foil on a single build. The Molotow pens are good if you leave the chrome ink for 24 hours at least to dry, and I have found that they apply best over a high gloss surface. By far the most successful application has been liquid chrome pen over Yacht Varnish...... the yacht varnish needs a good 24 hours drying before the molotow pen can be smoothly ' stroked ' on. Although it is a pen, I find it helps to kind of brush it on, in terms of the motion..... that's how it feels ! David -
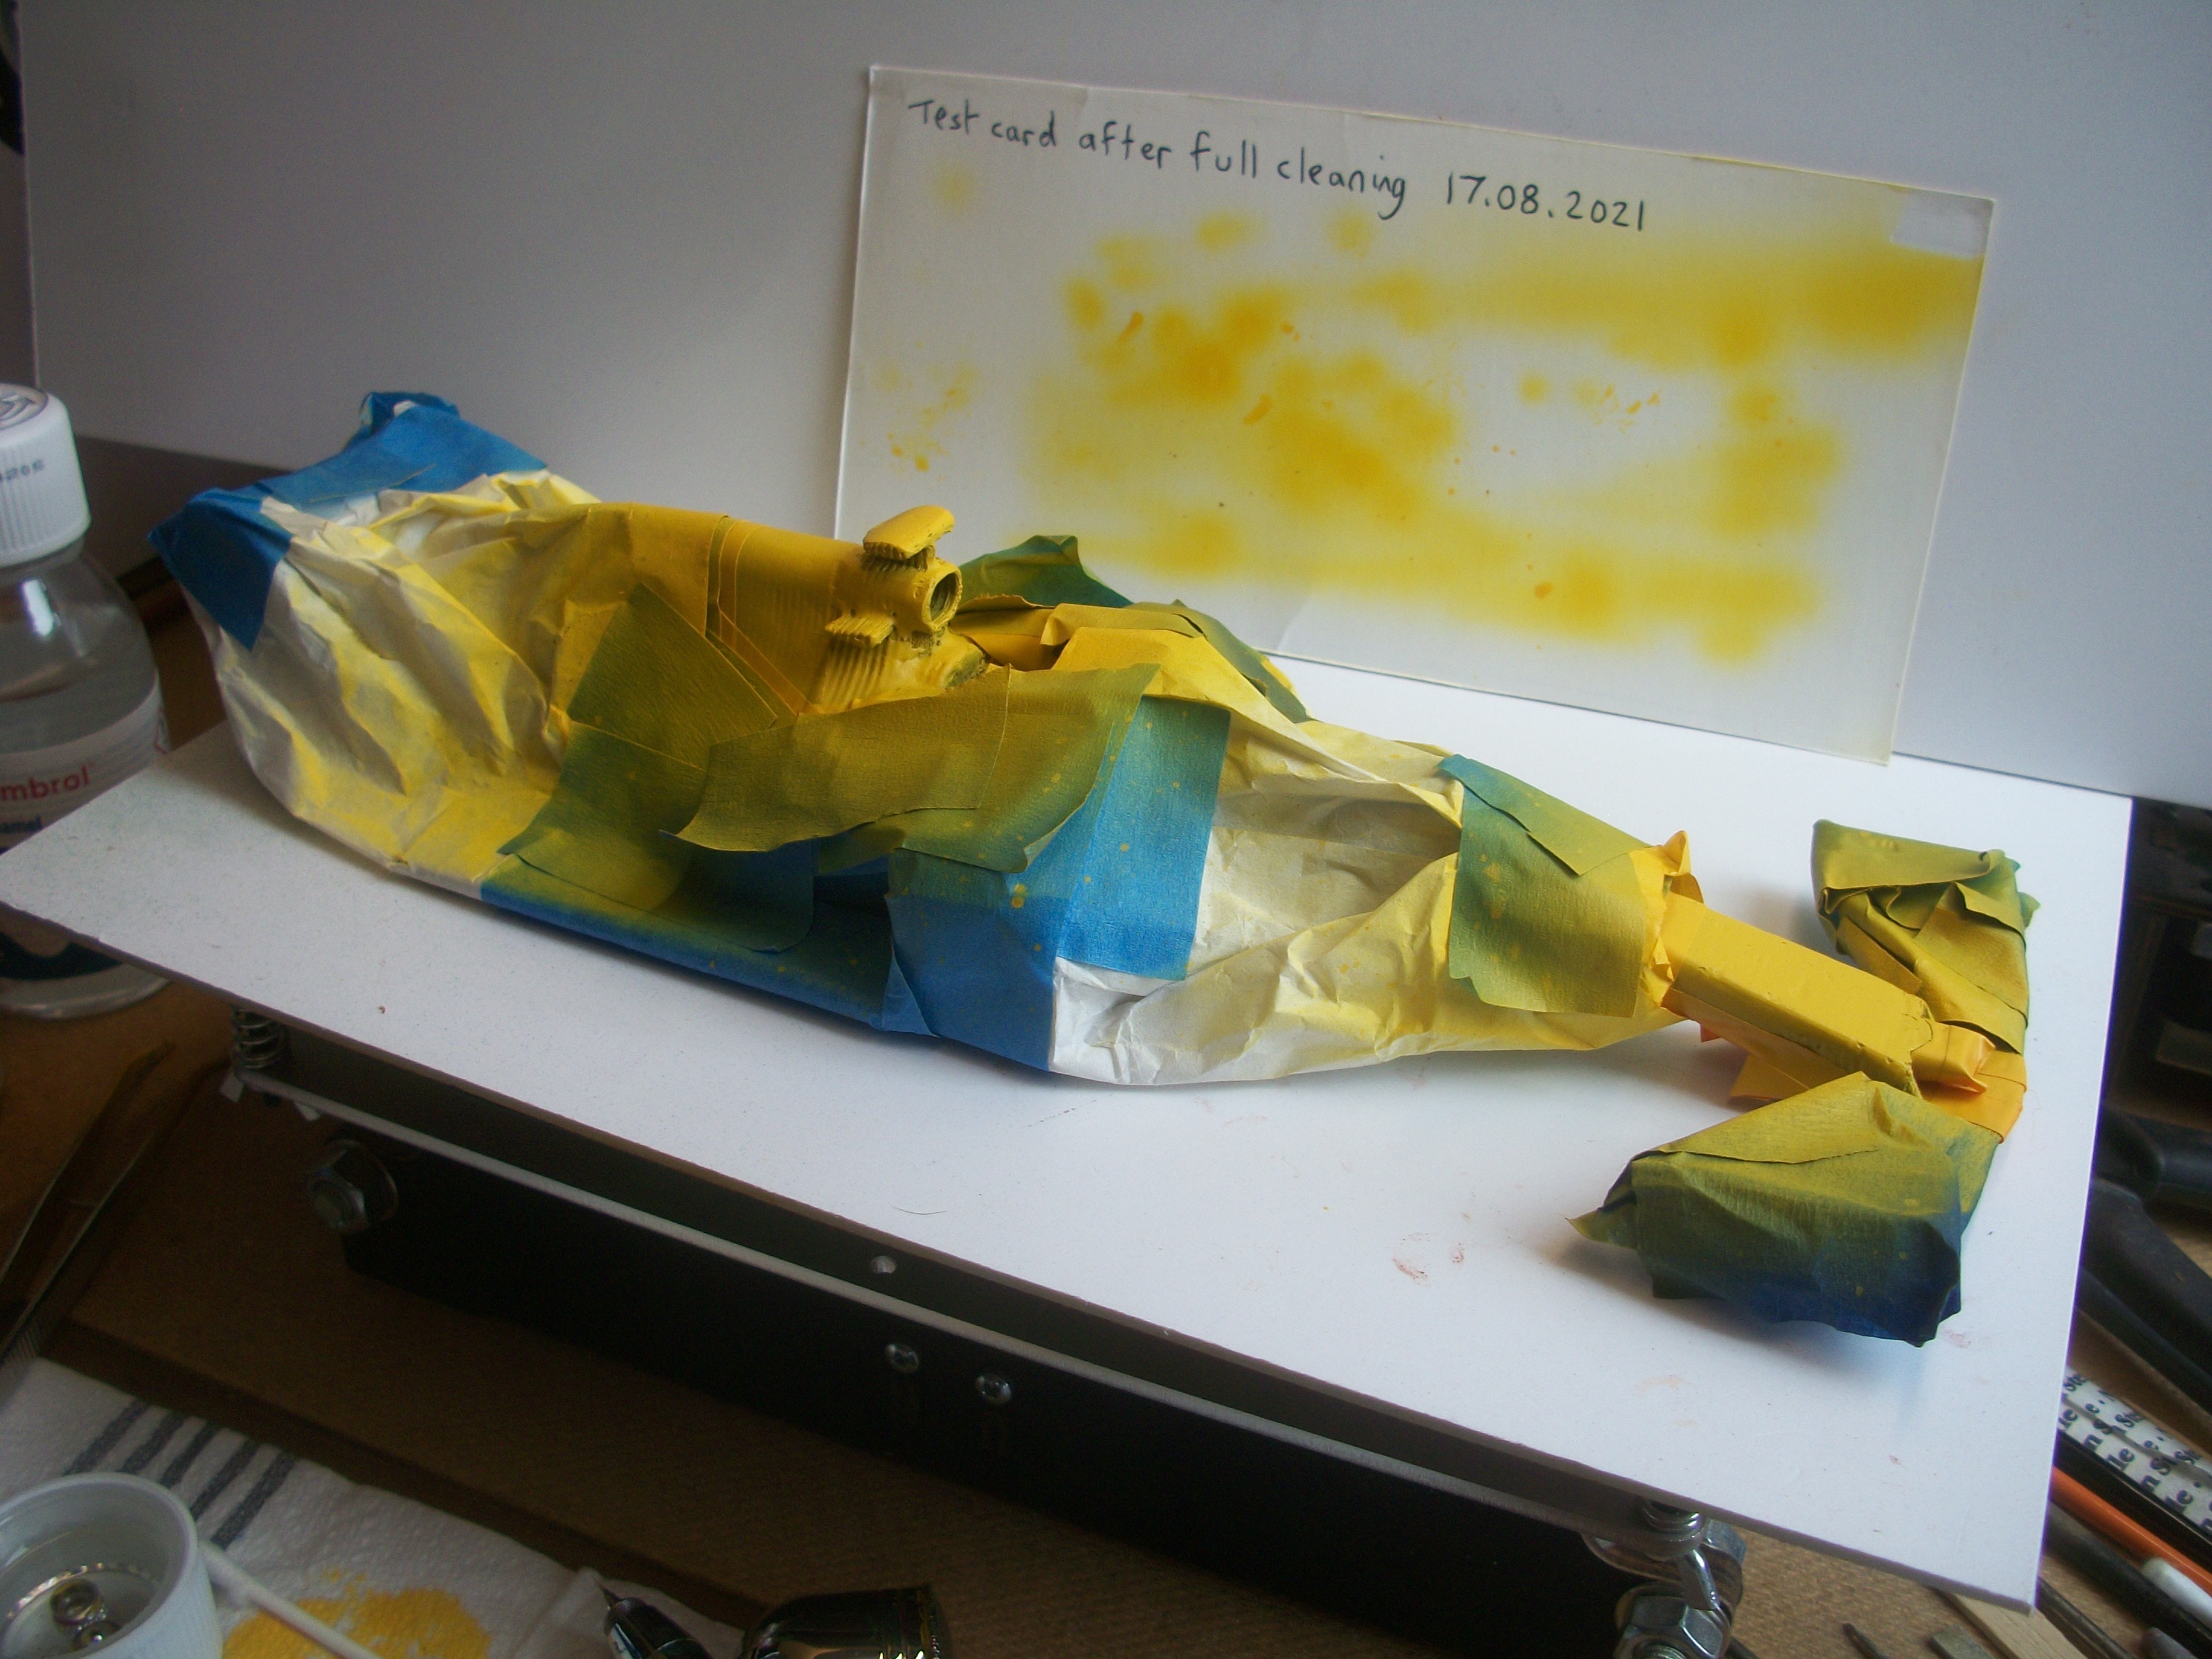
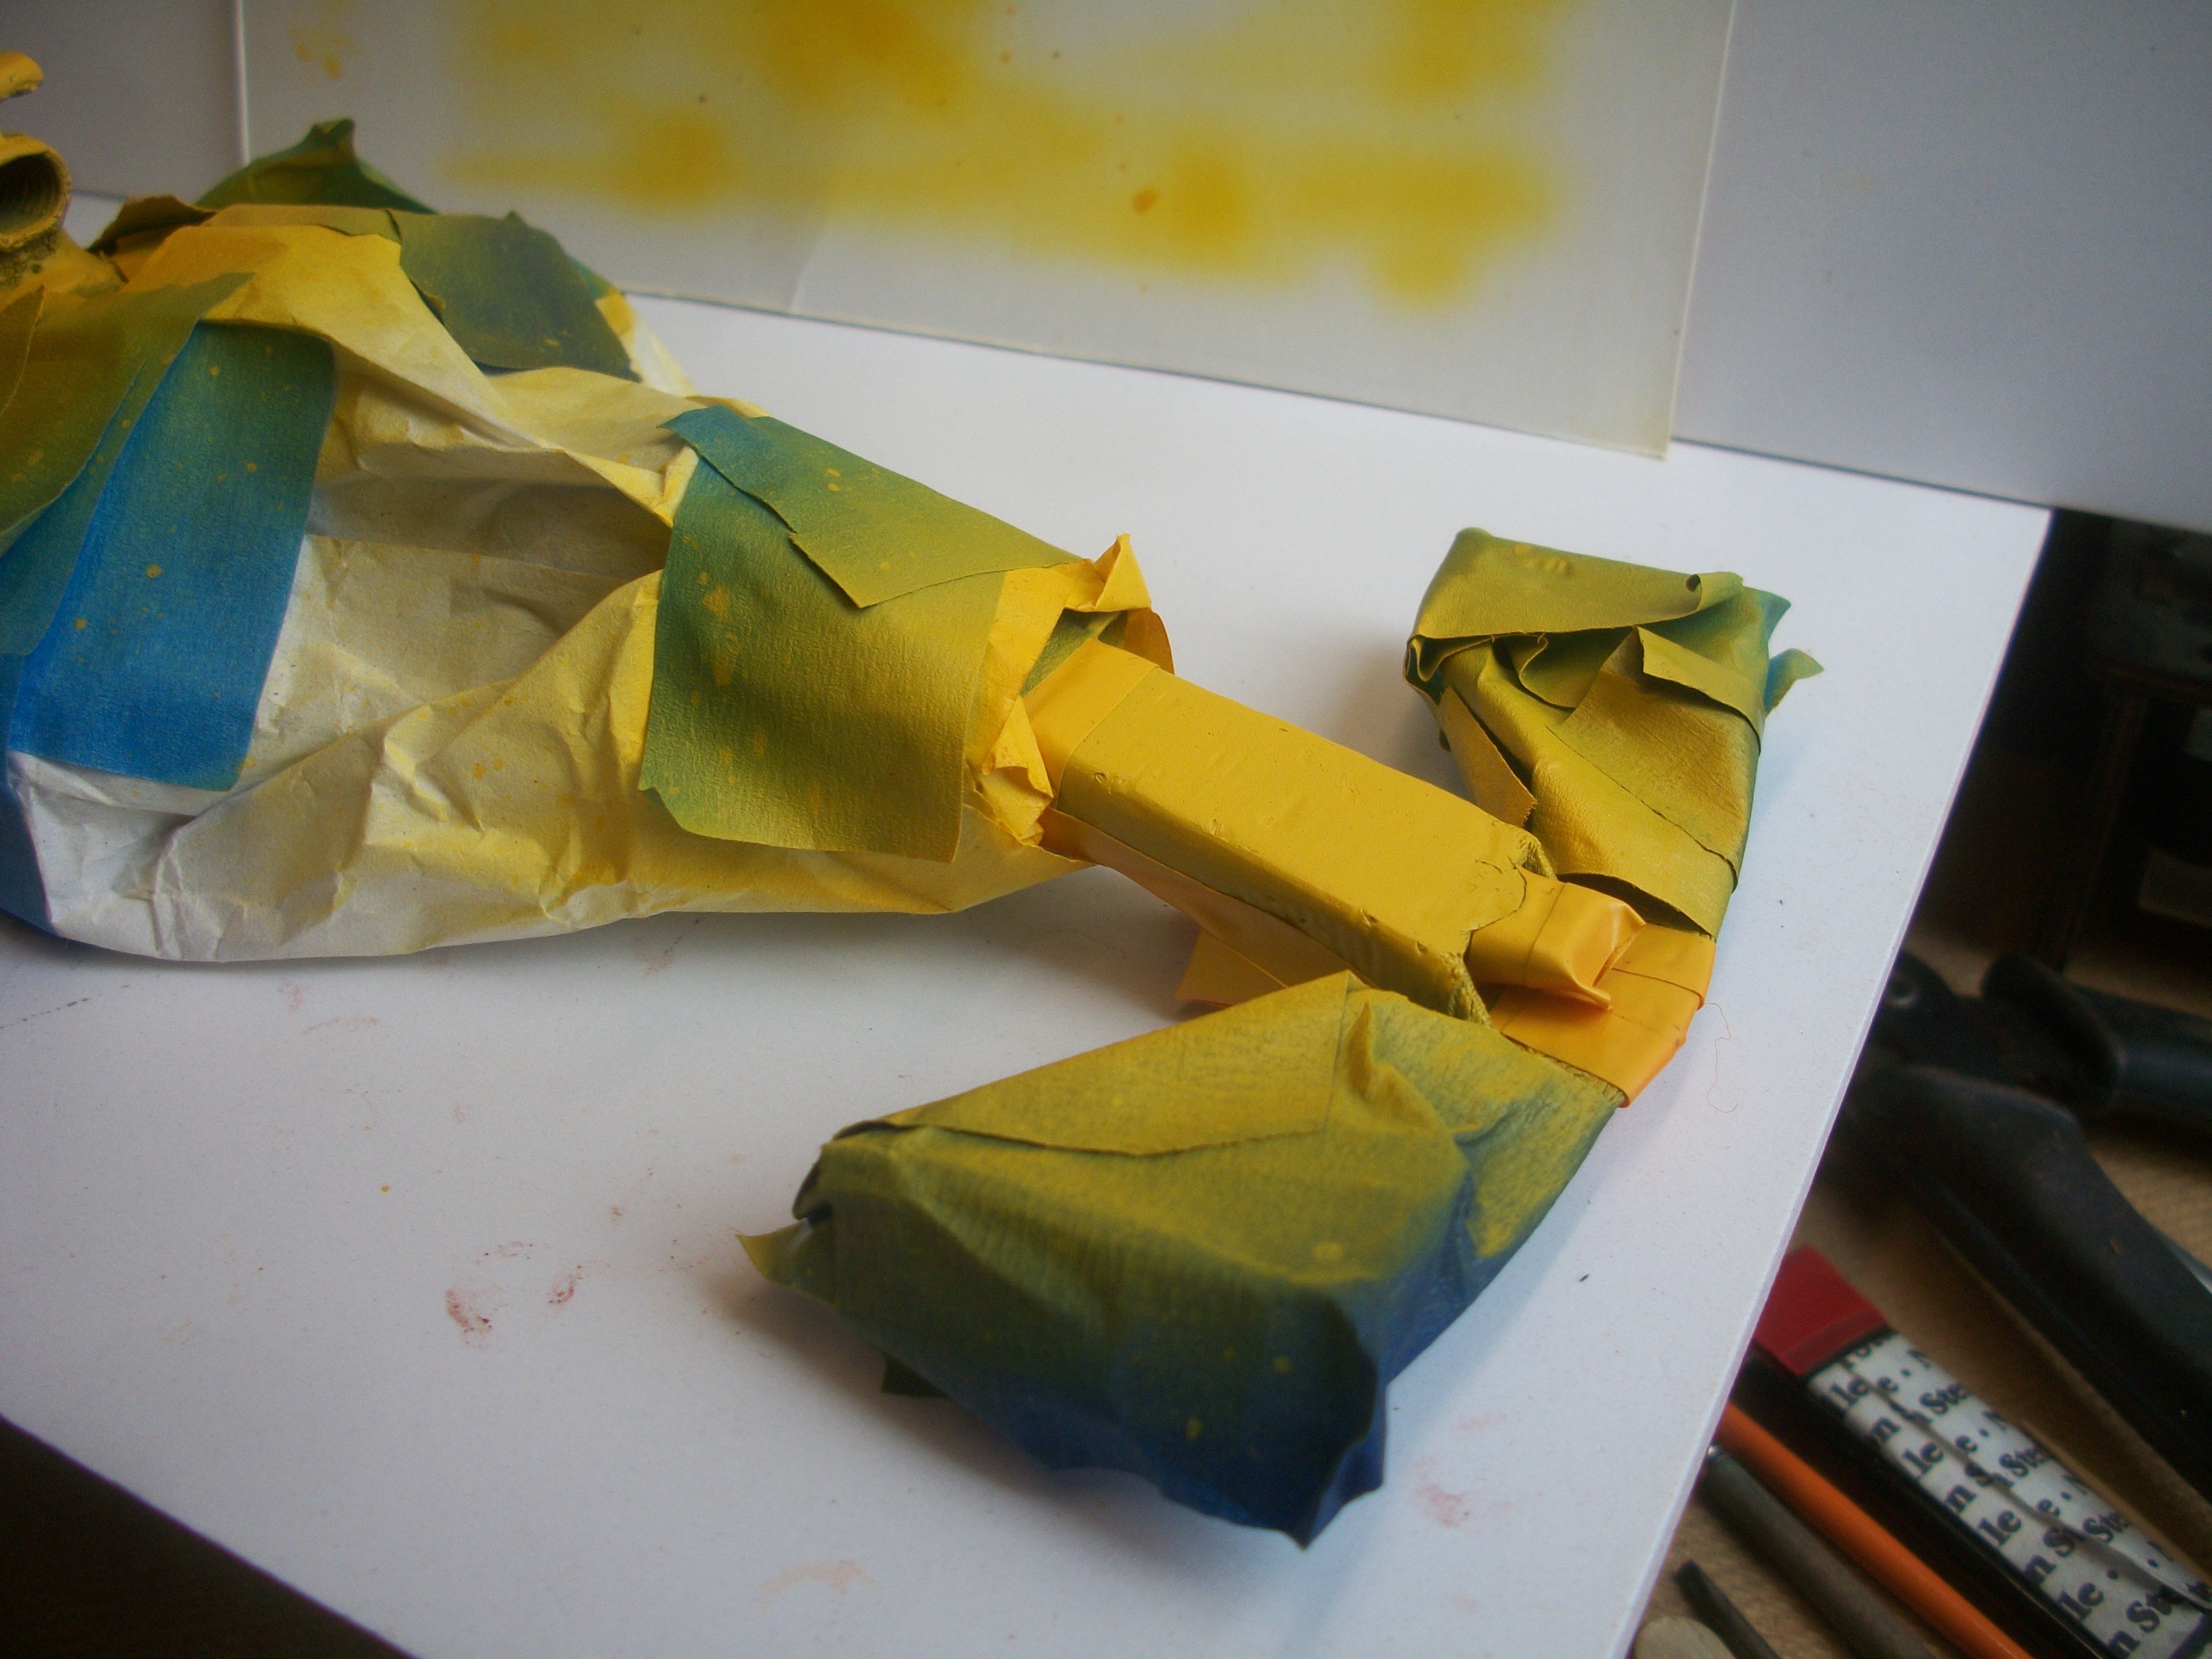
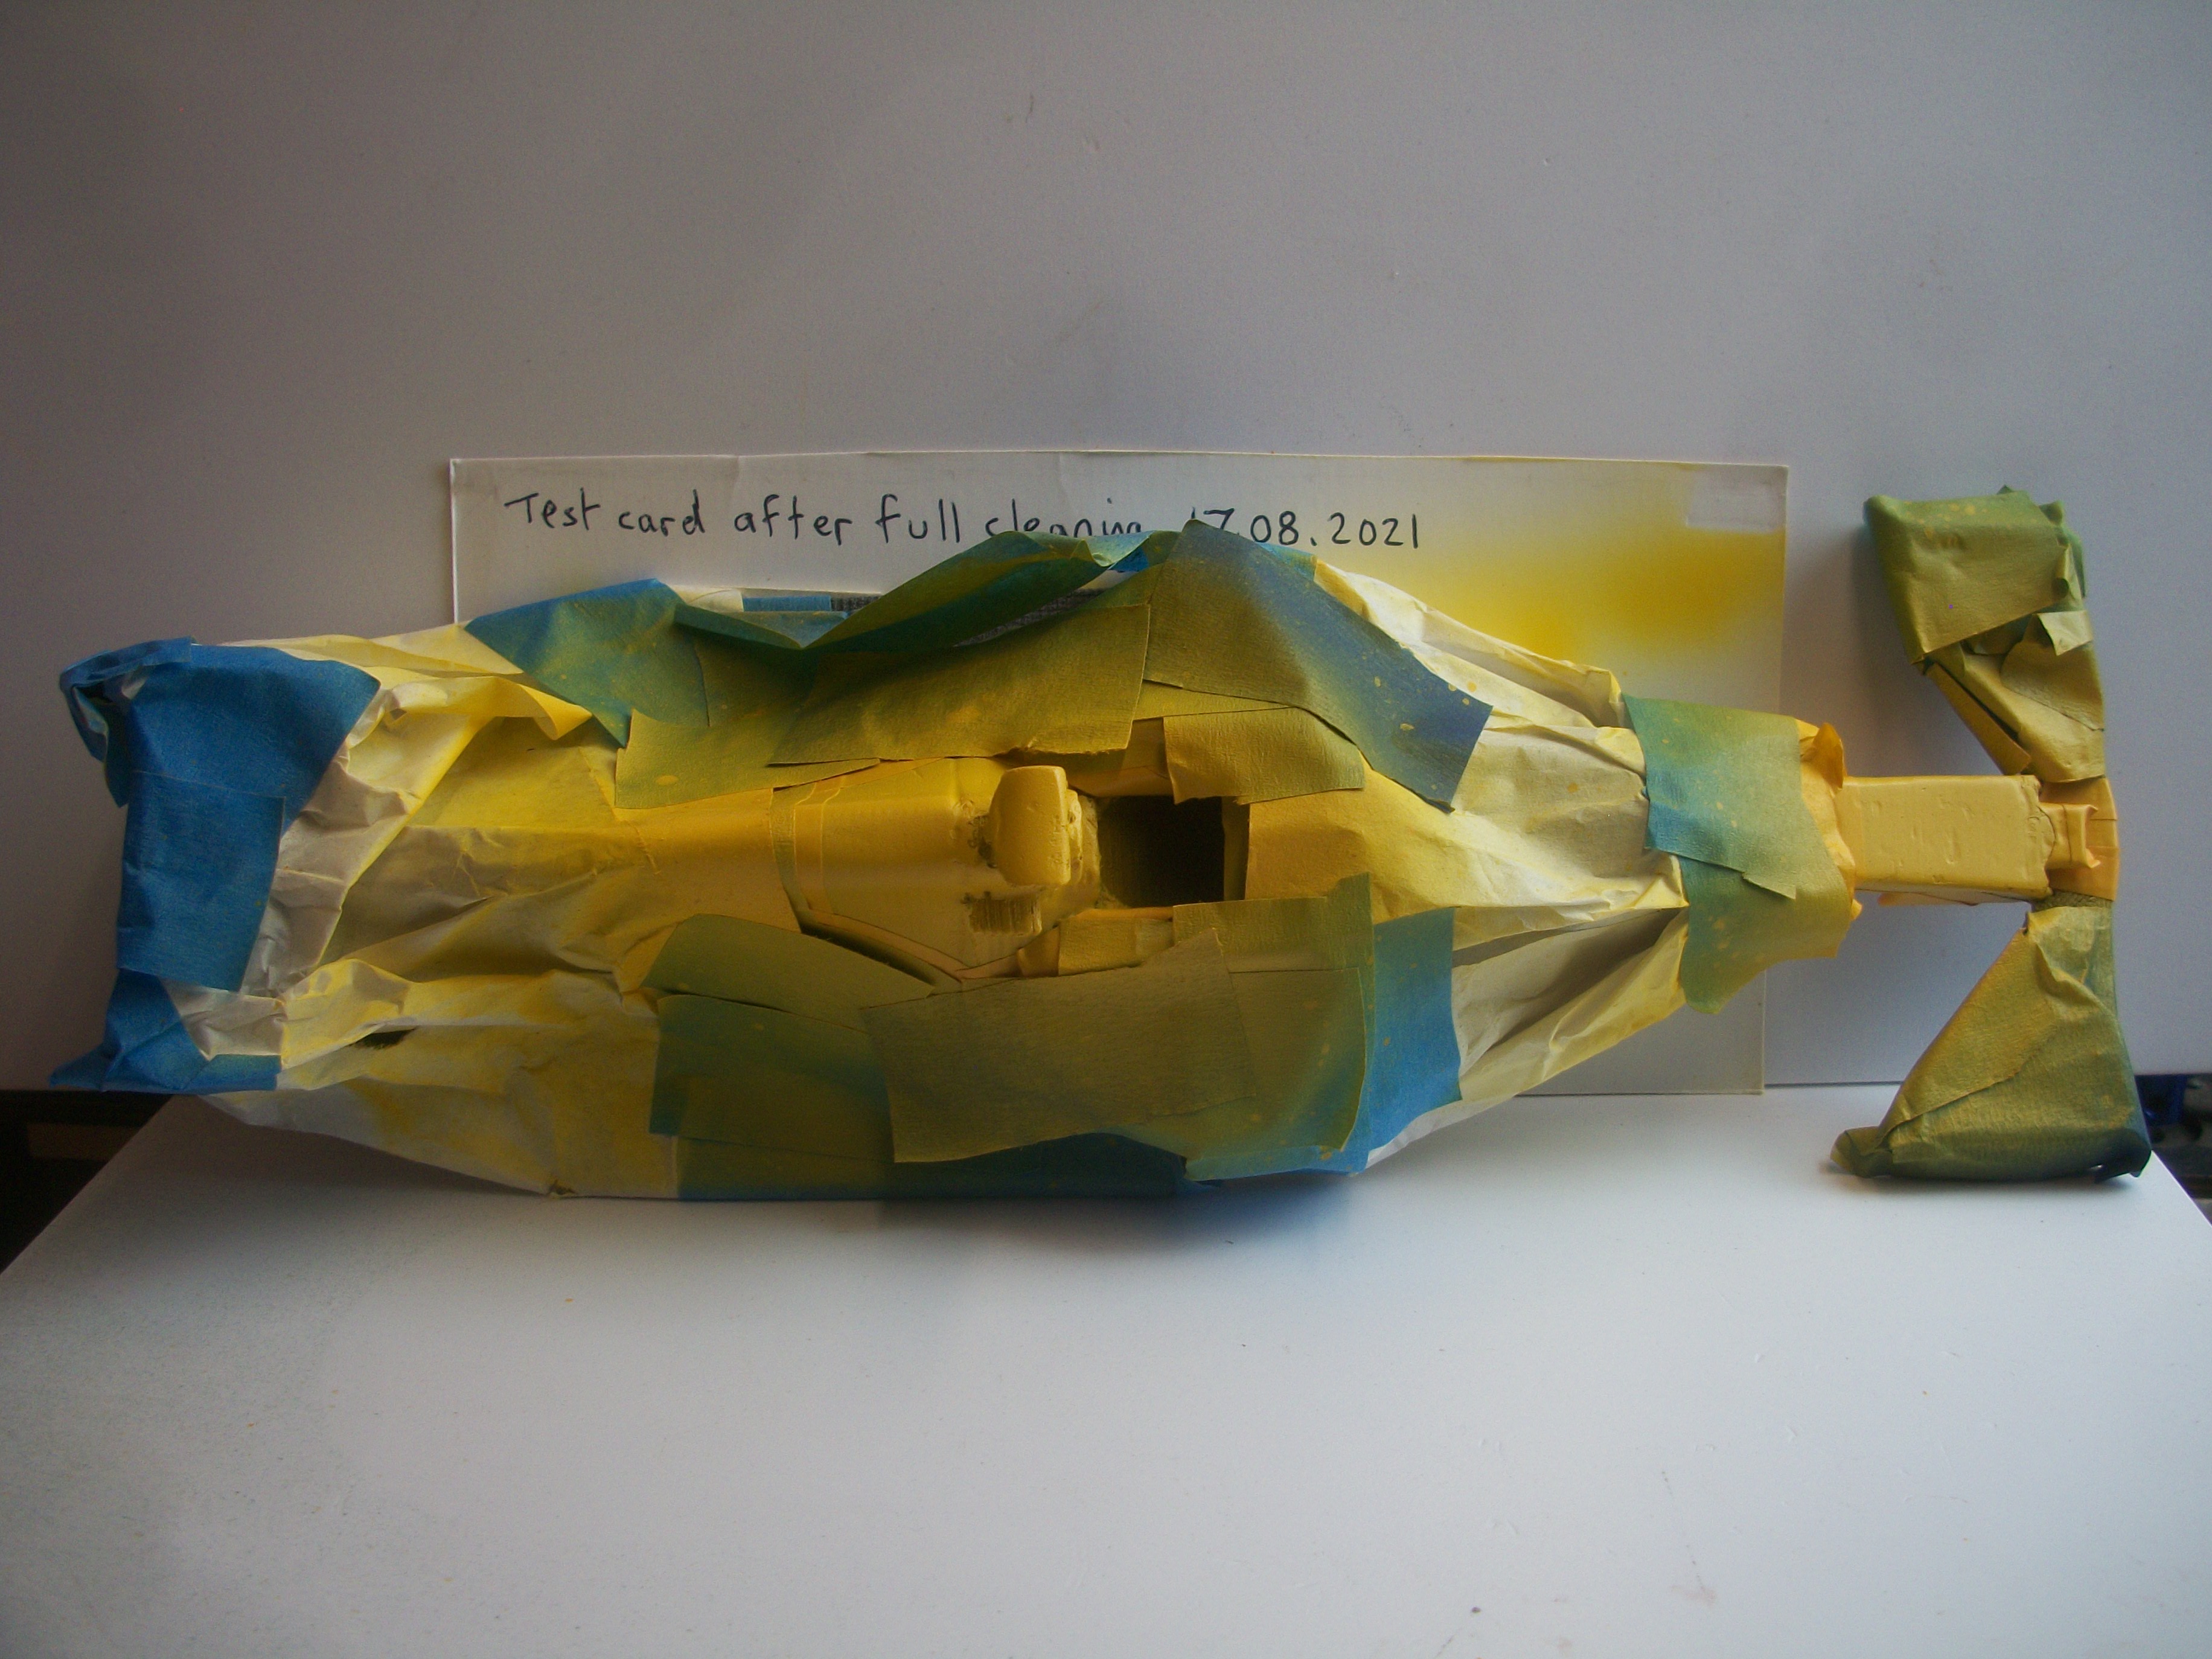
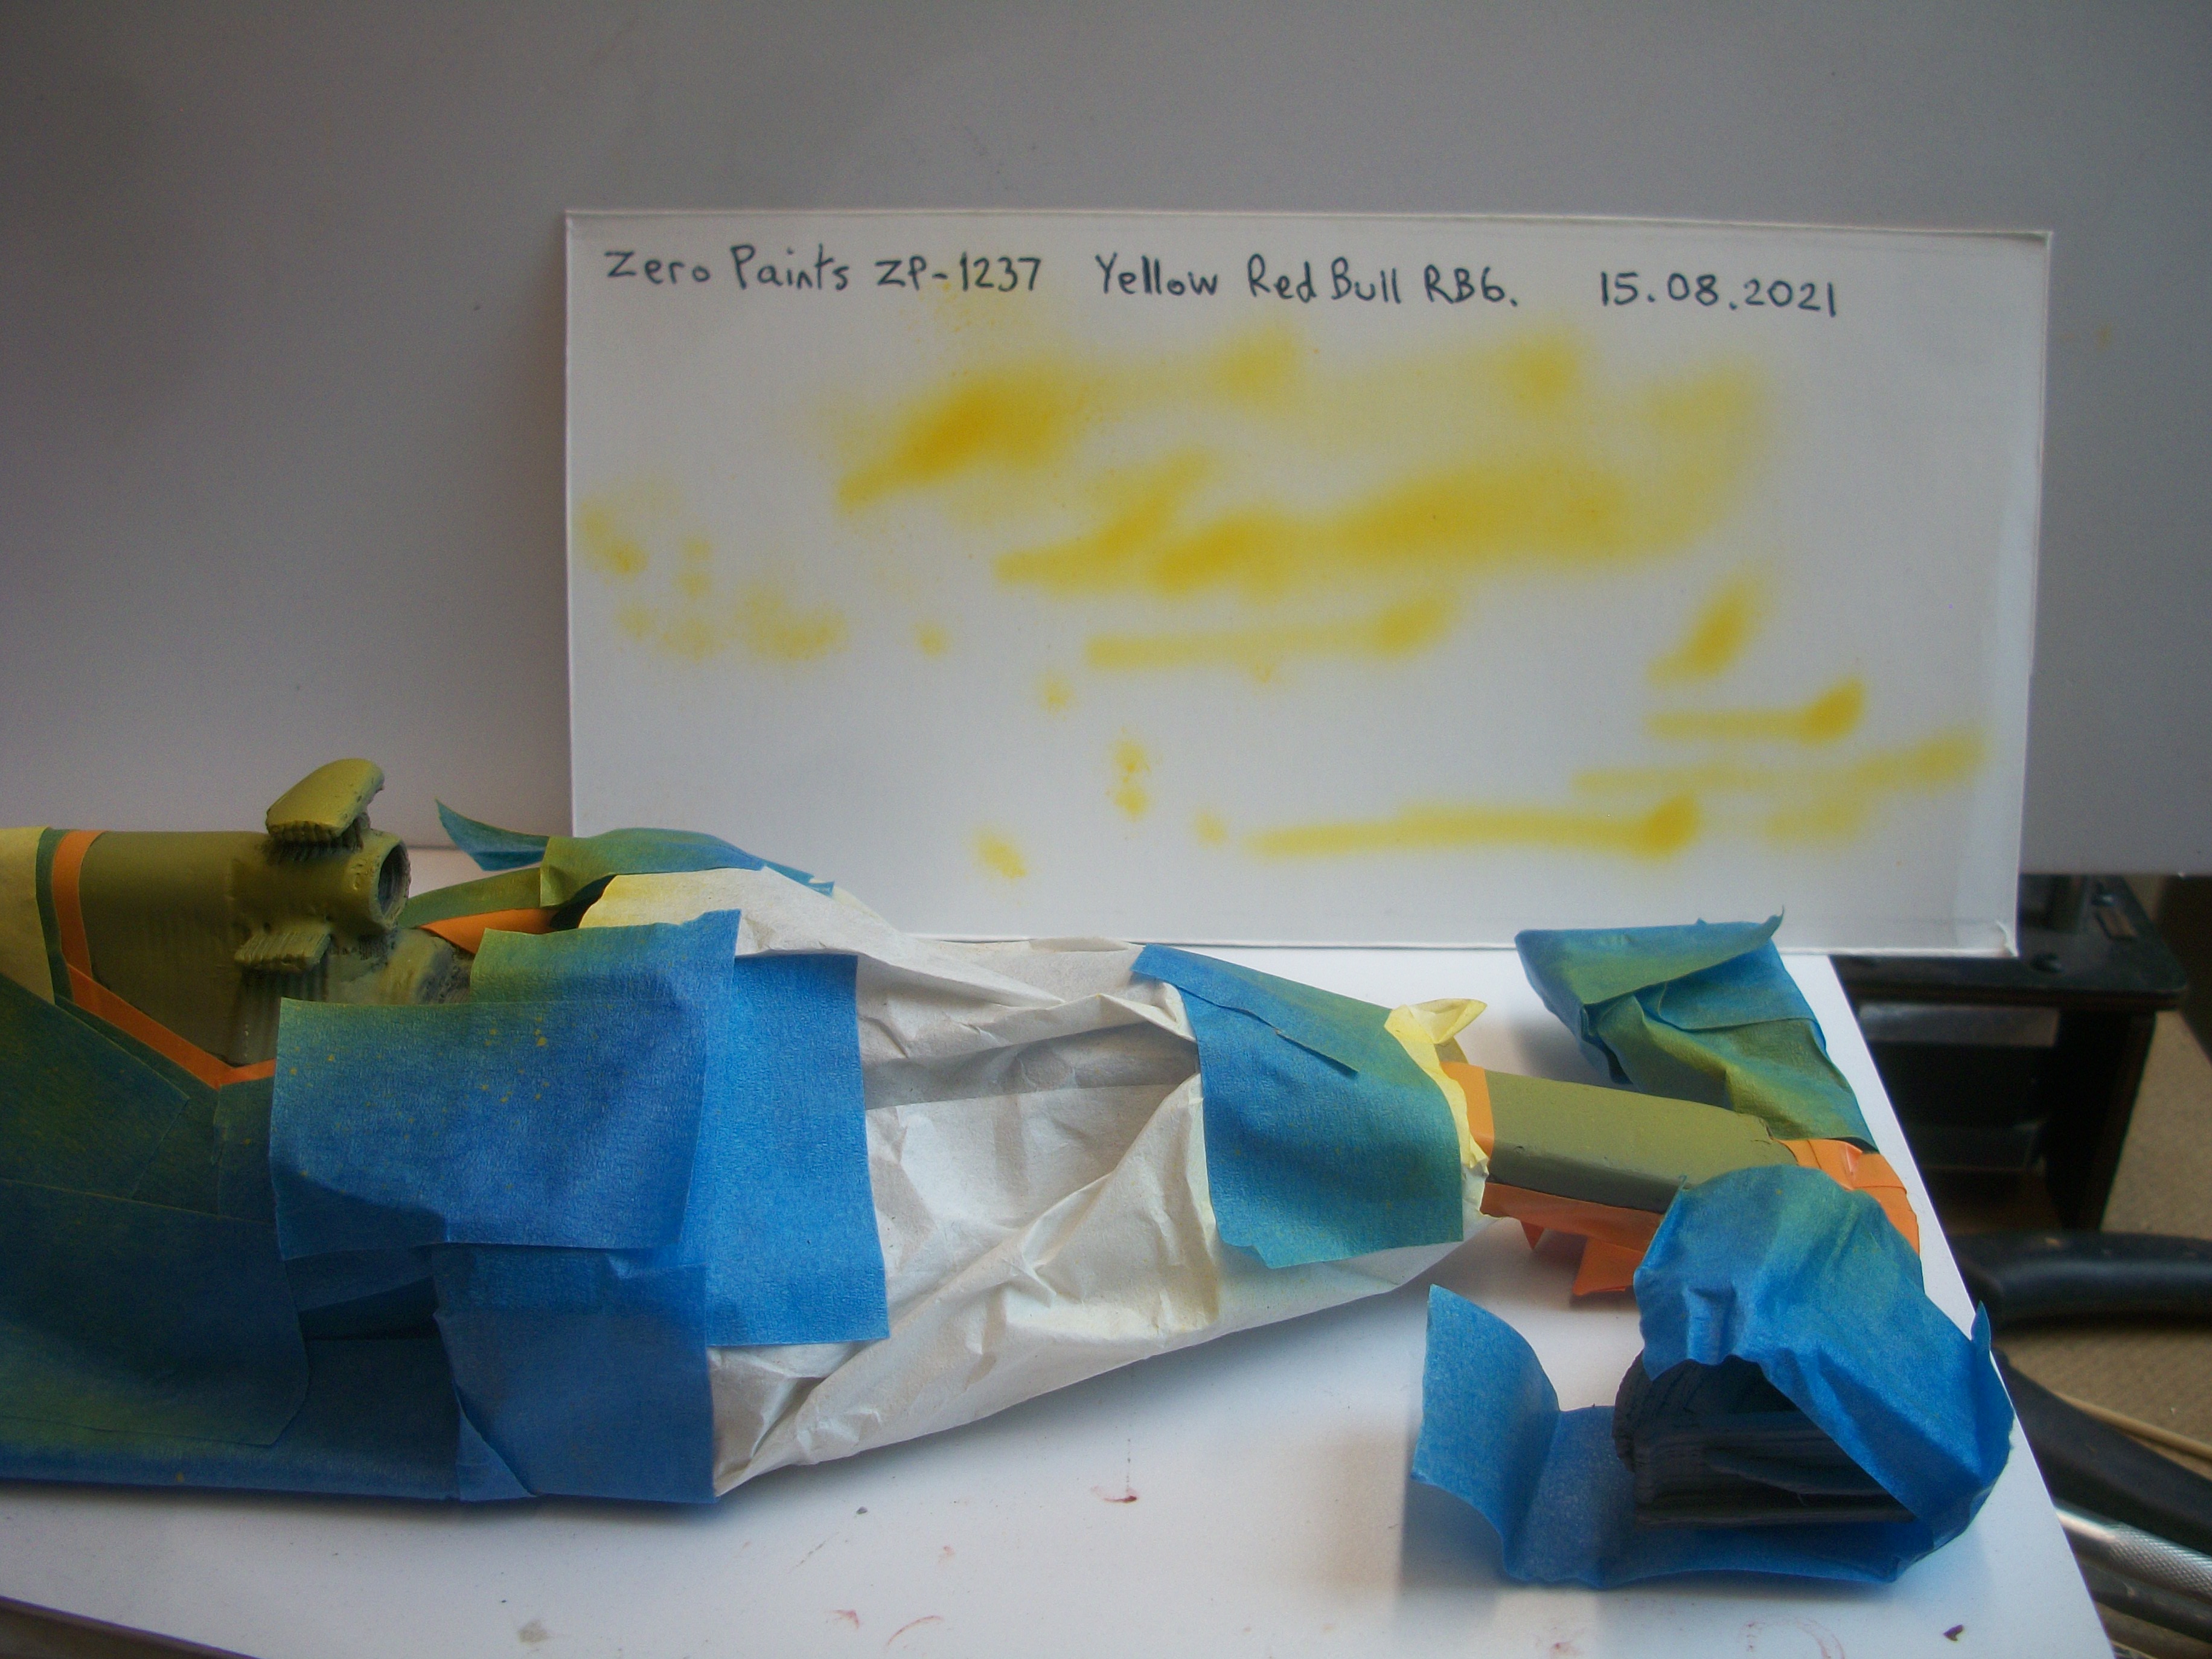
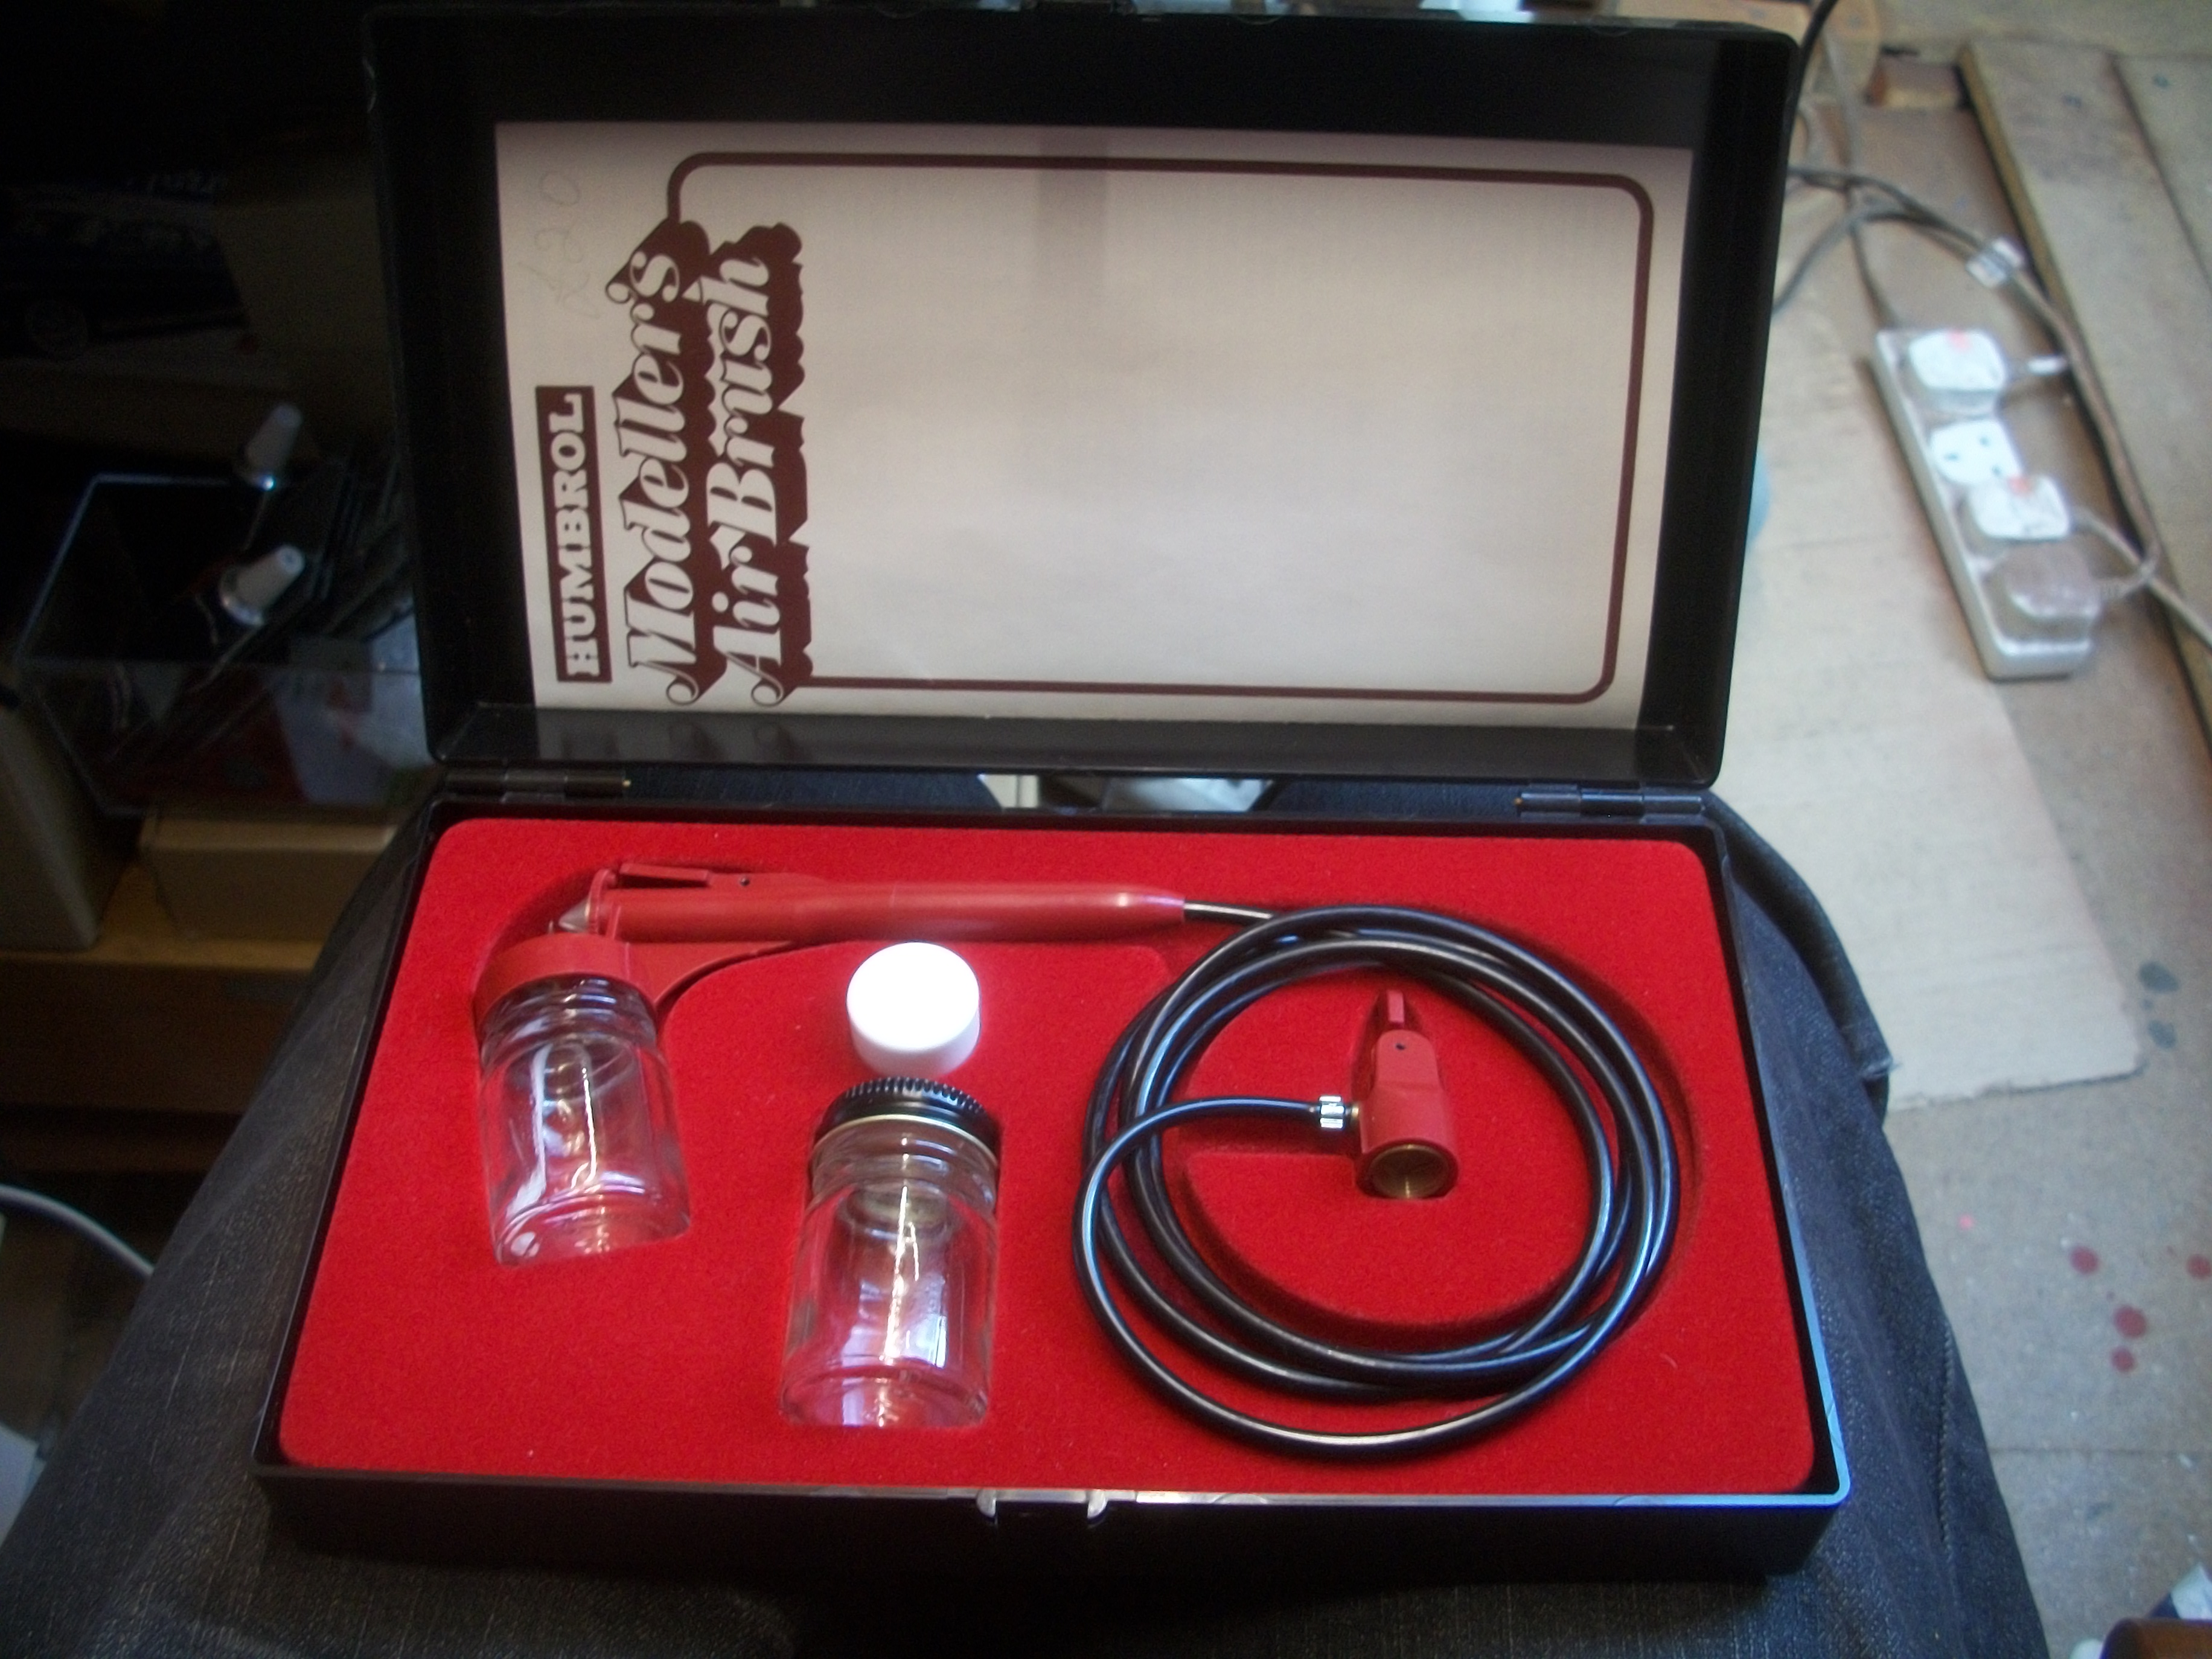
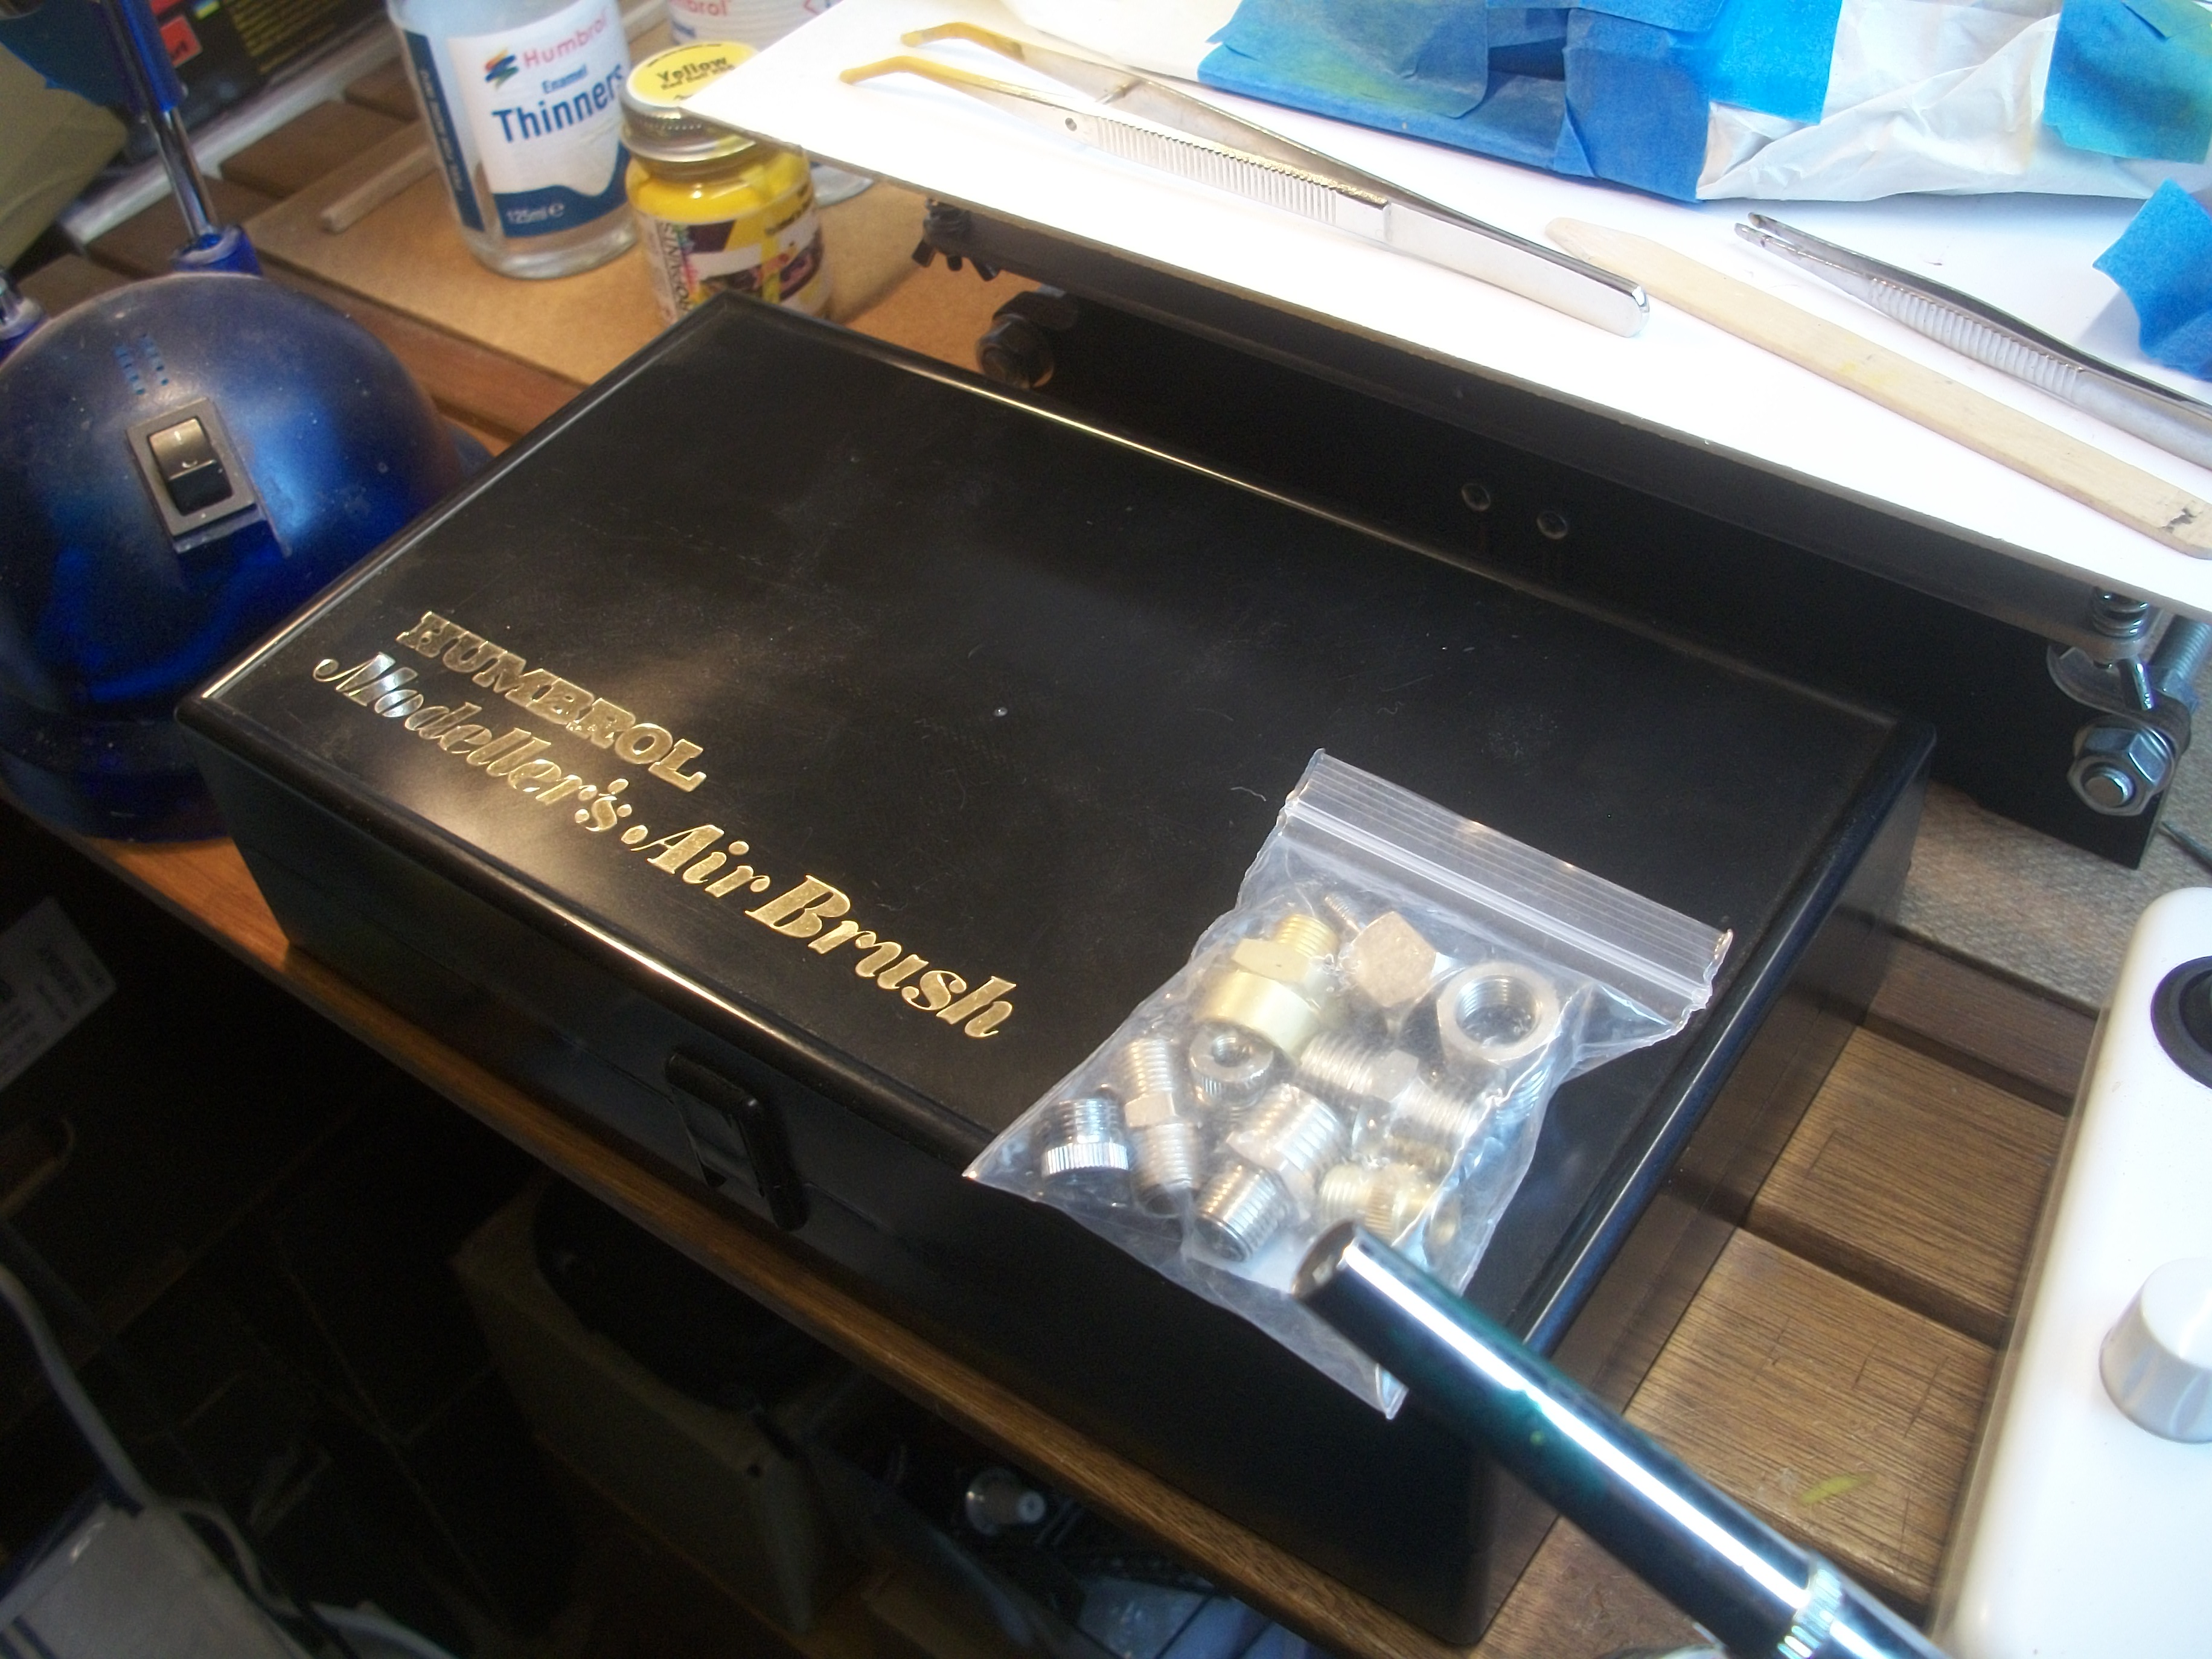
As you can see from the photo, I have cut out the semi circular piece of orange tape at the front of the nose cone, using a scalpel knife. Then set up the airbrush and checked everything was ready to go..... To begin with, the yellow paint was flowing as it should and I used a test card to see the result. However, once I had given the two areas of the model a very light coat of yellow, the airbrush stopped applying paint properly. Nothing is coming out of the nozzle. Set about dismantling the airbrush and cleaning each part. Put it all back together..... and still nothing. Not sure what might be wrong, as all looks normal. I do have a ' Vintage ' Humbrol Modeller's Air Brush, which I would like to try, but the threaded connection on the air hose does not fit the KK Moon compressor, and none of the 9 different adapters in a pack bought off Ebay fit either. So far, I haven't been able to check if the the thread on a propellant can will fit the Humbrol airbrush..... probably not ? The build of the Red Bull RB14 is now held up, while I try to figure out what is wrong with the KK Moon airbrush. Nothing seems to be out of place. David
-
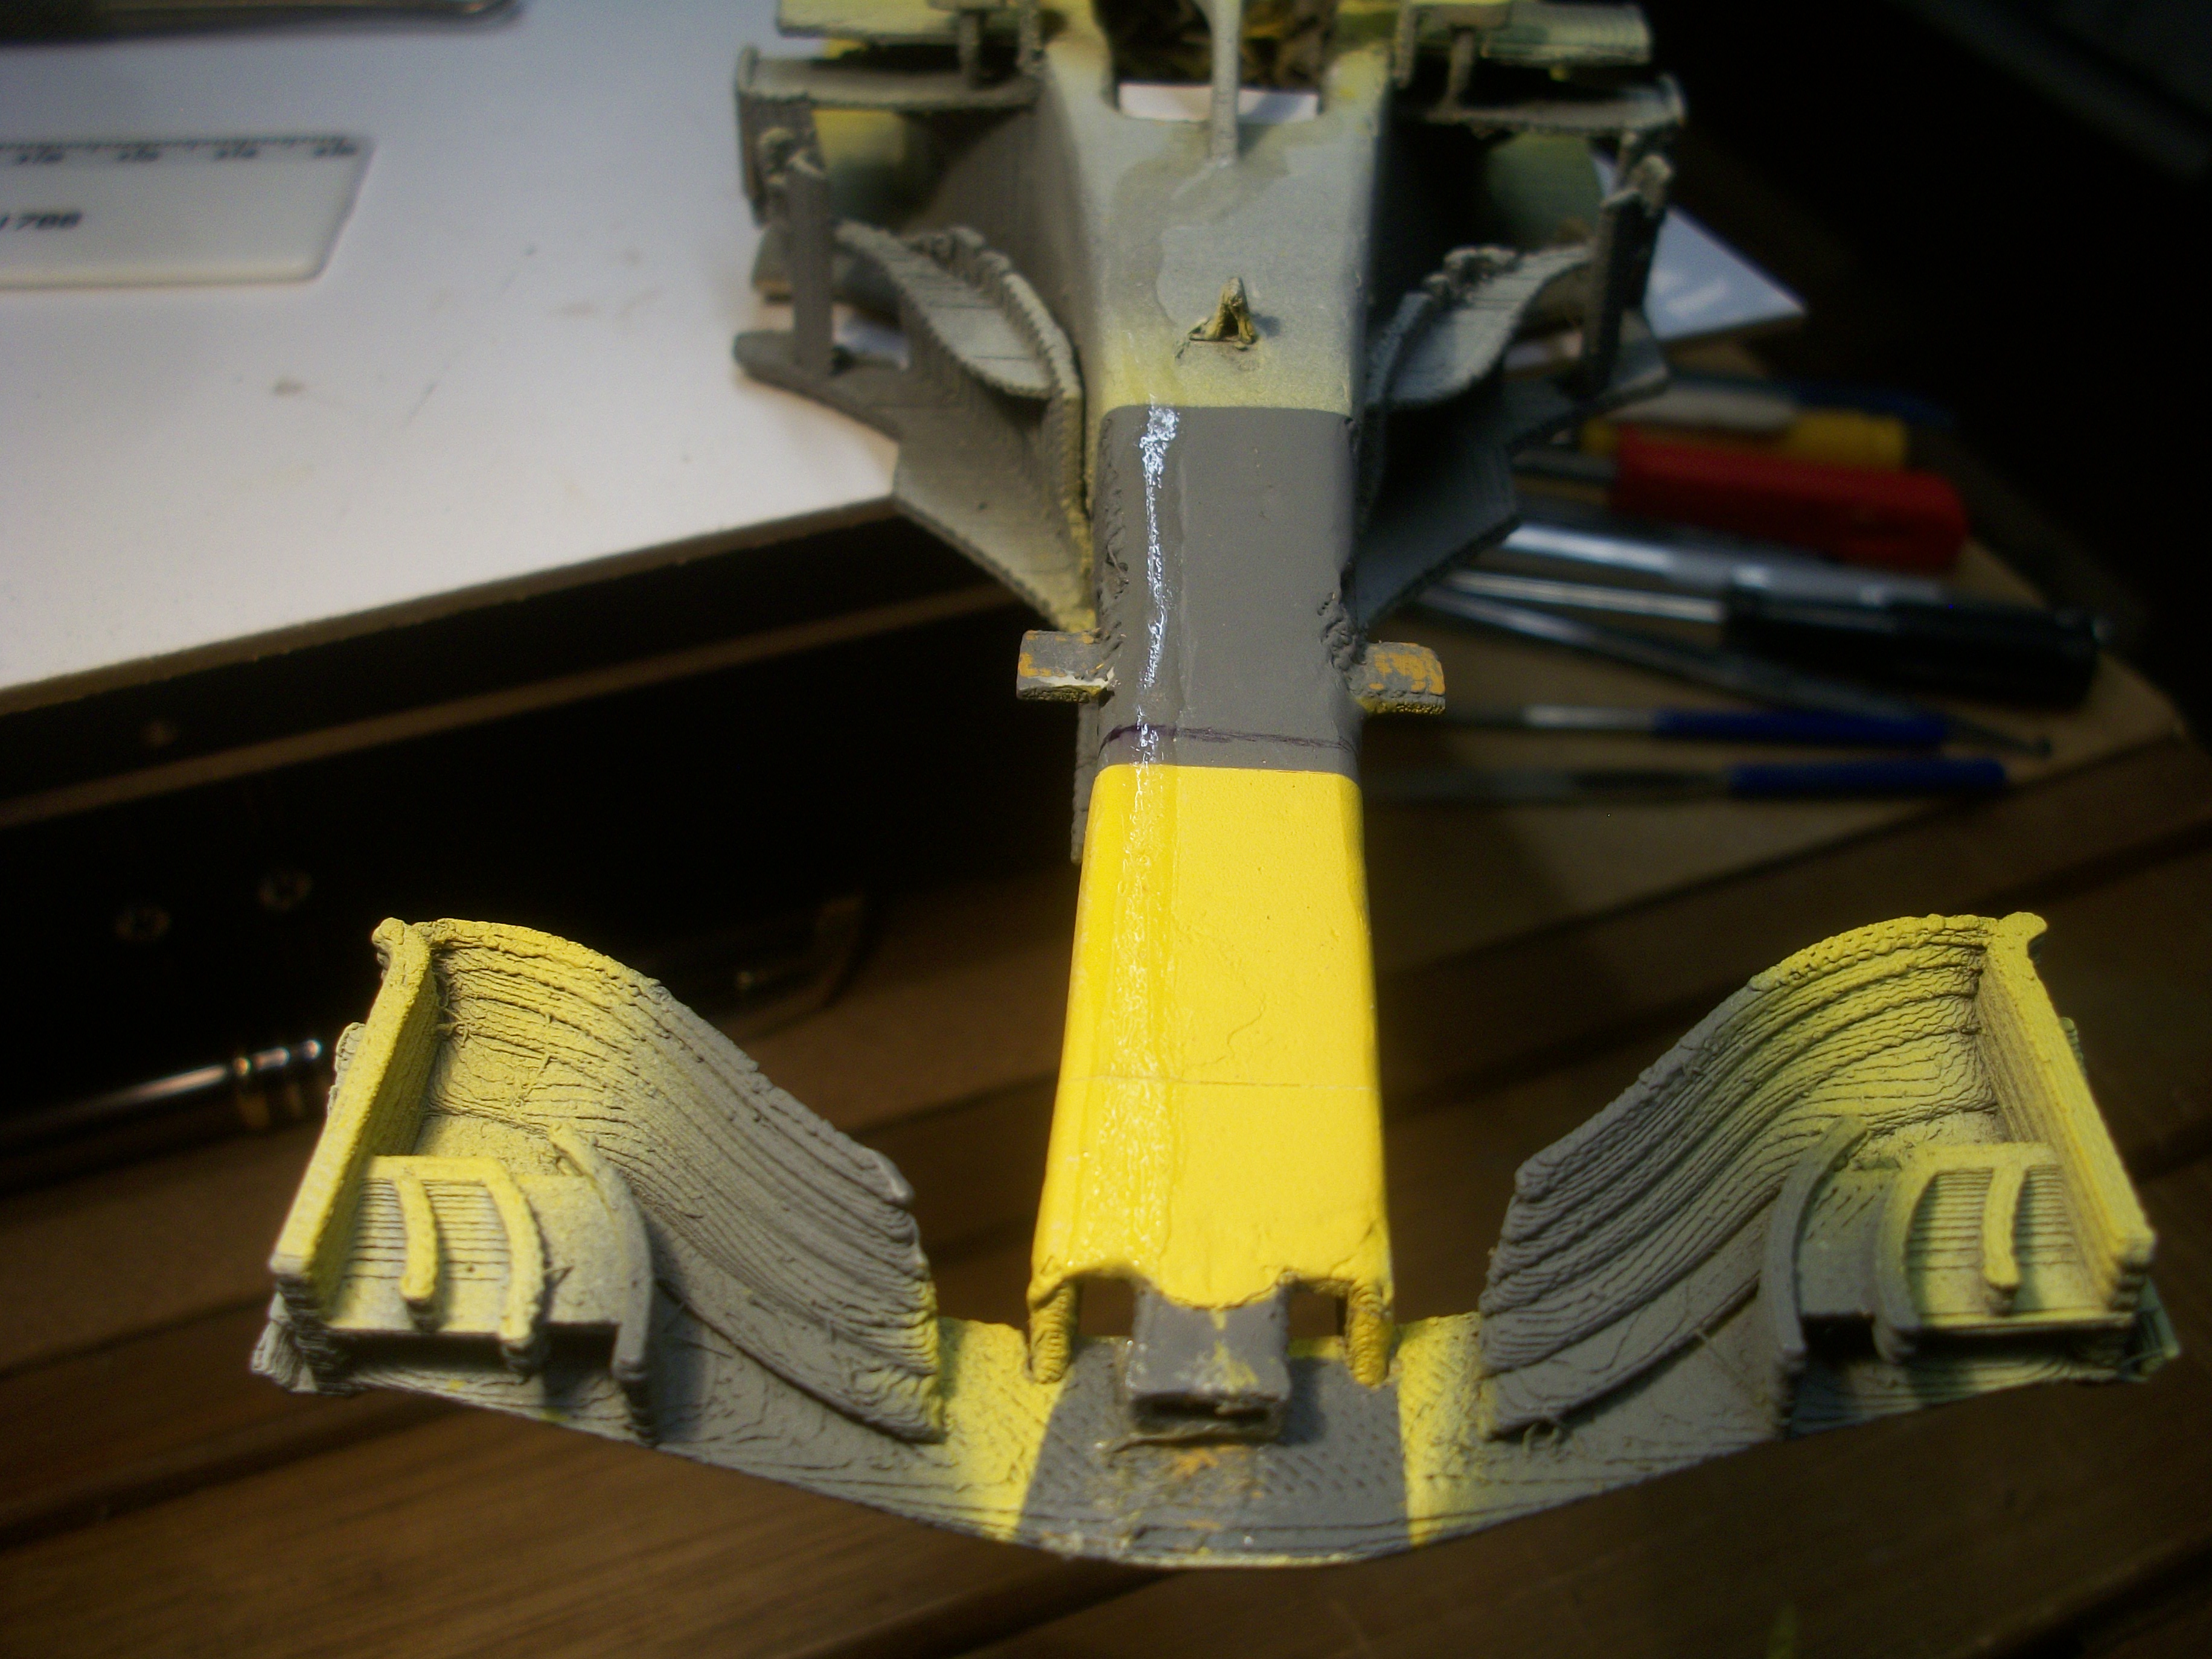
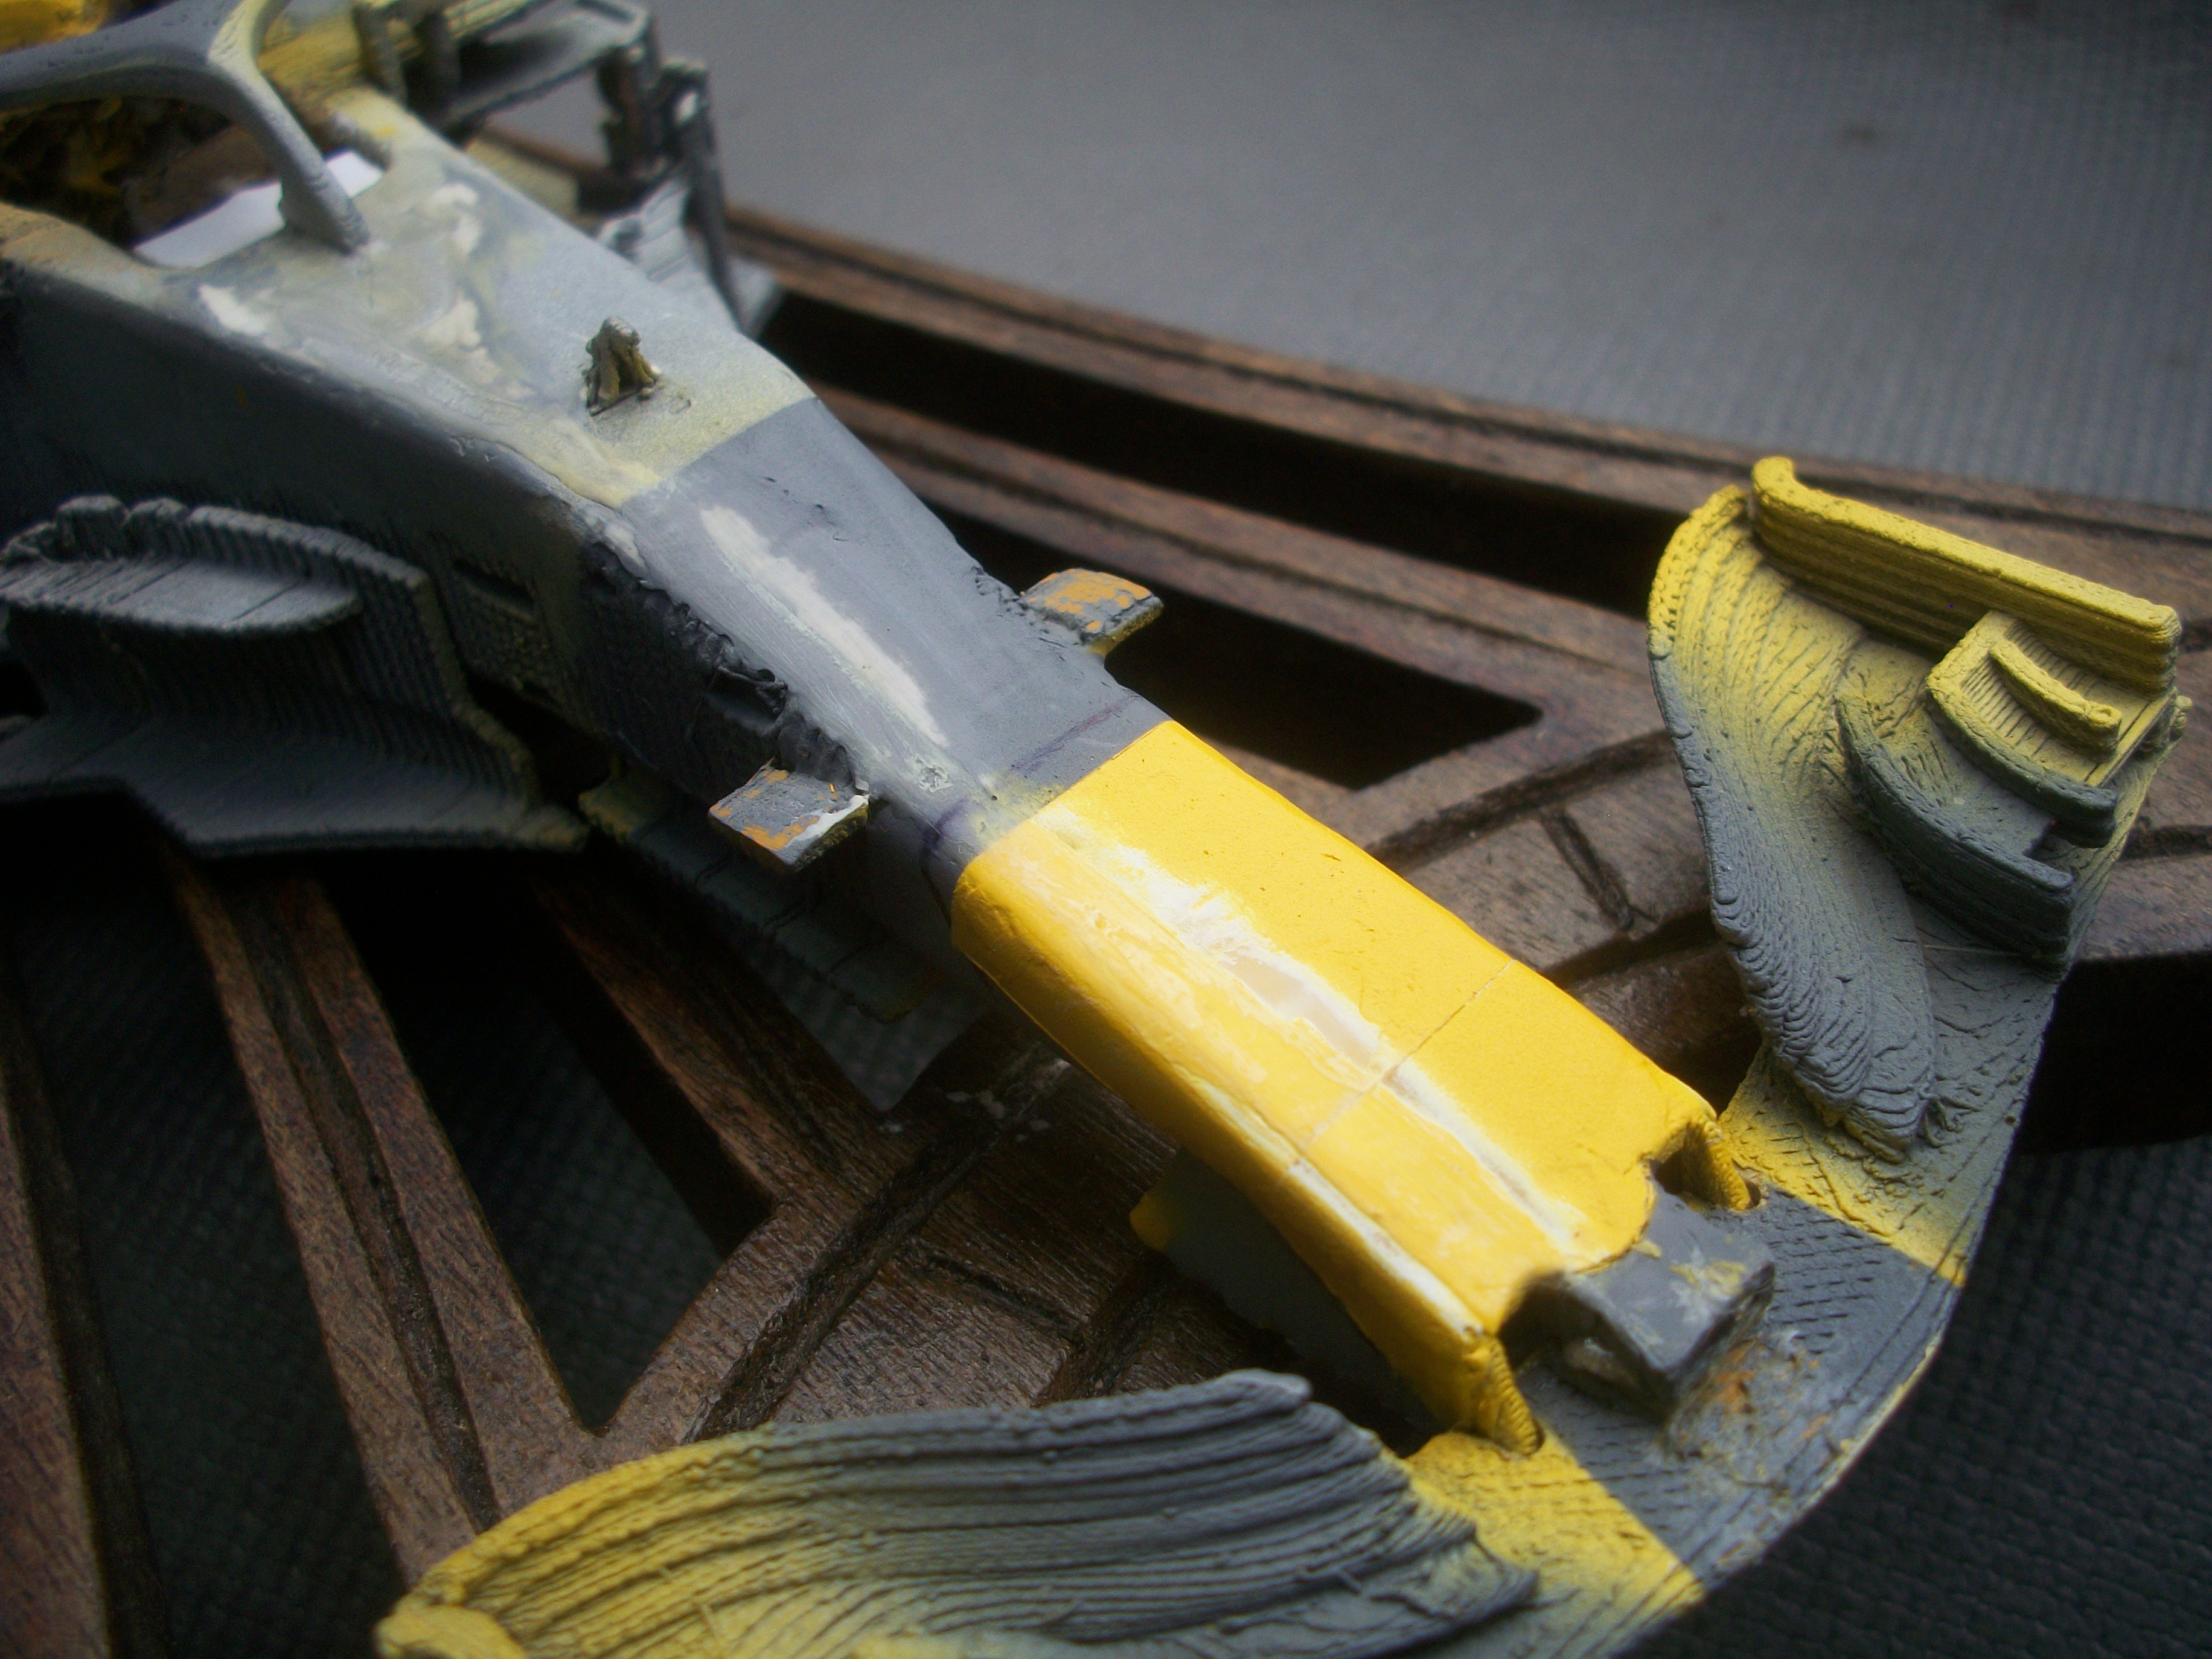
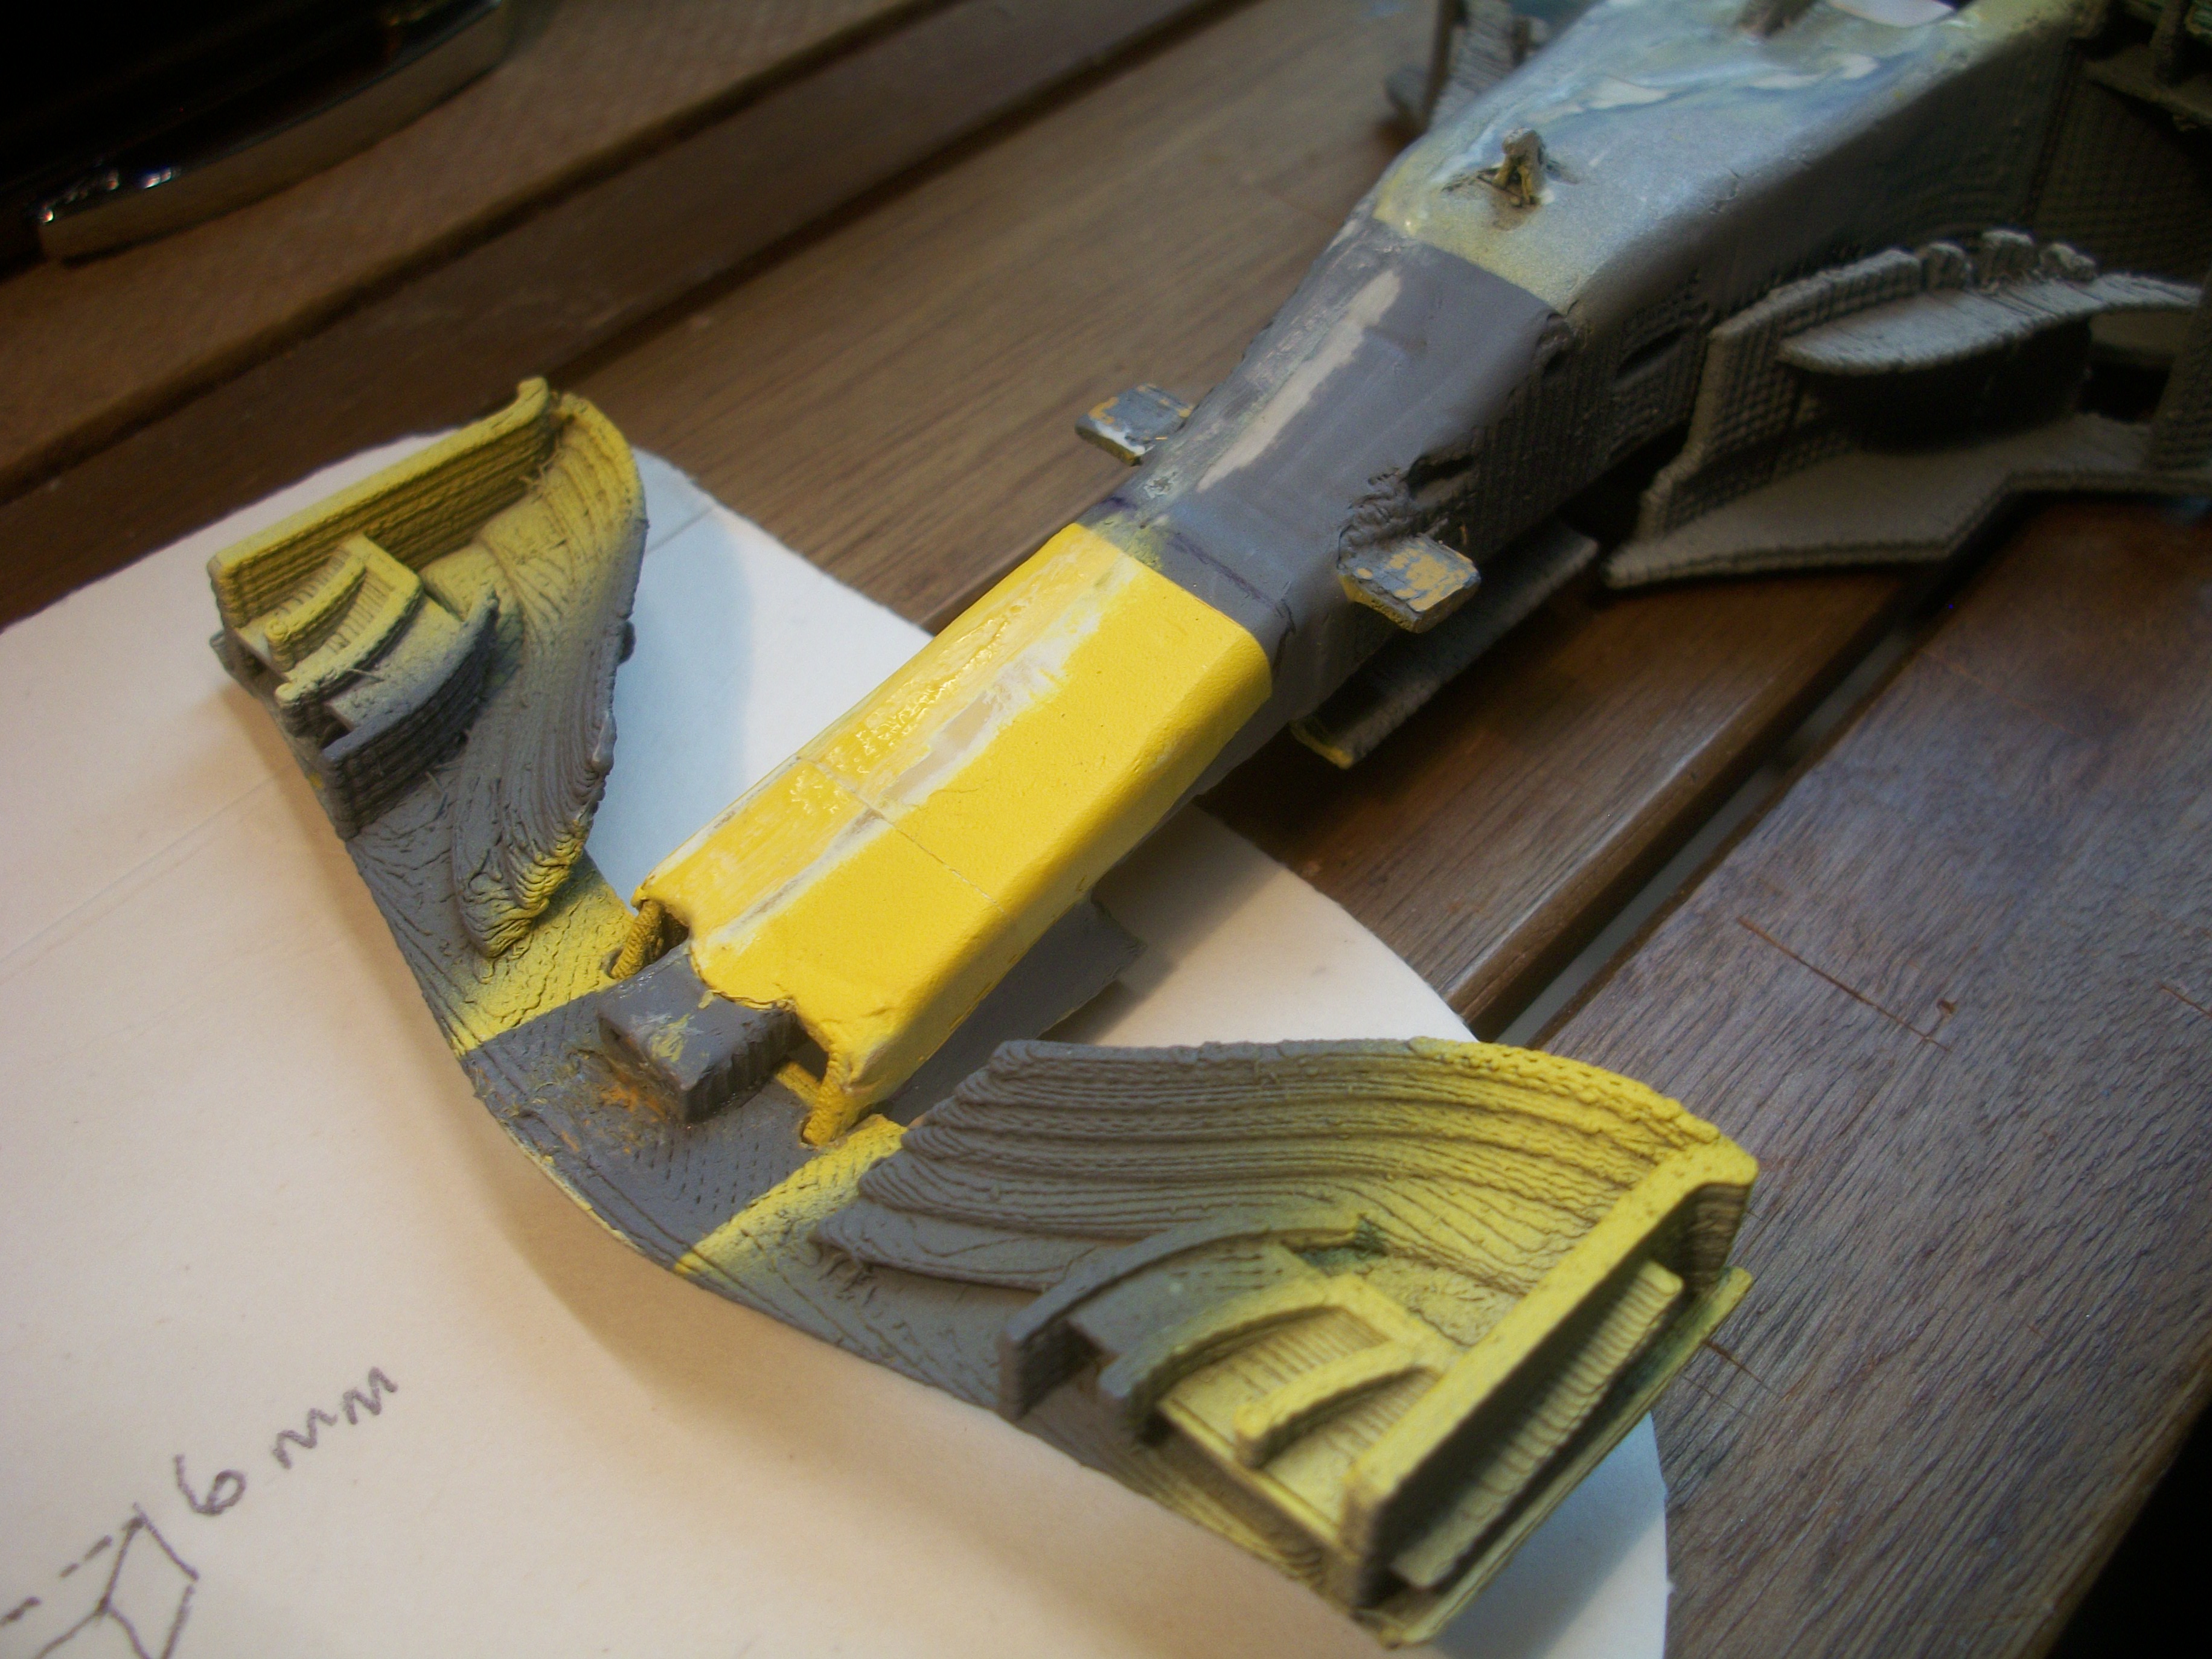
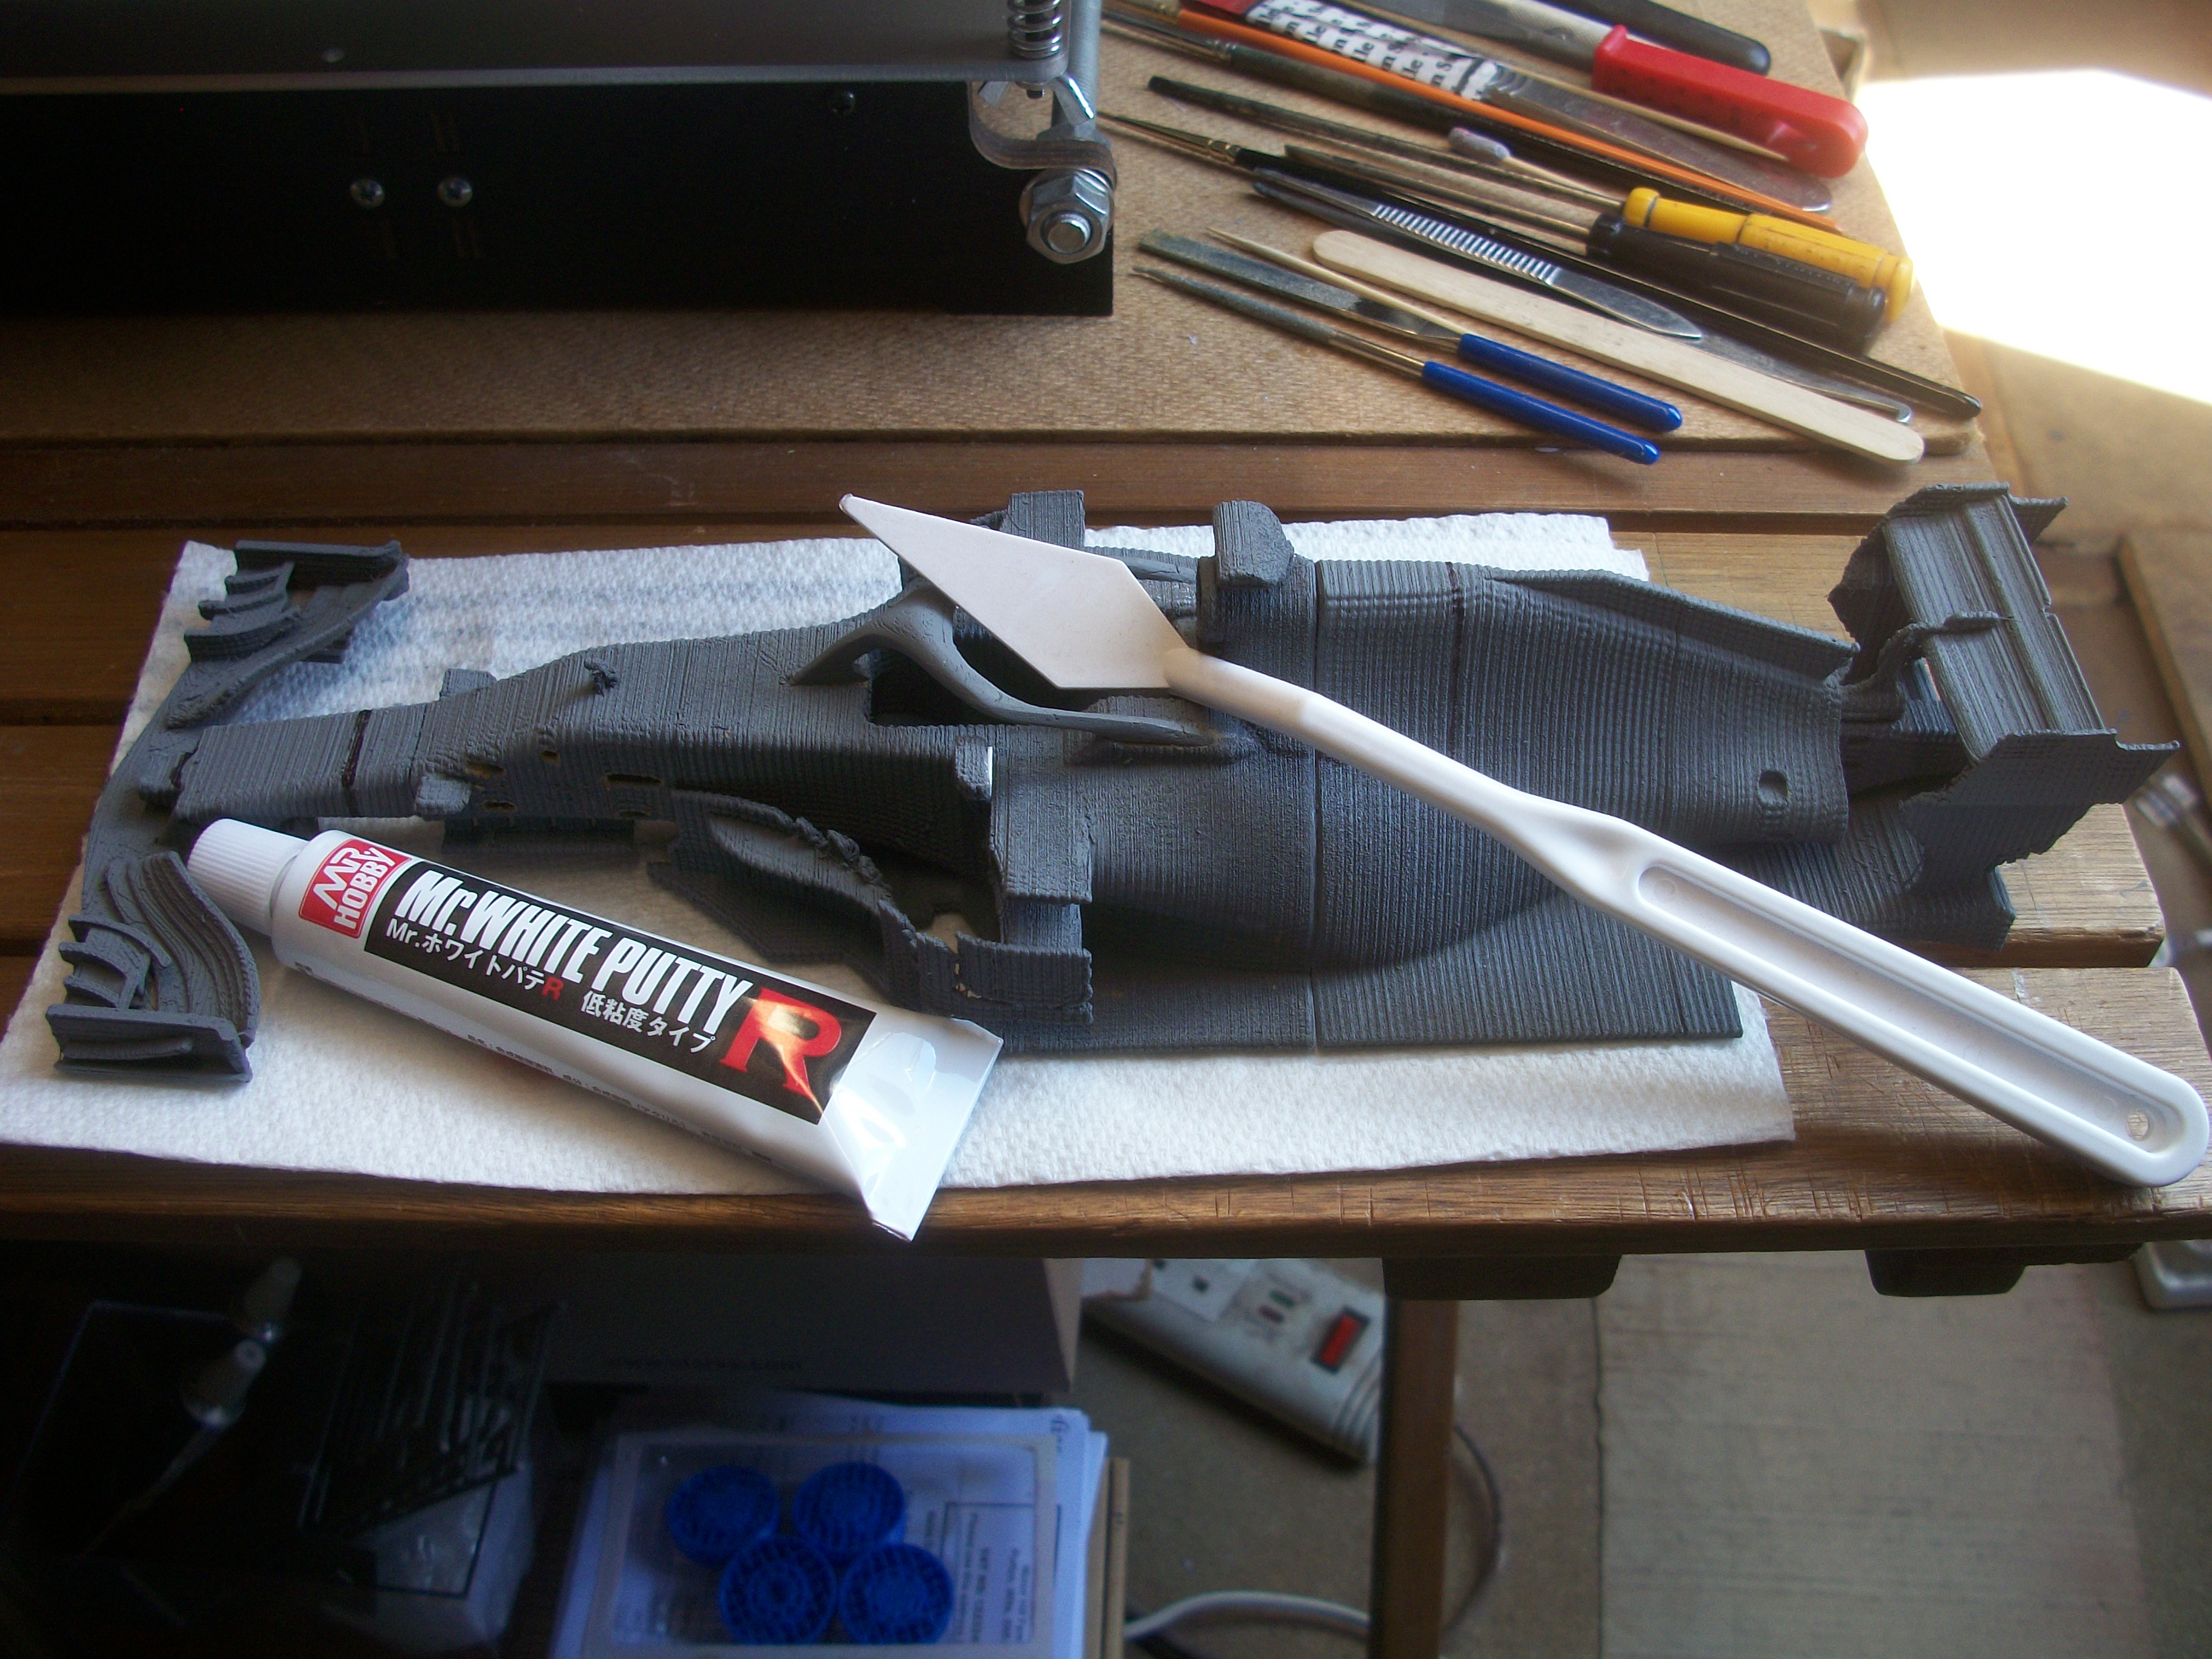
Thanks, David....... I see what you are getting at, with the resolution principle, but whereas you would think of figures such as 1920 x 1080, 1024 x 768 and 640 x 480 as being relevant to computer screen graphics and photo images, the way things work with 3D printing is totally different. Unless I am misunderstanding you here, and I hope not, the issue with 3D printed models is all about layer height...... The layer lines are the visible layers as these stack up during the printing process. For example, you might want print at 0.20 mm layer height, or alternatively I might use a setting of 0.16 mm, or 0.08 mm. The nozzle jet of the 3D printer is capable of printing at a minimum of 0.04 mm for layer height, as my nozzle is 0.04 mm, and the settings then go up in multiples of 0.04 mm. There are many other factors that affect layer lines visibility, but basically my problem is that even with a setting of 0.08 mm, the layer lines are very prominent. The PLA material is so hard, that sanding the lines away becomes difficult and time consuming. This MR WHITE Putty R seems to work quite nicely, but there is still a lot of sanding involved ( I don't like sanding ). The stepper motors of the printer raise the Z - axis, or vertical axis, by 0.04 mm steps as travel up the threaded rods either side of the build platform. I do enjoy 3D printing, and I am fascinated by the technology which is extremely clever, but this one aspect of the quality of the printed models continues to bug me ! David
-
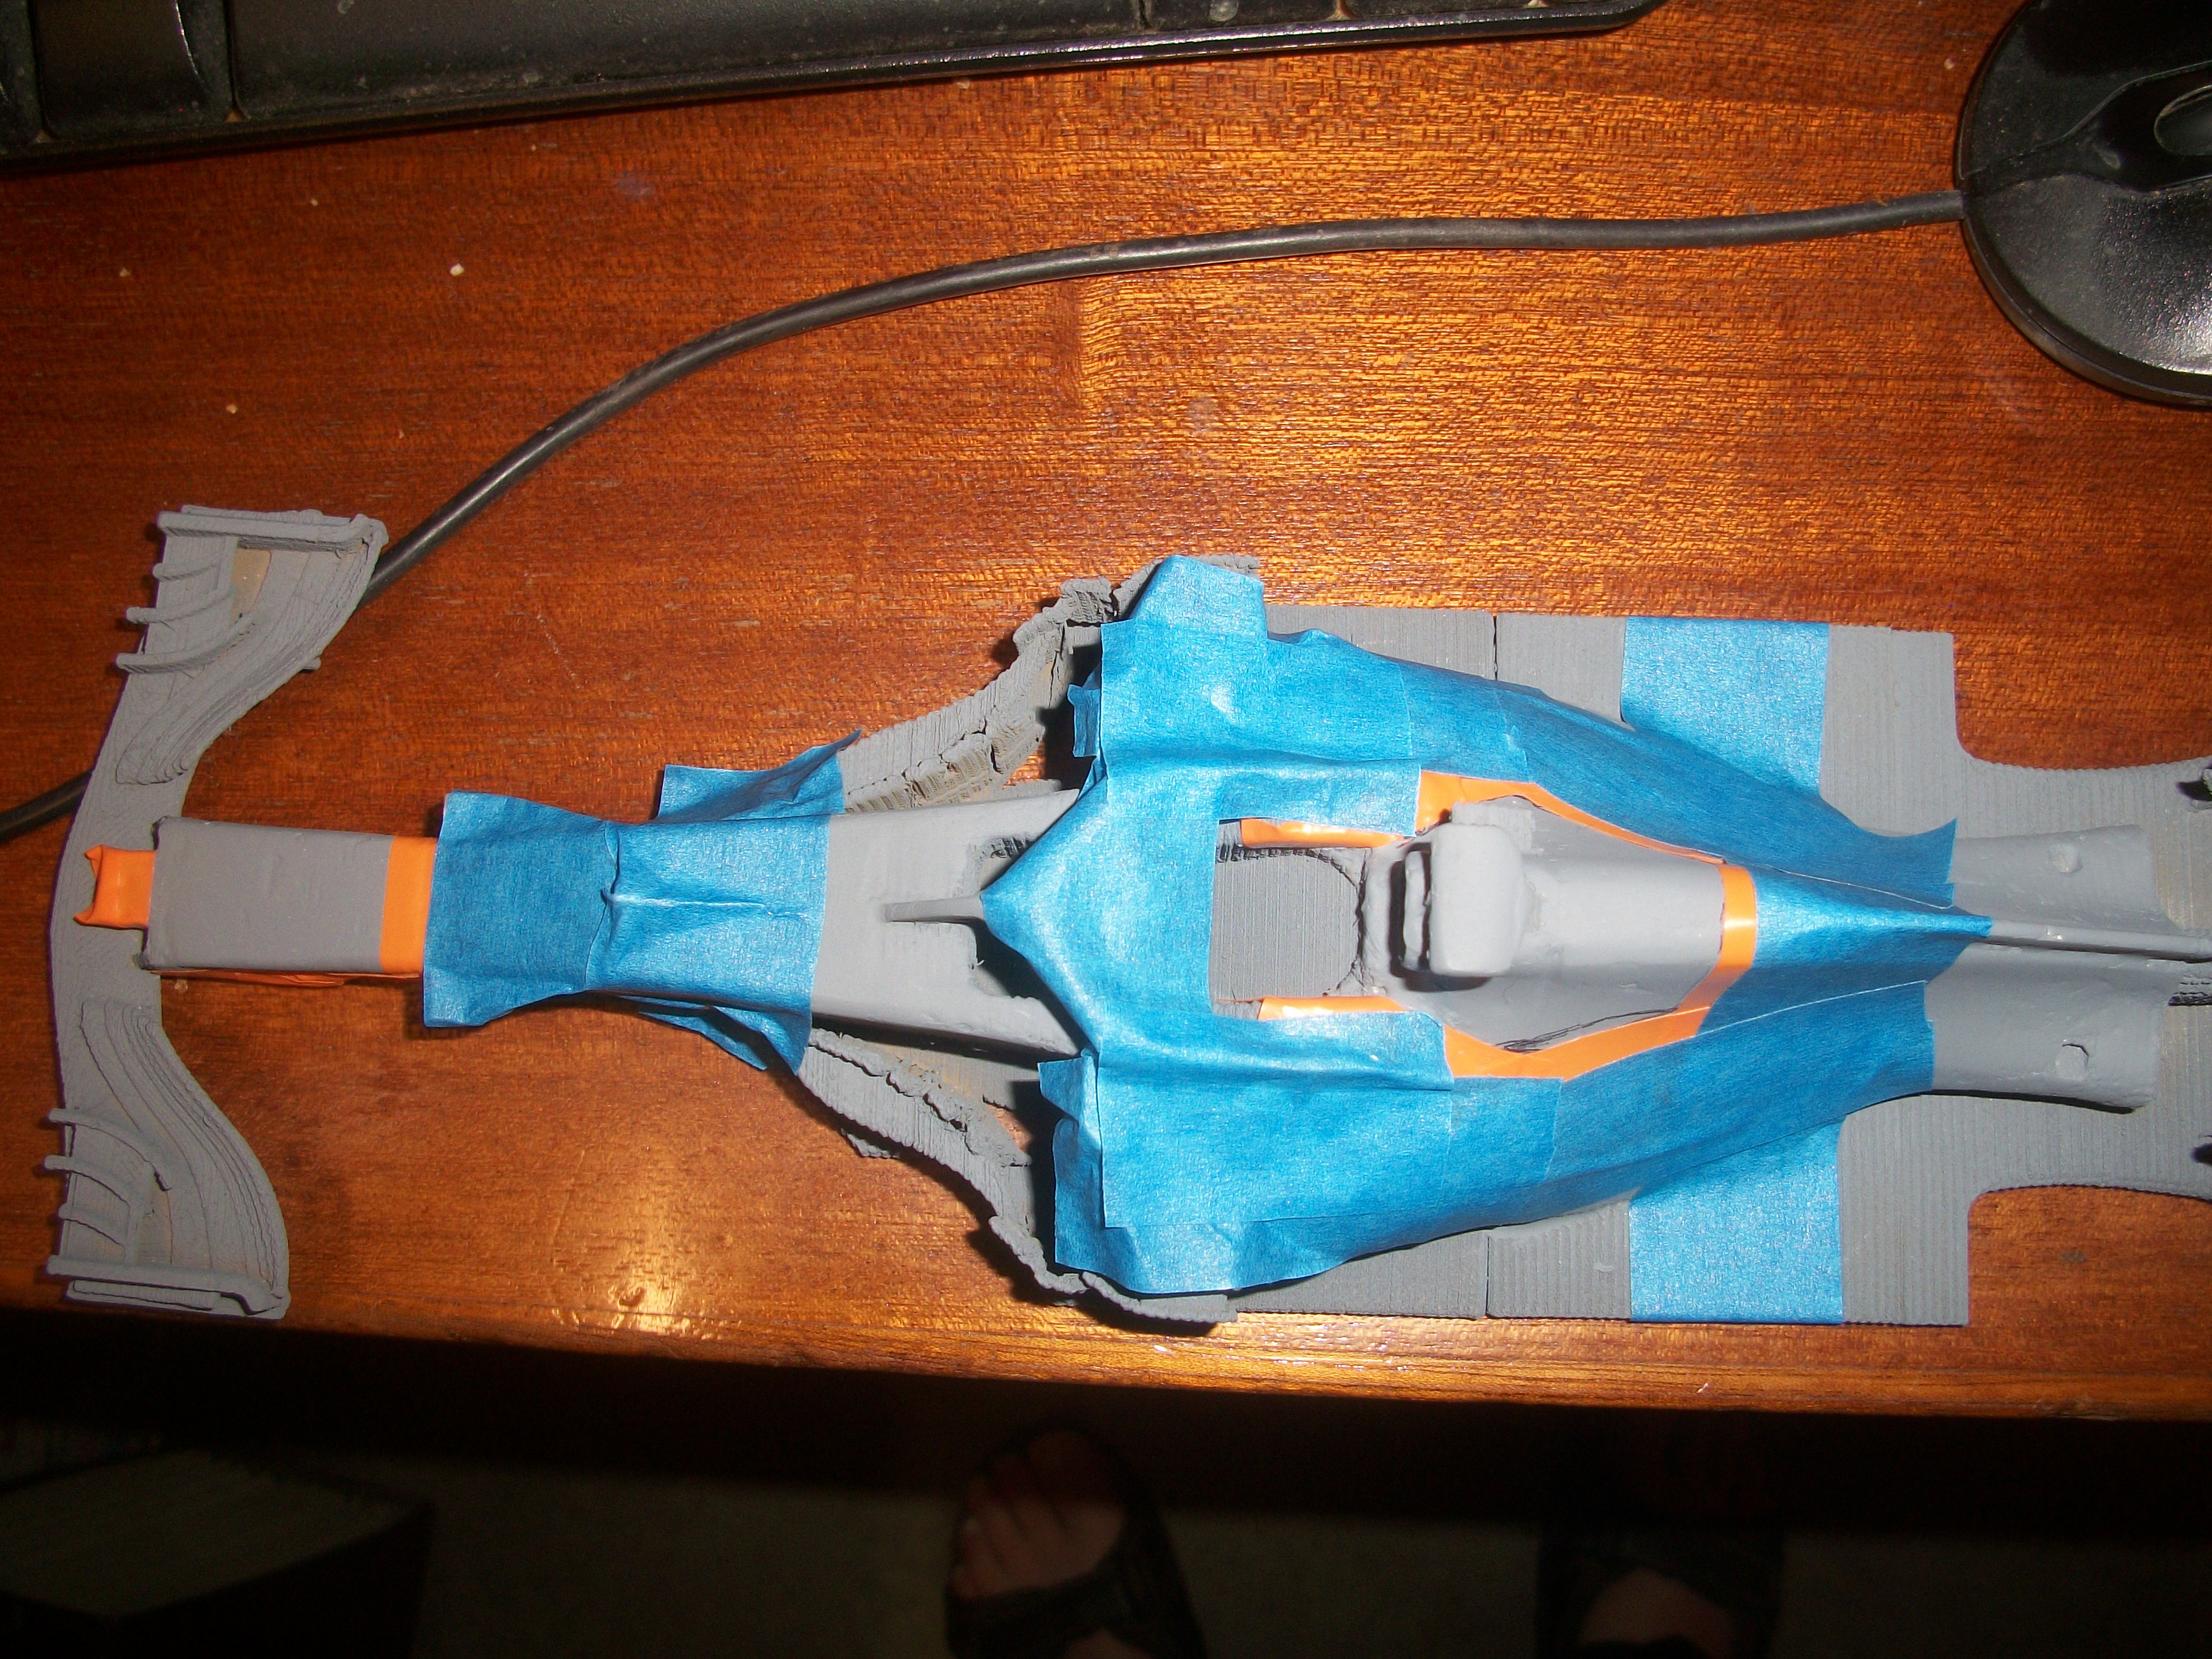
The final coat of grey primer has been applied, and most of the car body has been masked off, leaving the two small areas that need to be Red Bull Yellow. This will be my first use of airbrushing for about one year, so I need to refresh my skills to some degree ! Positioning the decals to merge in with the yellow painted areas is the tricky part of this, and these decals are not precut, so I shall have to cut each decal precisely to size and shape. David
-
Thanks, Mark........ David
-
Hi Dennis..... The 0.2 mm nozzle clearly makes a significant difference, and the detail is excellent on that middle piece in your photo. Maybe I need to invest in such a nozzle ? Always trying to avoid having to do lots of sanding, so thanks for this tip ! David
-
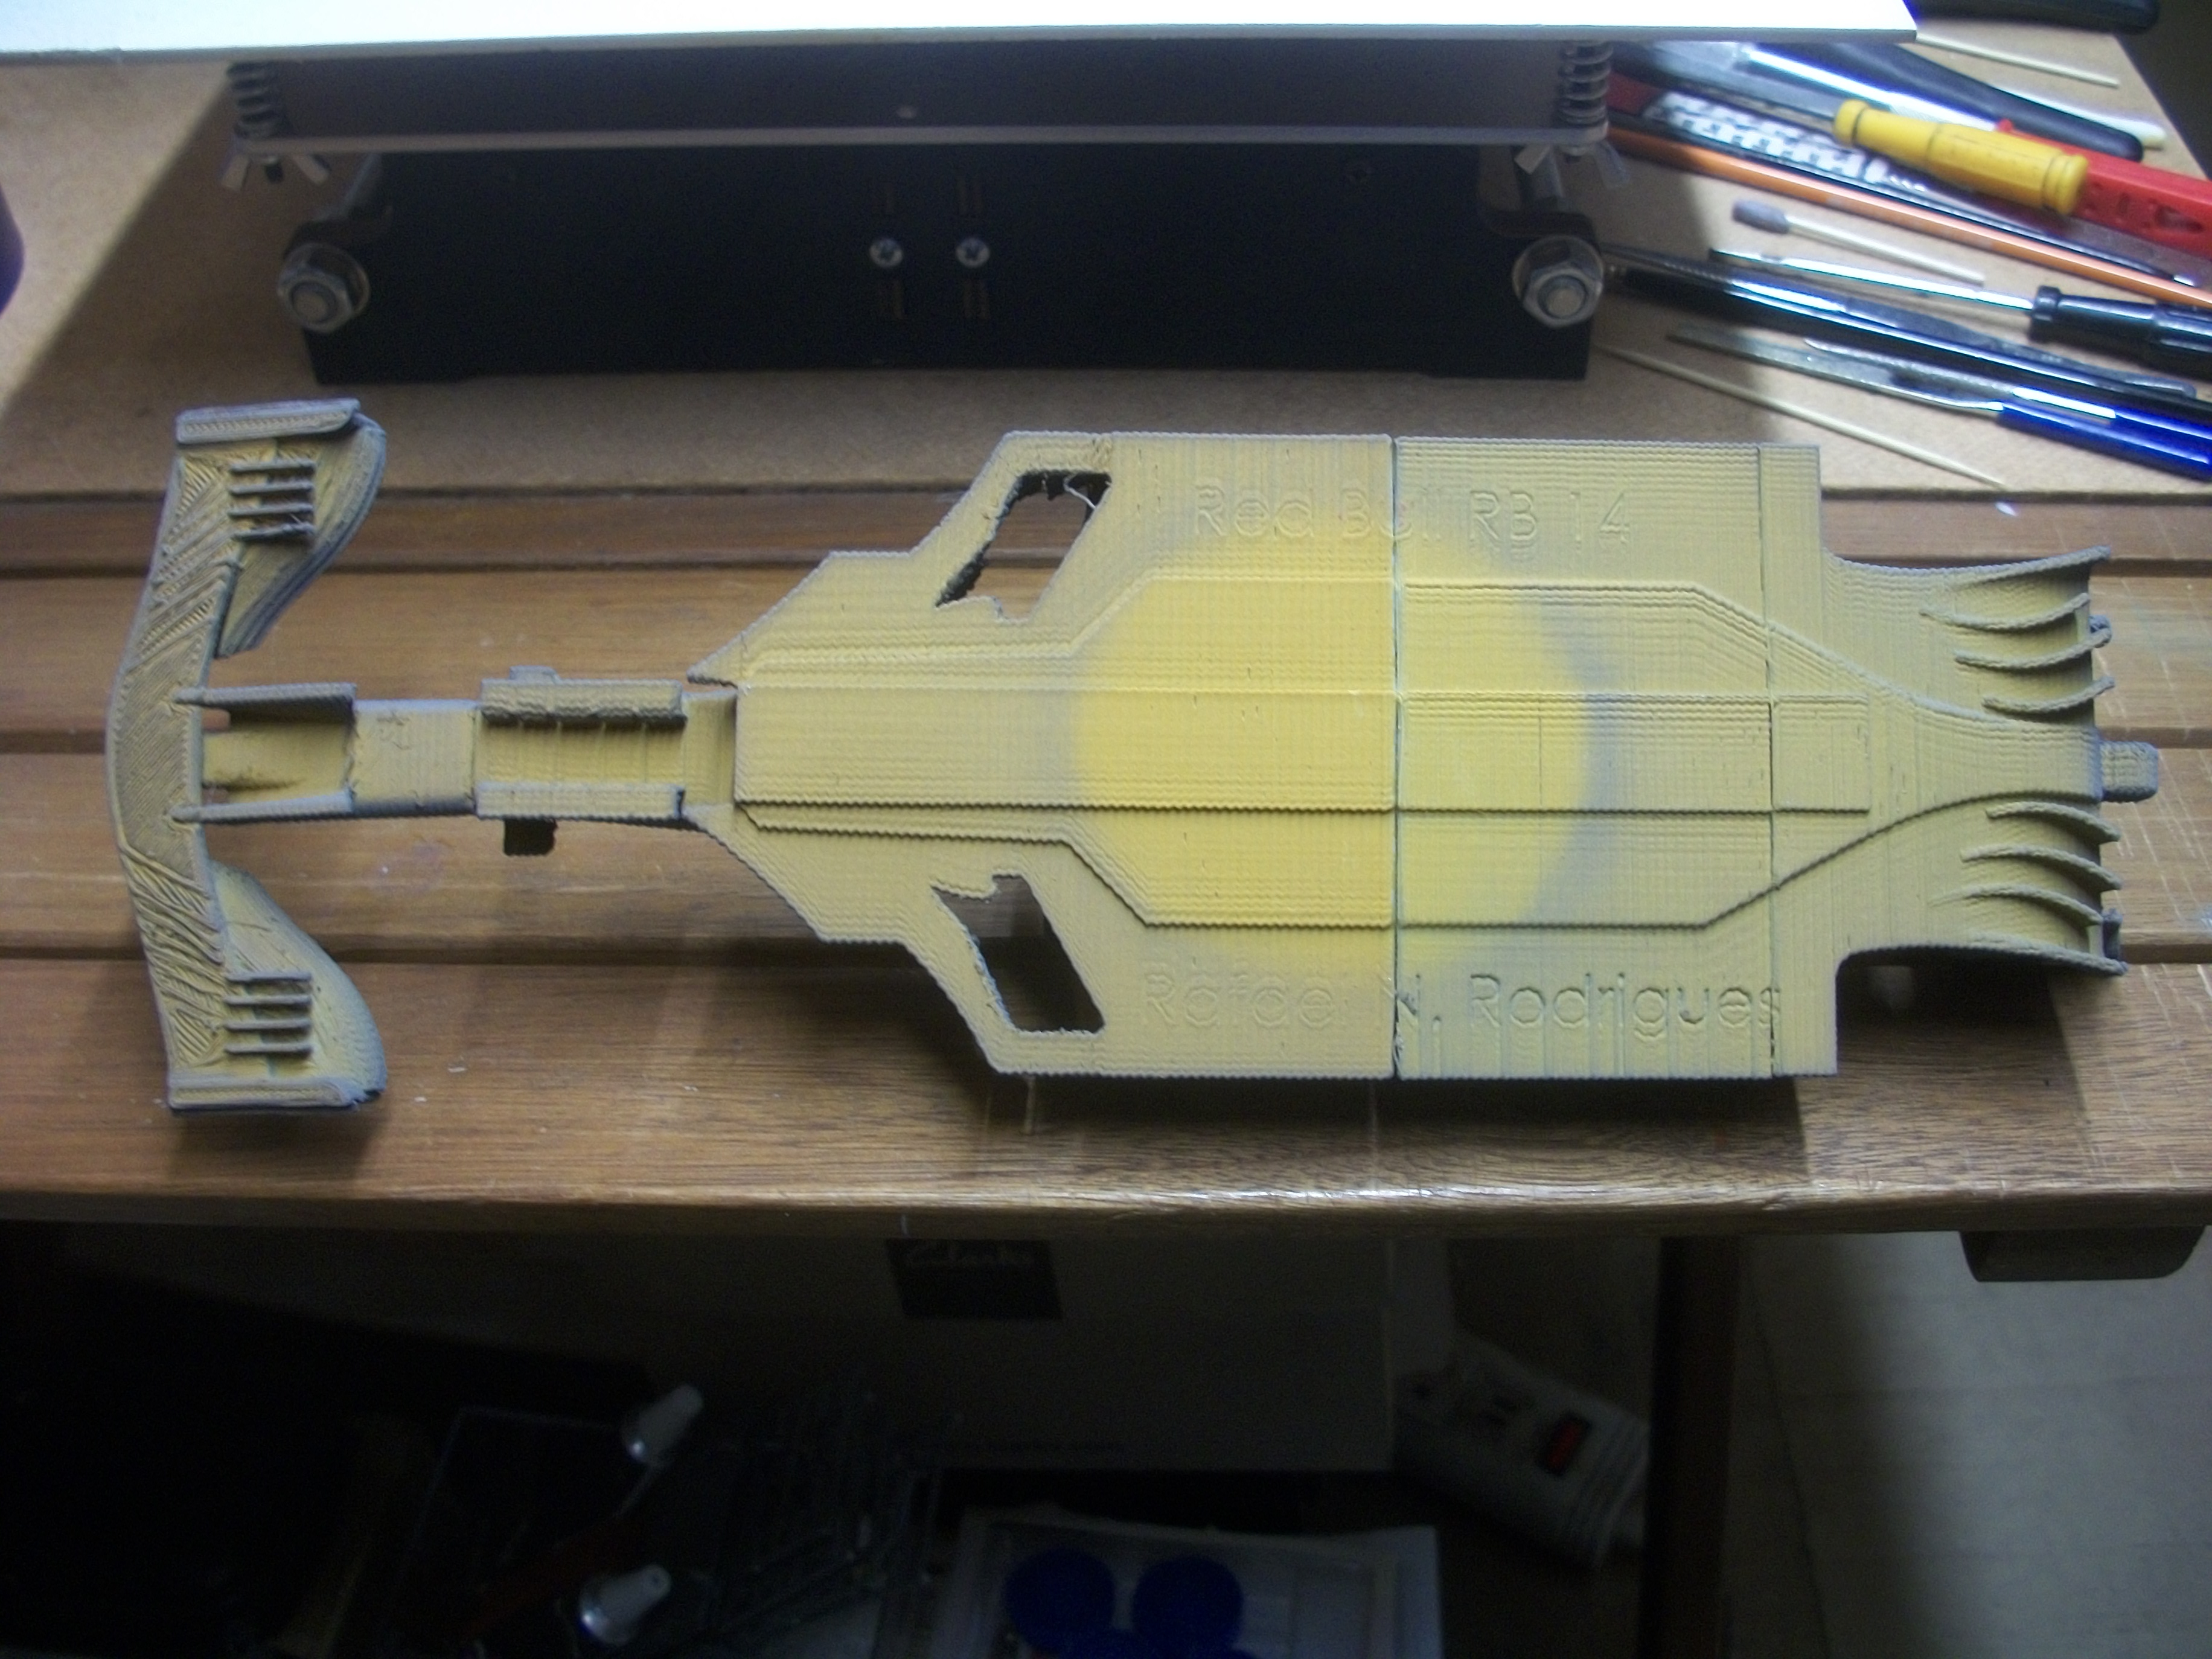
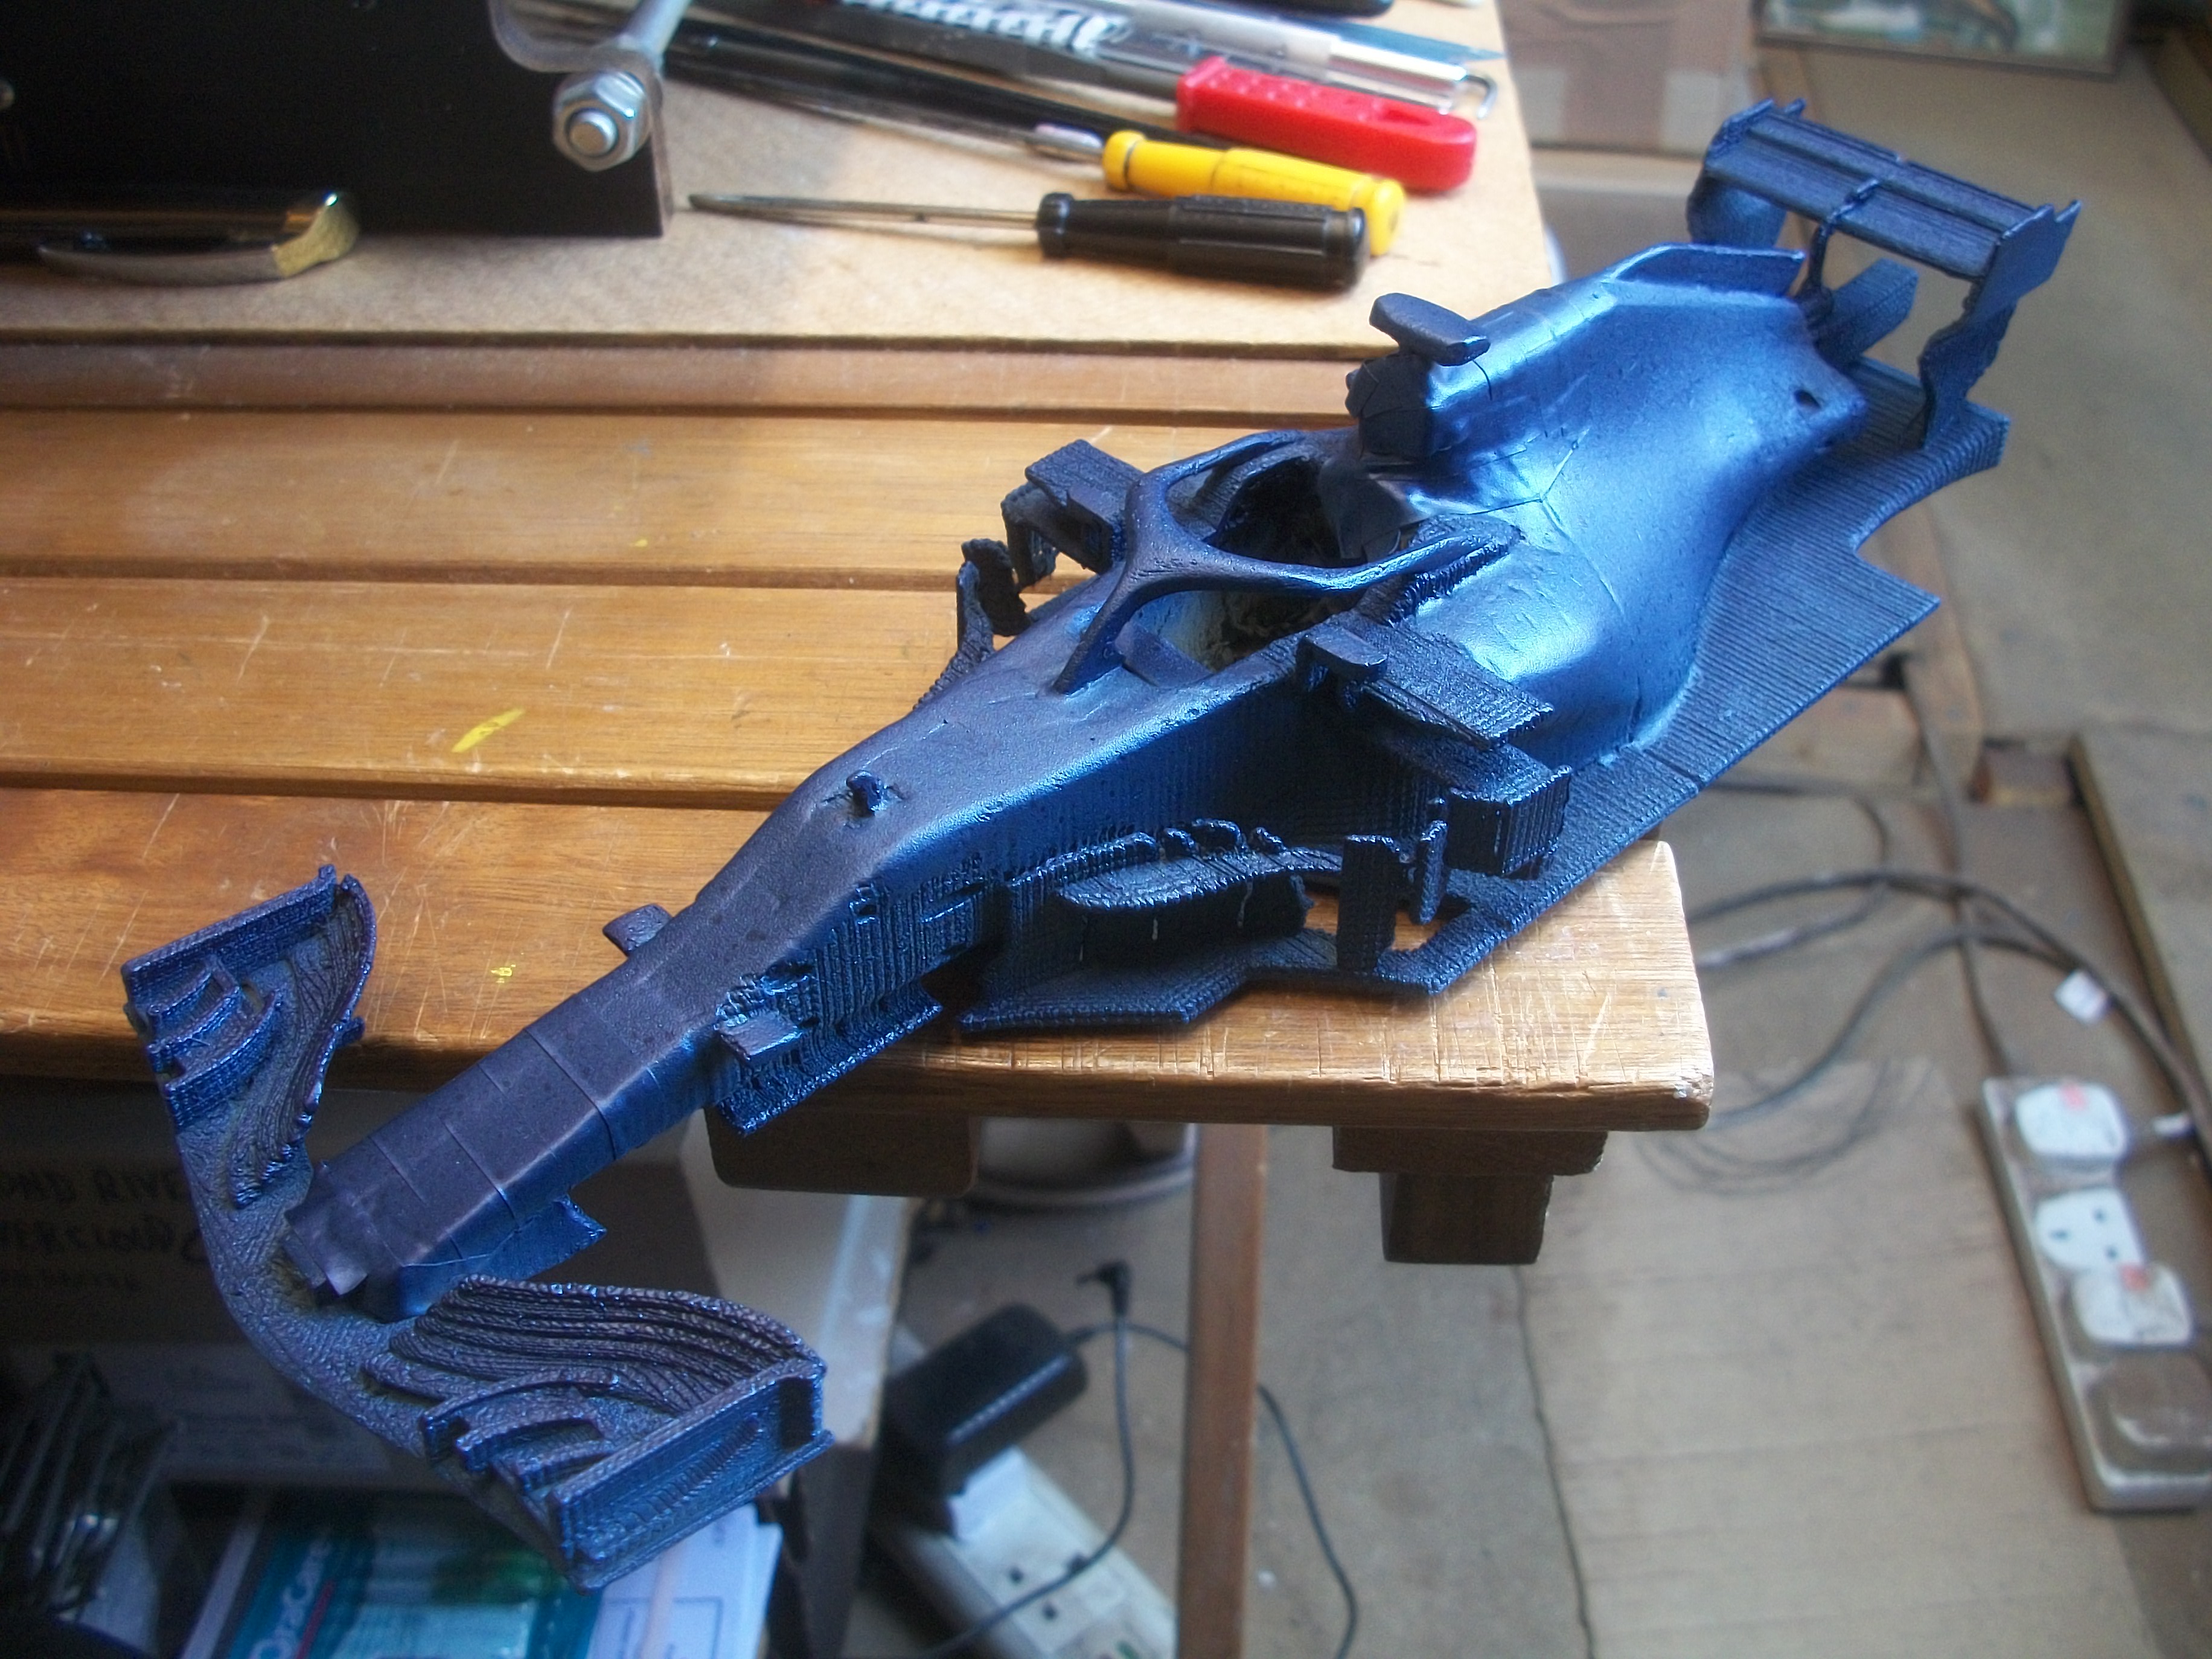
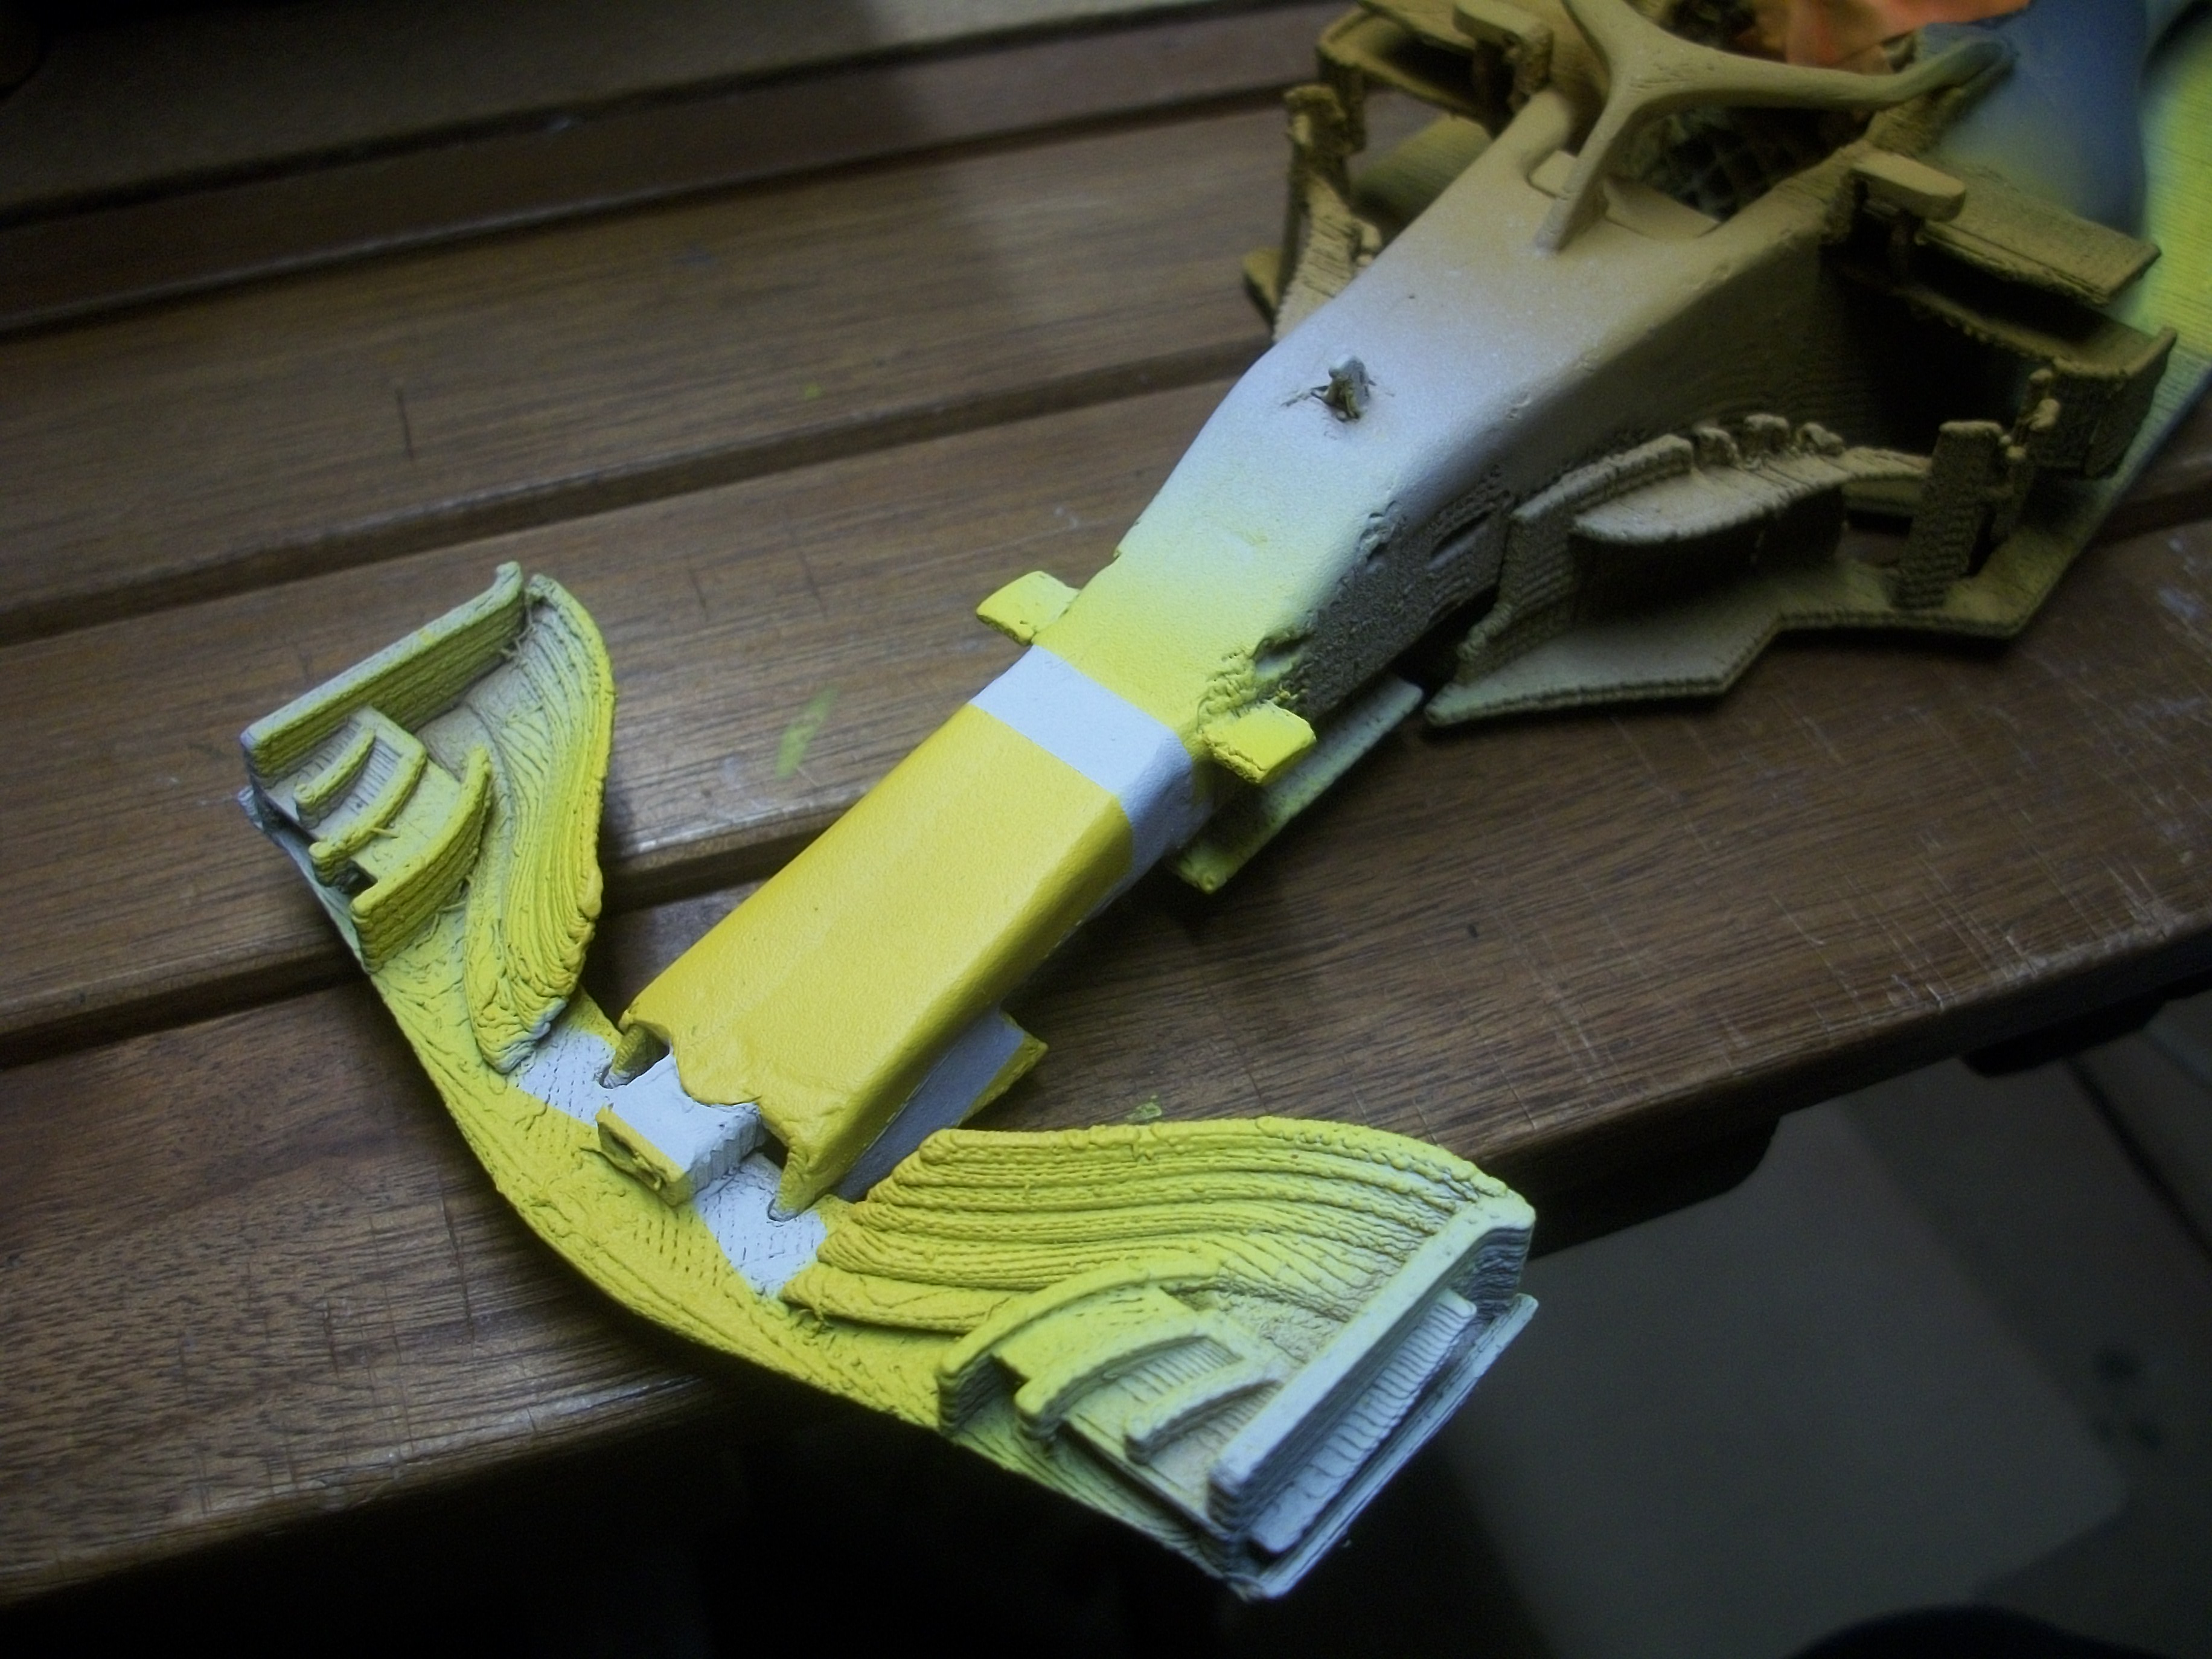
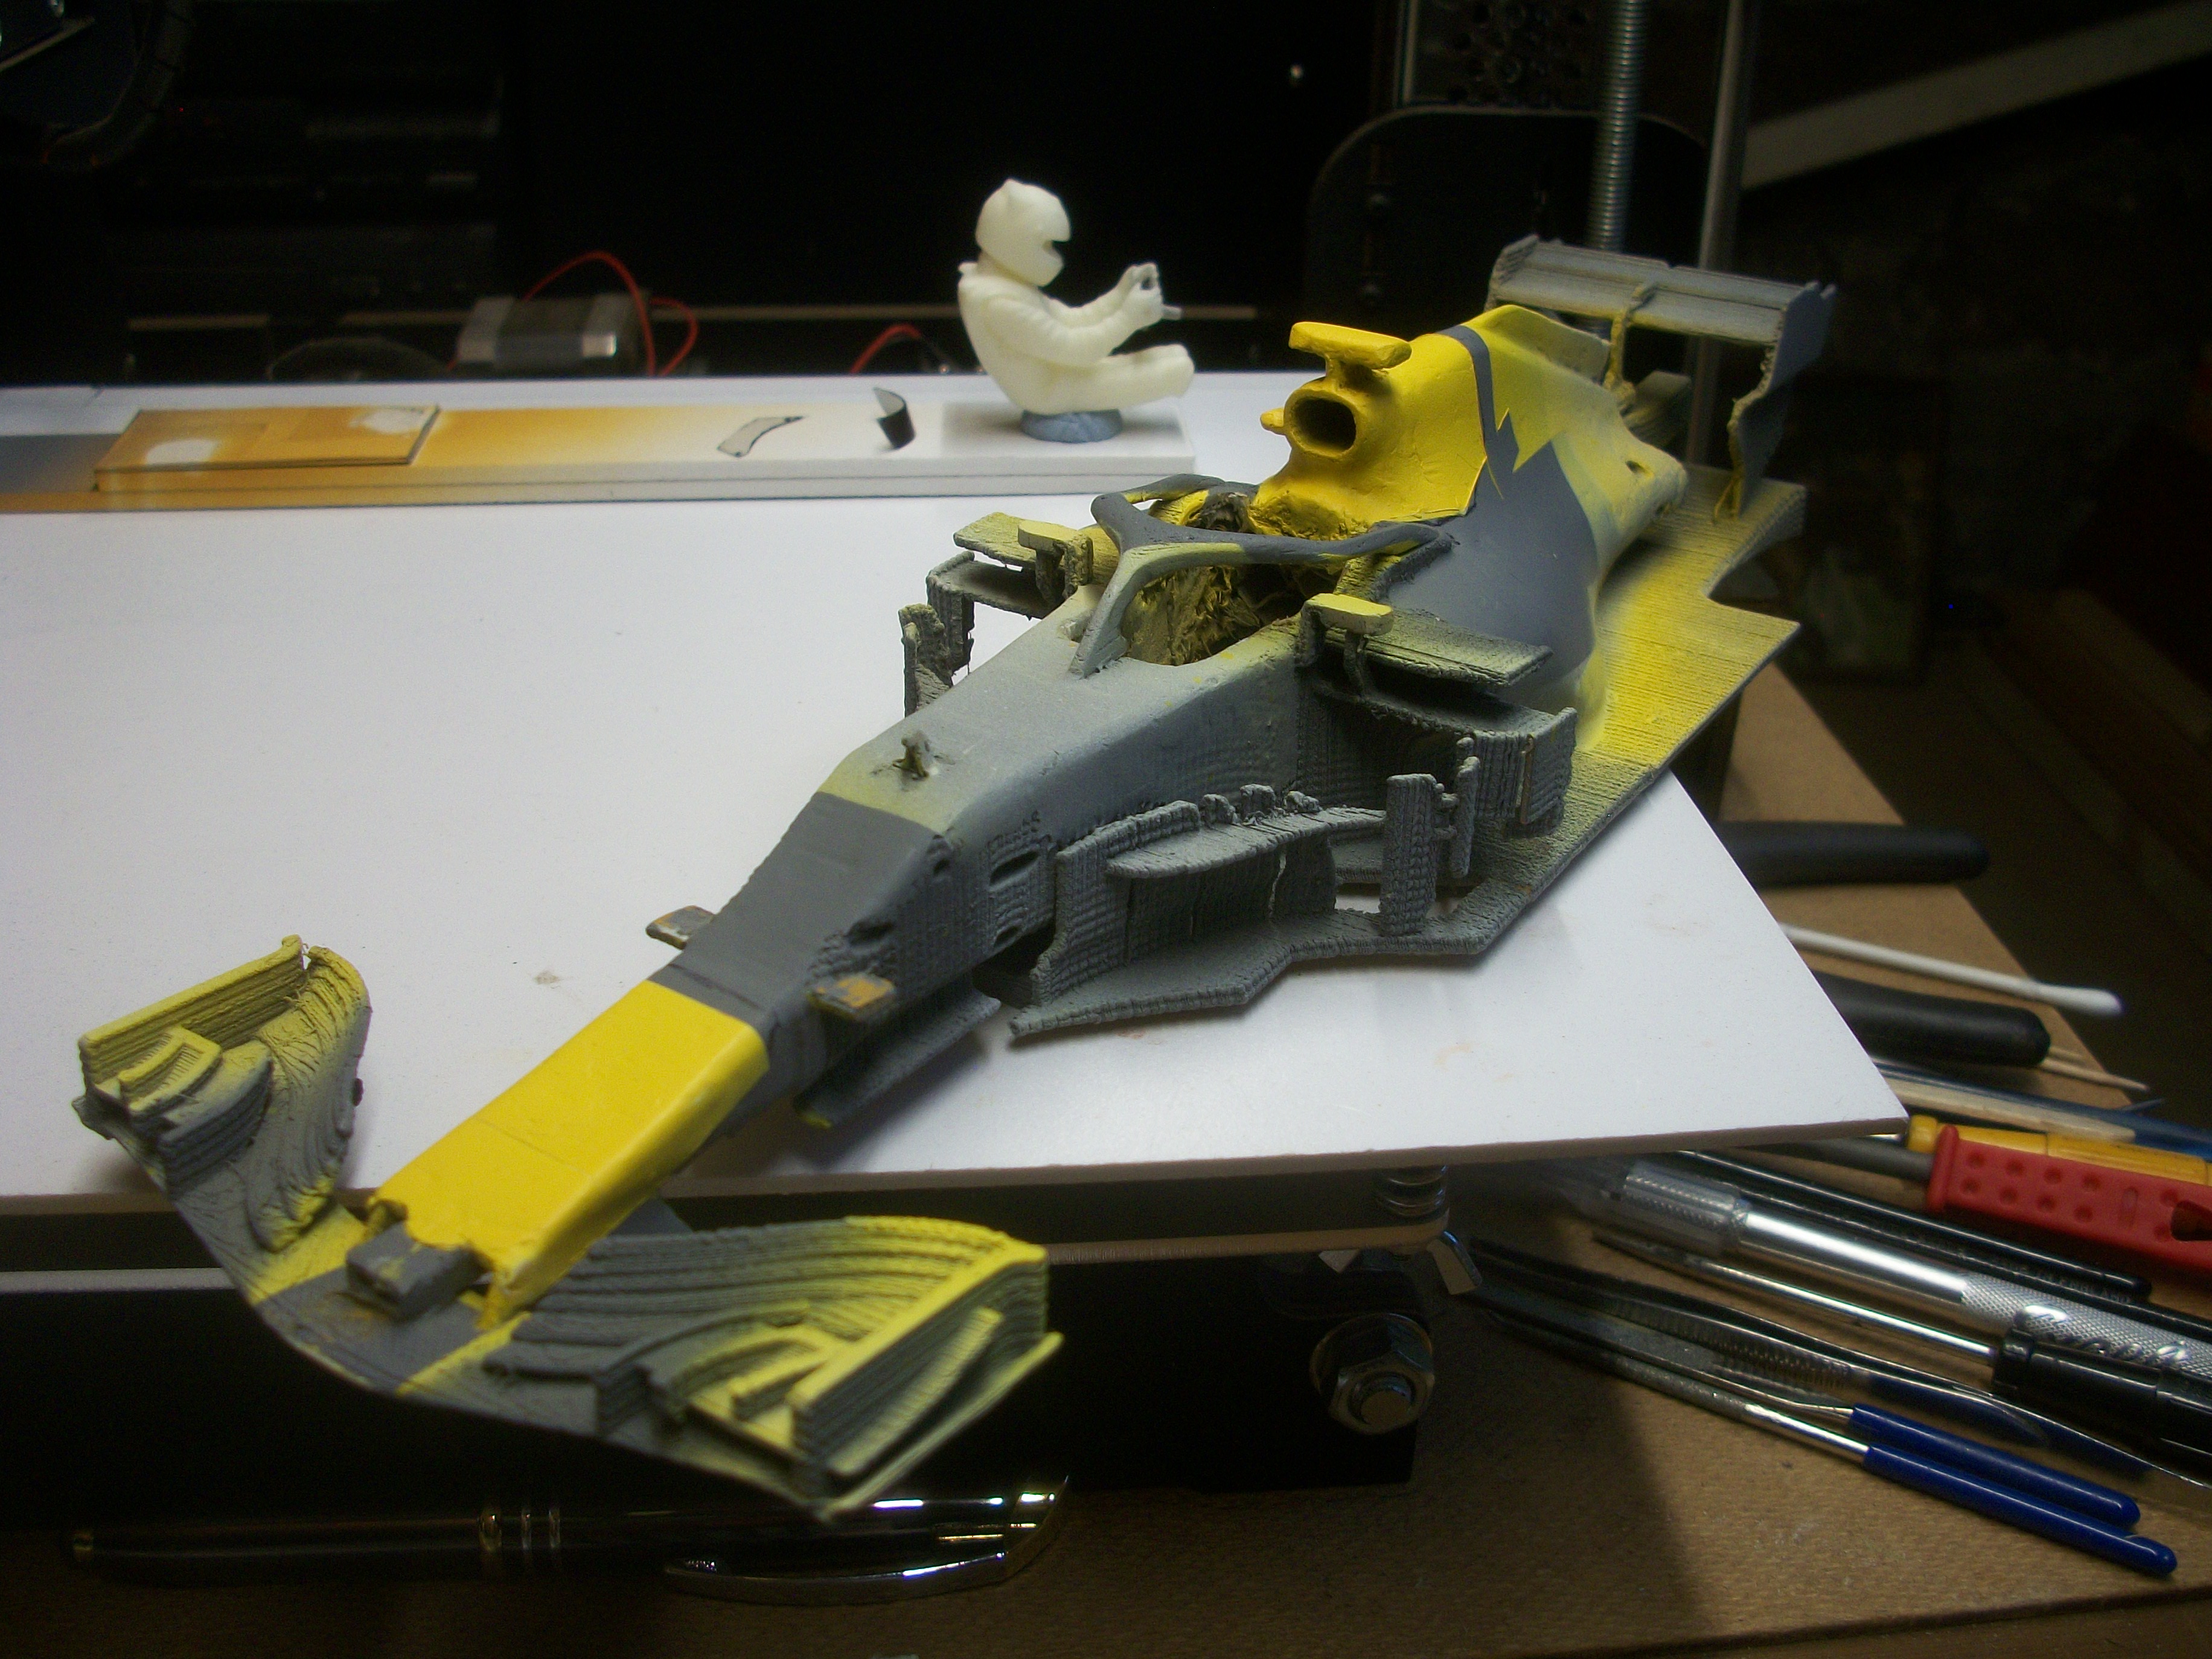
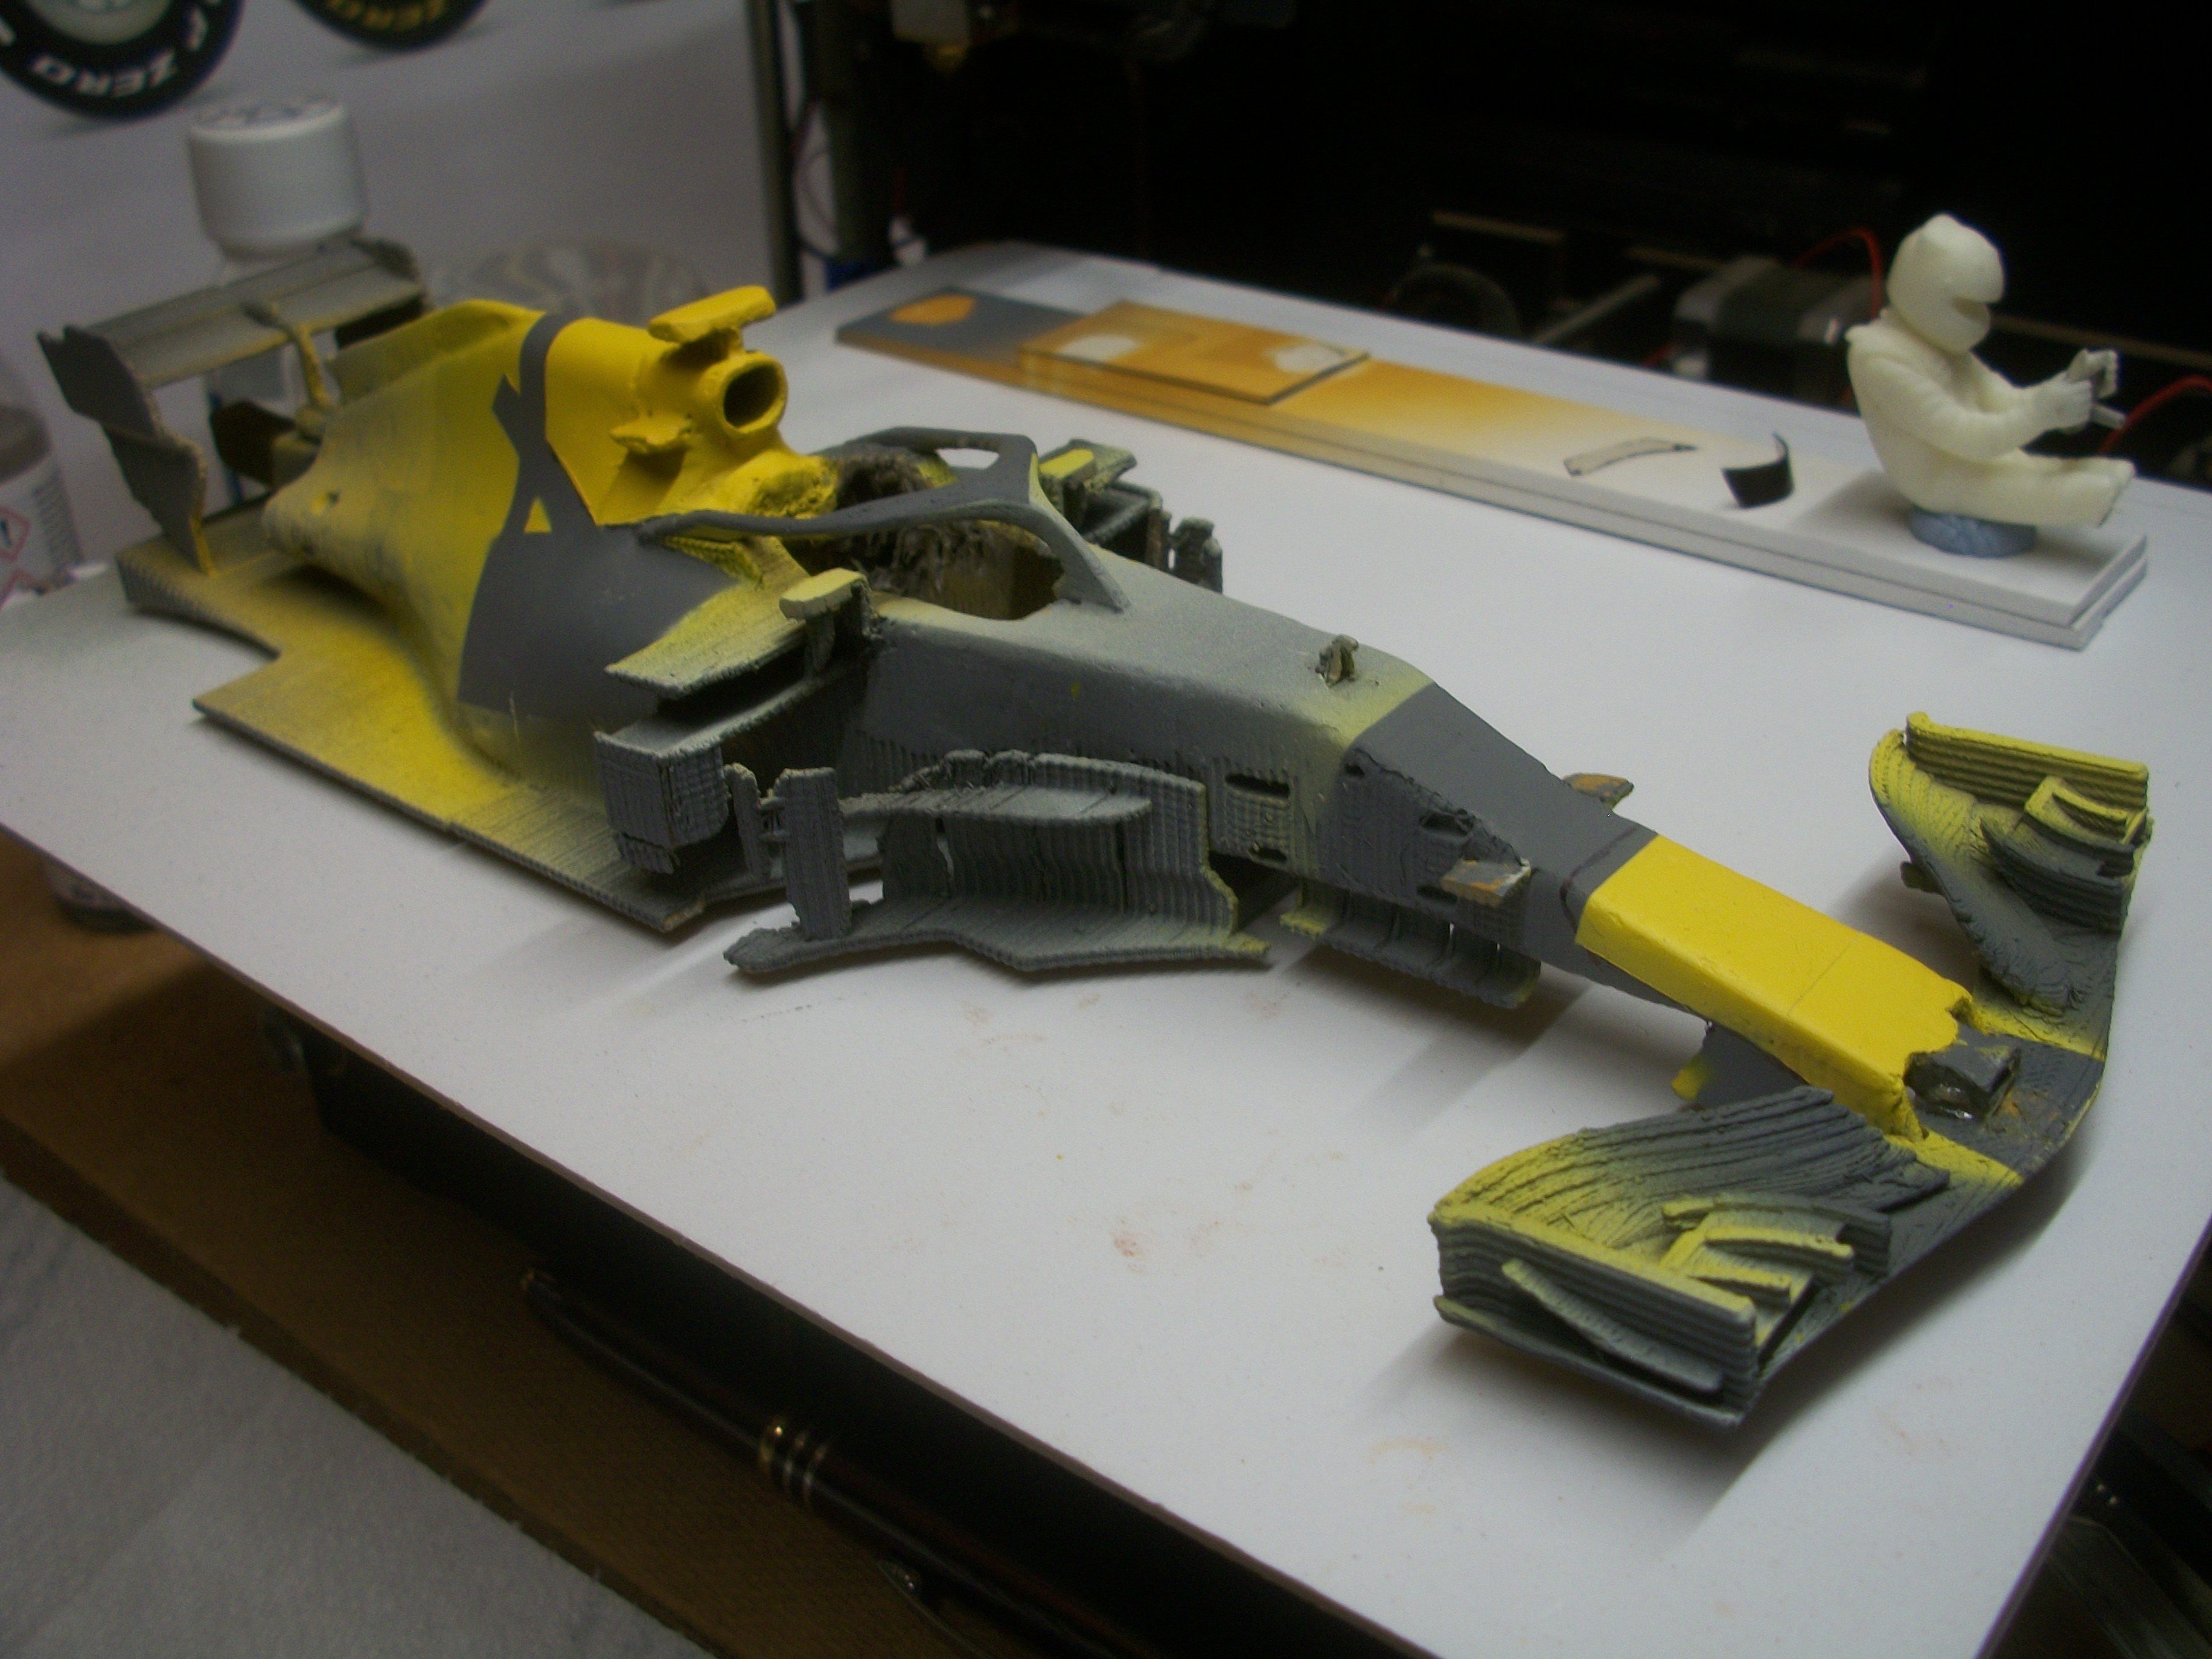
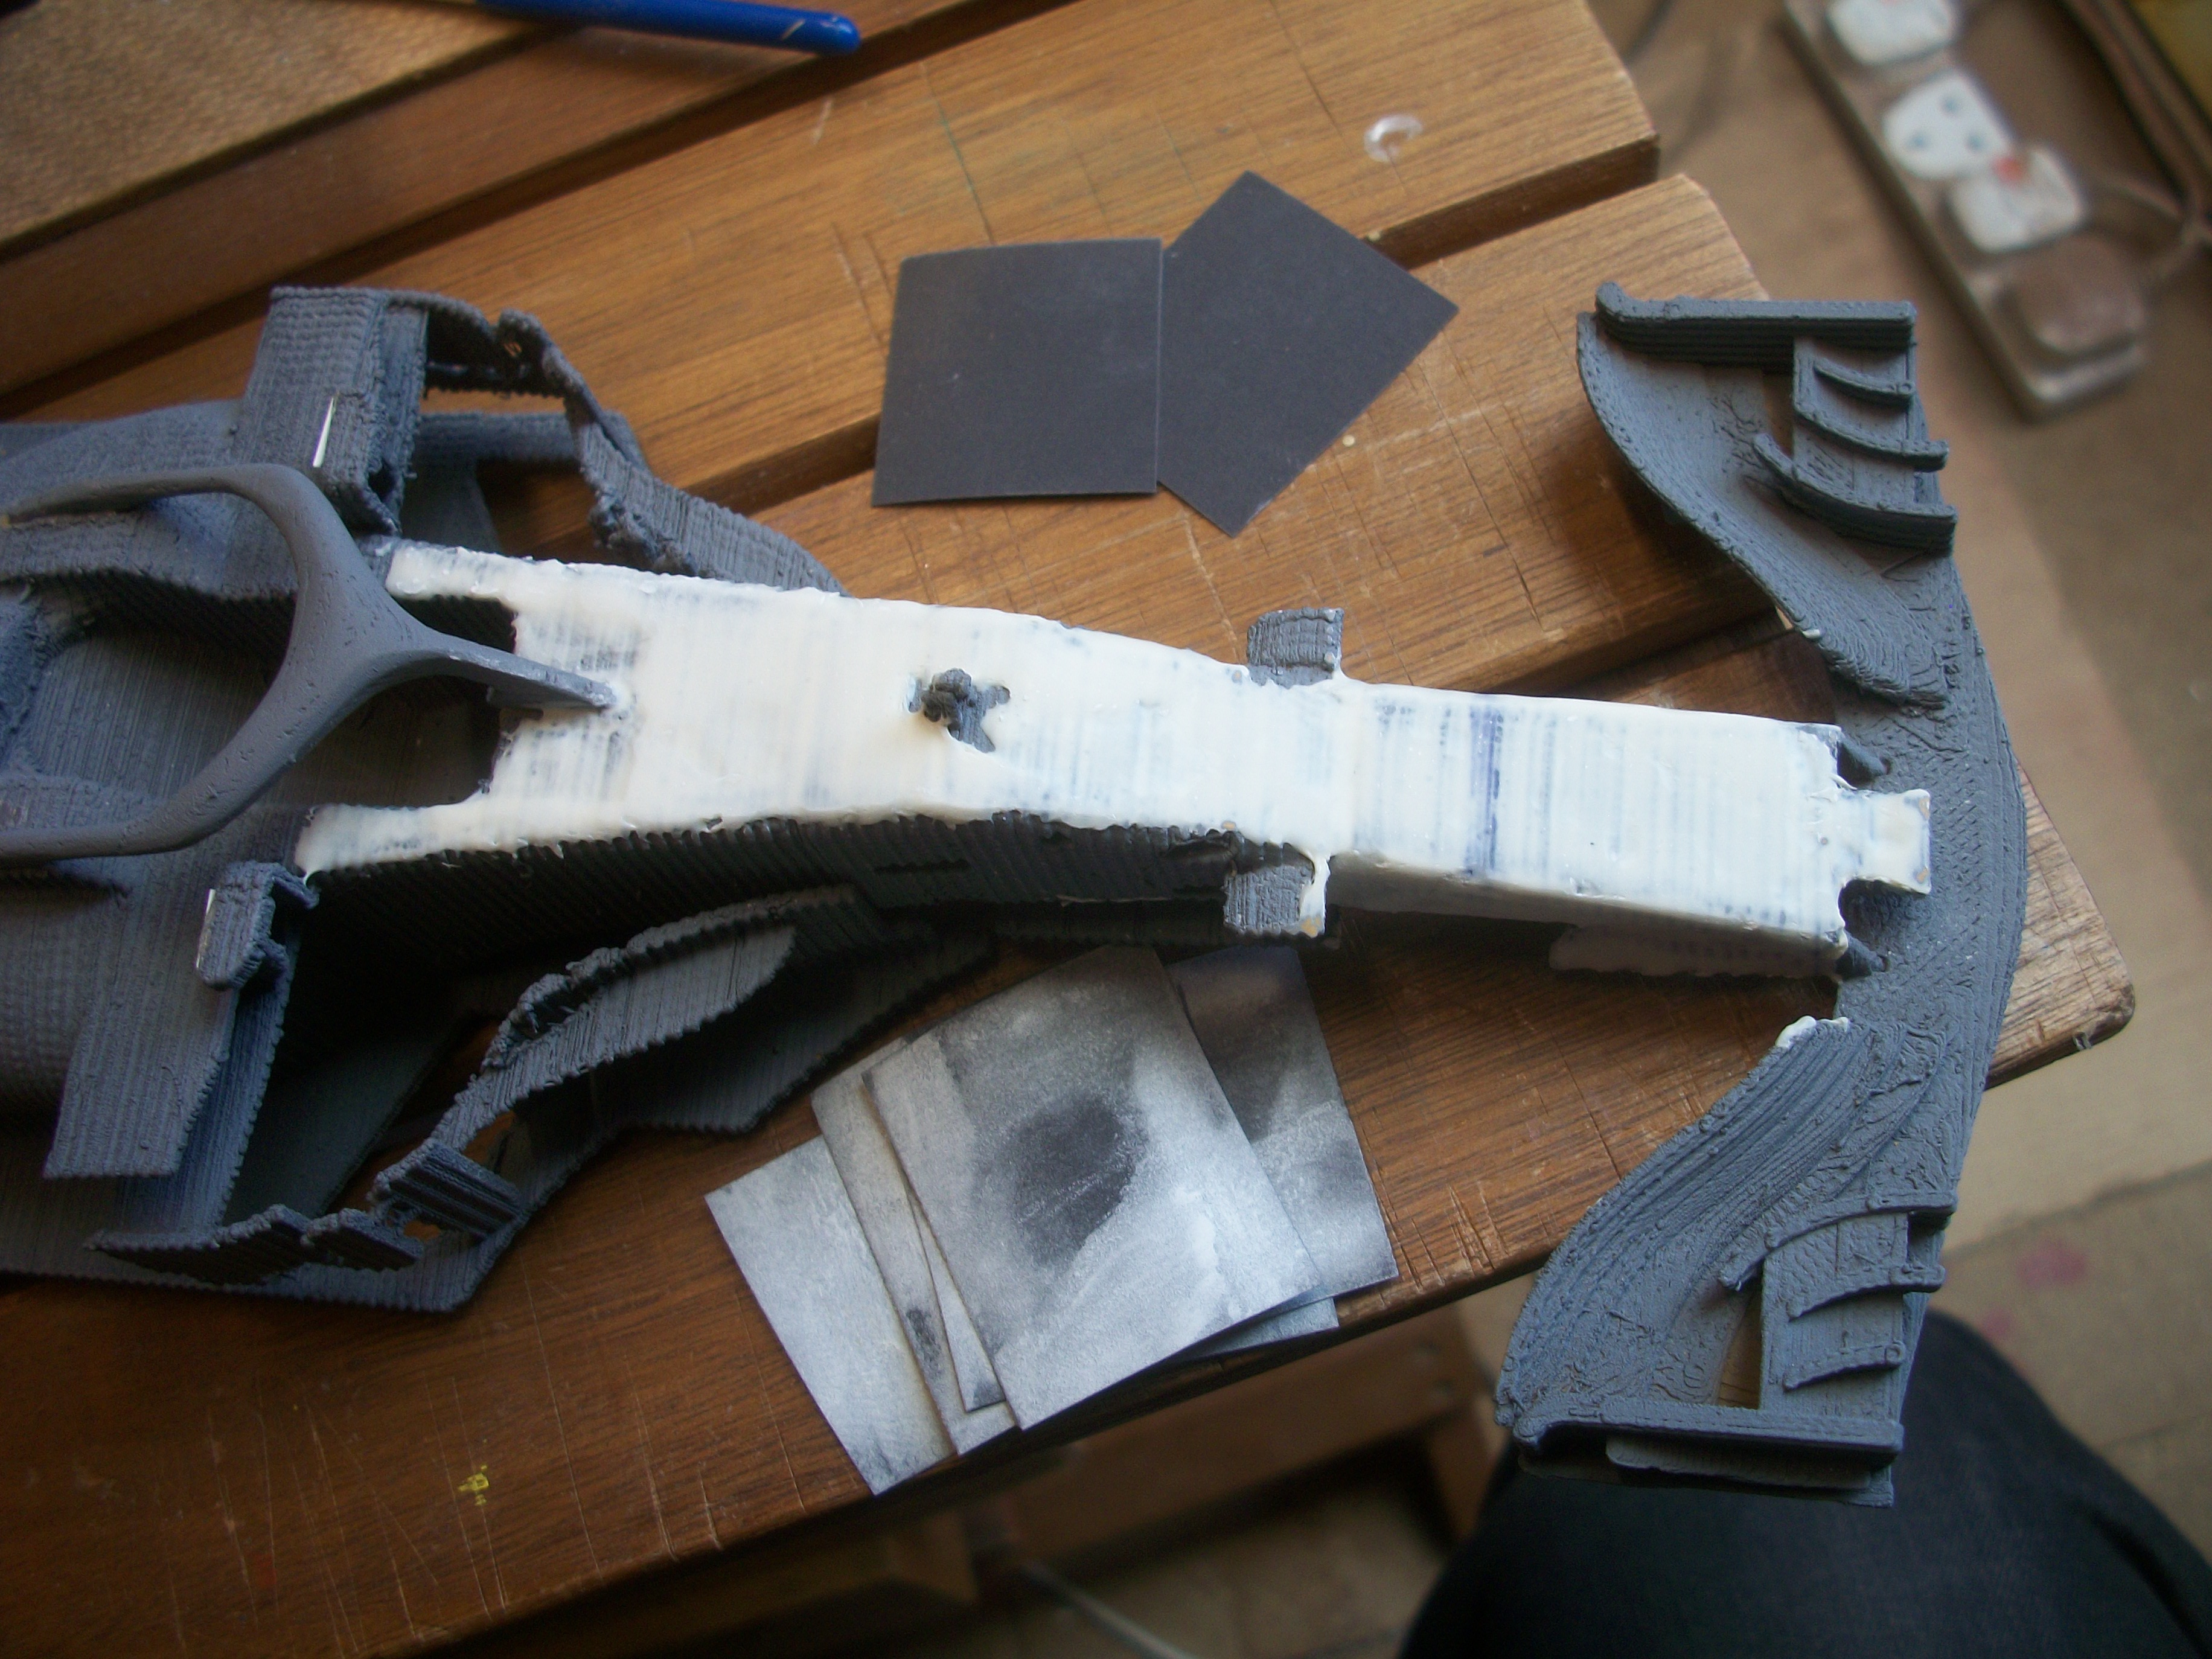
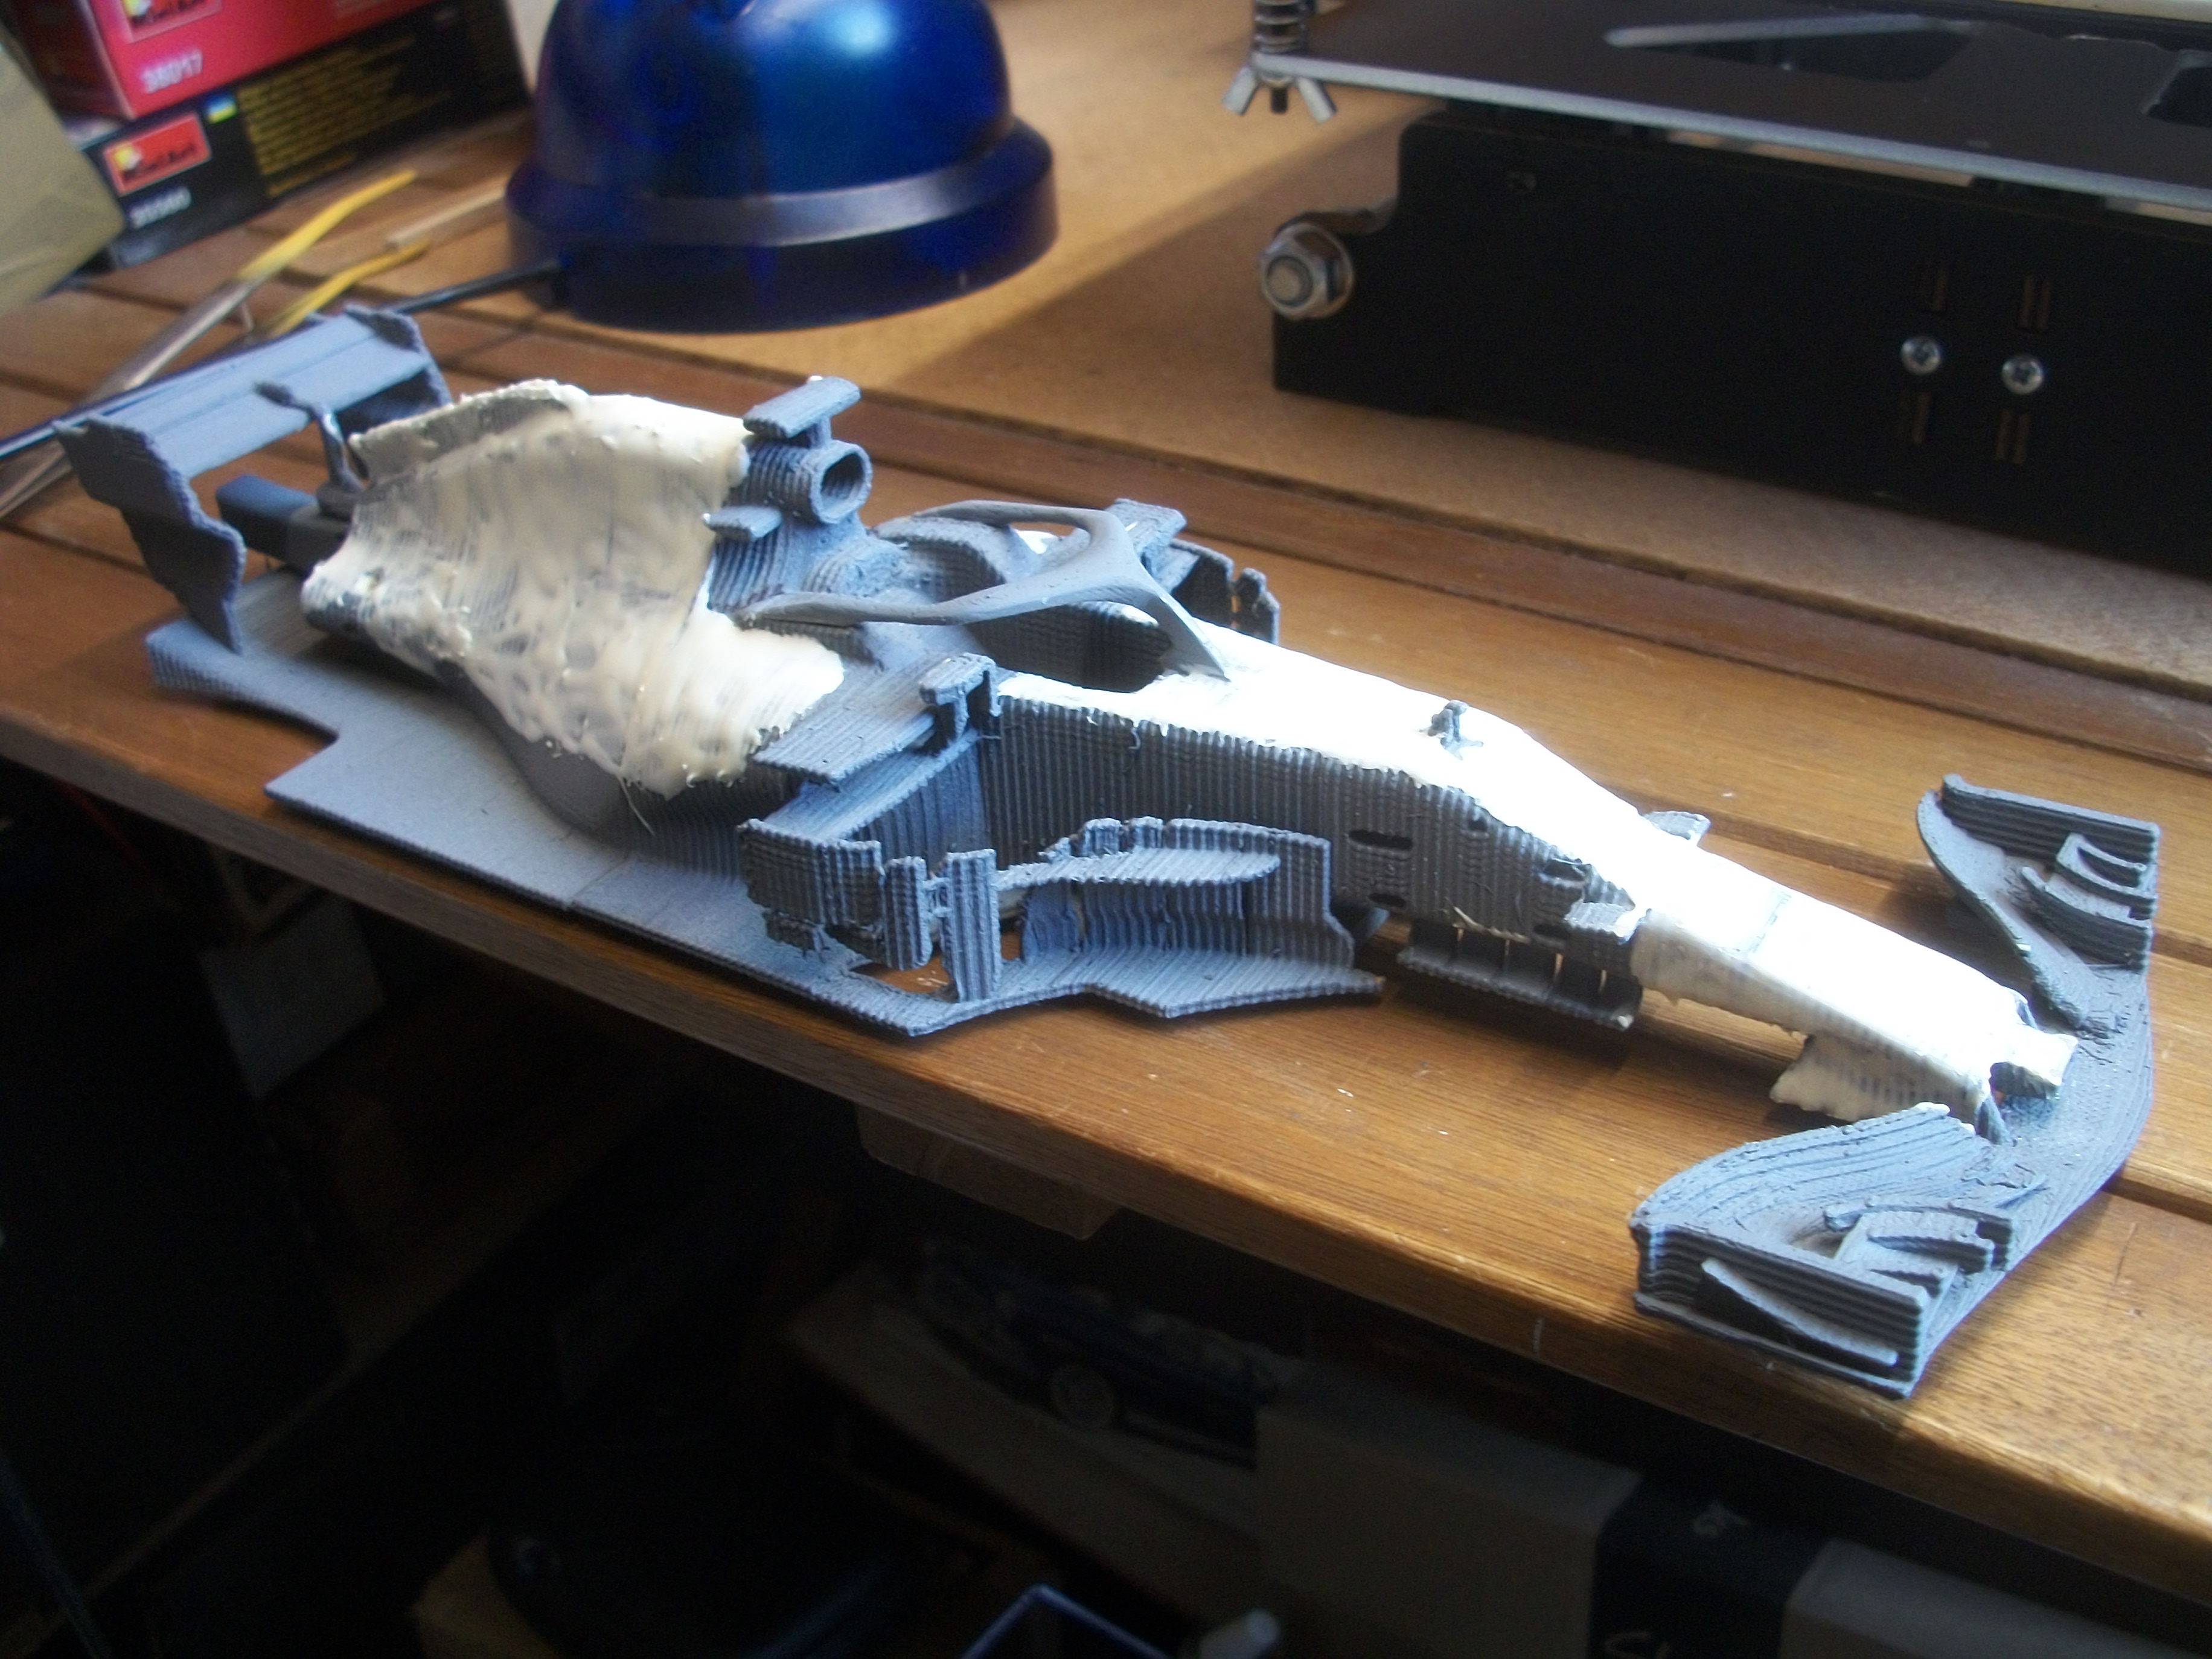
Wheels and tyres, along with the four suspension units are set aside ready for assembly later. Meanwhile, the Mr White Putty ' R ' has been applied to the upper front surfaces of the body, and also around the cockpit and rear sides. This product spreads on nicely, with a consistency like double cream, and after 4 hours I was able to sand the putty areas with 600 grit wet & dry. Once the areas of the body where the layer lines are most prominent have been filled and sanded, I shall apply a single coat of grey primer. Only when I am happy that the surface is smooth enough, will I airbrush the yellow areas, and the mostly dark blue matt area. David
-
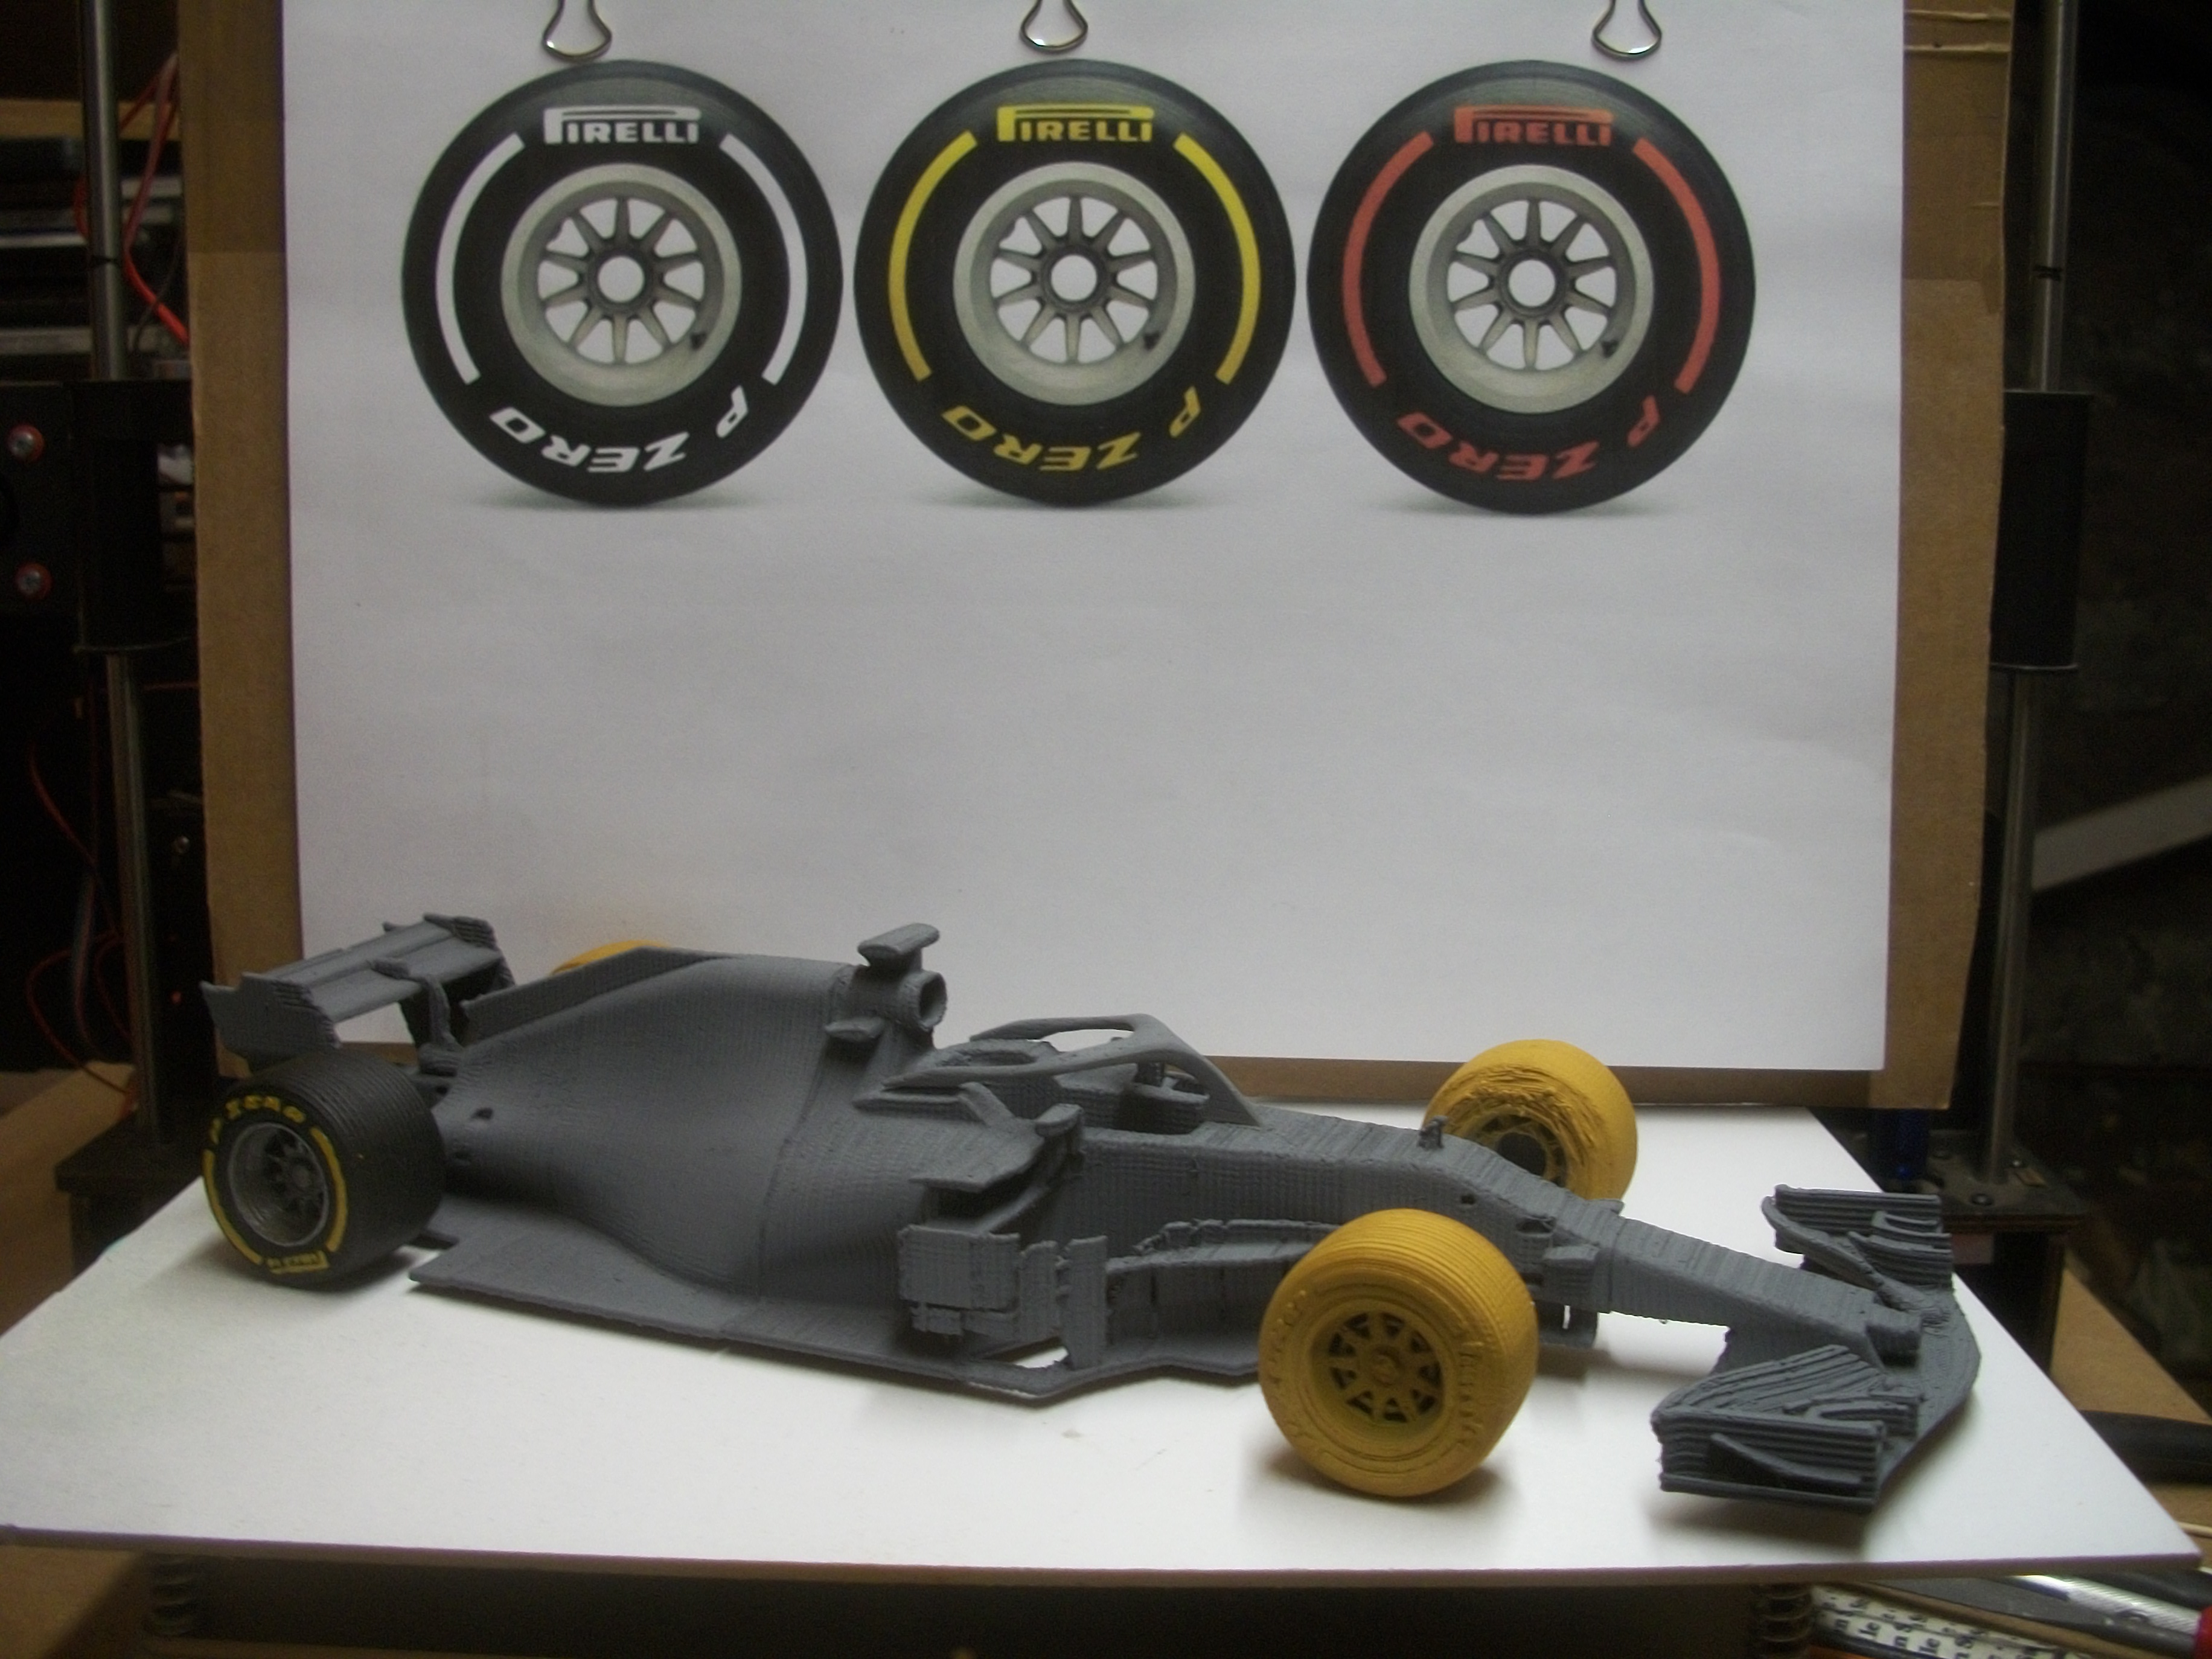
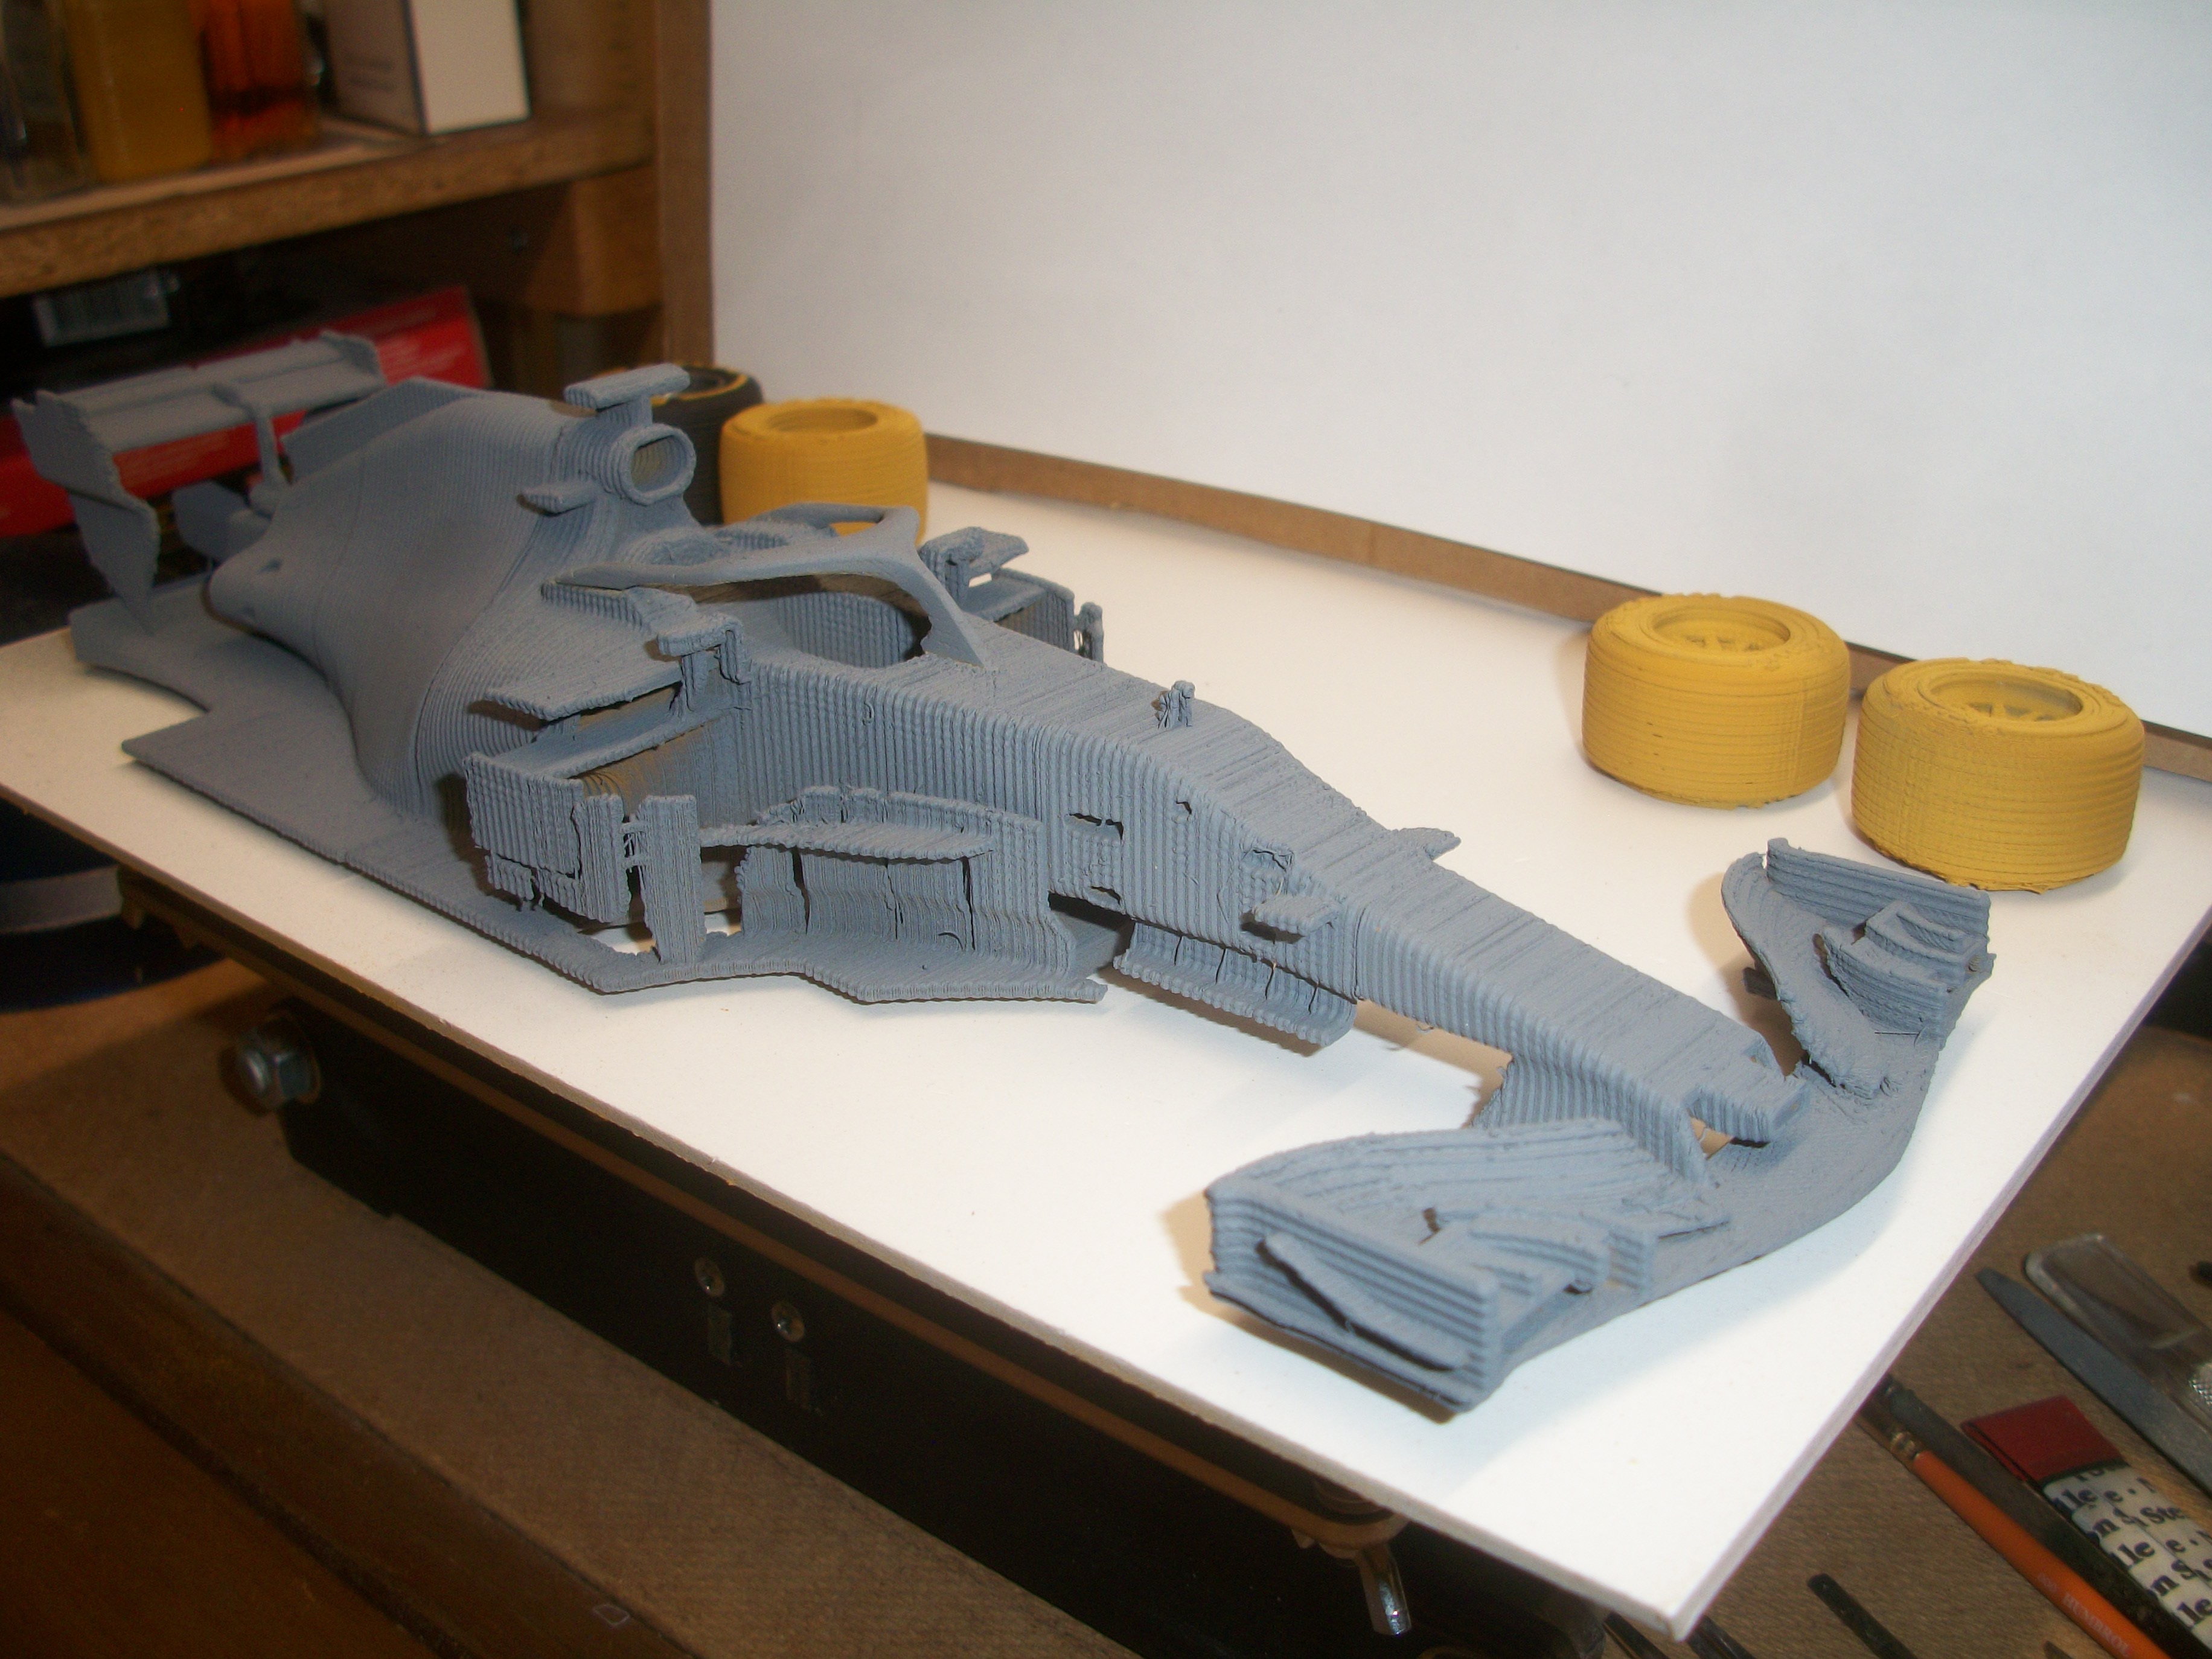
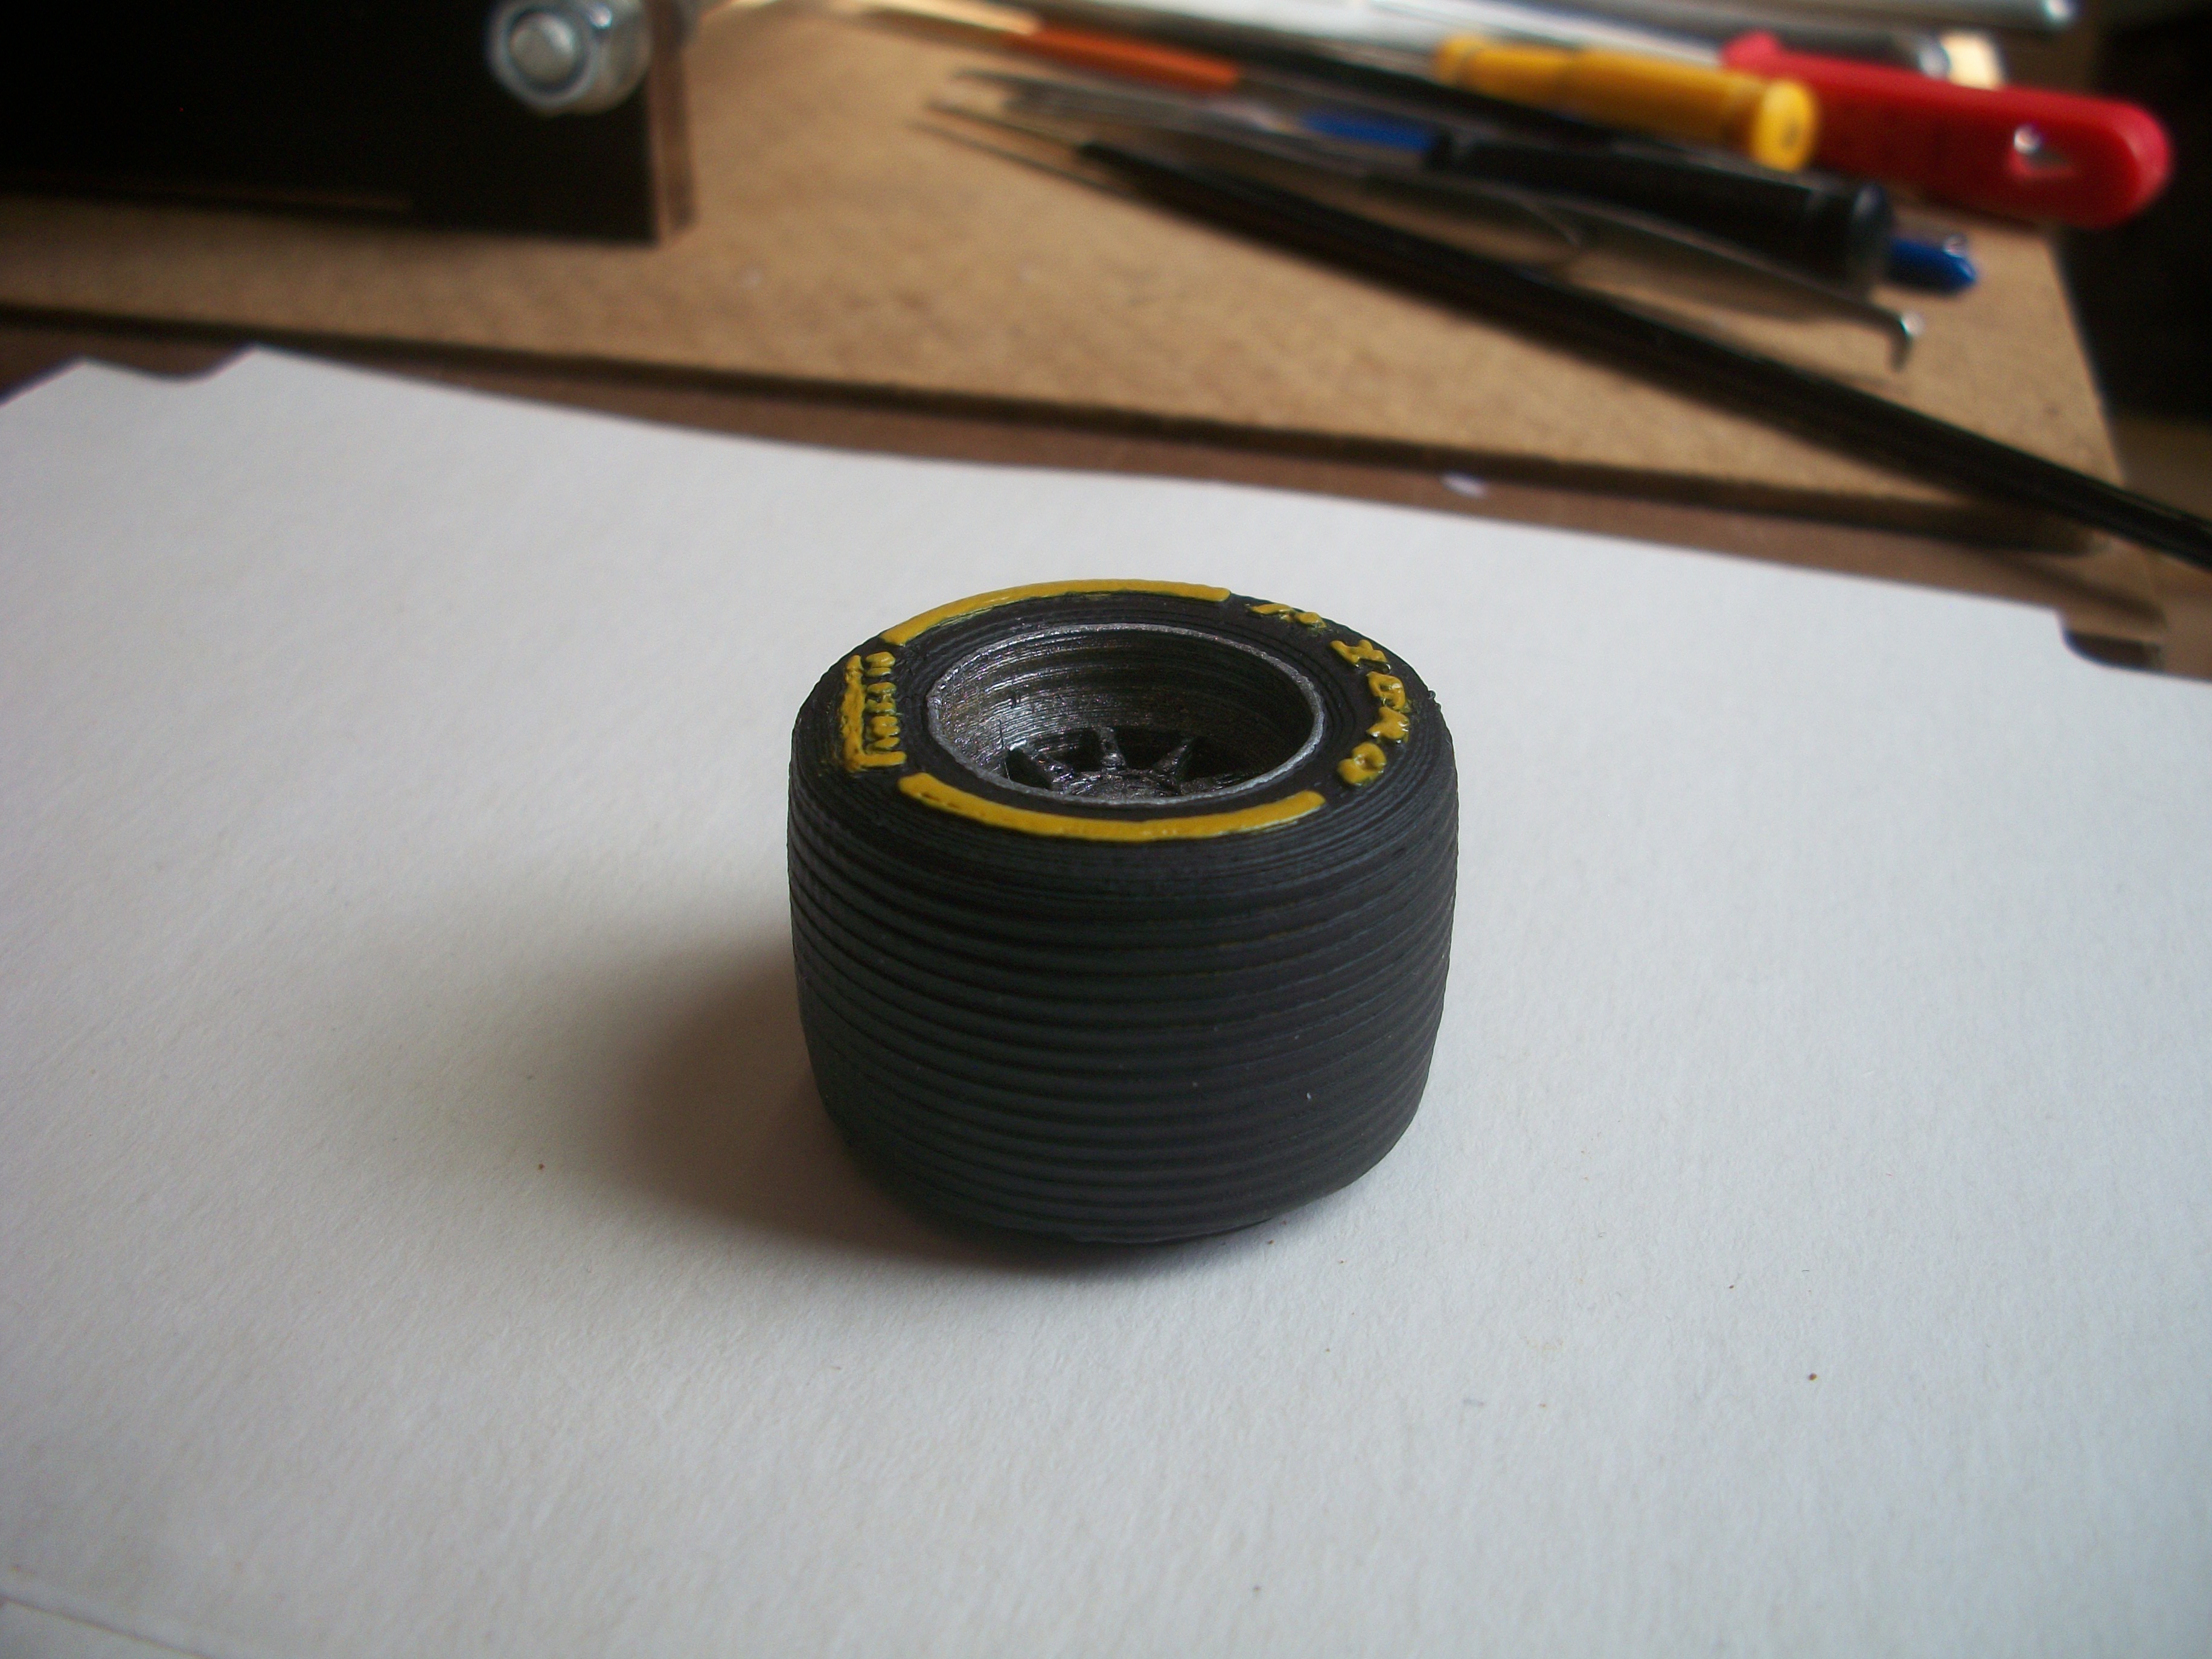
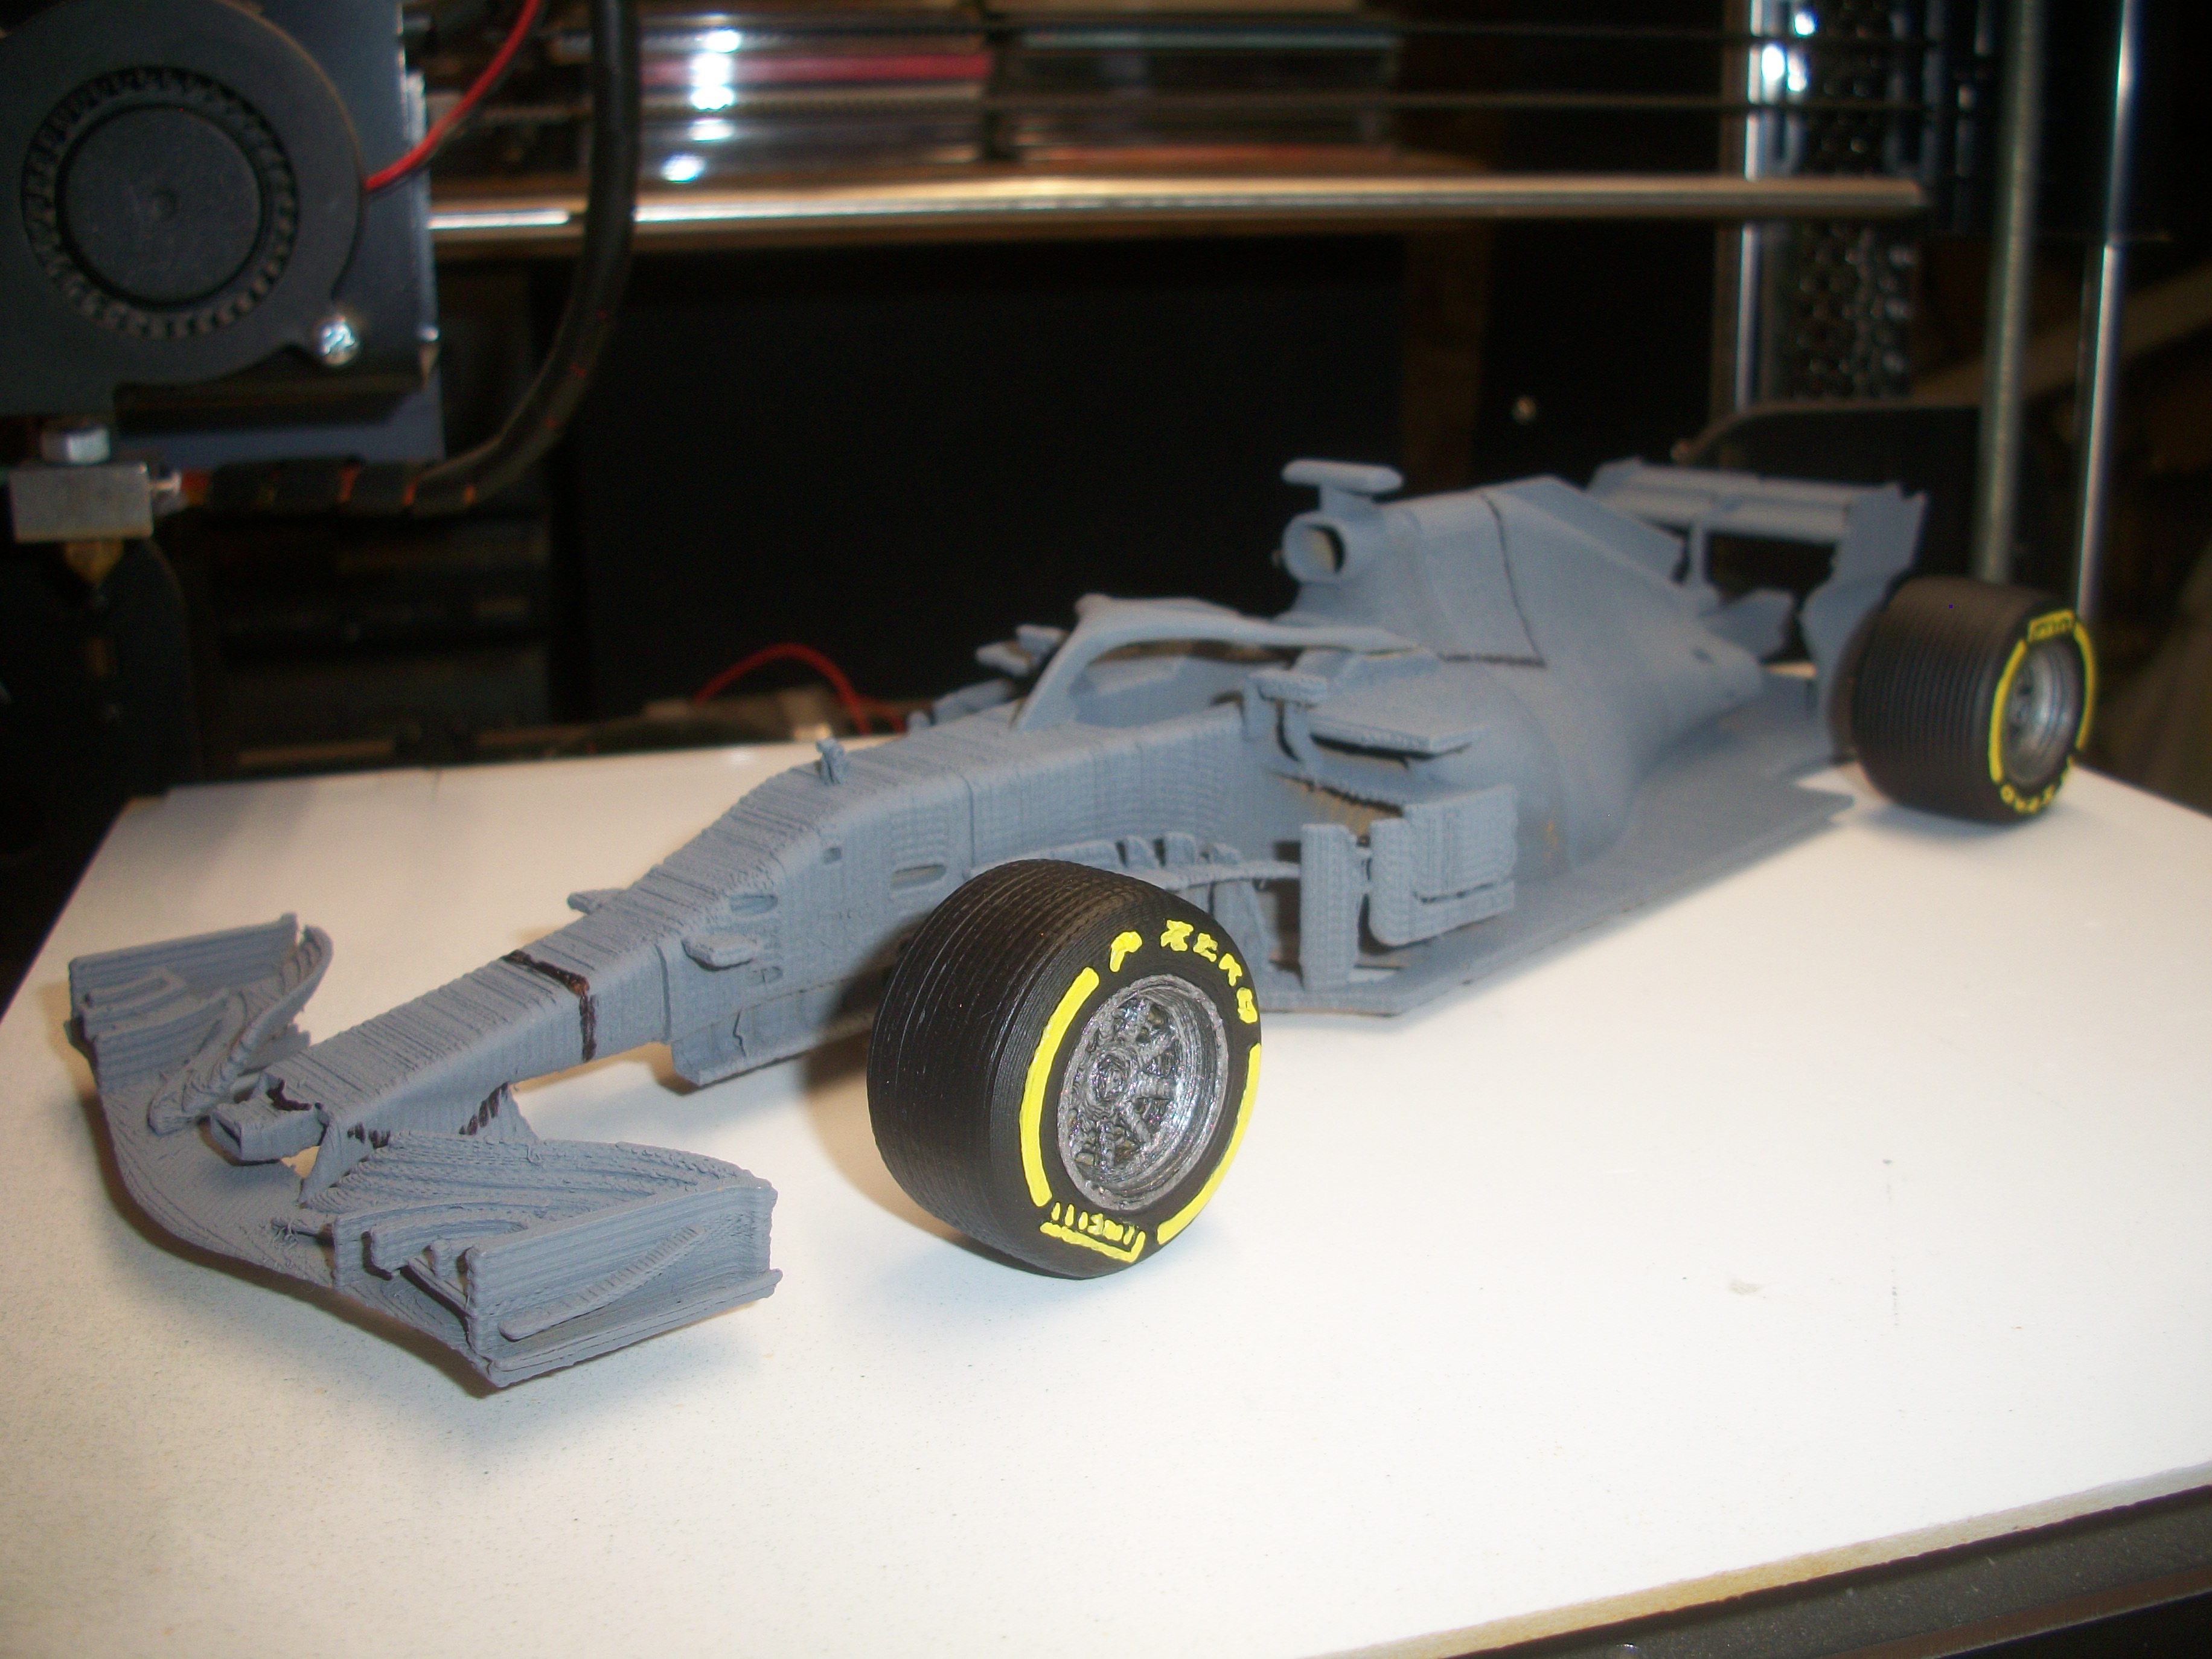
Thank you, Bruce........ Not sure yet if I will try the ABS alternative. For the moment, I am going to try a product called Mr White Putty ' R ' and see if this smooths out the layer lines sufficiently to apply airbrush paint. The wheels and tyres have turned out quite nicely, and I have managed to source a 1:20 scale seated driver figure for this car. Also, found a good reference photo for the Max Verstappen helmet detail. Thanks for following my progress with the RB14 build, and here are a few further photos. David
-
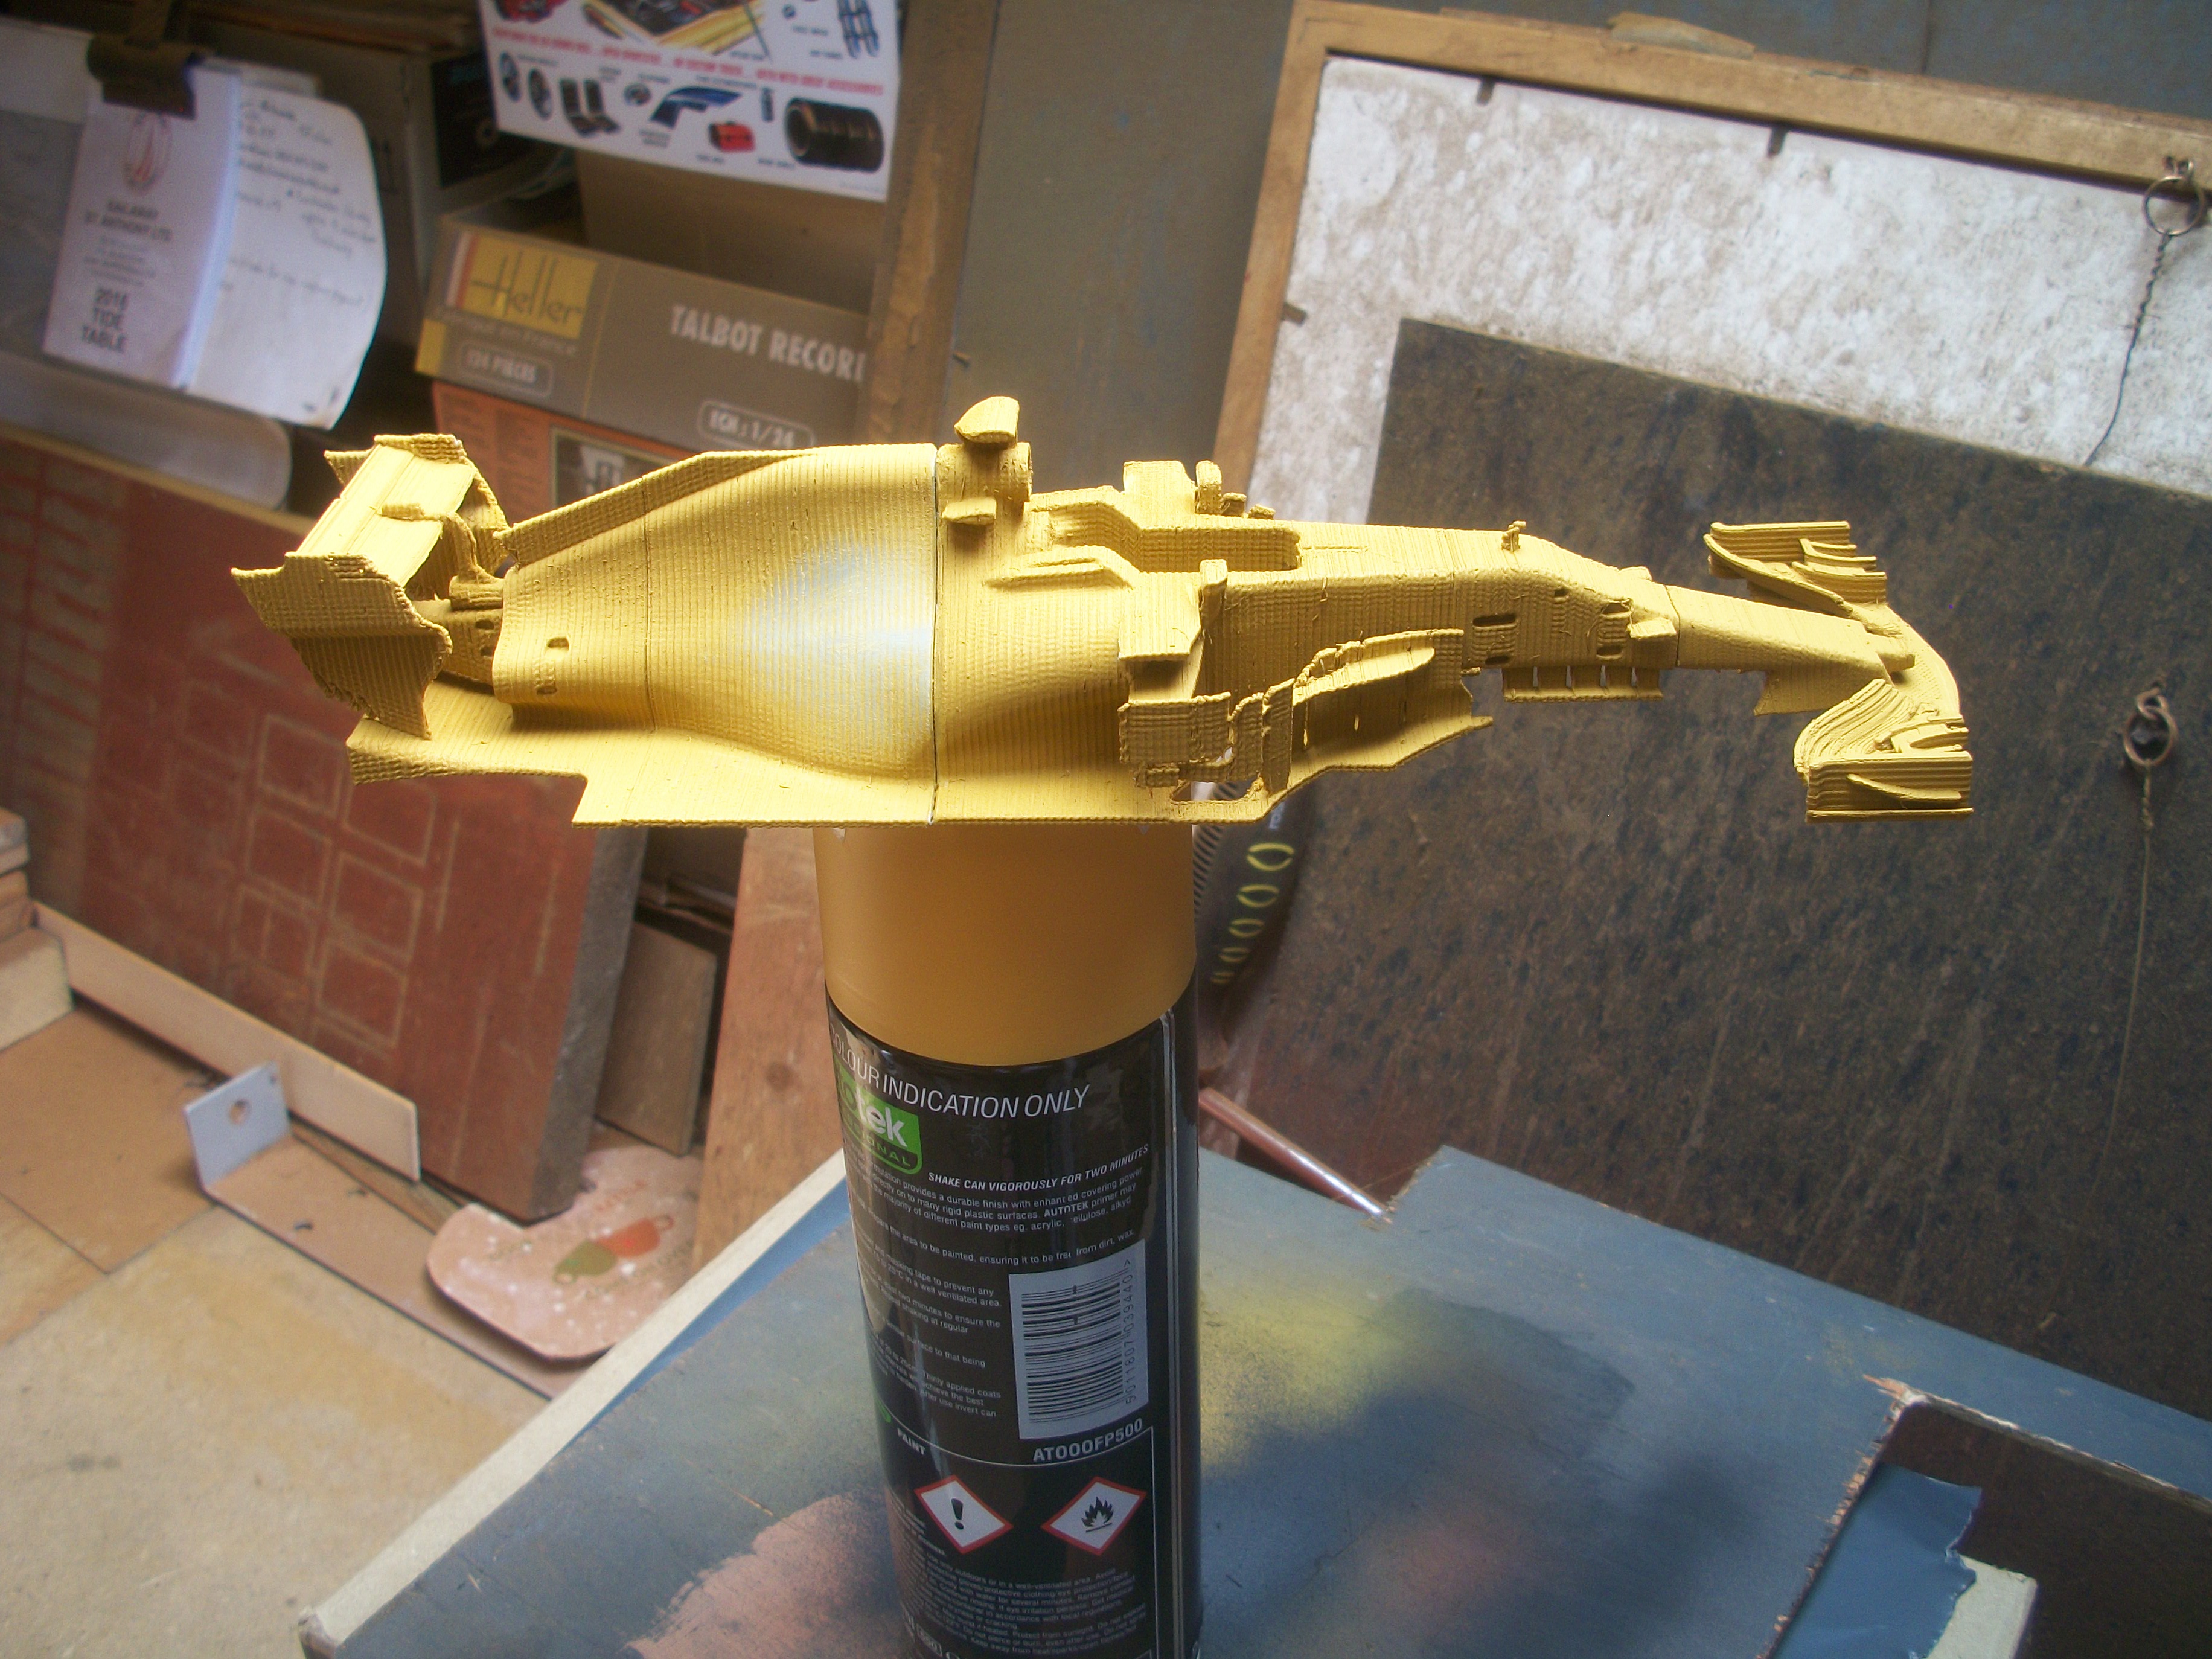
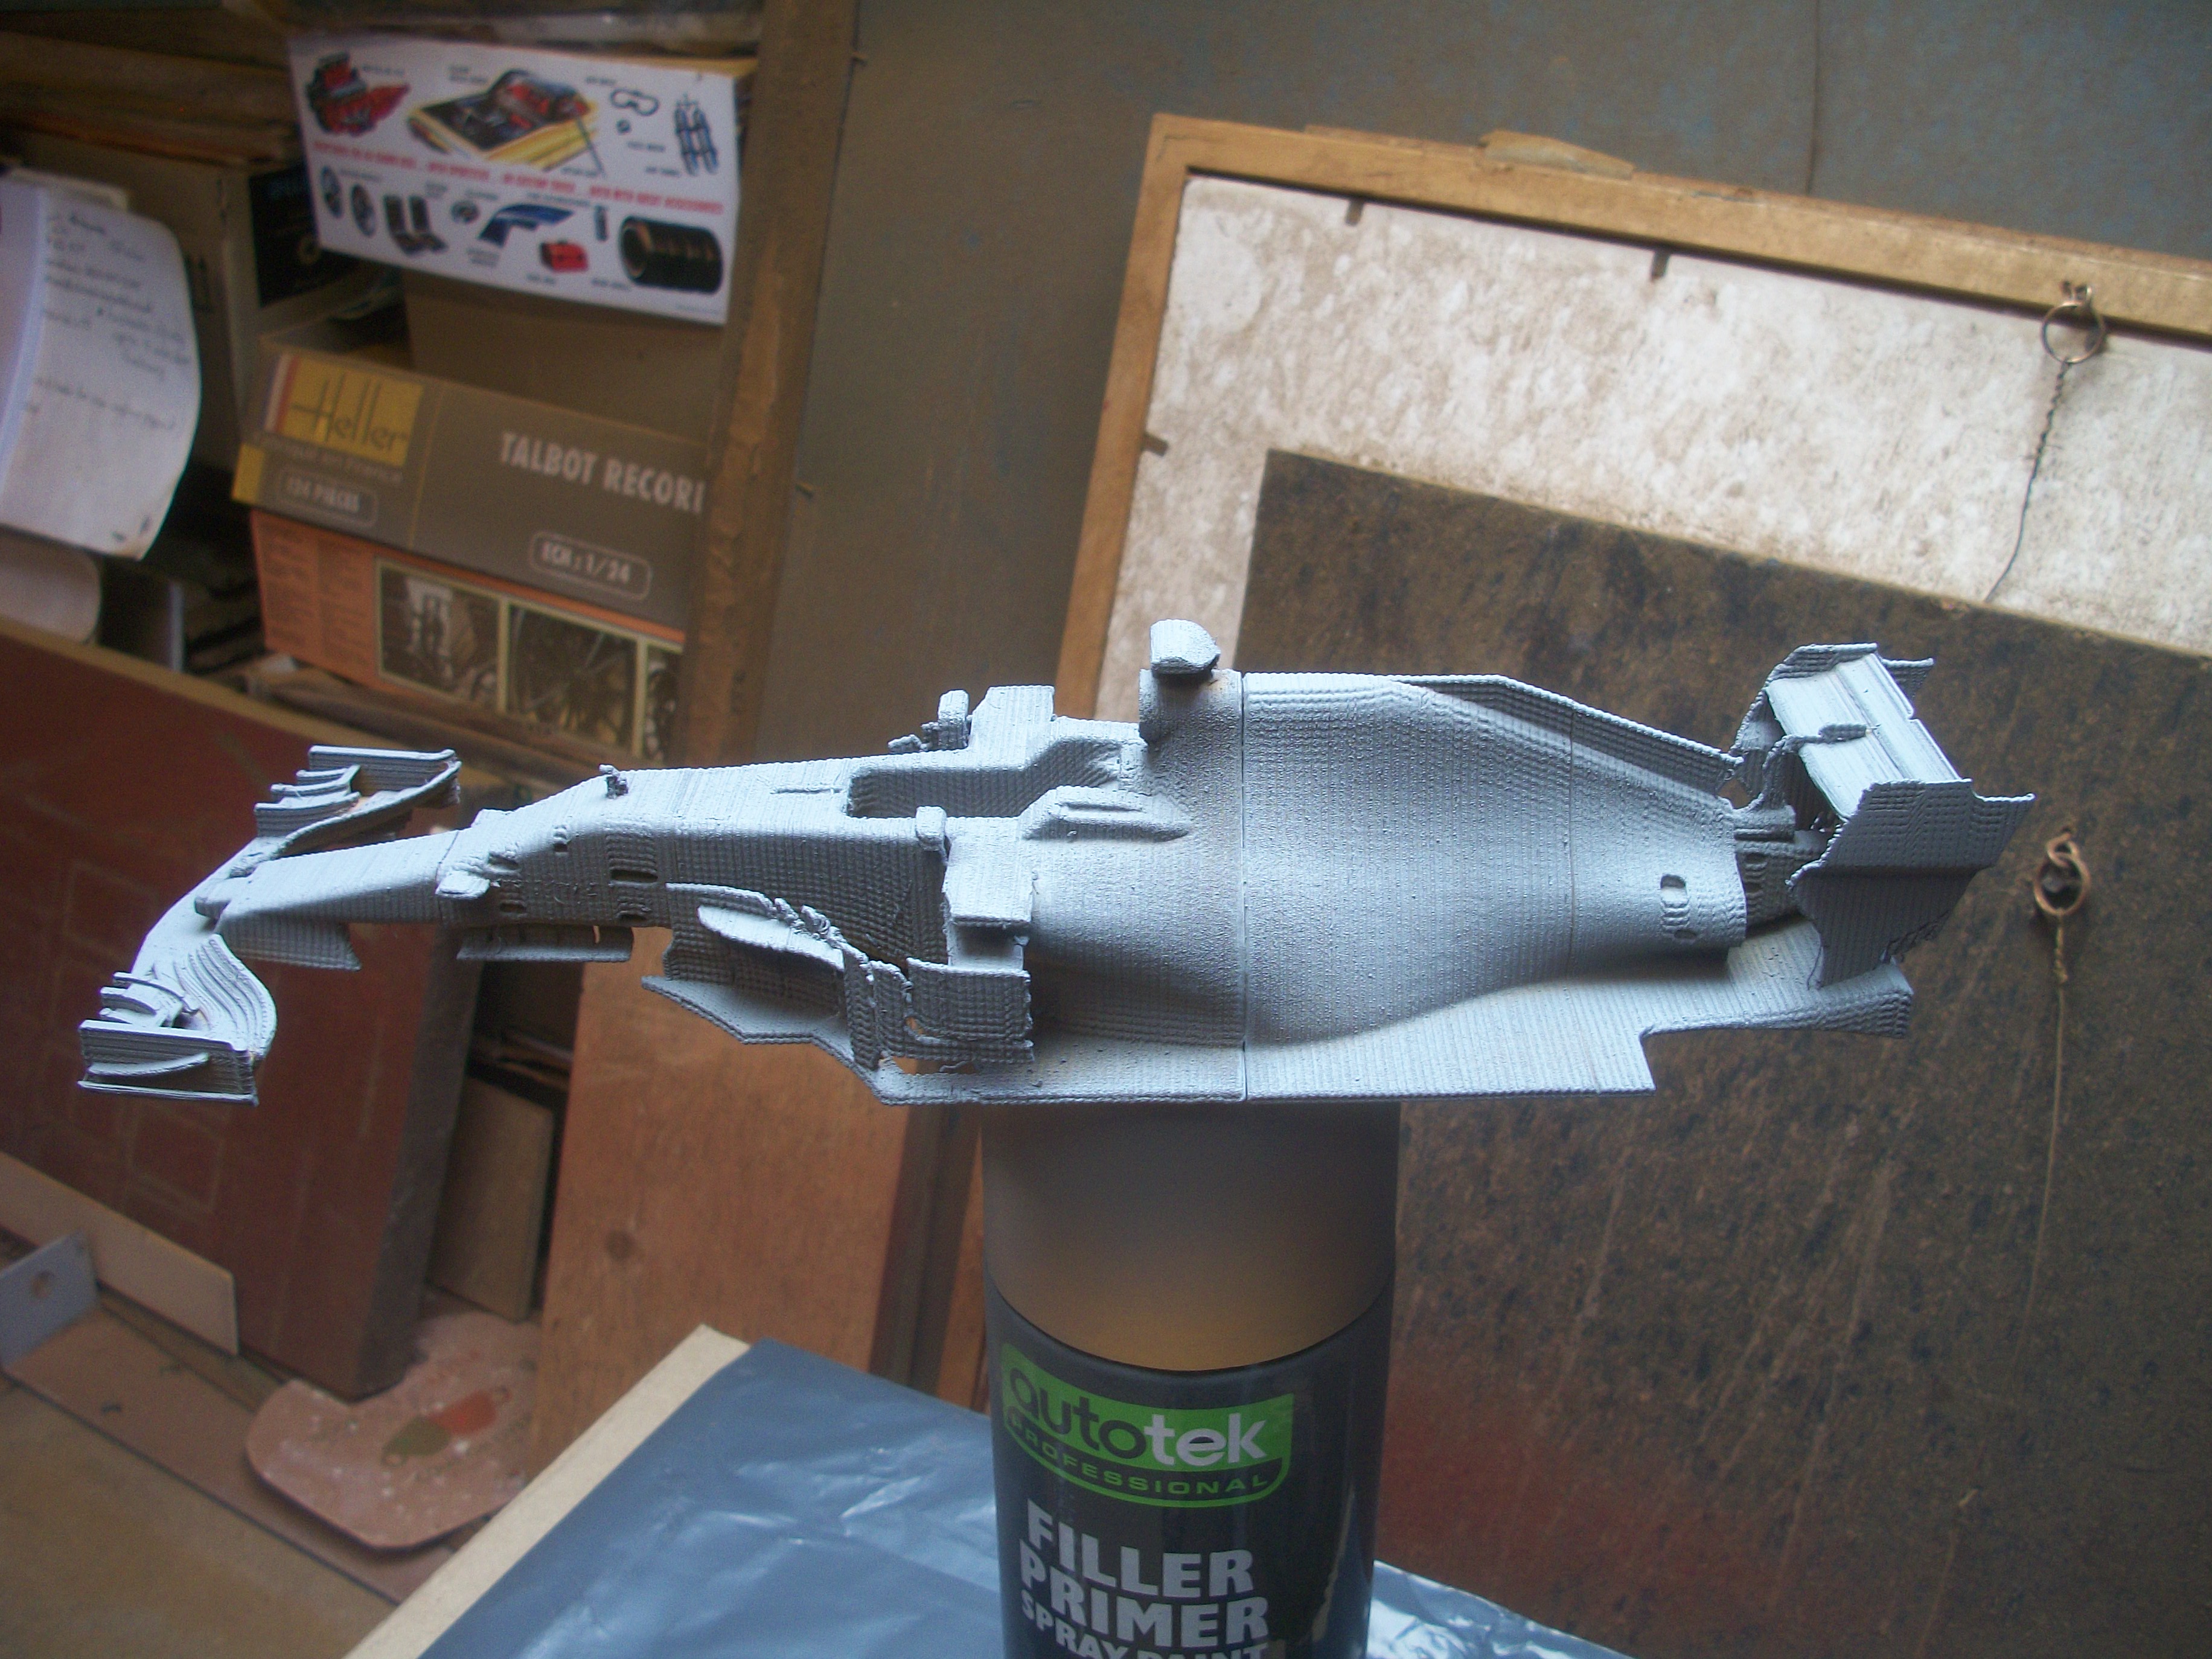
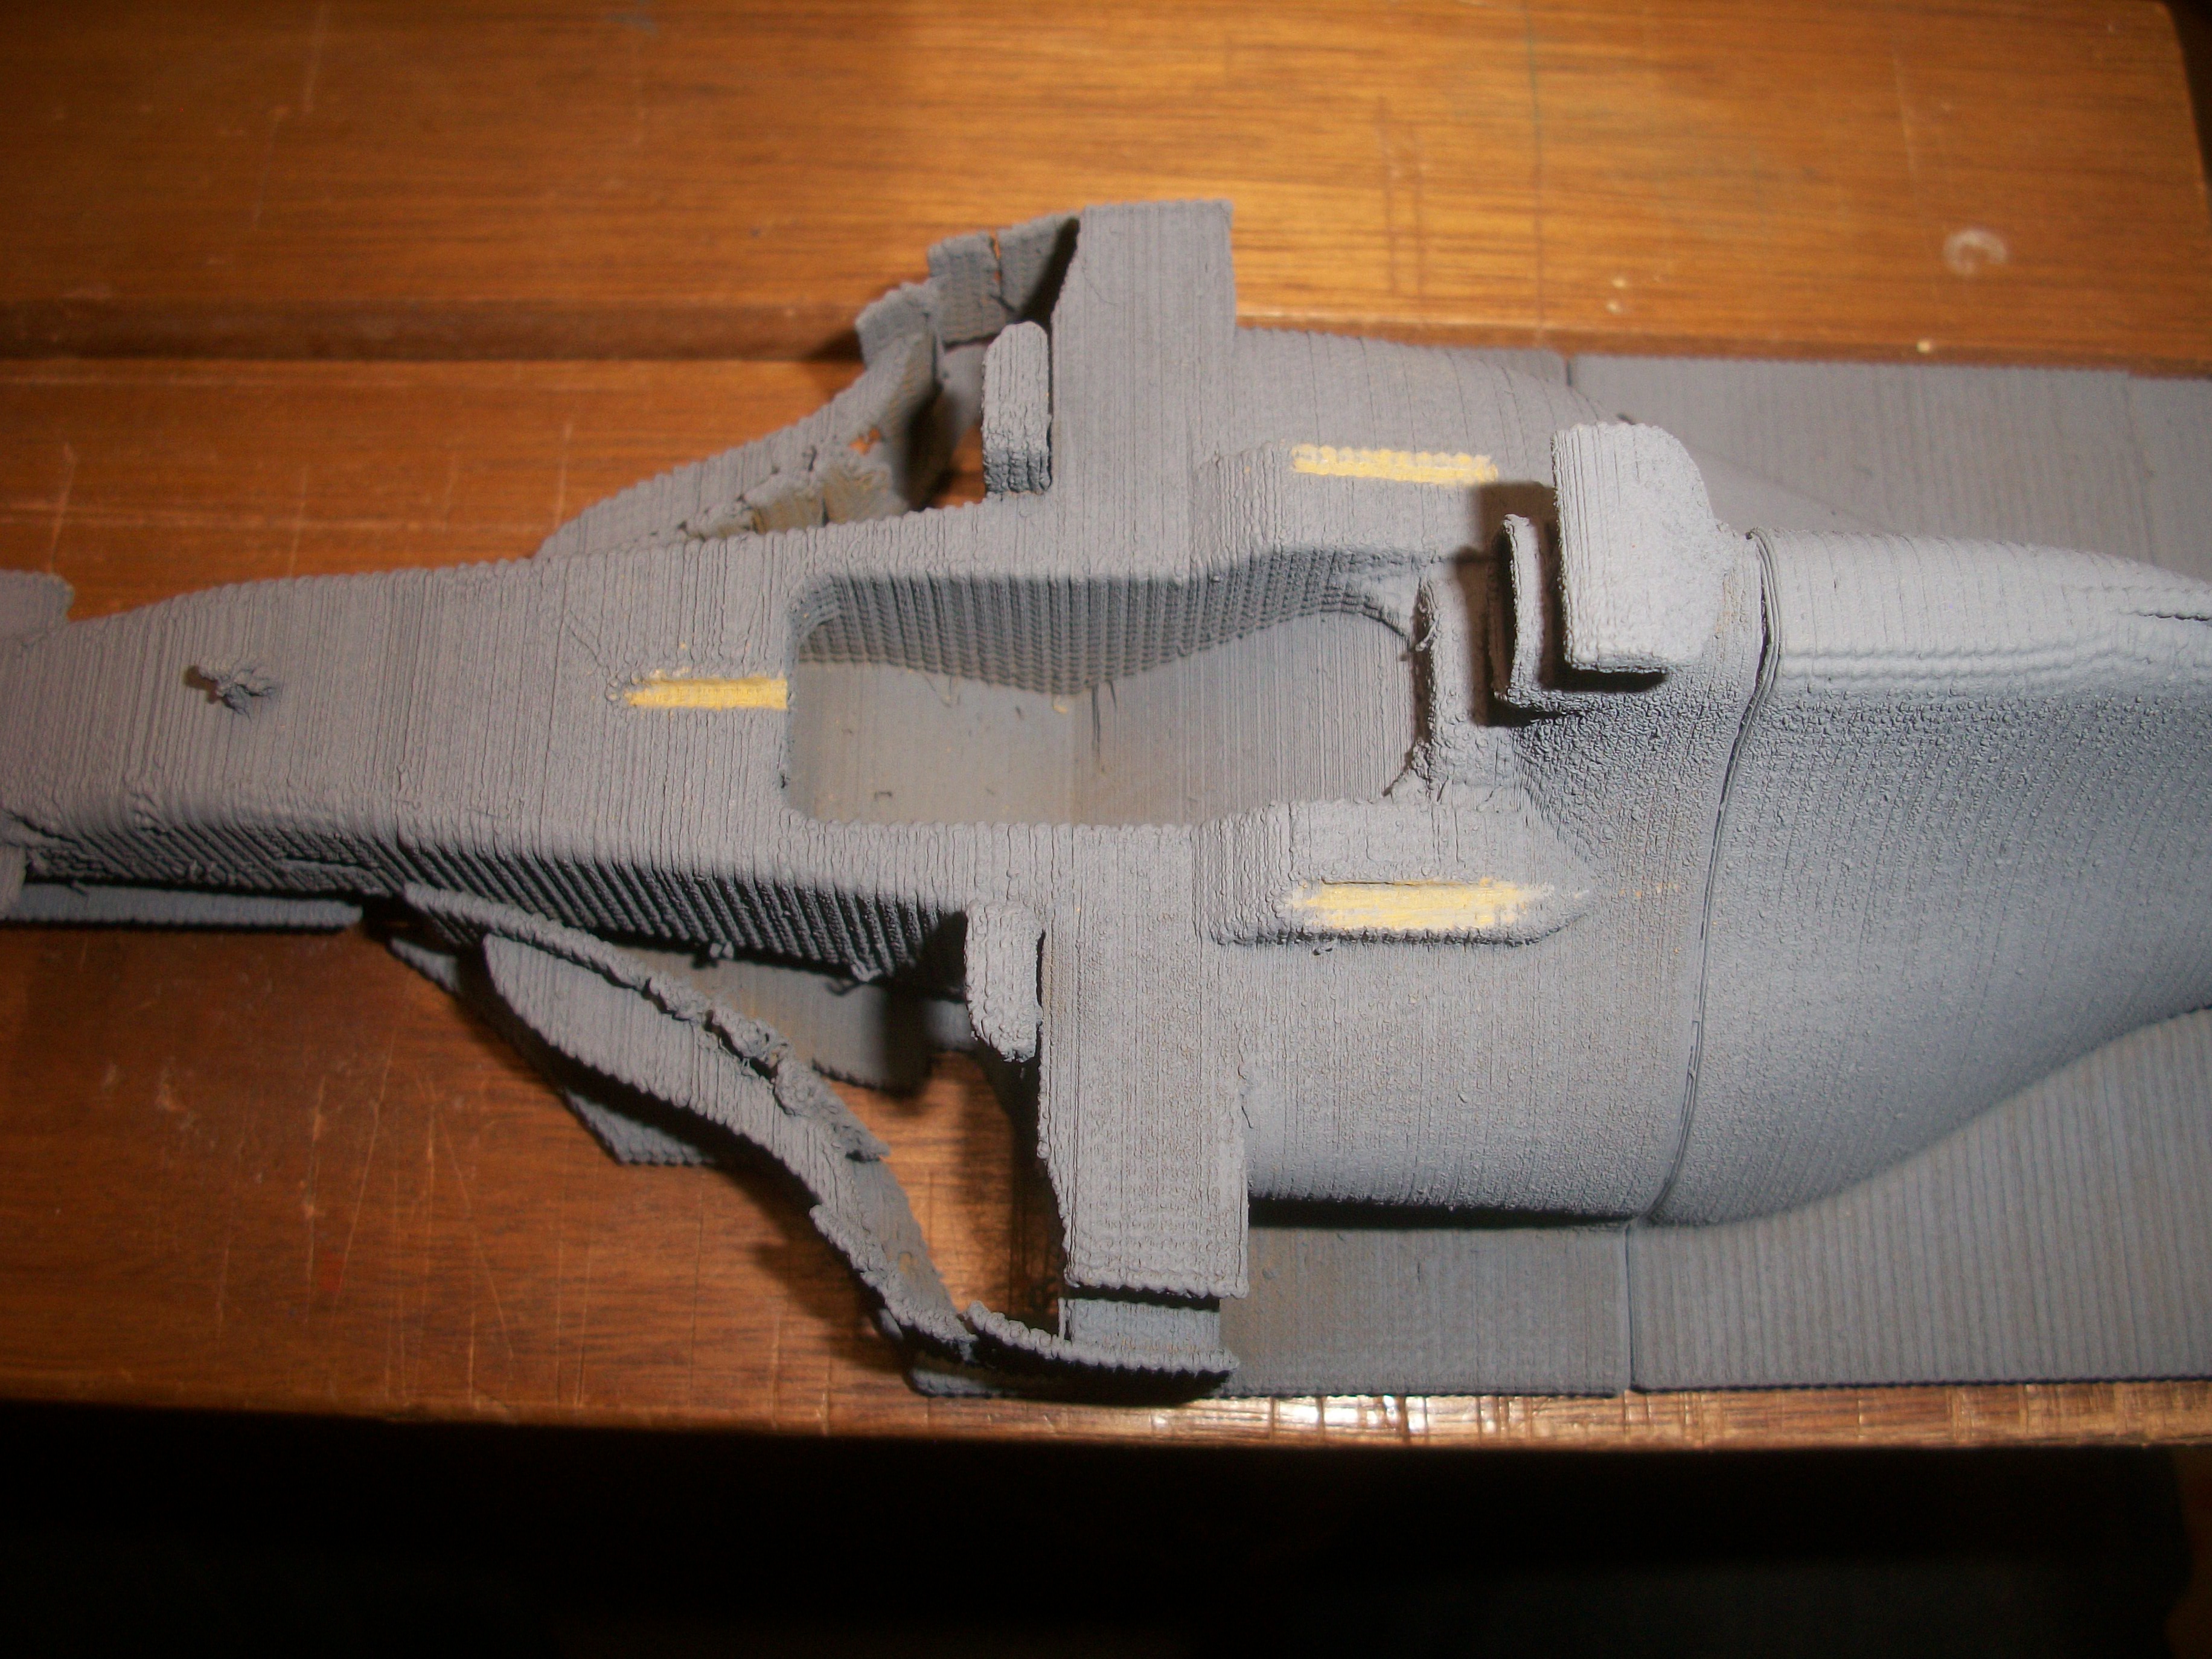
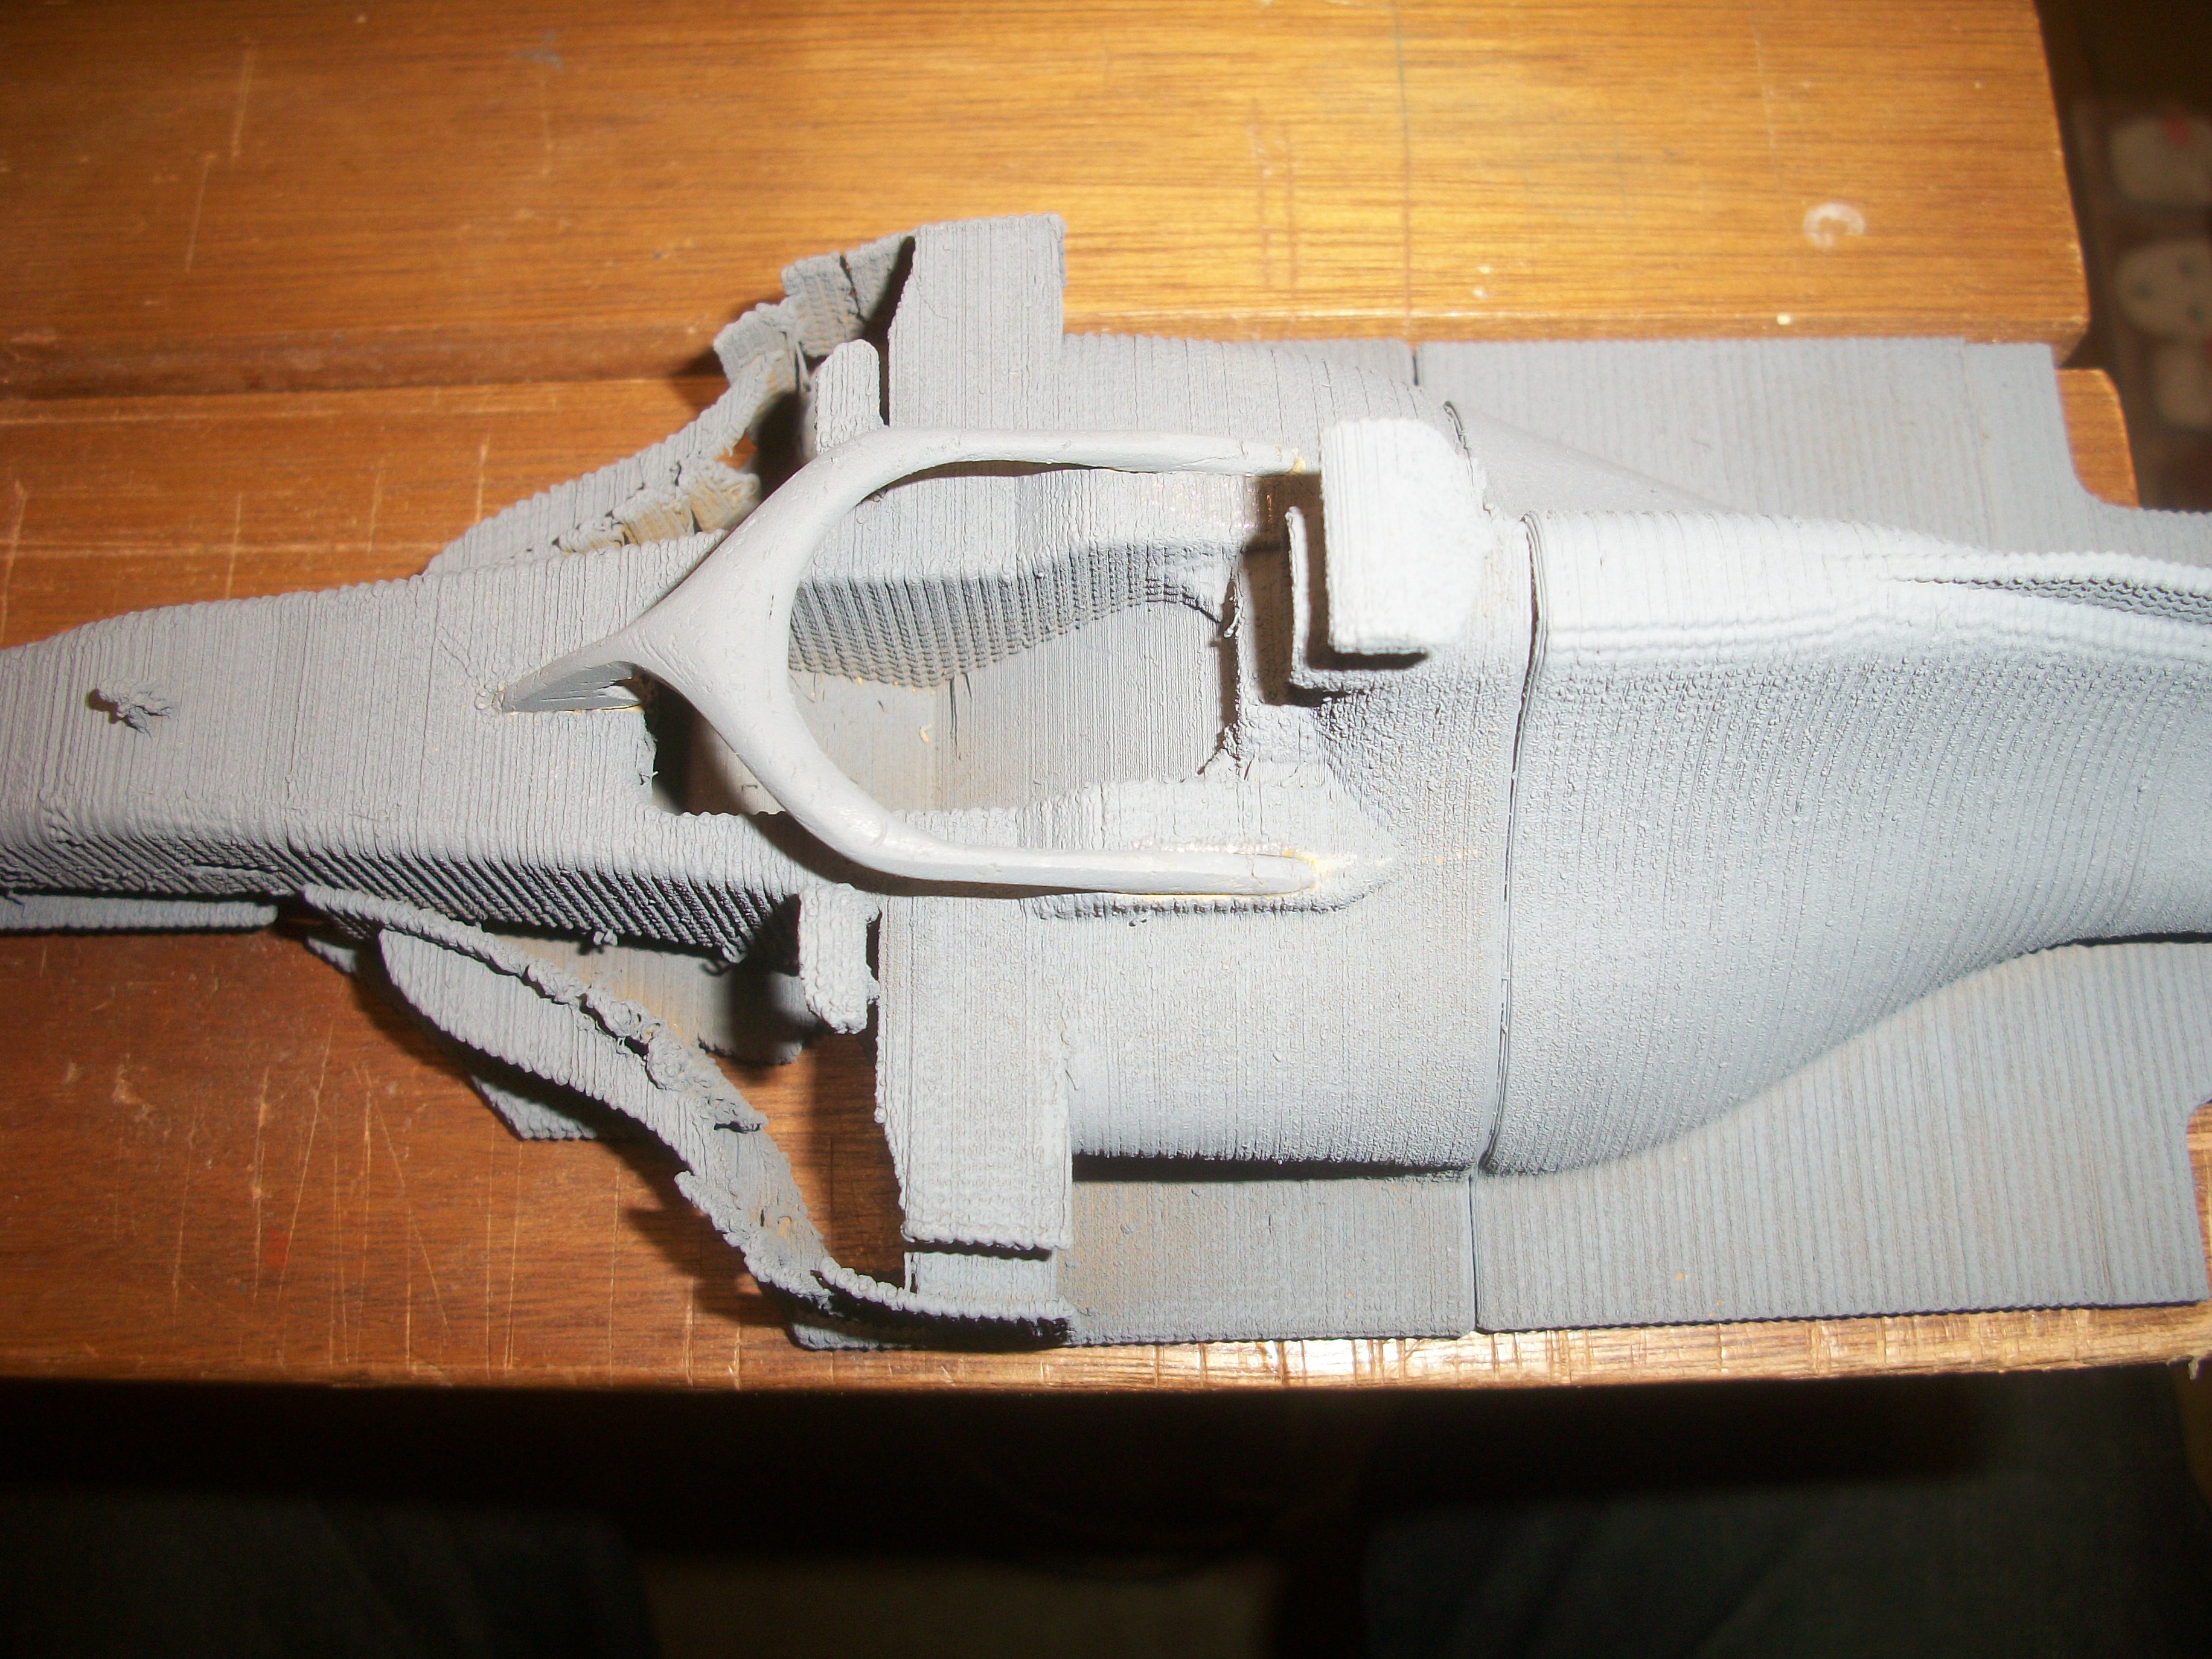
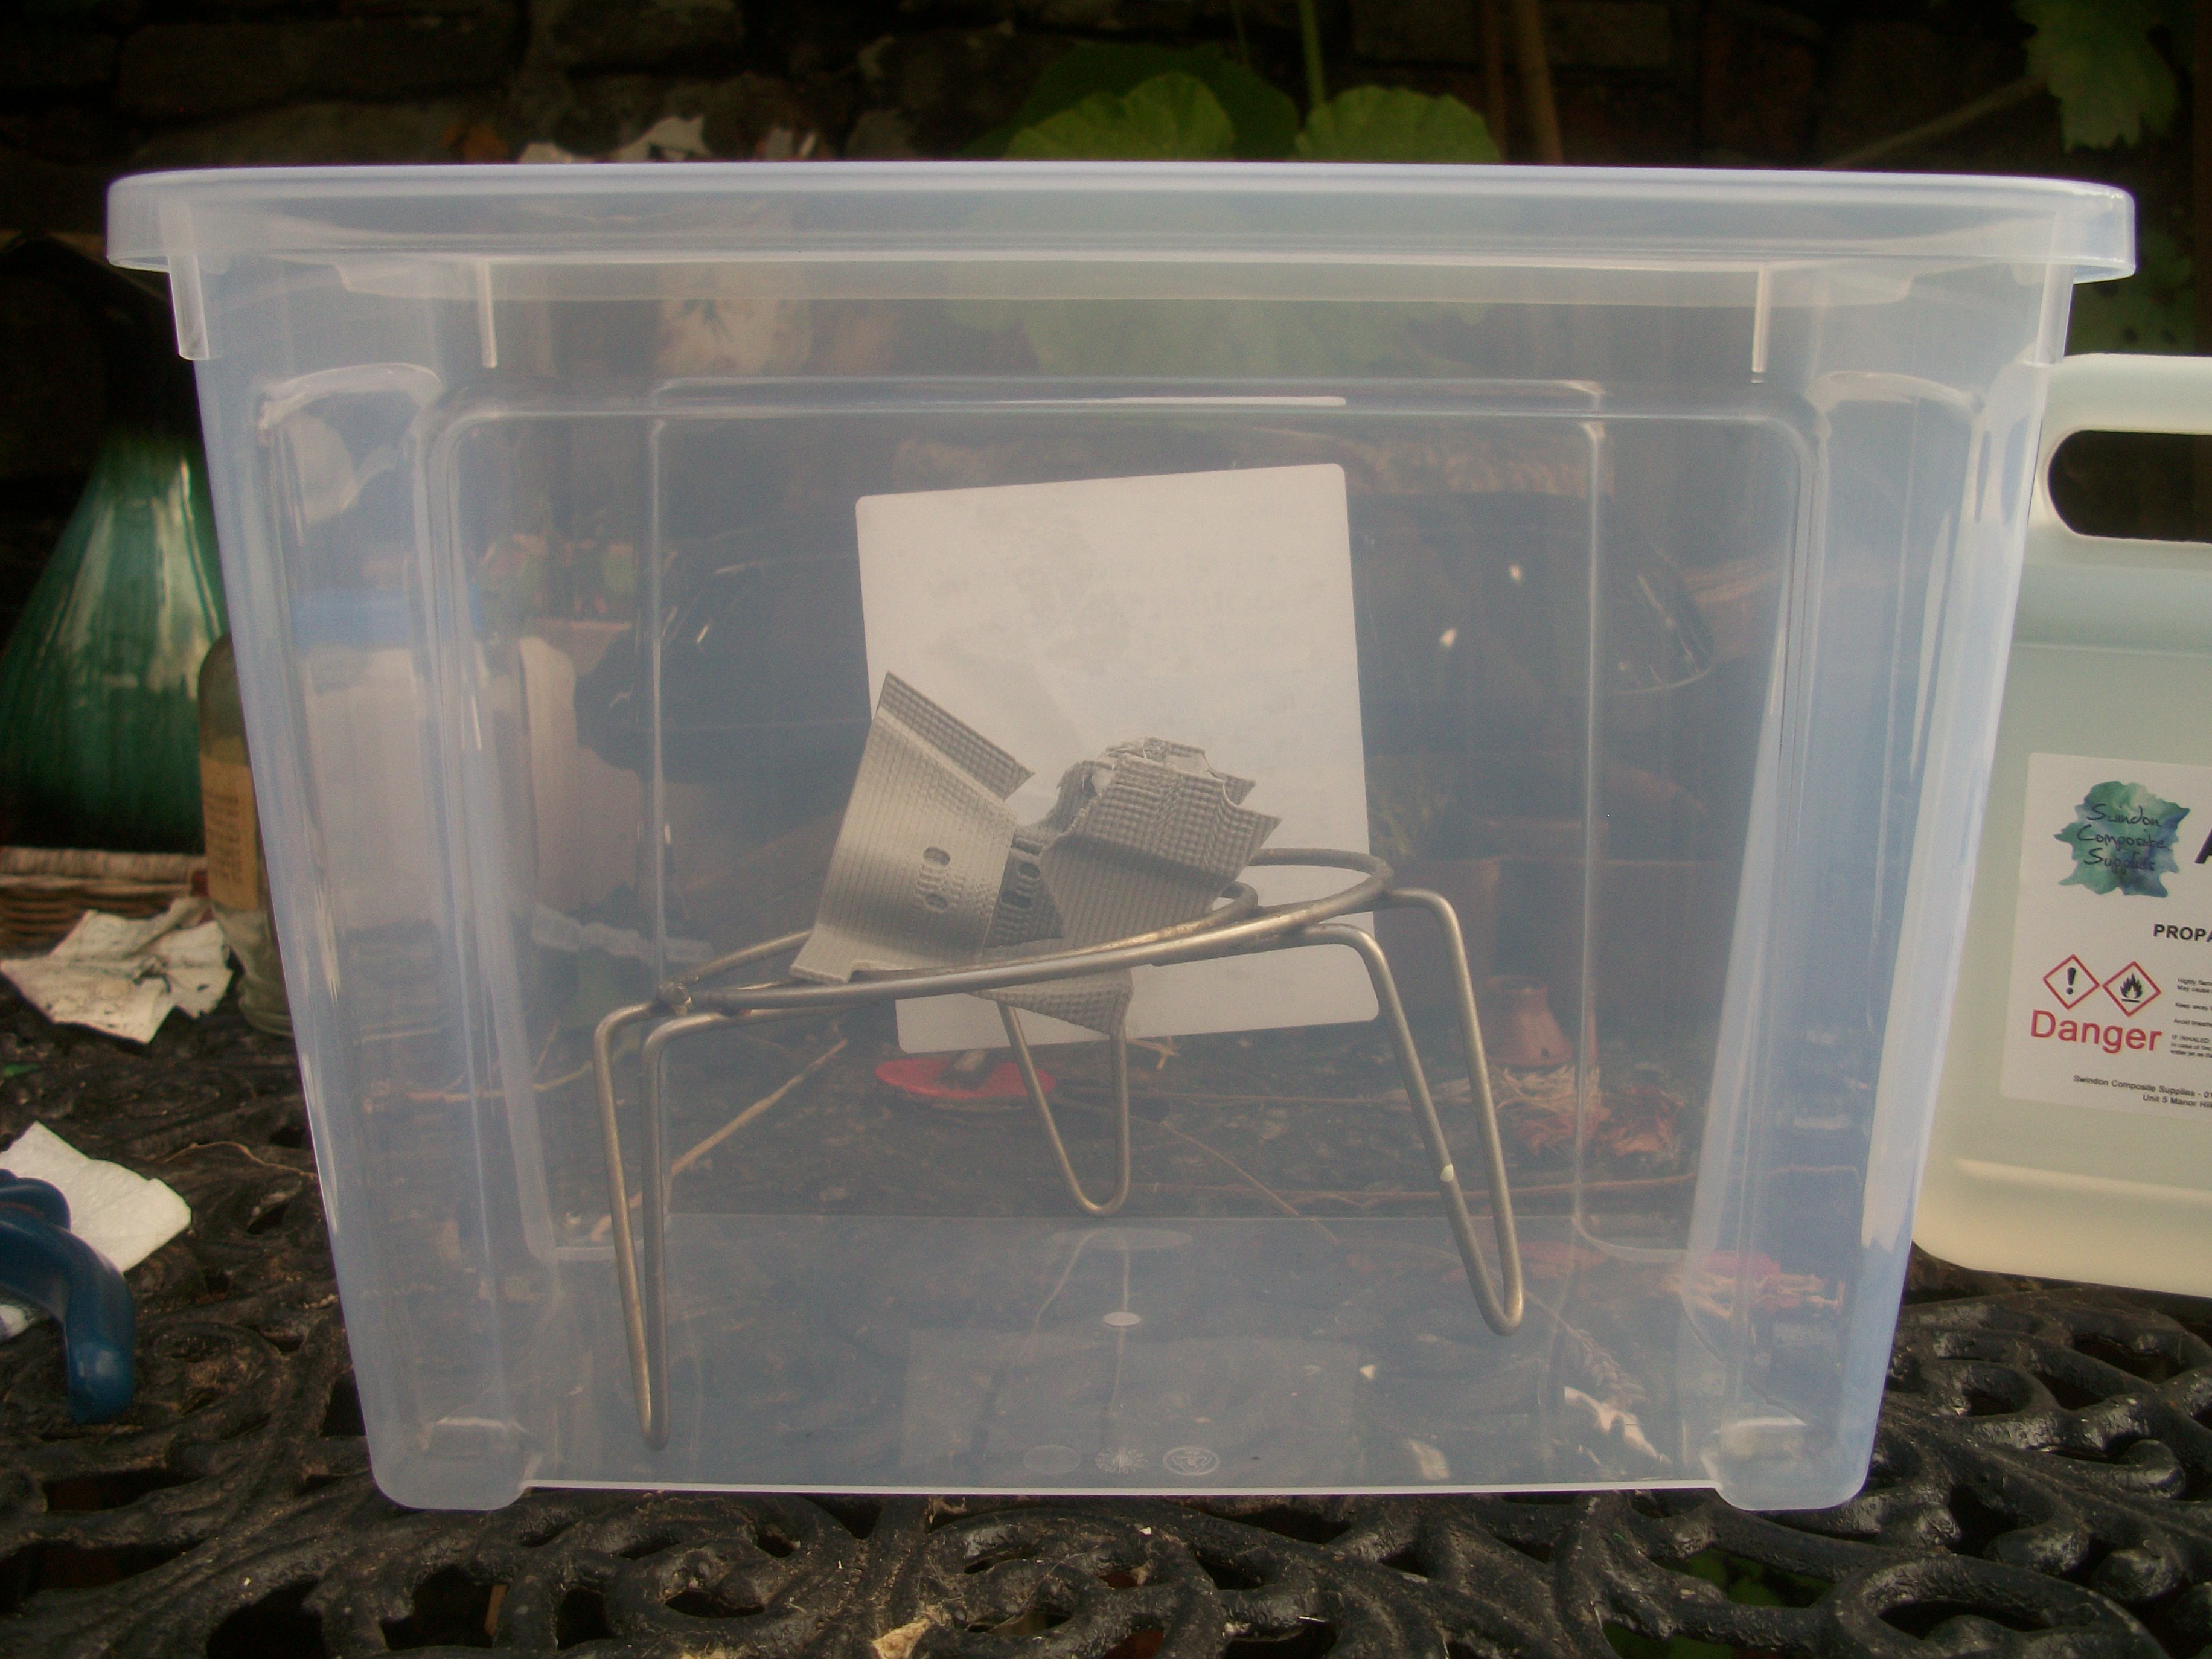
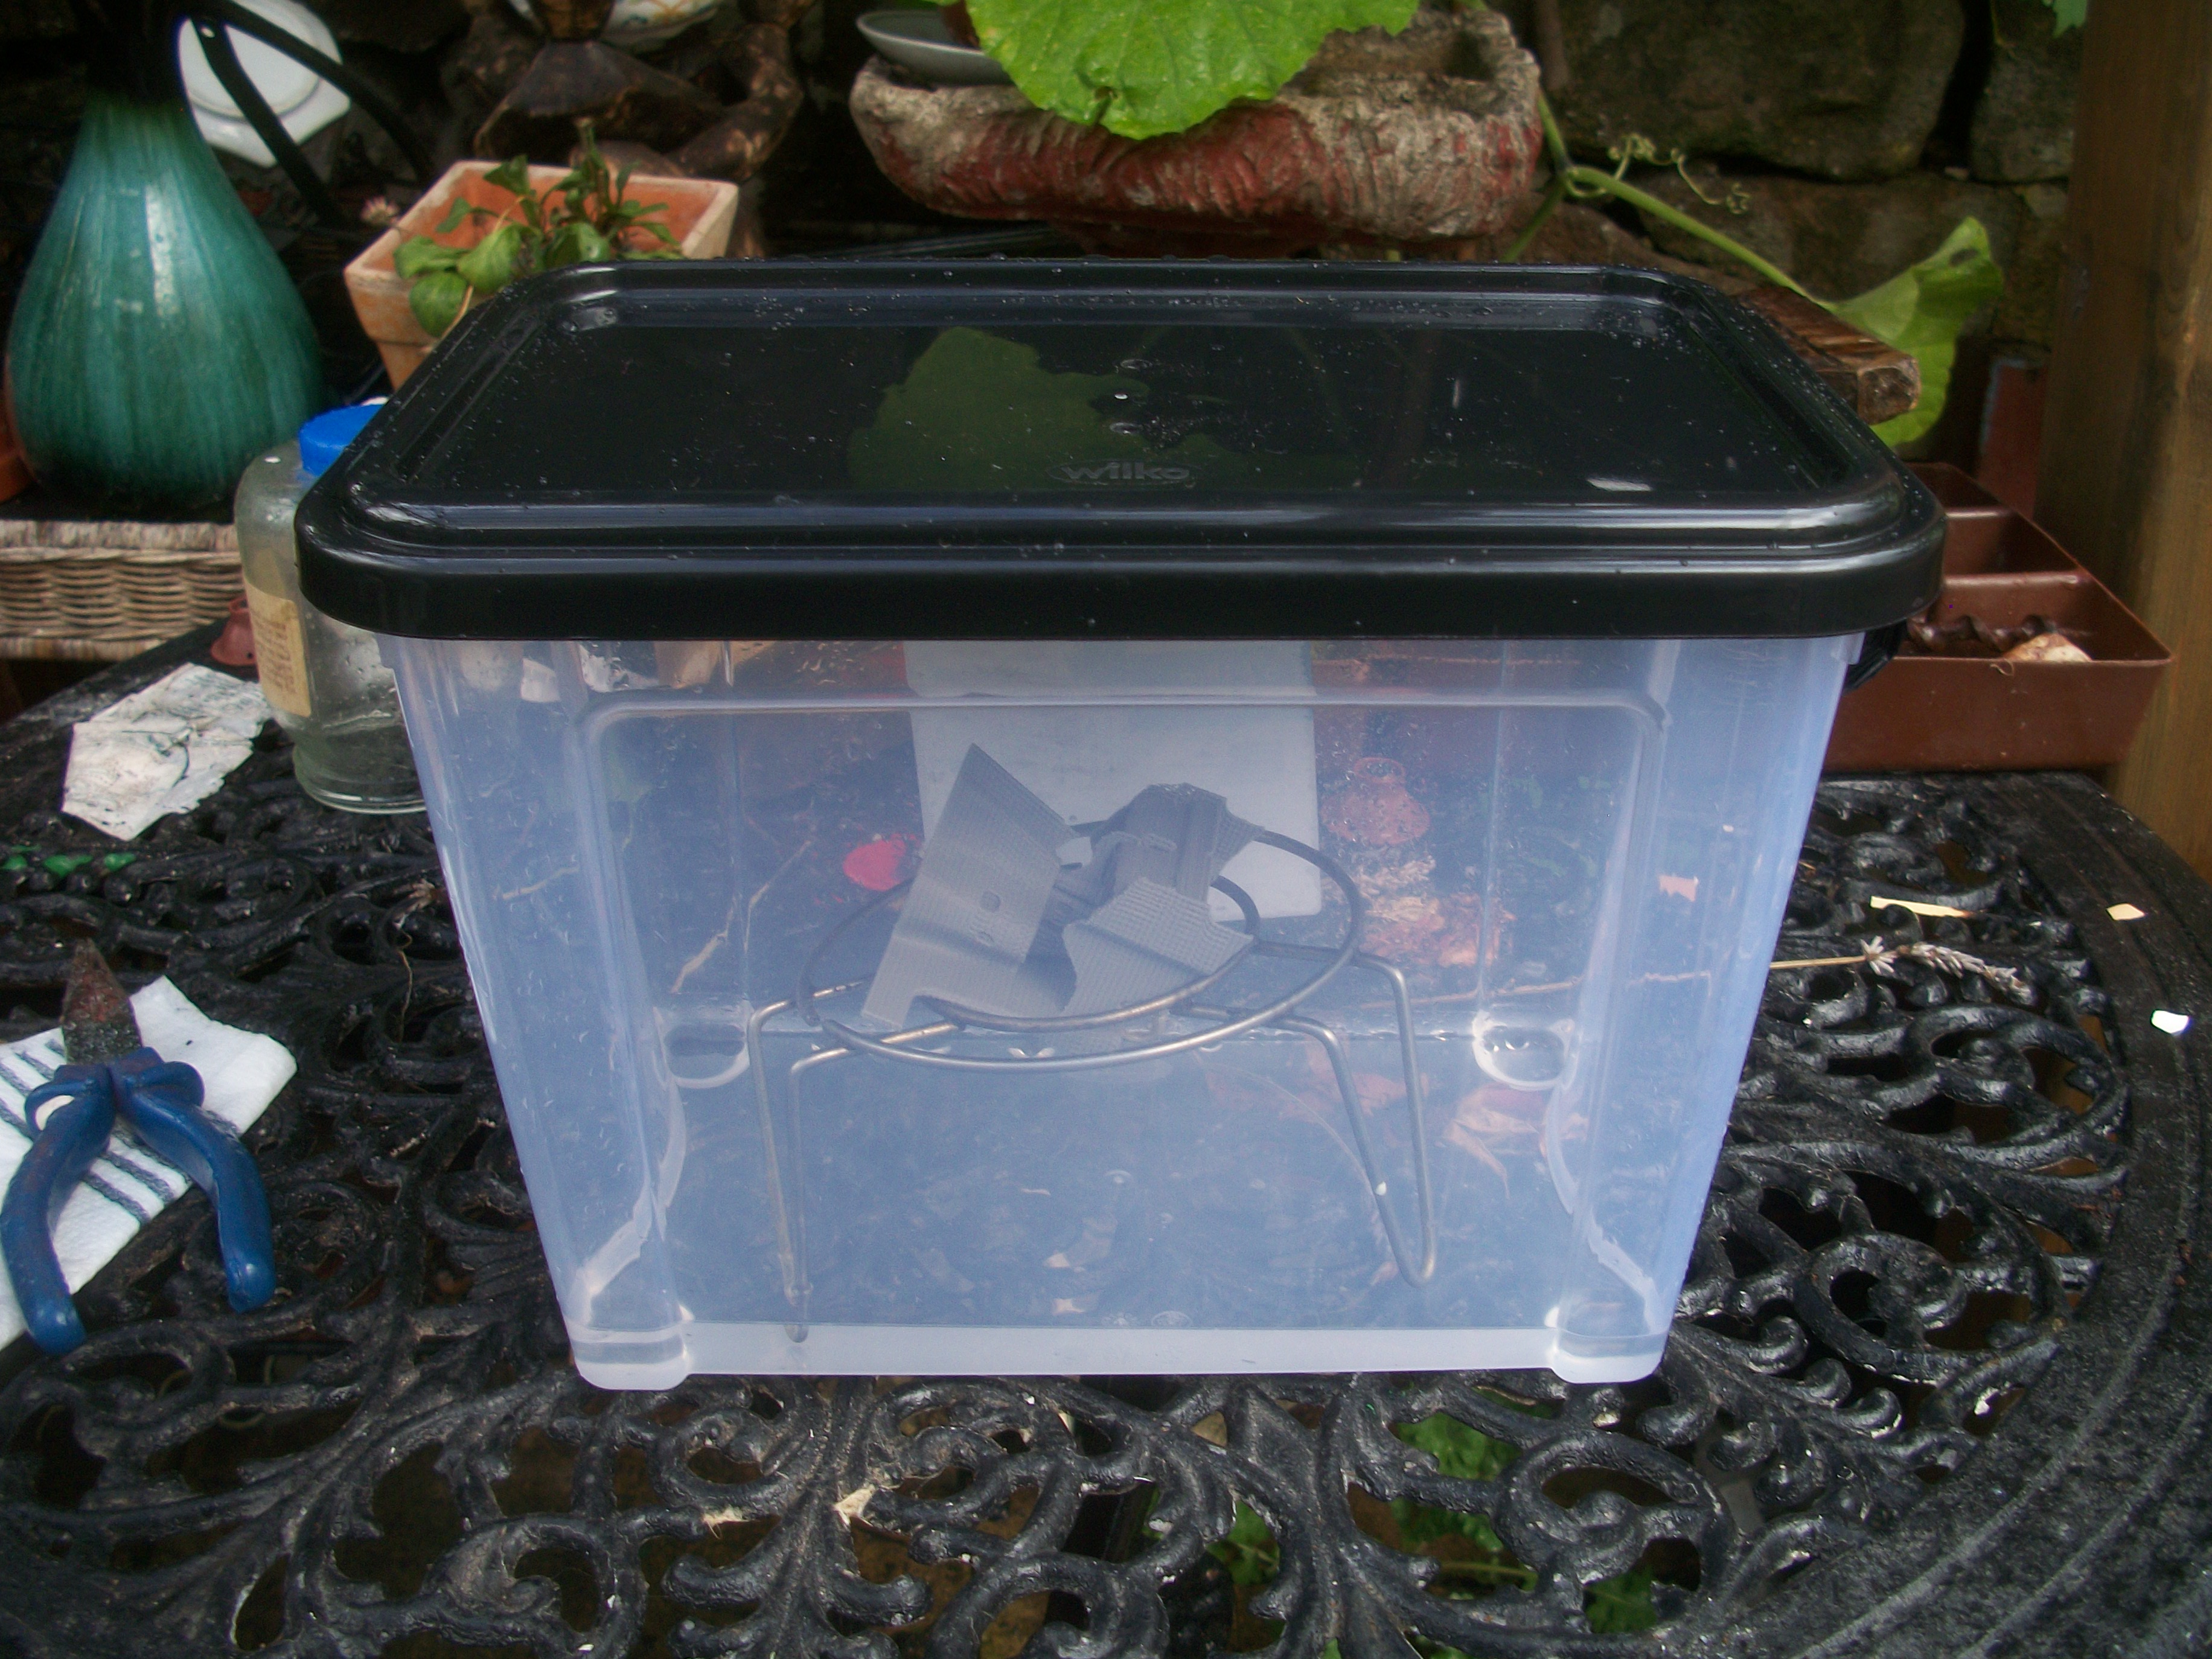
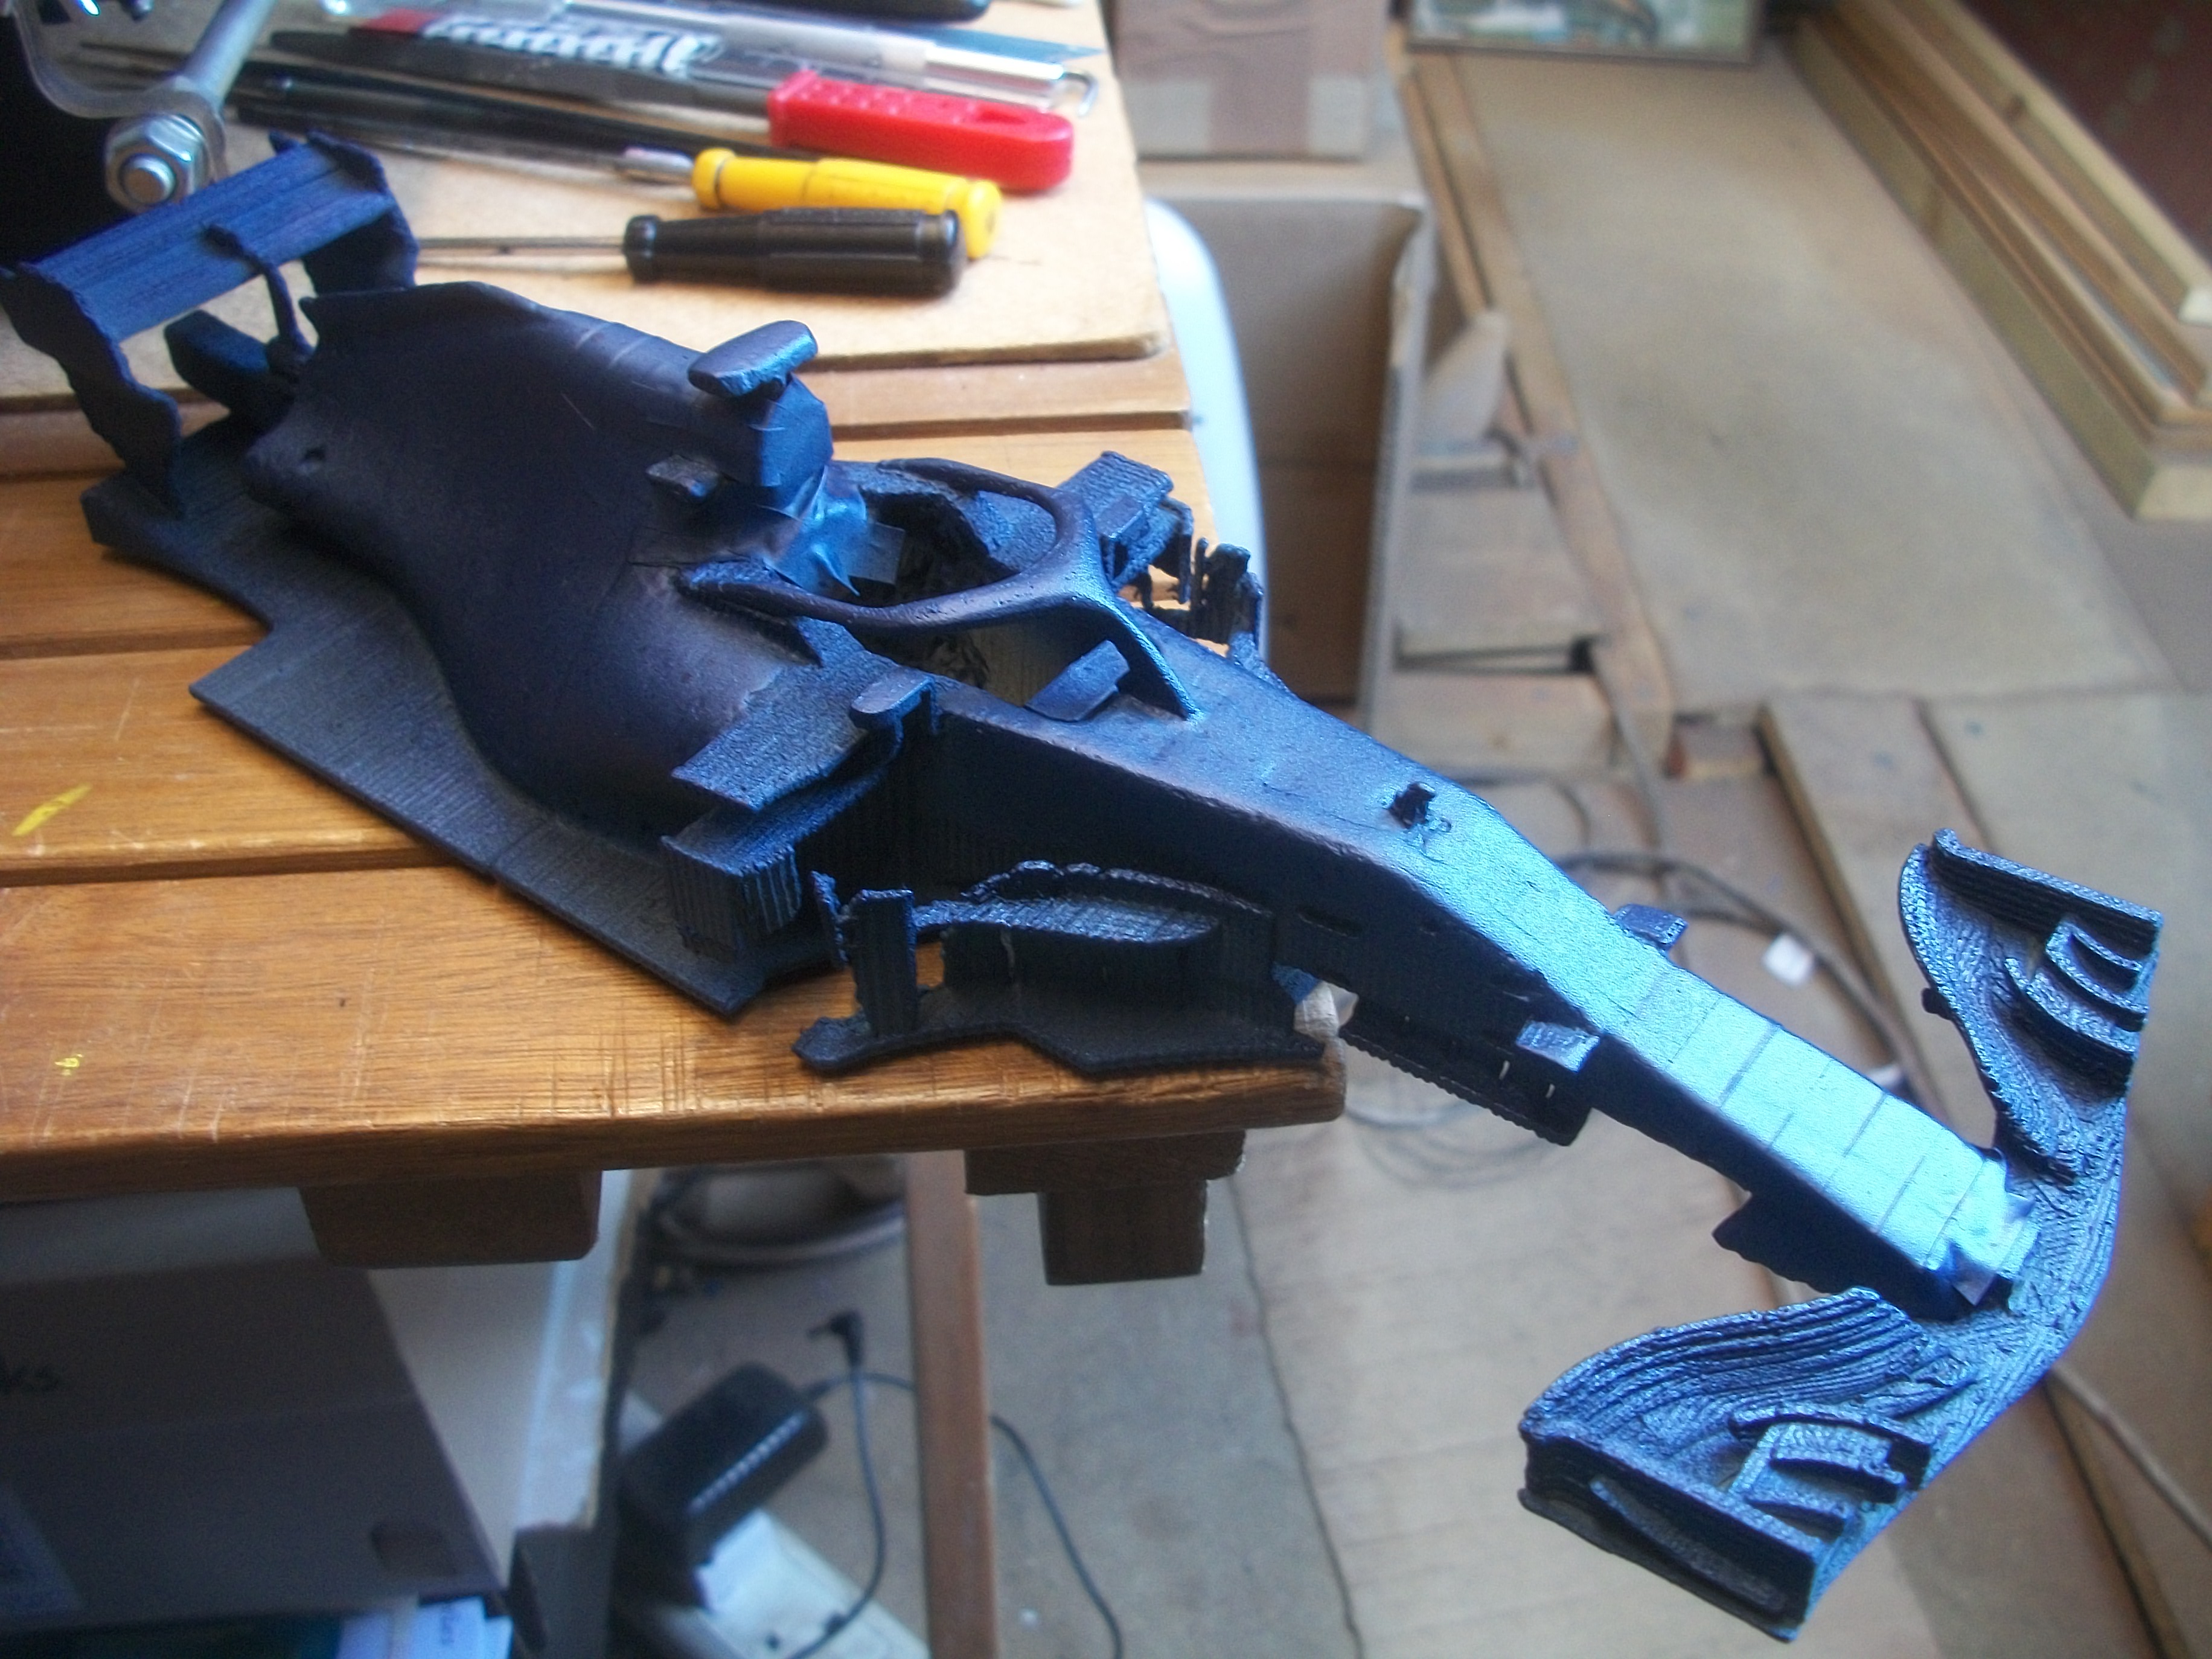
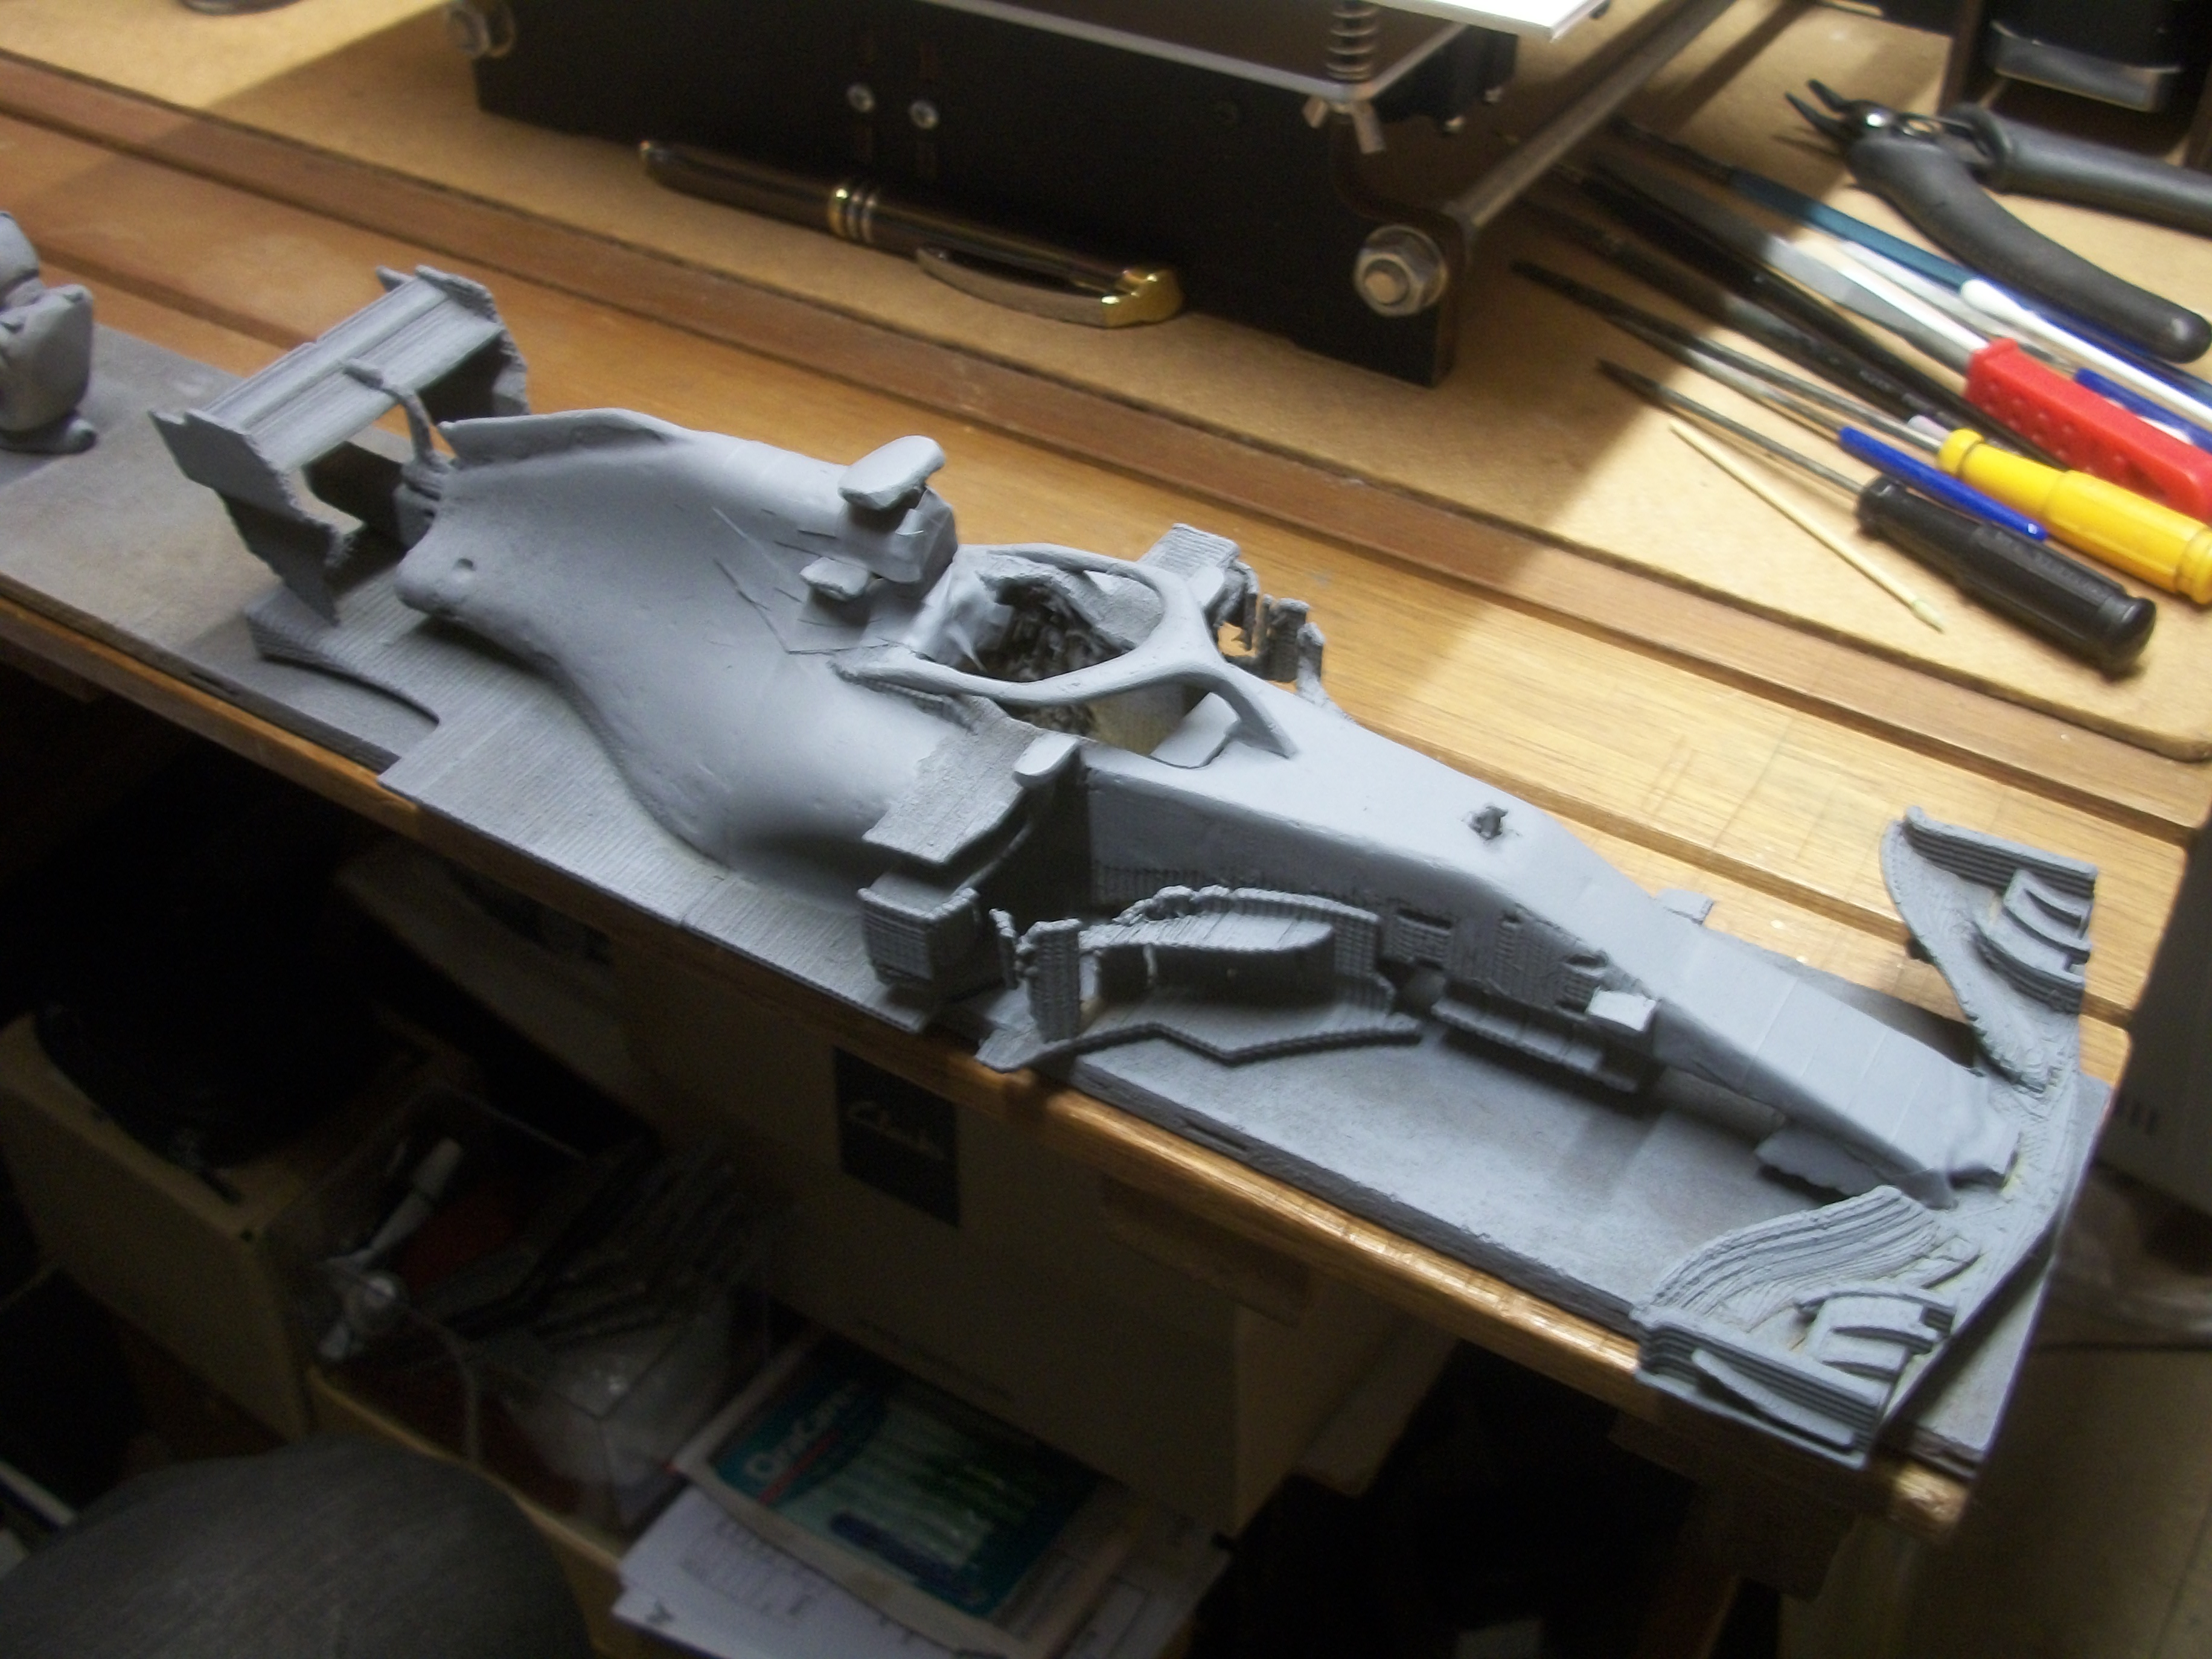
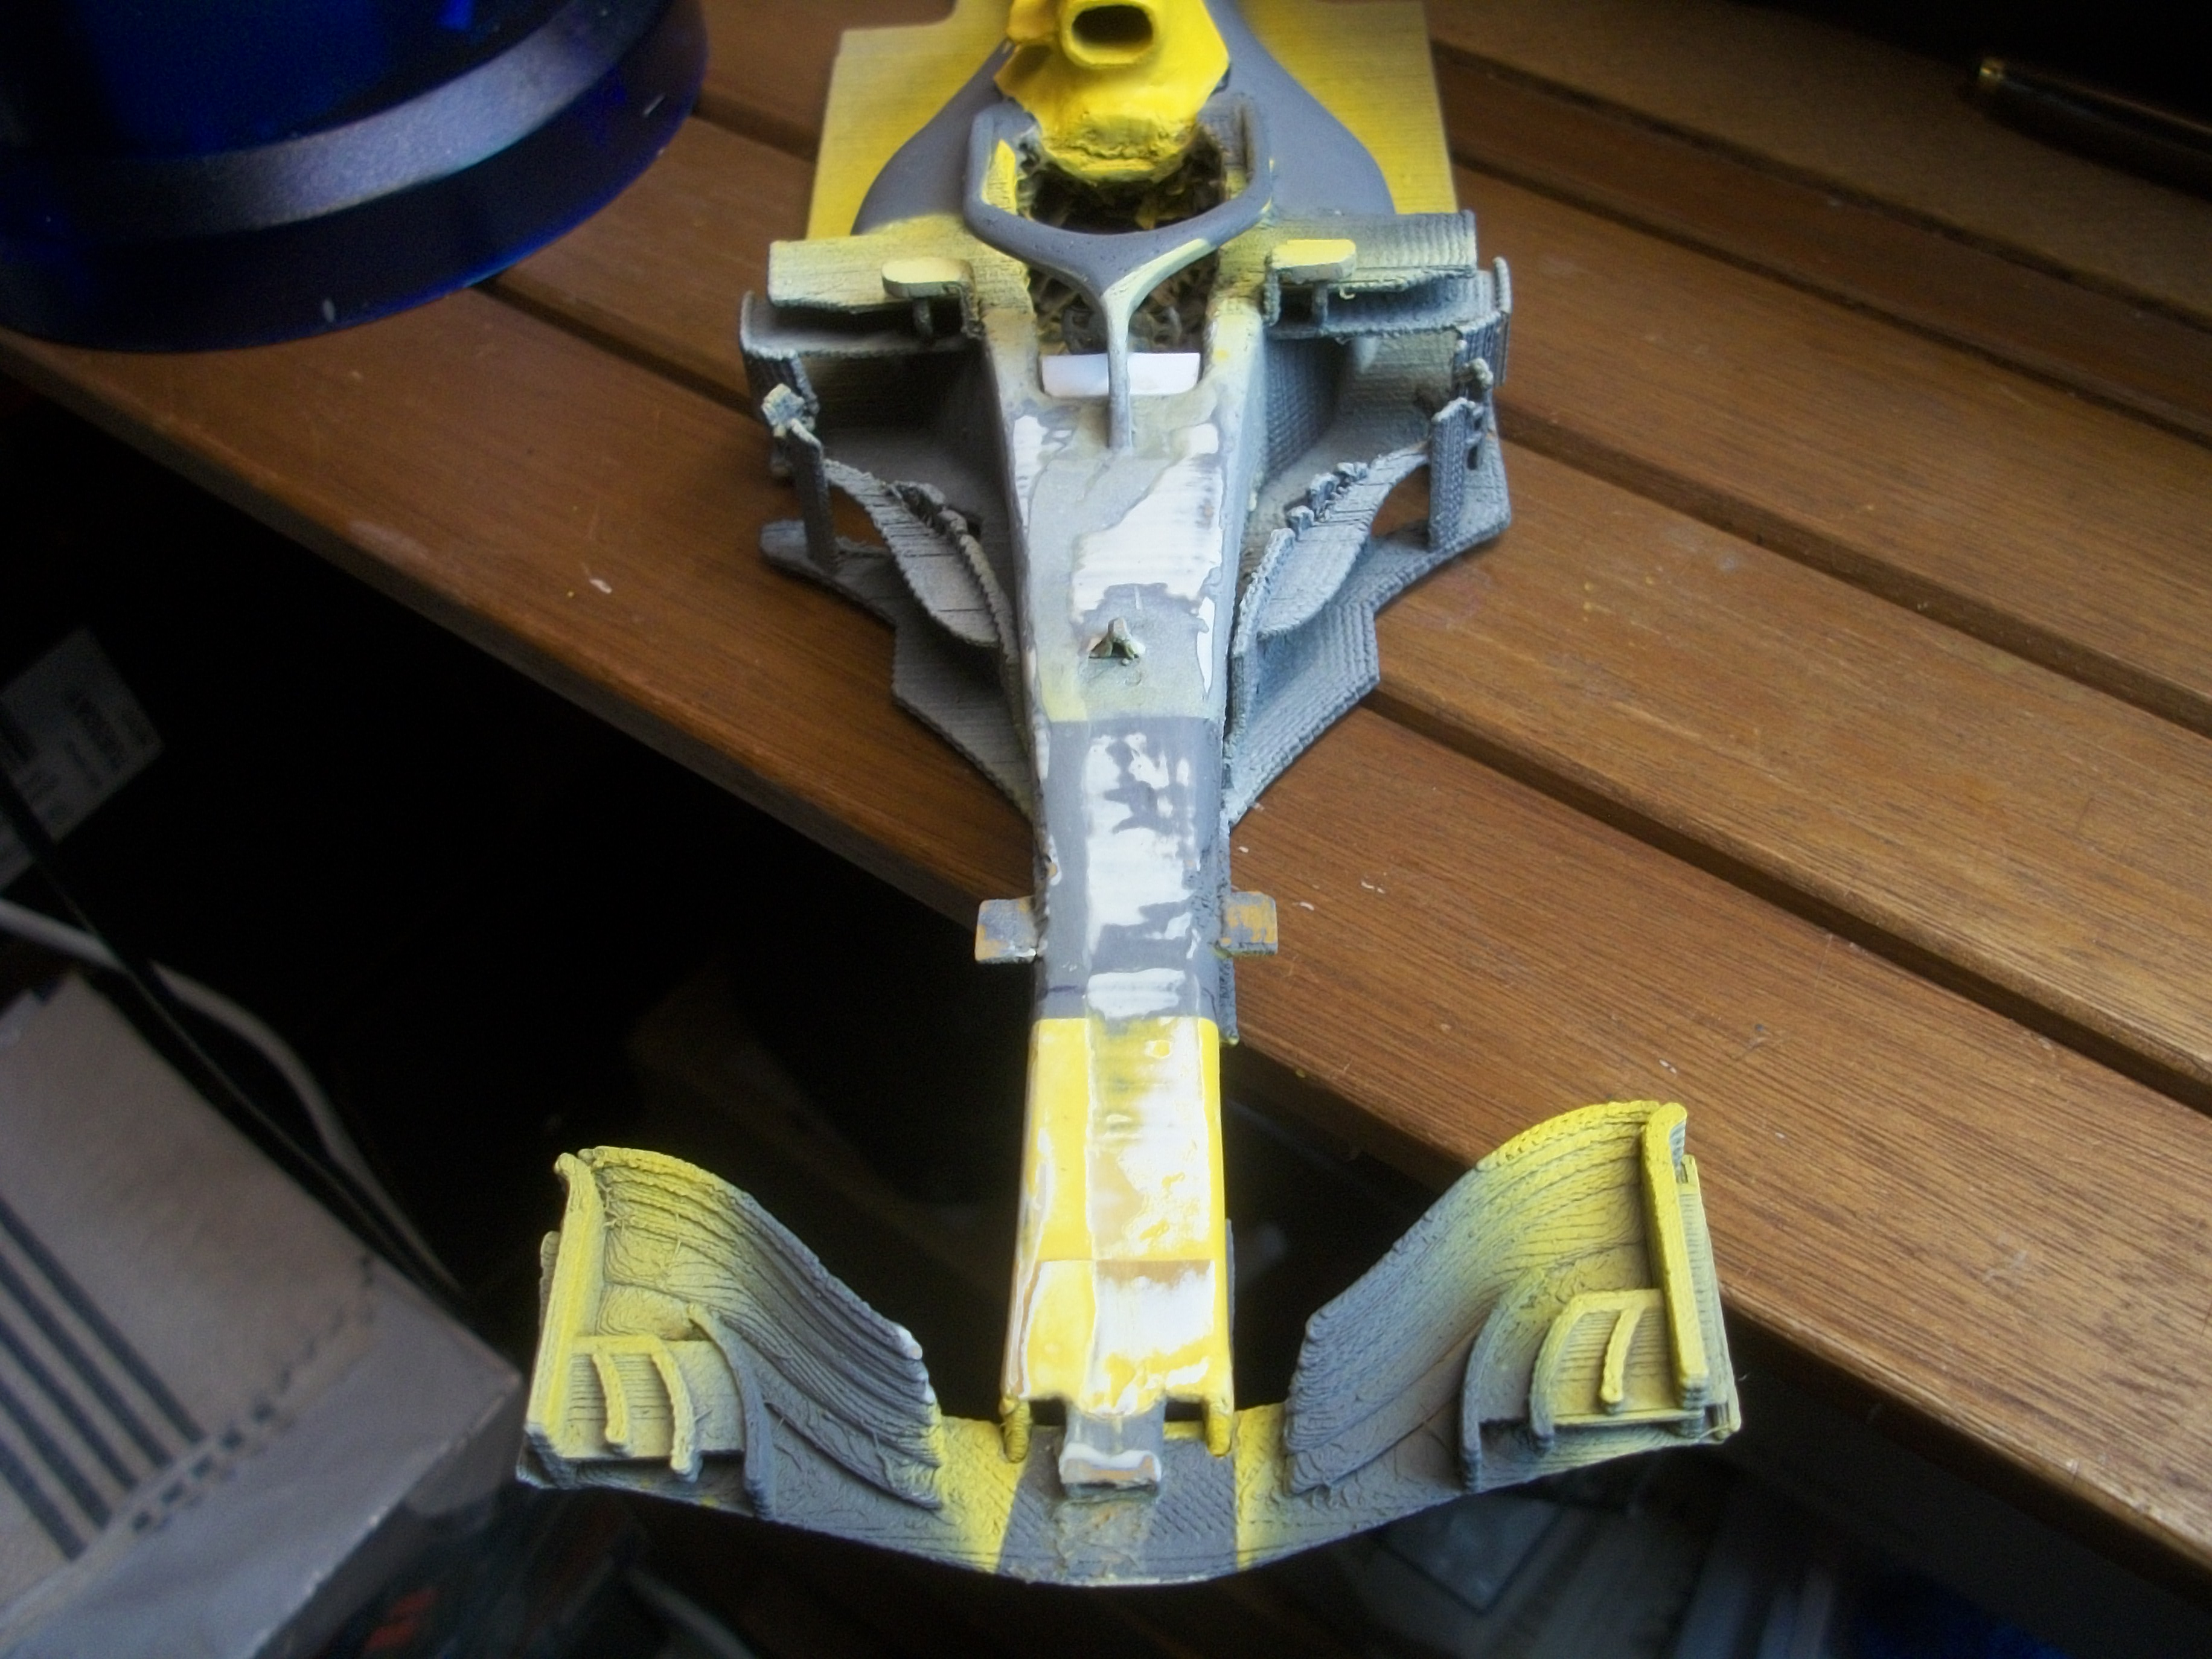
After leaving the PLA part in the acetone vapour smoothing tank overnight, for 17 hours in total, there were no visible signs of any change to the layer lines. Leaving the part to dry for a few hours inside the house did not bring about any change either. I do have the option to try 3D printing the six main body parts once more using ABS material instead of PLA material, and then the AVS procedure would probably remove the layer lines. In the meantime, I have decided to move forward with the PLA model, so the two halves of the body have been super glued together as one assembly. The halo has sanded down nicely, and this part has responded well to the orange primer filler. The body assembly and the halo have been given two coats of grey primer, with 15 minutes between each coat. Next step is to prepare the wheels and tyres, along with the suspension struts. The airbrush is ready to apply the Red Bull yellow and the Red Bull dark blue, following masking off the relevant areas. David
-
1974 Camaro , continued
Anglia105E replied to MarkJ's topic in WIP: Other Racing: Road Racing, Land Speed Racers
Thanks, Les David -
1974 Camaro , continued
Anglia105E replied to MarkJ's topic in WIP: Other Racing: Road Racing, Land Speed Racers
Interesting work on the tyres and wheels there, Mark........ The Shoe Goo product looks to be ideal for this kind of work, and I don't think this product is available here in England......... I have made use of Halfords Rubberised Black, aerosol spray paint, which produces a really nice finish on the wide race tyres that I am currently working on for the Red Bull F1 car. ( the wheels and tyres are 3D printed by myself ). Keep up the good work ! David
-
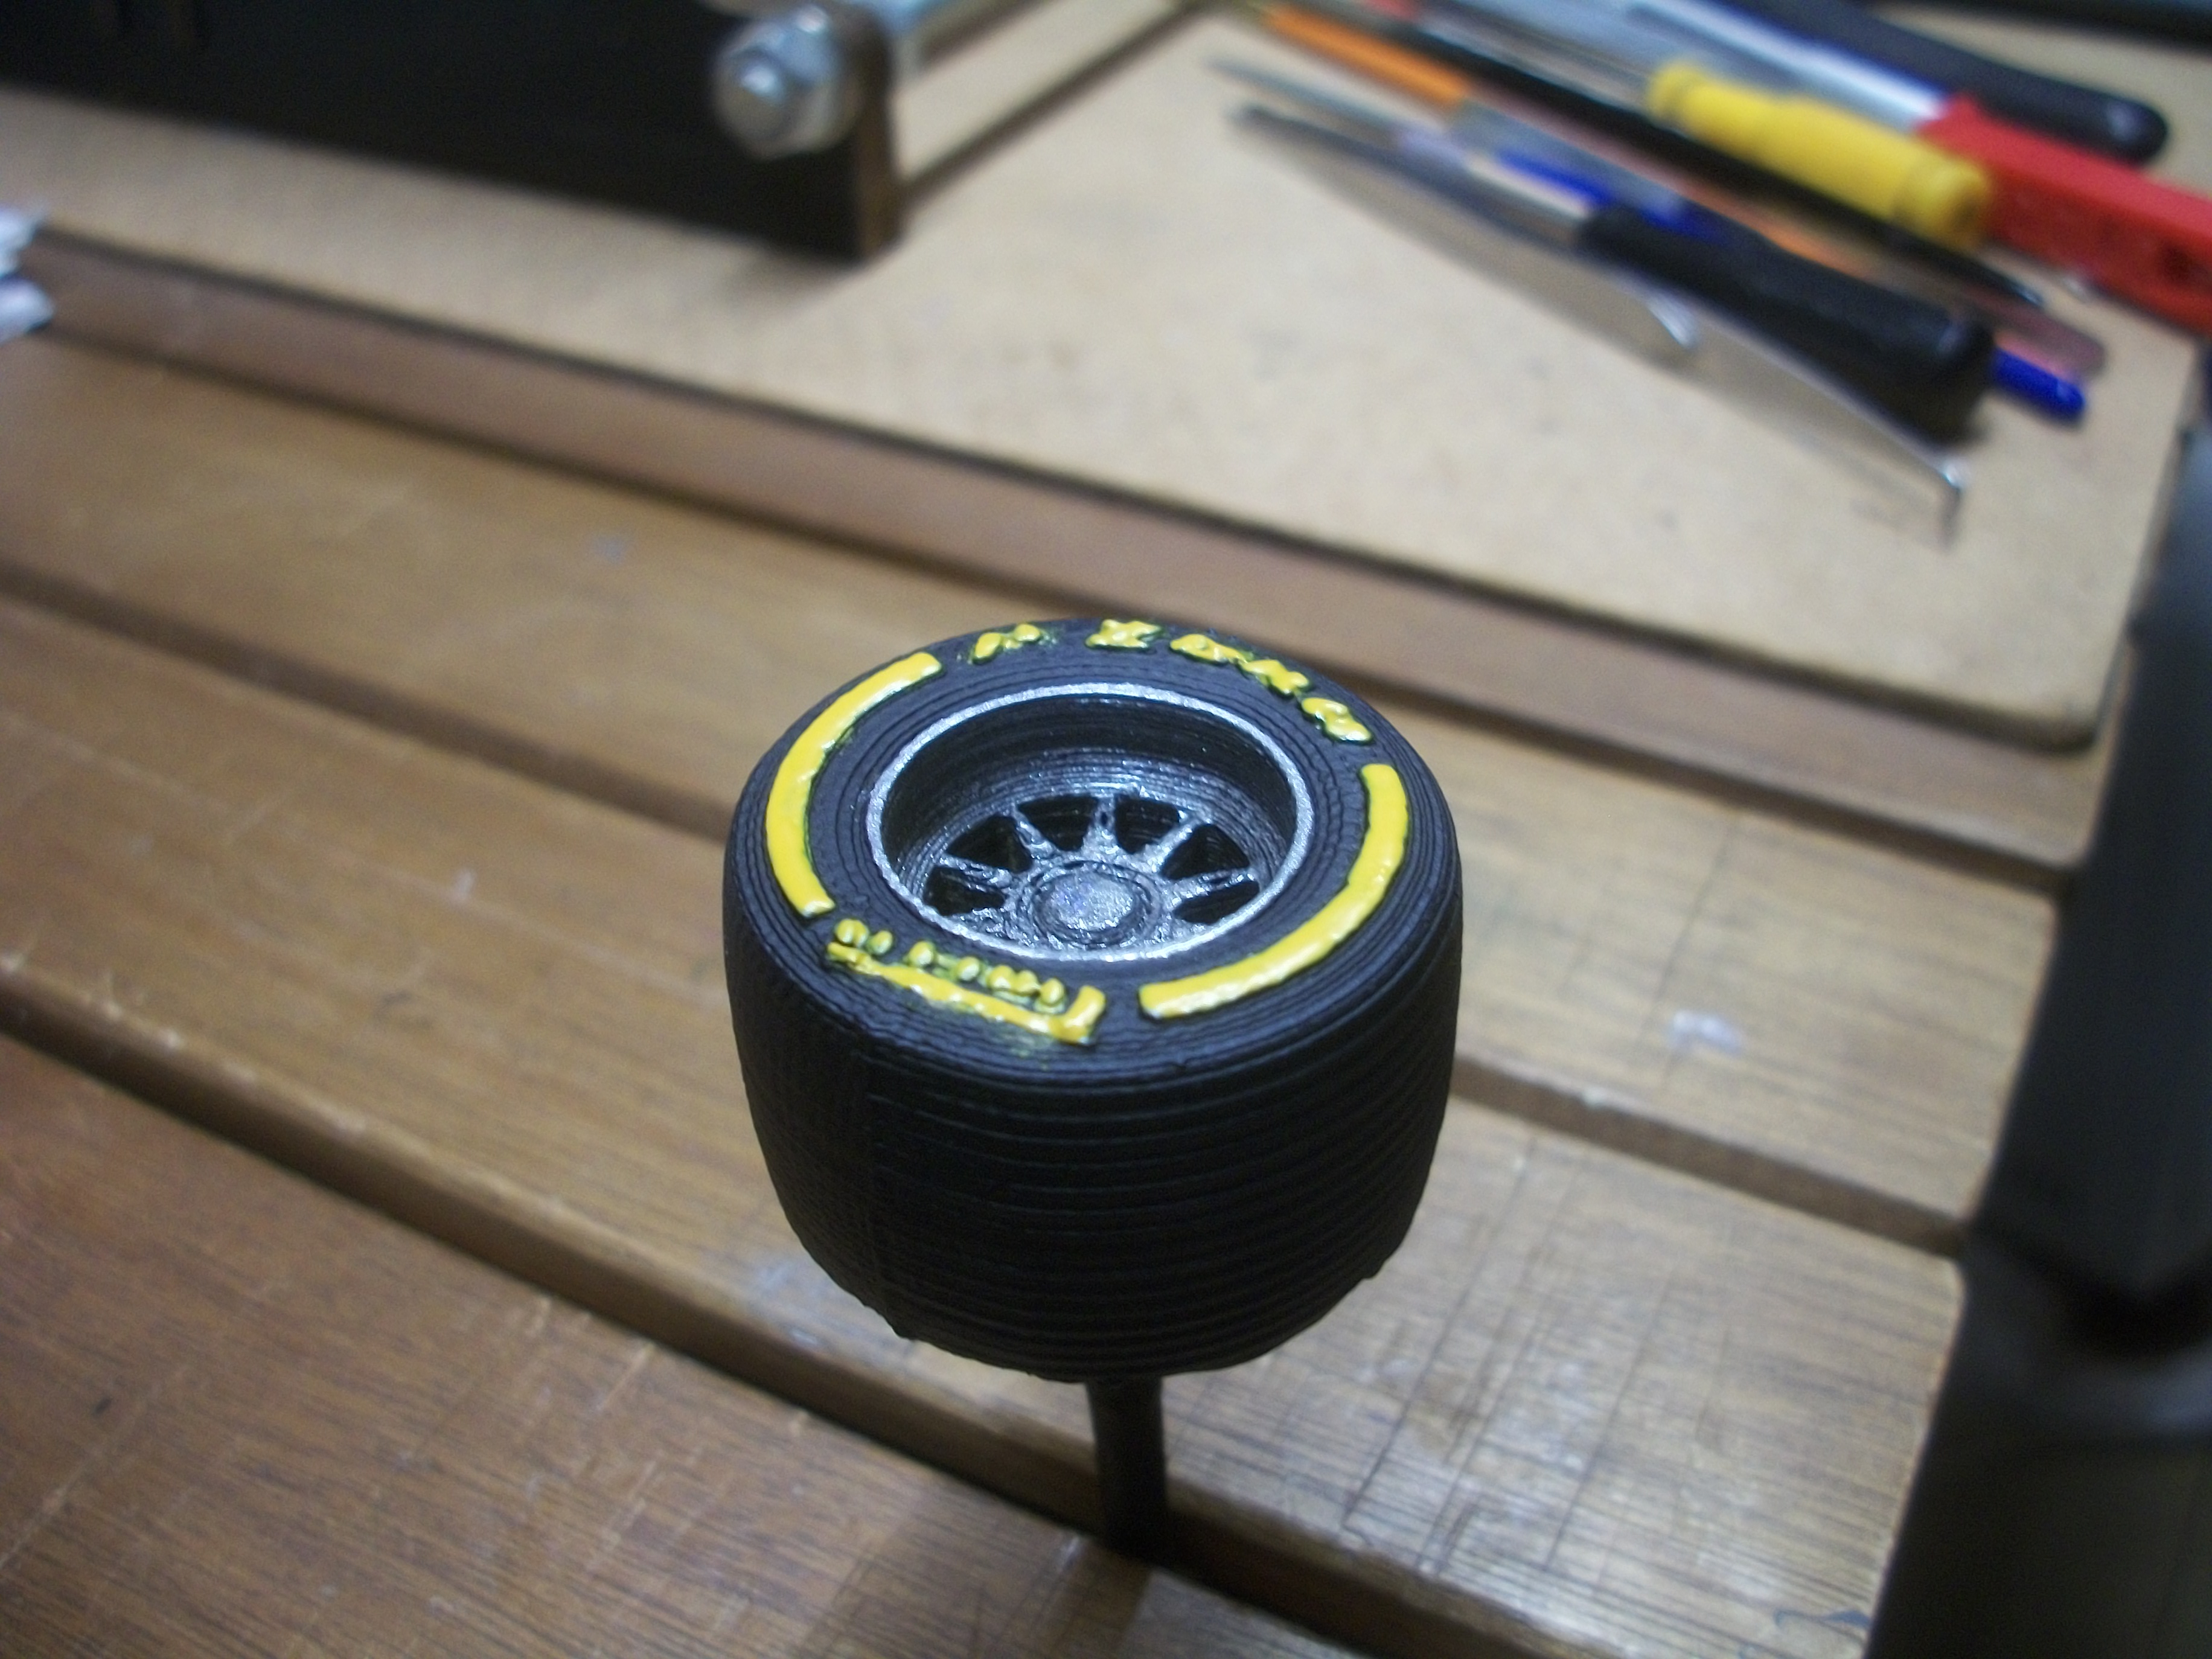
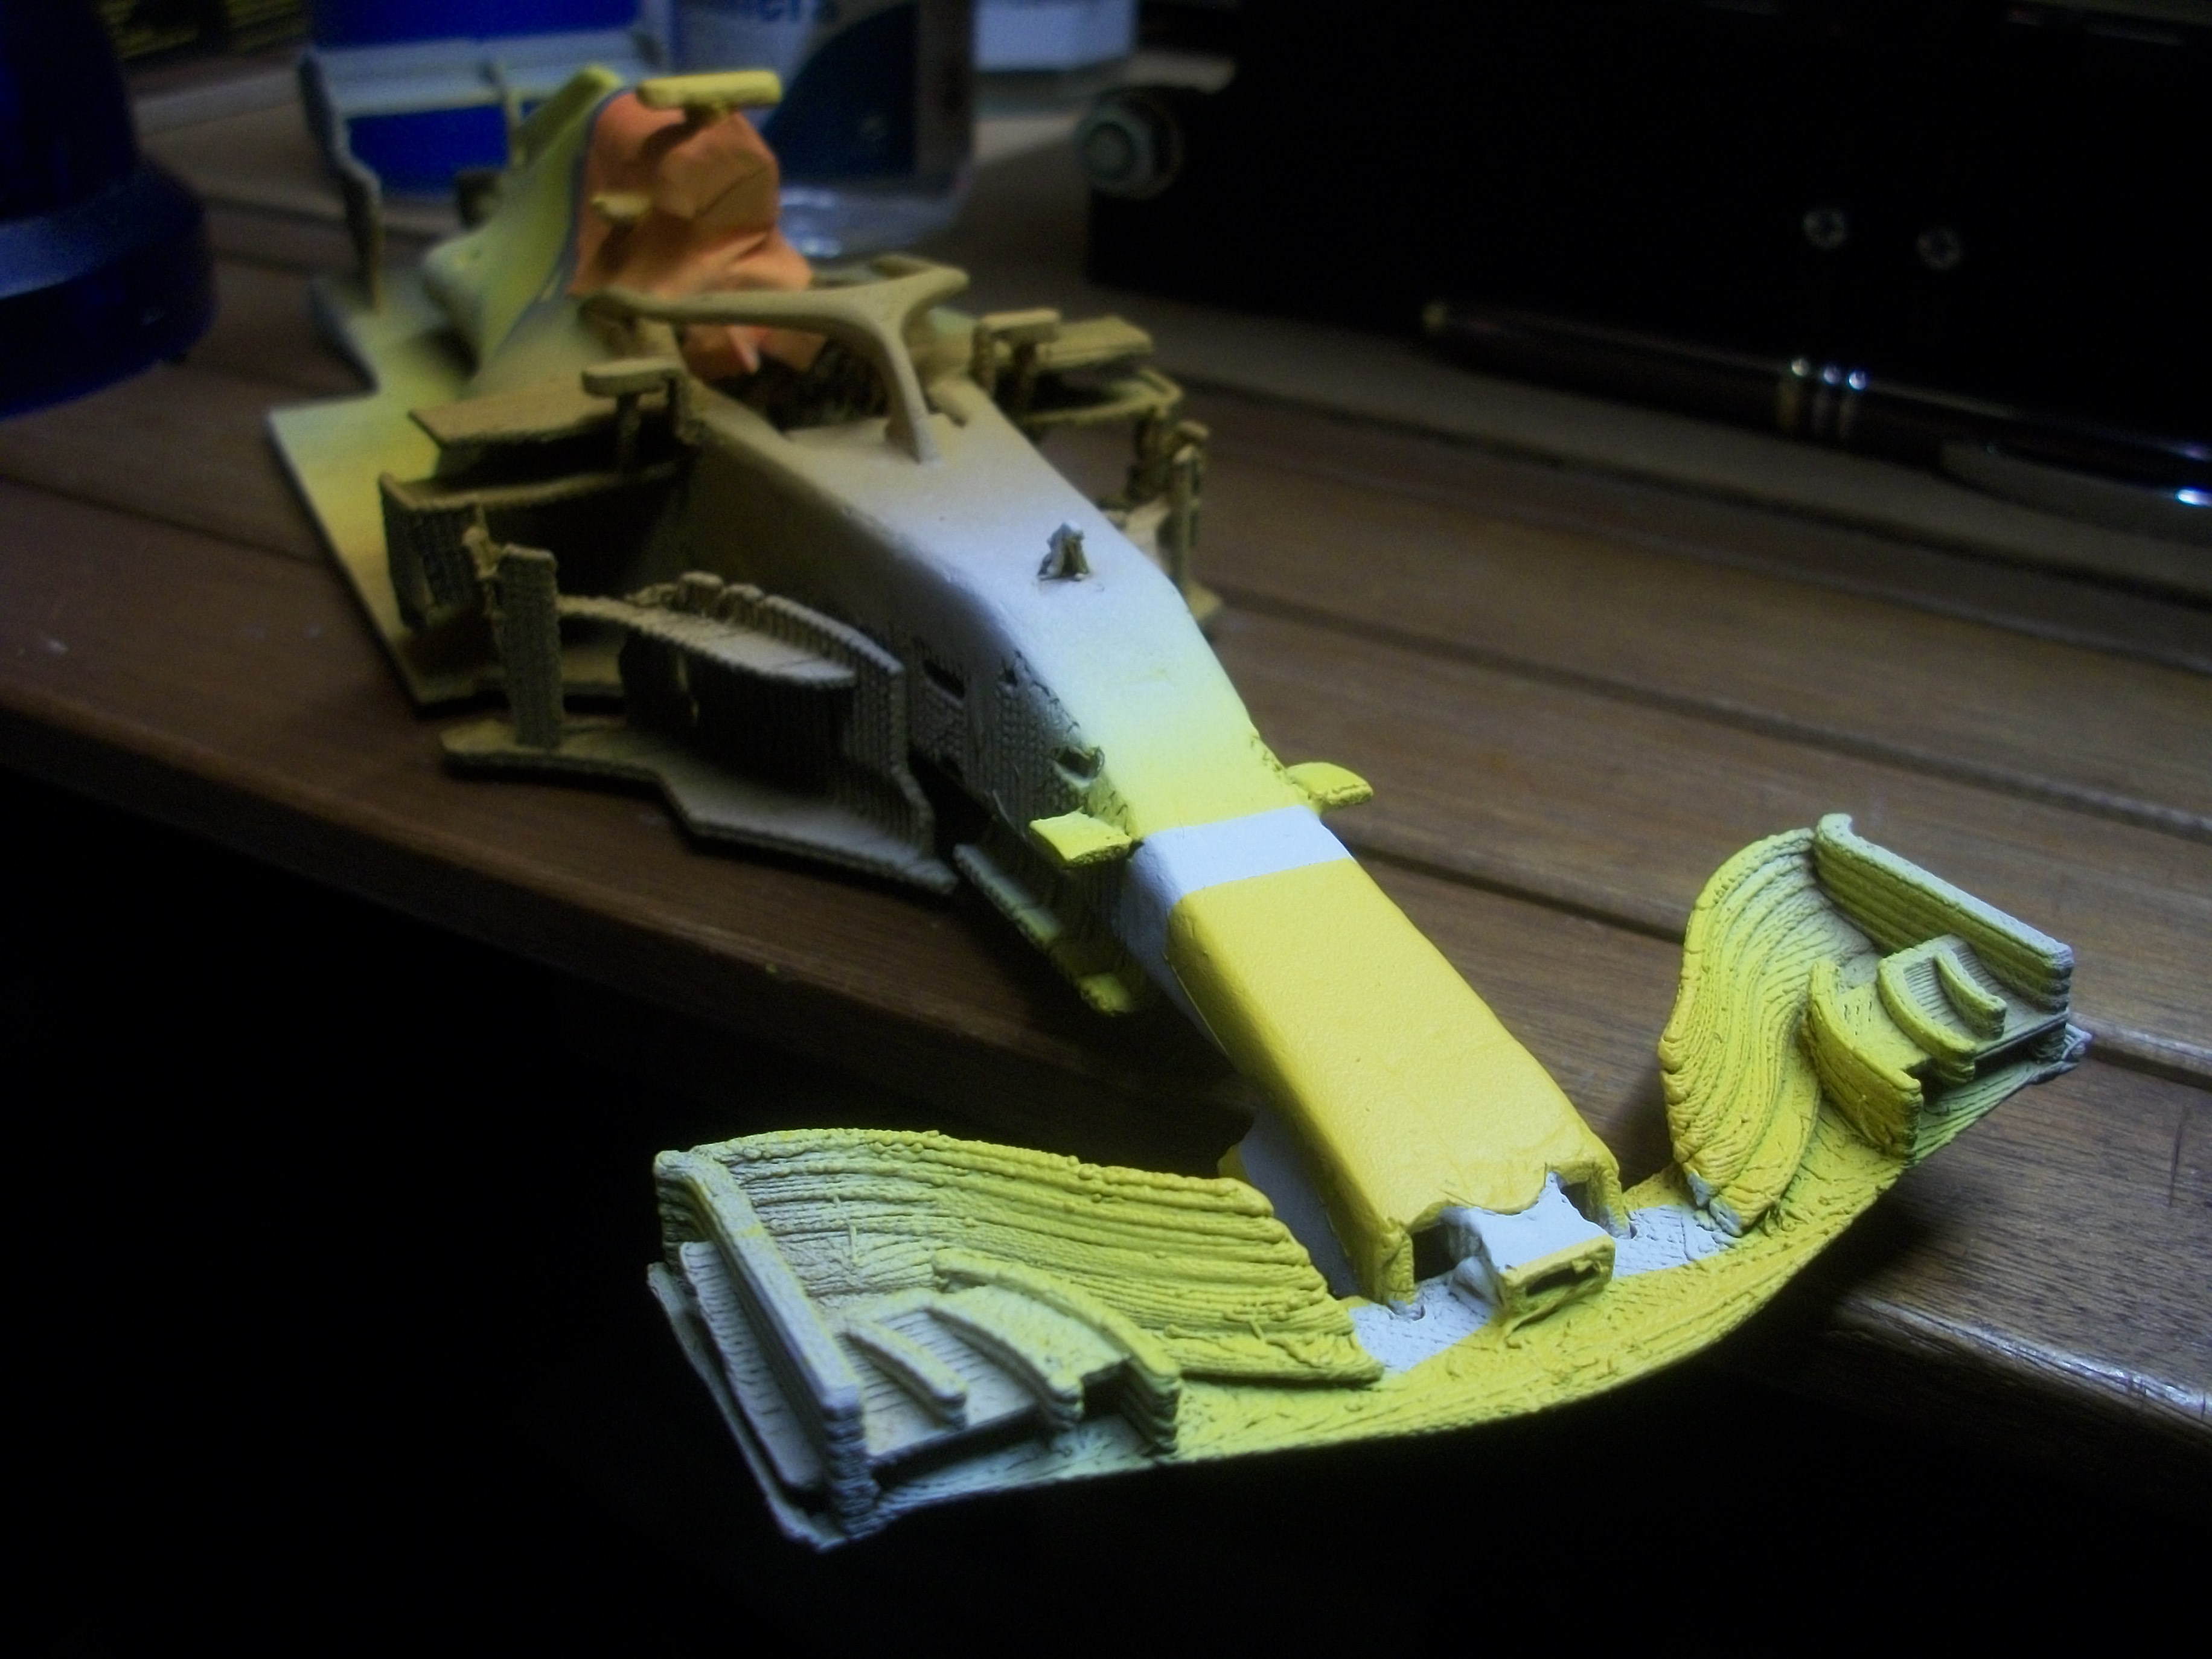
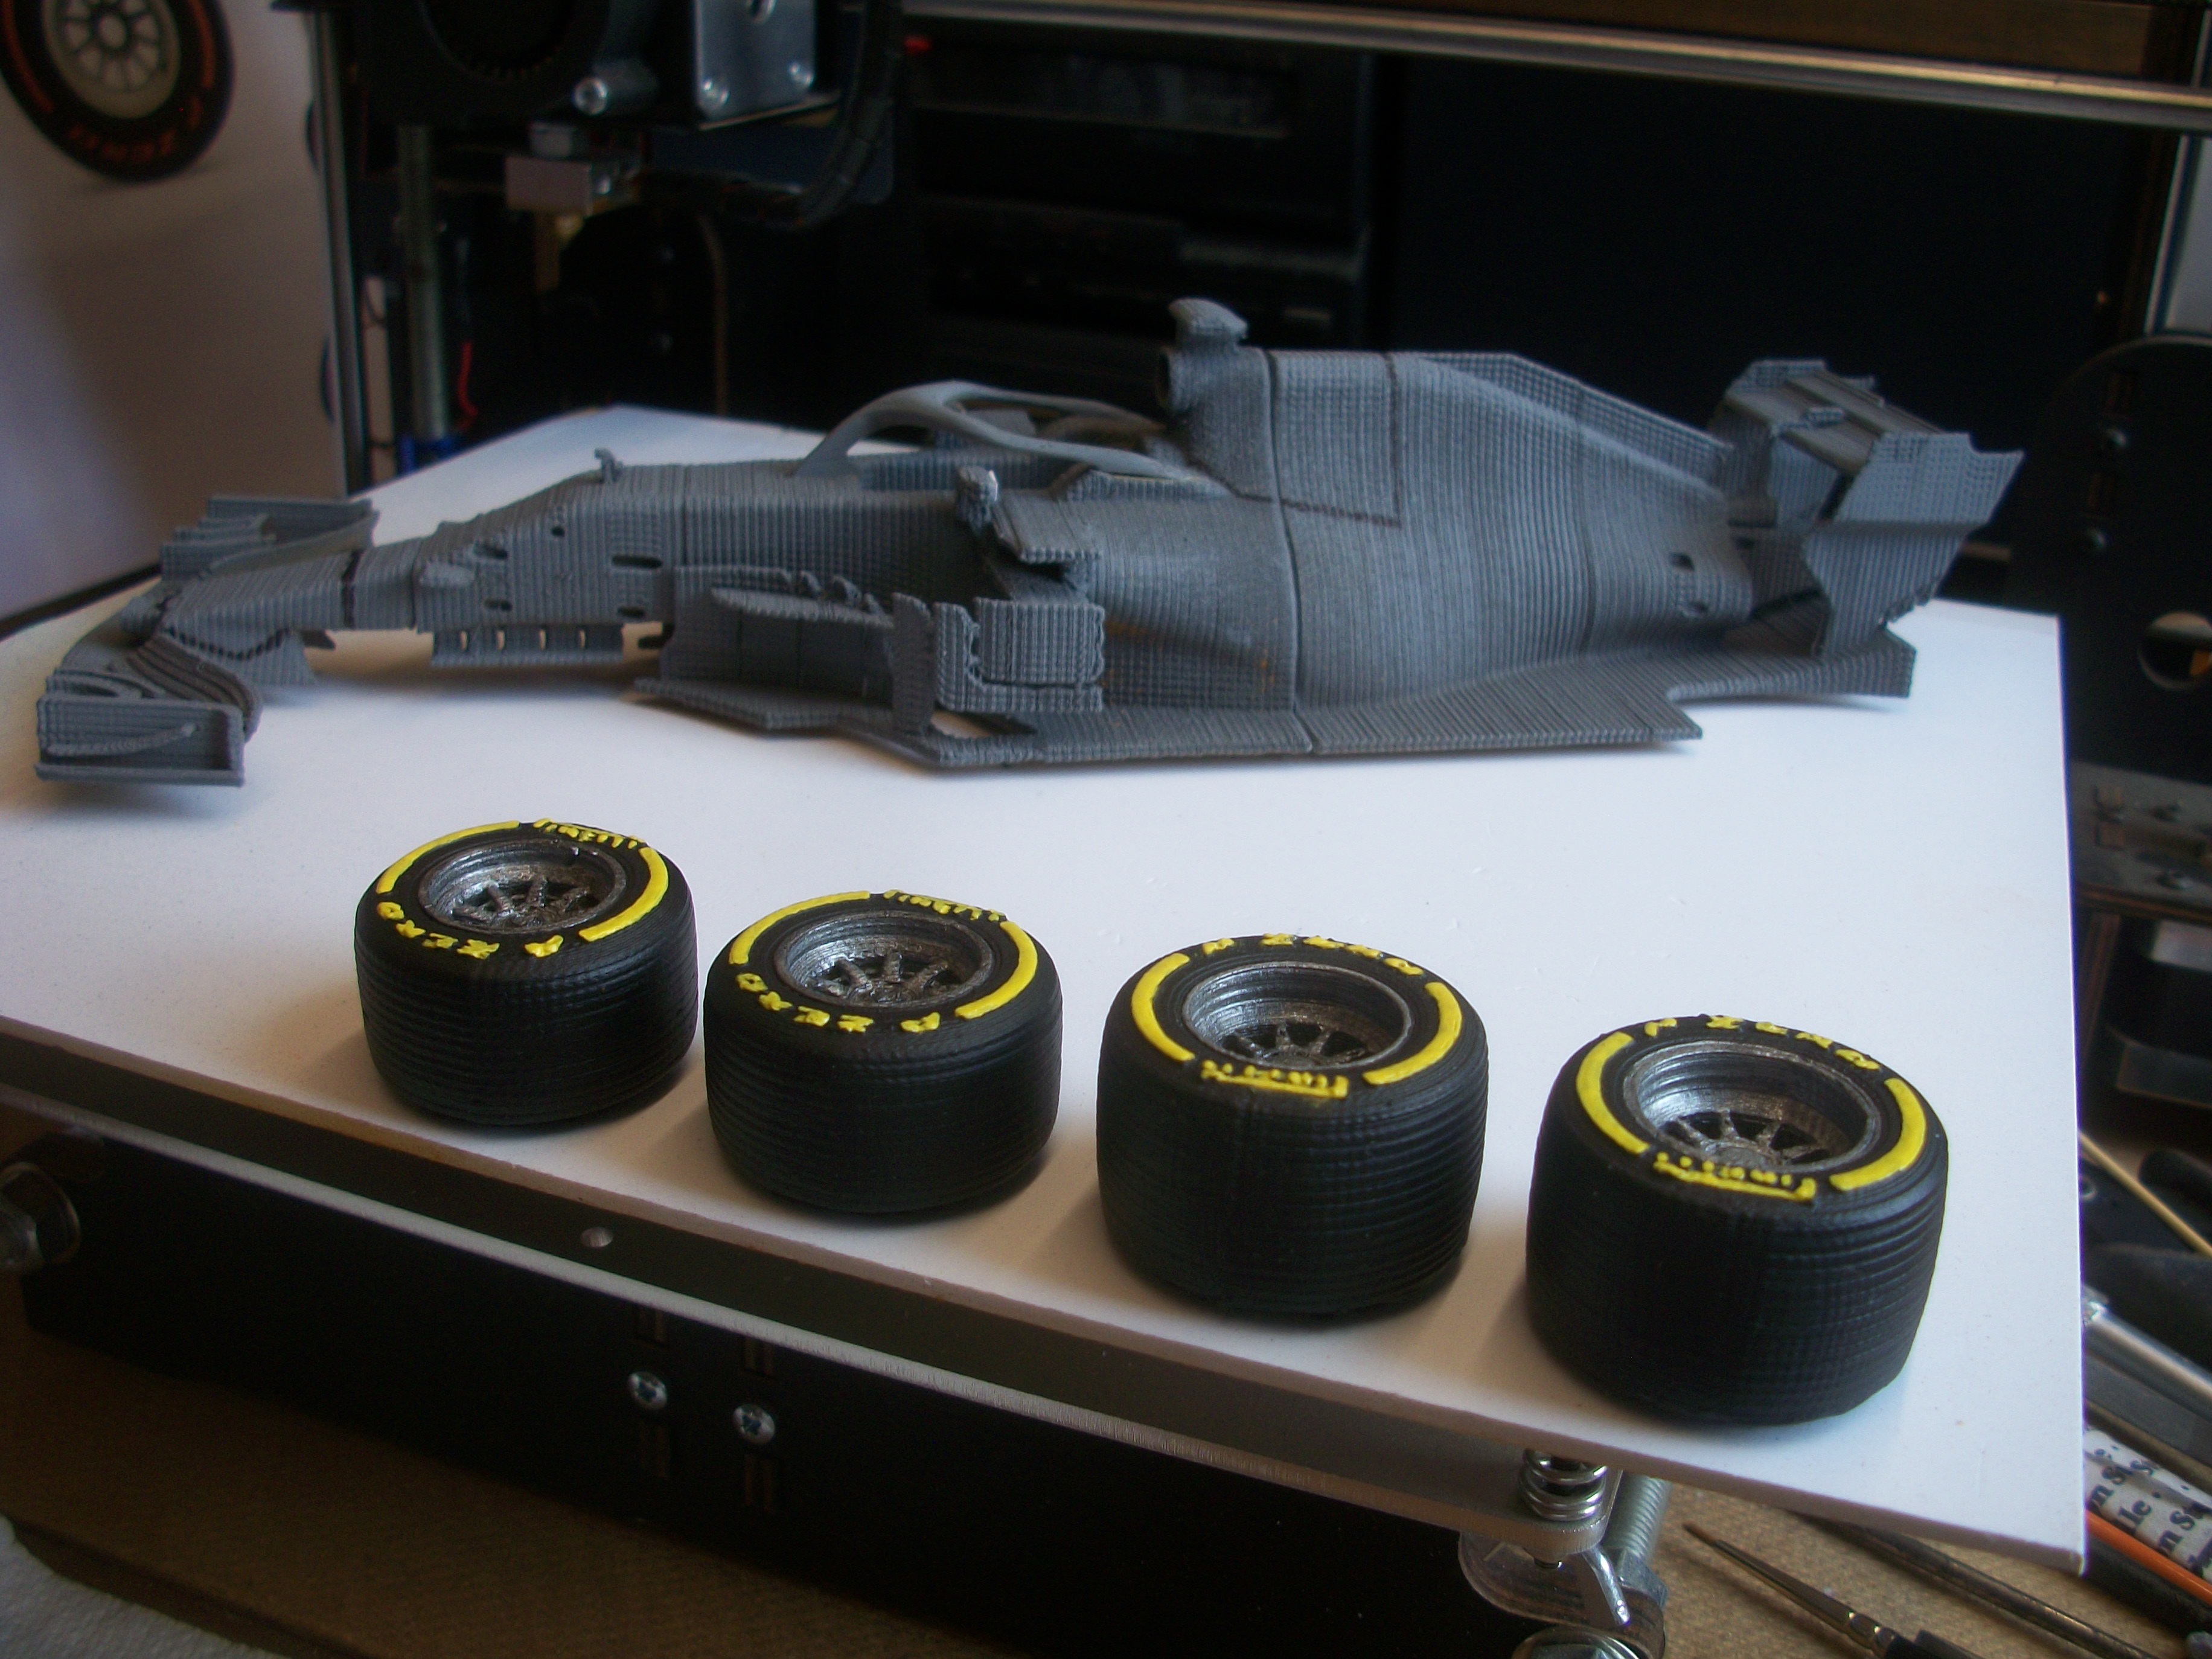
Preparing one of the rear wheels and the tyre for this RB14, and I shall have to remove the tread pattern because a Pirelli P Zero tyre with yellow lettering is a slick tyre. The 3D printed tread pattern was accidental, due to the layer lines. I did consider making these a set of ' wet ' tyres, rather than mediums, which would have blue lettering, but the tread pattern has horizontal lines as well as radial lines. Also, the wet tyre has ' Cinturato ' instead of ' Zero ' lettering. The rear end part of the car, including the rear wing, has been placed inside the Acetone Vapour Smoothing box and after one hour there is no visible change to the layer lines. This will be left overnight, and checked again tomorrow. David
-
Thanks to the moderators for moving this topic of mine to the correct section...... I had a feeling it was in the wrong section ! David


.jpg.91f1a1fd6e09a1e8ff5cceae8077d7f0.jpg)