Anglia105E
-
Posts
3,487 -
Joined
-
Last visited
Content Type
Profiles
Forums
Events
Gallery
Everything posted by Anglia105E
-
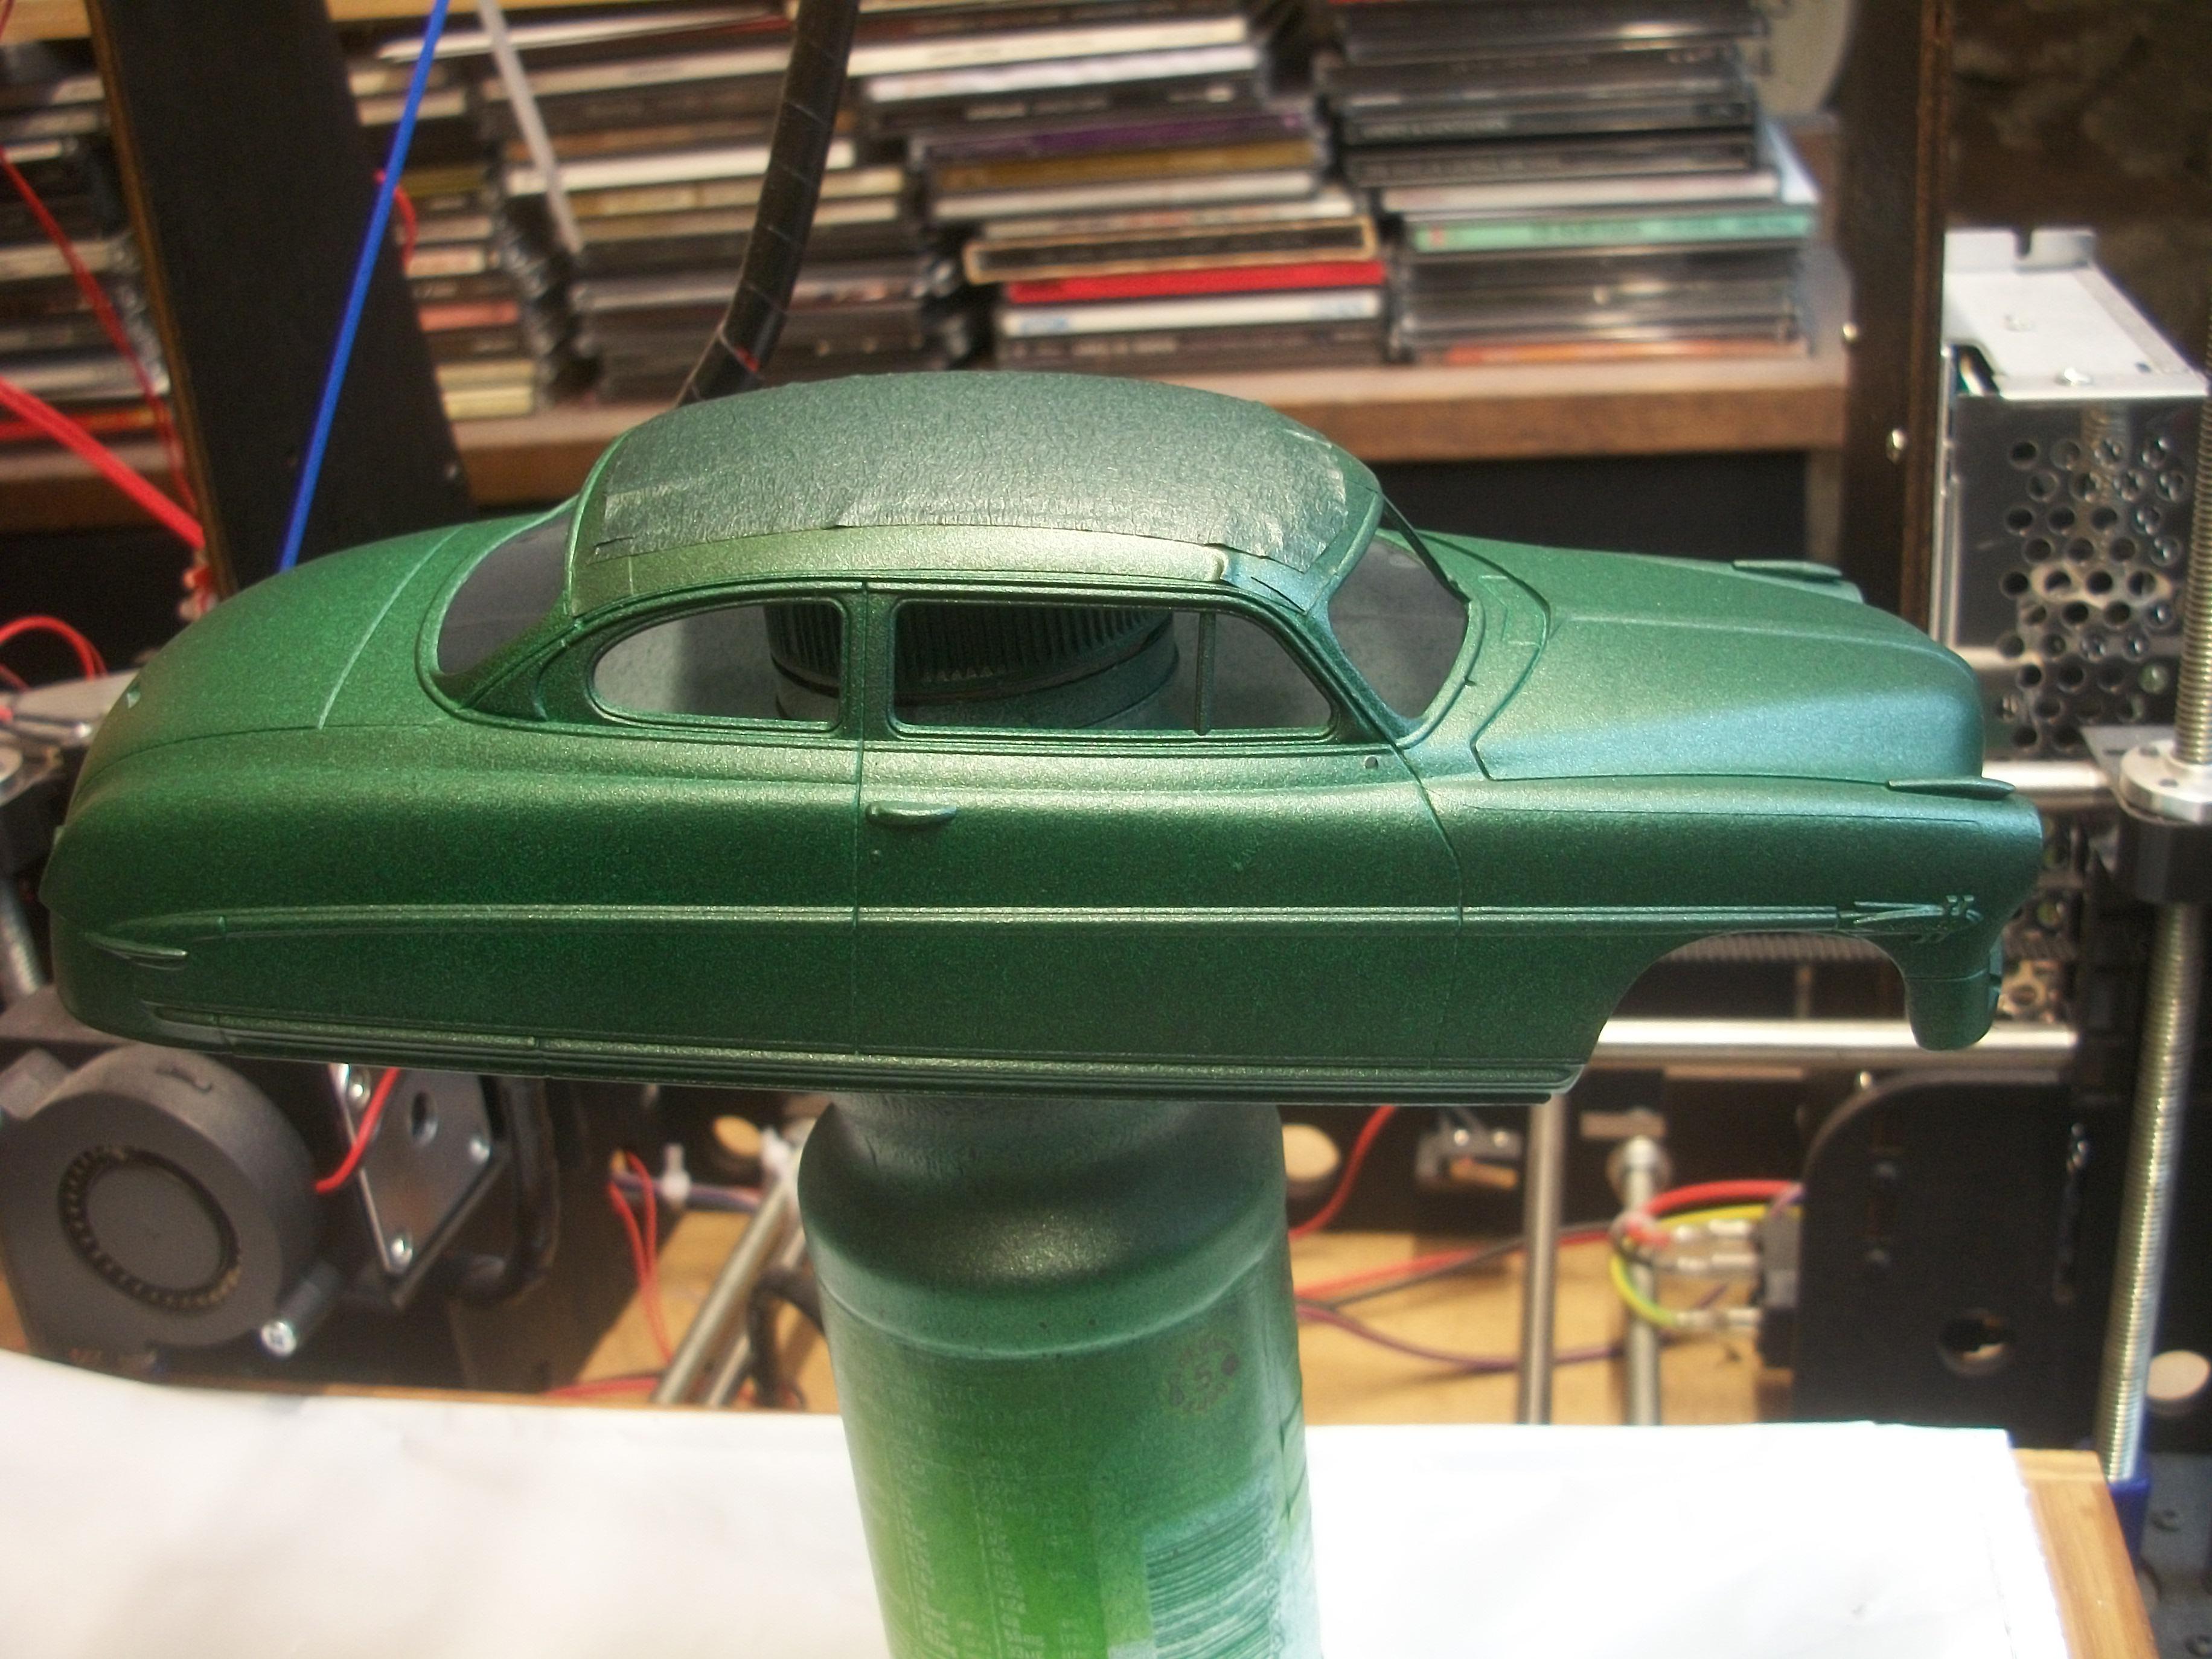
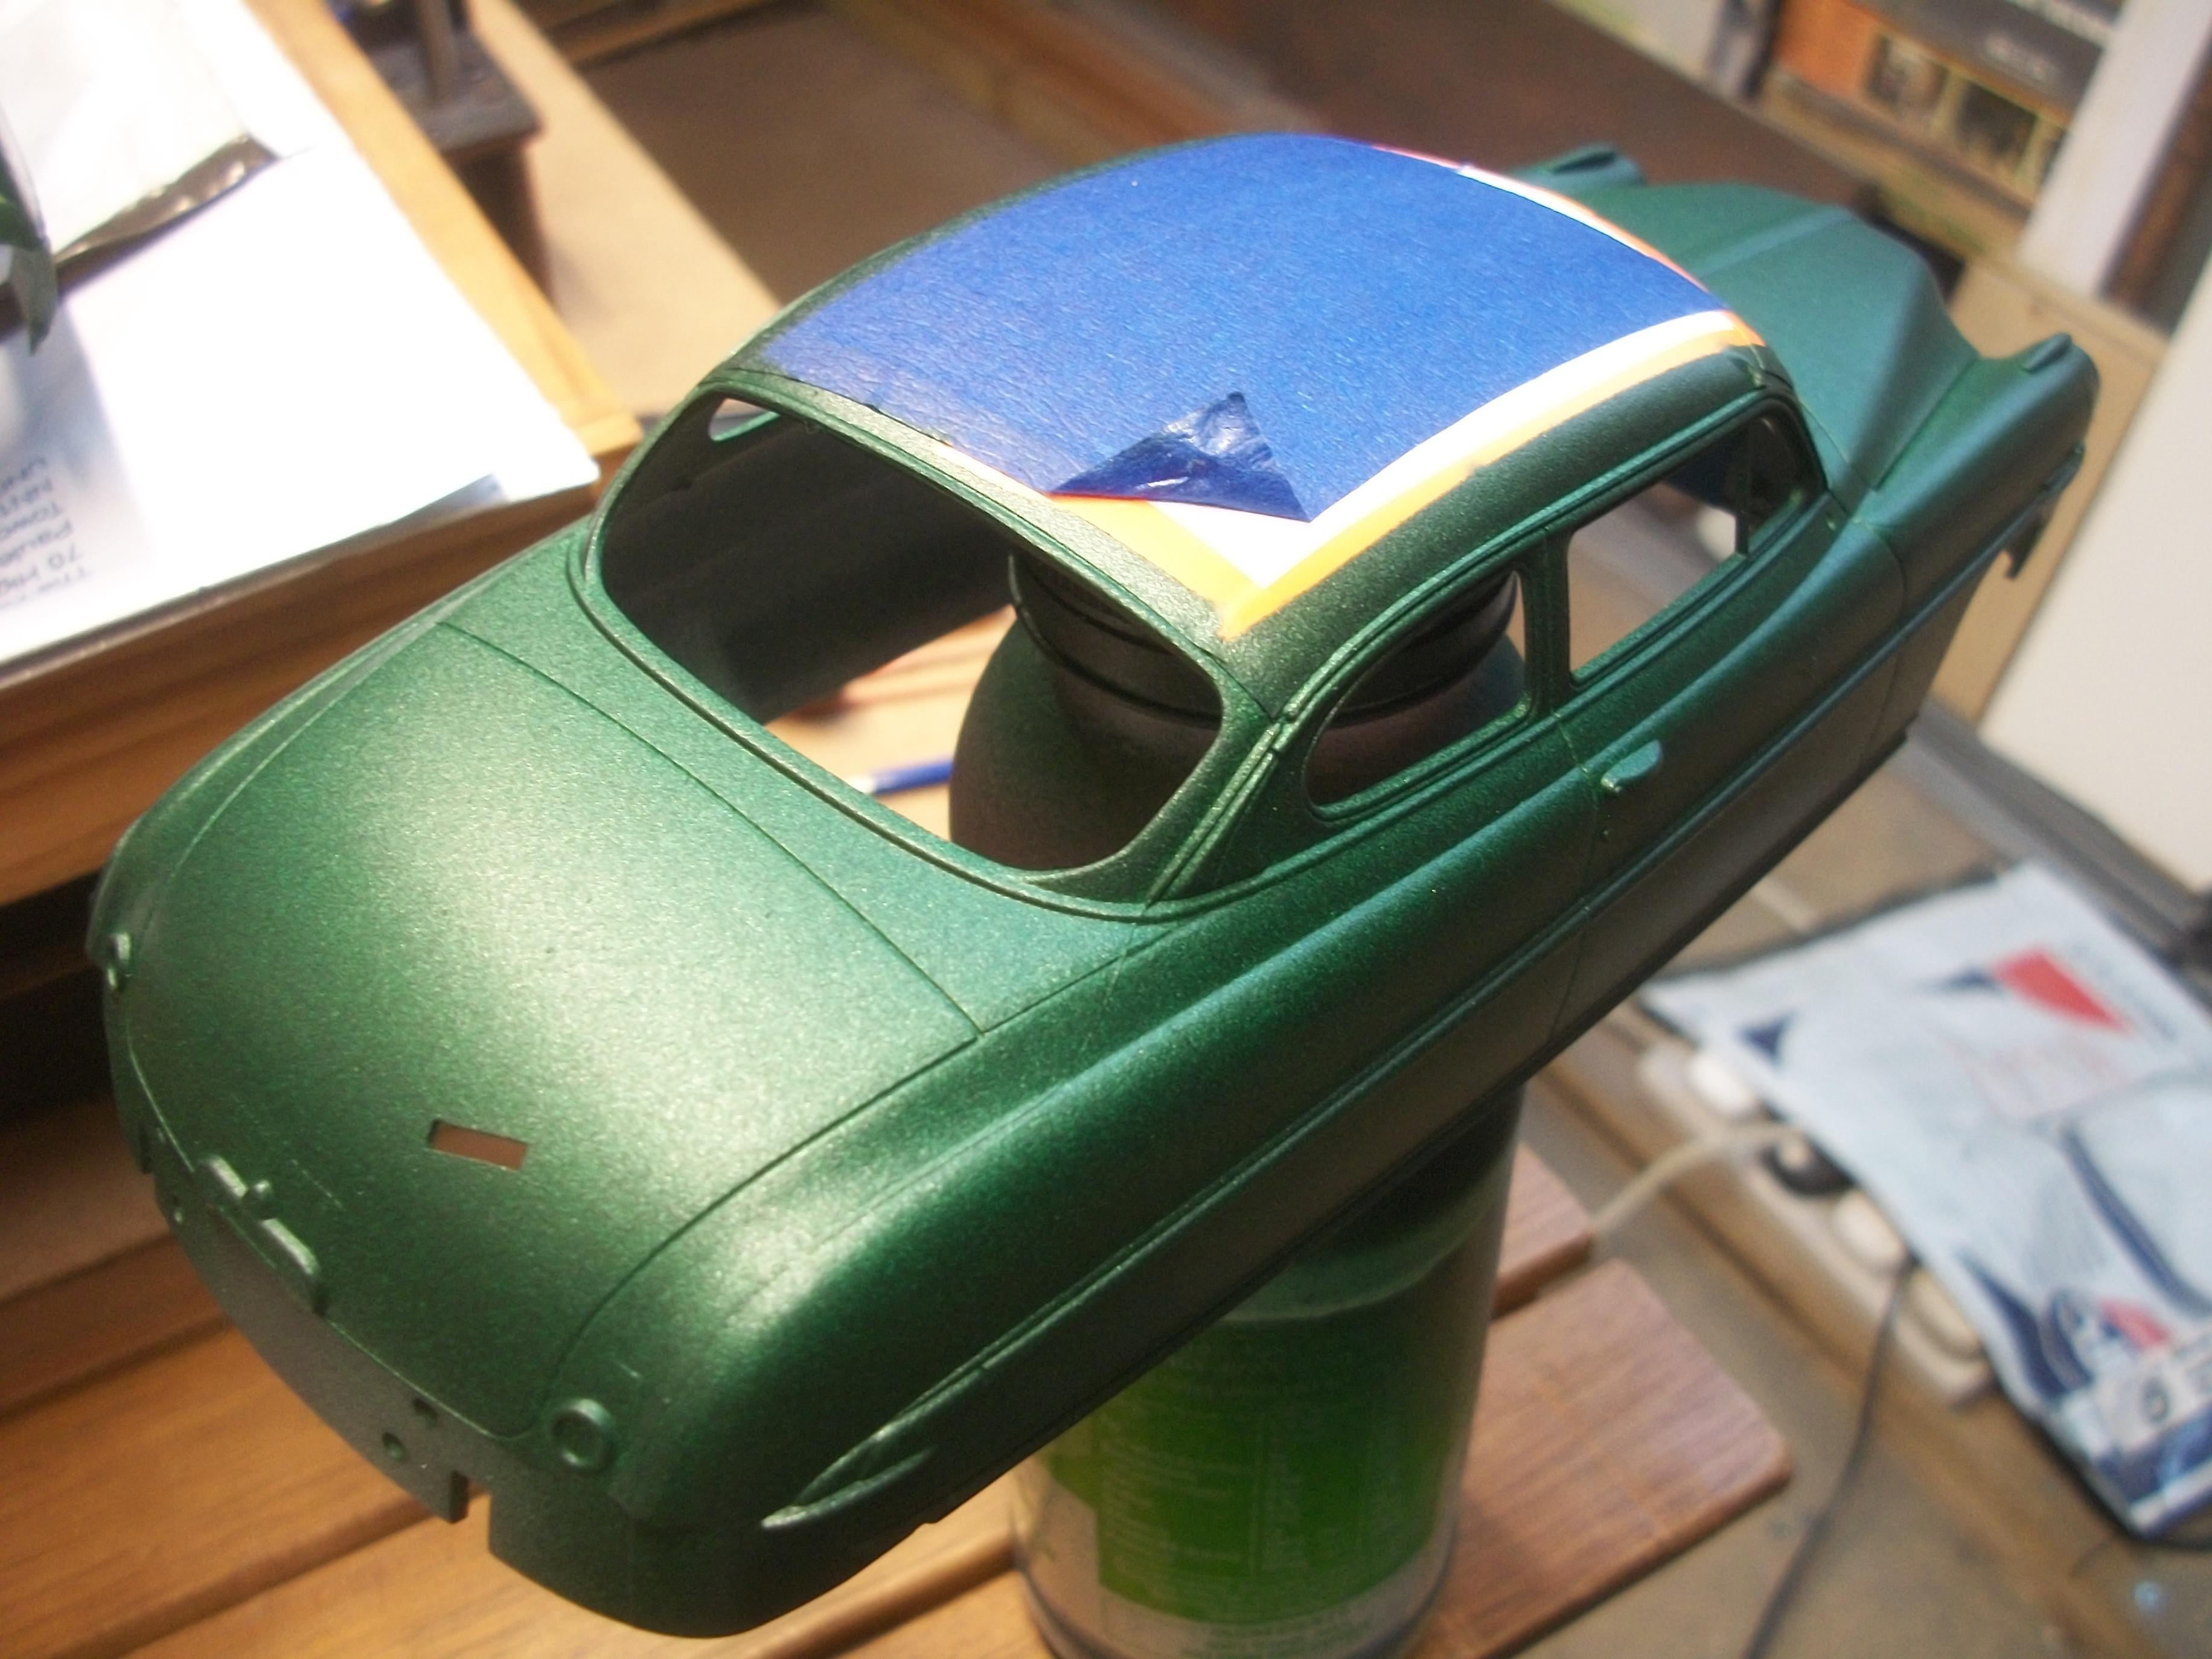
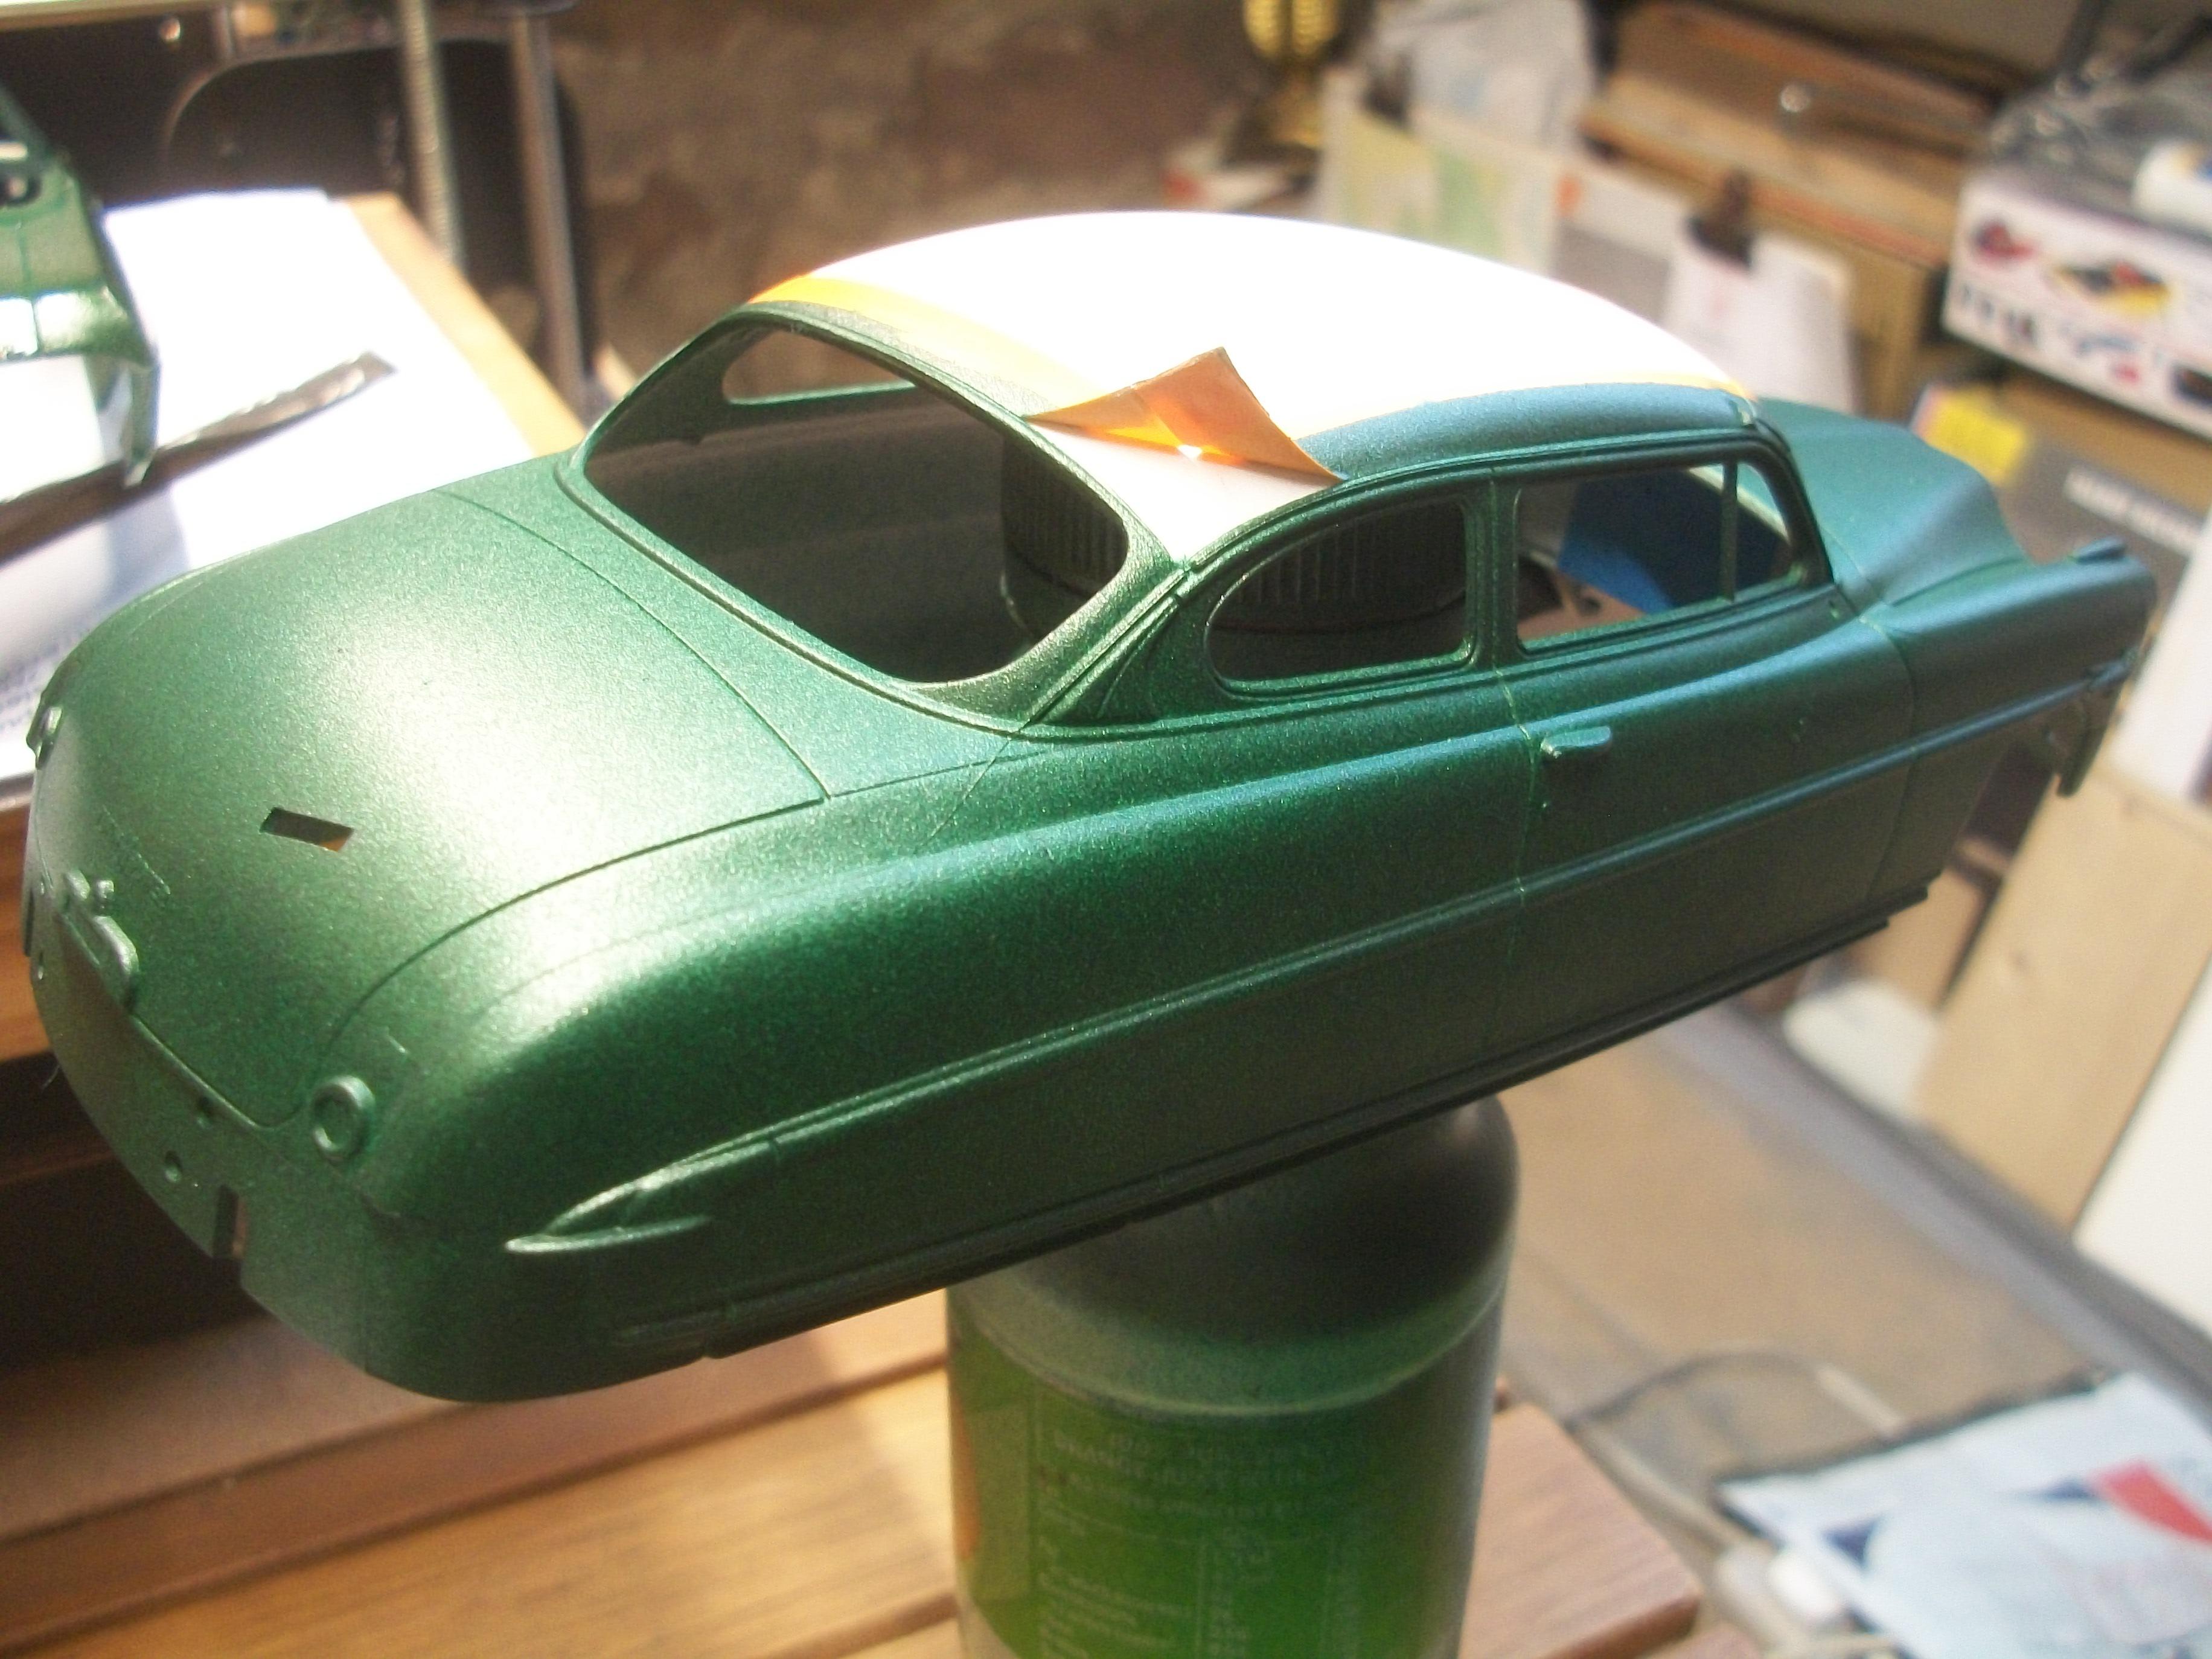
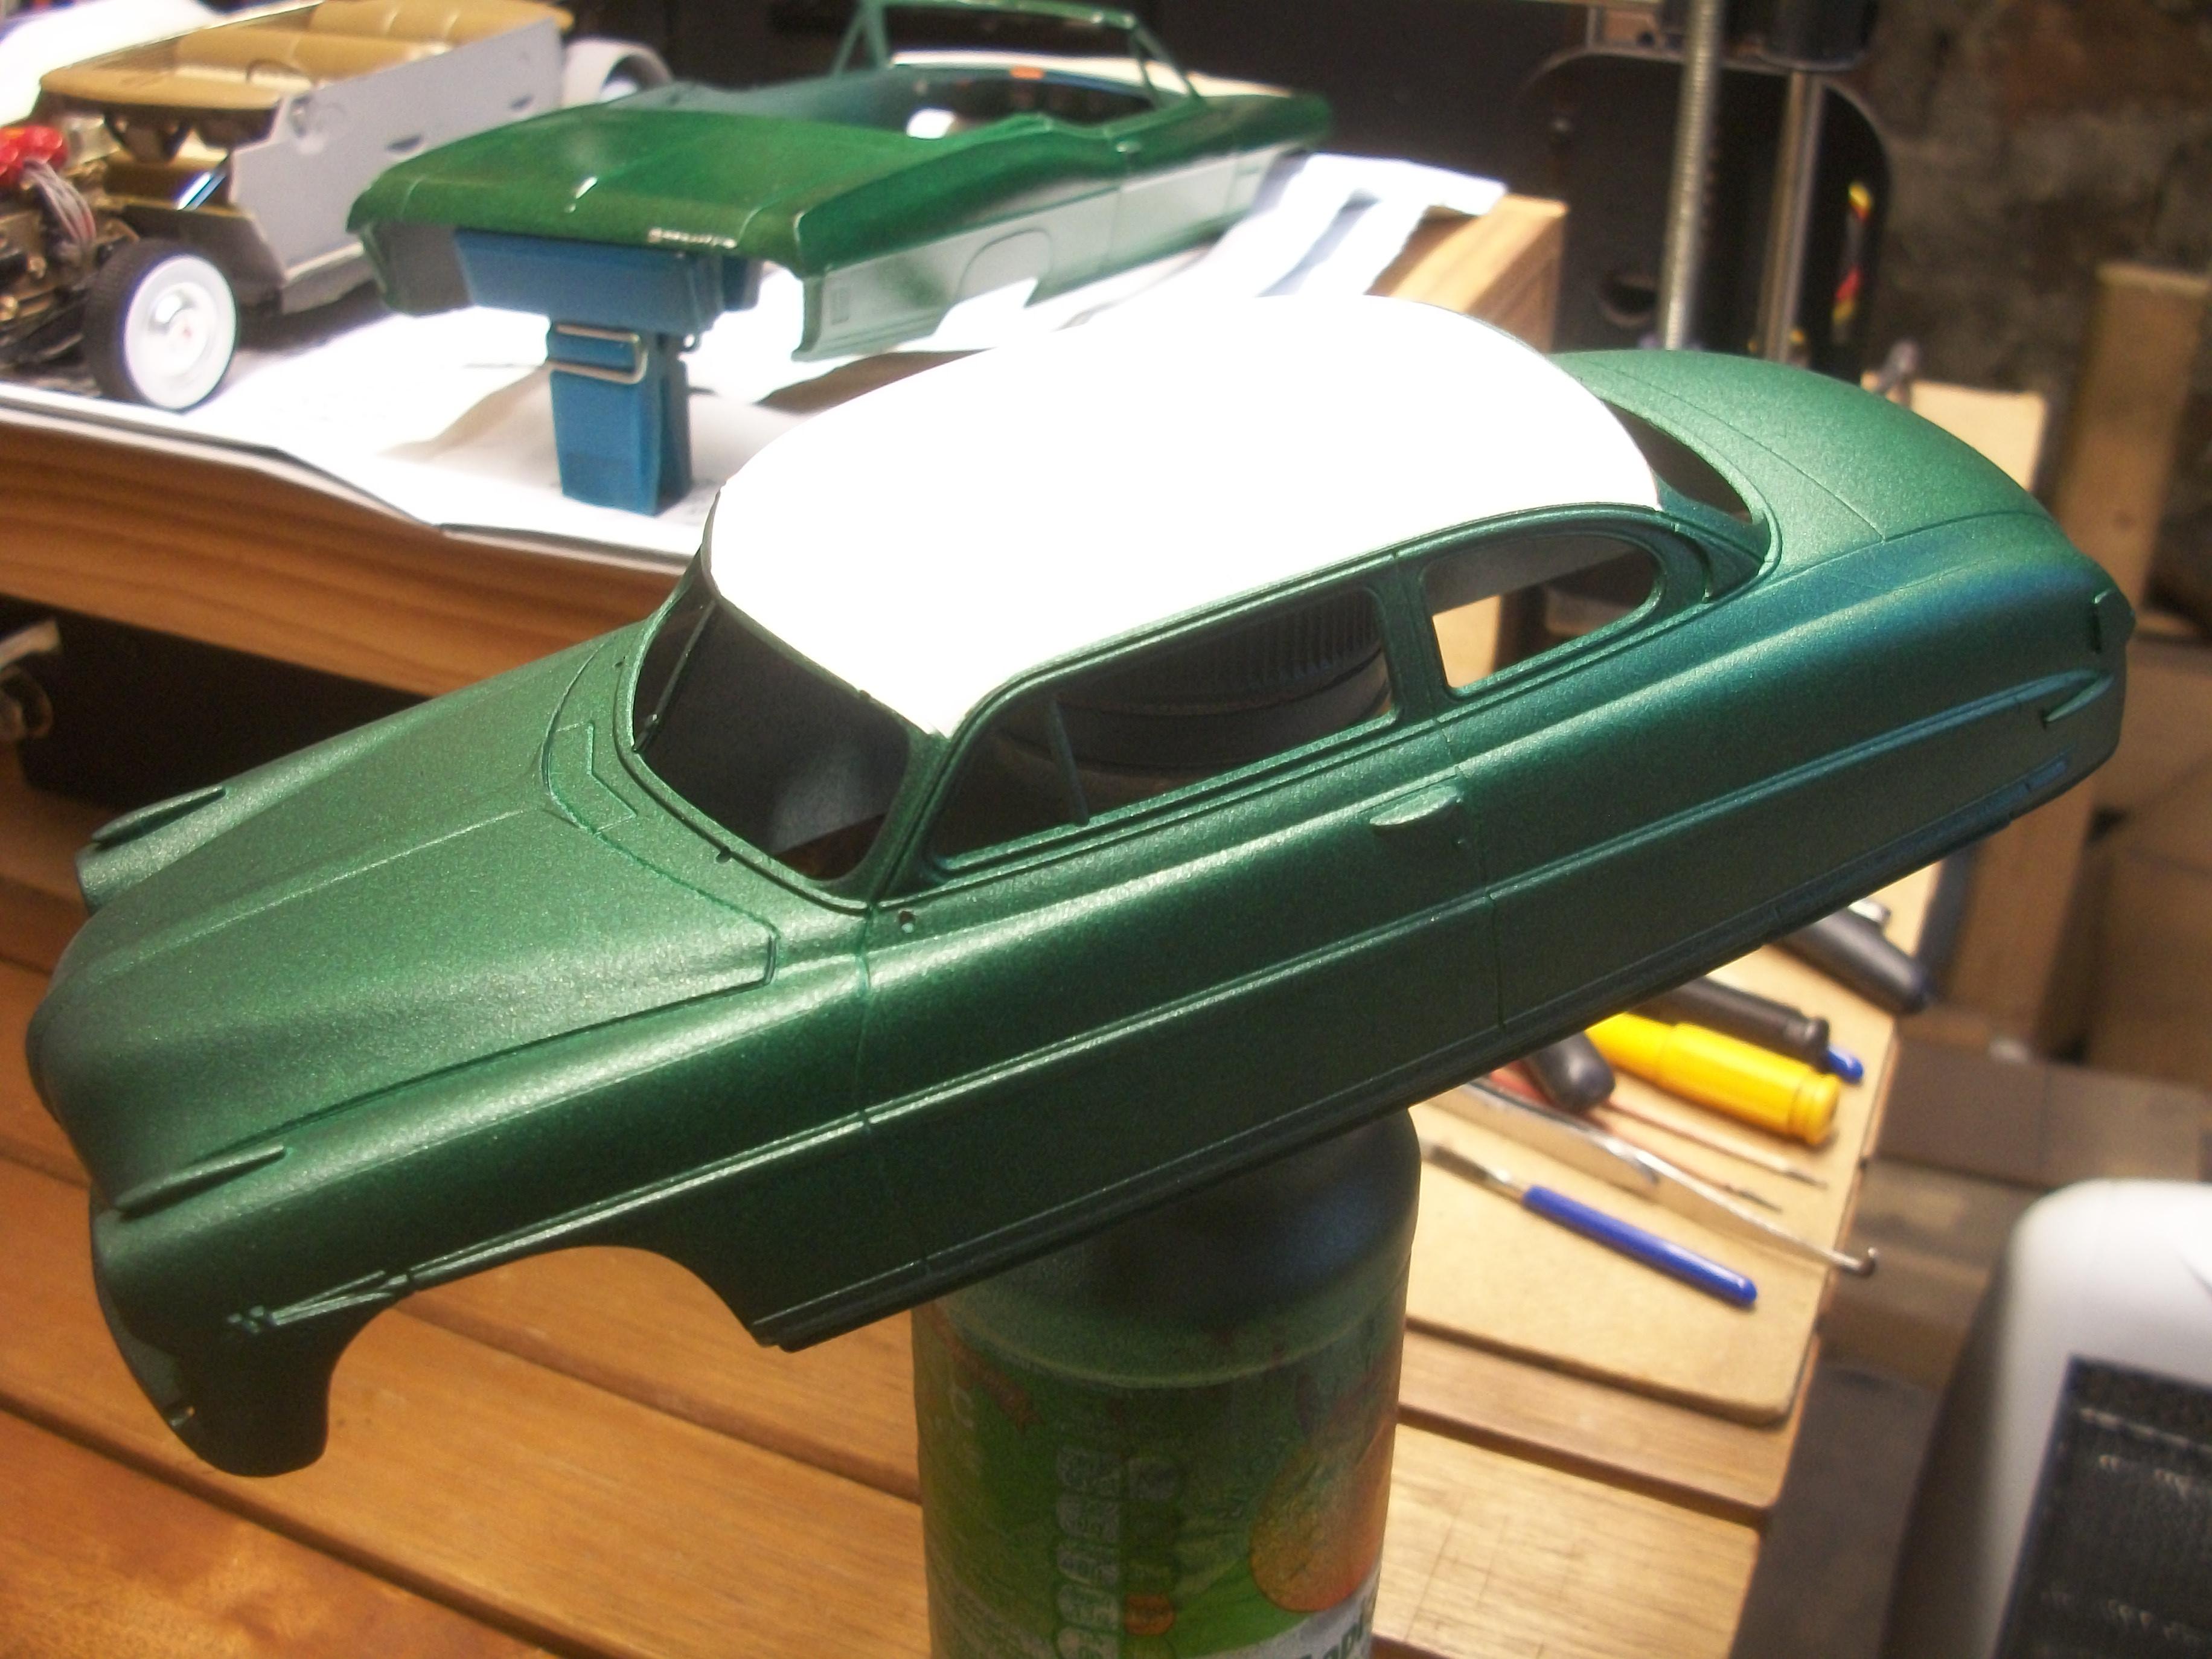
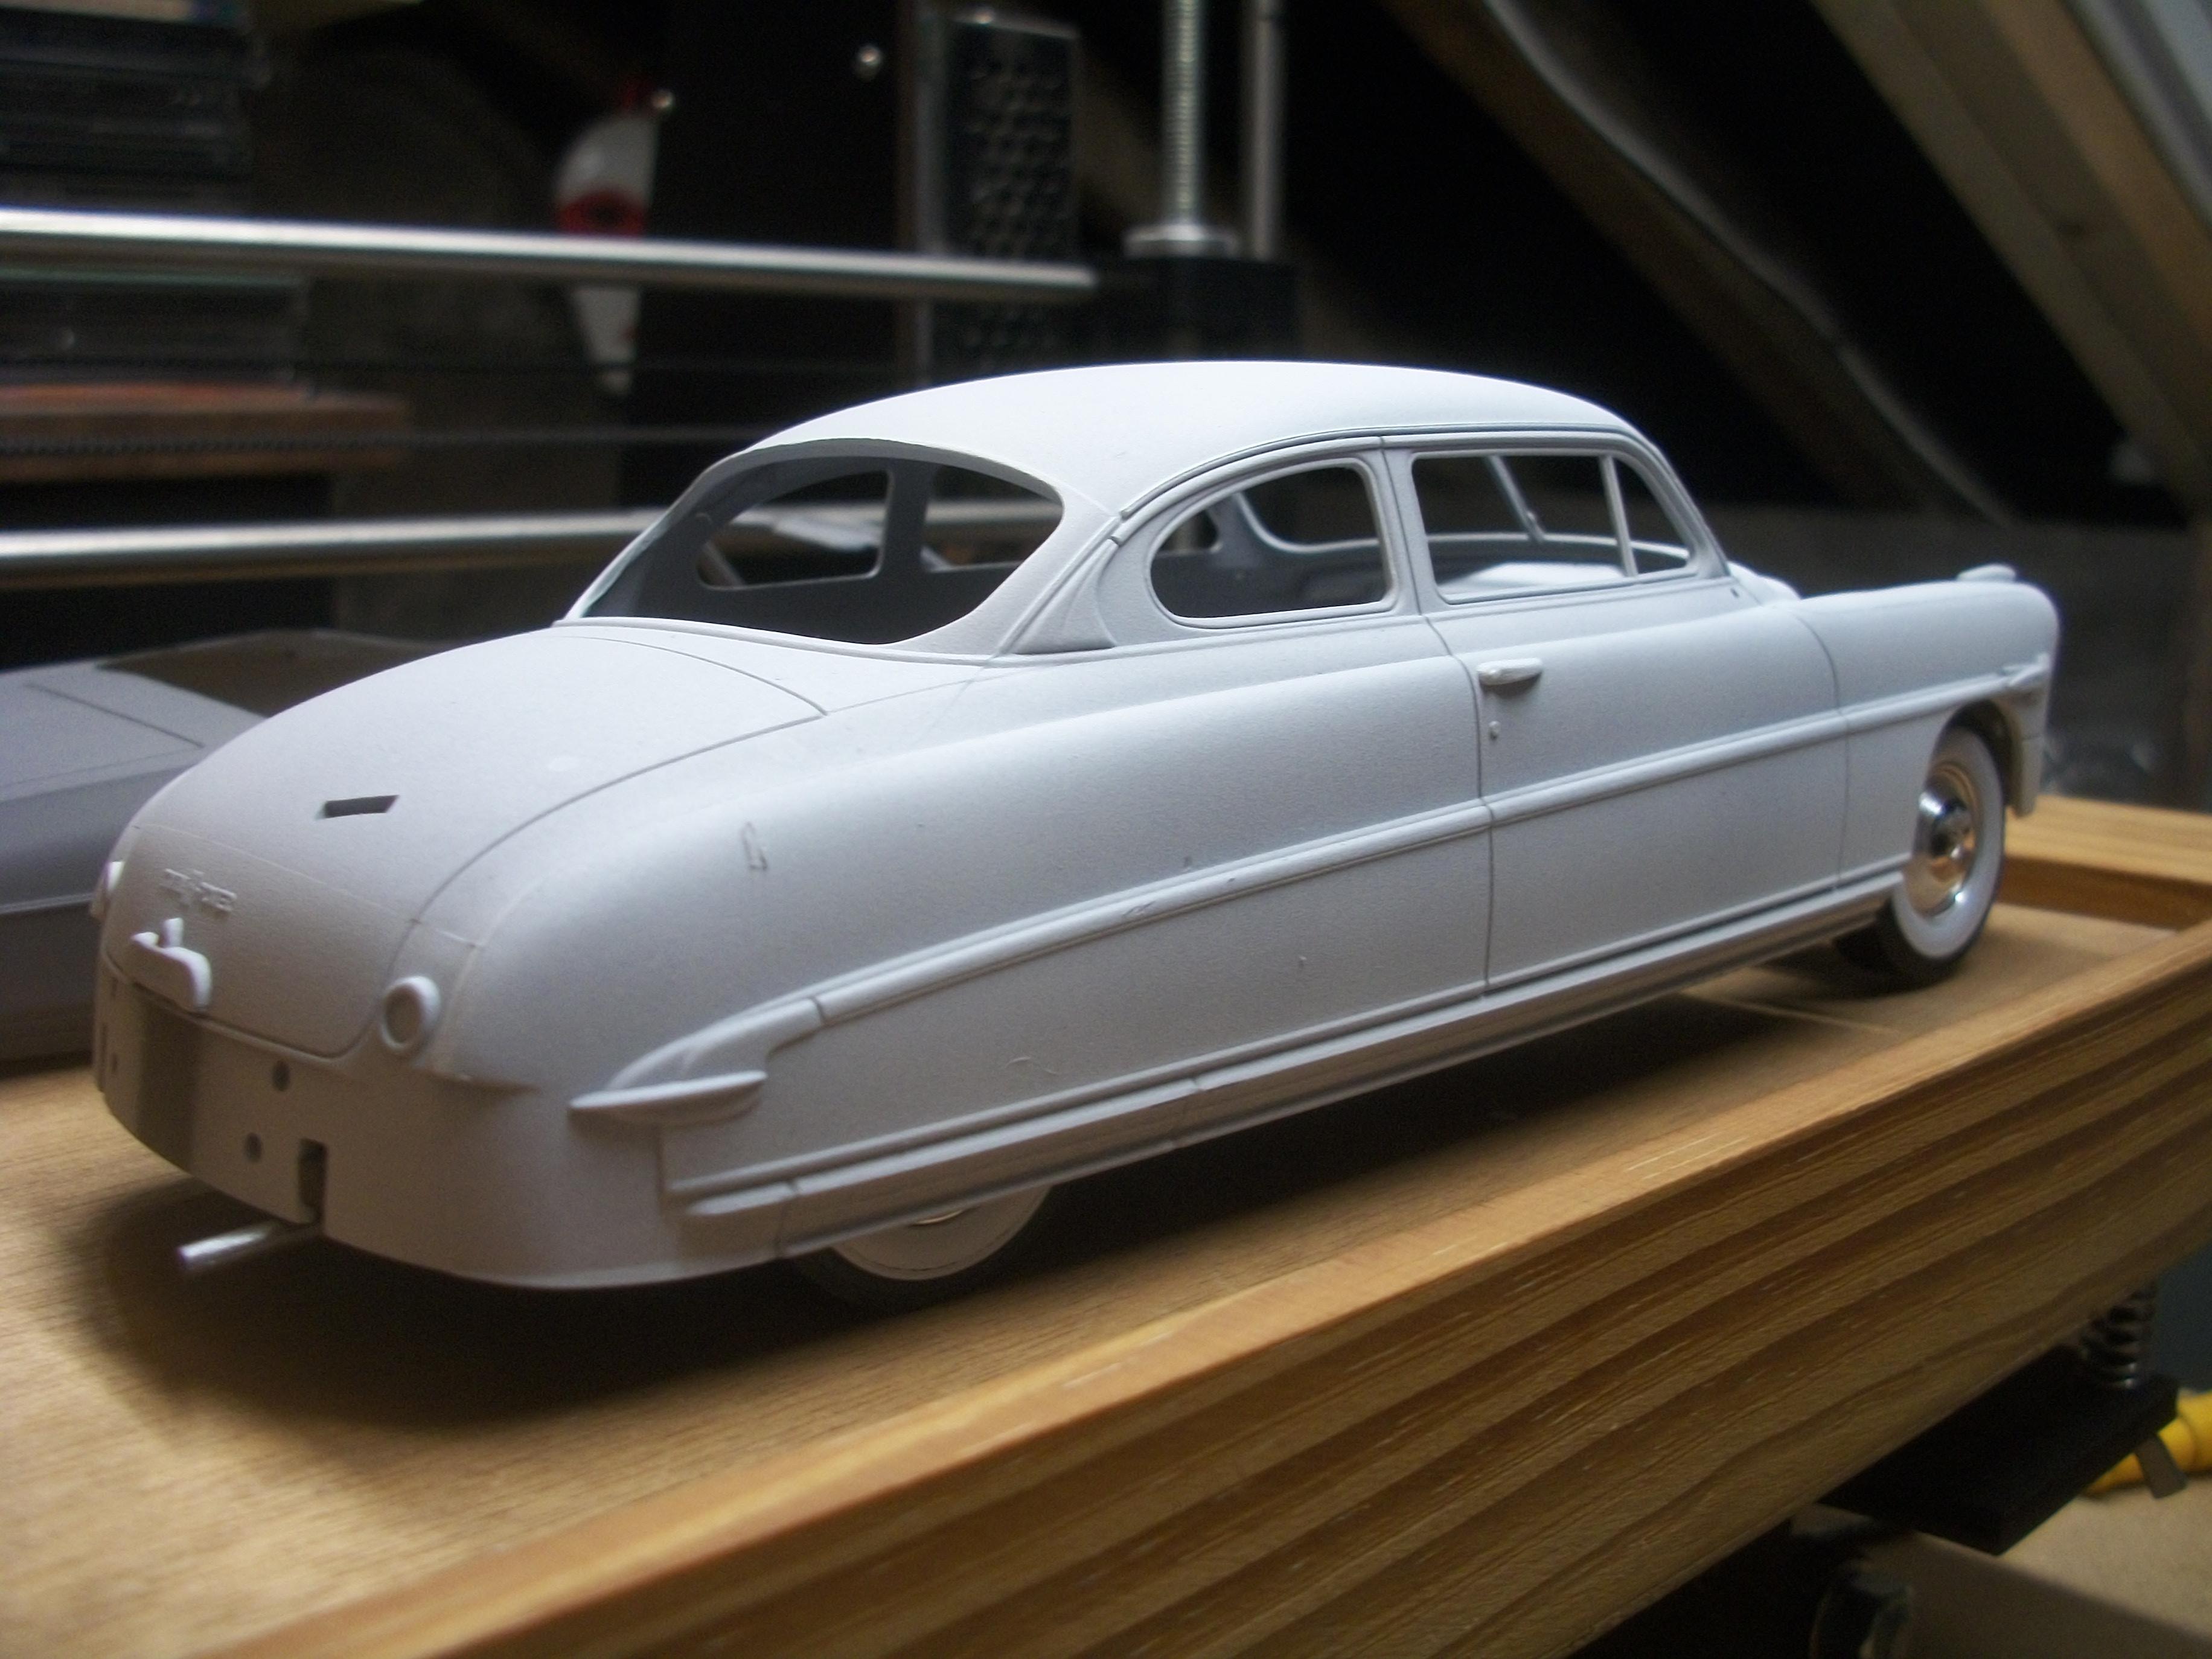
The Moebius 1953 Hudson Hornet has the lower body paint colour applied, which is the Rolls-Royce Balmoral Green (metallic), and this is a cellulose lacquer paint finish. Having removed the masking tape from the roof section of the model car, I have now masked off the lower body area so that the Rustoleum Antique White paint can be applied to the roof, and also the exterior sun visor. This Antique White is quite close to the Hudson Honey Cream, and will be applied over the Halfords White Primer. The Balmoral Green does look very much like the Hudson Meadow Green (opalescent) when photographed in fluorescent light. Currently testing the Rustoleum Crystal Clear gloss coat, which I have applied to the Pontiac Bonneville body shell, and this allows me to see what effect the clearcoat has on the three types of paint. The clearcoat will probably go on before the Molotow Liquid Chrome Pen, and I am still not able to source any BMF at all. When completed, this Hudson will be photographed in a diorama setting, and most probably the Hooper & Co. diorama at this stage. David

-
1964 Pontiac..... Yes ! Pontiacs all good David
-
Thank you, Pat....... and if I had to guess before, I would have said a '57 Chevrolet Bel Air, so it is nice to know it is actually a '56. Your grandson will appreciate such a fine motor car, I'm sure. So as I understand this, and from the viewpoint of an Englishman, the city of Blaine, Washington and the city of Surrey, British Columbia are connected by the Peace Arch Border Crossing. Now that I have the height measurement for this Peace Arch structure, I am wondering where I can find the width and depth of the arch. Perhaps some further ' Googling ' is needed. I can see three motor car models as part of this diorama, the Hudson, the Pontiac and the Rolls-Royce, also the Peace Arch itself, then some grass and a clear blue sky. The arch is entirely white, with some lettering and some plaques. There are the two flags and flagpoles on the top of the arch, both the US flag and the Canadian flag of course. Maybe I can do this, and the diorama should not have a particularly large footprint (baseboard). The height of the structure would rise to 31.5 inches, which is around 10 inches taller than my Hooper & Co. building. Photos below show the Hudson ready for the painting. The roof is masked off, and this will be either Antique White on the left of the hood or Ford Ivory on the right of the hood. The Antique White looks closer to the Honey Cream that is the original Hudson colour. The Rolls-Royce Balmoral Green metallic cellulose lacquer is pretty close to the Hudson colour, which is Meadow Green (opalescent). The model car body is not attached to the rolling chassis / interior / engine bay parts, so can be lifted off during paint spraying. David
-
Thanks, Don.......... Yes, I had planned to build the Peace Arch, and you are absolutely correct, it would be precisely 2.68 feet high as a 1:25 scale model. To be honest, I hadn't realised the structure would be that high ! ( should have checked by now ). Still think it would be a nice idea, and I stumbled upon these two photos of a Hudson Hornet, and a Rolls-Royce, and the car in the middle is possibly a Chevrolet ? David
-
I am using a 1970 Pontiac Bonneville convertible body and hood, from the kit by AMT, for testing the different paint finishes. The photo below shows the Pontiac body with Rolls-Royce Balmoral Green applied, and the hood has Ford Ivory applied on one half, so that I can apply Rustoleum Antique White on the other half of the hood. The Balmoral Green is a cellulose opalescent lacquer paint, applied over Halfords white primer, which has been applied over Halfords grey primer. I am using aerosol spray cans rather than my airbrush for this 1953 Hudson Hornet by Moebius. Having picked up some orange fine line masking tape (6 mm), this has been applied in two strips on the rear wing of the Pontiac, so that I can brush on some Yacht Varnish..... the Molotow Liquid Chrome Pen will be applied over the Yacht Varnish, along the moulding strip. I have decided to use the chrome pen for all the chrome work on this build, rather than Bare Metal Foil...... and both the varnish and the chrome pen need to be tested on the cellulose paint finish. BMF is almost impossible to source in the UK right now, and I am hoping to get good results with the chrome pen method. David
-
6 builds on the go at one time ! Wow, David ! I tend to have one build that I am working on, at any one time. I did try two builds running concurrently, but I wasn't comfortable with it. Well done you. I can see the advantages, but not everybody works in the same way, I guess. David
-
There are so many different camera angles, Charles...... all of which show clearly how much work has gone into putting this diorama together. You have done your research, and every detail is there. My knowledge of this type of equipment and machinery is limited, so I am not familiar with much of the content, but even I can see how you have gone to great lengths to achieve this high level of accurate detailing. We can learn a lot from projects like this. Thank you. David
-
 That's the way to do it, Pat....... Oh my, that is a lot of boxes ! David
 -
So much detail, Charles..... I shall have to study these photos of your ongoing project, and take it all in ! Thanks for posting. David
-
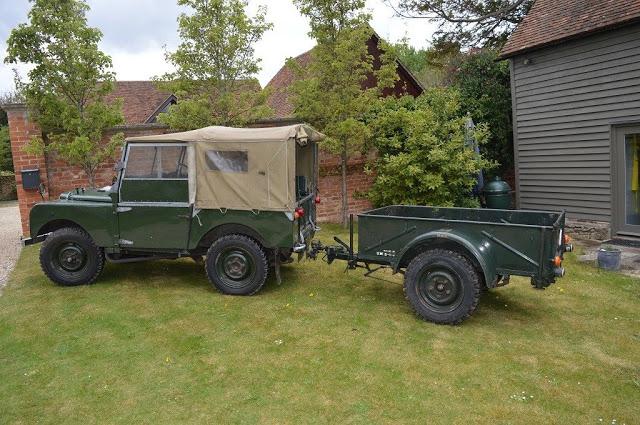
The 1:43 scale trailer for the Land Rover Series I, which is 3D printed and scratch built, is completed and becomes part of the 1:43 scale Hooper & Co. dioramas. Meanwhile, I am building a 1:25 scale 1953 Hudson Hornet by Moebius, and I am finding this kit an absolute joy to build. This Moebius kit number 1200 is by far the most satisfying product that I have ever assembled...... The quality of the kit is considerably better than anything else on the market, and the assembly instructions are a lesson to other kit manufacturers as to how it should be done. As other model builders on MCM forums have stated, the fit of the parts is that good, it is very often not necessary to apply any glue ! This Hudson motor car will not be part of the 1:24 scale Hooper & Co. diorama, but I do have an idea forming in my head that features a border post between the United States and Canada, such as the Peace Arch for example. I thought it might be nice to show the 1953 Hudson Hornet from Detroit, Michigan, the 1968 Pontiac Parisienne from Oshawa, Ontario and then a 1958 Rolls-Royce Silver Cloud from Crewe, England.... the Rolls-Royce was exported to Victoria, British Columbia, so I could see all three cars coming together at the US / Canada border around 1969 or early 1970's. I have chosen the paint colours for the Hudson, and these are Honey Cream for the roof and sun visor, with Meadow Green (Opalescent) for the body colour. Here in England, these paint colours are not available, so I am using Rolls-Royce Balmoral Green (metallic) and the roof colour will be either Rustoleum Antique White, or Halfords Ford Ivory. David
-
Boxes, boxes, boxes...... and all the contents safely packed...... arriving at their new home undamaged. David
-
Thank you, Paul...... and enjoy your diorama project during these difficult times. David
-
Okay, fair enough........ My misunderstanding..... and yes, I am having a bad day !! It did take me more than one hour, just to take all the parts out of the huge box. I should not have reacted that way.... SORRY. David
-
Hi Paul..... Assembling my Anet A8 3D printer from a DIY kit, took me 32 hours over an 8 day period. The printer is a cheap Chinese knock-off of the Original Prusa i3. I am a Technical Support Engineer, and I have been working in the computer industry for 39 years now. I started with ICL mainframes in 1981, and then progressed through all the versions of the Microsoft Windows operating systems, right from the very first version. My experience has covered most types of hardware and software problem solving. I used to enjoy building computers ' from scratch ' , so that is from the case and motherboard upwards. There are people on the Internet who are claiming to have assembled a 3D printer from a DIY kit in around 2 hours...... Are you telling me that you can do it in less than ONE hour? Why would I spend 32 hours of my life doing something that I could have done in ONE hour? Yes, I did take my time, and I am the sort of person who slowly and methodically puts things together, very carefully, usually making notes as I go along. This applies to scale model cars and dioramas, as well as 3D printers. What do mean ' building from scratch ' ? What is the difference between assembling a 3D printer and building one from scratch? You have a huge box of parts and components, which you have to ' assemble ' in the correct order, according to some very CRYPTIC instructions. In fact I had to do many hours of research and Googling to find any instructions that I could use properly. The instructions supplied with the kit were no help whatsoever, and the CD-ROM disk in the box could not be read from any computer device. As I understand it, Paul, a Creality 3D printer is actually better than an Anet A8 3D printer, and consequently requires more ' Assembly ' time. Oh, and by the way Paul....... this conversation in my topic is between Gregory and myself. David Watson M.C.I.T.P.
-
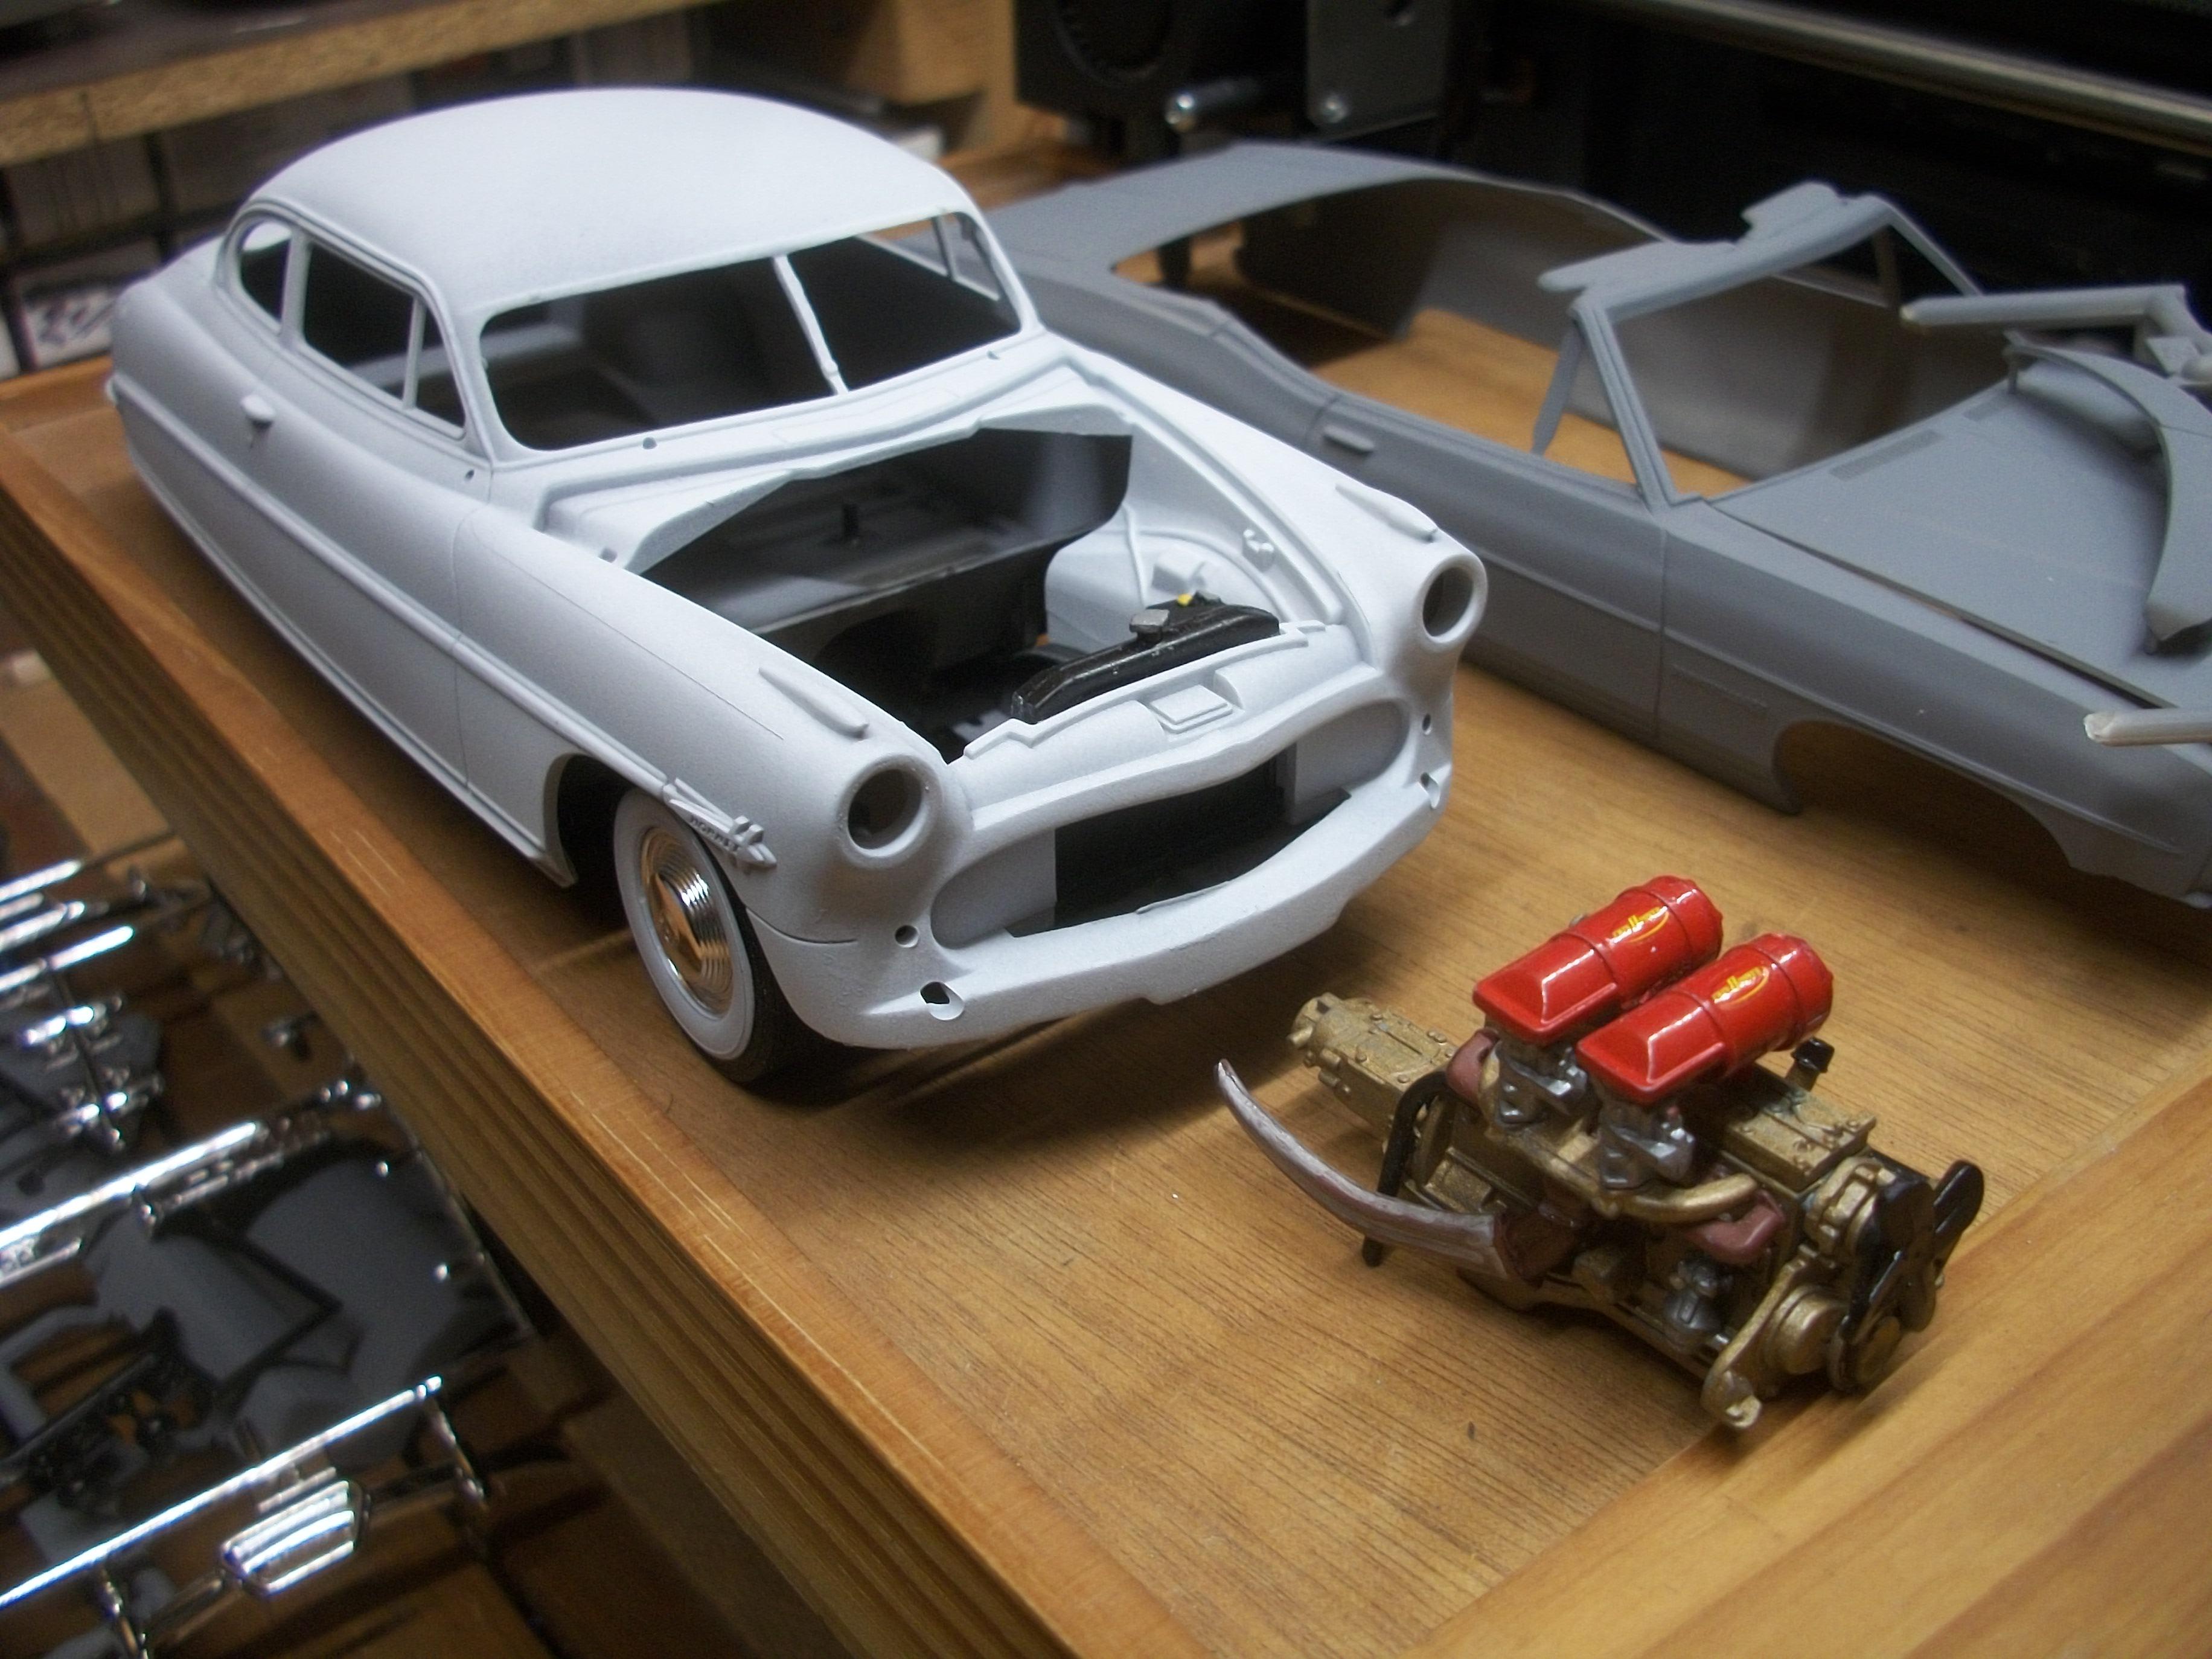
Sorry, Greg...... The photo that I attached as an example, is not my 6-cylinder Rolls-Royce engine...... the gold engine that you see is from the Moebius 1953 Hudson Hornet kit, which is my current WIP. ( this is also a straight - 6 engine as it happens. Didn't intend to mislead you ! ) Oh, by the way.... assembling a 3D printer is not something to be taken lightly, as it took me 8 days and many hours to build. This is a much cheaper way of getting into 3D-printing, but not for faint hearted, I would say ! David
-
Many thanks for your recent post, Gregory...... I haven't considered the long wheelbase version of the Rolls-Royce Silver Cloud, but your project build sounds just like the sort of thing that I would find very interesting. Most of my Silver Cloud model cars are from the Minicraft / Revell kit, and I have a Hubley promo model that was shipped over from the United States, so I didn't build that one from a kit. As well as the plastic version, I also have the Franklin Mint Silver Cloud, as well as the Franklin Mint Bentley S-type. Several of my Rolls-Royce Silver Cloud I cars have a straight-6 cylinder engine, instead of the V8 engine out of the box, and at least two of the 6-cylinder engines are my own 3D-printed design. Previously, I had these engines printed by Shapeways from Holland, but I now have my own 3D printer which I assembled from a kit, so that I could print my own engines. Some of the Silver Cloud cars have been converted from LHD to RHD, and one of them has been moulded and cast from resin, so I produced the two-part mould for this one. One diorama is 1:24 scale, and three further dioramas have been 1:43 scale. I like the way you are using both the Minicraft kit and also the Hubley kit to create your LWB version of this wonderful motor car model. As regards uploading photos to the MCM forum website, this is very easy to do, Greg..... You simply type your post as I am doing now, and then at the bottom left you will see ' Choose Files '...... click once on choose files, and this will allow you to select any photo image files that are stored in folders on your computer hard drive. When you submit your reply, the attached photos will display in larger size, below the text of your post, like this one below........ David
-
Good luck with the move, Pat...... and make sure to pack those models and dioramas carefully! David
-
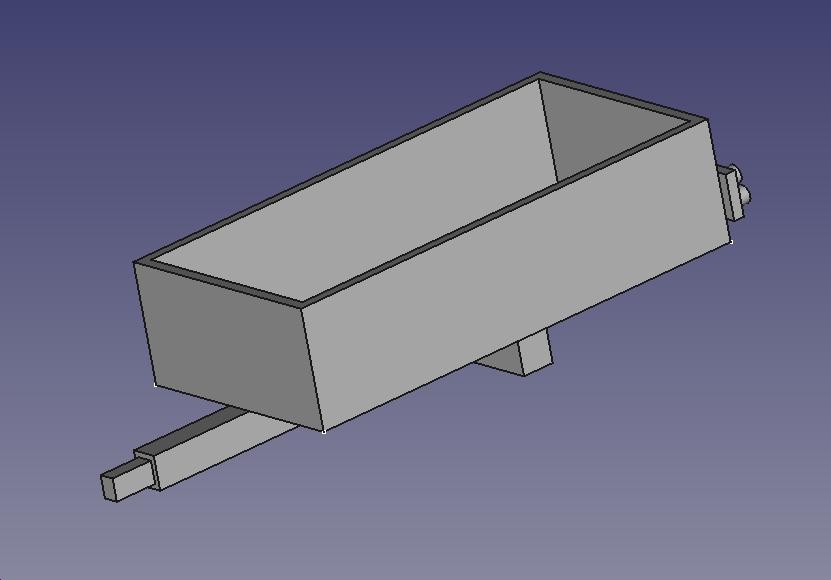
Currently, I am working on a 3D printed model of a 1950's Land Rover Series I, which I downloaded as several STL files, while at the same time I have designed and 3D printed a trailer using FreeCAD software. The Brockhouse is a steel single axle trailer that was supplied as a genuine Land Rover accessory during the 1950's, and it has the same size wheels and tyres as the Land Rover itself. The wheels have already been 3D printed, so once the axles are assembled and fenders are added, the trailer can be painted. Meanwhile, I have also purchased a 1:43 scale 1957 Land Rover Series I SWB by Oxford Diecast Commercials, finished in Bronze Green....... both of these Land Rovers will form part of the 1:43 scale diorama, within the Imperial Motors garage, which is just across the road from the Hooper & Co. factory. These Land Rovers are ideal for towing the Lansdowne Willerby Vogue caravan, and also the Brockhouse trailer. David
-
Good to see that FTB is open for business again, Pat...... the Motorcraft and FoMoCo banners take me back to when I first worked for a Ford dealership, when I finished school at 17 years of age. I was working in the parts department of a large truck dealership that also had a car side to the business. Motorcraft labelled parts were a common everyday thing in those days, 1970 - 1976.......... I particularly remember seeing the Diamond T recovery vehicle in the commercial workshop, having the huge engine stripped down and rebuilt. I served on both the commercial service counter and the car service counter, as well as the retail counter and goods inwards, telephone orders...... long time ago now, Pat........ David
-
Nicely done diorama, Rob...... and I agree that those ICM figures are good to work with. Once assembled and painted, the ICM figures are always realistic, so I have used them a lot in my diorama settings. David
-
This diorama of yours really works, Paul....... those garage doors are so realistic, and as another member commented, there are too many good features to list here. The Jaguar MK II is an excellent model car, and there are some nice Porsche cars in there also. You seem to have the lighting setup sorted..... both from inside and outside the garage building. David
-
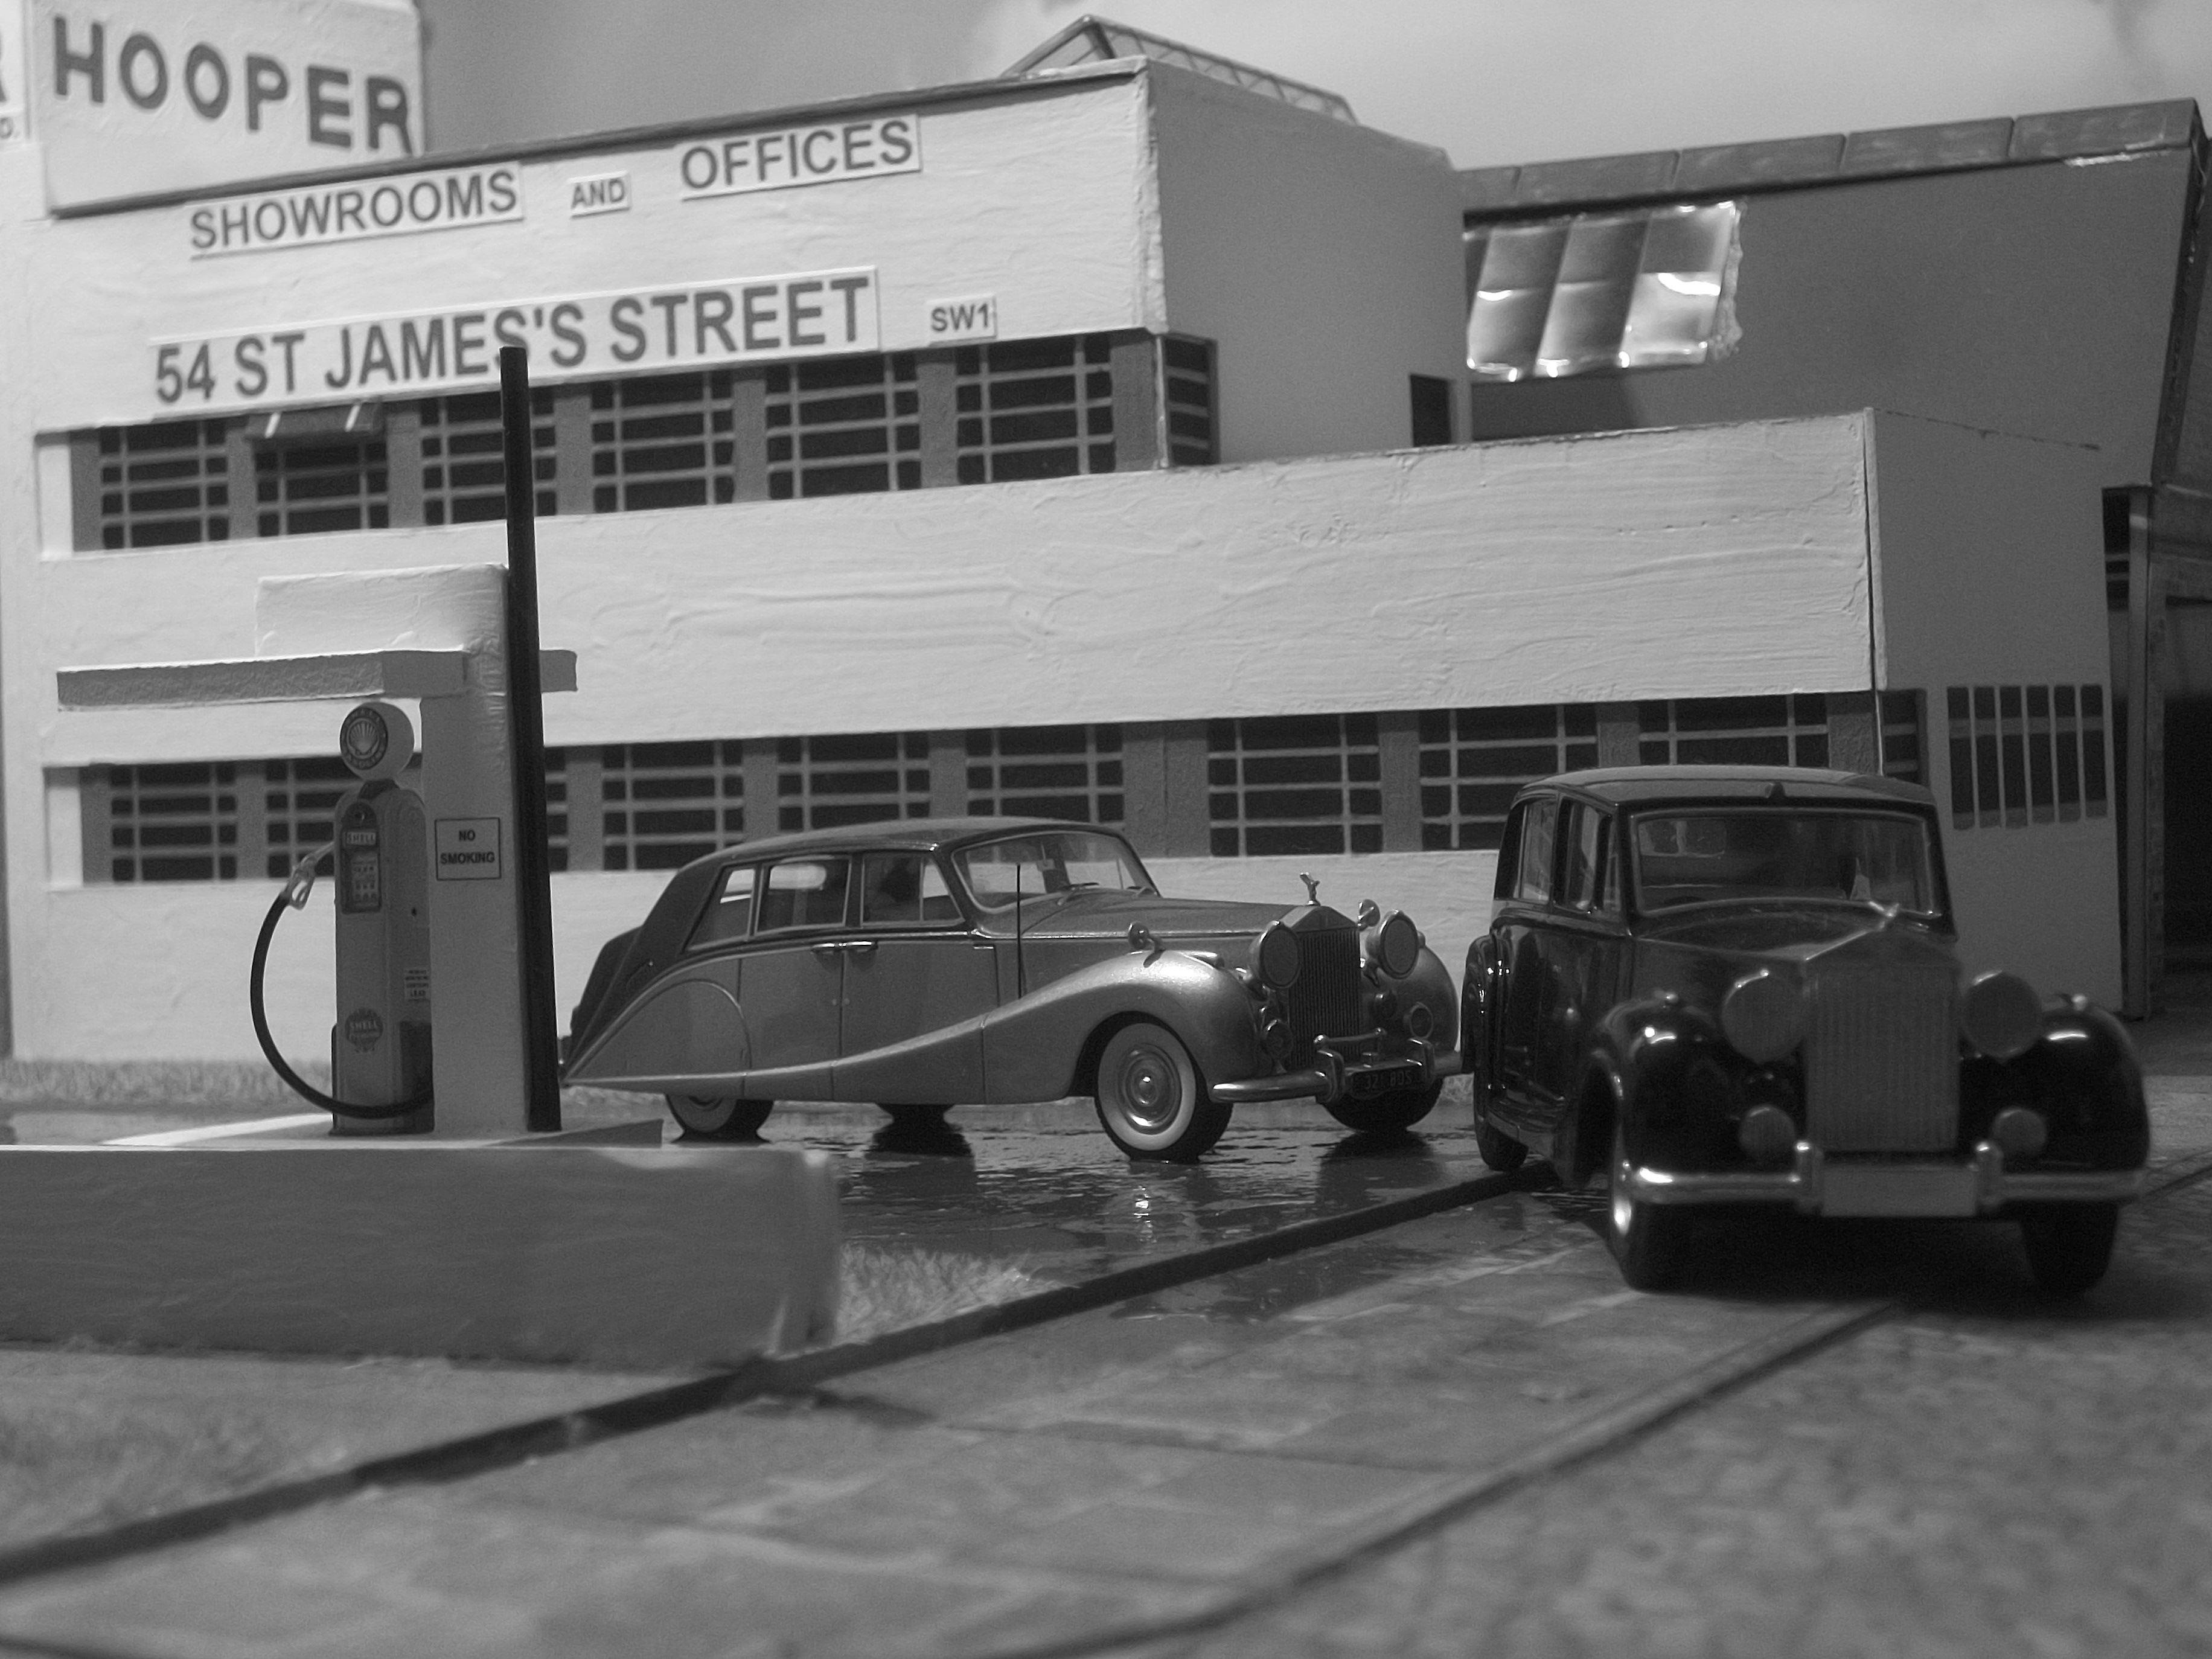
Thanks very much, Peter......... This is one of the reference photos that I have been using to build this diorama, and there are not that many available. This particular angle caught my eye, and I saw the potential to capture the composition. Within the limits of my camera lens, this was quite tricky to set up, but I did manage to get reasonably close I think. David
-
The upper photograph shows two Rolls-Royce Silver Wraith motor cars, leaving the forecourt of the Hooper & Co. factory on Western Avenue, Acton during 1959. The lower photograph shows a 1:43 scale 1951 Rolls-Royce Phantom IV, which is followed by a 1:43 scale 1956 Rolls-Royce Silver Wraith, also leaving the forecourt of the Hooper & Co. factory. The factory building in the lower photograph is a 1:43 scale scratch built model, and the petrol pump stand has also been scratch built. I have tried to recreate the original photograph of the real motor cars, by using careful composition and by paying close attention to the camera position, settings and of course the lighting setup. I don't have two black Silver Wraith's in my collection, so this composition utilises a dark blue Phantom IV and a Silver Wraith in bronze and gold. Both of these model cars are Hooper bodied cars. A mix of water and dishwashing fluid has been applied to the surface of the forecourt to reproduce the wet surface as this appears in the original photograph. David
-
You do have some brilliant ideas, Charles..... and this one is no exception! These models and dioramas of yours are so interesting, and I am sure they inspire many model builders on here....... myself included of course. David
-
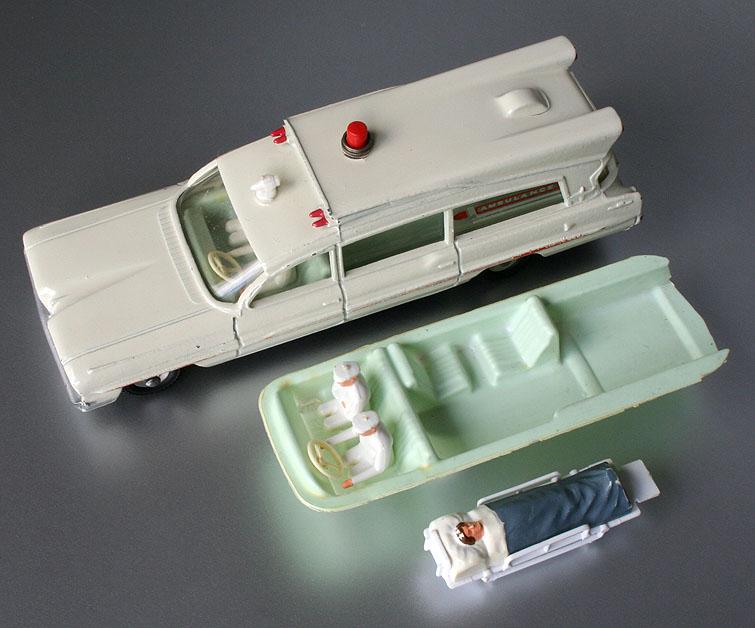
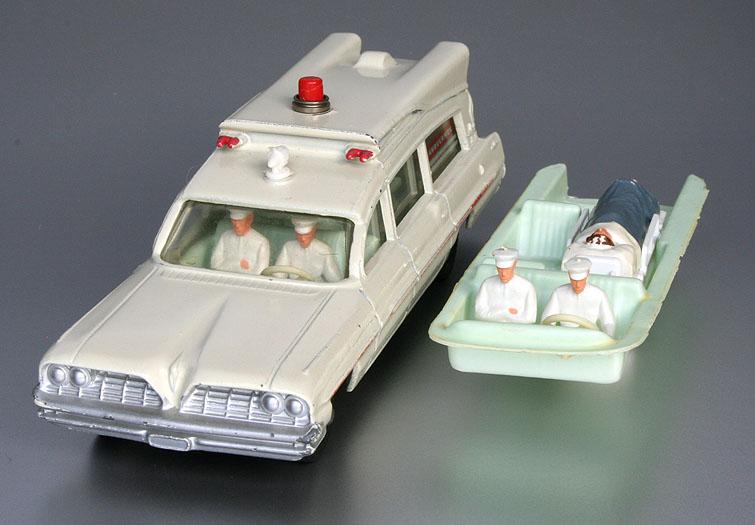
This is a very interesting build, Ken..... and I have not seen one of these ambulances built and painted before, in this scale.... I do remember the Dinky diecast version of this ambulance, back in the '60's when I was a child...... David