Anglia105E
-
Posts
3,487 -
Joined
-
Last visited
Content Type
Profiles
Forums
Events
Gallery
Everything posted by Anglia105E
-
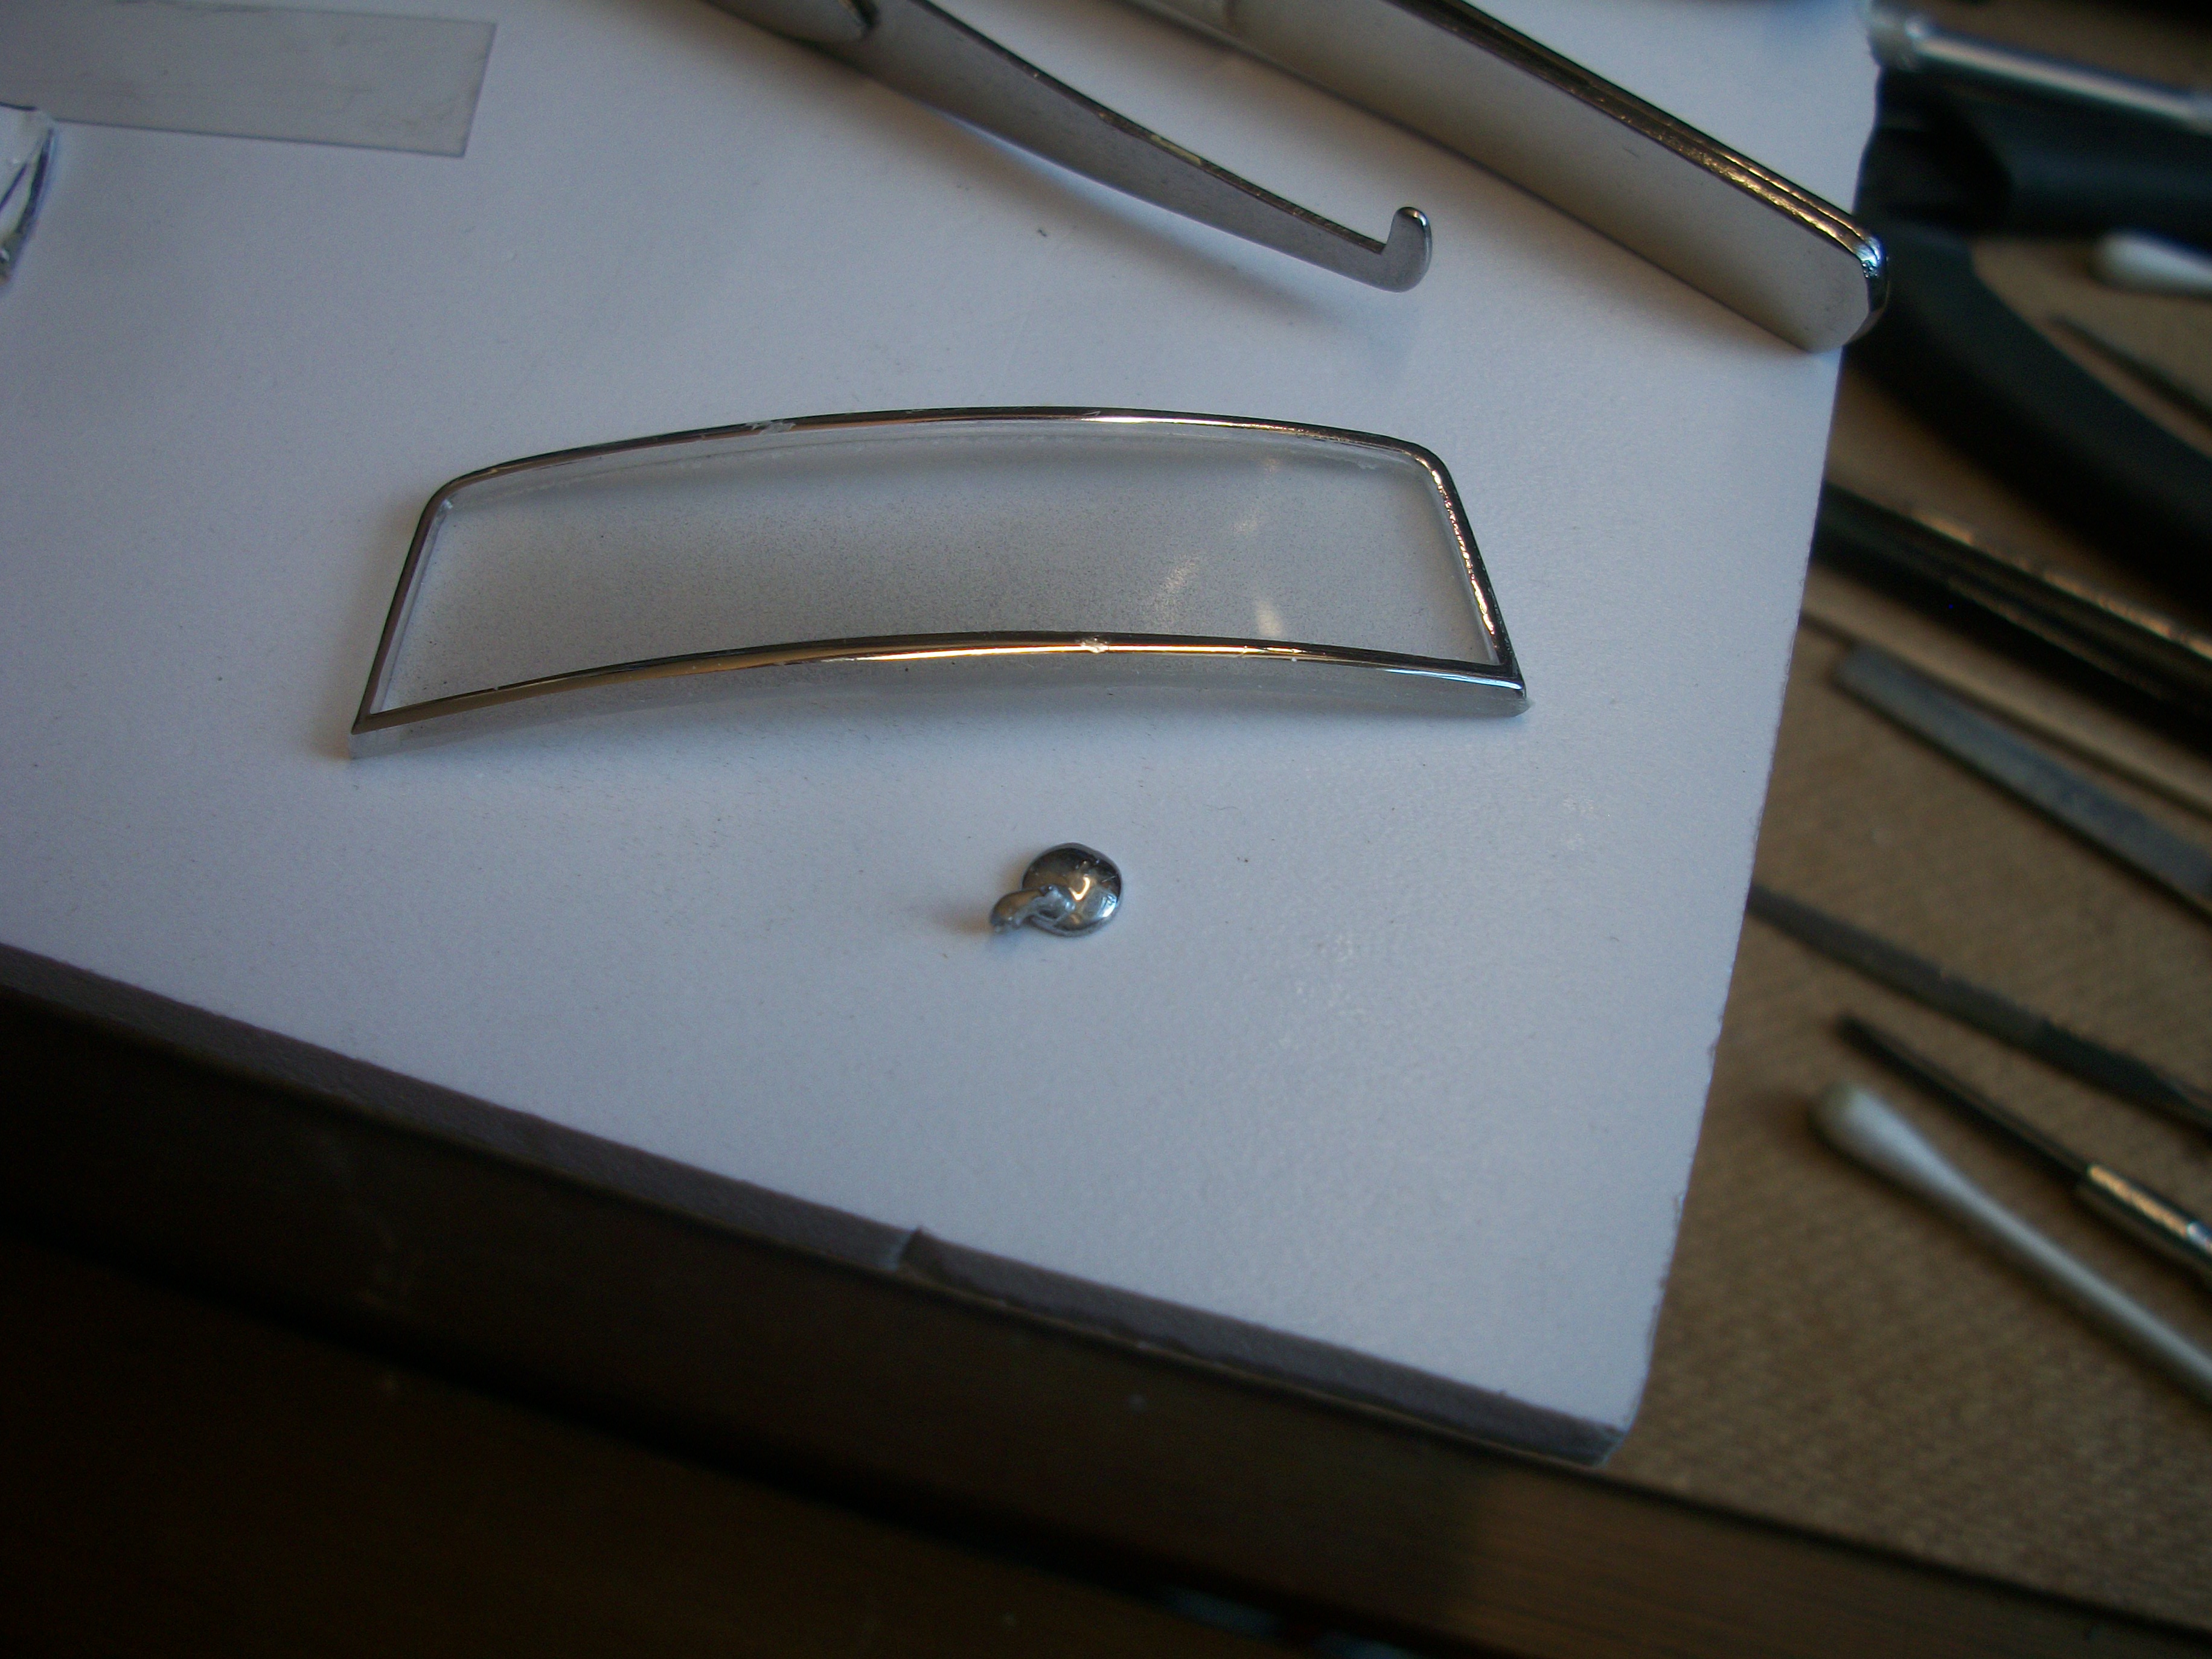
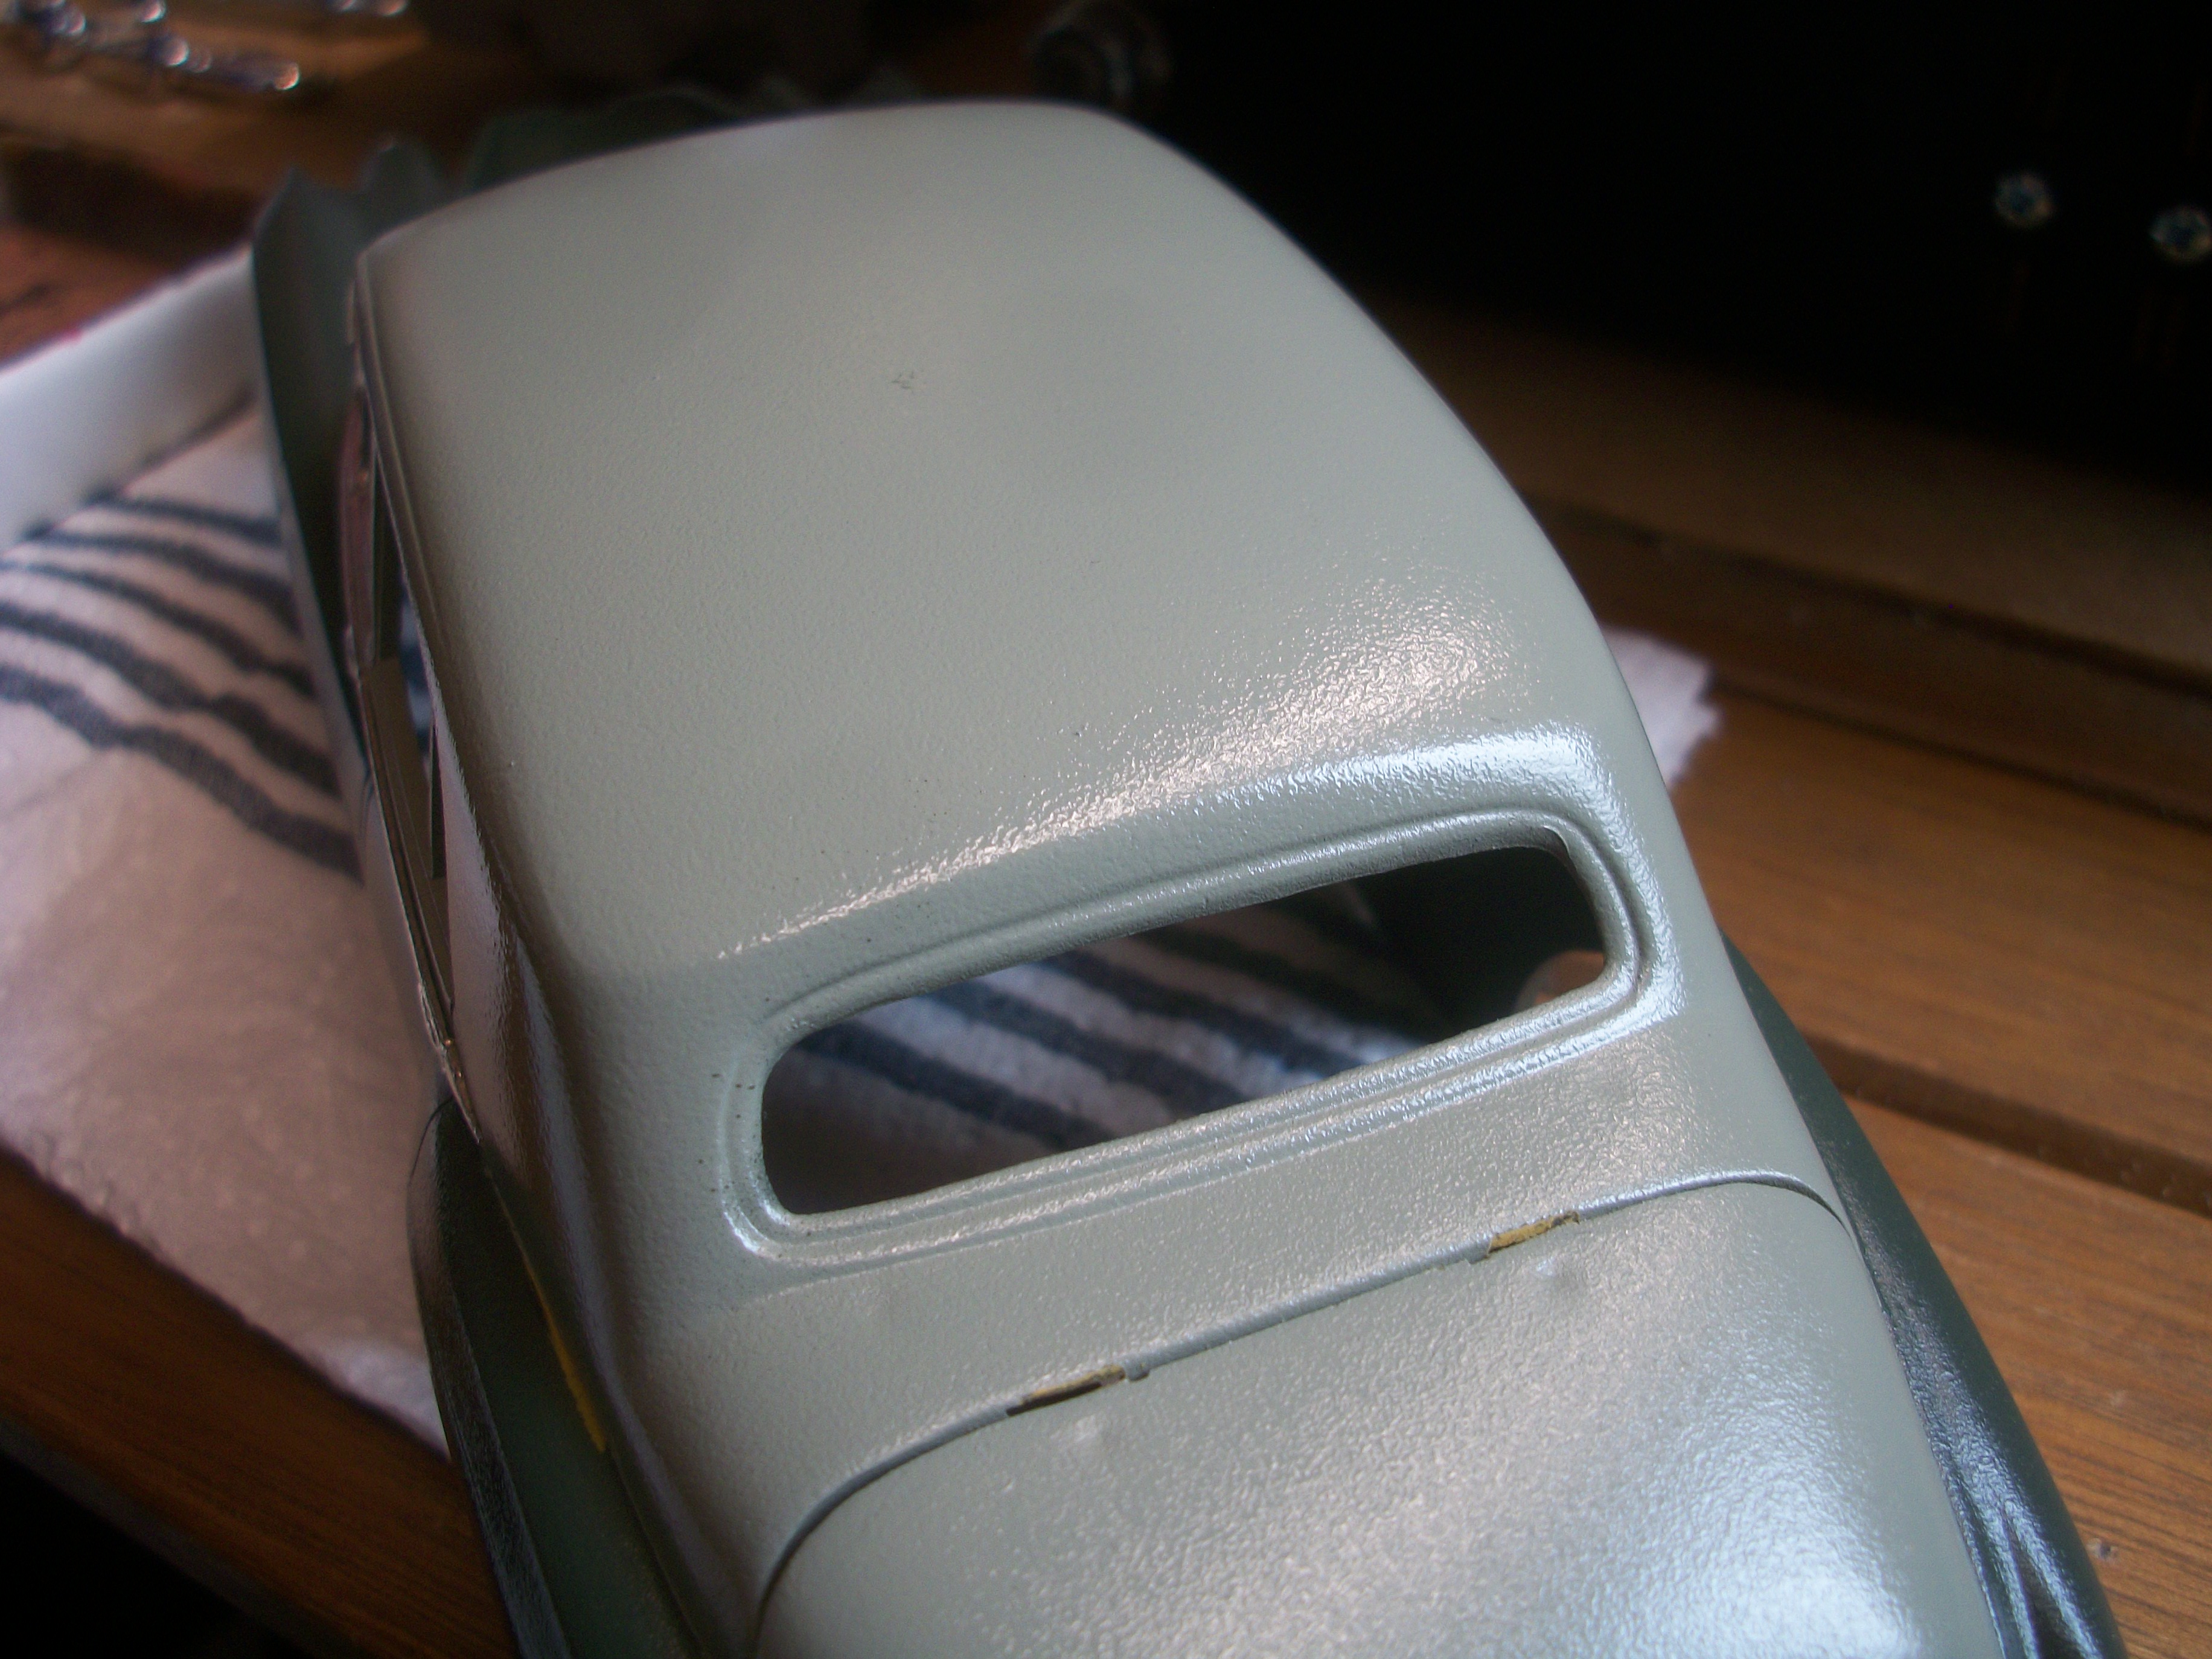
Here are some photos of the continued efforts to fit the windscreen surround moulding. I am using Revell Contacta Professional adhesive, and unfortunately, once the Plastruct moulding was in place, I carelessly smudged some glue on the screen ( top centre right ). This is proving difficult to remove, and so far I have tried white toothpaste, warm water and vinegar. David

-
What a find, Tom ! As you say, quite unusual to find kits like this in 1:24 scale and there is such a lot in the way of materials for $9.99. I am sure that with your creative imagination, you can come up with some good ideas ! David
-
Thank you, Steven....... David
-

Automotive Restoration and Machine Shop
Anglia105E replied to The Modeling Hermit's topic in WIP: Dioramas
Your diorama work is excellent, Douglas........ and you have no need to worry about this project passing the scrutiny of the examiners. The detail is so meticulous, the proportions and layout are absolutely first class and the whole visual concept is most interesting, in every respect. Thank you for posting these photographs of your work. David -
Nice to see your old garage diorama getting a new lease of life, Mattias....... This is the exciting part of your project, as you bring your ideas to the table ! David
-
Well done, Steven....... Now you have got the scale model building BUG you will be surprised how quickly, and how strongly it takes over ( in a good way ). David
-
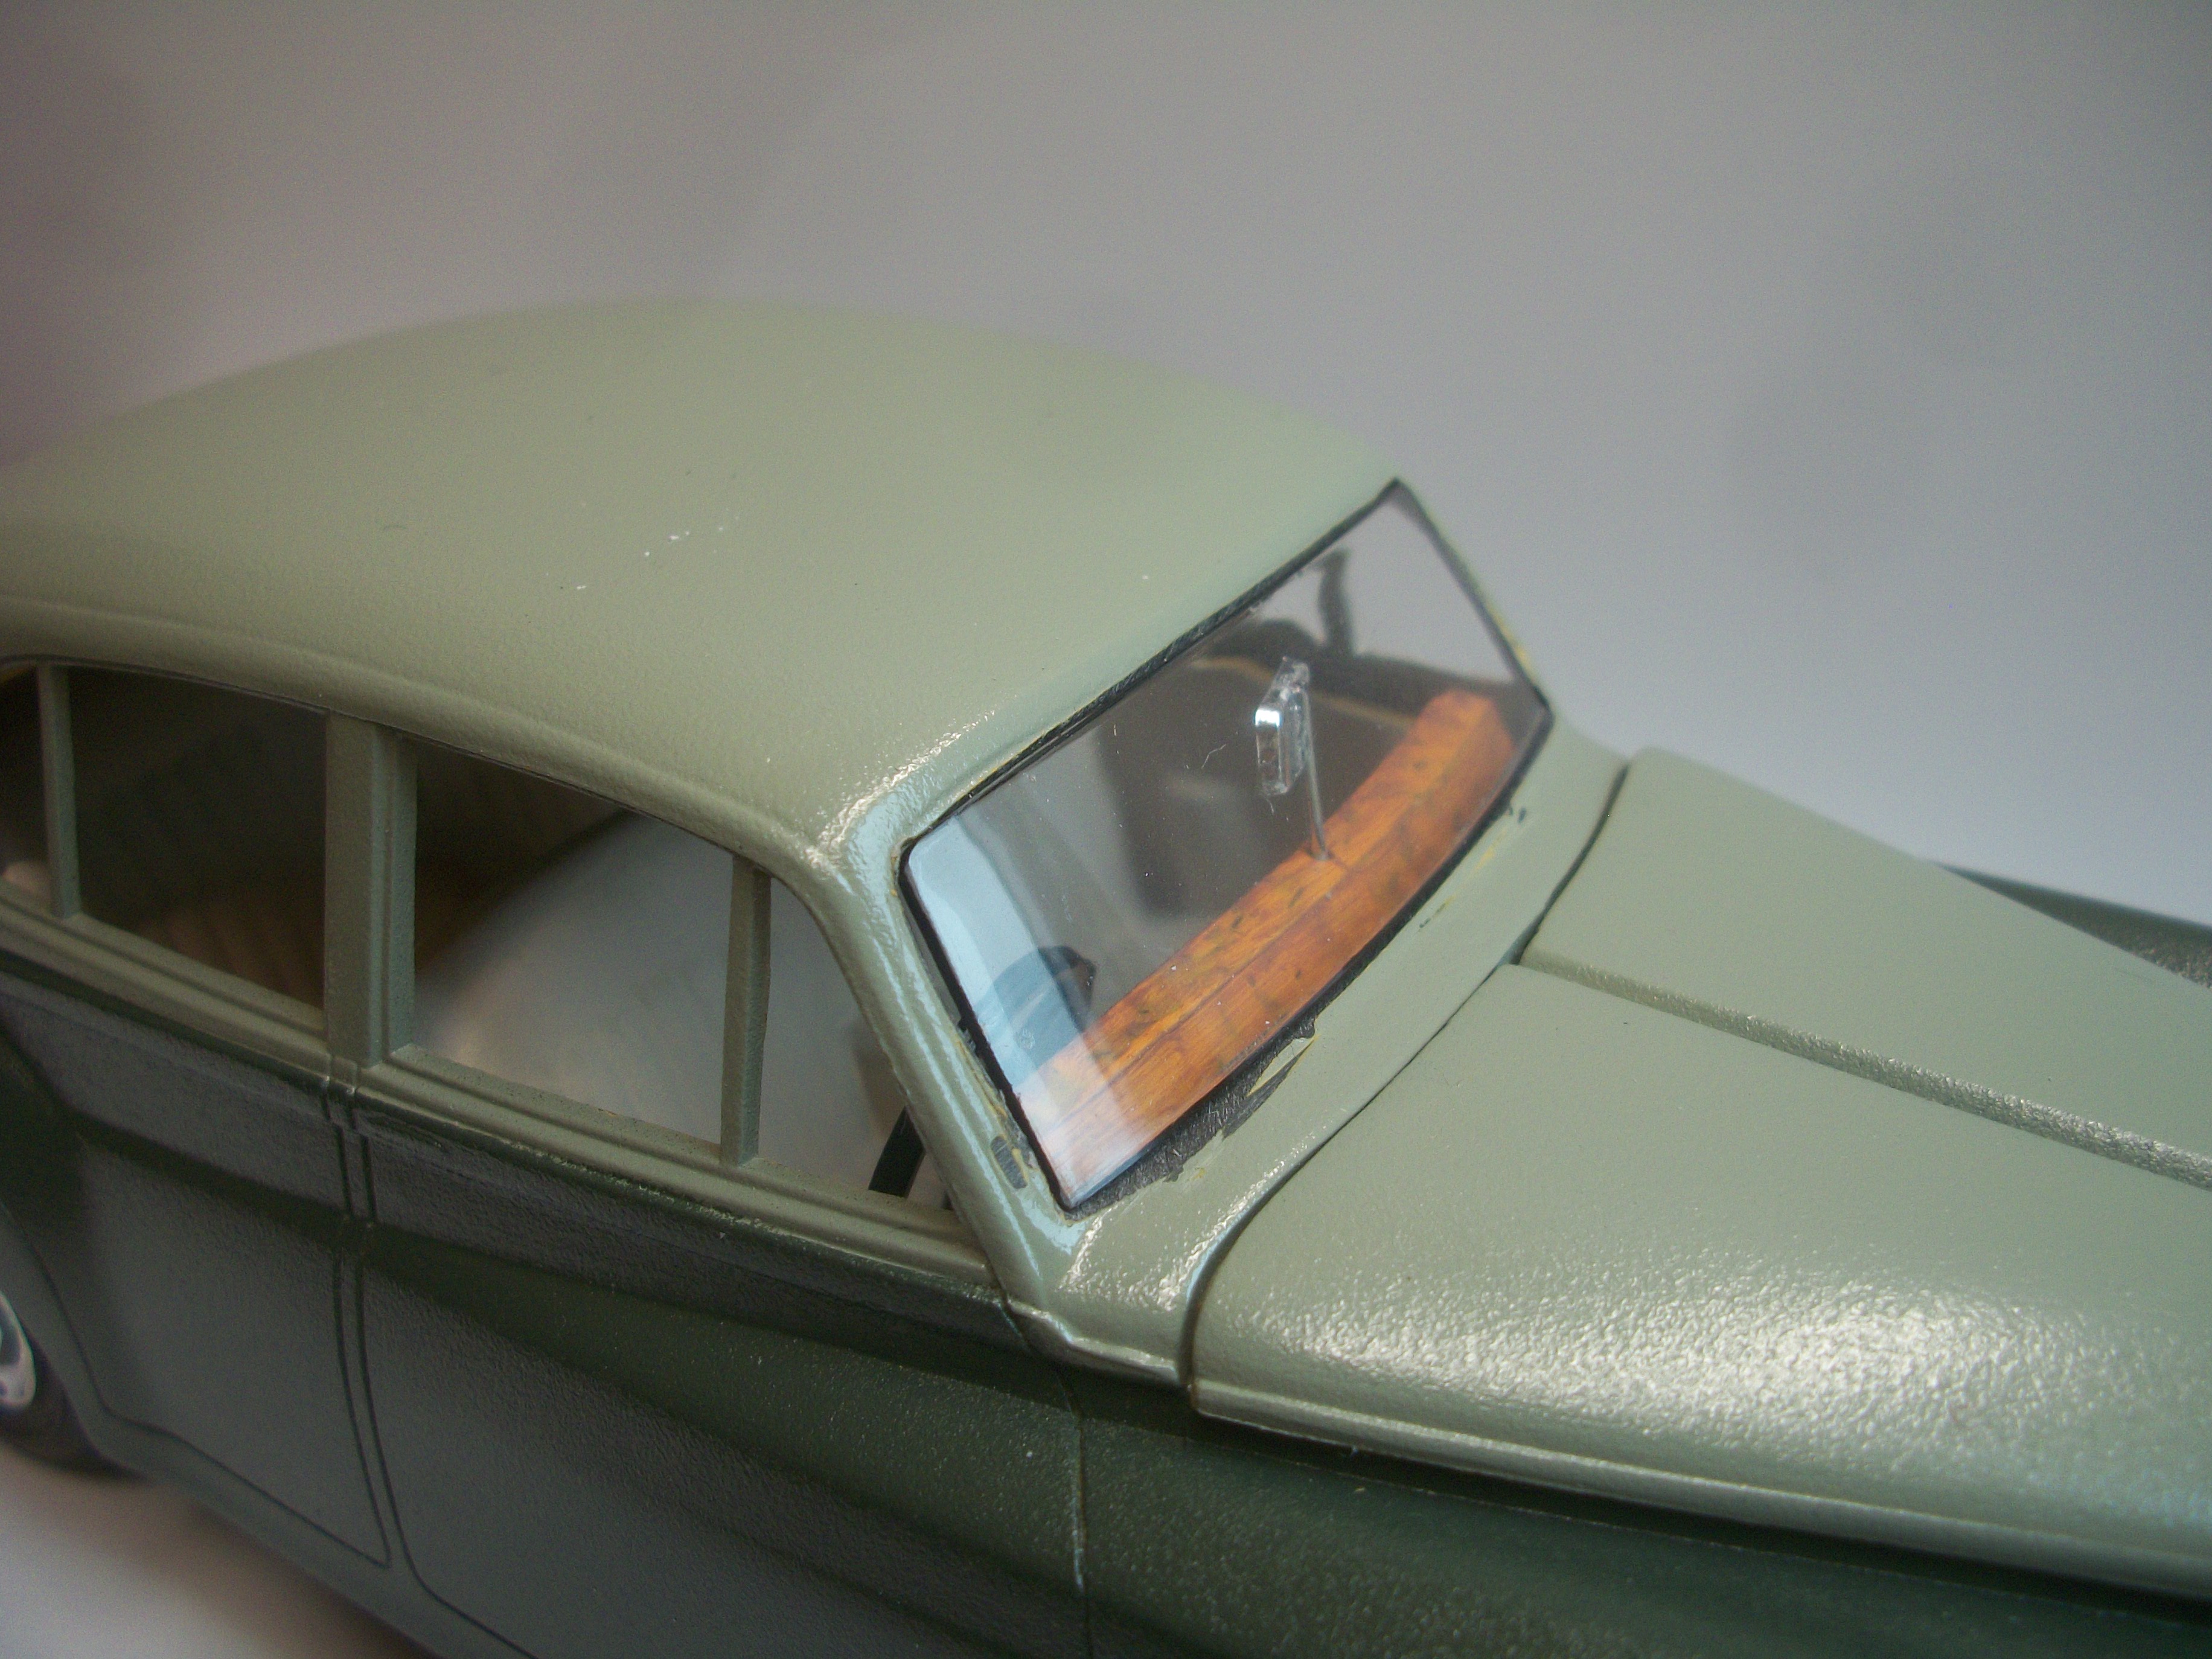
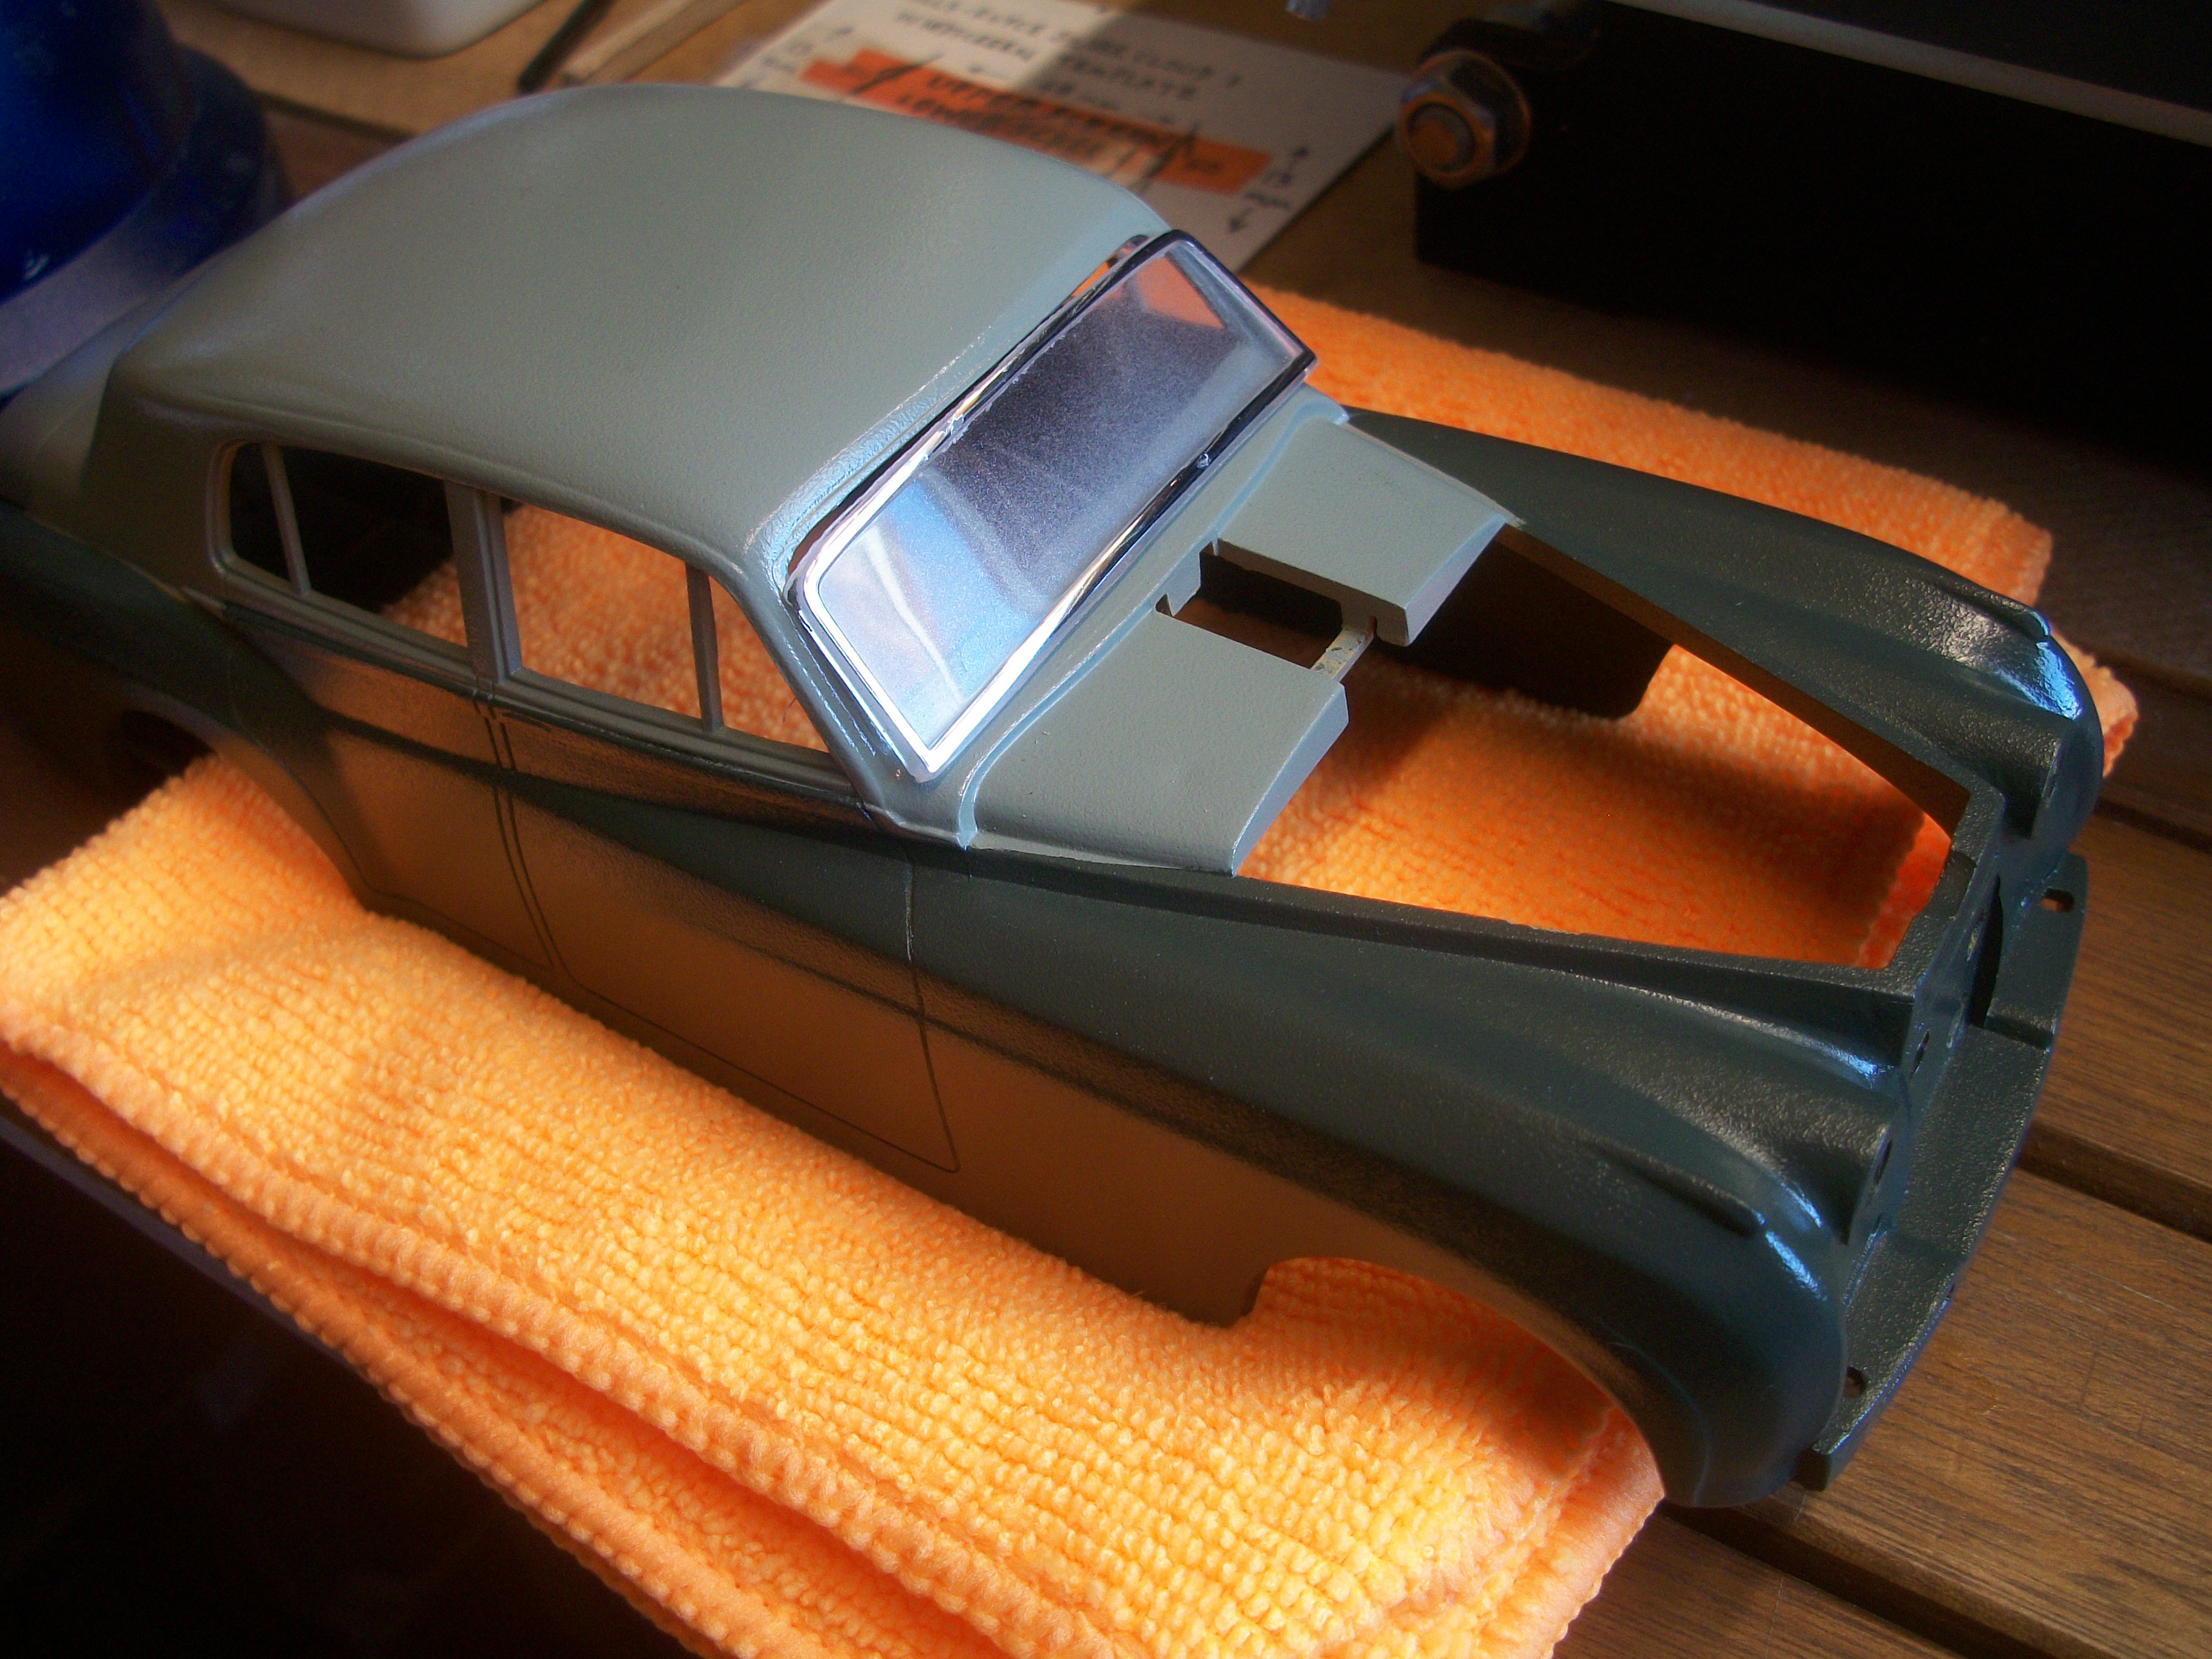
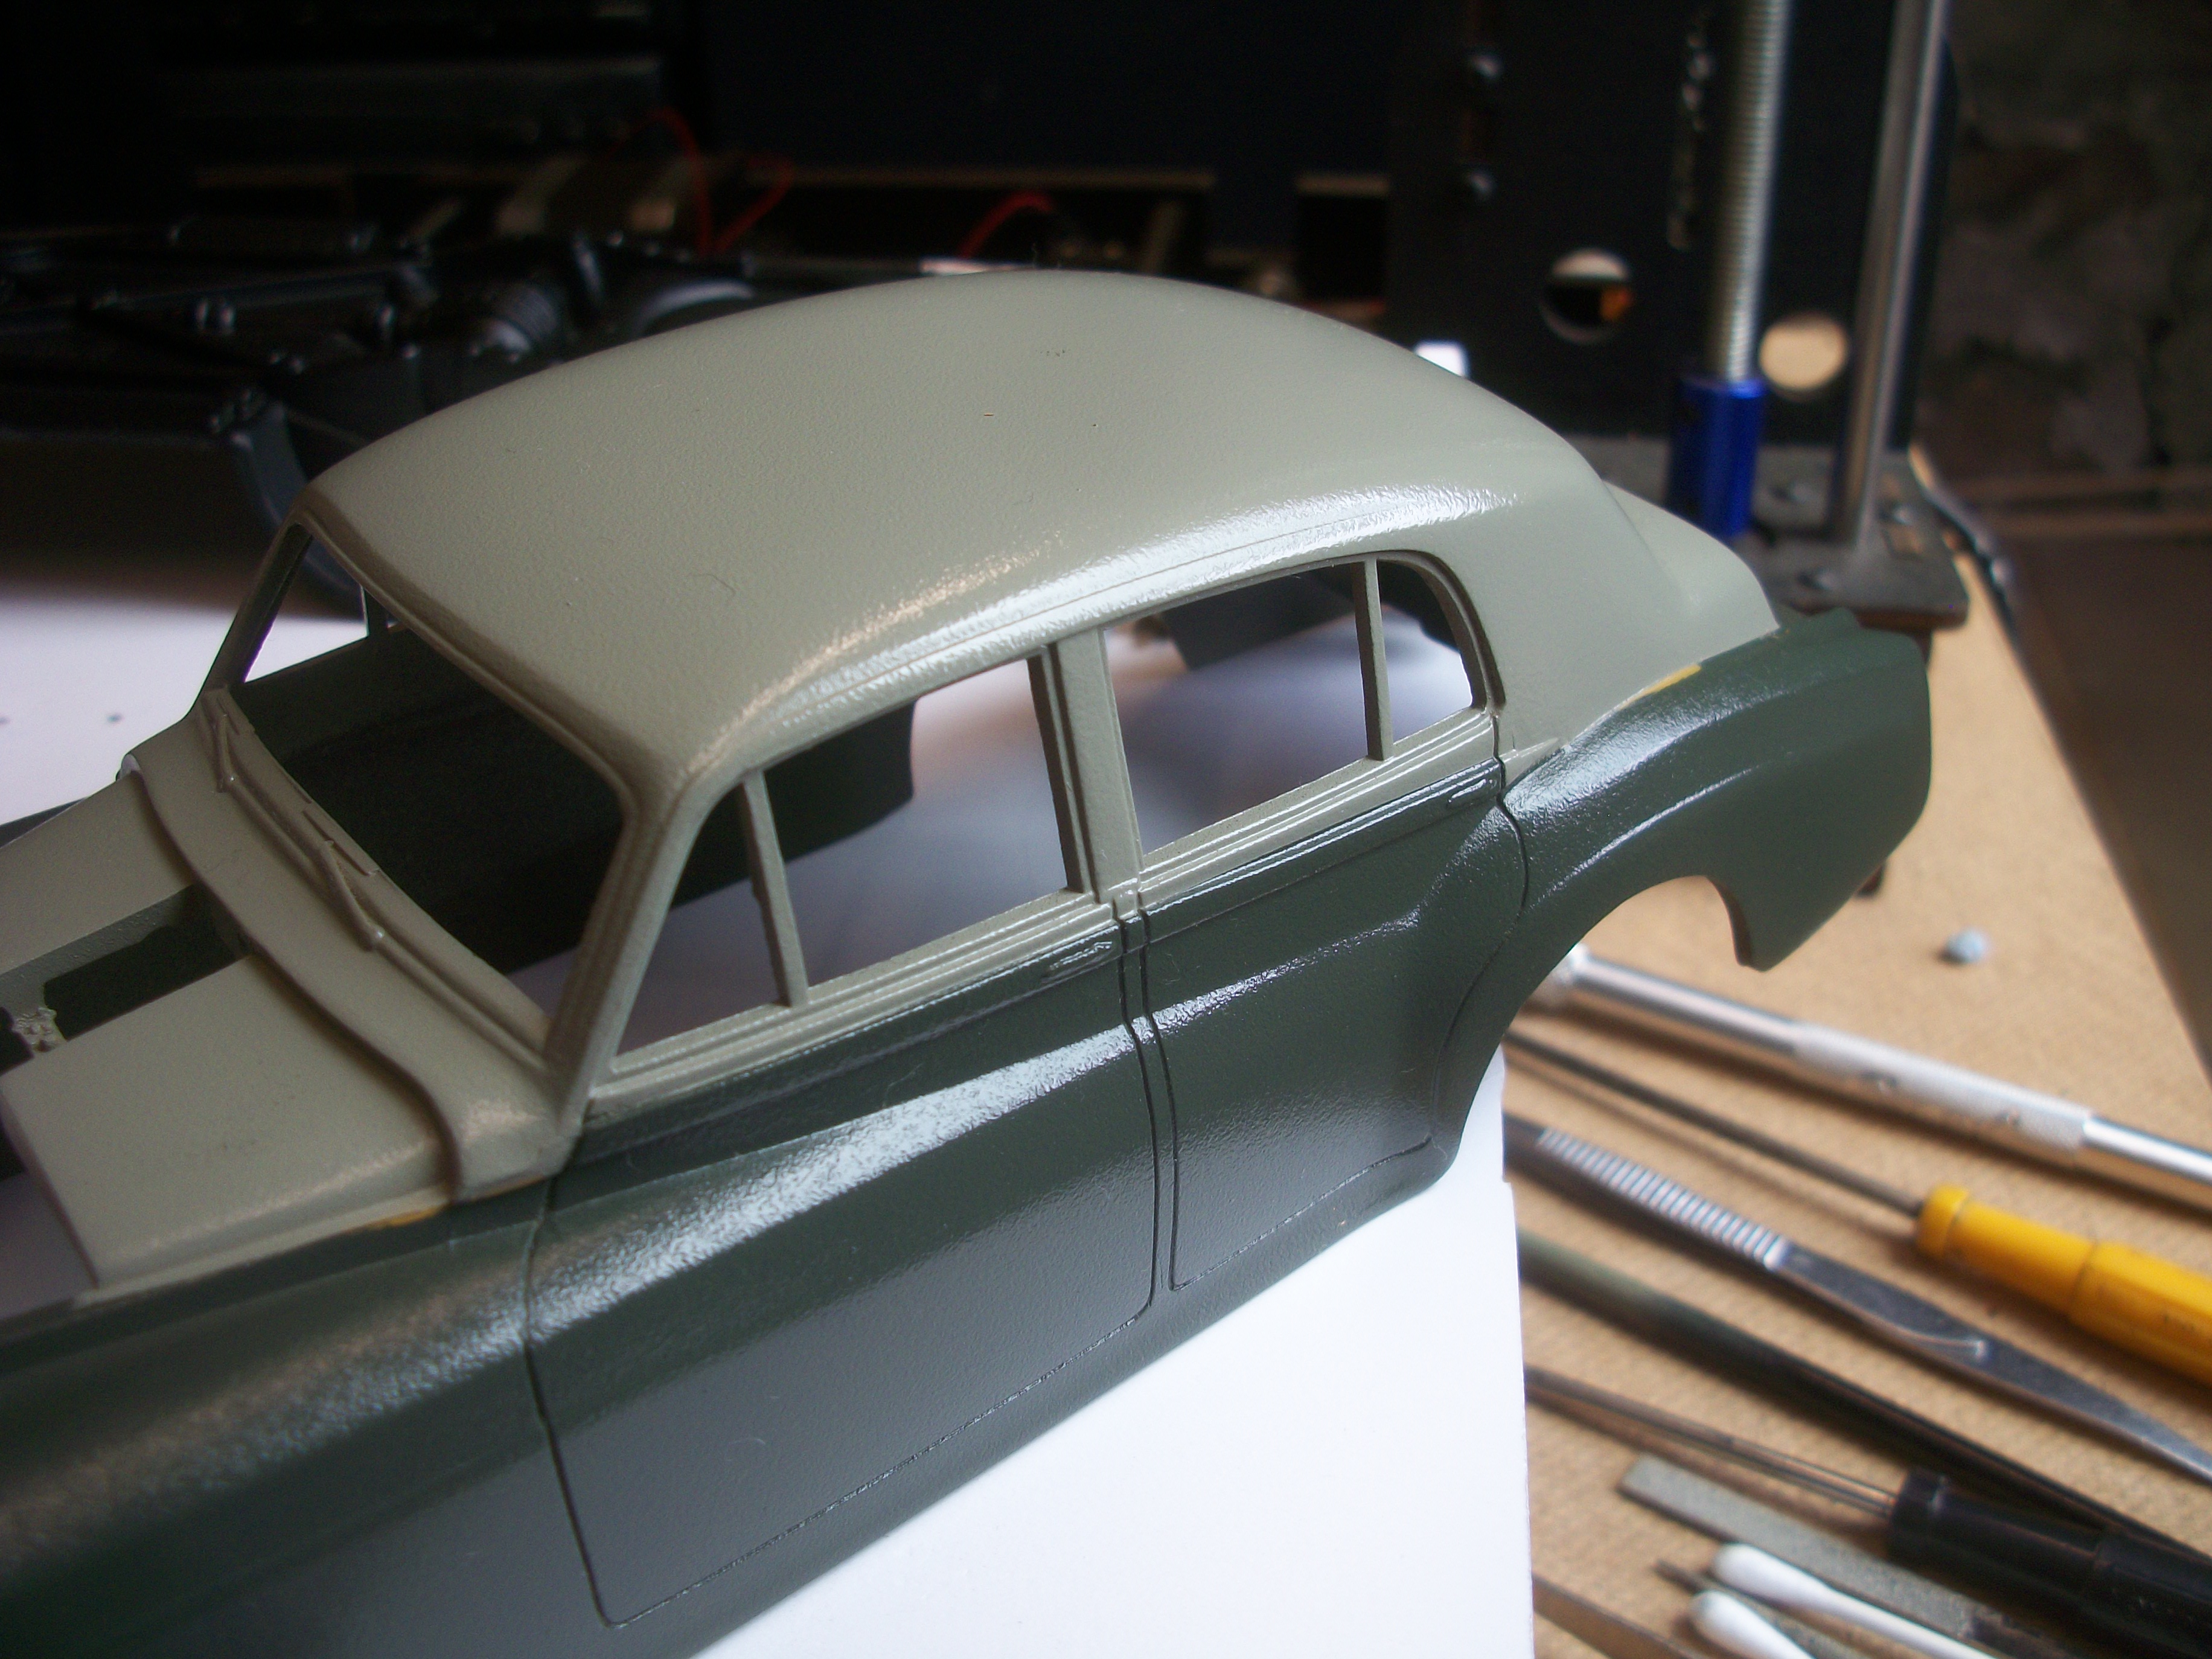
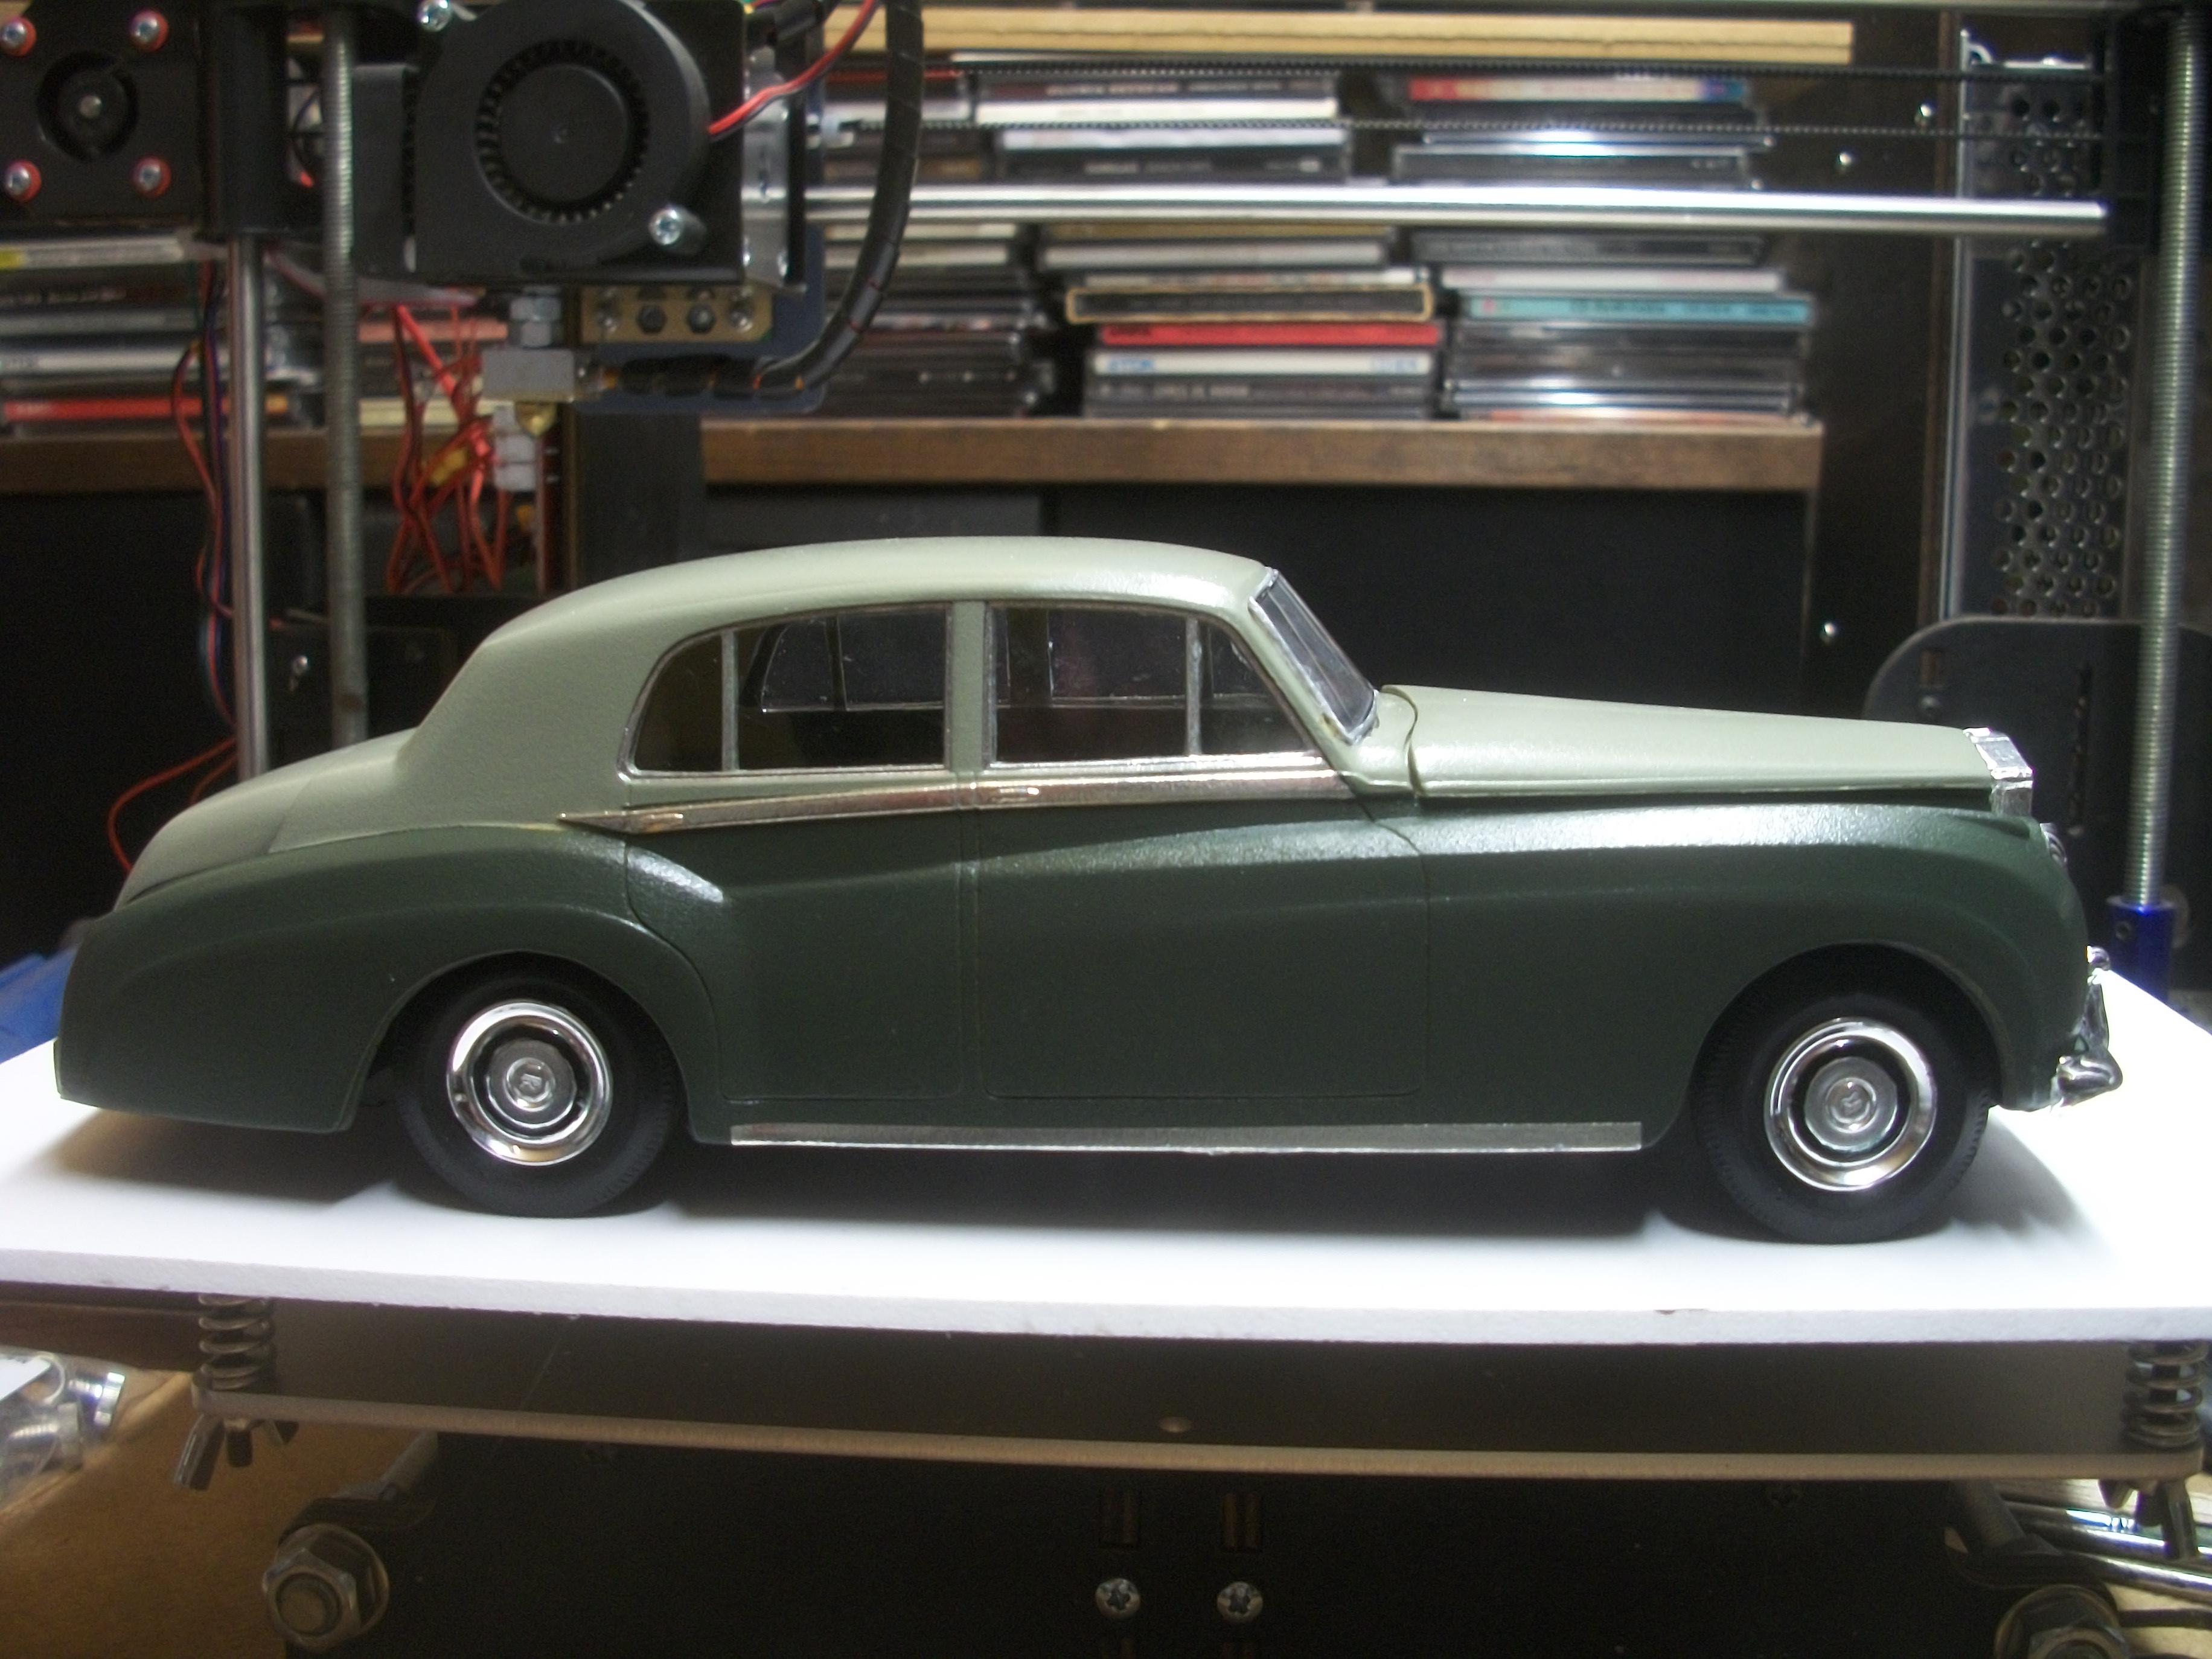
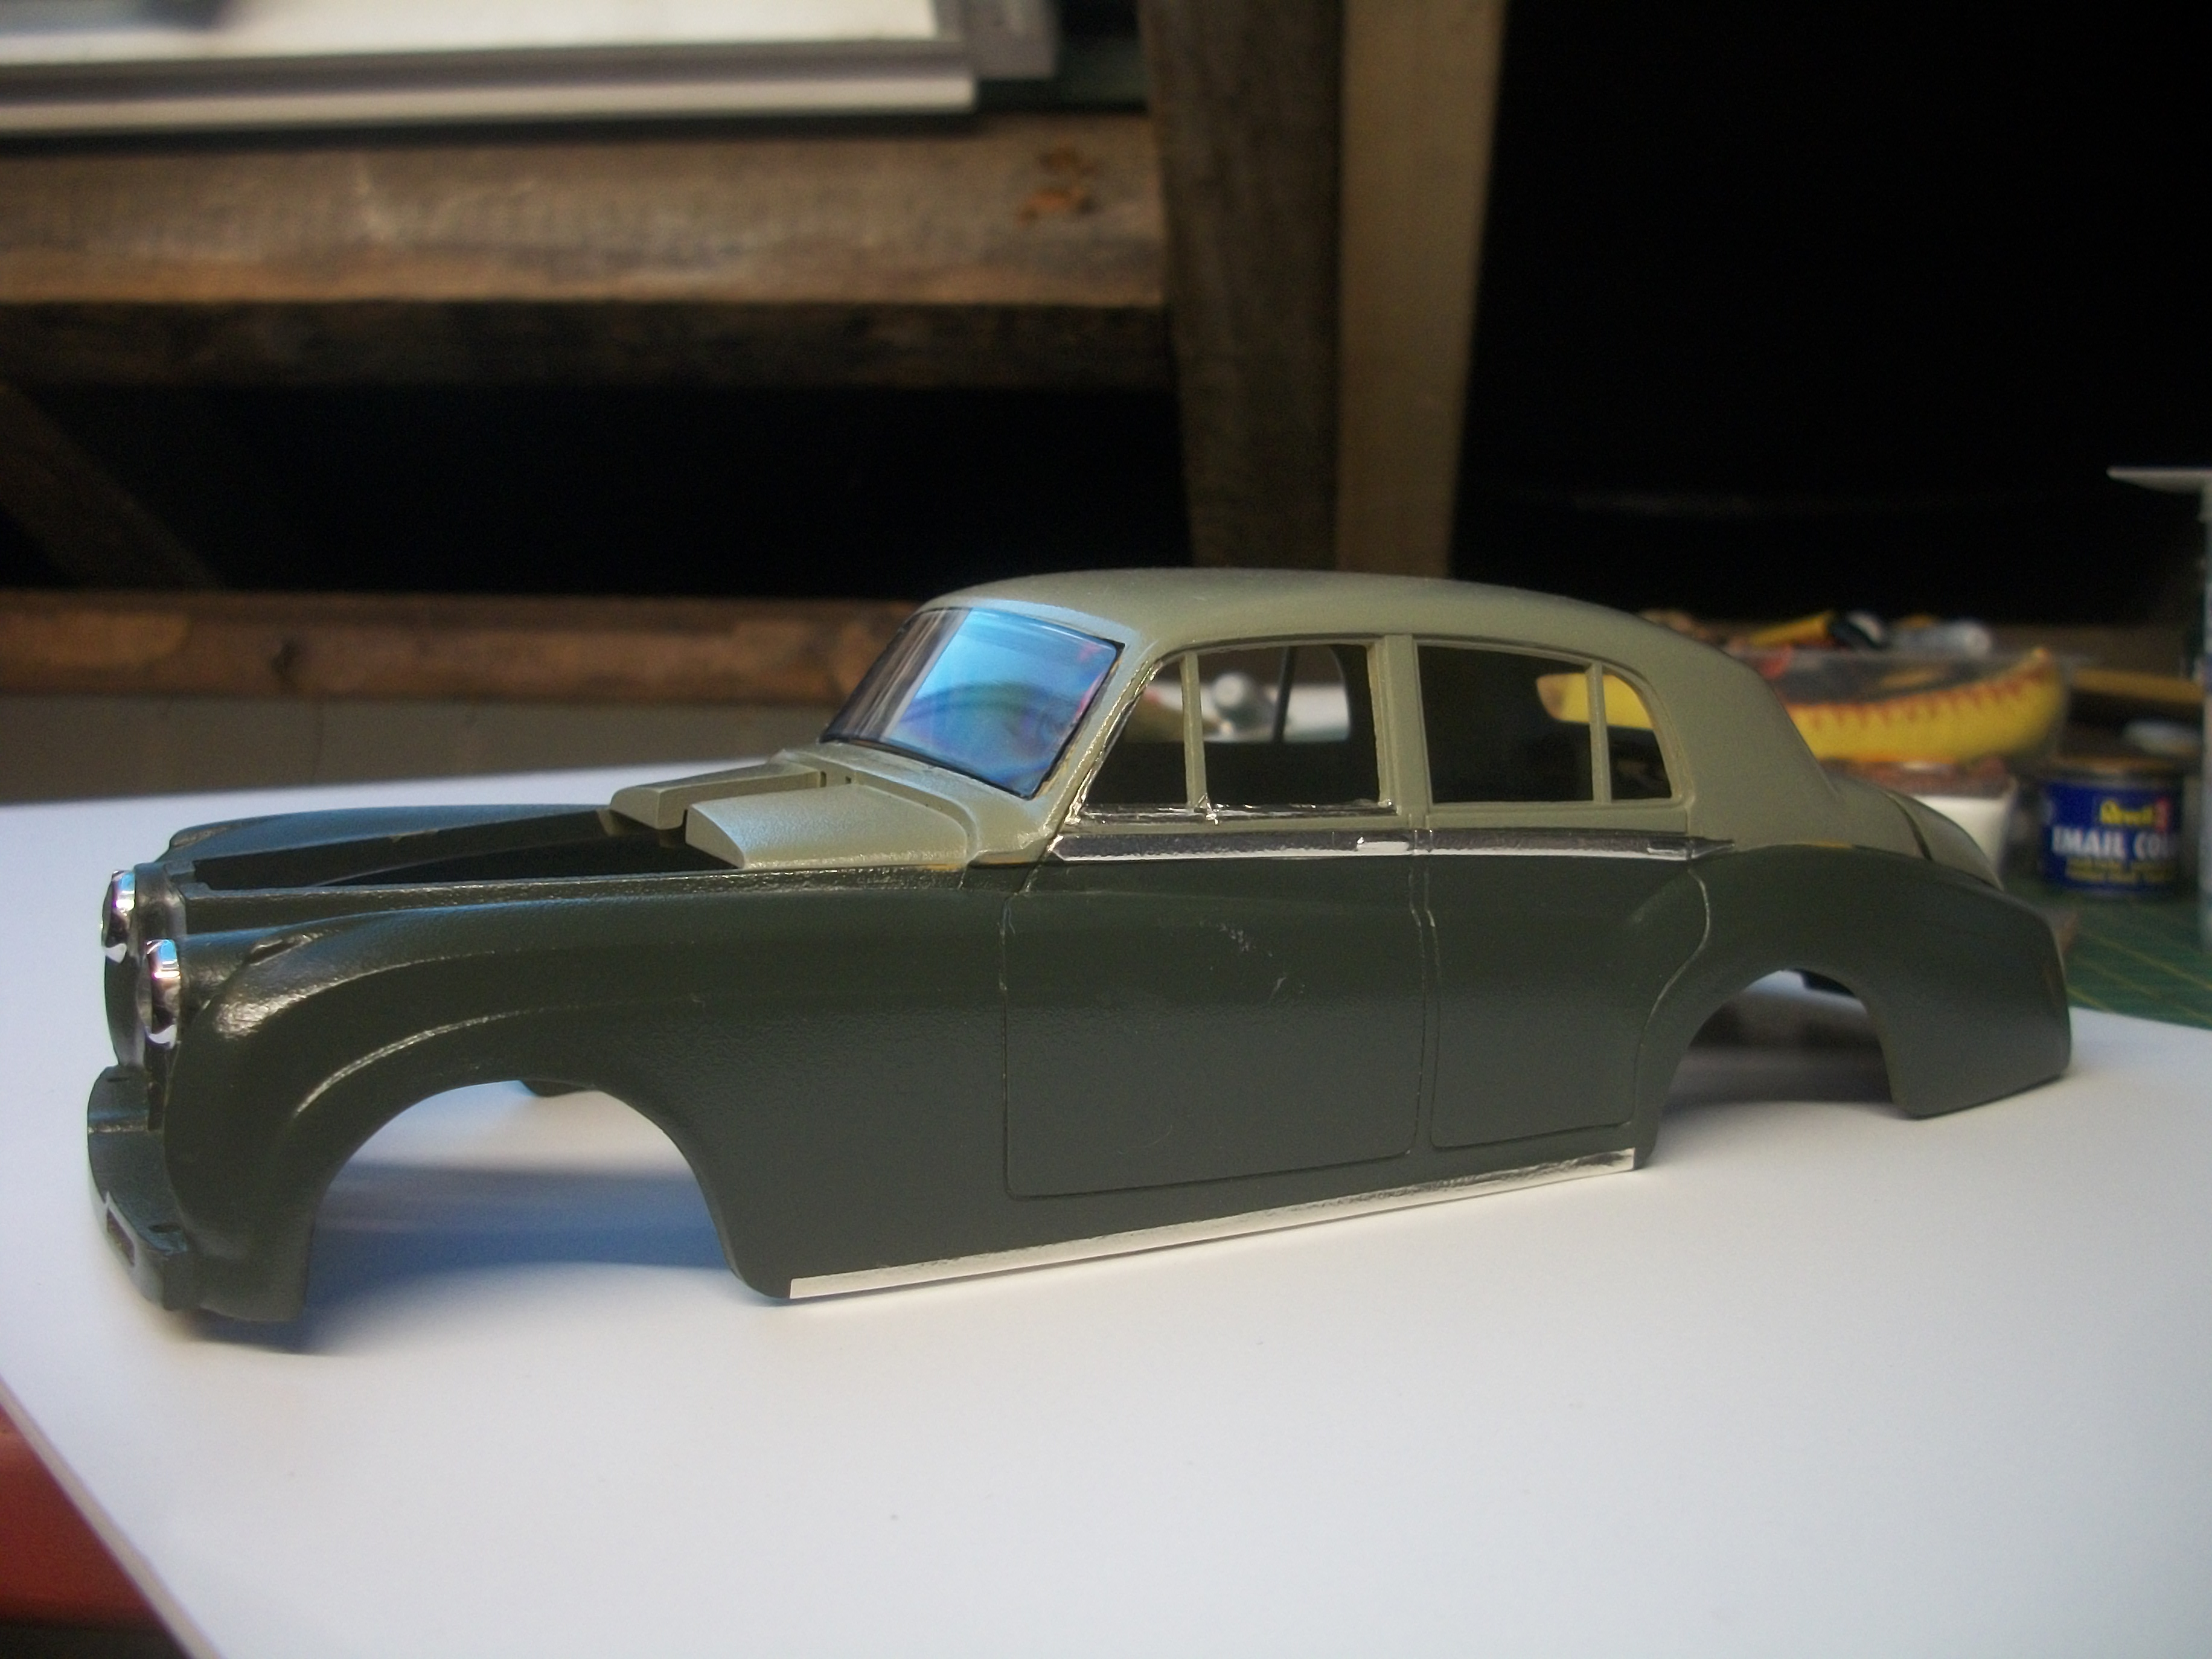
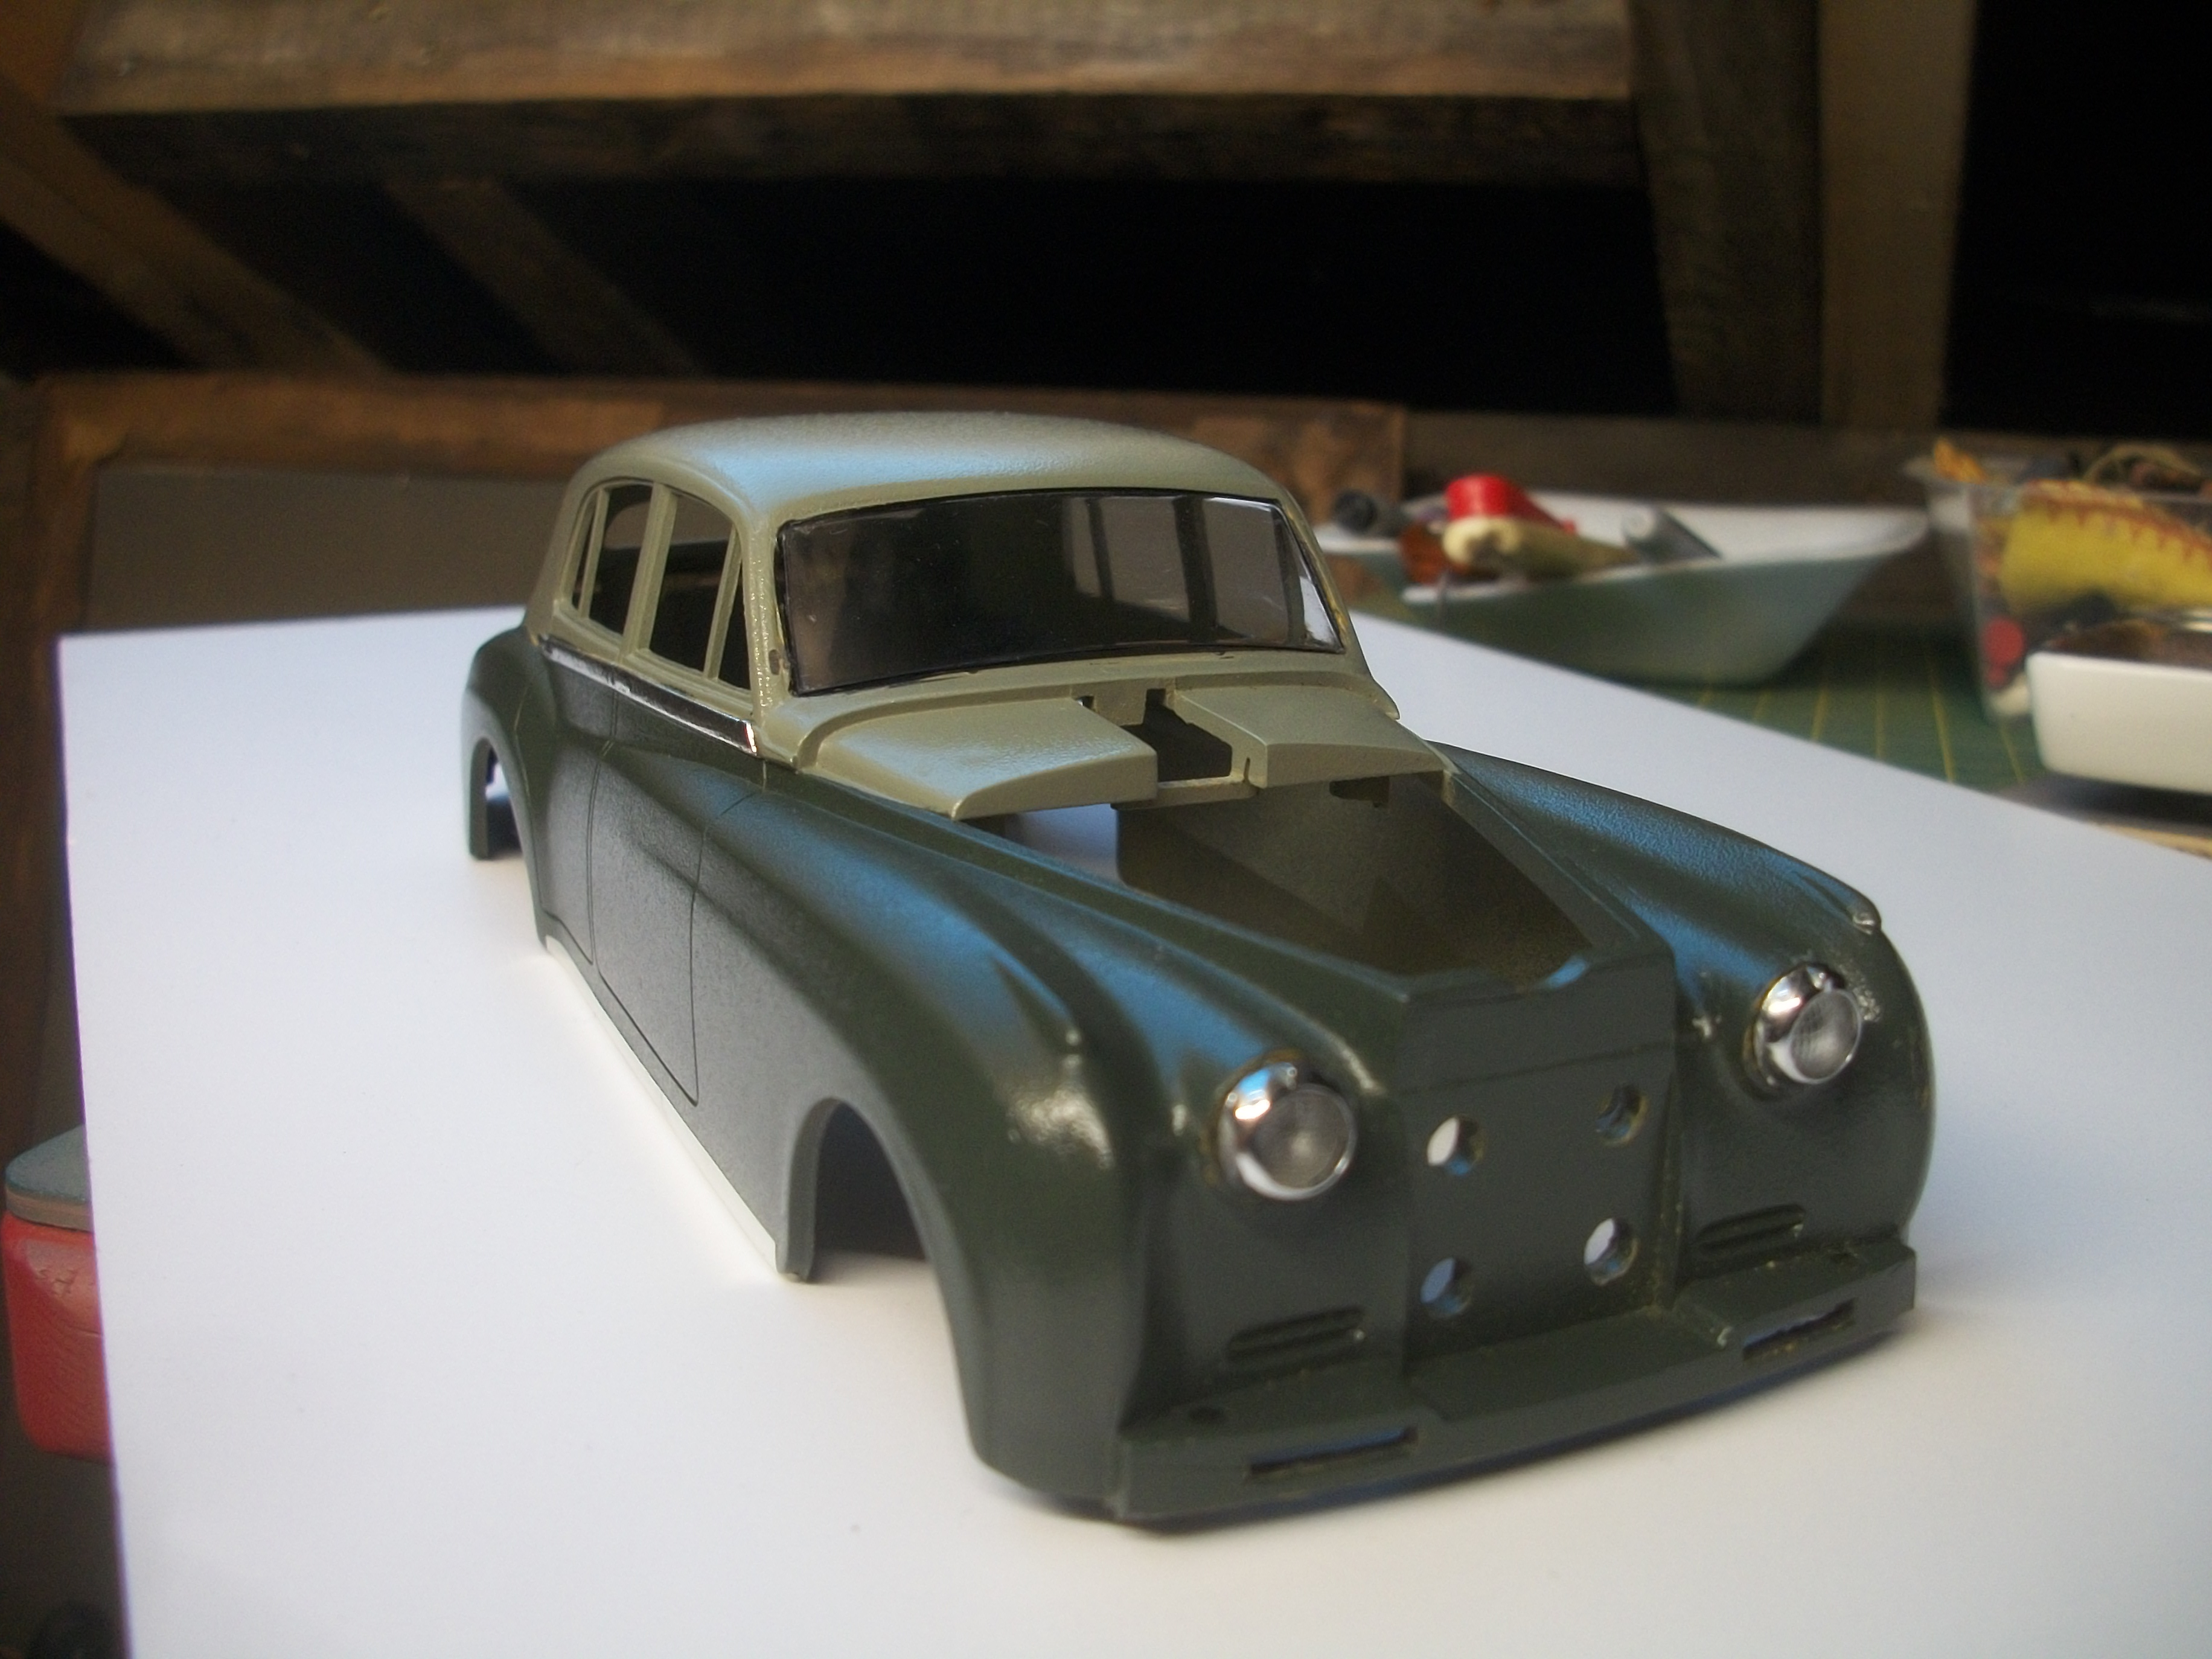
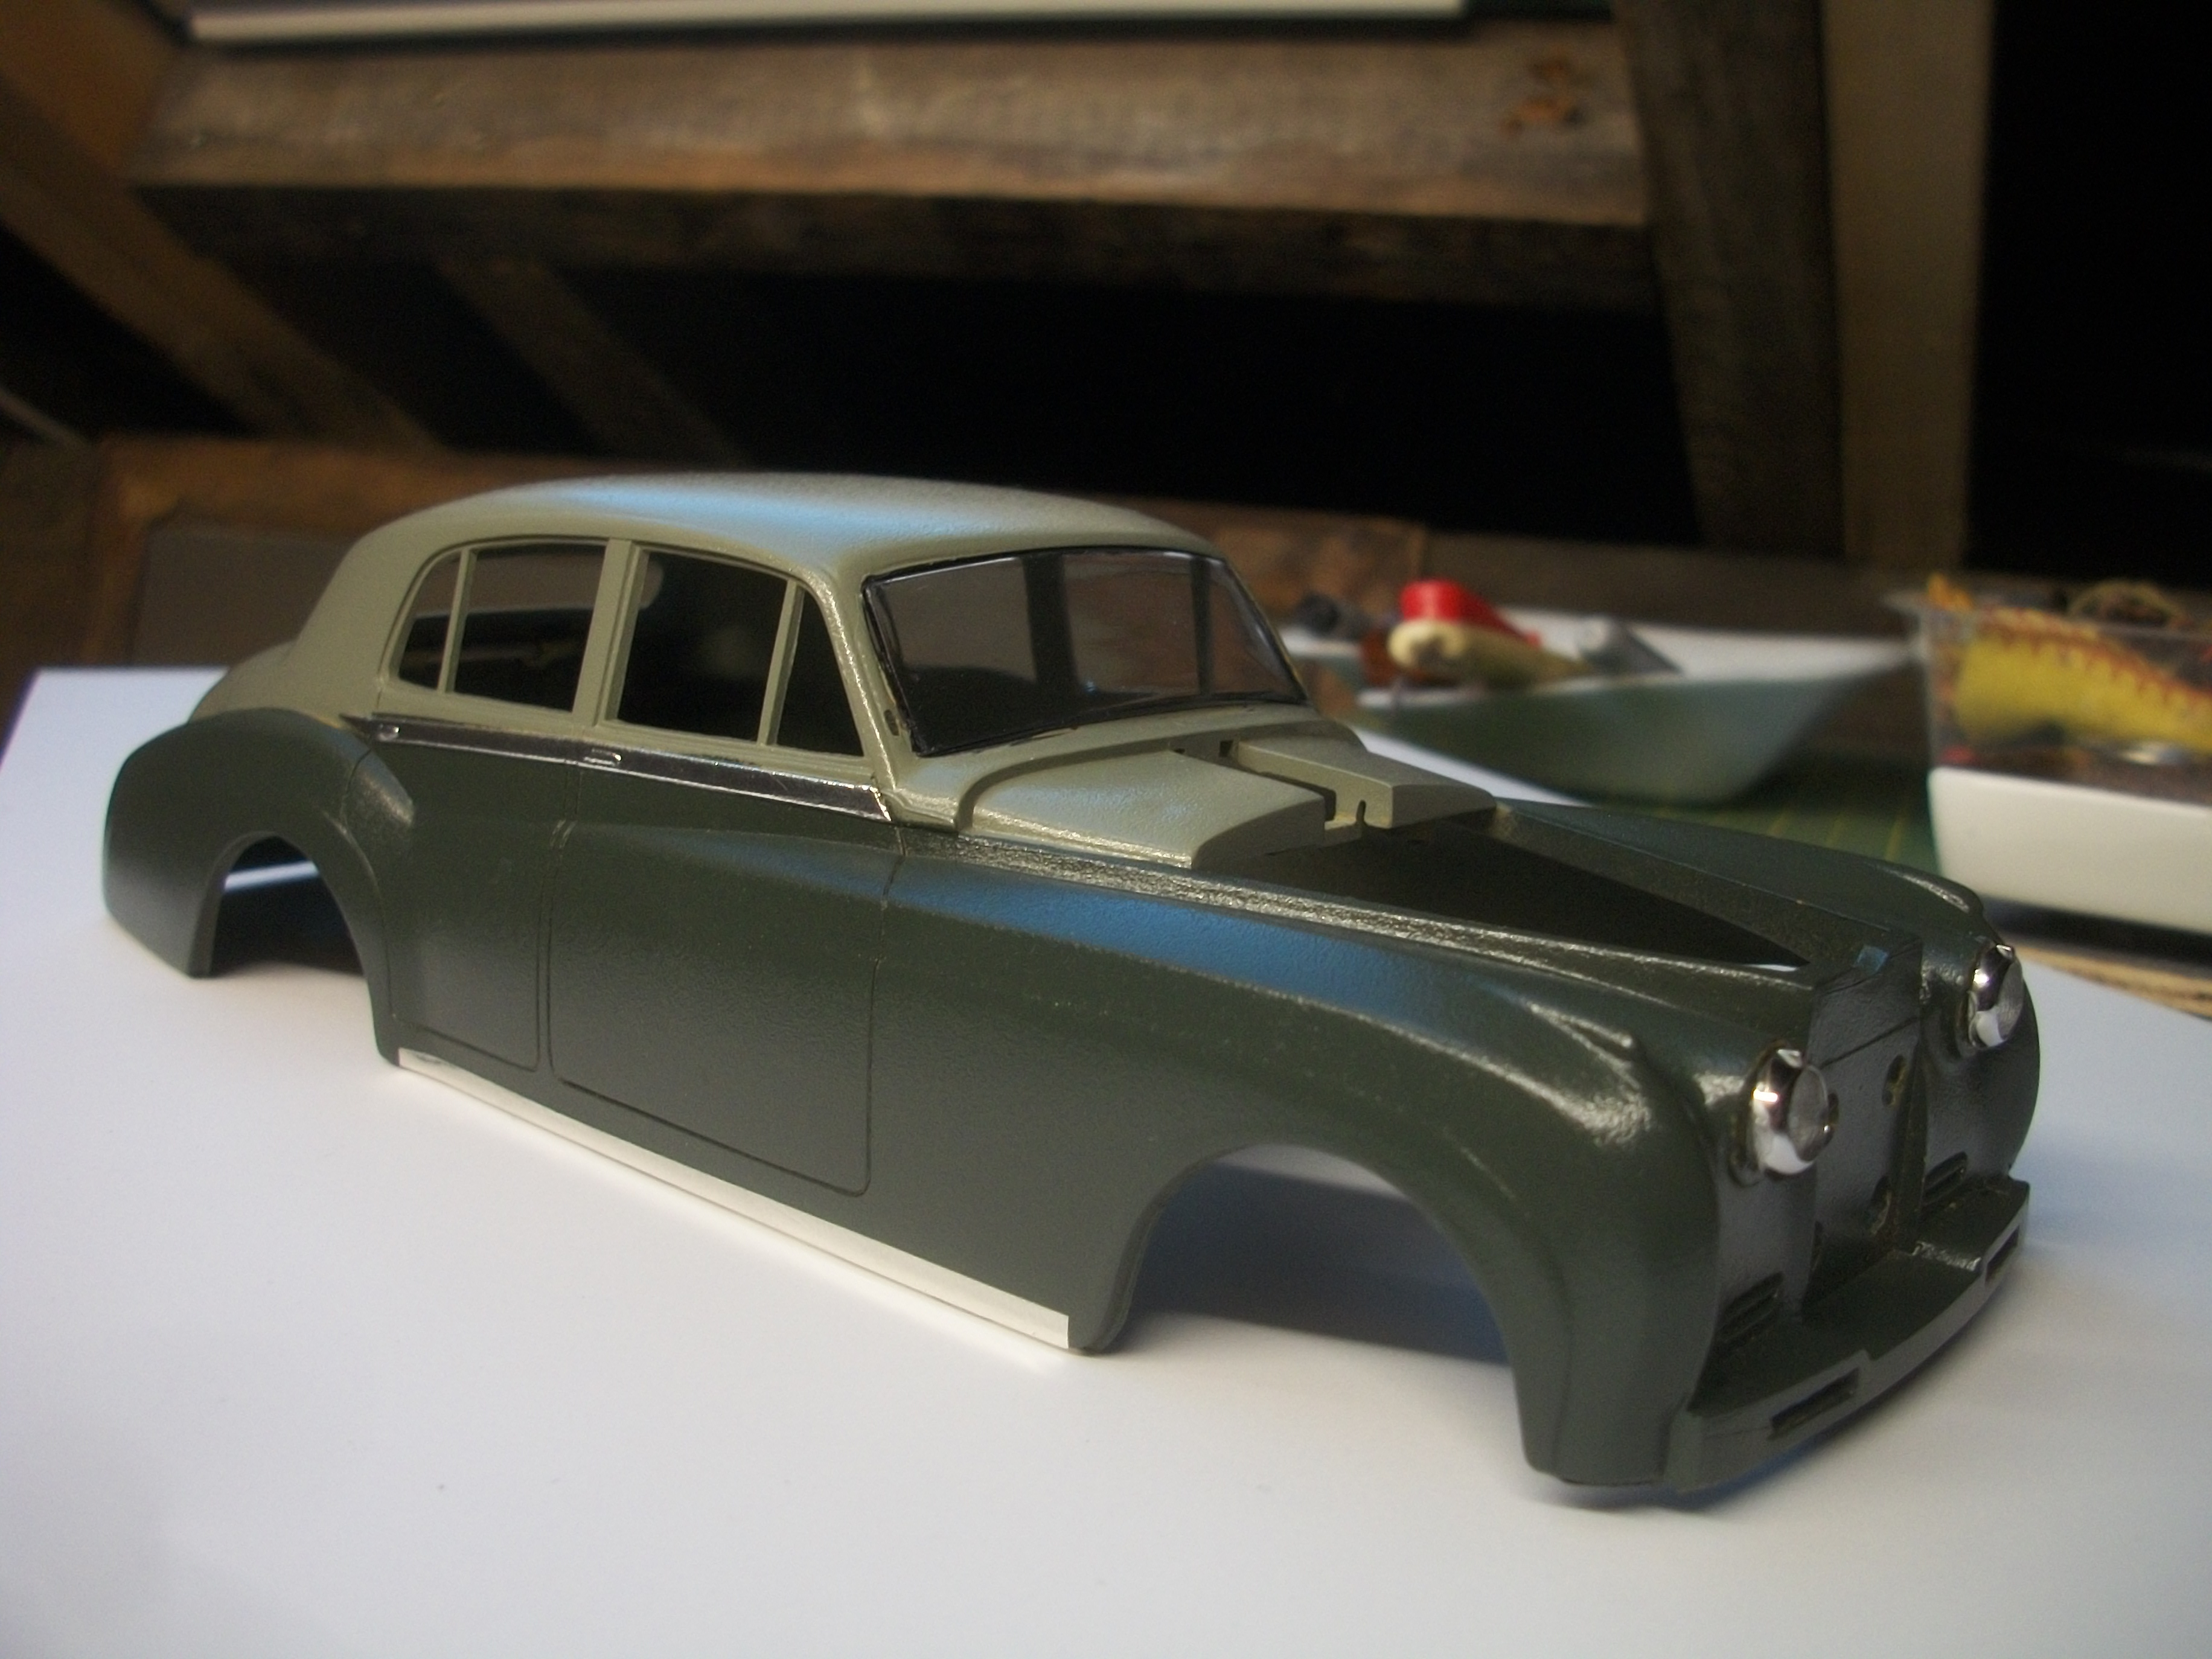
Much appreciated, Douglas...... I hope to make this particular Silver Cloud a masterpiece, and we shall see how it goes. The kit windscreen has been glued in place. For this I have used Crystal Clear glue by Zero Paints, which was applied too thickly at first, so I gently wiped off the excess with a cotton bud until there was very little glue remaining. I allowed the fitted screen to dry overnight for 24 hours, before pushing the screen lightly with a cotton bud on the following day, just to make sure that it had held. The rear screen is not yet in place, but I have painted the rear window seal with Humbrol Satin Black enamel. The one mistake that Franklin Mint have made with their diecast version of this car is to have made a chrome moulding surround for the rear window glass, which was not correct for the Rolls-Royce Silver Cloud. Otherwise, the Franklin Mint model is an excellent representation of the iconic car from 1955. David
-
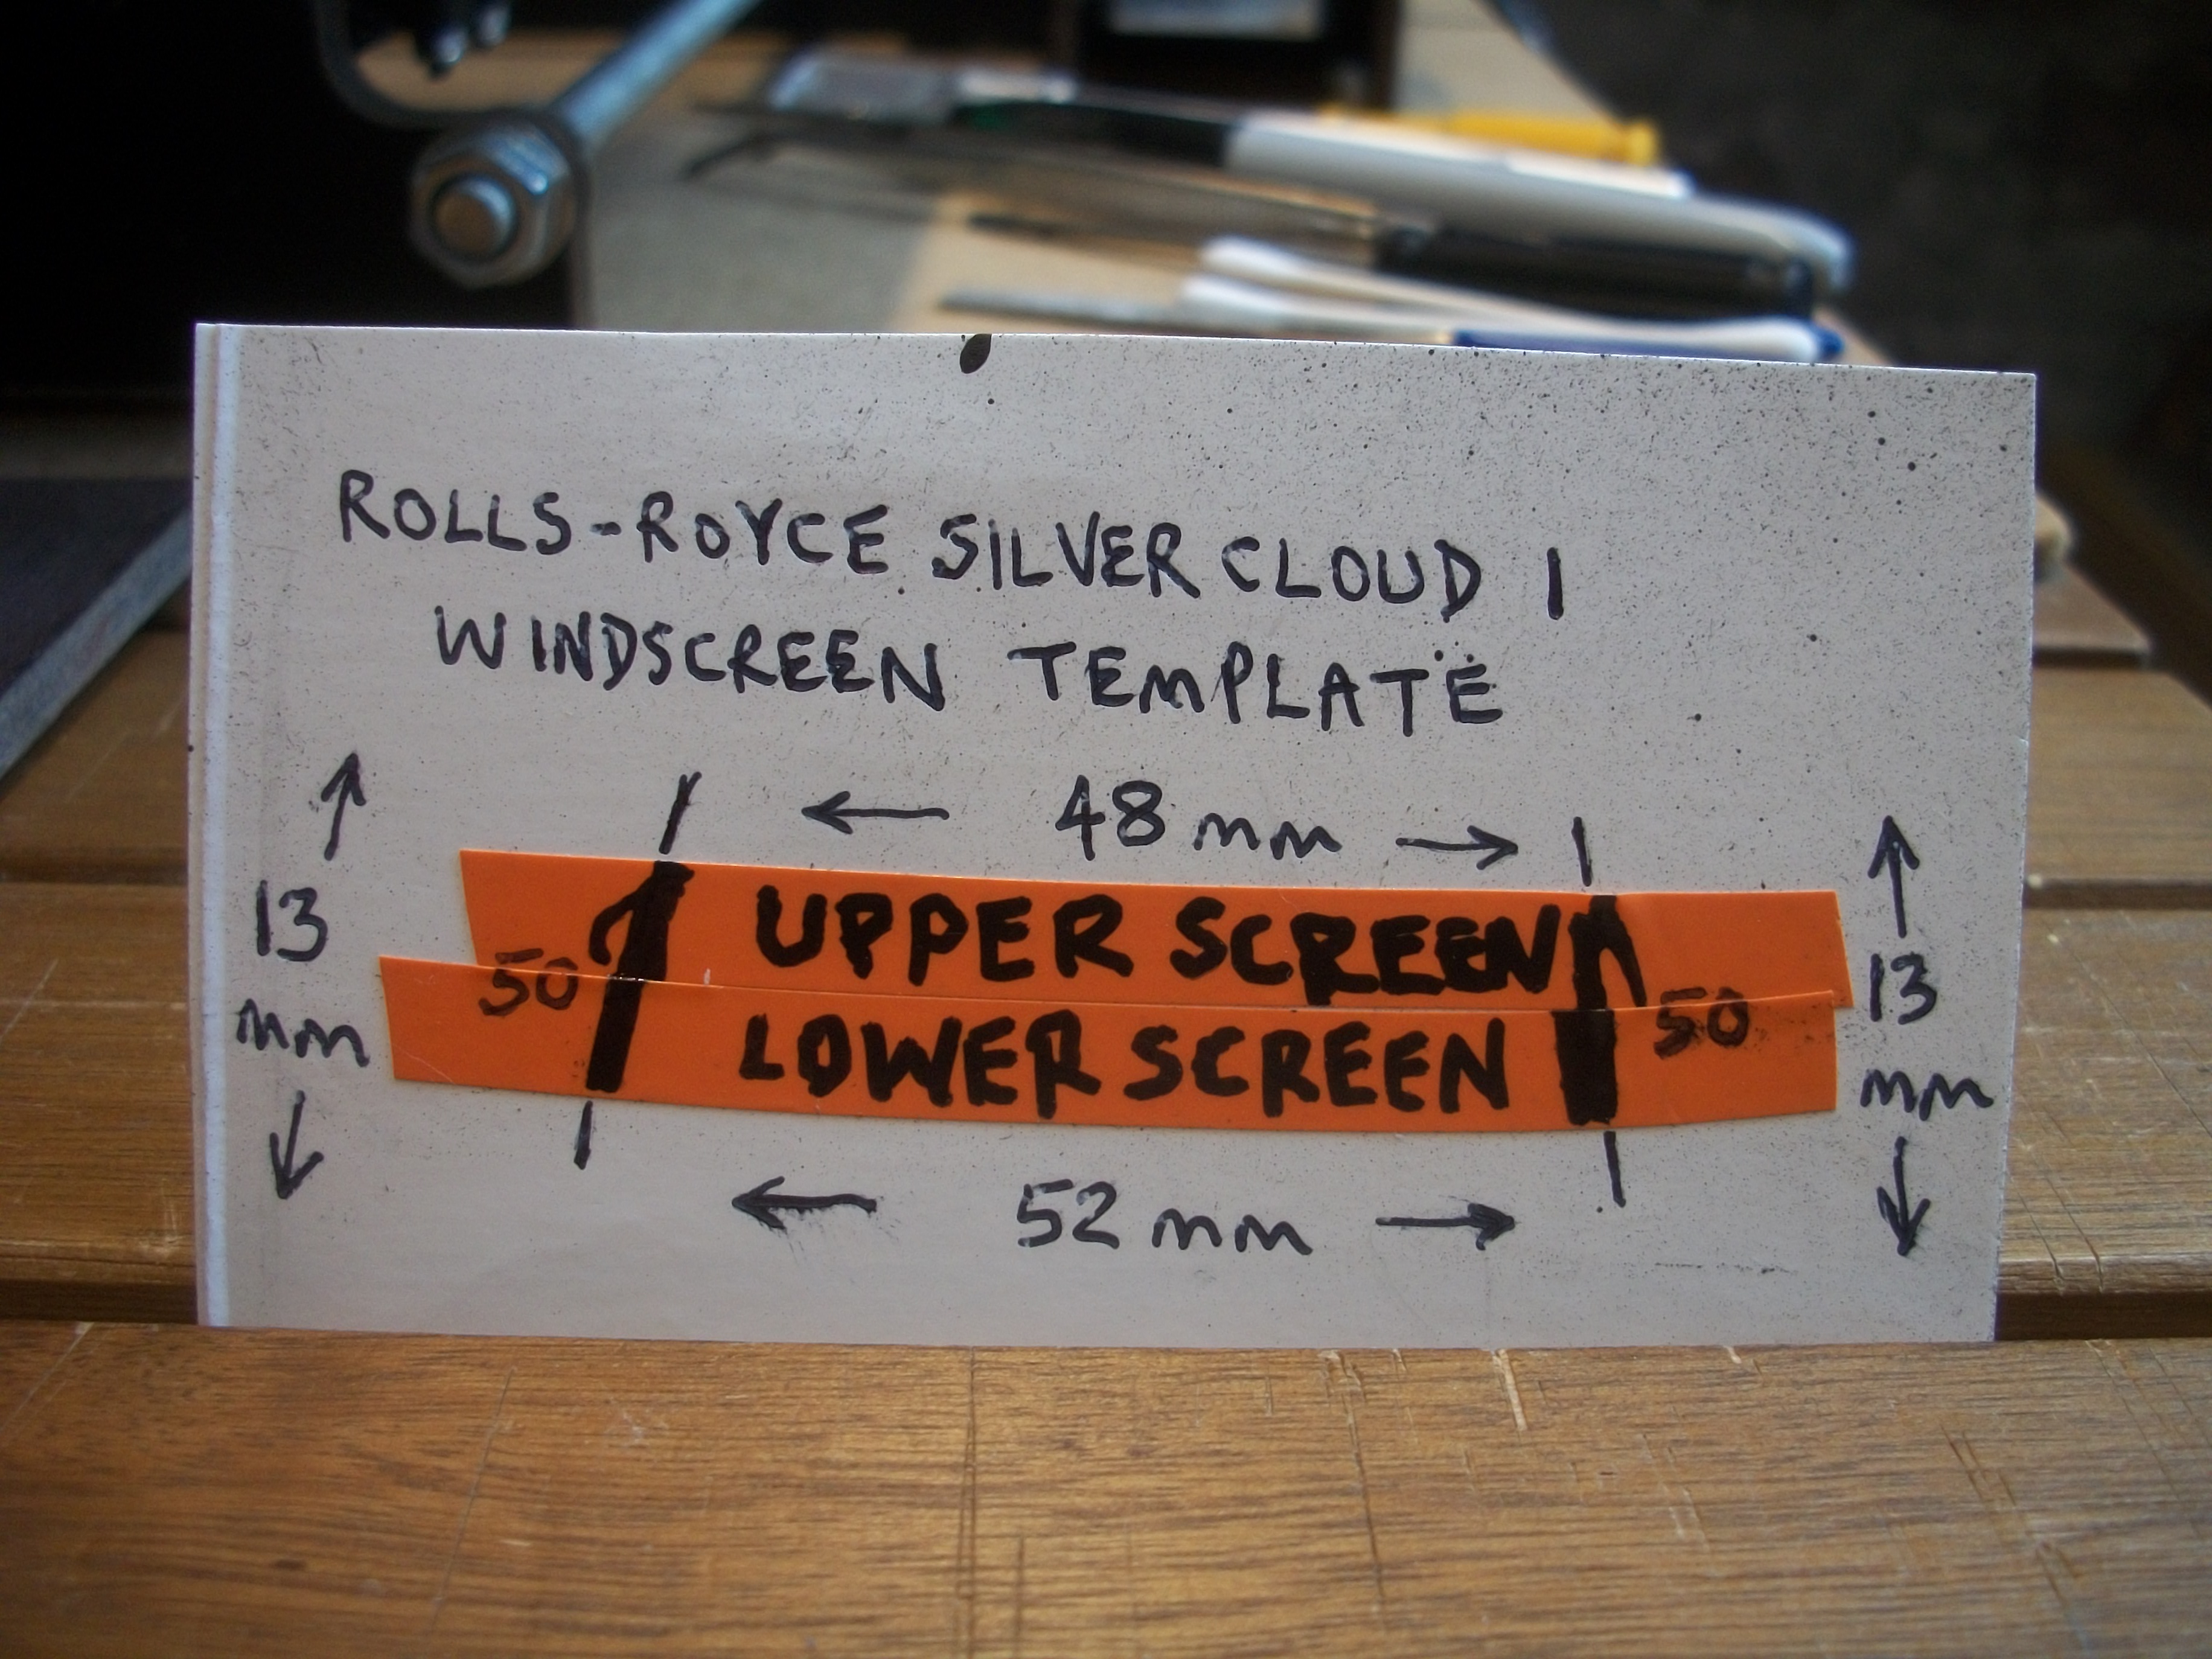
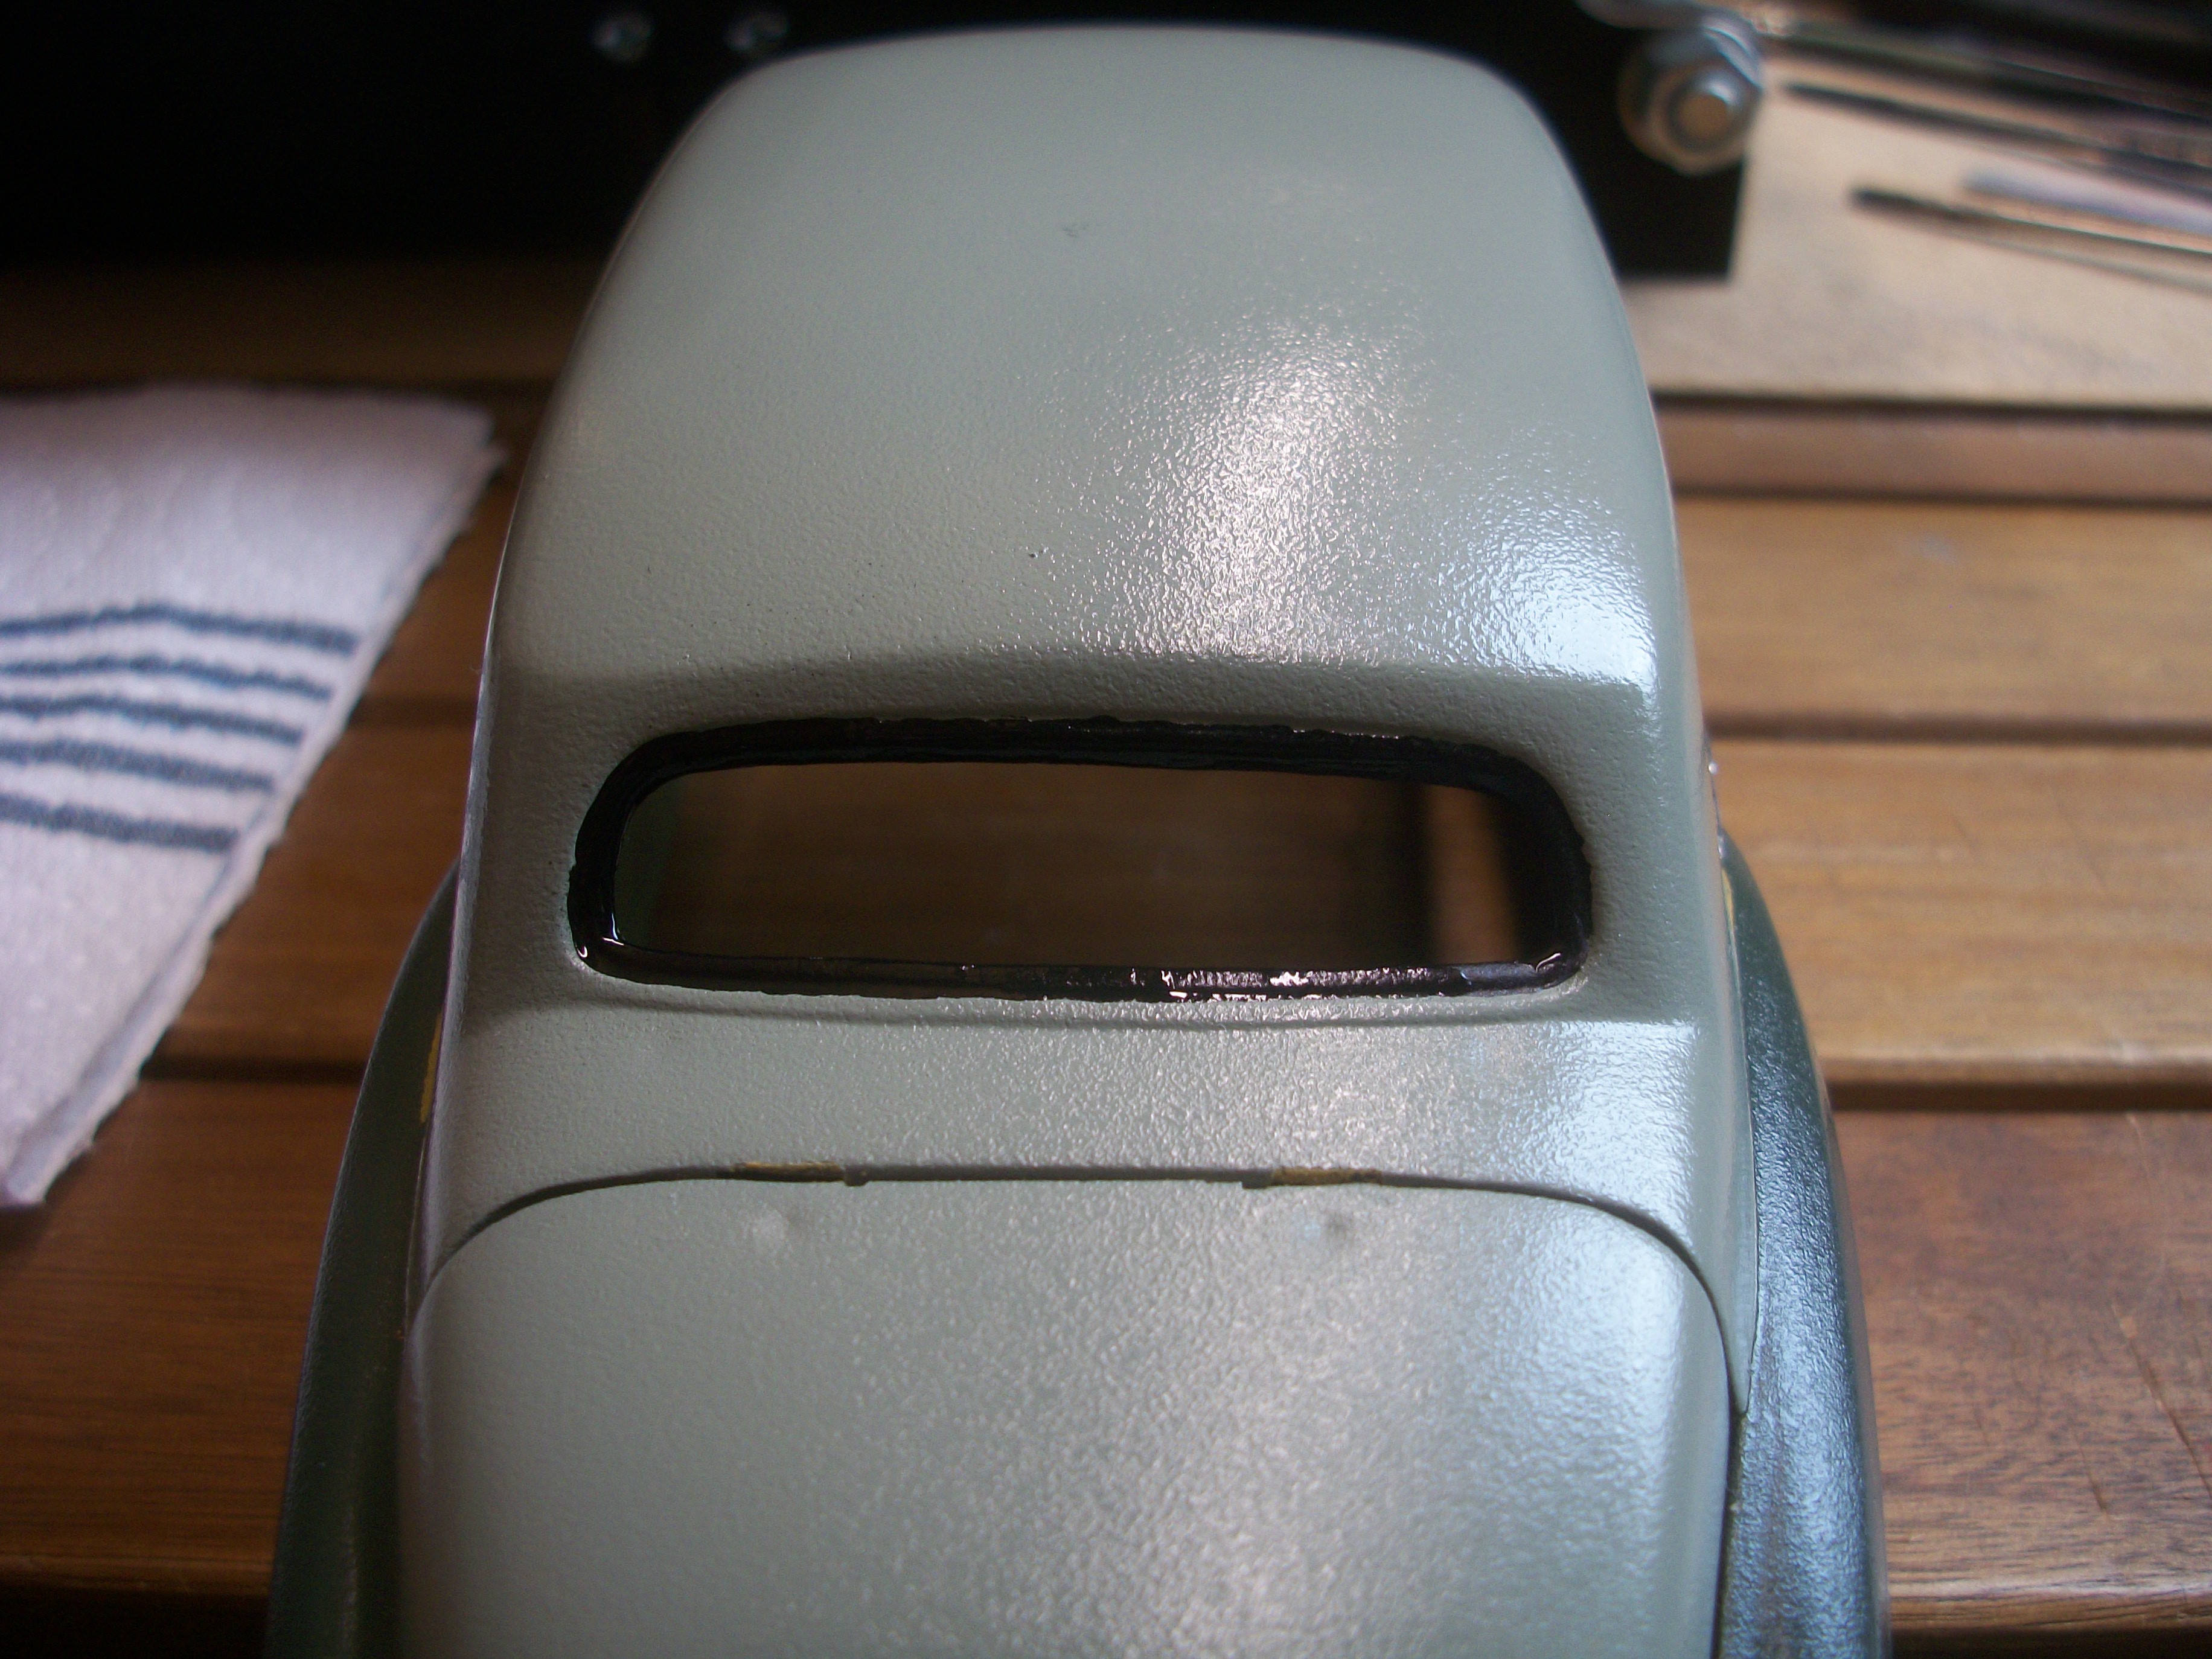
The screen from the diecast version of the Silver Cloud does not quite fit into the enlarged opening. Even with the opening enlarged as much as I can reasonably go, it is a matter of tenths of a millimetre........ Anyway, all is not lost, as I had yet another good idea. Why not use the Revell kit windscreen, I thought? Sure enough, the kit screen fits so precisely into the opening that it does not need any glue. All the filing work to enlarge the screen opening has been done on a spare black plastic Revell body shell, but this means that I can confidently go ahead and do the same on the Sage Green over Smoke Green build. The windscreen has fitted really well, and the difference that it makes to the overall realistic appearance of the car is of paramount importance. The following photos are just a simple mock up, so nothing is fitted properly just yet, but they do show how this screen is aligned. There is a small area of damage to the scuttle, in front of the screen and on the left side. Once the chrome moulding surround is in place, and also the wipers, I am hoping this will not be visible. I am using the wiper arms and wiper blades from a Tamiya Jaguar MK 2 kit, as the lower edge of the windscreen on both cars is identical in width at 53 mm. David
-
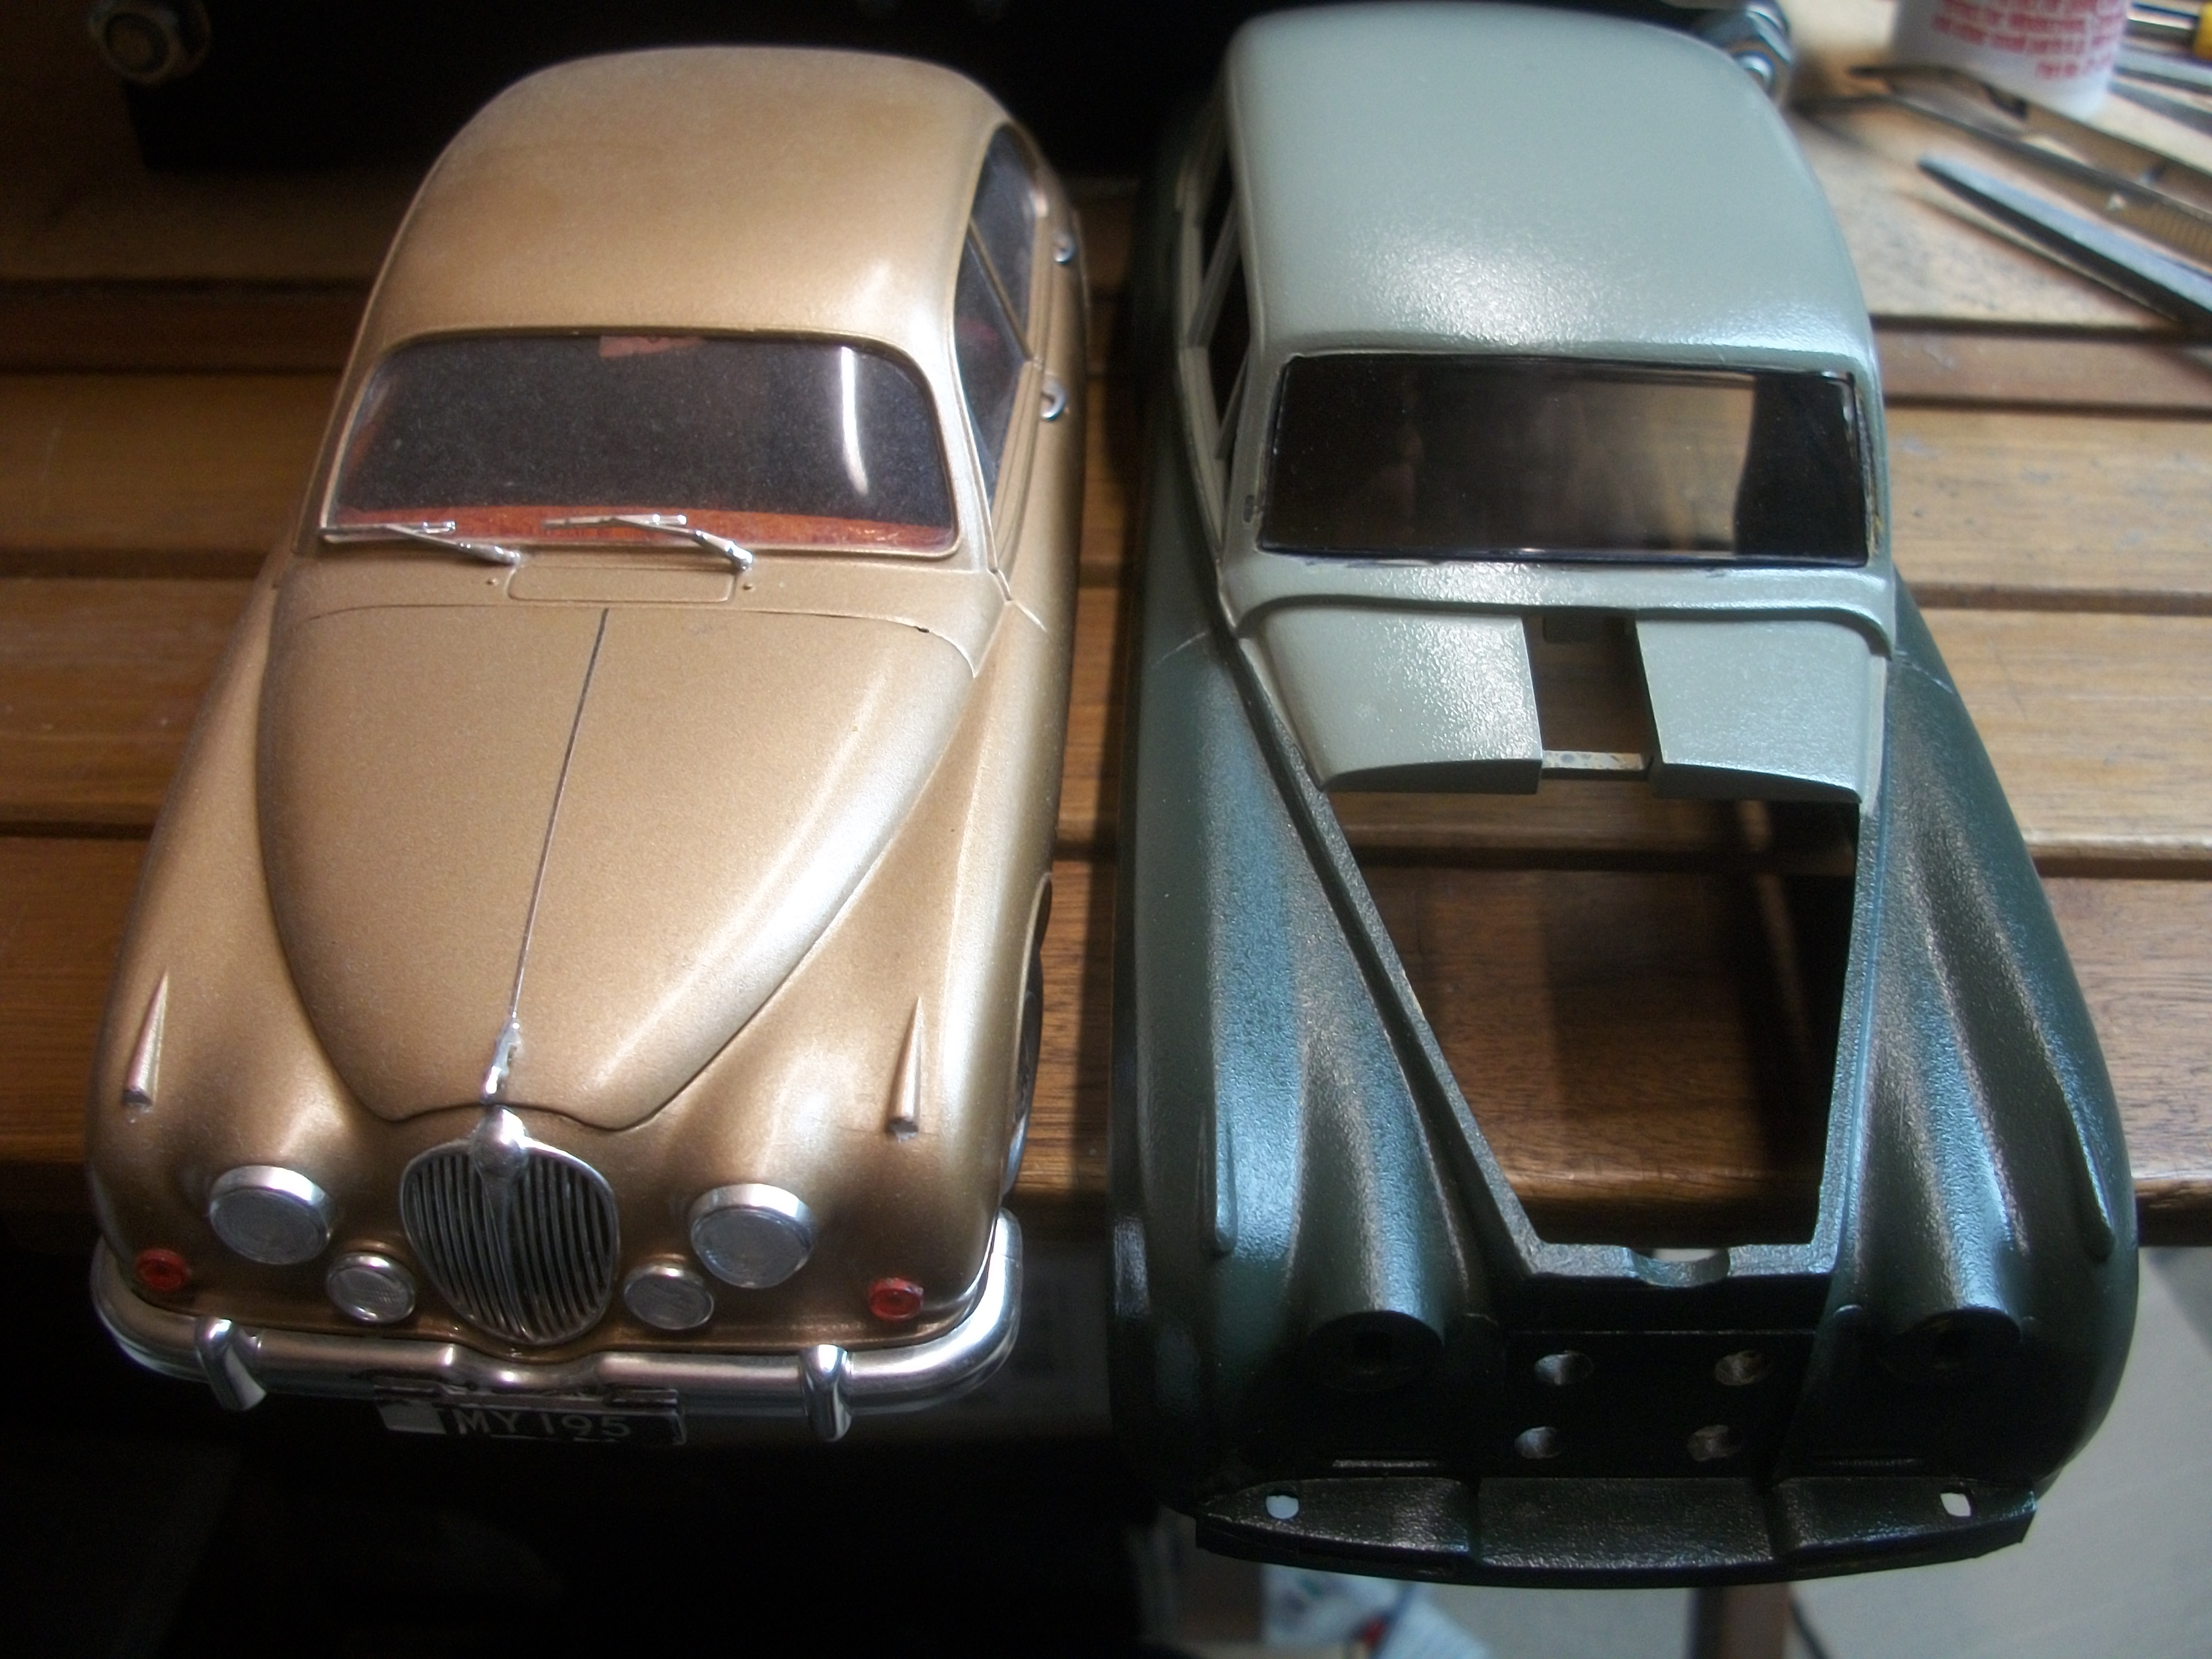
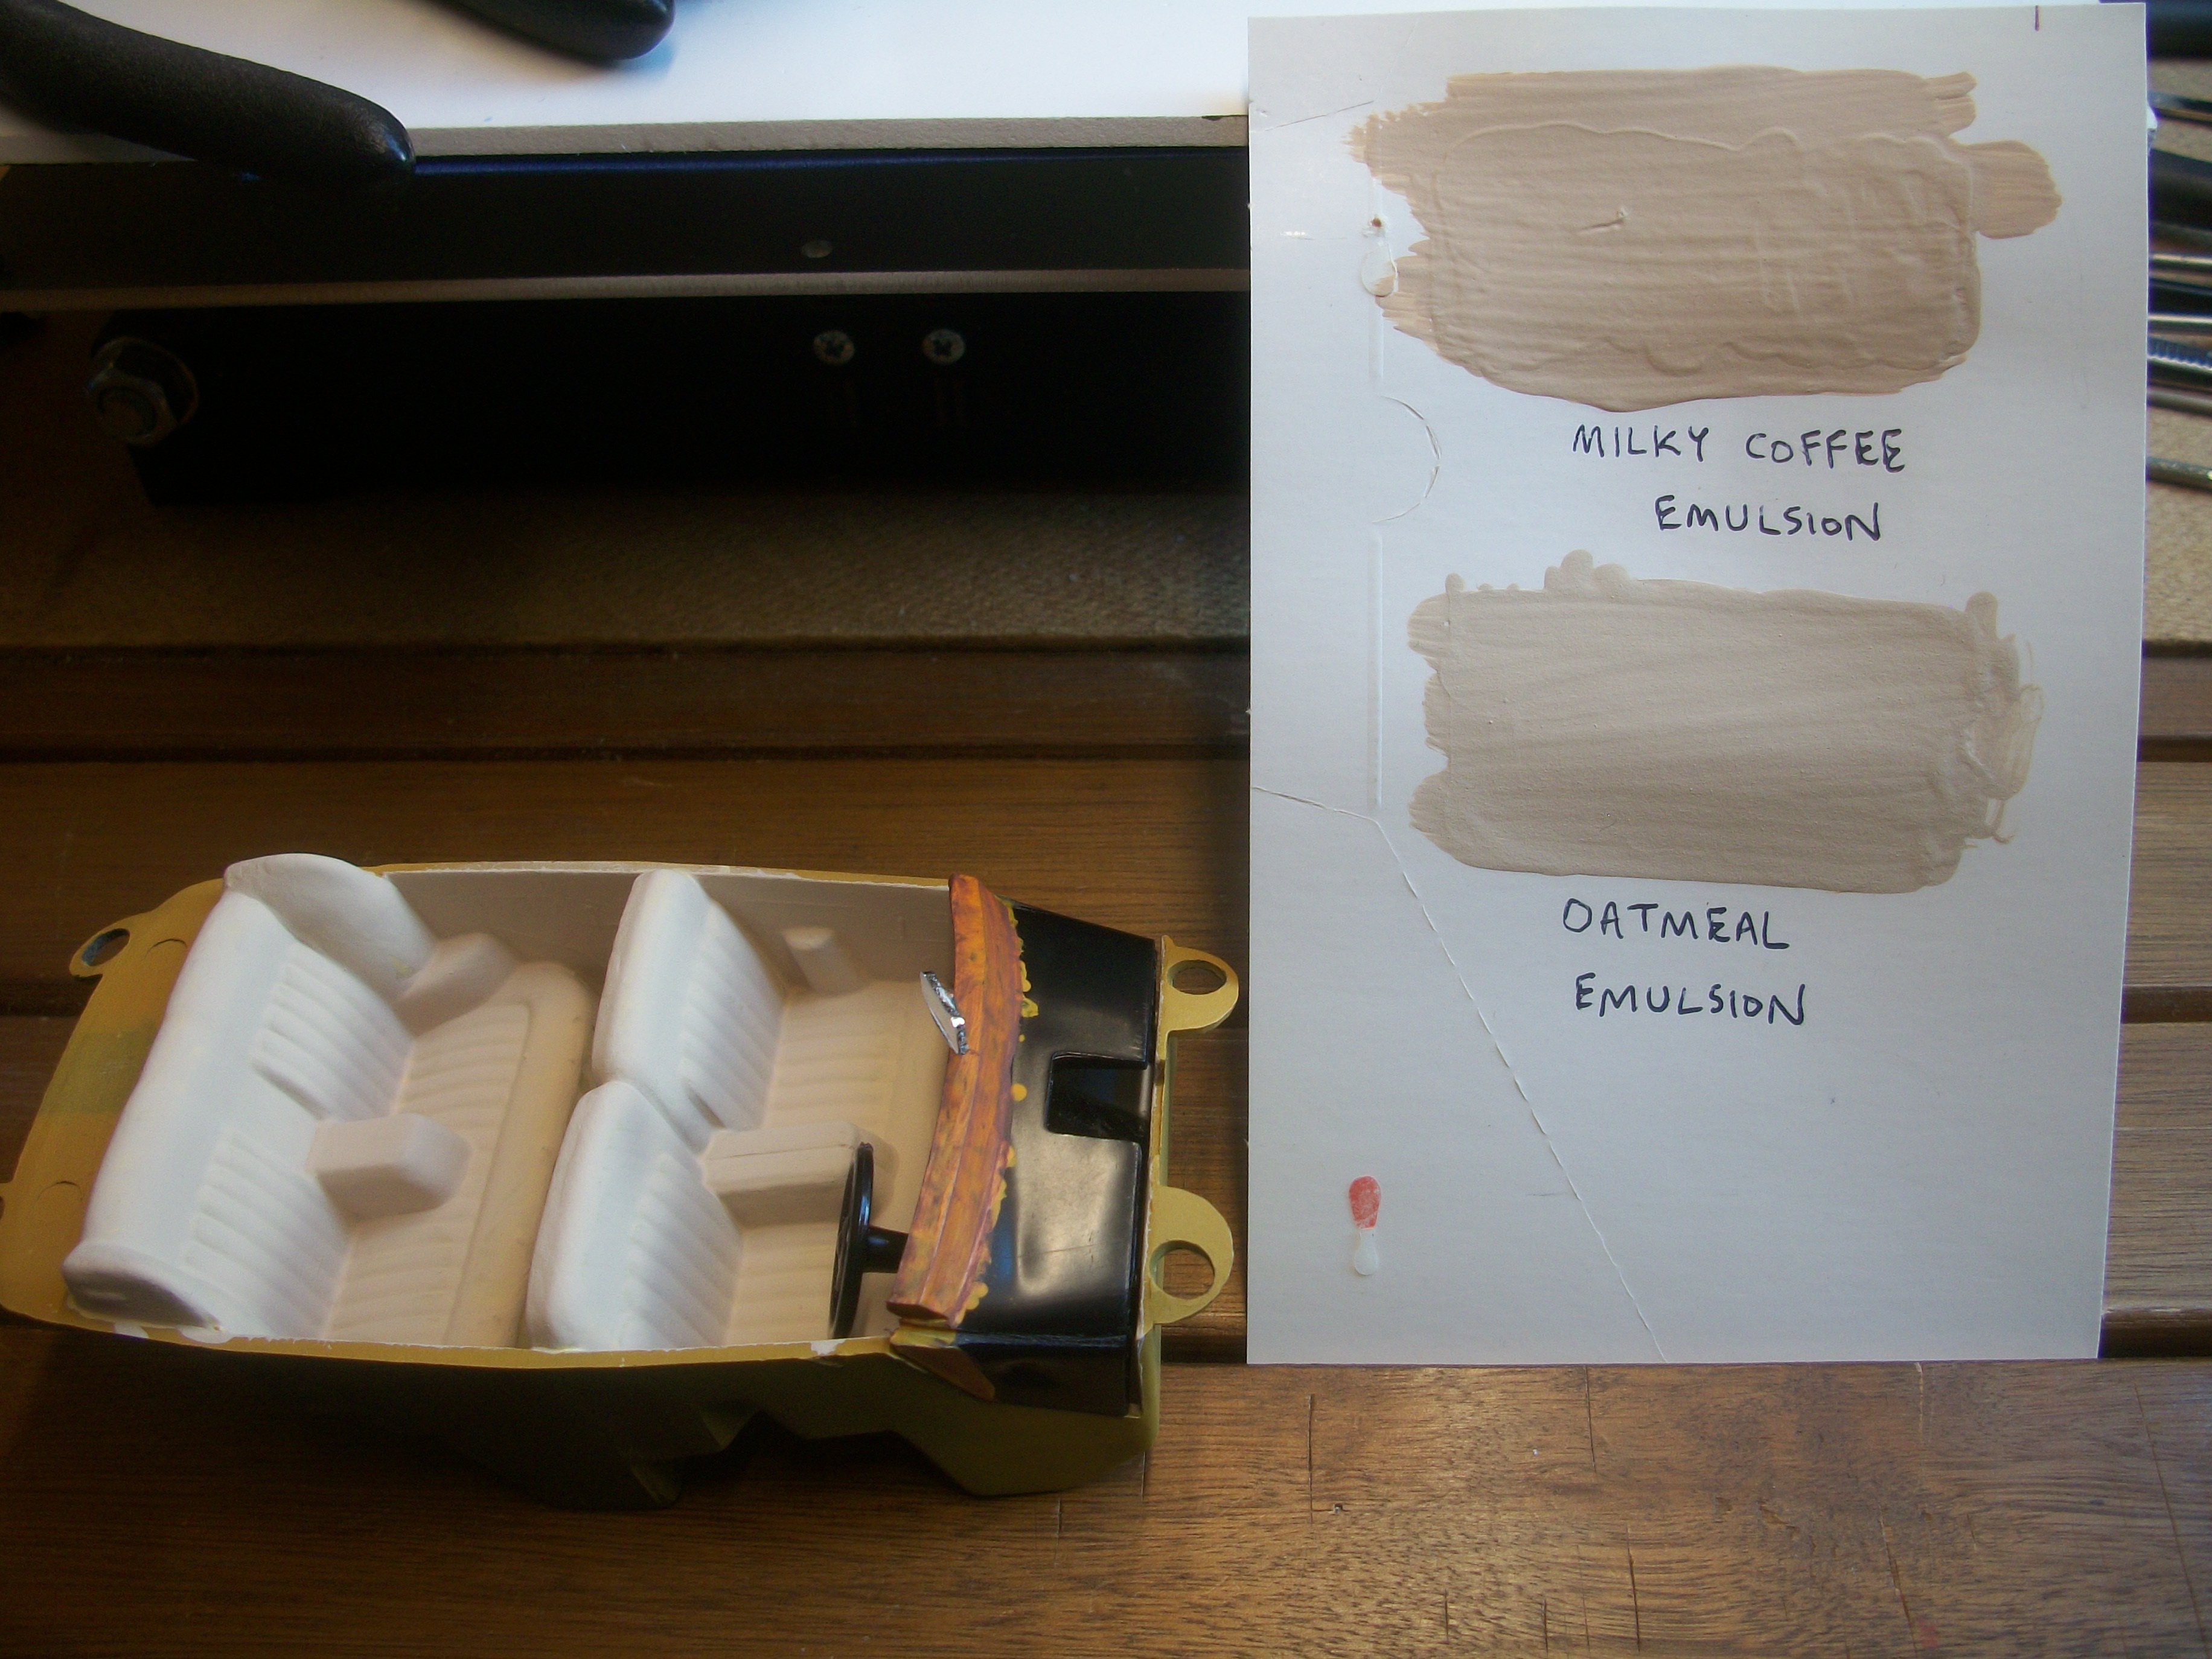
Some further work carried out on the interior seating ' tub ' of the Silver Cloud, and I have chosen a colour of Oatmeal for the beige upholstery. This is an emulsion paint over the enamel cream underneath. The dashboard has a burred walnut effect which turned out quite well eventually, after much experimenting. There is a scratch built rear view mirror on a stalk in the centre of the dashboard on top. The windscreen / windshield has developed into a bit of a struggle, and several methods of trying to arrive at the most realistic screen fitting have failed so far. Then I was watching a YouTube video showing two gentlemen who were fitting a windscreen seal and chrome moulding surround to a full size Rolls-Royce motor car, before putting the screen into the car from the outside. This gave me an idea..... I dug out a box from the loft, containing two 1:24 scale Franklin Mint diecast Silver Cloud body shells. The screen that I removed from one of these bodies is just perfect for the plastic kit build, as it is precisely the right size, as well as having a chrome moulding around the outside edge. All that needs to be done now, is to enlarge the opening for the screen, by filing away the moulded in chrome surround that is part of the body on the Revell kit, and also the wipers. The passenger side front door on the Franklin Mint diecast version had a round door mirror, which I have cut off for the driver's side door on the Revell kit version. David
-
Automotive Restoration and Machine Shop
Anglia105E replied to The Modeling Hermit's topic in WIP: Dioramas
Now that is is the sort of detail that impresses me, Douglas........ Not just a circuit breaker box, but an ABANDONED circuit breaker box ! David -
Automotive Restoration and Machine Shop
Anglia105E replied to The Modeling Hermit's topic in WIP: Dioramas
Your lighting system is extremely effective, Douglas....... The whole scene is coming alive now ! David -
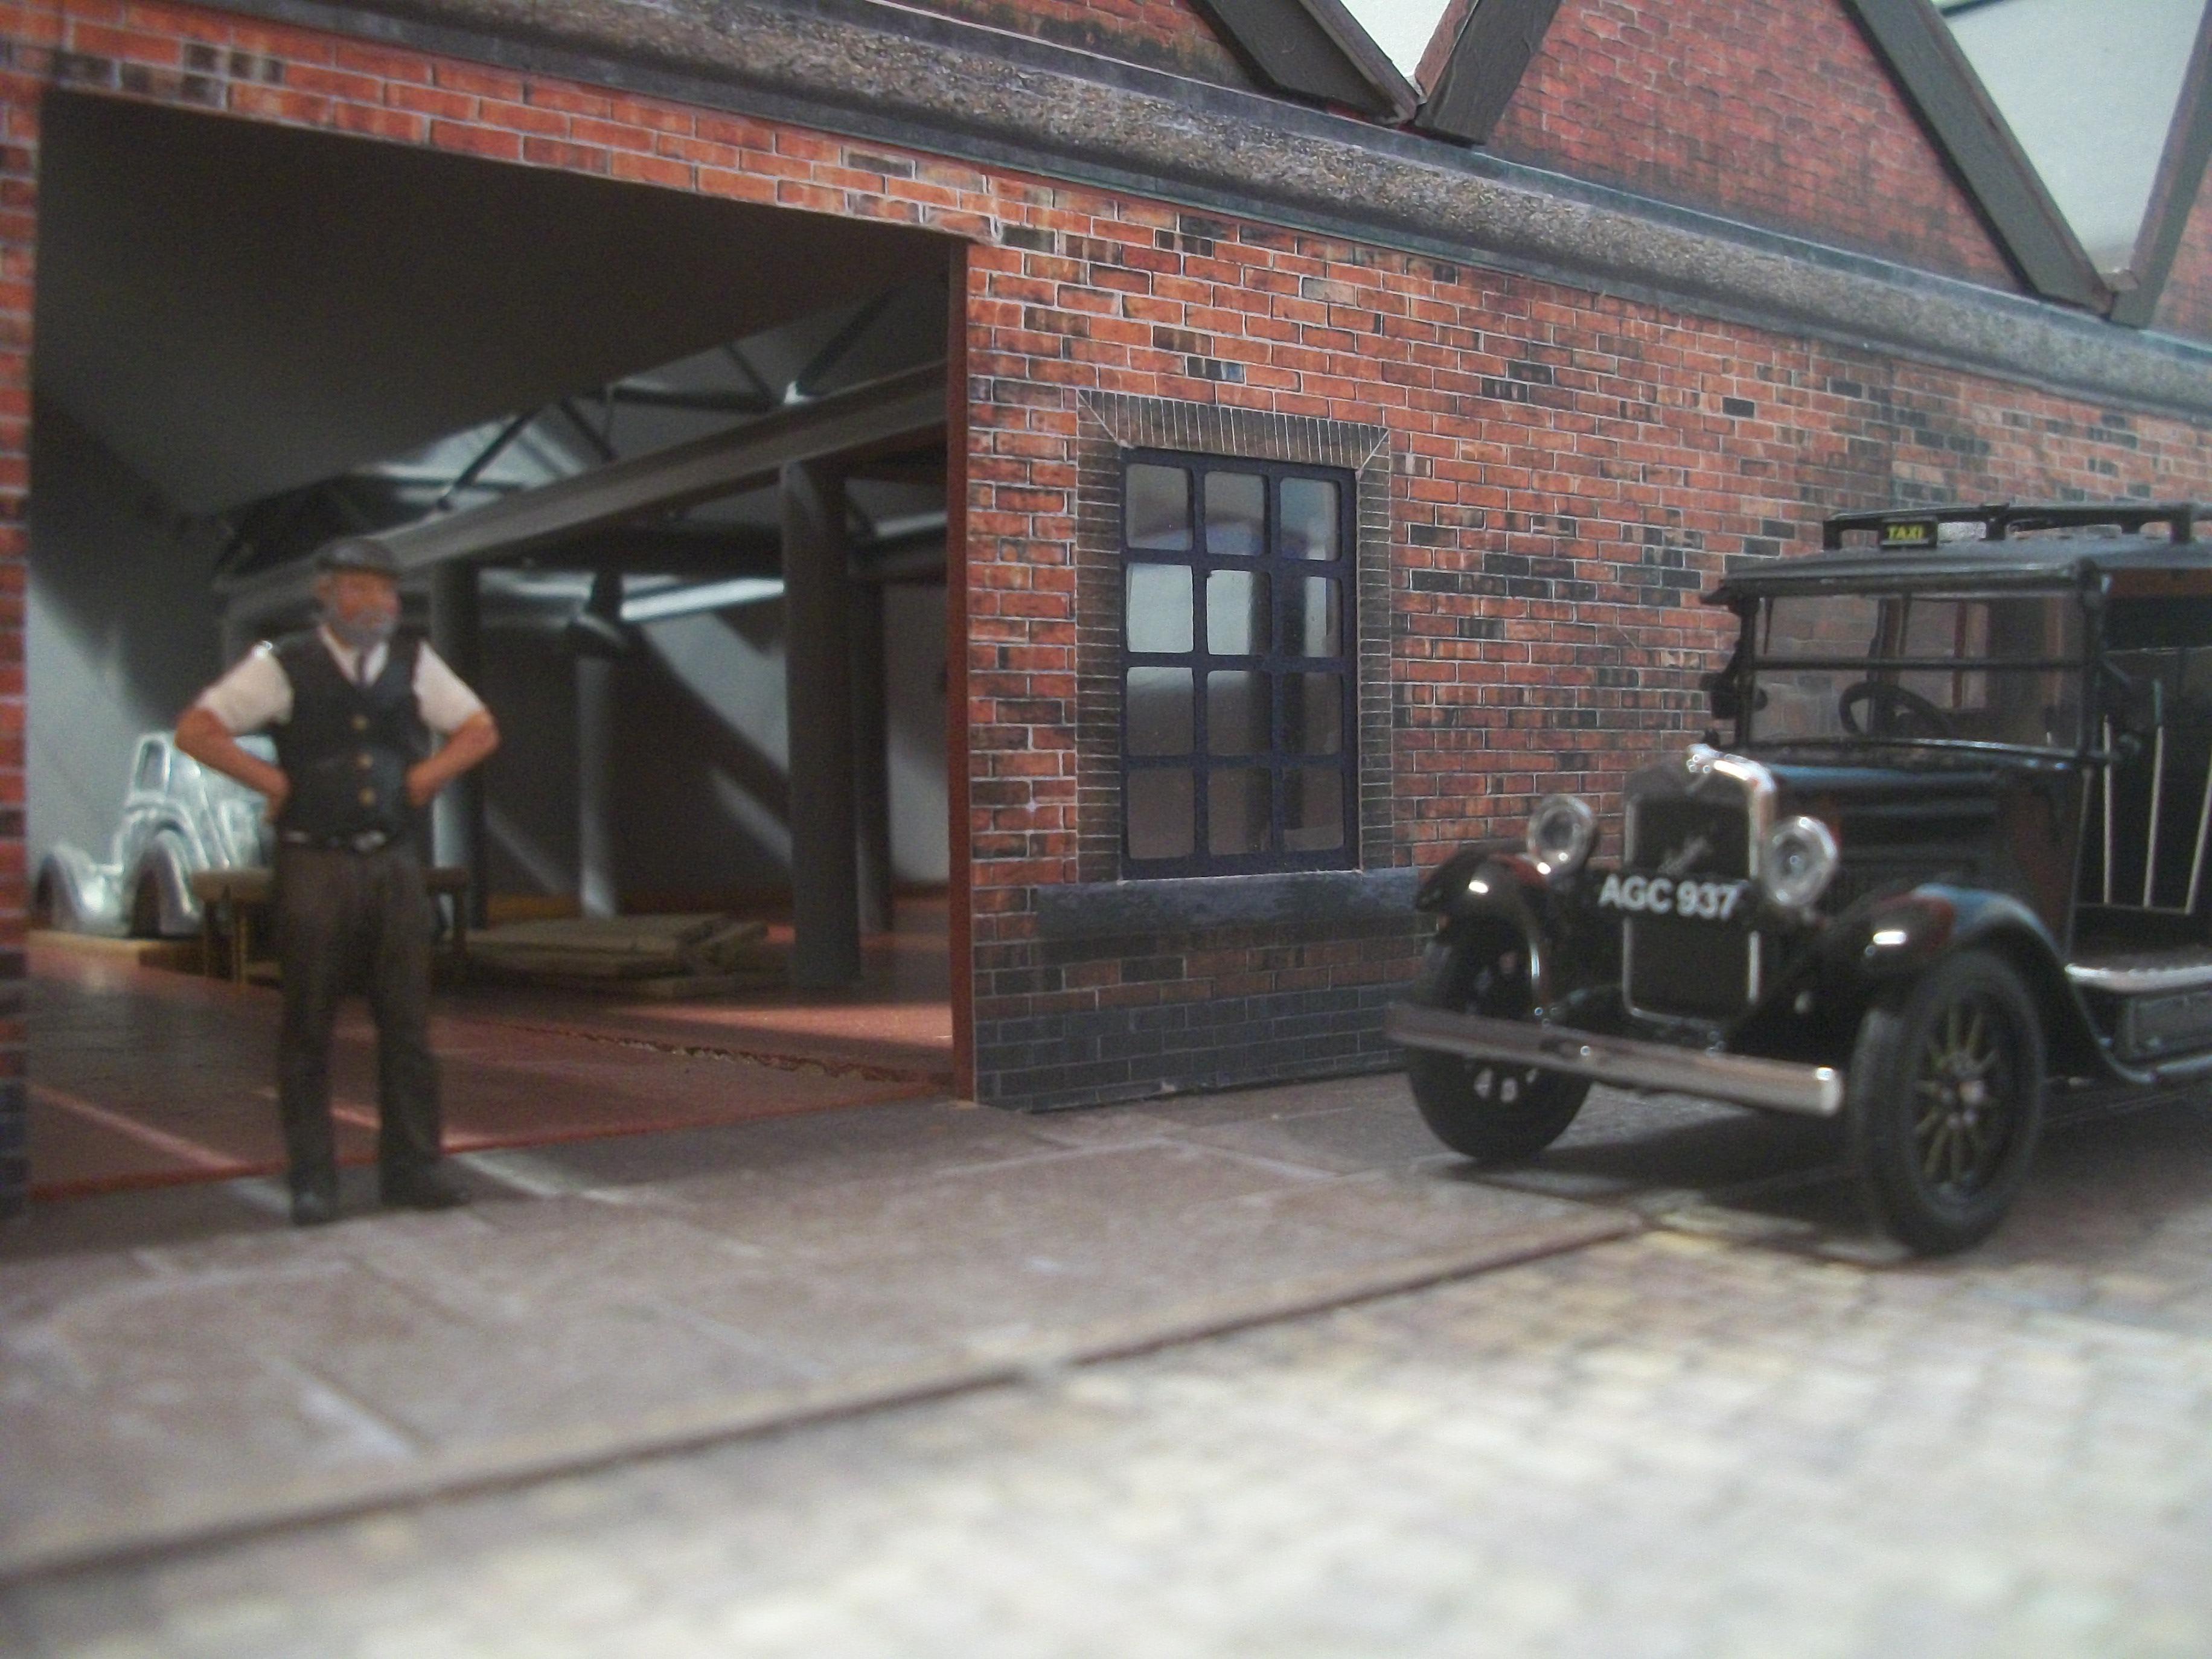
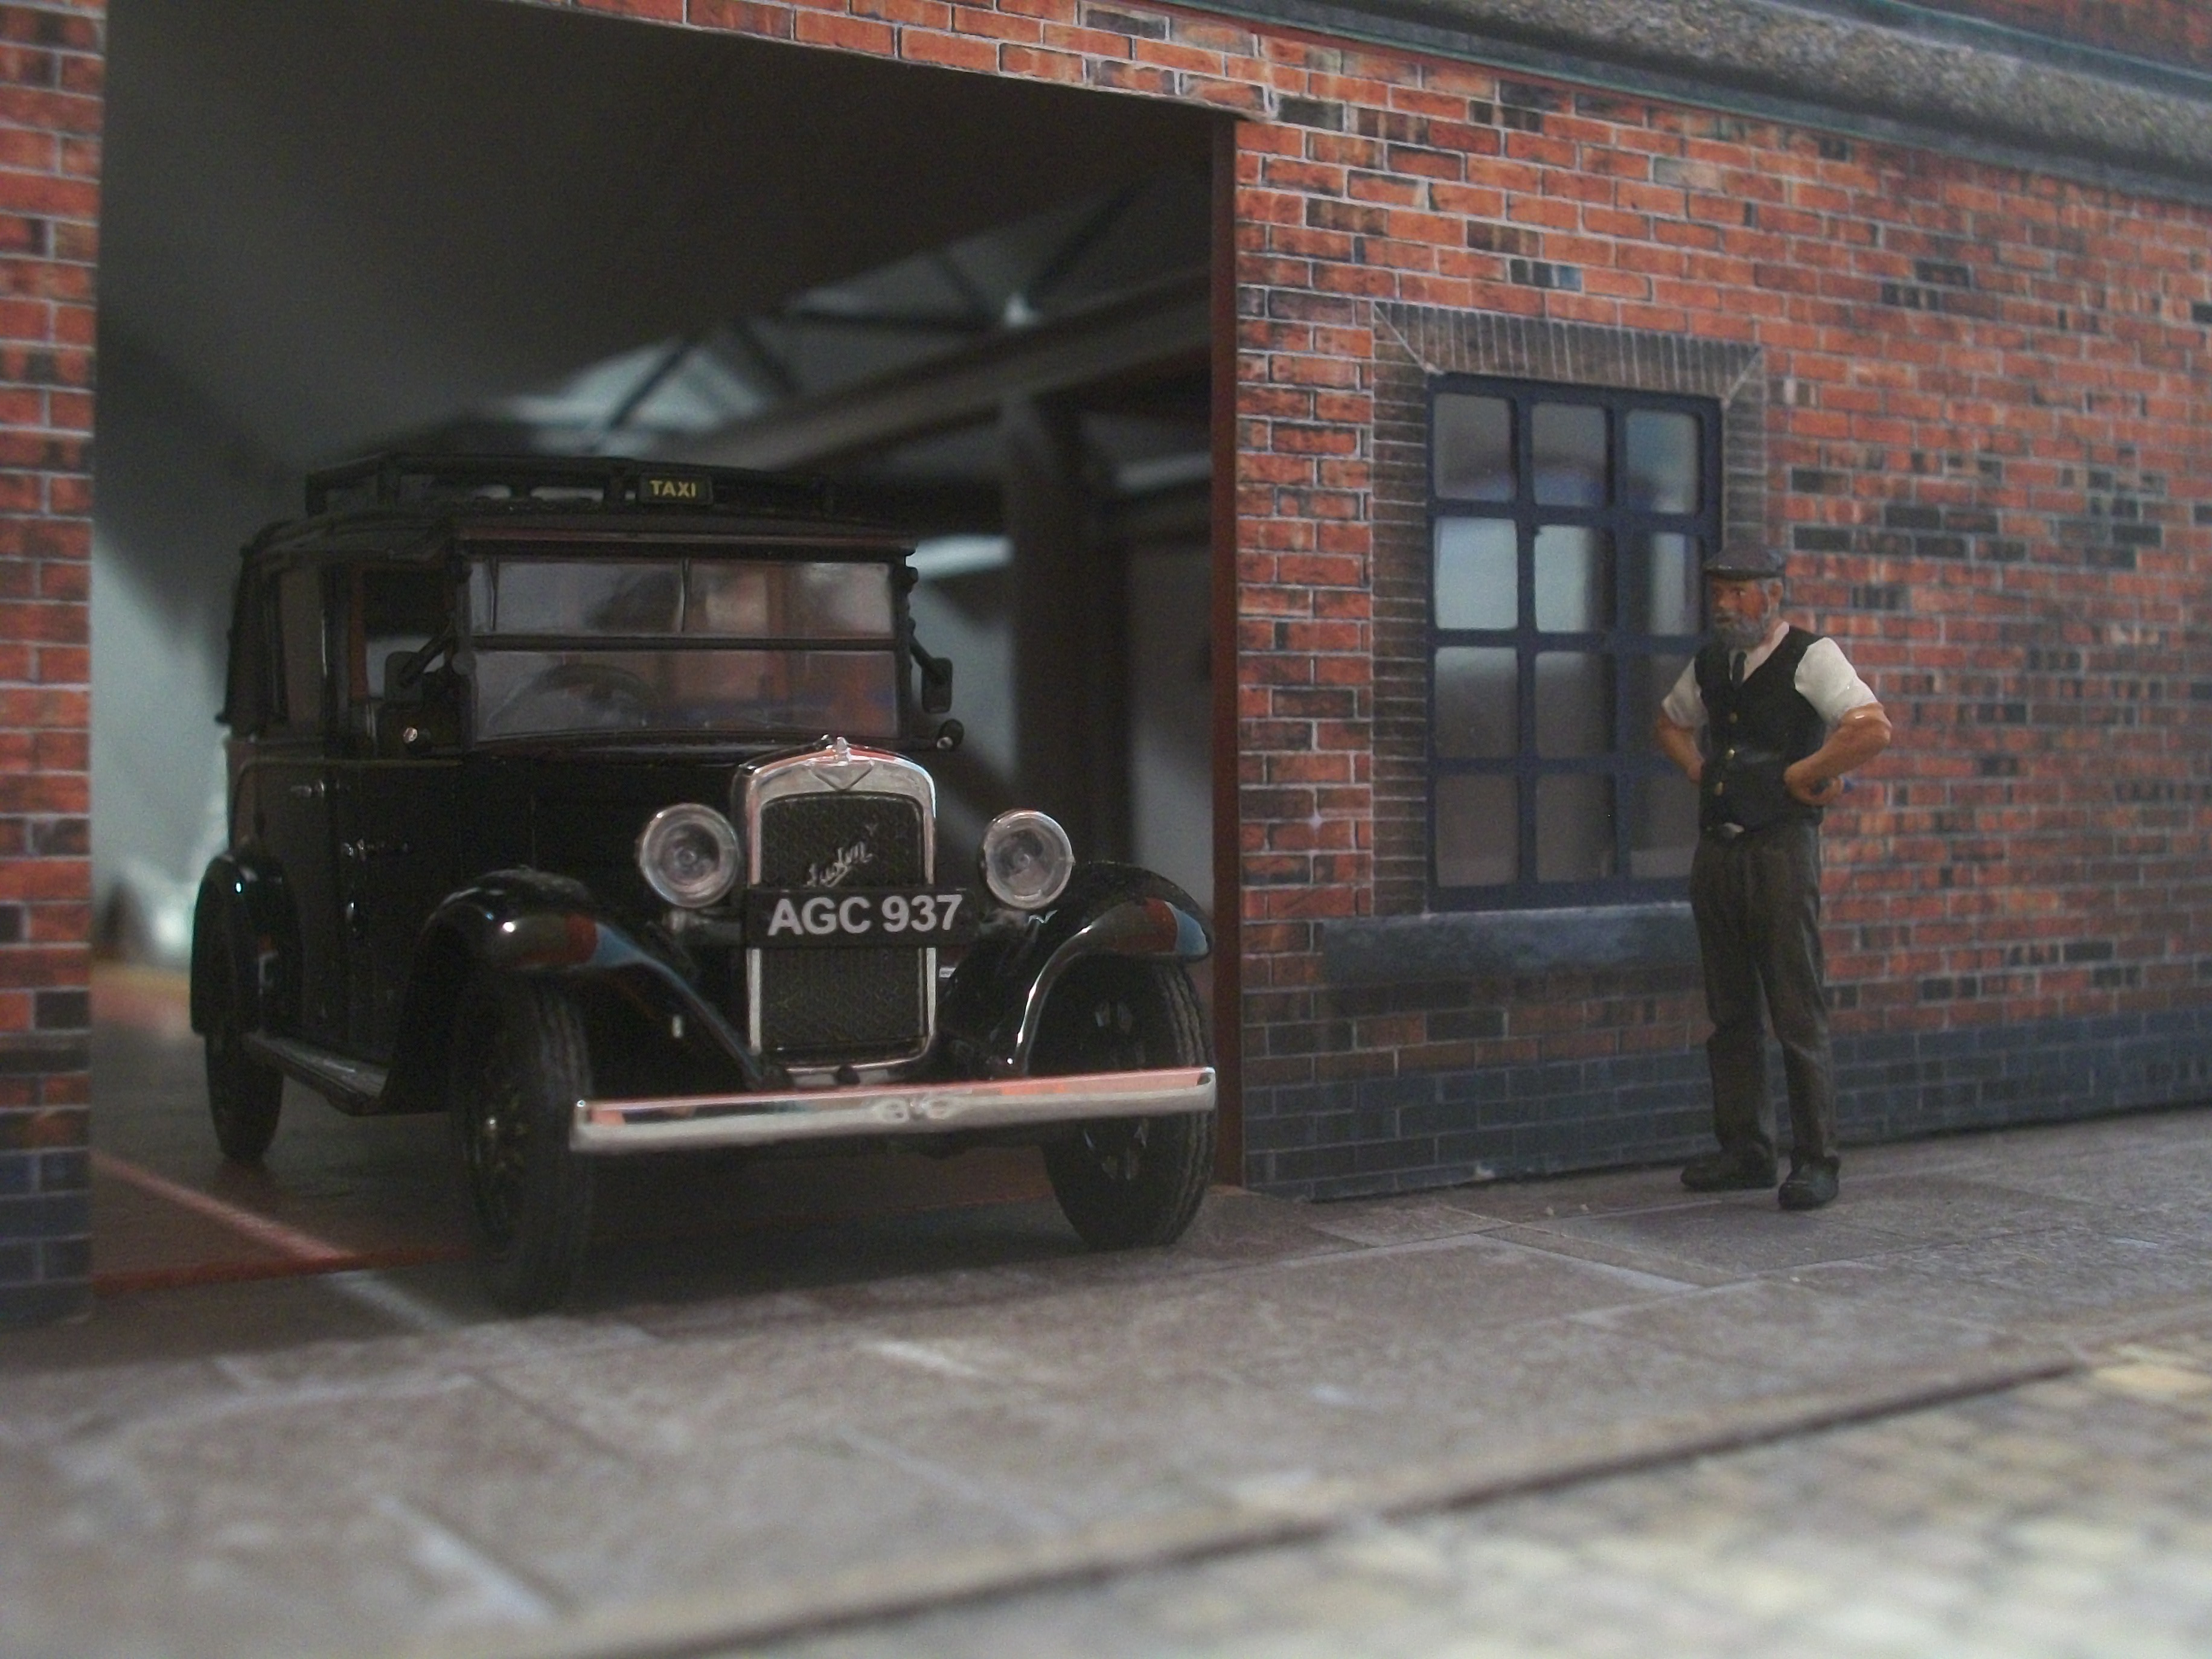
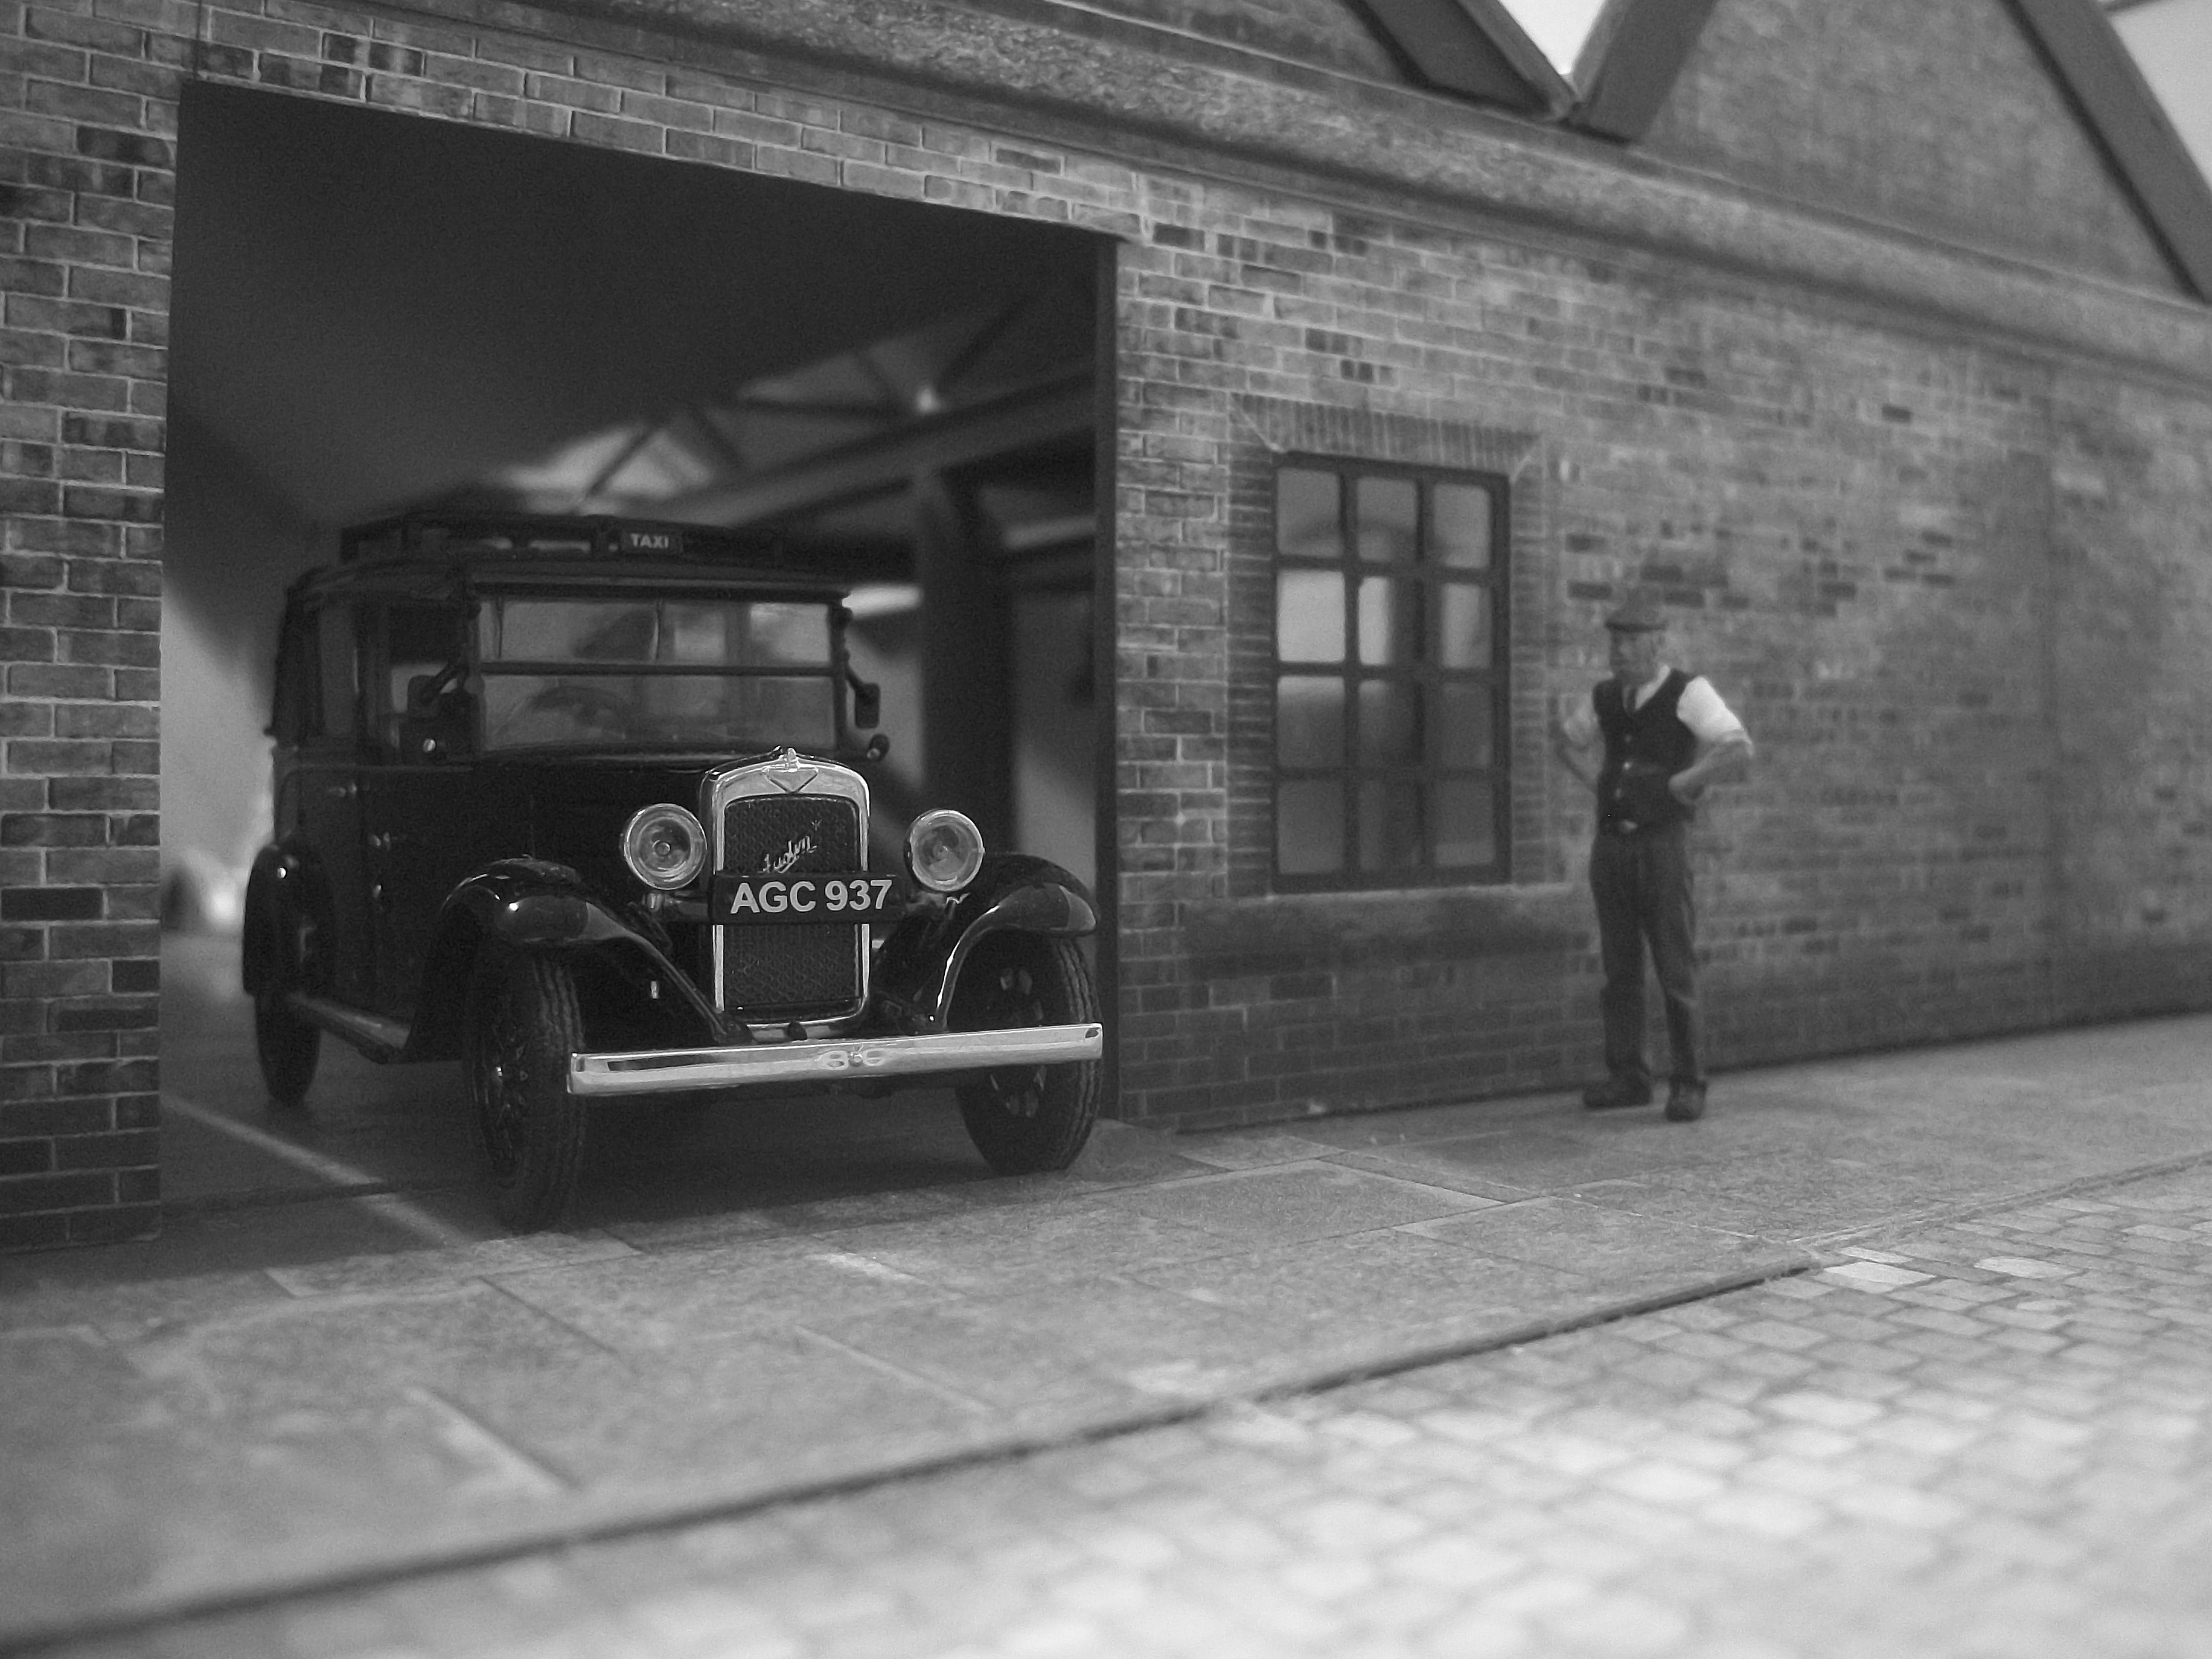
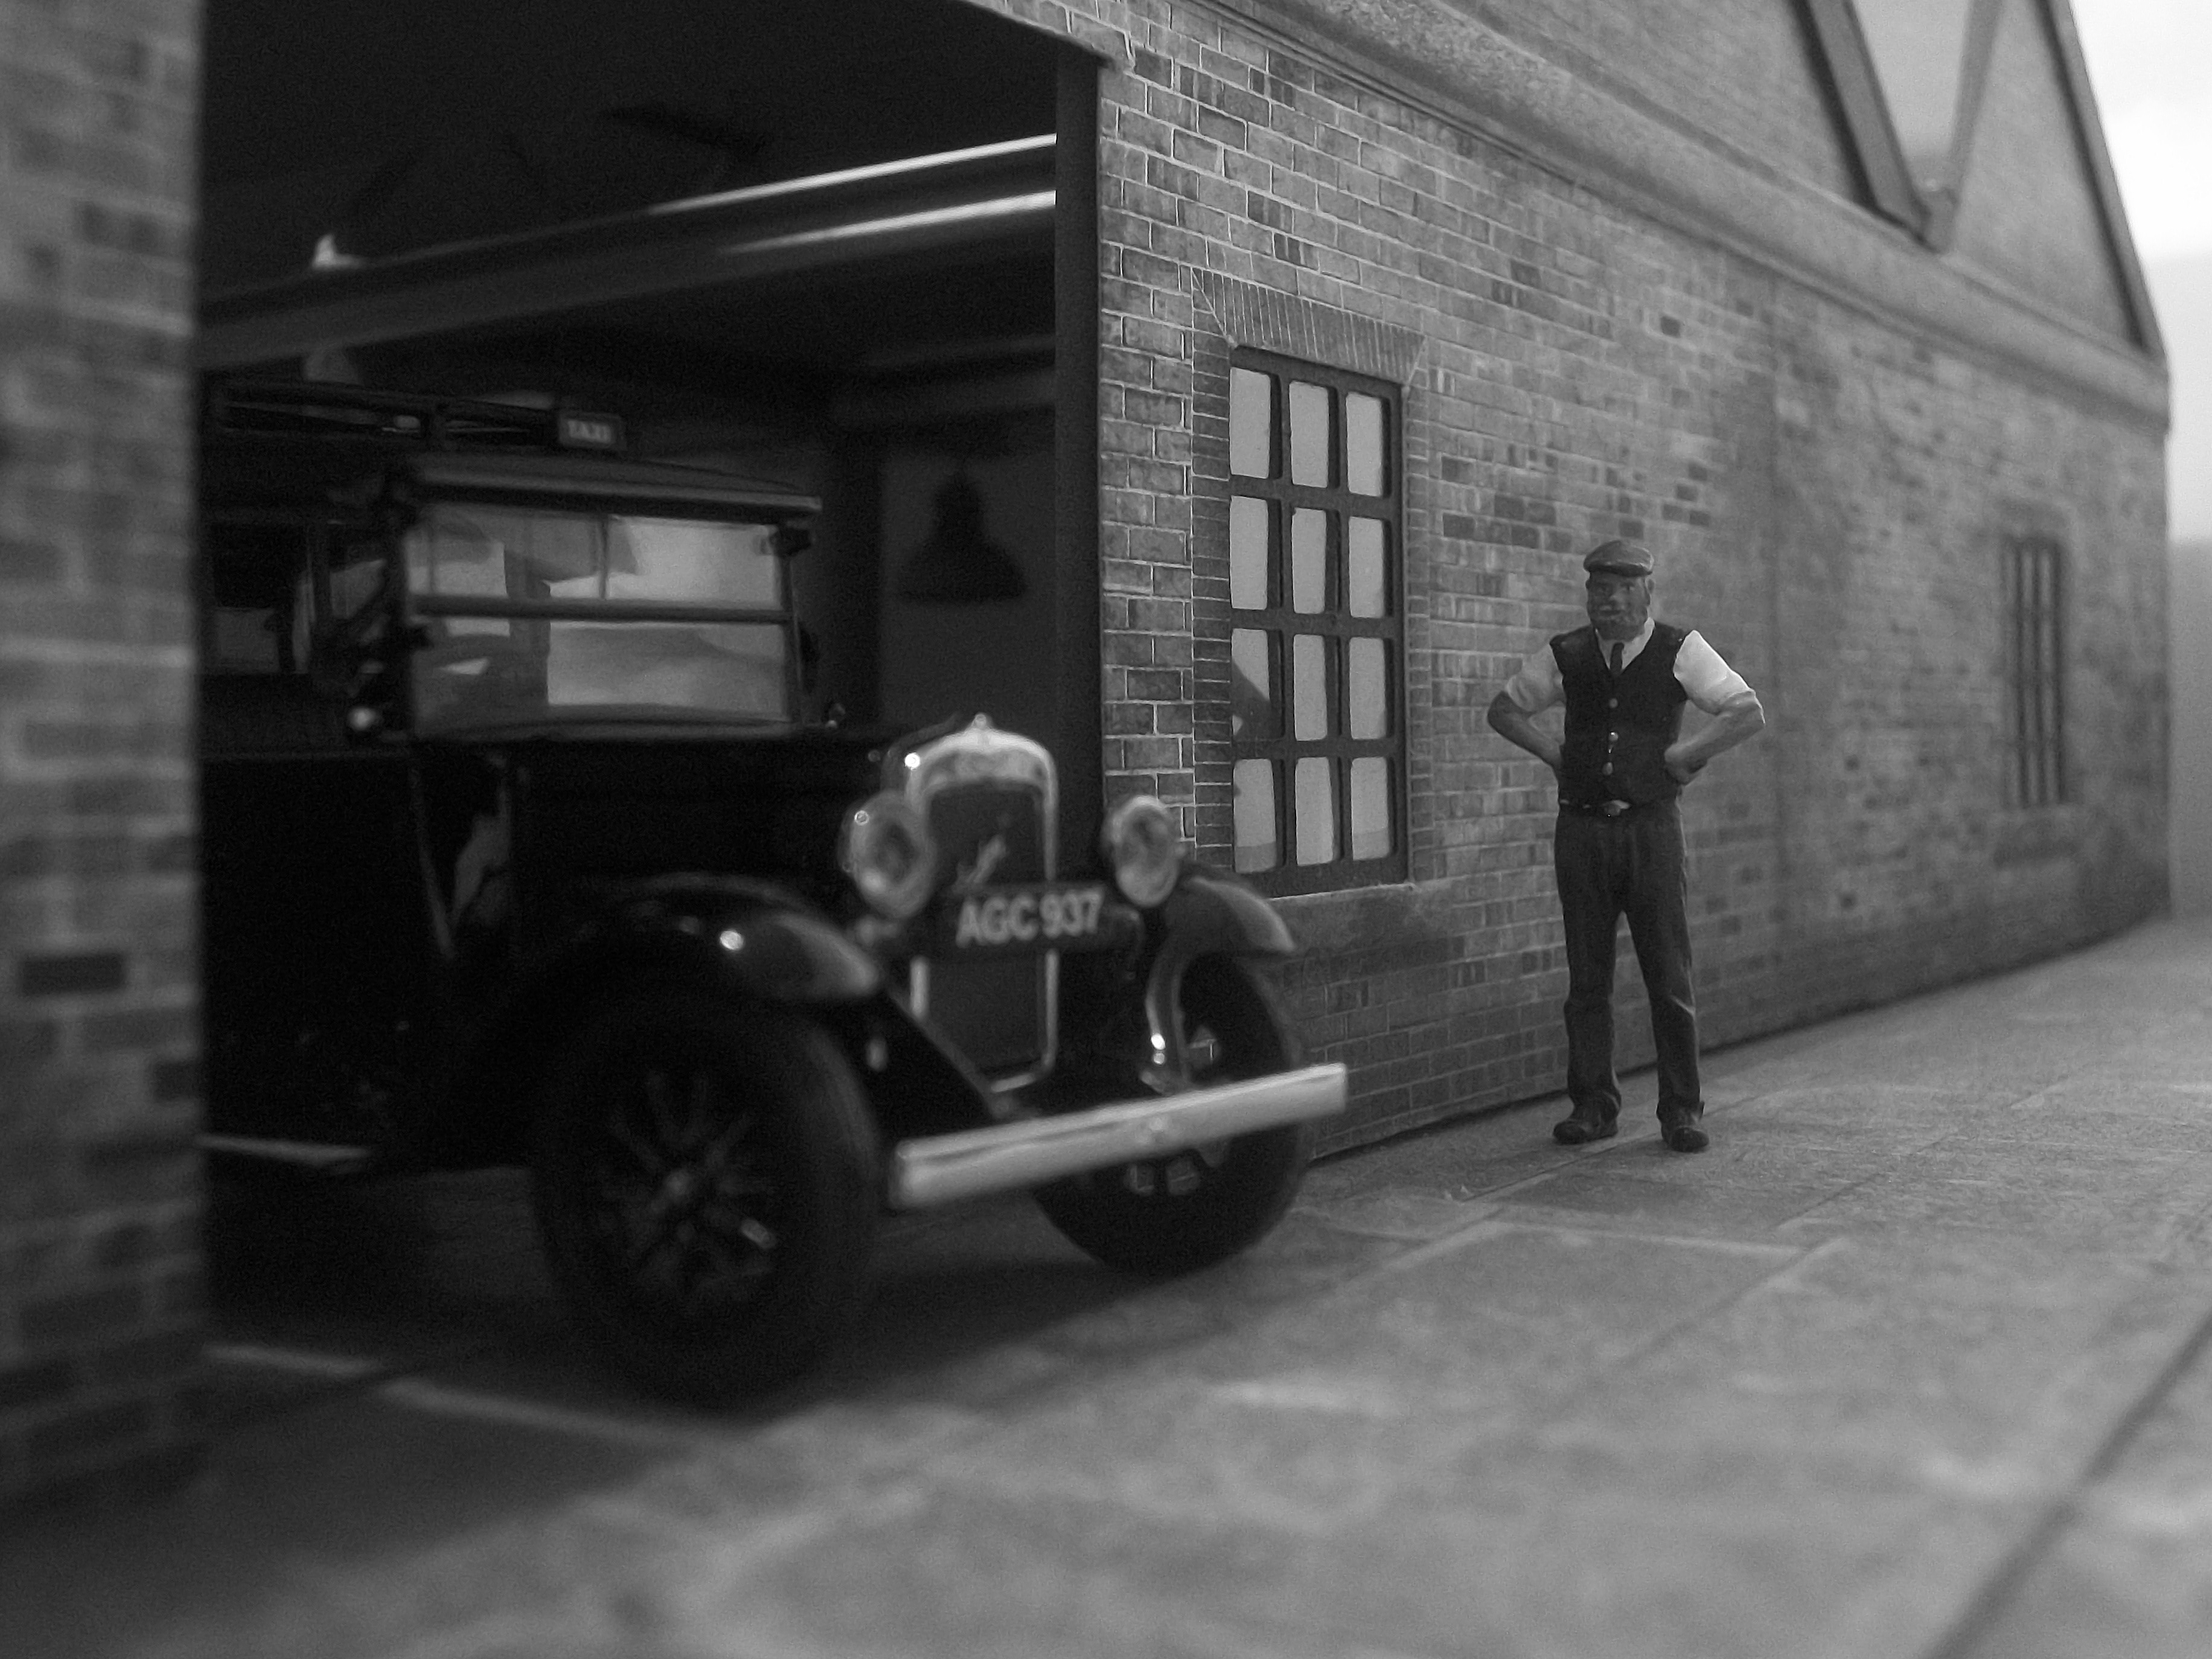
While the Rolls-Royce Silver Cloud is being built for the 1:24 scale diorama, there has been a further addition to the 1:43 scale diecast model car collection. This is an Austin Low Loader Taxi Cab by Oxford Diecast, and these London taxis were produced from 1934 until 1948...... There were still quite a few of these types of taxis around London during the 1950's. Here are some photographs taken just outside the Hooper factory, probably in 1959. David
-
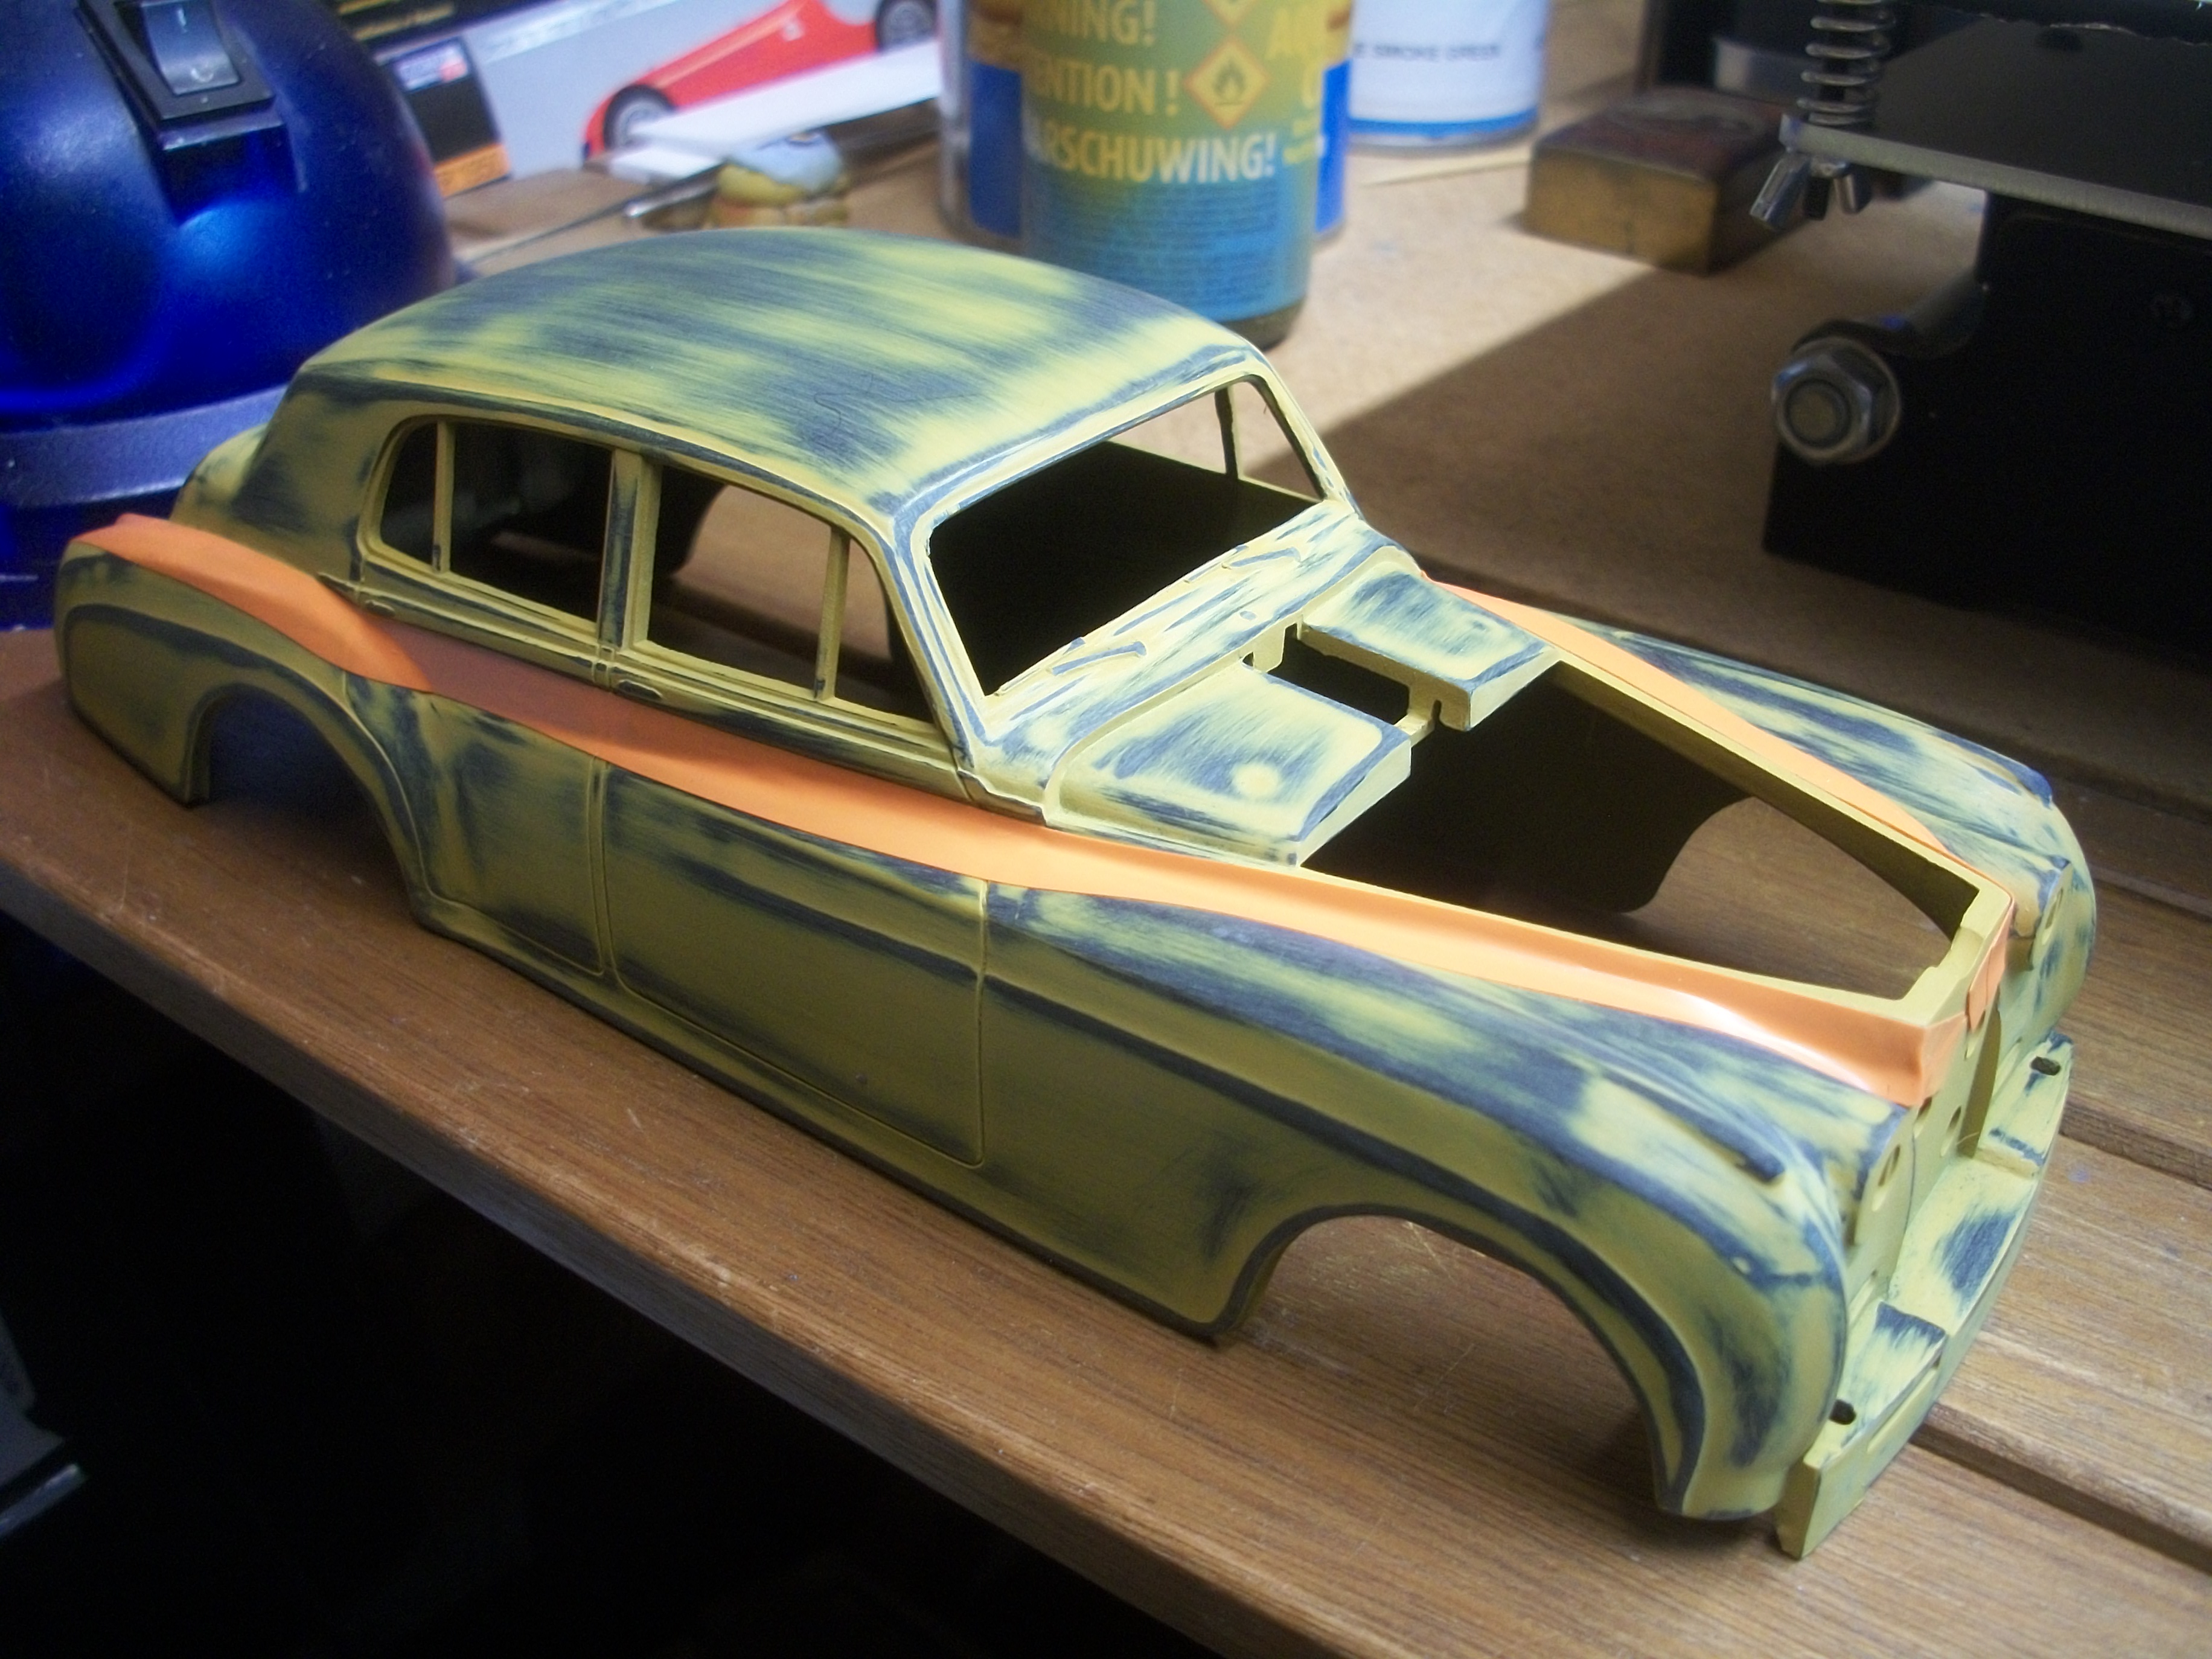
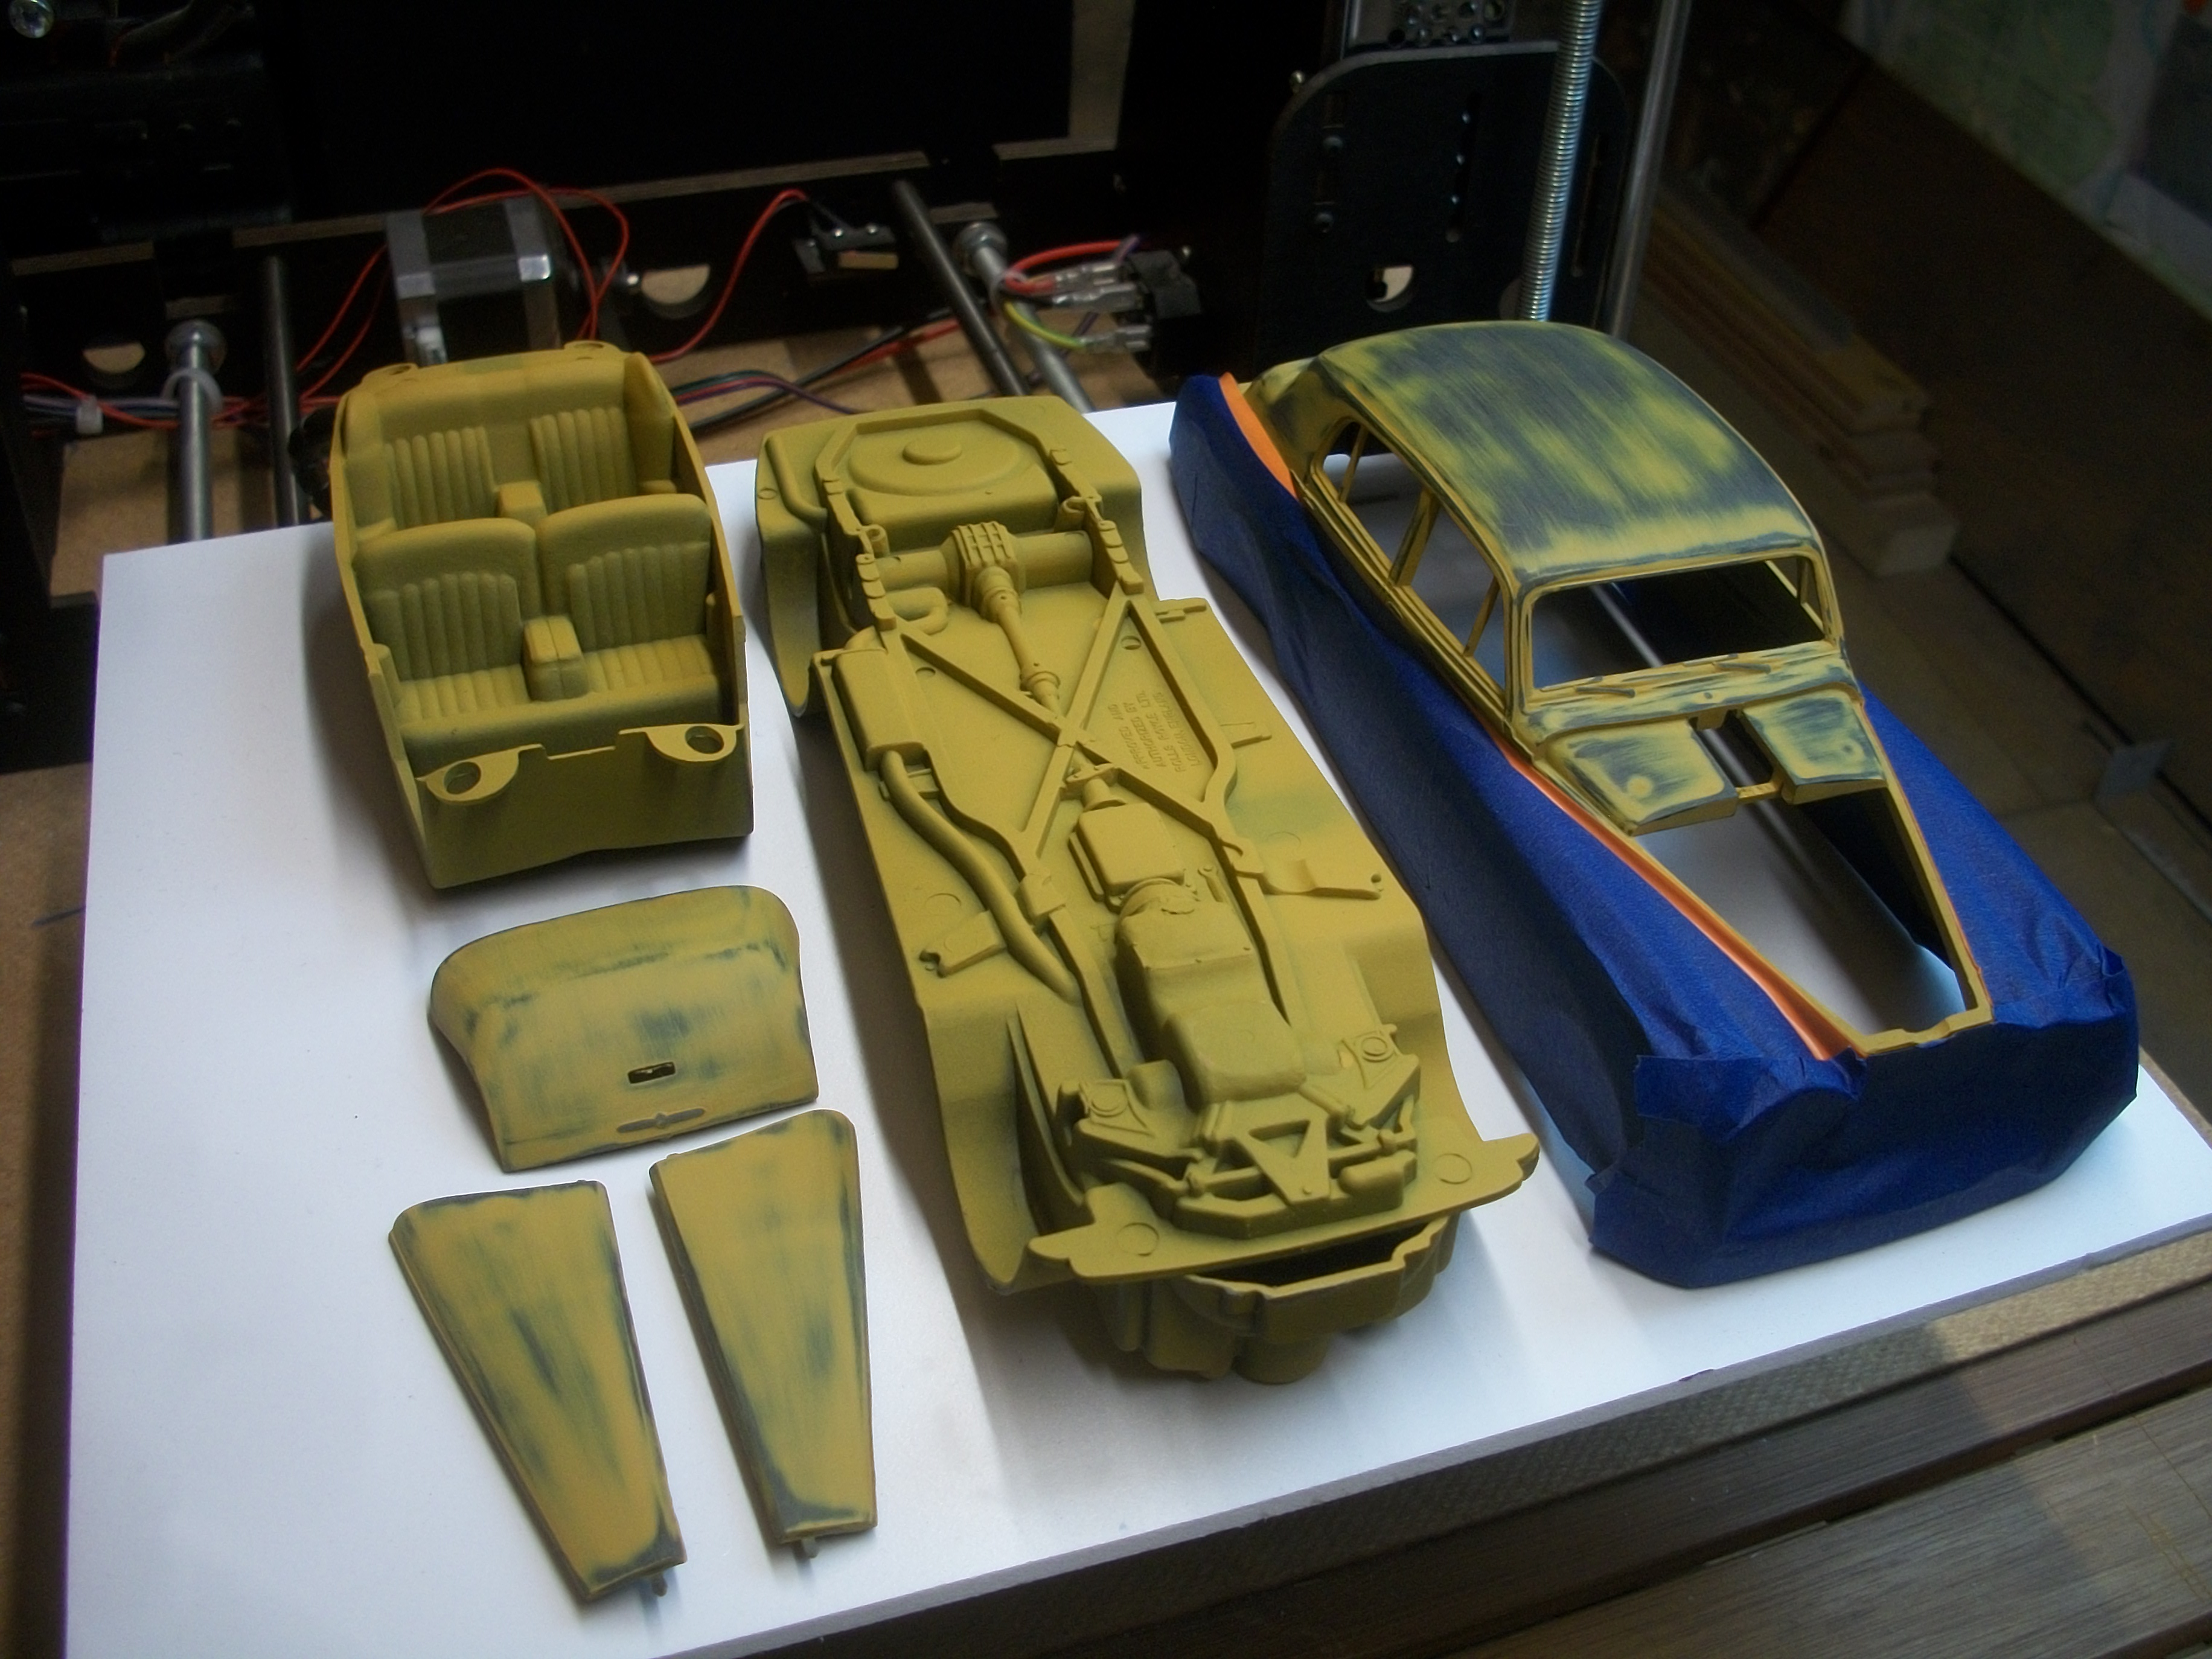
Work continues with the Silver Cloud build, and both colours of the two-tone paint scheme have been applied. Test fitting and painting is under way for the chassis, engine, interior seating, dashboard, bonnet panels, boot lid, radiator grille, lights, wheels, windscreen and bumpers. David
-
Automotive Restoration and Machine Shop
Anglia105E replied to The Modeling Hermit's topic in WIP: Dioramas
I really like the work you have done here, Douglas....... The layout and the realism is excellent. This is diorama building at it's best ! Your idea to include an elevator is interesting, and well worth considering if you can find a way to do that...... My 1:24 scale Hooper & Co. building, as it was in the 1950's had an elevator to move cars from the ground floor up to the first floor showroom, but I wasn't able to find space to include this feature, unfortunately. David -
Truly a man of many faces !
-
That must have been a satisfying moment...... key in the door of the new home. You remind me of the great Tom Jones from Wales in appearance..... Has anyone told you that before? David
-
Much appreciated, Eric and I have a feeling this one should be an important part of the project. Certainly, the paintwork aspect of the build is demanding greater attention, and the chrome work application also. The masking tape has been removed from the body of the Silver Cloud, and the Sage Green looks pretty good, so during today the masking tape goes on, ready for the Smoke Green lower half. Thanks for watching ! David
-
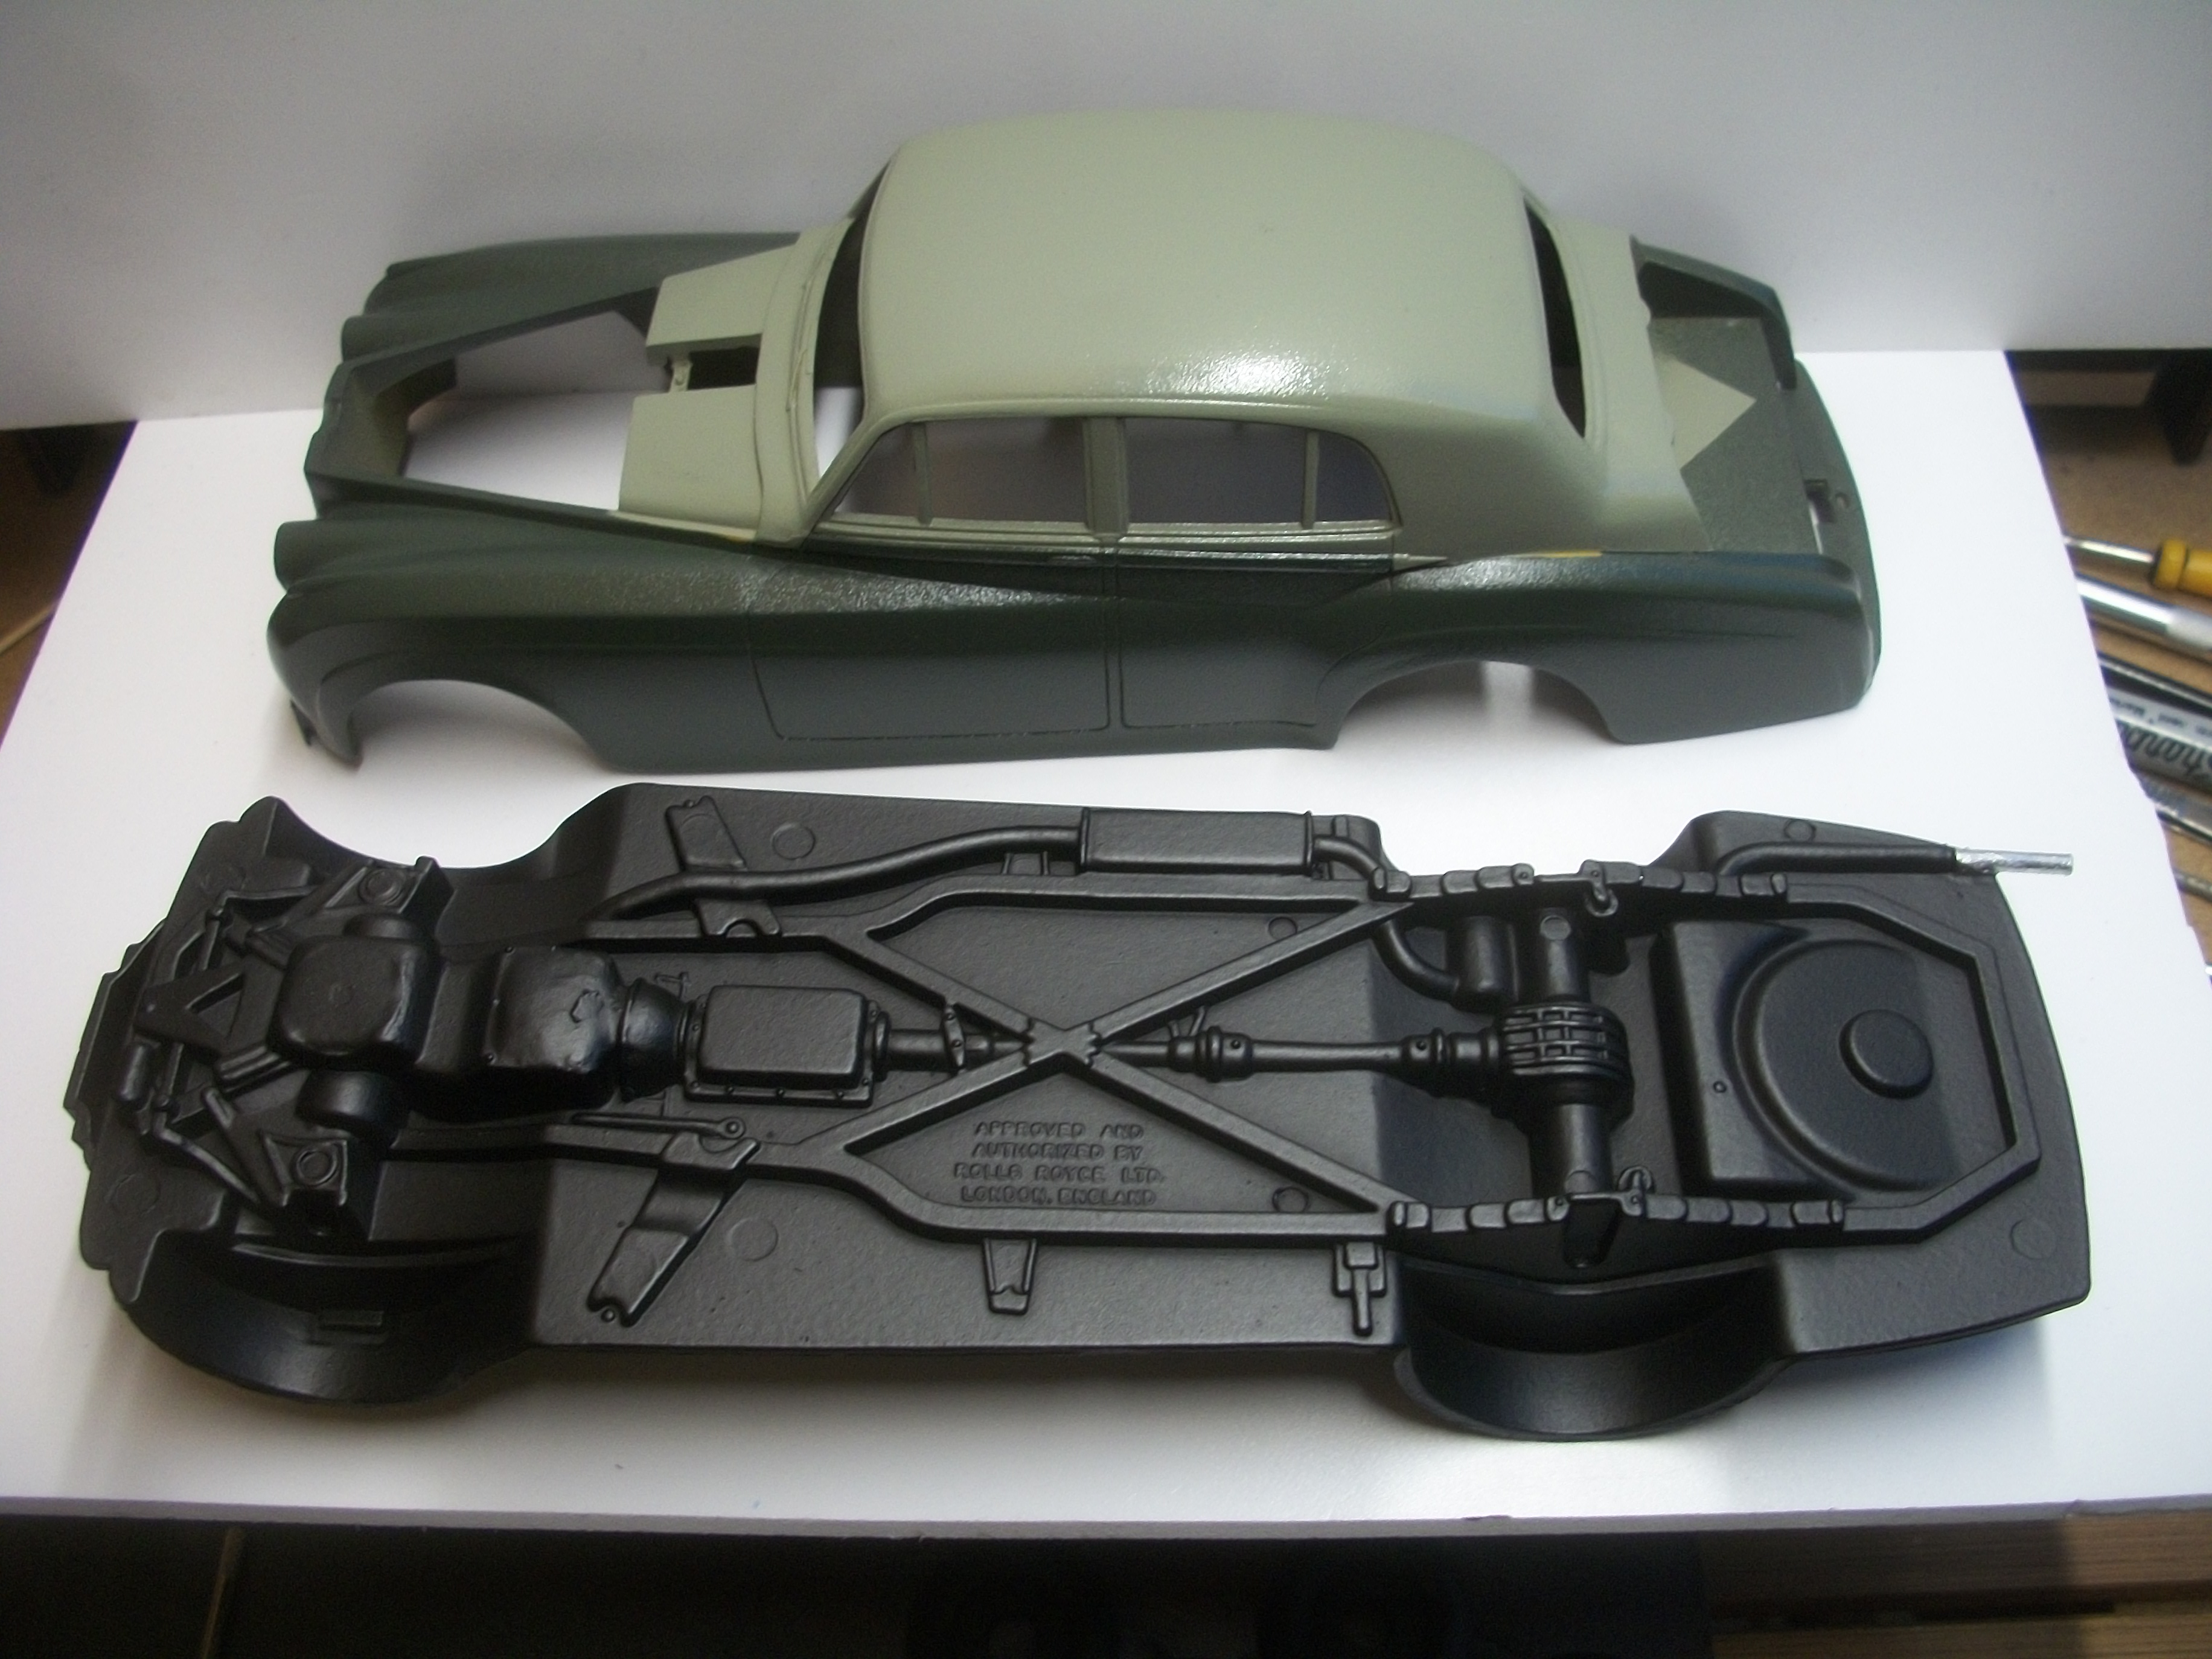
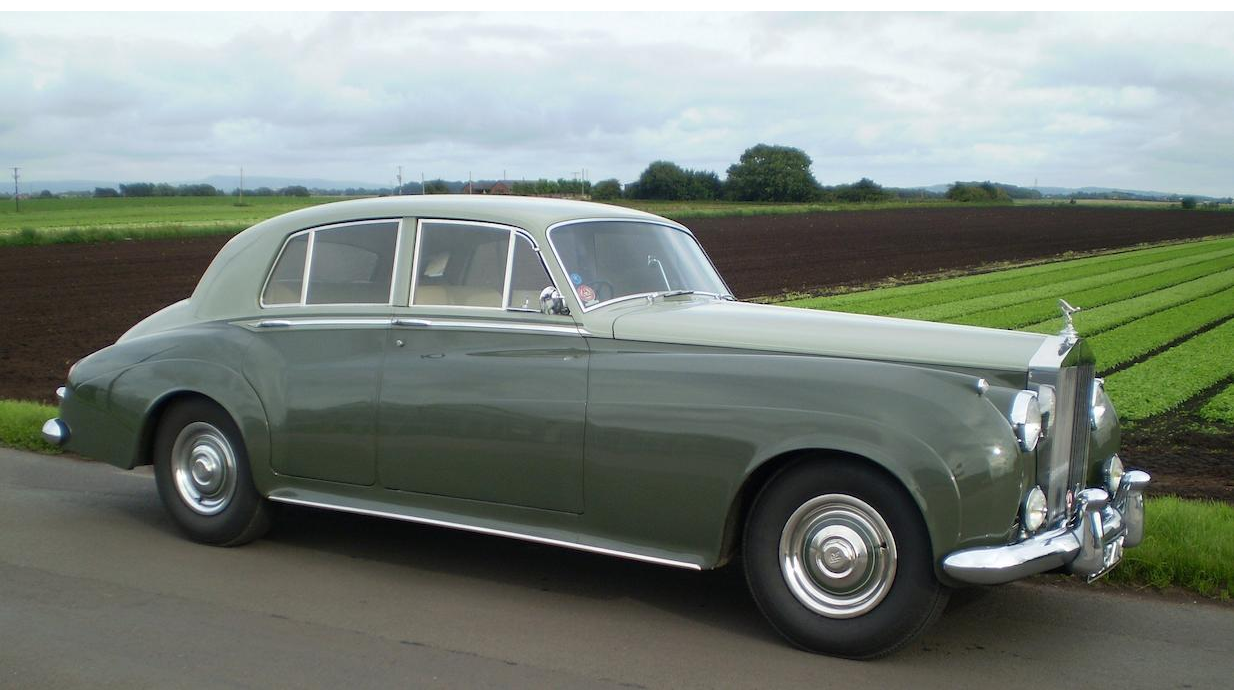
Work is well under way on this 1:24 scale Rolls-Royce Silver Cloud I mostly from a Revell kit. Having learned a great deal over the past 4 years of model car building and painting, and also having recently built the 1953 Moebius Hudson Hornet kit, I am striving to achieve the best ever build yet of a Silver Cloud. The body parts have been sanded down thoroughly with 80, 180, 320, 400 and 600 grade wet & dry papers, and I have applied Automotive Orange Filler Primer spray........ more sanding followed, from 320 to 600 wet & dry. Just today, I have sprayed the upper body of this model with Rolls-Royce Sage Green, which is an aerosol cellulose paint, and the lower body will later be sprayed Rolls-Royce Smoke Green, also a cellulose paint. All the chrome work in the Revell kit is grey plastic, which allows me to apply yacht varnish followed by Molotow Liquid Chrome Pen, whereas the Minicraft kit for this car has the parts already chromed, but not particularly well. Some of the chrome mouldings on the body will be done with Bare Metal Foil later. One of the attached photos shows the actual motor car that I have base this model on. This Silver Cloud is unusual because it was an experimental car which never left the Rolls-Royce factory, and the car was fitted with several different V8 engines, so not the inline 6 - cylinder engine that a Silver Cloud I would normally have. The car has a special experimental chassis number, 32B and the registration number was licensed to the Rolls-Royce factory, 225 ALG. The reason that I need to build a 1957 Silver Cloud, is that I have one for each year of production, which was 1955, 1956, 1957, 1958 and 1959, but the 1957 model car was sold to the owner of the actual real car, leaving a gap in the run of cars. My attention to detail will be much more precise this time round, and a good example of this will be the windscreen / windshield. The method of attaching the kit screen clear plastic to the inside of the body shell is not correct, and the method of attaching a screen cut from thinner clear plastic to the outside of the body shell, is also not to my liking. This build will see me attempting to insert a thin clear plastic screen into the windscreen frame aperture....... which is guaranteed to pose an interesting challenge ! David
-
Kind words indeed, Dan........ and thank you for having a look at my topic. Currently, I am building a 1:24 scale Rolls-Royce Silver Cloud I, which is based on an actual 1957 motor car and uses mostly parts from the Revell kit. There should be some new photos posted here during this weekend, so watch this space! David
-
Thank you very much, Douglas........ and it means a lot to me that you have been inspired by what you see here. The project continues ! David
-
Liking the colour combination, and well done with the kit bash ! David
-
Dan, here is a link to the Revell 1970 AAR Cuda kit history, which you might not have seen........... https://www.youtube.com/watch?v=Vq_SW5ermCg David
-
Minicraft Models Discontinued?
Anglia105E replied to Anglia105E's topic in Welcome! Introduce Yourself
Many thanks indeed, Charles !......... I am pleased that you find my project interesting, and it makes all the work over a 4 year period so worthwhile. Usually, I would be exhibiting both the 1:24 scale Hooper & Co. diorama, and also the 1:43 scale Hooper & Co. diorama at the Rolls-Royce Enthusiasts Club Annual Rally, which is held every year during three days in June but of course the 2021 event is cancelled due to the pandemic. There will be a one day event this year, which I am attending as a non Rolls-Royce owner, and there will be a full 3 day event in June 2022. The event organisers kindly invite me back every year since 2018, so it was unfortunate that COVID-19 got in the way. There was a 1:43 scale version of the Hooper Coachworks building at 54 St James's Street, London that I built, but this diorama was sold to a gentleman from Paris, France at the 2019 RREC show. The 1:43 diorama as it stands now, has the Hooper factory, also a couple of Victorian terraced houses, a bus shelter, a greenhouse, a garage and a Little Chef restaurant building. My larger 1:24 scale diorama is entirely scratch built, and this showroom building closed at the end of 1959 for Hooper's, when coach built motor cars were no longer in fashion. The building has four floors, the bus model by Revell took me two months to build from 400 parts. There is a Rolls-Royce Silver Cloud for each of the five years of production, so 1955, 1956, 1957, 1958 and 1959...... At this moment I am building the 1957 car again, because the one for 1957 was sold to the owner of the real car. Members of Model Cars Magazine forums are very friendly and helpful, and several members from both USA and Canada, and Australia have sent me small parts in the post, so this time it is nice for me to have been able to do the same for a member like yourself. I did order a resin body shell kit from a guy in South America, which was a 1968 Pontiac Bonneville, because at the time I was building the model of a Pontiac Parisienne that I used to own as a real car. David -
Automotive Restoration and Machine Shop
Anglia105E replied to The Modeling Hermit's topic in WIP: Dioramas
This is an ambitious project indeed, Douglas ! and I shall be following this one for sure. My 1:24 scale diorama features four levels (floors) with the office on the top floor, and my 1:43 diorama features two levels. Good luck with calculating the authentic size, which I know from experience can be tricky. The baseboard needs to be surprisingly large, I find. You will have lots of space for model cars, and many opportunities for photography also. David -
You are off to a good start there, Dan........ That is a very smart rig, and also the two race cars. Once you begin building this diorama it will take over, and you will think of it as a real place ( in a good way! ). I am sure that you will find the whole experience most rewarding. Having started three dioramas just over 4 years ago now, they are still not finished...... This is how a WIP becomes a long term project. Happy model building, Dan. David


.jpg.fa9362baf8248c92d5ab449e27ca7b0a.jpg)