Anglia105E
-
Posts
3,487 -
Joined
-
Last visited
Content Type
Profiles
Forums
Events
Gallery
Everything posted by Anglia105E
-
Really nice SnapOn tool box and tool cart there. Bill....... and you have a good friend in Tim, for sure. David
-
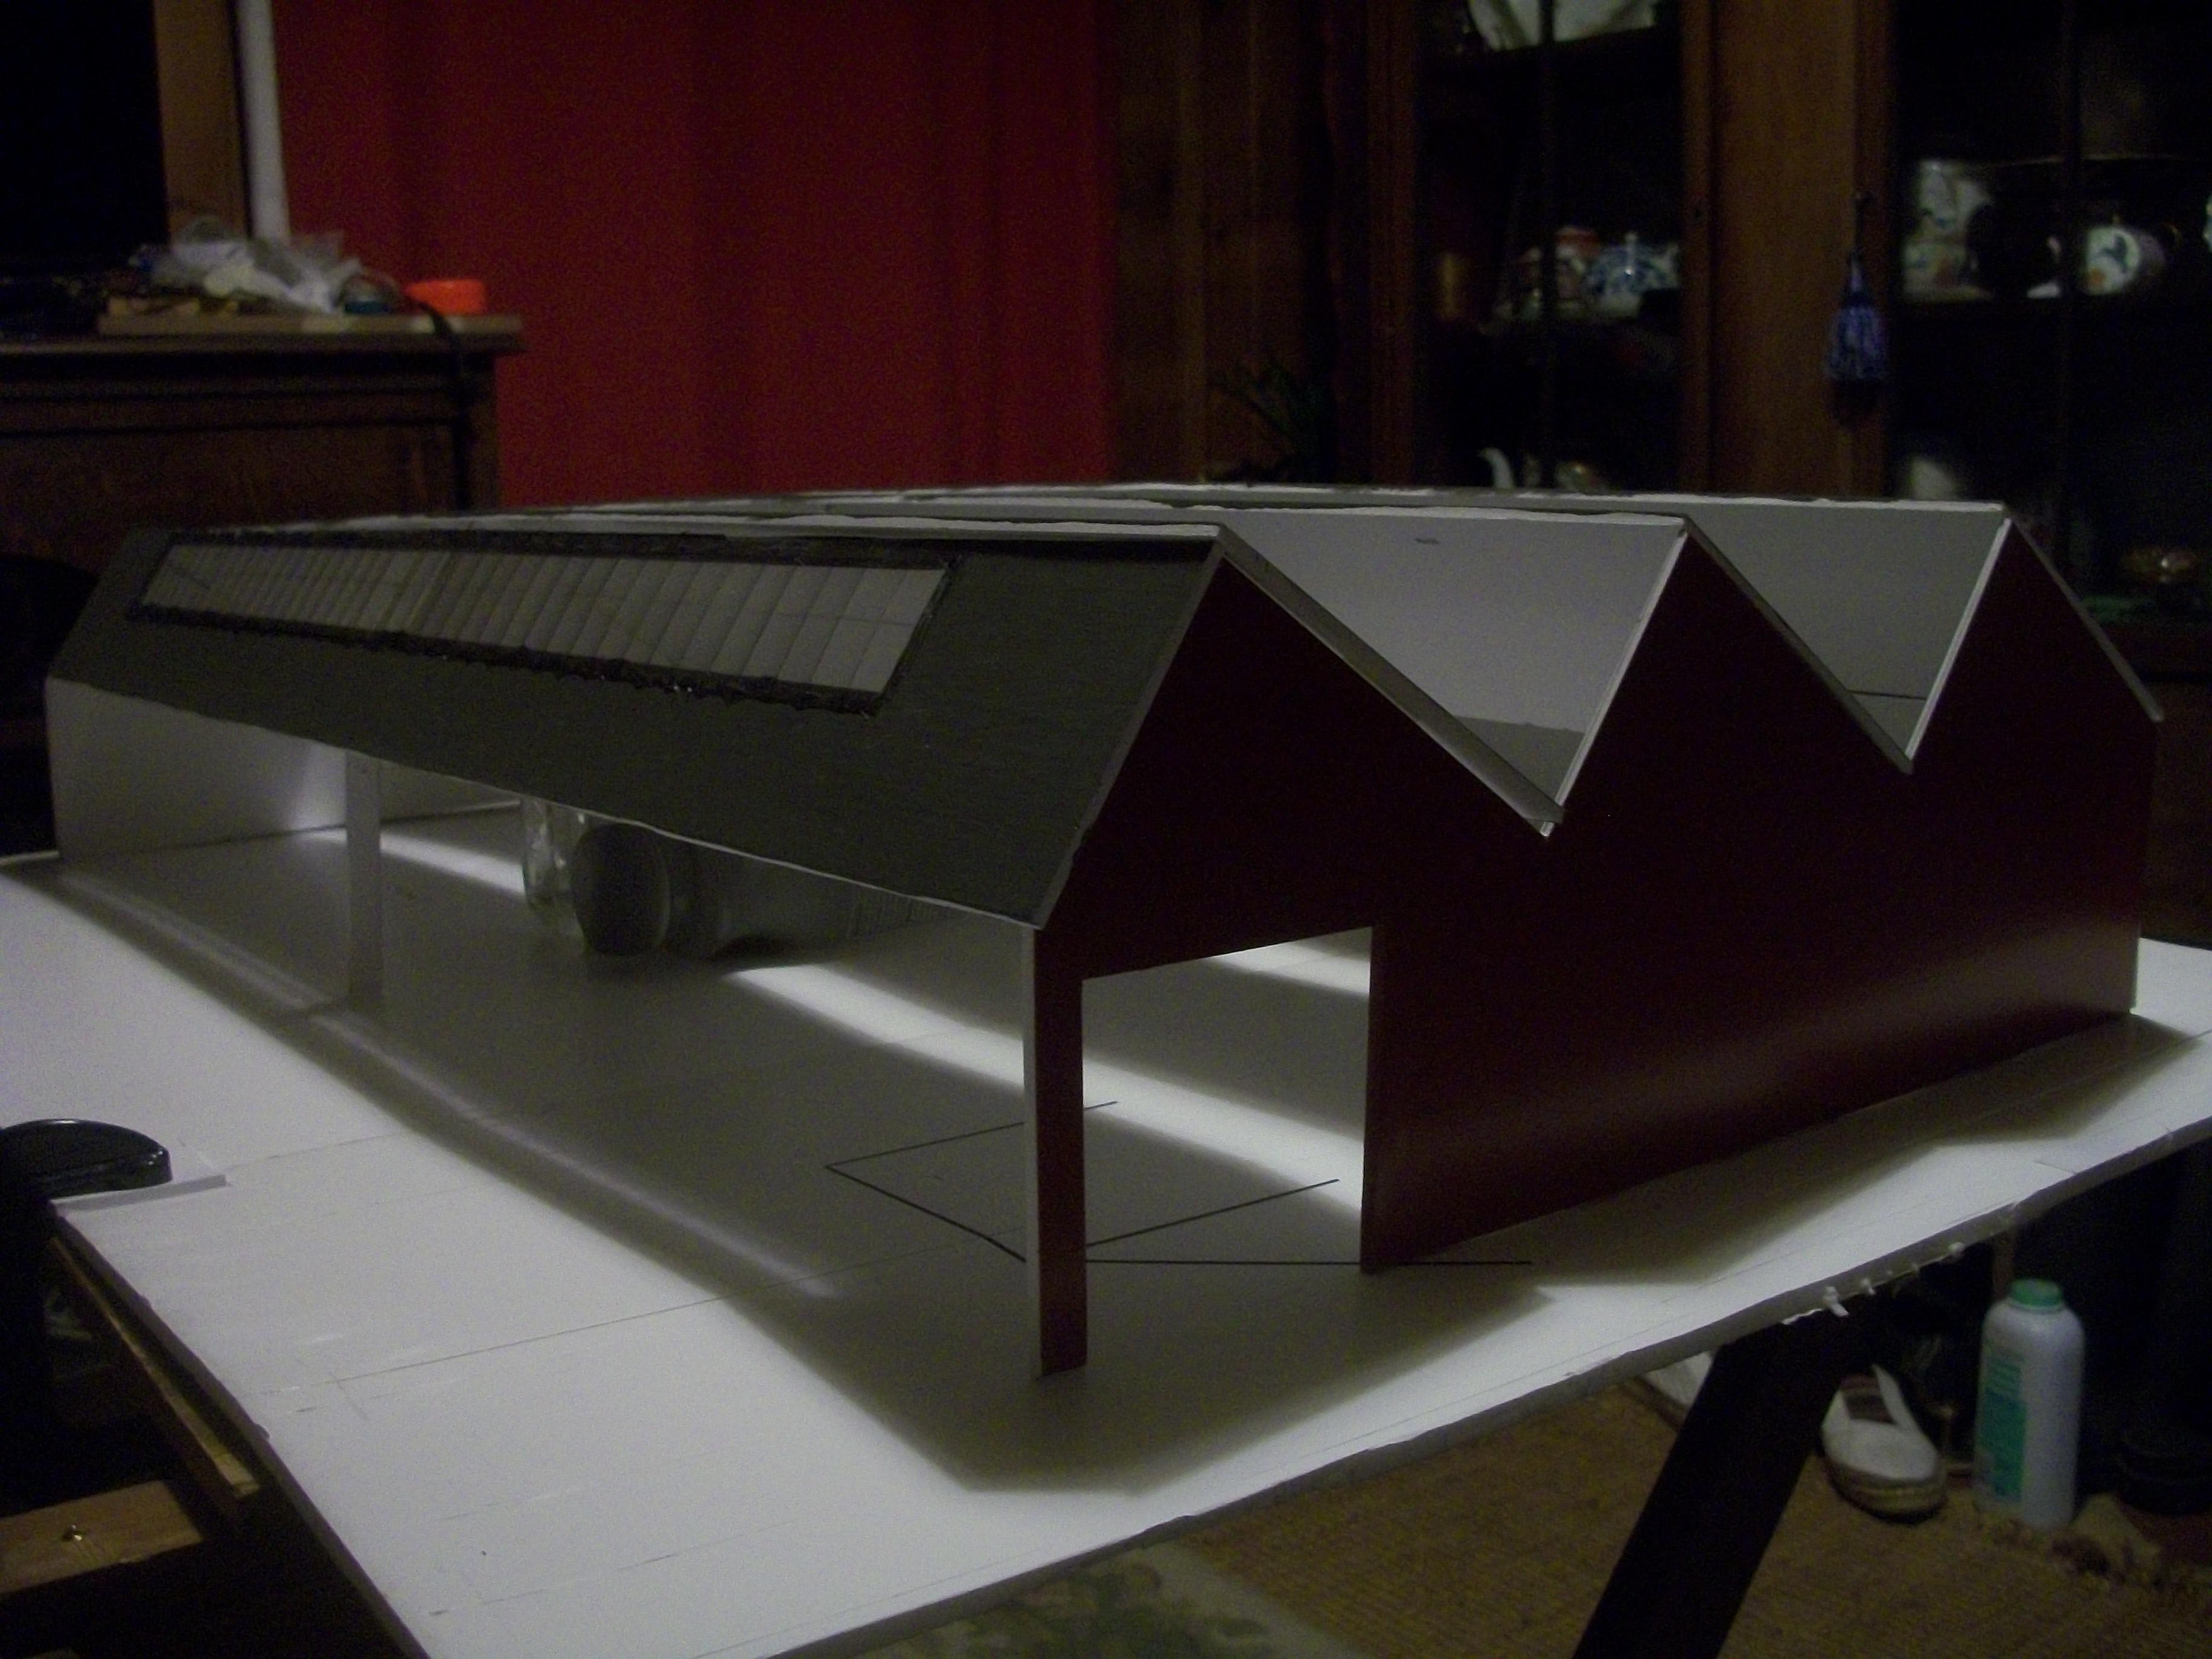
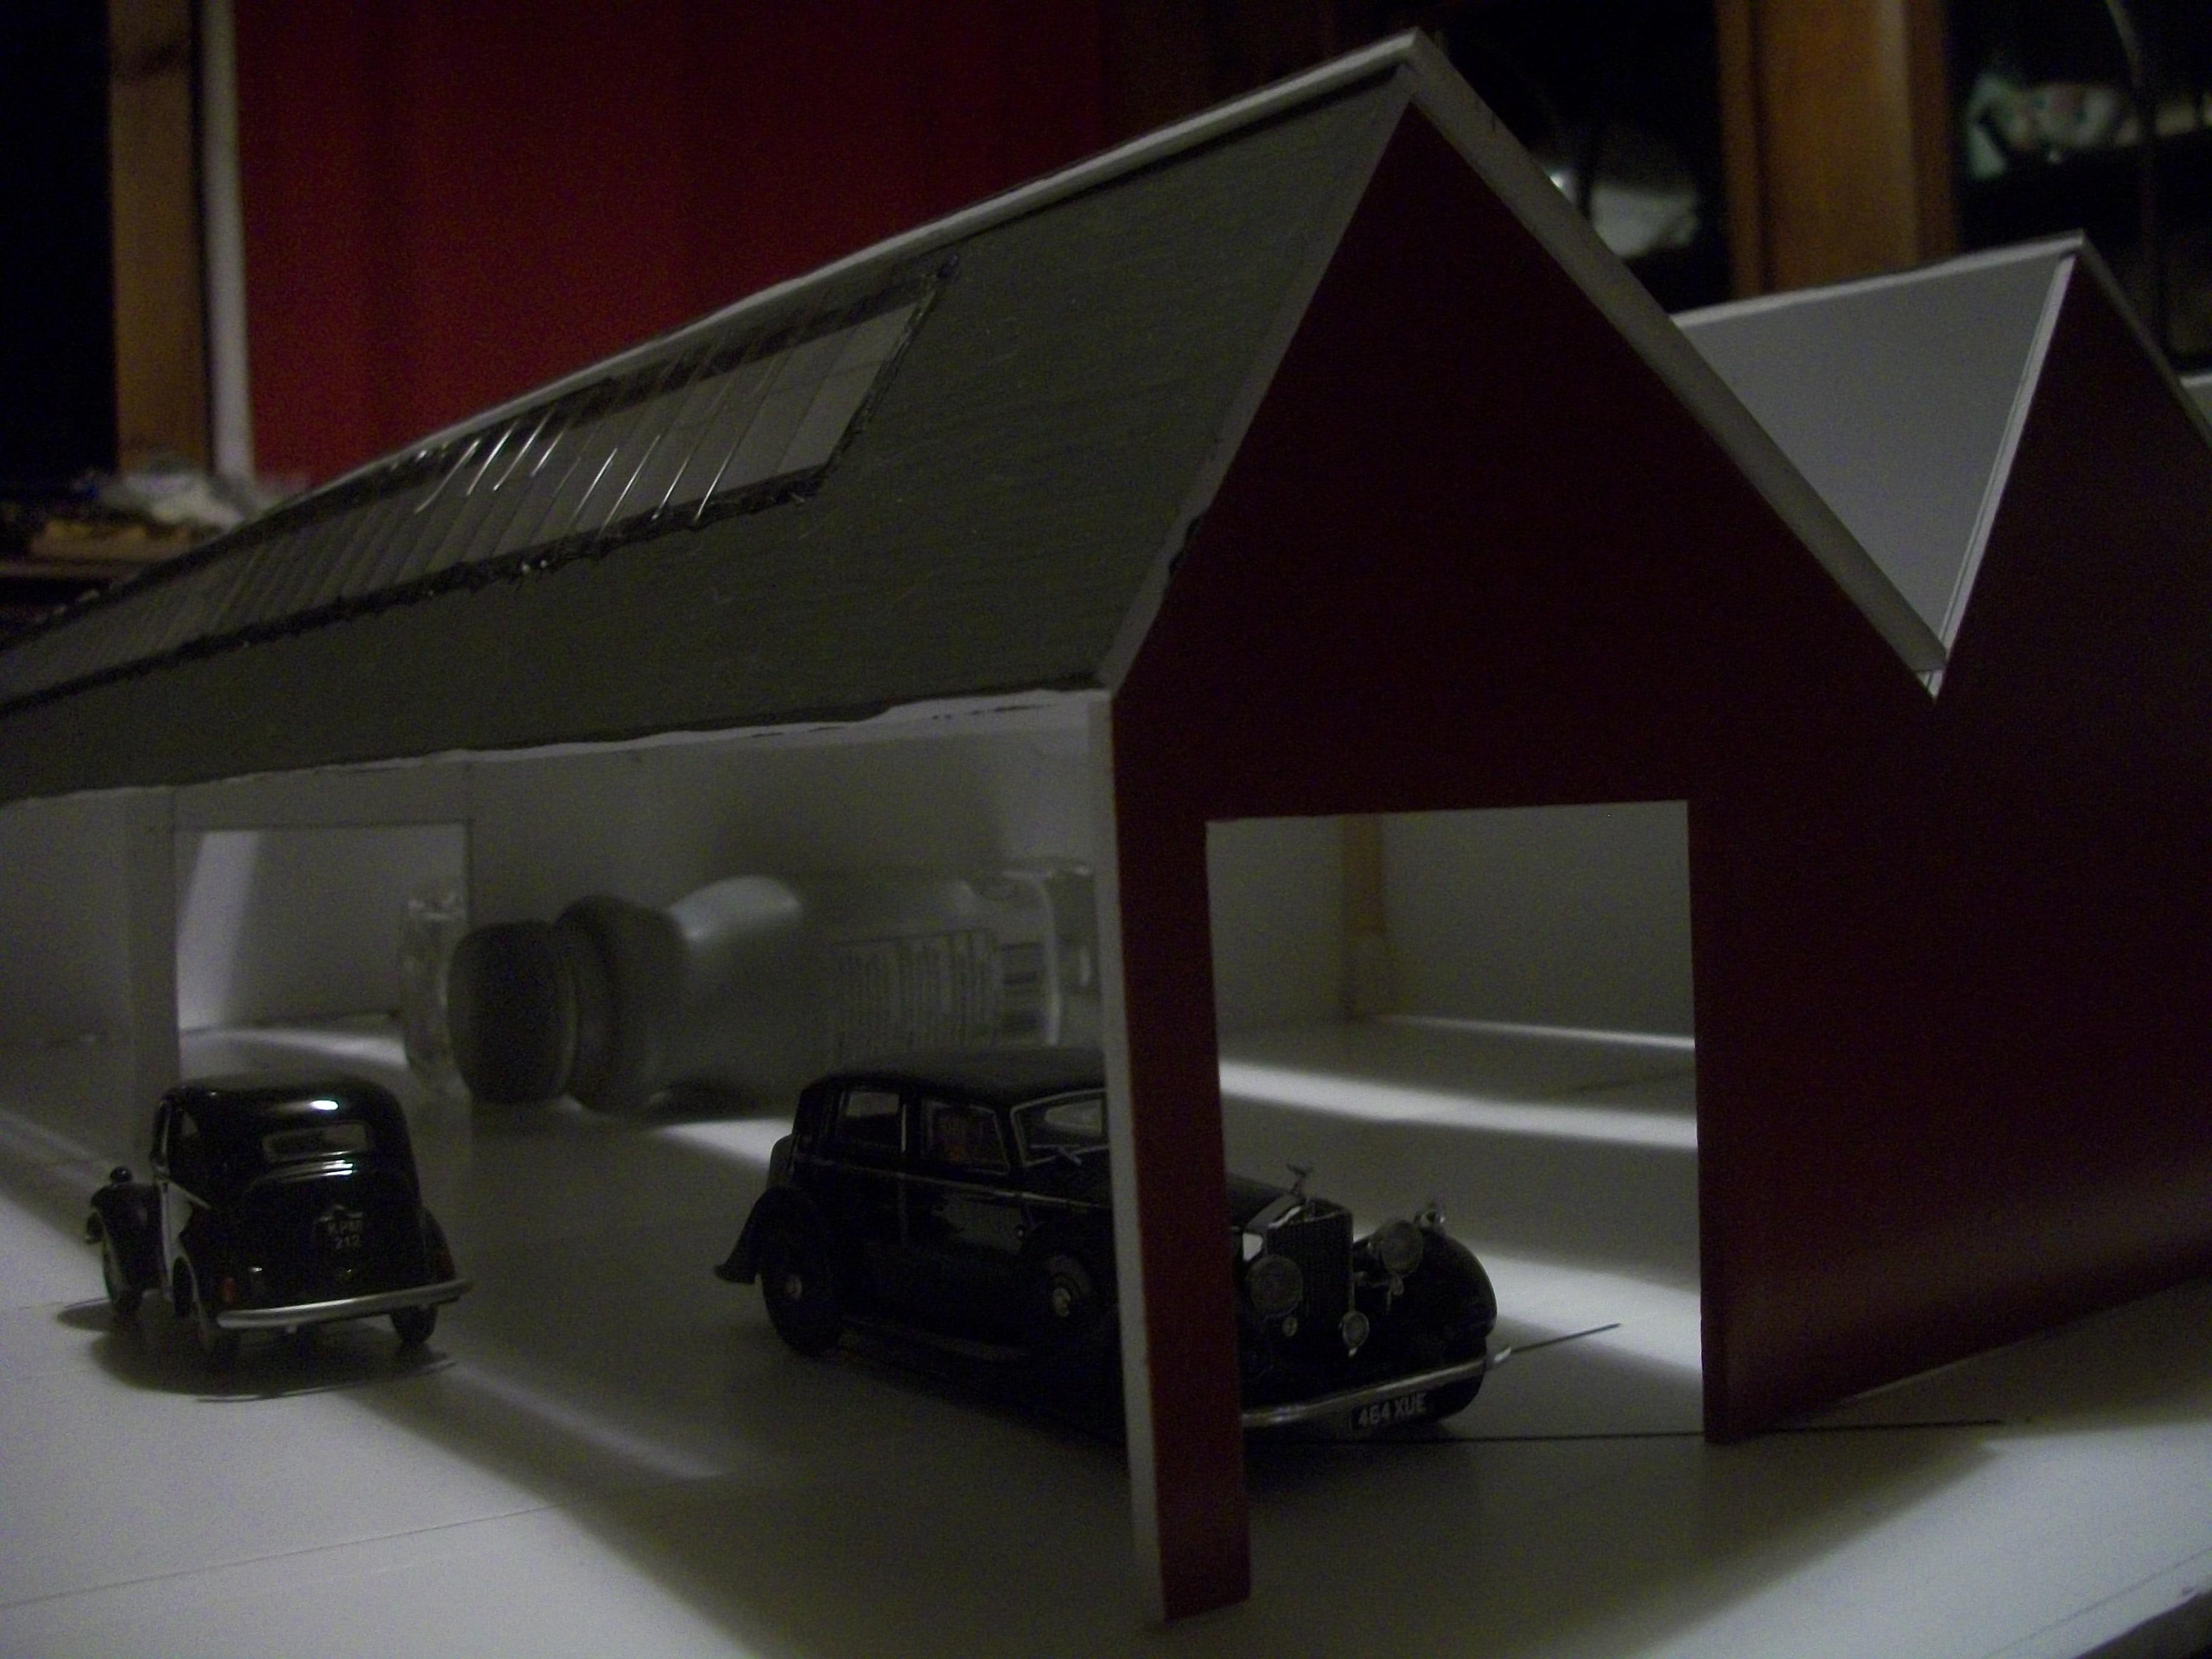
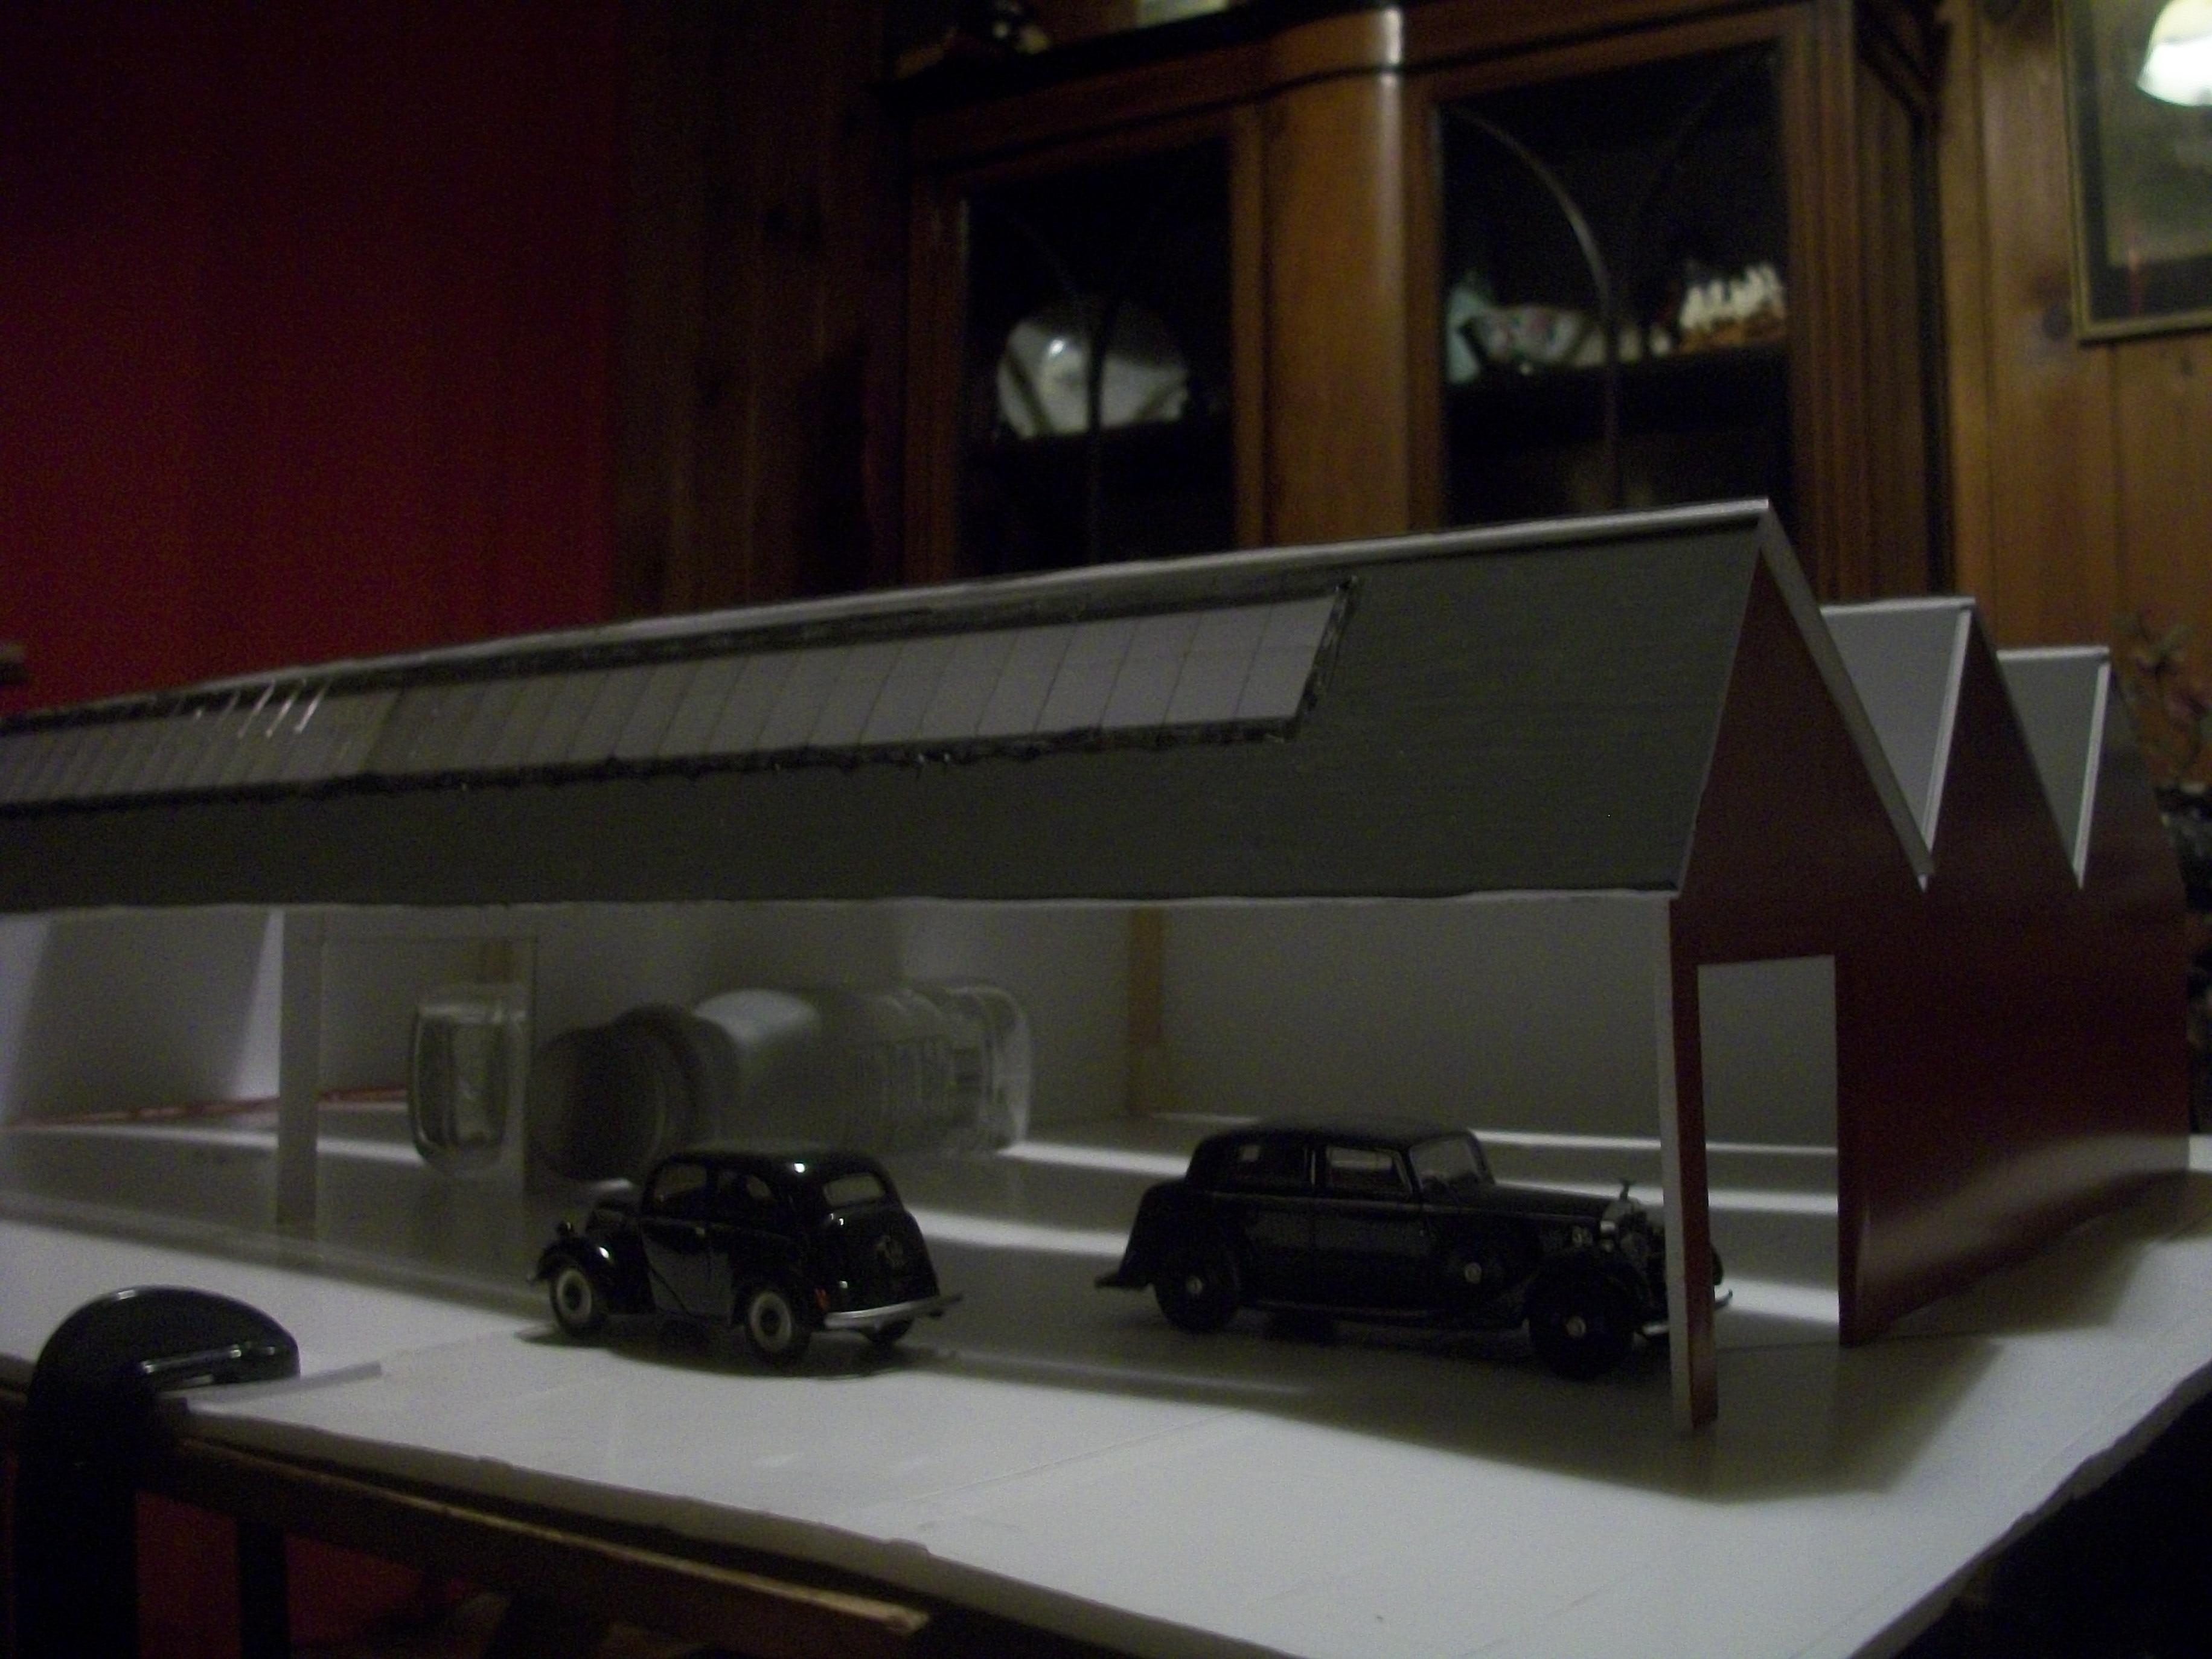
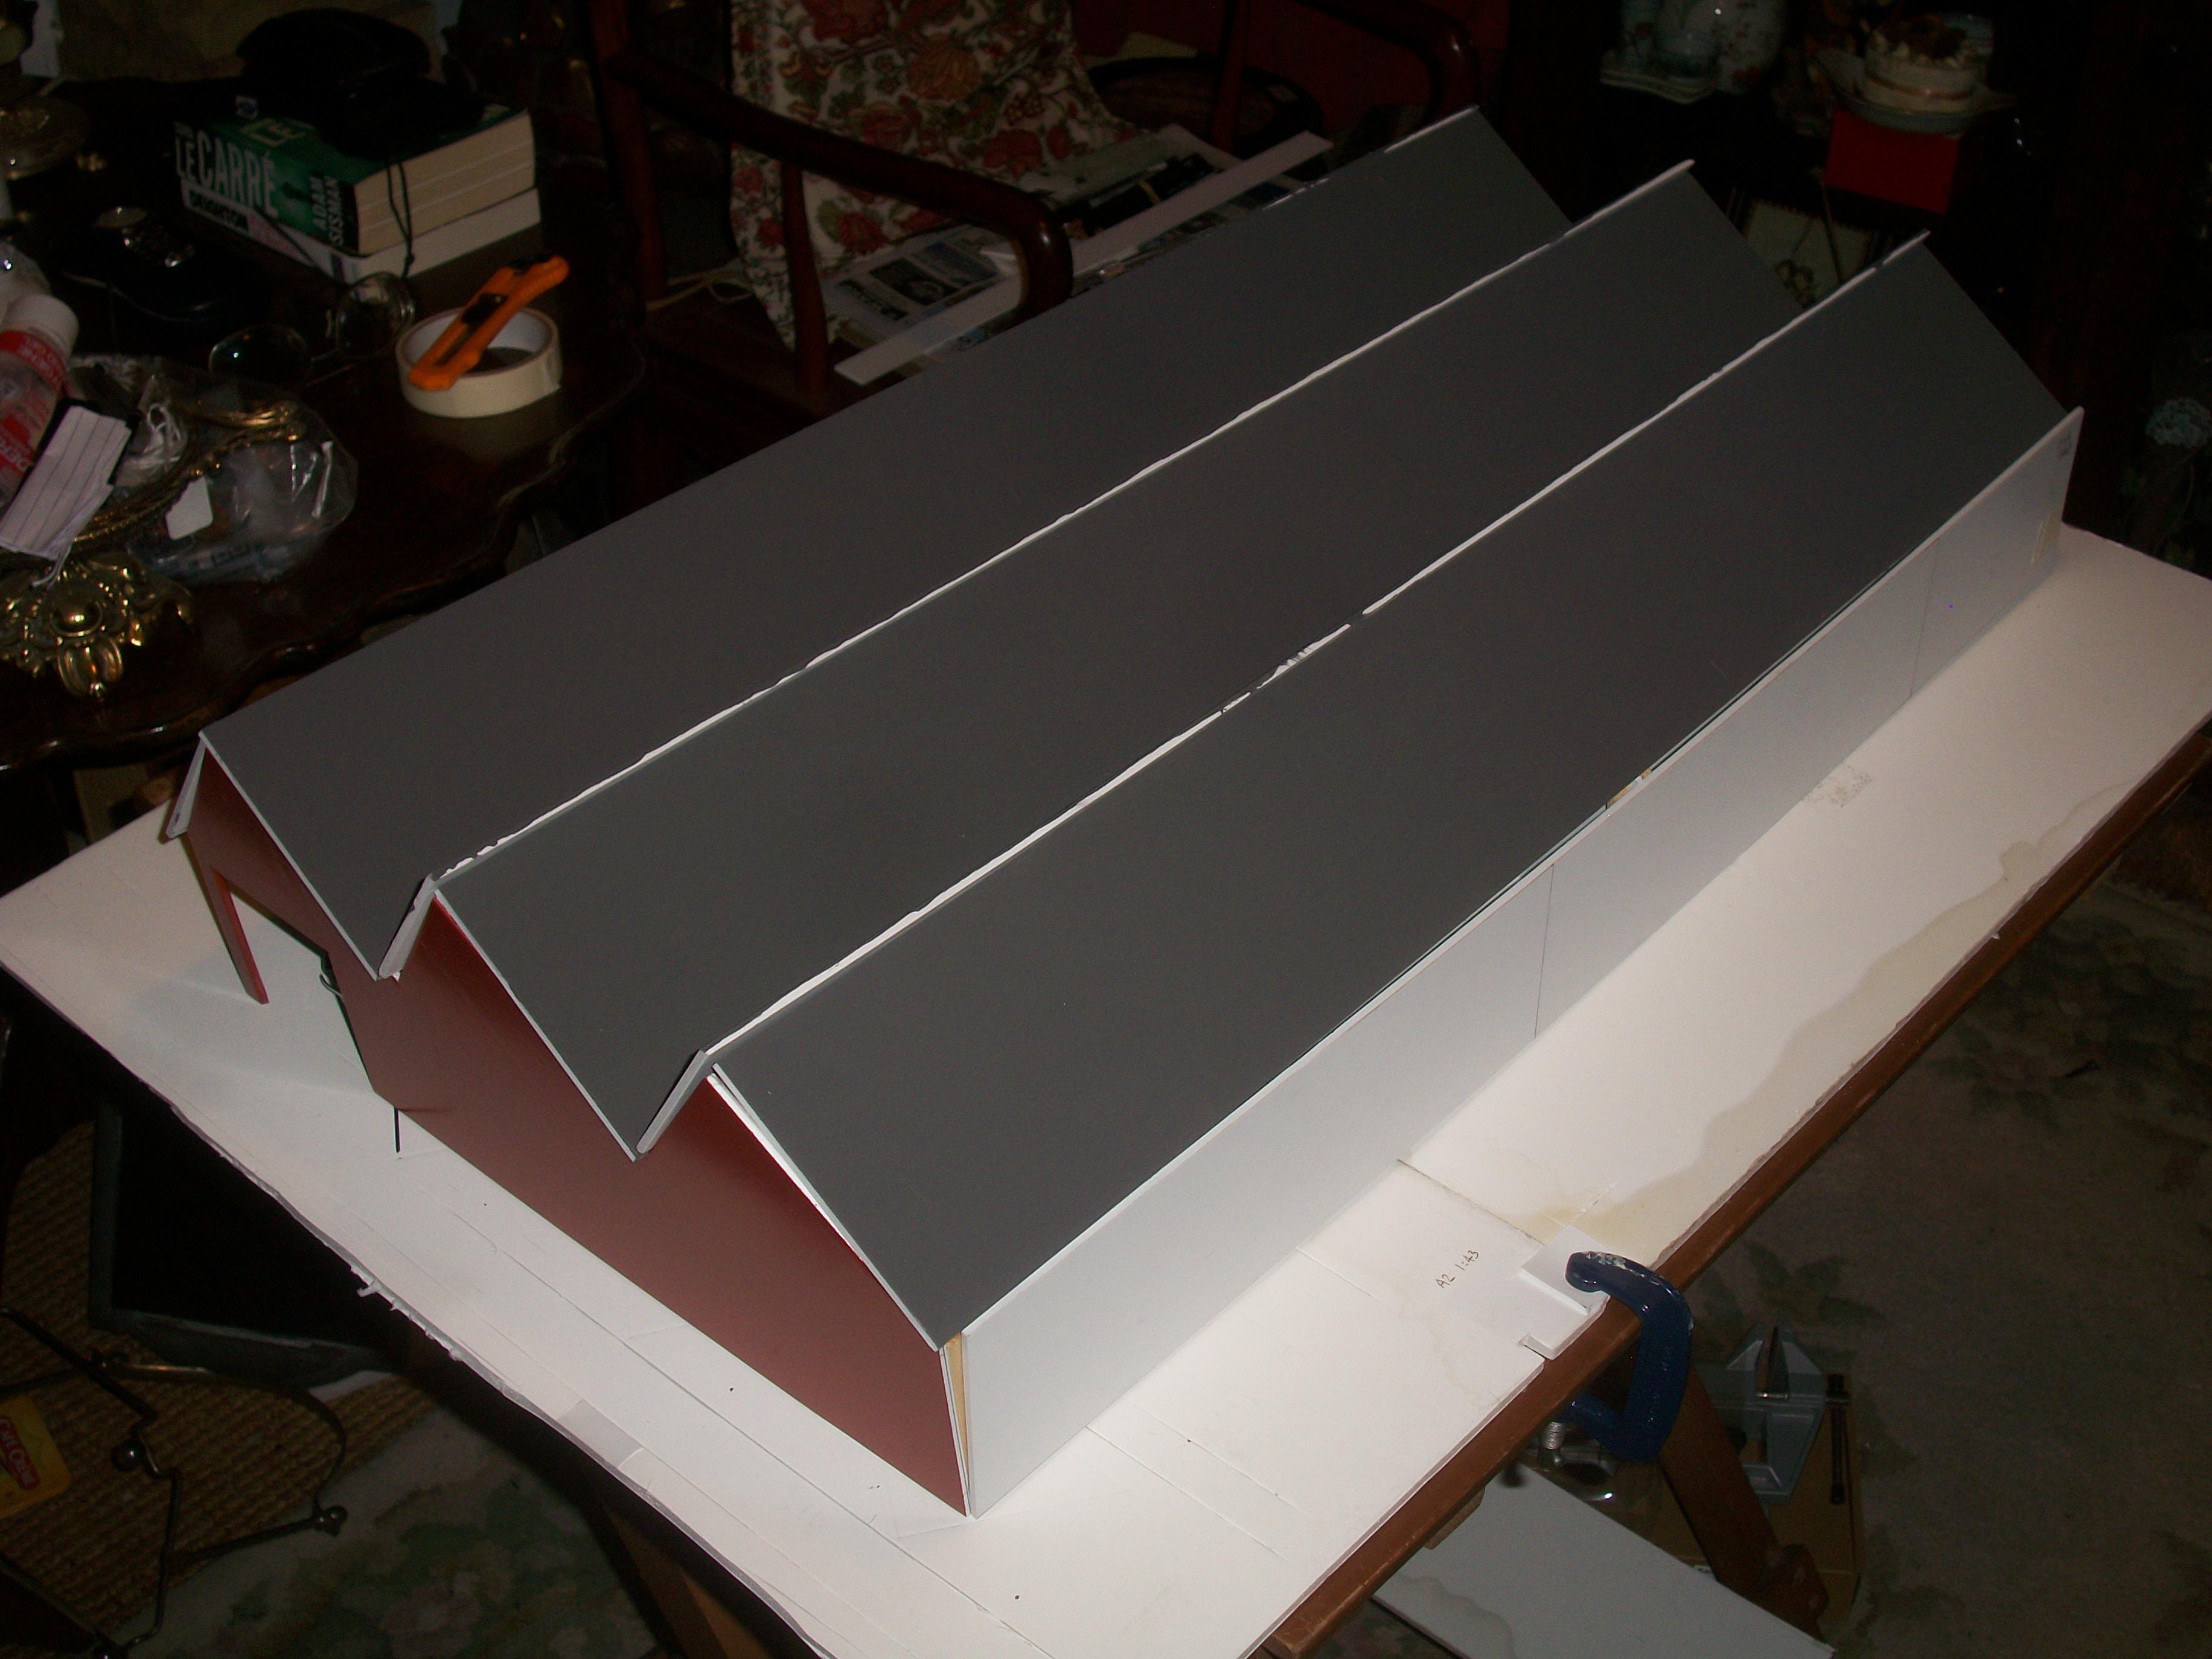
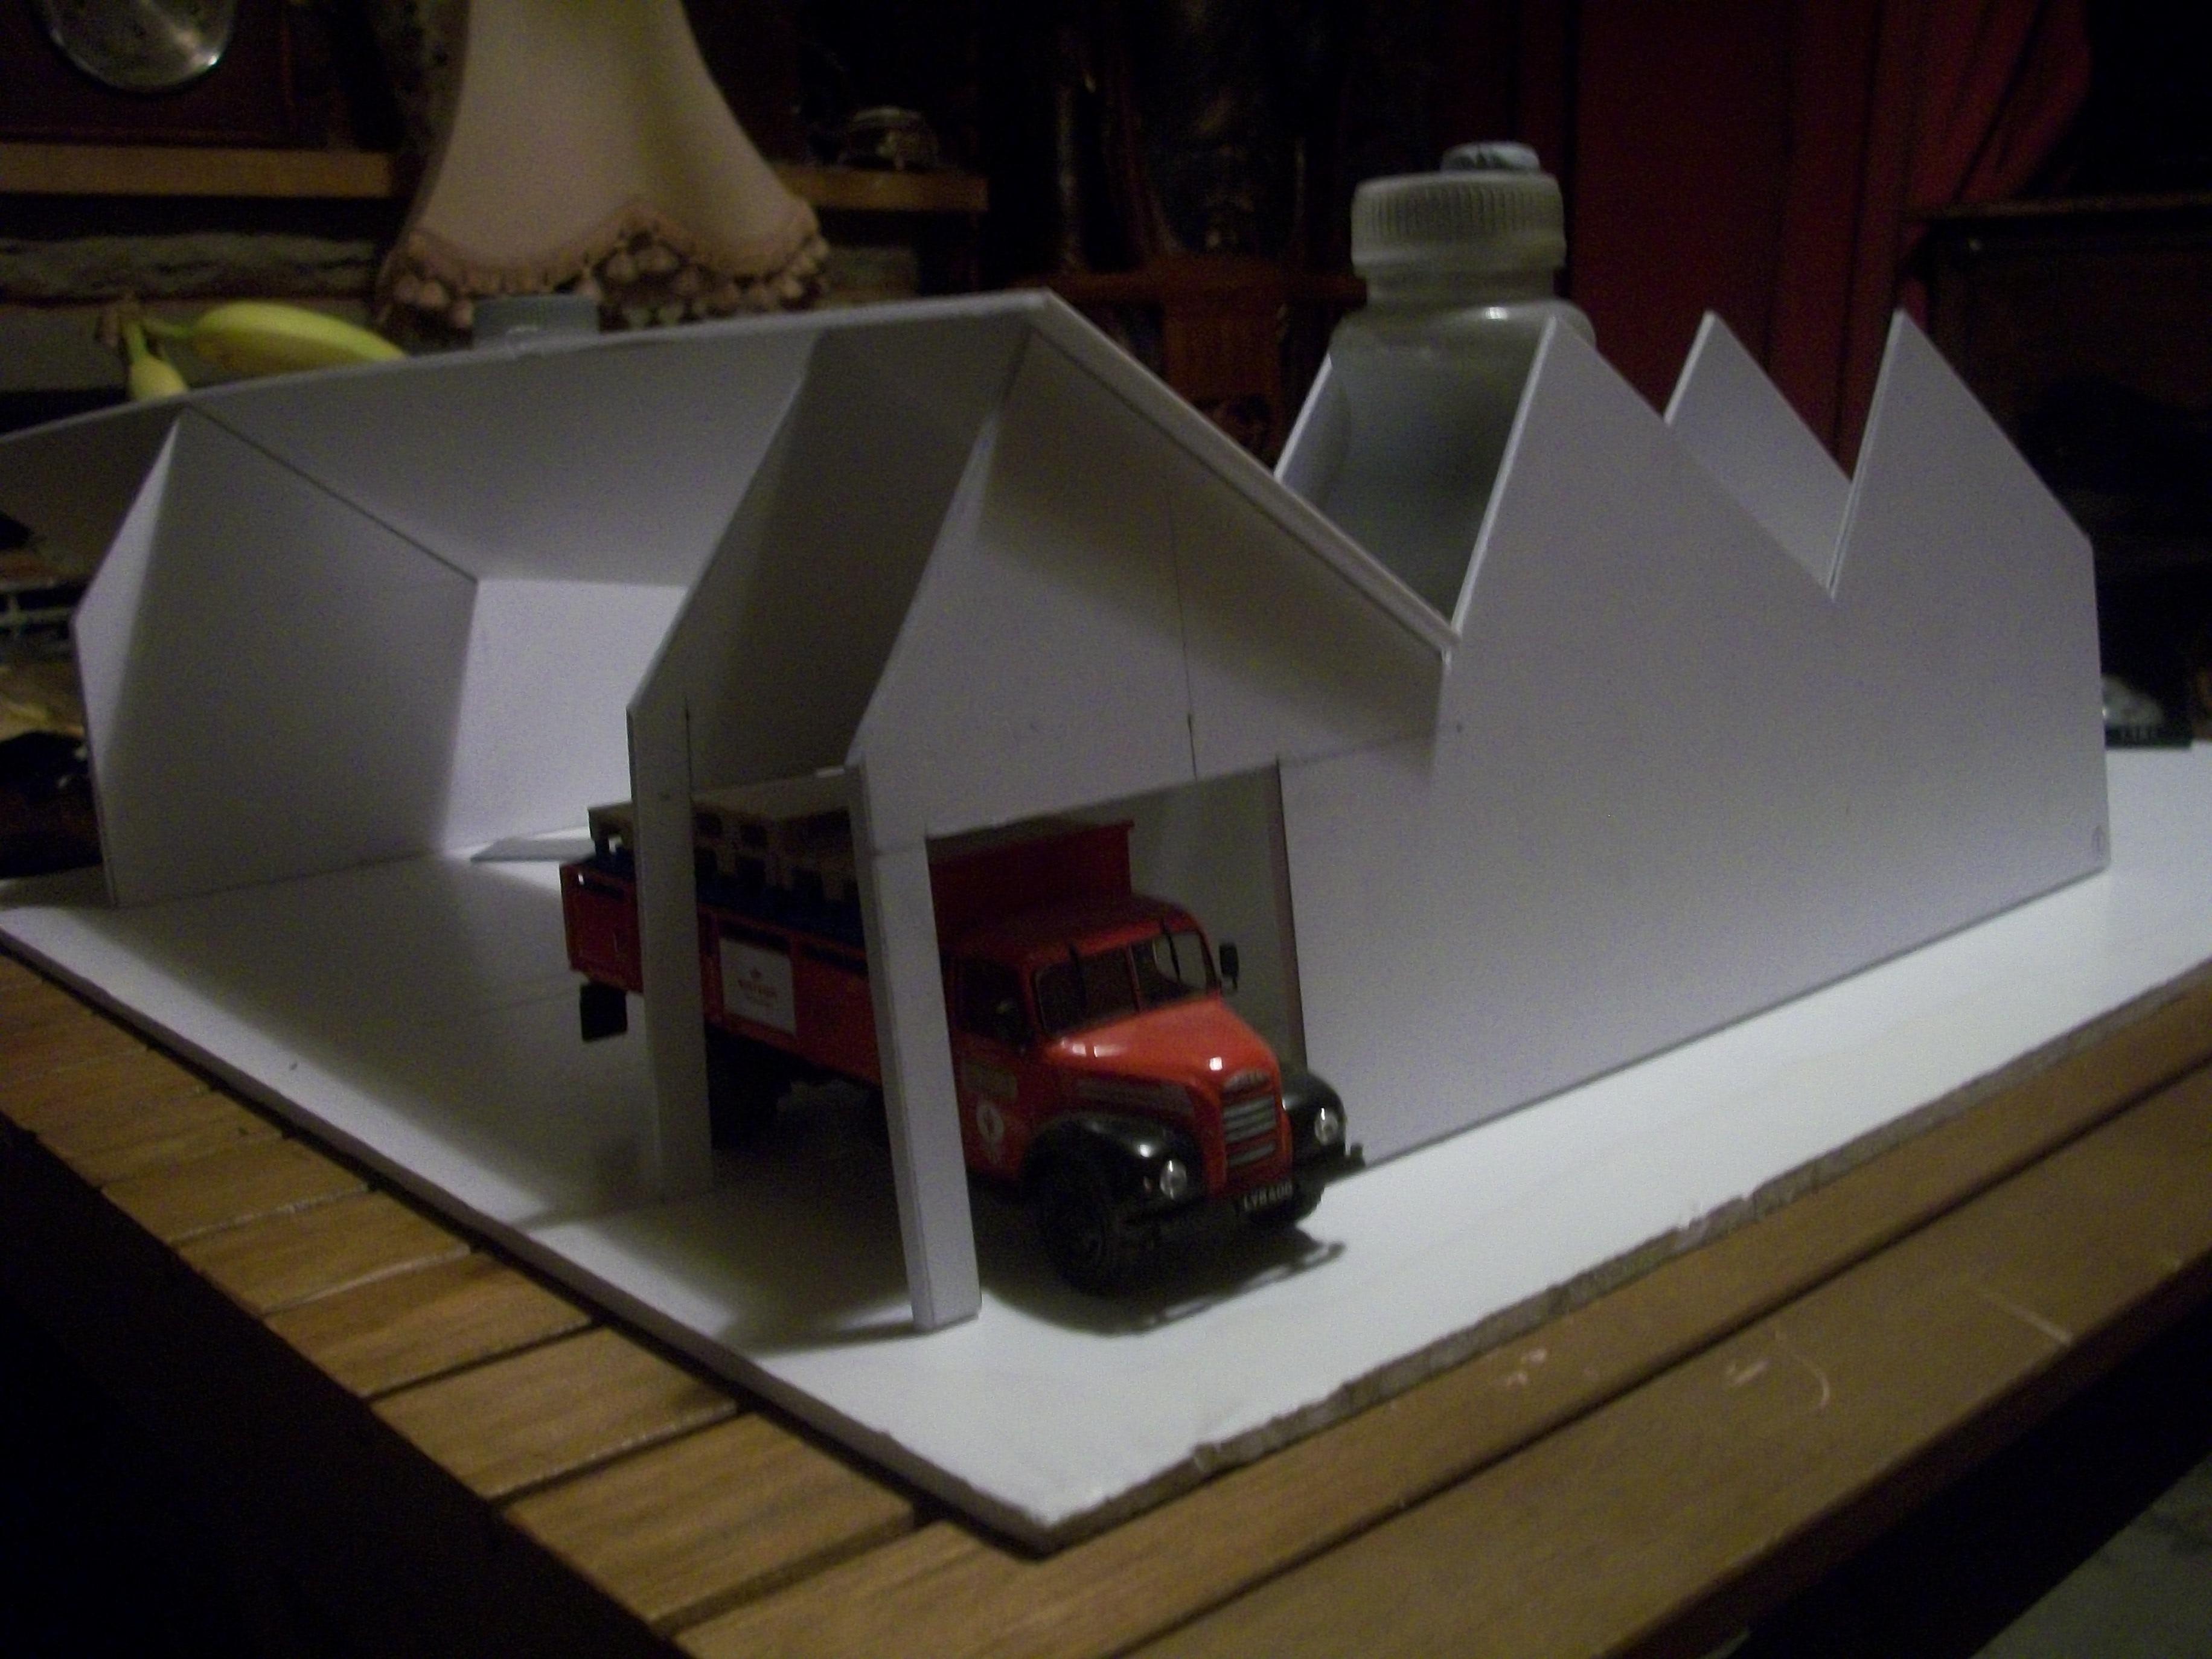
Eric, I wasn't aware that you were planning to take a back seat, as it were, and I am sorry to hear that this tremor in your right hand is having such a detrimental effect upon your model building abilities. You have obviously thought this through, and your decision is not an easy one, for sure. Good luck with your 1:1 scale '37 Cadillac, which must be a motor car that you are very proud of. Here are some photos of a mock-up of the three factory units. The 6 roof panels all have two coats of grey emulsion, the end wall has a coat of tile red paint, and the skylights are in place for one of the three narrow roof panels. Following several days deliberating over the method to use for the skylights, I came up with my preferred method. This is to score the clear plastic with a sharp 3B pencil, and then turn the panel over so that the indented side is on the inside. The assembly of the roof sections will be tricky, and this needs doing in a precise order to get the structure right. The footprint of this factory extension is quite large, at 75.0 cm x 37.5 cm., which is 0.28 square metres. The idea is to be able to lift the entire structure off the baseboard, so that vehicles and figures can be placed on the baseboard inside the factory units, for the photography. I intend taking some shots through the outer entrance doorway, with the daylight coming in through the skylights...... maybe with some dust rising from the factory floor, and caught in the beams of sunlight. David

-
Okay, Kurt..... you can see at the top of the home page for MCM, there are the headings...... Forums, Calendar, Gallery, Guidelines, Staff, Online Users If you click on ' Online Users ', you will see how many users are online at the moment ( 130 as I am looking ) and if they have visited just now, or several minutes ago........ hope this helps David
-
Thank you, Eric......... and I shall be posting further progress during the next 24 hours. The three units factory extension is coming along nicely, and this should bring a more balanced view to the diorama. David
-
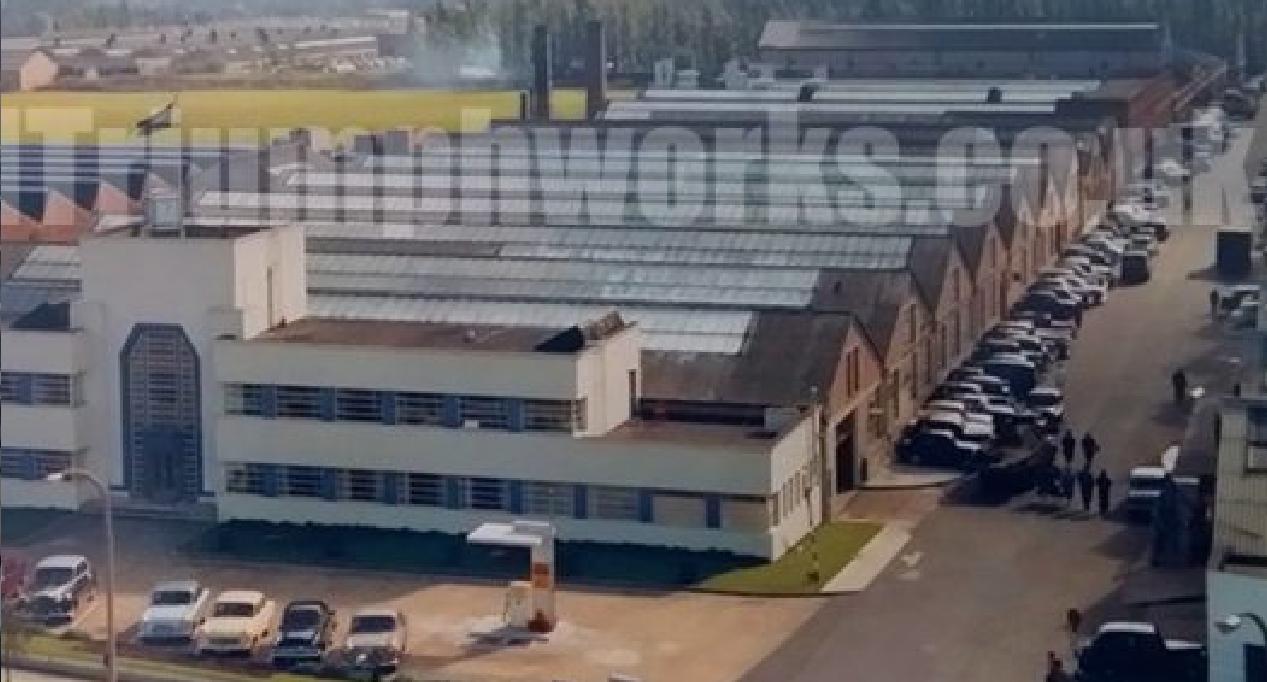
I have started constructing the factory units to go behind the Hooper & Co factory frontage, and here are a few photos to show my progress so far. There were 9 units for the real factory, but I only have space for 3 units. There is an entrance to the first factory unit from Duke's Road, and the wall that runs along the side of the building will be a brick red sort of colour, with grey roof sections, and rows of skylights on the shorter roof sections. The whole building will be constructed from Foamex sheet, with some wooden beams to add strength and rigidity where needed. The guy at my local print shop, gave me a bundle of Foamex off cuts instead of the one sheet that I asked for...... he assured me that he had referred to my calculations, and there were plenty of sheets for my 9 pieces. This has proved to be correct, and I have more than enough for the job. In addition to the two sides of the factory units, I have also added a third profile piece, which will be placed in the centre to prevent the roof sections from bending downwards. David
-
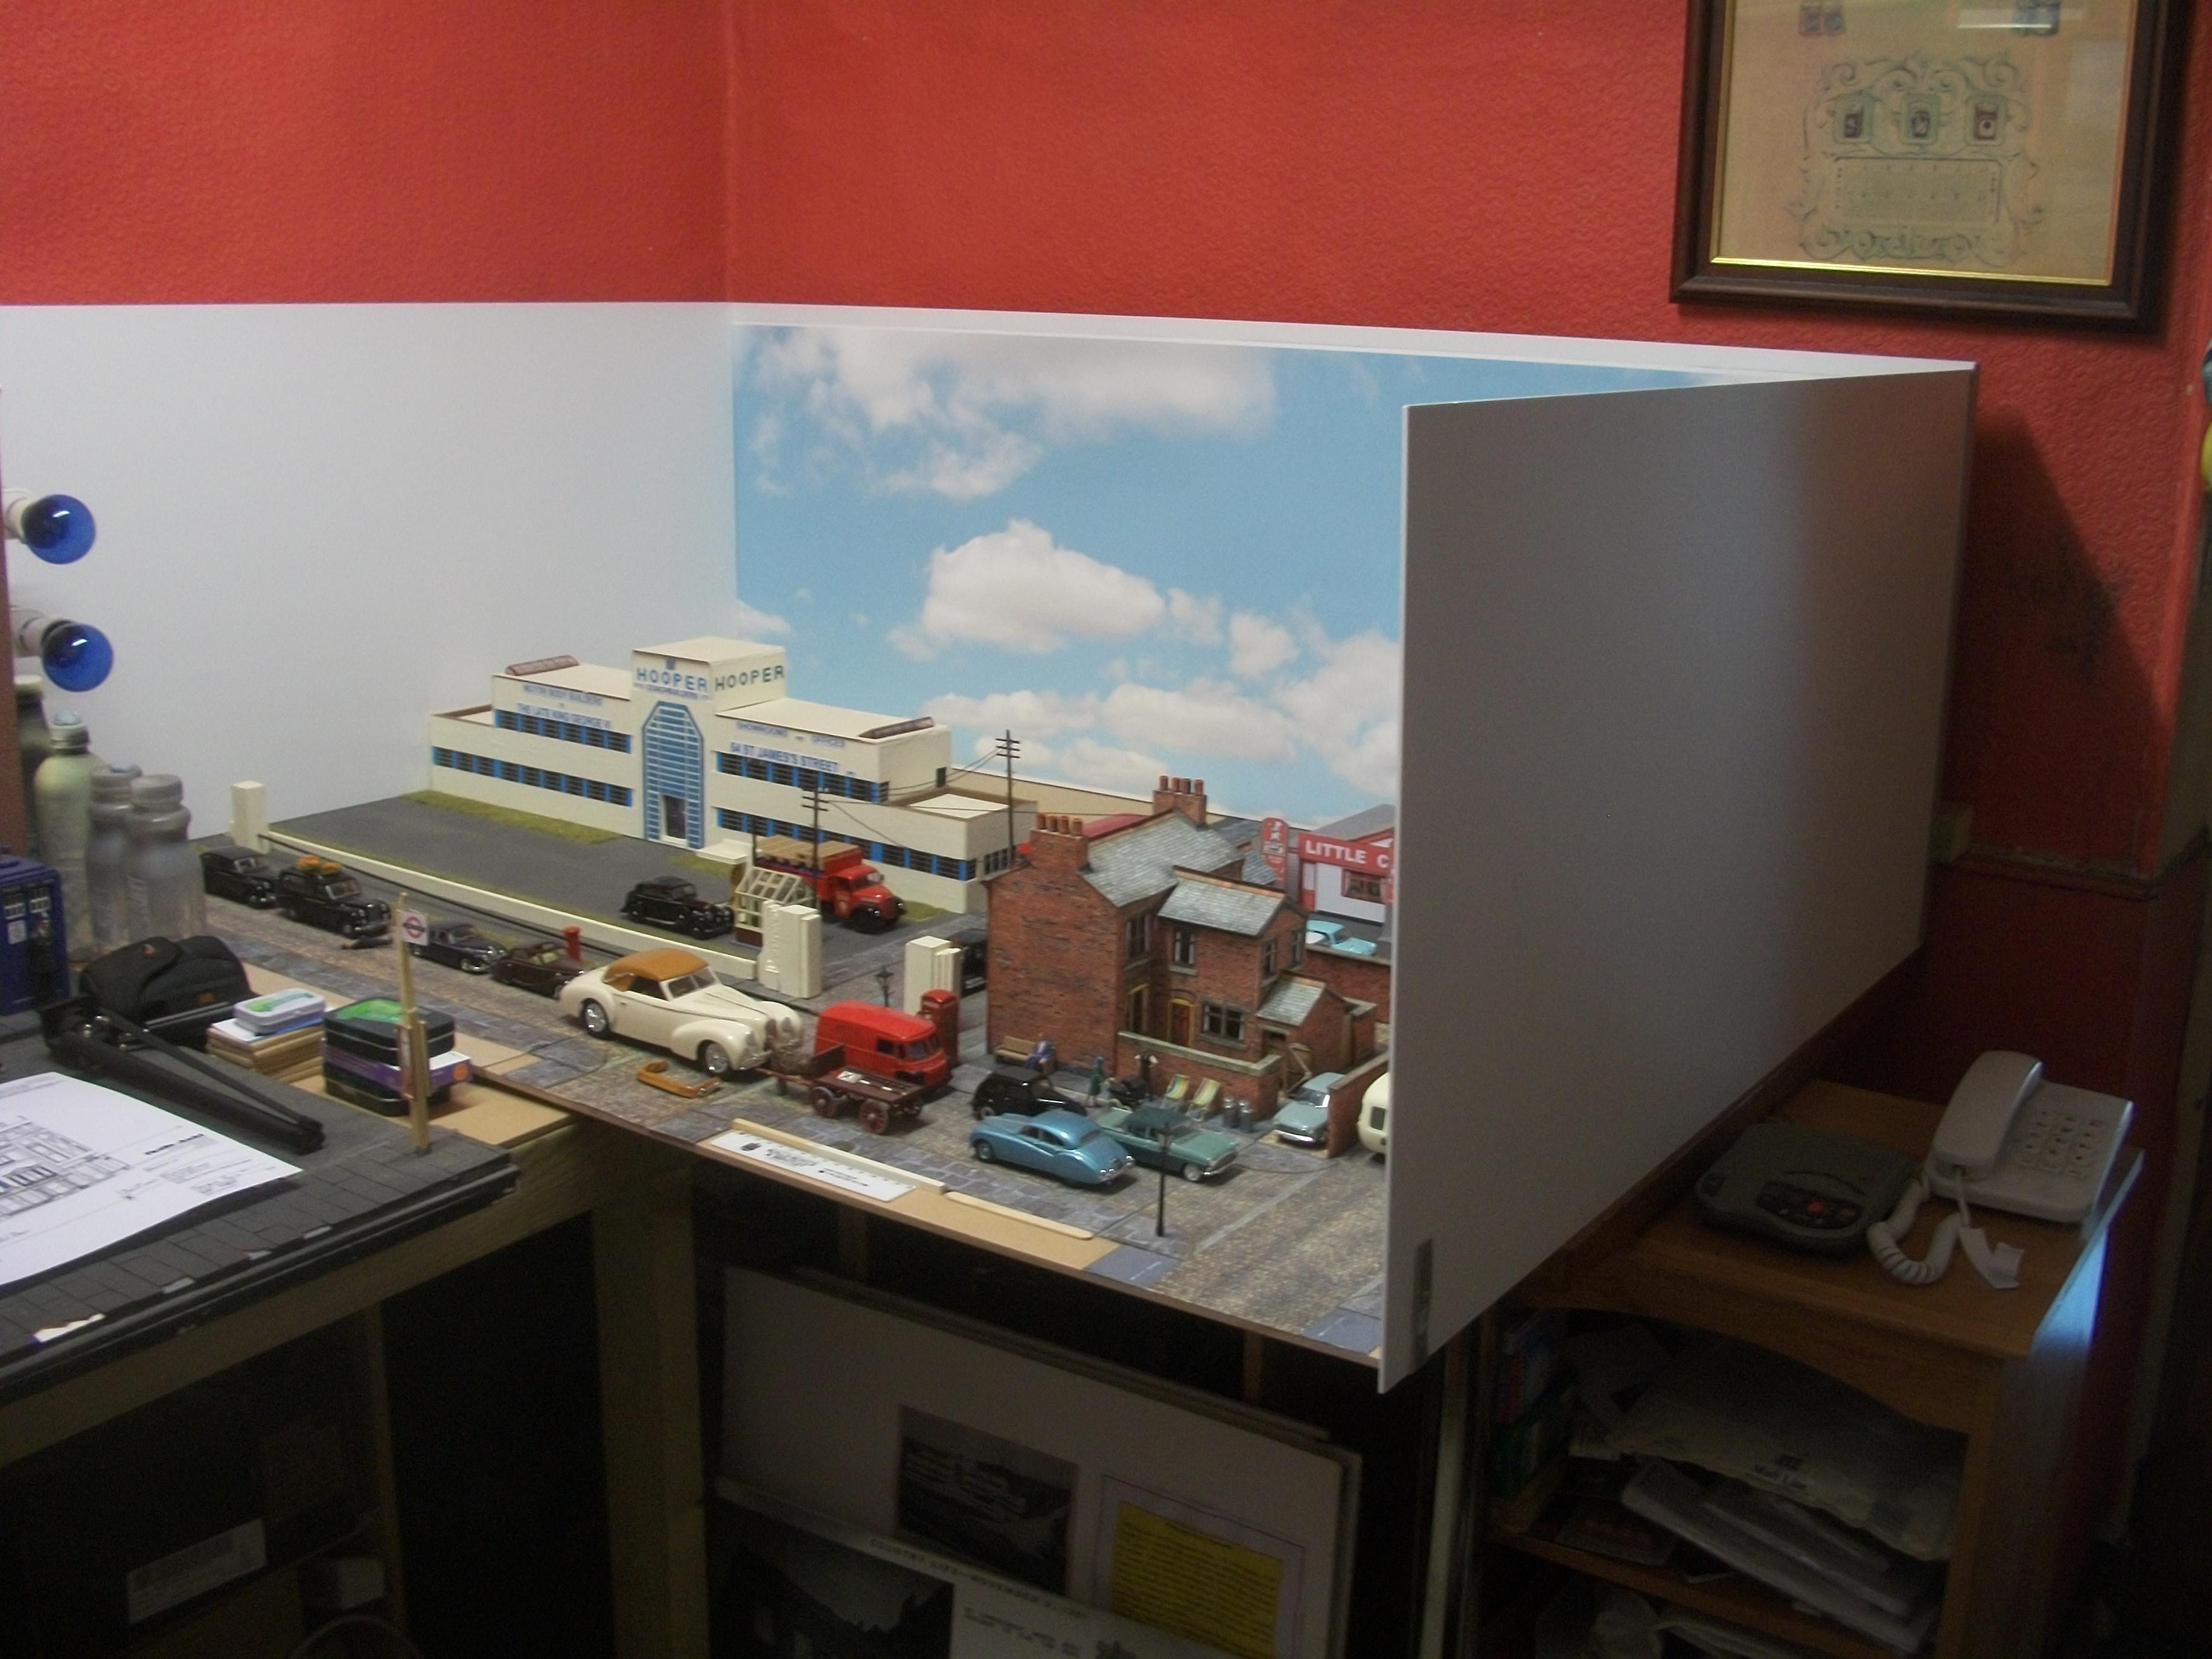
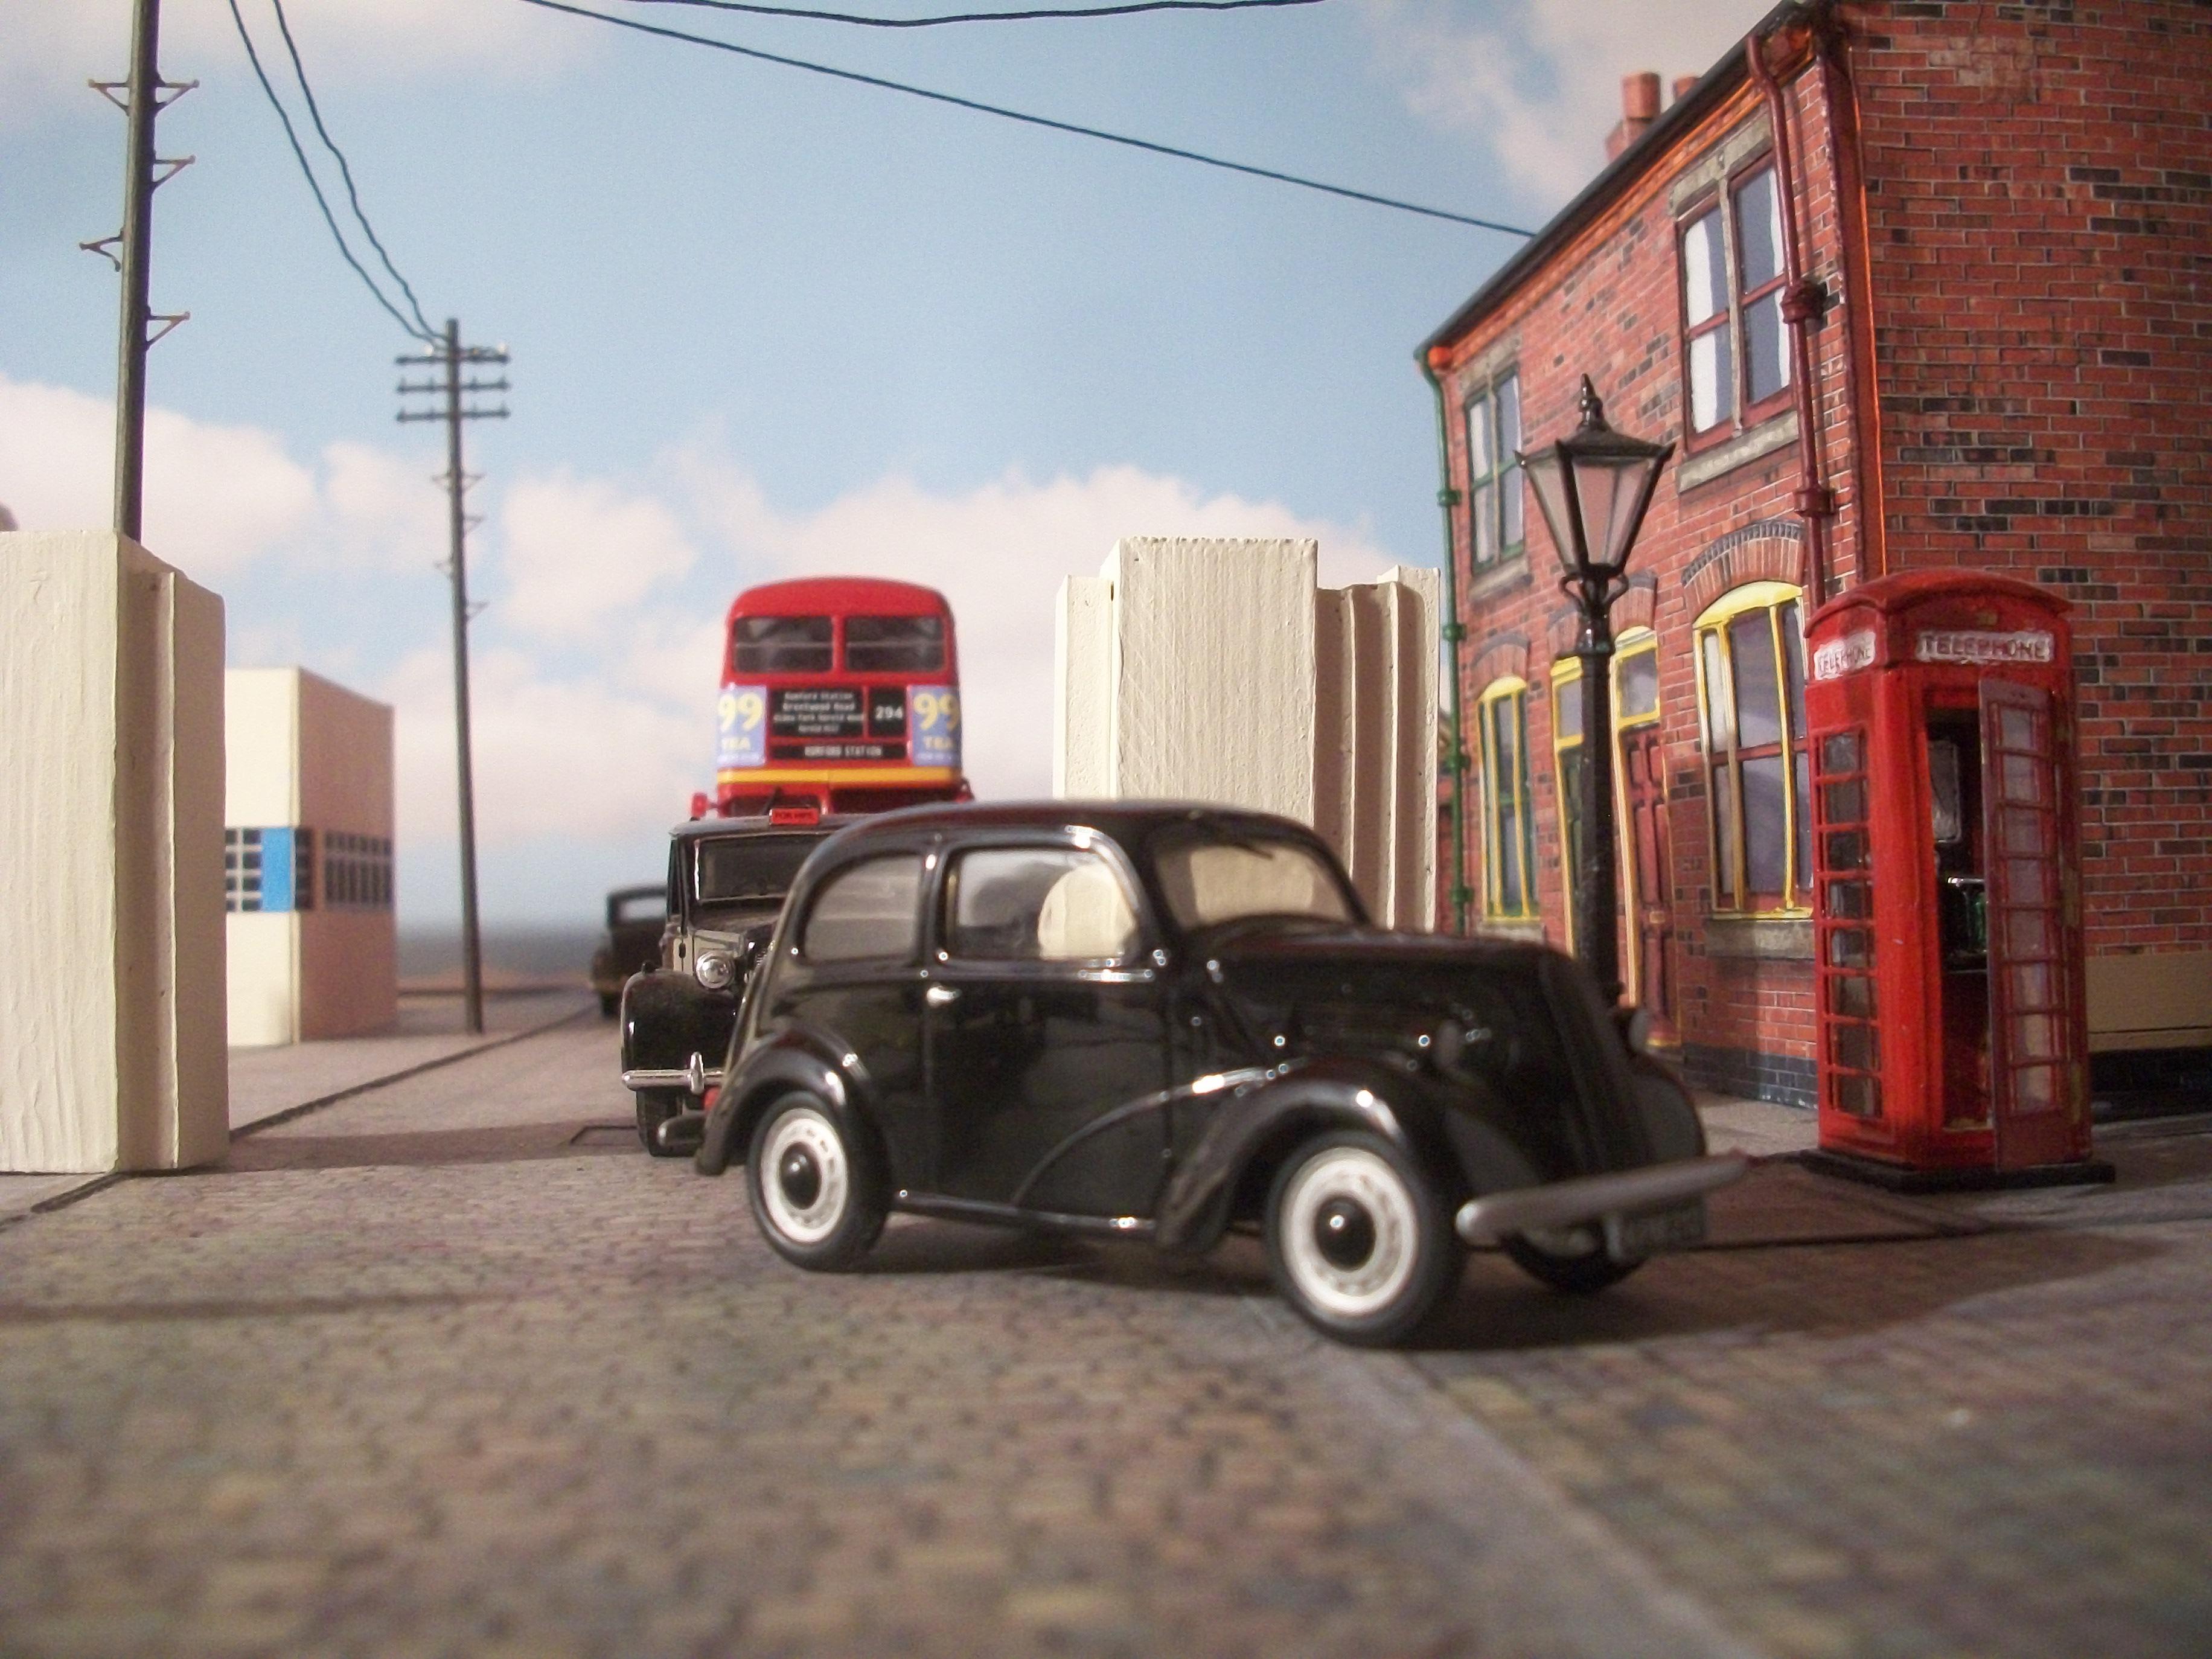
Over the weekend I set up the scenic backing board, and also two white side boards for the 1:43 scale dioramas....... this arrangement should eliminate any background clutter that is in the room, appearing in photographs of the models. Also, the light from the 100 watt daylight bulb will bounce off the white boards to create a better effect, hopefully. Here are a few shots that I have taken, to determine the difference in the quality of the photos. David
-
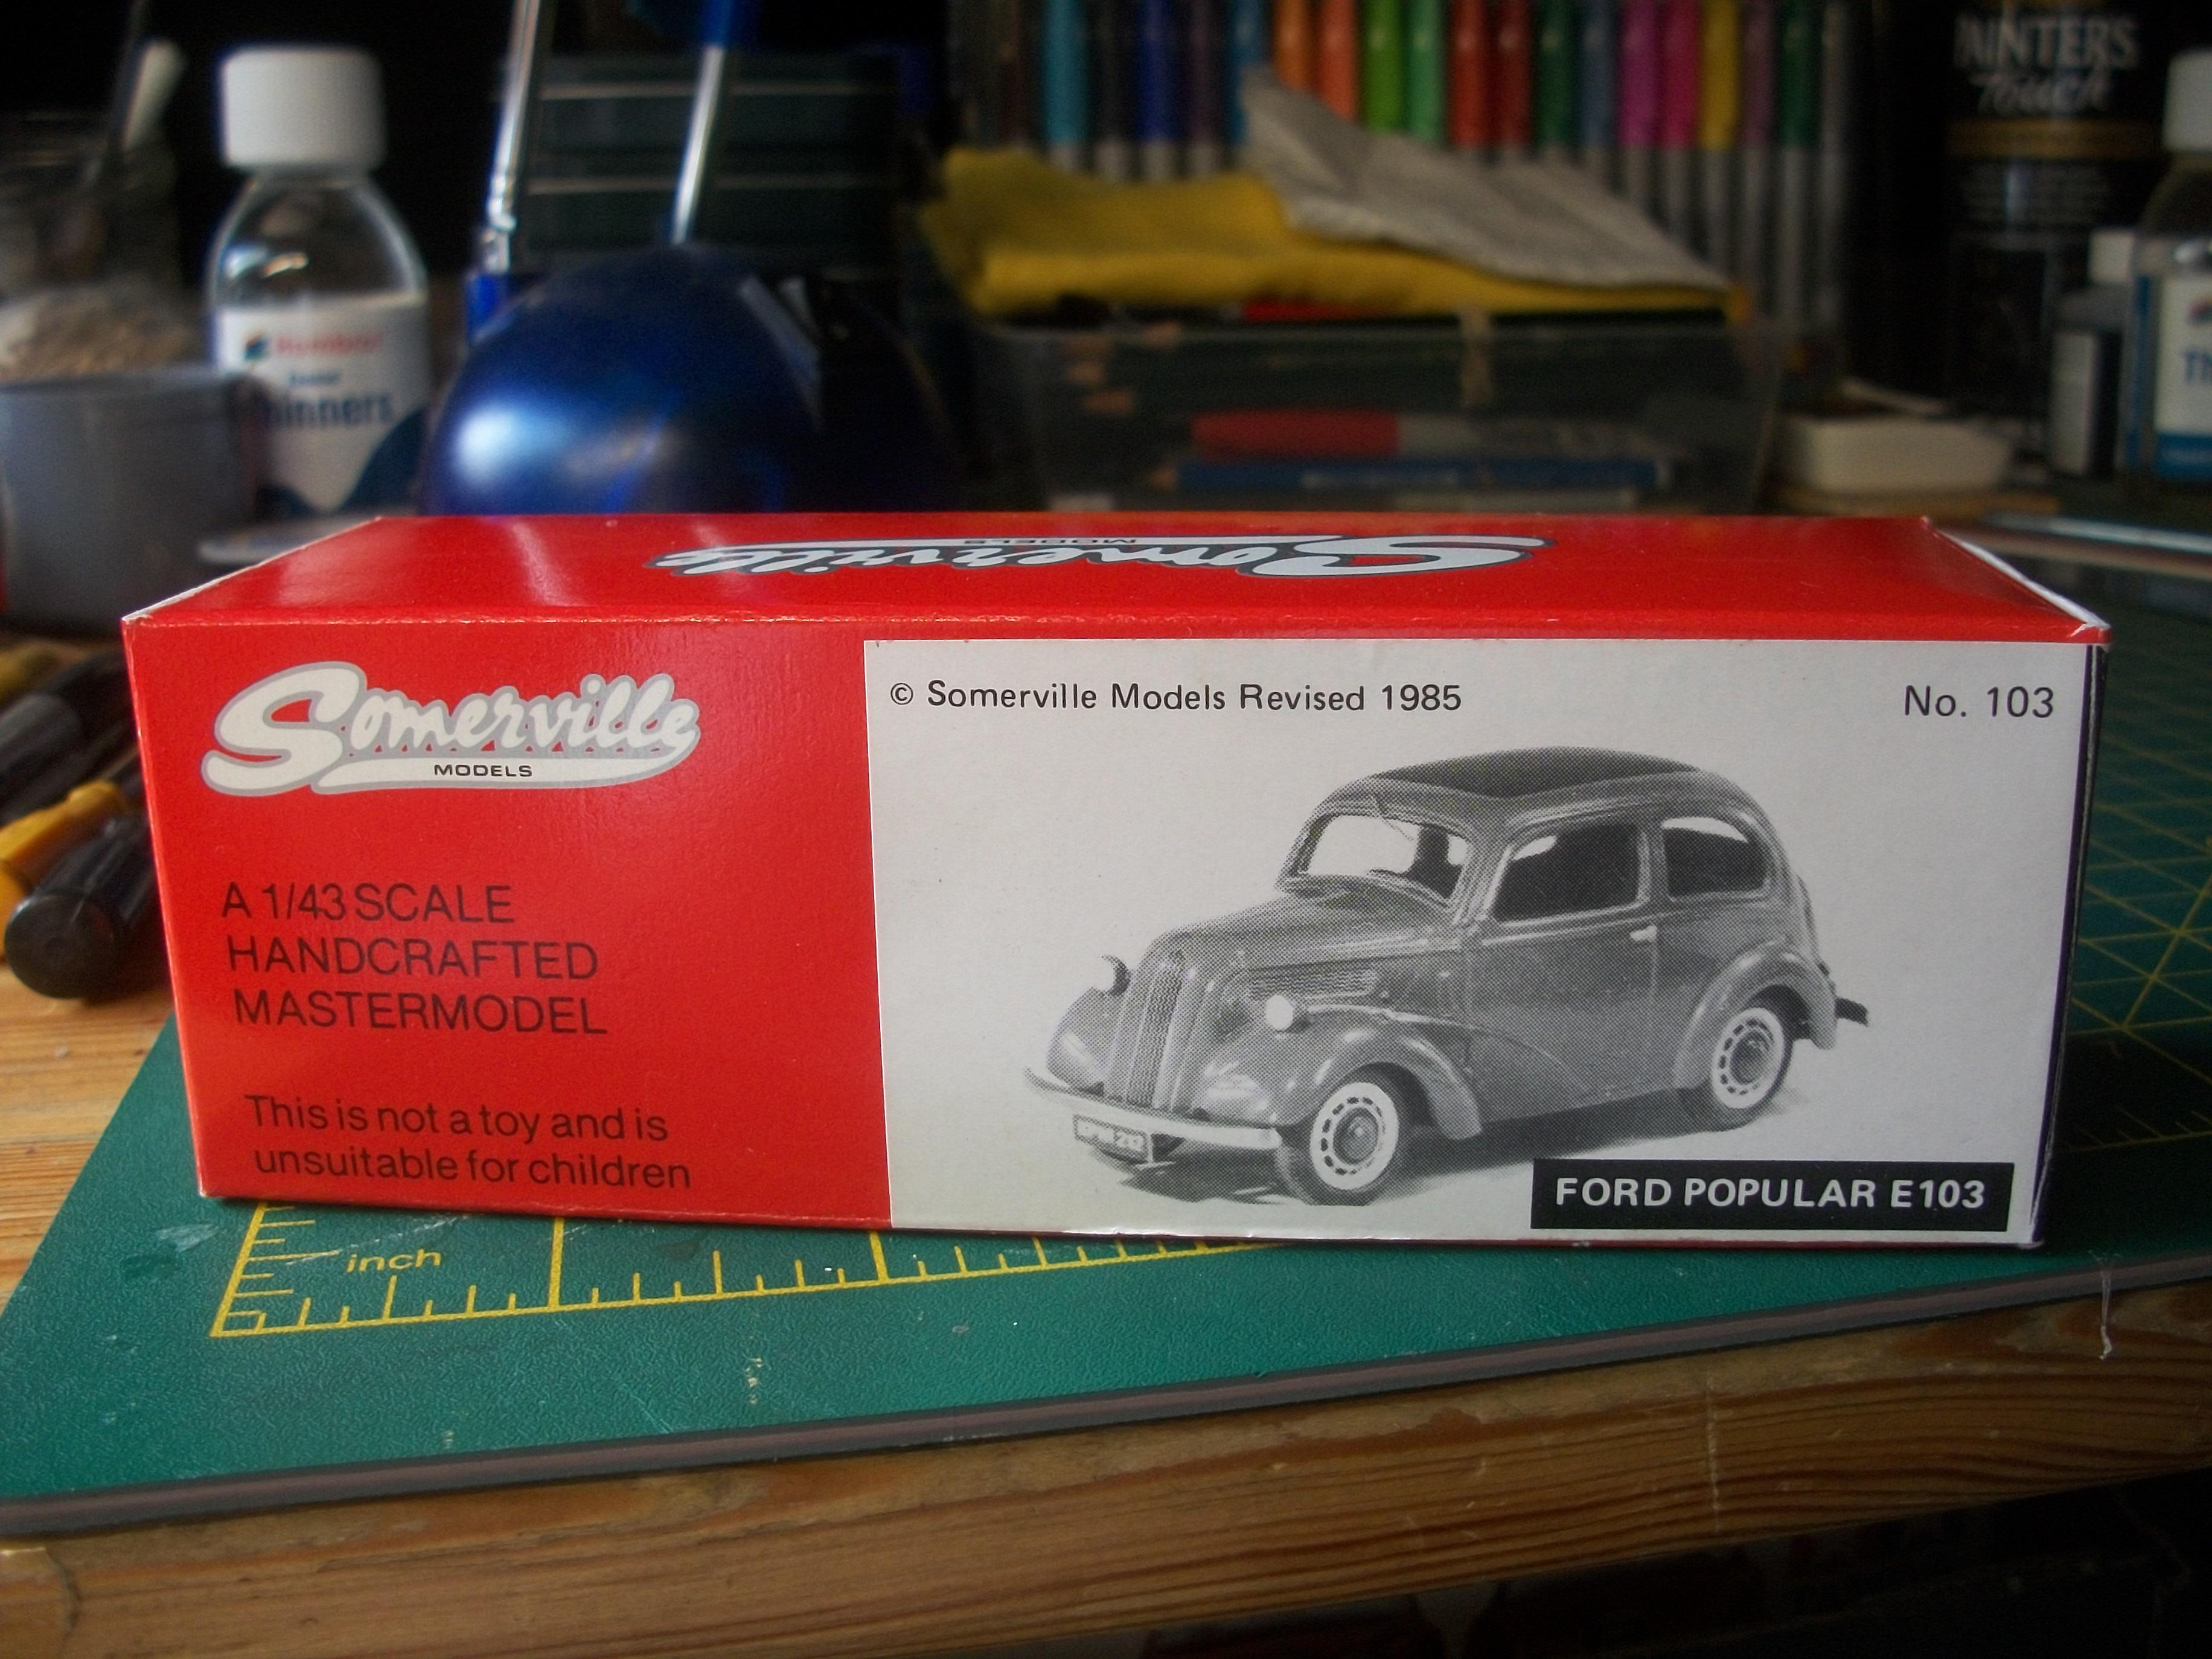
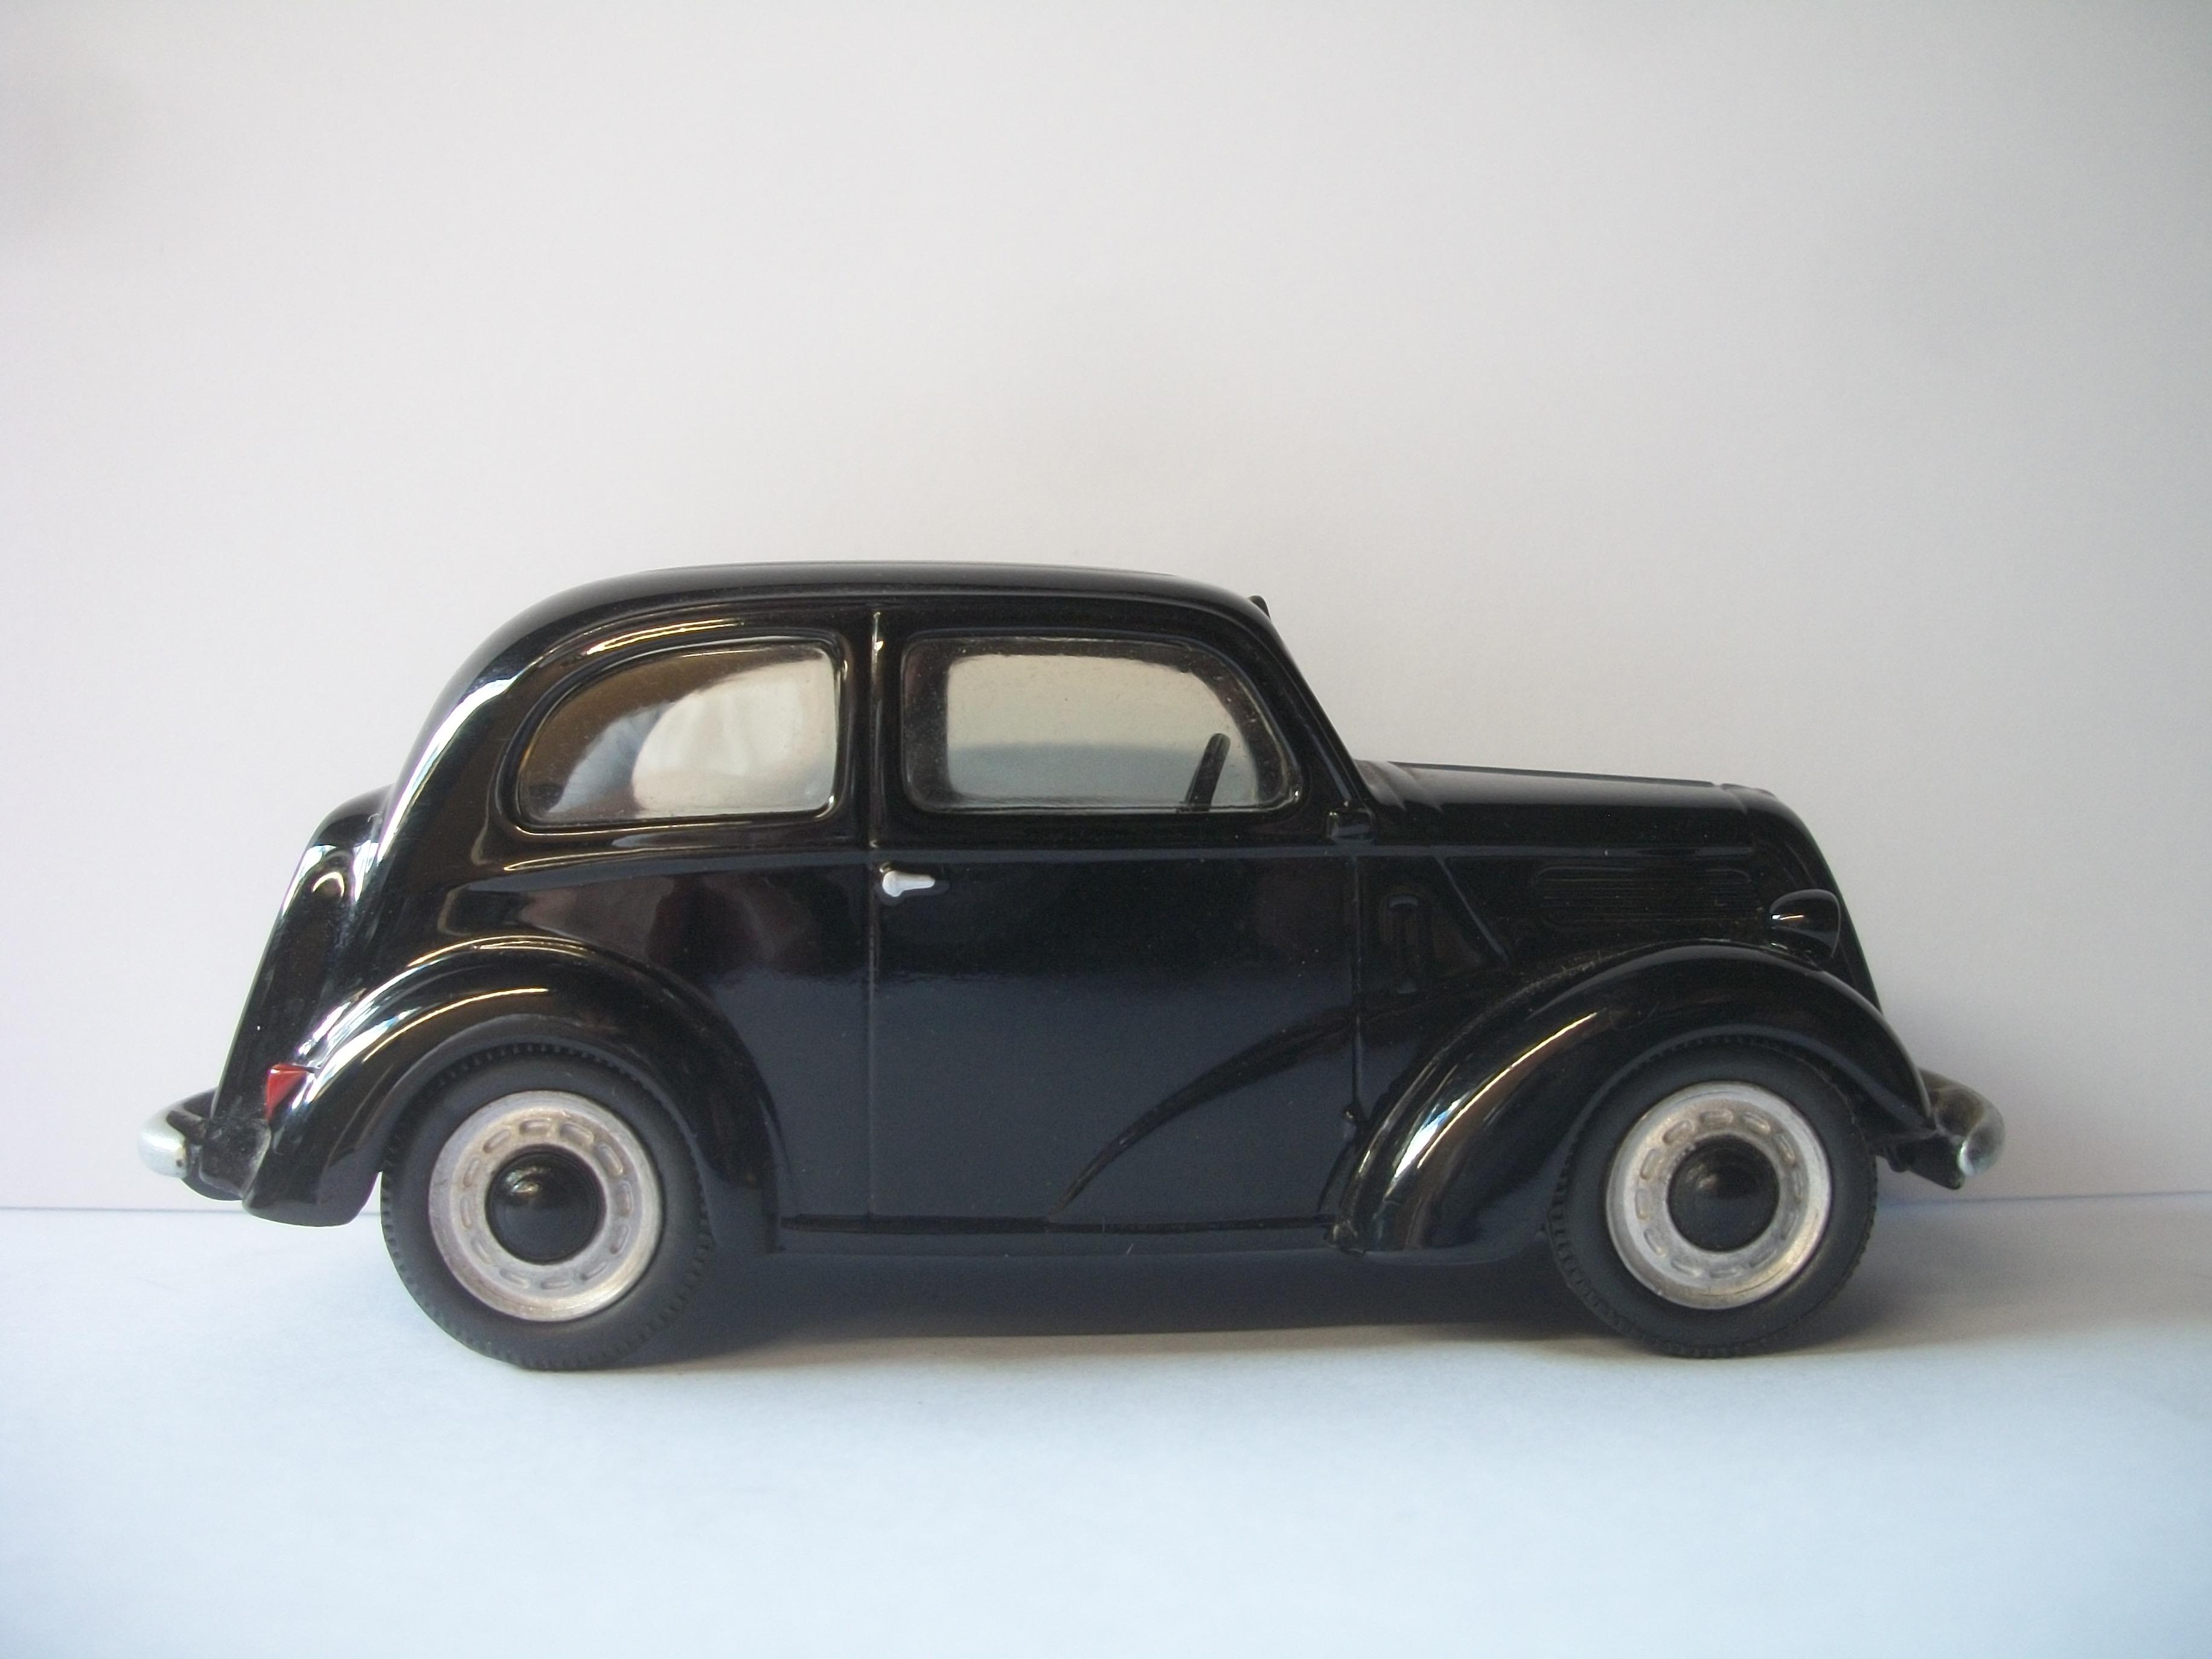
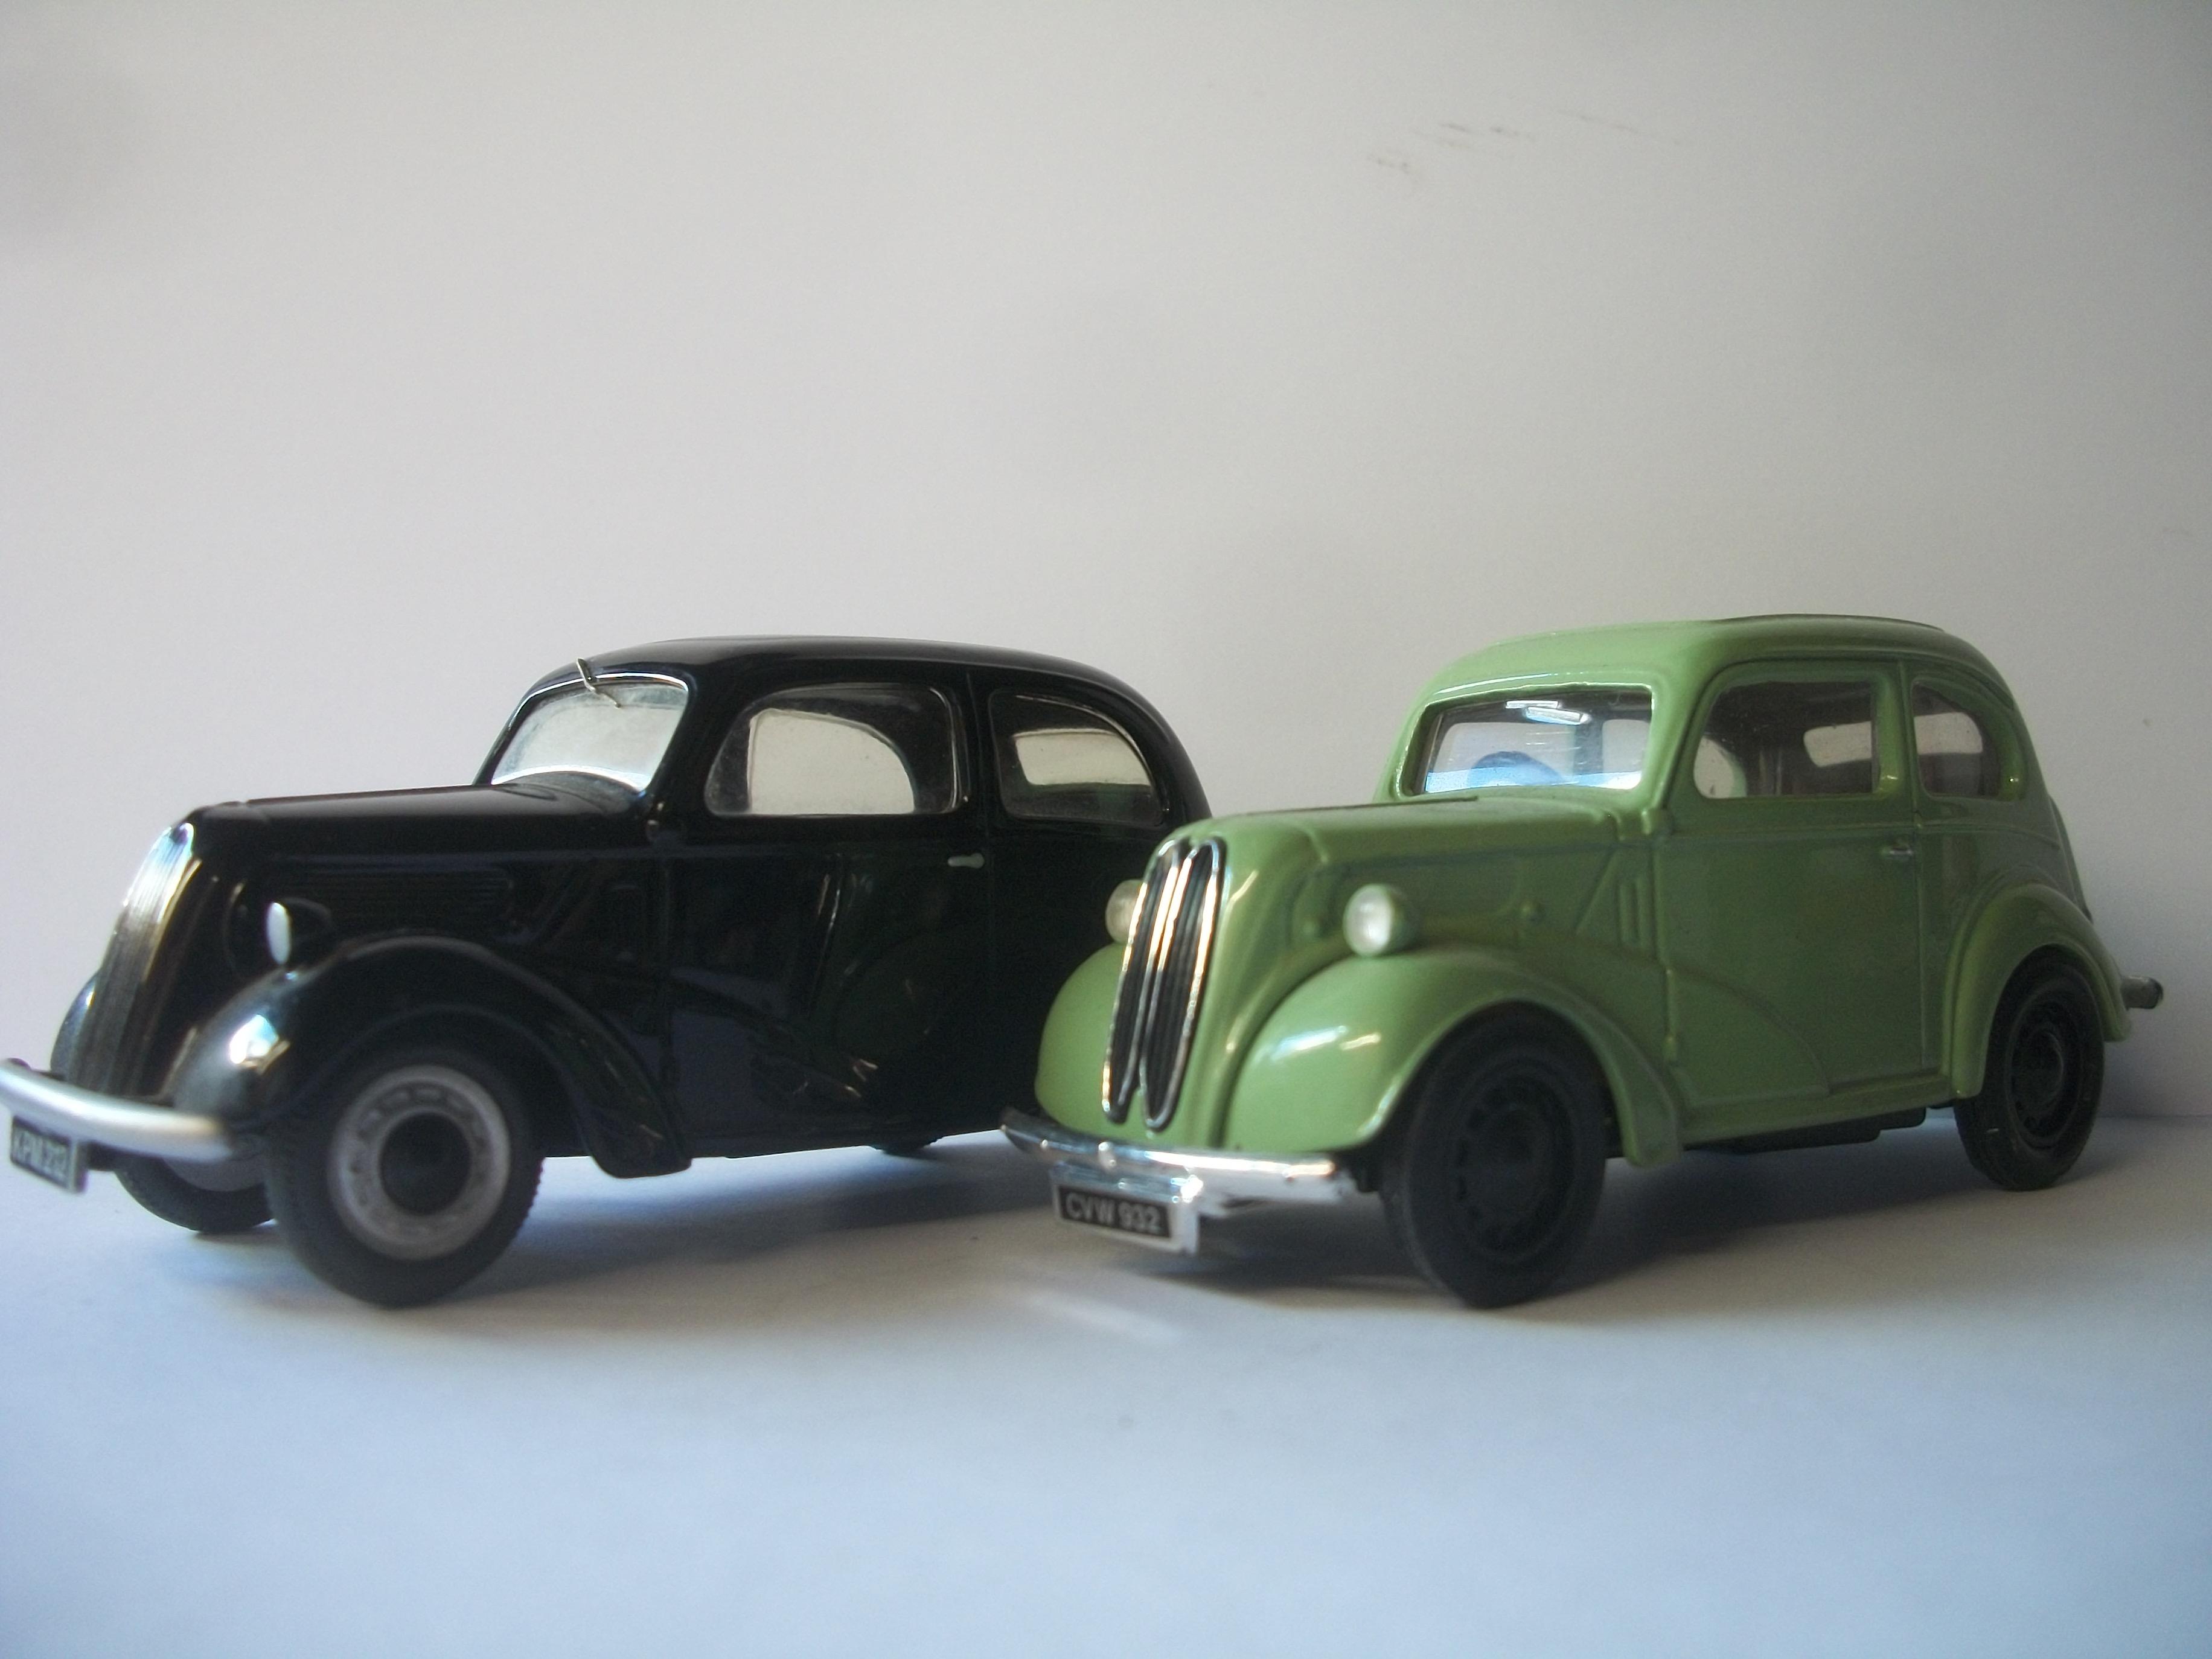
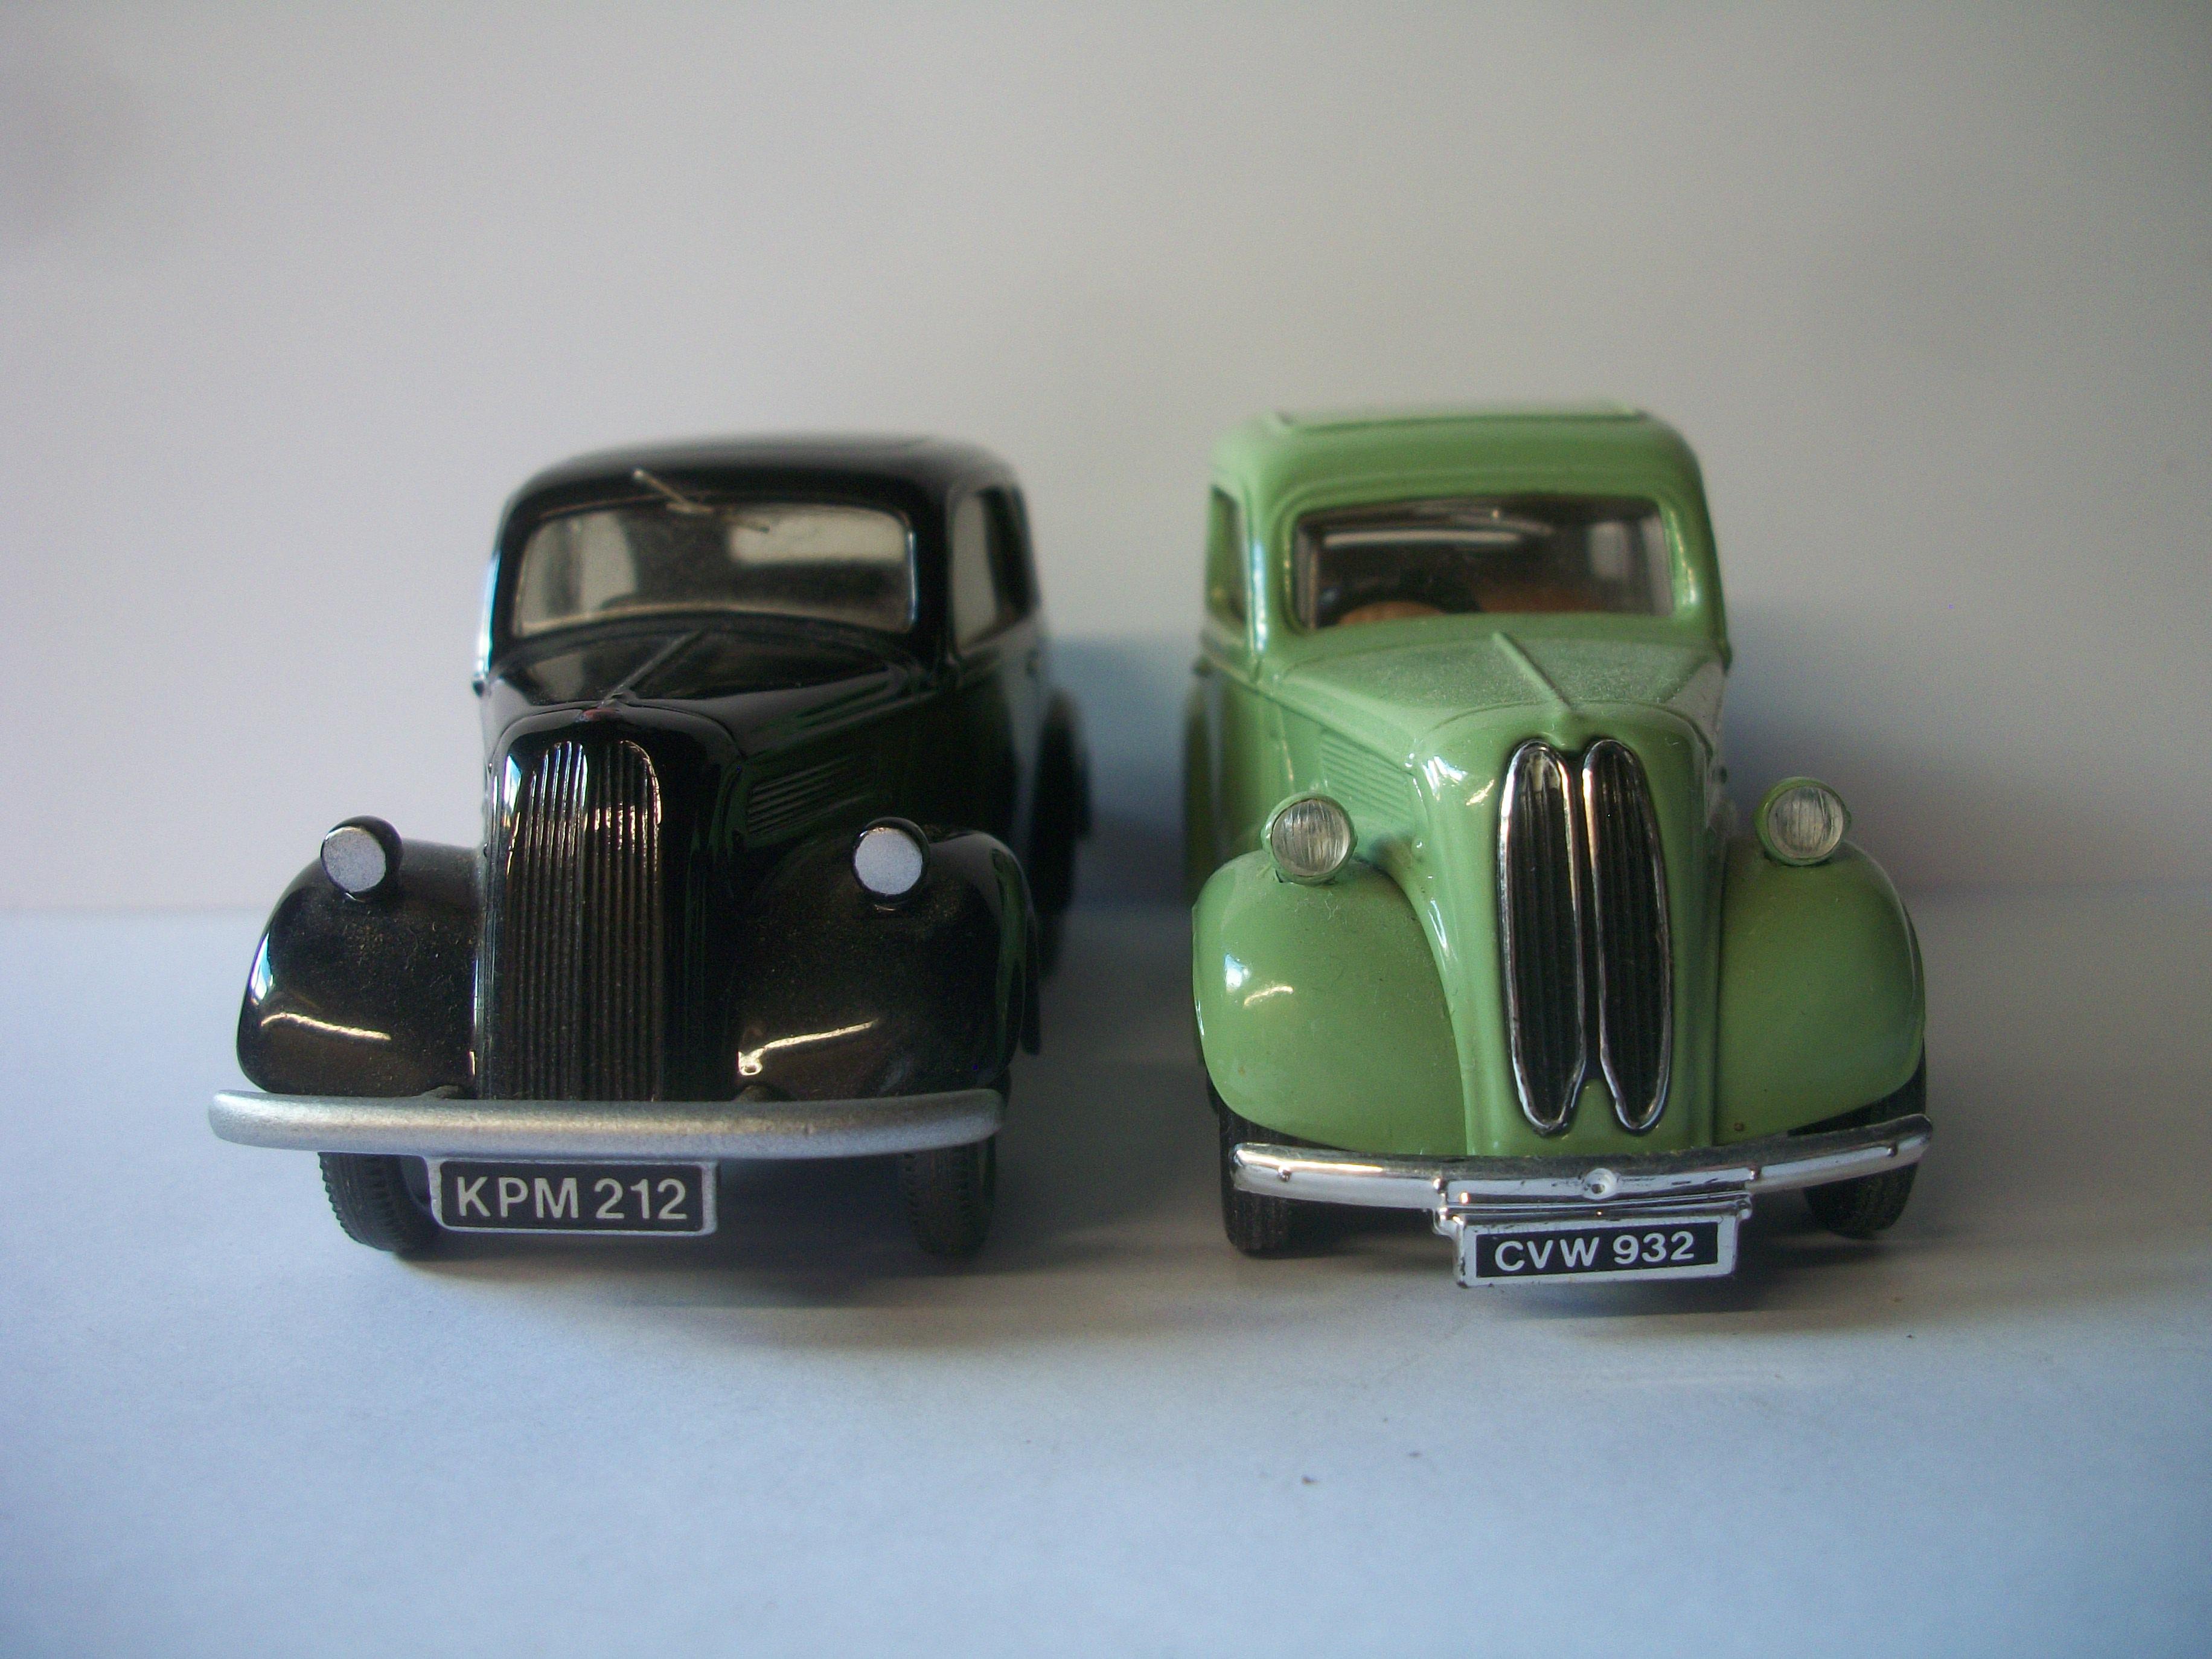
Today, there was a delivery from Ebay, which was a 1:43 scale 1953 Ford Popular 103E in black, by Somerville Models...... this is a much more accurate model car than the Corgi version of the Ford Pop that I have already. As you can see from the following photos, the black car has far better proportions than the green car, and especially the size of the windscreen. To be fair, the Corgi is intended as a child's toy, whereas the Somerville Models car is a collector's model, not a toy. David
-
The whole workshop setting comes alive in natural daylight...... and just as you do, Bill, my dioramas are very much like miniature film sets to allow the model cars to appear as real as possible when photographed carefully. Well done with this project of yours! David
-
 Thanks, Pat...... that sounds like a very reasonable explanation. David
 -
Just one question, Pat...... have you noticed the number of views of your topic rising by large amounts, on a daily basis? The only reason I ask, is that since the design and layout of the Forum was updated I have observed increasingly large numbers of views, while there are much less comments on my topic..... in fact, hardly any. The correlation of views to comments does not seem right to me. I would seriously question how valid the number of views registering is actually being calculated. Of course, I may be wrong, and maybe I am just getting paranoid? Not all members keep a daily record of views for their topic, so perhaps that makes me a sad old man ! David
-
Excellent garage diorama, Bill...... loads of detail to observe for the viewer. This one of yours is approaching completion, as you say........ whereas my project continues as a never ending work in progress. I can see that you must have really enjoyed constructing the diorama, and I do wonder where you might go with your next project? David
-
Yesterday I made a base for the 1:43 scale Shell fuel pump, by using some card paving material and laminated several layers together with PVA adhesive. This was left to dry overnight, with heavy books to keep it flat. Trimmed the edges of the paving today, then used a grey Sharpie to colour the white exposed edges of the card and cut the corners into a slight curve. Here are a couple of photos that show the petrol pump on the base, just in front of the Little Chef restaurant building. There is a 1:43 scale Ford Cortina MK I by Minichamps, and also the metal figure of a man in a long brown coat, who appears to be about to serve petrol. The background image of summer clouds is quite an improvement on a plain white background. David
-
Absolutely brilliant work you are doing here, Bill...... just a word of caution on the subject of foamboard. You may be aware of this already, but I put on an exhibition of my Hooper & Co dioramas at a Rolls-Royce venue last year, and it was inside a marquee during mid to late June.... the humidity was so great that my foamboard backing boards warped terribly, and gradually the displayed project tried to self destruct before the very eyes of visitors. You might not be too worried about this humidity factor, in which case please disregard my ramblings! David
-
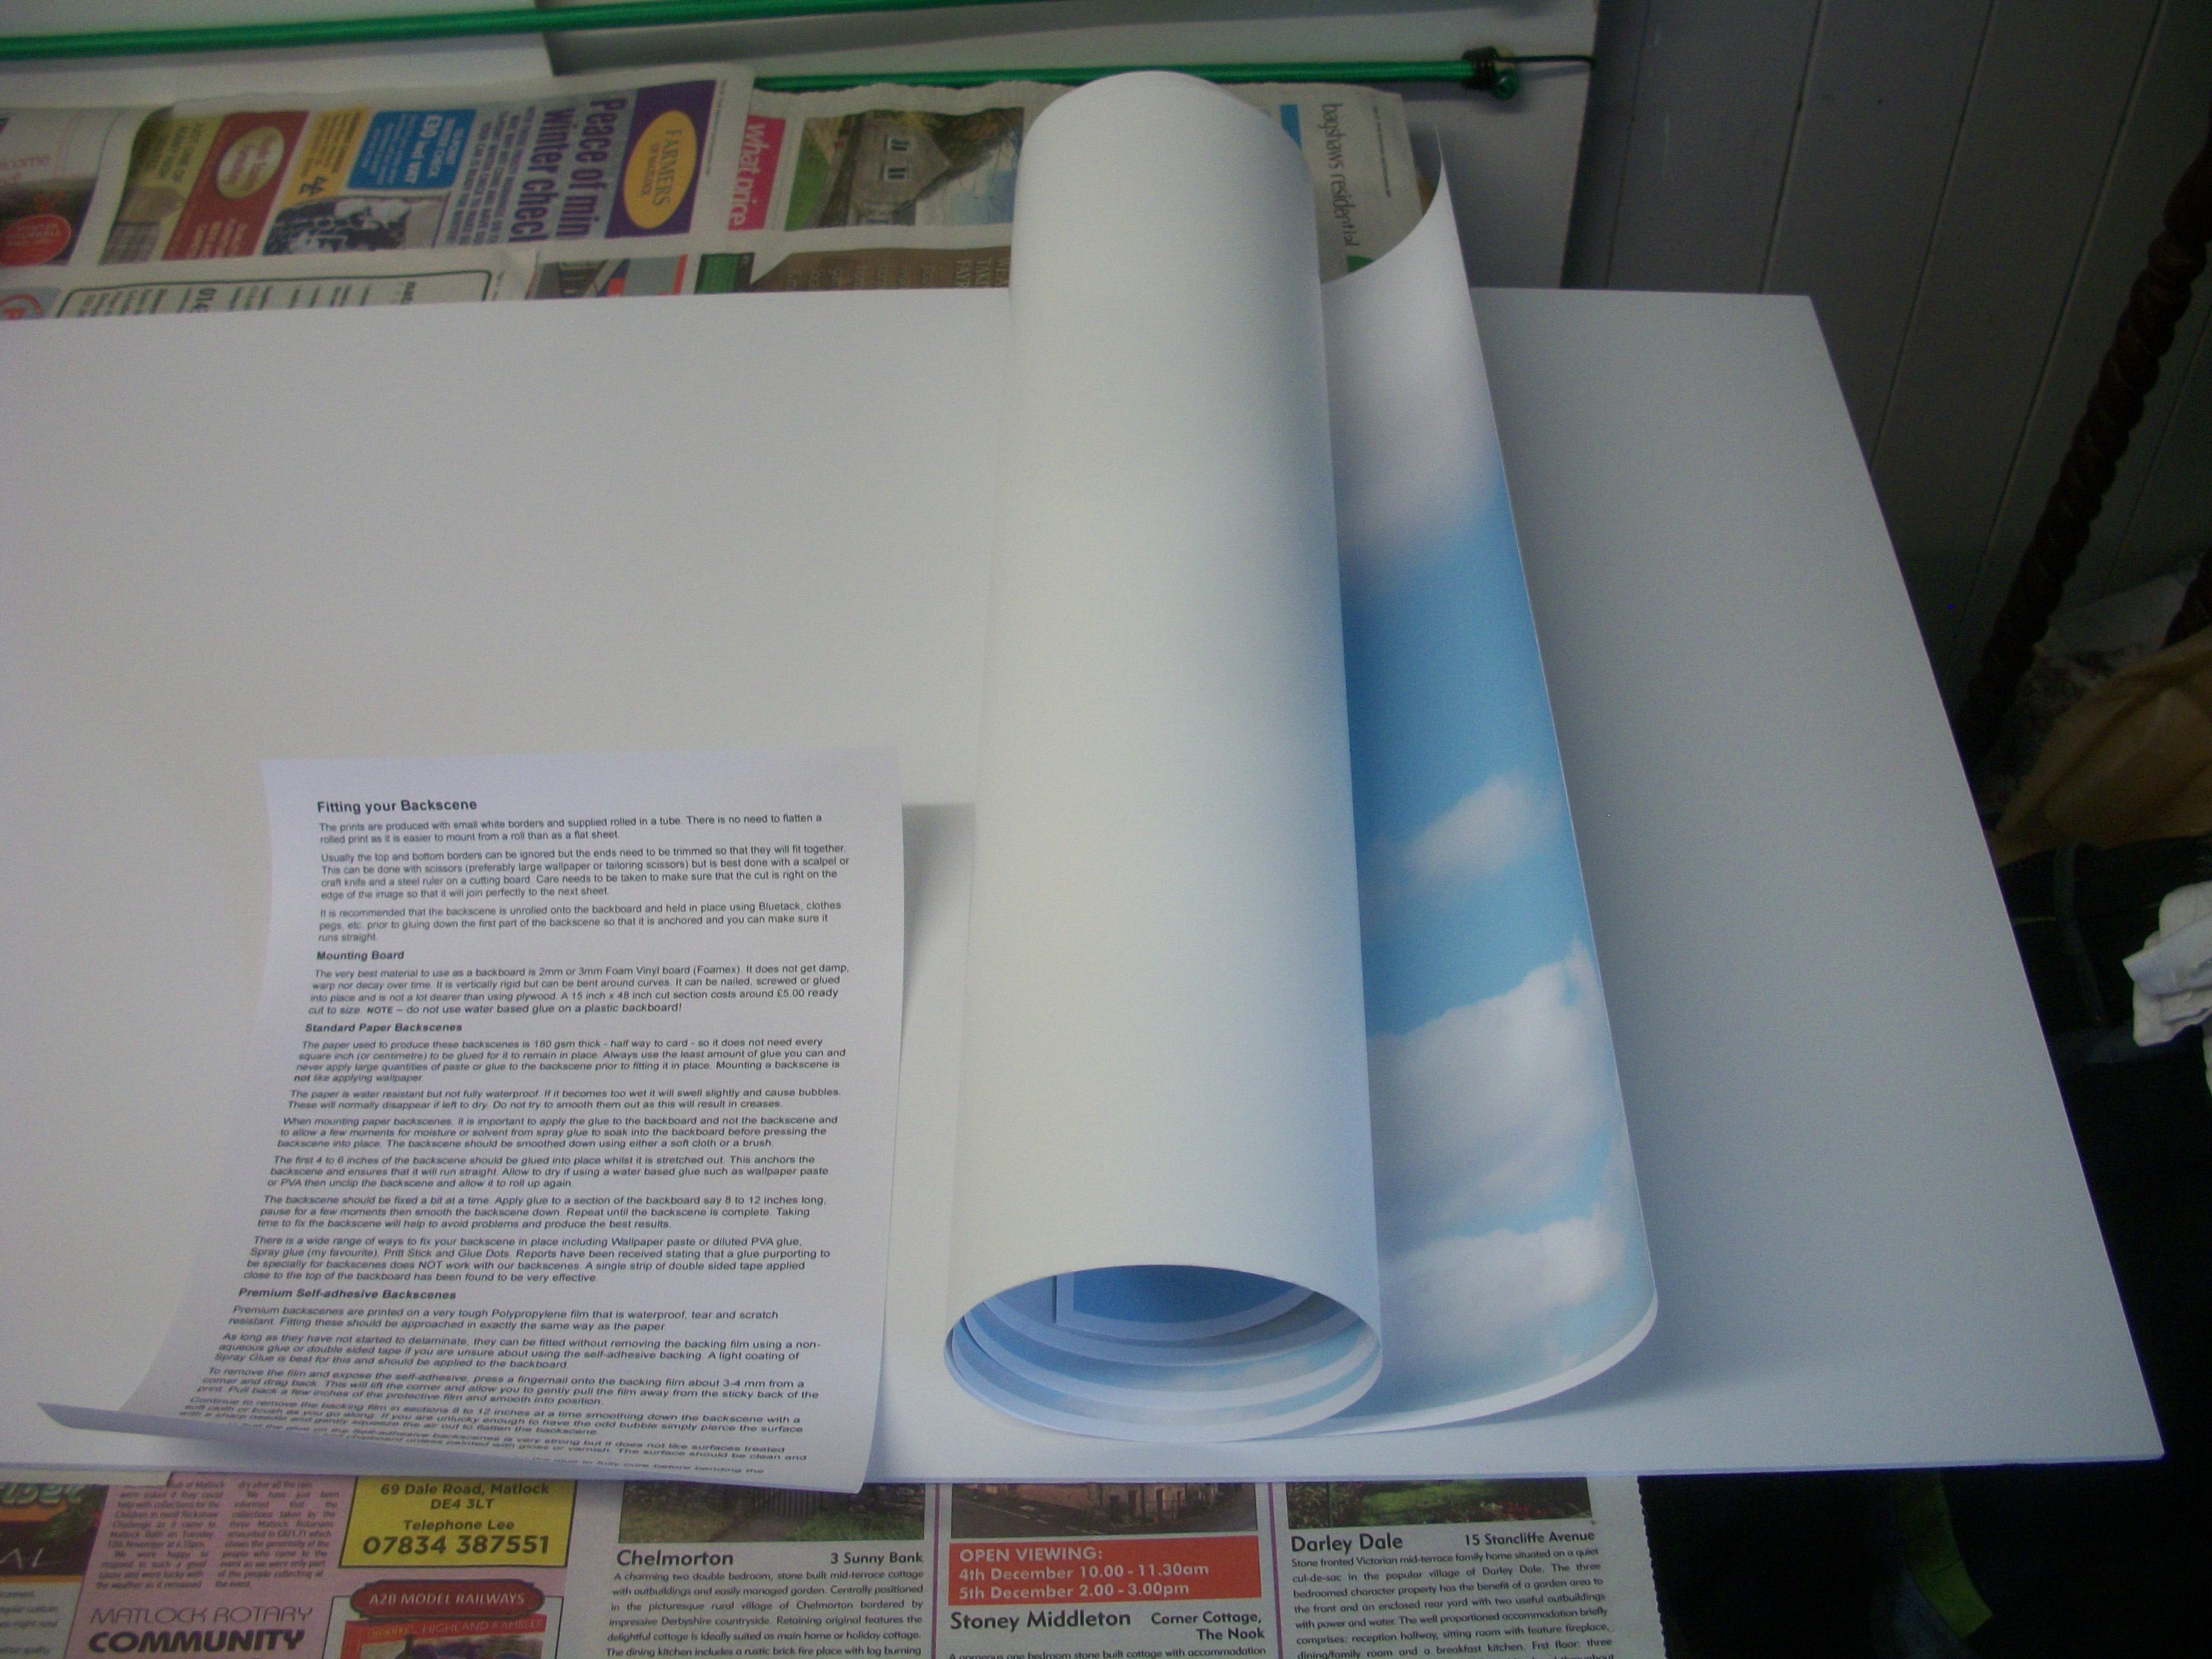
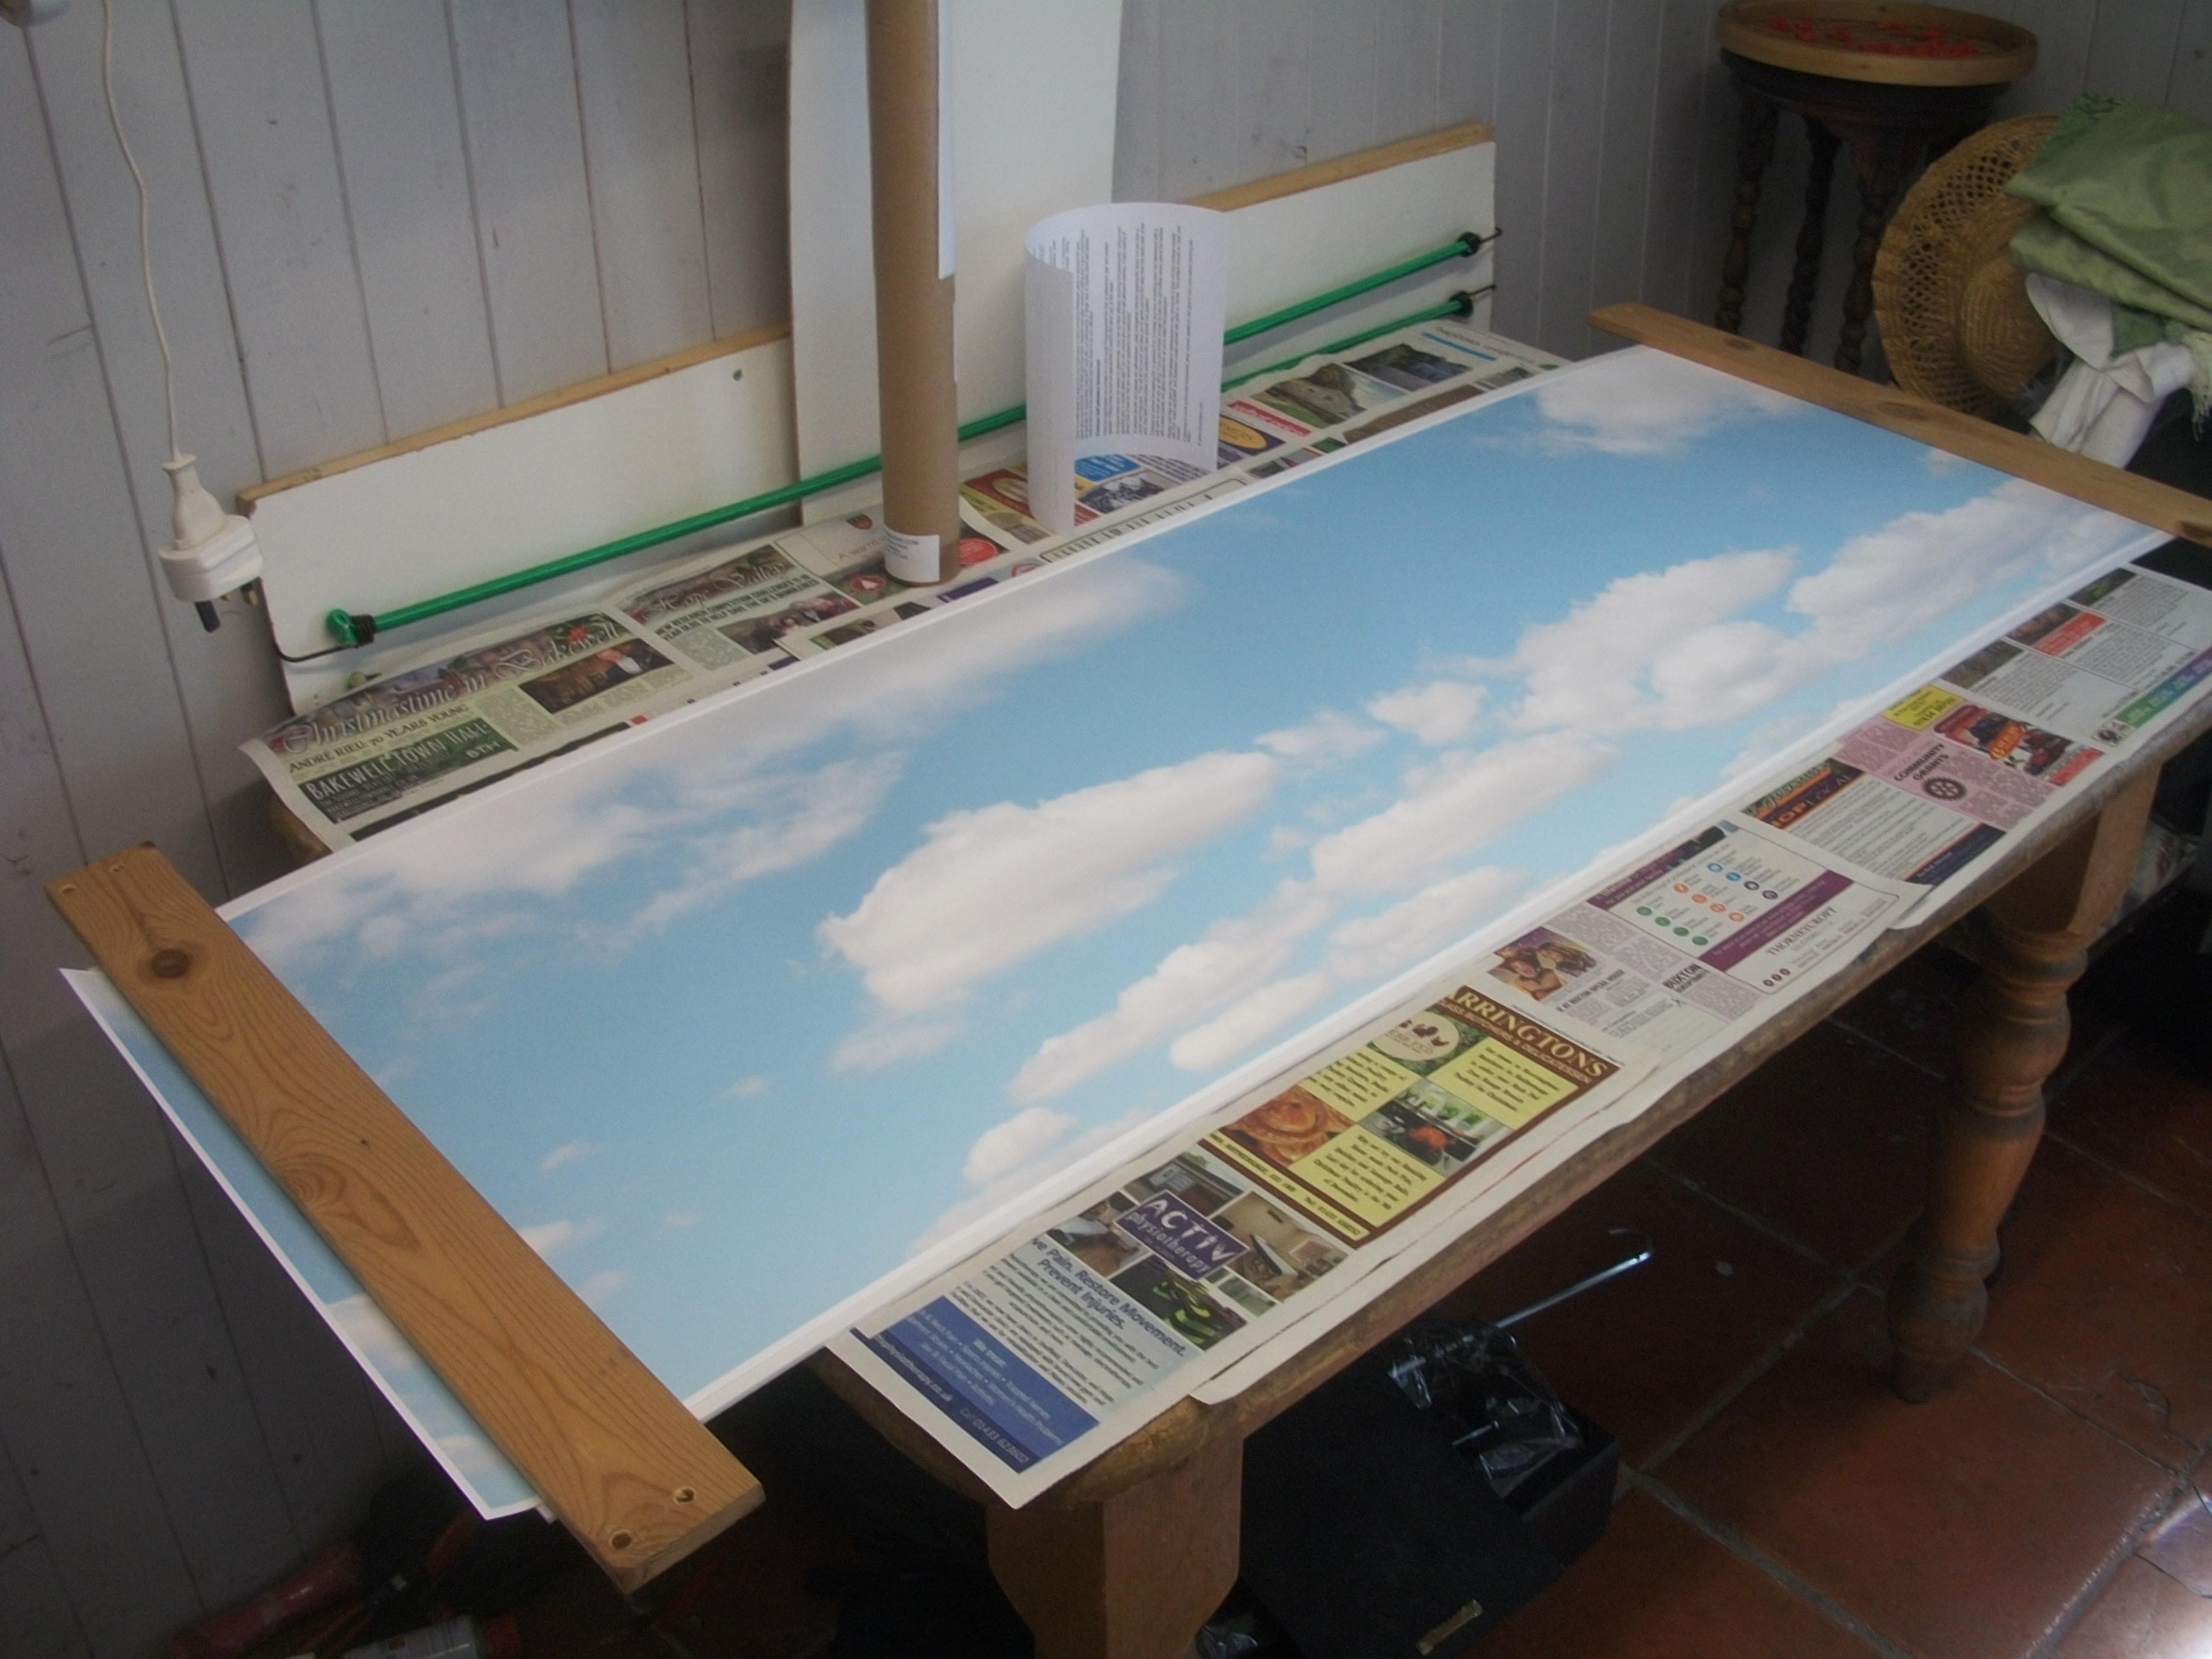
Picked up a large sheet of Foamex board, which is a plastic product and 3 mm thickness, and also a high quality scenic photo image of a summer sky. The summer sky backscene was nicely rolled up in a tube, and came with a large sheet of instructions. There are three ways of mounting this scenic photo image onto the Foamex board, it can be glued in place with spray adhesive, or you can use double-sided tape, or if you are very confident you can peel off the backing film and let the self adhesive backing do the job. The instructions warned that this self adhesive is very strong, and if you are unsure don't use this method. I could see that method going badly for me, so I used double-sided tape which I am comfortable with. Using the whole of the kitchen table, which is the only flat surface big enough in our house, the mounting procedure went well. Backscene is in place behind the 1:43 scale dioramas and looks pretty good. David
-
I am extremely surprised to see that it is even possible to get a London bus into the driveway of an average British semi-detached house of that type. A friend of mine who produces patterns for the moulding and casting of small scale bus models in resin, commented that this man's neighbours are probably not too pleased about having a huge bus in the drive next door! David
-
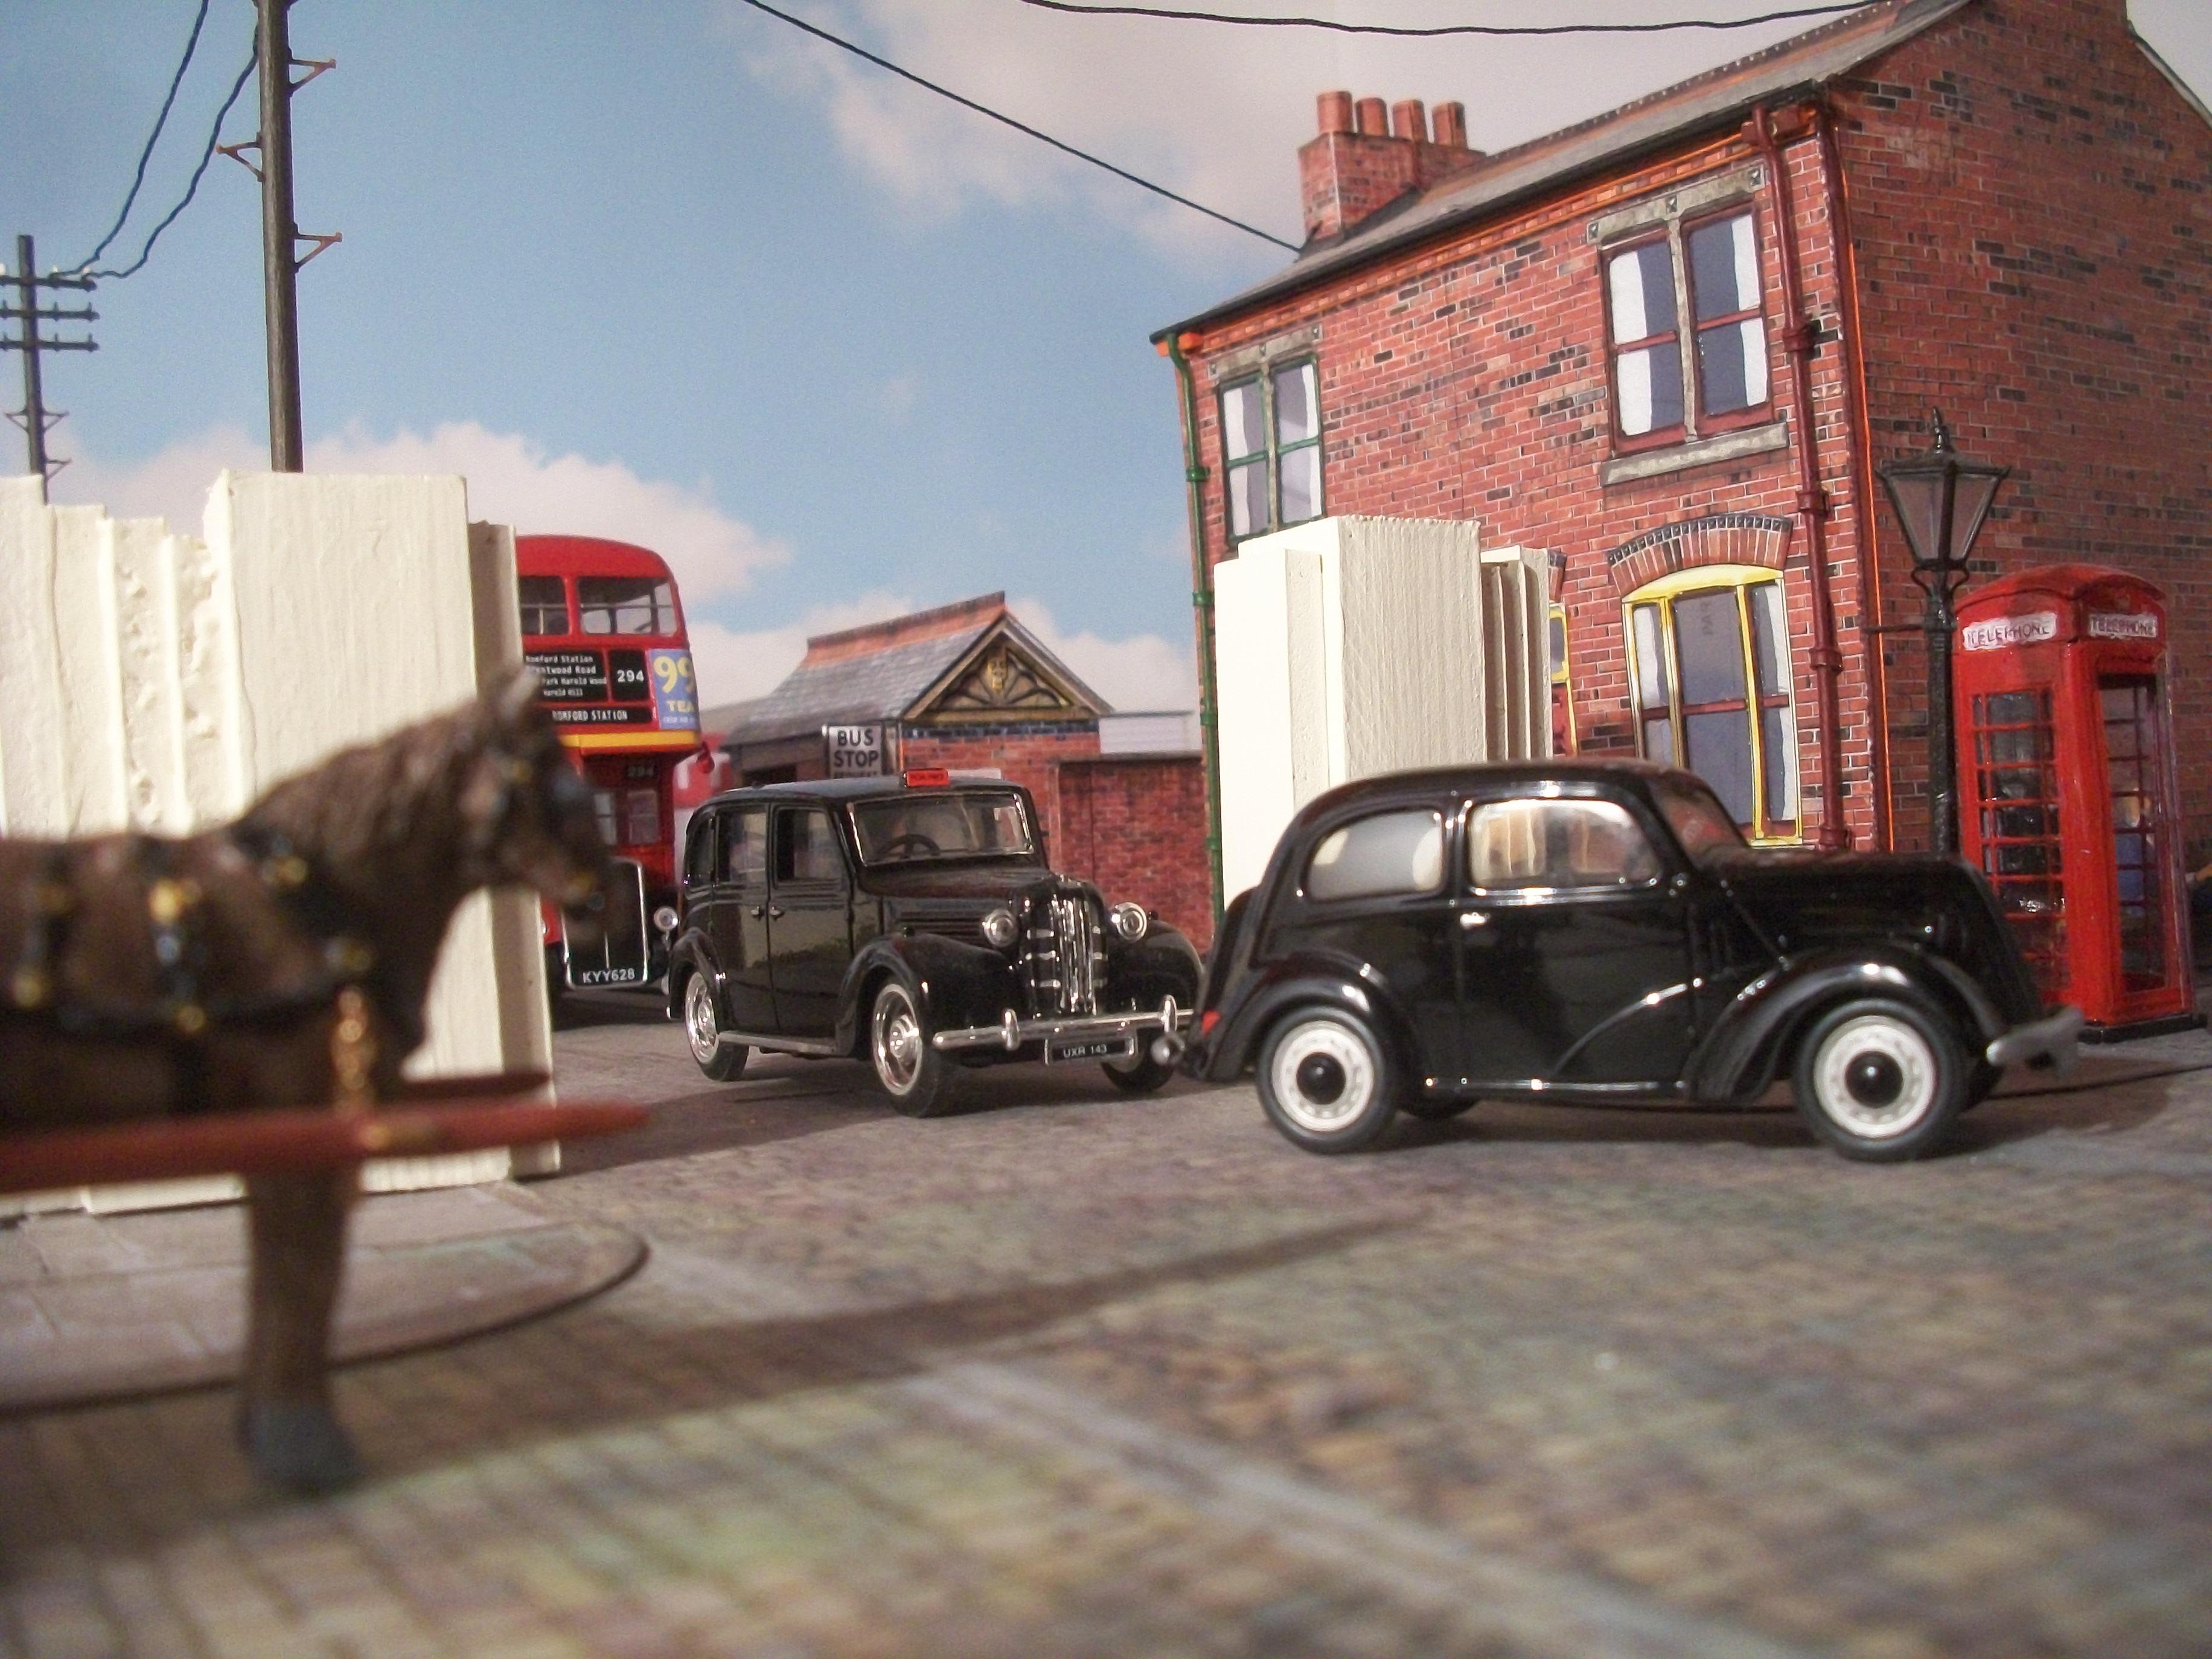
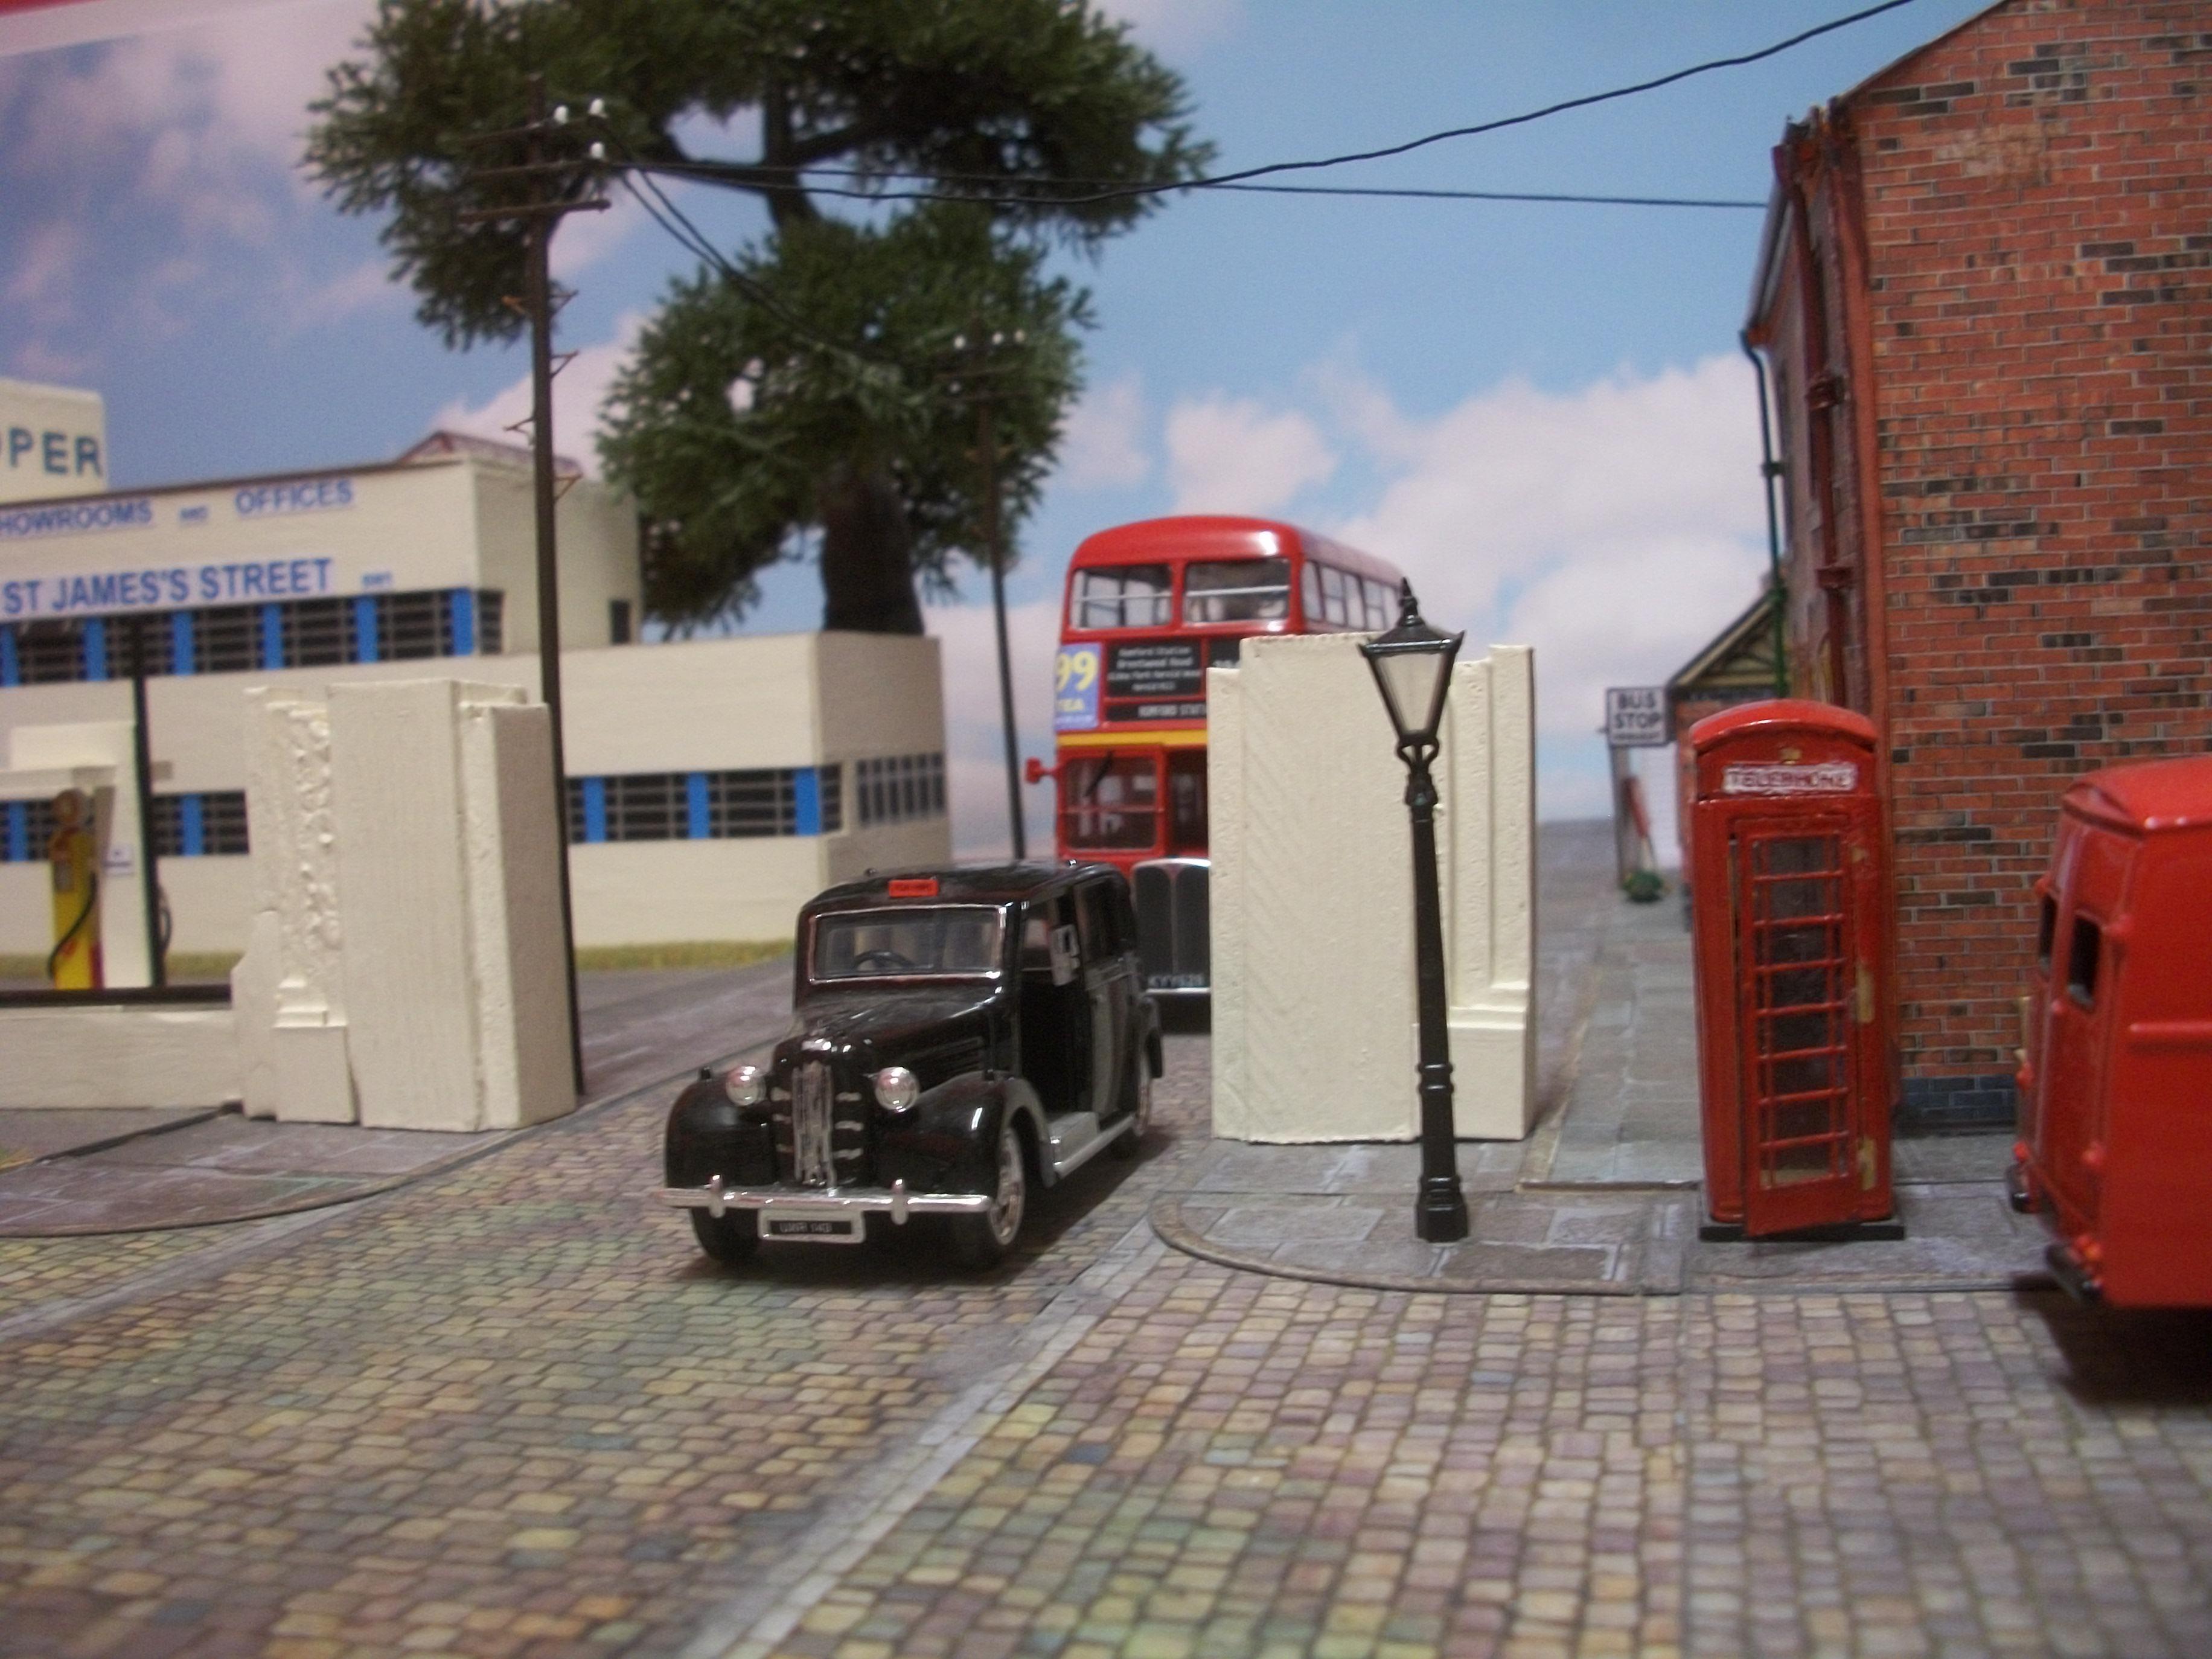
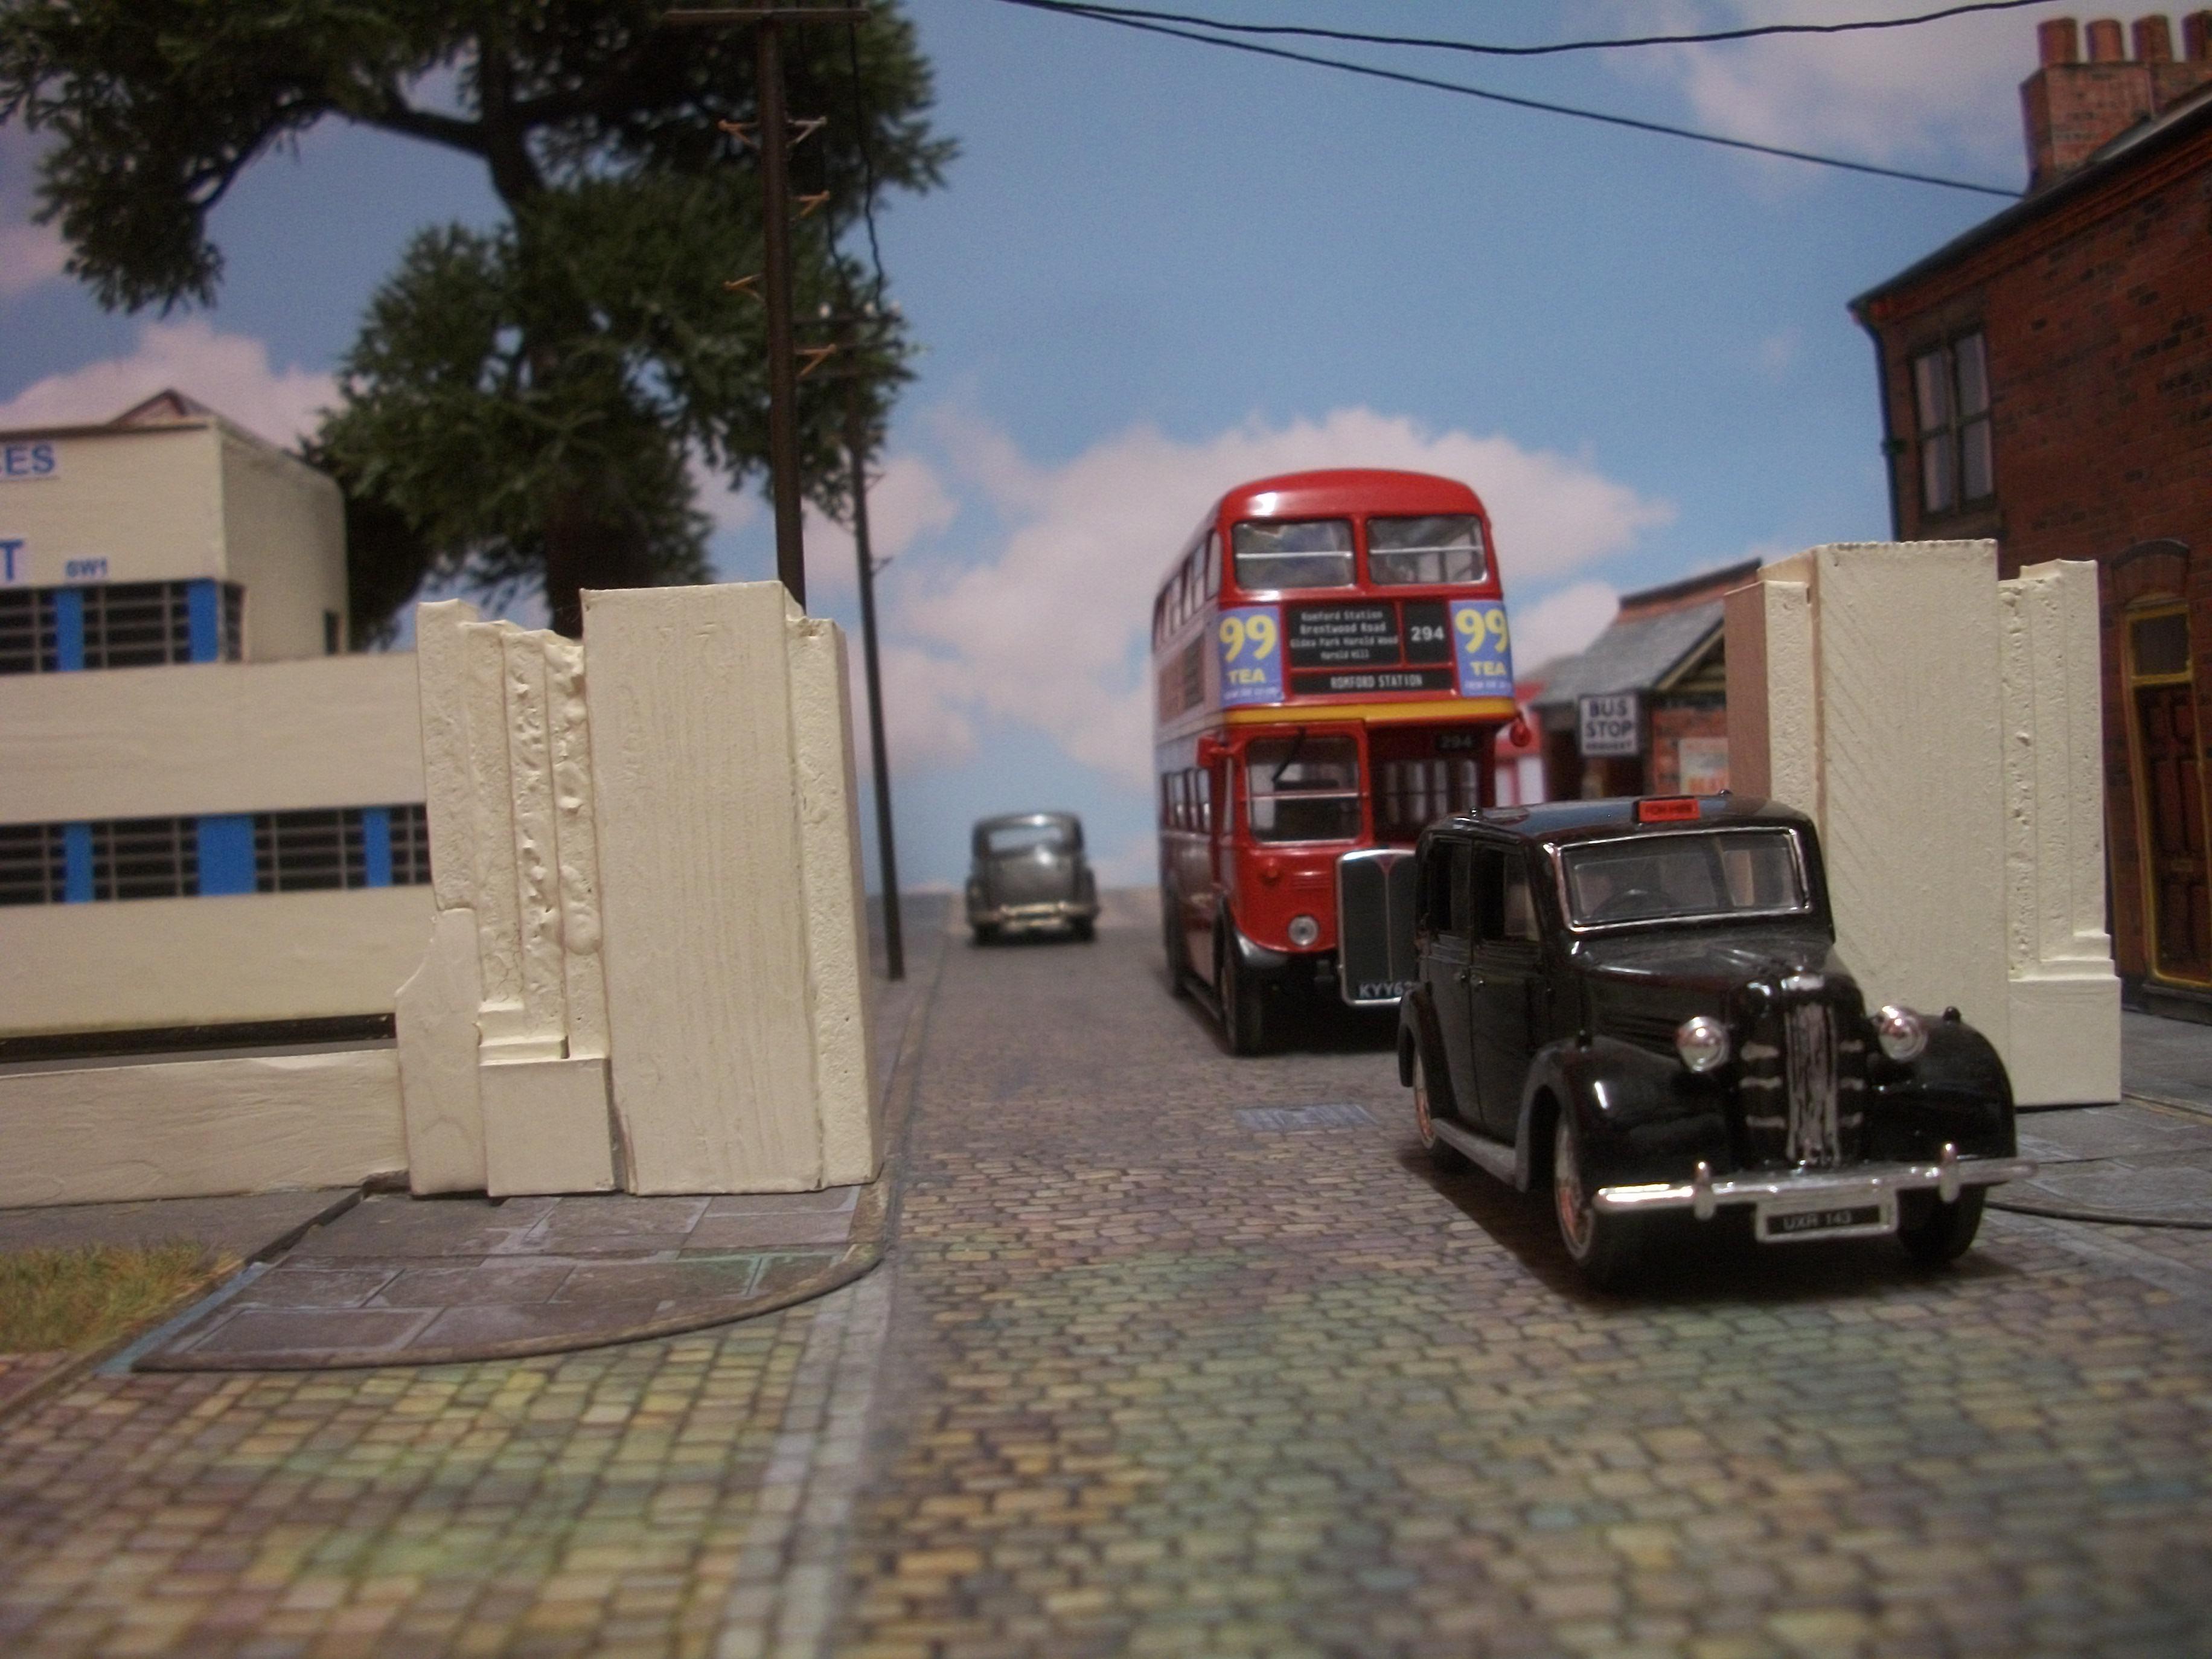
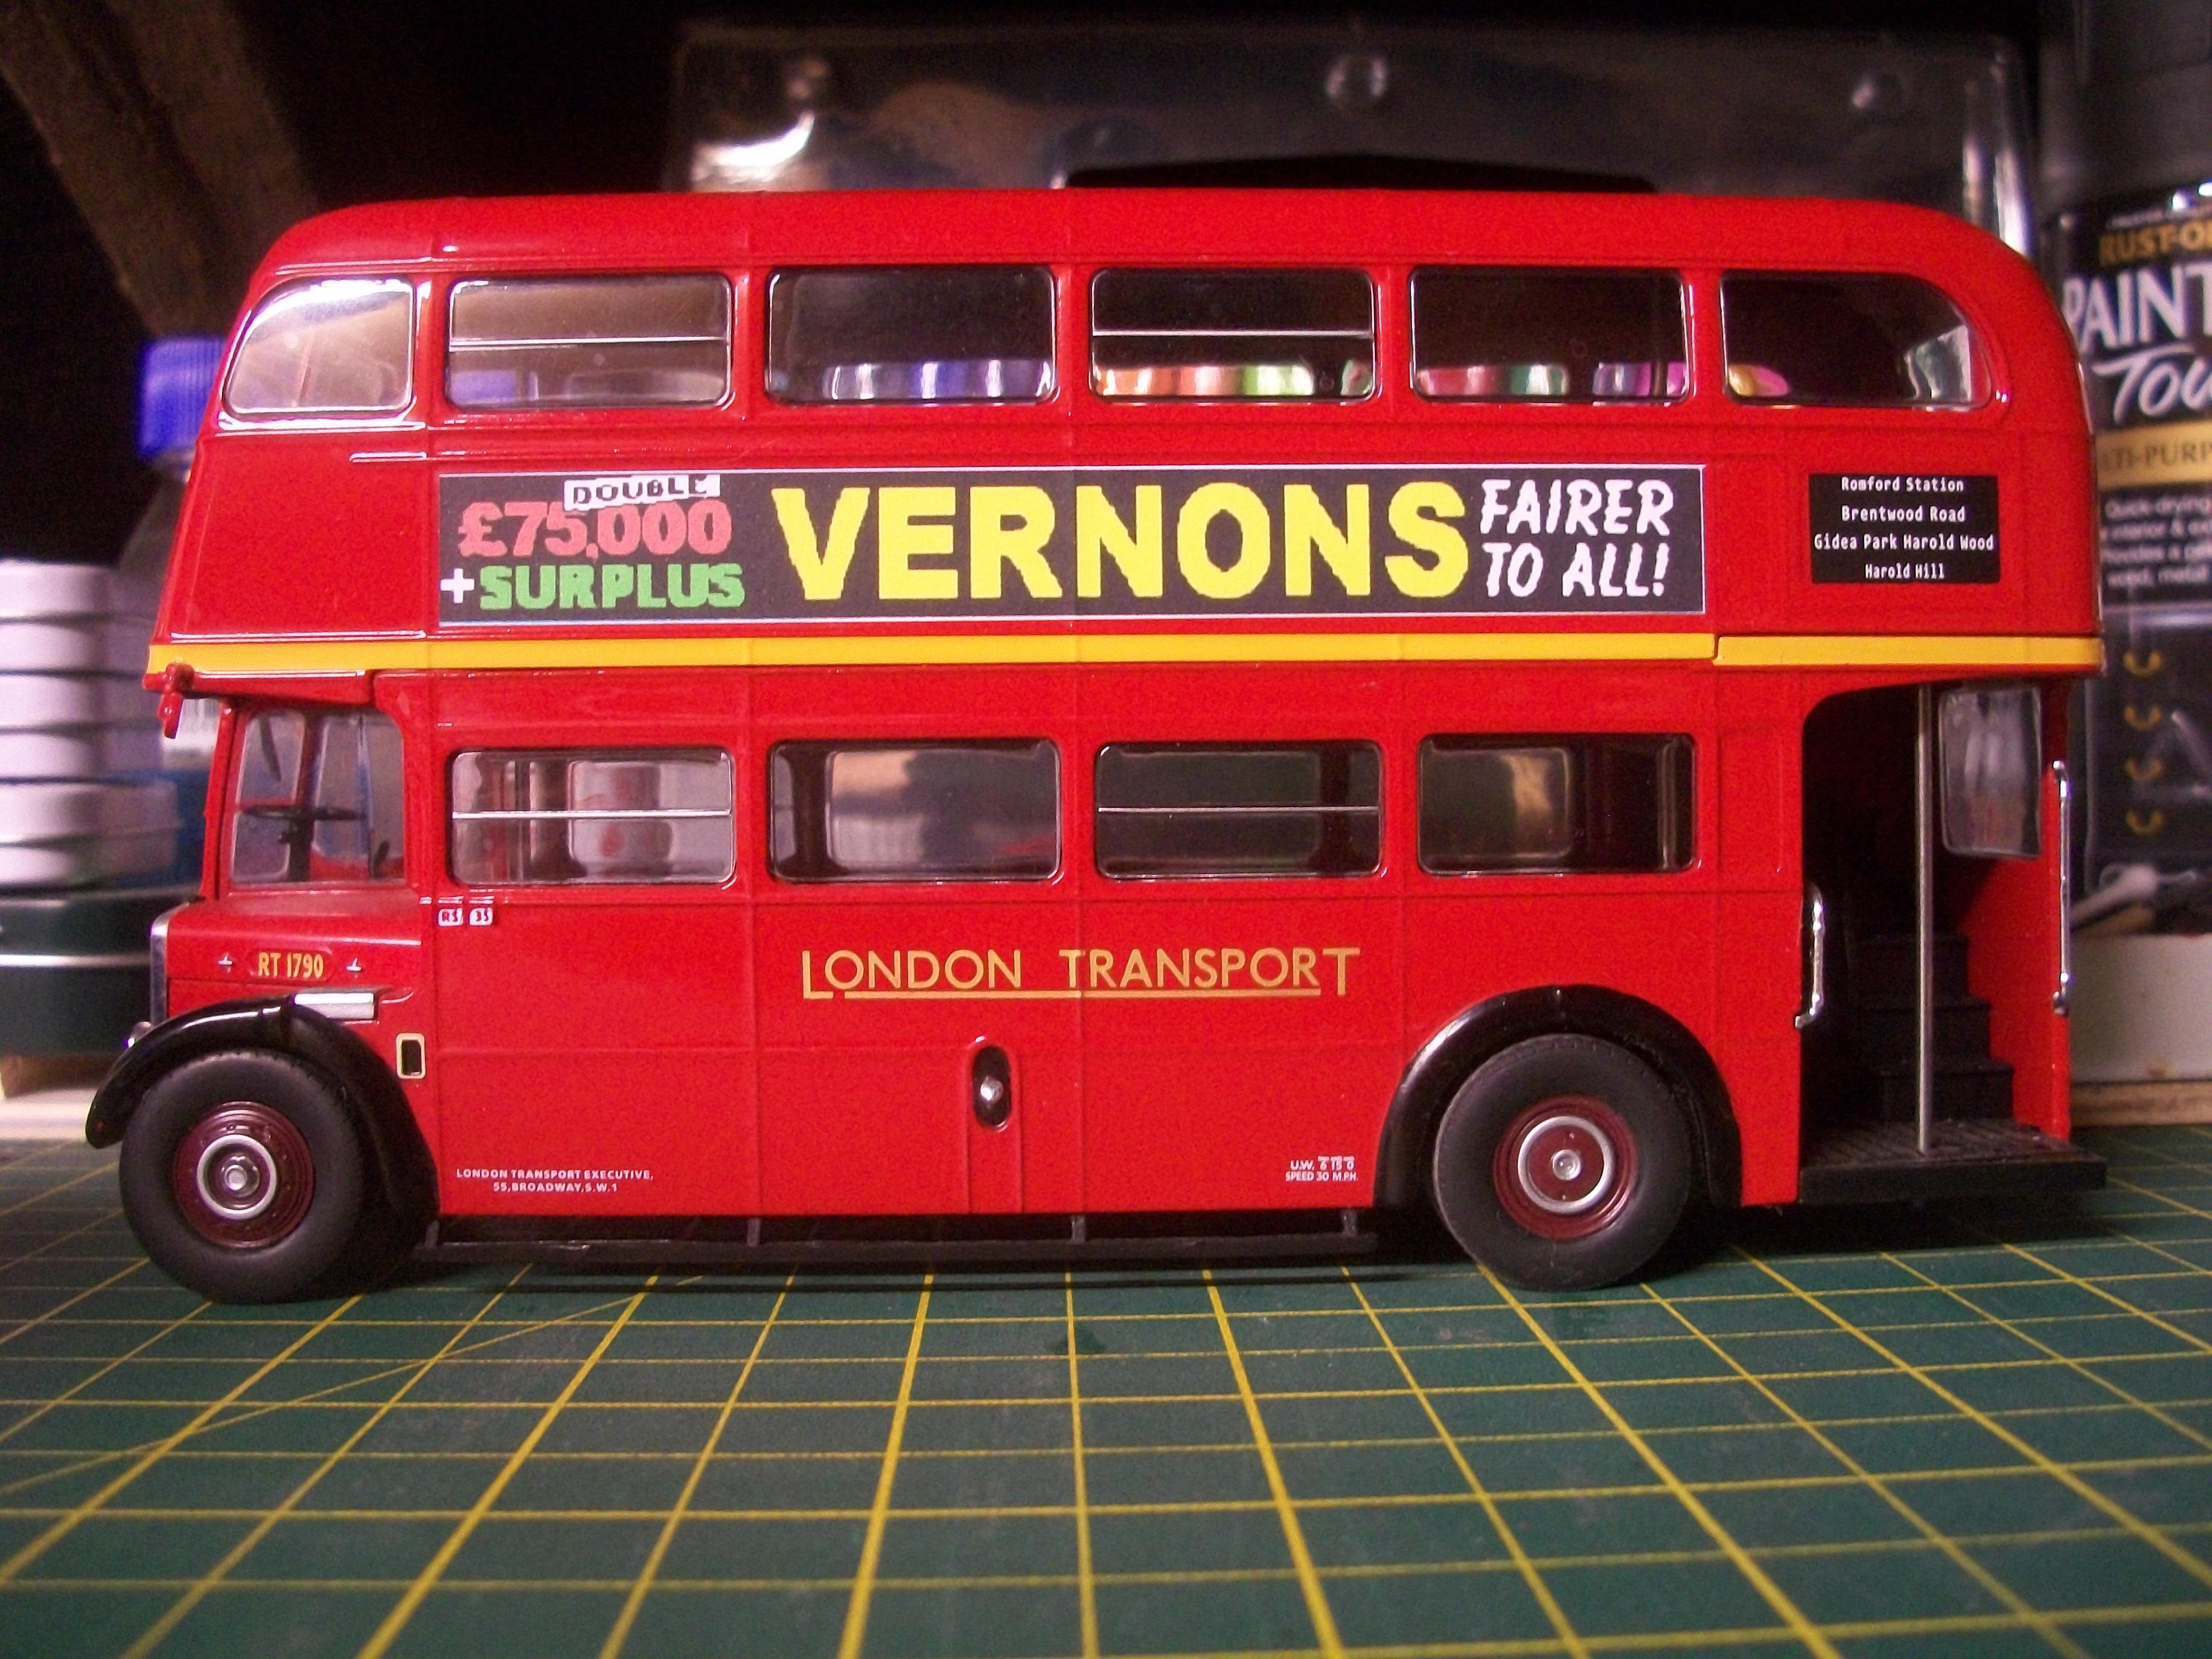
The 1:43 scale AEC Regent RT London Bus by IXO did not have any advertising banners on the bodywork, so I have sourced some adverts from a local supplier. These are cut out from a sheet of quality paper, and they have a self-adhesive backing to them. The model bus has the registration number plate KYY 628 and here are some photos of the real bus...... the owner is David Arnold, and one of these photos shows the bus parked in the driveway of his house. This model bus adds a great deal of realism to the diorama setting, both for the factory diorama and also the terraced houses diorama, all in 1:43 scale. David
-
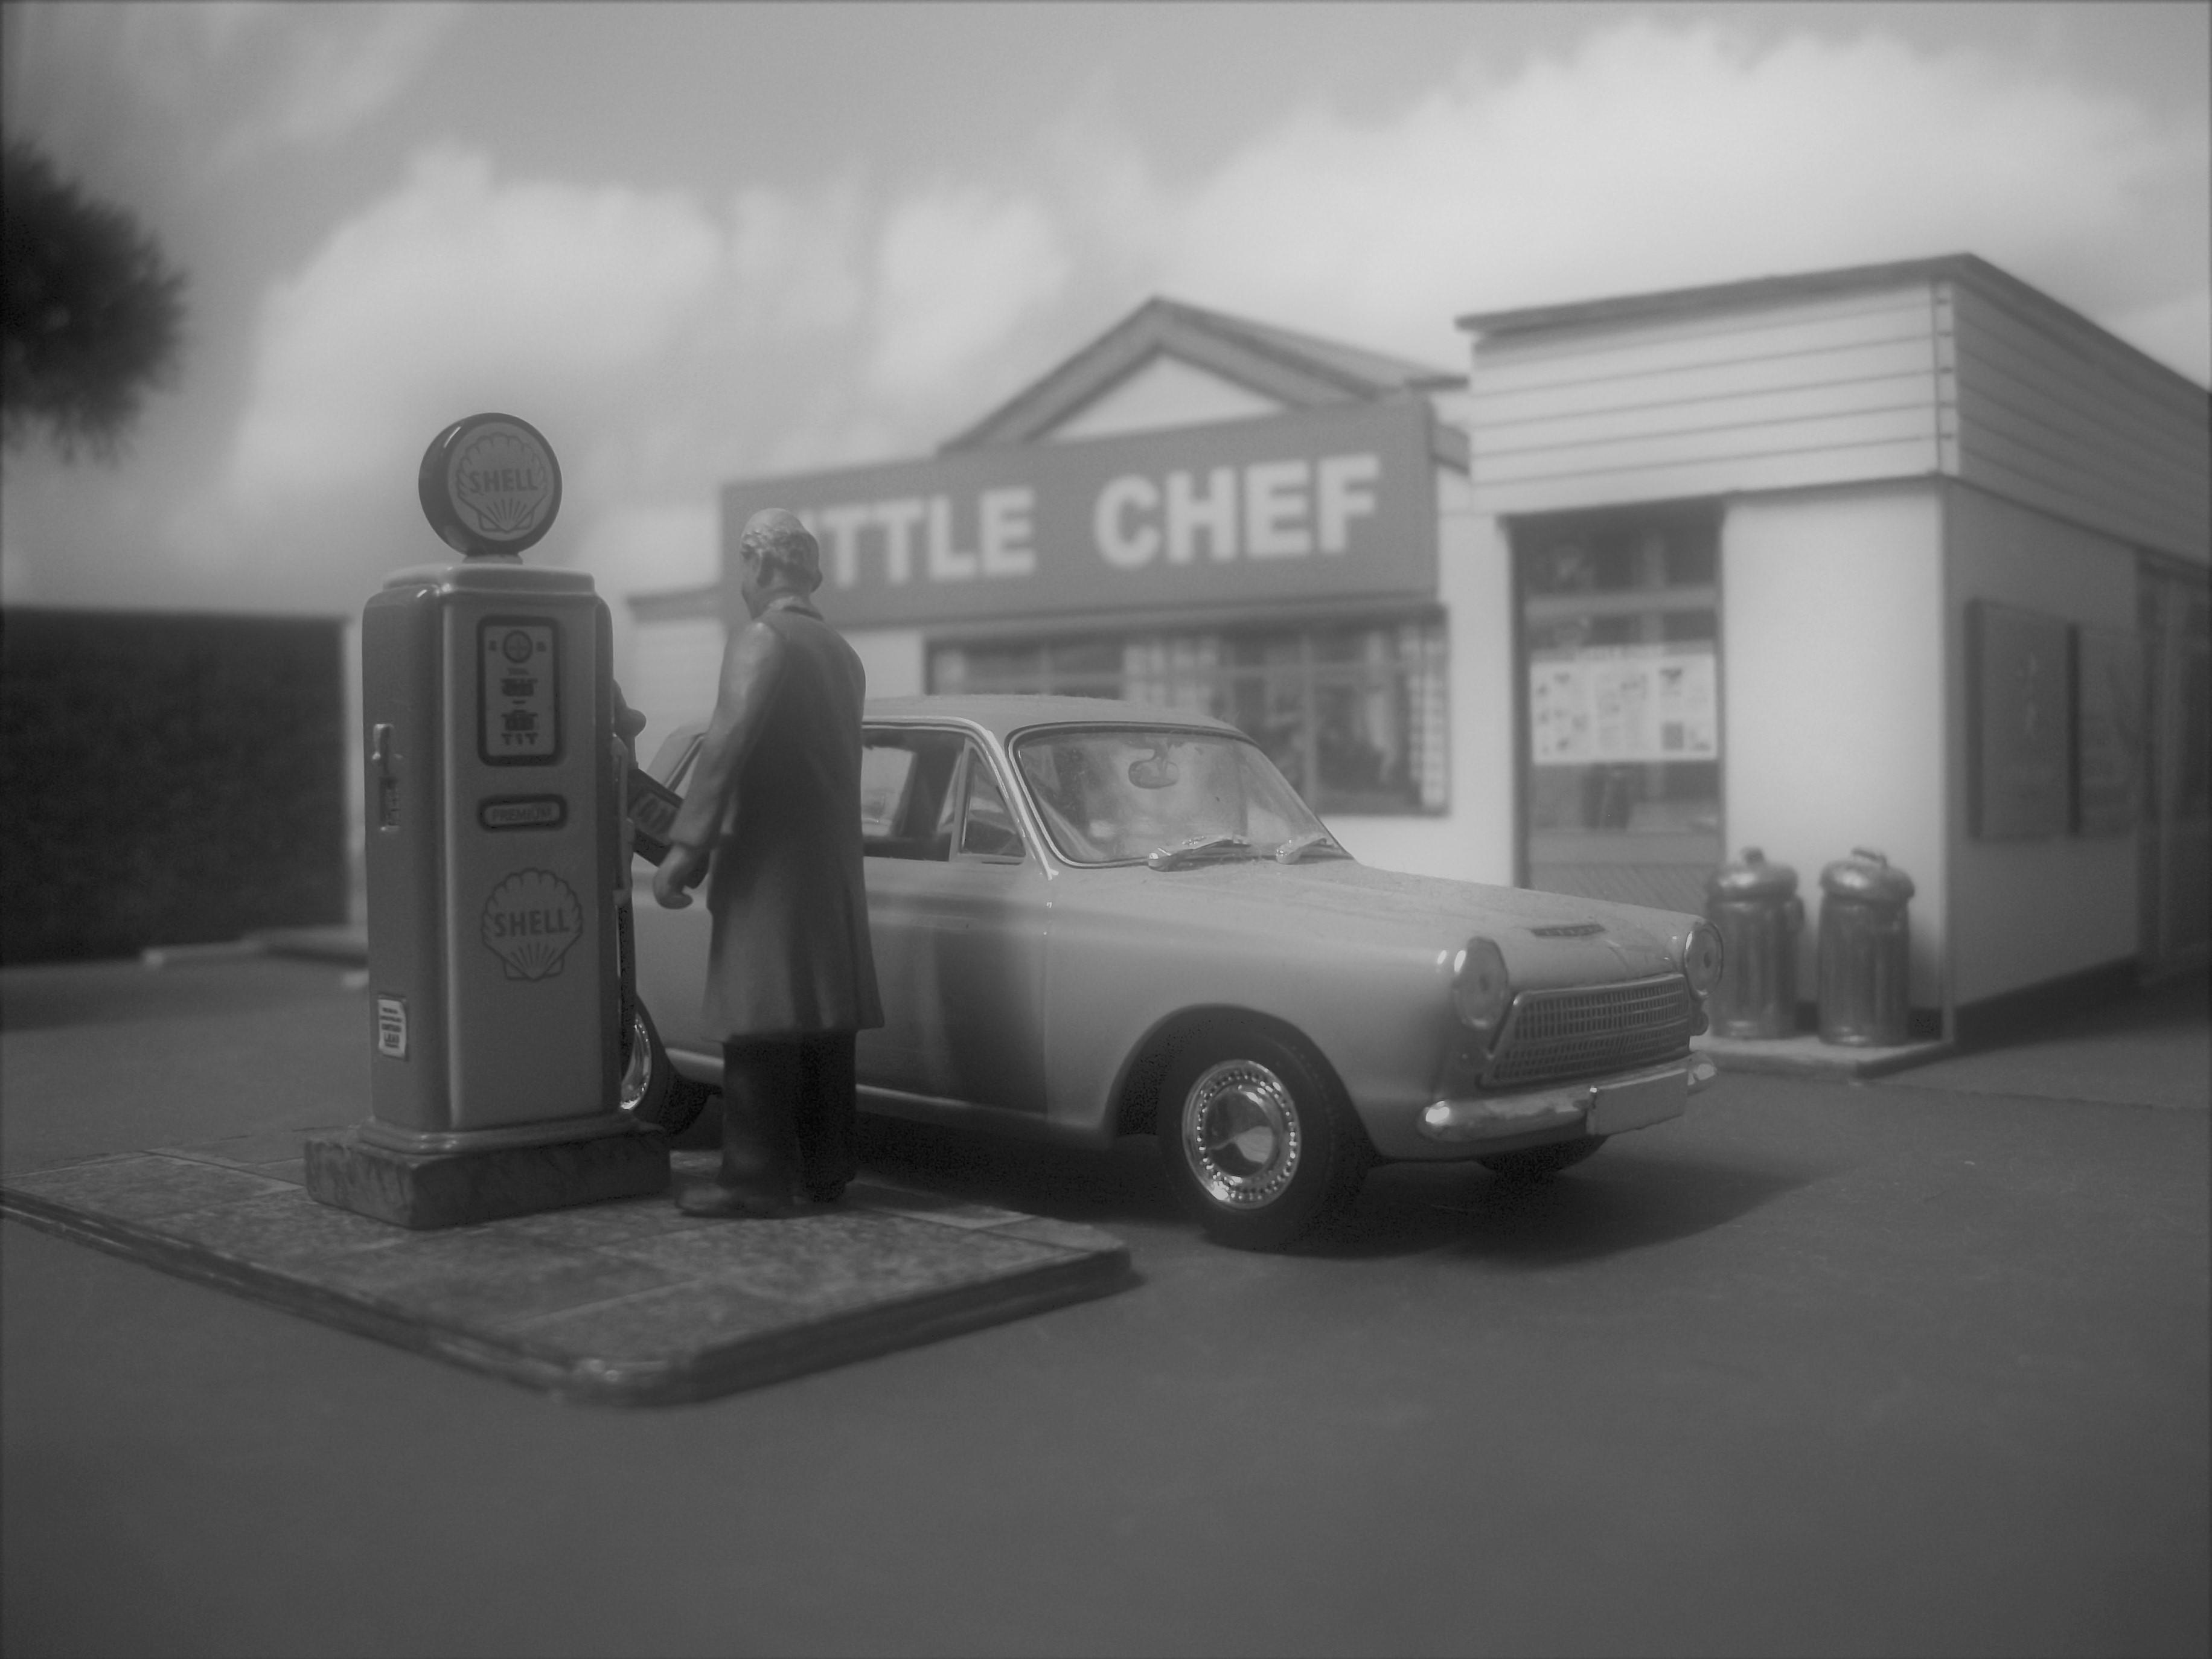
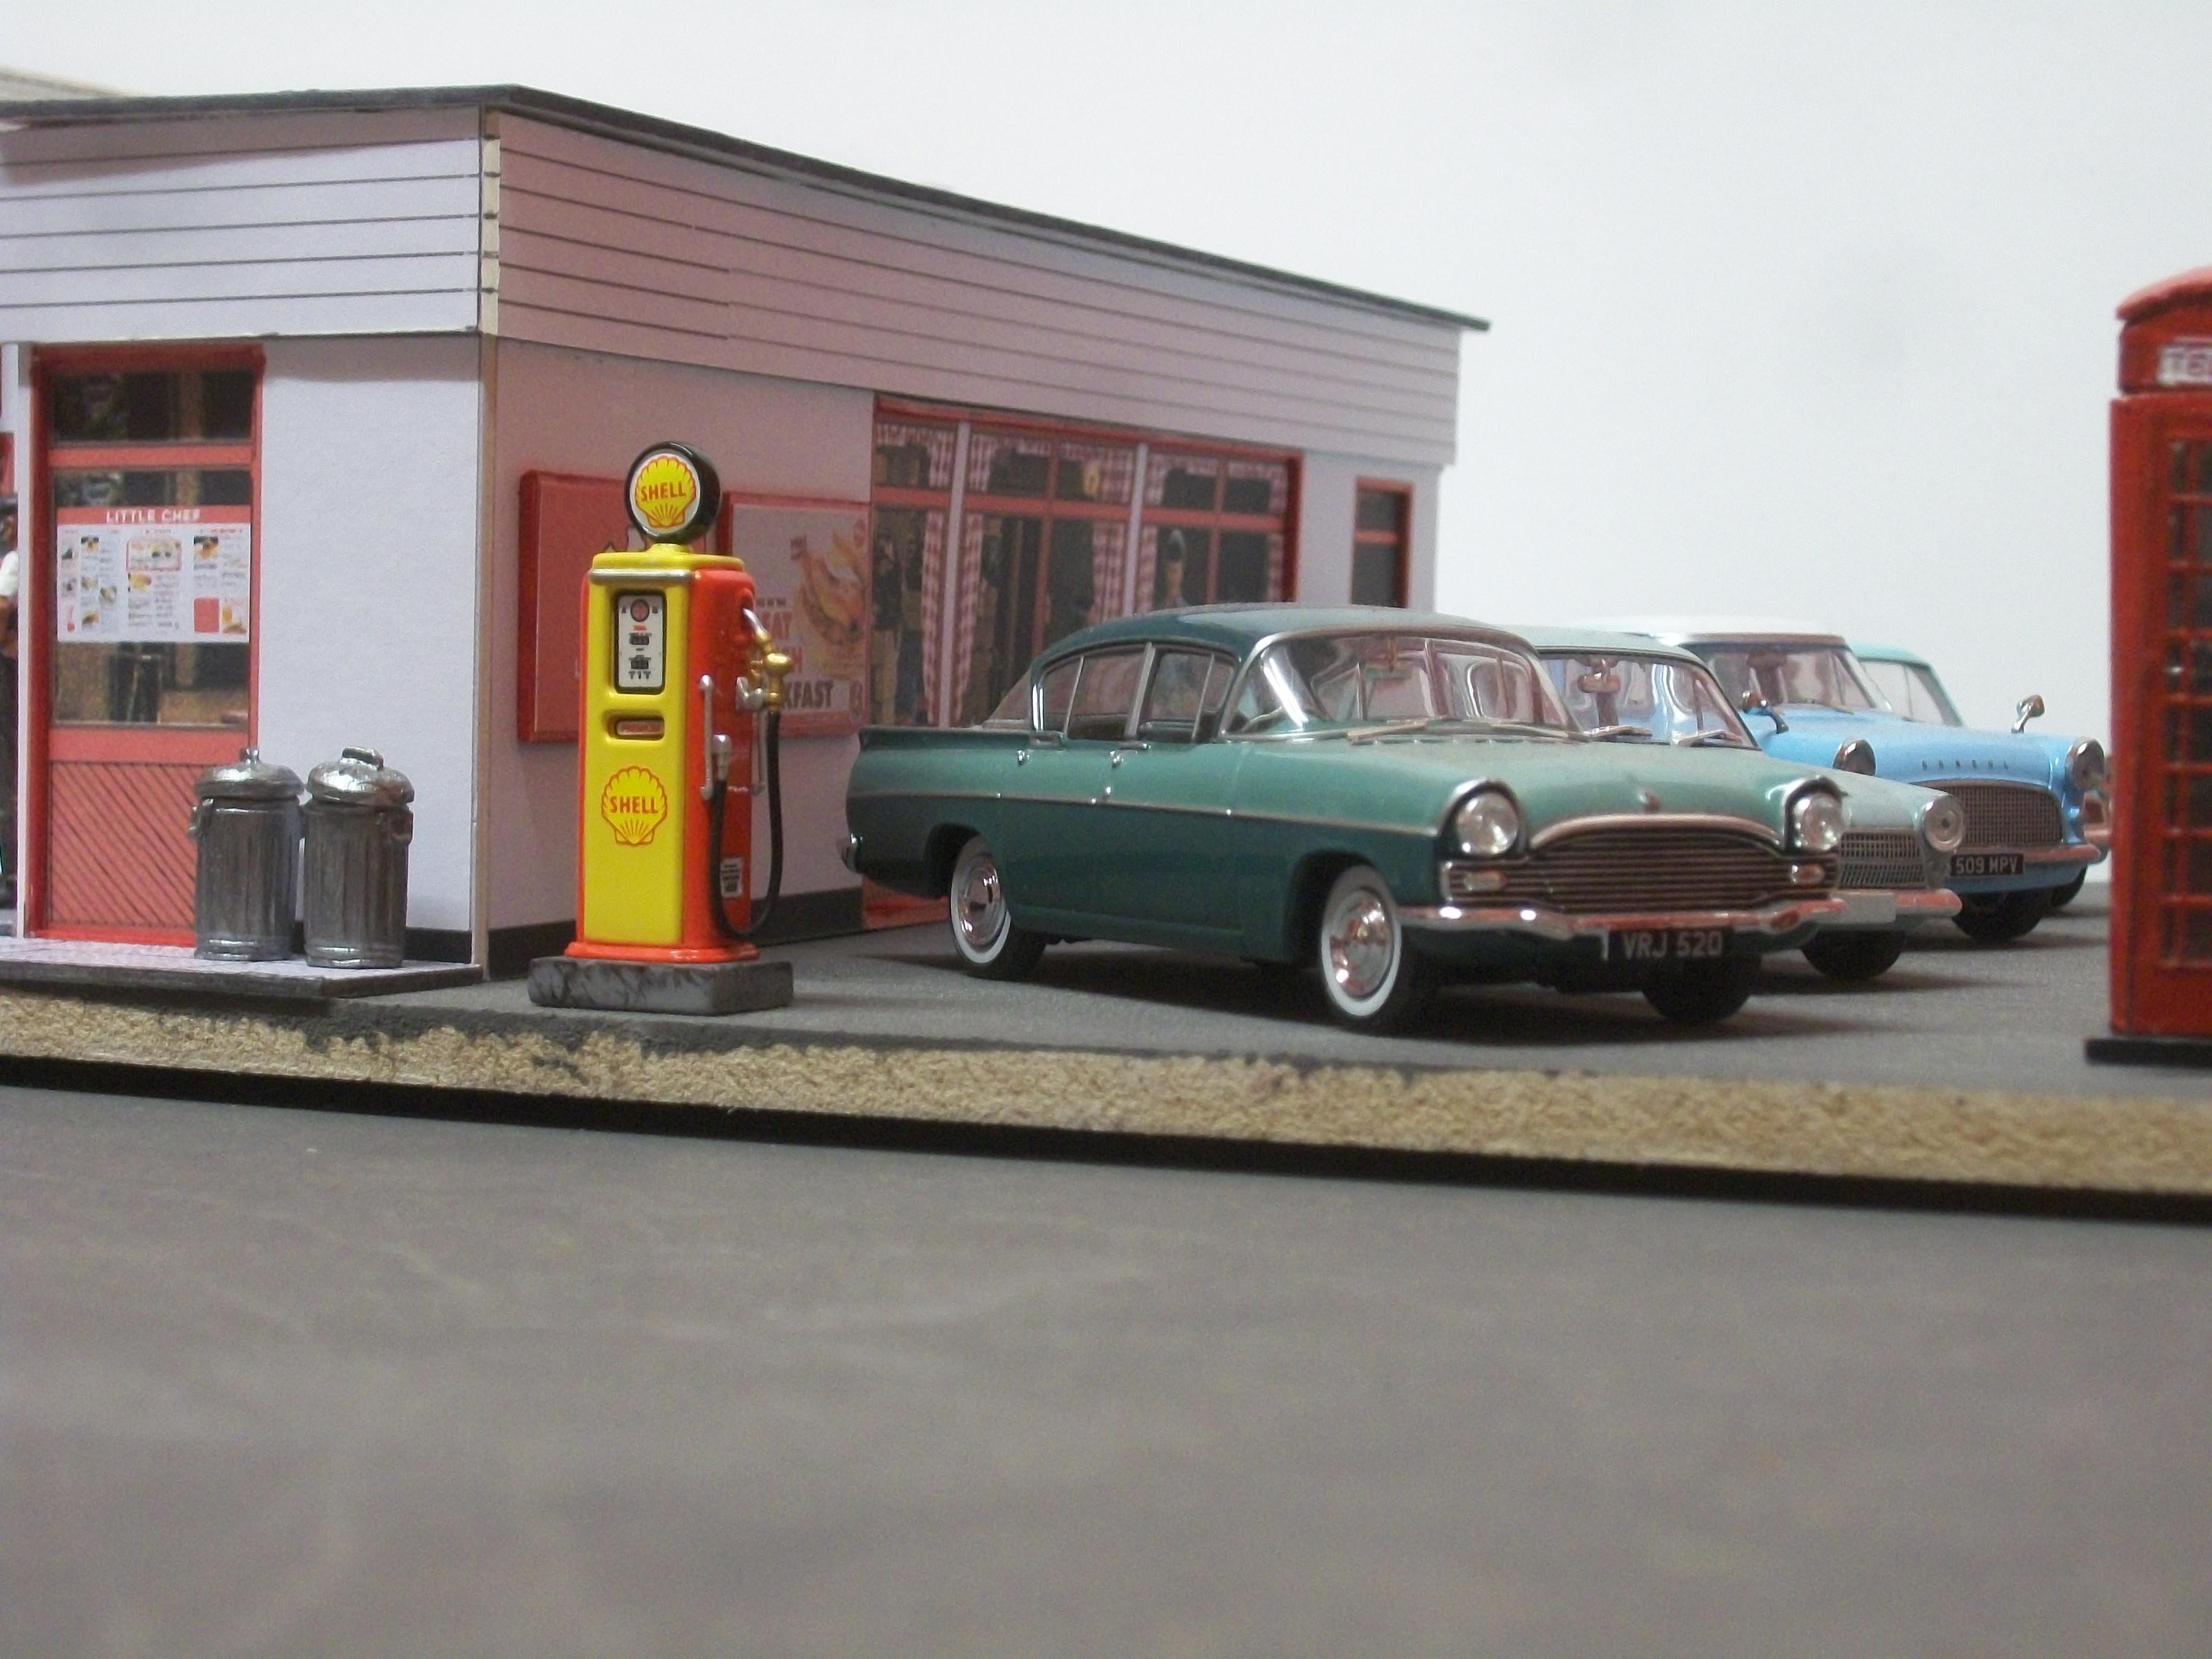
The new petrol pump that arrived today is better than the one that I had already, it is shorter in height, and it is British rather than American. The taller petrol pump is diecast, whereas this shorter one is either resin or plastic ( resin I think ). Few photos attached that show the new petrol pump near to the Little Chef building, also alongside the taller one, and how it looks inside the petrol pump stand . Some further photos of different cars next to the pump. David
-
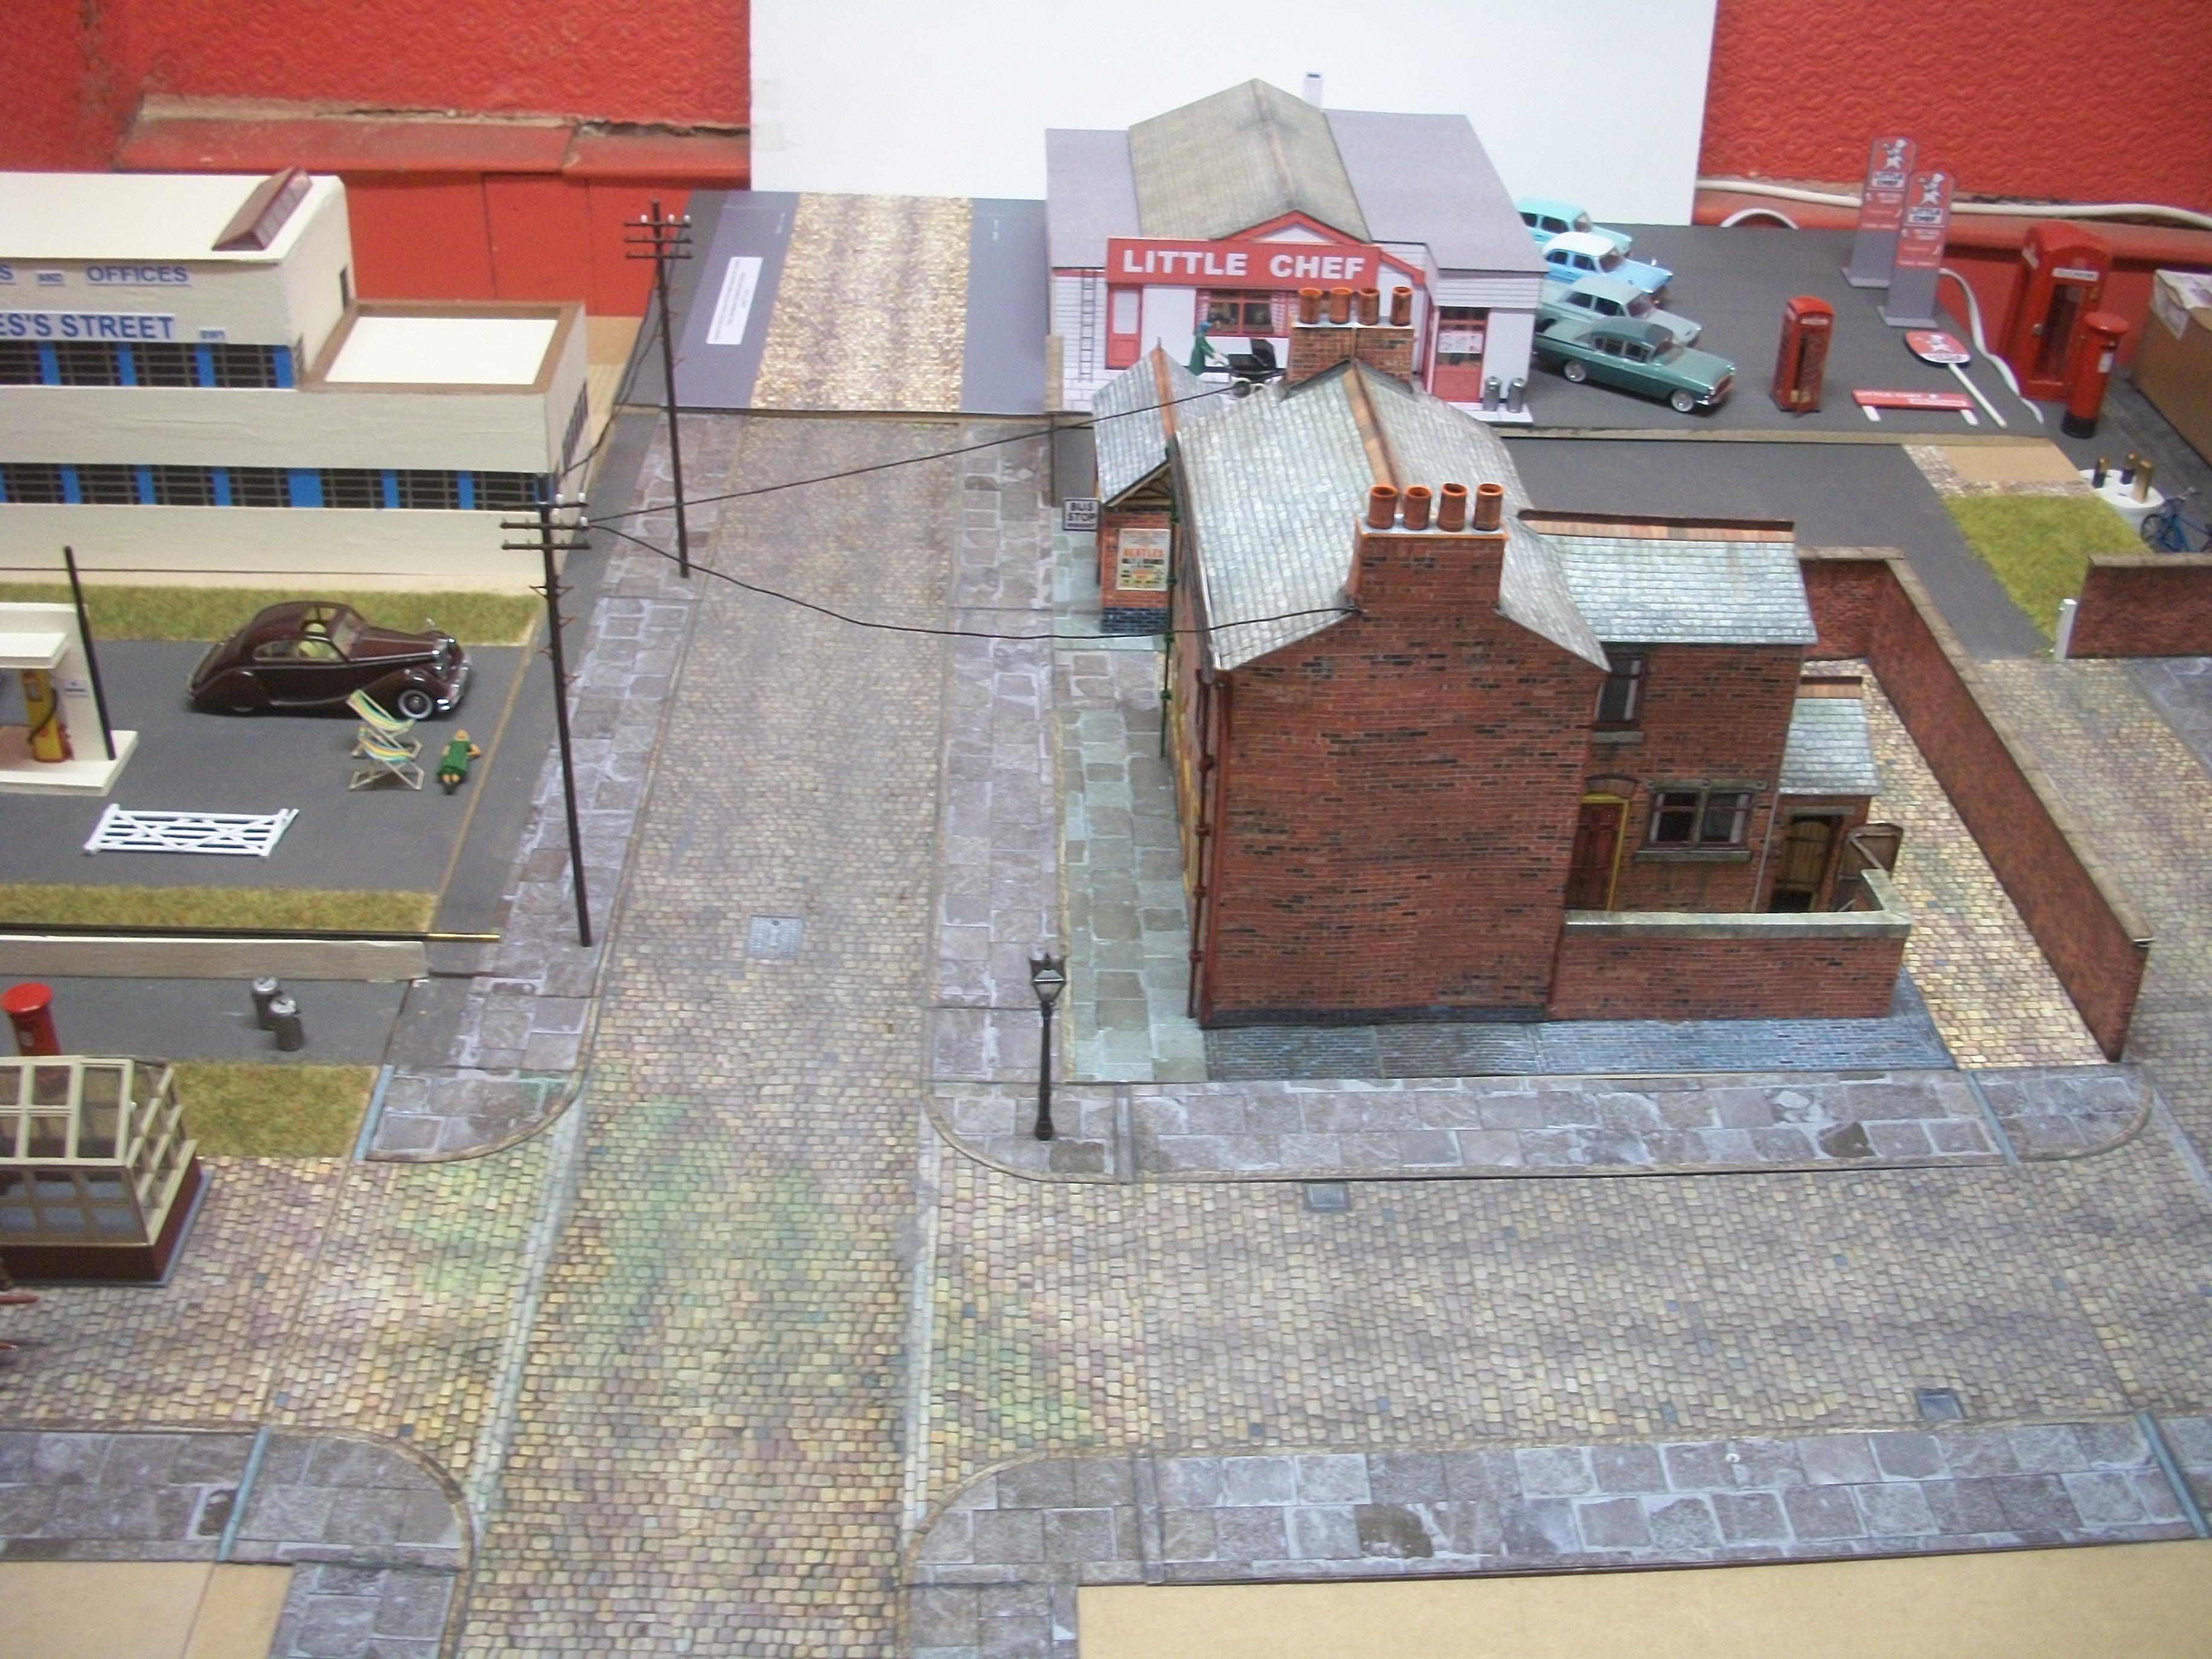
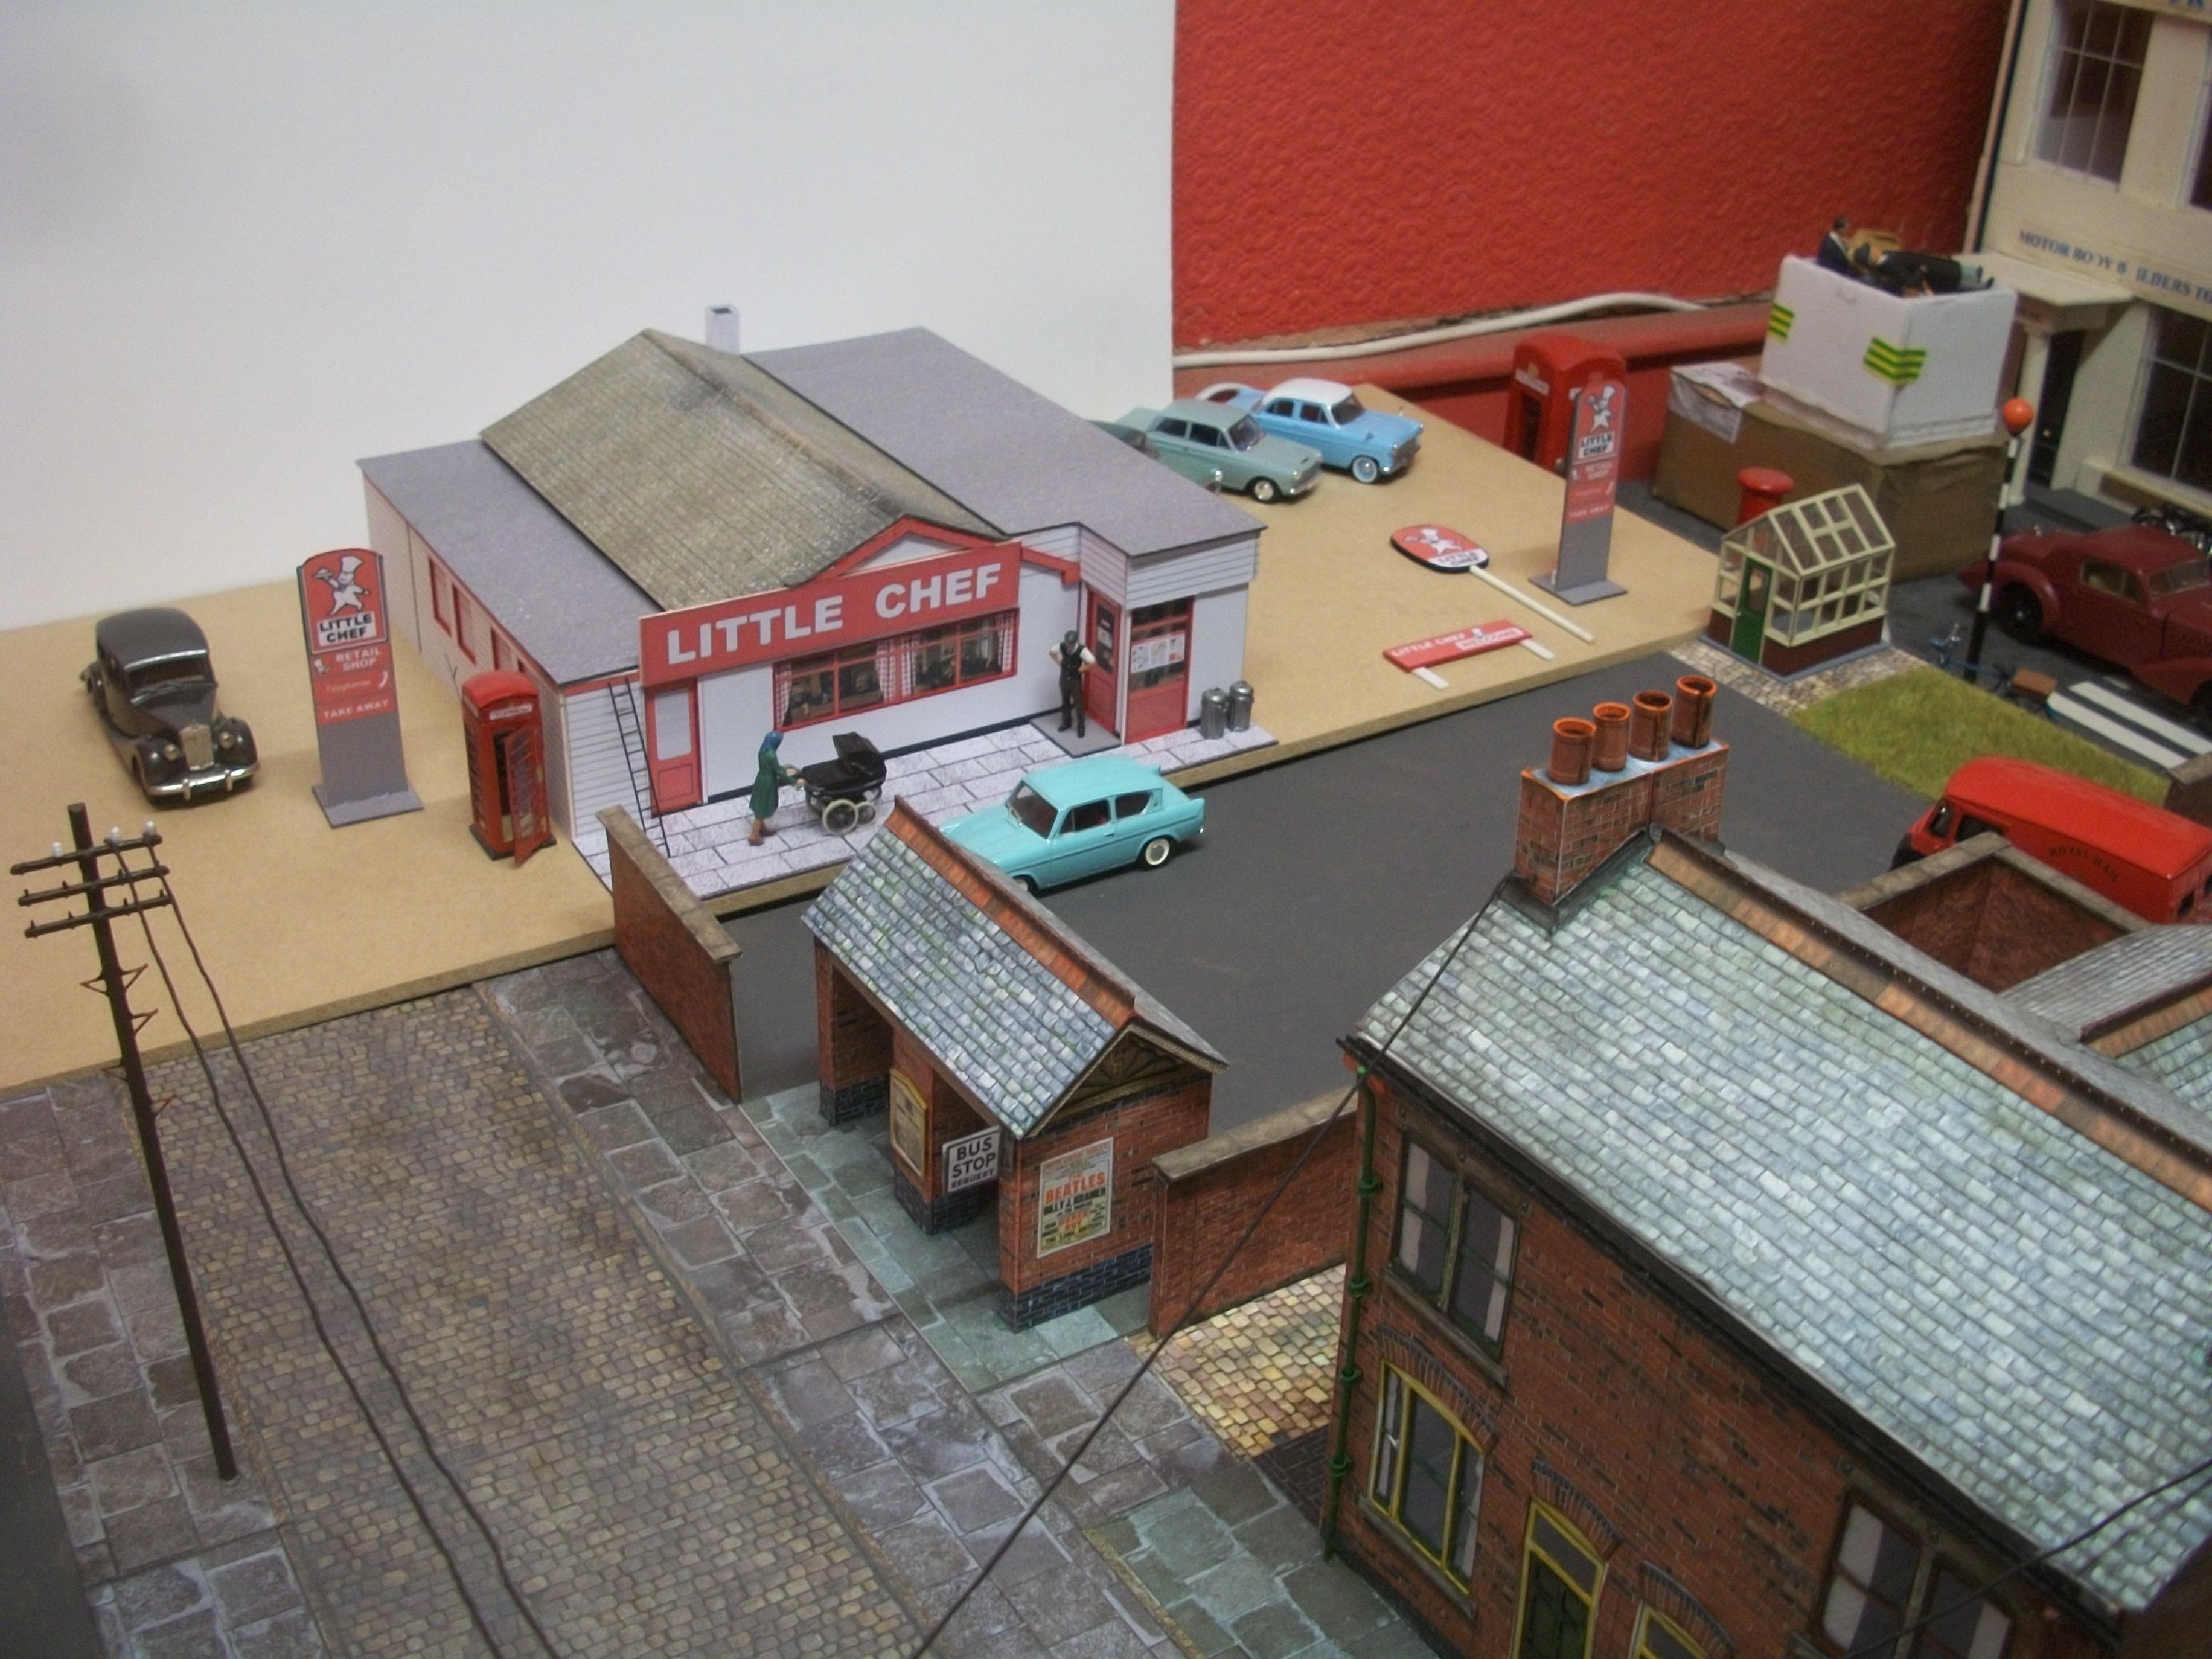
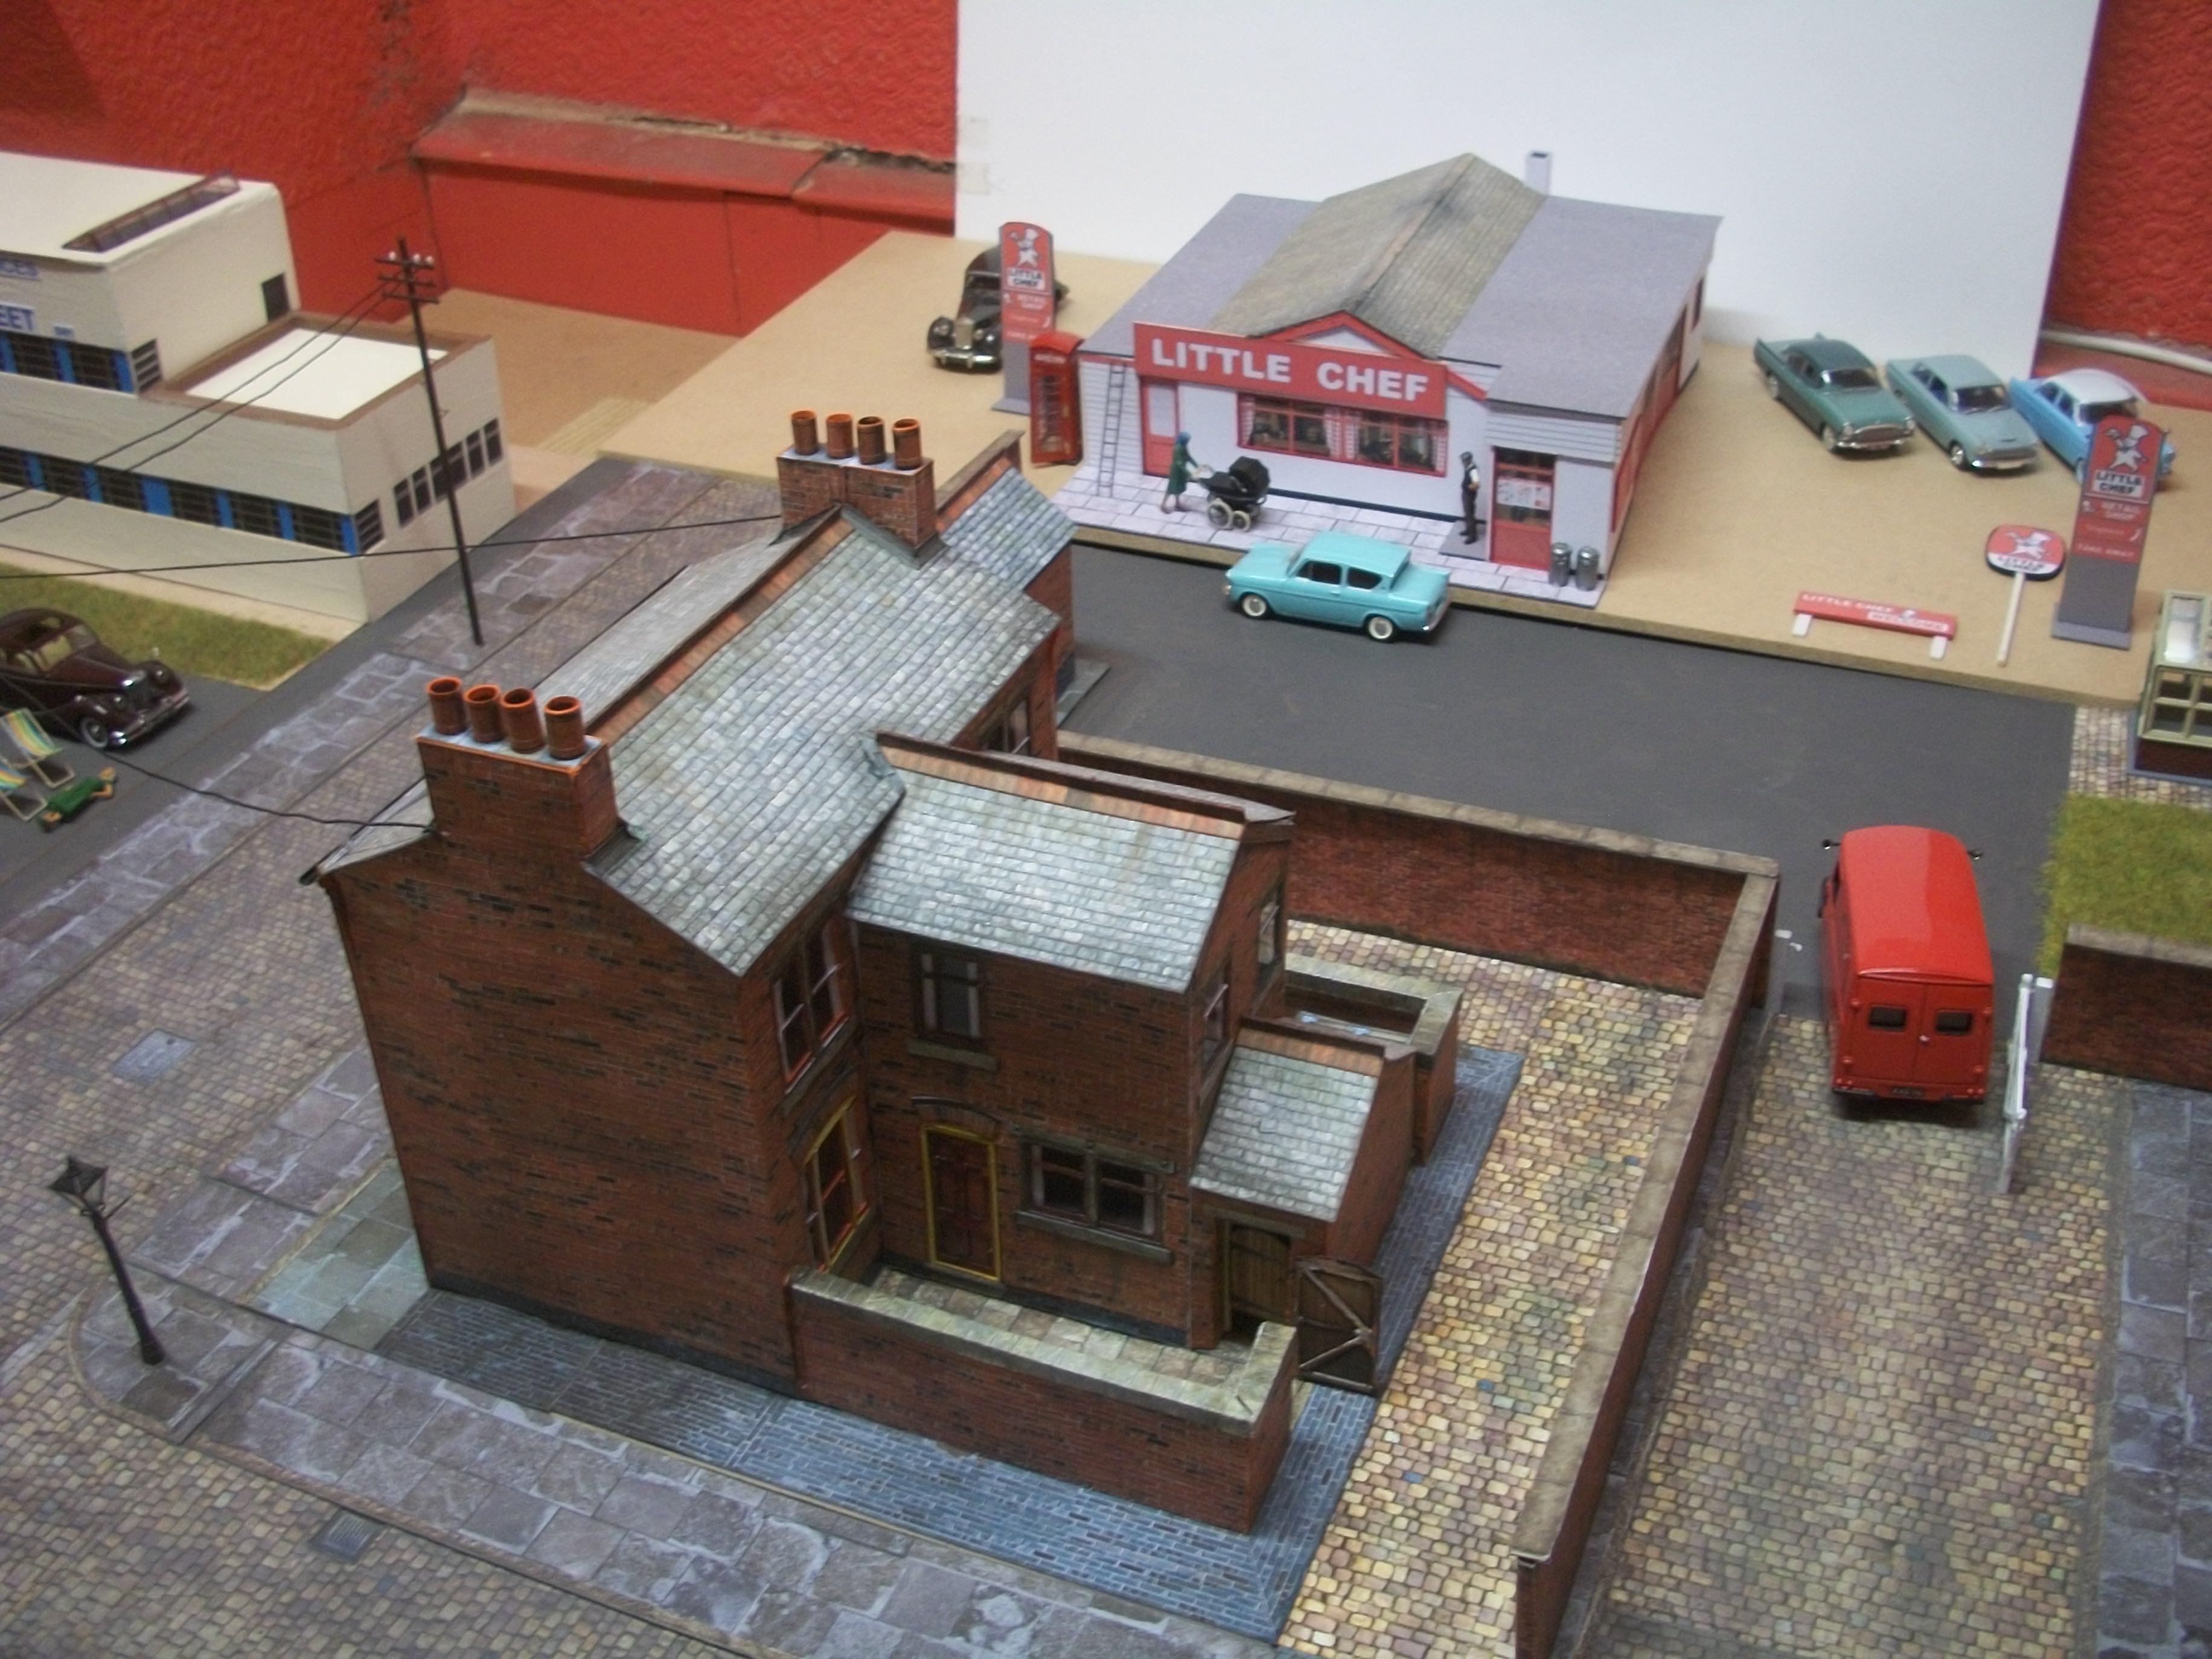
Having placed the Little Chef restaurant building on the grey painted baseboard extension, I am now working on the cobbled road and pavements, over to the far left of the diorama. This road surface will extend Duke's Road by about 11 inches, with the Little Chef immediately to the right of the new road section. A friend of mine who is a model builder and pattern designer, pointed out that maybe the office staff who worked at the Rolls-Royce factory across the road might have gone to the Little Chef for their lunch breaks. Usually, I think a factory such as Hooper's would have had a canteen for the workers. David
-
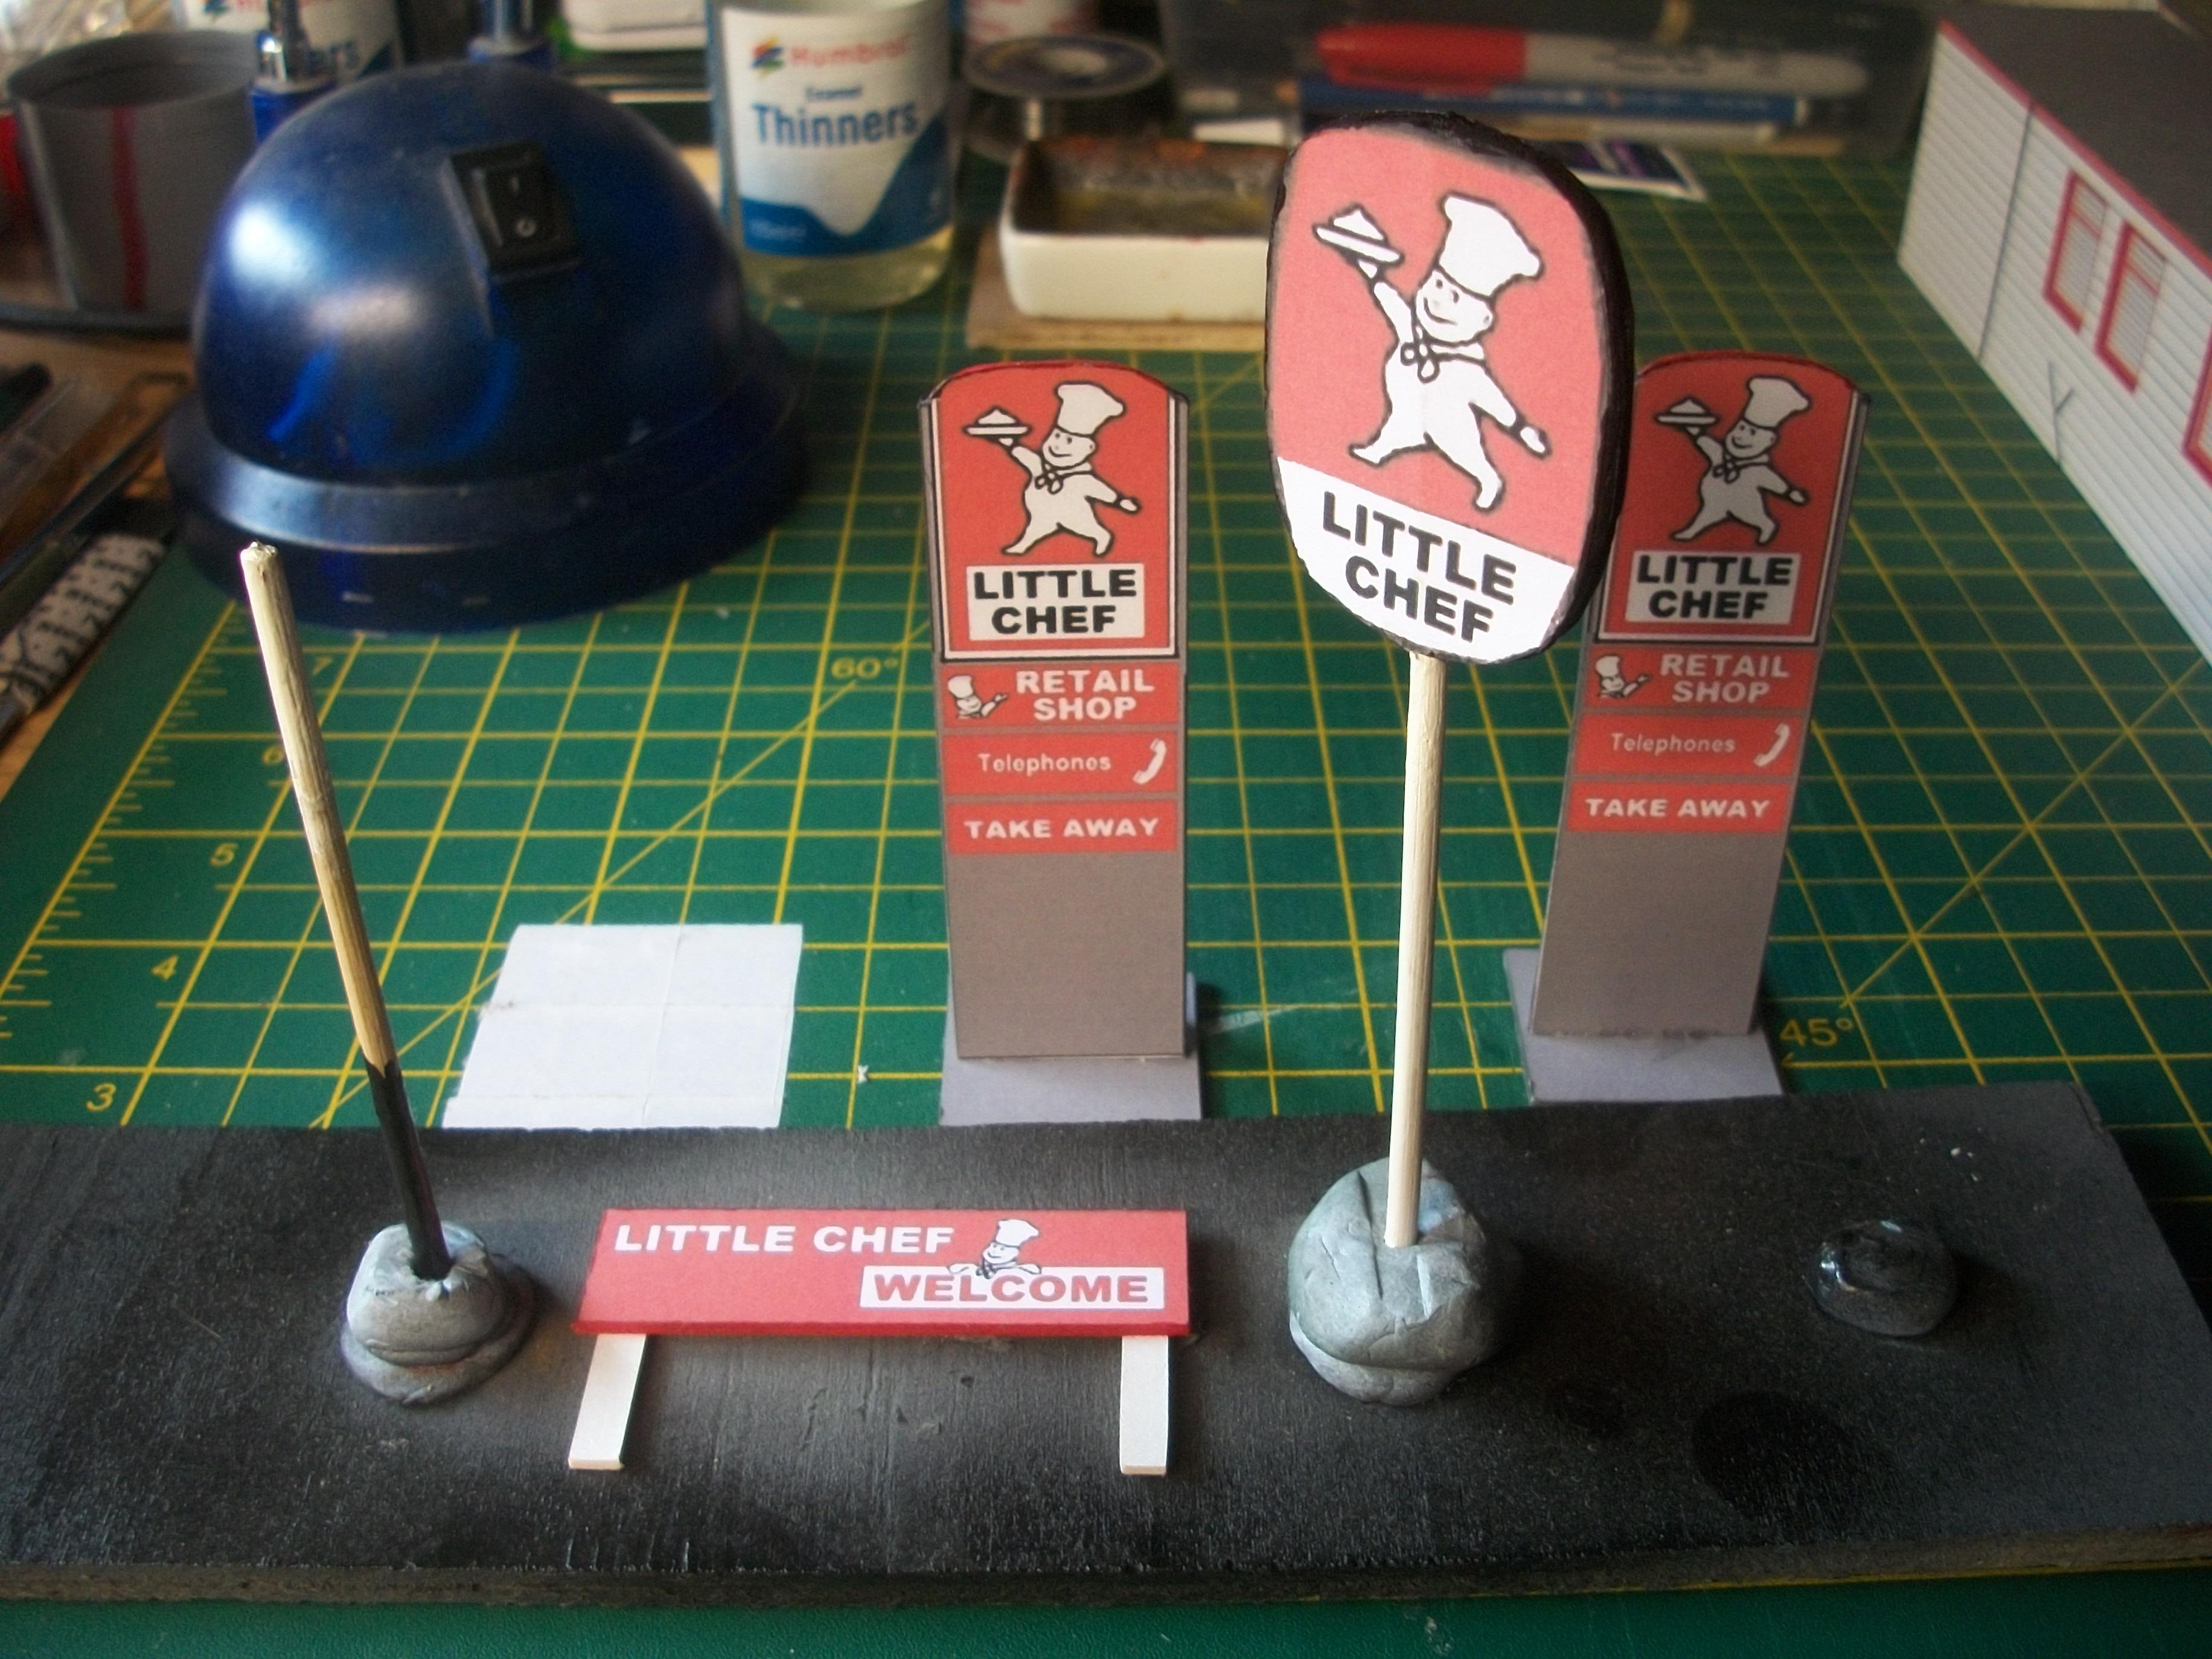
The Little Chef building has been brought to the diorama table, and a piece of MDF sheet has been cut to size, coated with primer and painted with grey emulsion. This extension baseboard has to line up flush with the other two diorama baseboards, using blocks of wood because the window shelf is higher than my worktop surface. Later, when the dioramas are on an exhibition table, the blocks will not be necessary. The entrance to the car park is through the white five bar gate, and the car park now extends to the right of the Little Chef building. Need to put the signboards in place, and also add some cobbled road surface with pavements, to extend Duke's Road which runs between the factory and the terraced houses. Today I added a few cars and figures to see how the proportions look in photos. David
-
Thanks a lot, Eric..... and I quite understand that many members are not checking in as often as previously, due to the current situation in the world. I really do appreciate any interest in my project, and all comments are very welcome...... the whole process of posting on MCM forums and the interaction between model builders is extremely important in my view. Hope you are keeping well yourself. David
-
Fascinating story, Don..... and apparently W.O.'s wife divorced him around the same time as he was asked to return his personal 8 litre Bentley.... the Rolls-Royce company stepped in to take over the financially struggling Bentley firm, as they regarded the 8 litre model to be a threat to the sales of their Phantom II model. David
-
You are absolutely correct about the registration number, Don....... W.O. Bentley's car was indeed GK 706, and something else is different about the model that I have. The paint colour of GK 706 was until recently green and black, but a current owner has discovered that the original colour of the car was all black. This owner intended to restore the car back to it's original black paintwork. David
-
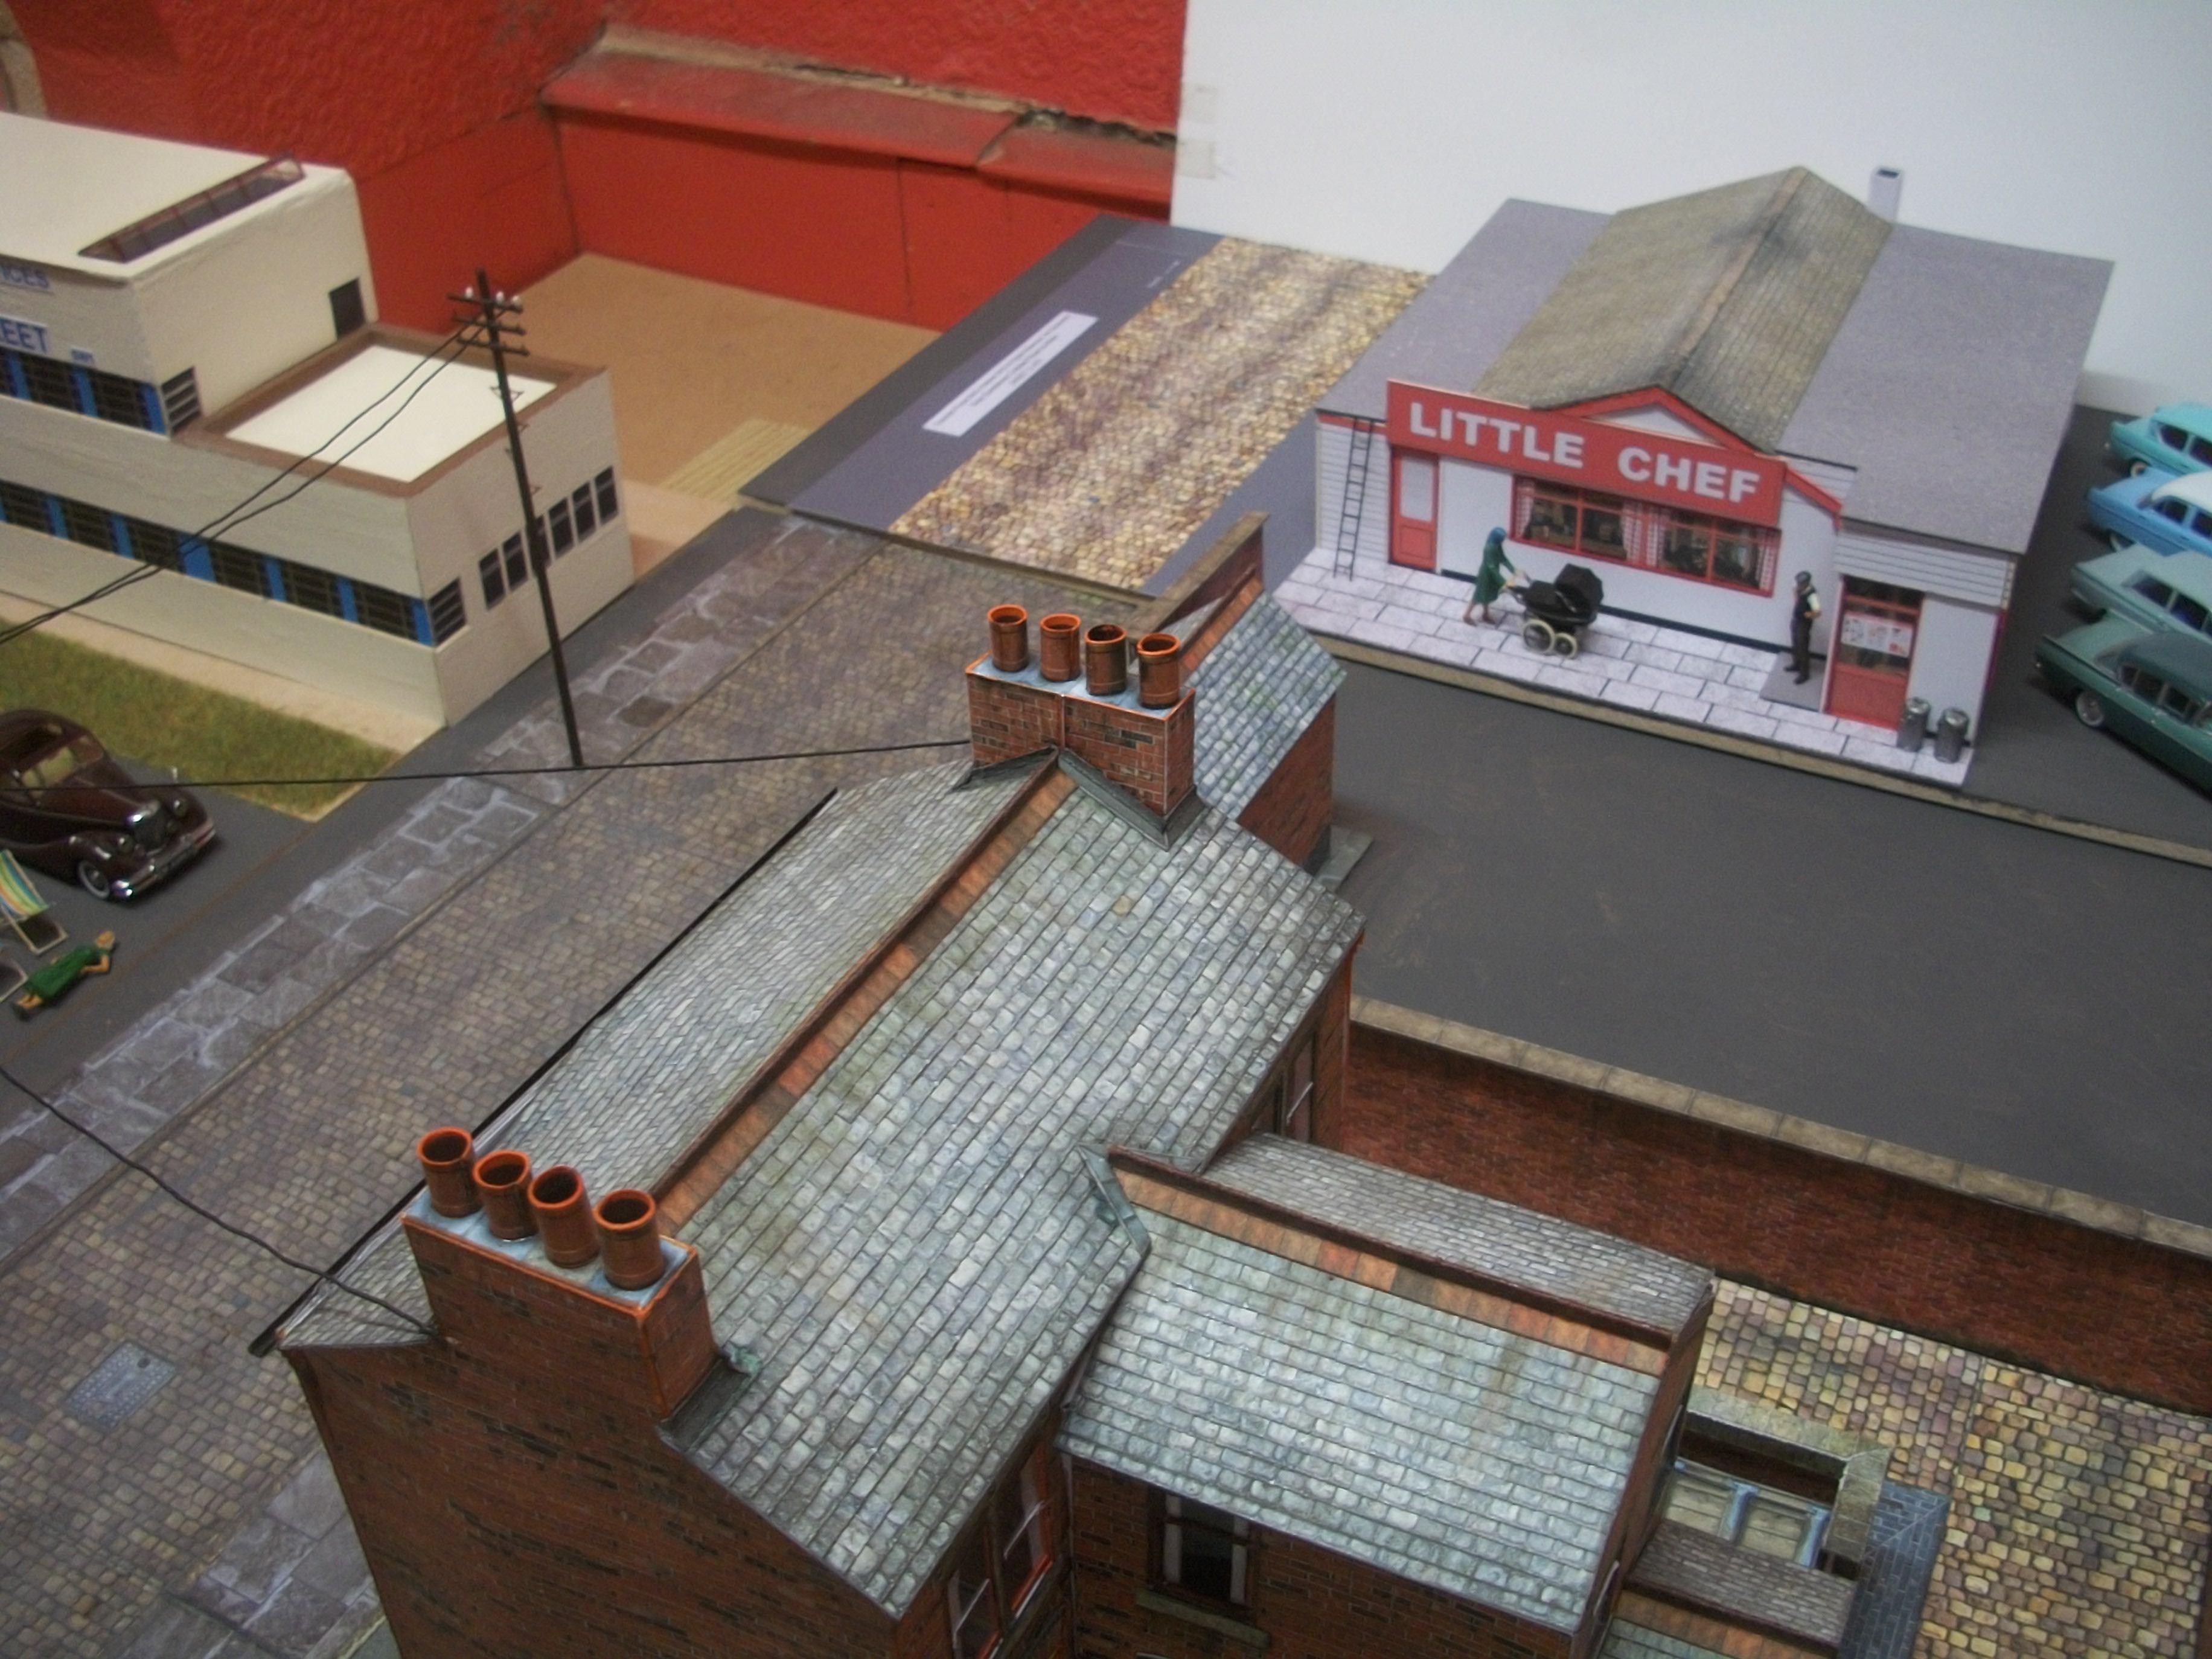
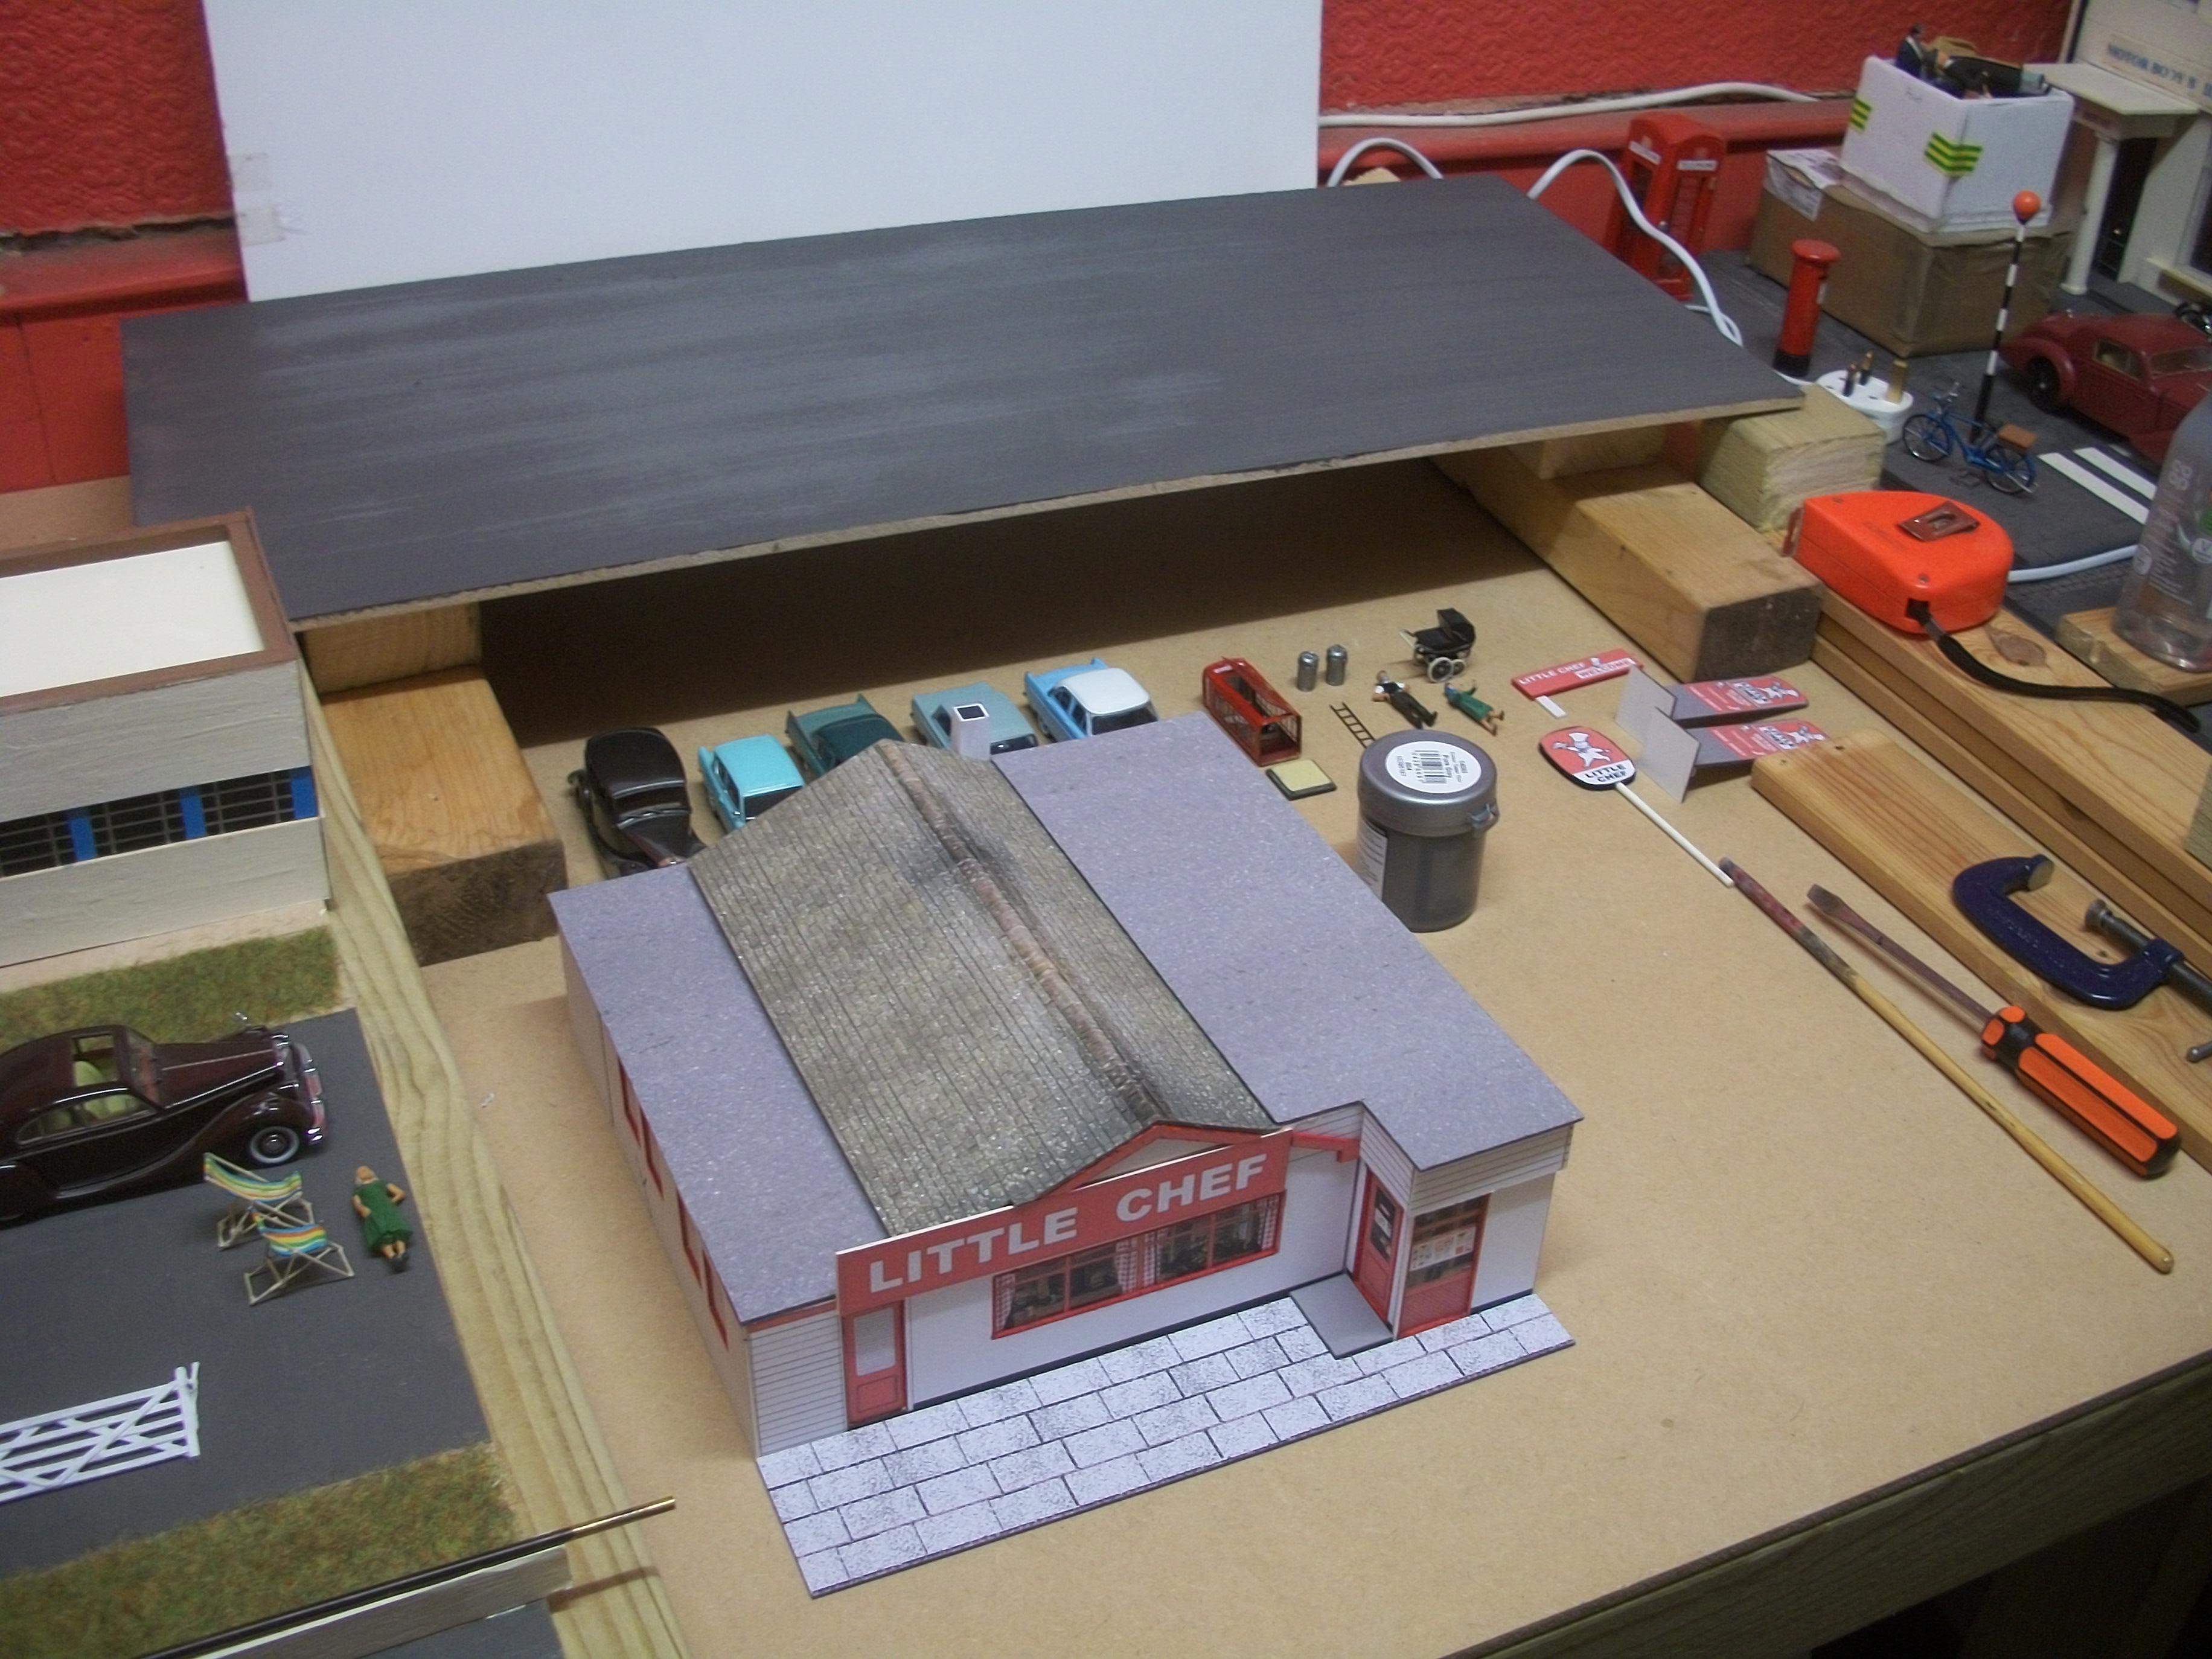
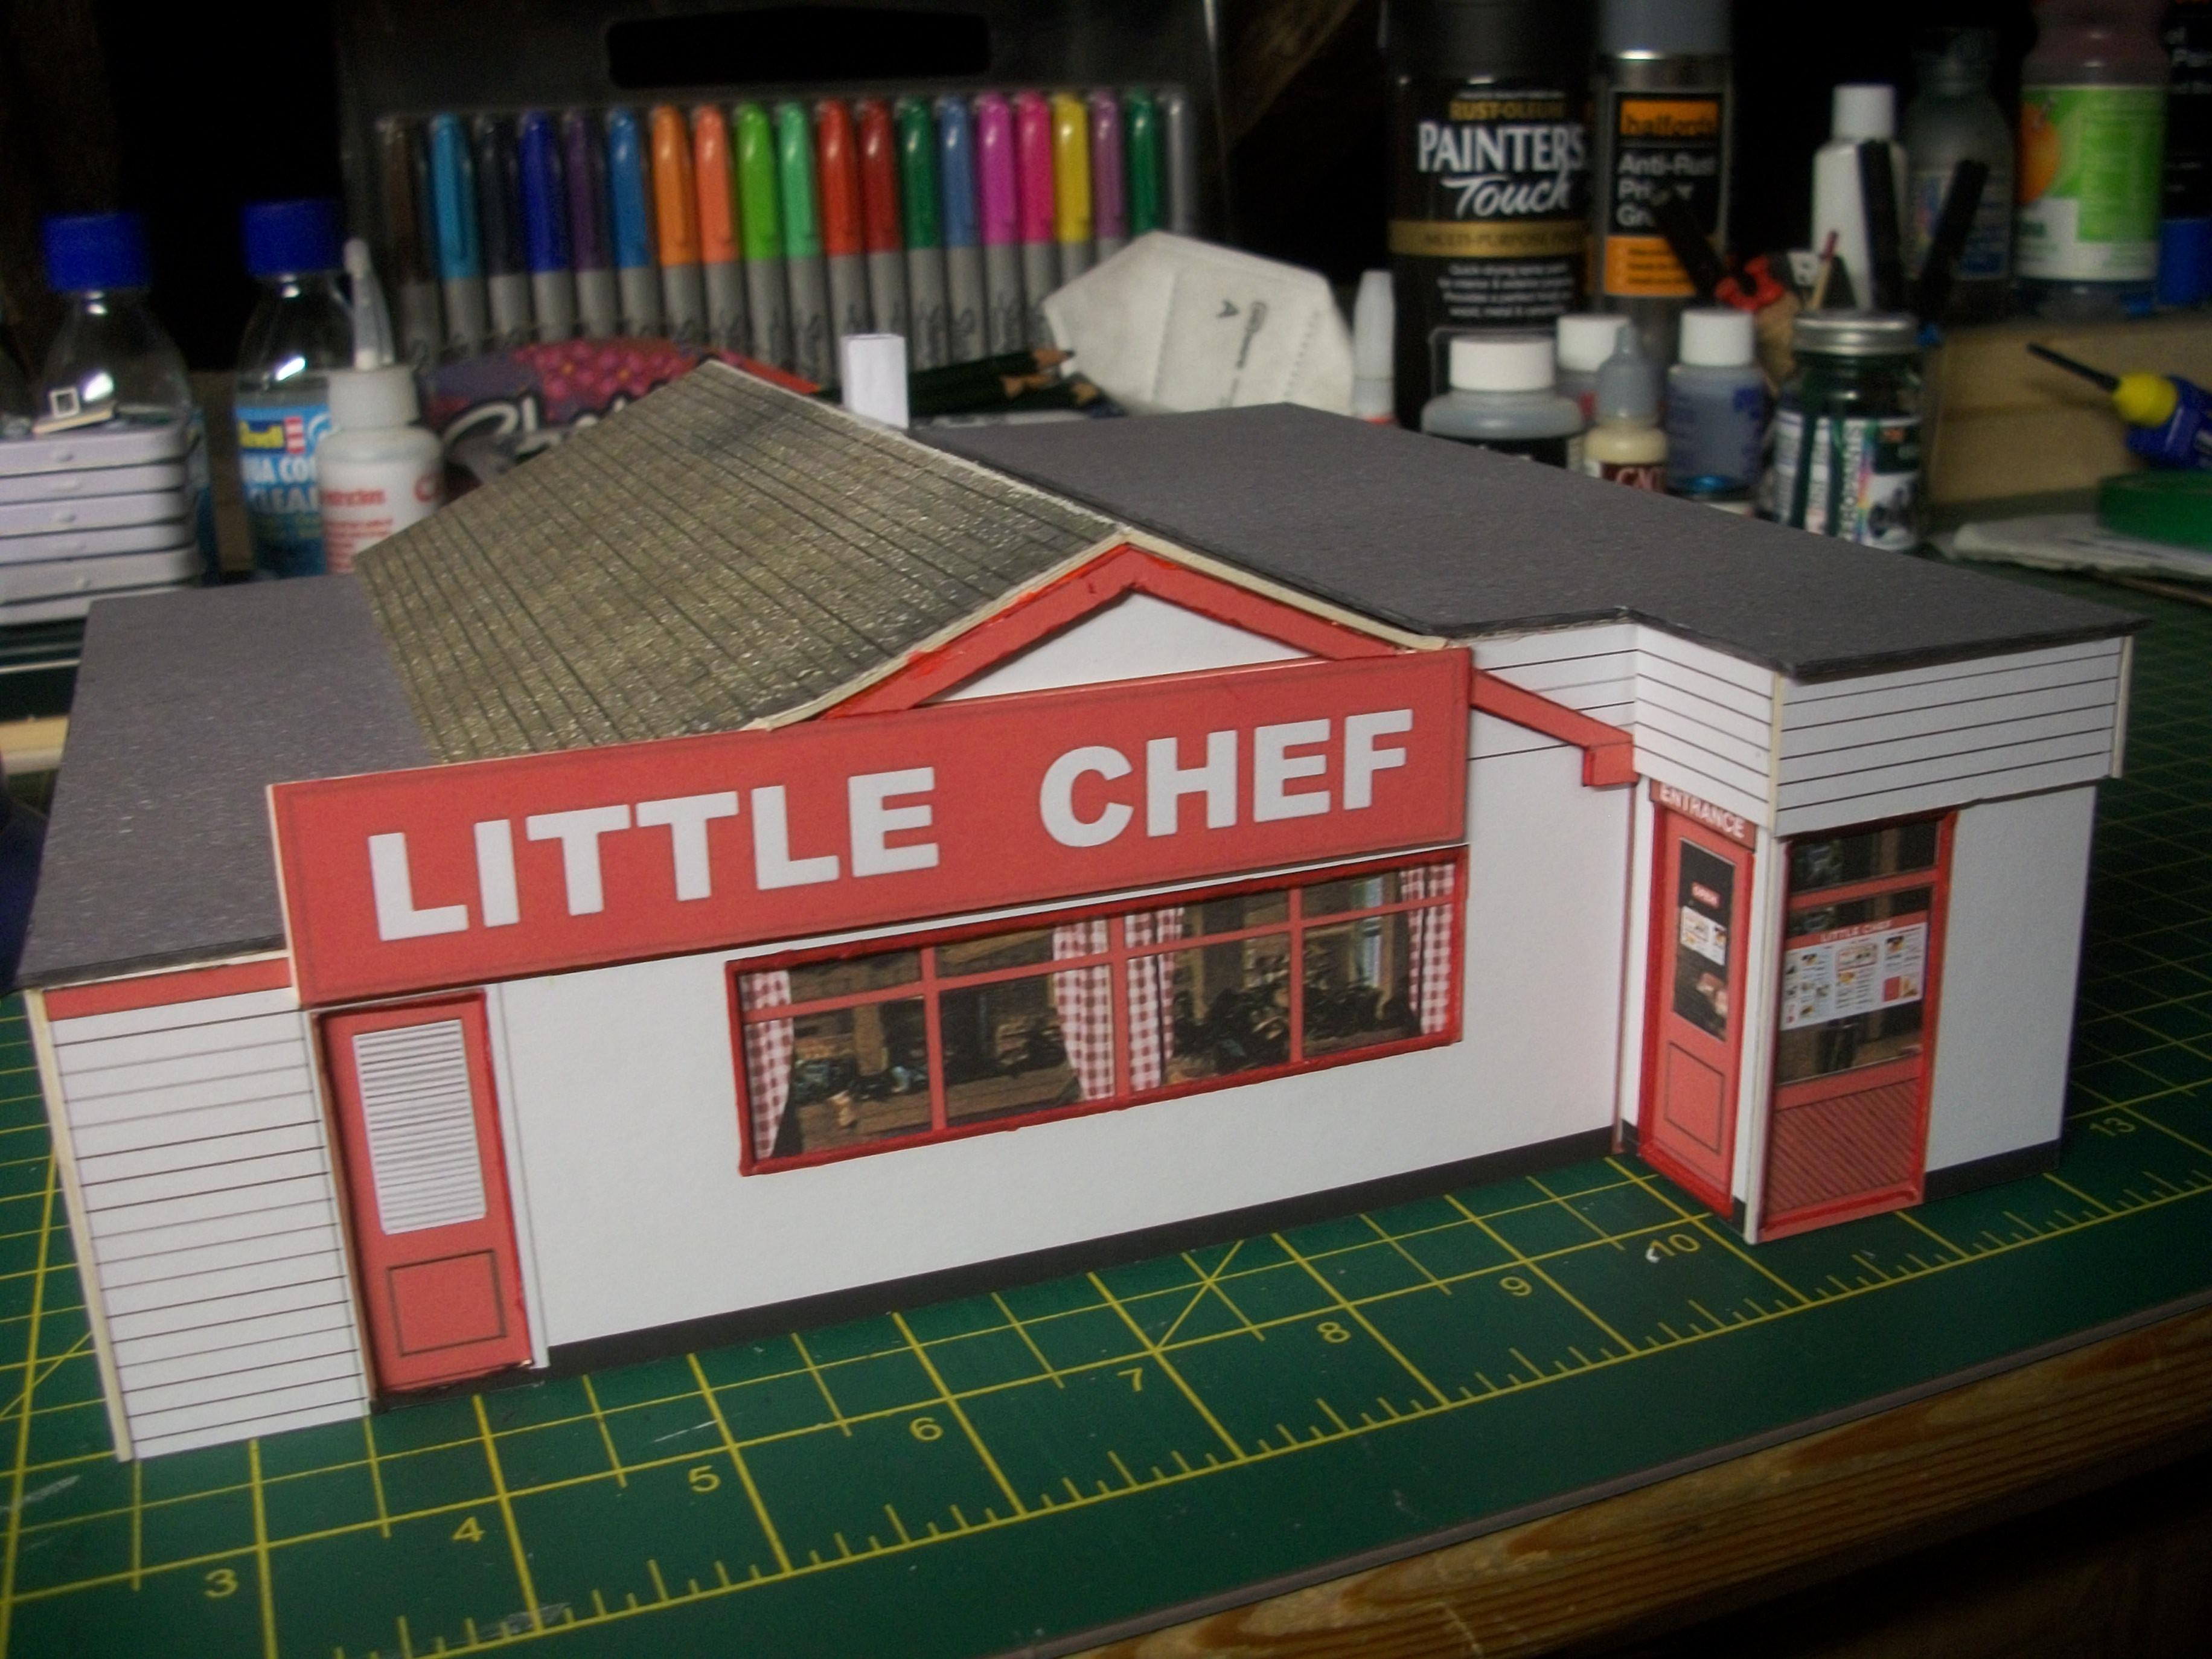
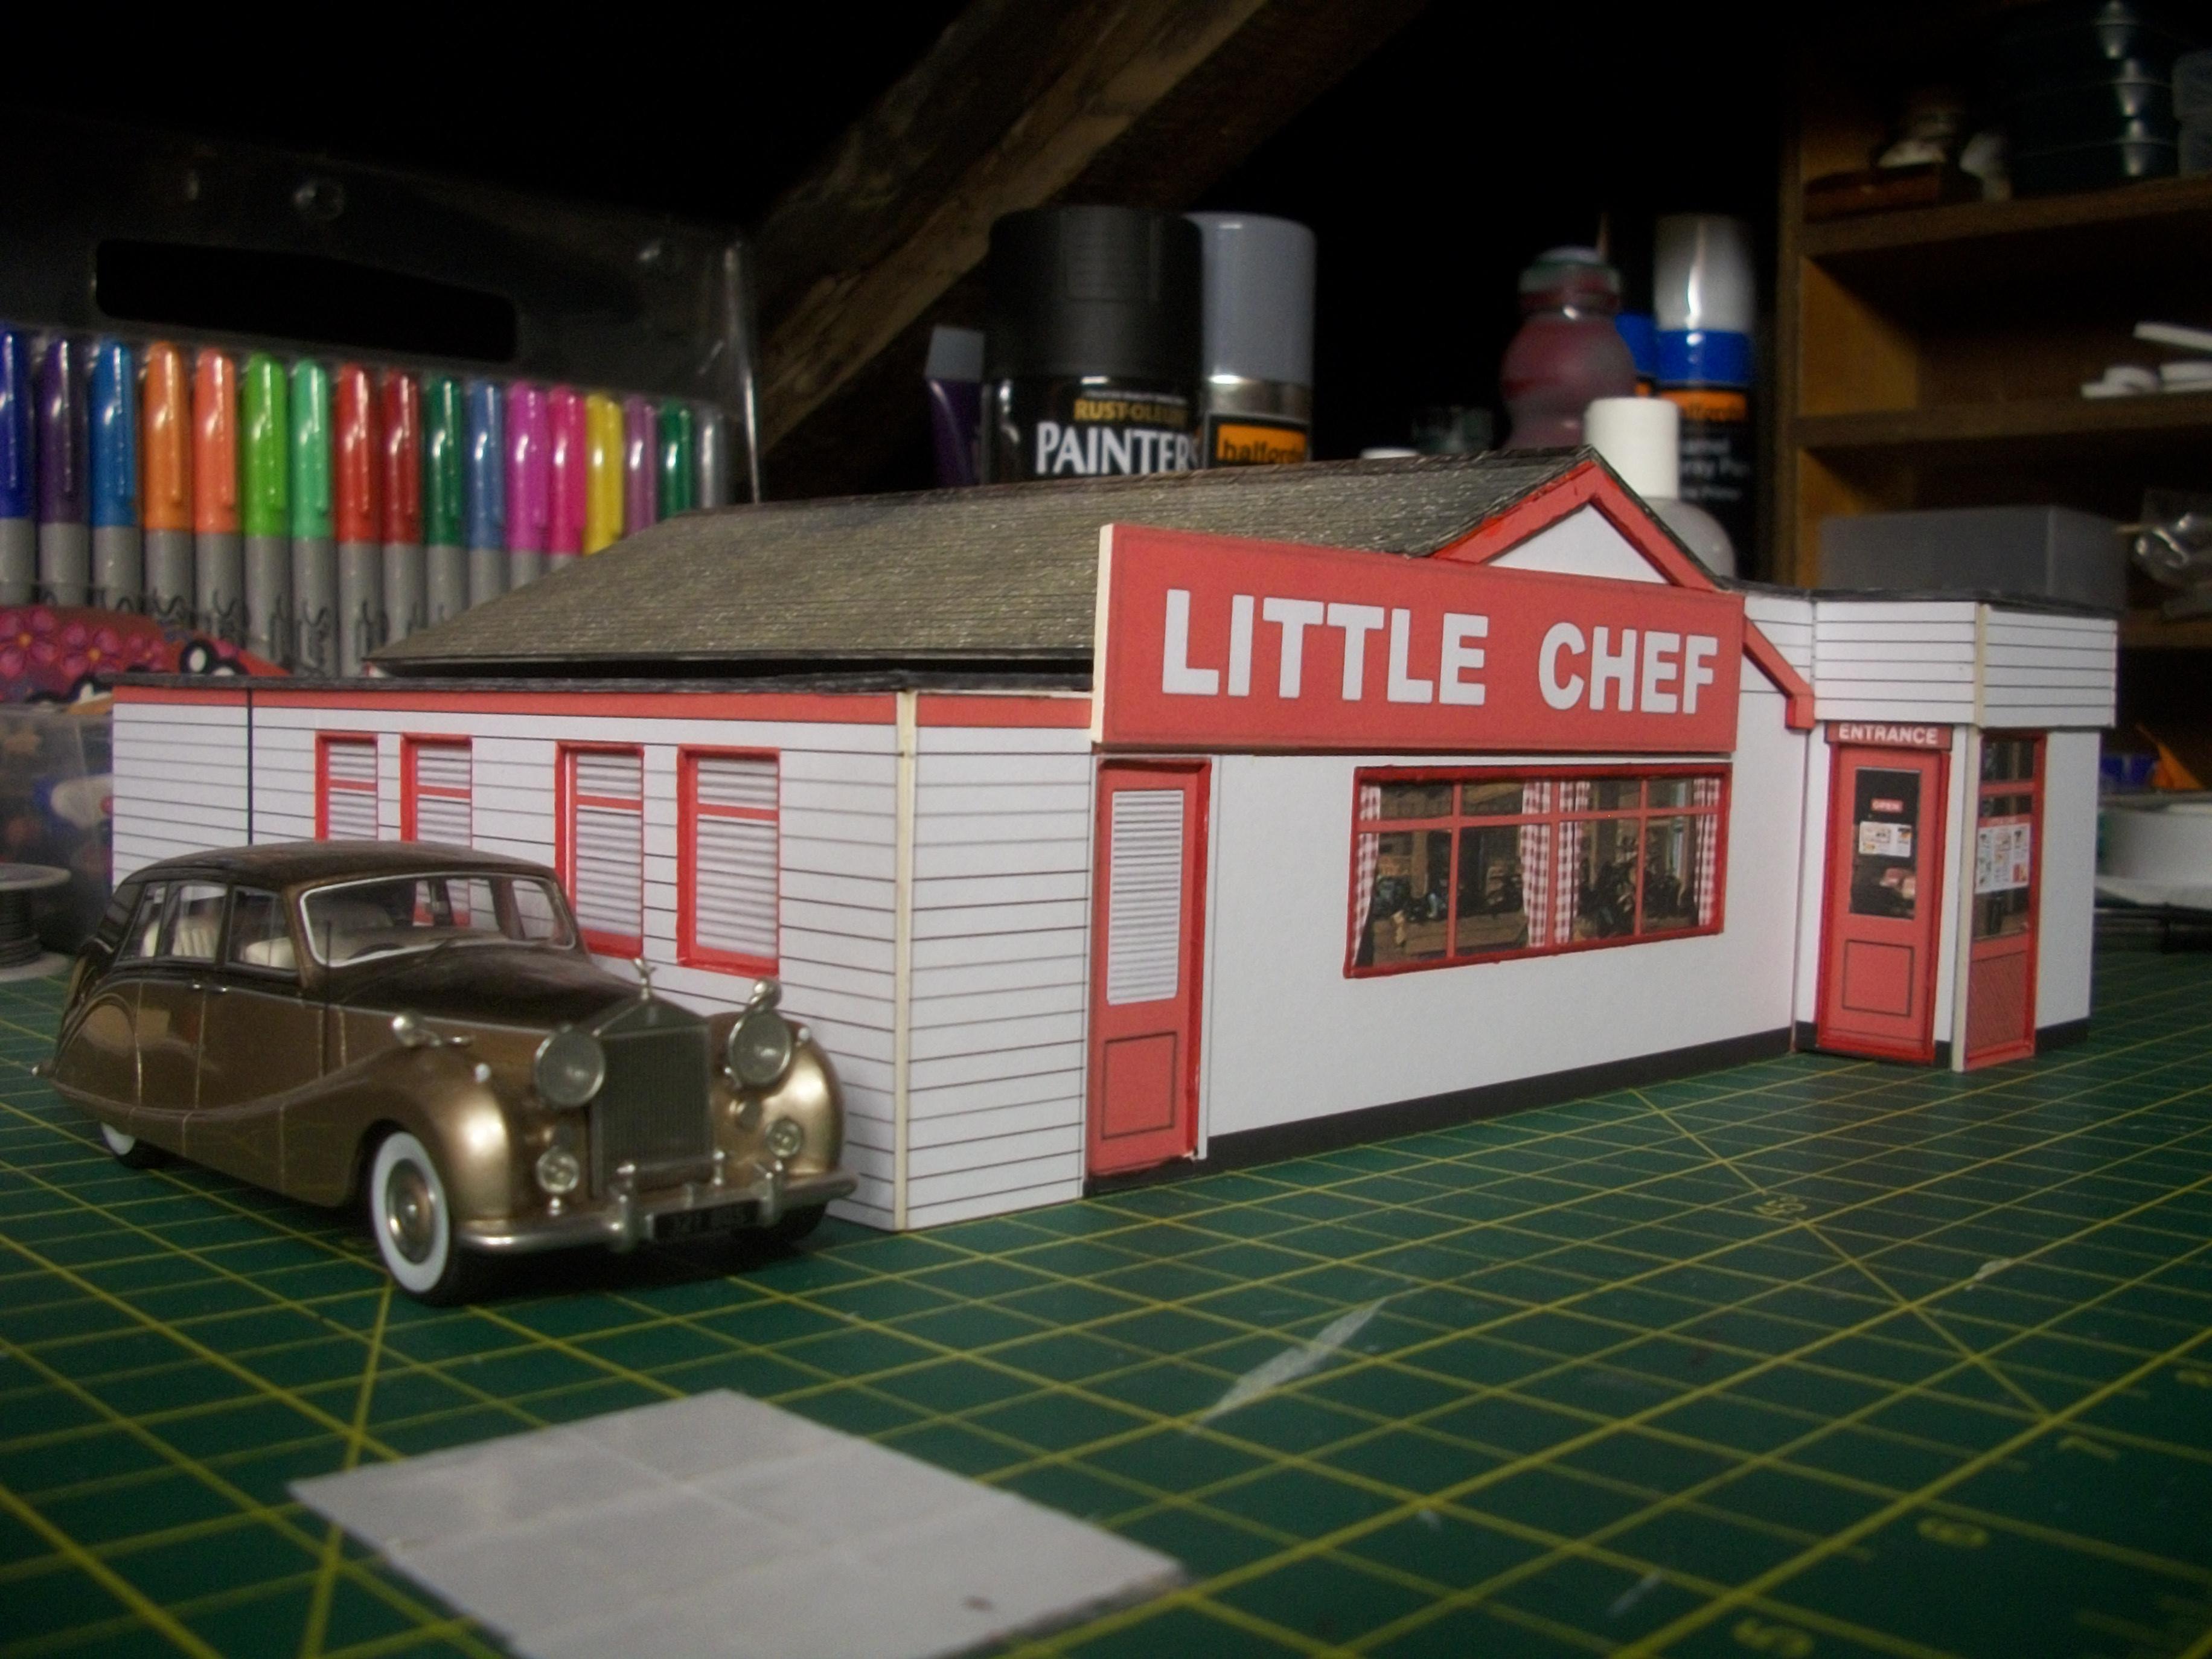
I have nearly finished constructing a 1:43 scale model of a Little Chef restaurant building, which is from a card building kit. The Little Chef chain of restaurants was a well known brand name in Great Britain, and the company was in business from 1958 to 2018 when the licence expired after 60 years. Most drivers in the UK have fond memories of stopping for breakfast or lunch at a Little Chef, including myself. The food was excellent and the service was very friendly and welcoming. My terraced houses diorama in 1:43 scale represents how life was in 1959, so there could easily have been a Little Chef restaurant in the vicinity at that time. David
-
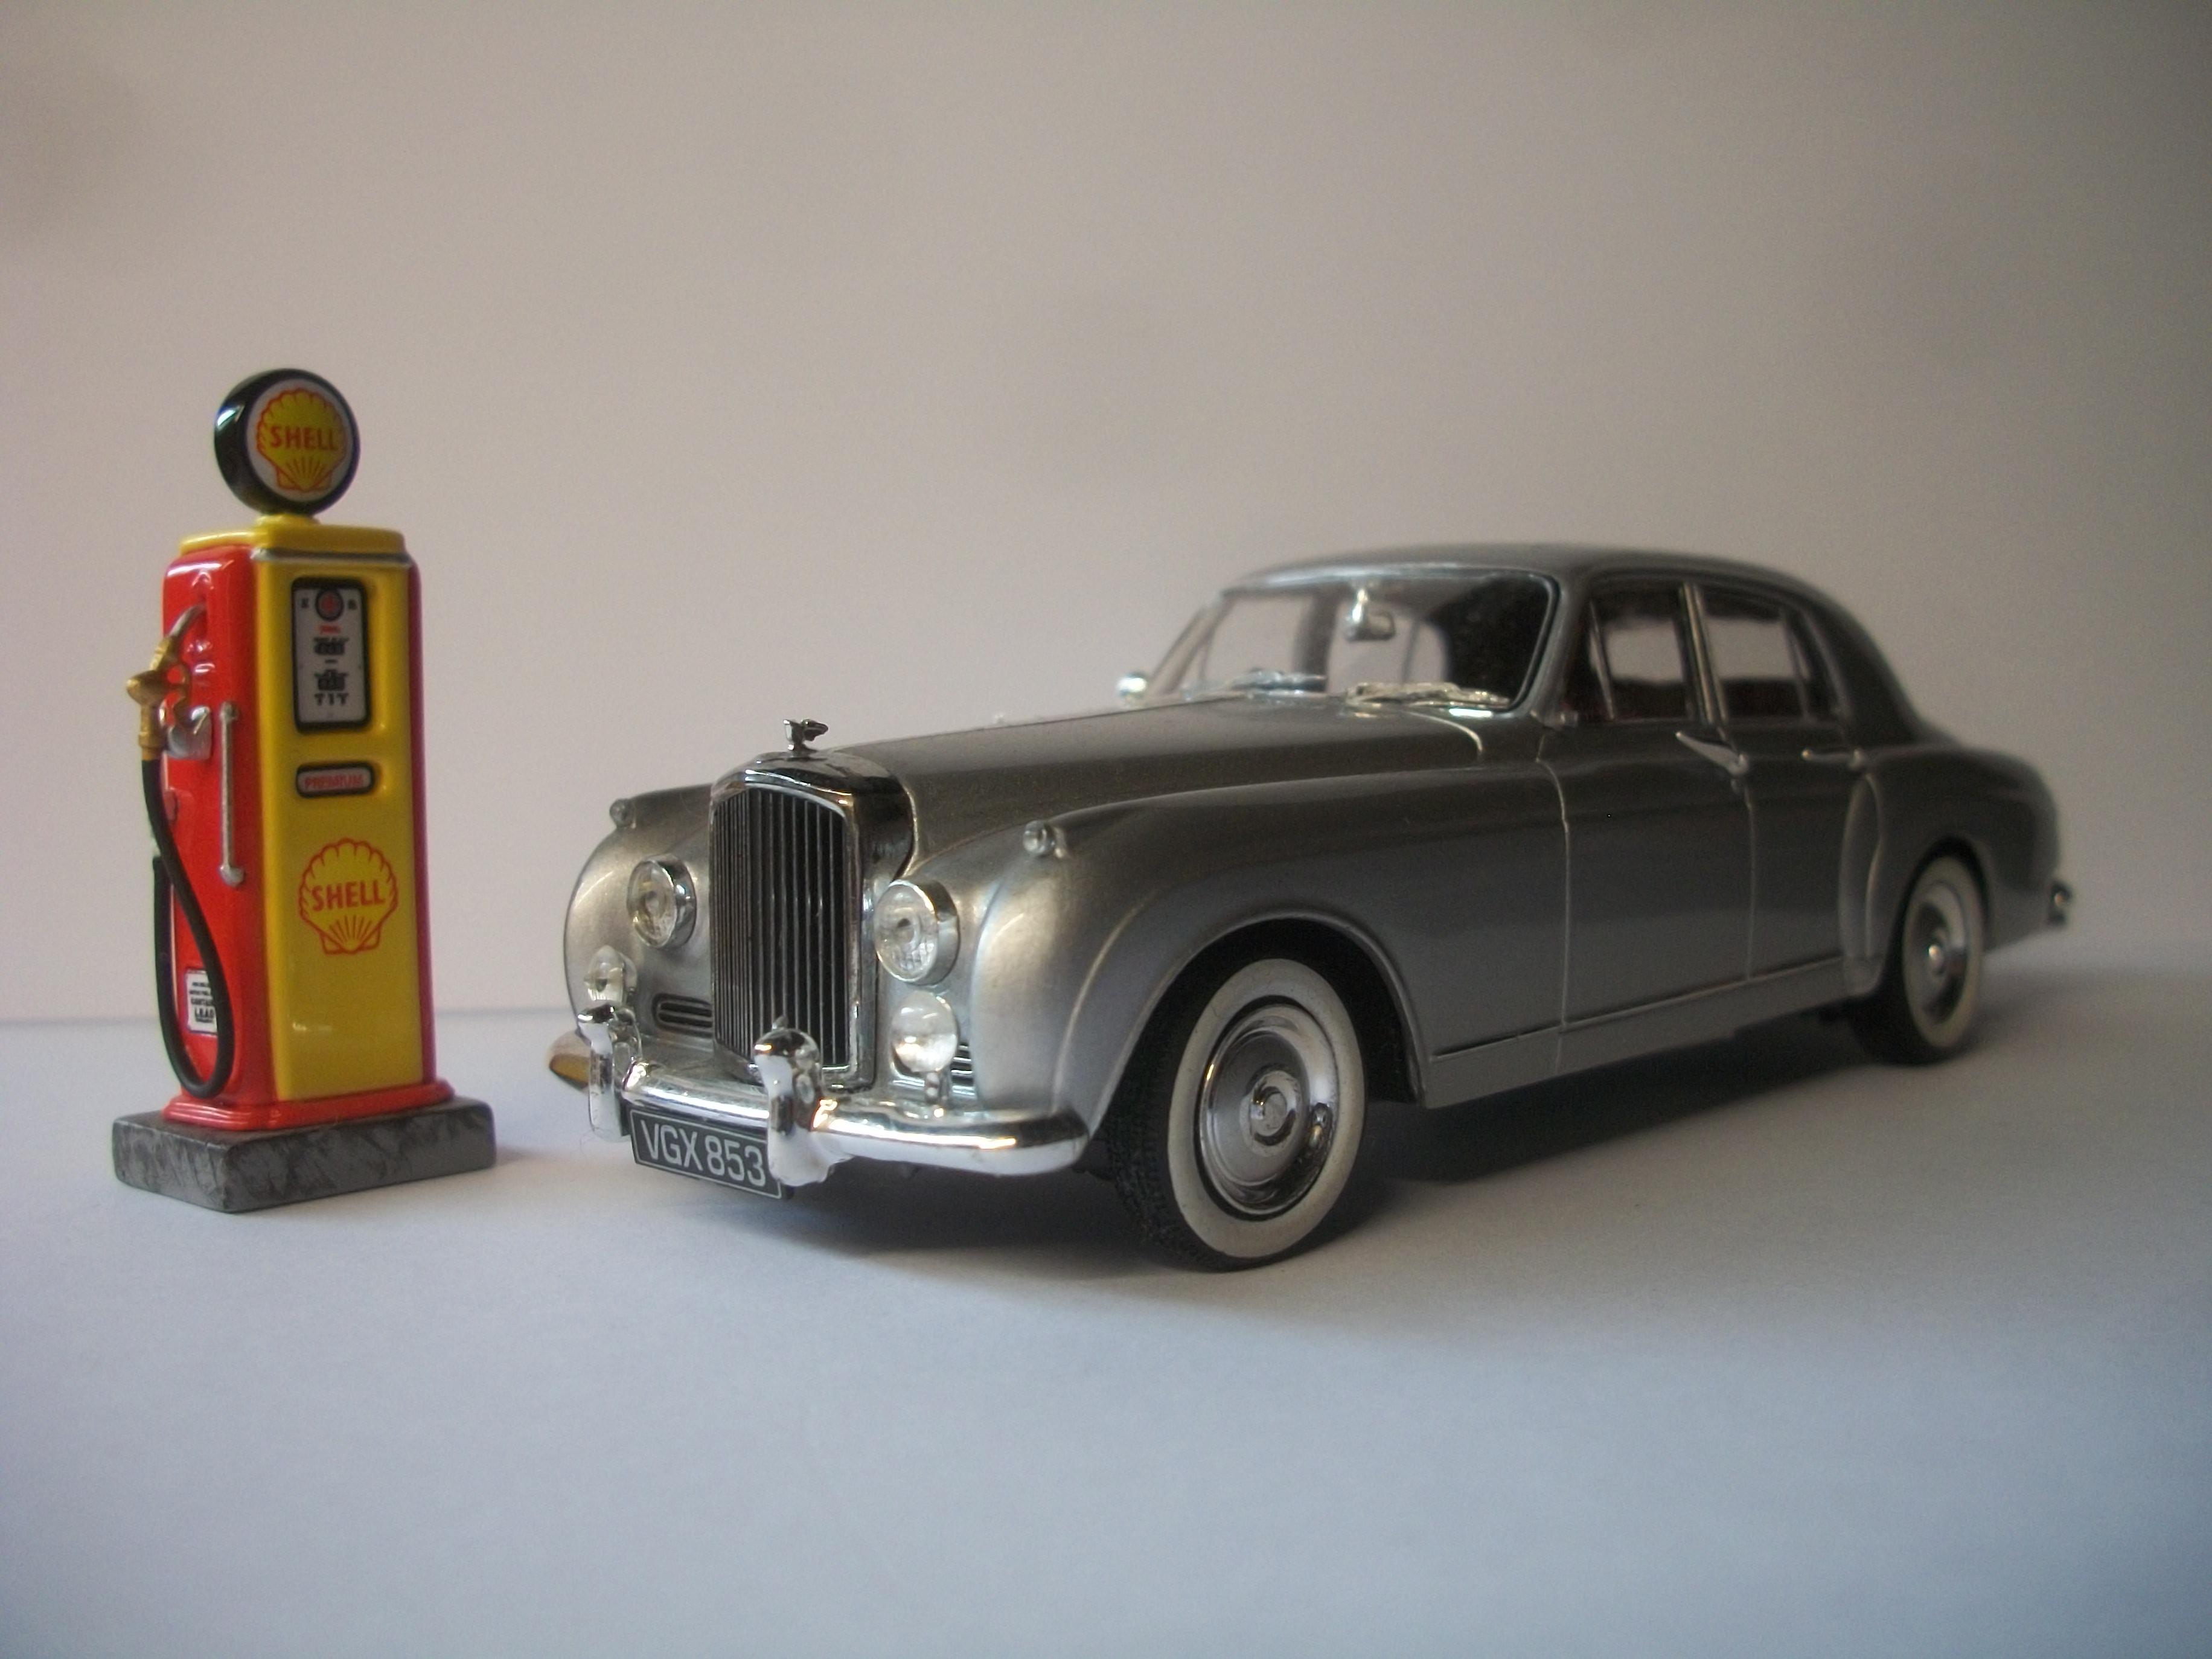
? Cheers, Pat...... thanks buddy! I forgot to mention..... the car in the shot is a 1930 Bentley 8 litre straight-six by Lansdowne Models, and was the car owned by W.O. Bentley himself. David
-
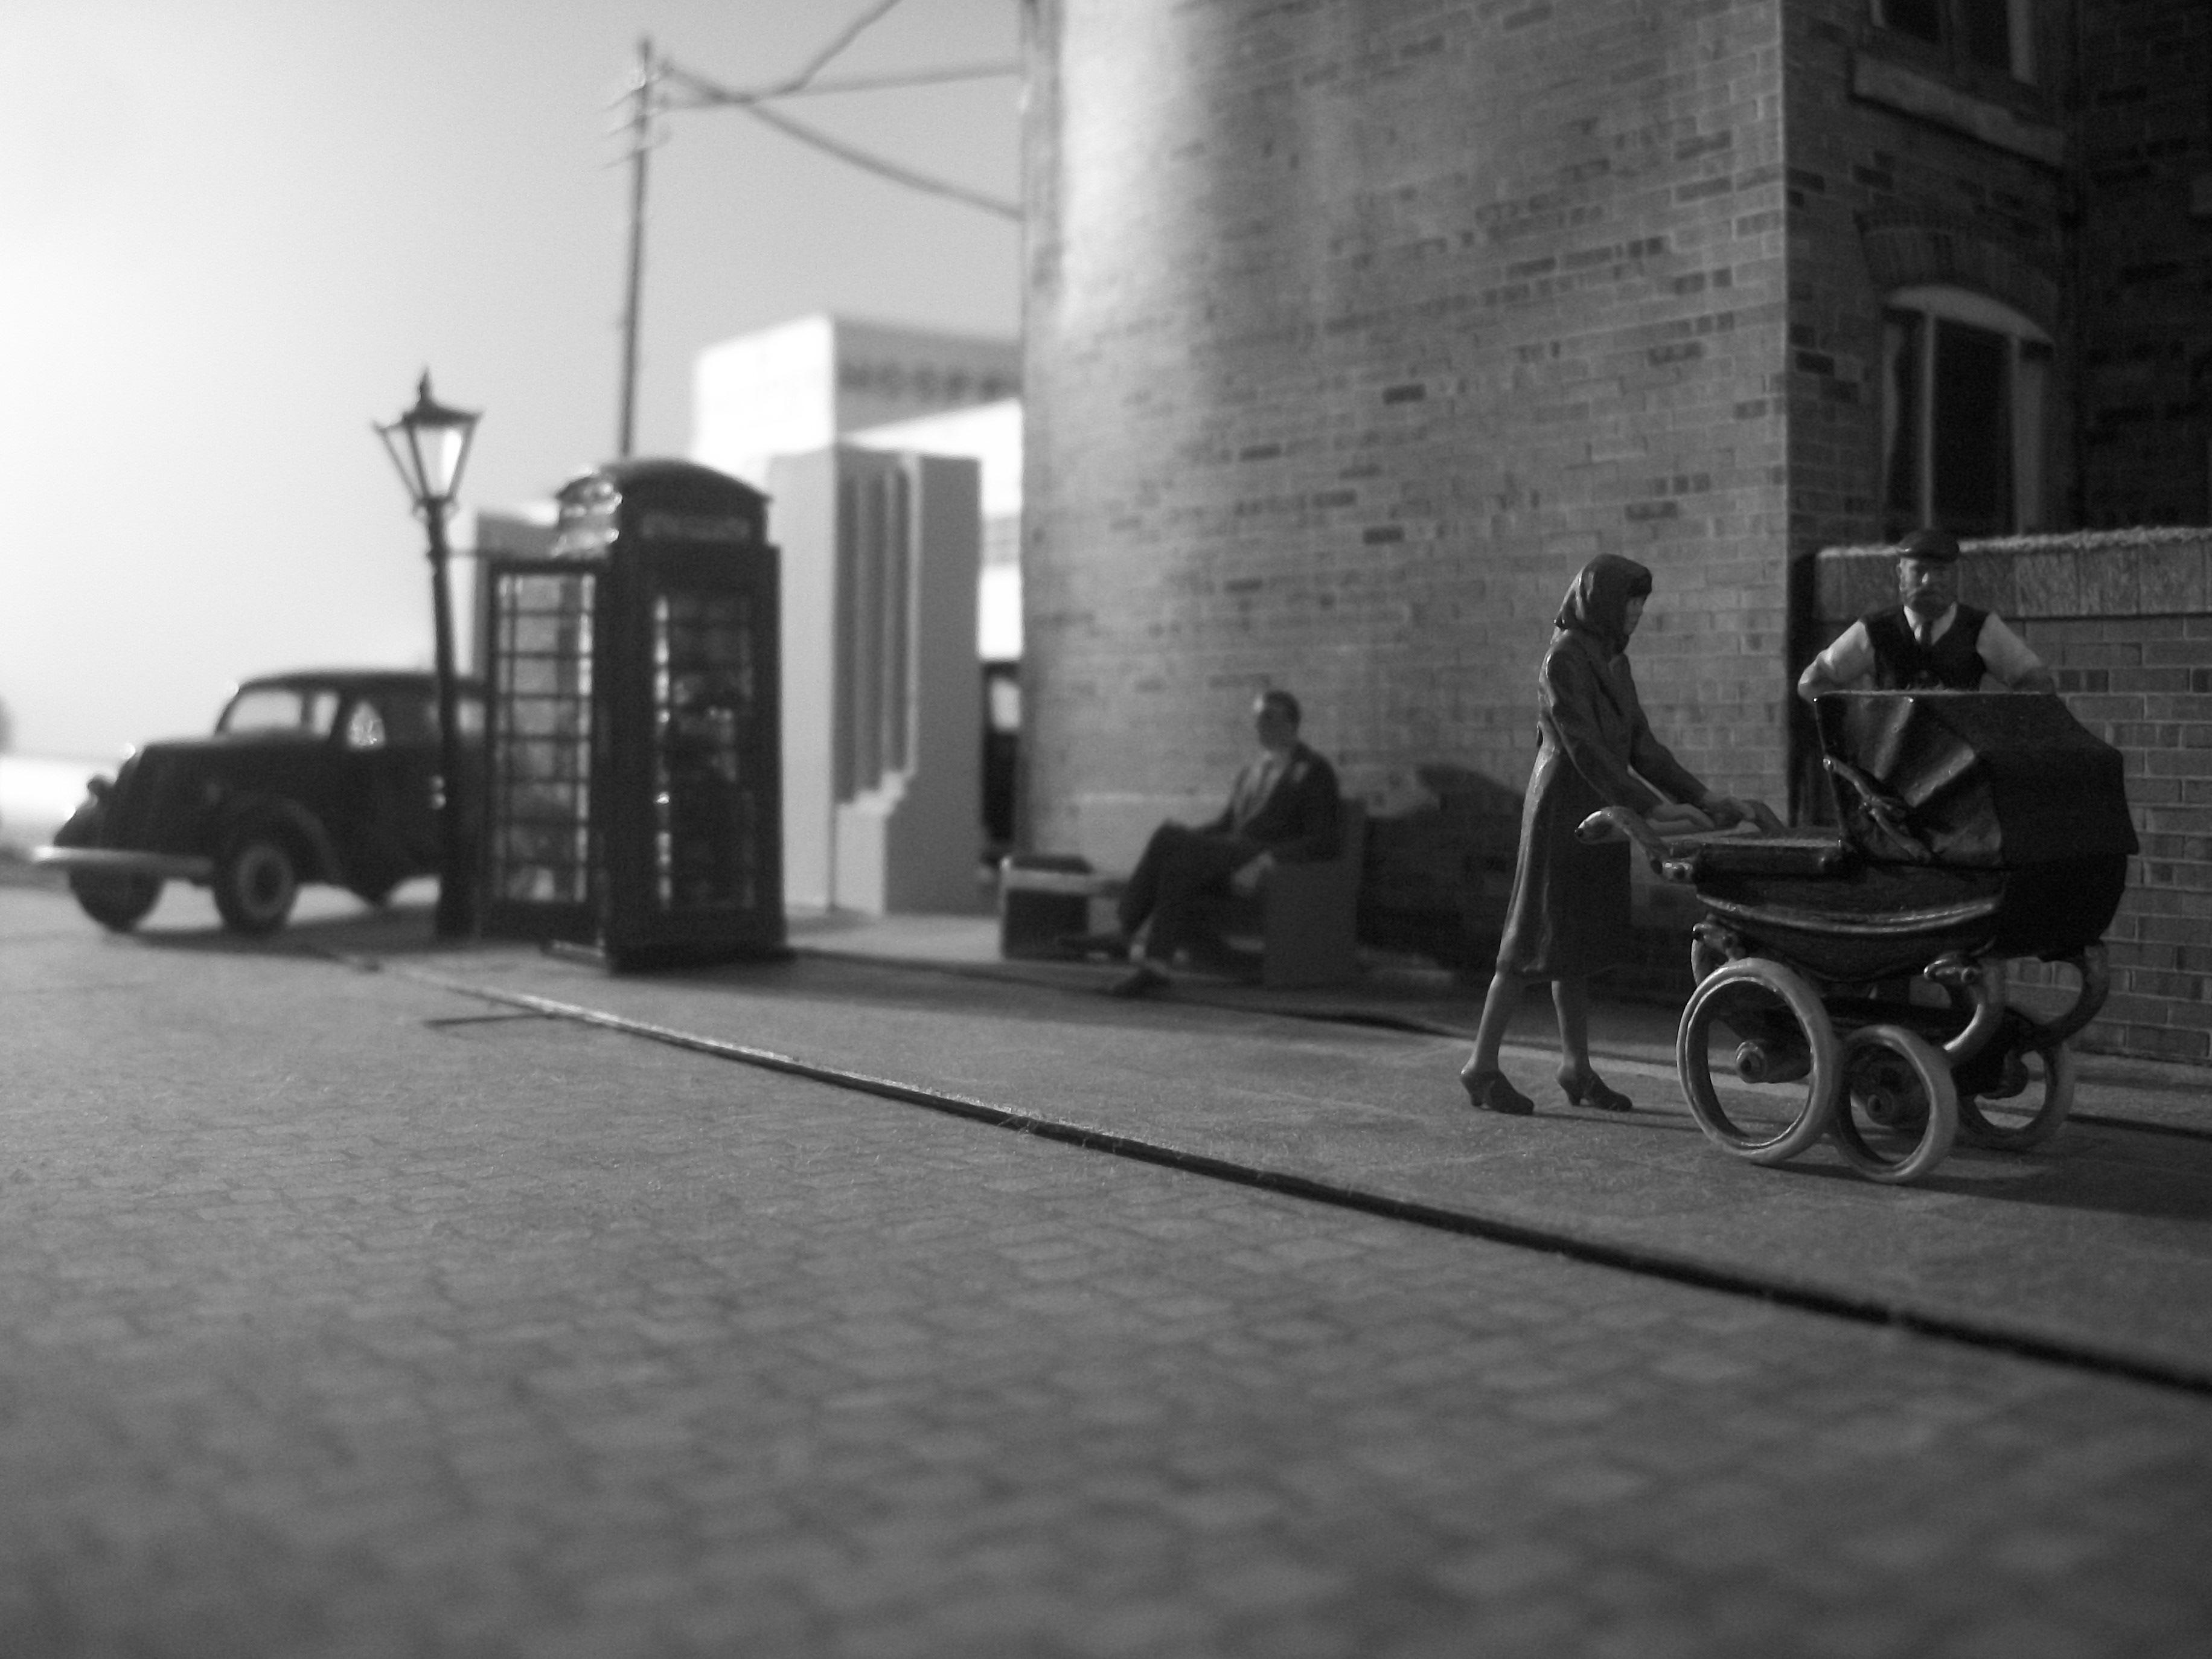
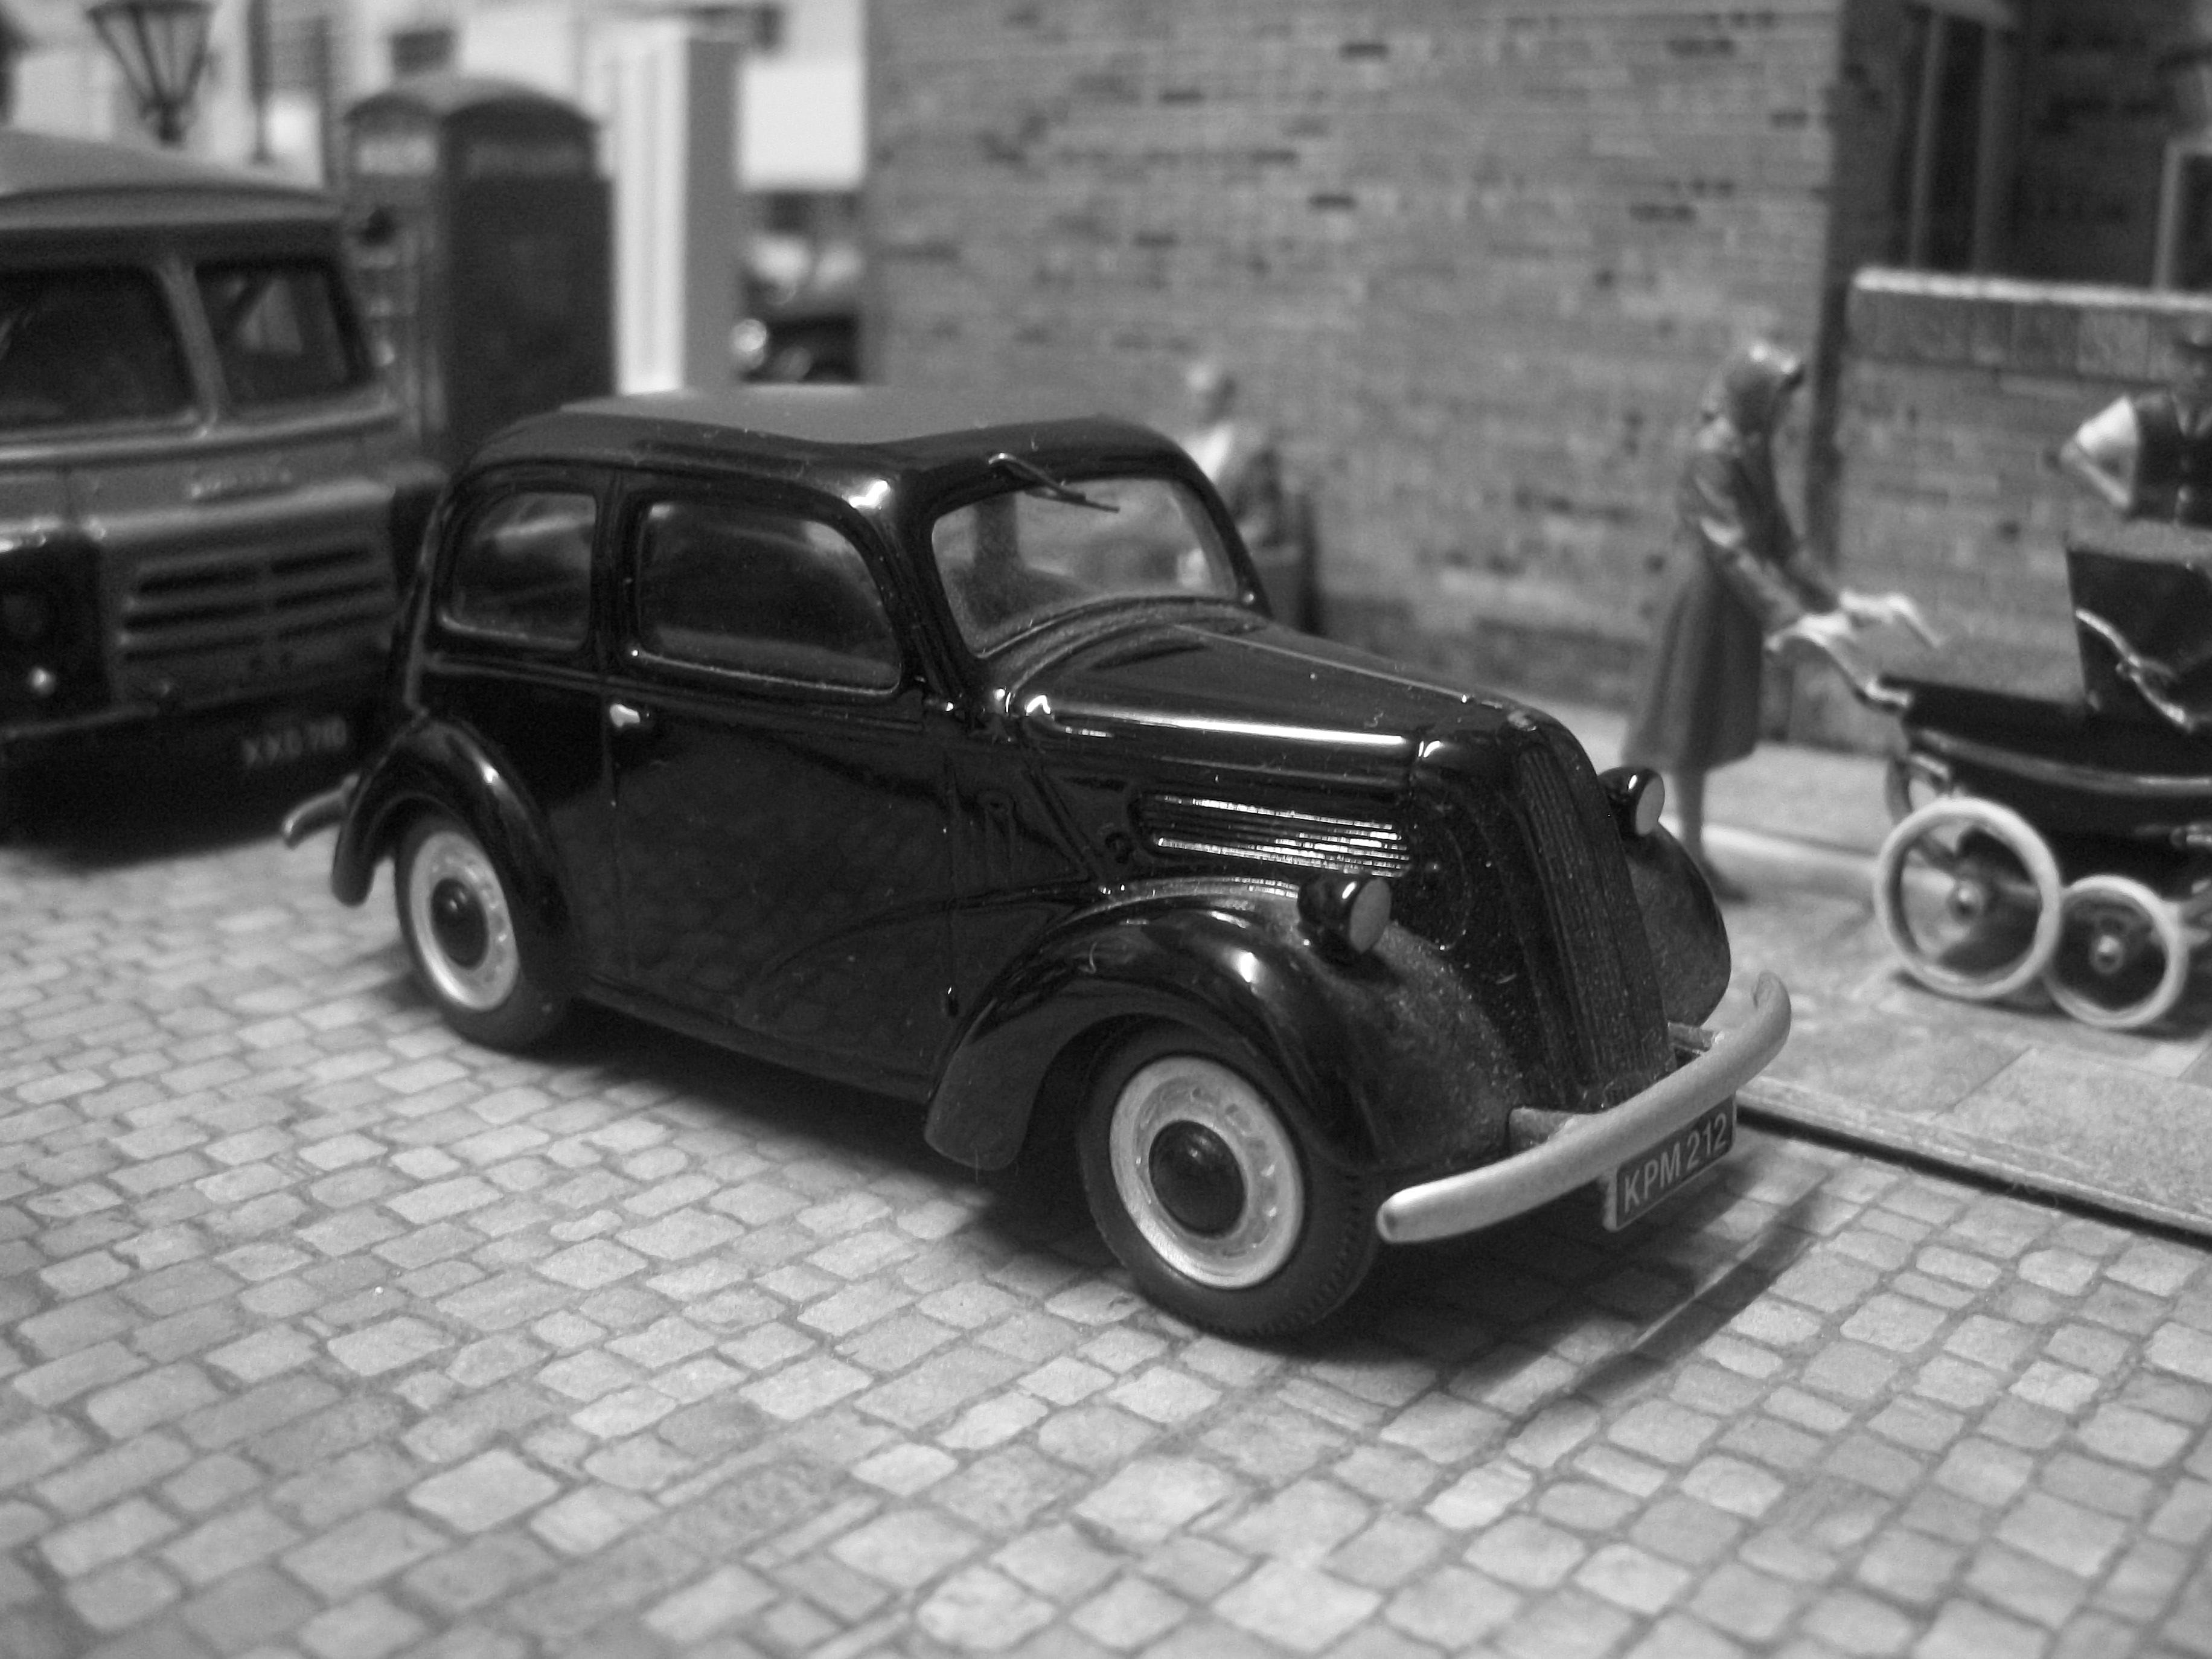
Today was a good day for some outdoor photography and this single photograph in B&W was taken in bright sunlight, but with some grey clouds adding to the overcast weather conditions. Using one scale model motor car and one figure, both in 1:43 scale, a batch of 44 shots was produced. From this batch of photos I have selected what I consider to be the best shot, because it has a sense of drama about it. I have deliberately removed some of the clarity in this shot, to enhance the quality of realism. David