Anglia105E
-
Posts
3,487 -
Joined
-
Last visited
Content Type
Profiles
Forums
Events
Gallery
Everything posted by Anglia105E
-
 A " behind the shop " scene such as you suggest would work, Pat...... because you can turn your whole diorama model around to show the back of the shop, I guess? David
 -
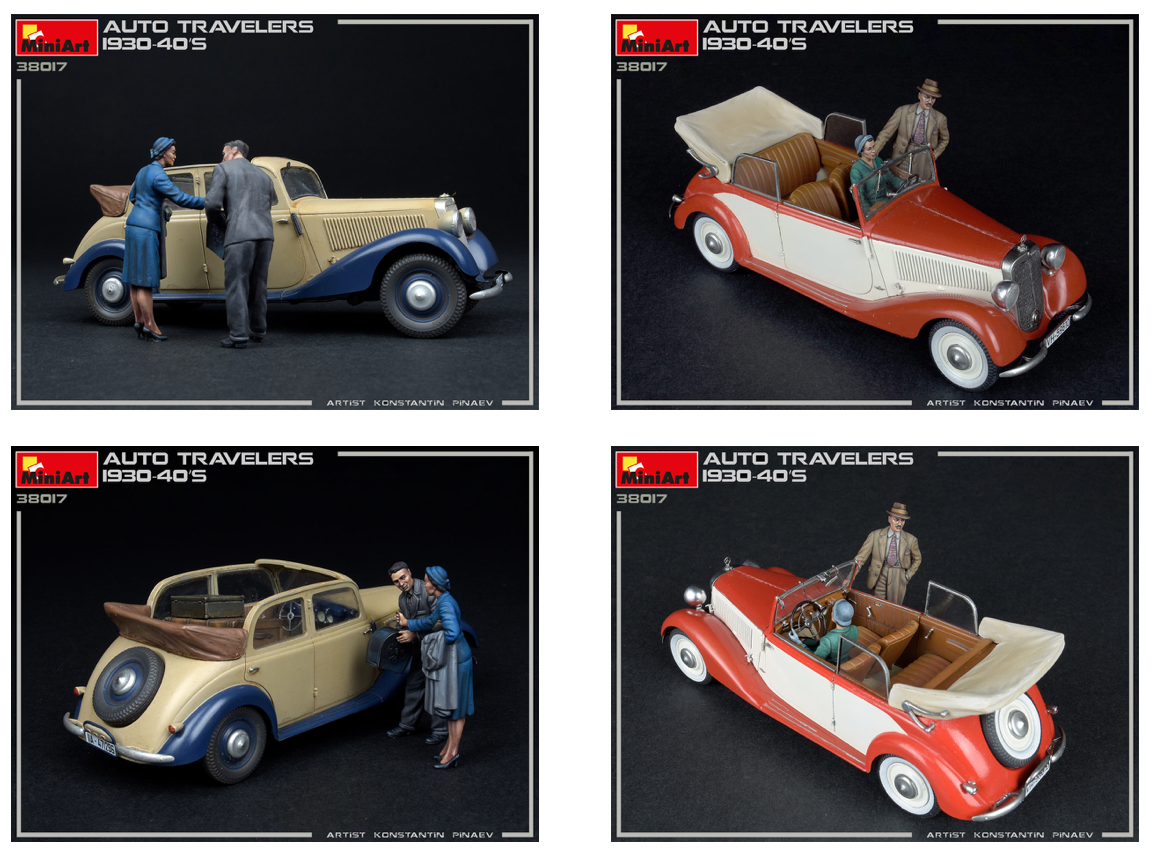
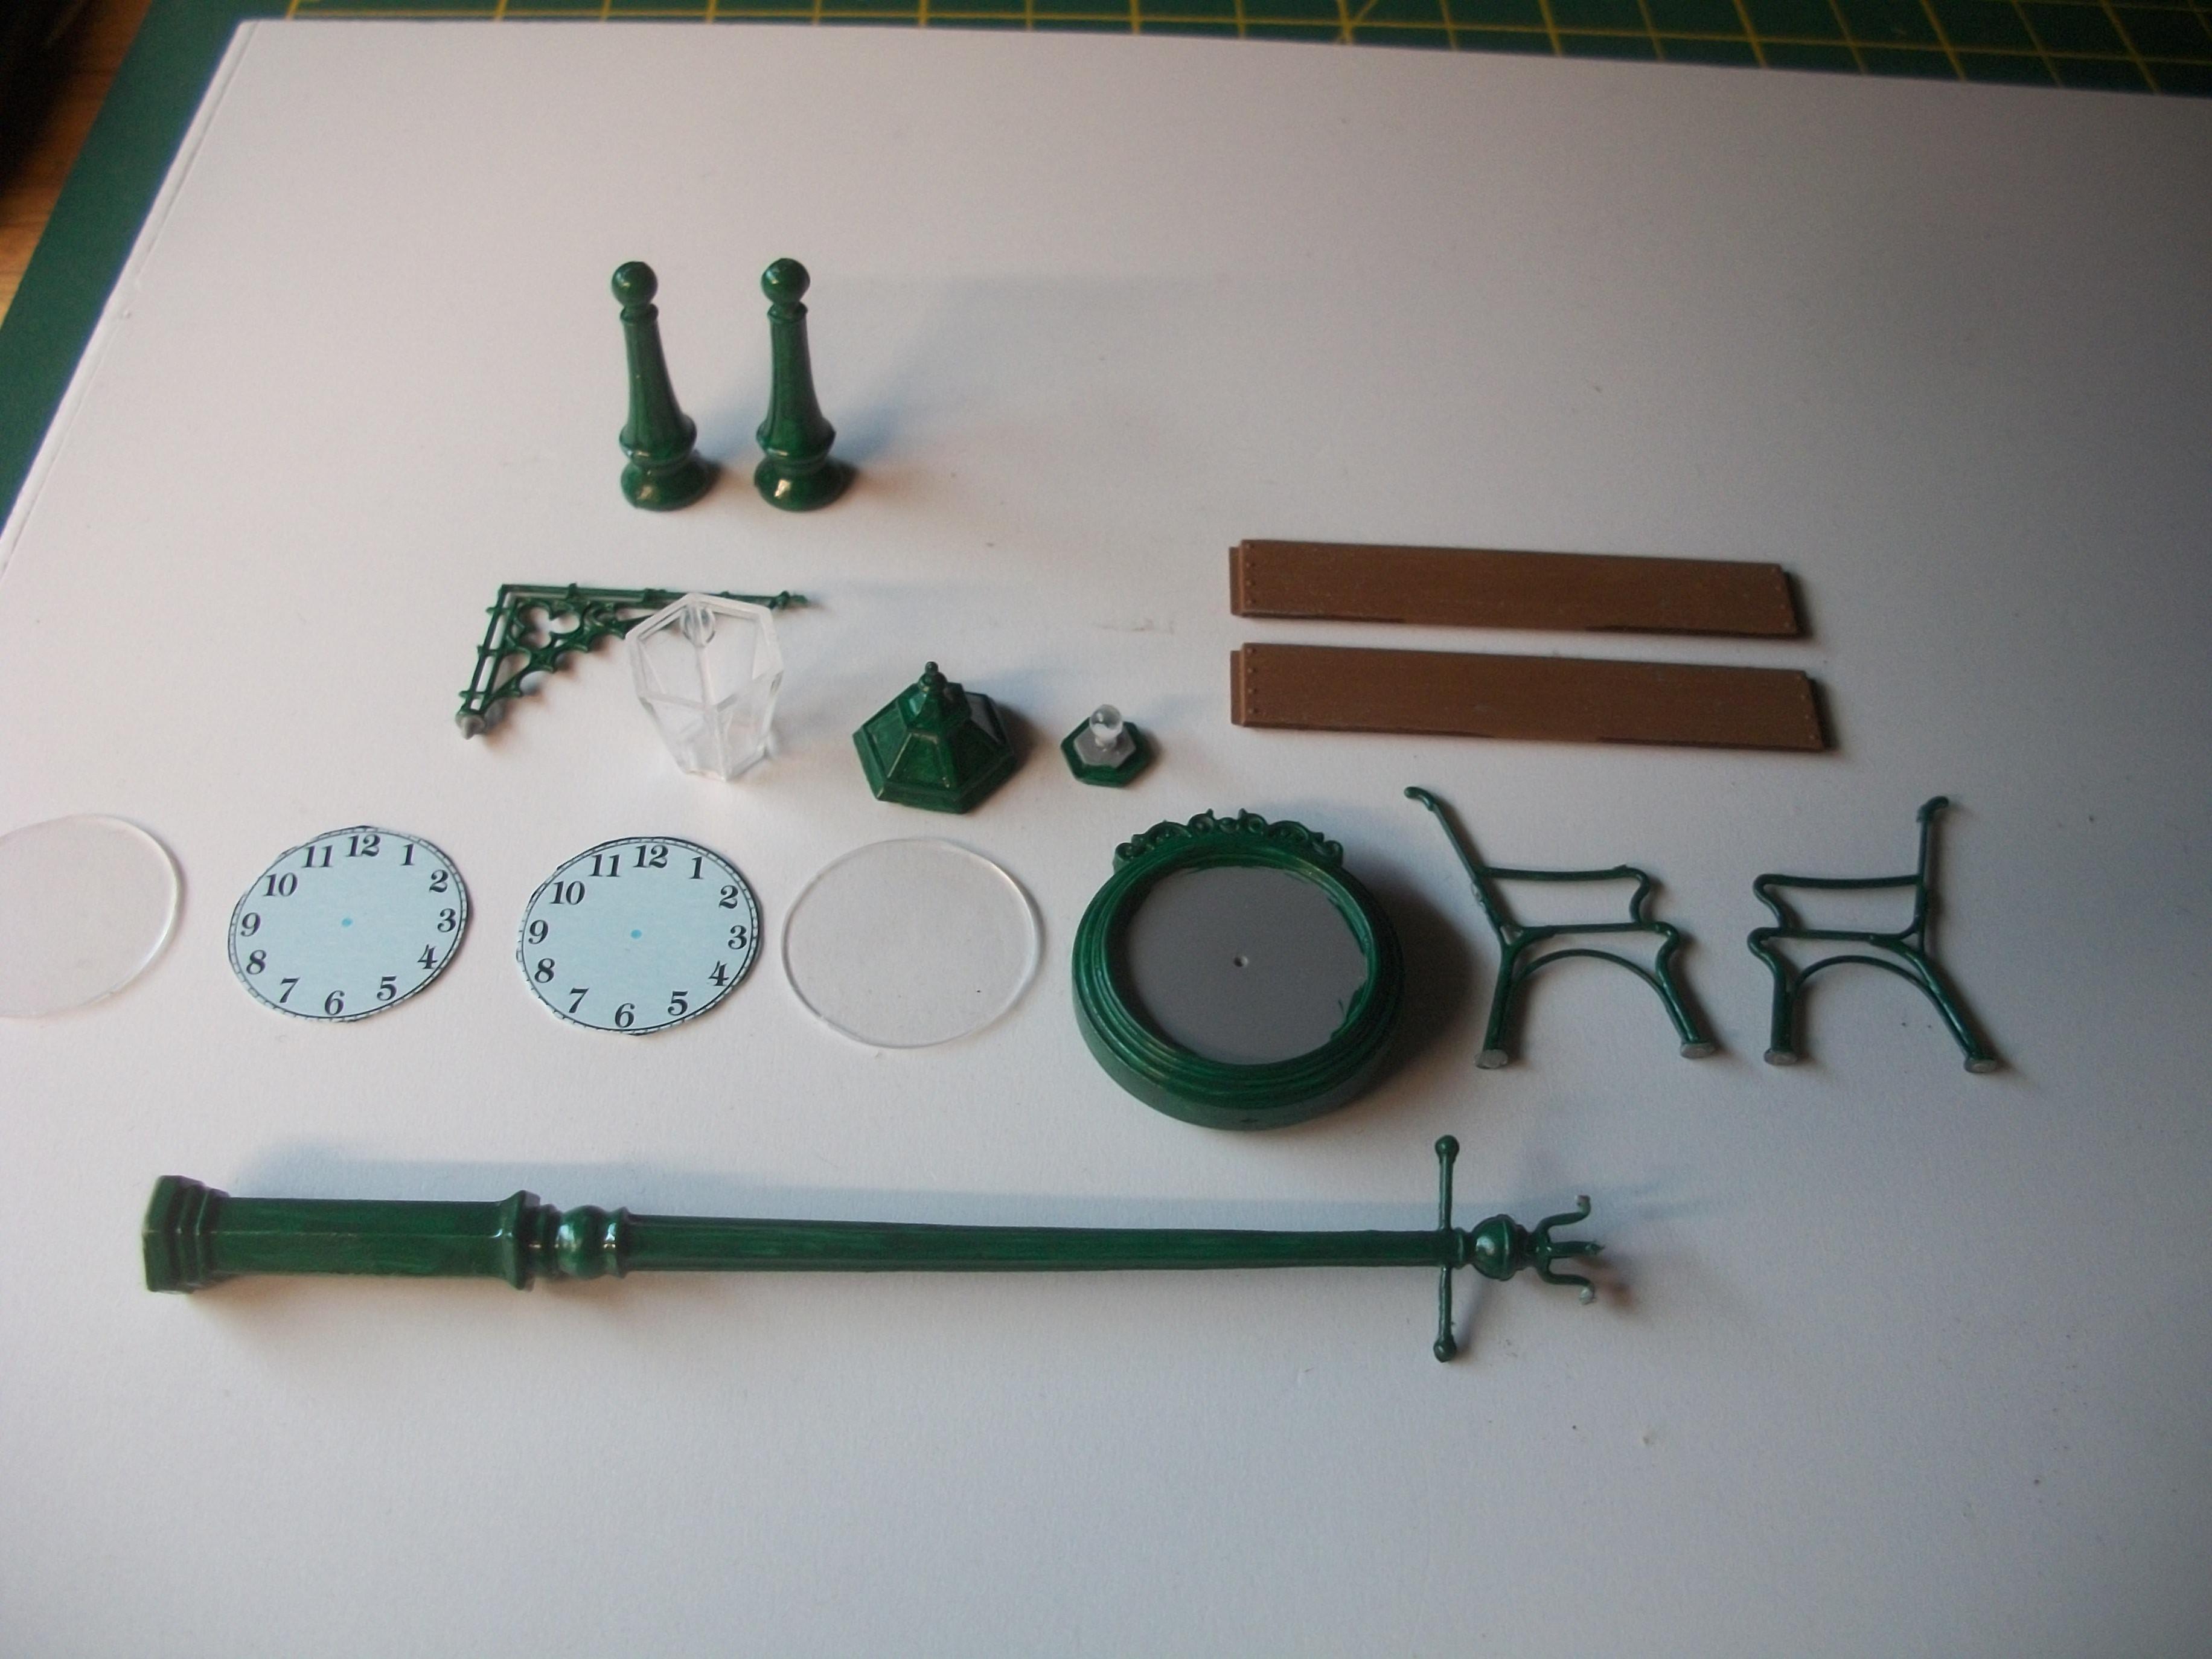
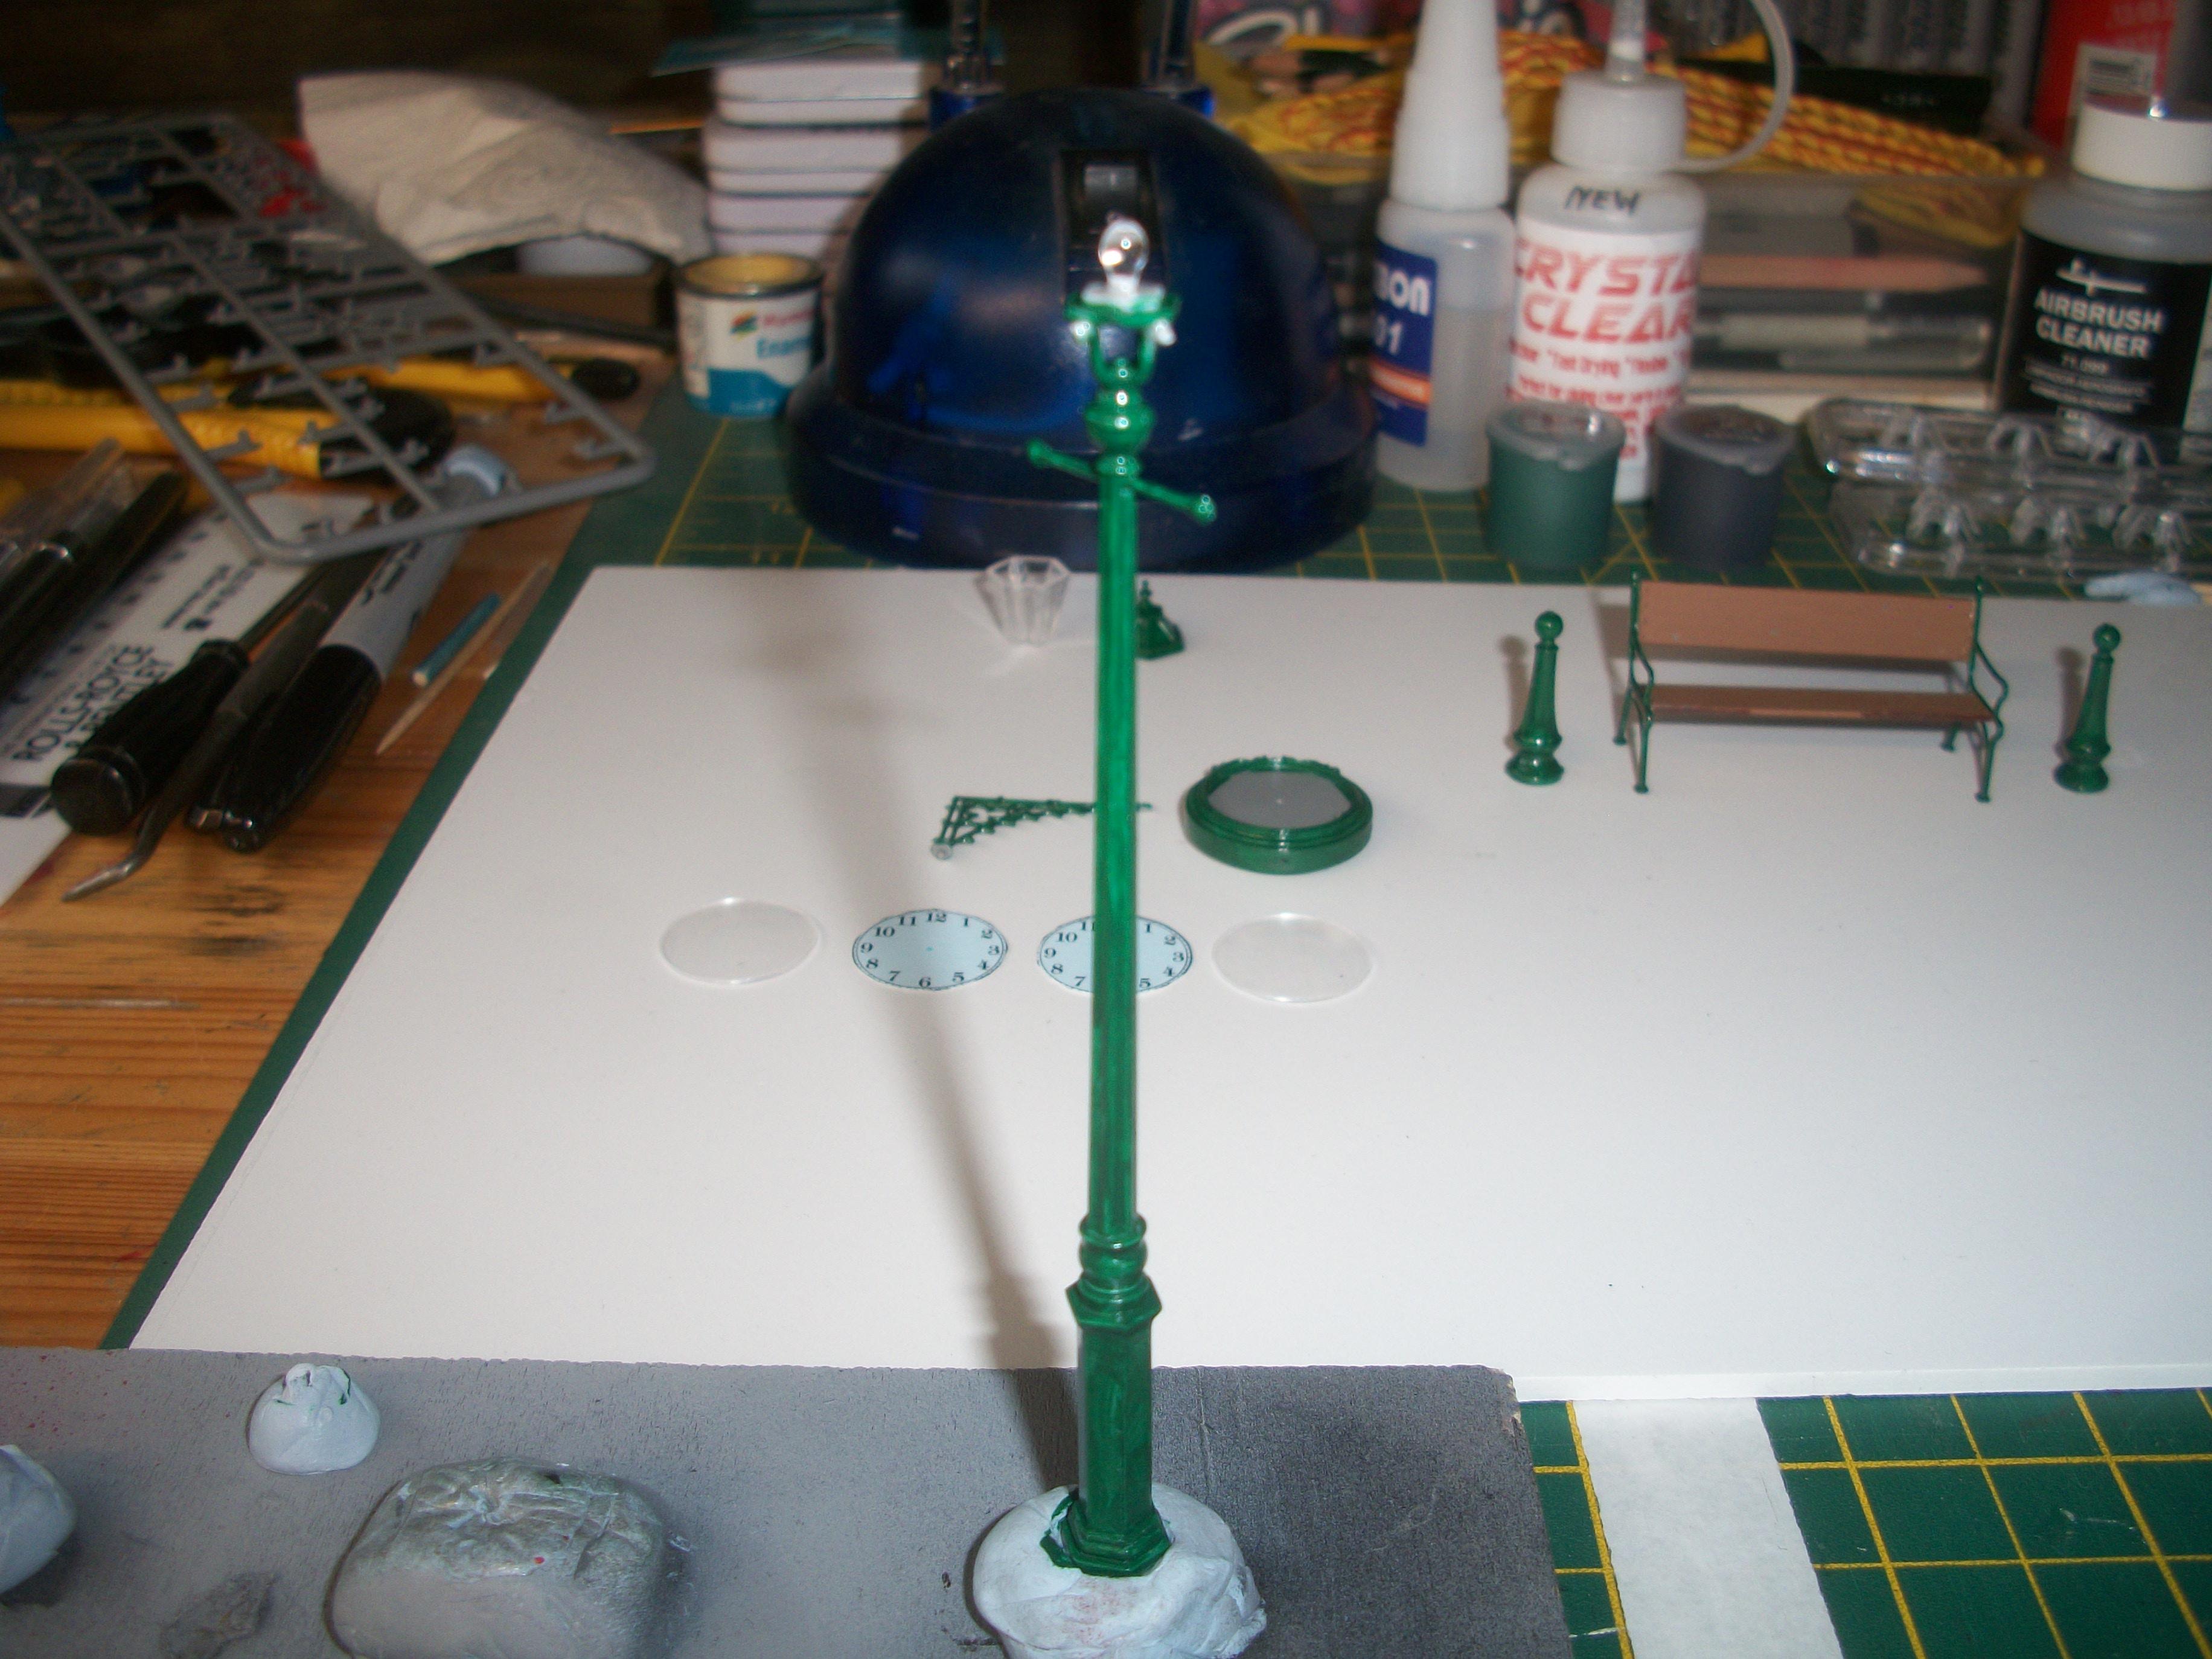
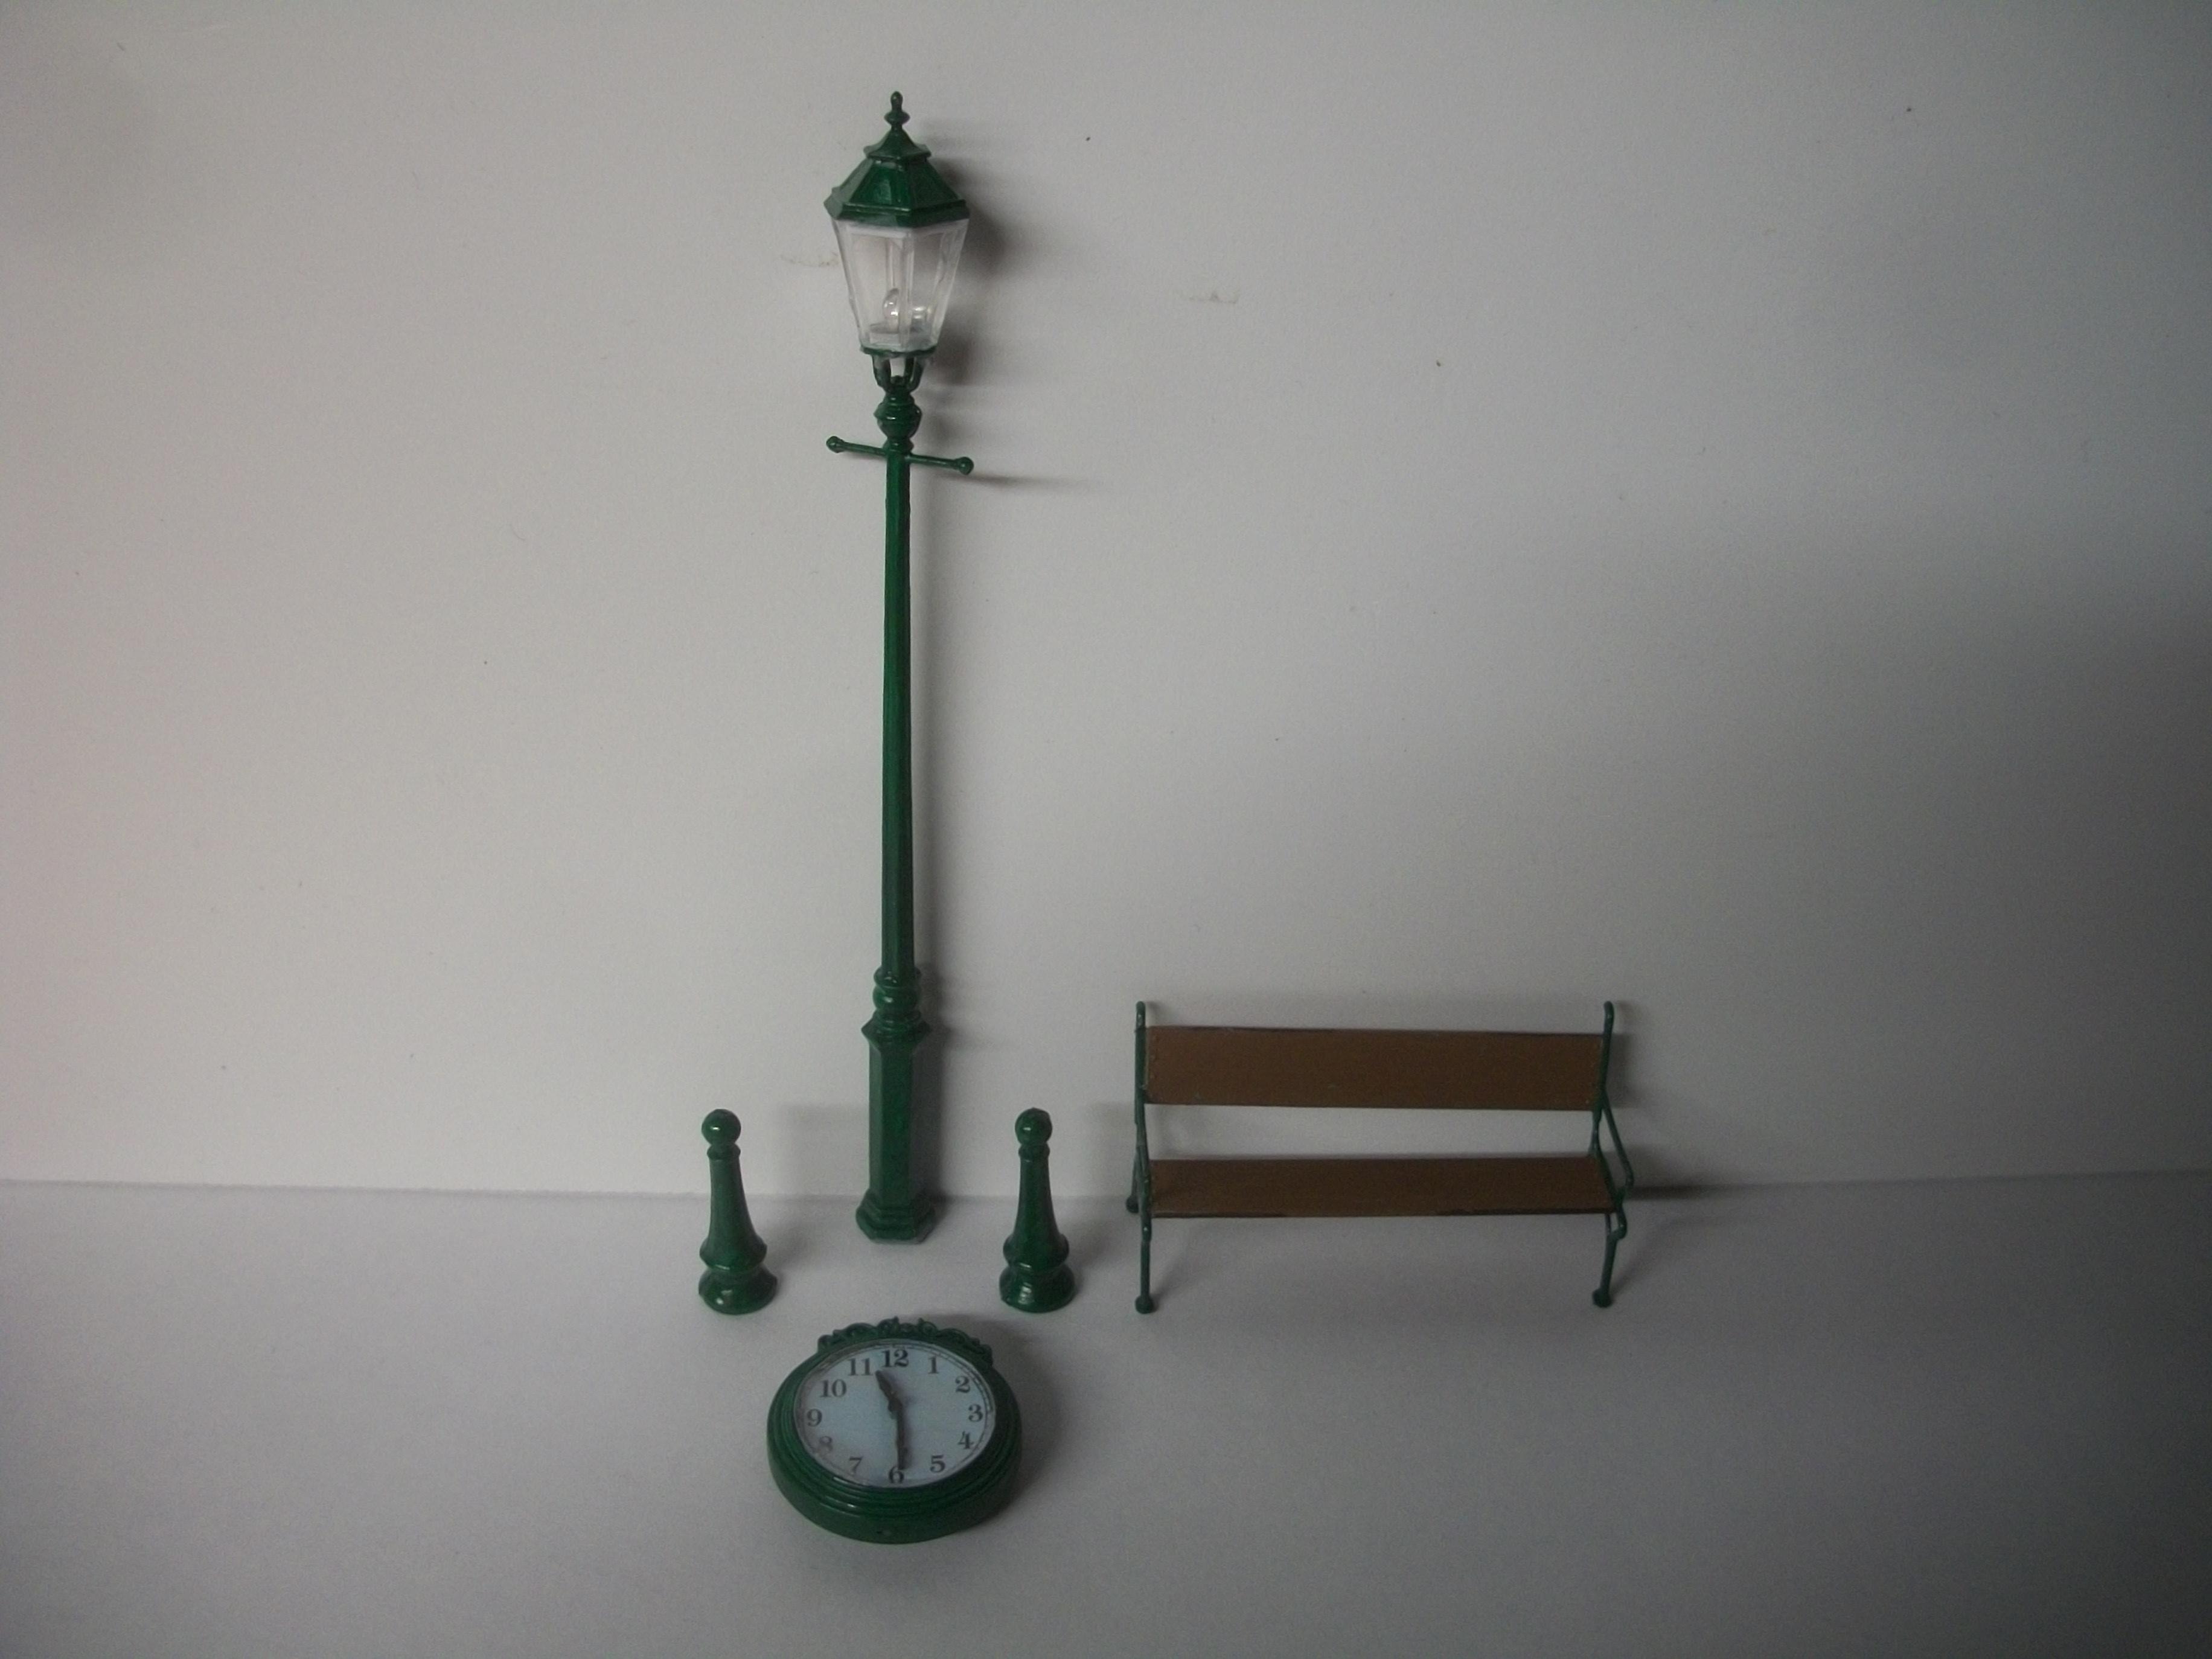
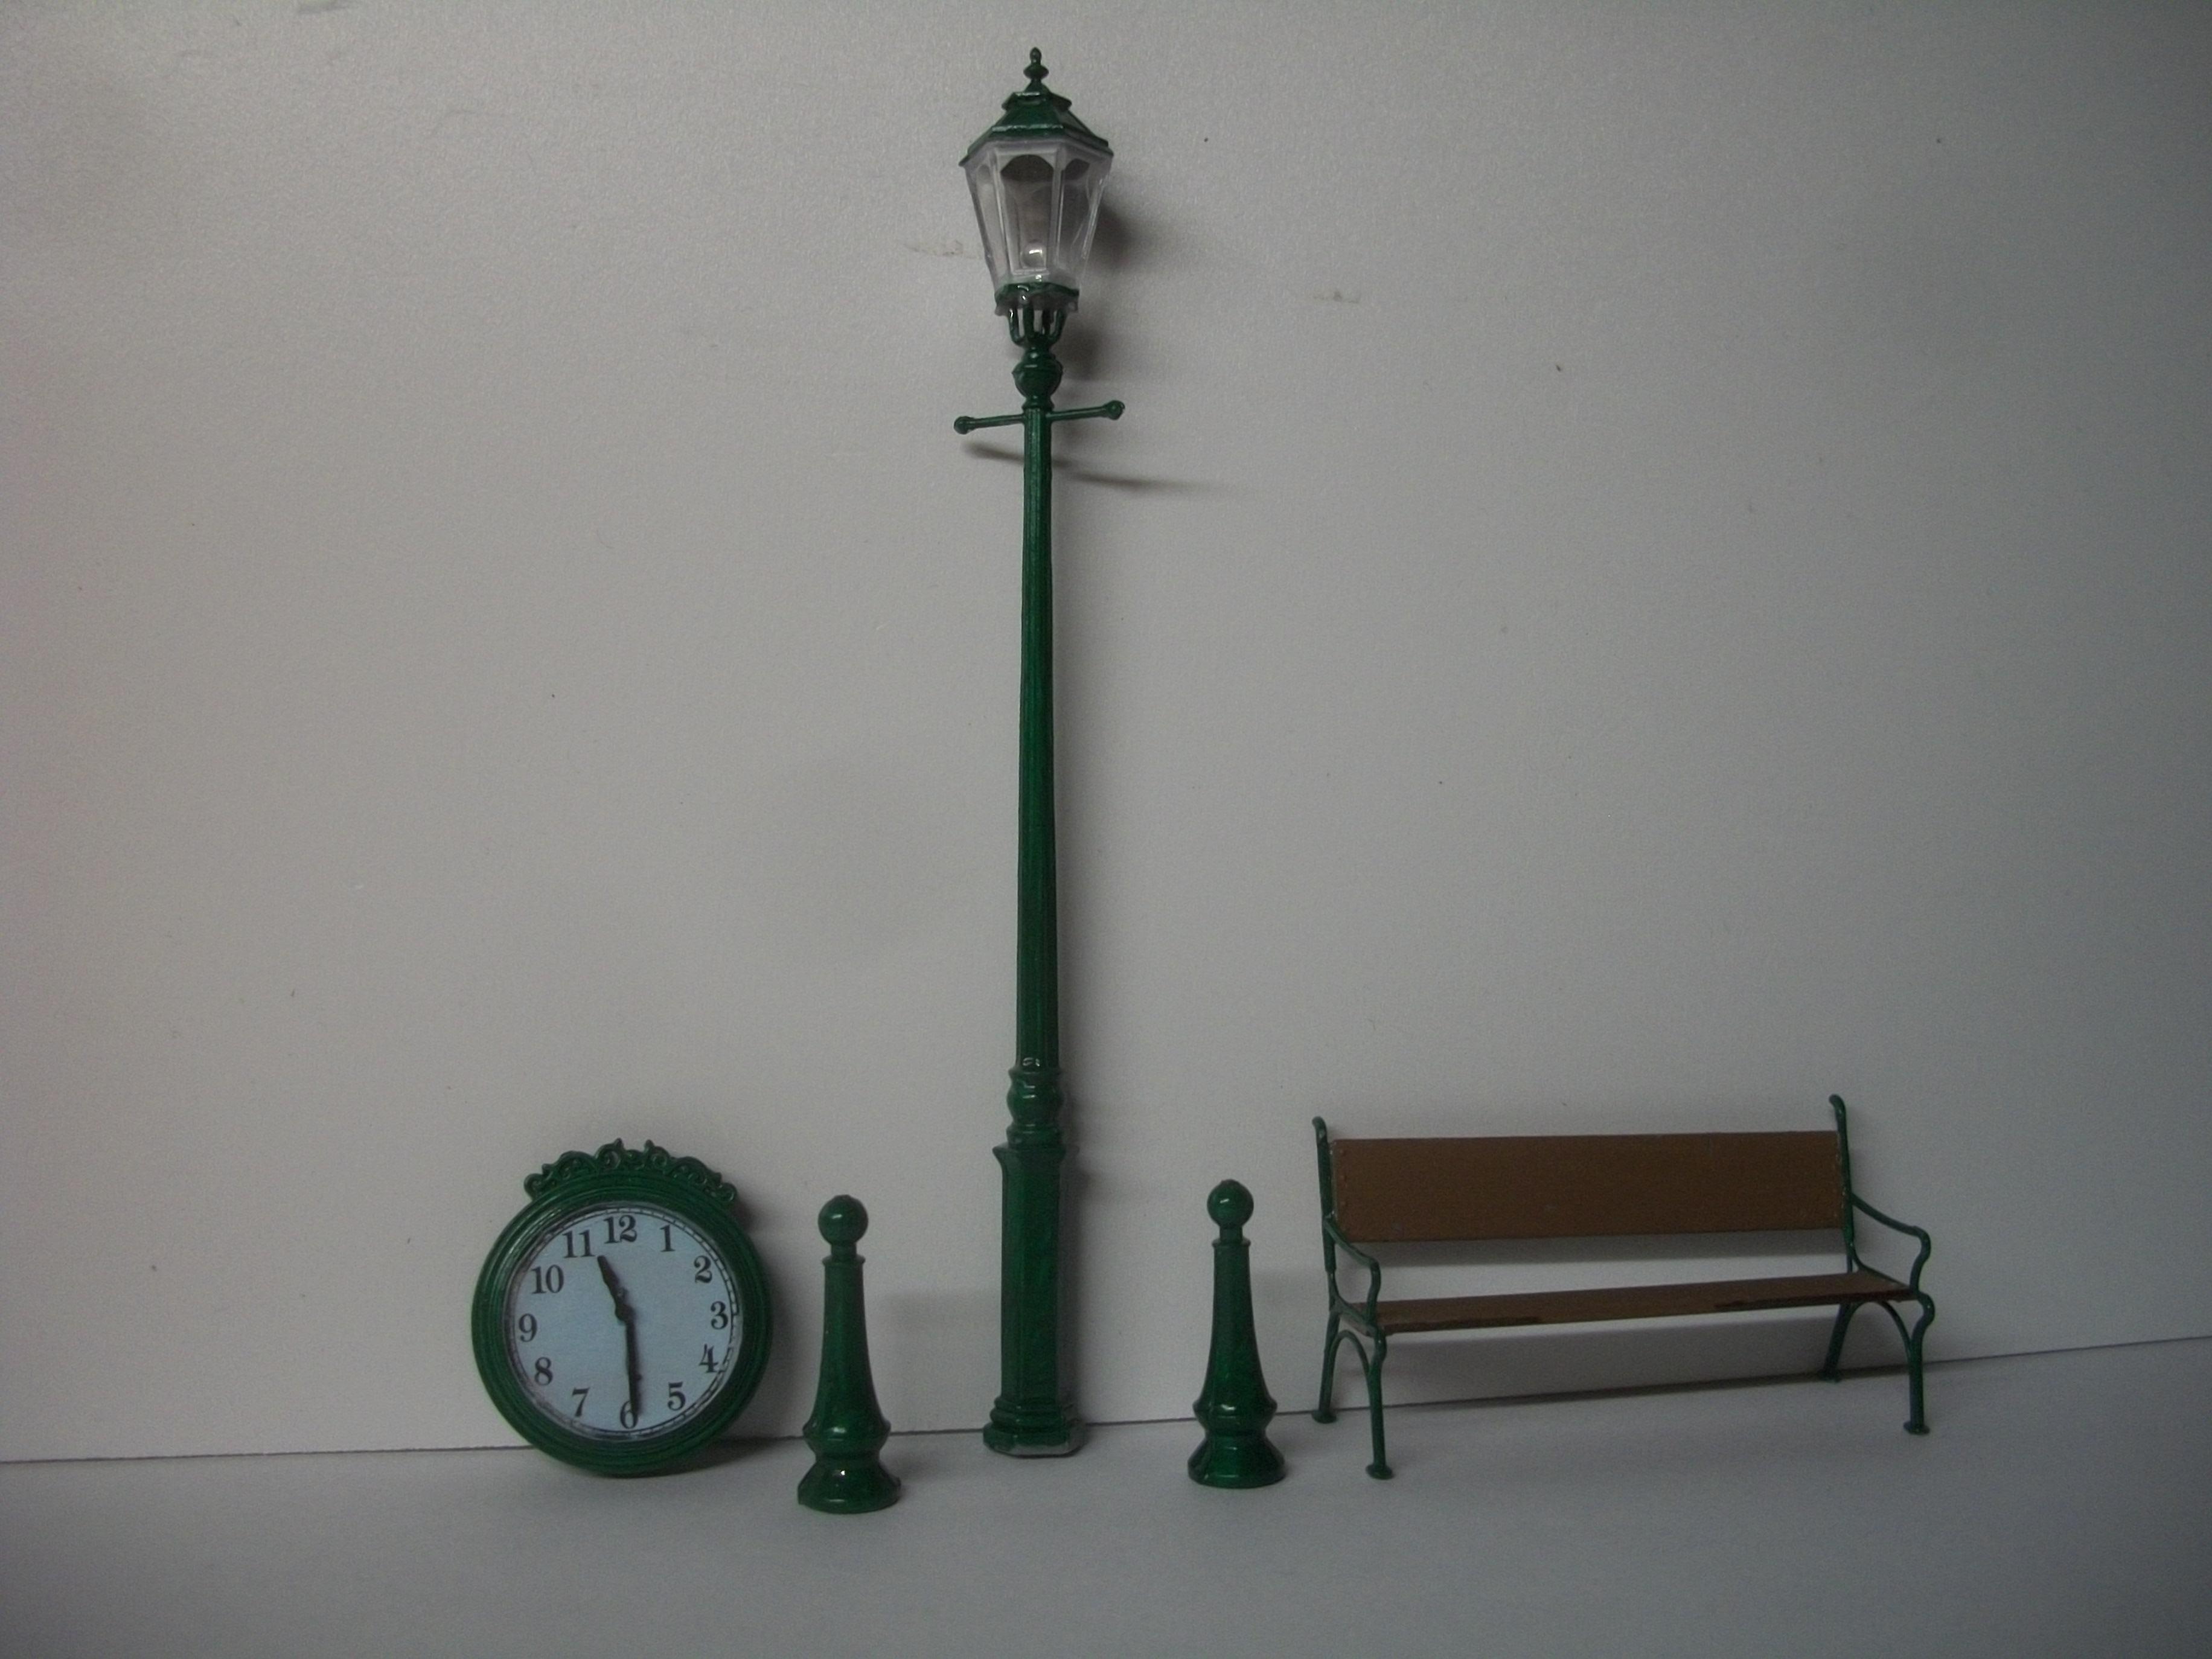
Working on the assembly and painting of some 1:35 scale street accessories, including a street lamp, a park bench, a couple of bollards and a clock. These are some really nice products by the Miniart company, which is in Ukraine....... These kits fit together well, and I like the quality of the plastic, which seems to file smoother than many leading brands that produce plastic kits. There are many unusual subjects in the Miniart range and this is one reason why I am trying to mix up the scales a little bit, as I haven't dabbled in 1:35 scale previously. The ICM company is also from Ukraine, and they do produce some 1:35 scale model car kits, but these are mostly German staff cars from WWII. Early next week I am expecting delivery of four more 1:35 figures by Miniart, and these are Auto Travellers from the 1930 - 1940 period. David

-
Excellent detail, David........ especially the handles on the oil pails ! The whole model is nicely done. David
-
Yes, Pat..... we can all learn such a lot and be inspired by the work of the brilliant Michael Paul Smith........ You will find the process of setting up one of your dioramas somewhere in town a truly fascinating experience. All sorts of possibilities are open to you, in terms of background buildings, trees, roads and of course the sky. Although at first it is a bit tricky to get the angles right, and also the distance, you will naturally arrive at the best configuration I am sure. Some people, and Michael was a classic example of this, do seem to have more of a feeling for the photography. Even using a very basic ' cheap ' digital camera you can achieve some wonderful shots. As you know, it is all about trial and error, and very often I only get maybe 3 interesting photos out of 100 photos taken in a single photo shoot. By interesting, I mean those shots that come anything like close to achieving that magical realistic effect that we are constantly searching for. All the time and effort is well worth it, when you do come up with a successful image. David
-
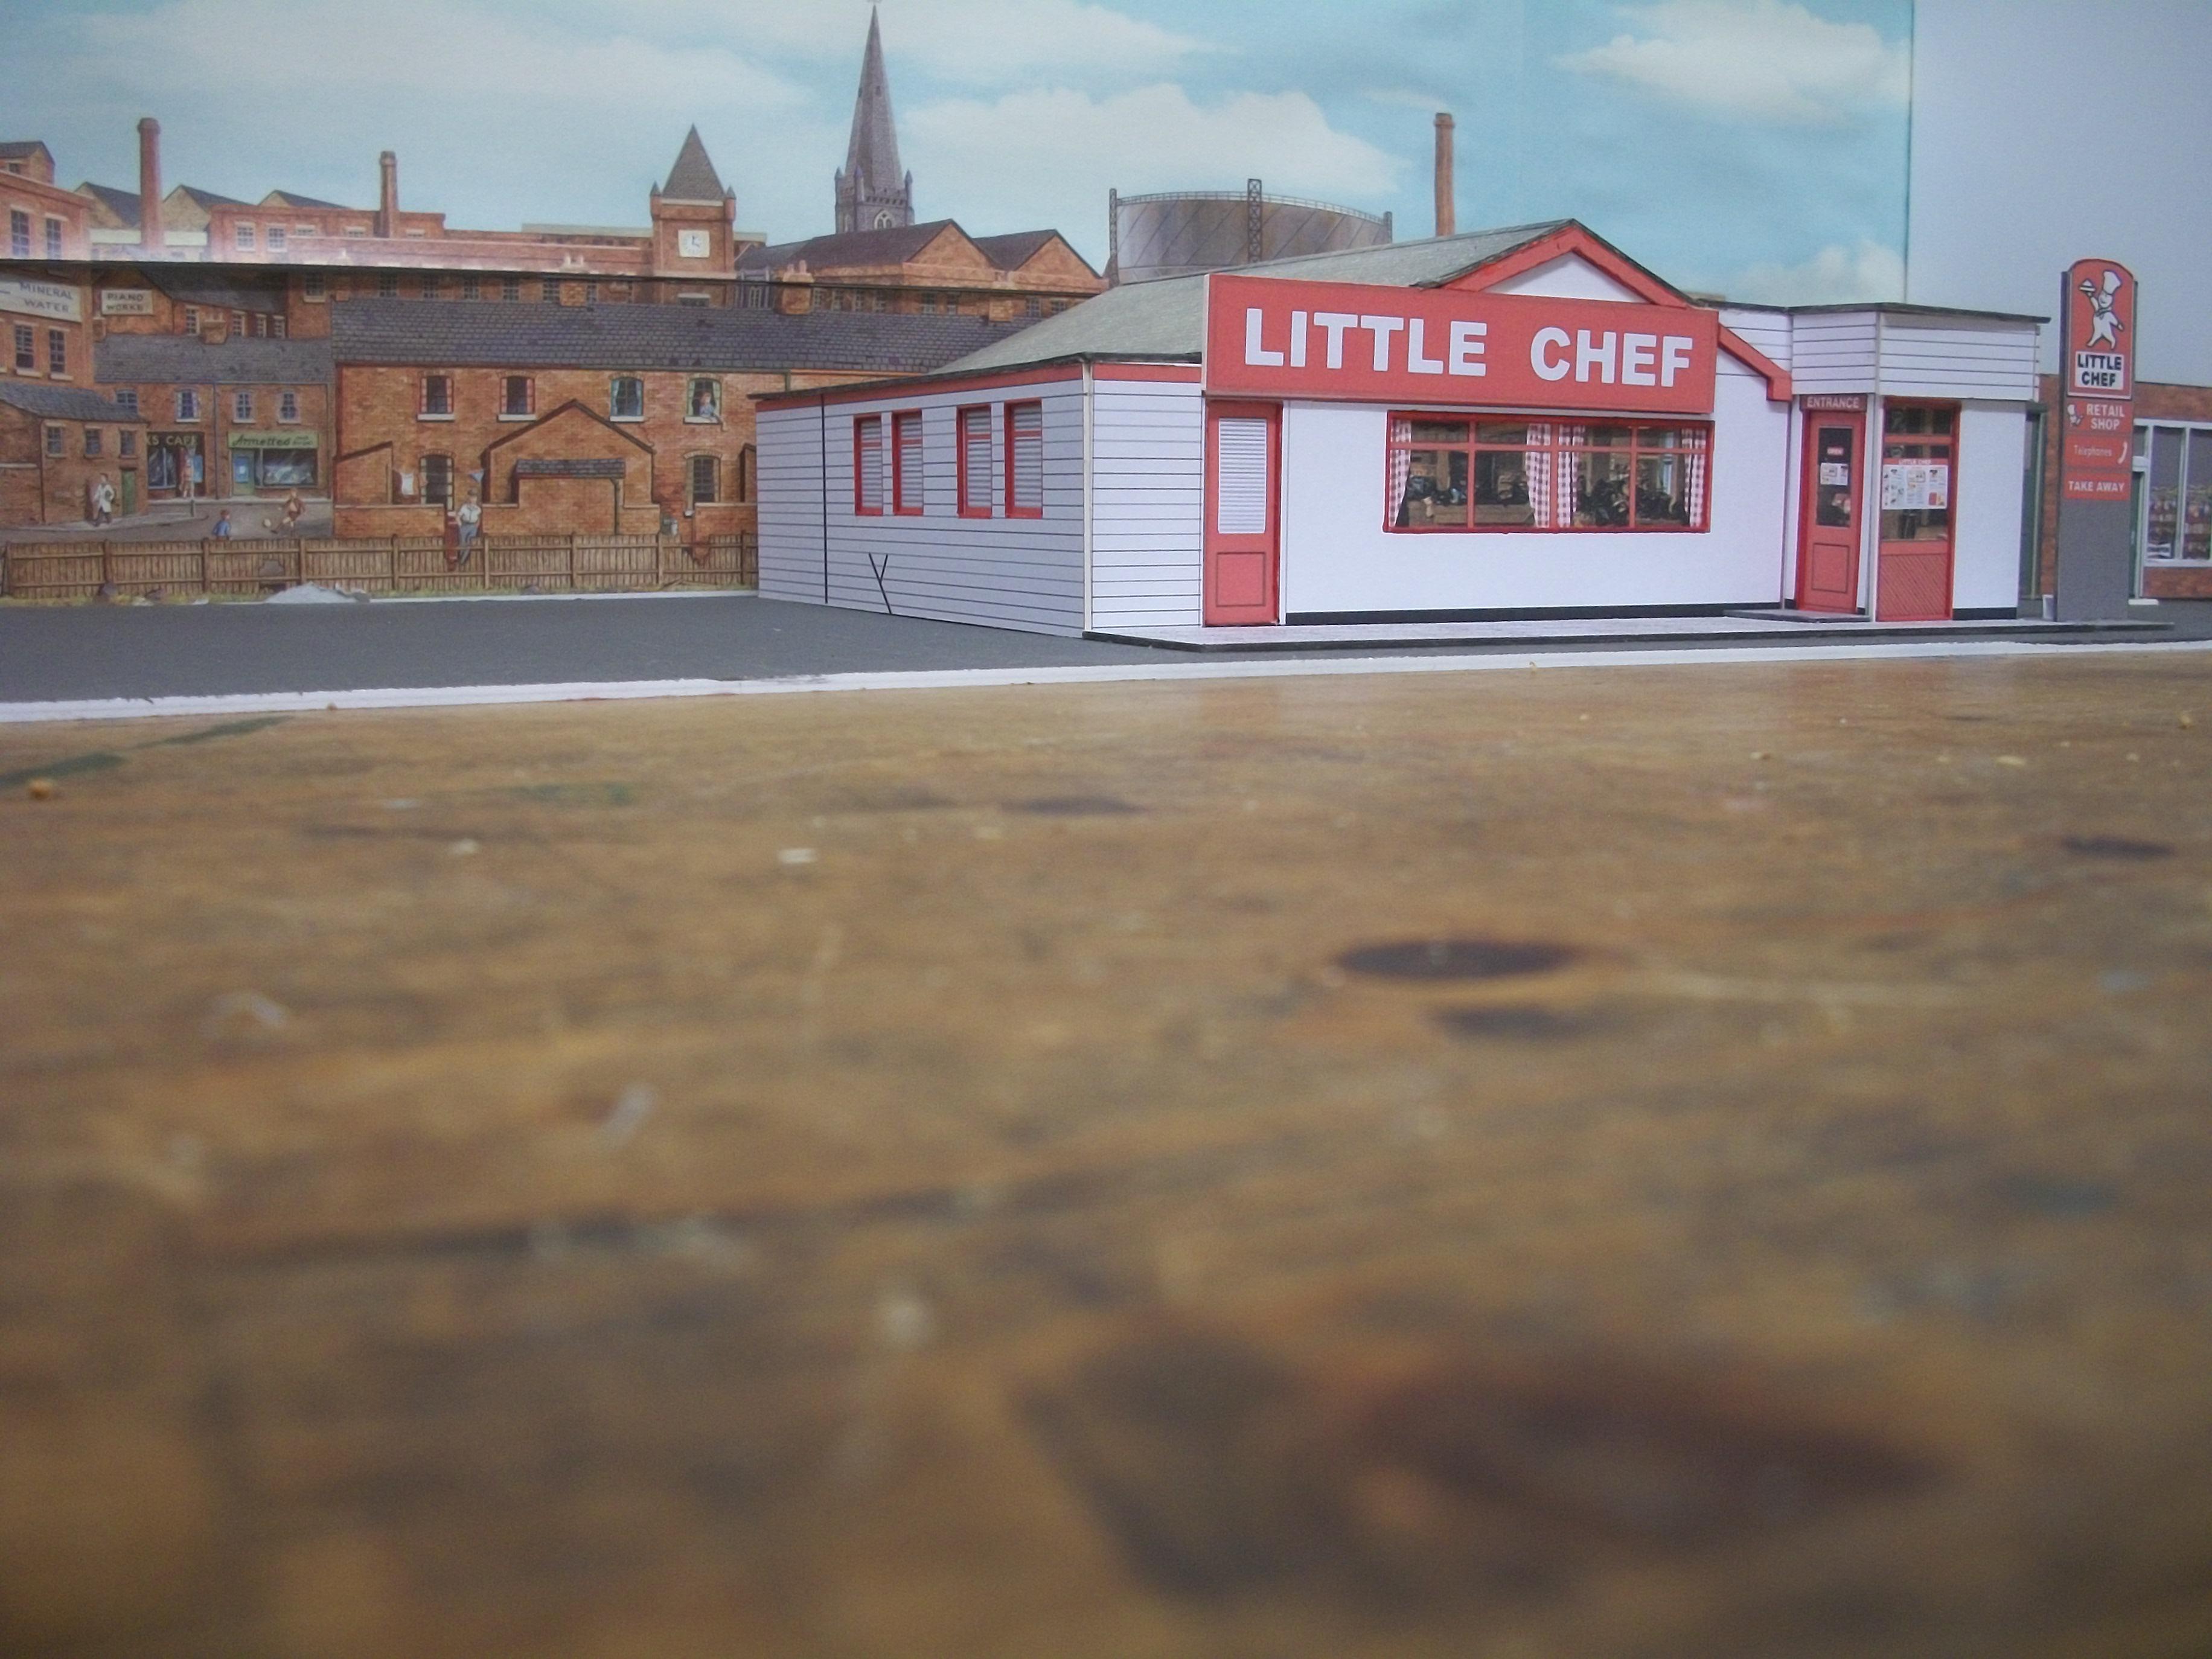
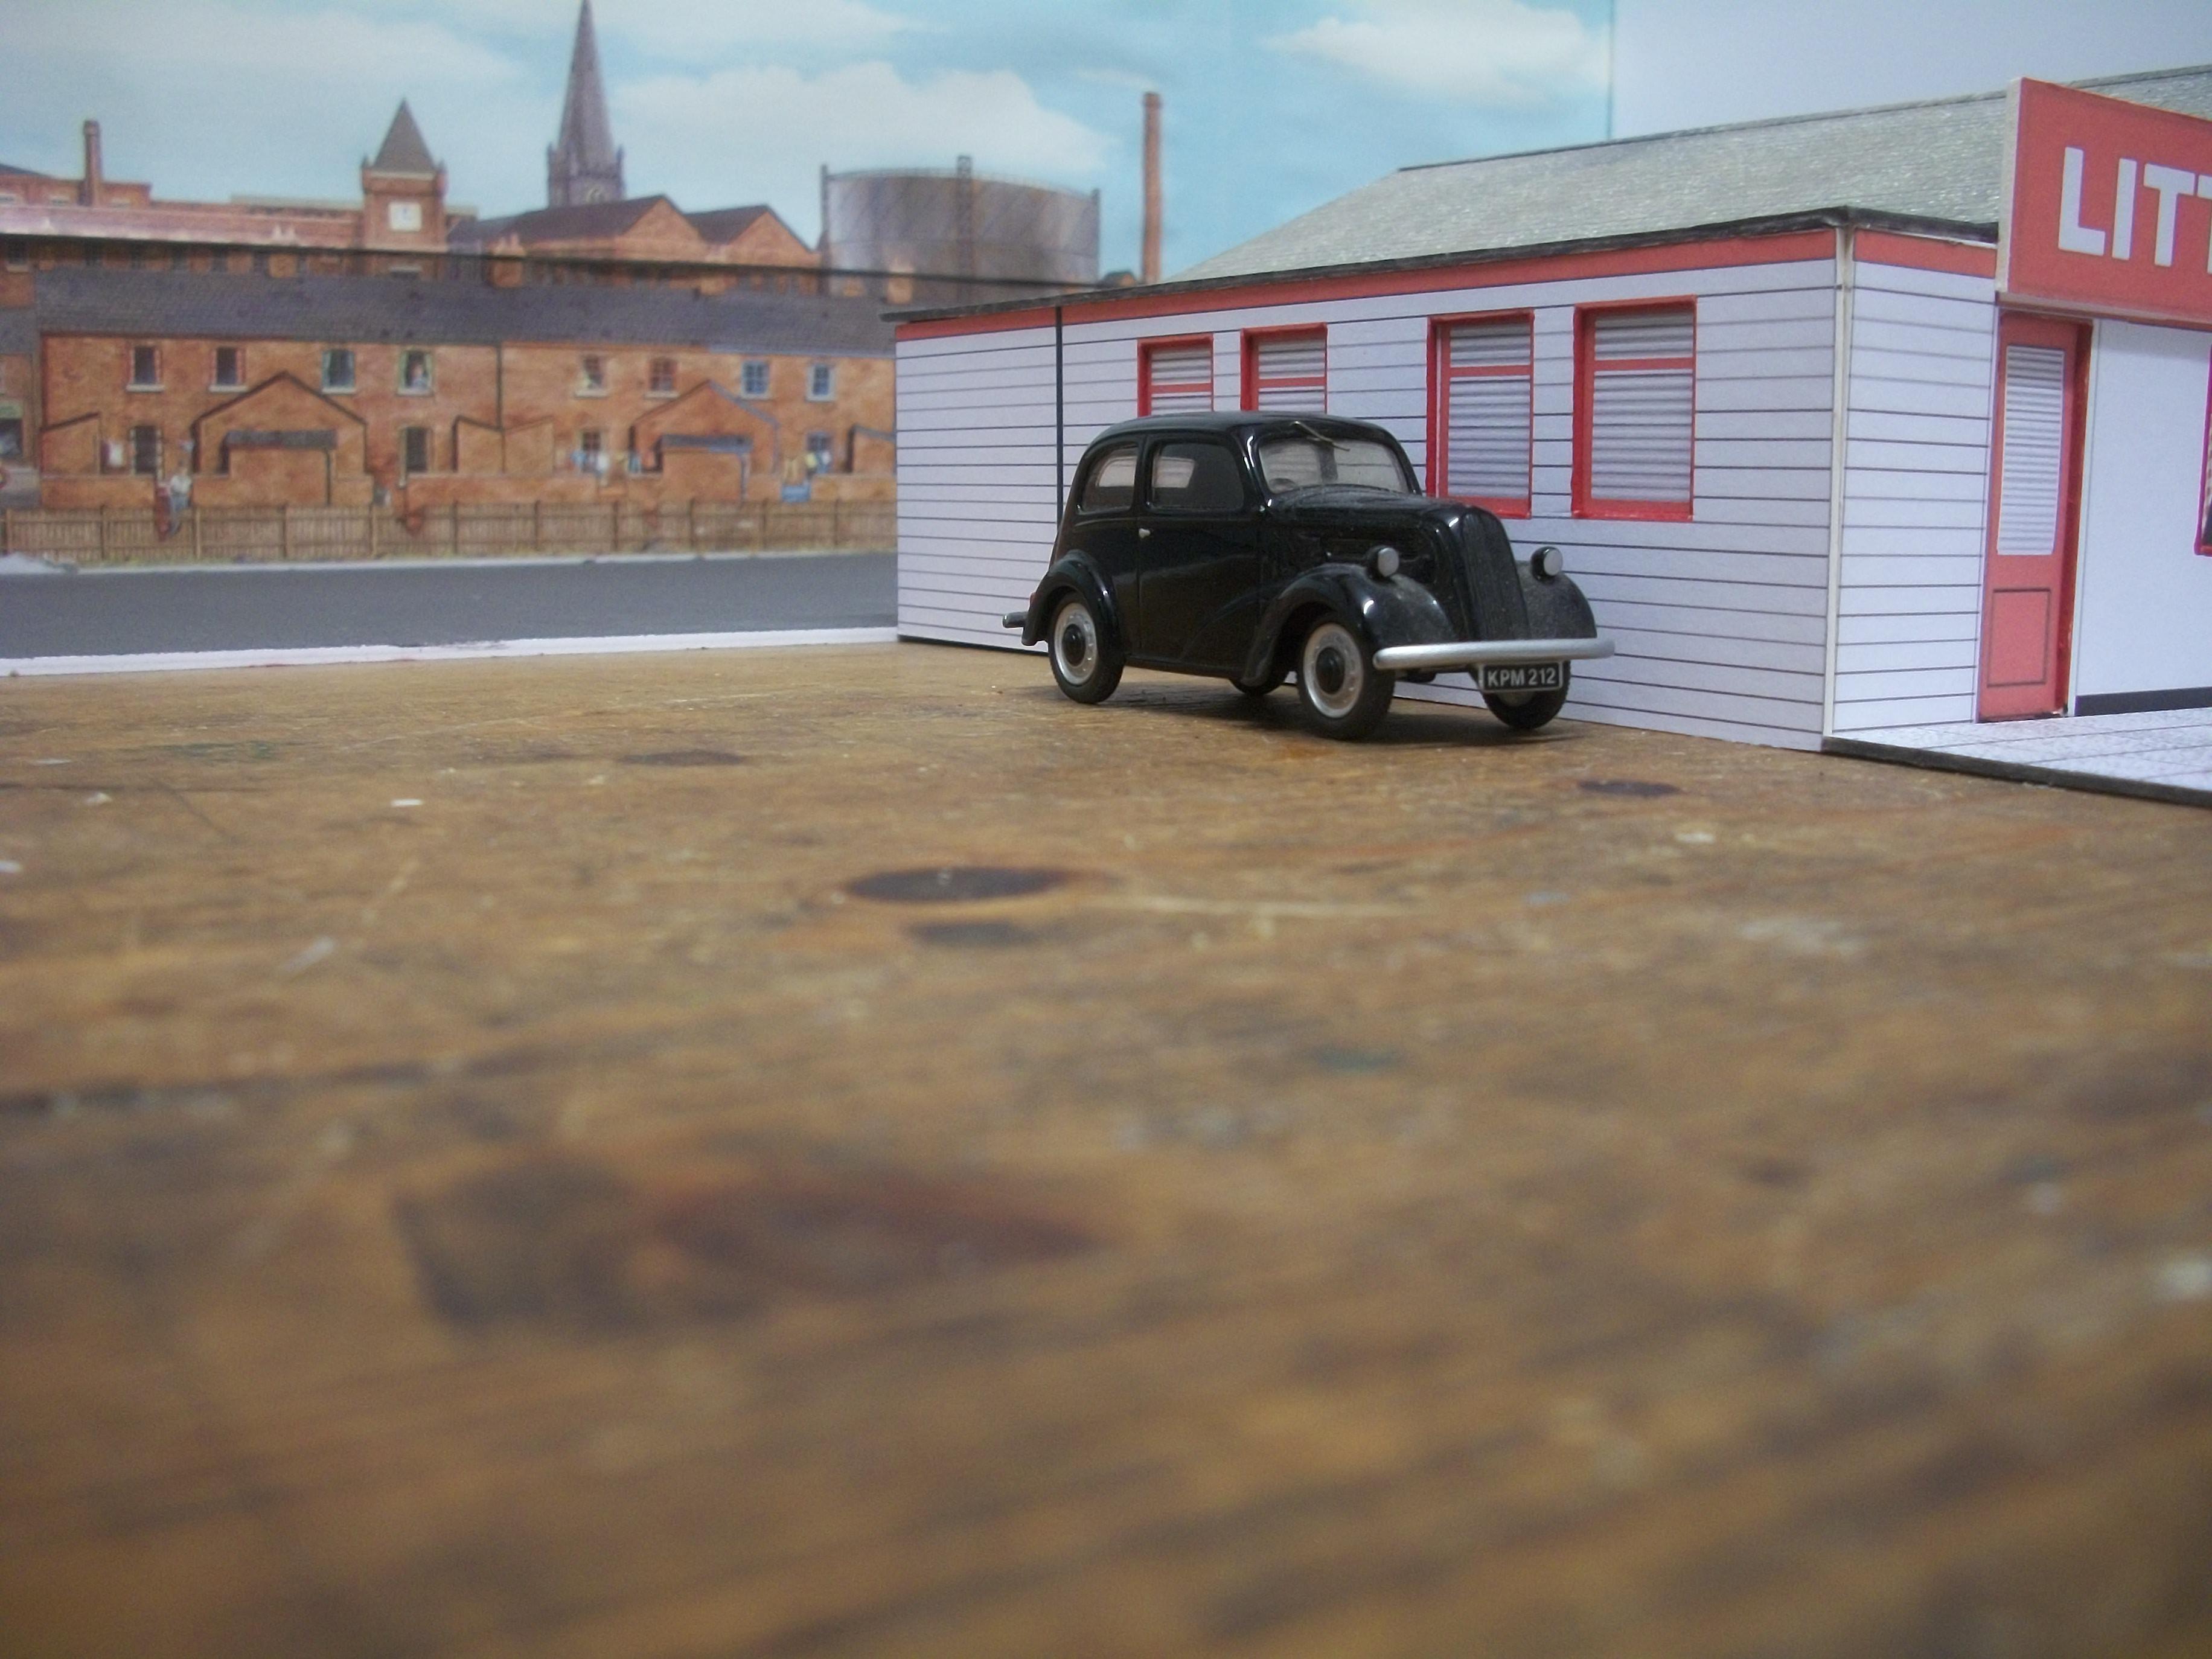
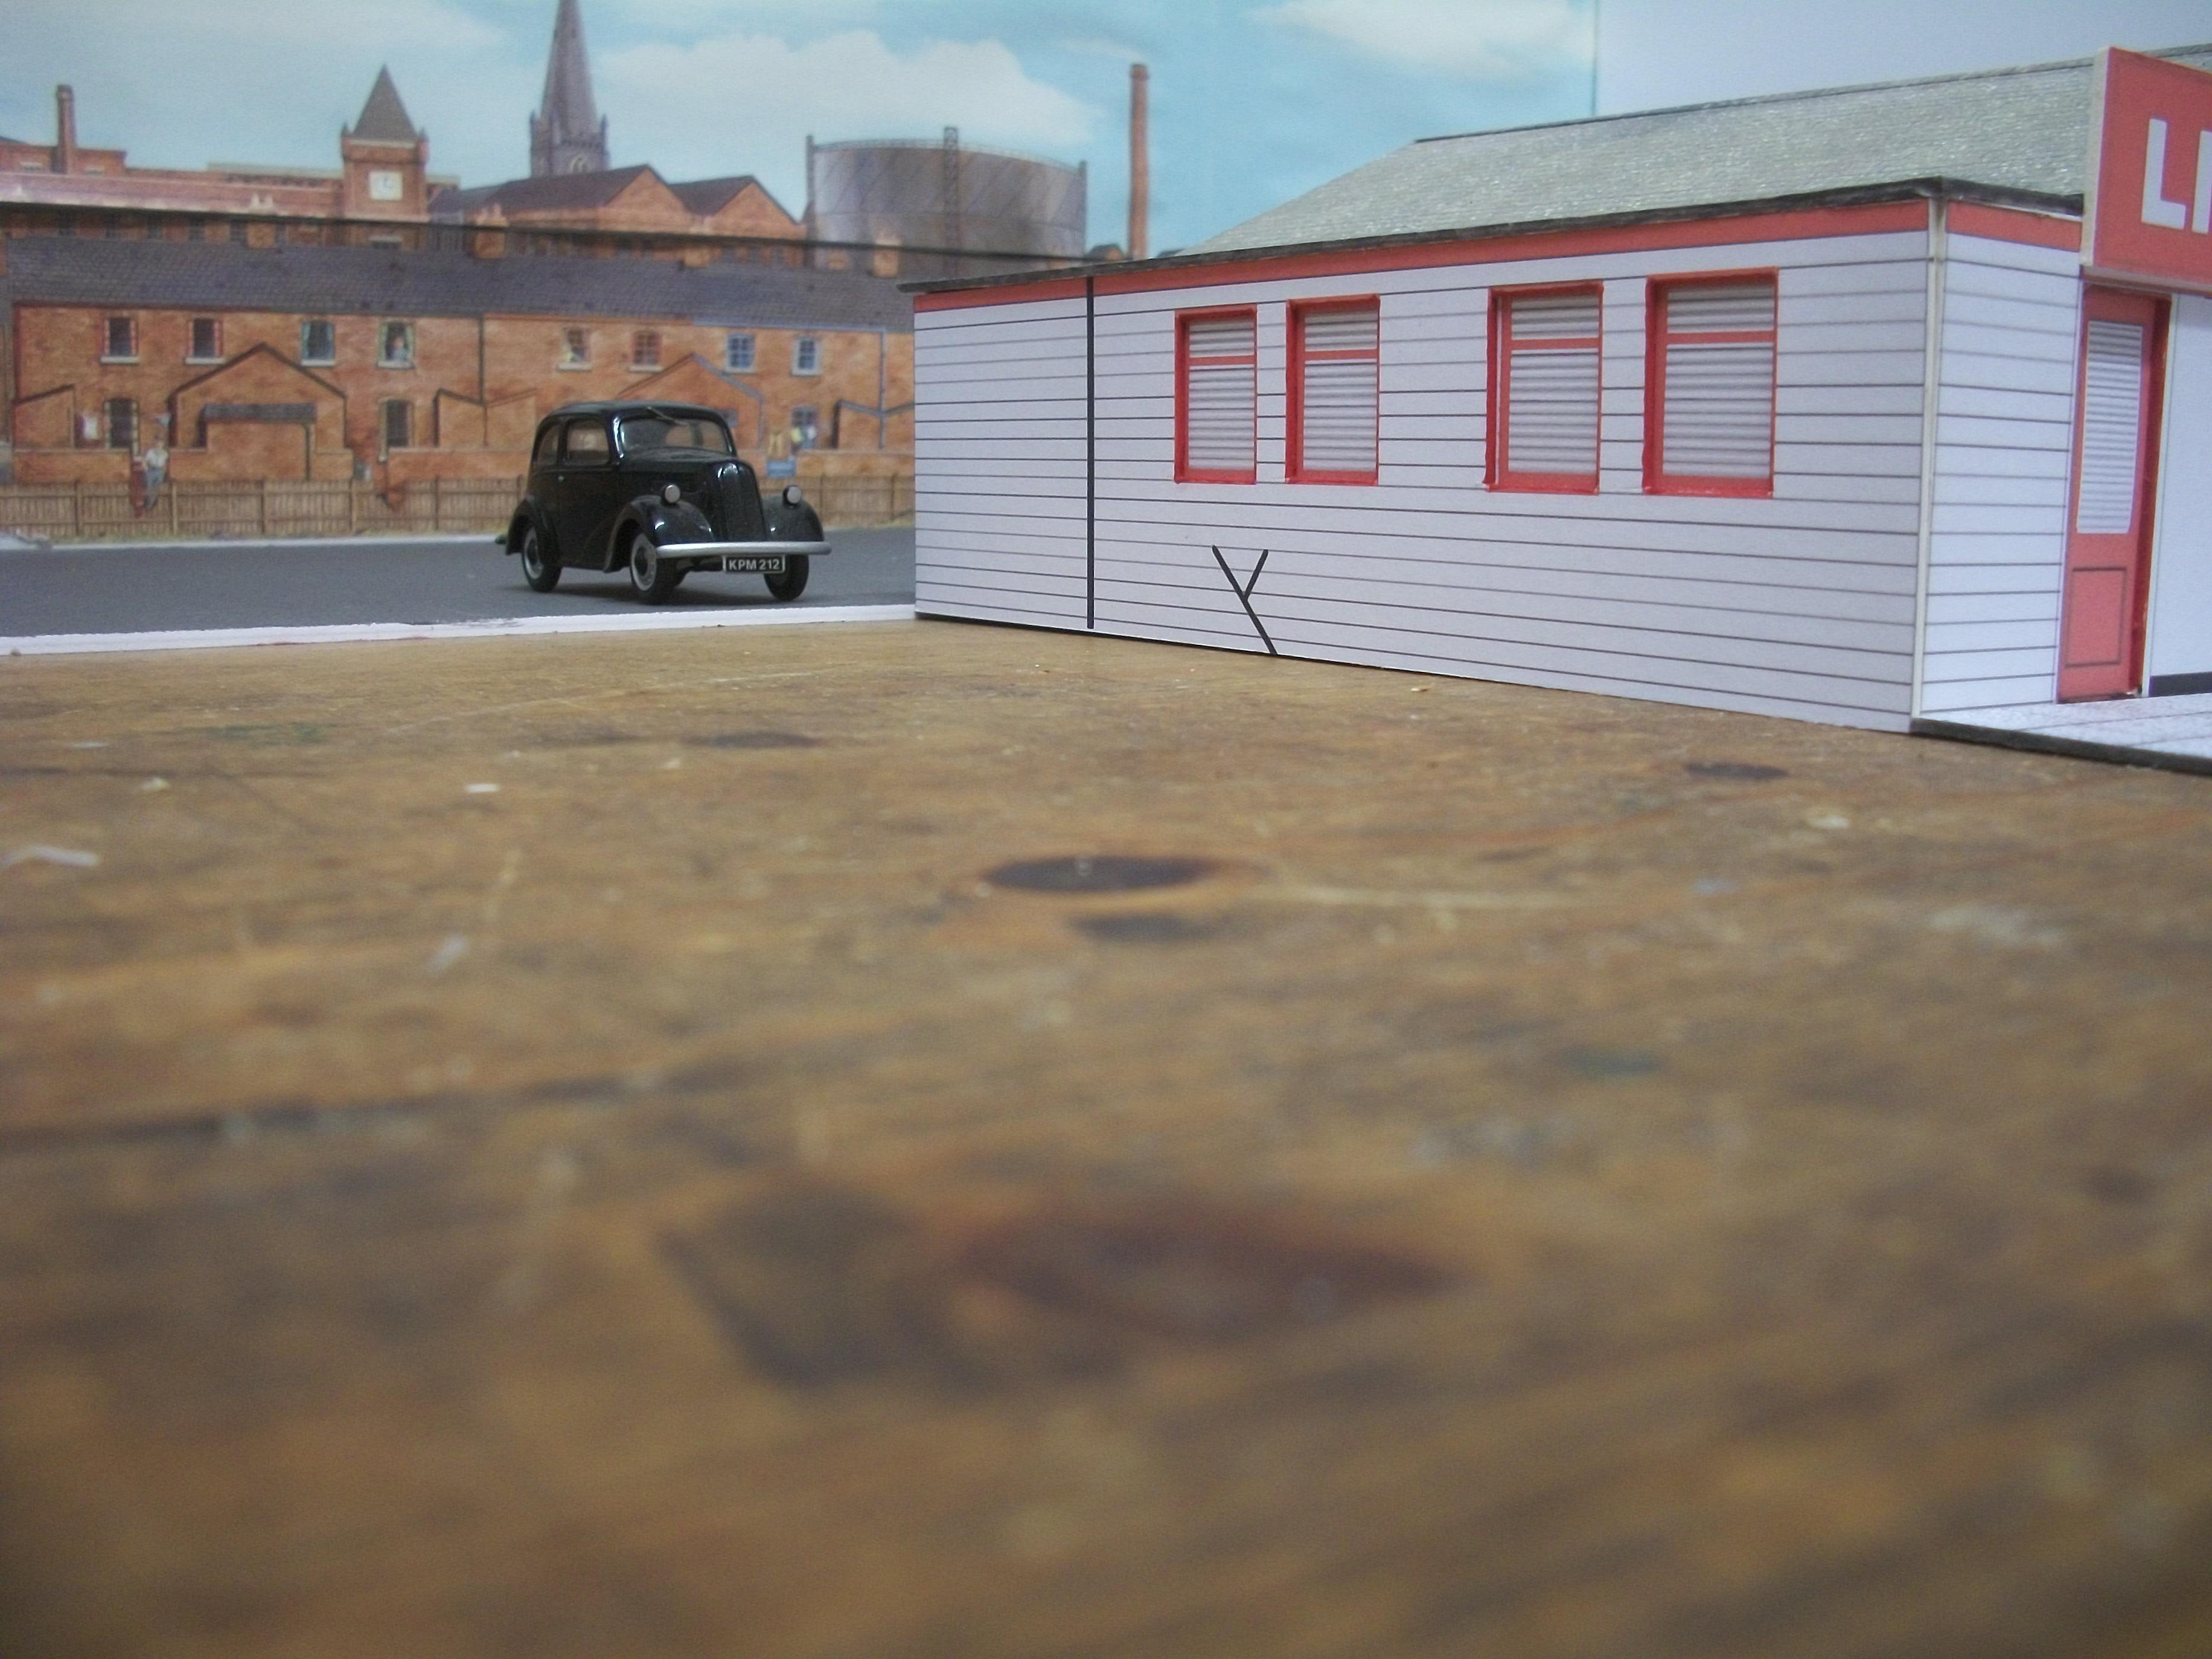
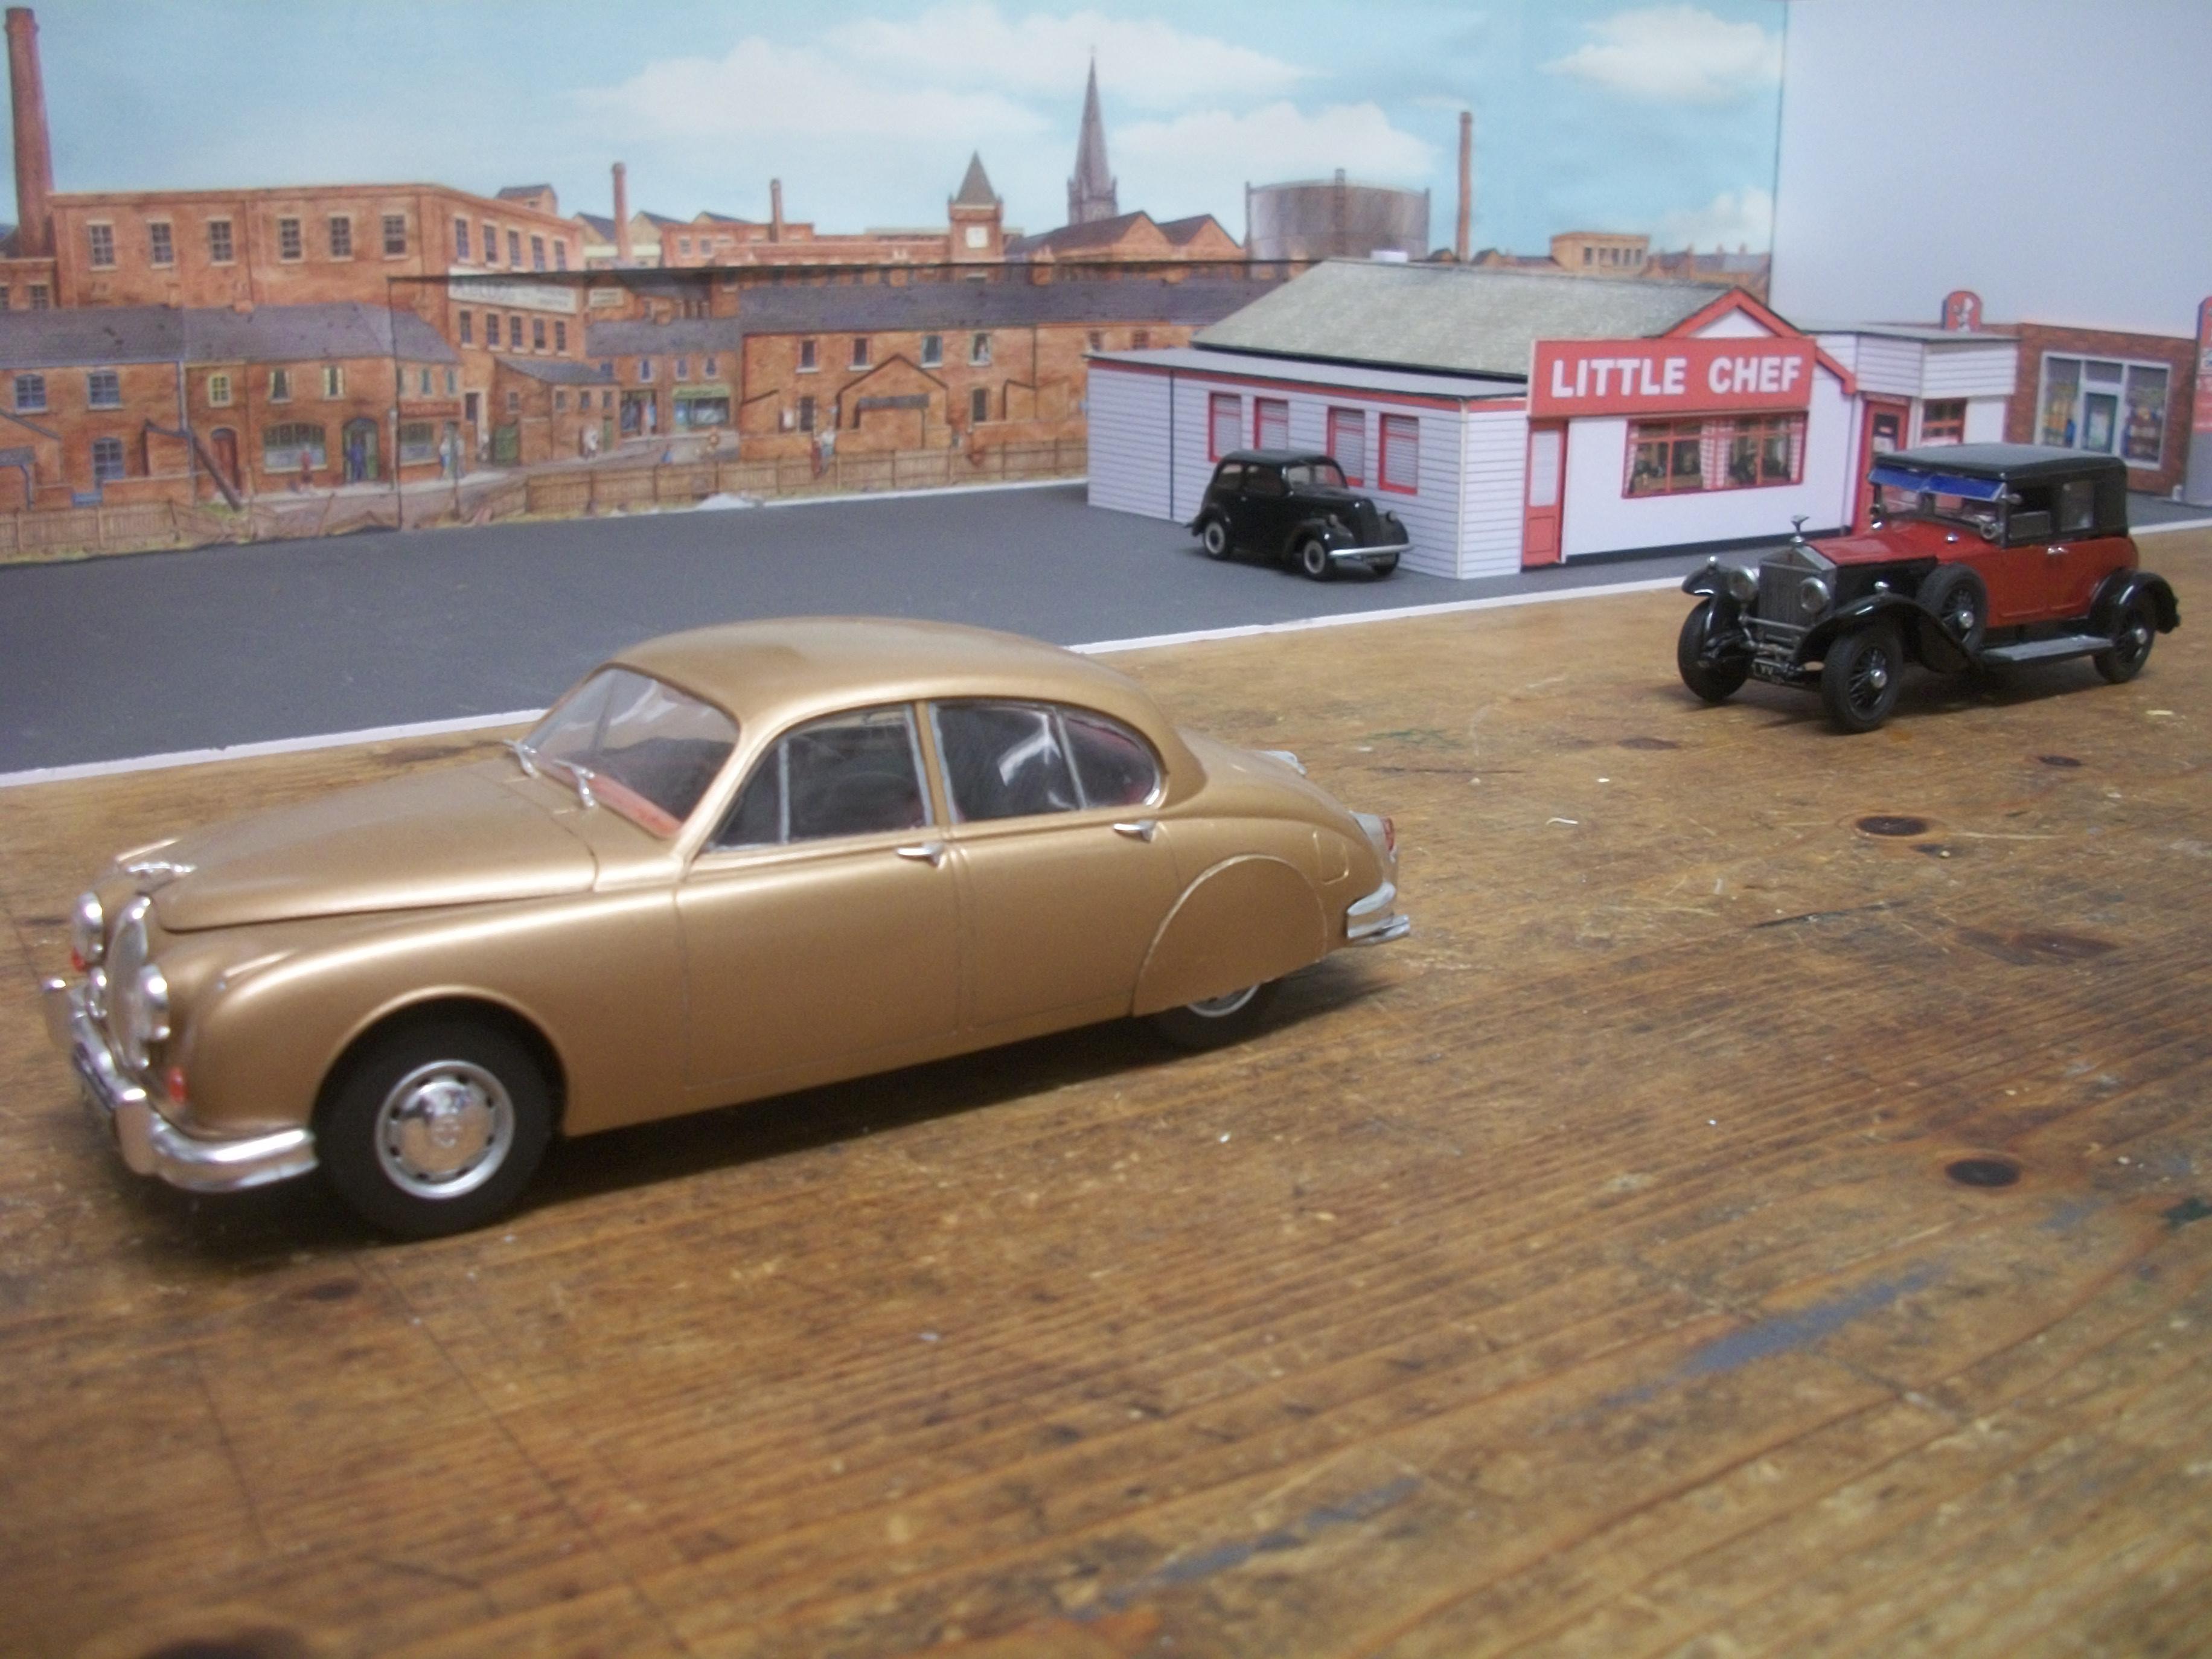
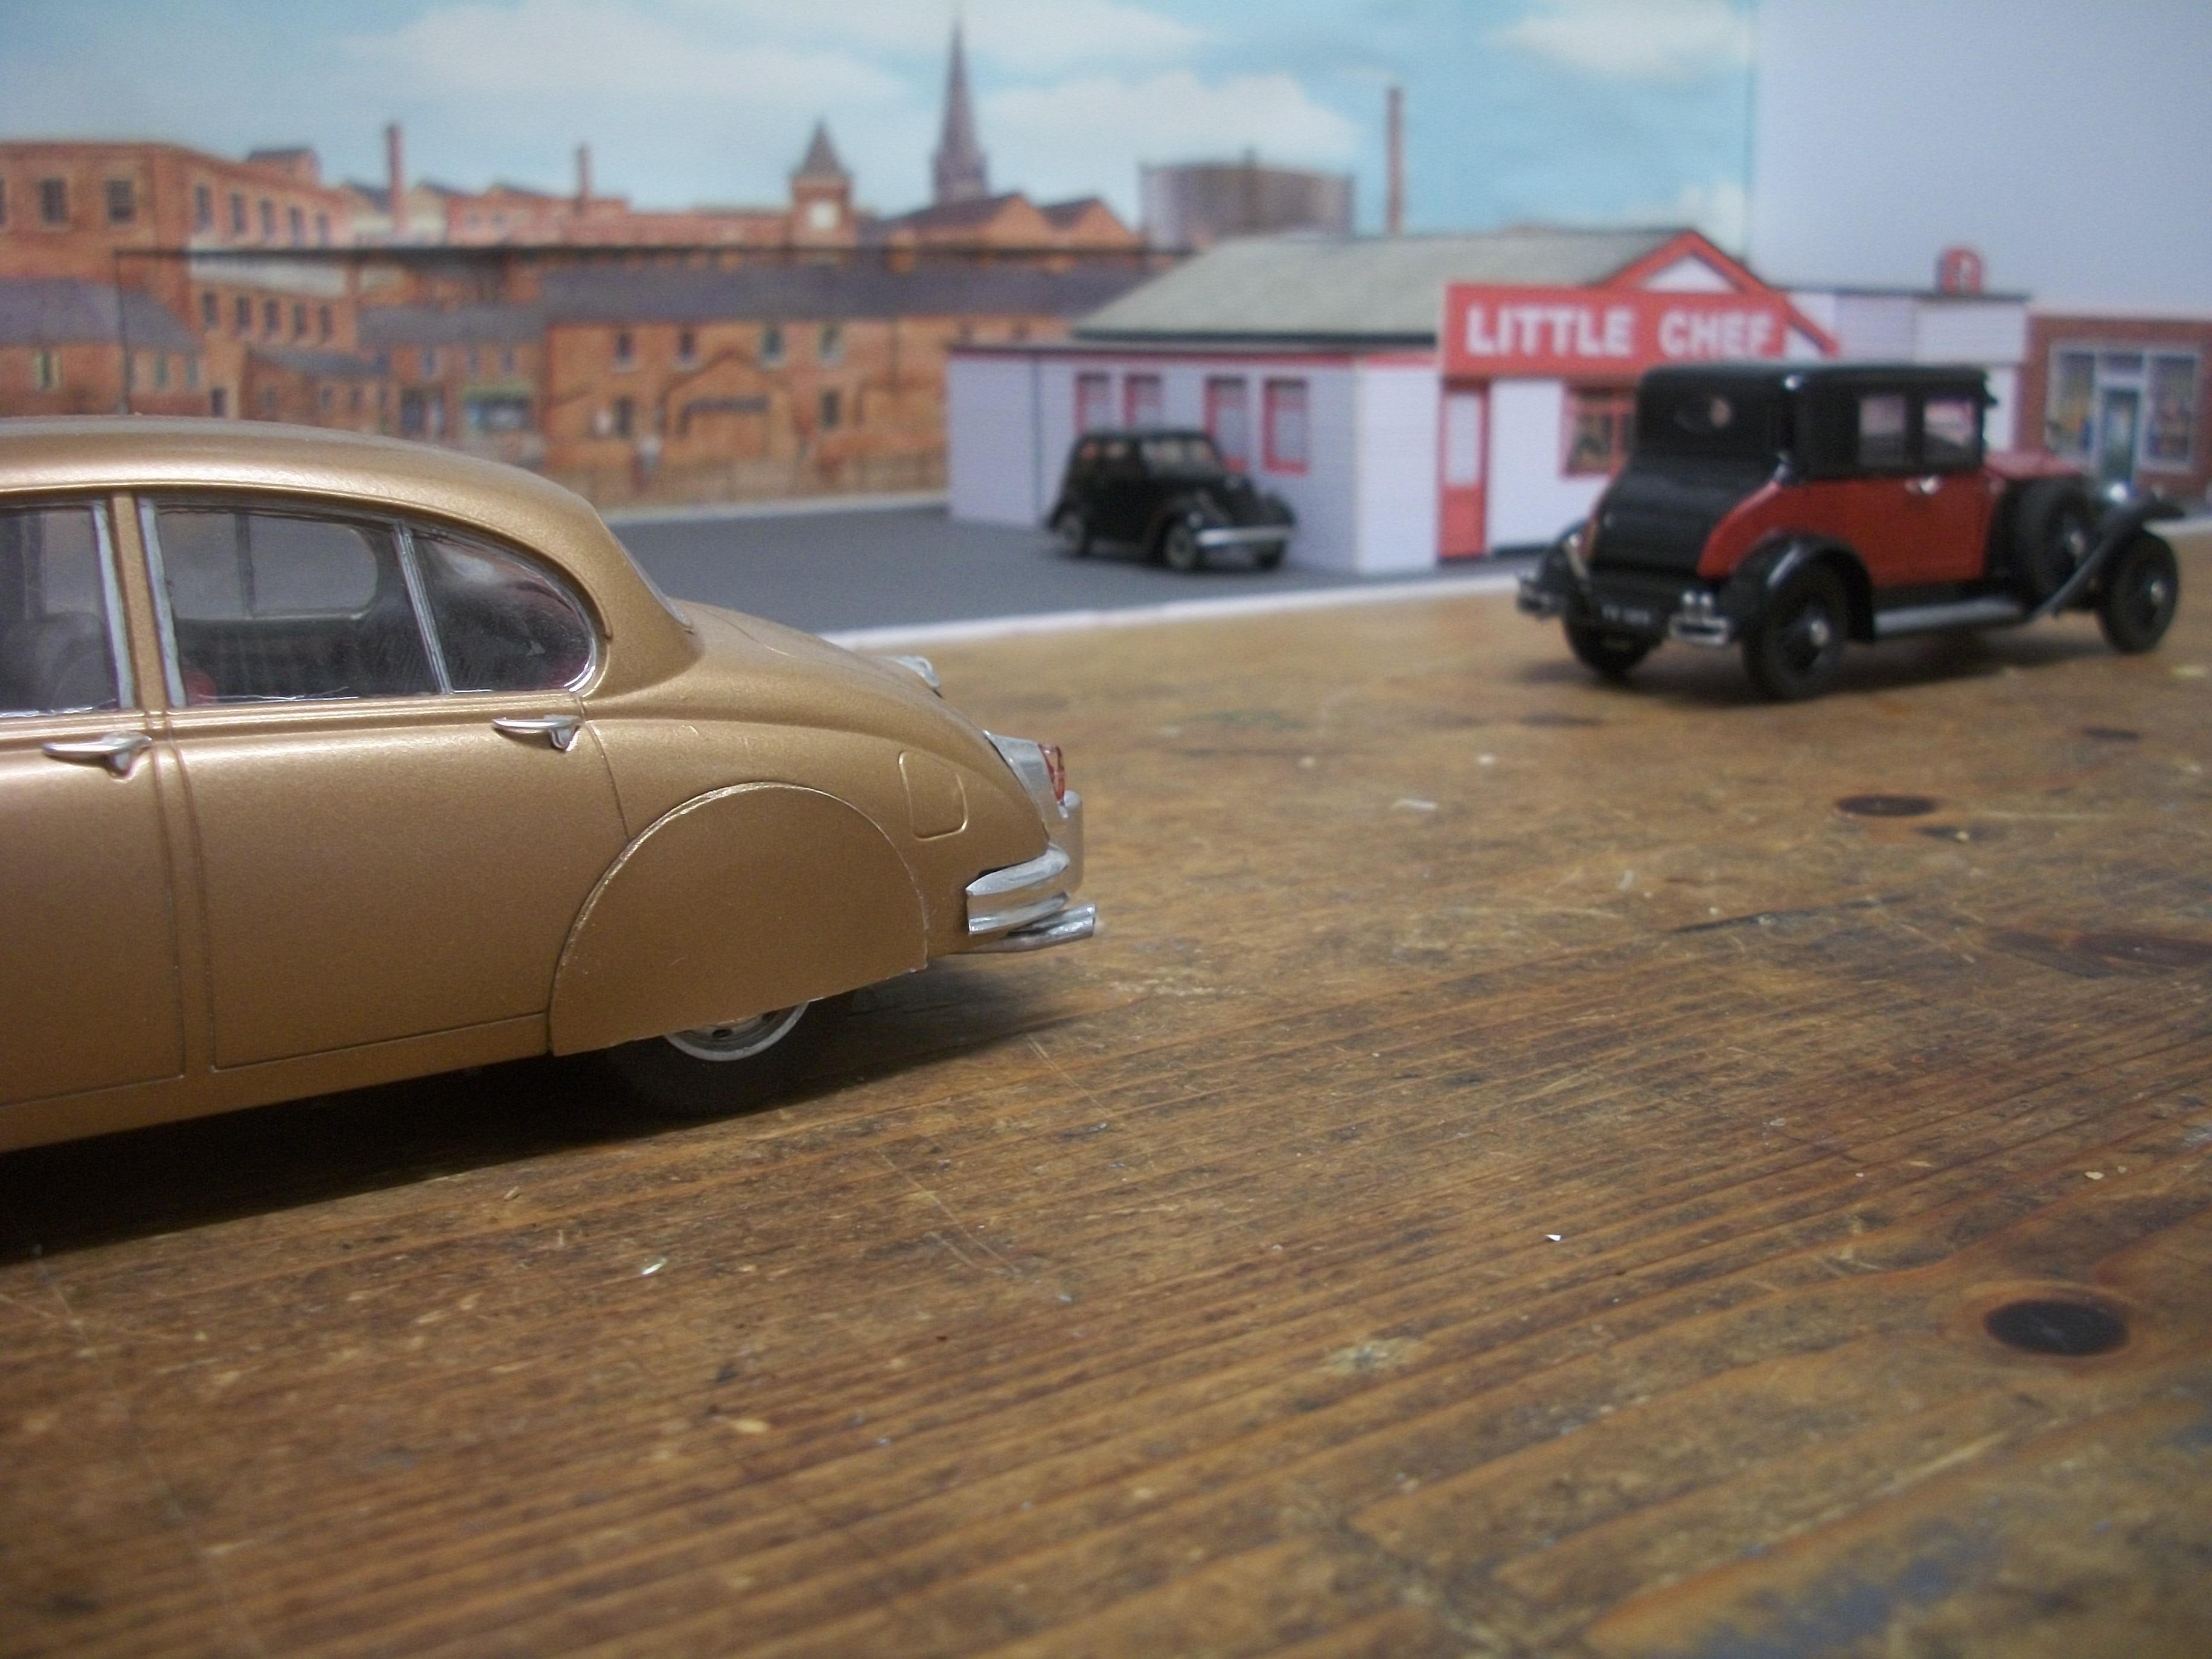
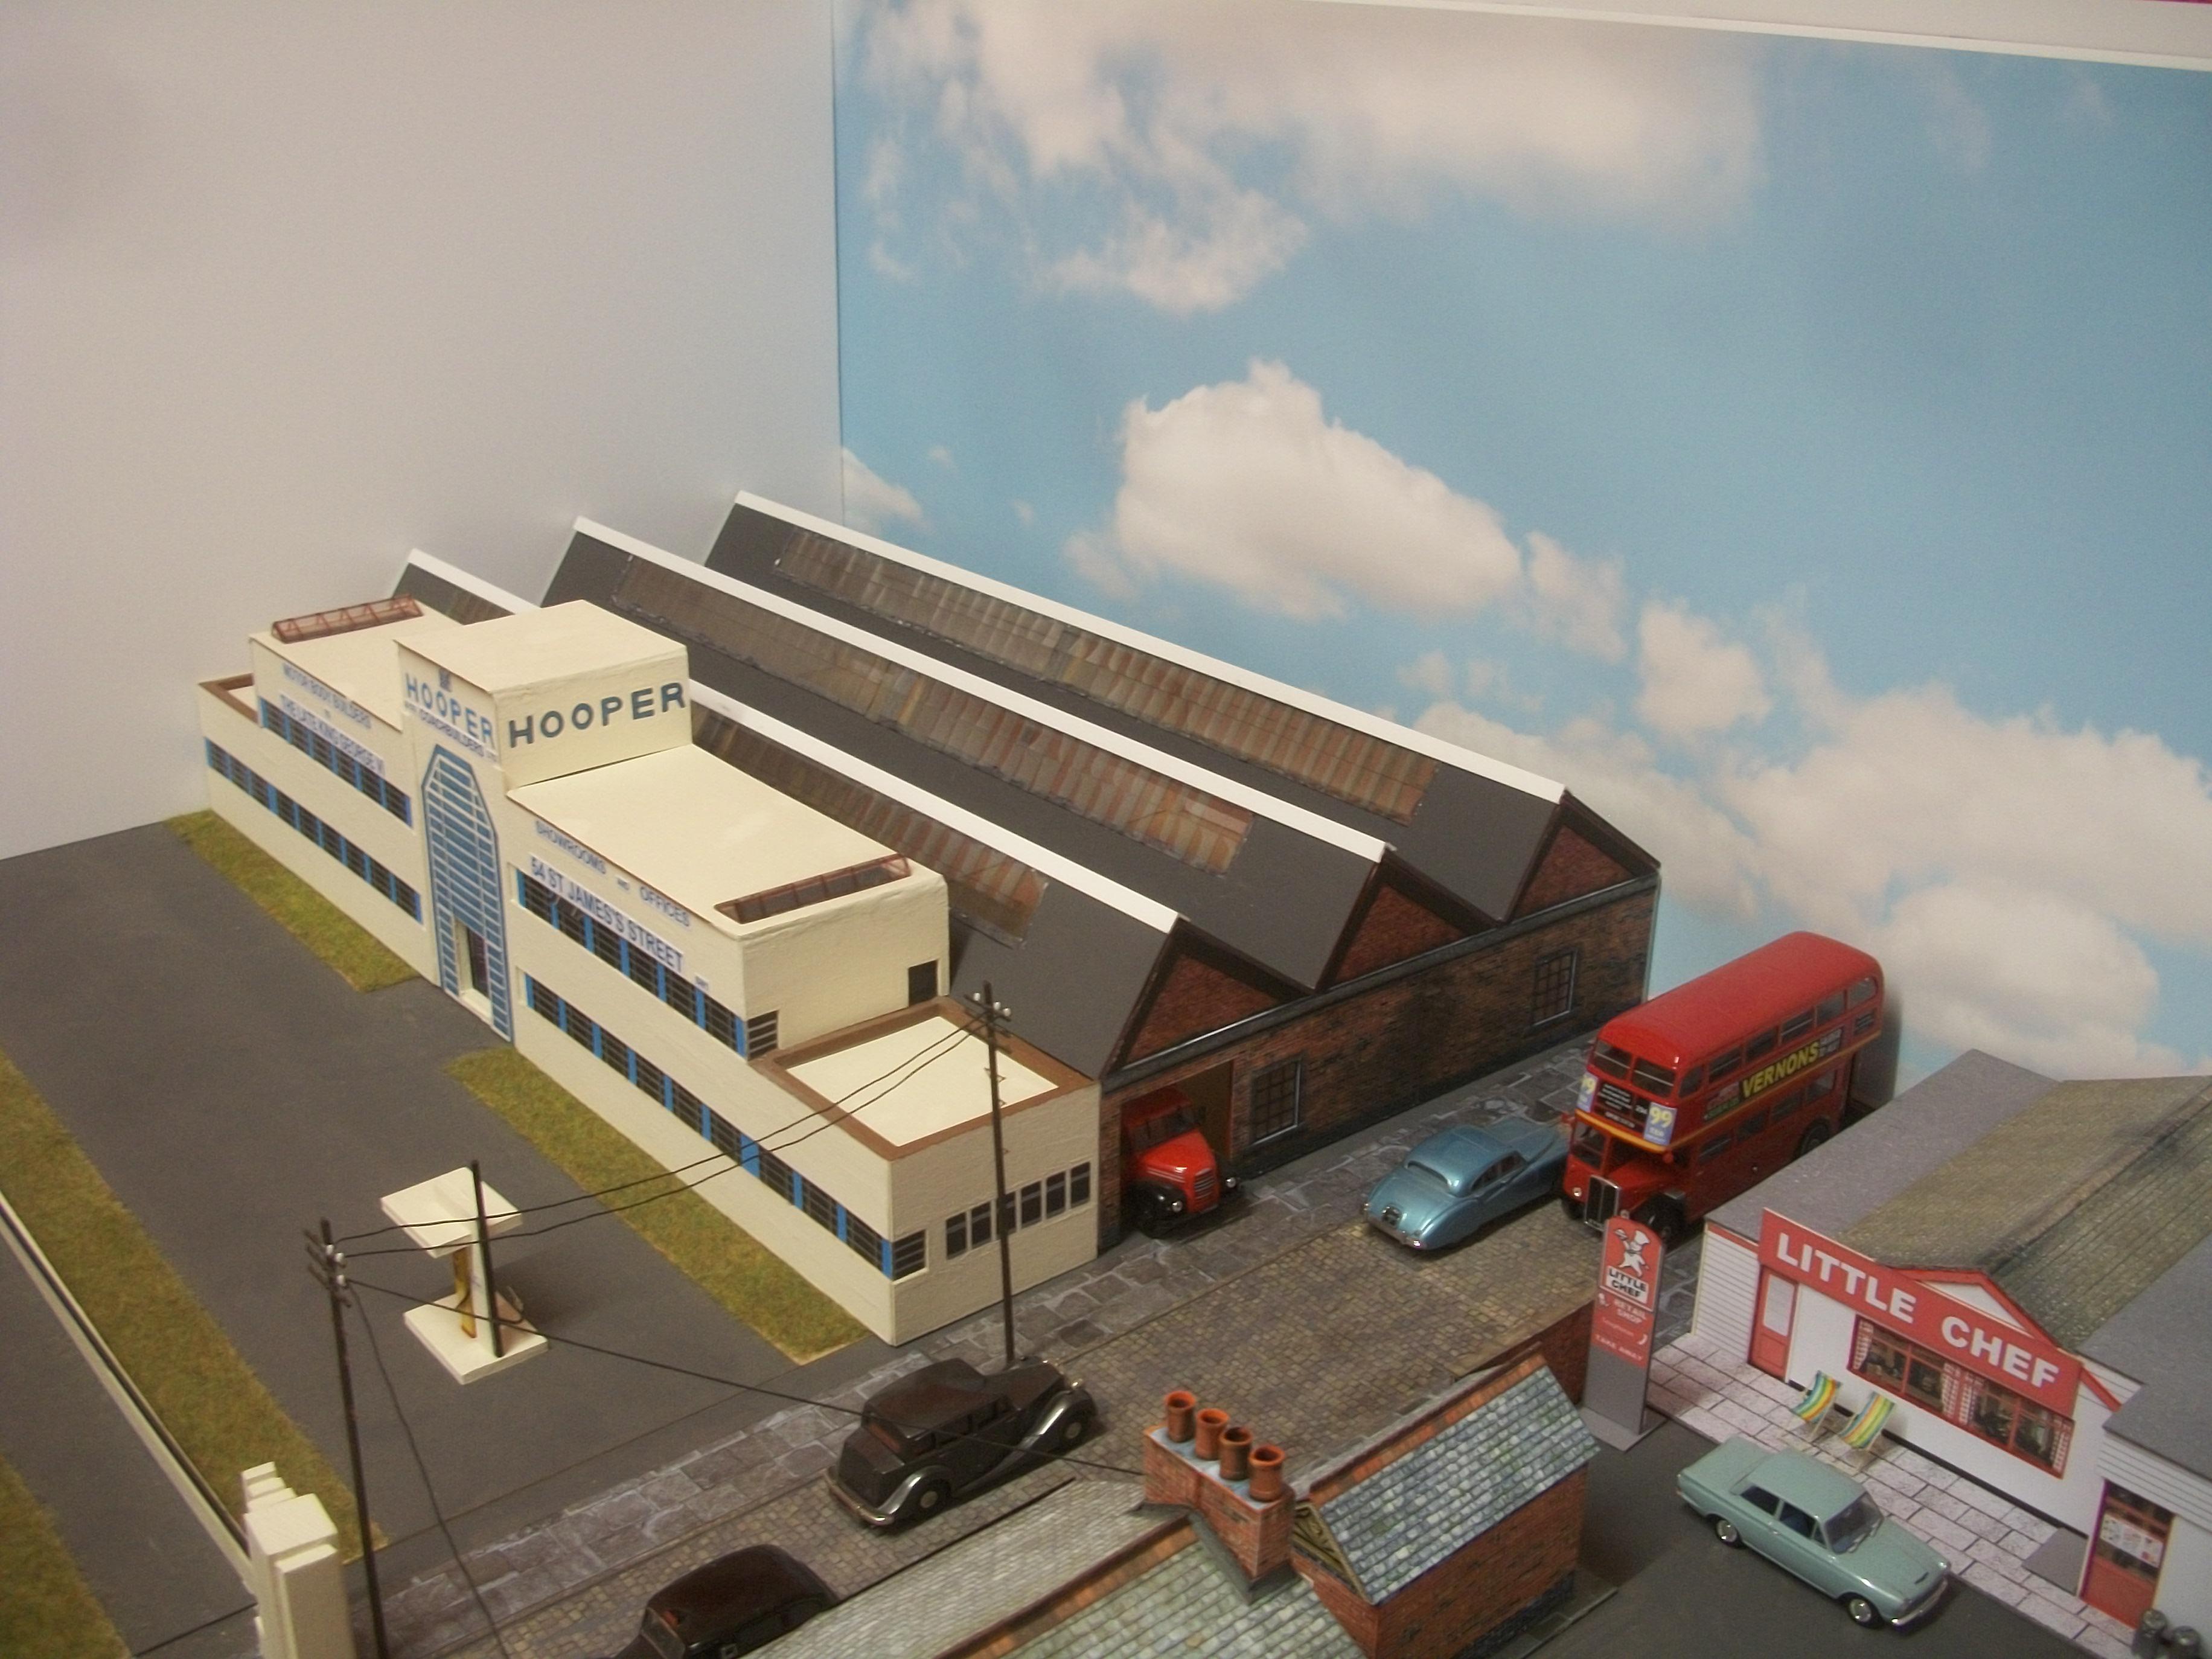
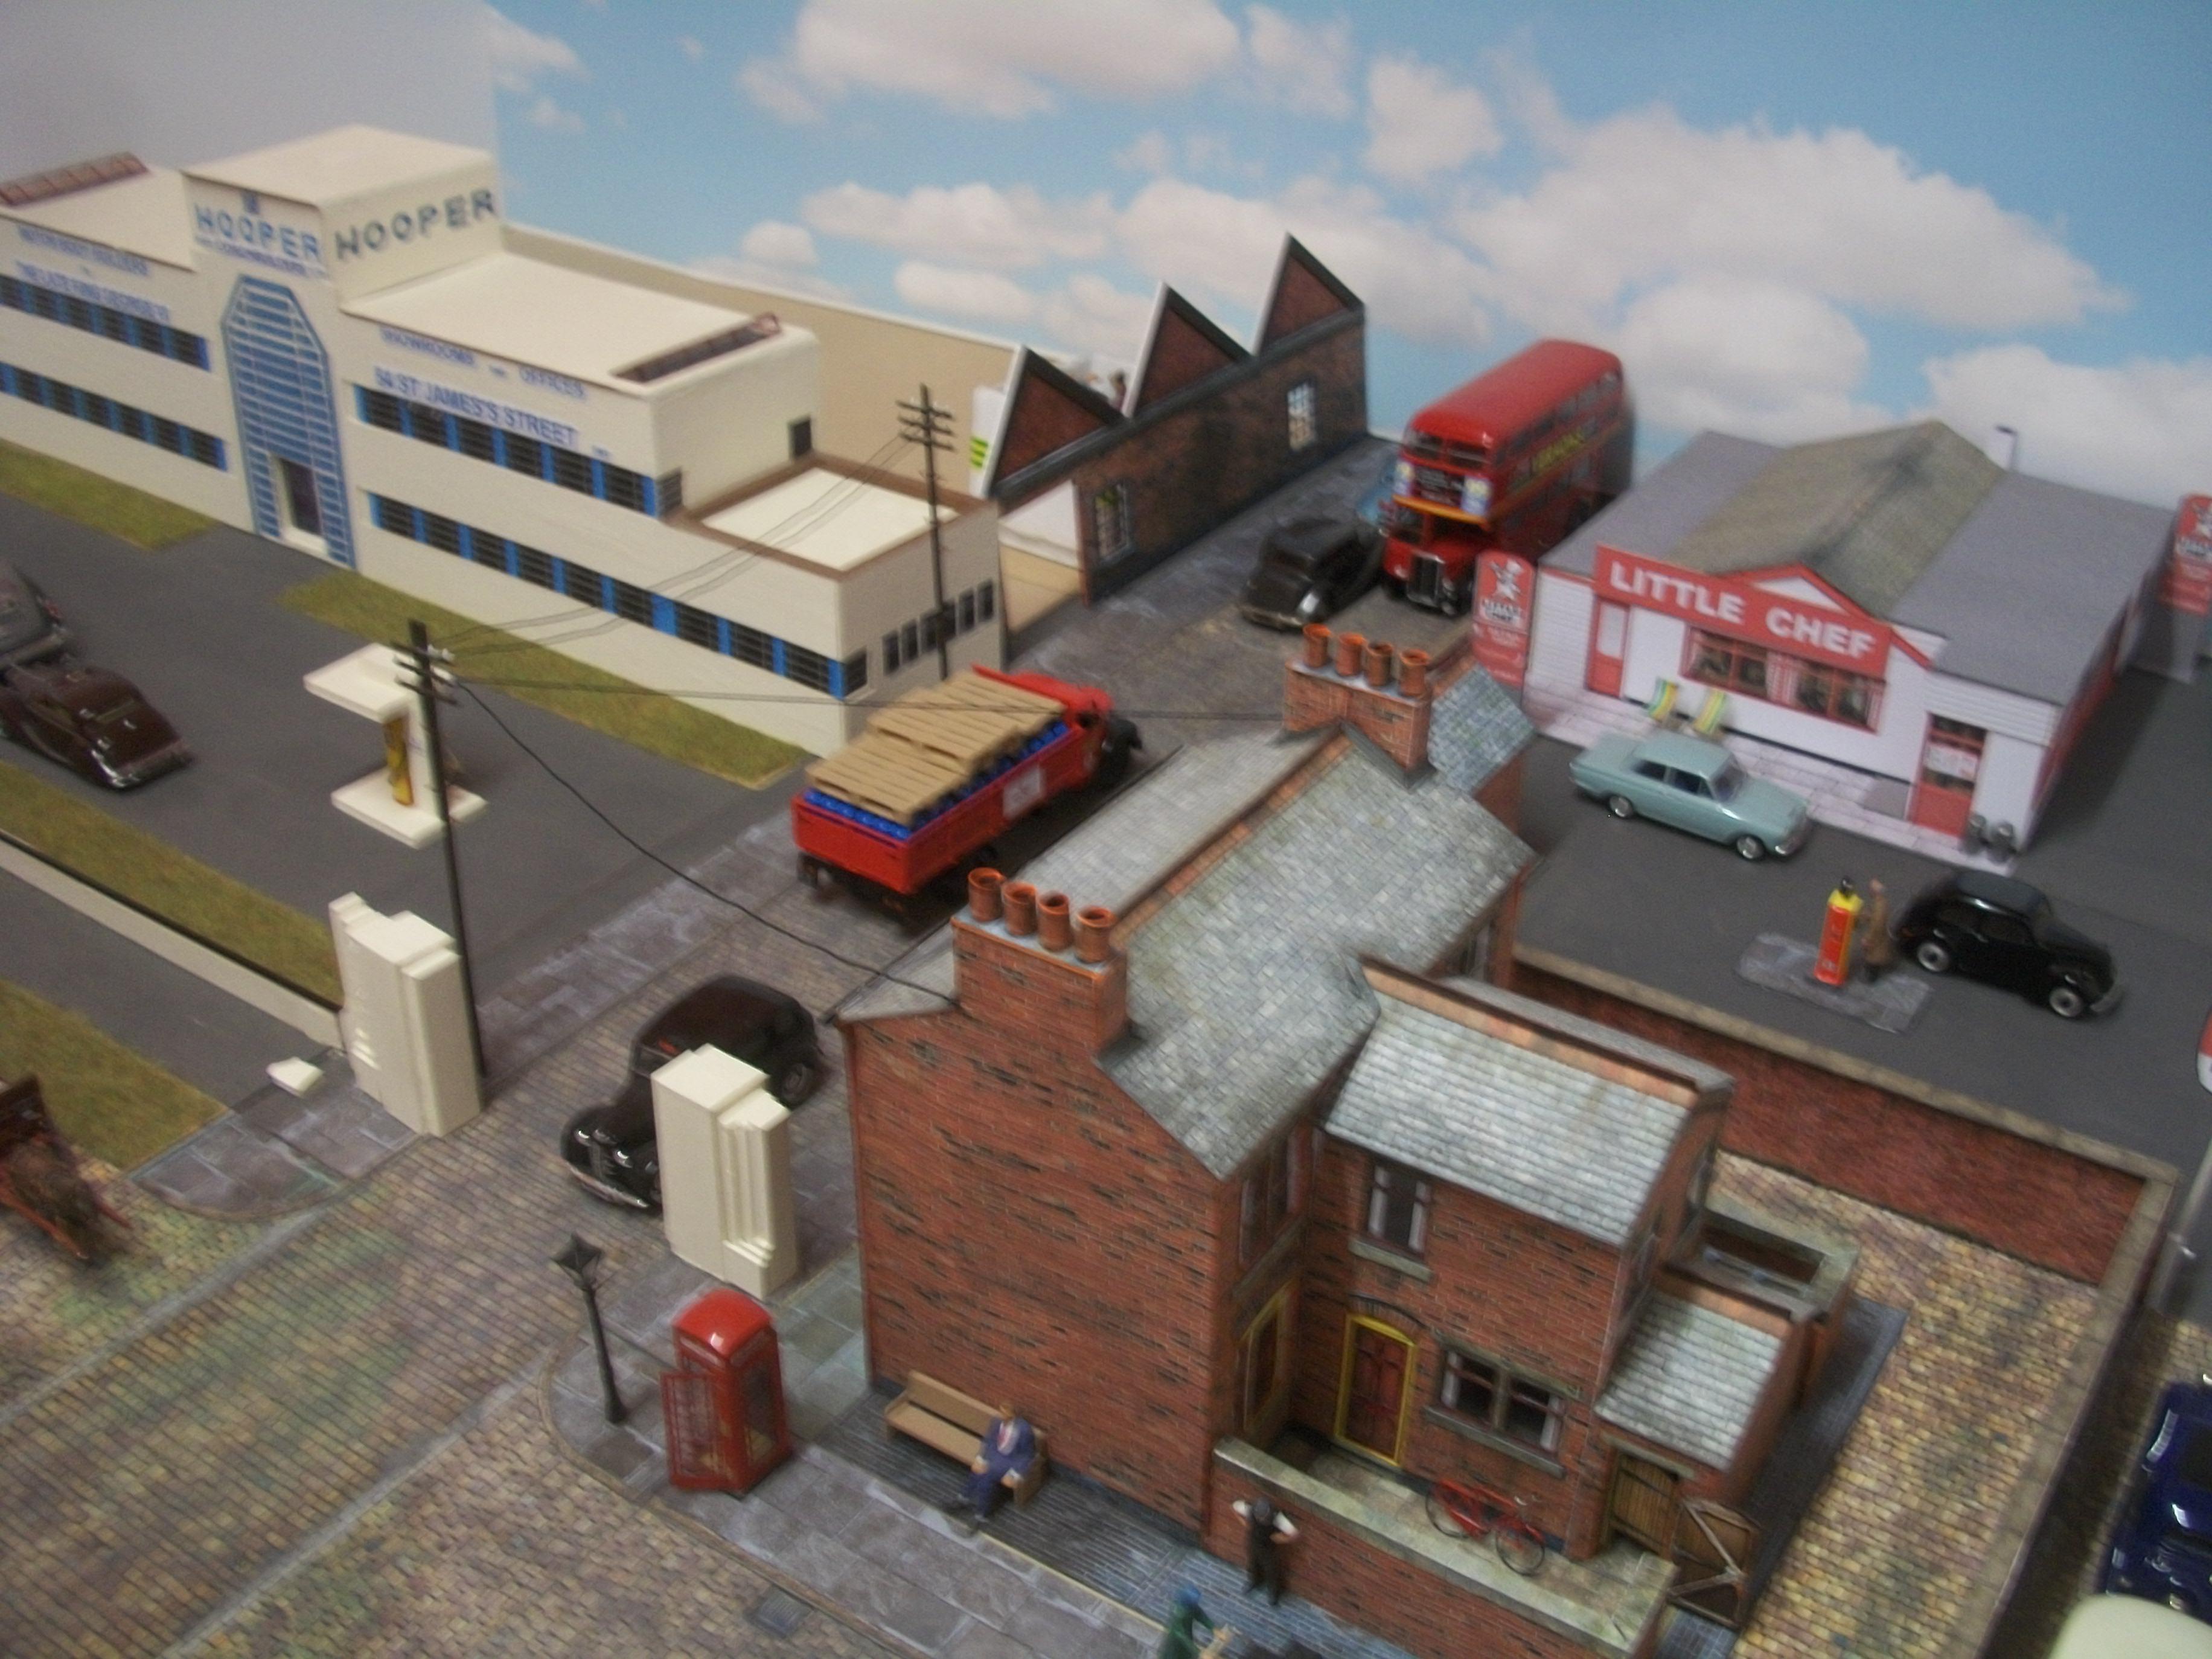
Here are a few photos, showing how I am attempting to mix scales. To begin with, I placed the Little Chef restaurant building, which is 1:43 scale on the diorama that has a backscene that is smaller than 1:43. Then I moved the building away from the backscene, which as you would expect, now looks more in scale. Next step is to add a 1:43 scale model car, and place the car towards the front of the building to begin with. Moving the Ford Popular further back, and behind the building gives a better effect. Two more scale model cars were then added to the scene. One is the 1:32 scale Rolls-Royce and the other is the 1:24 scale Jaguar....... The black Ford is in the background, the black and red Rolls-Royce is positioned in the middle ground, and the gold Jaguar takes up the foreground. This experiment will continue shortly, with the Hooper & Co showroom building in the foreground, which is intended to be 1:24 scale but could actually be 1:35 scale, and in the background there will be the 1:43 scale Hooper & Co factory building. By placing 1:24 scale cars in the foreground and 1:32 scale cars in the middle ground, followed by 1:43 scale cars in the background part of the setting, I hope to create the illusion that all of the cars and buildings (and figures) are of the same scale. This must have been tried before, but I don't know if anyone has managed to make the concept work successfully. David
-
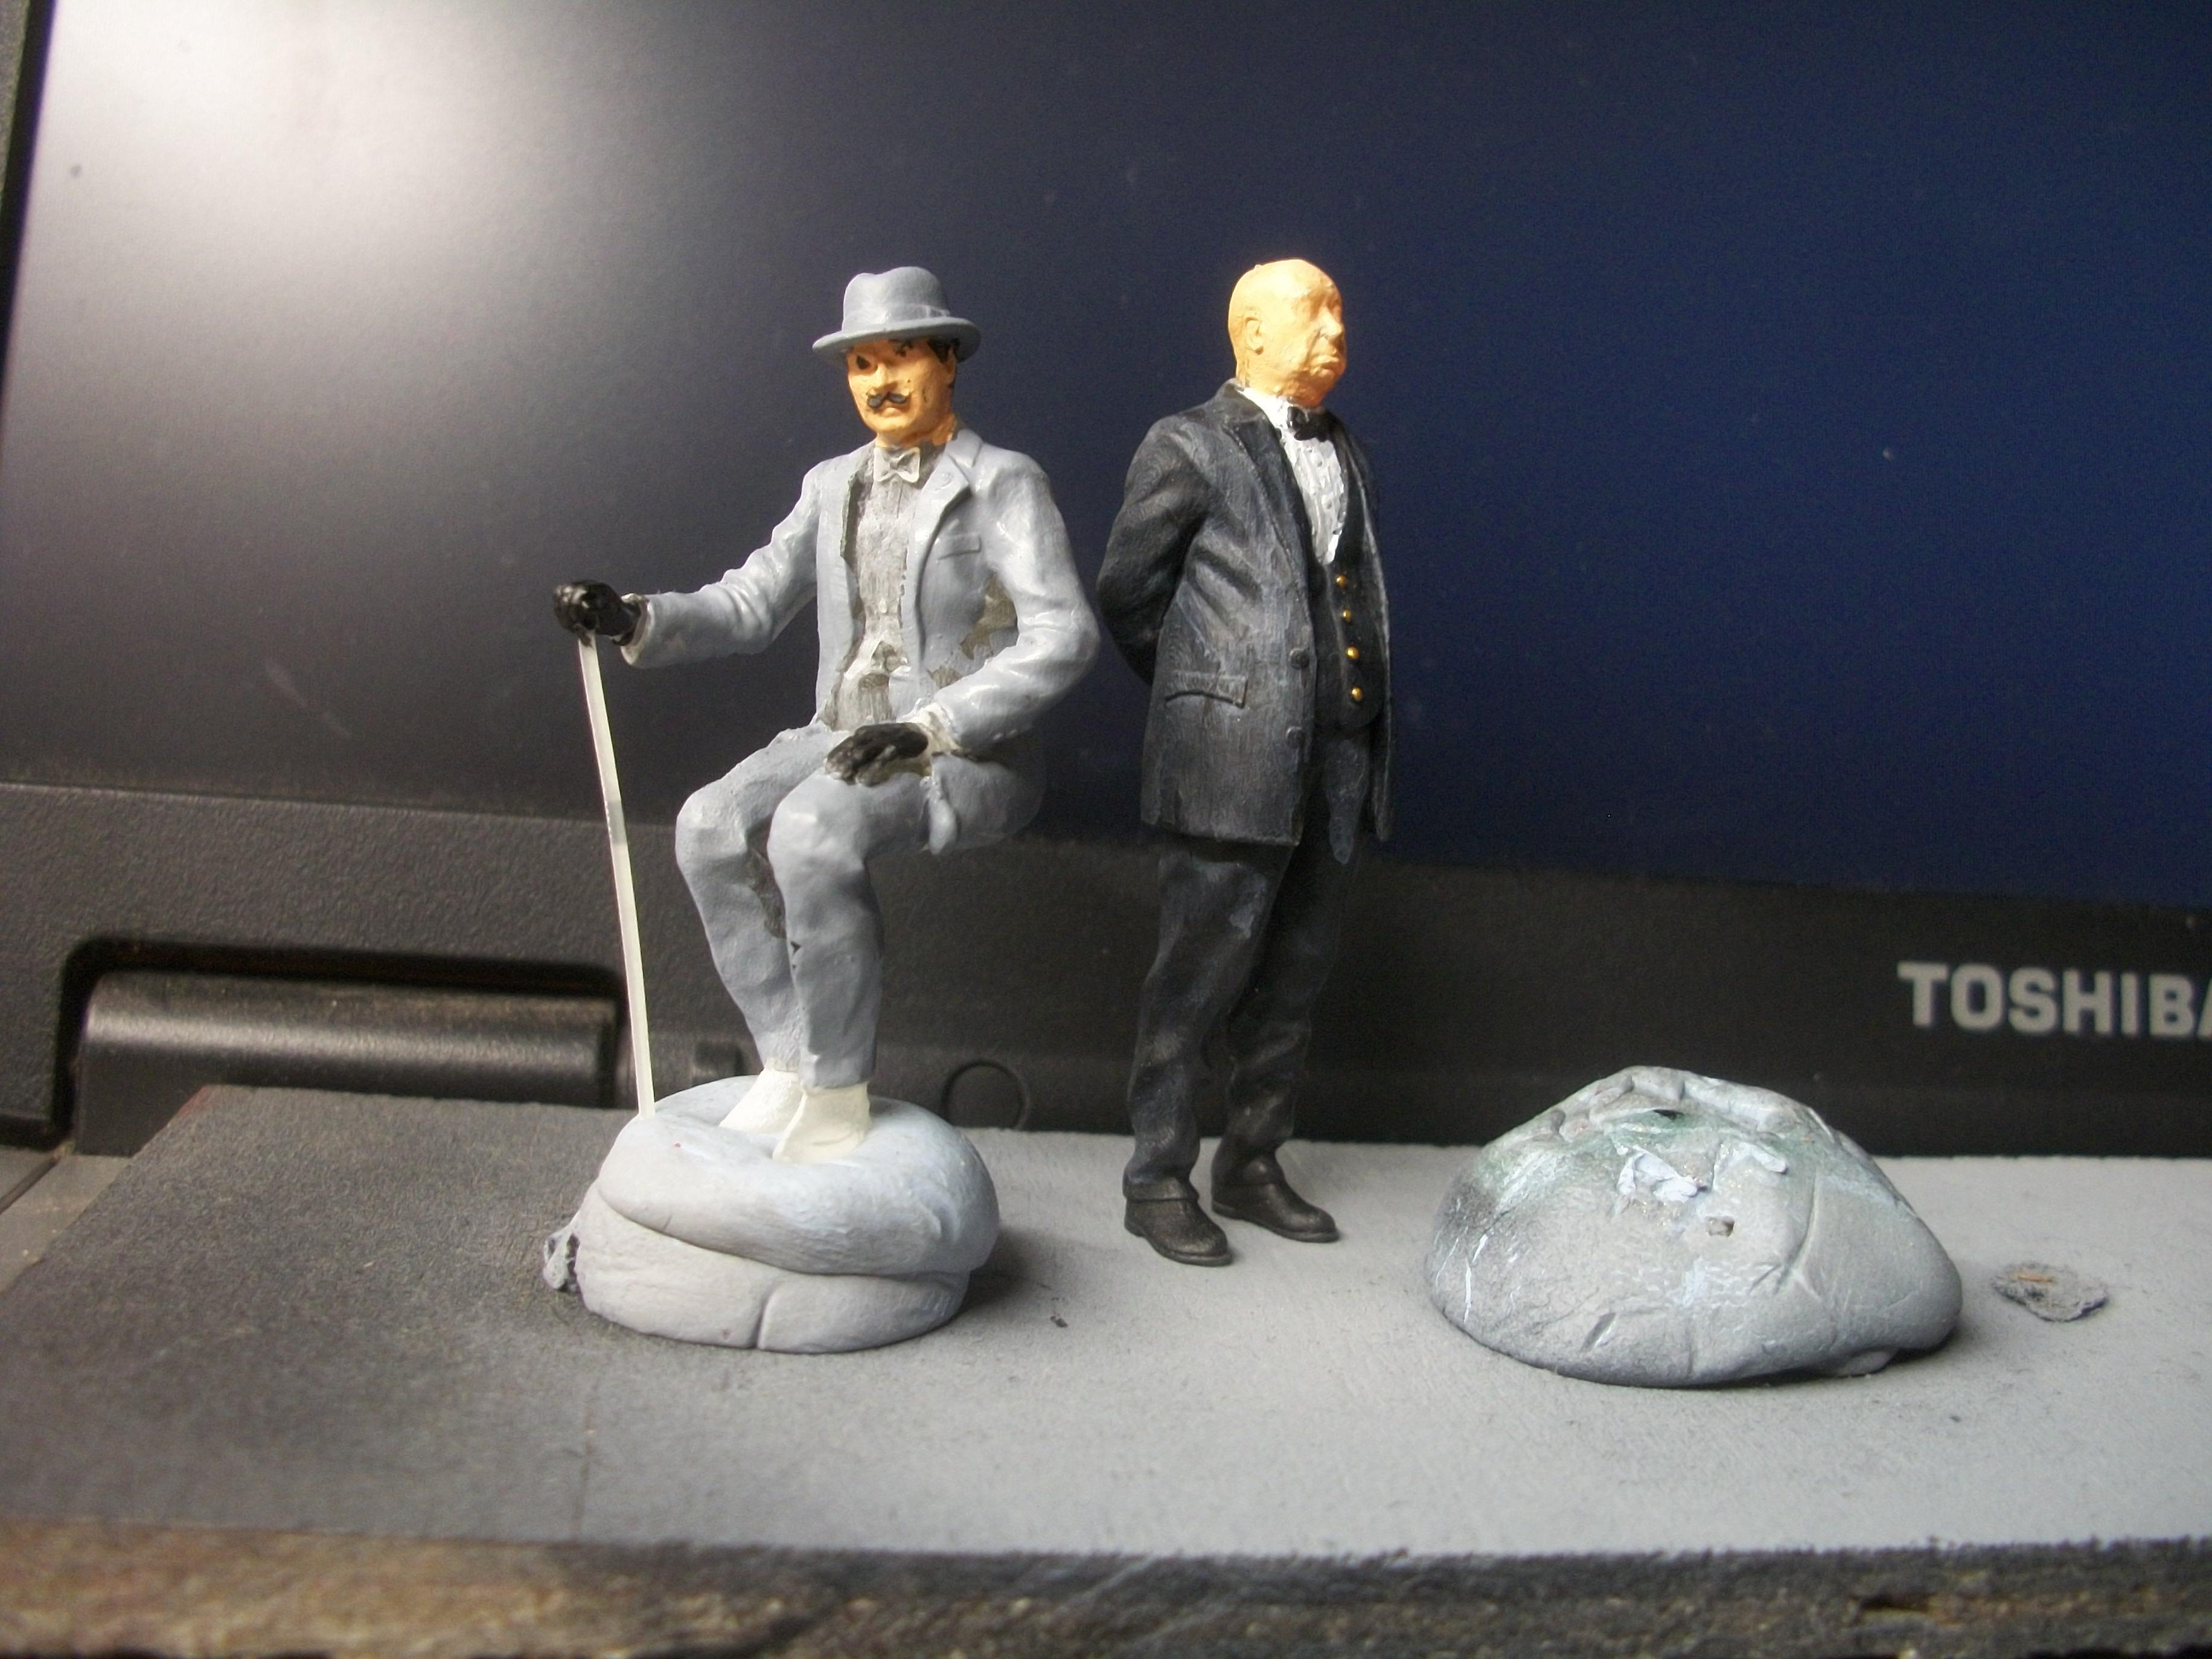
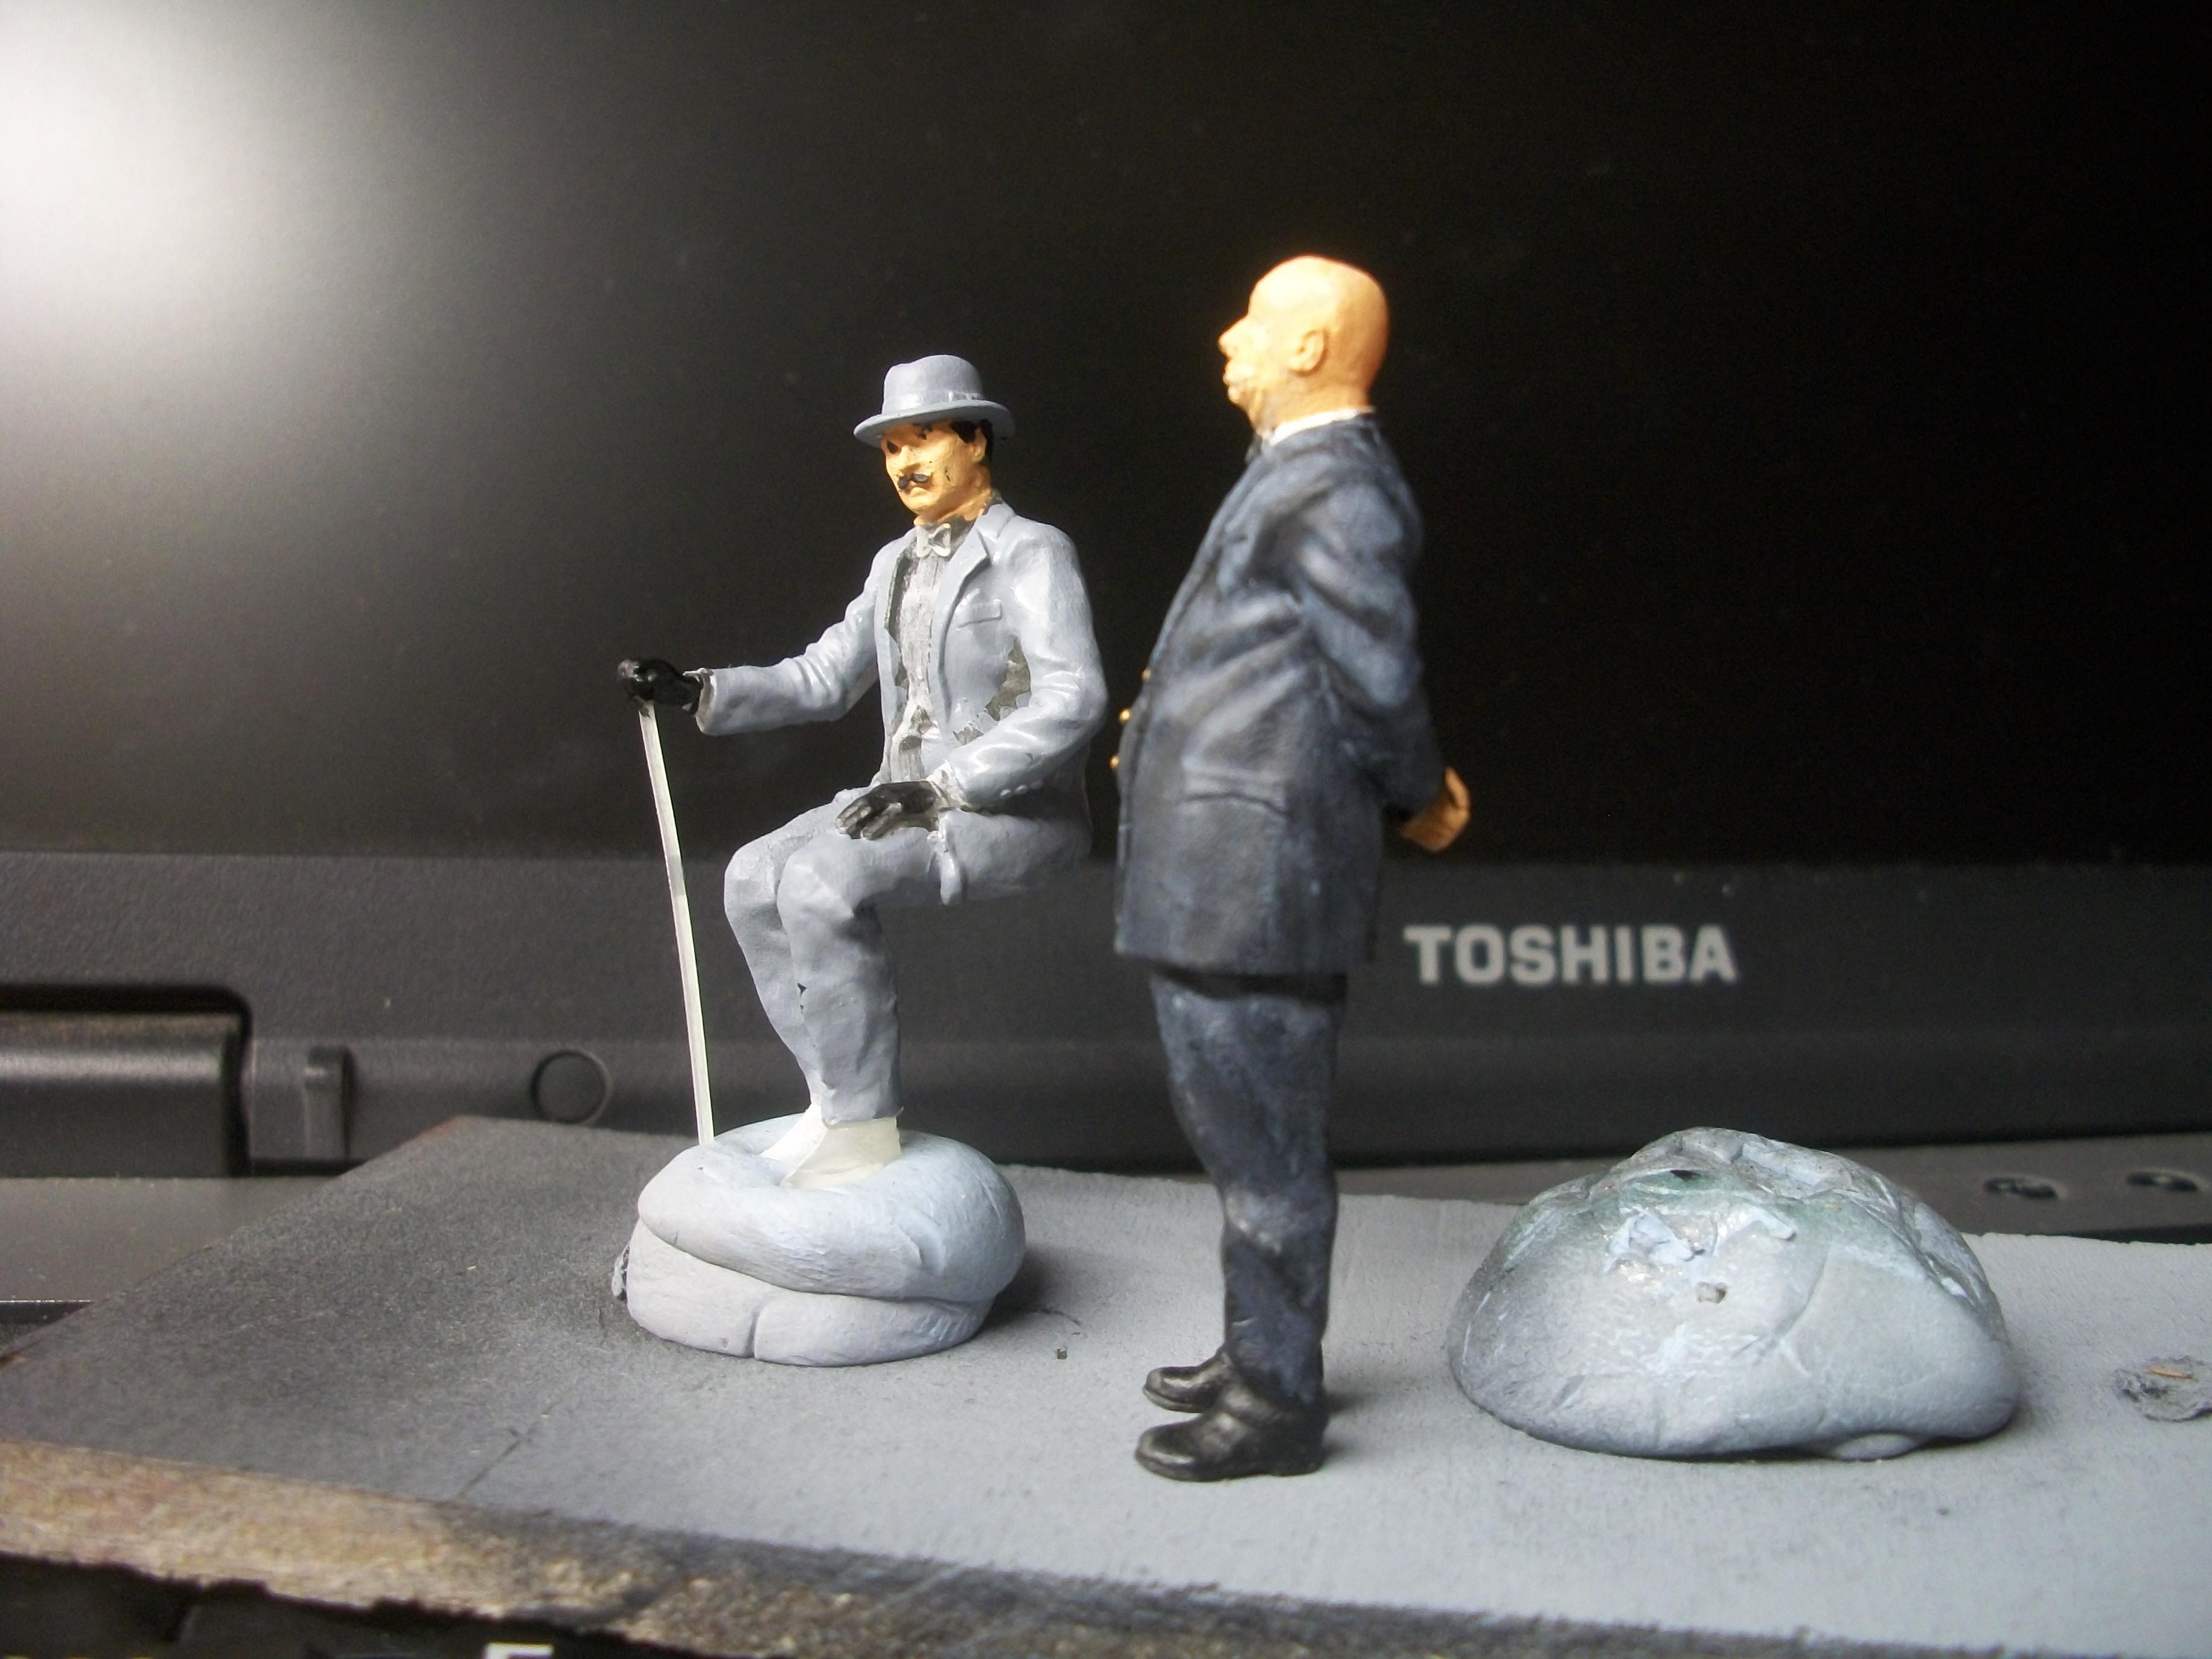
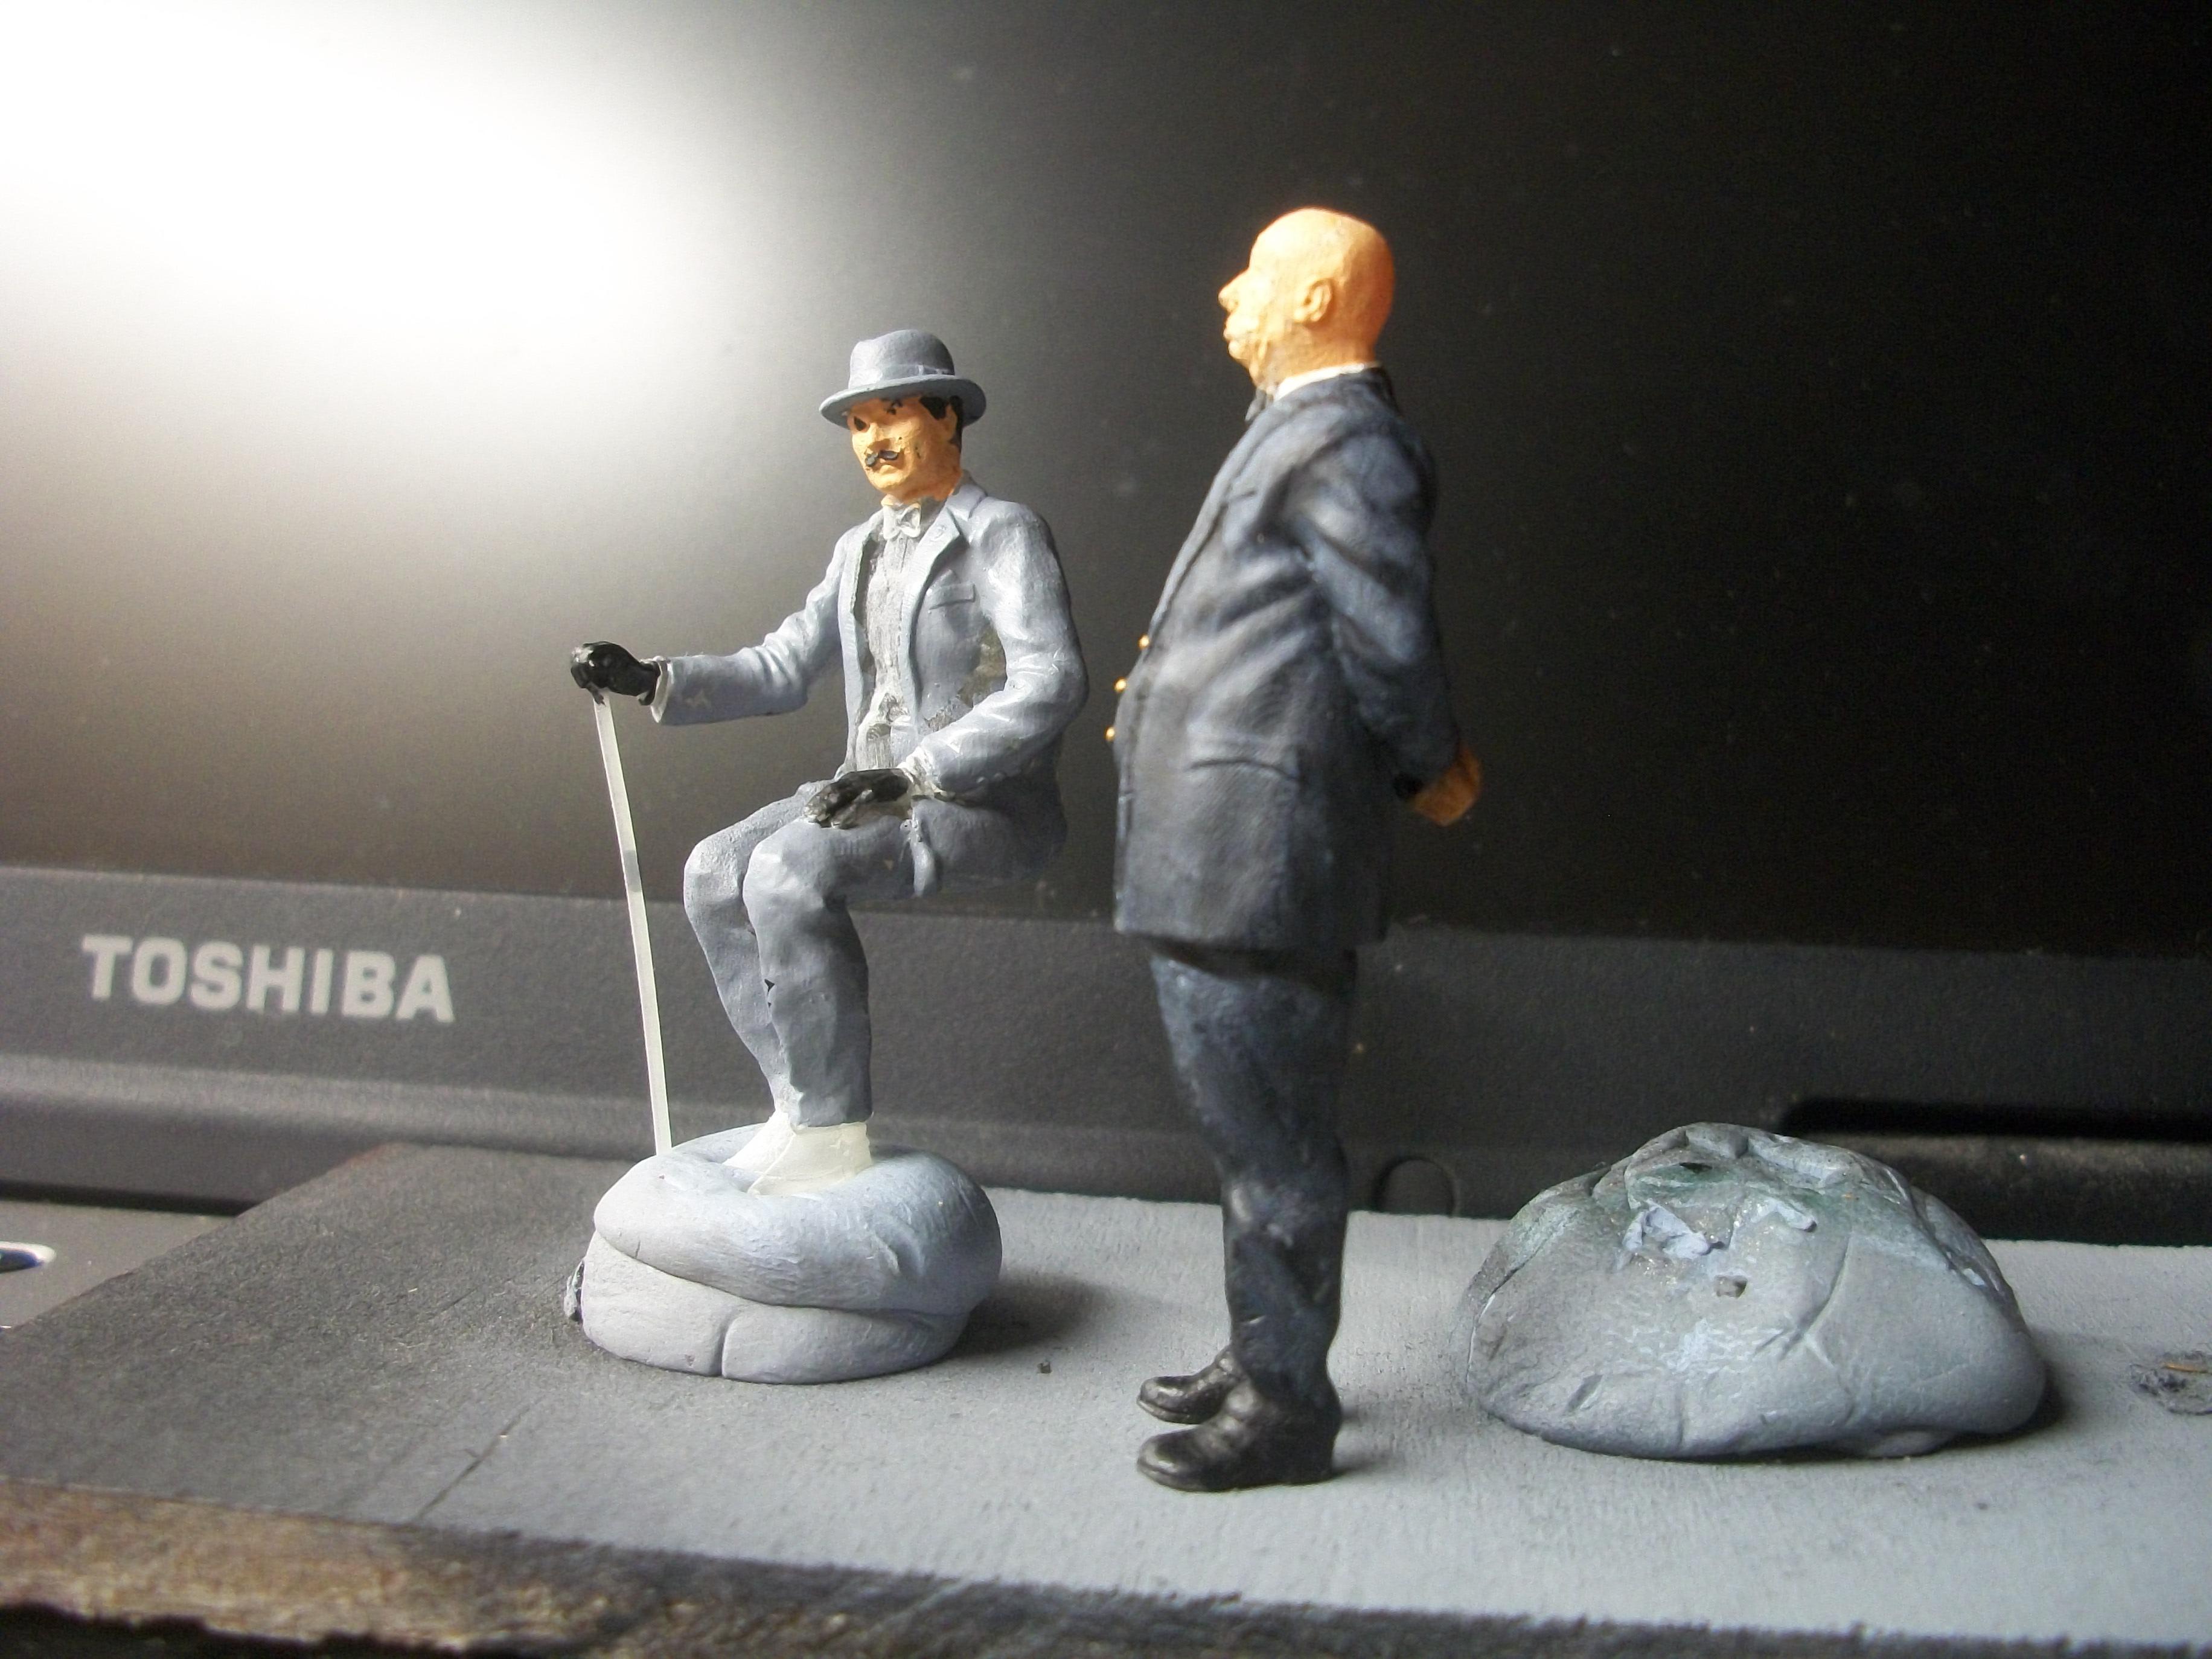
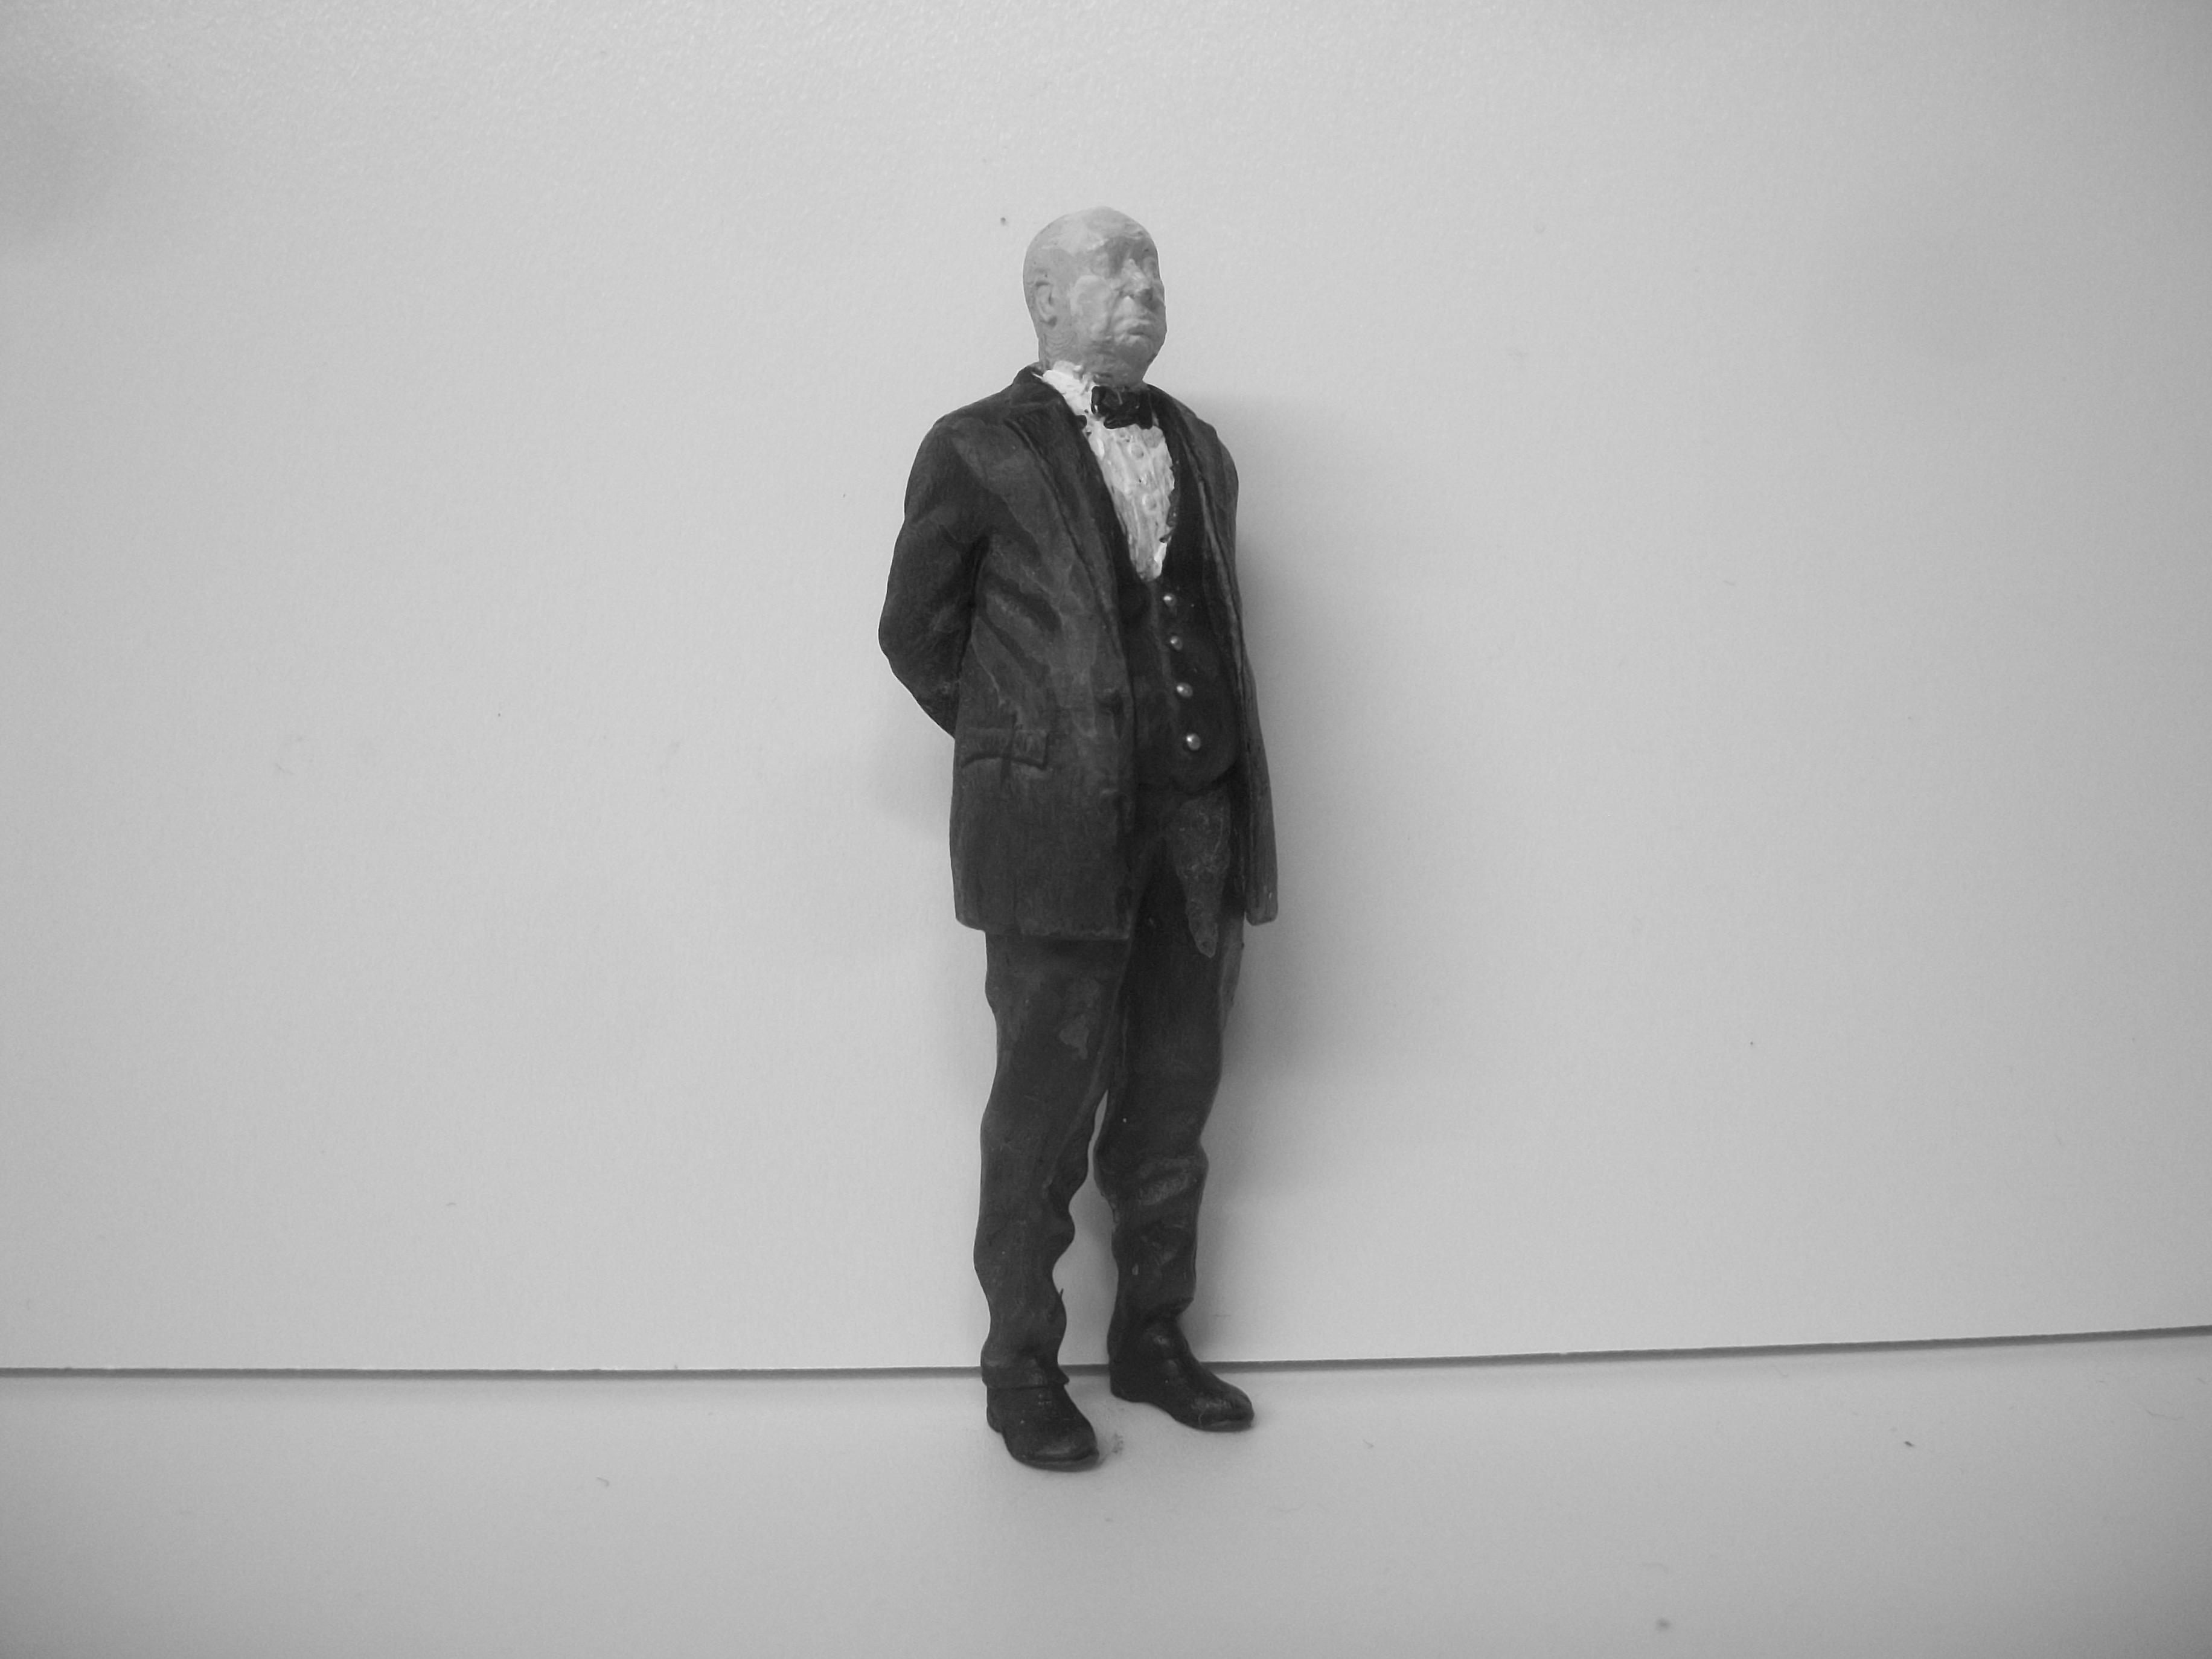
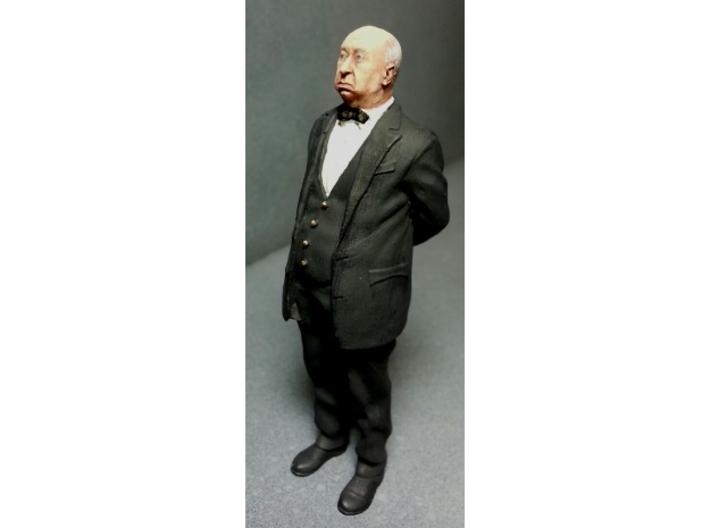
Managed to get some further figure painting work done today, despite various distractions. This is the 1:32 scale seated figure with hat and cane, who will be seated in the rear seat of the 1928 Rolls-Royce Phantom I, as part of a Hooper & Co. showrooms building setting at some point. Both the seated figure and the standing figure of Alfred Hitchcock are ultra fine detail 3D printed figures from Shapeways. David
-
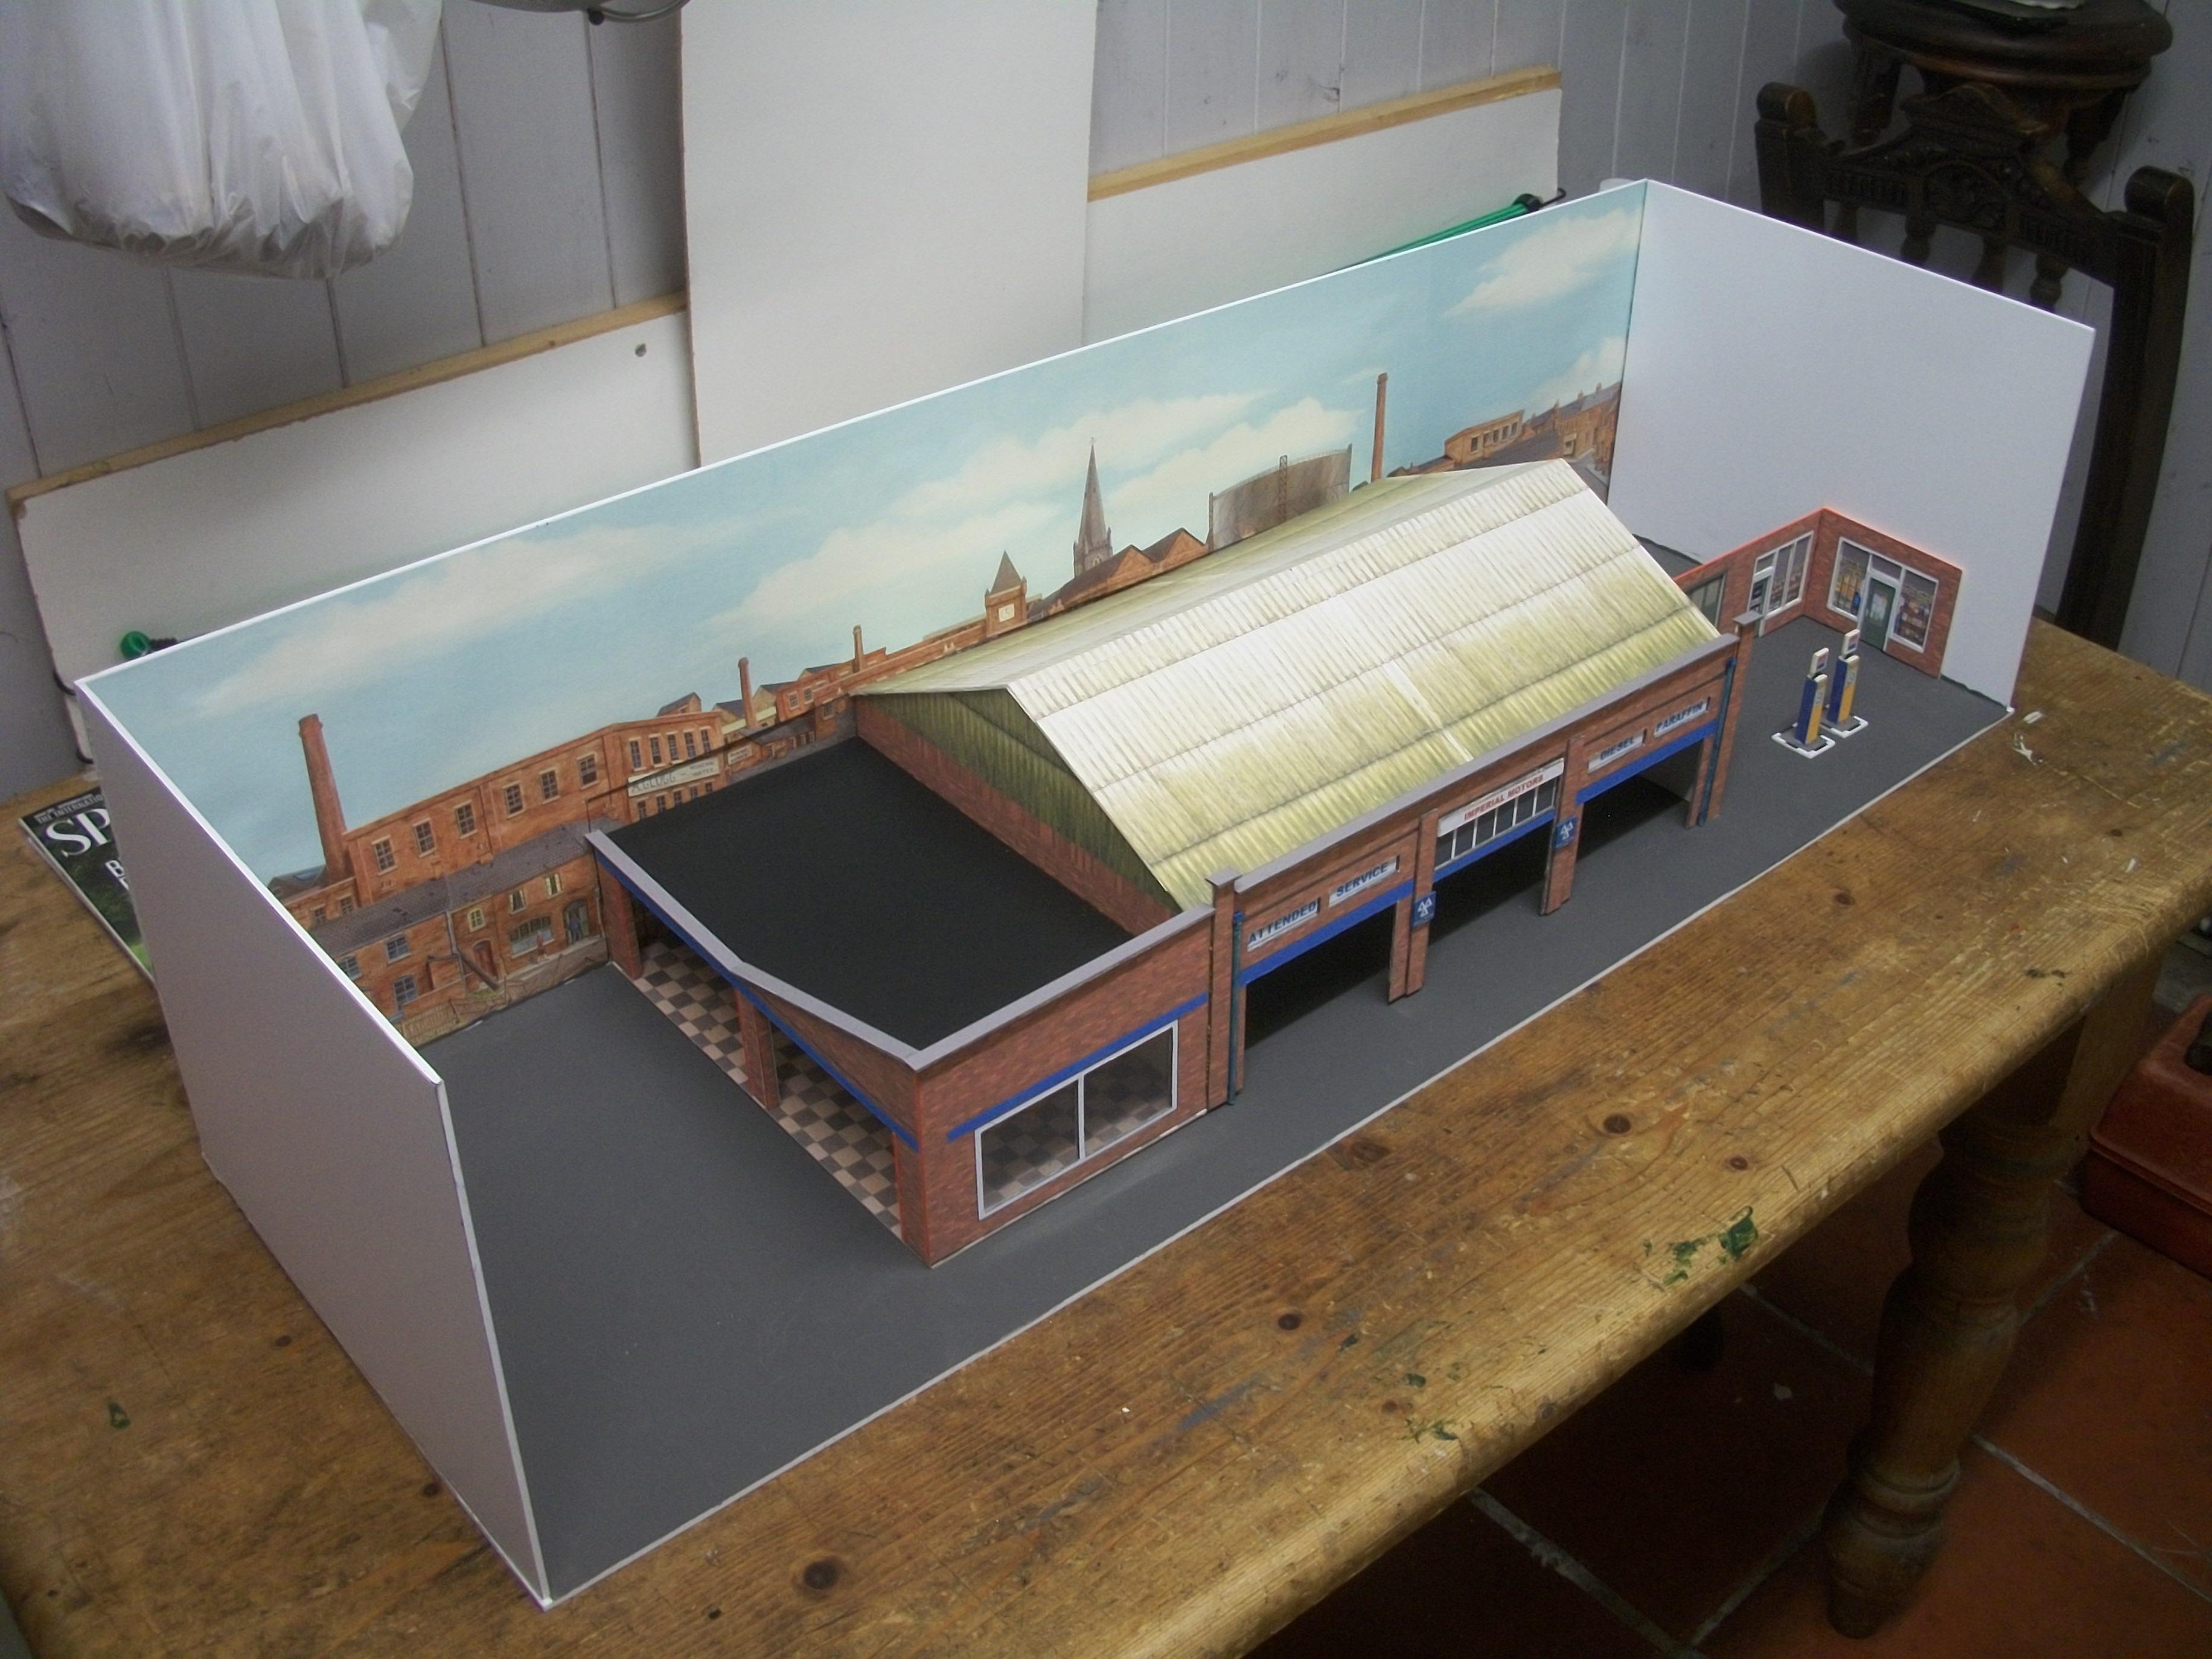
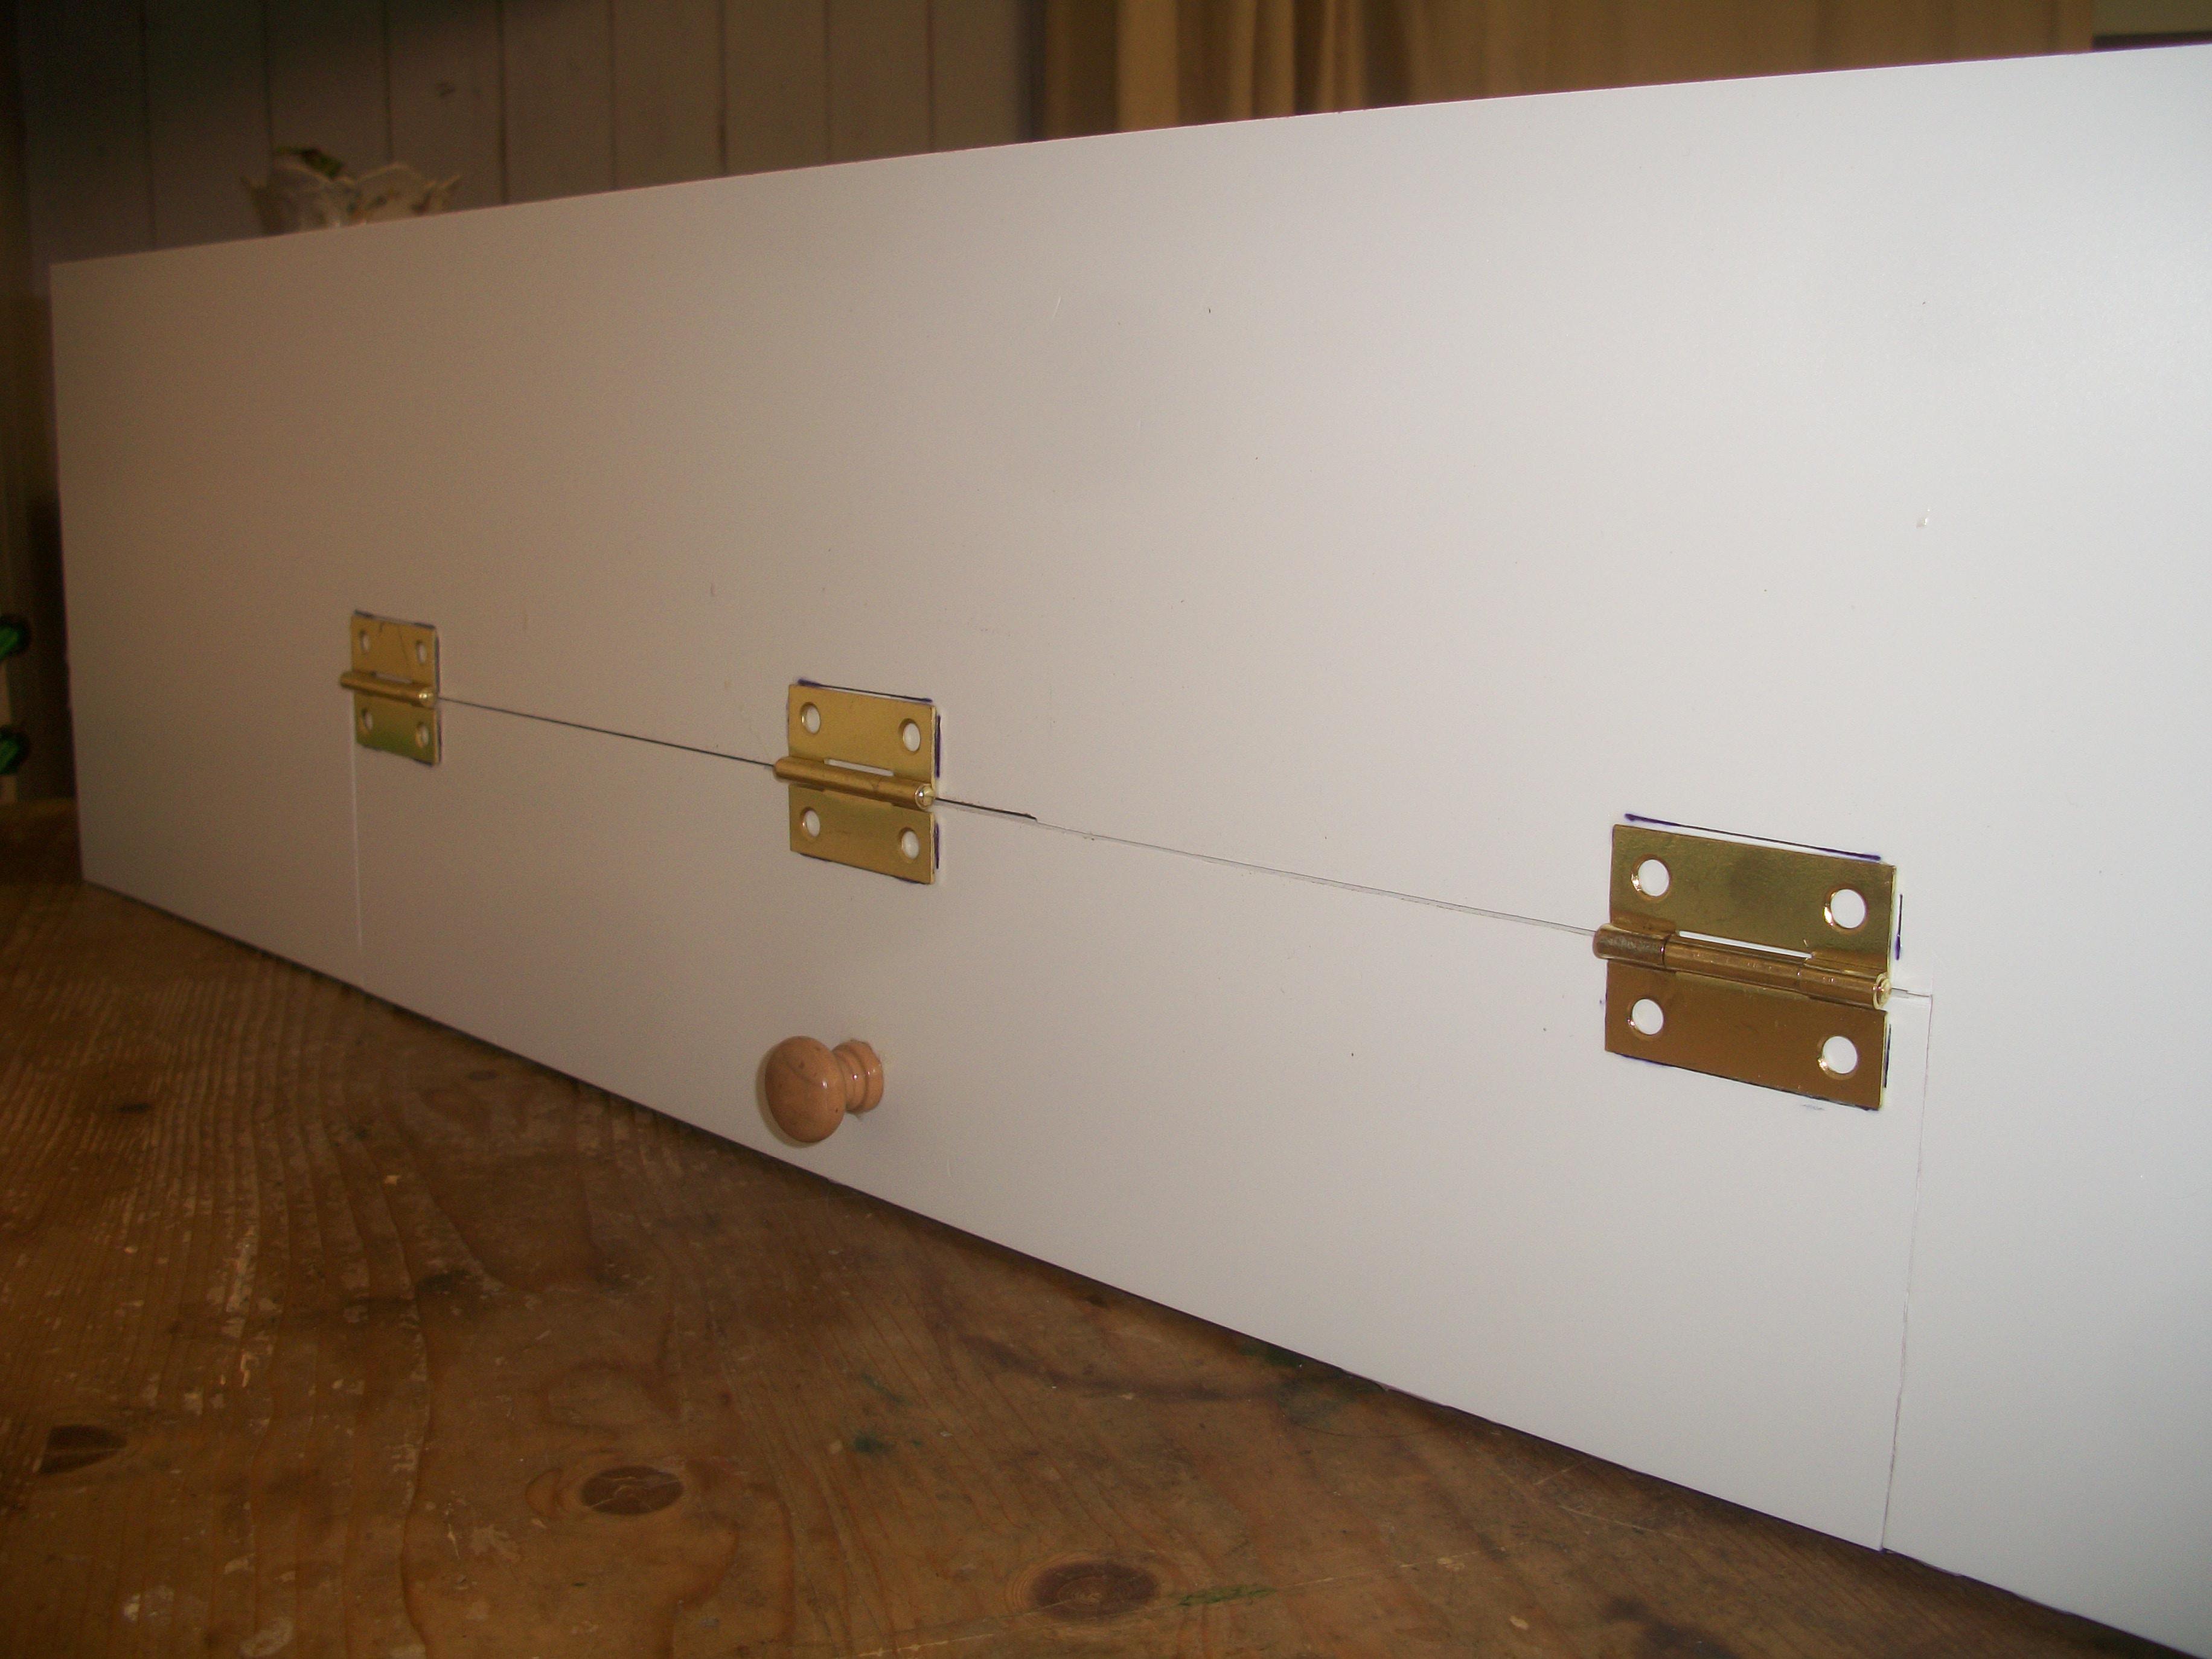
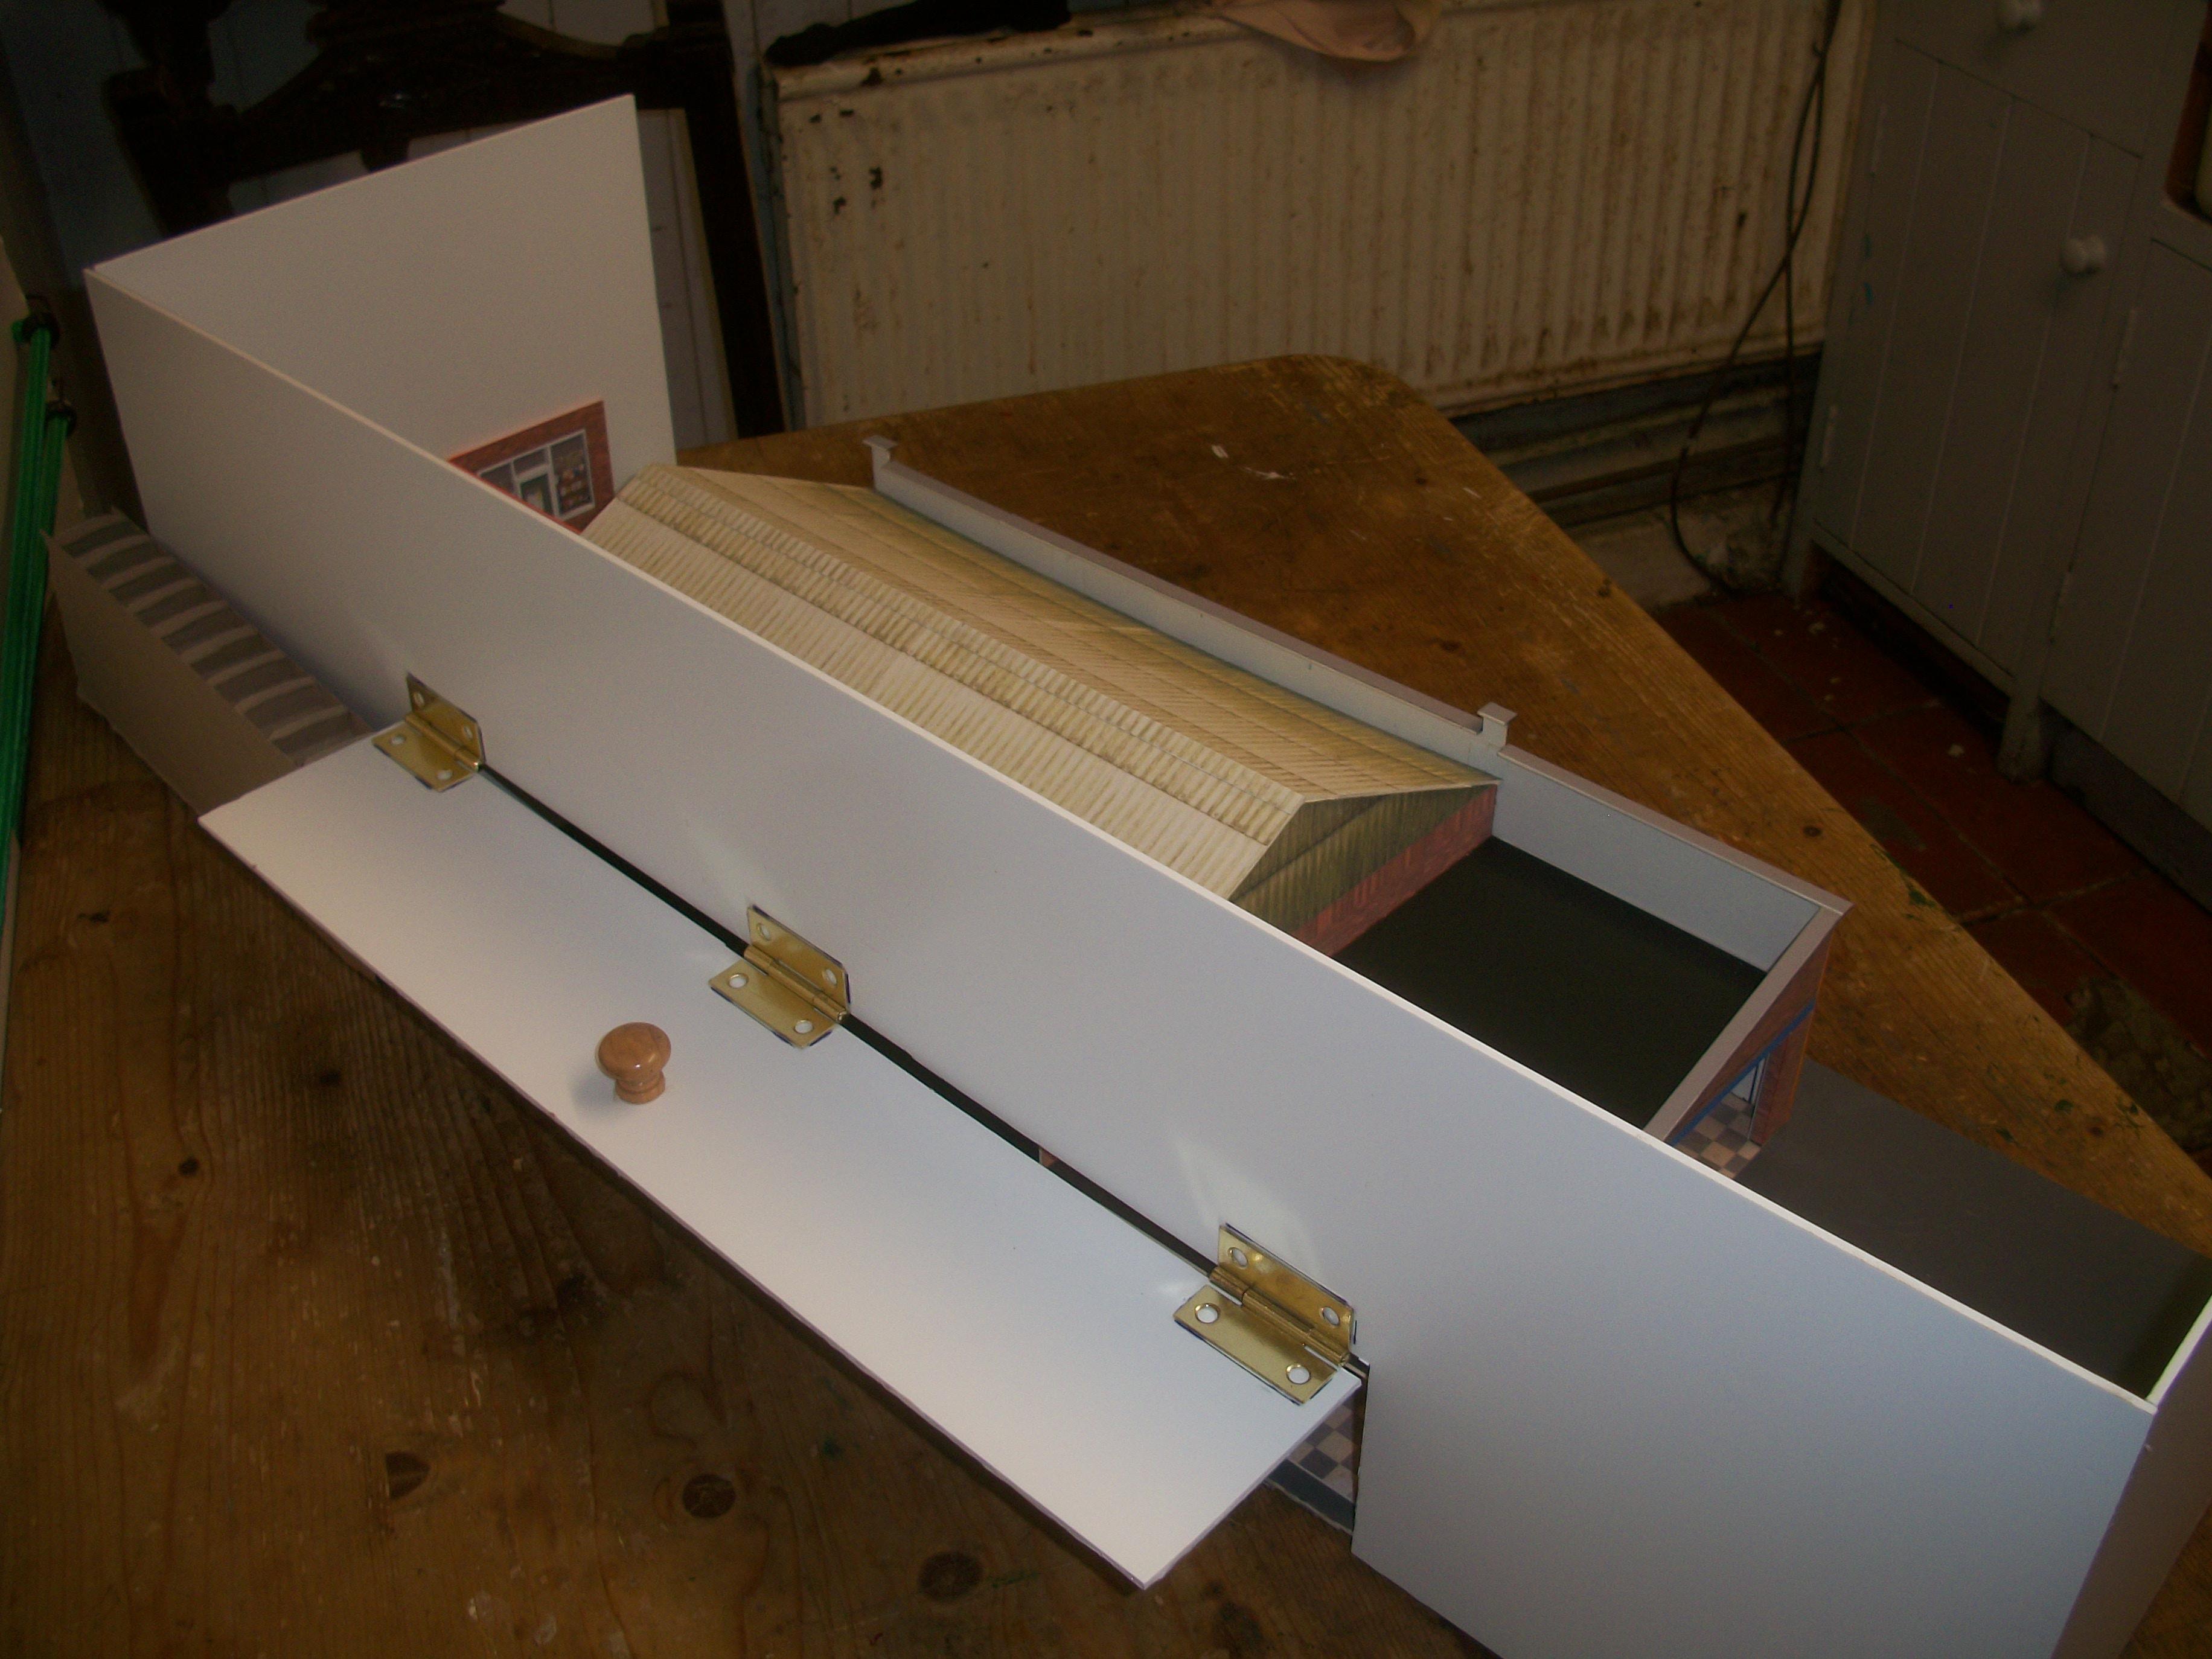
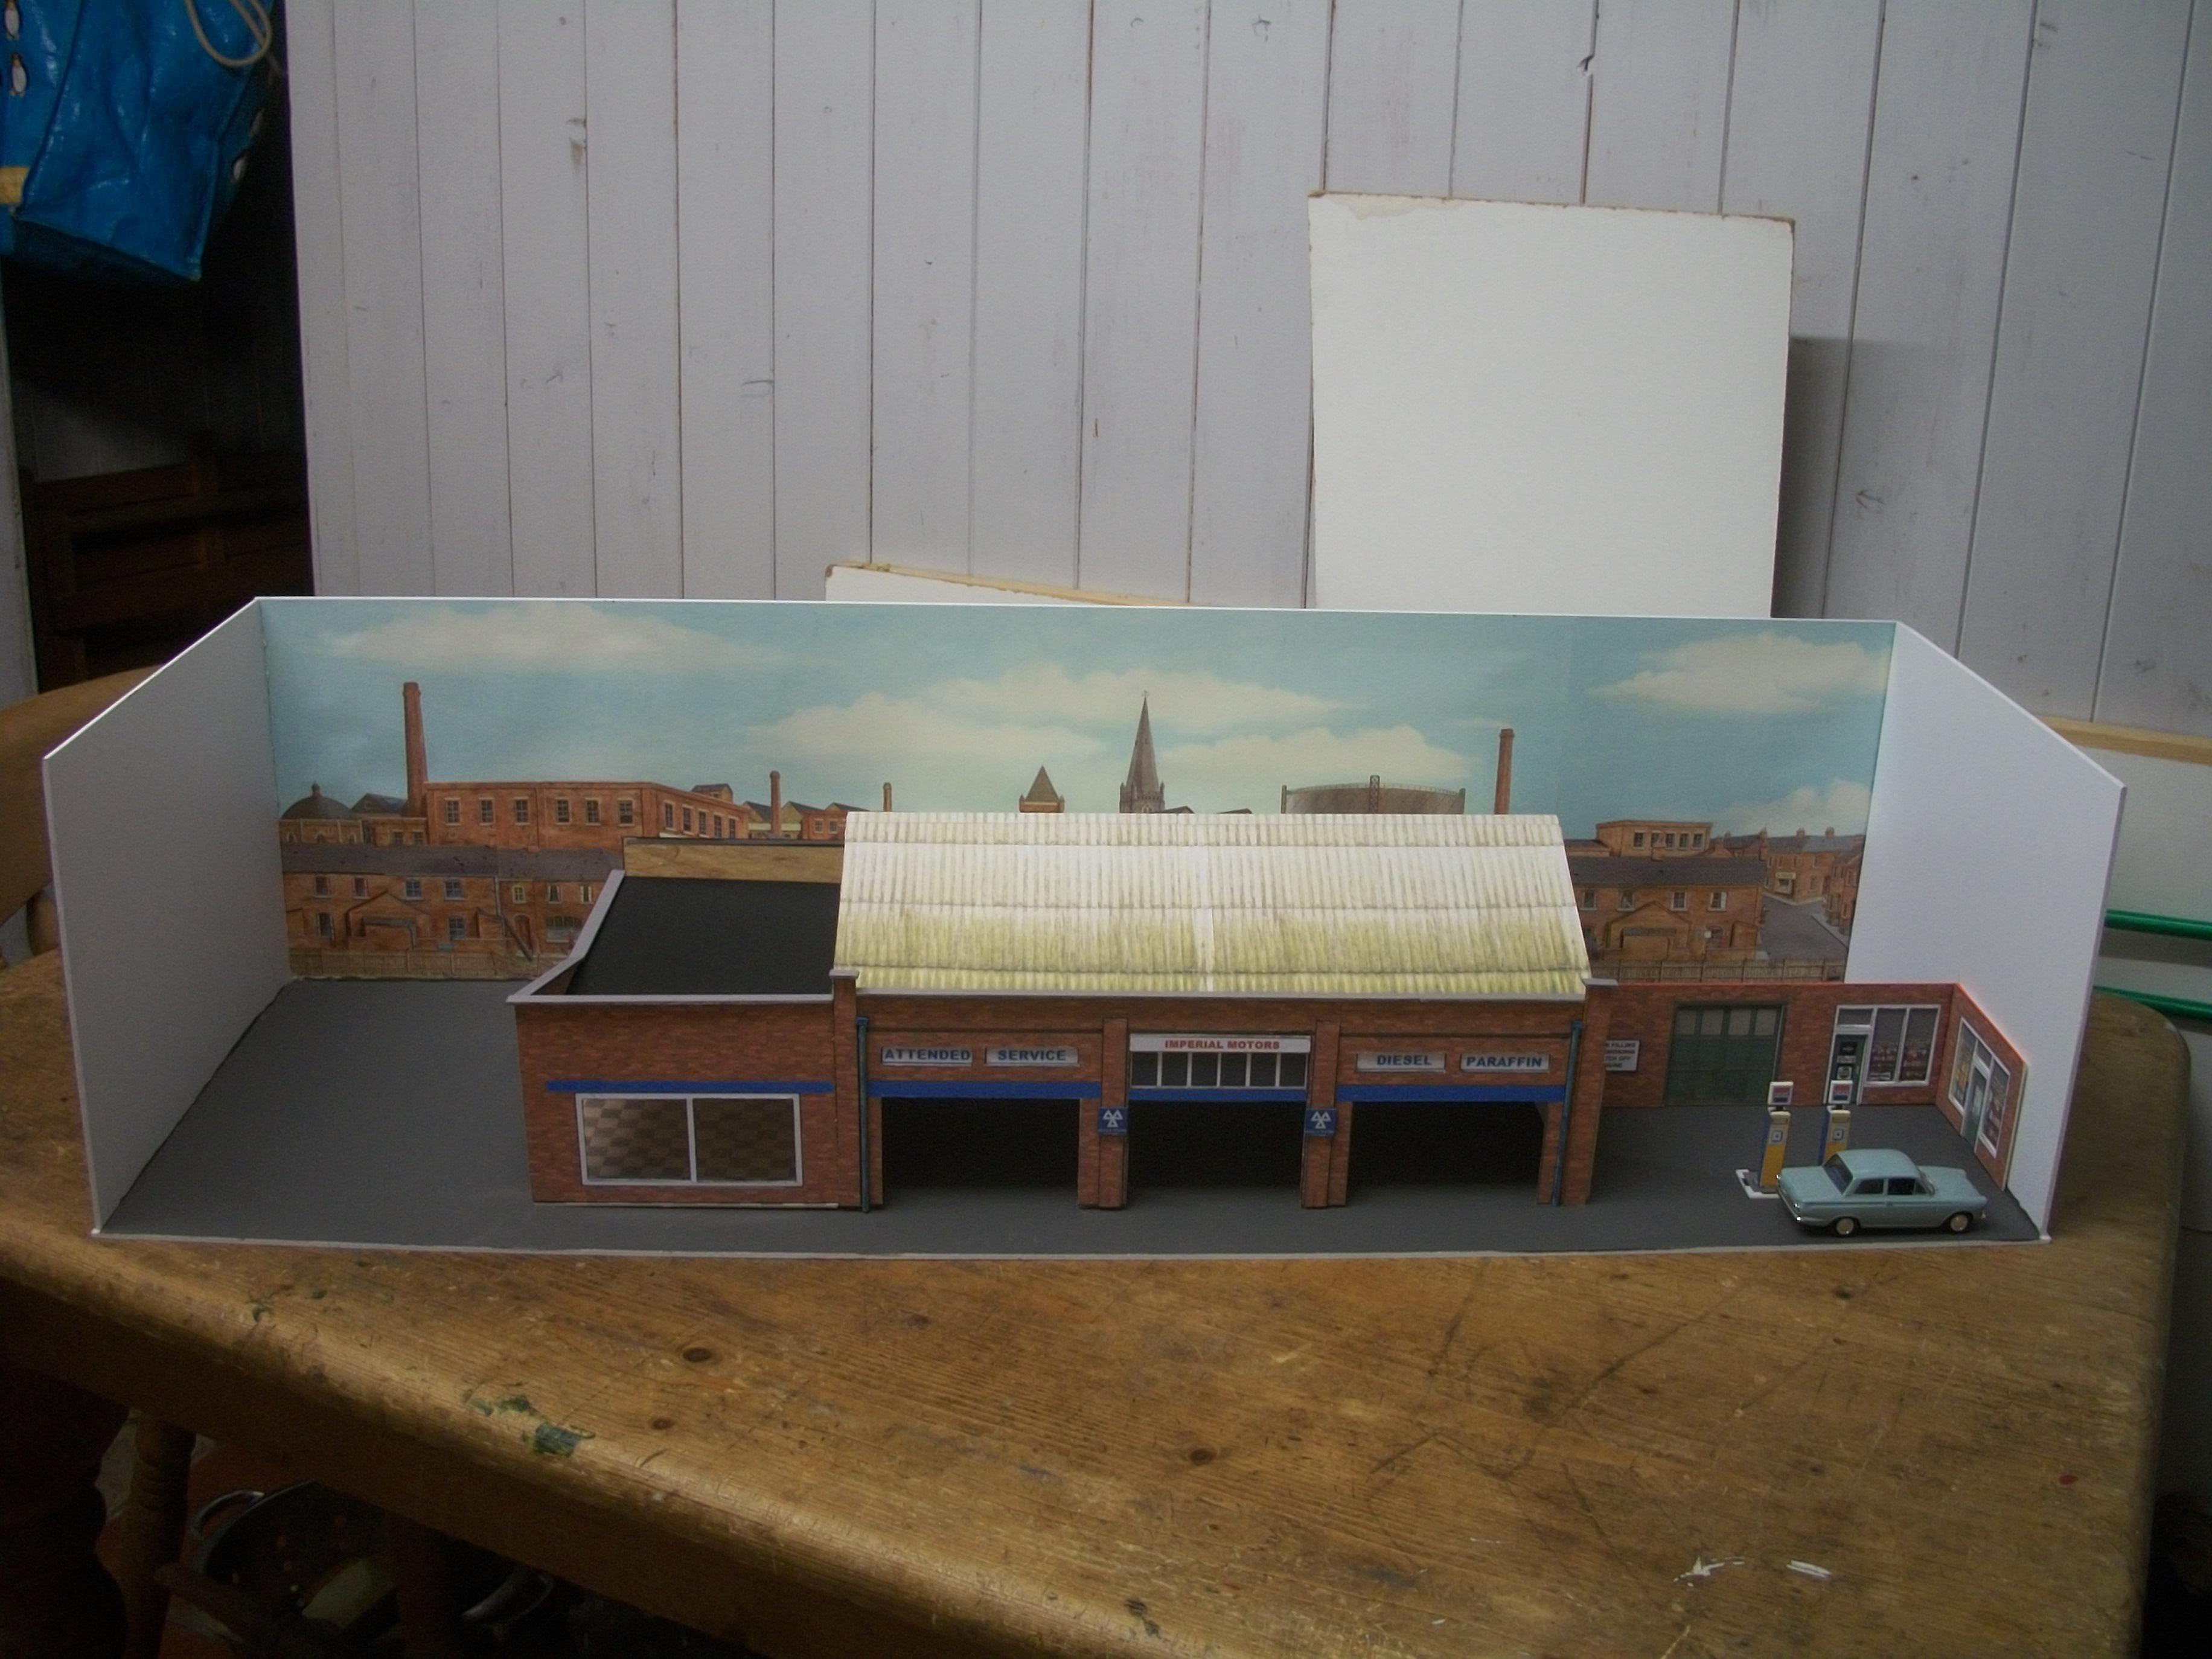
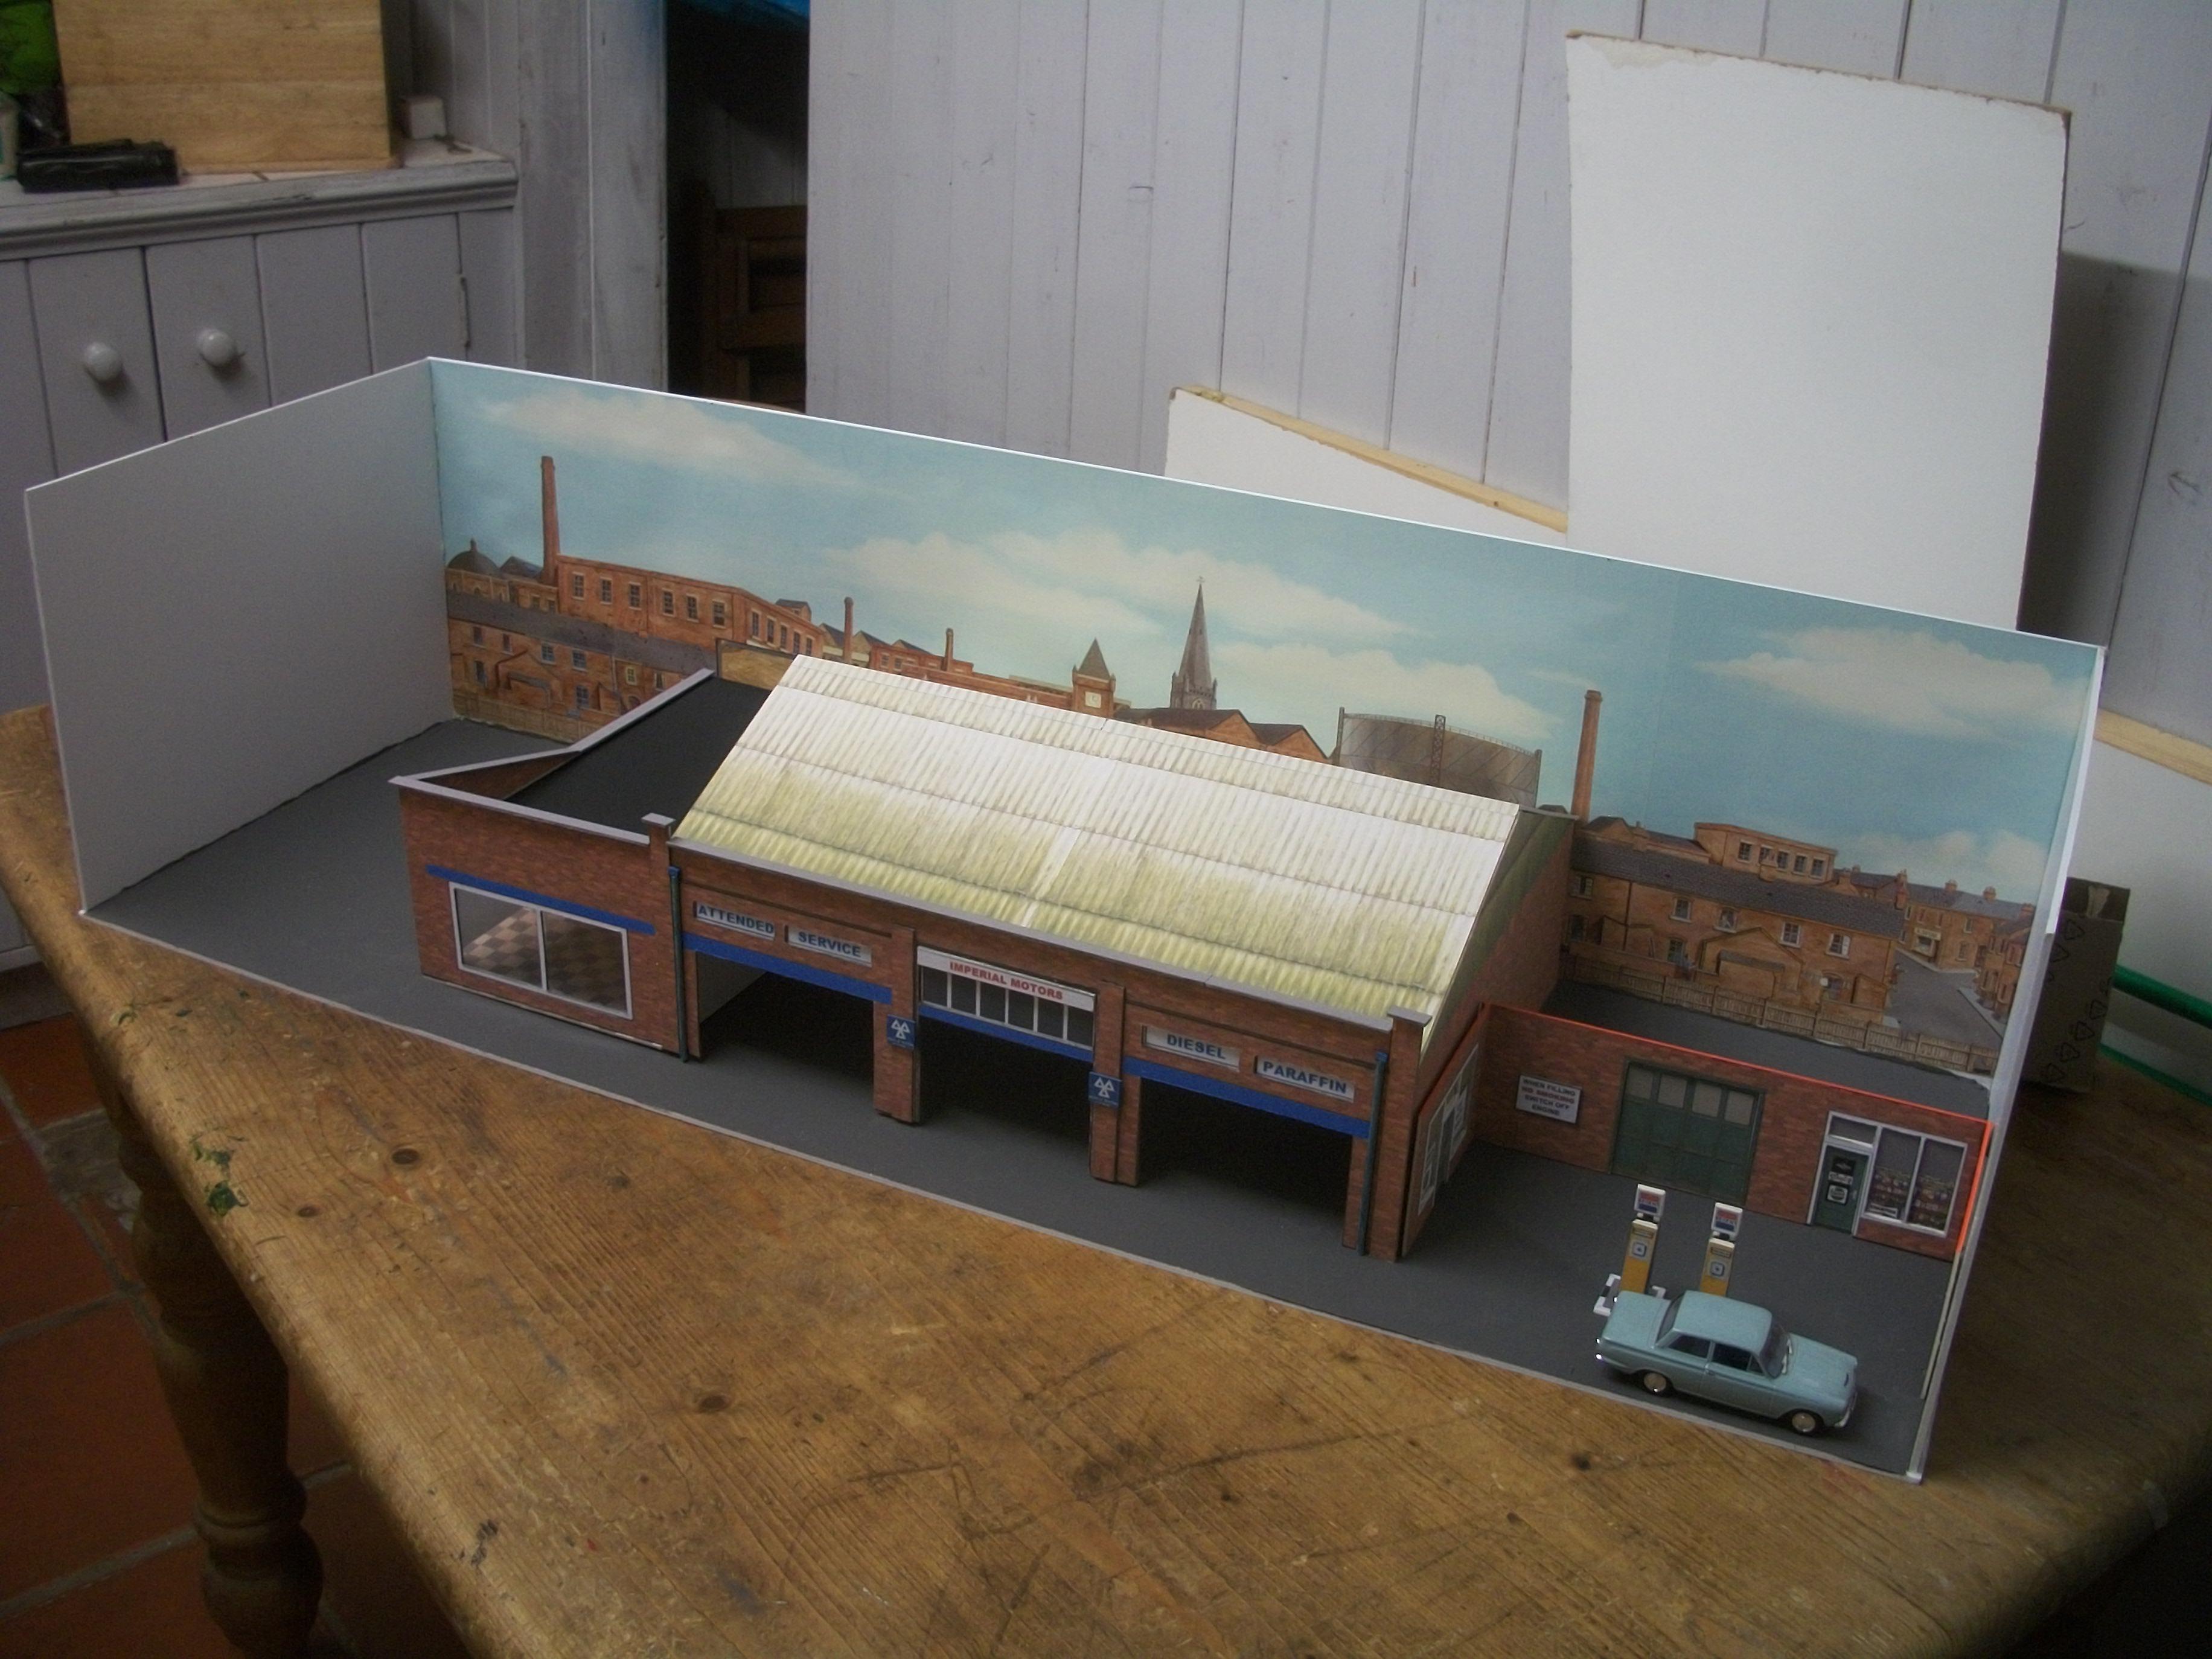
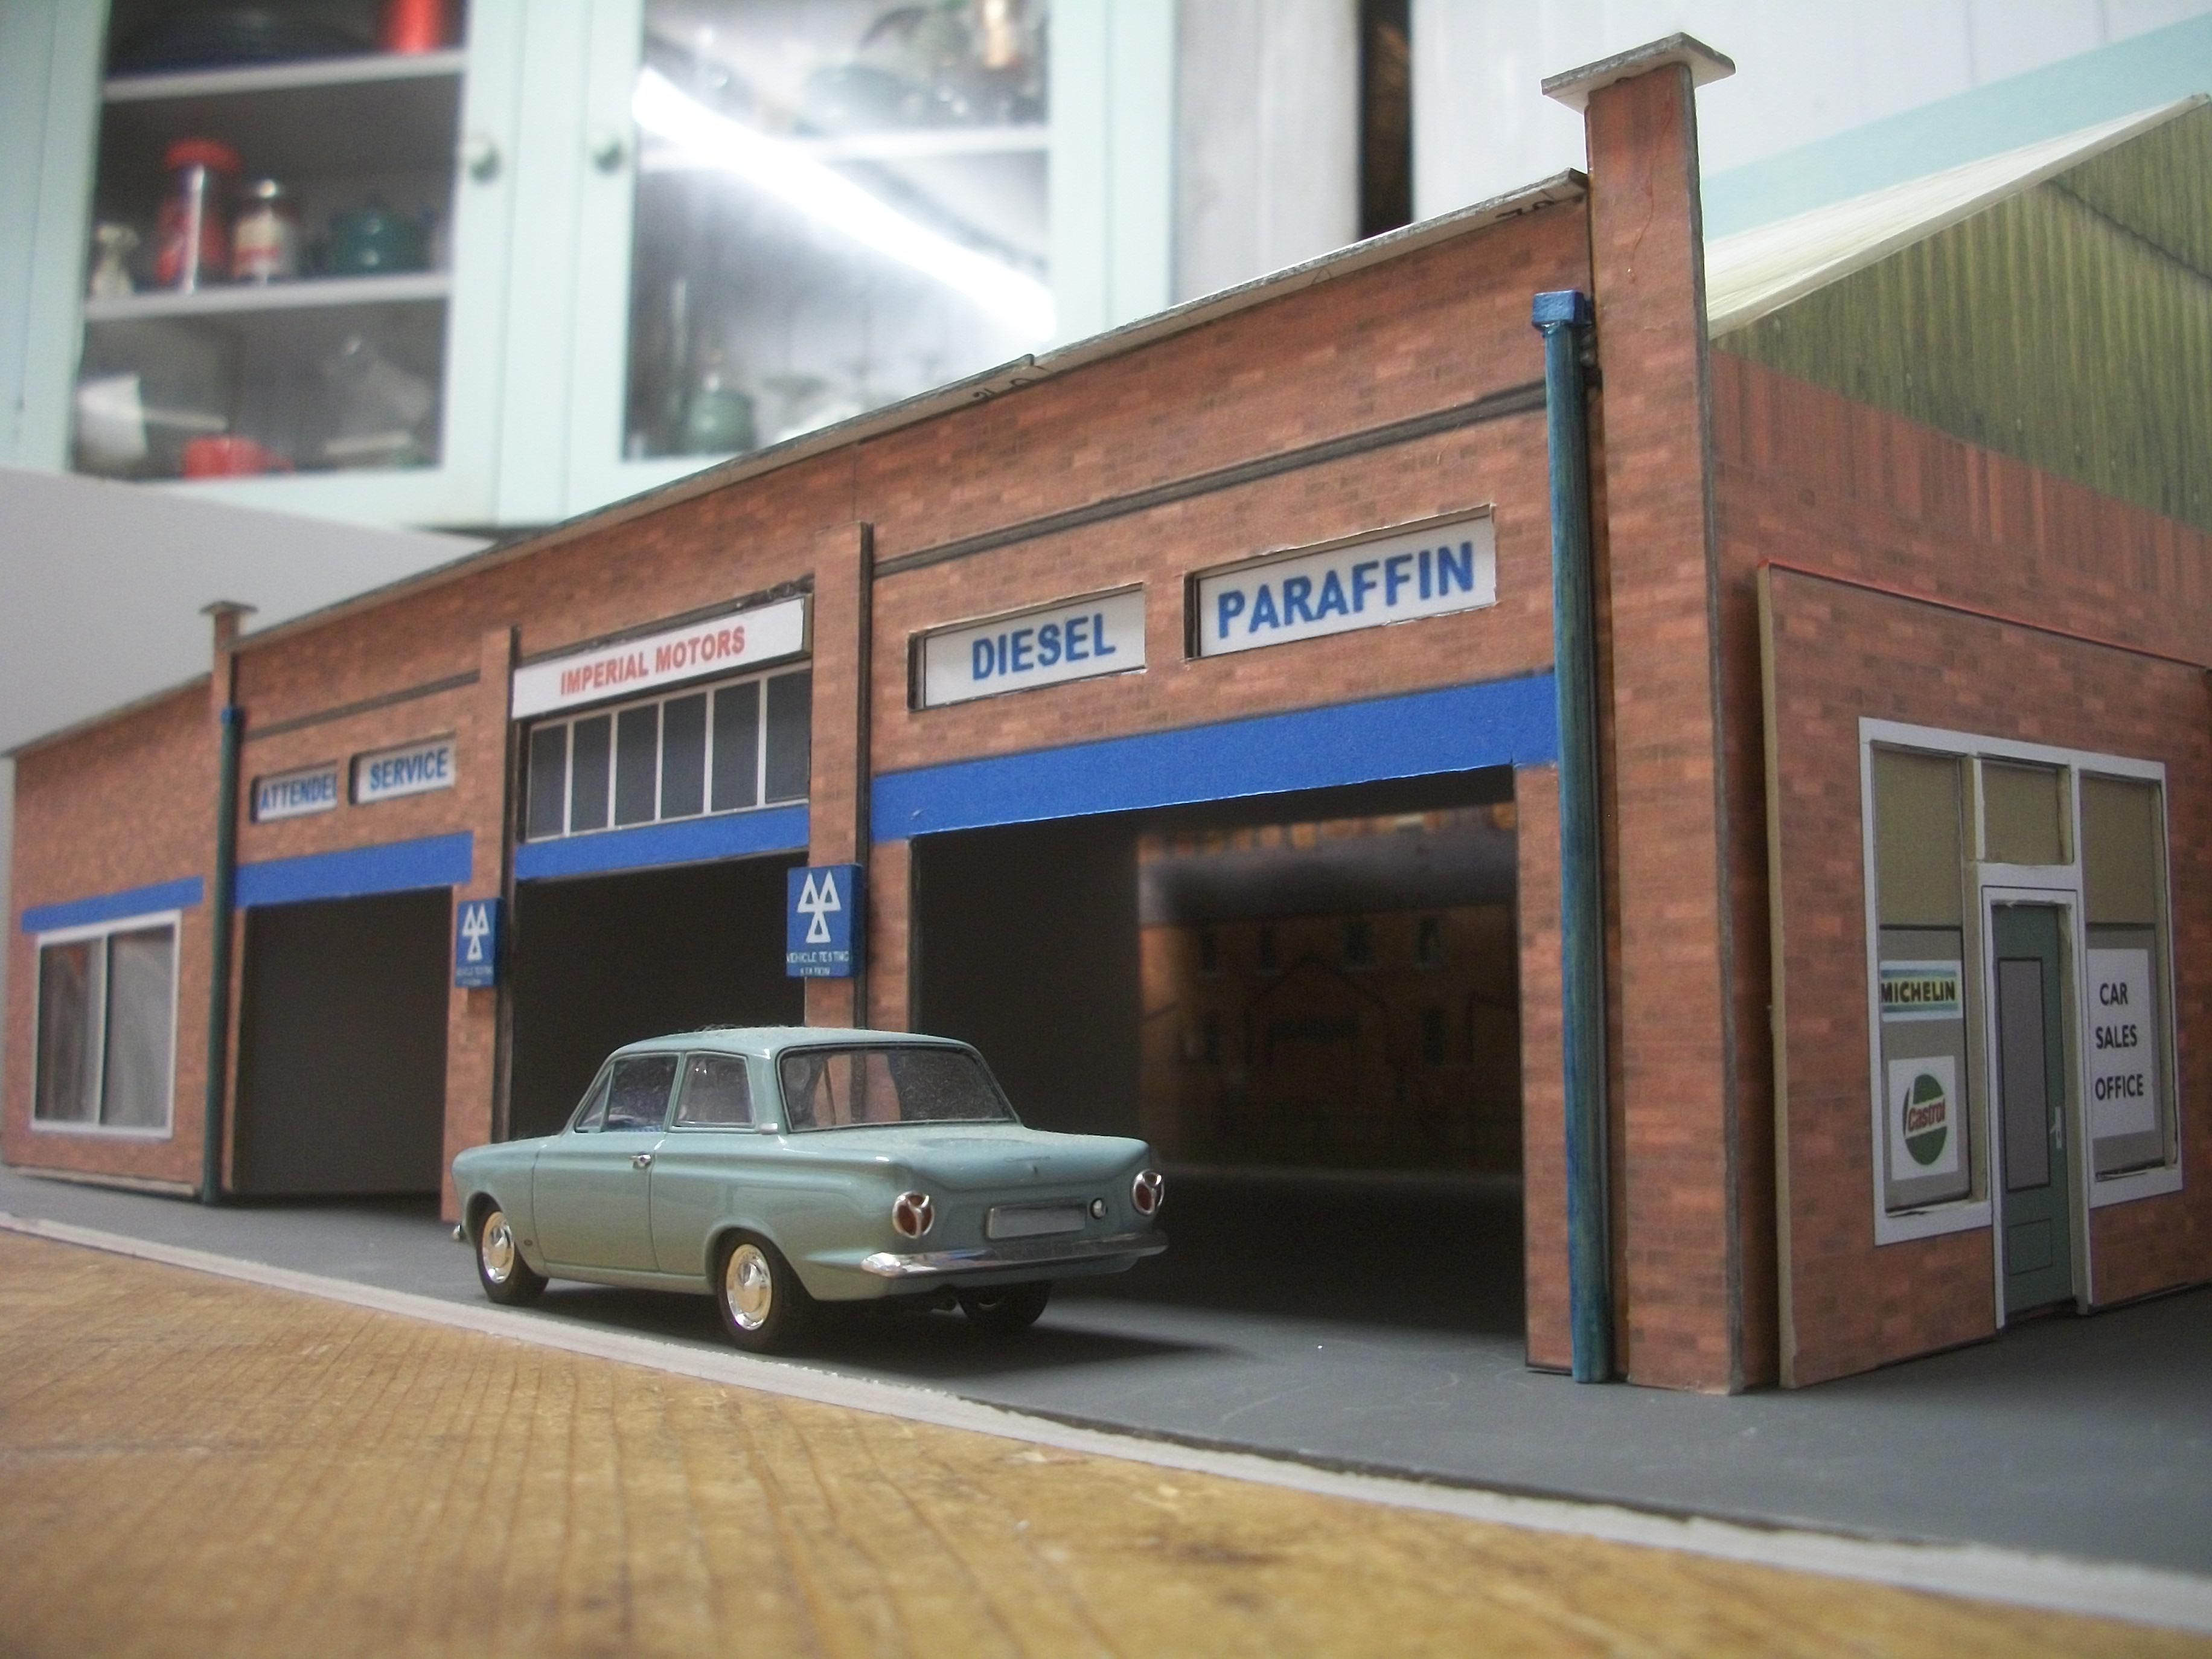
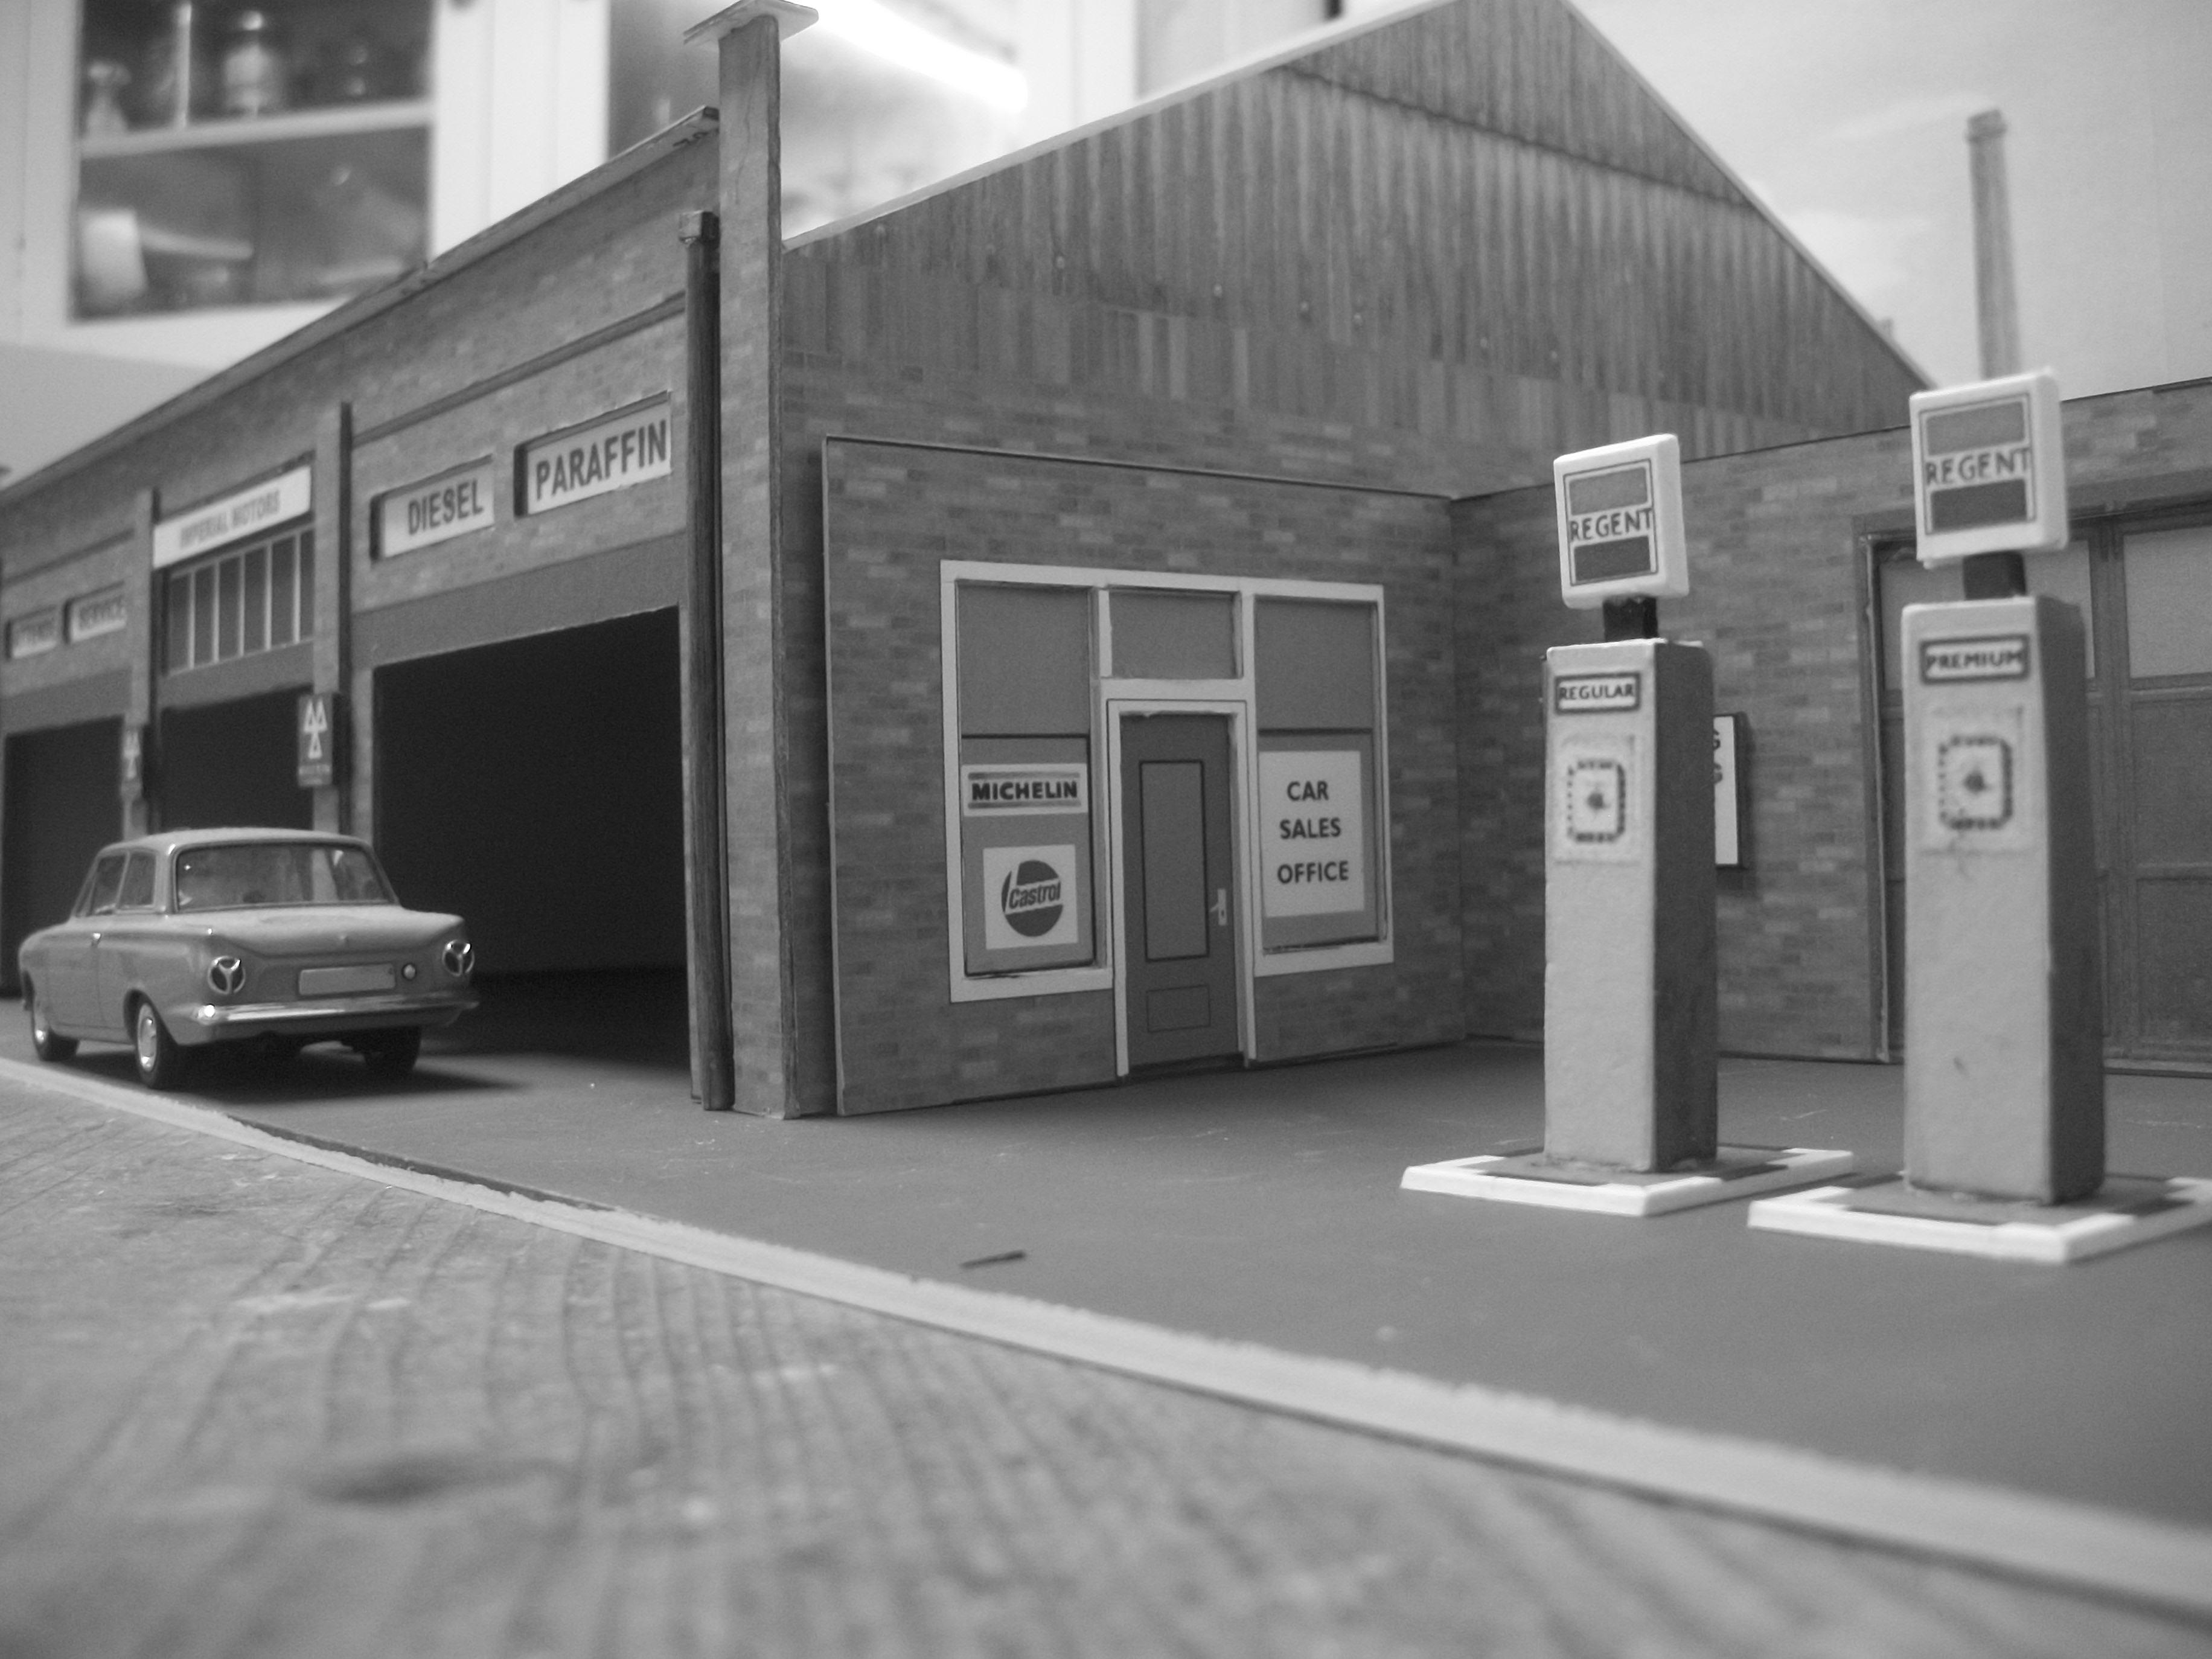
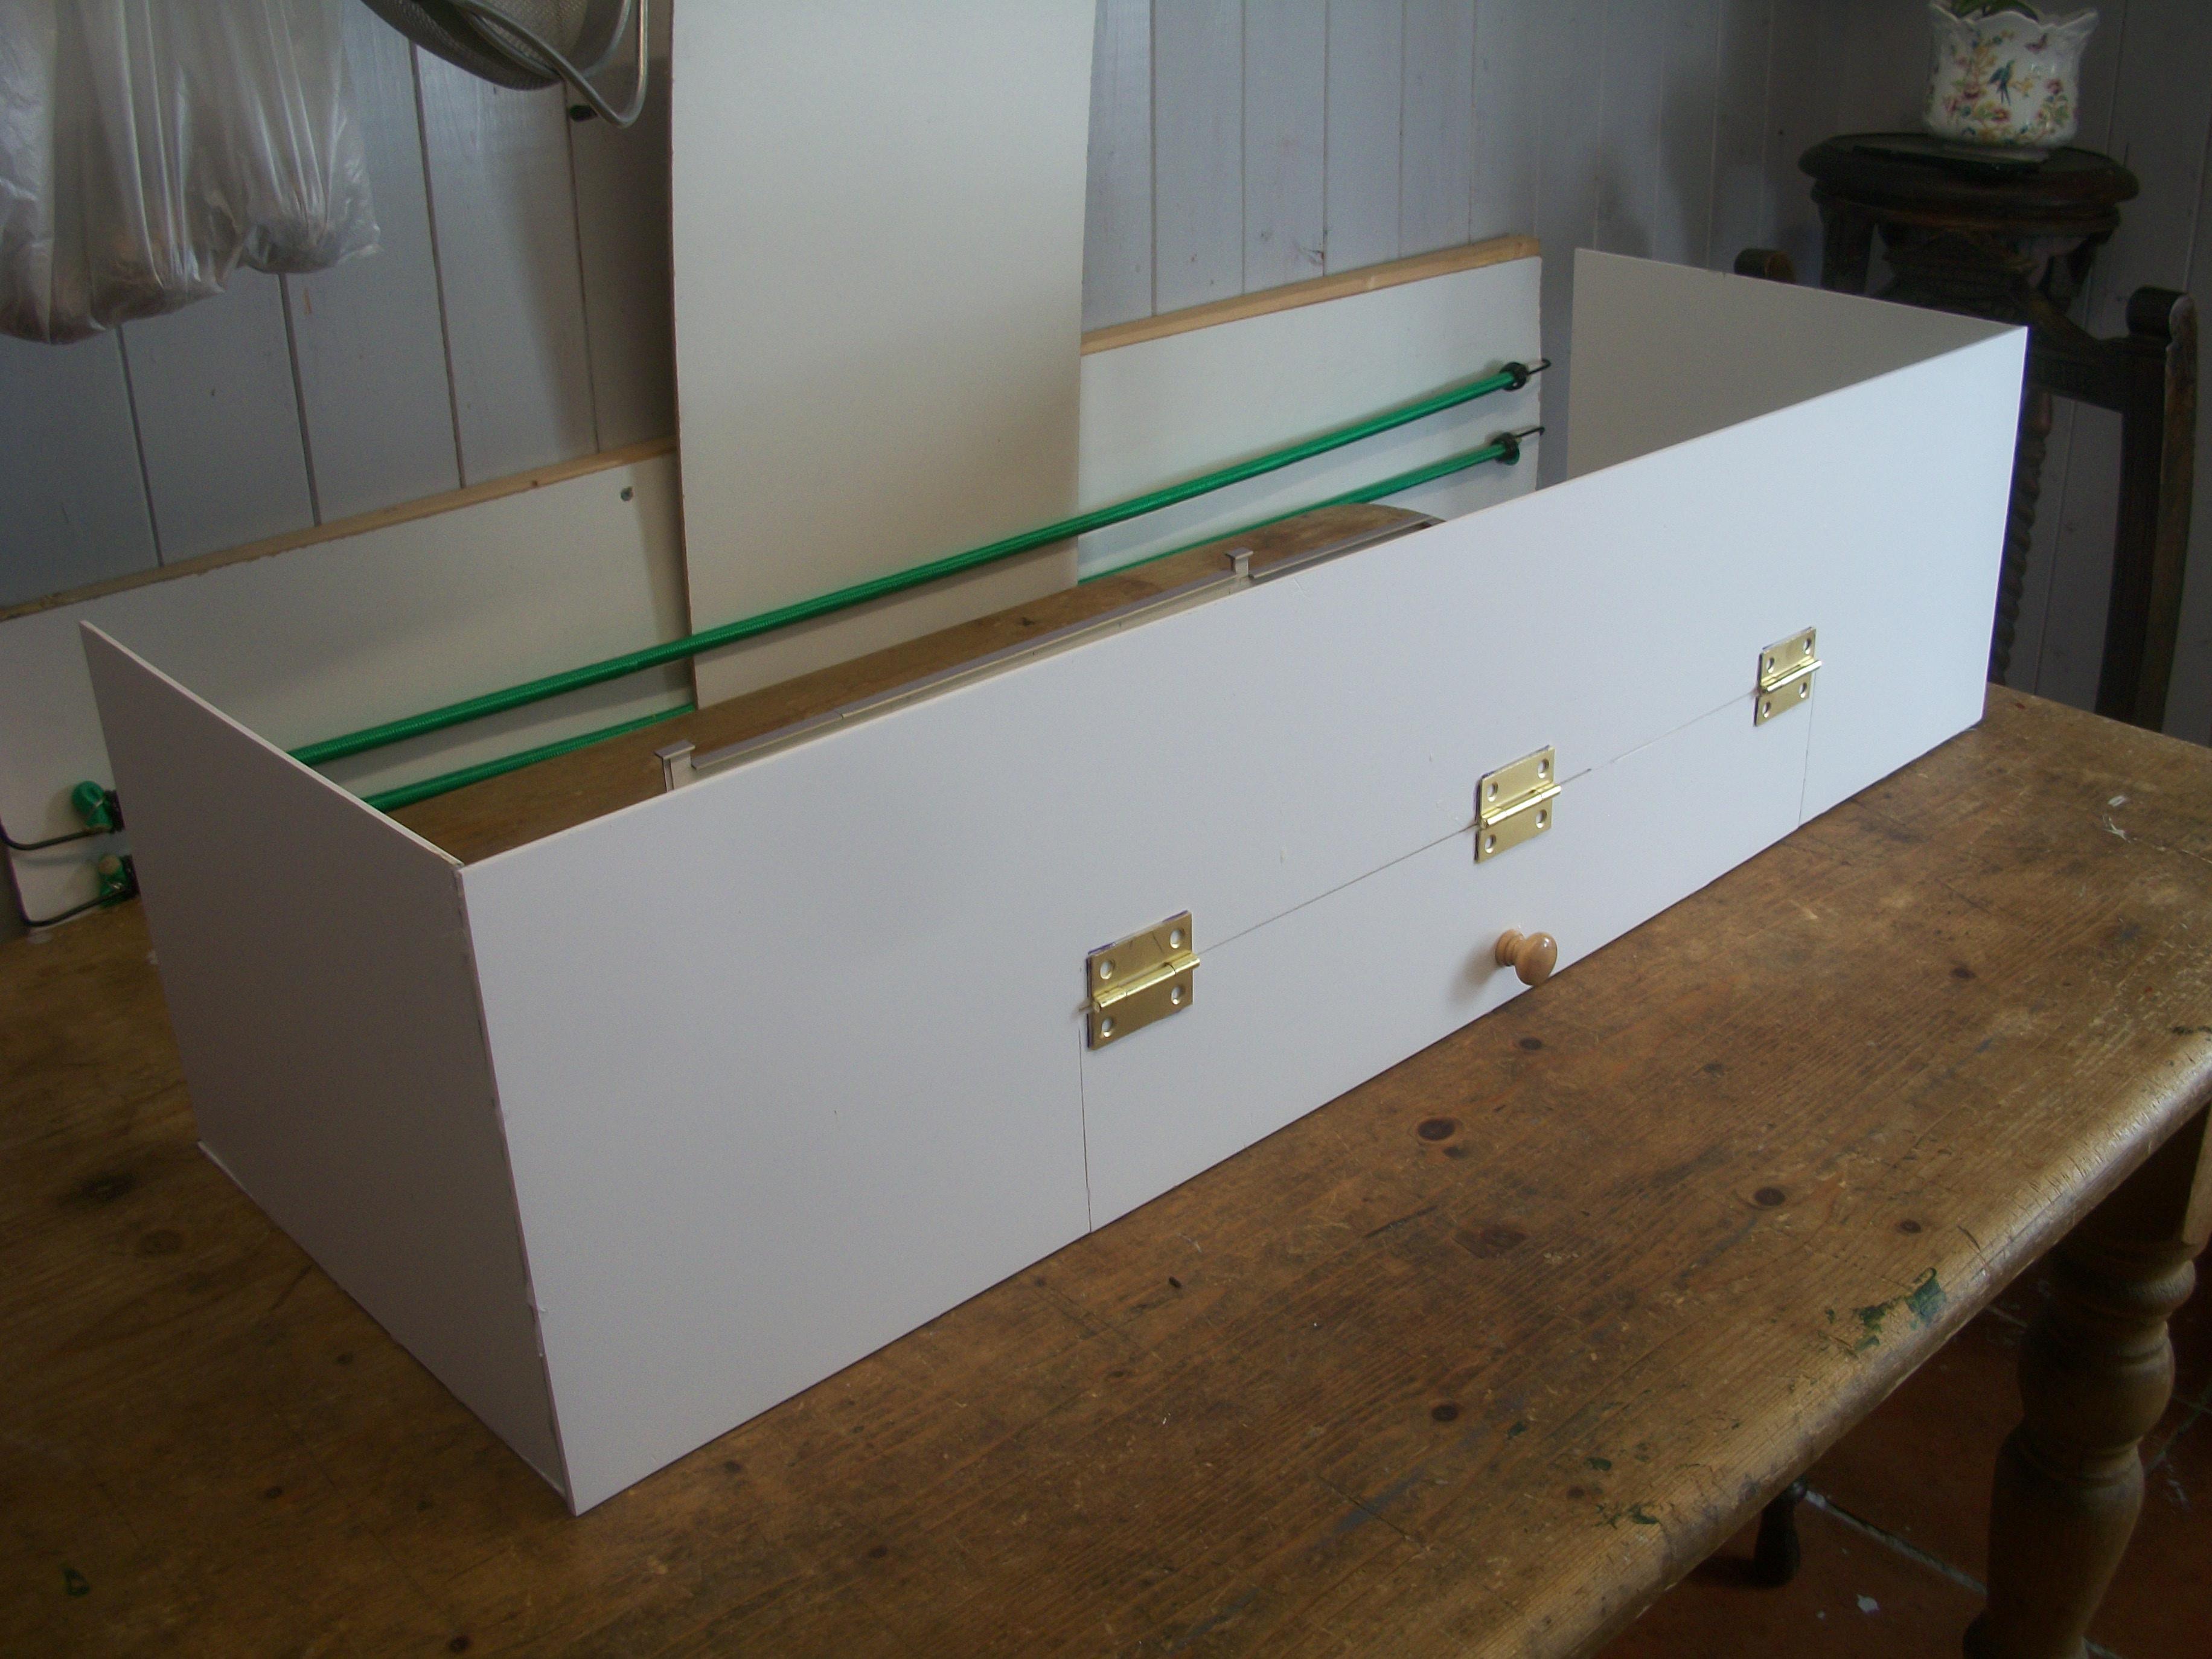
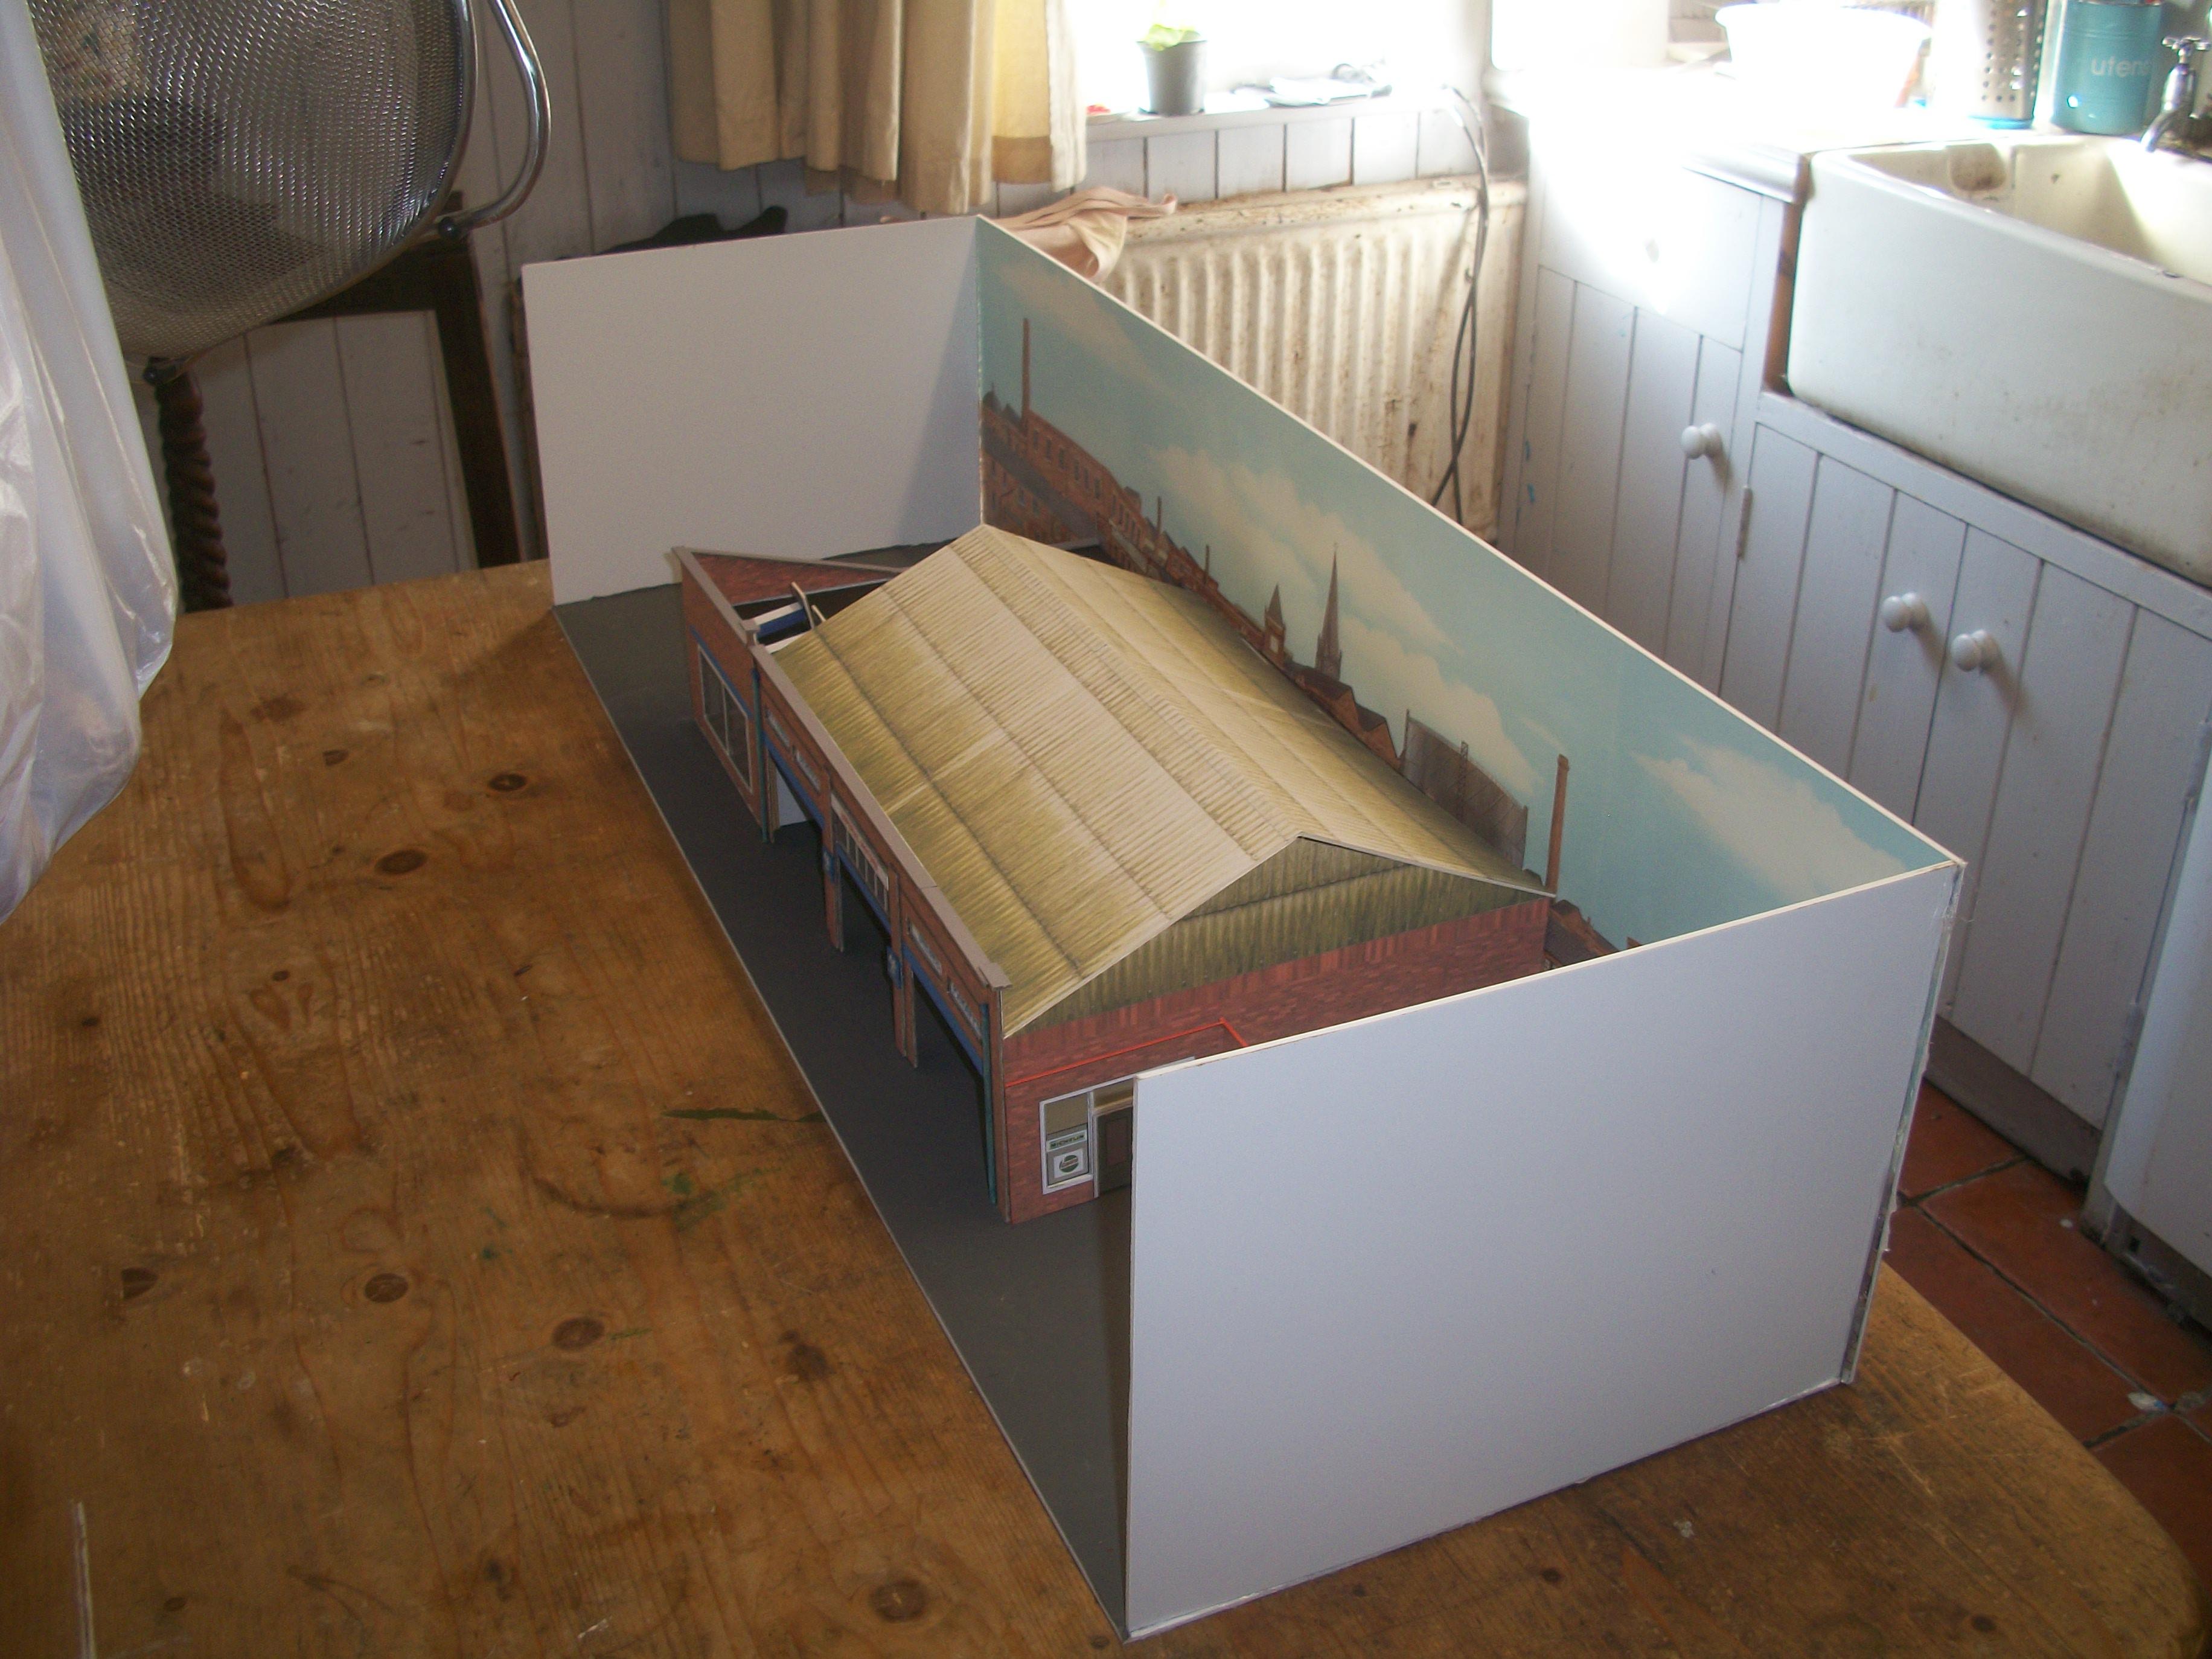
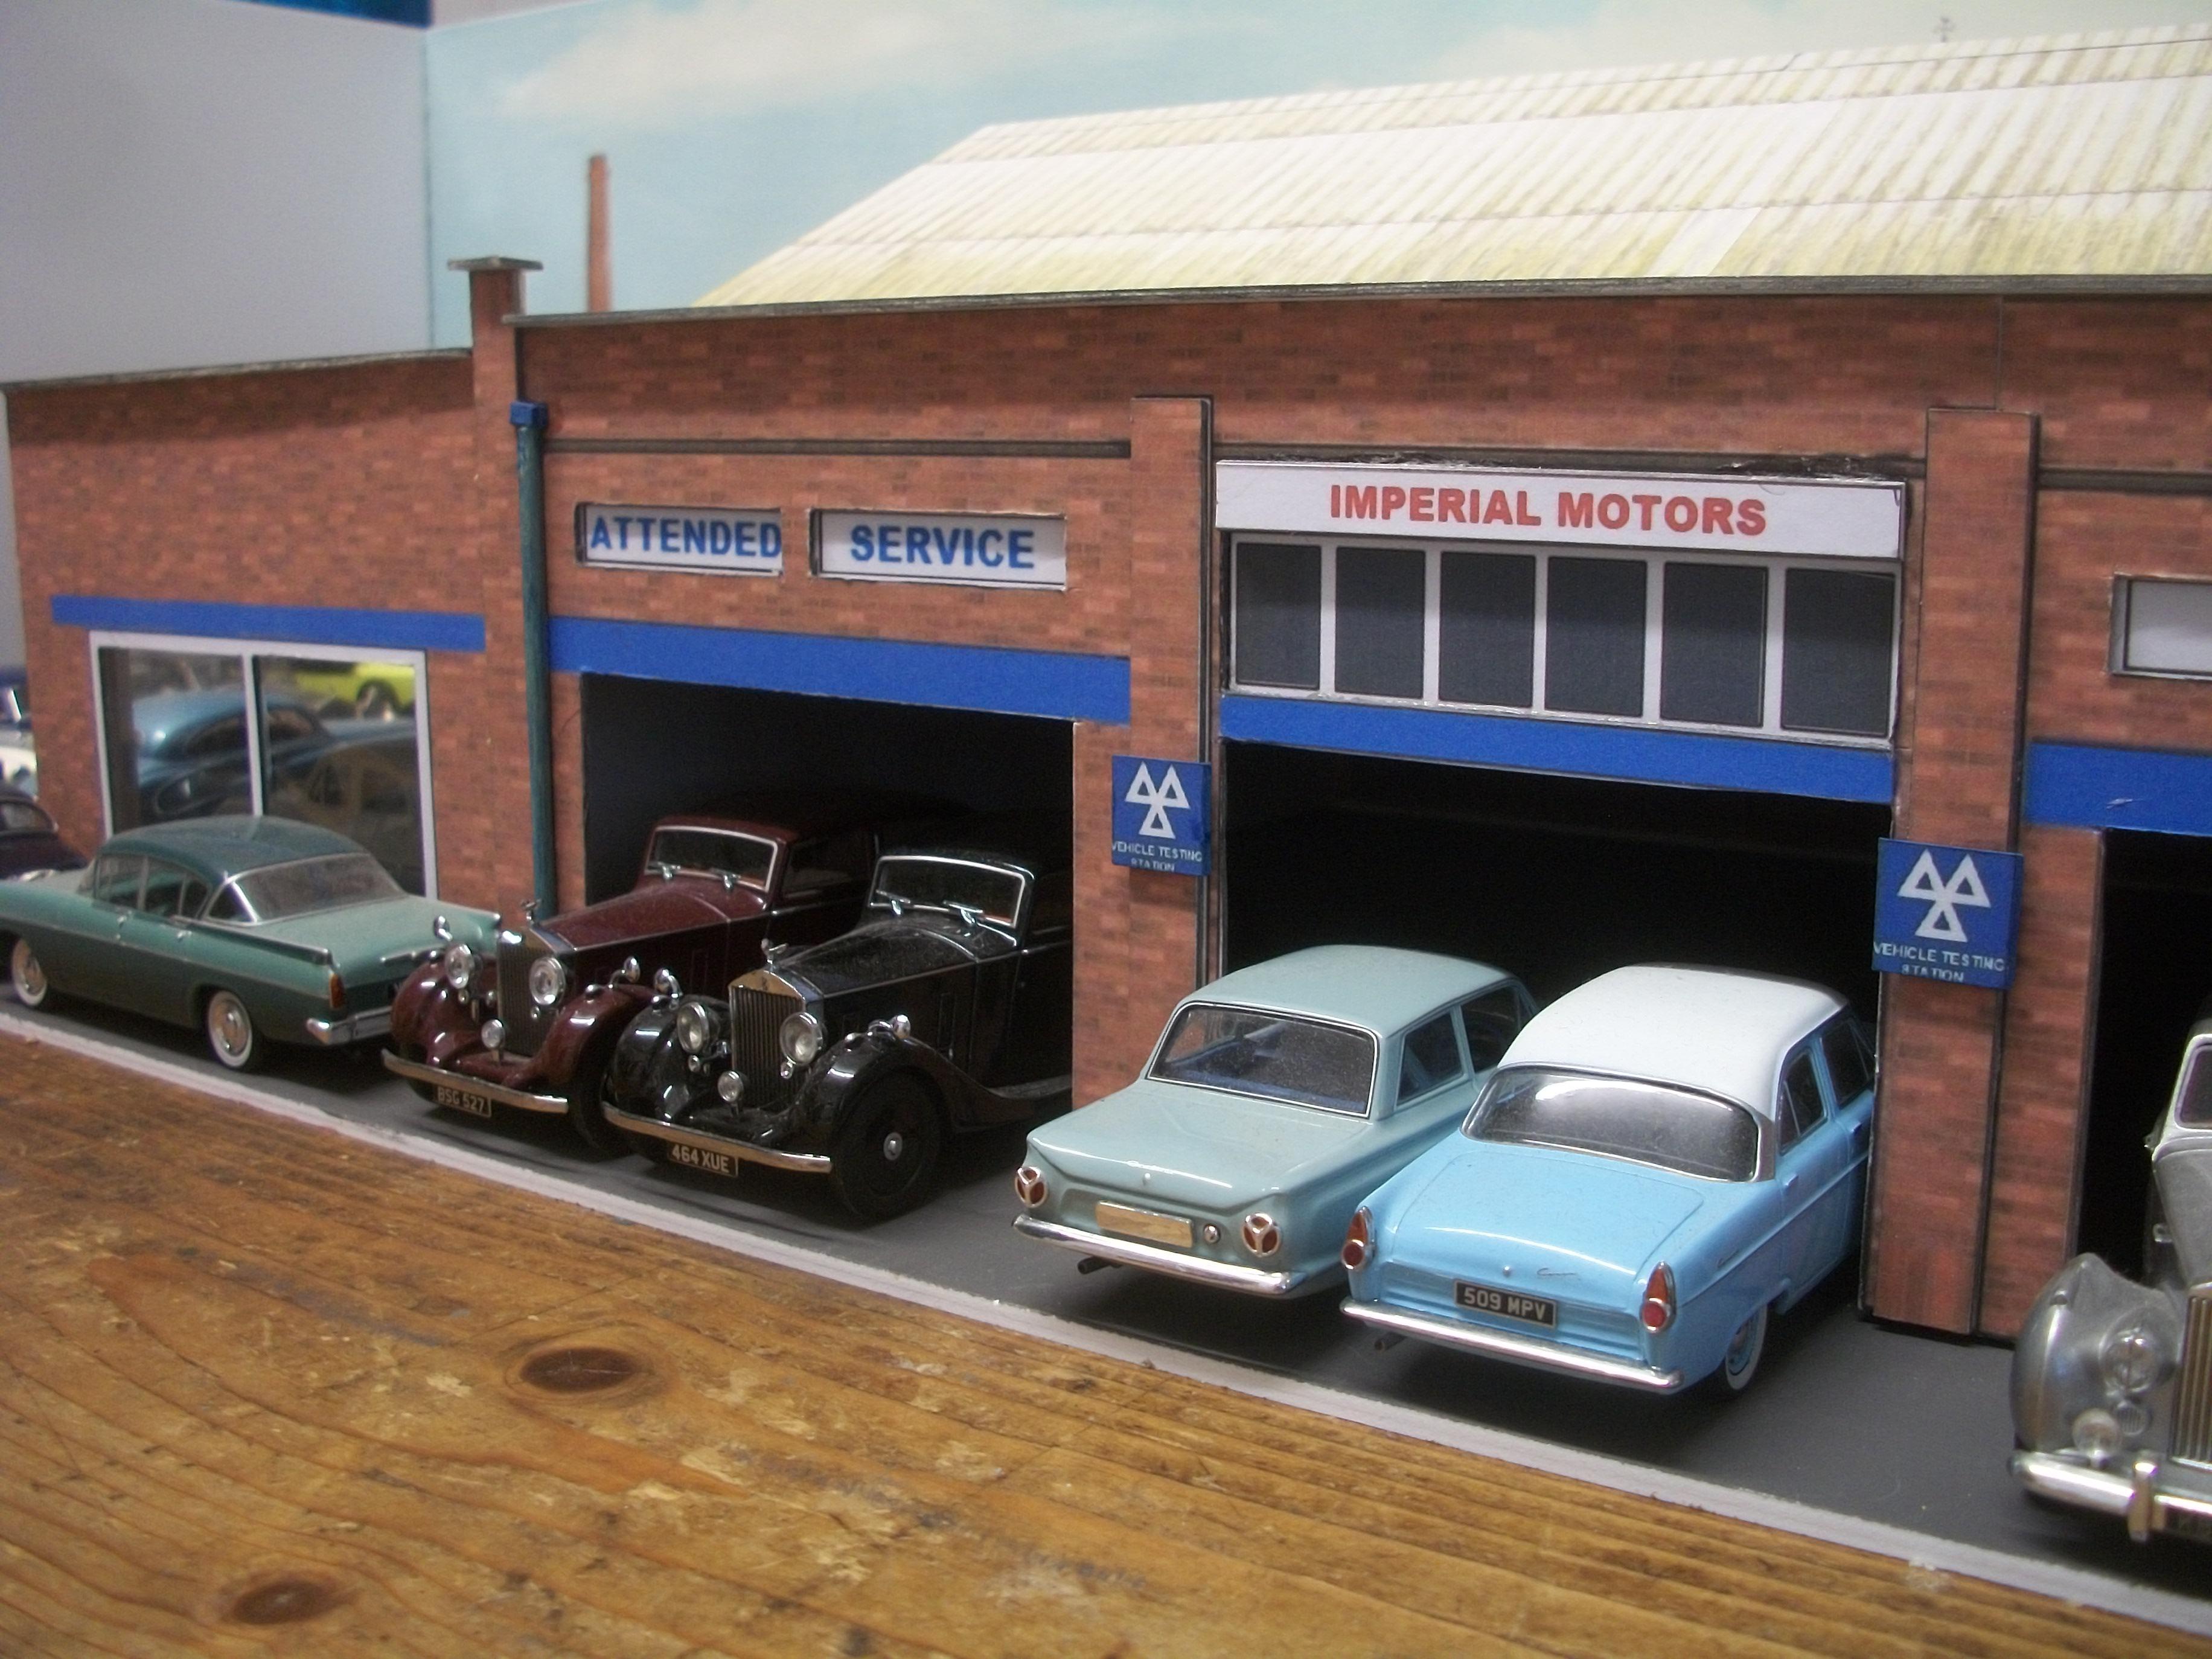
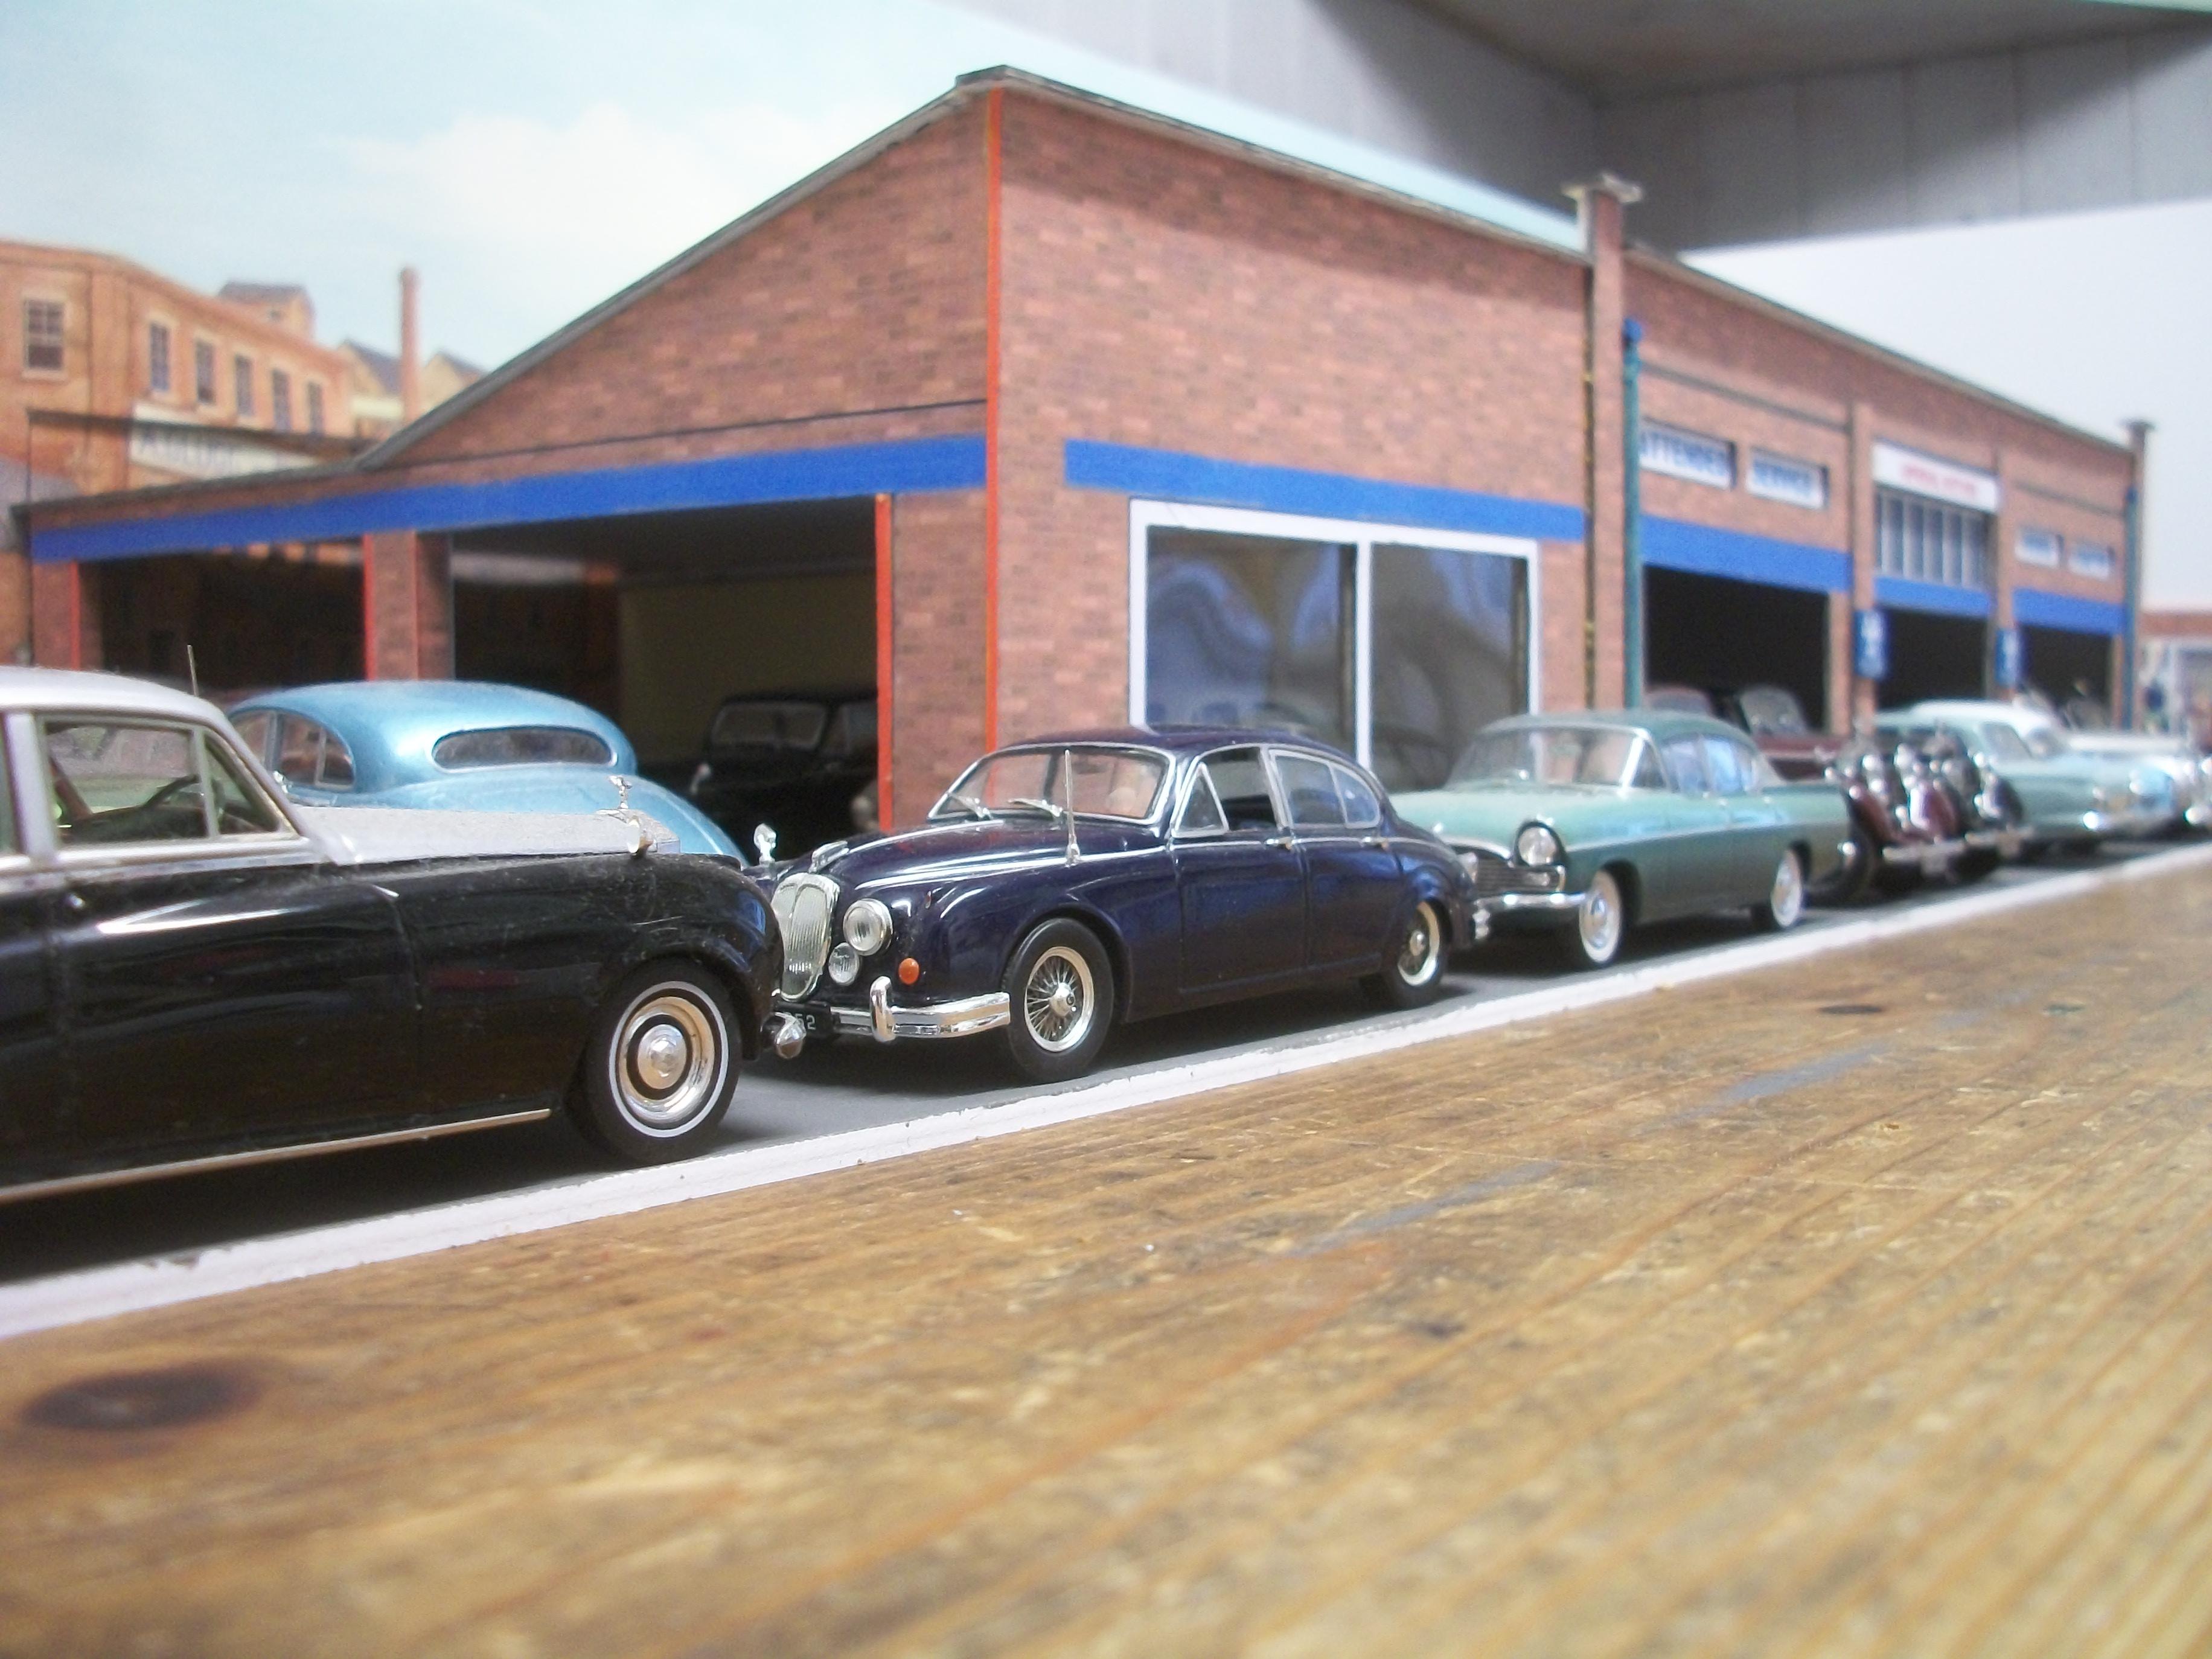
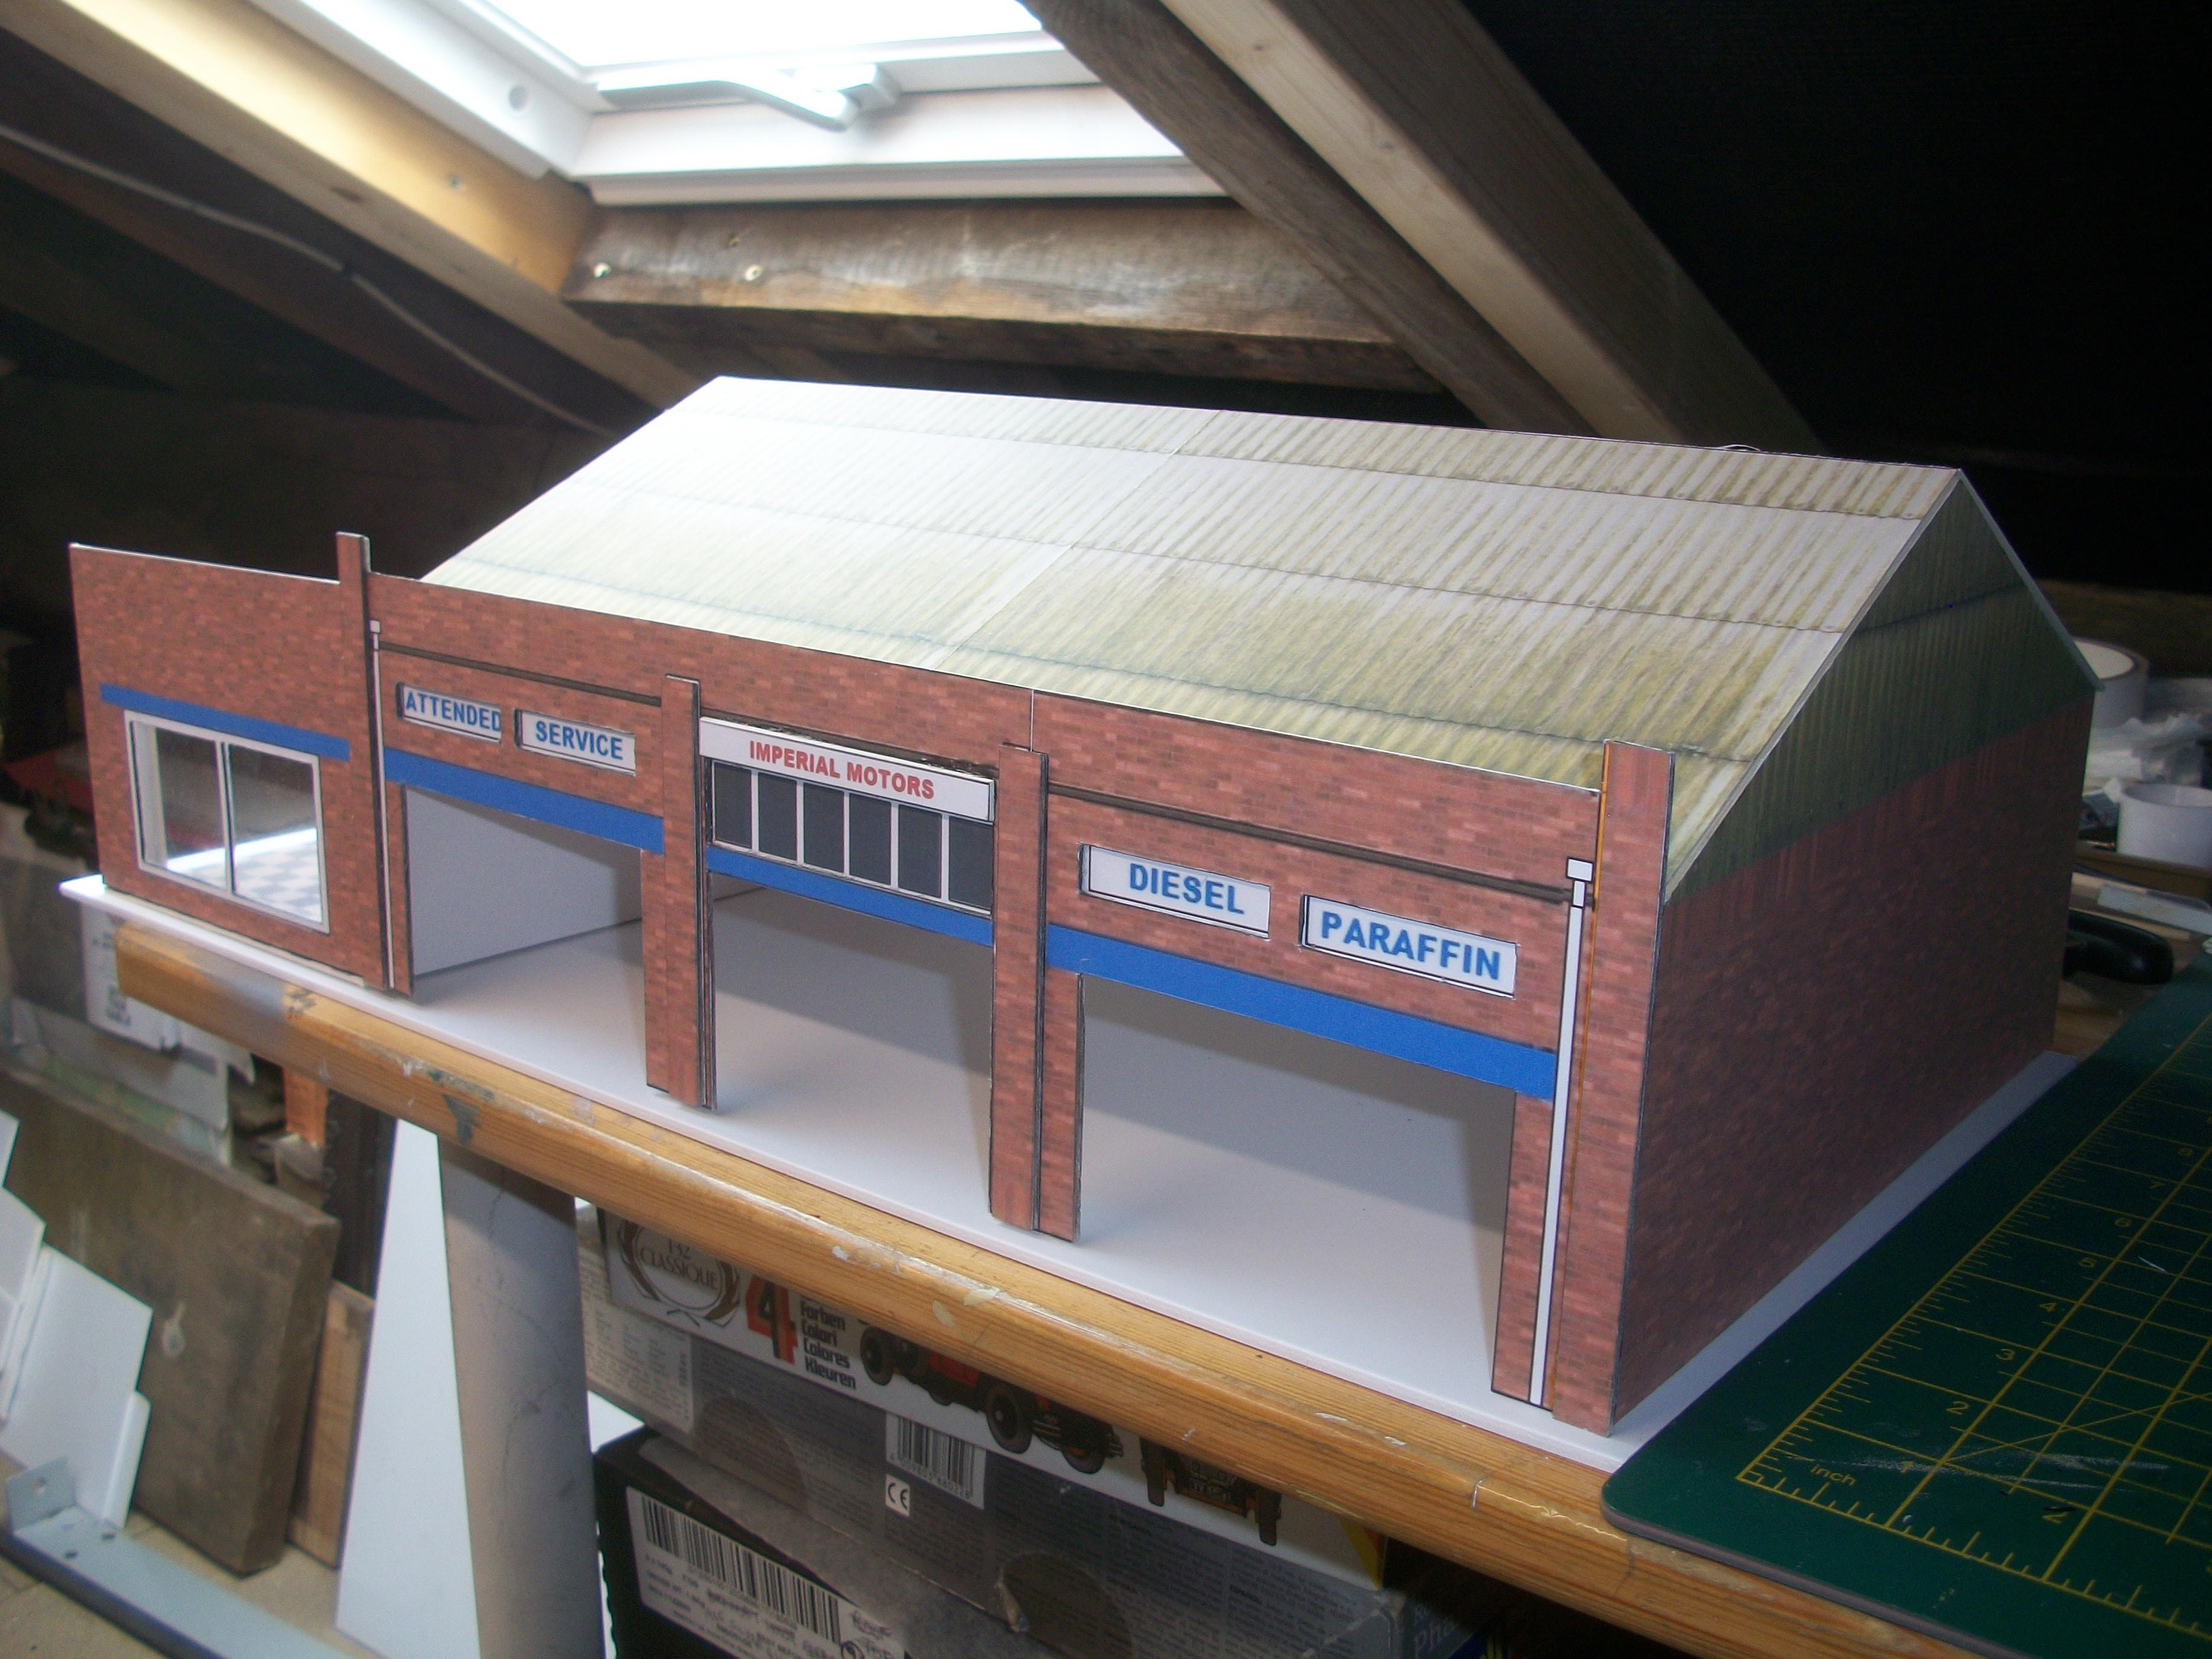
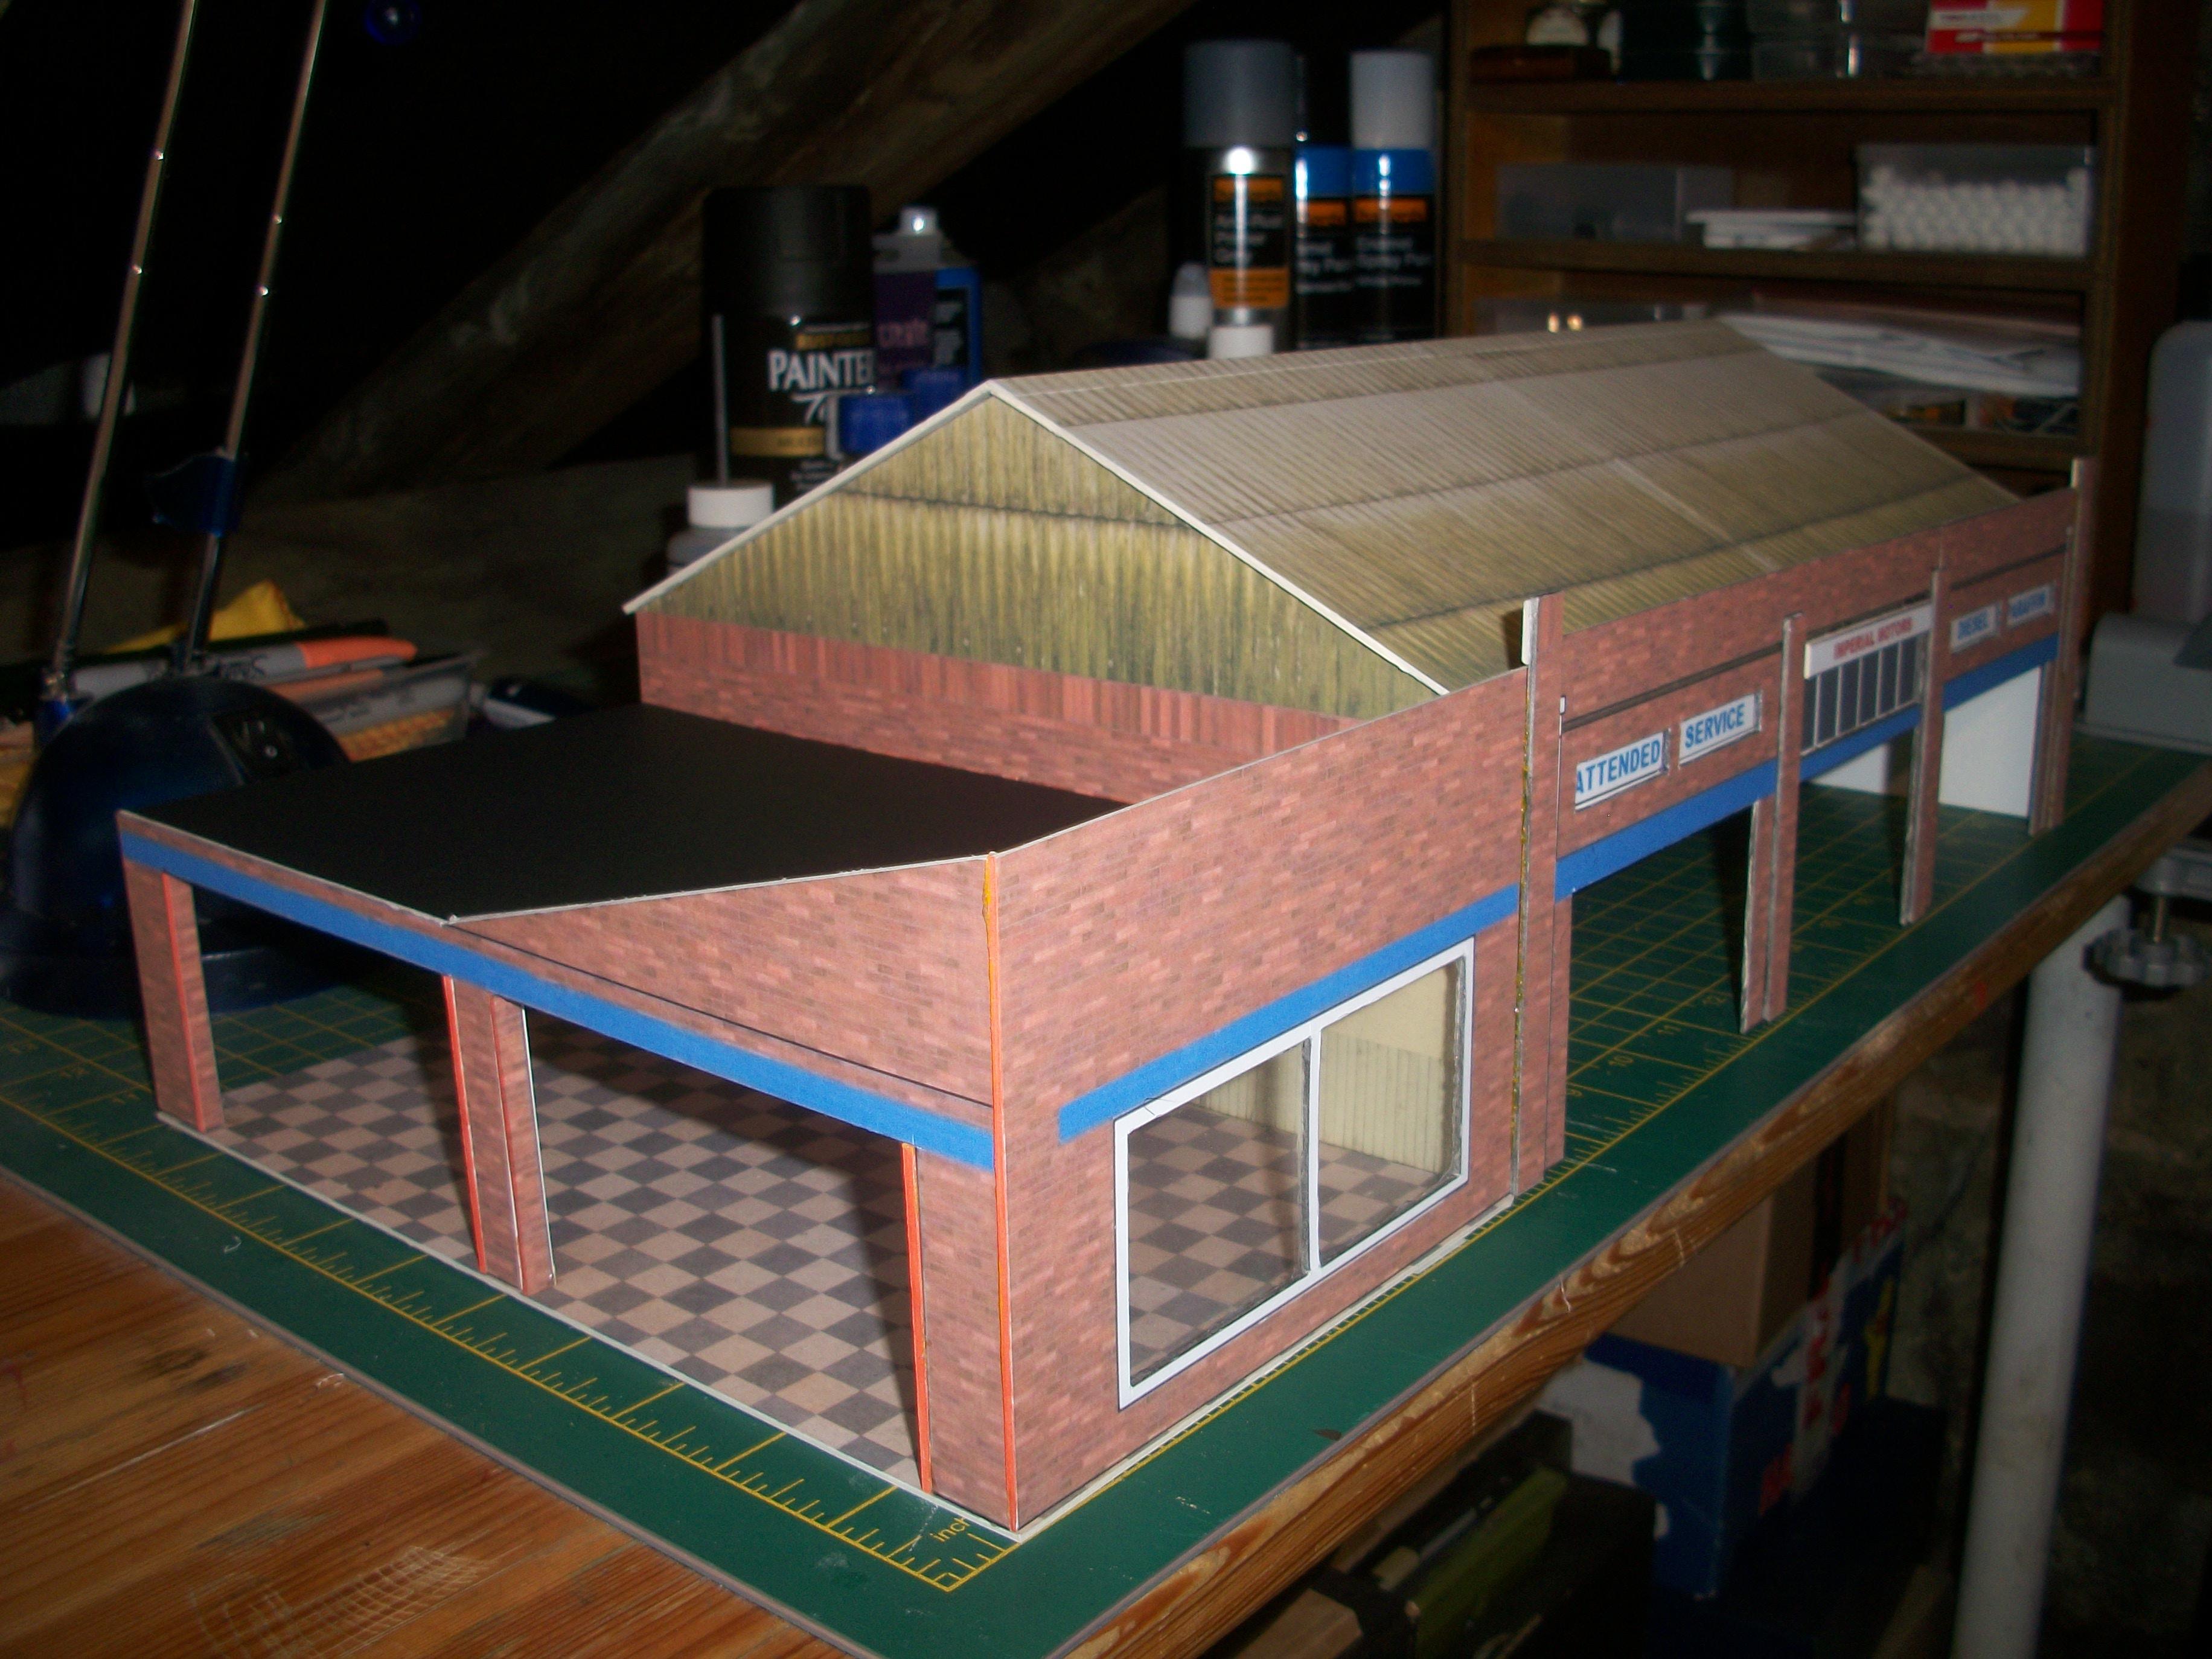
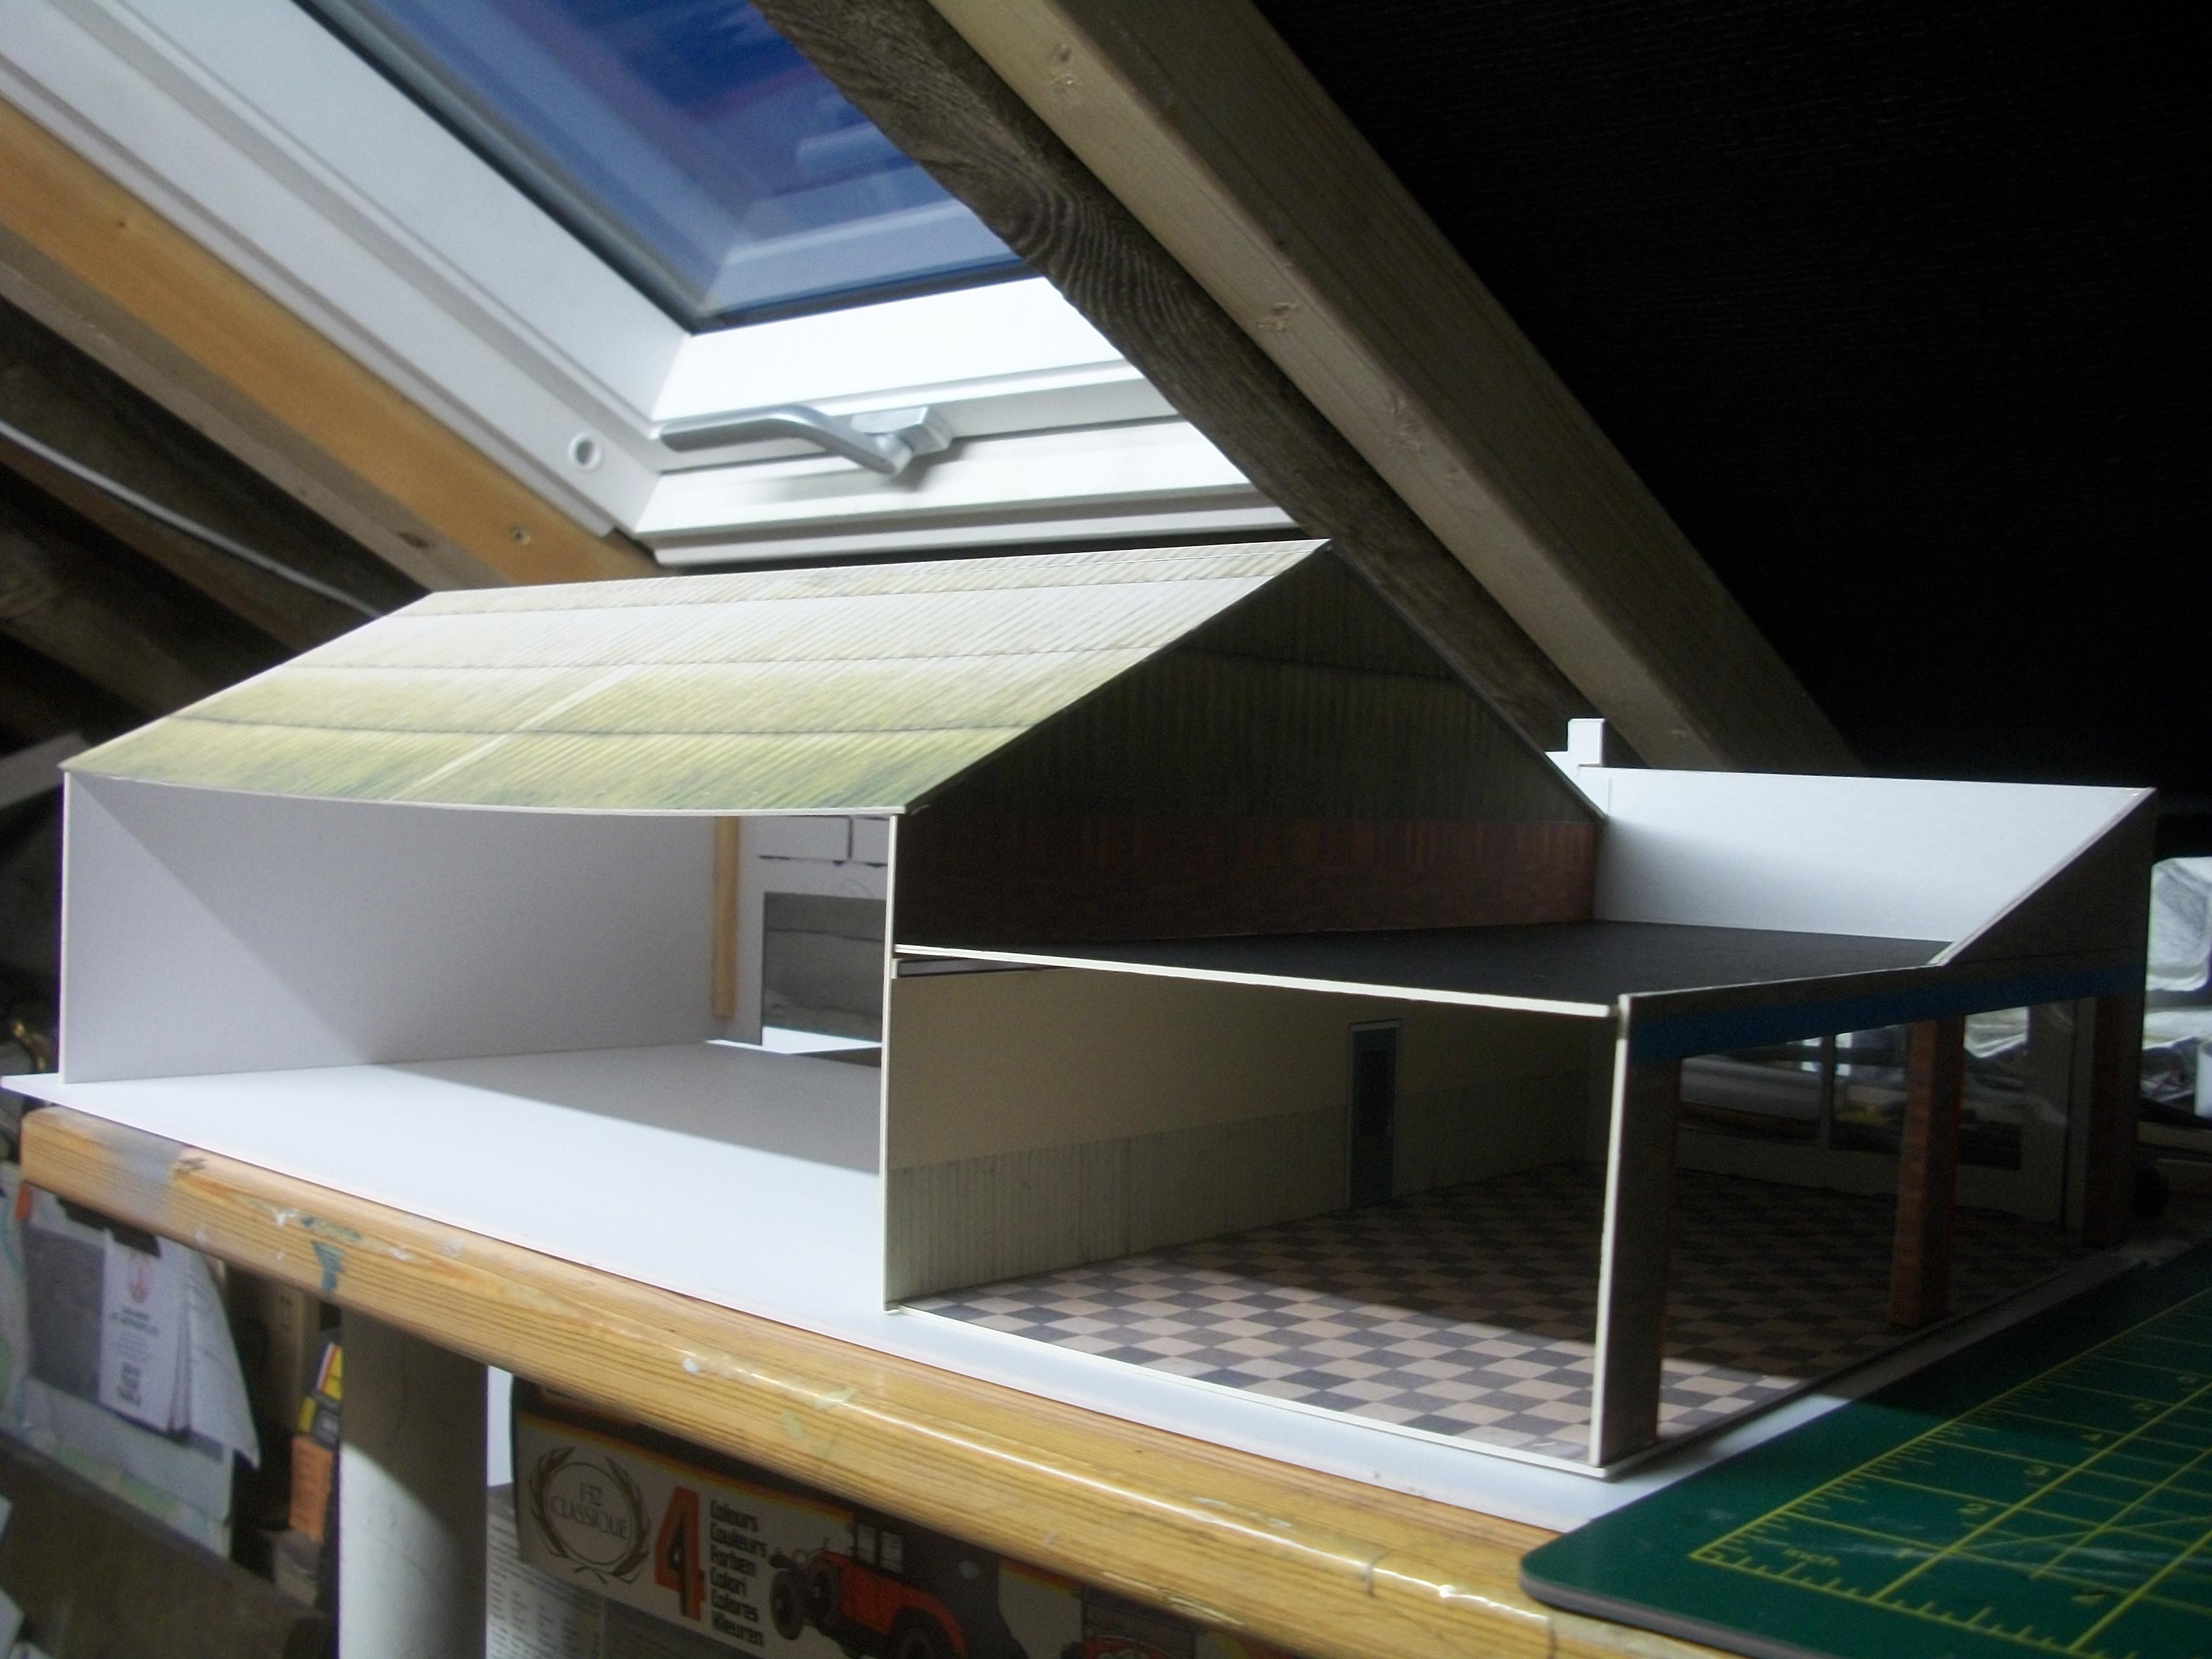
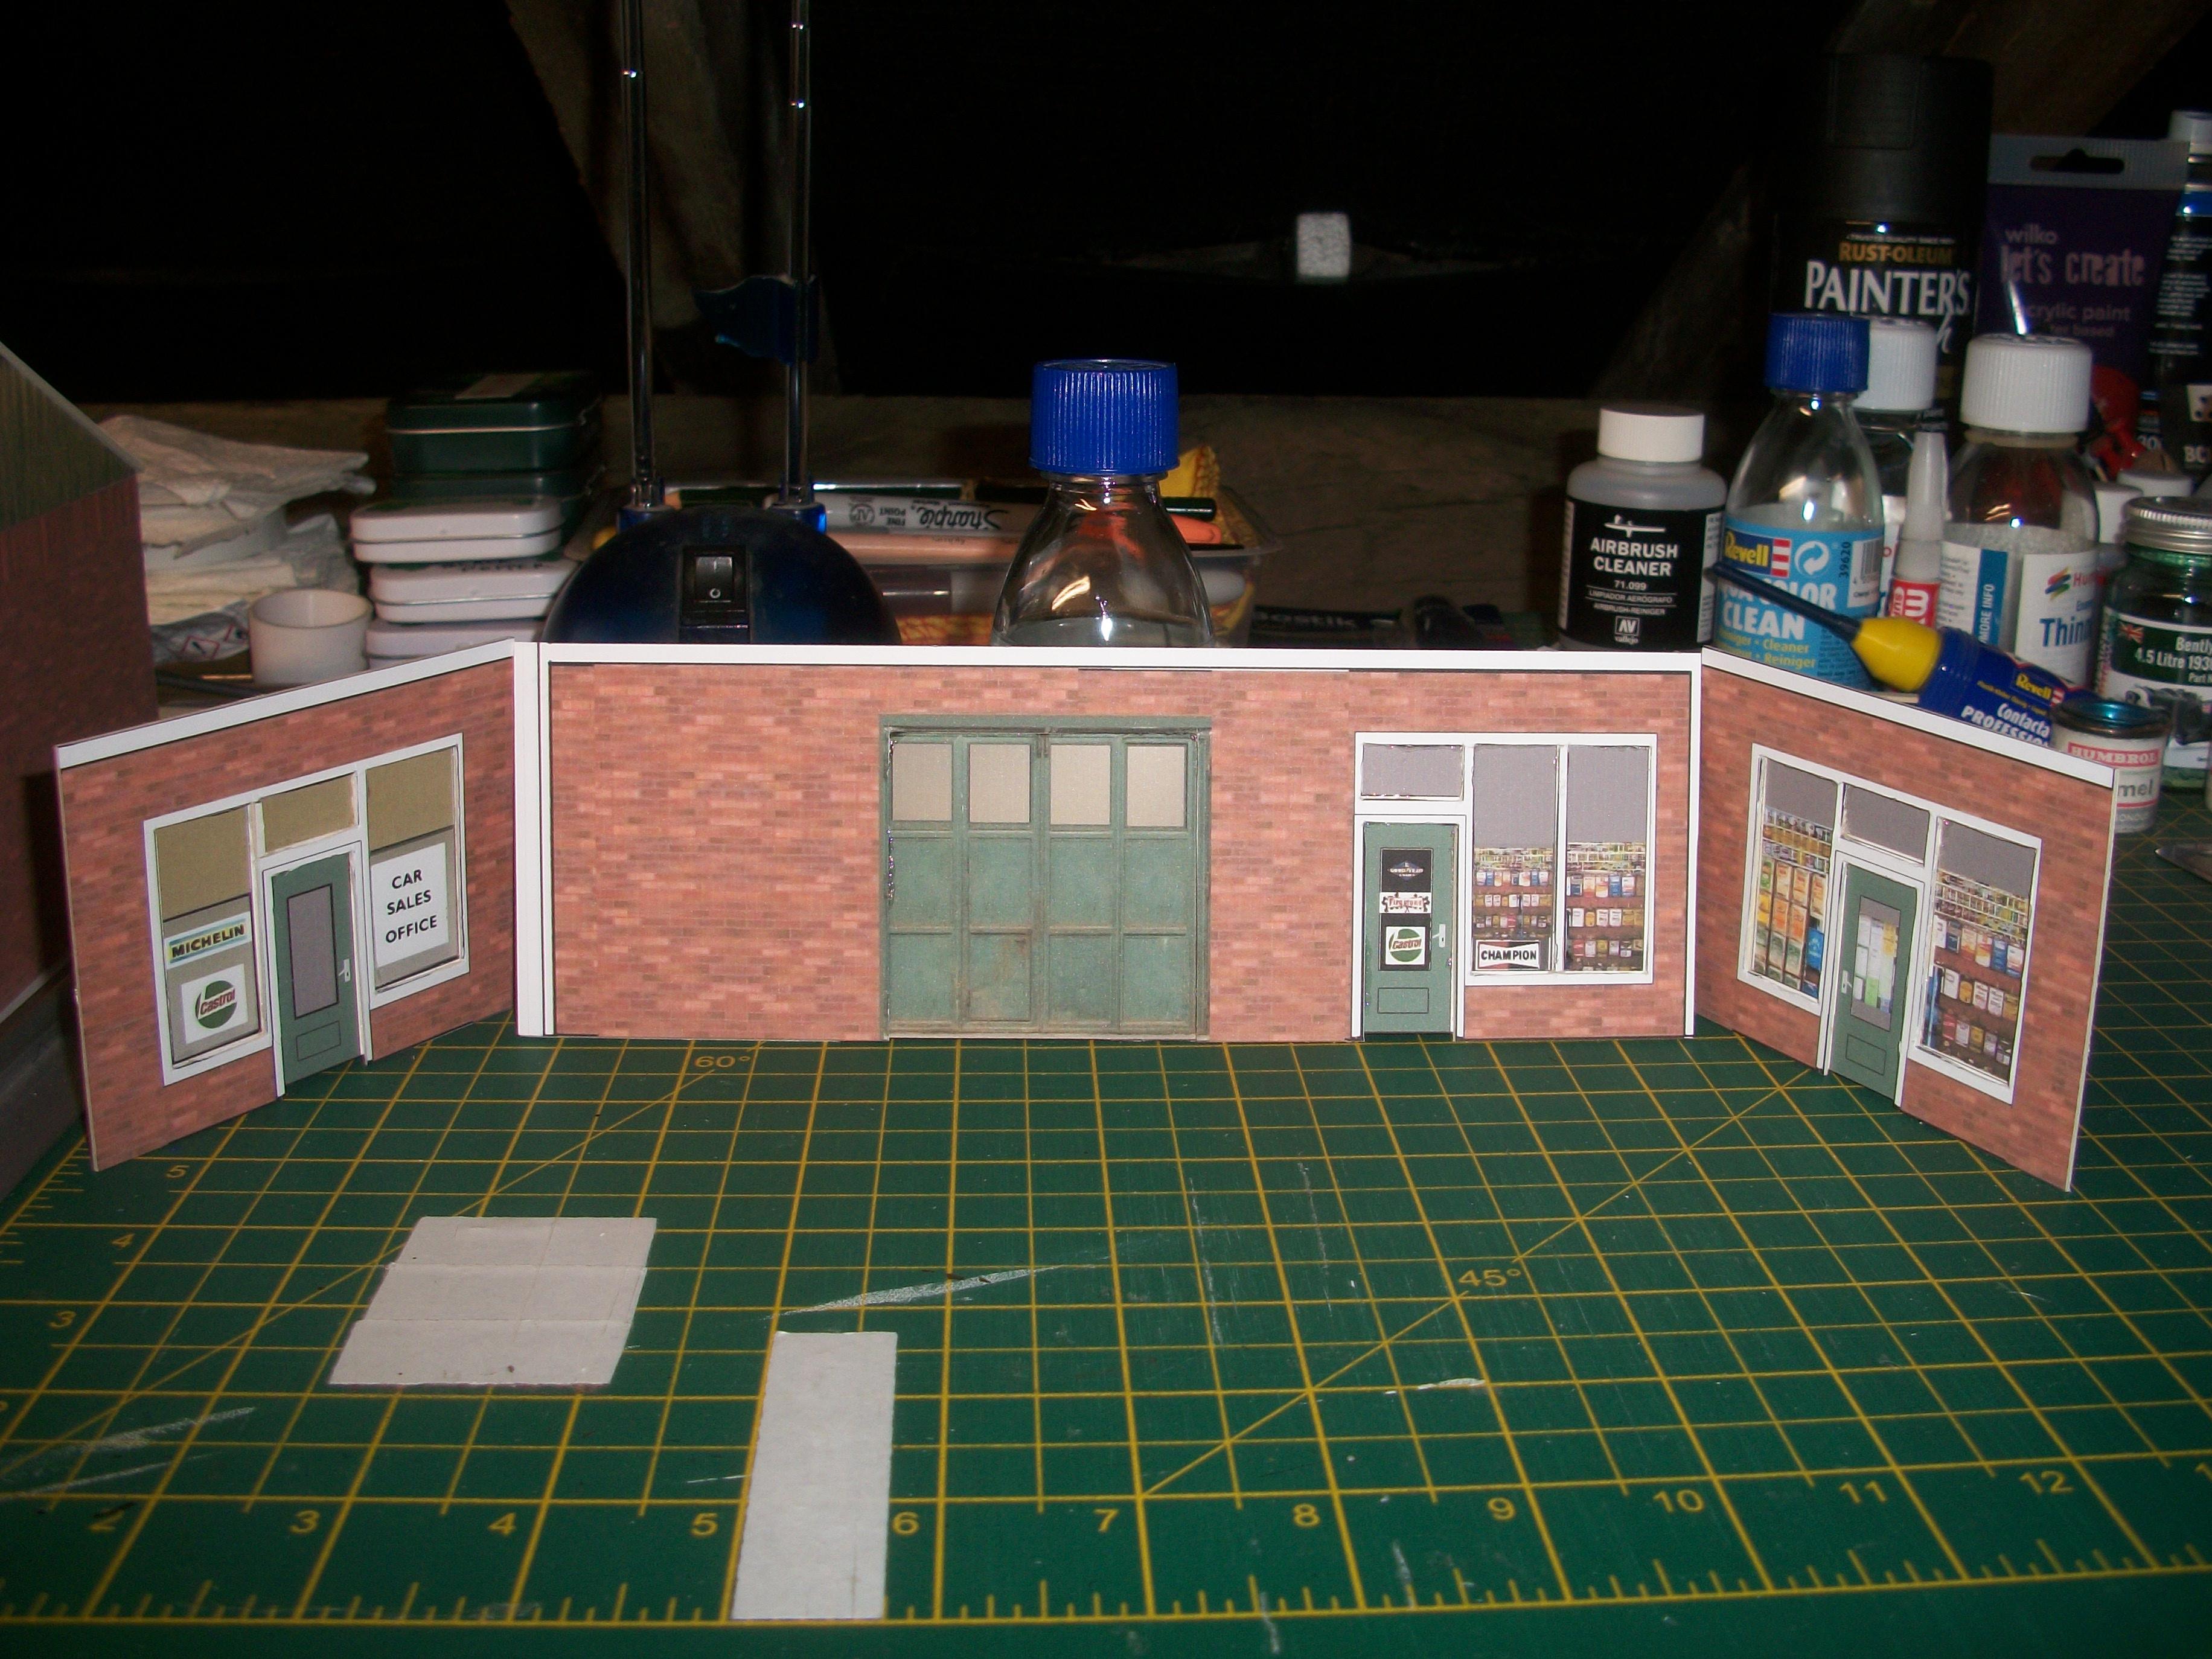
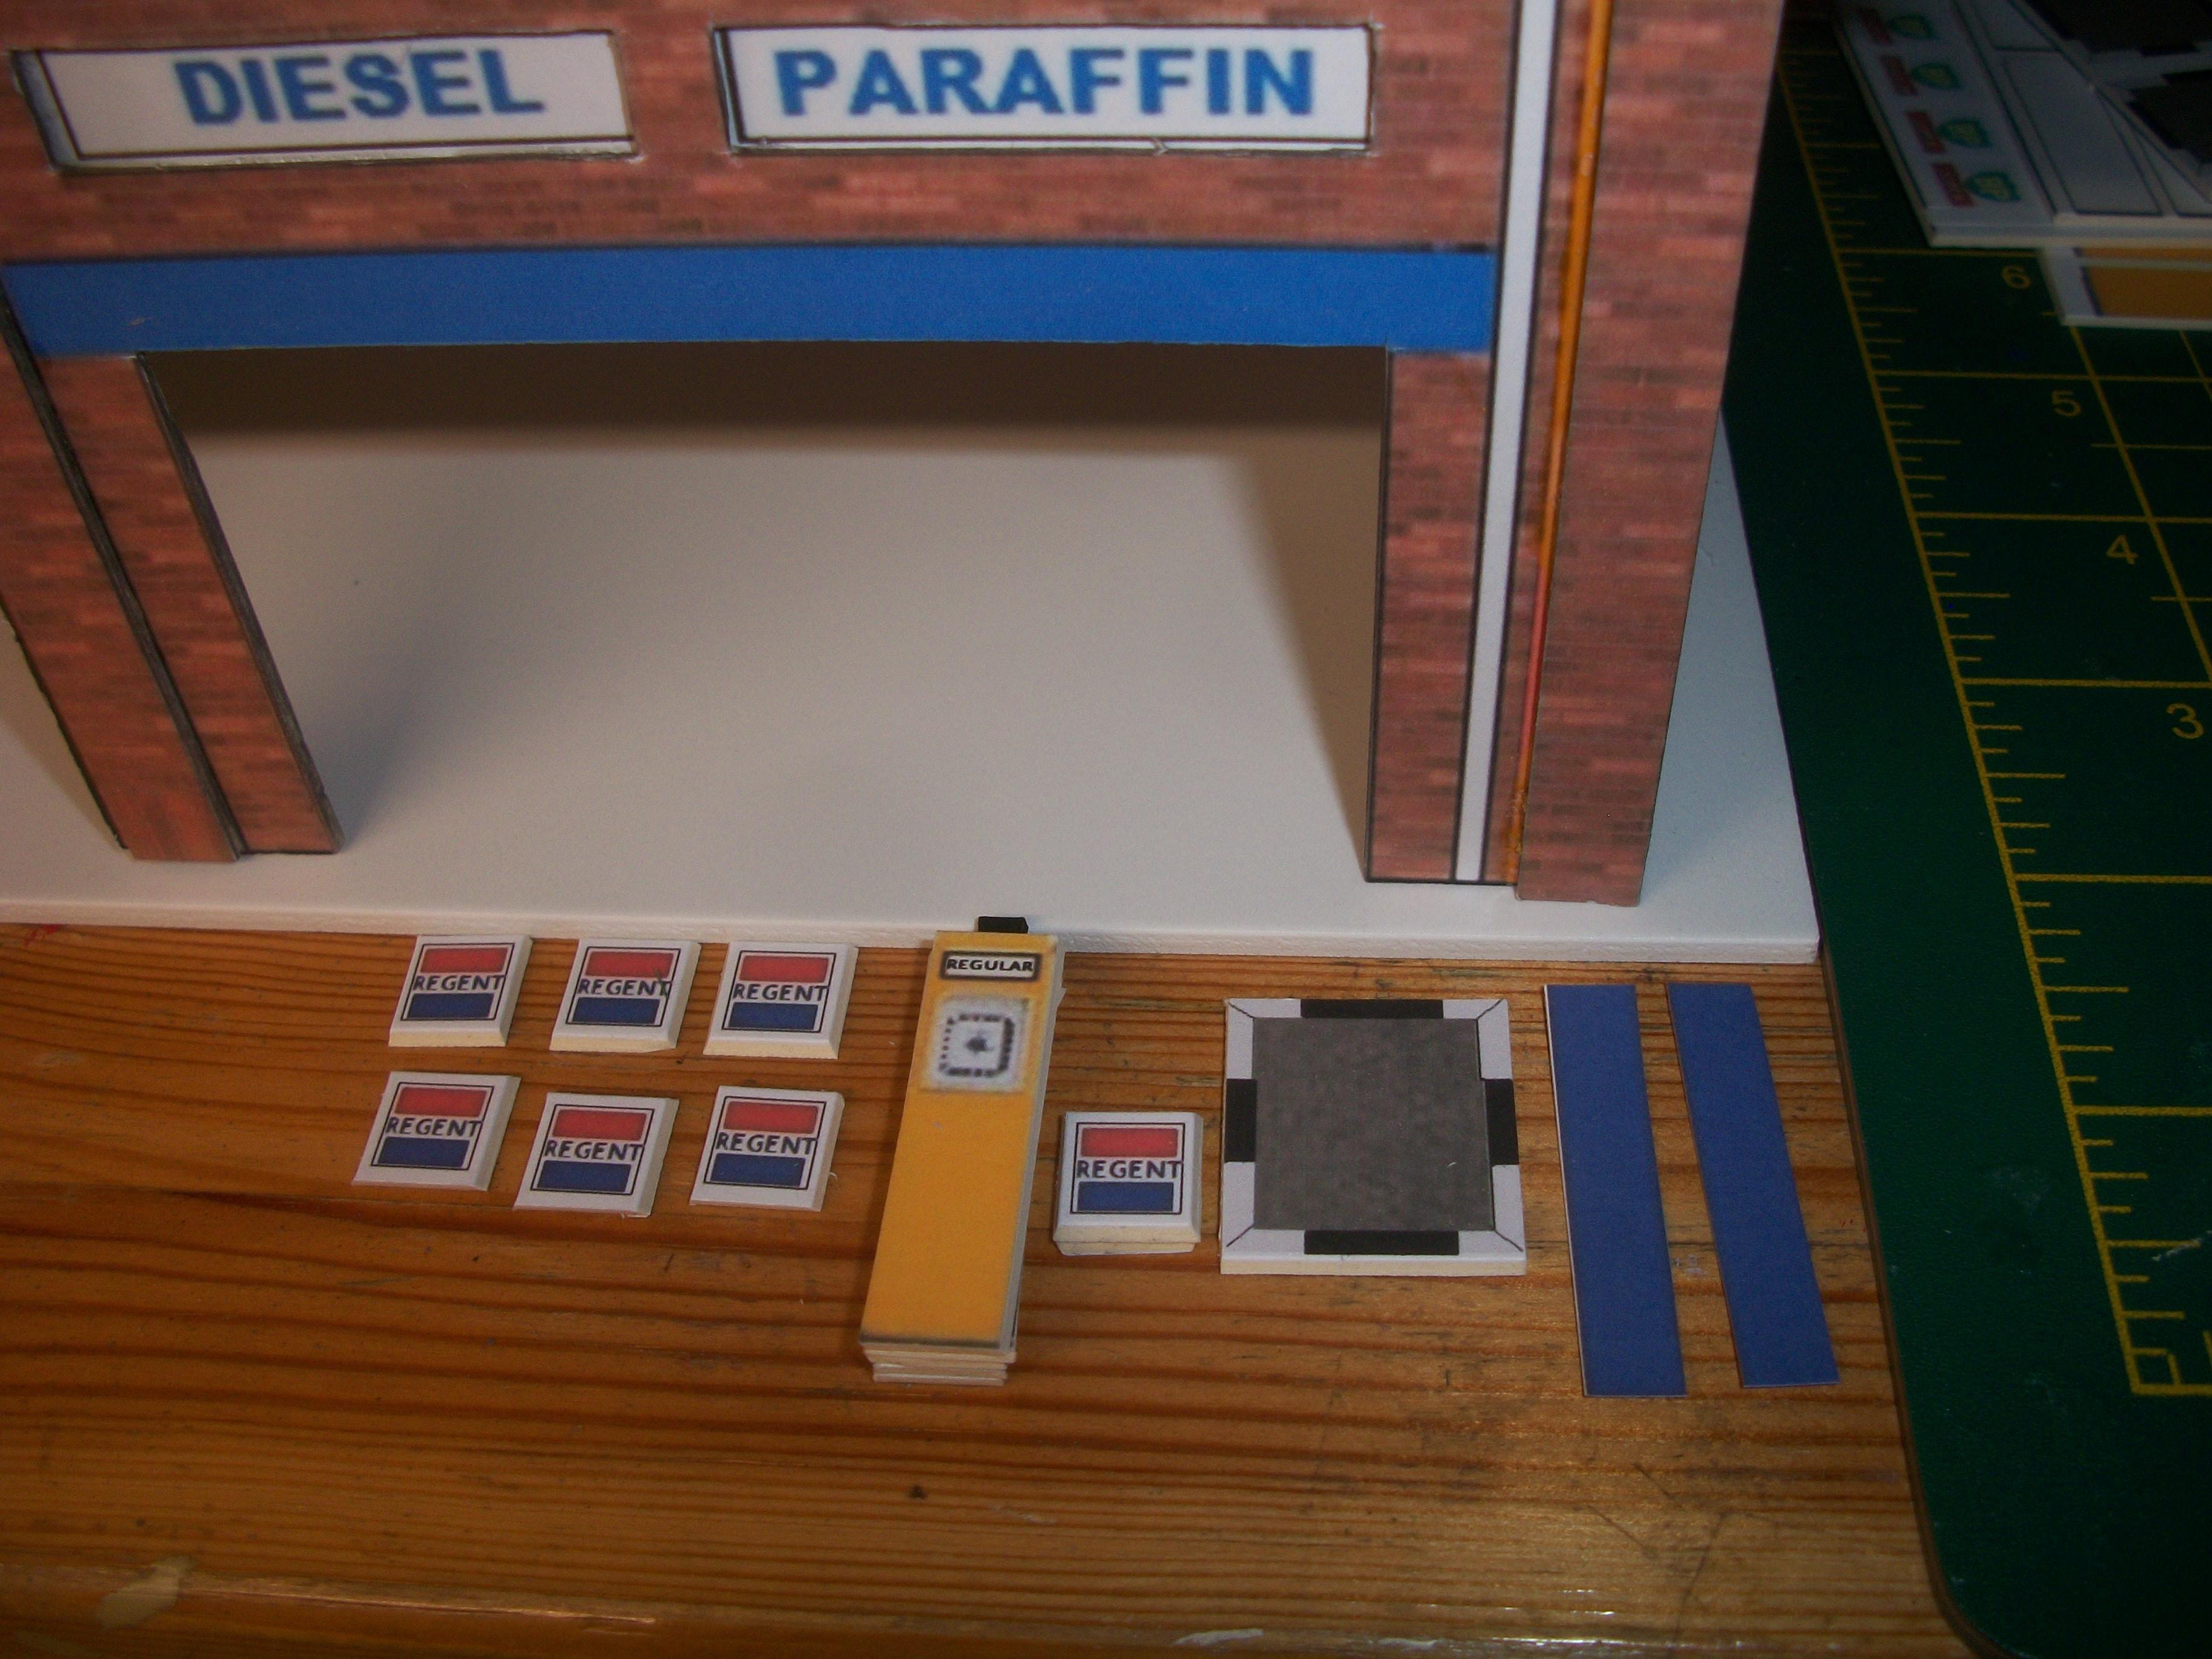
The 1:43 scale garage diorama is now completed, and ready for delivery to the owner of the Vintage Toy Exchange...... this has taken me only 9 days to build from start to finish. I have really enjoyed making this garage diorama and it came together quite quickly, which leaves me with time to concentrate on other parts of the Hooper & Co. project. The following photos show the finished garage model, including the opening panel at the back of the diorama, which allows the buyer to place model cars for display purposes, from inside his shop. Hope you like it ! David
-
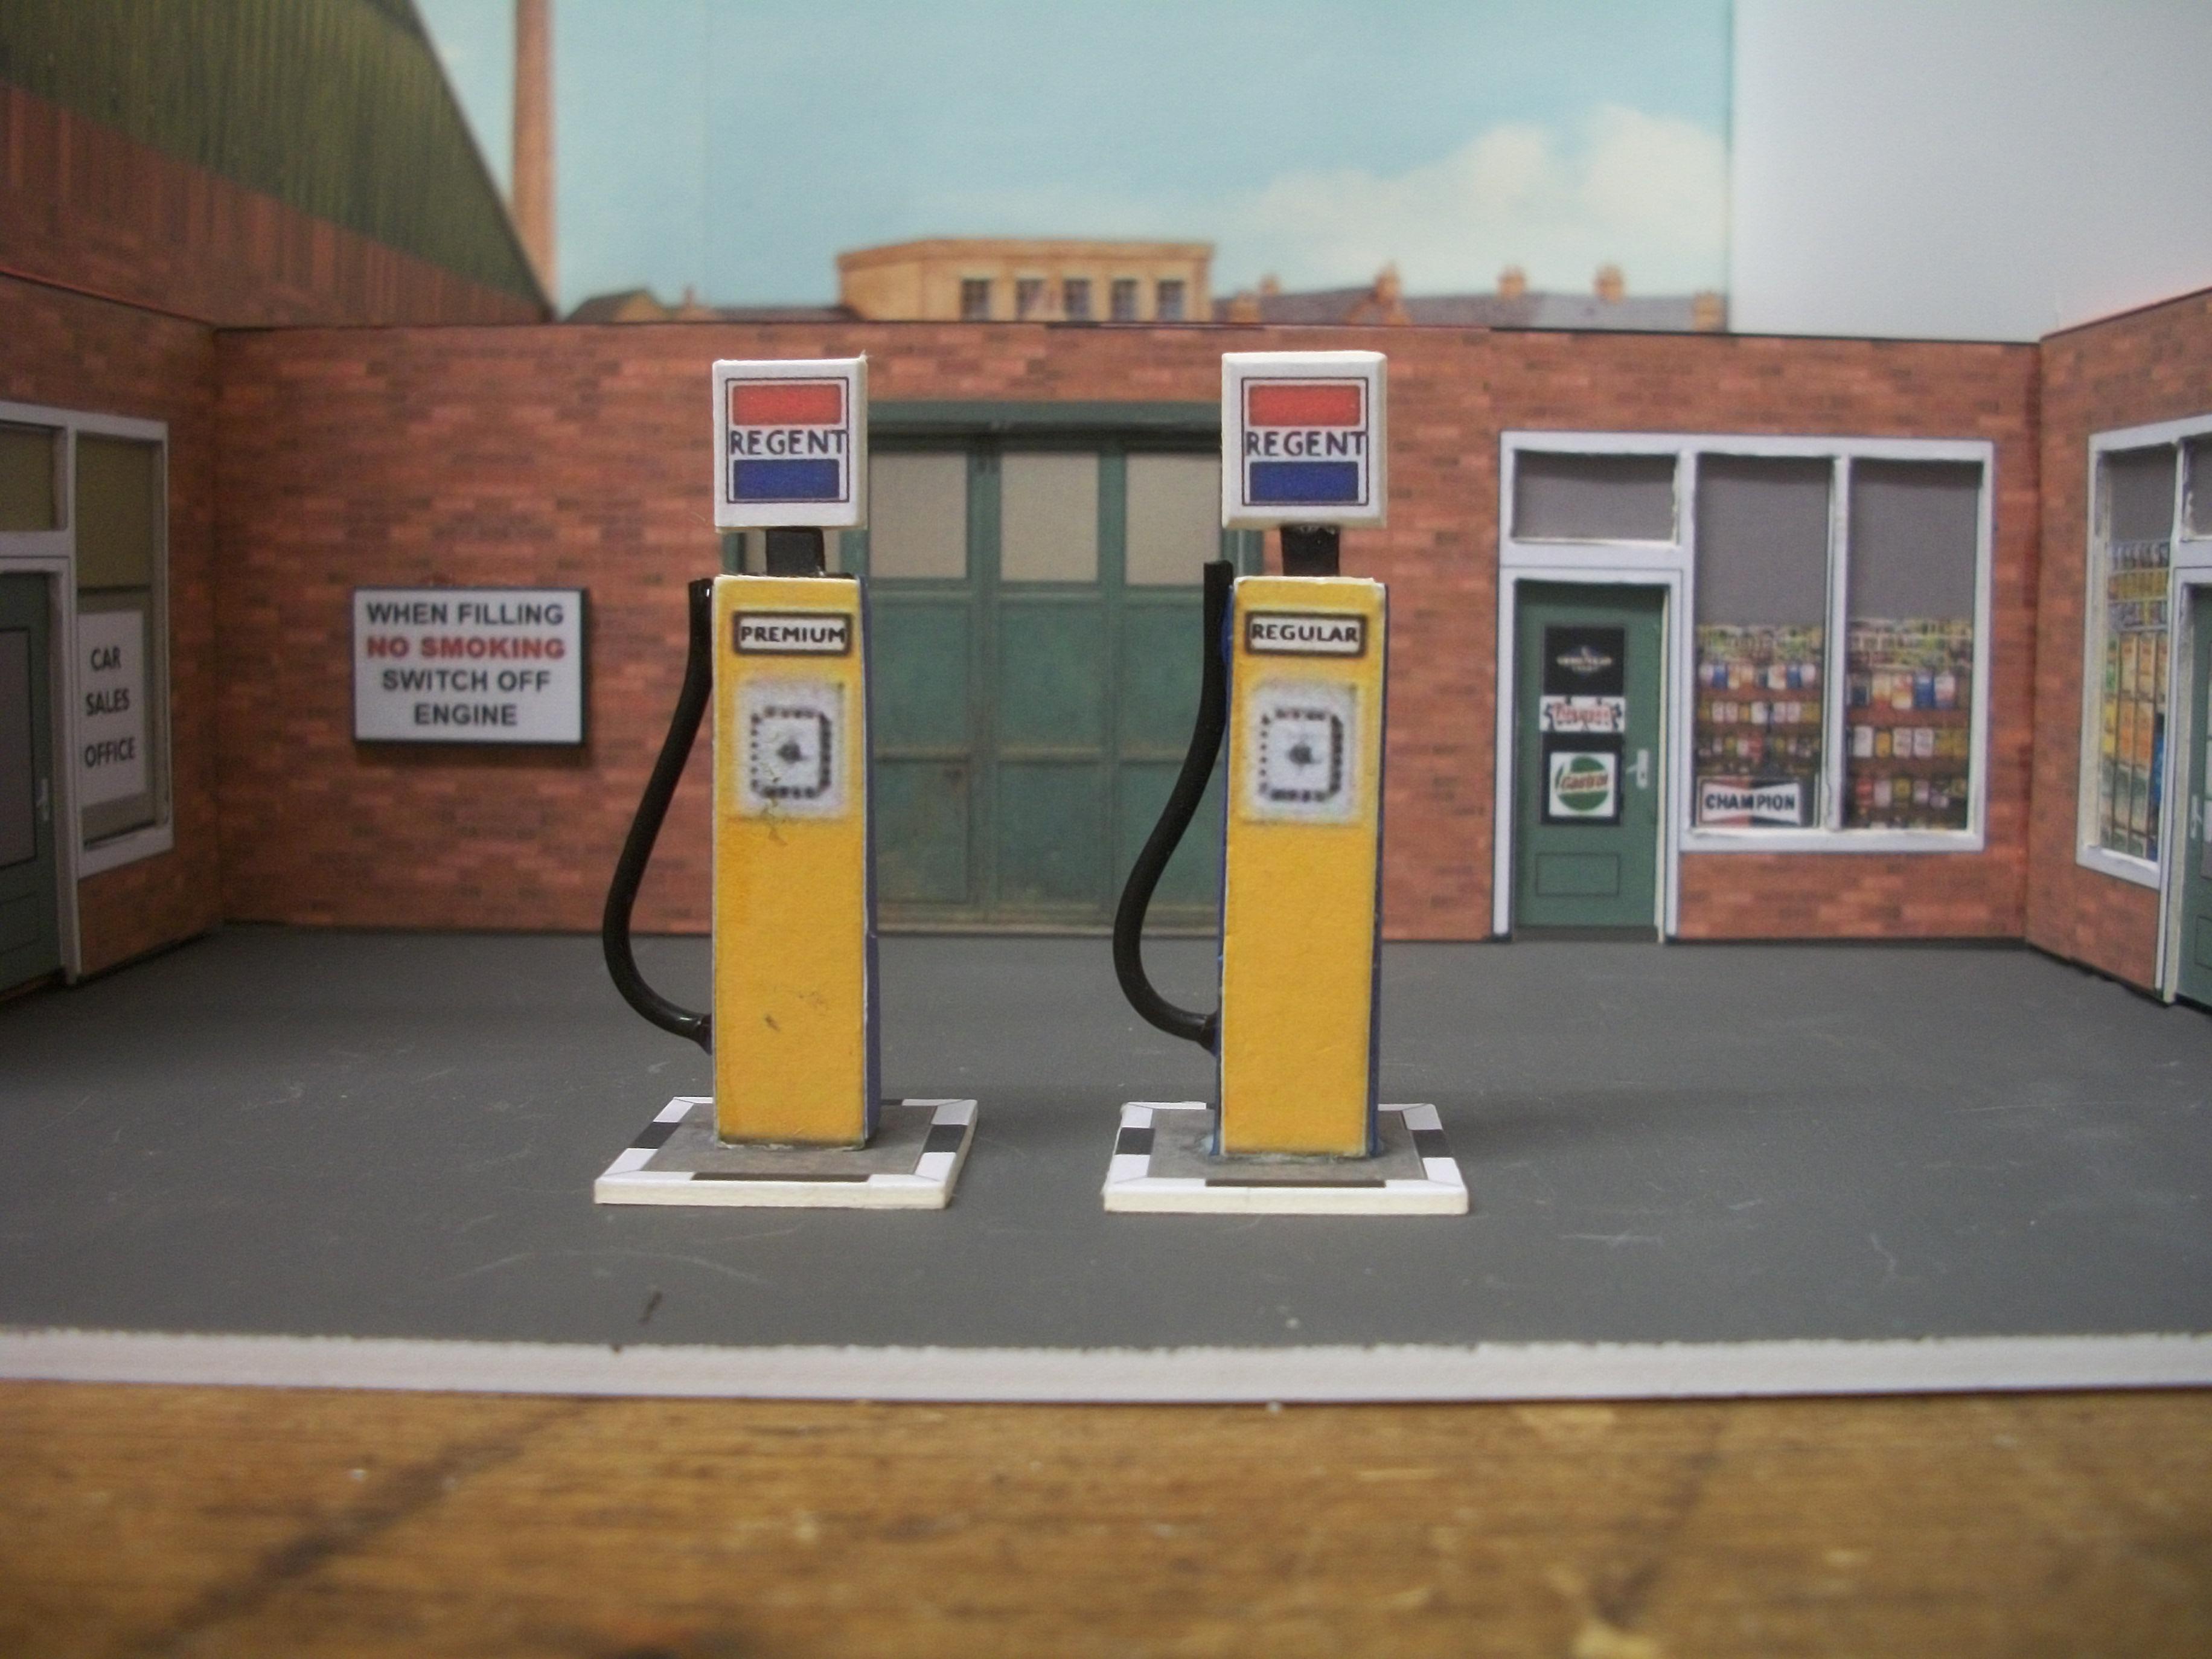
The Hooper & Co. dioramas project is on temporary hold for a couple of weeks, while I have been asked to build a garage diorama for a business in the local town. There is a small shop called Vintage Toy Exchange, which has a window display that features a small diorama already. The owner of the shop wants to remove the O gauge model railway diorama from this window, and instead he wants to display 1:43 scale model cars in a garage type setting. The photos following below show my progress so far. There is a main dealer garage building constructed from thick card, with a petrol forecourt to one side, and a small parking area on the other side. Behind the diorama setting there will be a backscene of an old industrial town. The dimensions of this small diorama in 1:43 scale are 93 cms x 30 cms x 23 cms. David
-
Some nice looking Ferraris you have in your shop there, Pat...... and these cars are in the best place for quality prepping! David
-
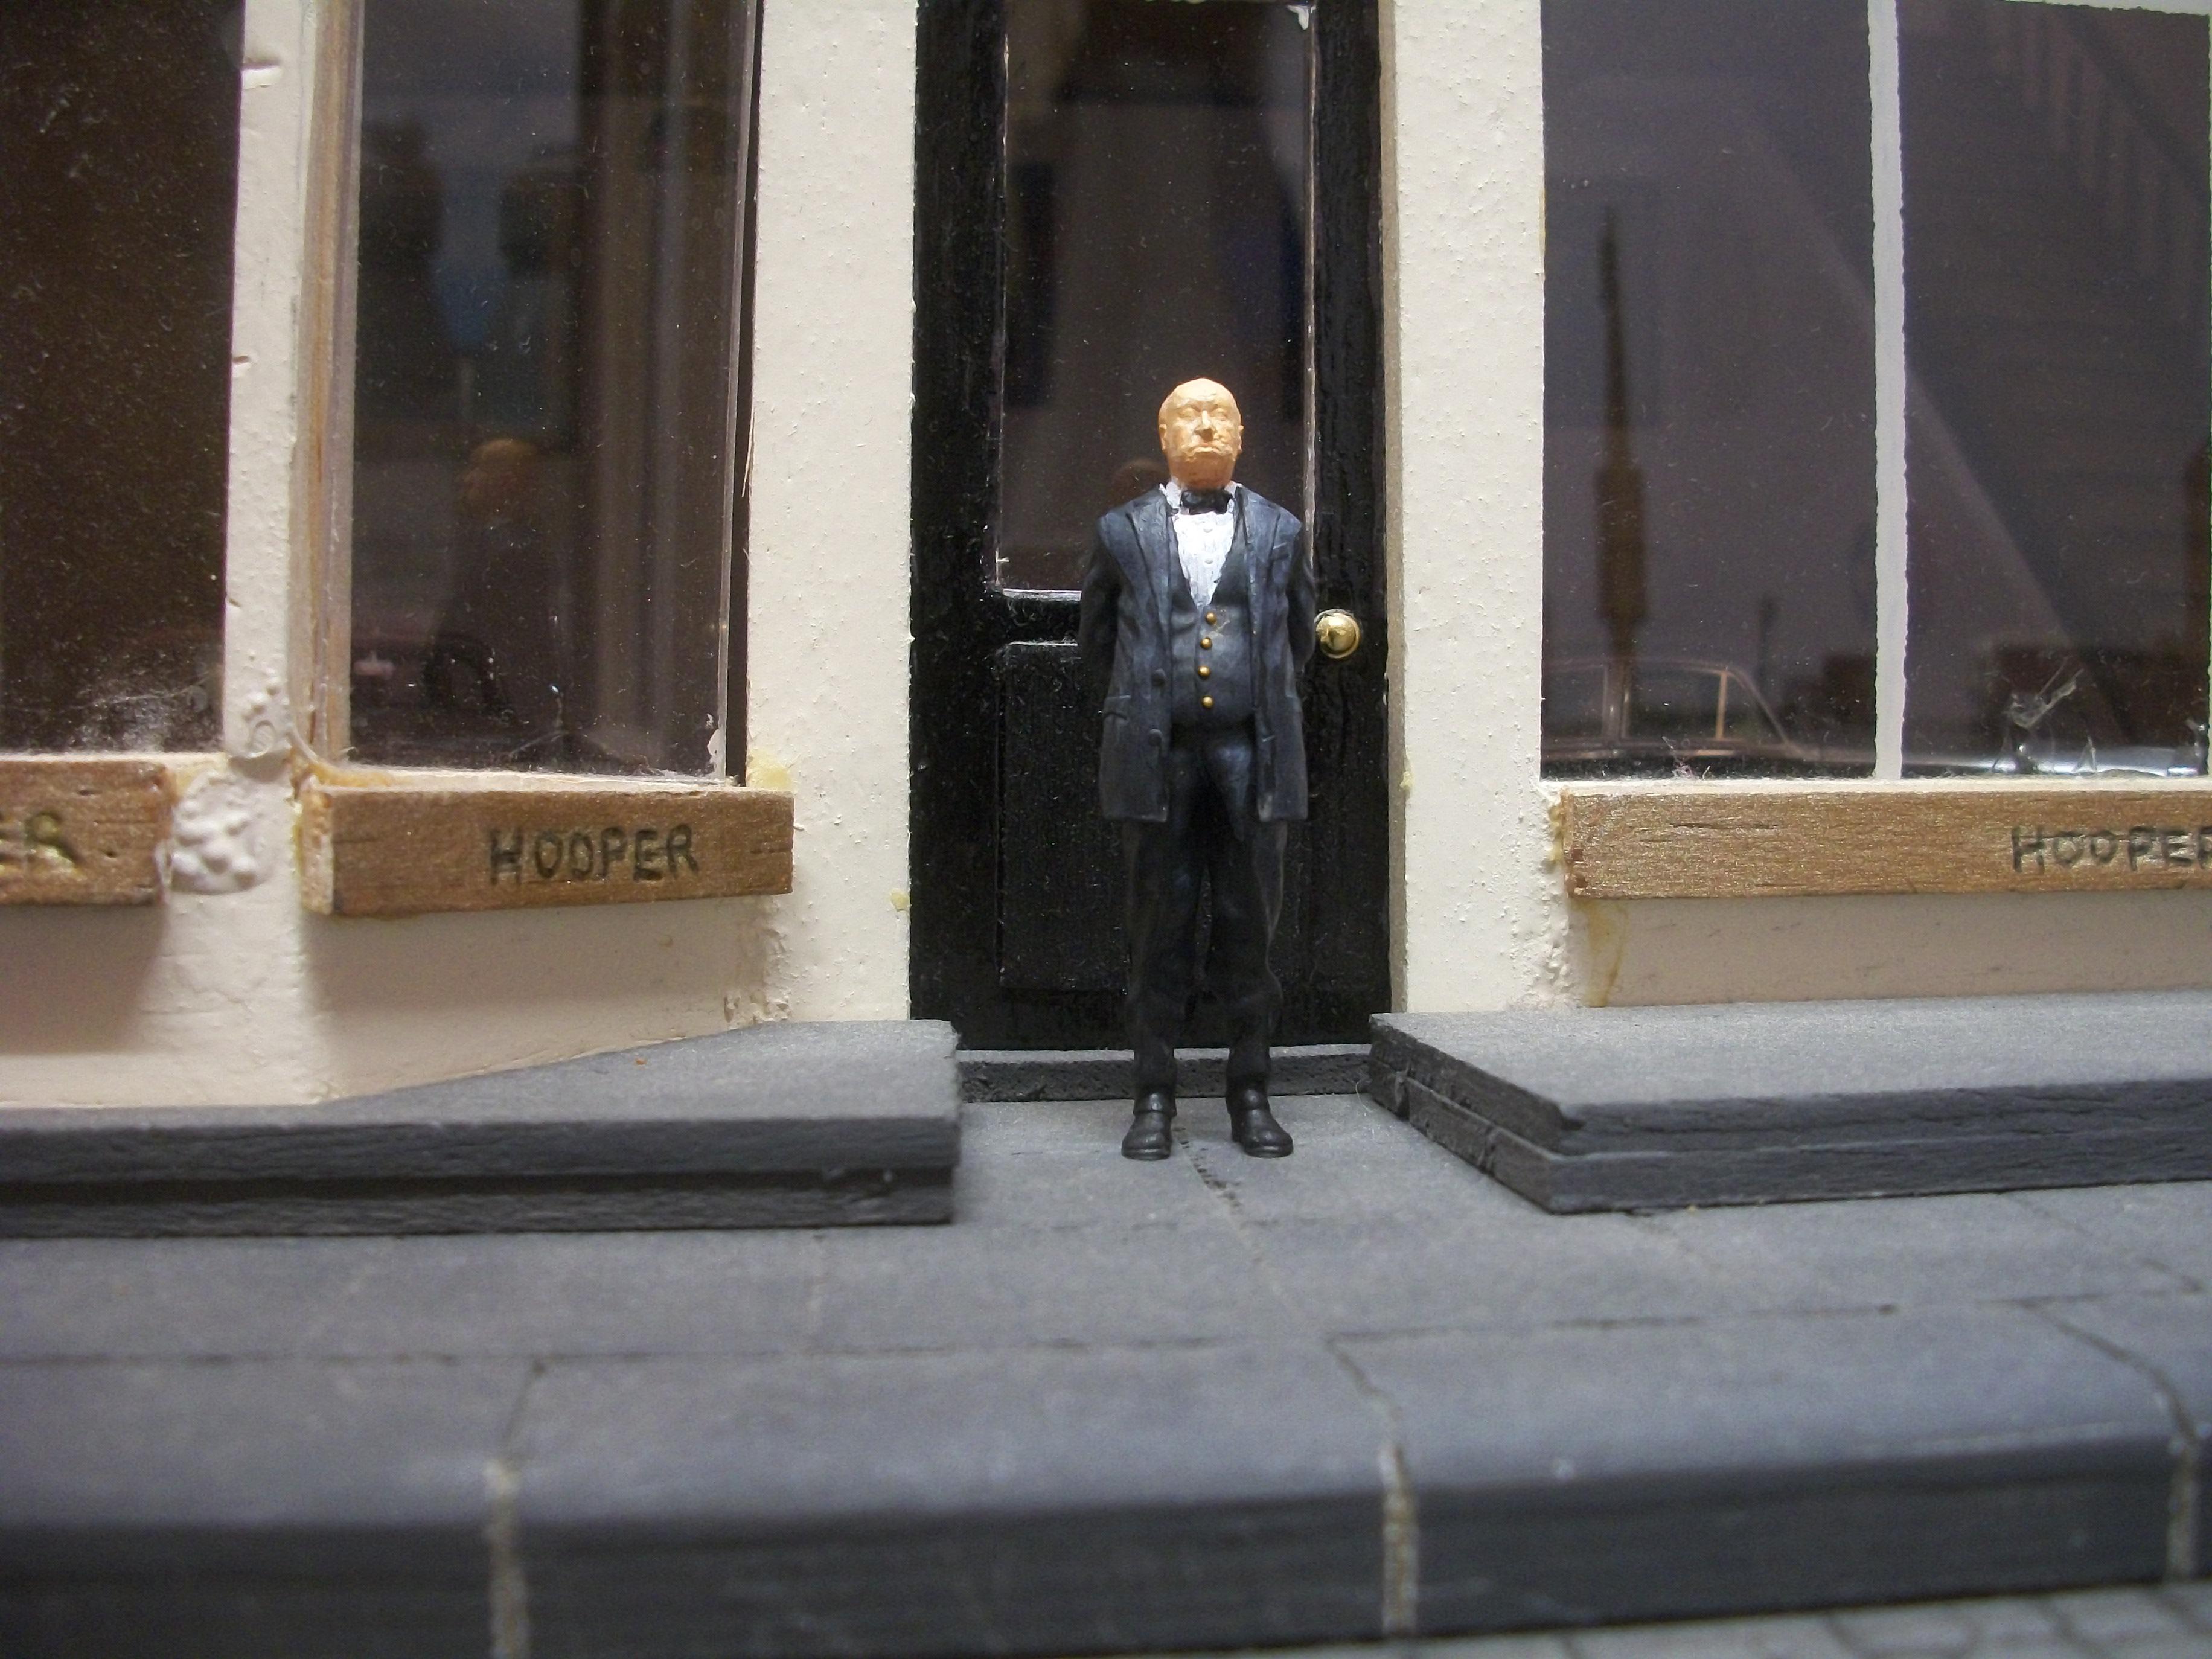
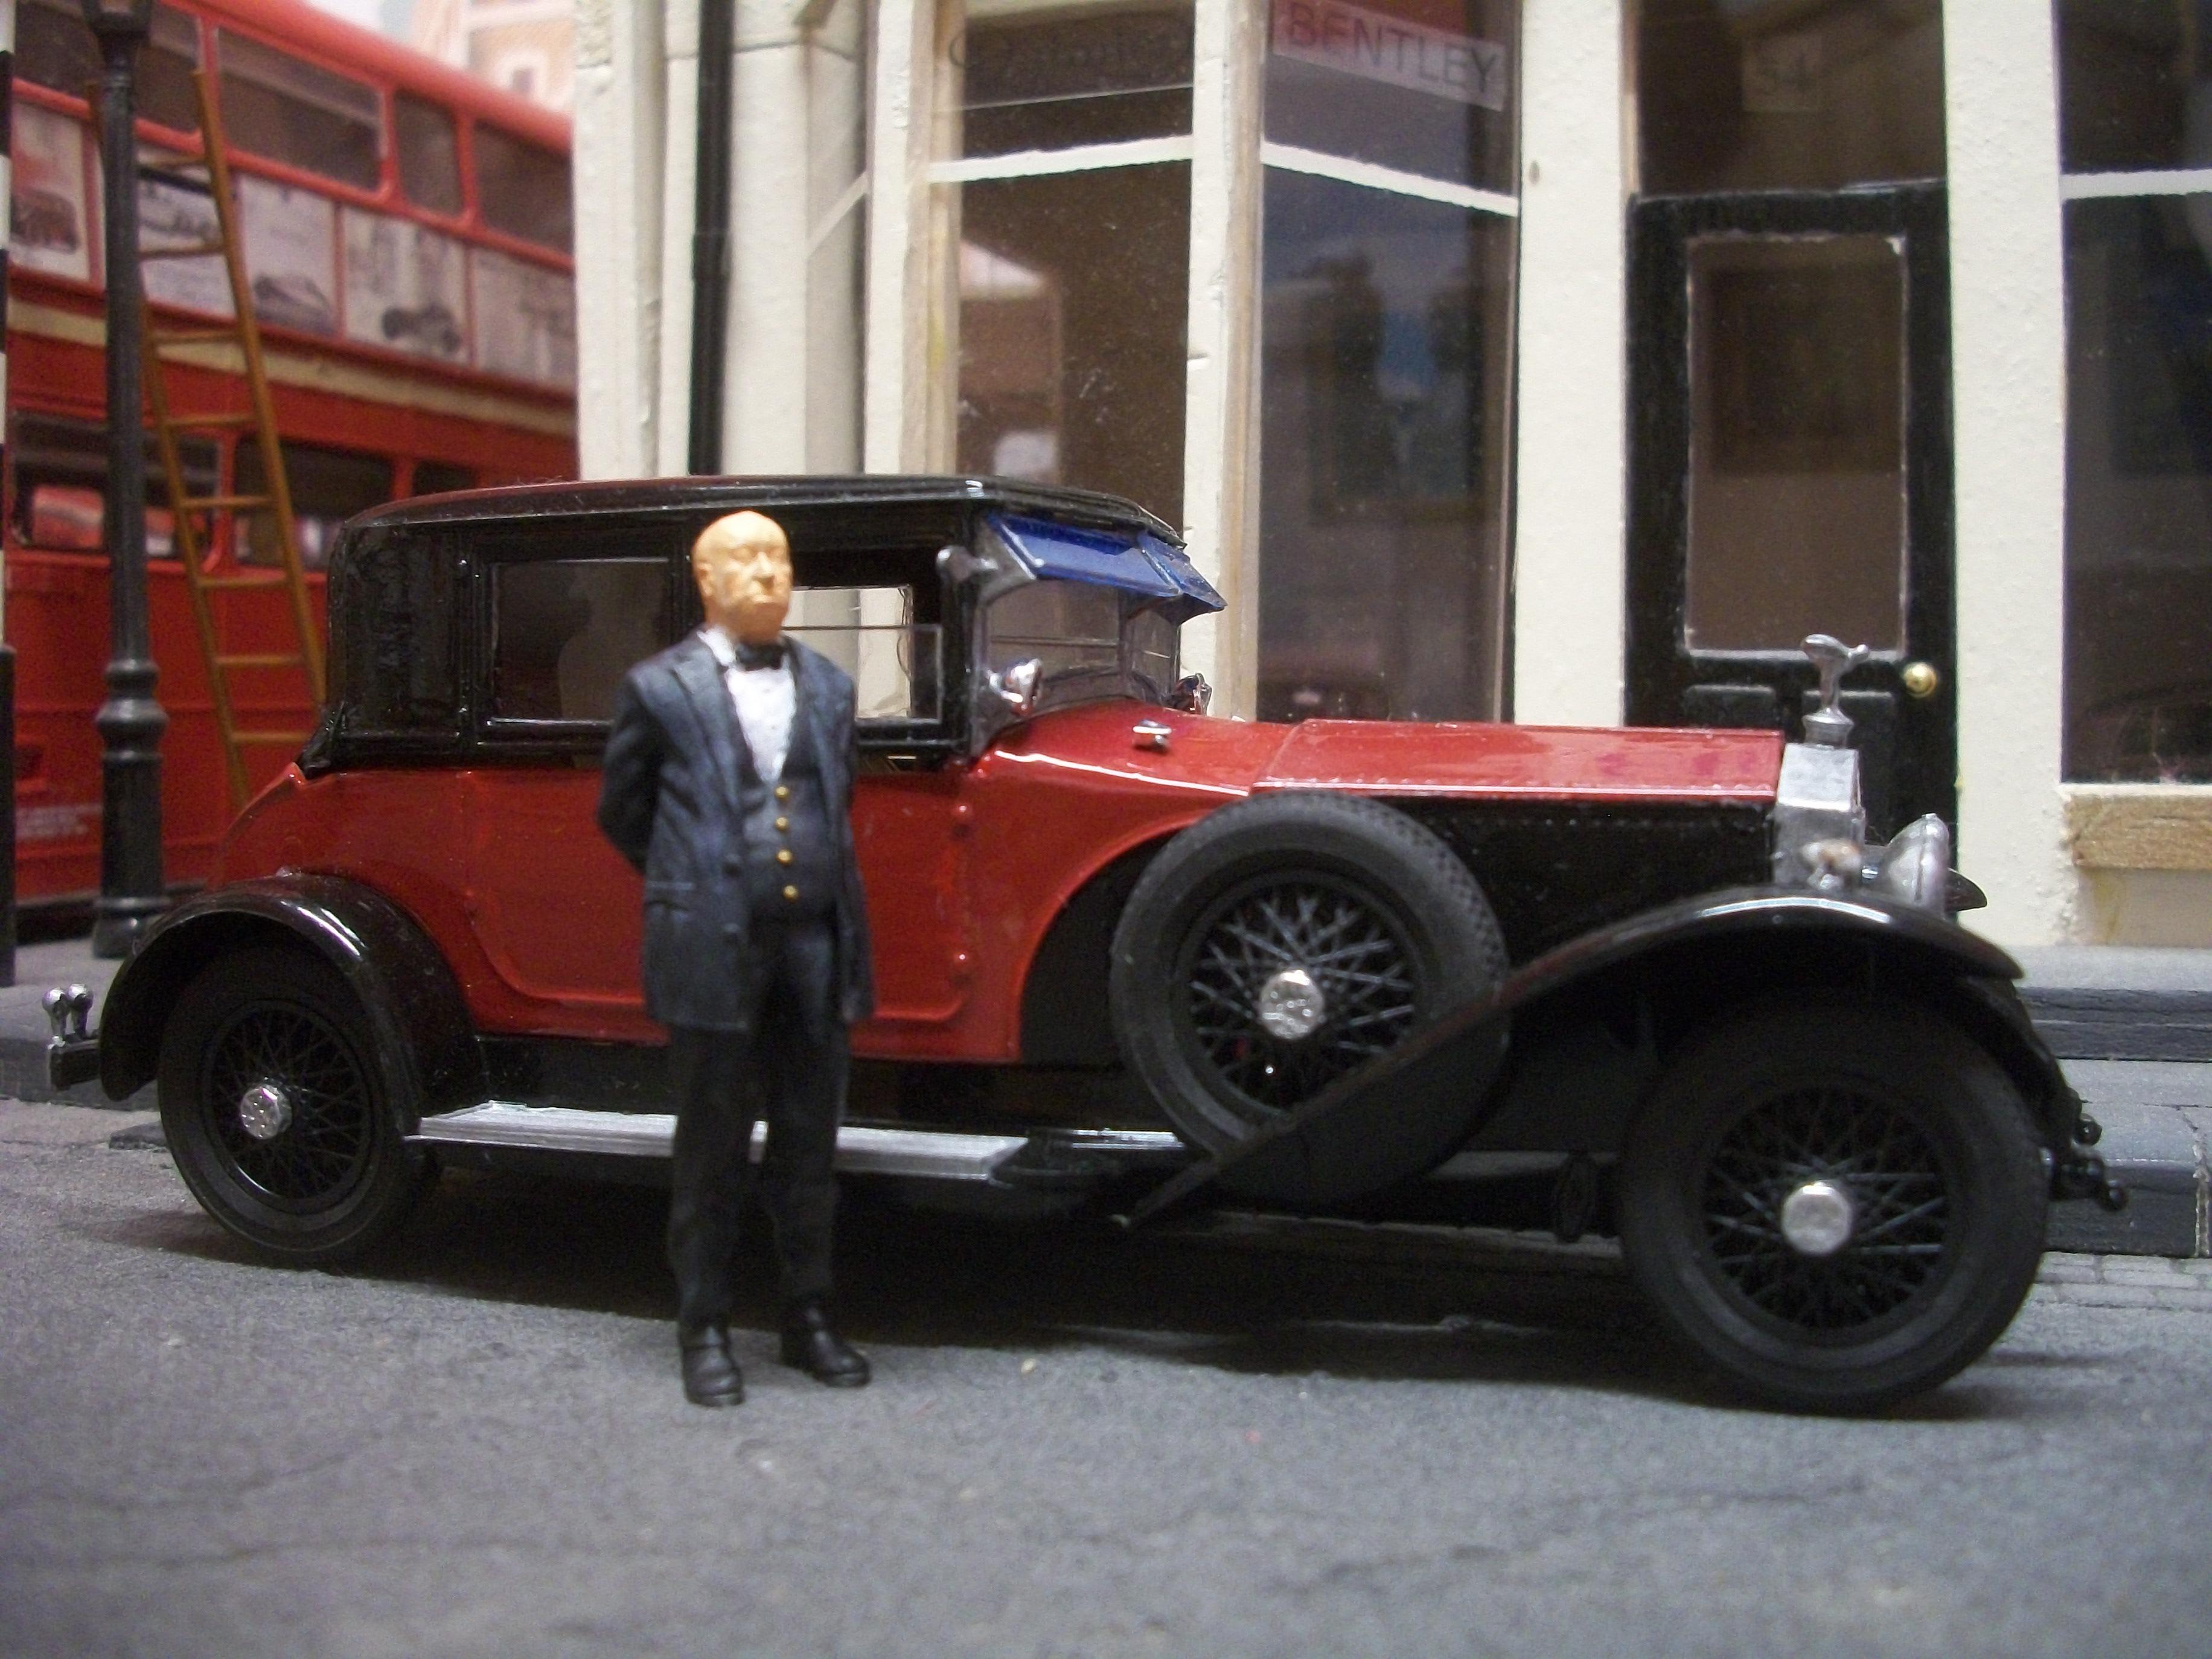
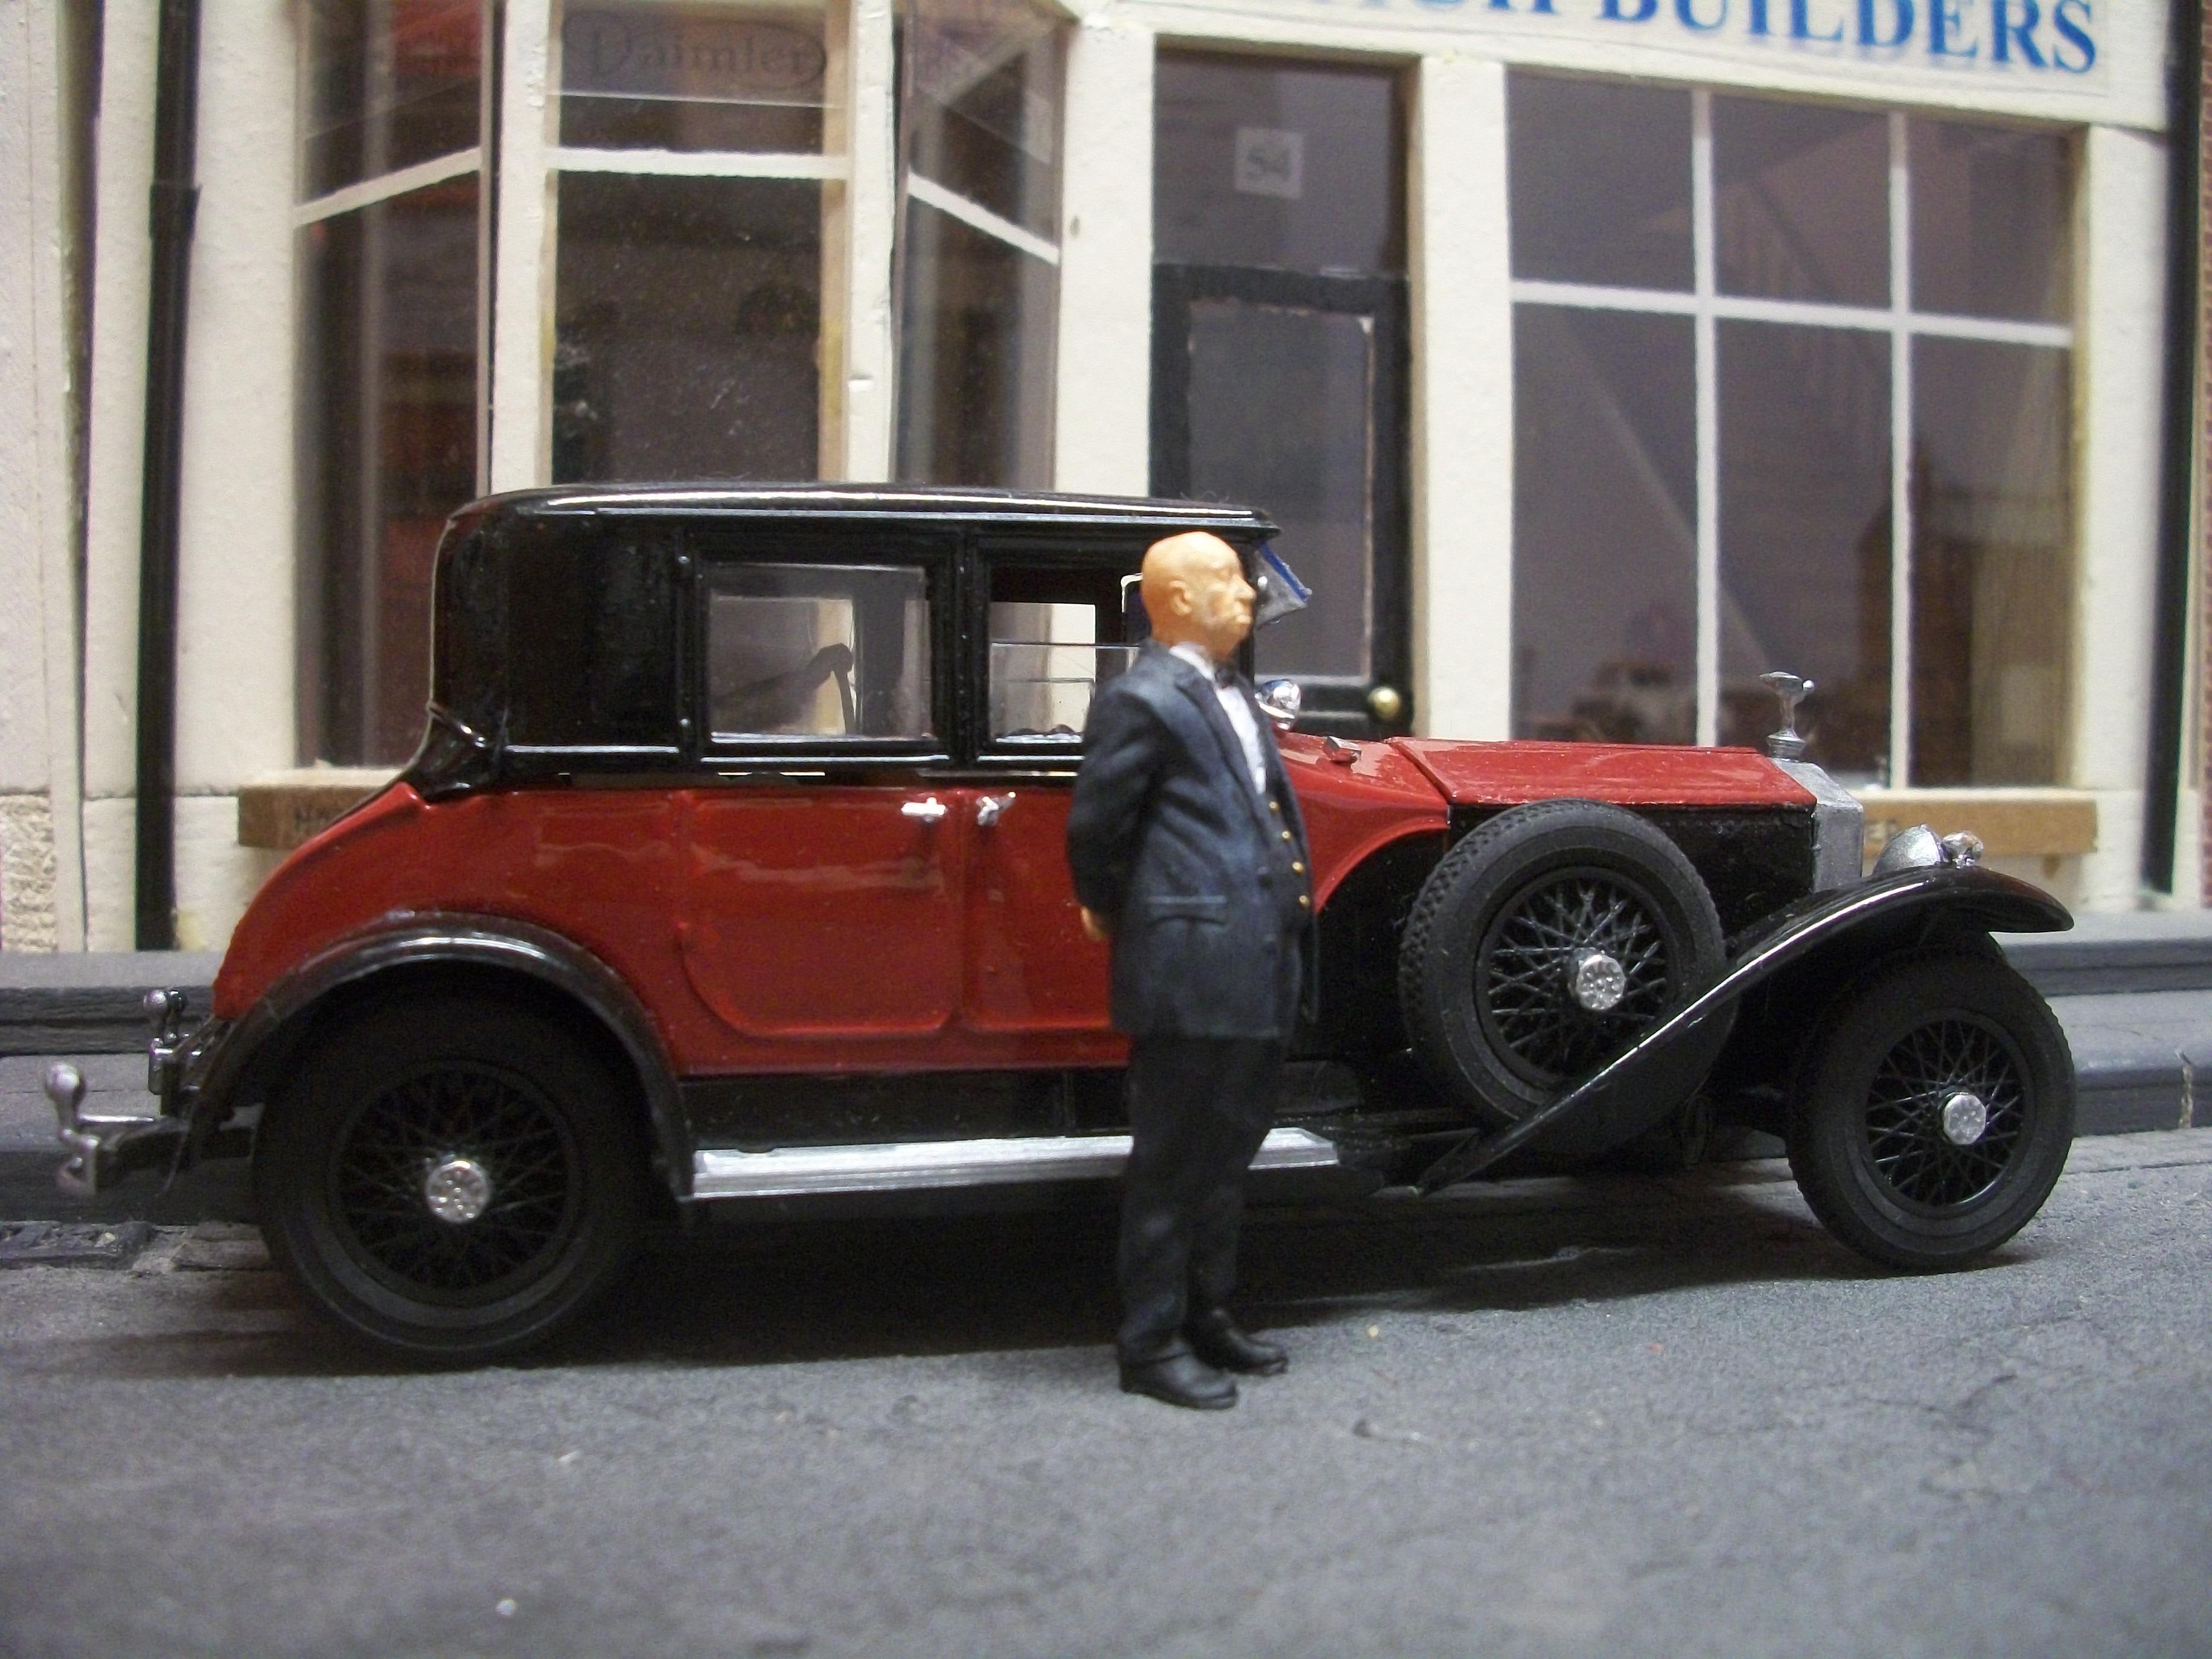
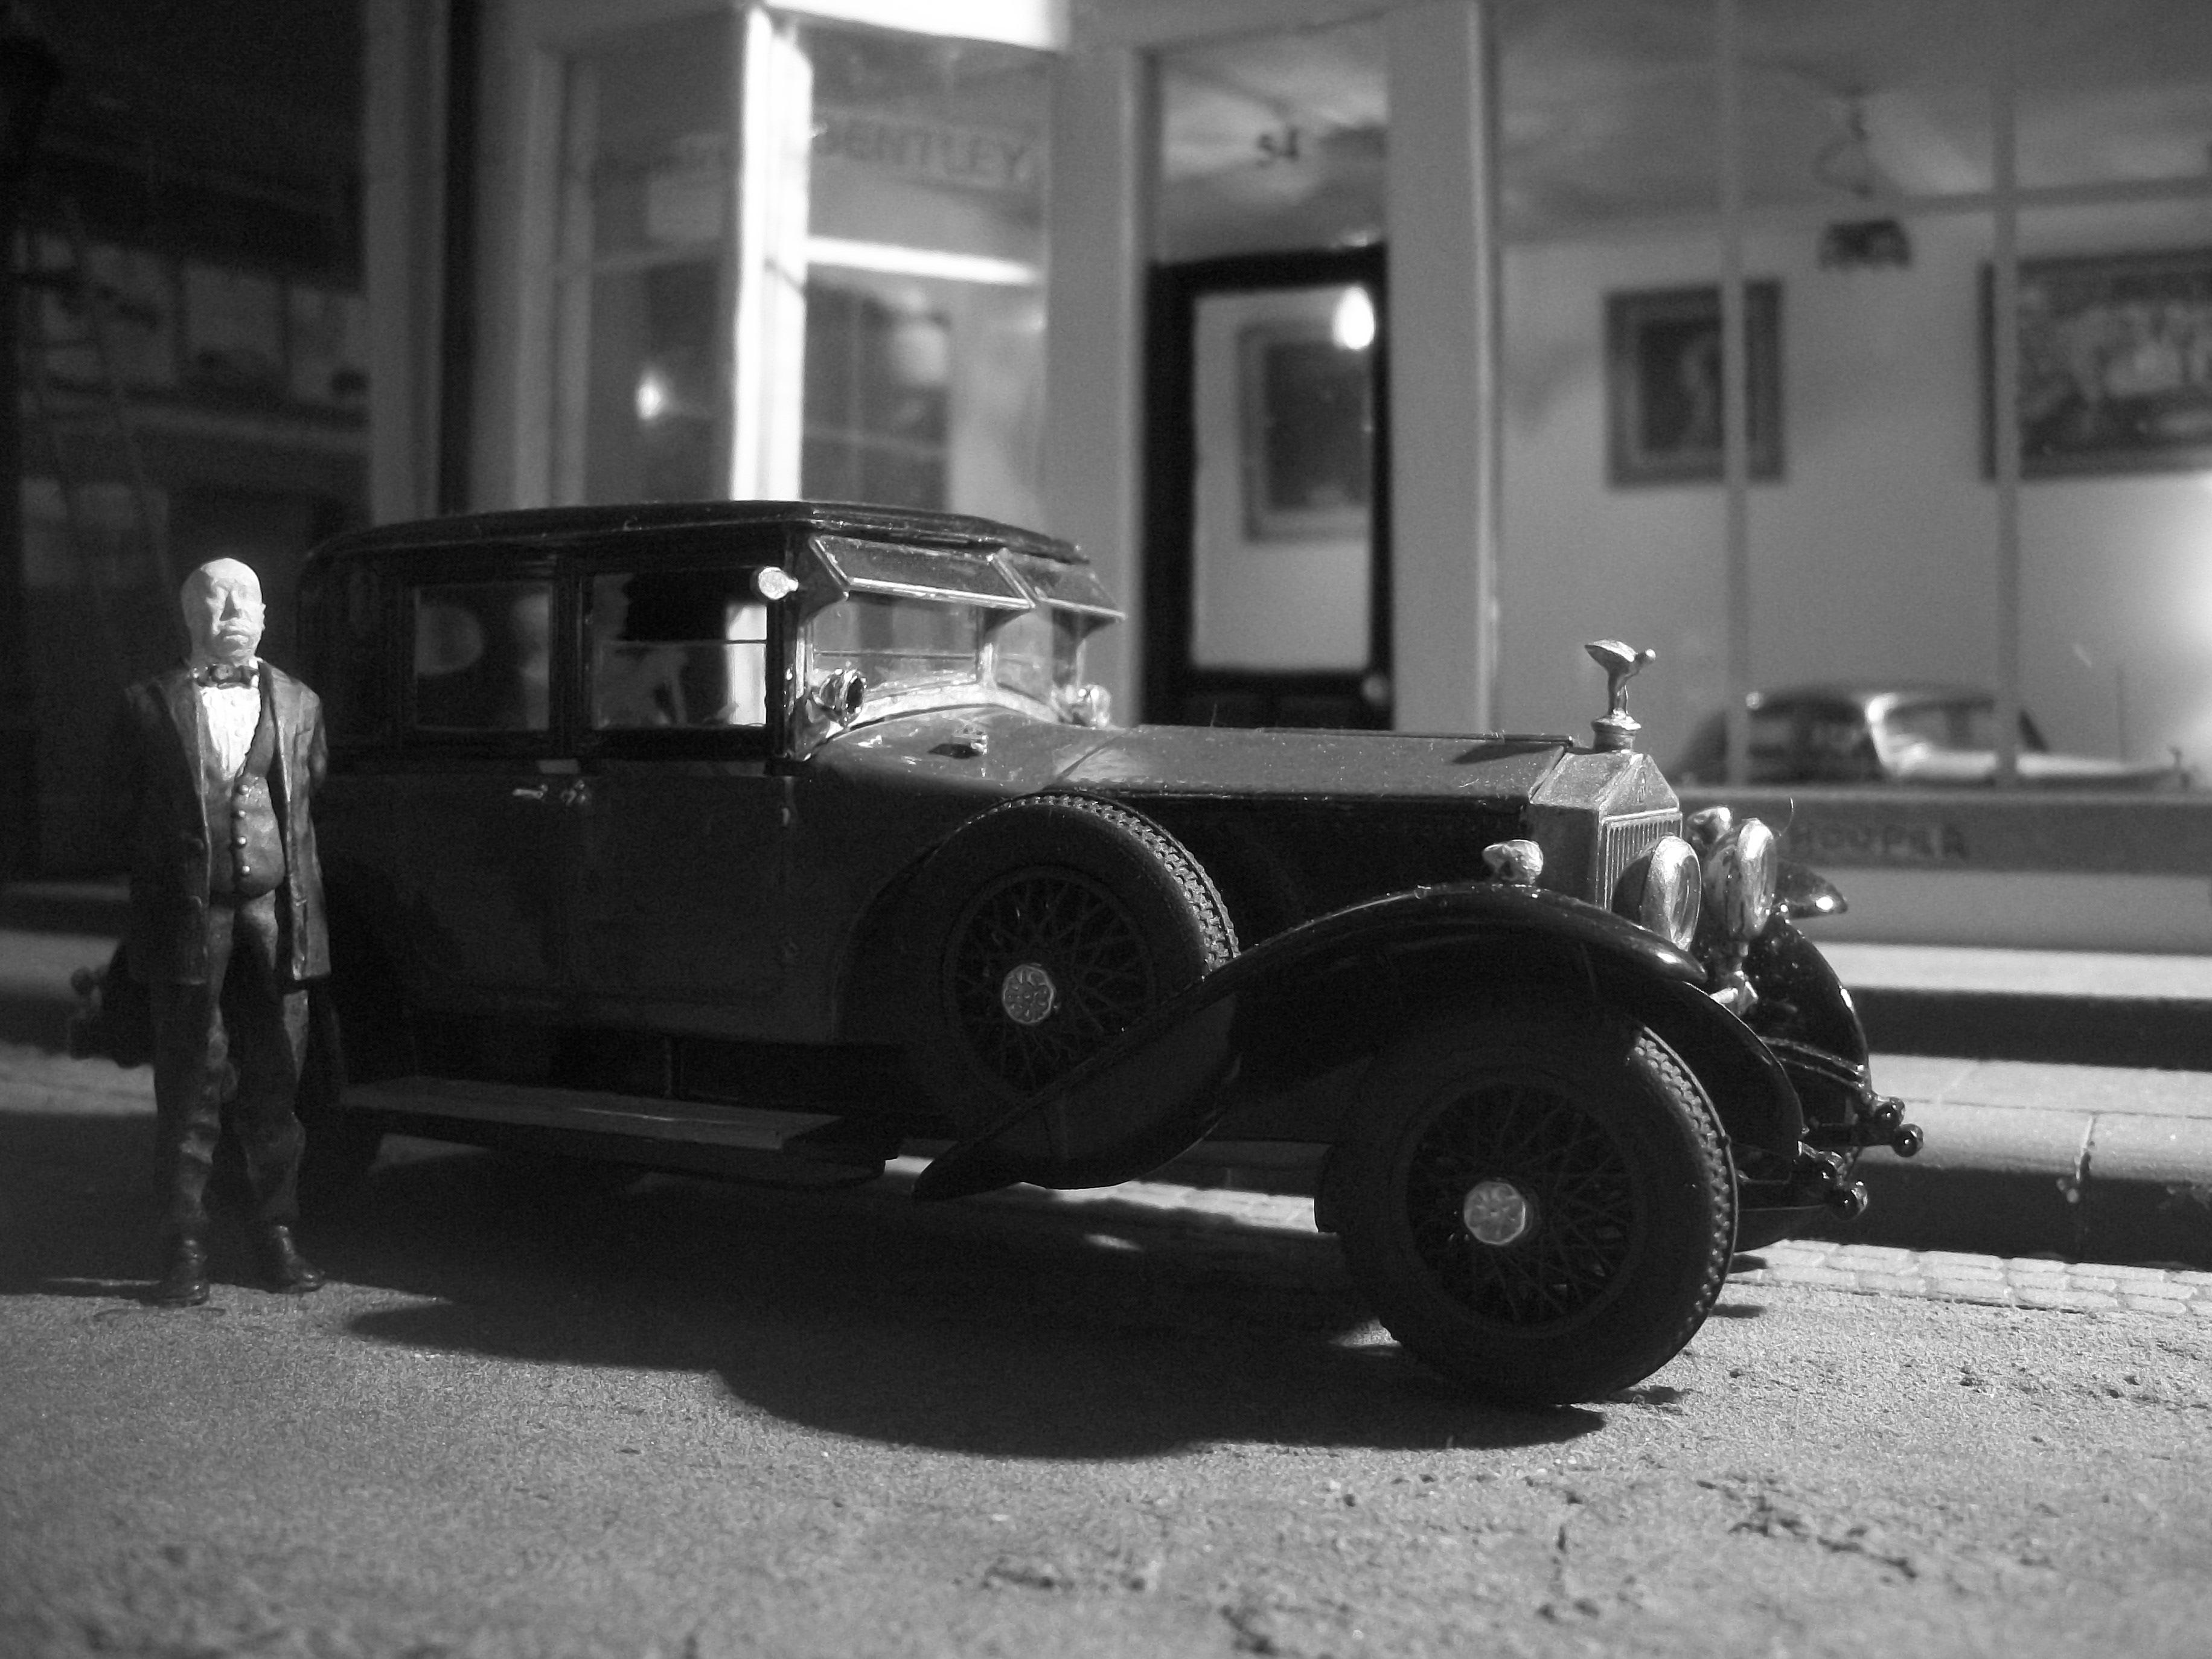
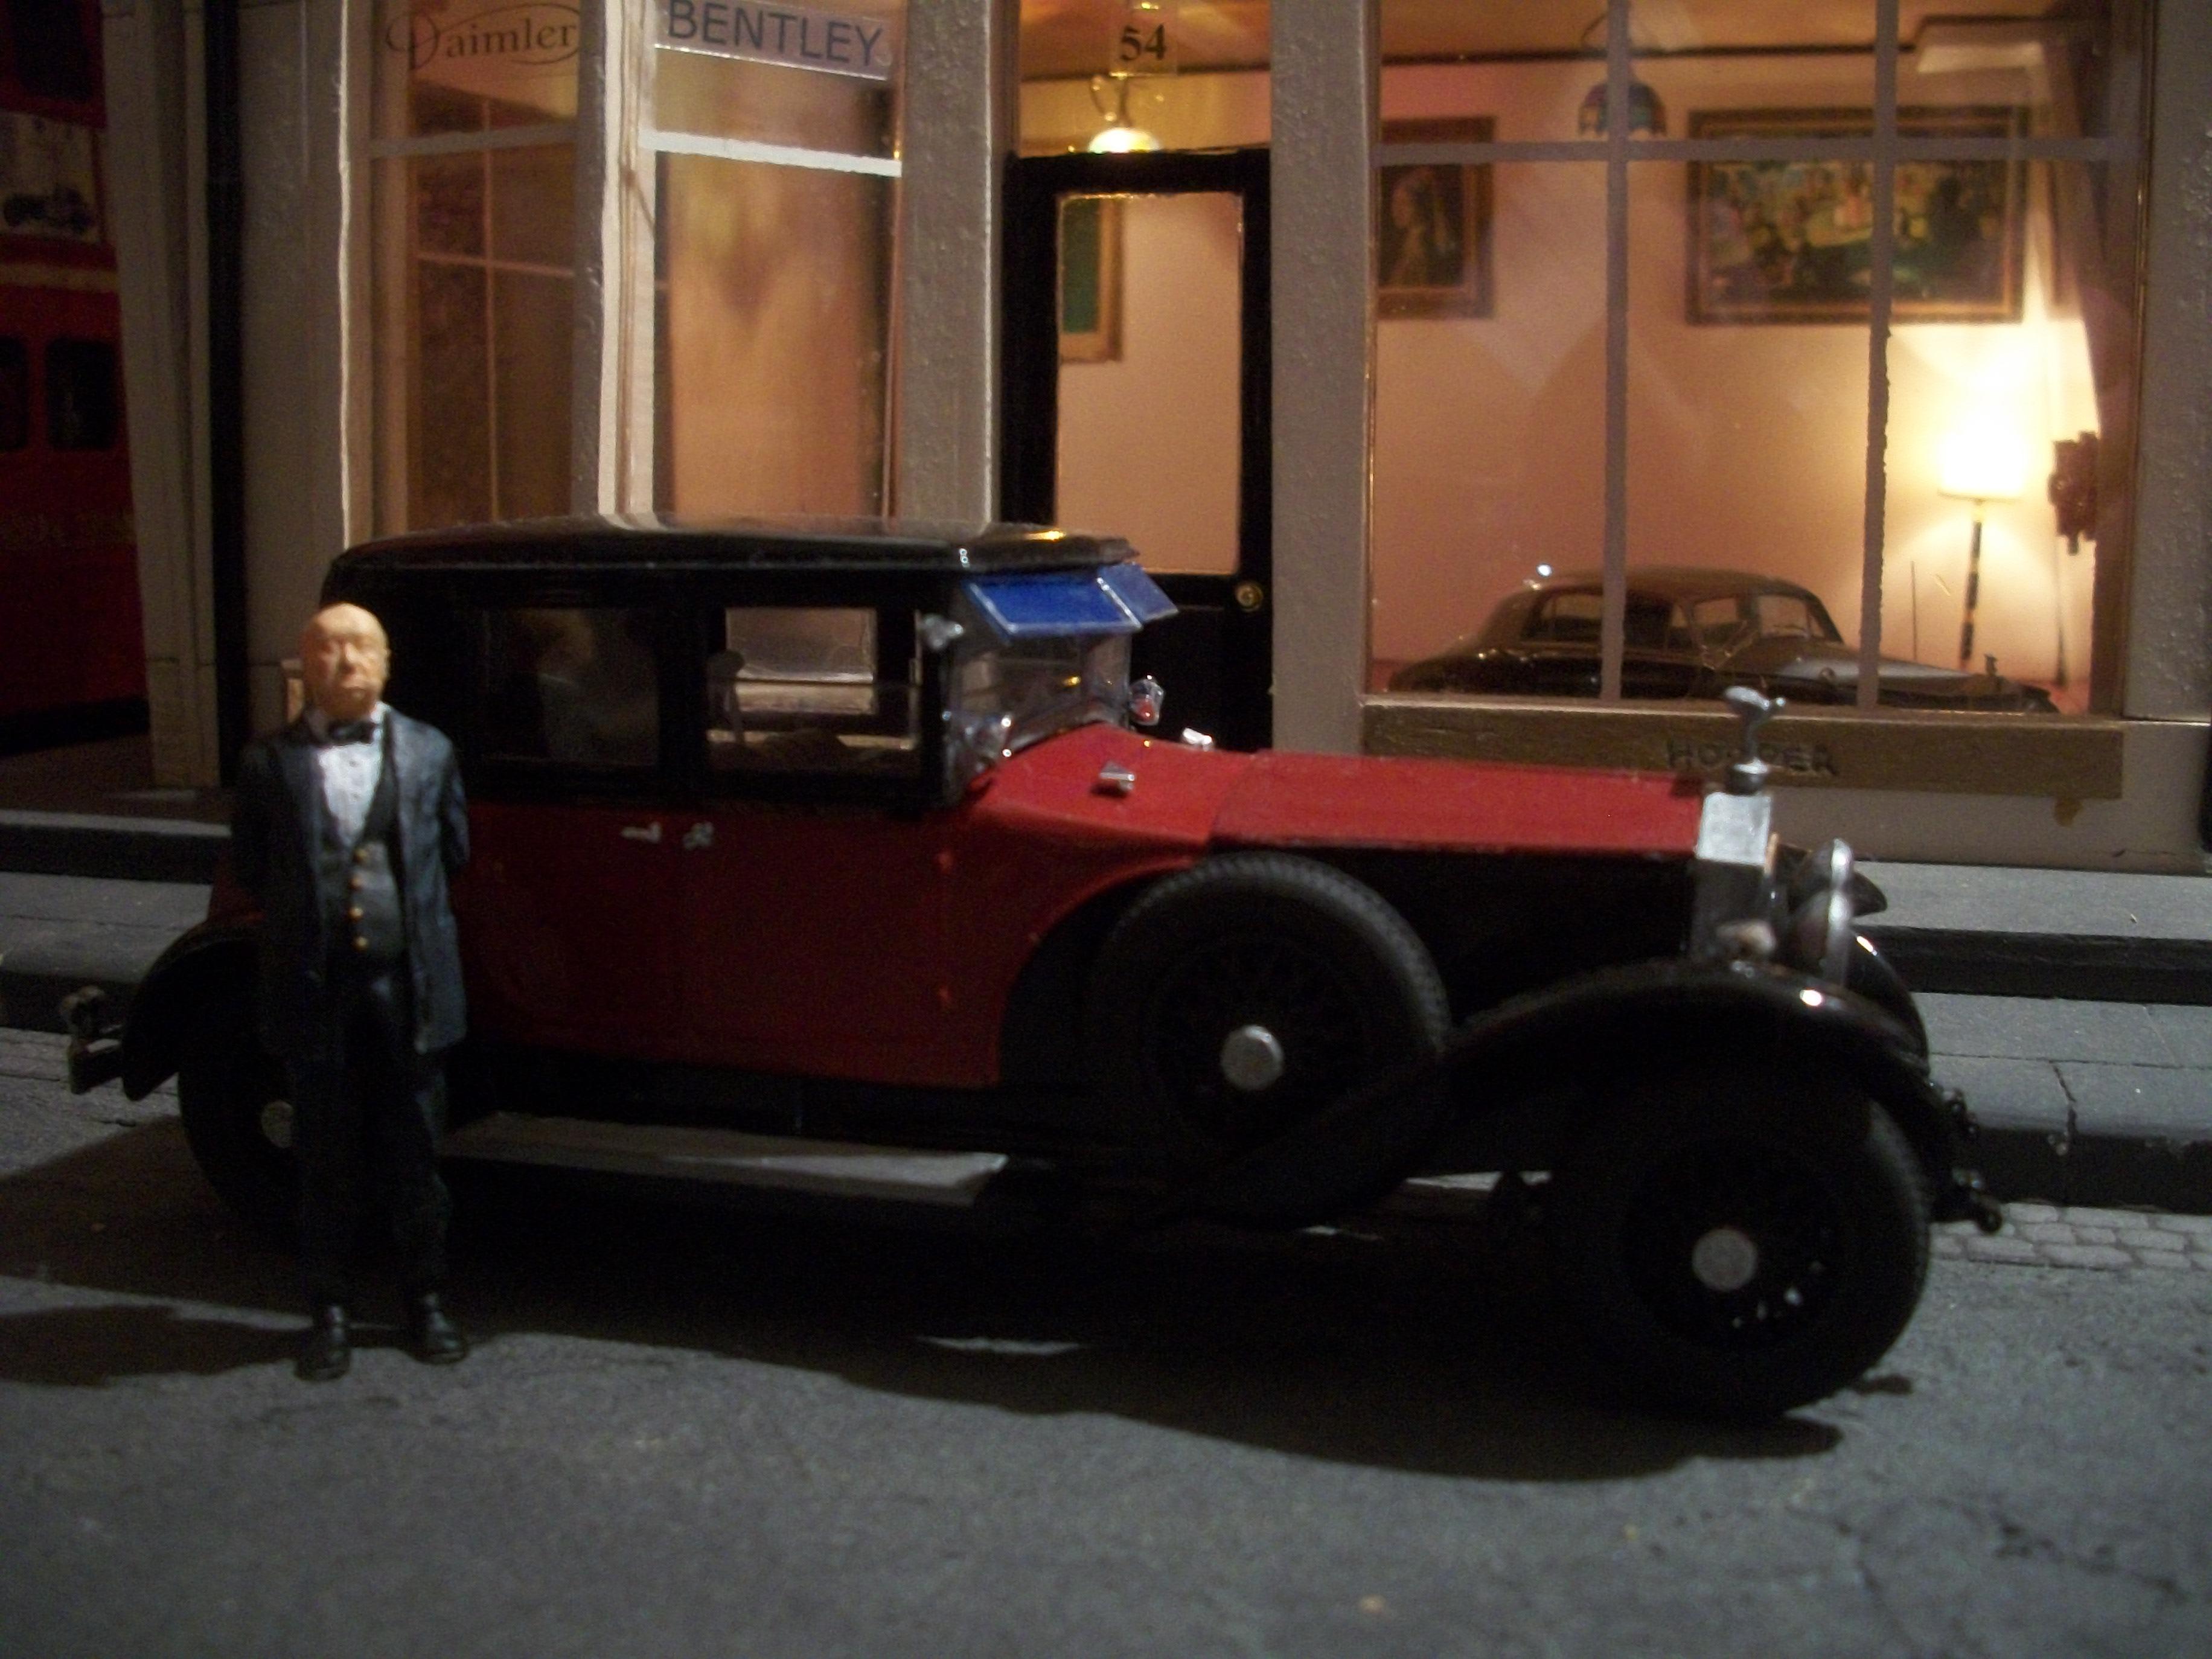
The two Shapeways figures in 1:32 scale have arrived recently, and the standing figure of Alfred Hitchcock is especially good. This figure is 3D printed in what Shapeways refer to as Frosted Ultra Detail, which is a semi transparent material that is very nice to work with. The painting of this figure is not yet completed, but here are some photographs of Alfred Hitchcock alongside the Rolls-Royce Phantom I, and these shots were taken in front of the Hooper & Co. building...... shortly, I shall be taking photos inside the ground floor showroom of Hooper's, to determine how these 1:32 scale models look within what is thought to be a 1:24 scale model of the building. David
-
I really like this one, Charles........ and for me, the most interesting part of your ' Tight Squeeze ' diorama is the short depth of the whole model. You have managed to display the large bulky truck cab, which appears to have reversed the even more bulky trailer unit into the opening of the building, and yet you have only extended the overall depth of the building by less than half the total length of the trailer unit. Also, the area in front of the truck has only been extended forwards to make space for two figures to stand........ you are a genius, my friend! This is how to construct a diorama at the highest level of skill and imagination.... just brilliant. David
-
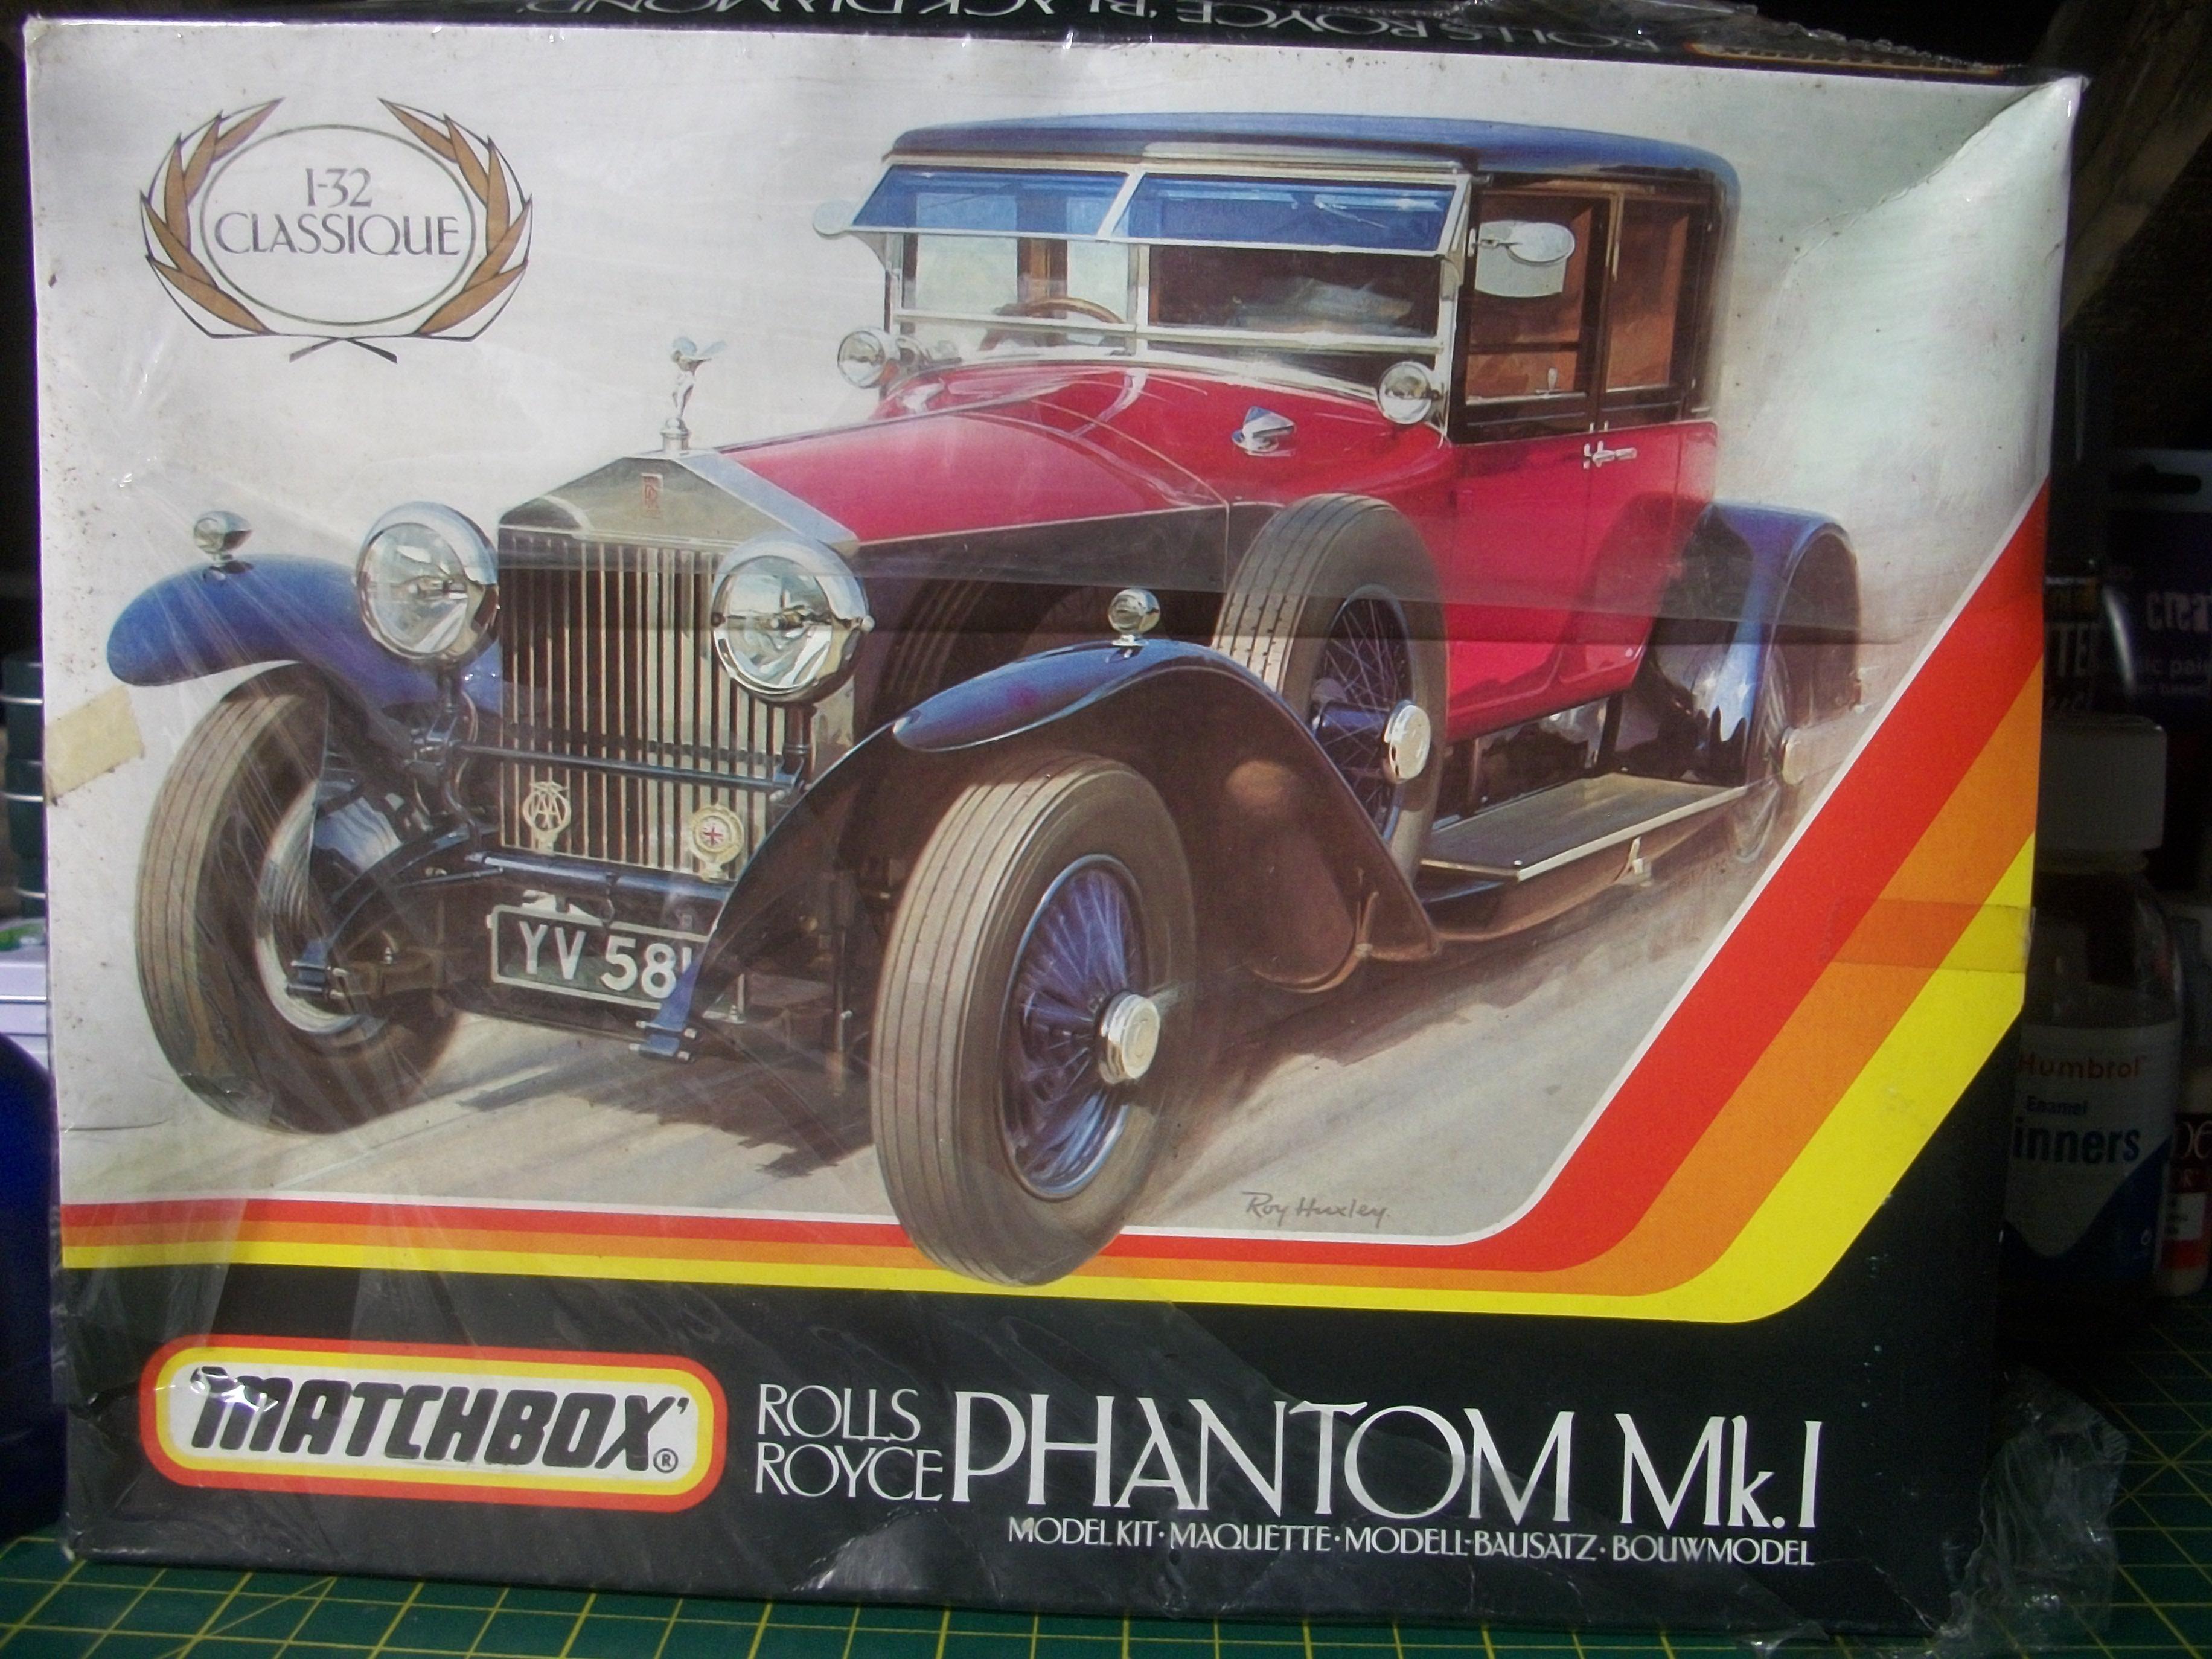
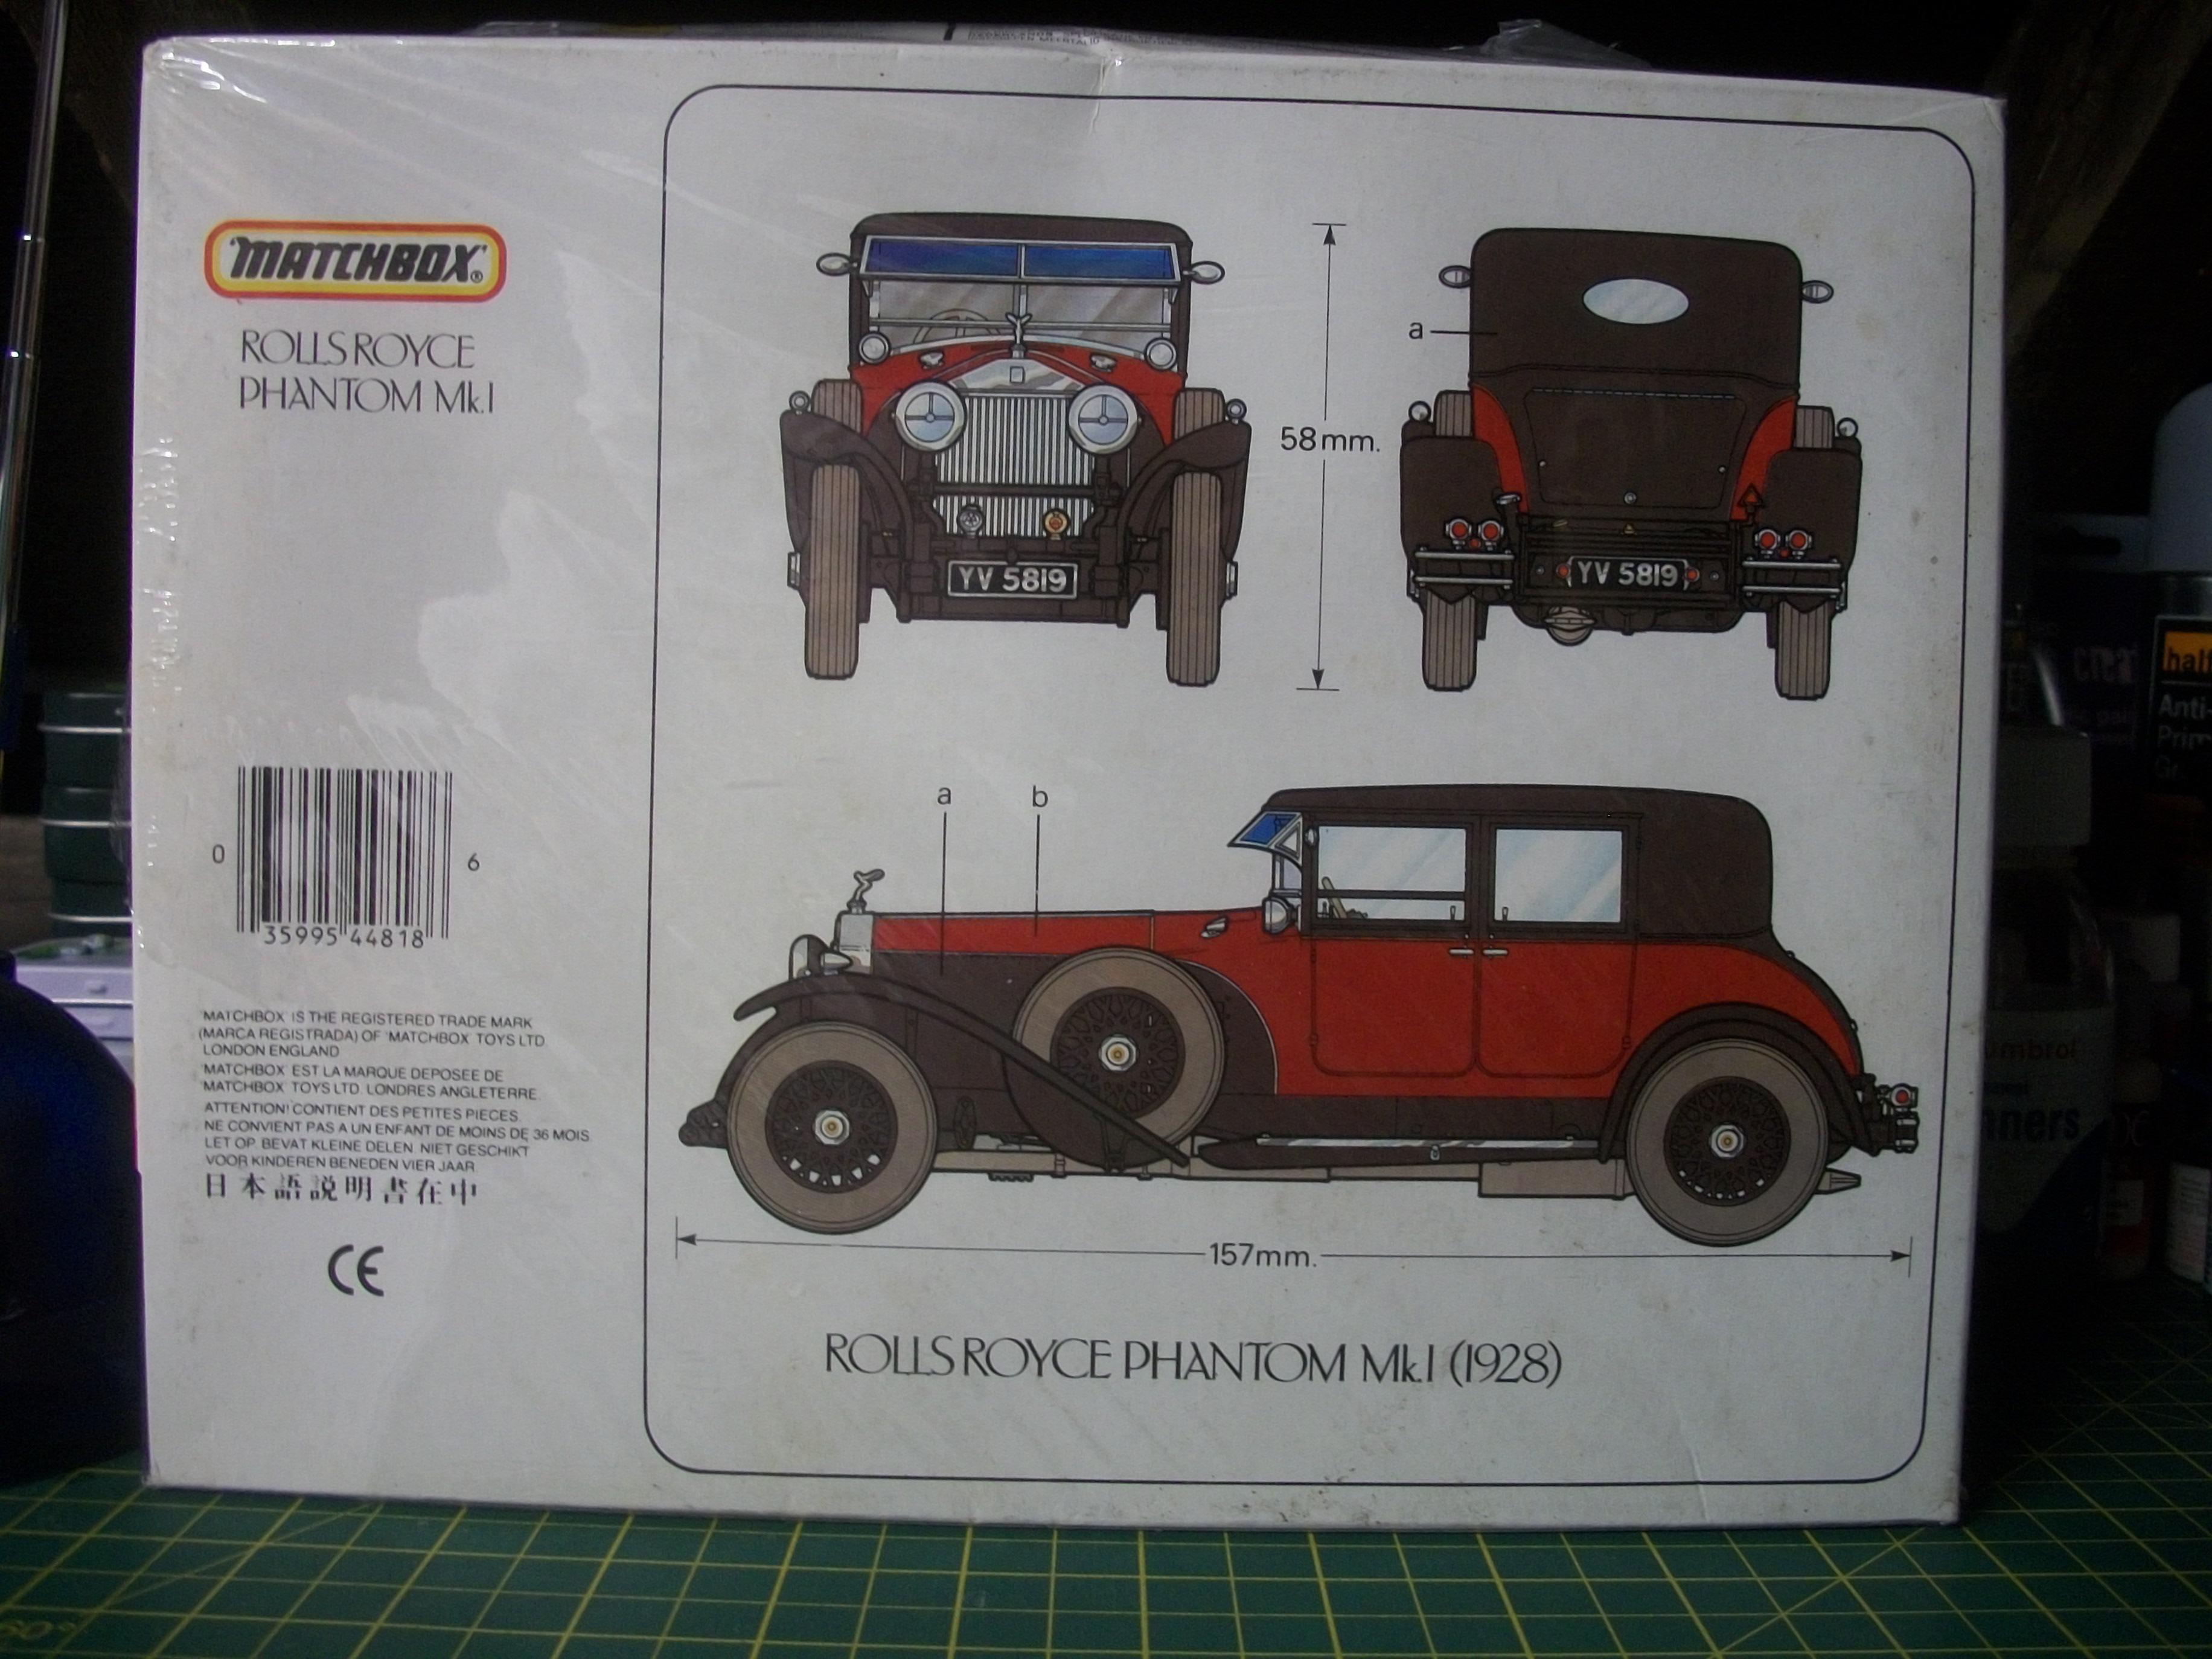
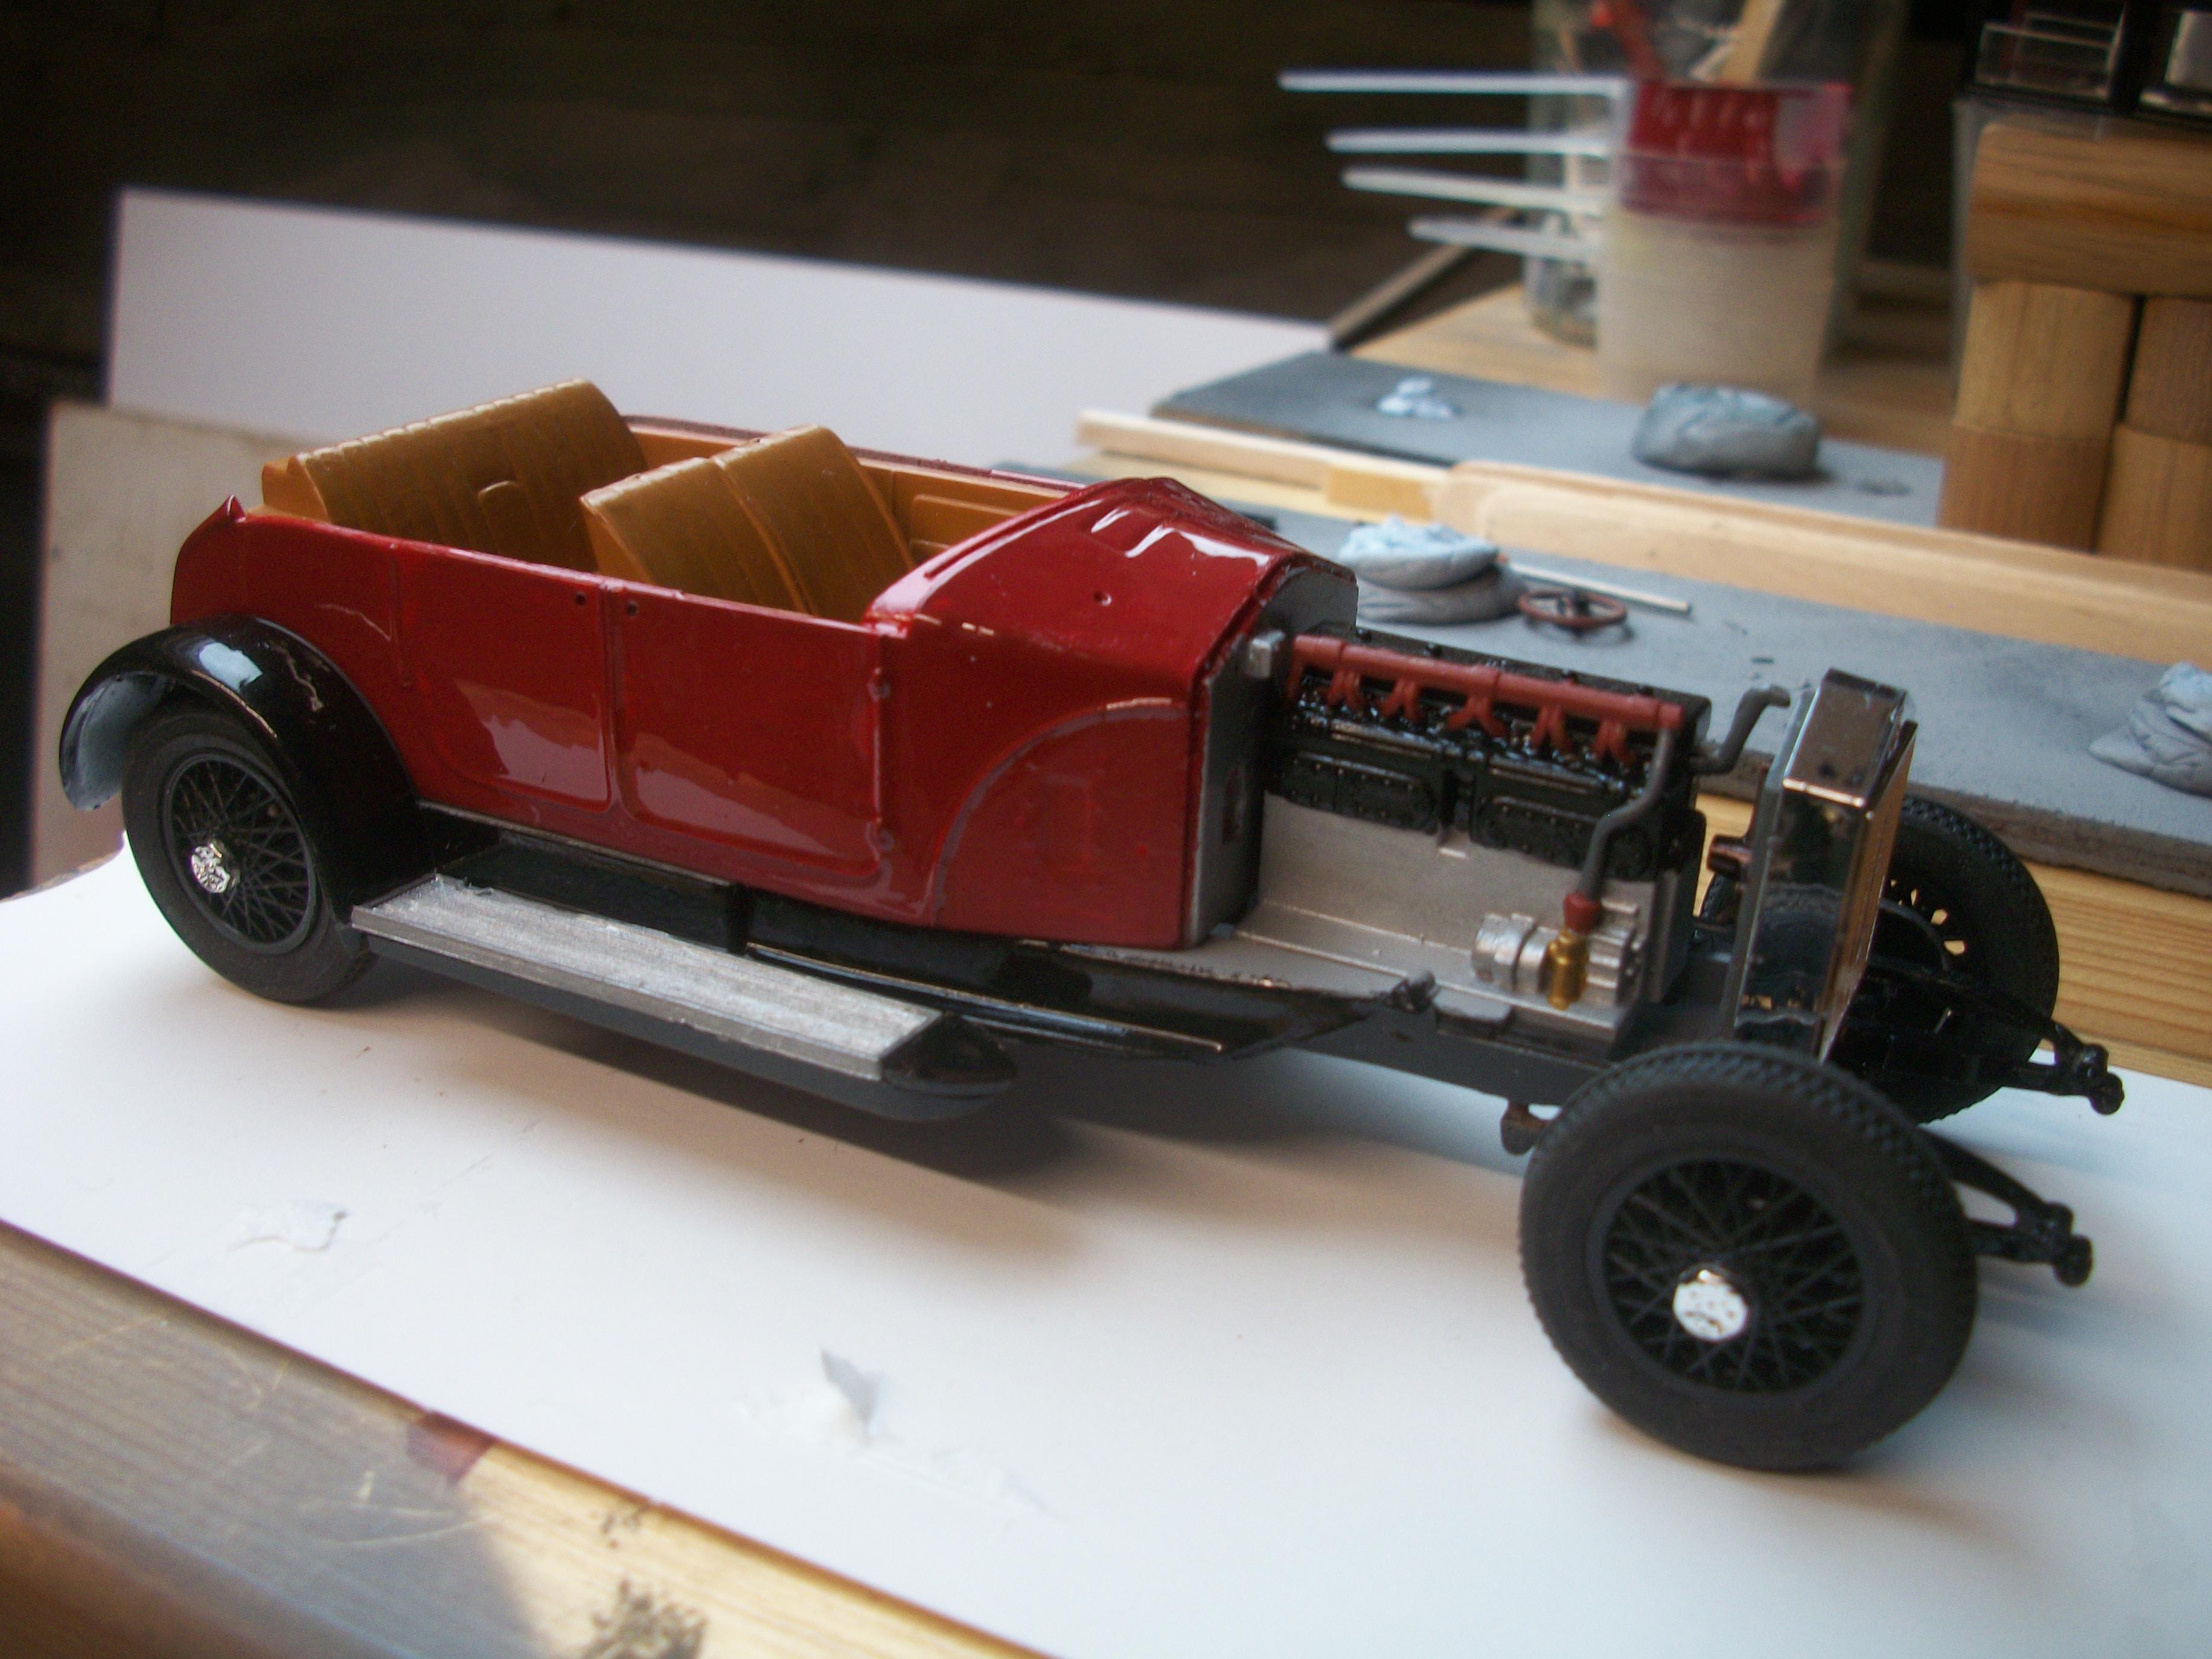
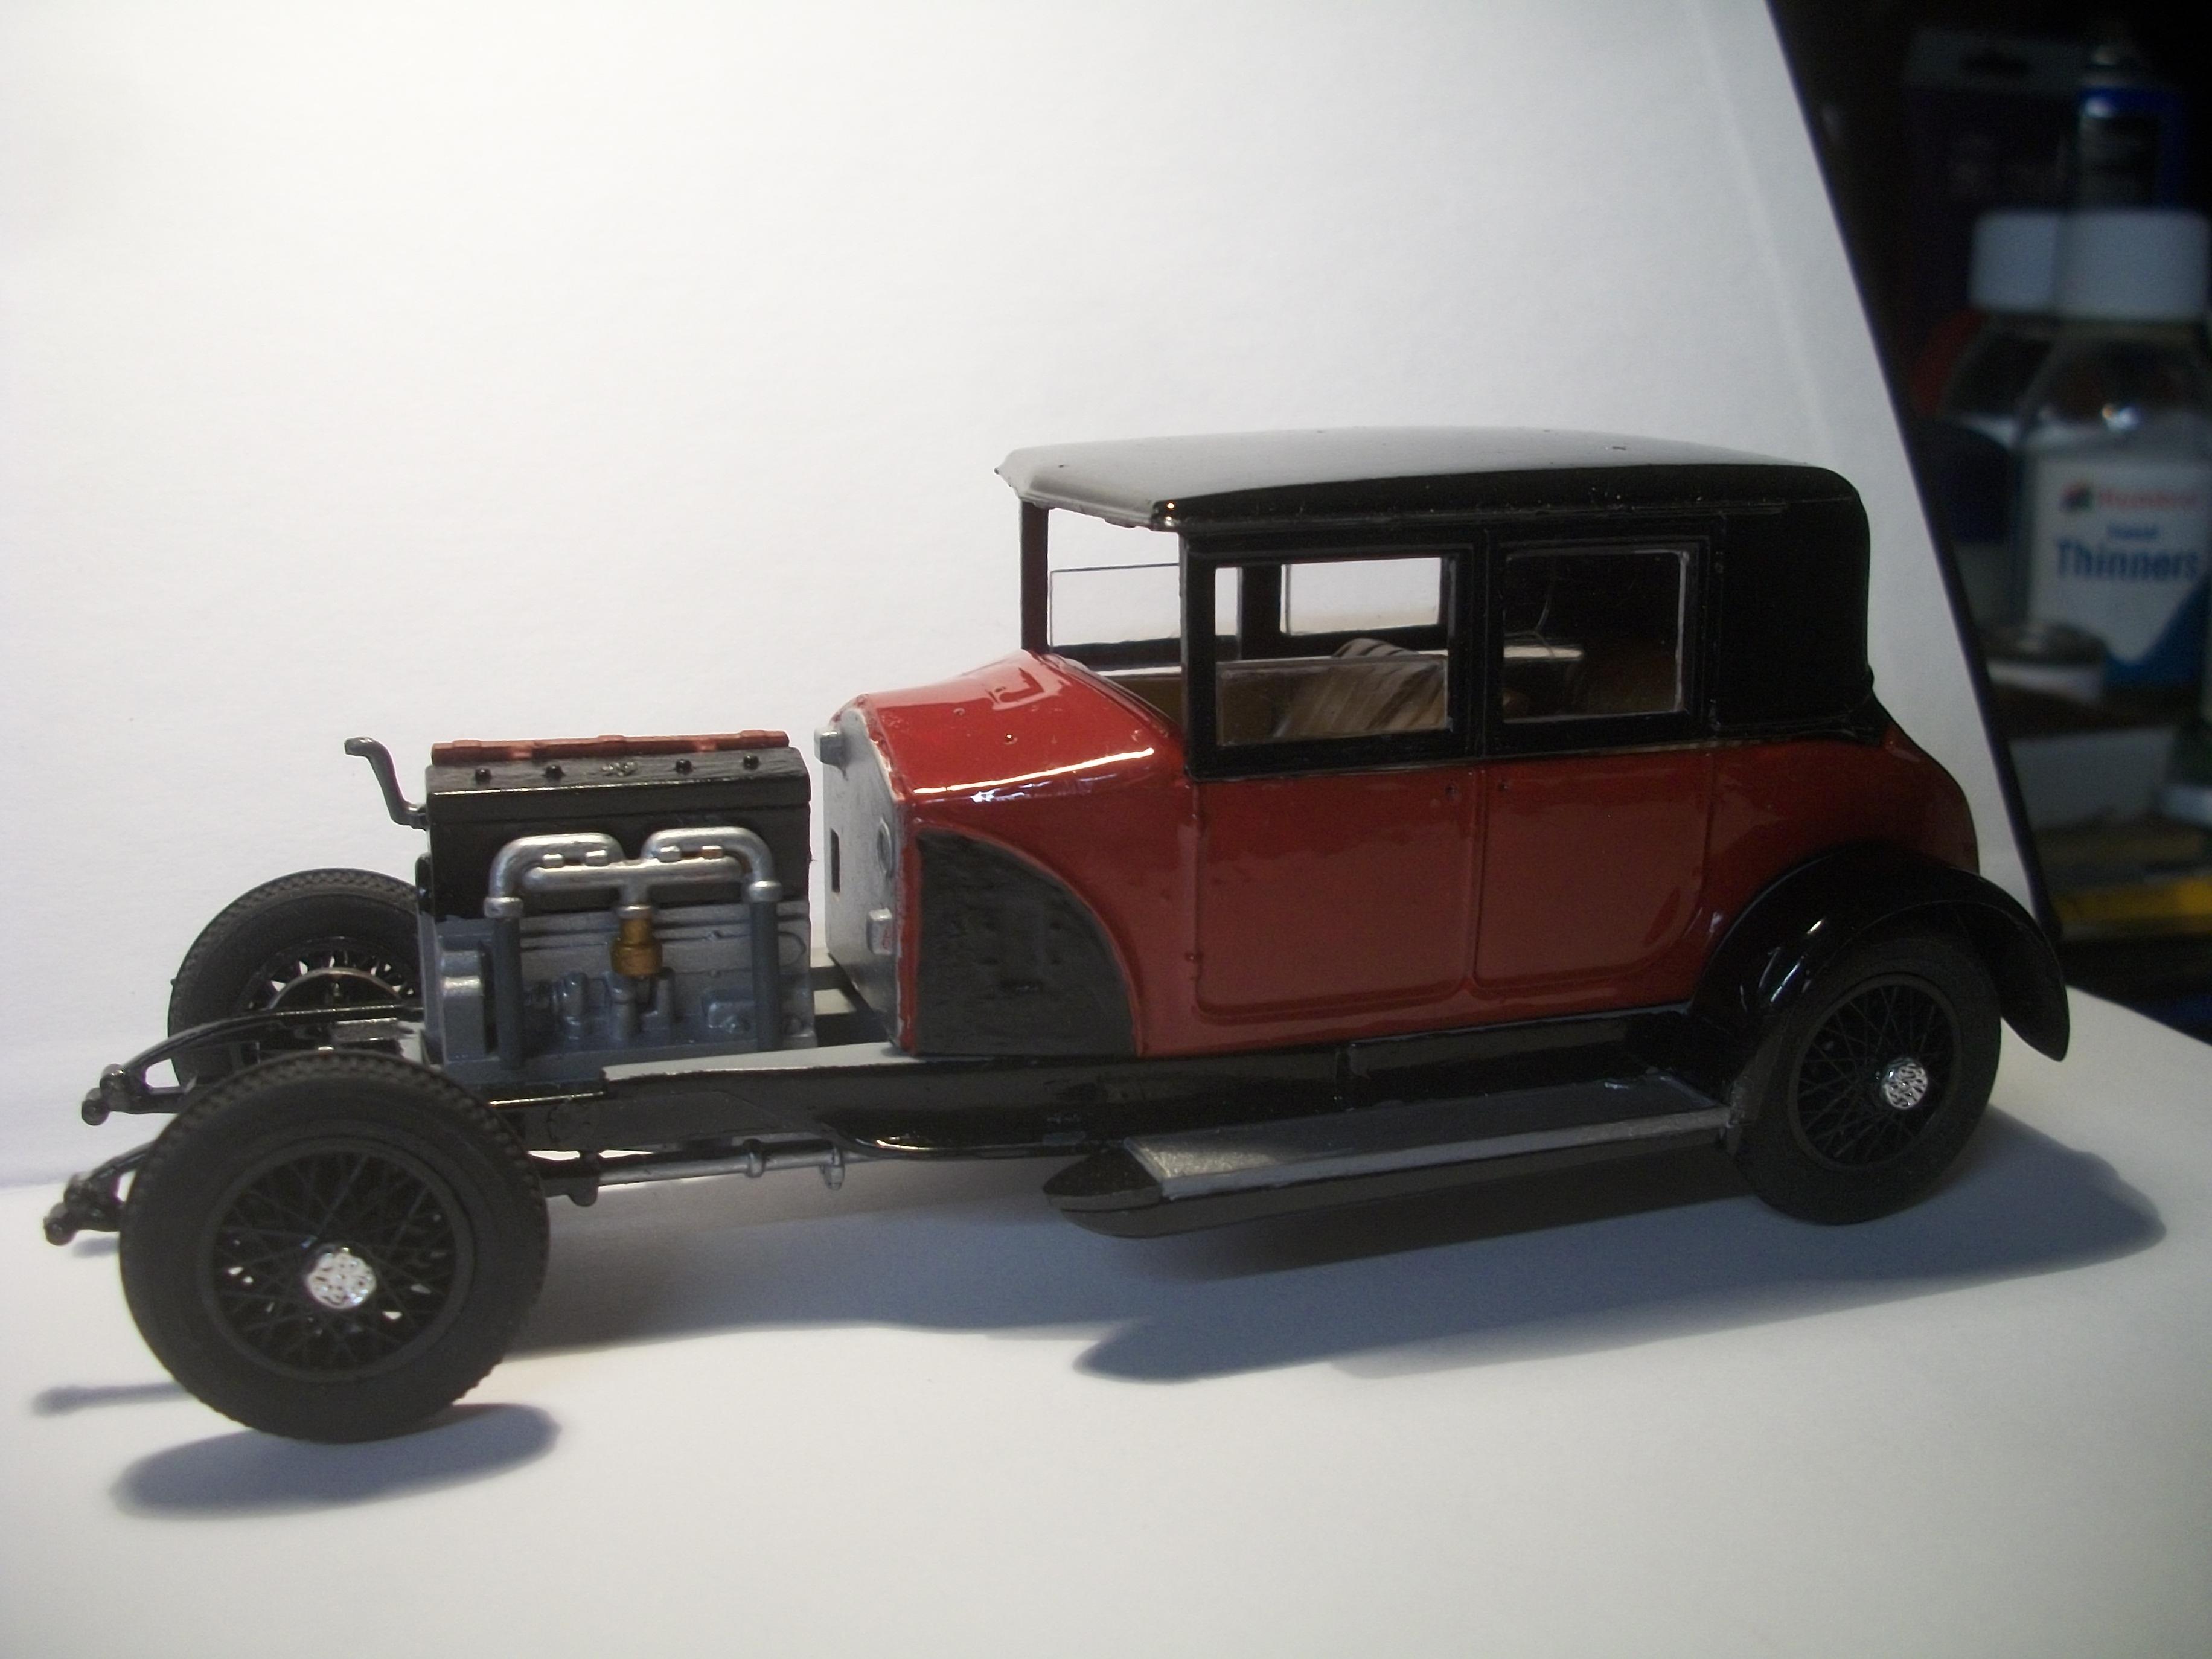
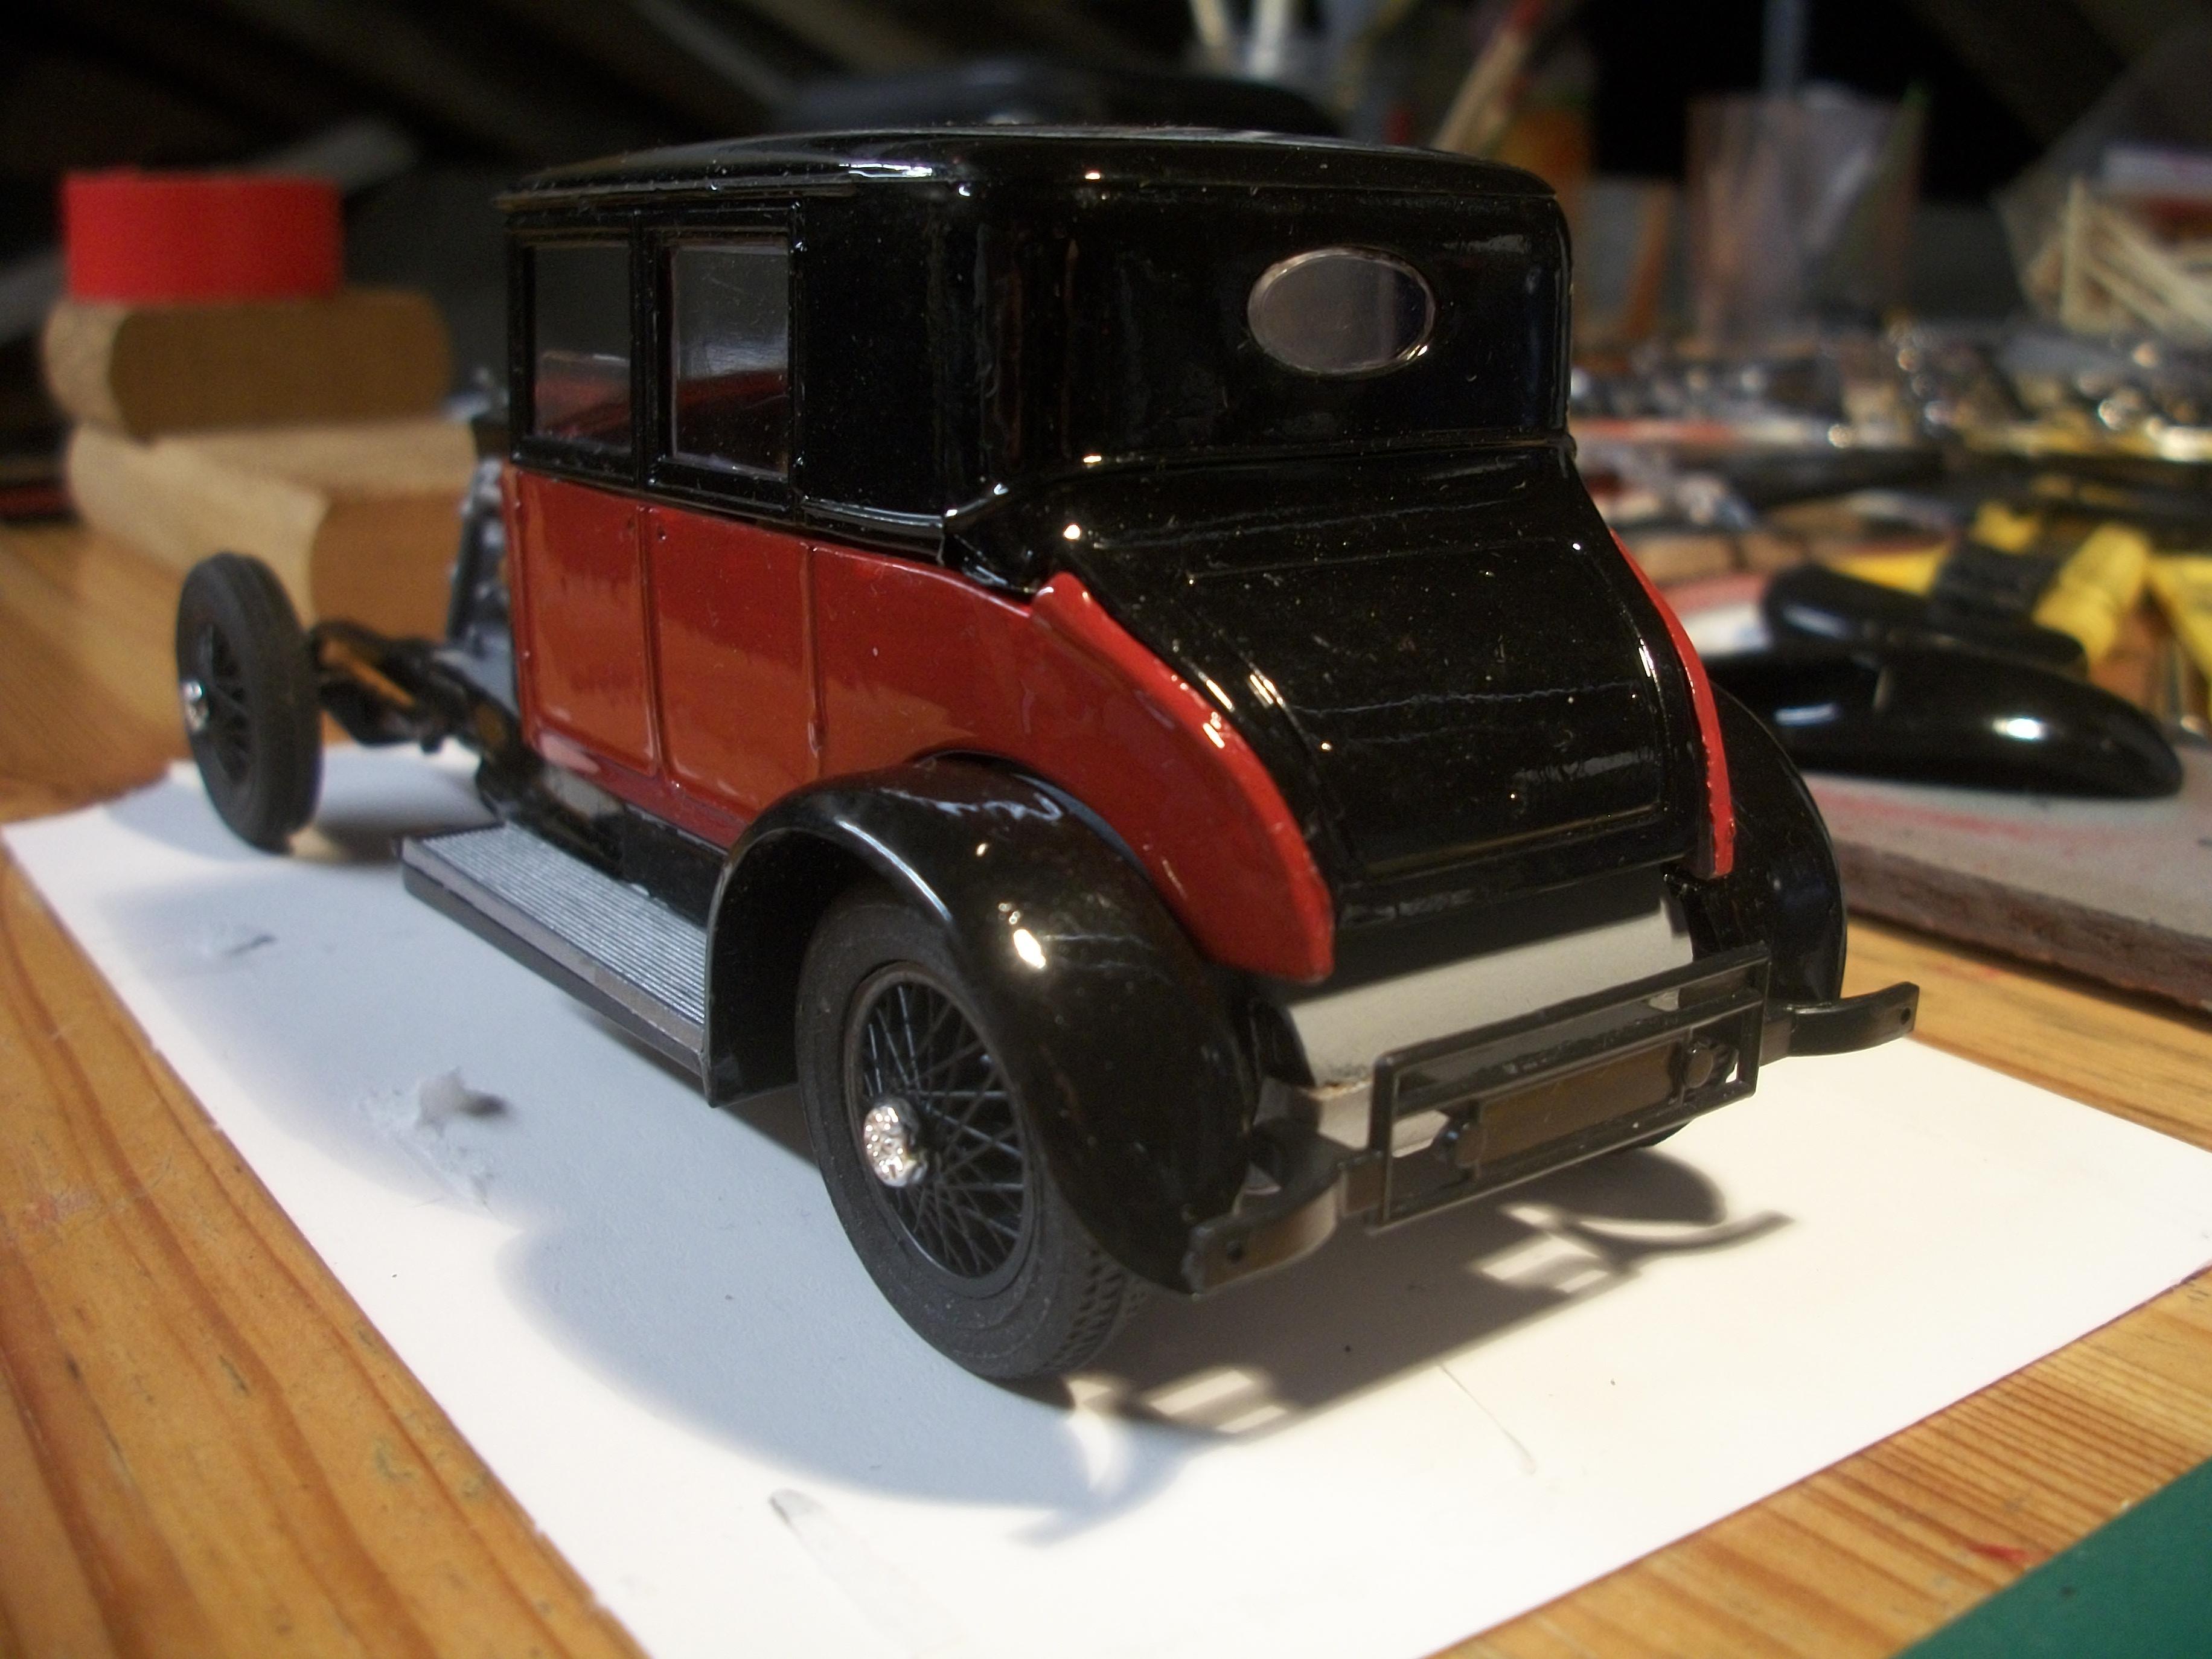
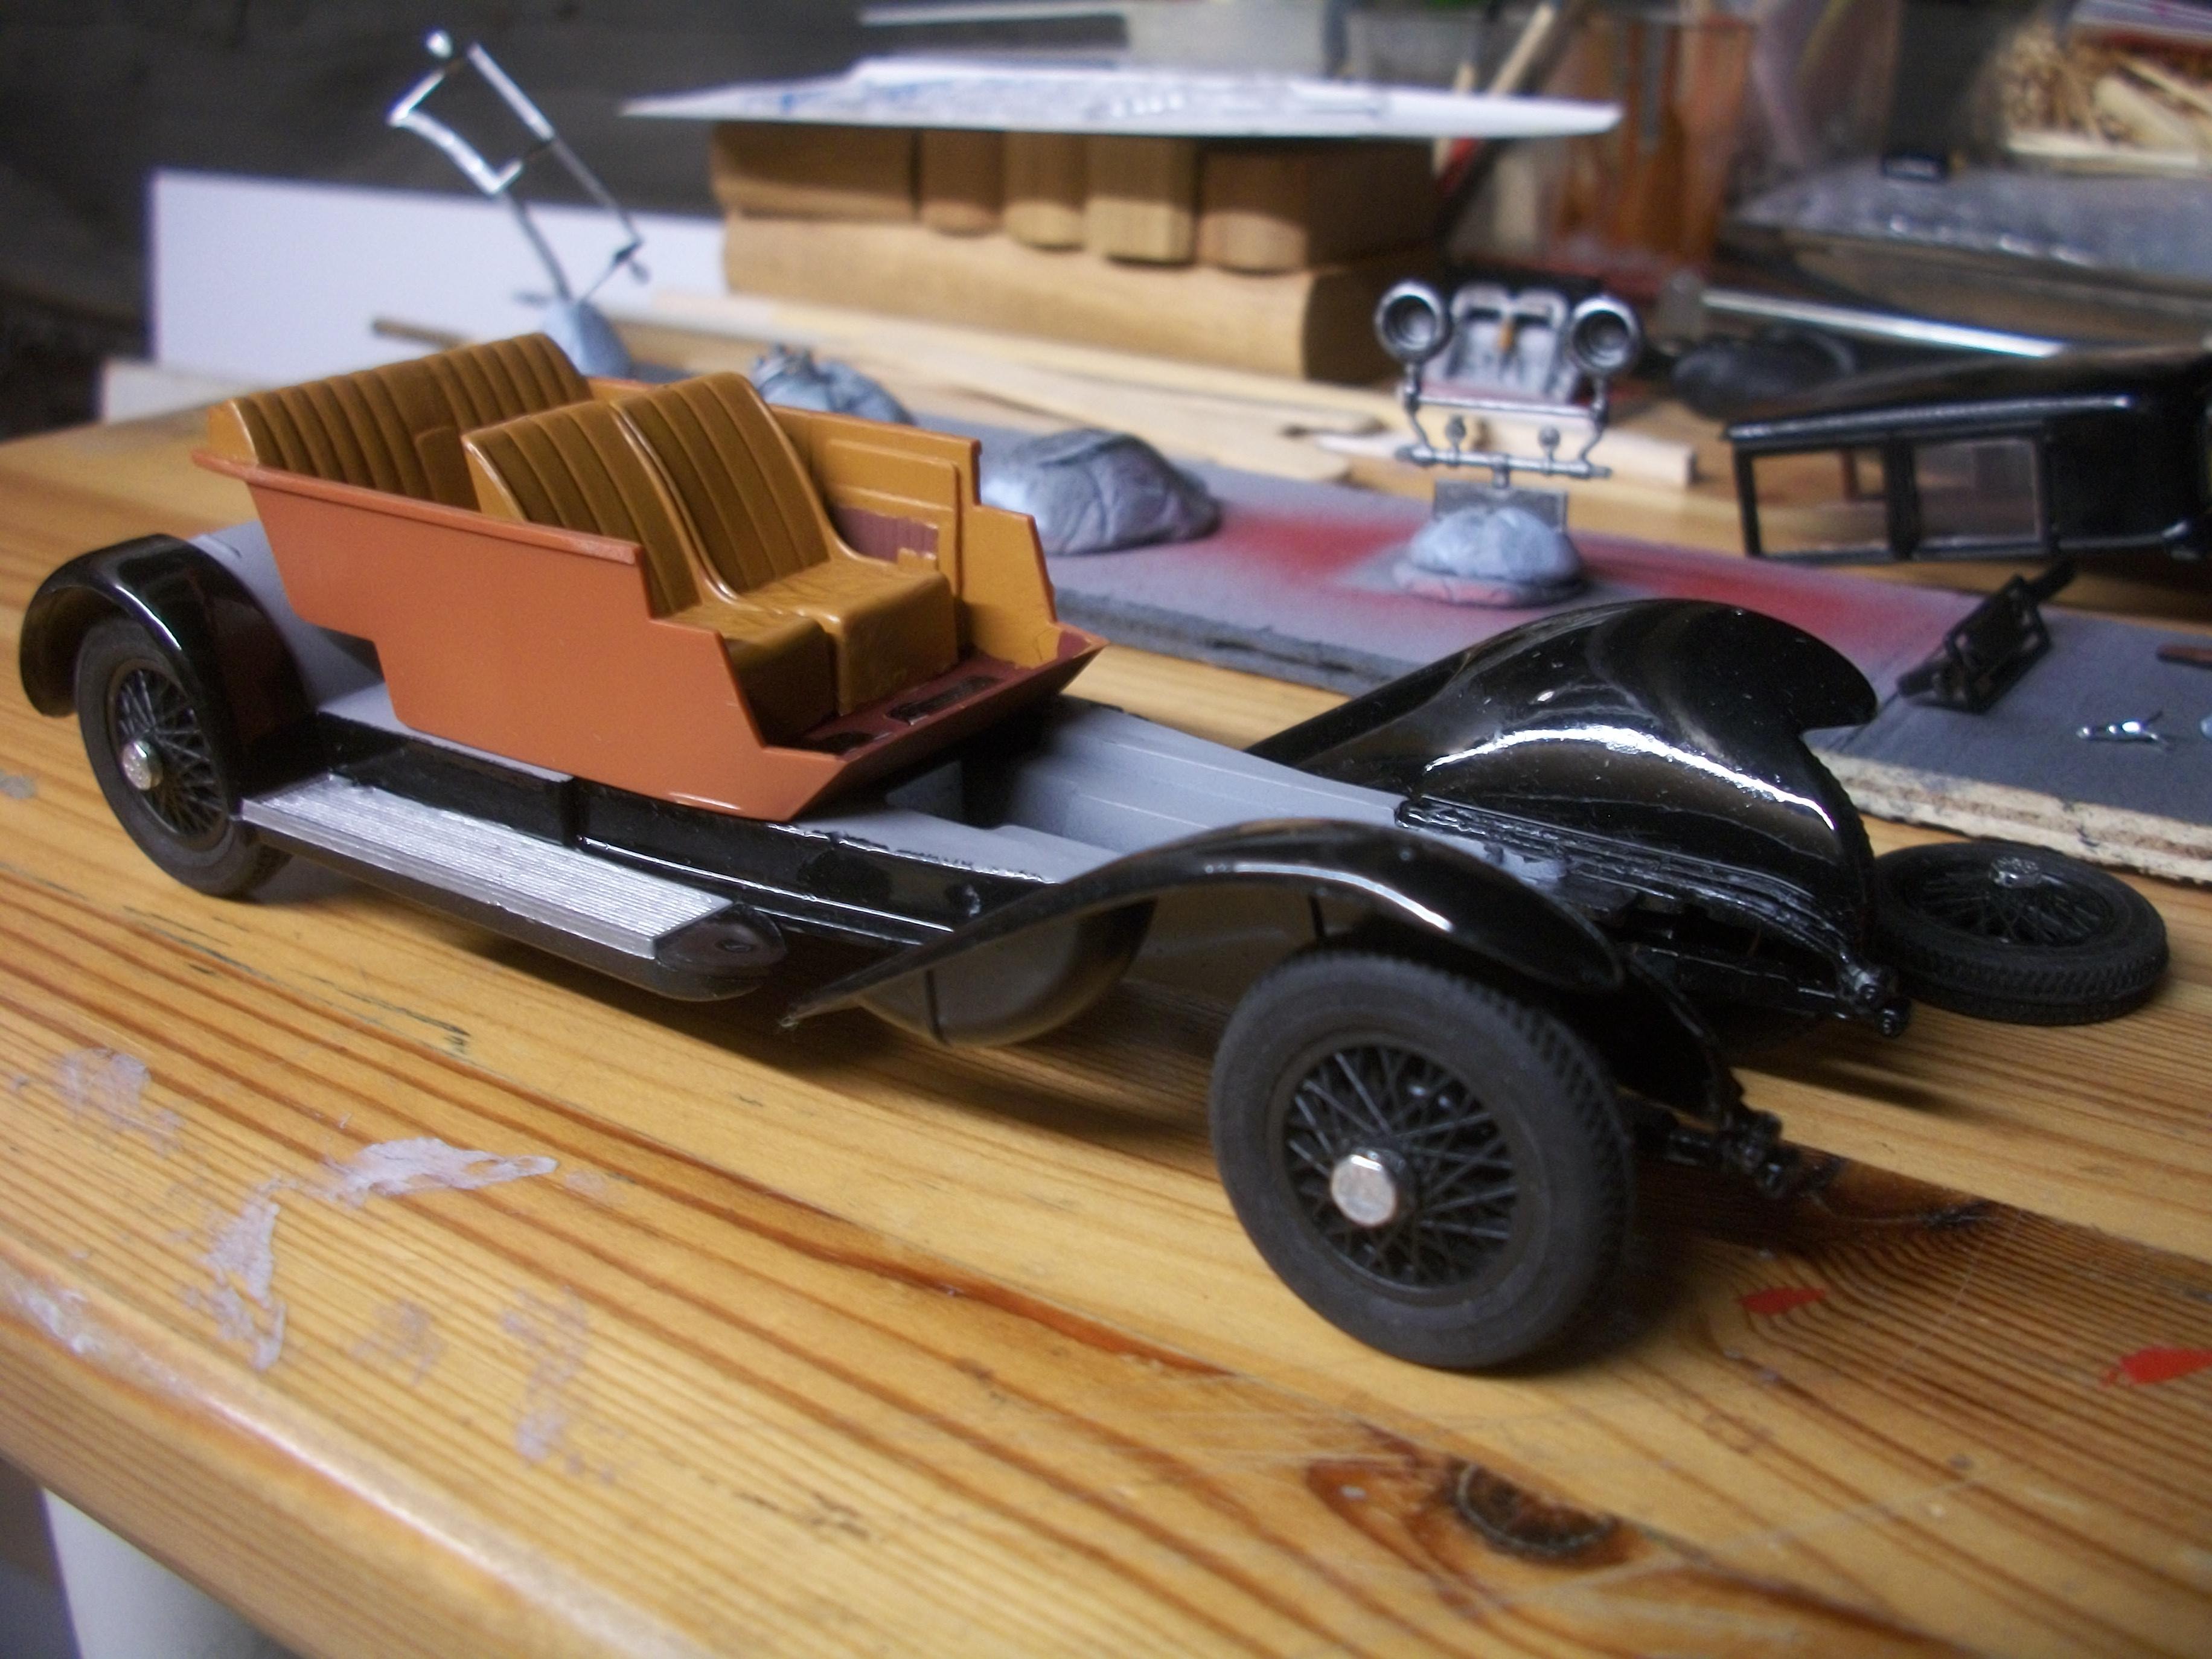
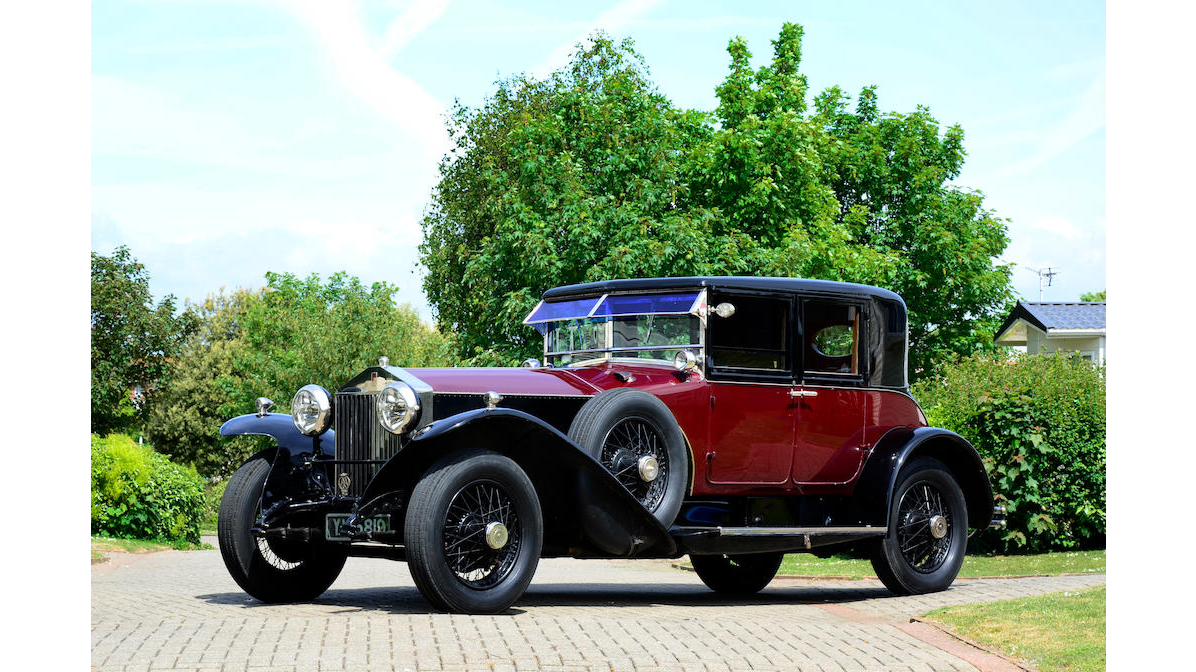
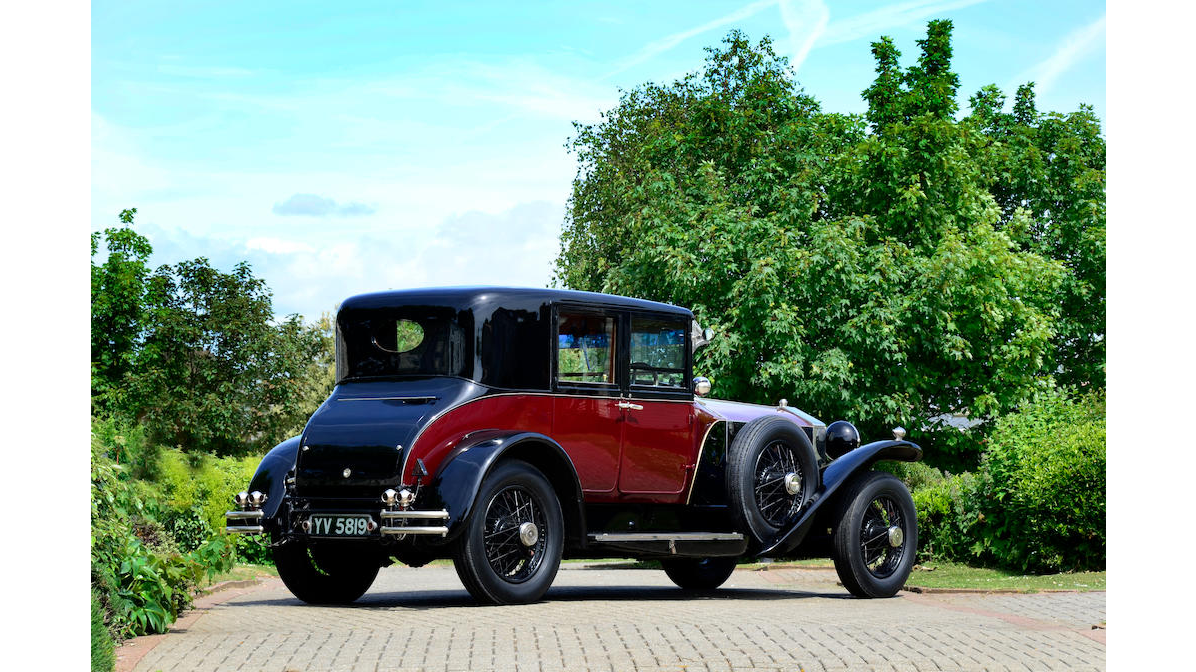
I am beginning to realise that my 1:24 scale building of 54 St James's Street, the Hooper & Co. showrooms, is not actually correct for 1:24 scale....... following some recent re-calculating and head scratching, I am inclined to think that this model is closer to 1:35 scale. With this in mind, I have purchased a 1:32 scale kit of a 1928 Rolls-Royce Phantom I, which was known as the ' Black Diamond ', and the real car was owned by Otto Oppenheimer who was a diamond magnate. This particular kit is by Matchbox, and there is a Revell version of the same kit. Once this model car is built and painted, I am hoping to be able to establish the true scale of the Hooper building. It was an old photograph that set me thinking, because the motor car in the photo appeared to be much smaller than a 1:24 model would be, in relation to the building itself. Here are some photos showing the build of the Rolls-Royce in 1:32 scale, and much of the work is now done. I have ordered two 3D printed figures from Shapeways in the same scale, which should also help with the proportions of the diorama scene. David
-
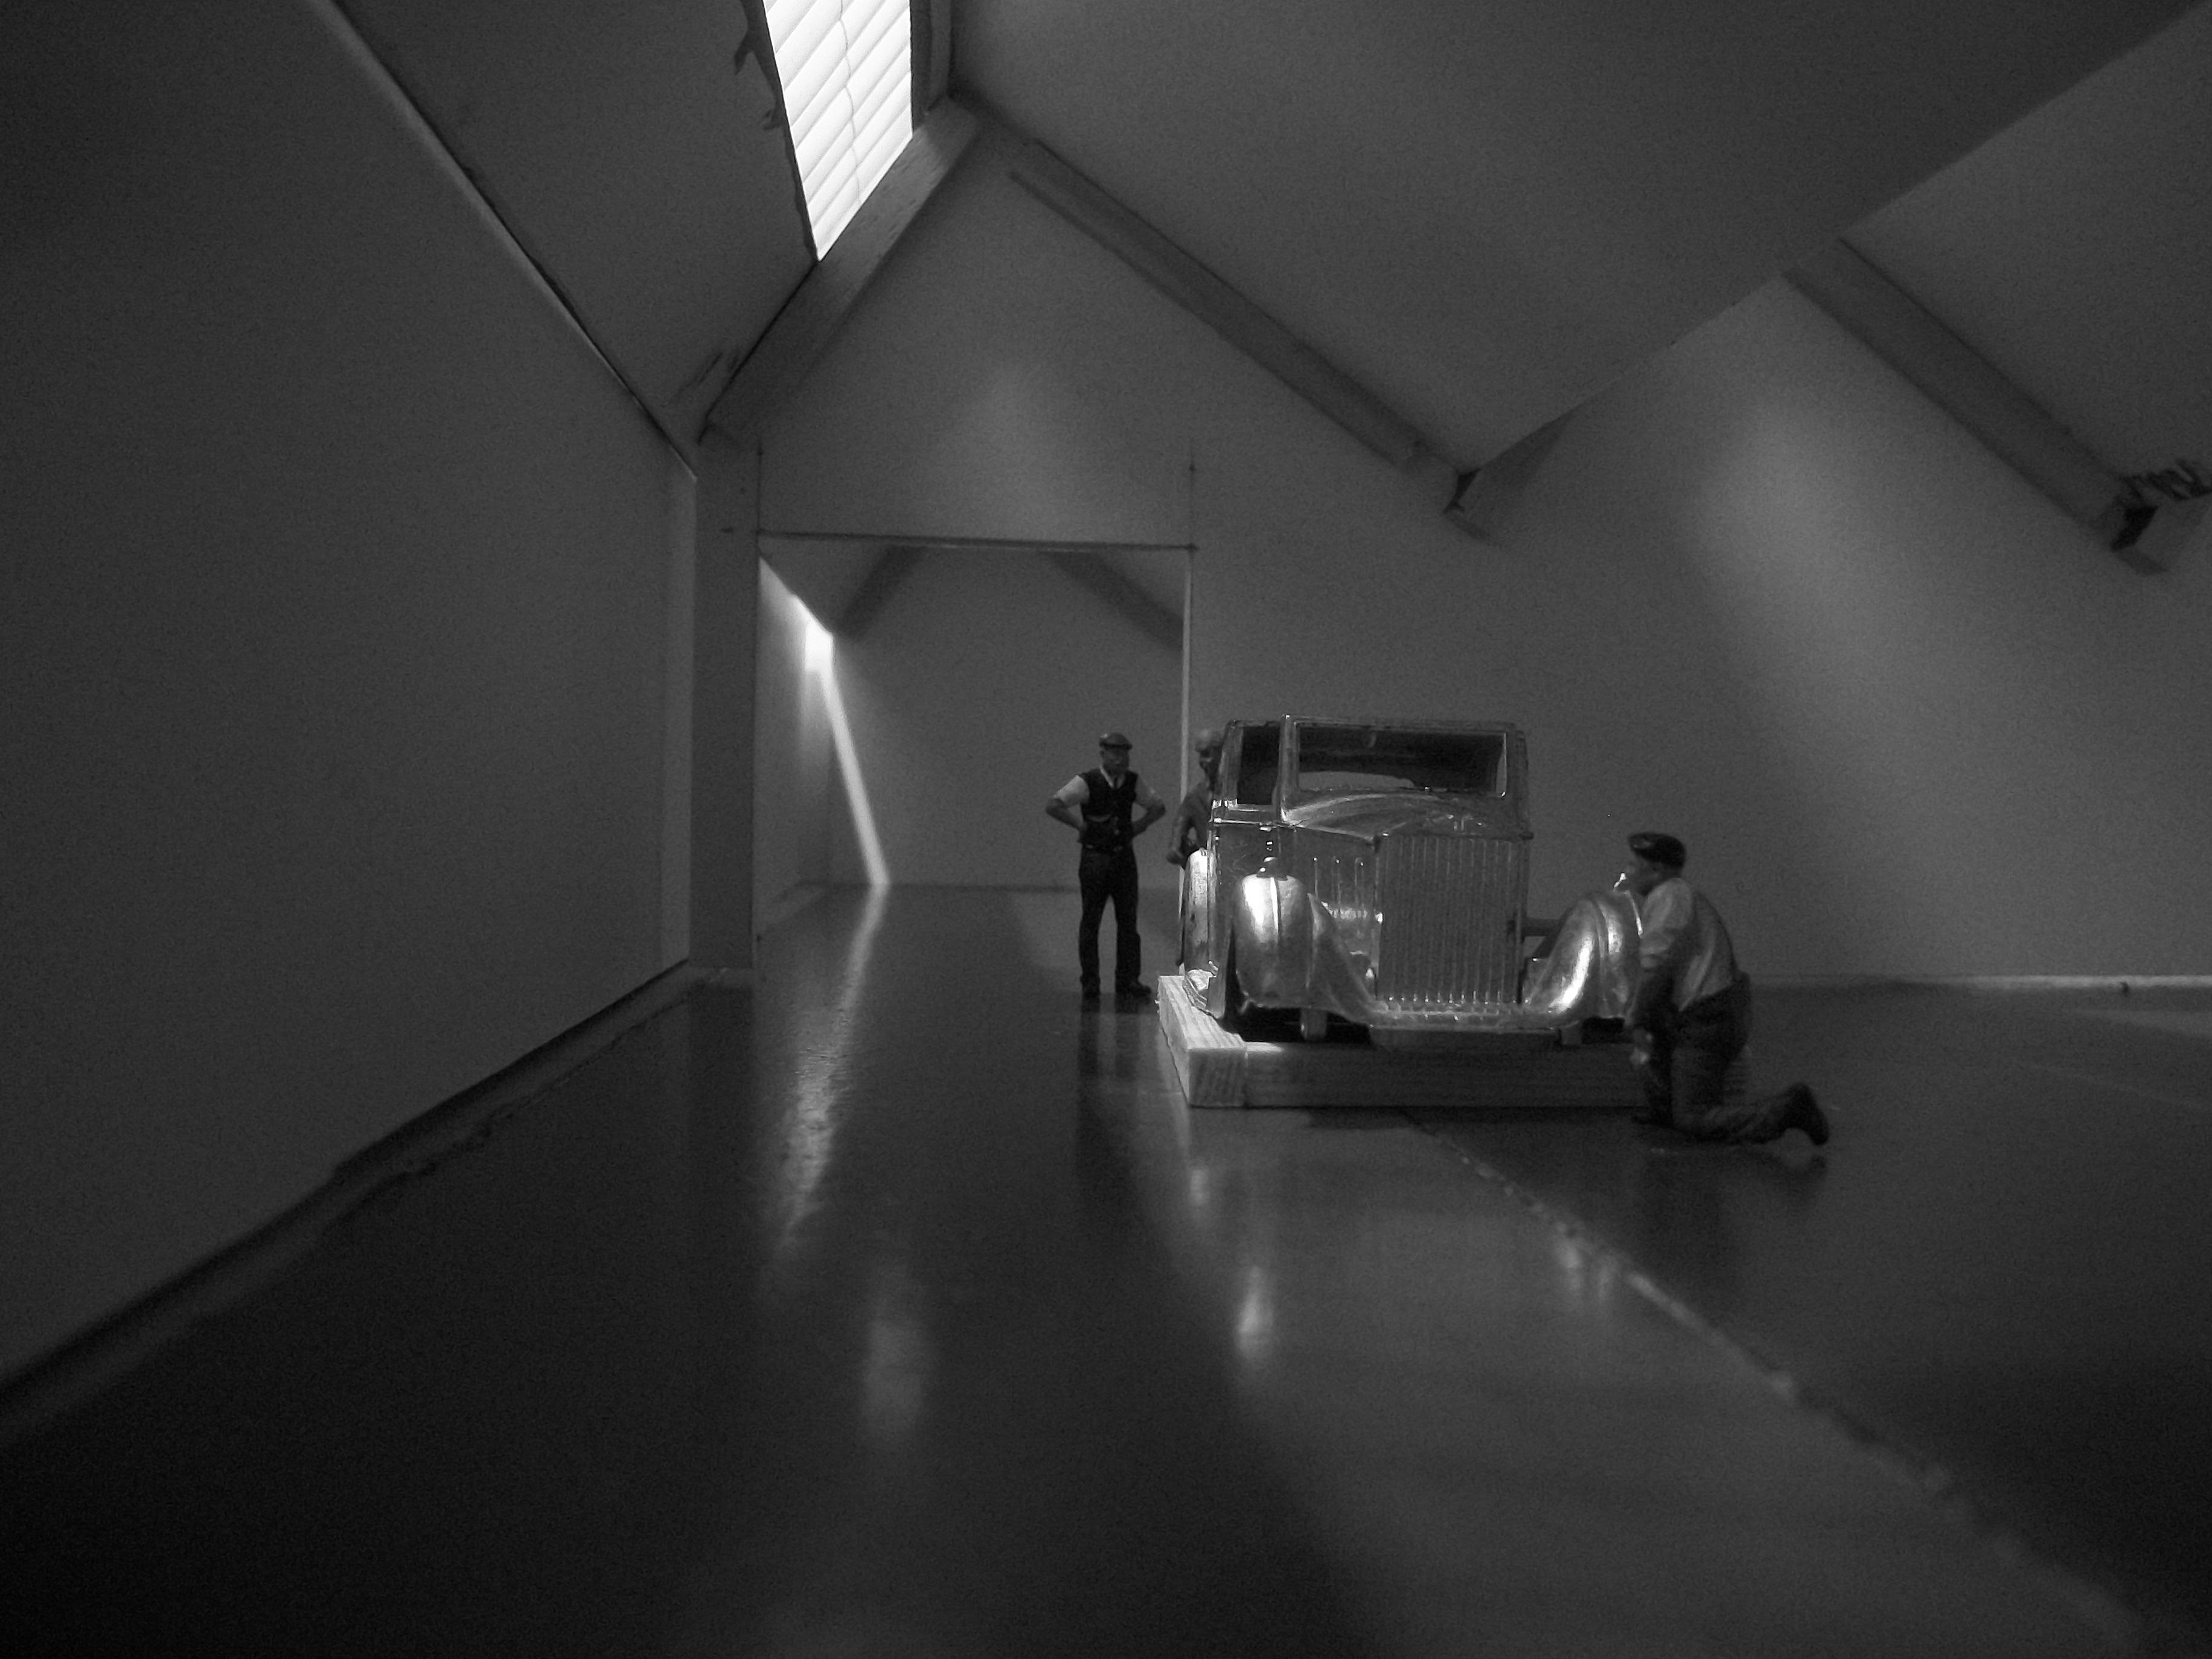
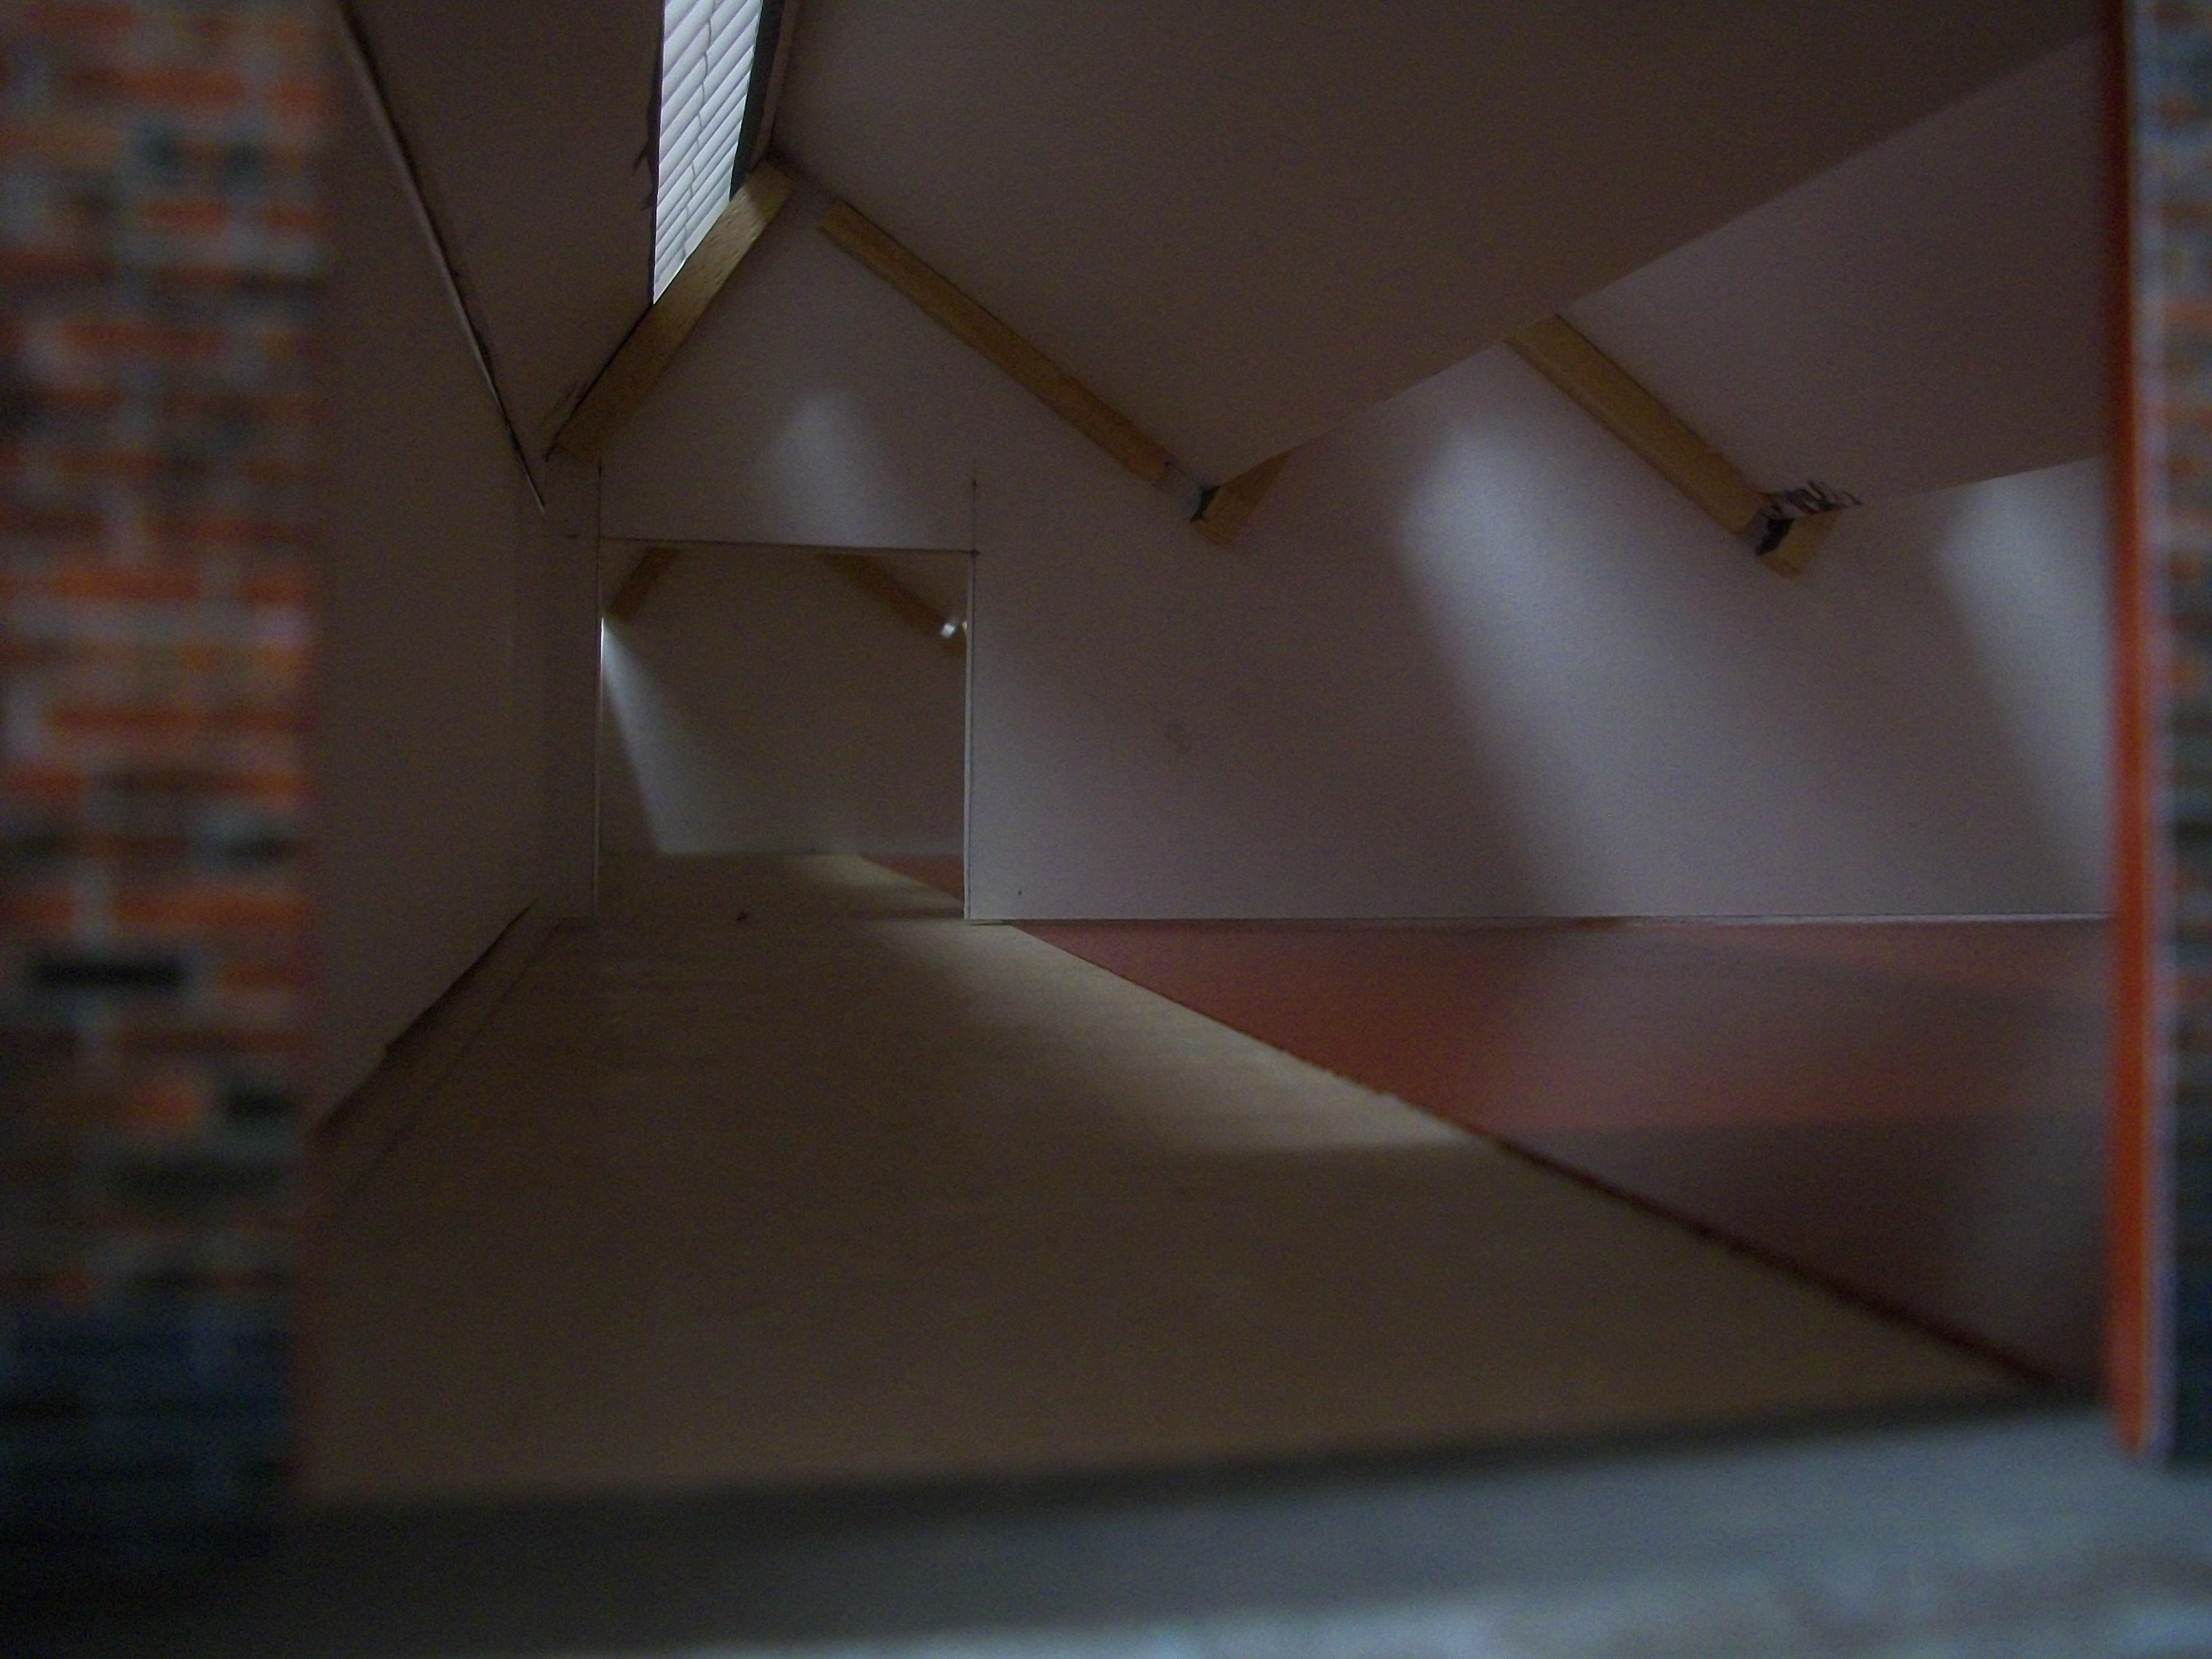
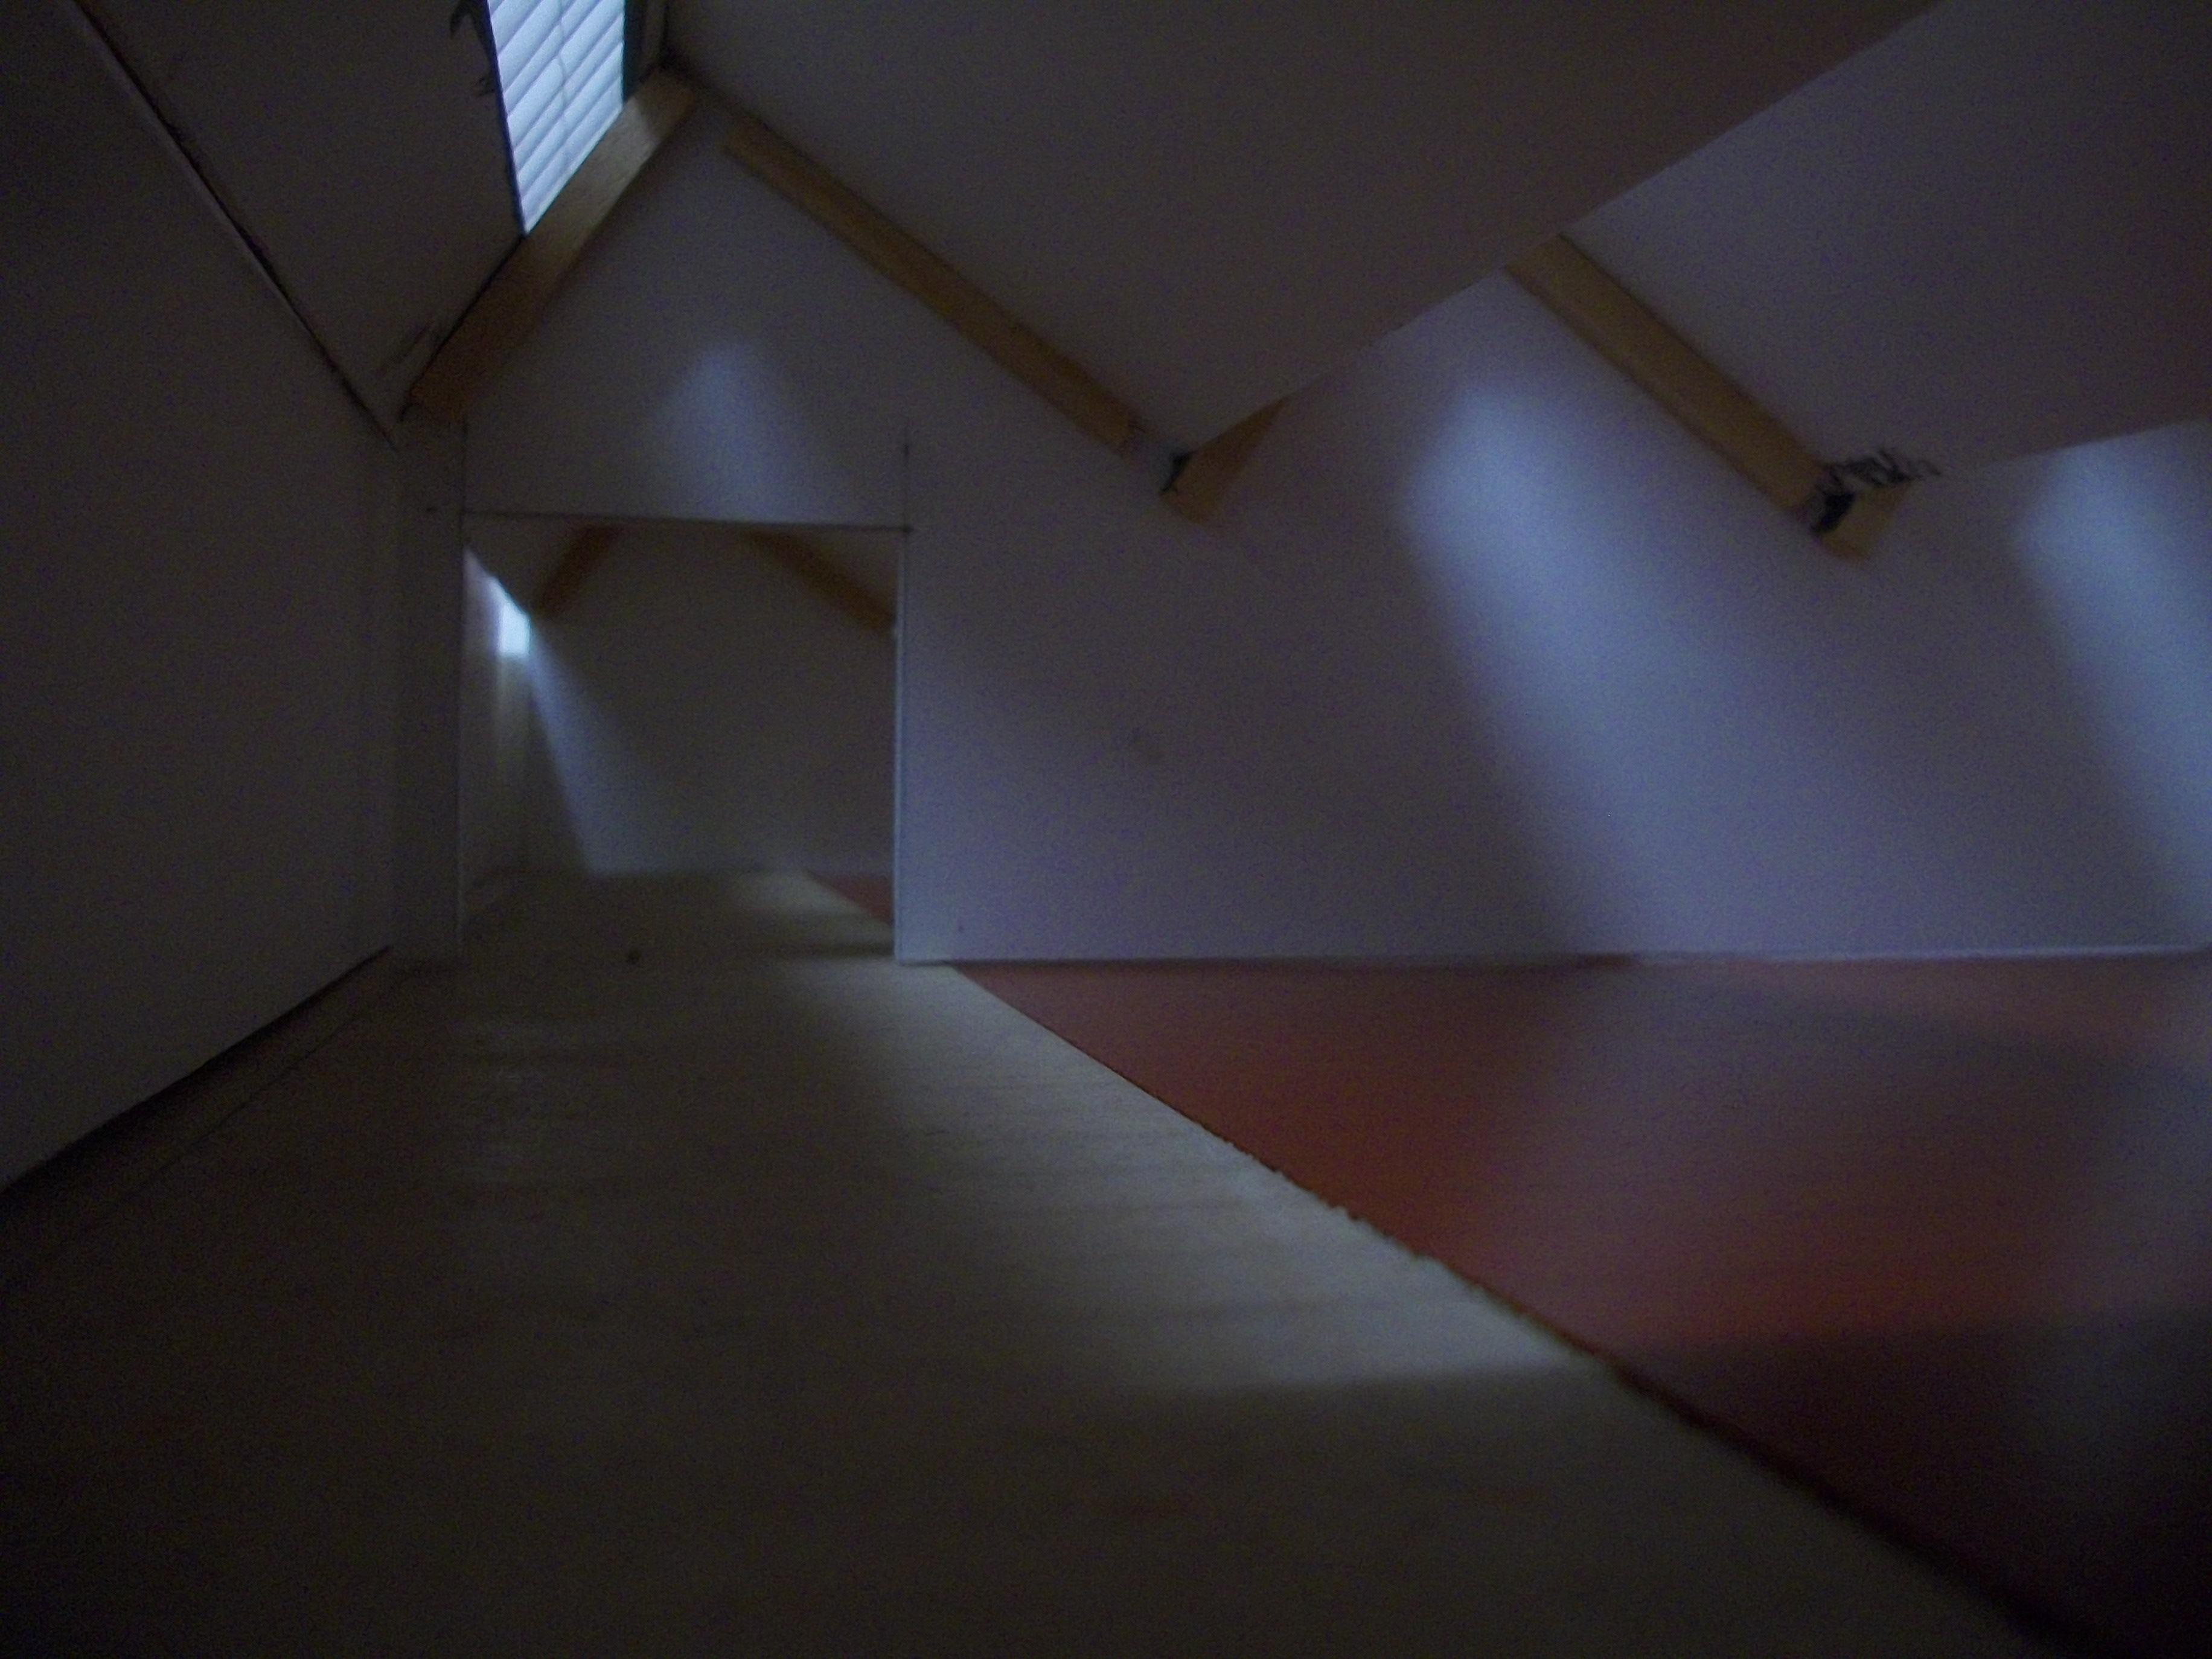
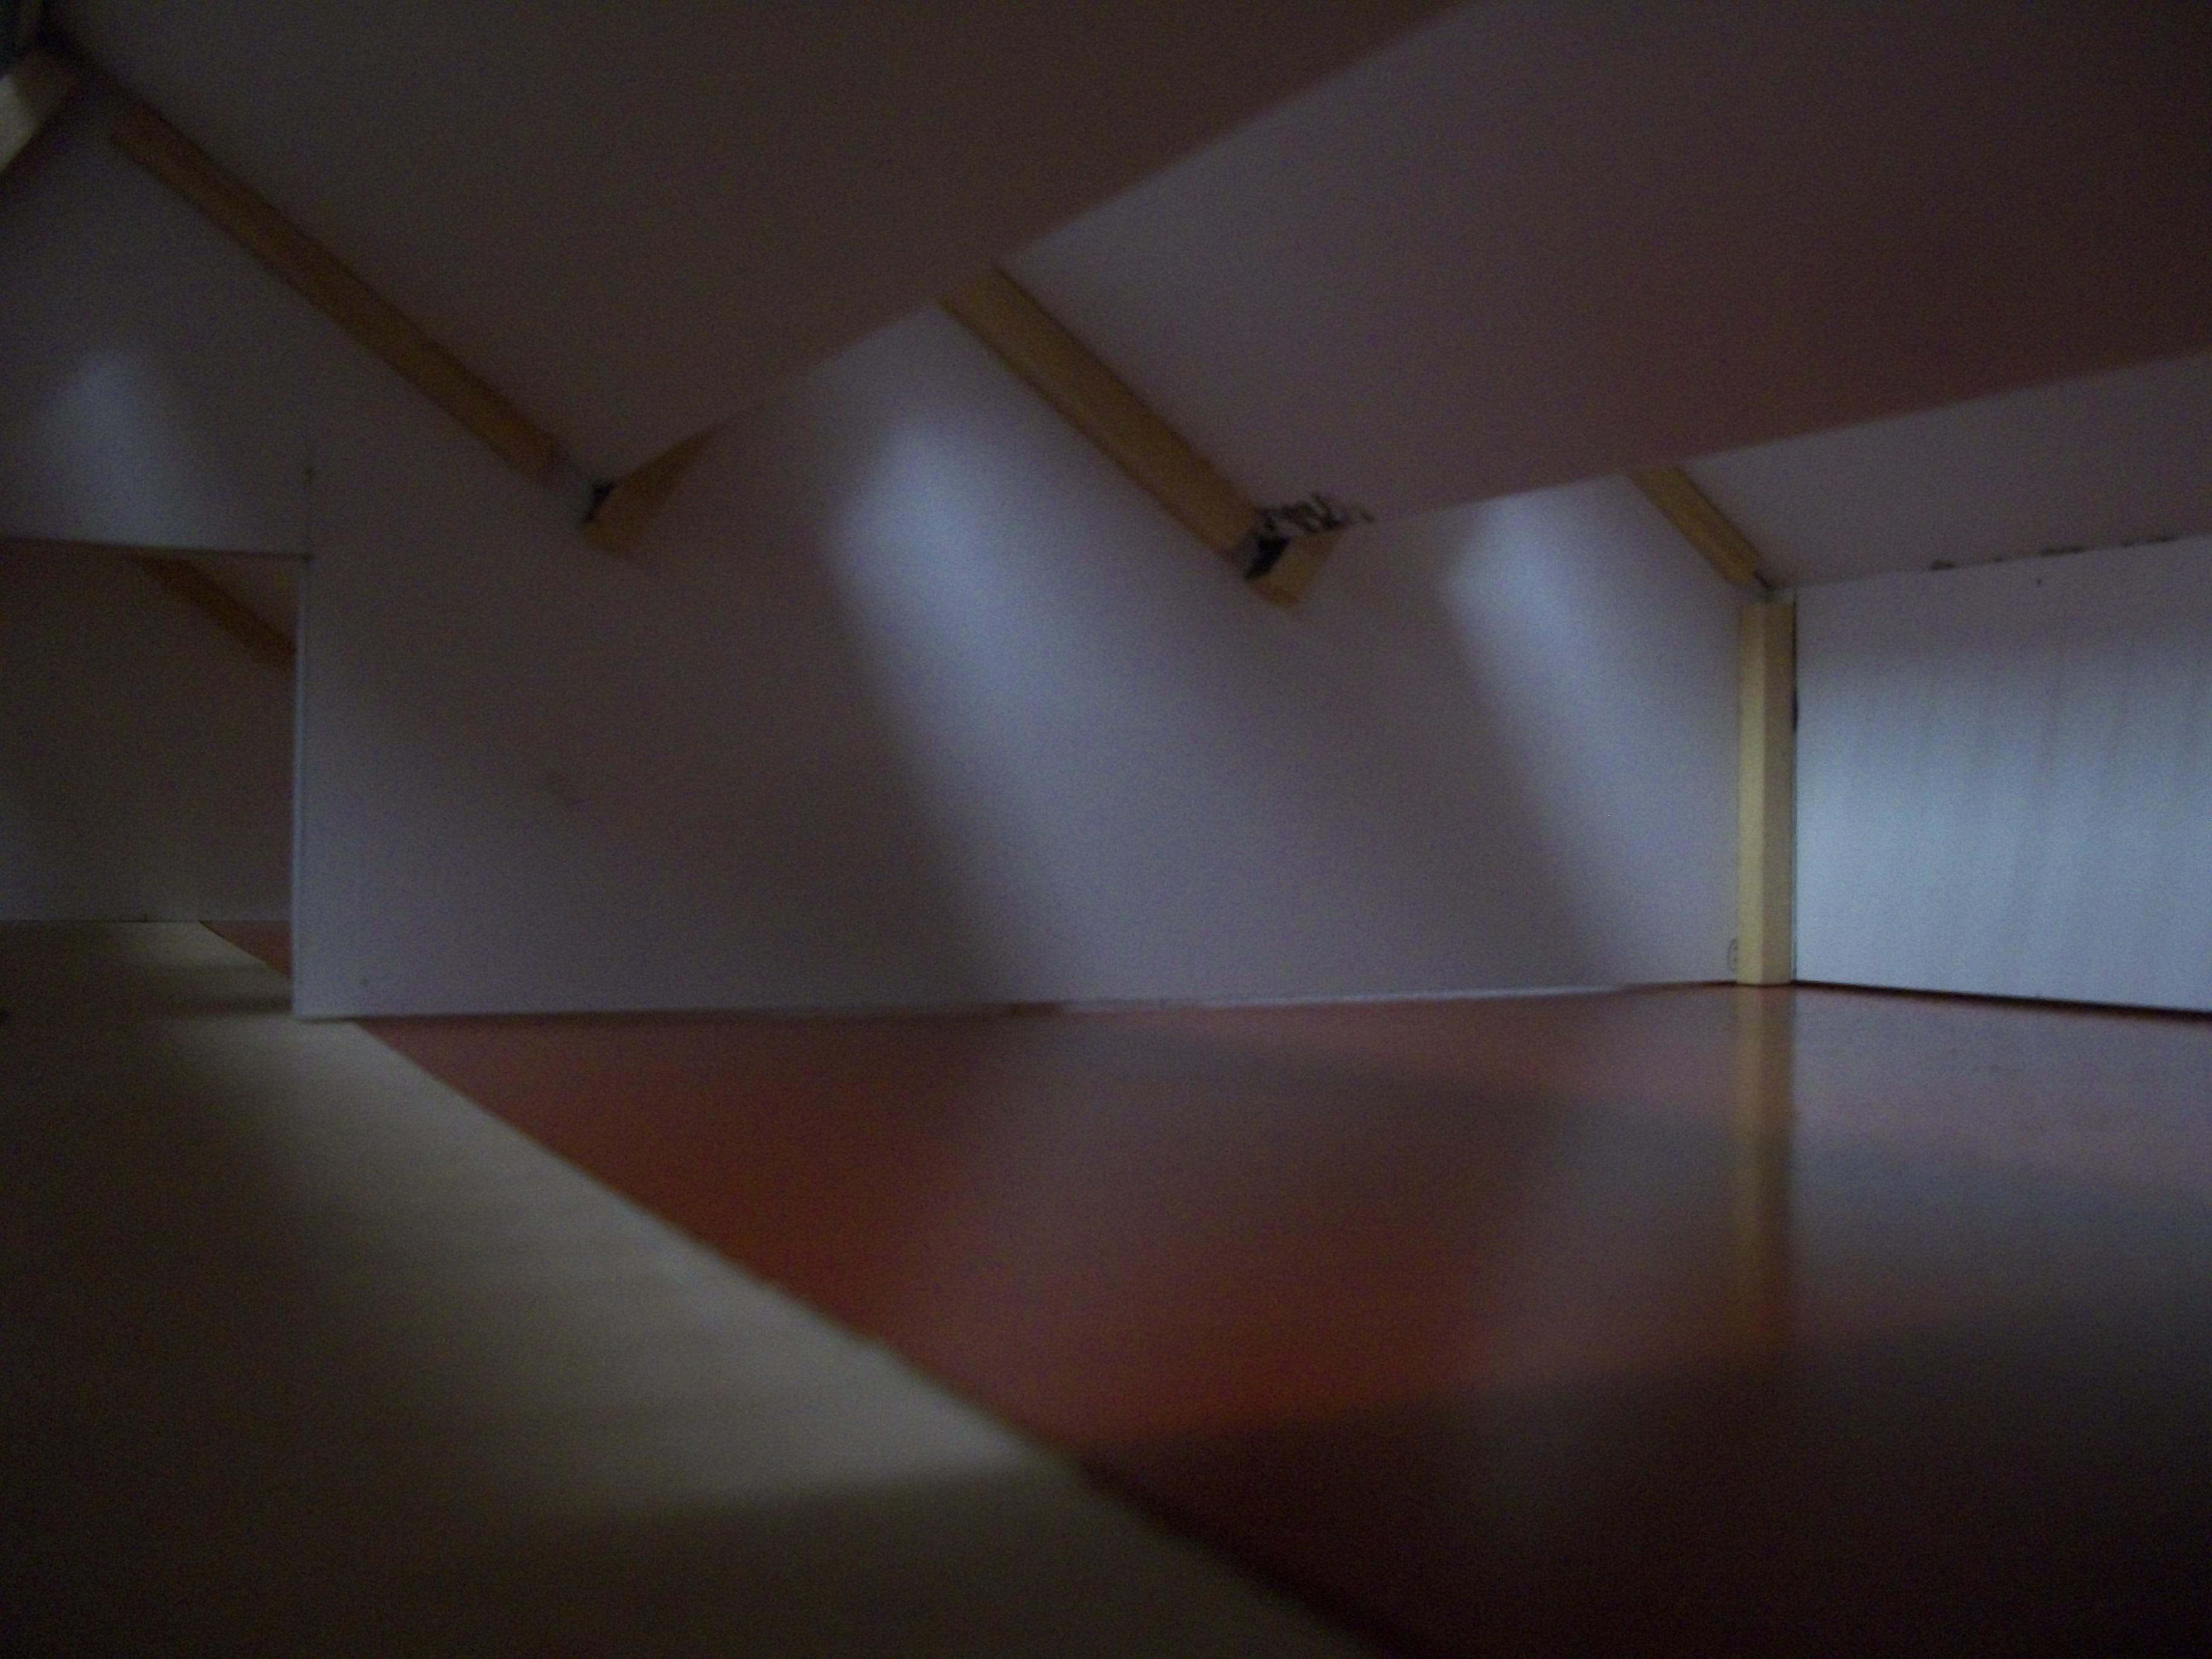
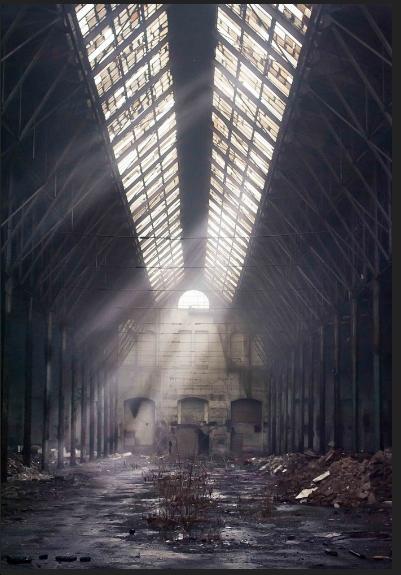
The lighting ' gantry ' is set up on the forecourt of the Hooper & Co. factory, and this provides overhead lighting from the 100 watt daylight bulb. Here are a couple of shots that were taken as I experiment with the incoming light through the roof skylights, using a white metal 1938 Rolls-Royce Phantom III body and several figures, all in 1:43 scale. Earlier shots proved to be a little on the dark side, so I switched on the fluorescent tube light as well as the daylight bulb. The real factory would have had some basic lighting, positioned over the work area, but generally these factories were dark and gloomy. David
-
Thanks, Don...... I like the car, but I am not so keen on the colour.......... I have seen other Daimler Double Six models on Ebay in black, which seems to suit this car better. David
-
Don....... the cream and beige roadster is a 1:43 scale diecast model of a 1931 Daimler Double Six 50 Convertible, by Whitebox. David
-
The last photo, I should have explained, was one that I found on the Internet...... so this is really just to illustrate how I would like to achieve a similar effect. David
-
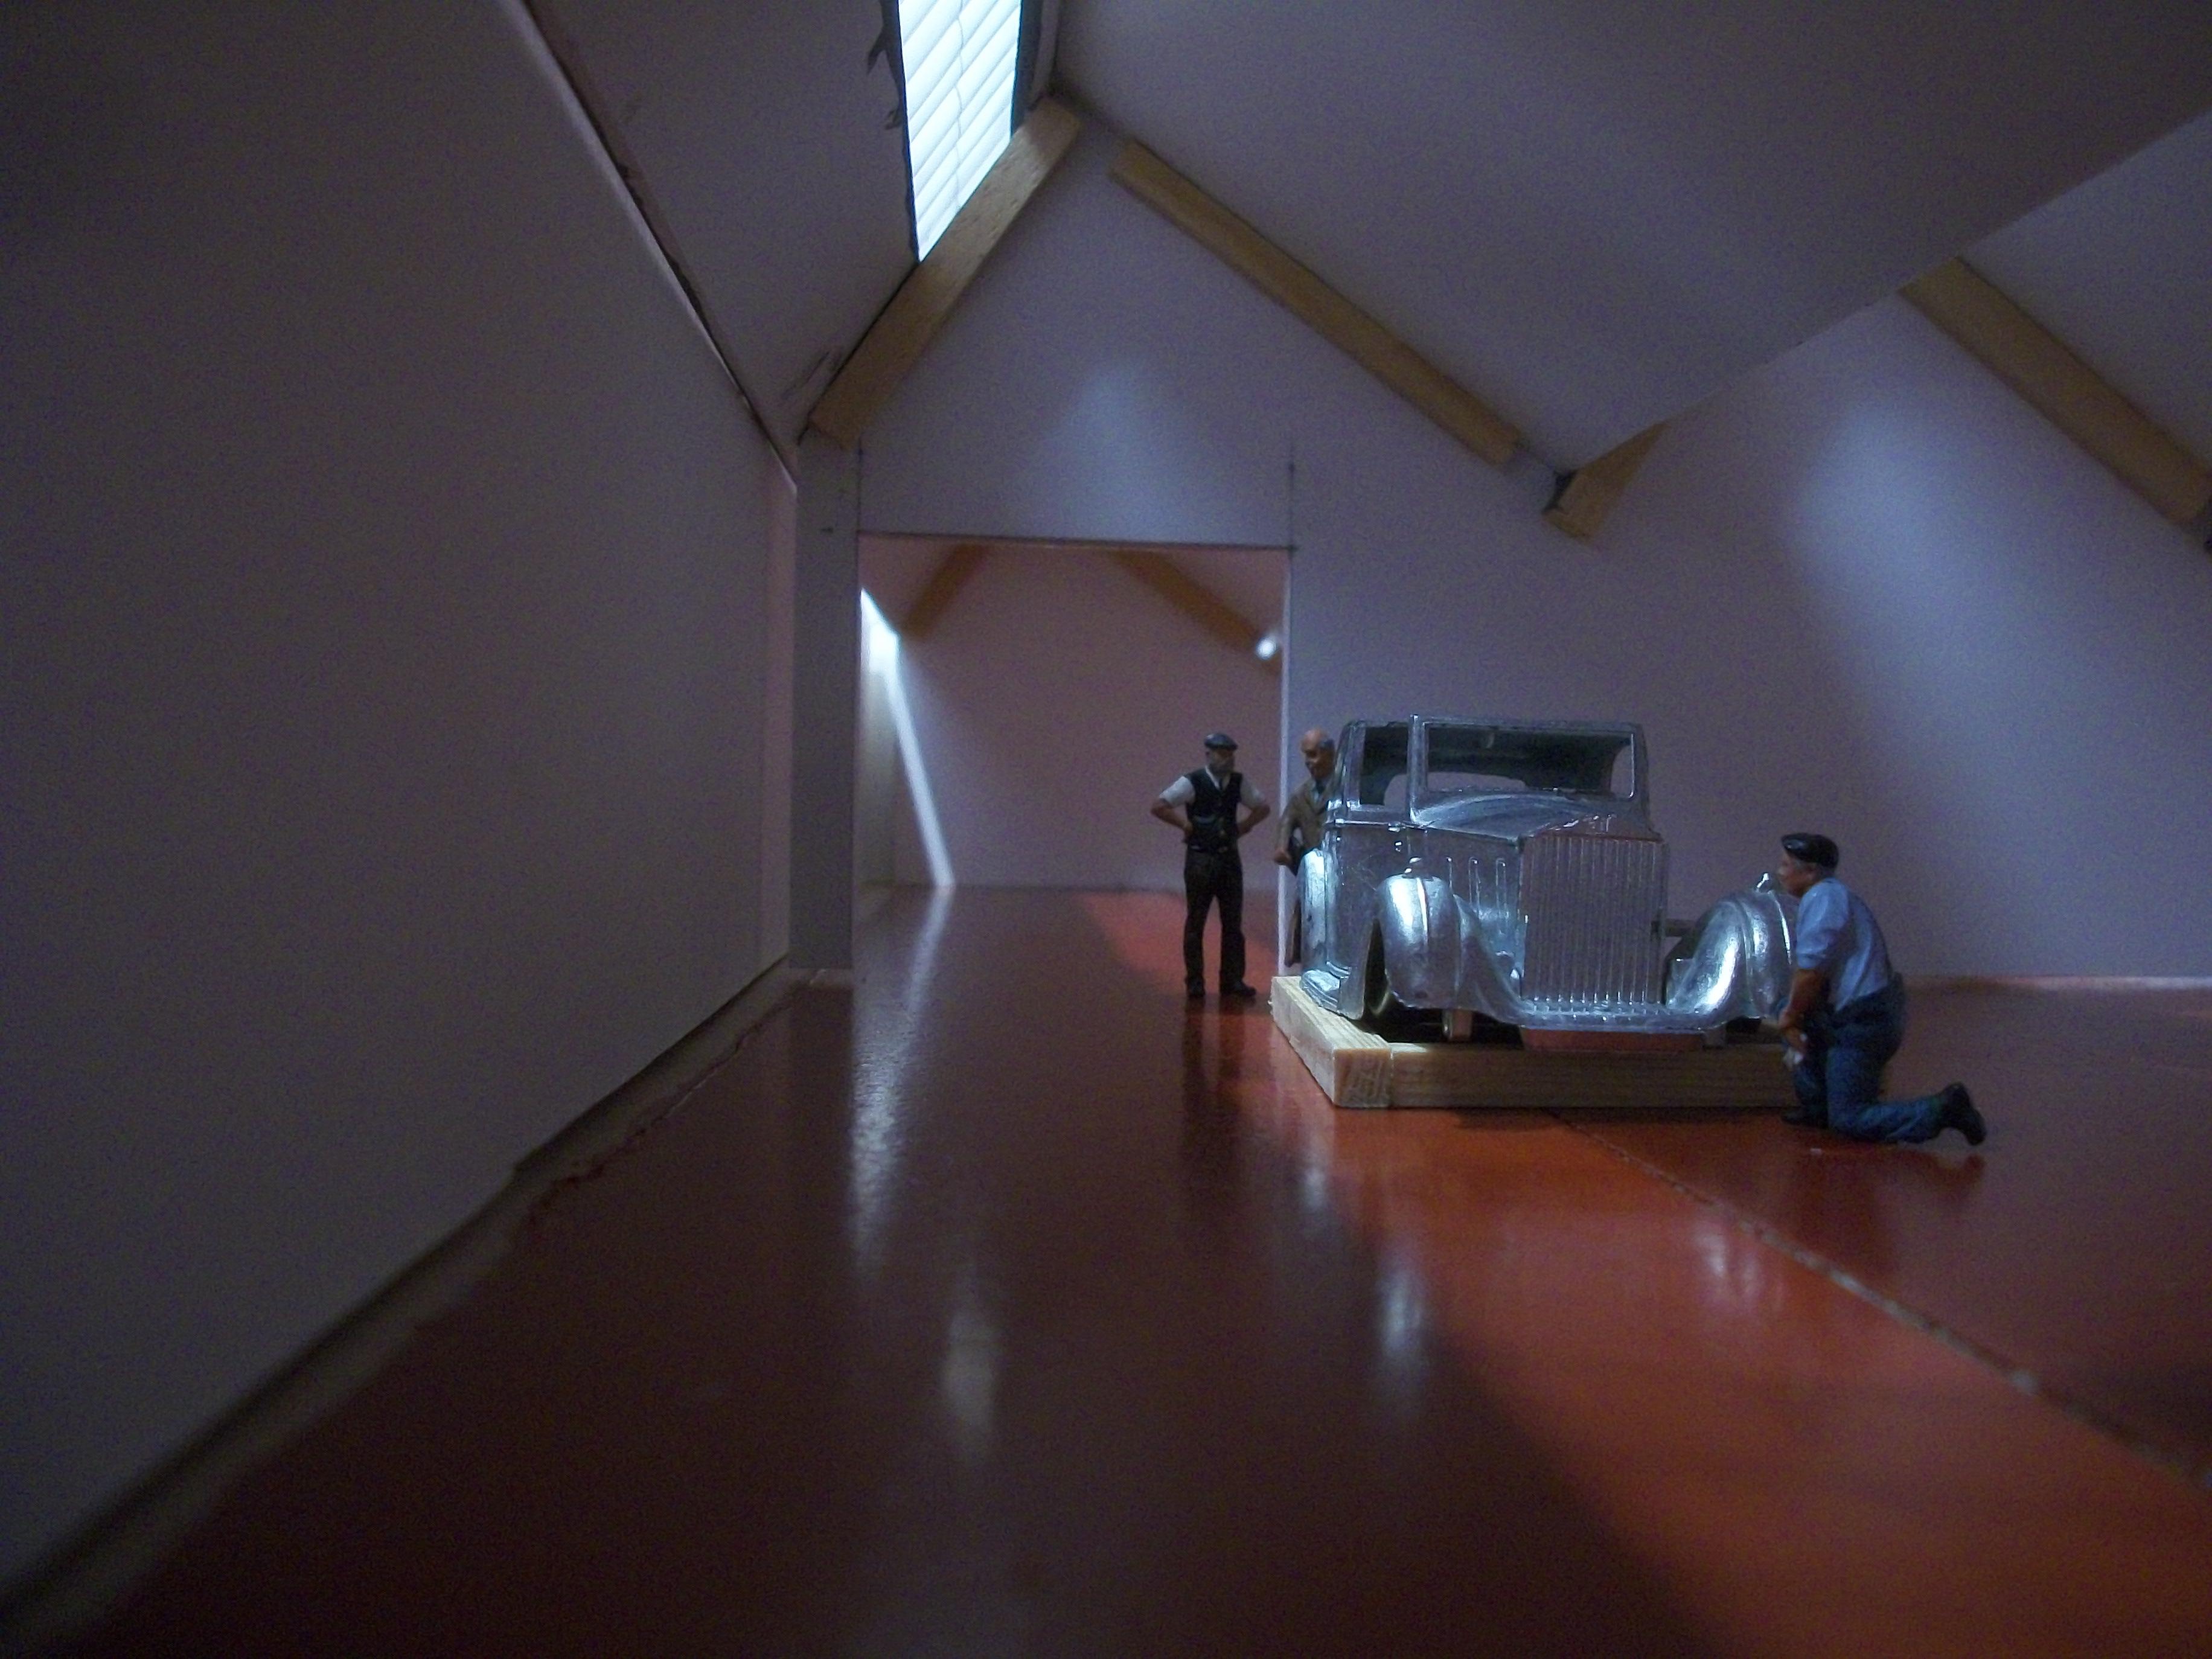
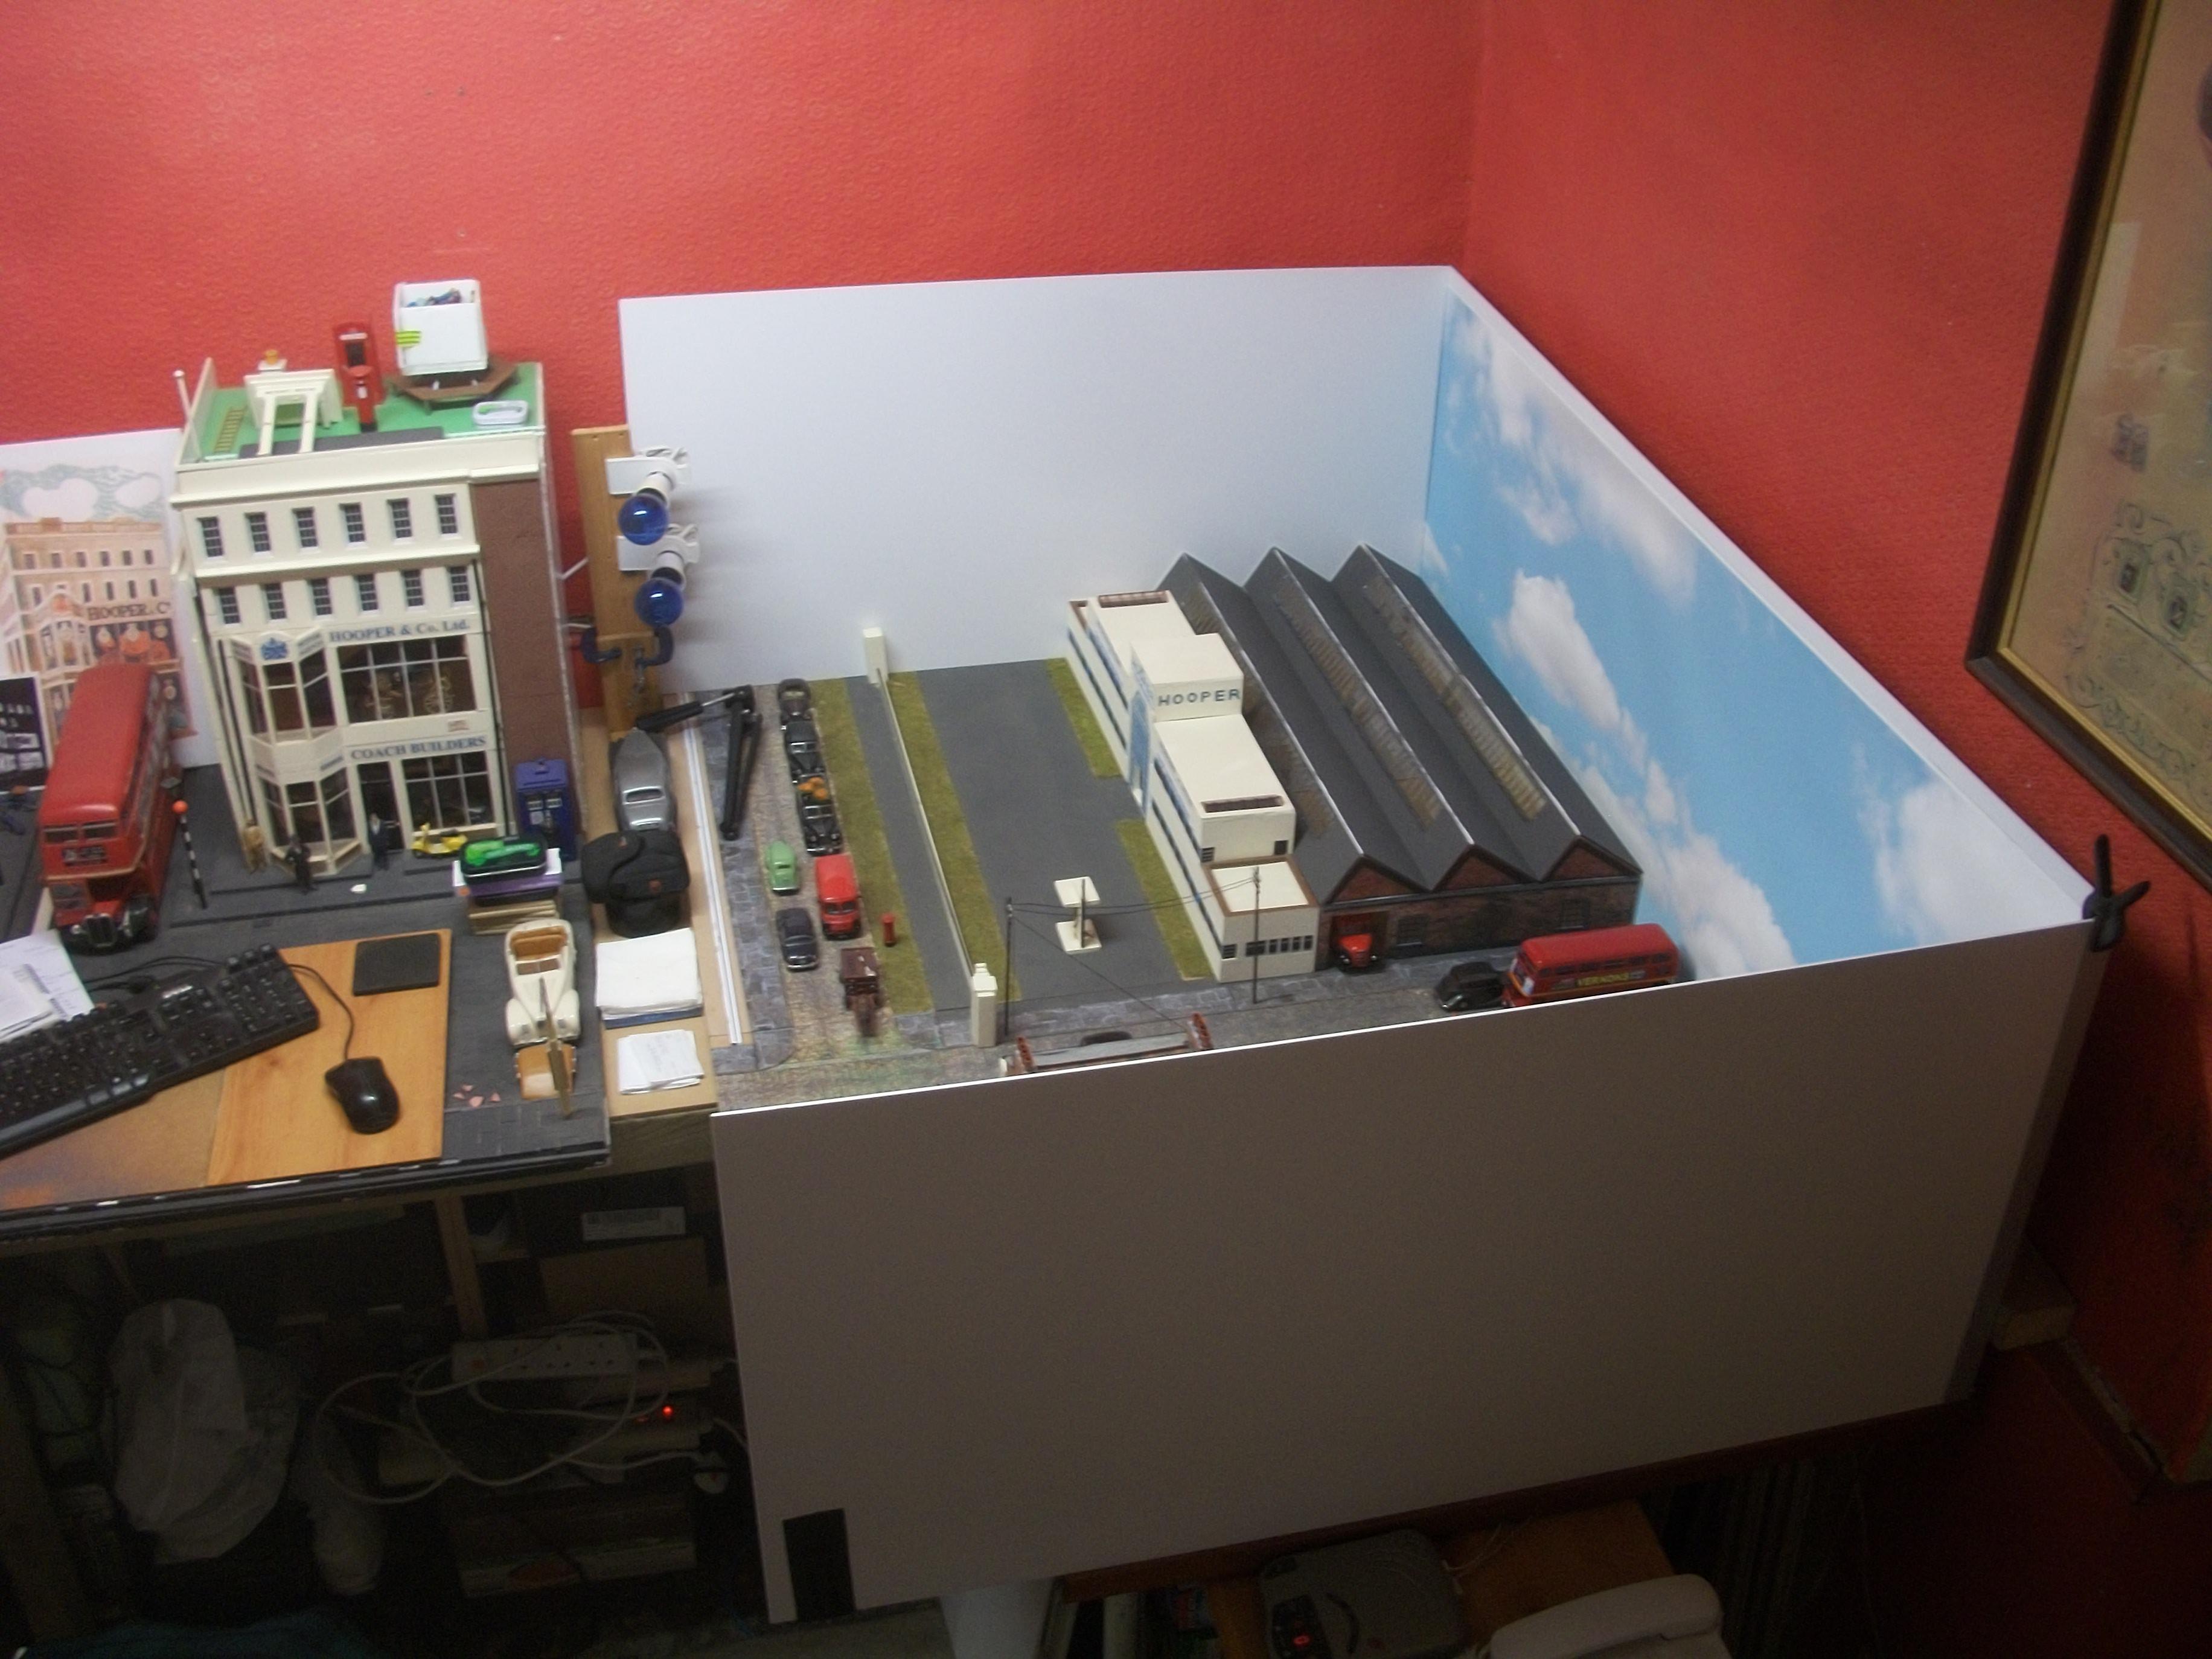
The three long strips of ridge tiles for the factory roof sections are now glued in place, and have been given one coat of grey emulsion paint. This leaves them looking rough and weathered, rather than being fully painted as new. From these following photos, you can see the three factory units in place on the baseboard, which has been coated with MDF Sealer and then given a single coat of Tile Red paint, of the type of paint used for garage floors. I thought this would resemble a typical factory floor surface, which has a slight shine to it, but nowhere near as shiny and glossy as the crimson red showroom floors of the Hooper building at 54 St James's Street. There is one remaining strip of flooring to be painted with tile red, which runs through both of the doorway openings. Also, there are three test photographs, which represent my first opportunity to examine the effect of light coming in through the factory roof skylights. This light is from a fluorescent tube light fitting, so not the 100 watt daylight bulbs that will be used later in the process, or indeed natural daylight. I can see potential for this subtle lighting effect to be very atmospheric, when I intend to add car bodies on wooden trestles and figures of assembly workers. David
-
This one is to your usual high standard, Charles...... and the photo on the left looks more realistic than the photo on the right ! Lots of subtle detail, including different types of material, such as steel, brickwork, rubber and concrete...... and many others, I am sure. Rust and weathering effects, it's all there. Very nicely presented diorama, Charles. David
-
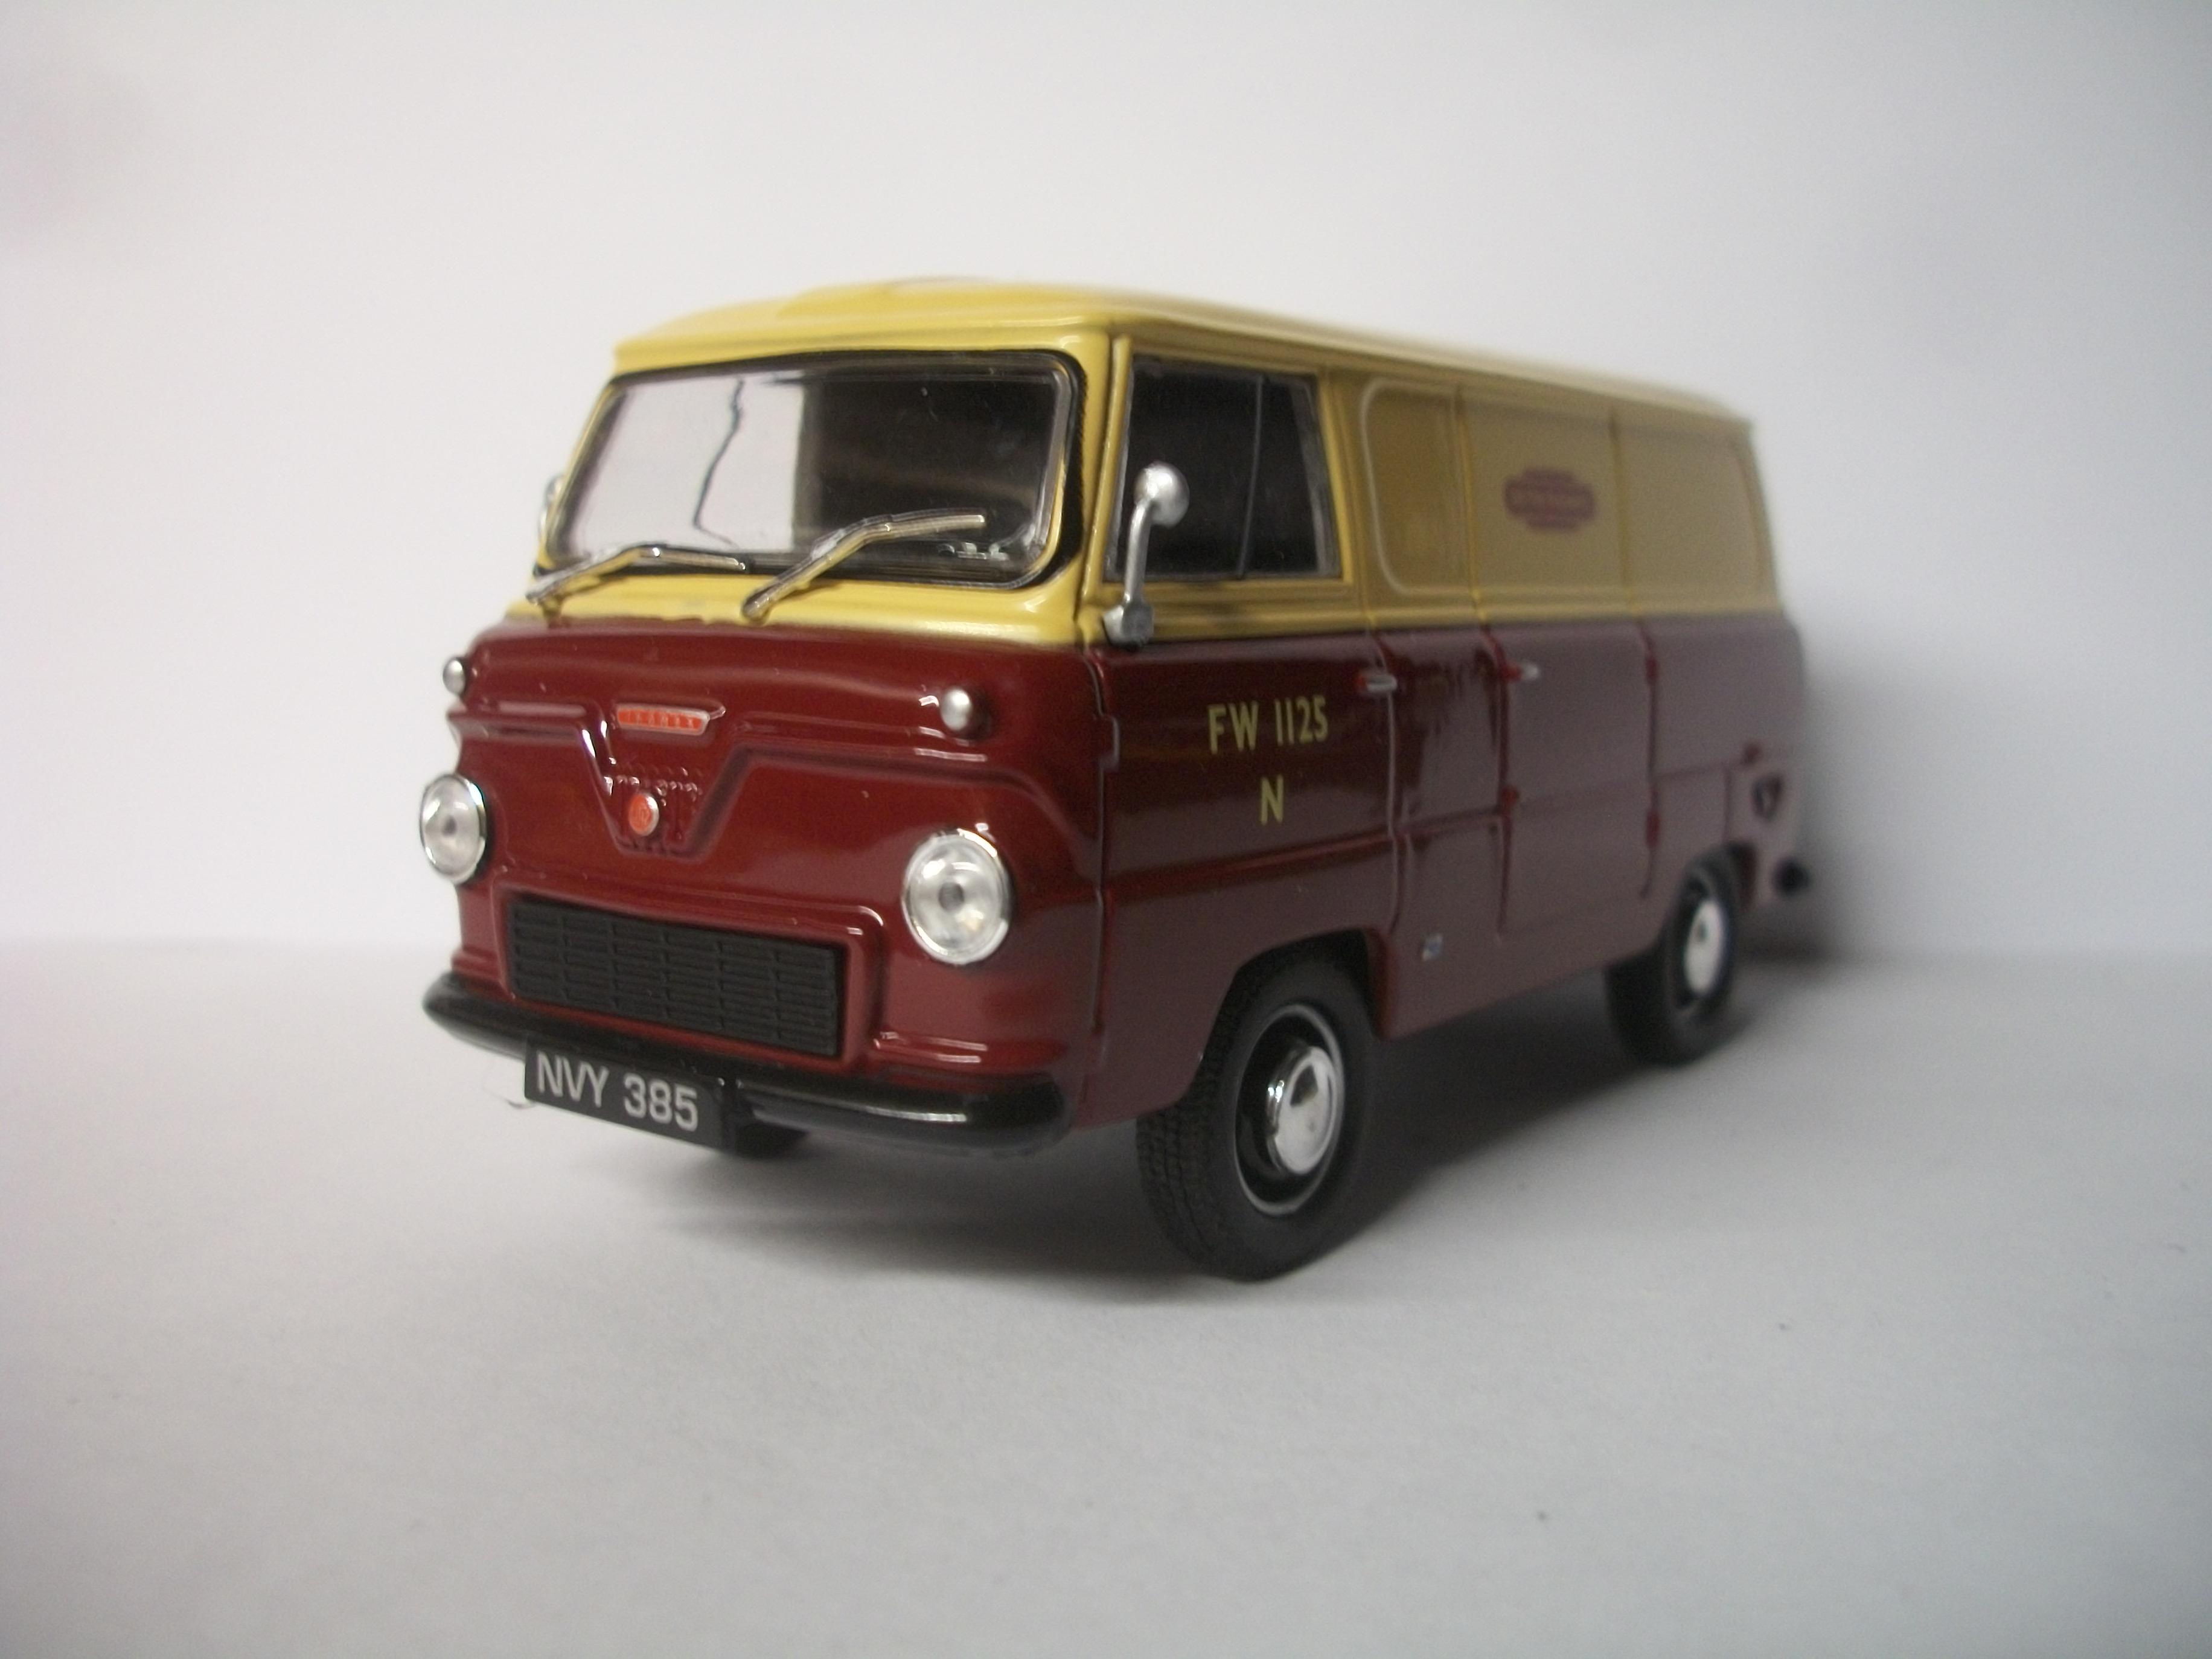
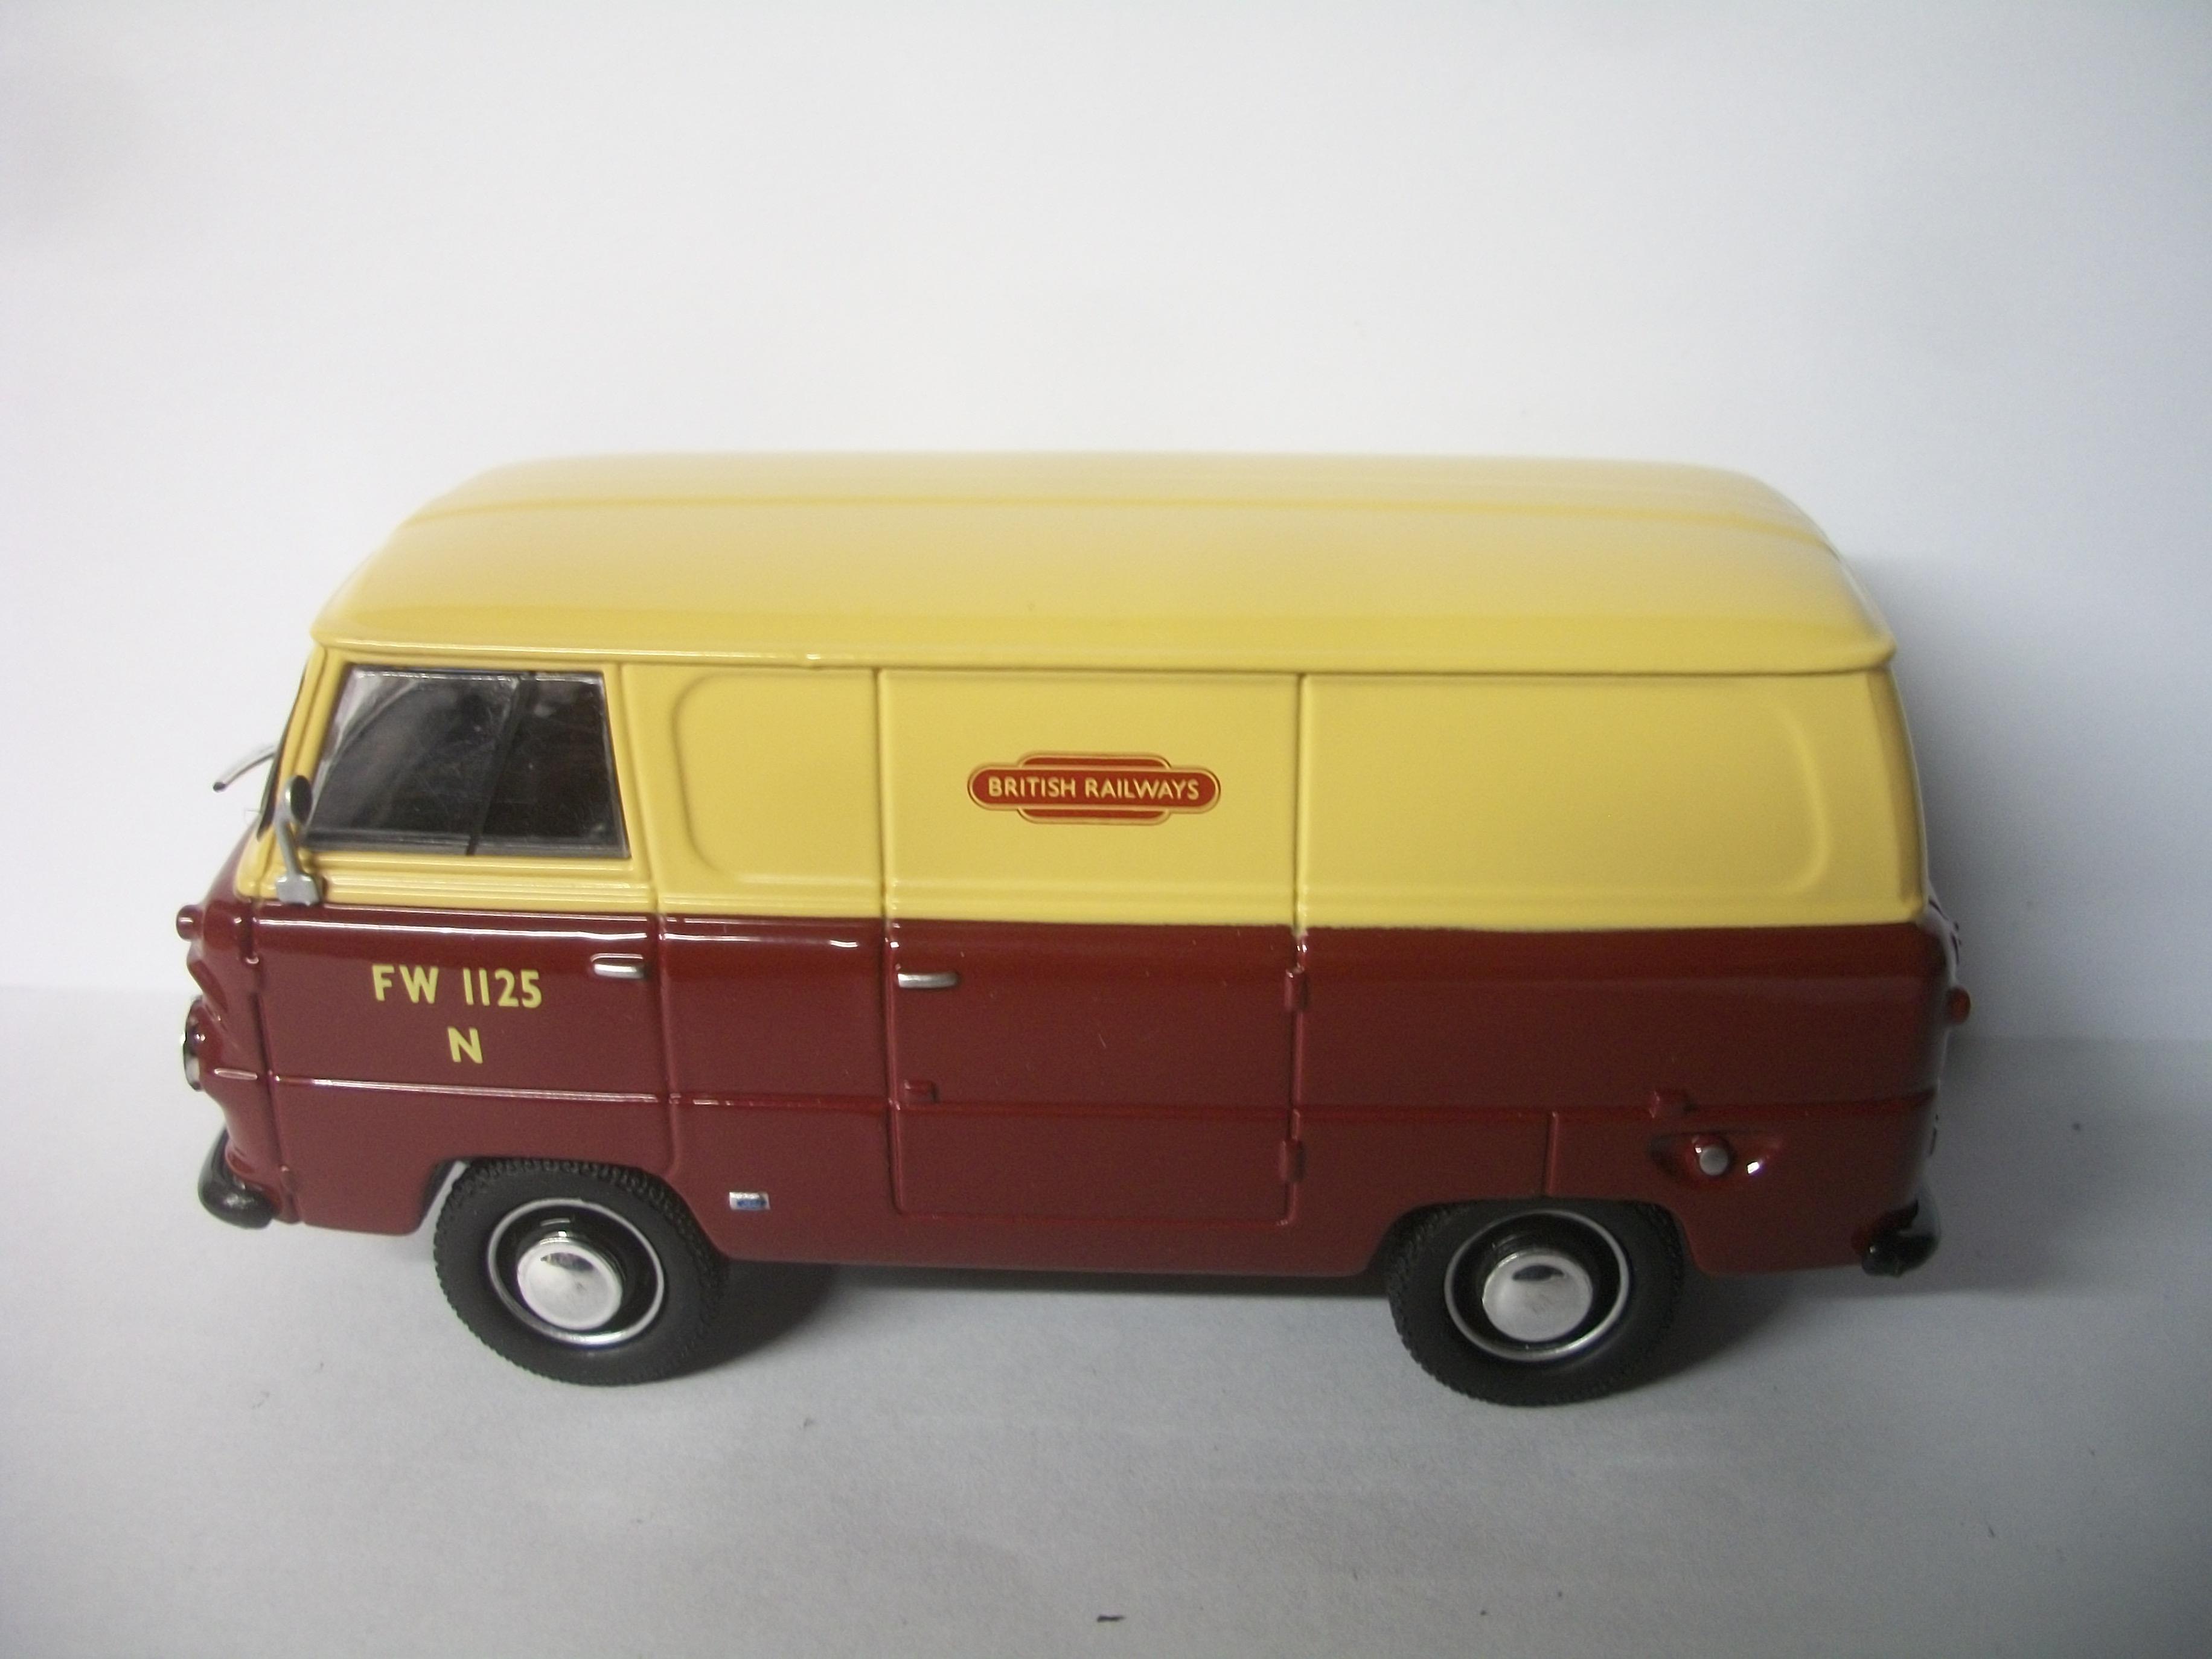
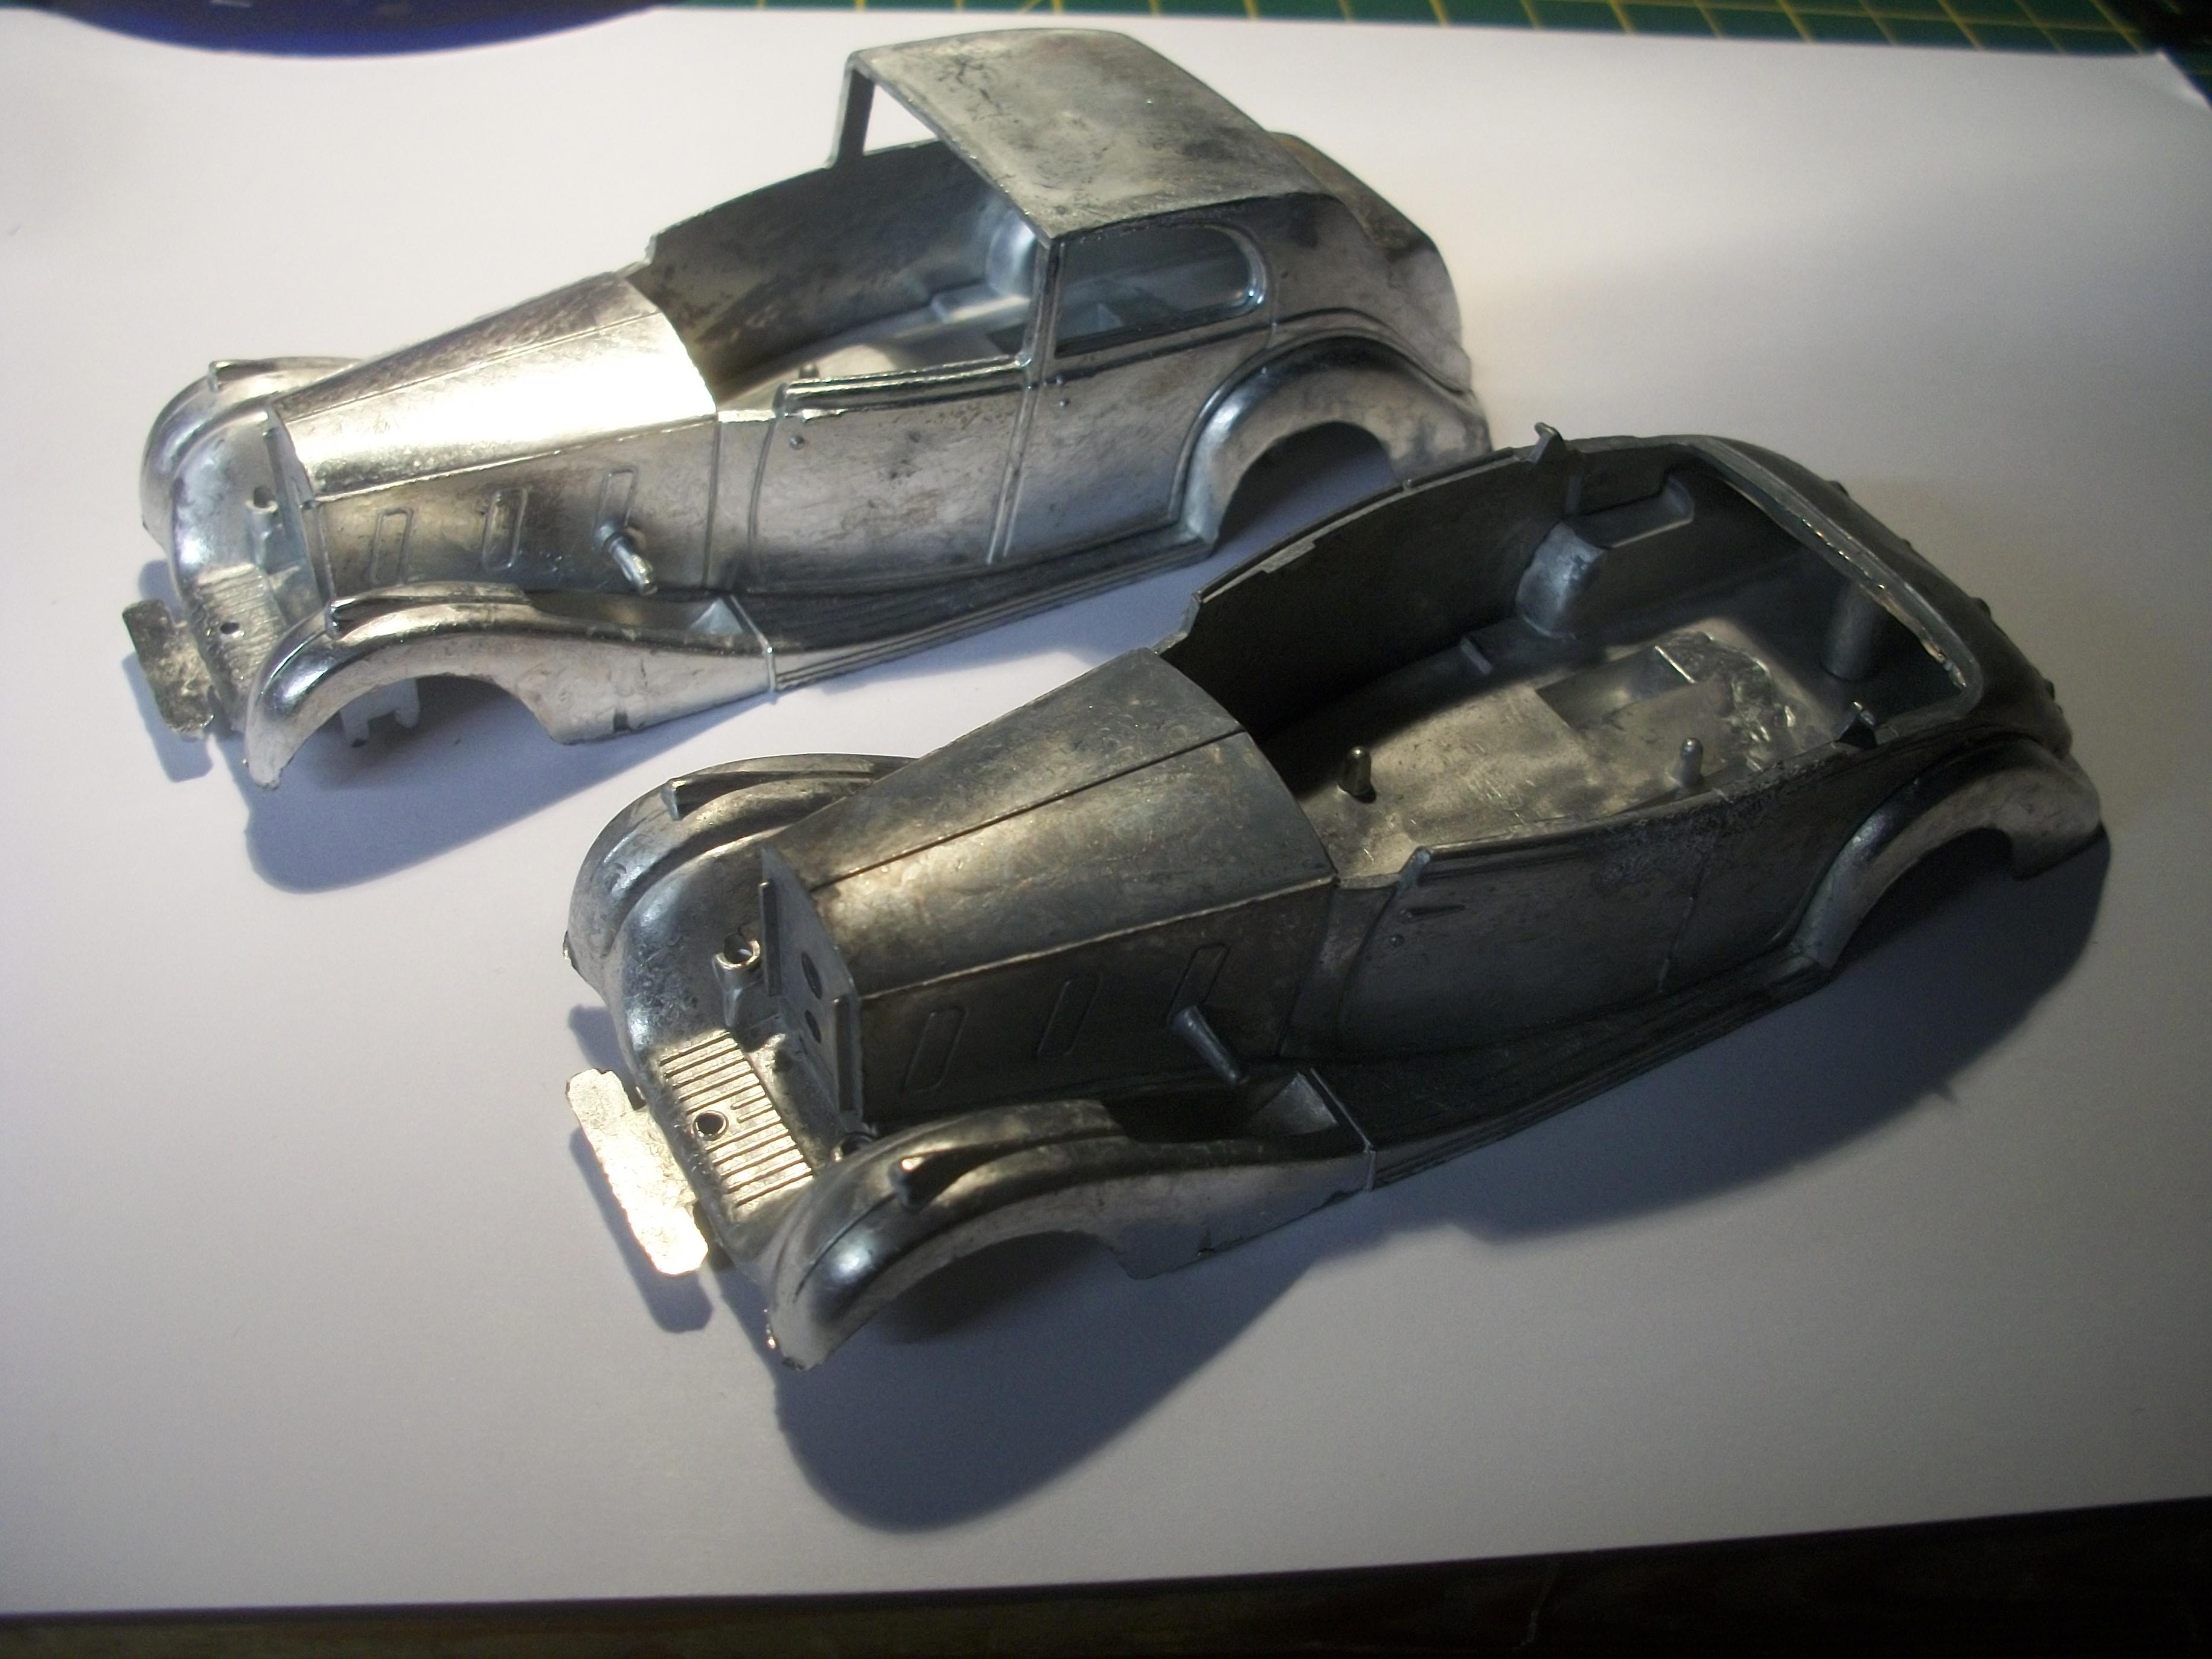
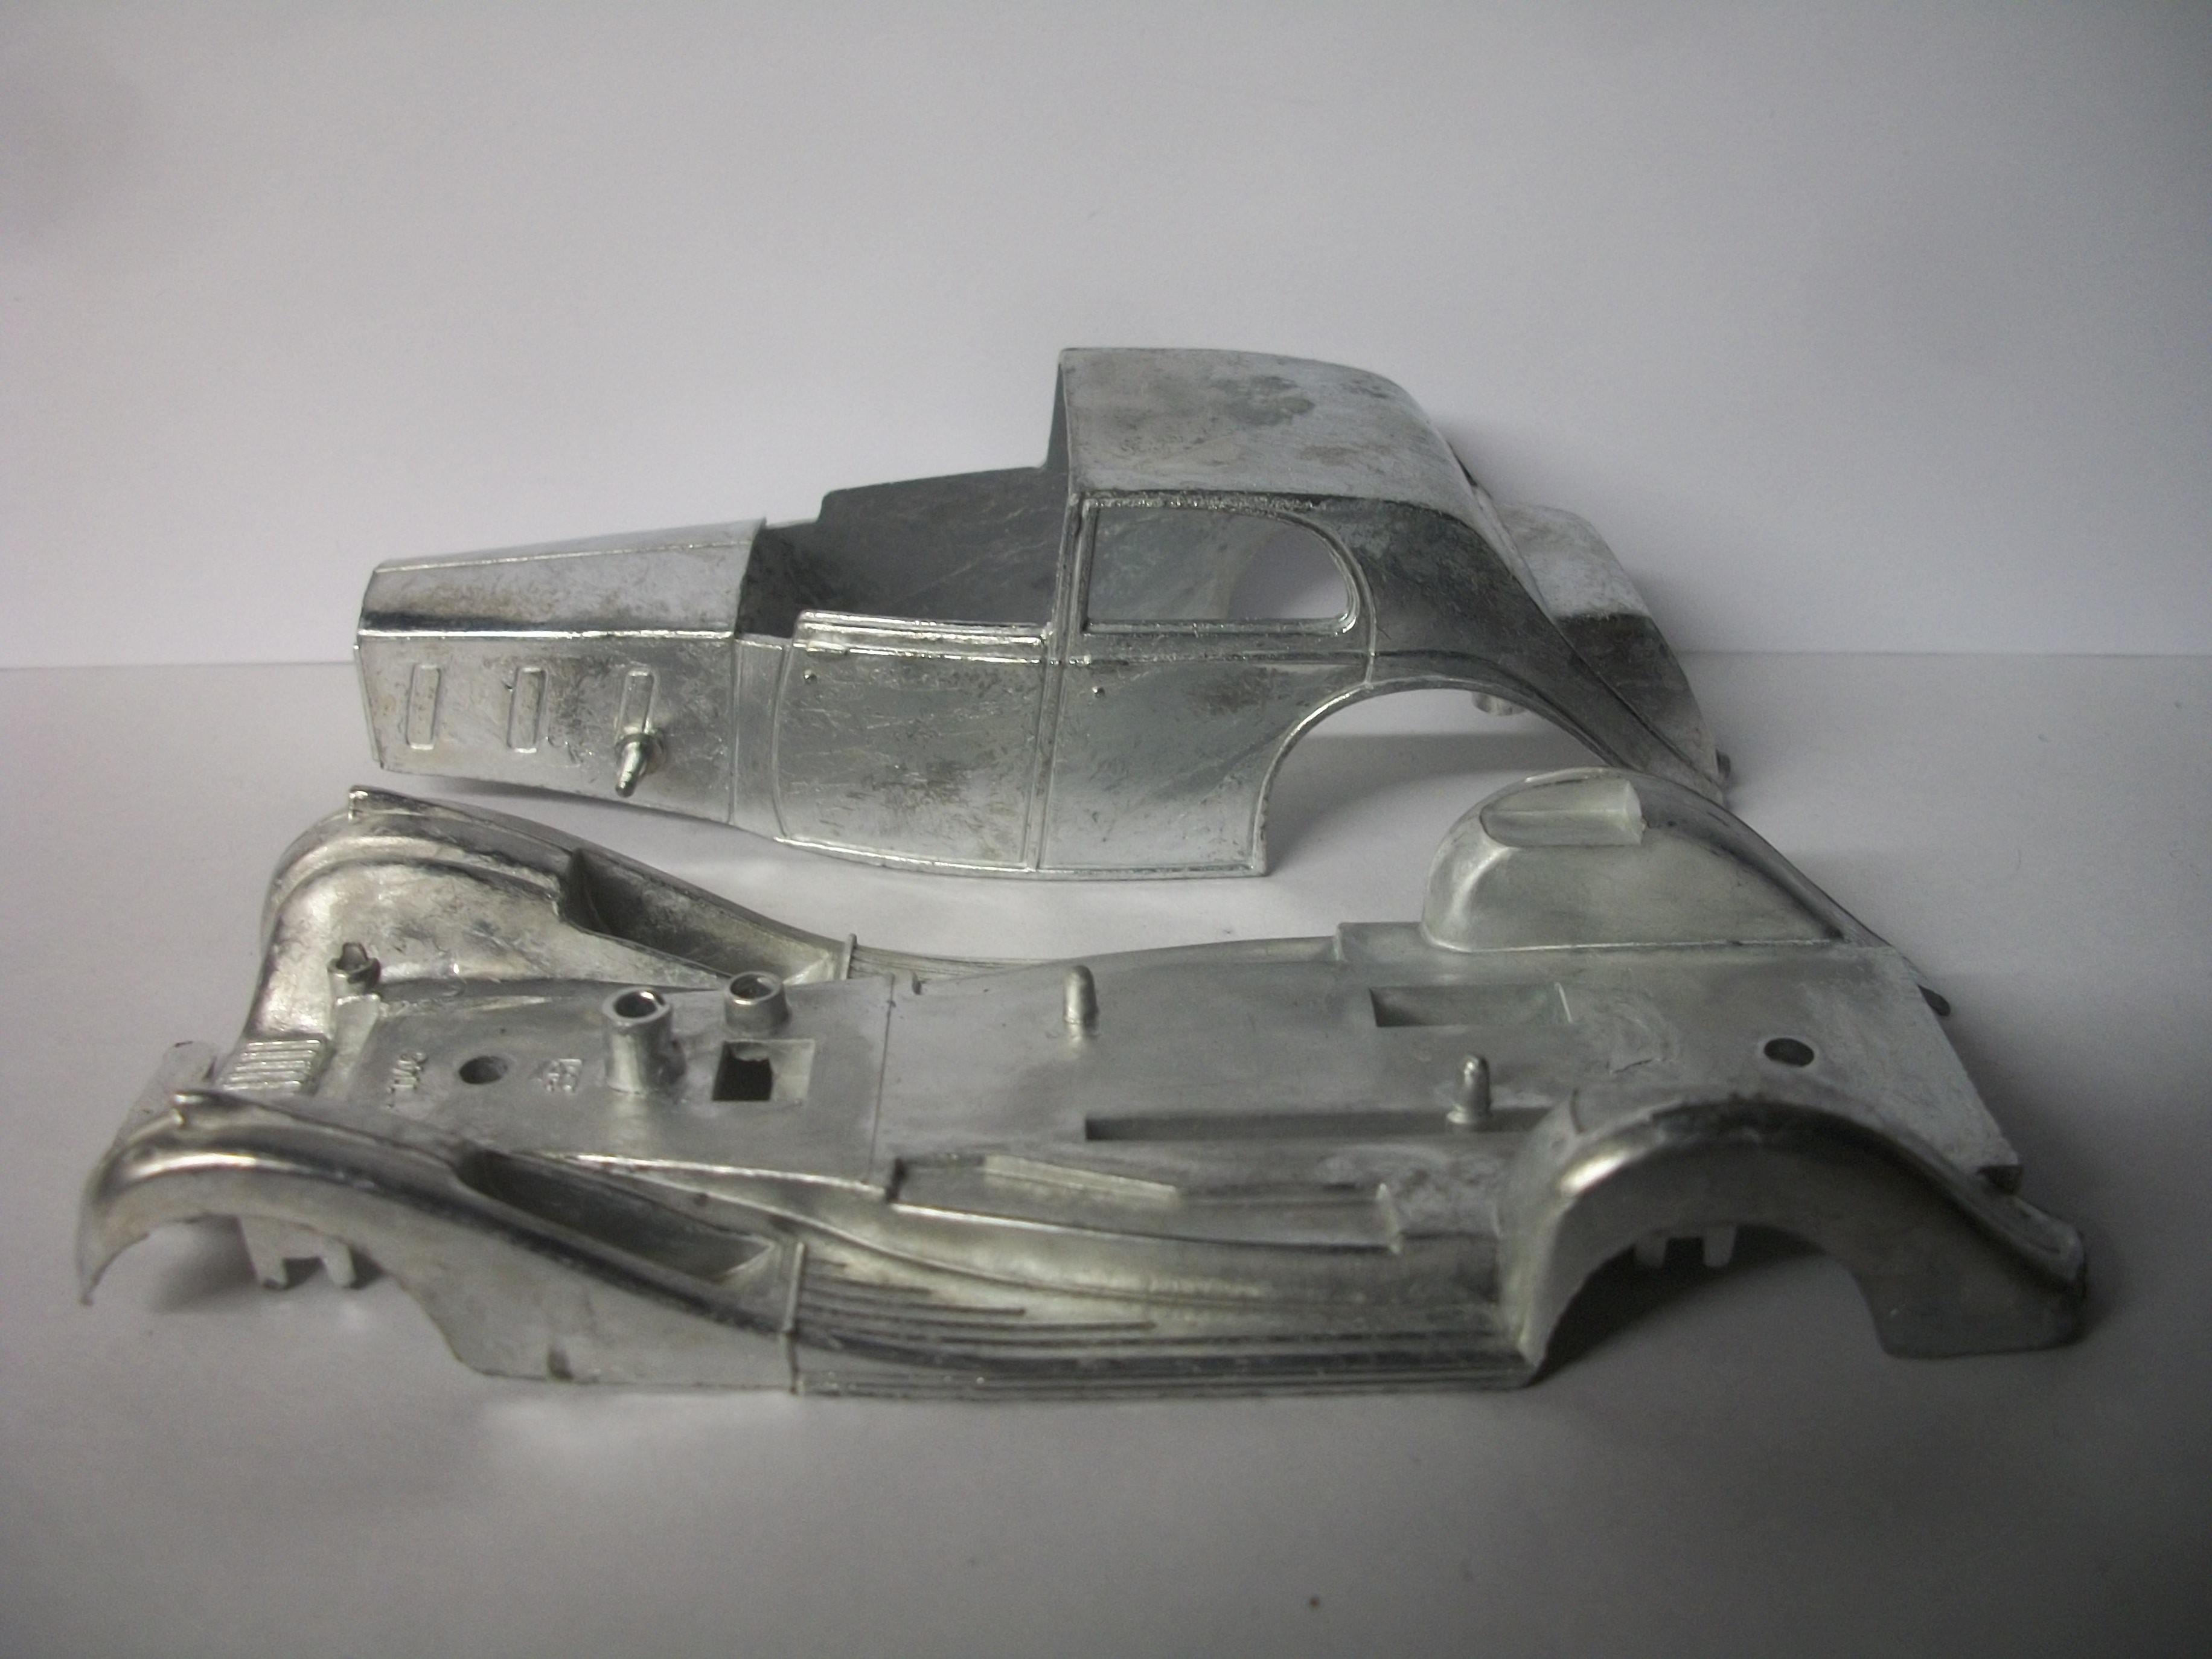
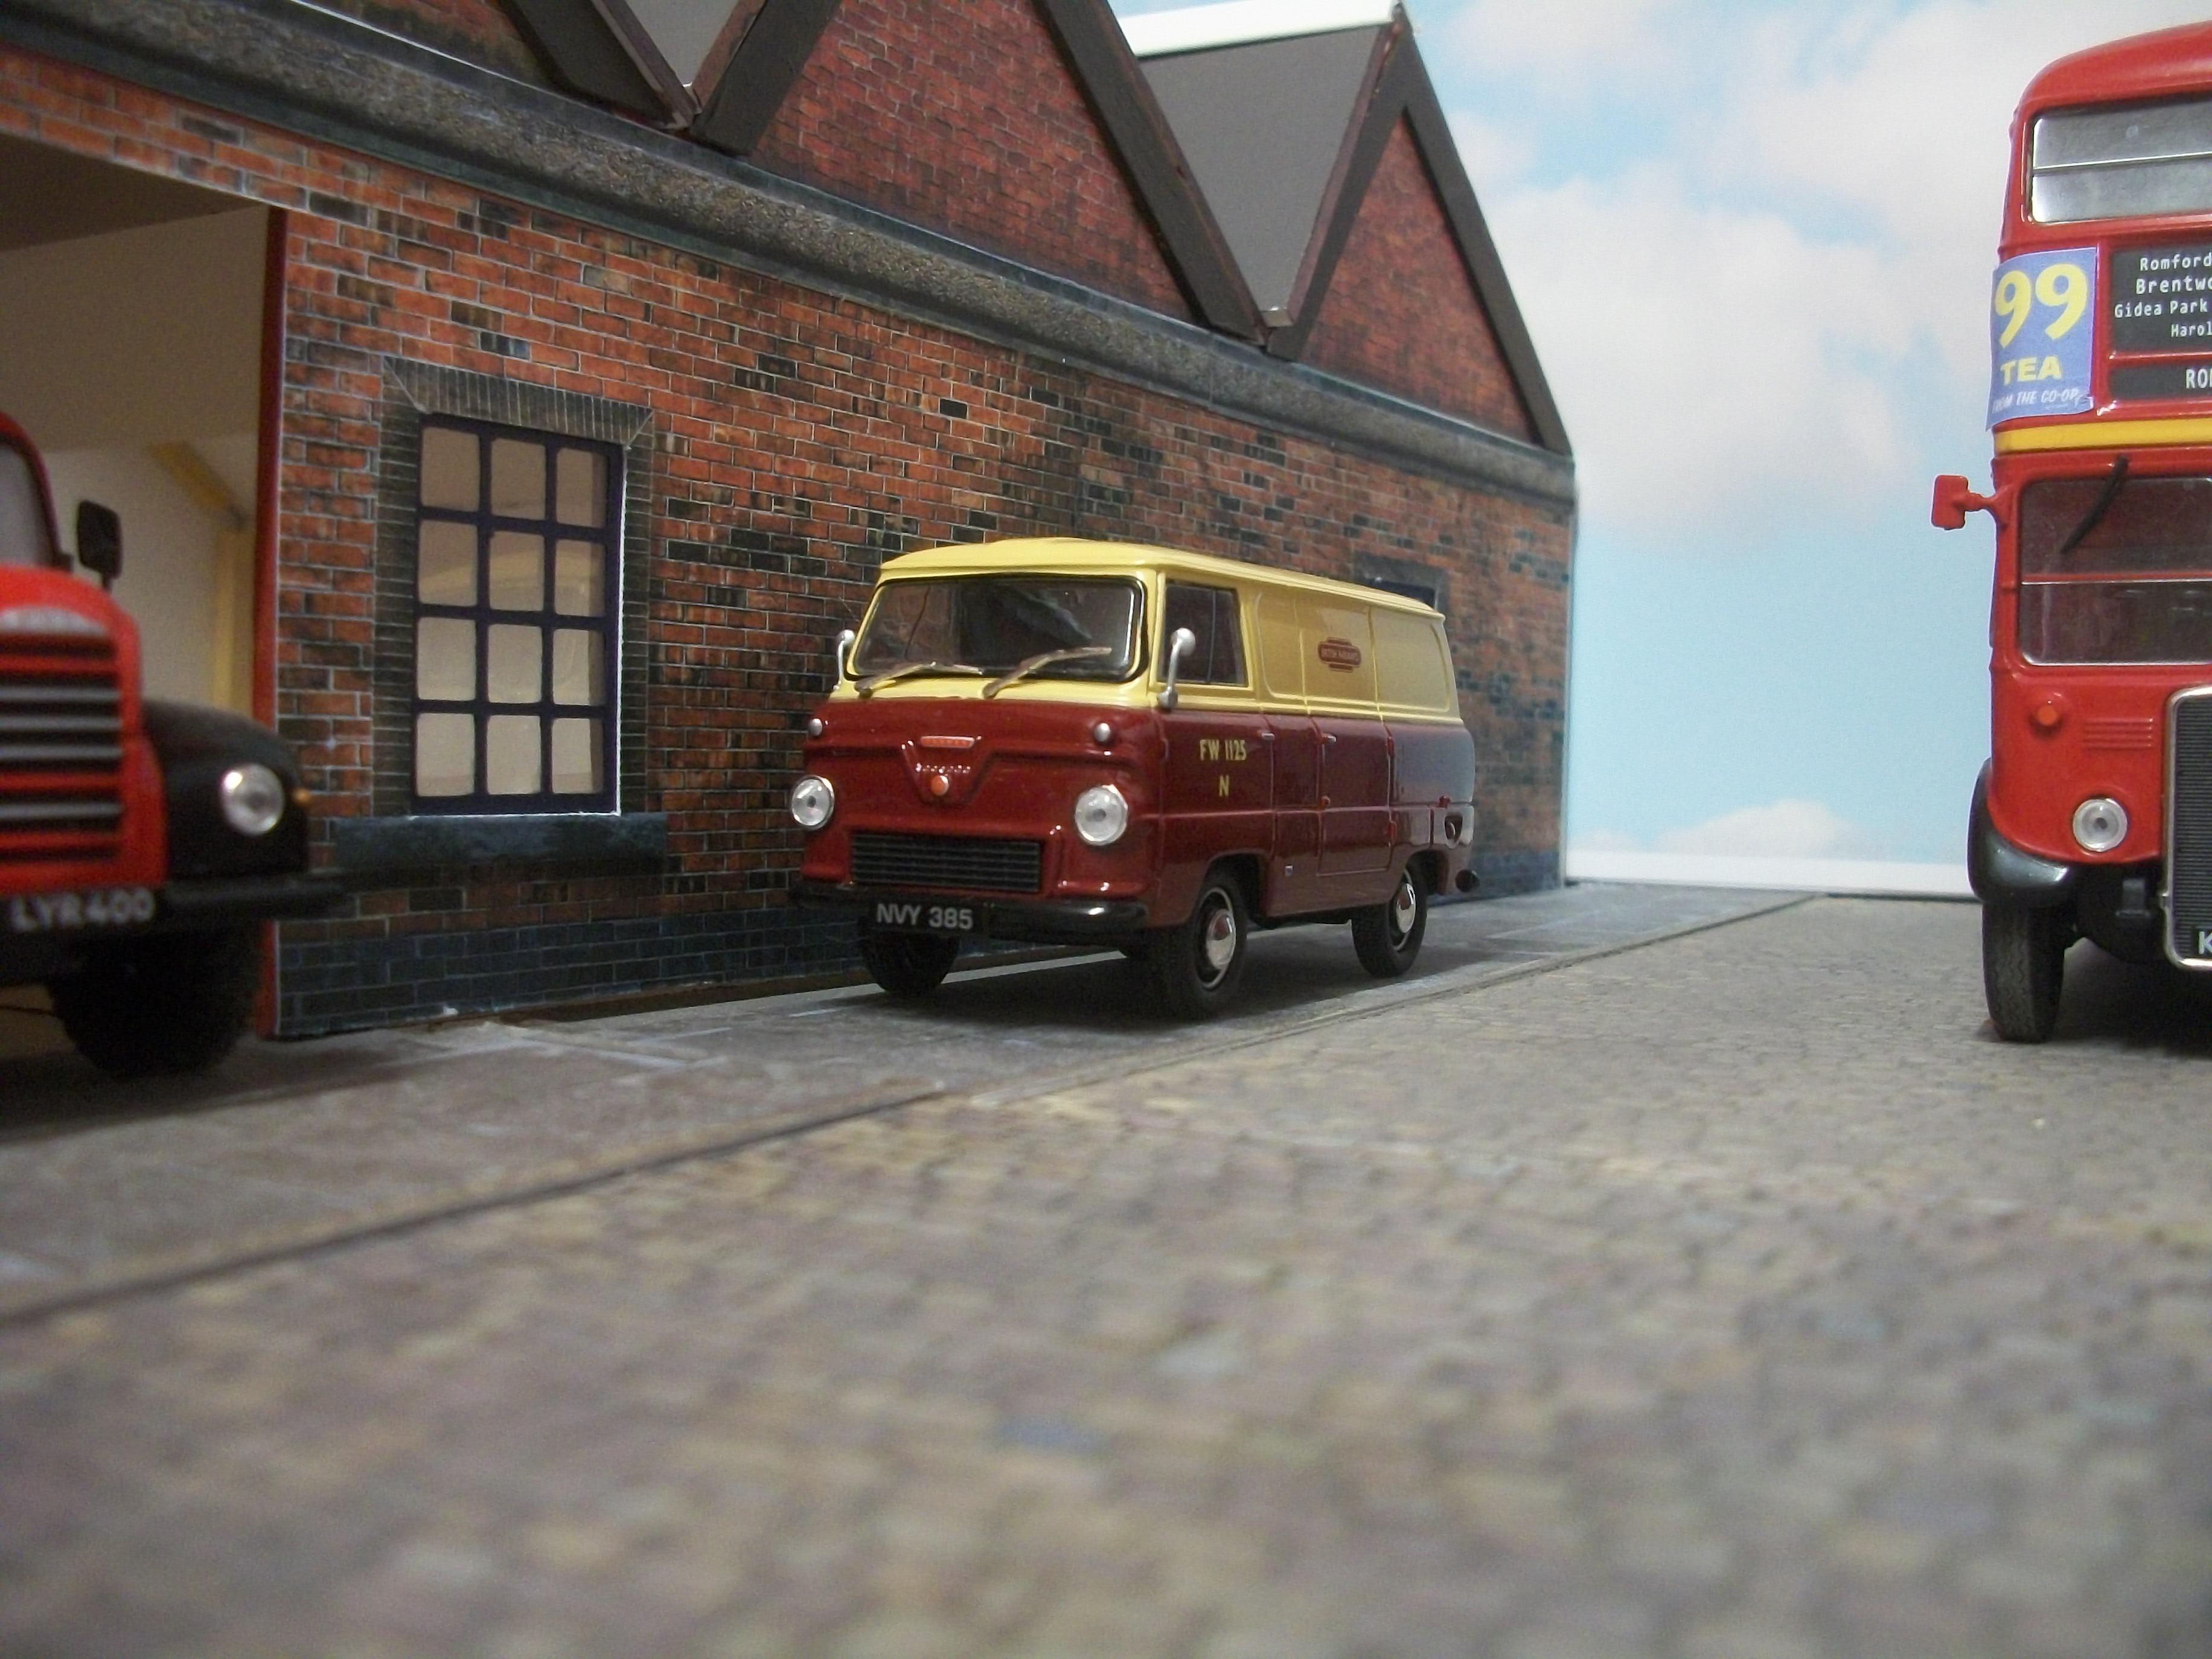
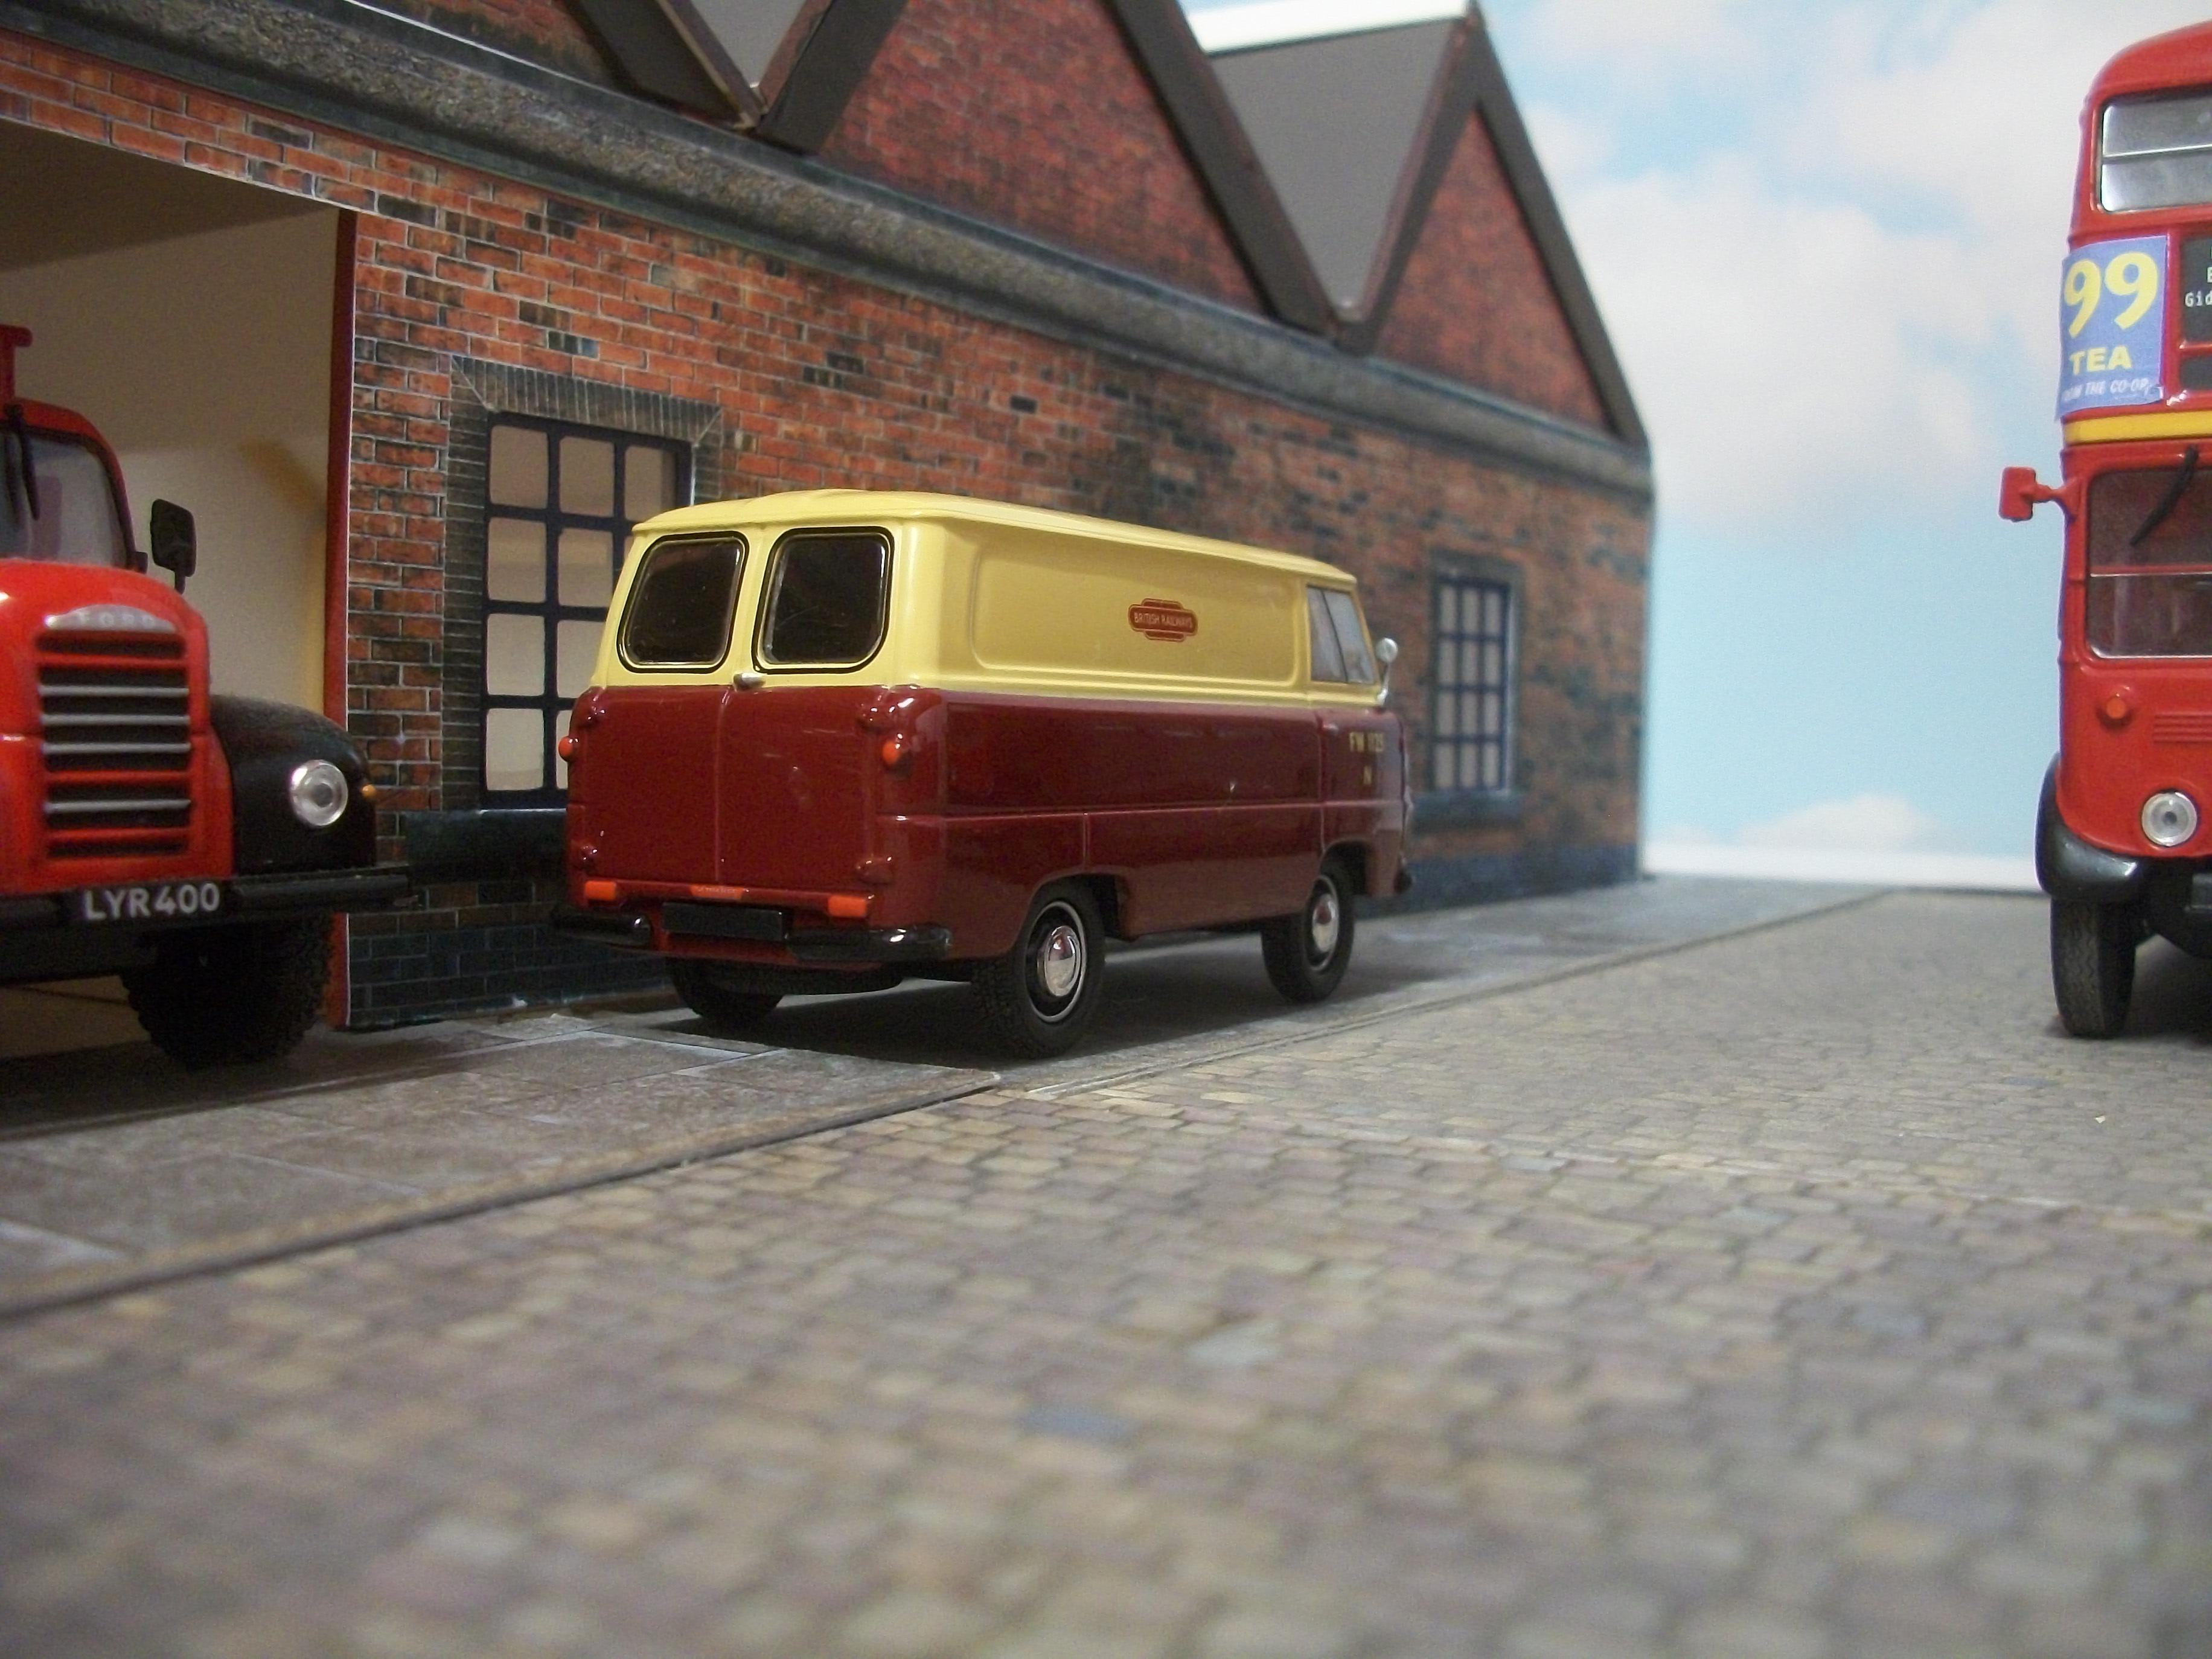
The 1:43 scale Oxford Commercials Ford 400E Van in British Railways livery has arrived from Ebay and it is quite a nice model, which does photograph well too. It doesn't appear to have a rear number plate? The Solido kit also arrived from Ebay today which is made in France, and the box contains two 1939 Rolls-Royce Phantom III cars. Previously, I have avoided Solido models, because I was worried that they would not build up into realistic model cars, but in this case I will be using components such as the body and chassis to set up scenes inside the factory units extension building for the photography, to show motor cars being assembled on the production line. I think the castings of the Solido kits look good, but then I am not an expert on white metal castings to judge what is good or bad..... Started cutting grooves in the ridge tile strips for the factory roof and painting them with grey emulsion. David
-
Yes, Pat and I would be inclined to agree with your thinking..... the front of the factory will be most visible, so it would not be necessary to rip out the rear of the roof sections for something that is less likely to be seen anyway. As long as I can create some interesting effects with incoming daylight, through these skylights, then I will be happy with the photography aspect of this diorama project. As always, thanks for looking...... David
-
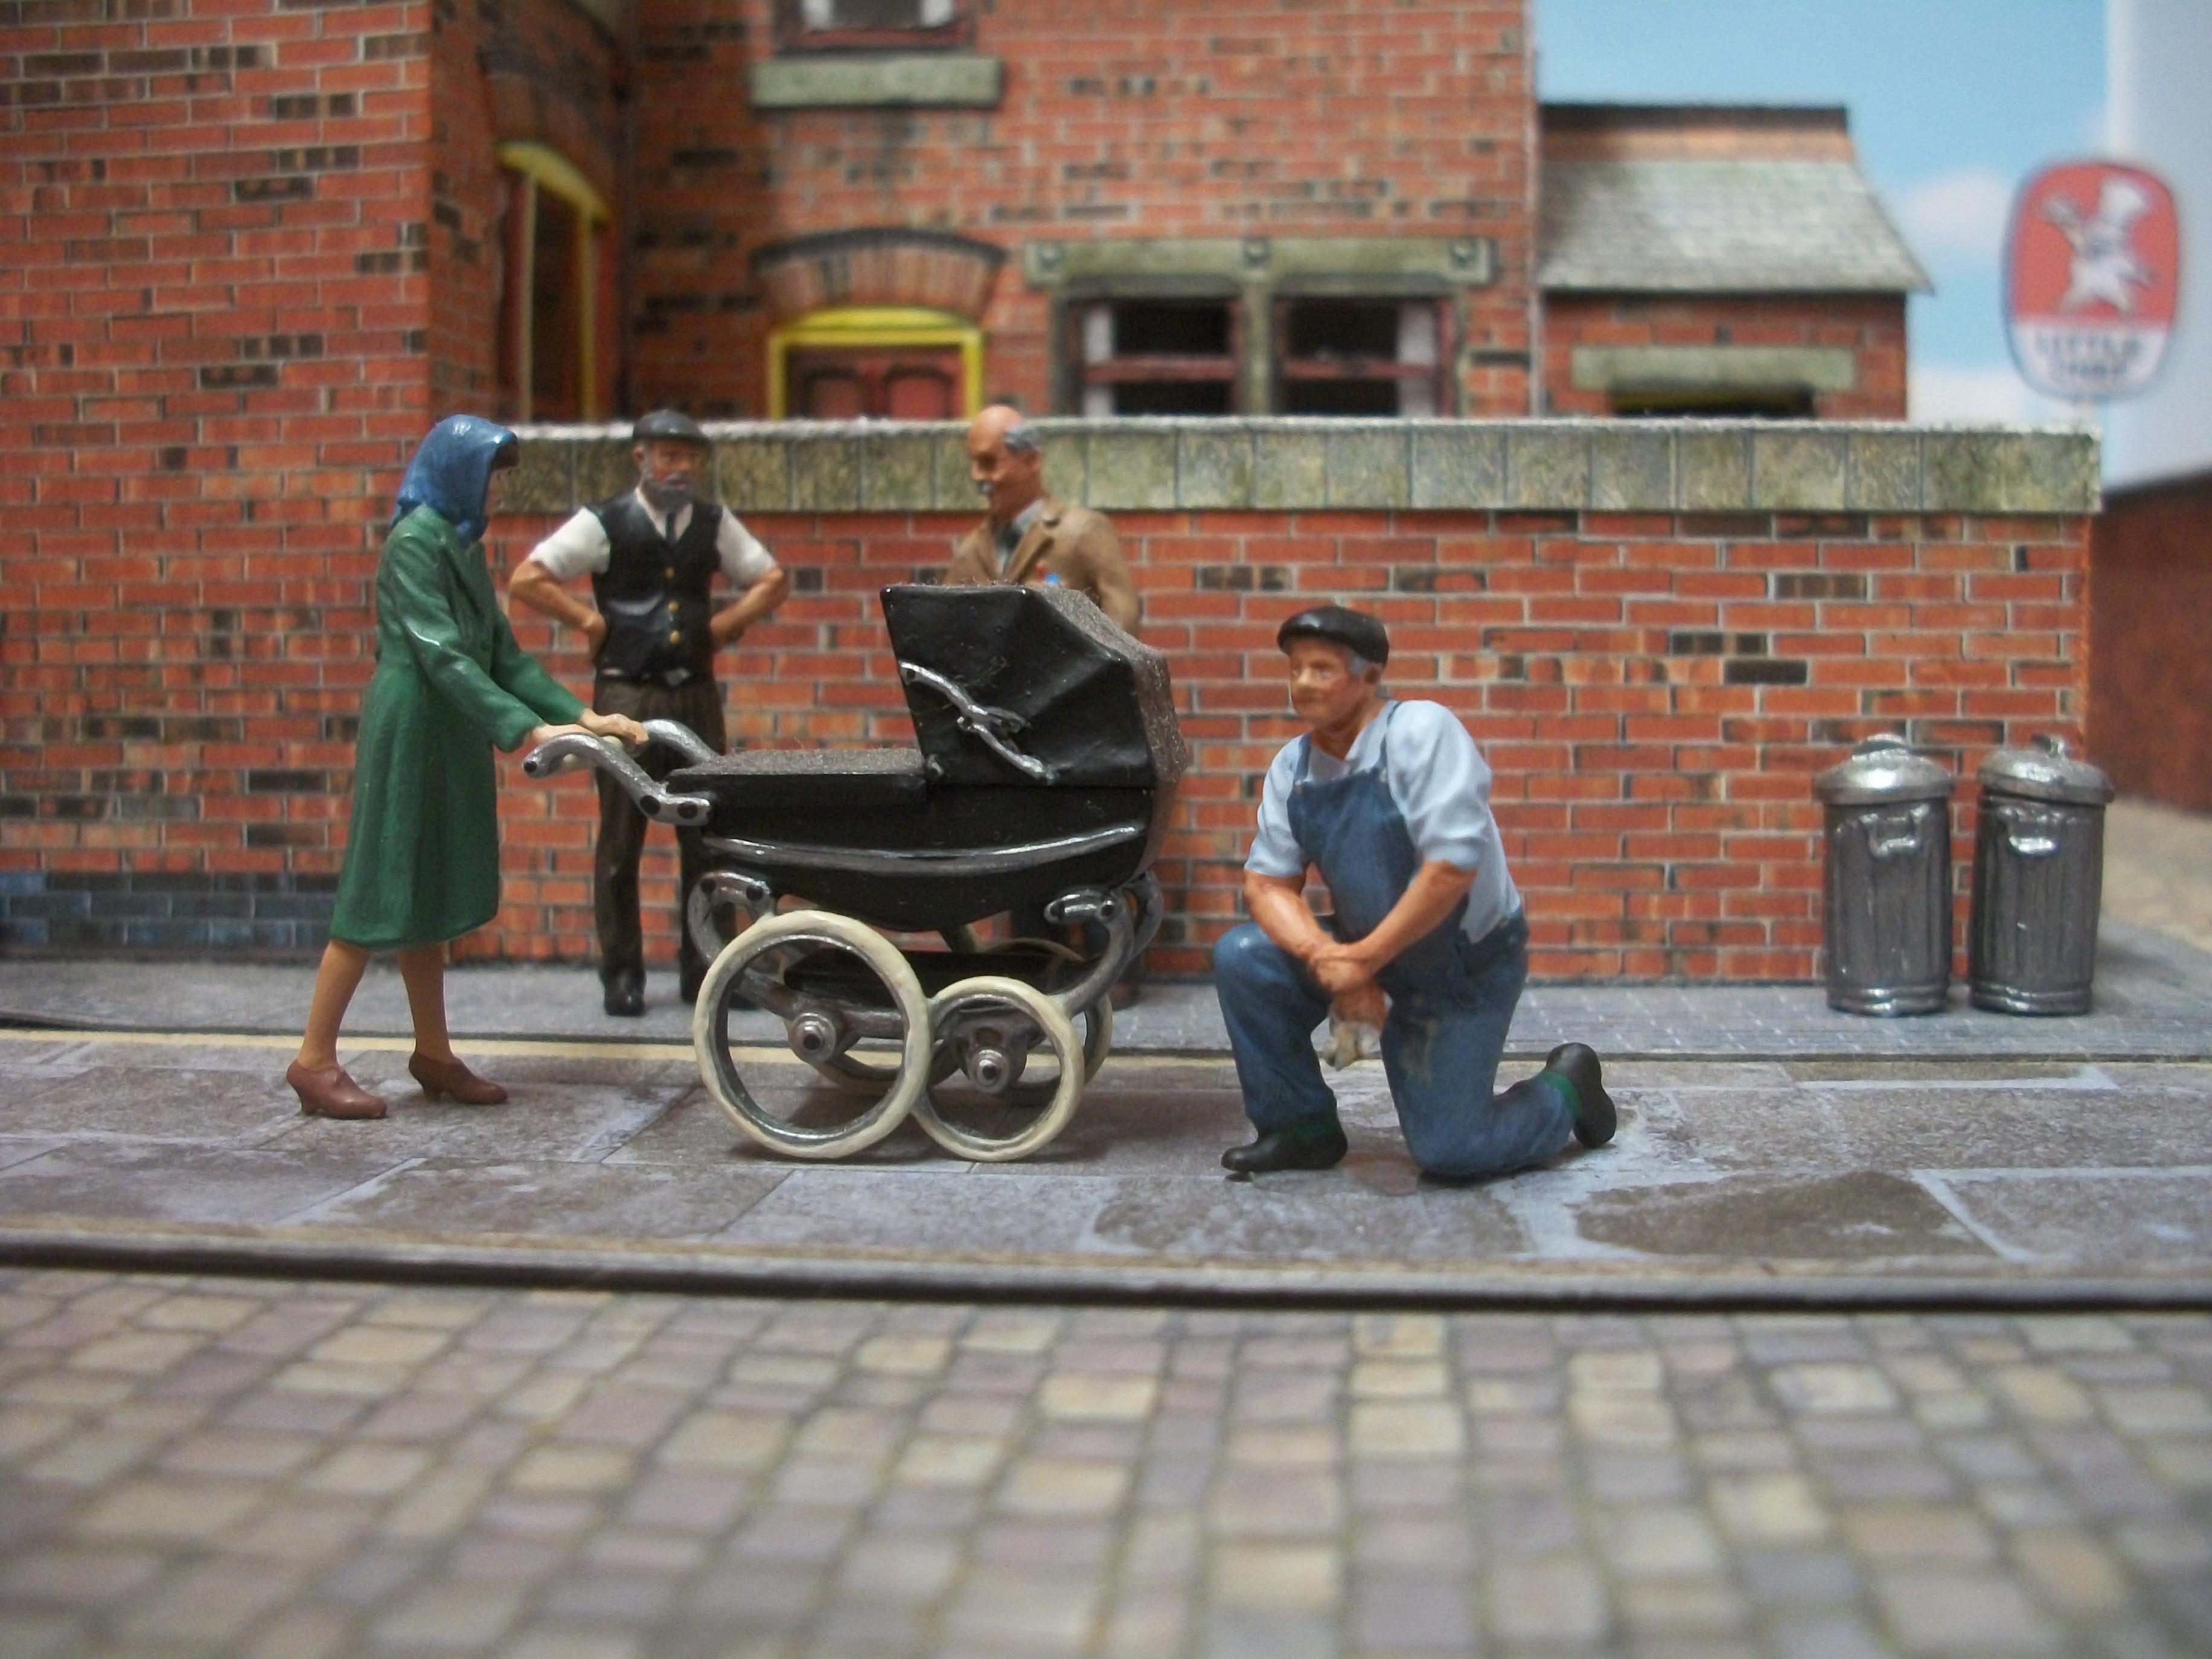
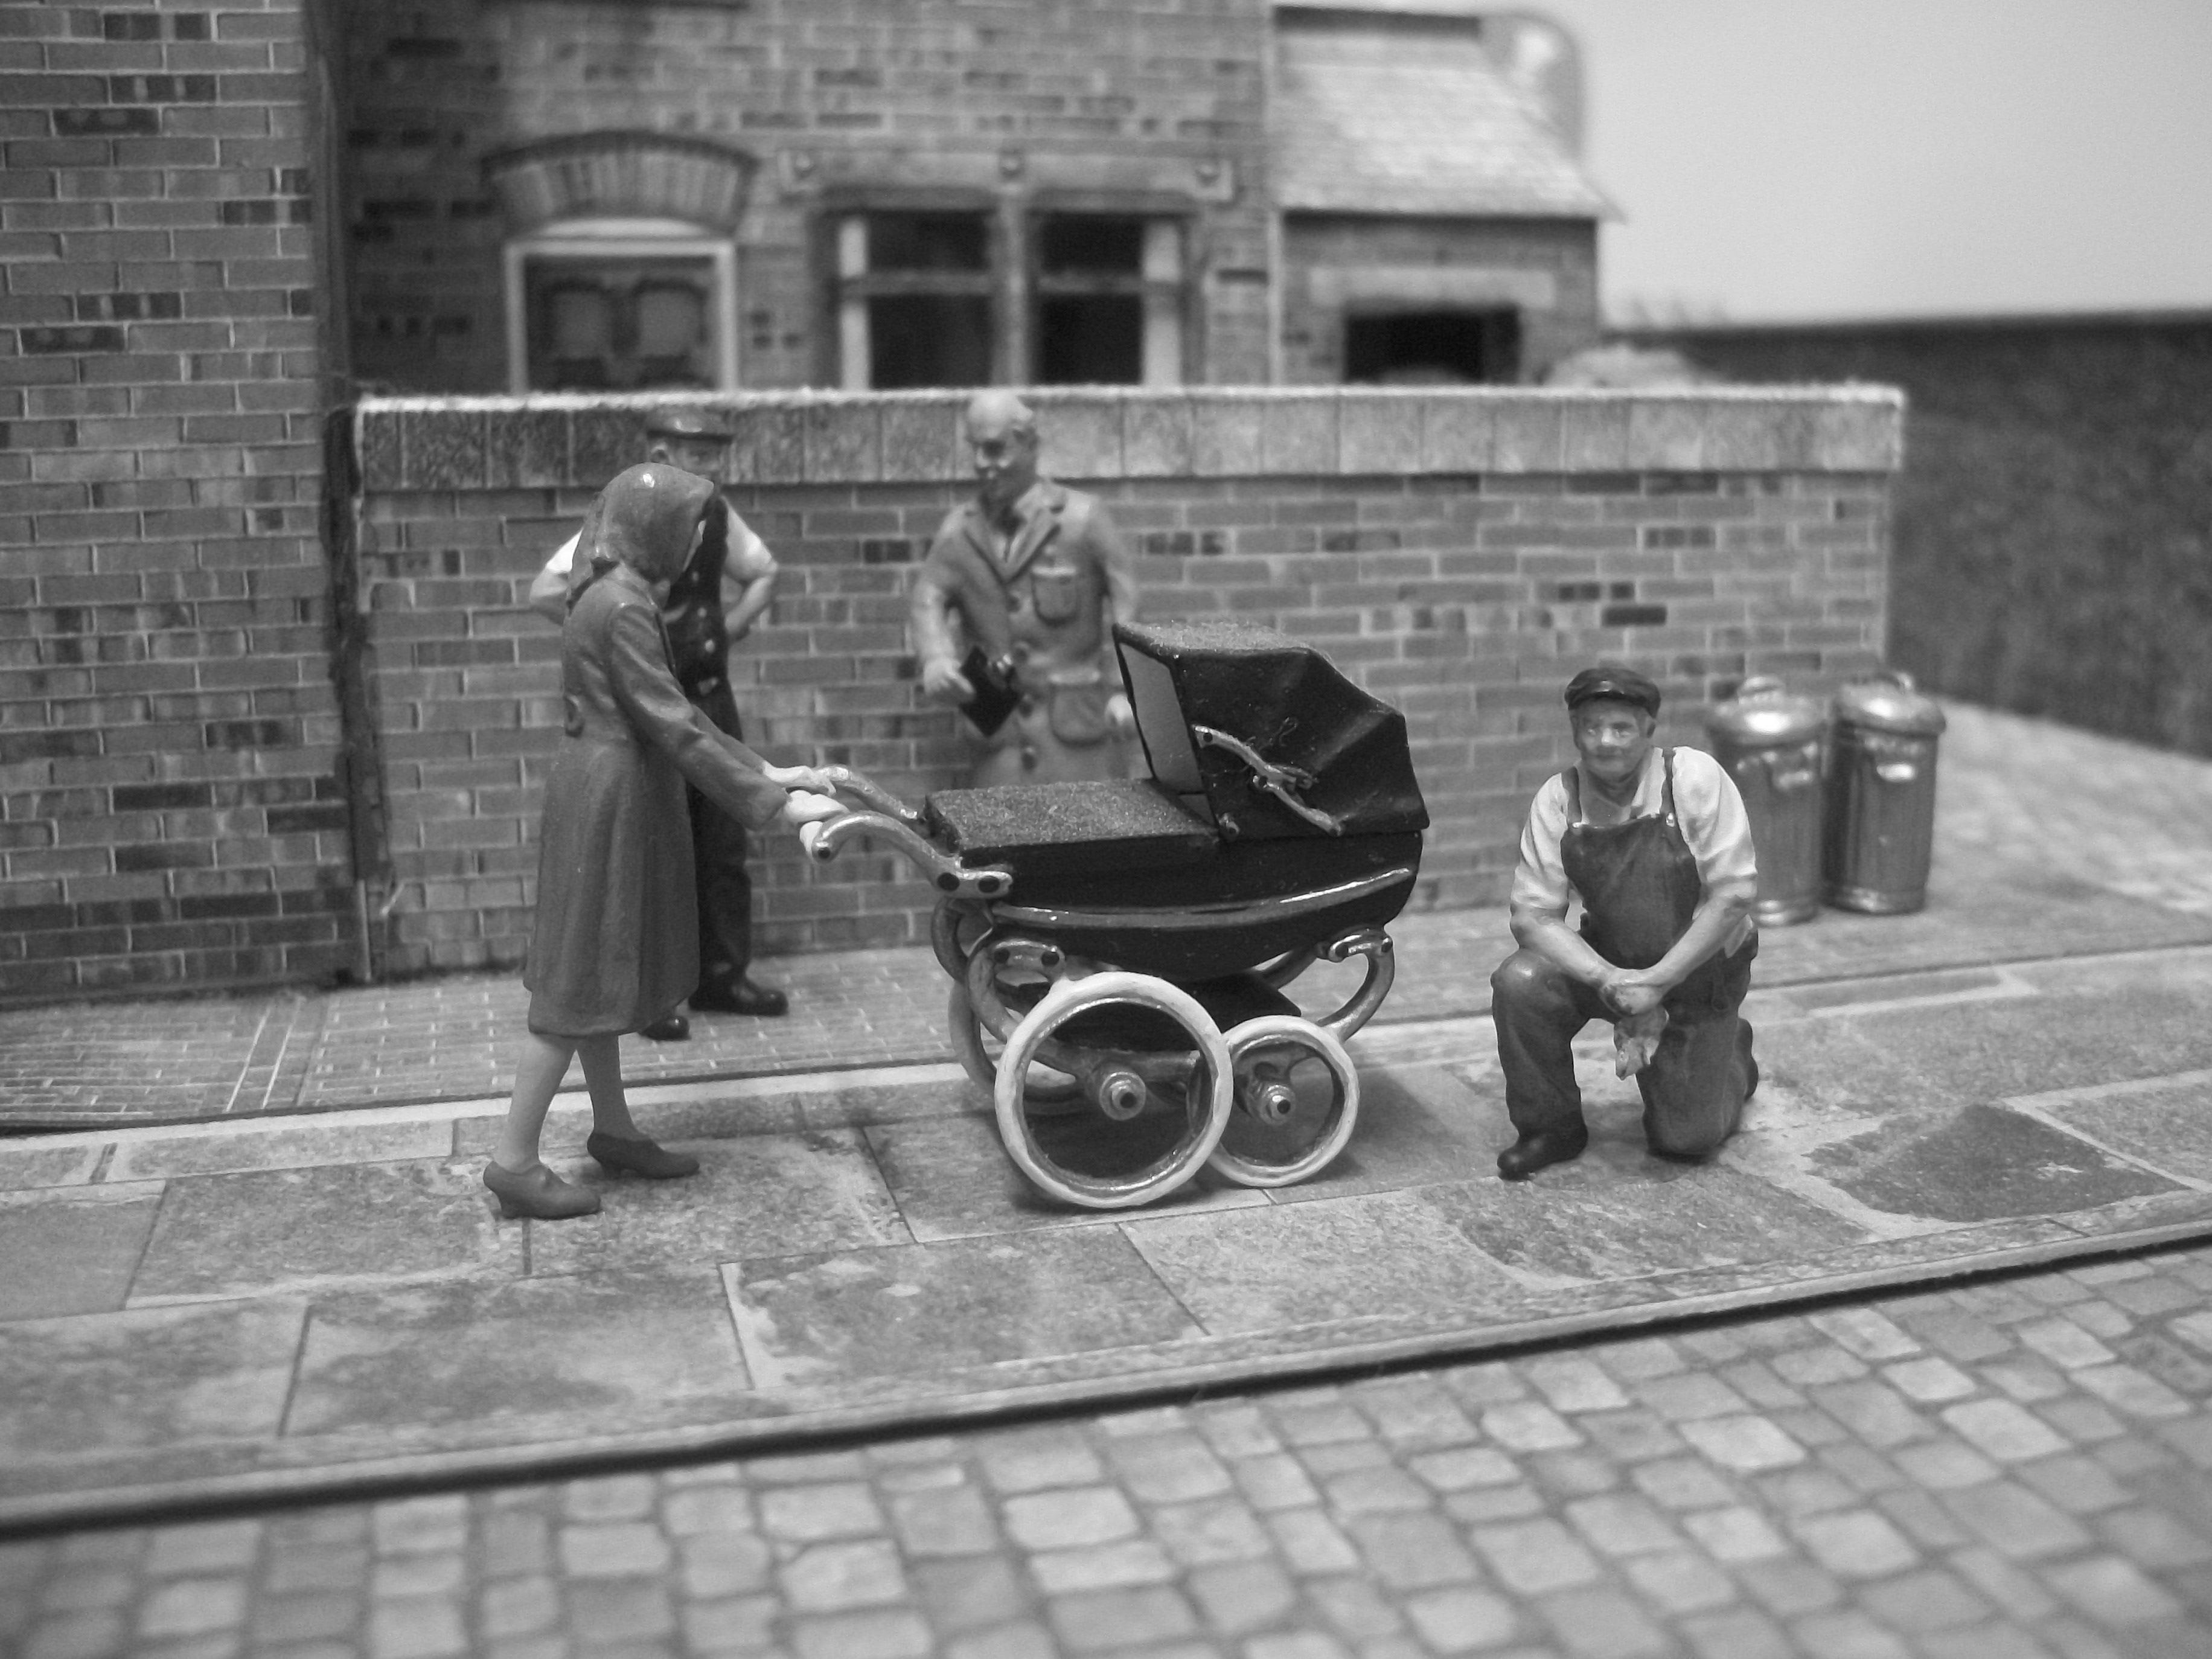
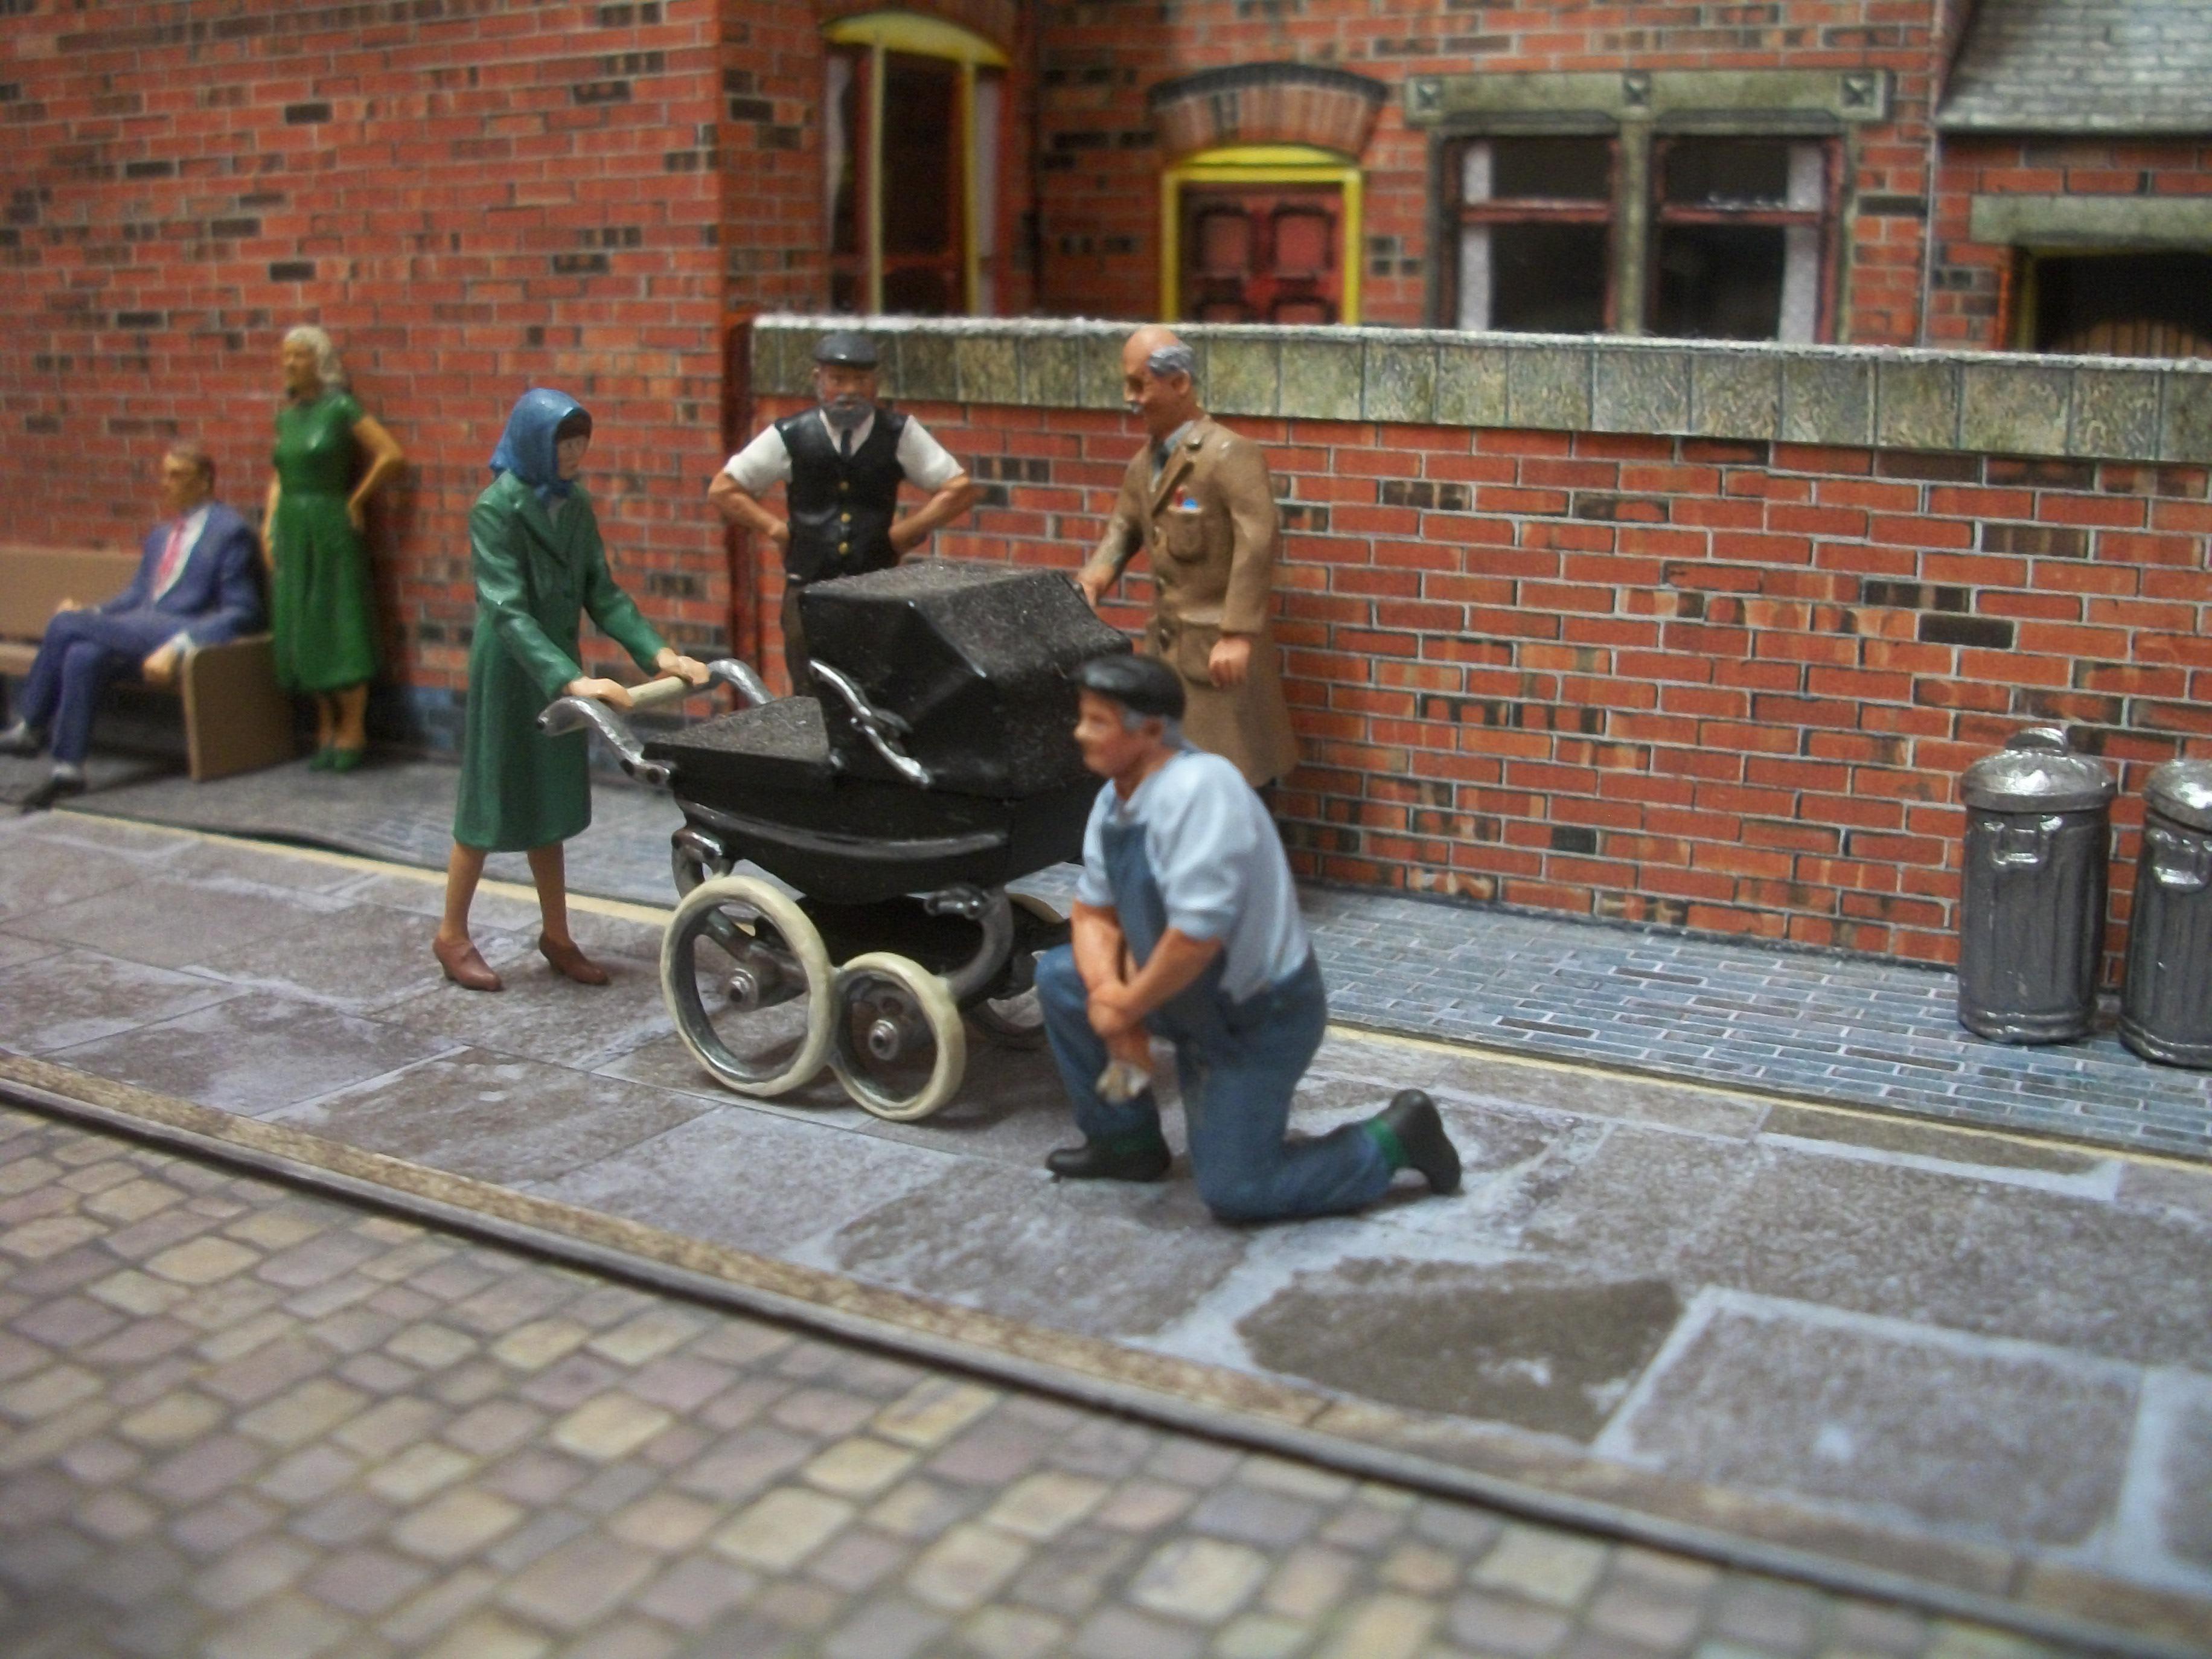
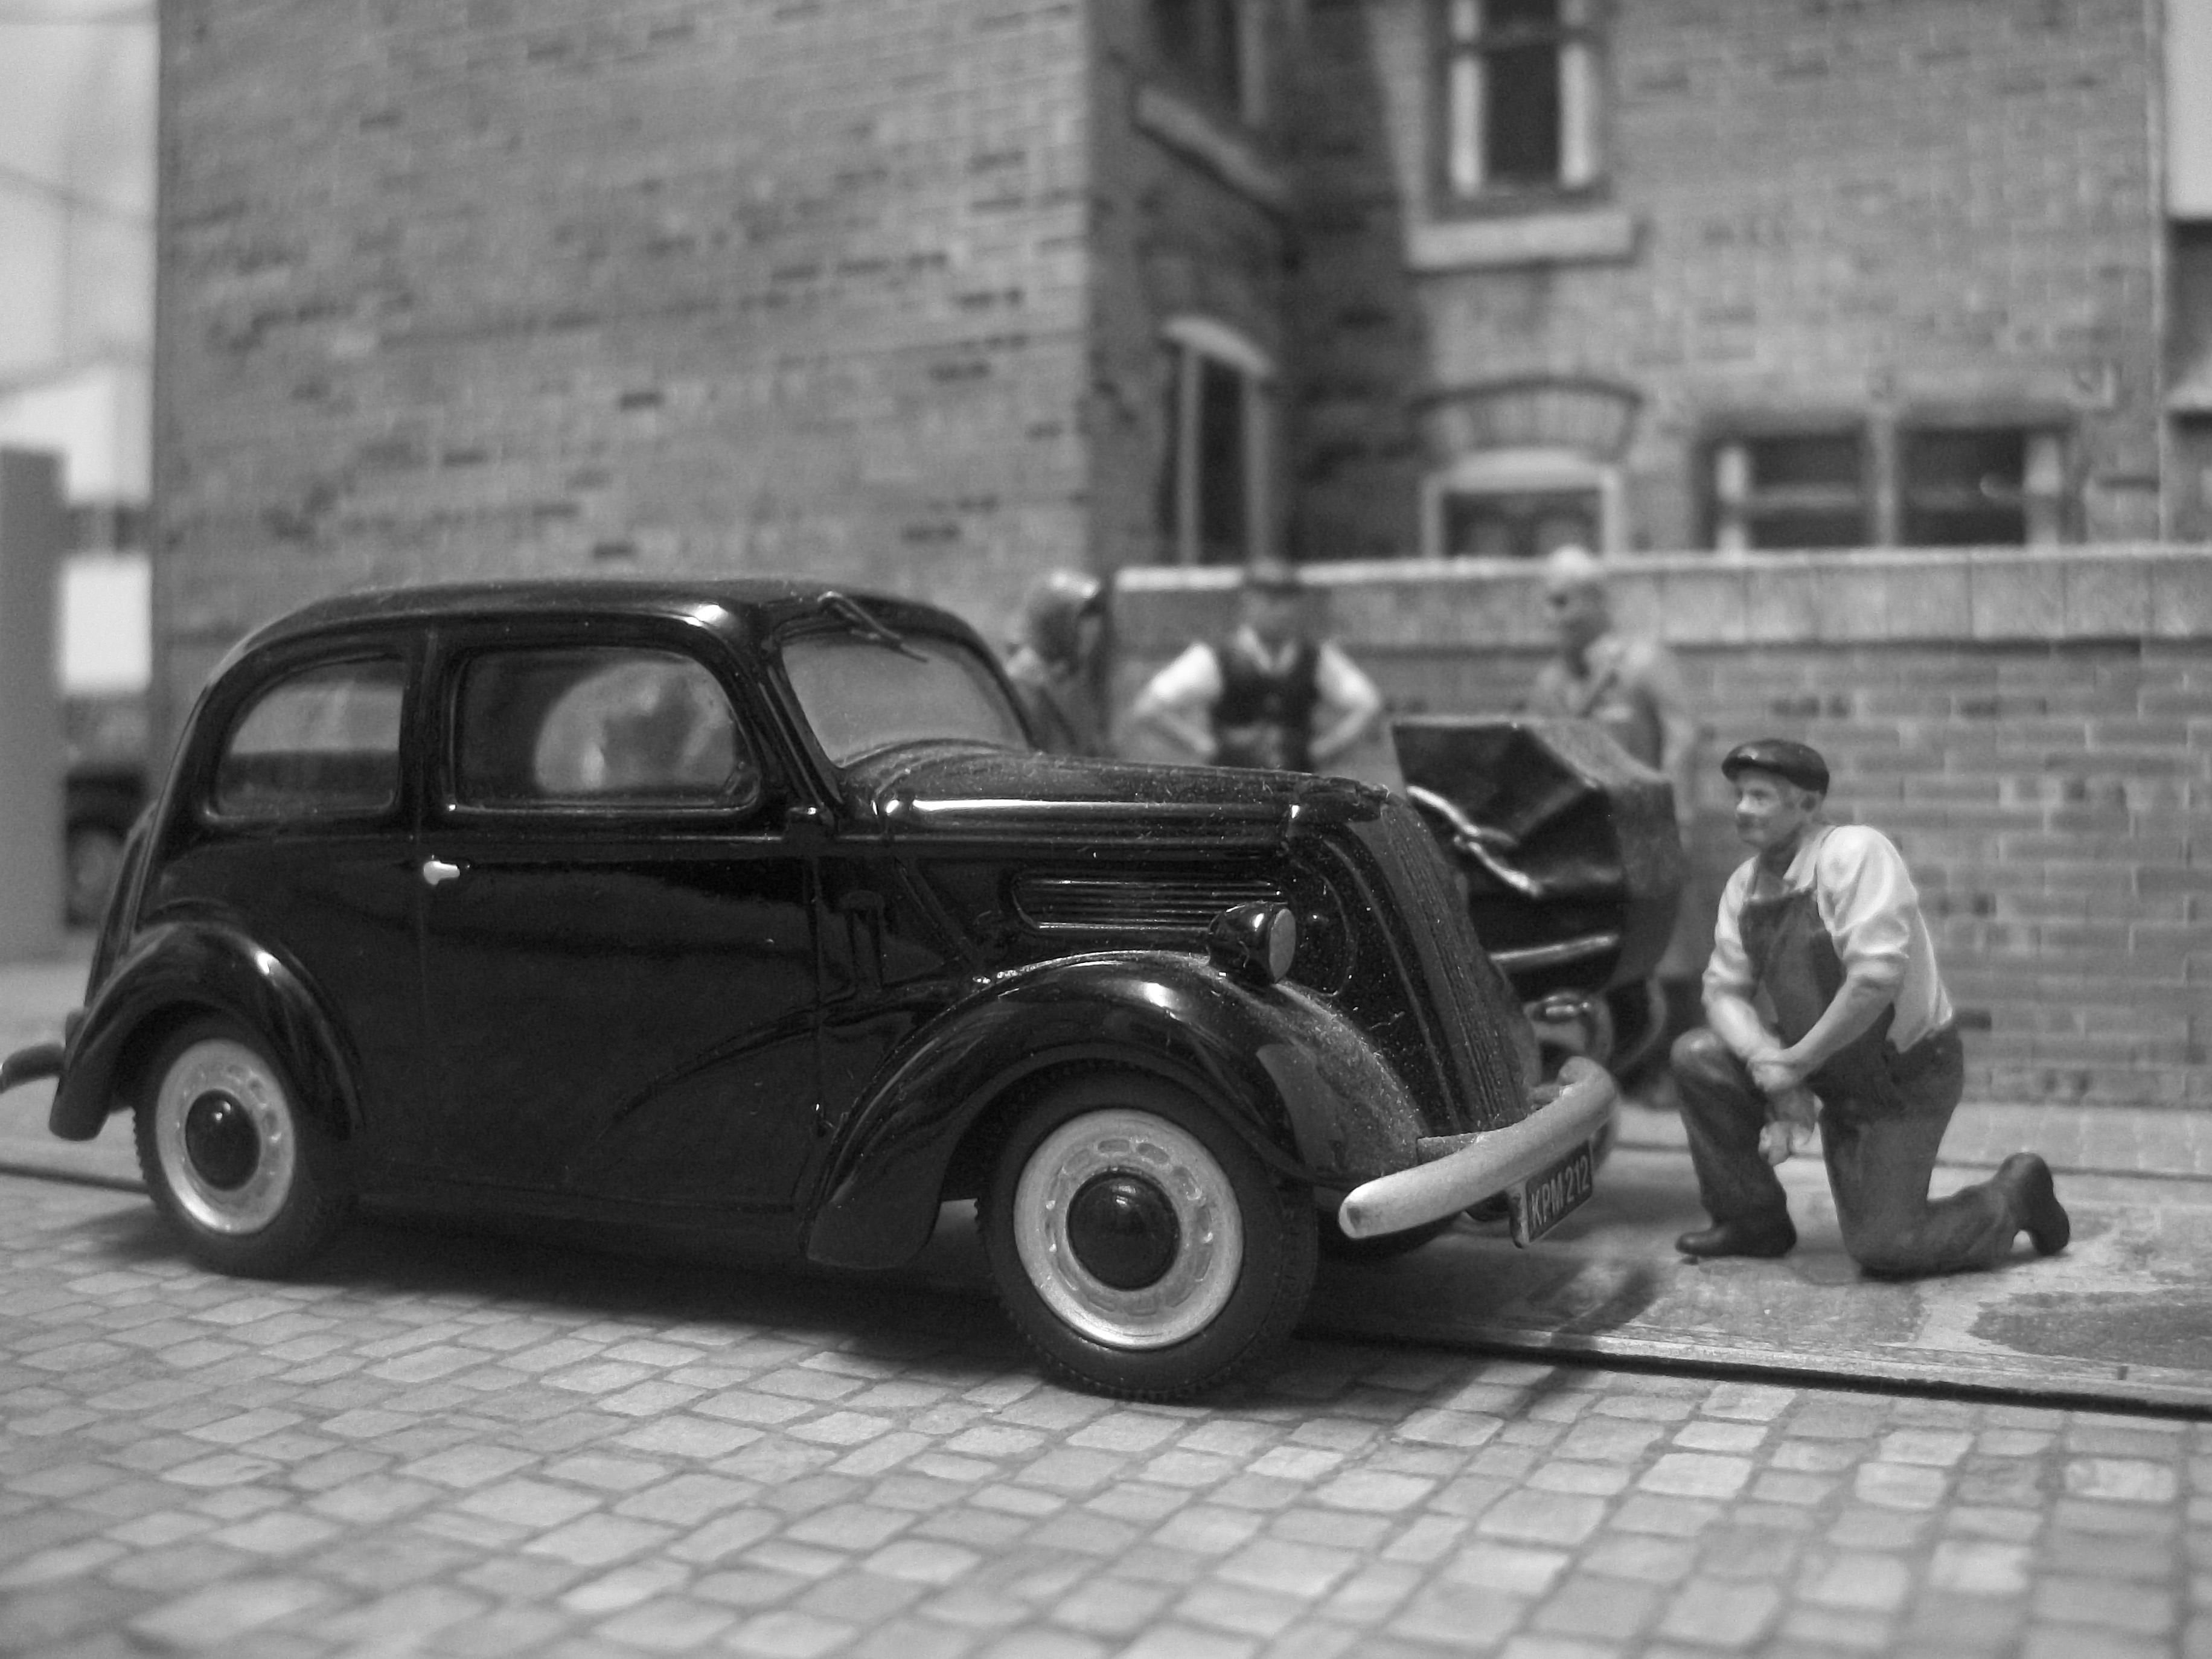
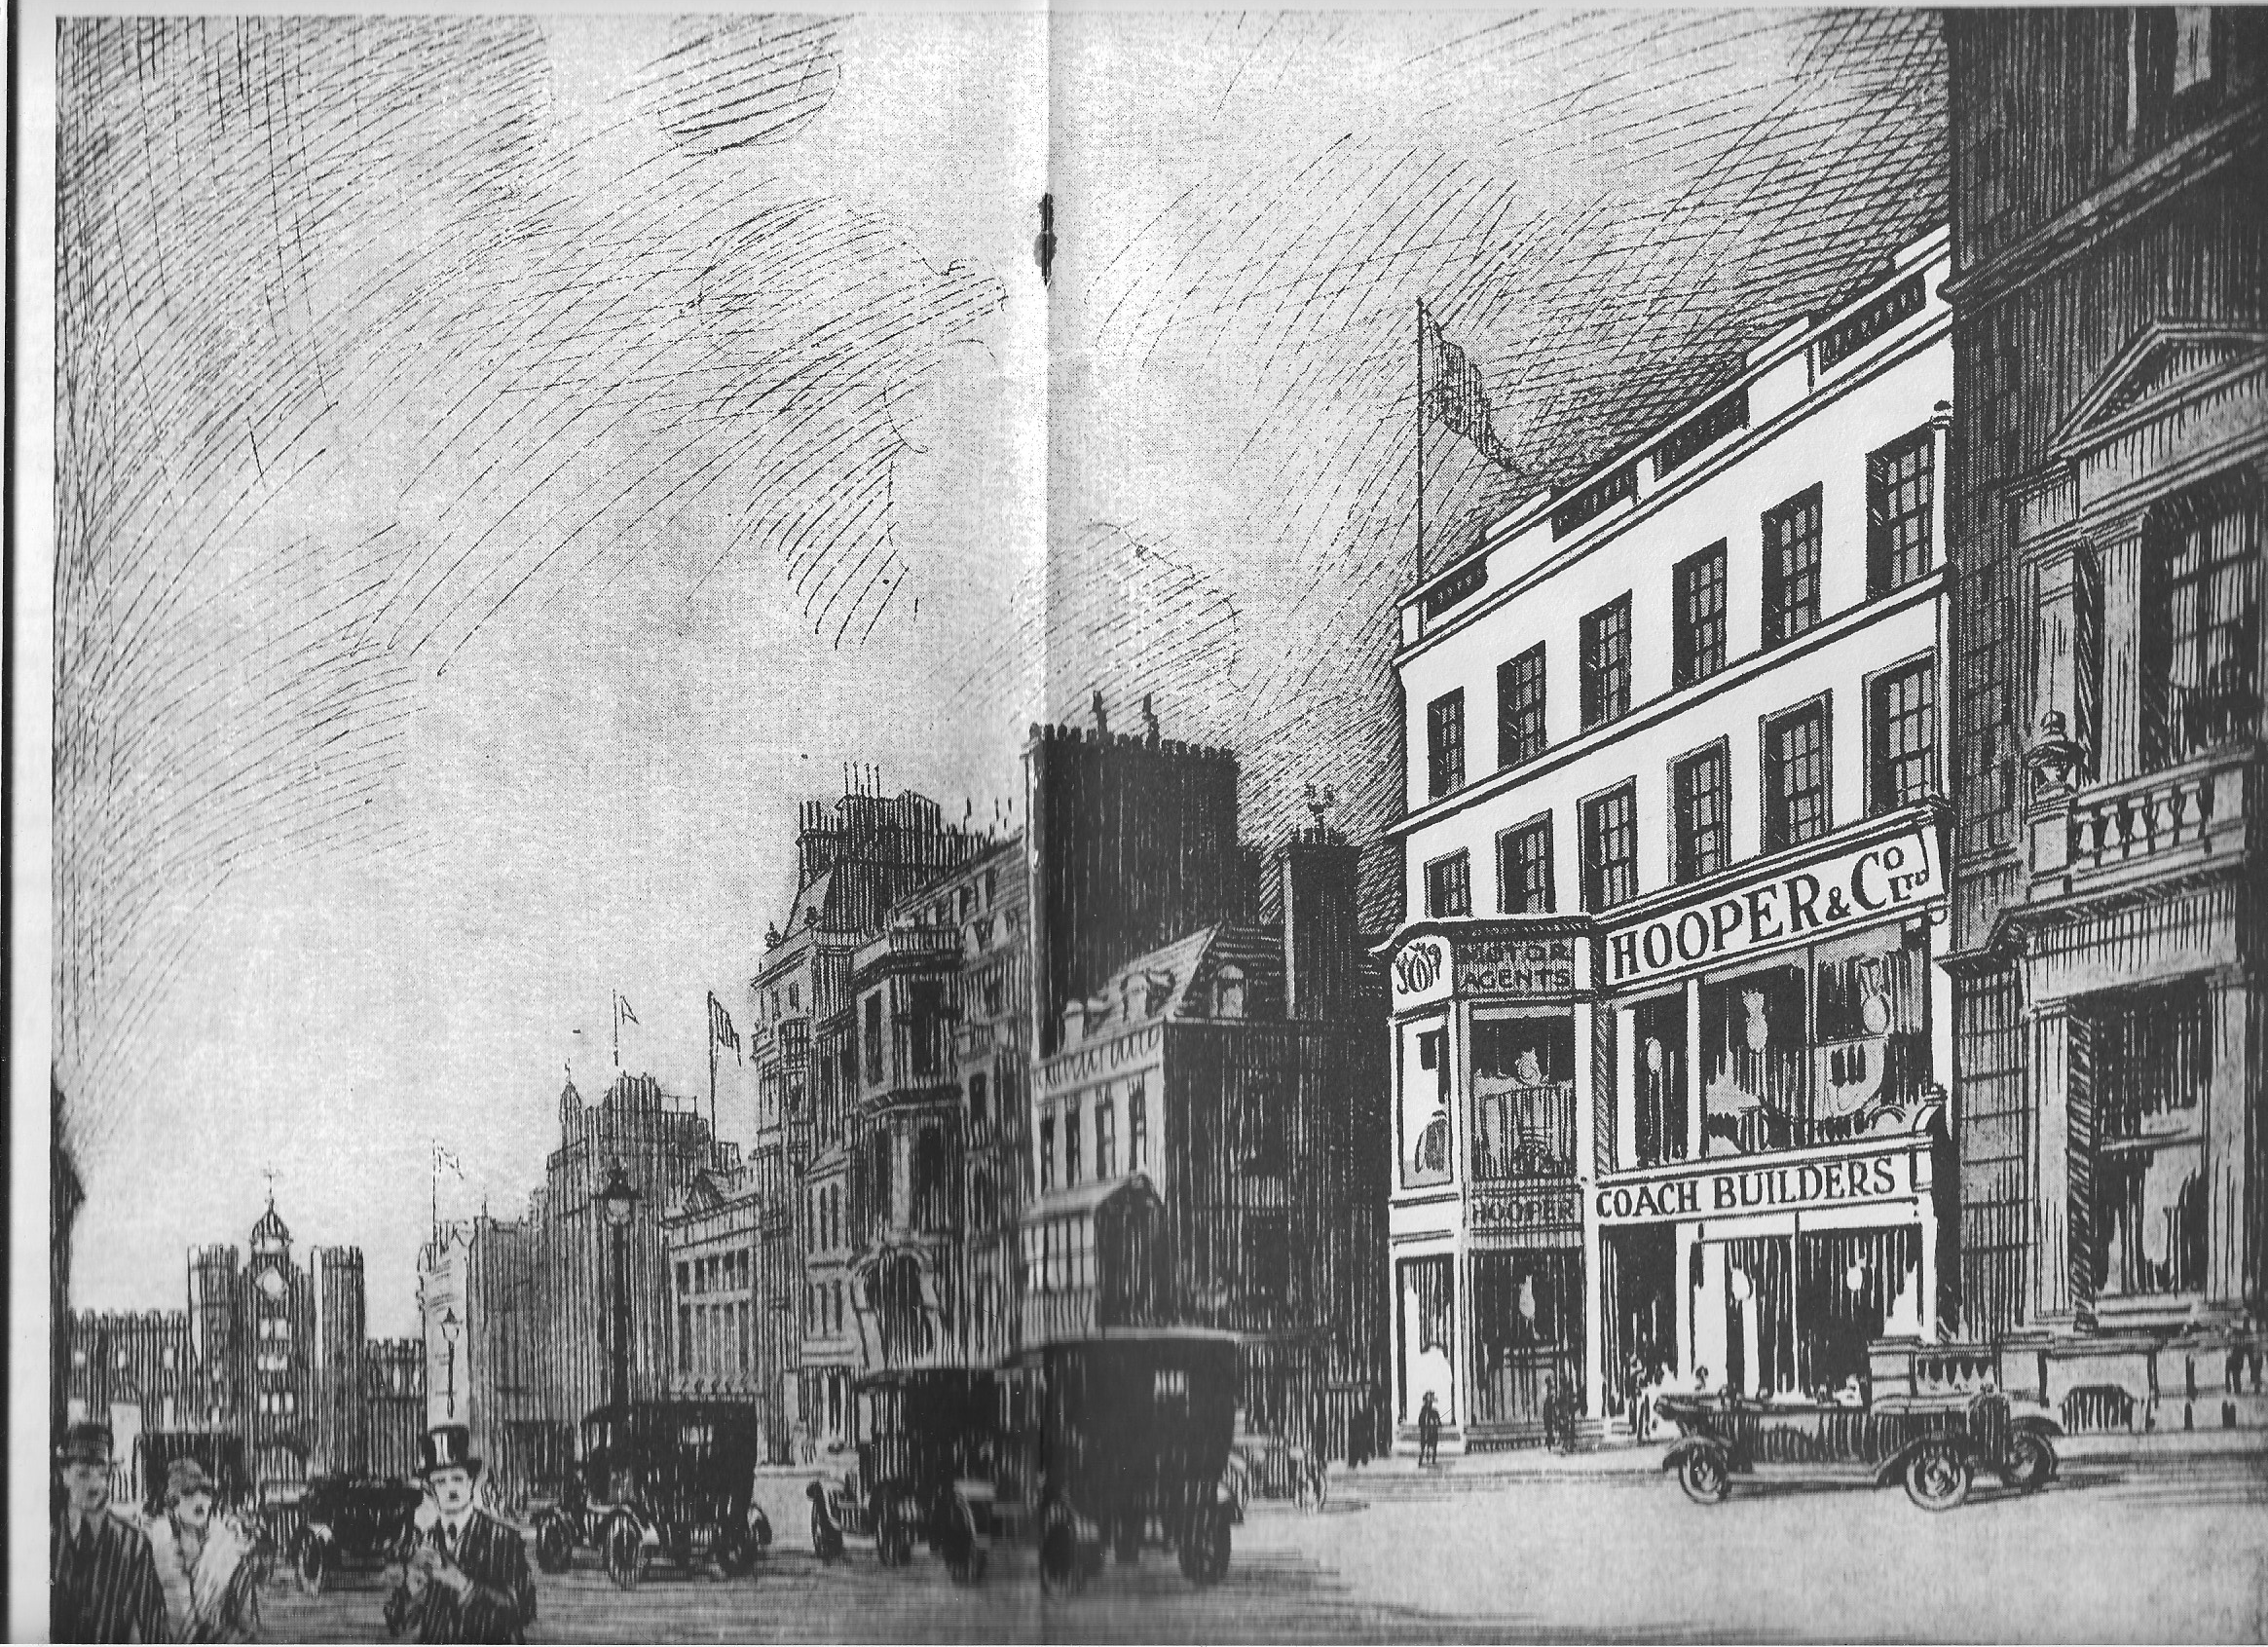
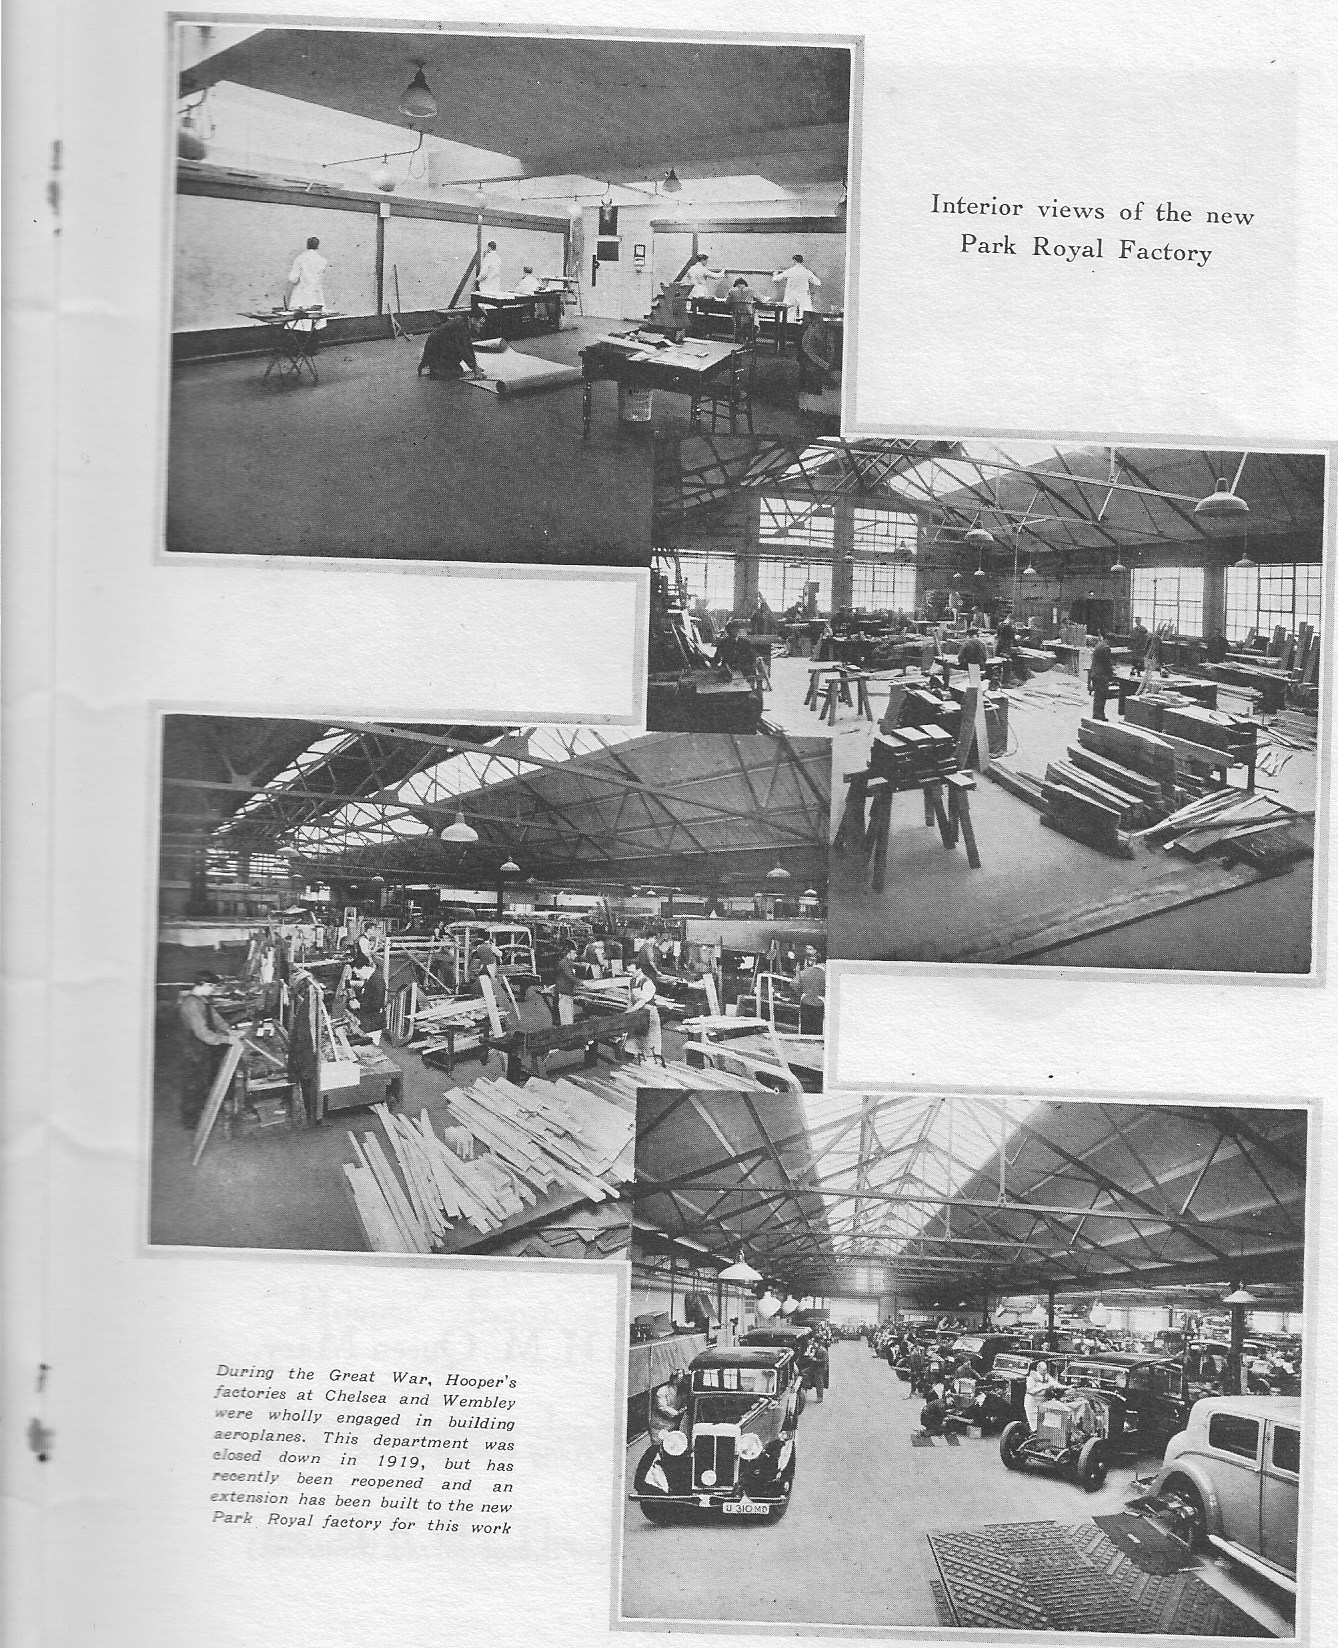
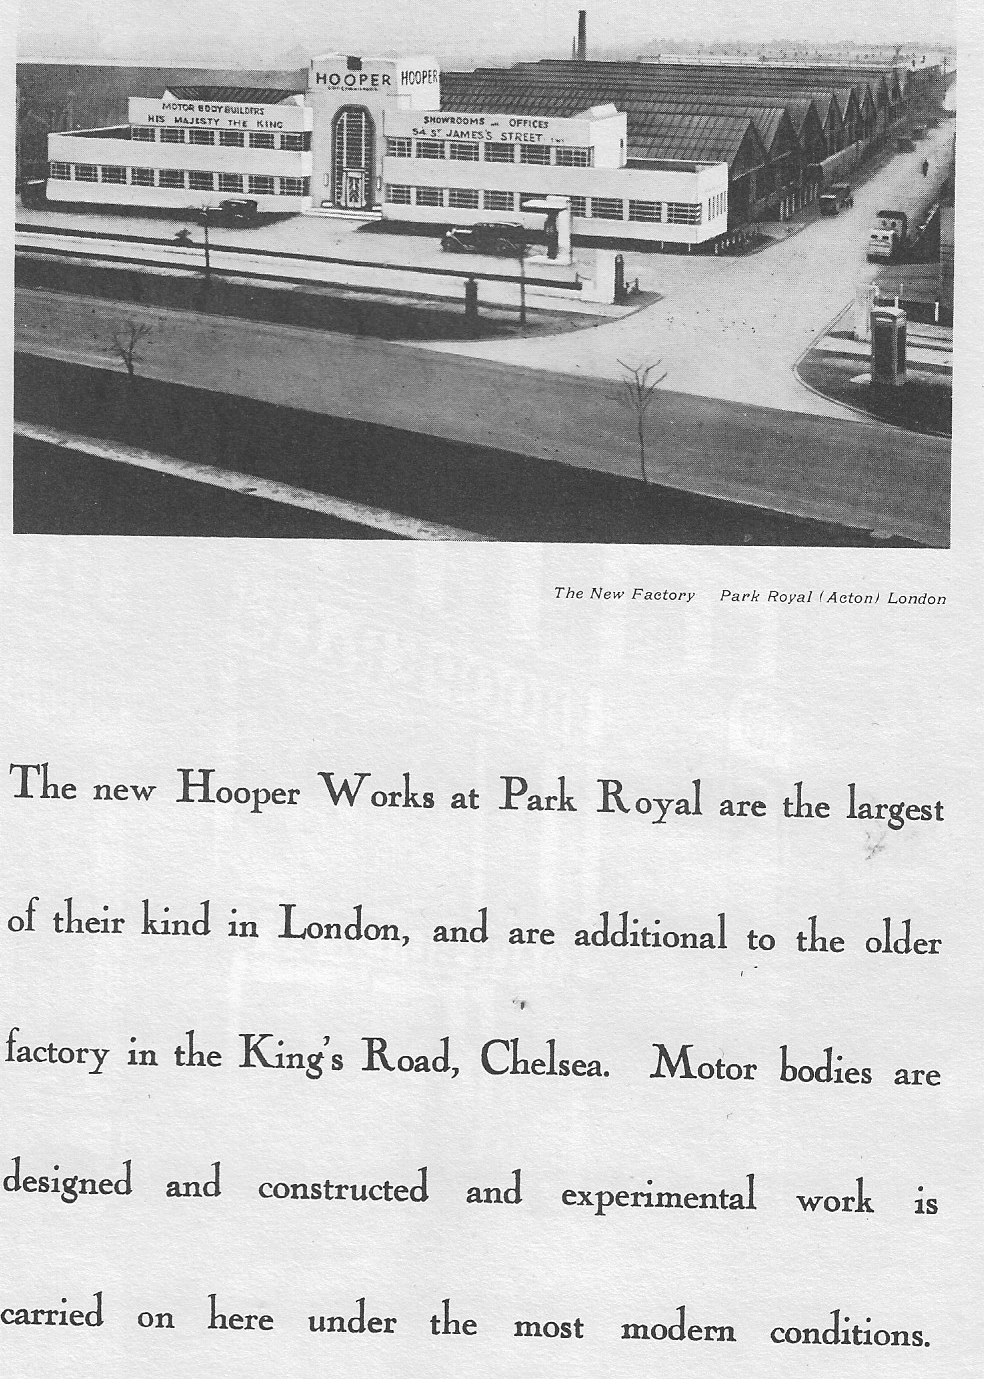
I stumbled across an envelope in a box this evening which contained a booklet, bearing the title ' The Art of Coachbuilding '....... What a find! and there on the last few pages are some photos of the interior of the new Park Royal factory, Western Avenue, Acton. This is 1937 when the factory was built, and this booklet was reprinted in 1975 by the Rolls-Royce Owners Club. Something that I noticed immediately, from the photo in the bottom right hand corner of Page Fifteen, is that the skylight when viewed from inside the factory not only runs along the top of the North facing roof, but also along the top of the South facing roof as well. Oh no! What do I do now? Some good photos of cars being assembled inside the factory, and it is also interesting that they used this factory to build aircraft for WW2. I have scanned these photos for you and included them here, including one of the St James's Street showrooms building, which has to be pre-1937, and a clearer photo of the factory site. A new 1:43 scale figure arrived in the post today from Detailed Miniatures, and this is a kneeling loco engineer, in a boiler suit and holding an oily rag. There was a note inside the package to say that they have many more figures on their website, which are cheaper than on their Ebay site. David
-
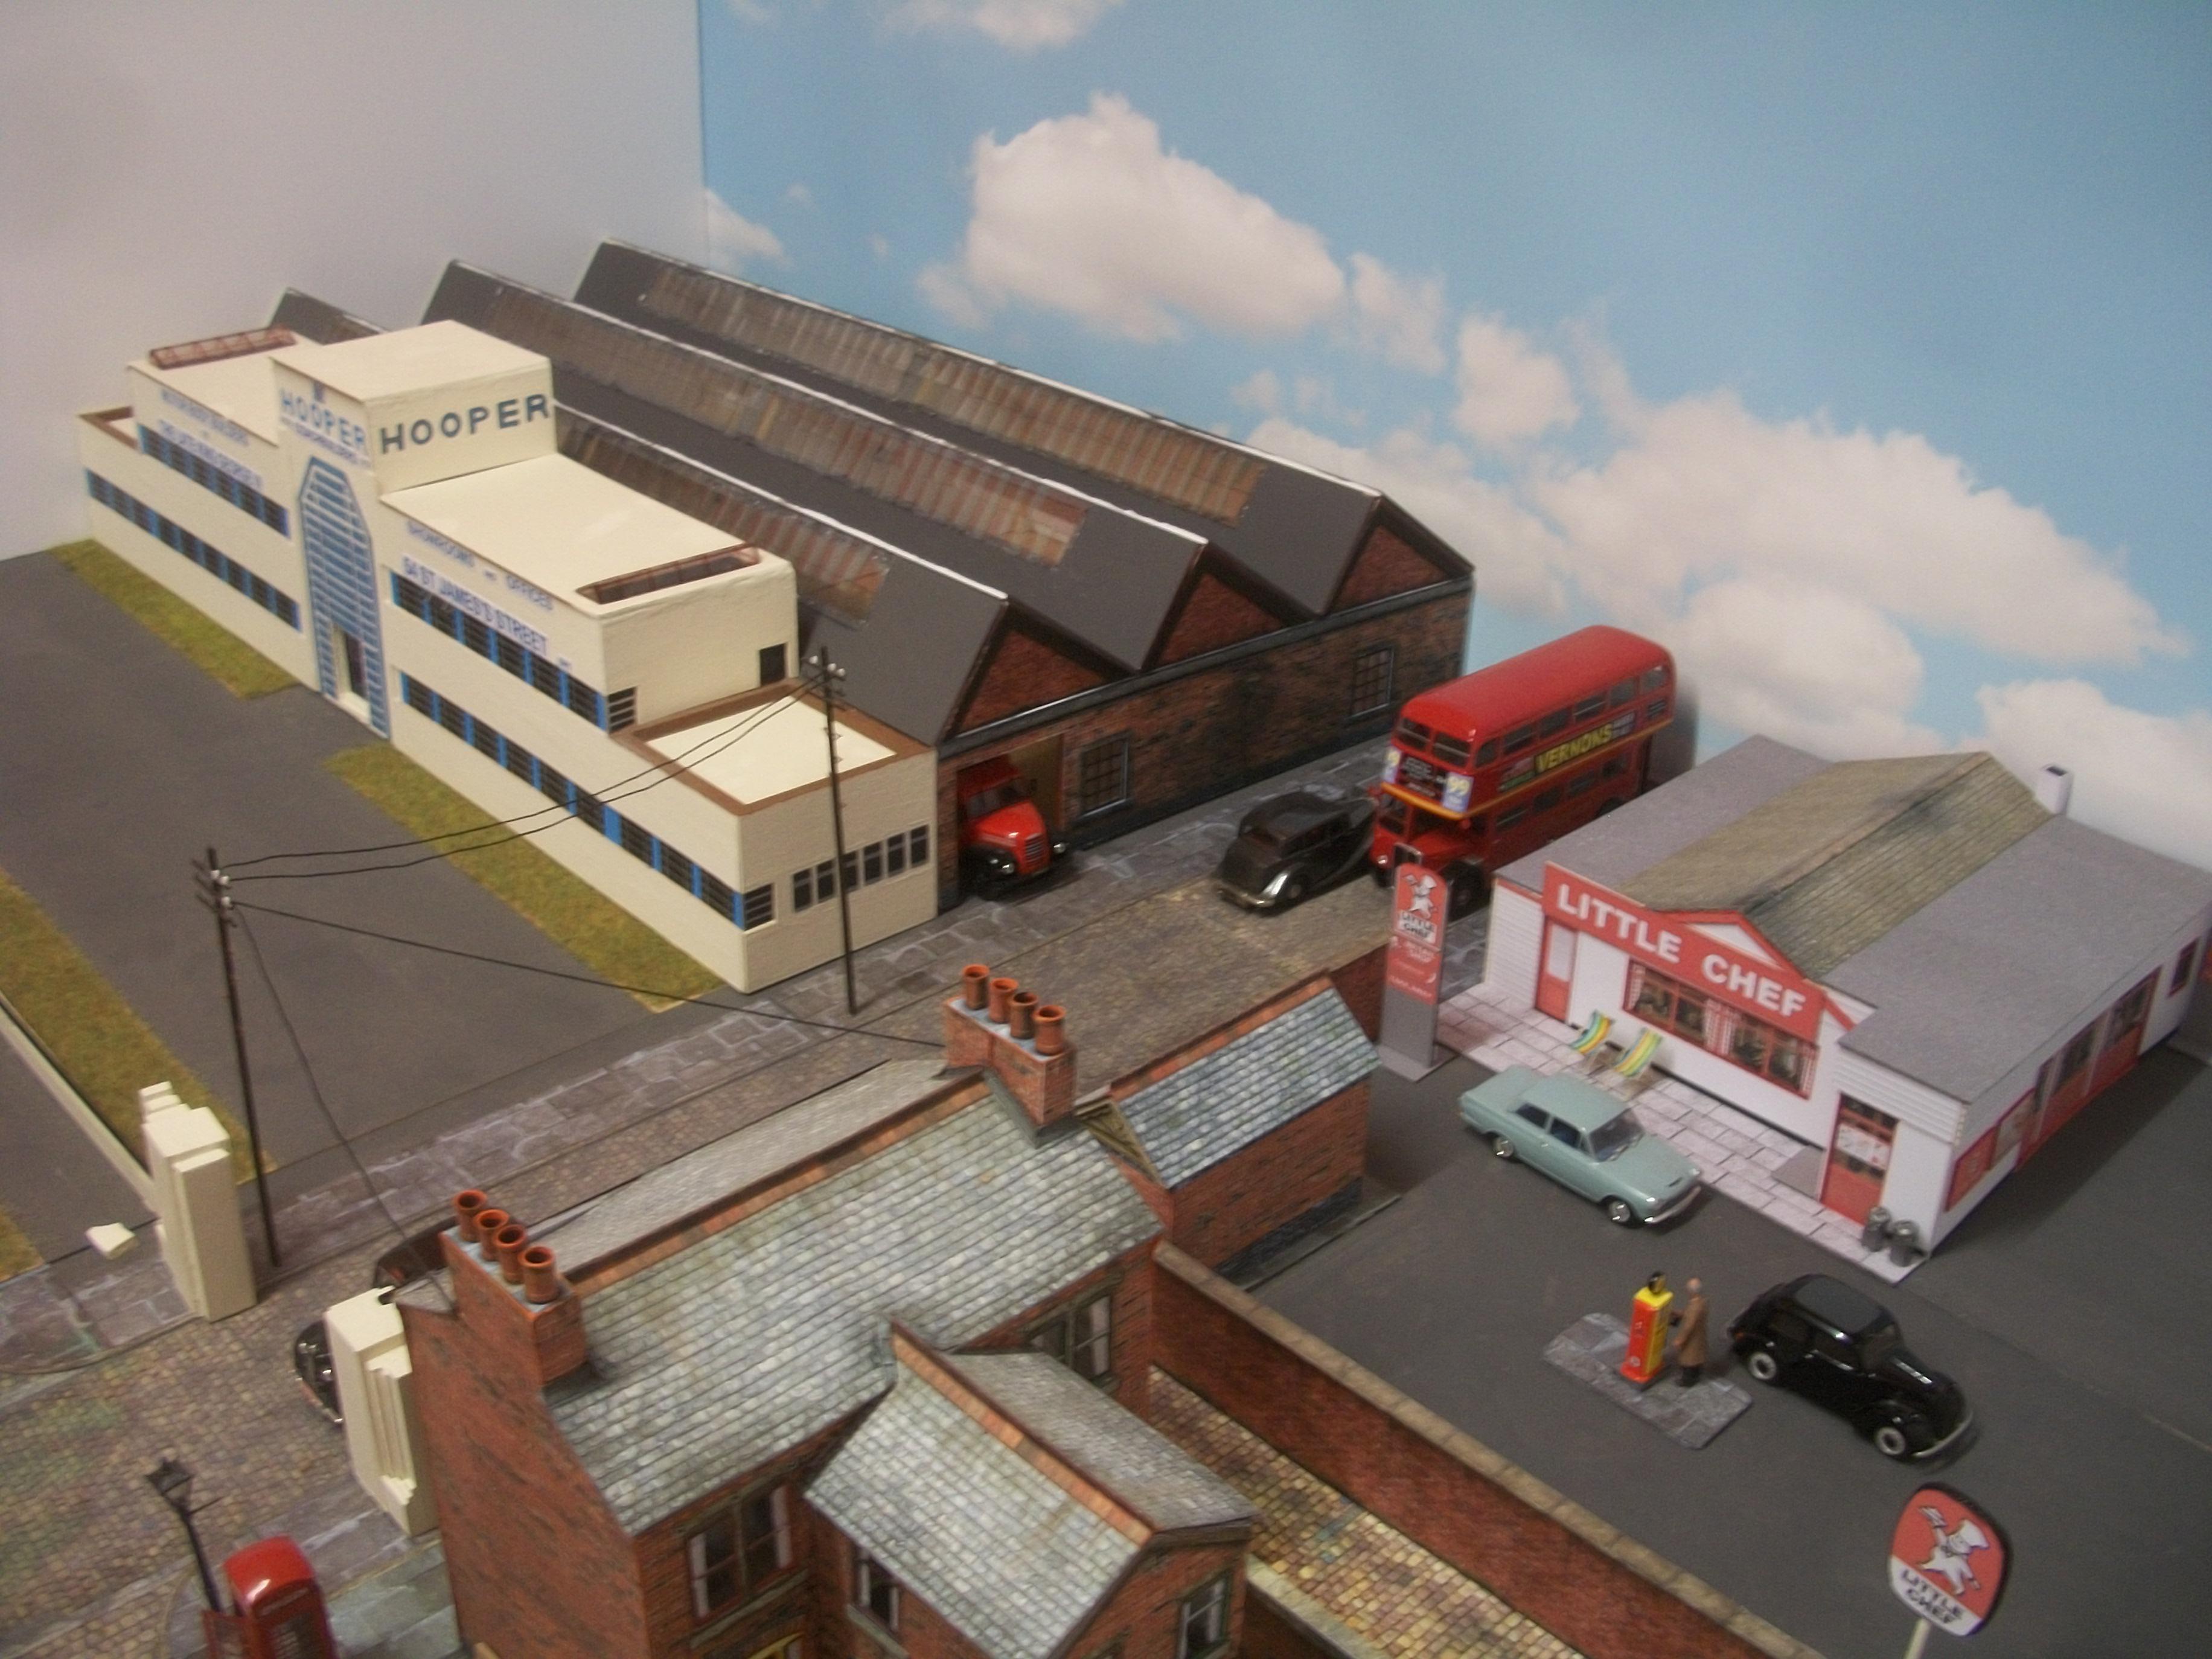
Thank you, Pat........ and you almost win the prize for being the first person to spot the number of missing units...... there were 9 units behind the real factory, and I only have space for 3, so there are 6 missing units! David
-
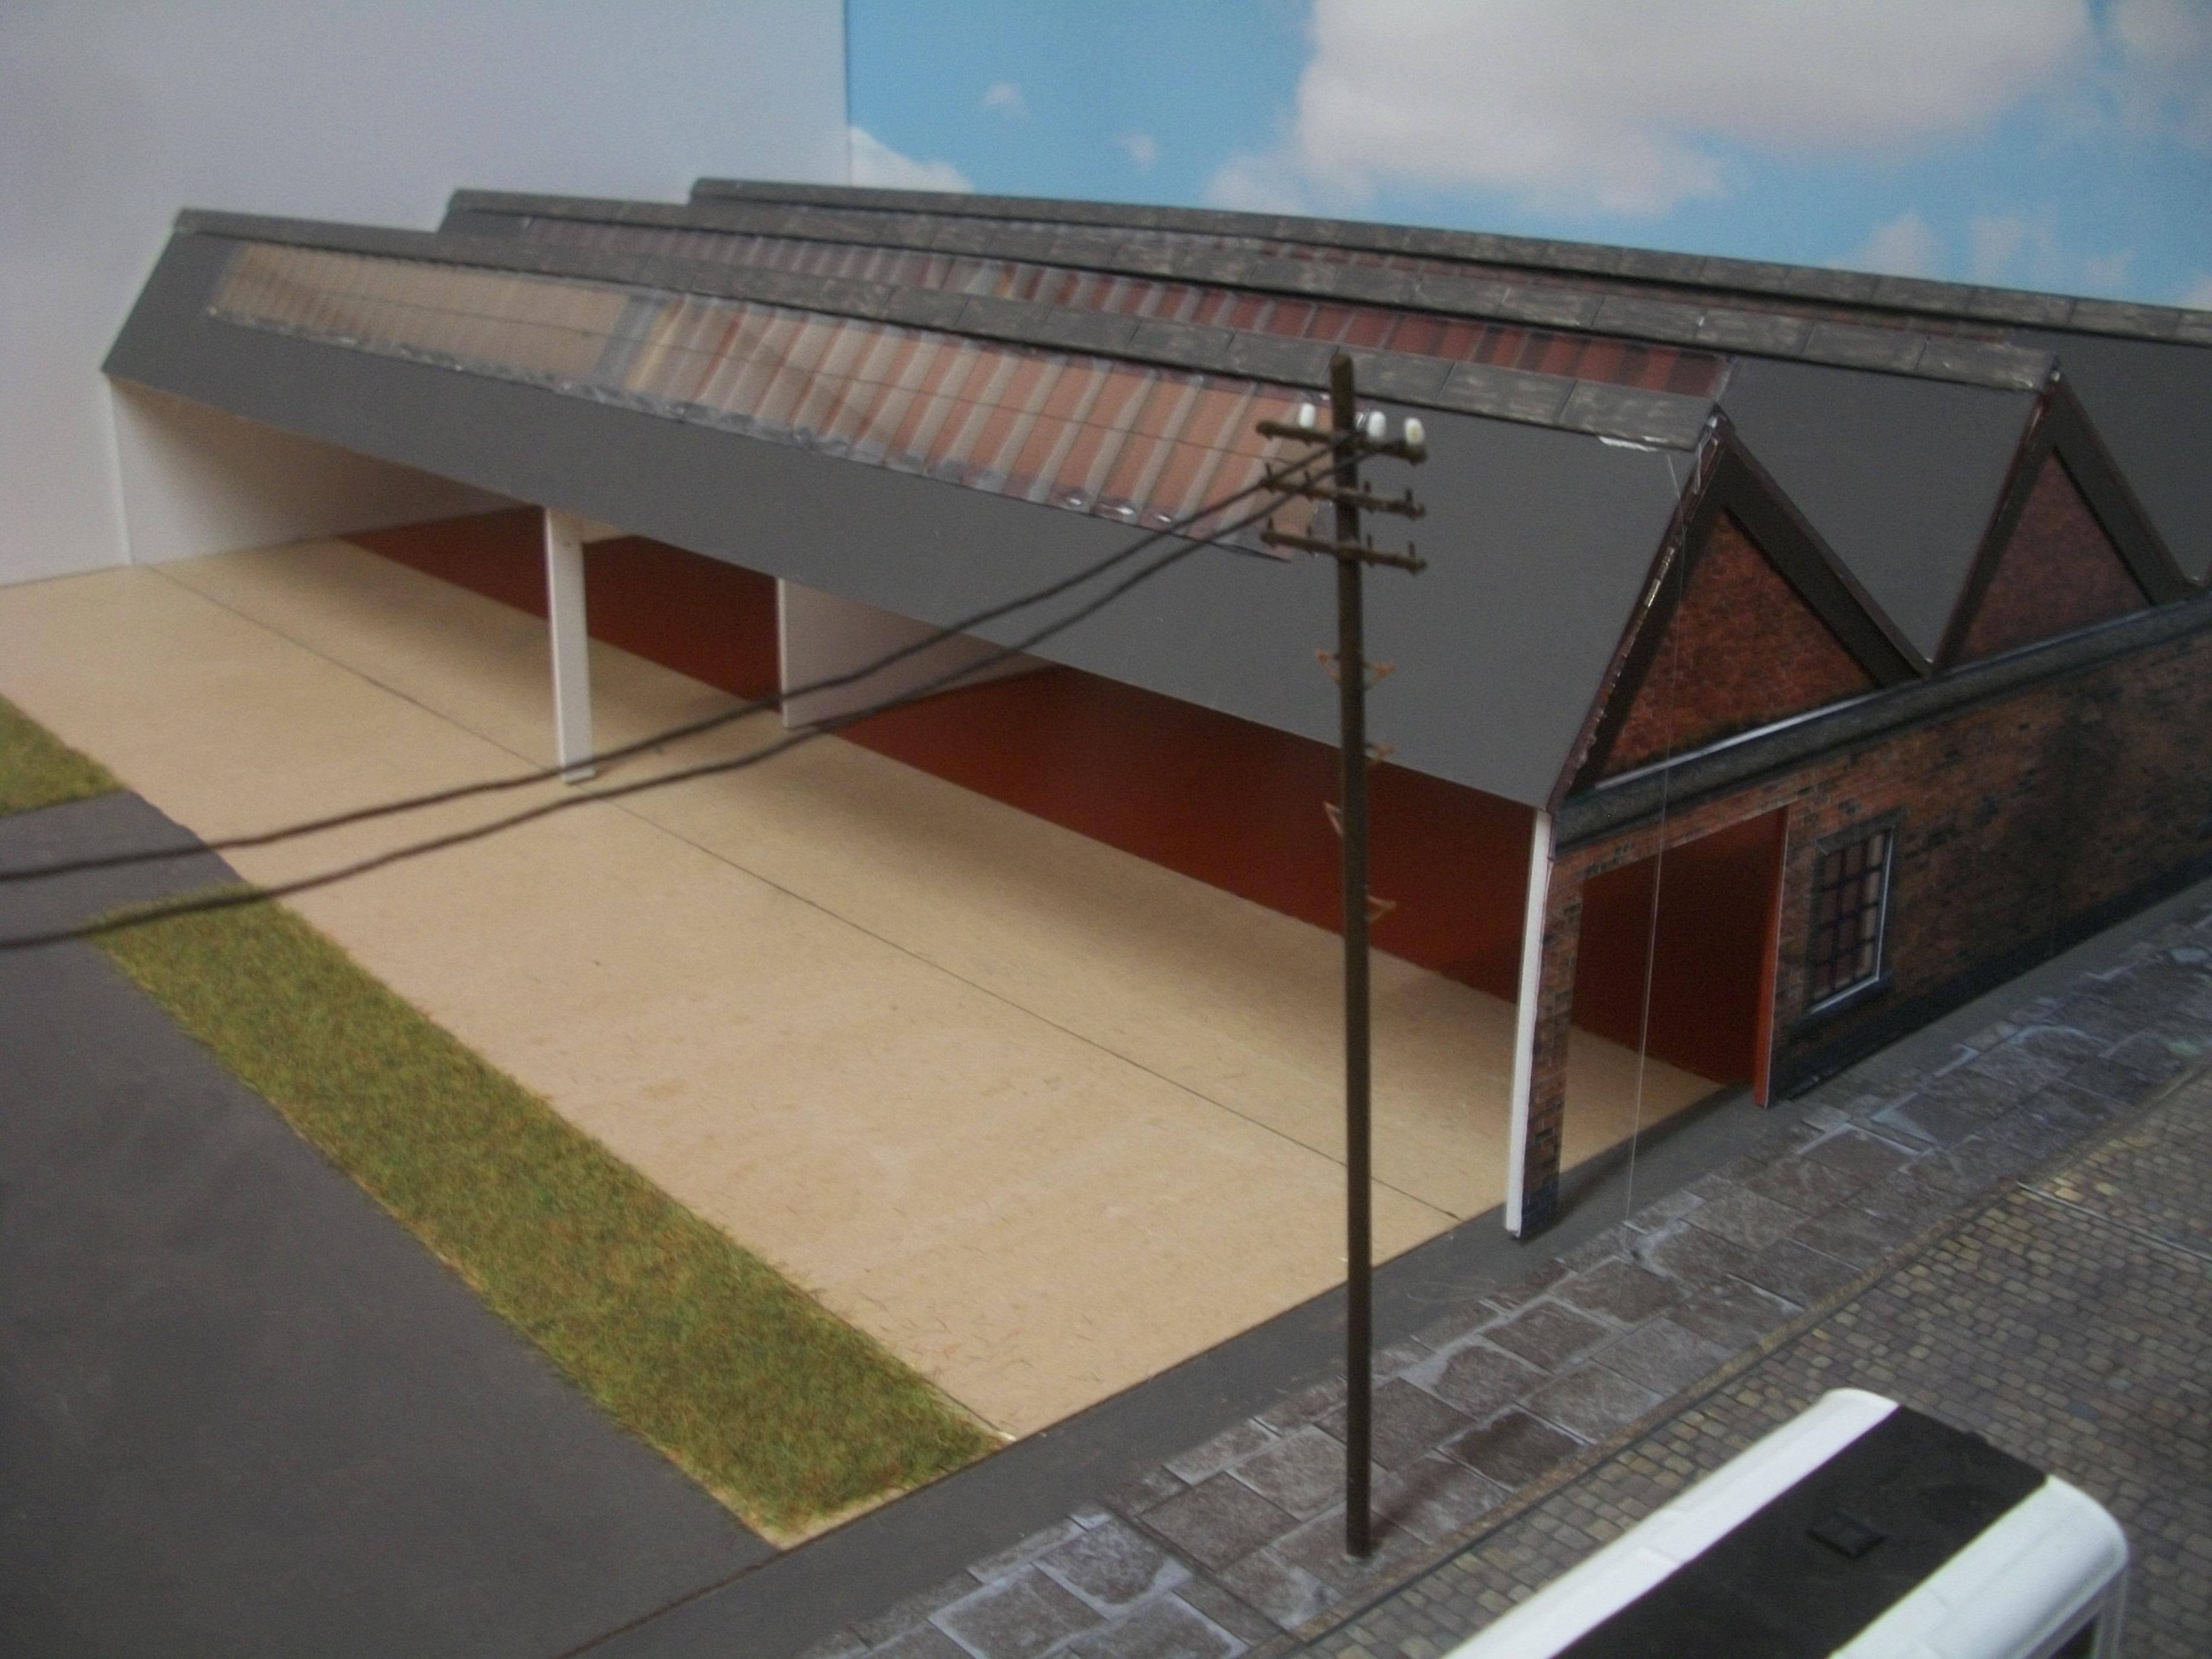
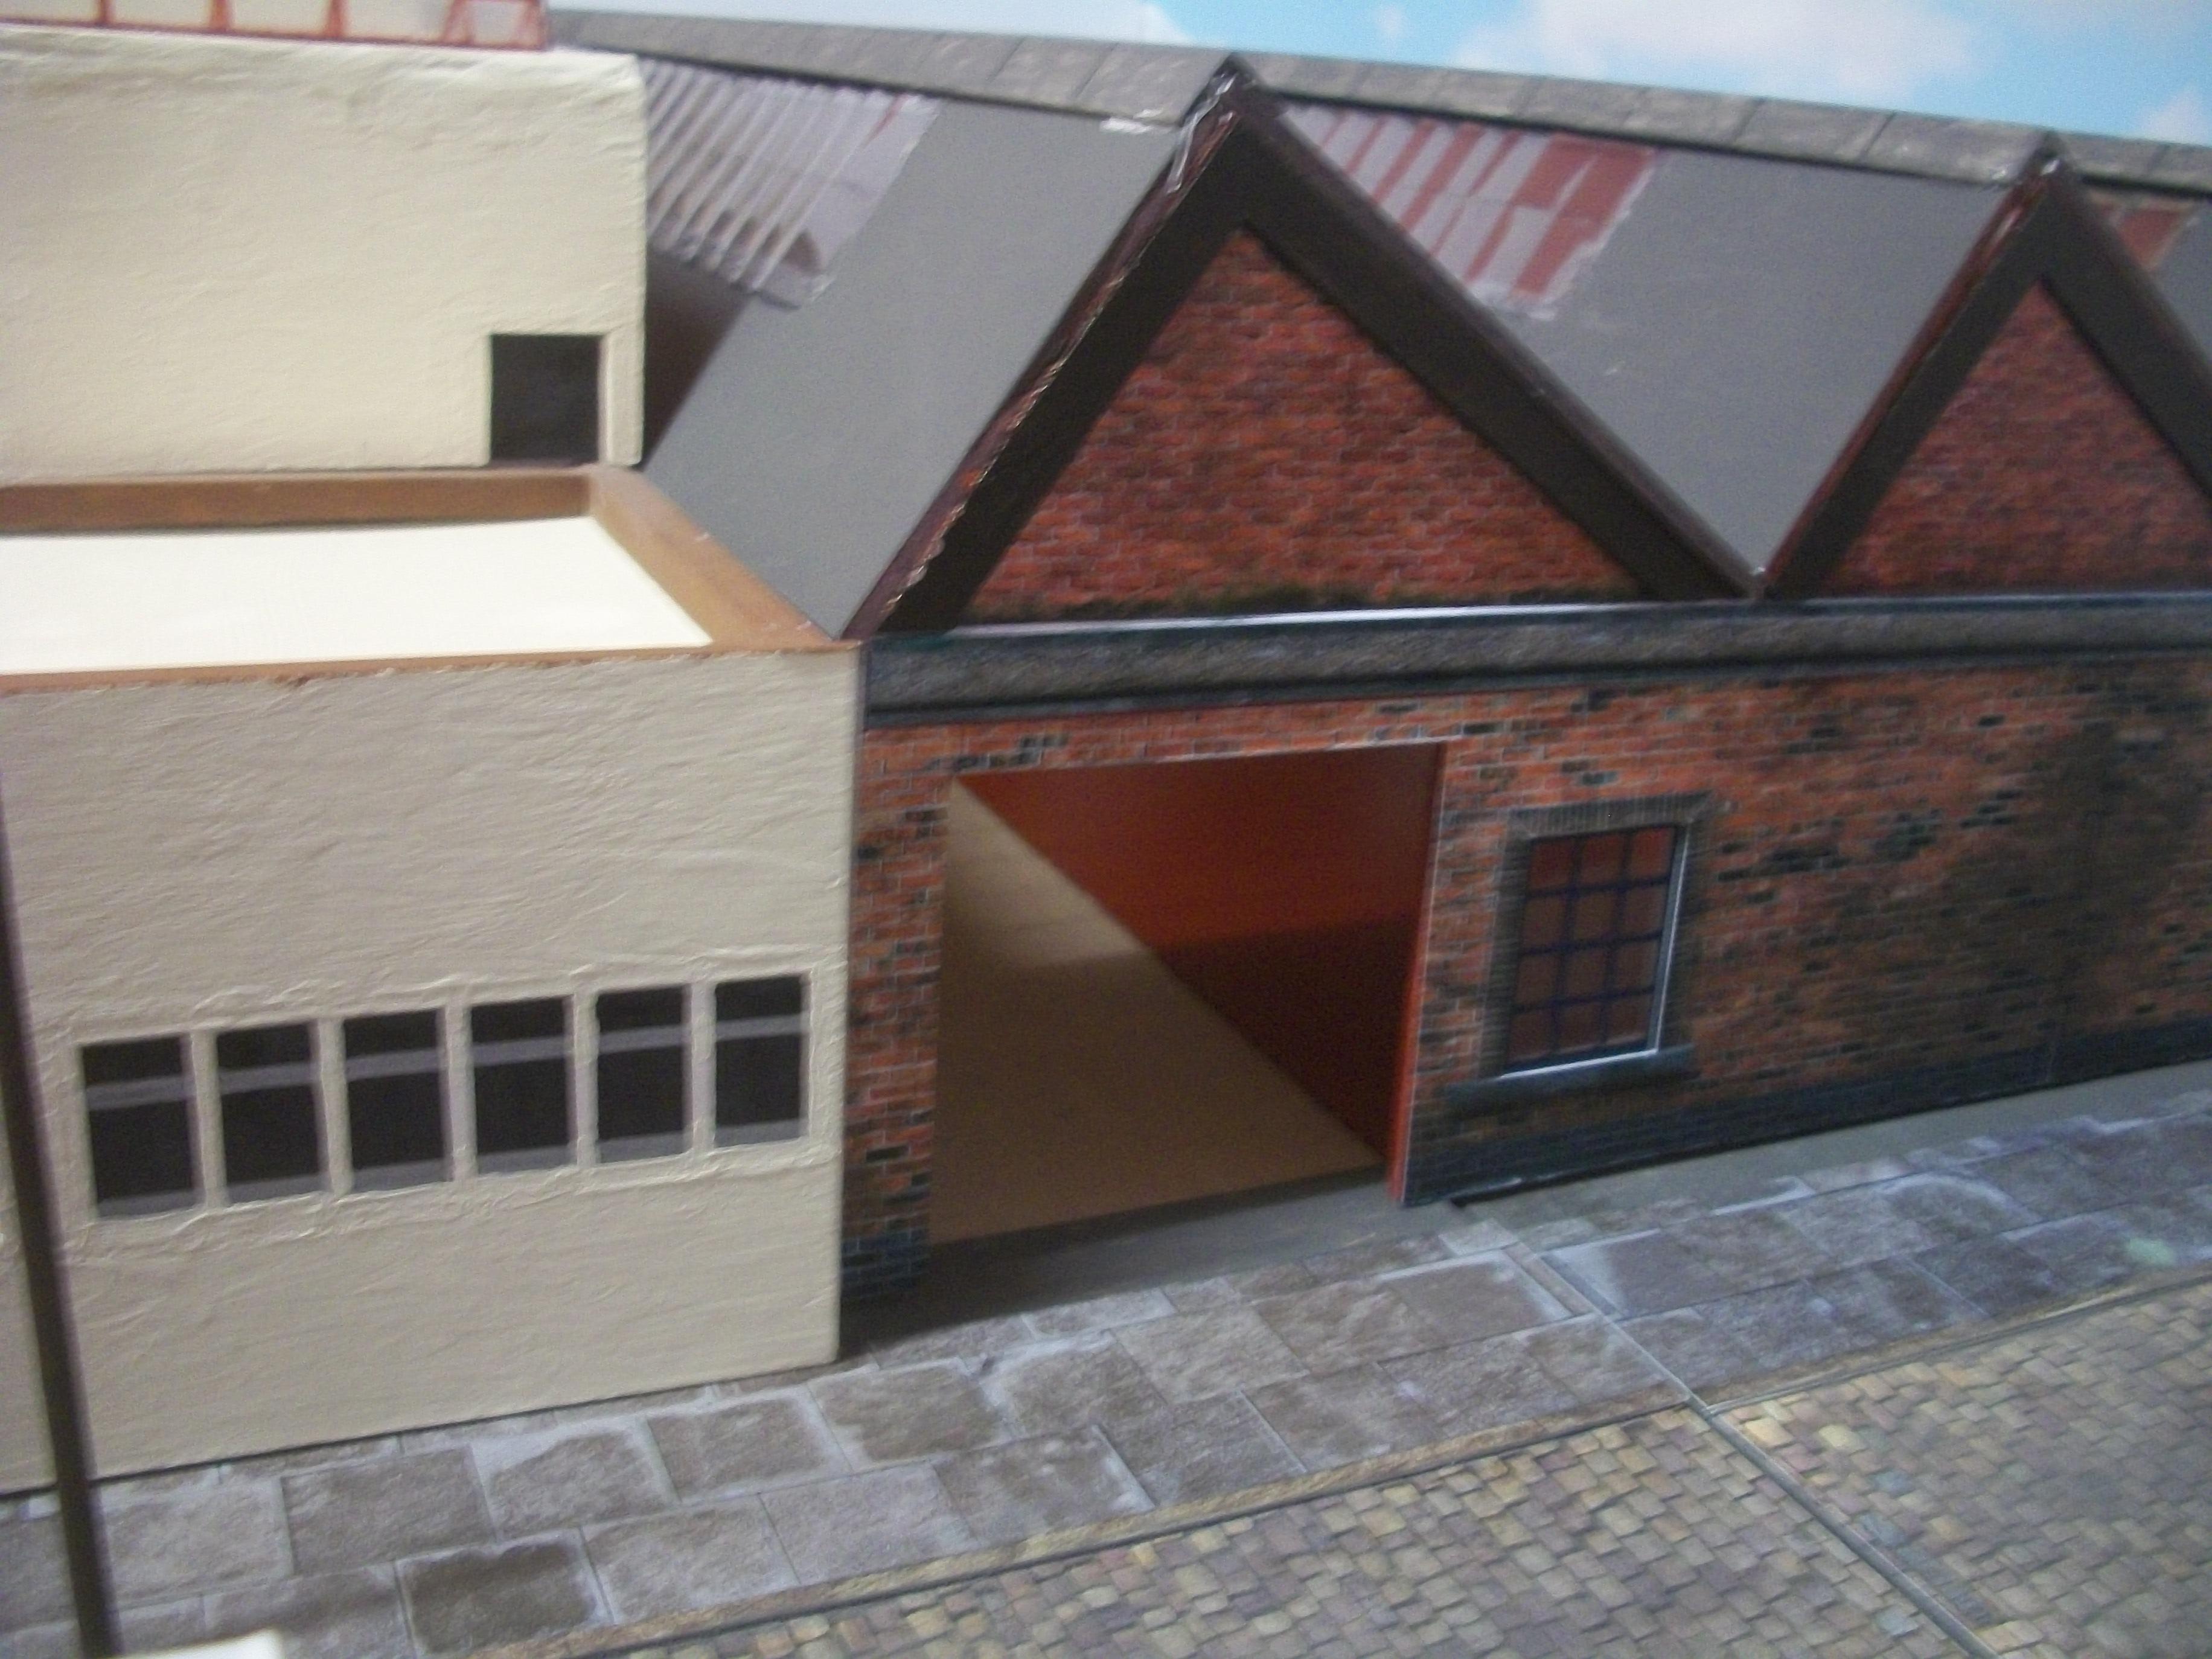
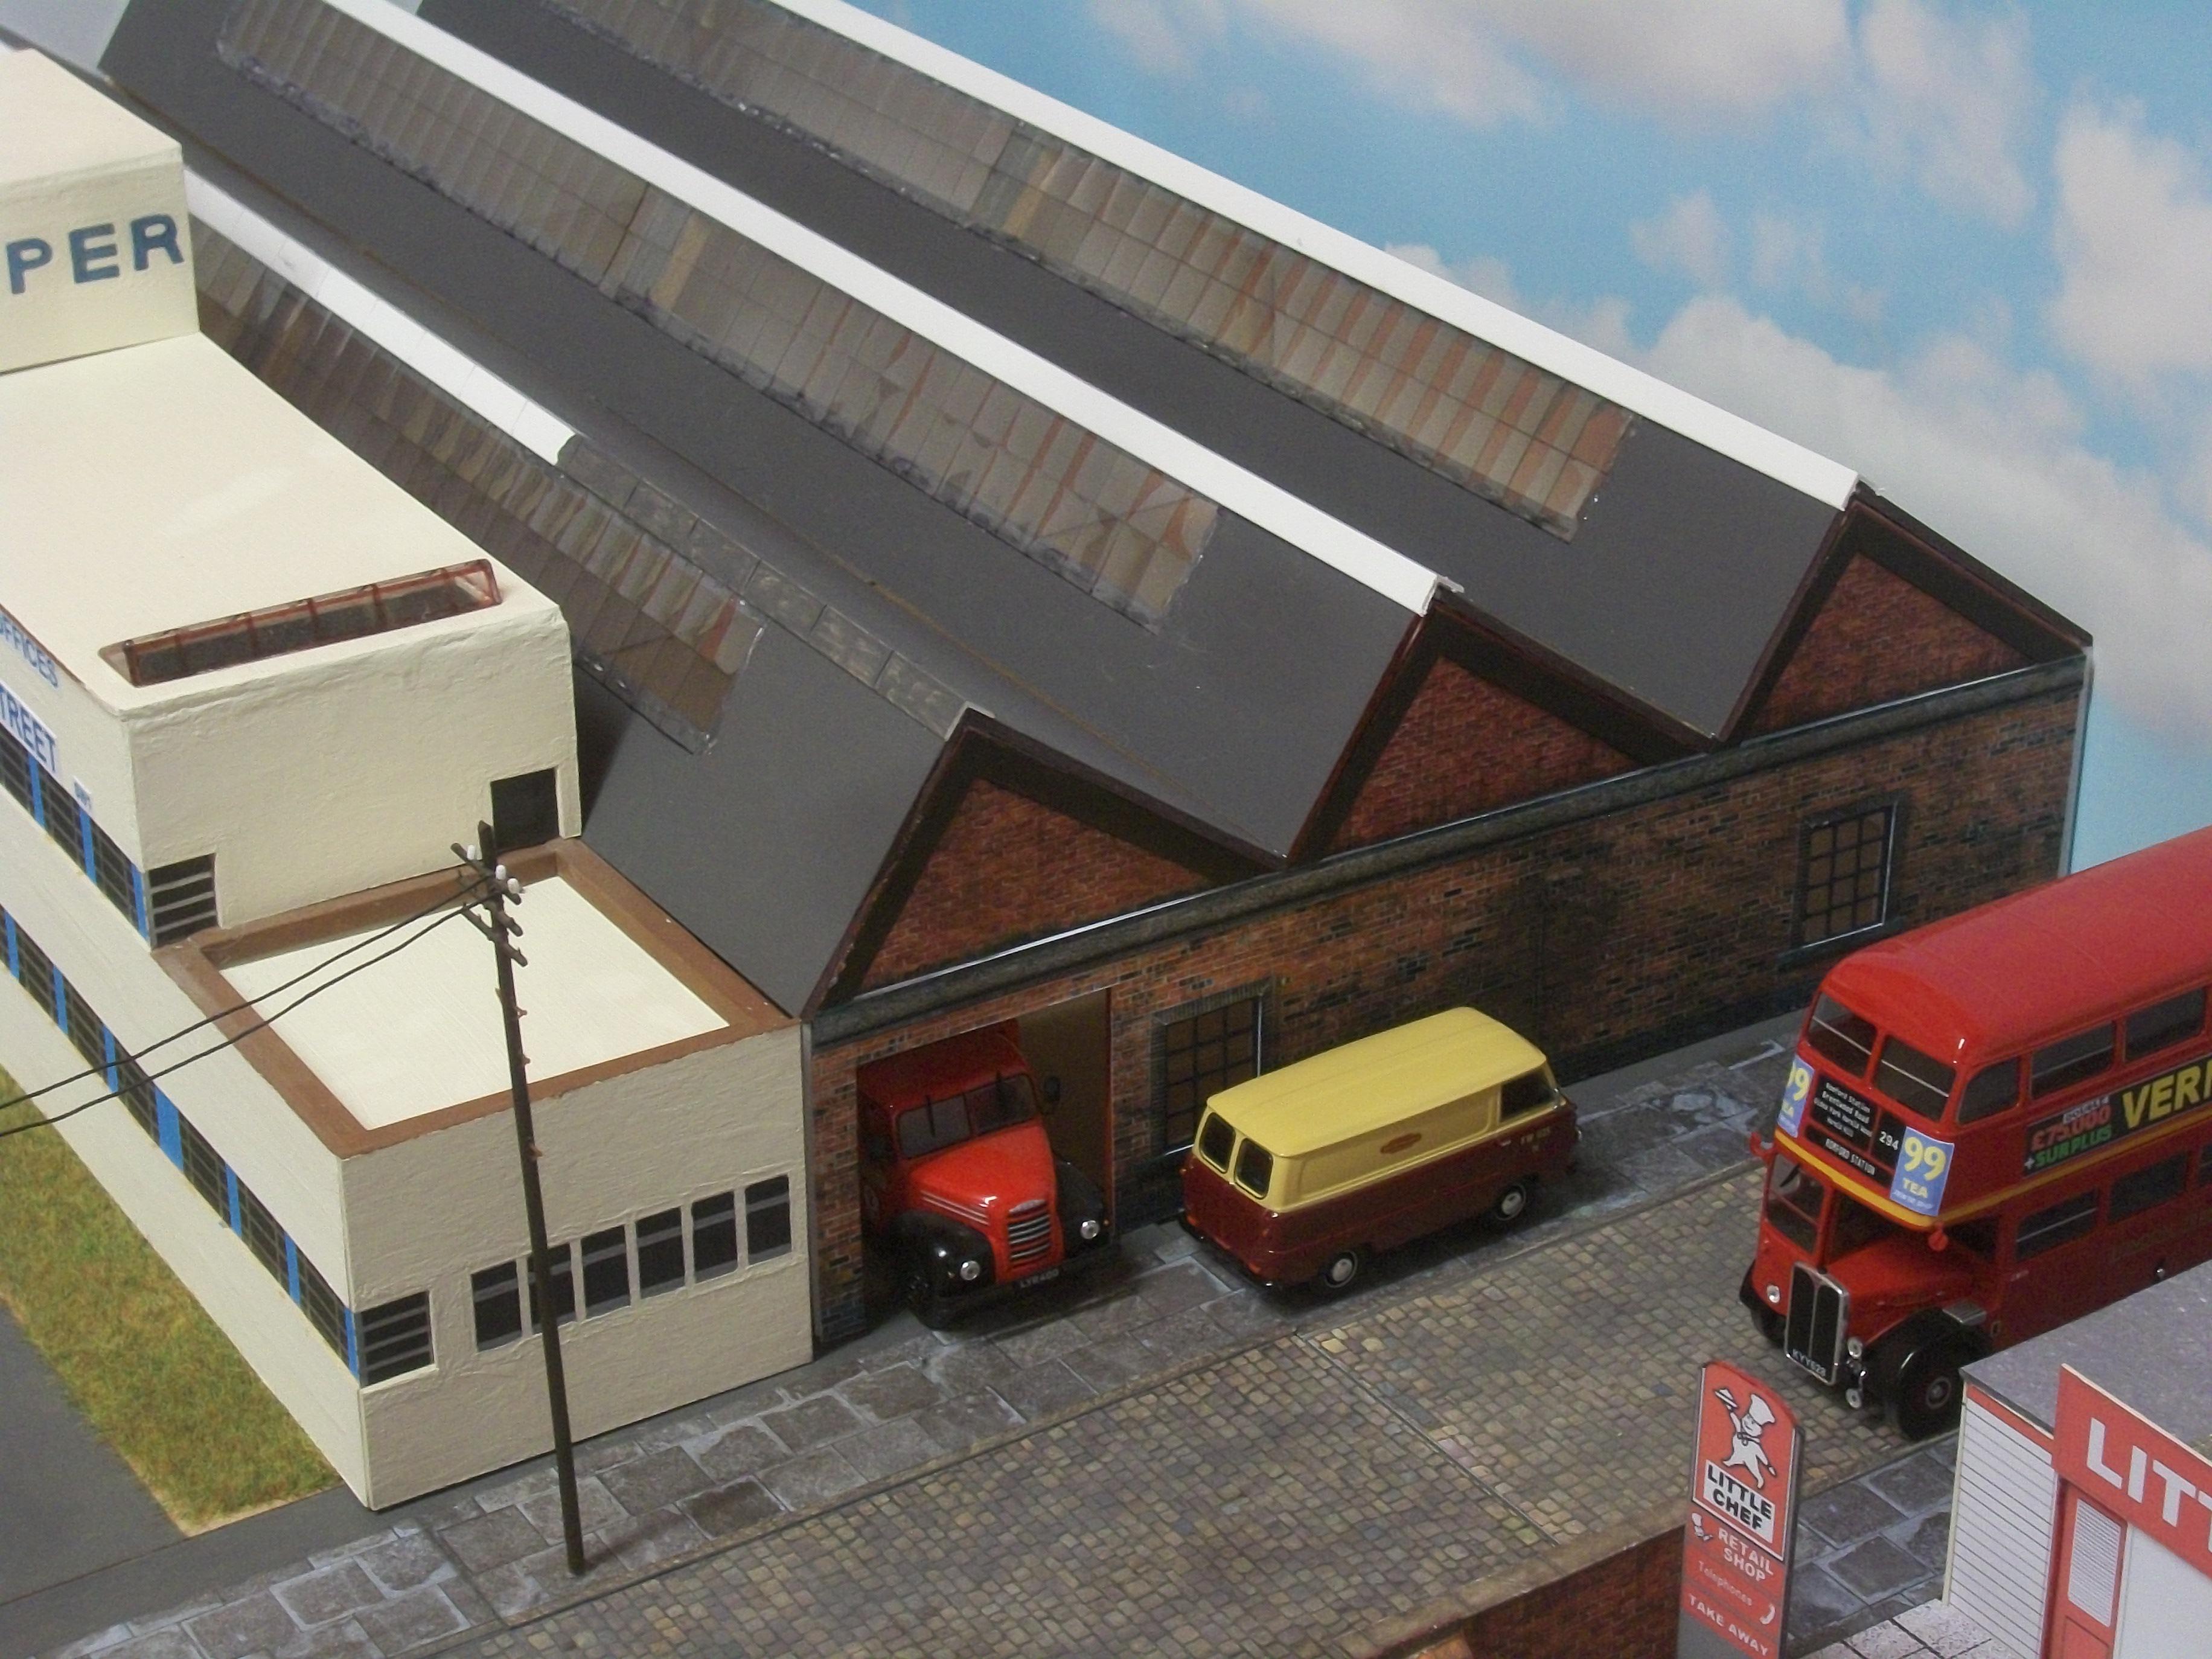
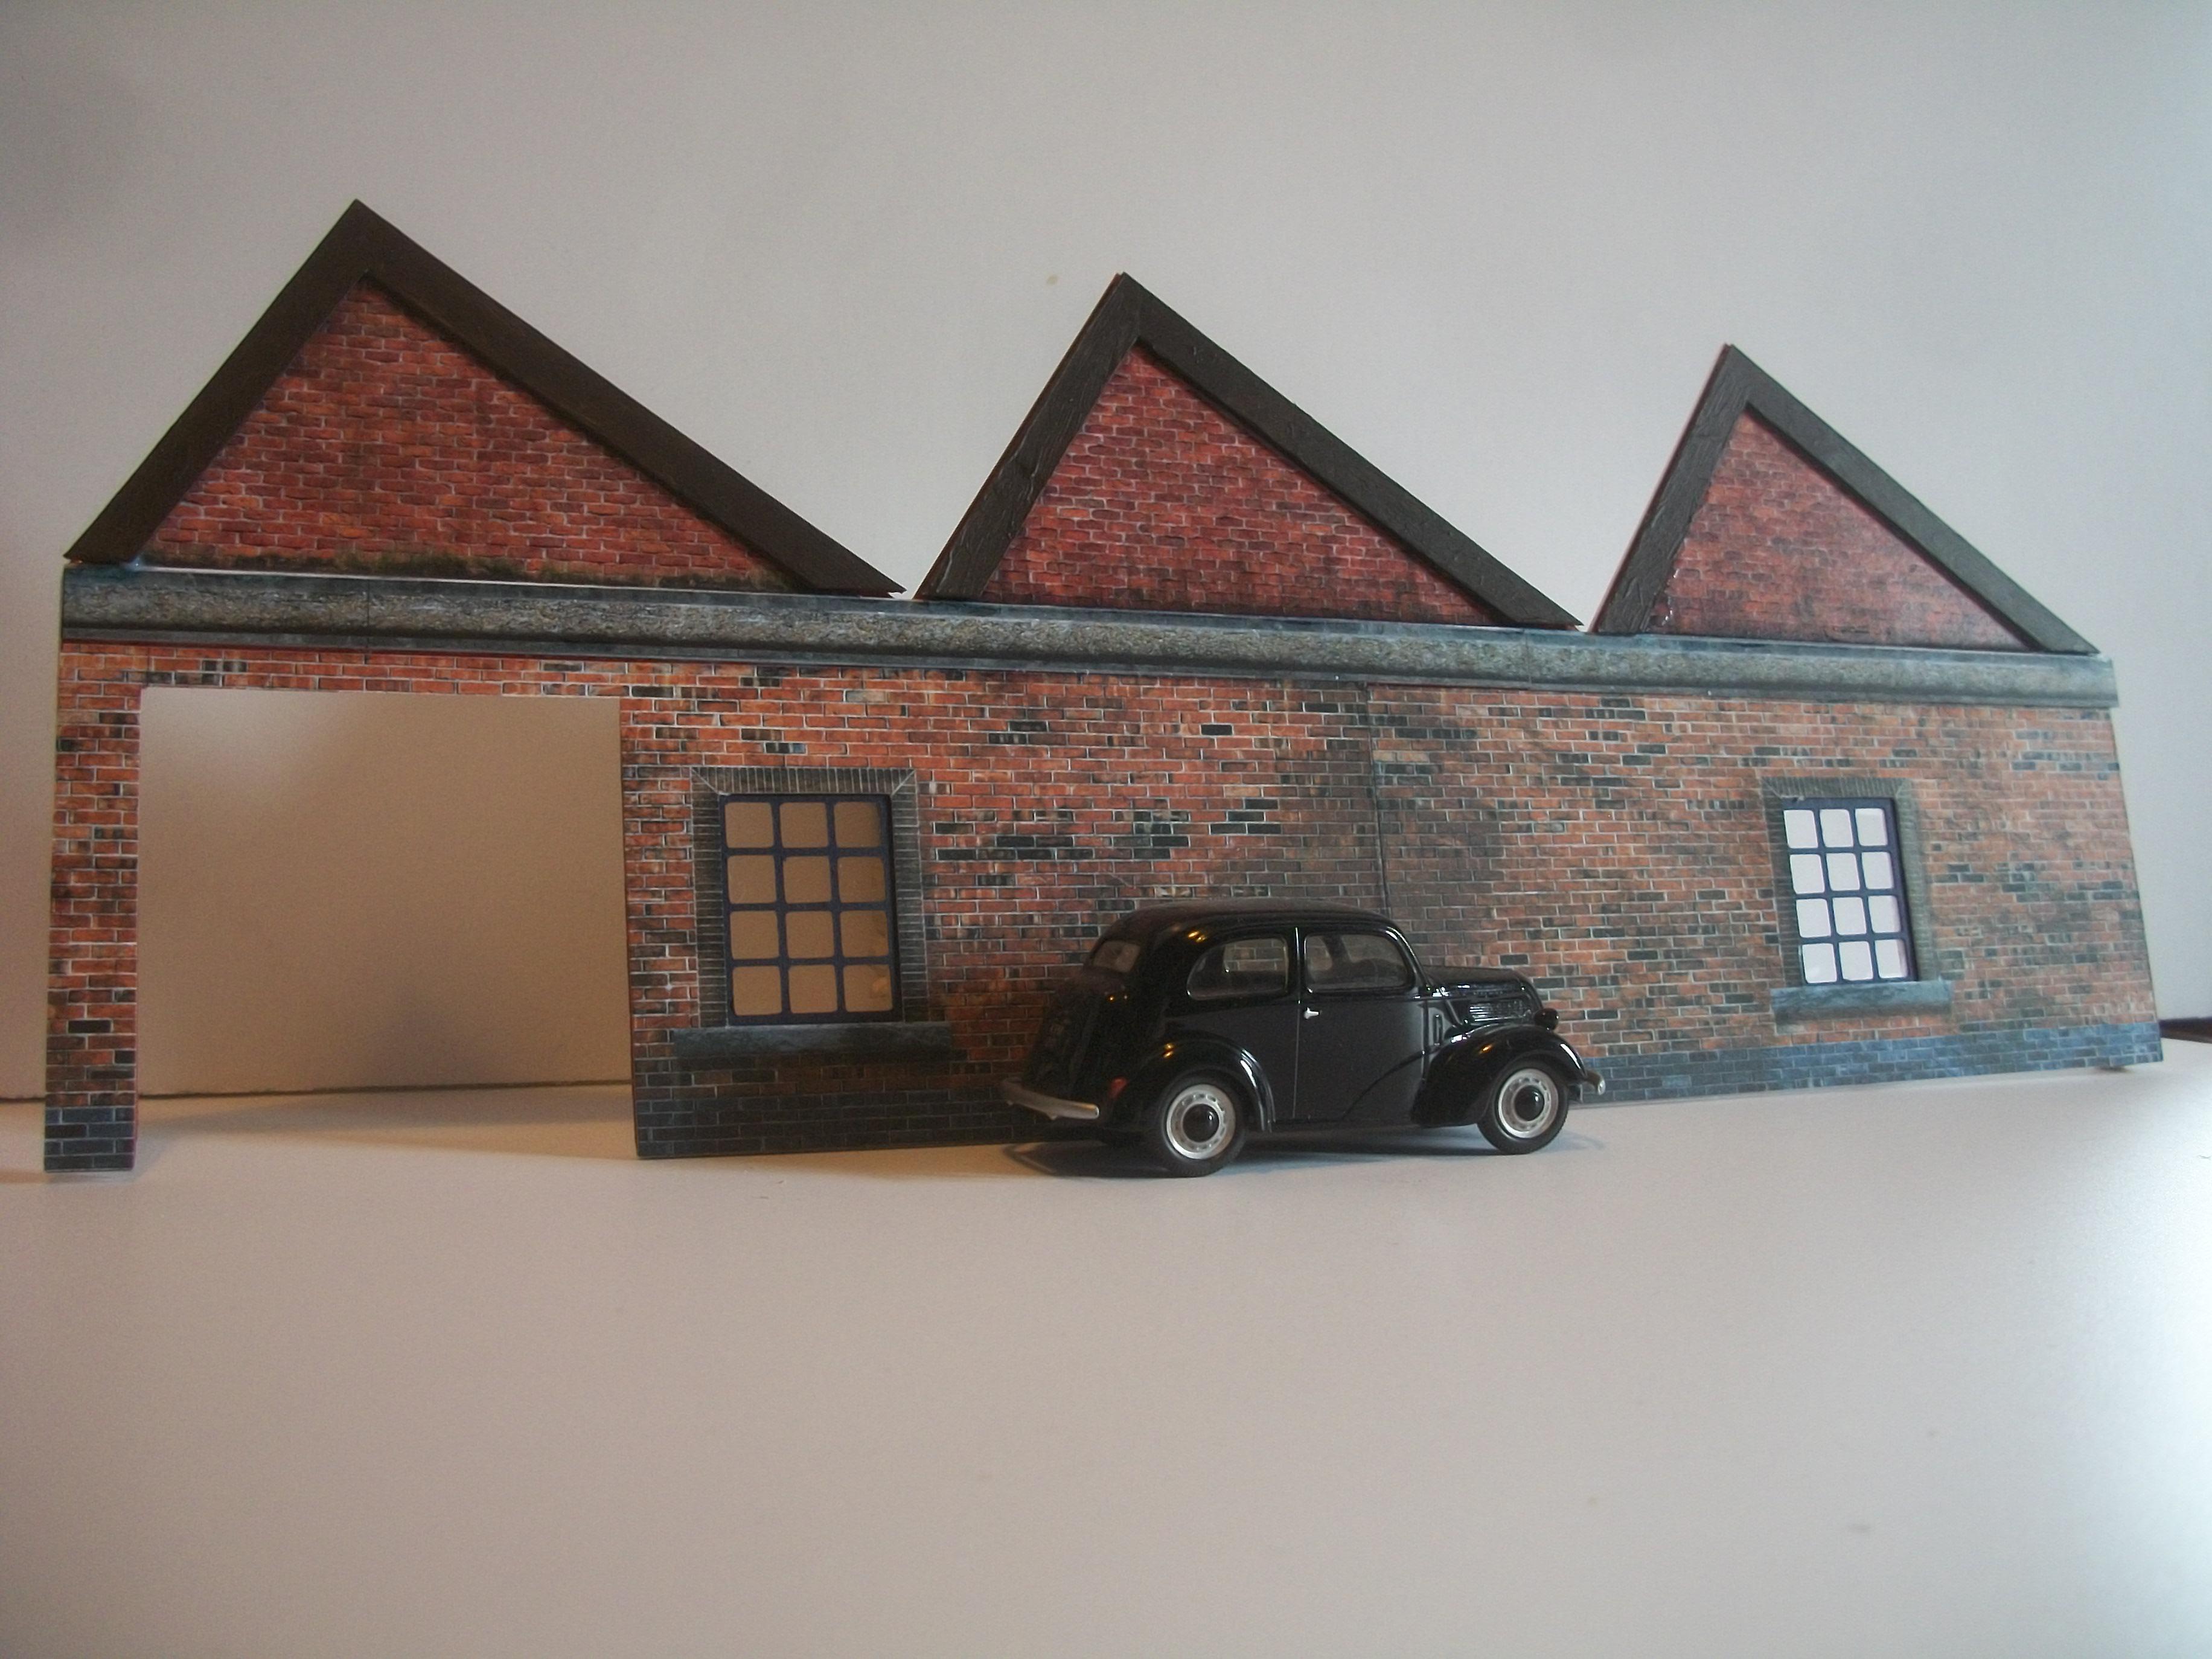
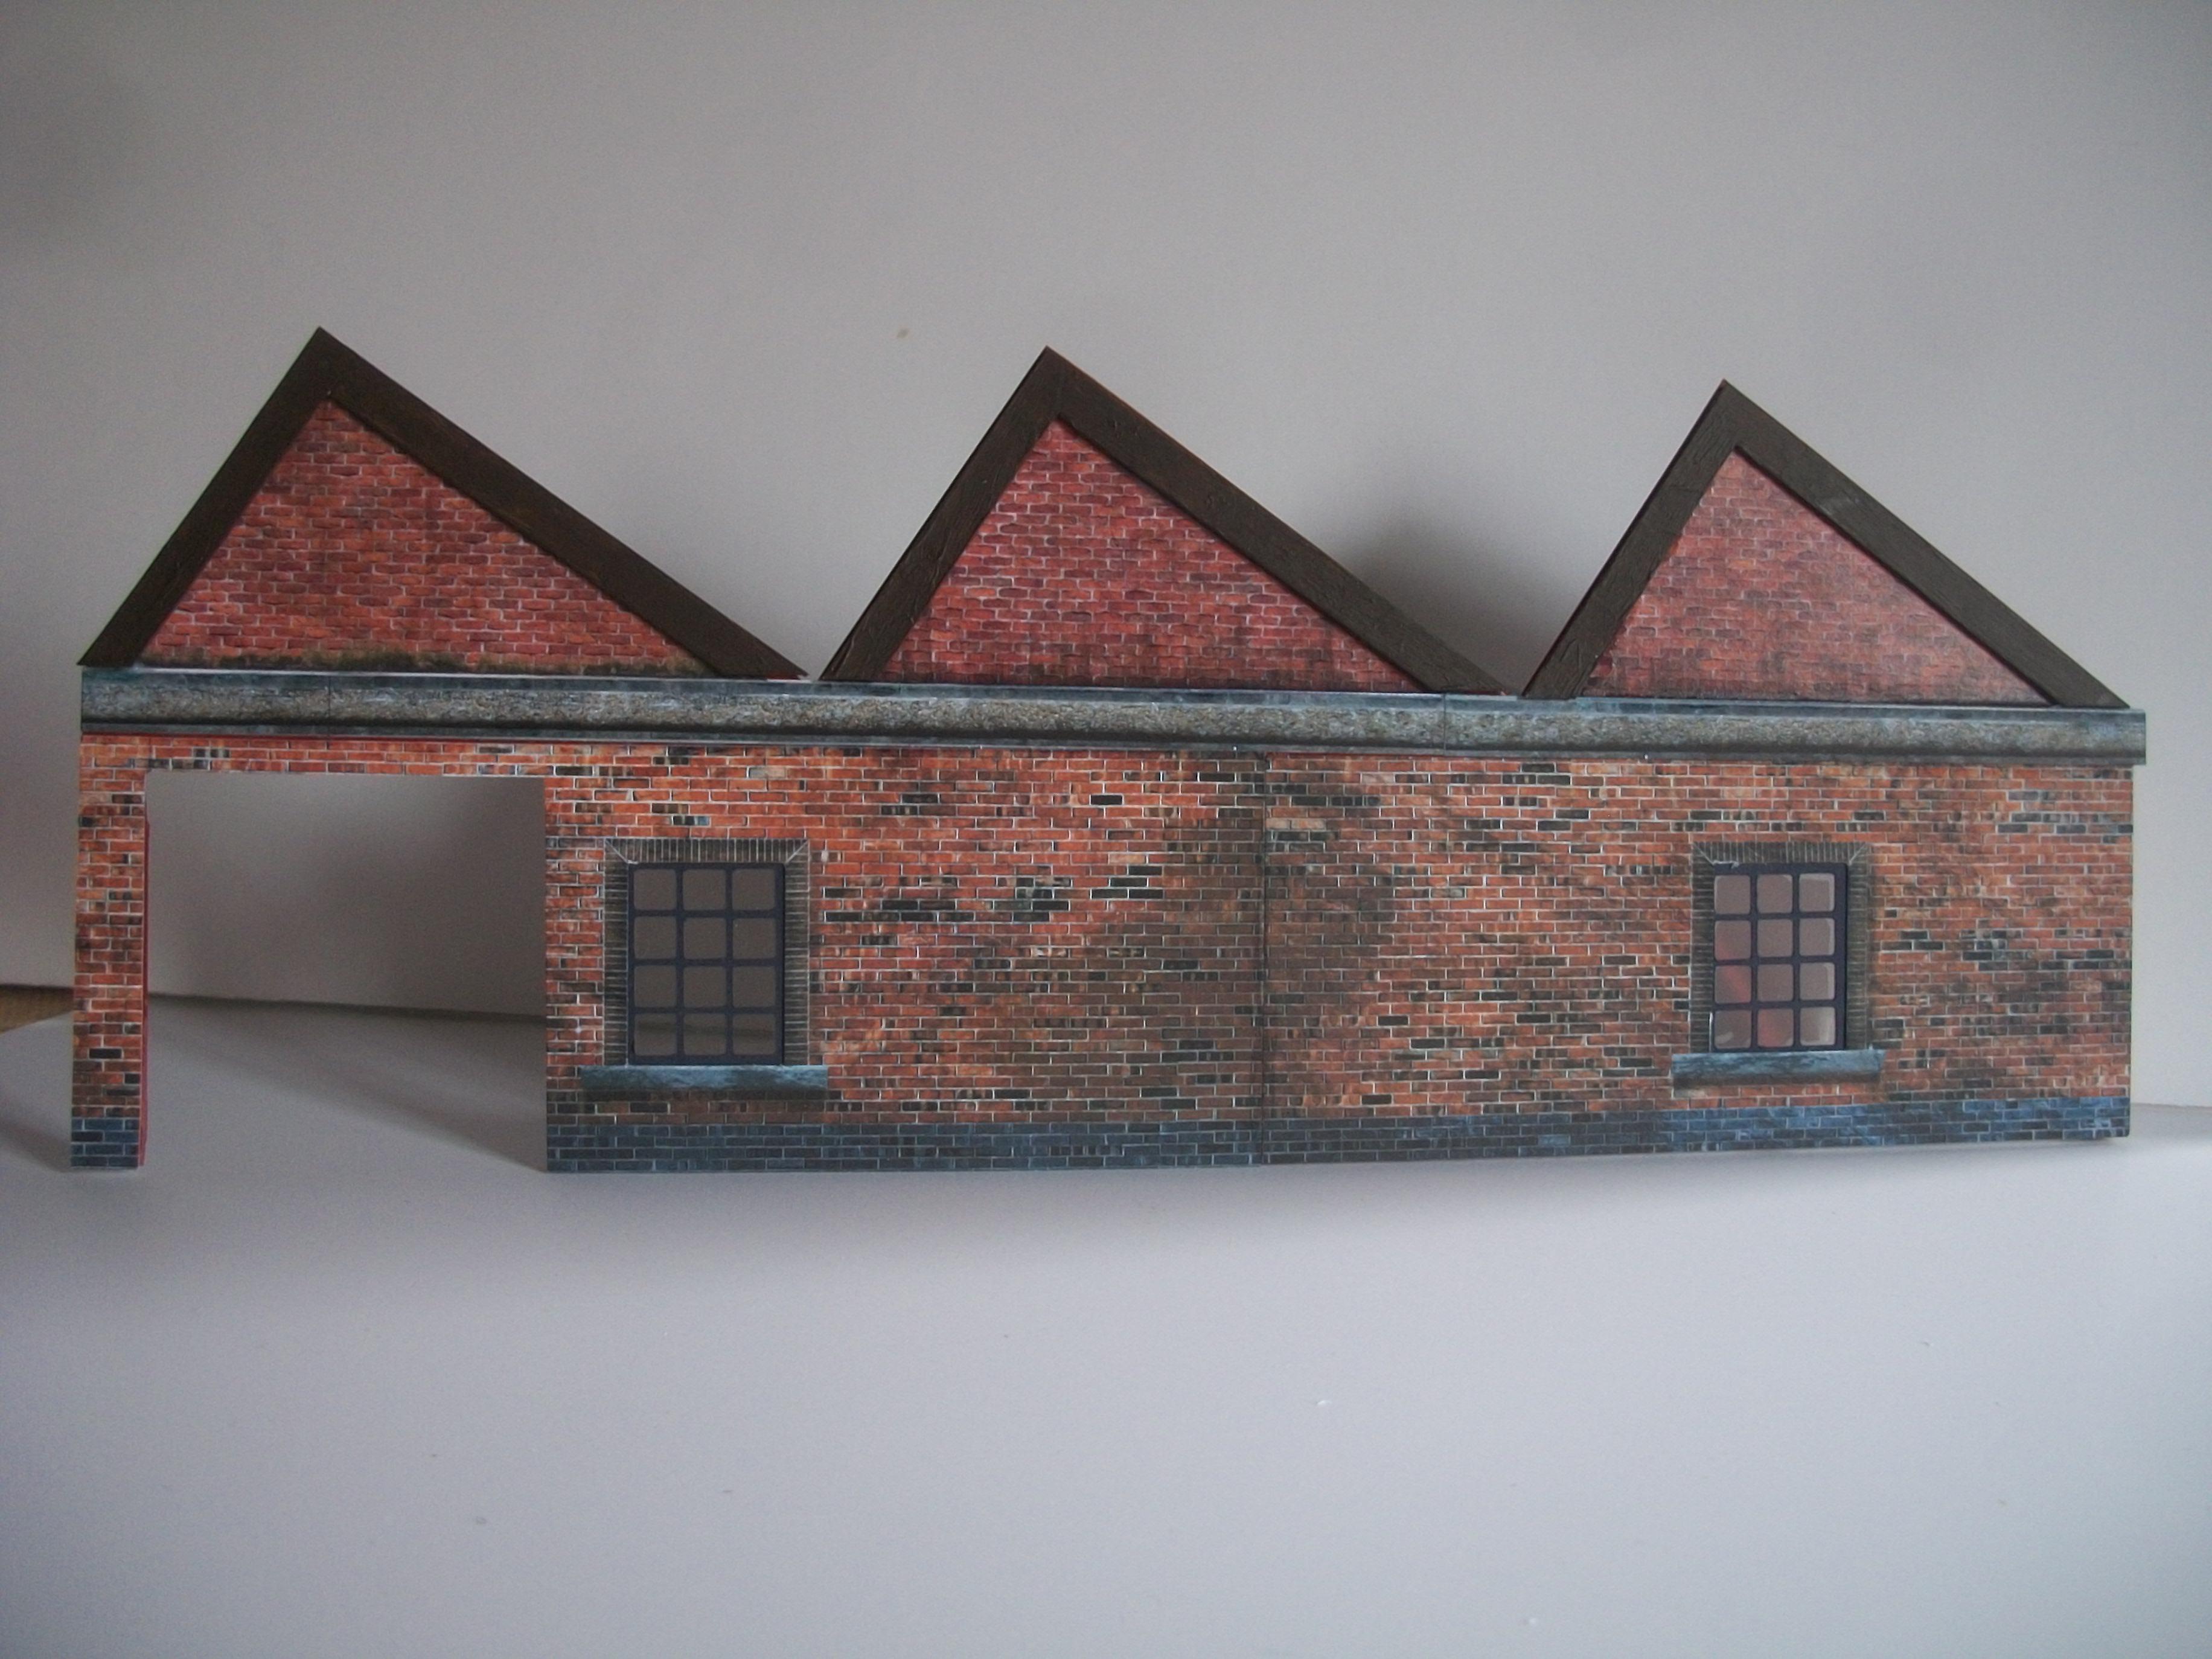
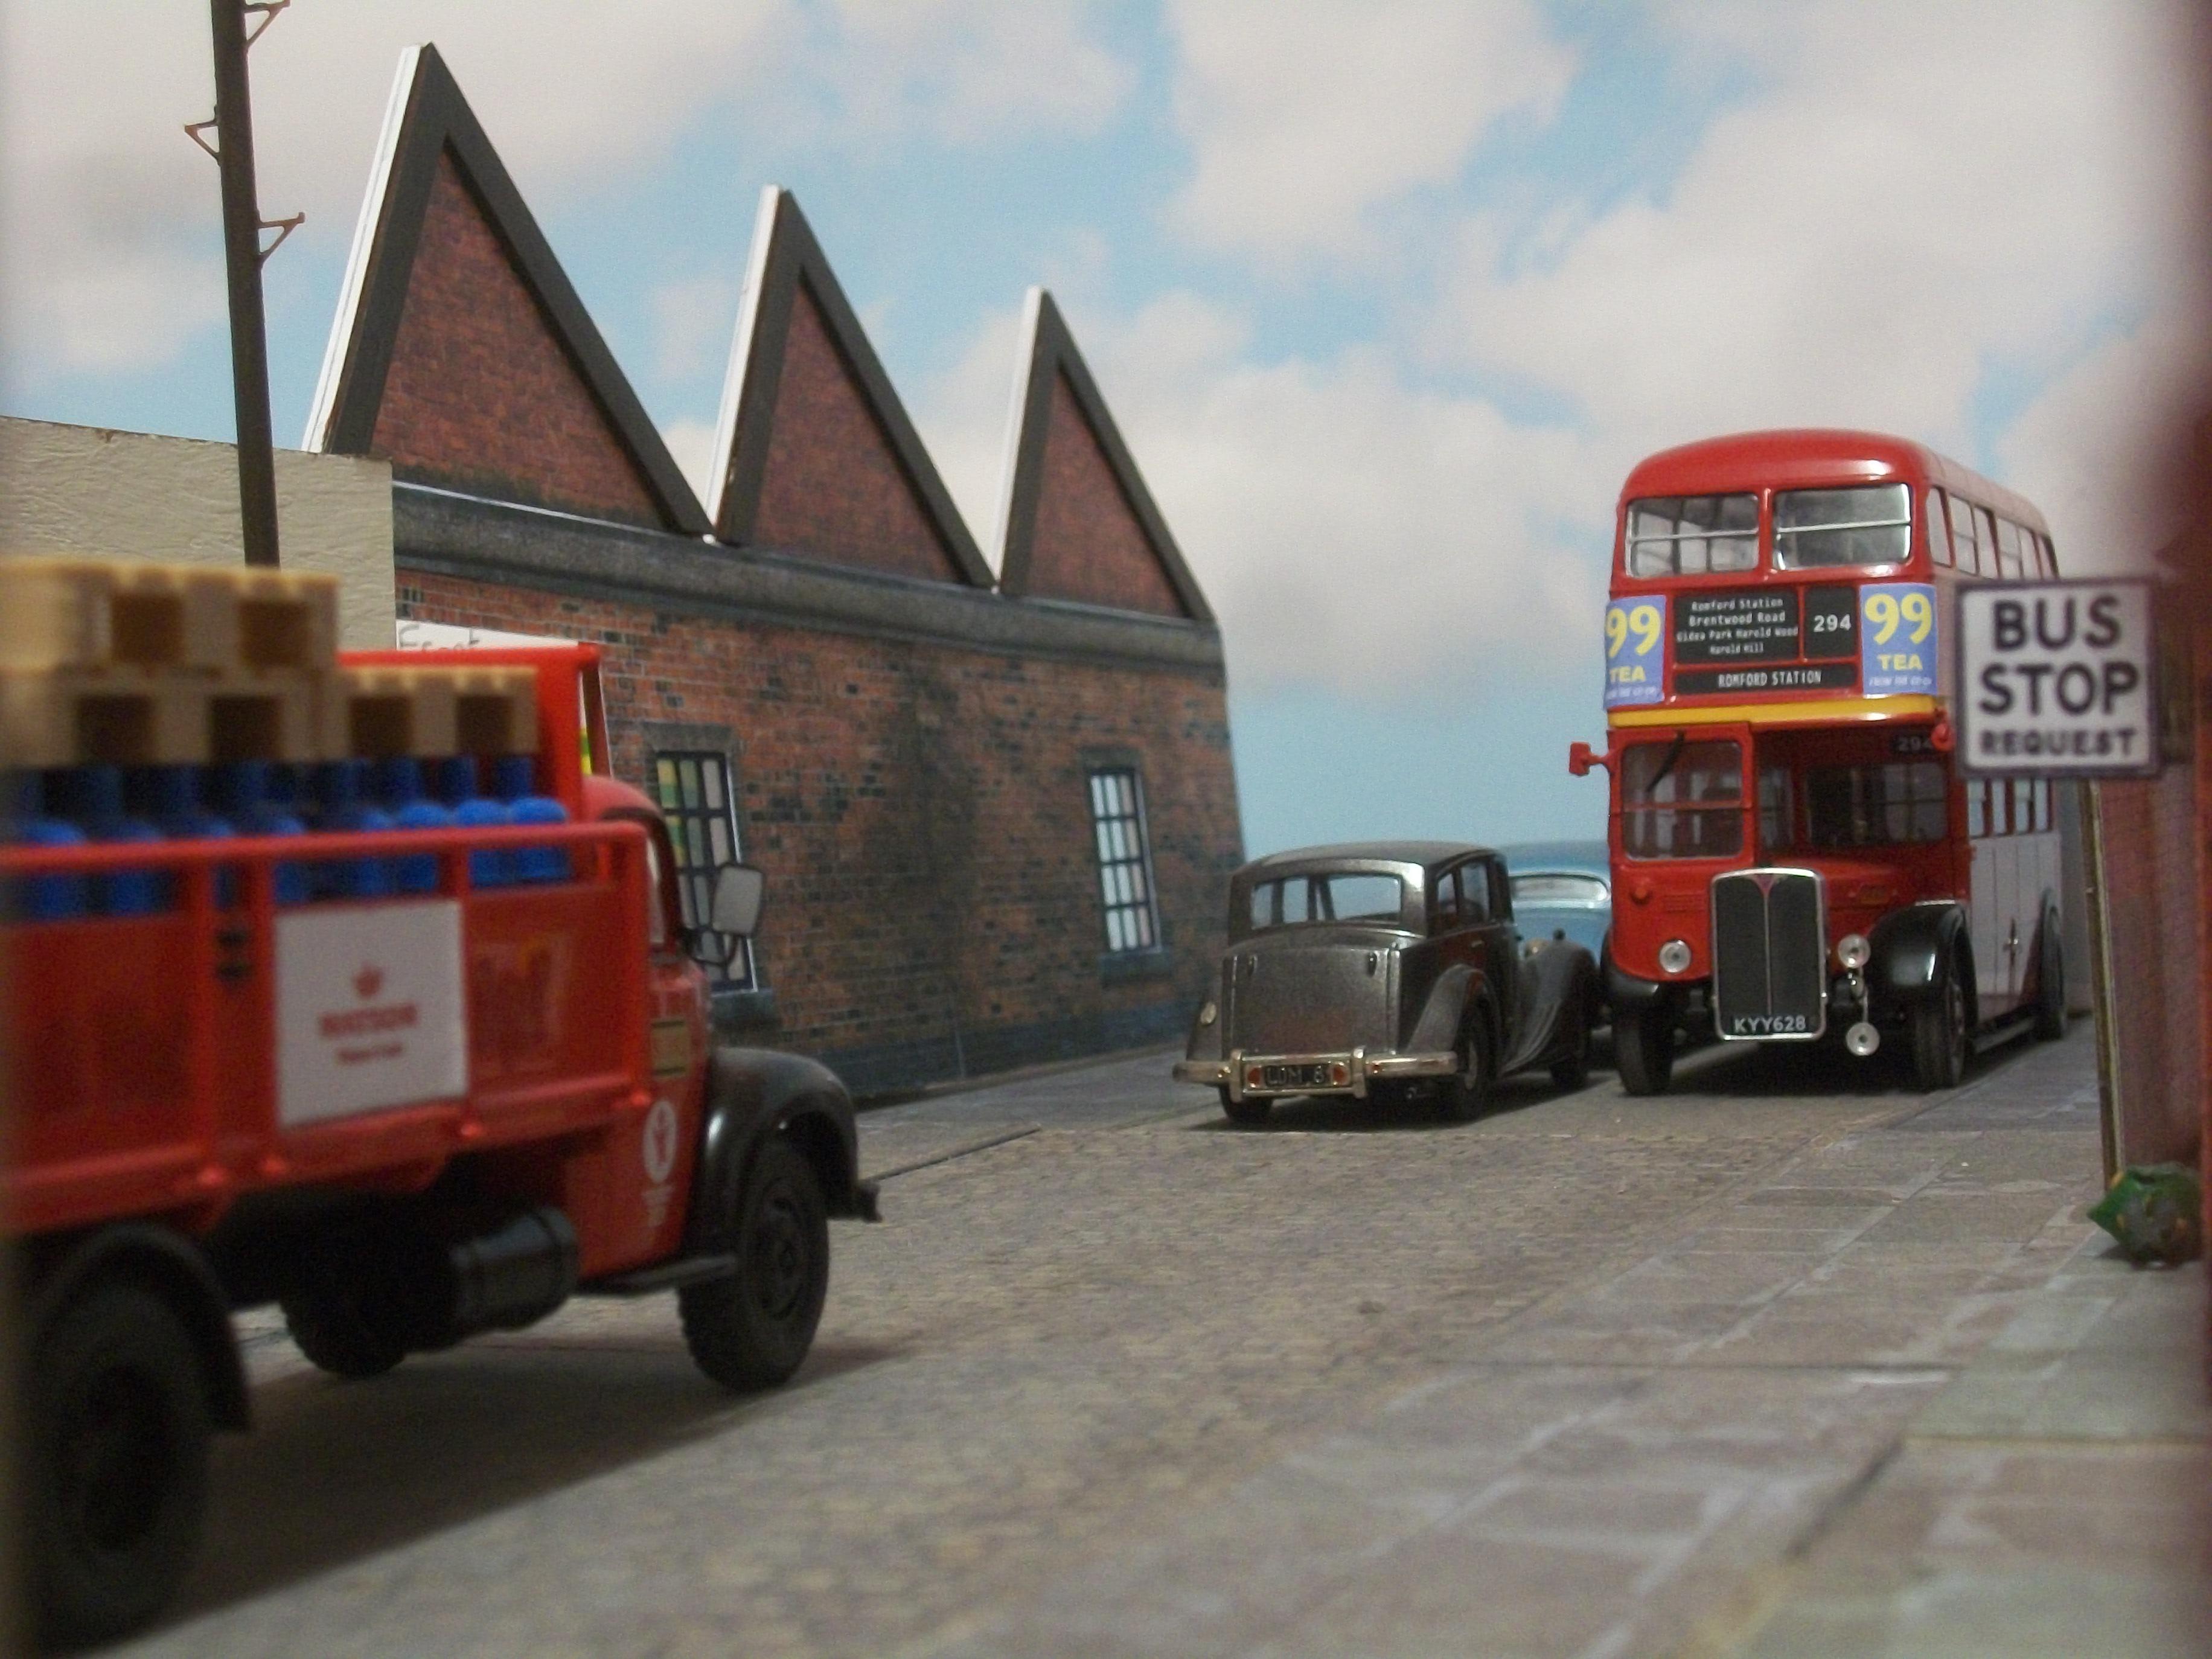
The factory units extension building is almost completed, and some of the following photos show the building in place on the diorama baseboard. All I need to do now, is to get some angle strips of wood to form the ridge tiles along the three roof apex joins, where the roof sections meet at the top edge. This is not 90 degrees, so plastic might be better than wood? You can see from the photo of the real Hooper factory, when compared to the photo taken in B&W and from approximately the same angle, that I have just about got it right ( I hope ). The whole structure is easily moved, and also quite strong. The front of the factory can be lifted clear, which gives me access to the inside of the factory units. This will allow me to position any vehicles and figures that I need for the photography. One of the Ebay orders that will be arriving later this week is a white metal kit of two Rolls-Royce cars in 1:43 scale, and I shall not build these kits, but instead I shall use the body shells and parts to represent cars undergoing production inside the Hooper factory. They could be on wooden trestles, as I have seen in some of the old photos of coachbuilders at work. David
-
Thanks, Pat...... and I am quite pleased with the way it has turned out.... better than I expected really. The three skylight roof sections were completed by midnight last night, so I am hoping to be assembling this factory extension building during today. It is all about getting everything lined up now, and ensuring that everything fits precisely. David
-
Much of the time over the weekend was spent completing the end wall of the factory units, that runs along Duke's Road and behind the factory offices frontage. I have used some brick wall material and windows from the Purple Bob's Edwardian Plating Factory kit, and cut some window apertures in the Foamex wall section of the building. Scratch built some eaves out of thick card. Quite time consuming work, but also very enjoyable. Need to produce two more skylight roof sections, same as the first one and then trim all six roof sections down slightly, so as to achieve a good fit. Final assembly will include the back wall section, along with some additional wooden beams where required. Here are a few photos to show my progress over the weekend. David


.jpg.e691e7aafbc0d8ae7d706698c8d1af4f.jpg)