PierreR89
-
Posts
532 -
Joined
-
Last visited
Content Type
Profiles
Forums
Events
Gallery
Everything posted by PierreR89
-
I will try that with the next kit that has decals that has turned yellow. I dont thing i have one that has that problem now but it has been a long time since i opend them and looked at them
-
I have been lokking at the Ford aeromax kits that Italeri has (106 and 120) I was starting to wonder what other differences there are in them exept for the grille? Is there any other differences or it is just the grille that is different on them? The cab and sleepers looks the same on them, are there any differences in the interior of them to or not? Only real reson i am interested in them is because i feel that i need some more modern looking trucks in my collection instead of trucks from the 60´s 70´s and early eighties. Nothing wrong with them but i feel like some more modern looking trucks would look good among the others + i already have the LTL9000 so why not continue with more Ford trucks.
-
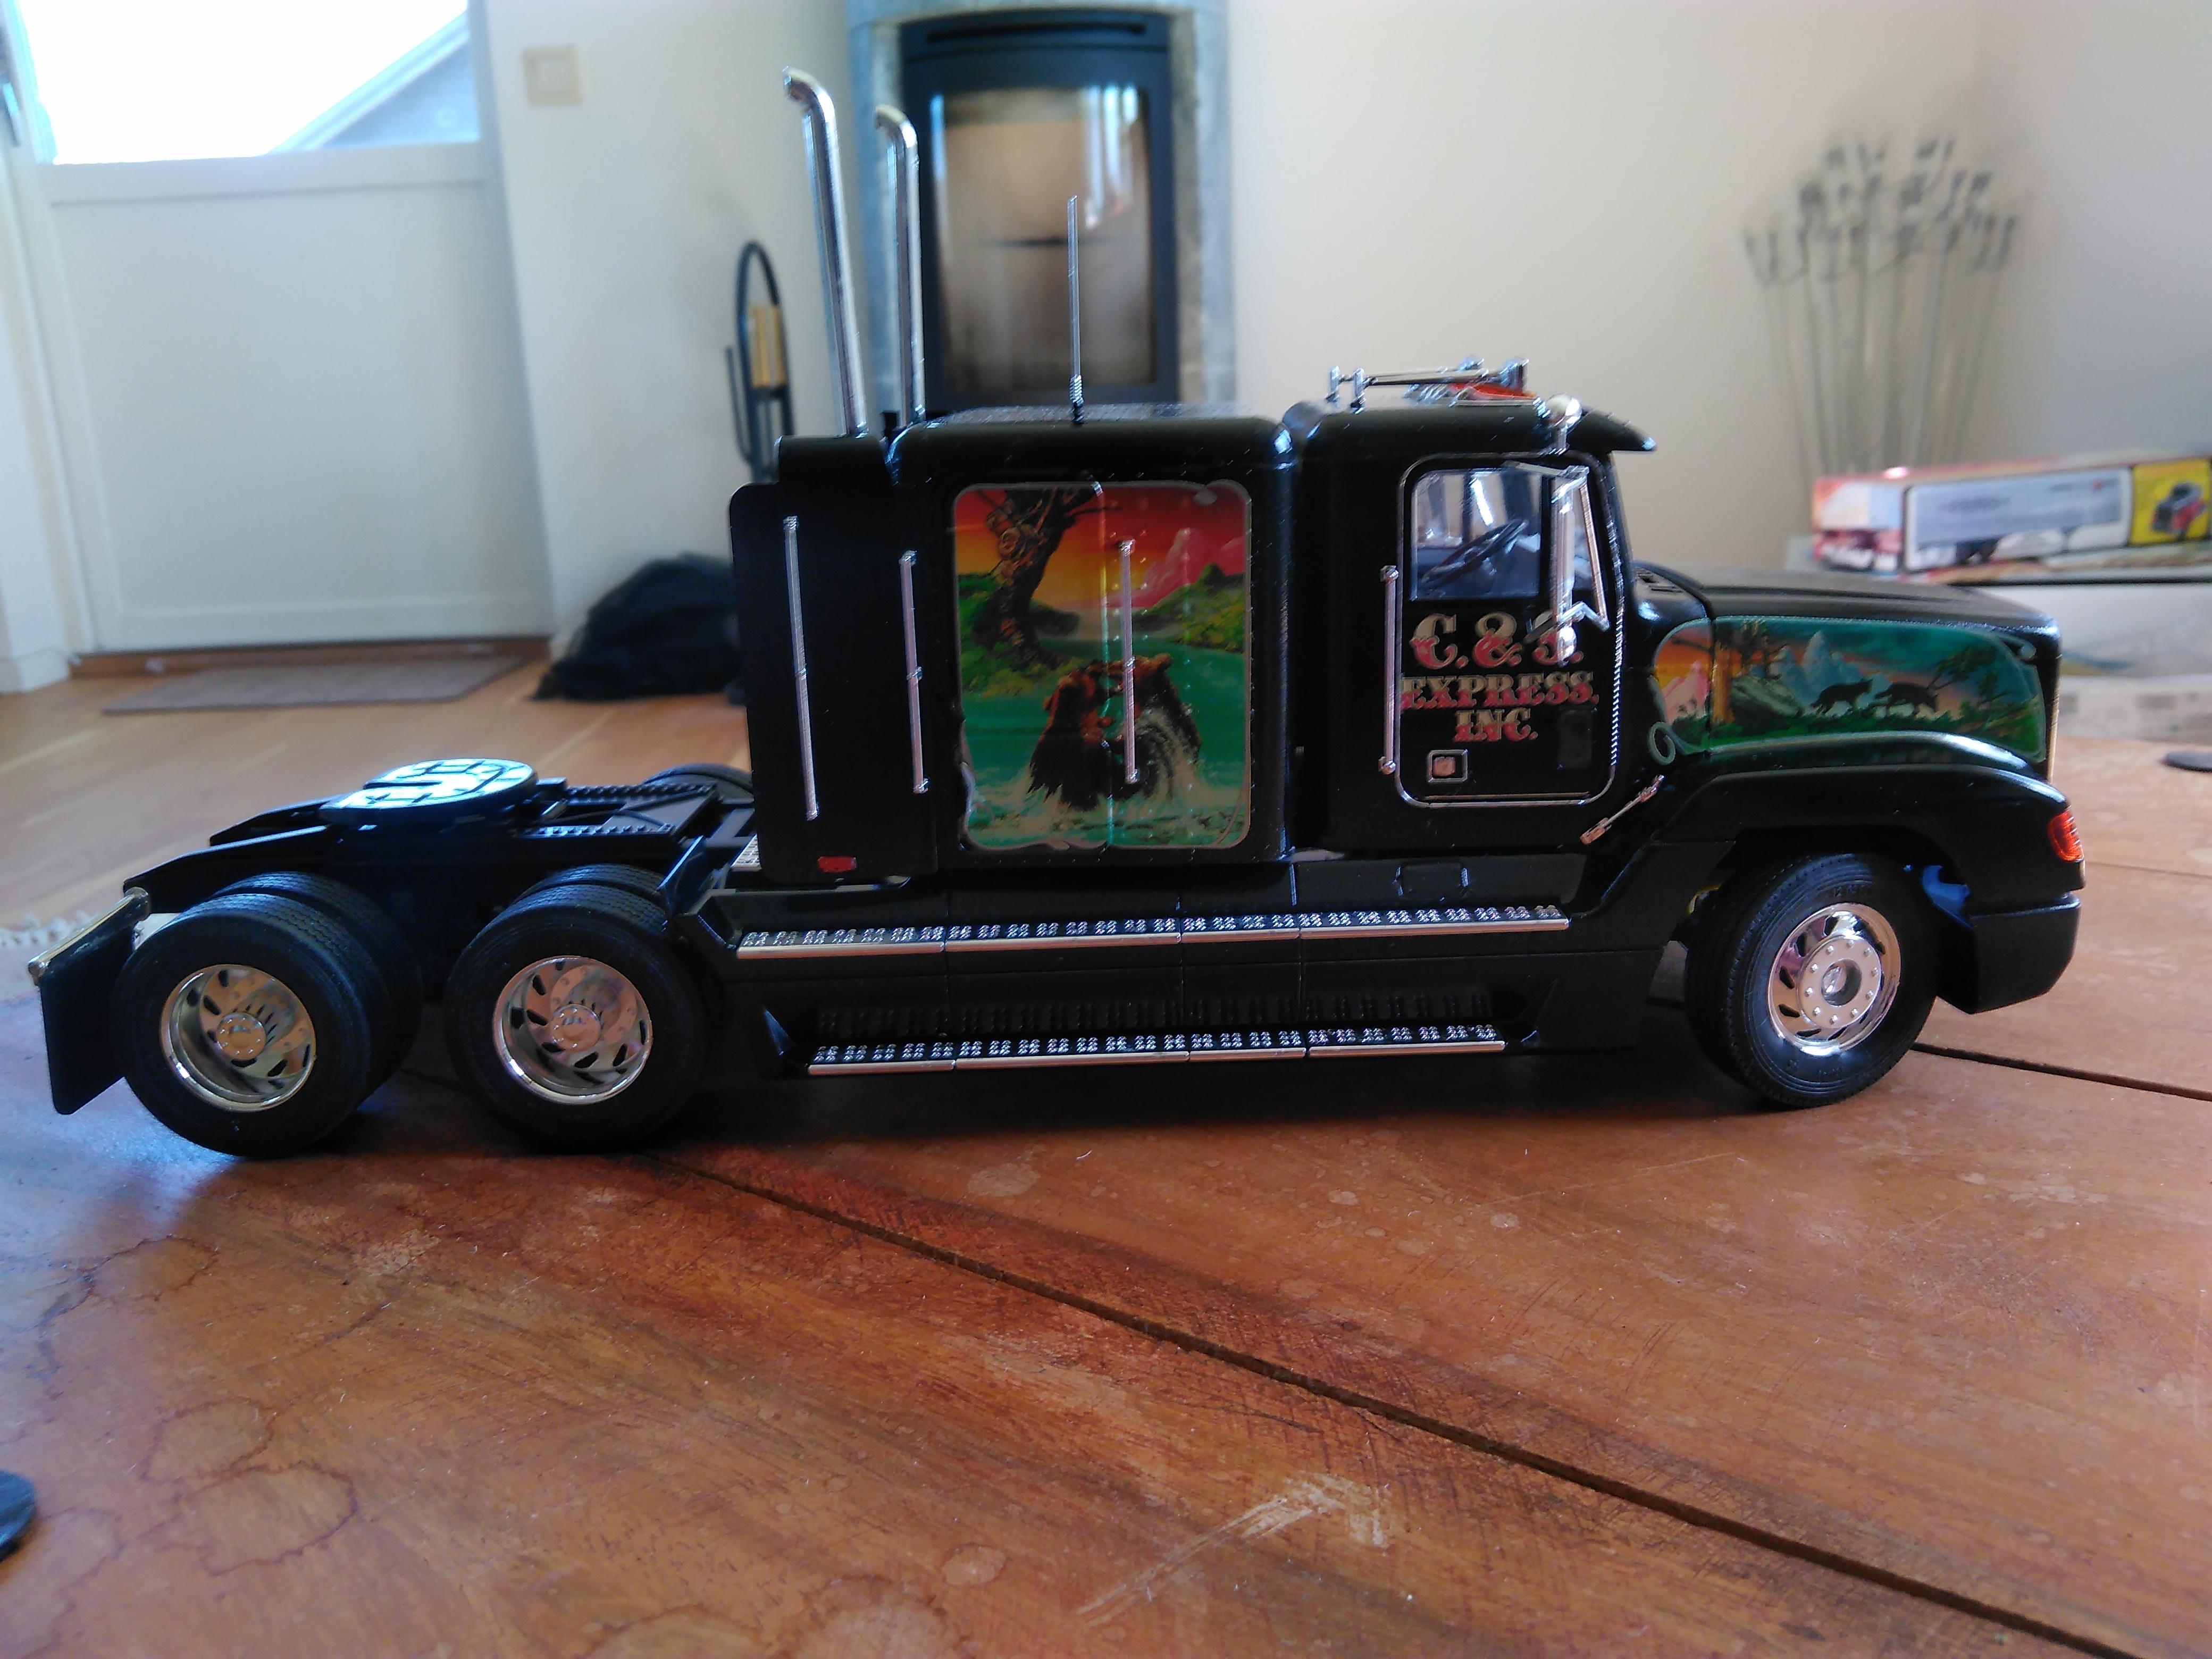
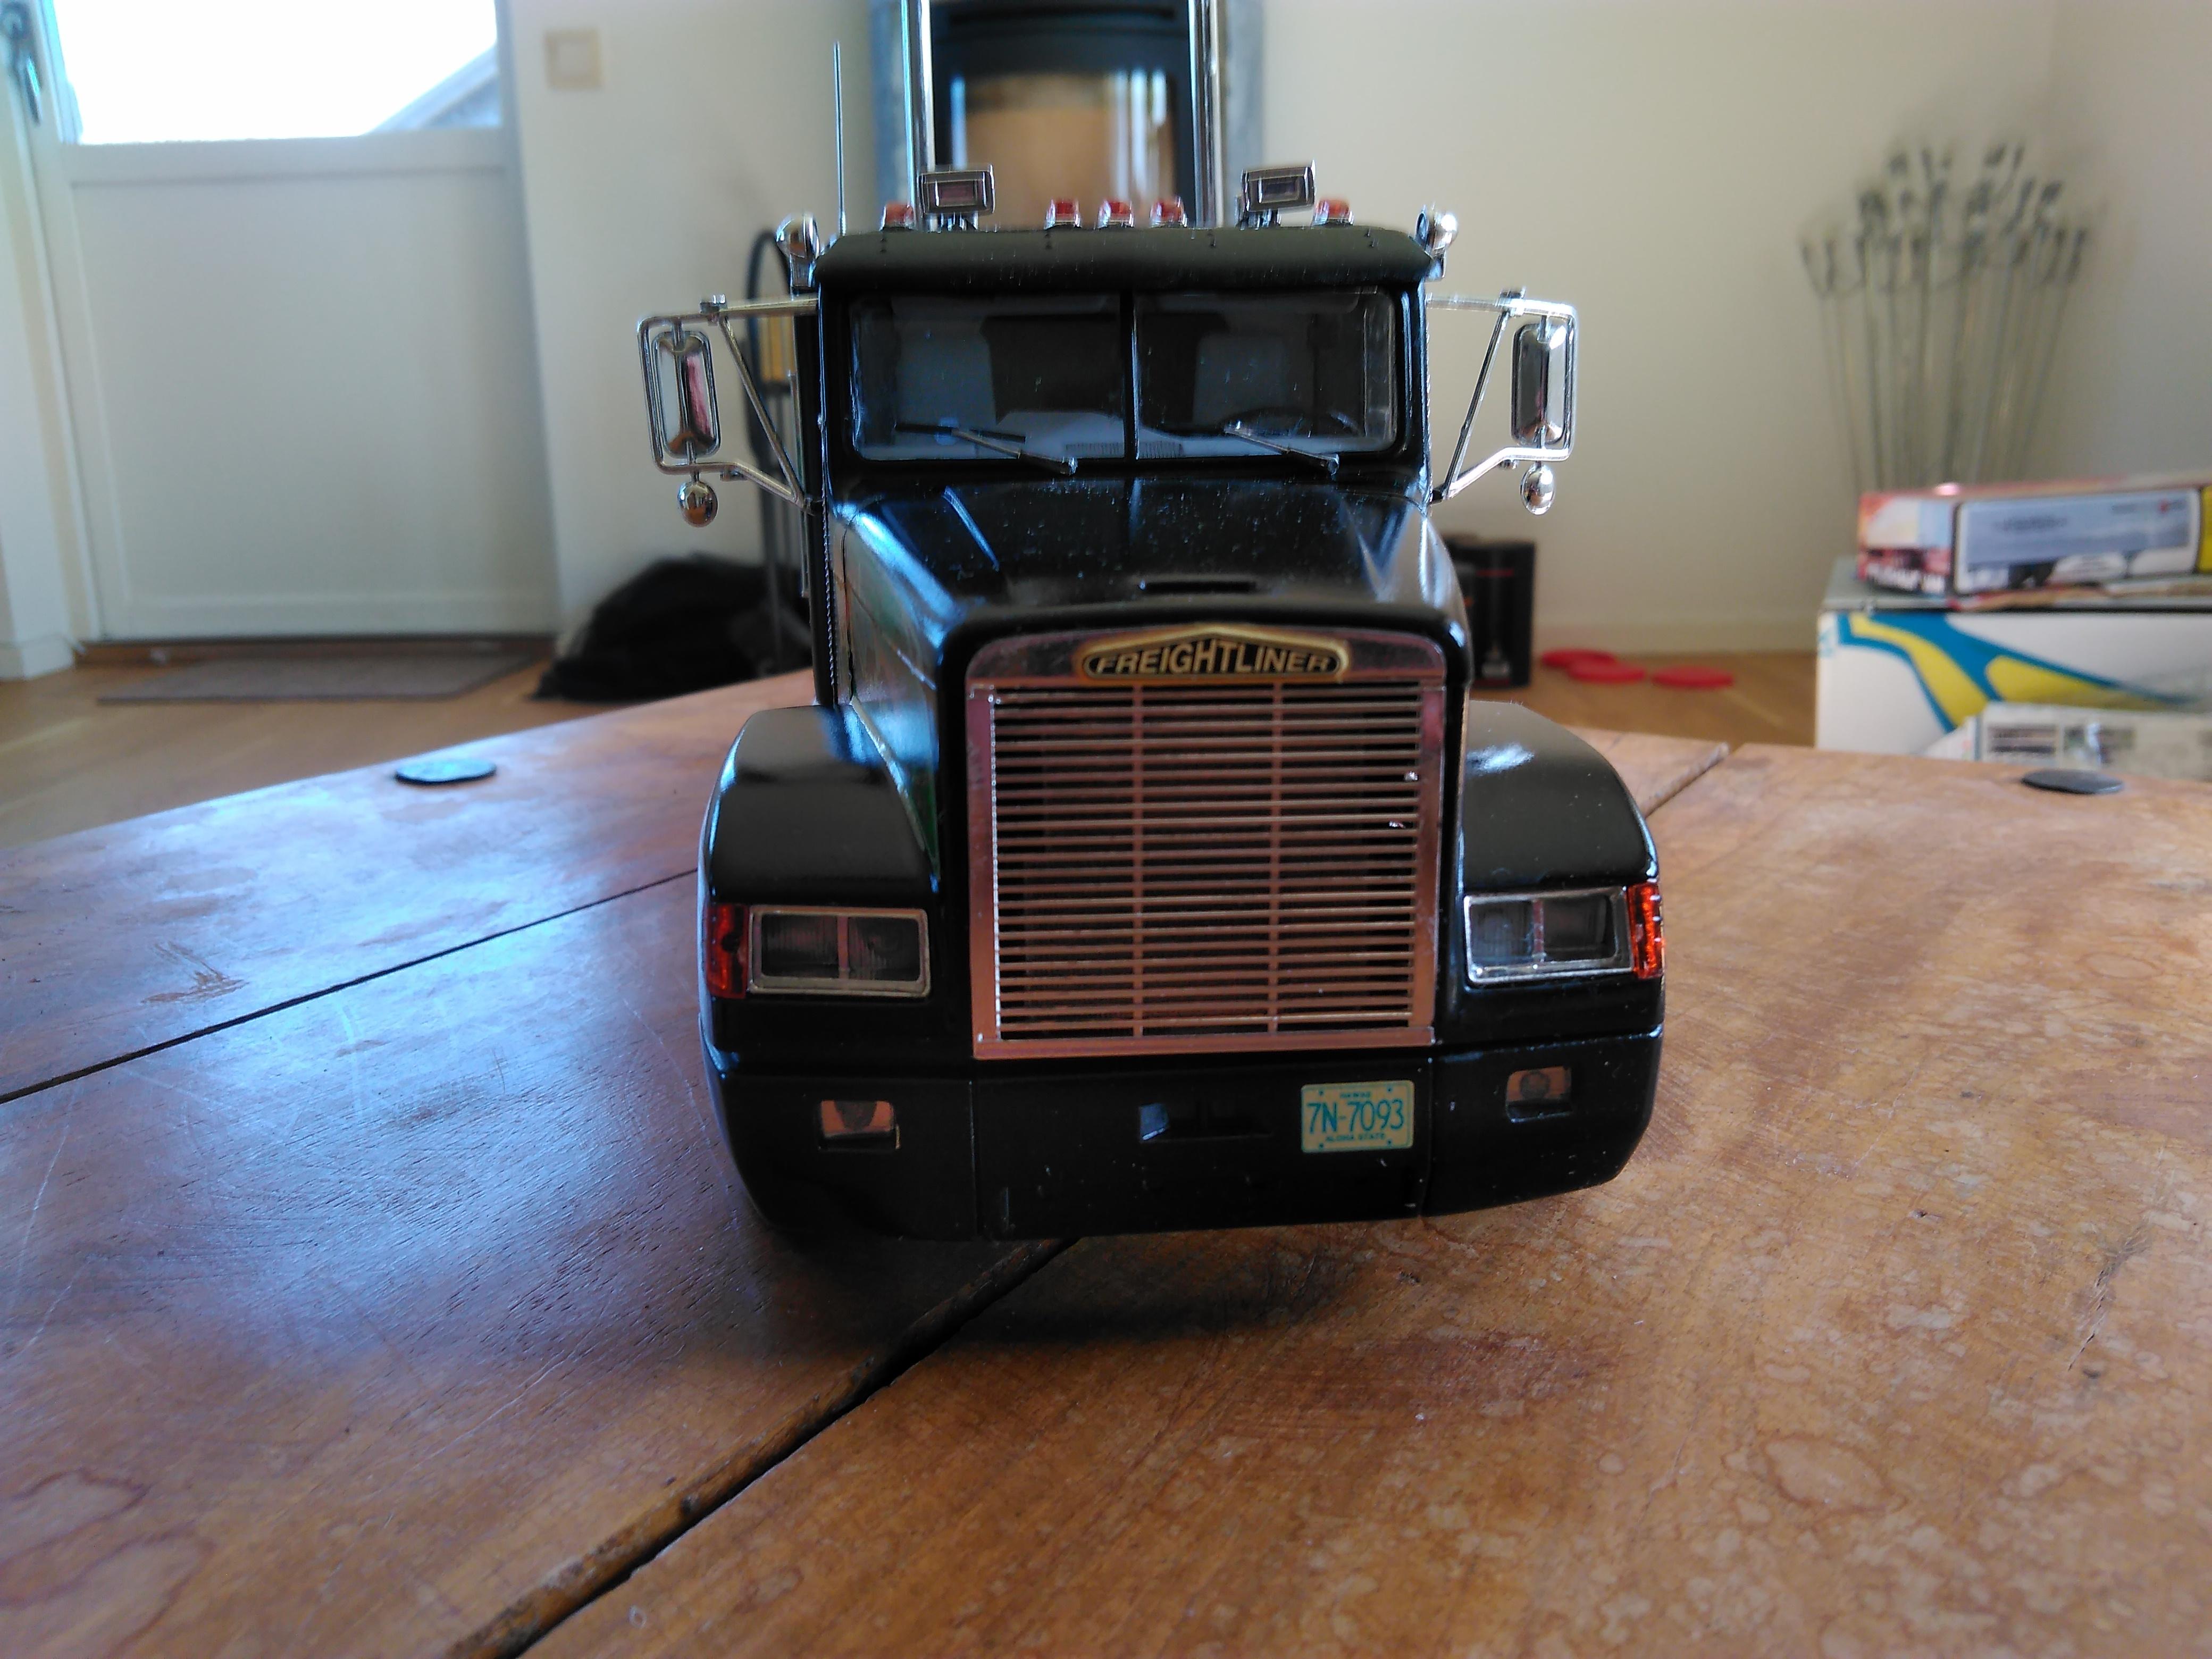
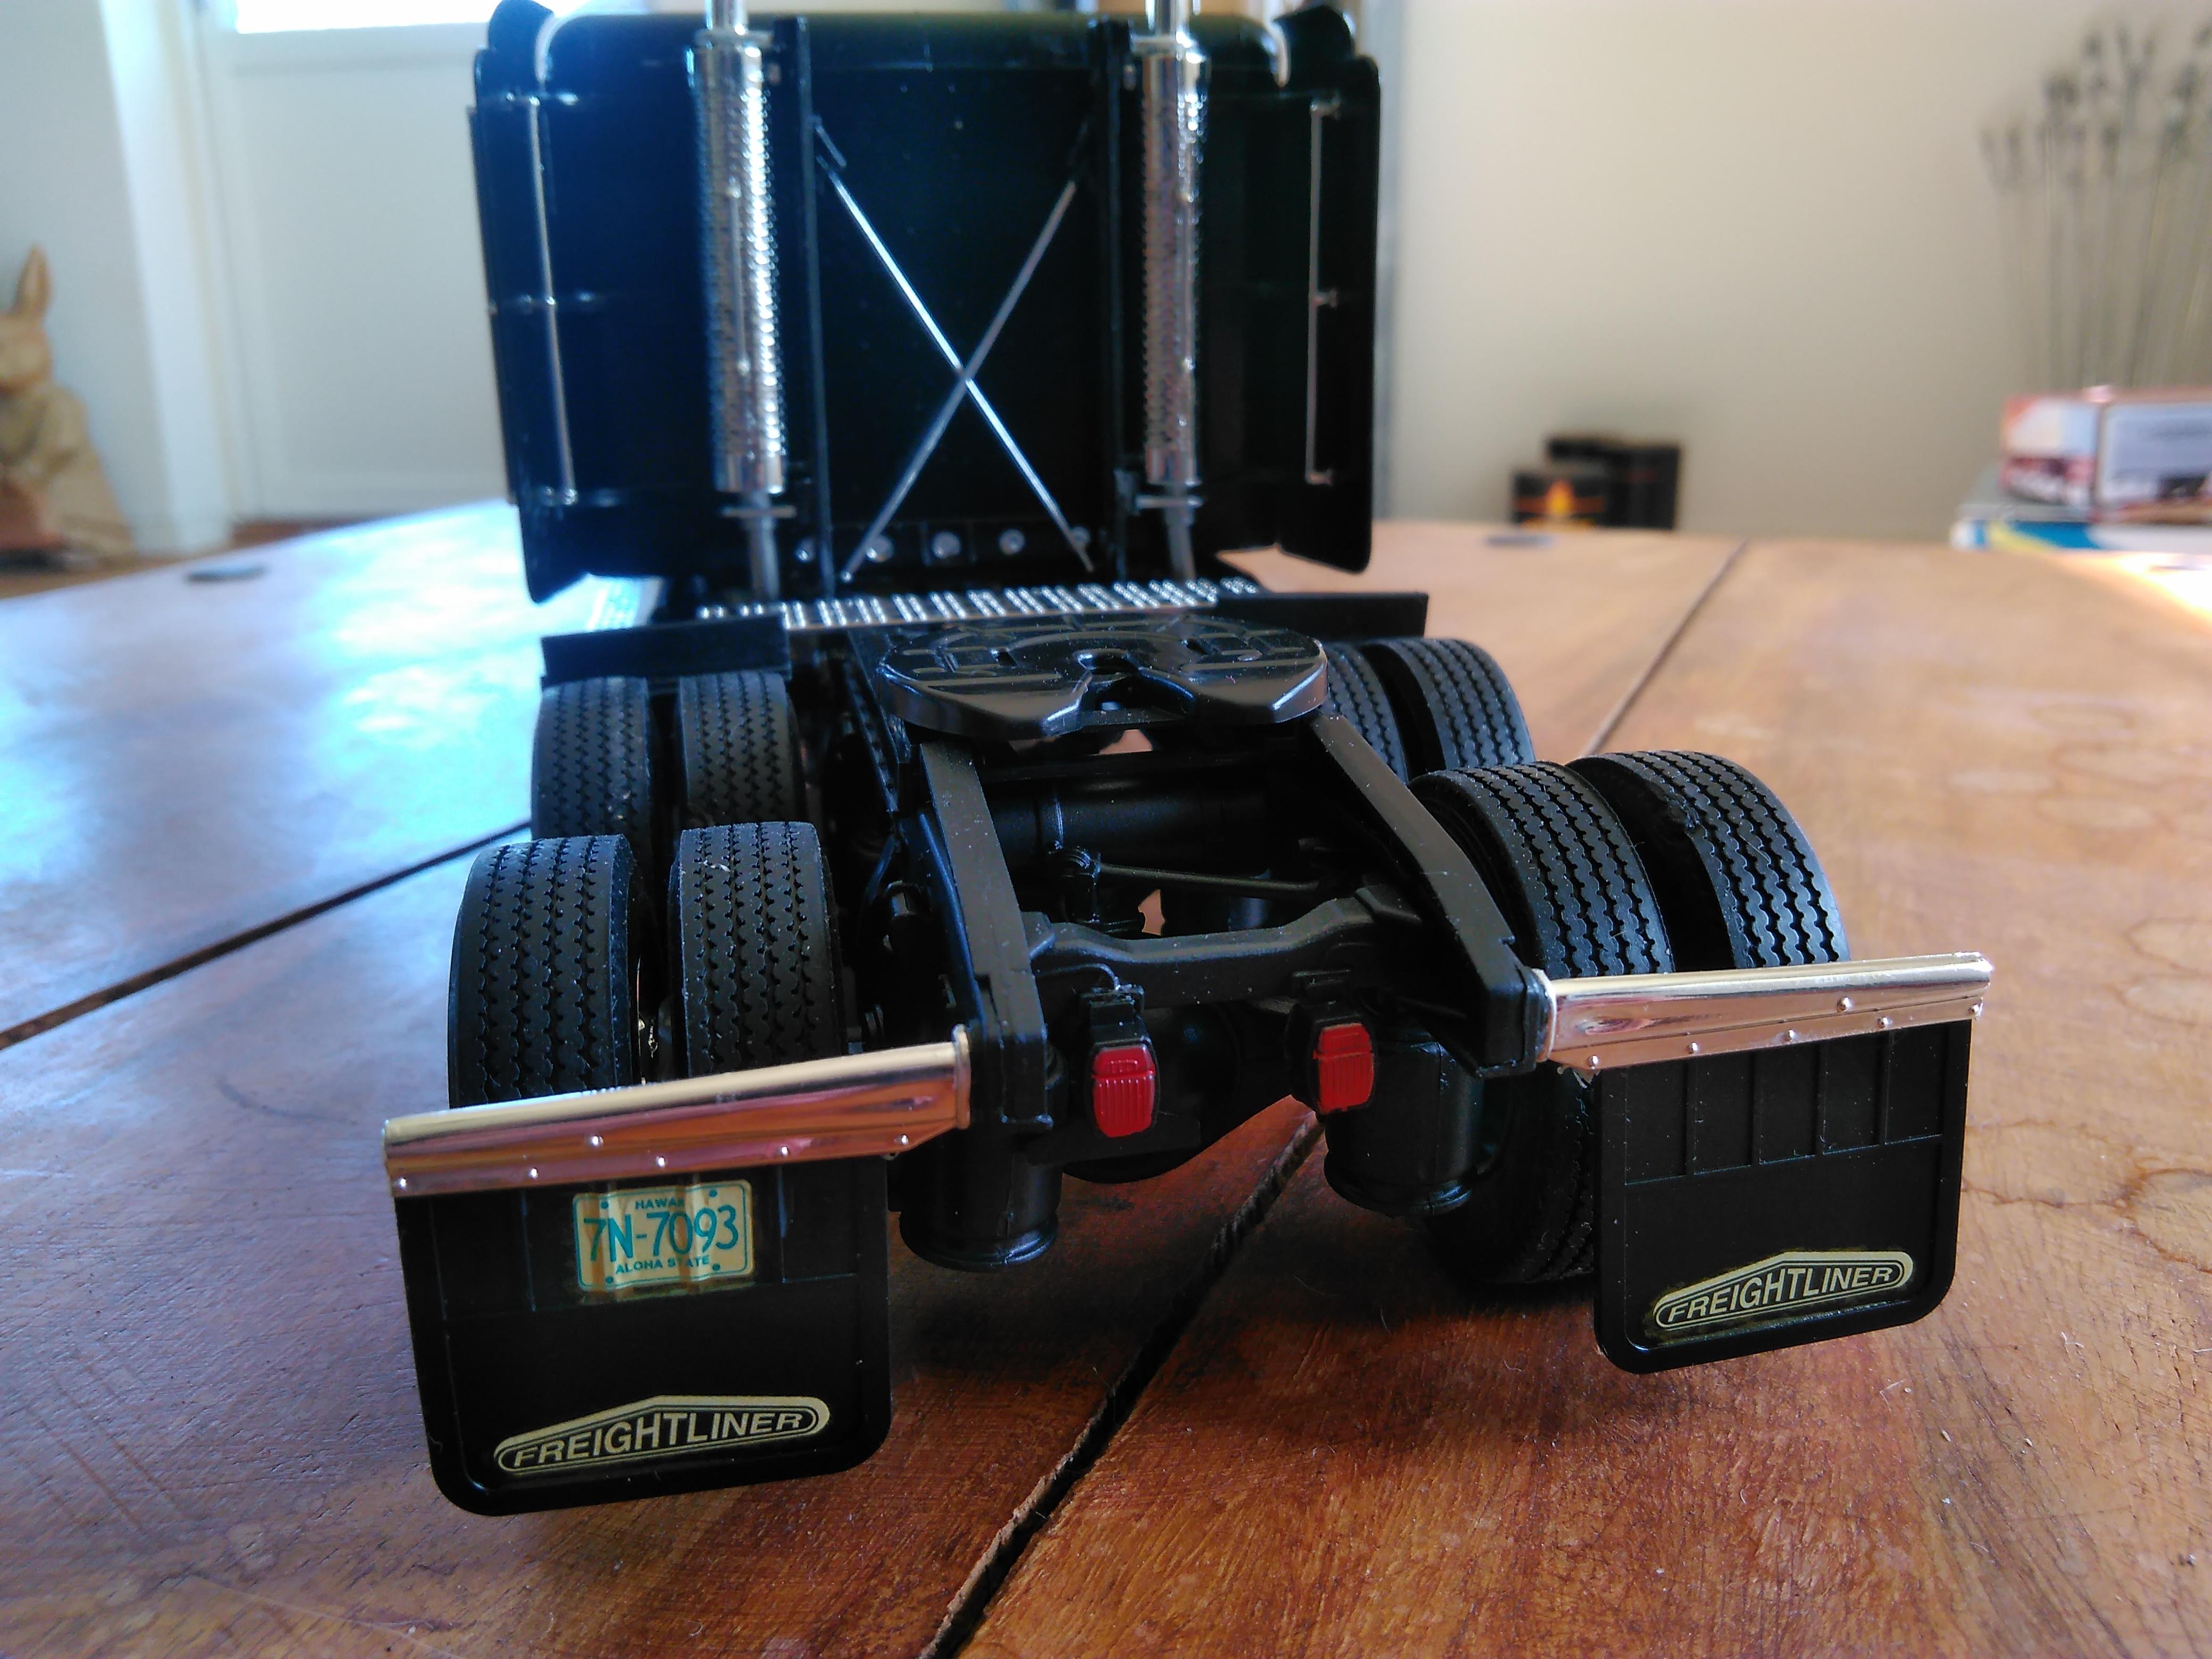
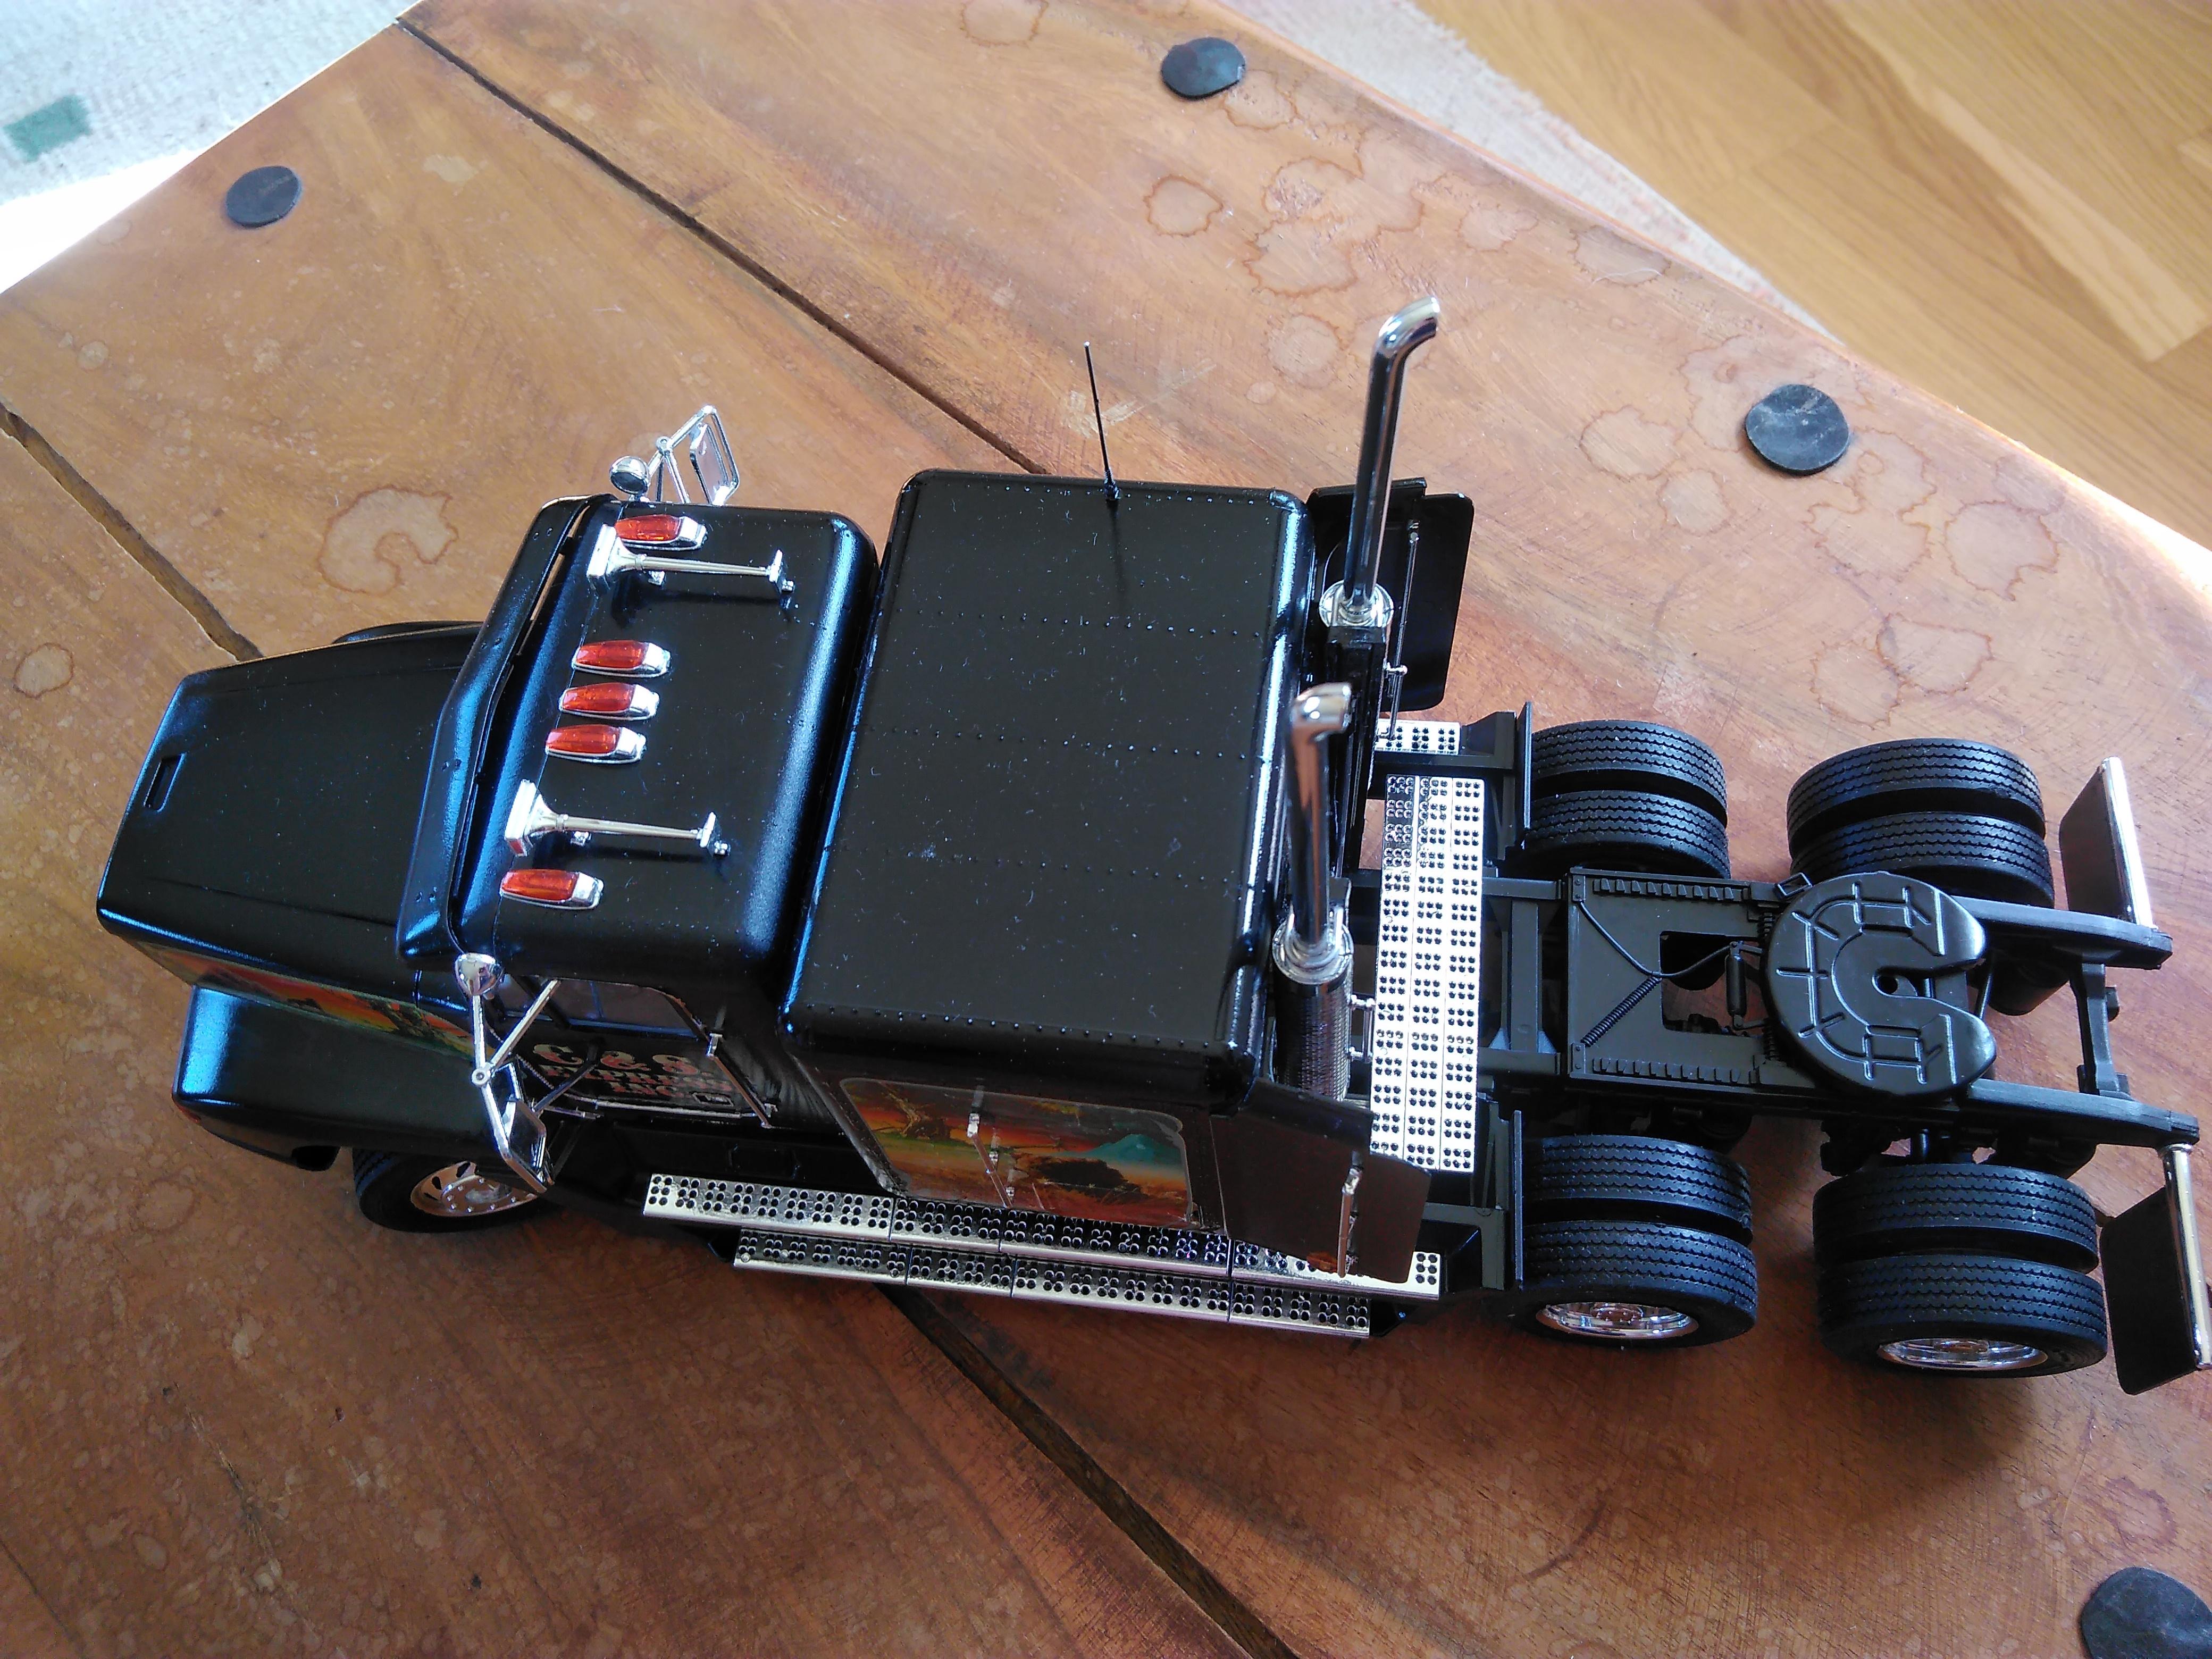
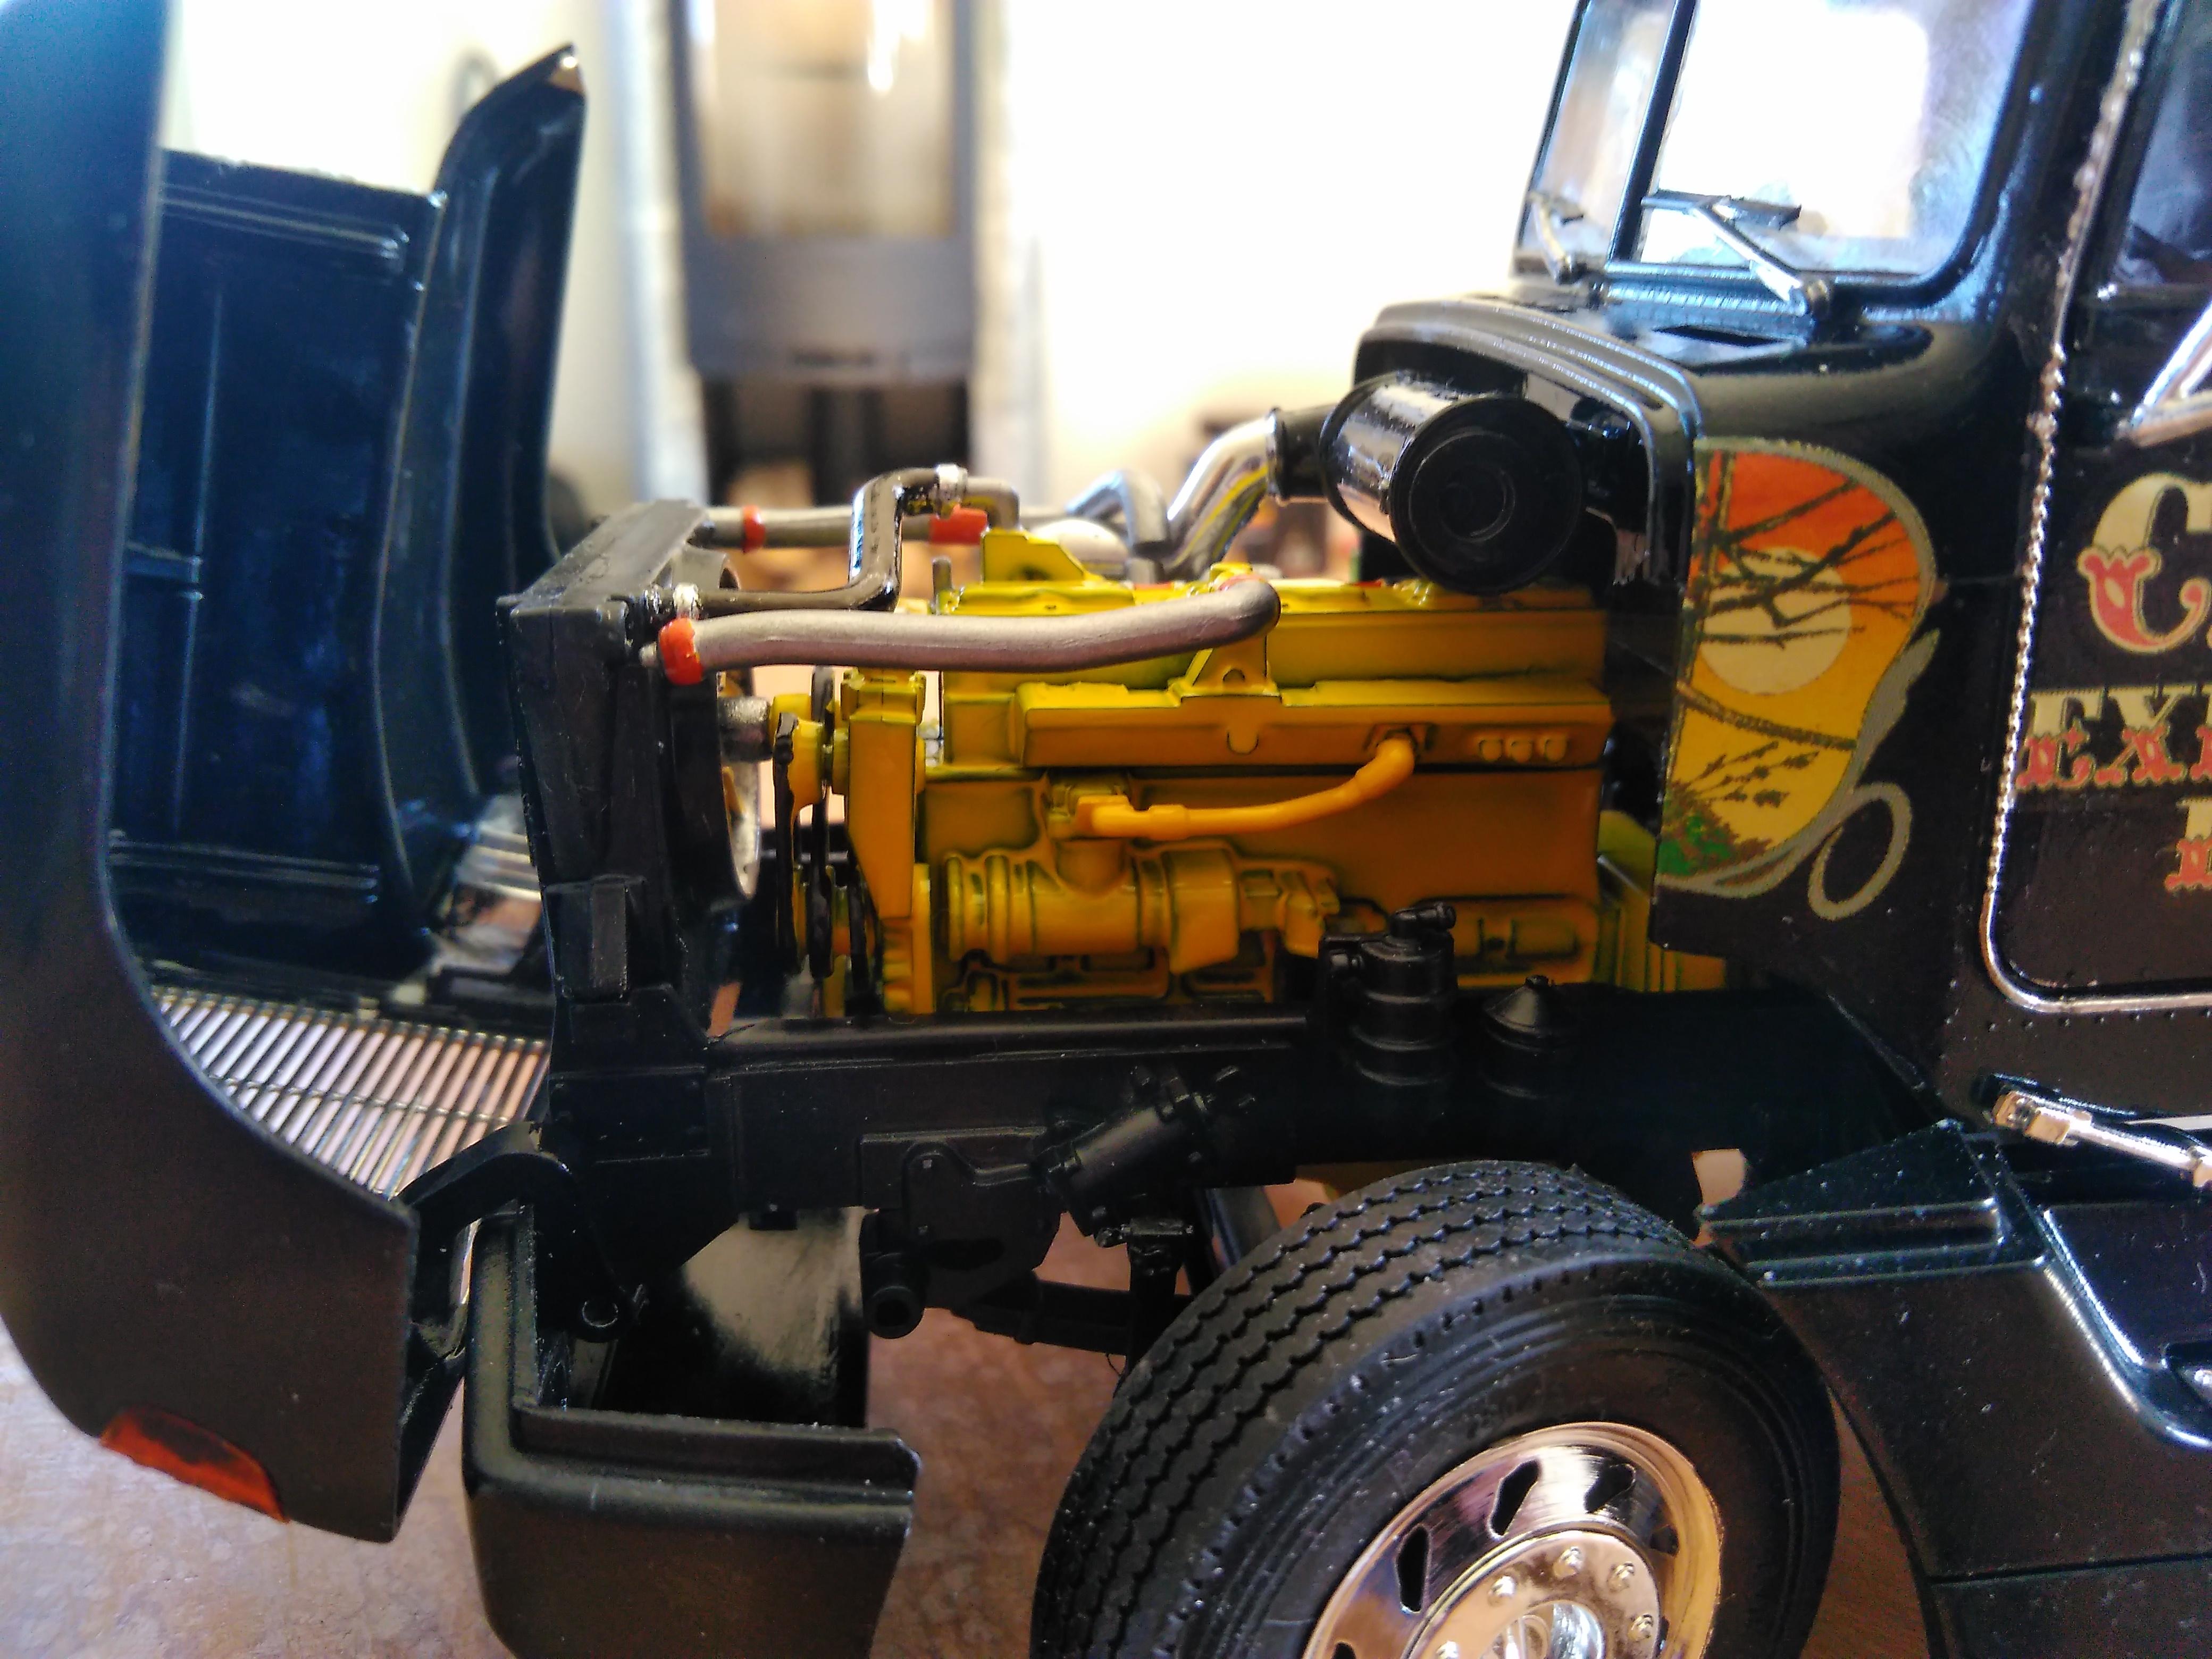
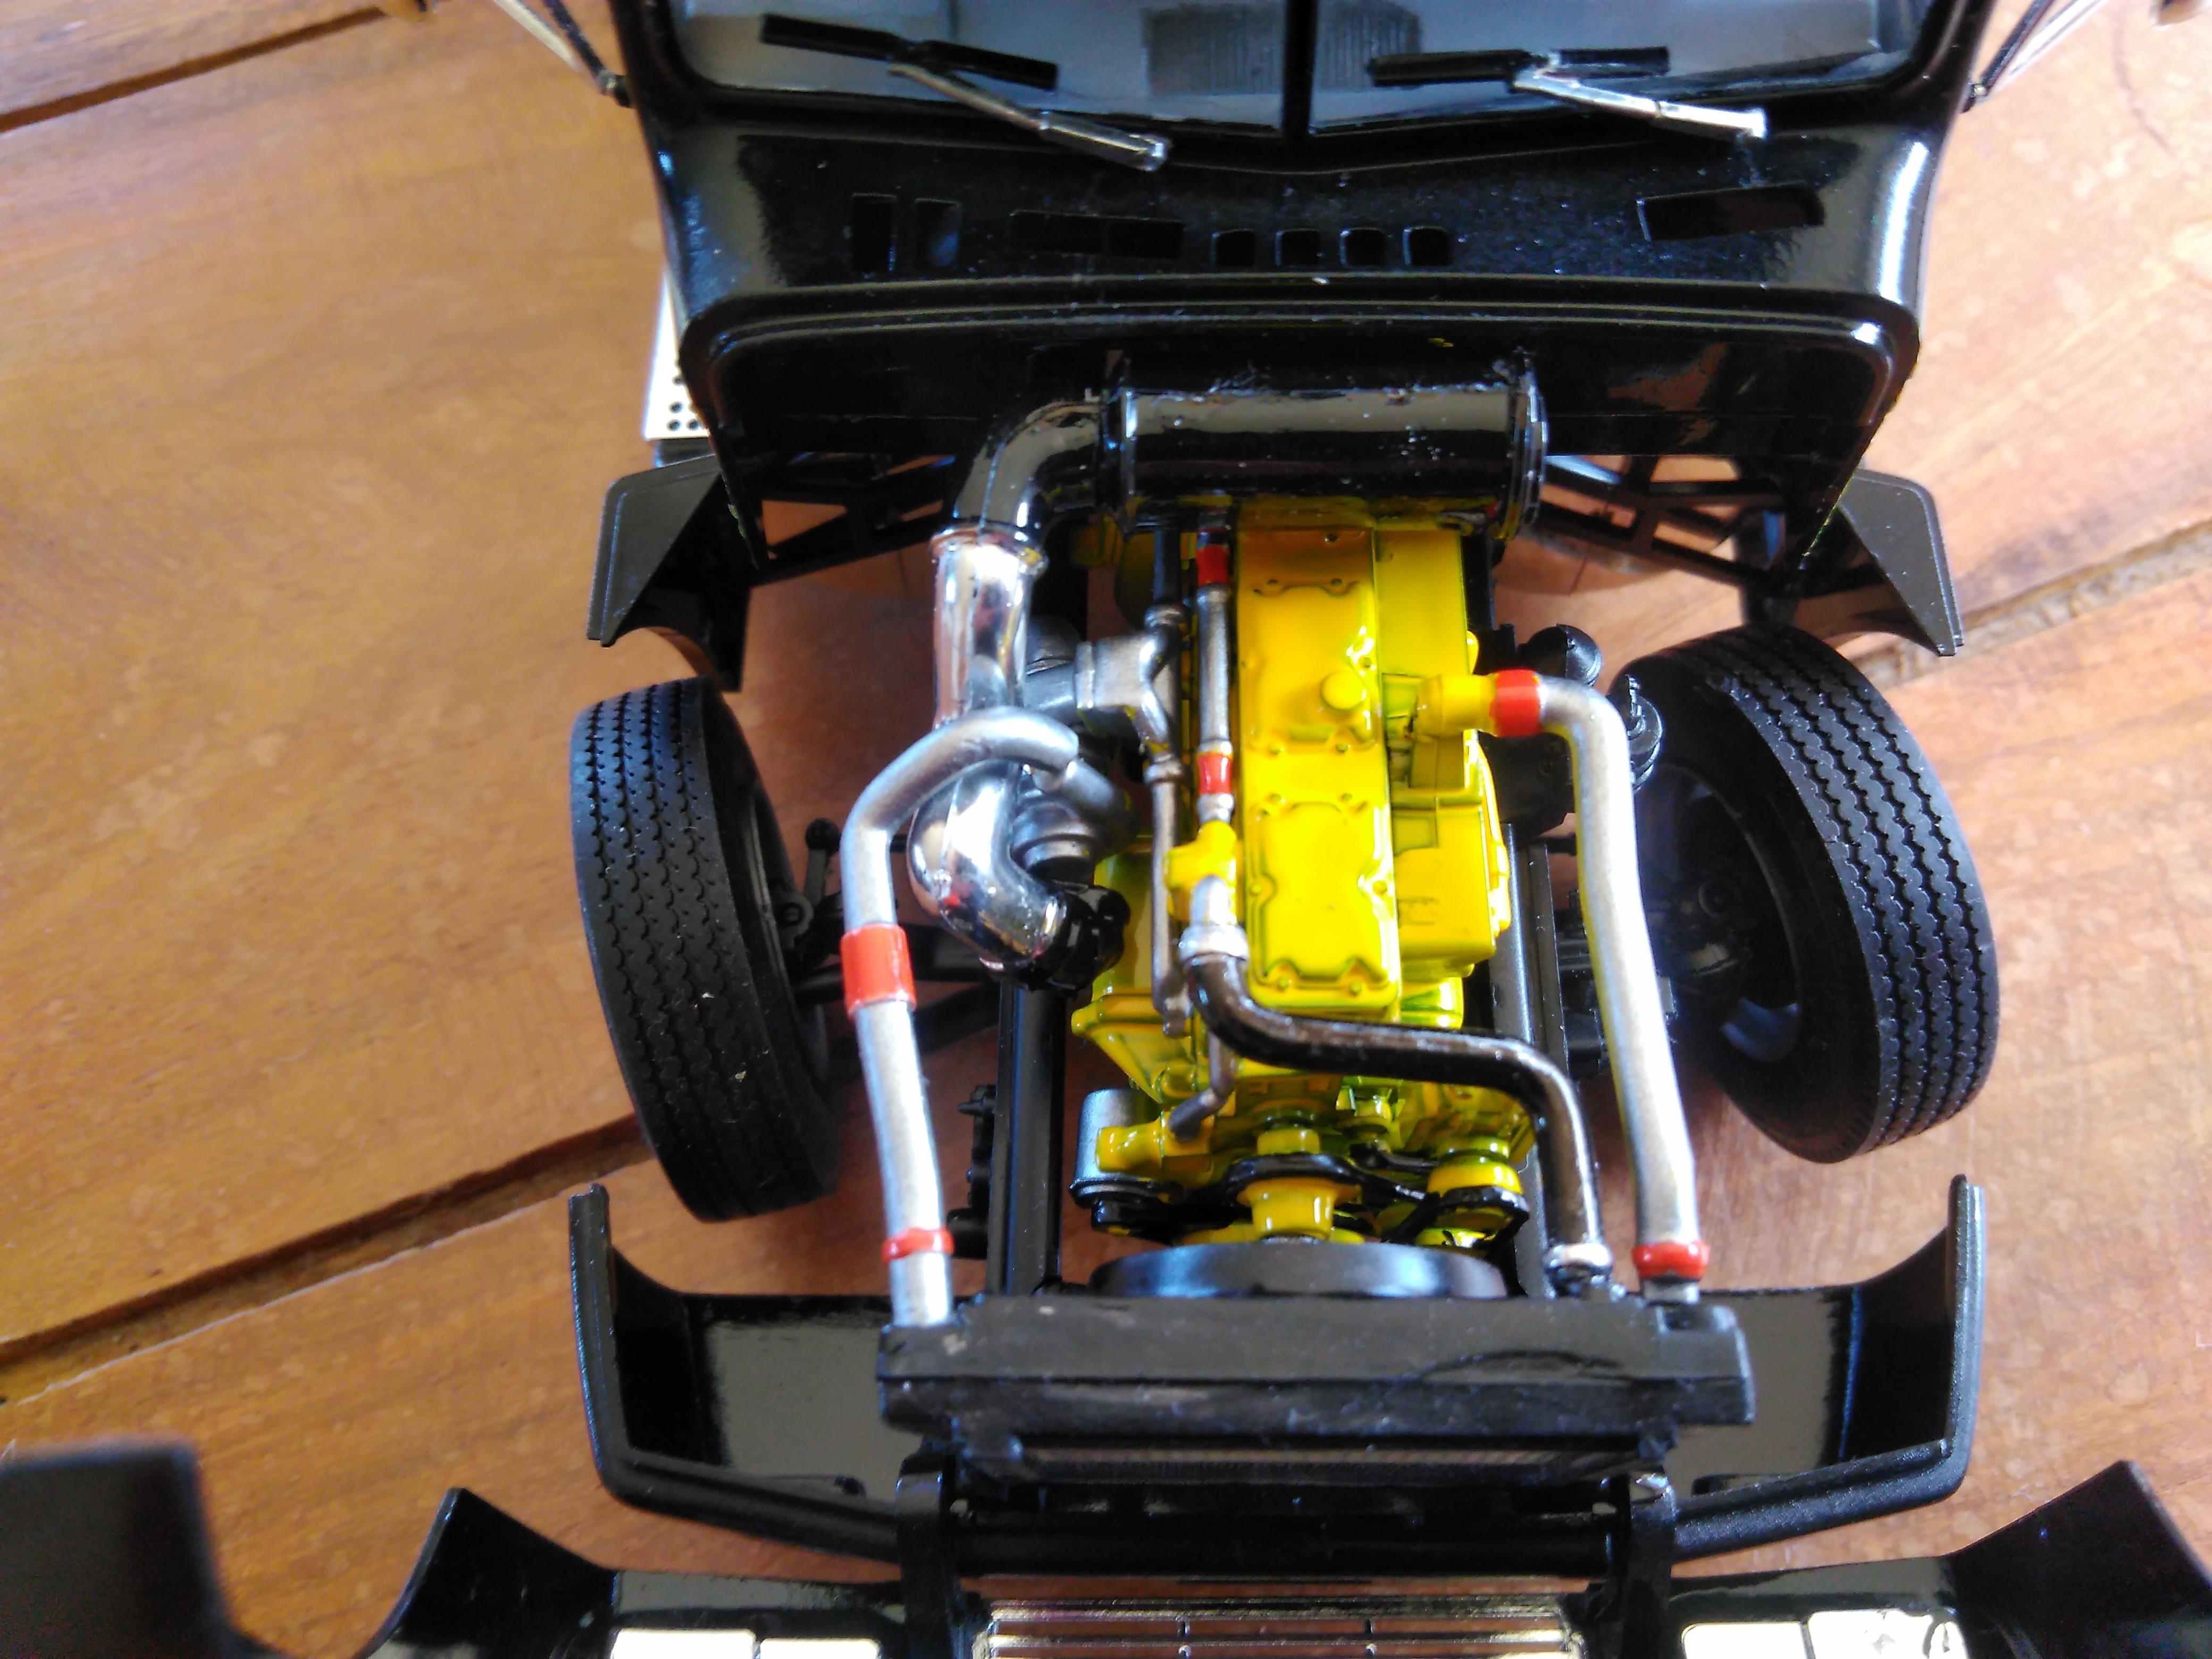
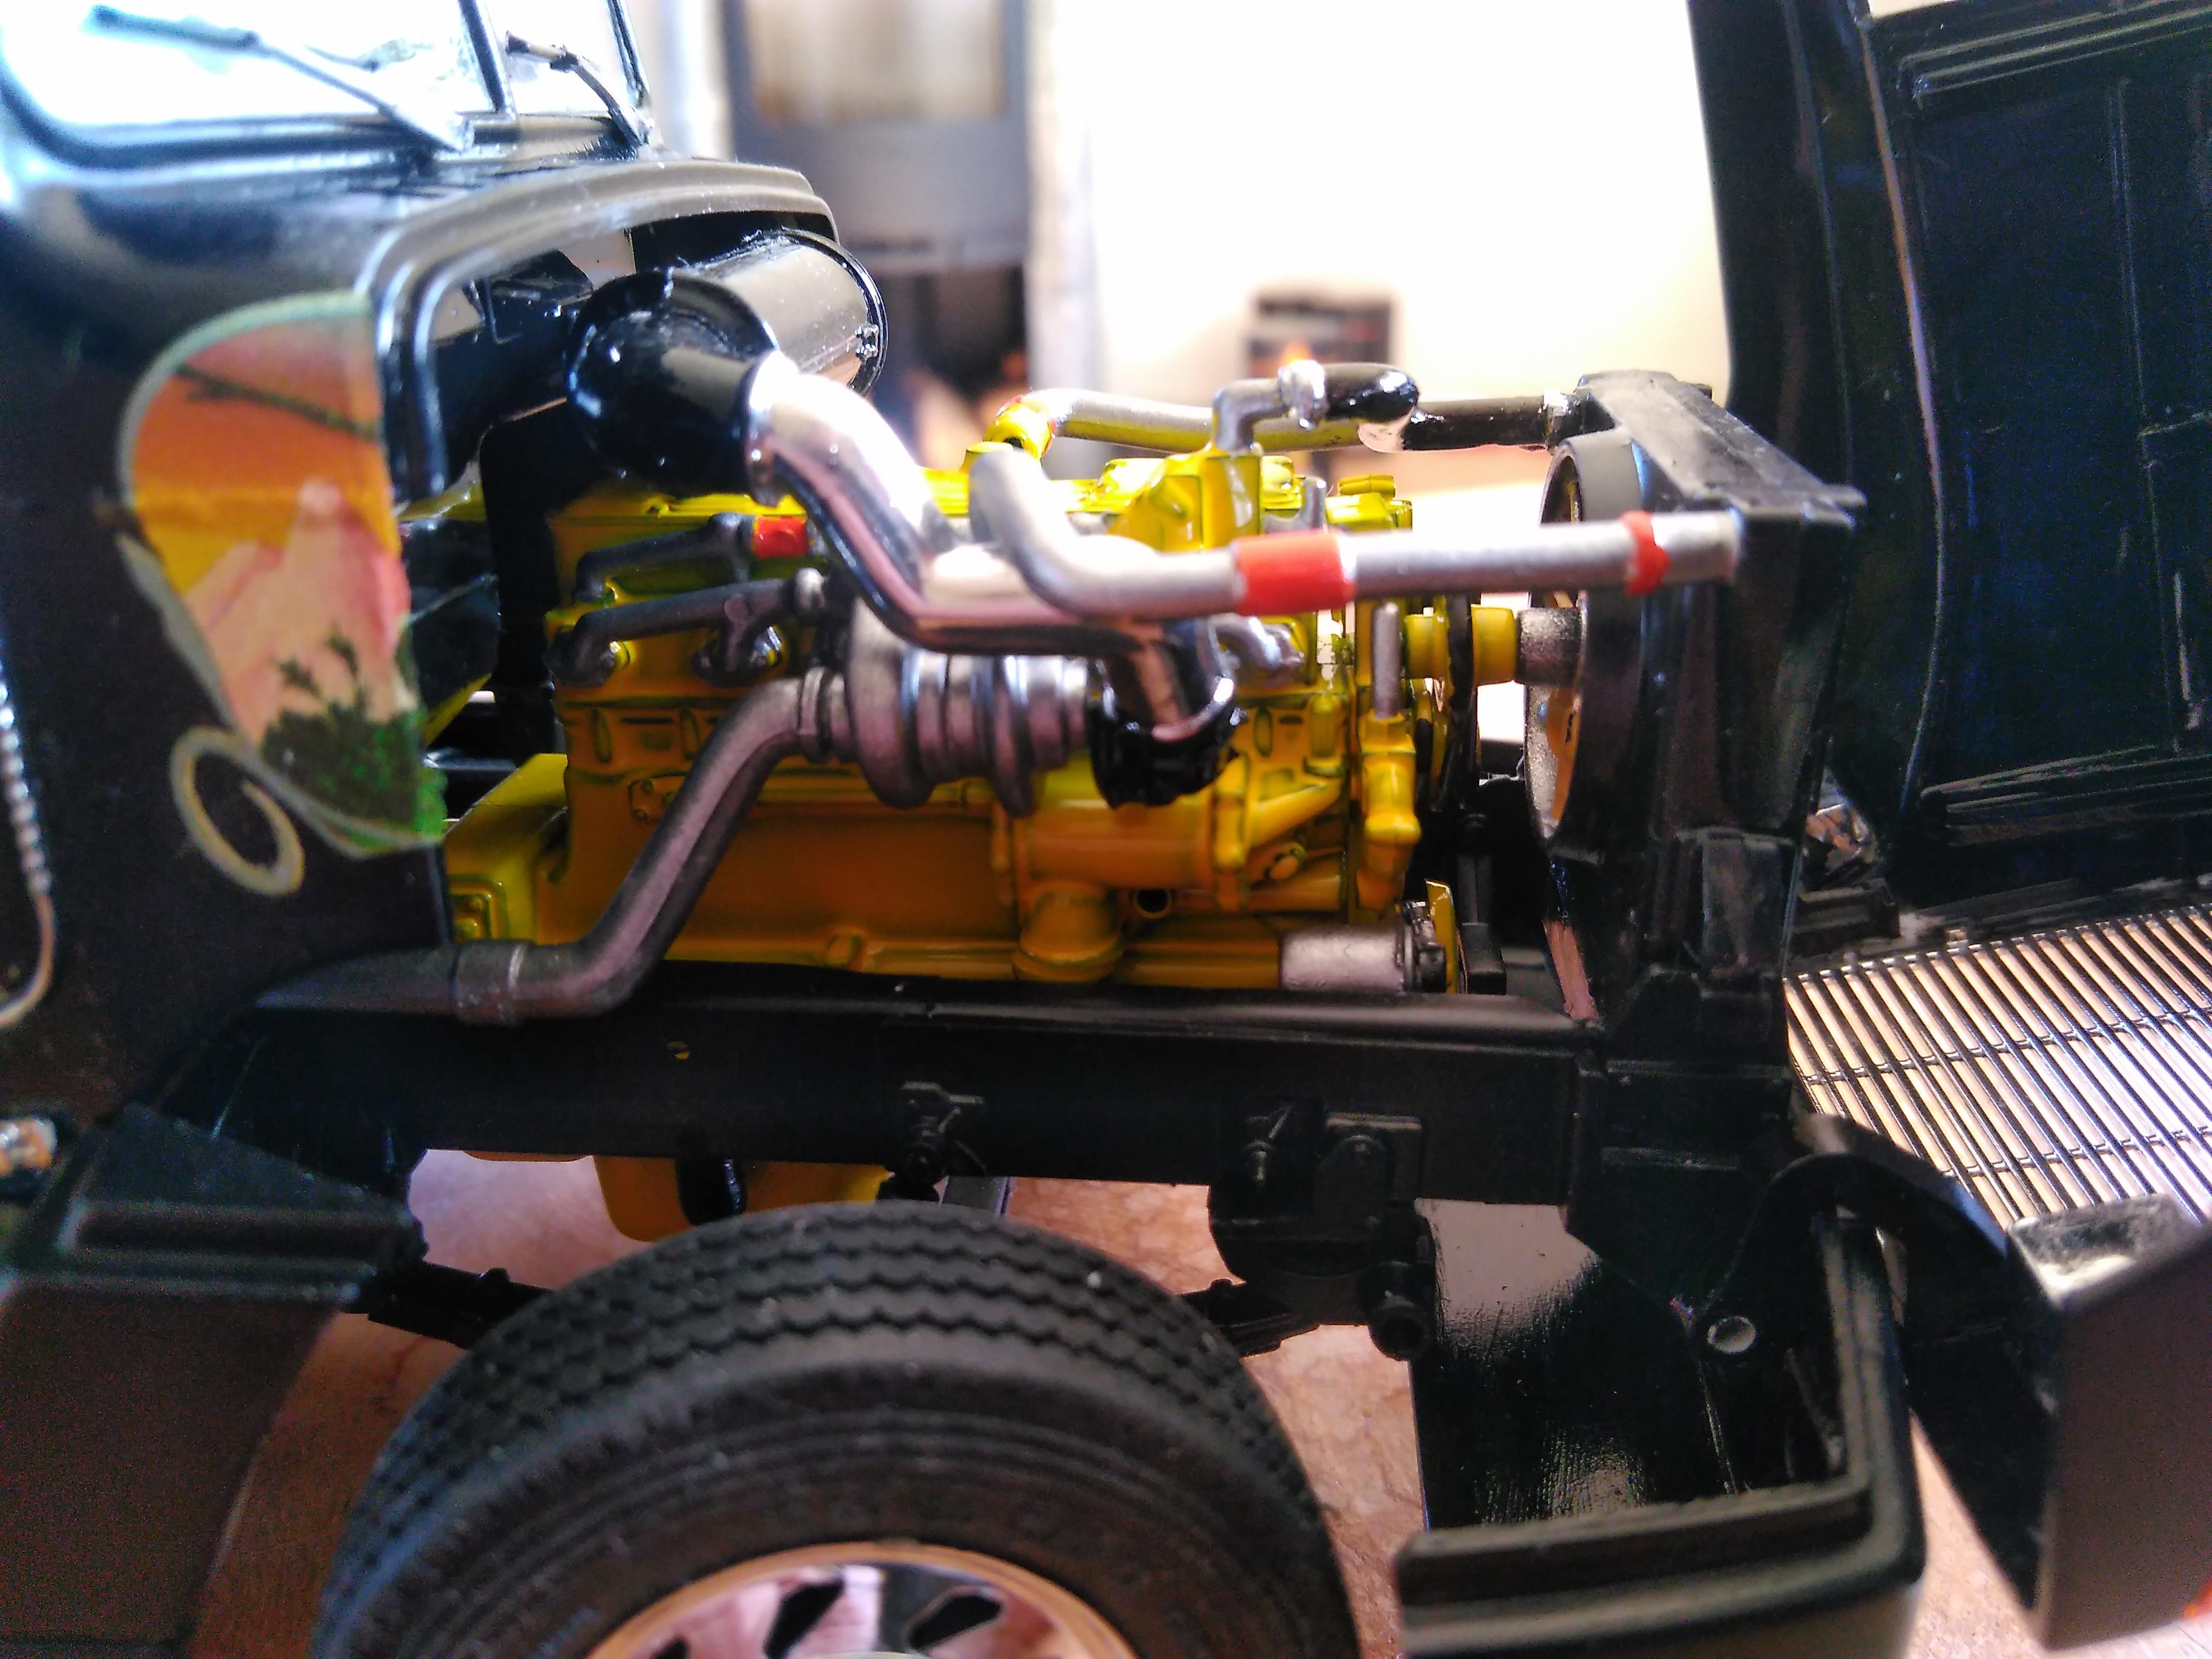
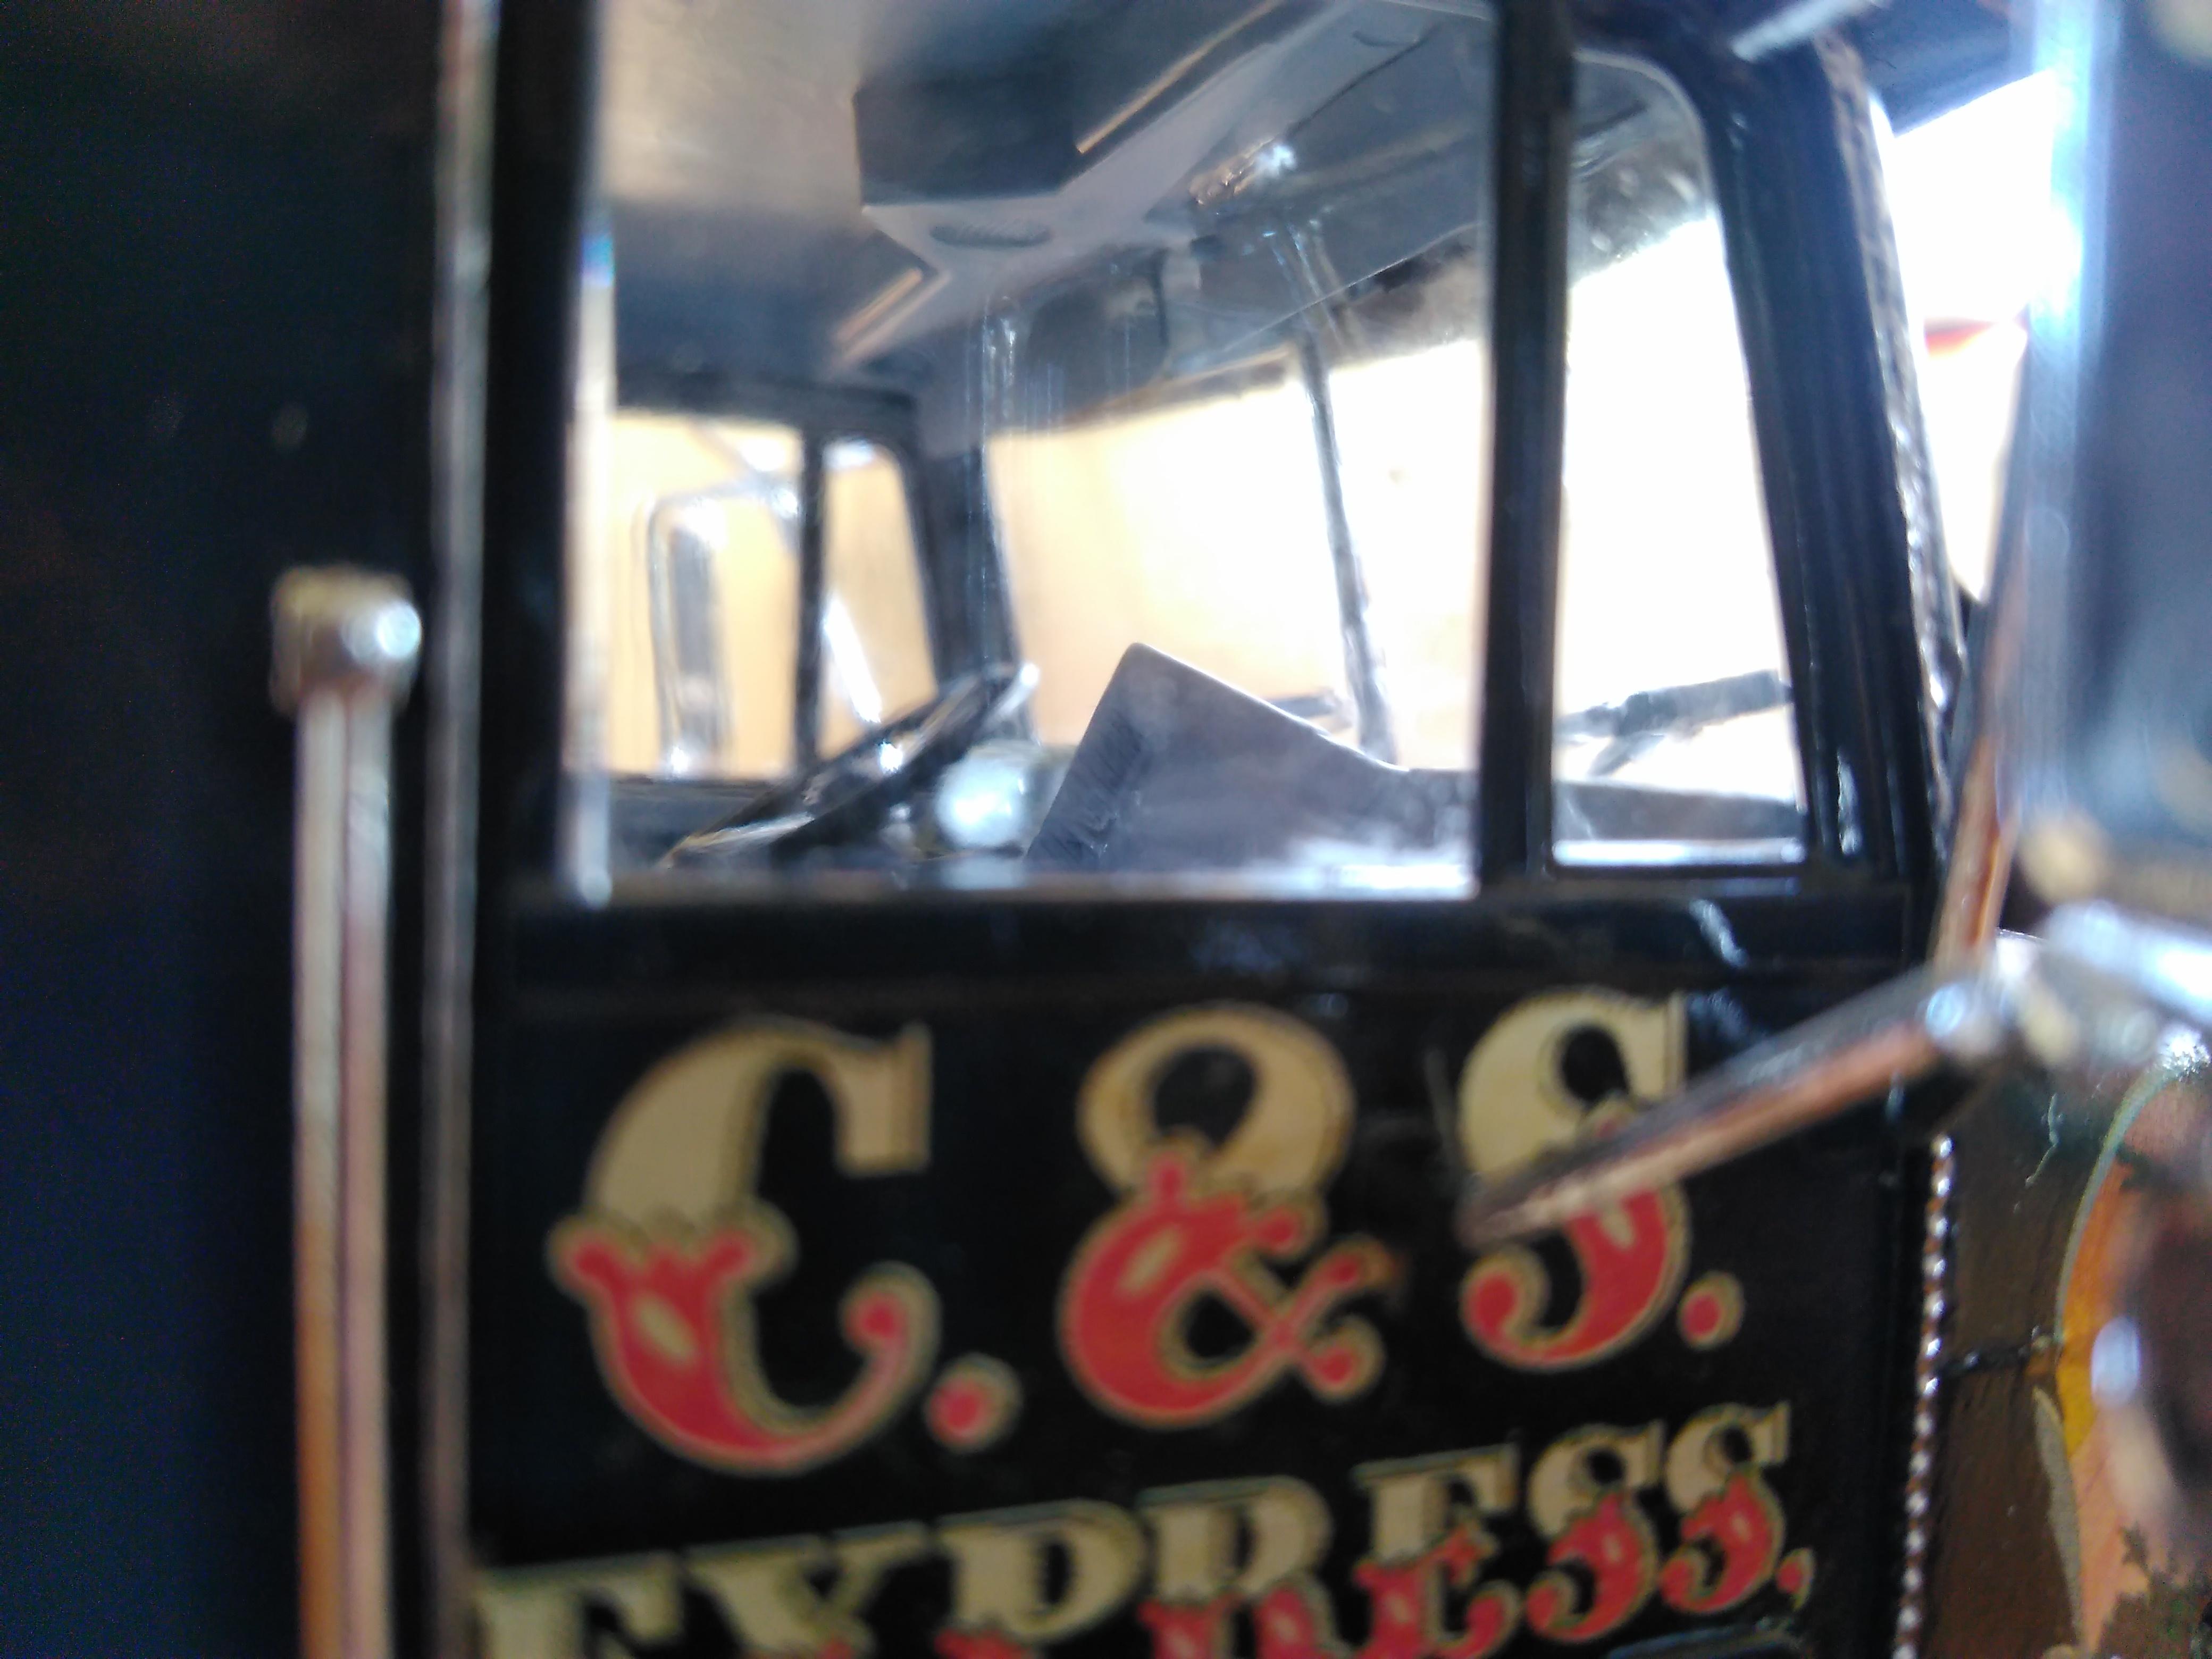
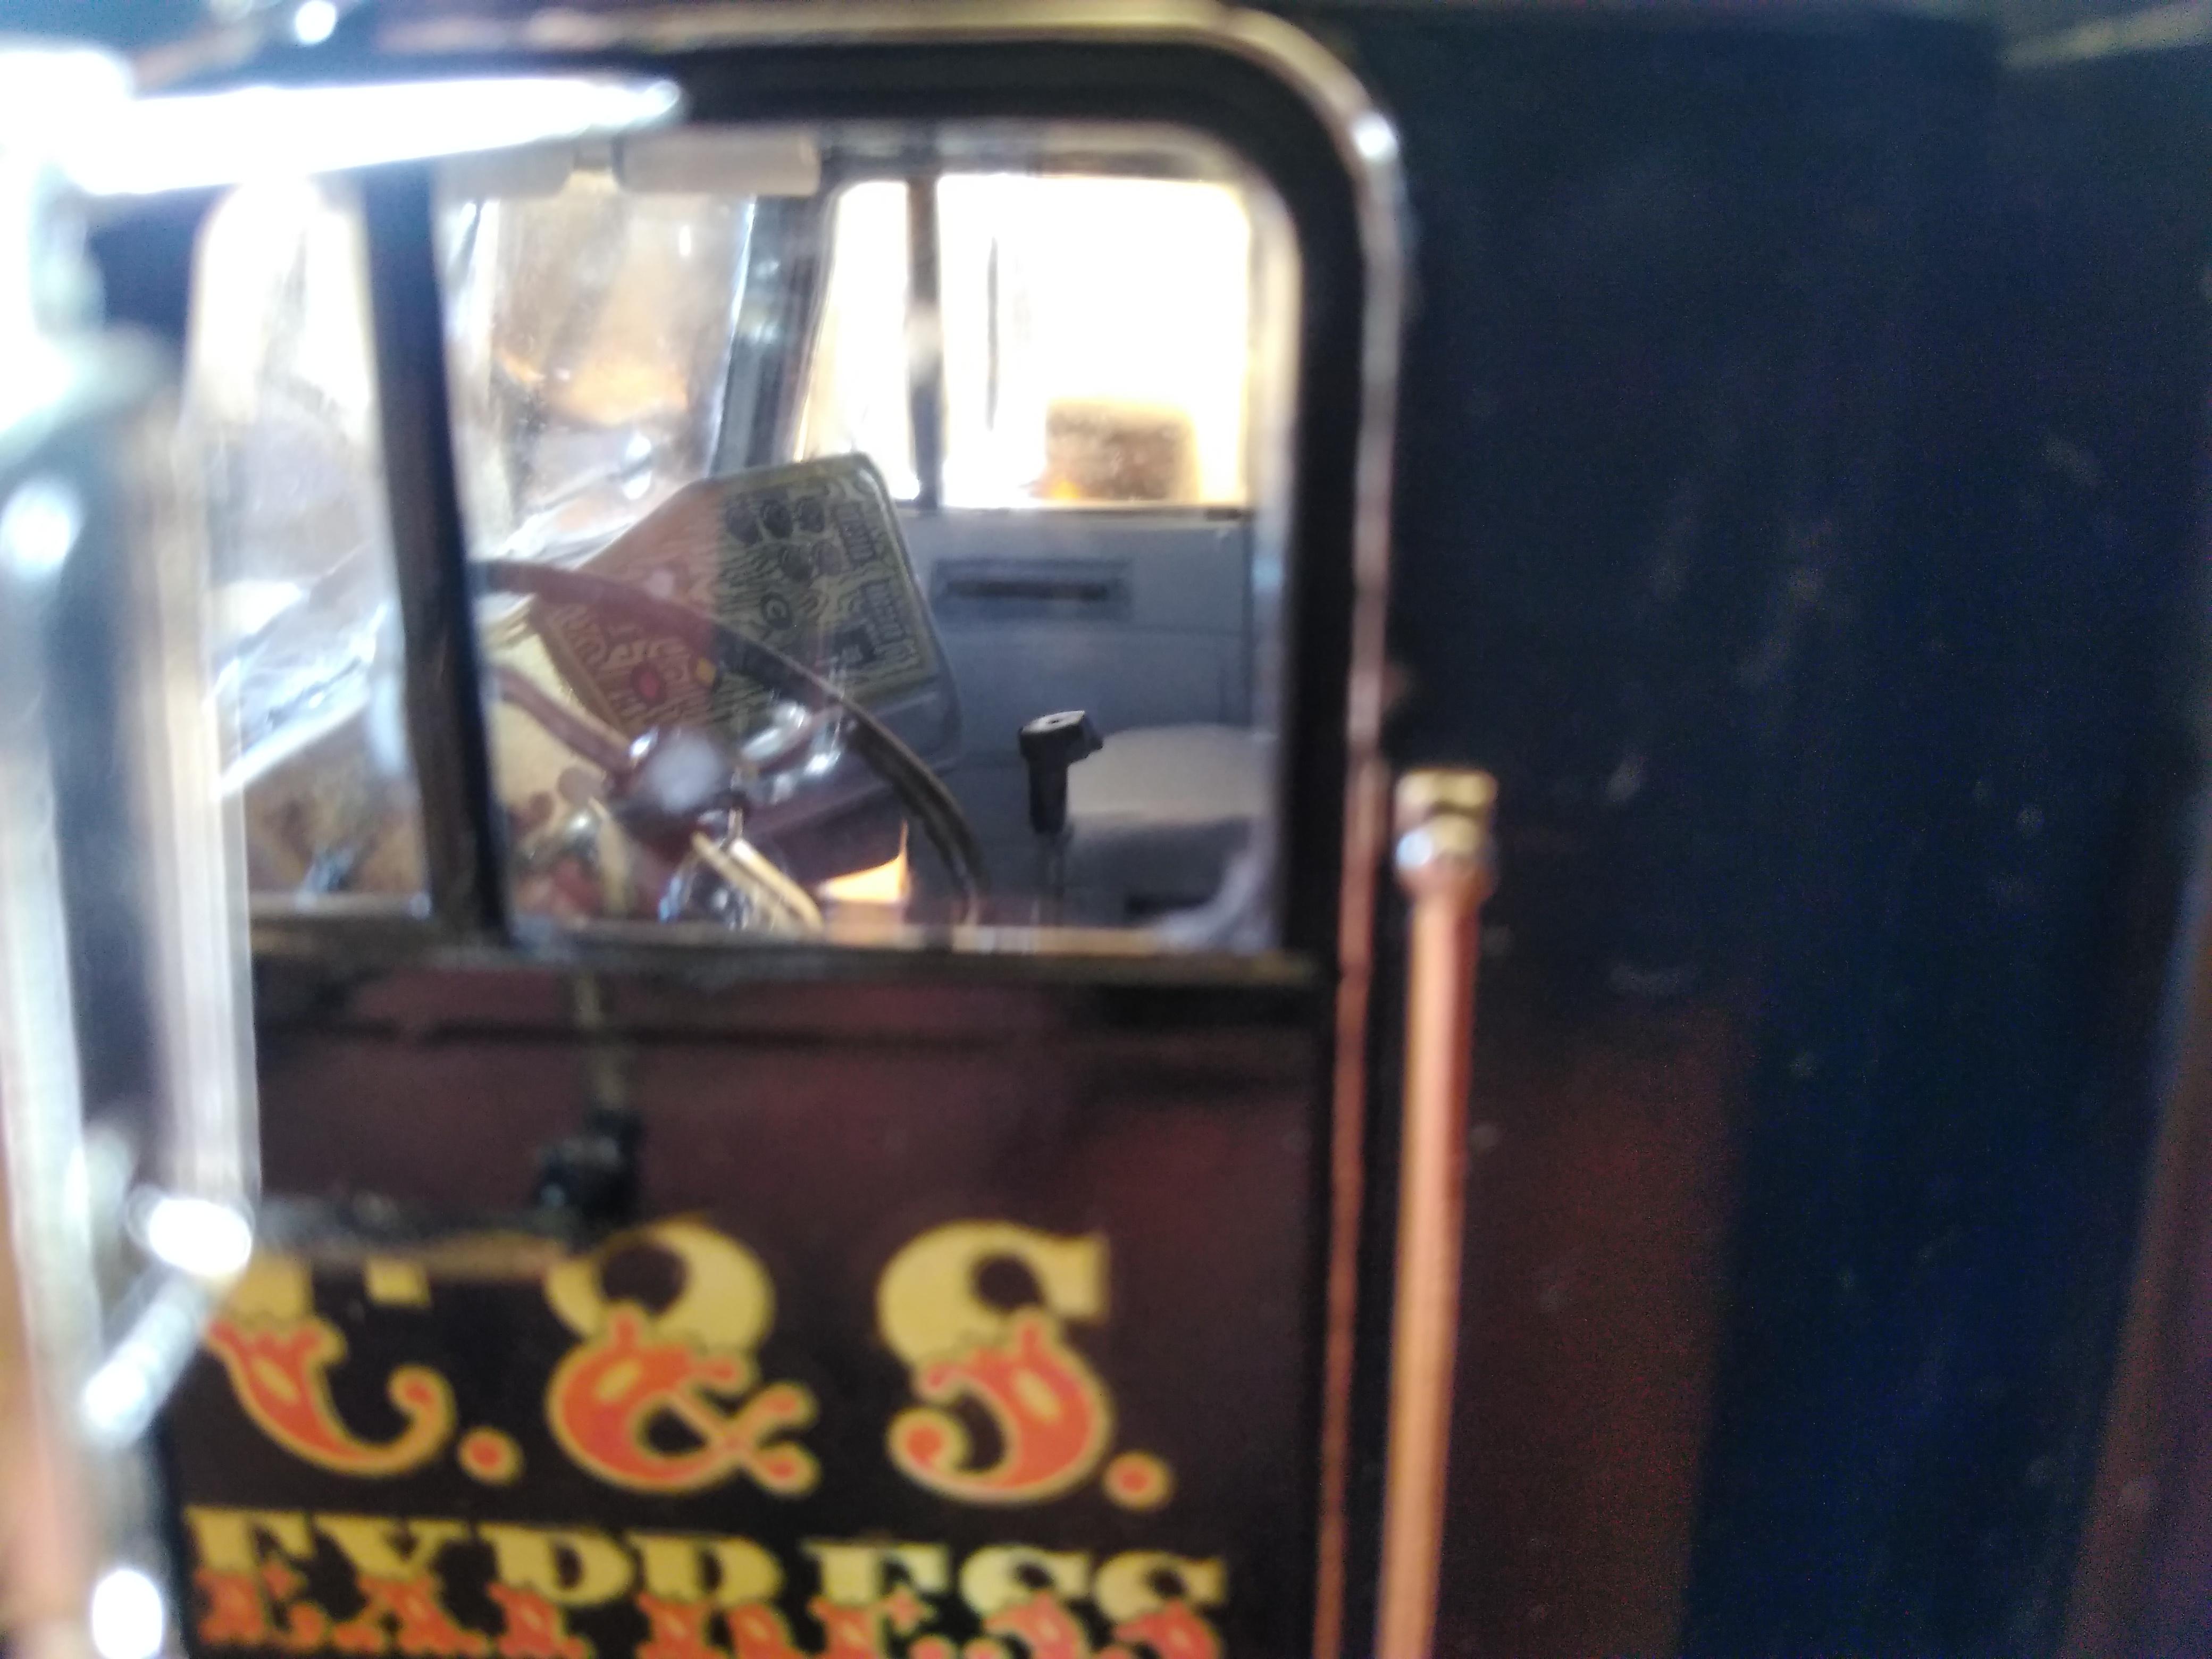
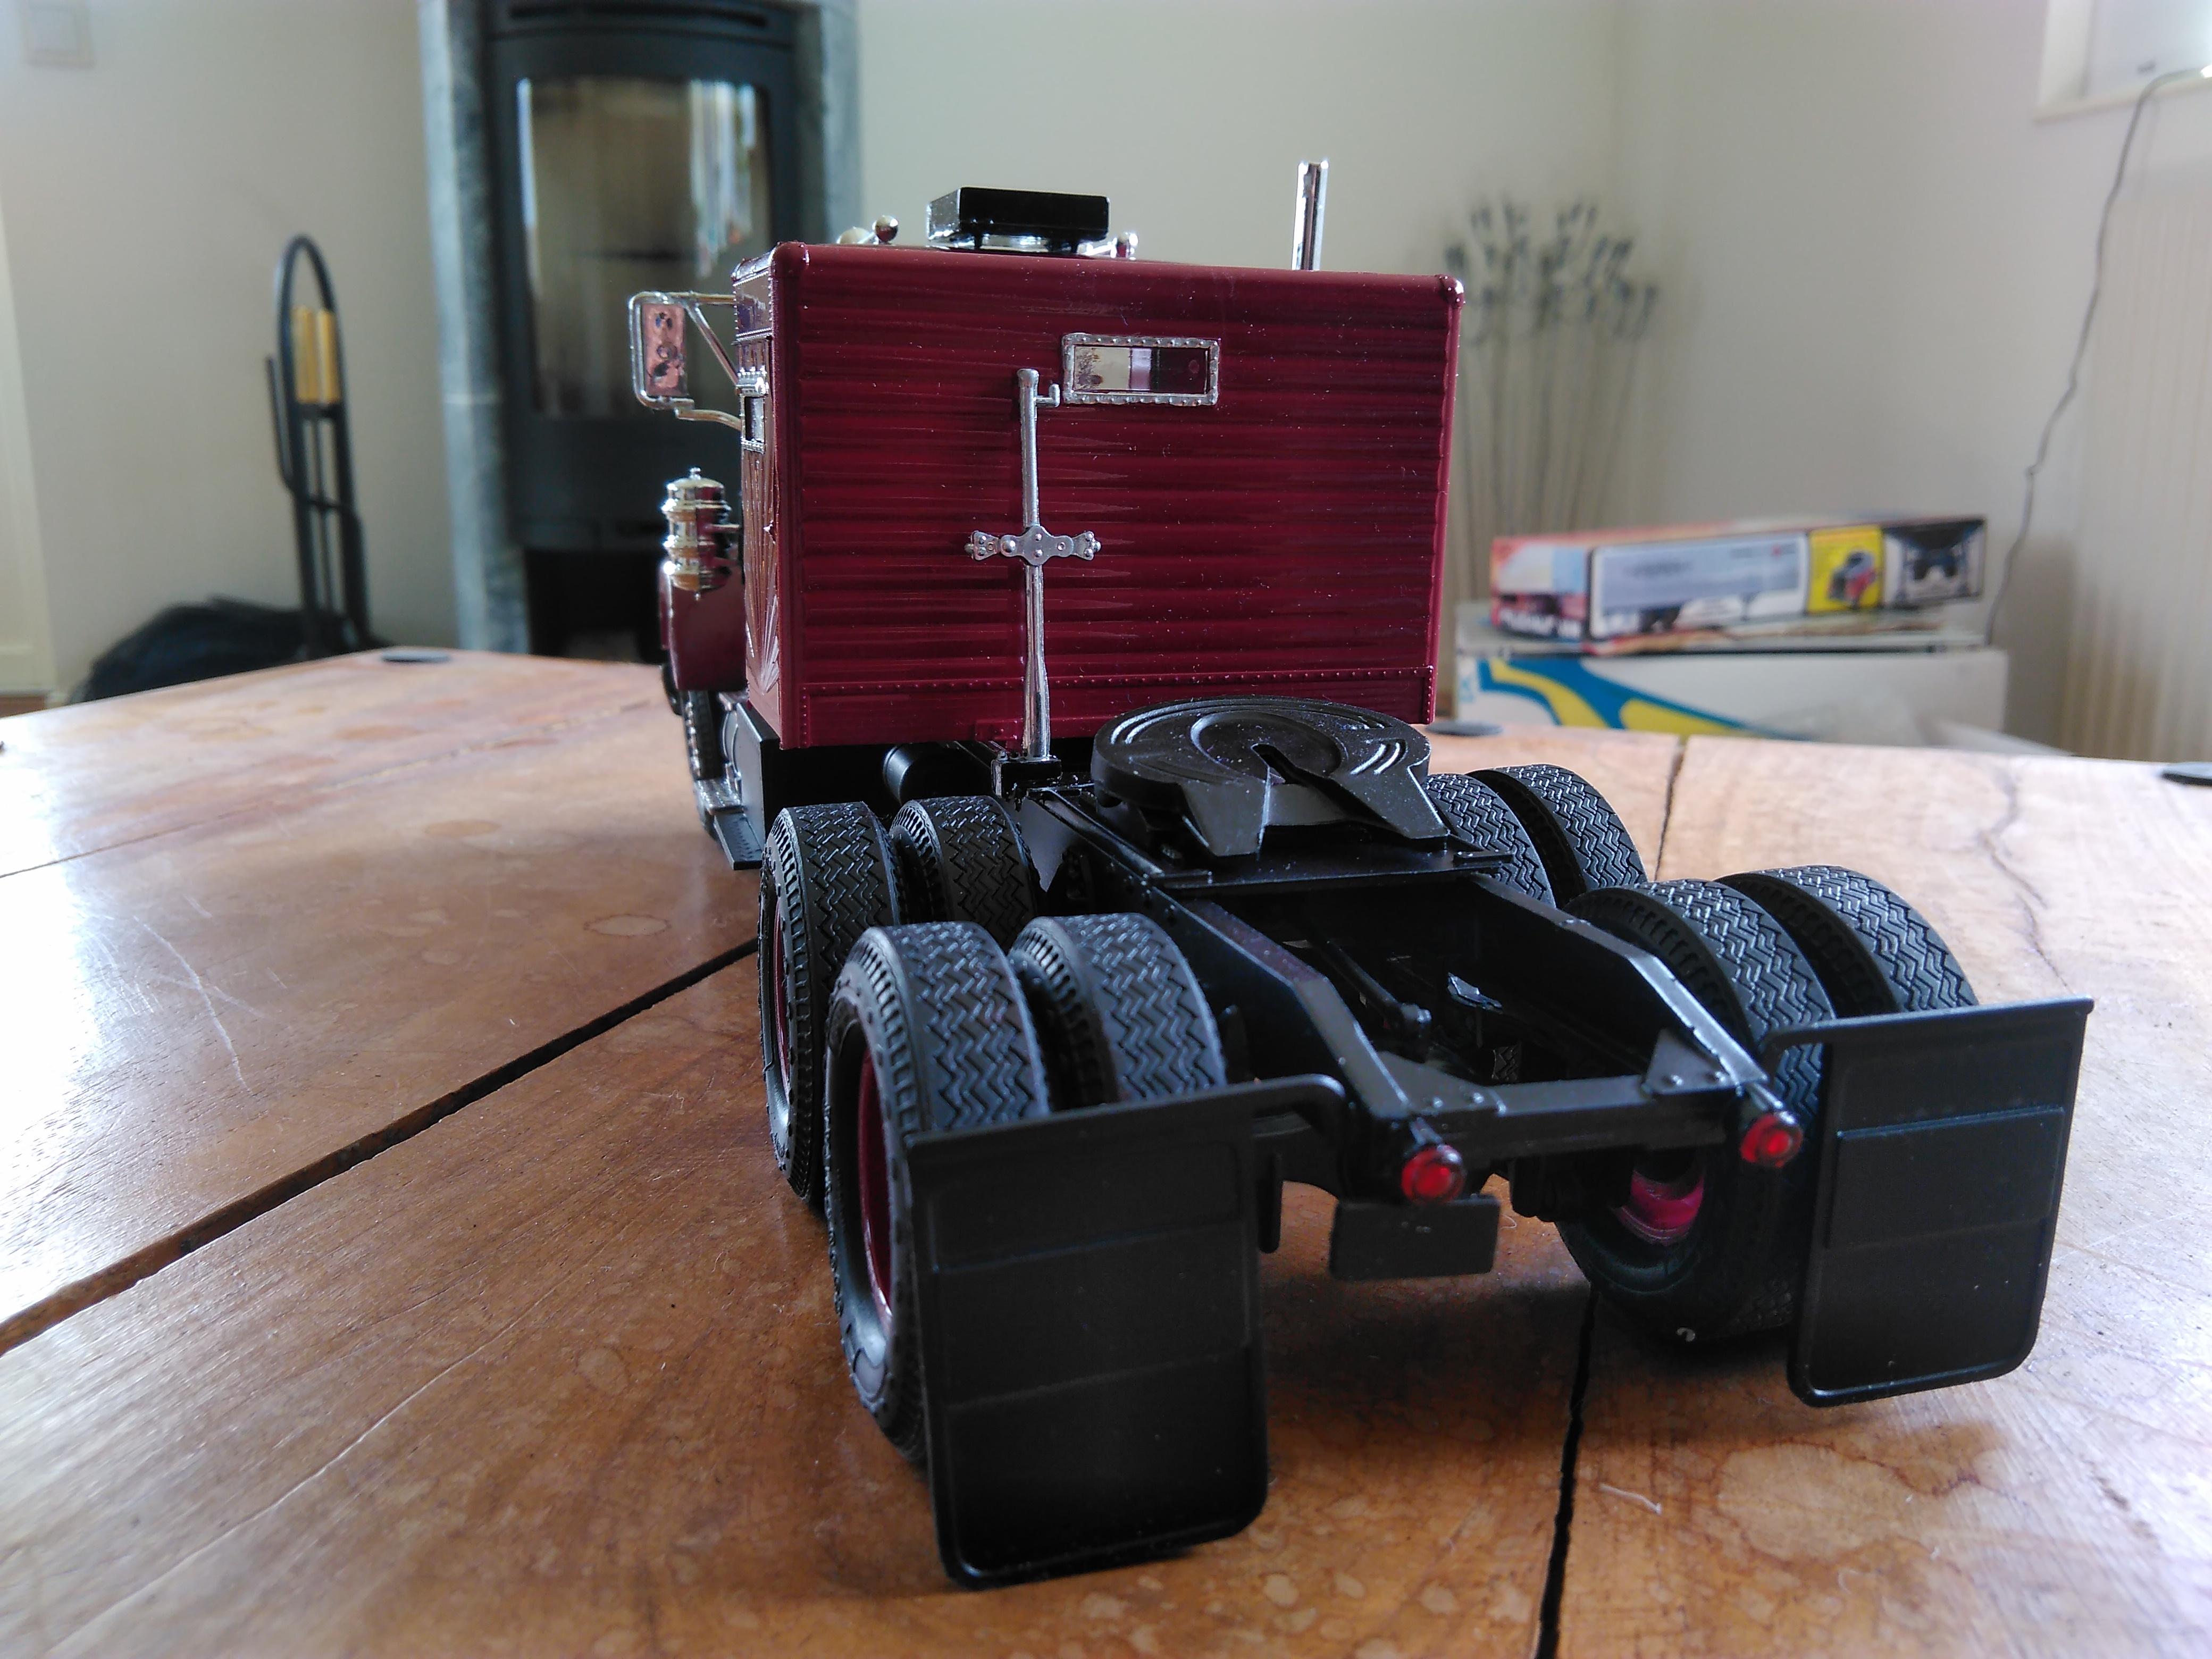
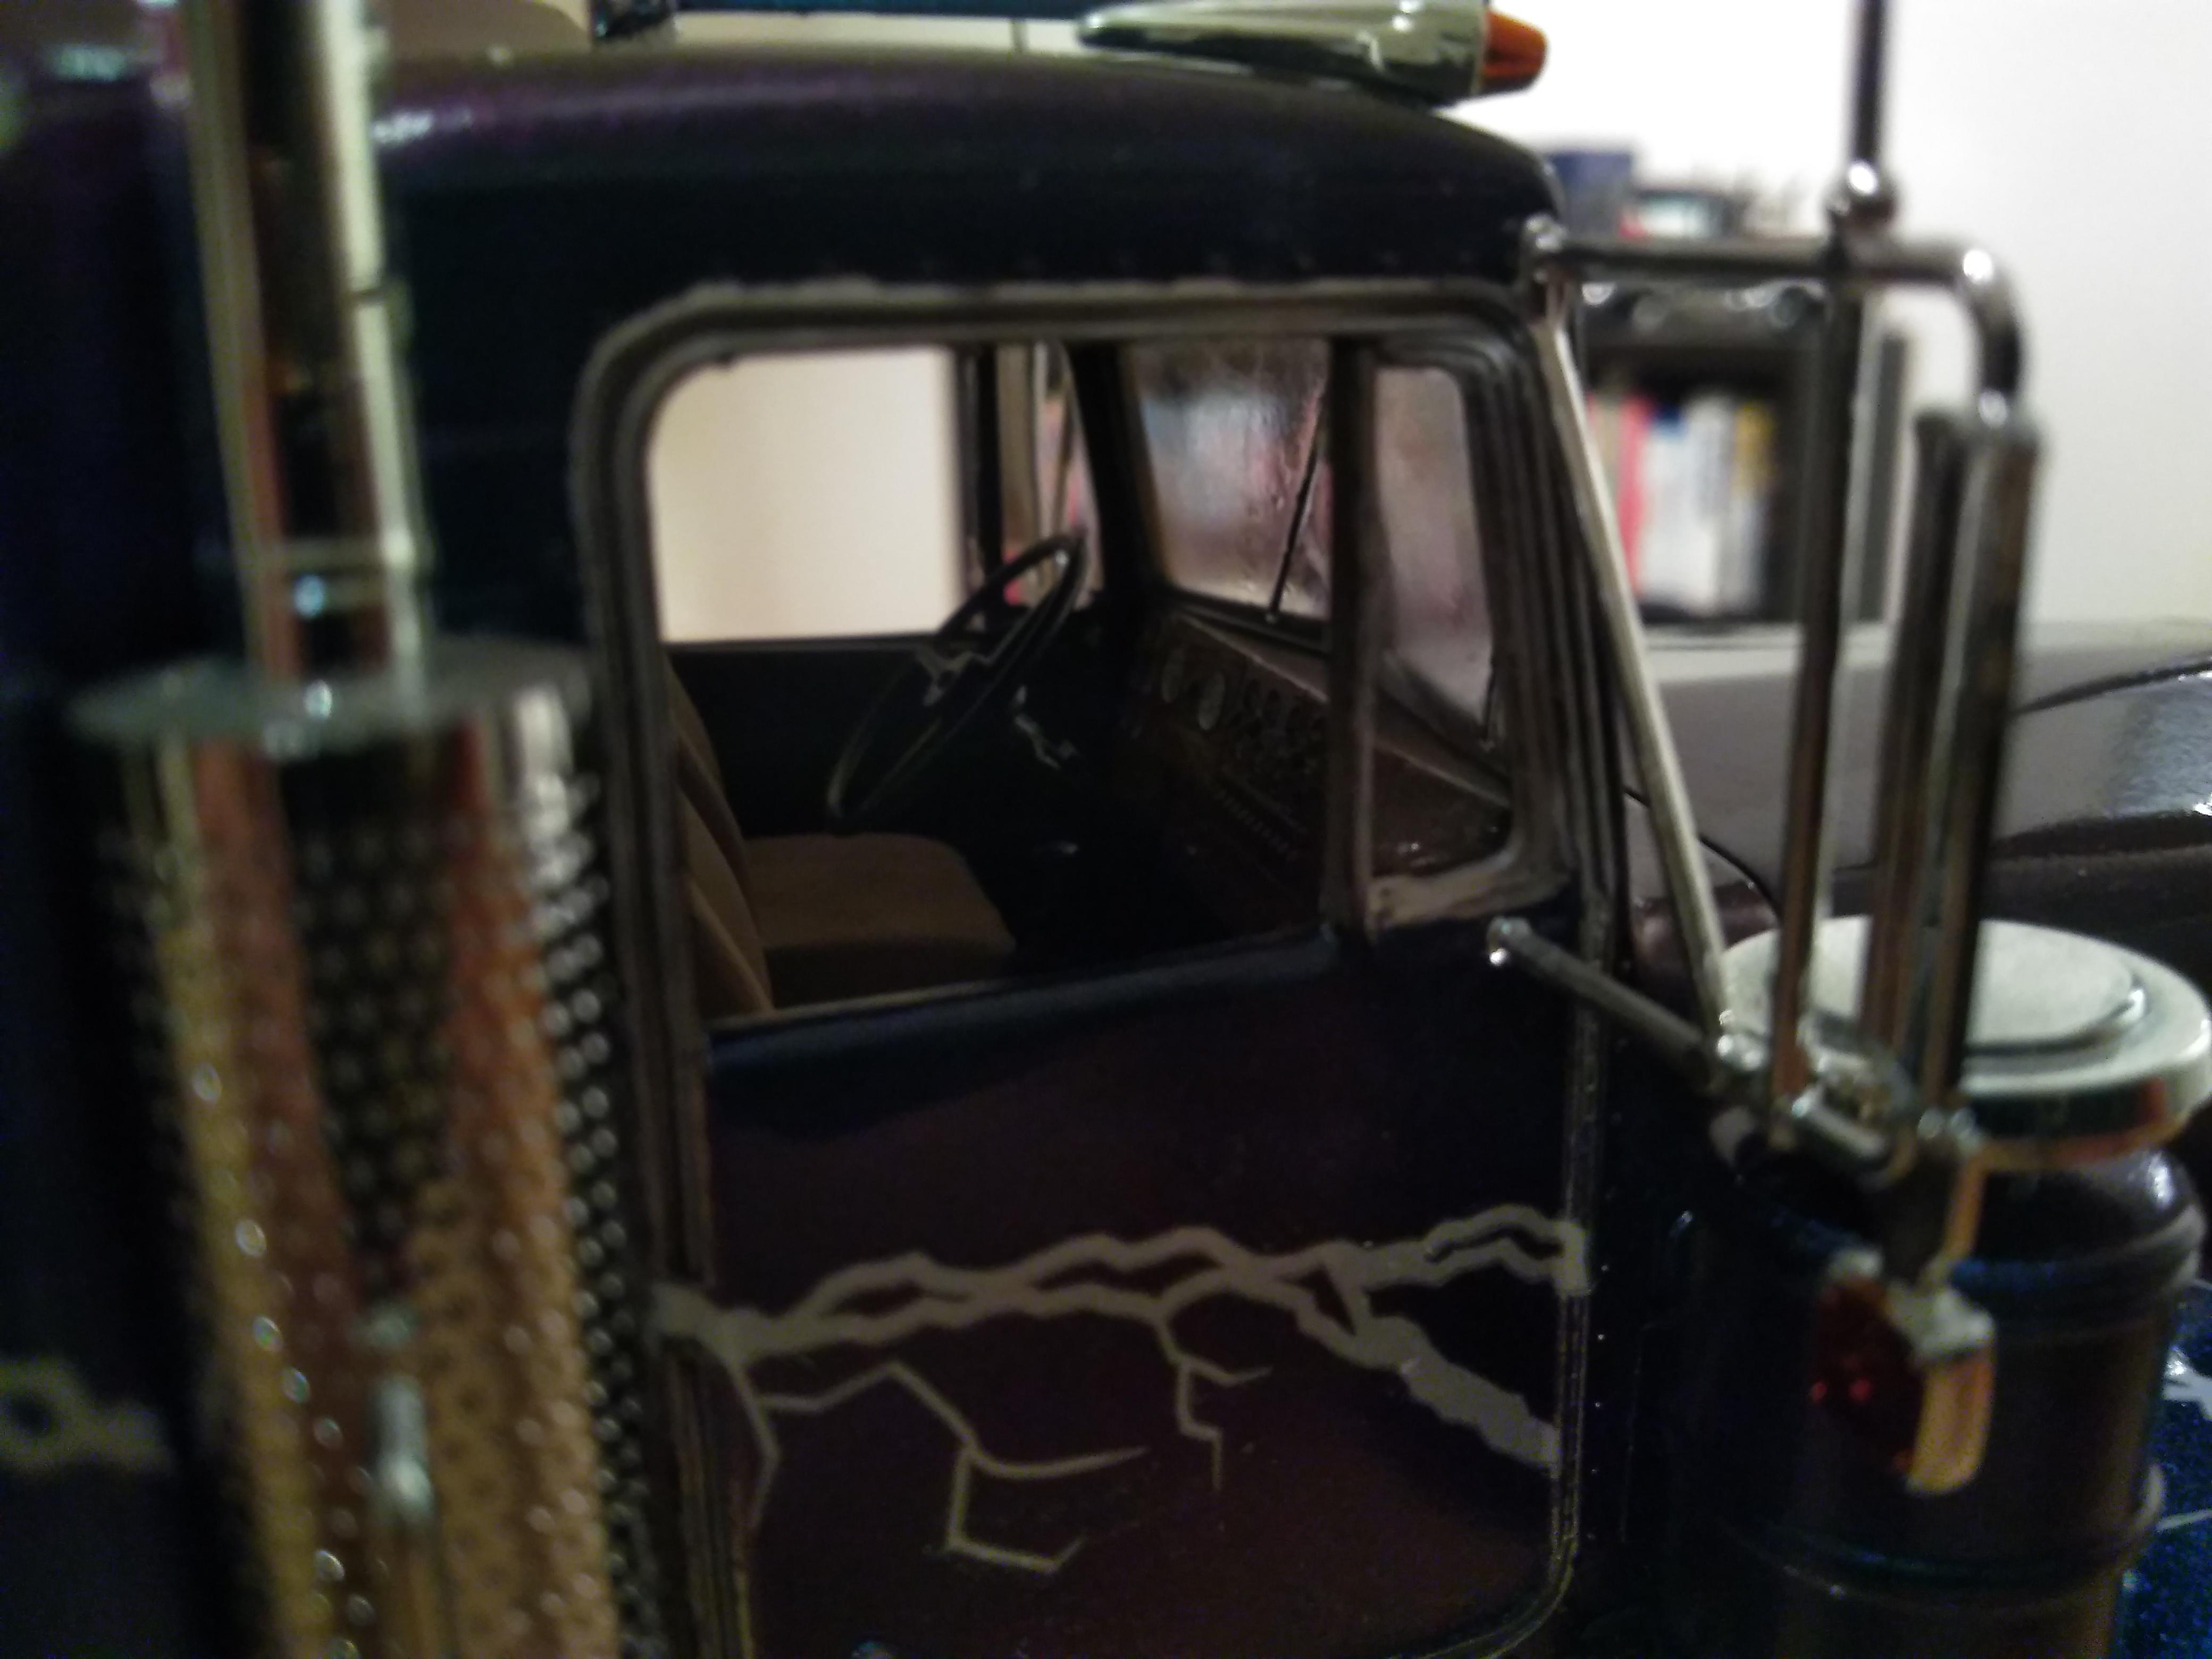
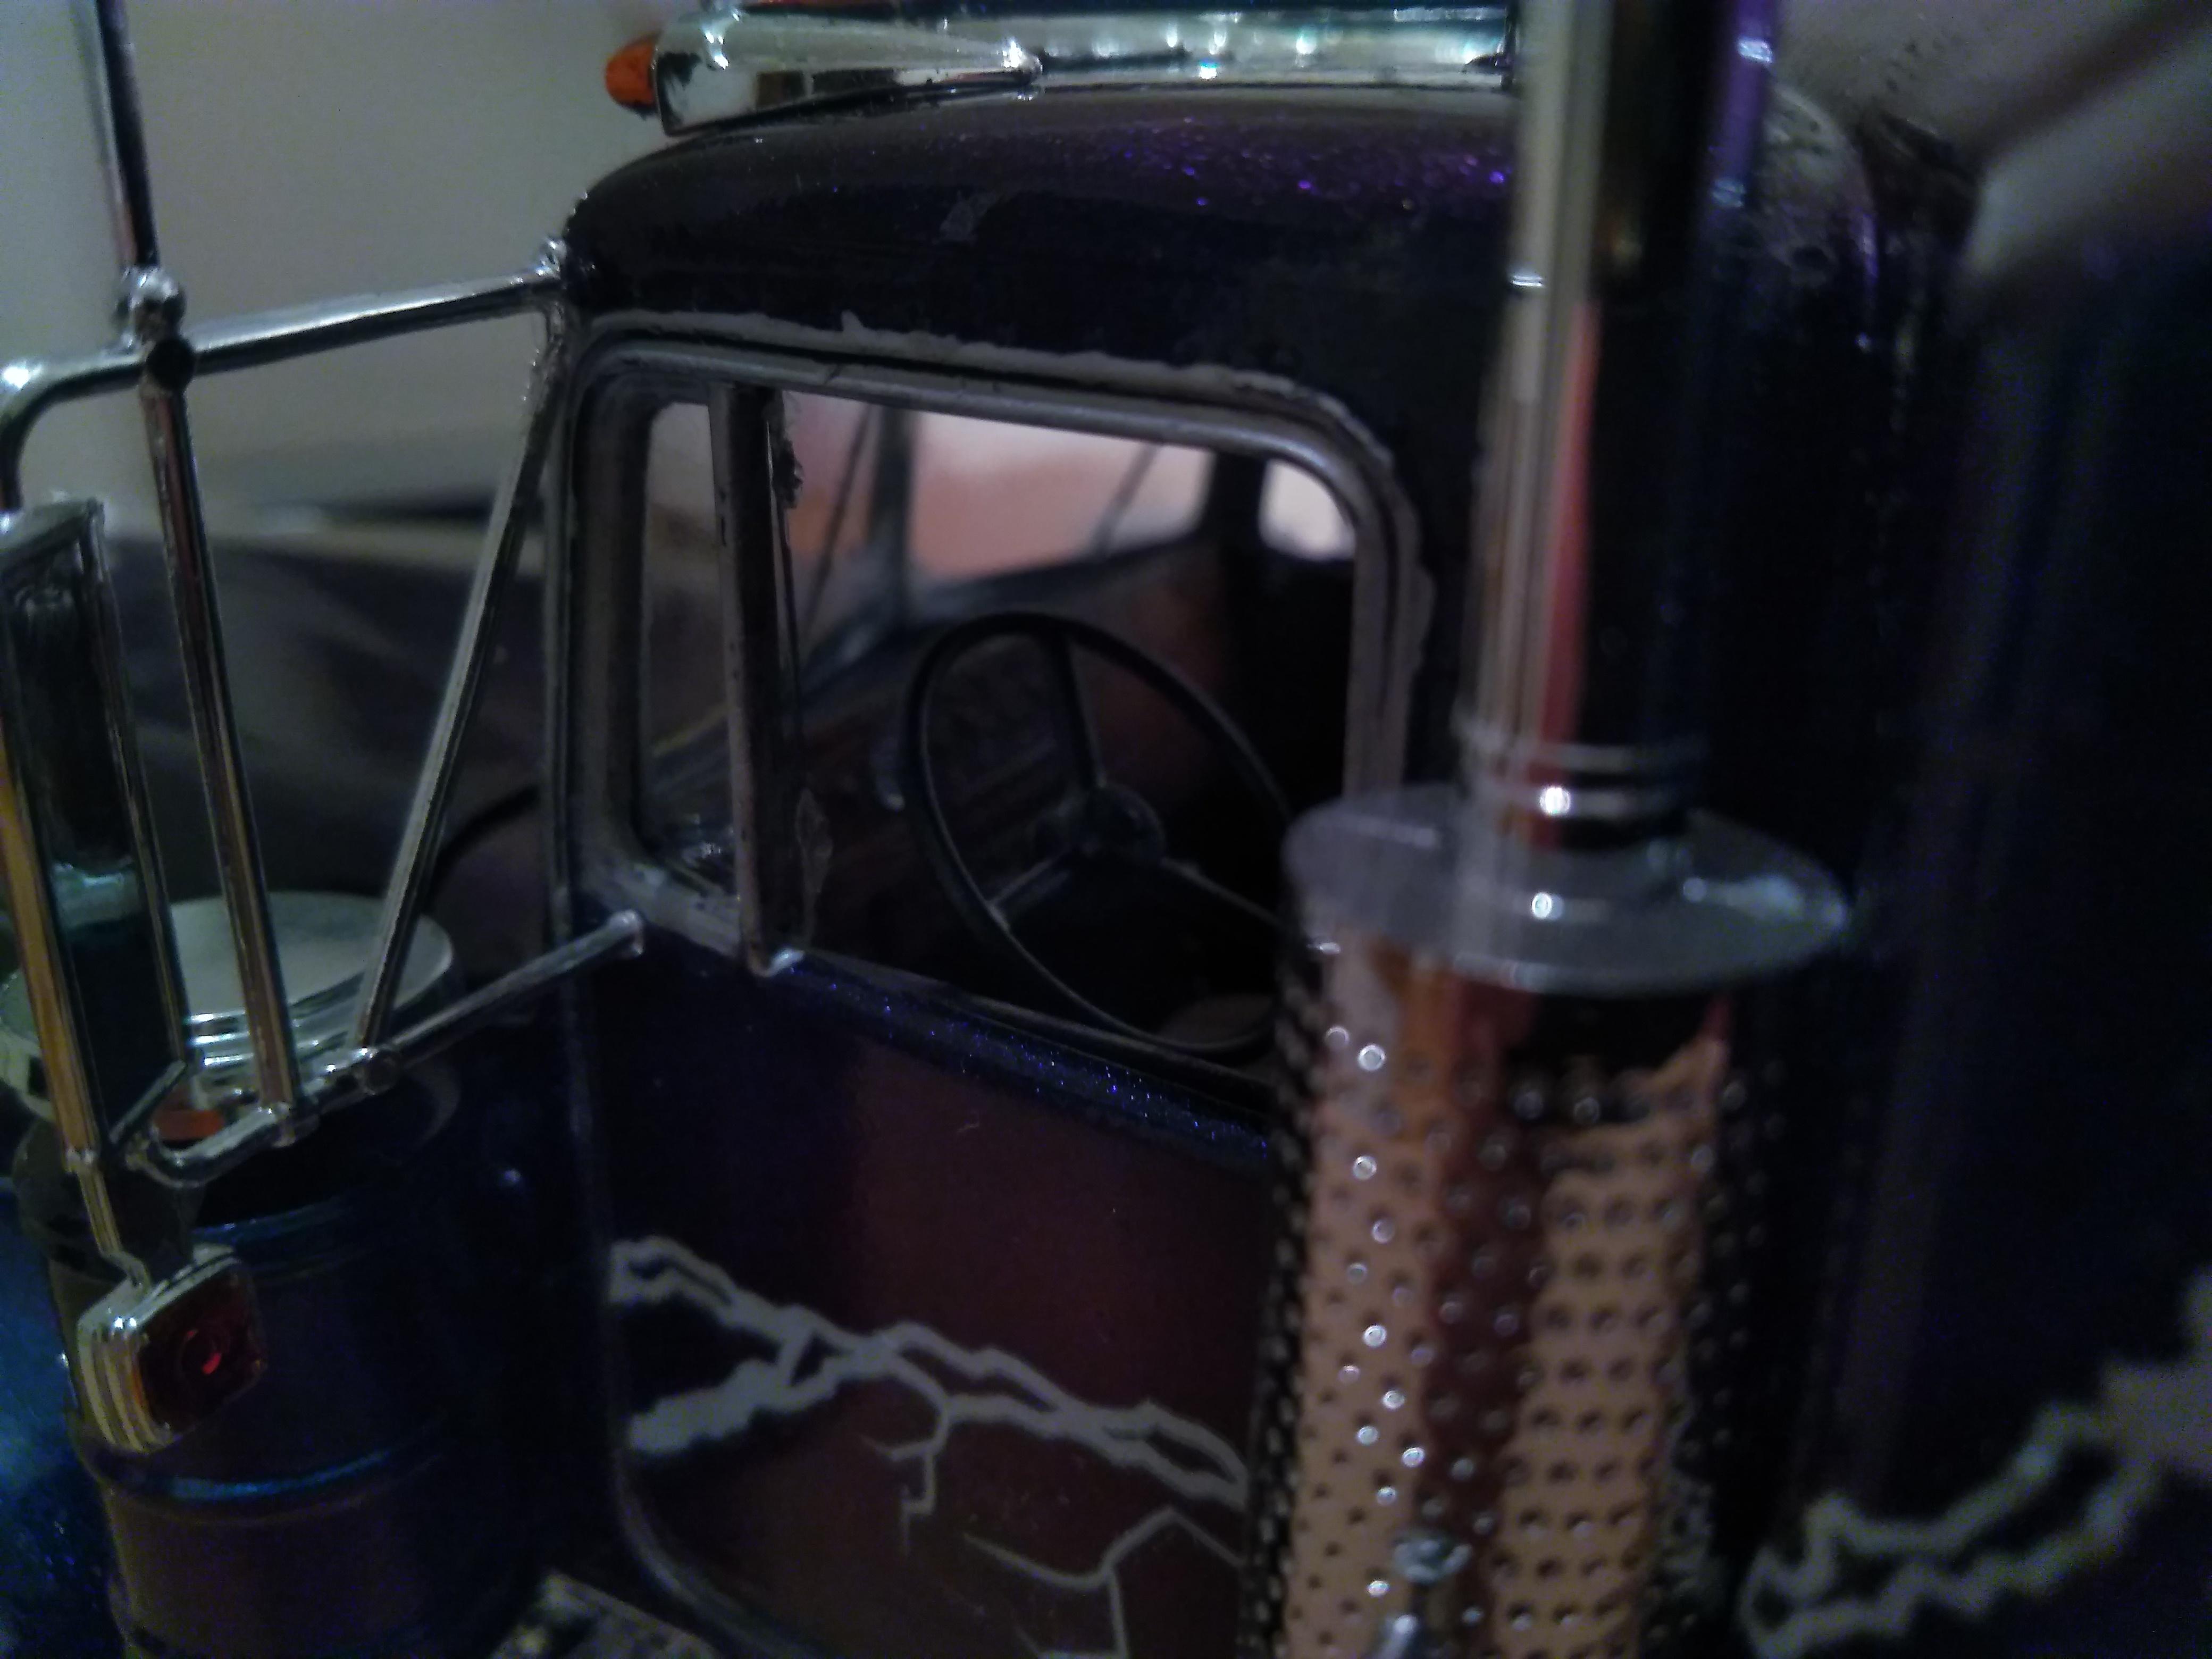
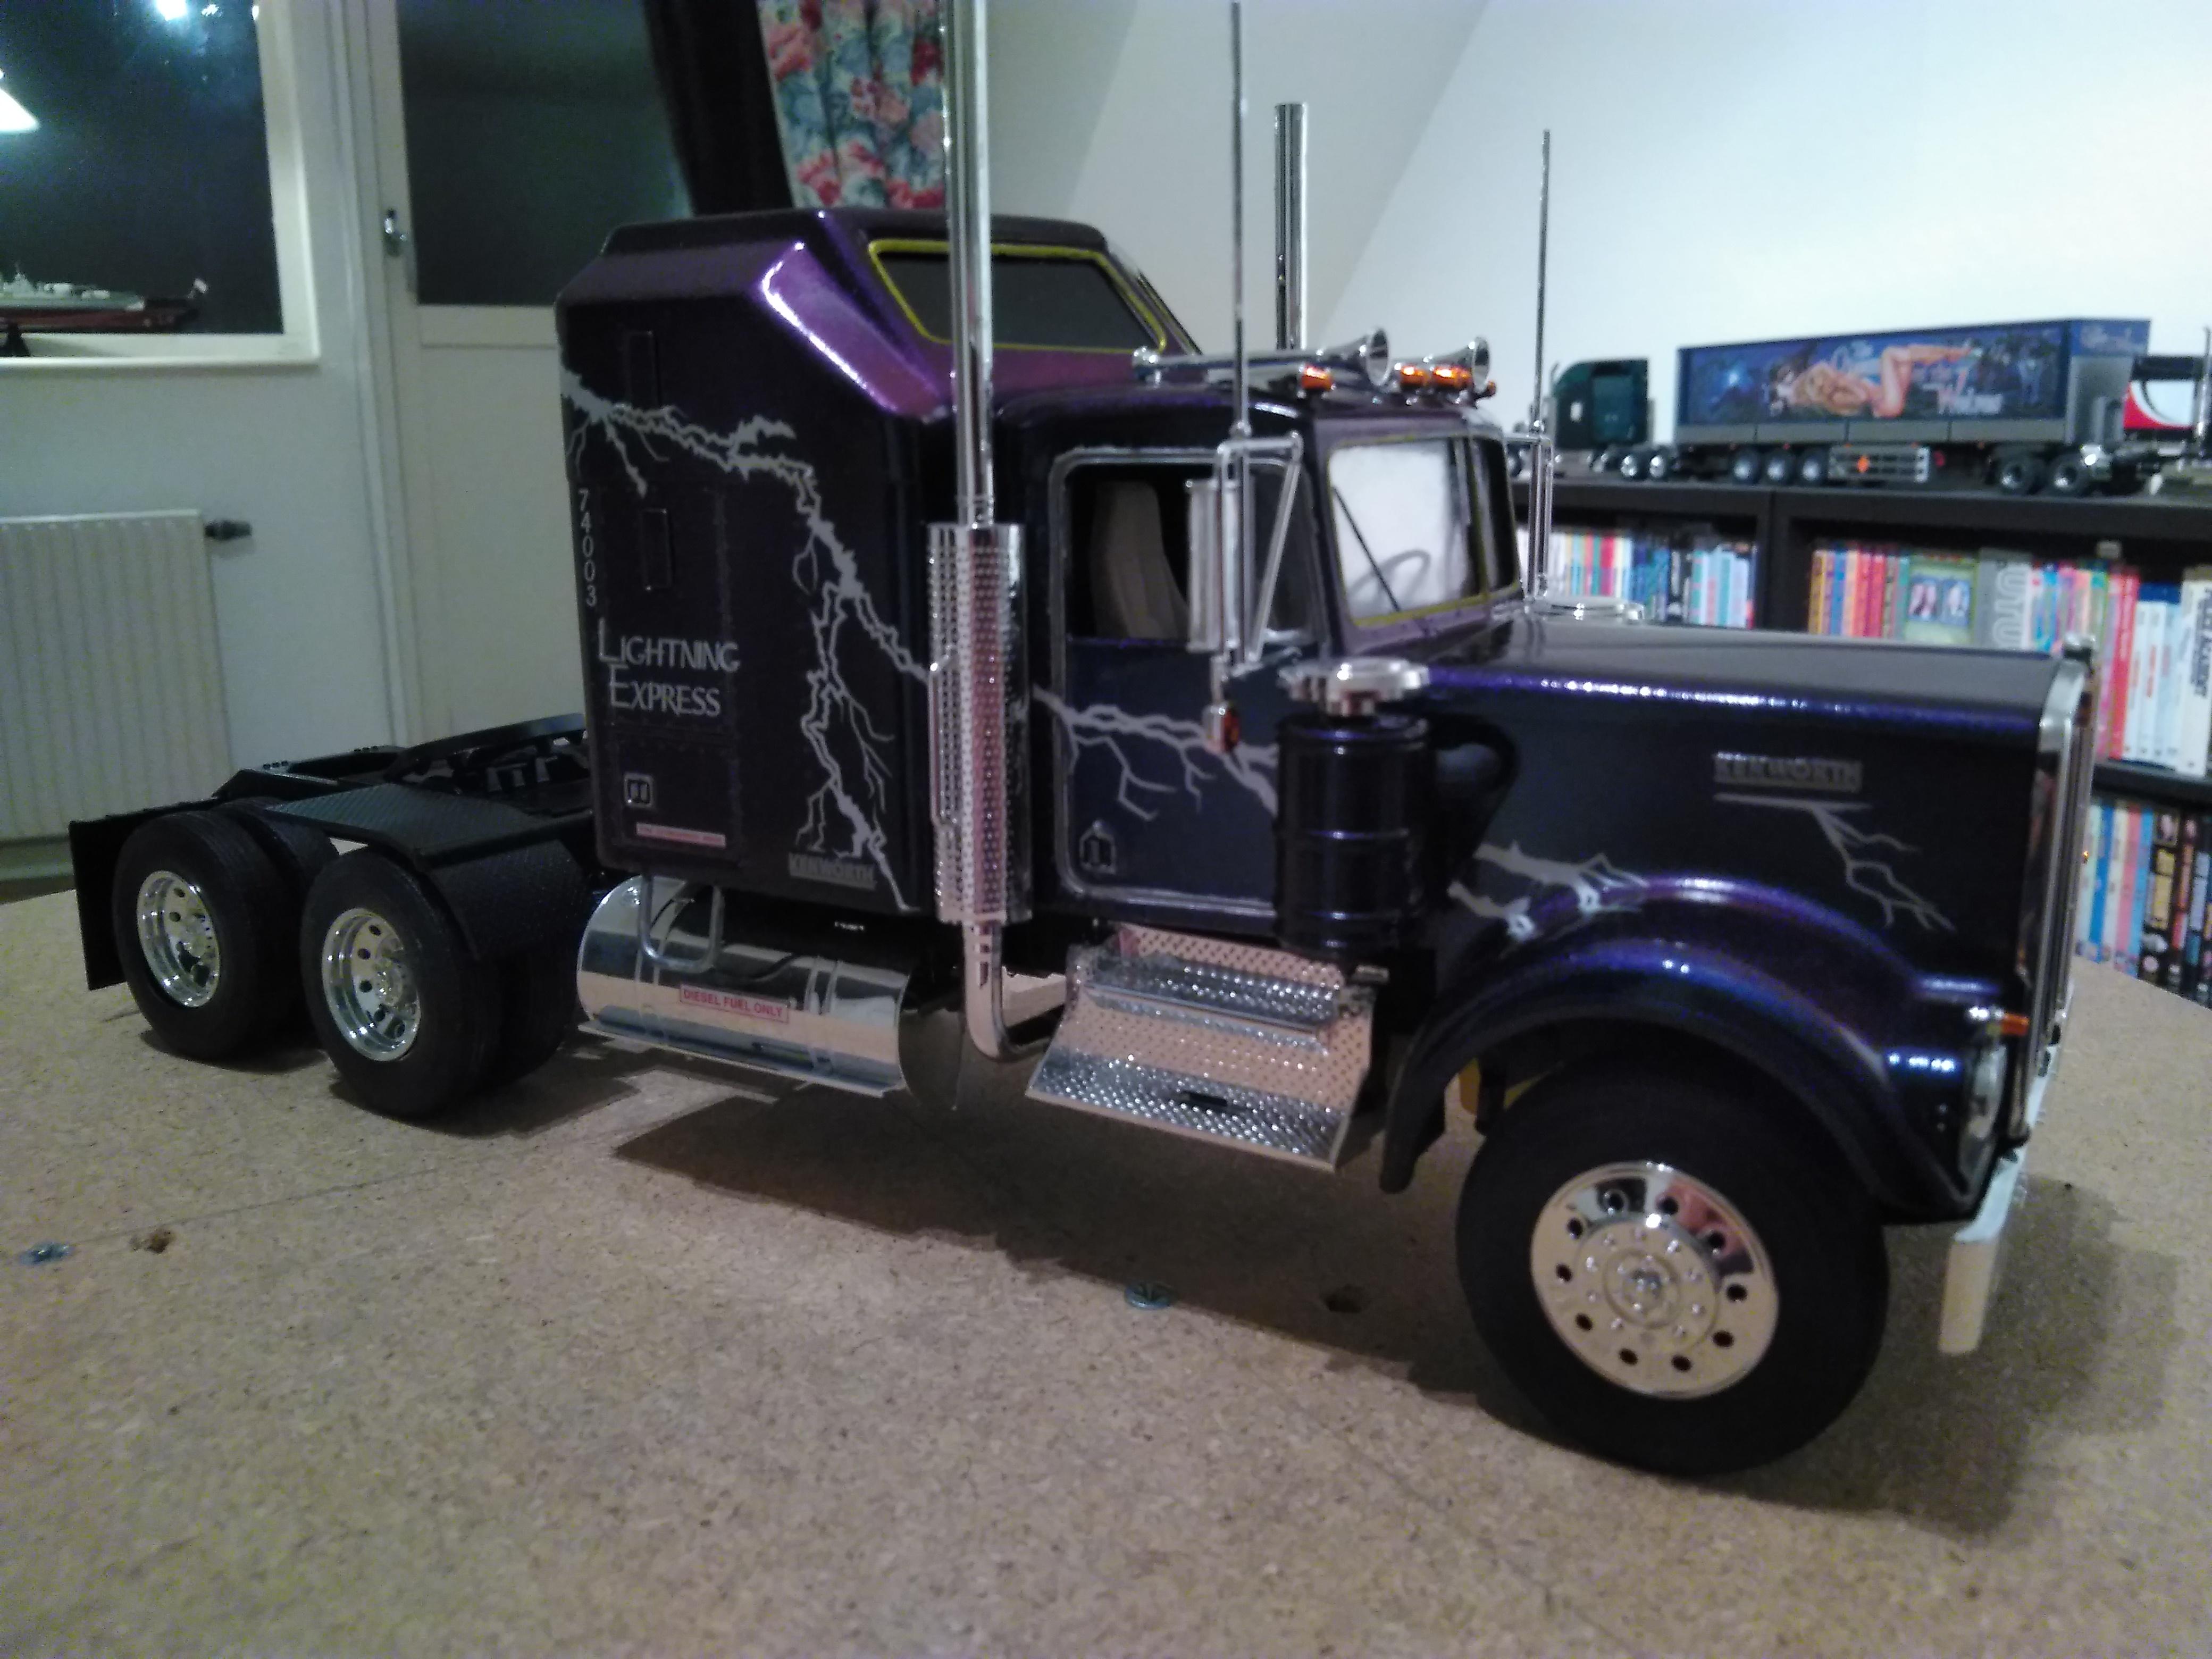
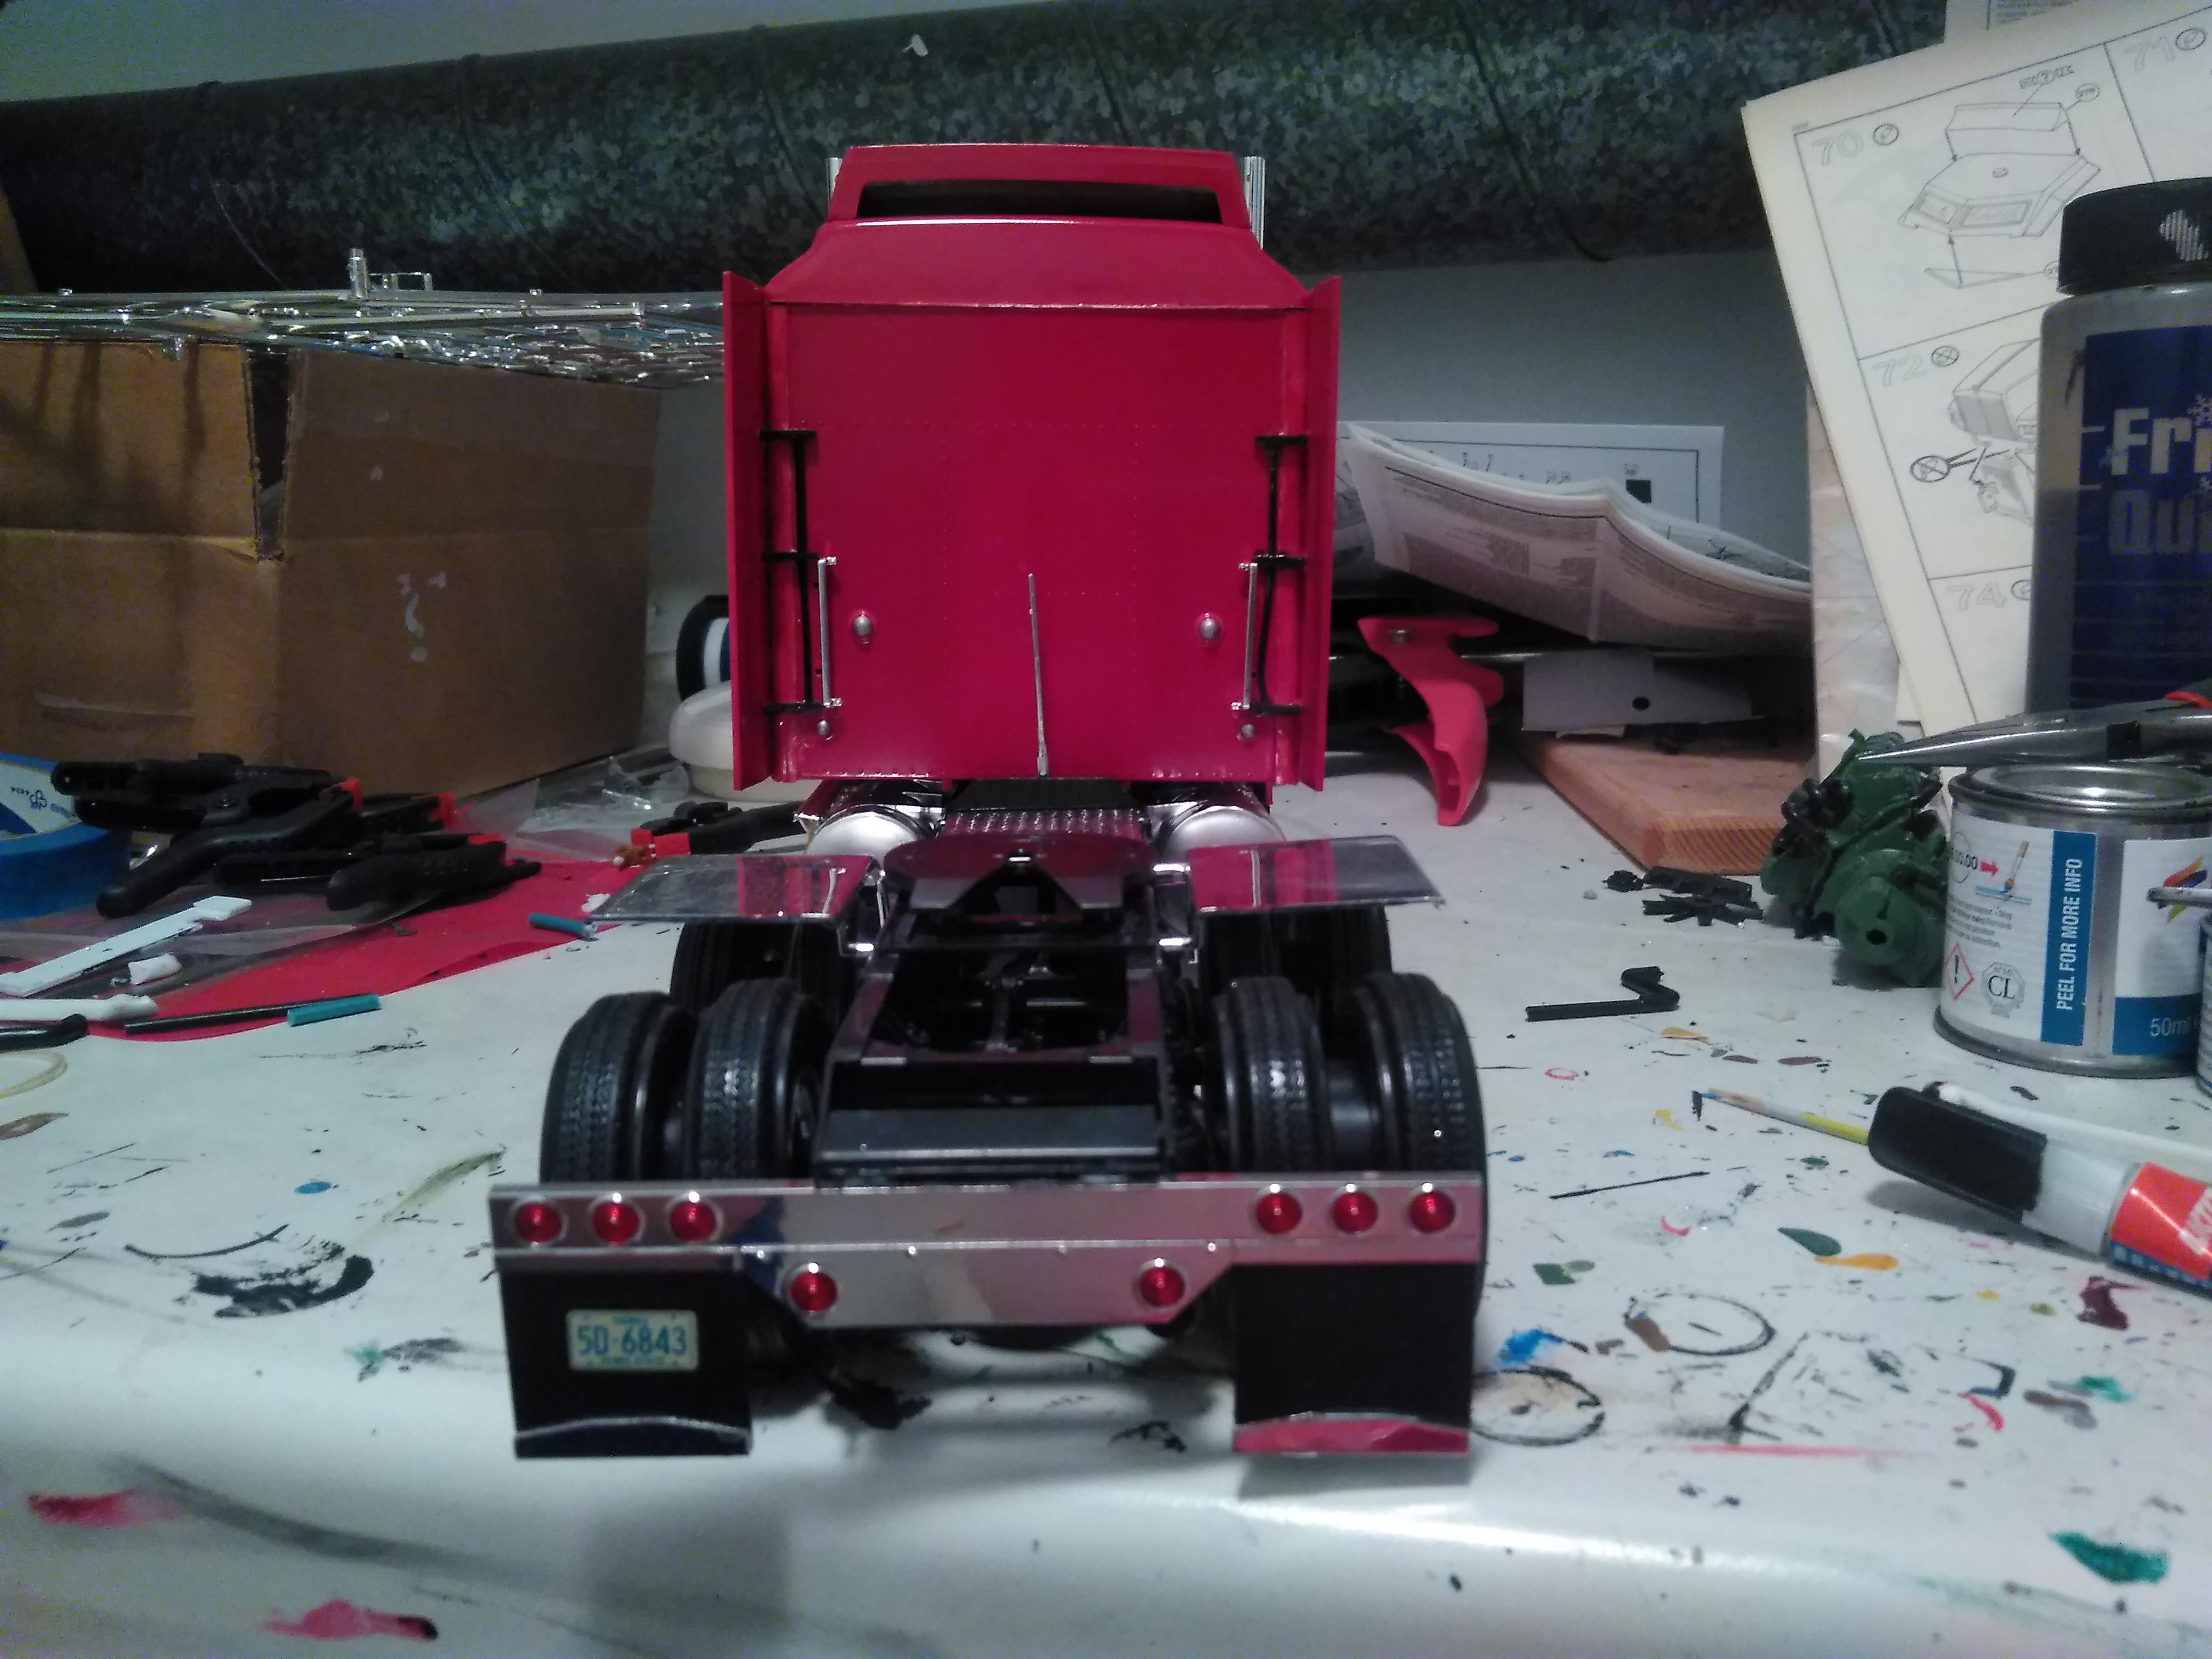
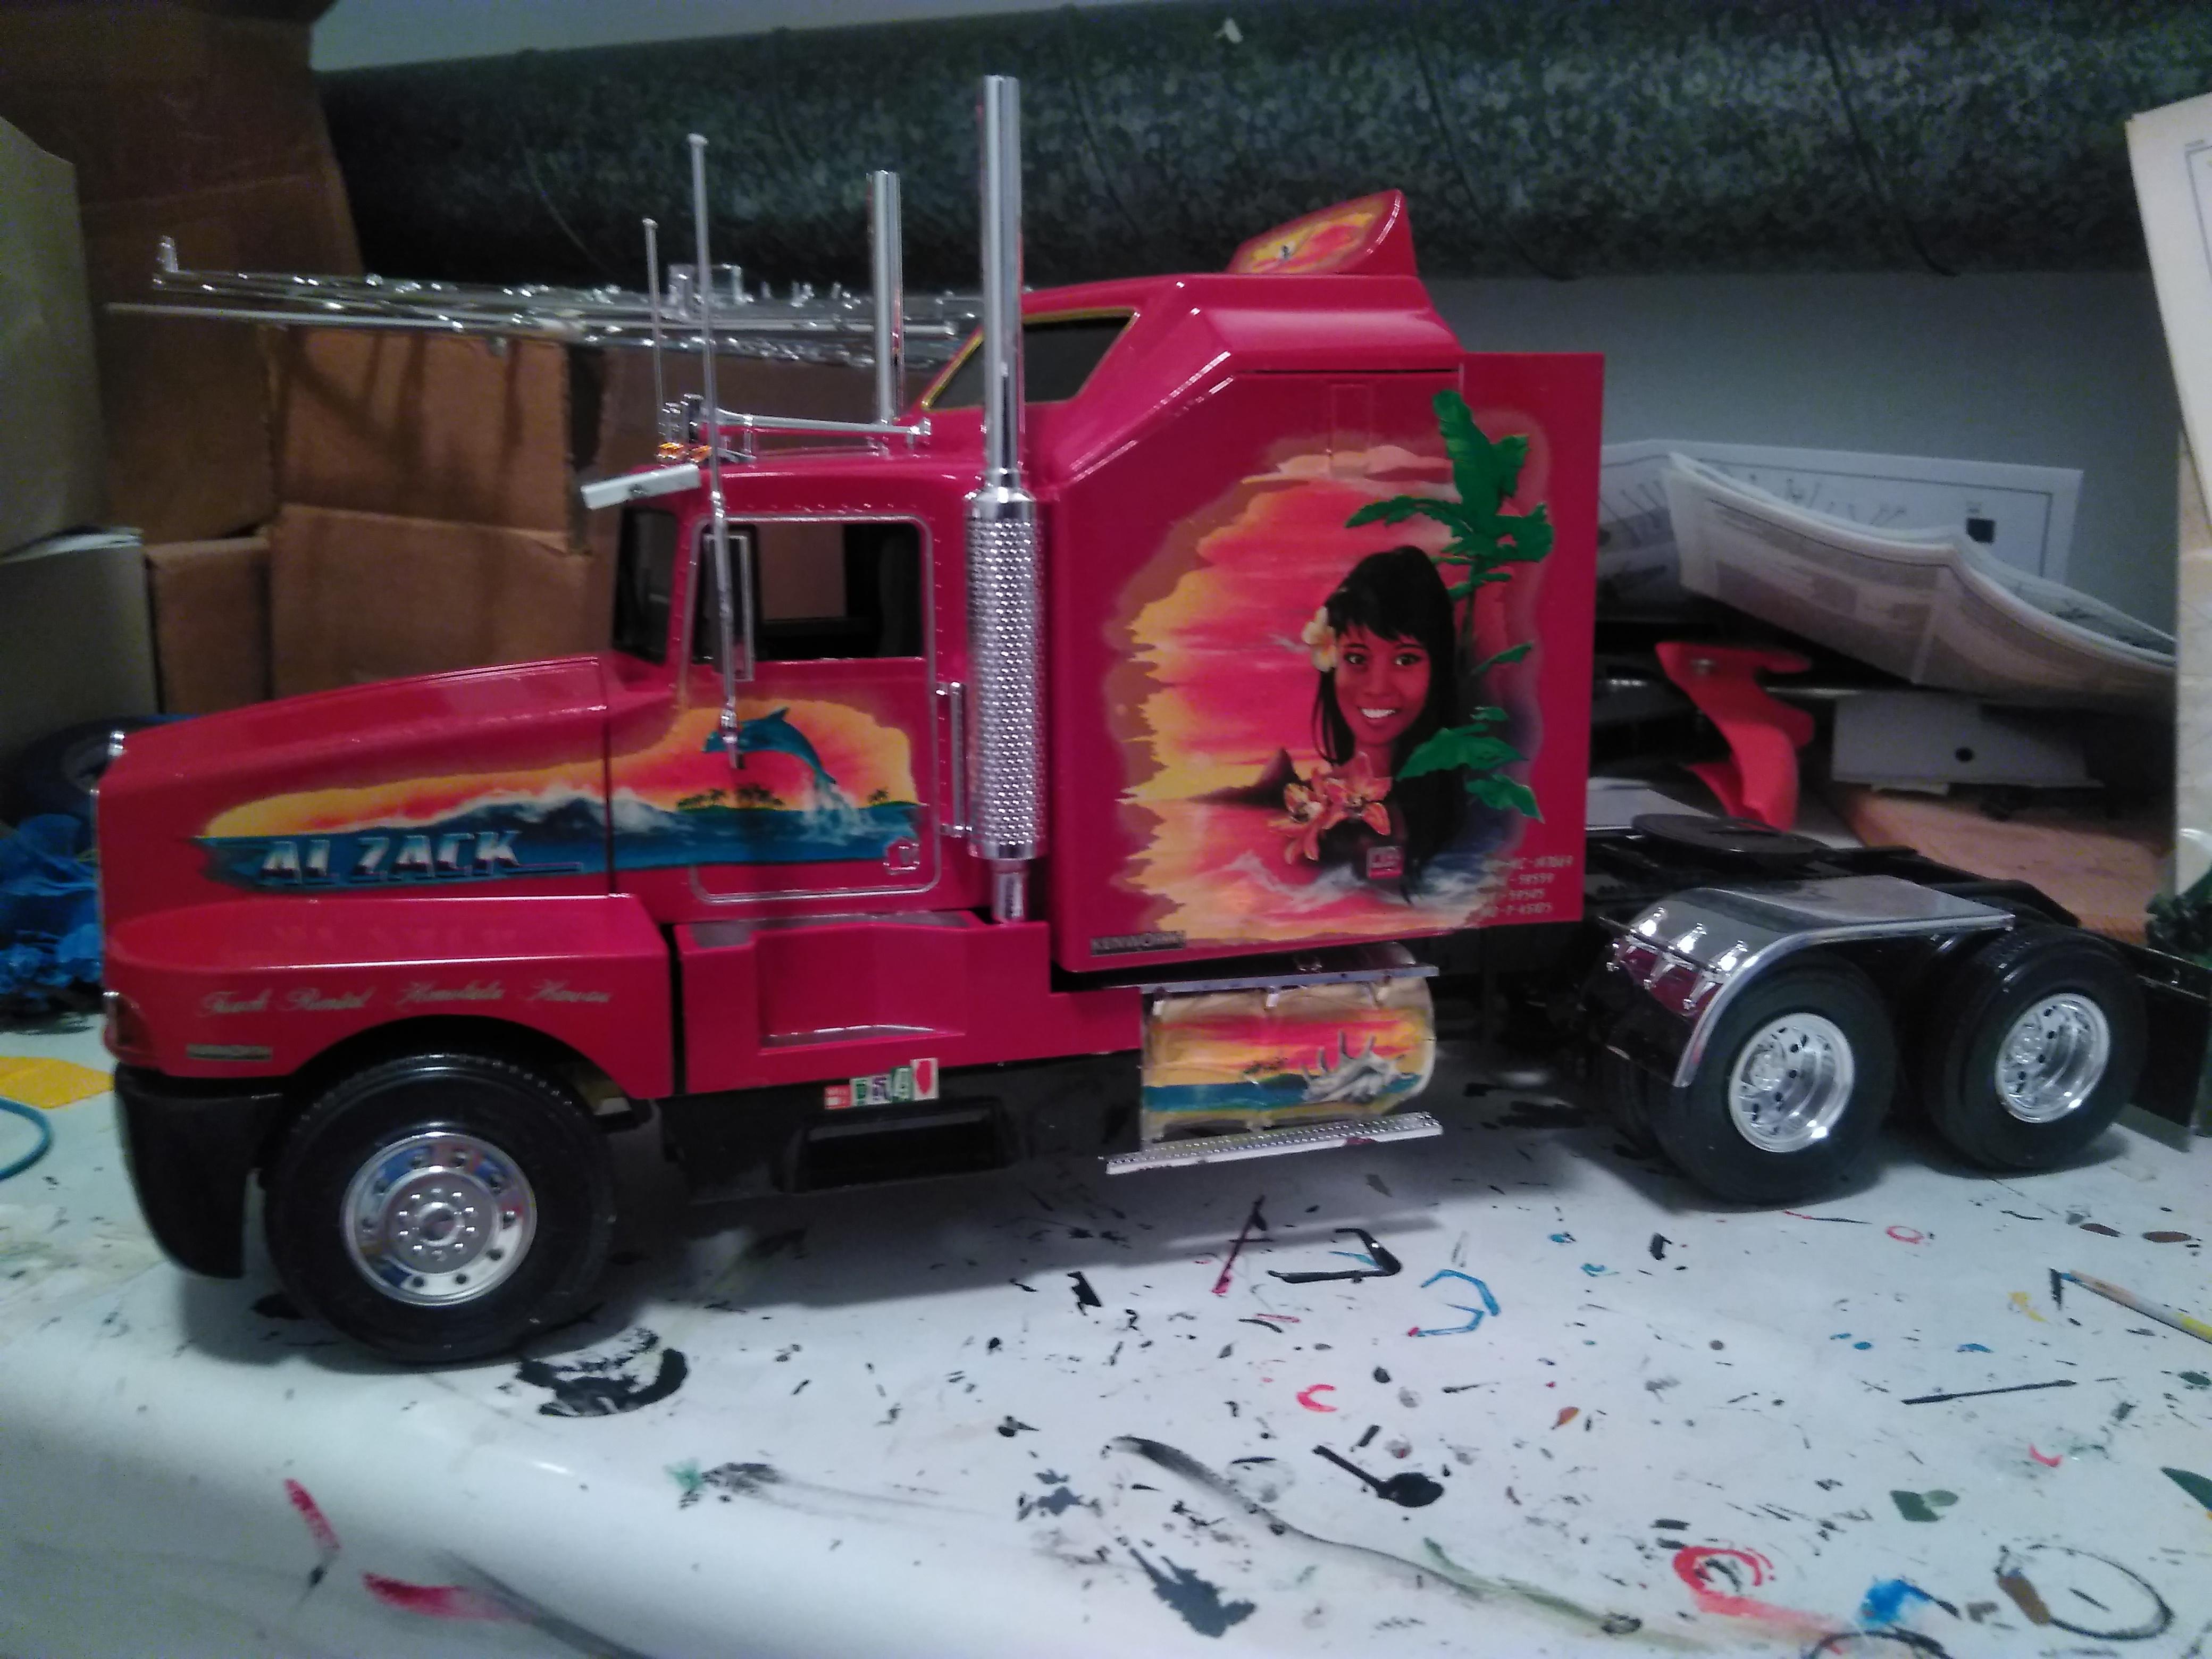
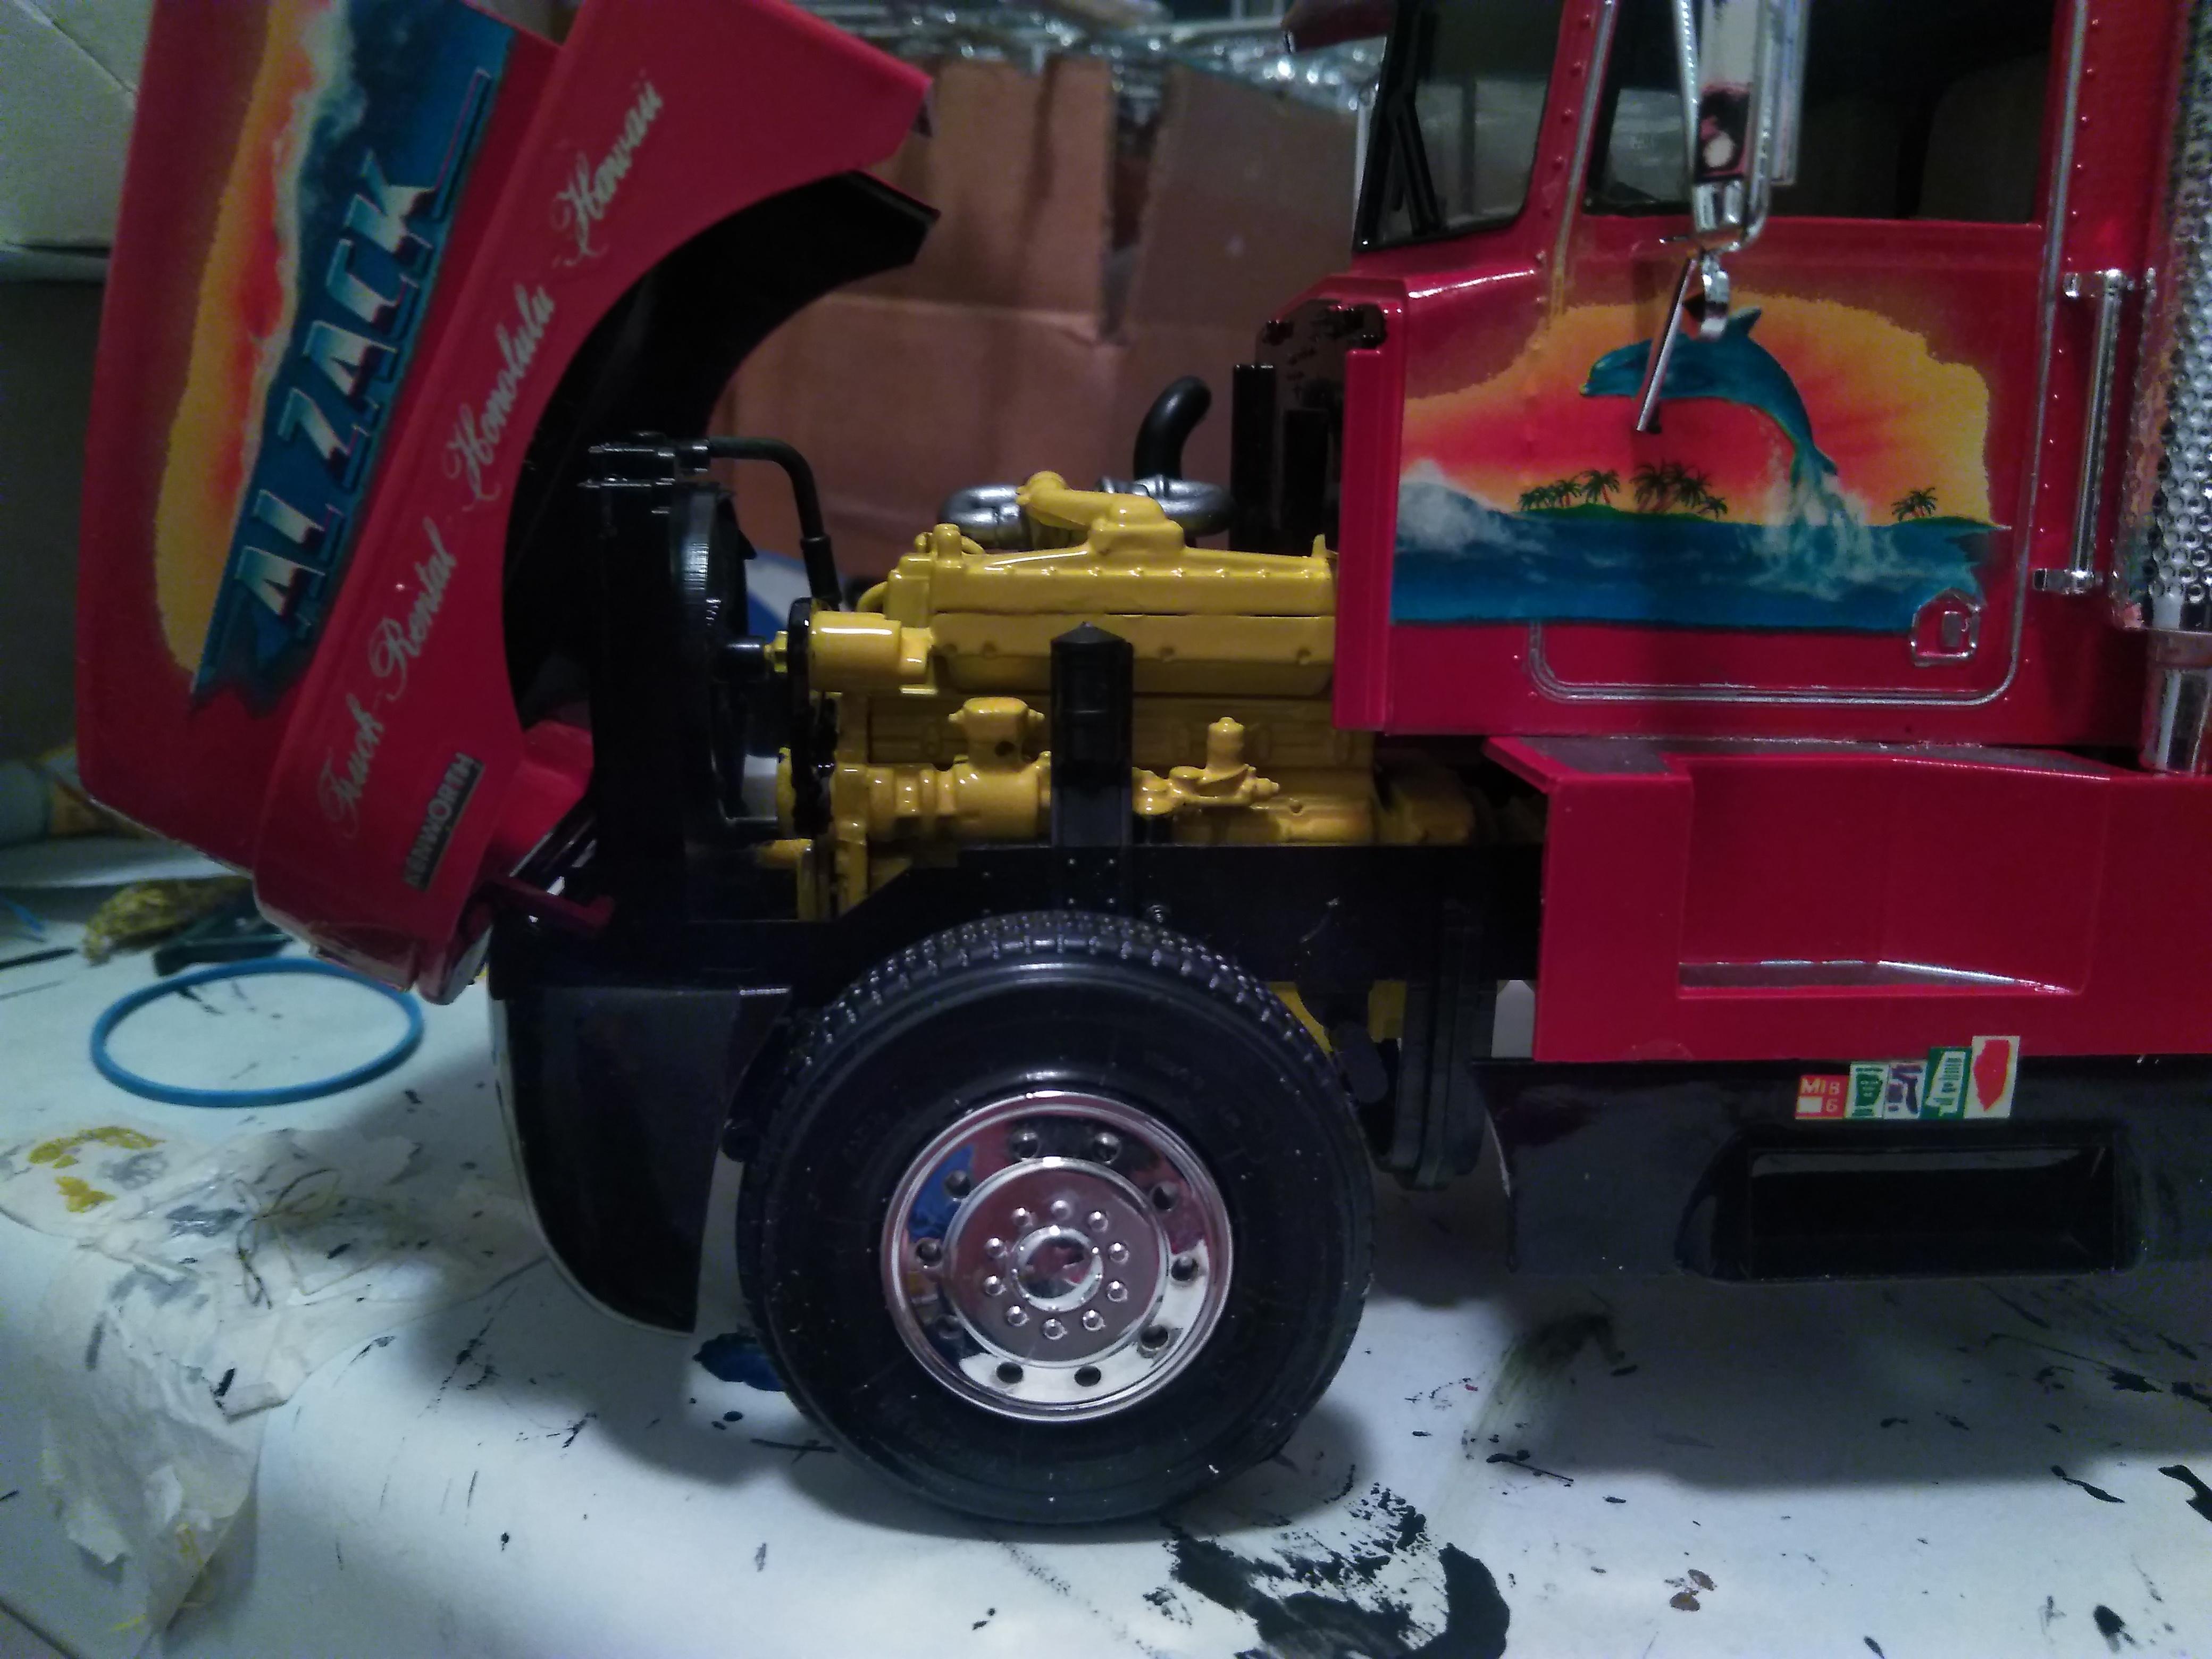
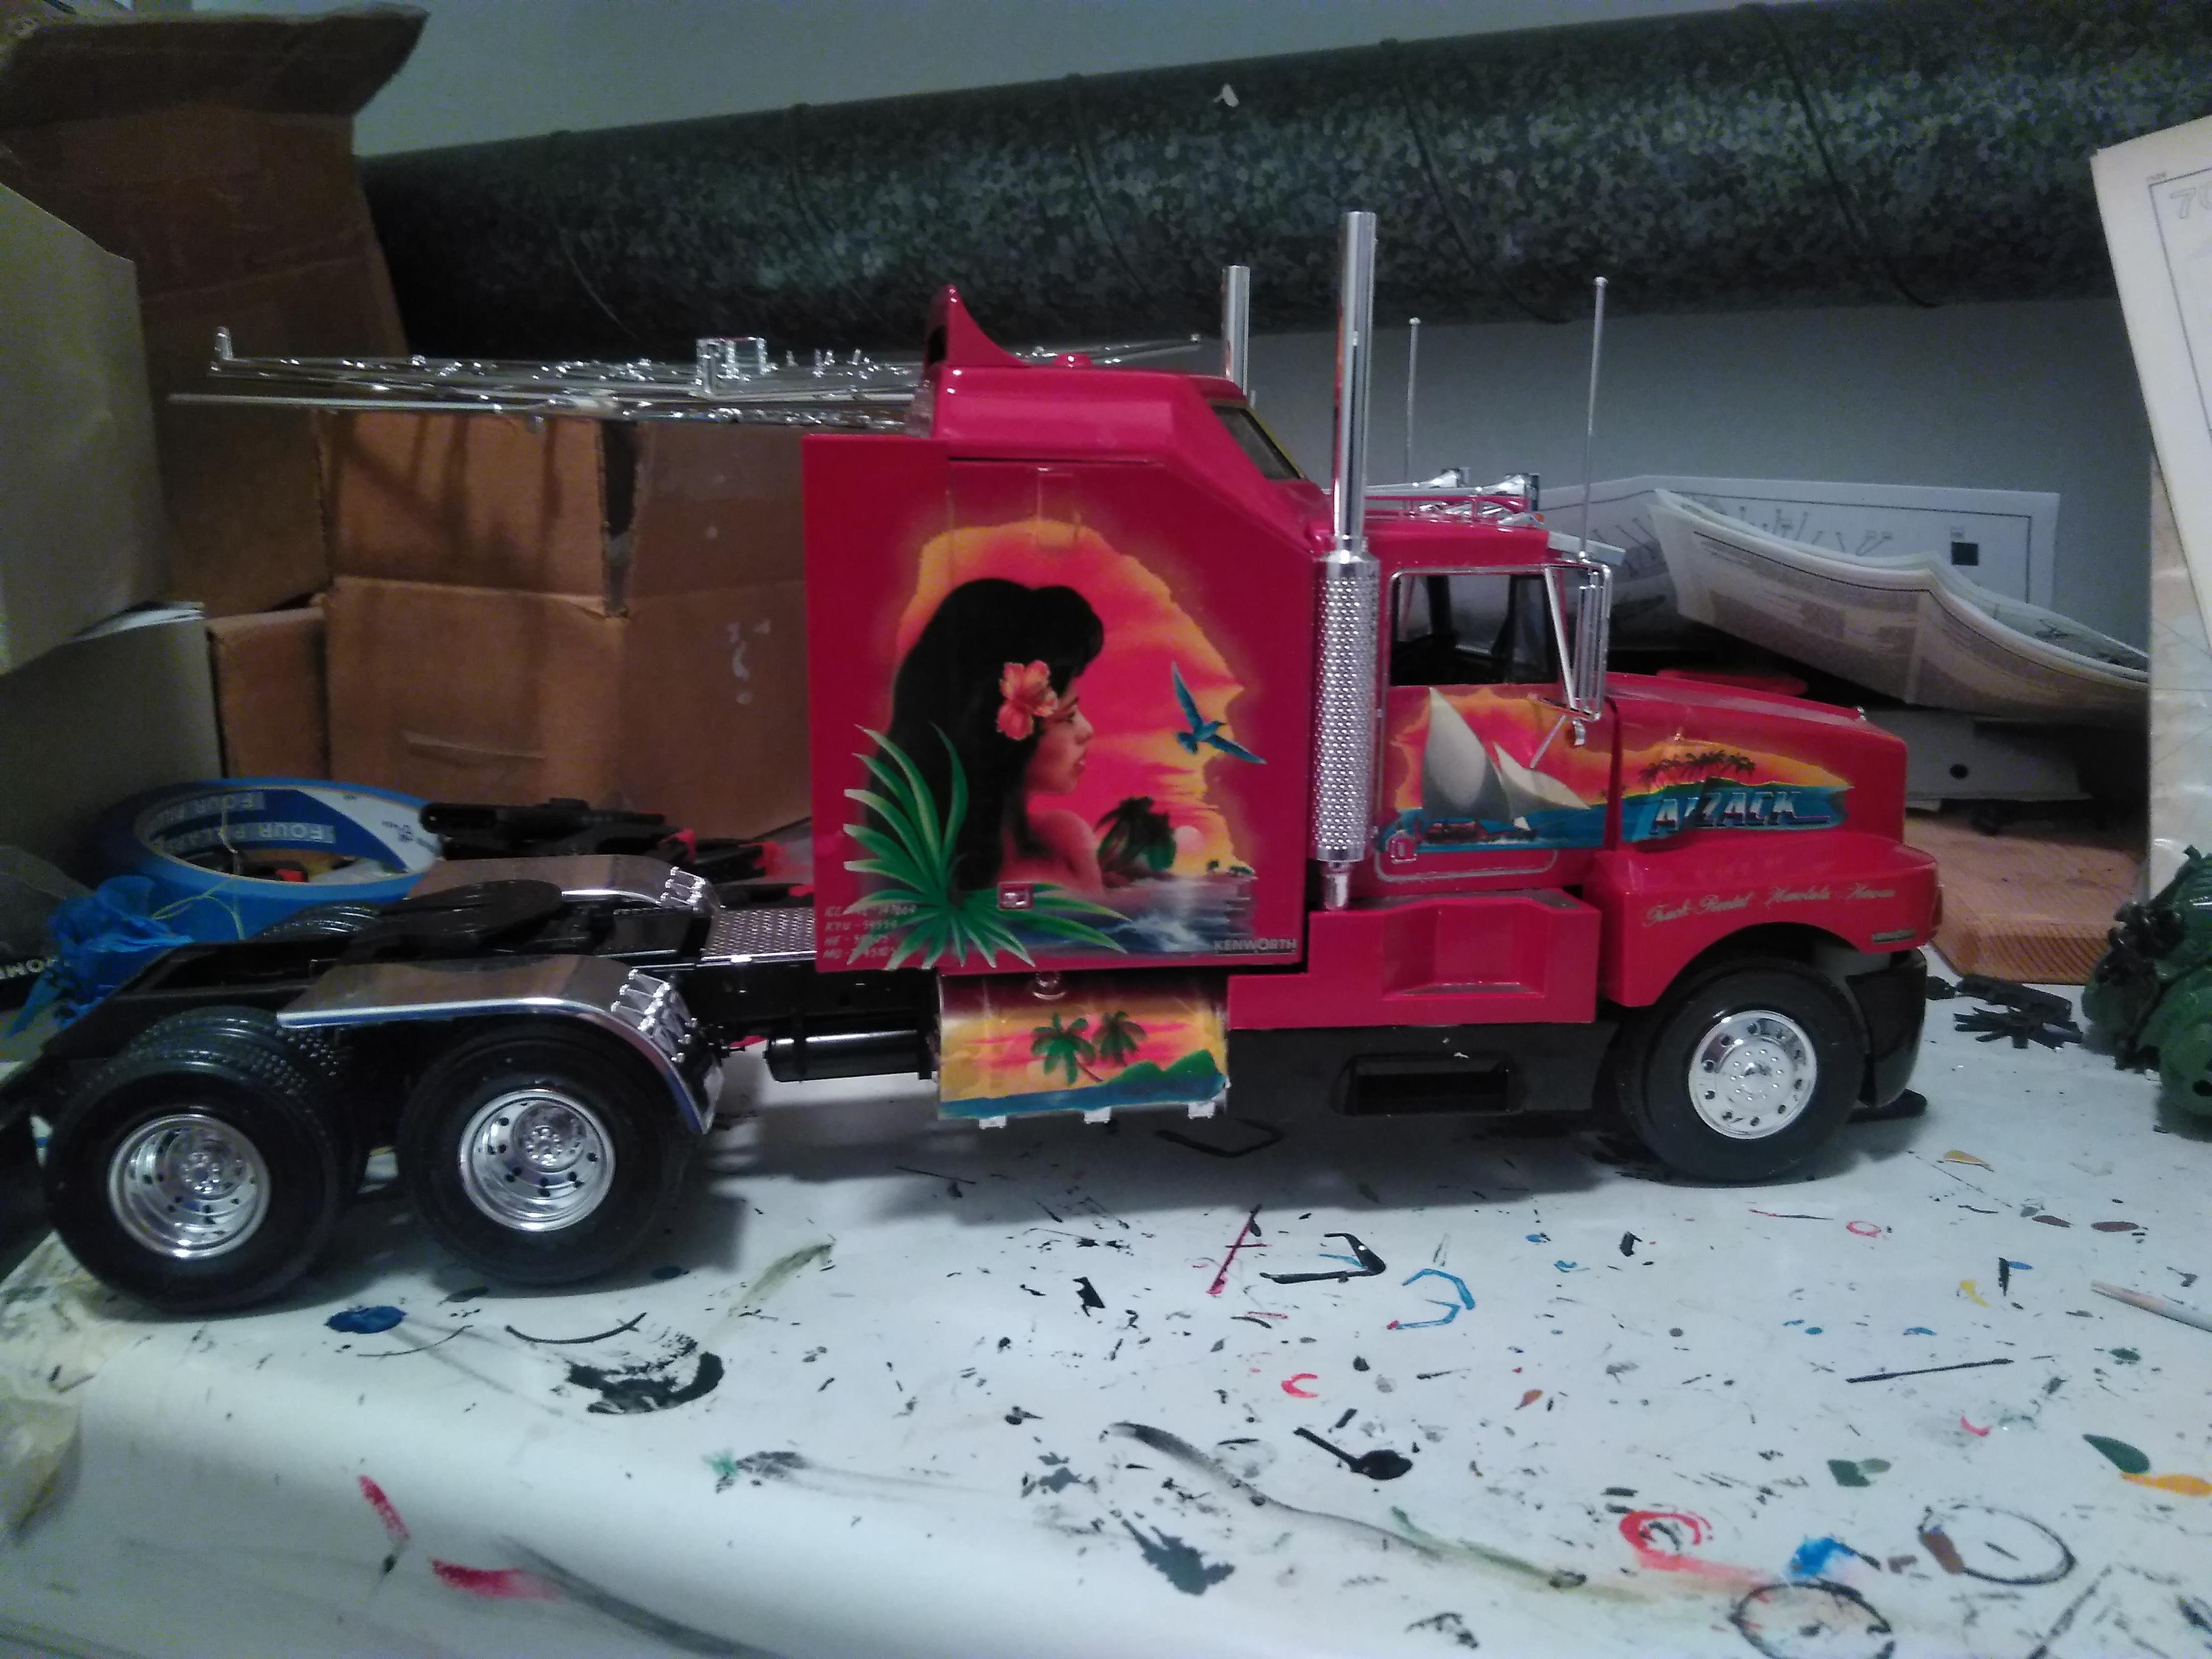
Since i only work 3 days every week now thanks to the C word... I had nothing to do 2 weeks ago and started on this. It is a Italeri kit reboxed by Revell and different decals (much nicer imo then what Italeri offers in their kit) I did find out a few things, 1: If you want the hood to open when assembled do not use the provided hoodpins that goes through the hinge and in to framerails, just let it sit loose. It will not fall off and when opening the hood the hinges will catch the front bumper letting it stay in the open position. Alignment between the hood, cab and front bumper will be way off if the pins are used. 2: When mounting the exhaust between the Y pipe and stacks, do not jump ahead and mount the sideskirts first it will be almost impossible to get the pipes in place. Manual also says to mount them after the sleeper is on but it will be much better access to it without it mounted. Only problem i had with the decals was that they have started to get yellow due to their age, can bee seen on the freigtliner decals on the grille and mudflaps. Did not manage to get the stacks to stand perfectly straight up so they are slightly tilted, but if anyone asks the driver hit a low branch knocking them that way because that must have happend alot of times irl because of how far up they go compared to the roof Did also mount the sunvisors inside the cab in the down position, its har to see but it shows in the pic,s through the windows.

-
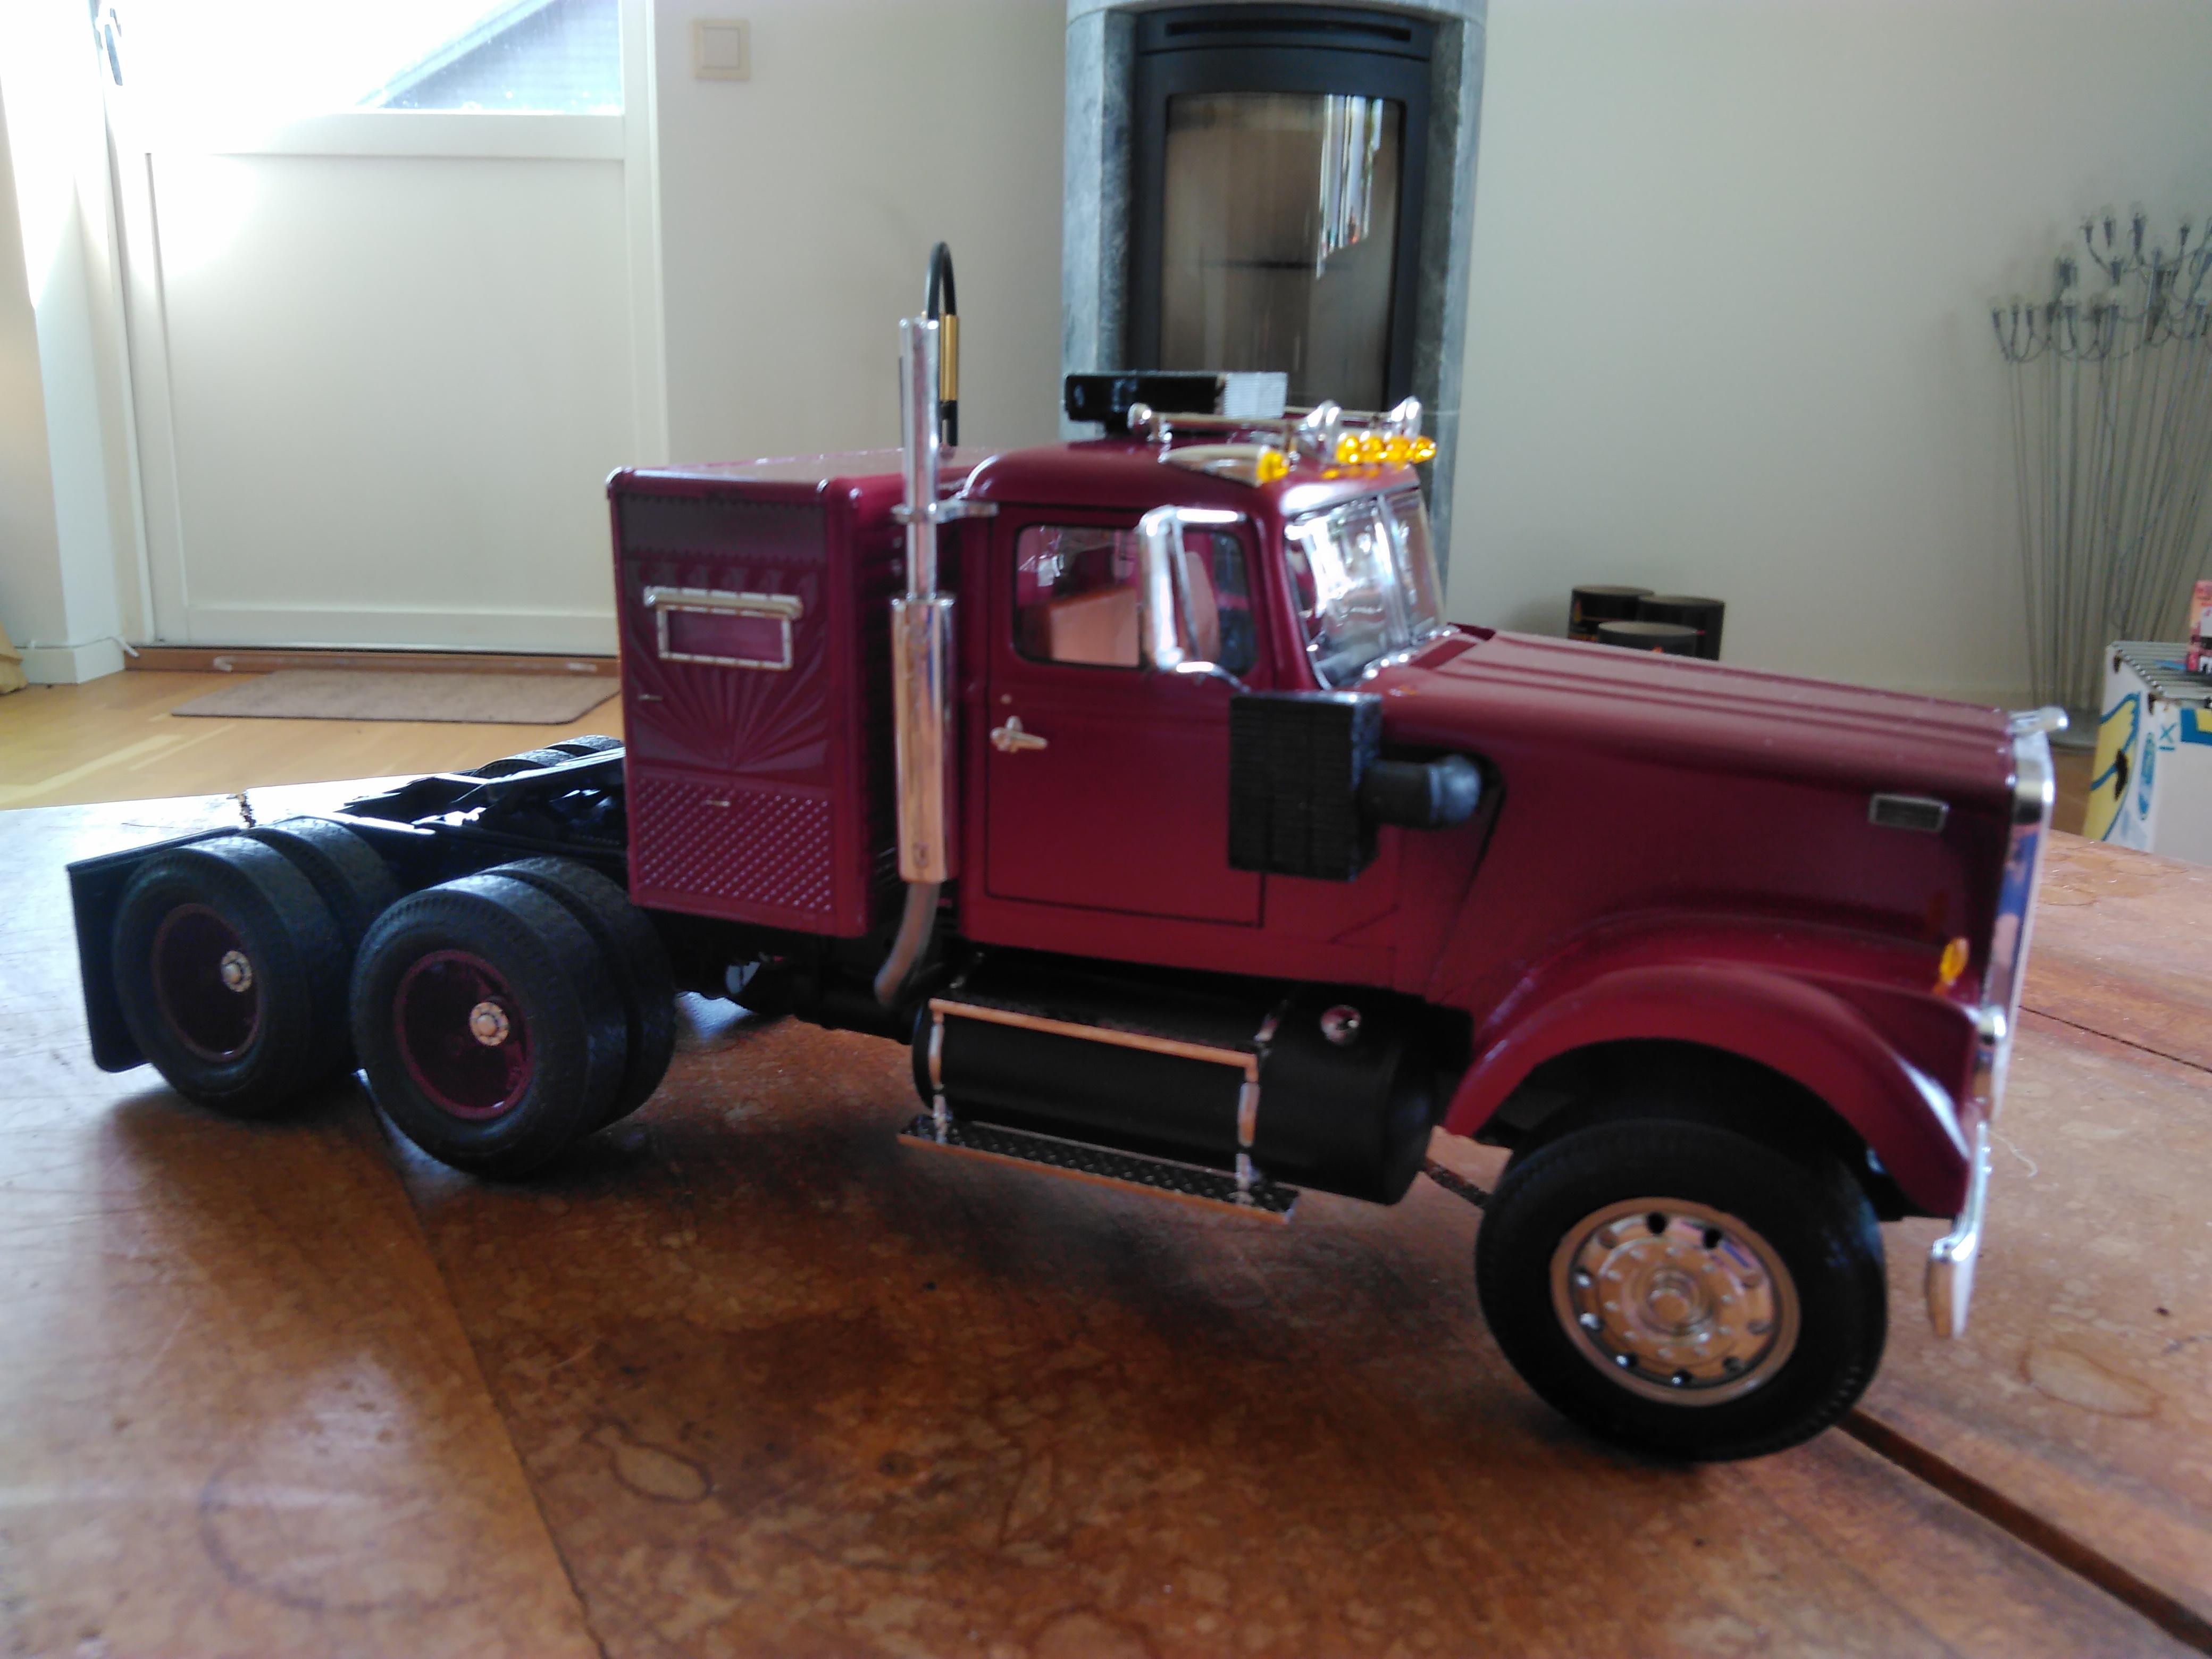
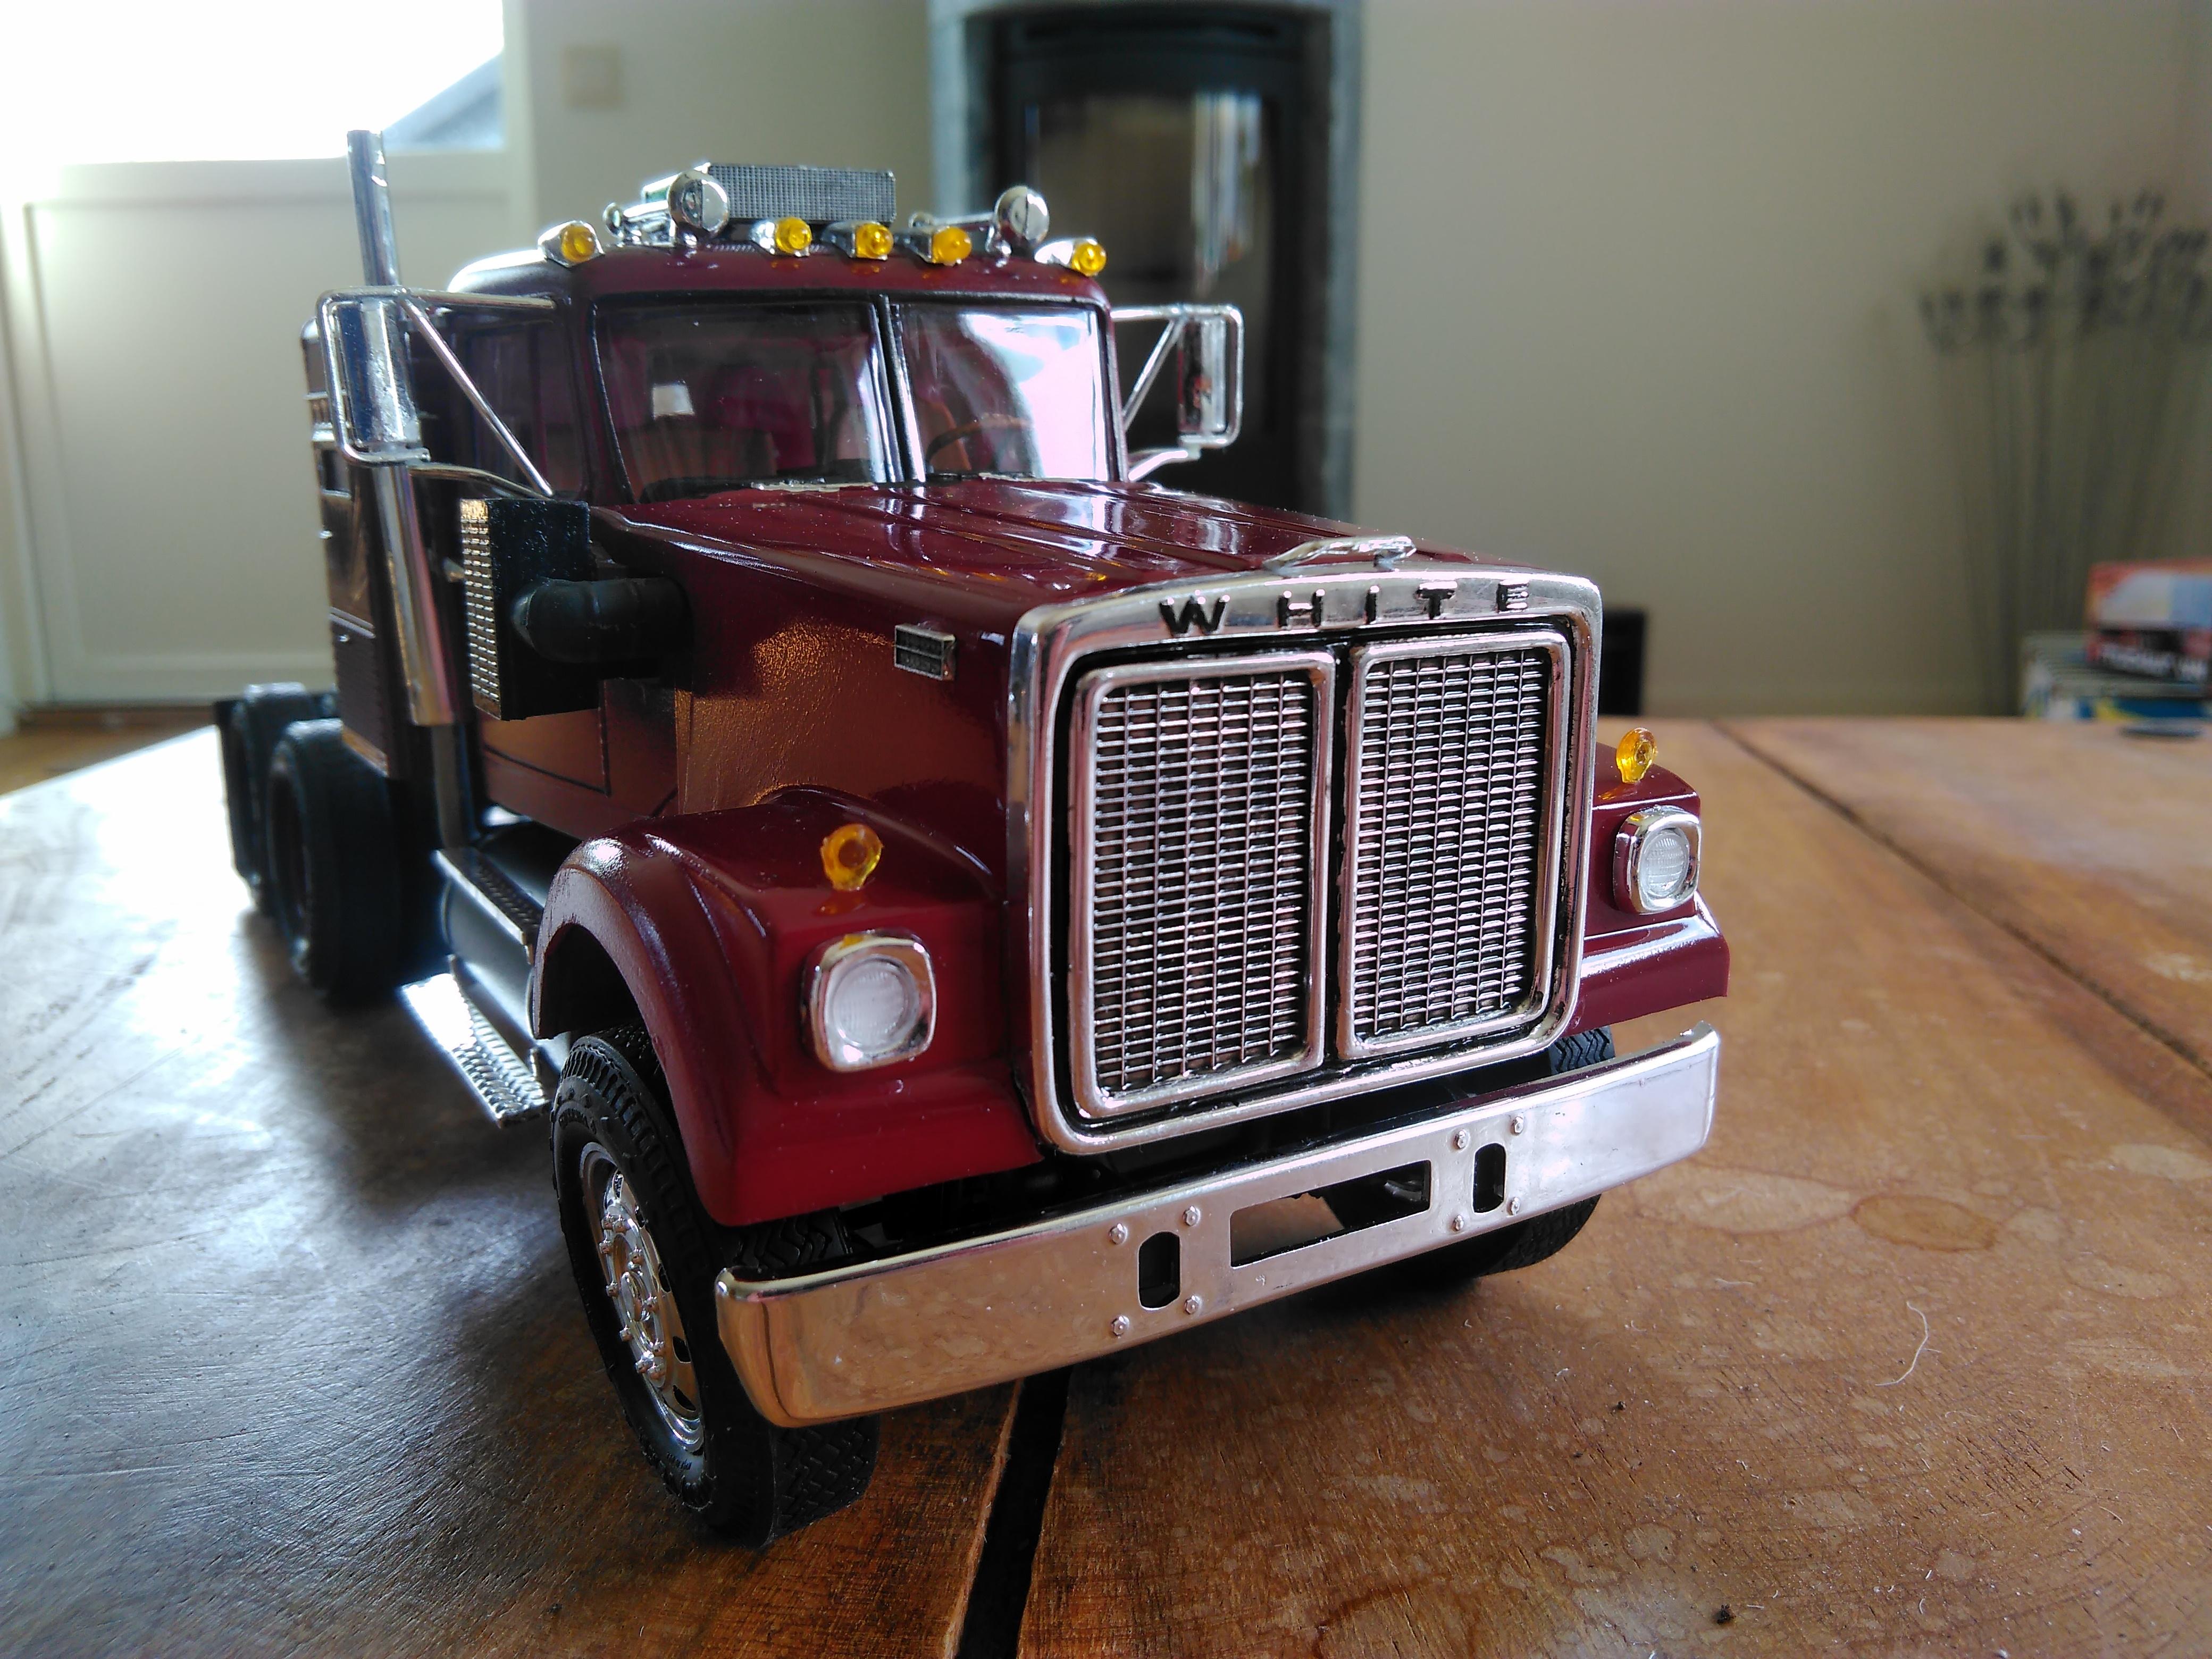
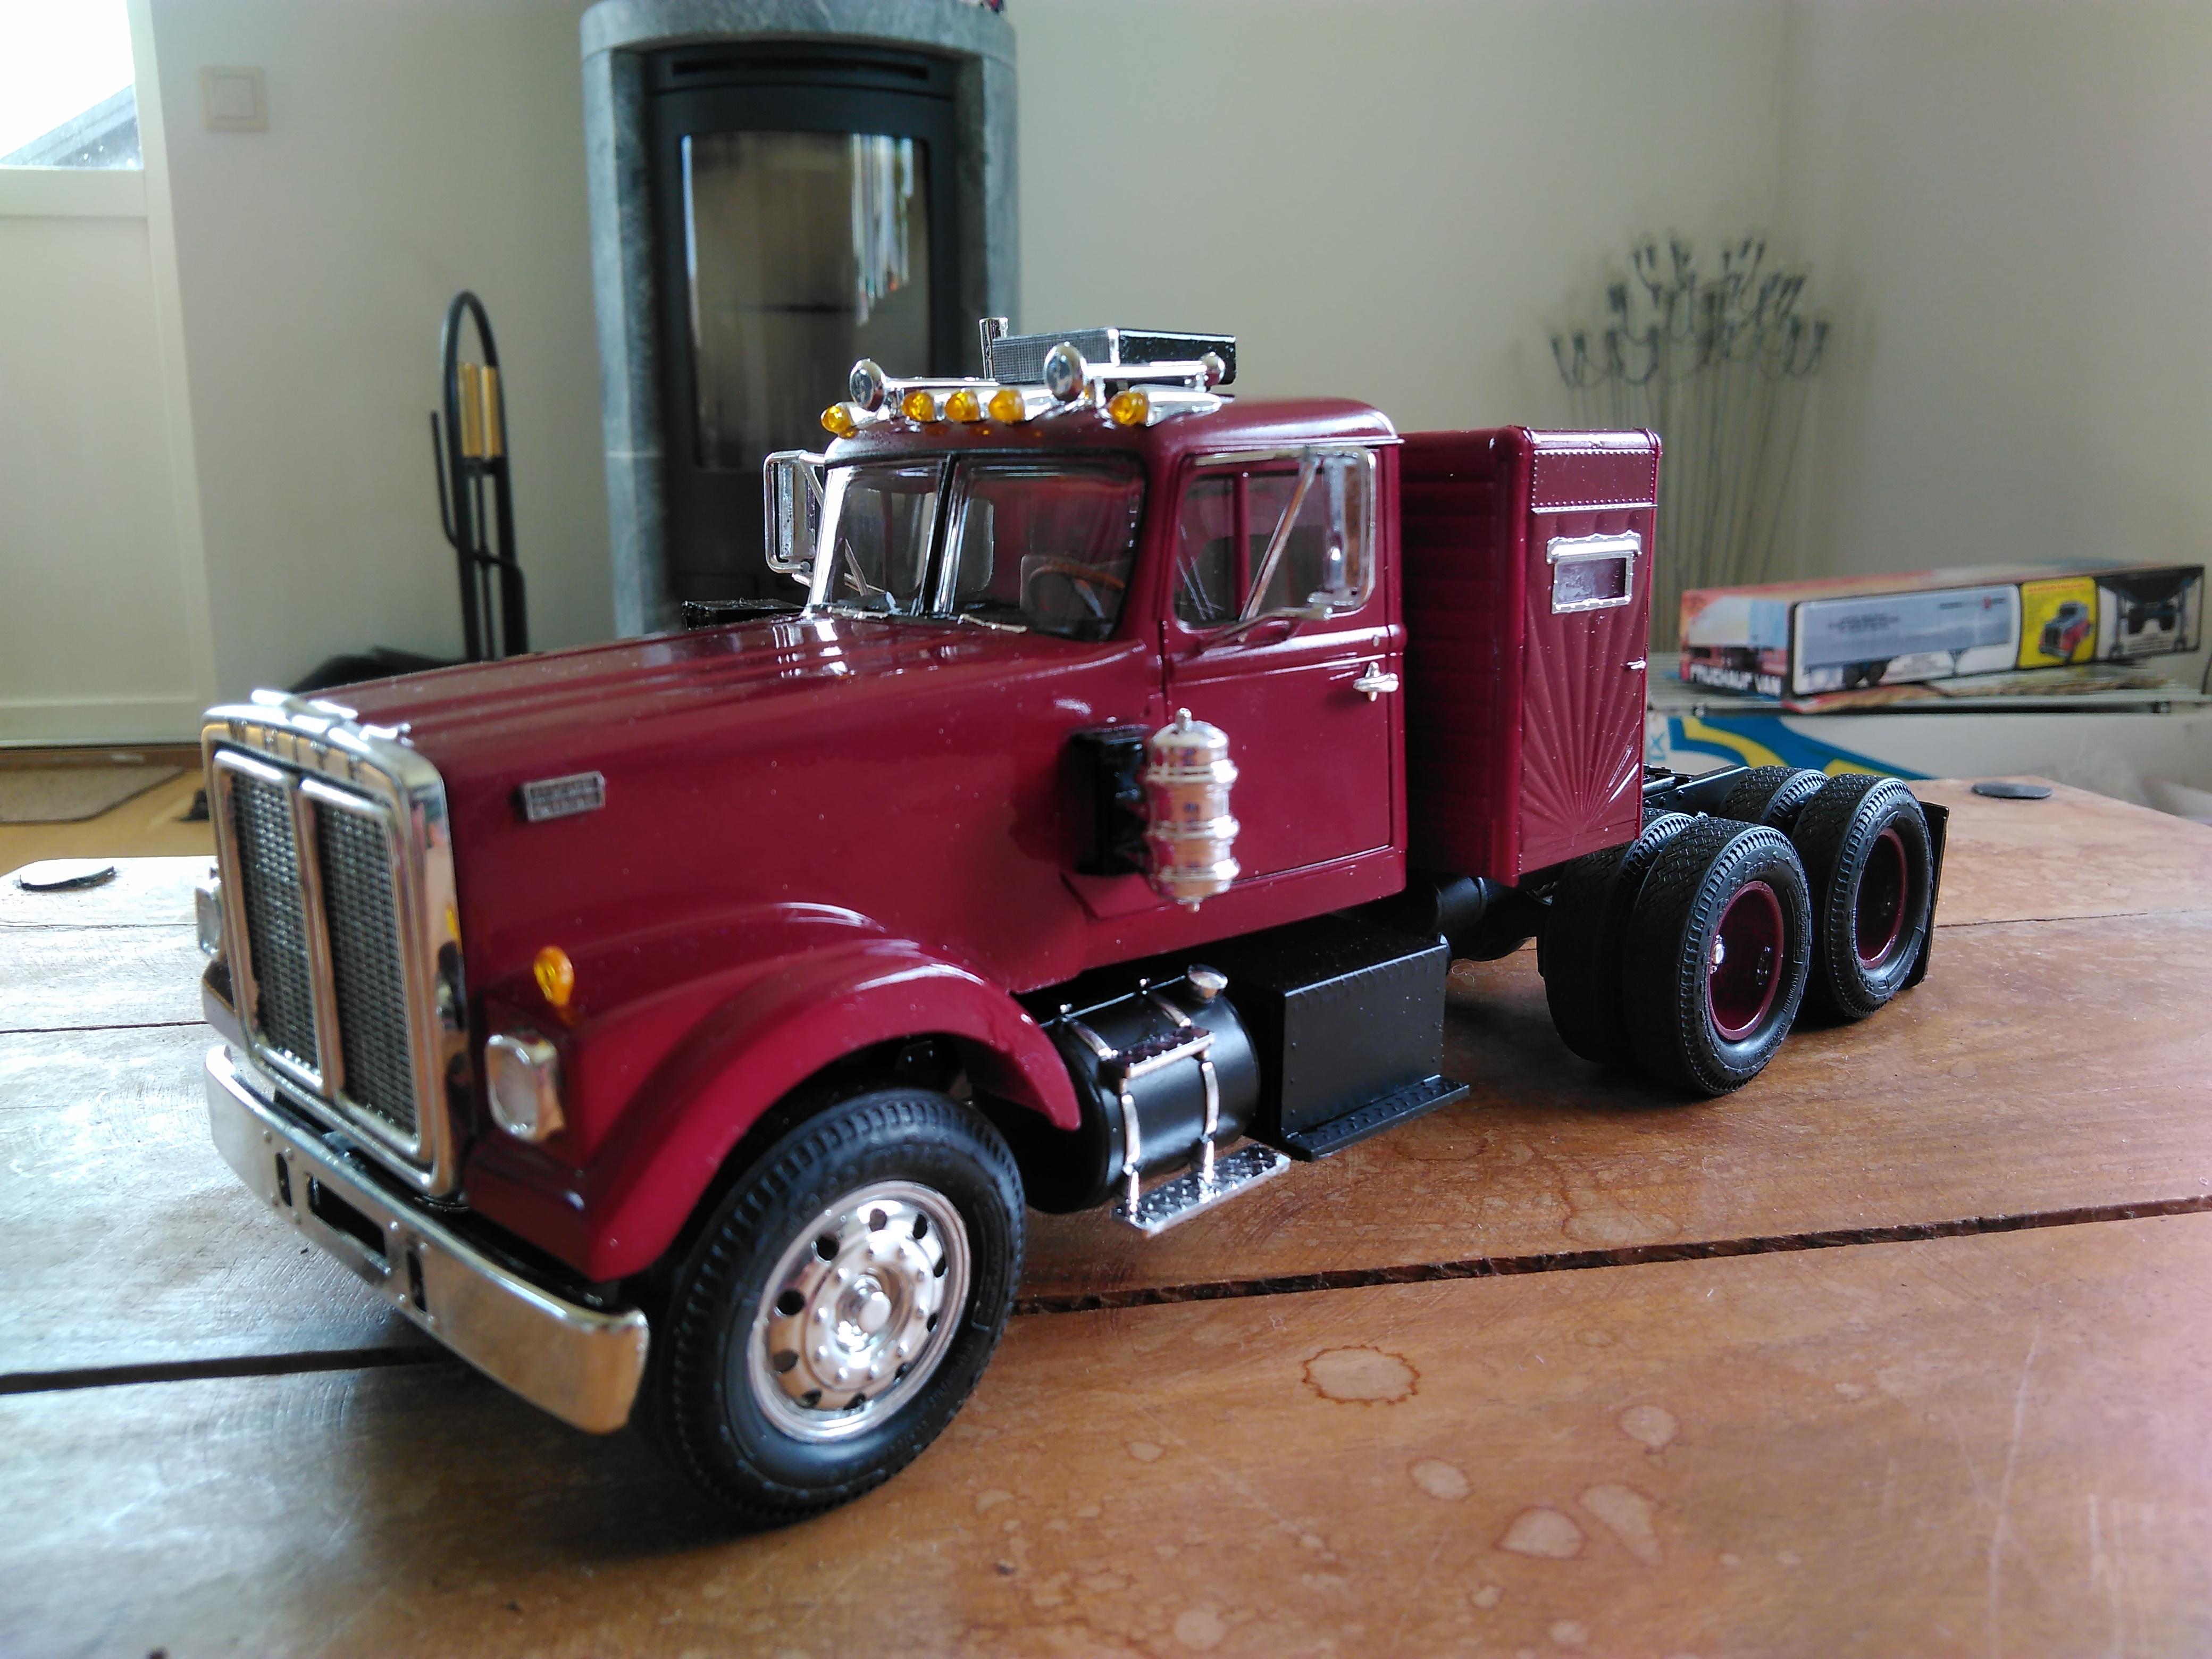
White road boss
PierreR89 replied to PierreR89's topic in Model Trucks: Big Rigs and Heavy Equipment
Thanks. The paint is called Bordeaux red -
Finally done with this. The mirrors were a pain in the you know what to build. Getting the cab to line up with the hood was also interesting but i think i managed to make it look right.
-
Peterbilt 353
PierreR89 replied to delta99's topic in WIP: Model Trucks: Big Rigs and Heavy Equipment
Looks good. I wish i had more of them because it was fun to build. -
A few things just to fill up my supplys as i was running out of everything apparently. Tamiya clear blue and yellow, tamiya putty, black tamiya panelline accent and glue. Molotow 1&2mm chromepens and molotow blackliner + a wethering set to create rust effects from vallejo. Did also order a few parts for my Mack wrecker from auslowe so it can call it done.
-
Revell Twin Turbo Cummins Help
PierreR89 replied to delta99's topic in General Automotive Talk (Trucks and Cars)
Any help?
-
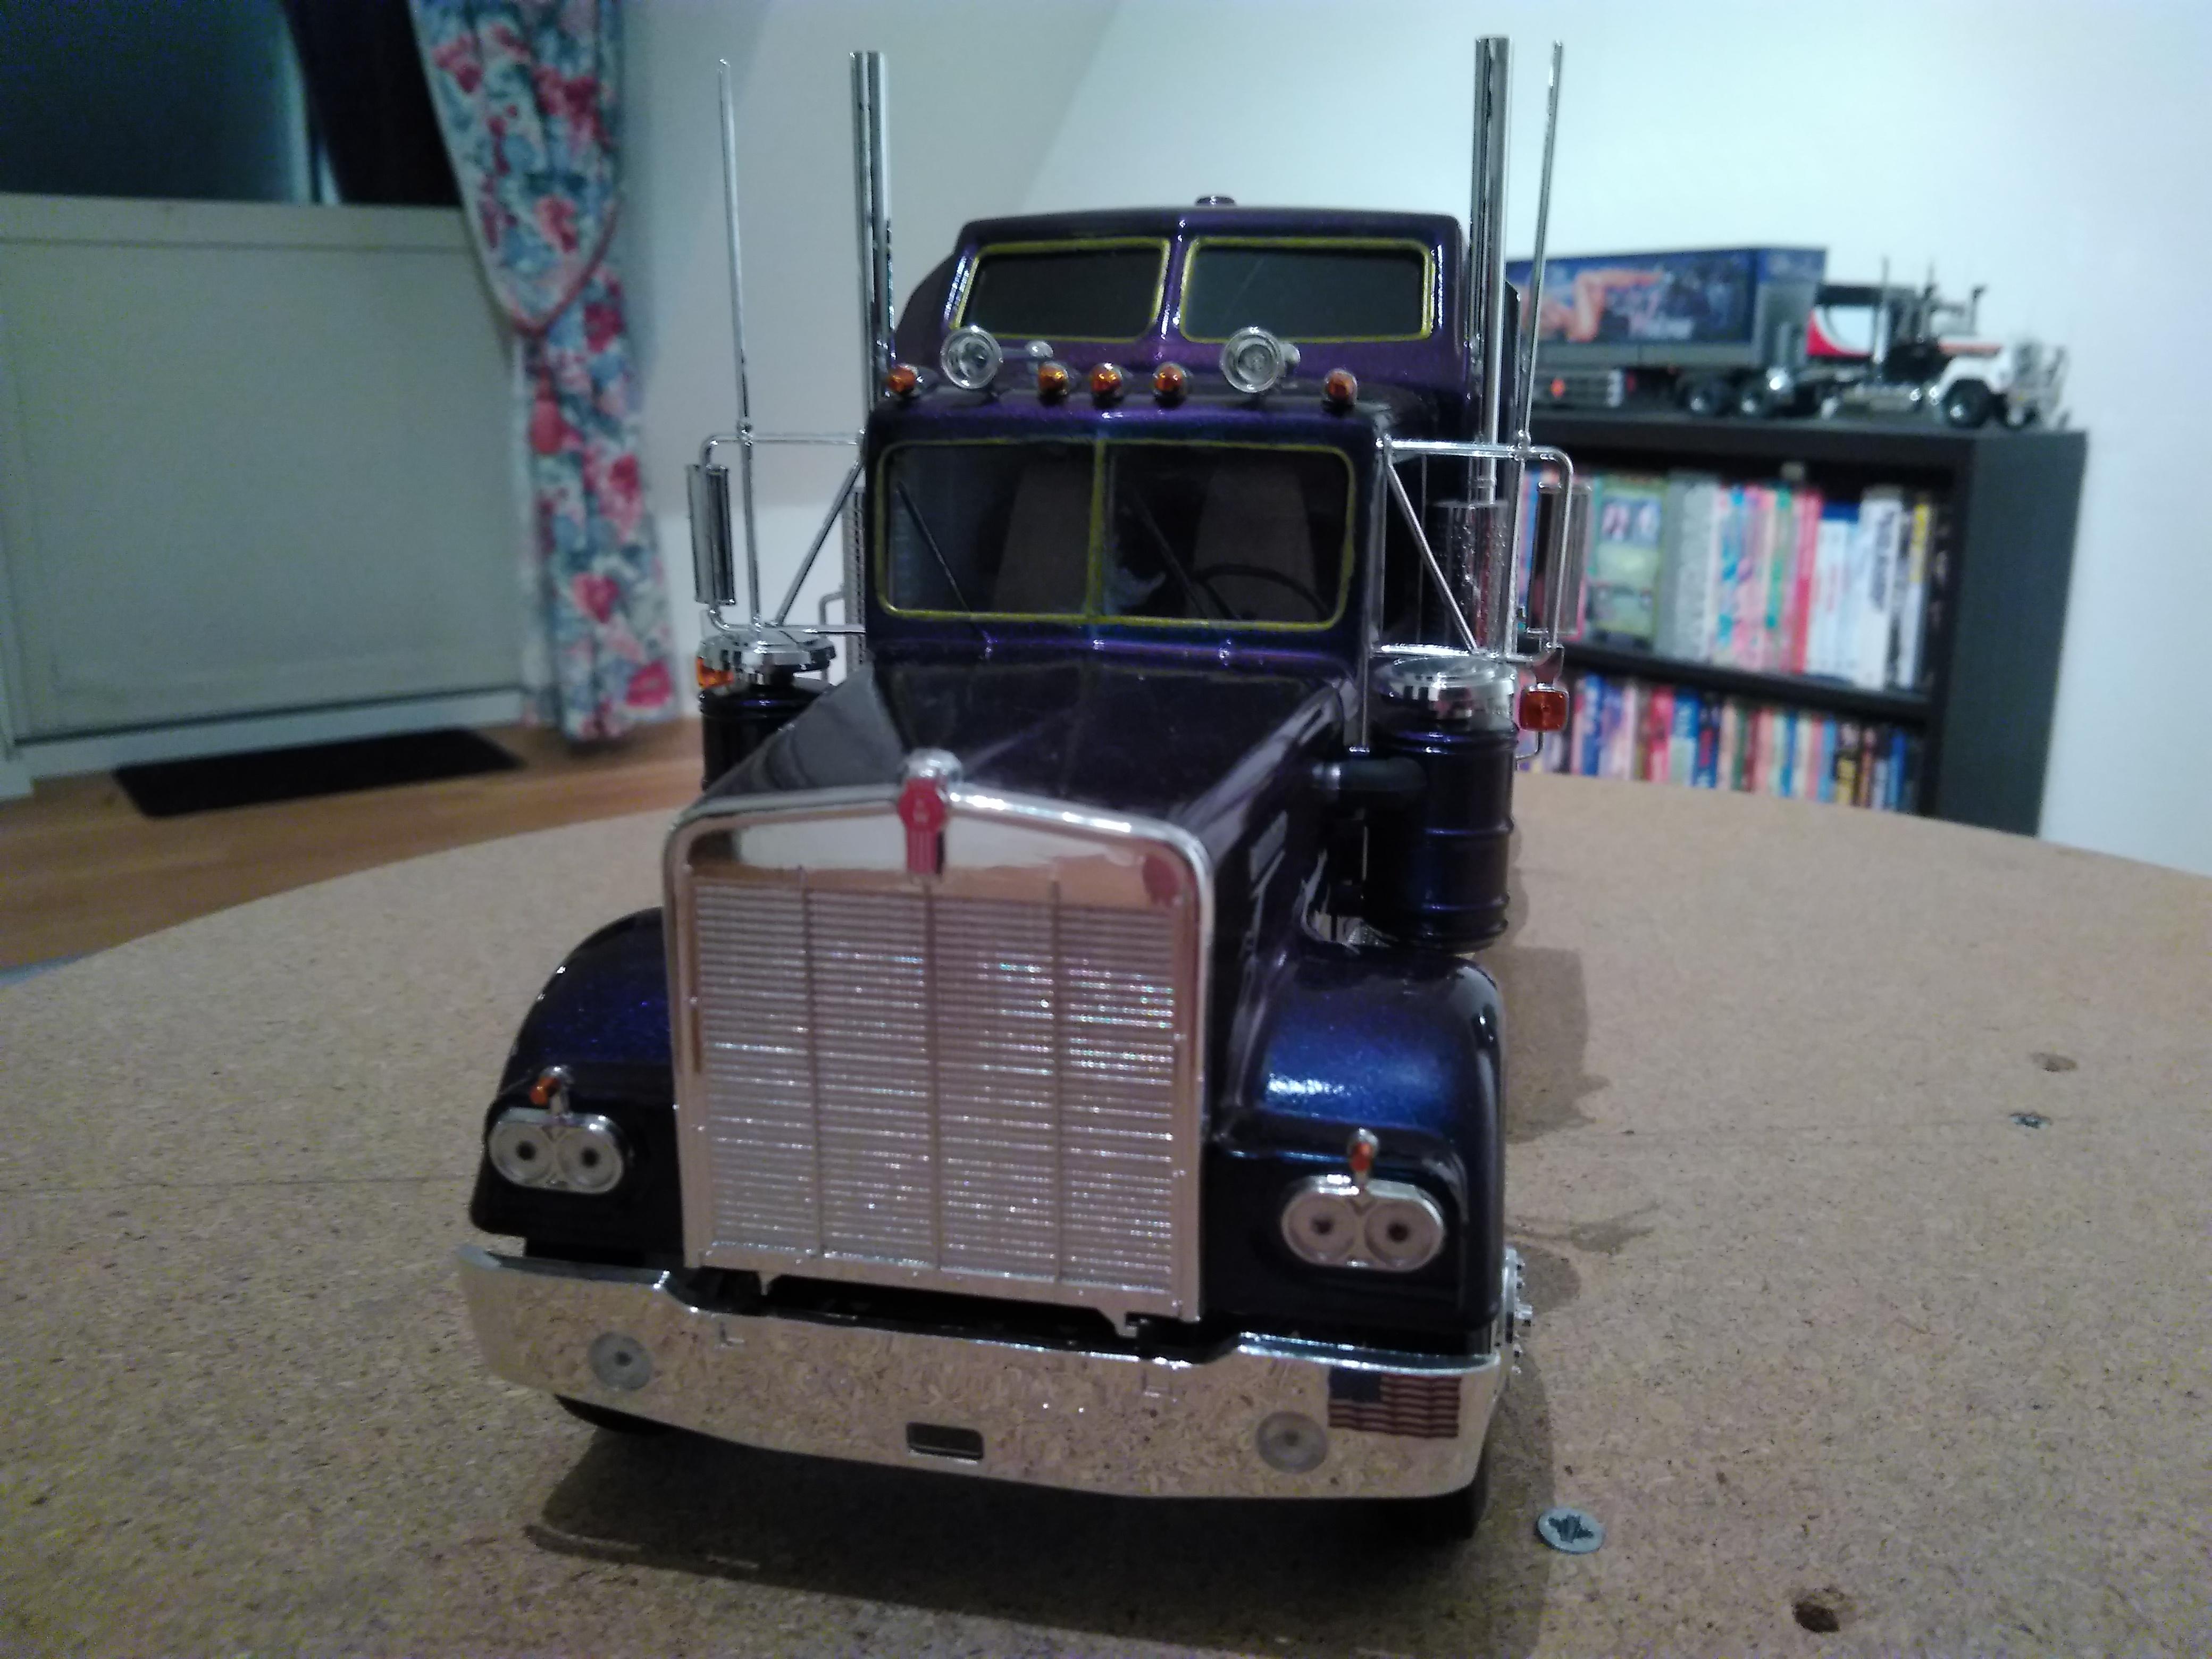
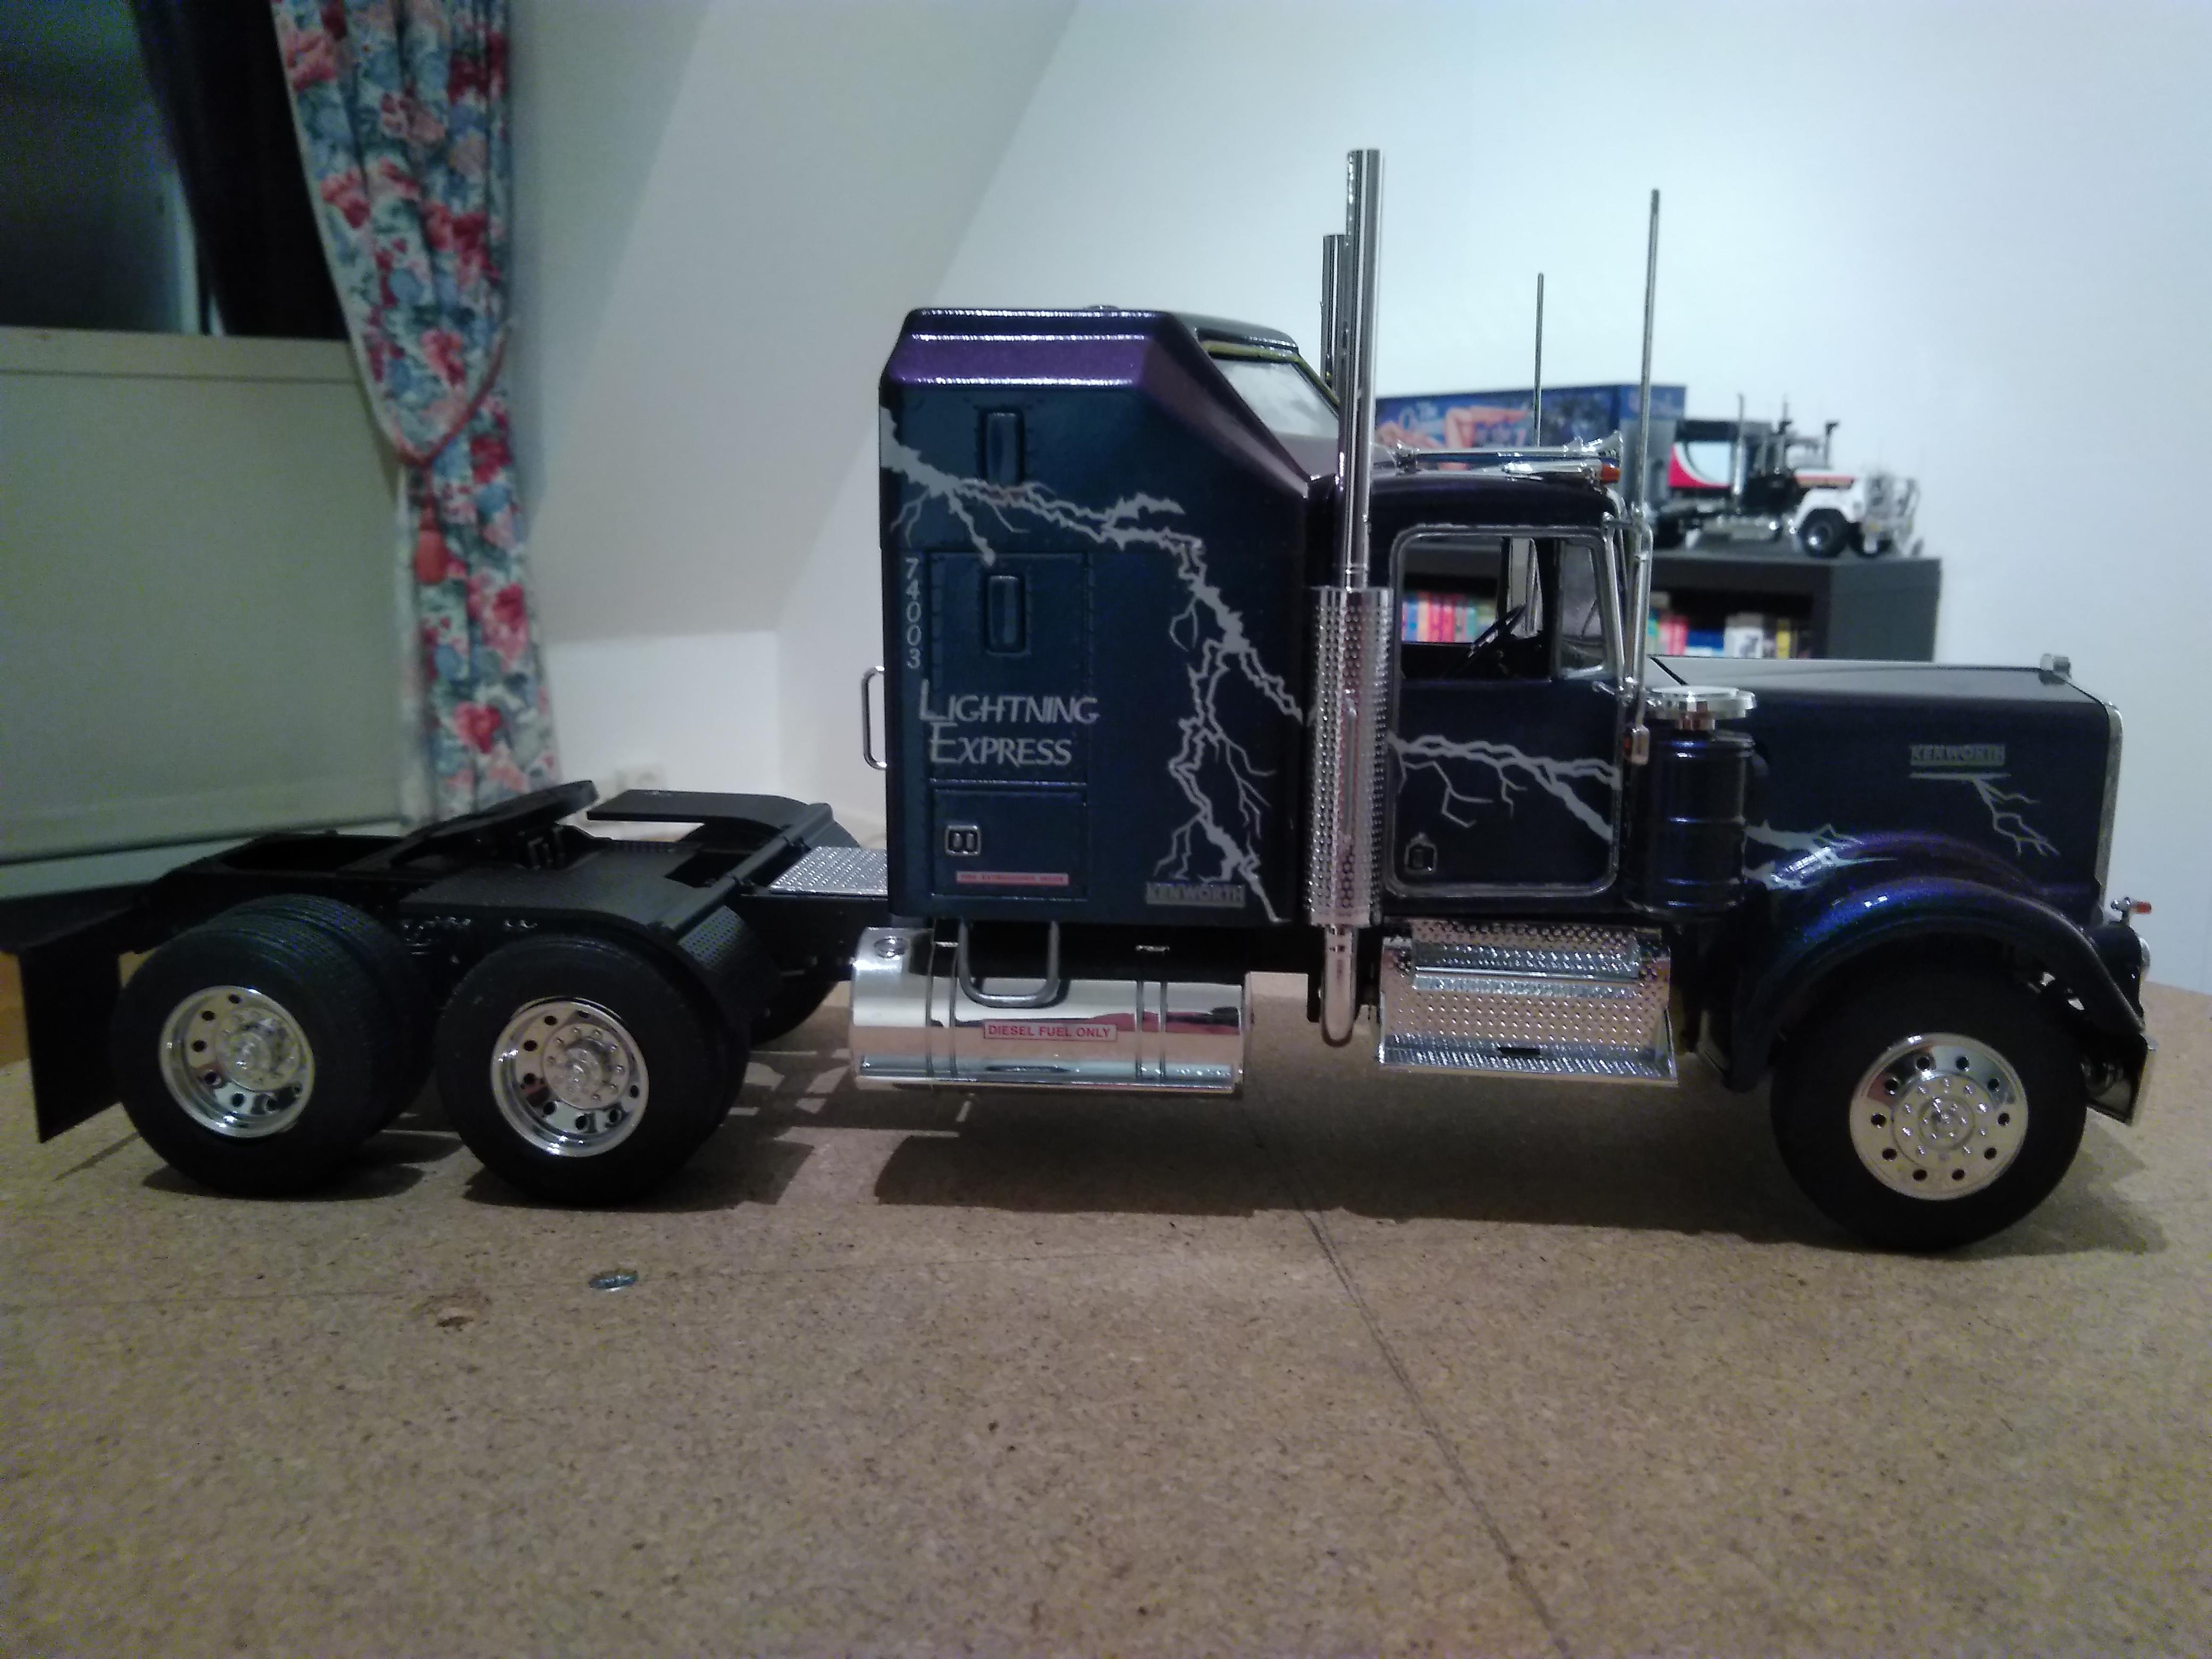
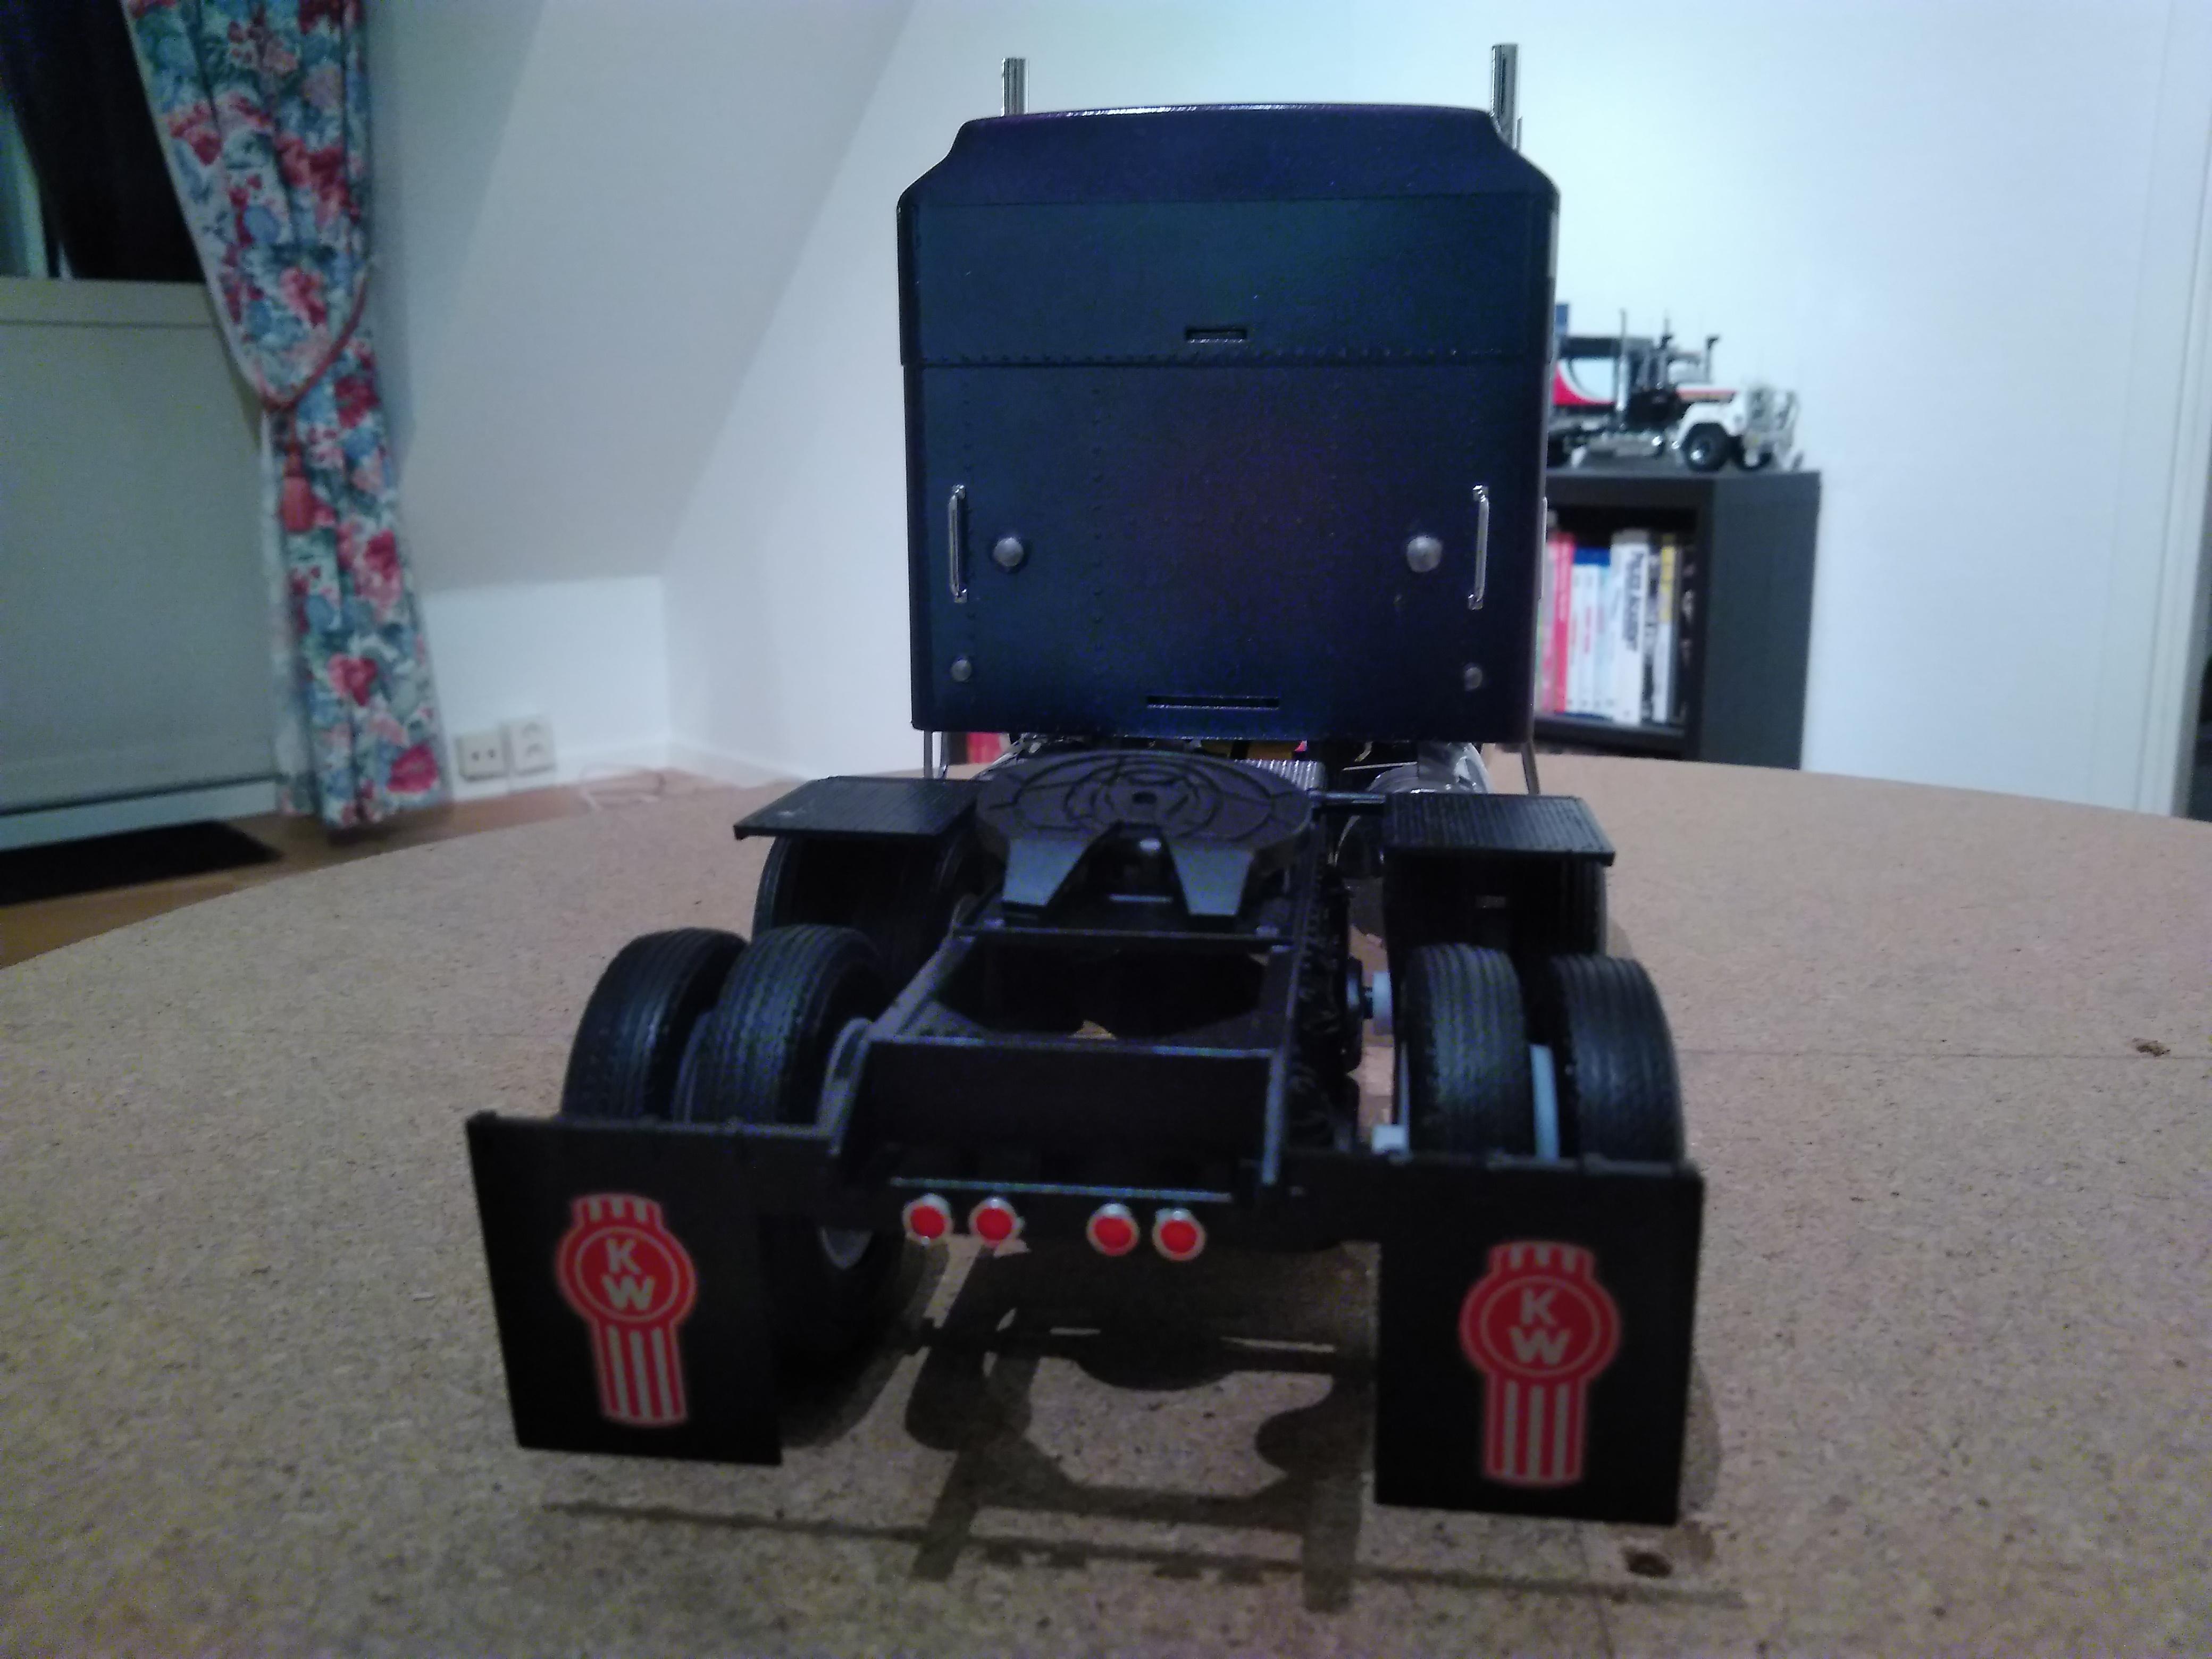
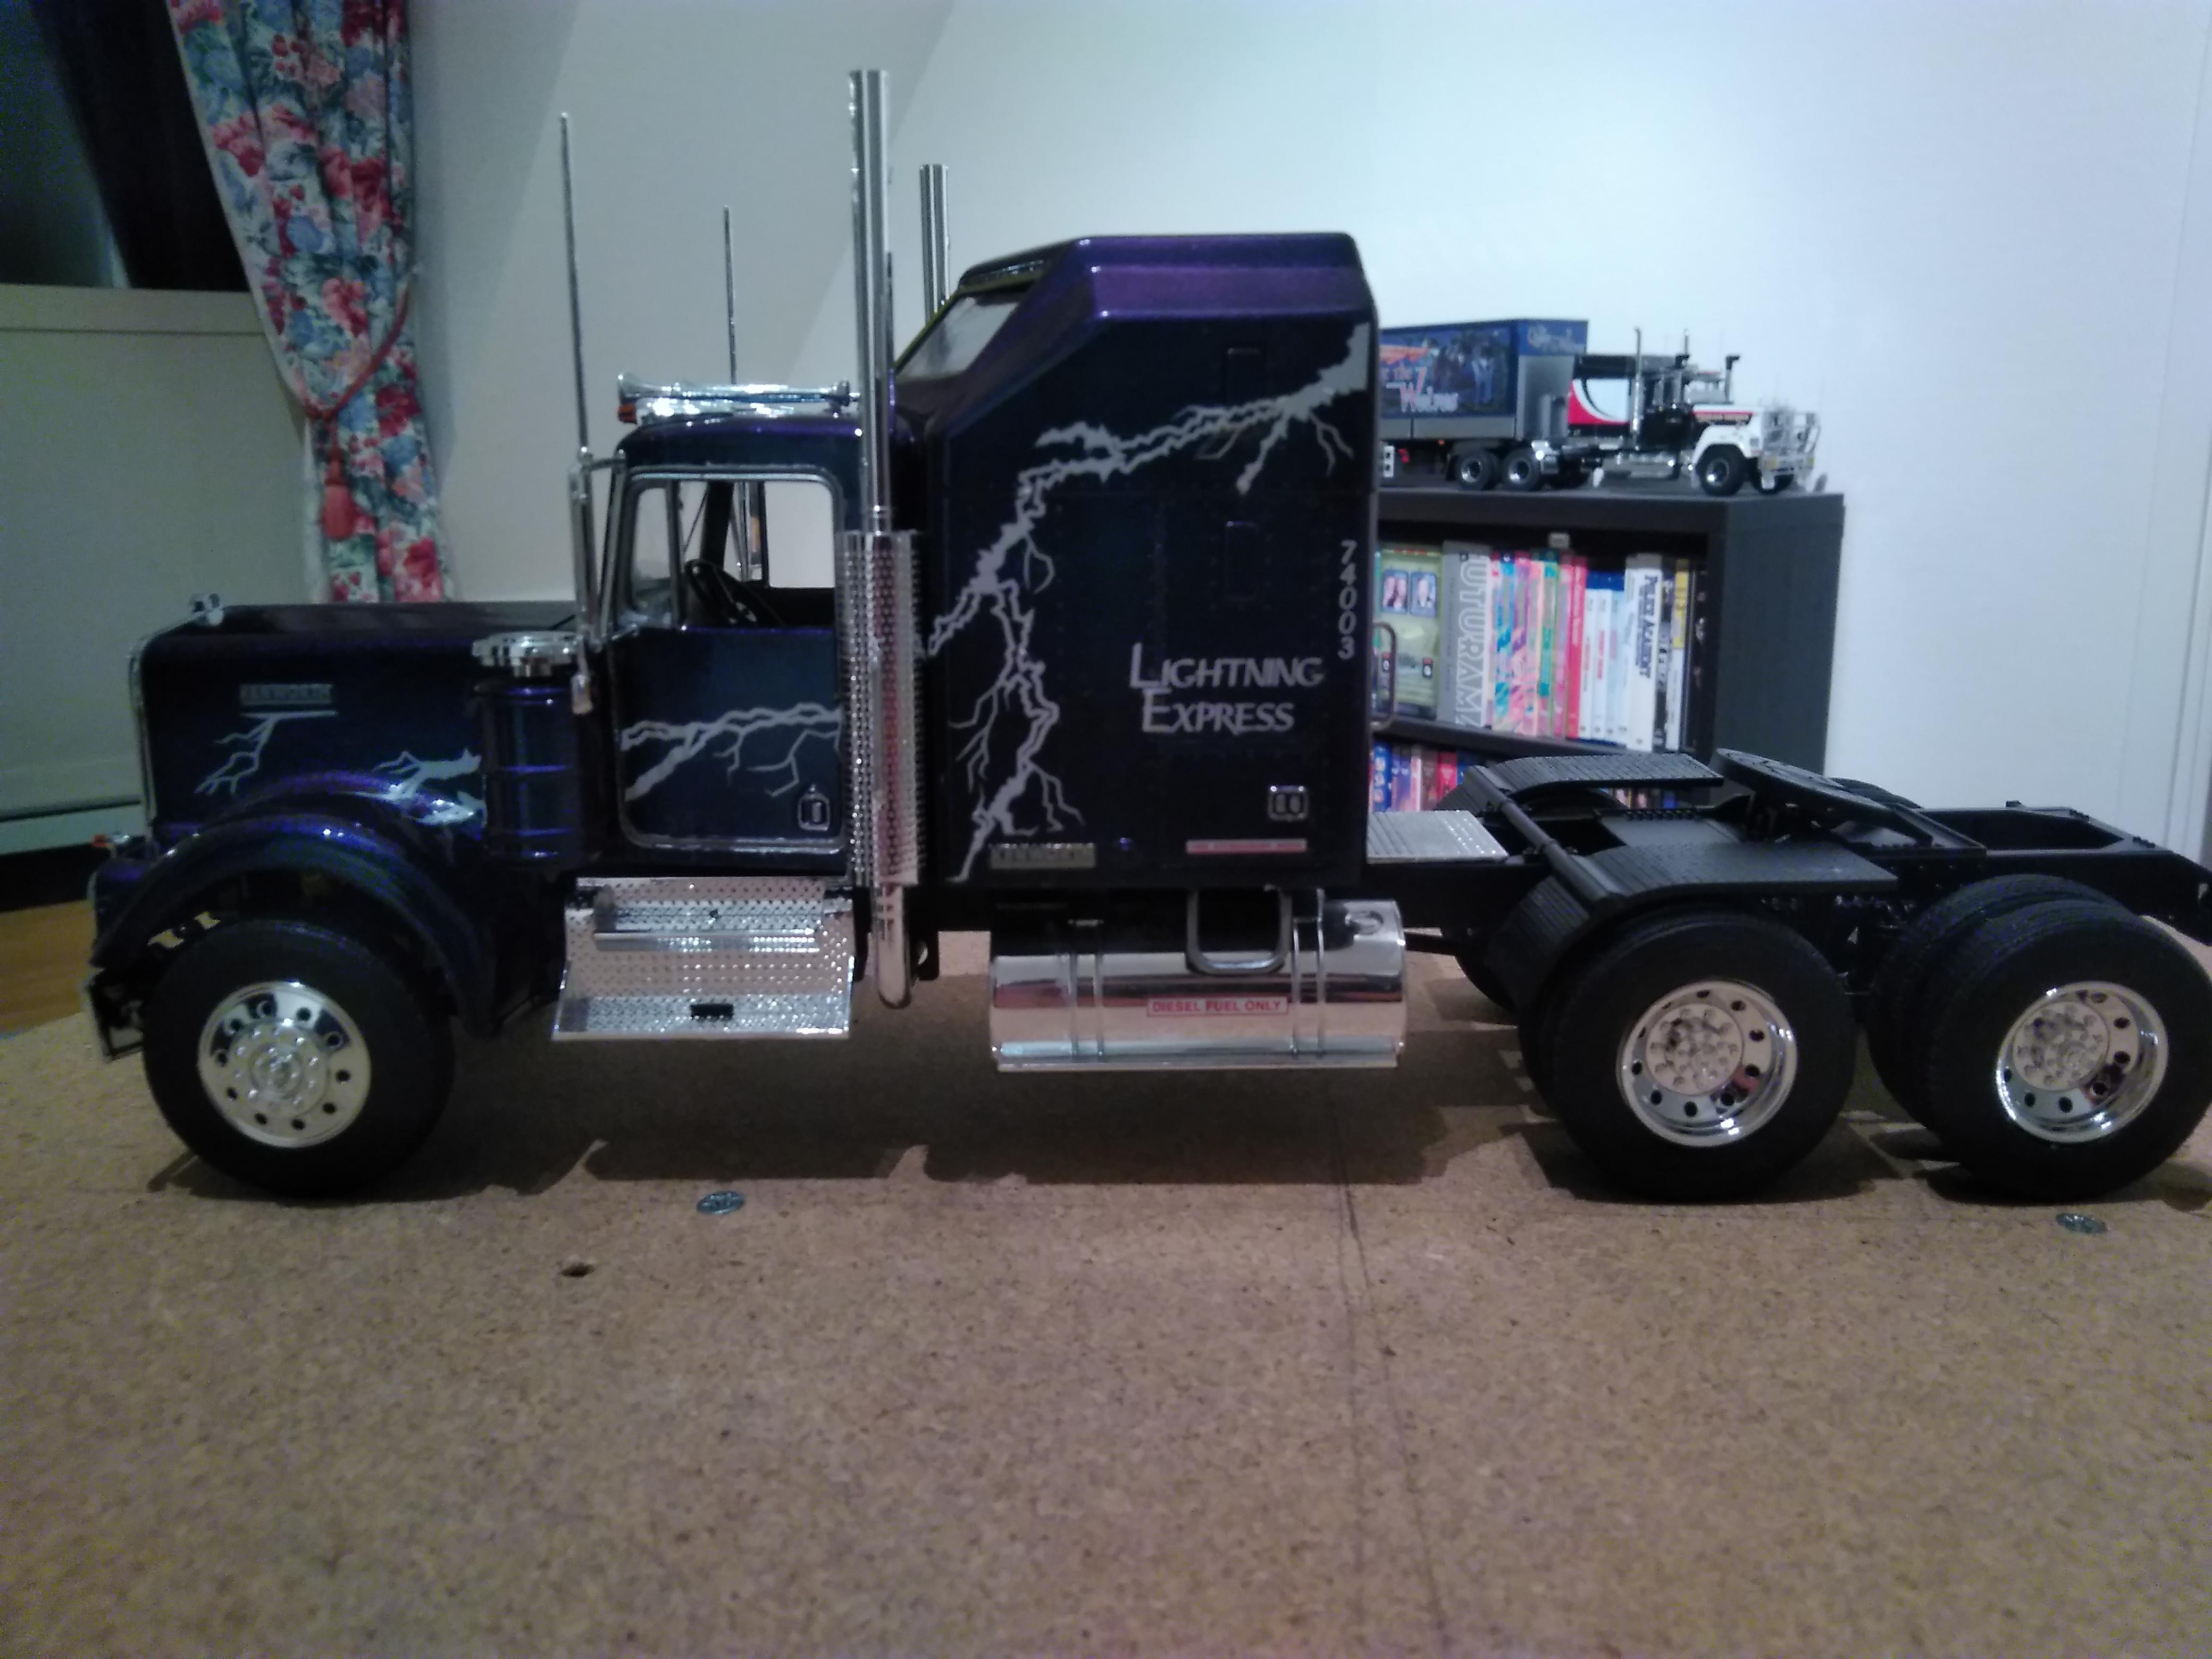
Thanks everyone Here are some pic,s that shows how it looks when it has shifted to purple.
-
My googling skills are apparenty somewhere else today. But what are the dimensions of it when it is fully built? length, width and height. Inches or mm doesent matter.
-
The tires are not that great in this kit. I got lucky in my kit and got 10 tires that was somewhat round but they need to be replaced with something better
-
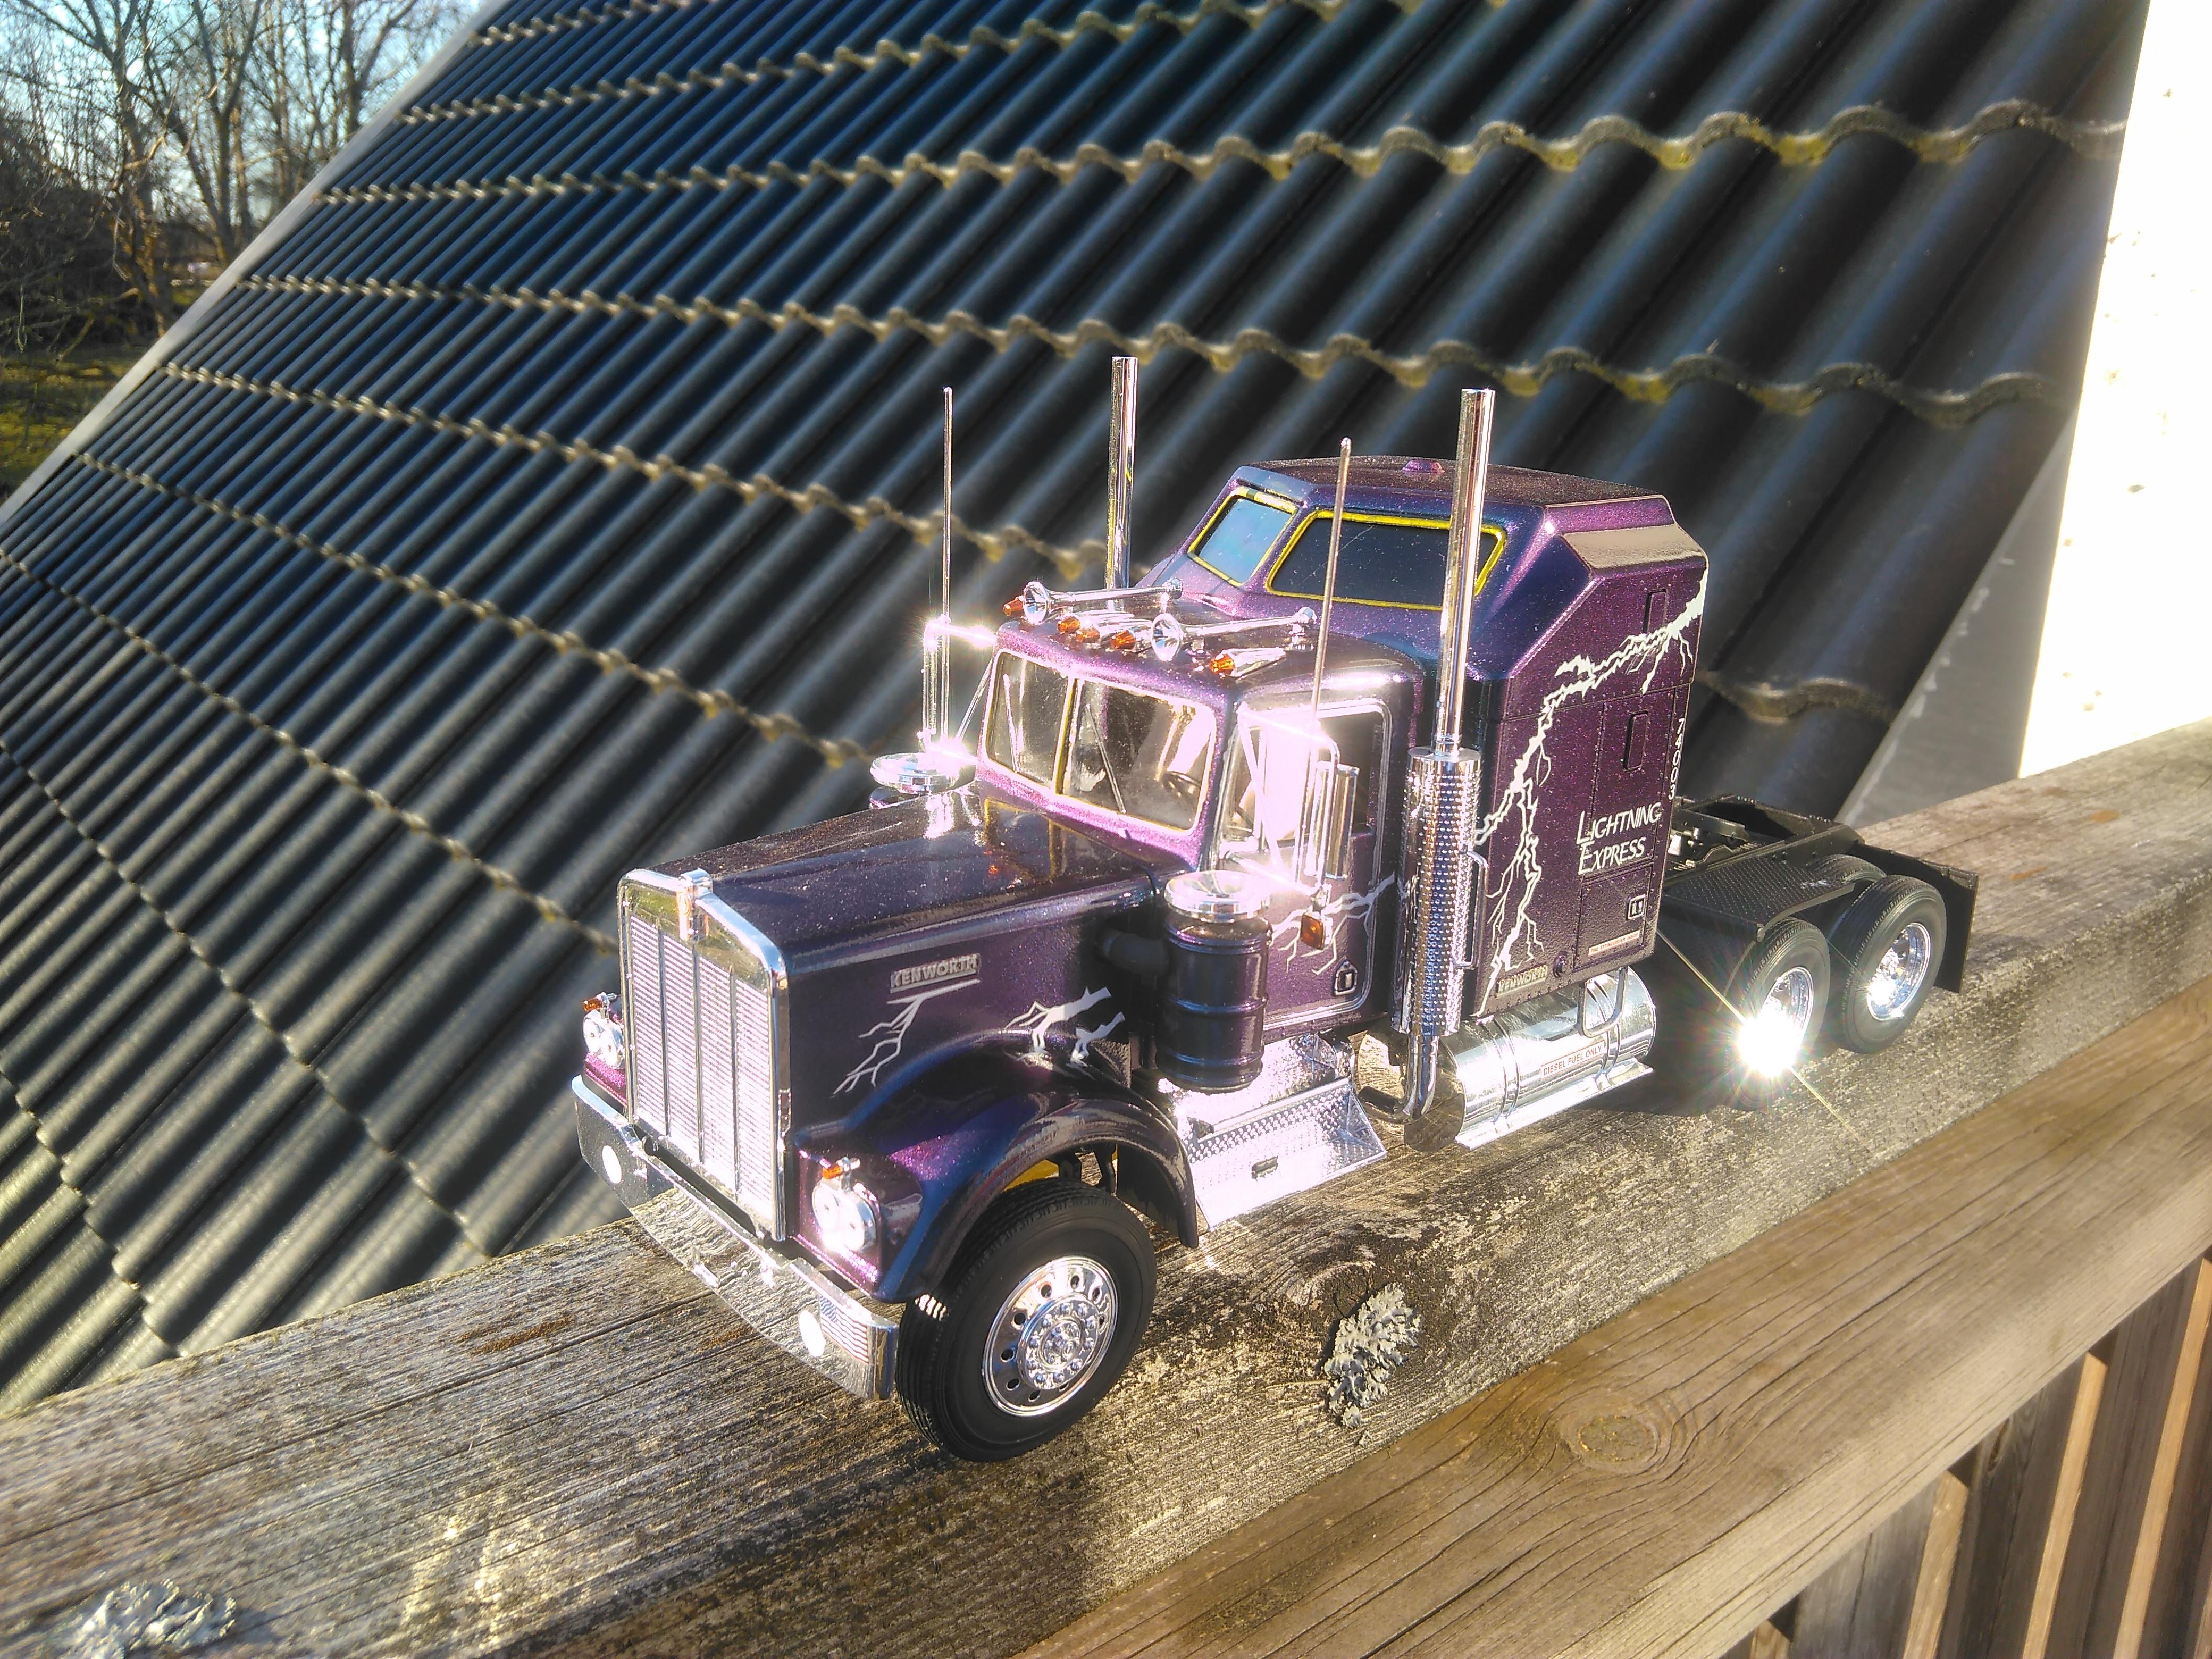
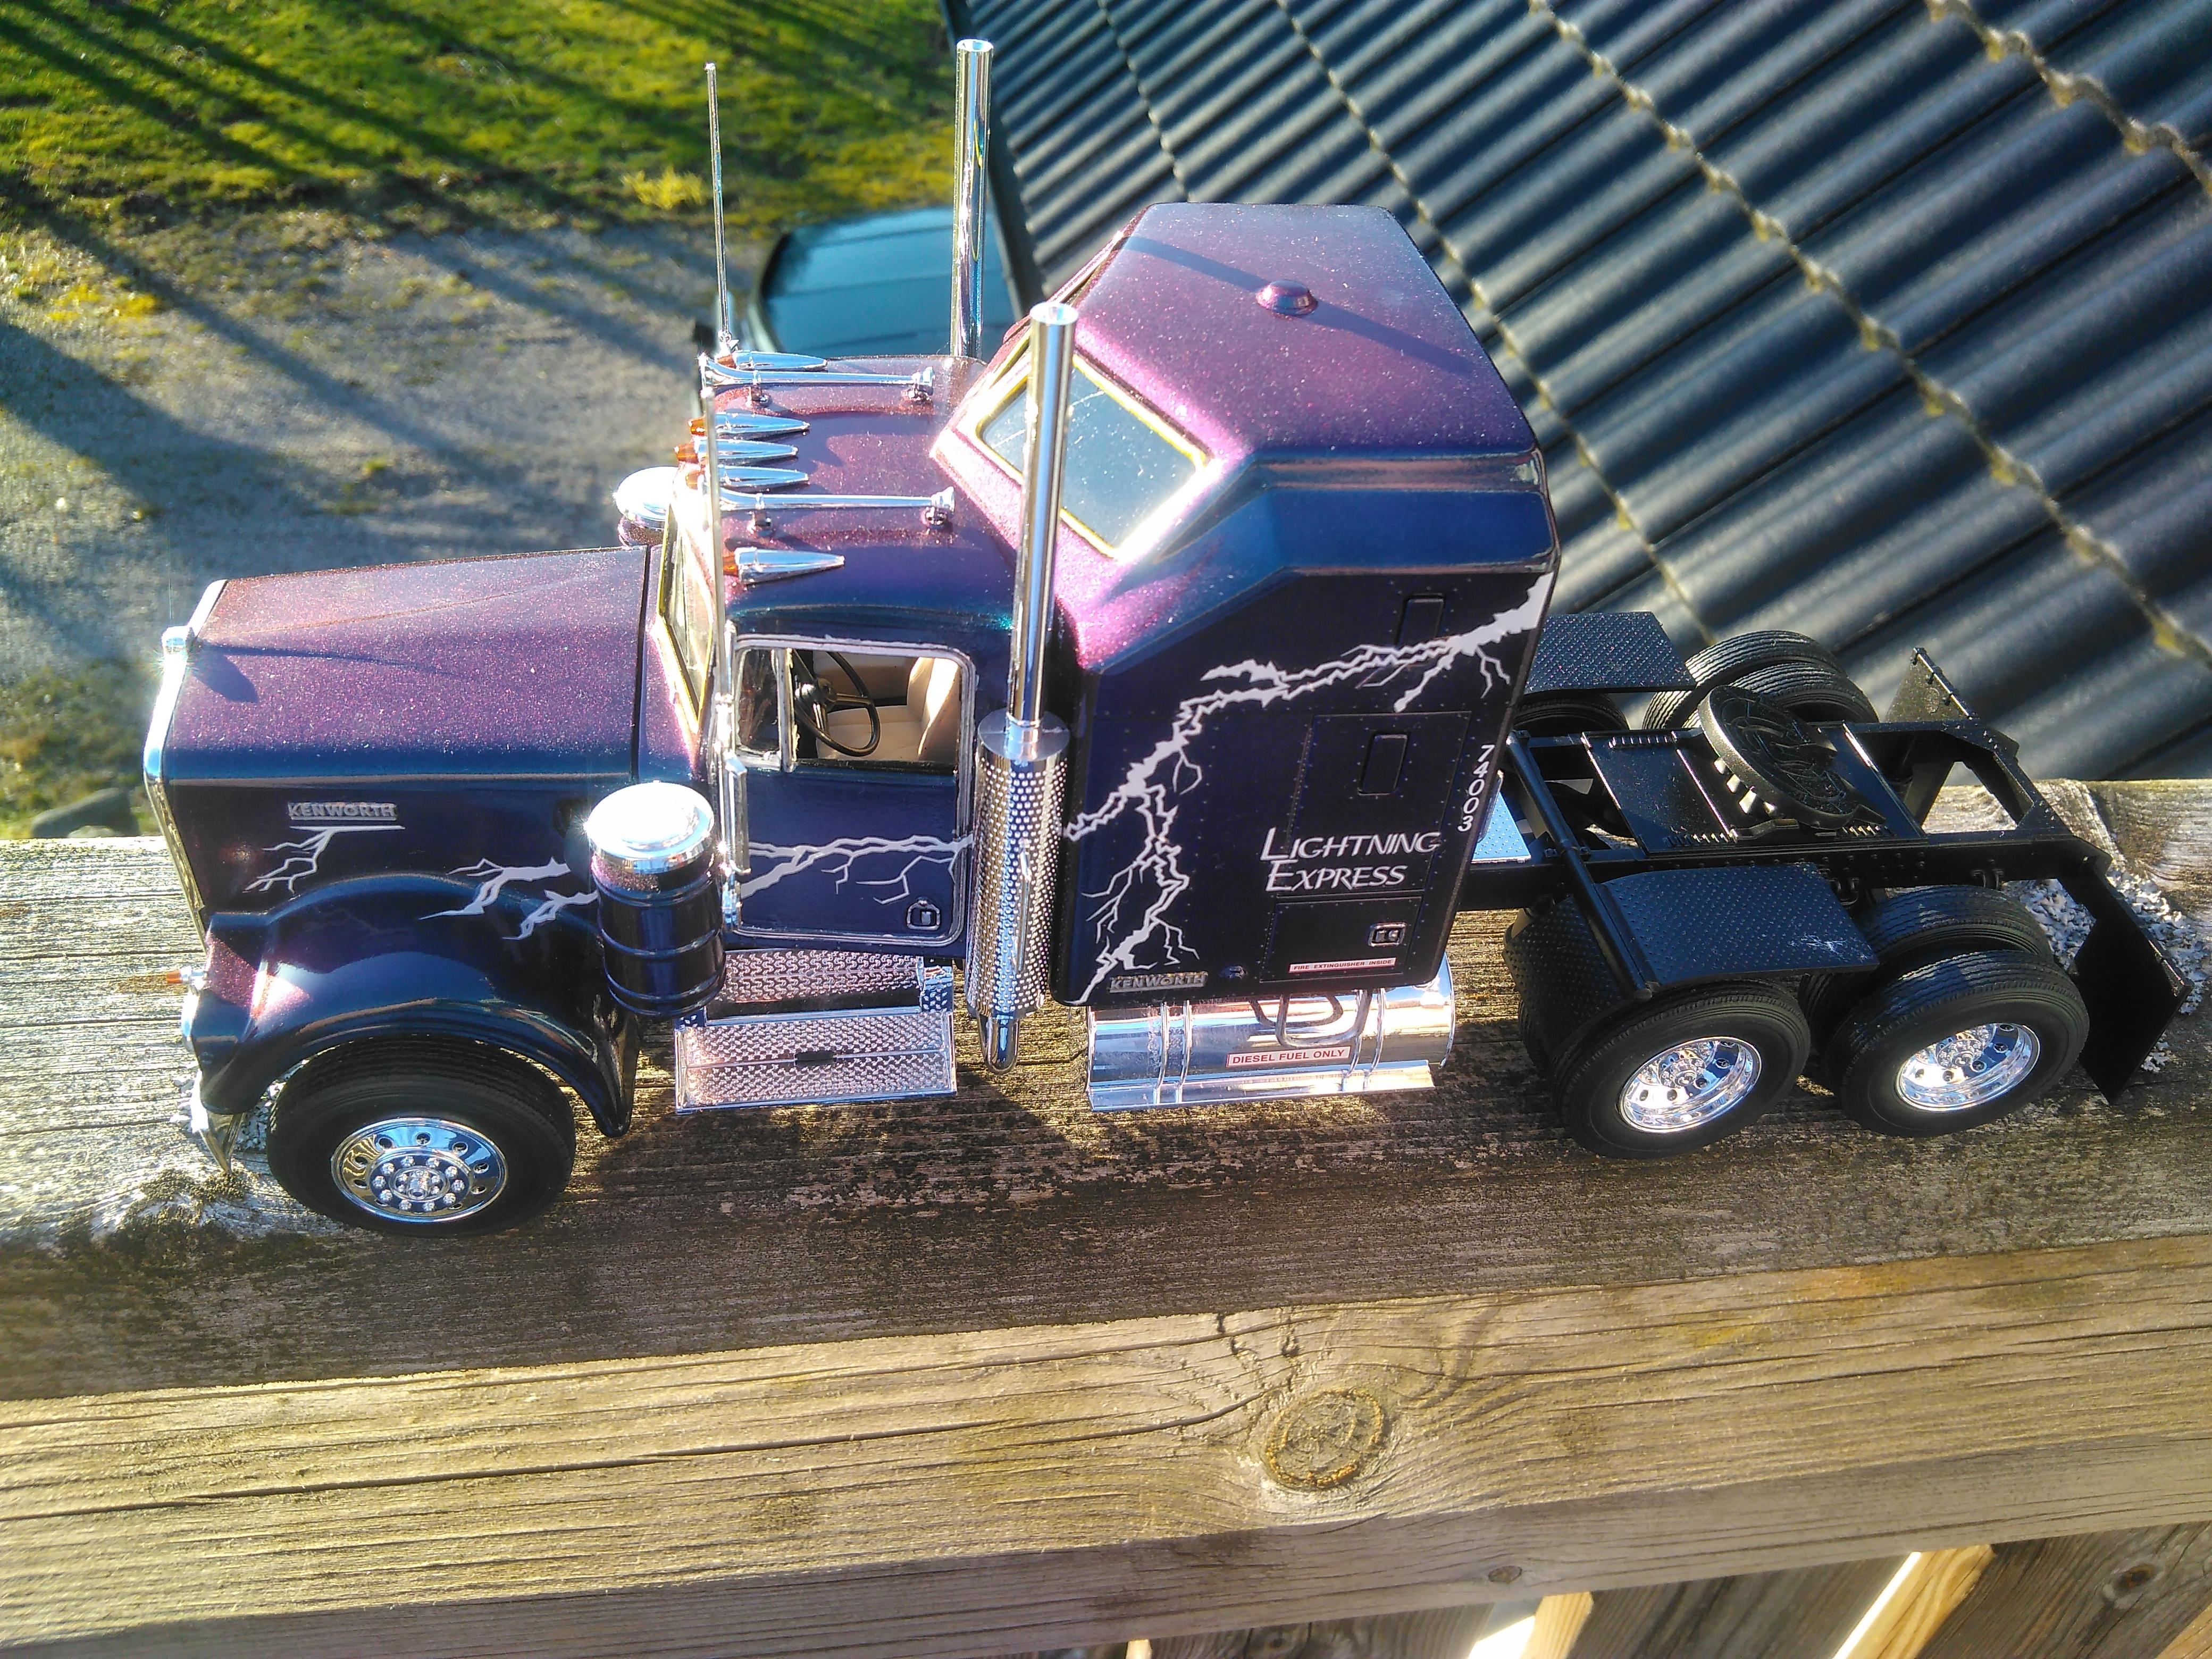
After about a year i finally decided to paint this. Its Revell,s snap kit so it was easy to disassemble. It has a gloss black basecoat and then i used an airbrush to paint it Darth Blue from greenstuffworld and a clearcoat over it. Its darkblue metallic that turns to dark purple metallic in the right light and angles, it was hard to capture the purple in these pic,s but it shows on some parts. I think the decals really fits it with this paint.
-
Kenworth T600 aerodyne (Revell)
PierreR89 replied to PierreR89's topic in Model Trucks: Big Rigs and Heavy Equipment
The fenders comes with the kit. The same fenders are in Revell,s kenworth K100 and K100 aerodyne as the rear end on this is from a K100 kit -
Kenworth T900 Australia (Revell)
PierreR89 replied to PierreR89's topic in Model Trucks: Big Rigs and Heavy Equipment
Thanks. It is actually both, there are parts in the kit to build it as a left handdrive and right hand drive. Only thing is that if you want it as a left hand drive you have to paint and detail the left hand instrumentpanel yourself as the decal included is for the righthand drive. -
Kenworth T900 Australia (Revell)
PierreR89 replied to PierreR89's topic in Model Trucks: Big Rigs and Heavy Equipment
Some outside pic,s that really shows the color now when it is sunny outside. It looks way better in reality then the pic.s show.
-
Started building on this truck over 10 years ago and lost interest so it was just standing collecting dust. But decided to finish it a few days ago. Only things left to do is mudflaps at the 2:nd axle, taillights and markerlights at the front fenders. The sunvisor for the cab was lost so i have to get a new one. The paint is a base coat of gloss black and then Greenstuffworlds chameleon metal paint called evil green. Was my first ever attempt at airbrushing to and i dont think i did that bad. The pic,s that looks greenish and black are taken without any extra lighting, the ones that are purple and greenish is taken with an extra light
-
Kenworth T600 aerodyne (Revell)
PierreR89 replied to PierreR89's topic in Model Trucks: Big Rigs and Heavy Equipment
I think i know why they never get built to. Step 1 in the manual is to cut the frame in half. After that it just goes downhill with parts that dont fit and instructions that are wrong and/or unclear and have to look at a pic of a real truck to find out how it is supposed to be. I have a thread on this truck in the workbench if you are interested in some of the problems i ran in to. Only part that was painless to build was the rearend as it is almost the same as any of the other Kenworth trucks revell has. -
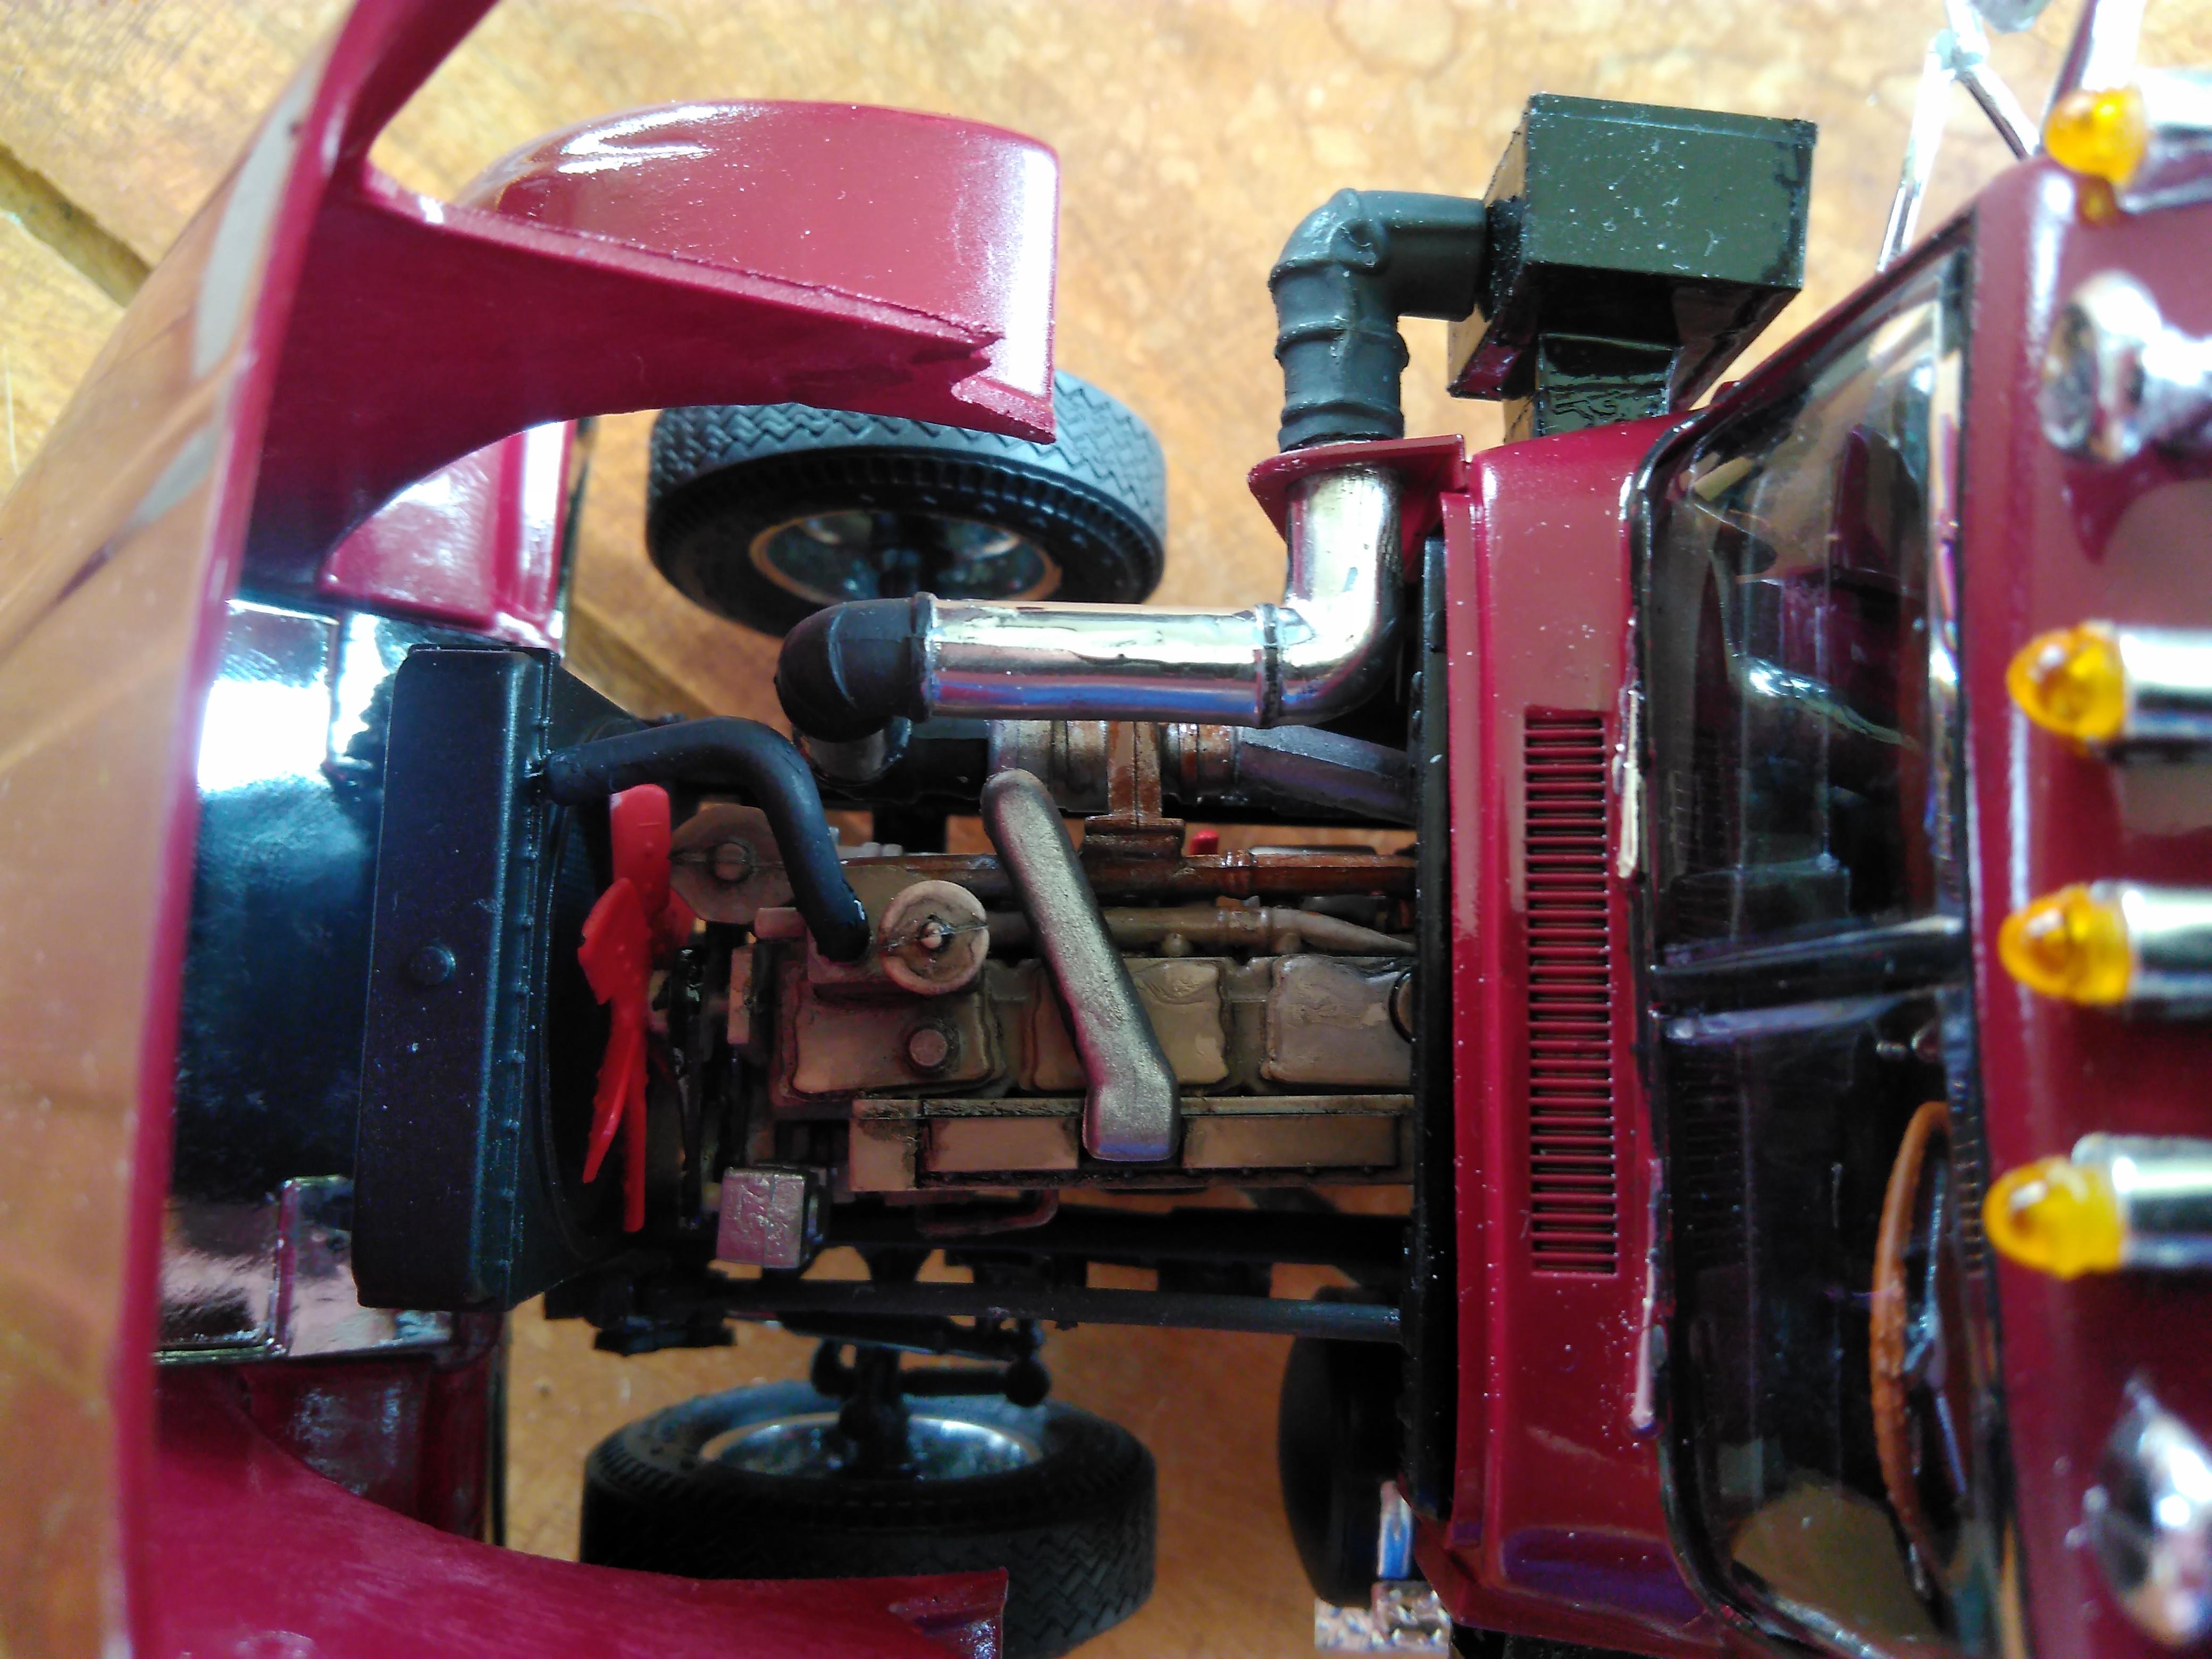
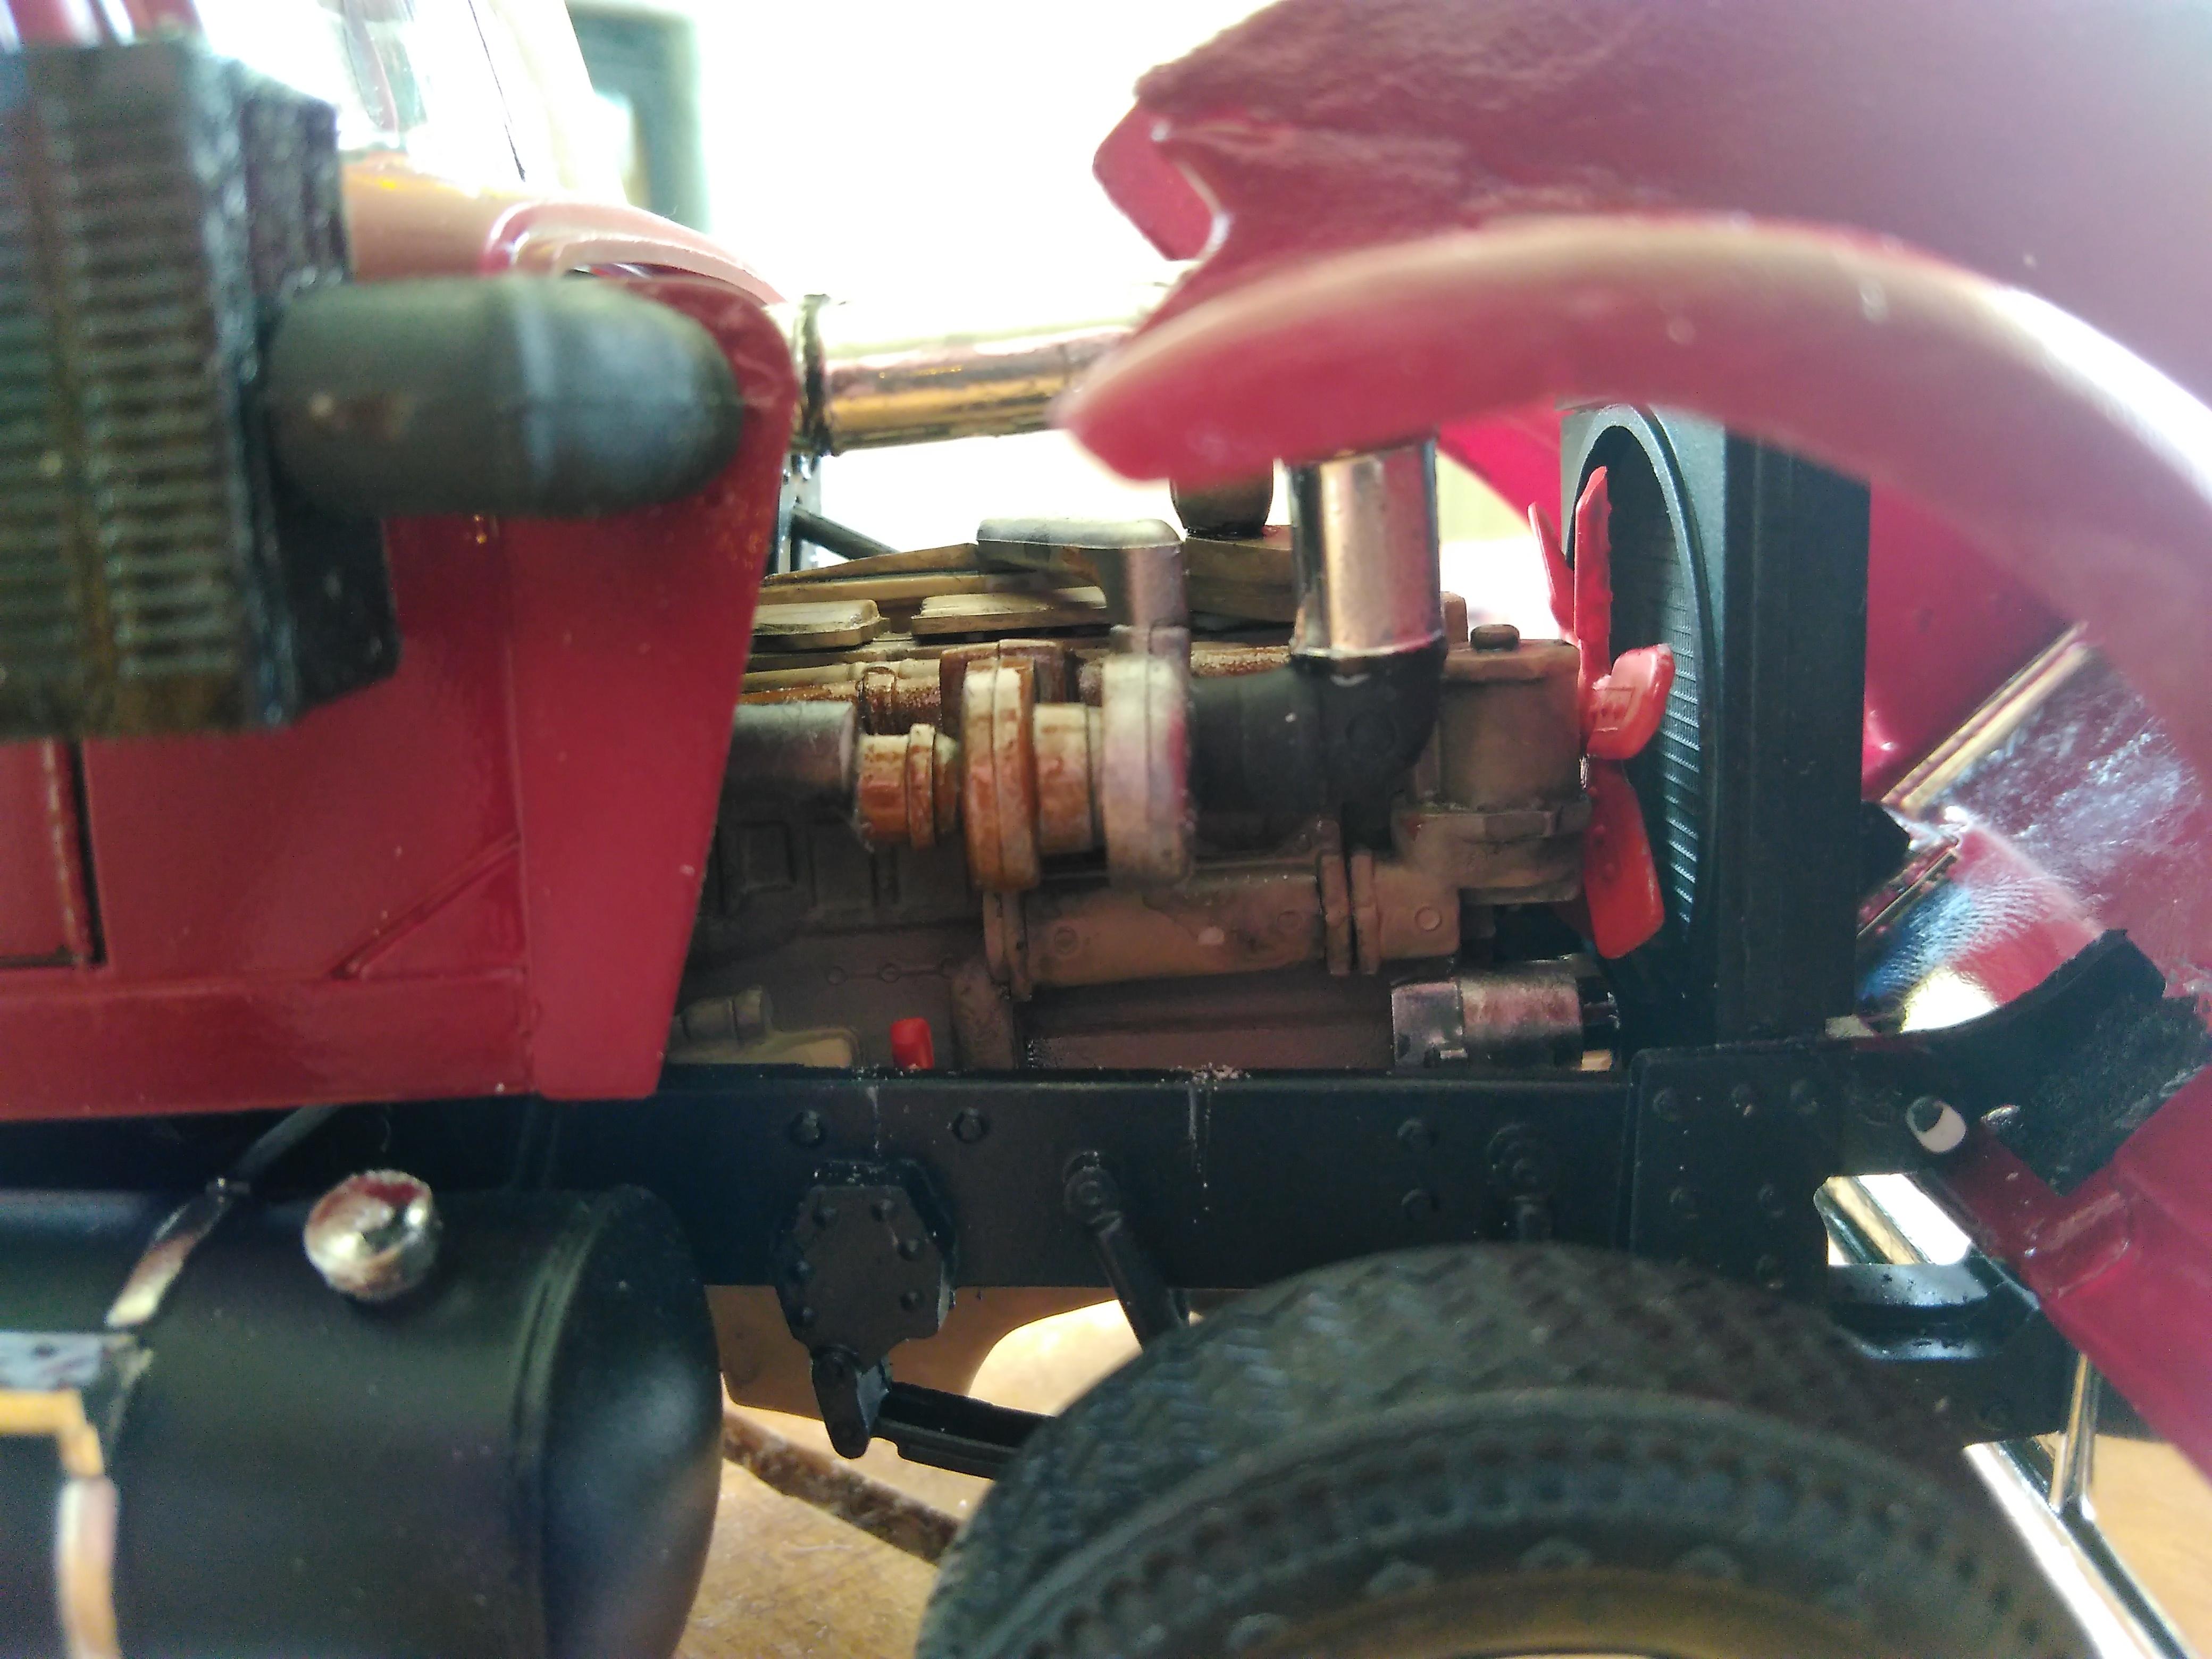
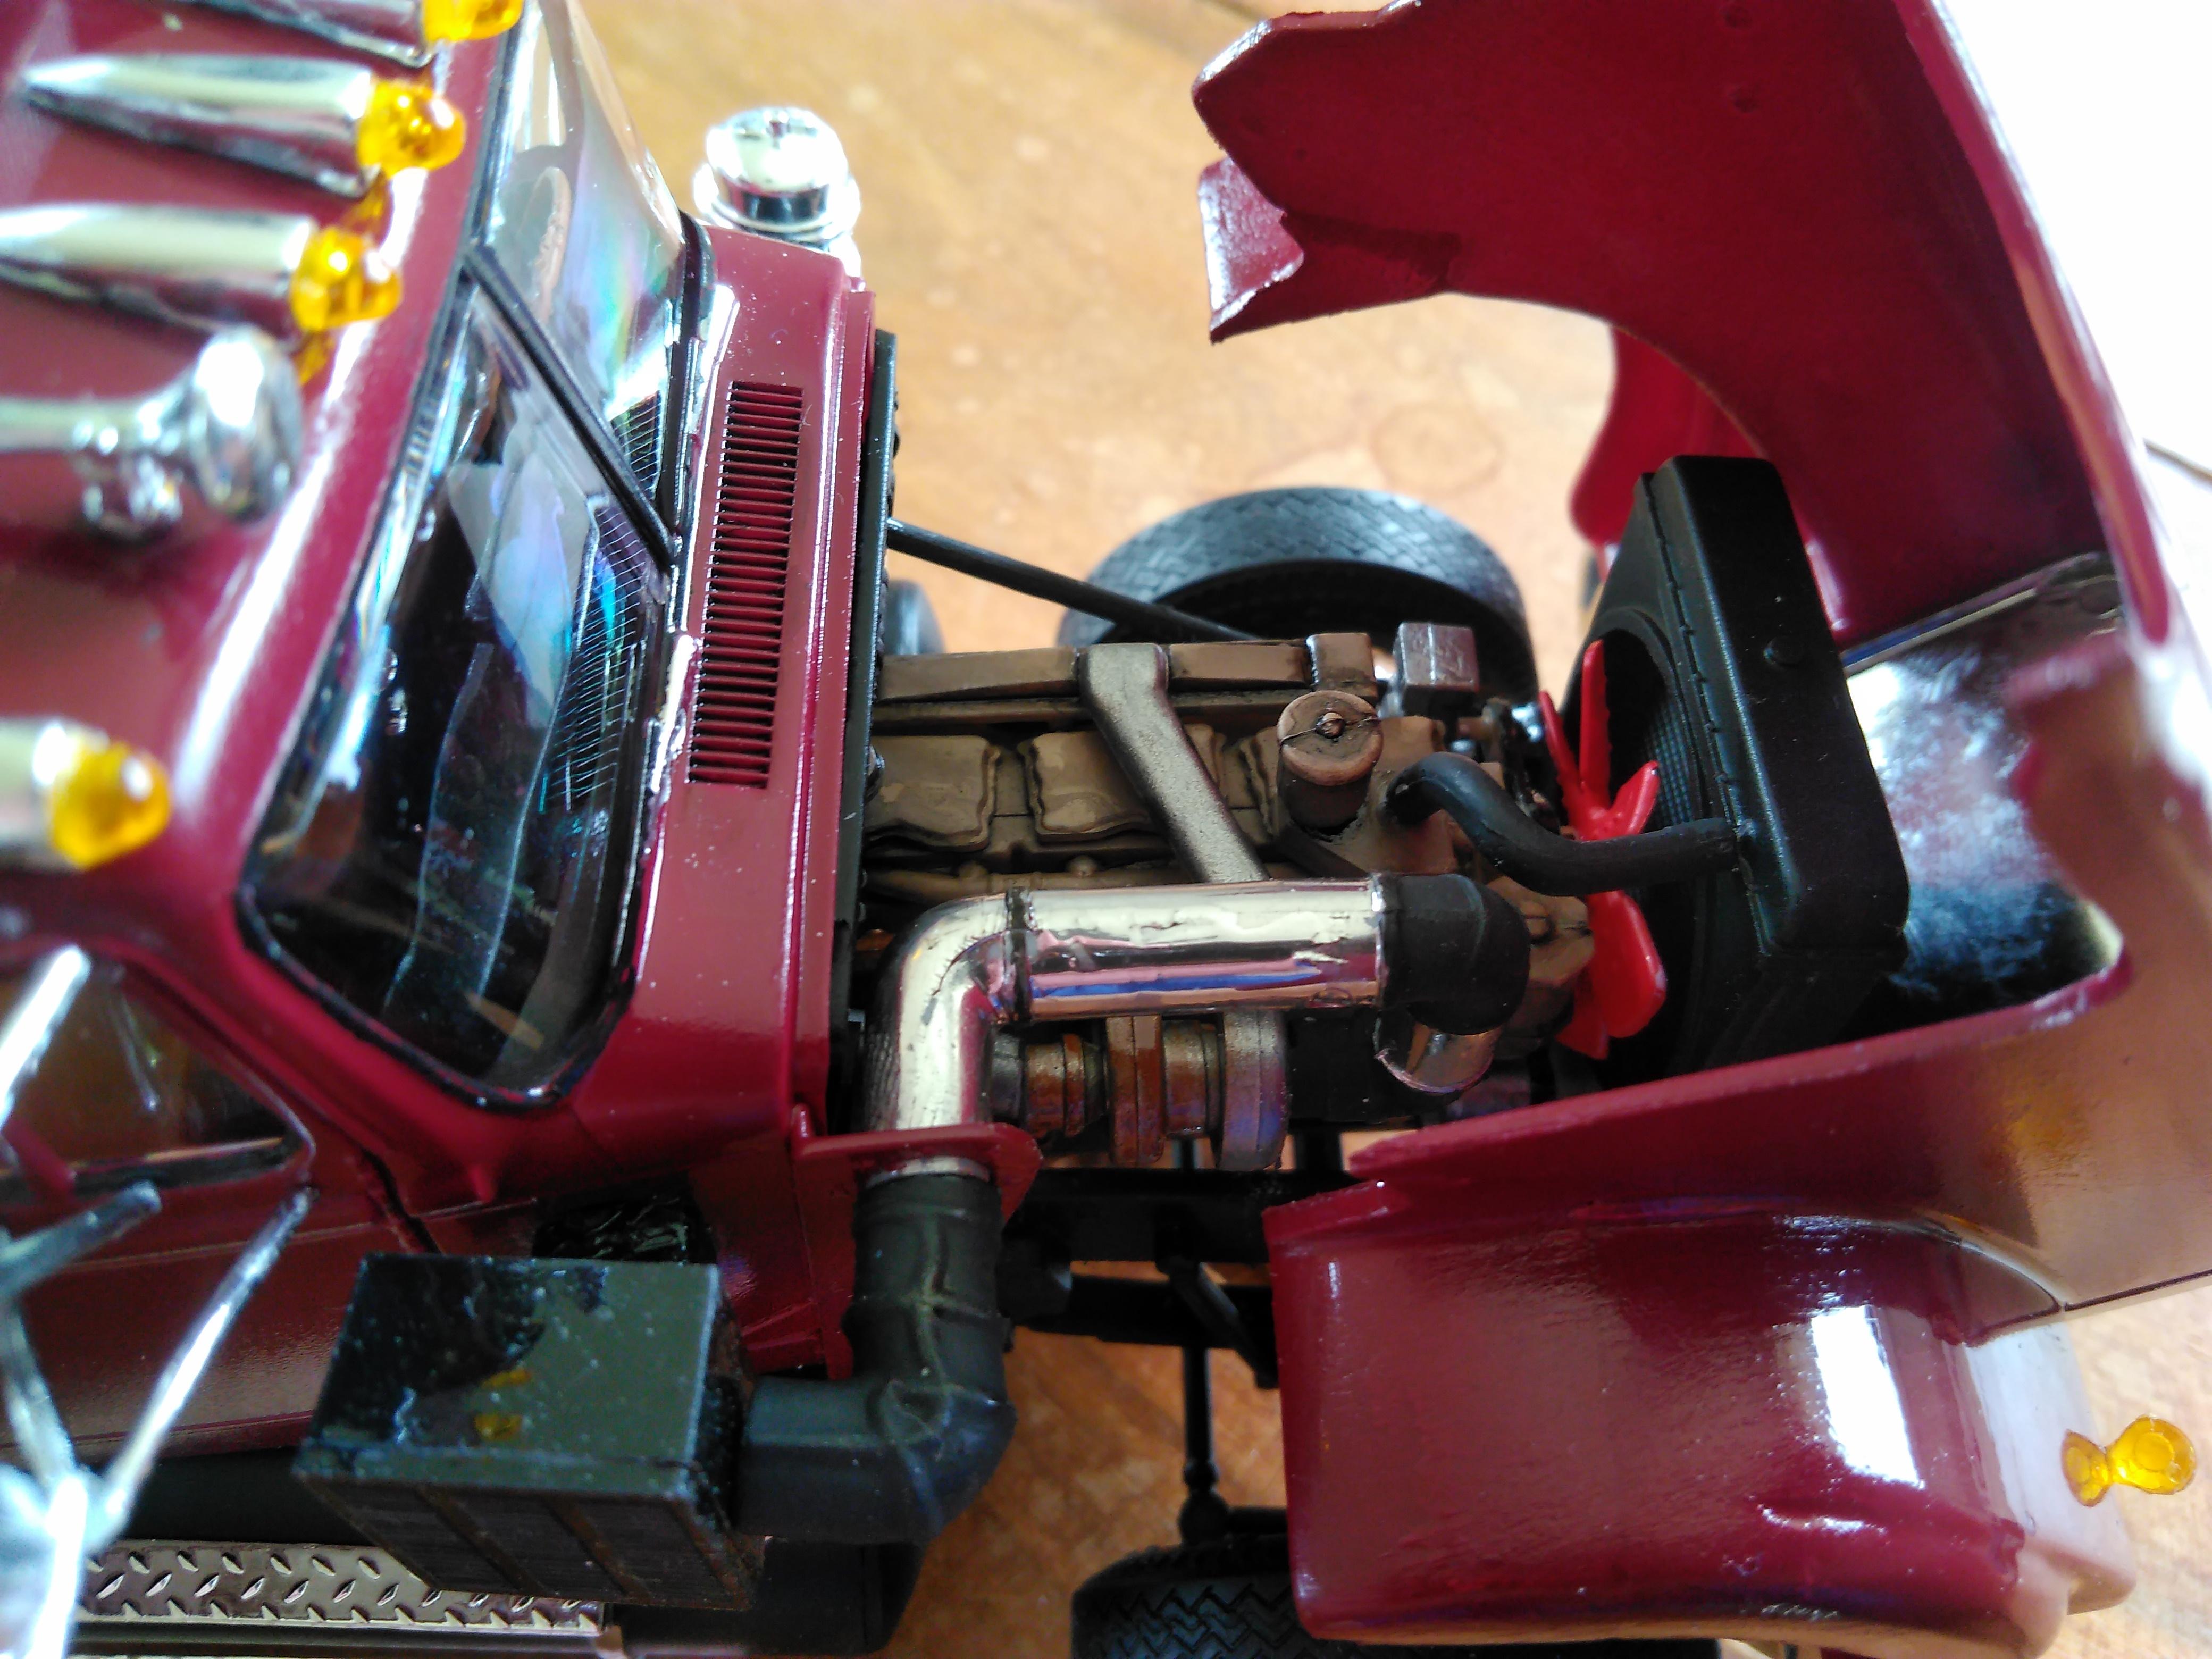
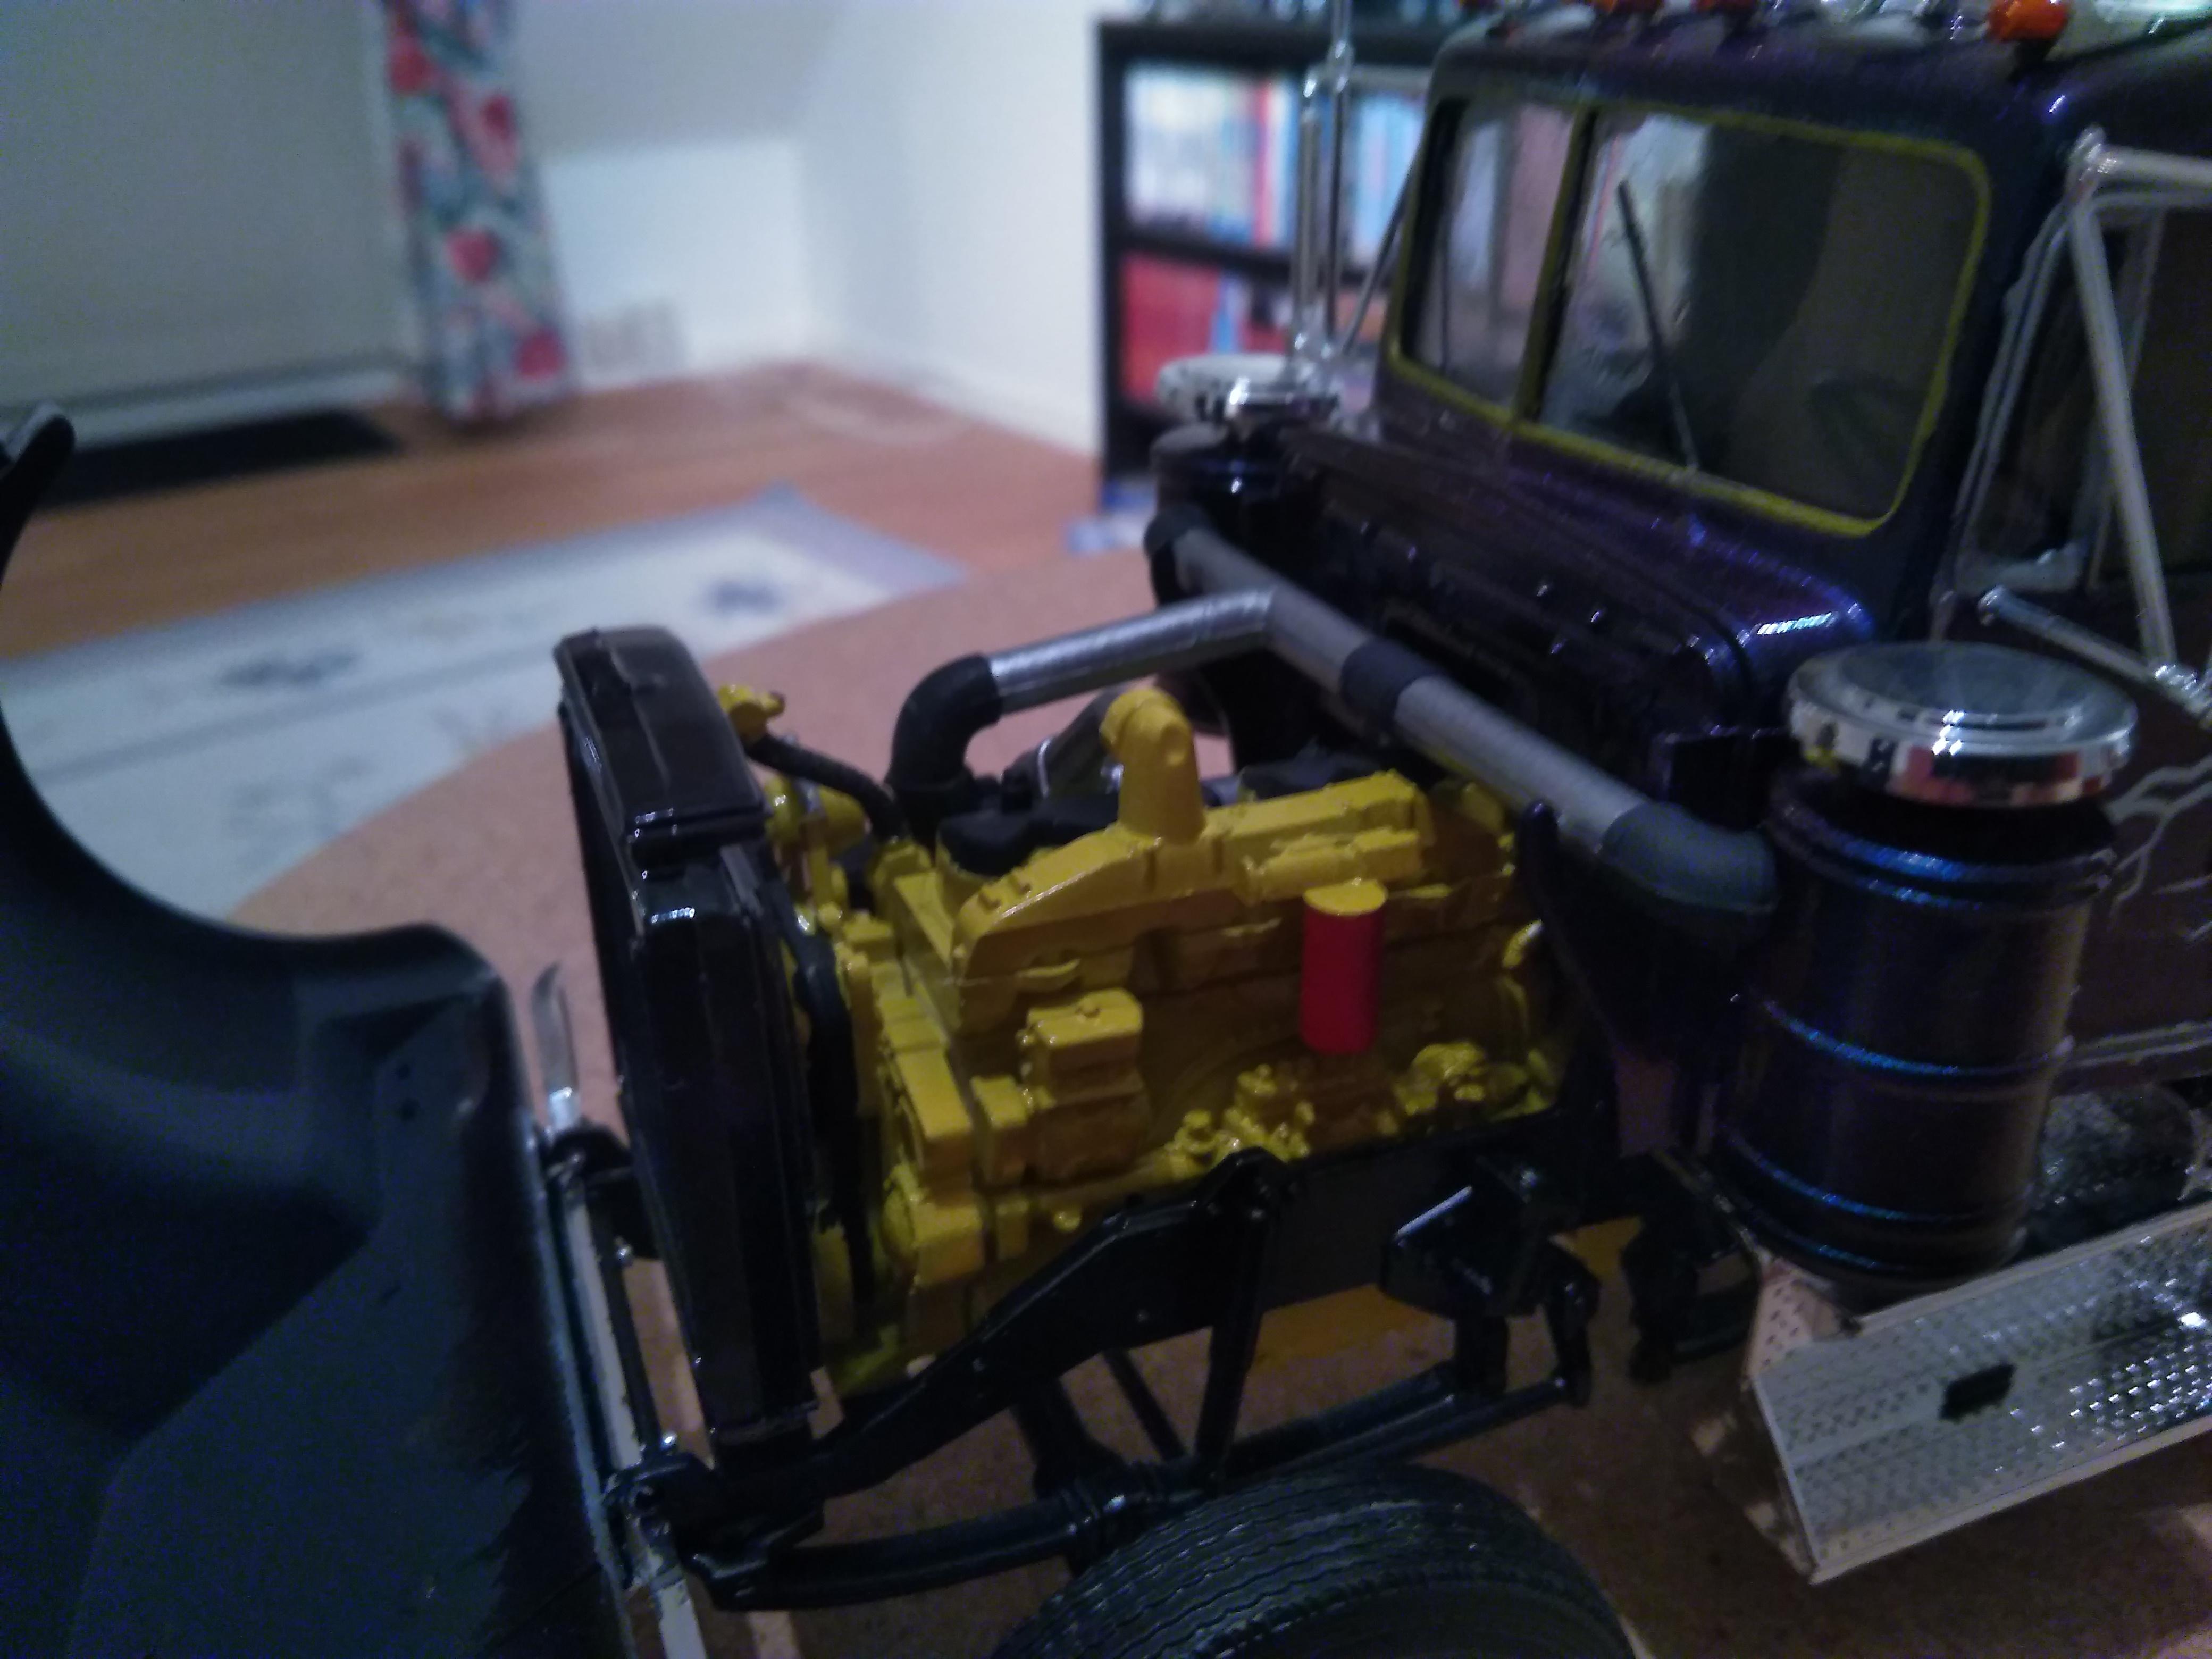
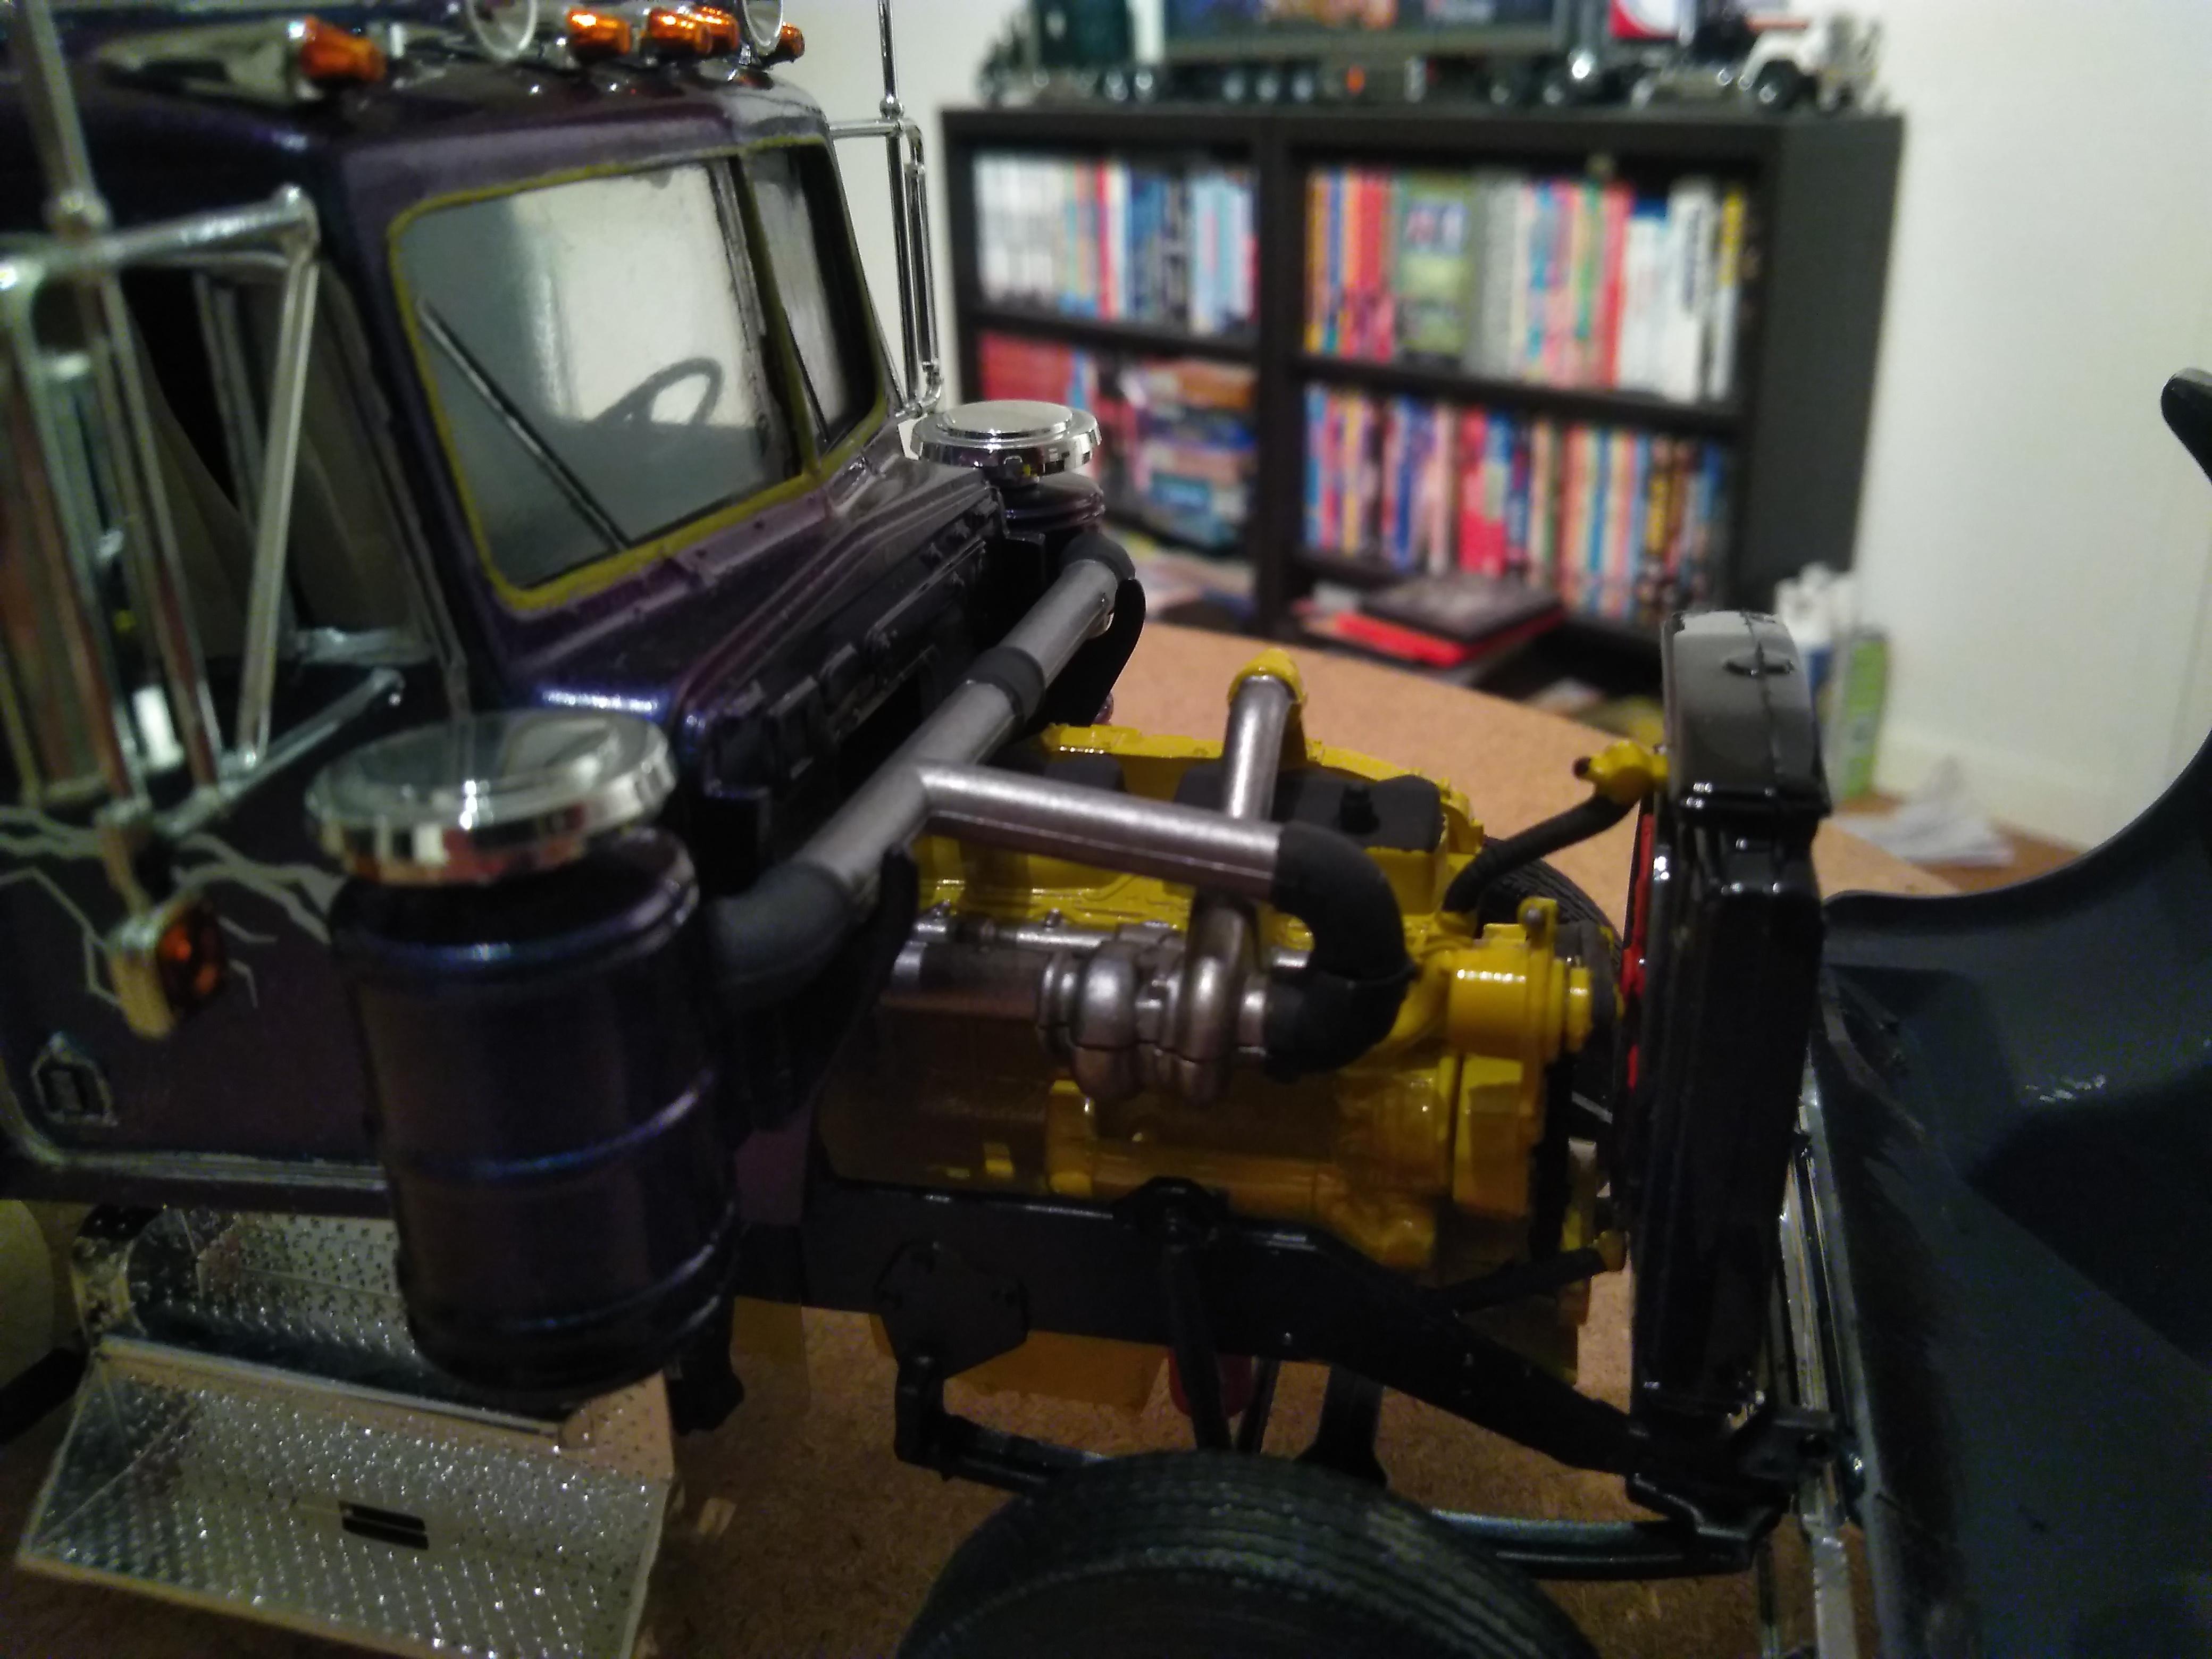
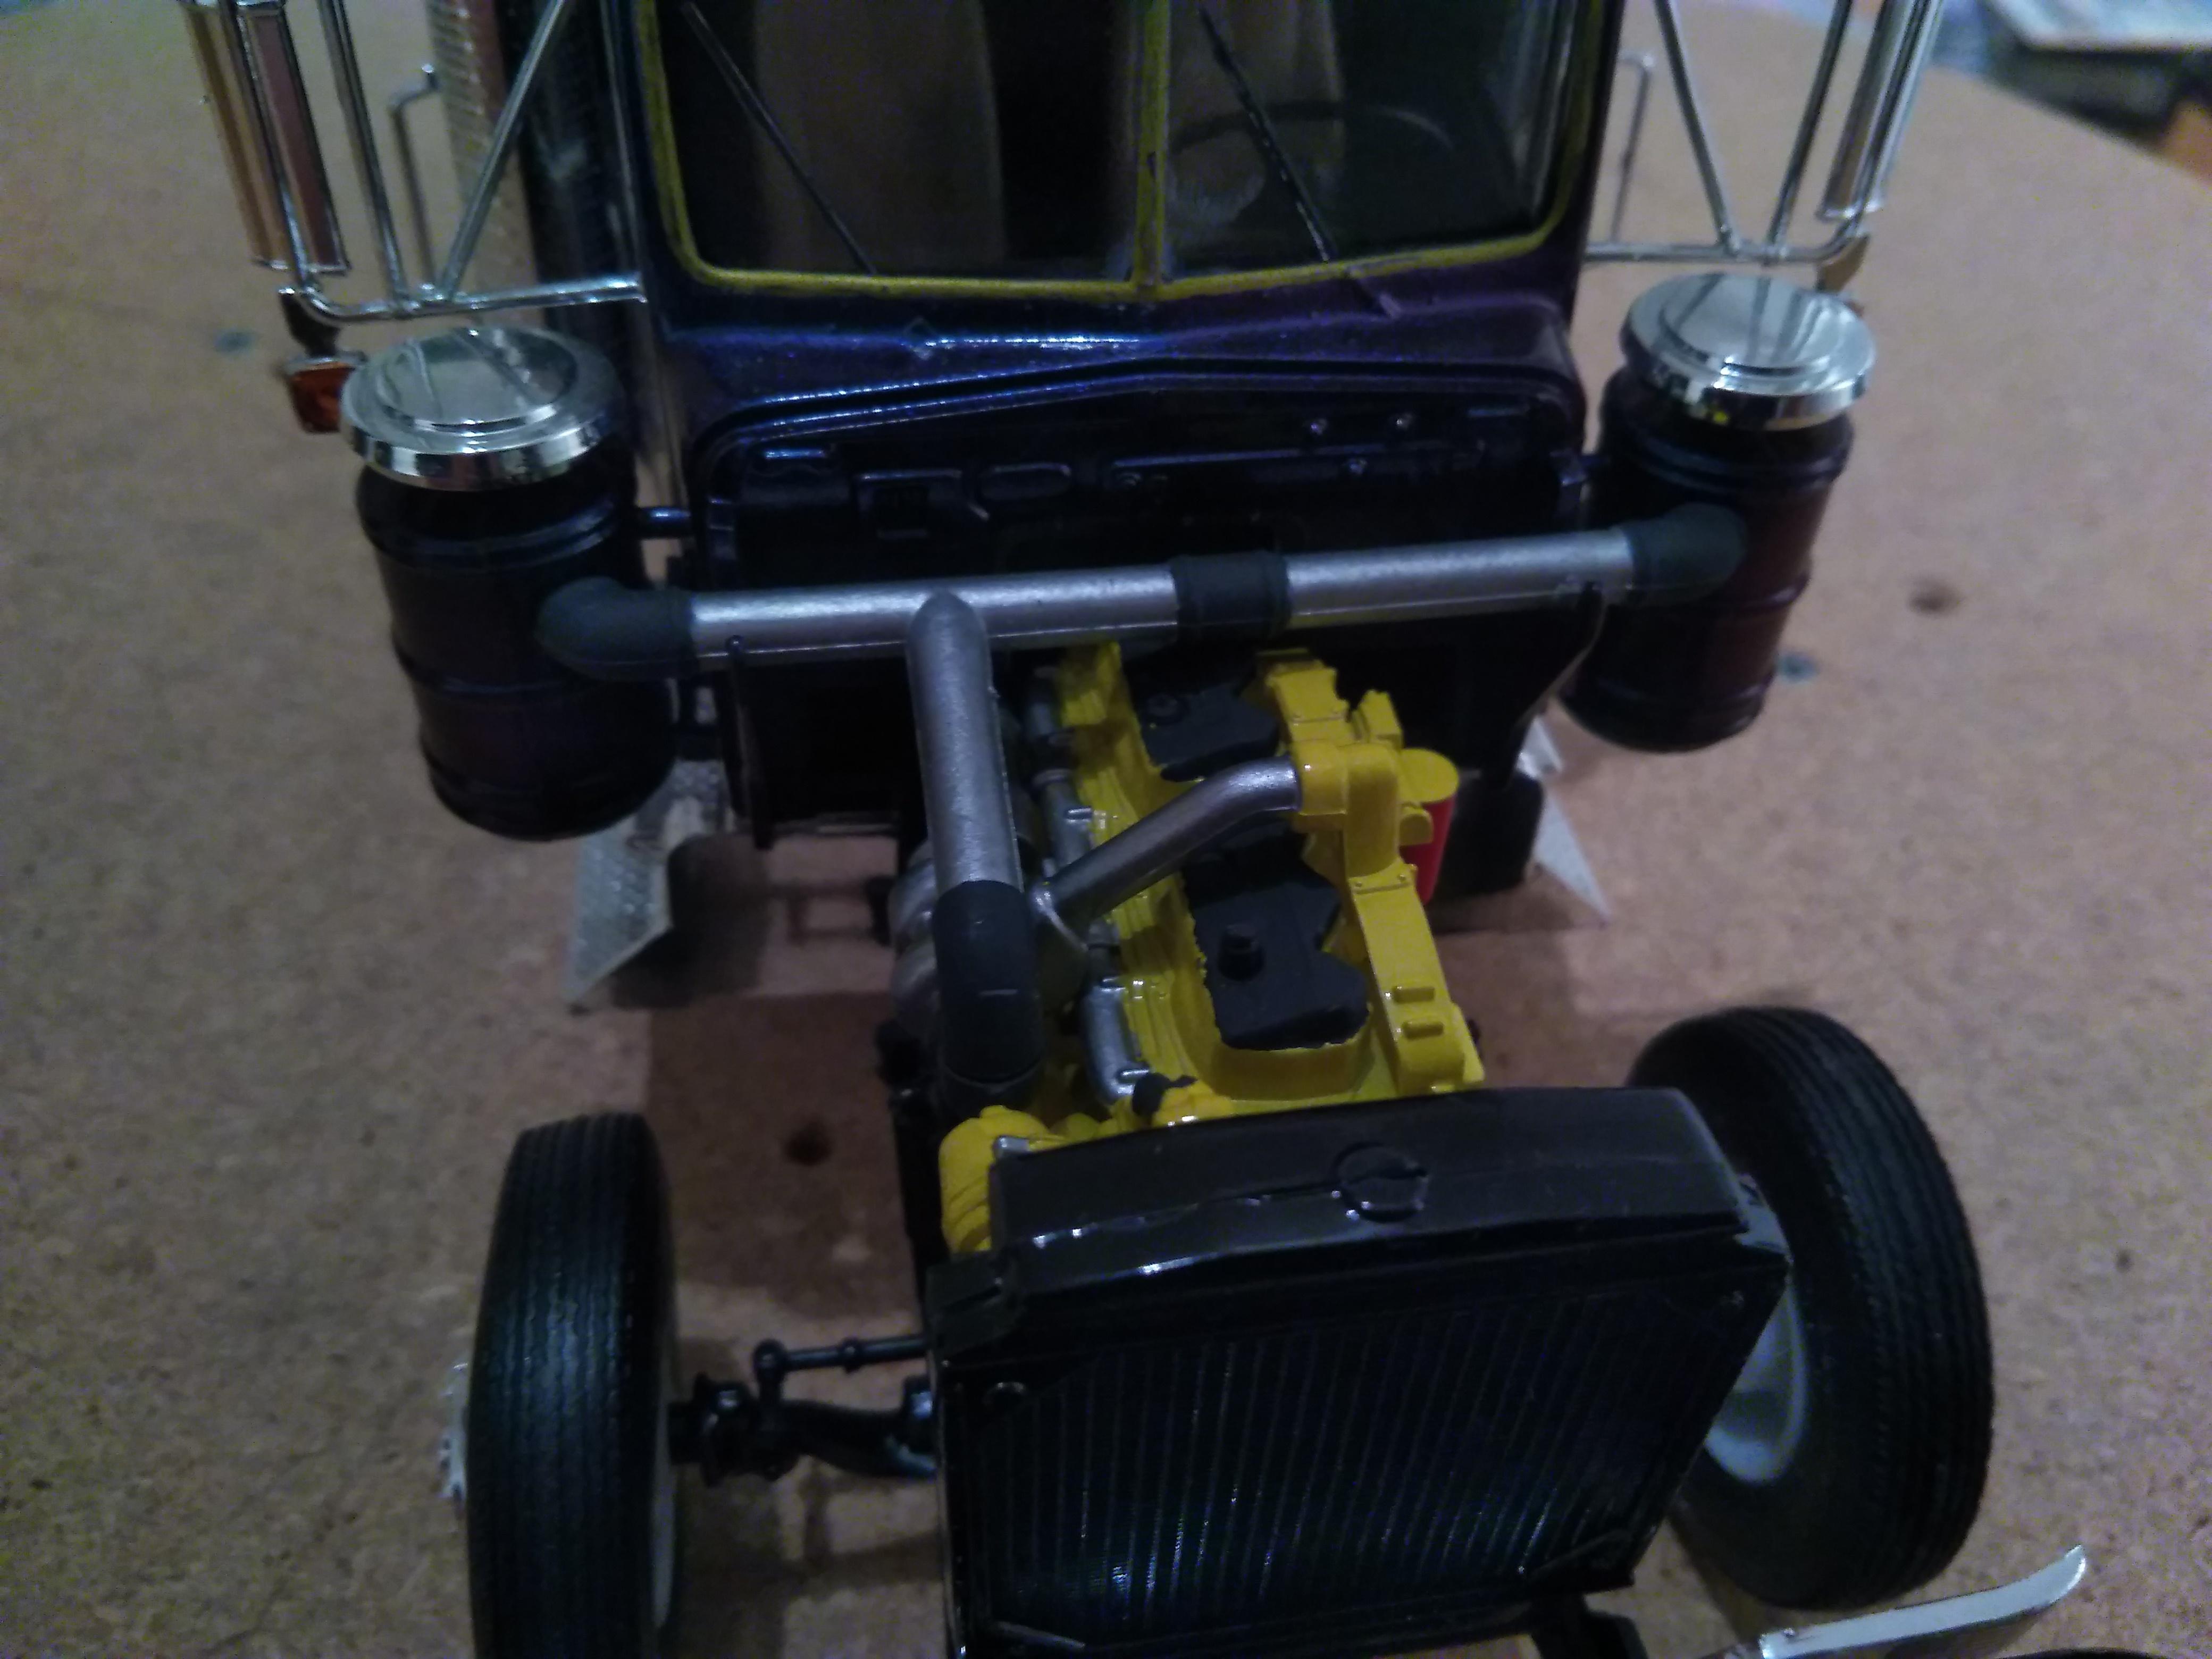
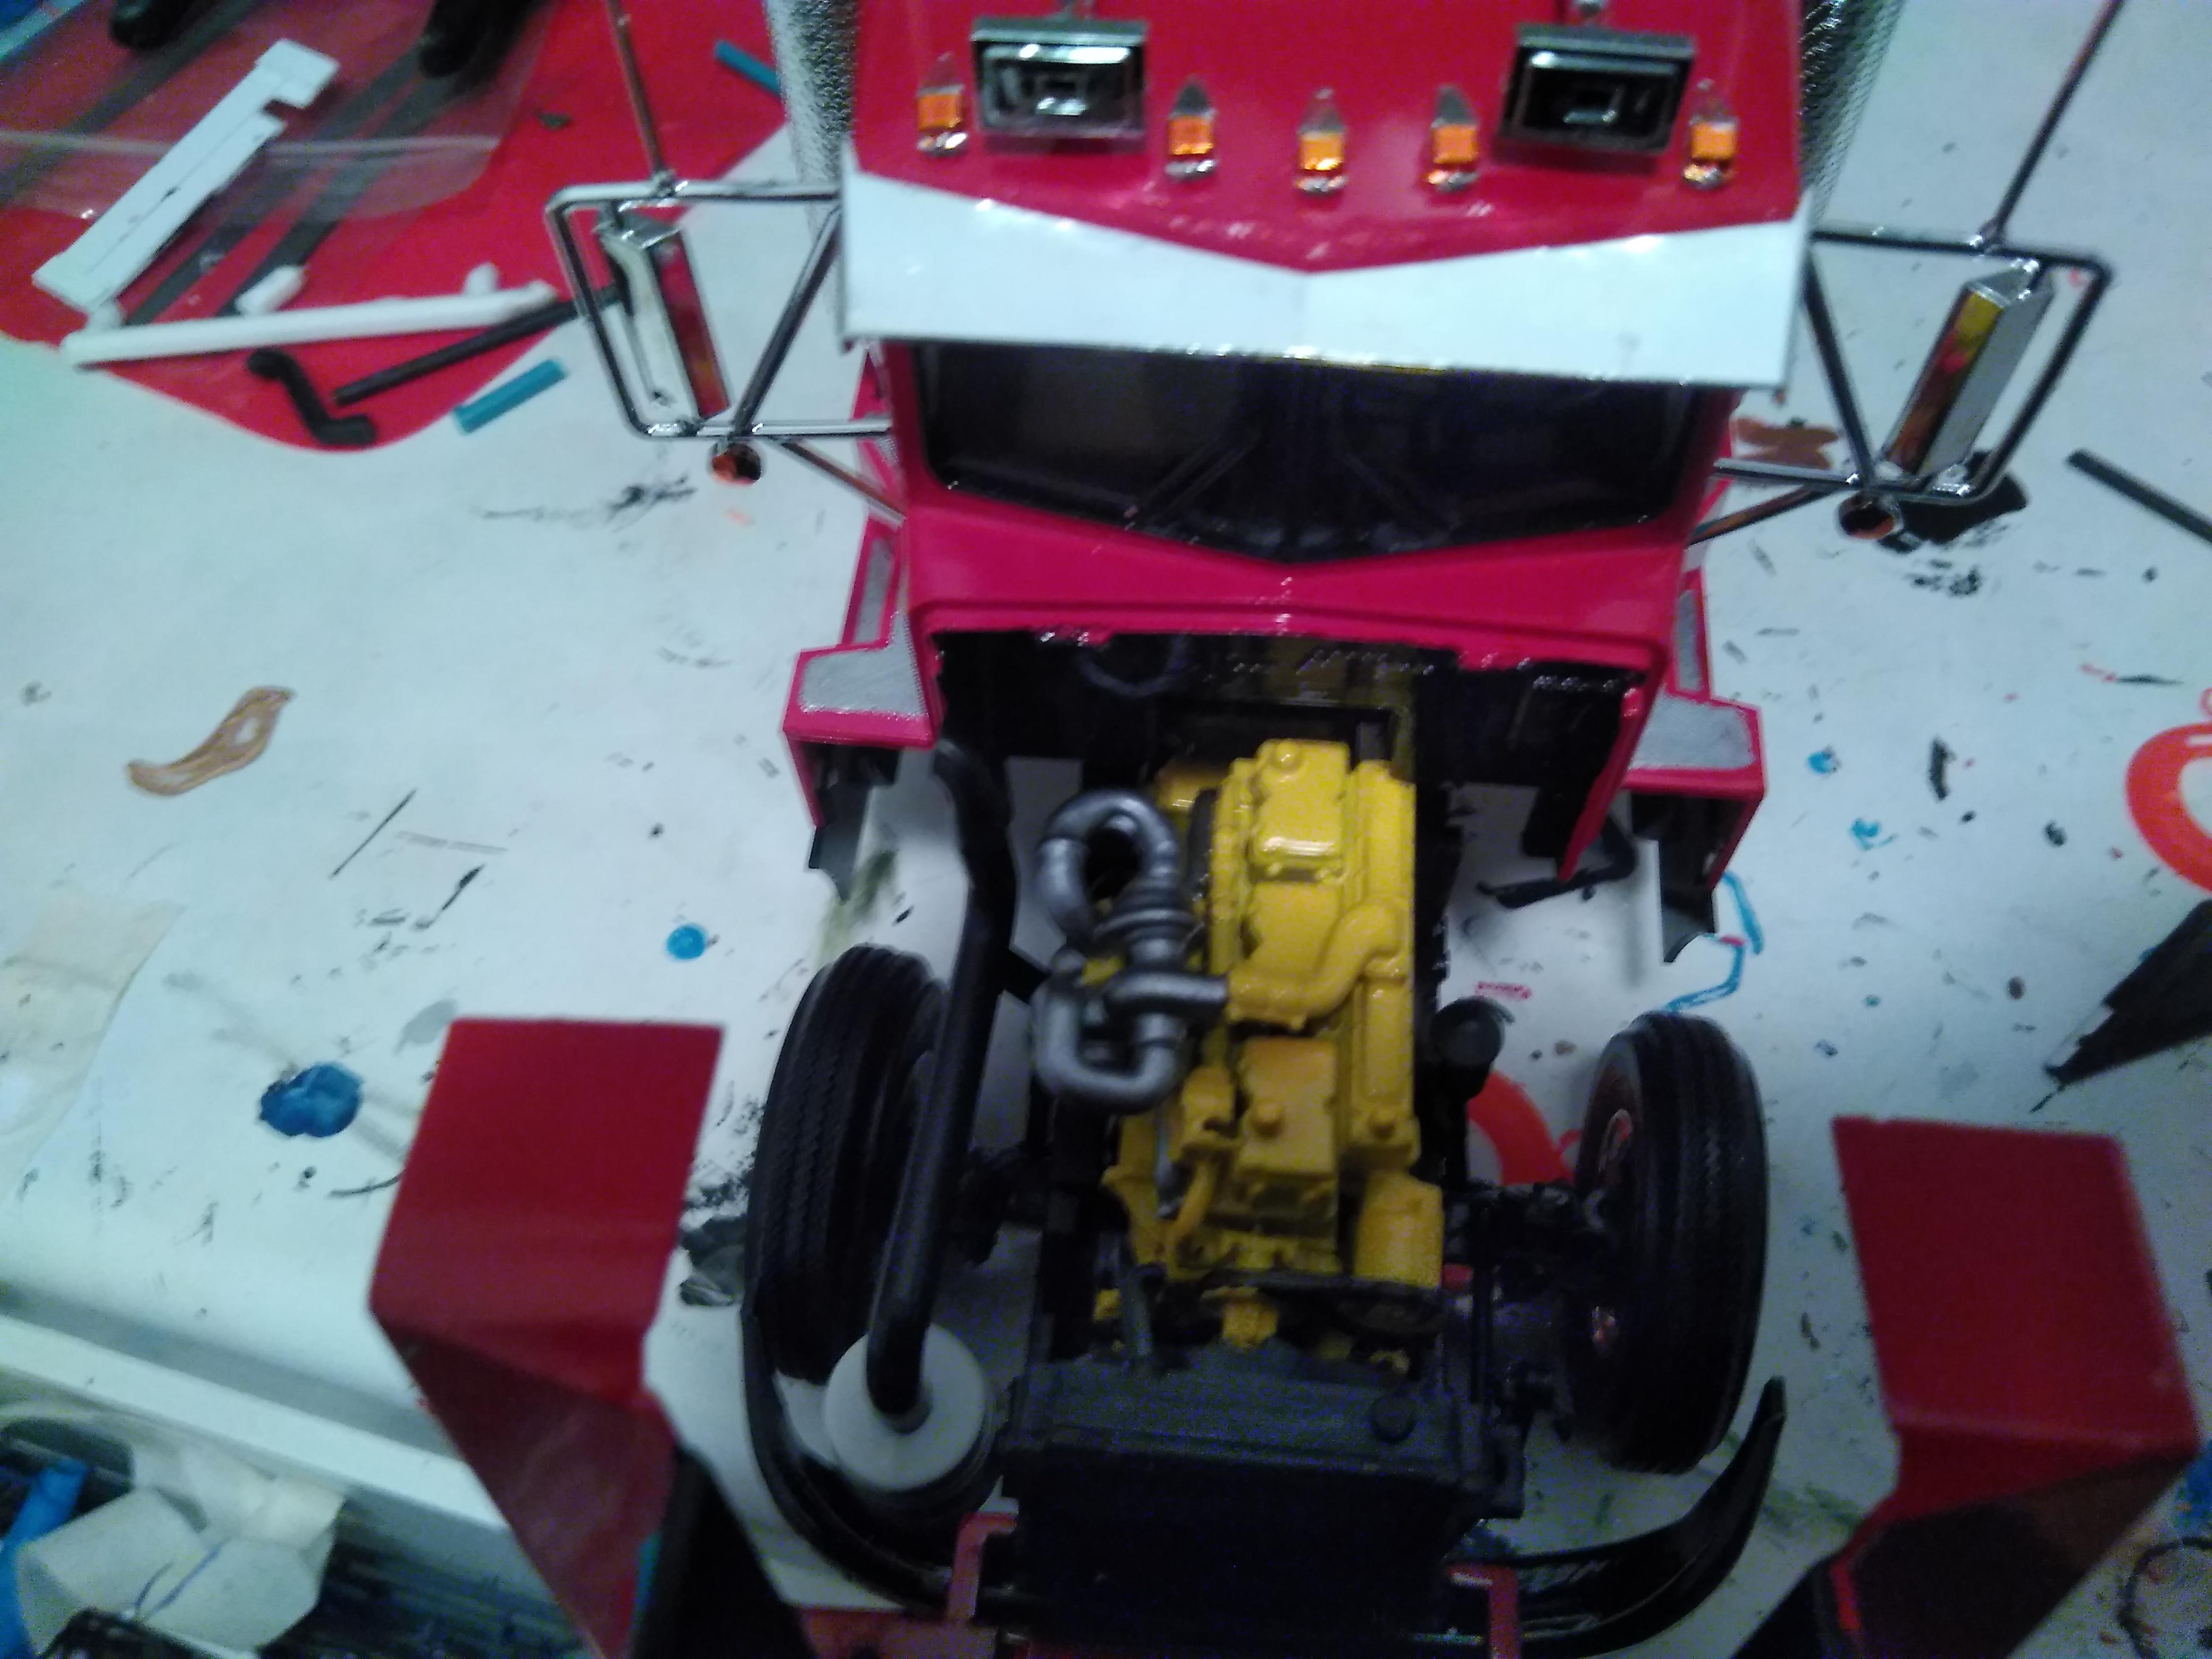
Realized that i have forgot to ad the airhose between the airfilter and turbo so i have to fix that. If i had followed the manual the grabhandles next to the doors should have been mounted above it but on all pic´s of real ones they are next to the door as i mounted them. For anyone that builds one of this from Revell, to make sure the exhaust pipe from under the cab to the stack lines up do not follow the manual. Take the exhaust elbow and look at what angle it should be in, the glue it in that position. Then put down that part first behind the sideskirt and lift up and twist the stack, there is just enough room to be able to move it like that. However it will not line up with the rest of the exhaust system under the cab but the exhaust did not fit good anywhere else either so i left it, no one is going to see it anyways.
-
Kenworth T600
PierreR89 replied to PierreR89's topic in WIP: Model Trucks: Big Rigs and Heavy Equipment
Finally did the last things on this and surprisingly the decals on the sleeper were no problems at all. Will soon be in the under glass section. Only real problem was one i created my self when i dropped one of the lenses for the headlights and did not find it again. Also being used to normal truckkits with maybee 5-6 left over parts this had a "little" higher partscount. There are 7 sprues left and the chromesprues do still have almost all of the parts left on them + a complete set of glass for the Kenworth aerodyne cabover. Here are the leftover parts:
-
The early Triton engines had that problem, i think it is fixed on the never ones. The heads have only about 3-4 threads for the sparkplug and if they are not torqued just once, its just a matter of time before it blows out the plugs. There are repairkits for it on Ebay for alot of $$$ or you can just use a helicoil and do basically the same as those kits does for almost nothing. If you go the helicoil rout you dont have to remove the head, just make sure that the piston in that cylinder is in top dead center, it will be easier to clean out any metalshavings that fall in to the cylinder. But it could be worse, you just had one plug shoot out. One i know had an Excursion with the v10 and that one blew out 4 of its plugs almost at the same time and oblitteraded the coilpacks + dented the hood and here in Sweden those coilpacks is about $150-$250 each. Hood is probably dented still as that was impossible to get at a decent price even at the junkyard.
-
International transtar 4300 eagle
PierreR89 replied to PierreR89's topic in Model Trucks: Big Rigs and Heavy Equipment
No i did not do anyting to it. I built it straight from the box with no changes. But yes the front axle needs to be moved fot them to be centered in the wheelwells. -
Kenworth T600
PierreR89 replied to PierreR89's topic in WIP: Model Trucks: Big Rigs and Heavy Equipment
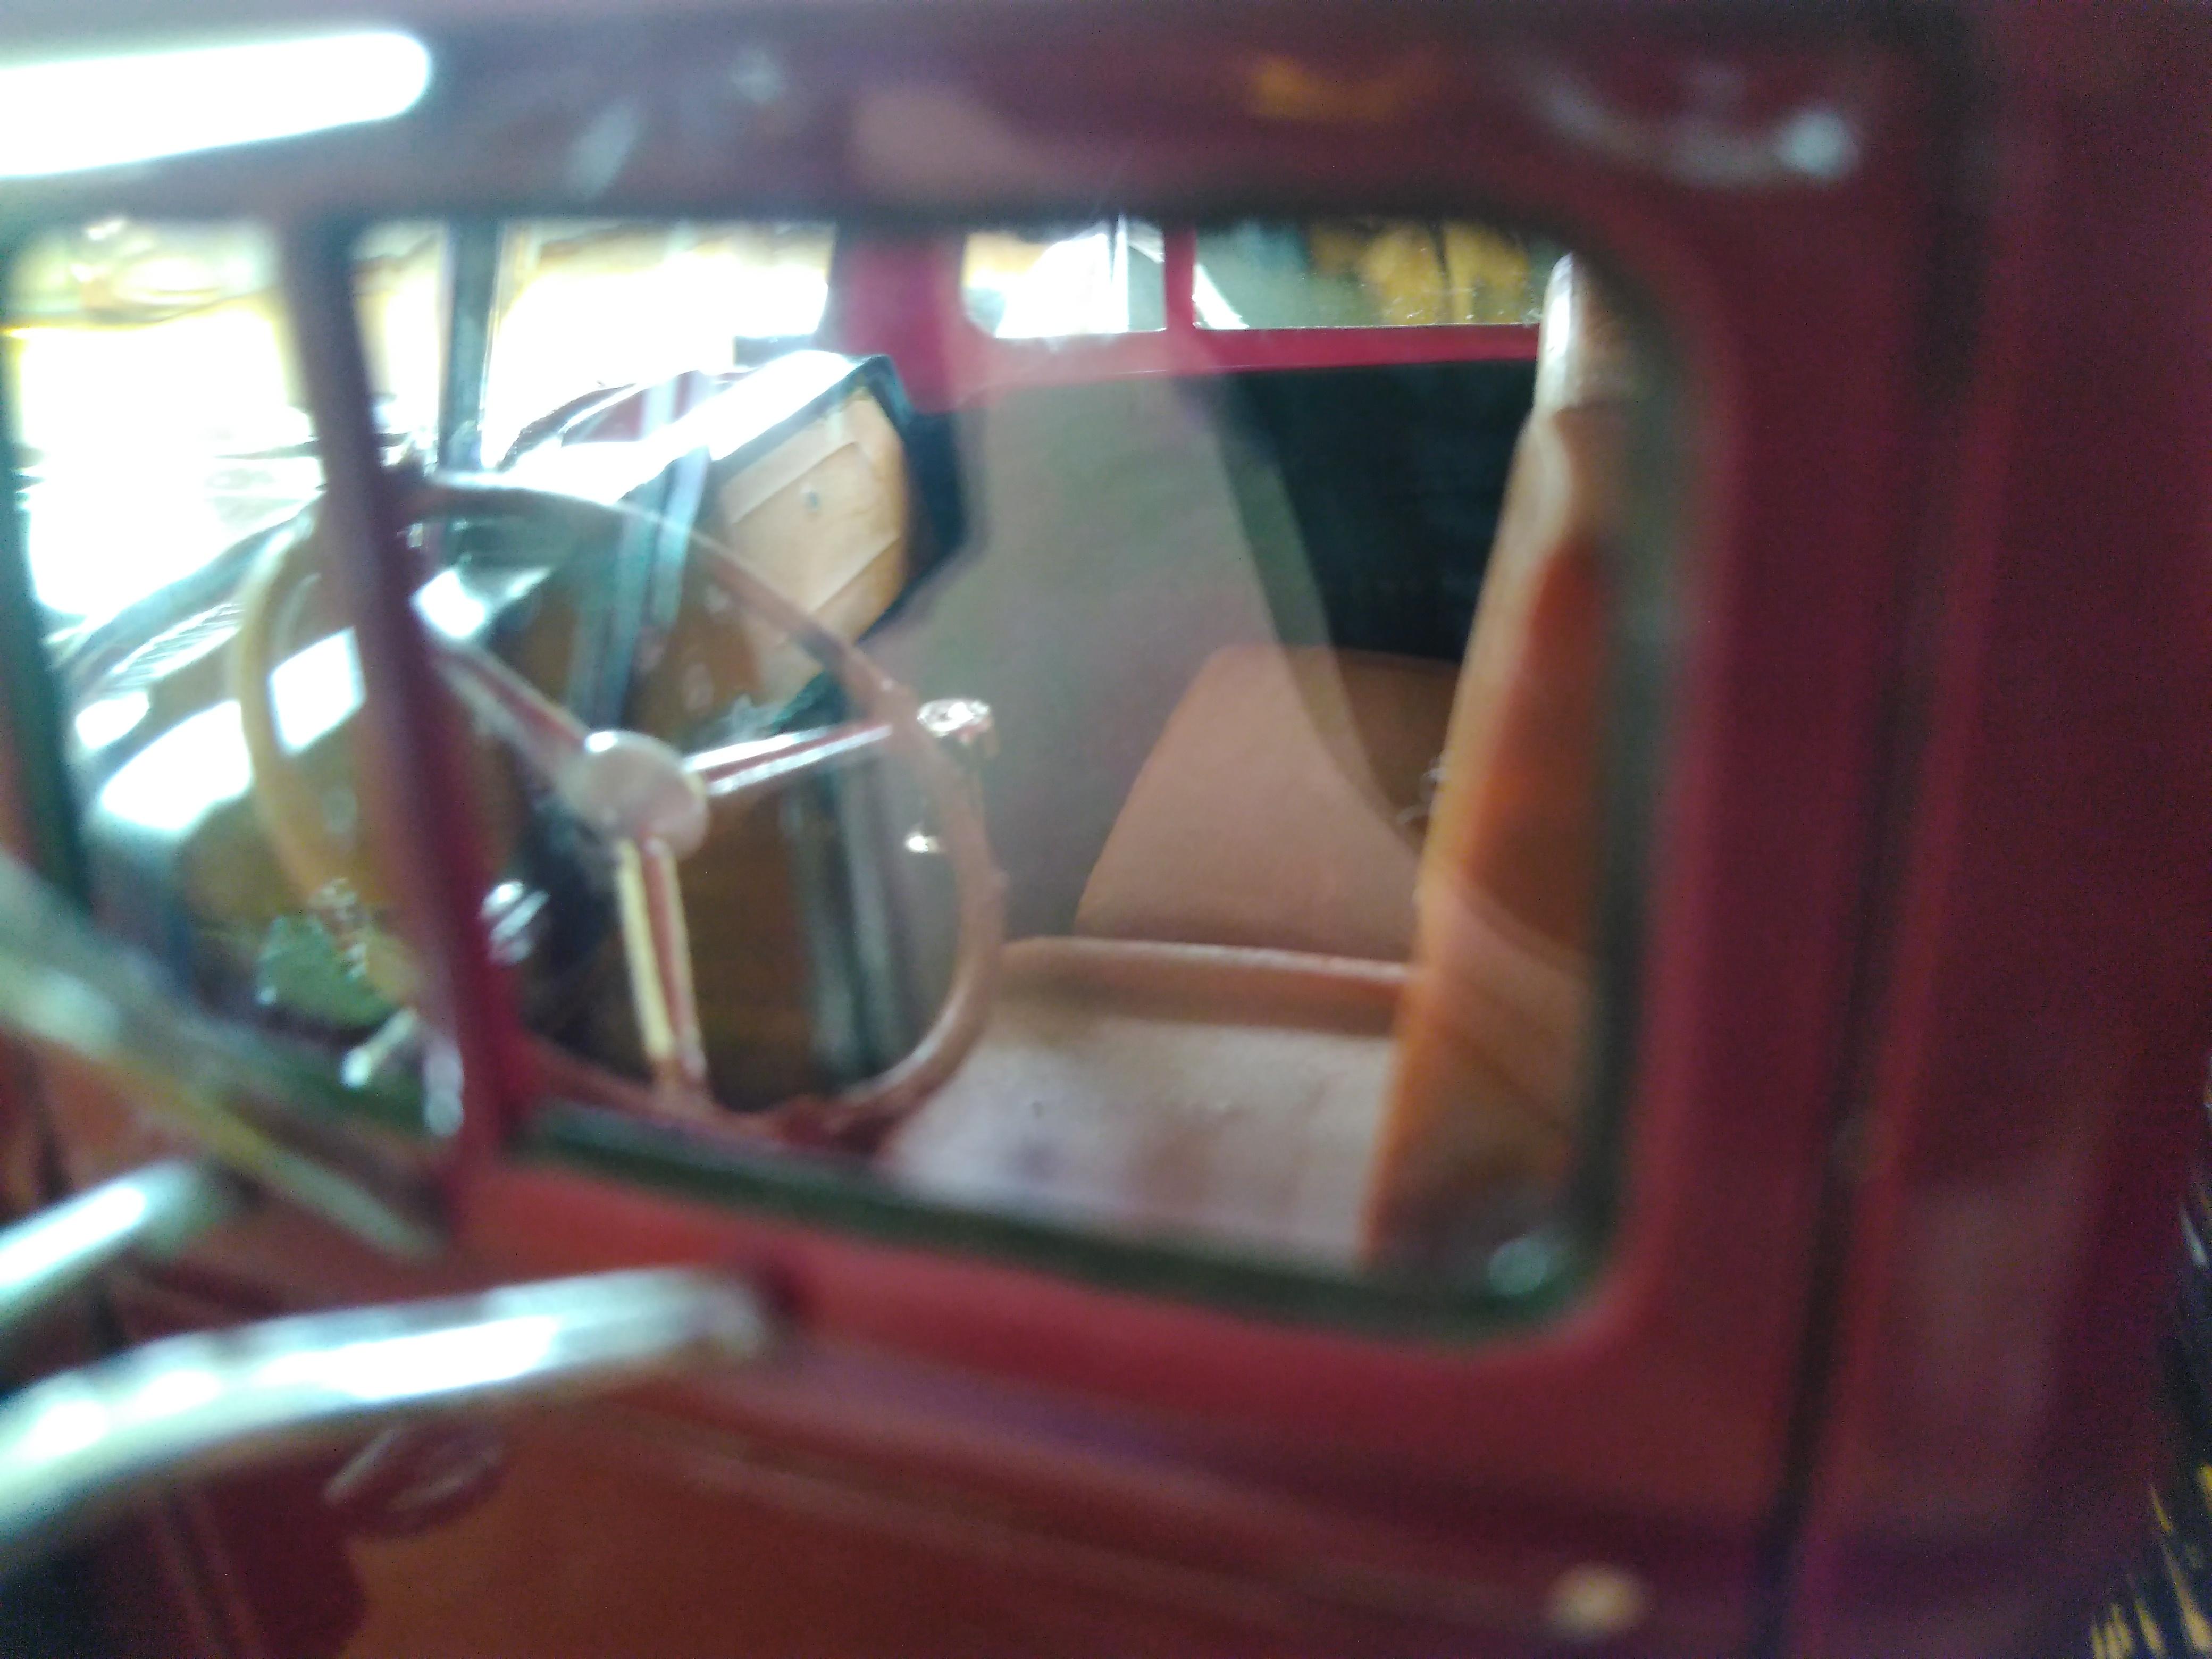
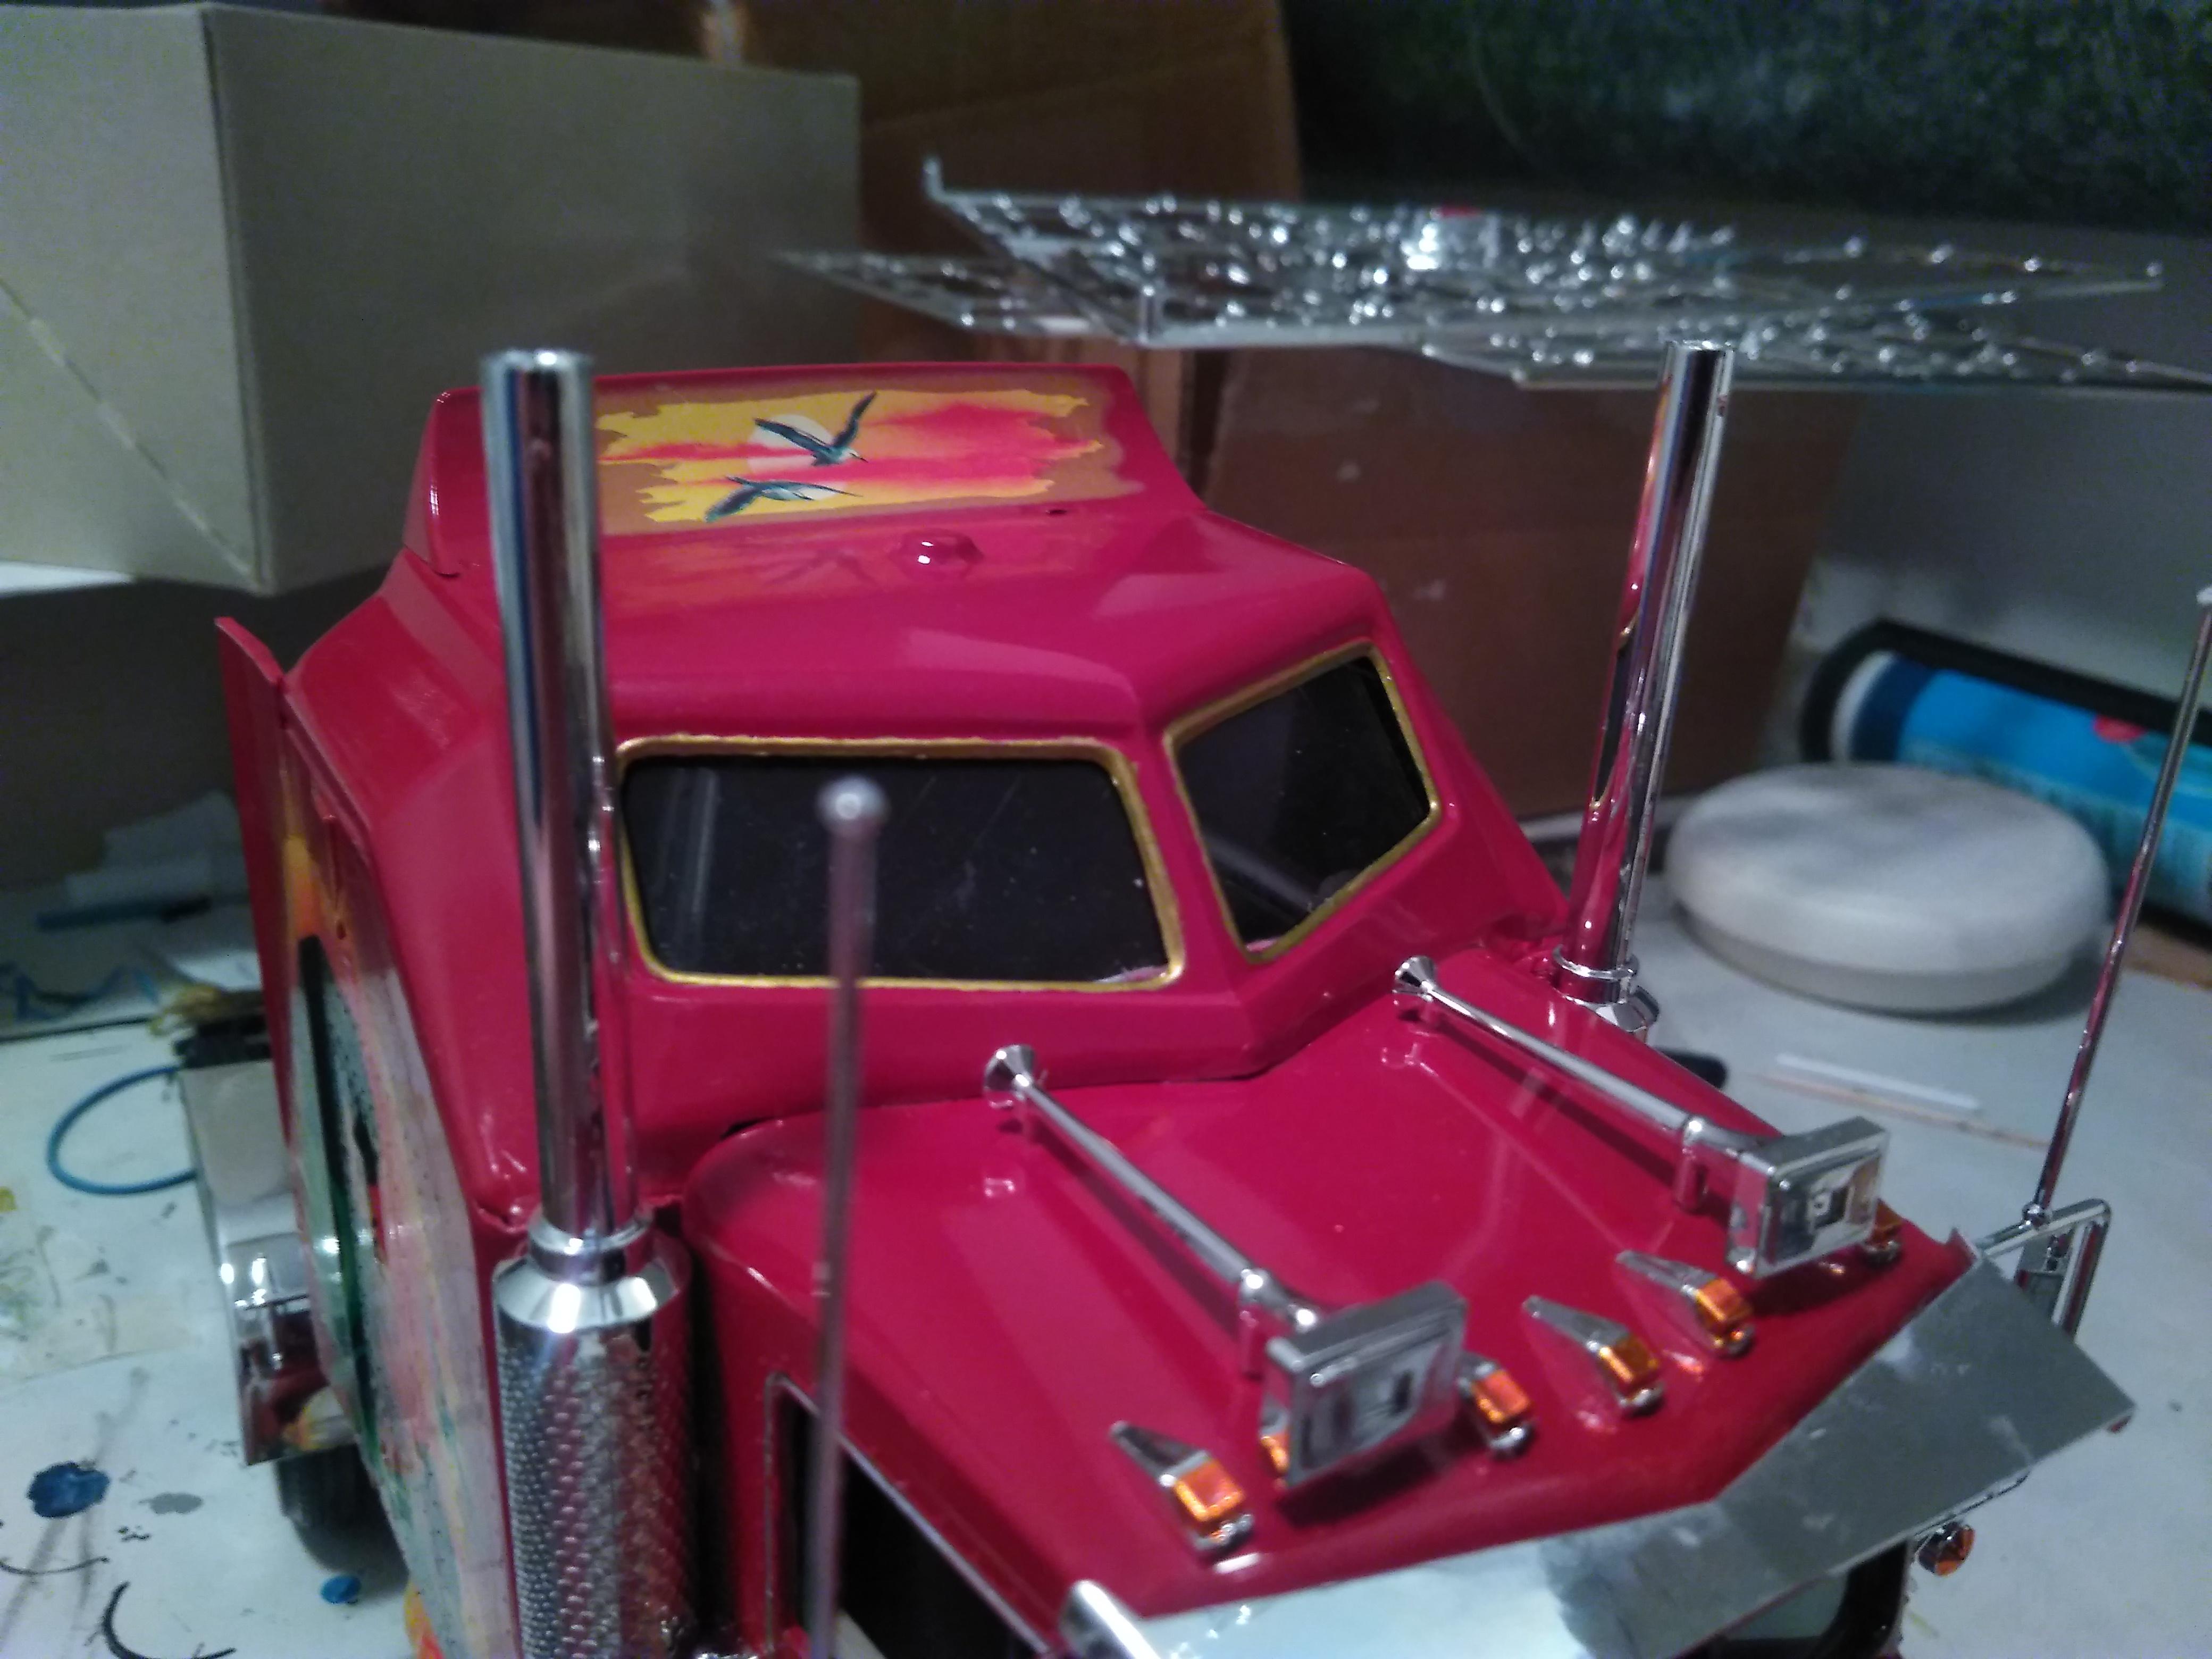
Done some more work on this and honestly not even surprised that not even the decals fit good. Have to do some trimming on them when they have dried. Passengerside looks really bad. The gap between the hood and cab is as good as it gets. Also i think the horns looks way to big for it but the other for a K100 that also are in it looks to small It might look better when the rest of the chromeparts is on it and the sleeper with its decals.
-
Kenworth T600
PierreR89 replied to PierreR89's topic in WIP: Model Trucks: Big Rigs and Heavy Equipment
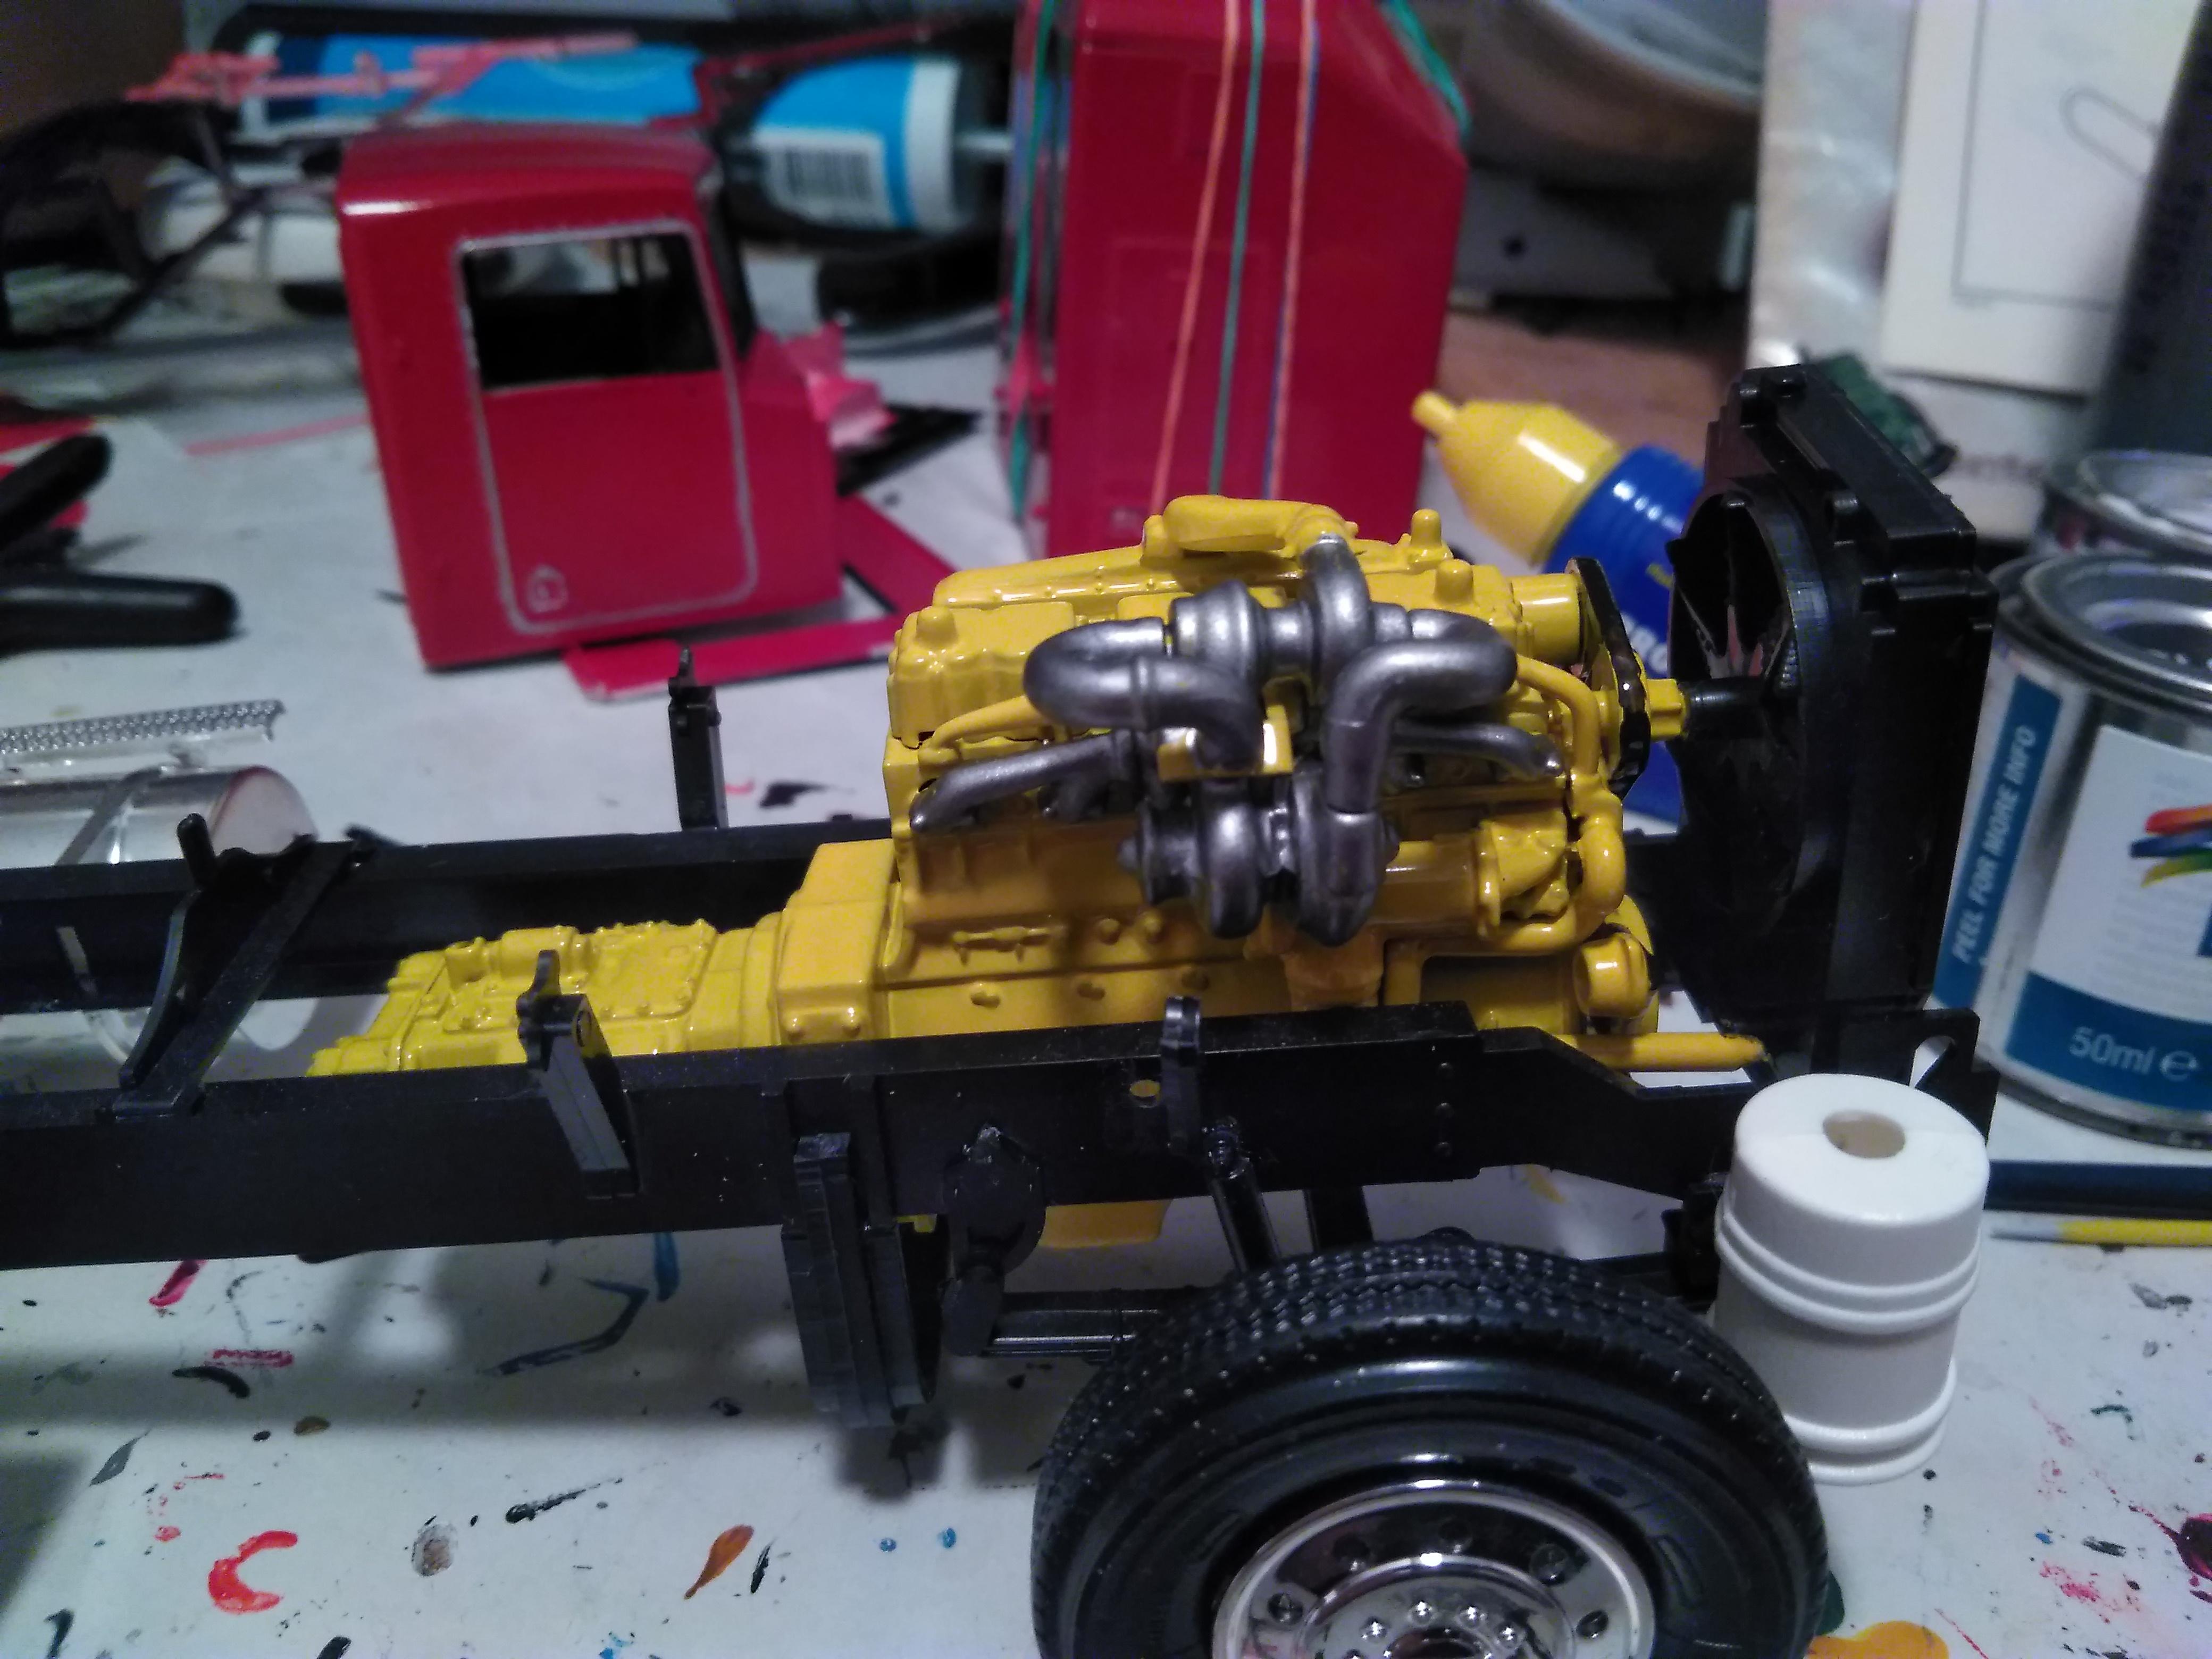
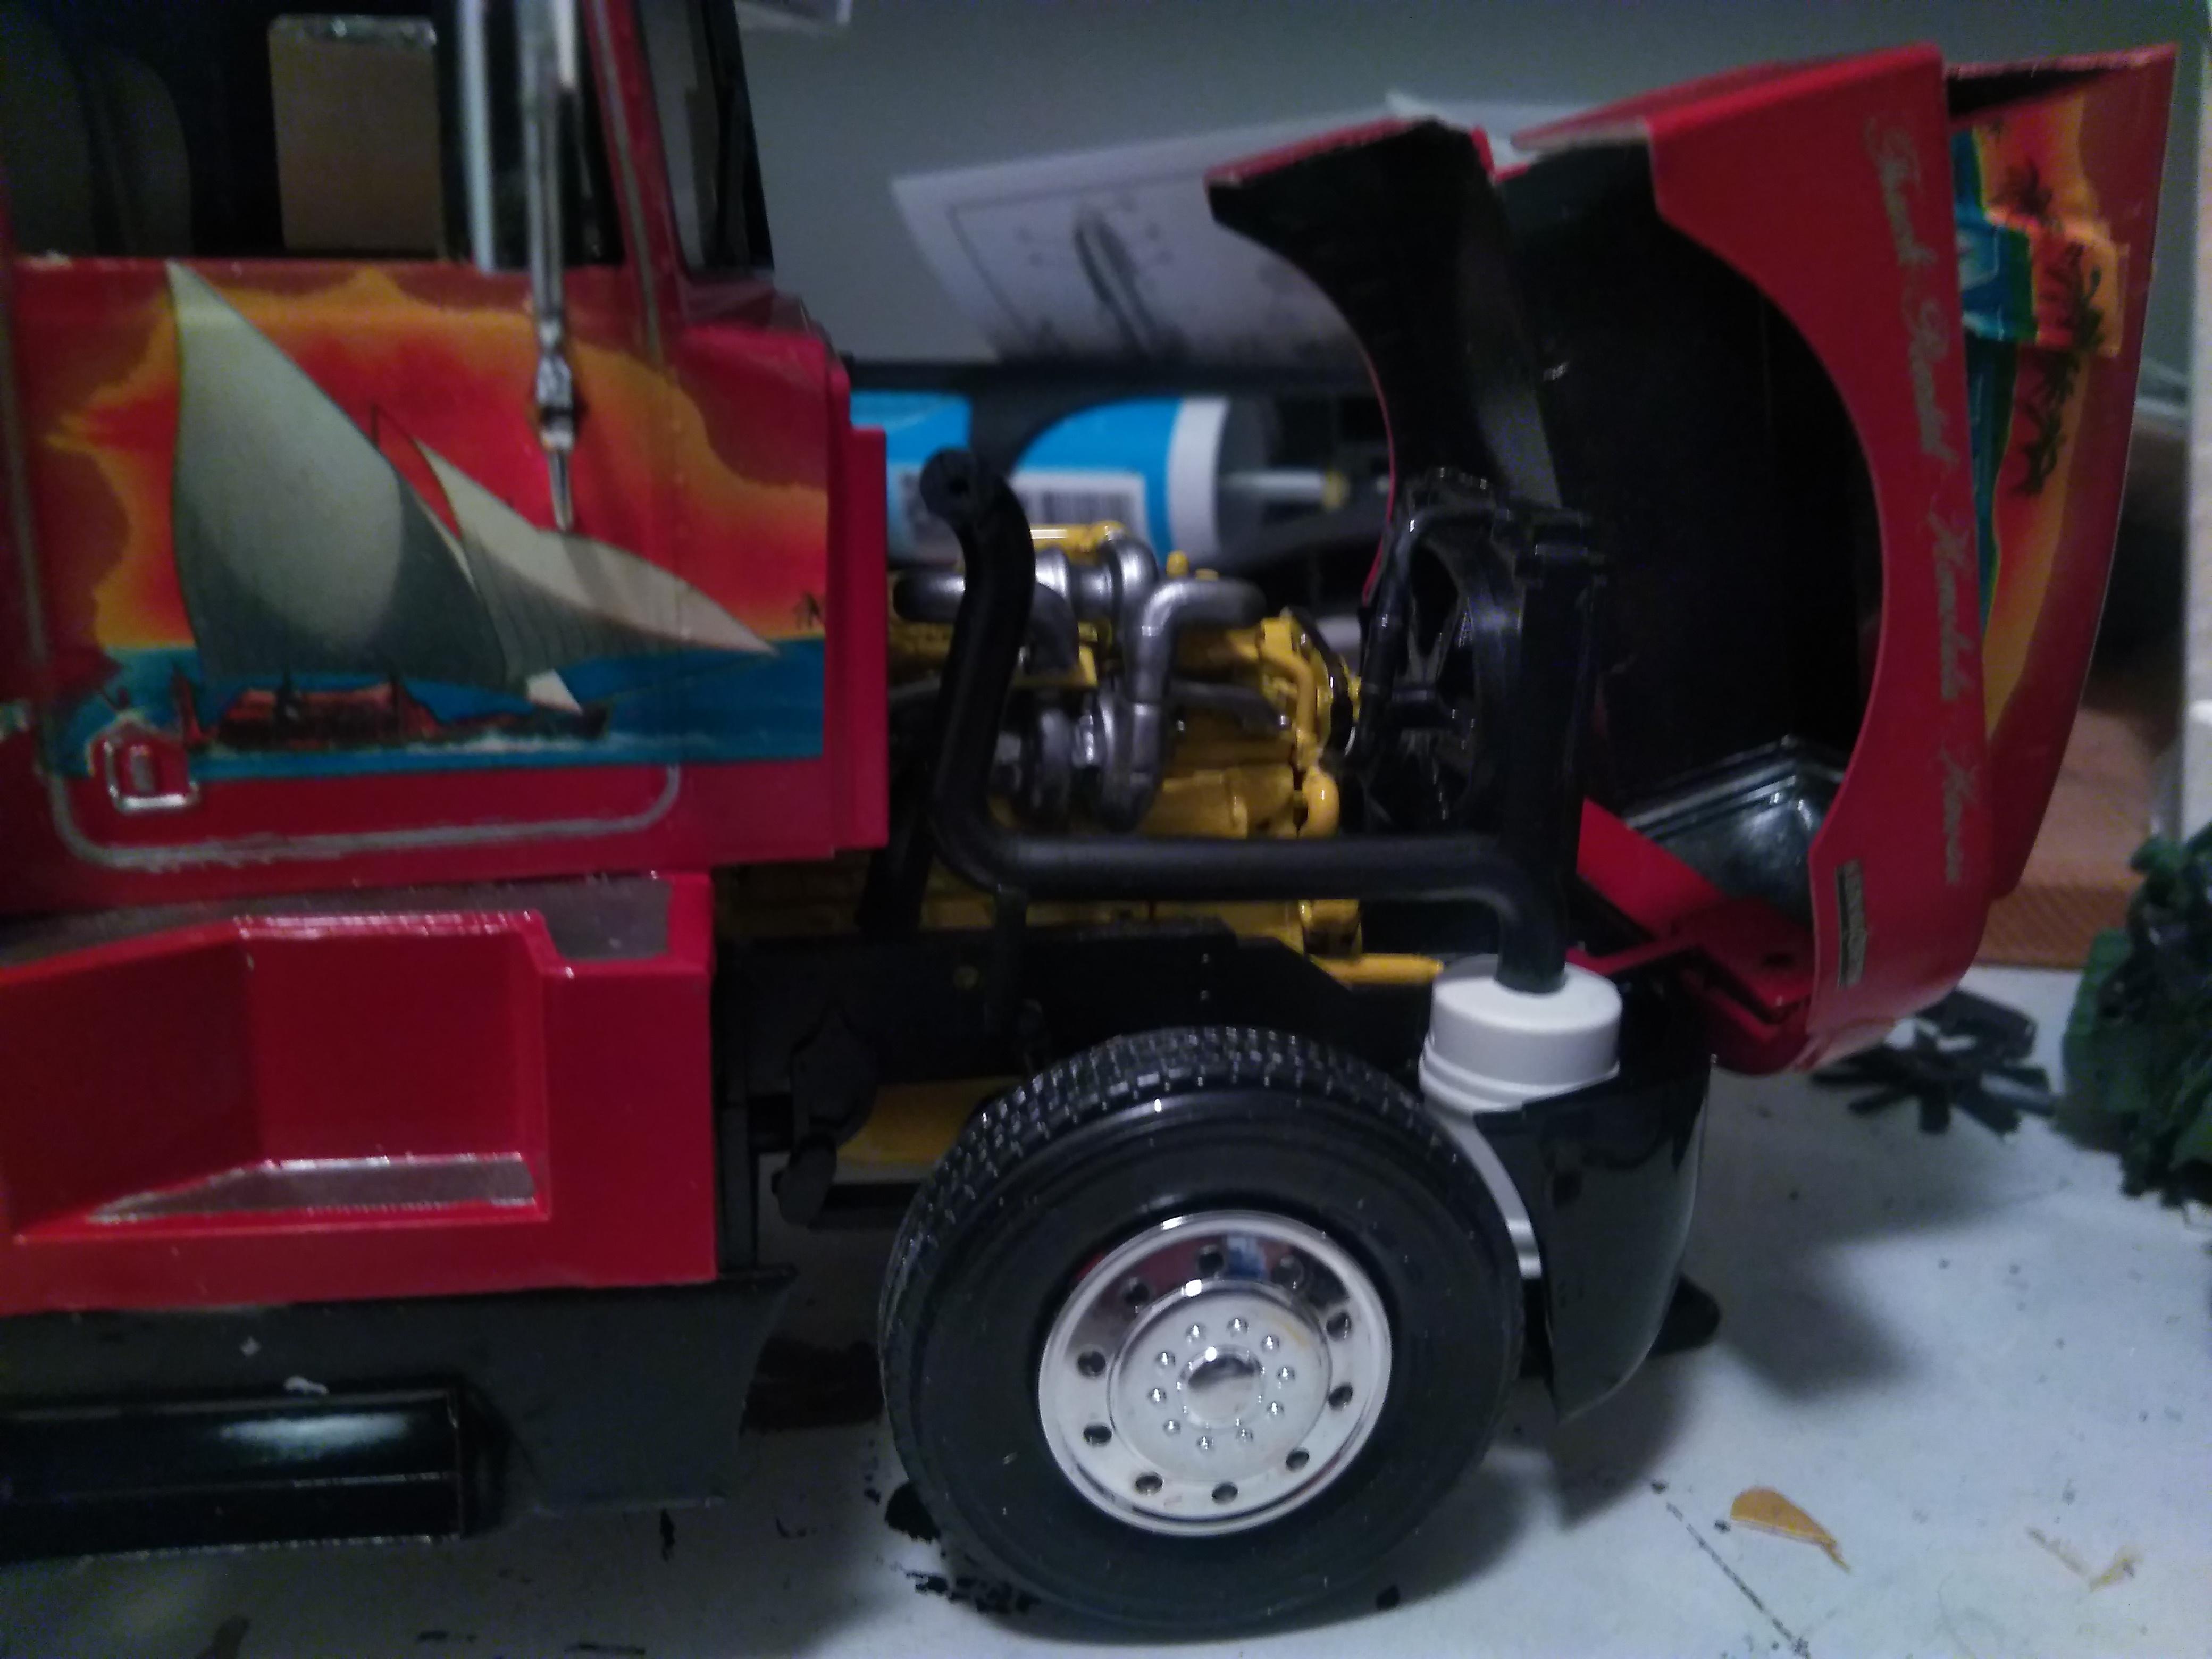
I know that the eninge should be beige but i am tired of painting almost all truck engines in beige just because everyone have a Cummins in them. I wanted something different. Next might be black as some Cummins engines we use at work are black. But those are not Cummins ntd/ntc they are Cummins qsm engines. -
Kenworth T600
PierreR89 replied to PierreR89's topic in WIP: Model Trucks: Big Rigs and Heavy Equipment
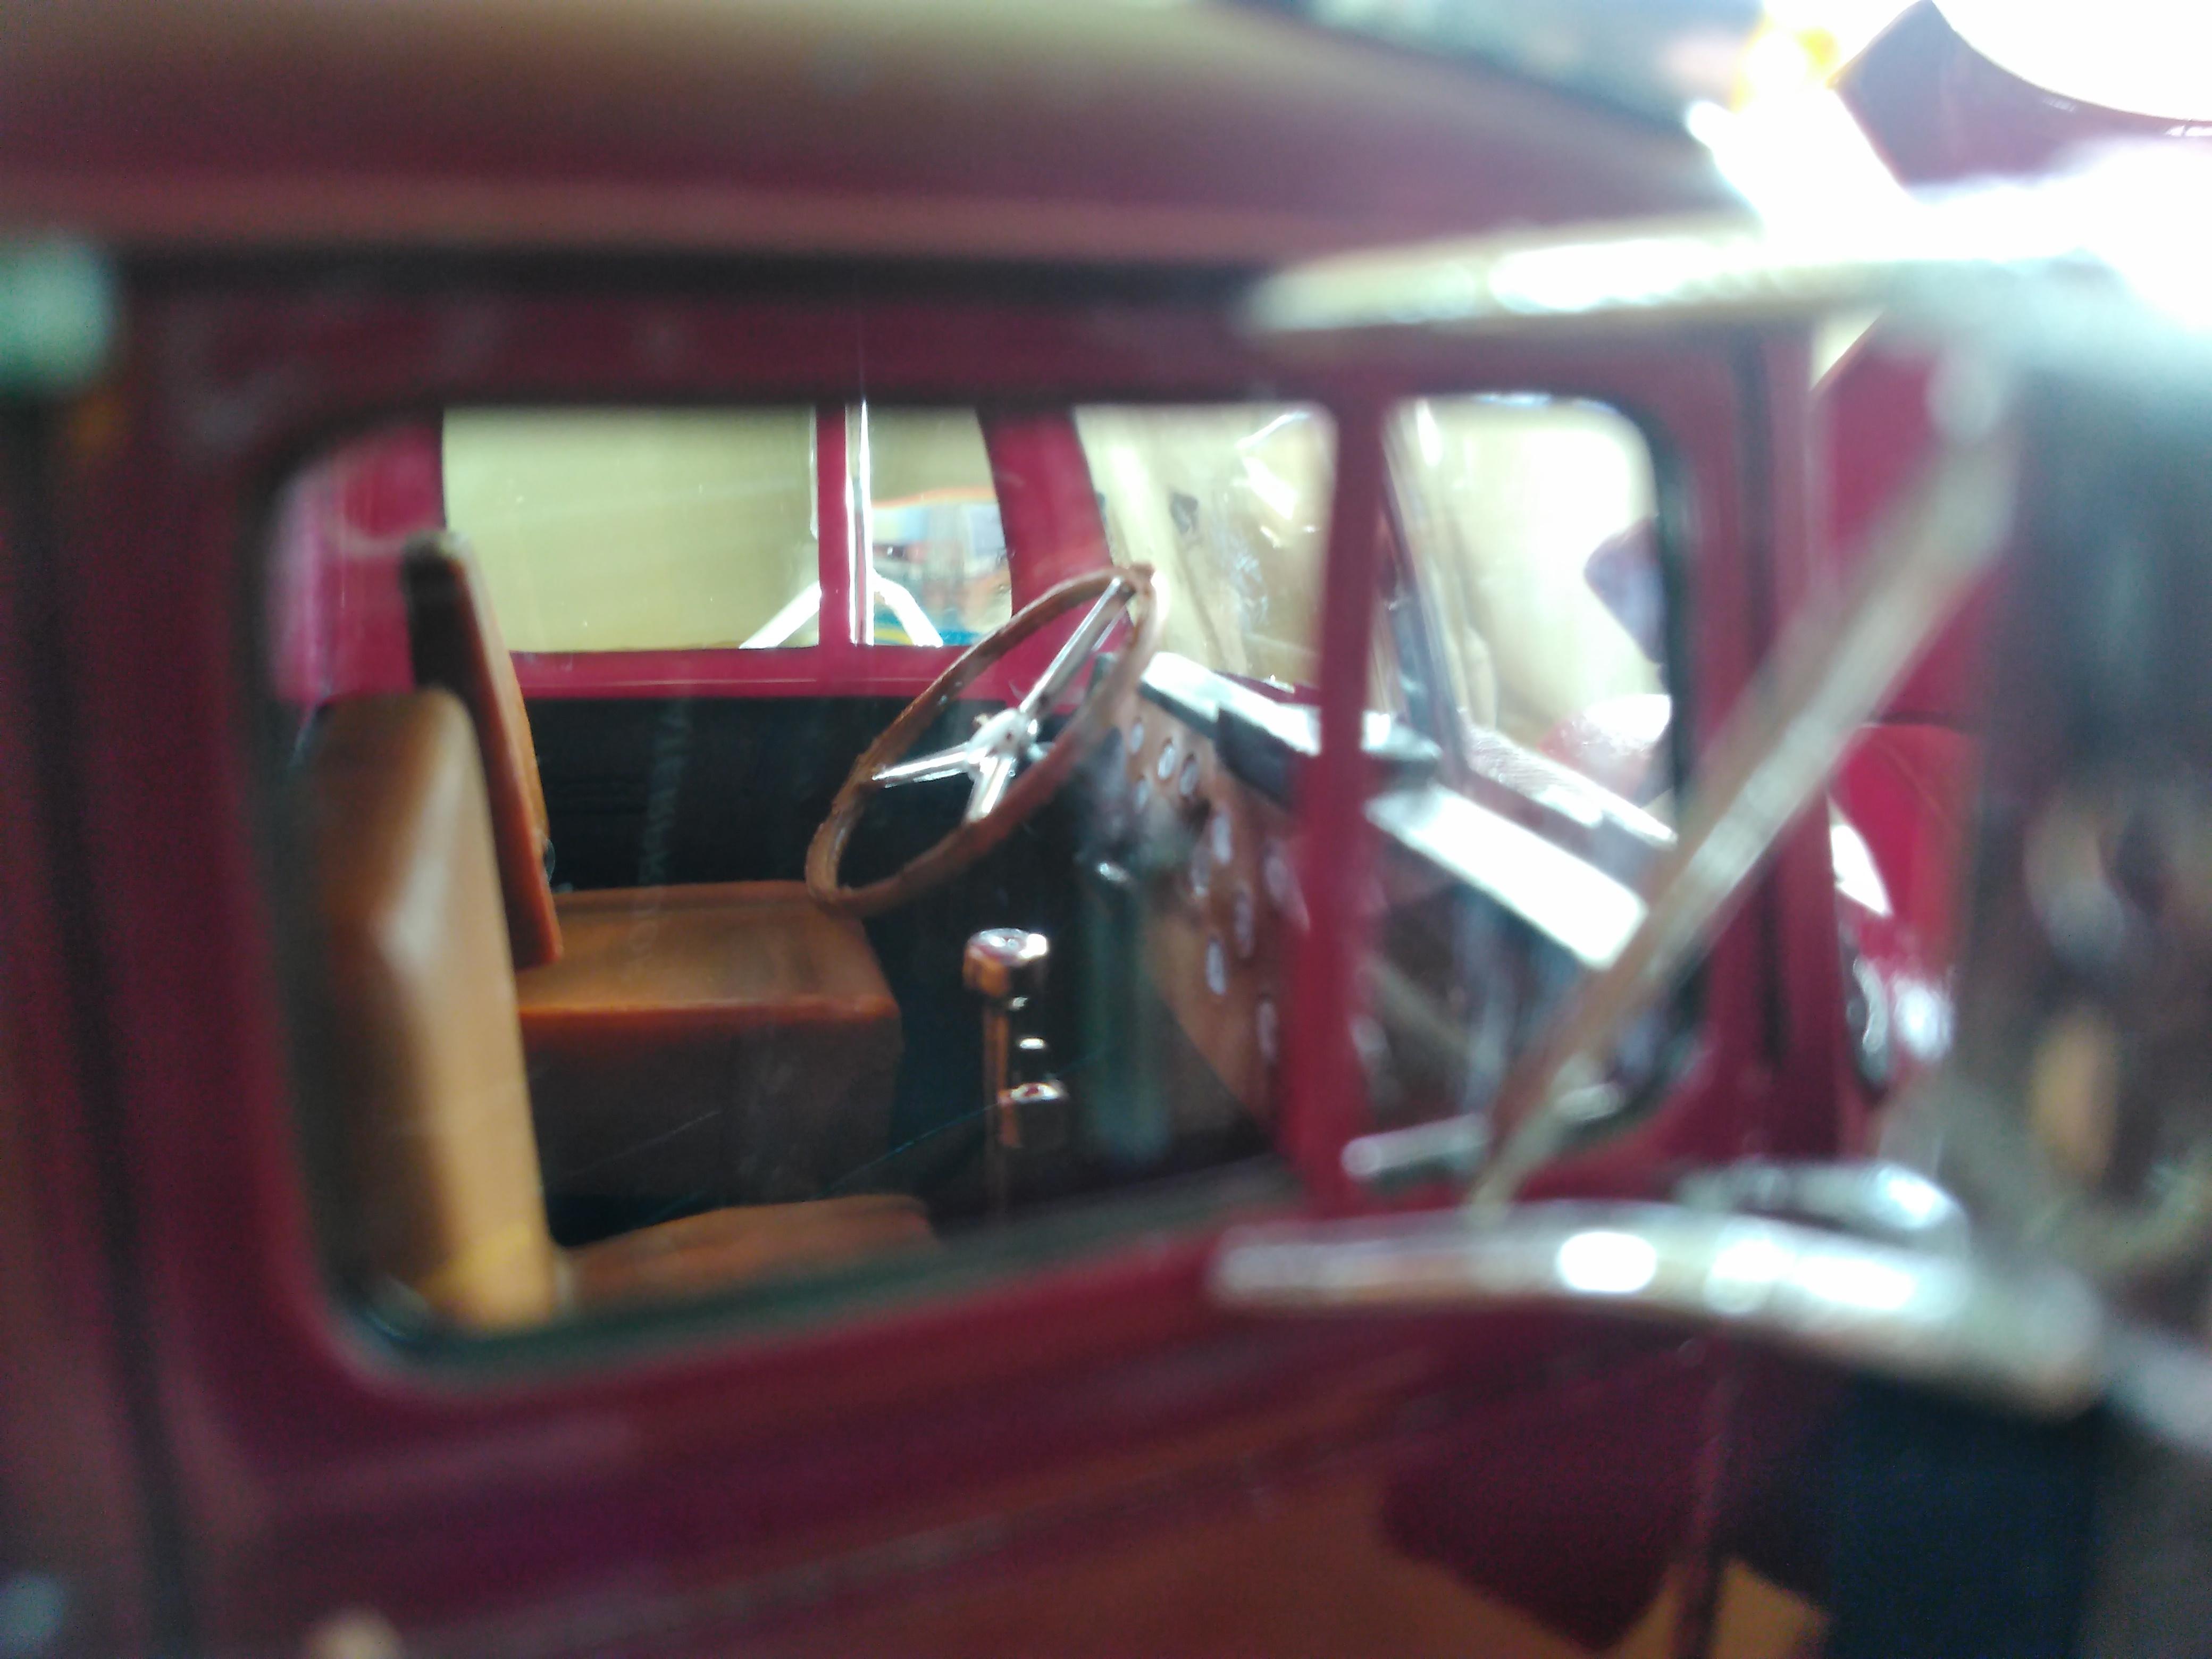
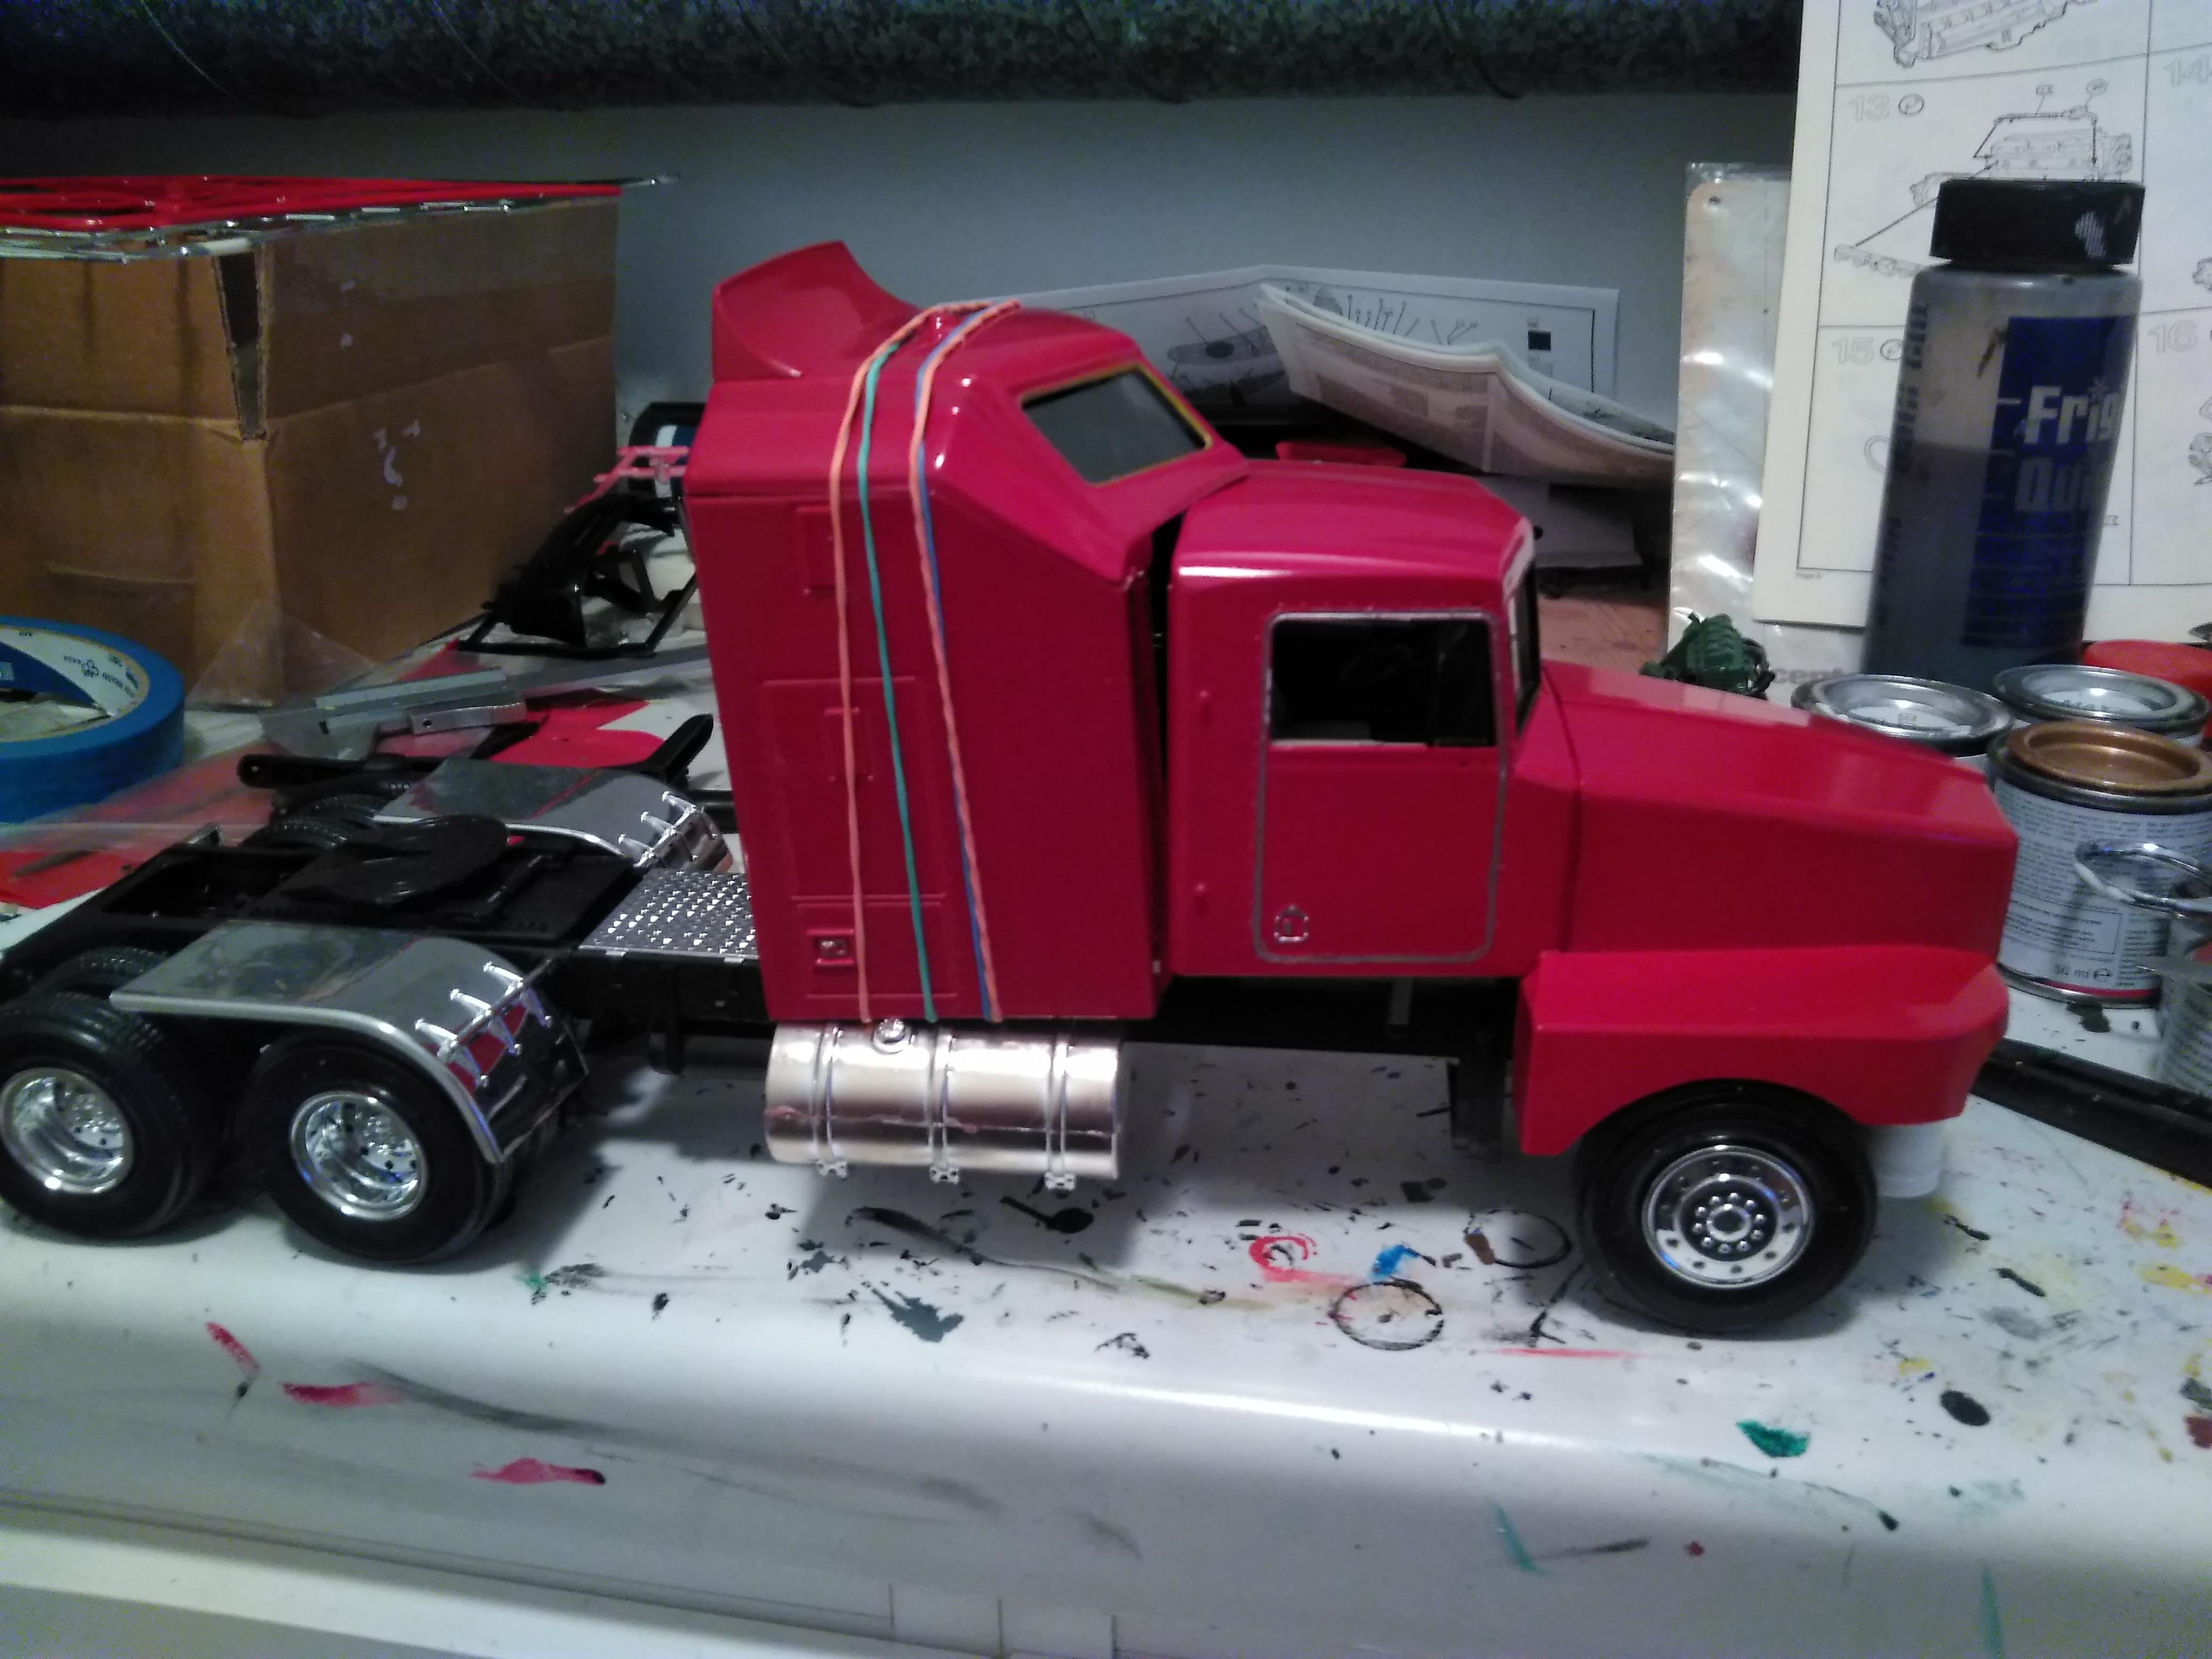
Have done some more on this truck. This truck is so bad fitting everywhere that it feels like they were in a hurry when they did it because Revell,s trucks are normally not this bad to build. I am actually happy that they stopped making it, hopefully it will stay gone to or rereleased after thay have done some work on the molds for it.. The only easy part was the rearend because that is the same as any of their Kenworth kits. The sleeper was a pain to put together as nothing fits on it.. Get the walls perfect and the roof dont fit, make so the roof fits and the walls are all over the place.. I just gave up on that in the end and decided to not care about any gaps between the parts. I have to do some modifying on it to make it fit with the cab and make some supports for it so the molded ones in the floor actually touches the frame..
-
BRBO International LoneStar
PierreR89 replied to DPNM's topic in WIP: Model Trucks: Big Rigs and Heavy Equipment
Here are the instructions for the Revell Lonestar: https://downloads.revell.de/Manuals-Modelkits/07408_%23BAU_2010_INTERNATIONAL_LONE_STAR.PDF