absmiami
-
Posts
4,794 -
Joined
-
Last visited
Content Type
Profiles
Forums
Events
Gallery
Everything posted by absmiami
-
 Bits and peices of Evergreen with some .06 bolts fr Master Club …
-
So i’ll make some pumps for my plate - slightly smaller than the corresponding Tamiya parts …
-
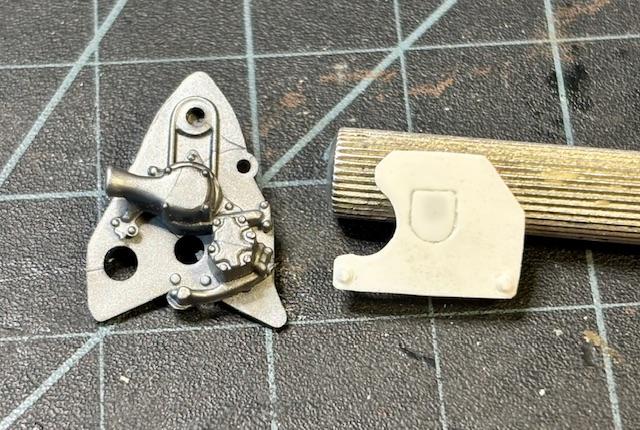
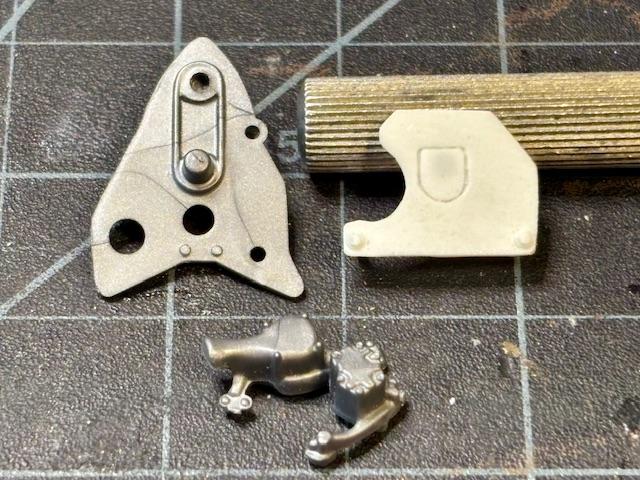
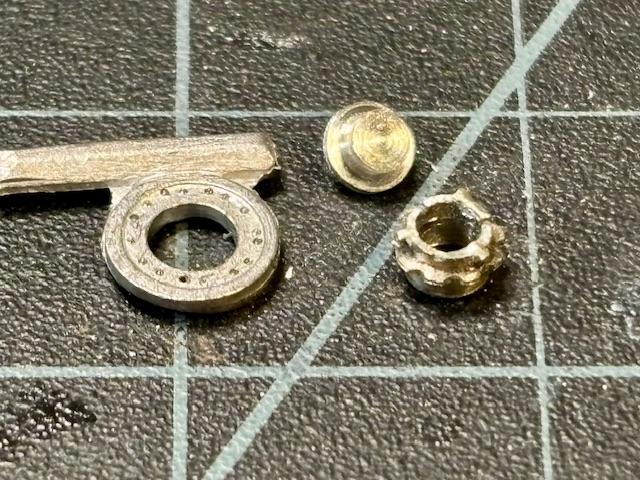
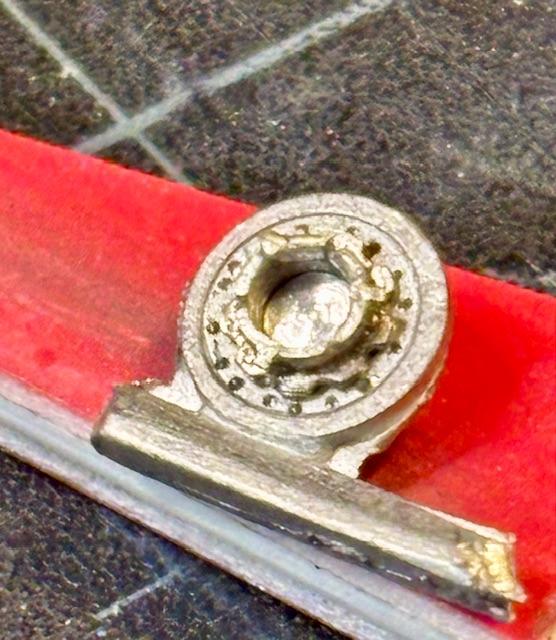
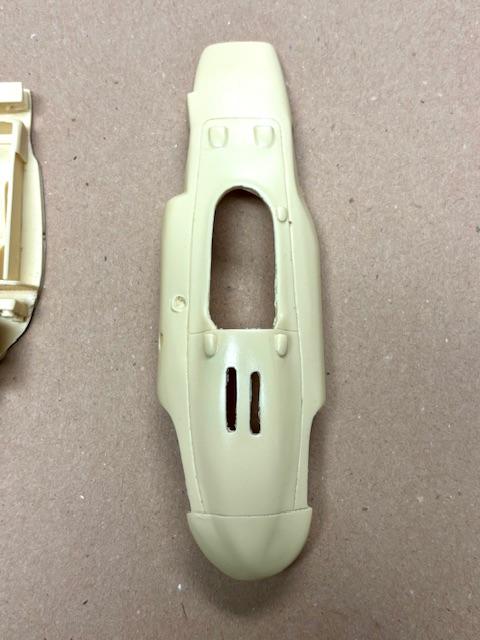
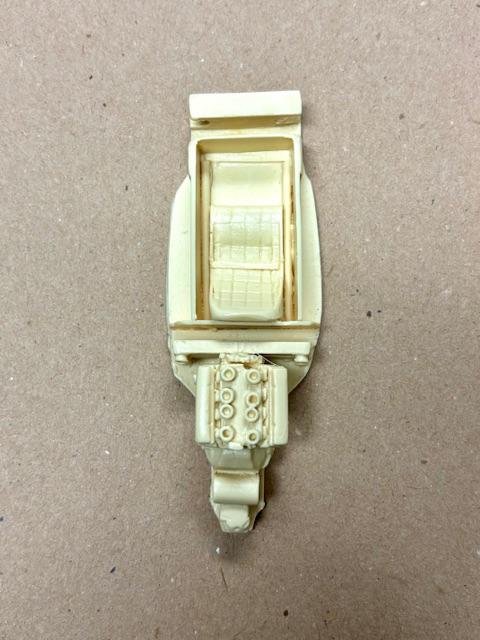
Needing a fuel pickup break - these are the front engine plates - the left hand is the 20th sc plate for the fuel injected Climax engine in the Tamiya kit - with the water and oil pumps - good stuff - the right hand plate is the simpler on that i made for the ‘62 Climax engines - which sported Webers …
-
So i’ve ended up w these three parts for the moment - but i mite ditch the wh metal ring and make one w 12 bolts - which is …. err … nuts - therapy pl …
-
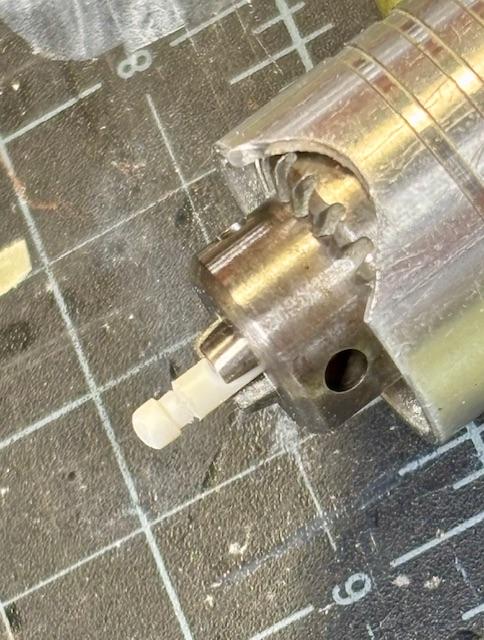
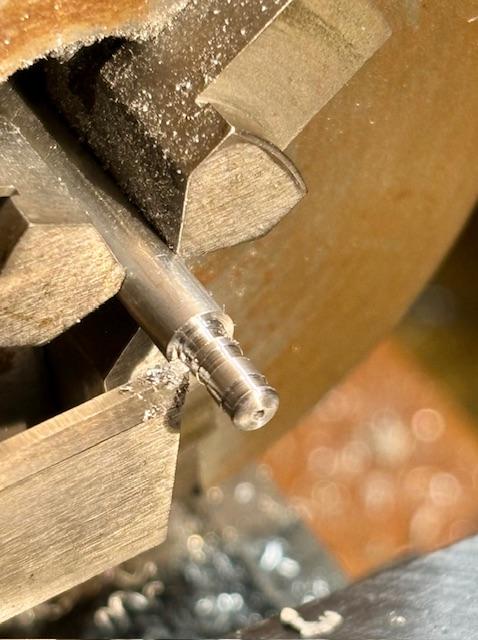
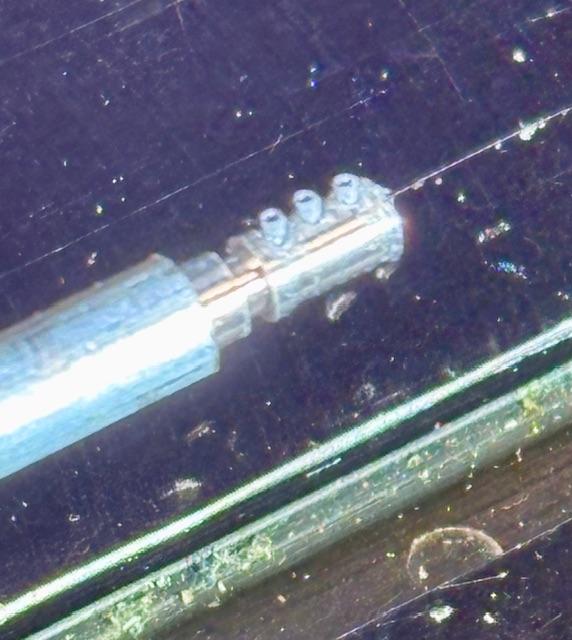
The above mite be confusing - the teeth on the rim are cut w an .015 mill - the scallop shapes on the rim are cut with an .031 mill - clear as Mud ?
-
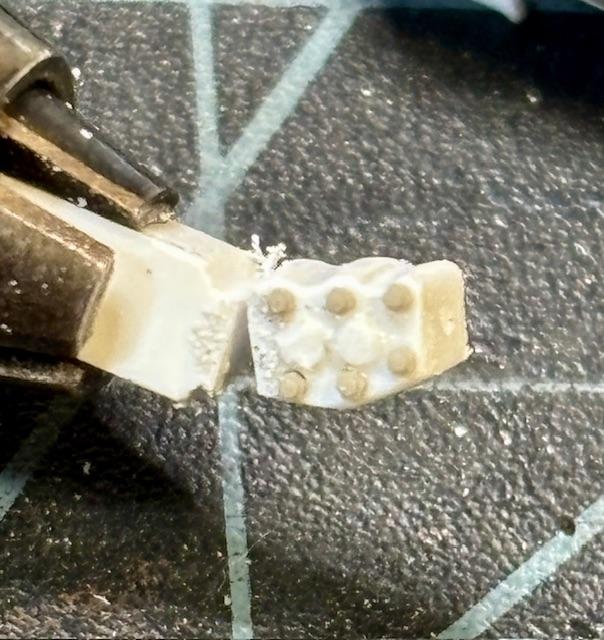
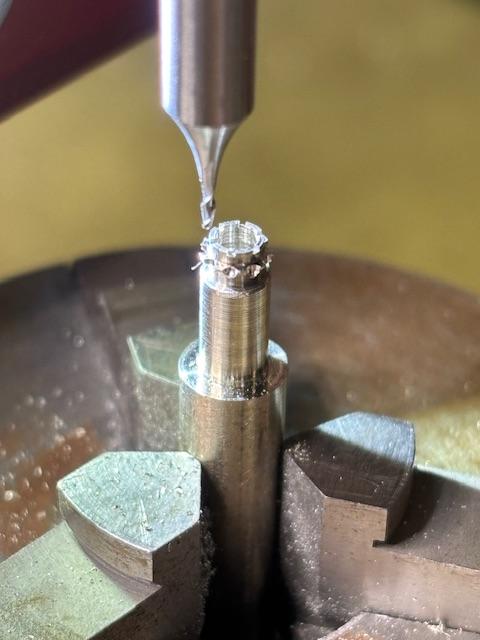
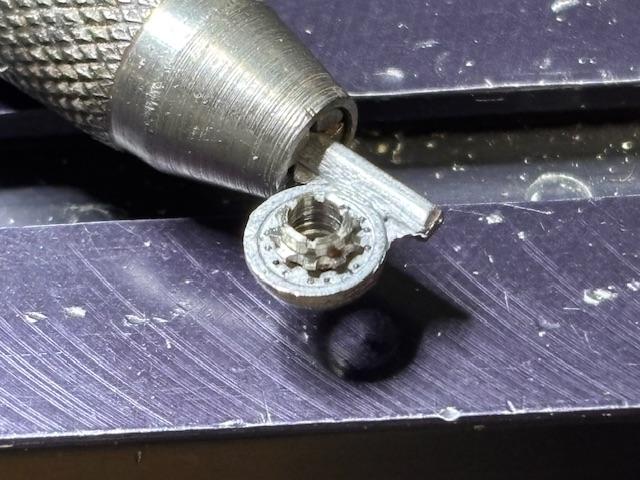
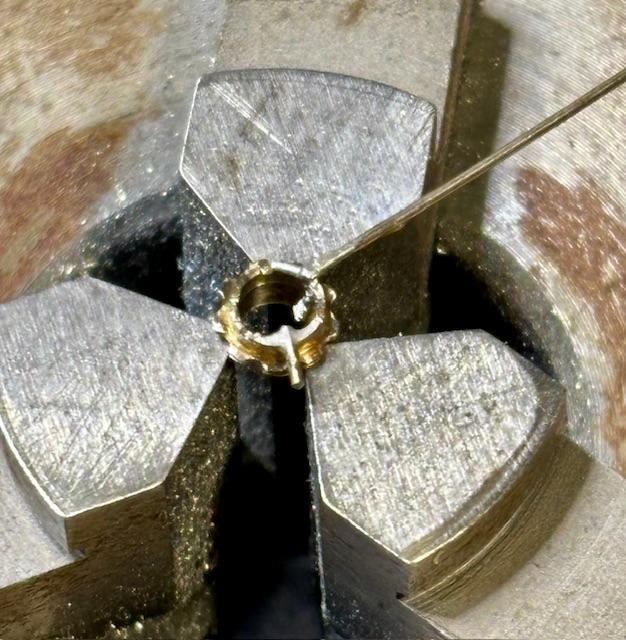
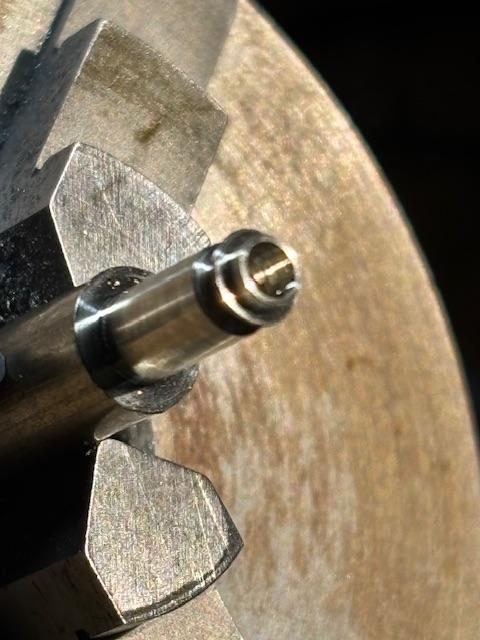
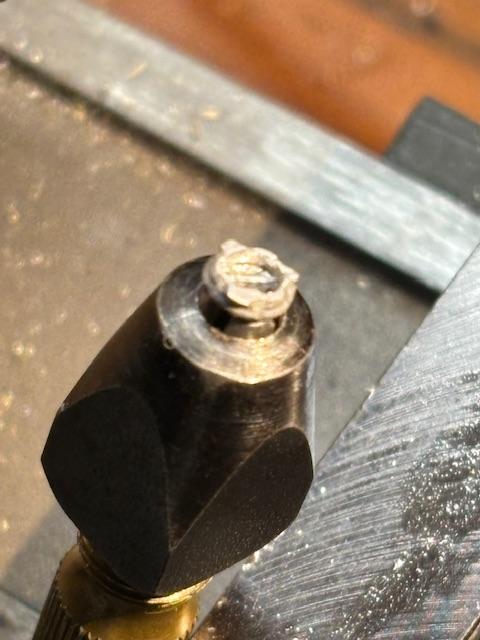
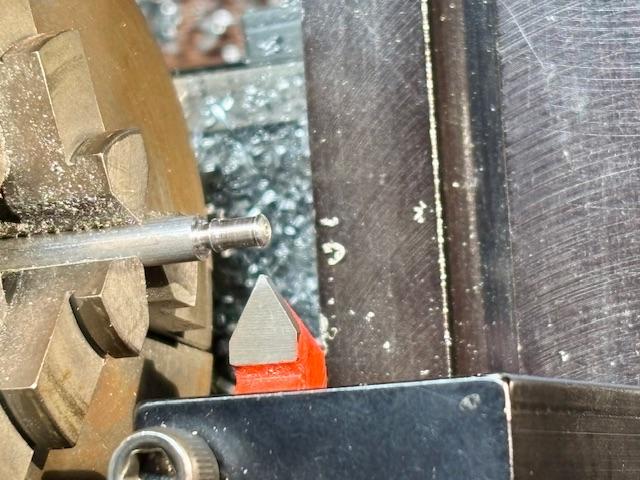
Next trying to solder pegs into three of the six teeth - thats why I used nickel silver rod-
-
Thanks PG and Charlie - the fuel pick up was turned fr Nickel silver rod …. The teeth on the rim of the pickup were cut on the mill using an .015 mill - thats the smallest one that i’ve got - that i haven’t broken - looks like its about the right size …
-
Buy a spare for the trunky
-
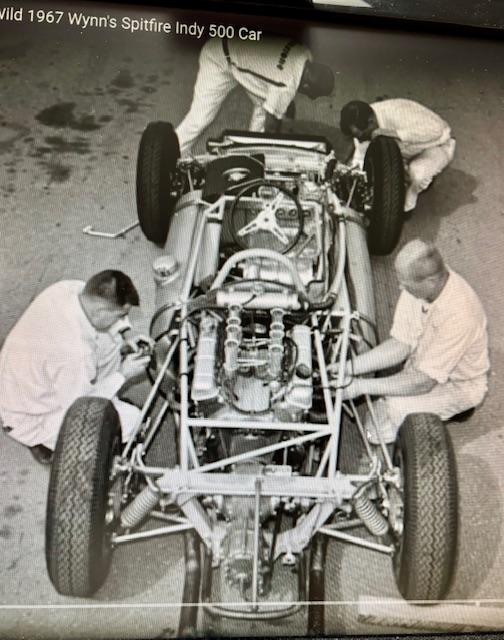
Michey Thompson's wynn's spitfire
absmiami replied to johnyrotten's topic in General Automotive Talk (Trucks and Cars)
Yup …
-
Michey Thompson's wynn's spitfire
absmiami replied to johnyrotten's topic in General Automotive Talk (Trucks and Cars)
Alrighty then - did Calvin cast the offset on his Thompson Harvey Aluminum kit ?? -
Michey Thompson's wynn's spitfire
absmiami replied to johnyrotten's topic in General Automotive Talk (Trucks and Cars)
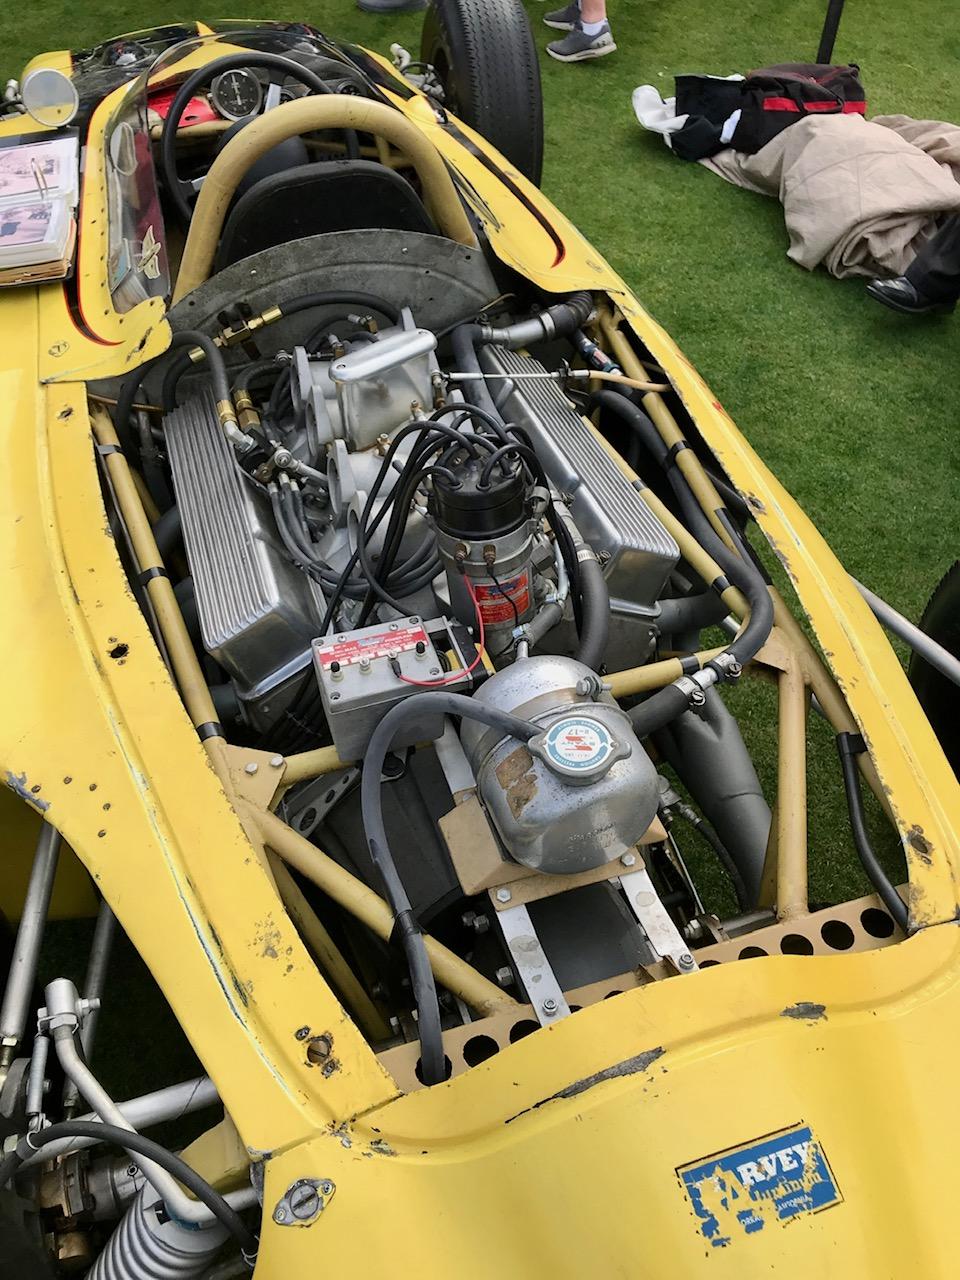
And in fact, this car is a survivor [against all odds] here it is at the Amelia Island concourse two years ago i think the livery is fr its last year of competition - which i think was '64 the offset is still in place .... - cool ....
-
Michey Thompson's wynn's spitfire
absmiami replied to johnyrotten's topic in General Automotive Talk (Trucks and Cars)
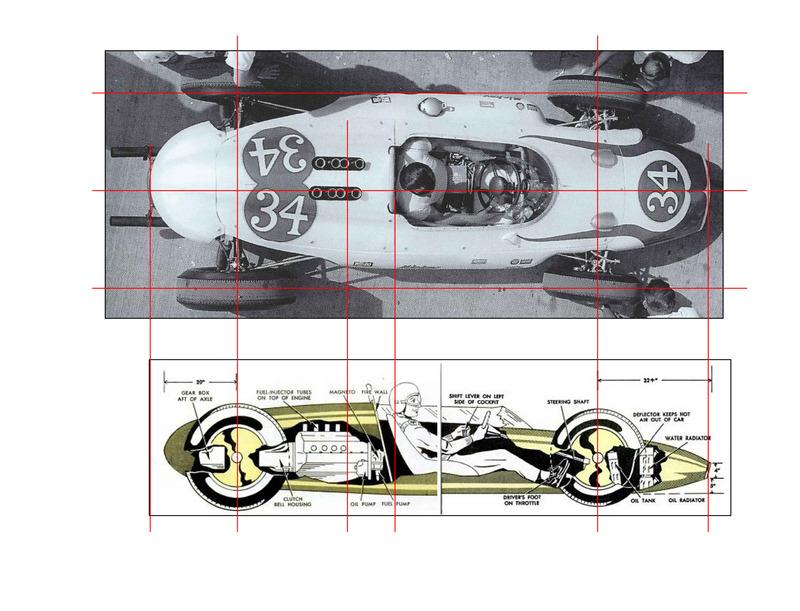
HERE'S A GOOD ILLUSTRATION OF THE OFFEST - I had forgotten about this feature - but - here it is ...
-
Michey Thompson's wynn's spitfire
absmiami replied to johnyrotten's topic in General Automotive Talk (Trucks and Cars)
This is a still shot from the video of the ‘62 Gurney car - notice the engine offset - this sent me back into research I had collected on this car …
-
Michey Thompson's wynn's spitfire
absmiami replied to johnyrotten's topic in General Automotive Talk (Trucks and Cars)
damn - that was great - and I scarfed up the great body off chassis photo of Gurney's '62 entry - which was casted yrs ago in resin - thank you Calvin ... -
cheetah reboot
absmiami replied to charlie libby's topic in WIP: Other Racing: Road Racing, Land Speed Racers
Alu soldering - a black art … -
The part on the Auto-Kits Indianapolis Lotus is a good example of the limits of white metal casting - the part can not be cast with precision - even MFH struggled with precision in their wh metal castings on their small sc kits
-
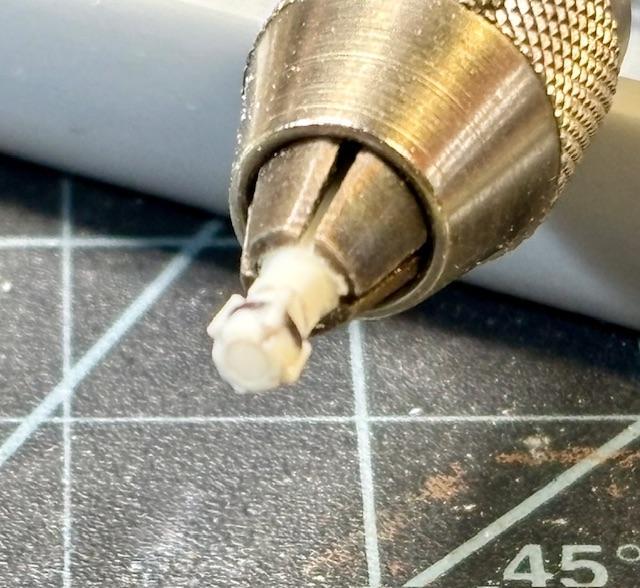
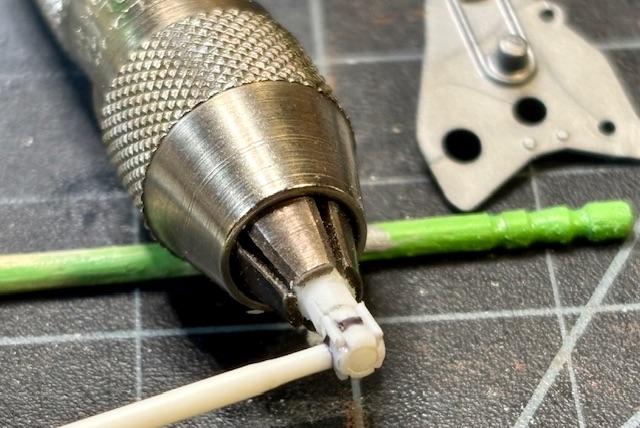
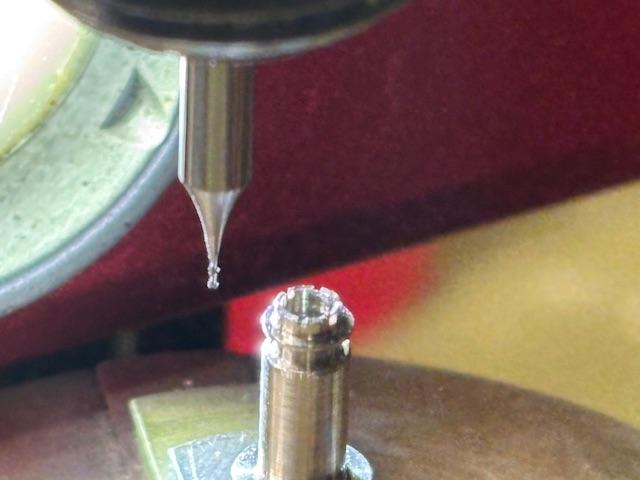
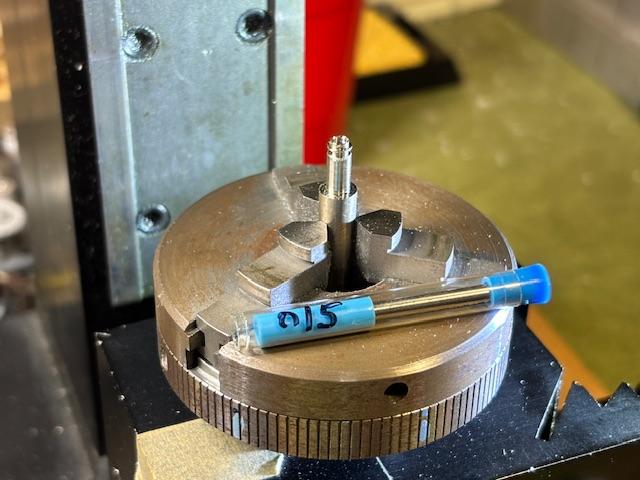
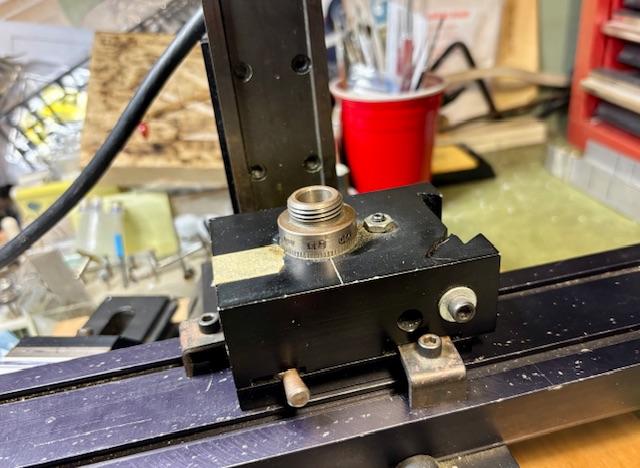
Pg - this is the sherline indexer that i’ve used for these milling ops - the chuck screws right onto the tool - they also sell a more expensive indexer for radial milling - its a better tool - but not needed for what I’m making …. The fuel filler collar on the Indy Lotus 38 is up next - while i’ve got the mill machine on the w bench …
-
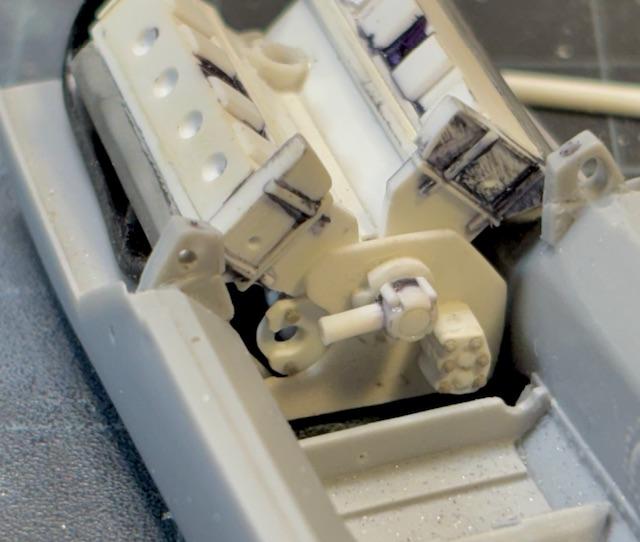
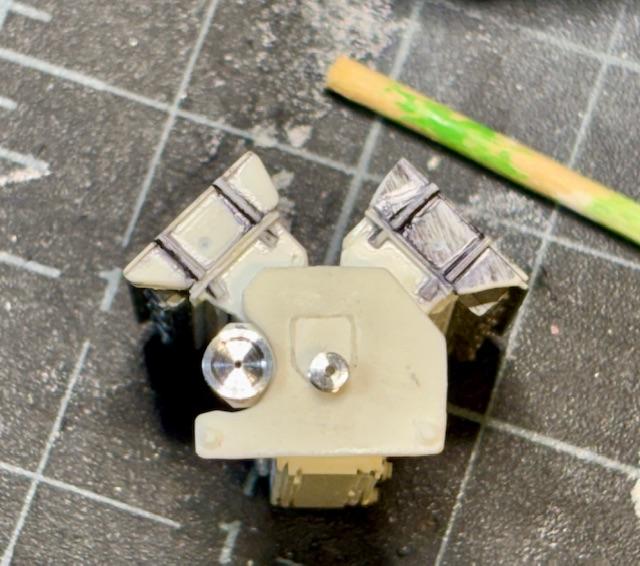
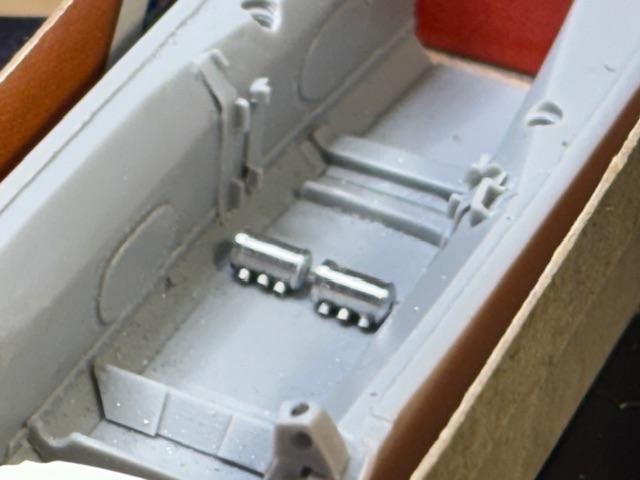
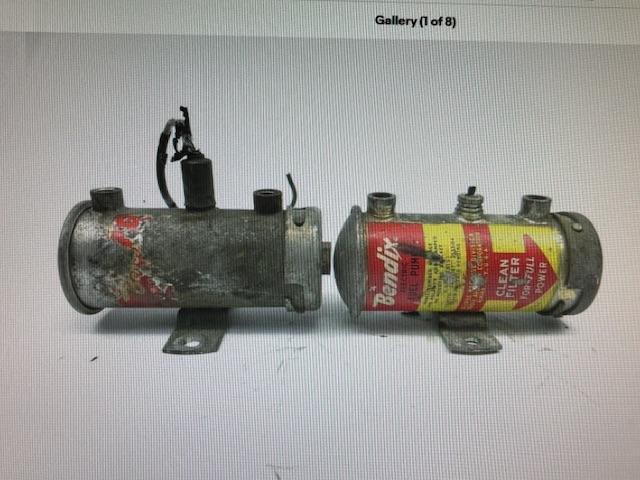
Lotus placed two Bendix fuel pumps under the legs of the druver …. It mite be possible to do this car with a removable driving seat - so i’m making the pumps
-
formula 55 chevy
absmiami replied to charlie libby's topic in WIP: Other Racing: Road Racing, Land Speed Racers
Oh Charlie ... Do you have a fractal mini bench vise ? didn't know what it was til 30 minutes ago there's one for sale on Amazon for 100 bucks - called a white rhino mini vise or your could spring for the $2,997 model - and I could borrow it ... -
Thanks for posting - i’m finishing a dormant 24sc MFH Ferrari 3 litre GP - the French GP winner - wish they hadn’t abandoned the 24 sc race car kits for greener pastures —- (12th sc) - oh well -
-
Mite have to join the FES - is there a secret hand shake ? ?
-
1937 Bugatti 57G
absmiami replied to TC's topic in WIP: Other Racing: Road Racing, Land Speed Racers
Nice -
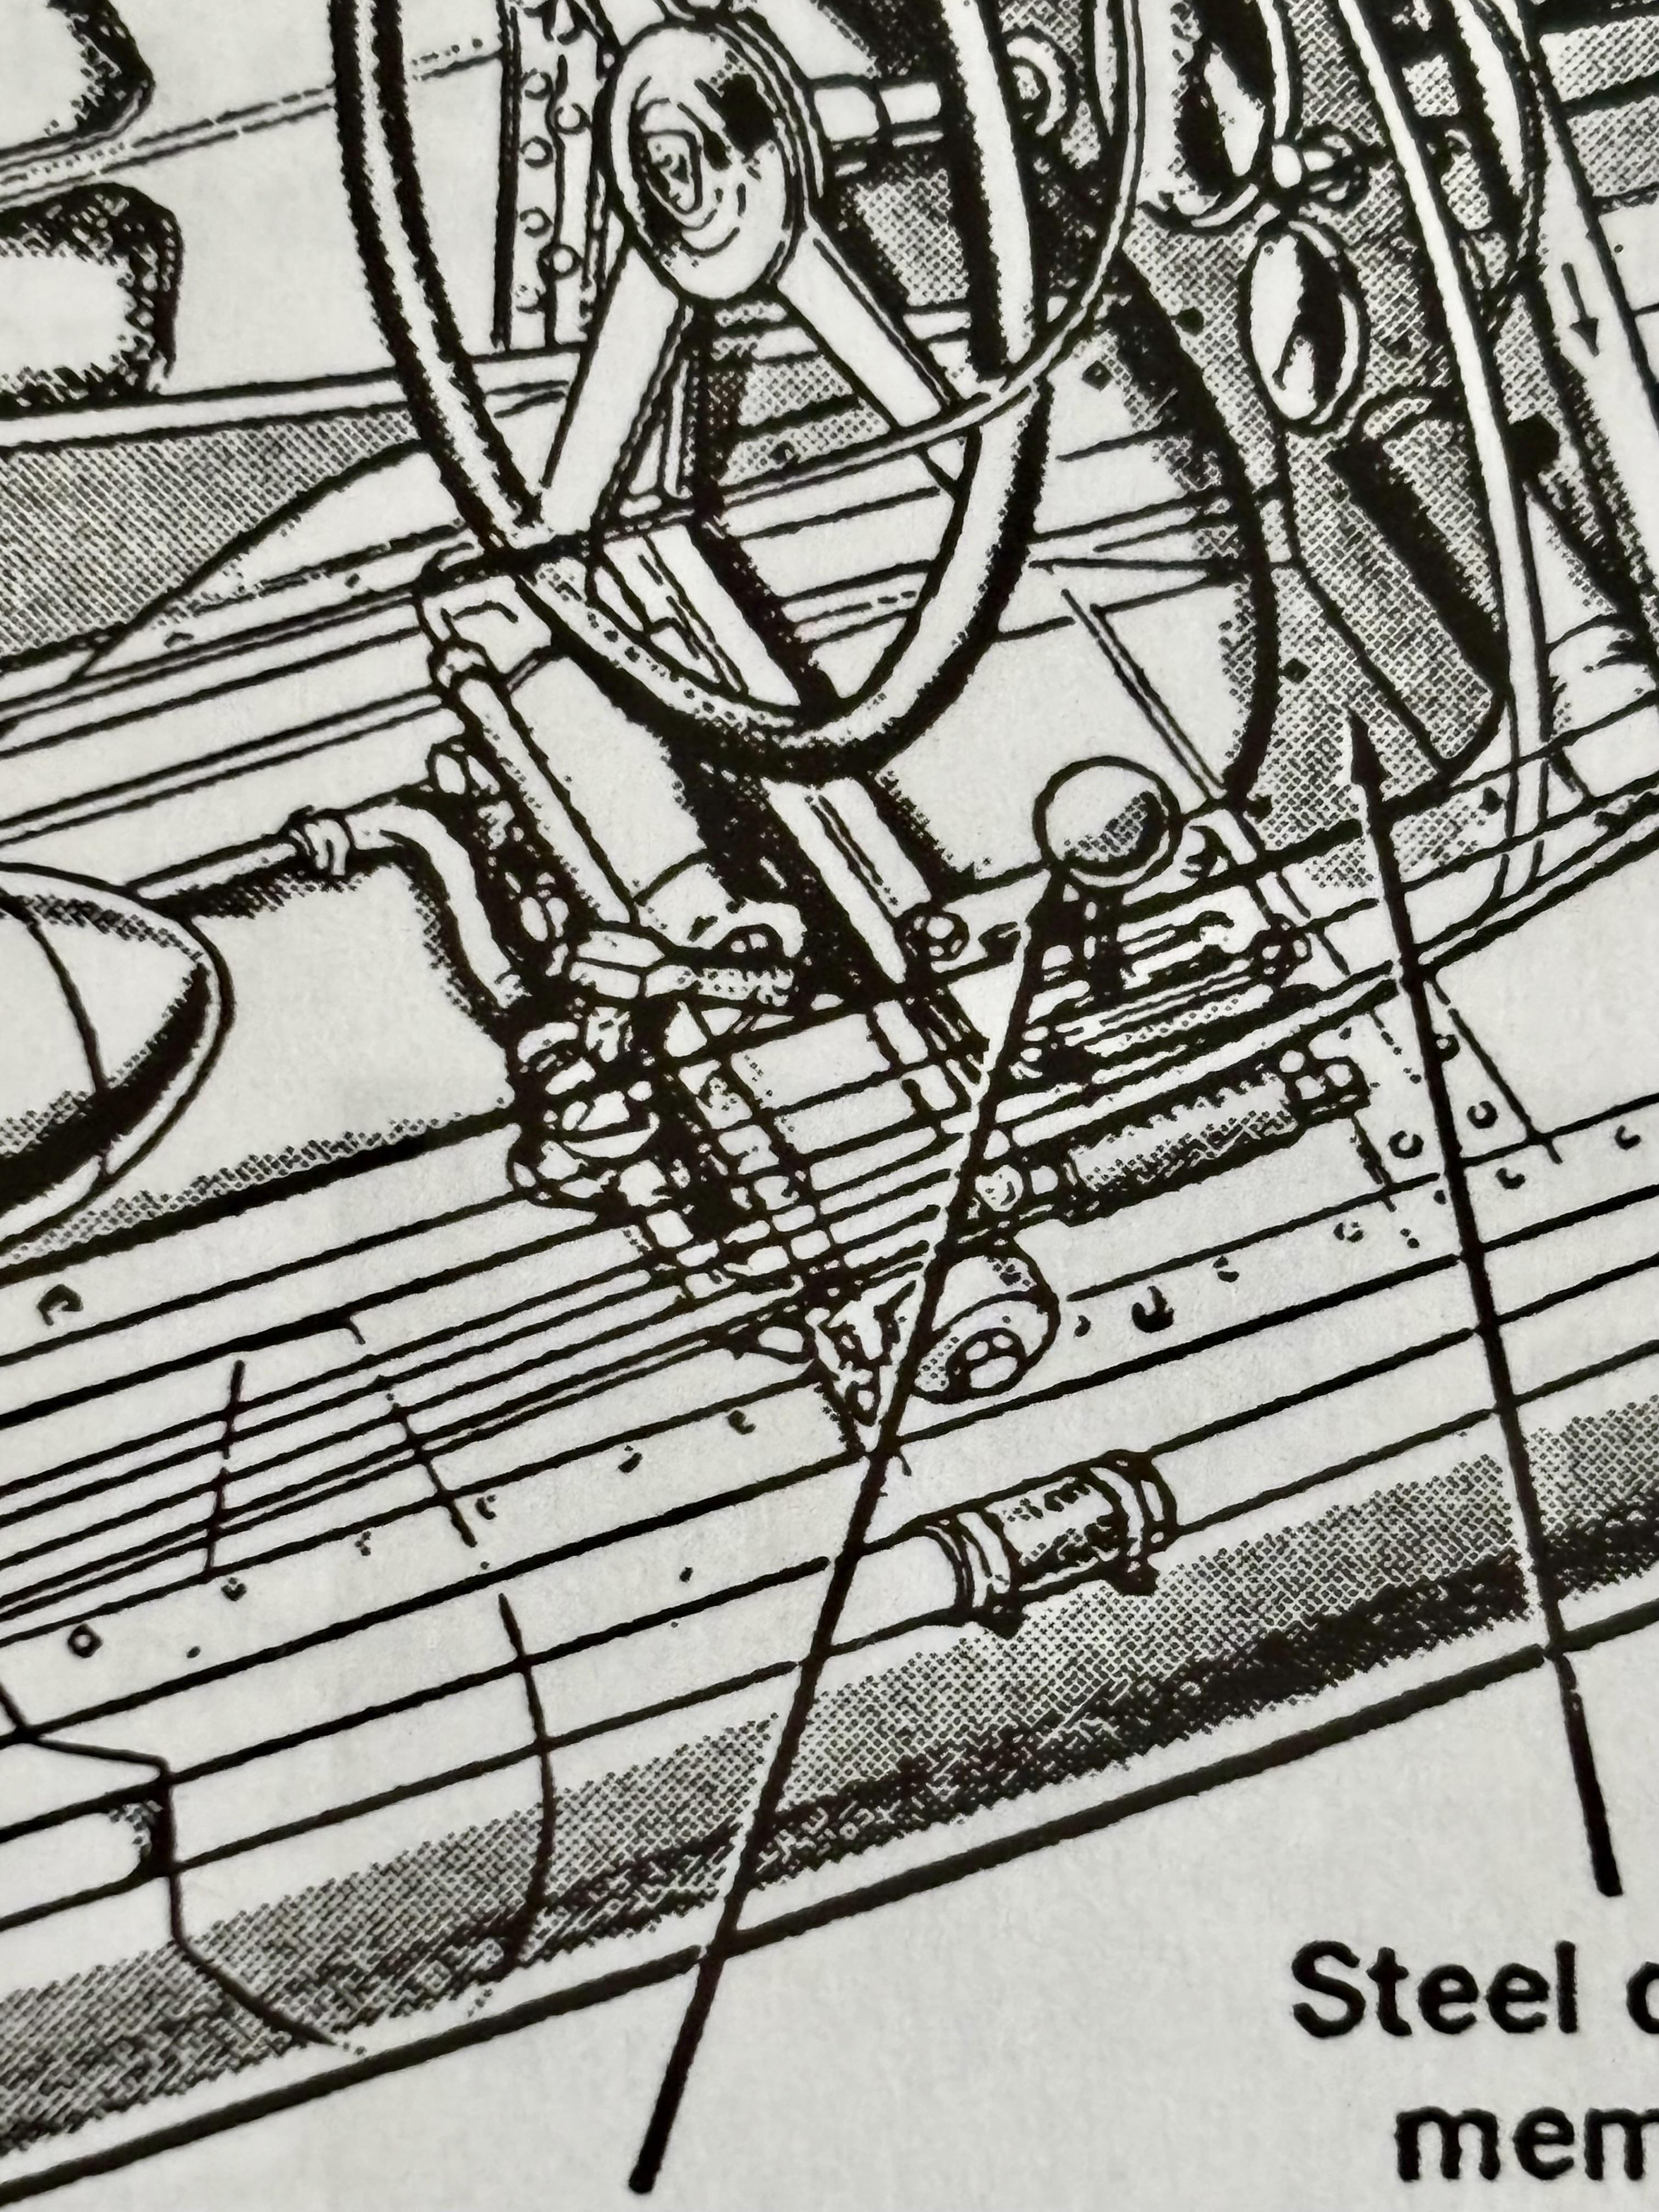
https://www.jagweb.com/aj6eng/xk_performance.html helpful drawing fr the jagweb ...