spencer1984
-
Posts
3,322 -
Joined
-
Last visited
Content Type
Profiles
Forums
Events
Gallery
Everything posted by spencer1984
-
1/24 scale Scratch built Ferrari 458 Aperta spider (sort of)
spencer1984 replied to fizi's topic in Model Cars
Excellent work, and it looks great in that color! -
Looks great, nicely done!
-
I've been there myself with trying to get a build pulled together and finished. Thanks for the back story, nice job on the updated General!
-
Nicely done, that turned out great!
-
Thanks, guys! This year has been a string of weird stuff vying for my attention, including work, house, and weather, so my build schedule is even more out of whack than usual. I'd like to say that things will even out once we get into summer, but it was snowing here today so who knows
-
I've been away from this for a while thanks to other priorities taking over, but I was able to get back to work on it today! The body trim has all been added, using a combination of Model Car Garage parts, styrene stock, tape, foil, and a set of door handles from Fireball Modelworks. Once that was done it was on to weathering - both to add the required gunk and also to reproduce the faded and dusty color.

-
1959 Ranchero
spencer1984 replied to spencer1984's topic in Model Trucks: Pickups, Vans, SUVs, Light Commercial
Thanks! -
Looks great, nicely done!
-
Very cool!
-
Iditarod Rat Rod Bus
spencer1984 replied to FrozenPlastik49's topic in Model Trucks: Pickups, Vans, SUVs, Light Commercial
Awesome job on this, it turned out great! -
1959 Ranchero
spencer1984 replied to spencer1984's topic in Model Trucks: Pickups, Vans, SUVs, Light Commercial
Thanks, guys! -
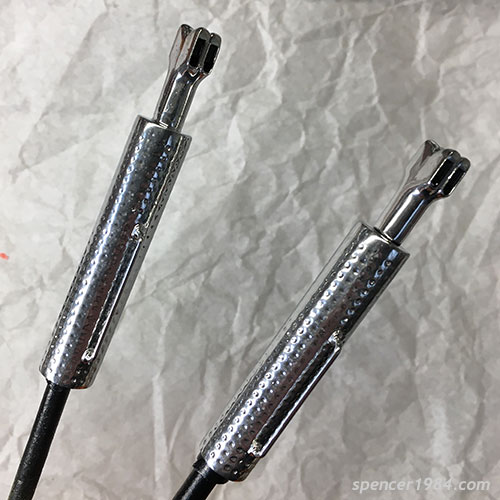
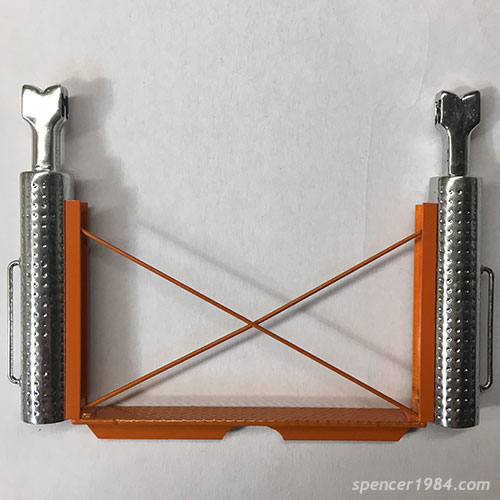
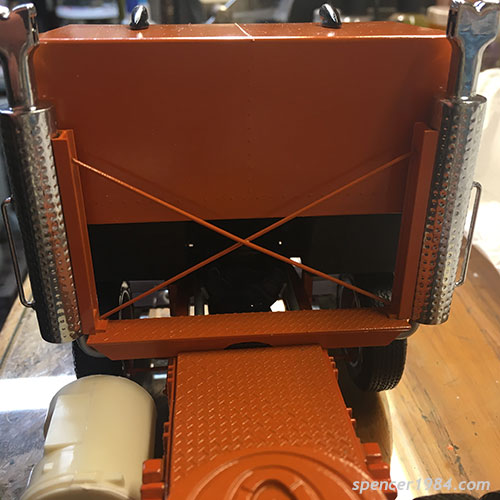
With my distraction for NNL East now finished, it's time to get back to work on Hiffer! One of the Minibot's most distinctive features was his exhaust pipe hands, and I wanted to homage that here. The mufflers are from an Italeri truck detail kit, with toppers from an badly beaten Huffer toy. Once painted with some Molotow Liquid Chrome, I mounted them on a custom rack. The X brace is something I first did on my Prime build to guarantee parallel pipes, and seemed like a good idea here as well. The diamondplate is more of the material I used for the decking, and the crossbean is notched to clear the transmission. Here it is mounted and drying, with the cab and a fuel tank set in place to give me an idea of how it'll all go together. So far so good!
-
1959 Ranchero
spencer1984 replied to spencer1984's topic in Model Trucks: Pickups, Vans, SUVs, Light Commercial
I considered it, but as tight as the tolerances were between the box and chassis I didn't want to risk it (a fair amount had to be shaved down just to get it to fit as it is). I figured a compromise would be to add some permanent stains. -
1959 Ranchero
spencer1984 replied to spencer1984's topic in Model Trucks: Pickups, Vans, SUVs, Light Commercial
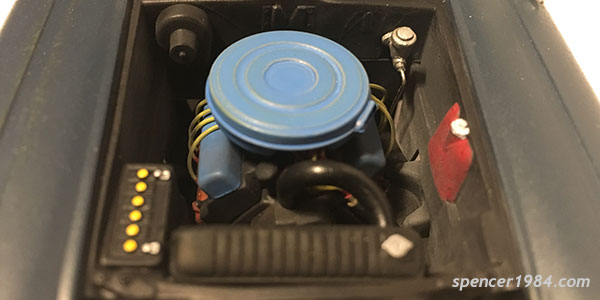
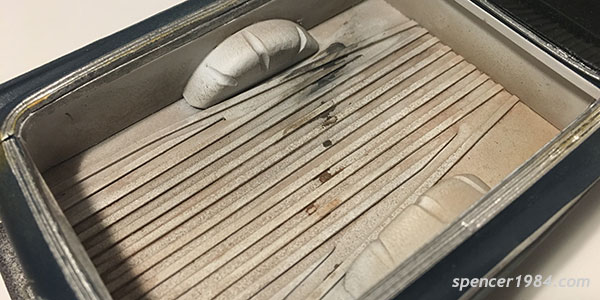
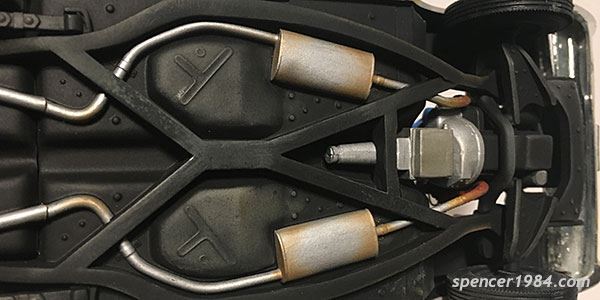
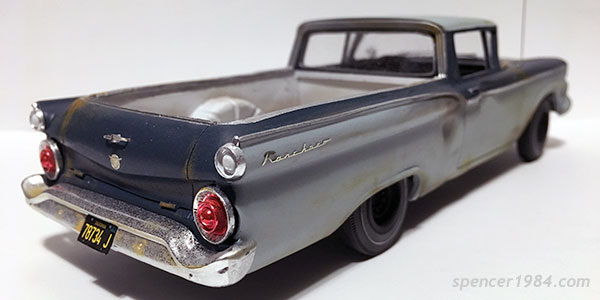
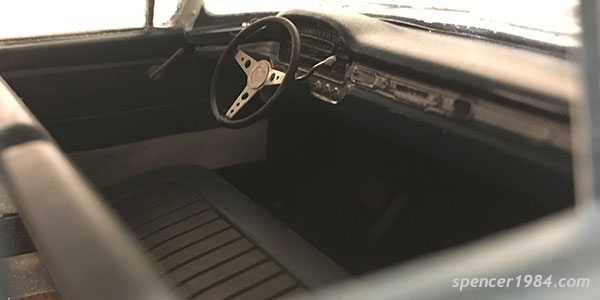
Thanks, guys! I did some basic engine detailing: ignition wires, radiator hose, new master cylinder, and relieved some plastic around bits like the air intake and coil. The chassis only has basic paint detailing, and until I flipped it over to take this photo I forgot that it doesn't have a driveshaft. The kit shaft comes in three parts, and was missing at least one of them when I got it. I'll have to go back and fix that this weekend. I tried to make the box look like it was intact but had seen some use, including an oil spill at some point in its life.
-
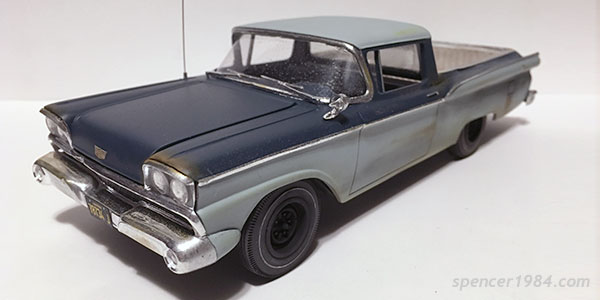
I used Revell's '59 Galaxie Skyliner with a Jimmy Flintstone '57 Ranchero roof, MCG emblems, and lots of scratch building. It was built to recreate Harry Dean Stanton's truck from Paris, Texas, and as a personal challenge to see if I could get it finished before NNL East (having started work on it mid-March).
-
58 Impala custom-the way it was done in the 60's
spencer1984 replied to pack rat's topic in Model Cars
I really like the look of this, nicely done! -
Great use of this kit, that looks fantastic!
-
Awesome project, and Motormaster looks great! I really like the idea for his scout car, looking forward to seeing what you do with that. Also, nice to see another 1/25 Optimus Prime! Do you have any more pics of him?
-
Box Stock Accurate Miniatures Grand Sport Corvette
spencer1984 replied to Hooked on Chaparral's topic in Model Cars
Nicely done, that looks great! -
Nice, and thanks for the wheel info! I have been collecting various Borranis for future projects (this, Ferris Bueller, etc.) so I try to keep notes on them. That bell housing seems *very* appropriate given some of the cutting that gets done to make cars screen-ready!
-
Nice clean work, that looks great!
-
Thanks, guys!
-
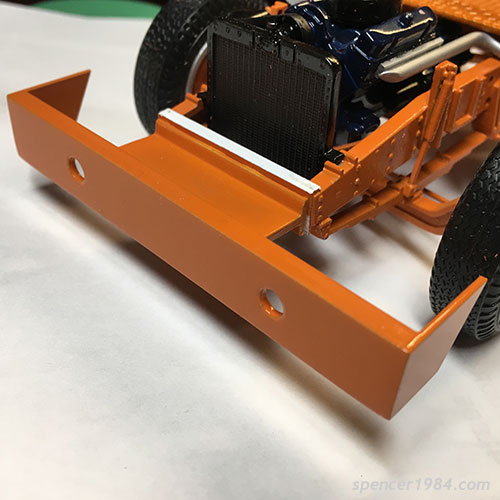
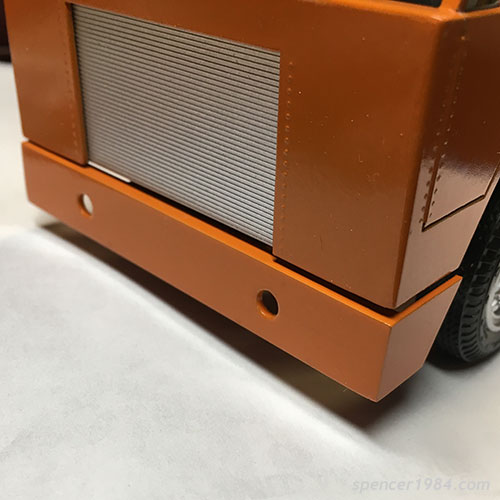
Thanks, guys! next up is the bumper: The main part of it is half an I beam, sanded flat to get rid of the inevitable curve that comes with parts like this. The wings are 0.040" sheet styrene, cut to follow the line of the wheel opening on each side. Turns out I shouldn't have cut off the forward frame rails: Huffer's nose is a lot longer than I had guessed up front. Since I'll be gluing the cab in place, I decided to cheat a bit and I made the standoff from another piece of I beam. While it lacks accuracy, it did make adjusting the tilt and spacing to the cab a breeze. And with everything closed up, you'll never see it!
-
Looks slick, nicely done!
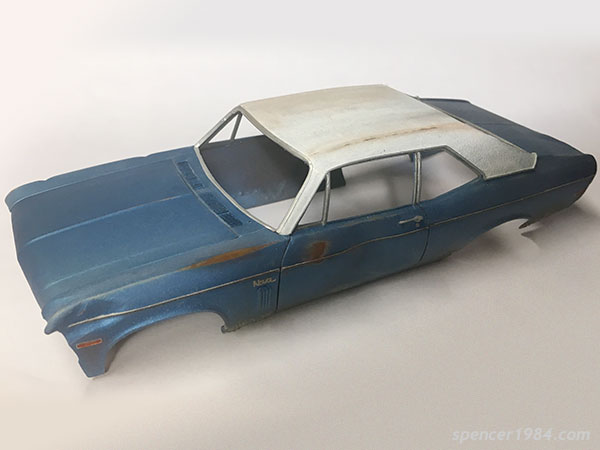
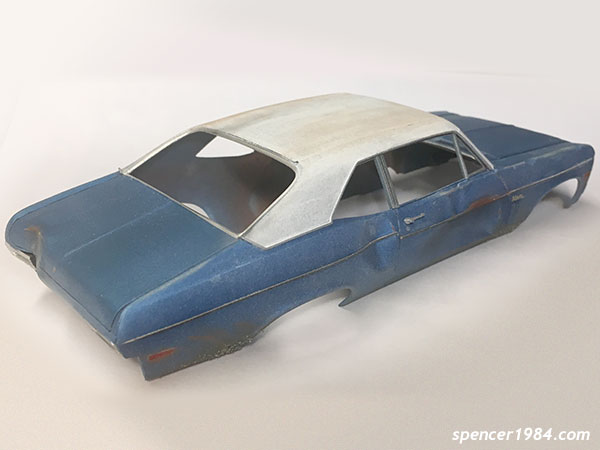
-
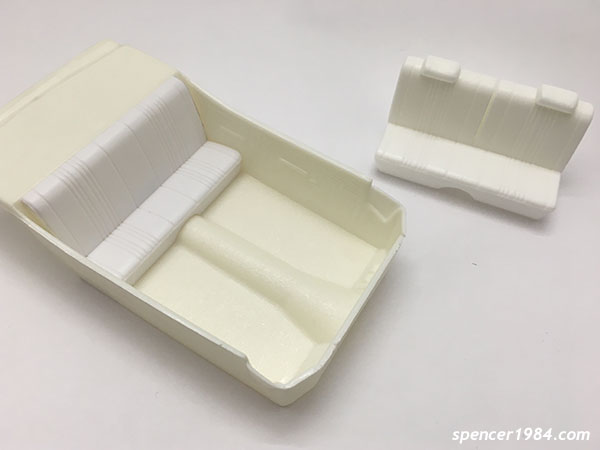
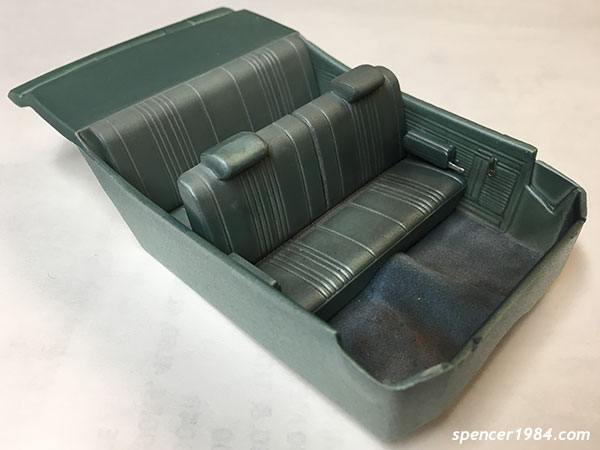
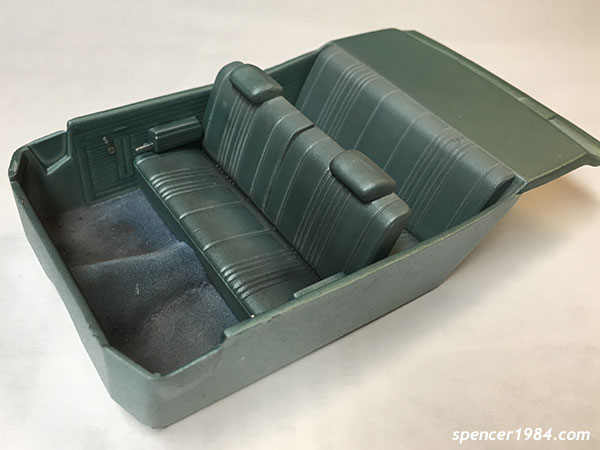
Progress on the Nova has been slow this past week between everyone in the family having a cold and what time I do have at the bench trying to get my NNL East model finished...but I do have an update! AMT bucket, bench seat from Harts Parts Resin, and rear seat from the Revell kit. The resin bench needed to have the split cut in the back and a little trimmed off the sides of the pad to fit. I was just planning to use the AMT rear seat, but the different patterns were really obvious in blue–last time I painted the interior black, so everything kind of blended together. Revell's seat had the correct pattern, but needed to be shortened to fit so I cut the back off and removed a couple scale inches. In retrospect I wish I had cut the front seat the same way, as the split between cushion and back looks a lot better as an actual split. Painted and partially weathered. I used Model Master Ice Blue for the vinyl, light blue flocking for the carpet, and MCG window cranks. The arm rests were from Monogram's '69 GTO, and are a bit bigger than they should be but still better than the tiny blips that were cast into the bucket. Next up is more color blending.