skid896
-
Posts
123 -
Joined
-
Last visited
Content Type
Profiles
Forums
Events
Gallery
Everything posted by skid896
-
The white and blue transam is just awesome. I need to build that, which kit is it Tony?
-
Love the italian stripes on the Ferrari, great work Bernard.
-
My votes for the MGB. I have the rubber bumper version to build next year, just need to match damask red for it. Great set of builds, no way I could complete as many as that.
-
Great builds, the eunos roadster looks great with the front splitter
-
Nice build, I have one of these I was building but misplaced a few parts in a move. Good choice of wheels, really suit it.
-
Great build did the rostyle wheels come with the kit? I am trying to find some like that for an aoshima rubber bumper MGB kit in my stash.
-
Really like the primavera beige combo with the wheels, great build.
-
Nice looking build, would you recommend the hasegawa ones? They tend to have a premium on the price over the other Japanese kits.
-
Raymond, thank you for the links, some awesome stuff there. So I ended up having to wet and dry the body back to remove the paint. I have now primed it again but I am not convinced the topcoat will go on without issues. Luckily I bought two of these kits so if I have to I can use the new body and start over.
-
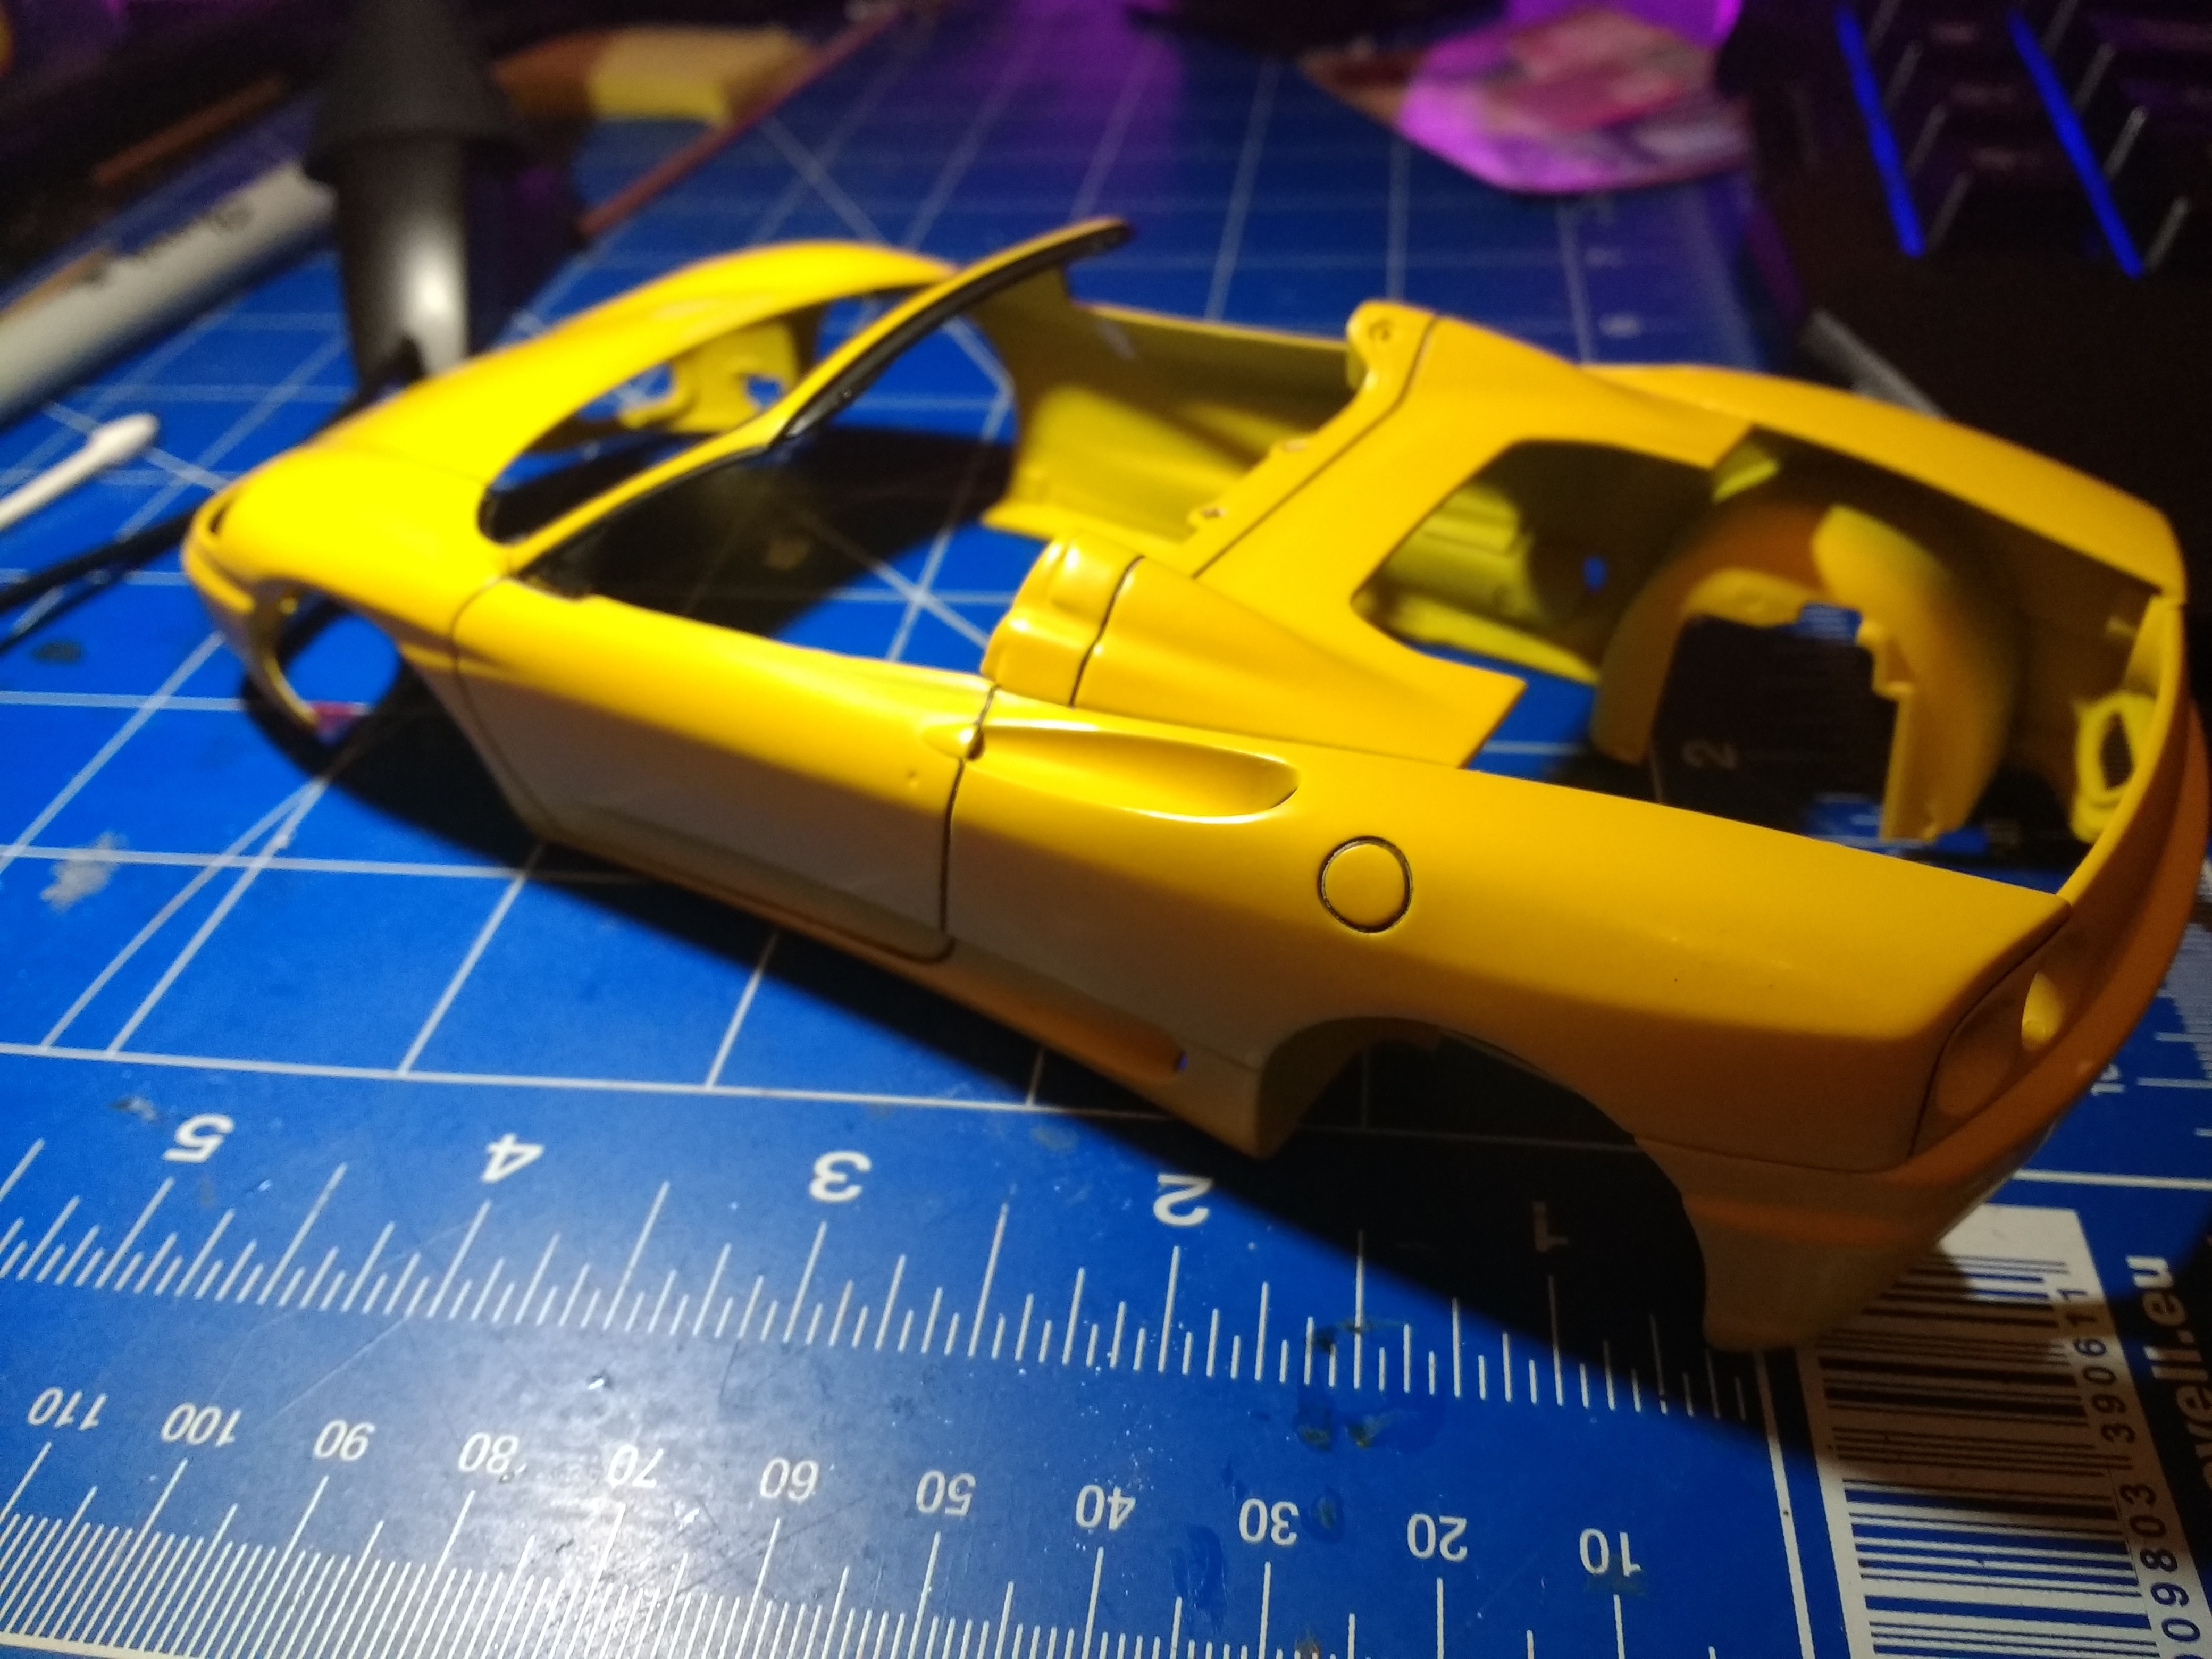
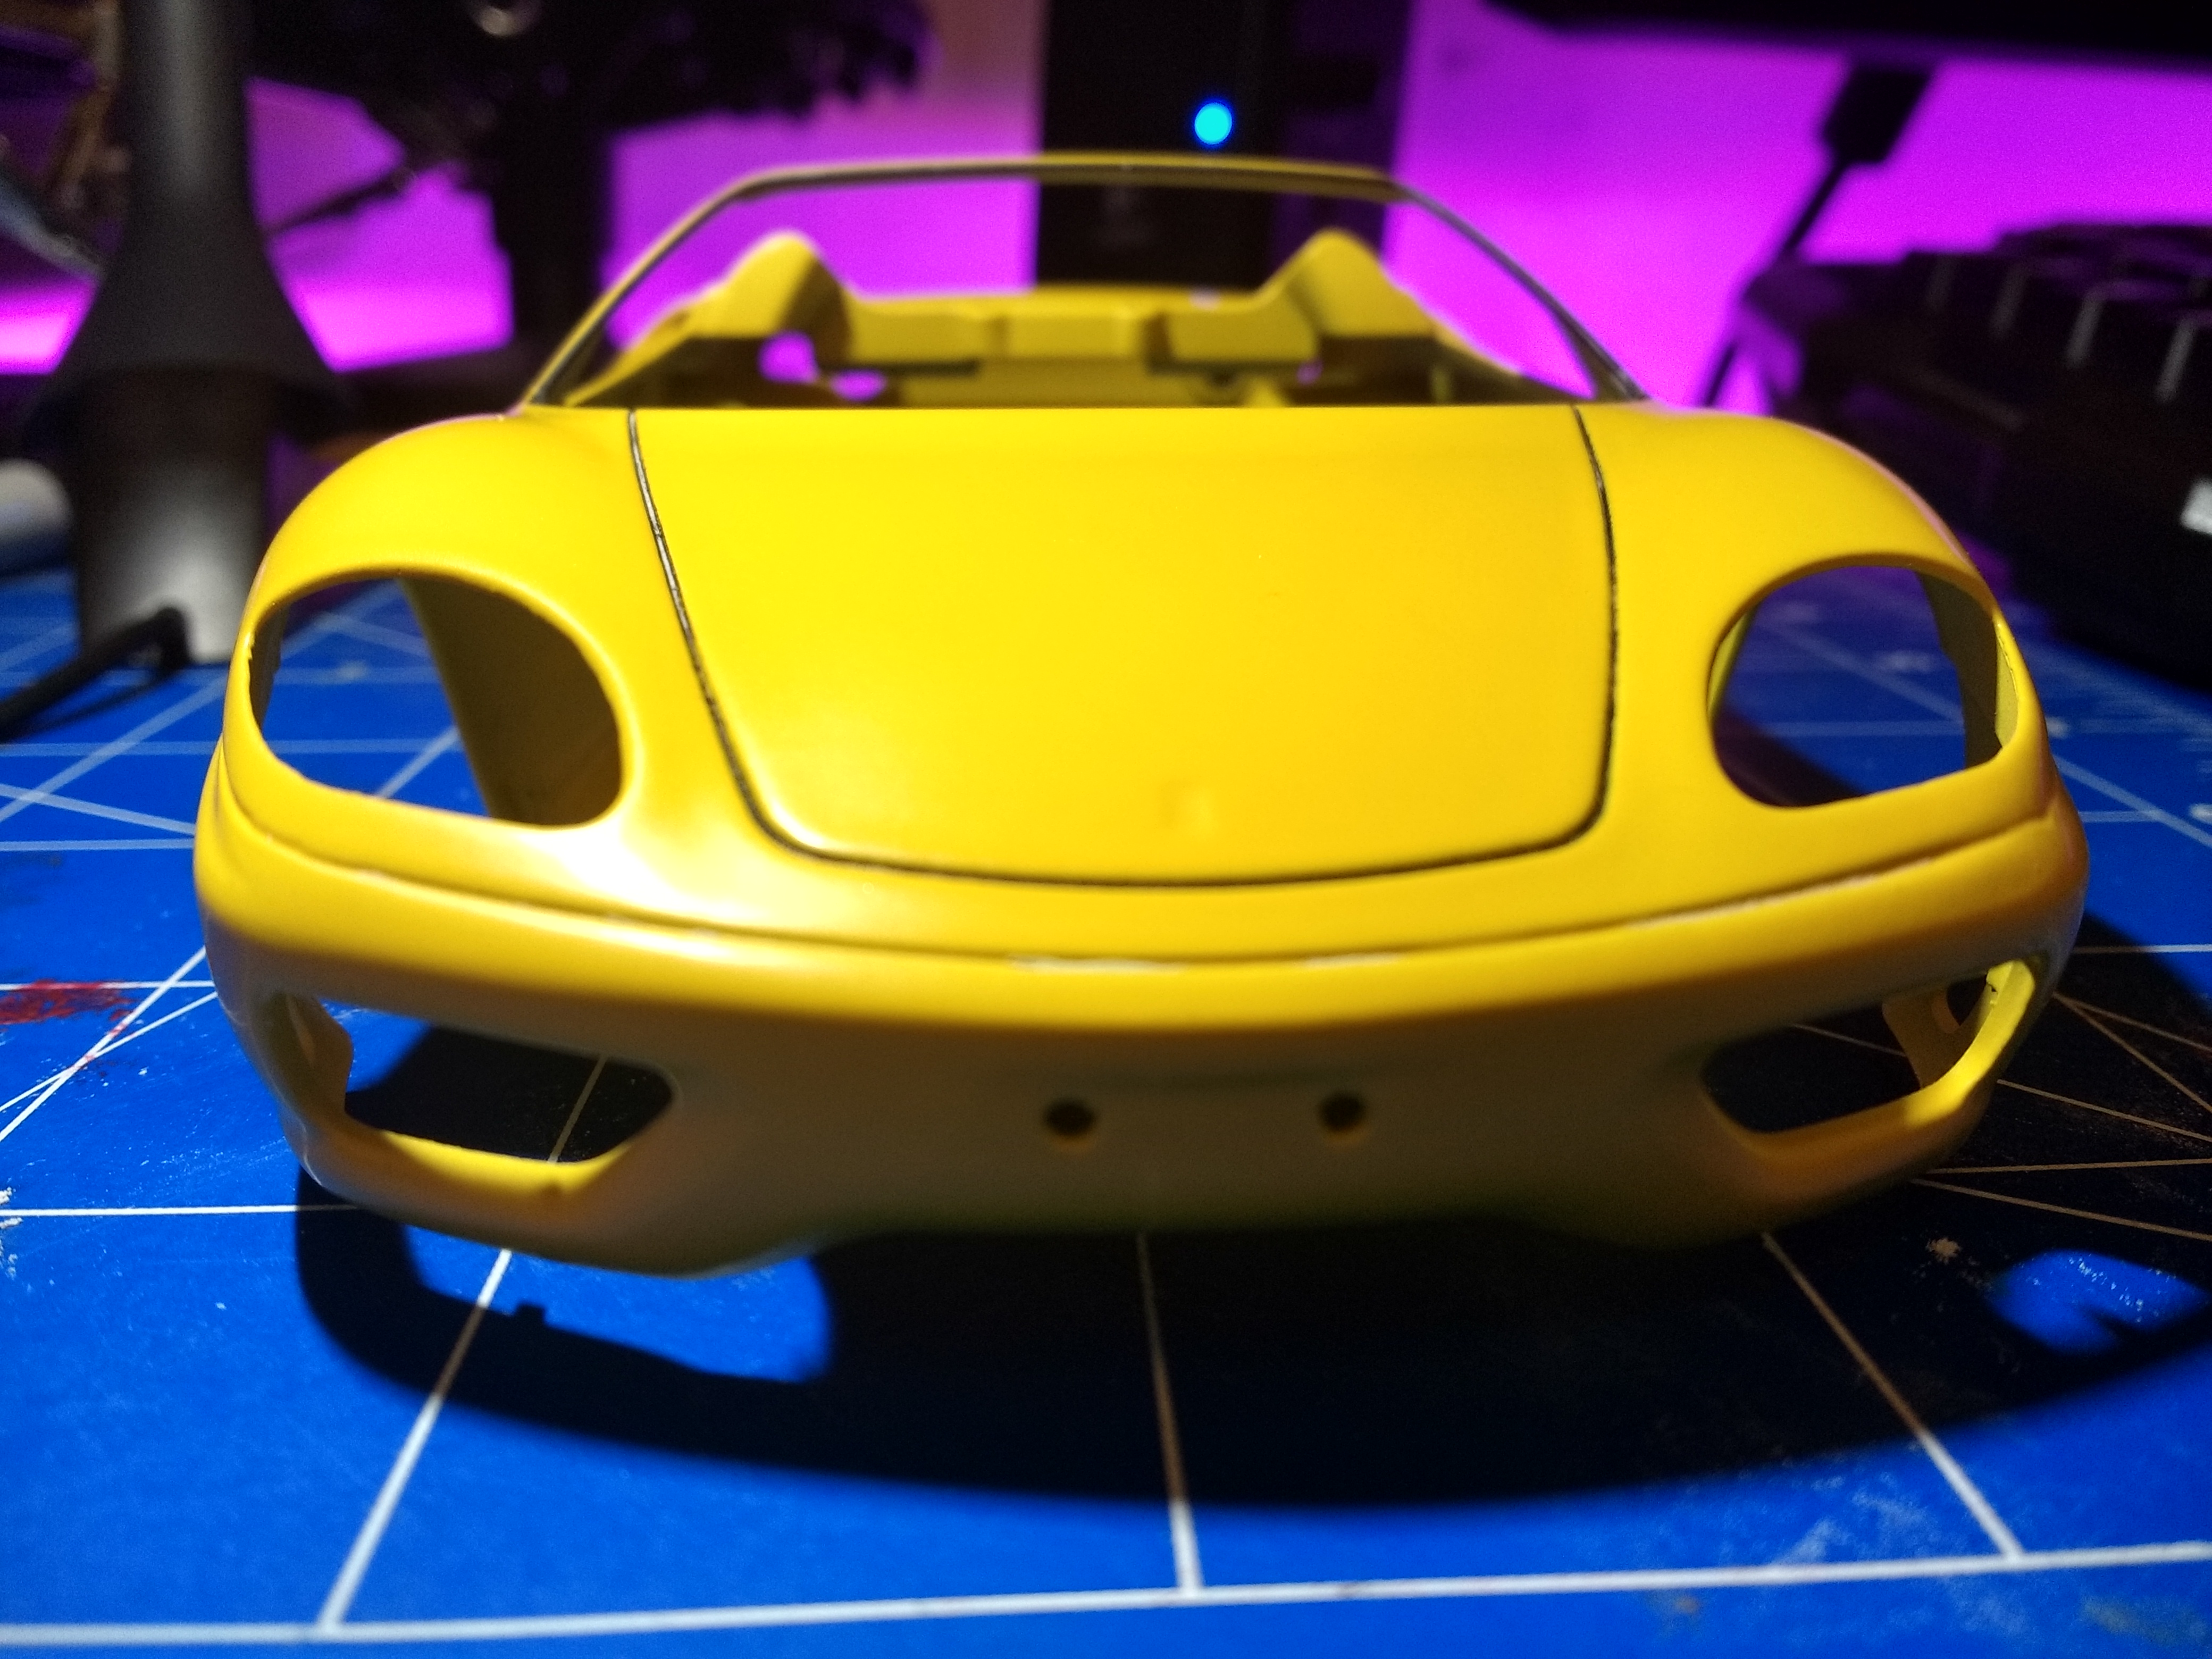
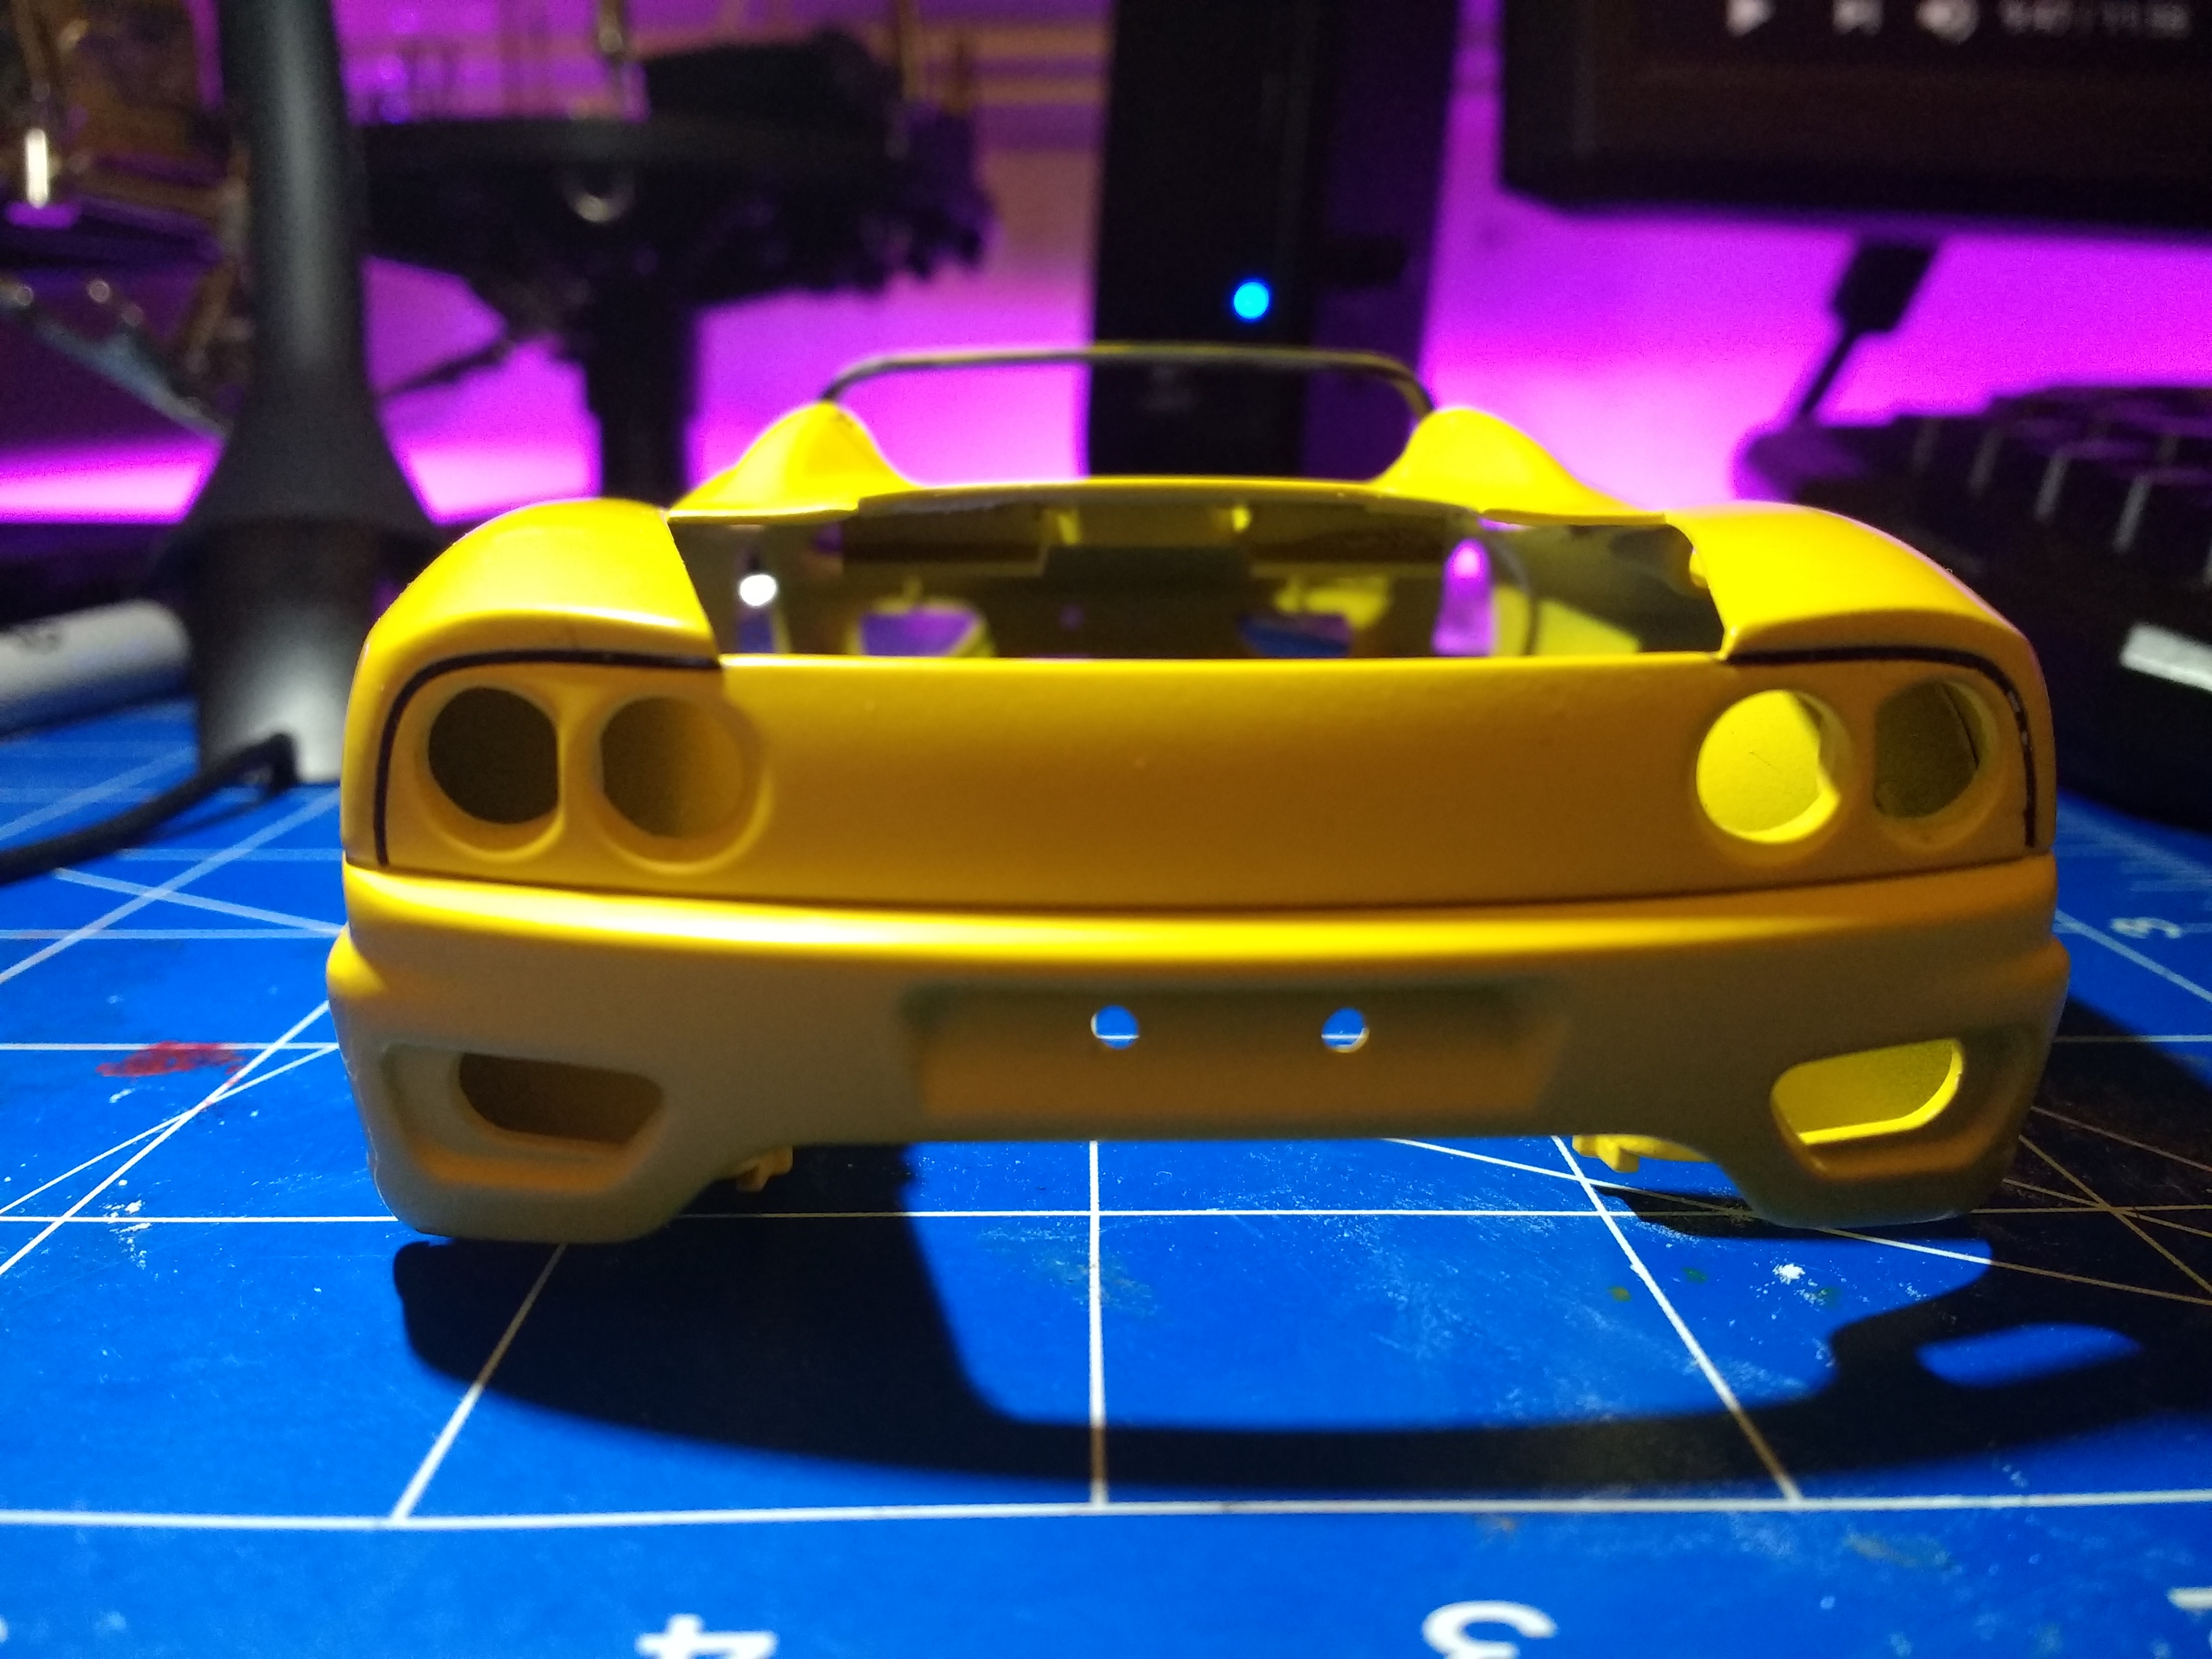
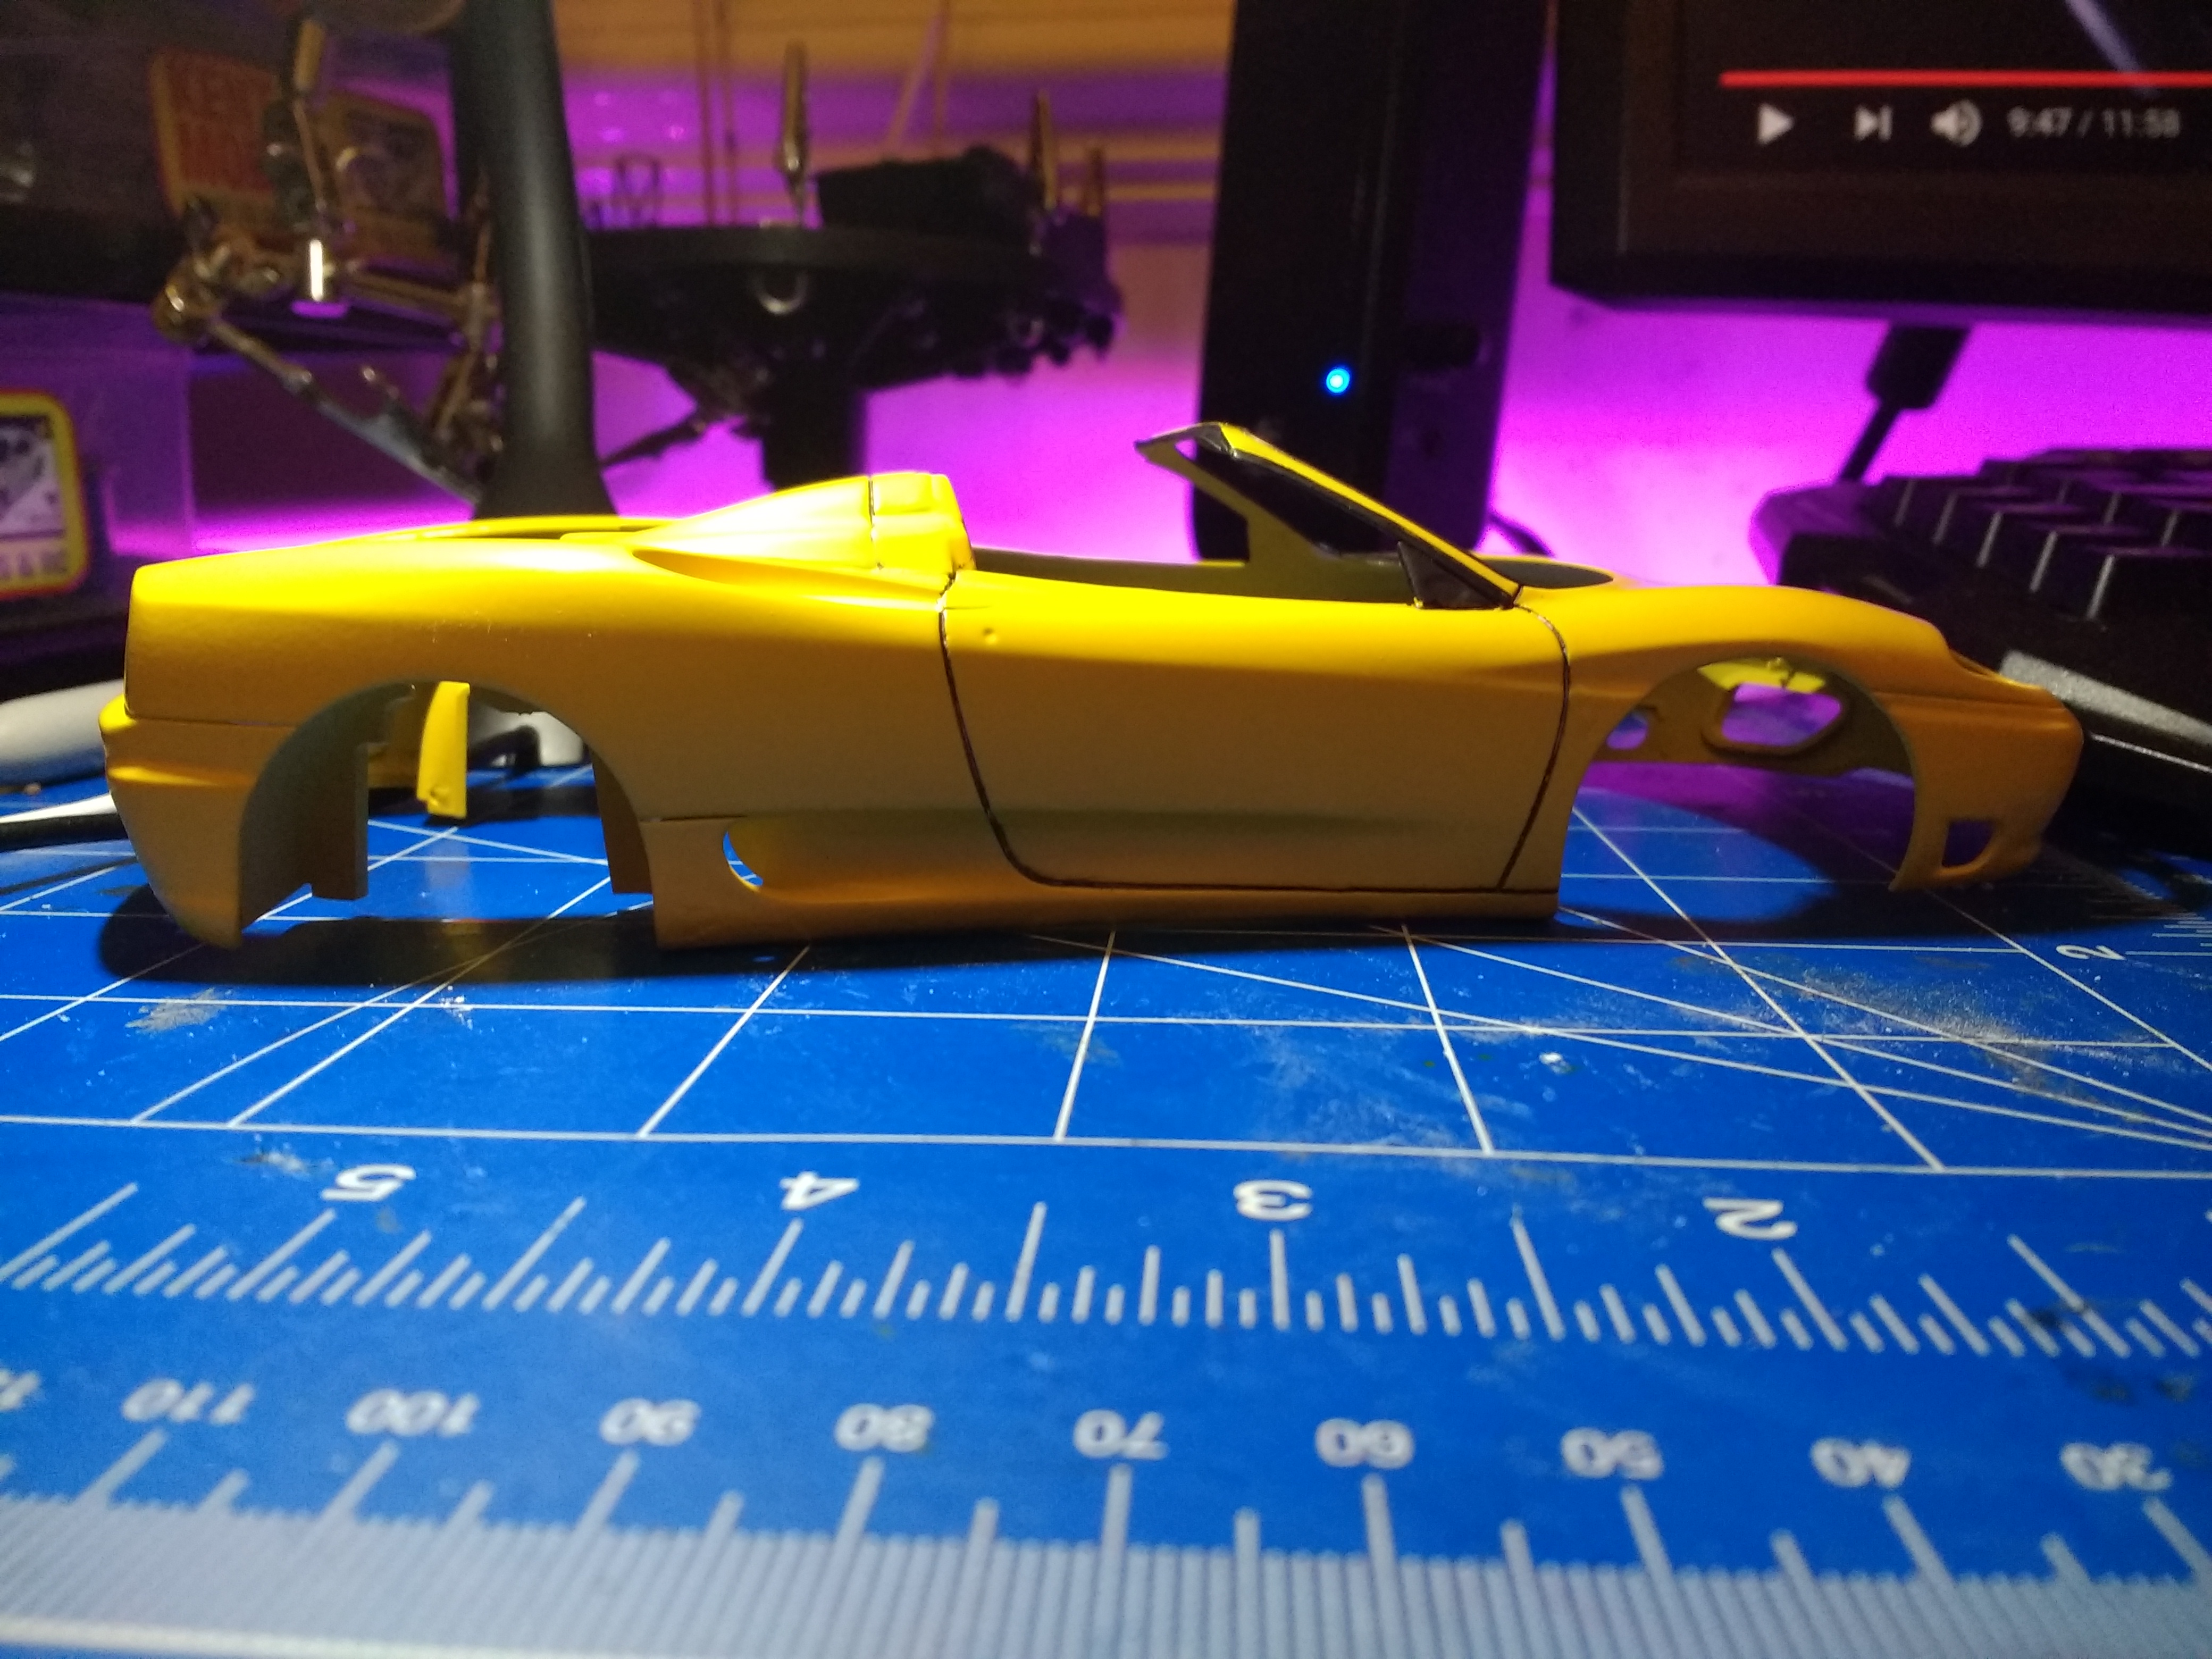
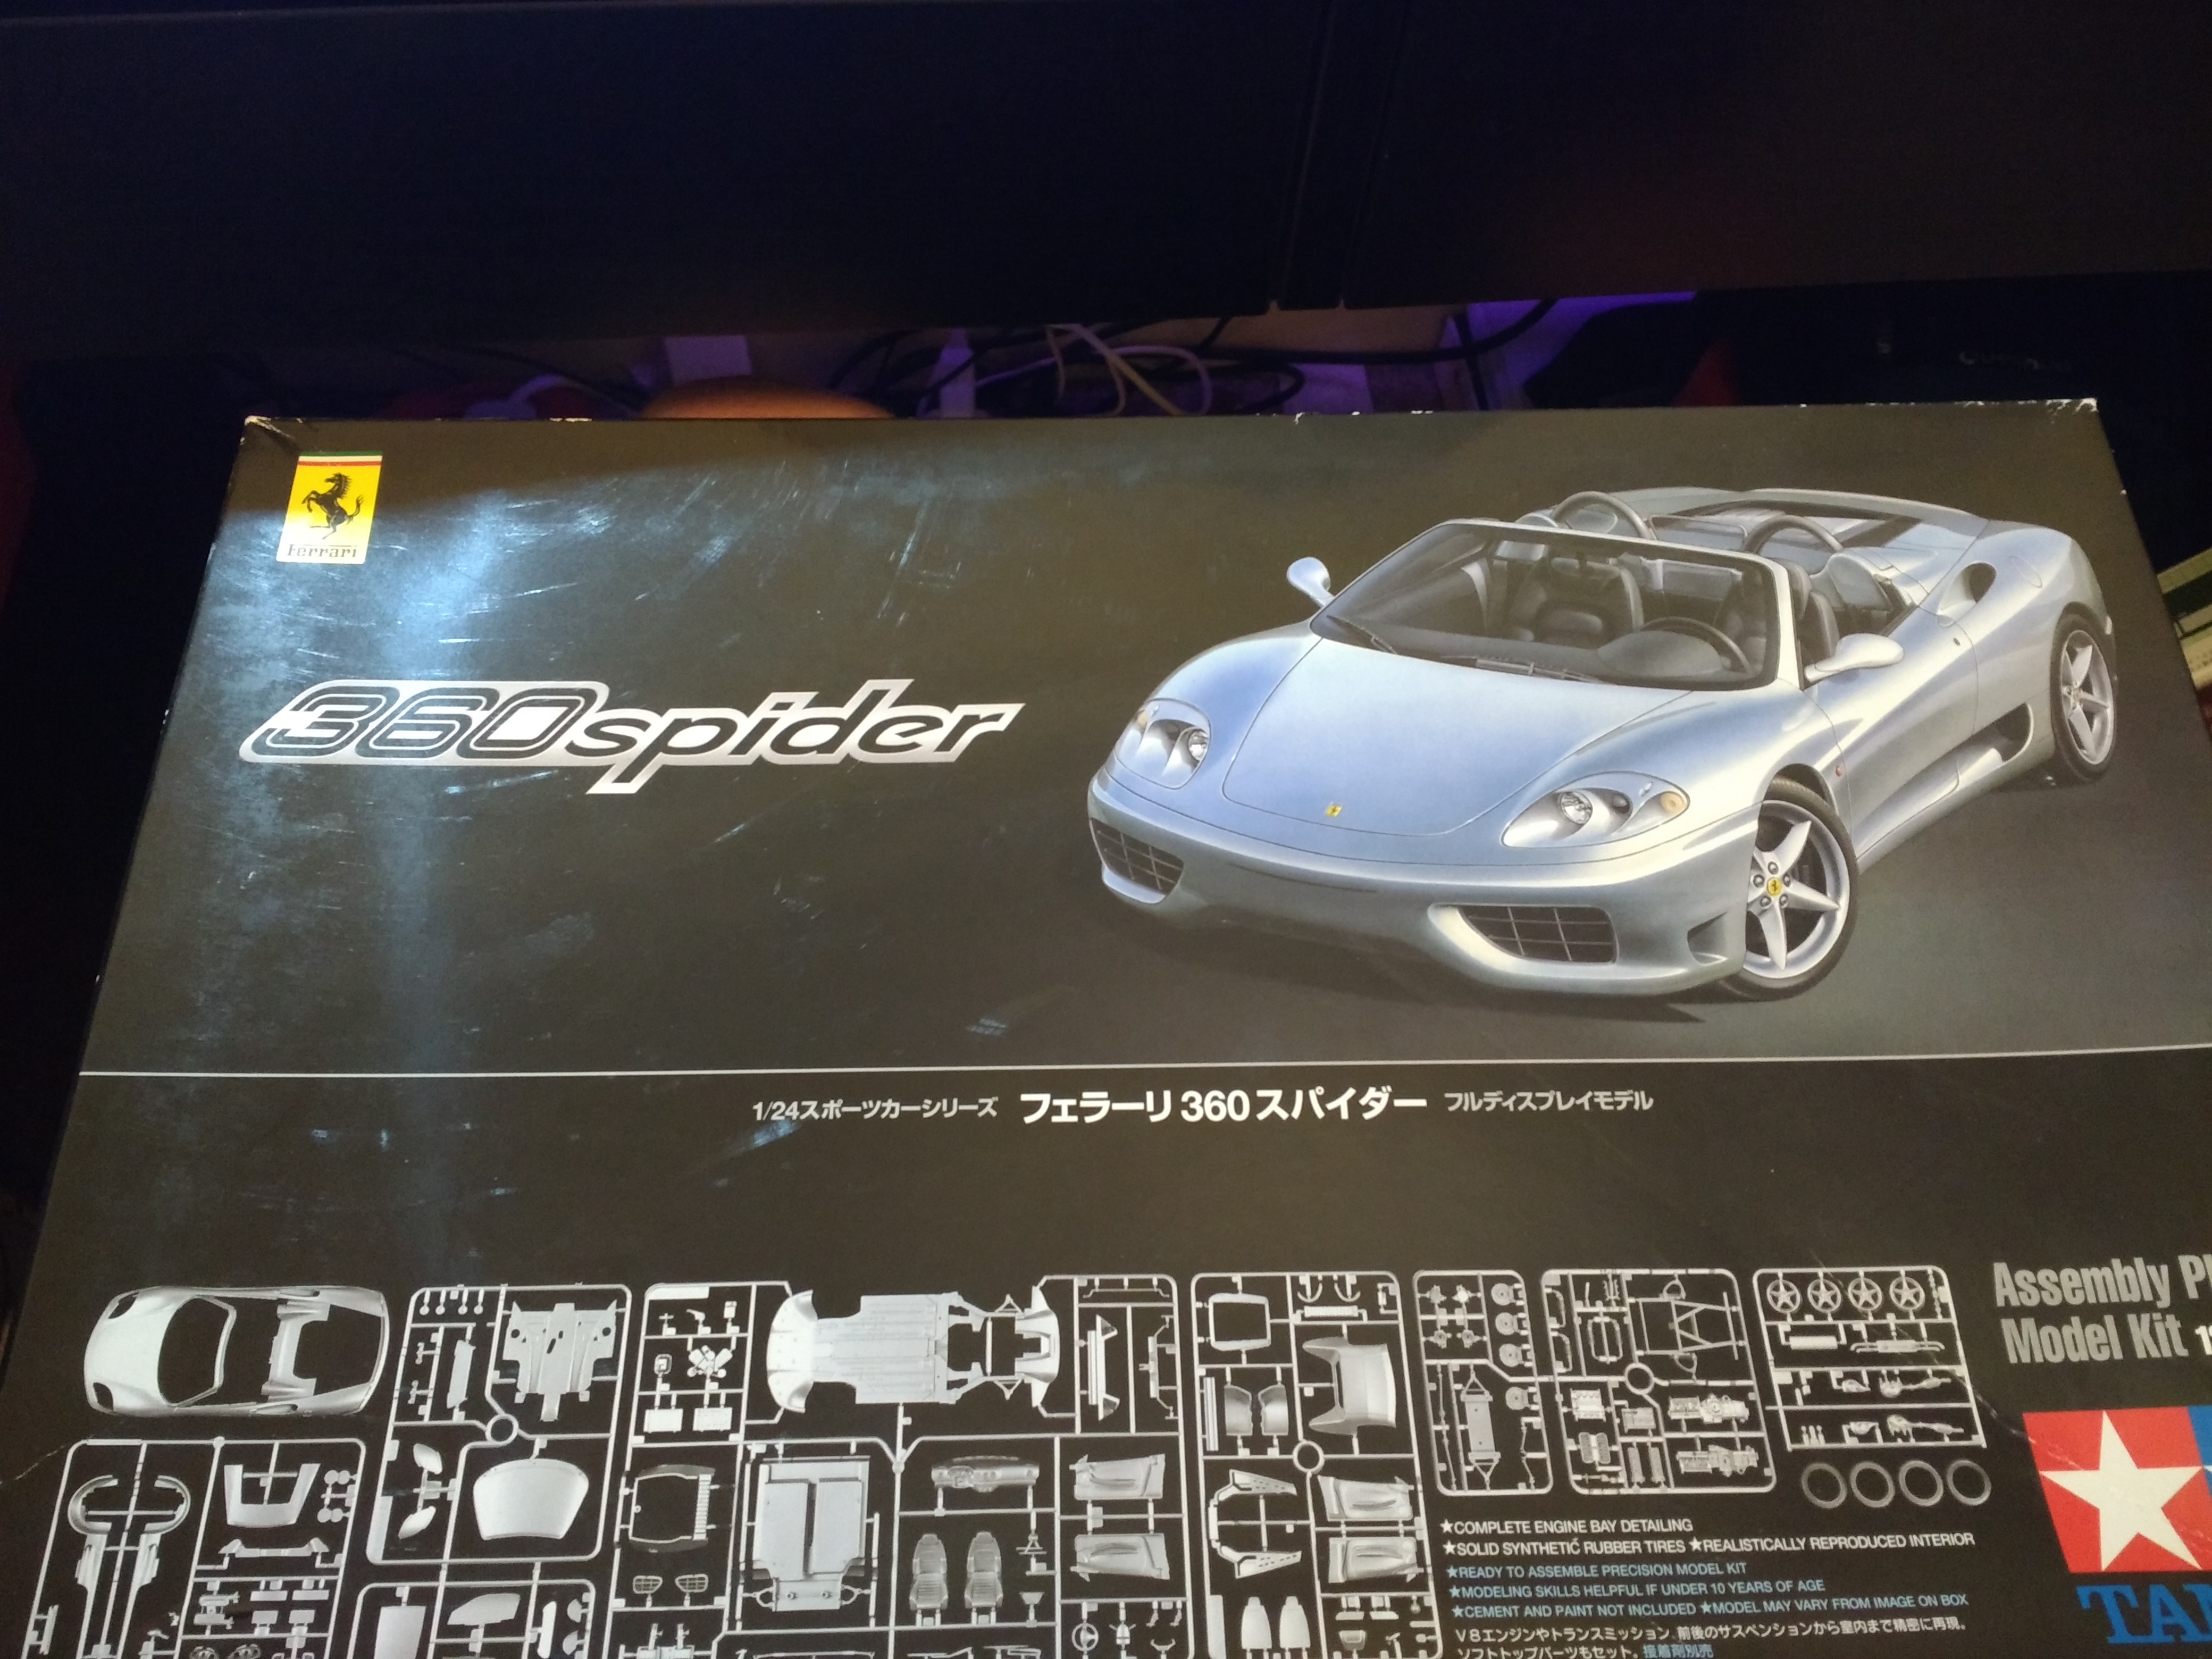
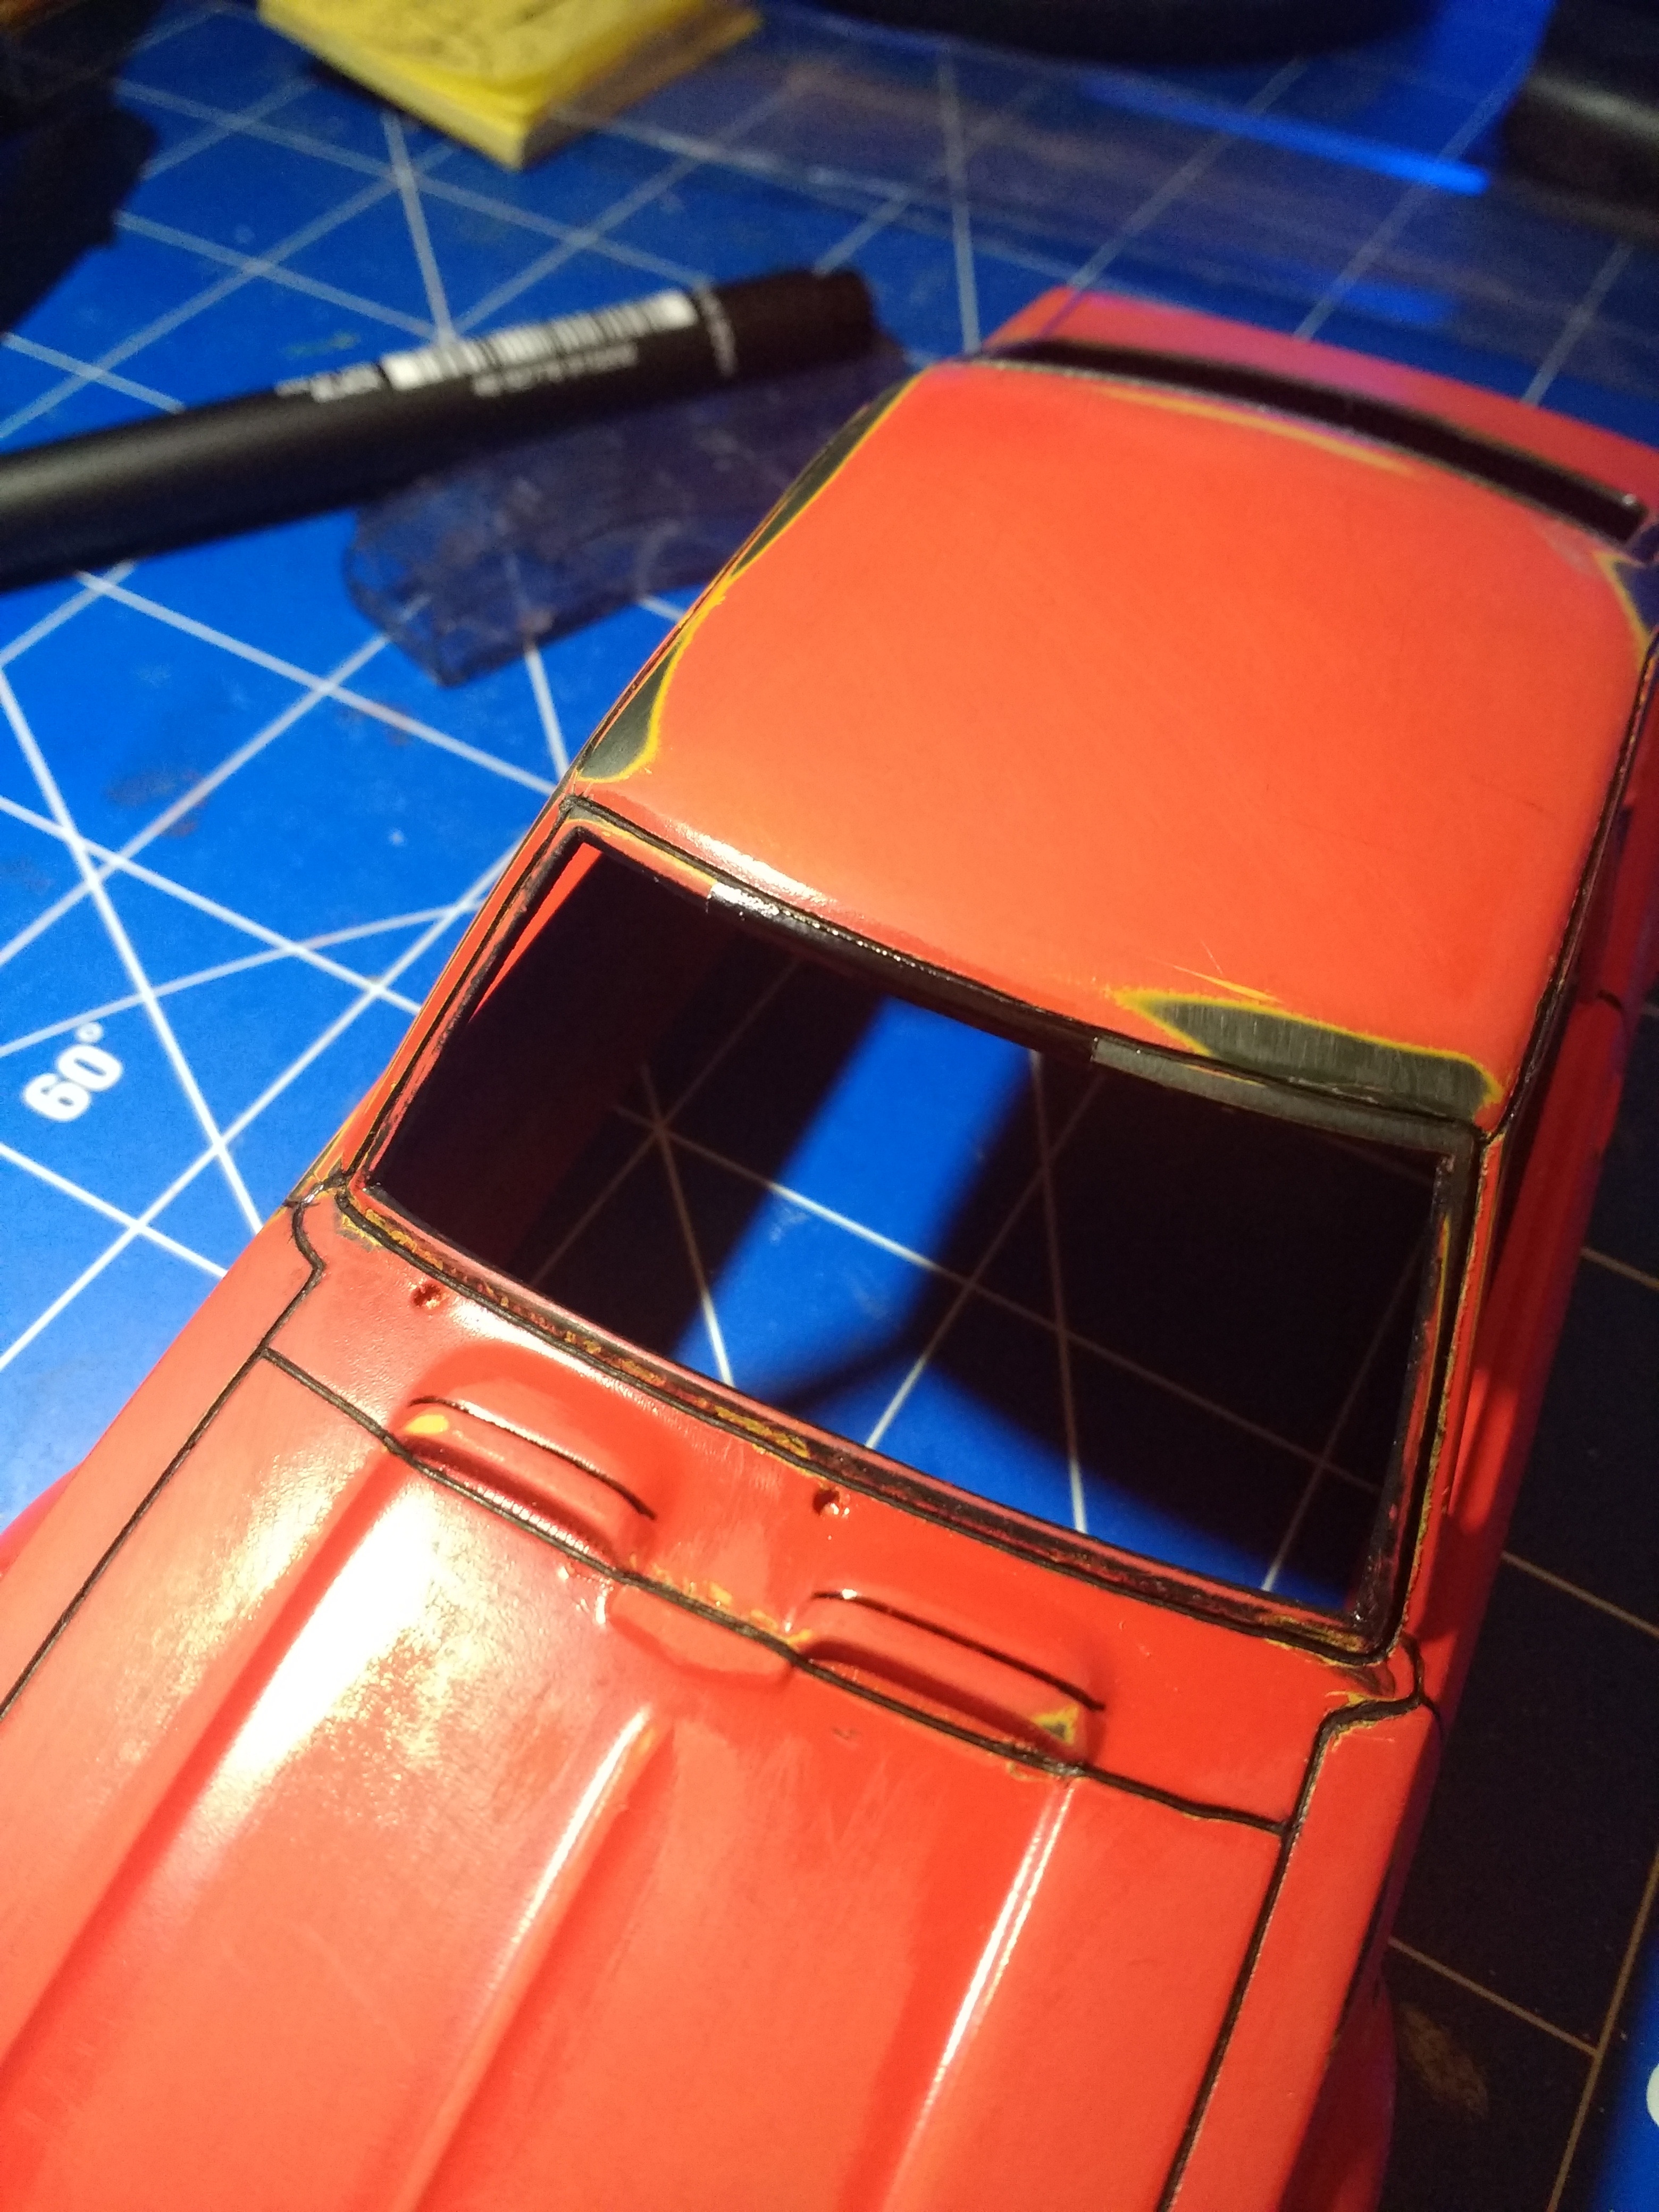
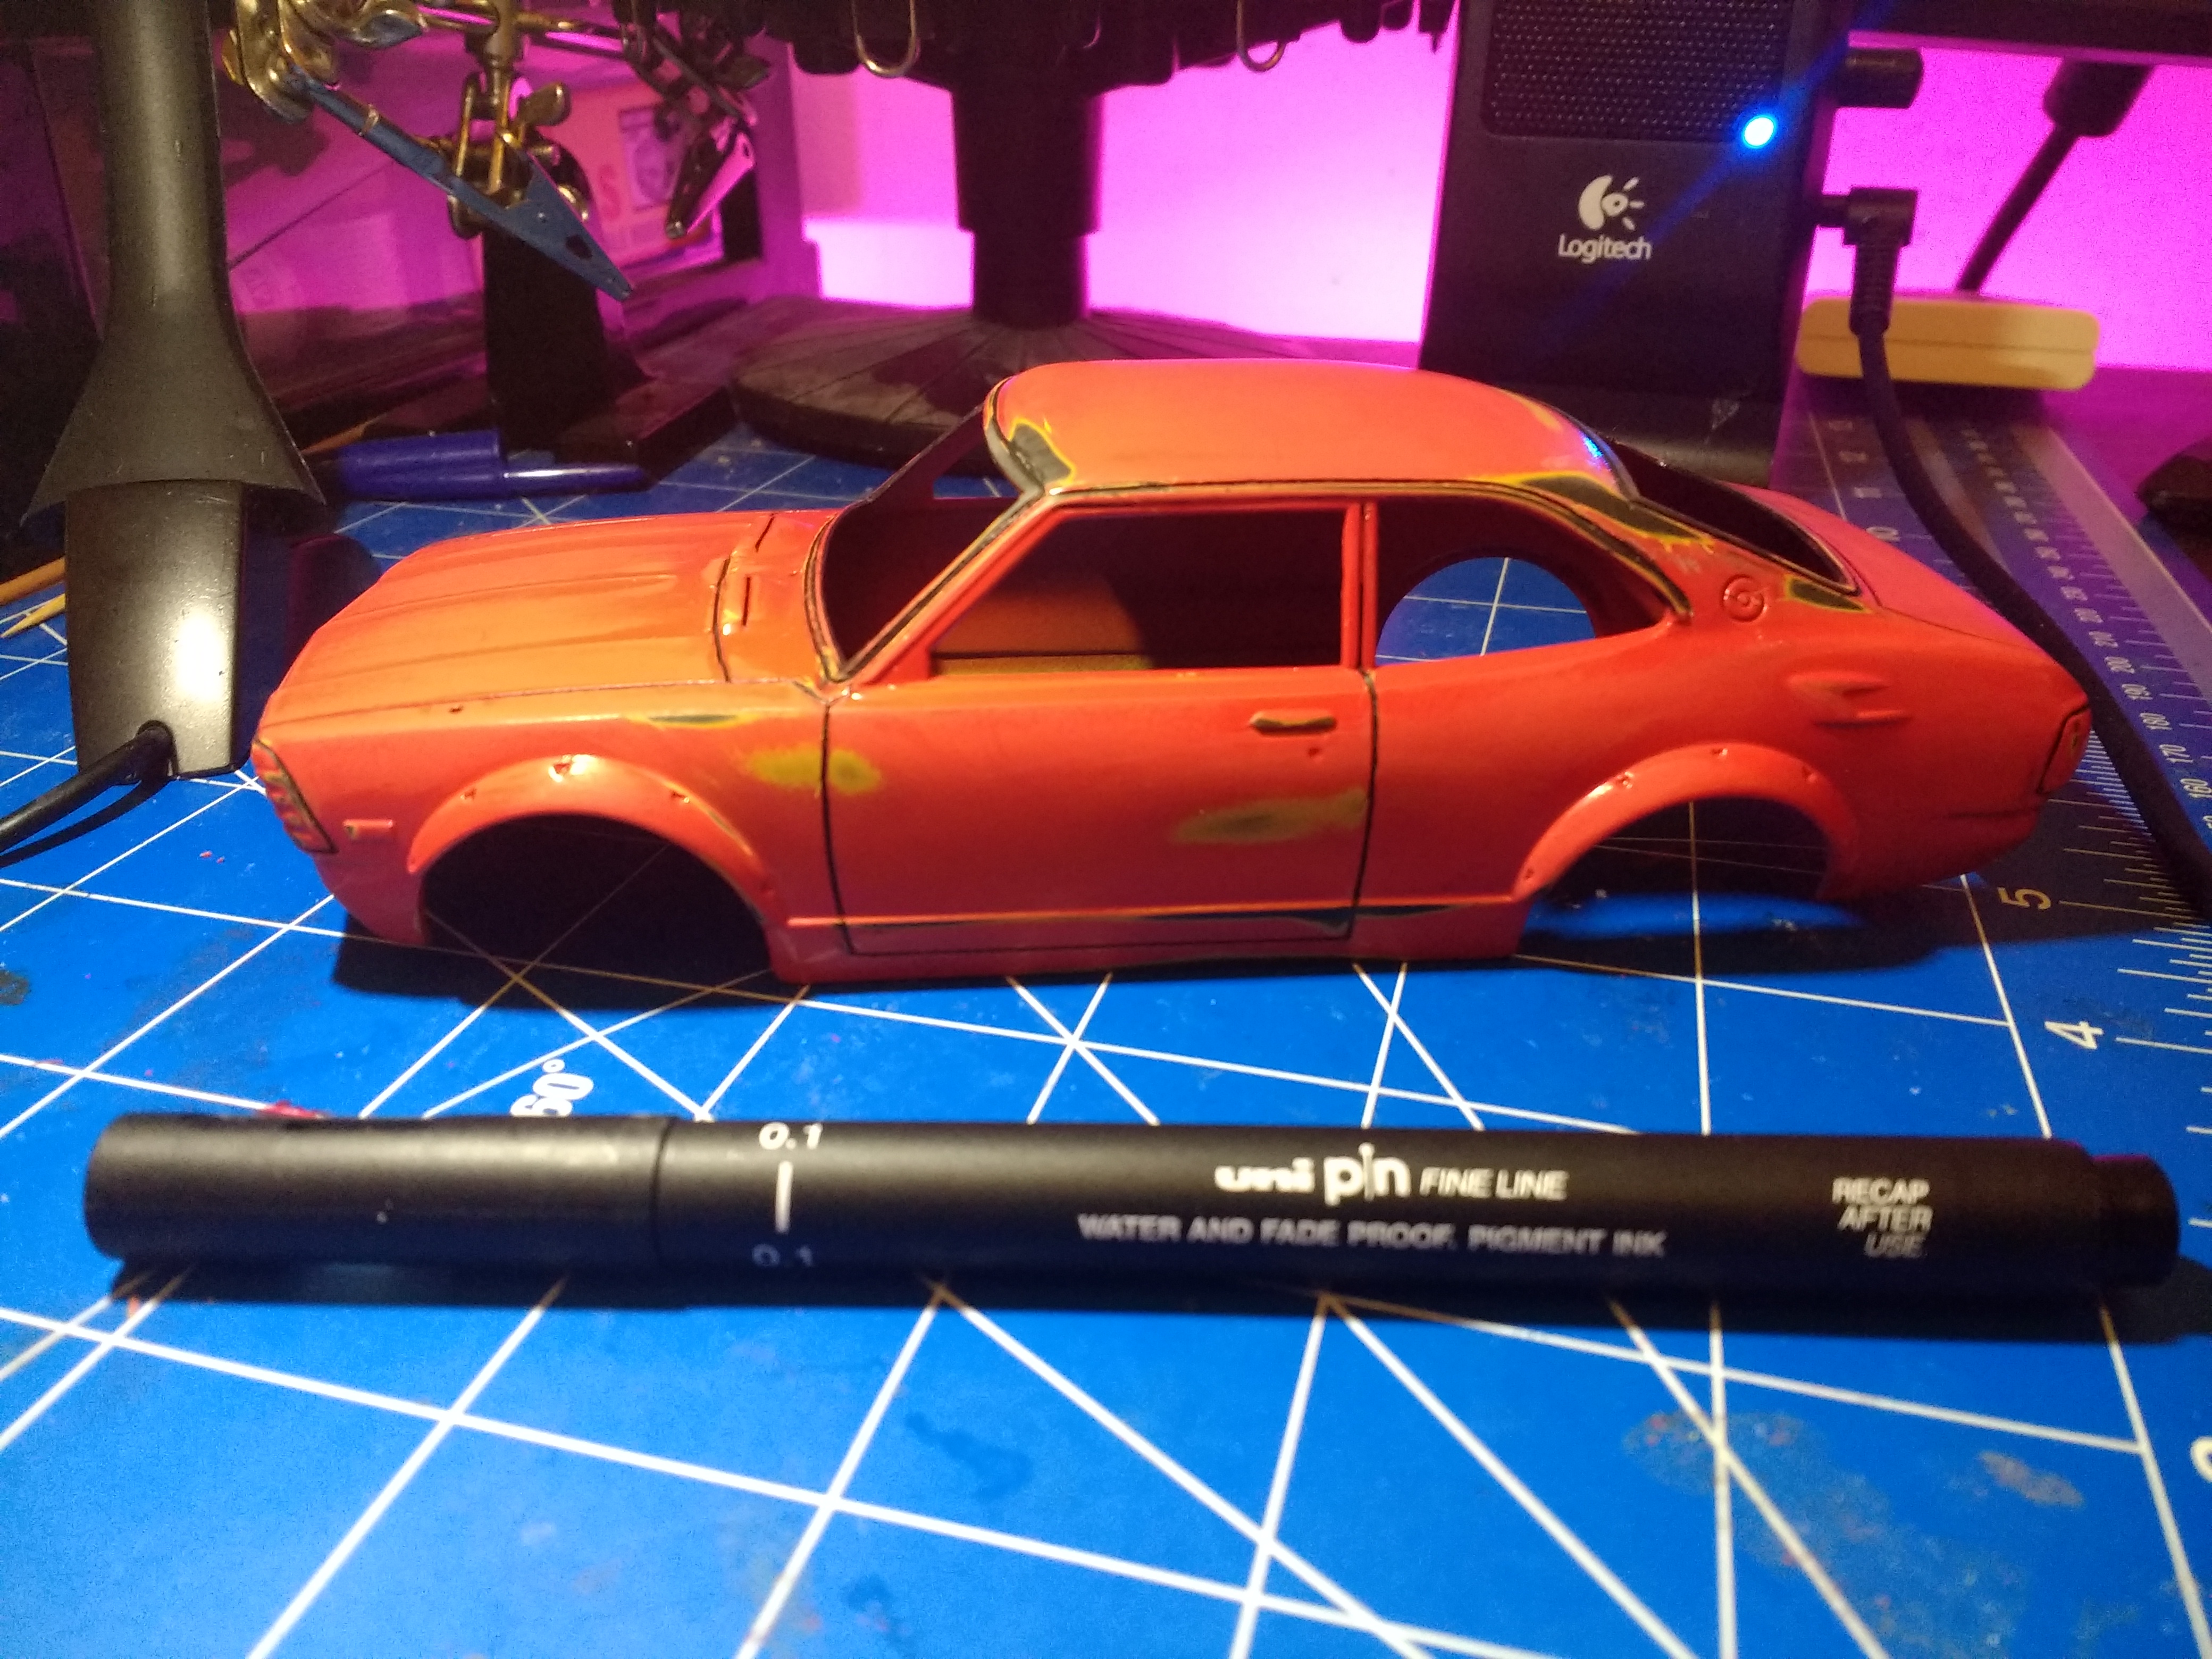
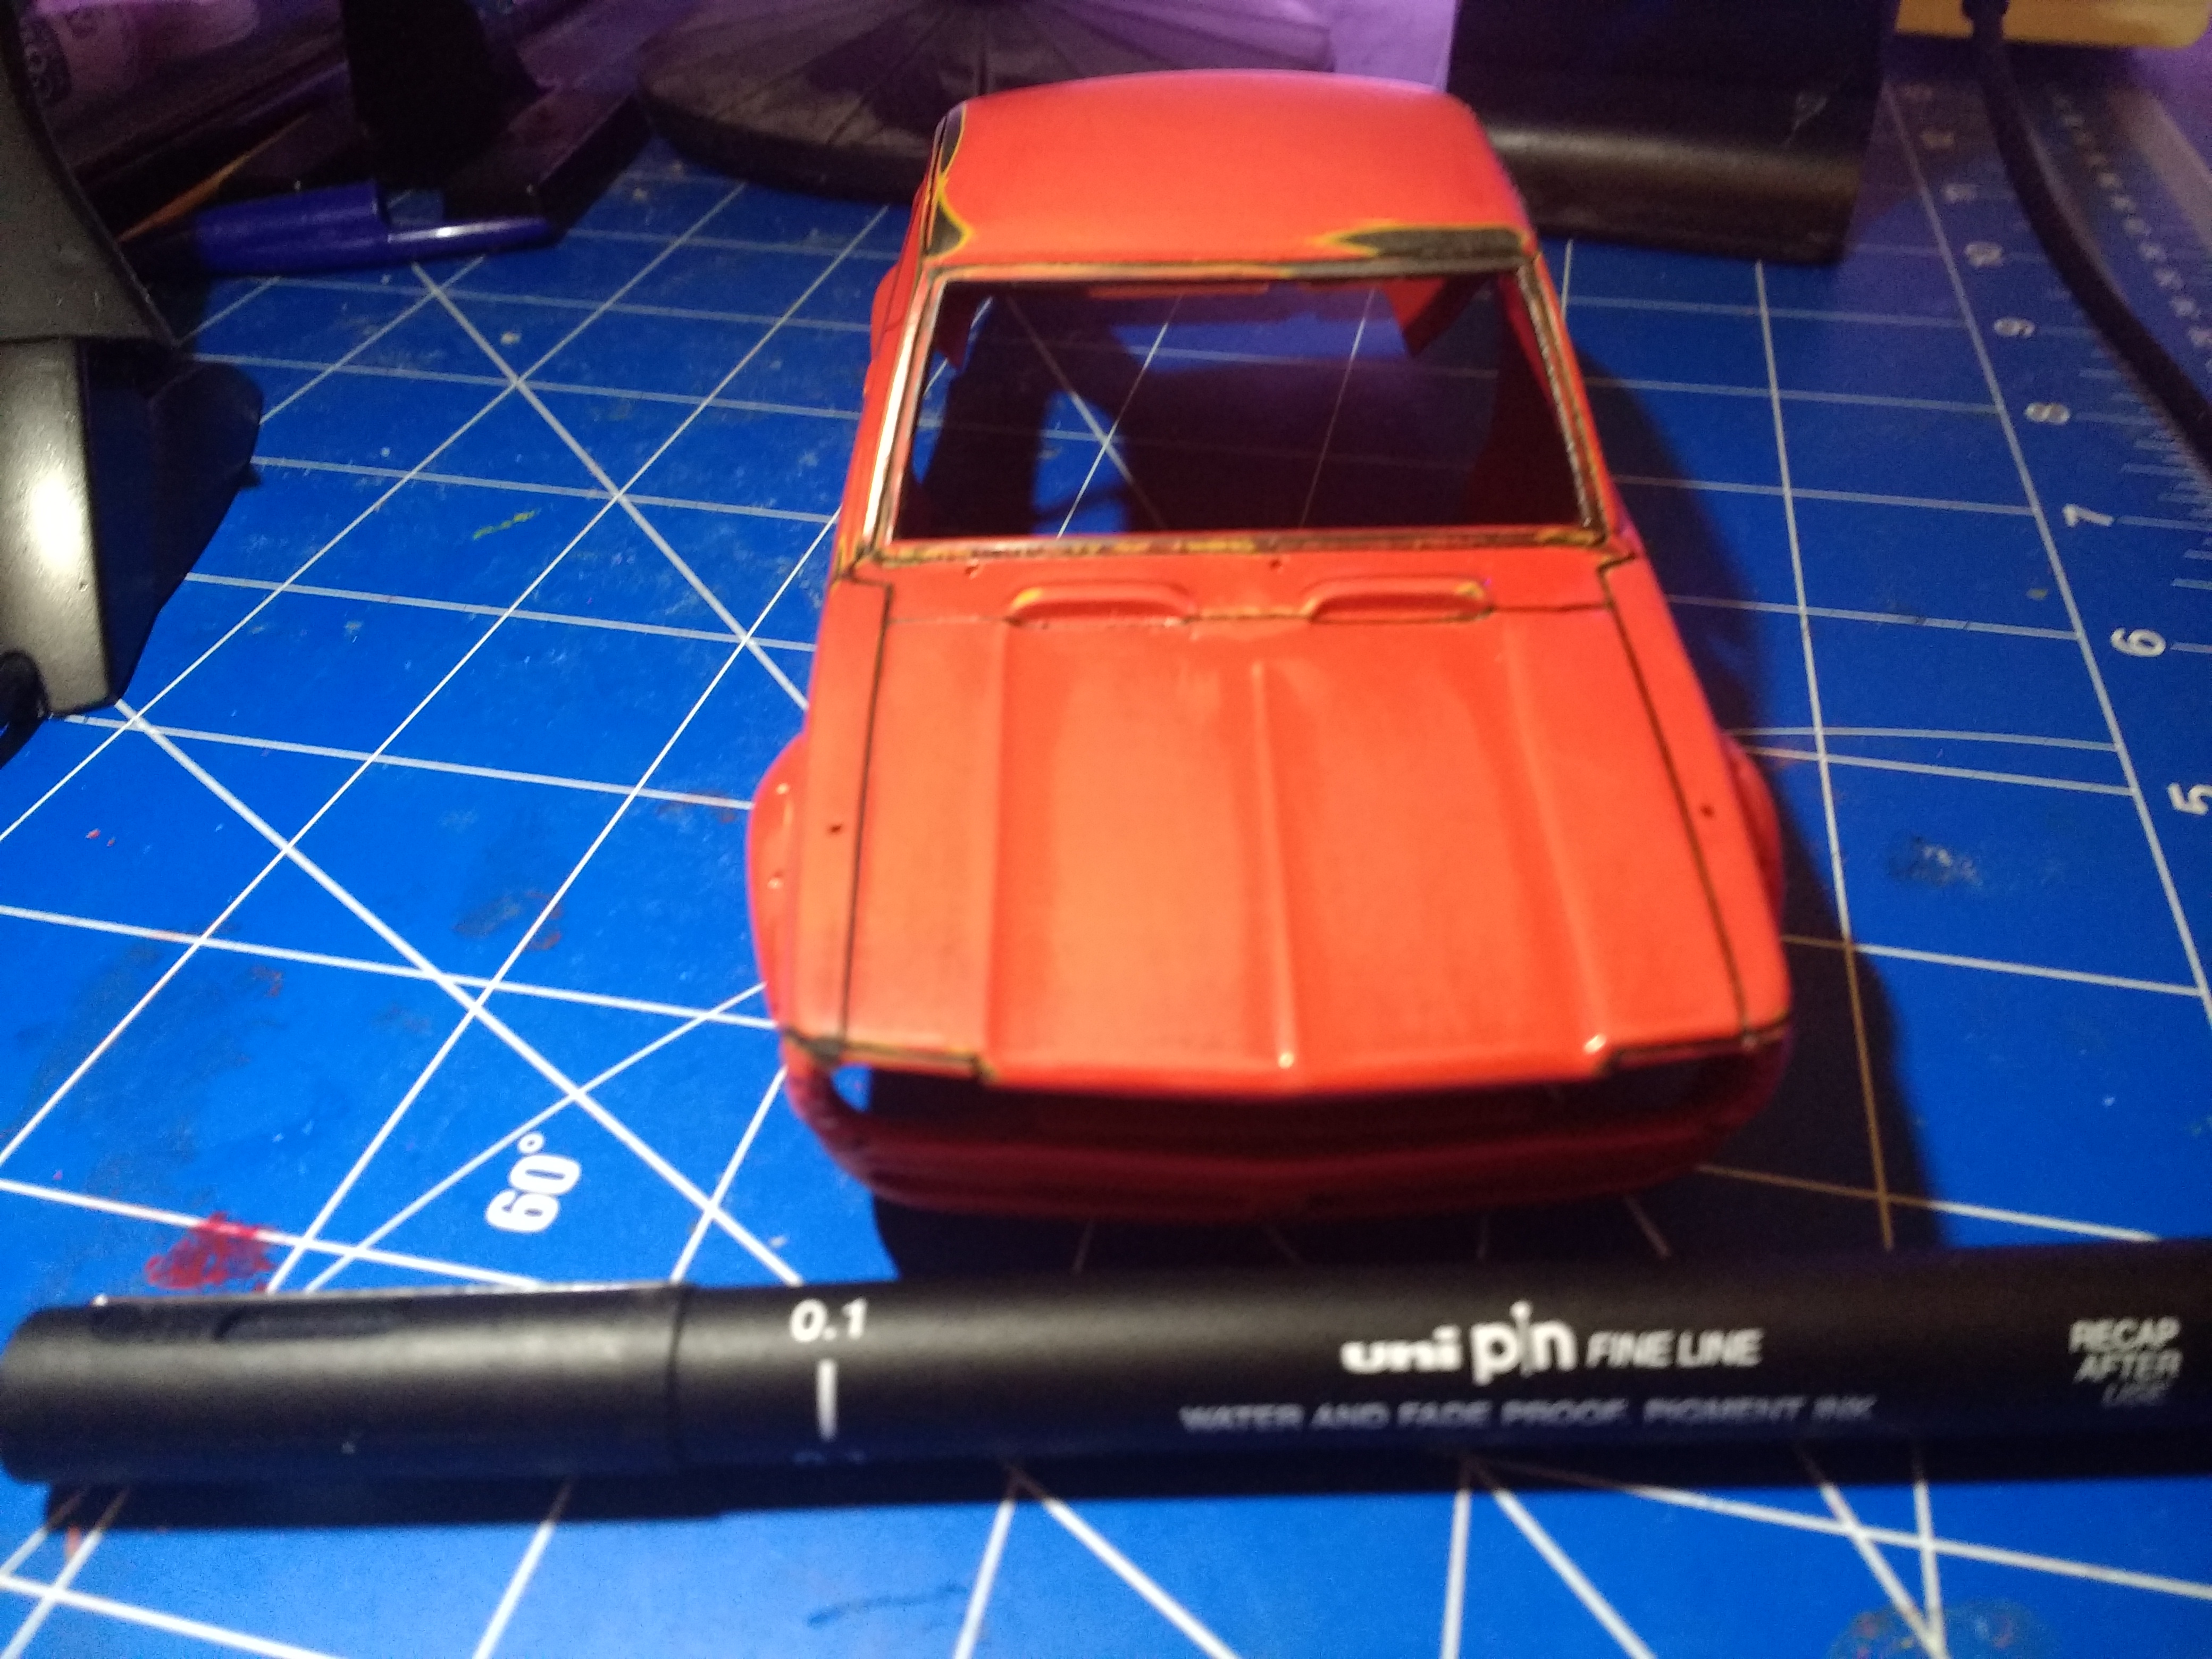
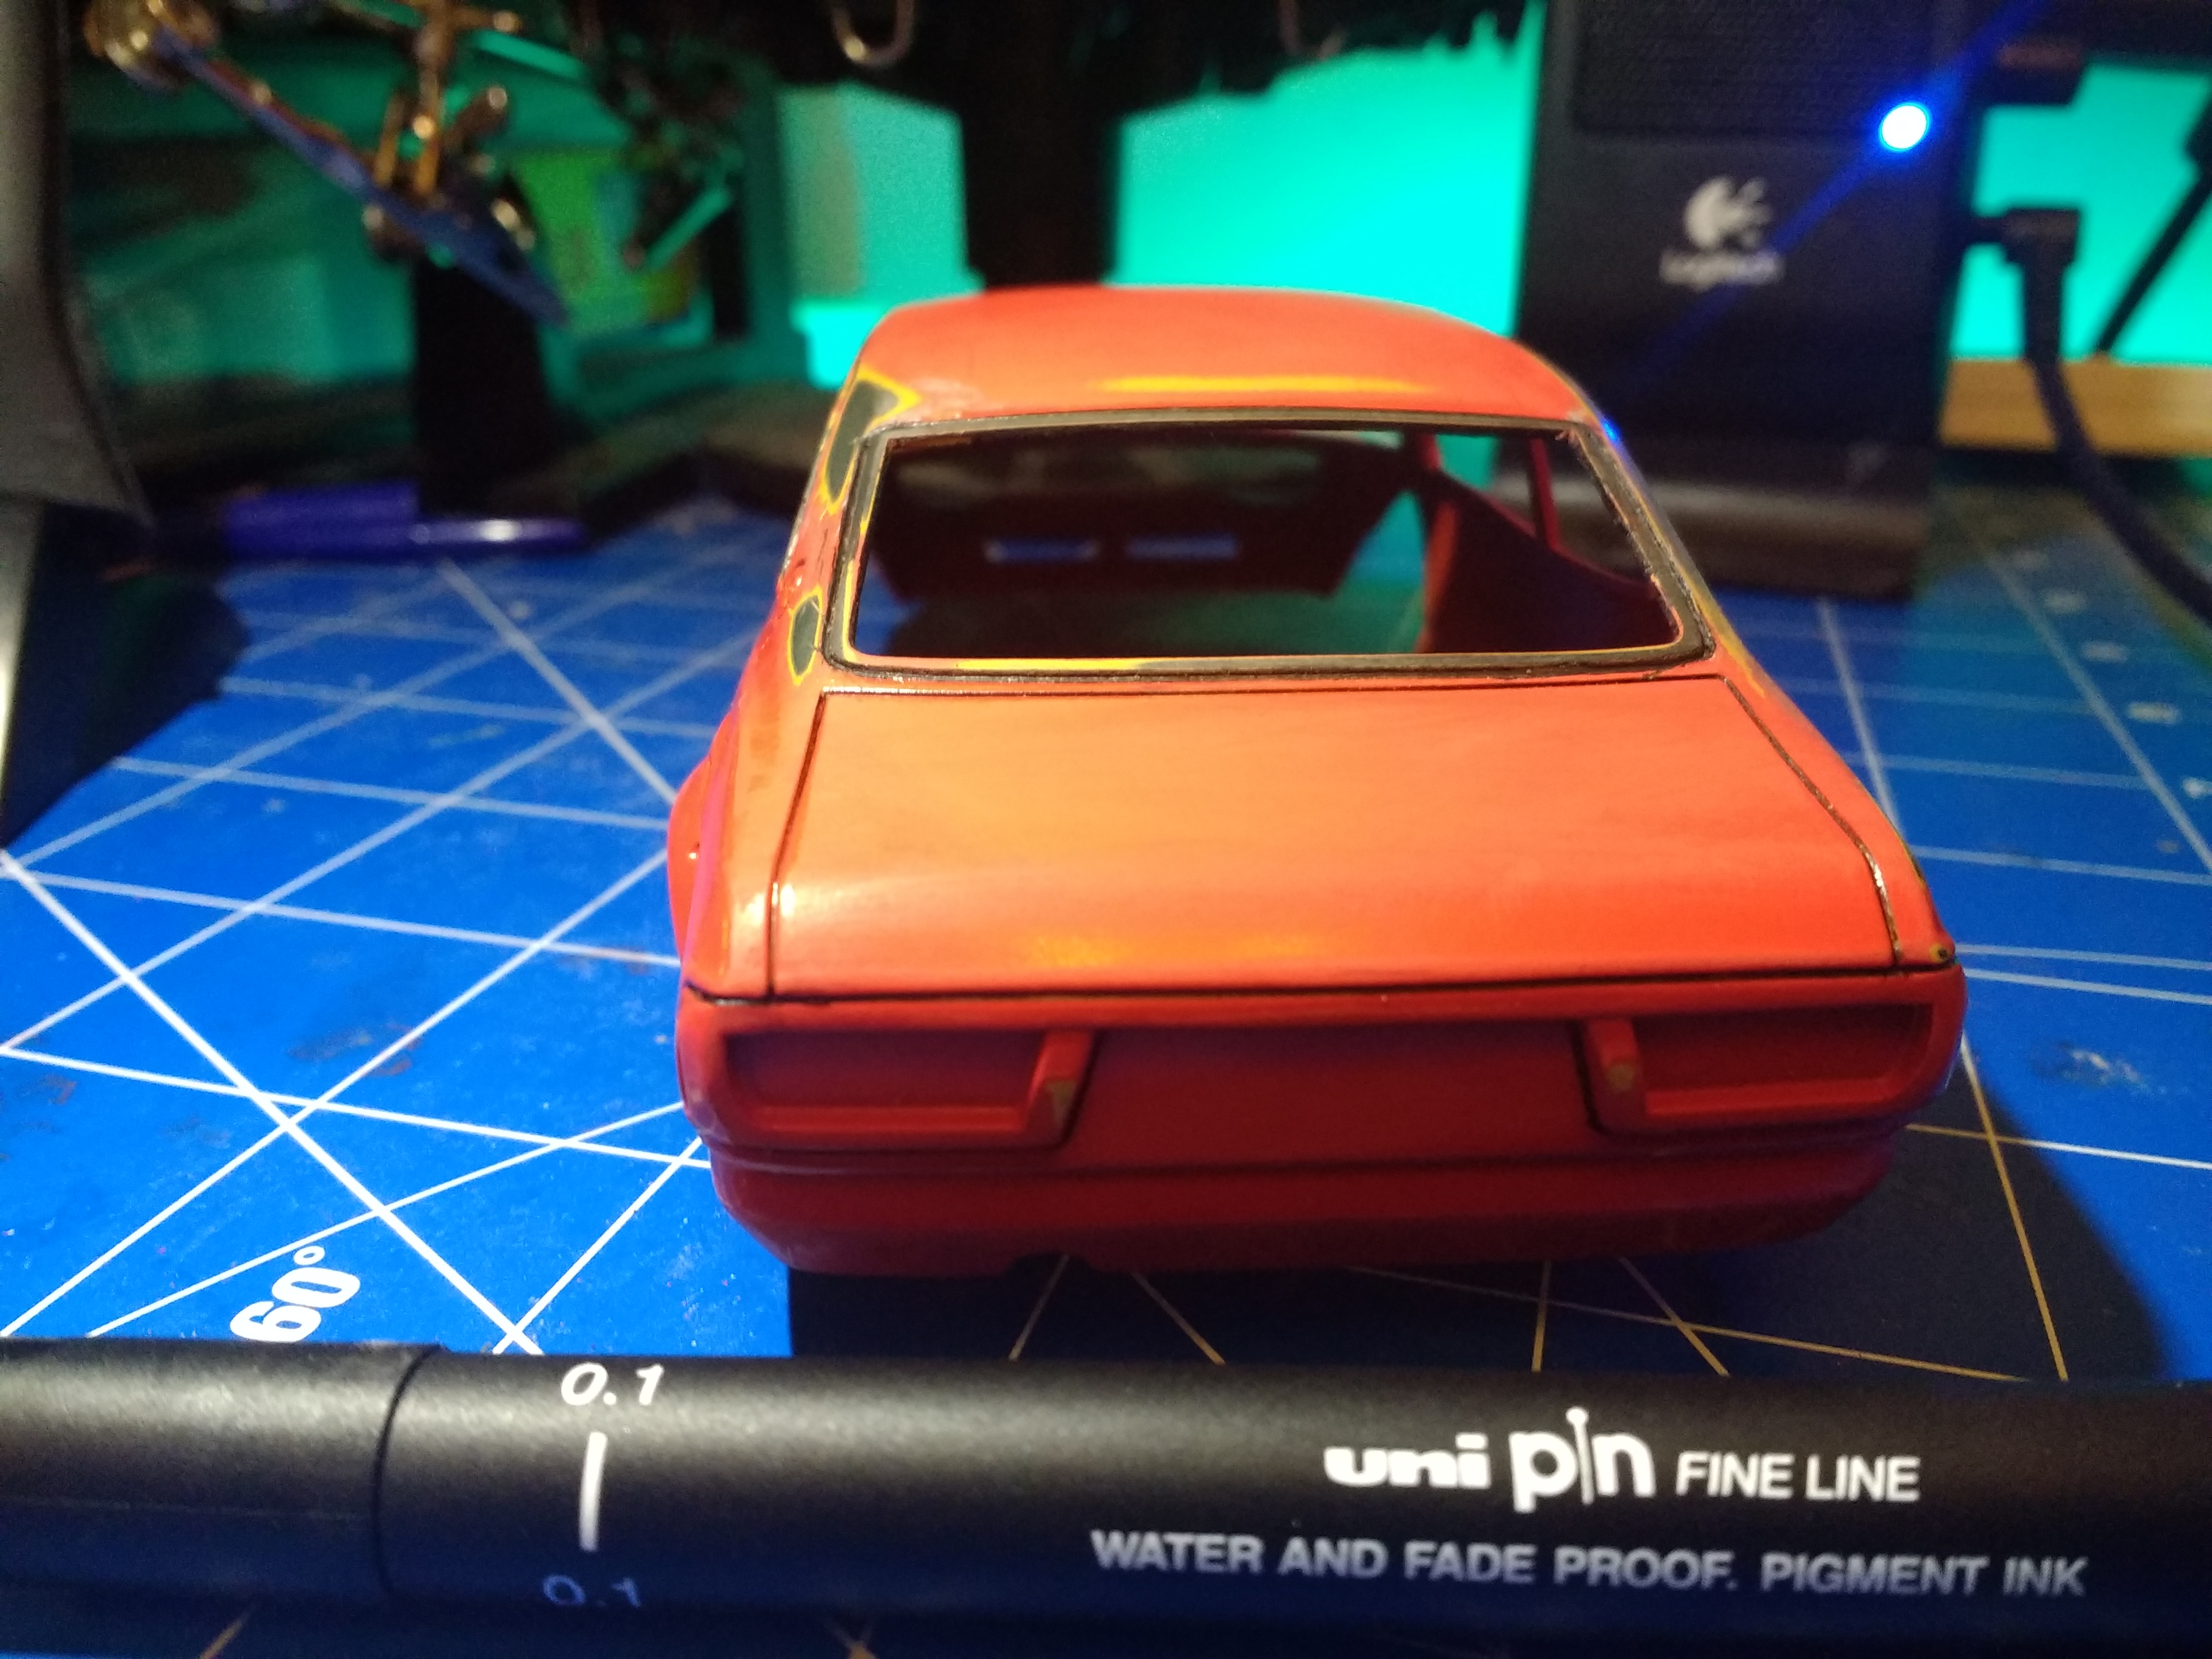
Had this build for a while and just got round to finishing the paint and panel lines. Used a 0.1 mitsubishi pencil co ltd uni p/n fine line for the panel lines. Worked out okay, once it had dried I used the Zero paints 3 part polishing kit to get rid of excess and polish up the paint. For the black paint around the windscreen I tried a new technique, Tamiya craft cotton swabs (the pointed ones) with Tamiya Rubber black paint. Kit comes with masking for the windscreen and rear engine panel, I have sprayed those, turned out okay has a bit of bleed but I spray with rattle cans not airbrush so the pressure might be a bit high.

-
Really impressed with that colour and the masking, nice build, I will echo the comments of everyone else 90s Bimmers awesome. I used the same tape the other week but still got bleeding with brush painting. I guess you get less pressure on the tape with spraying.
-
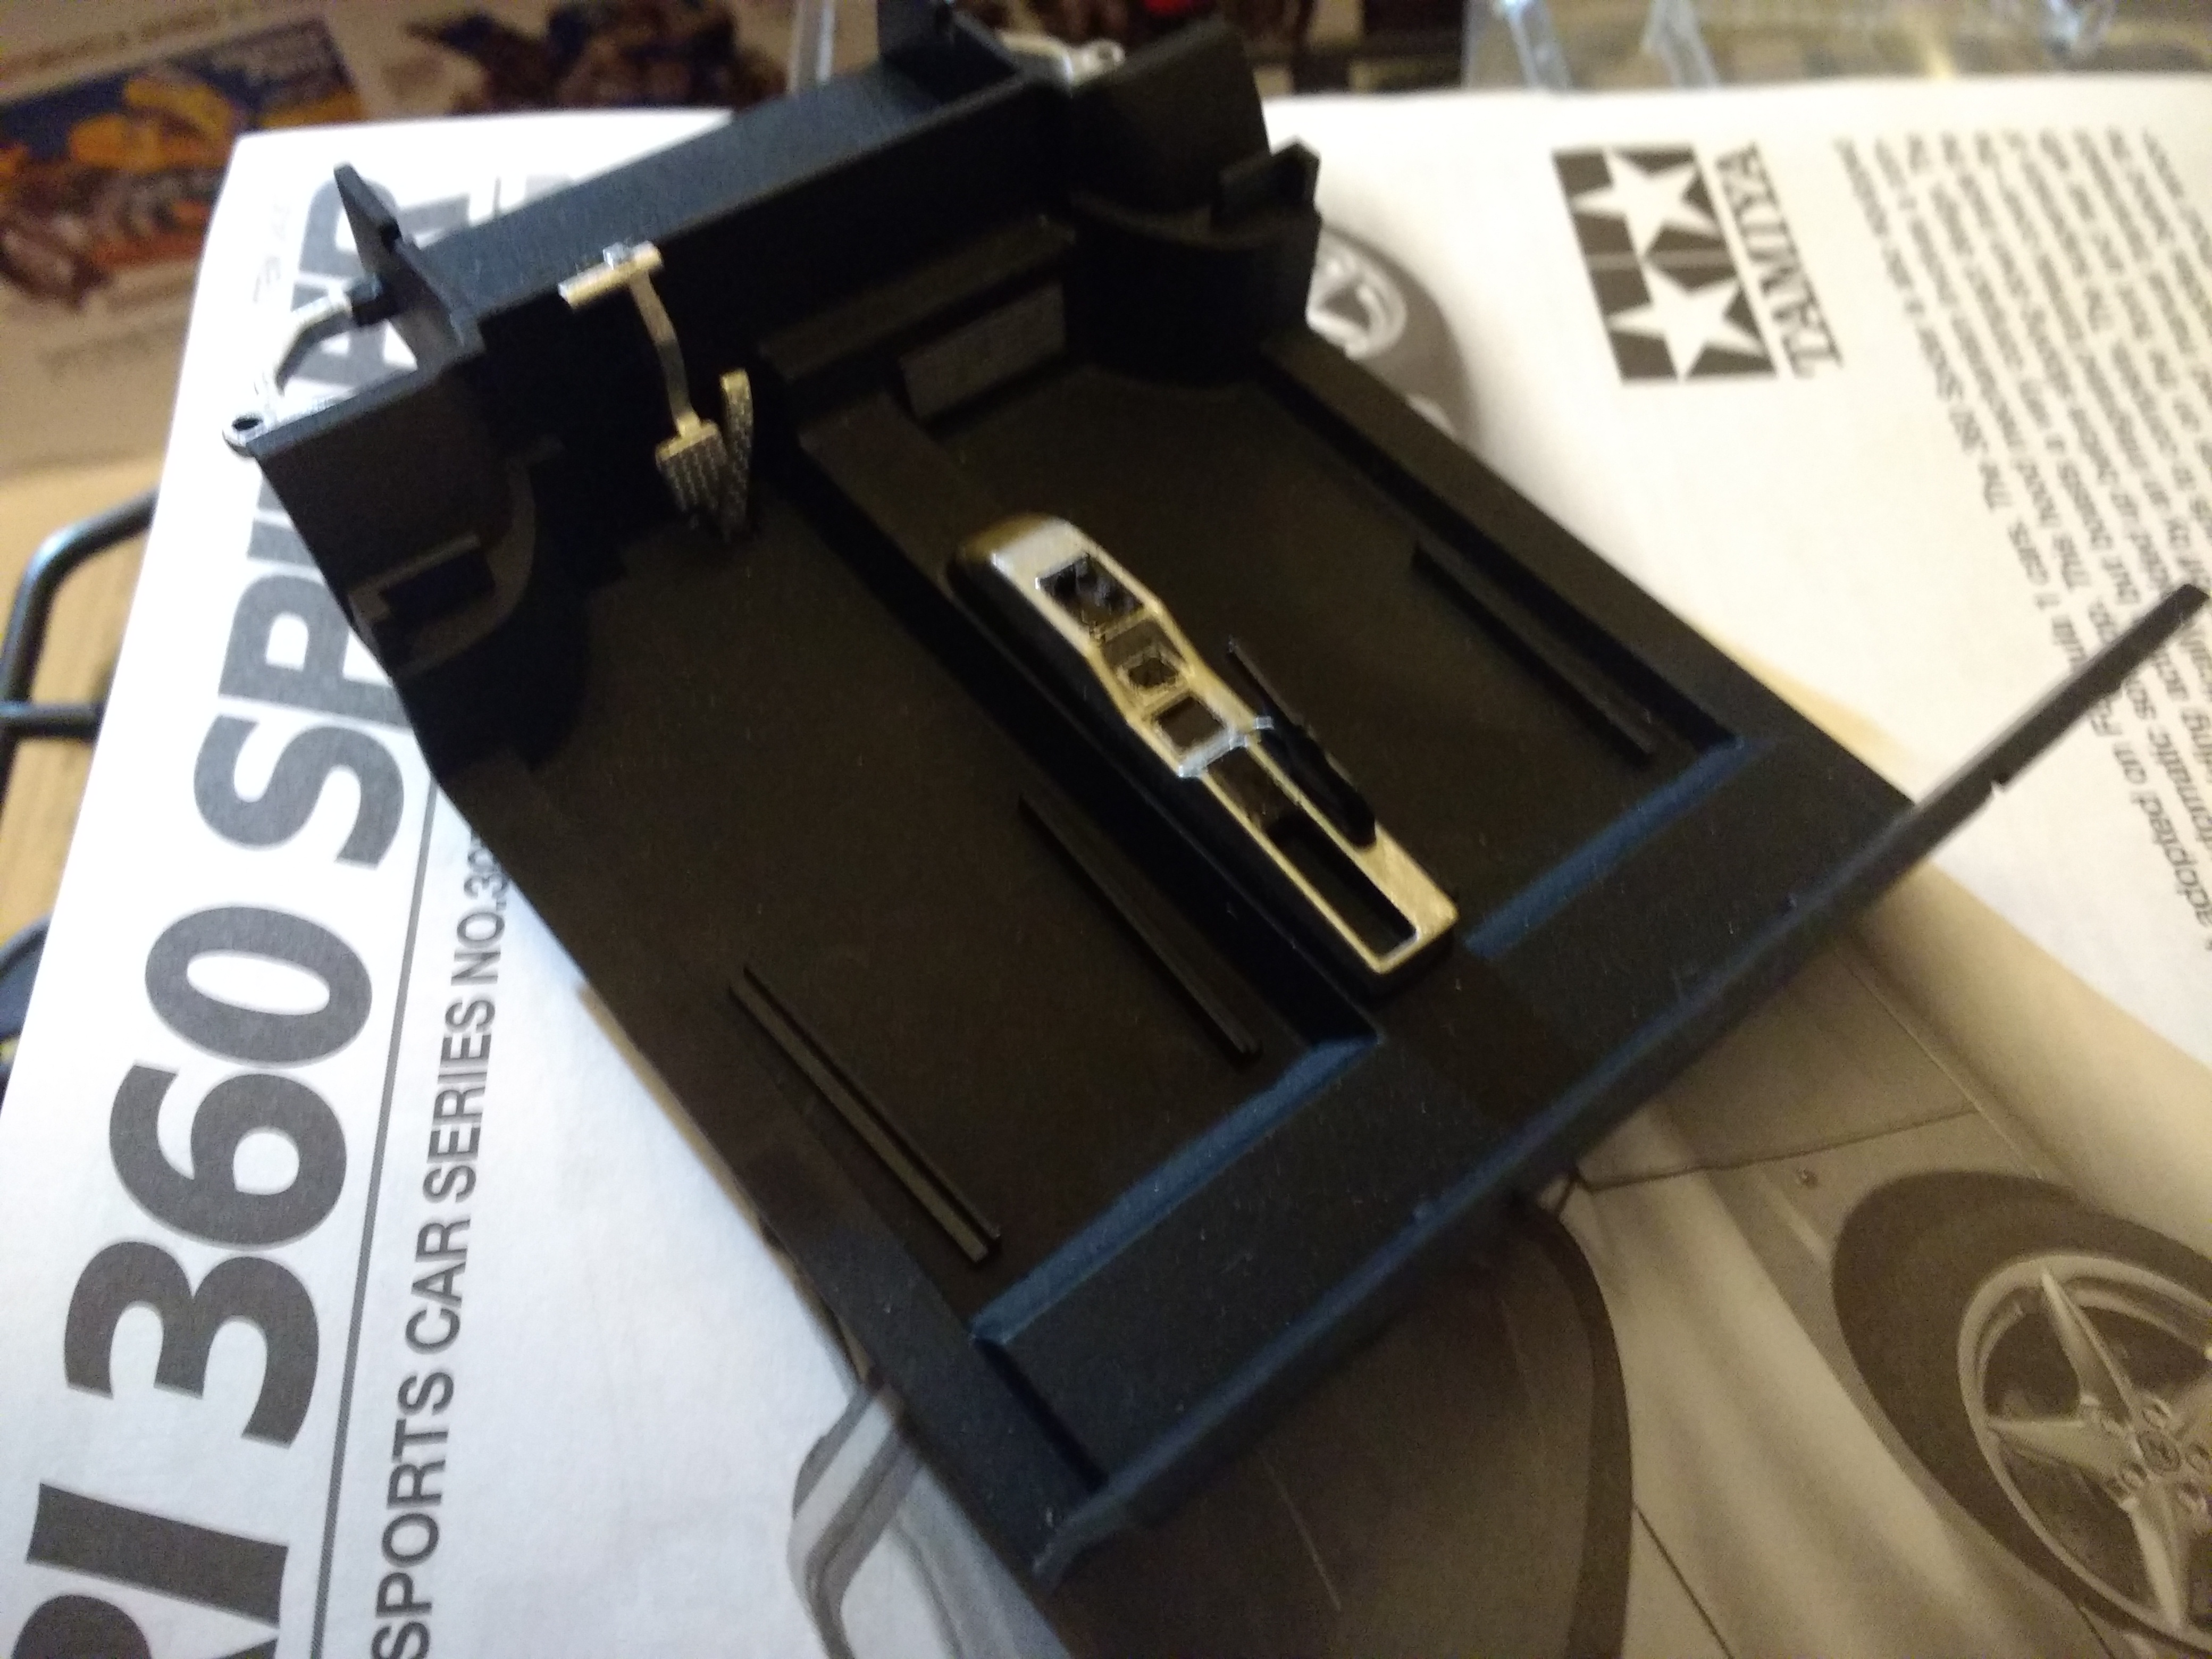
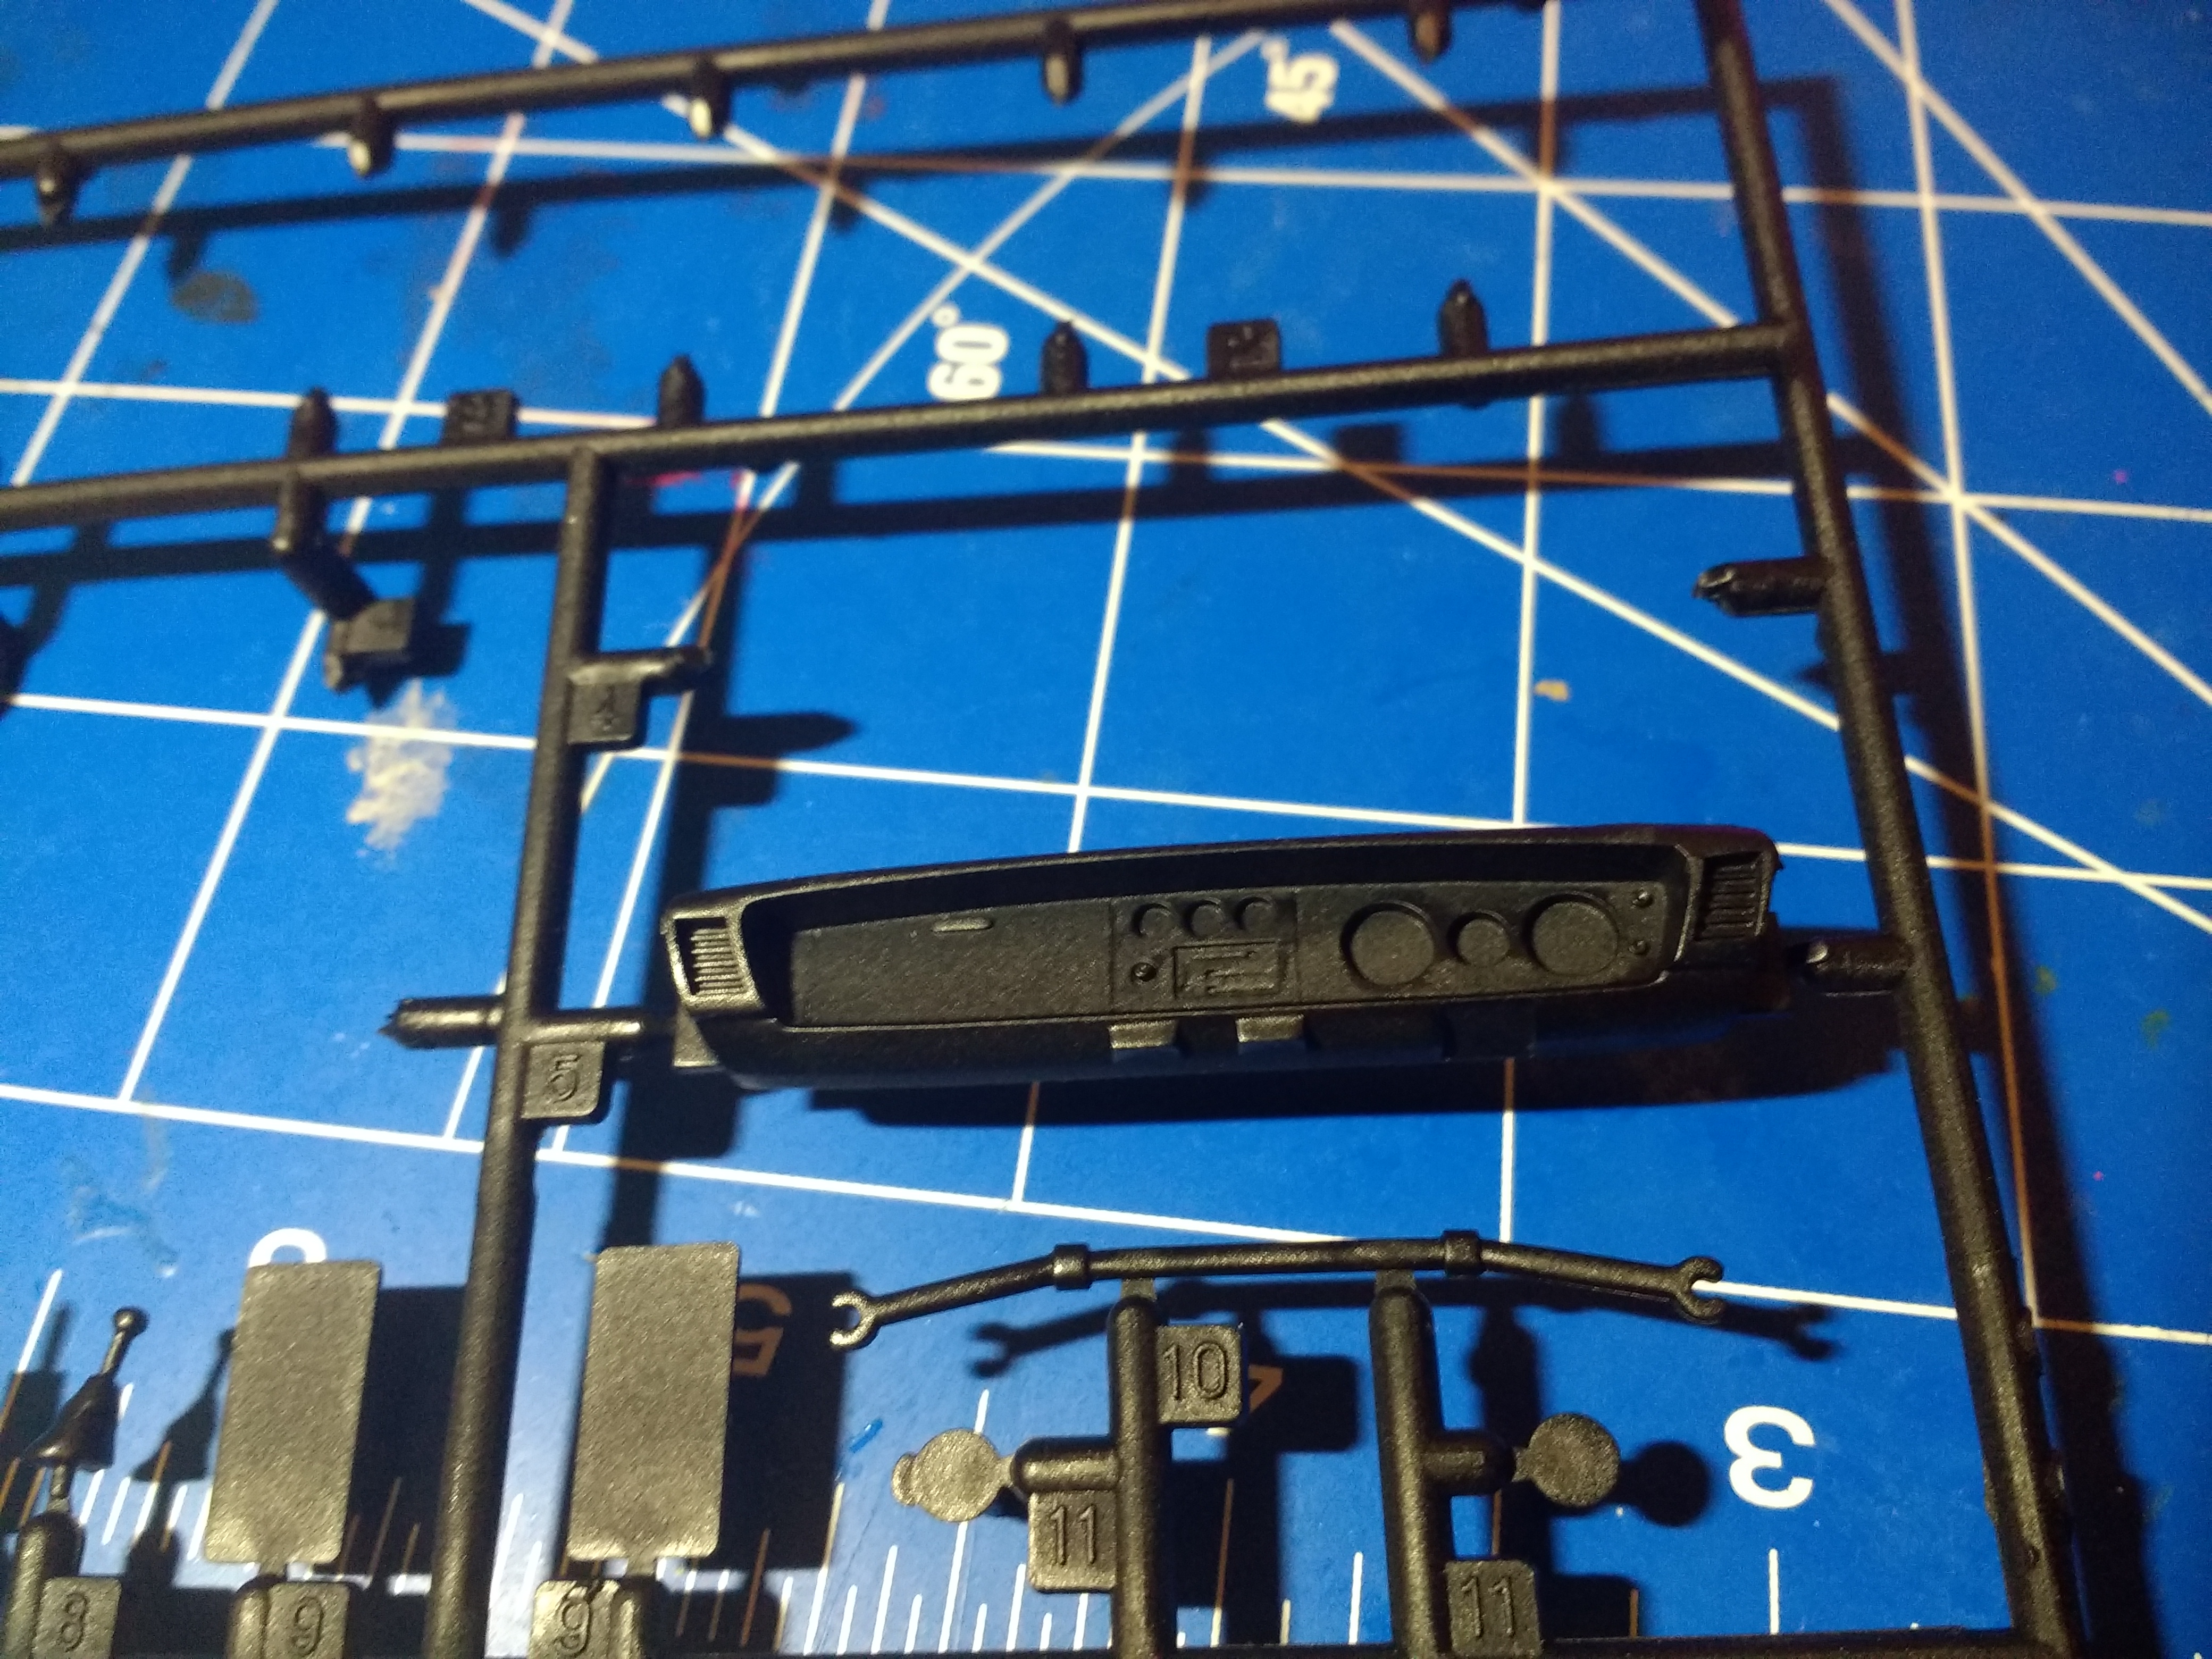
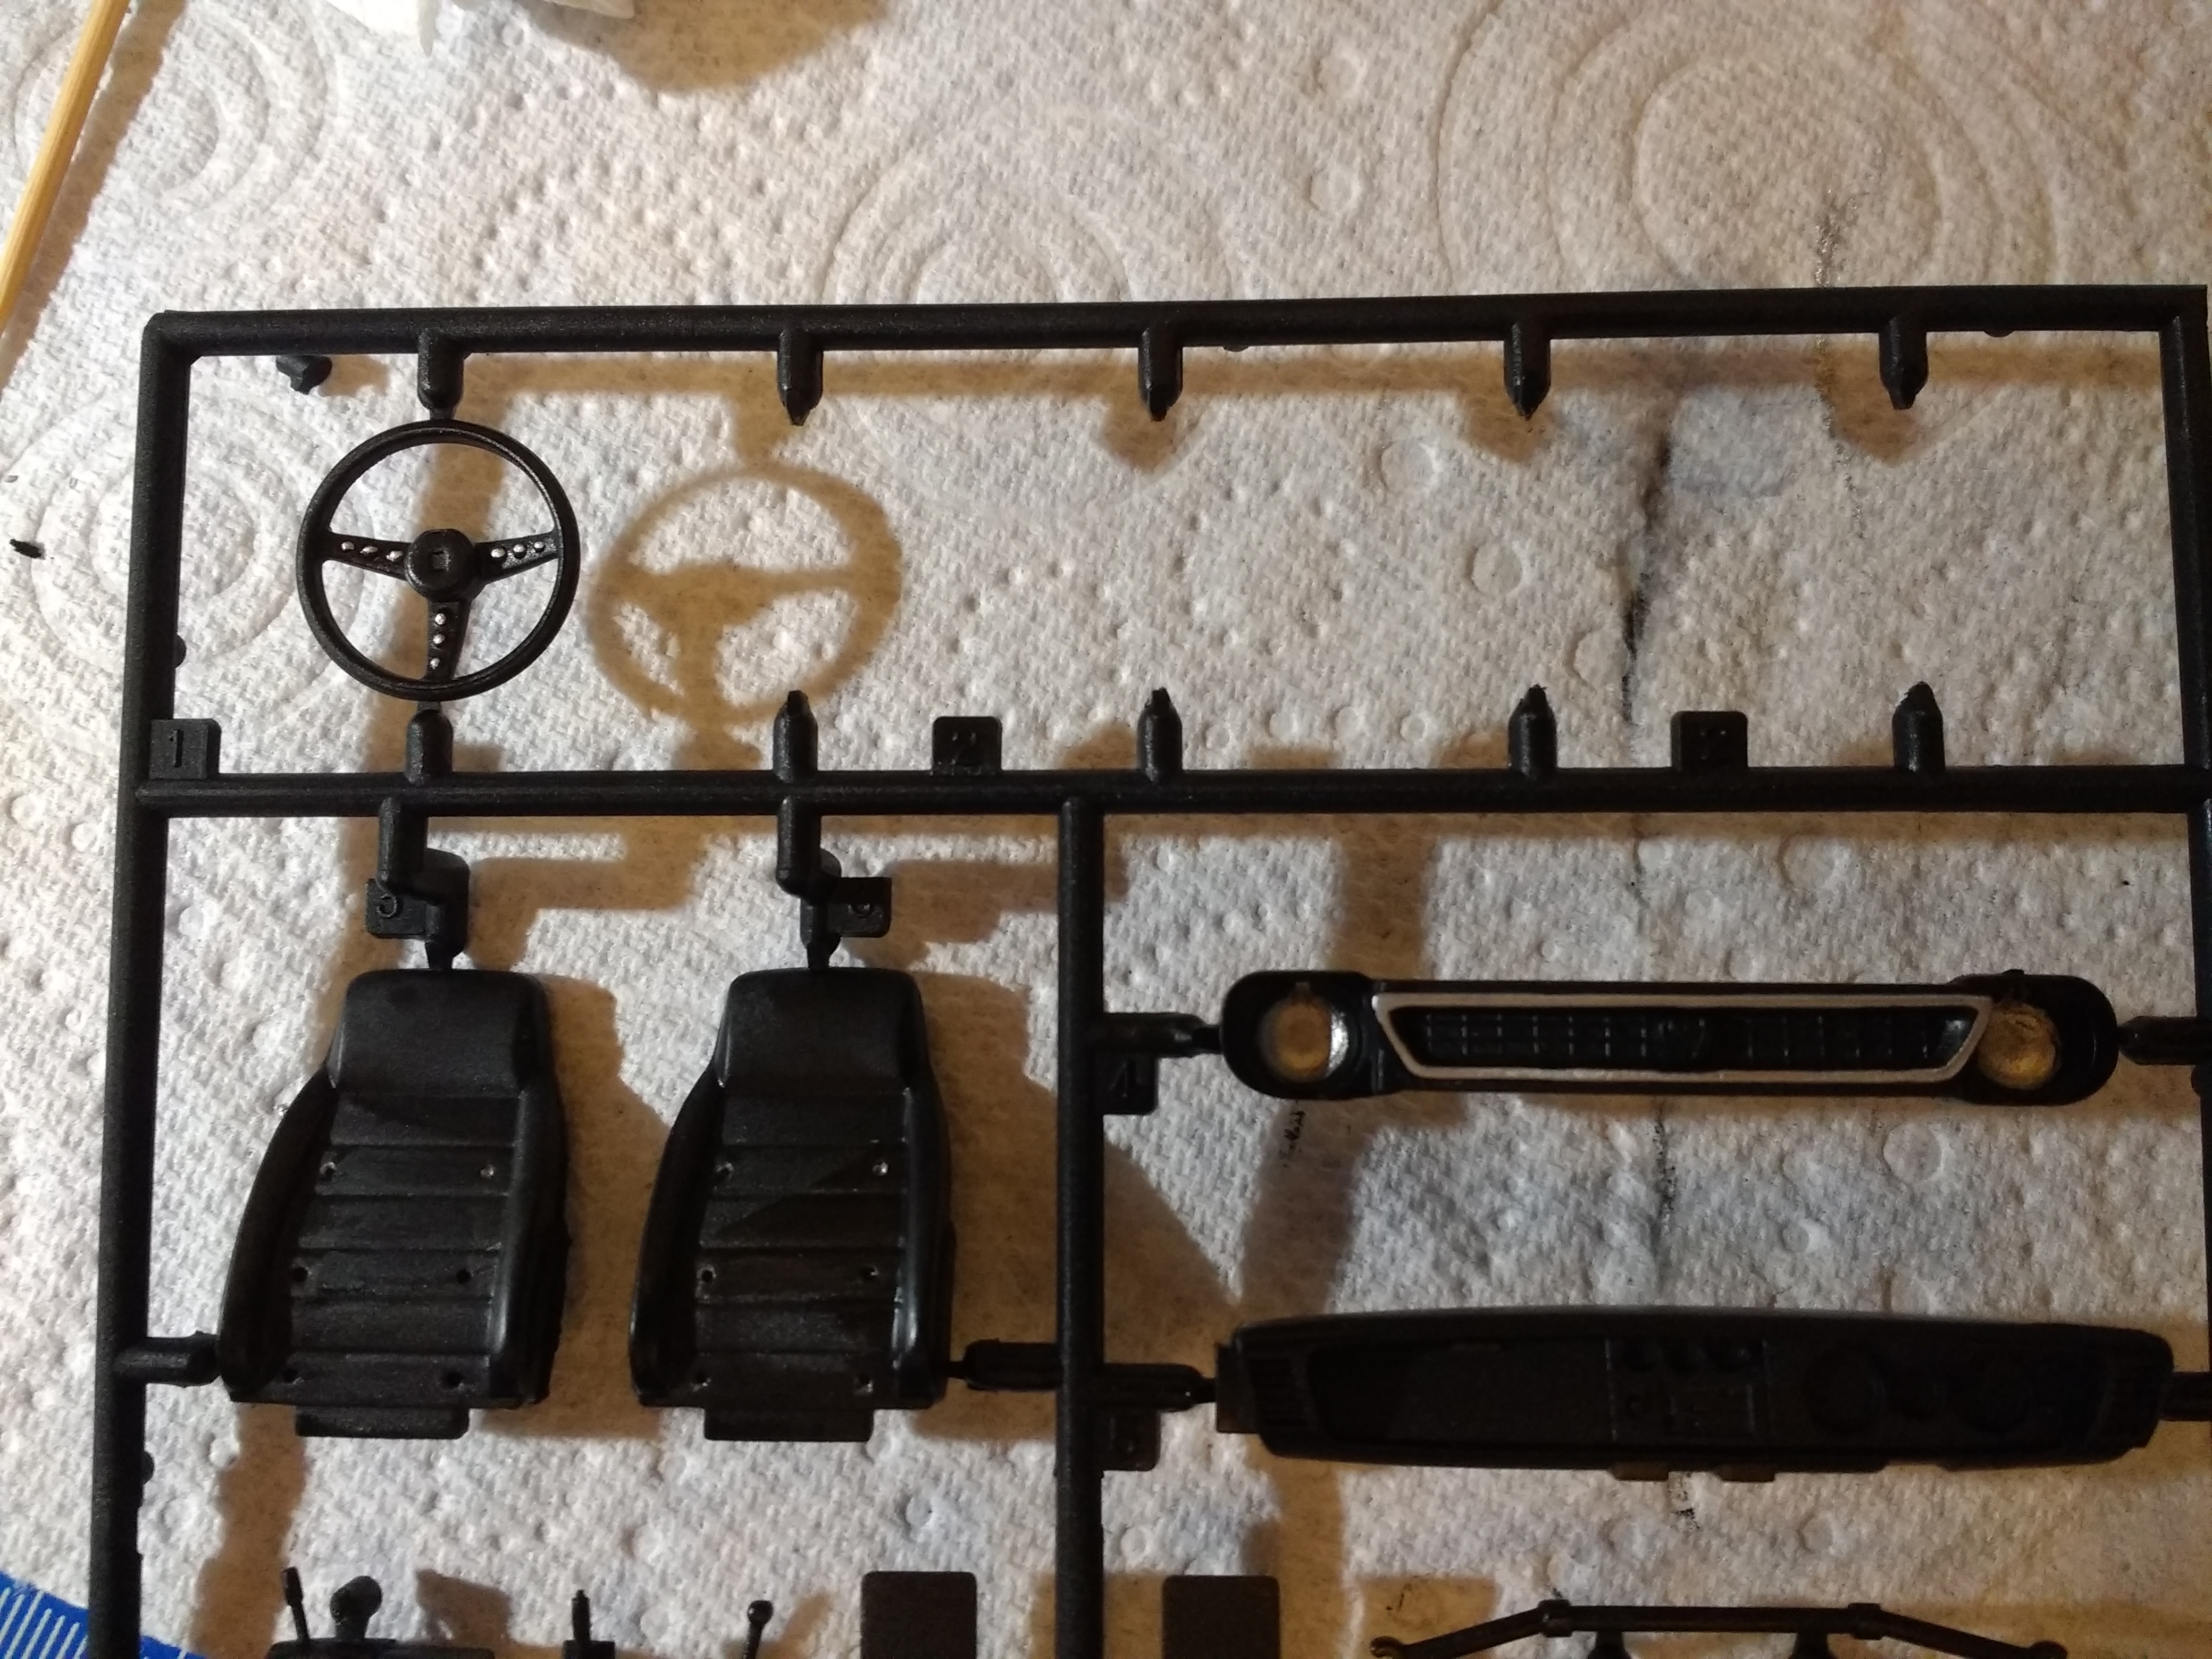
Test fitting the interior, there are some decals to fit for the dials on the dash.
-
Tried a small test piece of the black chrome for the window edging.
-
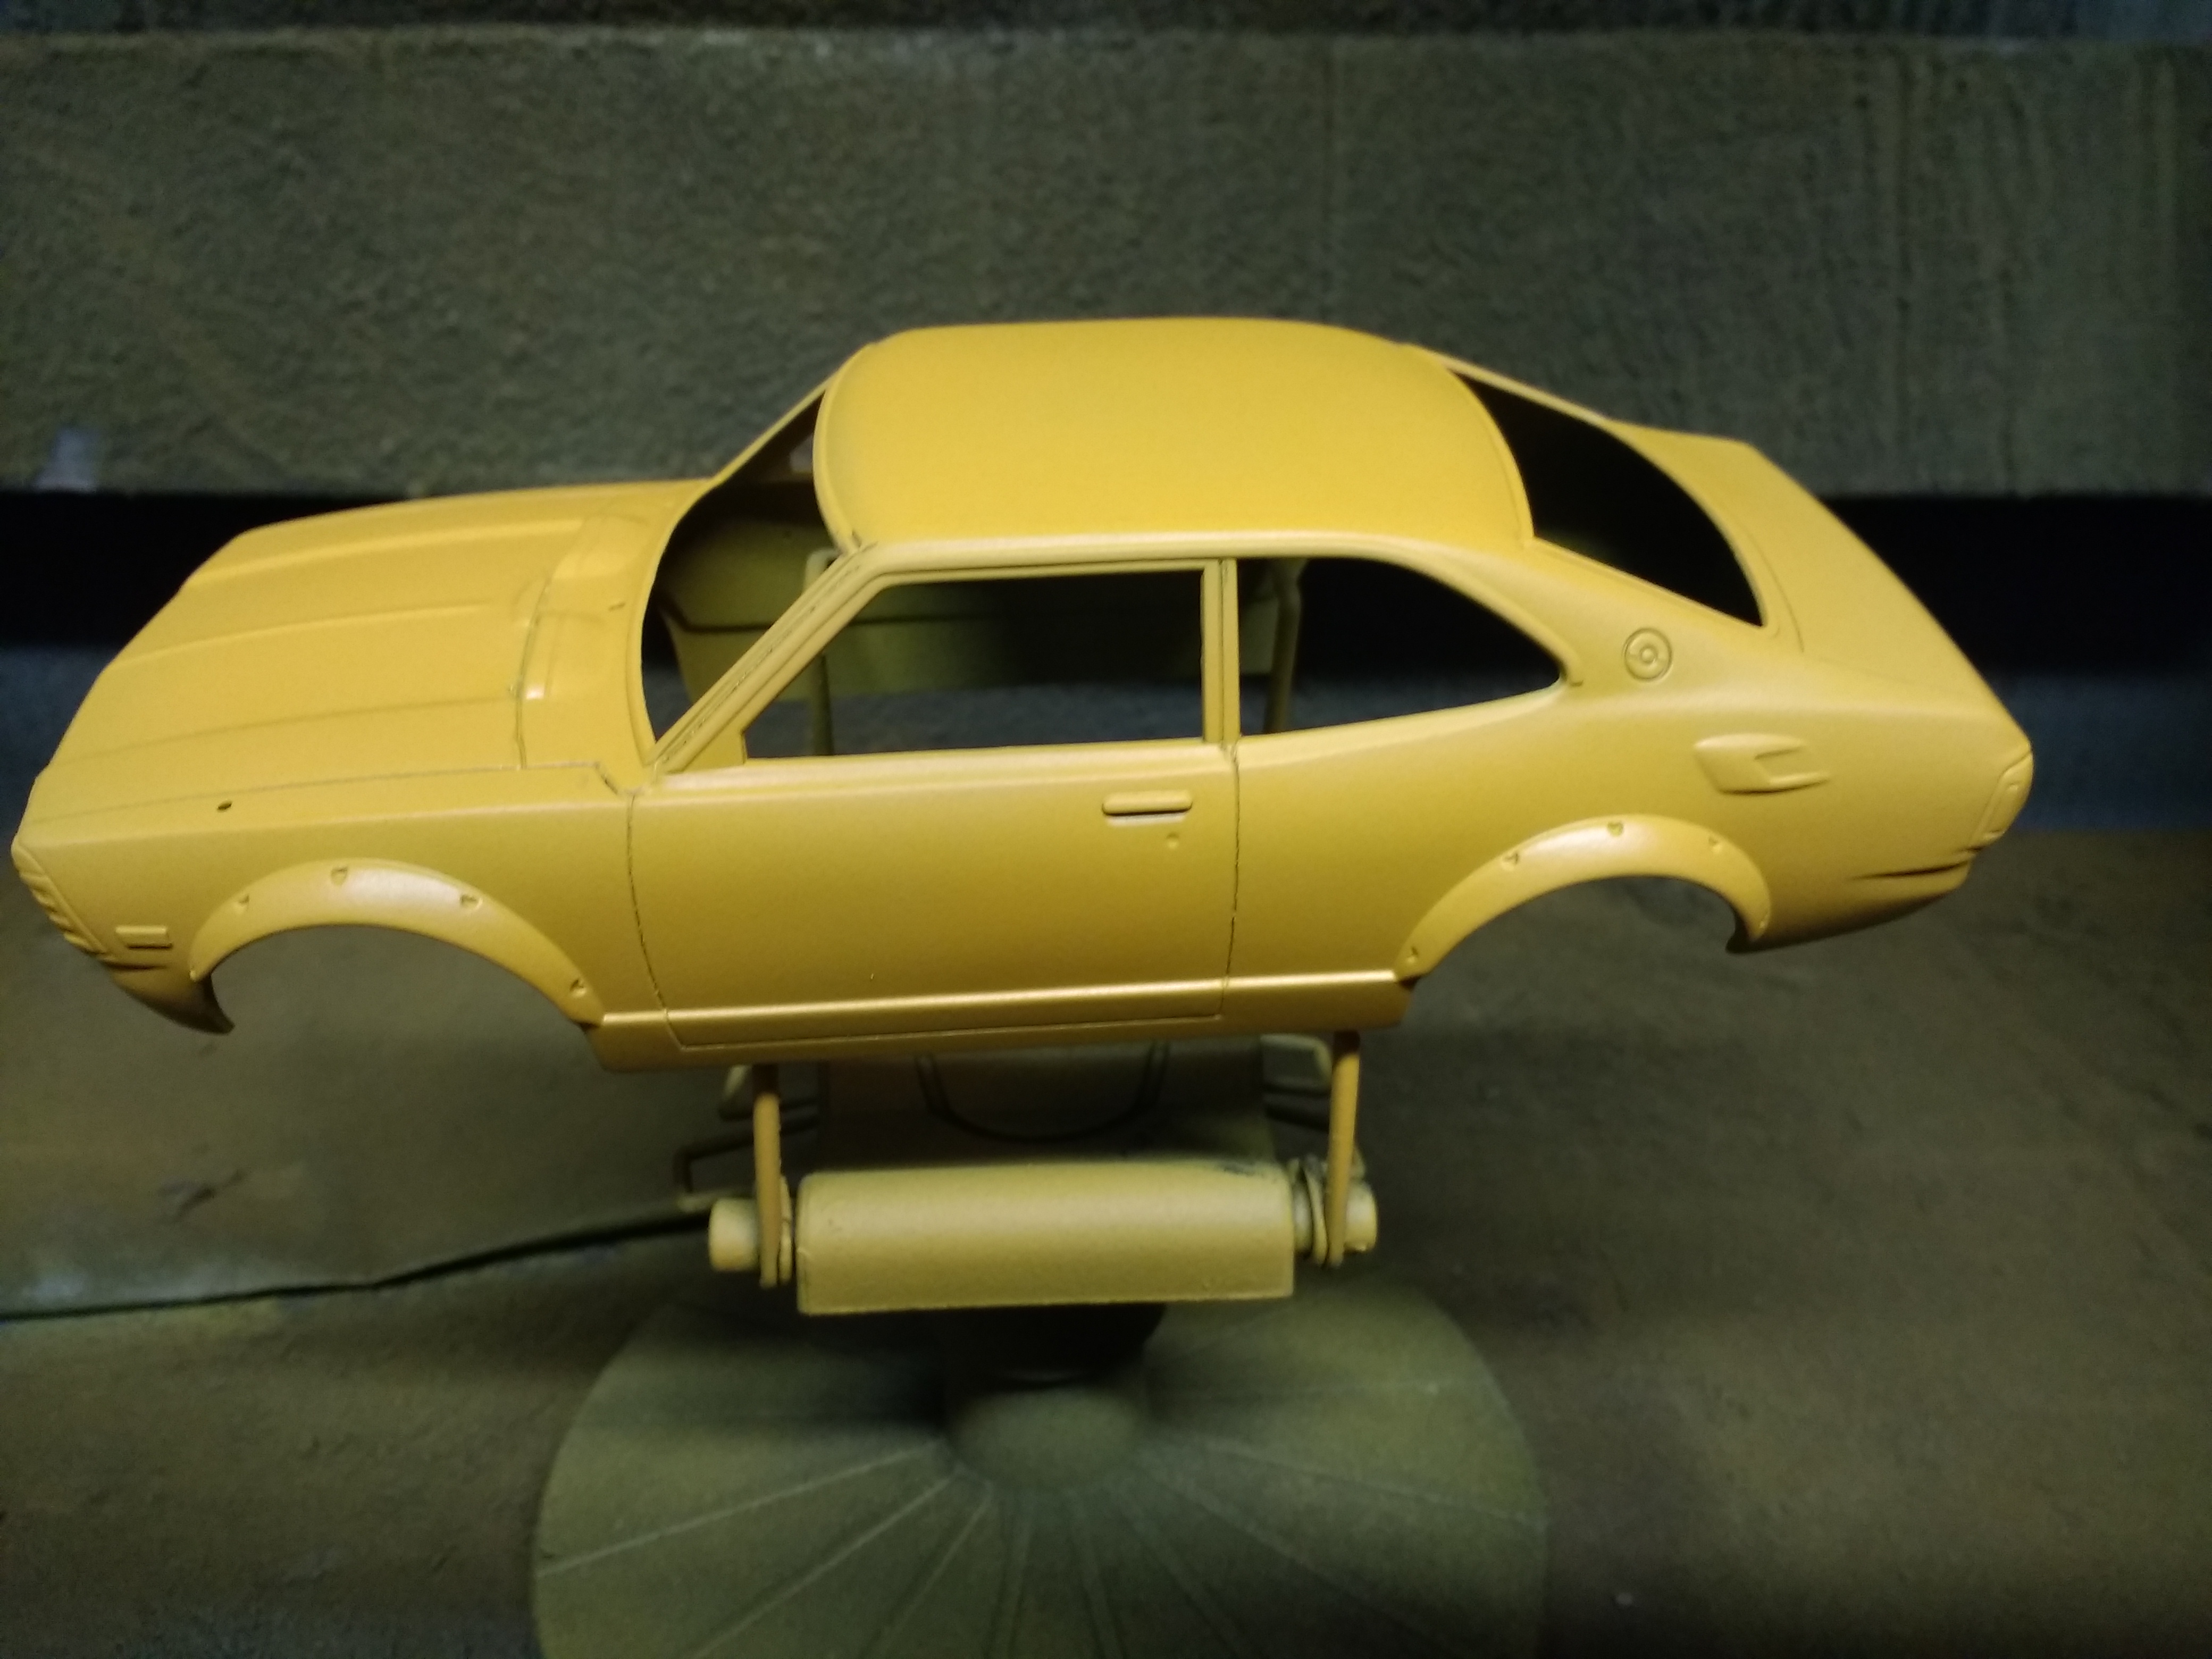
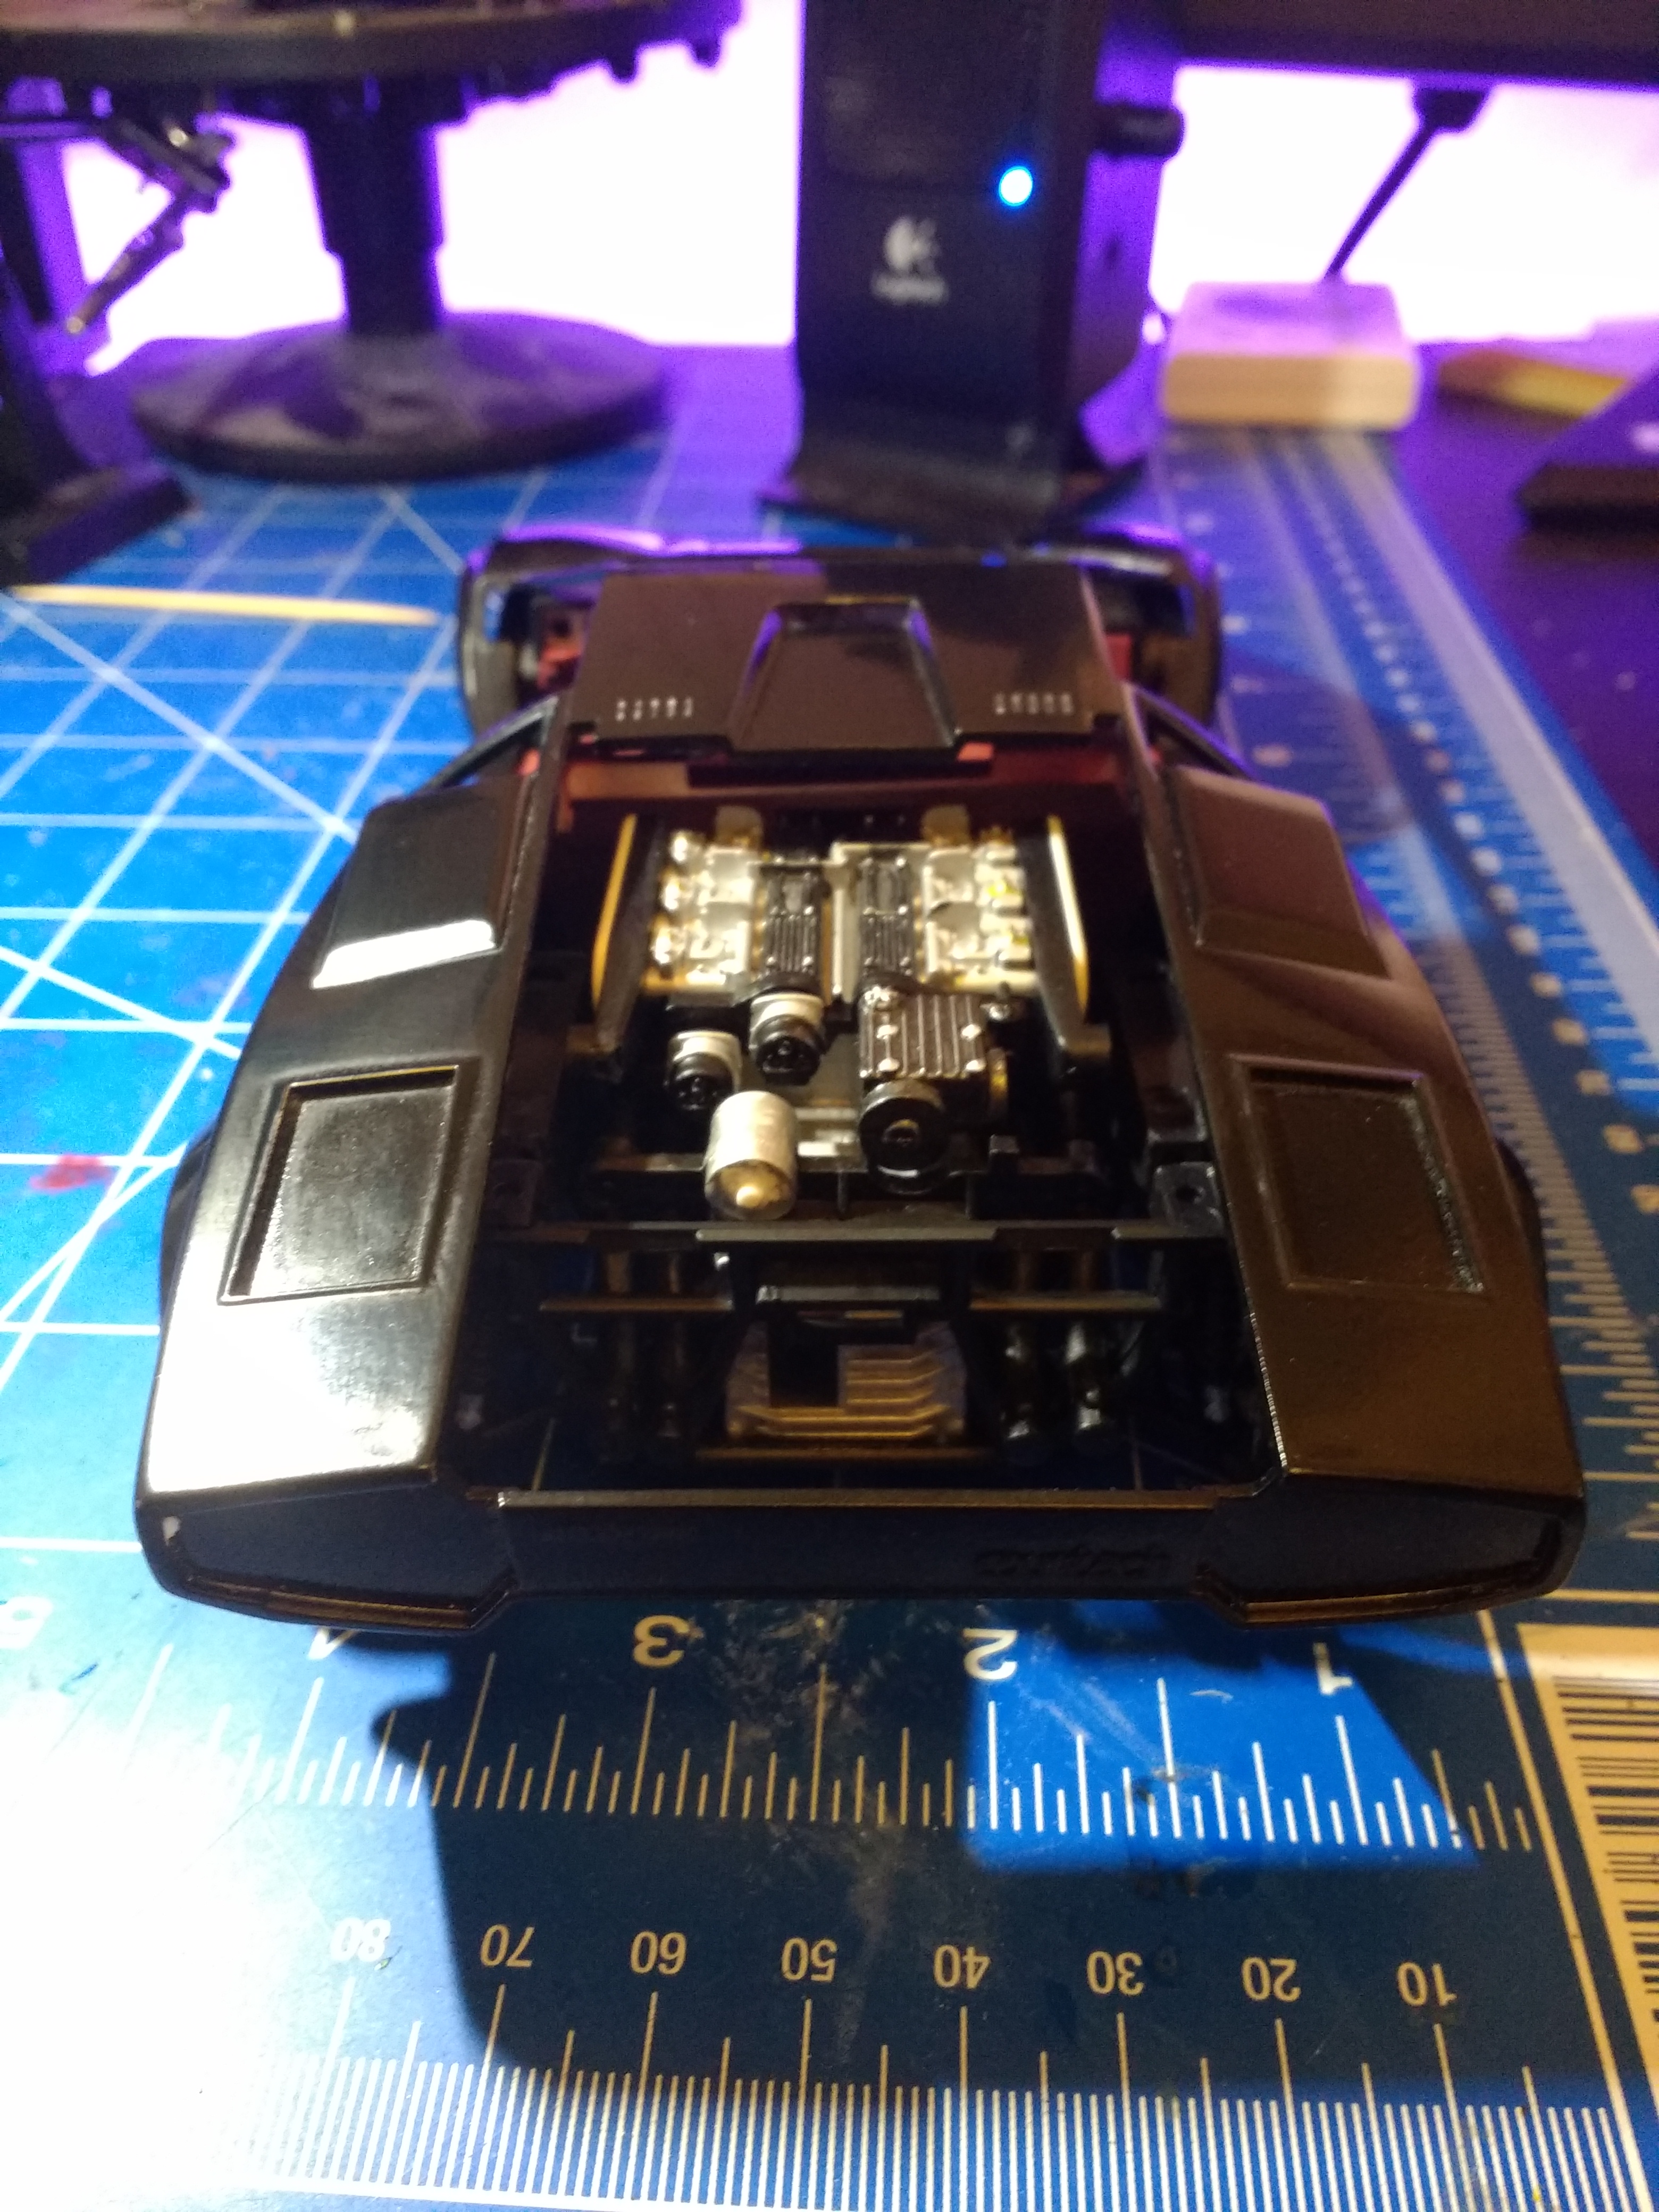
Yes Erik the flares are molded in which makes life easier, it wasn't easy fitting the ones on the Countach I have on the bench. So finished up sanding back the Corolla and colouring the panel lines ready for primer again. I will go over the panel lines again once primed. I just got some black chrome bare metal foil. Might try using it for the window edging, front and rear but I have deepened the panel lines enough that I can brush paint if I am careful.
-
Thanks for the tips I will get some of those pens.
-
I have not heard of using nail polish remover before. What effect does it have. Jereon that is good advice I will try the hair dryer next time between coats. What do you guys do to try and get neat window edging, I really struggle with the detail painting.
-
Kemszi, do you sand back after the primer. I use 1000 grit to even the paint and get rid of orange peel effect or dust that settles in the paint. Then spray the topcoat. I learnt a lot from The Scalemodelling Channel on youtube, really talented guy from Holland.
-
Nice Kemszi, can you chop the ride height at all by cutting the shock absorbers down a little.
-
Ricky no left hand drive option on this kit. The dashboard appears to be symmetrical so if you have the talent to reproduce the insert with the dials and glove box you could swap it to left hand drive. I don't have that kind of talent for scratch building. Anybody got any tips on window edging. I have tried paintbrush, paint pens, deeper panel lines seems to be the only way I can put in a separation to neaten it. Only problem is that I the panel lines end up looking rough. I use a scriber or scalpel turned upside down to deepen and widen the lines. I did look at the foil but I struggled to cut it neatly.
-
Those kits look very good Kemszi
-
Thanks for the input guys. So tonight I masked around the windows and put on the black. When I peeled off the masking tape the paint had bled. So I now have to sand the paint on the body back and respray. I have deepened the panel lines and will use the diluted tamiya panel line paint to fill these before spraying again.
-
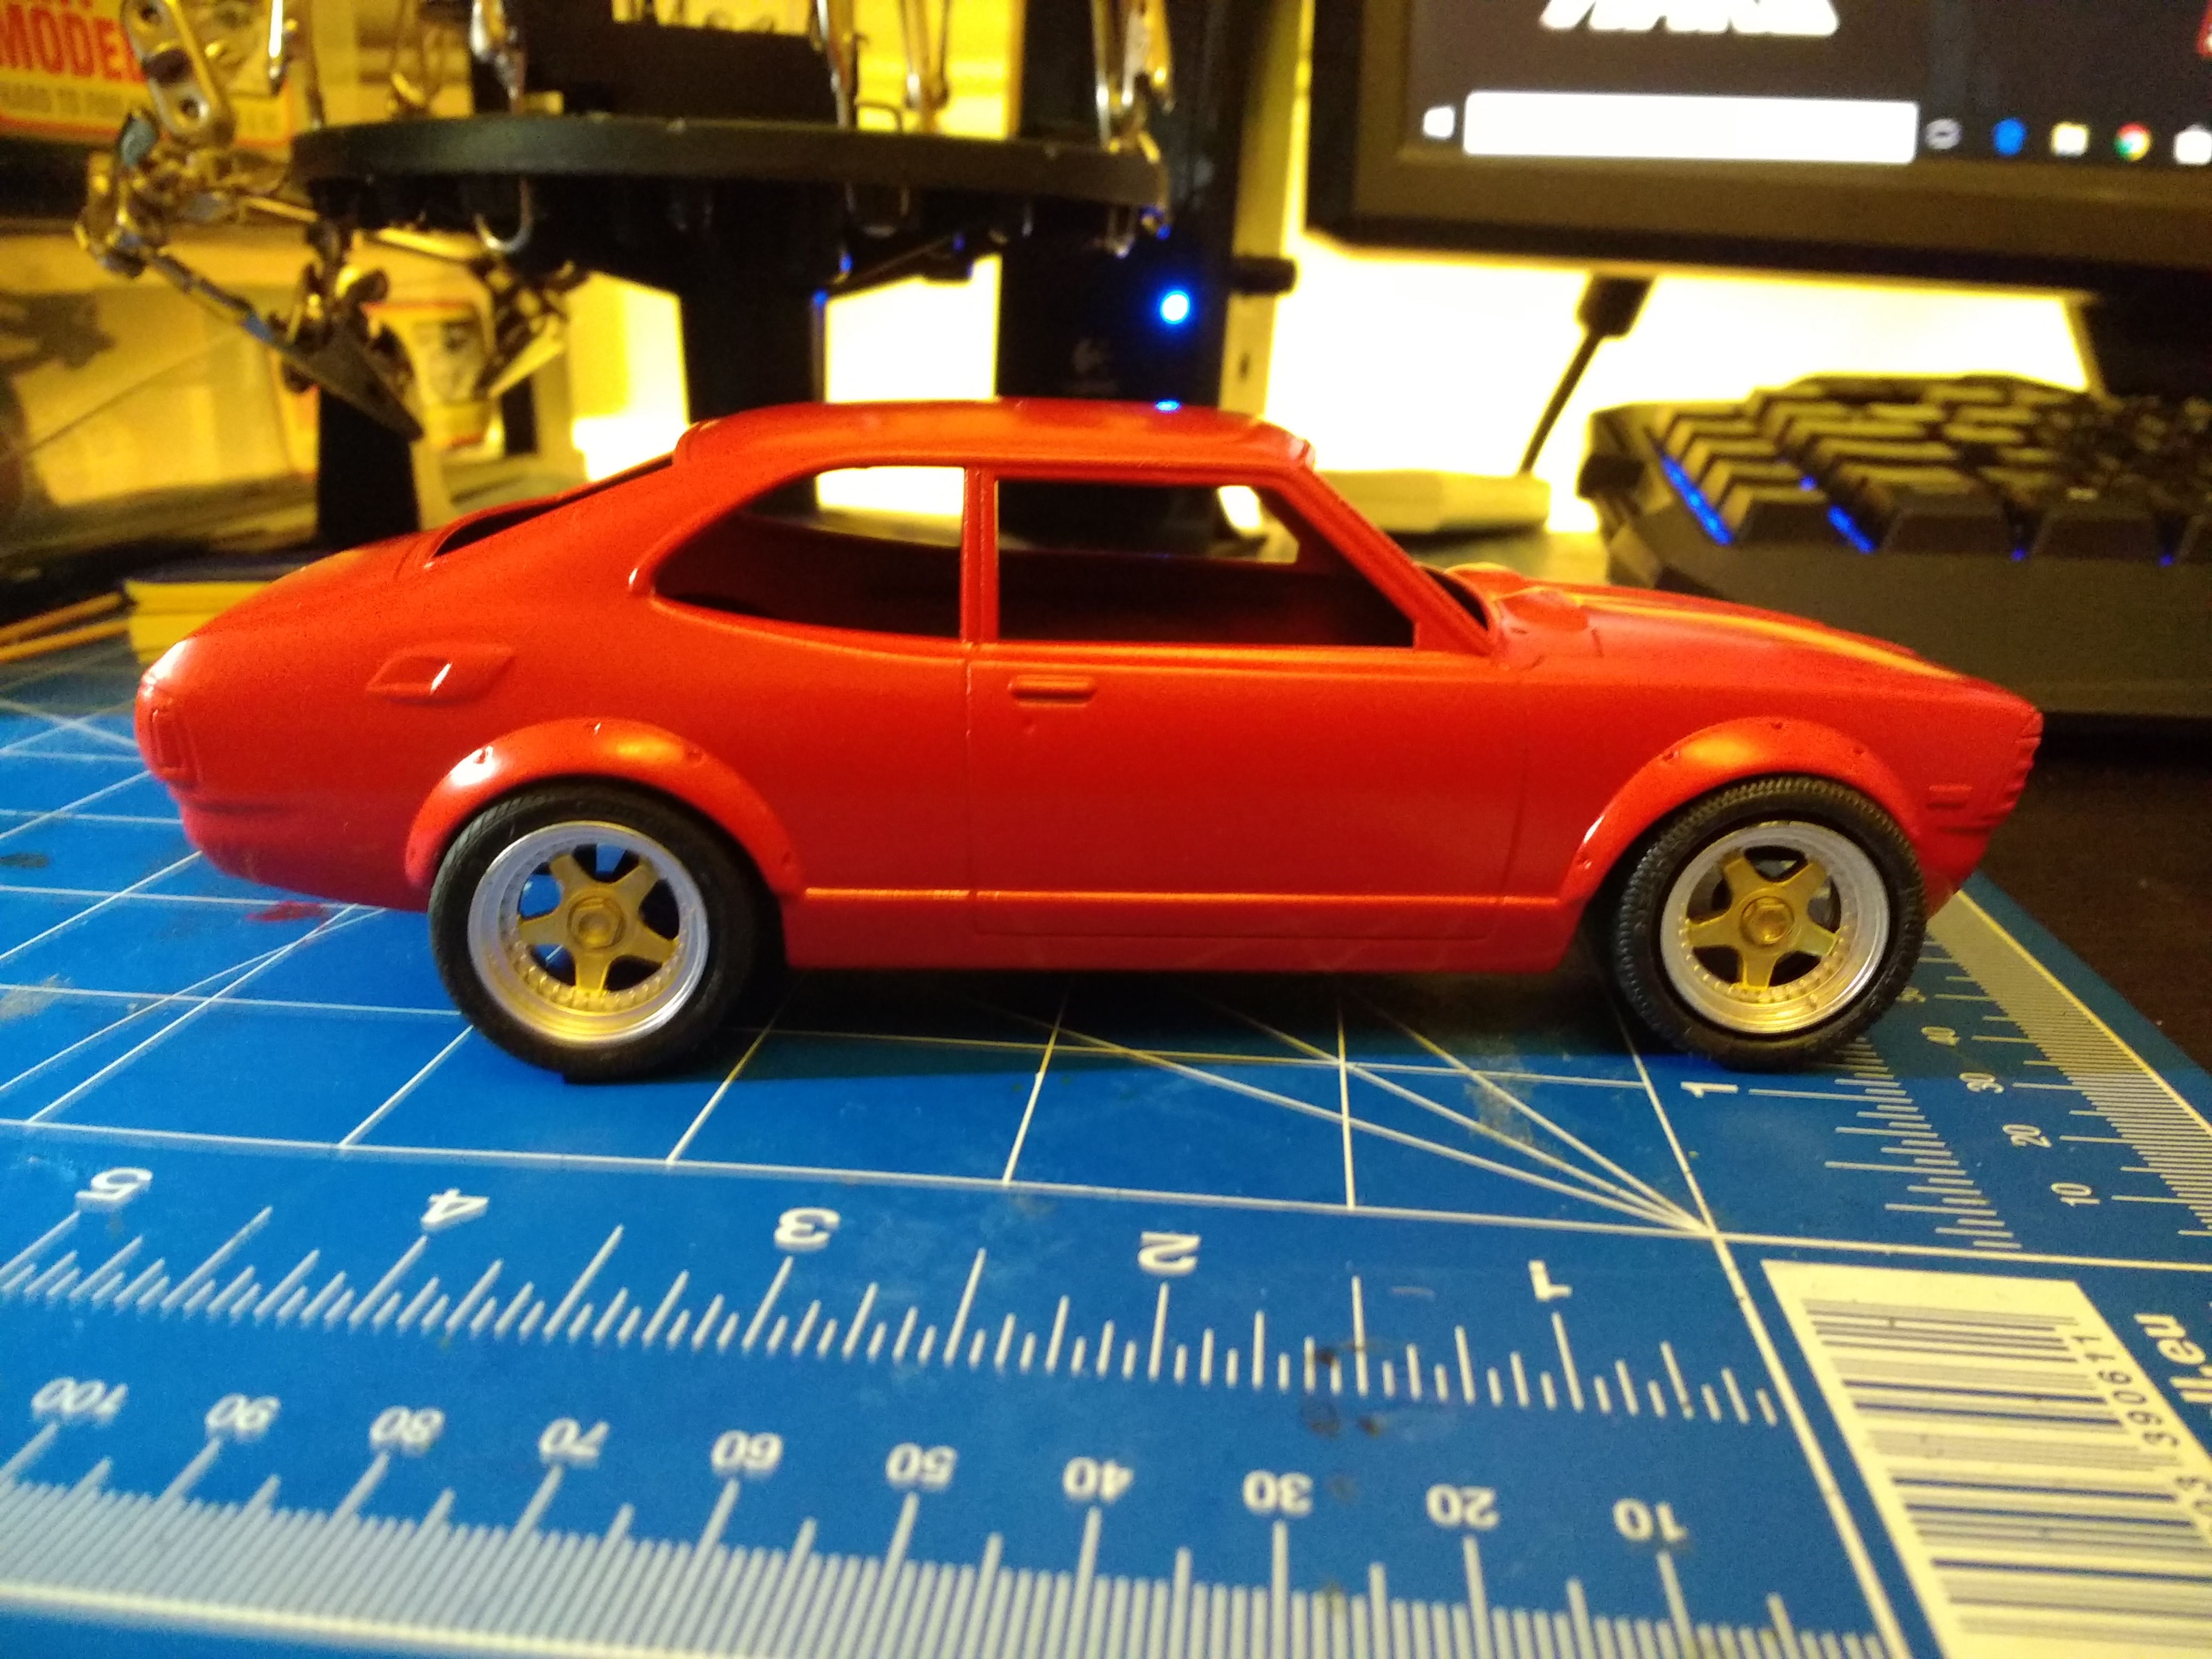
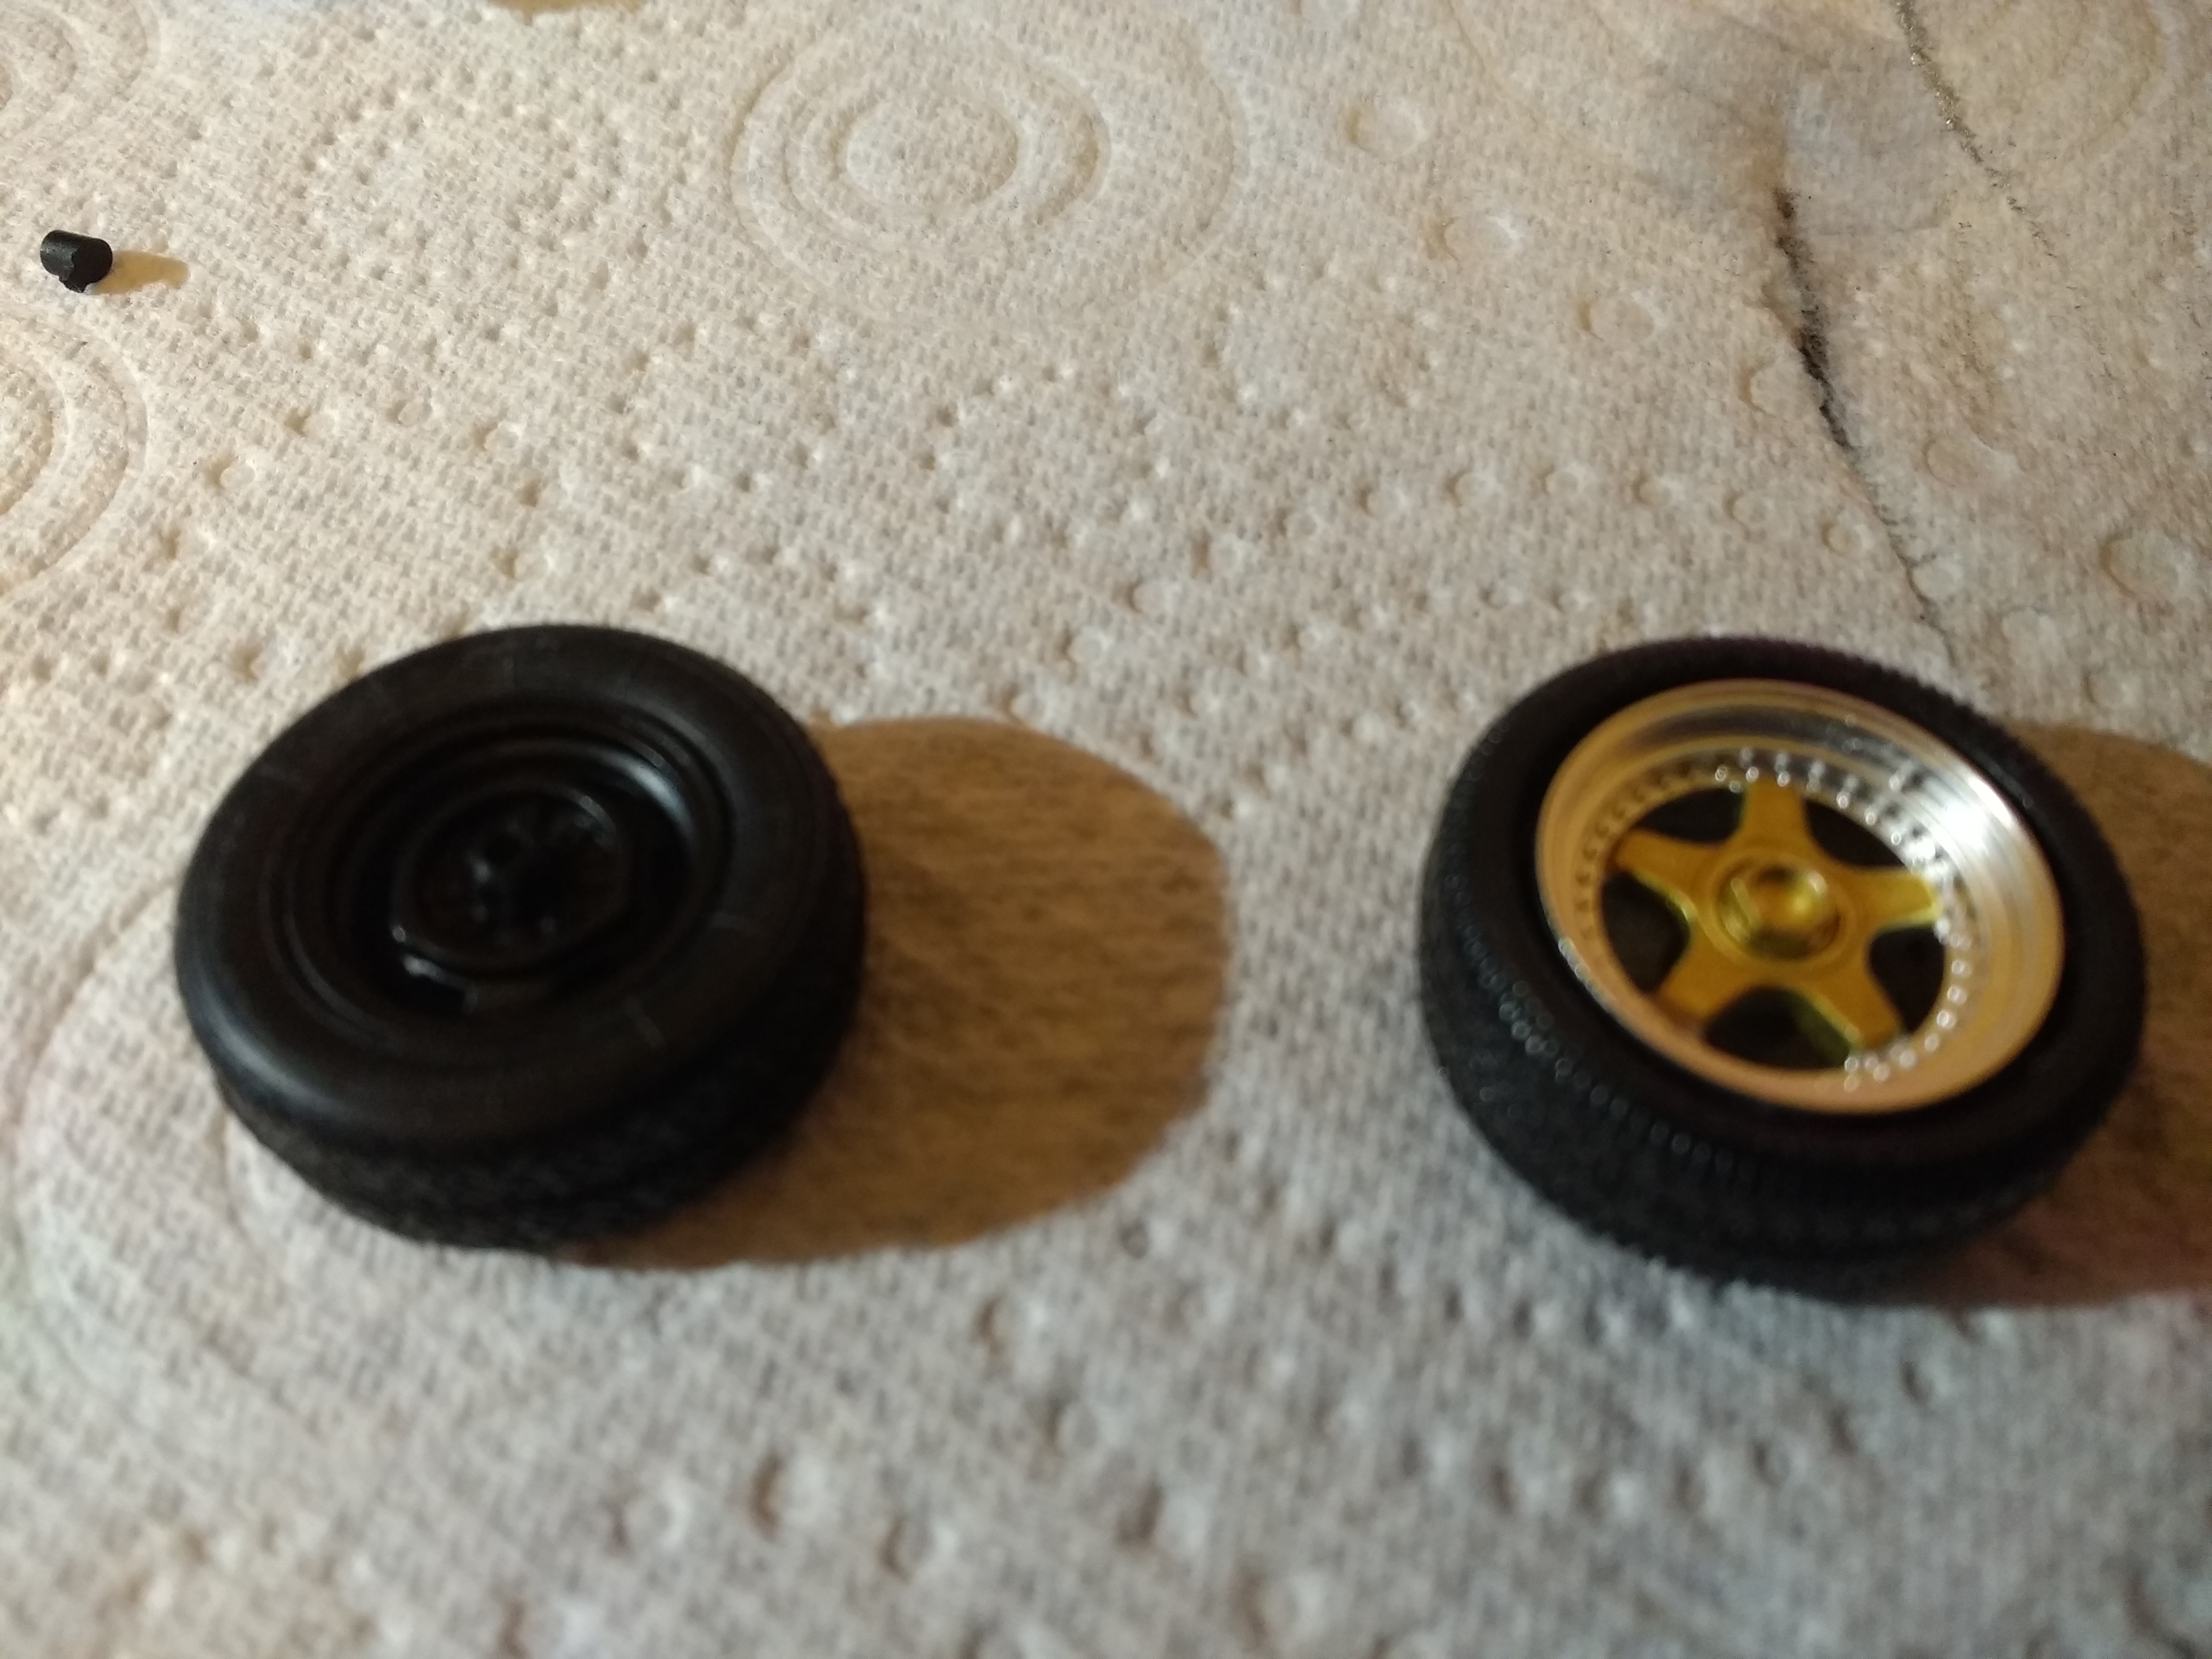
Which wheels? I am kind of thinking the steels which came with the kit suit it better. Might have to order some aftermarket 14 inch wheels for this
-
Yes they definitely suit that car, especially that colour.
-
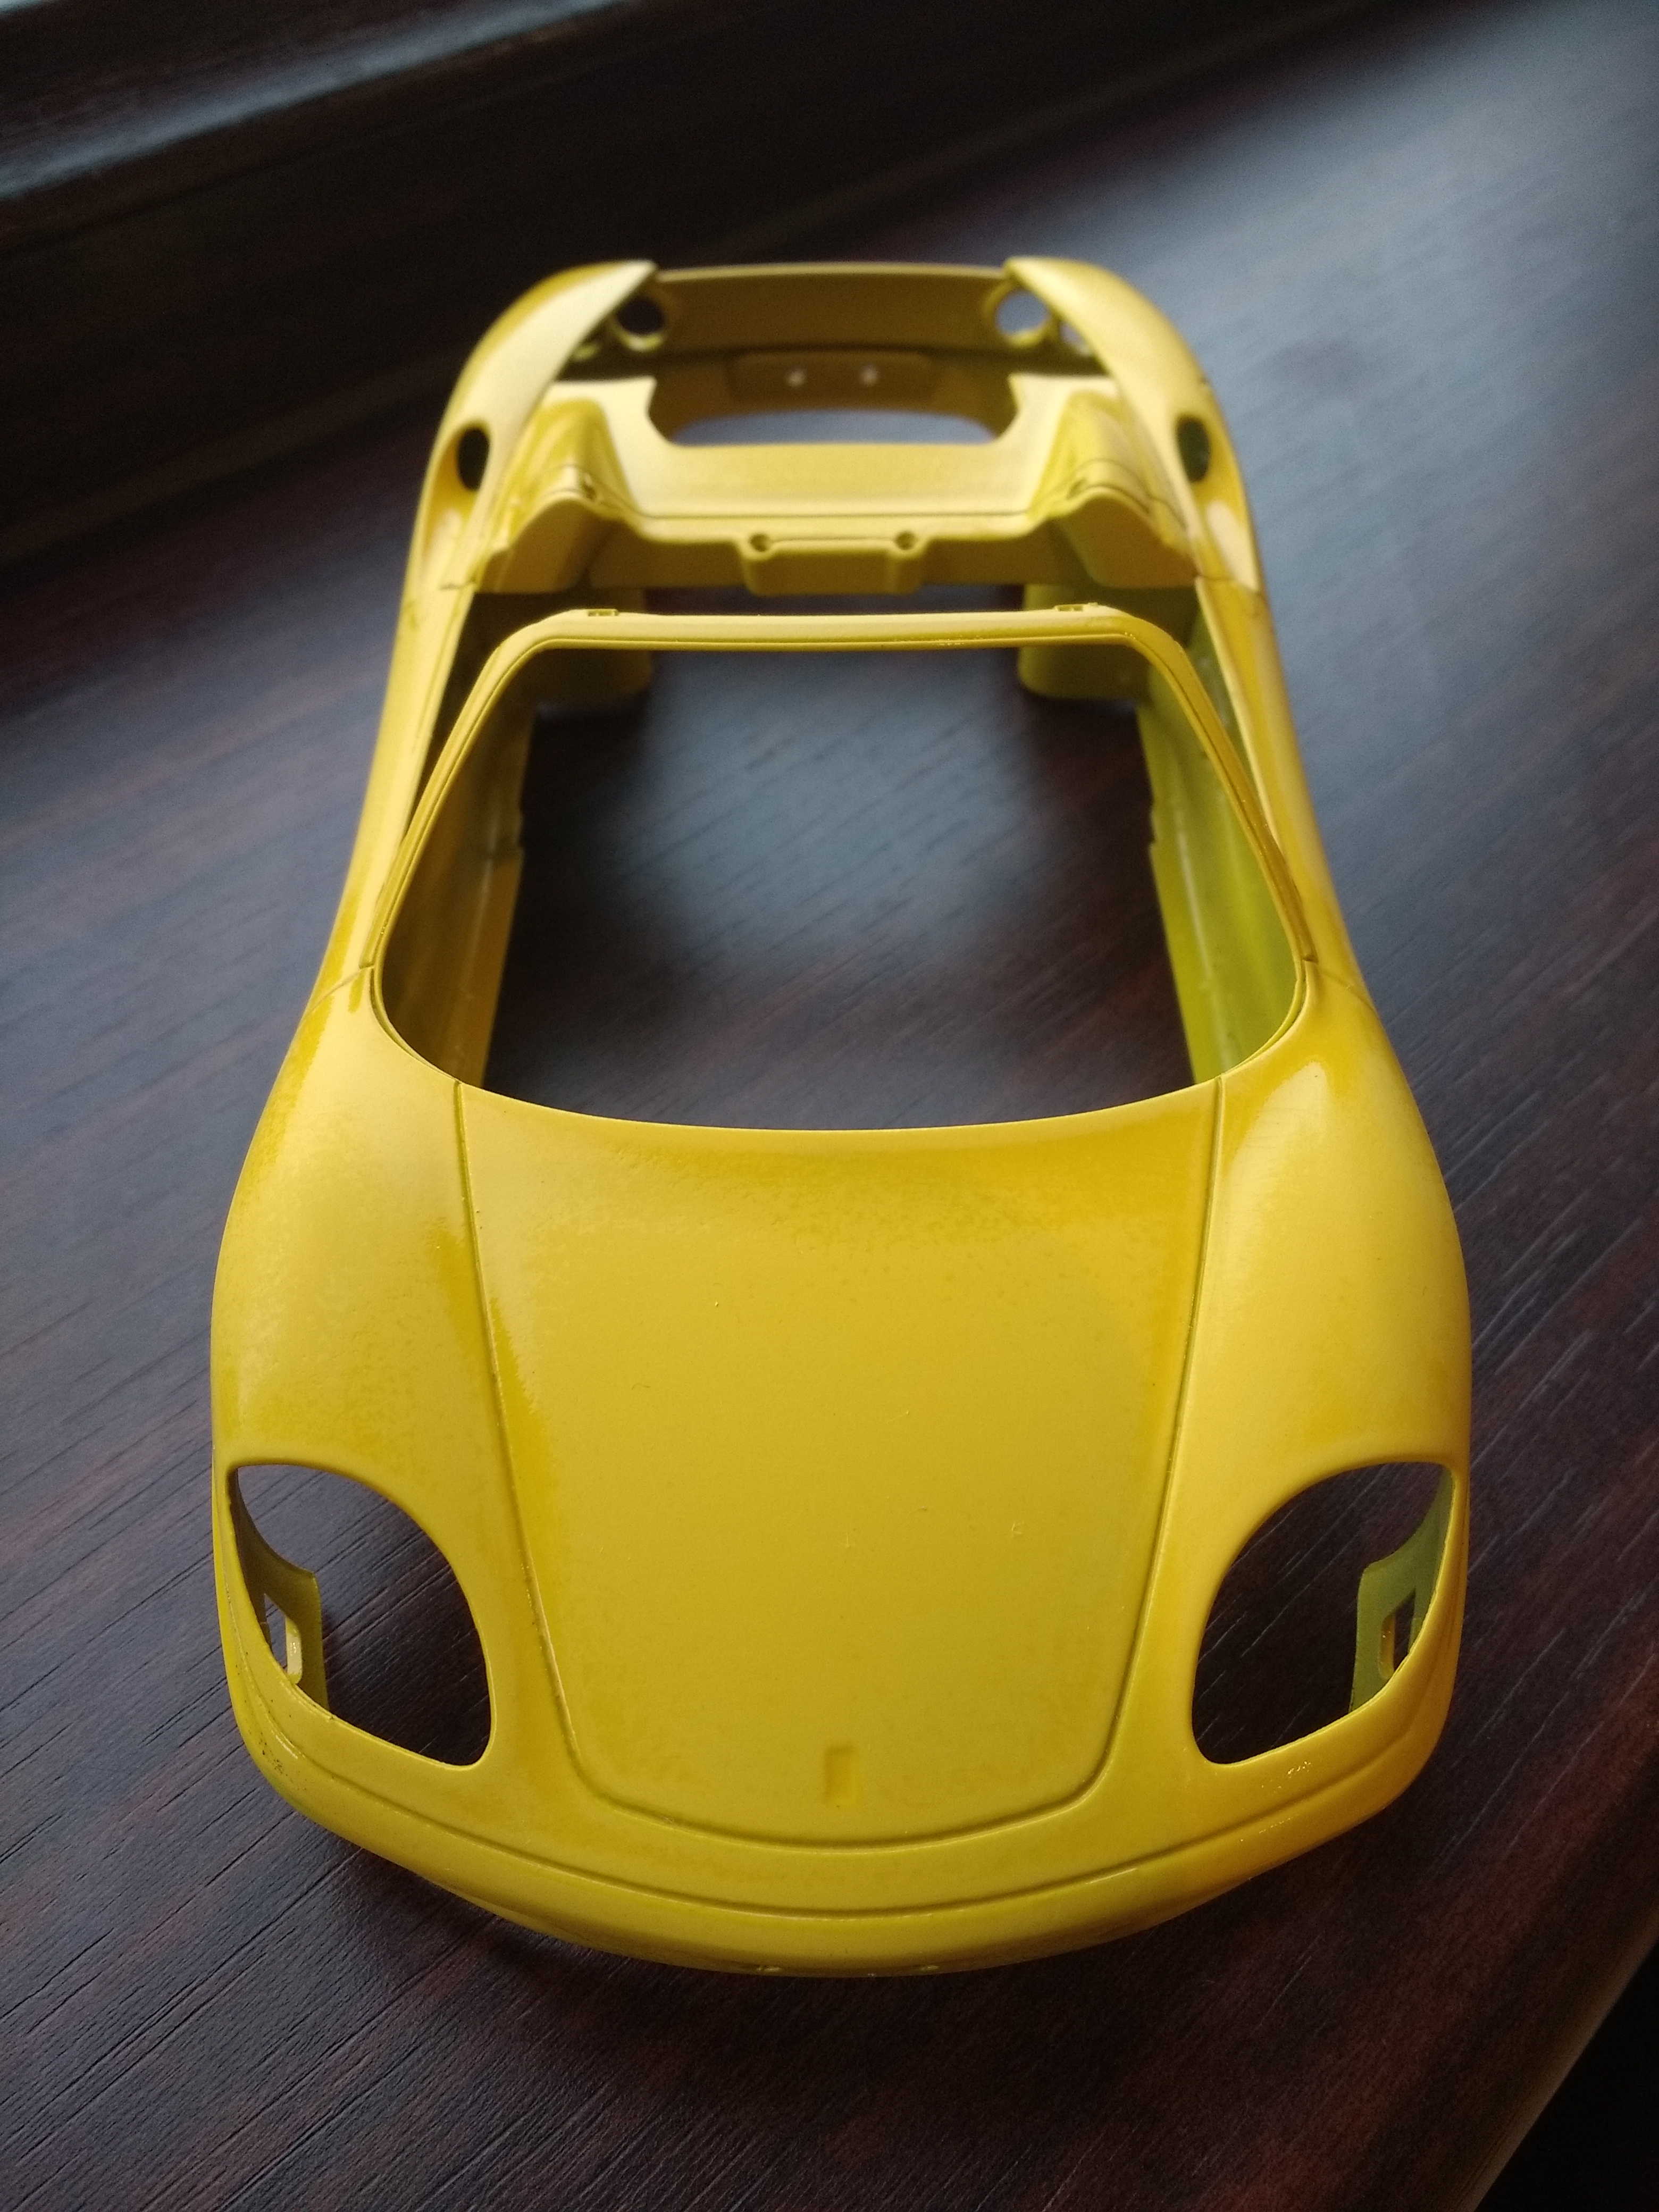
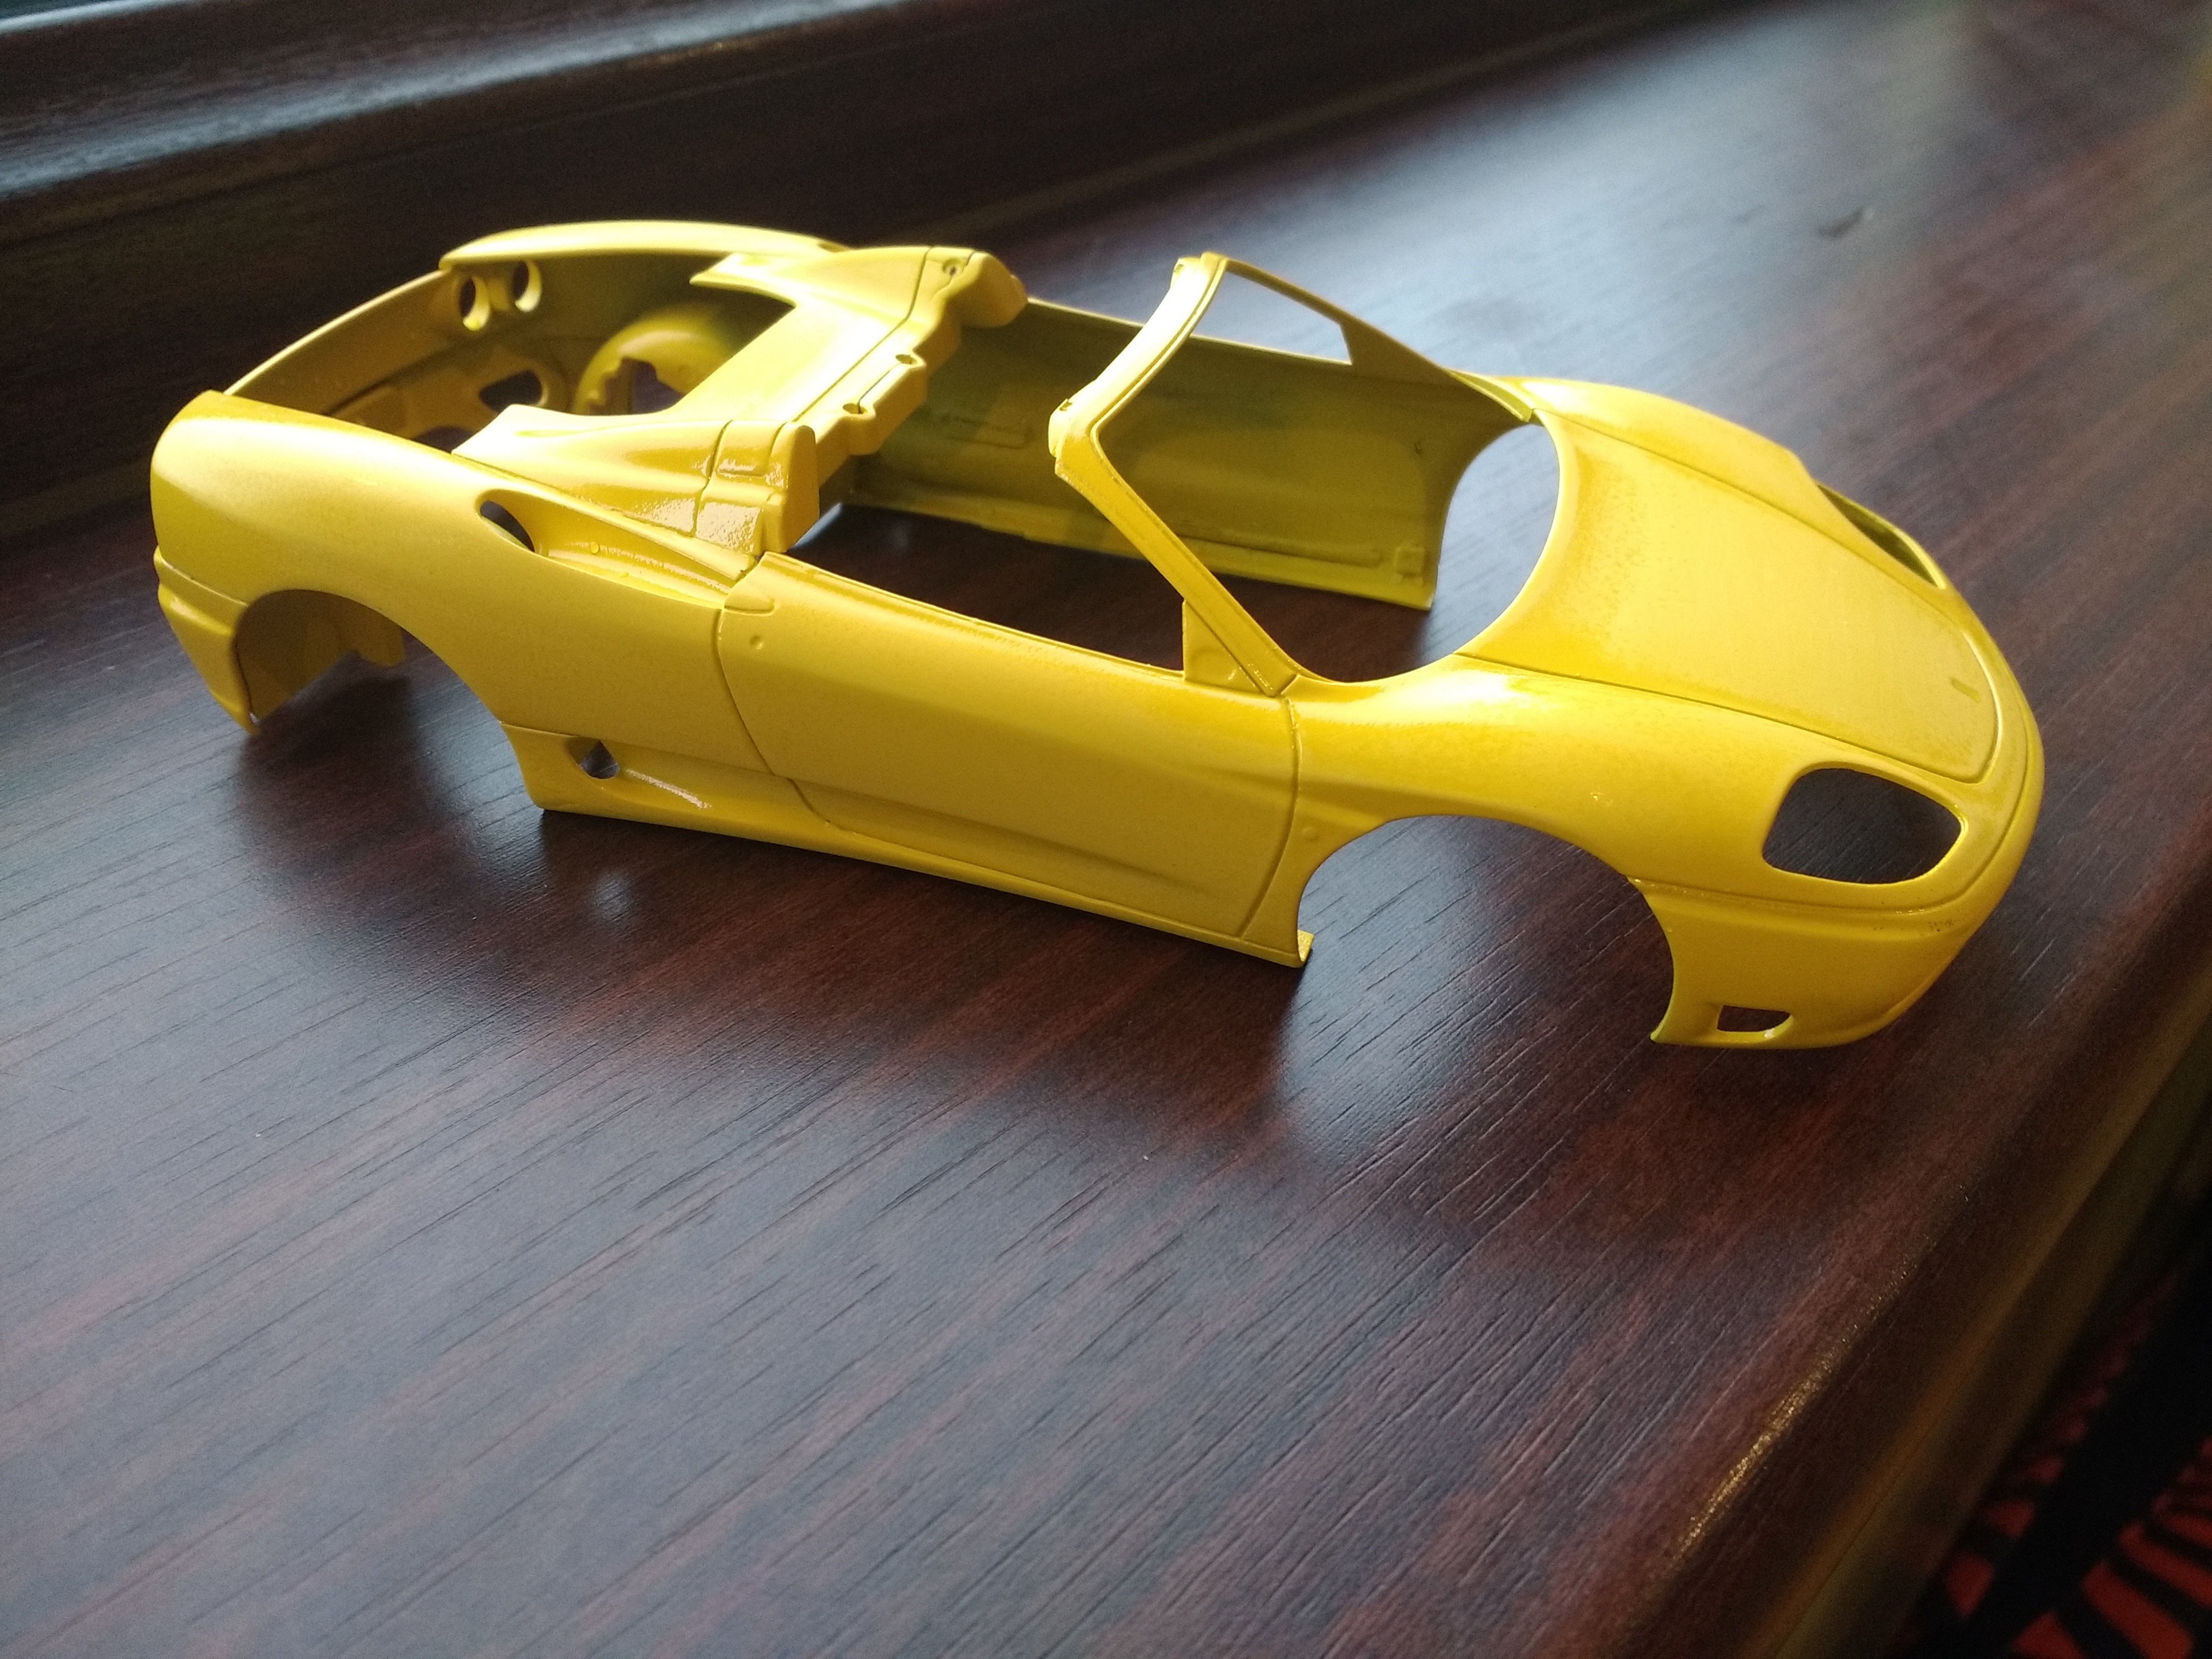
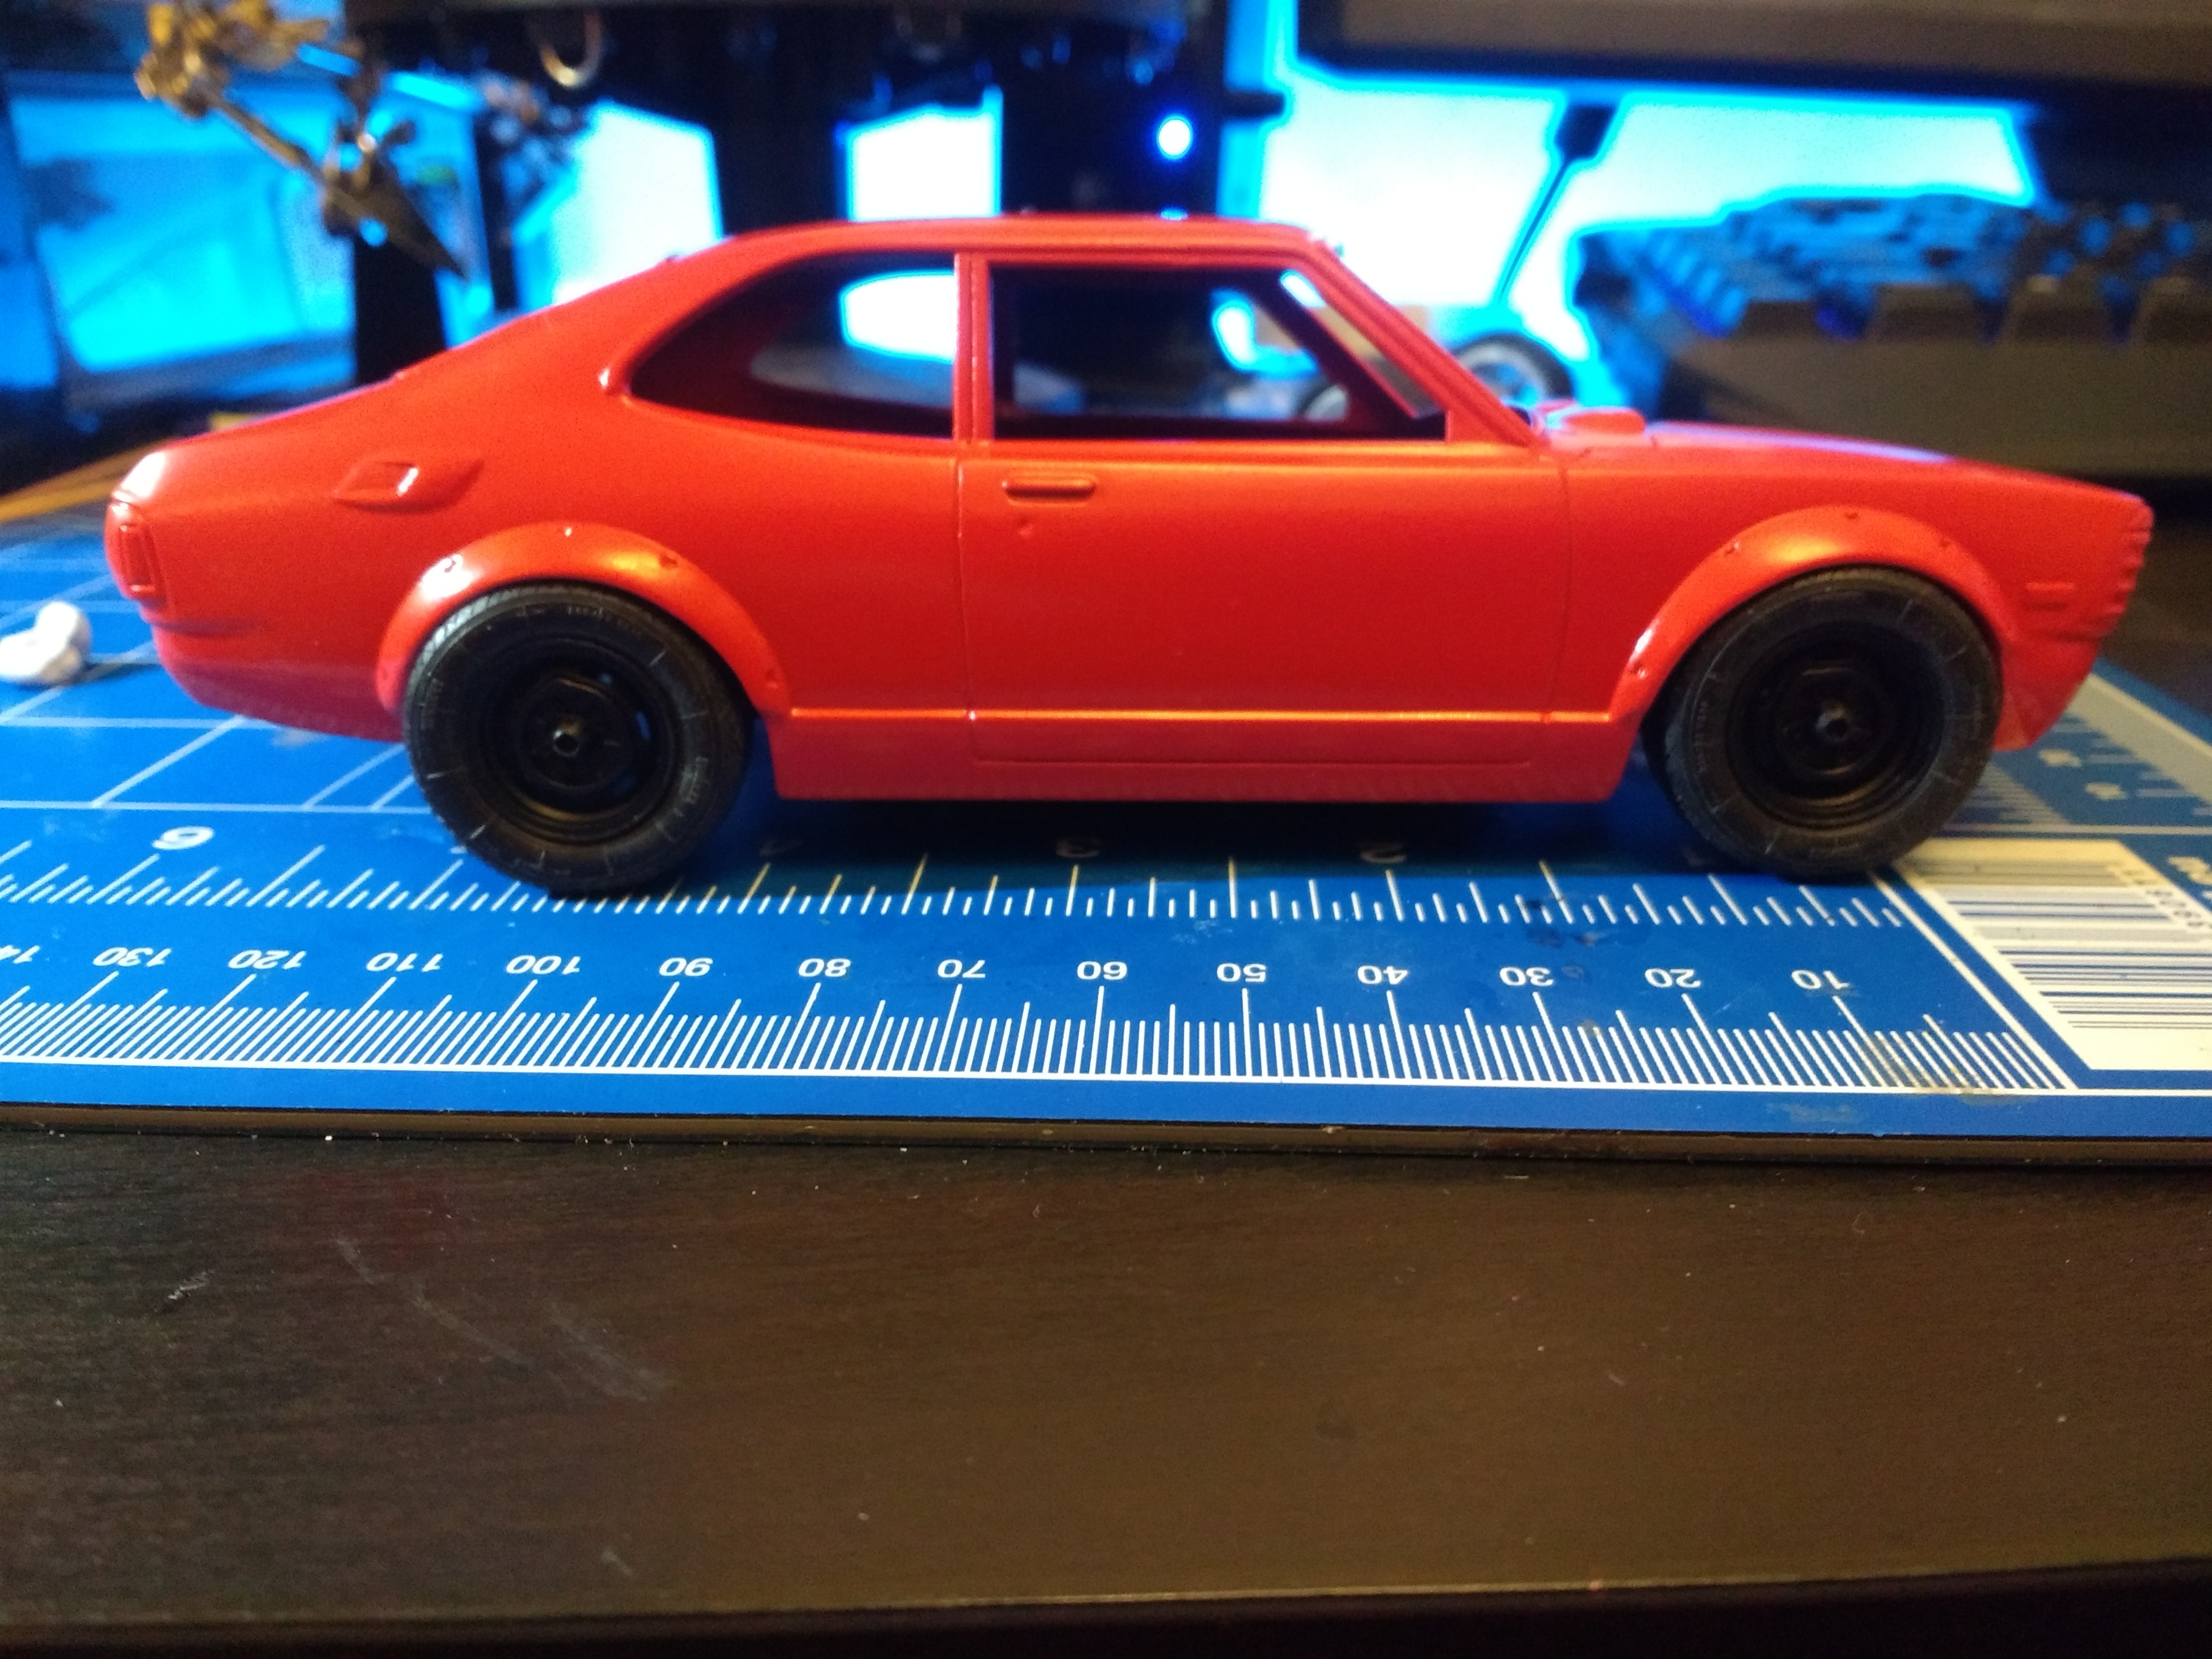
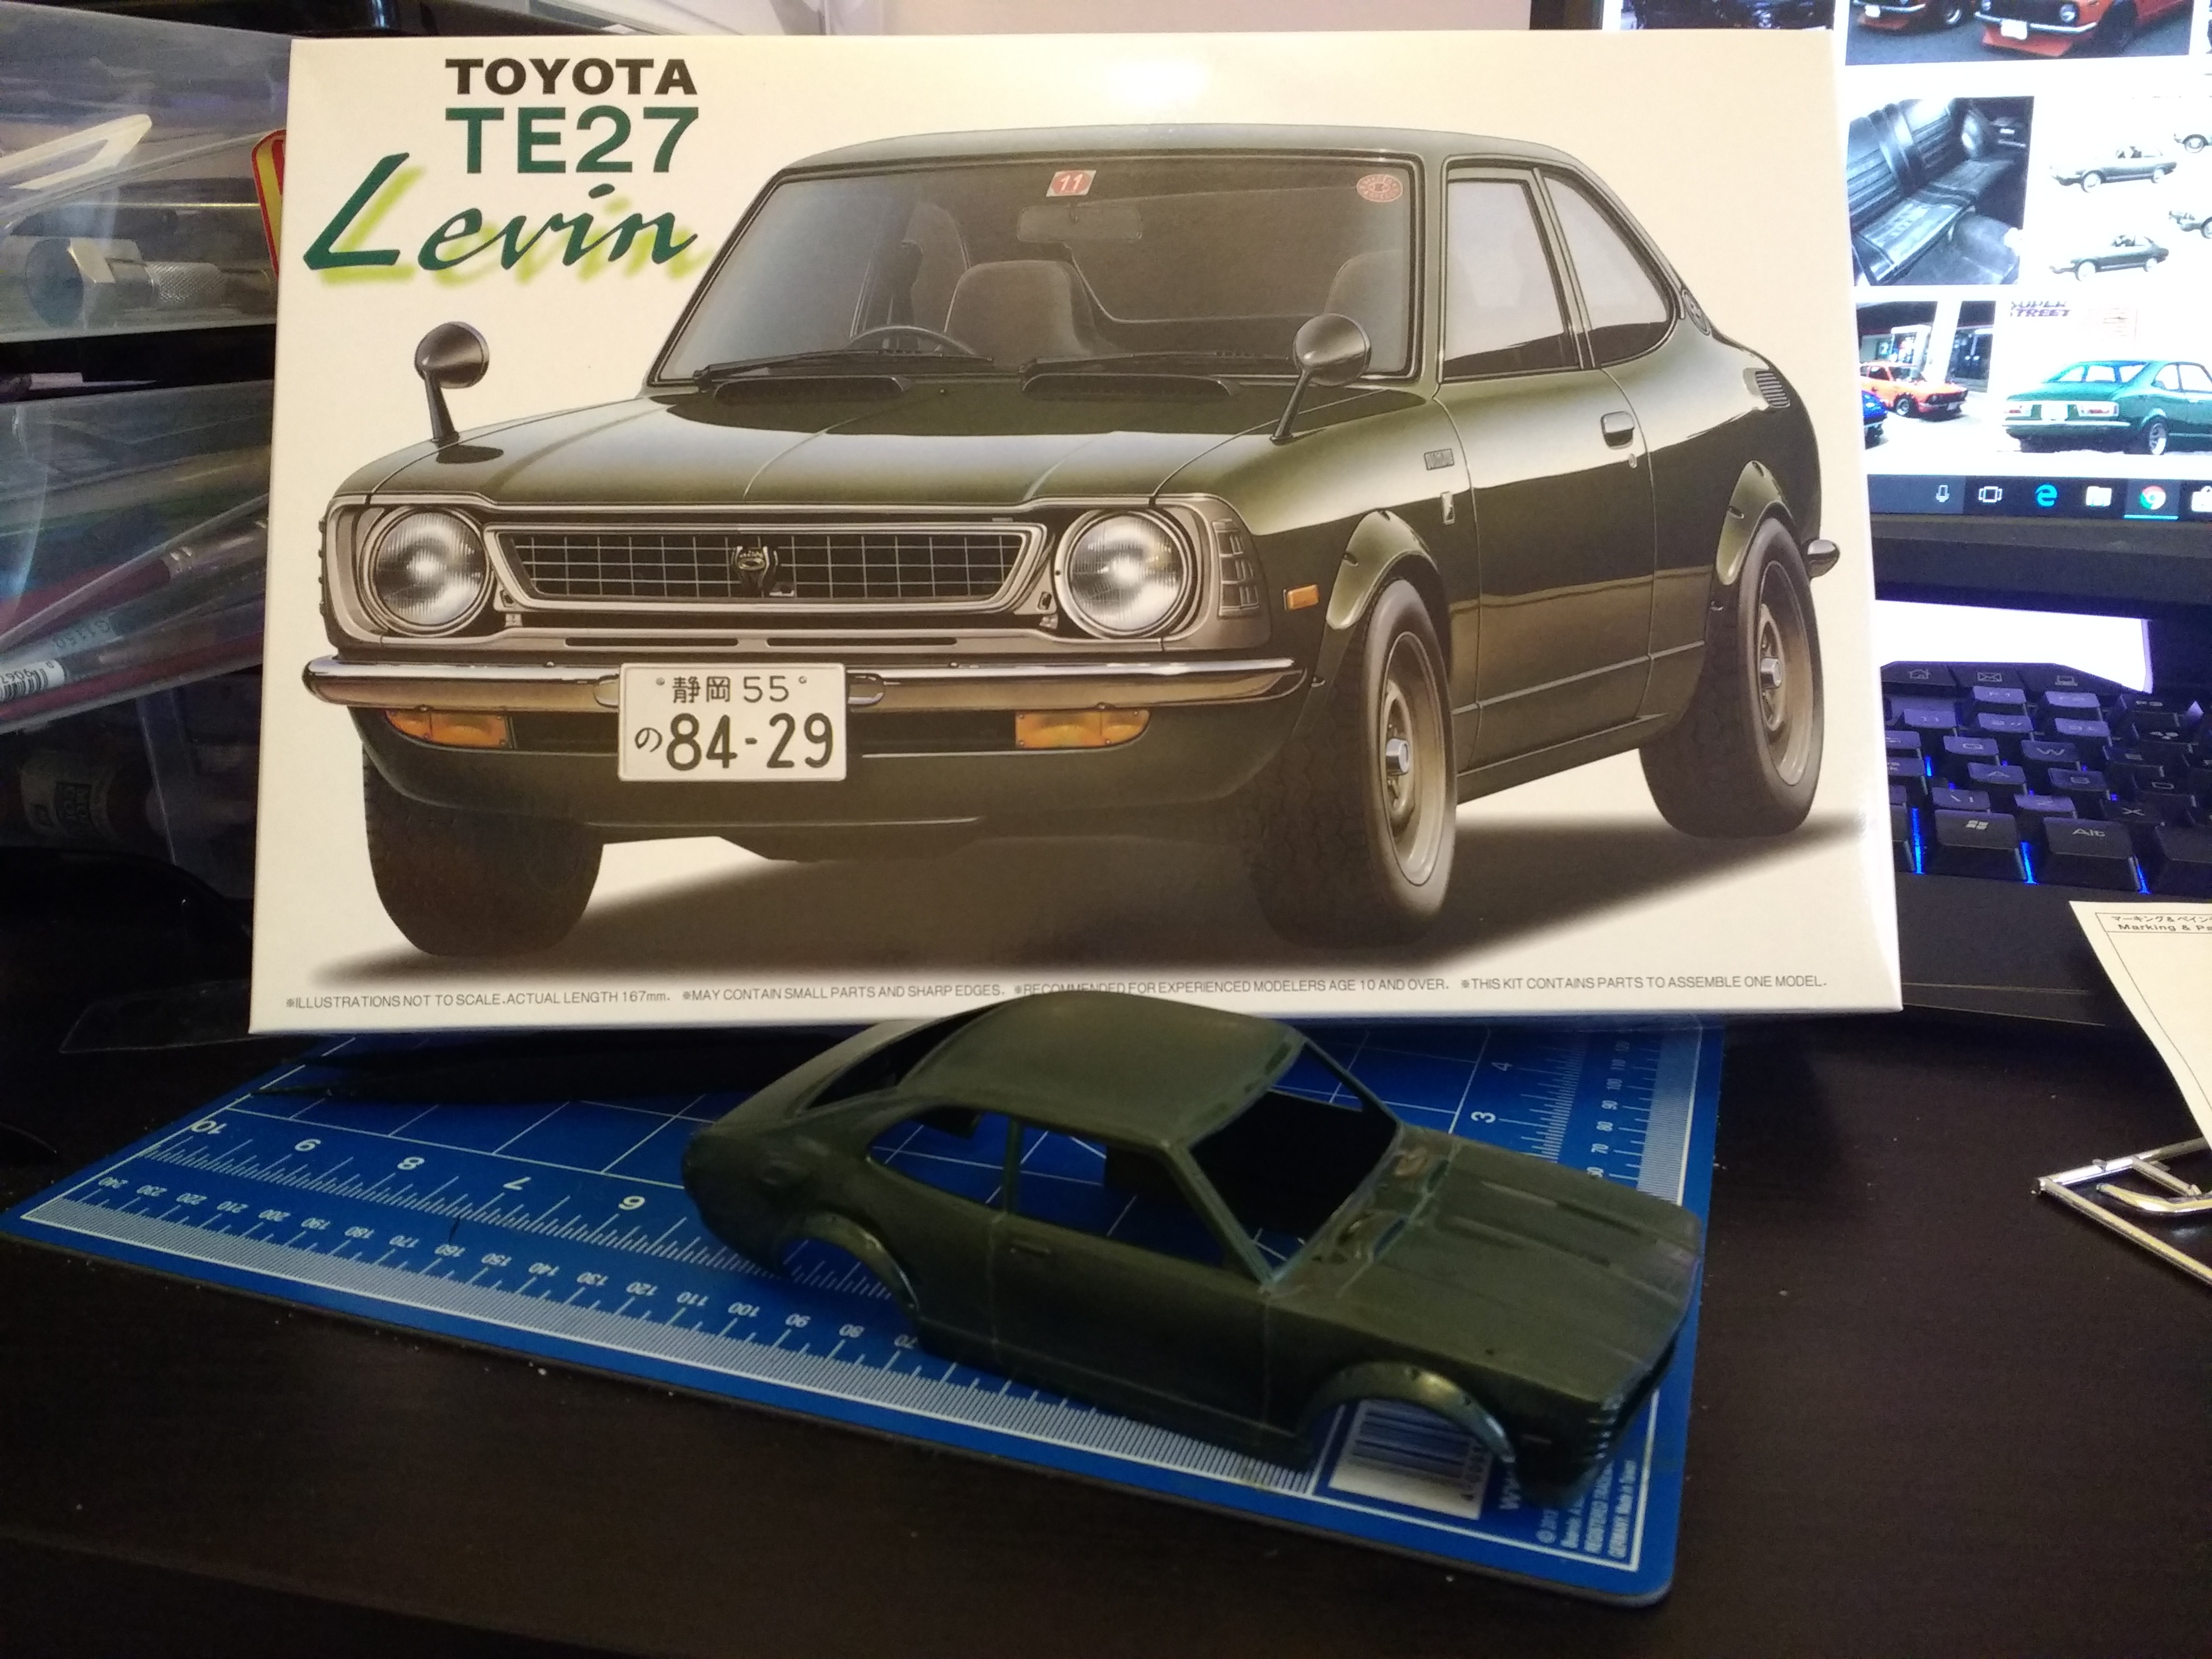
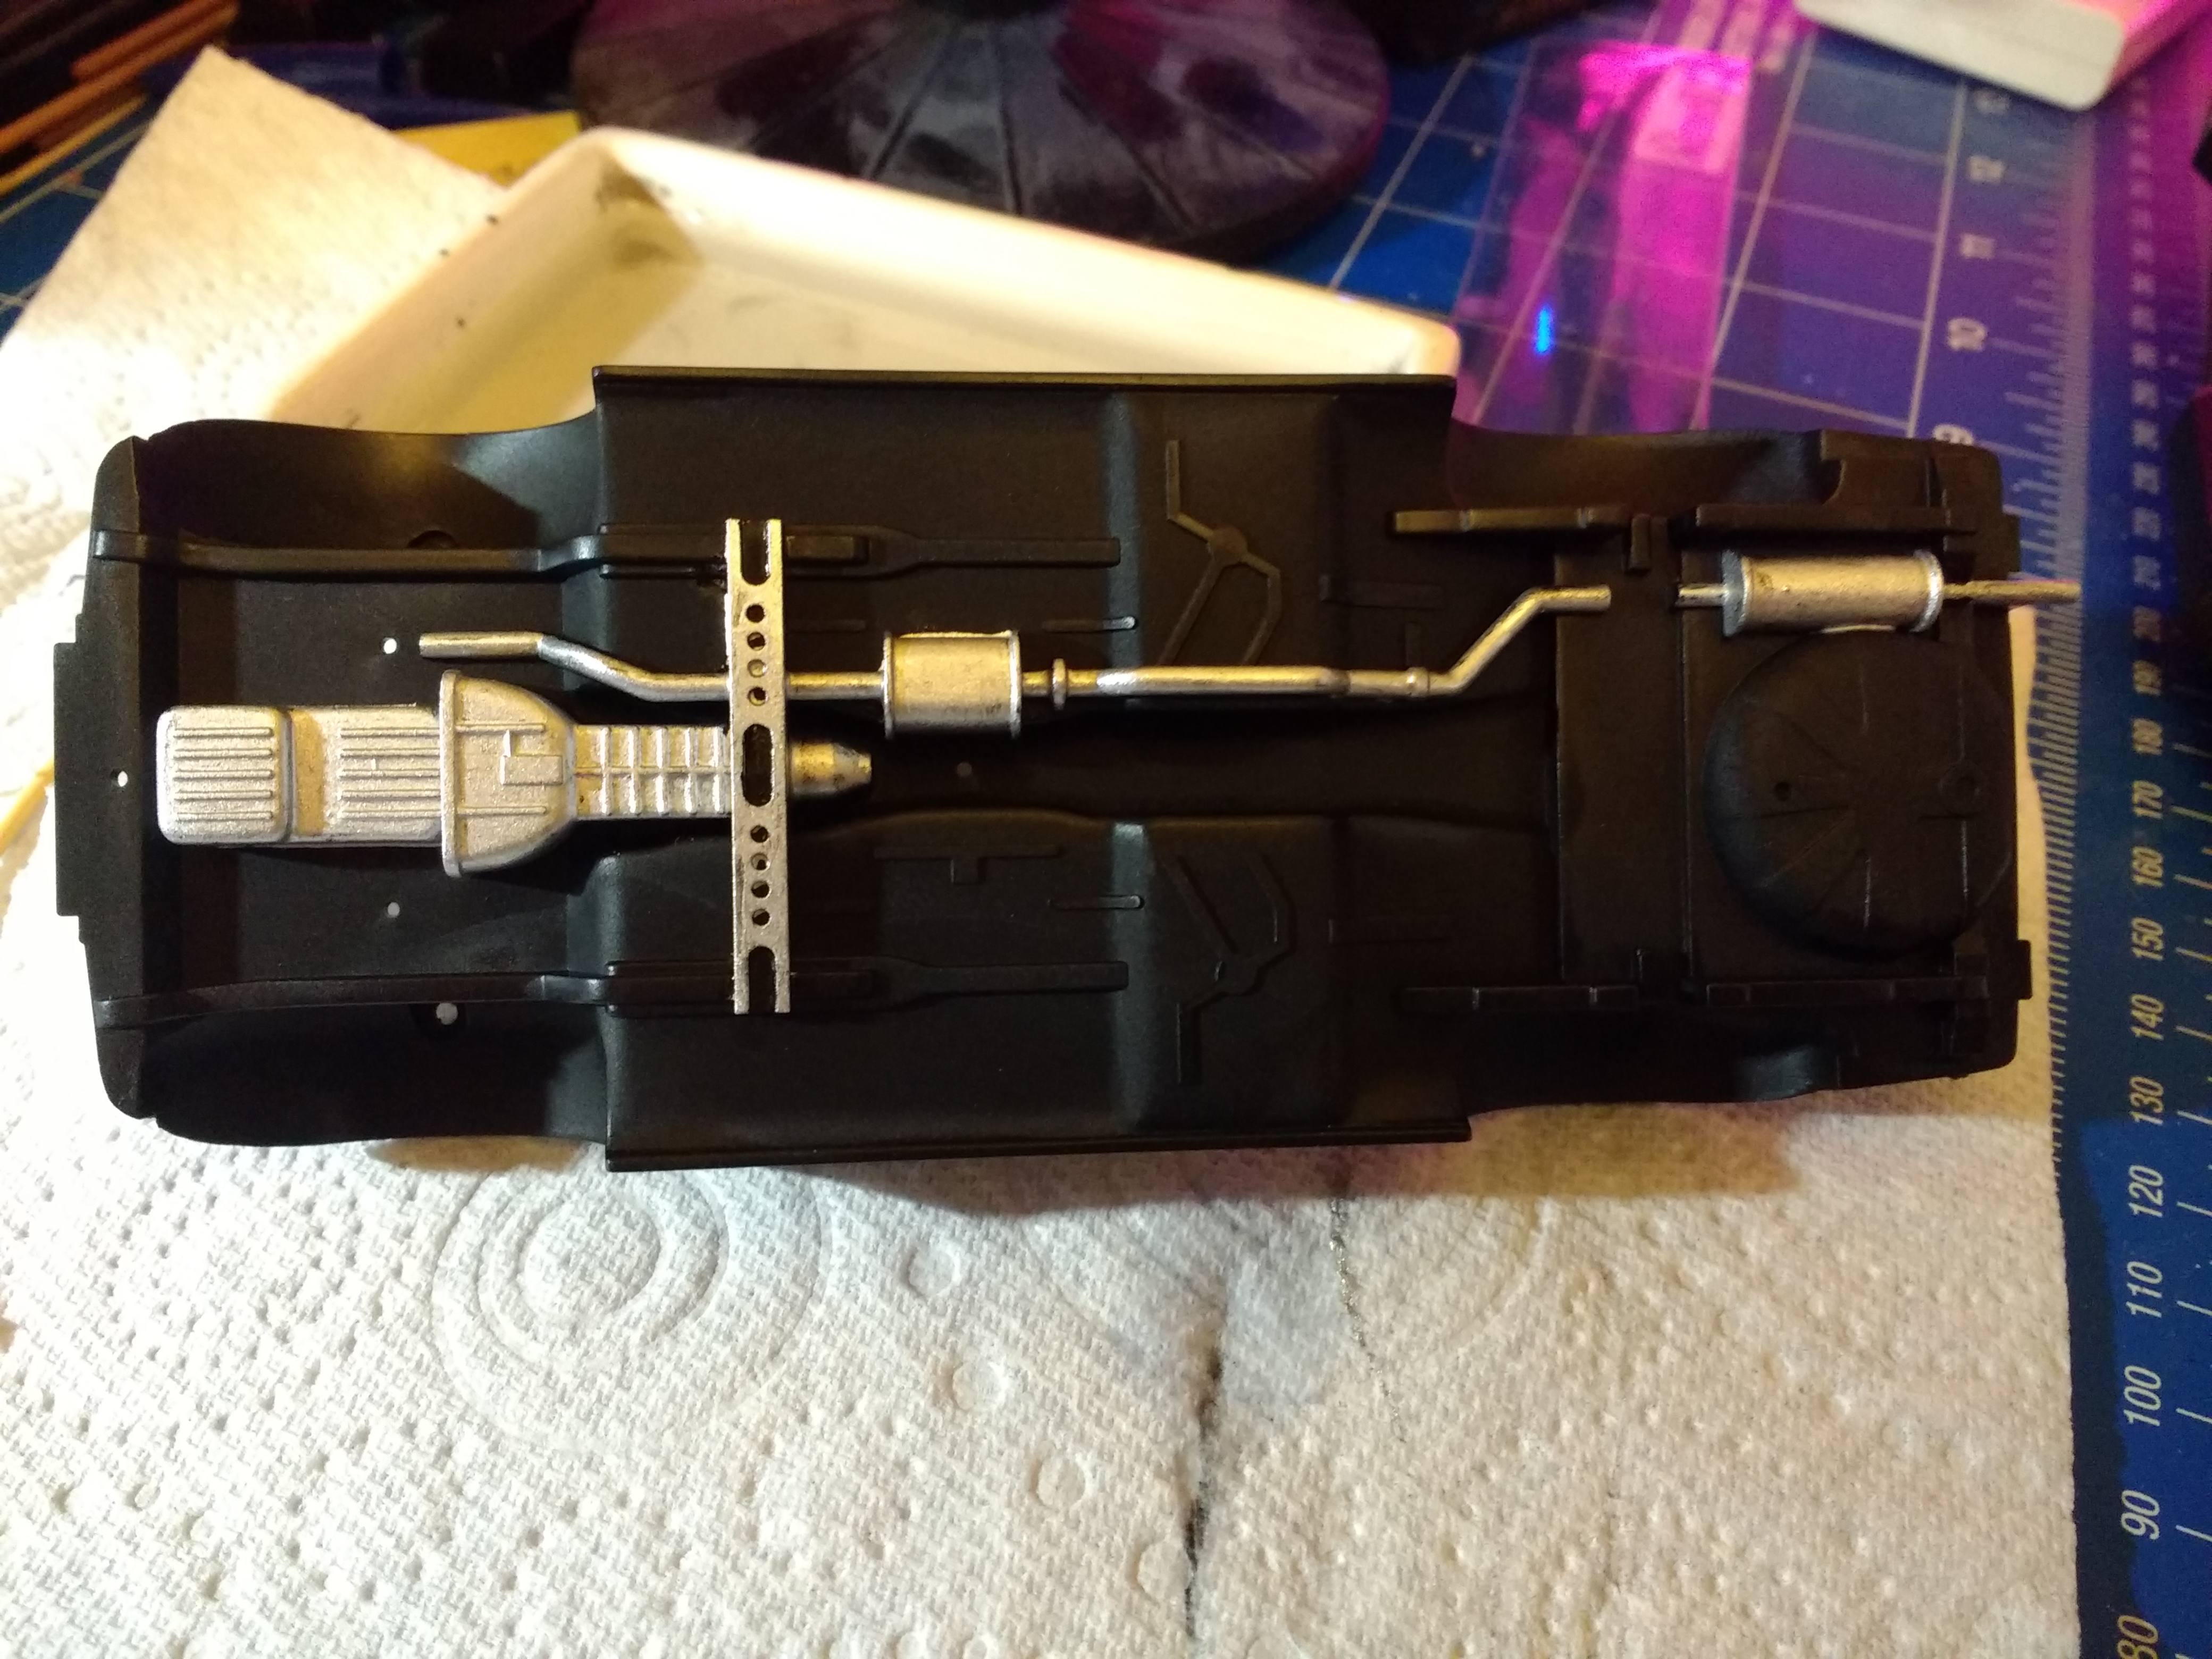
Needed a break from the Countach build and this turned up in the post. A nice simple set, good quality as always from Fujimi. Deepened the panel lines and sanded the body with 1000 grit ready for primer. Halfords filler primer Halfords Ford Sunburst Red rattle can for the topcoat. Managed to get a mild day to spray outside. Just needs some fine sanding to even out the paint and then onto clearcoat next week. Bit of detail painting, the front grill silver was a challenge Choice of wheels, left ones come with the kit, the right are the same size off a Mitsubishi EVO 5. Started a bit of detailing on the underside
-
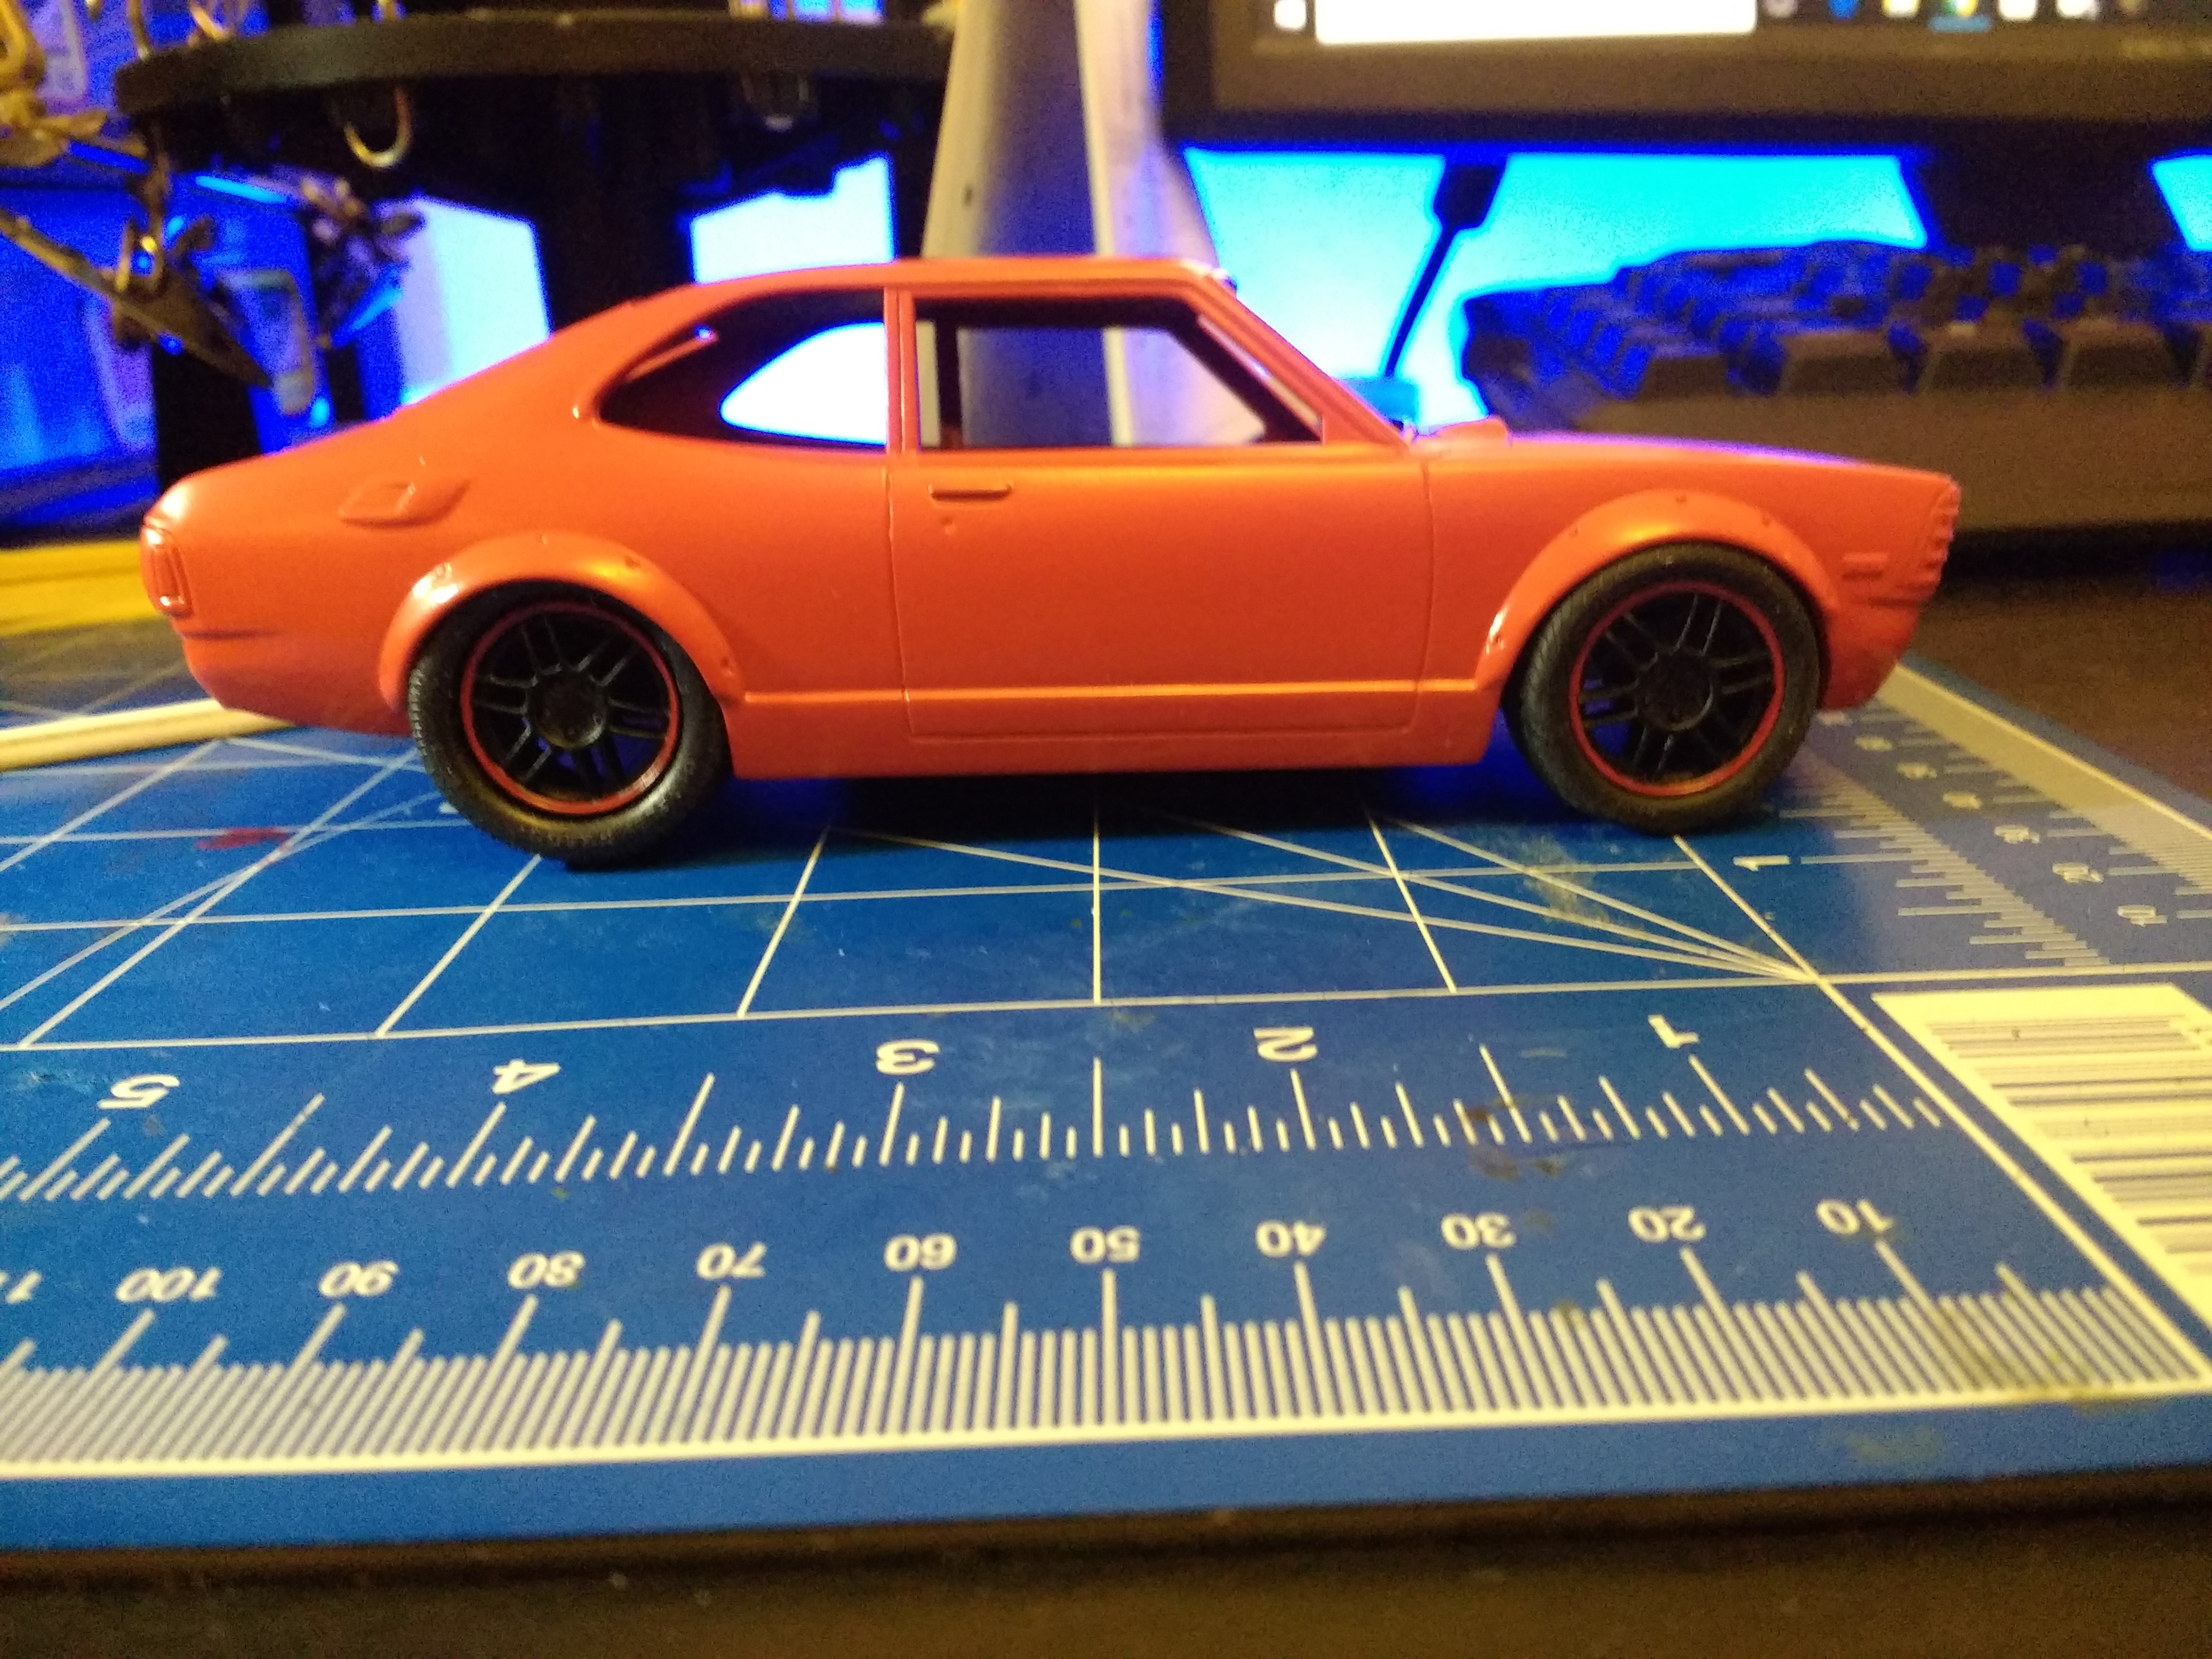
Test fit, very impressed with this kit so far, shame they don't make them anymore.