NOBLNG
-
Posts
9,943 -
Joined
-
Last visited
Content Type
Profiles
Forums
Events
Gallery
Everything posted by NOBLNG
-
It looks great Allison!😎 They are cute little cars. Is there an engine in it?…pics? I have a Toyota S800 I’m working on.
-
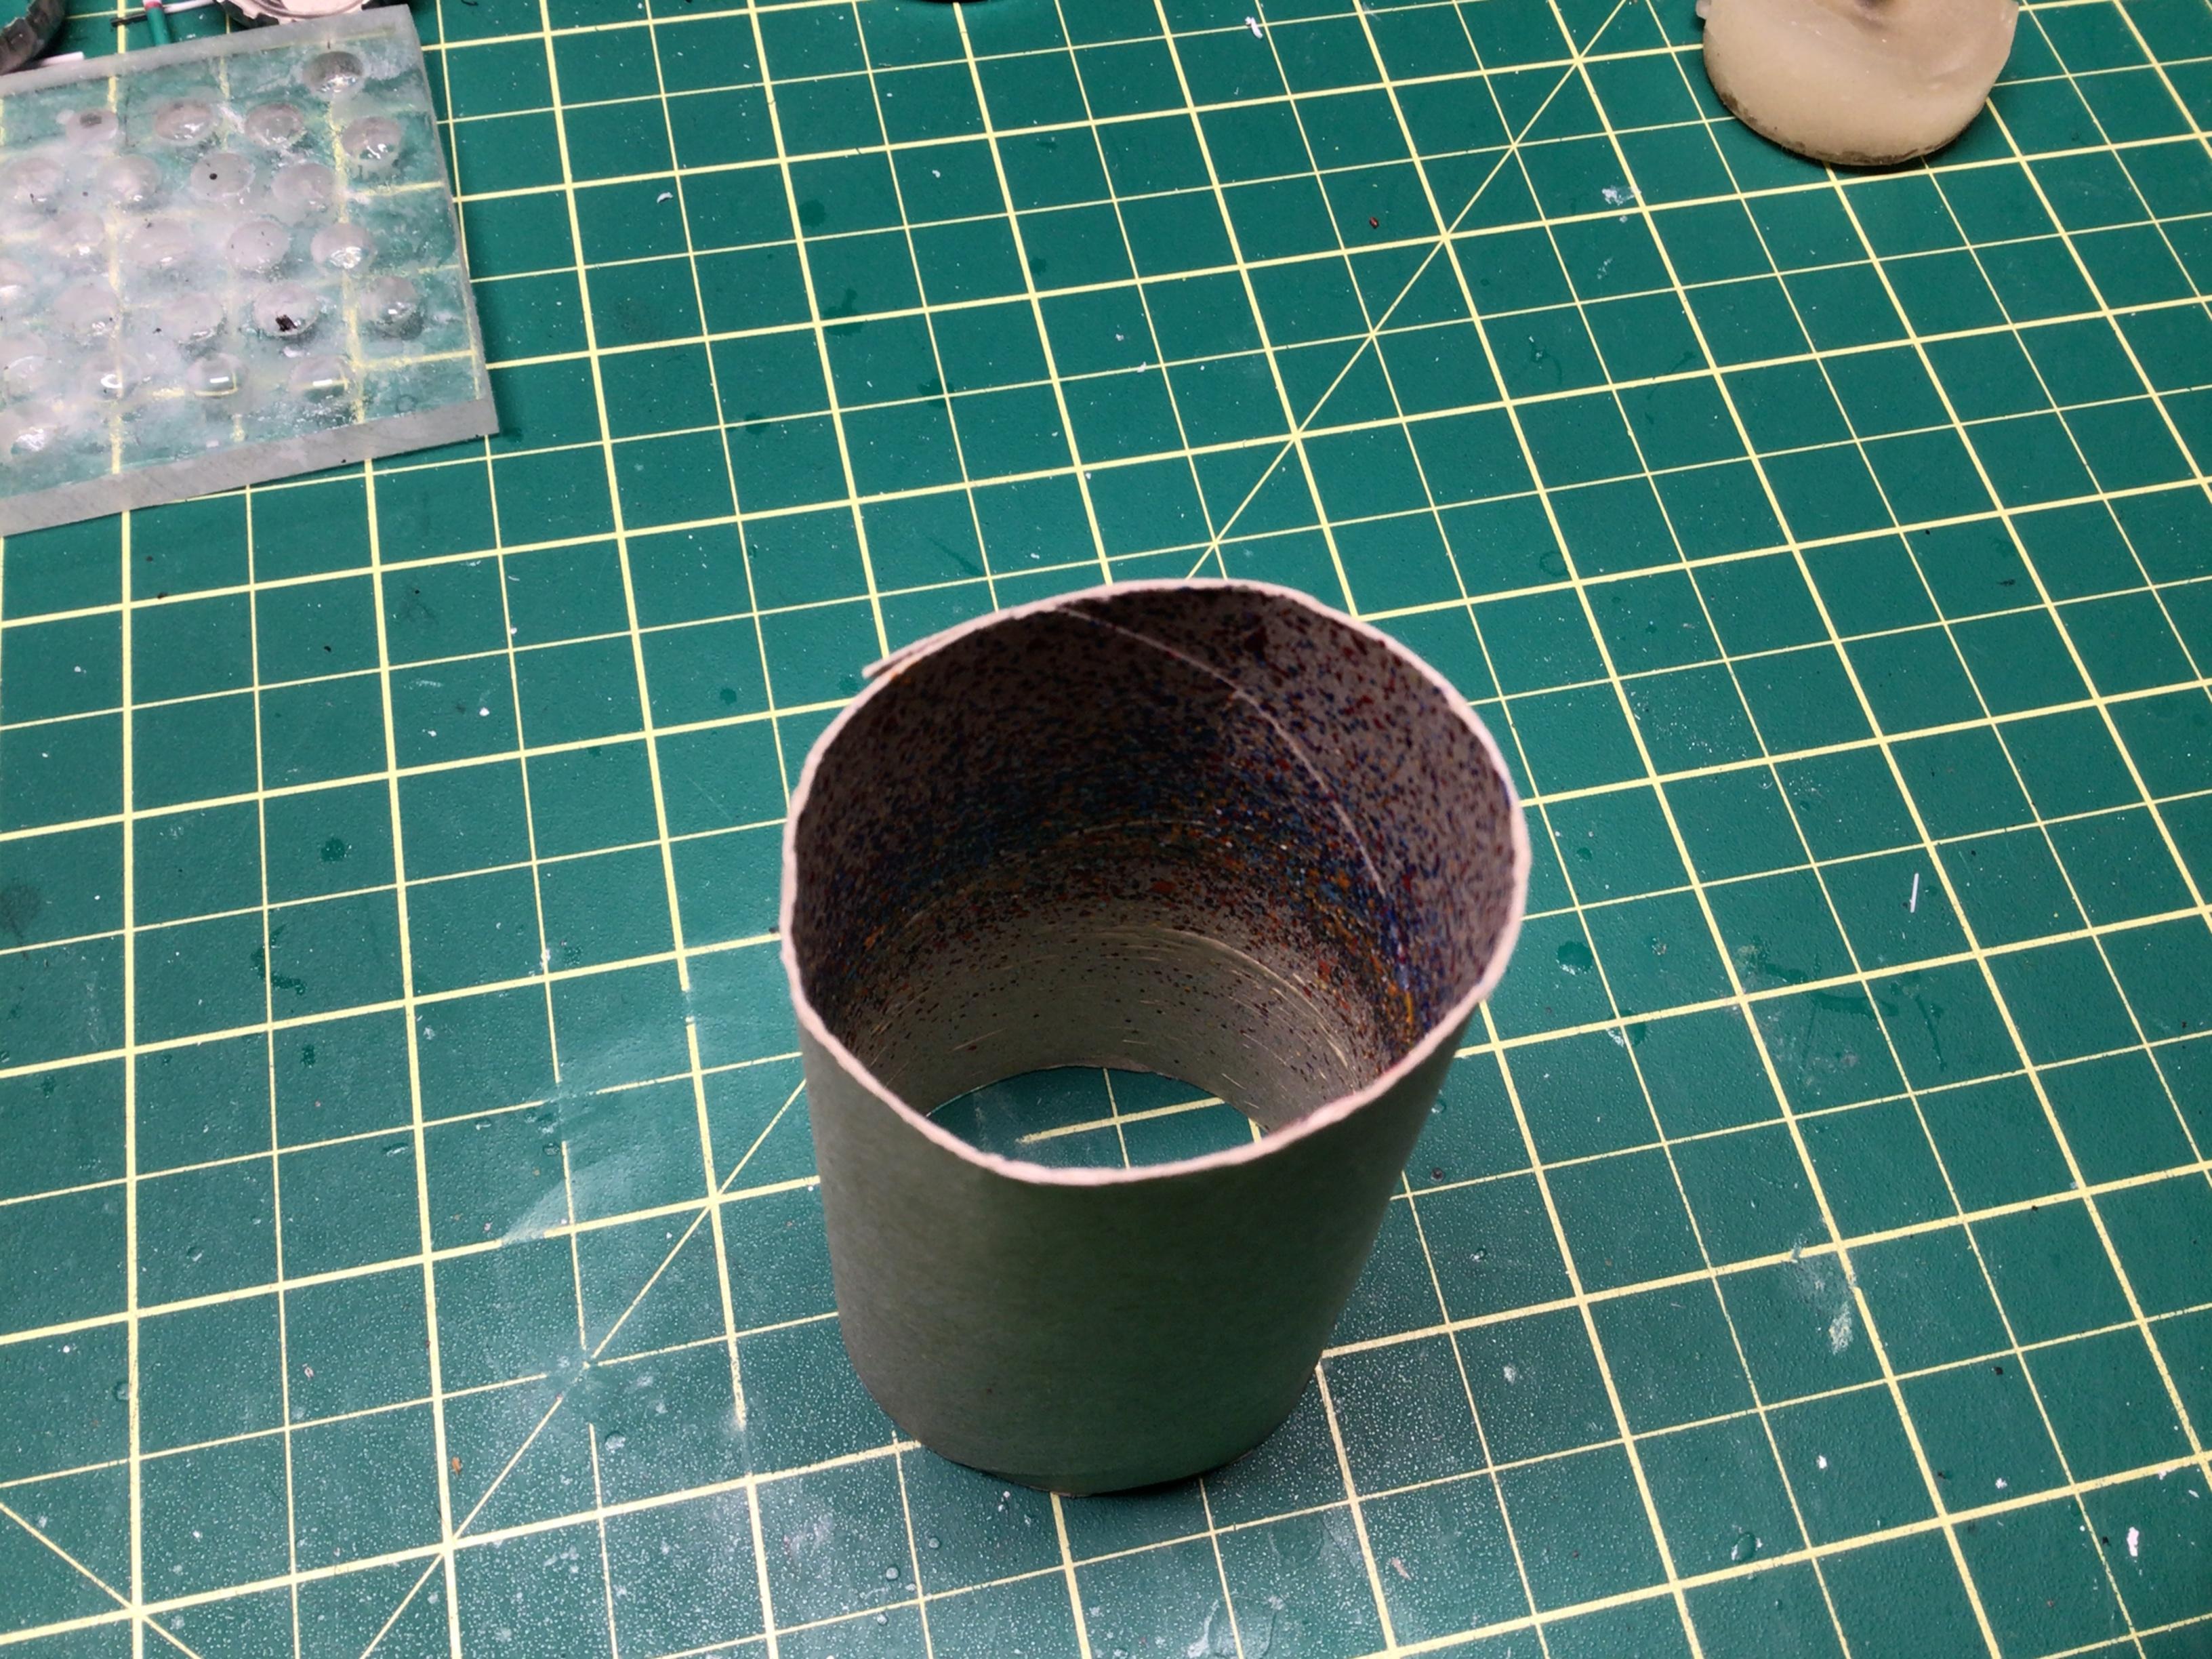
Exhaust is now finished and made some links for the rear axle. I also got a fuel tank made and added an inset filler cap.

-
Believe me I know what you mean. 😬 On my ‘41 Plymouth I used a thick layer of Sprue Goo underneath and softened the entire top surface of the front fenders. This is much more localized.
- 17 replies
-
- 1
-

-
- sectioning
- gouging
- (and 1 more)
-
You venture outside the norms quite a bit I imagine.
-
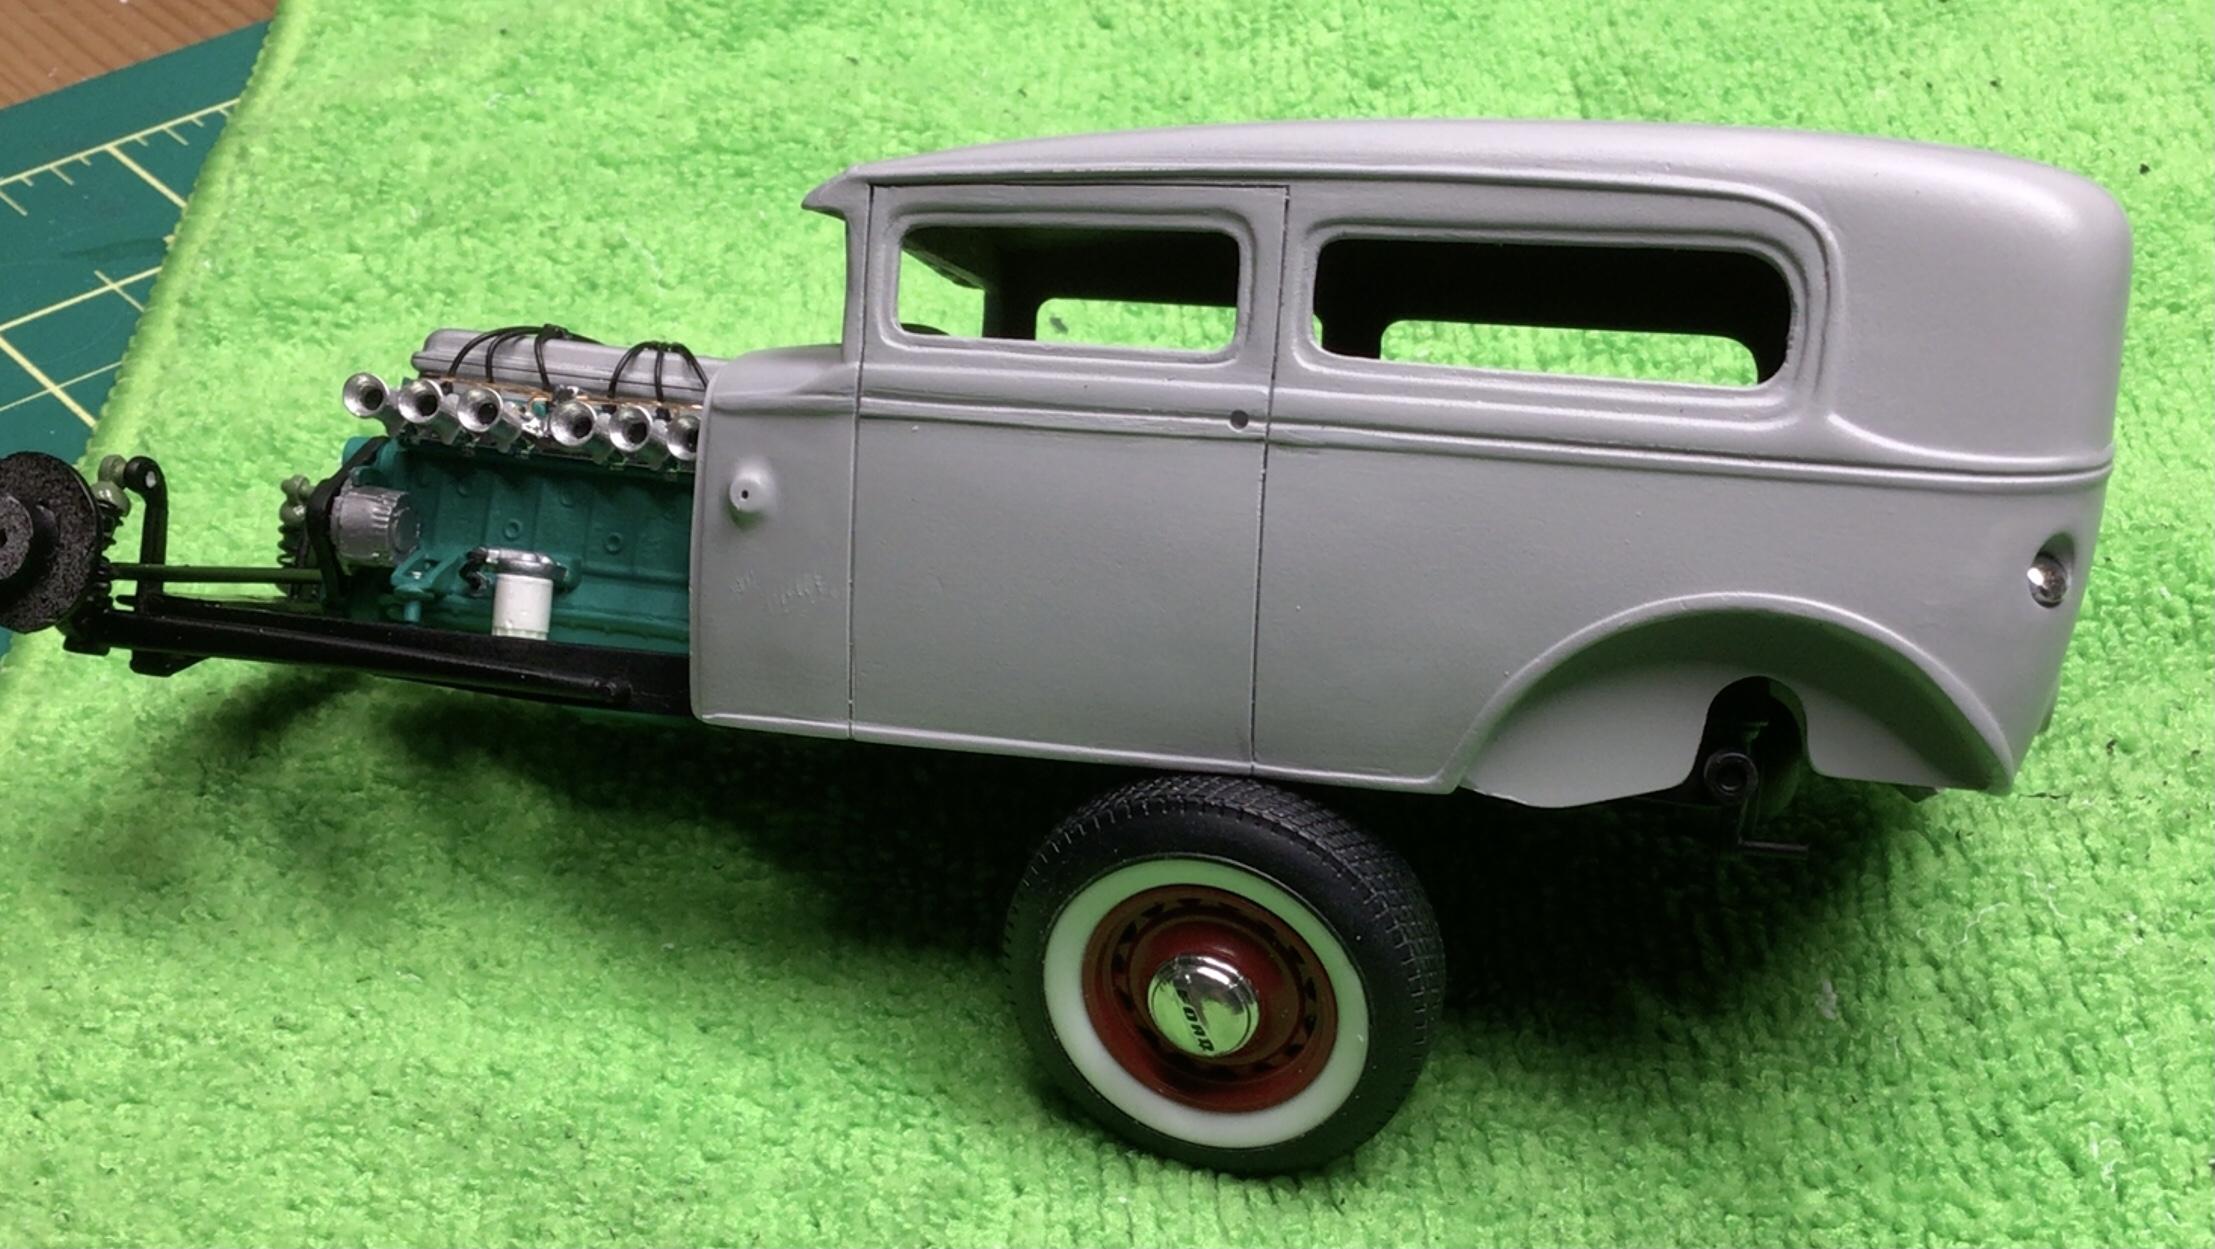
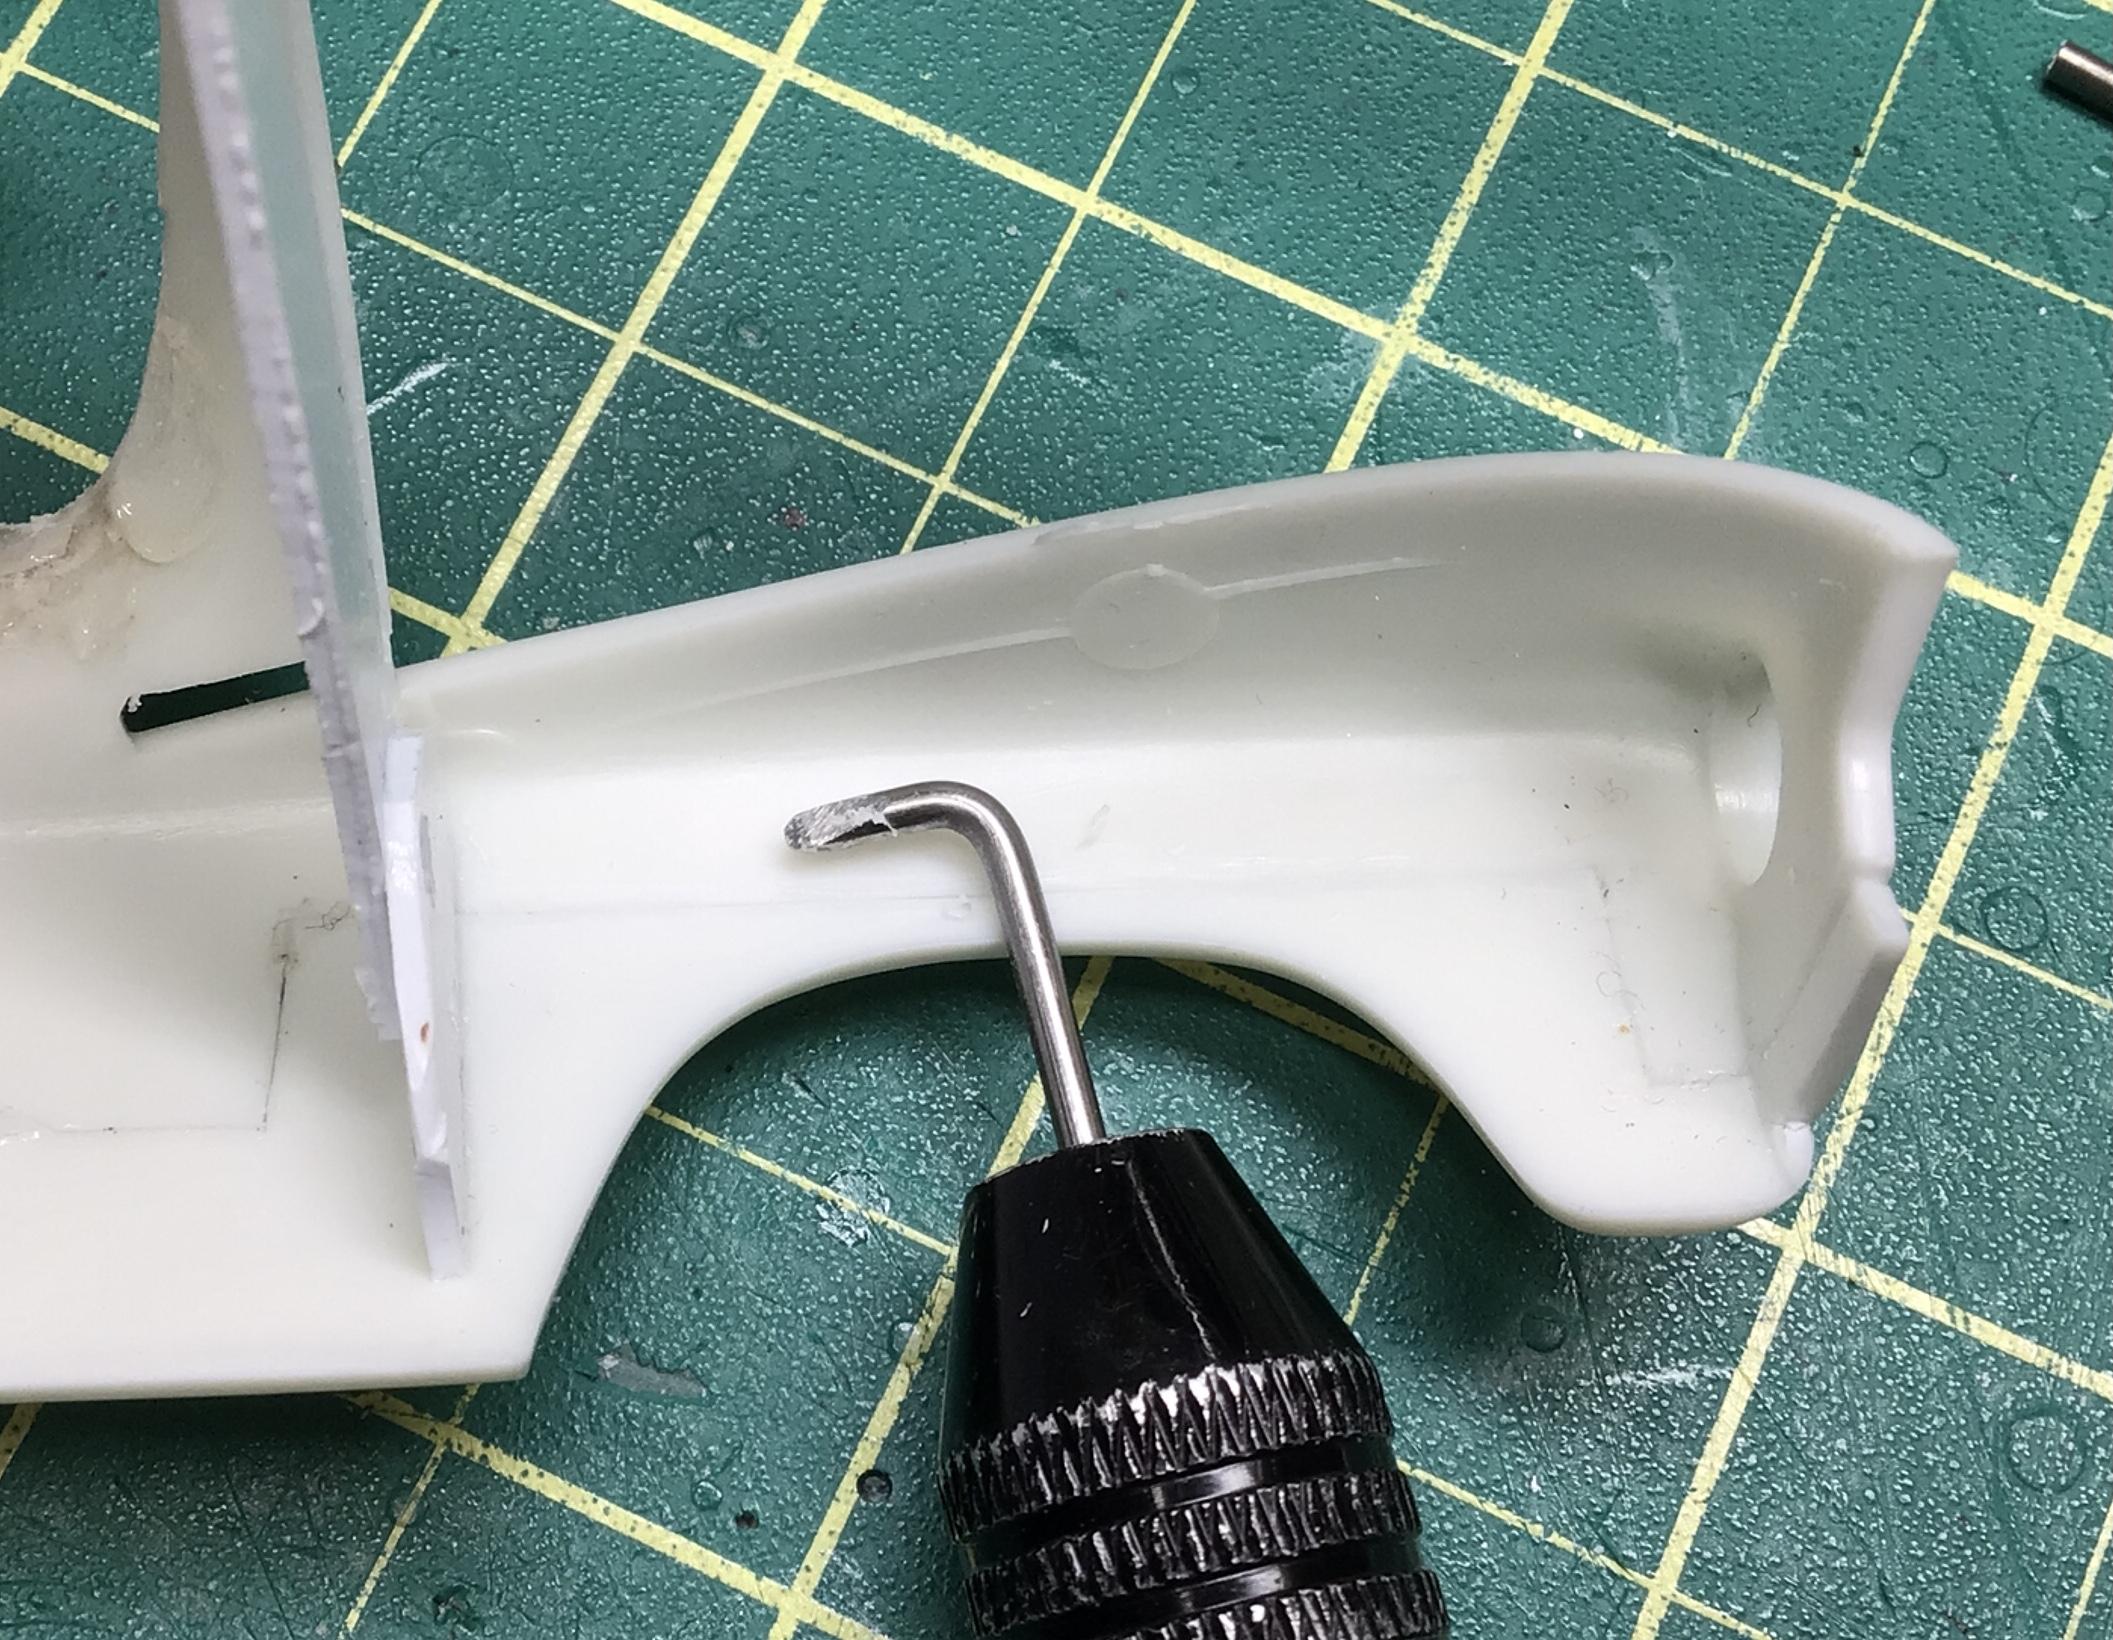
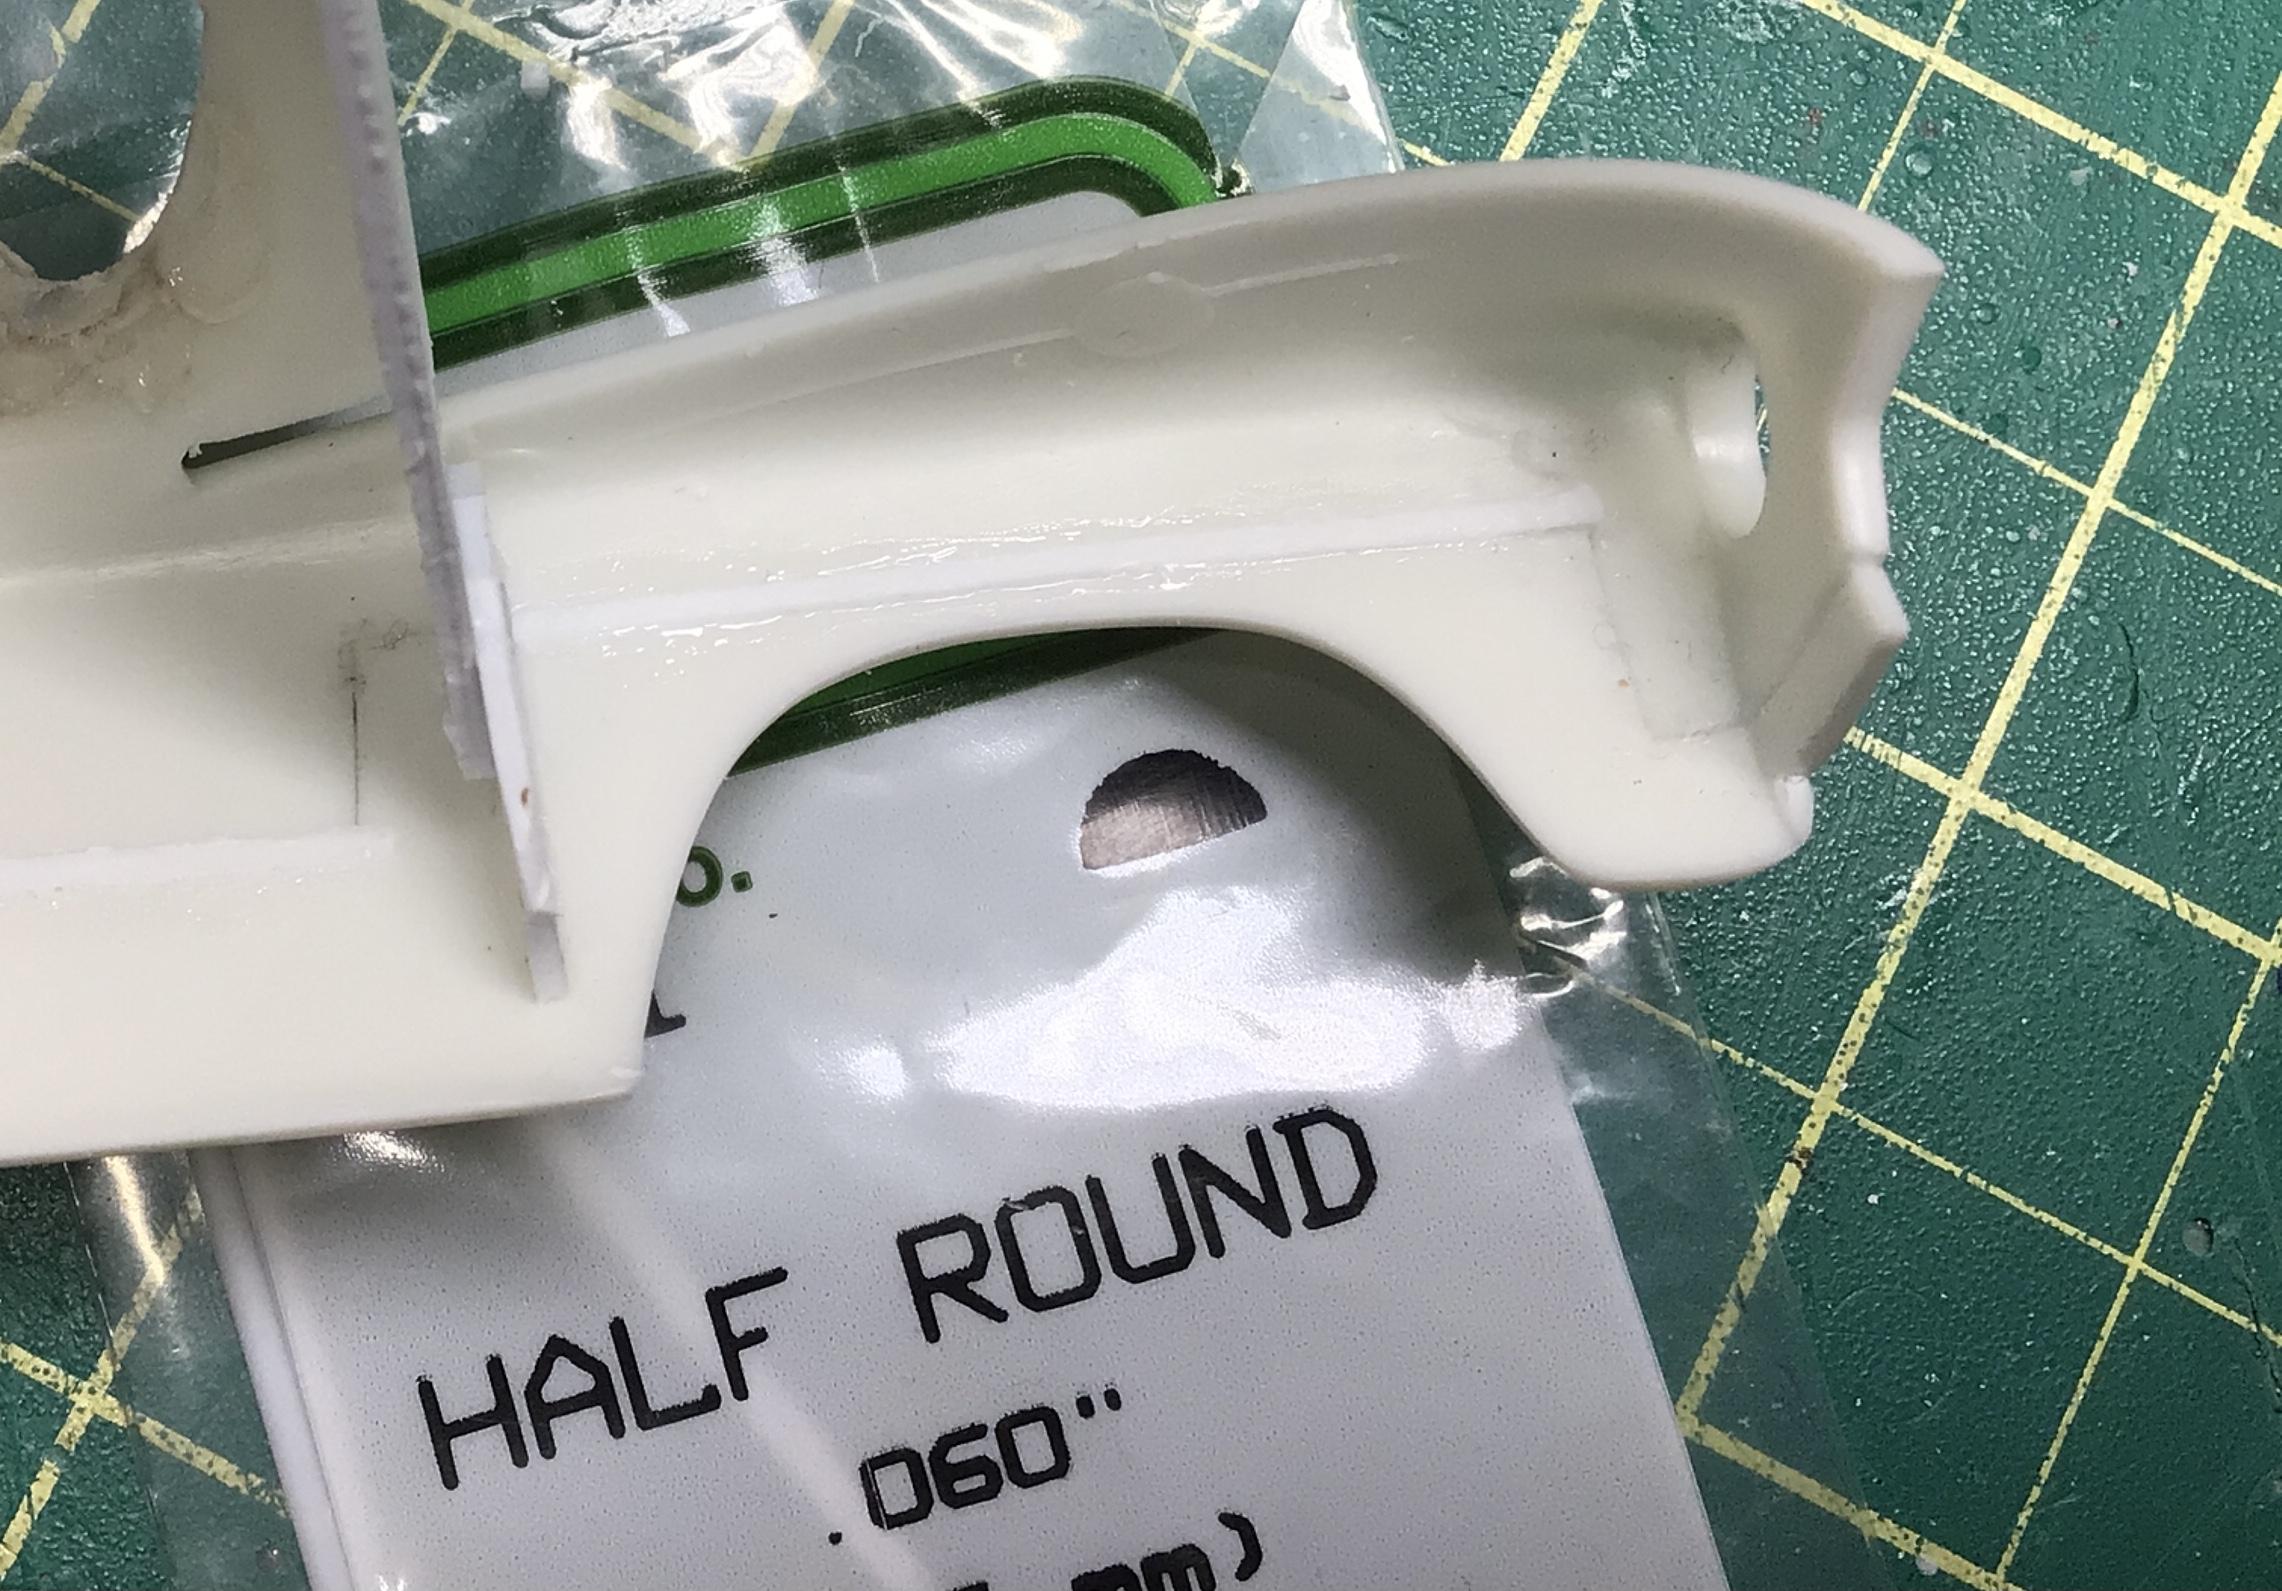
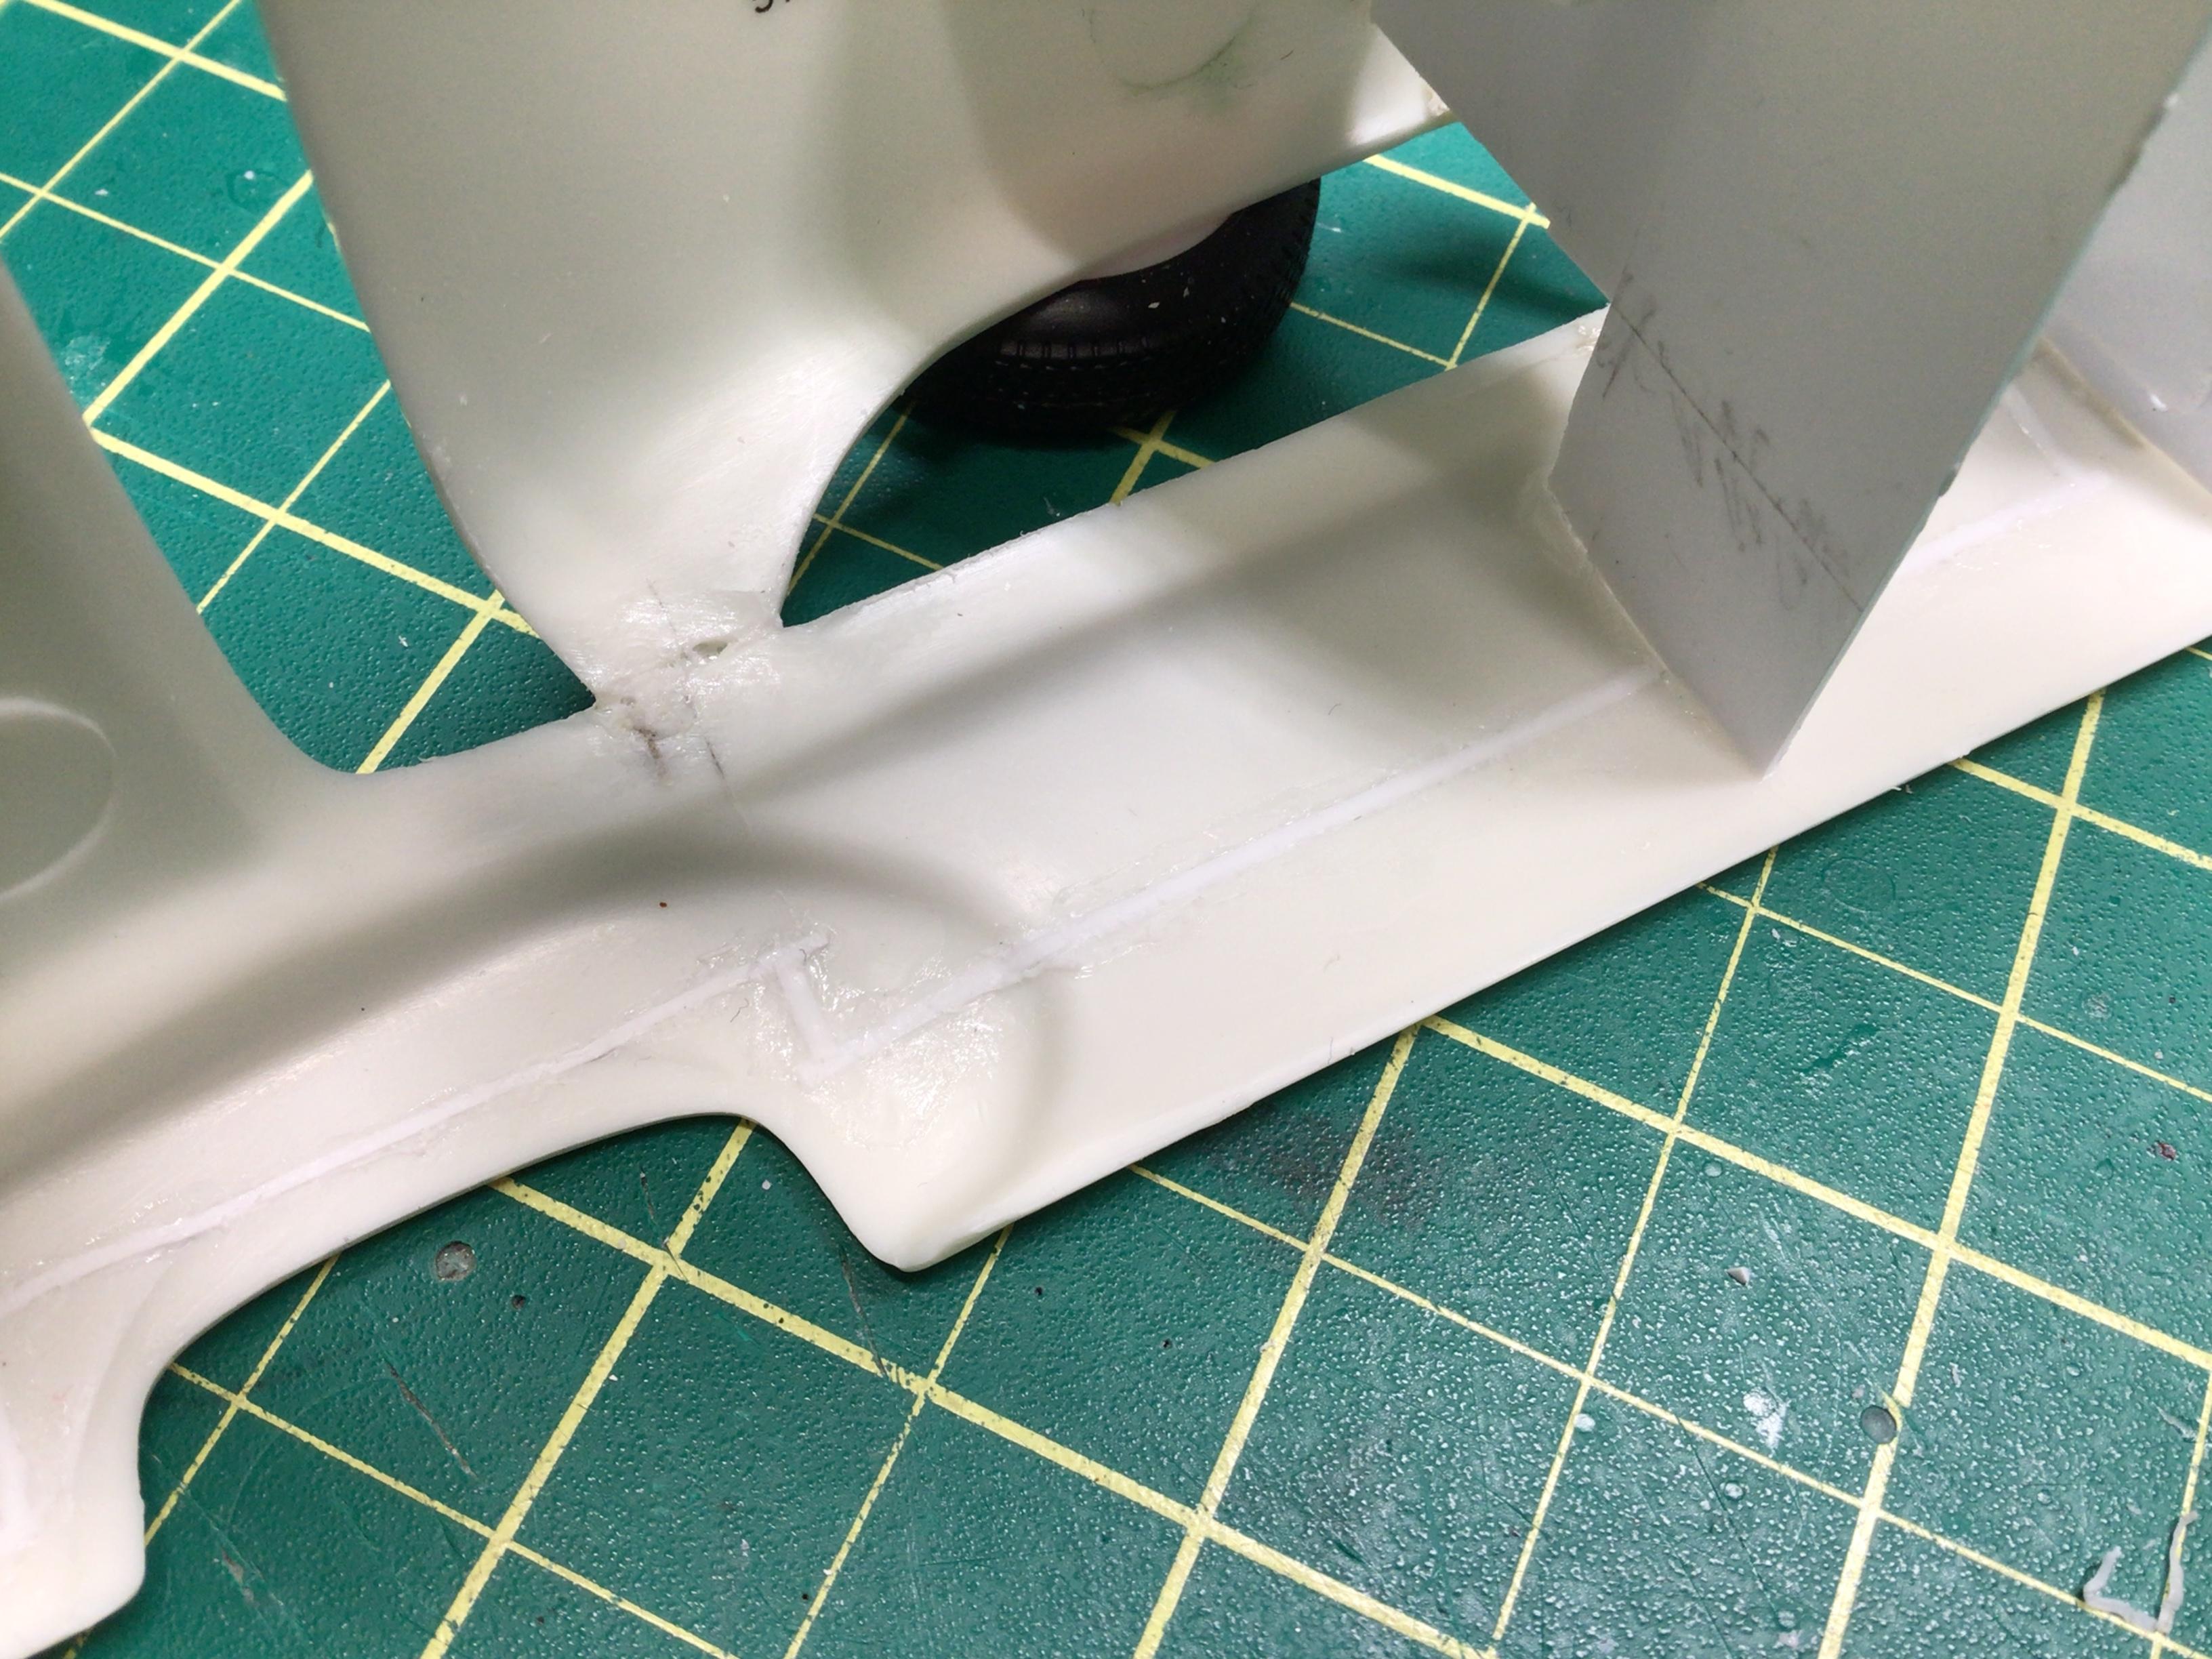
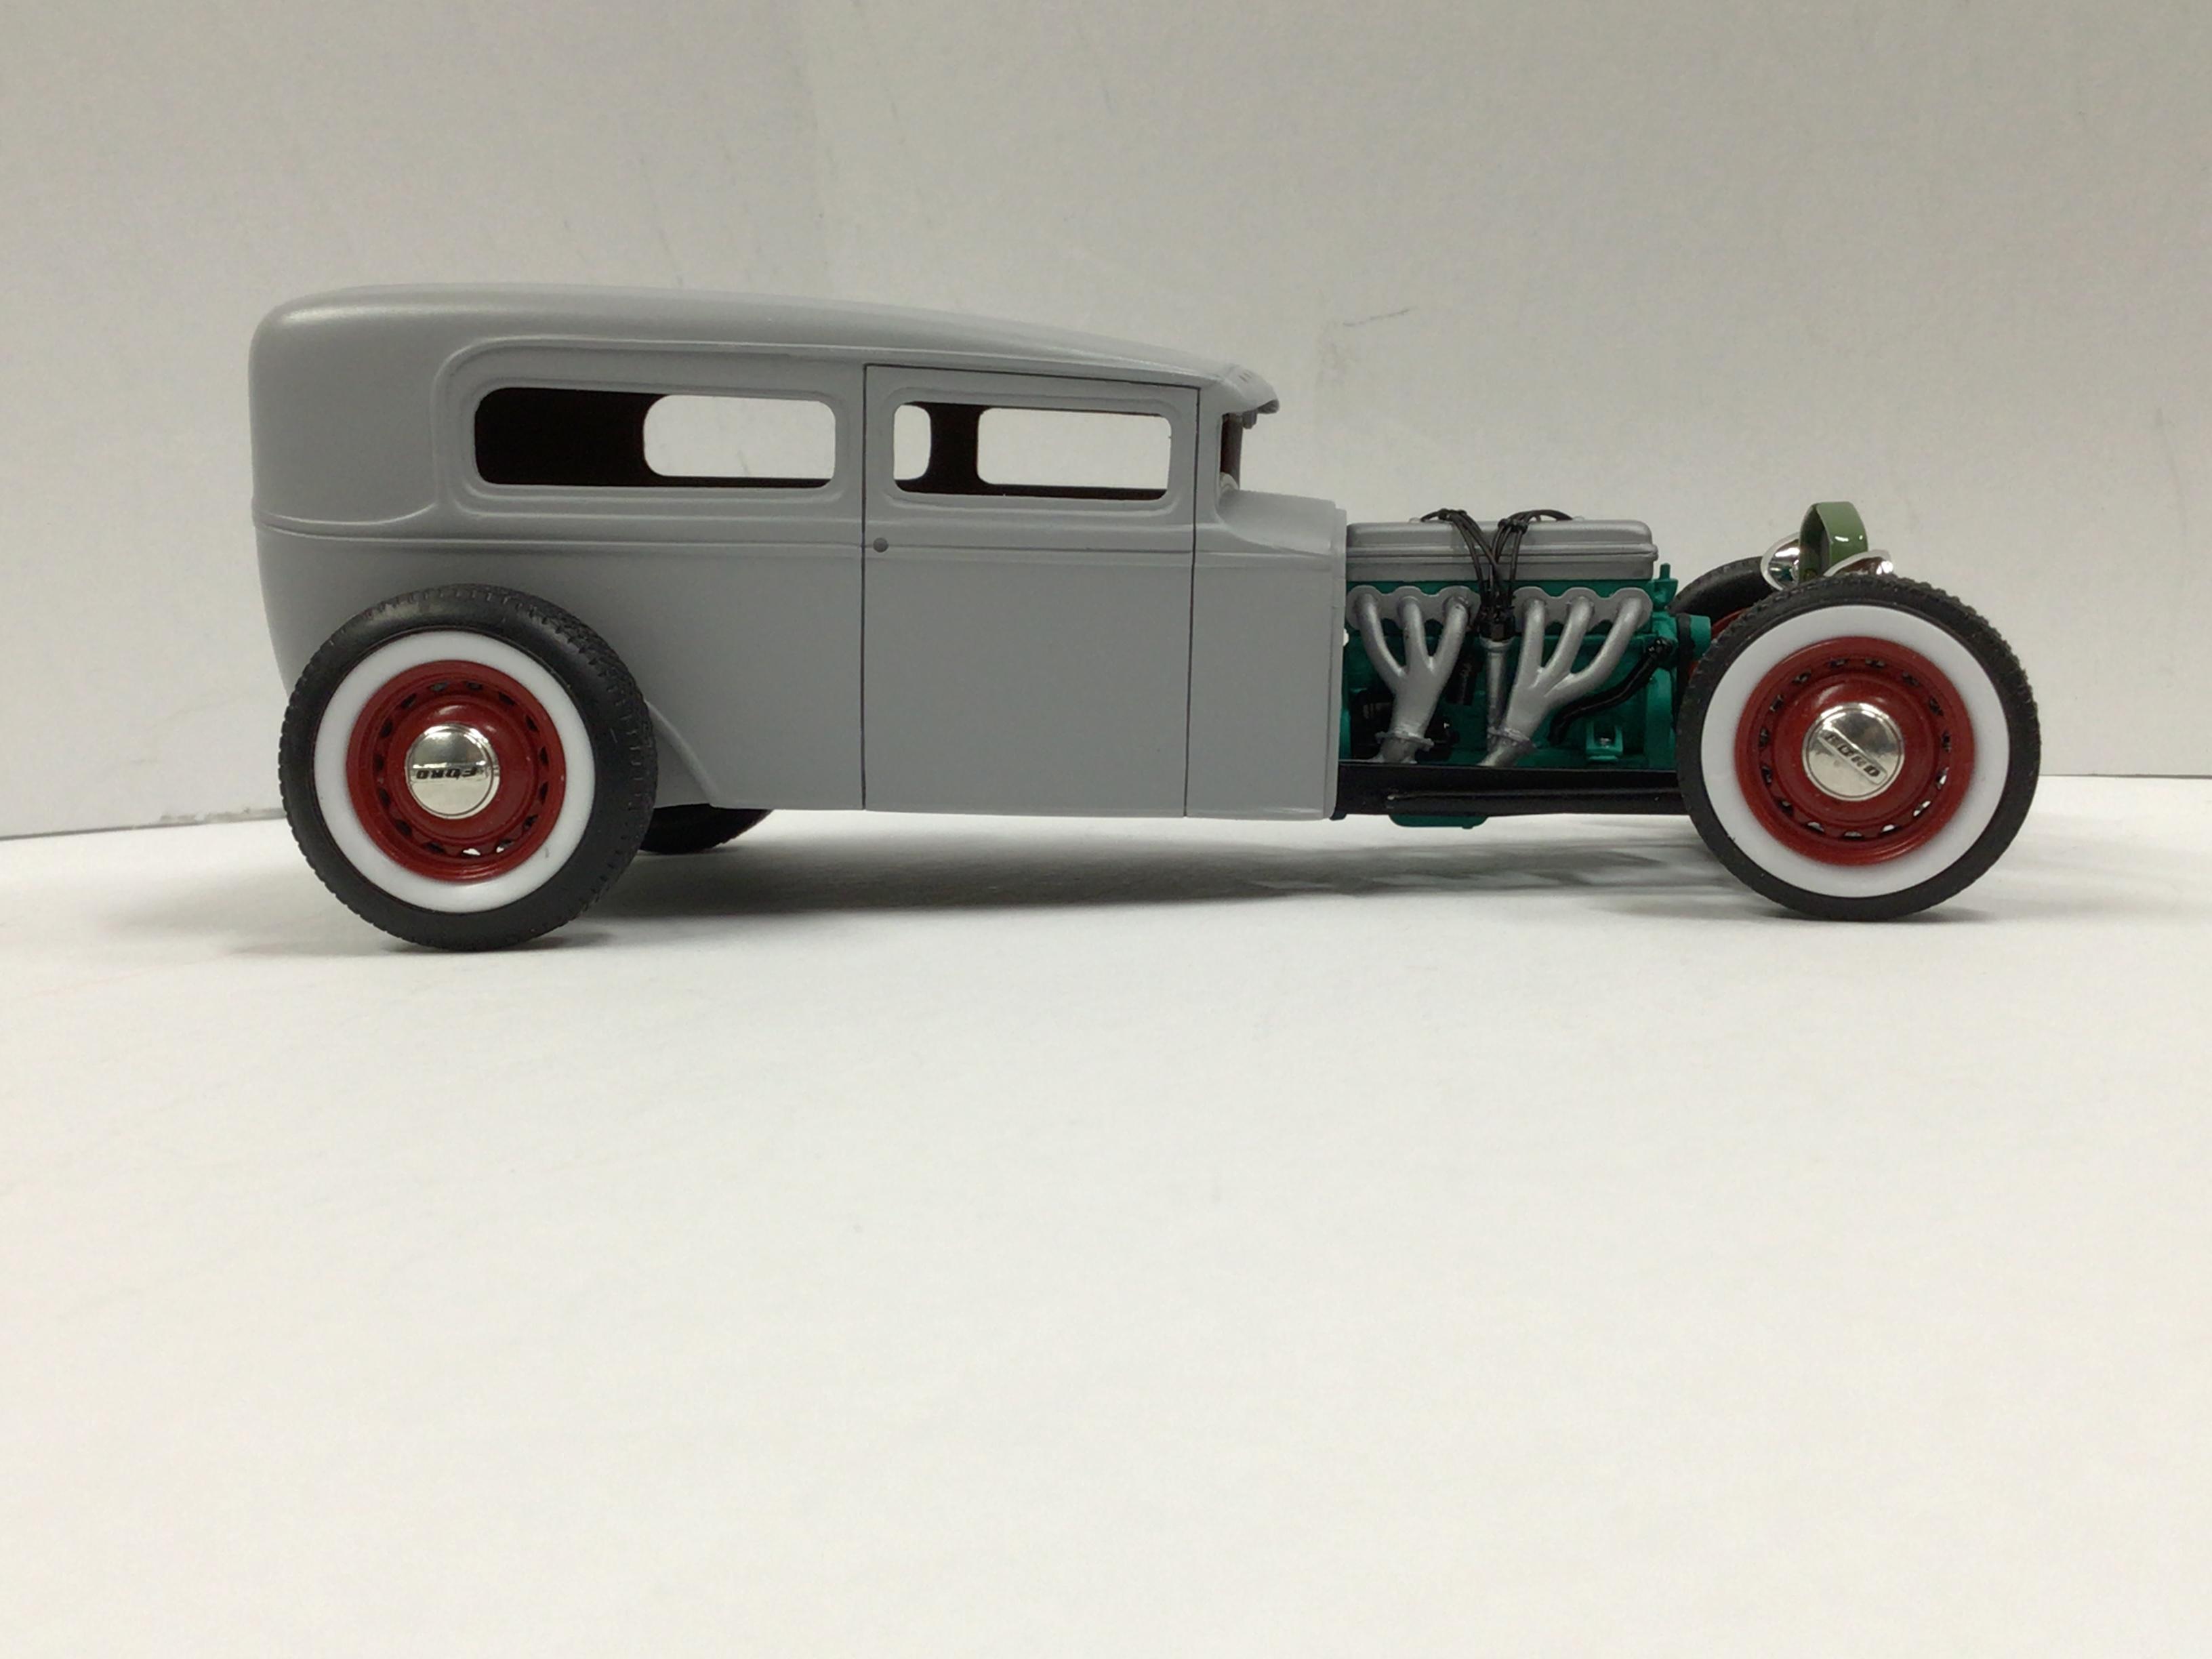
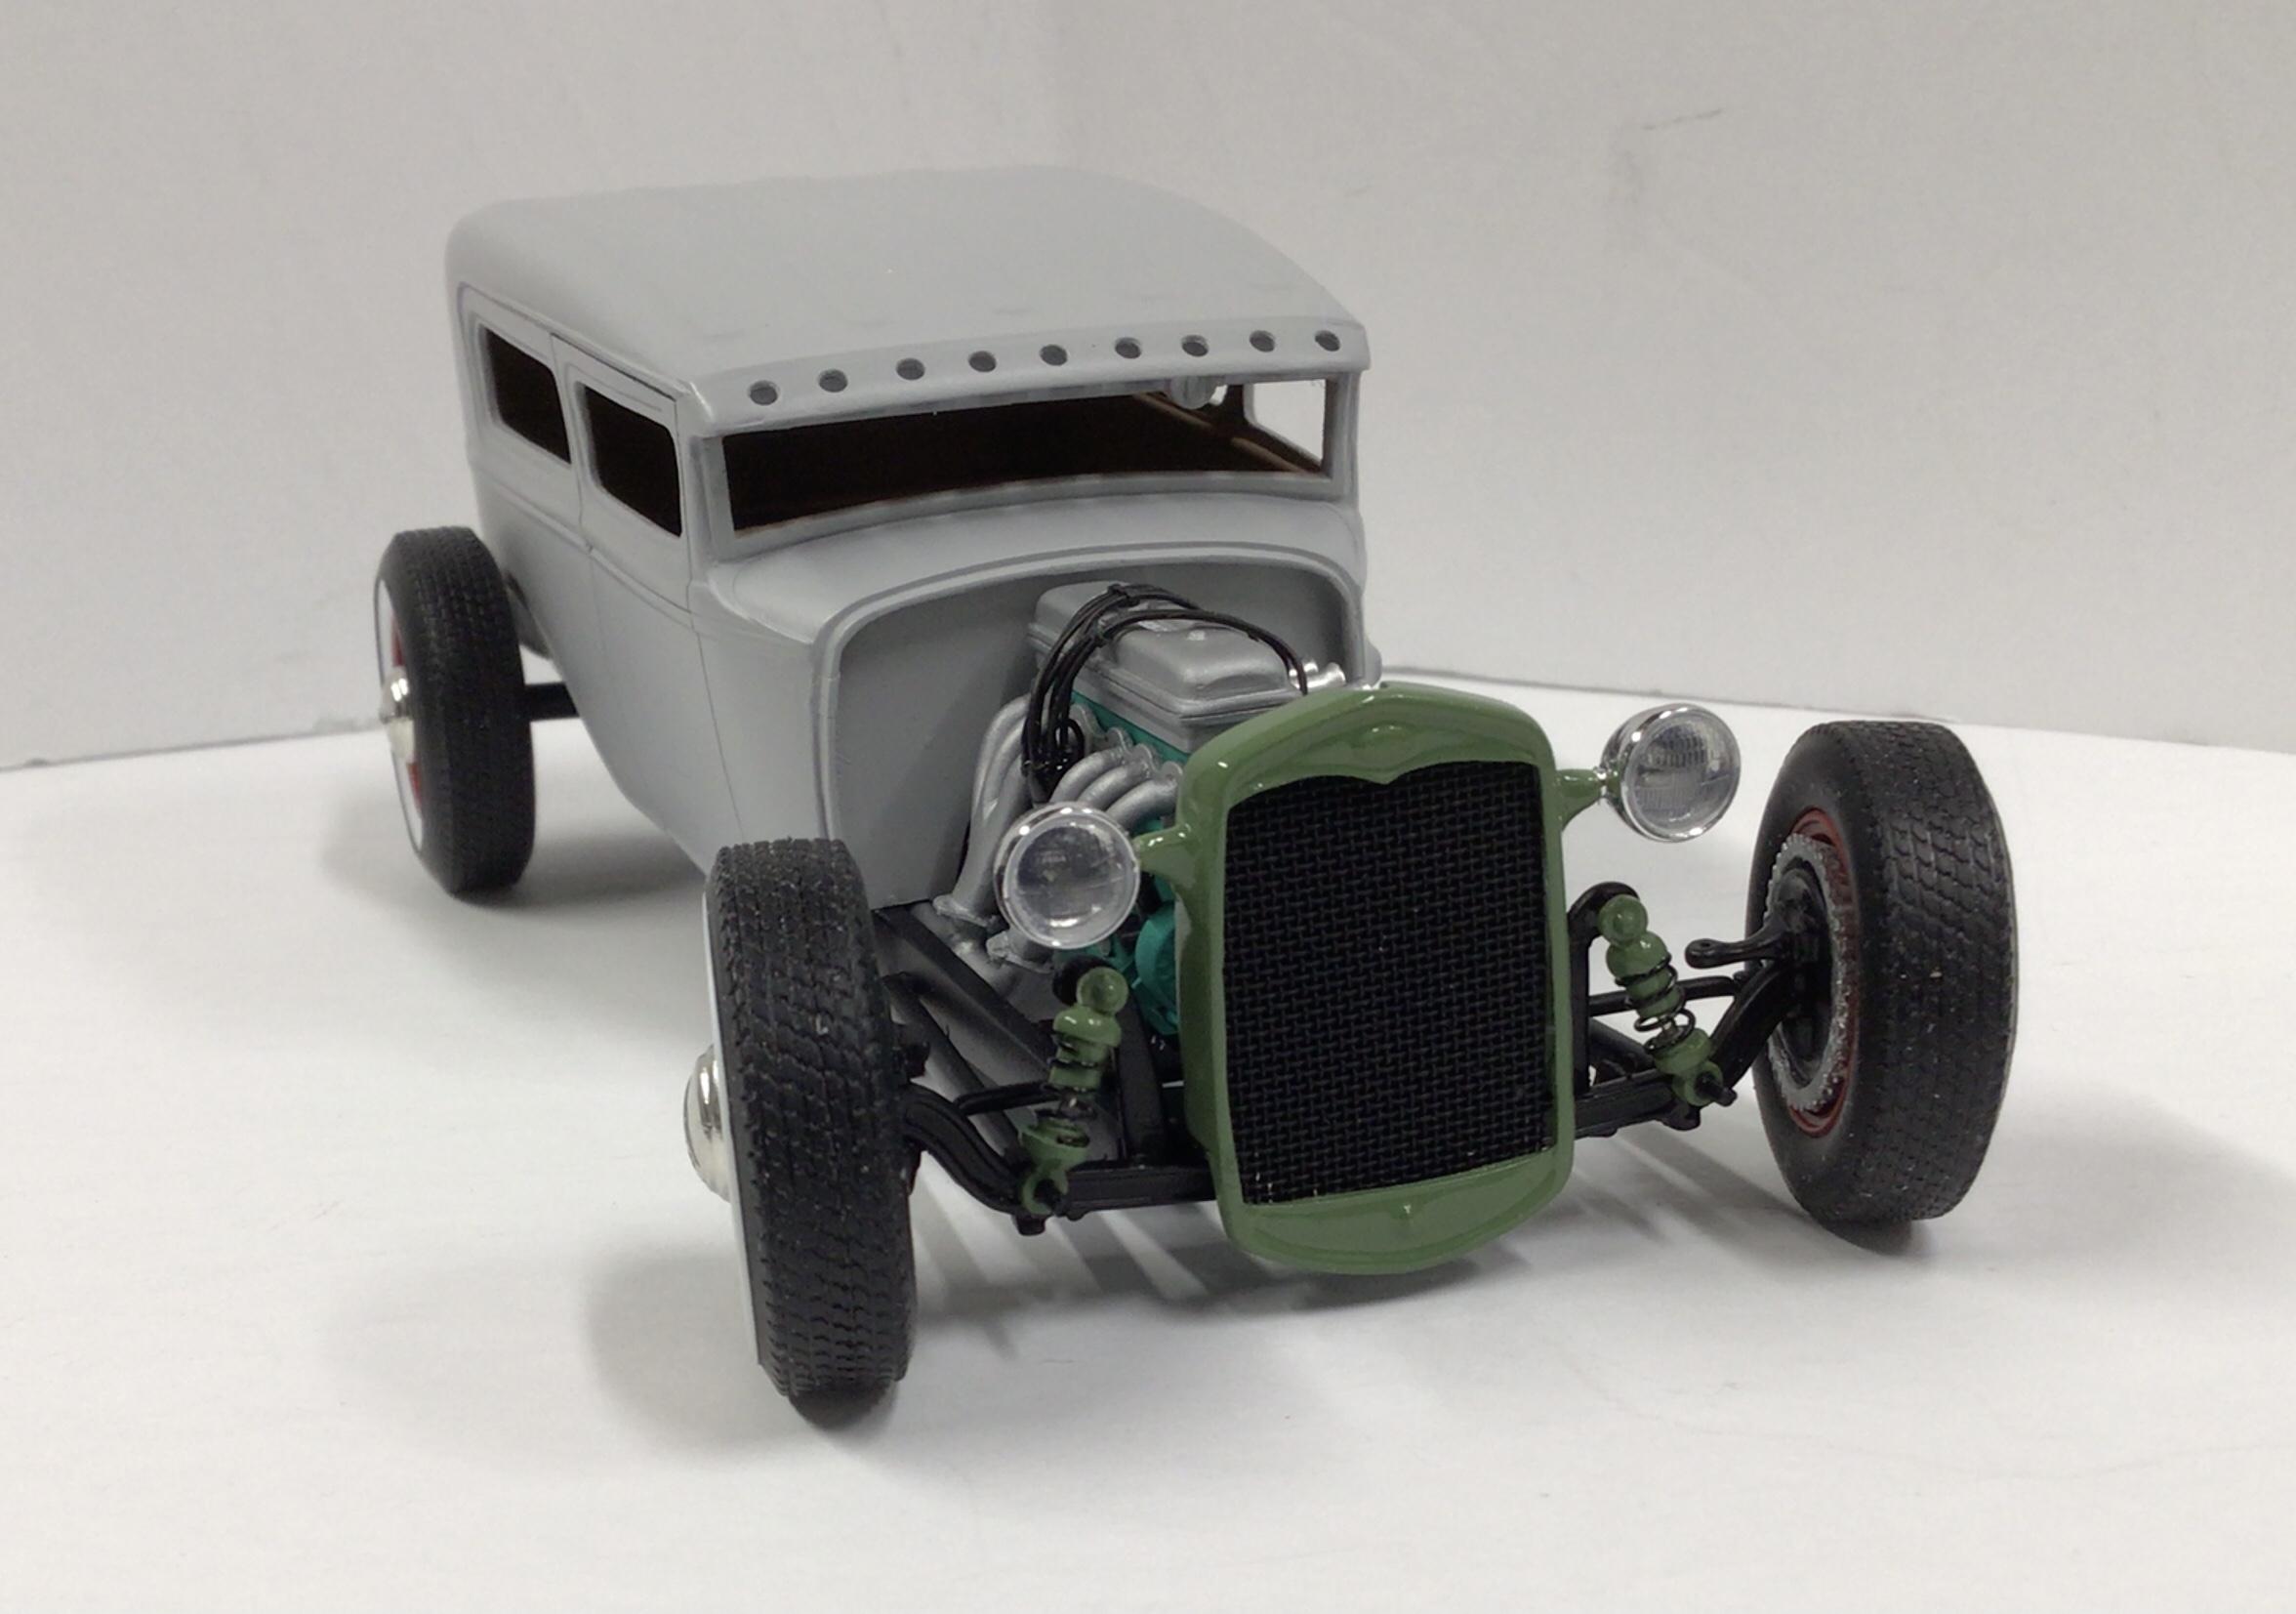
I am sectioning a ‘51 Chevy. I got the panels tacked back in place with Tamiya solvent and bits of styrene and CA. Due to a poor cut, I have a fairly large gap in spots. I’m not fond of the idea of filling the cracks with CA or putty. For access to the interior joint, I made this little scraper from 1/16” stainless tig rod and chucked it in my pin vise. I also made one 90 degrees to this one for the vertical seams. After gouging out the seam I glued in some 1/16 Evergreen half round with copious amounts of Tamiya thin cement and smushed it into the trough. When it’s good and dry I will do the same to the exterior. On the exterior, I can use the butt end of a drill bit. Some places I can get away with nothing or .020” round for filler and some I need .060” half round.😳
- 17 replies
-
- 6
-
-

-
- sectioning
- gouging
- (and 1 more)
-
Thanks Bill. I did run across that thread while searching. I really like the windshield treatment that Steve Boutte showed in that thread.🙂 I was hoping to see a ‘36 as the fenders/running boards are slightly different. I was thinking of taking a bit off the bottom and raising the running boards a bit? Edit: Here’s a link to the finished item…..Very Nice! https://www.modelcarsmag.com/forums/topic/126893-choppedsectioned-3940-ford/#comment-1841391
-
Anyone done it? Pics?
-
Part my hair is something I haven’t had to do in a long, long time.
-
My guess would be to simplify ejecting the part from the mold? Otherwise the holes for the metal axle would have to be made by pins which would have to be withdrawn before the part could be ejected.
-
That is a very common problem.
-
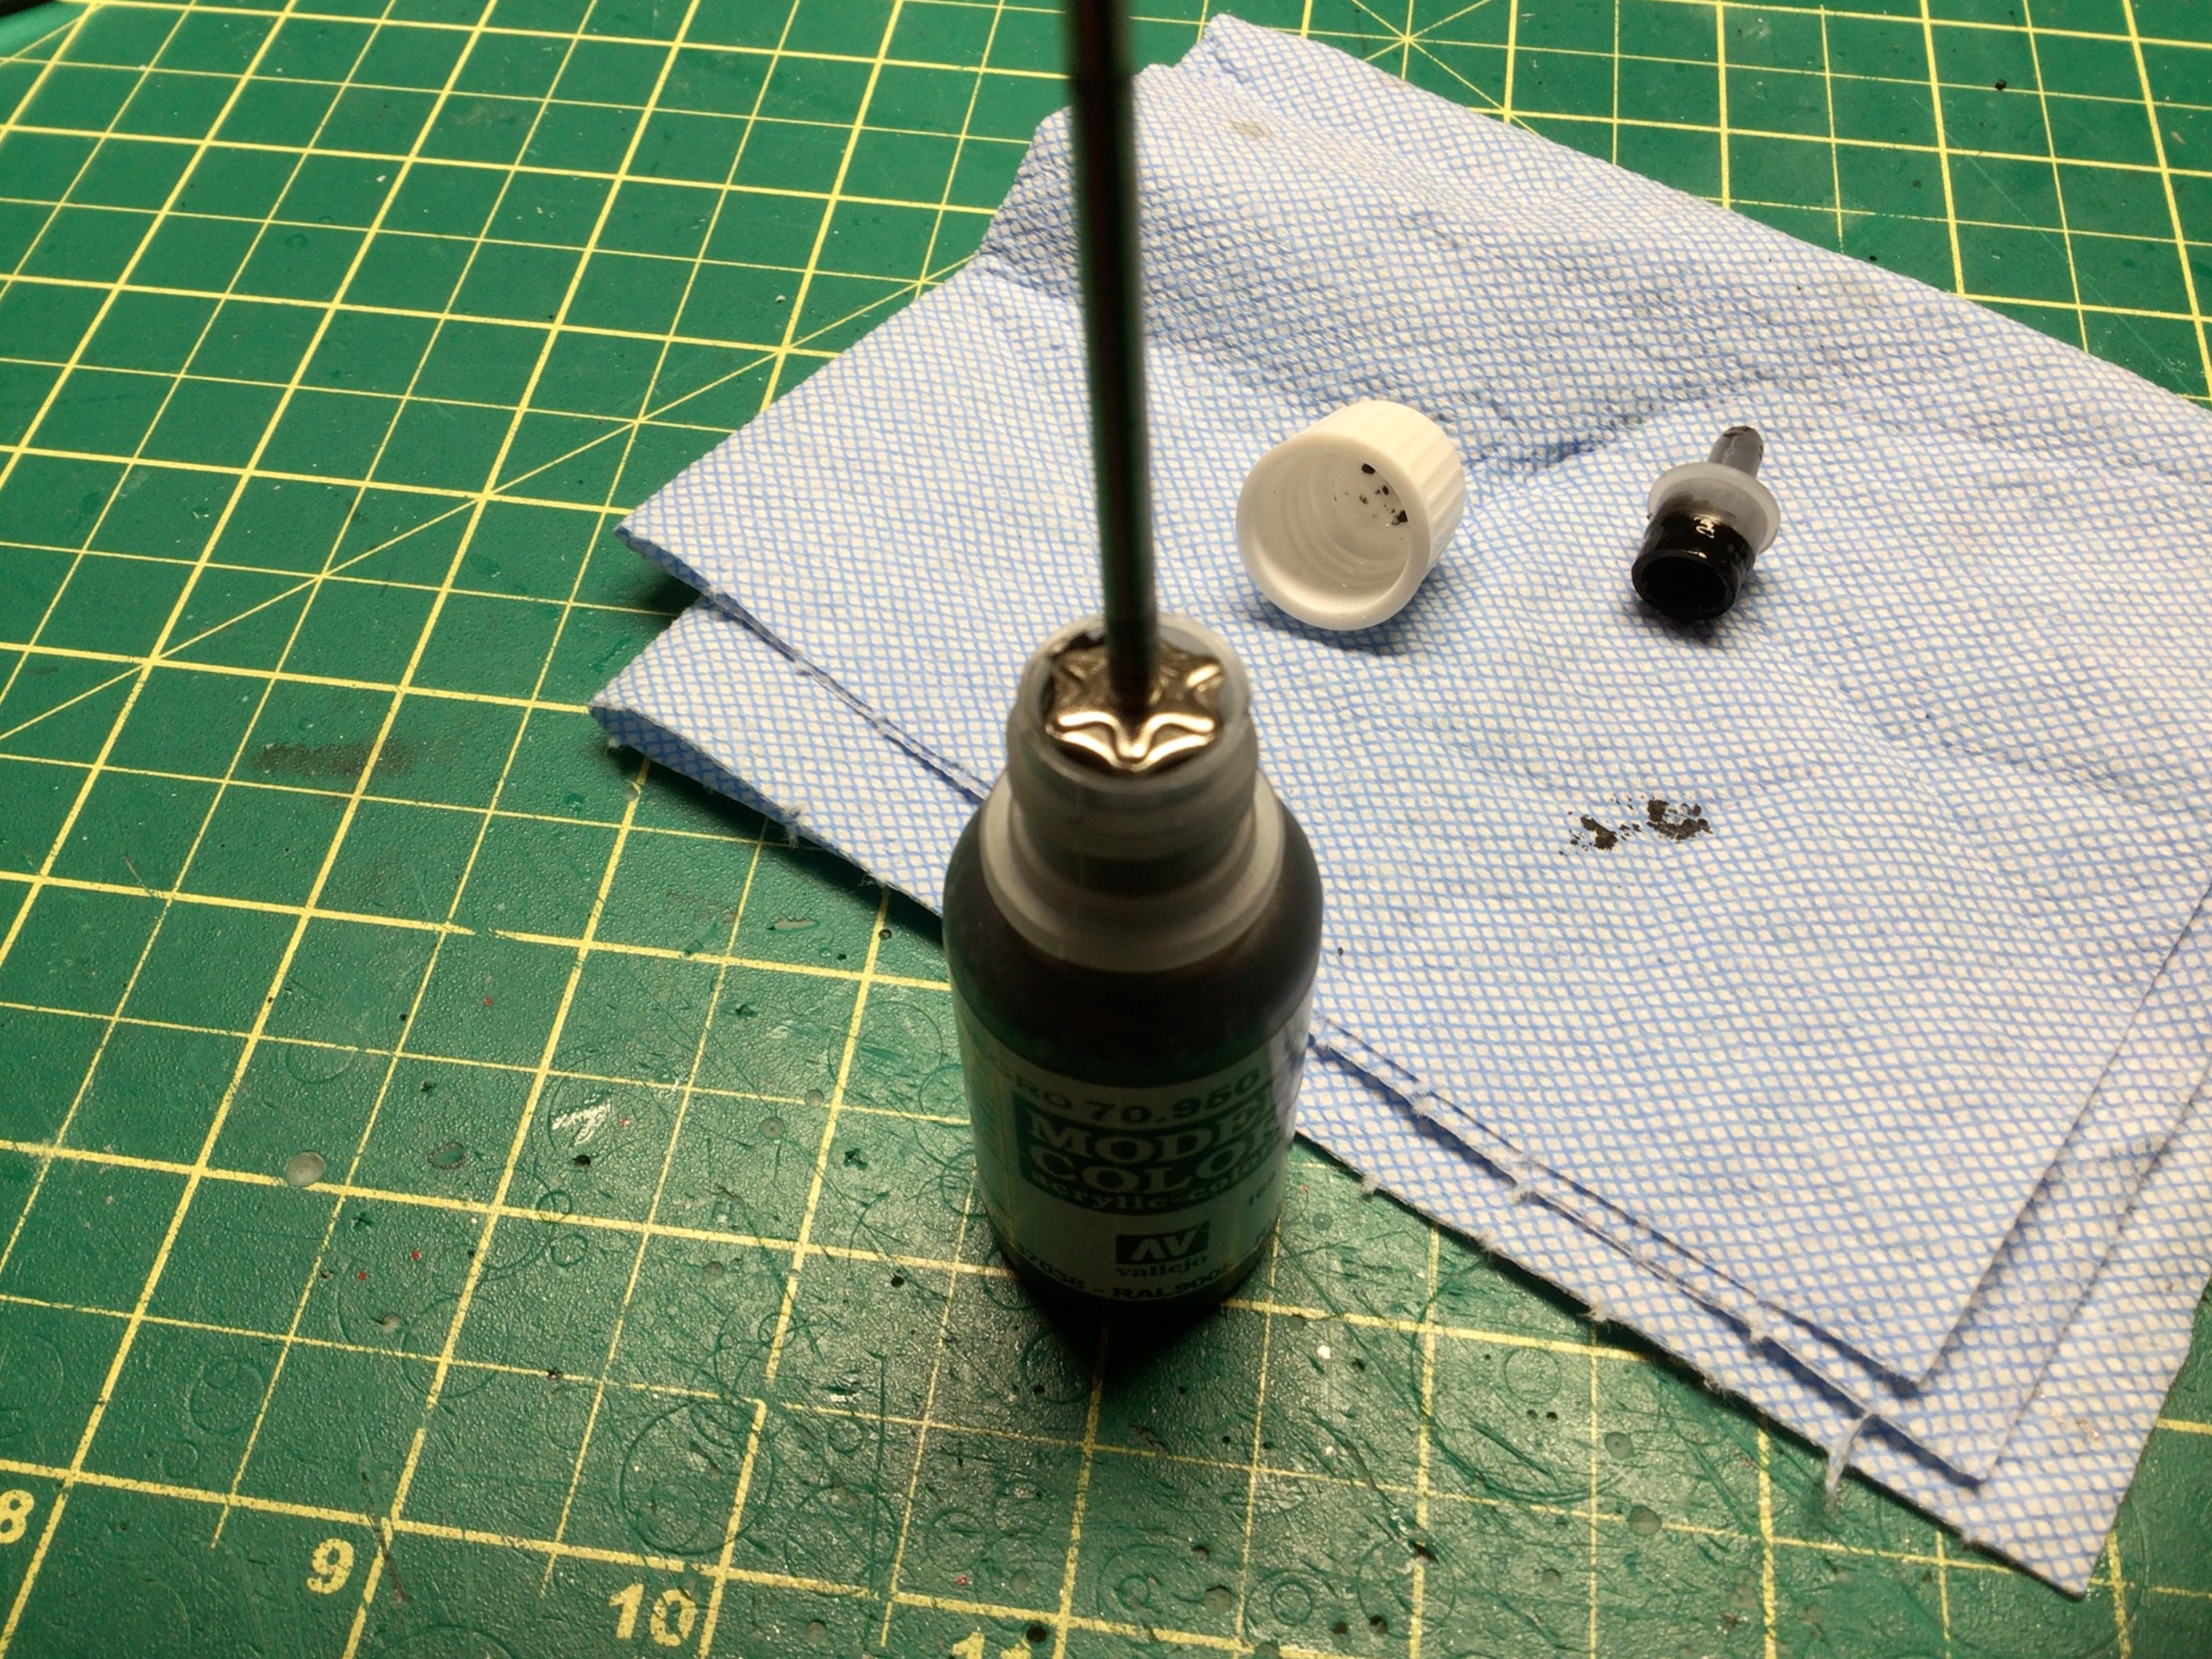
I like this stuff. It is water based, so should go over any paint.
-
Some assembly required?😳
-
Not in my lifetime is a phrase that is becoming increasingly unlikely.
-
Very nicely done James!
-

moebius tow truck
NOBLNG replied to Falcon.Studio's topic in WIP: Model Trucks: Pickups, Vans, SUVs, Light Commercial
Great work so far! The back end looks like a well used rig. -
You are probably better off using a stir stick with Vallejo paints than the mixer though because getting the mixer out without getting paint everywhere is near impossible. I do use the mixer every time with Tamiya and Mr.Hobby jars. If the jars are quite full I put them inside a section of TP tube to keep the paint from getting flung around while withdrawing the mixer.
-
The Vallejo nozzle is just a press fit and comes out quite easily…after you unscrew the cap. My battery operated mixer doesn’t quite fit so I had to grind the tip down a bit to fit.
-
Old cars are my favourite modeling subject.
-
Sorry for your loss Mike.😕
-
Months flash by like minutes.
-
Friend….you beat me by a second.
-
Yeah, I realize that now. I picked it up for $5 since it was a glue bomb….boy was it a glue bomb!😳
-
From the Ferrari website: https://www.ferrari.com/en-EN/auto/250-gto REMOVABLE 'D'-SHAPED PANELS All of the examples produced, apart from the ’64-bodied cars, had three removable ‘D’-shaped panels, retained by quarter turn fasteners, on the upper face of the nose, for increased radiator air throughput, the pattern being repeated with three similar uncovered openings in the underside of the nose panel.
-
Got the engine finished, fabbed up some taillights from red sprue and made a spot for a license plate.
- 169 replies
-
- 10
-
-
Thanks David.