Misha
-
Posts
1,014 -
Joined
-
Last visited
Content Type
Profiles
Forums
Events
Gallery
Everything posted by Misha
-
An update on the project: Been laid low past couple of weeks with a nasty cold/flu, so the shop has been rather quiet. Finished polishing out the Red Mica body colour and now planning out the body details including gold pinstriping. The chassis is getting closer to rolling, discs on all four corners, scratch built rear shocks & tranny oil cooler, and the tires just need the whitewalls. Still a way to go, yet on track to complete for the March show on the mainland in Vancouver. Be posting some snapshots in a few days. The rush will be to complete the 409 motivated A Bone Coupe that's following on, have it planned out and most of the bits have been cleaned up and ready for primer. Thanks for checking, Cheers Misha
-
Beautiful build Ludwig, the colour choice fits so well plus the excellant paint job places your wagon into the top ranks! The chrome is amazing, did you use BMF on the side trim and windows? Cheers Misha
-
Just getting back to the origin of this thread for a moment, my first language is Russsian and back in the late 50s I began school and learned "Canadian" although with a Slavic accent that followed me thru to grade ten when it disappeared. To this day I'm unable to duplicate my previous accent. Thru the years, speaking the language, it became very difficult to define a "Canadian accent". Two years ago my friend and I spent three months in Croatia, touring along the Adriatic Coast. I was able to use my Russian quite consistently and it was just the two of us speaking "Canadian", rarely hearing English of any type. Having a wonderous meal in Korcula one day, we heard melodic tones being spoken at a nearby table, it was English yet it sounded so familiar and yes unique! Introducing ourselves to the group of young women it turned out that they were from Vancouver, and yes, there is such a thing as a Canadian accent! Eh! Cheers Misha "Da Canuck" Koslovsky
-

Resin Realm... Closing up Shop...!!!
Misha replied to Ramfins59's topic in General Automotive Talk (Trucks and Cars)
Thanks for the heads up Richard! Had a look a their offerings and plan on getting an order in quick. The various Ford wagons are very cool and would make for great support vehicles for vintage drags. Cheers Misha -
Vancouver Island is truely the best part of Canada with breathtaking scenery and endless recreational opportunities, skiing in Strathcona Park to surfing at Tofino. The Cowichan Valley, my home, is a culinary heaven with local produce and irresistible seafood. The tough part is keeping it all a secret! Cheers Misha
-
Really like the direction you're heading in John. The Vicky looks good with the chopped top and the stance on the chassis, with the open top and cockpit in the rear makes it look very quick! Be following your build for sure, it'll be a great addition to your stable of vintage drag machines. Cheers Misha
-
"Little Feather" Jr. Fueler - Completed /w Final Photos
Misha replied to Bernard Kron's topic in WIP: Drag Racing Models
That is a very cool project! I certainly identify with the push/rush to the deadline, be pulling for you Bernard! Cheers Misha -
A Jewel!!! thanks for sharing your build. Cheers Misha
-
Auto World 1961 License Plates
Misha replied to afx's topic in General Automotive Talk (Trucks and Cars)
Great to see that again! I'm an old fart and recall how thrilling it was to get the customs card in the mail informing me that an Auto World package was waiting for me to pick up. Perusing the annual catalog was a thrill as much of the items were unavailabel in Canada inspite of having three great hobby shops in town. The sheet of plates was a good example. Somewhere I'm sure I still have one... Thanks for the memory! Cheers Misha -
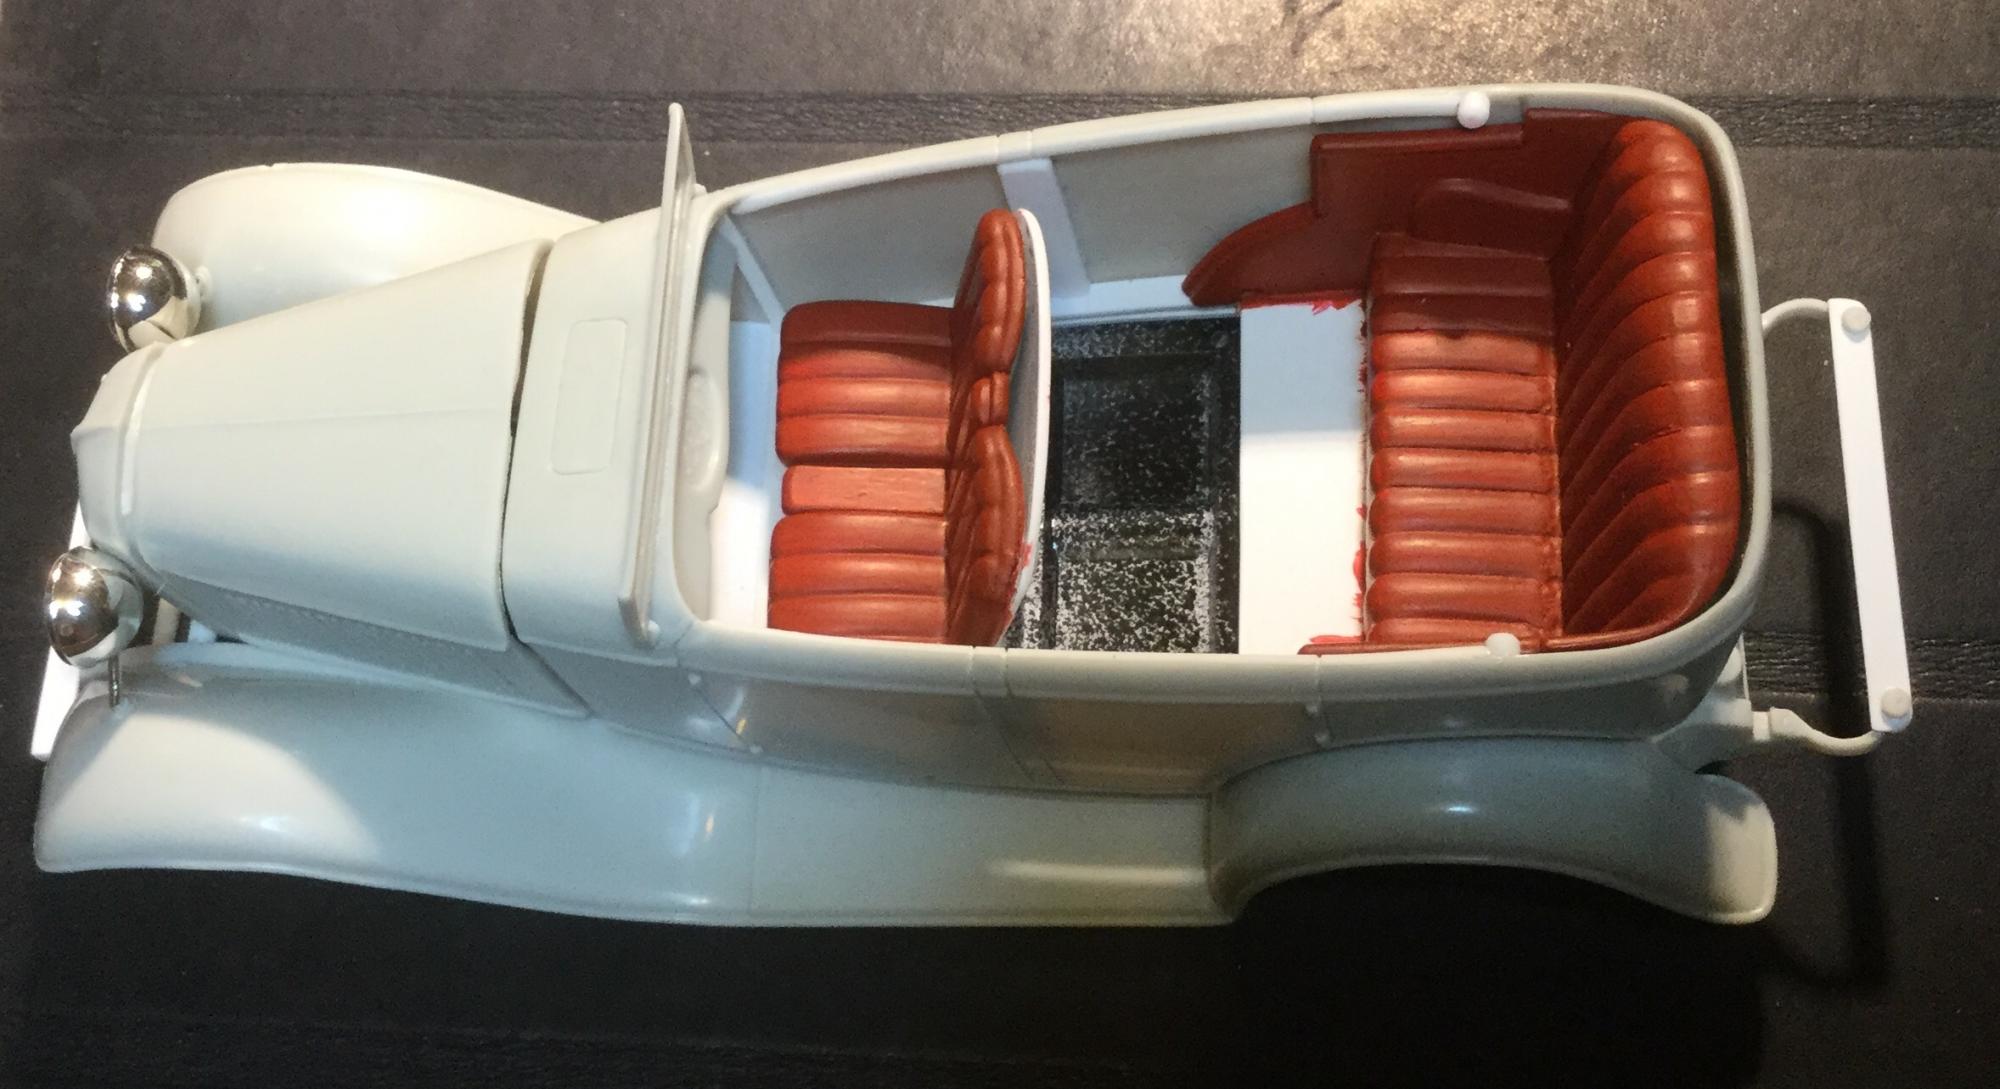
Thanks for all the encouragement!!! I'm really enjoying seeing how this comes together with the mixture of old and new parts. It's extremely gratifying to see the interest there is in such projects. I've been busy plumbing and wiring the Ford 302 that's going into the Phaeton. The fuel lines feeding the Holley double pumper are made of solder and crimps with an octagonal Evergreen rod forming the fuel log feeding the two bowls. The prewired distributor is a Parks item with spark plug boots made of slightly larger wire sheath. To depict the vacuum advance I used a part from a Bic lighter innards and a black wire for the hose. With the air cleaner on there is still enough to be seen of the carb to make it interesting. In between I've been getting the interior closer to being finished. Painting is complete with leather and fabric being depicted with Vallejo acrylics. I have found them the best for interiors as they produce an excellent texture after three coats. Being able to brush it on saves tedious masking. The only problem spot has been on the left corner of the rear seat cushion. This was the only part originally painted in the kit and it was very poorly done with the result that the plastic was pitted. To solve this problem and to make it appear realistic, I added a blanket, the perfect Phaeton accessory! It was made by folding a tissue and, while holding it with tweezers, dipping both sides lightly into a watered down white glue mixture. When dry it will be quite stiff and will accept paint readily. The back of the front bench seat is also complete with a passenger assist cord running along the back (I remember back in the 50s standing as a kid in the back holding onto that cord while riding in a big Olds land yacht). That's all for now, thanks again to all you are following along! Cheers Misha Thankfully it all appears to fit with in the AMT Deuce frame. Bit of a problem with the steering shaft, yet that will be sorted out. Wheels are nearing completion, at the stage now that I have to apply the wide whitewall decals --- cringing about that! Discs on all four corners need only plumbing and the chassis nears completion. The next big job is to polish the body and add detail to it!

-
Thanks for the advice, especially to use an acrylic spray. Going to run a test first on some spare rubber to see thr effect. I was familiar withnusing acrylic on vinyl poeces, such as figures, though wasnt sure about decals, now it seems to make sense to use acrylics for the rubber bits. Thanks to all, Misha
-
Thanks David, That's very useful info, I'm going to try the Tamiya products. Good hint about using the masking tape to protect the sanded tread whille painting. So fitting the rim in afterwards works without damage. Thanks again, Misha
-
Fresh from the paint shop! All set to polish out after the paint cures. I mentioned before the trepidation I usually feel about painting, yet it is getting better. I seem to be getting much better results spraying bodies with the Tamiya rattle cans than I have with the airbrush. Still use the airbrush for detail and metalizing finishes and unique paint colours not available from Tamiya. Also have been detailing the interior bits, building the small block Ford, and working on the tires. Have a question in the other category about how to deal with whitewall decals. Began another project also with a 409 W in a 30 Coupe, based on an upcoming theme "Car Songs" for the March 25th Vancouver show. Be posting it soon... Cheers Misha
-
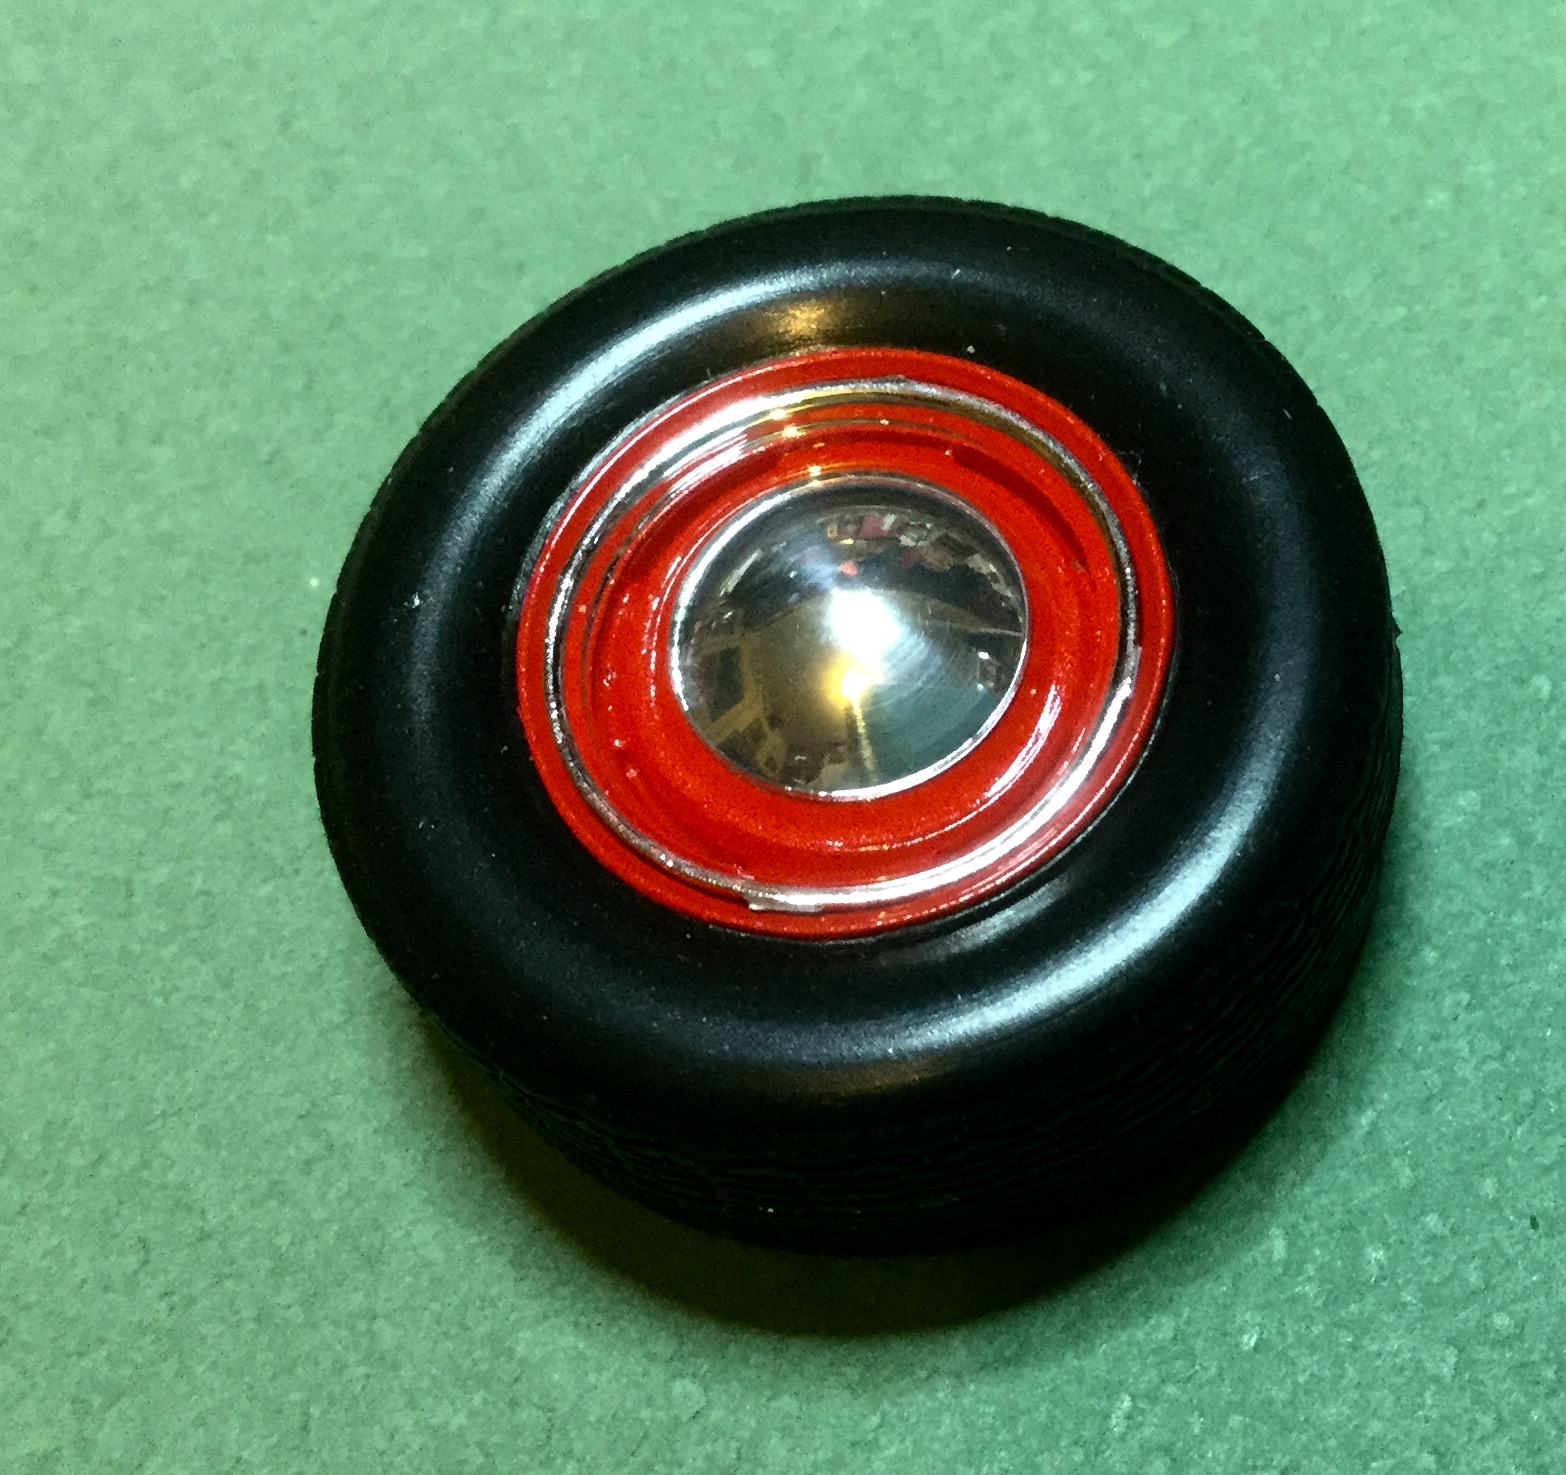
Have a question on applying wide whitewalls with decals. Remember someone mentioning the use of Testors Clear Semi Gloss on the tire, then applying the decal. Is this the best way to handle this? I also imagine that one would fit the rim in after spraying and before applying the decal. In regards to the decal itself, I'm using the 5 window Deuce kit decals and they have very little carrier film showing beyond the white. Should I trim as close to the white colour and is there a risk of cracking the white ink if I cut into it? Is it fine to use decal solvent and will it work on tires with raised lettering? This is the wheel combination I'm using on the Chopped Phaeton WIP. Swapped out the centres with Parts by Parks Baby Moons; they sure look sweet! Thanks for the help and hints! Cheers Misha
-
RIP Rete Chapouris
Misha replied to Psychographic's topic in General Automotive Talk (Trucks and Cars)
Sad news for the Hot Rod community... Treasure my copy of the film The California Kid autographed by Pete Chapouris that I picked up at the SoCal shop in Phoenix. Misha -
Have it marked on the calendar! Hope to be there again this year as last year was such a great event. Medical issues have kept us back home on Vancouver Island this winter, so hope to make it down by the beginning of April. Cheers to all involved inplanning the DSC this year! Misha
-
That is so sweet looking! Did you do the body or is it resin? I have a Johan in my stash and it would be so tempting to try. Hurst colours will really make it. Cheers Misha
-
Wow Bruce! I just stumbled across your thread, this looks so sweet in the primer, all smoothed out. Then the modern air splitter off the rear, whoa, that takes it in a neat direction. I'll be following... Cheers Misha
-
Thank you for the comments, it seems that the red and canvas is such a traditional hot rod look that I couldn't resist! Great memories Eric. Thanks for the B-Day wishes Bruce, the years mount up. Be spending this cold westcoast day (it's snowing here!!!) at the workbench and a local hockey game in the afternoon. Cheers to all, Misha
-
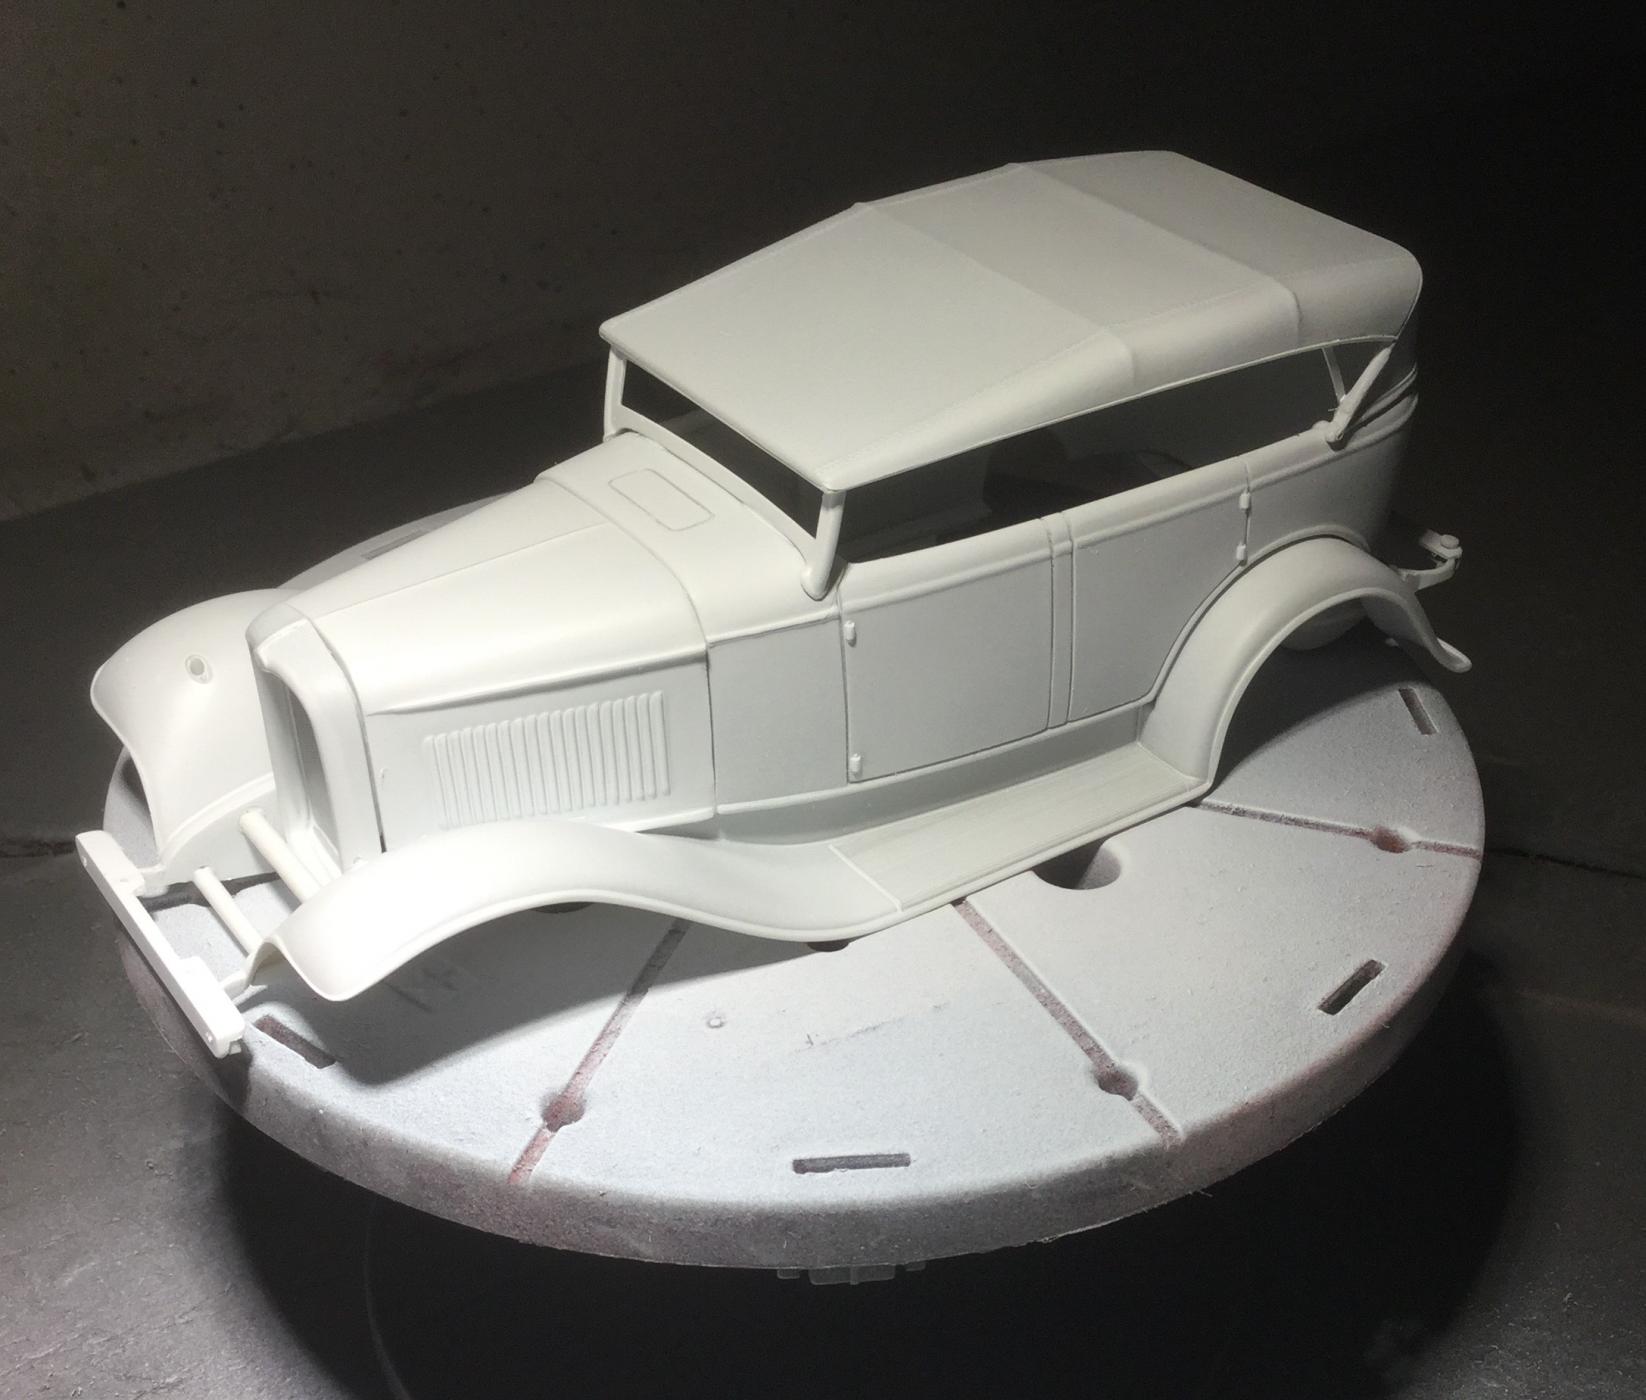
Getting more colour on the Phaeton! This morning I began to paint the Phaeton's body, fenders, hood, and rad with a rattle can of TS . First coat is on, looking not too bad. The underneath is particularly striking with the shift of gloss red on metal to the flat red wooden floorboards against the overall chrome of the chassis. Still a lot of detail paint to be done on all the bolt heads and then the fender stays will be chromed to match the chassis. The top is nearly done with a couple more treatments on the wooden bows and the brown canvas straps underneath. Door panels need a couple more coats of Vallejo Fire Red acrylic to complete the leather look (I'm a big fan of this paint line for interiors which is perfect for brush applications, plus doesn't require q primer coat). Hope to be done the body by the end of the weekend and then head back to working on the drivetrain using the small block Ford out of the Revell Deuce kit. Cheers Misha
-
Thanks for the great response to the build. Getting Evergreen shares would be a good idea at this point, as its getting close to restock time ?. The chopped top is included with the kit, can't take credit for that... AMT provided a single camvas top with optional parts, stock or chopped C pillar and windshield. Actually very slick and the fit is very good. My focus has been on the interior and getting parts to the stage of applying the colour coats. This seems to ve the toughest aspect of building for me, the Paint Job! Have a few more small parts to wash and primer, thereby delaying the inevitable spraying, either with the airbrush or rattle can. Perhaps tonite I'll get the first coats of the Ferrari Mica Red on... In the meantime I have finished buiding the new door panels... Cheers Misha
-
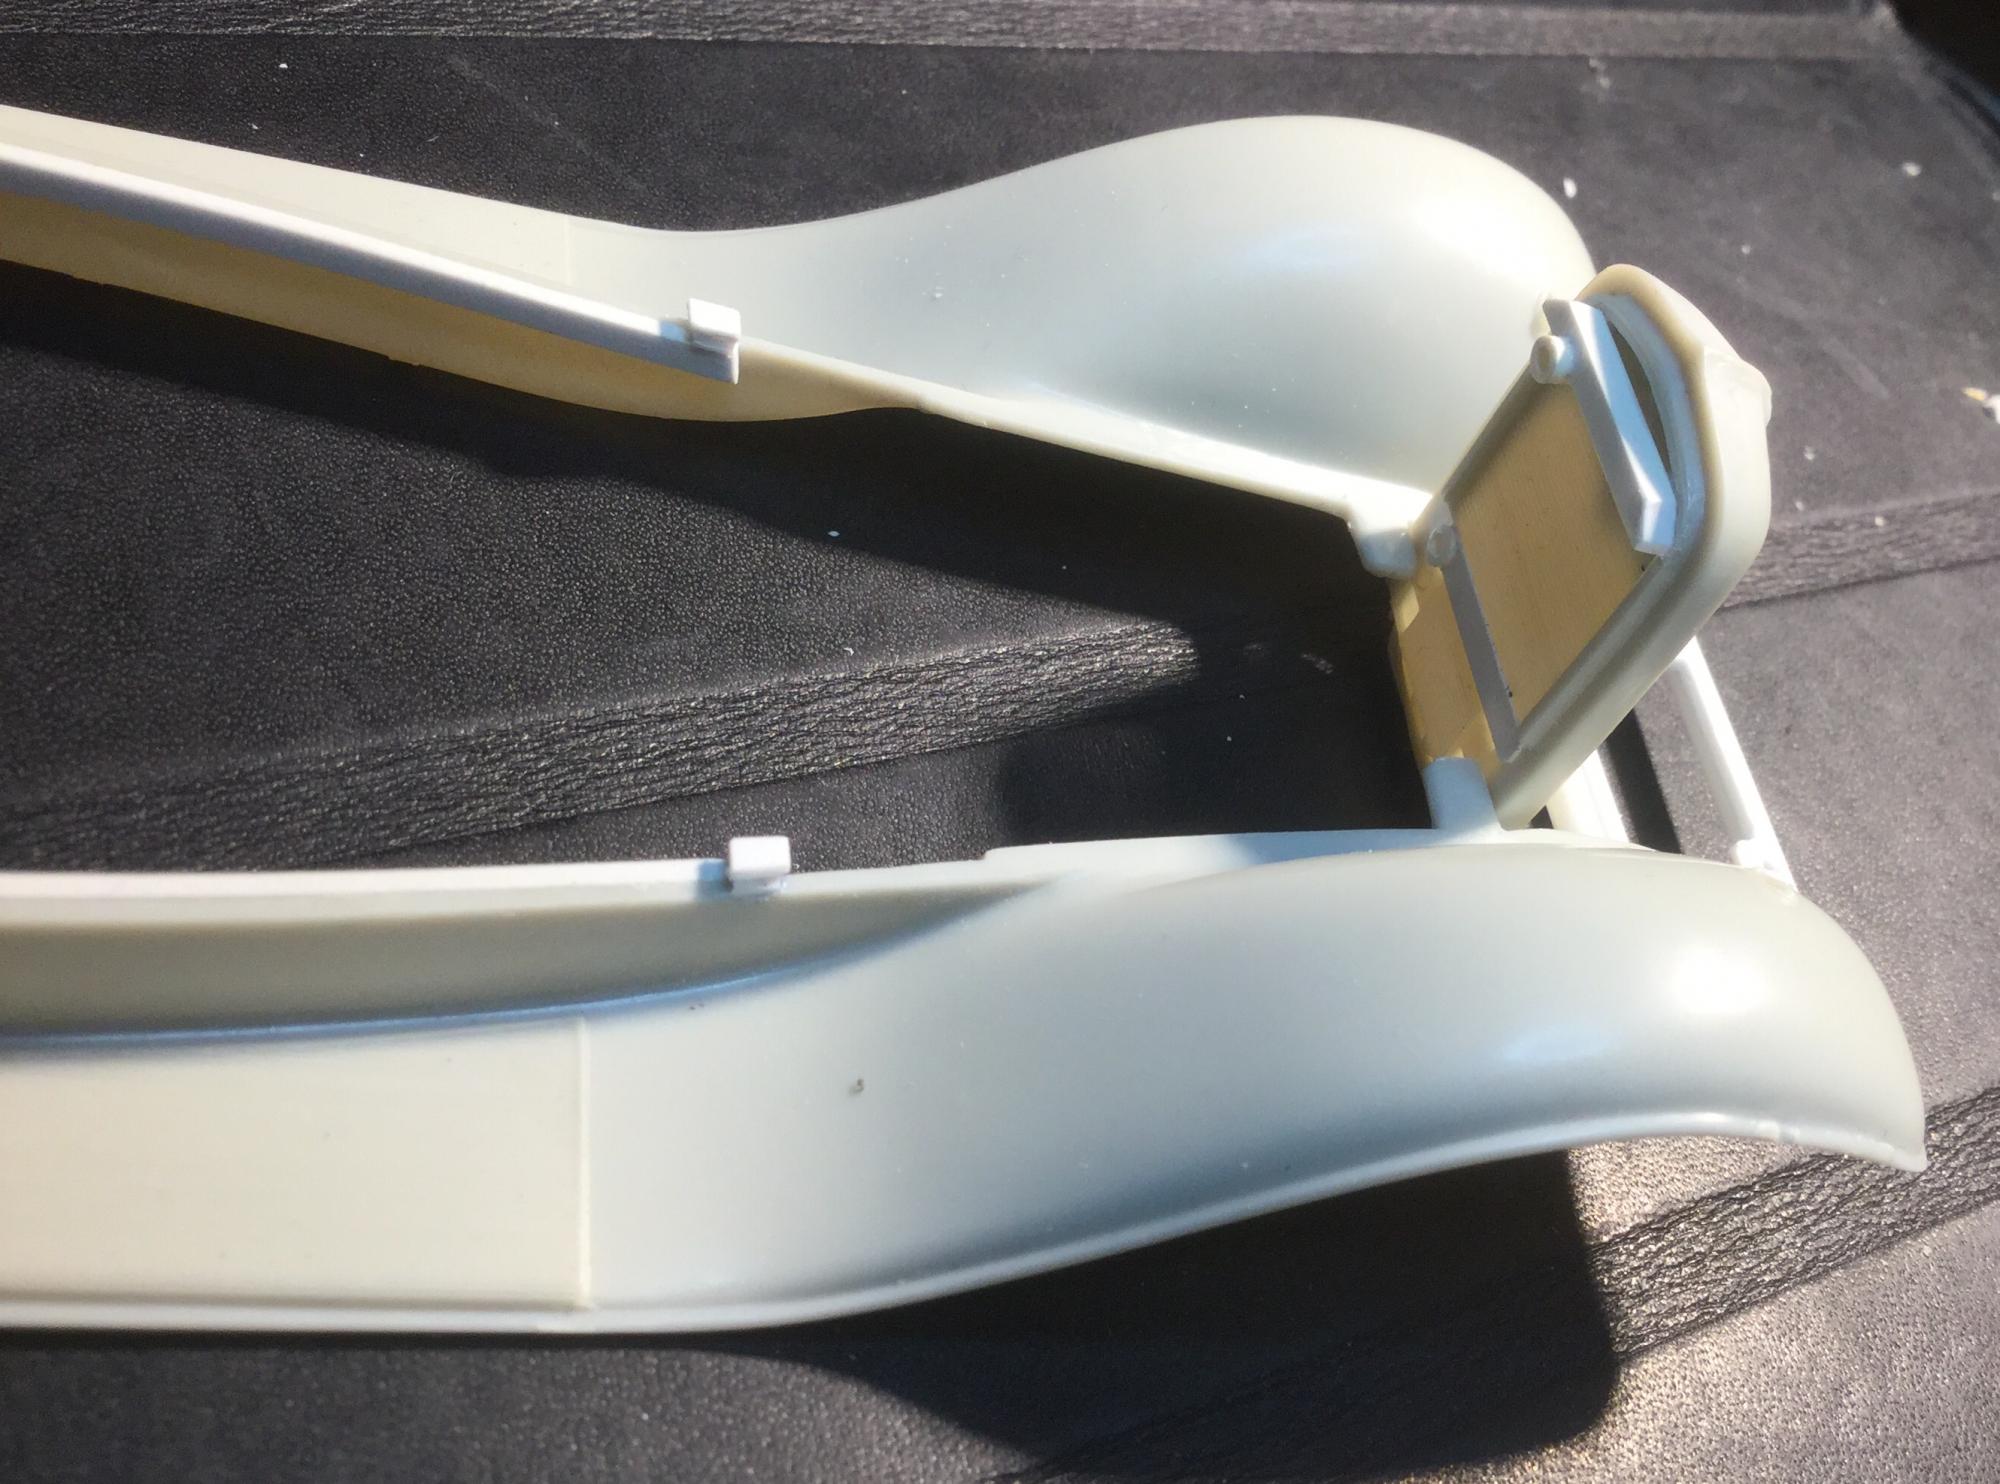
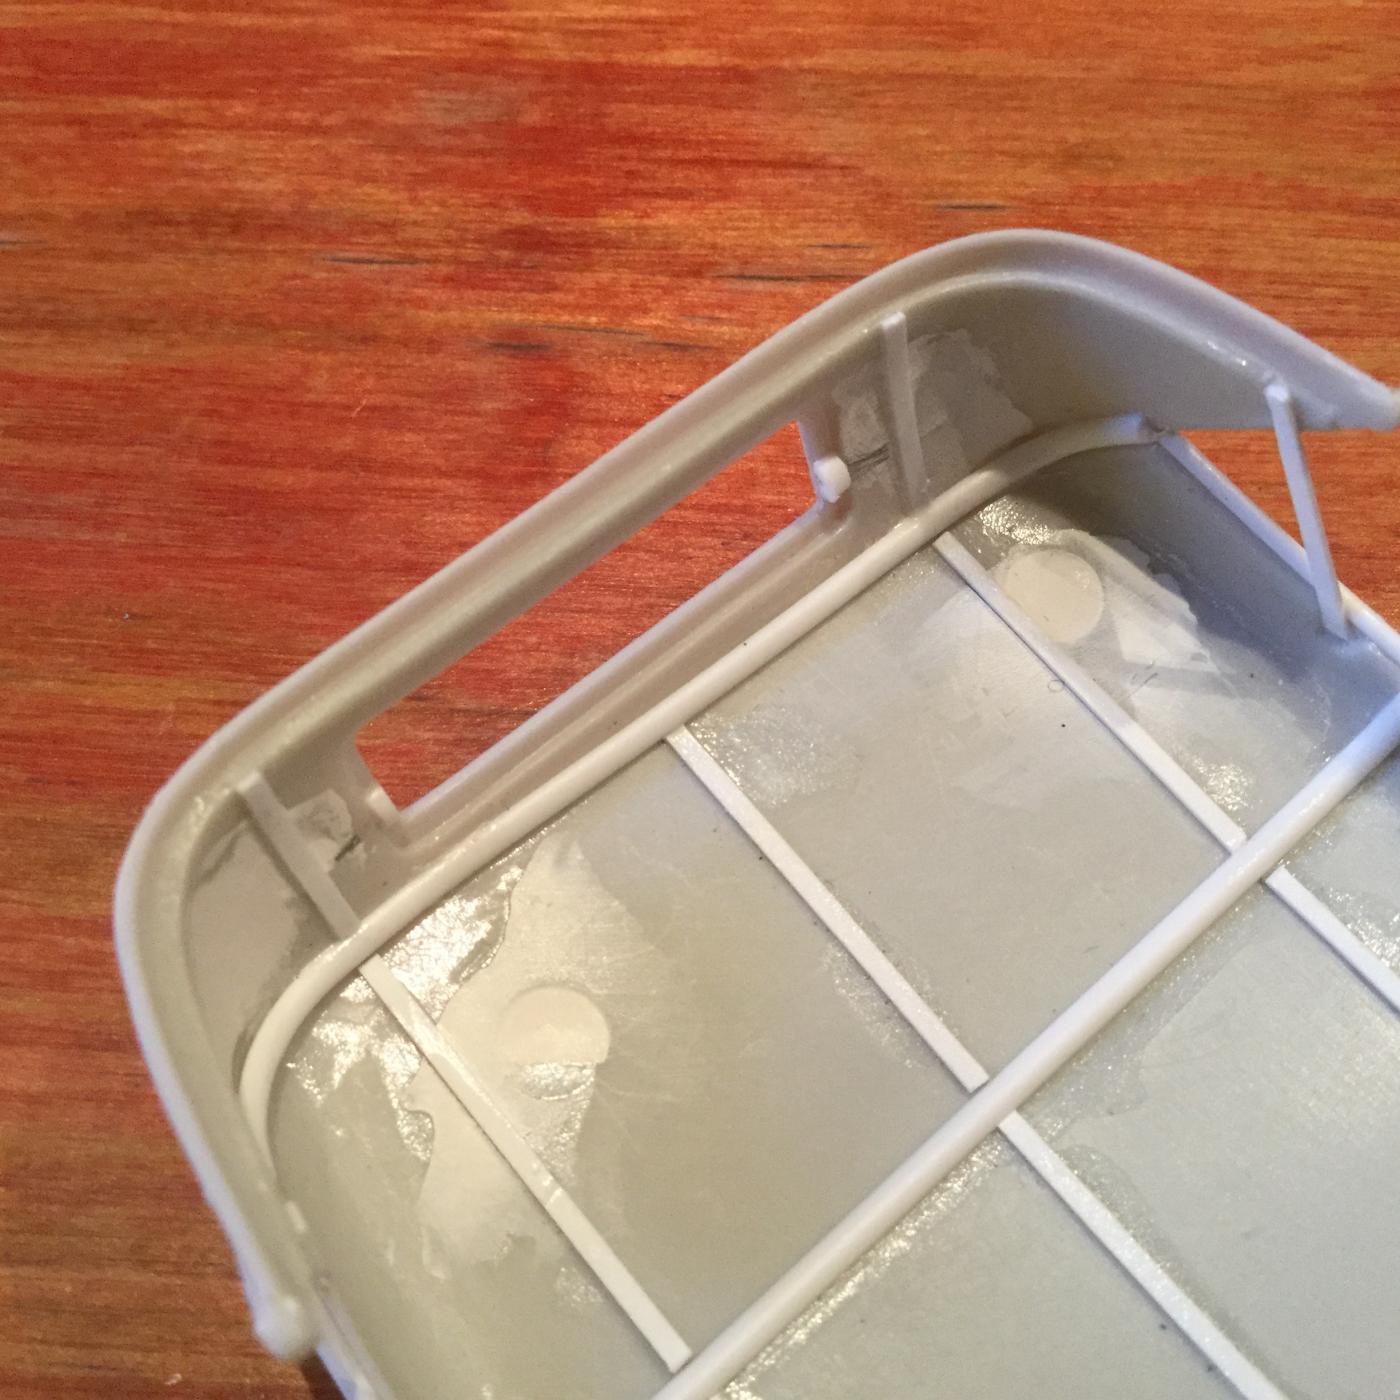
Happy New Year to all! Been able to sneak down to the workbench over the holidays to do some work getting the body ready for primer and further work on the interior. When doing a final dry fitting of the body tub with the fender unit and the hood, I noticed that it didn't quite line up, especially along the lower body line that runs along the hood and tub. That resulted in the top of the hood riding somewhat higher than the cowl. Also the body was crooked when sitting on the fender unit. Looking underneath the crookedness was apparent in one of the body rocker runners I had added on the tub. By raising the front of the tub with spacer blocks on the fender unit, it was possible to line up the body and hood correctly. Also went over the door panel lines with a scriber to deepen them. Finished the detail on the canvas top by running half round section around the perimeter of the underside. I'm wanting to include a flip up rear window, so added an attachment pivot to the window frame using small plastic tubing cut in half. The top now has the first few coats of colour. The seats have received their dark red leather colour, and the construction of the door panels is underway. Body is in primer, looking good, ready for the red to be applied. Happy New Year everyone! Cheers Misha
-
Congrats Jay! Been wanting to comment on how much I enjoyed the look of your build... Chevies Rule! The overall matte look is spot on. Cheers Misha
-
Thanks Jesse, Mike, Rob, and Dennis for your comments and your involvement with the CannonBall. A very welcome feature of the forum is the community of builders and the imaginative sprit that is displayed in events such as the AussieBall. Big thanks to Jonathan for organizing us and looking forward to Bill's return to the Brock Yates Memorial 10th Cannonball Dash... Thanks to all who voted and followed along, plus a big hand to all fellow competitors! Cheers Misha
-
AussieBall trophy truck
Misha replied to Belugawrx's topic in Model Trucks: Pickups, Vans, SUVs, Light Commercial
Congrats Bruce on a well run race! The result is most appropiate as both vehicles were well built for the job. This was my first CannonBall and I had a blast! Cheers Misha