Misha
-
Posts
1,015 -
Joined
-
Last visited
Content Type
Profiles
Forums
Events
Gallery
Everything posted by Misha
-
Having a problem posting photos from my iPad. Just updated to 13.3 yet never had a problem before. Any ideas? Thank Misha
-
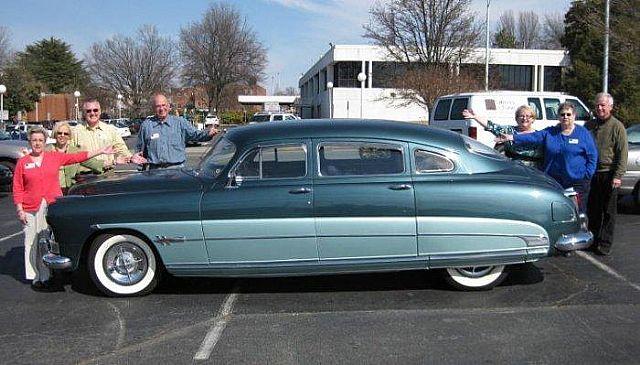
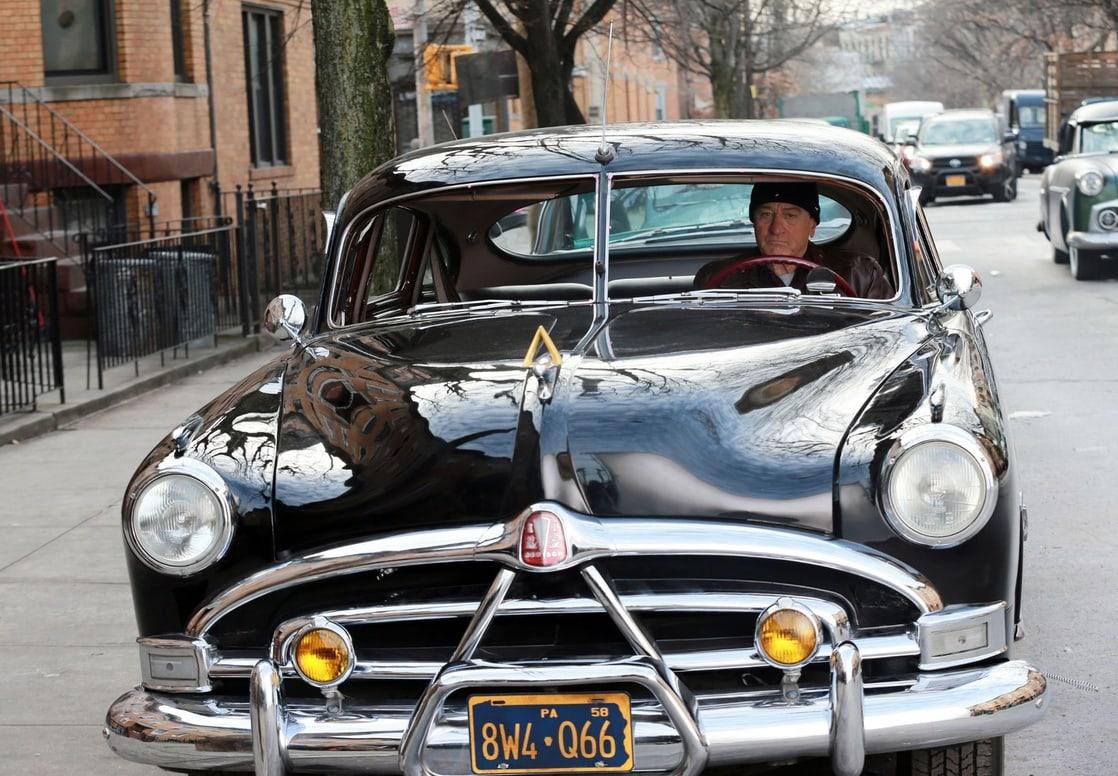
Well, after thinking about attempting to recreate the 51 four door Hudson Hornet that Di Niro wheels around in his early days in The Irishman I may have stumbled upon a solution! Motor City Resin offers a 53 four door and by combining it with the 52 ragtop for the grill and hood it might be a go. My main question regards the quality of the resin products and their service... any thoughts would be useful. So, not entirely sure of my decision yet, there are other options... Thanks for any comments, cheers Misha For some reason unable to post photos from my iPad....
-
That’s a great looking tree! Rich and bountiful. Wishing you and yours the very best for the Holidays! Merry Christmas, Misha
-

THE OFFICIAL CannonBall Run 2020 theme thread!
Misha replied to disconovaman's topic in Community Builds
Thanks for the suggestions Leslie and Mike, good ideas that Will help. Still undecided, yet it would be a great challenge. Whatever the decision, I'm in for this round of the CannonBall run and I'll post the build on the other thread. Wishing all the CannonBallers good luck and great fun! Cheers Misha -
THE OFFICIAL CannonBall Run 2020 theme thread!
Misha replied to disconovaman's topic in Community Builds
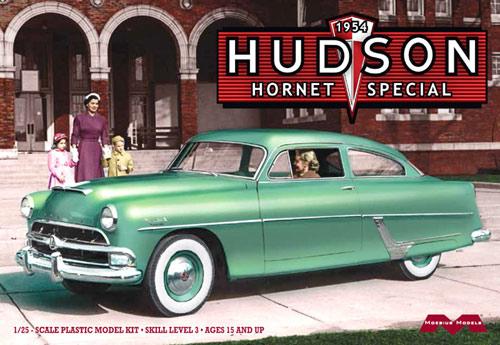
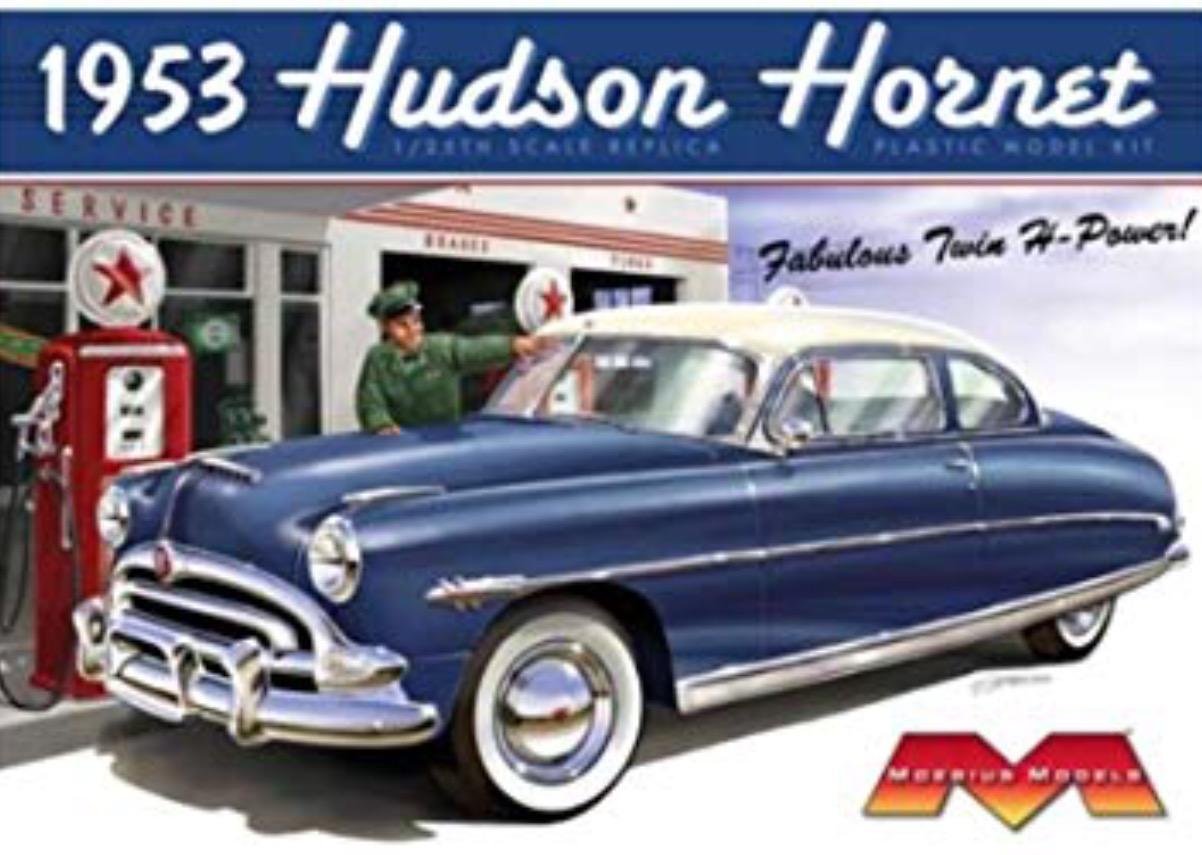
Thanks Rob for the correct year plus the great link, I'm sure it will be useful to all participants. Been looking at various examples of the Moebius Hornet kits to see how one would slice and dice to come up with the 51 four door; not easy! The main issue so far is achieving the truncated rear end. With the somewhat fastback look the greenhouse extends quite a bit over the rear quarters. Was looking at photos of the 54 special Fastback, yet it doesn't seem to reach back far enough. Also looking at the 52 ragtop body as the basis for the build as the 124 inch wheelbase was common to all models. What would remain is cobbling a four door greenhouse and mating it with a re-scribed body... it would be a major task to achieve the look required!
-
THE OFFICIAL CannonBall Run 2020 theme thread!
Misha replied to disconovaman's topic in Community Builds
I had voted for the rear engine theme, yet film is a great choice as well, so hope to take part this year. Right now the car that has grabbed my attention is the Hudsonfour door that Di Niro whelels around in his early days as the lead in The Irishman. Which year is it? Would it be too much of a stretch (sorry...) to use a two door in its place? Or perhaps two kits into one? Hmmm, Misha
-
"Bring Out Your Dead" Completion Build--ROUND 2 Is On!
Misha replied to Snake45's topic in WIP: Model Cars
I announced my intention to complete my Inca Shoebox for this round of "Git 'er Done!", yet life often tends to interrupt plans that are made. Nonetheless, I still have time to at least move this project along and with the holidays fast approaching and a minor surgical date coming up, I'm hoping to spend time at the workbench. The main work is getting the running gear built, based upon the Y Block from the 56 Victoria. The interior is nearly complete and the body requires detailing. Here is where I'm at, plan is to post daily advances... Cheers Misha
-
XR-6 (glue bomb restoration) Update 1/18/17
Misha replied to RancheroSteve's topic in WIP: Model Cars
That is great detail on the rear of the chassis! I realize that the body is nearly done with paint, yet it would be great to have the trunk panel removable to view your work. I still have my original that I built when it came out, all the parts are in a box, so one day perhaps... your build is great inspiration. Cheers Misha -
I believe that the car is Goldfinger's ride... "Auric Goldfinger (Gert Fröbe) owns a black and yellow Rolls-Royce in the movie Goldfinger(1964). The Rolls-Royce driven by Goldfinger and his henchman Oddjob (Harold Sakata) is a Rolls-Royce Phantom III Sedanca de Ville by Coachbuilder Barker, Chassis Number #3BU168. It was originally custom-built for Lord Fairhaven of Anglesey Abbey, Cambridgeshire in 1937."
-
Shelby Mustang: Total Perfomance Pony Car
Misha replied to Misha's topic in General Automotive Talk (Trucks and Cars)
Thanks Richard, another publisher of great auto books is Car Tech Inc. Have a few of them including Larry Davis's Gasser Wars: Drag Racing's Street Classes 1955-1968 and good bios of Don Nicholson, Tommy Ivo, amongst others. Cheers Misha -
Shelby Mustang: The Total Performance Pony Car Just finished a very informative and enjoyable read of Colin Comer's Shelby Mustang: The Total Performance Pony Car. He provides a very complete history from the beginning of the 1965 GT 350 to the upcoming 2020 Shelby GT500 with plentiful photos of most of Carroll Shelby's creations. A good part of the discussion focuses on the various changes from year to year during the first period, '65 to the final '69 (unsold units at the end received new VINs for 1970 models) and the current run that began in 2006 with the Hertz Shelby 350-H rentals, commemorating the original 1966 model from fifty years ago! While concentrating on the street versions Comer does offer coverage of the track models especially the first generation GT 350R and later race efforts with SCCA, TransAm, and on the dragstrip. I would have liked more details and photos of the competition vehicles, yet that might easily be another volume of just over 200 pages. Comer also offers a glimpse of the difficulties Carroll Shelby faced with his dealings with Ford. His desire for producing Mustangs that would perform on the track and street became frustrated as Ford gradually took control by October 1966. "Very few buyers existed for street cars thinly disguised for street use, but plenty of buyers existed for street cars heavily disguised as race cars." (p. 124) Sprinkled throughout the book are side bars with reprints of ads and magazine articles, testimonials from owners, and a description of Shelby memorabilia. The forward is by Lee Iacocca who developed a close friendship with Carroll when he came over to Ford from GM to shepherd the development of the original Mustang from a secretary's car into the GT 350. It was as a result of their friendship that Shelby developed special models for Chrysler during the intervening years between the original Shelbys and the current run. I found this book to be well written and very informative, especially for model builders that will enable scale versions with greater detail and authenticity. A very helpful detail Comer provides is to include the serial numbers of special models and one offs. Another fascinating detail is the story of the Shelby de Mexico developed by Eduardo Velazquez at the end of the 60s. He first bought a GT 350 to race in Mexico and progressed to manufacture Mexican Shelbys using the Ford plants there. "Since the only body style produced in Mexico was the notchback coupe, all Shelby de Mexico would use this body style... the biggest visual difference was the addition of fibreglass sail panels that extended back from the rear window area and into the rear quarter panels, giving a unique fastback look to the cars." (pp 196-7) Overall a great addition to any Shelby library! The book is published by Motorbooks, retailing for 38.99 Cdn or 29.99 US, A wonderful bargain and an entertaining read that kept me turning pages for two days. Cheers Misha
-
A stunning build! The entire build is a combination of top notch work, from the colour, the detailed Hemi, and overall stance. I keep looking at it and enlarging the super photos to catch all the detail work. Thanks for sharing, great addition to all your builds. Cheers Misha
-
It would be a great companion to your other builds!
-
Great colour and paint finish, plus the other details!
-
Also, if one is intent of having greater detail, kitbash it with the Lindberg 64 Dodge....
-
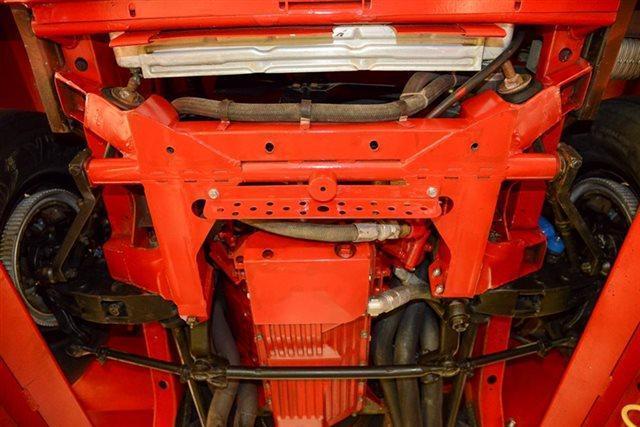
I have a couple of shots of the front of the chassis if it helps.... Cheers Misha
-
Very Kool Kurt! I remember your first cooler which was impressive and now with this new one it is even more so. I would be very interested in getting one. Are you making the decals for it as well? Cheers Misha
-
Our local club SPAM, Scale Plastic Auto Modellers in Victoria has a Christmas Brunch at a local pub where we exchange wrapped ? kits with the proviso of building the kits for a future meeting later in the spring. The tradition has been around for a few years now and it's coming up this Sunday. This year we also have the option of bringing a WIP that will be wrapped in plain paper for a second draw. Looking forward to it! ☃️
-
Been thinking about the time period the Savoy will represent. Leaning towards a more current time while still having the look fro the mid 60s. The rear end certainly would put it twards the end of the decade, yet curious how recent are the chassis stiffners? I'm after a "Plain Jane" look, with no sponsorship and just a couple of window decals. Have 't followed NHRA very closely since the late 70s, so a bit in the dark as to what class this rig would fall under.
-
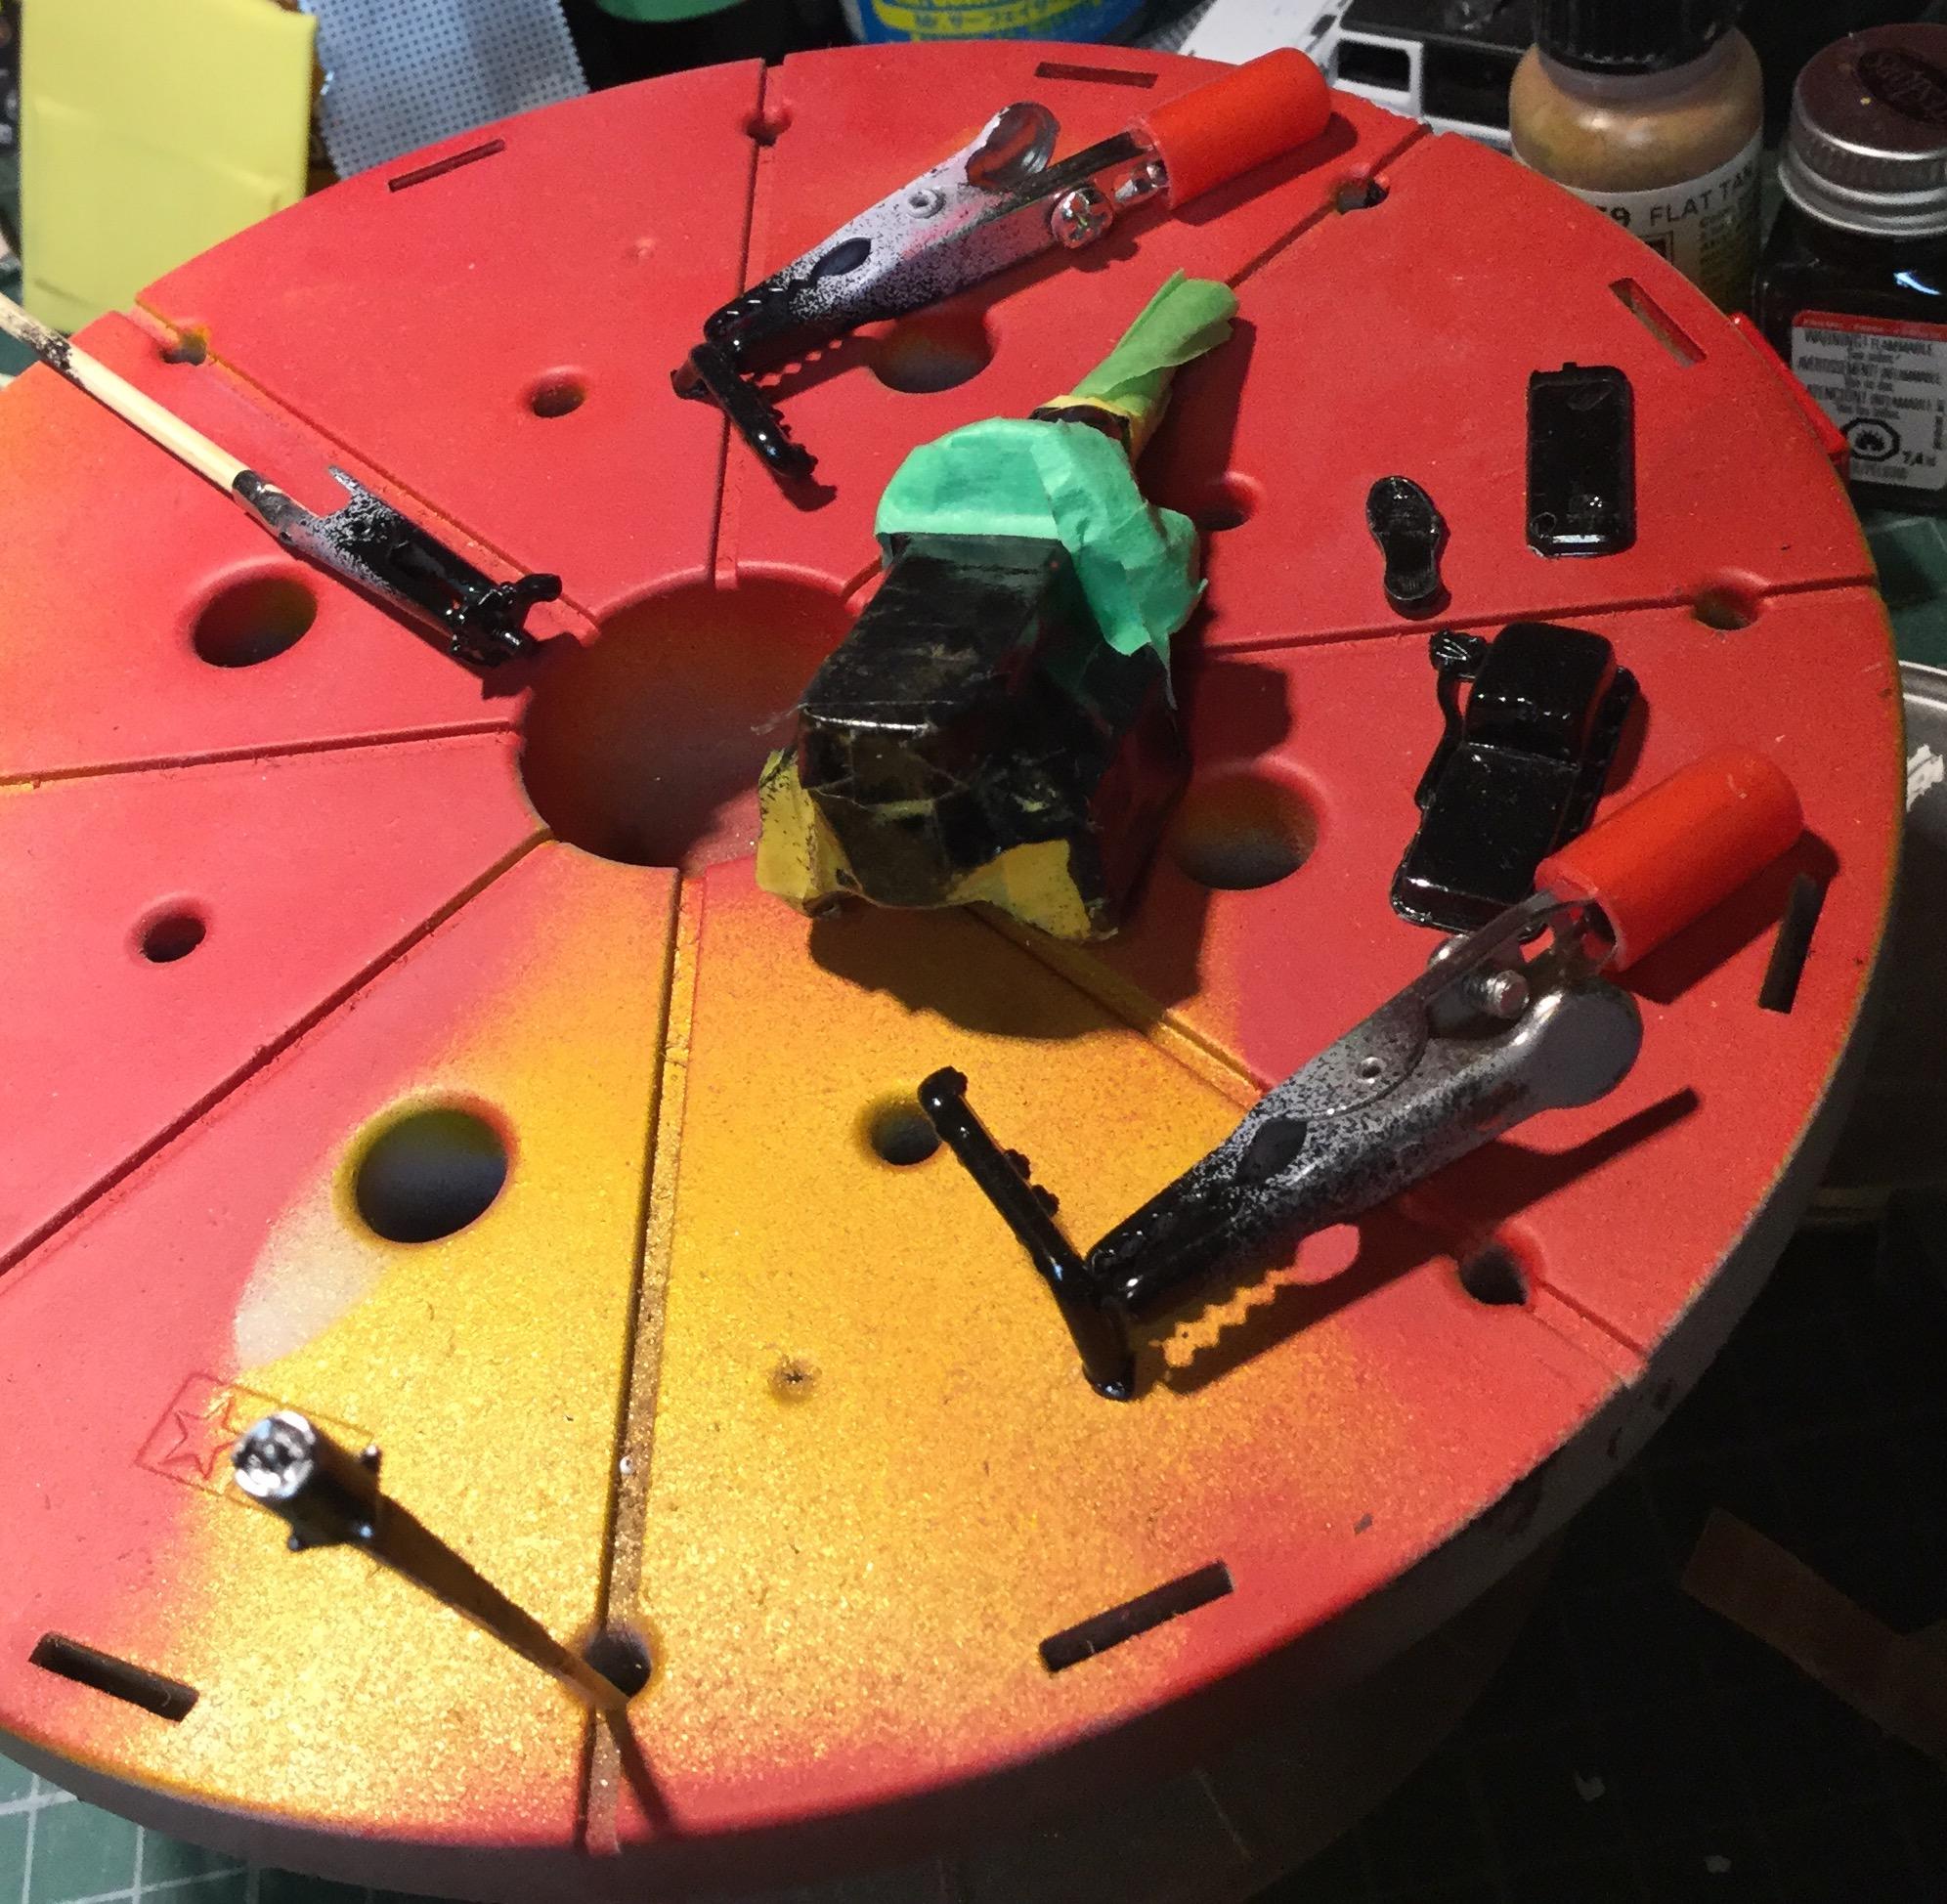
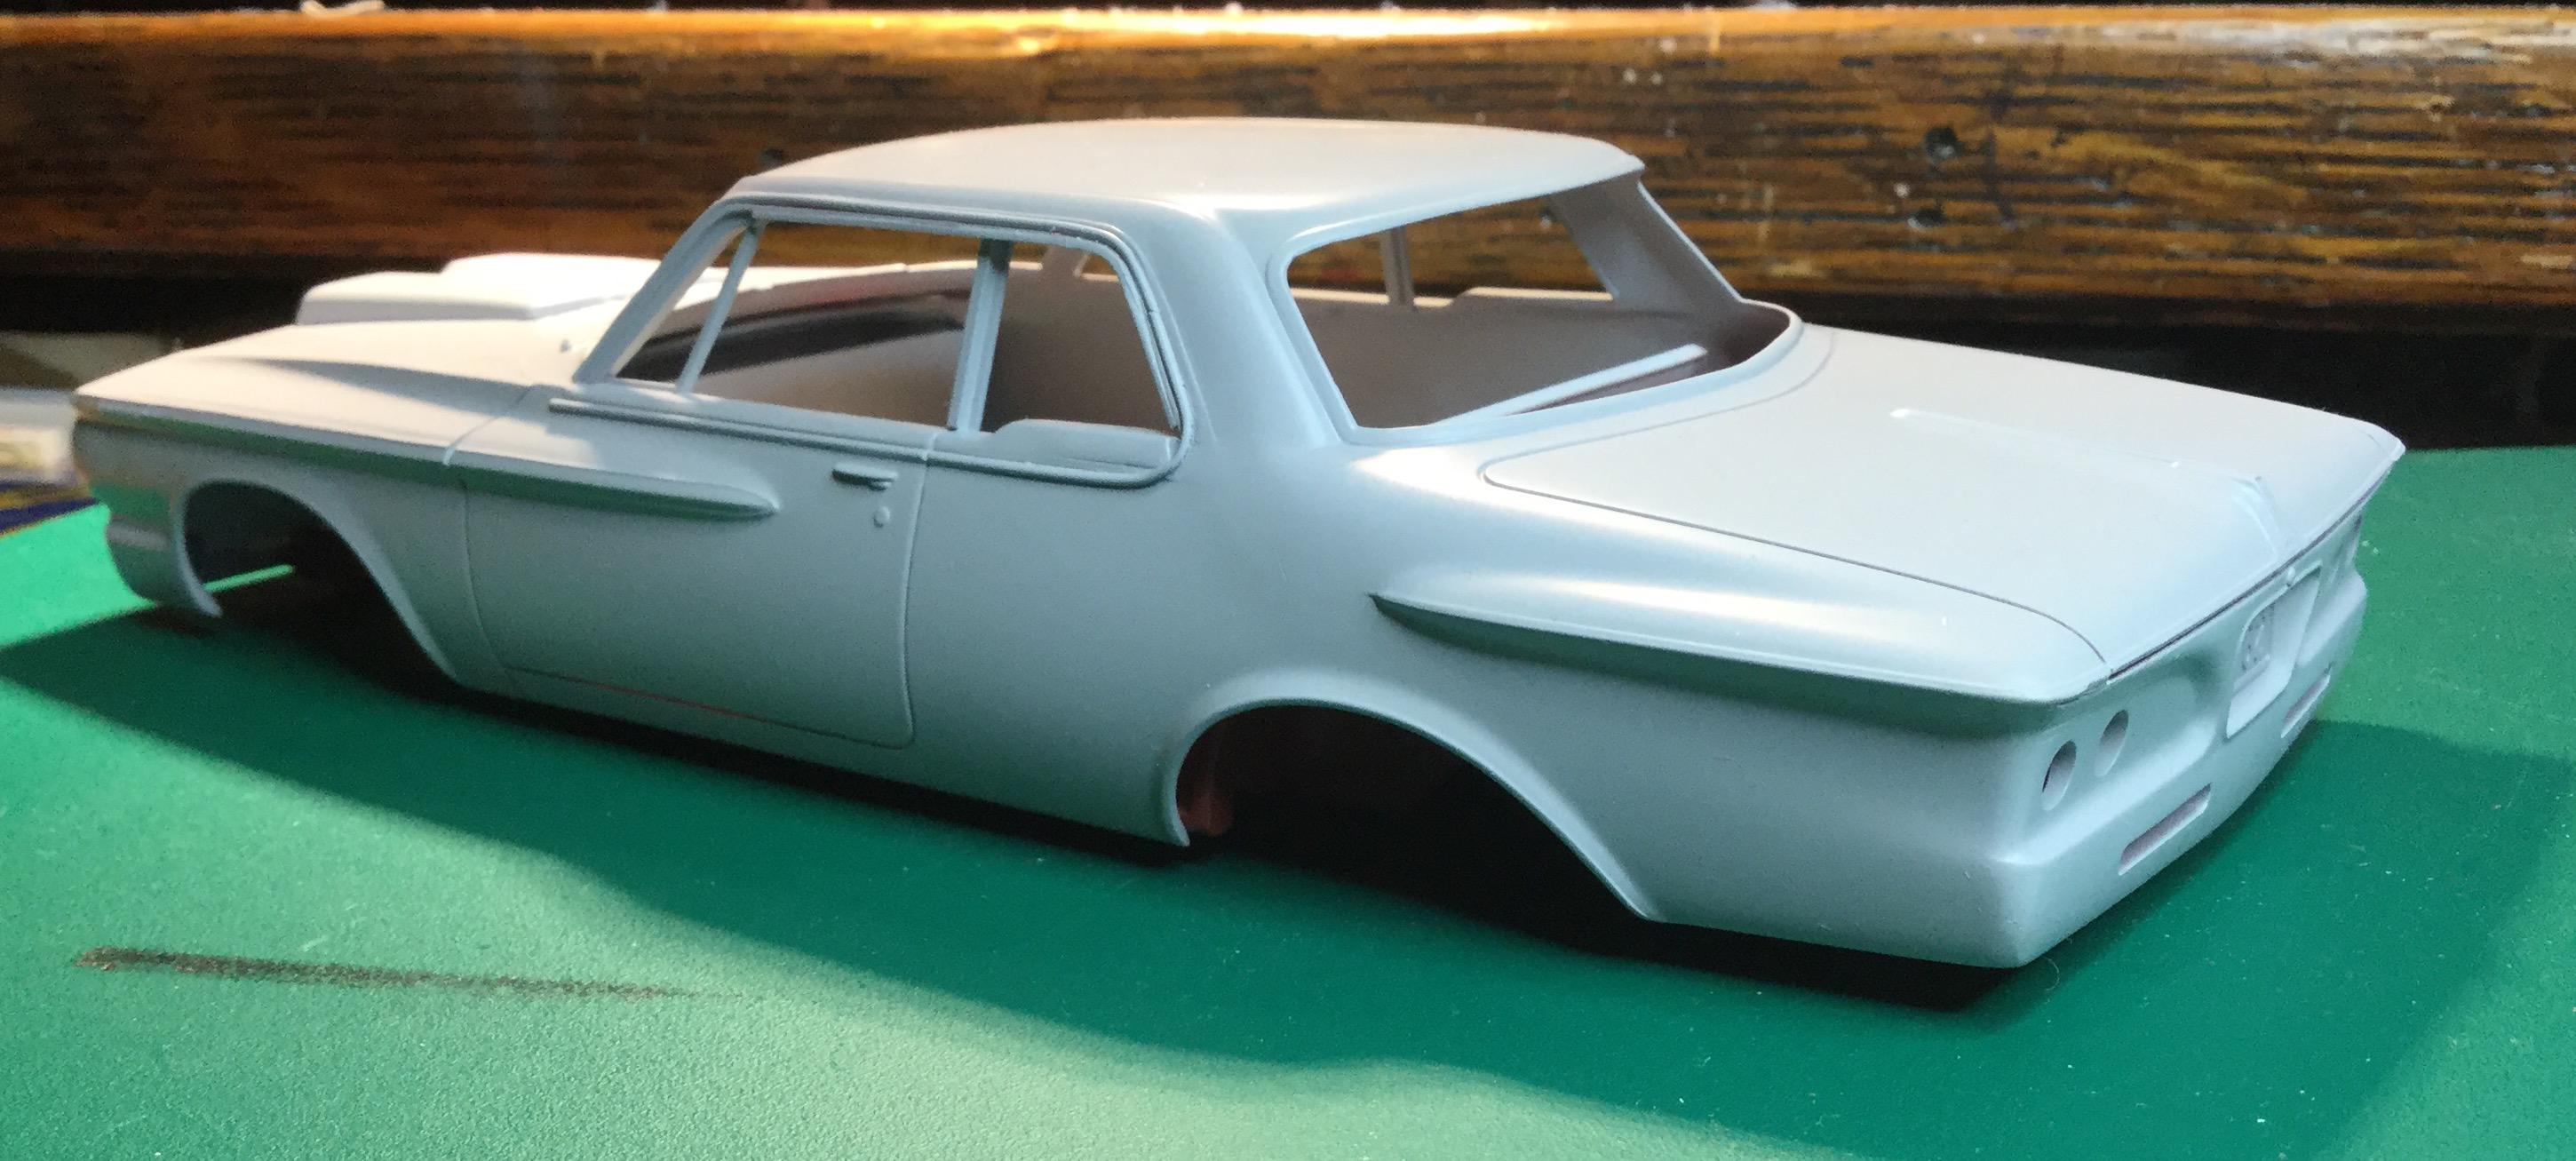
Thanks for all the comments and interest. Also thanks Leroy for the offer of spare parts, might take you up on it. Plus as Phil mentioned I had brought out the Savoy to our club meeting earlier this week to show the progress, always great to hear members' comments and suggestions. Haven't been able to spend much time at the work bench although I have begun to get parts into primer. Below are shots of the body and chassis in primer, along with the completed interior door panels. They required a certain amount of fiddling and modifications to match the side window outlines. Hope to spend more time on the build now that the yard is prepared for winter and temperatures have been reaching the freezing mark. More later! Cheers Misha
-
Gonna turn mine into a cab! Comfort and style.
-
AMT '60 Chevy
Misha replied to JJ Deuce's topic in WIP: Model Trucks: Pickups, Vans, SUVs, Light Commercial
I like the look of the Chevy steel wheels, updates it the right amount of years. The stance is great, maybe a bit more in the front, or a larger tire to fill the wheelwell? Looking forward to your progress JJ! Cheers Misha -
What's everyone's favorite red oxide primer?
Misha replied to aurfalien's topic in Model Building Questions and Answers
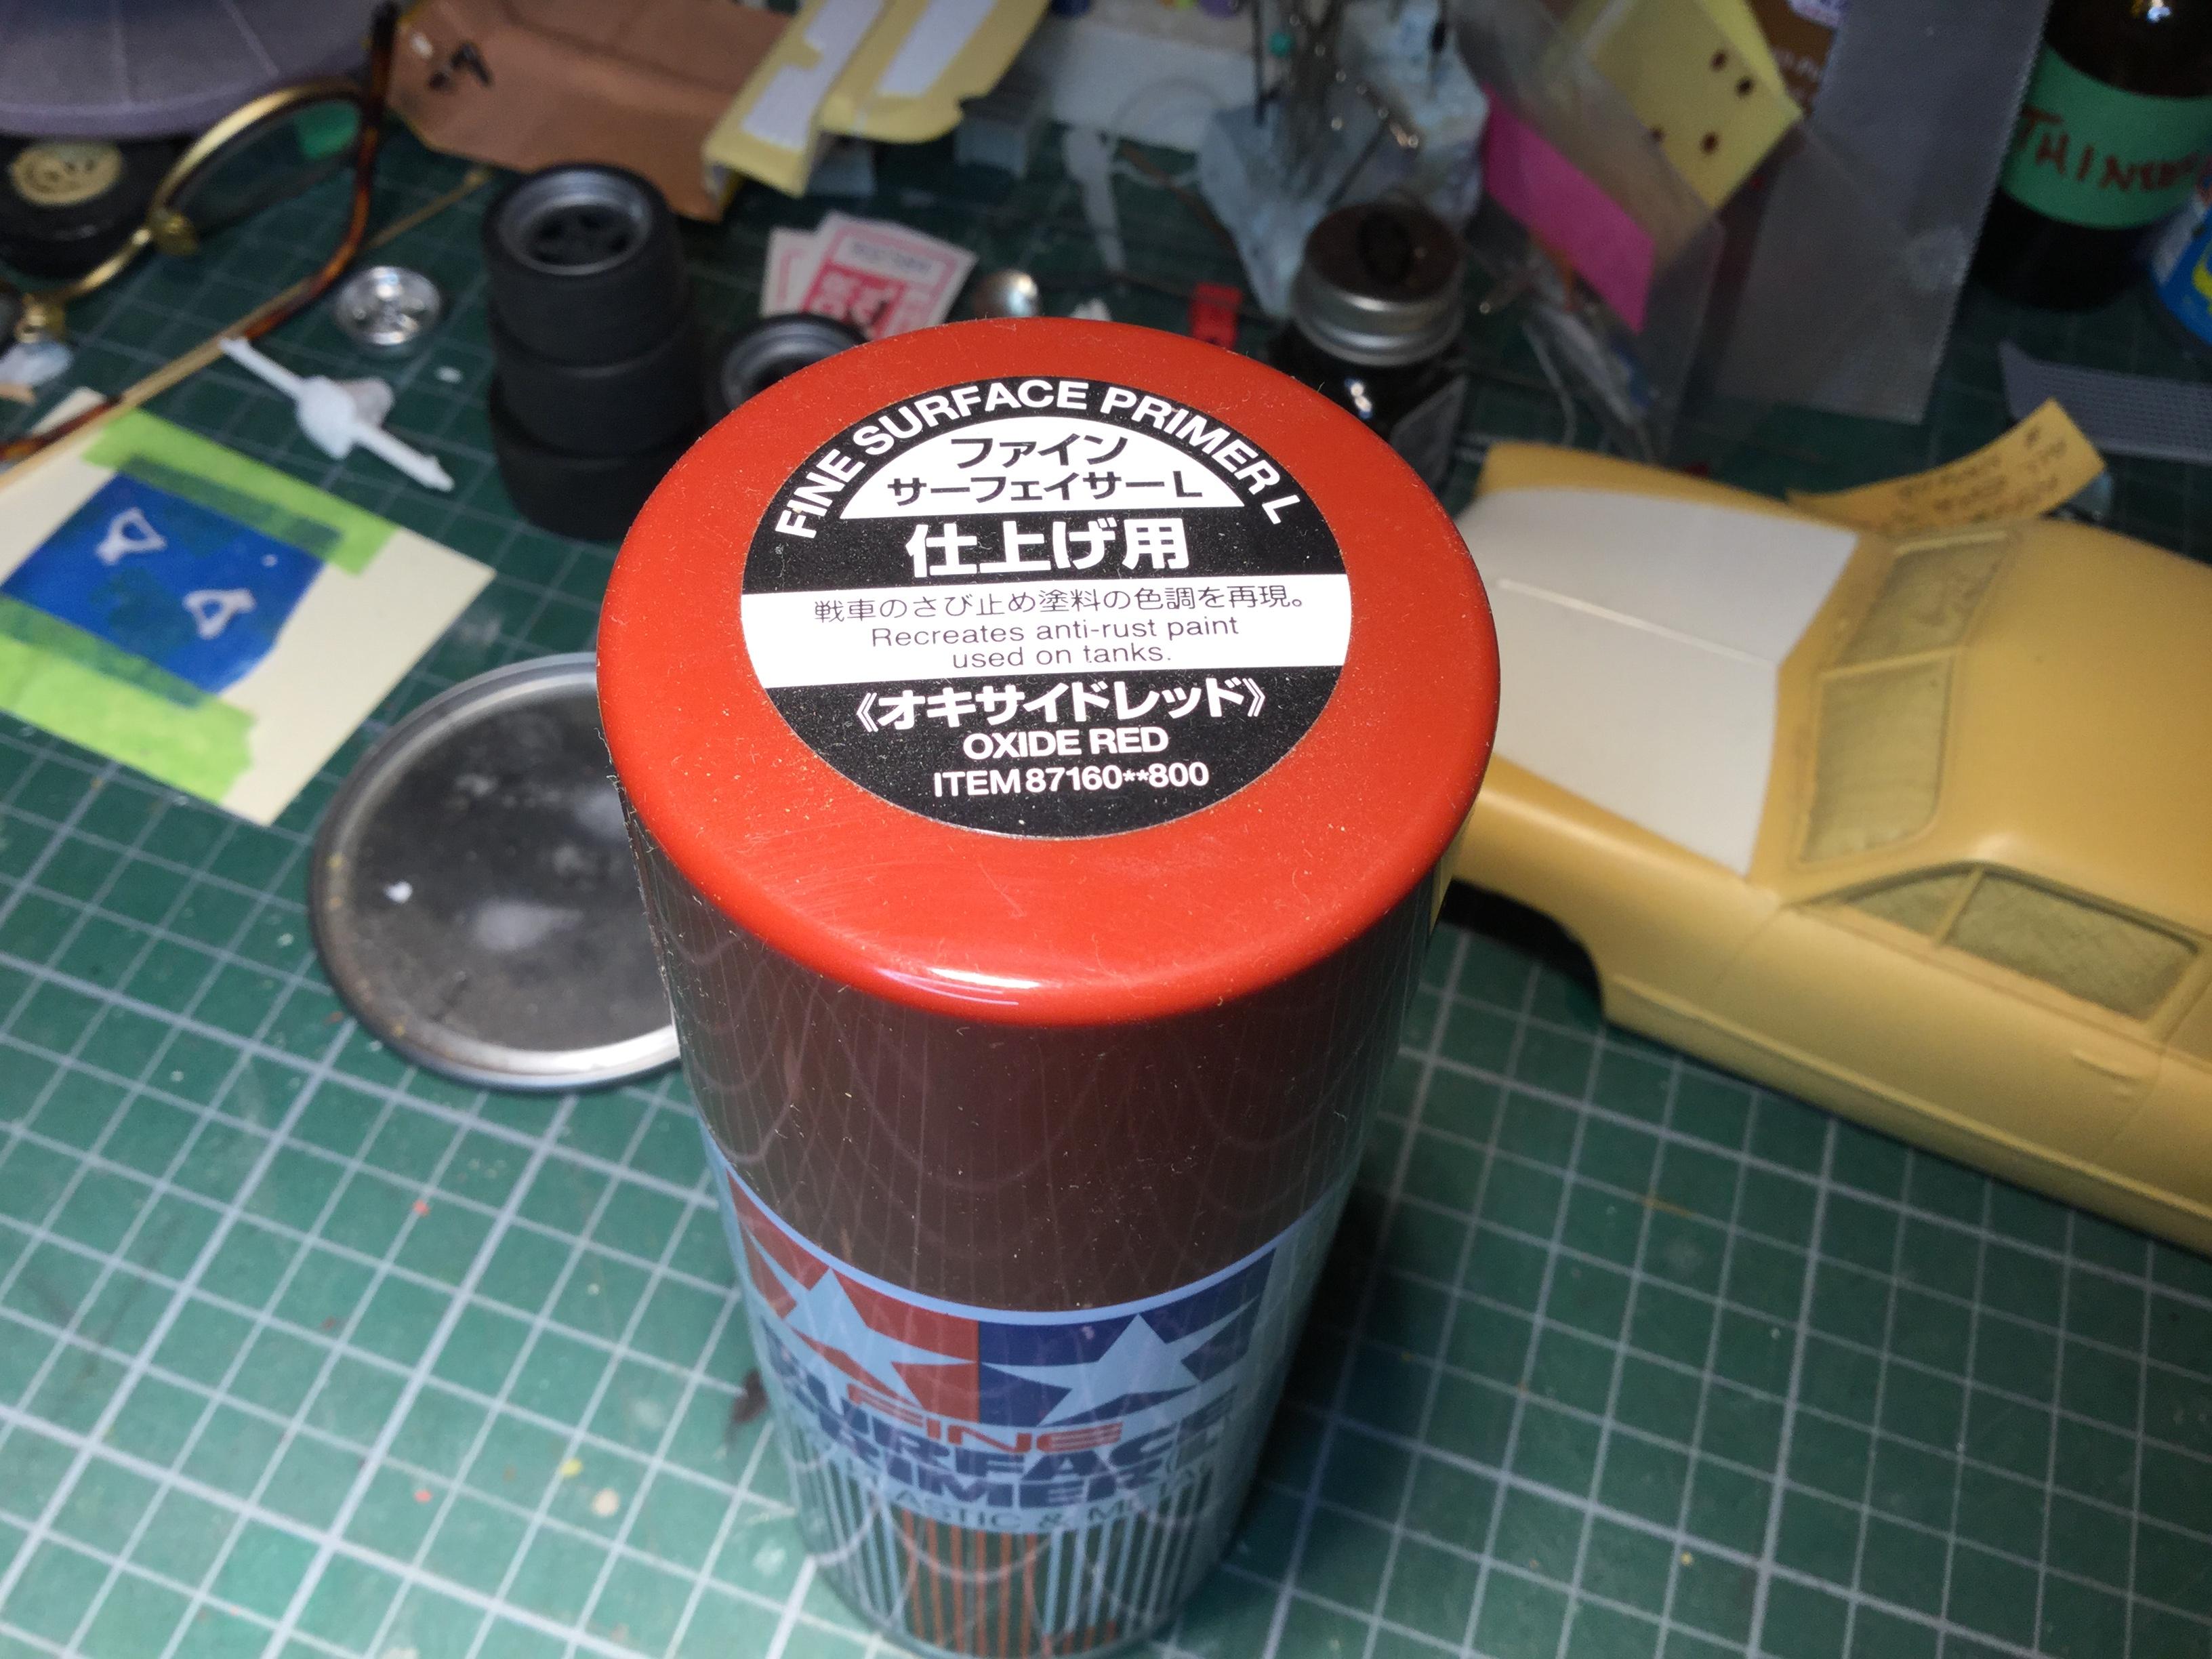
Here is the Tamiya Oxide Red Fine Surface Primer I picked a couple of weeks ago at the LHS. Planning to try it out on my 62 Max Wedge Savoy build this week. Cheers Misha
-
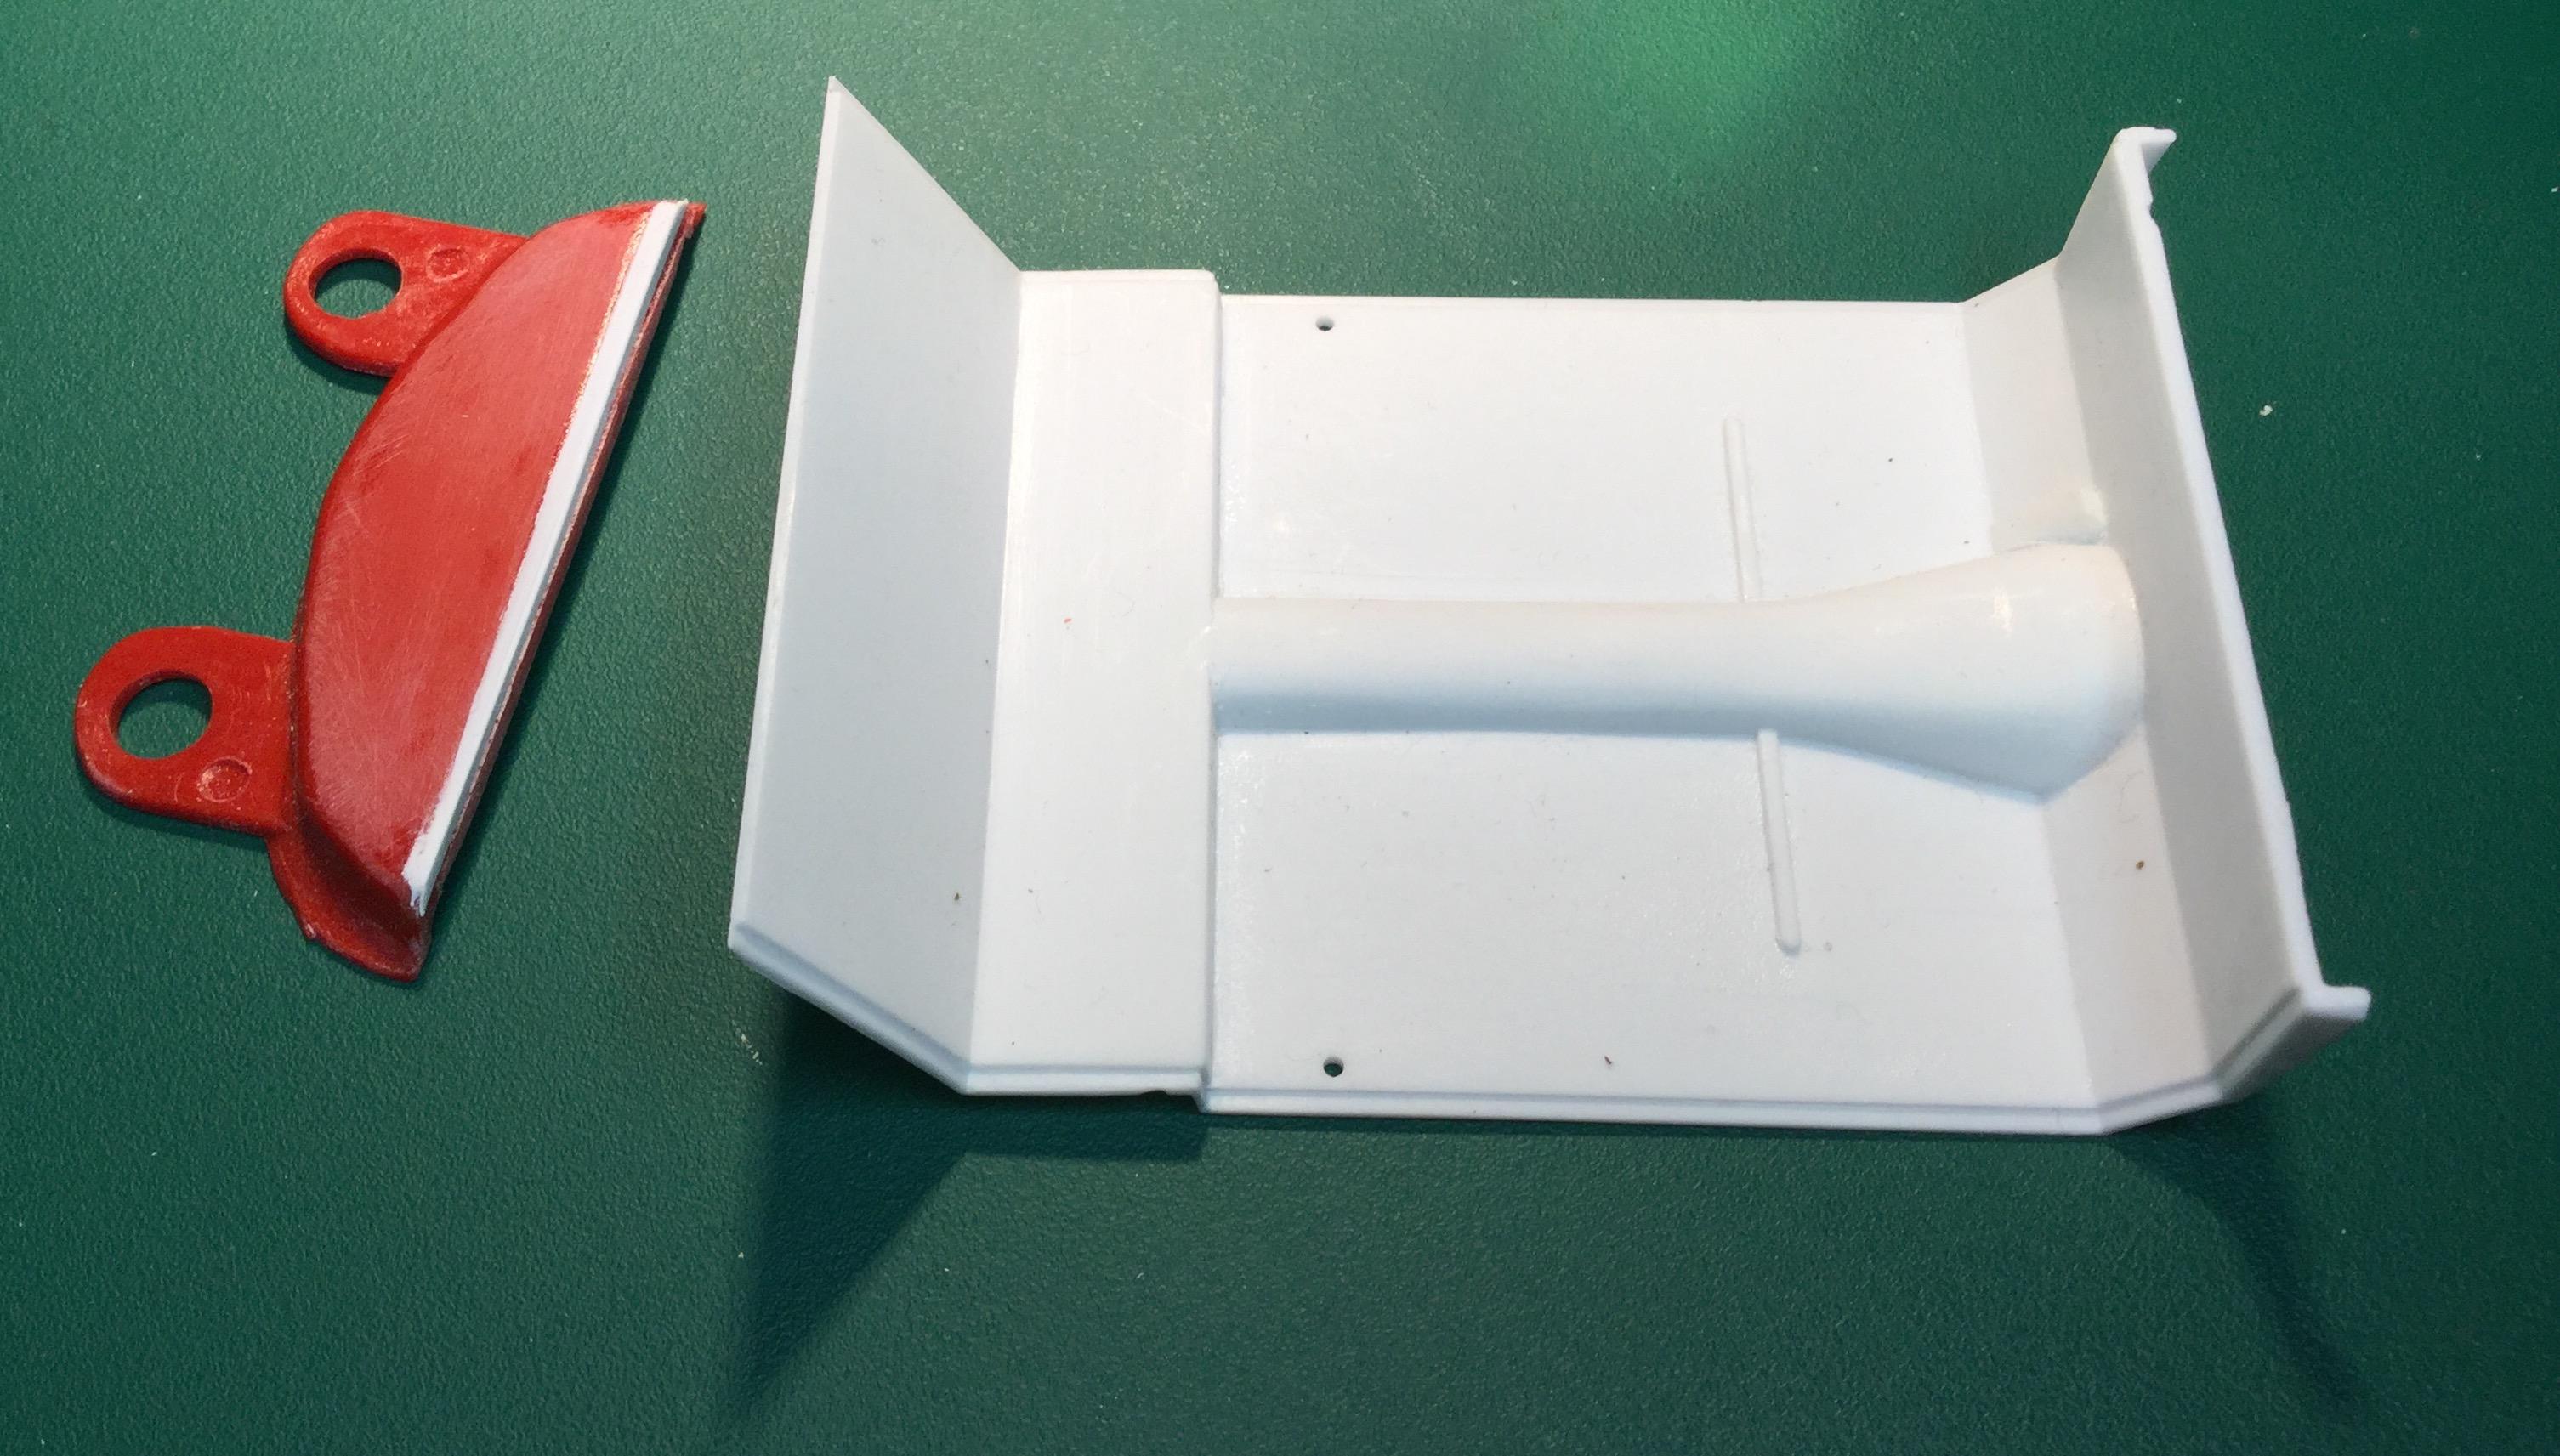
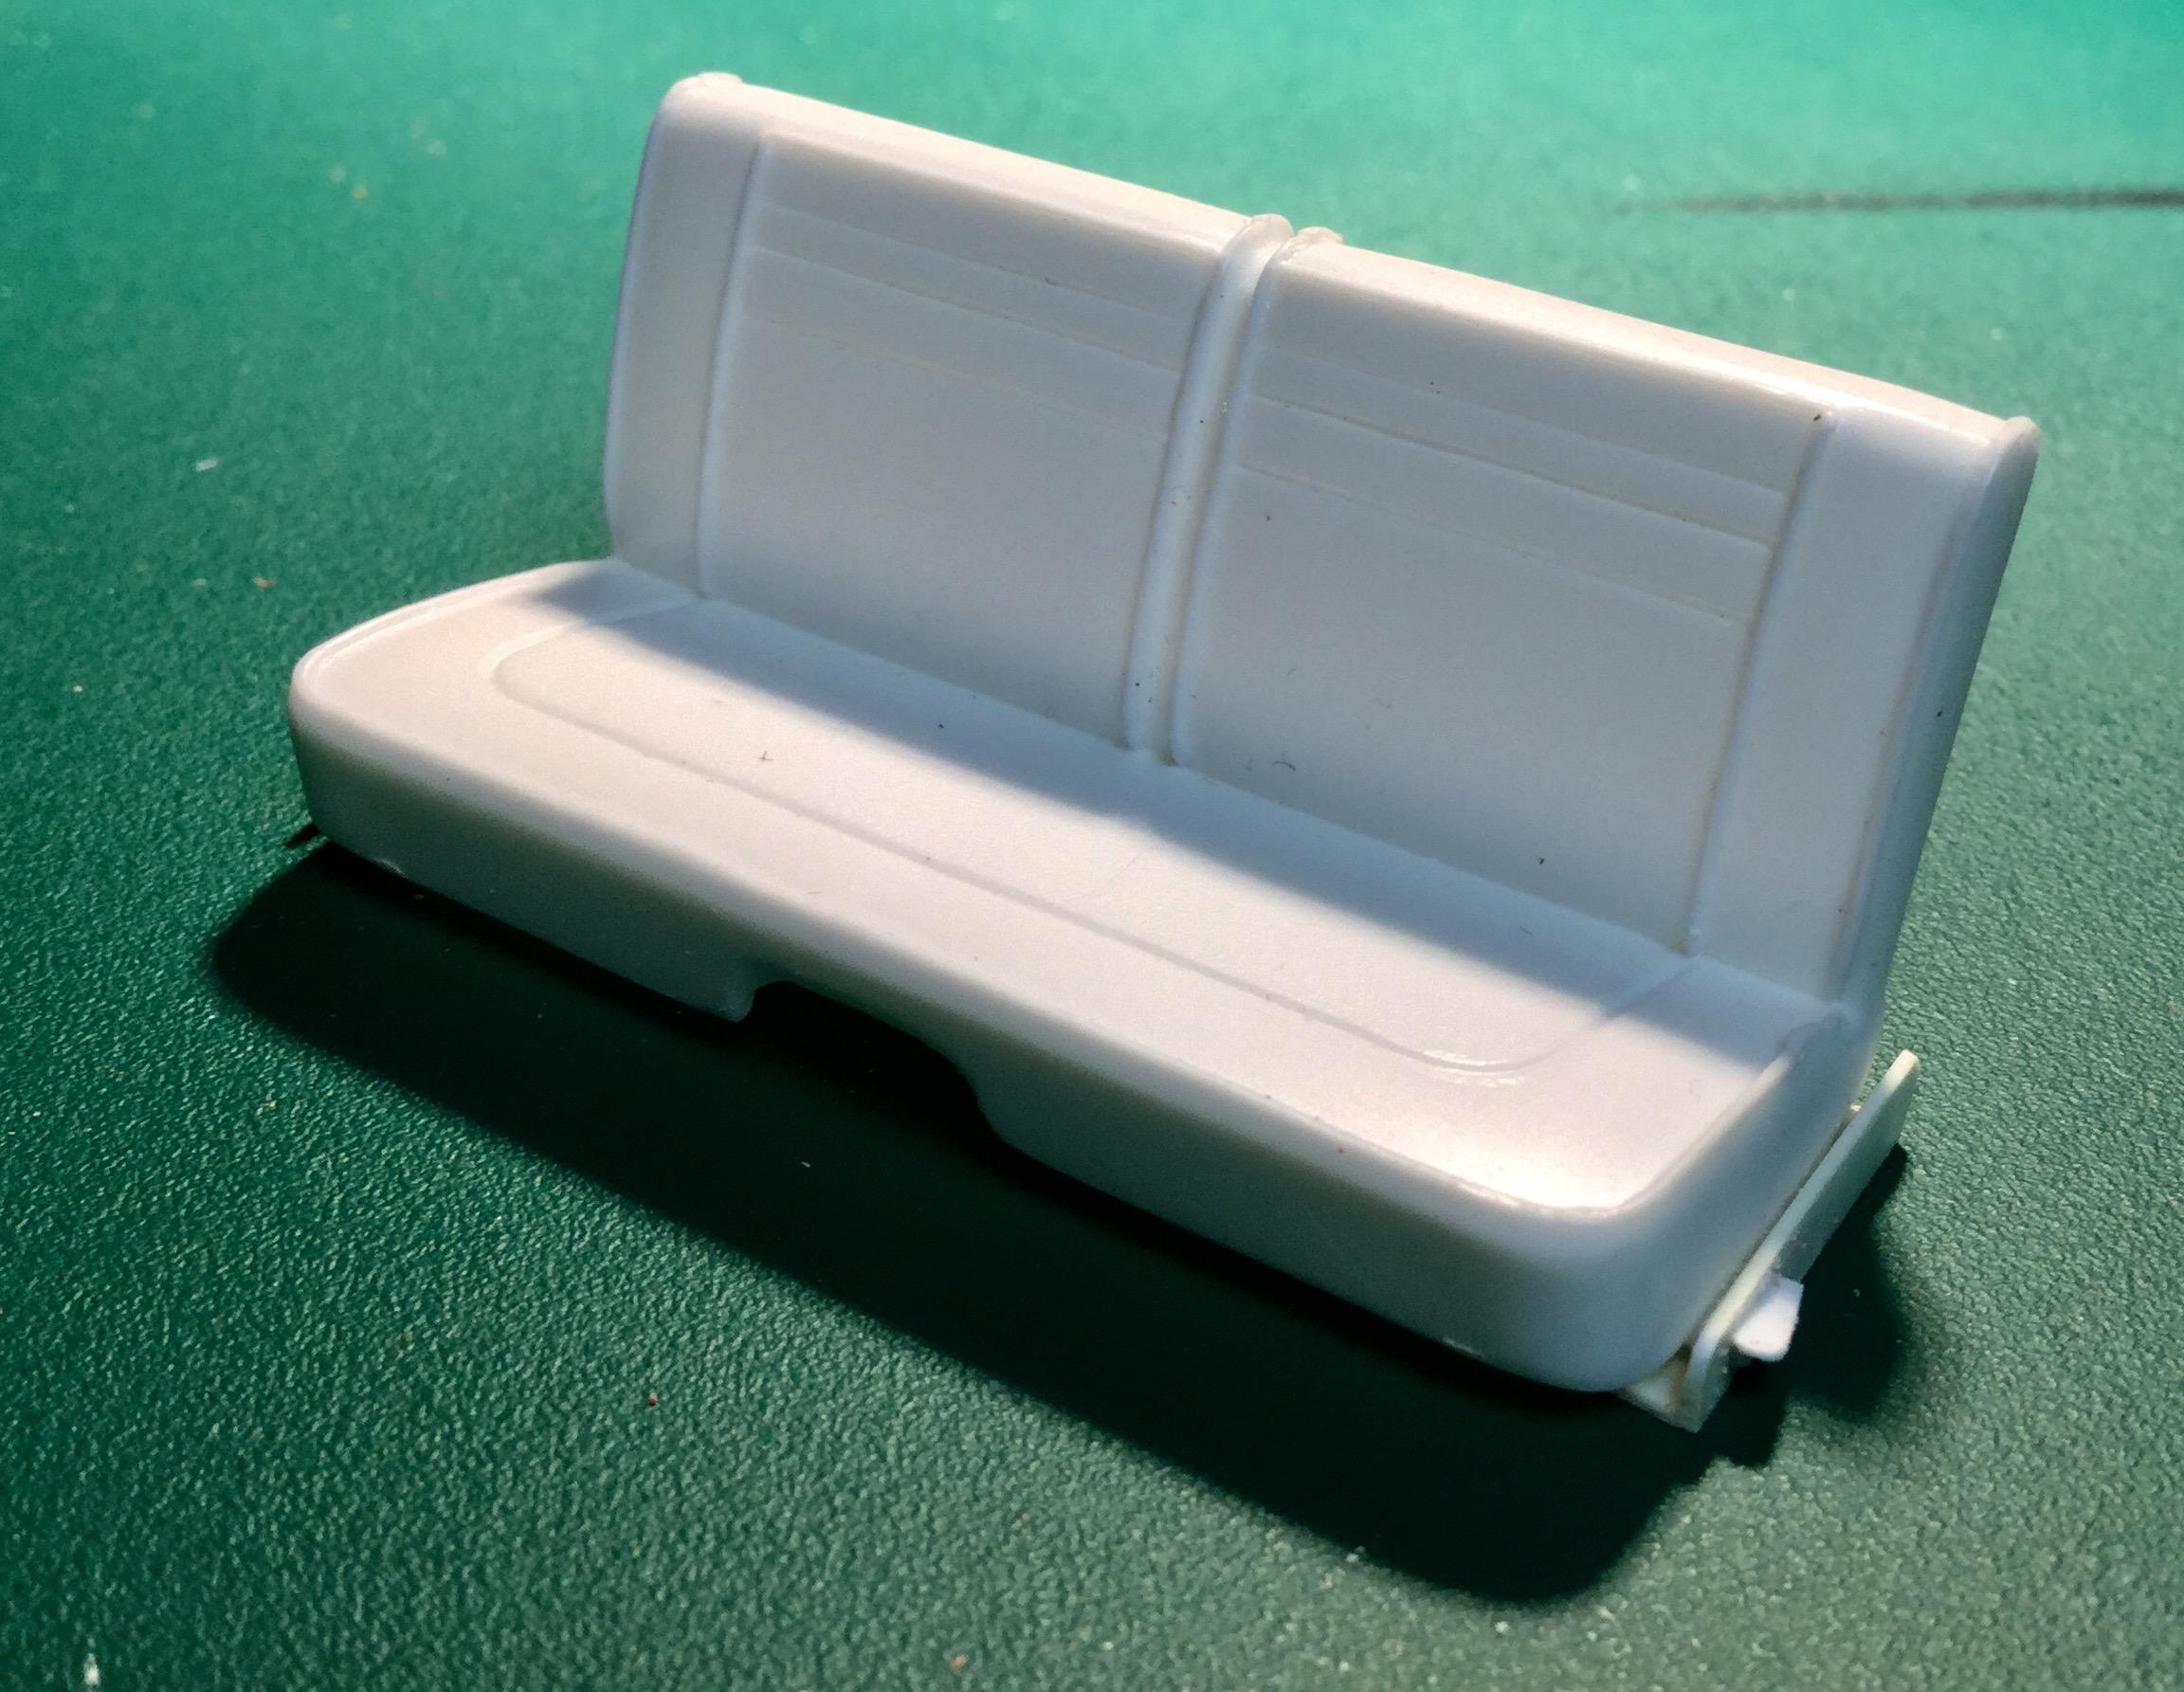
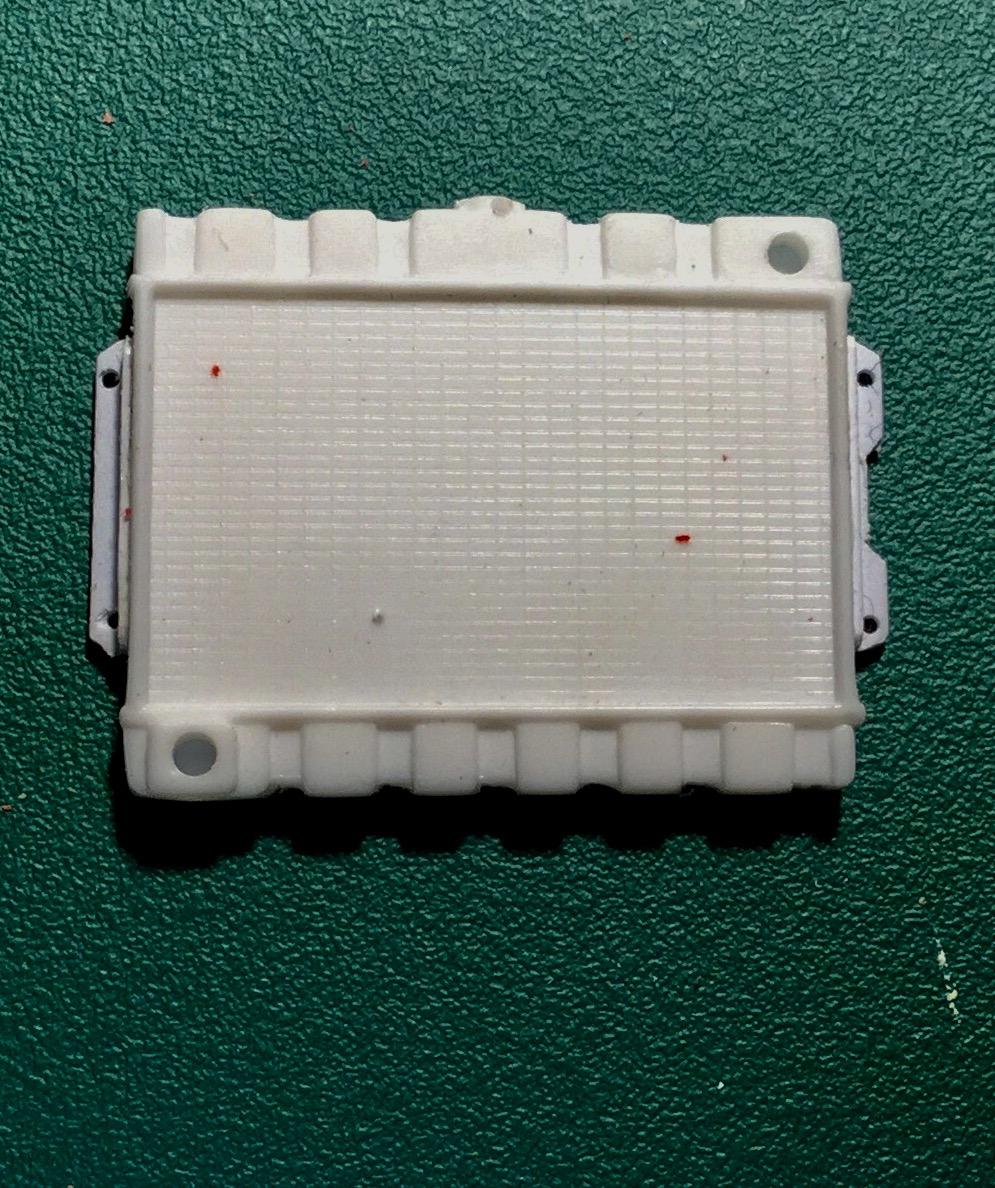
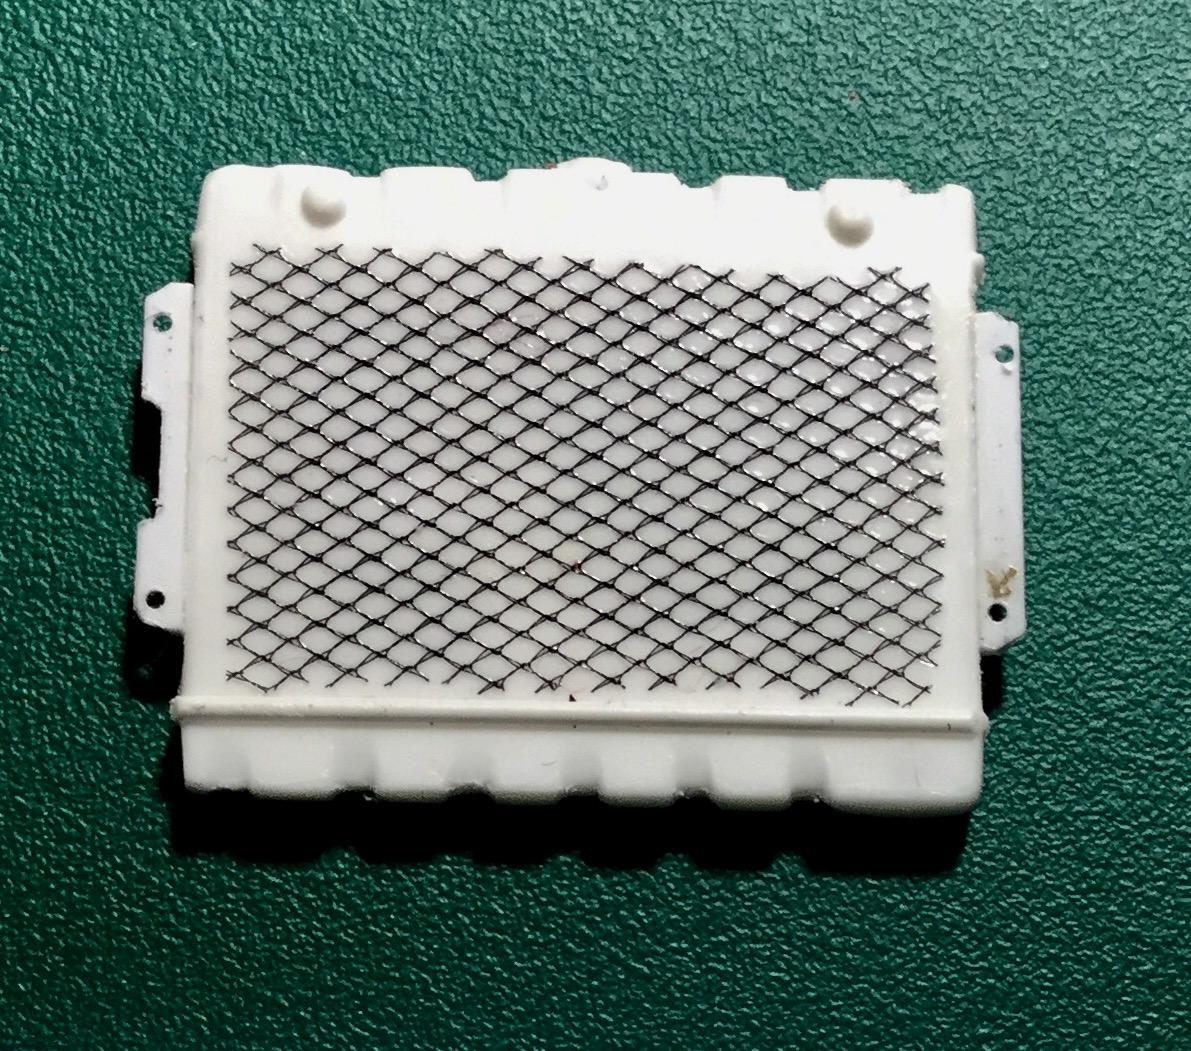
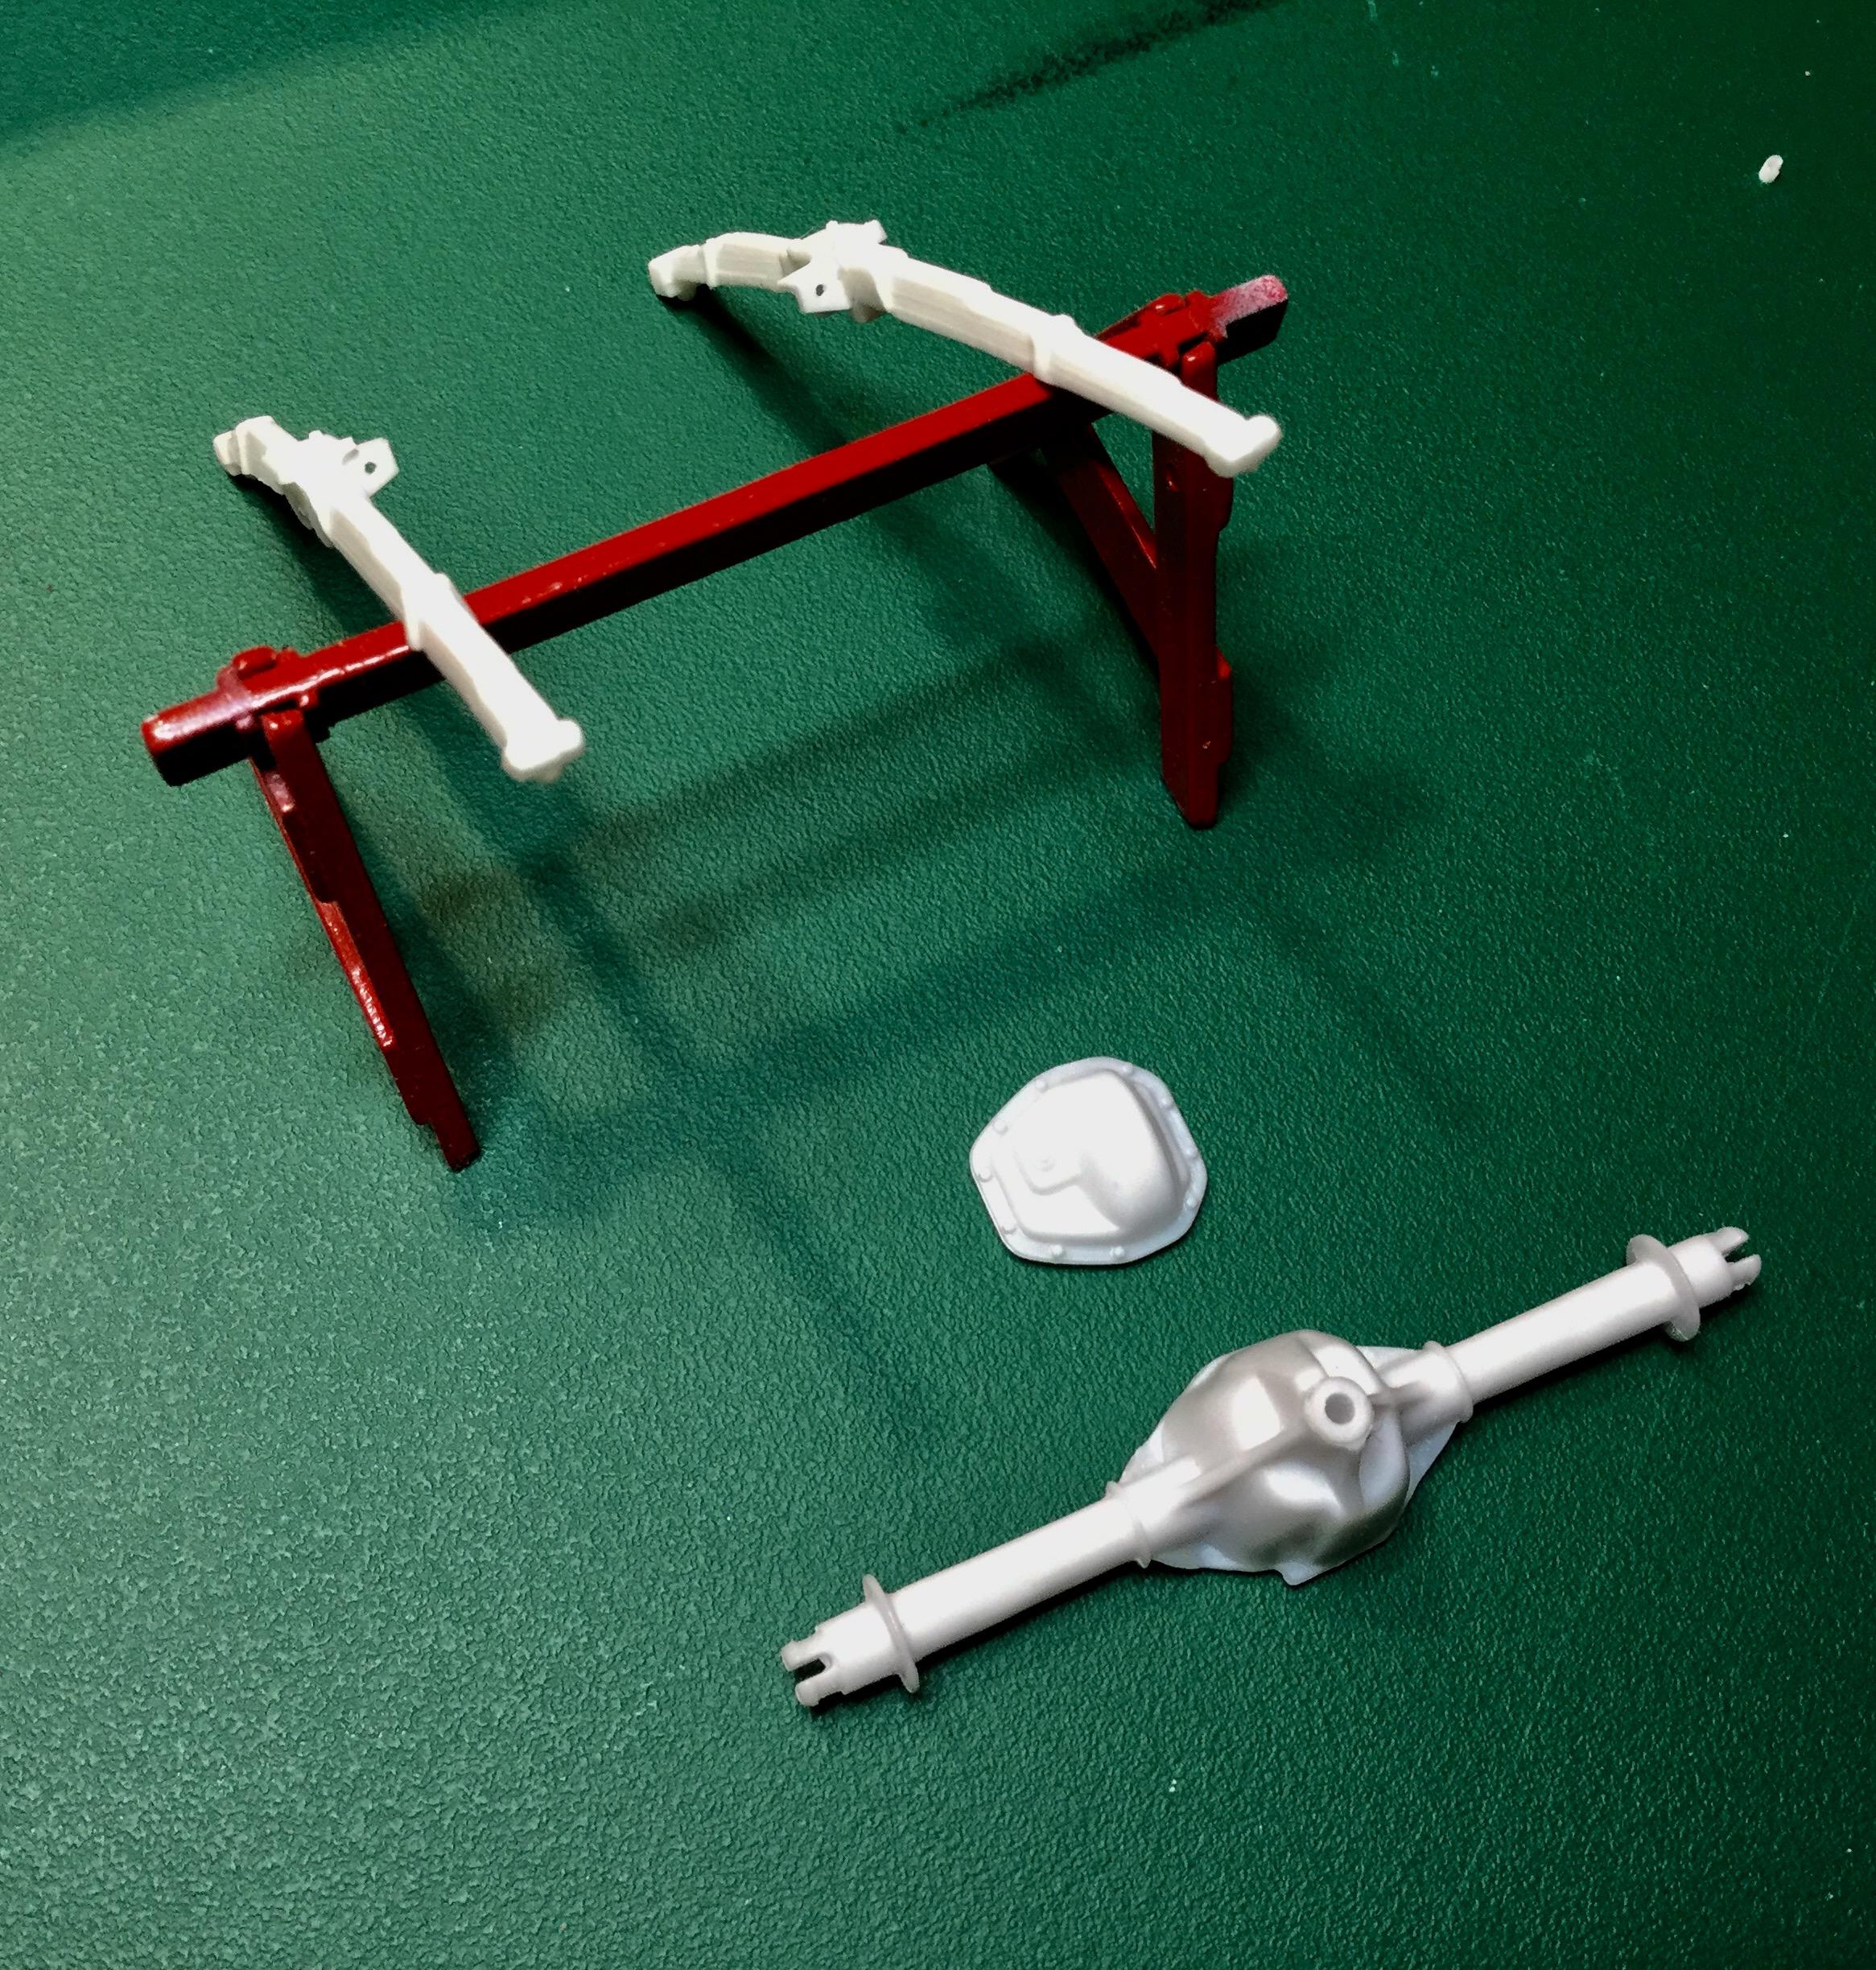
Managed to get some more time in at the workbench! Still busy with body modifications and detailing, scraping plastic for the most part. Been concentrating on the engine compartment, the interior, rear suspension and body mods to get it down to the basic Savoy trim level. Spent time on constructing the side window and door trim to replicate the Savoy post two door sedan. Using plastic structural pieces I cobbled together the look I was looking for. I had removed the heavy Fury chrome trim previously and now using very thin half round from Plastastruct, I added the basic window trim level. Missing from the original JoHan body were the cowl/fender seams and the fender/rocker panel ones, which I also scribed in. At the same time the chrome wheel lip trim was removed. Still debating on keeping the dual rear lights or really going spartan with the single taillight. Also been fitting the 64 Dodge hood scoop to the Plymouth. Getting closer to the primer stage! The engine compartment is slowly getting detailed after removing the molded bits and pieces. Using web photos has been a great help with this project, especially with details such as these and for the chassis detail. The firewall now has a ballast resistor and a regulator. Searched for a Mopar single chamber brake master cylinder in my collection to no avail, so will perhaps update to duals. The rad lacked any detail on the forward facing side. While it may not be all that visible, it did require some added detail, especially where it hangs below the core support. Also added the side mounts to the rad on the inside portion of the engine compartment. The interior from the Dodge thankfully has required little alteration to have it fit the JoHan body. Lindberg has provided a canvas for a new interior by having separate door panels that, when reversed, provide a clean surface. The main change is the kick up along the rear window, which is still being worked on. The rear package shelf has been replaced by the JoHan piece to provide the V shaped window in back. Wanting to use the bench seat, I found that it sat a bit too low in the tub. Raised it with a bottom structure to it, even including an adjustment lever on the driver's side. For the rear end I decided to go with the Dana out of the Hemi Dart kit. Once the extra bits were ground off, it fit quite well with the existing Dodge underpinnings. The rear shock mounting was missing on one of the leaf springs, they looked rather anemic to begin with, so new mounts were built. That's about it for now. Thanks for all the comments and for checking out the following snapshots, cheers Misha
-
"Bring Out Your Dead" Completion Build--ROUND 2 Is On!
Misha replied to Snake45's topic in WIP: Model Cars
"Oh boy! Tom has an update on his project" I thought seeing the thread at the top of the list! Yet, that is our biggest issue, diversions. I haven't touched my Inca Gold Shoebox, yet it is on the workbench next to the latest diversion, the 62 Plymouth Savoy 413 Max Wedge. I will get to it this weekend with an update. Wishing all the others all the best, cheers Misha