Reuhkapelti2
-
Posts
390 -
Joined
-
Last visited
Content Type
Profiles
Forums
Events
Gallery
Everything posted by Reuhkapelti2
-
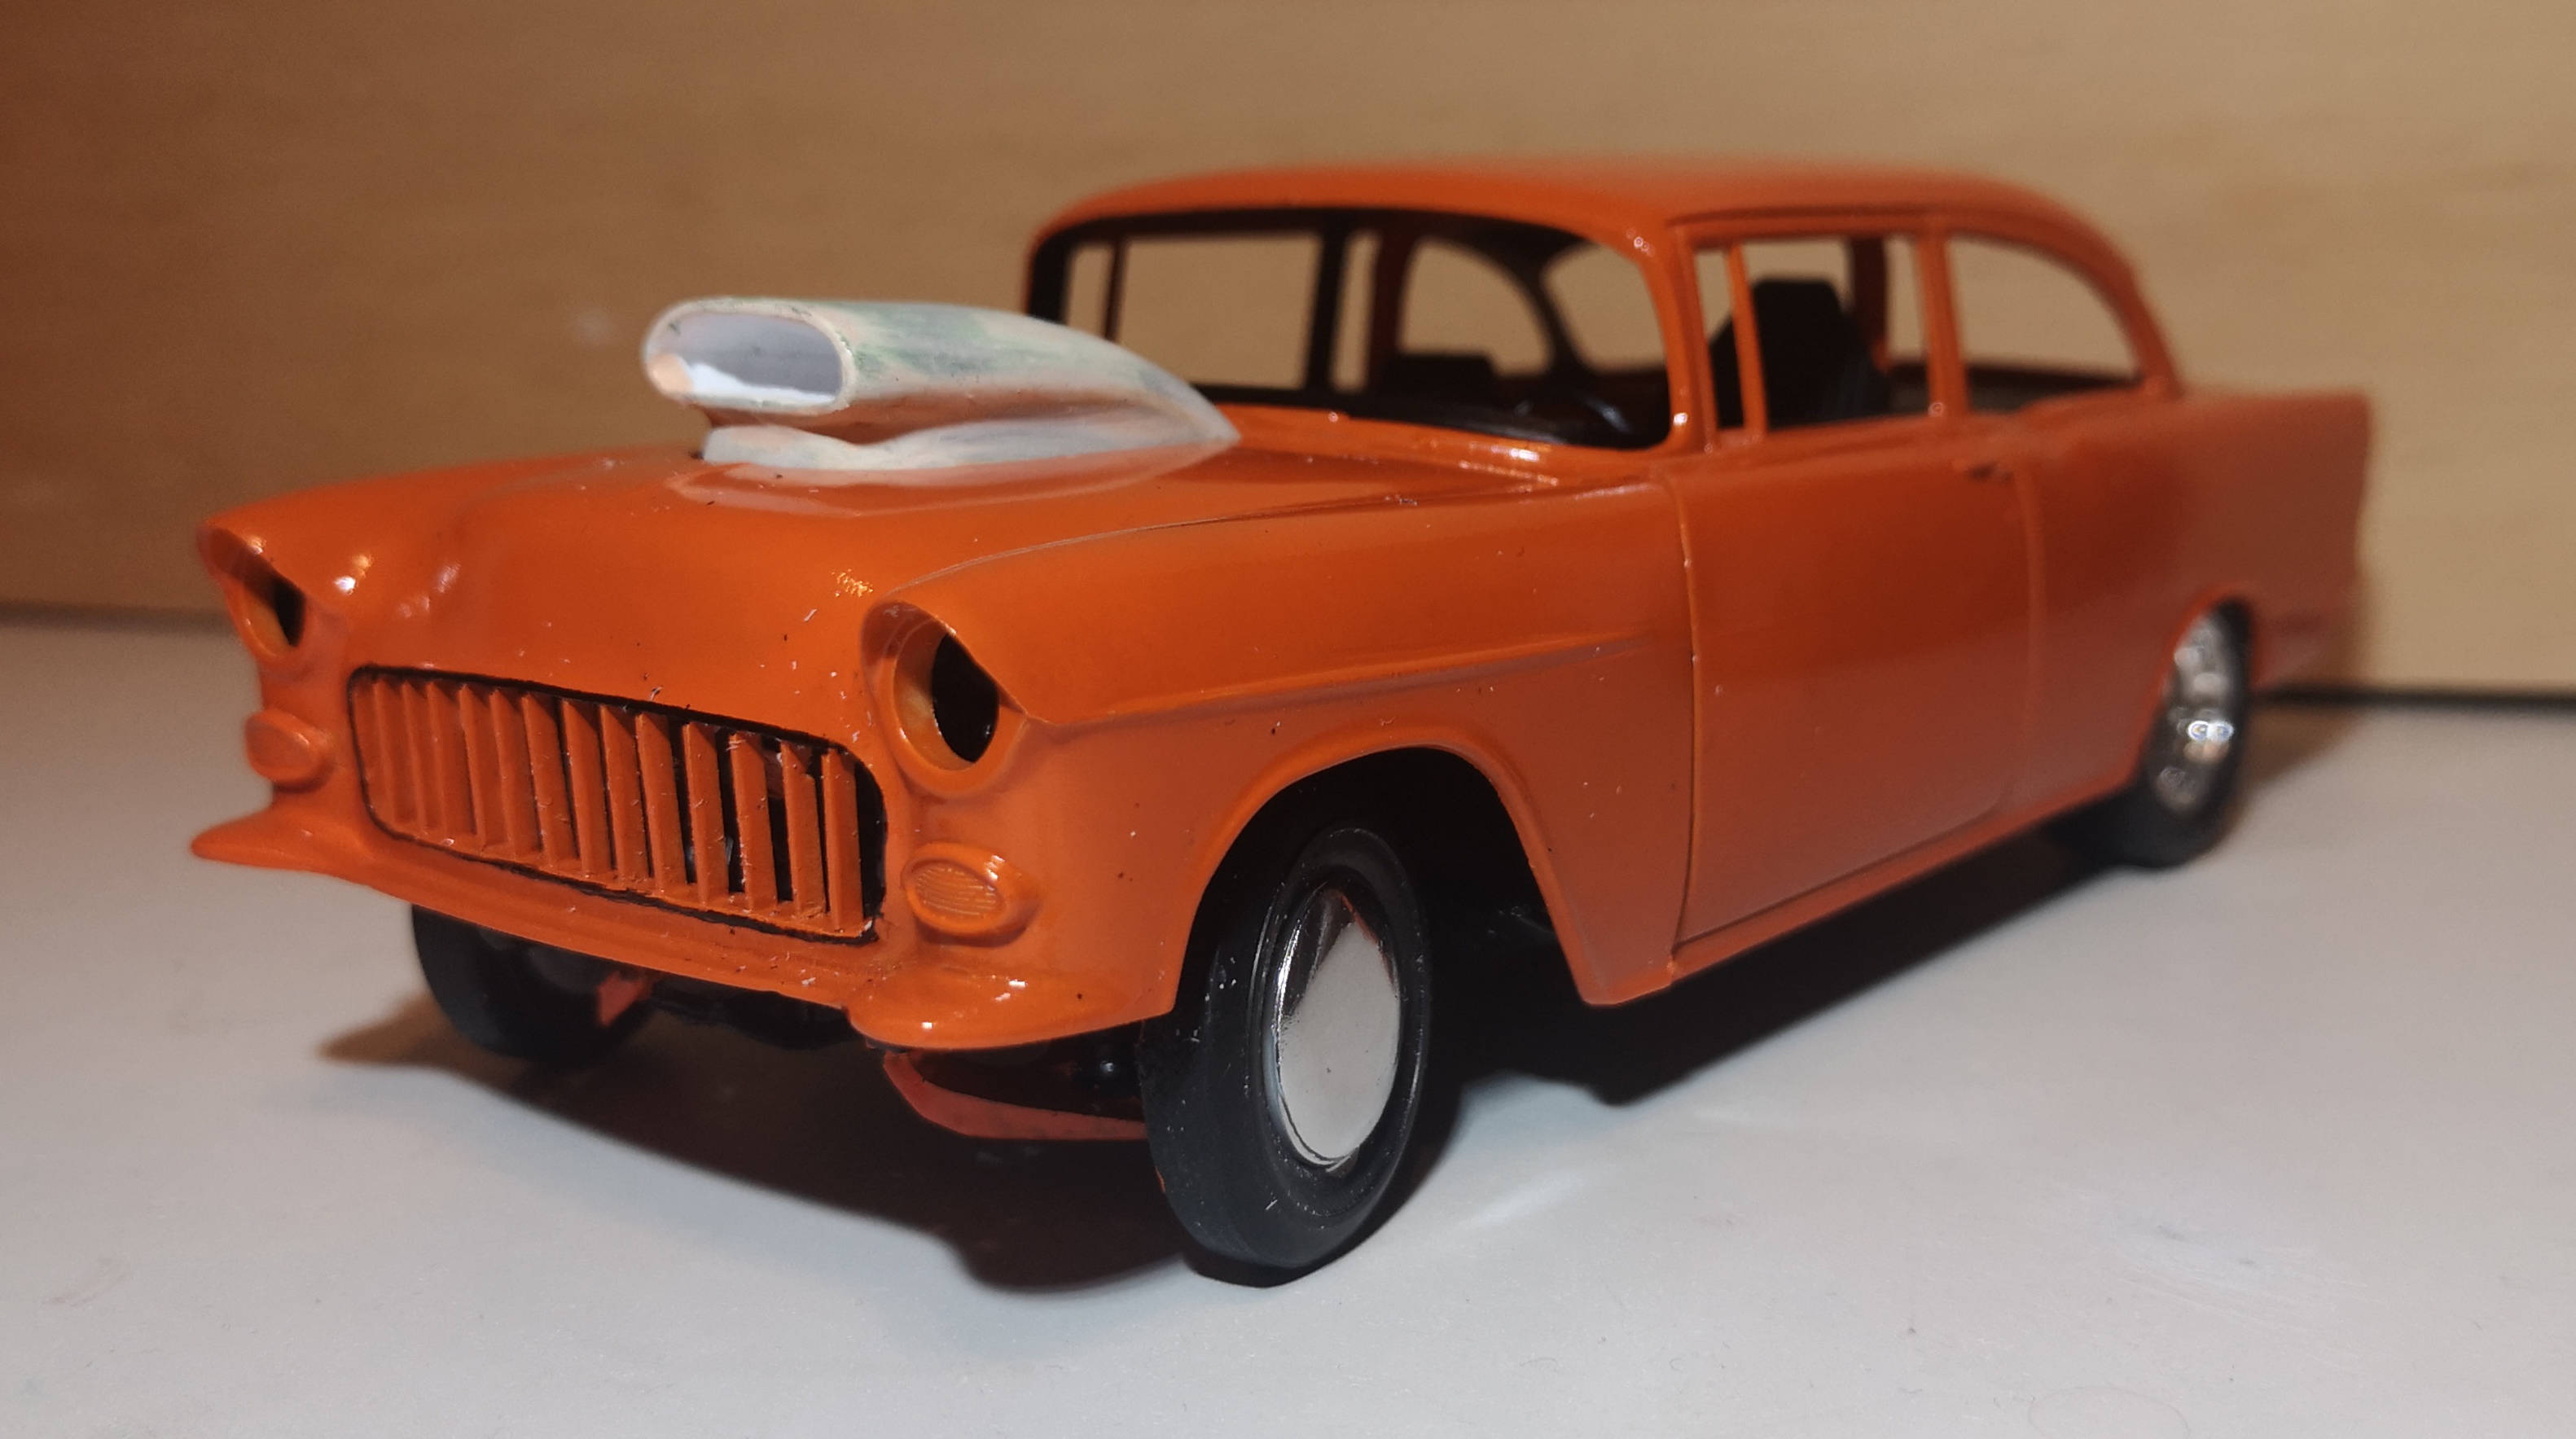
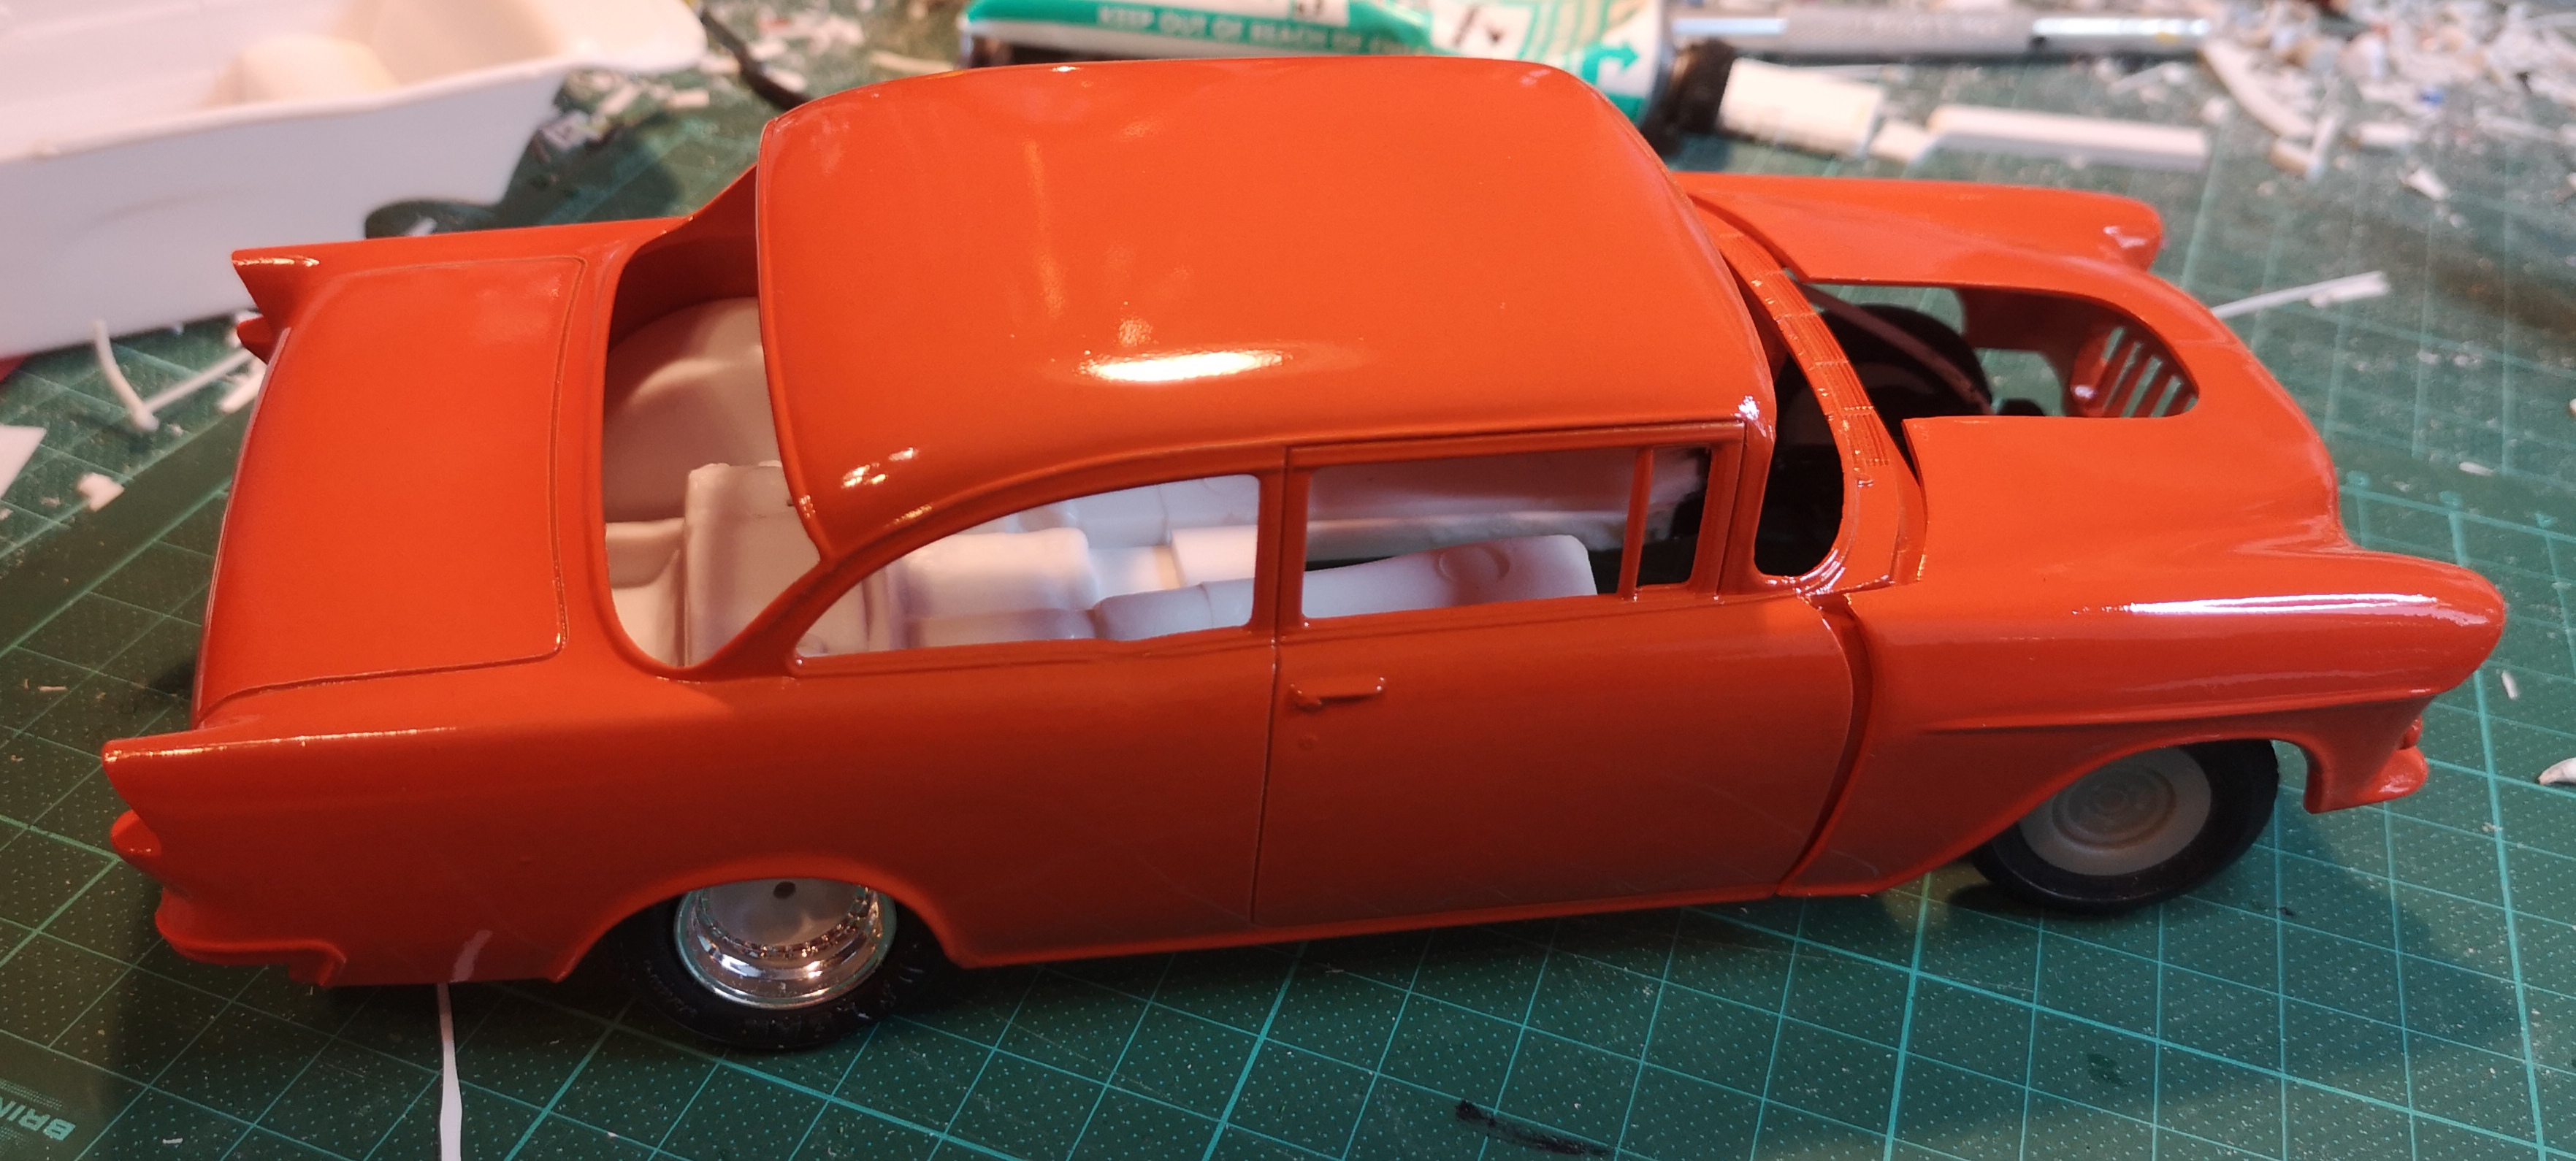
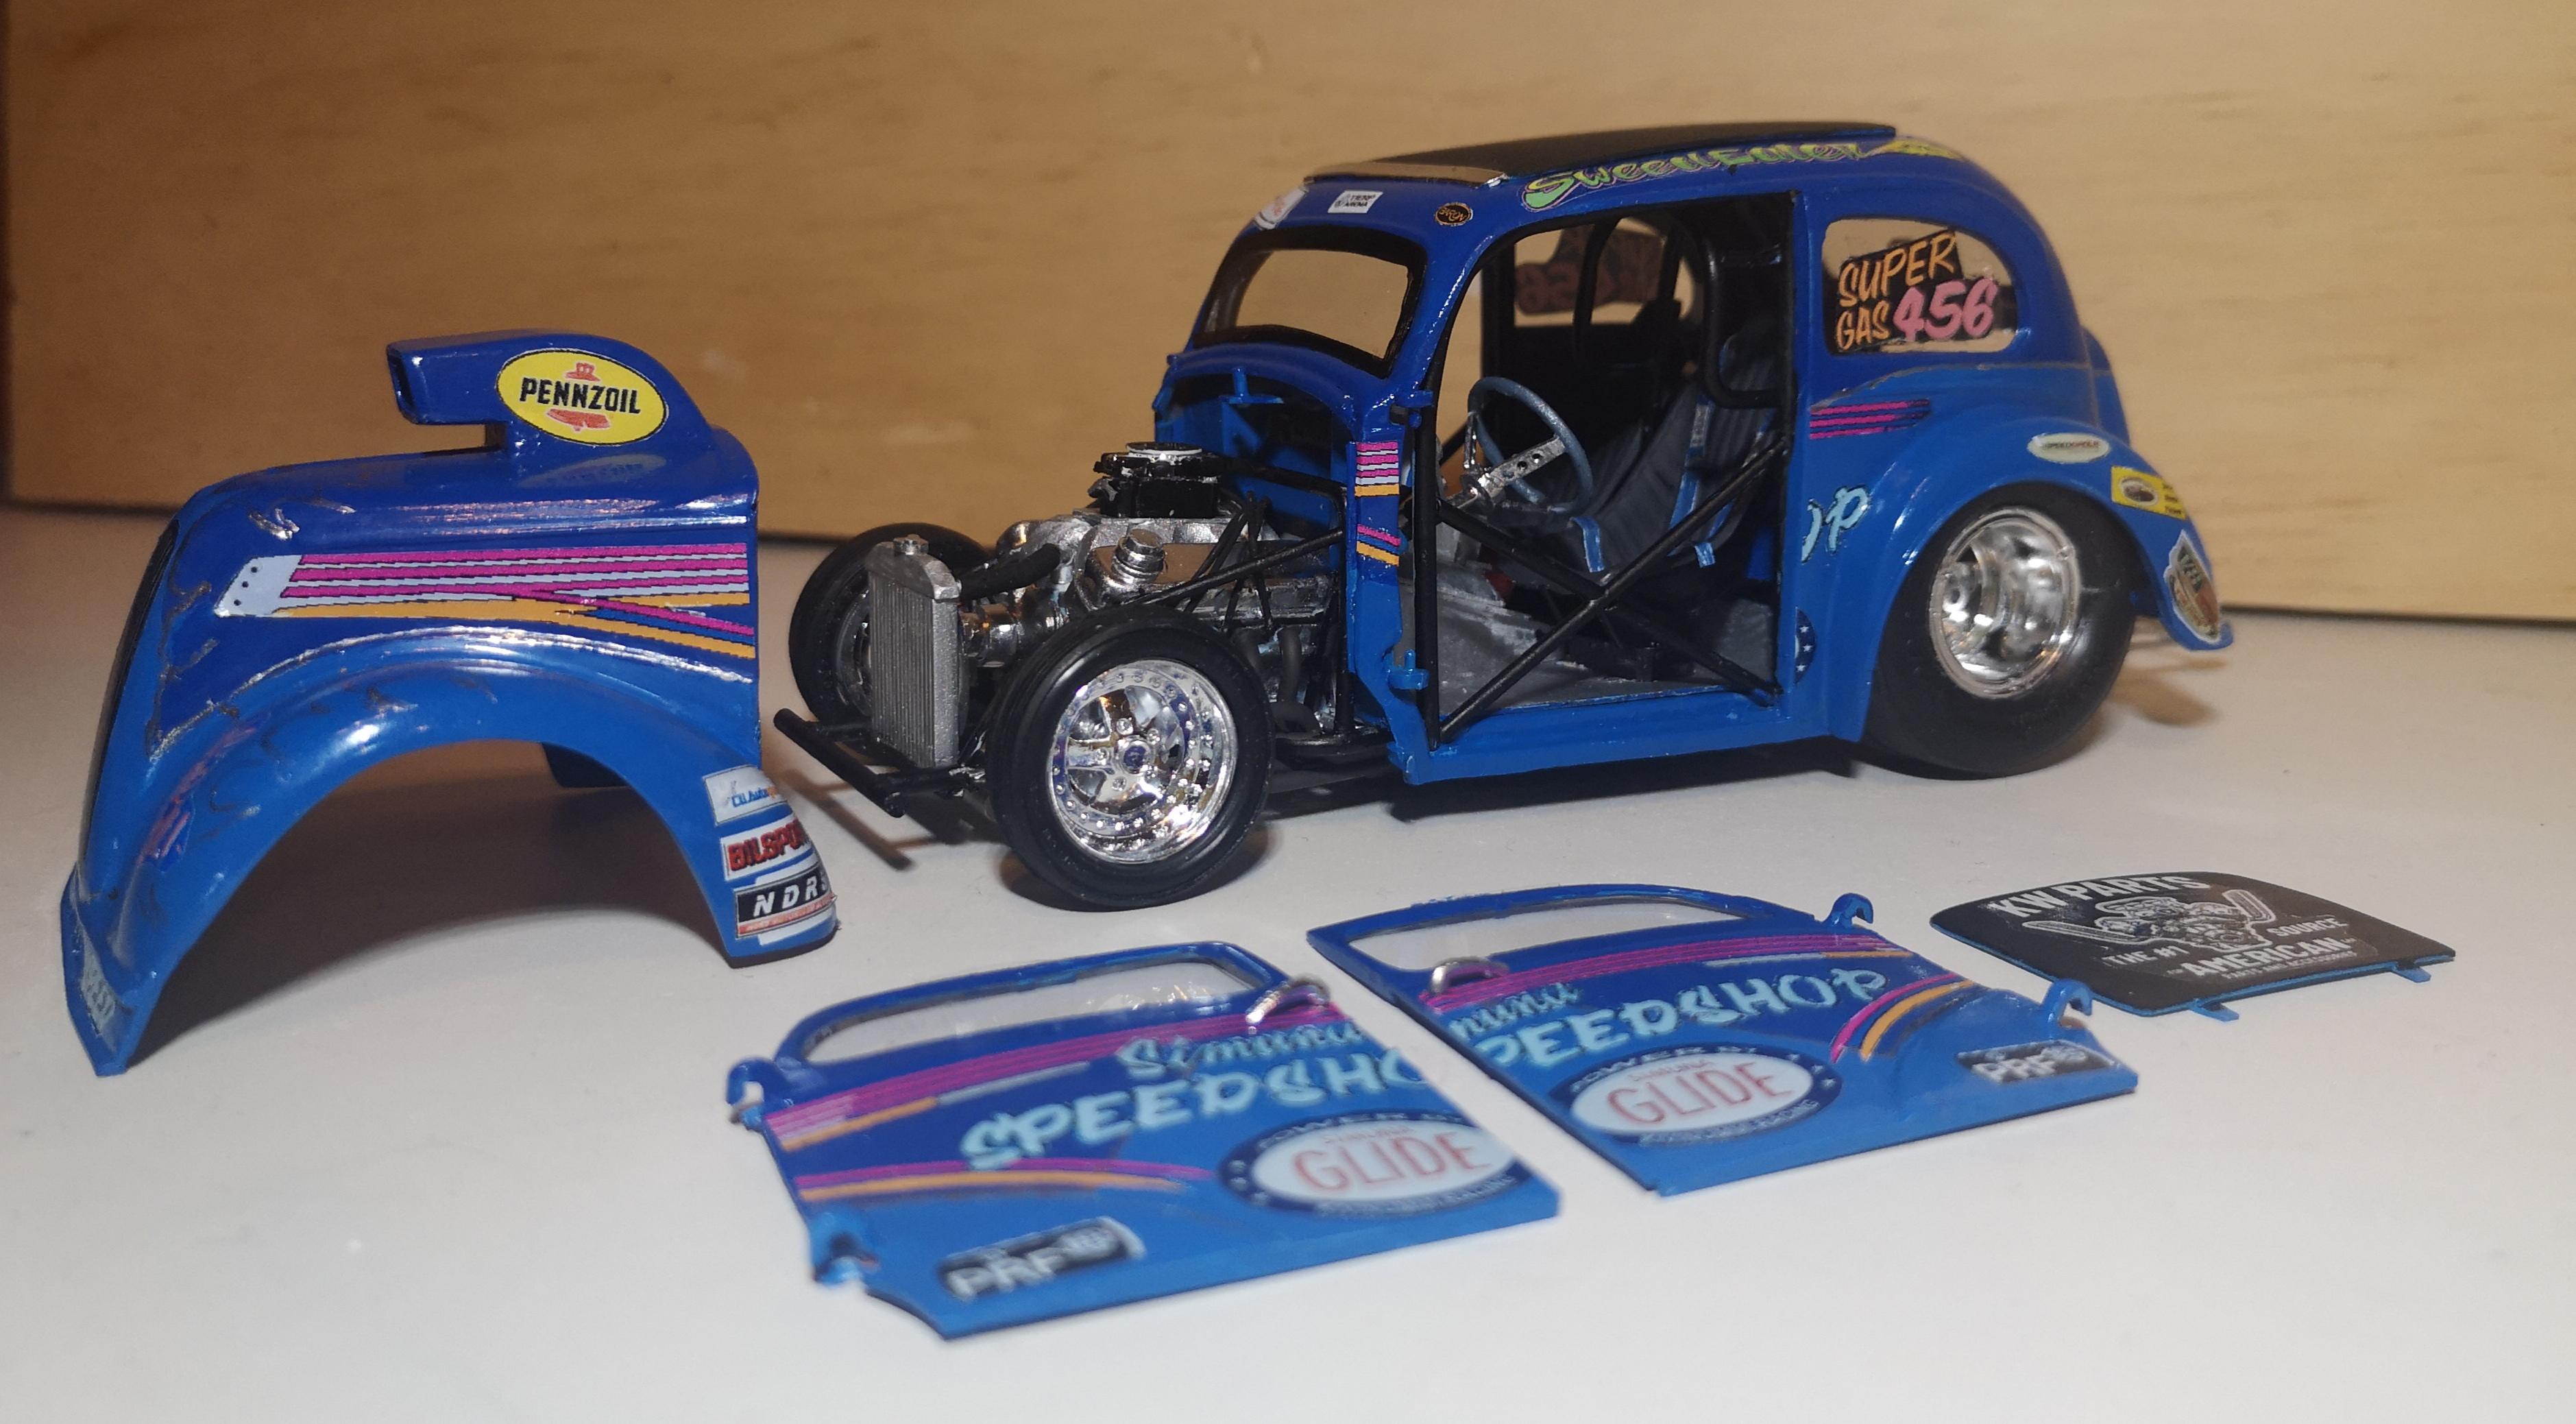
Thanks everybody. Snake, the front end is from this AMT kit, I just made some small changes. I got the roll cage in, and the self made valve covers too. The my own made radiator was a tight fit, but it's there finally. The rear wheels need some bolts, the engine needs the distributor. The radiator needs them hoses. I don't know, what kind of exhaust pipes the real car had, but I'll put some sort of pipes under it.

-
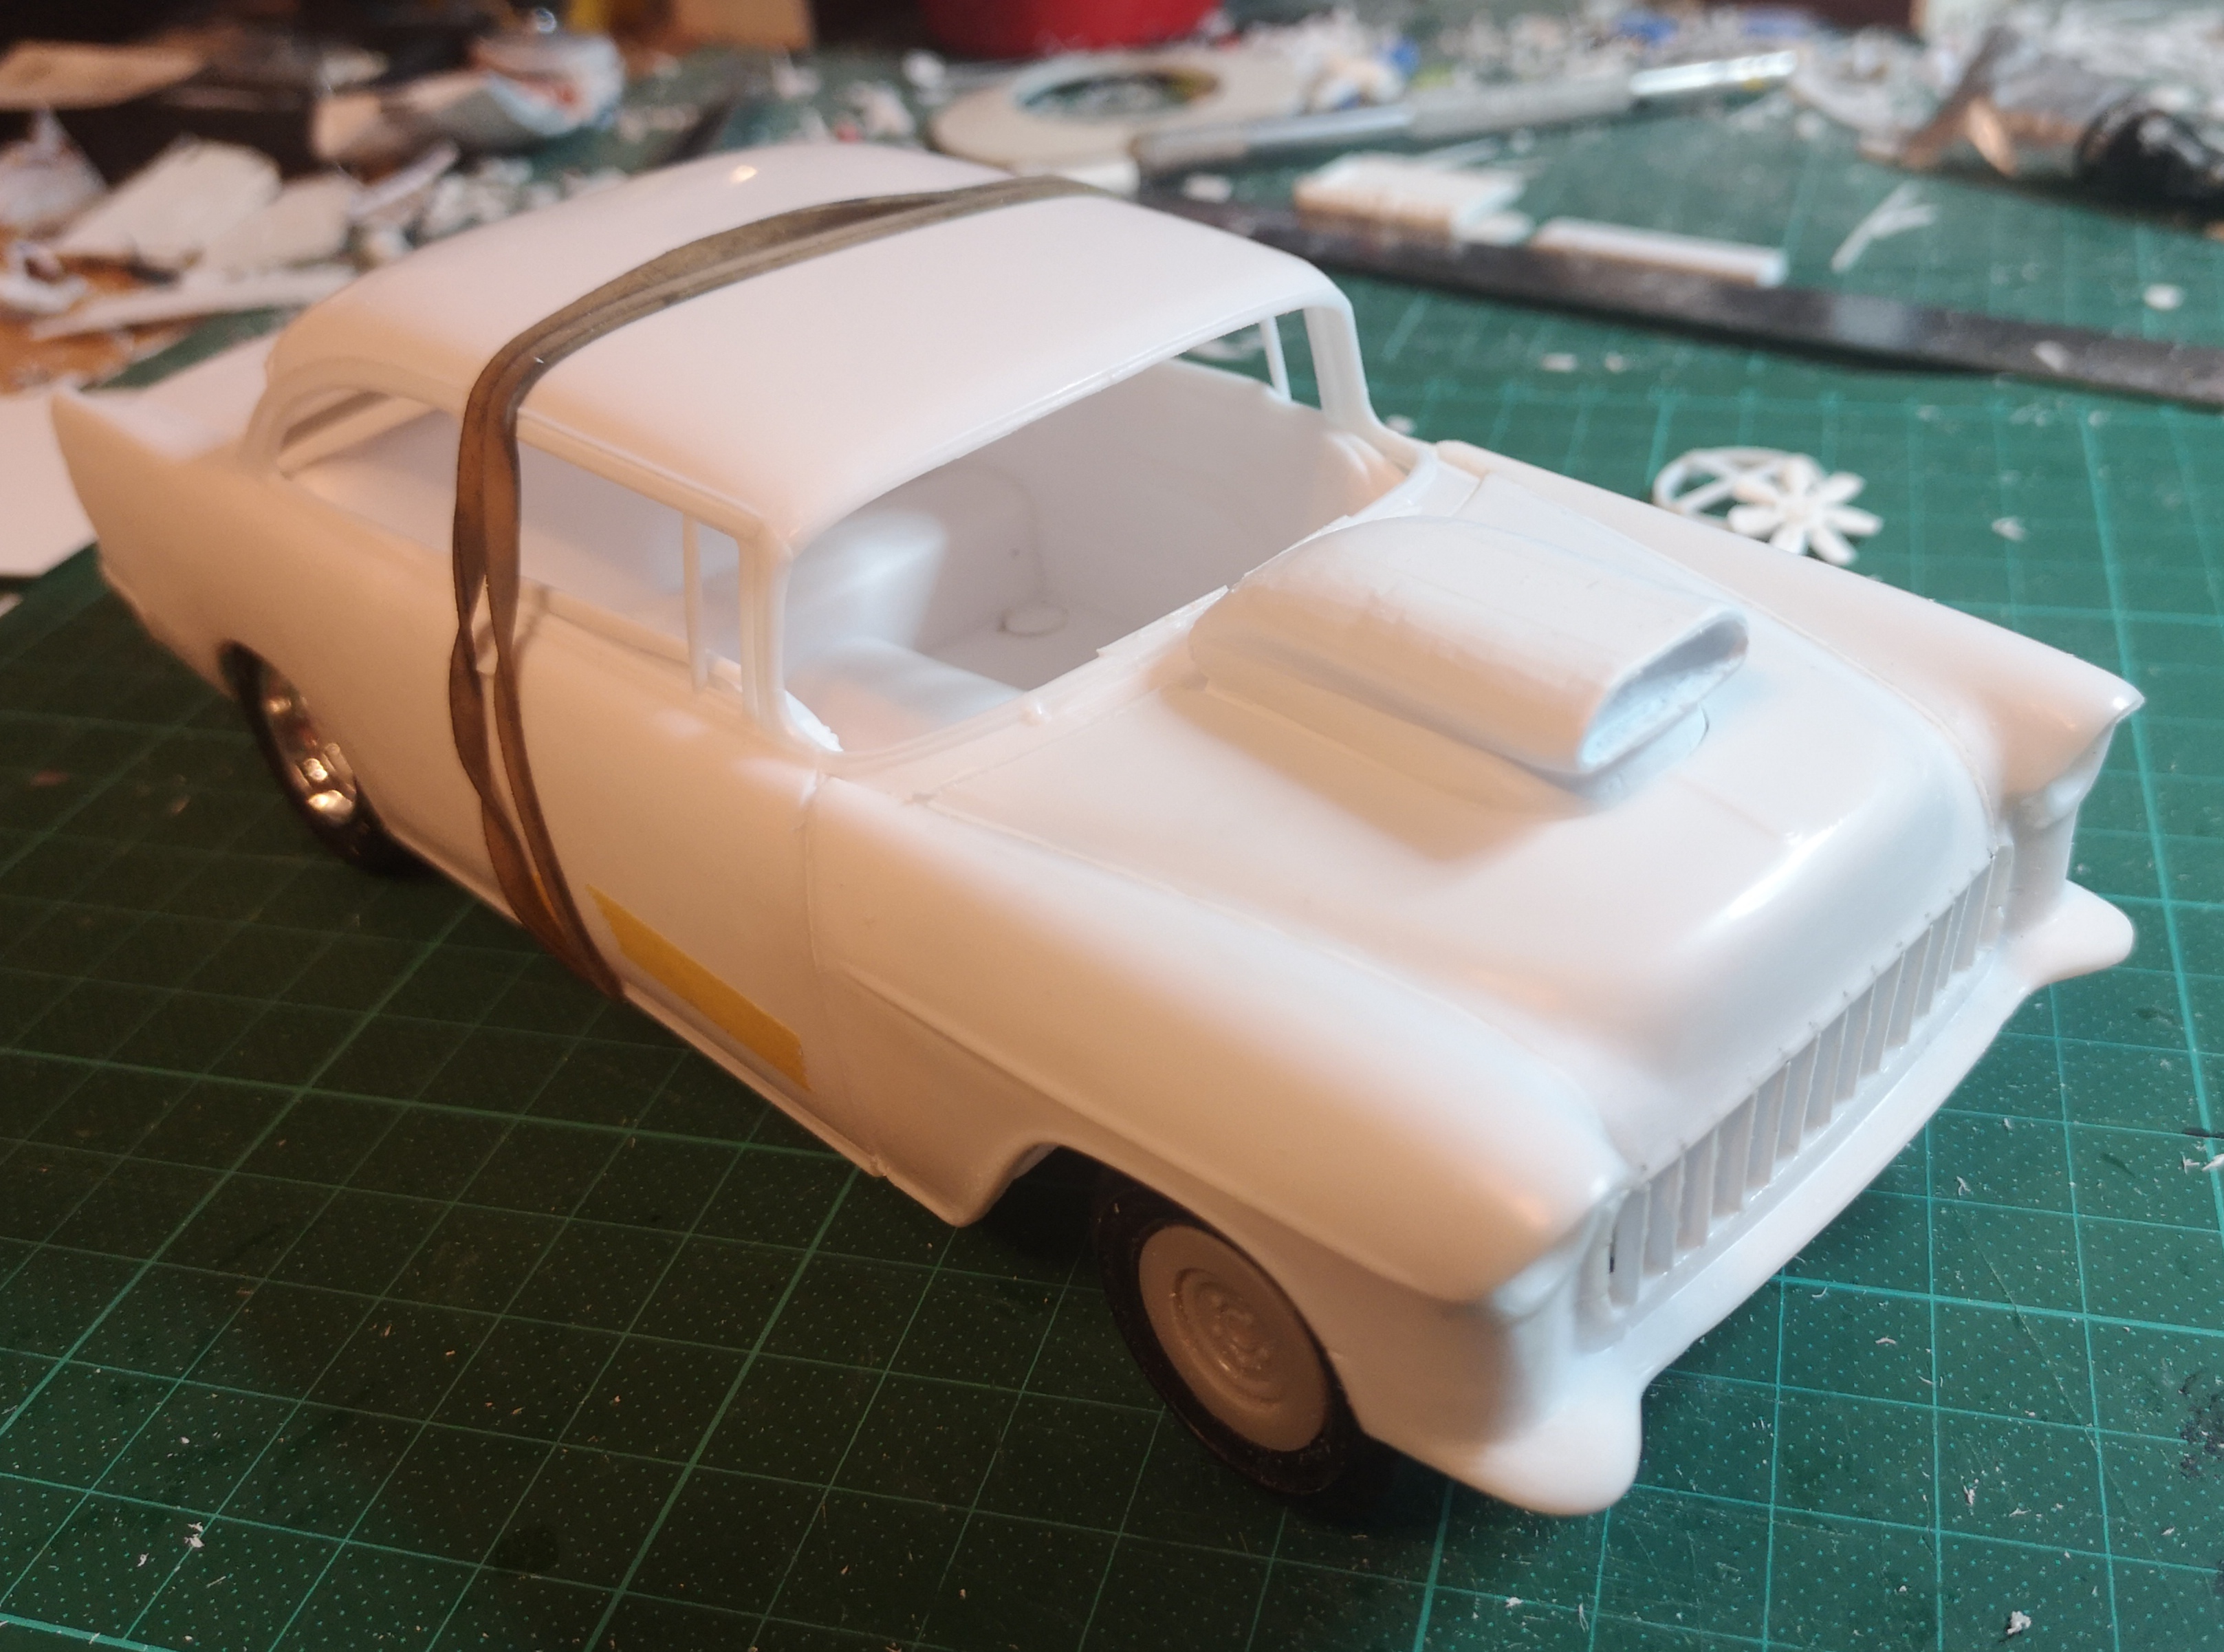
There's photos in the web on the owners page, but I don't want to post them anywhere. If you put on google Auliz.fi you will find lots of photos of his great street and race cars. Also this '55. Today I put orange paint on white primer (first I put light gray to cover those bondos) the orange didn't make perfect but I think it's ok. Also two coats of clear varnish.
-
This '55 was a real street/strip car in Finland in the '80ies. It had a SBC 355 engine with TH400 trans. Raced with limited money it was built by the driver from used and salvage parts, but it was very fast. I've built many old finnish street/strip car models, and for sure this won't be the last one.
-
Thank you very much, Snake45. In this case it was easy to start with the GTO, as the kit was already available, actually two similiar kits. I'd like to do this again, as this one may leave my shelf.
-
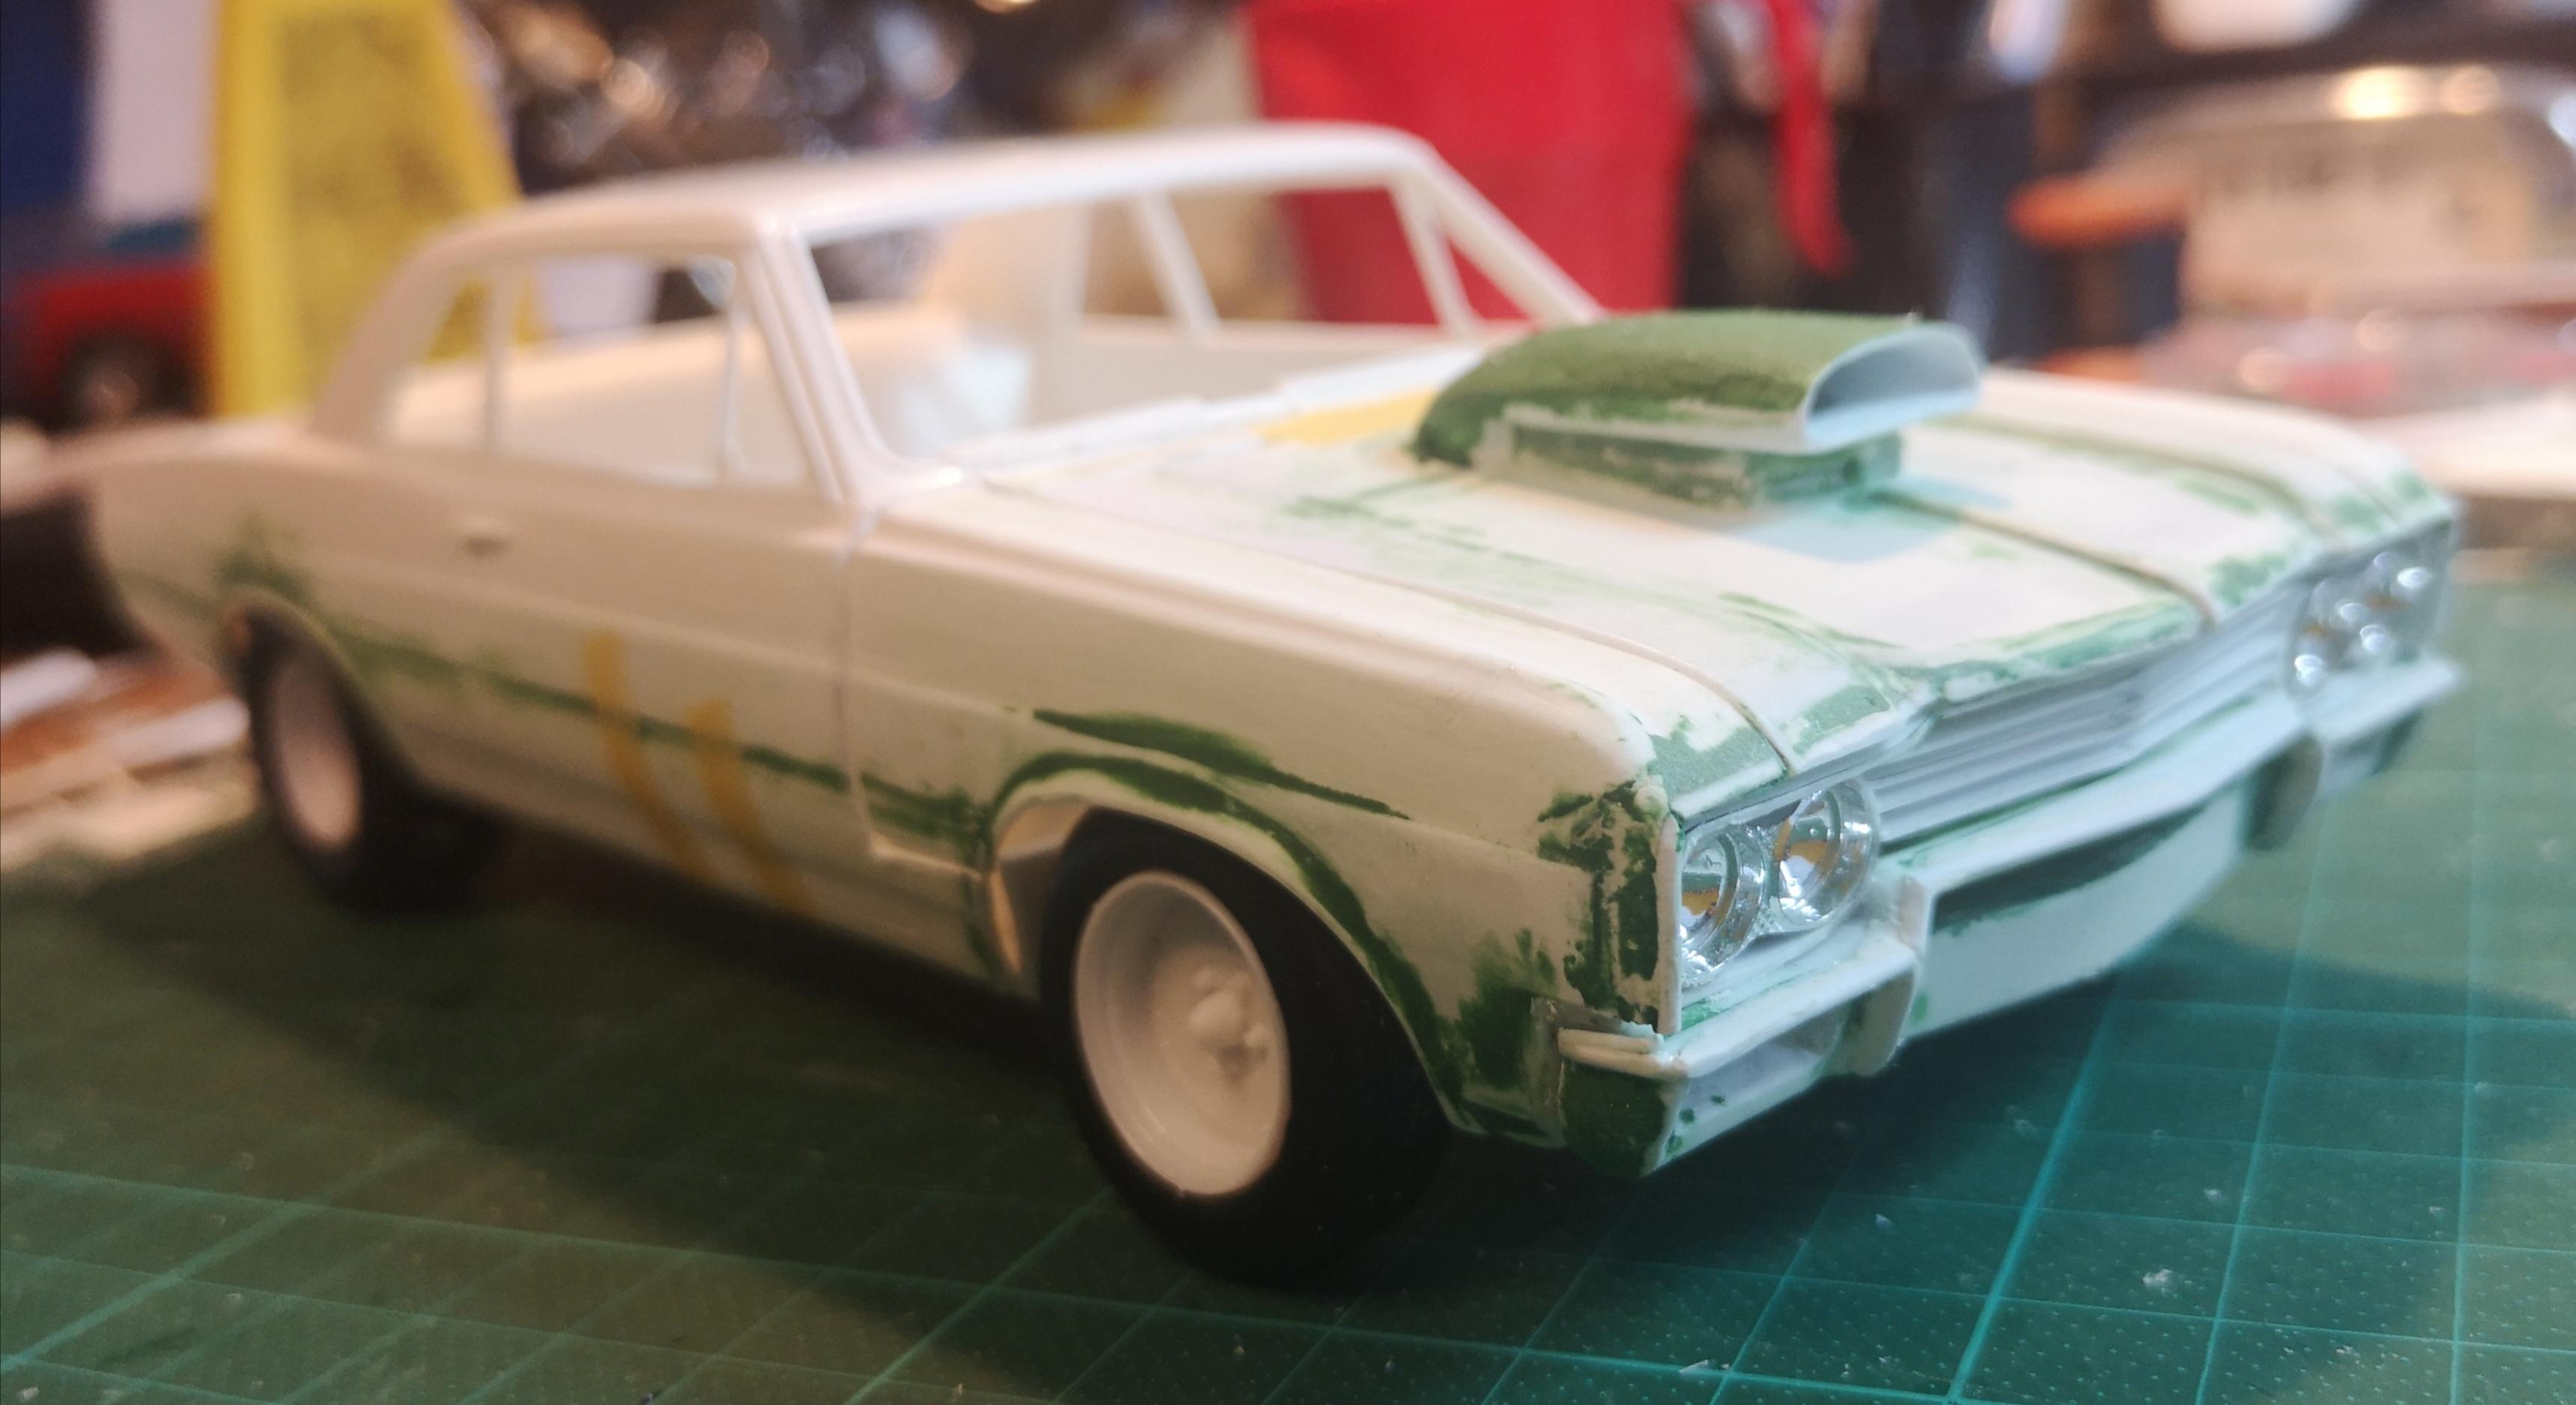
Thanks everybody for your kind comments. There's a few mistakes I made but after all I'm quite happy with the result. Chevelle body could be a bit easier starting point, if one could find other than wagon kit. The bumpers are always the big challenge when it's a 60-70 Buick. But they were and still are so great cars.
-
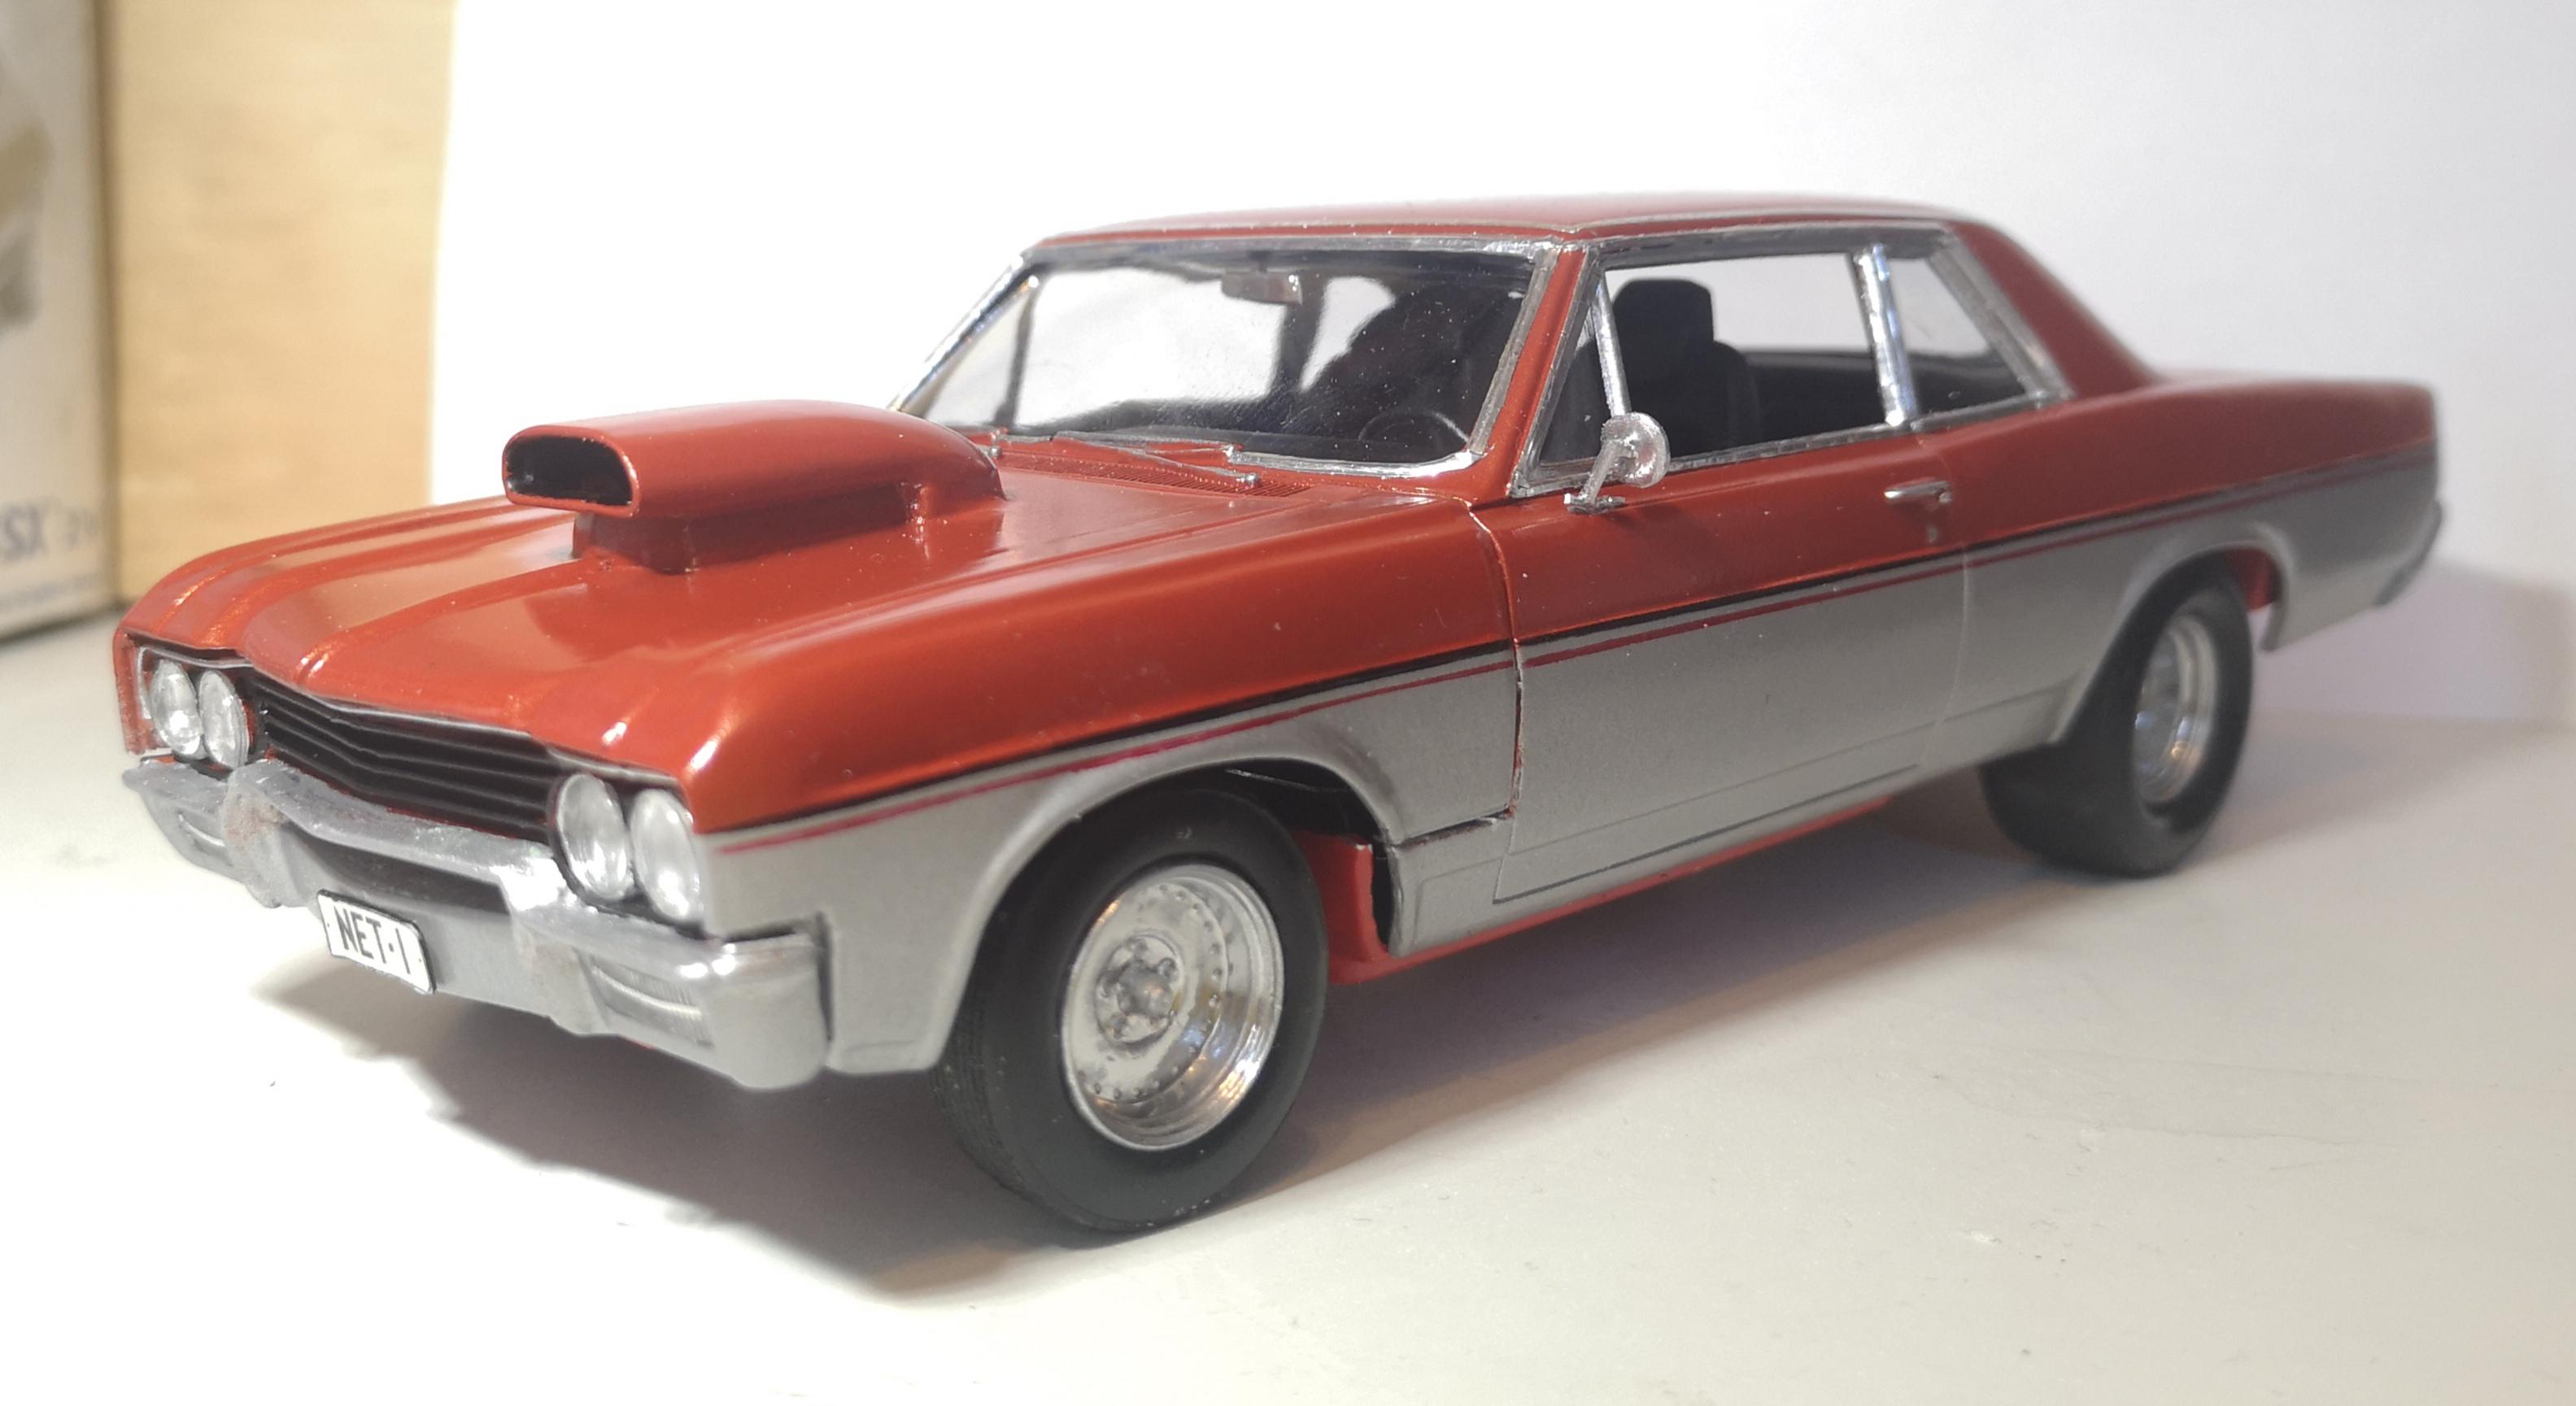
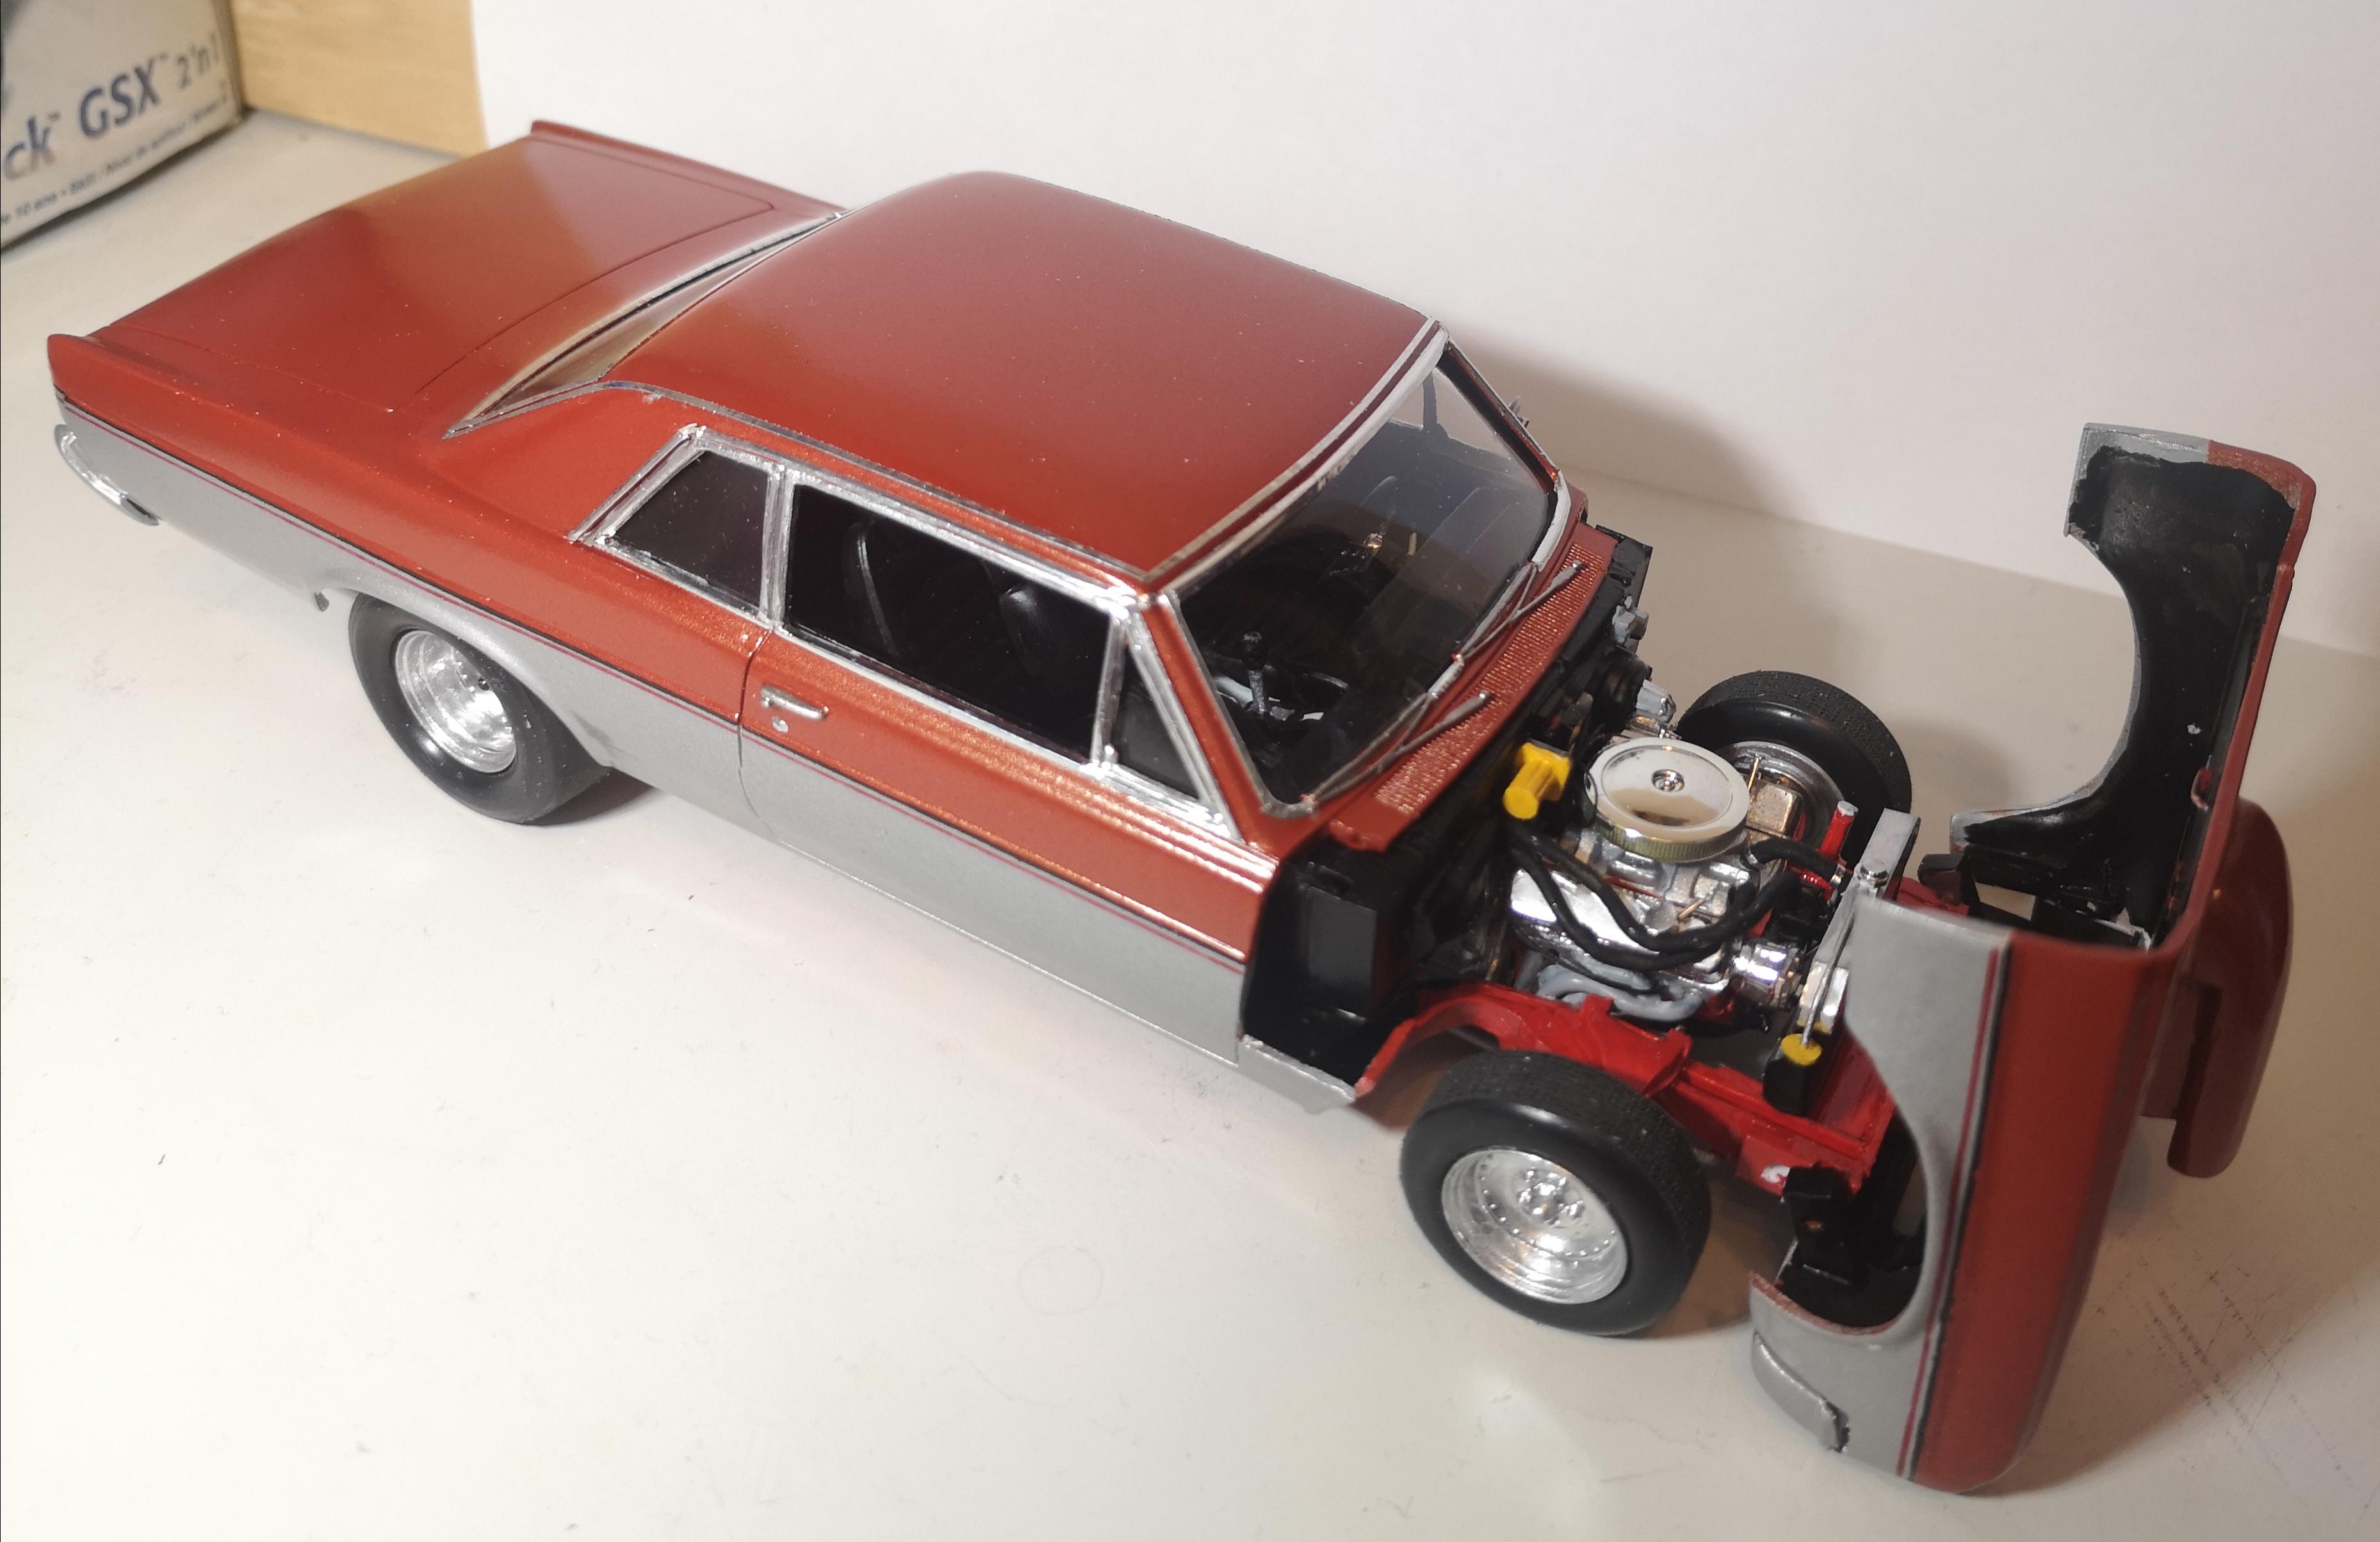
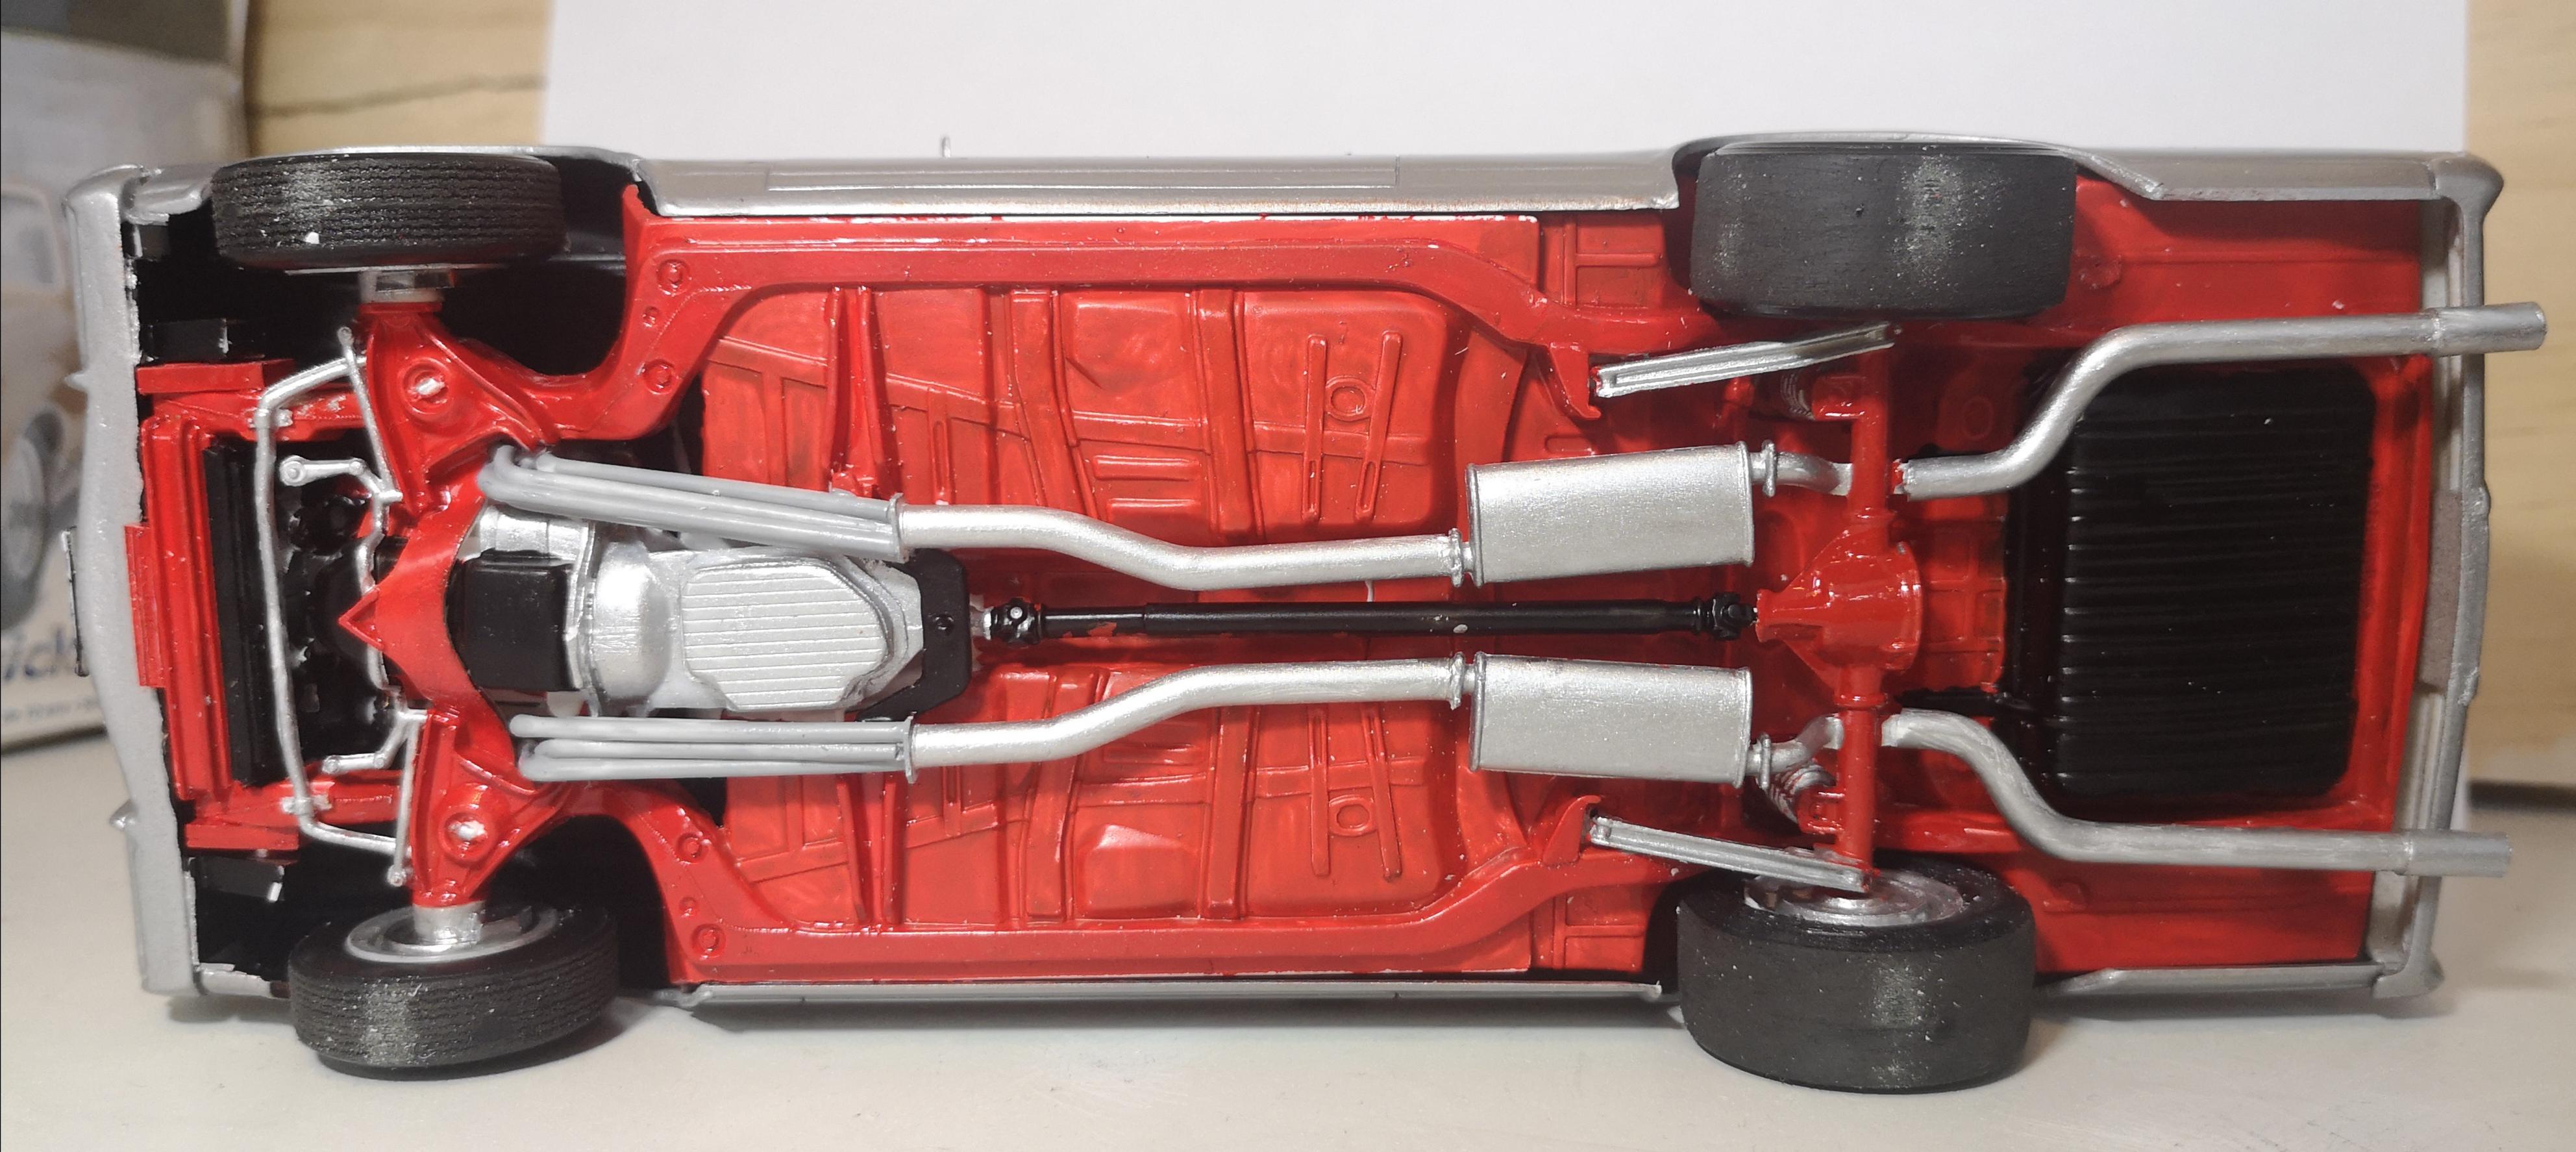
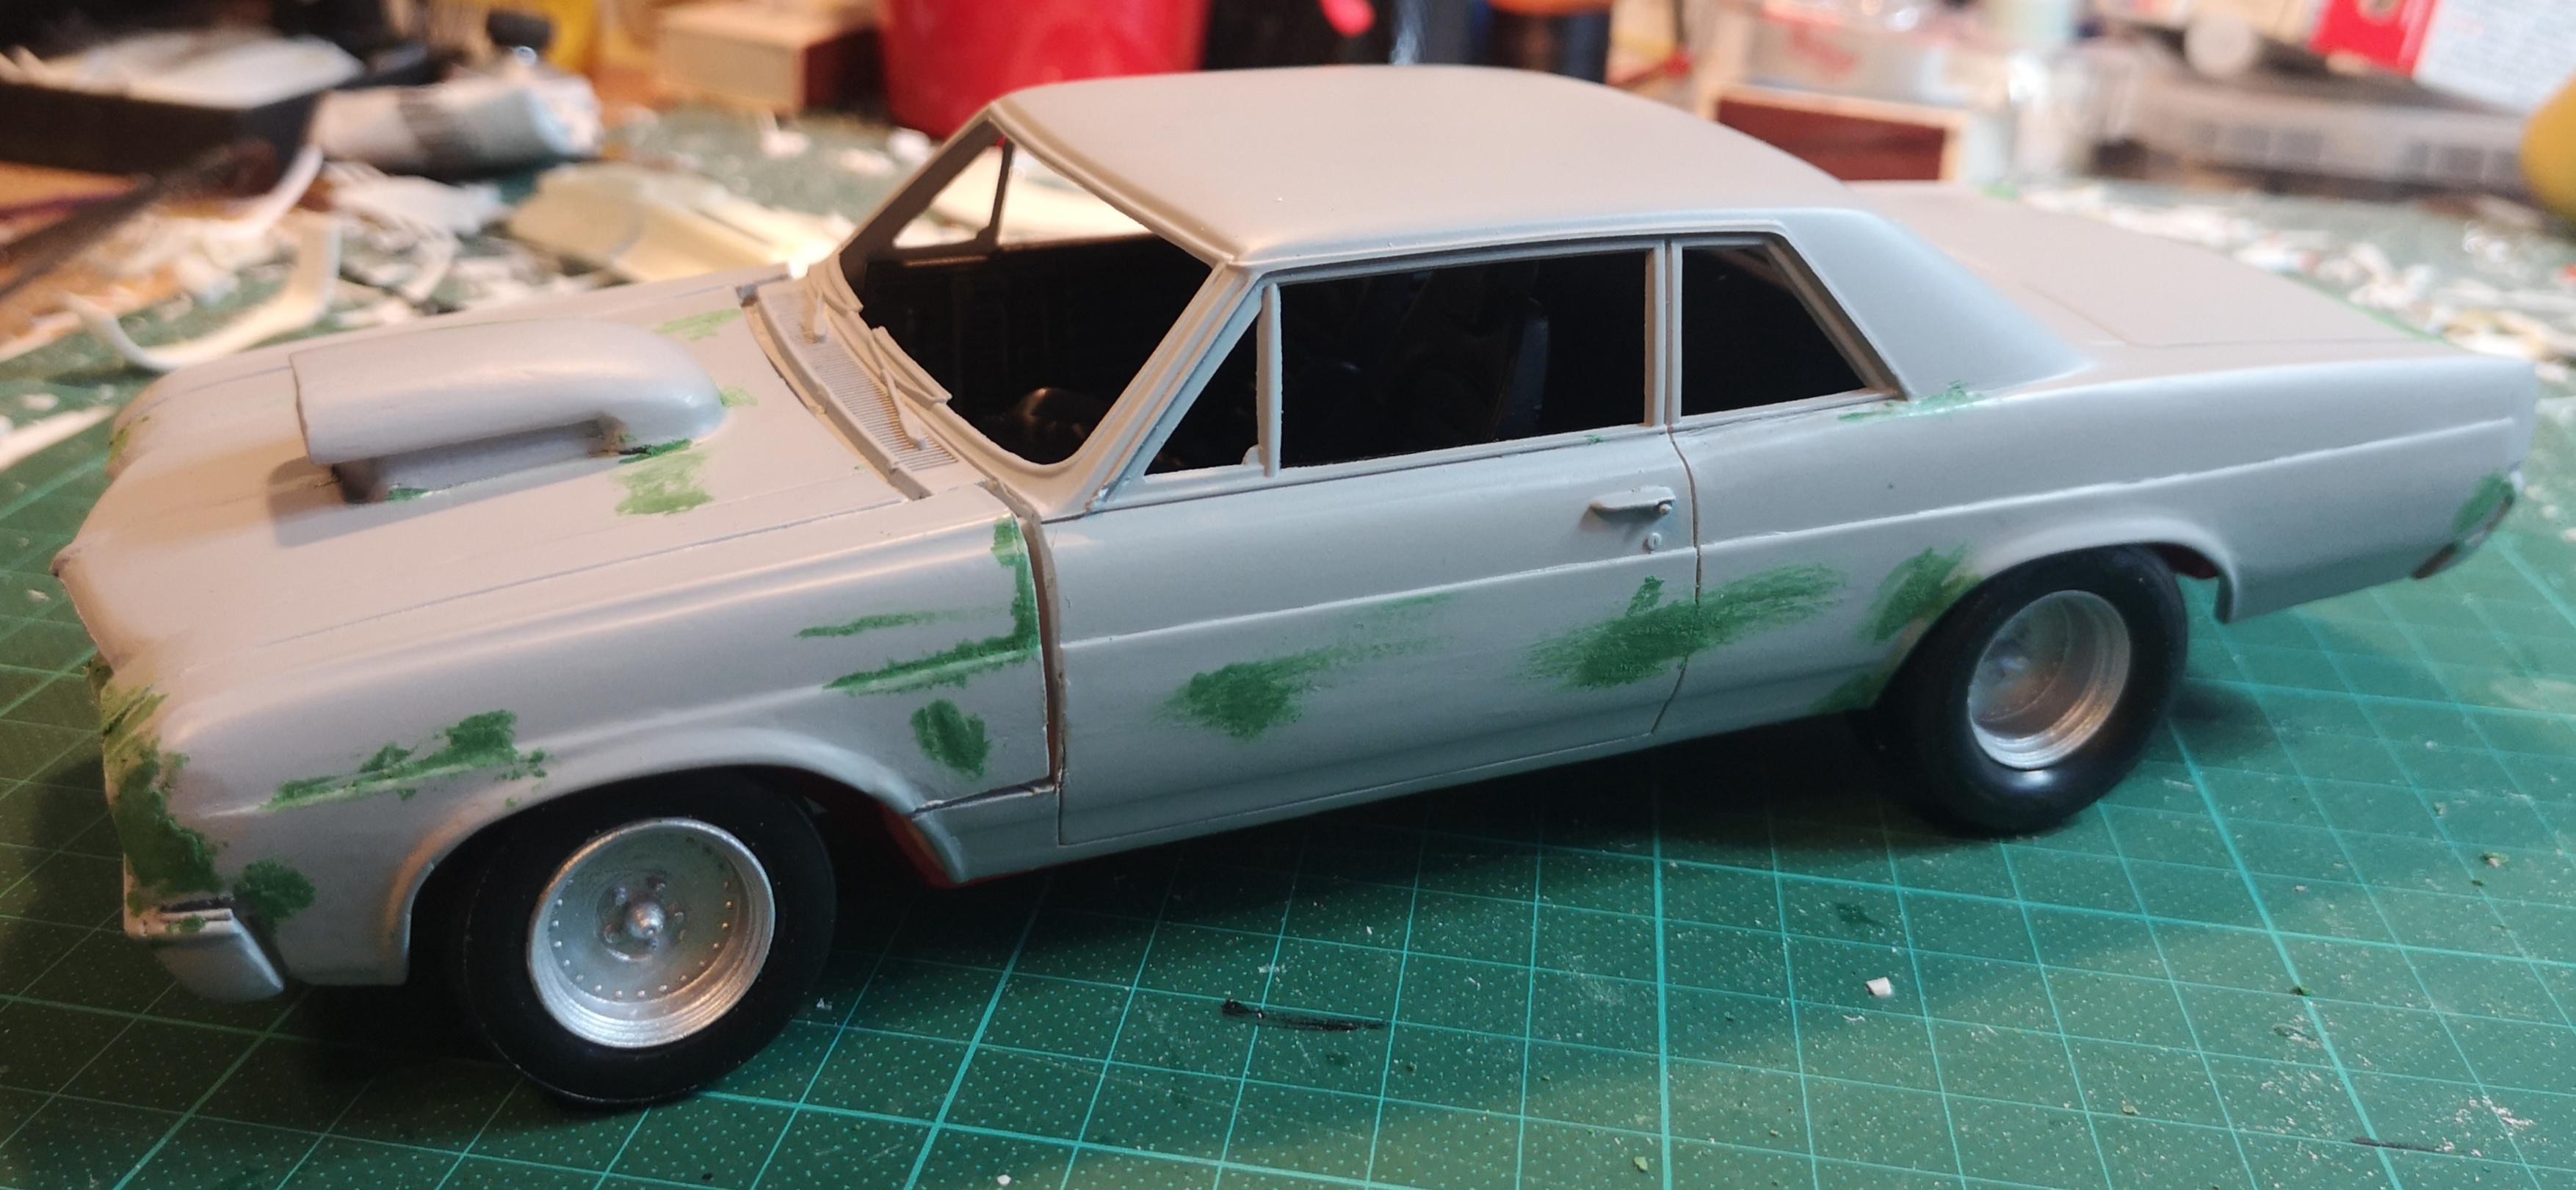
Hi there. This Buick was made using '64 Pontiac GTO kit. I made new bumpers, new flipping hood , modified the sides. The chassis is GTO. I made new thick exhaust pipes and the SBC 400 cid got TH400 transmission. Lots of self made parts were placed under the hood. There's a building story in Work in Progress. The real car is in Finland. Thanks for looking, feel free to comment.
-
Thanks fellows, I think this Buick Skylark 1965 is now ready to go Under The Glass. I added the rear view mirror, exhaust pipes, the antenna and it is now registered too. All kind of parts went under the hood. The B&M shifter for the TH400 transmission was made too, but unfortunately I didn't take any photos of it or the interior. The knob on the shifter is a scratch made 8-ball.
-
I hear you, Larry. I've been modifying '64 GTO to '65 Skylark. Those bumpers really give a challenge. Good luck with your interesting project.
-
Cheers Gerald! Thanks for the kind words. Today I had time to put some chrome trims to the body shell. Also I managed to make those thin black and red stripes to the sides. One section still to do. There's somerhing blocking the chassis to sit perfectly to the body, when I insert the glasses. I went outside of the house, before losing it and doing something stupid.
-
Thanks Patrick, '66 Buick could be the perfect solution, but I don't have that kit and don't want to buy one now. Instead I cut a slice of red transparent plastic and bent it slightly from the ends and from the middle too. Then I added few narrow strings of chrome tape and now I have some sort of tail light panel for this Buick. In the middle, above the license plate, I will put the Buick logo decal. It could be better for sure, but I'm guite pleased with it. Also I needed a three spoke Grant steering wheel, but my stock was empty. Had to make one.
-
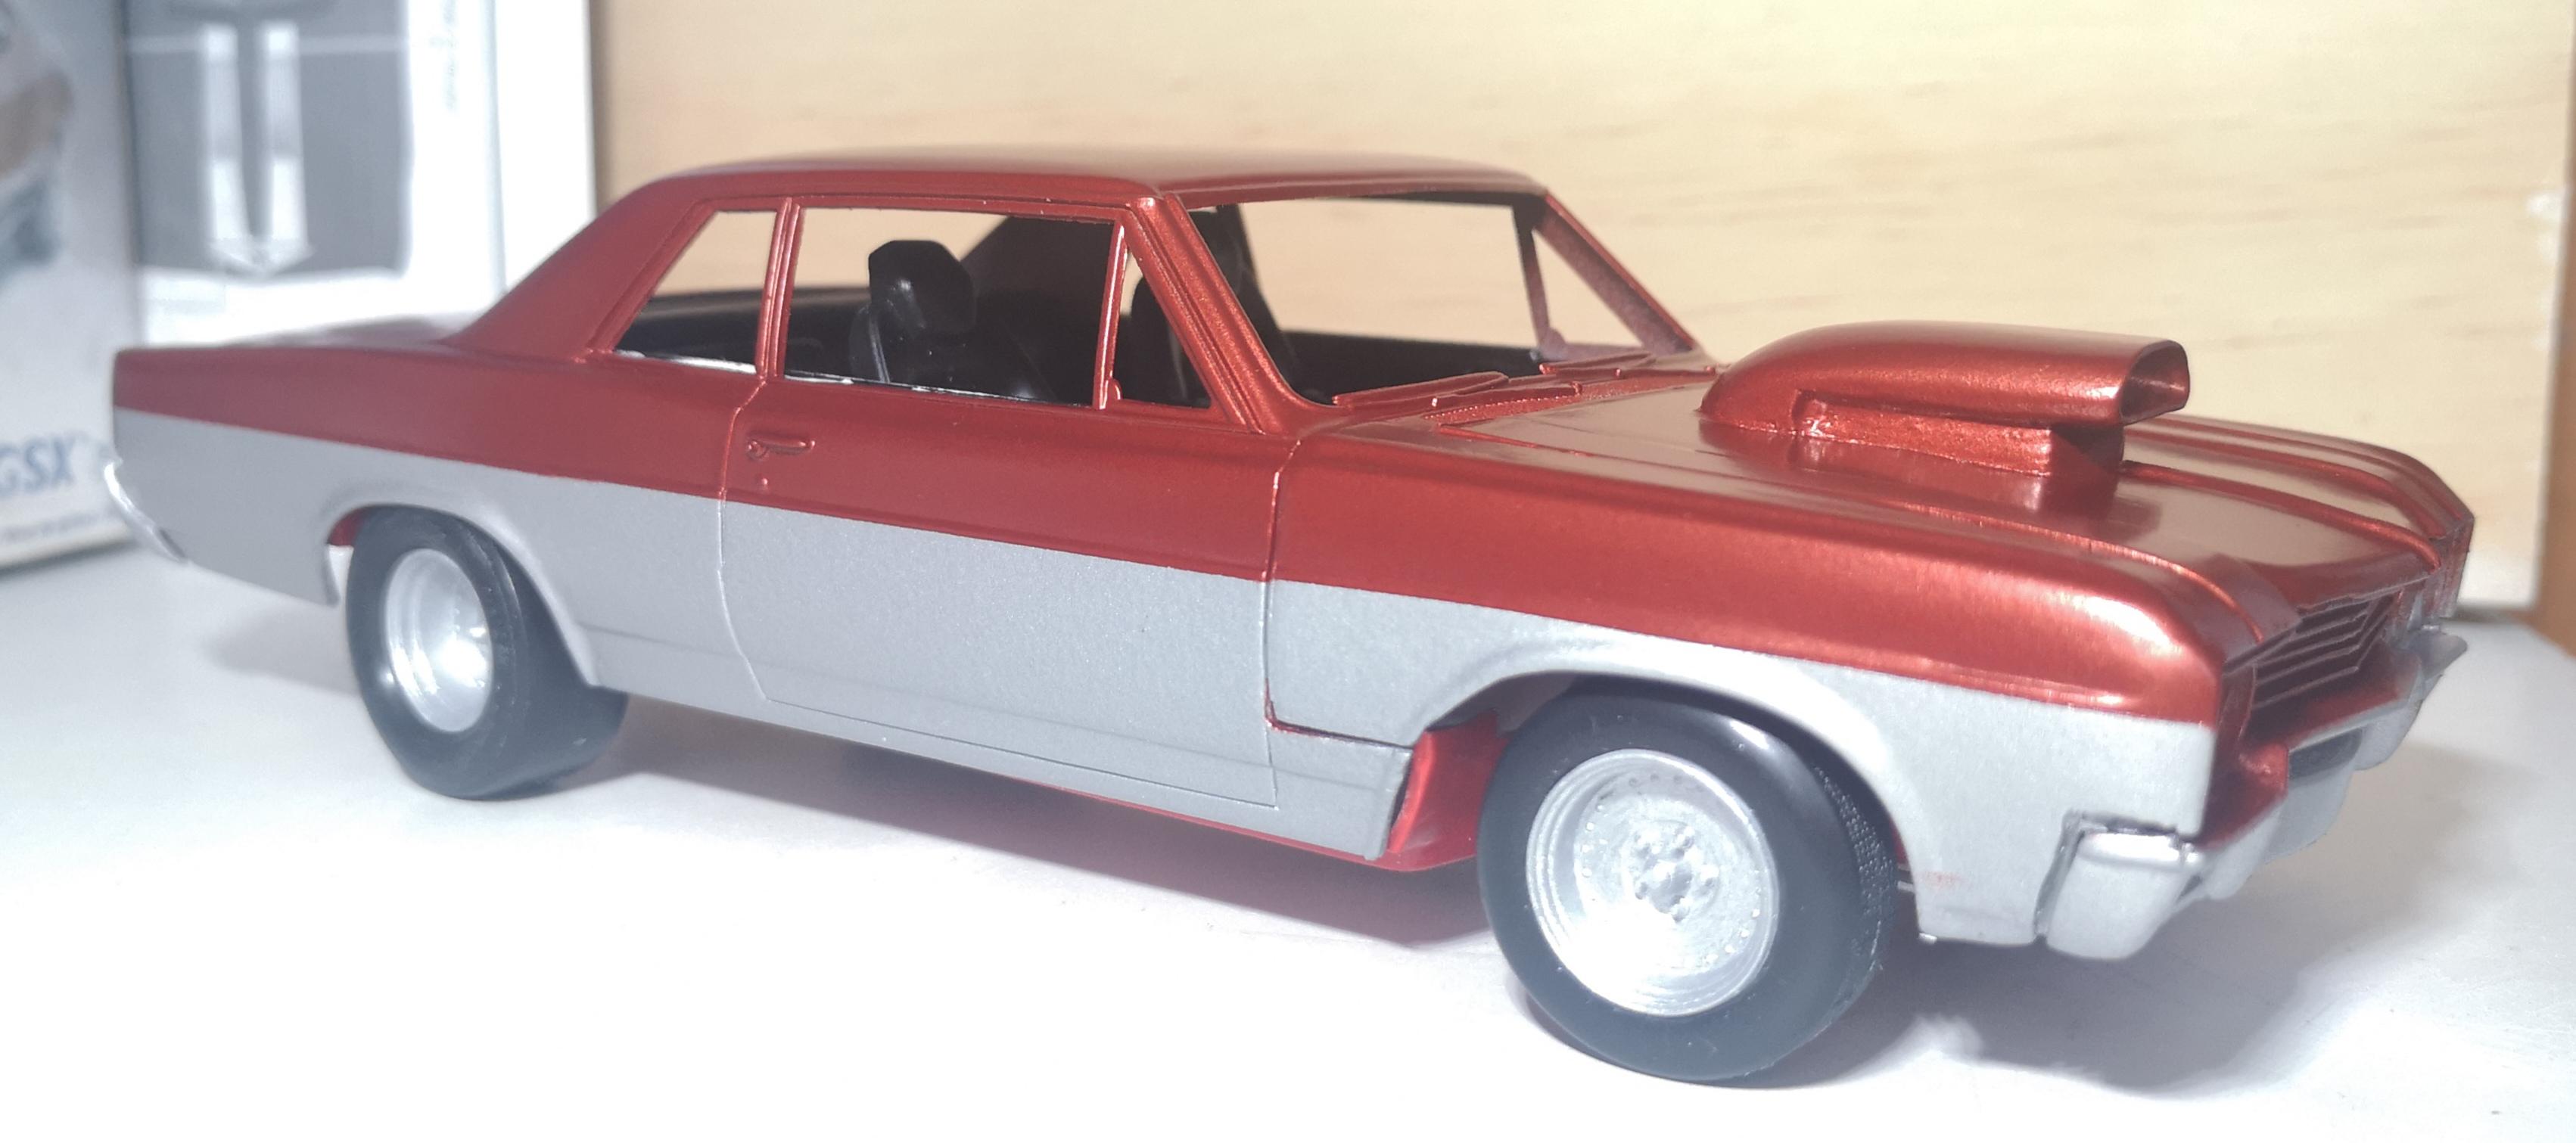
Great duo of Buicks, Chris. Today I went and got a new paint , this time it's more orange. Good enough. I put also clear laquer on it. There will be two narrow lines between those upper and lower tones, atleast I'll try to paint them. The mask will be black, and the bumpers will have Molotow chrome on them.
-
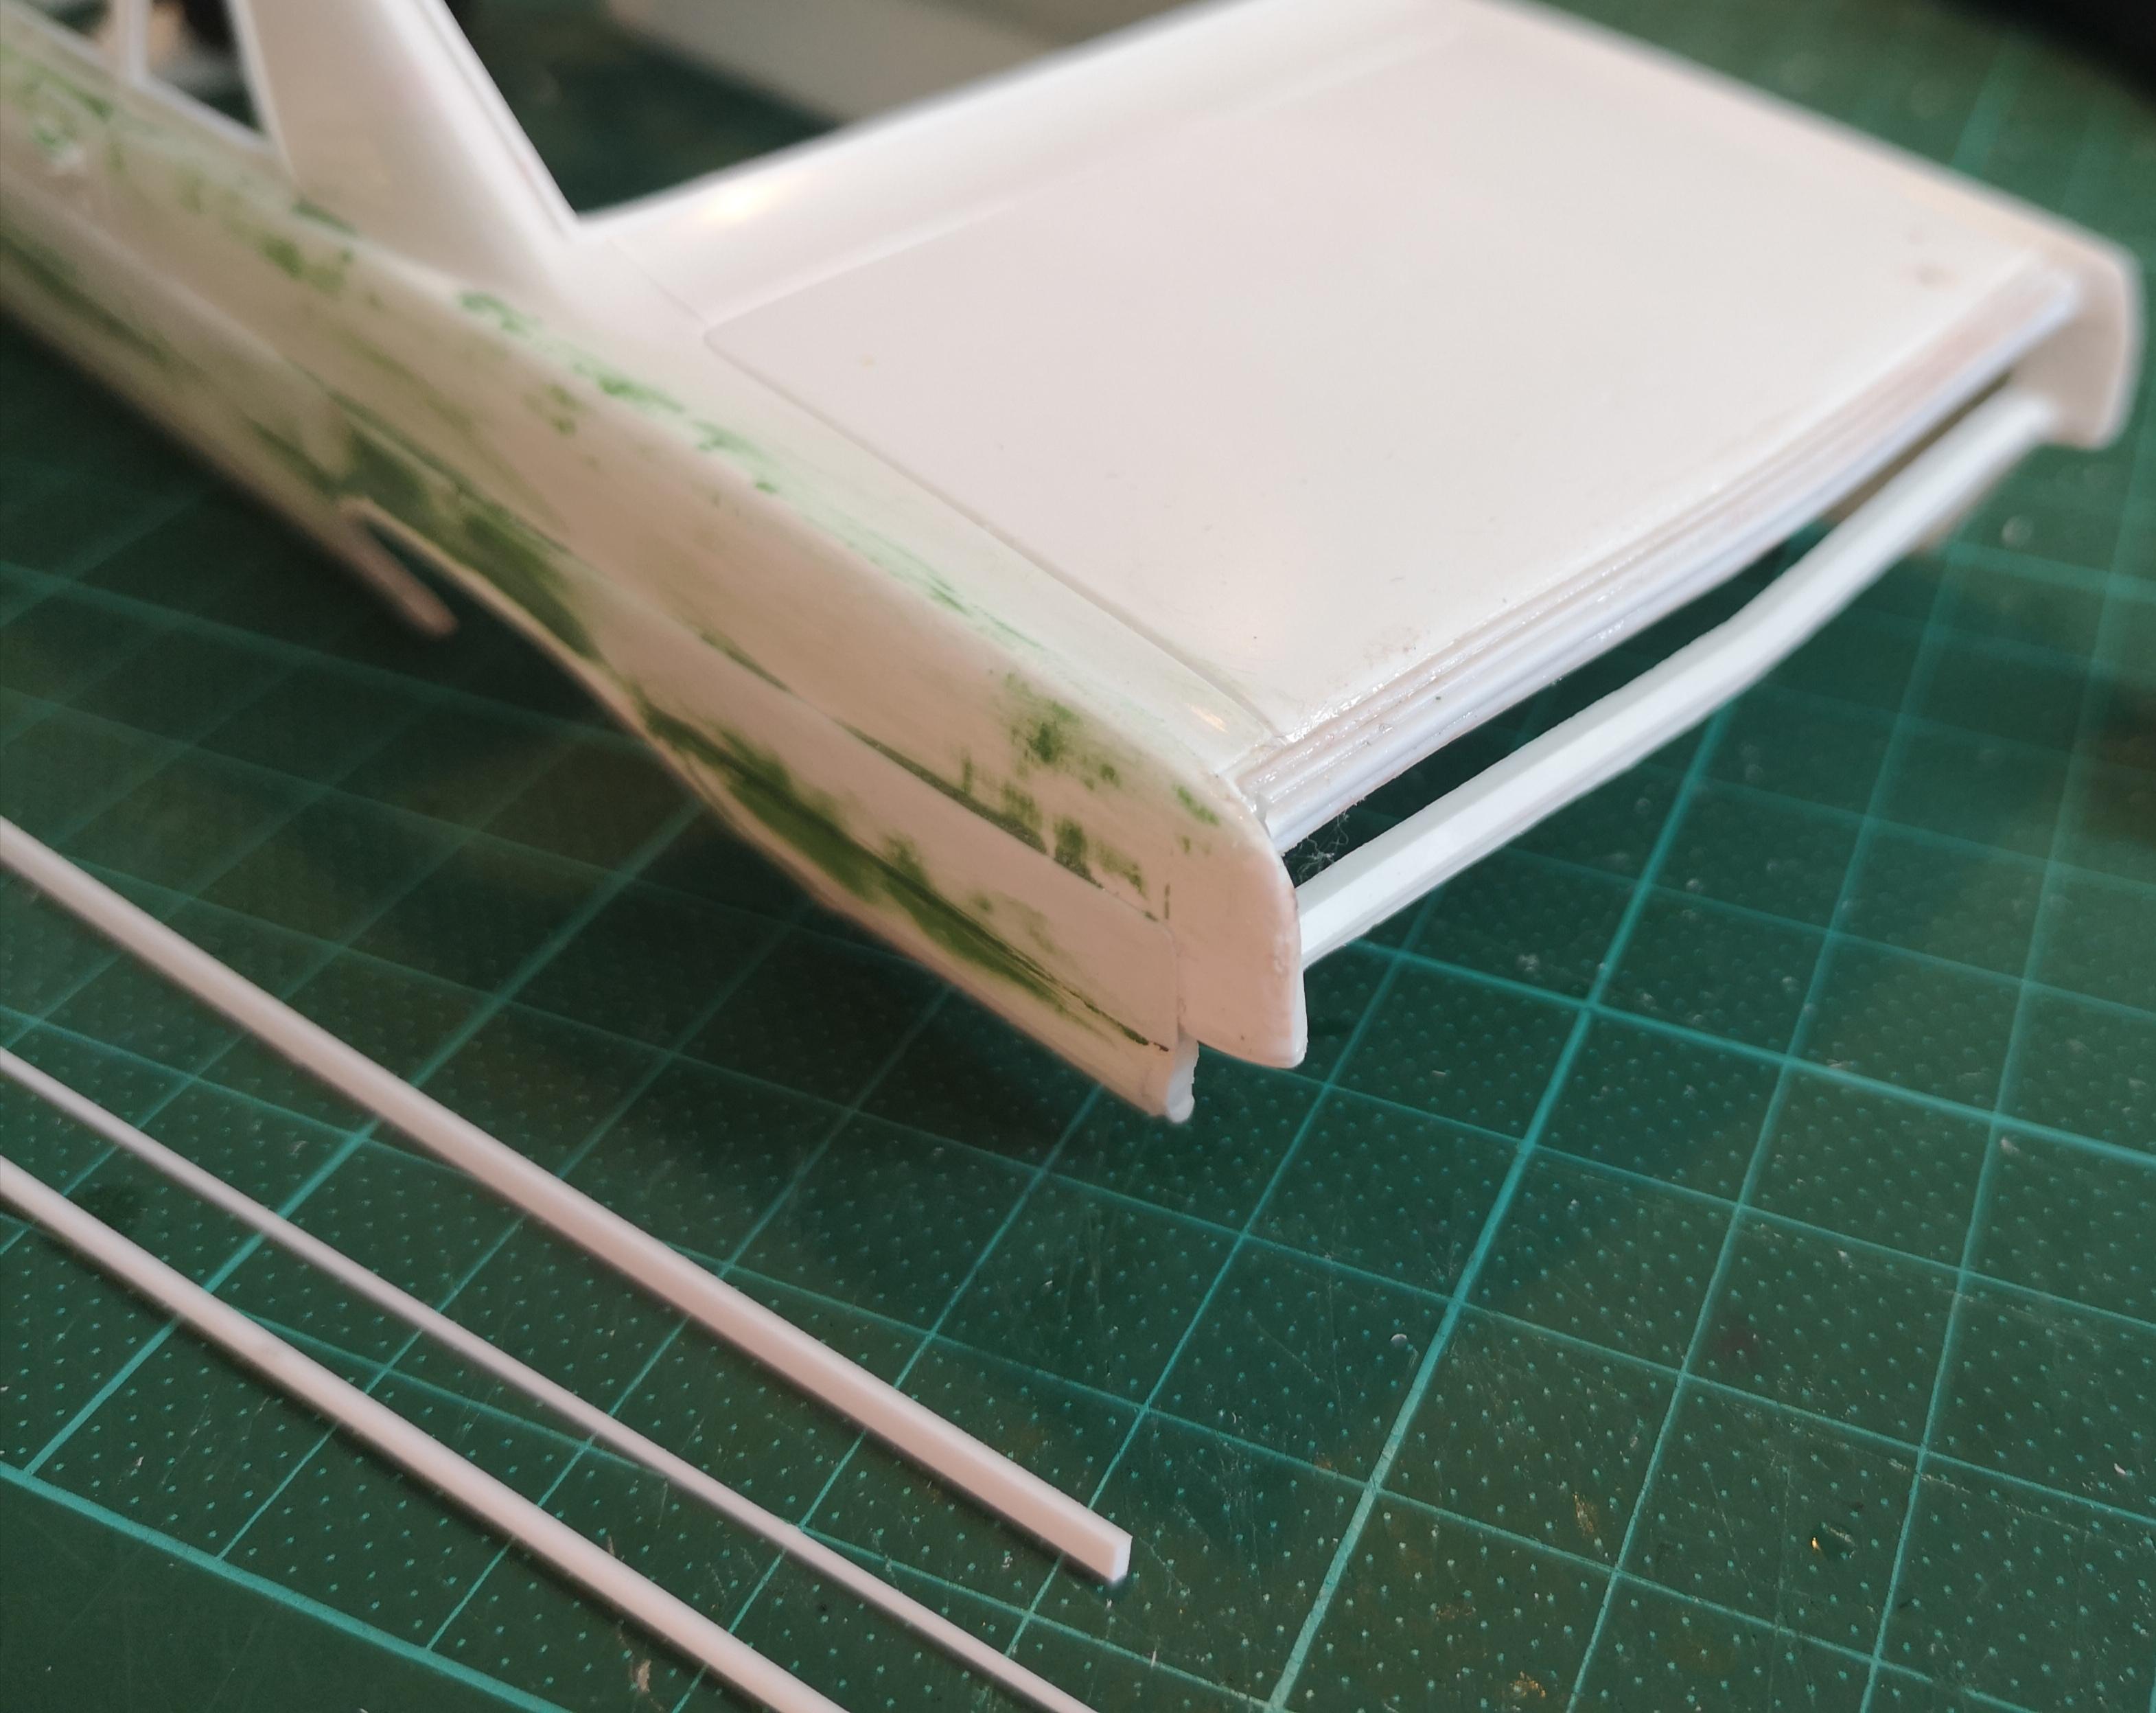
Yep the back end was modified with various narrow strings of Evergeen plastic, first one was flat then I glued maybe 4 or 5 thin strings where needed to get the shape of the deck lid look good enough. Very little bondo on top of them. Some filing was needed to the corners of the back end too. Also the bumper needed some small bits of plastic around the license plate hole. The deck lid was also carved where needed. I still wonder how to make the tail lights. Today I went to my spray booth and choose another silver, the first one was too bright. This has more gray in it, and when it was dry, I took the new can of metallic red, sprayed it and oh boy... it's too dark. I chose it from the paint tone slips or what you call it, well it looked ok there but not now. Respray is needed with a brighter tone.
-
Silver first, then comes the other colour.
-
Thanks thomascoffey! Today I sprayed the first primer on the body, to see all the dents and scratches. Not too bad, needs some slight bondo here and there, but nothing major hickups. I put some heavily padded front seats in, the real car has seats from BMW 325, so those will do fine. All the interior will be black anyways. My big task will be the rear light combo, red light panel all the way corner to corner, and tight curves at the ends of it. I have a jar of Tamiya Clear red X27, that can be useful. Also I need to patch that fire wall, big holes were exposed when getting the hood and fenders to tilt up together.
-
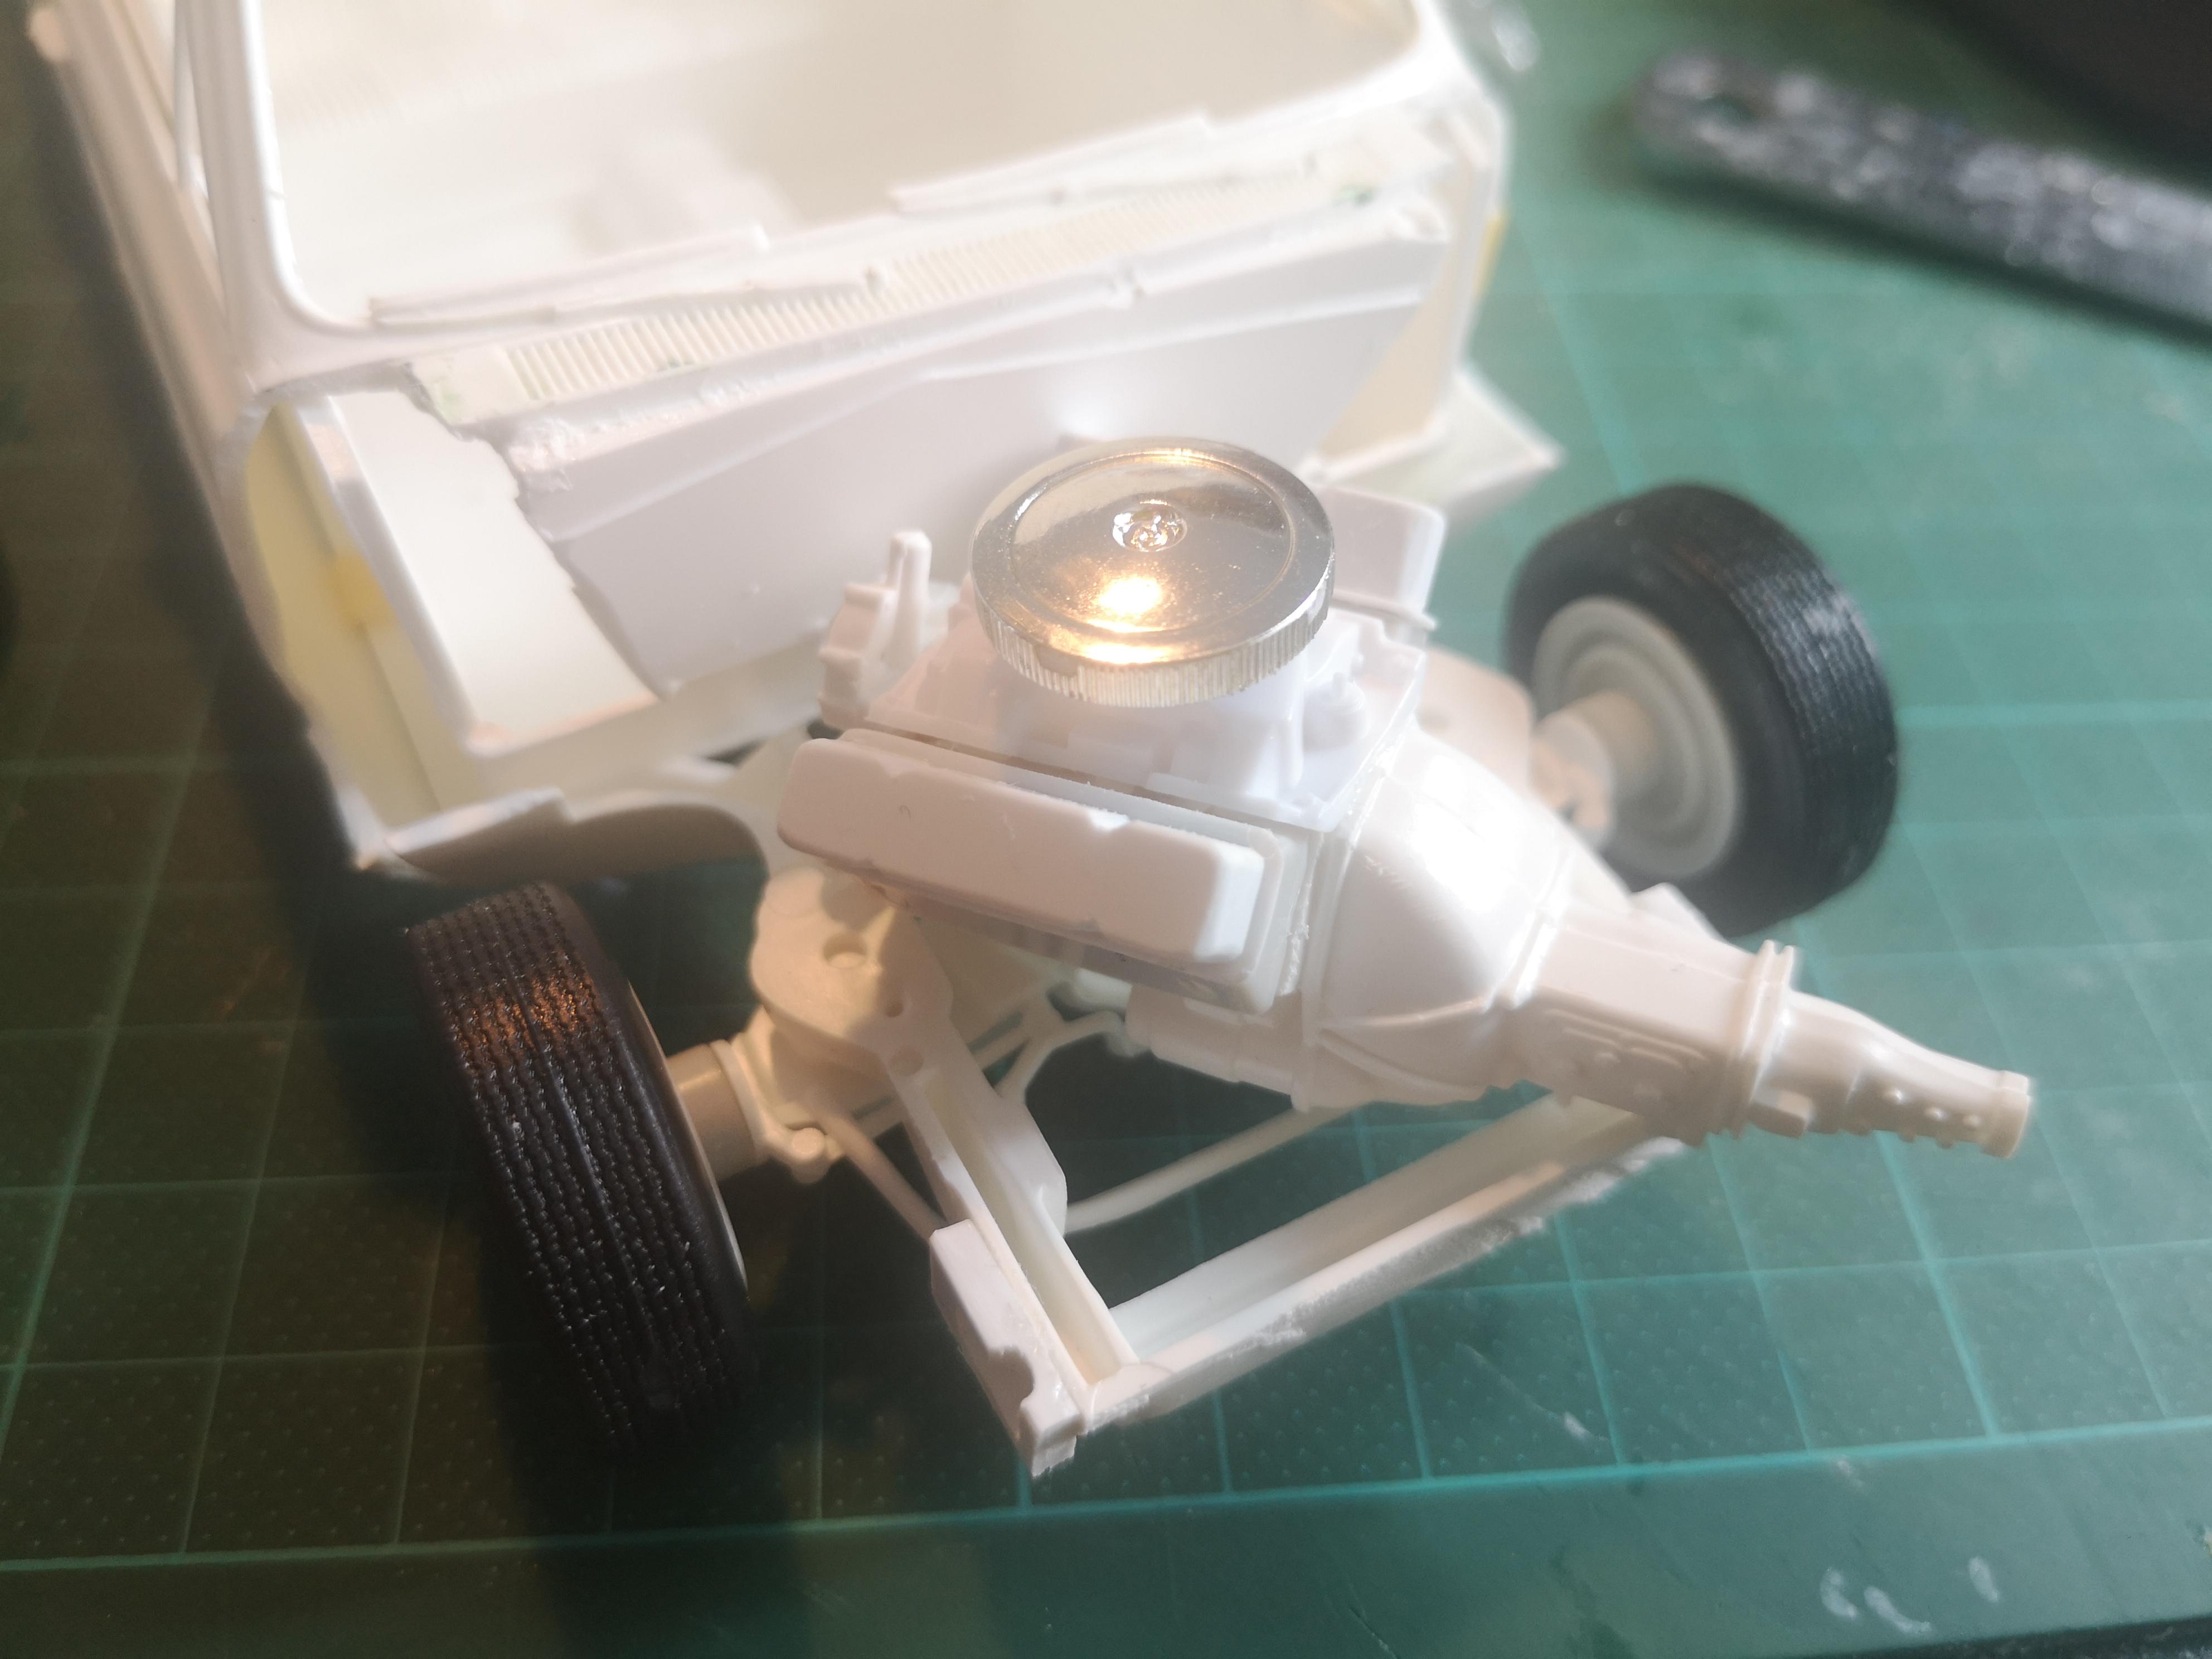
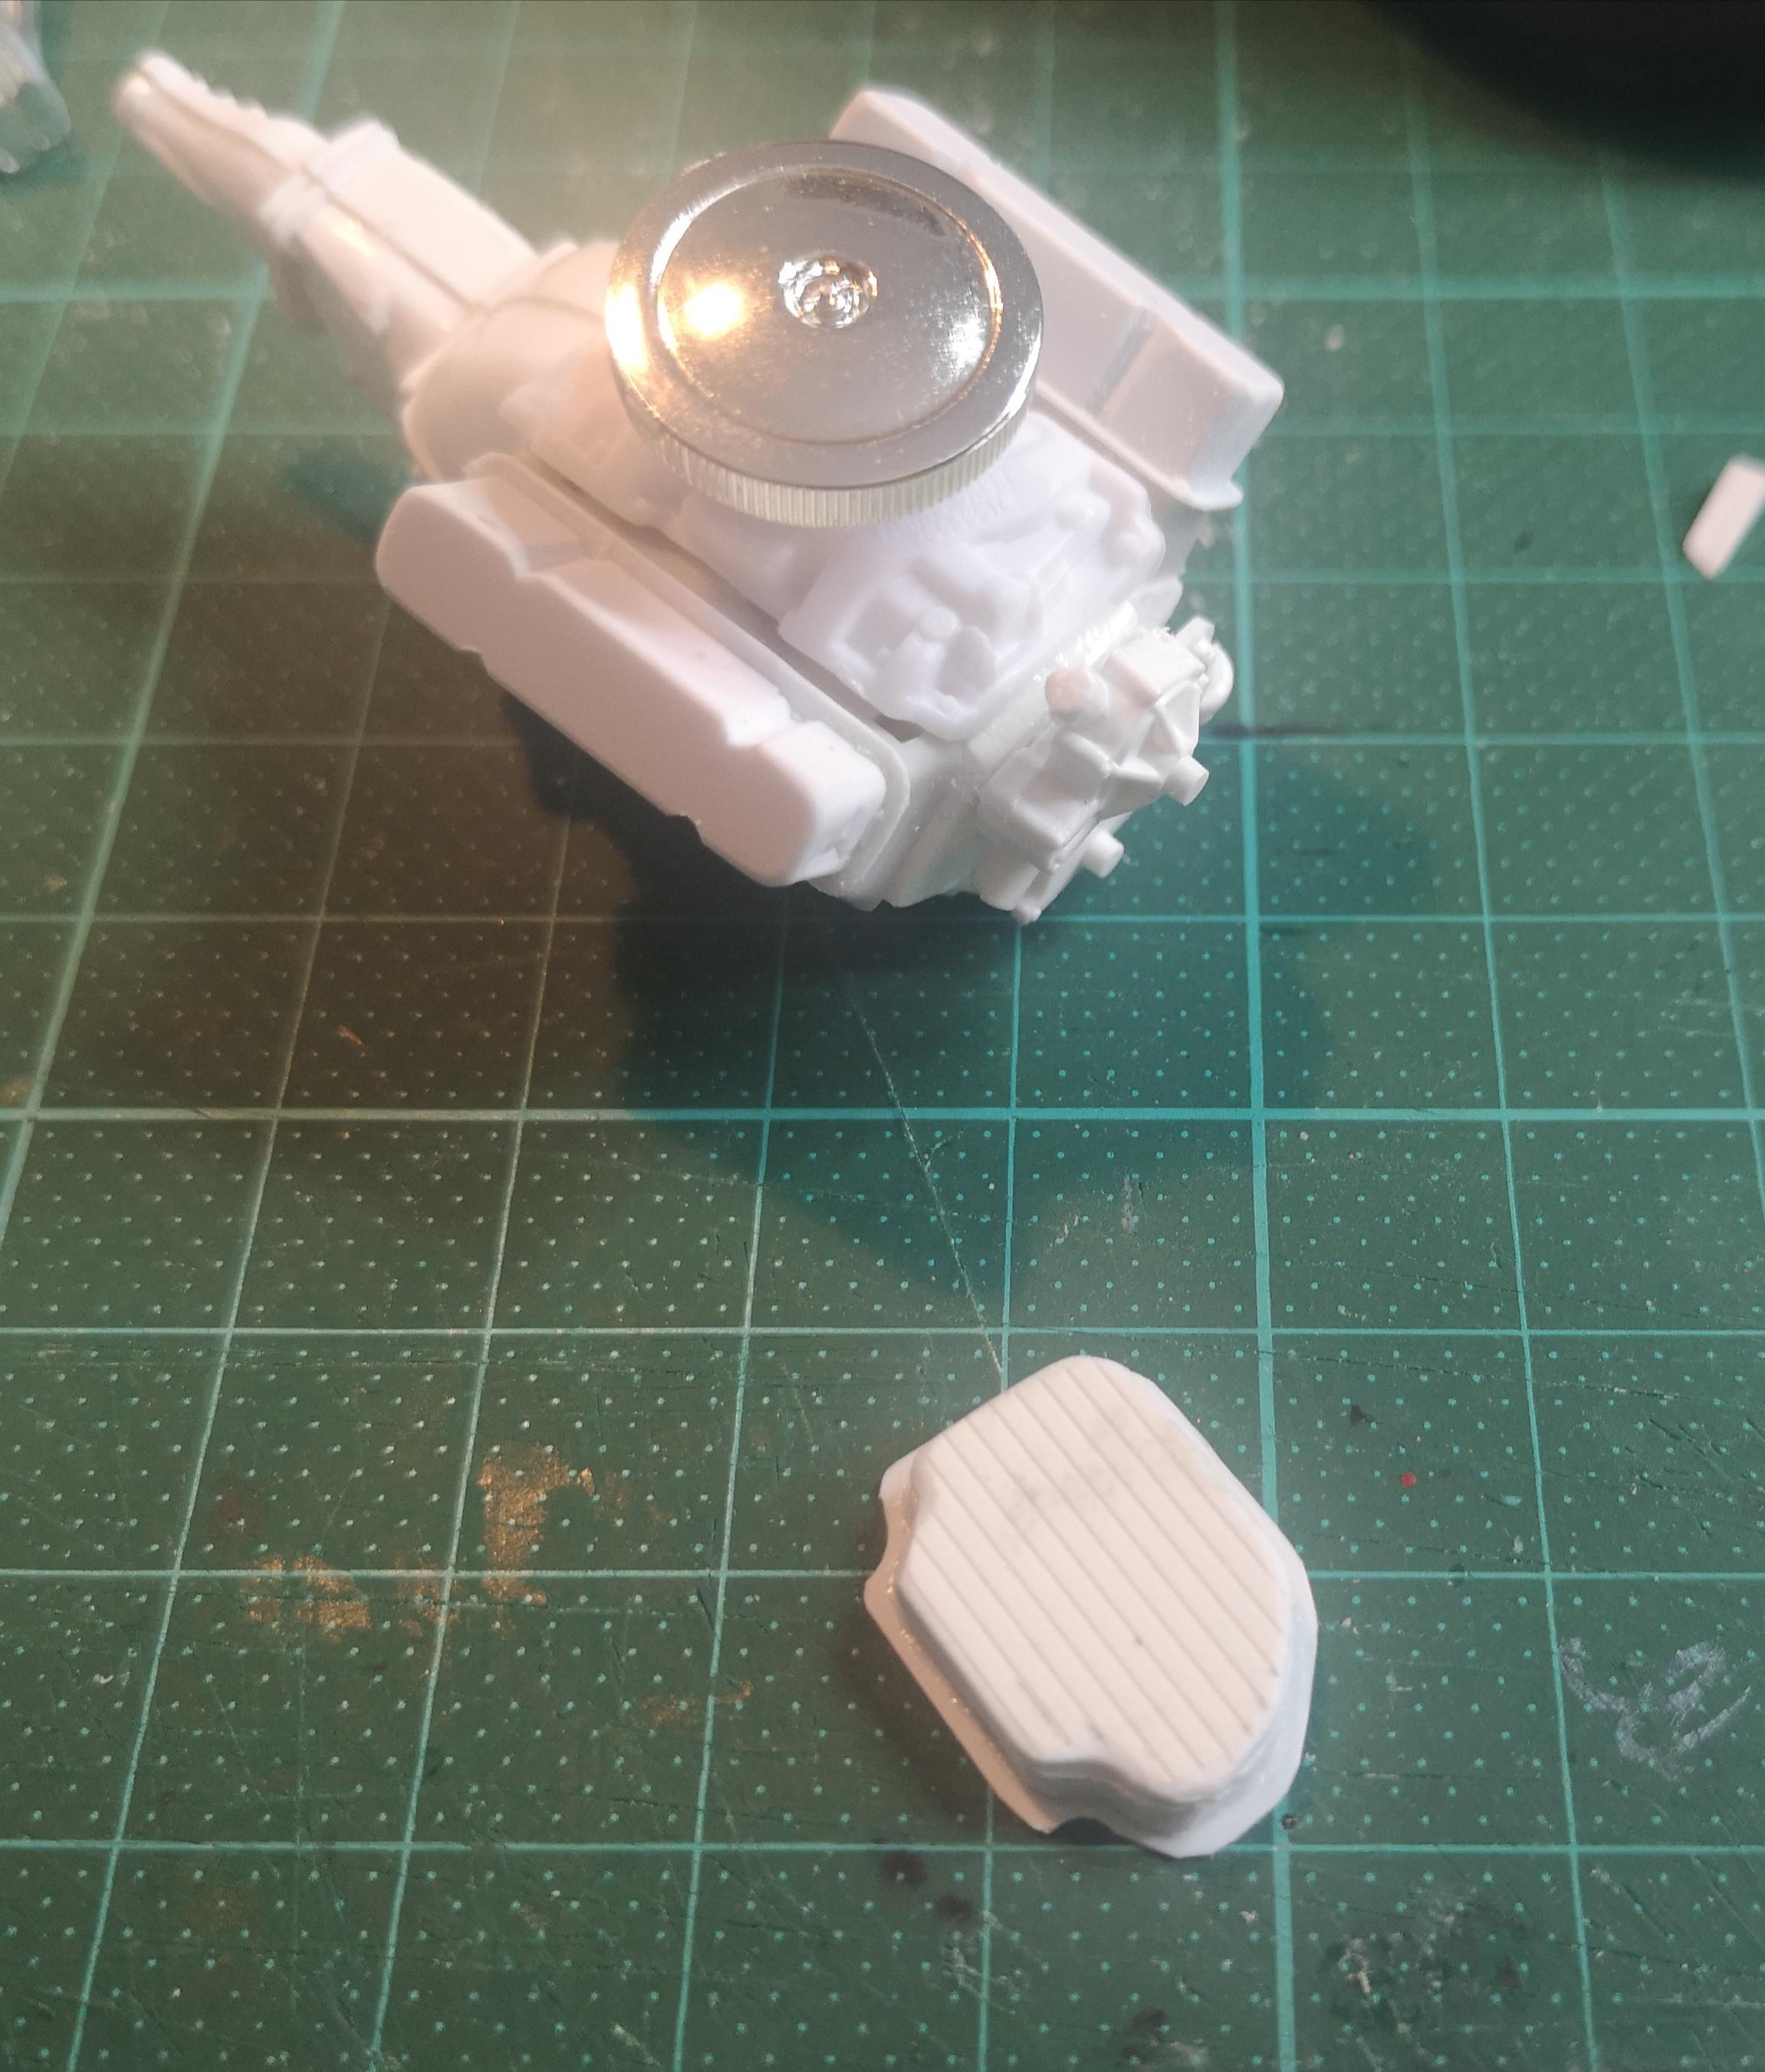
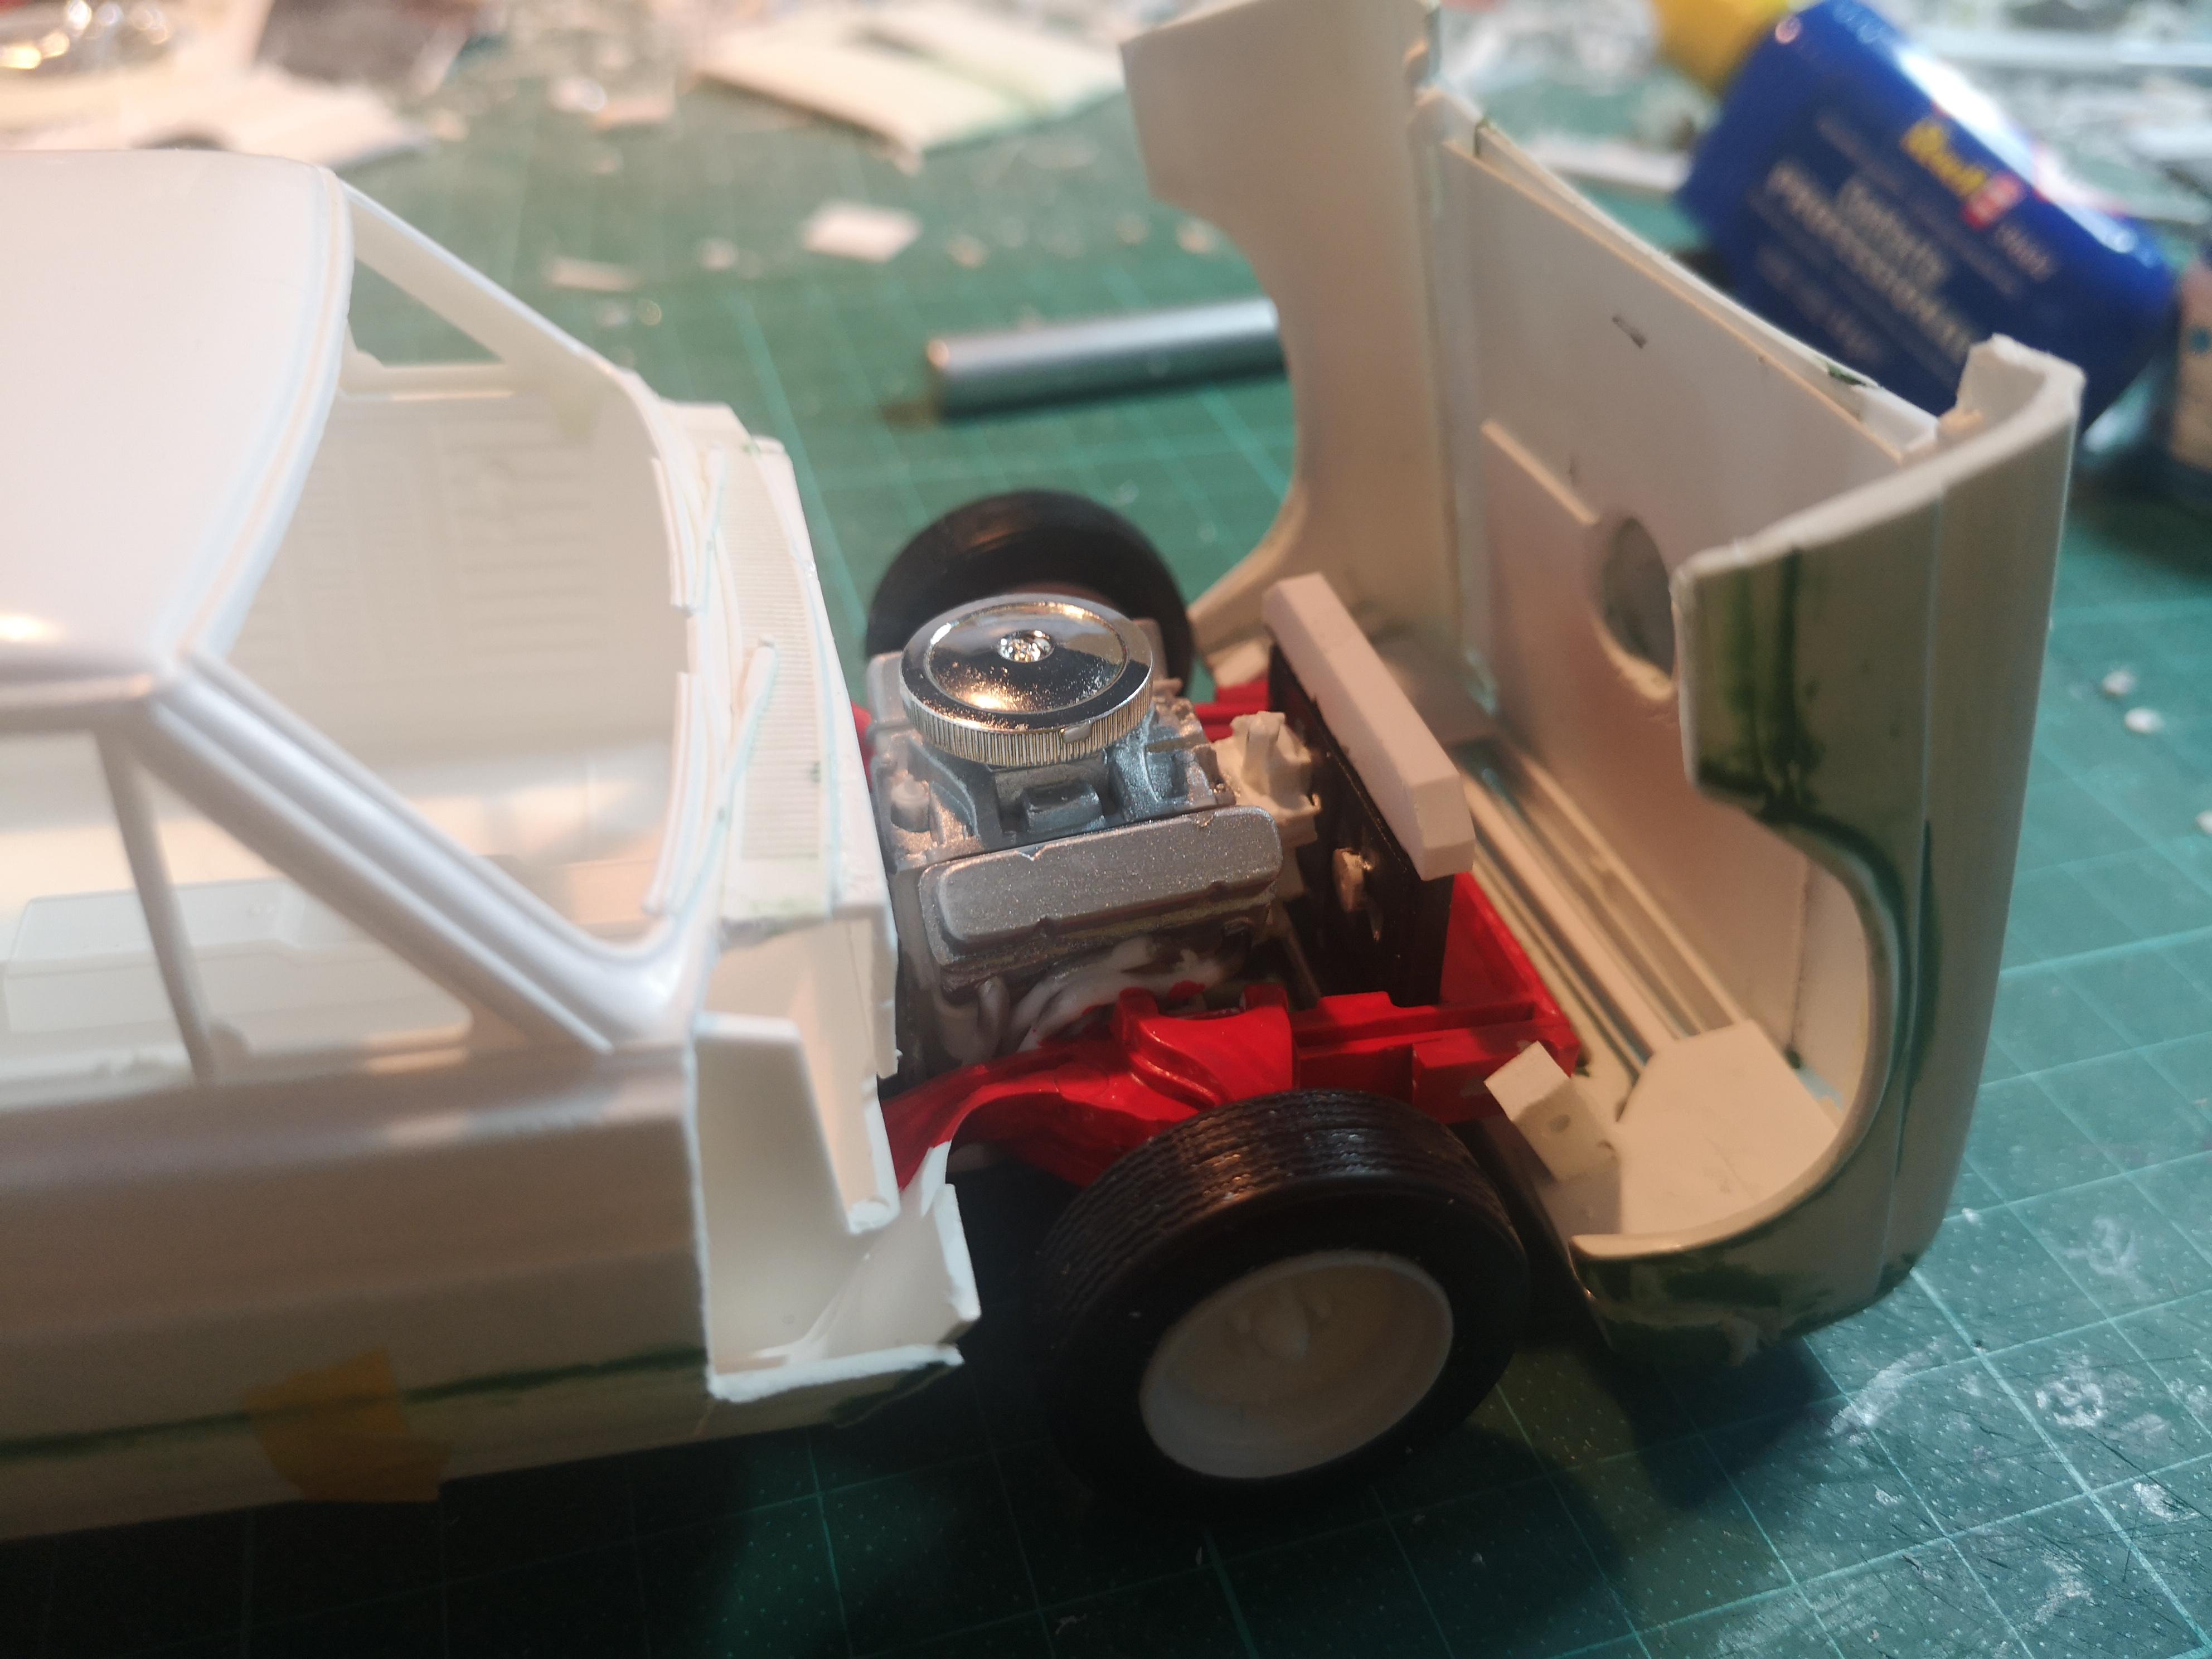
400 cid has landed into the engine bay. I swapped the manual transmission to automatic, that looks close enough TH400. I just added the oil pan to it. I also made the plastic headers, every tube is bent with a candle.
-
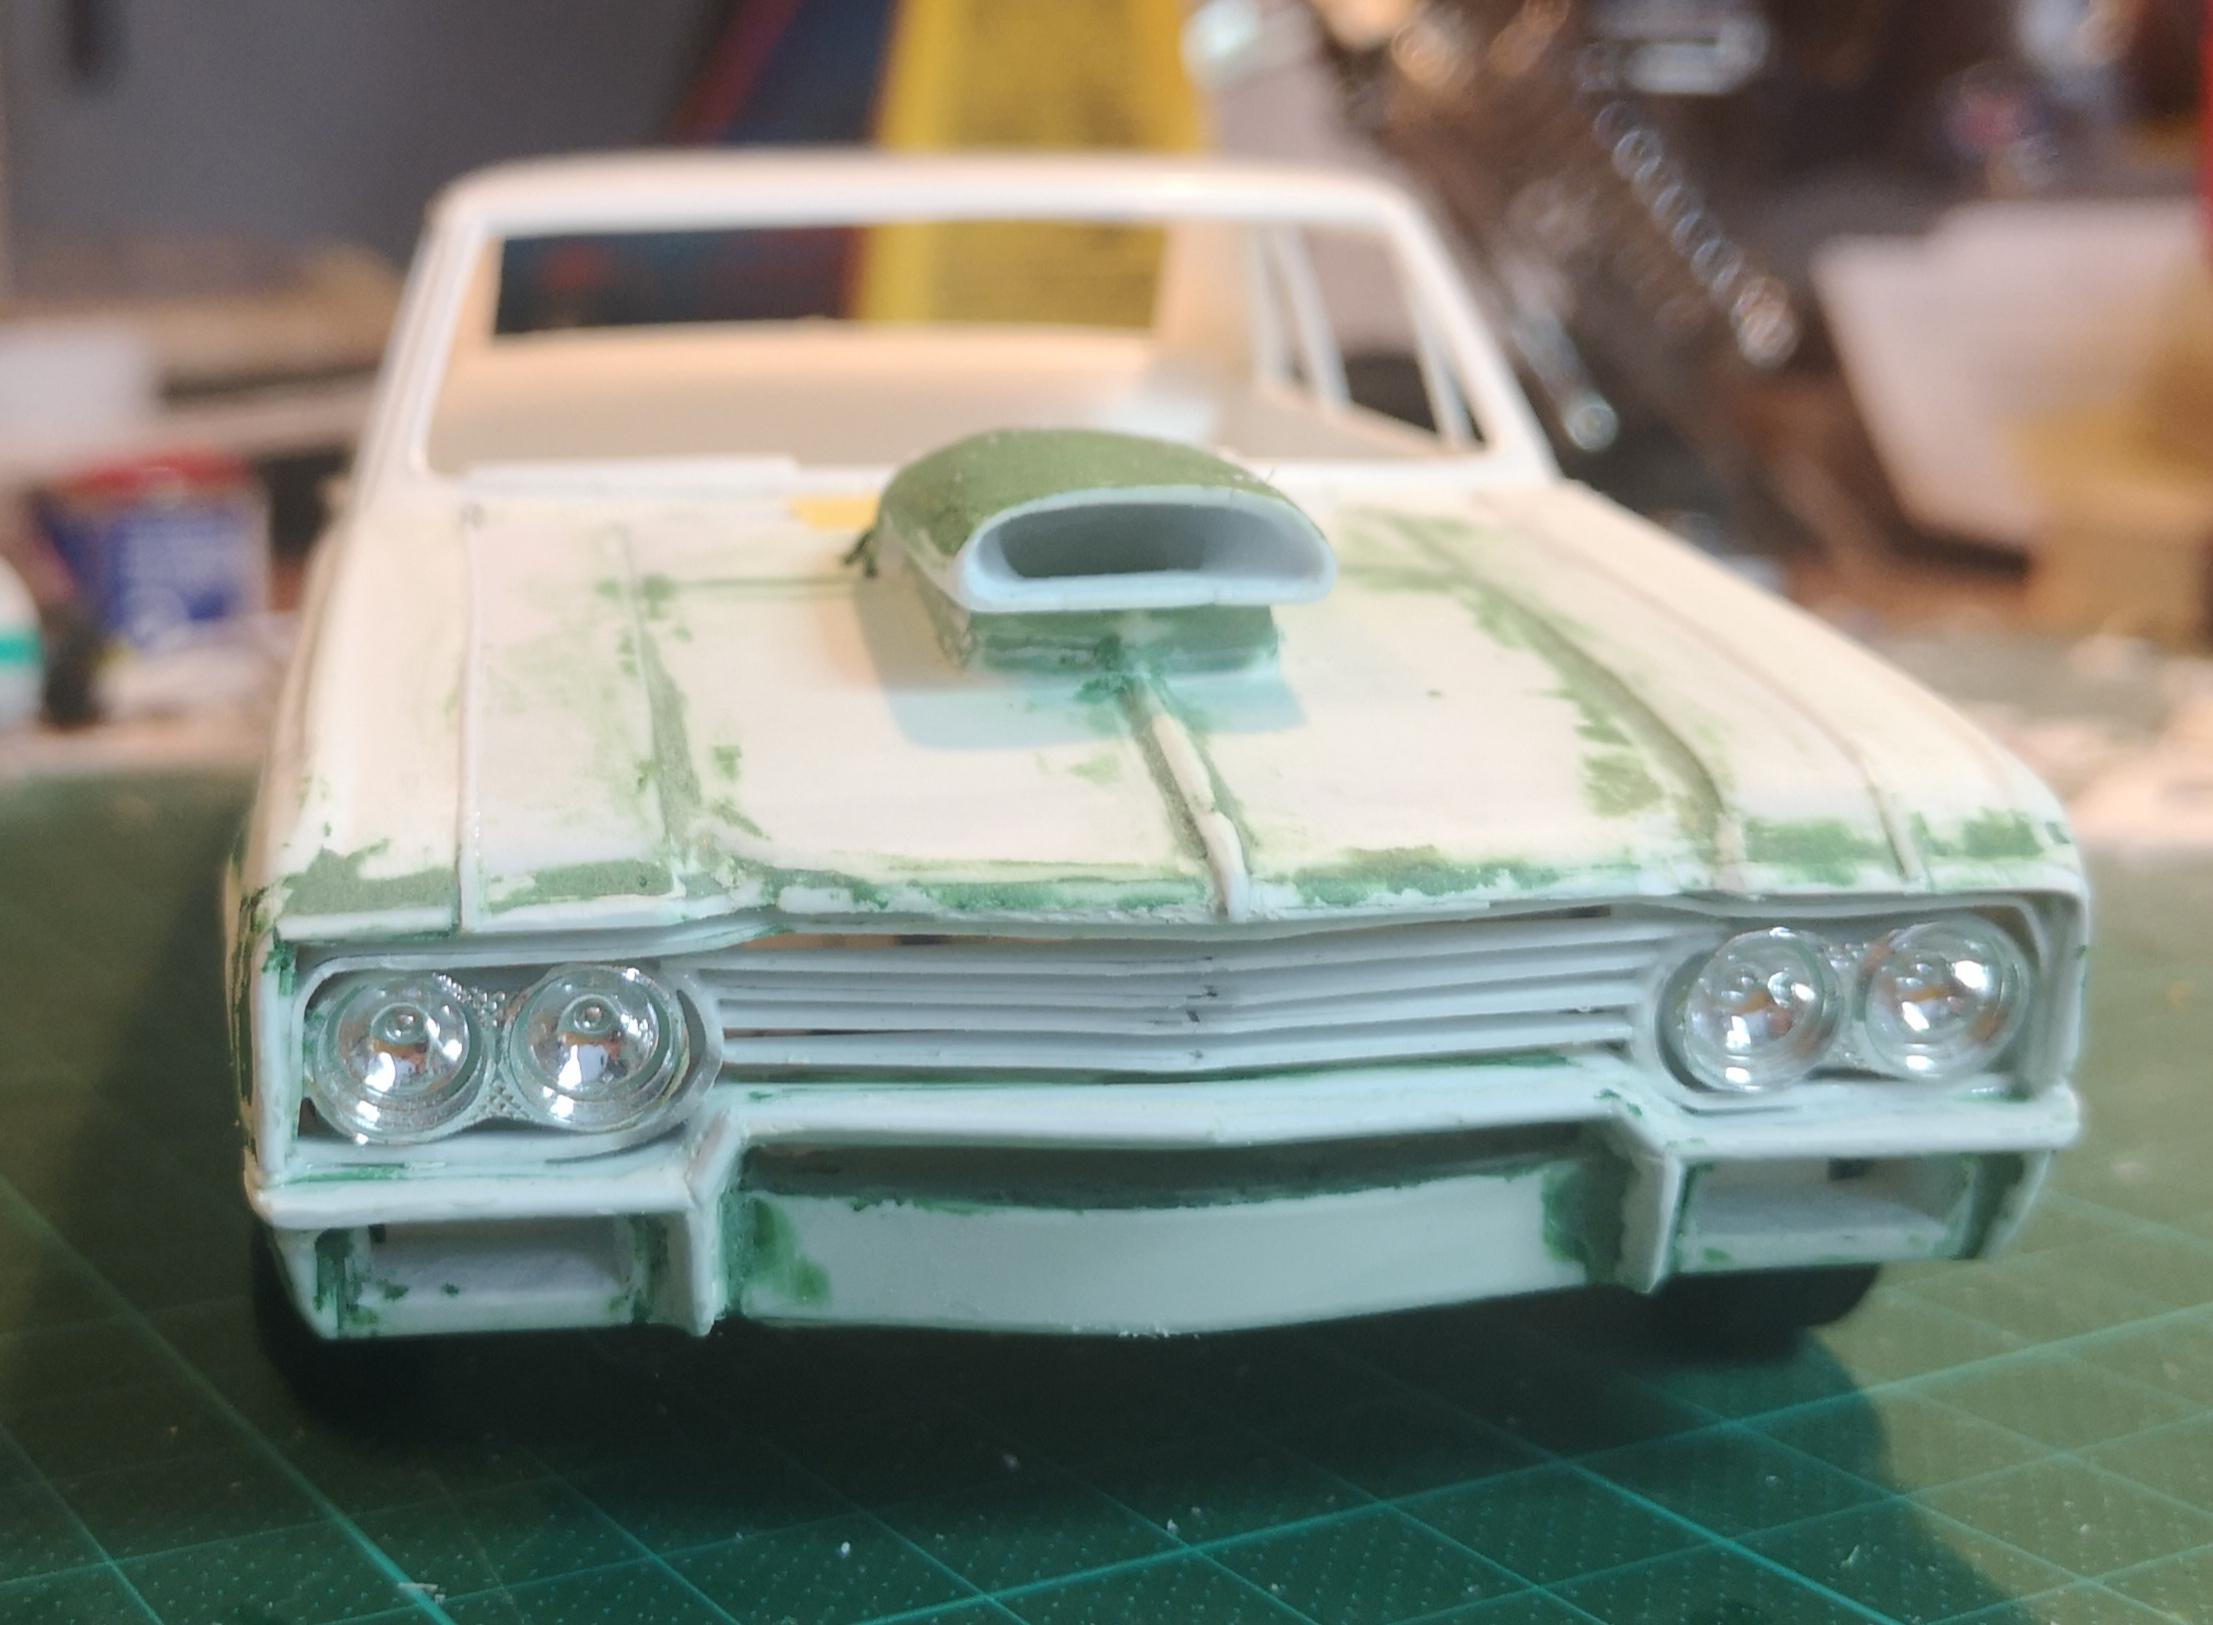
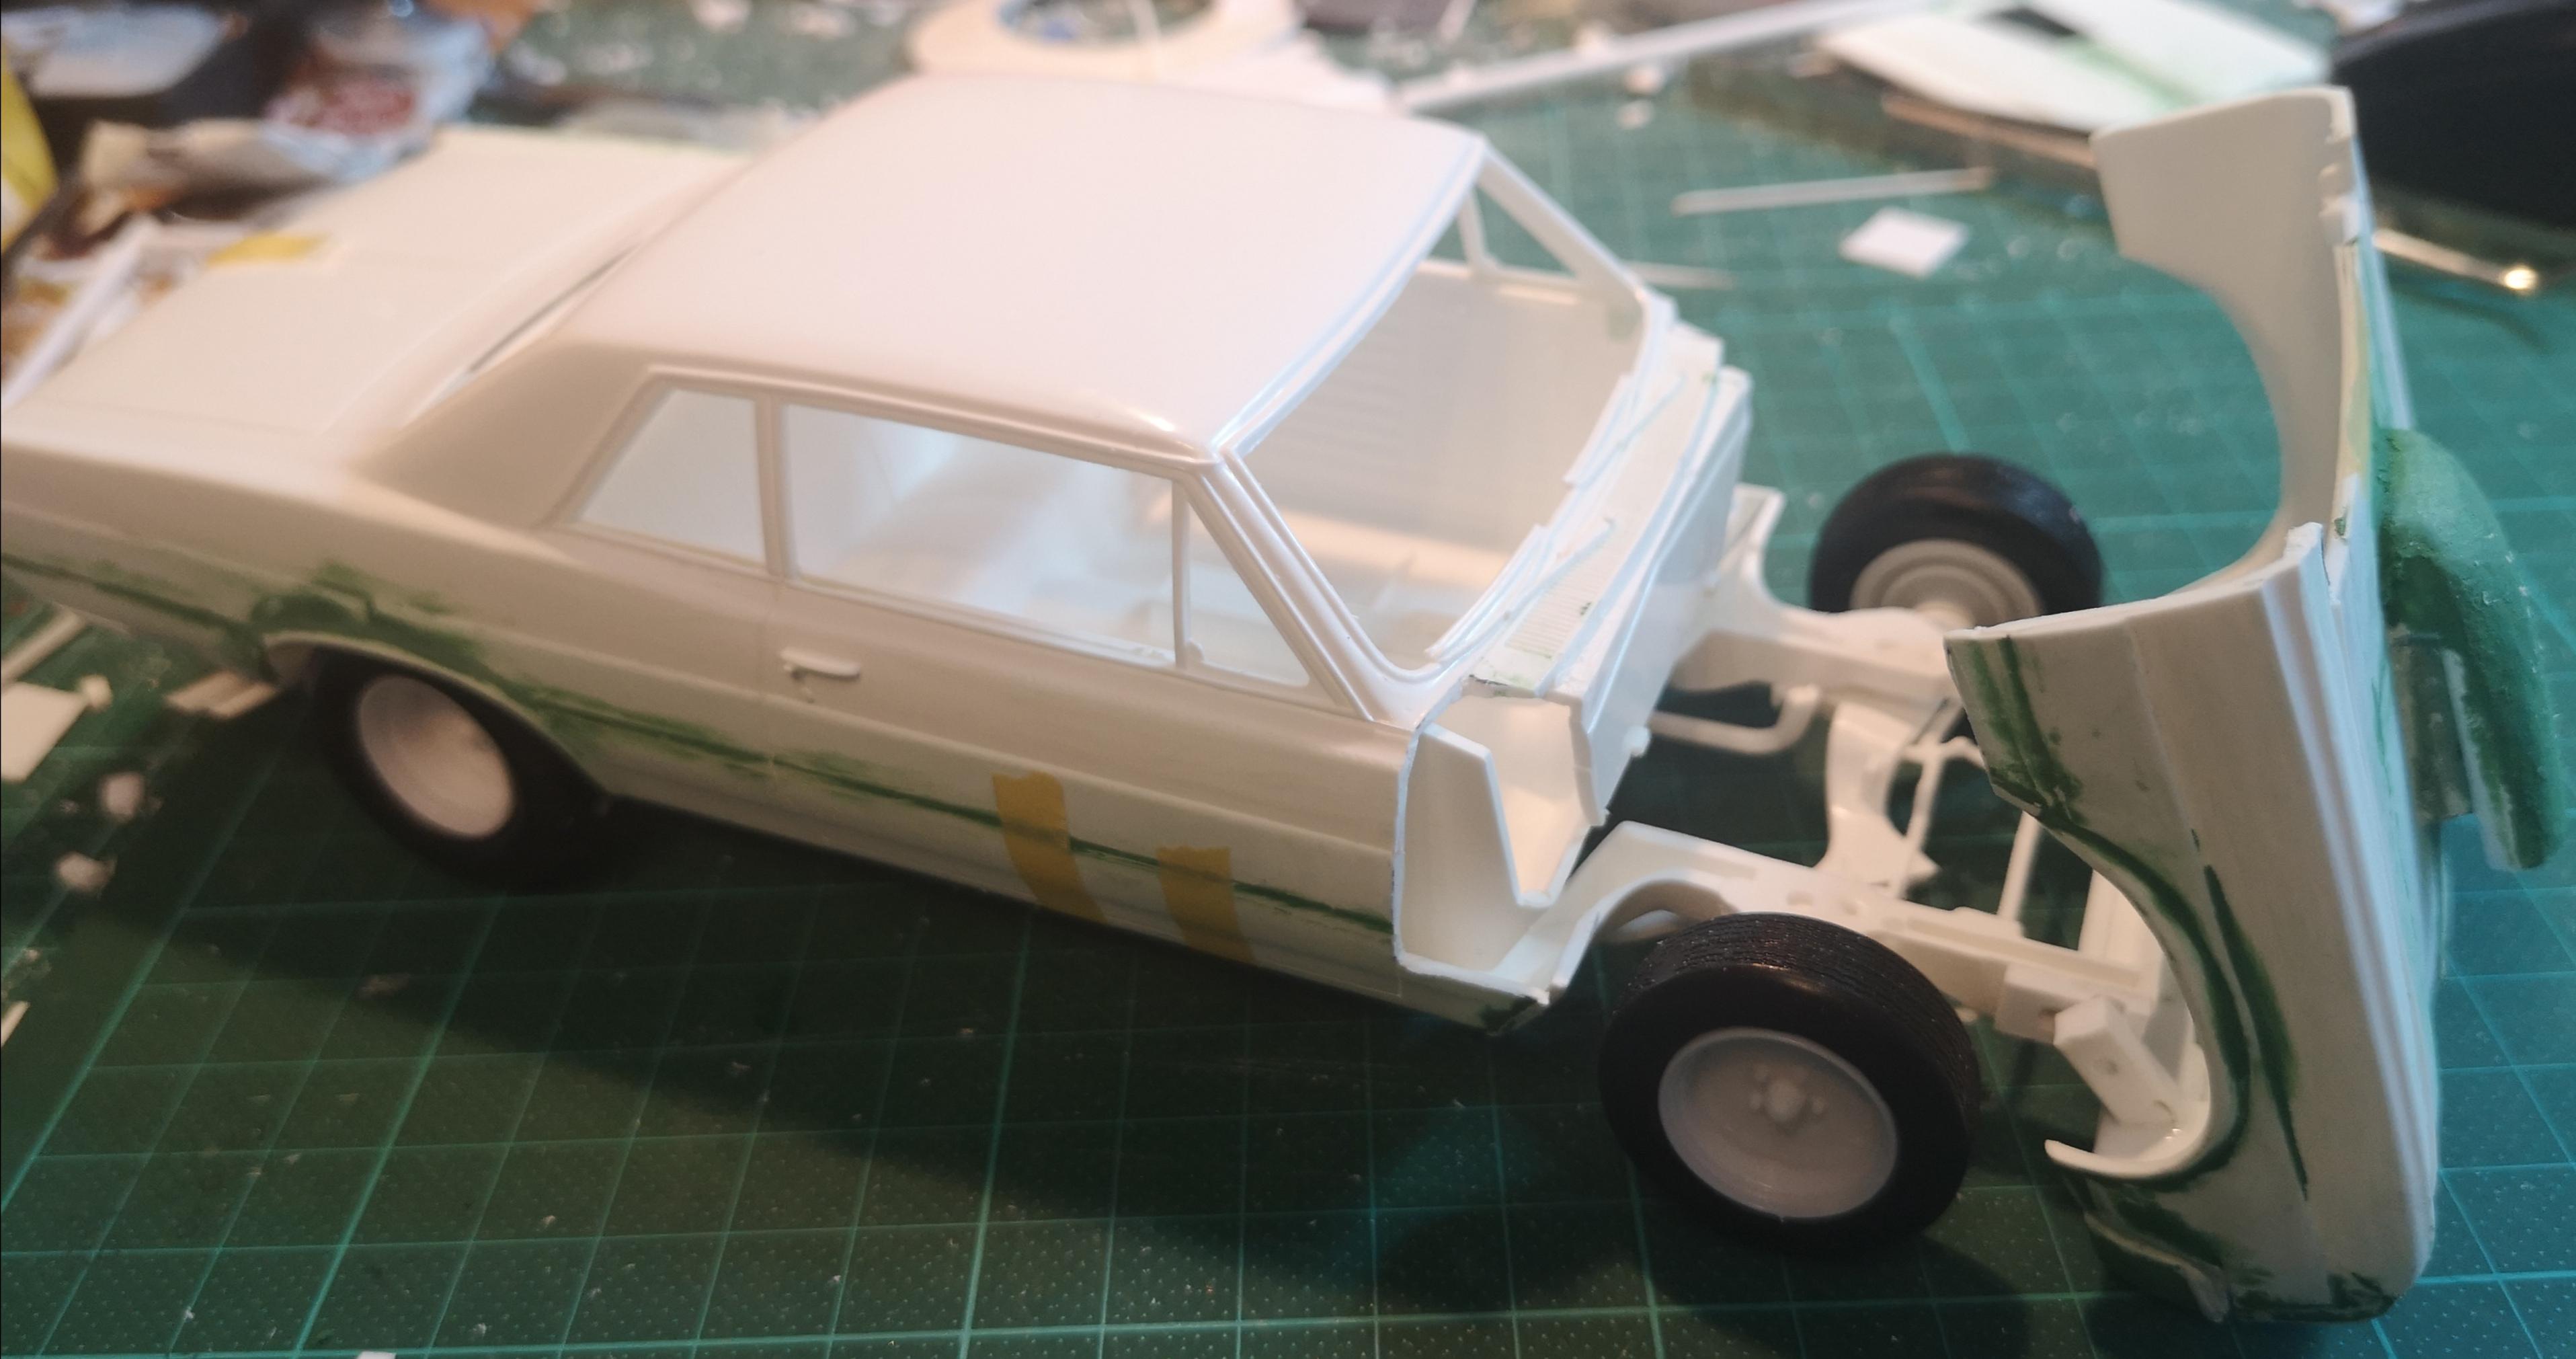
Thanks everybody, and Bisc63, thanks for the offer. I have some good photos of the real car by the present owner, and I found a short video clip. It was shot when the car was raced in the quarter mile track too. I have fought with the front end hours and hours. Buick has some interesting shapes on the bumper and the hood, that are quite different from Olds. '65 Chevelle could have been a bit easier starting body shell for this transformation to Buick, but all I could find were Chevelle Wagon kits for a big pile of money. Now I have a functional flip hood. The wheels sit where I want them to be. Nothing special in the chassis, just some small adjusting. Next I need to locate a decent 400cid SBC engine.
-
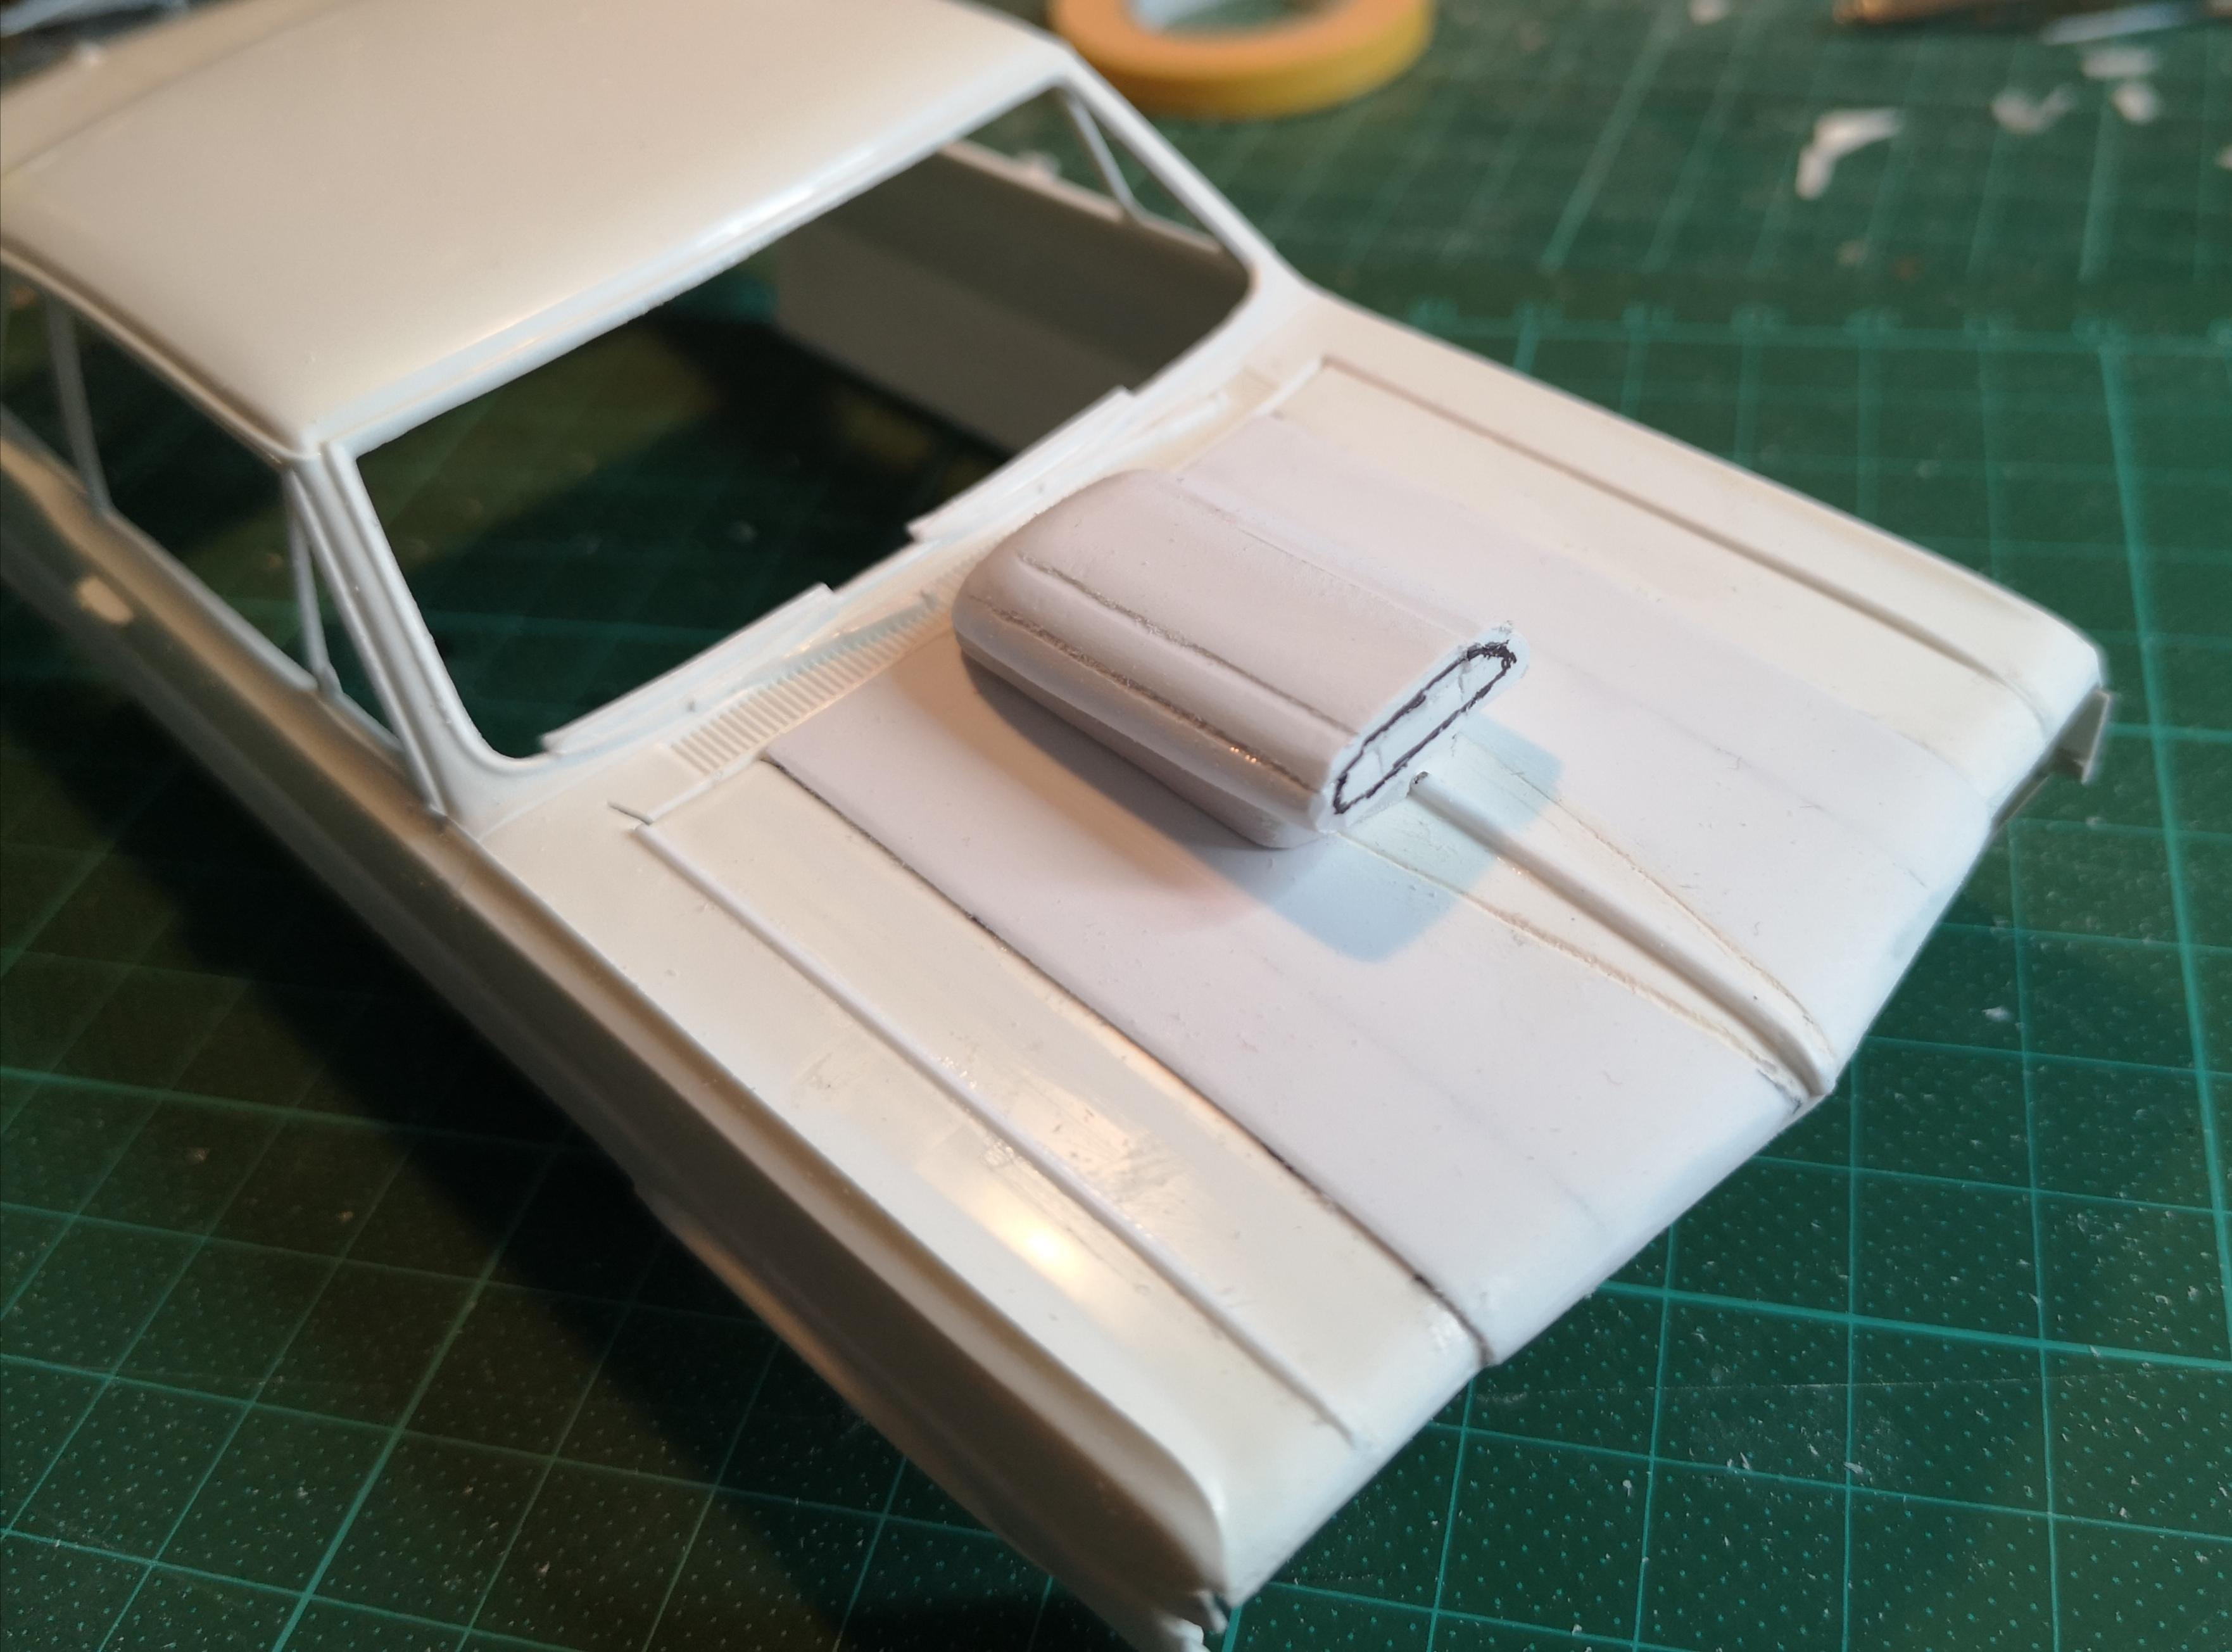
Thanks. Maybe you have already noticed, that I have made a mistake with the hood. Some optical disturbance made me to modify the hood in the wrong way. Luckily I have another hood, so I will make another go.
-
I couldn't find a kit of '65 Buick Skylark 2d, so I took a '64 Pontiac GTO 1:24 Revell kit and started to make some changes. New side panels, new front bumper, modifications to the hood... still a lot of work, but that is the thing I like in this hobby. Under the flipping hood will sit a SBC, 400 cid as the real car has. This will be a model of a 1:1 car in Finland.
-
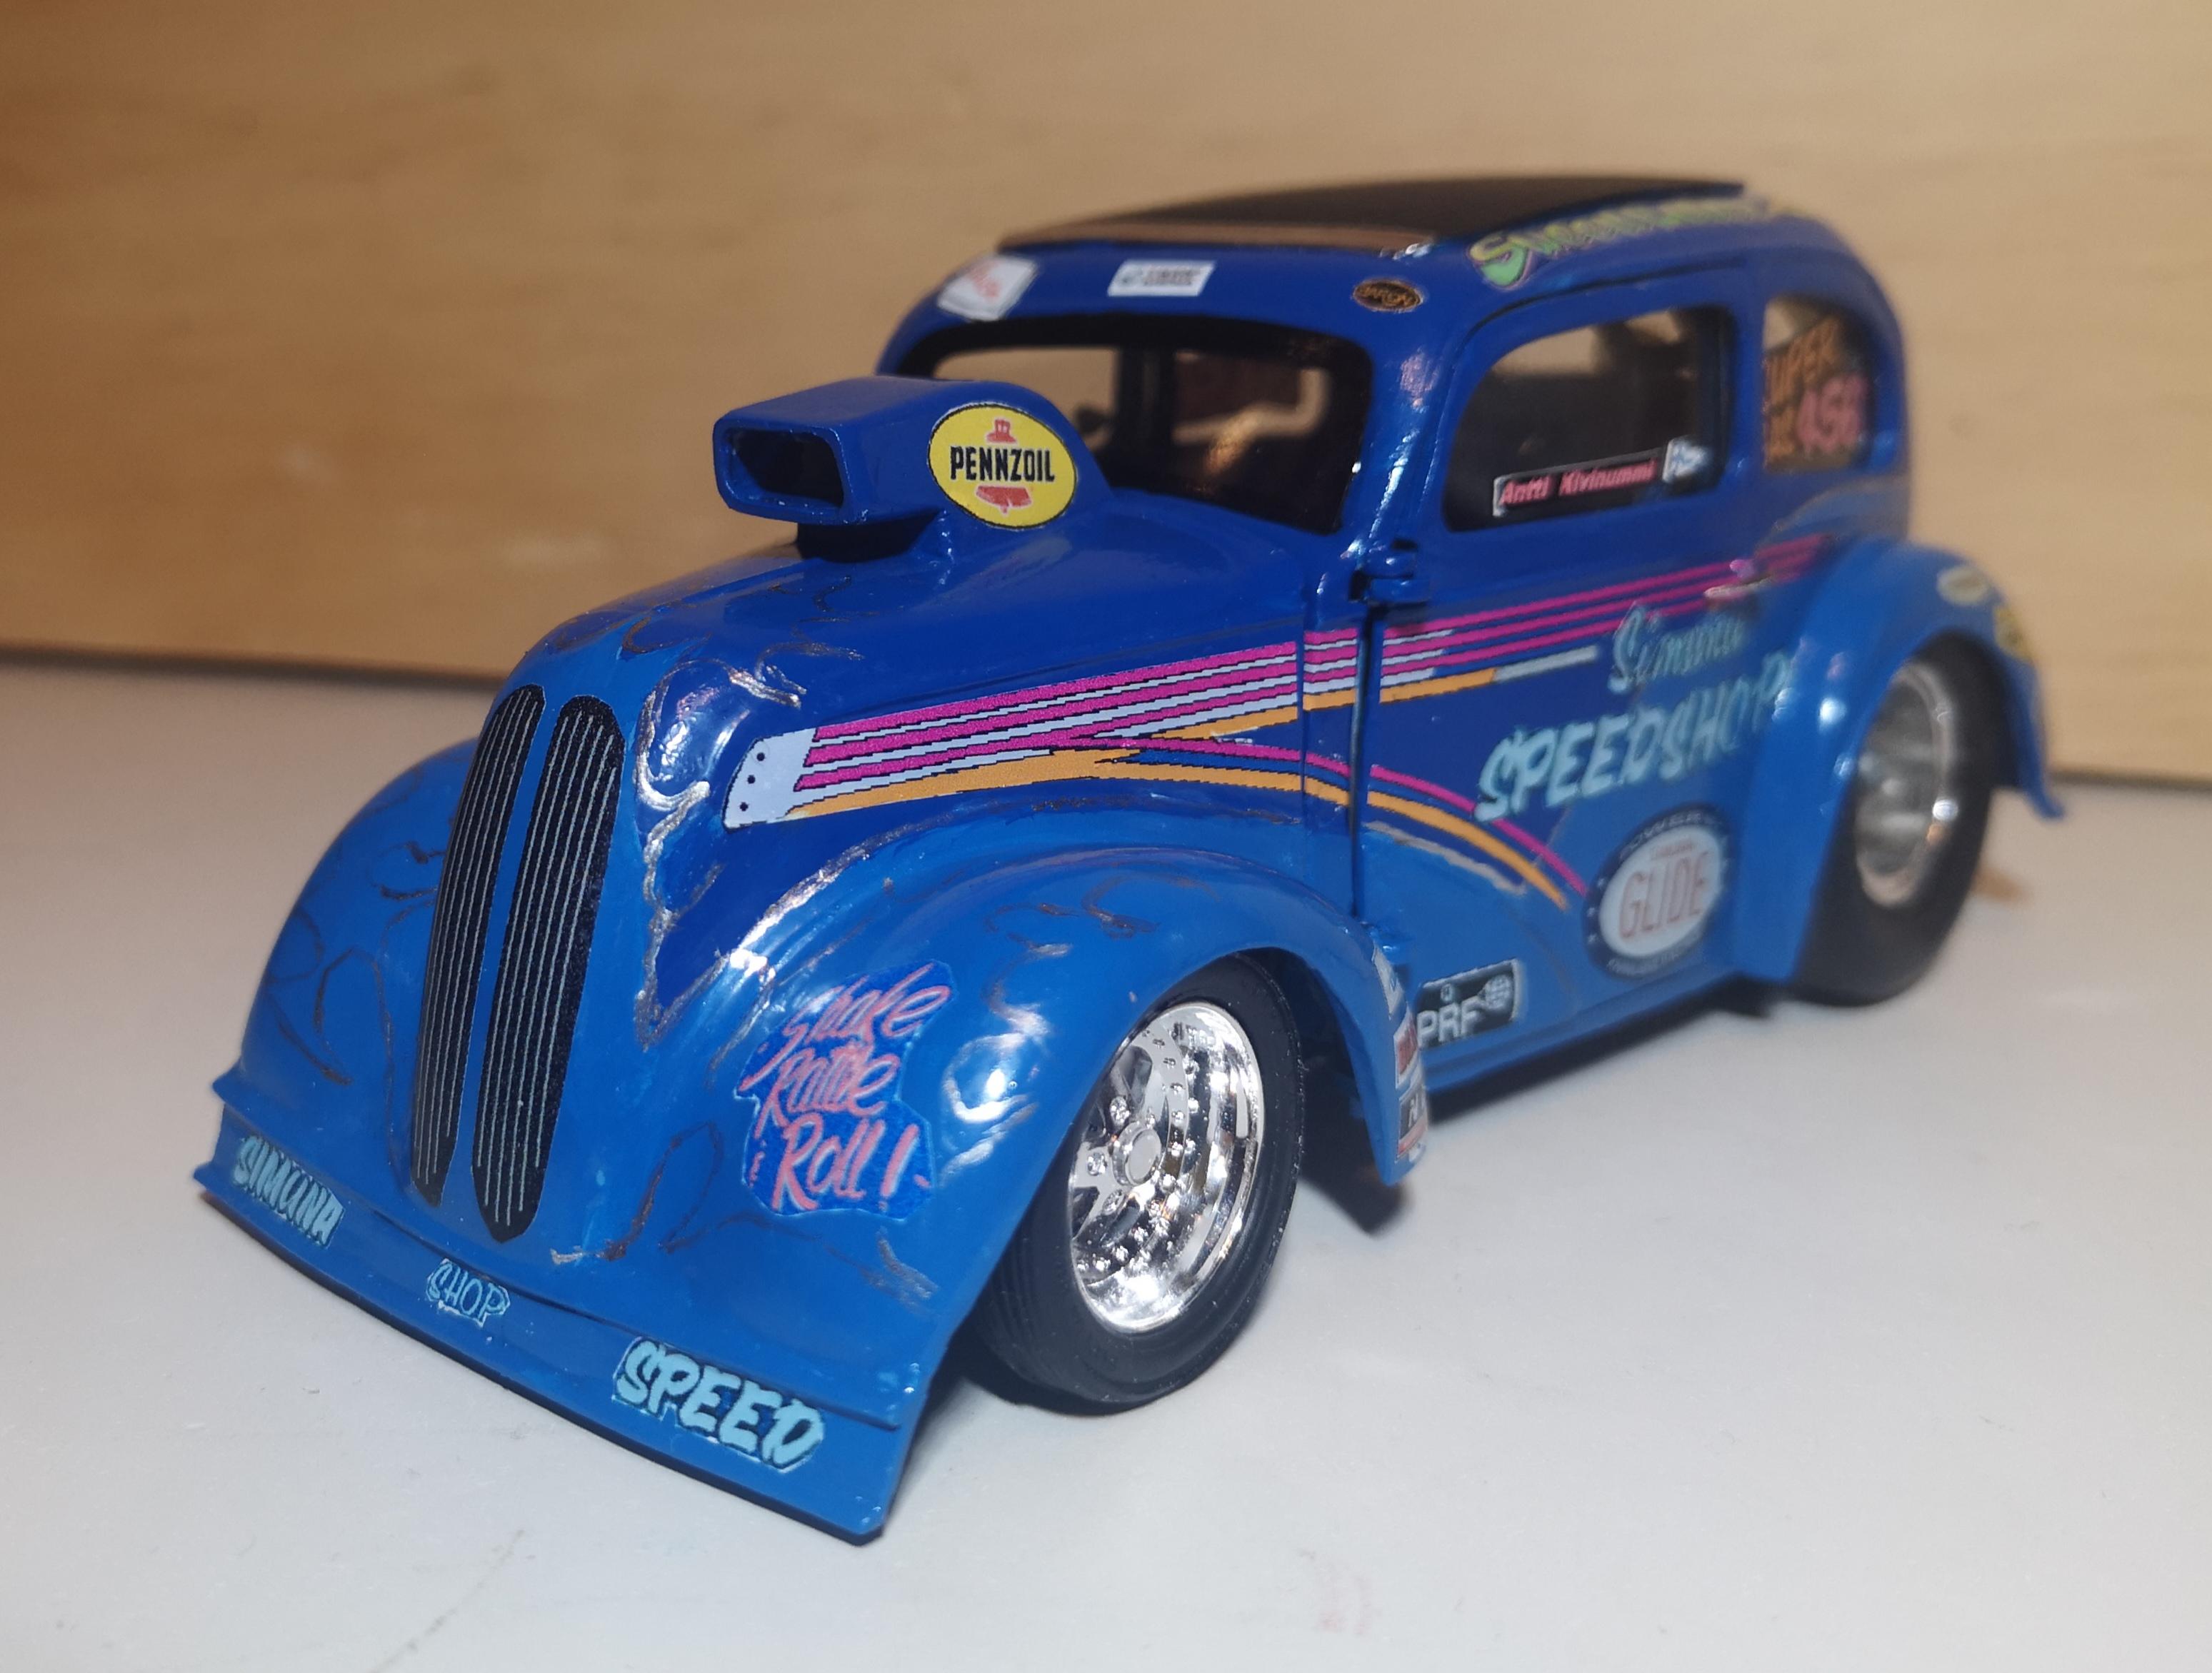
Thank you very much everyone for your kind words. Yesterday the owner/driver of the real car got the little Anglia and took it home. I really hope he likes it as much as he said with a big smile on his face.
-

Mazda Cosmo Sport 1968 + wankel engine
Reuhkapelti2 replied to Reuhkapelti2's topic in WIP: Model Cars
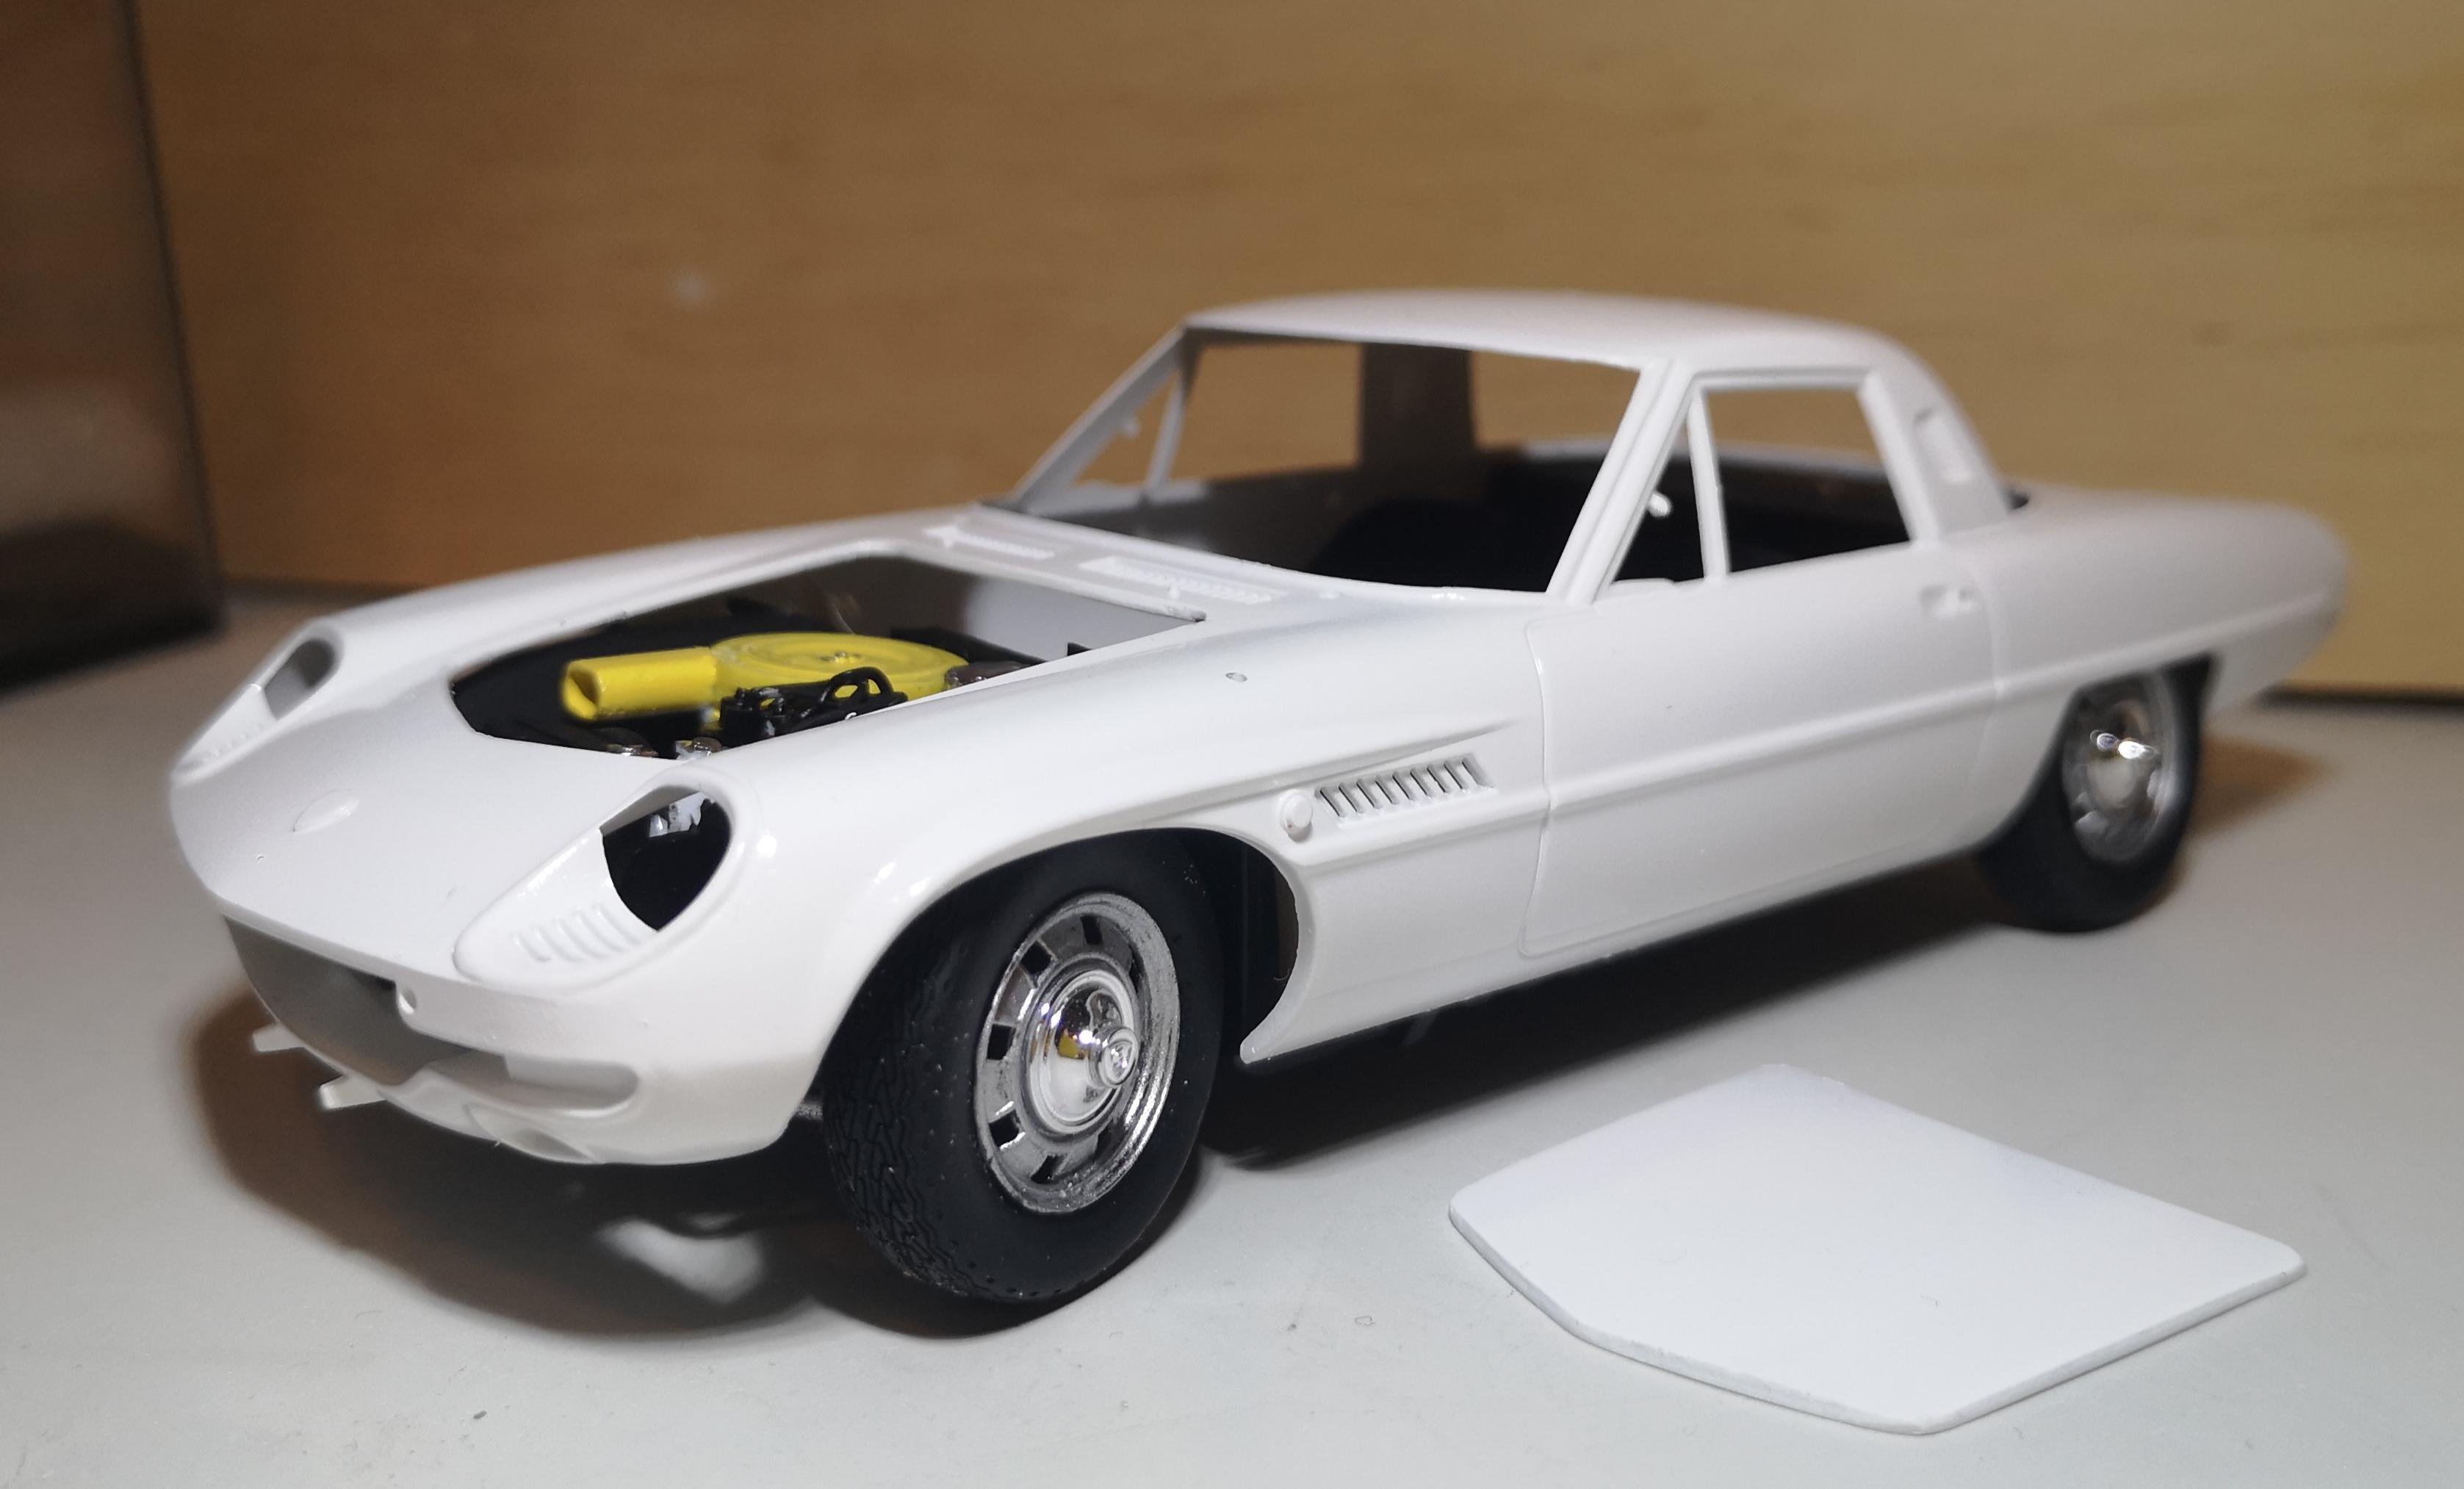
Well I started to put the old decals on the body. They are very brittle and it takes a long time soaking them in warm water to get the back paper to slide off. The nr. 19 decals are a bit yellowish, and it shows even better as the paint is pure white. No sun shine here now to get them white again... I noticed that the wheels are not silver in the race version, so I'll strip the paint and the chrome dishes off.
-
Mazda Cosmo Sport 1968 + wankel engine
Reuhkapelti2 replied to Reuhkapelti2's topic in WIP: Model Cars
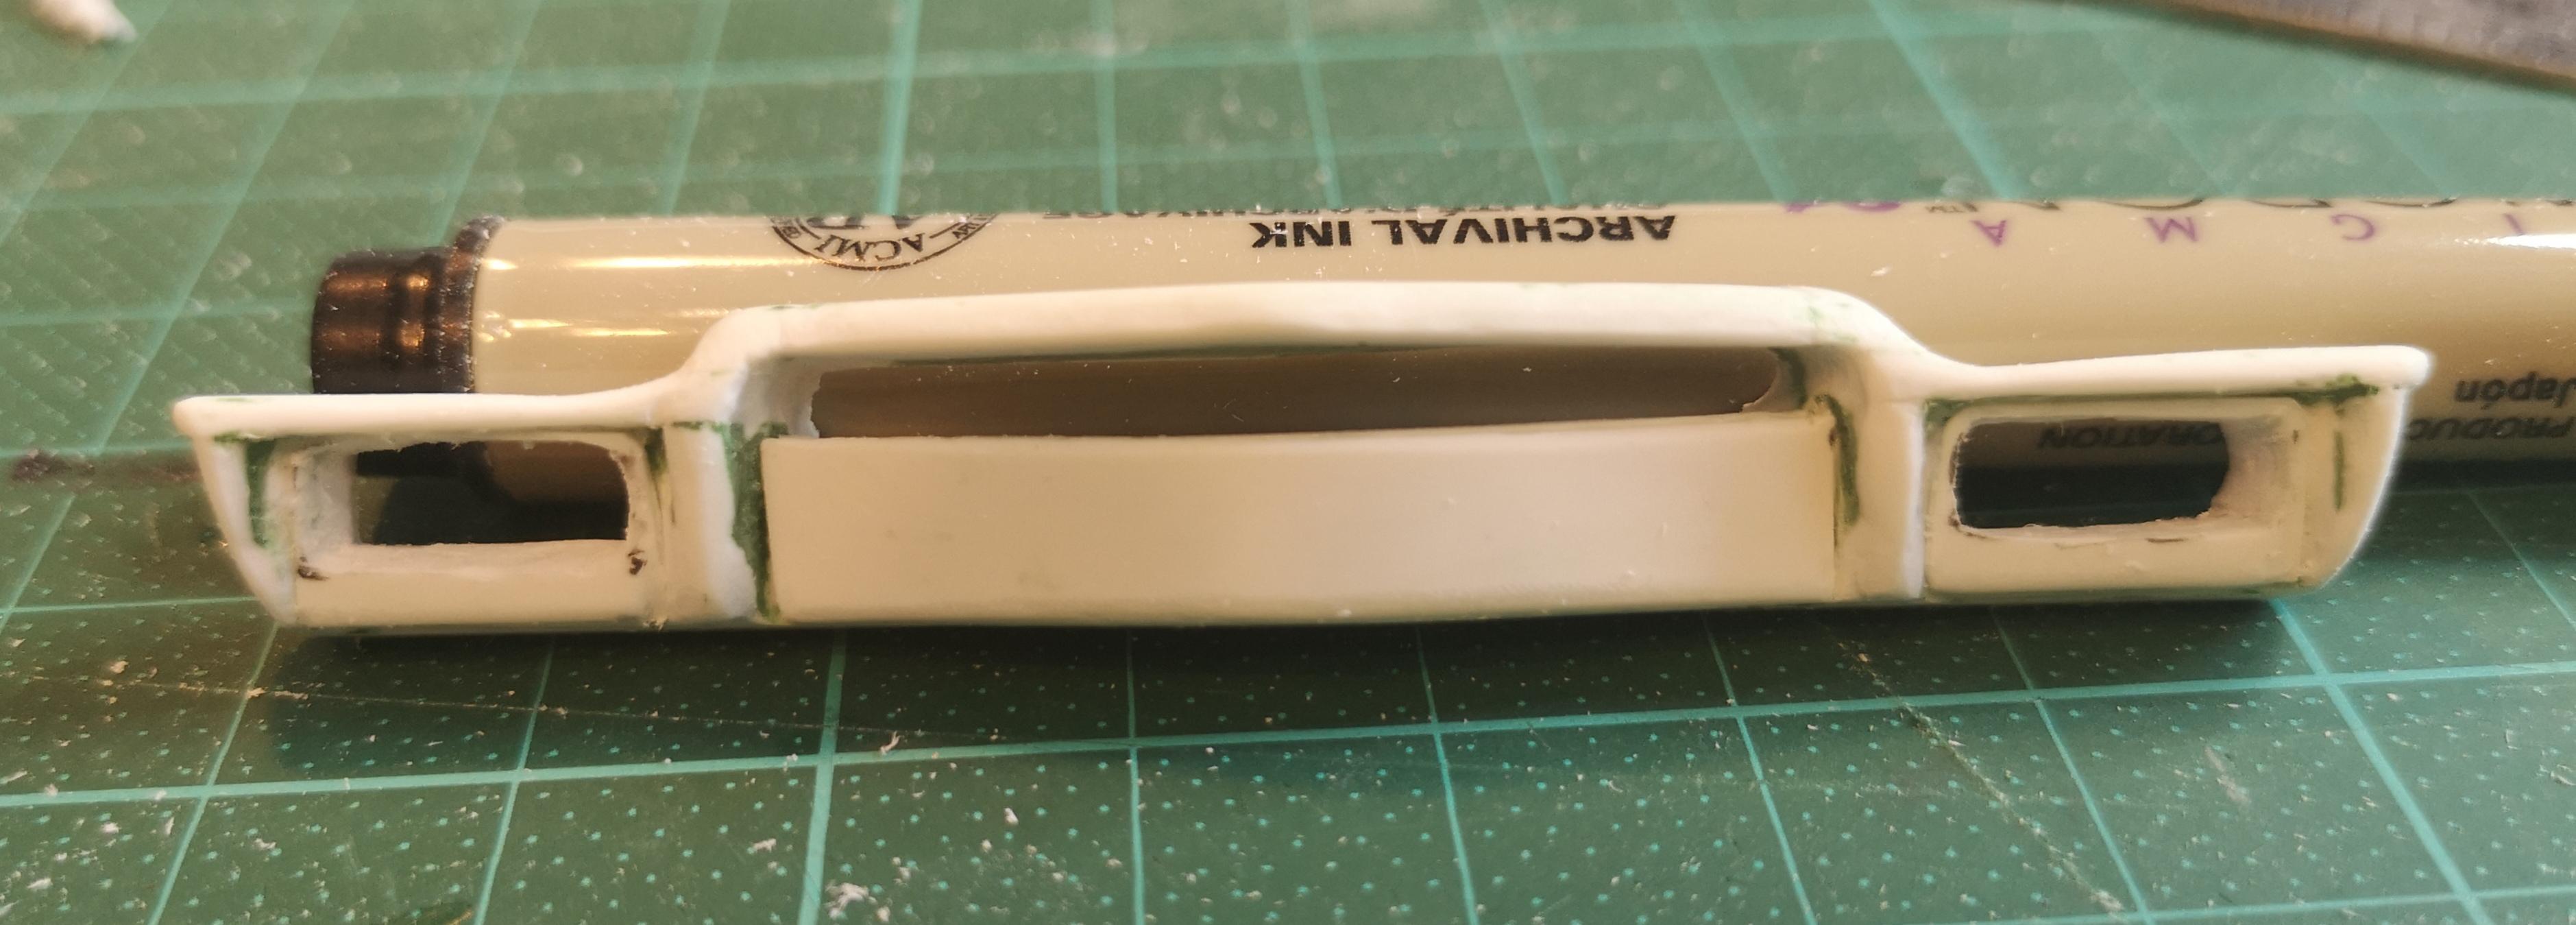
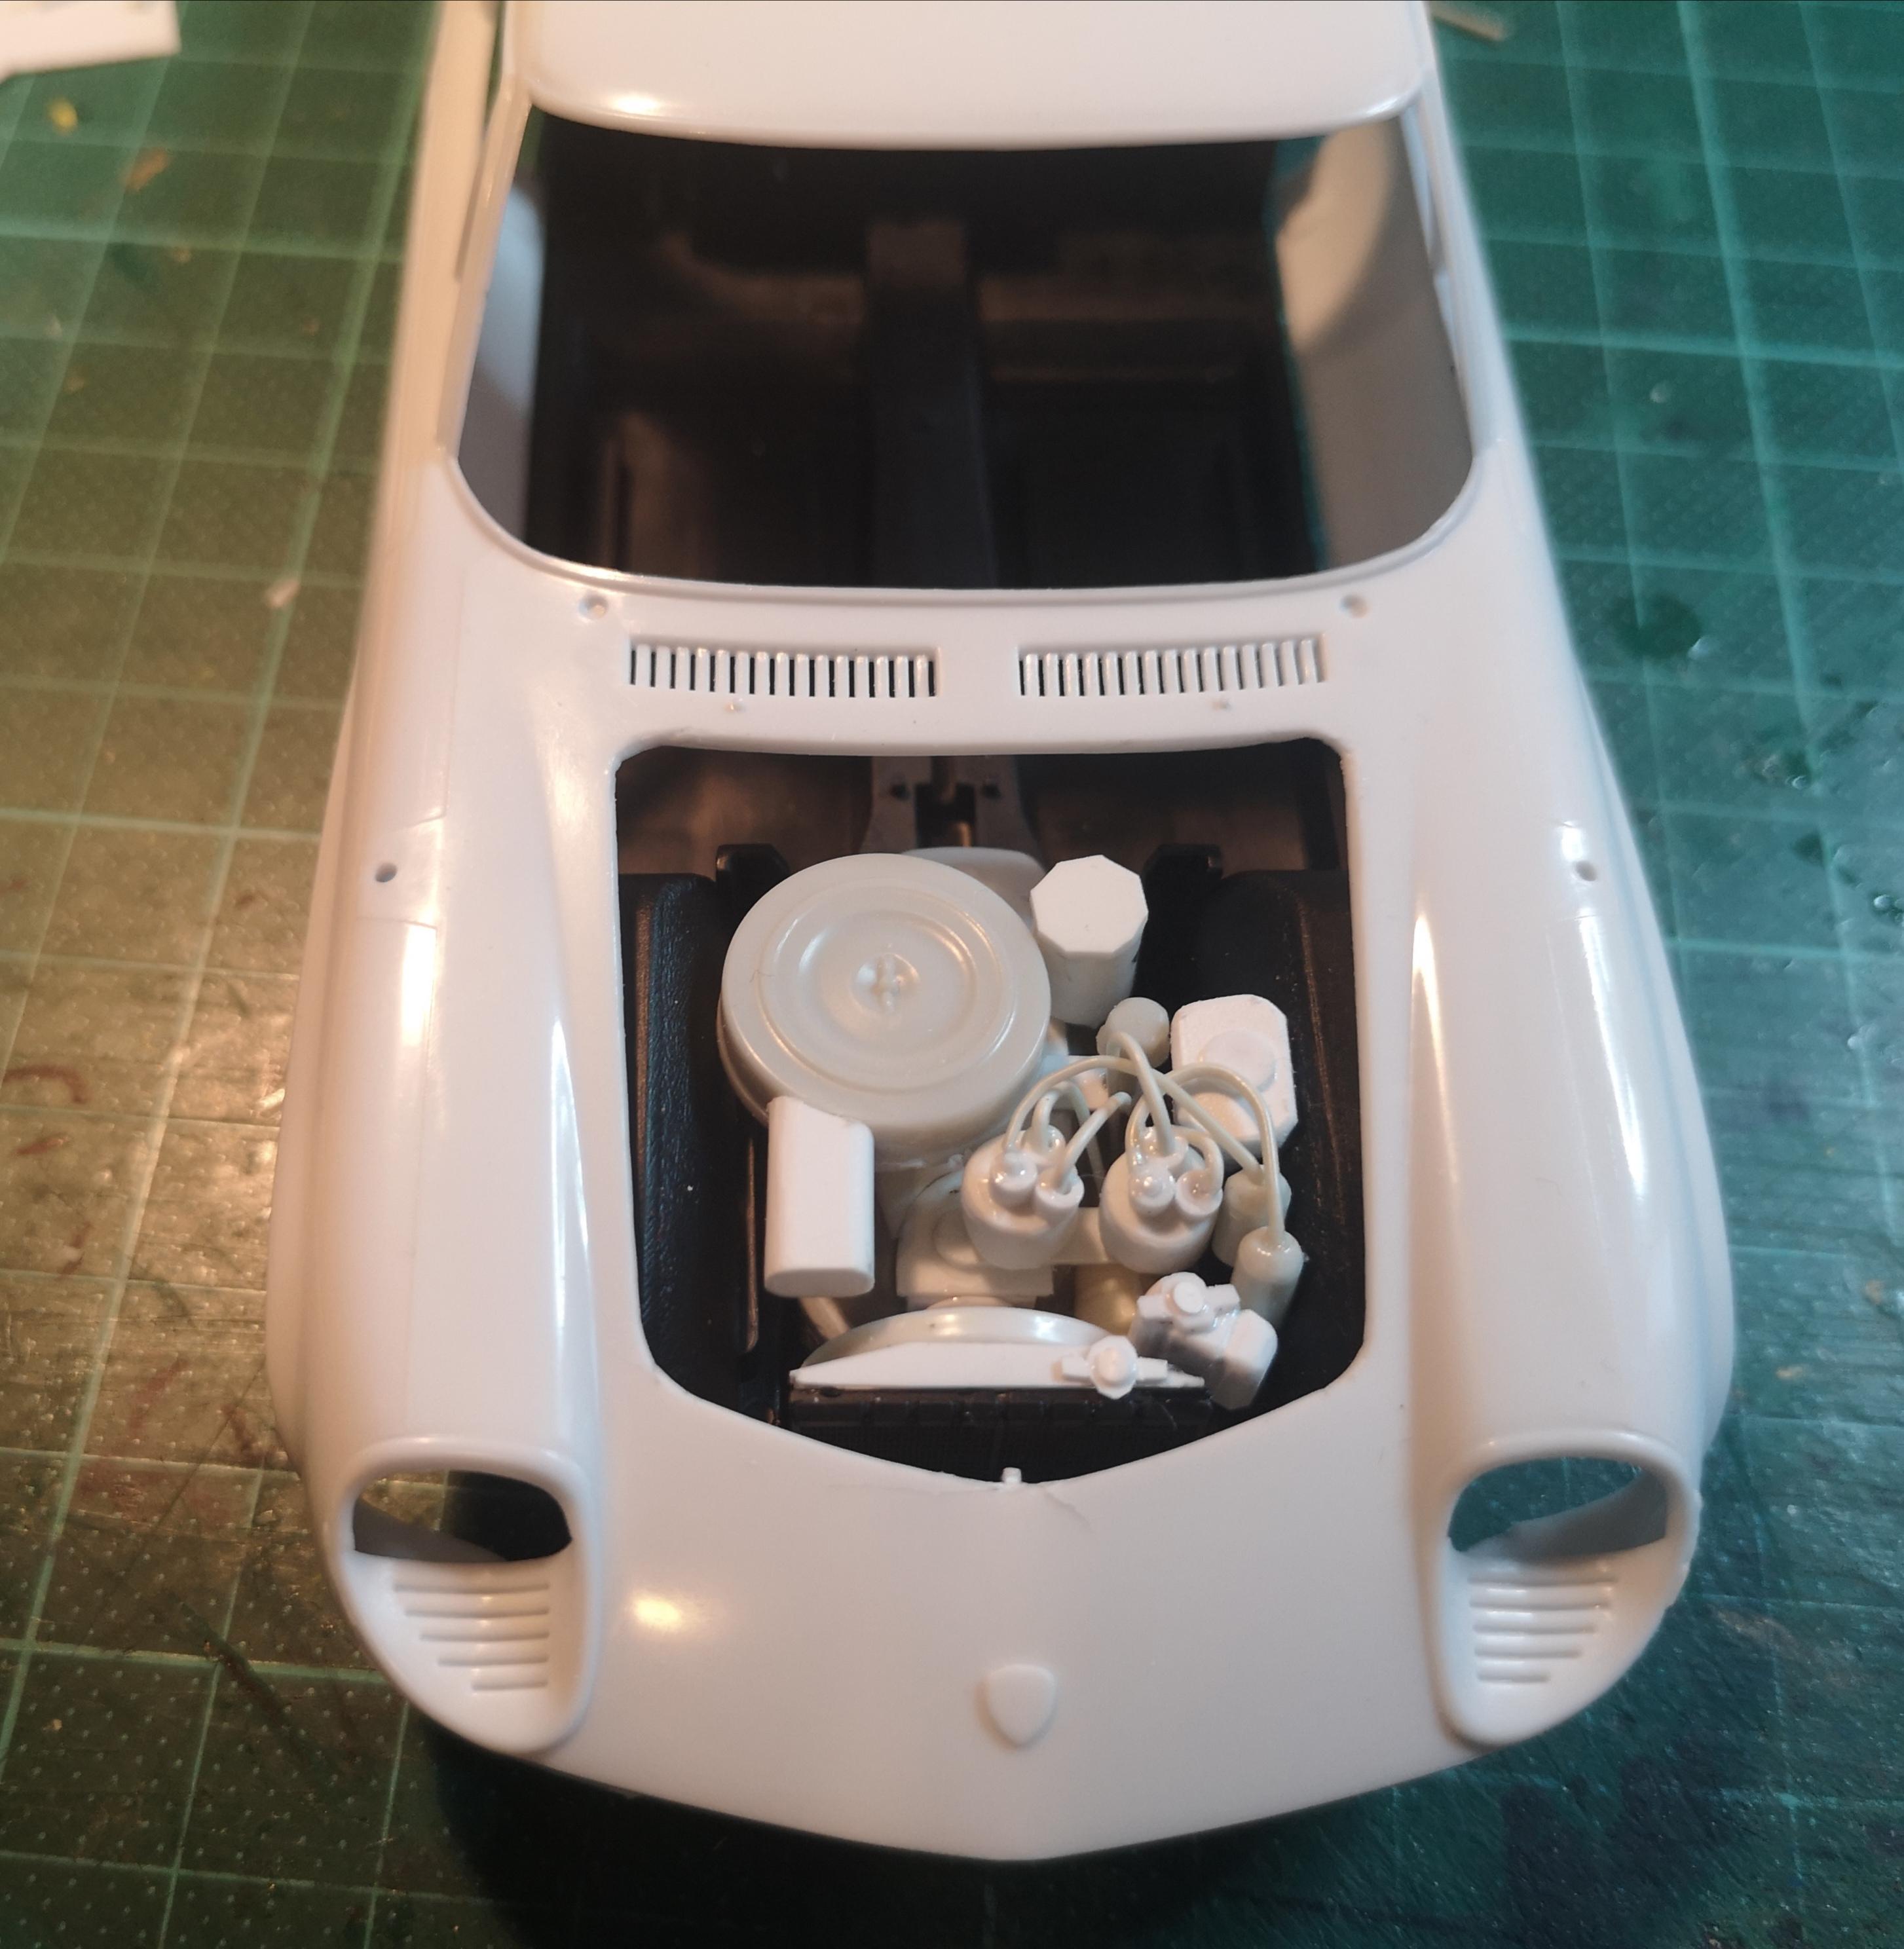
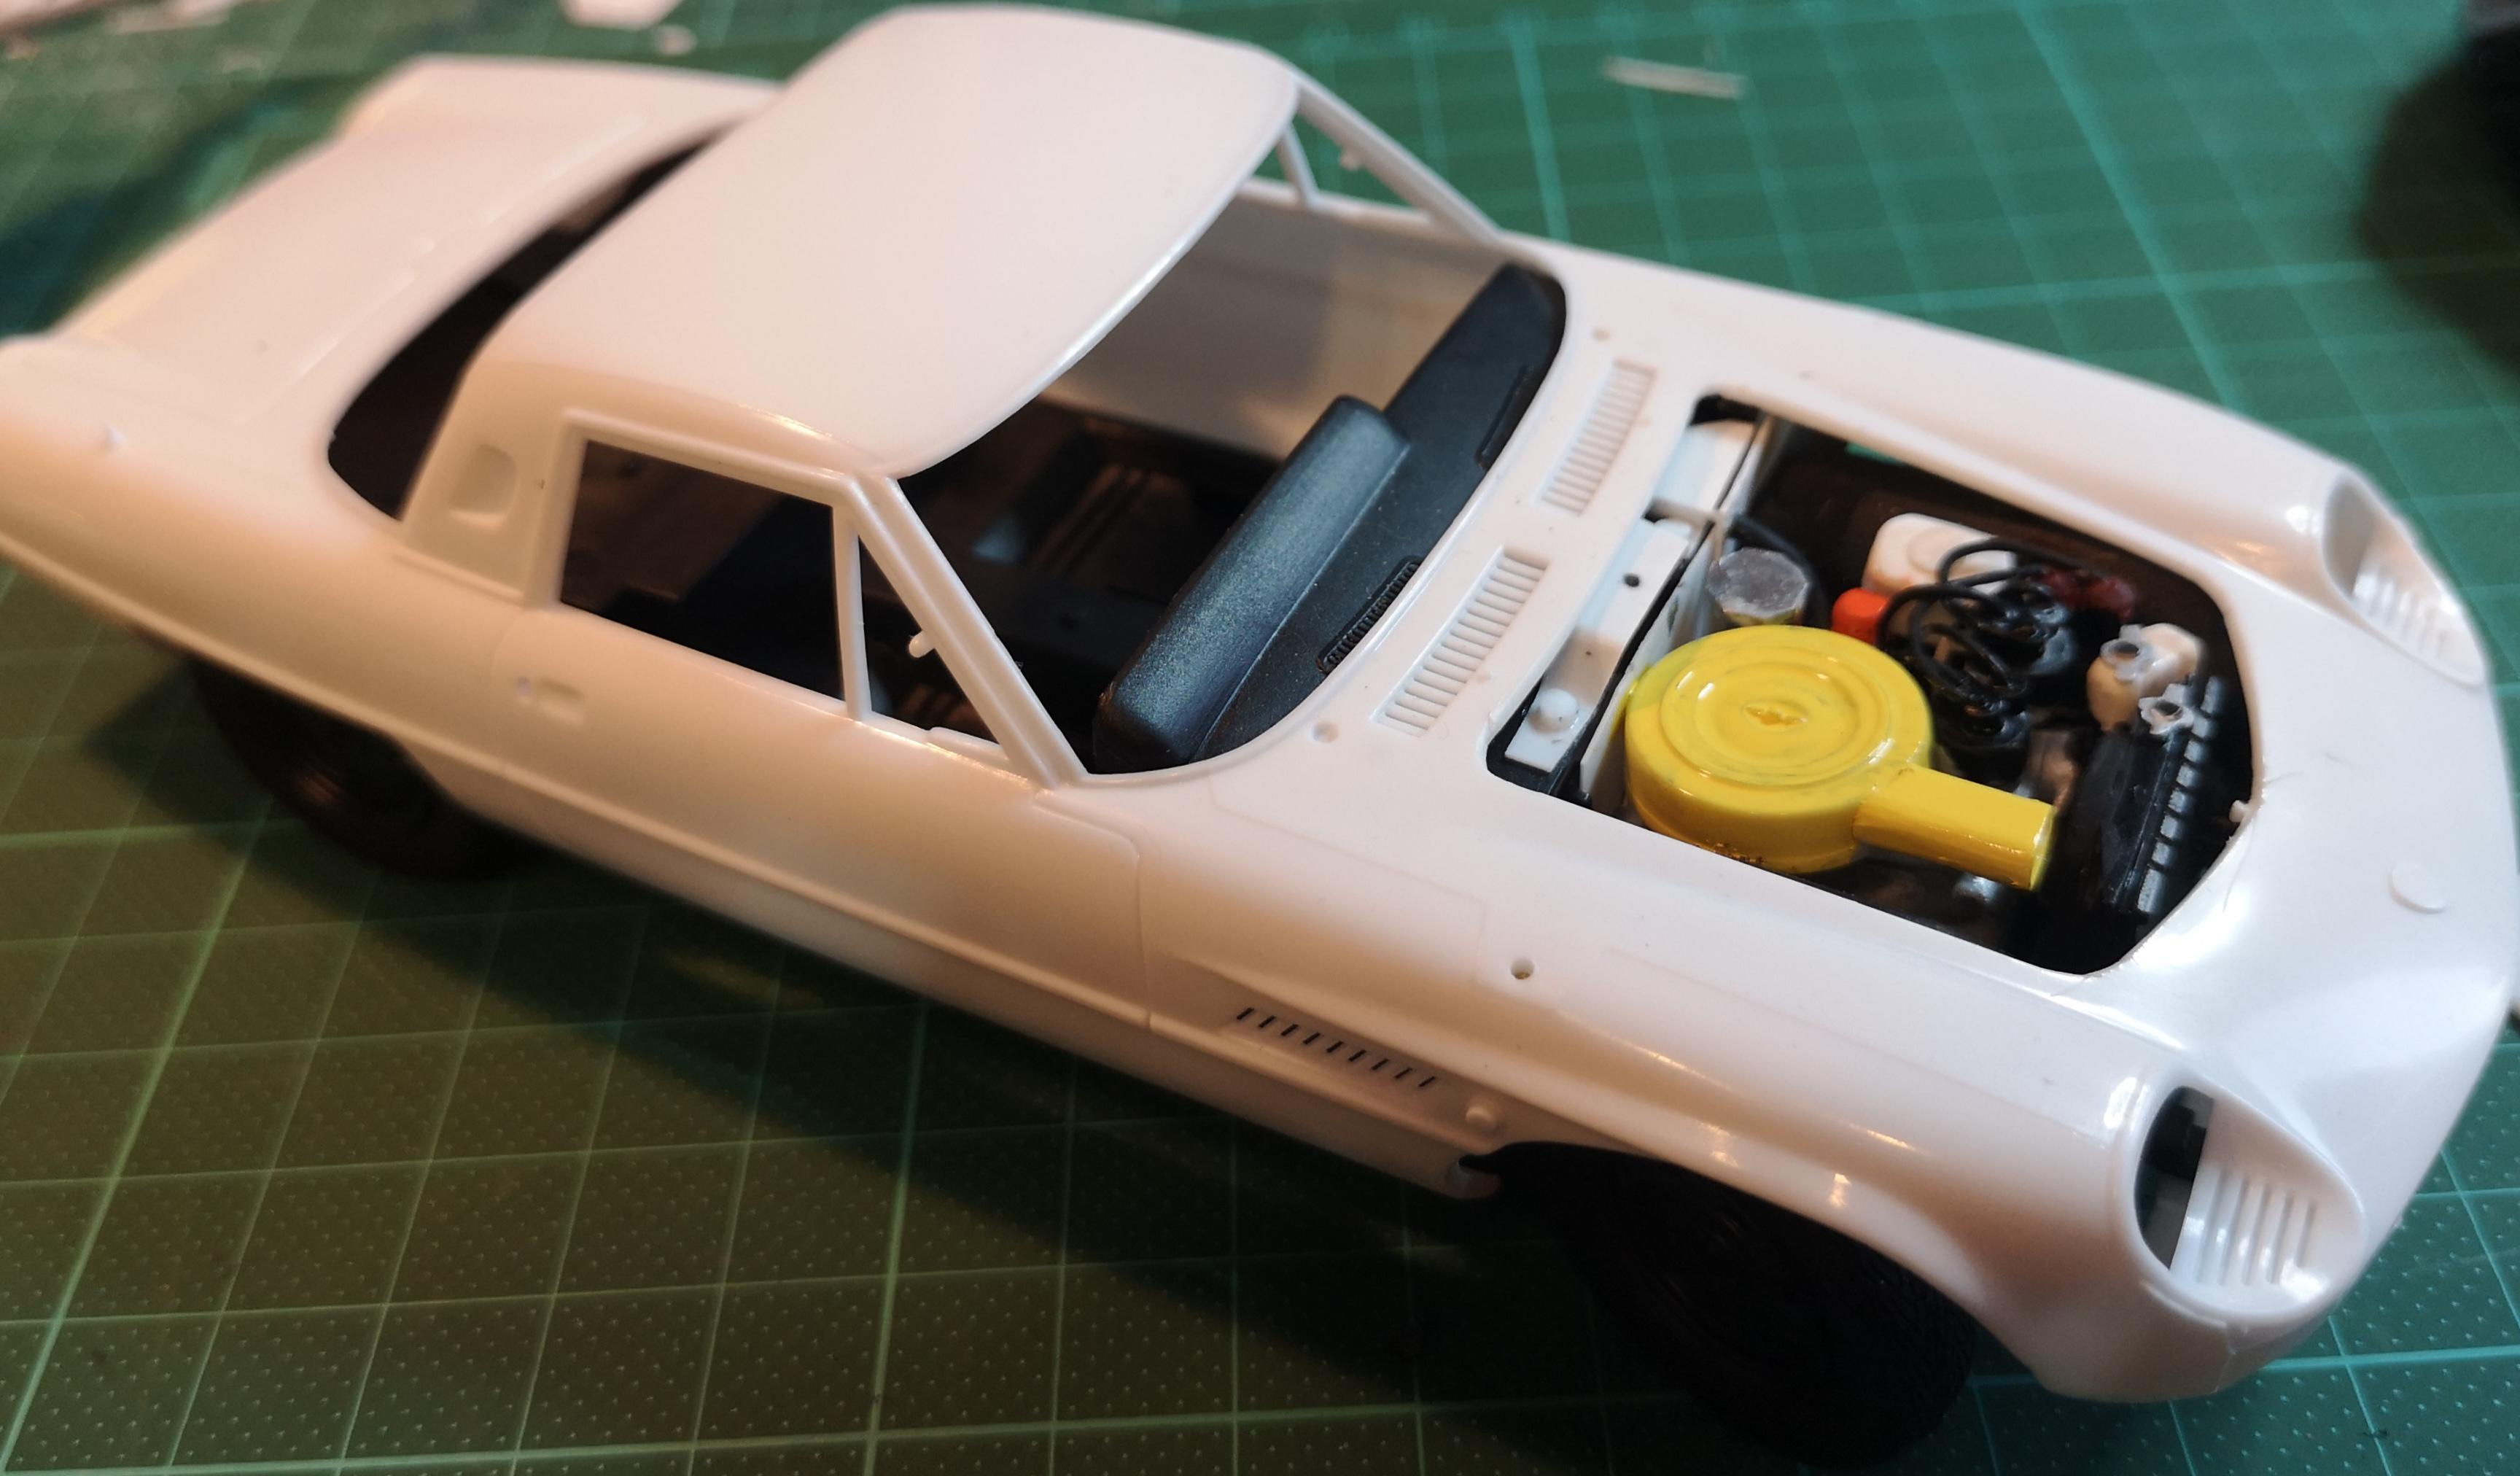
Thanks everybody. There's nothing special with this wankel engine. I cut off the bottom of the half engine that was in the kit. Then I searched my scrap box for a useable piece of plastic, shaped it with my Dremel, glued it in the engine bay. Then I started to study pics of the real Cosmo engine and piece by piece made and assembled them on the engine block. I think what you can't see, doesn't matter when the model is finished. The engine block got the original oil pan underneath, the clutch bellhousing and the transmission were modified a little to match the driveshaft. Today I got the white paint sprayed and the wheels are now silver tone.
-
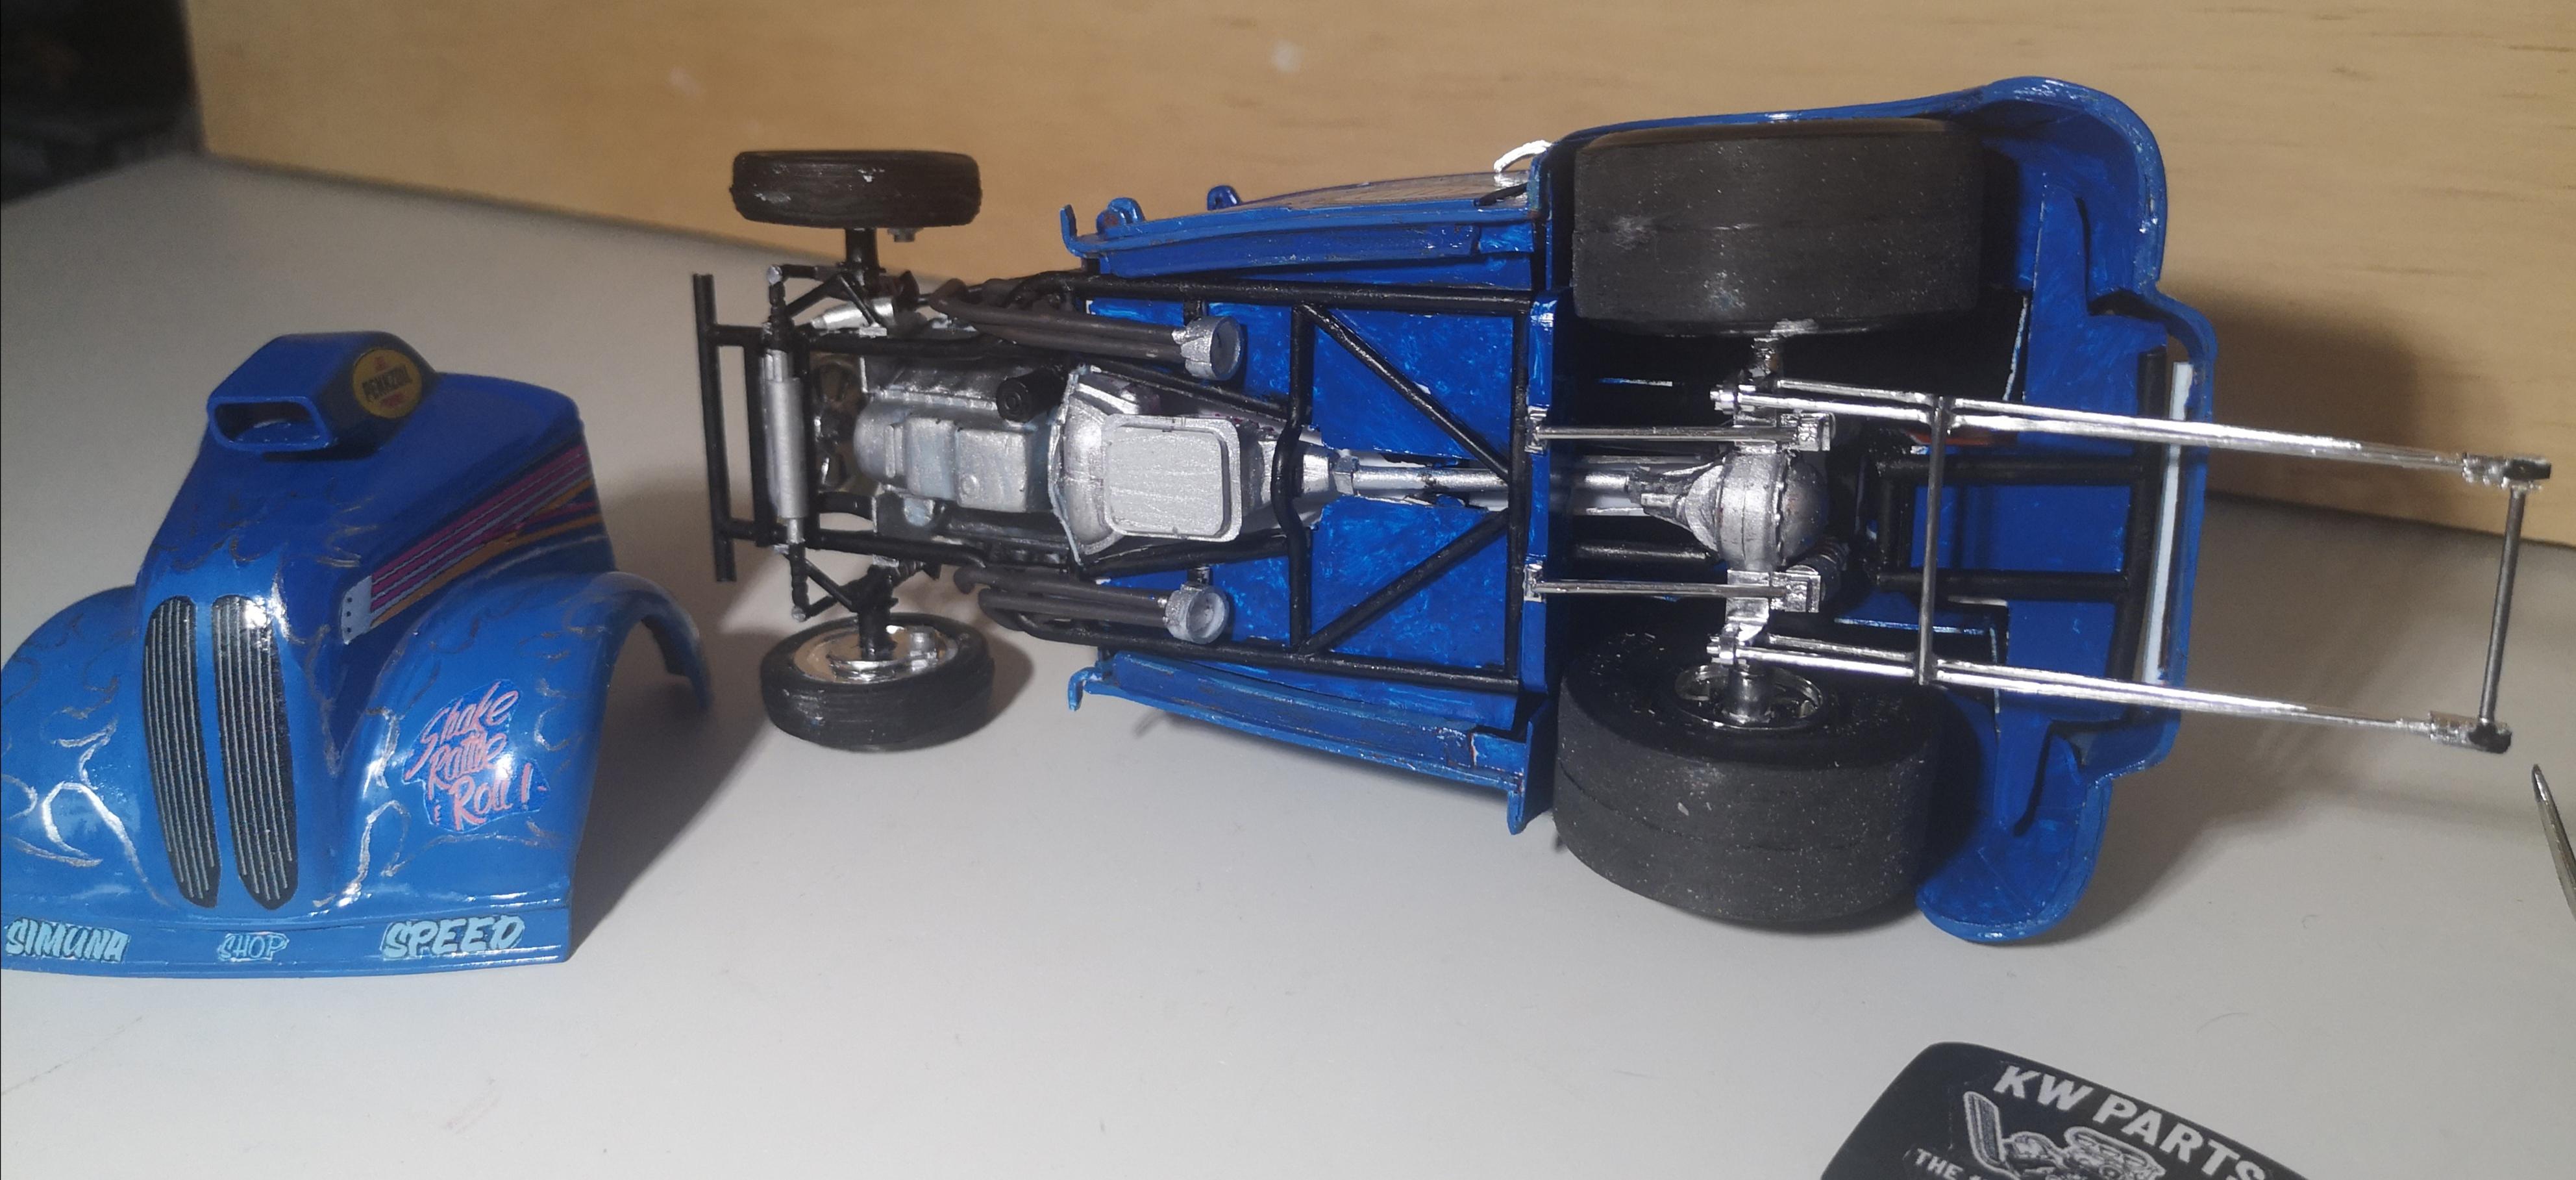
Antti Kivinummi, a finnish drag racer has had this Anglia ca. 20 years. I got the 1/25 Revell kit Anglia Street Rod gasser, chopped roof, wide rear fenders, made a tube chassis, BBC 490 cid, PG trans, 9" rear end, four links, coilovers, disc brakes, roll cage, headers, intake, lift off bonnet, scoop, gas tank, rear wheels, wheelie bars, all the decals etc. Lots of fun and challenging scratch work for weeks.
-
Mazda Cosmo Sport 1968 + wankel engine
Reuhkapelti2 replied to Reuhkapelti2's topic in WIP: Model Cars
Thanks, the metal engine Cosmo looks great. I just like making parts out of Evergeen plastic. -
Hasegawa is a new kit manufacturer to me, but what a perfect fit on the parts. No need to clean anything, just cut loose and put together. That could sound boring to me, I'm used to fix and adjust and make my own parts in every model I build. Well also this time I couldn't resist some scratch building. I want to make a Mazda Wankel engine under the hood, since Hasegawa didn't do it. No cursides on my shelf.
-
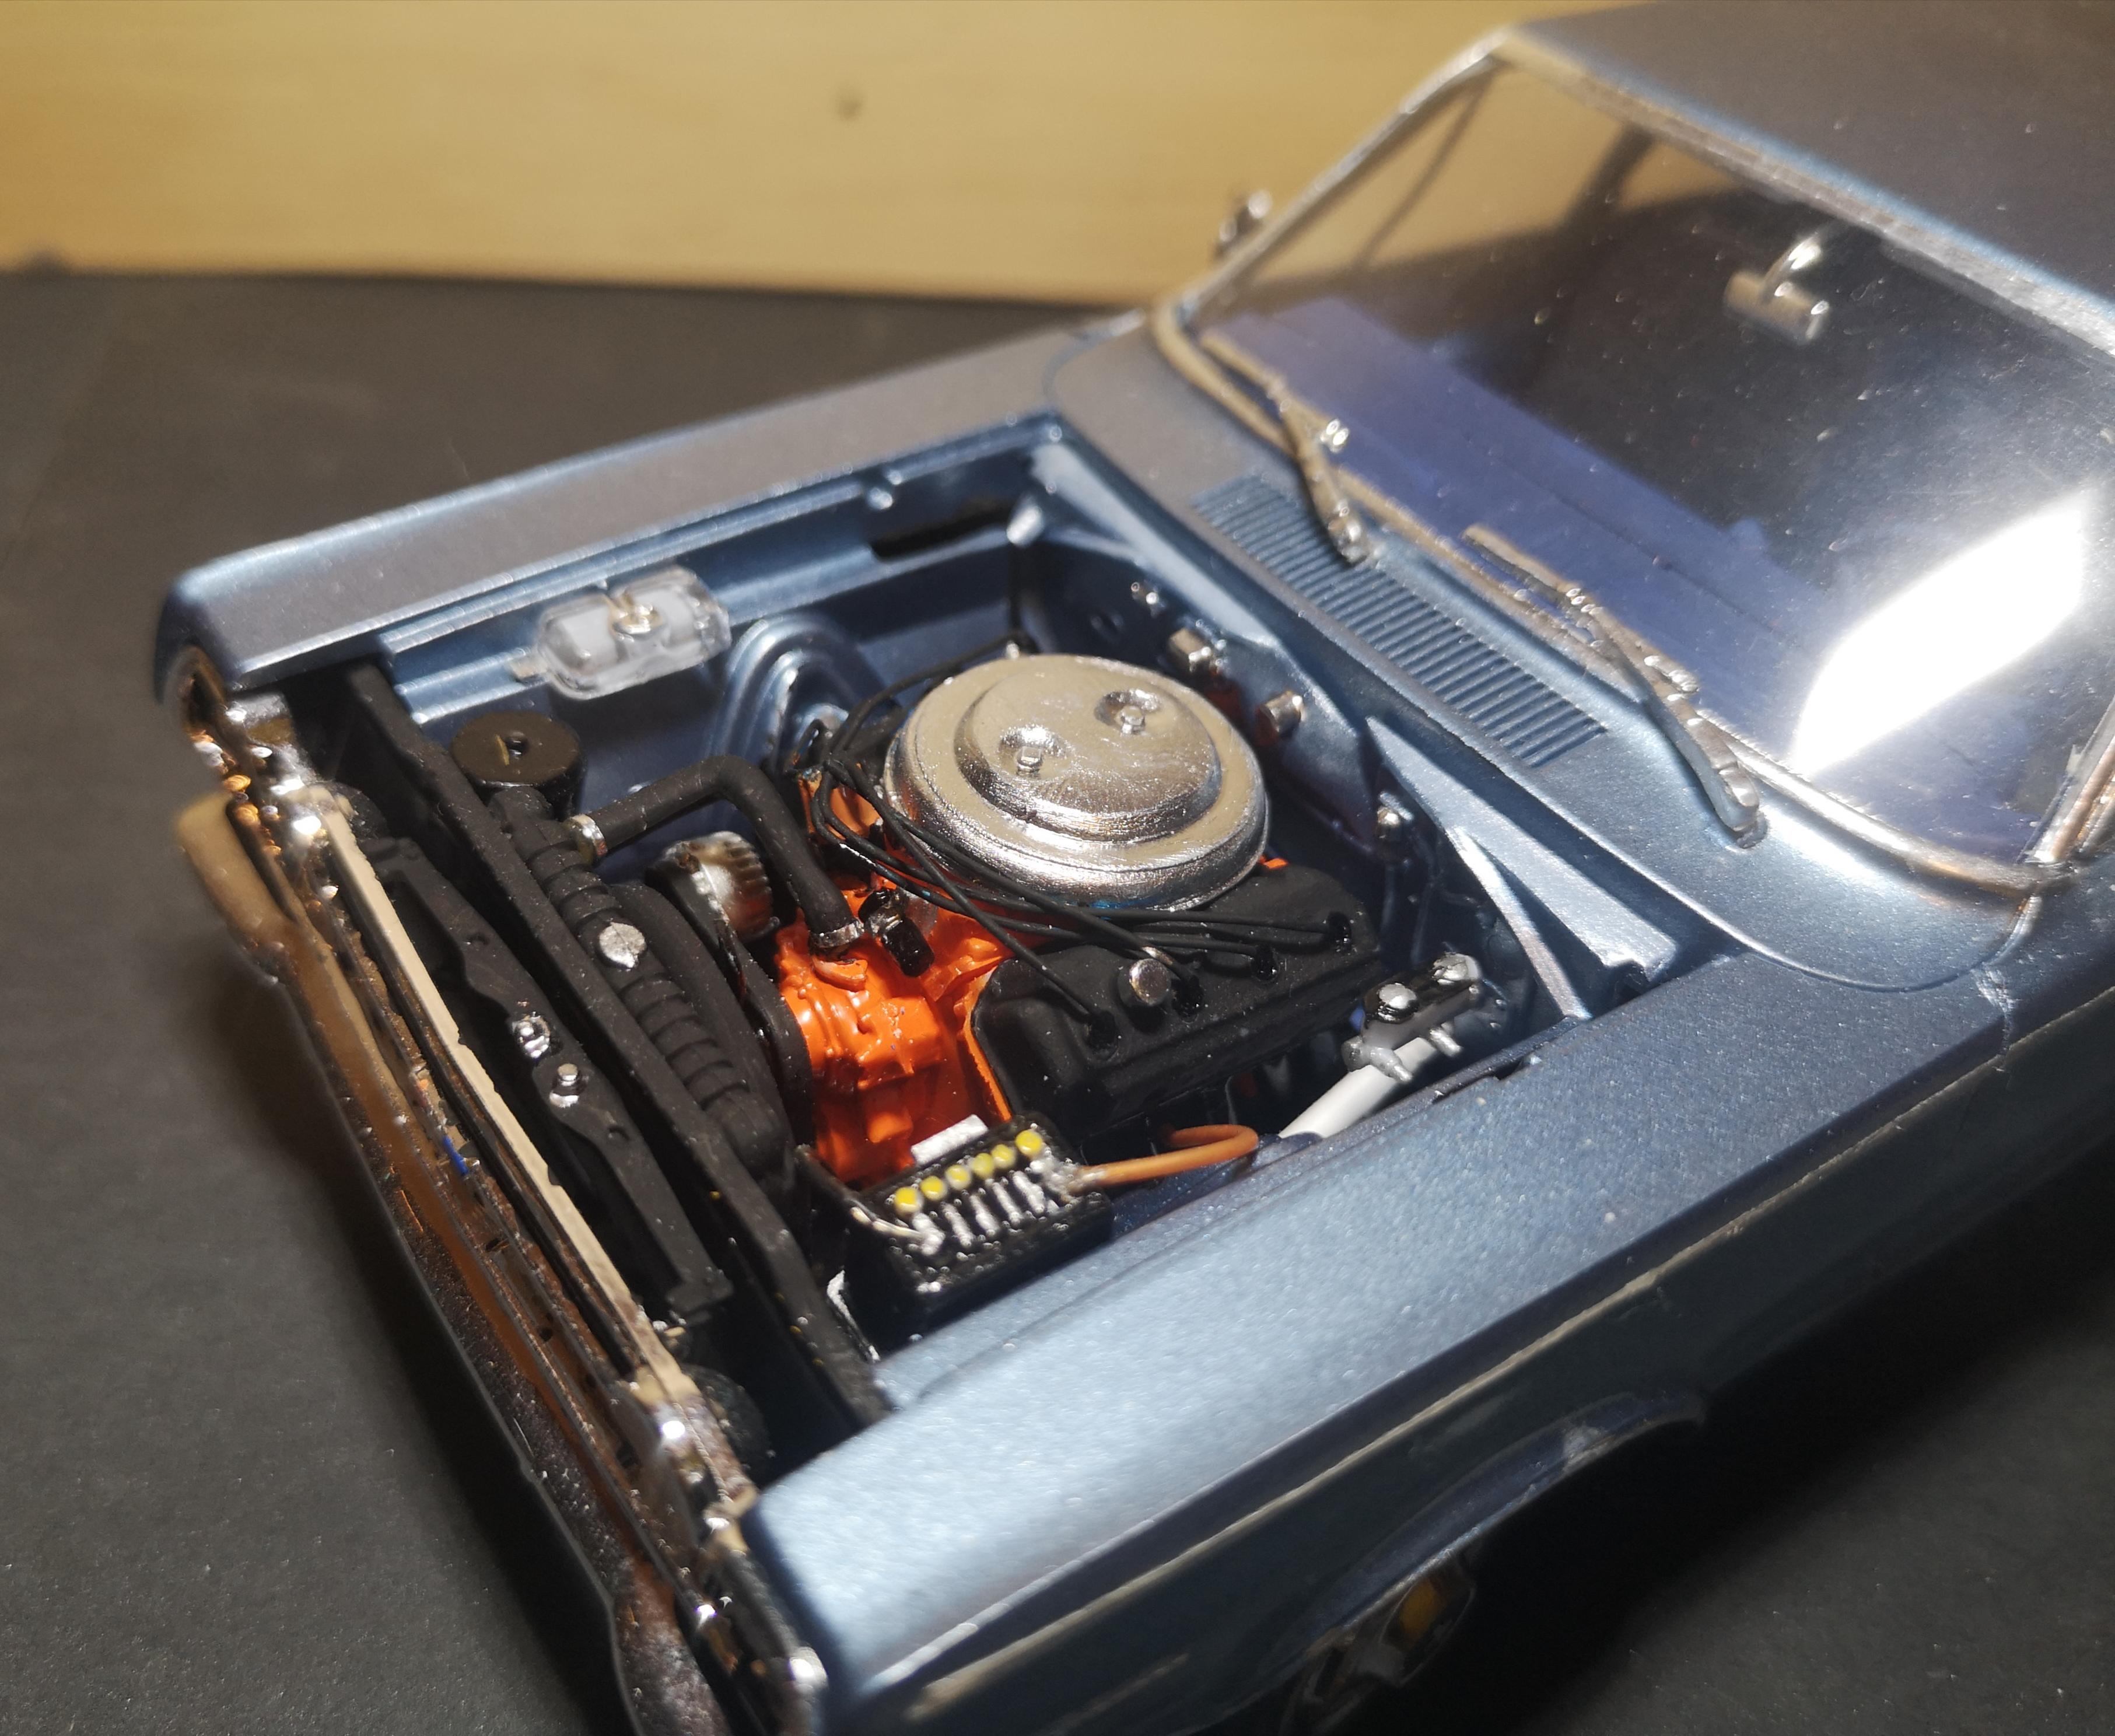
This 1/25 model presents the '67 Plymouth Belvedere 4 door HEMI car in Finland.