Dave G.
-
Posts
1,708 -
Joined
-
Last visited
Content Type
Profiles
Forums
Events
Gallery
Everything posted by Dave G.
-
Spraying craft paints with an airbrush
Dave G. replied to DoctorLarry's topic in Model Building Questions and Answers
I've been tweaking craft paint reducers now for the better part of 10 years. I could say that now with the new Createx 4021 reducer, that those days should be over. But probably are not, knowing me ! Think about it, 4021 was produced to specifically work together with 4030 and or 4050 intercoats in acrylic paint... A lot of science went into that after 4012 had hickups in those products. 4011 came out and now 4021 to aid flow. -
Spraying craft paints with an airbrush
Dave G. replied to DoctorLarry's topic in Model Building Questions and Answers
I have posted it here before and I'm not aware of anyone else that has till today lol !! Anywhere from 10-20% is enough to kick the paint over to poly acrylic. Leaning more to the 20 or 30% side, you can usually thin less too and still have flow through the airbrush. It's great stuff. Better leveling with a heat gun too. I use 4030 now in all waterborne acrylic paints that I use, not just Createx. -
Spraying craft paints with an airbrush
Dave G. replied to DoctorLarry's topic in Model Building Questions and Answers
Ya, his recipe is a little varied from one of my own. About the same ratio water to alcohol but then I add about 10% denatured alcohol, and use Liquitex retarder. The denatured alcohol itself adds flow but the retarder stops tip dry. I have several different mixes actually, some have no alcohol. There are a couple of paints in the DecoArt lineup that don't like alcohol, fwiw. But 4021 and 4030 have changed my whole craft paint game. Especially the 4030. -
Spraying craft paints with an airbrush
Dave G. replied to DoctorLarry's topic in Model Building Questions and Answers
I've found craft paints to be as tough as any other if put down over well cured primer. I have a couple of different good working recipes for thinners that I've shared with others here. But lately have been adding 15% or so of Createx 4030, which cross links the paints to be poly acrylic. Then thinning that combo with Createx 4021 reducer, which has a little retarder in it. This makes for a whole new and acrylic strengthening process. And it goes on more solvent like in nature. I still use a hair dryer between coats, just as I do with Createx paints. Another reducer that works well with craft paints is US Art Supply airbrush reducer. This is made with acrylic resins in the reducer so it won't break your paint down structurally, regardless how much you thin it. However, flat colors will become more semigloss. So I mix that reducer for flats, if I want it flat, in a separate bottle about 50/50 with water.. I thin by viscosity not by ratio. -
If I'm going to shoot Tamiya lacquer, though airbrushed, I use Mr Surfacer primer. Mr Surfacer primer is similar in nature to Tamiya primer. I then wait a couple of days, or even because life goes on, a month before I get back to color coating.. That lets the finish gas out before boxing up. I feel you had uncured paint on the model, be it primer when the color was sprayed or even the color, then boxed it up un vented. I do often use a dehydrator though, about 30 minutes for Tamiya lacquers. 4 hours with enamels, and about 30 miinutes for acrylic.. Then a couple days of room air before boxing. And your primer really needs to be cured good before color coating. Or it's going to try and gas out through the color, it may shrink more as well, thus wrinkling etc. Tamiya lacquer gloss colors take very well to about 30 minutes @ 108f in the dehydrator. You can get plastic containers at Dollar Tree stores. And you can either make vent holes in the sides, or flip them over, placing over the model ( obviously no lid), slightly raised off the bench surface, so air can circulate around inside. A couple of guys over in the FSM forums, even utilized a light bulb and computer fan to create drying boxes from larger containers. The main thing though is air, so the cure rate isn't hindered.
-
I've gotten my 1/16 scale kits from Ebay, except the AMT T Bird, that was from HL. But I build those stock. Model A, The T Bird, Vintage classics. So far nothing over $60. The only rod that would interest me is the Big Deuce, as I built one back in 1965. Wouldn't mind that again. Prices get crazy in 1/8 scale it seems.
-
Not sure you want to squirt a car body with Rustoleum 2X, then stick it in a closed up box to dry for a year, either. Seems to me that might be a bit futile. Just a thought.
-
Was it Tamiya primer in spray cans that you used ? And how long did you wait between priming then color coating ? Yes, I've used Rustoleum 2x on models, in fact one of my chassis black enamels is their semi gloss black 2X. But I decant it, ad a slight bit more thinner and airbrush it. To spray from the can is a total bomb job, IMO. But some of the folks here have reported liking Krylon Short Cuts. There is always Testor's enamels.
-
How do YOU clear coat?
Dave G. replied to dreadpyrat's topic in Model Building Questions and Answers
Ya its a high gloss clear coat for use with fabrics, or in fabric painting. Thus I imagine has flexibility. I'll stick with what I'm using, as they are designed for hard surfaces. Or in the case of 4050, to convert the standard color line from a flex type coat to poly acrylic hard coat. Or as top coat. 4053 is top coat only. 4030 is inter coat only. -
How do YOU clear coat?
Dave G. replied to dreadpyrat's topic in Model Building Questions and Answers
I shoot Createx, never heard of that top coat number. I'll have to look that up. But I'm using 4050 or sometimes 4053 high gloss, both are UV protective, Personally I think polished 4050 is a dead ringer for polished Nitro lacquer though. IMO, either polishes up easier than X-22. In fact 4050 if put down right, you can go right to buffing without sanding. then polish. I'm one who thins X-22 with lacquer thinner, or the Mr Leveling thinner, it's generally ready to buff in a couple of day, maybe 3 days but Createx buff easier for me still.. Is that 5604 a new product ? -
Back in the day we didn't have modified kits. We kit bashed them, mostly old coupes. But a good source of tires for Modified stockers was slot car tires in the right scale. You got that lower wider profile needed. Course I have no idea what might available these days. But it worked back in the 1960's. I remember building my first cut down 36 or 40 Ford coupe, put in a small block Chevy as I recall. And those slot car tires made the build. I cut my own wider rims from the kit rims.
-
I'll just say that first I'd get a scrap piece, and since it seems you have the AK primer, to prime the piece with that. Let it cure up, then try the auto base color coat right to that and see what you get. It may well be fine. If you're doing candy, then I assume your first color is silver or gold. It may go right to the AK primer. In shooting candy, you just need as much base color as to get everything covered, usually mist coats are fine, as long as the metal flecks are even.
-
On die cast model train kits, I used the Zap a gap to install the brass pieces. That was decades ago, still holding today. In wood turning, if you know what you're doing, you can turn out small tree ornaments and finish those to a super high shine using thin CA on the lathe. And use the gap filling CA to hang wire for a bell gong in bell ornaments. In fact you can do block glue ups with CA before turning, you can glue on top domes or bottom spires on wood ornaments using CA. As I said, I don't use Ca much on plastic models. And since I'm never in any rush to build my kits, the strong glue I use is the Black bottle Testors. The weaker glue is the orange tube Testors. And Testors clear parts glue for chrome or glass. Those are my standard glues to use on any plastic kit. Again, I'm never in any rush. With the ornament turning I always was in a rush or under pressure as the season approached, and CA was perfect.
-
I don't use much CA glue for plastic models. But it is good if you need to glue metal parts to plastic. So is epoxy. I like Zap Ca products. And the 5 minute version of JB Weld for epoxy.
-
How do YOU clear coat?
Dave G. replied to dreadpyrat's topic in Model Building Questions and Answers
Russ, till Steve replies, I'll just say that how his builds turn out in most cases has little to do with the kit itself. But how he implements the builds. There are many kits out there in this era to build, maybe not that specific convertible or Chrysler but a lot available. -
Early '70s funny car question
Dave G. replied to Monty's topic in Model Building Questions and Answers
Ya, I dragged raced in early mid 70's ( not funny cars) and saw lots of bodies up. As Tim said, some were just color coated, some raw. No finish work done though. Just color in the raw glass or not. Some of the alcohol guys worked on a lower budget than sponsored fuel cars too. To me funny car died after the 70's, !! It was a magnificent time in funny car history, to me. -
How do YOU clear coat?
Dave G. replied to dreadpyrat's topic in Model Building Questions and Answers
Over water based acrylic paints, to include Vallejo, Craft Paints and Createx paints, I've settled on Createx 4050 thinned a bit with Createx 4021 reducer, which has a little retarder in it. In my experience this buffs up quicker and easier than some others and it's UVLS protective. But note that it does not dry with full gloss, you have to polish it. Not really wet sand but buffed and polished. For Tamiya or alcohol acrylics, I use Tamiya X-22 thinned with Mr Leveling Thinner. That's if I use clear at all on the glossy X series. Because the paint itself buffs up pretty well right in the color coat. Both color and X-22 level well using Mr Leveling thinner. If it's an auto/car I'm finishing, pretty much I only use clear if base coating flat colors. Or if there is a decal situation, but that's a little bit rare in the classic and antique era I build. Edit: by the way, half the time I don't use acrylic, water or alcohol borne. LP lacquer by Tamiya comes out gorgeous if sprayed right, to the point that to me, polishing is an option. Then there are enamels, which come out right up there in terms of finish as well. But that wasn't the thread question. -
Airbrushing Testors enamels???
Dave G. replied to doorslammer68's topic in Model Building Questions and Answers
On a completely different note but still enamel. A couple of weeks ago I had decanted some Rustoleum 2x semigloss black into one of my mixing jars to store and have on hand. Today I put some of that in my Paasche VL metal side cup and sprayed the loose chassis parts to my 34 Ford pickup build. Along with the interior floor. The difference between airbrushing this stuff and using straight from the can is phenomenal, in terms of over spray, even application. Usually I add a slight bit more thinner to 2x, with this I did not, but the .5 tip handled it. That semigloss is pretty loose to begin with. In the mixing cup after all settles, the layer of pigment on the bottom isn't a whole lot. But it still could have stood an extra bit of lacquer thinner. It was fine for what I was doing though. It sprayed great through the airbrush and cleaned up super easy with hardware store lacquer thinner Anyway, little Testors bottles aren't the only way lol. I had that can of black semigloss left over from a couple of summers ago, when I repainted a metal patio table and chairs. -
Airbrushing Testors enamels???
Dave G. replied to doorslammer68's topic in Model Building Questions and Answers
You bring up a good point, re tip size and thinning. When I used automotive enamel reducer in Testors paints, it was back when Dupont was producing 3812 reducer, which I stocked for 1:1 painting before moving to acrylic enamel.. I thinned with that back then, and every paint I ever shot in an airbrush went through my Badger 200, which was either lacquer or enamel. Lacquer being thinned with Dupont 3661 LT.. My favorite tip was/is the Fine tip which is .25 on that brush. Lacquer and enamel got thinned so it flowed right through that tip. You just got to know the consistency, it wasn't even a ratio thing in my head at that time. Flowquil paints got their own thinner. Later, with years moving along, in fact decades, I got on to using acrylics, I then used the medium .5 tip in the 200 but quickly changed to a Paasche H.. Lately now, if I shoot Testors enamels I use the Paasche VL with #1 tip, which is also .5. My H is relegated to acrylics now using the #5 tip.The Badger stays with the .25 tip for lacquers. Between the three airbrushes I no longer change tips or needles, I just plug in a different airbrush using the quick connects I installed at the end of the hose.. Understand that this didn't all happen over night ! It's morphed into this over the last 50 years or so, maybe 55. -
Airbrushing Testors enamels???
Dave G. replied to doorslammer68's topic in Model Building Questions and Answers
The only paint confirmed by the makers, I know of that promotes lacquer thinner causing a harder shell finish, is Tamiya.. That's concerning their acrylic line of paints. I don't know, nor have I heard that thinning Testors enamels with lacquer thinner causes a harder finish. It may be cured a little sooner but to me that's surface cure. Deep curing still takes time. You definitately can handle it sooner, but that doesn't mean it's deep cured. My own results regarding using lacquer thinner in Testors enamels has given me super level and high gloss results. Thinning 1-1.. Also to mix odorless mineral spirits and hardware paint thinner together and thinning with that gives awesome results. Curing time is much the same as using the Testors thinner in that case. I haven't bought Testors thinners in decades. Maybe since around 1970. -
Airbrushing Testors enamels???
Dave G. replied to doorslammer68's topic in Model Building Questions and Answers
Have a look at this video, not that I condone his whole practice, just look see ( edit, click the youtube link) -
Airbrushing Testors enamels???
Dave G. replied to doorslammer68's topic in Model Building Questions and Answers
Thinning 1 to 1 with Hardware store lacquer thinner works for me. Ultra smooth and glossy if put down right. And putting it down right is basically a no brainer to many of us here.. -
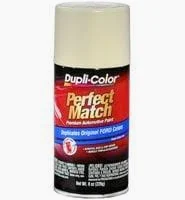
Wimbledon white was basically the standard white for Fords over many years. I used it for pin striping many types of cars besides Ford in 1:1. Great color. I'm just putting up the duplicolor can photo so you can have sample goal to match your Tamiya mix to..

-
Mr Hobby and Mr Color Spray paint
Dave G. replied to Valvefloat's topic in Model Building Questions and Answers
Mr Hobby, is the line of paints. These are divided into Mr Hobby Aqueous, as mentioned above. And Mr Color. Mr Color being lacquers ( the stinky kind, though relatively speaking, on the mild side) and Mr Hobby Aqueous being alcohol based acrylics. Mr Color is cleaned up with solvents like lacquer thinner or acetone.. And Aqueous with water based products, water itself or Fantastik, Media airbrush cleaner, acrylic paint cleaners etc. That's in terms of paints, colors, clears. Then you have the primers, mainly Mr Surfacer. It's all very comparable to Tamiya products. Though they do have a Mr Hobby Metals line too. -
MR. COLOR LEVELING THIINER
Dave G. replied to Andrew McD's topic in Model Building Questions and Answers
My only true hobby shop 20 or so miles away, never had any Mr products at all. So I've always ordered online the leveling thinner. Course I don't always need it either. There is always a way, it's not the end of the world to not have it.