RCprofile.JPG.6b95b19b856bf00a3becd6aeaaa48f3b.JPG)
Ian McLaren
-
Posts
1,360 -
Joined
-
Last visited
Content Type
Profiles
Forums
Events
Gallery
Everything posted by Ian McLaren
-
Great job on the front suspension and struts, I'm looking forward to your next update.
-
Mike this is a great model and a very ambitious project. Good to see another Canadian modeler hitting it out of the park, well done!
-
RCprofile.thumb.JPG.1691ea753d0f0897fdc1b2510cf06775.JPG) Wishbone fabricated and installed to check clearances, temporary four link bars still in use for set up only, rear end set in place temporarily to check drive line angles (silver tube in center of the car front the crank centerline to the pinion. MVI_0138[2].MOV
Wishbone fabricated and installed to check clearances, temporary four link bars still in use for set up only, rear end set in place temporarily to check drive line angles (silver tube in center of the car front the crank centerline to the pinion. MVI_0138[2].MOV
- 352 replies
-
- 3
-

-
- brass
- tube chassis
- (and 2 more)
-
’72 Dodge Demon Drag Racer 1/25 scale
Ian McLaren replied to AmericanMuscleFan's topic in WIP: Drag Racing Models
Great work Francis, I hope you have a great Christmas and a productive New Year! -
Nostalgia Fuel Dragster--Blower Manifold (01/28/23)
Ian McLaren replied to Straightliner59's topic in WIP: Drag Racing Models
Another good update, the cowl is looking as it should and I like the tip with the scissors. I know you'll get the wheel deal handled. -
You a slacker? Not a chance, I am amazed by your productivity on all of your projects especially when your quality is never affected. I have been in a bit of a groove lately but that stops tomorrow. I am involved in a new restaurant project that we hope to open Jan 1/23 so tomorrow I'm off to work on the interior trim (stainless and polished aluminum) and the main cashier kiosk. Apparently being an assistant manager involves more than just standing around. LOL So this photo is about as far as it's going to go at least for the next little while. Unless I can steal a little me time here and there.
- 352 replies
-
- 4
-
-
- brass
- tube chassis
- (and 2 more)
-
Front upper bars are in, allowing the supports for the front motor plate and upper strut mounts to be added
- 352 replies
-
- 3
-
-
- brass
- tube chassis
- (and 2 more)
-
’72 Dodge Demon Drag Racer 1/25 scale
Ian McLaren replied to AmericanMuscleFan's topic in WIP: Drag Racing Models
The deck lid looks great. -
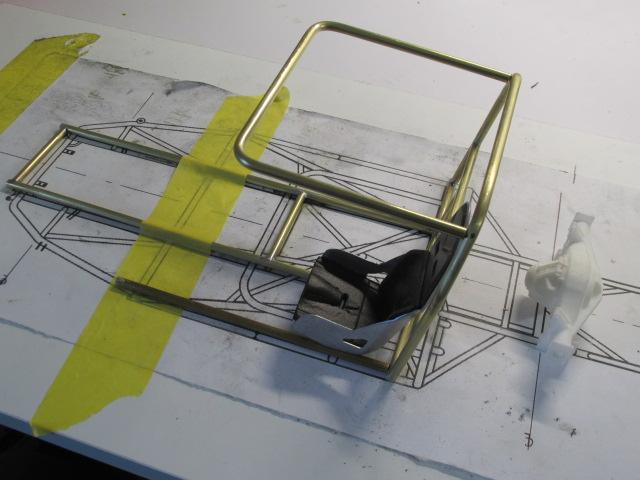
This weekends progress, the body is now pinned in place on the chassis (still removable) rear suspension has been trial fitted, and ride height, stance and driveline alignment has been checked with representation of the 33 inch slicks. Rear motor plate is mounted.
- 352 replies
-
- 3
-
-
- brass
- tube chassis
- (and 2 more)
-
Nostalgia Fuel Dragster--Blower Manifold (01/28/23)
Ian McLaren replied to Straightliner59's topic in WIP: Drag Racing Models
Daniel sorry for the late reply regarding the Power Grid setup on the altered. The wiring I used ran three wires to the dash, and 8 cables forward to the engine (4 on each side of the can). Two larger cables one red one black ran forward to the battery box in front of the engine. The forward cables terminated at the lower corners of the motor plate except for the battery cables. The wiring on the engine is simplified, consisting of the eight thermocouples on the headers, fuel flow ( just above the fuel shutoff valve) , oil pressure and two wires to the MSD coil. -
It just keeps getting better and better, well done!
-
Starting to look like a chassis, and a bit of reference as to how large this thing is getting.
- 352 replies
-
- 5
-
-
- brass
- tube chassis
- (and 2 more)
-
69 pro mod chevelle, chassis started mock ups
Ian McLaren replied to mr68gts's topic in WIP: Drag Racing Models
WOW Just amazing dedication to scale and function, well done! -
More bars installed and I had to build the four link front brackets as I could not find any in 1/12th that were being produced.
- 352 replies
-
- 3
-
-
- brass
- tube chassis
- (and 2 more)
-
Slow but sure, funny car inner bars installed, unlike a full-size car you can't just get inside the cage to install a bar, therefore the order of fabrication is from the center out. Lesson learned LOL
- 352 replies
-
- 4
-
-
- brass
- tube chassis
- (and 2 more)
-
I wish I had the capability to machine aluminum, I am envious of all of you that can.
-
Thanks Paul I'm going through your Chevelle thread and learning a lot.
-
More chassis progress, it's amazing how much more tubing is used in this larger scale.
- 352 replies
-
- 4
-
-
- brass
- tube chassis
- (and 2 more)
-
Nostalgia Fuel Dragster--Blower Manifold (01/28/23)
Ian McLaren replied to Straightliner59's topic in WIP: Drag Racing Models
Very cool information thank you. -
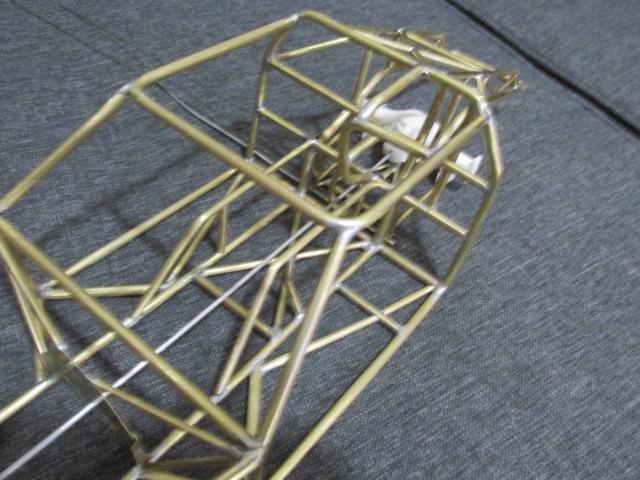
Finally got the part in I ordered over a month ago which finally allowed we the calculate the positions of several major items. Starting with a basic plan but will make changes as I go along to incorporate Tim McAmis's building style where I can. As of today the chassis is under construction. Front section of the chassis is built, square and level as the is the foundation. Main hoop is attached, four link / rear section support bar is in, as are the front four link bracket support bars and the primary drive shaft loop (first McAmis feature). Upper halo bar is bent to shape and attachment points to the main hoop are installed (these are pinned connections to ease construction as well as to add additional structural strength. All comments are welcome.
- 352 replies
-
- 4
-
-
- brass
- tube chassis
- (and 2 more)
-
69 pro mod chevelle, chassis started mock ups
Ian McLaren replied to mr68gts's topic in WIP: Drag Racing Models
Paul I have been terribly remiss in not commenting here on your increadable modeling skills. This is an awesome project and the parts you are producing are virtually indistinguishable from the real thing. I am in awe. -
’72 Dodge Demon Drag Racer 1/25 scale
Ian McLaren replied to AmericanMuscleFan's topic in WIP: Drag Racing Models
Great progress on the body Francis, a detail you would not notice on the finished model, that would be glaringly obvious if it was not there. This is the stuff of great modeling. -
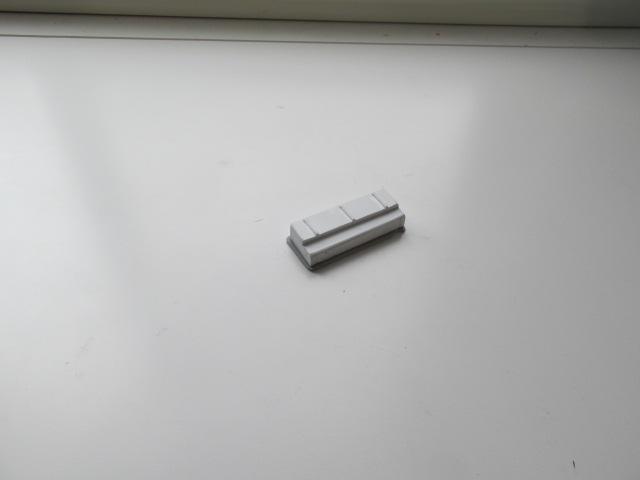
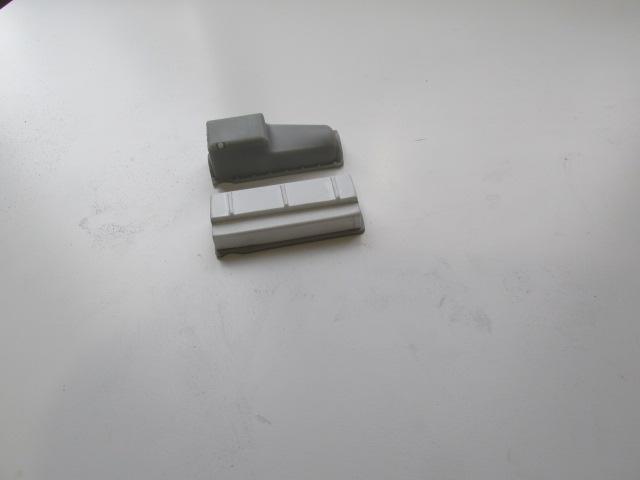
Thank you Marcos, I was going to do it in brass but with all of the edges and straight lines, plastic was much easier, faster and more precise. I the end it will get an allodized finish so the base material was less important.
- 352 replies
-
- 1
-
-
- brass
- tube chassis
- (and 2 more)
-
Nostalgia Fuel Dragster--Blower Manifold (01/28/23)
Ian McLaren replied to Straightliner59's topic in WIP: Drag Racing Models
WOW Daniel you have been very busy as of late. I am so glad you have pushed through on this project with your usual level of detail and craftsmanship. The work you have put into the third member is wonderful and congratulations on getting it up on its wheels. I always consider that a milestone in any of my projects, that is the point it becomes a vehicle in my mind. -
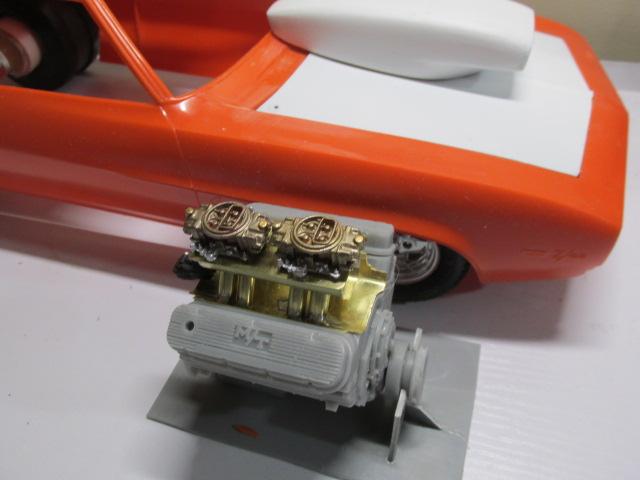
Some progress, Still waiting on parts. Testing paint colors for the carbs, the kit carbs will not be part of this model, I'll be using 4500 series Dominators instead, also got started on the dry sump oil pan
- 352 replies
-
- 4
-
-
- brass
- tube chassis
- (and 2 more)


.JPG.a18f5ee41ff3e5158b2d0b6b5b6cd7c6.JPG)


.JPG.907c144a2395742041fcfcac33709c74.JPG)

.JPG.b8ea805aaf54d4ffa1e7efa5b0c8ef7d.JPG)

.JPG.1d111a9d272b6cbe0d61f47bfd6c9bcf.JPG)
.JPG.7f5c33a1ea3e8780c42c3eeaa99ef6b4.JPG)
.JPG.64b25ab68f51e476e02f80f8054cf24f.JPG)
.JPG.6c404acb21e528a985186799fa2ec915.JPG)
.JPG.b886e445e7aa6300eed55cdc69dd007c.JPG)
.JPG.69e55503b274892fd6b4c811215fe904.JPG)
.JPG.a3e8ad3cce98a0098bb00f39a571c4ed.JPG)

.JPG.df9596812a0dc527d7fd9e4beecd9624.JPG)
.JPG.68205df52612fdfcfef78447baa105c1.JPG)