RCprofile.JPG.6b95b19b856bf00a3becd6aeaaa48f3b.JPG)
Ian McLaren
-
Posts
1,360 -
Joined
-
Last visited
Content Type
Profiles
Forums
Events
Gallery
Everything posted by Ian McLaren
-
RCprofile.thumb.JPG.1691ea753d0f0897fdc1b2510cf06775.JPG)
Project 1/16th AA/FA AND HERE IT IS!
Ian McLaren replied to Ian McLaren's topic in WIP: Drag Racing Models
Small update
-
Super Gas '77 Vega--Completed! (11/12)
Ian McLaren replied to Straightliner59's topic in WIP: Drag Racing Models
Good morning Daniel. The monster tach is looking great and will be a great addition. Just my opinion on the scoop is that it is some what atypical. Back in the day most Super Gas racers bought commercially available scoops from the likes of A&A or Morosso, The snorkel style scoops tended to be straight and not drooped as yours is (which if my memory serves me correctly a couple of Pro Stock teams did try). The A&A scoops were two piece, base and top, with various length tops available that just screwed on. A&A also offered a base with a 7 degree upward slant to keep the top level on cars that had a nose down stance. This was my personal favorite and the one I used on my Mustang ll in 77/78. The shape and size of your scoop looks good and would be fine on the model, and it is obviously well built, It is just a little high dollar for the theme of the car, but if your guy had deep pockets, why not. -
Project 1/16th AA/FA AND HERE IT IS!
Ian McLaren replied to Ian McLaren's topic in WIP: Drag Racing Models
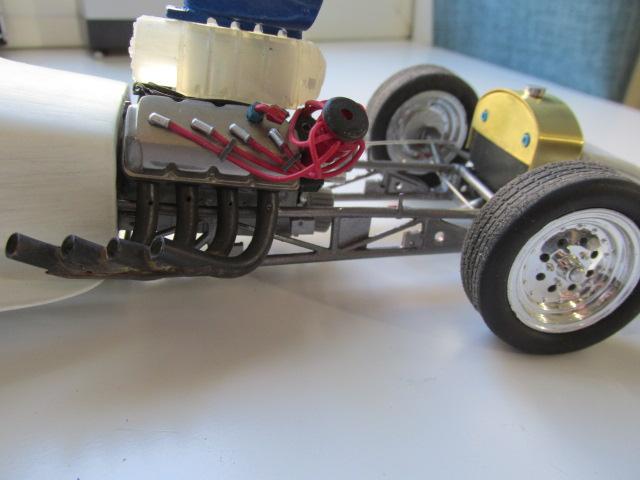
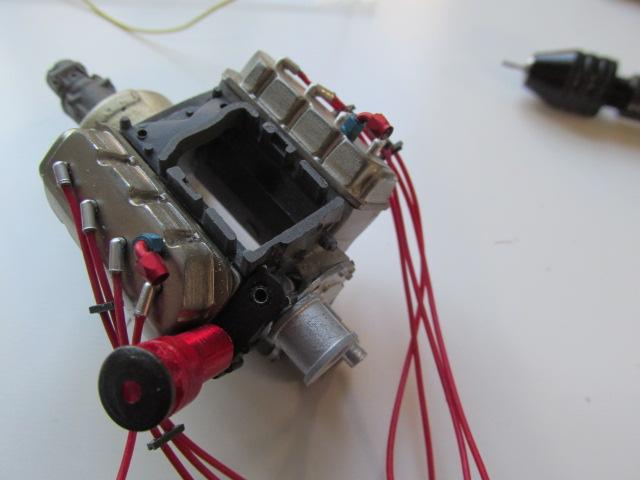
Minor update Mag wired and installed, headers showing run patina finish. Fuel tank ready to plumb
-
You really have my attention with this one, I have been an Injected Nitro Funny Car fan ever since they ran in the original NHRA Pro Comp category back in the 70's. I did an A/FC model about a year and a half ago. I will definitely be following this project; it looks like it's off to a very good start.
-
Project 1/16th AA/FA AND HERE IT IS!
Ian McLaren replied to Ian McLaren's topic in WIP: Drag Racing Models
Great to see you back Francis. Thank you for the kind words. Glad to hear that there is a next subject in the offing, you have been missed! -
A masterful model, you have truly set the bar higher. As to the velocity stacks, sometimes you just can't beat the original materials and methods.
-
Project 1/16th AA/FA AND HERE IT IS!
Ian McLaren replied to Ian McLaren's topic in WIP: Drag Racing Models
Thanks Tim for the heads up on the Facebook deal I reposted the bulk of the photos. Finally starting to see some of the parts coming together. Progress. -
Project 1/16th AA/FA AND HERE IT IS!
Ian McLaren replied to Ian McLaren's topic in WIP: Drag Racing Models
Dave, thank you for the kind words. For the net I used the paper Pro Tech supplies with his seat belt seat sets. He also sells it seperately. I just cut it into strips colored it with a felt marker and applied it with thinned contact cement. -
Super Gas '77 Vega--Completed! (11/12)
Ian McLaren replied to Straightliner59's topic in WIP: Drag Racing Models
Great job on the interior, truly a time capsule of the early Super Gas days! -
Project 1/16th AA/FA AND HERE IT IS!
Ian McLaren replied to Ian McLaren's topic in WIP: Drag Racing Models
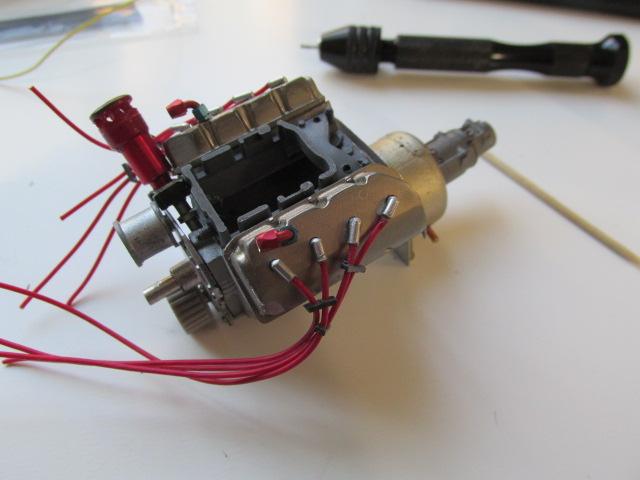
Finally some of the parts are starting to come together
-
Super Gas '77 Vega--Completed! (11/12)
Ian McLaren replied to Straightliner59's topic in WIP: Drag Racing Models
The dash and instrument panelooks great and very believable. Looking forward to your next update. -
Project 1/16th AA/FA AND HERE IT IS!
Ian McLaren replied to Ian McLaren's topic in WIP: Drag Racing Models
I was also informed that my attempt to transfer files from facebook resulted in some people not being able to open them. I'm reposting the files I think were affected and won't do that again (sorry Tim). Aluminum panels now attached and correctly positioned. Plus a little bling on the rad/fuel tank
-
Project 1/16th AA/FA AND HERE IT IS!
Ian McLaren replied to Ian McLaren's topic in WIP: Drag Racing Models
A fellow modeler, Dave Tolson sent me a nine inch ford differential for this project that he has designed and cast. It was so well done I was compelled to step up on the rear coupler and the driveshaft just to keep up
-
Project 1/16th AA/FA AND HERE IT IS!
Ian McLaren replied to Ian McLaren's topic in WIP: Drag Racing Models
As I mentioned yesterday the fuel tank/ rad needed some work to fit properly, and even though it's been built as a racecar and not a show piece I couldn't resist adding a little bling and old school altered detail to it.- 149 replies
-
- 1
-

-
- 1/16 scale
- supercharged
- (and 2 more)
-
Project 1/16th AA/FA AND HERE IT IS!
Ian McLaren replied to Ian McLaren's topic in WIP: Drag Racing Models
Thank you Stephen! This started out as just a styling exercise that kind of got away from me. Oh well I'm still having fun and the next one will be less ambitions (I hope. LOL)- 149 replies
-
- 1
-

-
- 1/16 scale
- supercharged
- (and 2 more)
-
Project 1/16th AA/FA AND HERE IT IS!
Ian McLaren replied to Ian McLaren's topic in WIP: Drag Racing Models
Thank you Jim. This has been a fun project and have stretched my boundaries along the way -
Project 1/16th AA/FA AND HERE IT IS!
Ian McLaren replied to Ian McLaren's topic in WIP: Drag Racing Models
Thanks for your interest Daniel. I really like your current project and have picked up some valuable tips from it.- 149 replies
-
- 1
-
-
- 1/16 scale
- supercharged
- (and 2 more)
-
Project 1/16th AA/FA AND HERE IT IS!
Ian McLaren replied to Ian McLaren's topic in WIP: Drag Racing Models
Thanks for the kind words Erroll. Paint isn't that far away now. -
Project 1/16th AA/FA AND HERE IT IS!
Ian McLaren replied to Ian McLaren's topic in WIP: Drag Racing Models
Thank you David, the zoomies still have a ways to go but so far I'm reasonably happy. I appreciate the kind words and your interest. -
Project 1/16th AA/FA AND HERE IT IS!
Ian McLaren replied to Ian McLaren's topic in WIP: Drag Racing Models
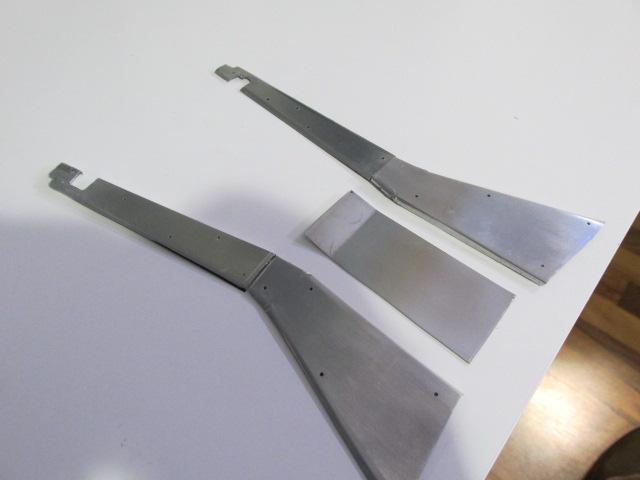
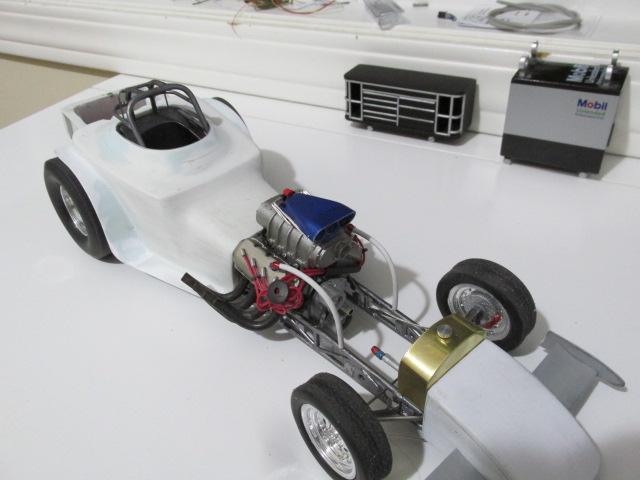
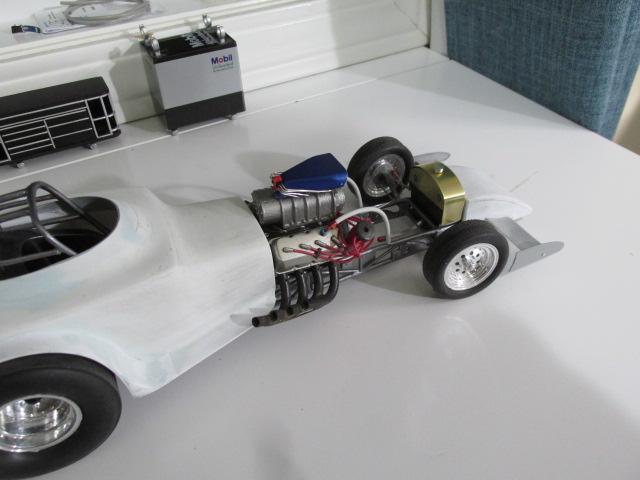
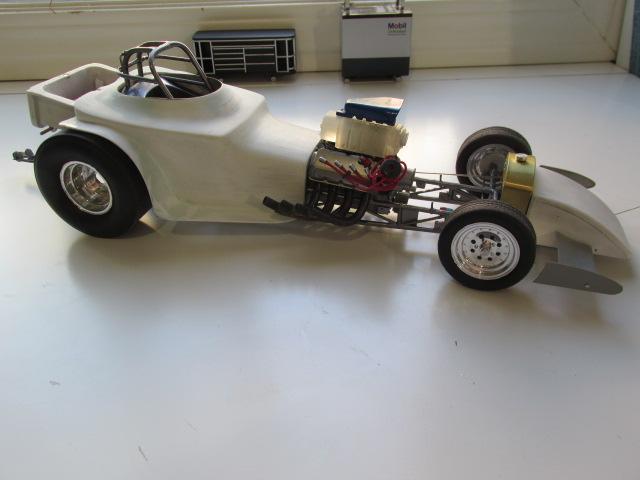
Drivers compartment tin now located, all three pieces. Front sections now installed and trimmed, just have to finish profiling the chassis plates. The panels can now be removed, replaced and worked on without damage to them or the chassis. They will also be removeable for display purposes. Regrouped from this afternoon and took all of the major sub assemblies and made sure they still fit. Fuel tank/rad is off getting modified for better fit and also getting some bling added,14-71 shown is just a place holder unless I put a bag on it (not wasting a perfectly good 14-71 if you can't see most of it) If Scott gets me the blower retainer plate, I have a very nice fully detailed 14-71 to use as well as an updated hat. You can see the front rotors and calipers in place as well. From this point forward it's basically clean up, add detail, get out the airbrush and start to finish this one off.
-
Tim I can relate to your health issues and hope they are resolved quickly. The test paint job looks to be a great option for the body style and era. It should be a standout. Get well my friend.
-
Project 1/16th AA/FA AND HERE IT IS!
Ian McLaren replied to Ian McLaren's topic in WIP: Drag Racing Models
Tin mounting holes drilled in panels, dzus plates mounted on chassis, waiting for adhesive to cure before drilling matching holes for panels and profiling the plates.
-
Most of this build predates my being on this site but this modeļs detail is suburb as is everything else. I read the whole thread and learned a bunch. You and Chris really have this funny car deal down pat. Love it!
-
Charlie, again you are taking what would normally be a straight forward model and elevating it to a master level. Just a fantastic project, I love this.
-
Super Gas '77 Vega--Completed! (11/12)
Ian McLaren replied to Straightliner59's topic in WIP: Drag Racing Models
The shifter, linkages, and seat look great and I understand what your saying about the belts. In the aircraft the belts hange fairly straight and flatter so the stiffness was less of a problem for me but visually they are hard to beat.

-Copy.JPG.740a1eb51453fc681fc675f67a9f8797.JPG)
.JPG.c19f3ec0d68126e296bfe9b195d53af3.JPG)
-Copy.JPG.fdcacd373d386877ba34dddd8f14704d.JPG)
.JPG.565b9a856824eb4a730e03ffea2f45f2.JPG)
.JPG.7bbbe618c060288bbaed3a0e16c0cdbe.JPG)
.JPG.81ff5229db284a40a33858f677304b82.JPG)
.JPG.6a199499344f0135b8f2025e35670603.JPG)
.JPG.a277d3918074c0f1d7b720a3e1625749.JPG)
.JPG.c44ca55aabdeac799de76d8f146dd1dc.JPG)
-Copy.JPG.cfef751967c823b76b515f444e489256.JPG)
-Copy.JPG.6e0fd7a8175960e687f77c00ddffecaf.JPG)
.JPG.1c5e6052ca5196ec6b913f9c342112b7.JPG)
.JPG.b4aa4433b5748a9346a9469c6ada5b18.JPG)
.JPG.8eb3d22e65f7206cf800f6e5c4339407.JPG)
.JPG.08785510cc823703c15dde4e36271634.JPG)