RCprofile.JPG.6b95b19b856bf00a3becd6aeaaa48f3b.JPG)
Ian McLaren
-
Posts
1,360 -
Joined
-
Last visited
Content Type
Profiles
Forums
Events
Gallery
Everything posted by Ian McLaren
-
RCprofile.thumb.JPG.1691ea753d0f0897fdc1b2510cf06775.JPG)
Super Gas '77 Vega--Completed! (11/12)
Ian McLaren replied to Straightliner59's topic in WIP: Drag Racing Models
The best results I ever had was using a fine point BIC pen the tip has a roller ball in it, It was .015 soft aluminum but I forget from where, for the Vega panel -
Project 1/16th AA/FA AND HERE IT IS!
Ian McLaren replied to Ian McLaren's topic in WIP: Drag Racing Models
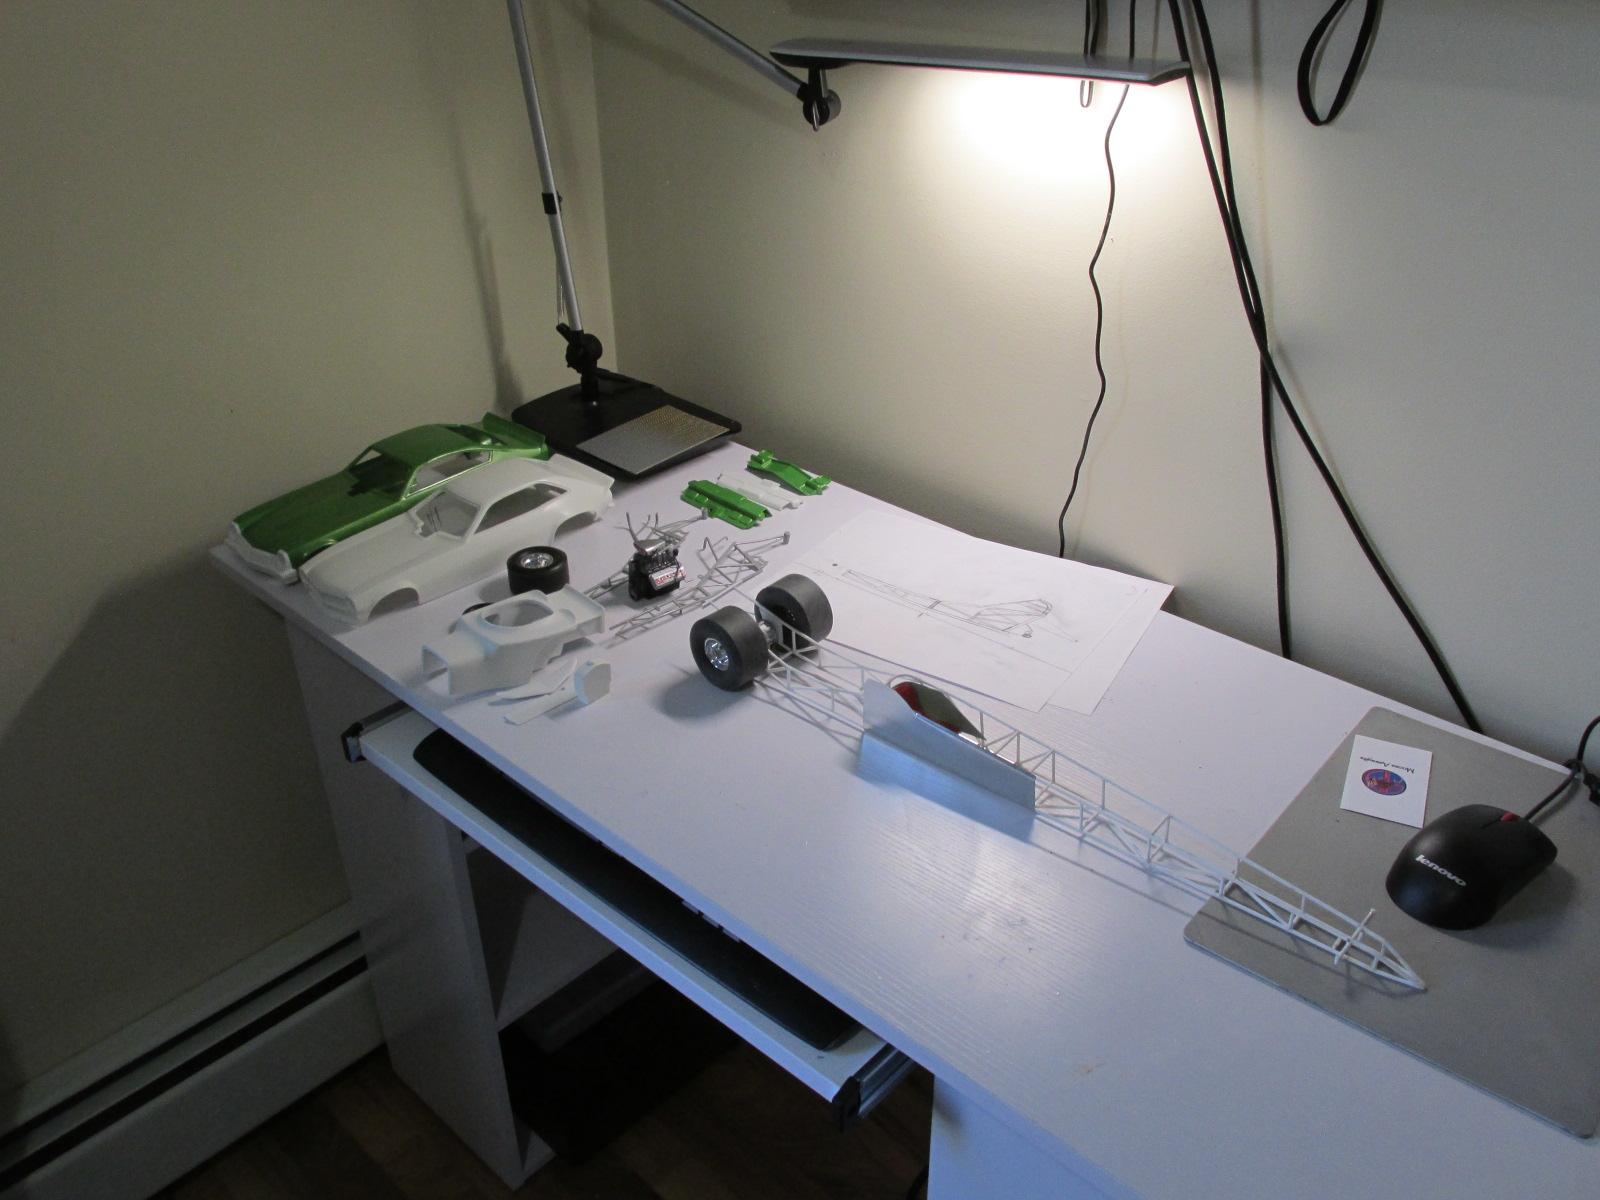
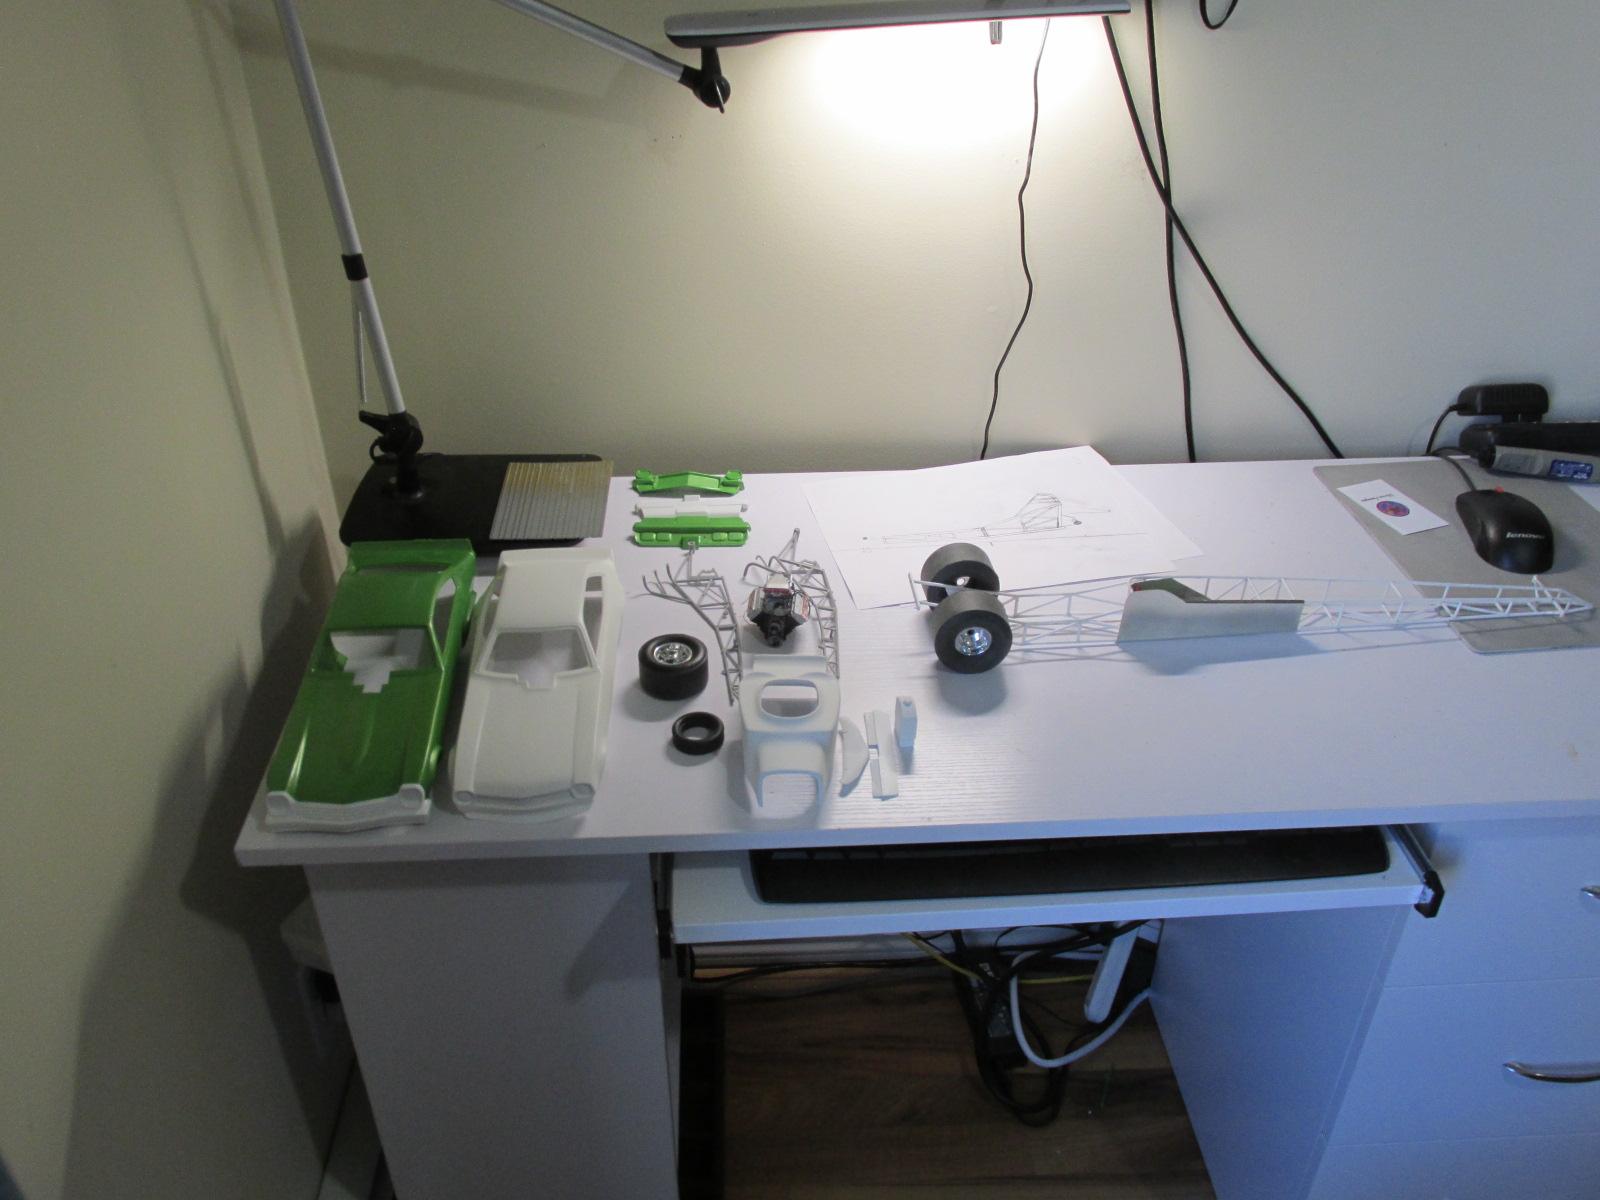
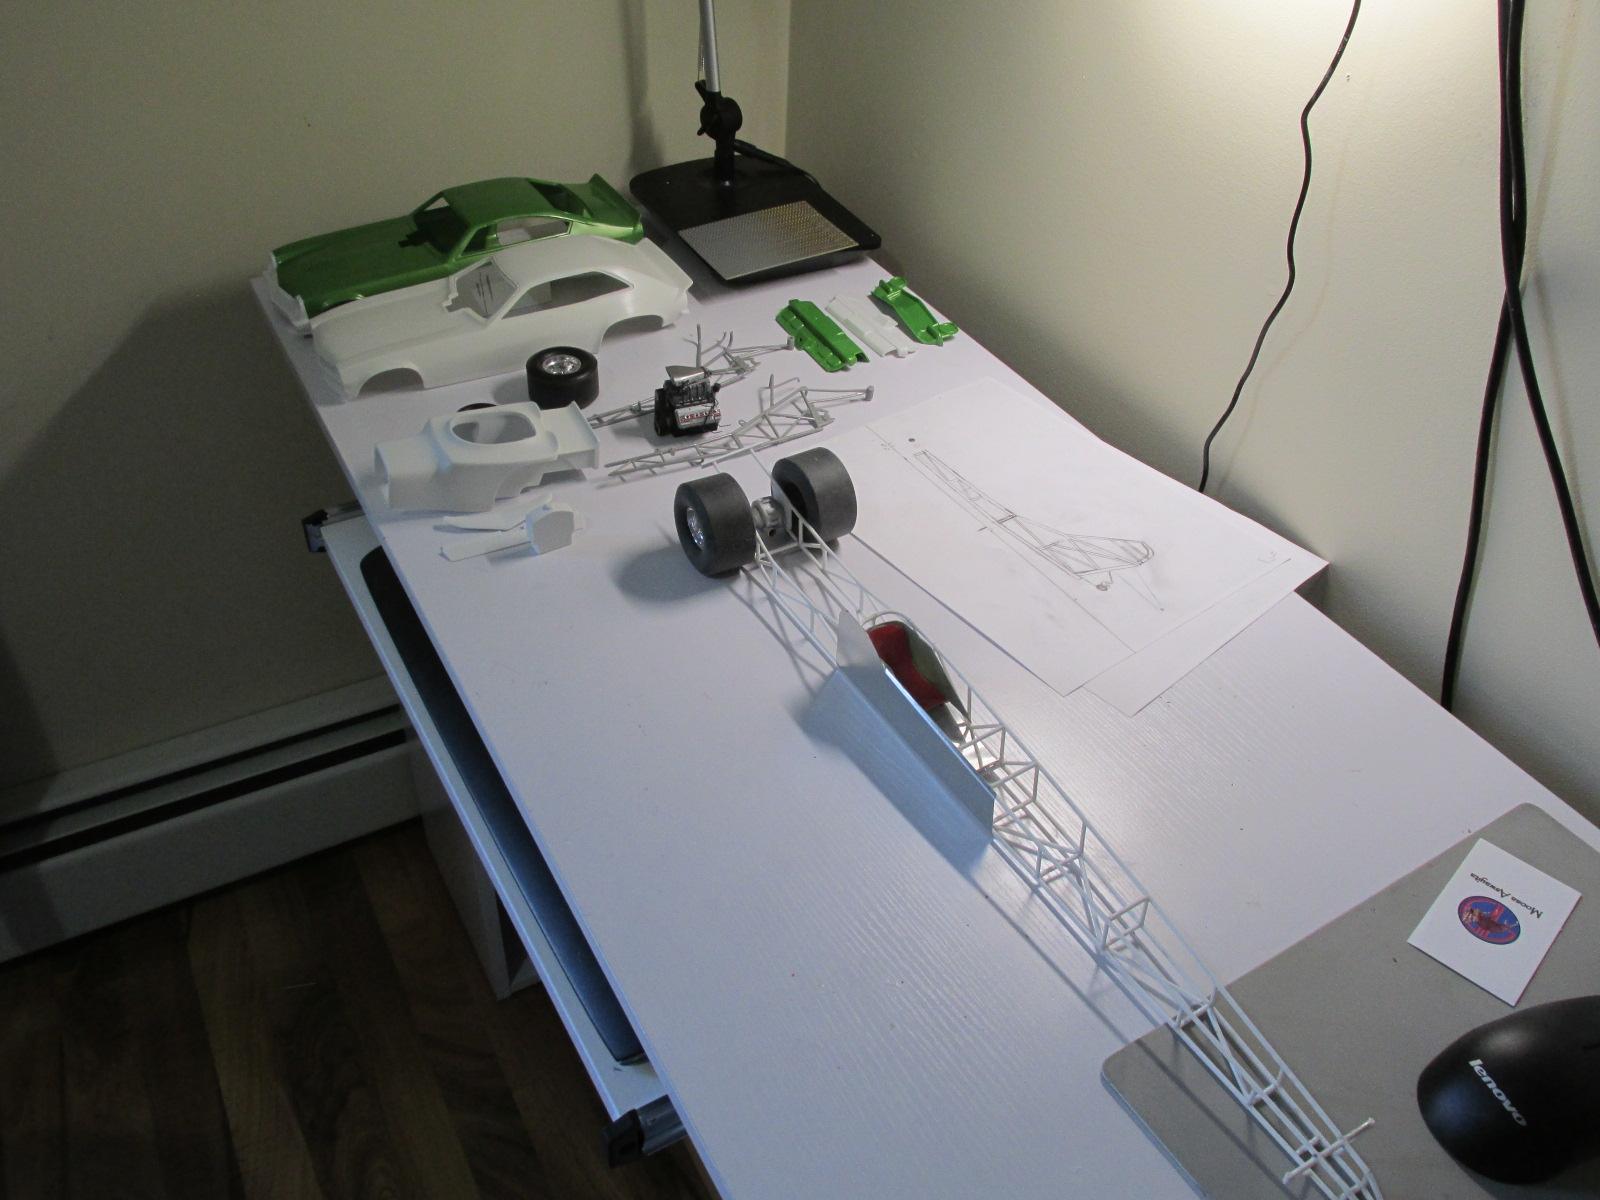
I took 4 Scale inches off the nose and now the balance seems better , at least to me. Also playing with a more subtle rear fender/ body extension. Not sure I'm liking the spoiler / kick up on either the pick up bed or rear body upper corners.
- 149 replies
-
- 1
-

-
- 1/16 scale
- supercharged
- (and 2 more)
-
Super Gas '77 Vega--Completed! (11/12)
Ian McLaren replied to Straightliner59's topic in WIP: Drag Racing Models
The interior is really starting to look like the real deal, well done on the bead rolling I always have the challenge of either not enough bead and deform the panel or the bead is too pronounced, you seem to have hit the sweet spot and they look great. -
Project 1/16th AA/FA AND HERE IT IS!
Ian McLaren replied to Ian McLaren's topic in WIP: Drag Racing Models
After looking at the above for a while the plan has evolved in another direction. Extent the frame, shorten the wheelbase, relocate the rad/fuel tank and fab a nose piece. Also put the correct engine in with the 14-71 and fabricated the two wall headers. Thinking the nose may be a little too long.
- 149 replies
-
- 1
-
-
- 1/16 scale
- supercharged
- (and 2 more)
-
Project 1/16th AA/FA AND HERE IT IS!
Ian McLaren replied to Ian McLaren's topic in WIP: Drag Racing Models
May go this way on this one, this is not the intended motor just a Donovan that was laying around.
- 149 replies
-
- 1
-
-
- 1/16 scale
- supercharged
- (and 2 more)
-
Project 1/16th AA/FA AND HERE IT IS!
Ian McLaren replied to Ian McLaren's topic in WIP: Drag Racing Models
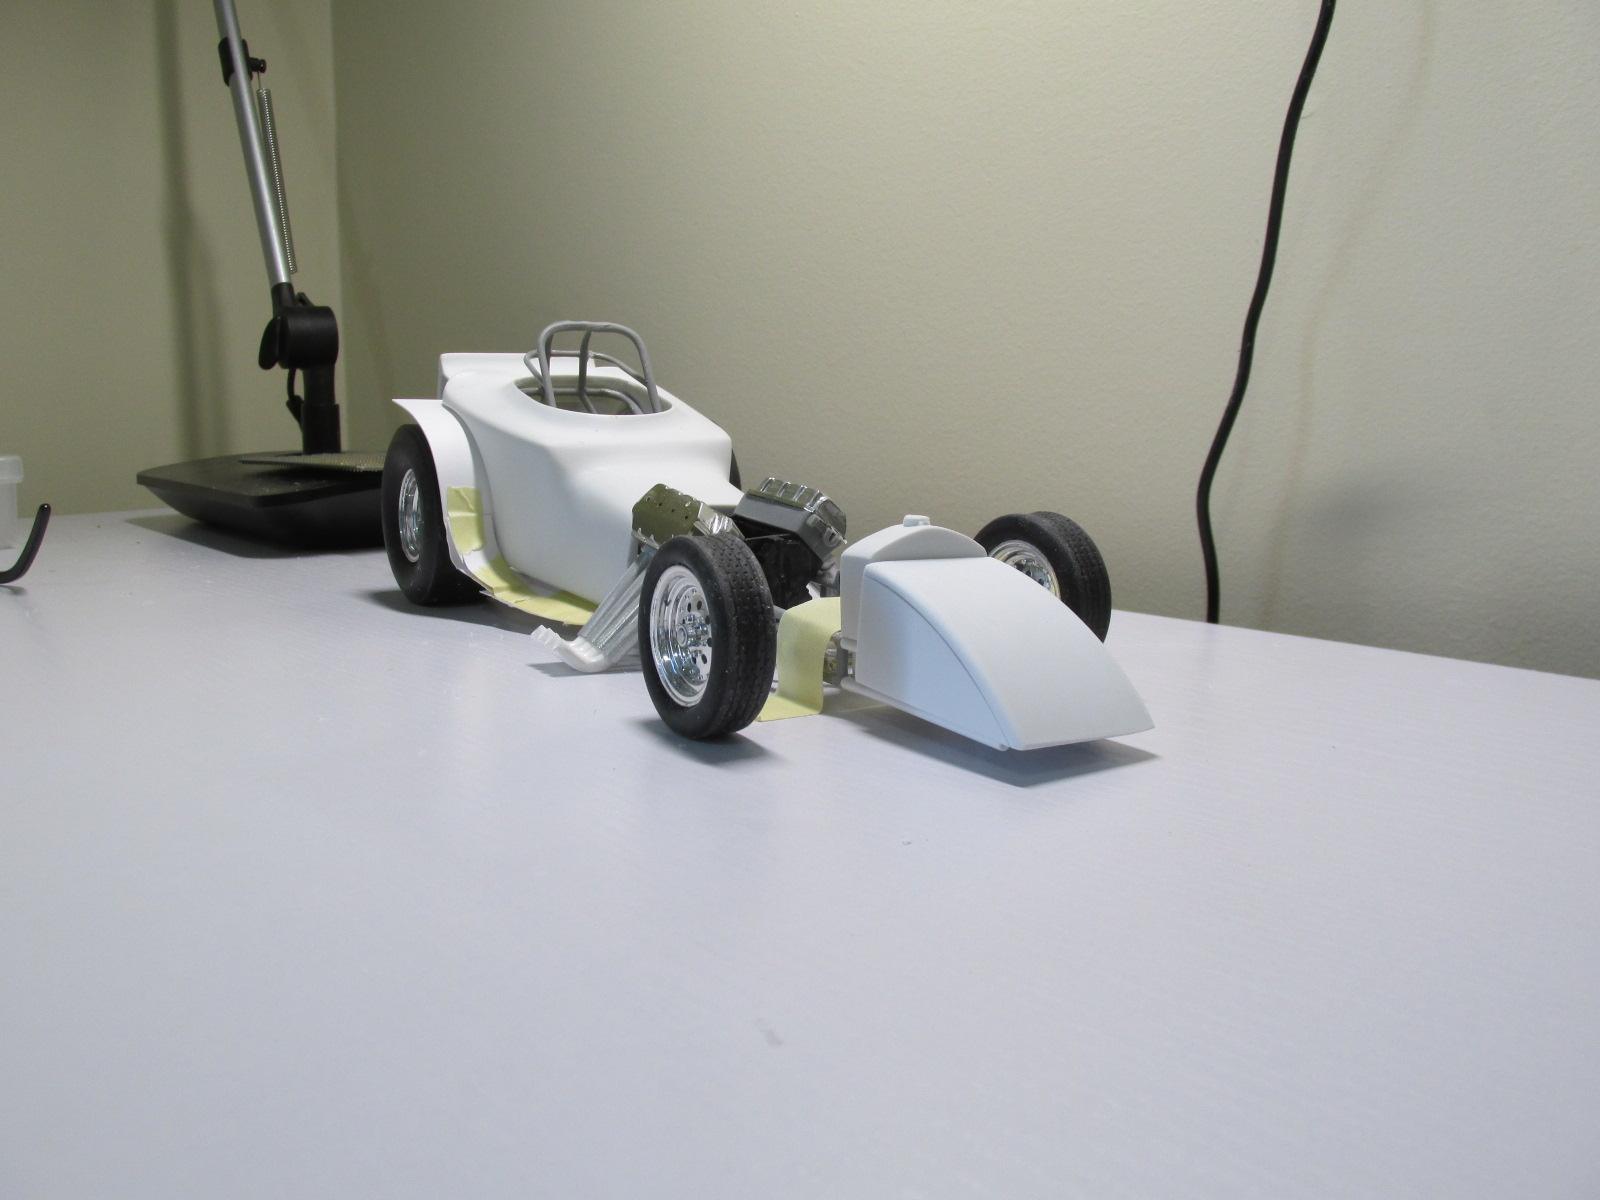
Starting point, not sure how far I'm going to go, but this design is evolving and changes are going to happen.
- 149 replies
-
- 1
-
-
- 1/16 scale
- supercharged
- (and 2 more)
-
Project 1/16th AA/FA AND HERE IT IS!
Ian McLaren replied to Ian McLaren's topic in WIP: Drag Racing Models
Project underway 426 Hemi, 14-71, ate style Enderle hat, Cragars on both ends. First actual photos tomorrow. This not going to be a replica of any existing car just a clean sheet design that is going to evolve as the design process move
- 149 replies
-
- 2
-
-
- 1/16 scale
- supercharged
- (and 2 more)
-
Project 1/16th AA/FA AND HERE IT IS!
Ian McLaren replied to Ian McLaren's topic in WIP: Drag Racing Models
Yes it does but I think I have to order a few parts before I can make significant progress on it, than and I built the Royal Canadian with a brass chassis after I started this. I still have the jigs for the chassis and they are suitable to redo this in brass instead. Wheels and tires are also high on the list of needs and being a mid 80s car both the front and rear wheels differ significantly from what it readily available. We will see. -
Project 1/16th AA/FA AND HERE IT IS!
Ian McLaren replied to Ian McLaren's topic in WIP: Drag Racing Models
Narrowed the field somewhat, not sure what this is going to be but the foundation is straight and square.
- 149 replies
-
- 1
-
-
- 1/16 scale
- supercharged
- (and 2 more)
-
Too Many Options to choose from.
- 149 replies
-
- 1
-
-
- 1/16 scale
- supercharged
- (and 2 more)
-
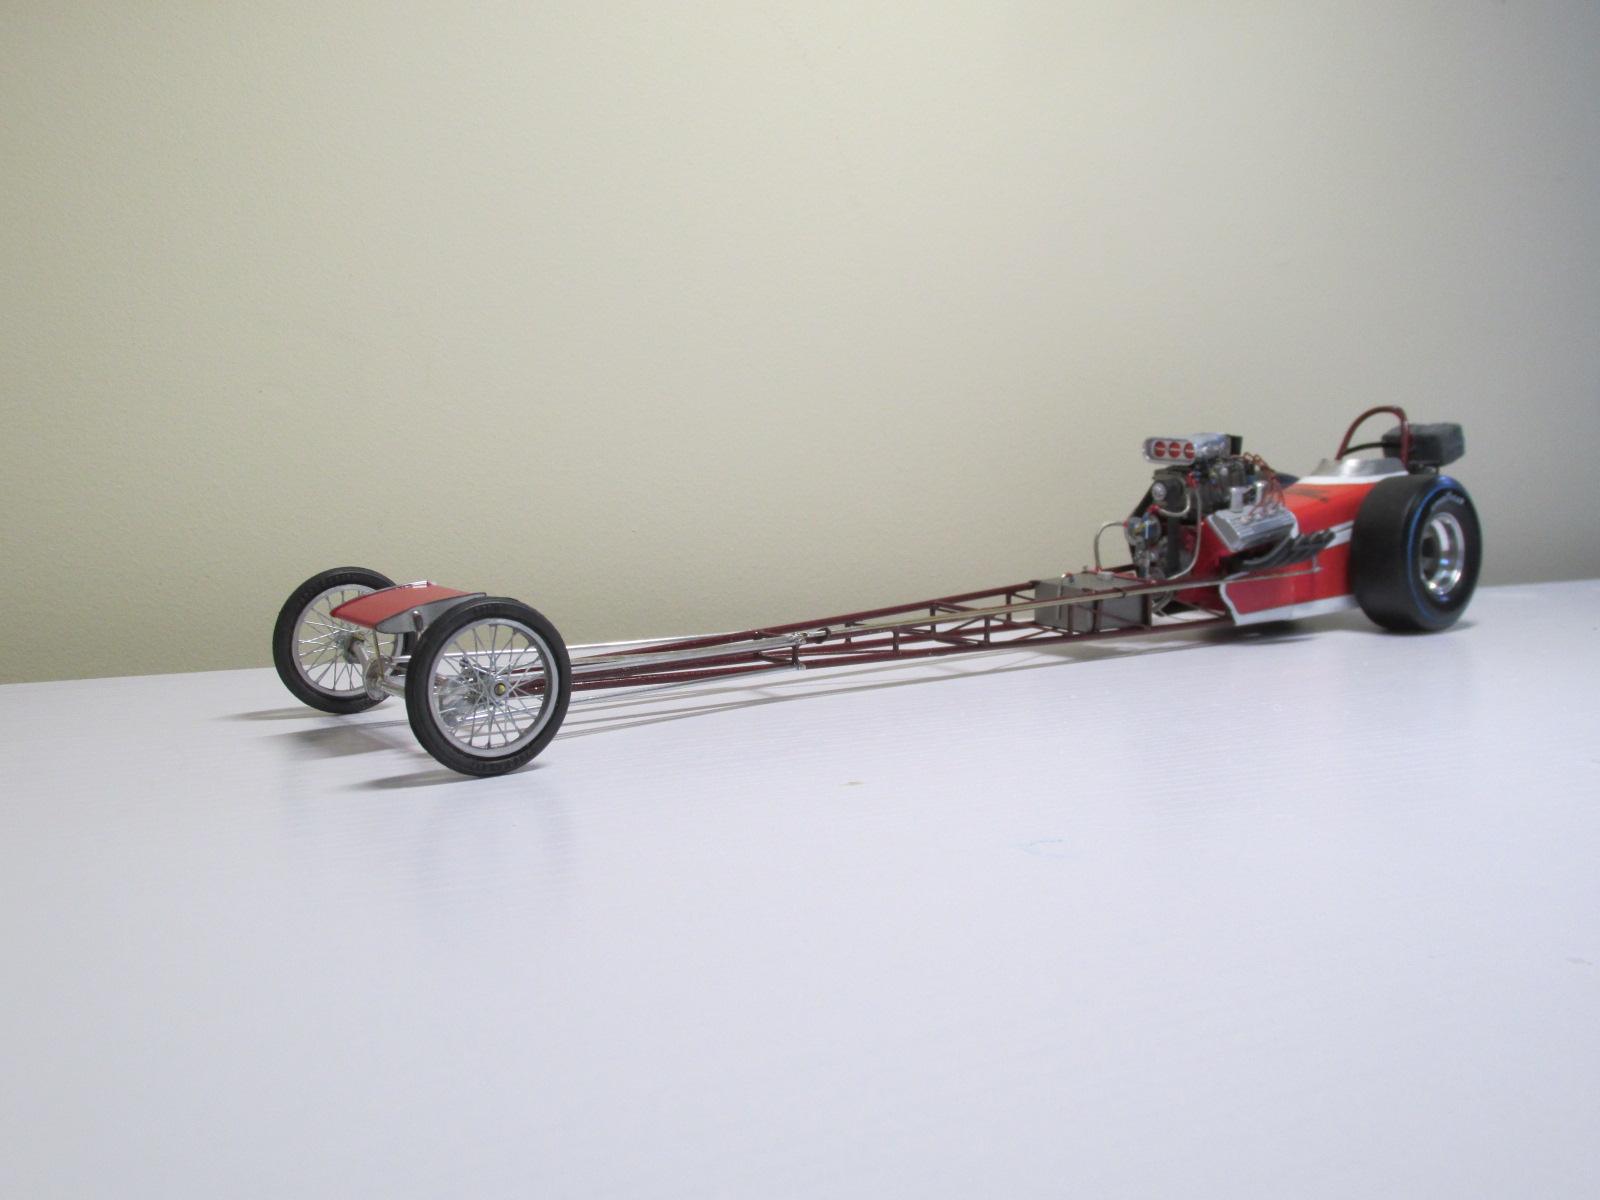
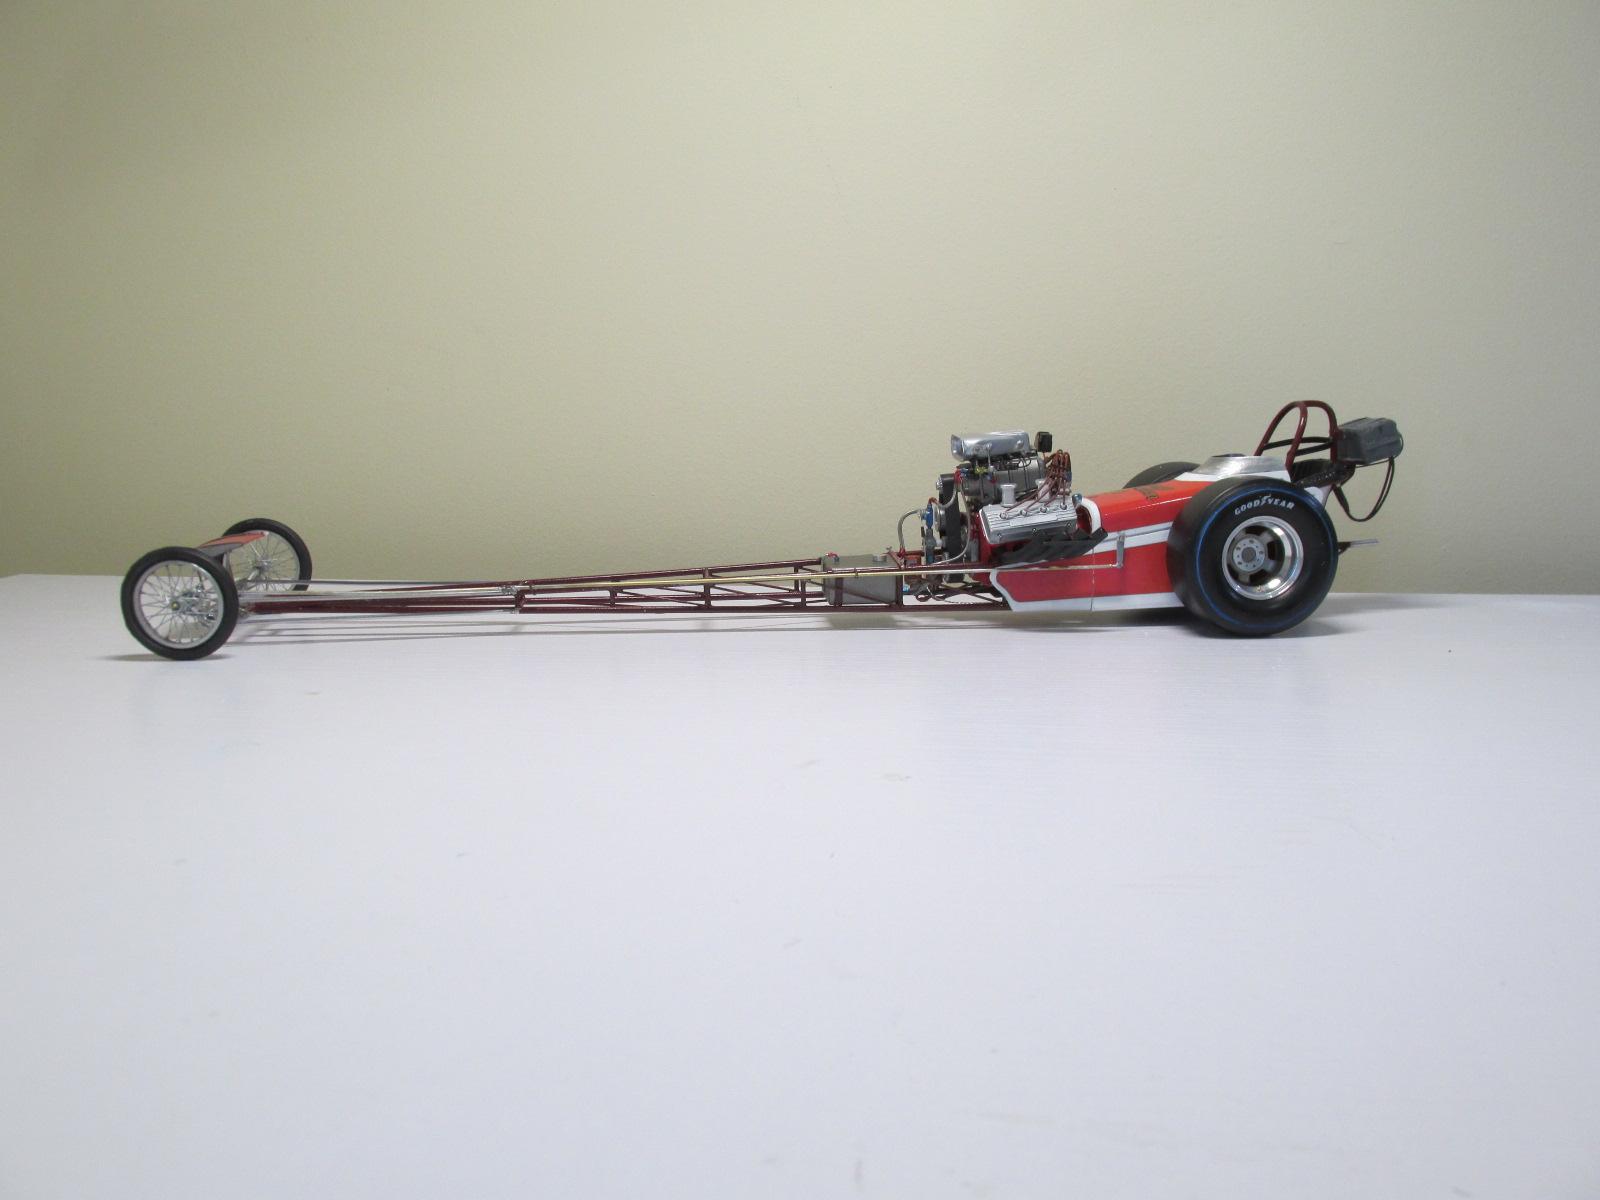
ROYAL CANADIAN 1/16 SCALE TOP FUEL DRAGSTER
Ian McLaren replied to Ian McLaren's topic in WIP: Drag Racing Models
Thank you so much Francis for the kind words, coming from someone with your credentials it really means a lot to me! I can hardly wait to see what your next project will be, but whatever it is I will be watching you work your magic. For myself my next build will not be quite as ambitious as the Royal Canadian. Too many replicas in a row, and now I'm going to get me some happy with a freelance design. # WIP Drag Racing Models -
Holy BLAH_BLAH_BLAH_BLAH, I was going back over your photos and just noticed the block off plates covering the exhaust ports, well played my friend. Love it!
-
It's really hard not to believe that these are pictures of a 1 to 1 motor except most 1 to 1 engines are not this clean and precise. No words!
-
ROYAL CANADIAN 1/16 SCALE TOP FUEL DRAGSTER
Ian McLaren replied to Ian McLaren's topic in WIP: Drag Racing Models
Thank you very much Barry for the kind words. No I haven't talked to Don or sent him any pictures directly. I have been in contact with Stacy on a few occasions and have sent him updates occasionally up to just recently. I know he showed the early pictures to Don but I don't know about the new up dates. I am going to deliver the model to Bryan in the next few days and it's up to him as to who sees it from there. Quite a few people saw it in St Albert at Hodgson's deal for the new Bubble Up car now being driven by his son. Most of the old guard was there for Gordon Jenner's tribute and most of them got a look at it, even though is was still not completely finished -
ROYAL CANADIAN 1/16 SCALE TOP FUEL DRAGSTER
Ian McLaren replied to Ian McLaren's topic in WIP: Drag Racing Models
Here are some of the detail shots I promised, I'll put up the rest in completed Drag Race a little later when I can get it outside and properly cleaned
-
Super Gas '77 Vega--Completed! (11/12)
Ian McLaren replied to Straightliner59's topic in WIP: Drag Racing Models
Love early super gas cars, quick enough to be fun but reasonably affordable, You are capturing the look very well. -
A/SR (mid-1960's Altered Street Roadster) full detail model kitbash
Ian McLaren replied to tim boyd's topic in Drag Racing
Great model, do I detect a nod to the Cobra in the paint scheme and dual quad 427 up front? Well done I like it! -
I read all of the comments and there is not much left to say, another great model with a stunning paint job, love it!
-
Another stellar build, the wheels are outstanding as are the other fabricated parts. I am currently gathering parts for this same kit but as a big block Super Stock Eliminater car. I can't duplicate your fabrication skills but I am taking notes. Well done
-
Just a superb model, your attention to detail and scale is remarkable, well done!
-
Hi Tim I was doing some research online and stumbled on to your altered build and lost a lot of time looking at it. Amazing model my friend but I stumbled on a reply of yours to Chris Sobak from 2019 and it struck me funny. Quote ------------ "Appreciated Chris!! I'm going to do a simpler build next before I jump back to the Pro Mod. A bit of a mental break if you will. Really keen to do a Pro Stock Maverick. I was able to pick up a sweet, totally complete kit from a gentlemen in the U.K. Great foundation for it. I've been checking out the forum and there is a ton of great info on the topic from others here. Nobody beats this site for knowledge when it comes to modelling IMO. Cheers !! ------------ So how's that working out for you? LOL
-
ROYAL CANADIAN 1/16 SCALE TOP FUEL DRAGSTER
Ian McLaren replied to Ian McLaren's topic in WIP: Drag Racing Models
Yes David it was very special day not only was the current owner there but two of the previous drivers were as well and the event was in honor of one of the original owners partners in the car Gordon Jenner. A lot of memories came up that day. Bryan, the current owner of the car, an myself have had many conversations over the duration of the build and he has seen and extraordinary number of photos of bits and pieces as they product along the way, But this was the first time he had seen and held the car since it was an unpainted bare chassis with most of the brackets not yet attached. From my point of view that although I had unlimited access to the car throughout the entire build I had not heard it run in the last three decades. I had always been aware of the car, but it was a dragster and we ran funnycars so it was at best a passing glance back then. To be there with the crew and involved with the car and then to be mere feet from it while it was running was more than just the icing on the cake, it made the entire process so much more worthwhile. However once the fun and games were over we sat down and addressed some areas of the model that both of us wanted to change. That has been my focus and mid next week the car goes back to Bryan for good. As a side note the presence of the model at the event has sparked some interest in recreation a much more well know car from Alberta and I'm going back to Edmonton on Friday to see if we can come to an agreement. It would be an honor to replicate this car, fingers crossed. -
ROYAL CANADIAN 1/16 SCALE TOP FUEL DRAGSTER
Ian McLaren replied to Ian McLaren's topic in WIP: Drag Racing Models
Thank you Francis, Yes it was great to get the two cars together and better yet being able to hang out with Bryan and crew while they ran the car. We found a couple of areas that required a small rework on the body panels but with them being attached with magnets it going to be a fairly simple fix. Detailed photo set to follow. -
ROYAL CANADIAN 1/16 SCALE TOP FUEL DRAGSTER
Ian McLaren replied to Ian McLaren's topic in WIP: Drag Racing Models
Thank you so much for the kind words and I'm glad you like it. Perfect, no, but I am happy with the way it is progressing. After a side by side comparison I am making a couple of changes to better match the original. That will be in the next week or so and I will then post a detailed photo set. -
ROYAL CANADIAN 1/16 SCALE TOP FUEL DRAGSTER
Ian McLaren replied to Ian McLaren's topic in WIP: Drag Racing Models
Hi Barry I have one that I got out of New York, I tried to get one from Chuck who printed them originally but I seem to have upset him somehow and he won't even return my emails. If something goes sideways I my need to buy the one you have. Pm me with your email and I'll send you a video of the car running at Standens this morning