
RCprofile.JPG.6b95b19b856bf00a3becd6aeaaa48f3b.JPG)
Ian McLaren
-
Posts
1,360 -
Joined
-
Last visited
Content Type
Profiles
Forums
Events
Gallery
Everything posted by Ian McLaren
-
RCprofile.thumb.JPG.1691ea753d0f0897fdc1b2510cf06775.JPG)
ROYAL CANADIAN 1/16 SCALE TOP FUEL DRAGSTER
Ian McLaren replied to Ian McLaren's topic in WIP: Drag Racing Models
Thank you Tim It's been a long process and just about done. When I printed the decals for the red panels the printer was set to transparence. I though it might be ok as the color was dead on when printing the test panels on paper. I tried to get more decal paper but there was nothing for a laser printer anywhere in western Canada? I had misgivings once they were on the car so I did not put the script decal on as it is the only one I have and I won't be able to obtain another one (it has the correct gold leaf lettering). When we got the cars together the model shows way to orange so the decision was to strip all of the body panels and redo the decals. Not as big a job as it might seem as the panels are steel and held on with magnets. Everything else, Bryan ( the owner) was thrilled with and taking the panels off is a 30 second deal and reinstalling them slightly longer as the cowl has to be set in place very carefully to avoid damaging the paint on the side panels, more clearance would be nice but the fit suffers. Had a great time with Bryan and the crew, and yes I have some detail photos of the nitro moose I'll throw up. It was also the unveiling of the new Bubble Up Trans Am funny car, great looking car. -
I could go on and on about this, suffice it to just say increadable.
-
ROYAL CANADIAN 1/16 SCALE TOP FUEL DRAGSTER
Ian McLaren replied to Ian McLaren's topic in WIP: Drag Racing Models
Yesterdays activities, I'll post a detailed set on the car shortly IMG_2592.MOV IMG_2589.MOV
-
Chroming Resin Parts
Ian McLaren replied to Fun_E_Car's topic in Model Building Questions and Answers
Sorry Steve but the advances have already be made. In non modeling areas there is a wet on wet on wet Chrome finish for non metallic surfaces that are for all intents is non distinguishable from real chrome let alone the vacuum plating typically used in the automotive industries. Draw back, it is very expensive, but it is here. The model paint manufactures have been going to school on this process and they have the surface reflectivity handled. They do require some patience and initial careful handling. The secret to success with these paints is (as it is in real chroming) preparation, The surface HAS to be mirror/chrome smooth before refinishing. They are at their best as is, but with care and a quality acrylic clear the results are still most convincing. The other bonus is you can do it in house anytime you wish, no freight, lost or damaged parts, and the costs are reasonable but not cheap. -
Chroming Resin Parts
Ian McLaren replied to Fun_E_Car's topic in Model Building Questions and Answers
Most people have gone away from actual chrome plating. With the advances of spray on chrome paints it's become almost obsolete. One of the original players was Alclad 11 with a whole line of metallizer colors but almost all or the major paint companies have gotten on board. There is probably 15 plus different chrome paints and of those a few give outstanding results. I use the term paints but they are actually inks and as such do have some drawbacks the main on being the finish is fragile for a long time unless clear coated. The clear has to been acrylic as any other type dulls the finish. There are numerous video's on you tube comparing the chrome paints them selves and another set dealing with clears. For myself I have had very good results with Alclad II and Spaz Stix chromes and I have used Future acrylic as a clear with no problems. Feel free to PM me if you need additional info. -
ROYAL CANADIAN 1/16 SCALE TOP FUEL DRAGSTER
Ian McLaren replied to Ian McLaren's topic in WIP: Drag Racing Models
Thanks Daniel I'm pretty happy with it, I'll post more photos once the owner has seen it. He's running the real car in a Cackle Fest near here on Wednesday, It will interesting to see the model with the real car and I have missed the smell of nitro in the evening. -
ROYAL CANADIAN 1/16 SCALE TOP FUEL DRAGSTER
Ian McLaren replied to Ian McLaren's topic in WIP: Drag Racing Models
Profile
-
ROYAL CANADIAN 1/16 SCALE TOP FUEL DRAGSTER
Ian McLaren replied to Ian McLaren's topic in WIP: Drag Racing Models
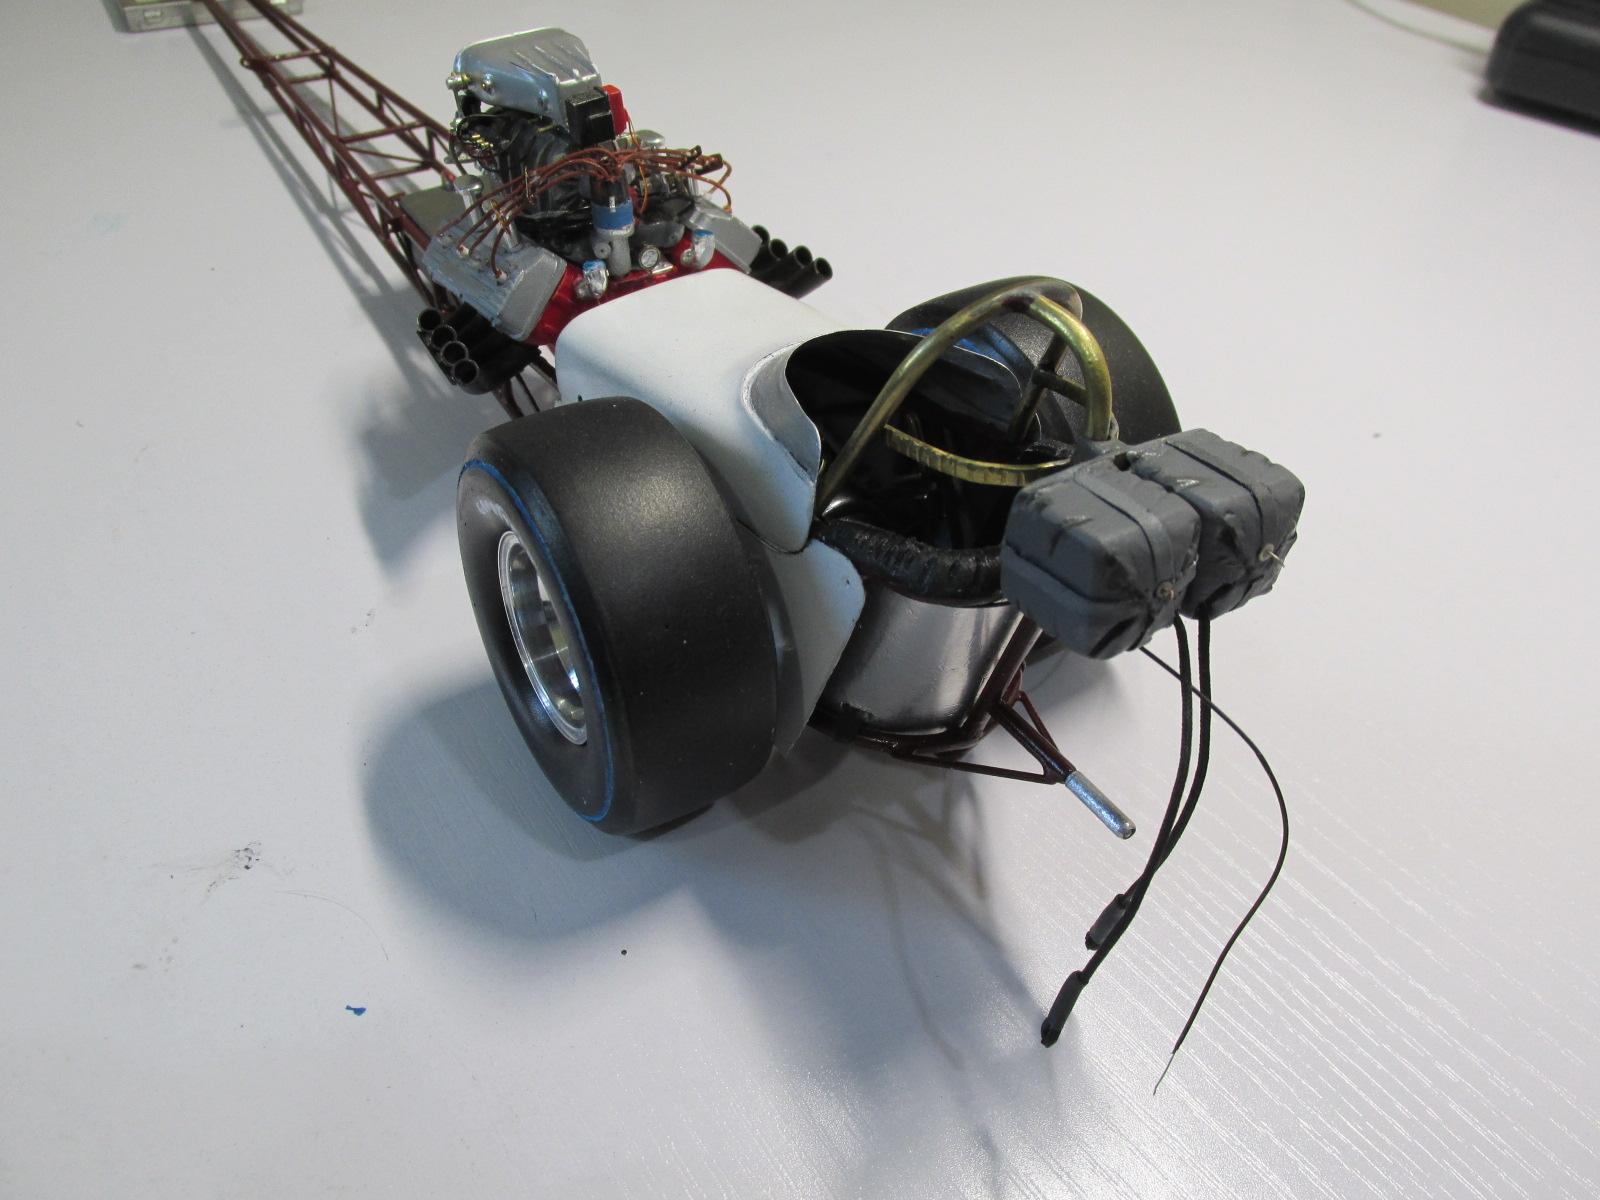
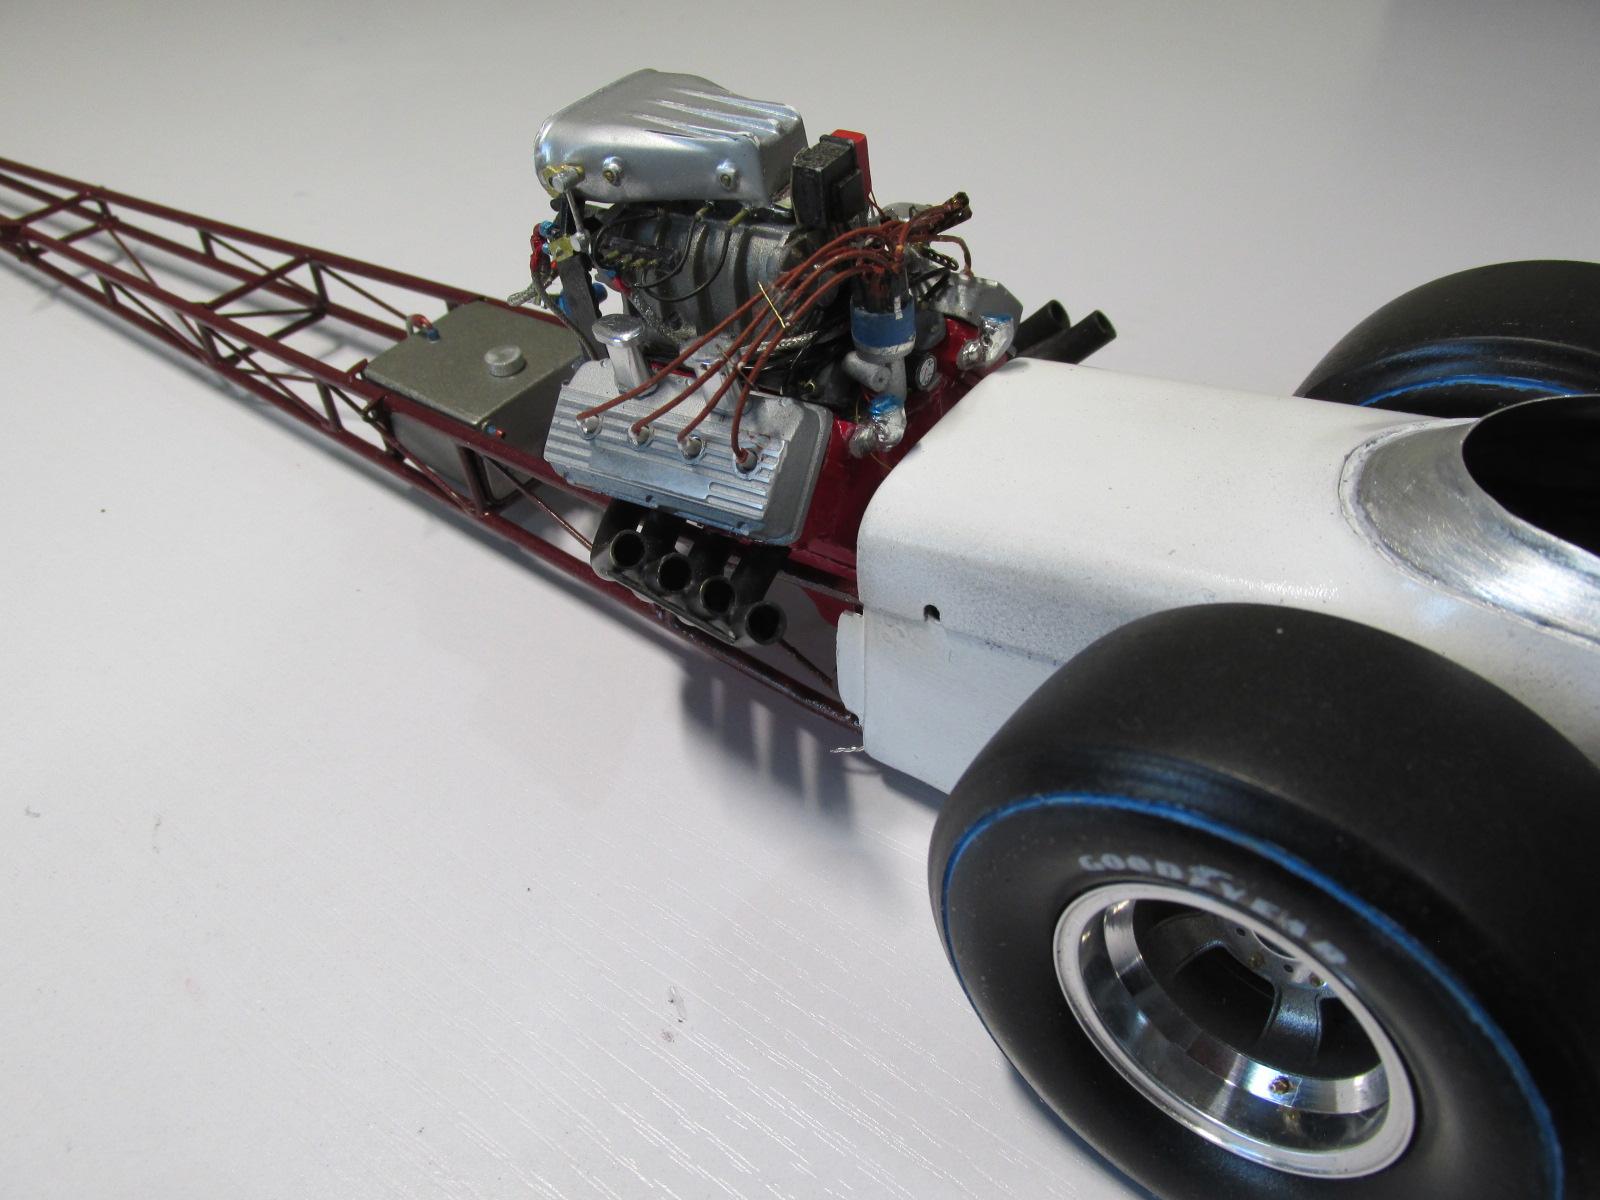
Chassis basically complete, steering shaft and pitman arm have to gone on after side panels are installed and a few paint touchups have to be completed. Body panels are getting clear coated and polished in the next two days and I'll be calling this a wrap.
-
ROYAL CANADIAN 1/16 SCALE TOP FUEL DRAGSTER
Ian McLaren replied to Ian McLaren's topic in WIP: Drag Racing Models
Getting very close to done
-
Wow The new manifold looks great and is certainly a step up from the prior design (which I though was also great by the way). The color of the metal really makes a difference, it may have been more effort but worth it in the end.
-
ROYAL CANADIAN 1/16 SCALE TOP FUEL DRAGSTER
Ian McLaren replied to Ian McLaren's topic in WIP: Drag Racing Models
-
ROYAL CANADIAN 1/16 SCALE TOP FUEL DRAGSTER
Ian McLaren replied to Ian McLaren's topic in WIP: Drag Racing Models
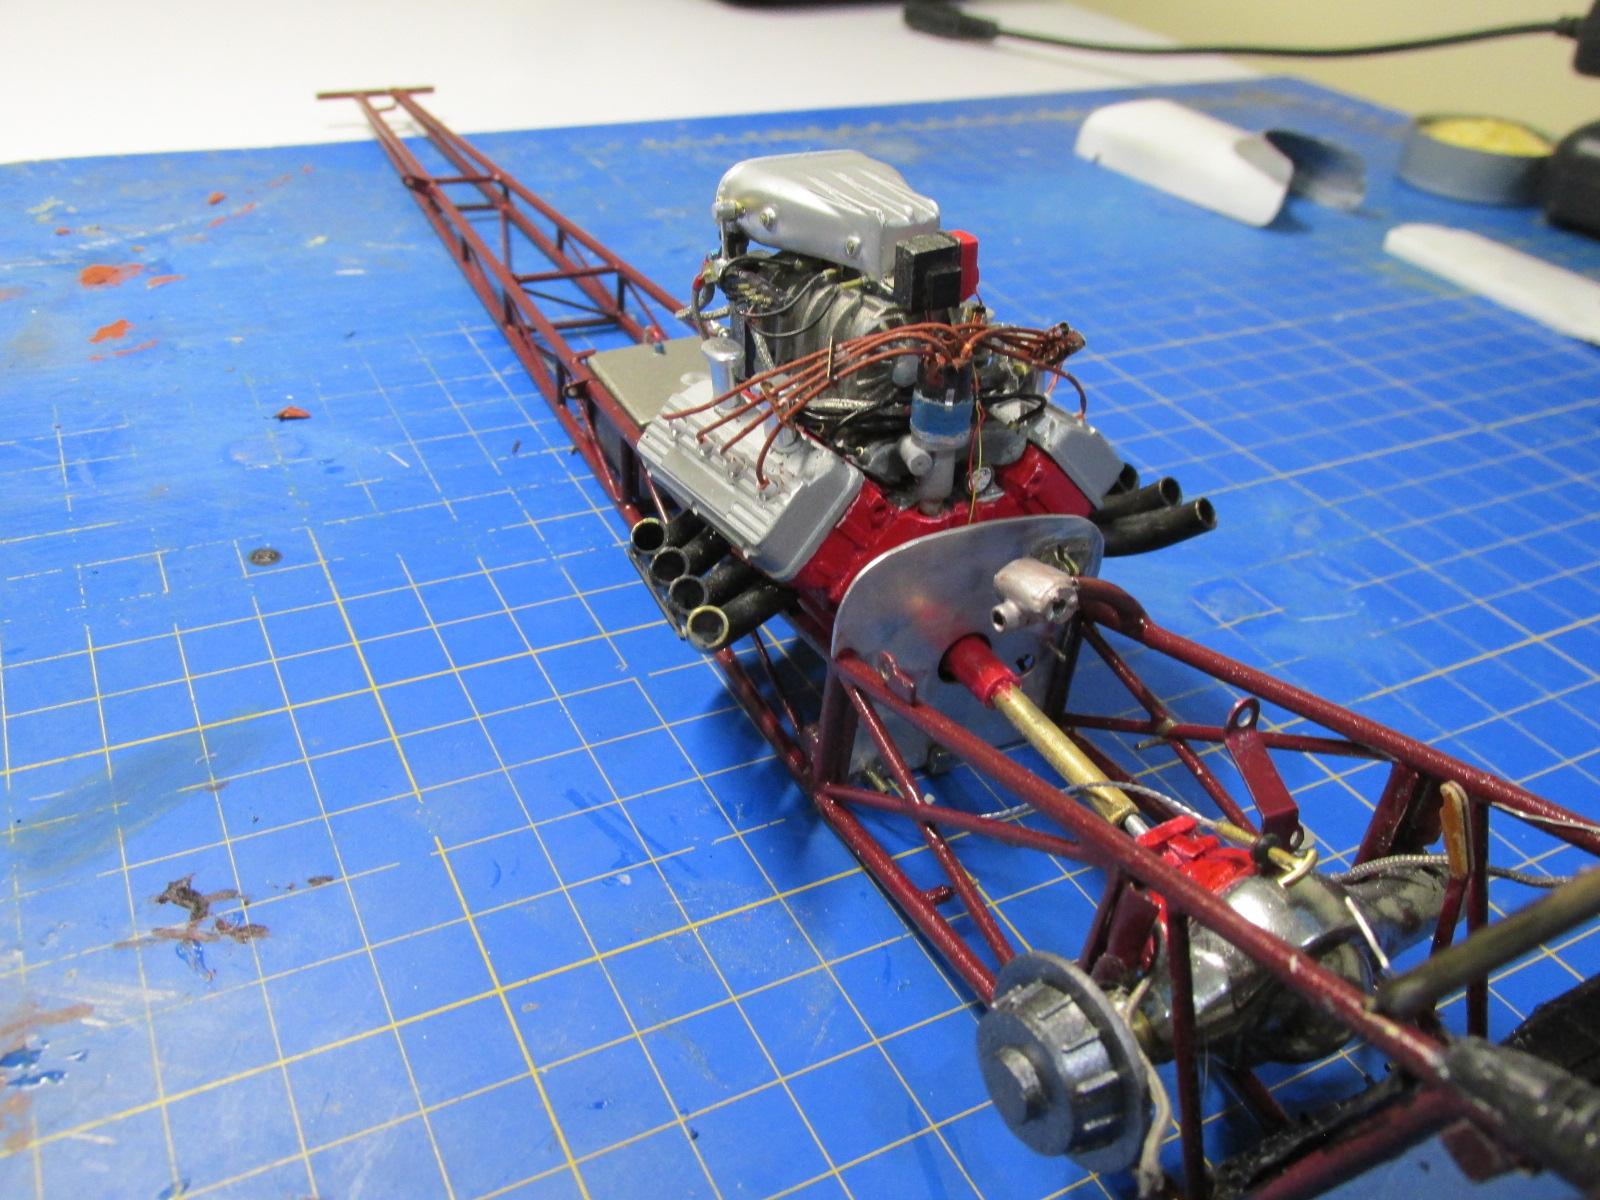
Assembly under way
-
ROYAL CANADIAN 1/16 SCALE TOP FUEL DRAGSTER
Ian McLaren replied to Ian McLaren's topic in WIP: Drag Racing Models
Thank you Francis, first off congratulations on completing current project, it's a stunner! As you can see by the new posts progress is being made, and I am gradually finding out where things have been hidden. Luckily all of the parts for the Royal Canadian survived the move intact, although there were some heart in the throat moments when the box that contained several of the main subassemblies could not be located. Problem solved and everything is now accounted for. I am fairly please with the filter block adaptor. The Mallory coil is kind of a hybrid.it started out as a Pro Tech coil, but was then modified and added to to represent the unique unit on this vehicle and its location. -
ROYAL CANADIAN 1/16 SCALE TOP FUEL DRAGSTER
Ian McLaren replied to Ian McLaren's topic in WIP: Drag Racing Models
Thank you Daniel, it feels good to have some tangible progress showing. and also a sense that this project will be finished shortly. -
ROYAL CANADIAN 1/16 SCALE TOP FUEL DRAGSTER
Ian McLaren replied to Ian McLaren's topic in WIP: Drag Racing Models
Thanks David, I'm glad to be close to having this project completed. Not sure what will be next but there are a few options but they are all 1/16th -
ROYAL CANADIAN 1/16 SCALE TOP FUEL DRAGSTER
Ian McLaren replied to Ian McLaren's topic in WIP: Drag Racing Models
These are the final decal paper templates before committing them to decal paper. A little clean up on the cowl and final assemble is in progress
-
Francis you have raised the bar to new heights. I'm going to spend hours just looking at these photos, so much to see. I am in awe of your talents my friend.
-
64 Dodge D100 Pickup Pro Street
Ian McLaren replied to AmericanMuscleFan's topic in WIP: Drag Racing Models
CONGRATULATIONS FRANCIS! This has been an epic project with the results being just jaw dropping. Truly at testament to the art of model building! Well done my friend! -
I know how you feel, there is a time for fidelity to scale and a time for just good modeling practices. I like where this is going and how you are approaching it. Well done.
-
ROYAL CANADIAN 1/16 SCALE TOP FUEL DRAGSTER
Ian McLaren replied to Ian McLaren's topic in WIP: Drag Racing Models
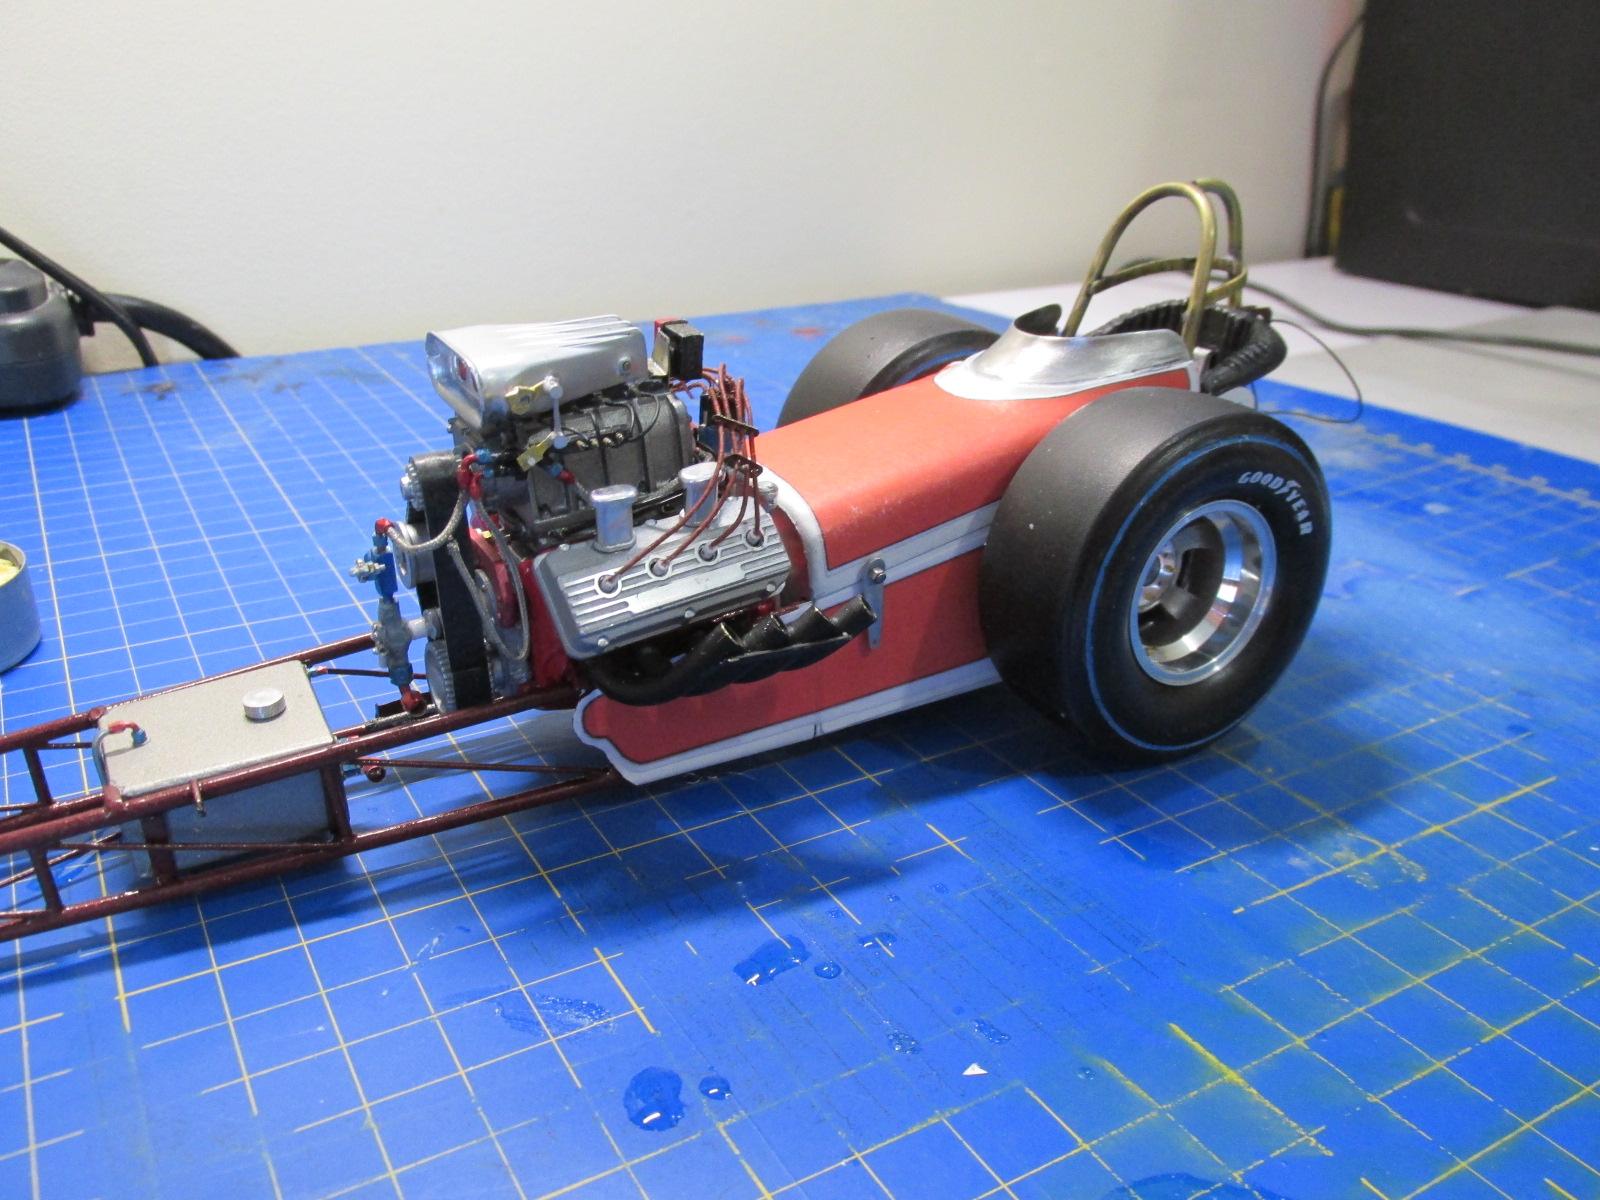
Final test fit
-
ROYAL CANADIAN 1/16 SCALE TOP FUEL DRAGSTER
Ian McLaren replied to Ian McLaren's topic in WIP: Drag Racing Models
Moving along
-
ROYAL CANADIAN 1/16 SCALE TOP FUEL DRAGSTER
Ian McLaren replied to Ian McLaren's topic in WIP: Drag Racing Models
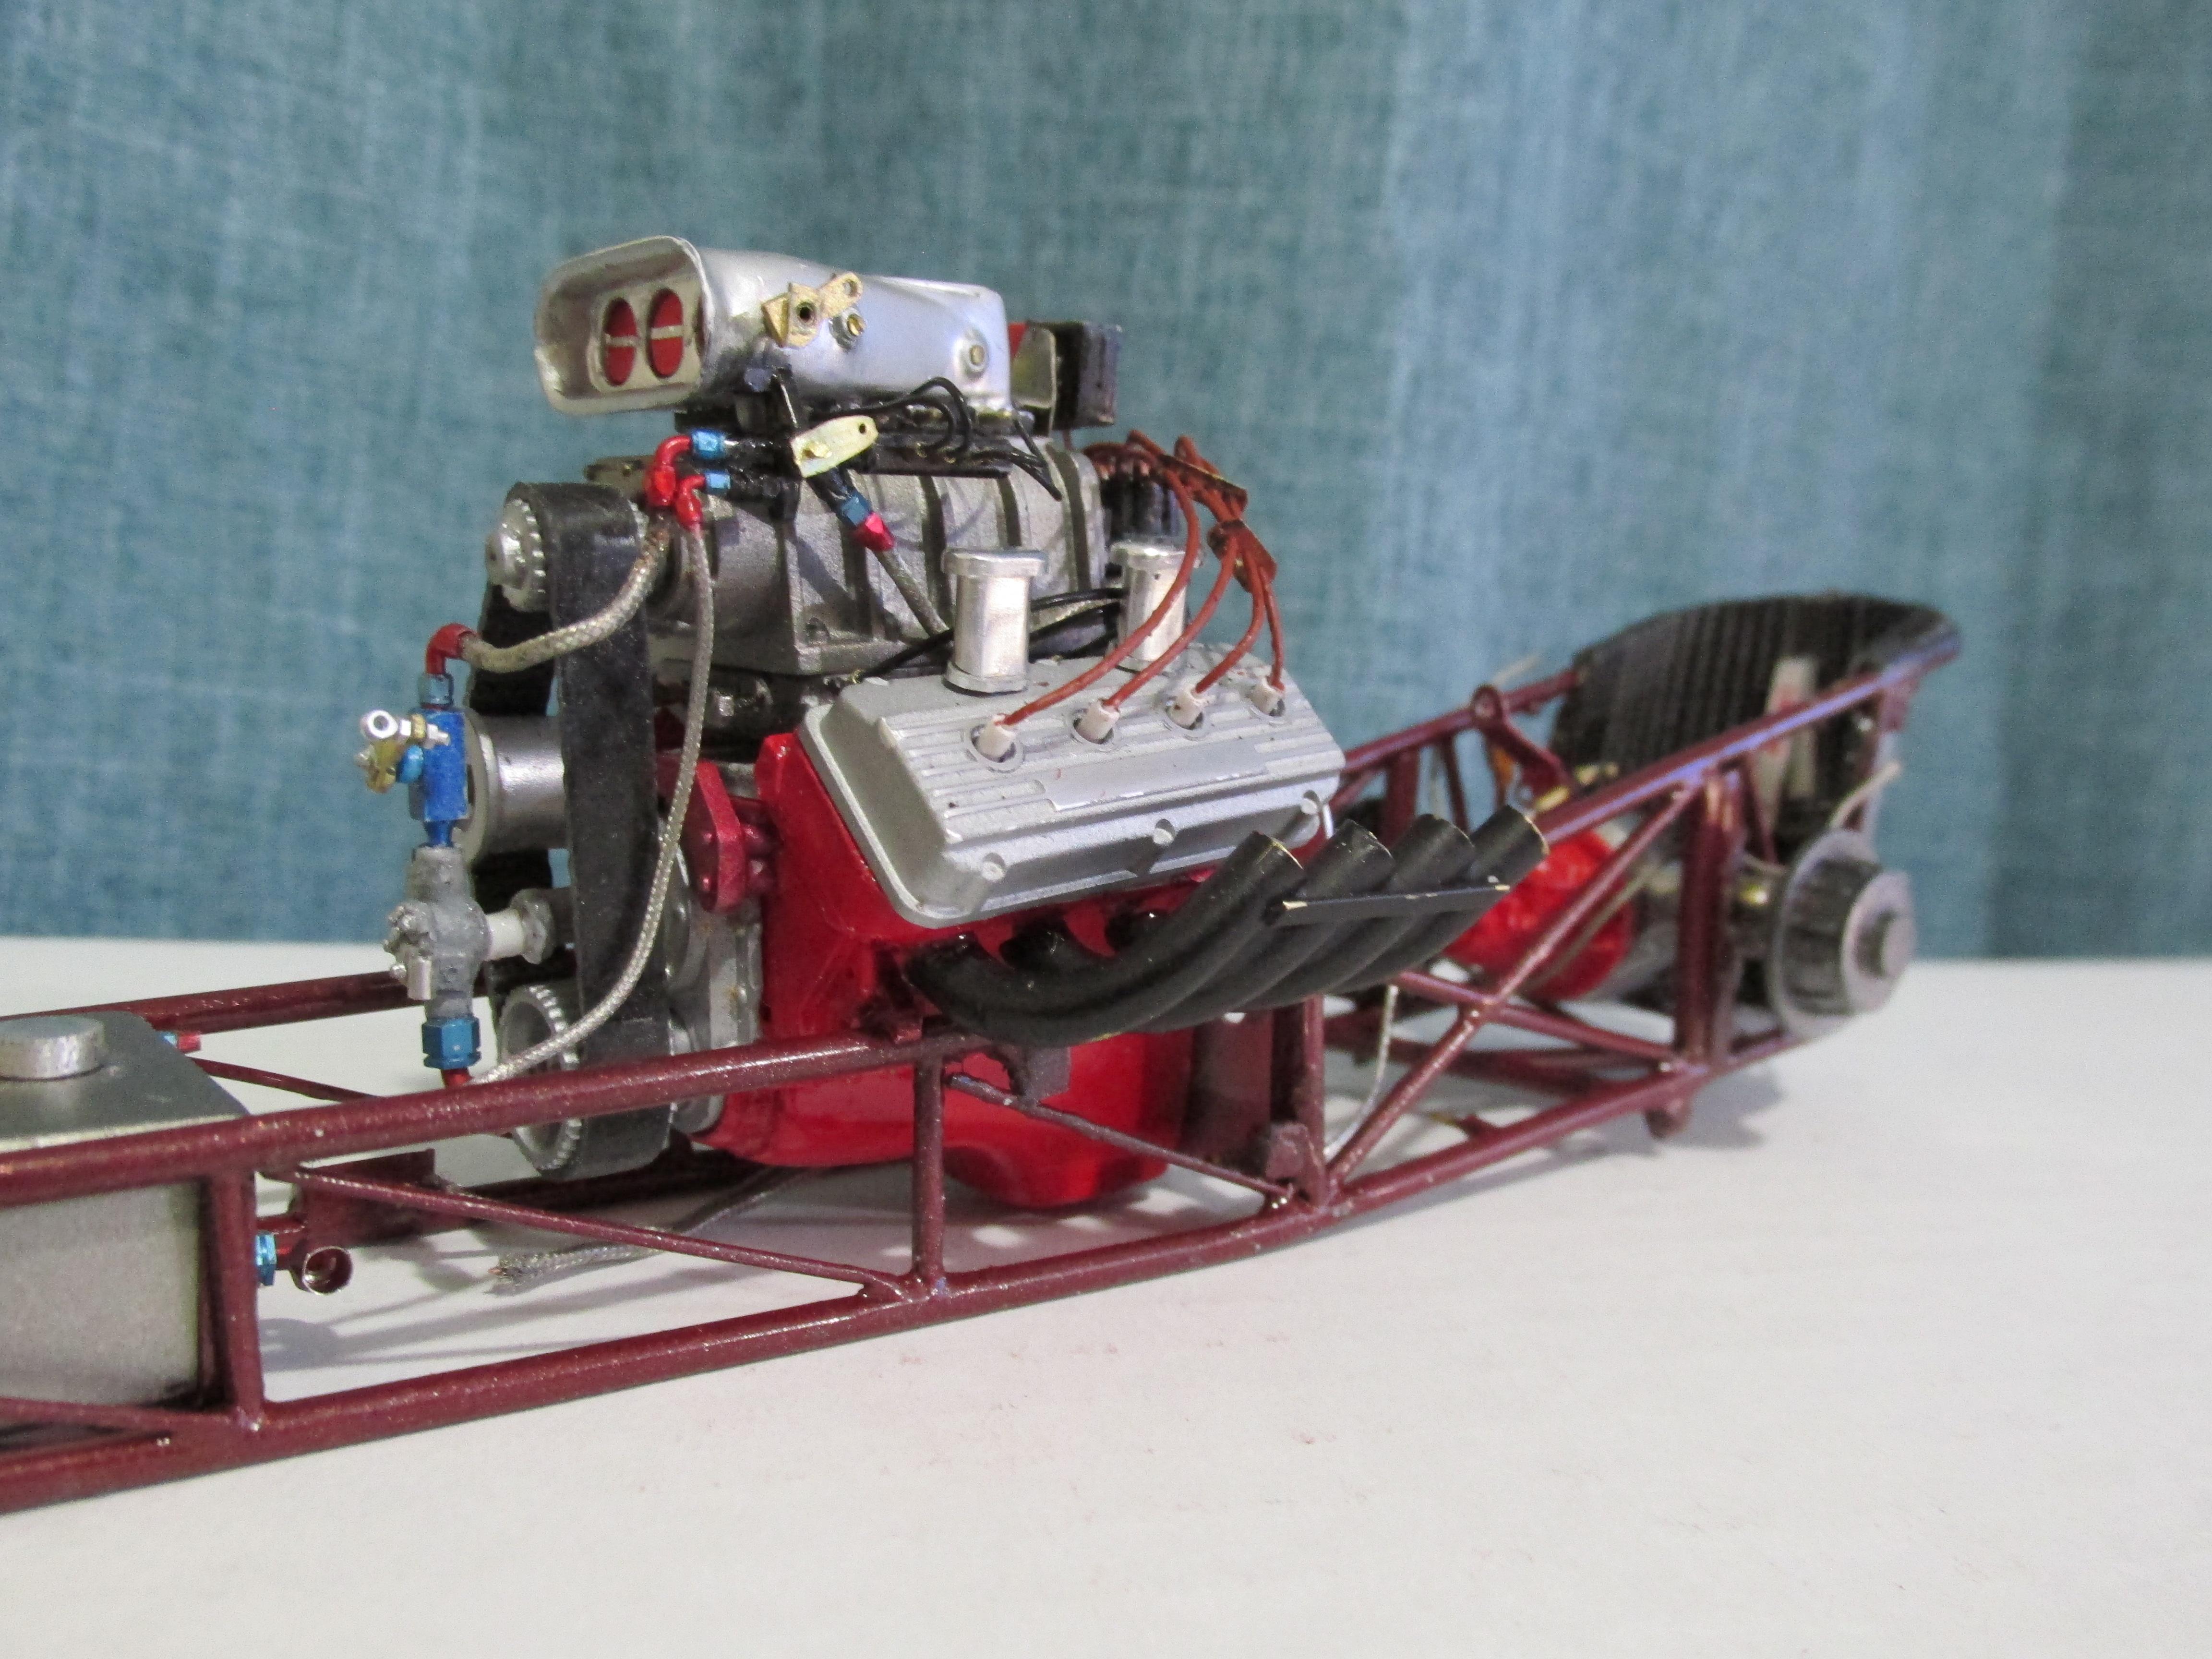
LPH1320 392 dressed up and ready to party, just need to install the balance of the drive line
-
ROYAL CANADIAN 1/16 SCALE TOP FUEL DRAGSTER
Ian McLaren replied to Ian McLaren's topic in WIP: Drag Racing Models
Today was a good day.
-
ROYAL CANADIAN 1/16 SCALE TOP FUEL DRAGSTER
Ian McLaren replied to Ian McLaren's topic in WIP: Drag Racing Models
First new upgrade to the shop, so far just shot some primer with good results. Also my Iwata air brush works with the compressor as well, bonus! I'm told a charge is good for over an hour of spray time. Looks like a winner!
-
Simply an increadible model, fit, finish and attention to detail off the gauge. What strikes me the most is the fidelity to scale of every visable component, ourstanding!


.jpg.dc345f3ed4c7046ee1f0a6b90420cb89.jpg)

.JPG.0a6cf367a2df97247501353fa4d5c3cd.JPG)
.jpg.a4d70ed6966da2358a024d9b0f4e33f5.jpg)


.JPG.add417ec00bf6ca35c033793f4255c69.JPG)