Bills72sj
-
Posts
4,583 -
Joined
-
Last visited
Content Type
Profiles
Forums
Events
Gallery
Everything posted by Bills72sj
-
I actually have the Monte Carlo snappy. However, I do have some 70 Monte Carlo seats in my parts box. Some slicing and dicing with the promo seats might get me there. I'm not sure if I have parts to make the rear bench match though.
-

Amber lights, 3 different techniques.
Bills72sj replied to Bills72sj's topic in Tips, Tricks, and Tutorials
I know all about the interchangeability of that era car. I put a rear axle from a 1:1 65 El Camino under my work beater 72 Grand Prix years ago. My present 1972 Grand Prix has 1-1/4" front bar from a WS6 Trans Am in front and an aftermarket 1" sway bar on the 12 bolt posi rear. PM me with pics of your '62 Poncho. -
Amber lights, 3 different techniques.
Bills72sj replied to Bills72sj's topic in Tips, Tricks, and Tutorials
Don't feel bad, it was just one of those bits of trivia I happen to remember since my very 1st car was a 1968 Chevelle. -
Probably not. Now I will have to go find what I can find that is better. The bolstering and the high backs are correct but the pleats are supposed to be vertical not horizontal. I will have to see if I am in the mood to deal with it when I get to that point.
-
The promo came with a separate interior tub.
-
Amber lights, 3 different techniques.
Bills72sj replied to Bills72sj's topic in Tips, Tricks, and Tutorials
On American cars they were federally mandated starting in 1968. -
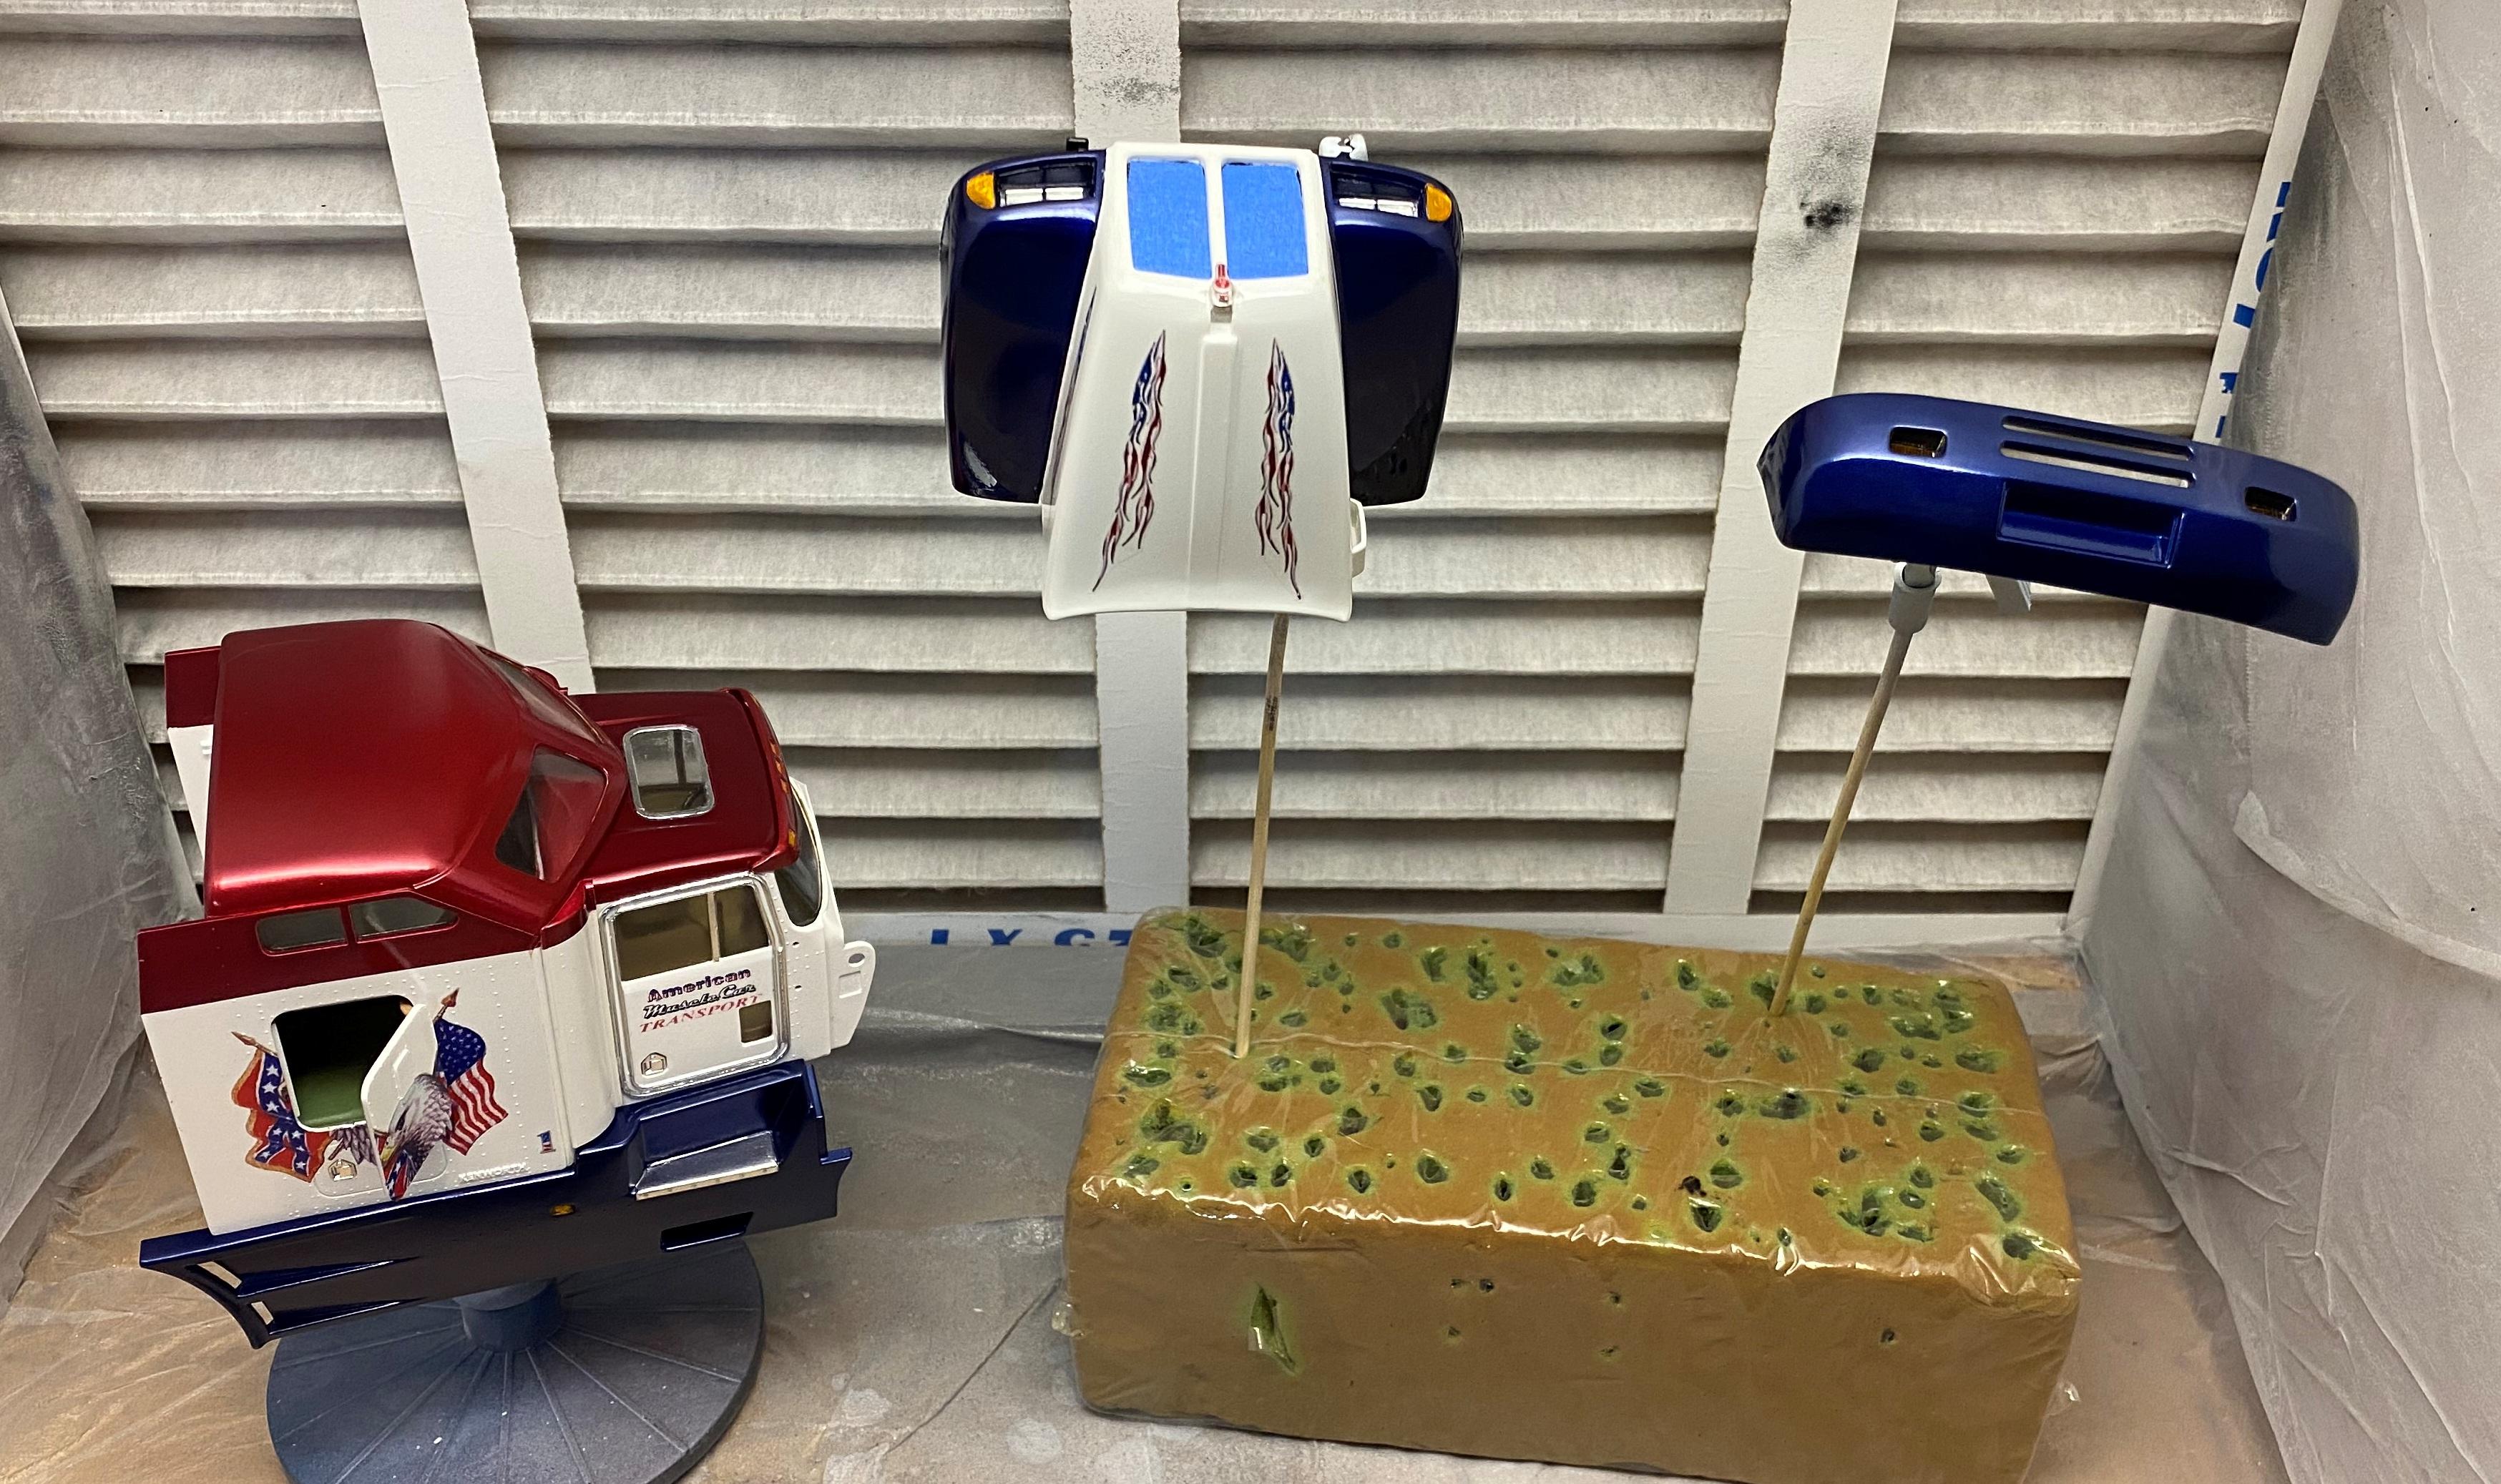
Got brave and shot some Pledge over my paint and decals. I have never airbrushed it before. In spite of poor technique and probably the wrong air pressure, Pledge's self leveling properties covered for me. We are nearing the homestretch now.

-
I have this kit. The spoof parts would make a fun crazy build on something else.
-
I like the flashy purple you have going on. I just picked up a new Revell snappy kit from HL as I heard the body proportions had high reviews.
-
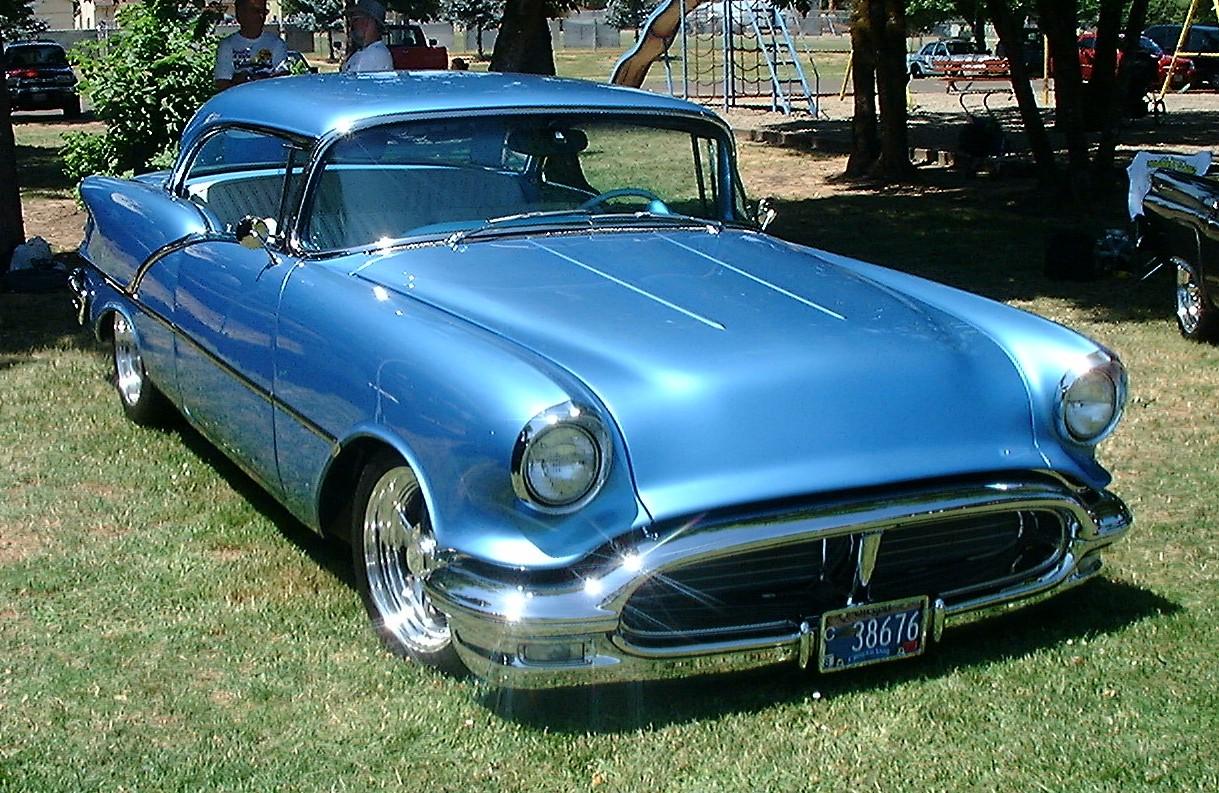
Very nicely done. I have a resin 56 Olds to get to some day. I want to recreate one I saw in a local car show.
-
That is a serious looking machine you have there. Do you intend on giving it any racing livery?
-
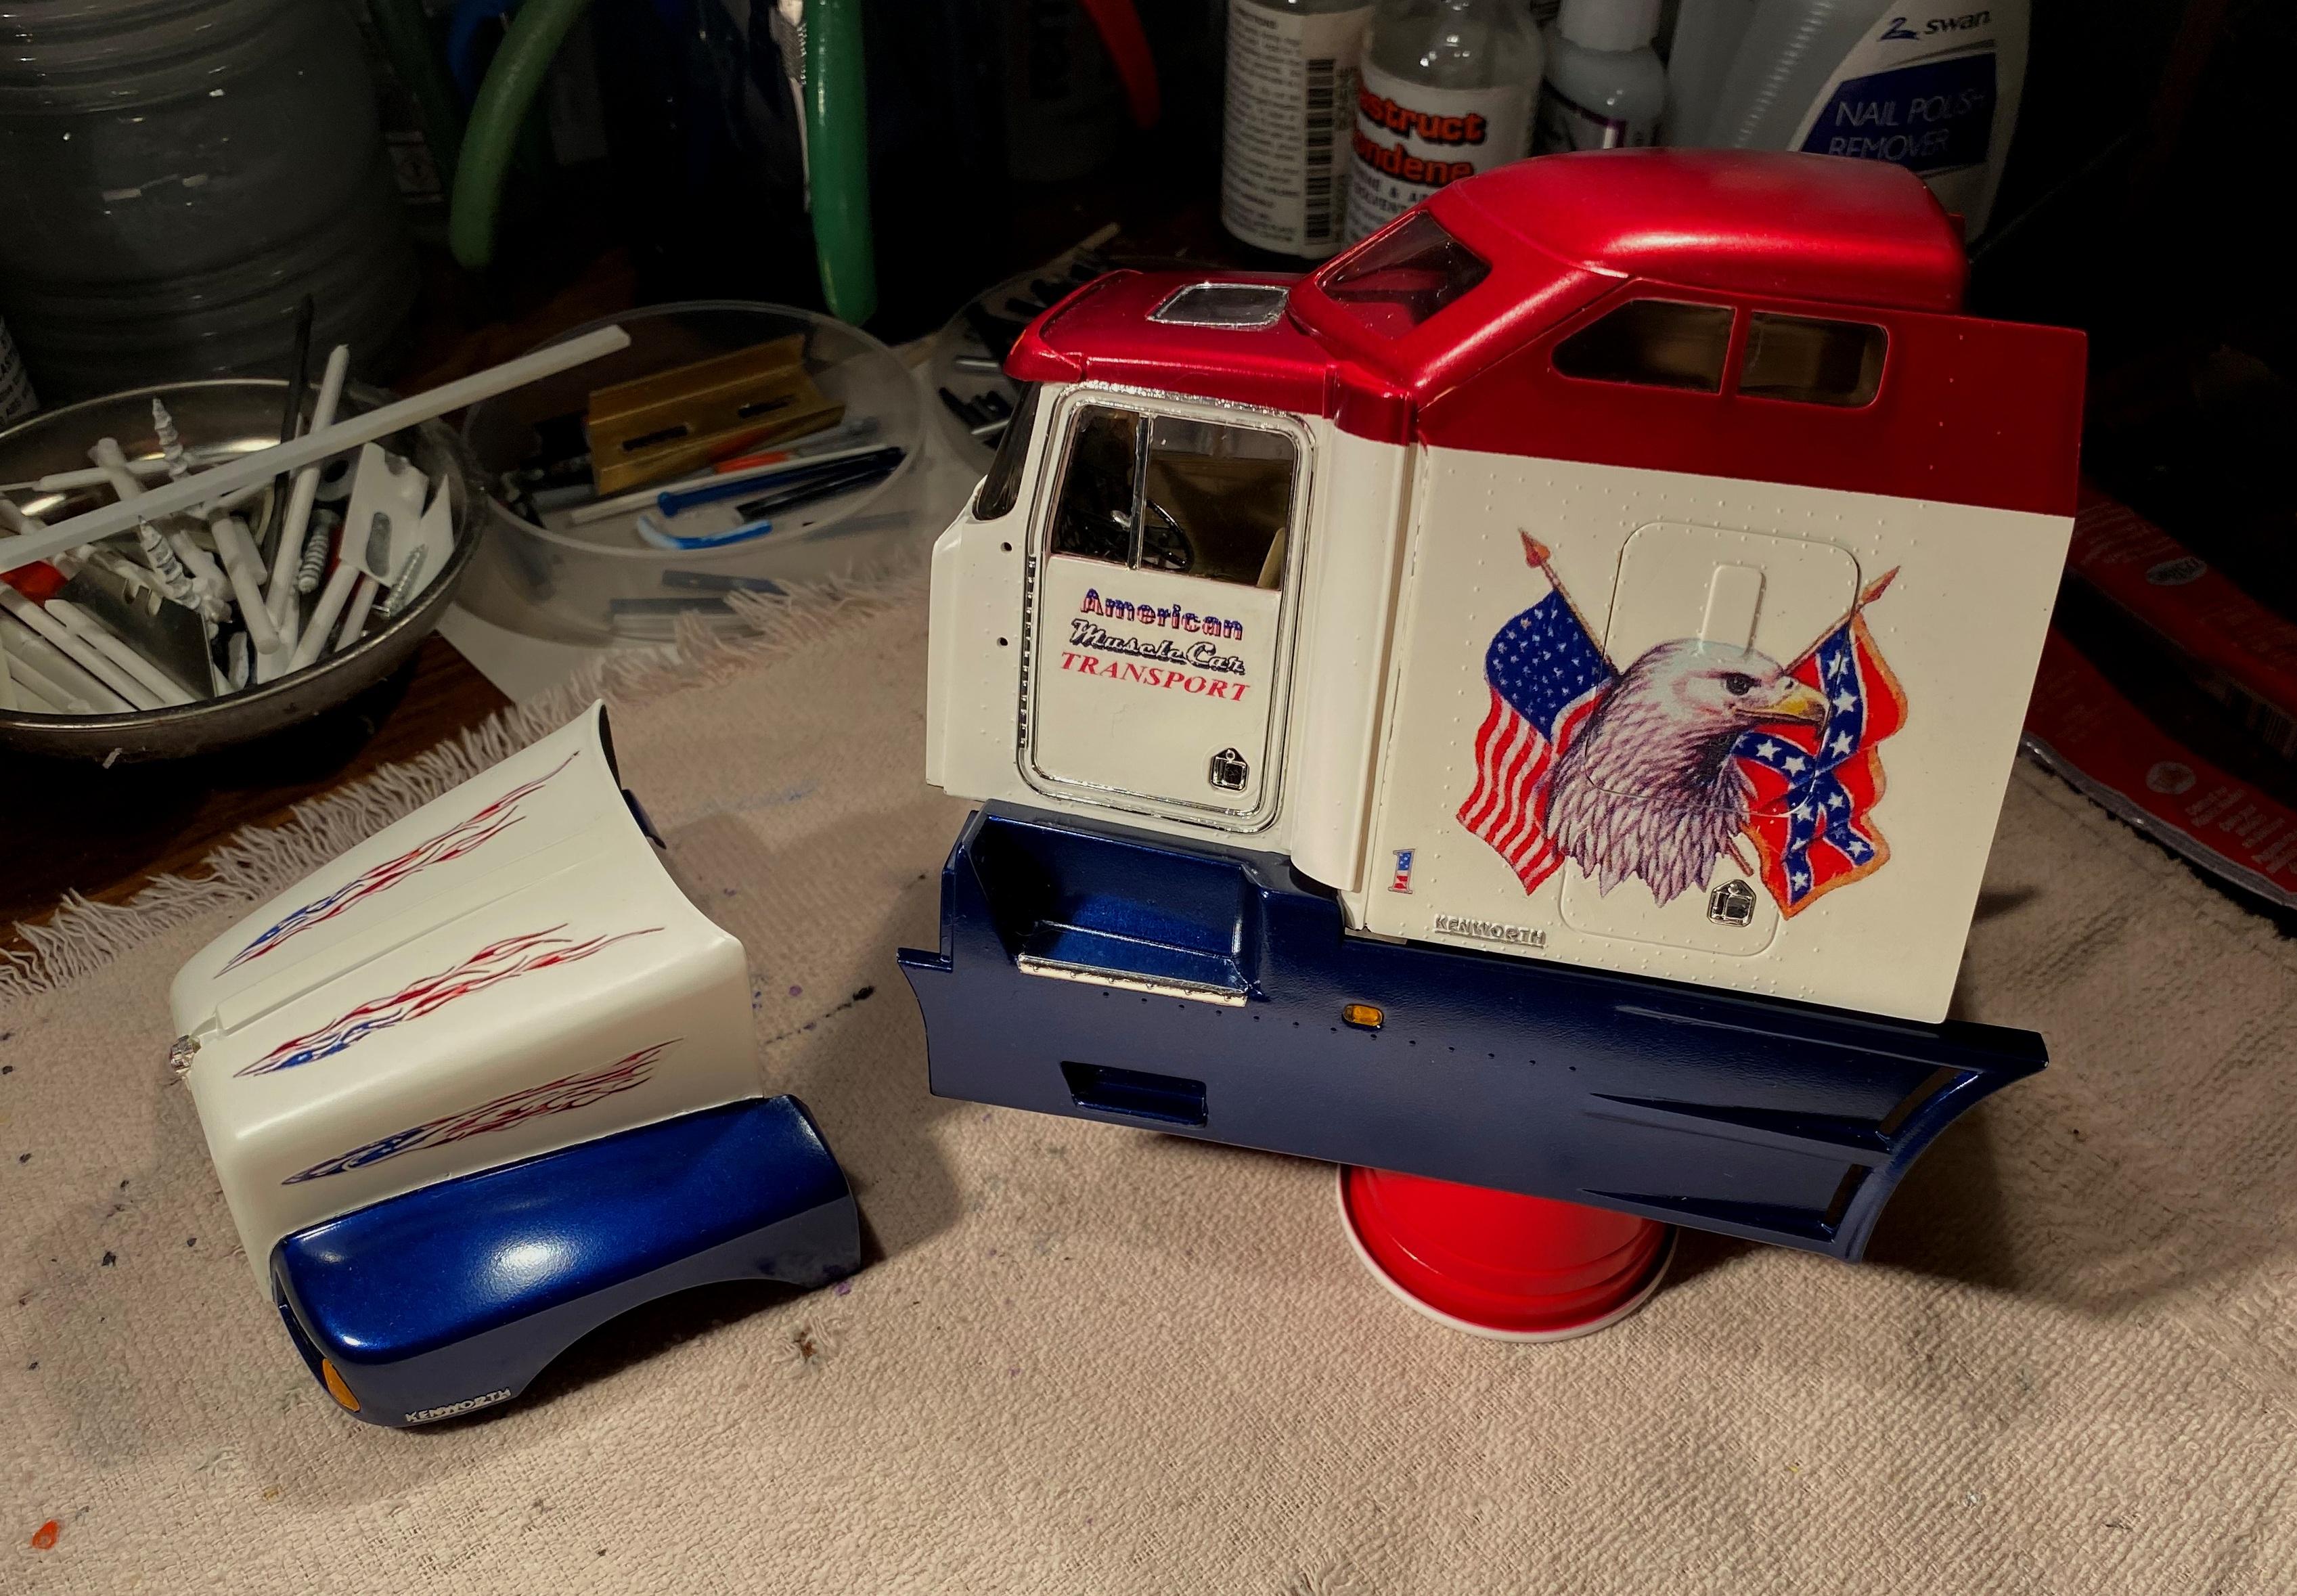
Thanks Dan. I probably have 20 minutes invested in getting the eagle and flags to lay perfectly over the rivets and other texture on the sleeper.
-
This is the 2005 reissue I have in the stash. Any newer than this?
-
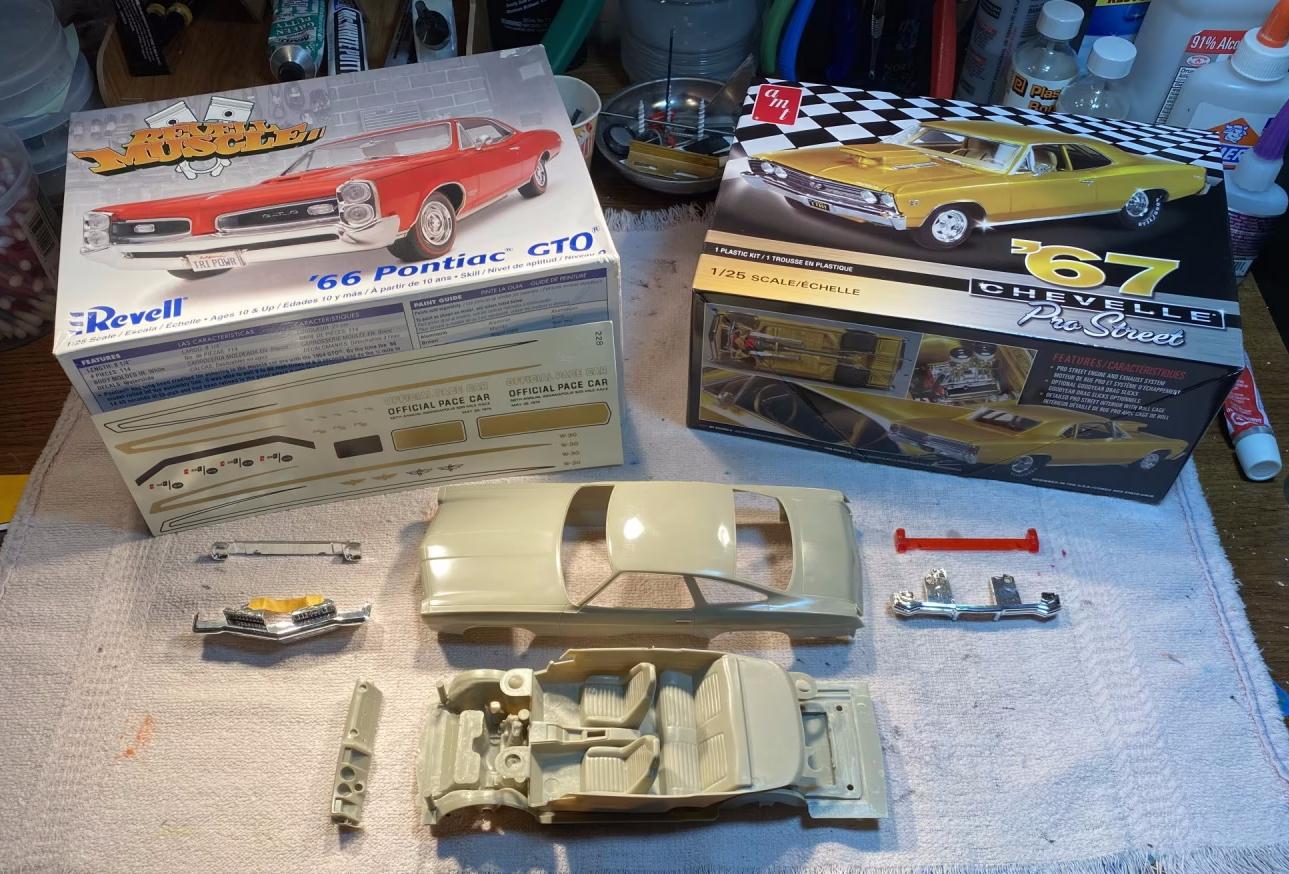
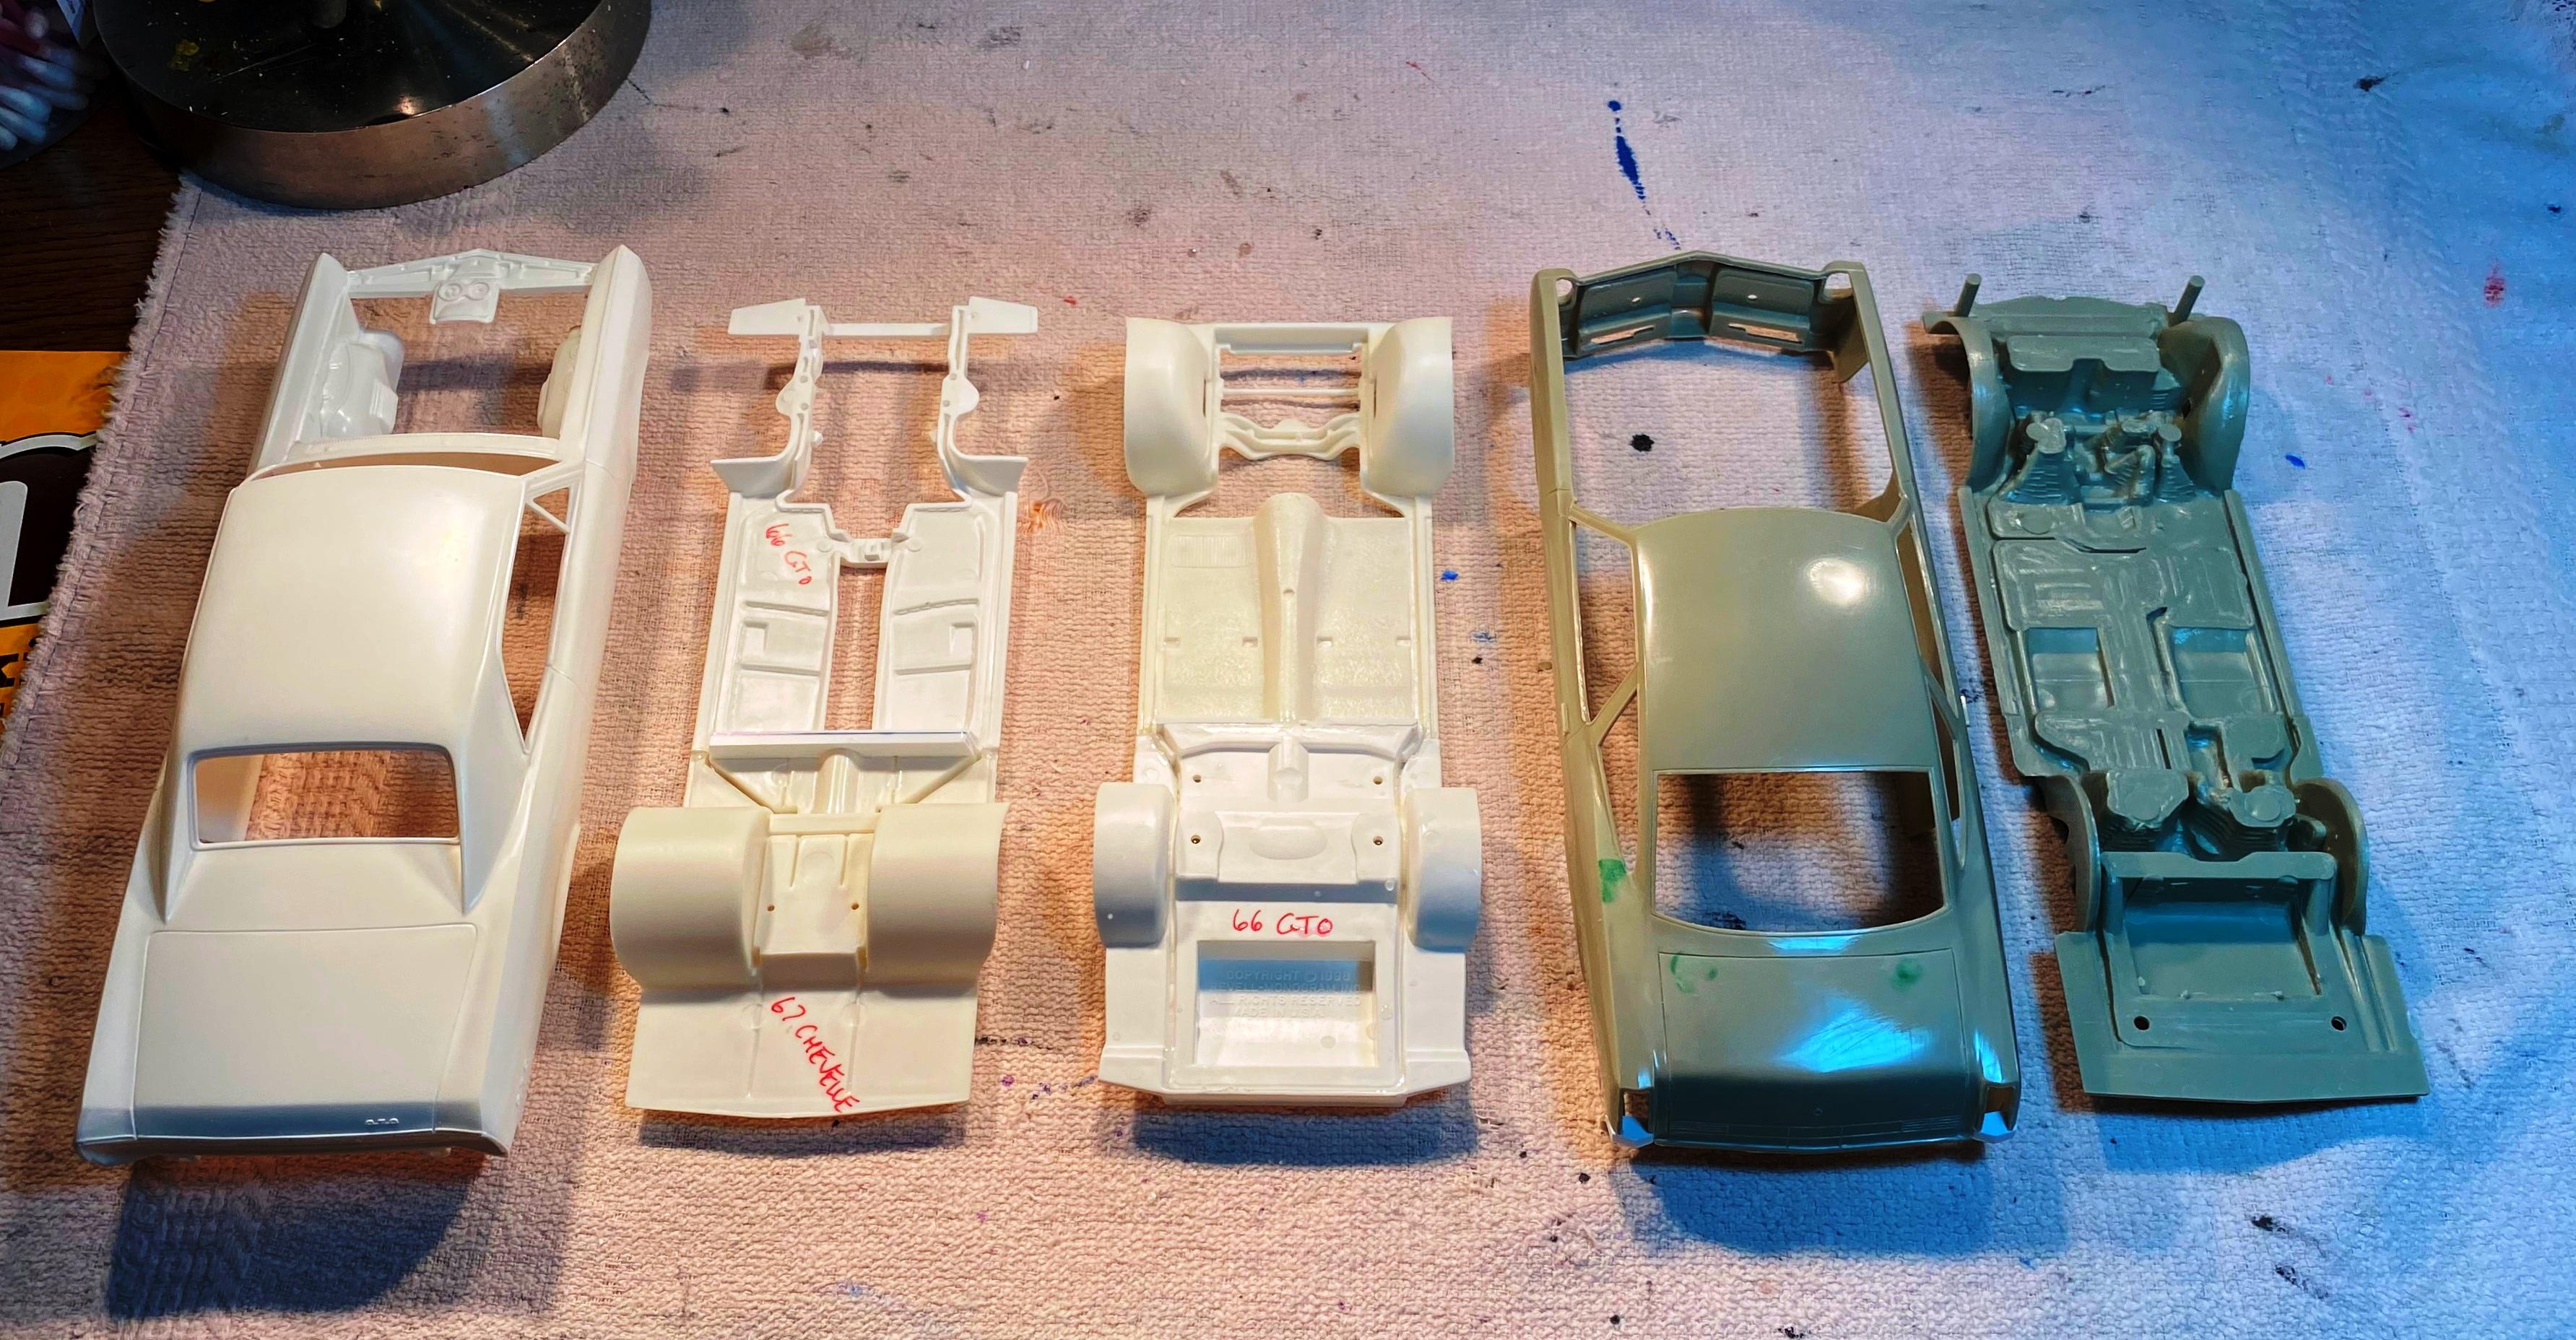
Some kitbashing is required to improve the detail of my 74 H/O project. Based on the chassis requirements of my Olds and the desire to make a Pro Street 66 GTO in the future, some swapping and hacking is needed. The 67 Chevelle is giving up the rear of its chassis to the GTO. The rest of the chassis is for the Cutlass. The rear portion of the GTO chassis is spliced to the front Chevelle chassis to make it complete.
-
Happened to be in a nearby town with a Hobby Lobby. 40% of all kits motivated me to get this.
-
Welcome aboard Steve. ?
-
Thank you Brian. ?
-
Nice color combo.
-
Thank you Gary. ?
-
Really? If I had known I would have tried to track one down.
-
Larry, Thank you for the generous offer. I am going to attempt to make appropriate mods on mine. If I fail, I will take you up on the offer.
-
Thank you Rusty and Eric. ?
-
With my custom decals printed, clearcoated and dried. I got to apply them today. They did not turn out perfect but good enough.
-
Welcome aboard.
-
Airbrushing: Jumping in with both feet and my wallet.
Bills72sj replied to Bills72sj's topic in Tips, Tricks, and Tutorials
I did get the Iwata handle. The whole combination has some heft to it. A pleasant surprise that in spite of the trigger and handle, it fits very well in my airbrush holder.