Bills72sj
-
Posts
4,583 -
Joined
-
Last visited
Content Type
Profiles
Forums
Events
Gallery
Everything posted by Bills72sj
-

Extra Parts, Boxes, Instructions, Etc.
Bills72sj replied to bluestringer's topic in Model Building Questions and Answers
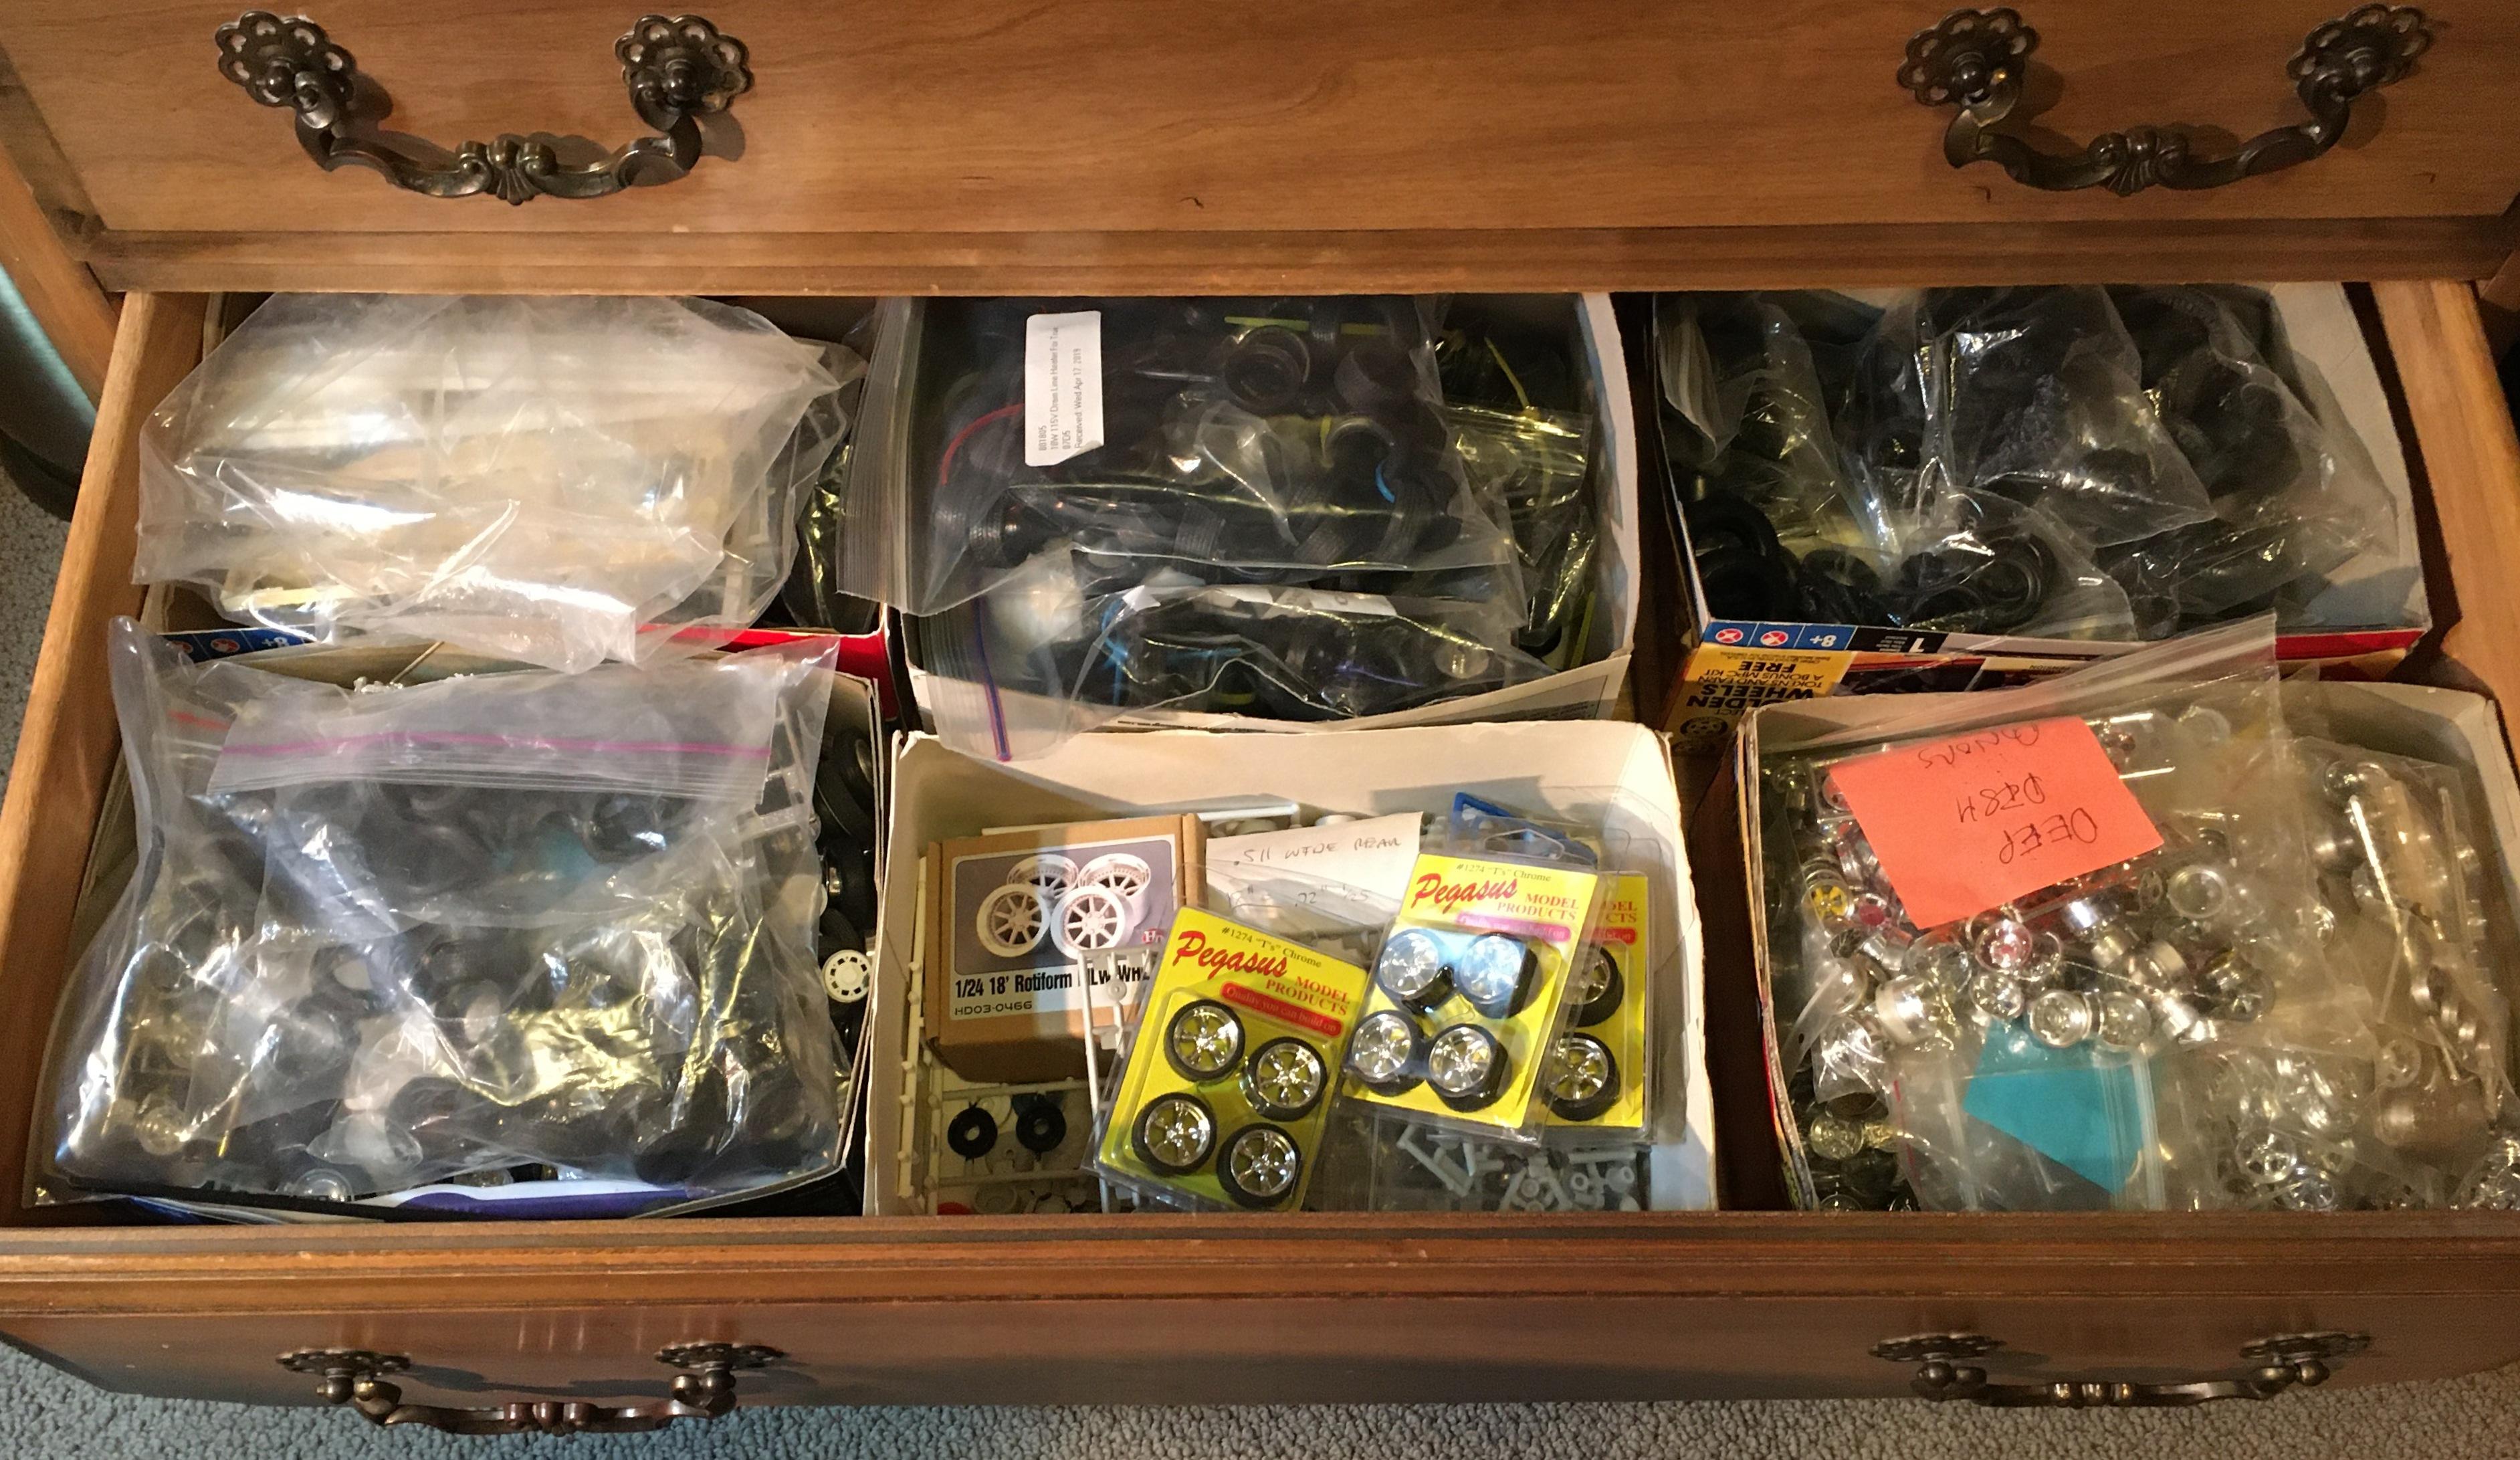
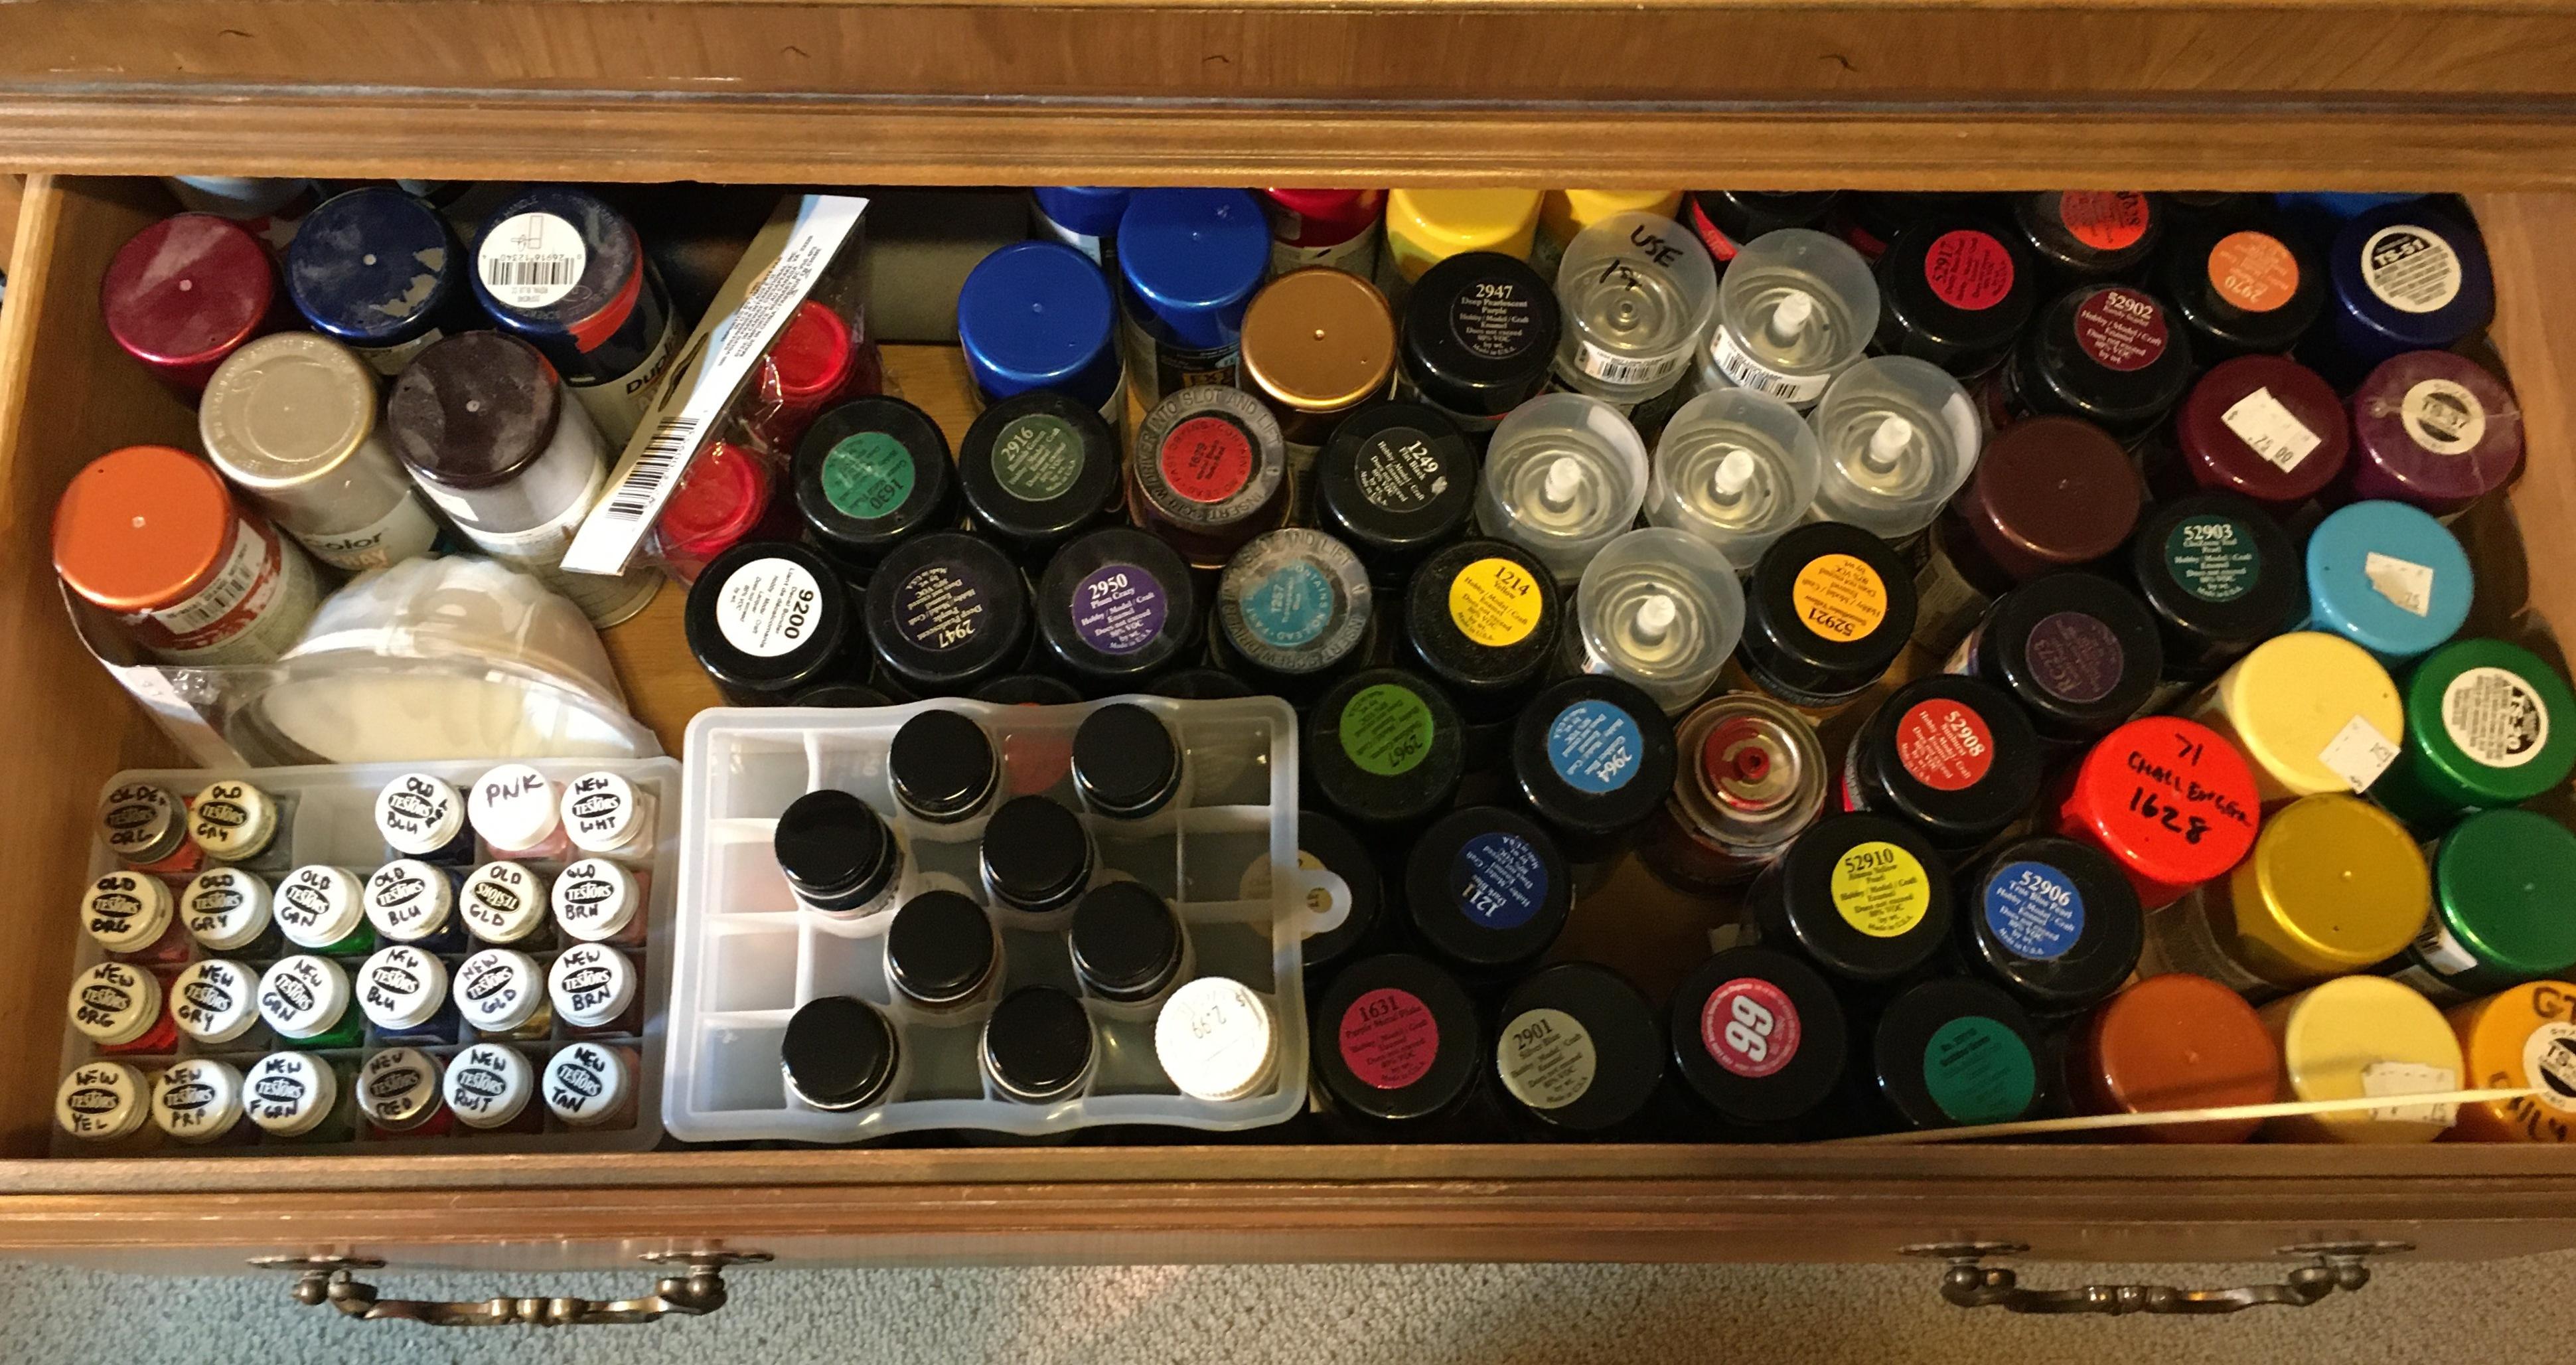
When my wife and I got new bedroom furniture, I repurposed our old handmedown dresser. The drawer depth and width is perfect for holding 6 open kit boxes in each drawer. The instructions all fit in one box as I have only built maybe 40 kits. I have one box for engine bits, 5 boxes for tires 2 boxes for wheels, one or two for body parts, one for decals, etc. It makes it easy to pull the box out of the drawer and paw through it for what i am looking for. To save me some searching time, I presort them in various sizes of zip-loc baggies. The box tops that fold, I save flat for now. The ones that do not, hit the recycle bin.
-
Very nicely done. I had the same wrinkle on the nose of mine too. I have a suggestion on your next Olds. Nip off the stud on the red tail lights and sand the back smooth. Then apply some Future to gloss it back up. As the last step, apply some BMF for some reflectivity.
-
Love your Charger. I have not seen many done in "Arrest Me Red".
-
What to thin enamels with for airbrush?
Bills72sj replied to dawgvet's topic in Model Building Questions and Answers
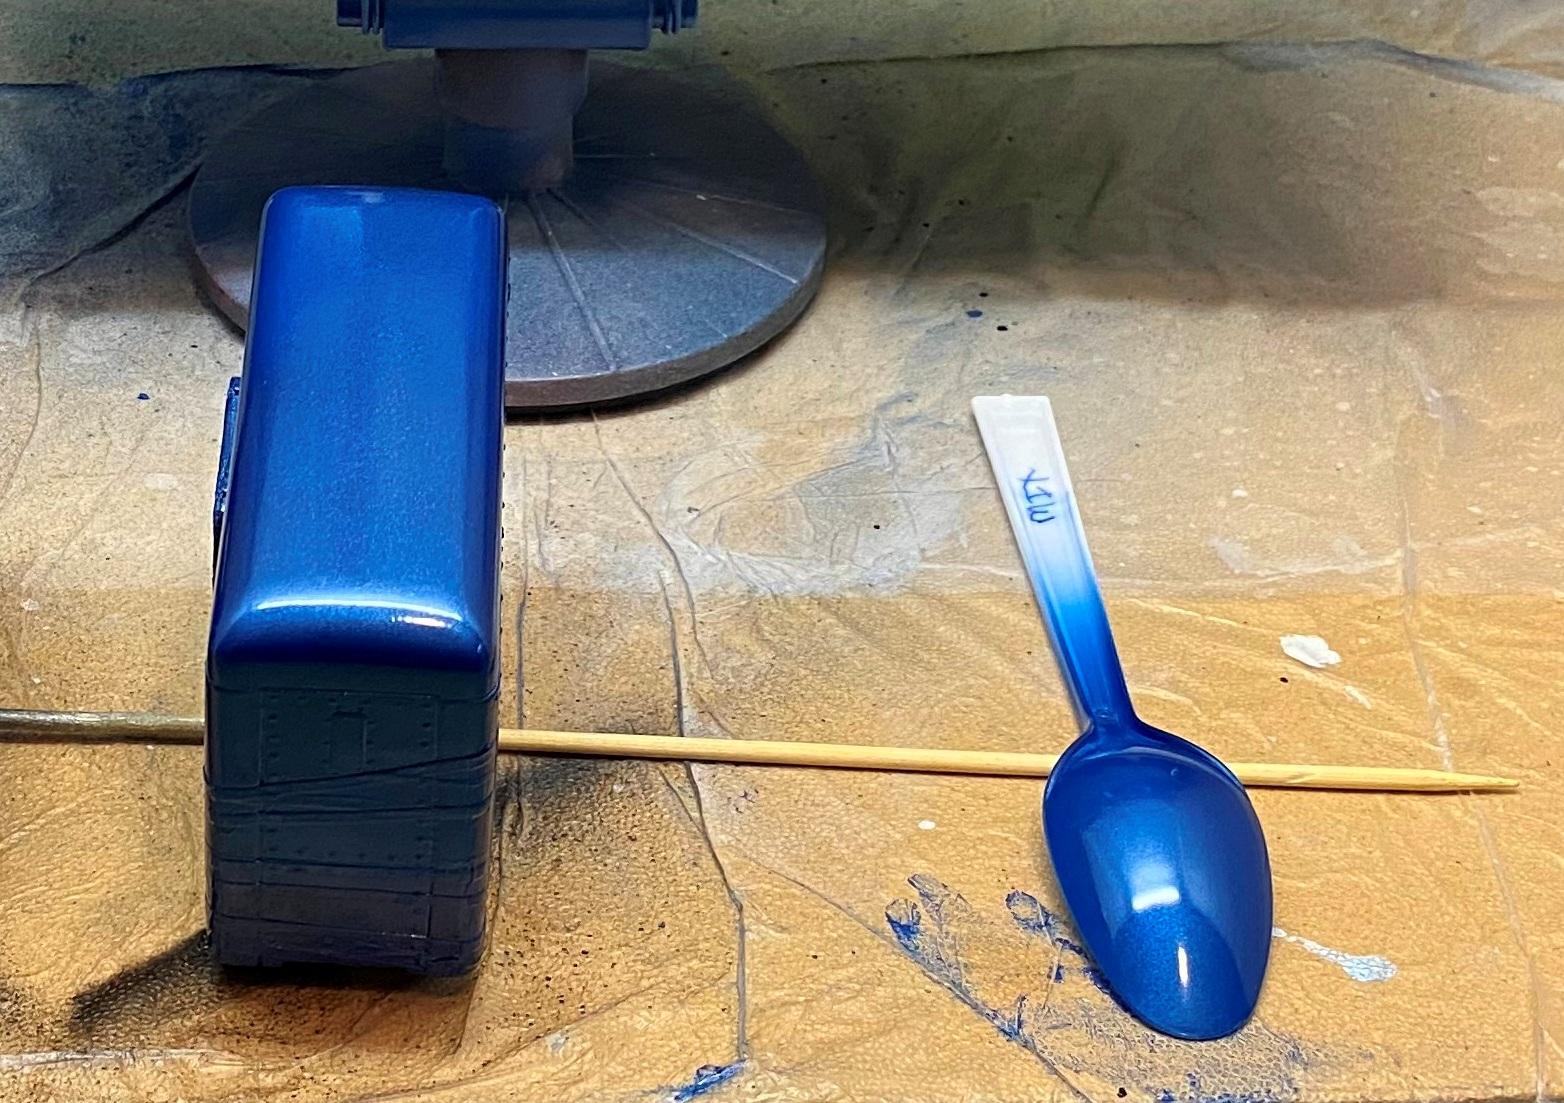
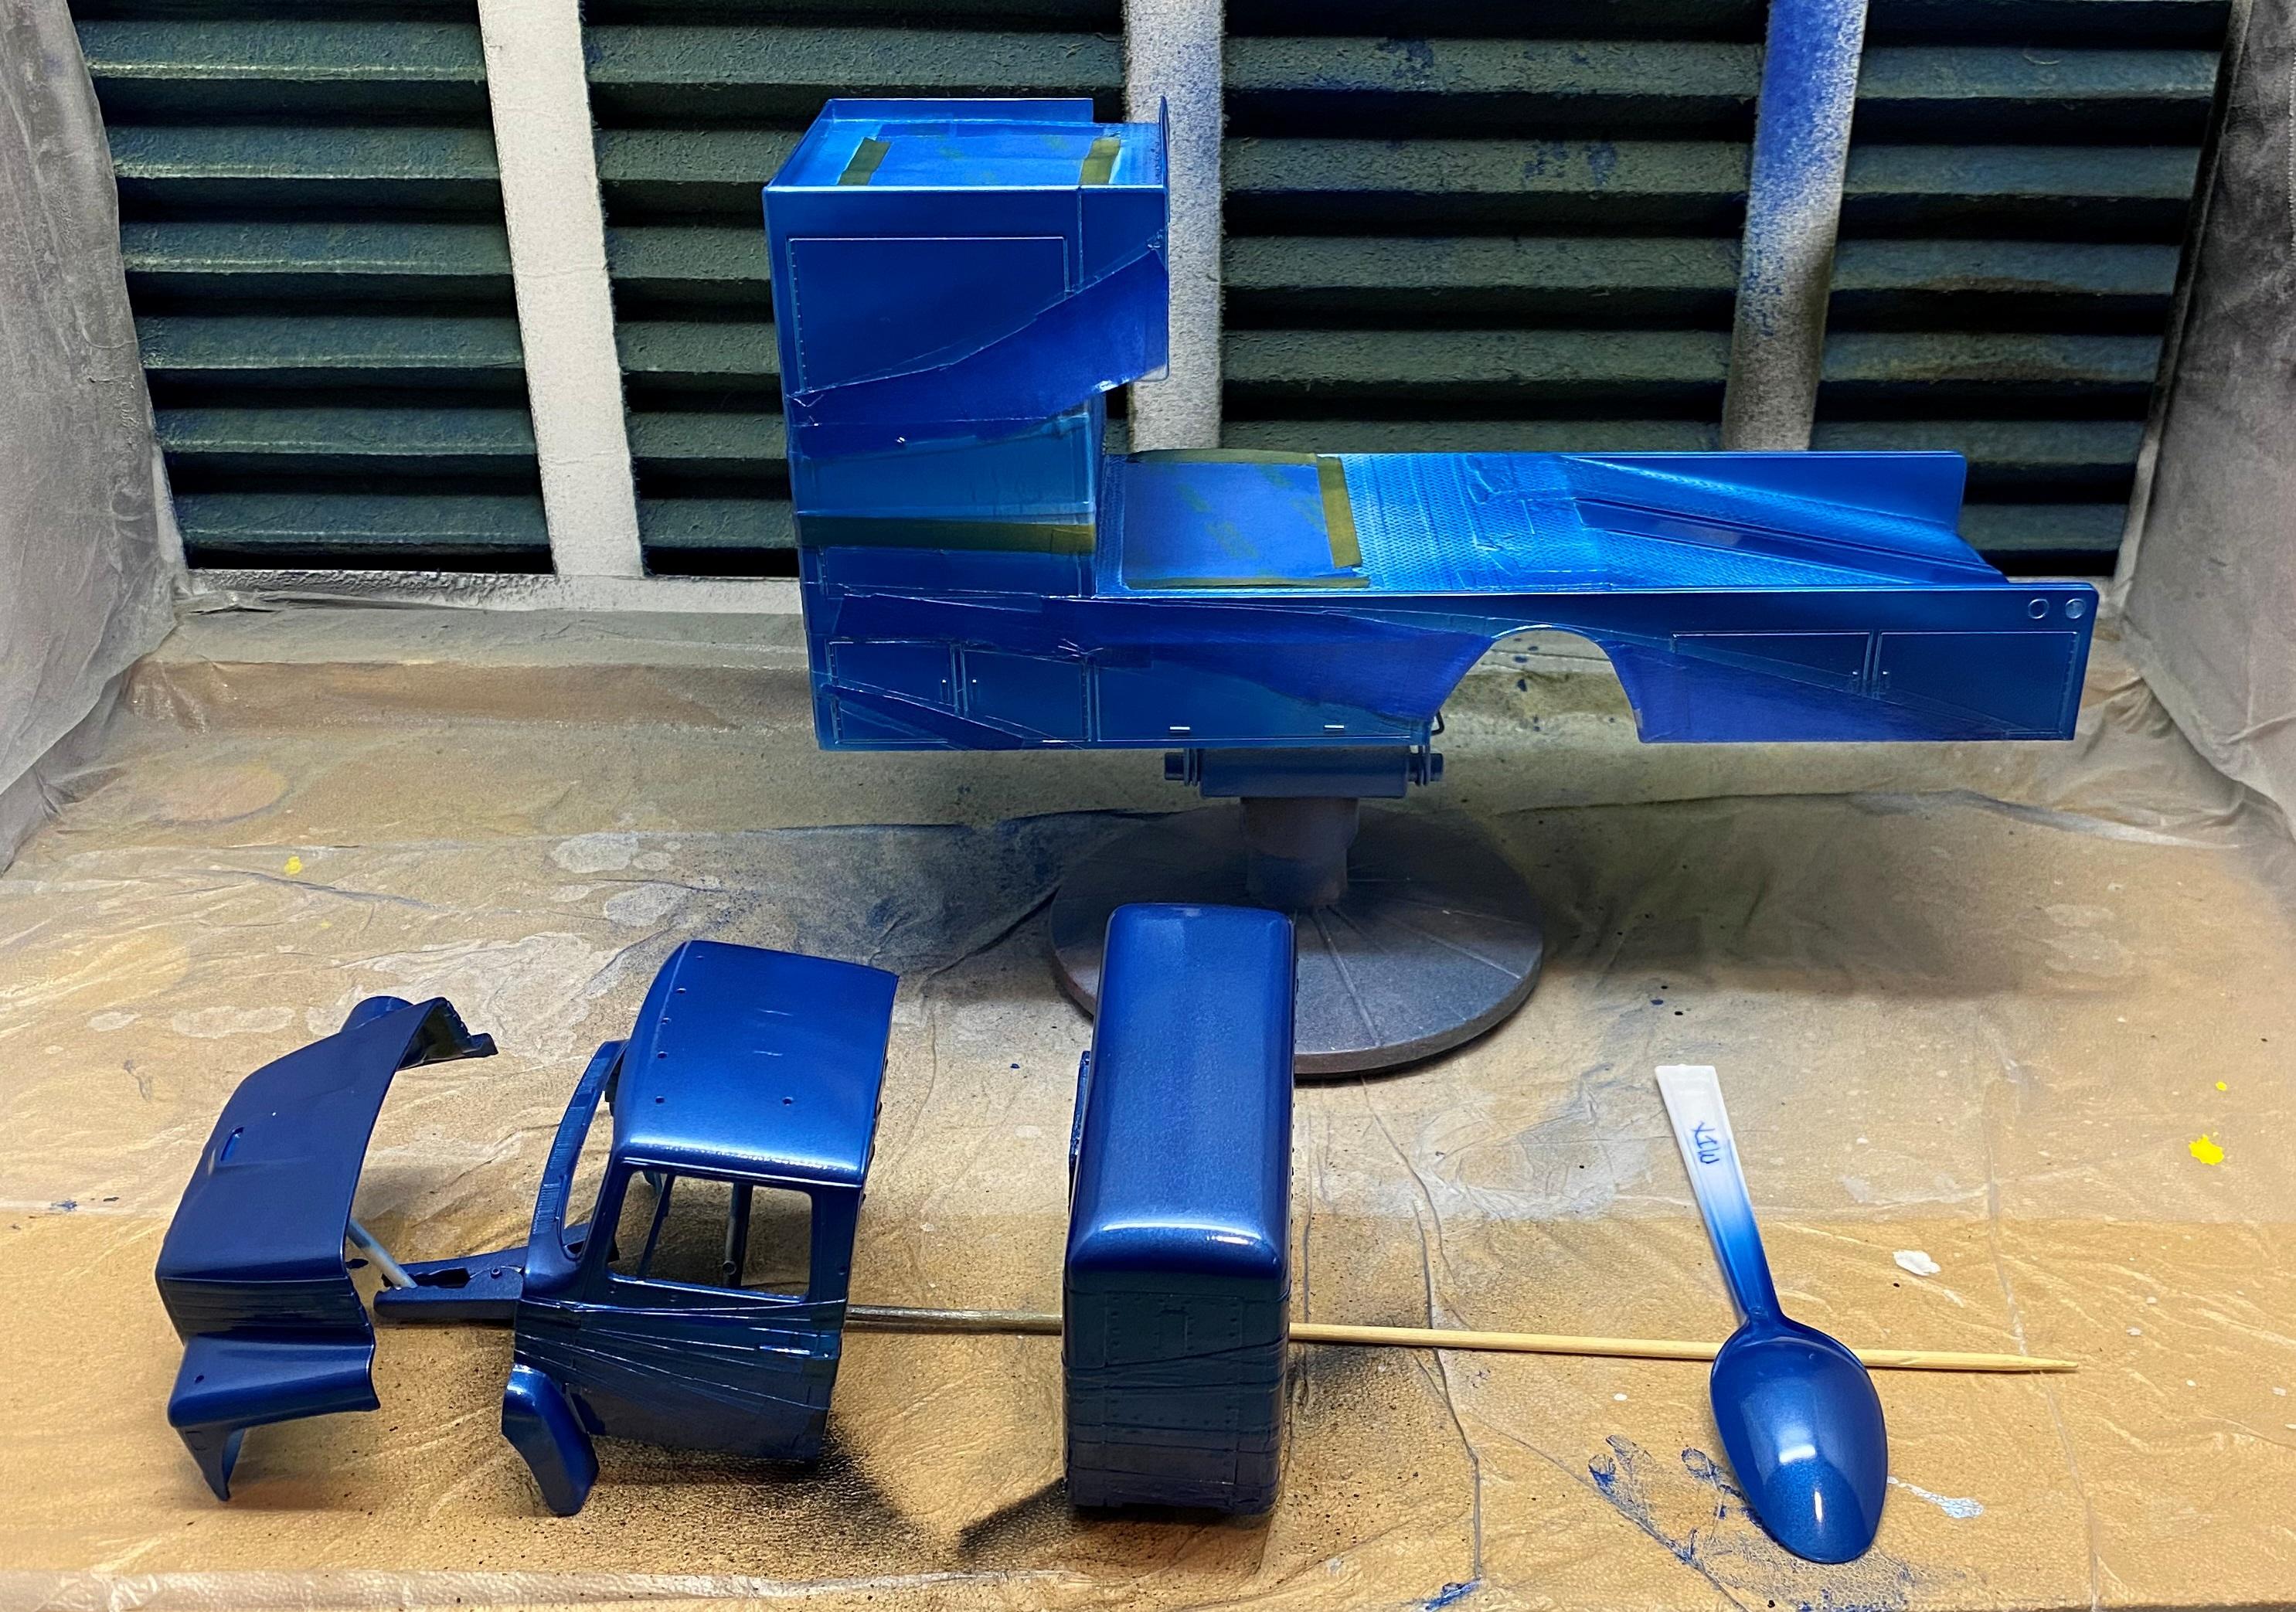
I just painted these last week. i used two different colors of Testors metallic blue enamel mixed together. Then filled the just emptied bottles of with hardware store lacquer thinner. (To extract every last bit of color) All of it was dumped into a larger clean/new jar. This yielded 1 full fluid ounce of thinned paint. It was prayed at 20 psi through a 0.5mm airbrush. The spoon is bare plastic with no primer whatsoever. The sleeper is over Future (used to seal the masking to prevent bleed under). The gloss is amazing. I may likely not clear coat it. Though I am going to be patient and let it cure for quite a few days before handling. The fact that it is Testors enamel means, it will be pretty tough one it does cure fully.
-
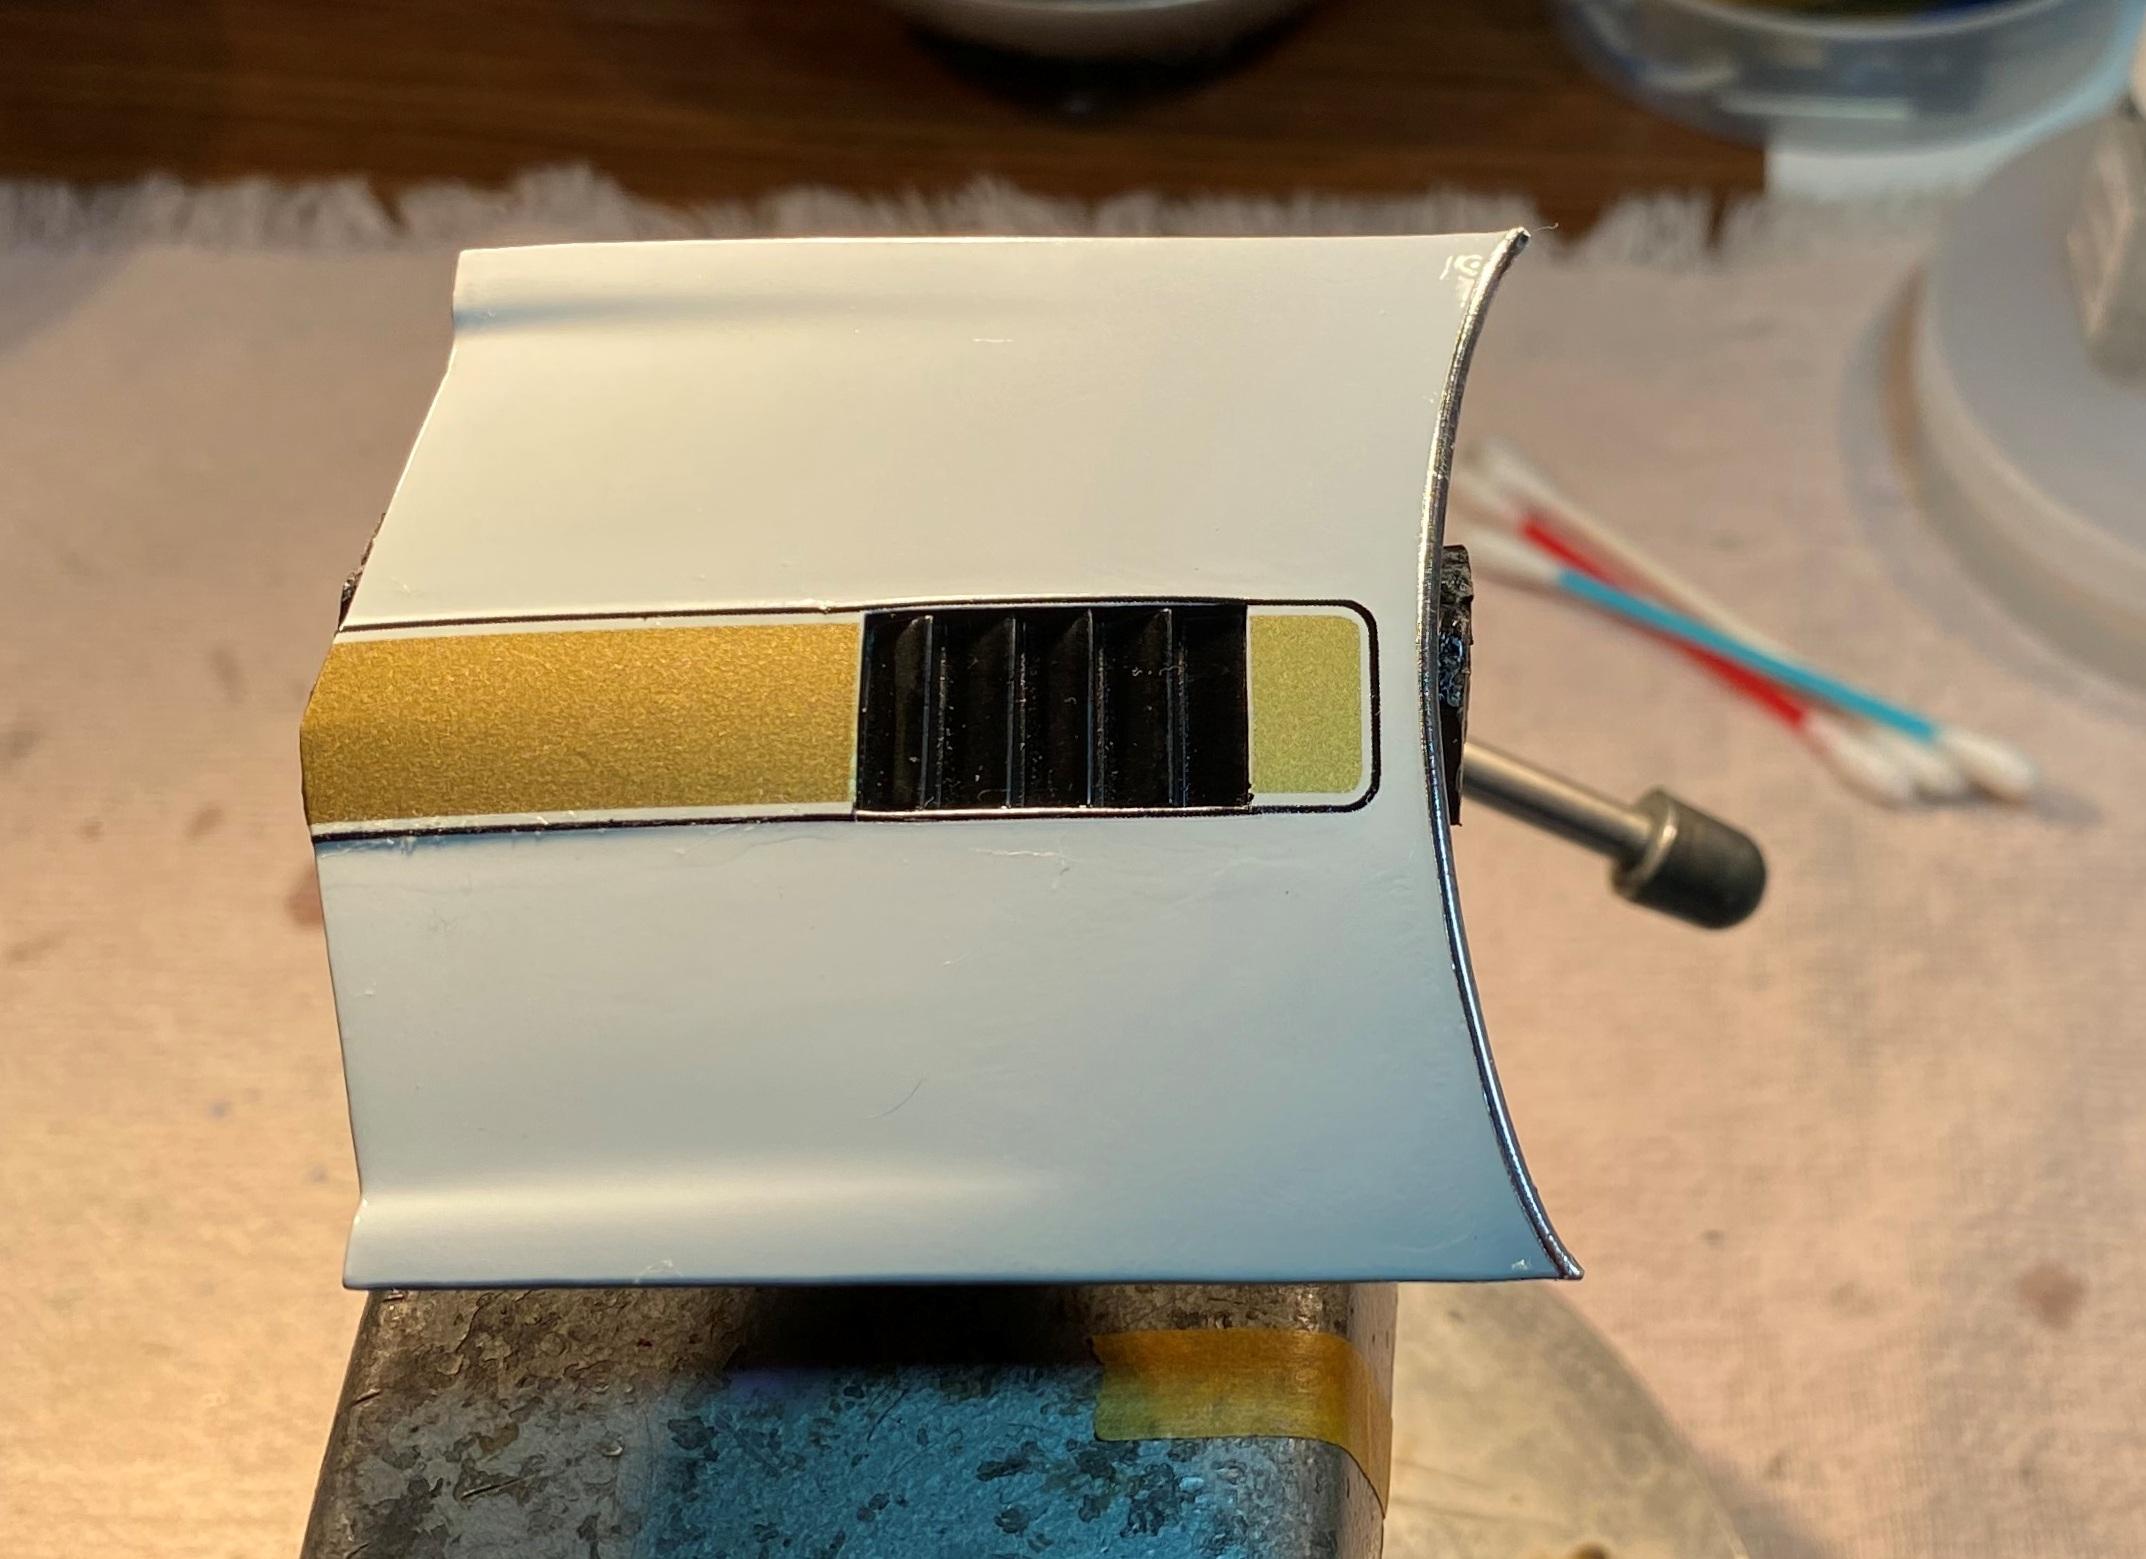
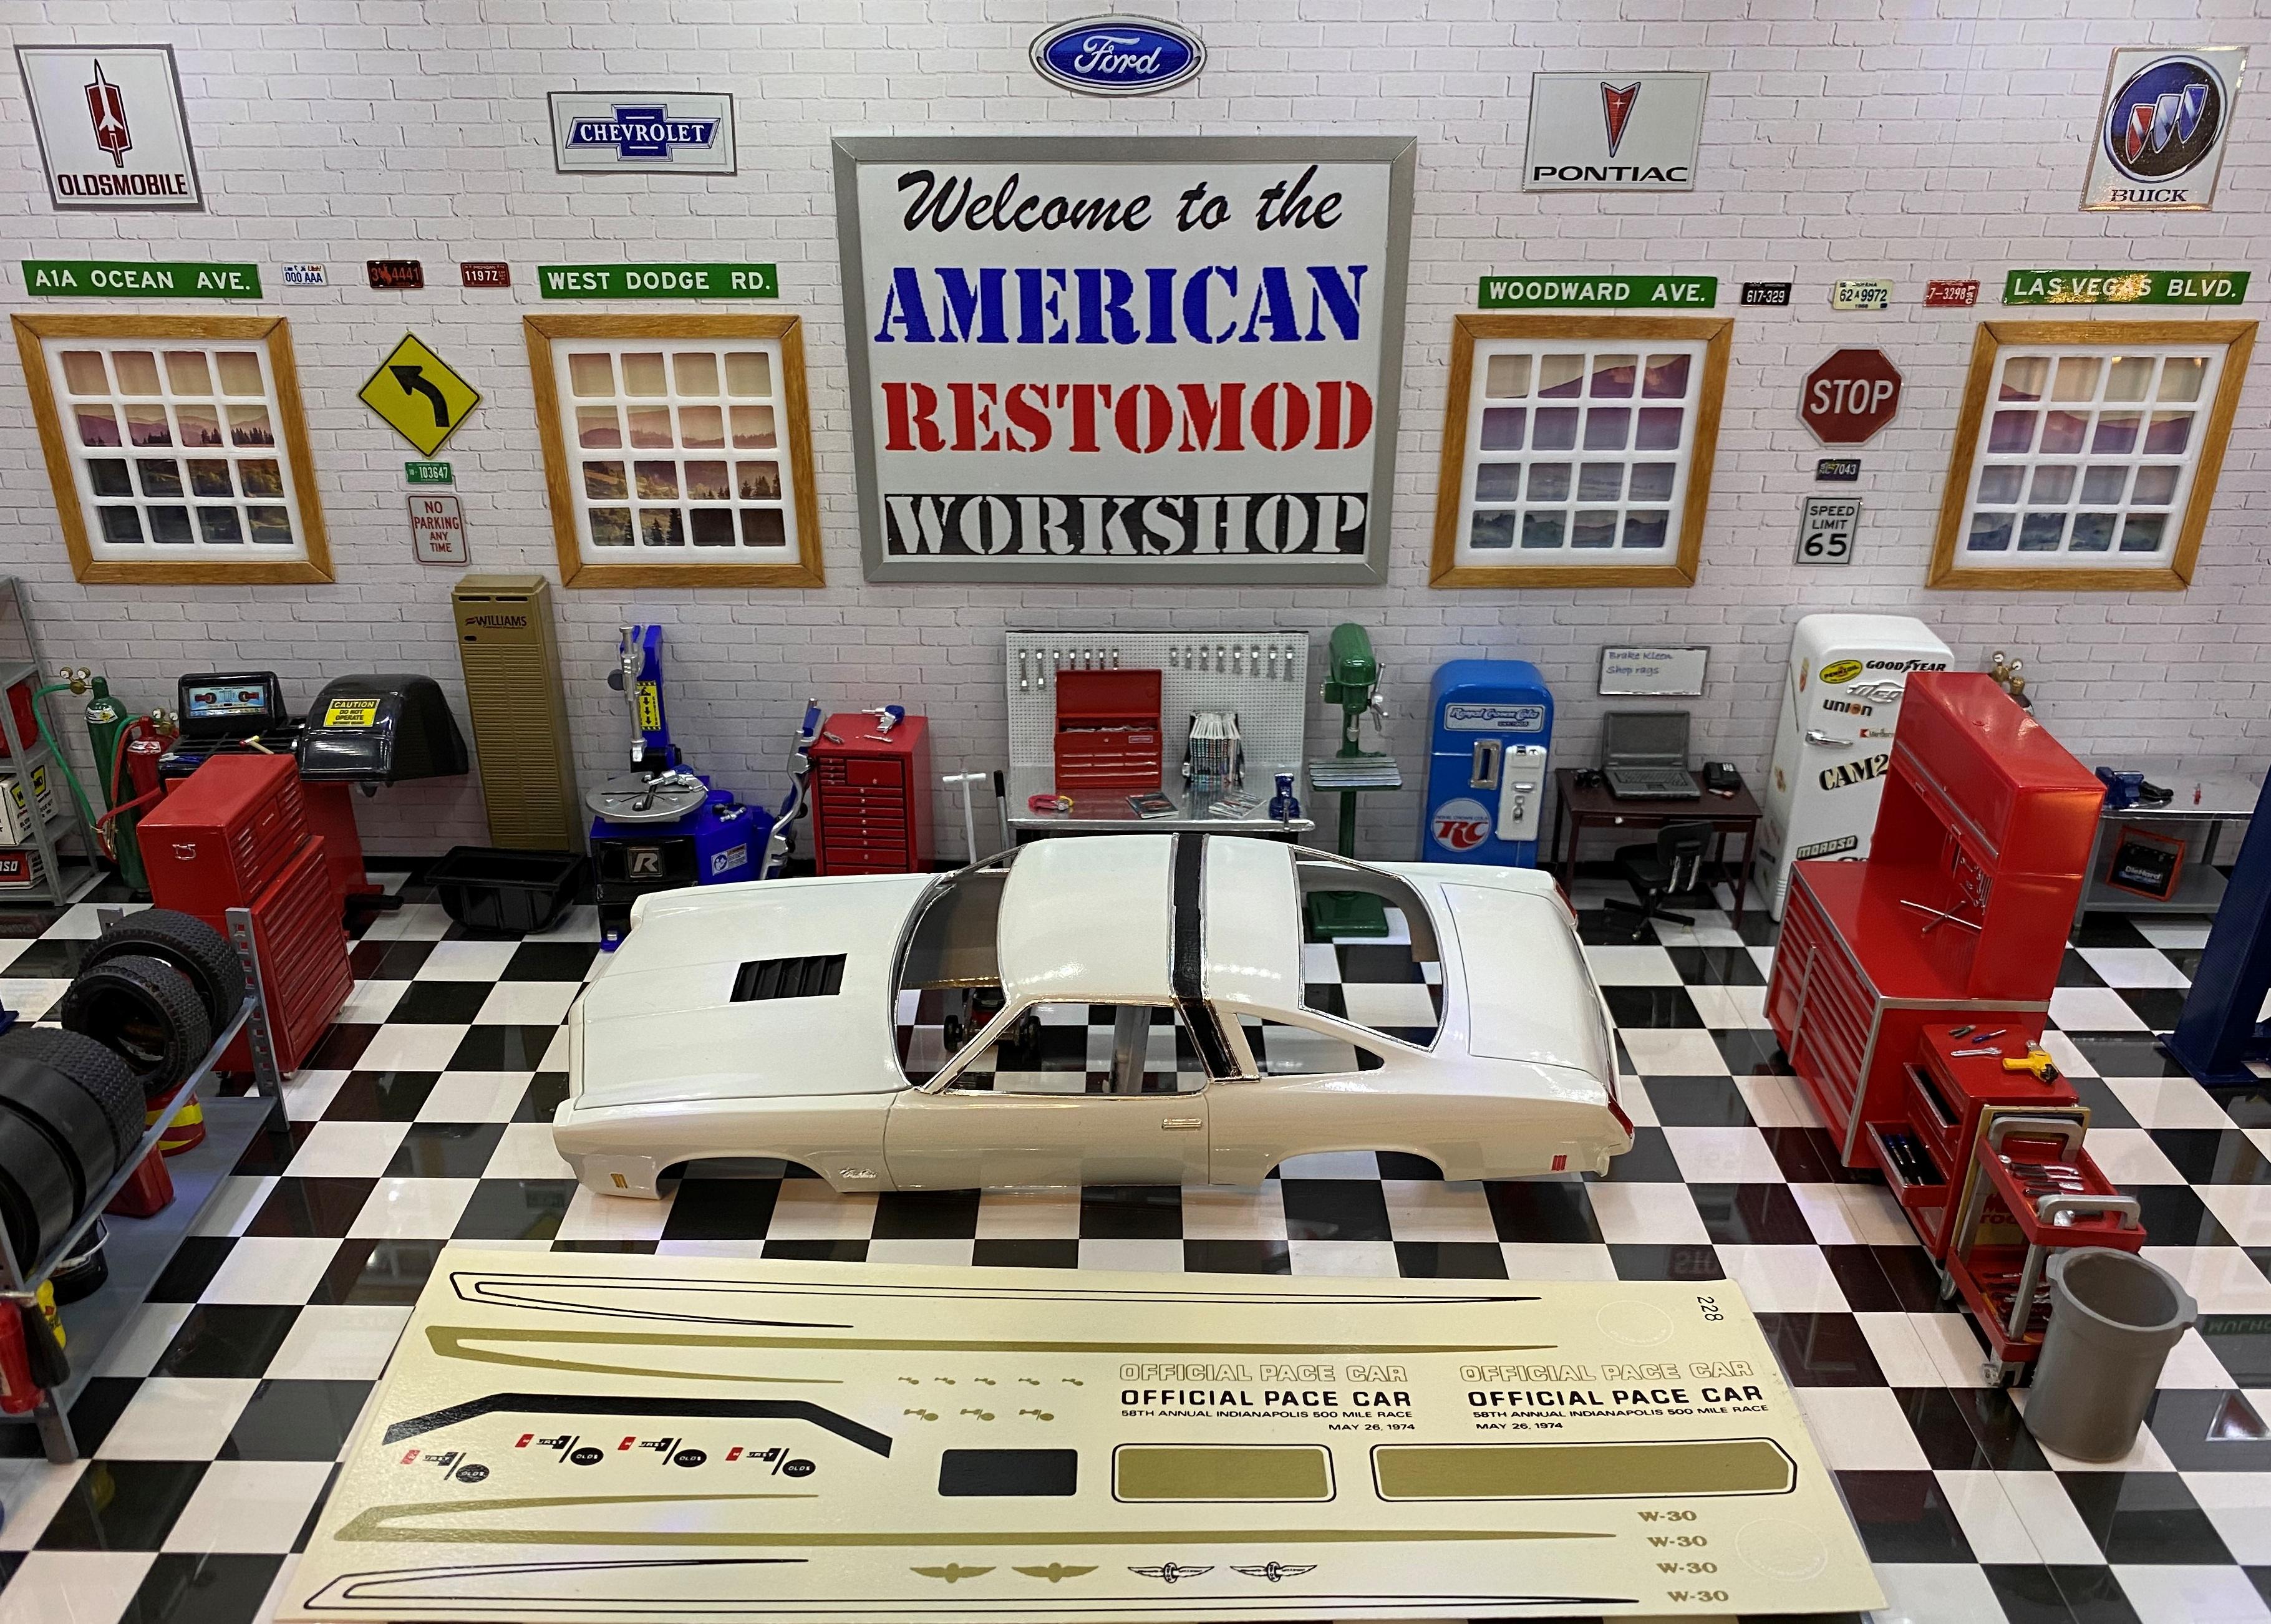
Just a teaser of the finished hood with decals and clearcoat. It turns out the decal set center stripes are a bit long both for the hood and the trunk. A little magic with some scissors took care of it. The body has to have two rounds of decals because the black borders around the side stripes are separate from the gold portion of the side stripes. Ditto with the door lettering and winged logo.
-
I got brave enough to remove my experimental masking job and was very pleasantly surprised. Bleed under was almost non-existent. Also all the adhesive much preferred to stay with the foil and NOT on the paint. (Quoting Sam above) Woo Hoo! It needs some more time to fully cure then I will tackle the dust on the hood. I can finally see the light at the end of the tunnel.
-
Post your truck mockups.
Bills72sj replied to Mike C.'s topic in WIP: Model Trucks: Pickups, Vans, SUVs, Light Commercial
Wow! A whole bunch of cool looking projects. Sadly, I own 8 kits and still have yet to build one. -
It is pretty good. Though if I had to do another one, I would kitbash a 70 front clip to a 68 El Camino to keep it all styrene.
-
That is awesome! The detail and finish is impeccable.
-
Very nice. Thank you for sharing.
-
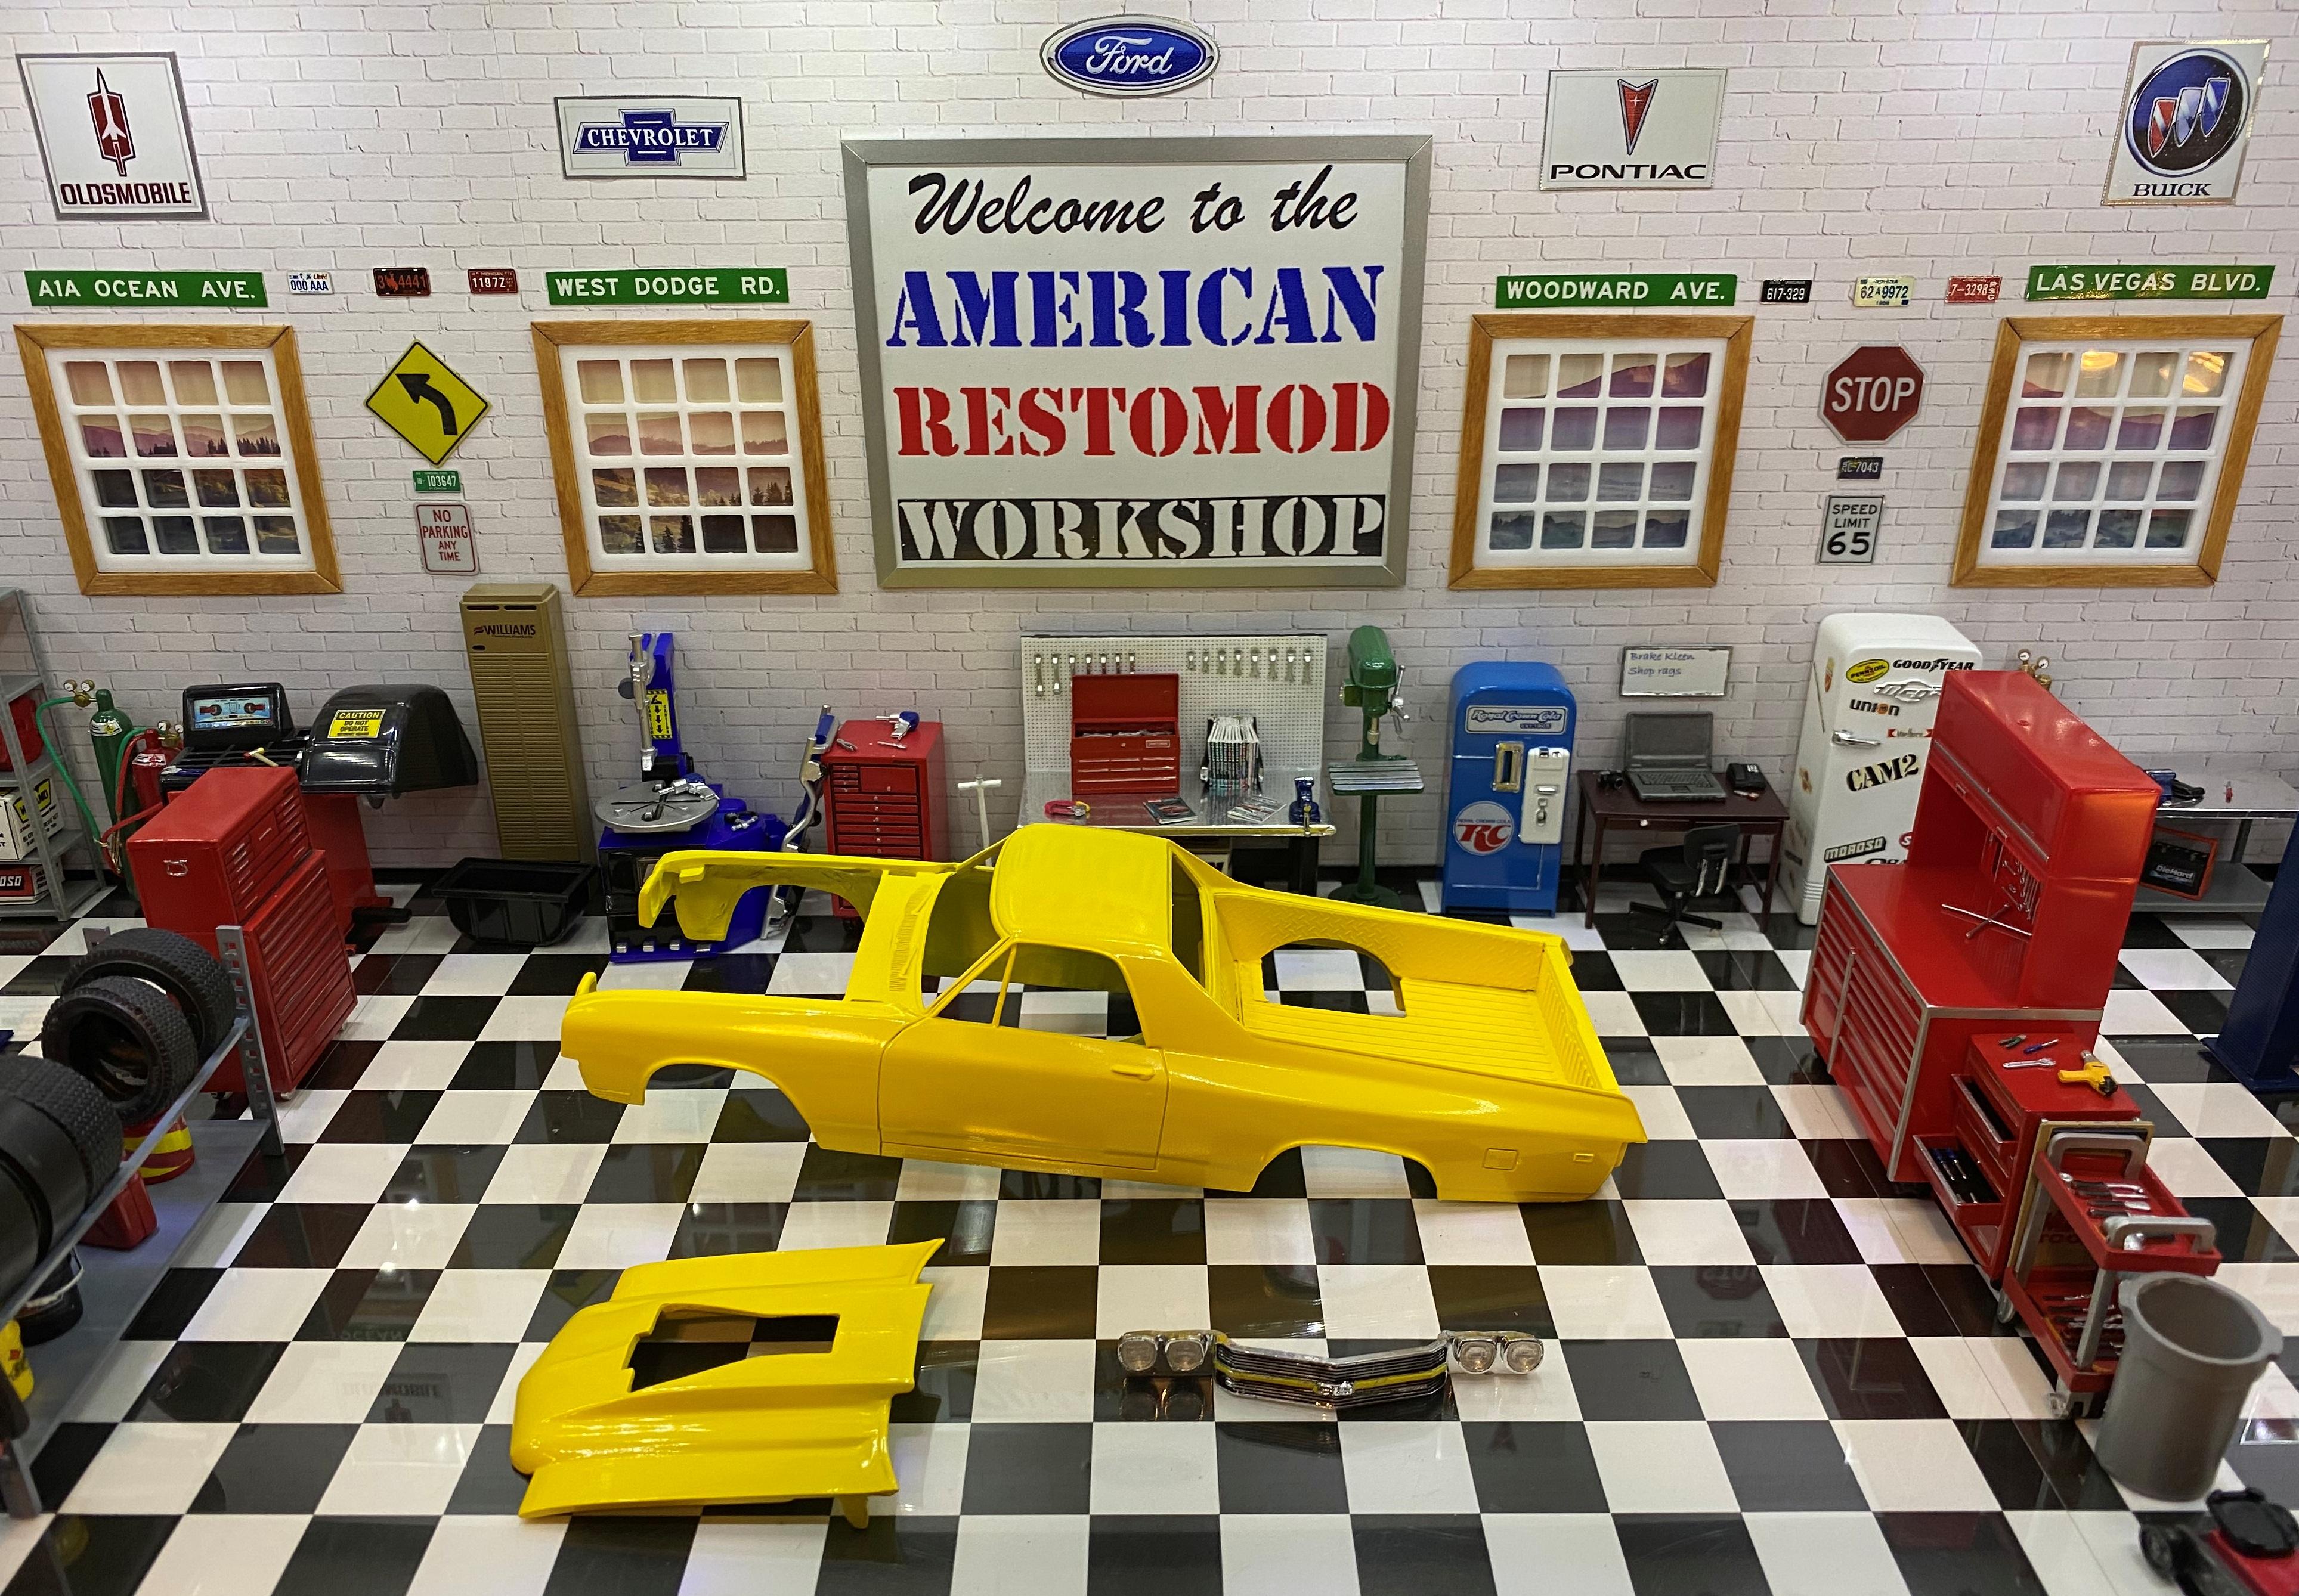
I got color on it Thursday but the pic did not post. Here it is in "Magazine Cover Yellow"
-
Thank you Anton. ? Sam, My paint booth is inside. I lower the humidity in the room by heating it to 80+ degrees.
-
I hope so too. Though I did buy enough to shoot everything all over again.
-
Thank you Mike and Sam. ?
-
You NAILED the stance. I like the sponsor decals too.
-
Exactly
-
Sweet lowrider. I like the color.
-
I had two friends in HS that owned red Chevelles. Both were SS 396 4-speeds. One was a 69 the other was a 70.
-
Man, that red is so bright, I need sunglasses lol.
-
I think you a very admirable result. Another technique you might want to experiment with is to BMF foil scripts/emblems BEFORE paint then reveal the letters/highlights with light sanding and/or solvent on a thin cloth.
-
I did not realize that it has been 8 months since I reported any progress. The delay has been I have been procrastinating masking my ambitious paint scheme. I finally pushed myself to finish it and got it in paint today. I knew I wanted dark metallic blue for the primary color. I checked my inventory and did not want to use any of the rattle cans I have. I decided to be brave and try something new. I took two different Testors bottled metallic enamels and mixed them together. I added some lacquer thinner to them in a 1:1 ratio. I fed my airbrush and shot a plastic spoon. I liked the resulting color and loved the gloss. I shot the hood, cab, and sleeper. Then, while painting the box, I ran out of paint 80% of the way through, BUMMER! I had to search ebay to find a vendor that had both colors in stock. Now that Testors line of paints have been terminated, I decided to grab a few more colors. I ended up ordering 17 bottles for $51.12 including shipping. At $3 a bottle to get exactly what I want, I am not complaining. Hopefully the new remix will match in color.
-
Made a bit more progress. Added some barely sticking BMF and reclearcoated the decals in anticipation of application.
-
Superior finish and detail. But I would not expect any less from anything you build. Stellar example of a rarely seen subject.
-
Building the 'Icon' - a 57 Chevy in Sierra Gold
Bills72sj replied to beeRS's topic in WIP: Model Cars
Nice plan of action. Following. -
55 Chevy Sedan from the American Graffiti rollover scene
Bills72sj replied to Alan Barton's topic in Model Cars
Very nice creativity and craftsmanship to accomplish your vision.