AmericanMuscleFan
-
Posts
3,058 -
Joined
-
Last visited
Content Type
Profiles
Forums
Events
Gallery
Everything posted by AmericanMuscleFan
-
 Thanks for the comment Rob! Cheers, Francis
 -
Thanks Joe! Your kind comments are very appriciated. Cheers, Francis
-
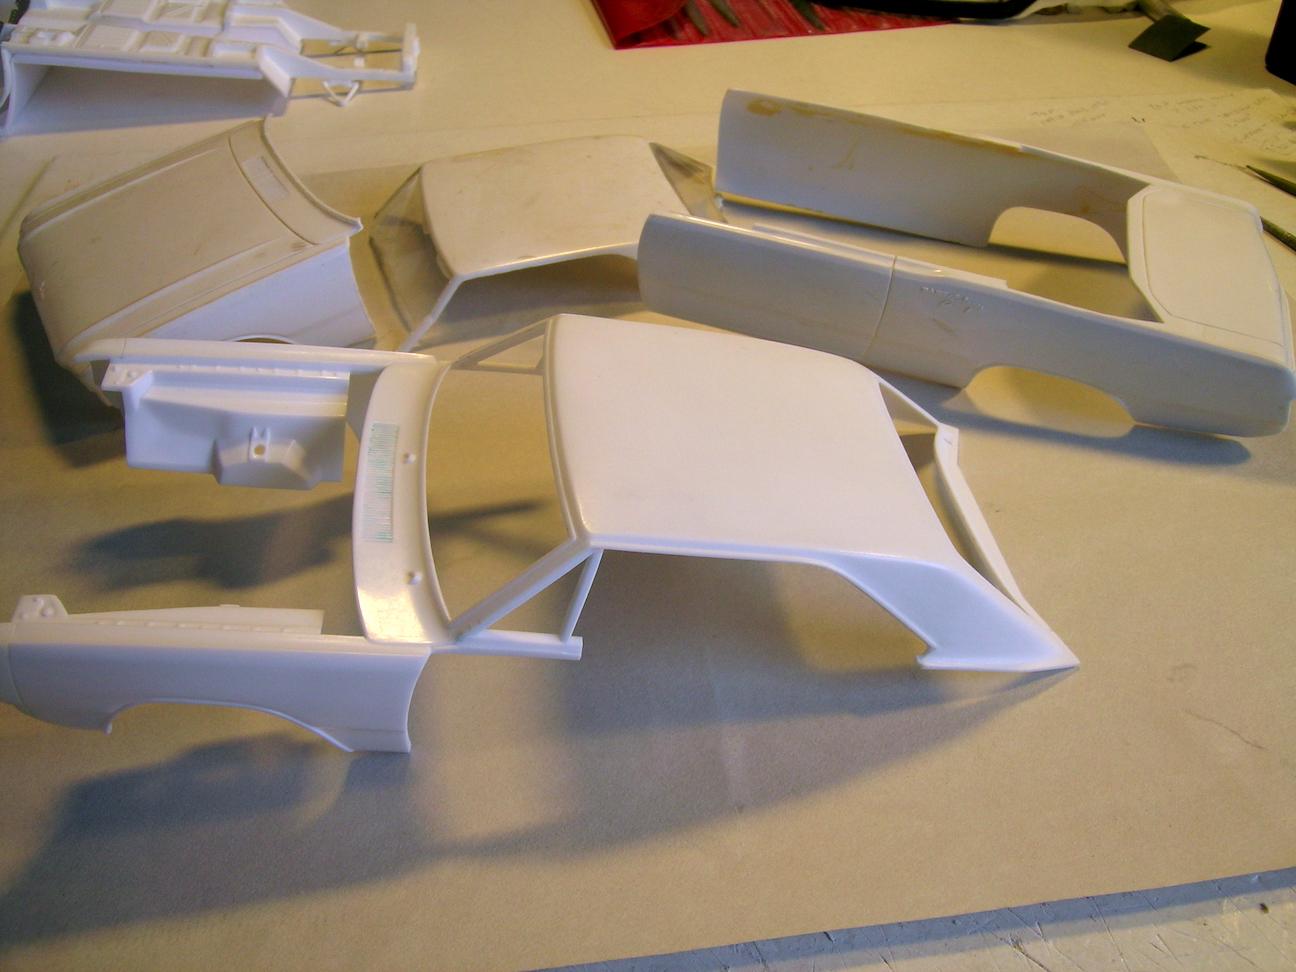
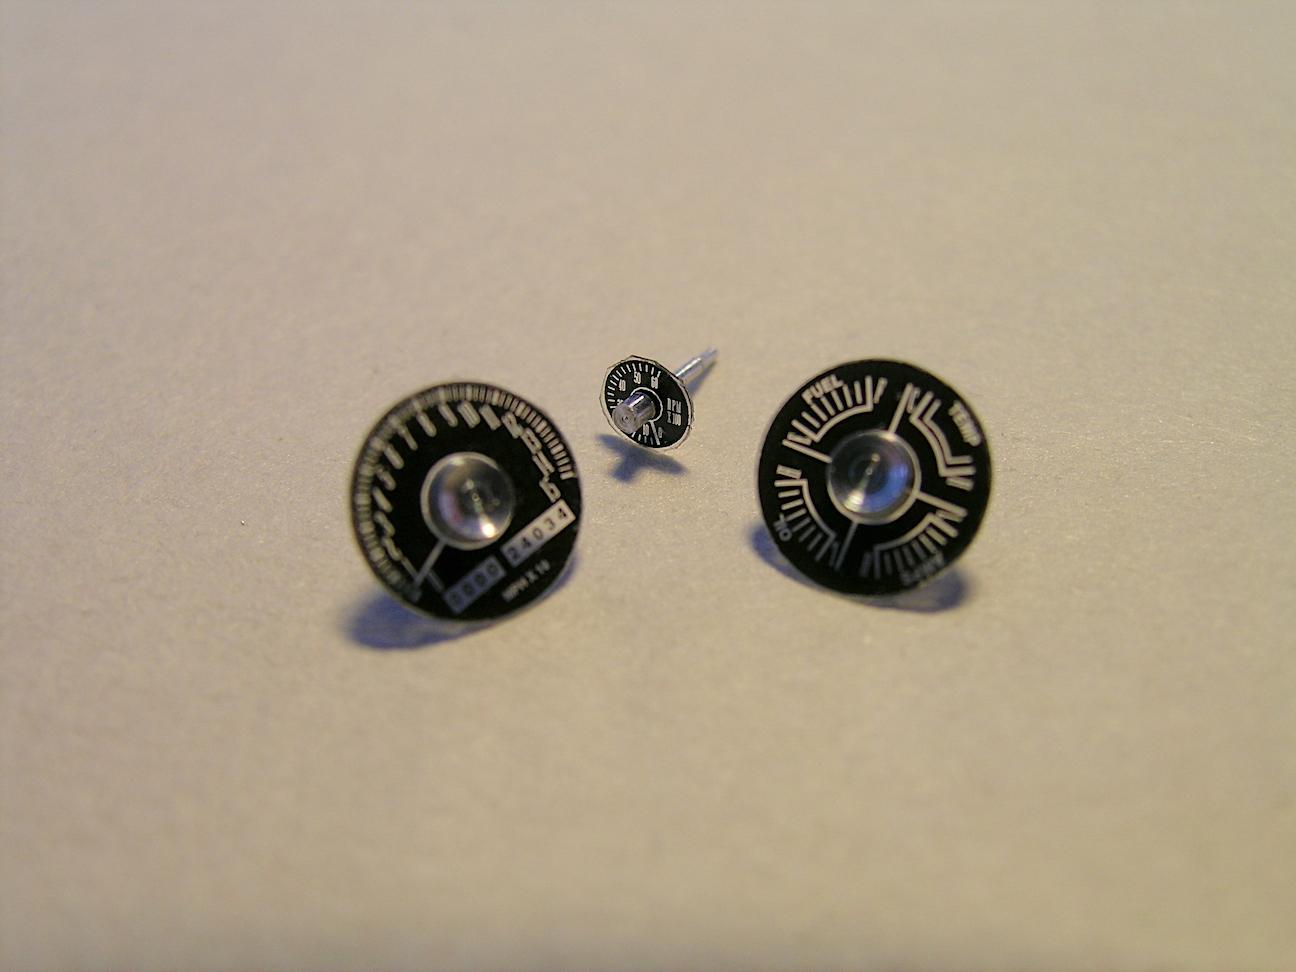
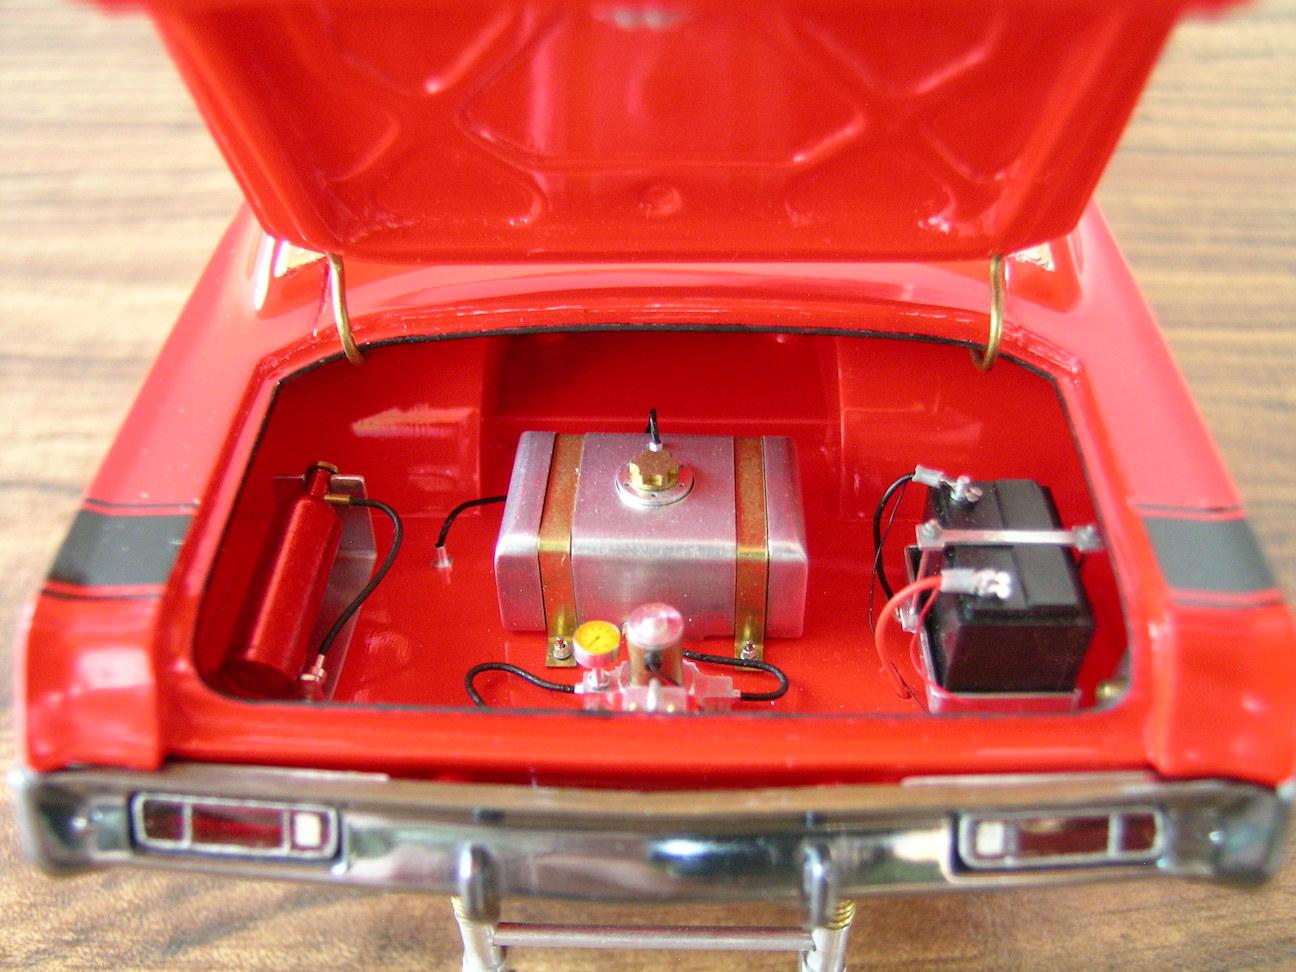
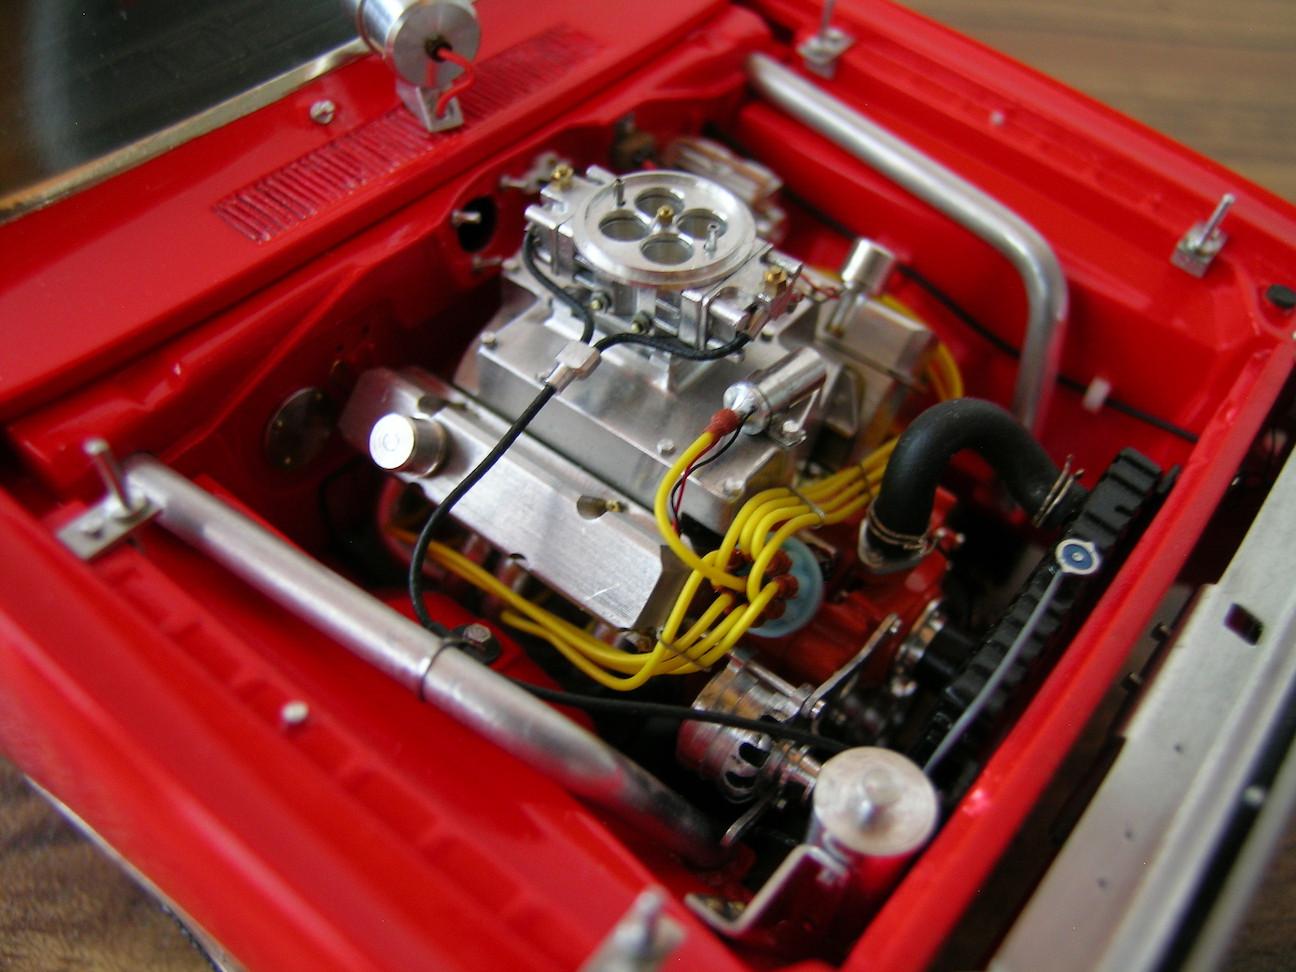
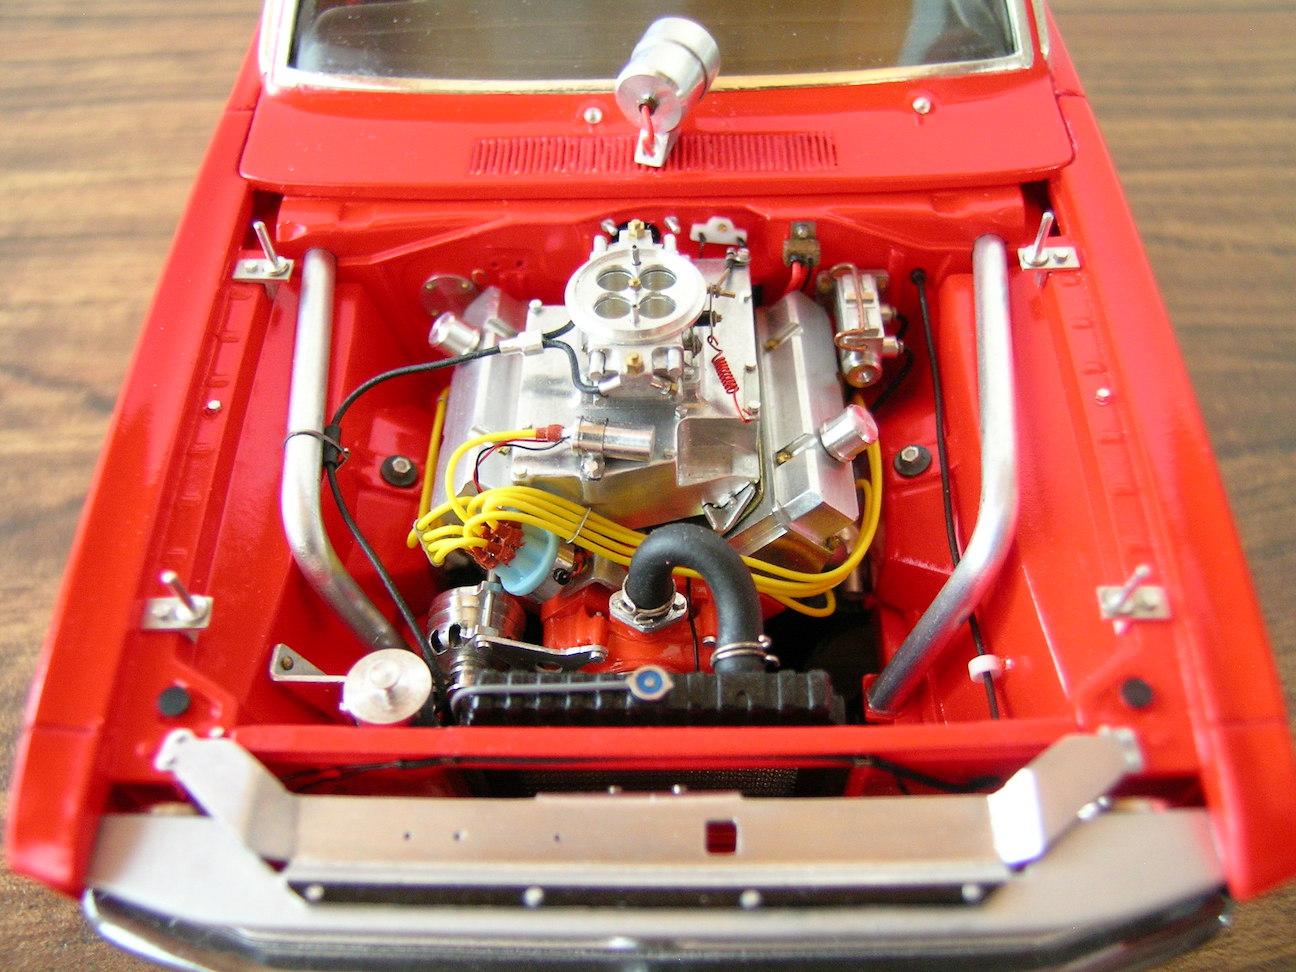
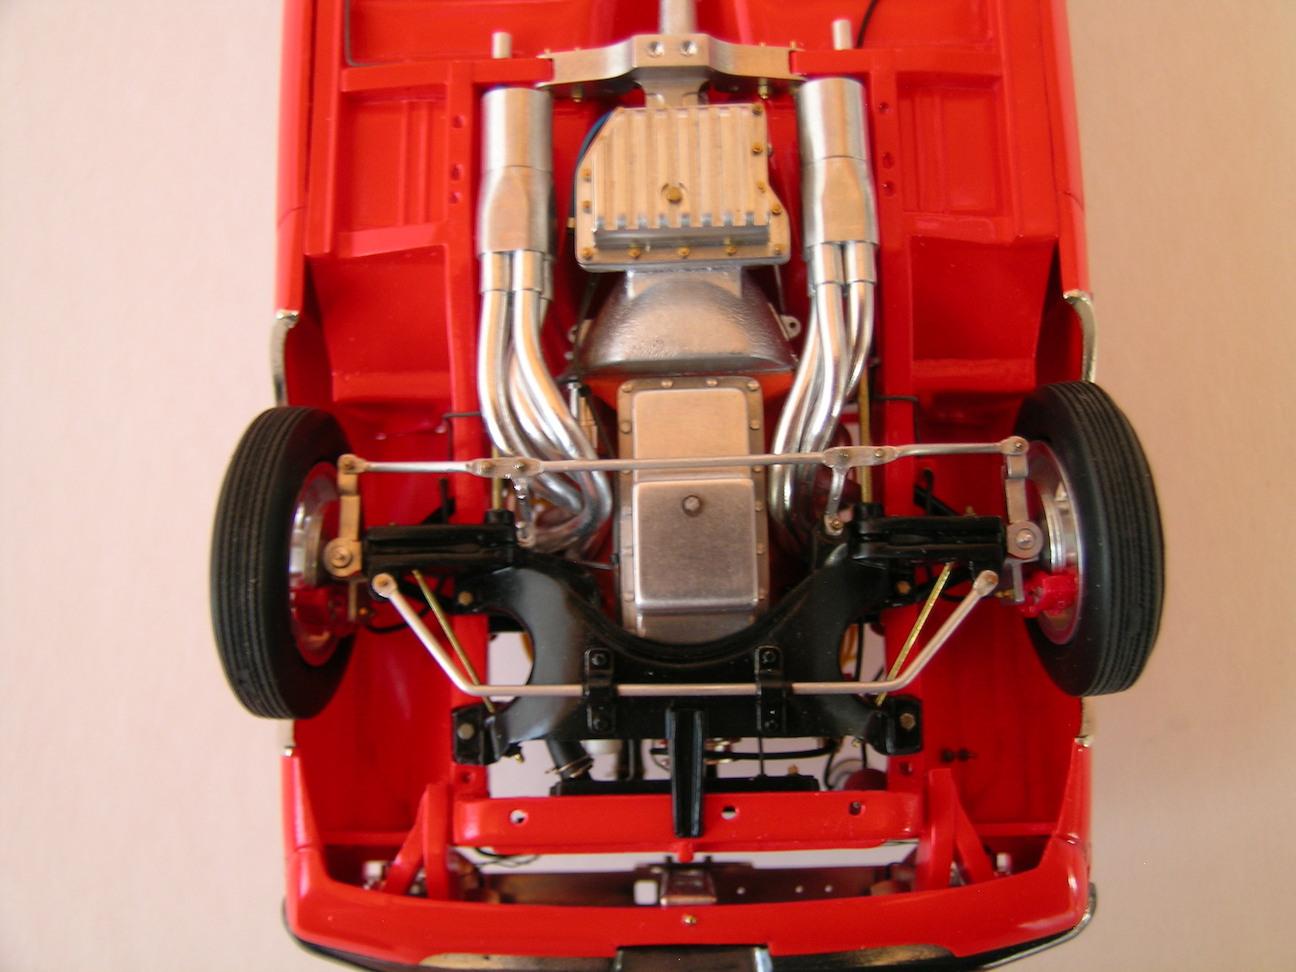
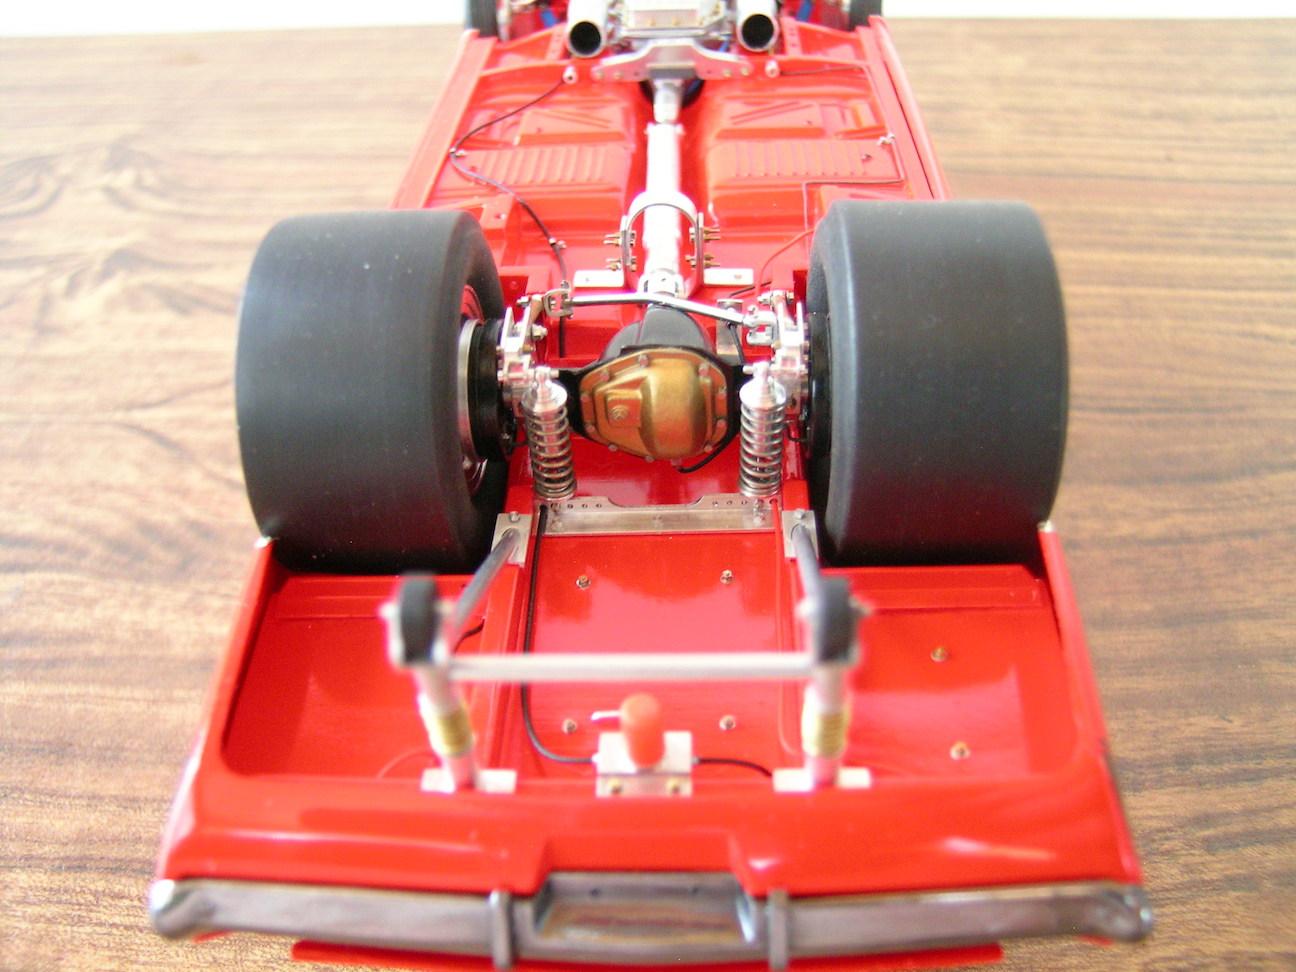
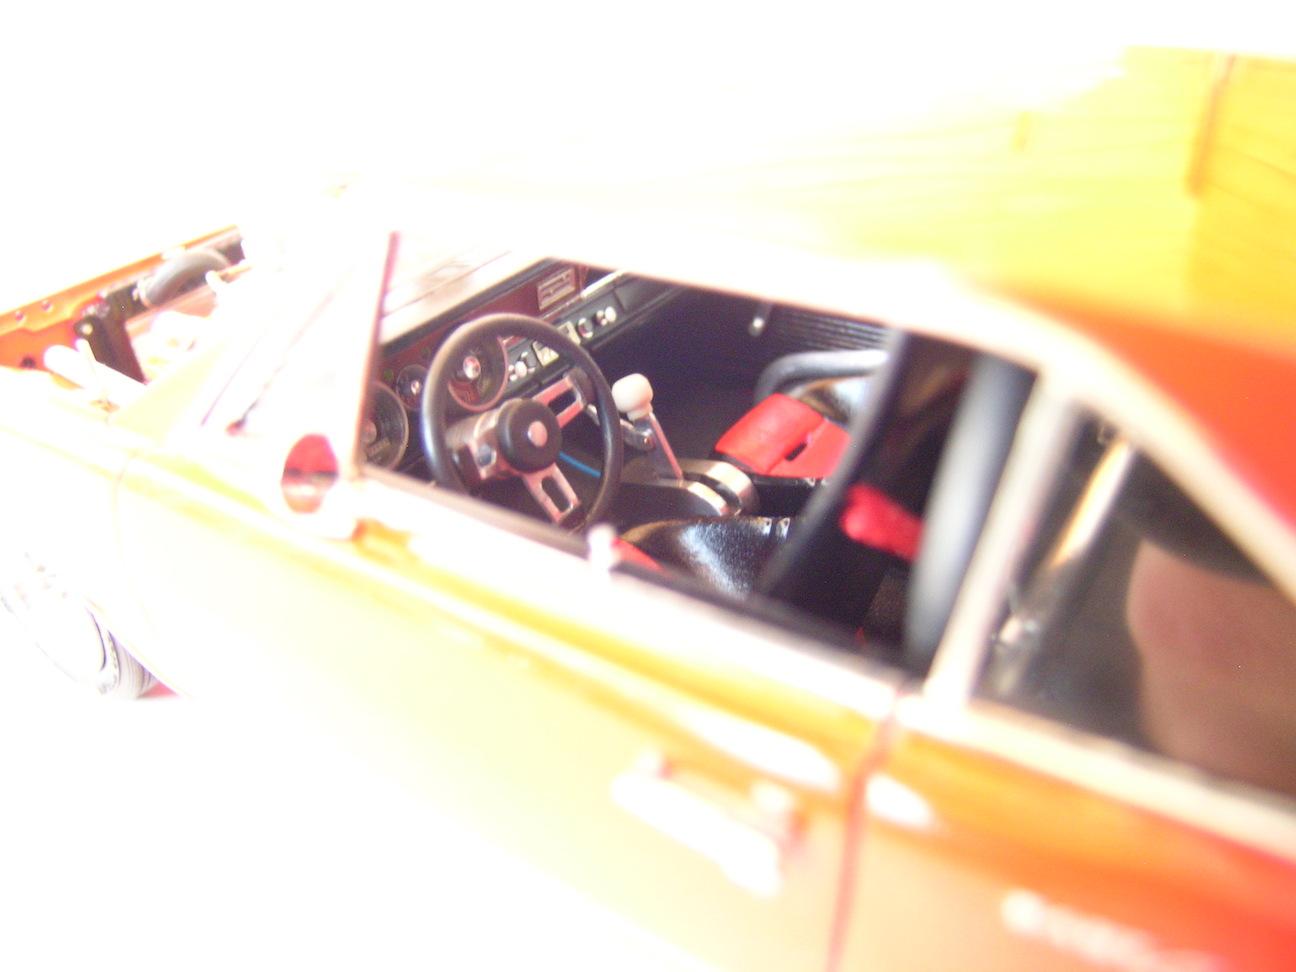
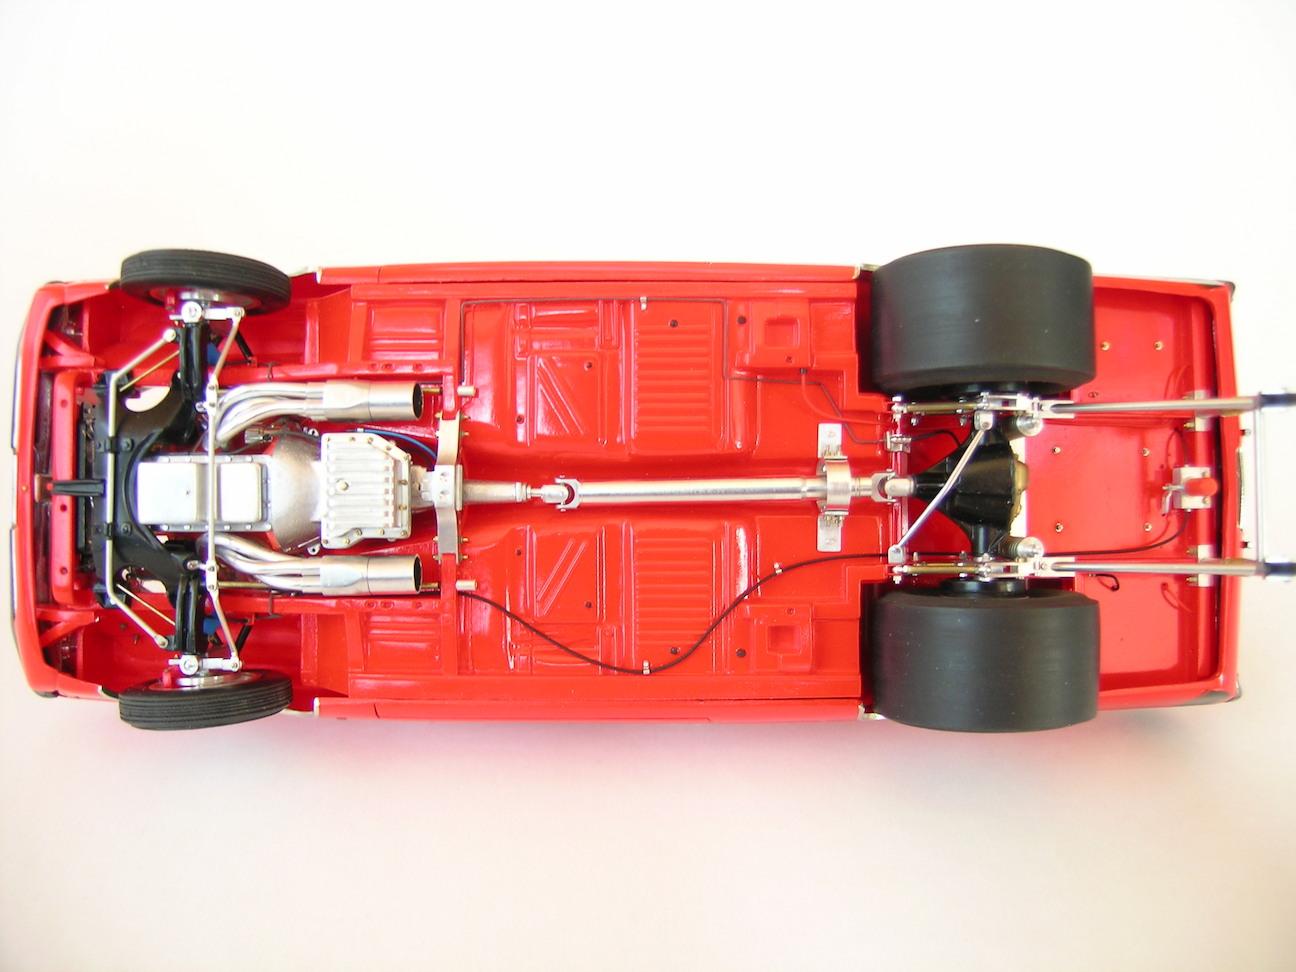
Hello Everyone! Following the requests of some fellow members I'm starting another thread of one of my completed model. This one is less detailed than the ’70 Plymouth GTX and it will be like that for the subsequent posts since they are older builds (you are the judge so I hope you will be indulgent for the flaws). On this thread you will see my drag version of a 1970 Dodge Dart Swinger 1/25 scale. I don’t recall if I had taken many pictures during the build but I can’t find more than what is posted in this thread. I wanted to build this small Dodge pony car for a long time so I bought a resin kit on internet but I wasn’t satisfied with the rendering so I decided to start my own styrene version with extensive scratch building. I recreated the body by using 3 different kits including the recent Revell ’68 Dart Mr Norm, a used MPC ’70 Dart Ramchargers Funny Car body and the remains of a junk MPC ’71 Dodge Demon. The first operation was to cut the body of the ’68 Dart at the door line, keeping the front fenders and at the base of the back top pillars and between the back window and the trunk lid. I made the inverse operation on the ’70 Ramchargers body keeping the doors and back portion of the body. The Ramchargers front fenders were unusable because the wheel openings were enlarged and at the wrong position, close to the front bumper since it was a Funny Car body. I did cut the front fender extensions on the ’71 Demon body and glued them on the ’68 Dart front fenders. I also used the front grille, valance and hood of the ’71 Demon. A lot of operations but the mock-up picture is self explanatory. I did use the ’68 Dart floor pan as well and add large wheels tubs, recreate the trunk floor in order to add the fuel cell, an electric fuel pump, the battery and a fire extinguisher (all scratch built). The interior has been done using the ’68 Dart door panels, modified to represent a drag racing car. The ’68 Dart dash has been modified to receive the round style cluster like the Dodge Demon and instrument faces made on my computer using Adobe Illustrator and printed on negative film at high resolution (same technique as for the ’70 Plymouth GTX). I spent around 800 hours on a 2 years span working on from mid 2011 to May 2013 on this build. Cheers, Francis

-
64 Dodge D100 Pickup Pro Street
AmericanMuscleFan replied to AmericanMuscleFan's topic in WIP: Drag Racing Models
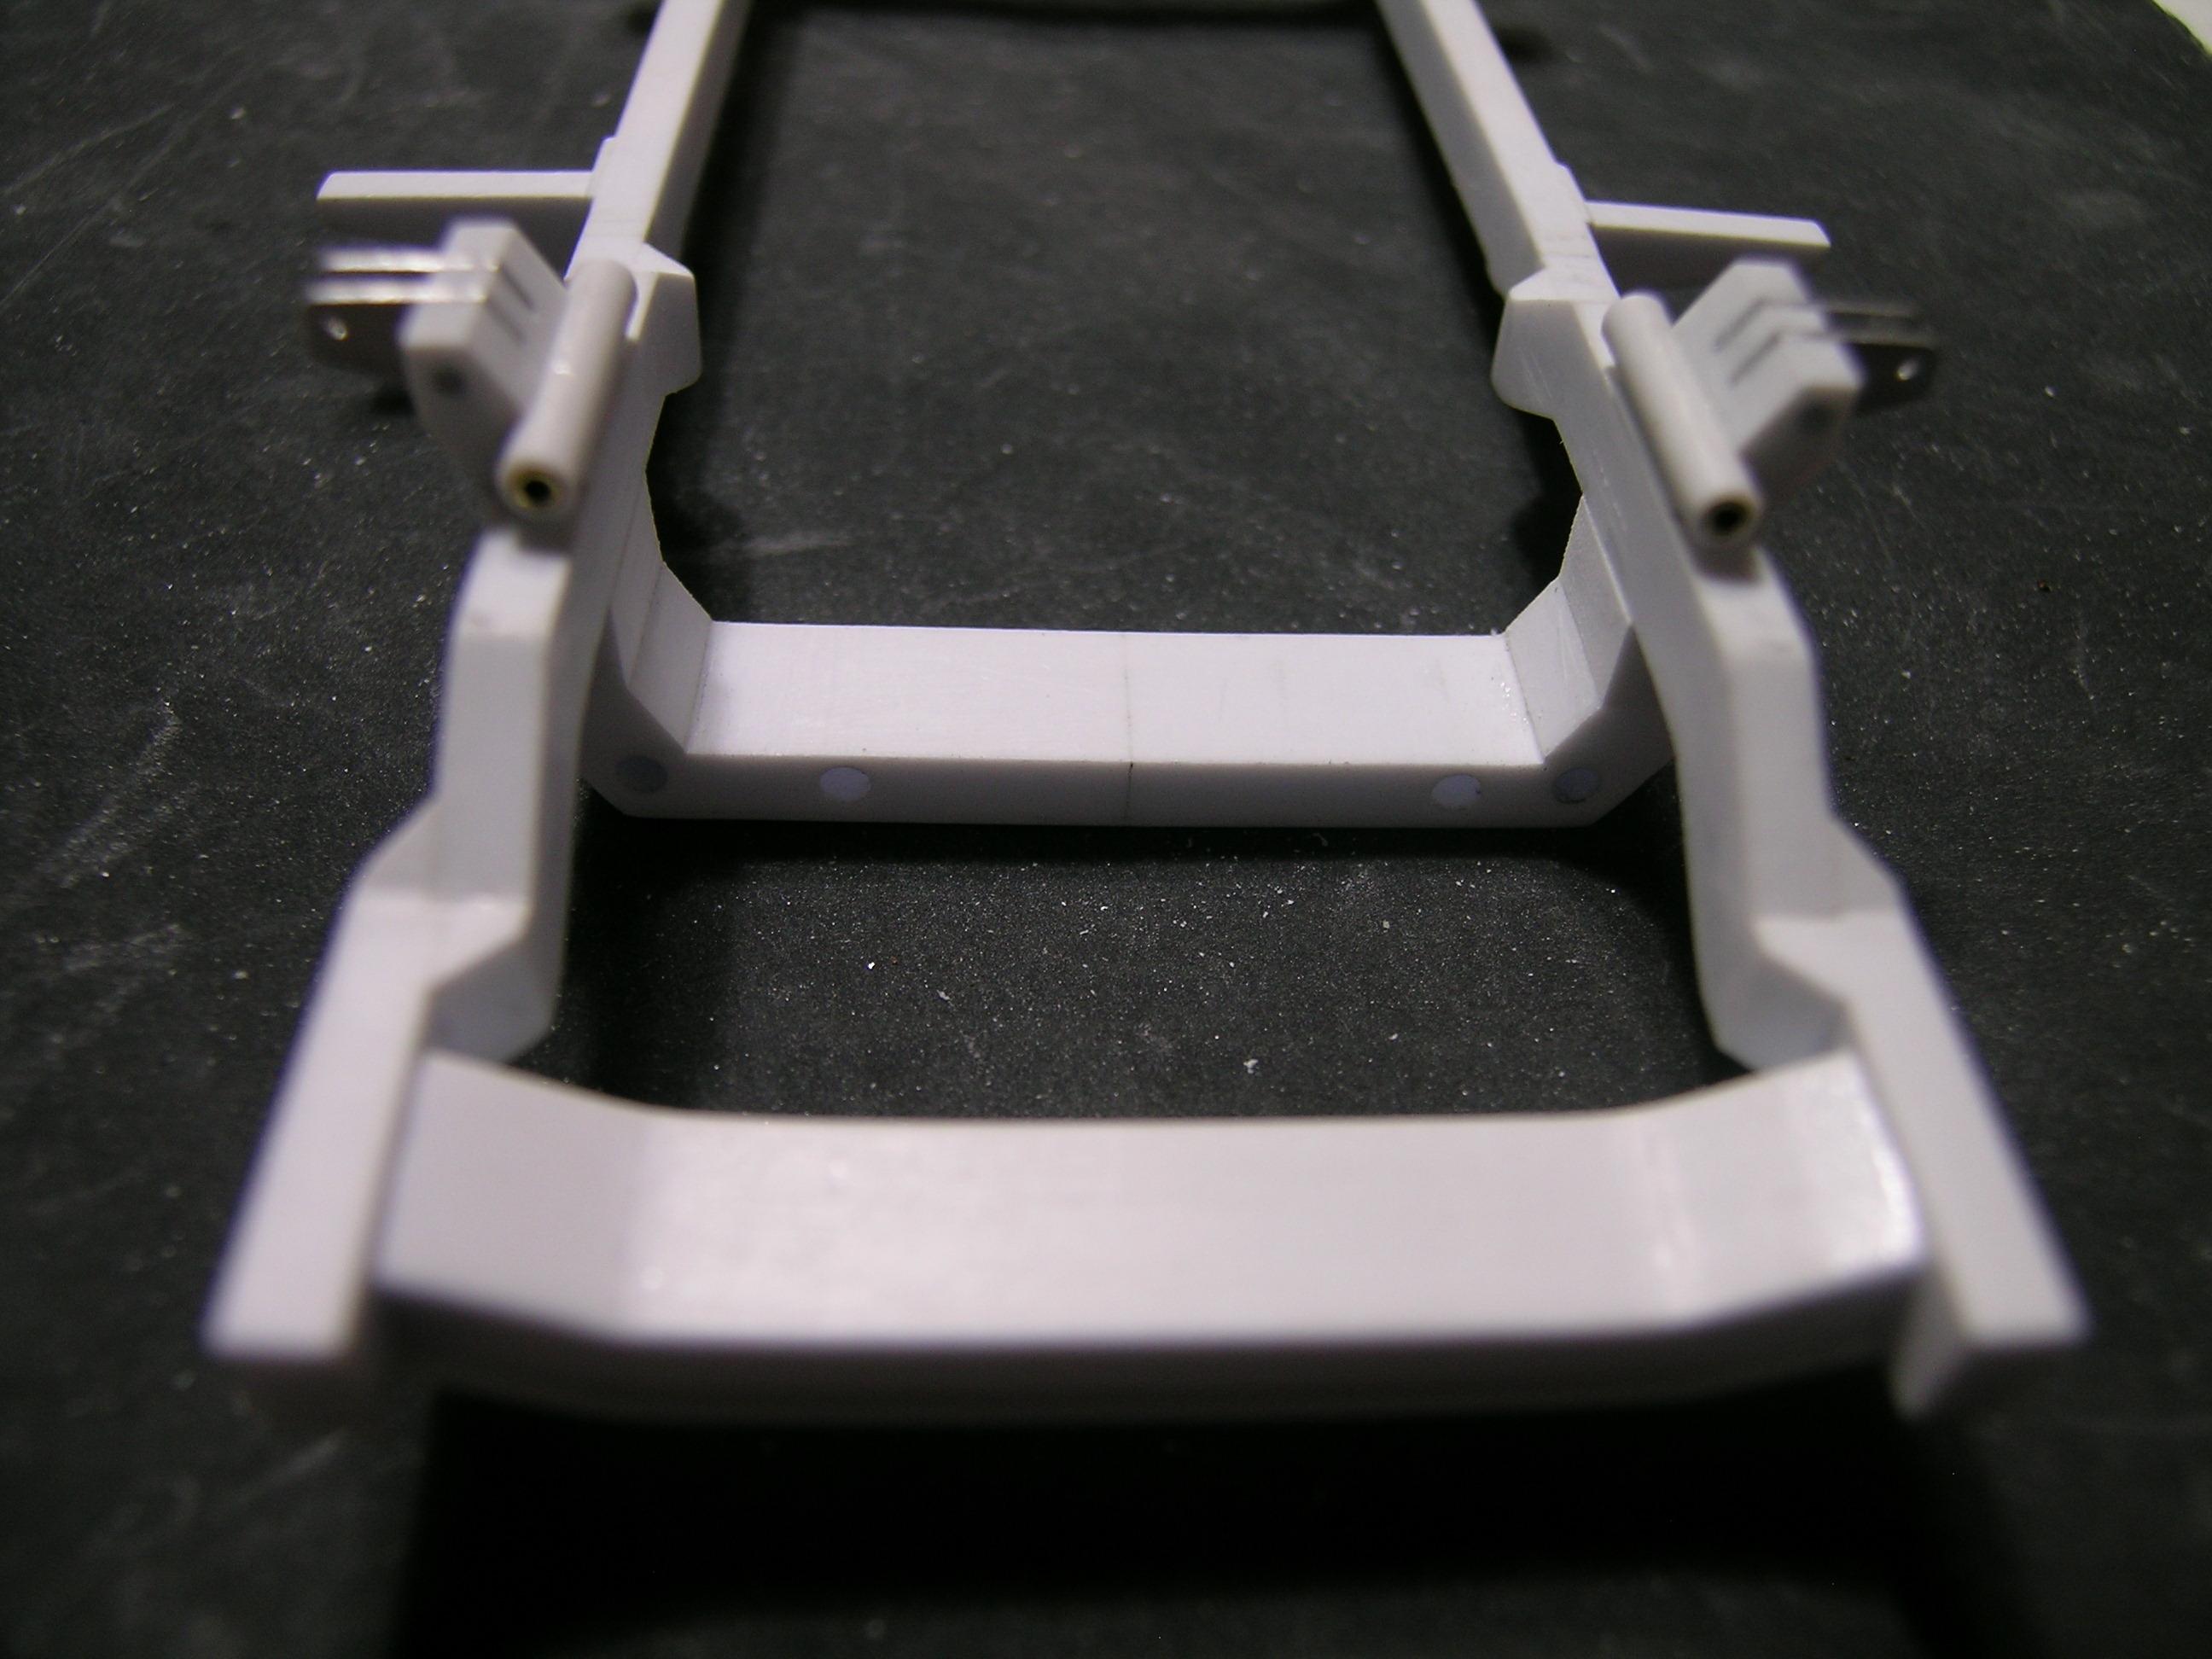
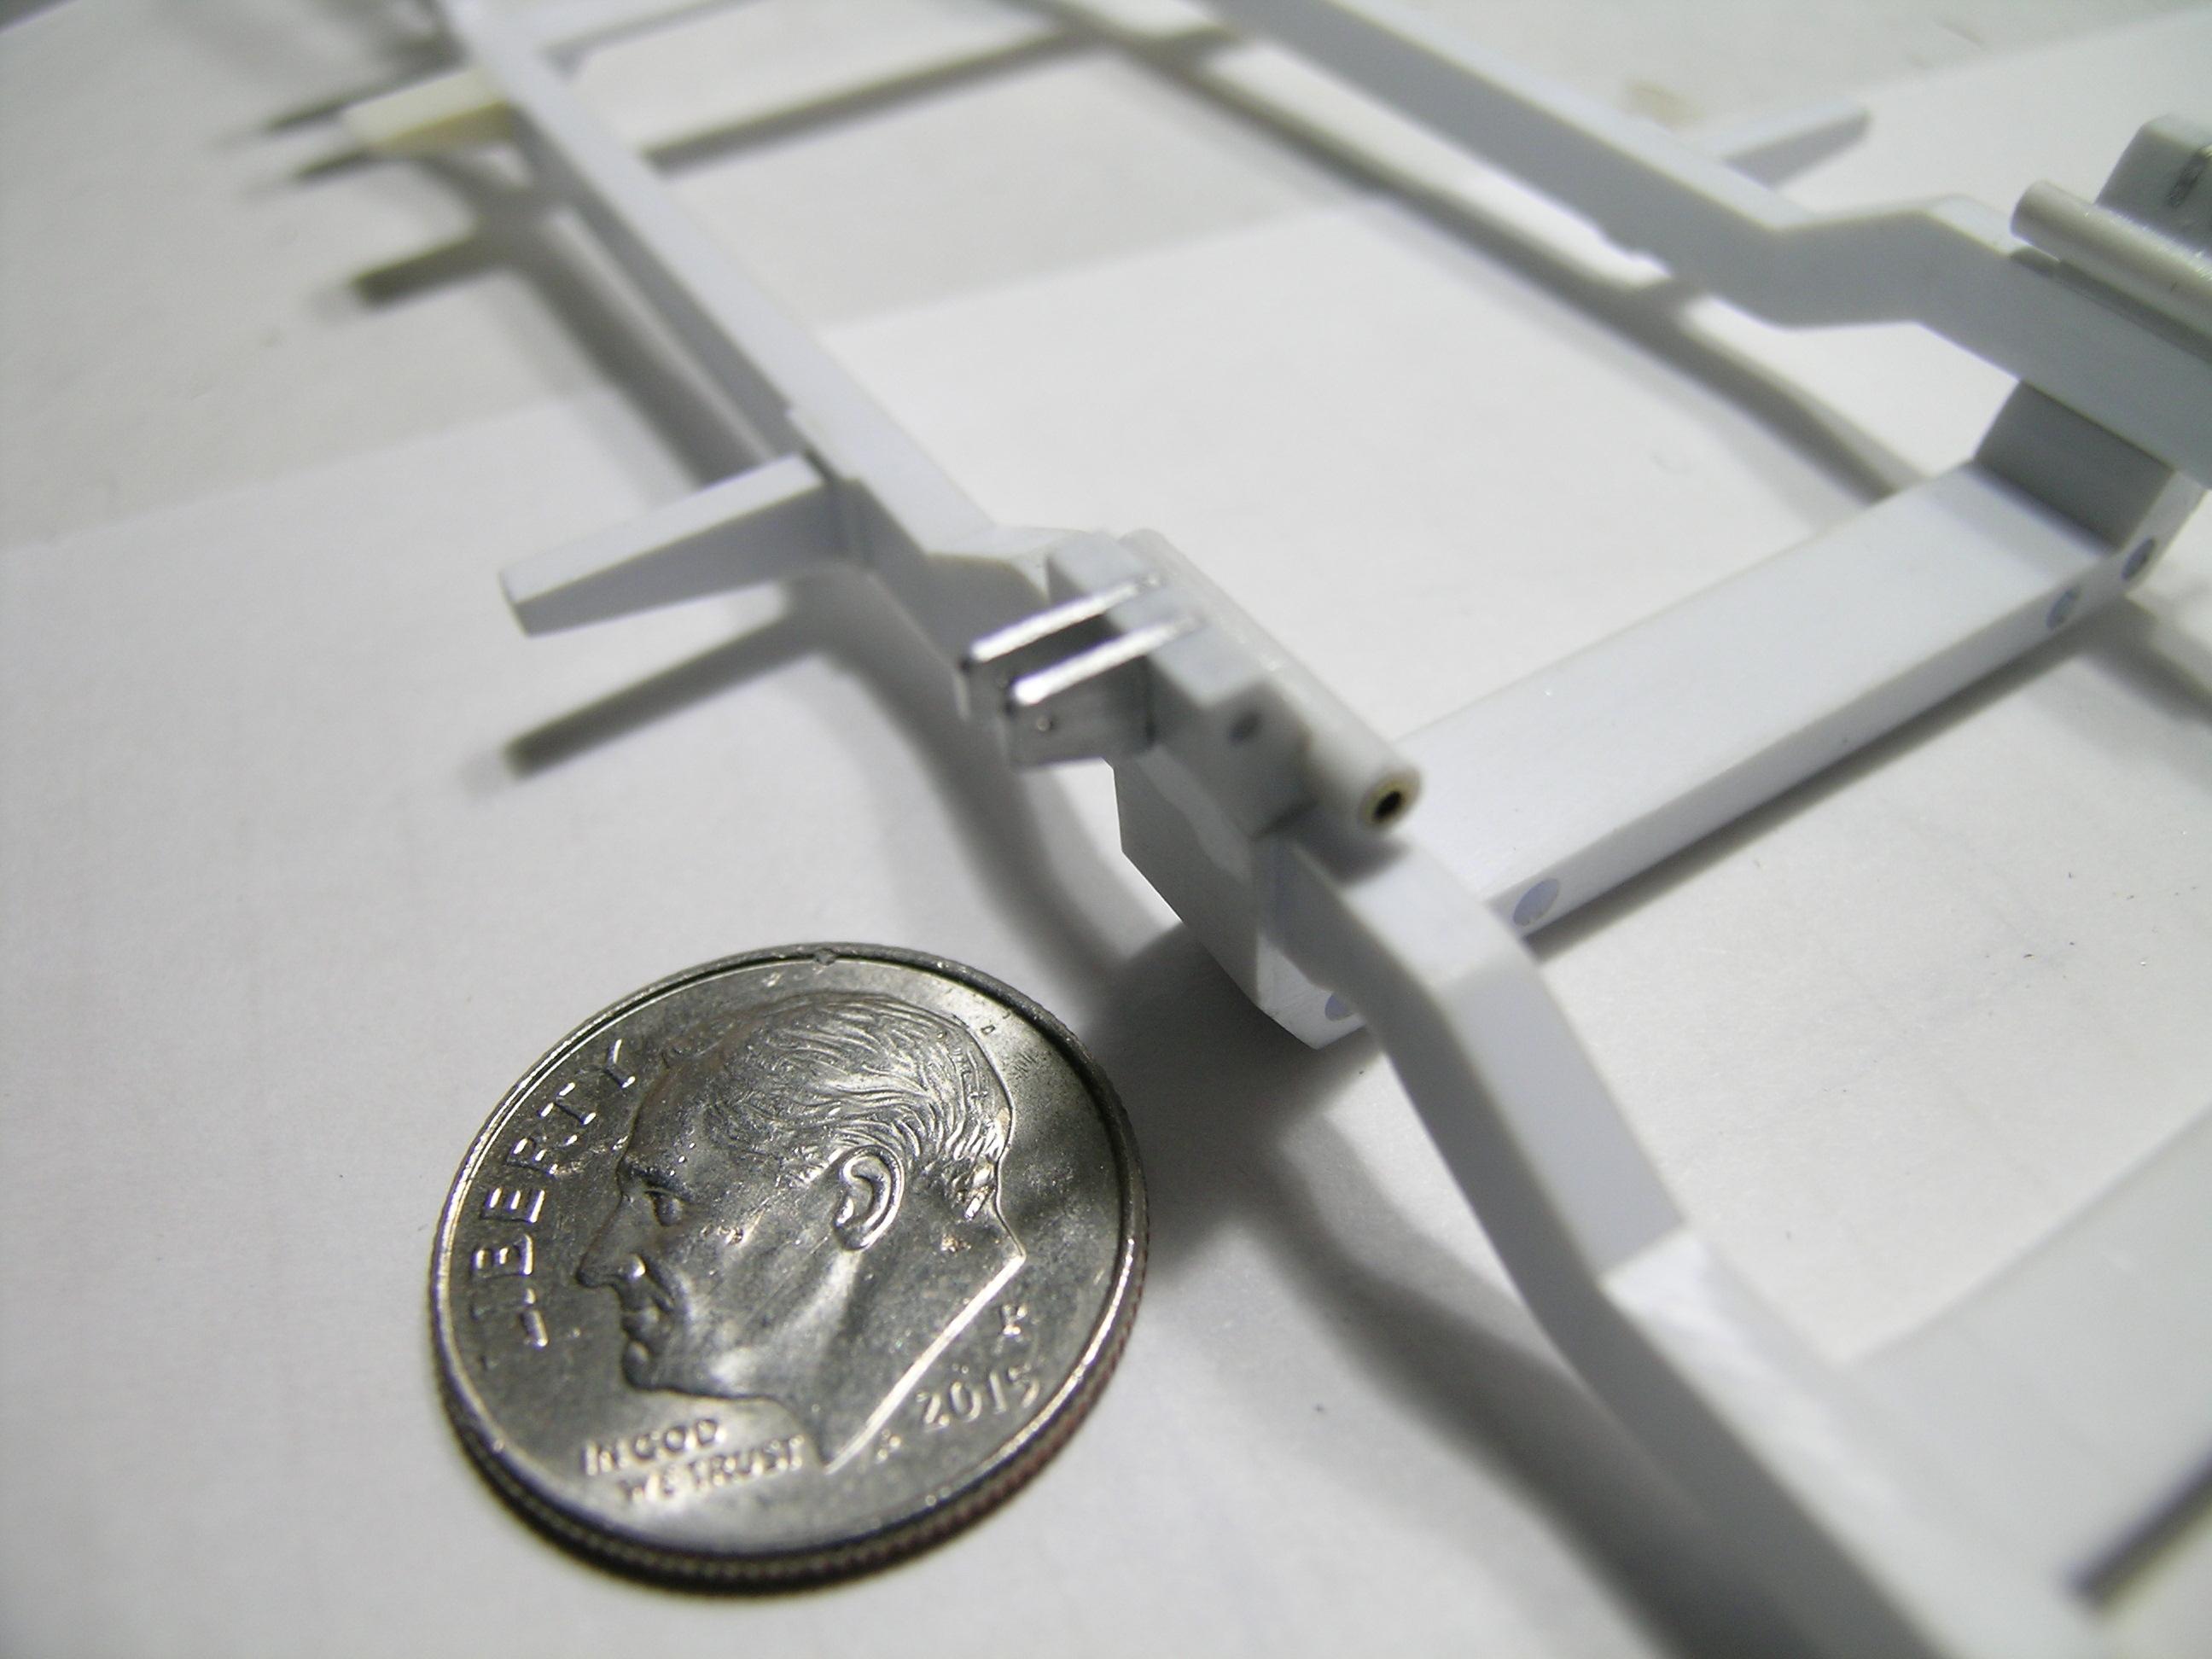
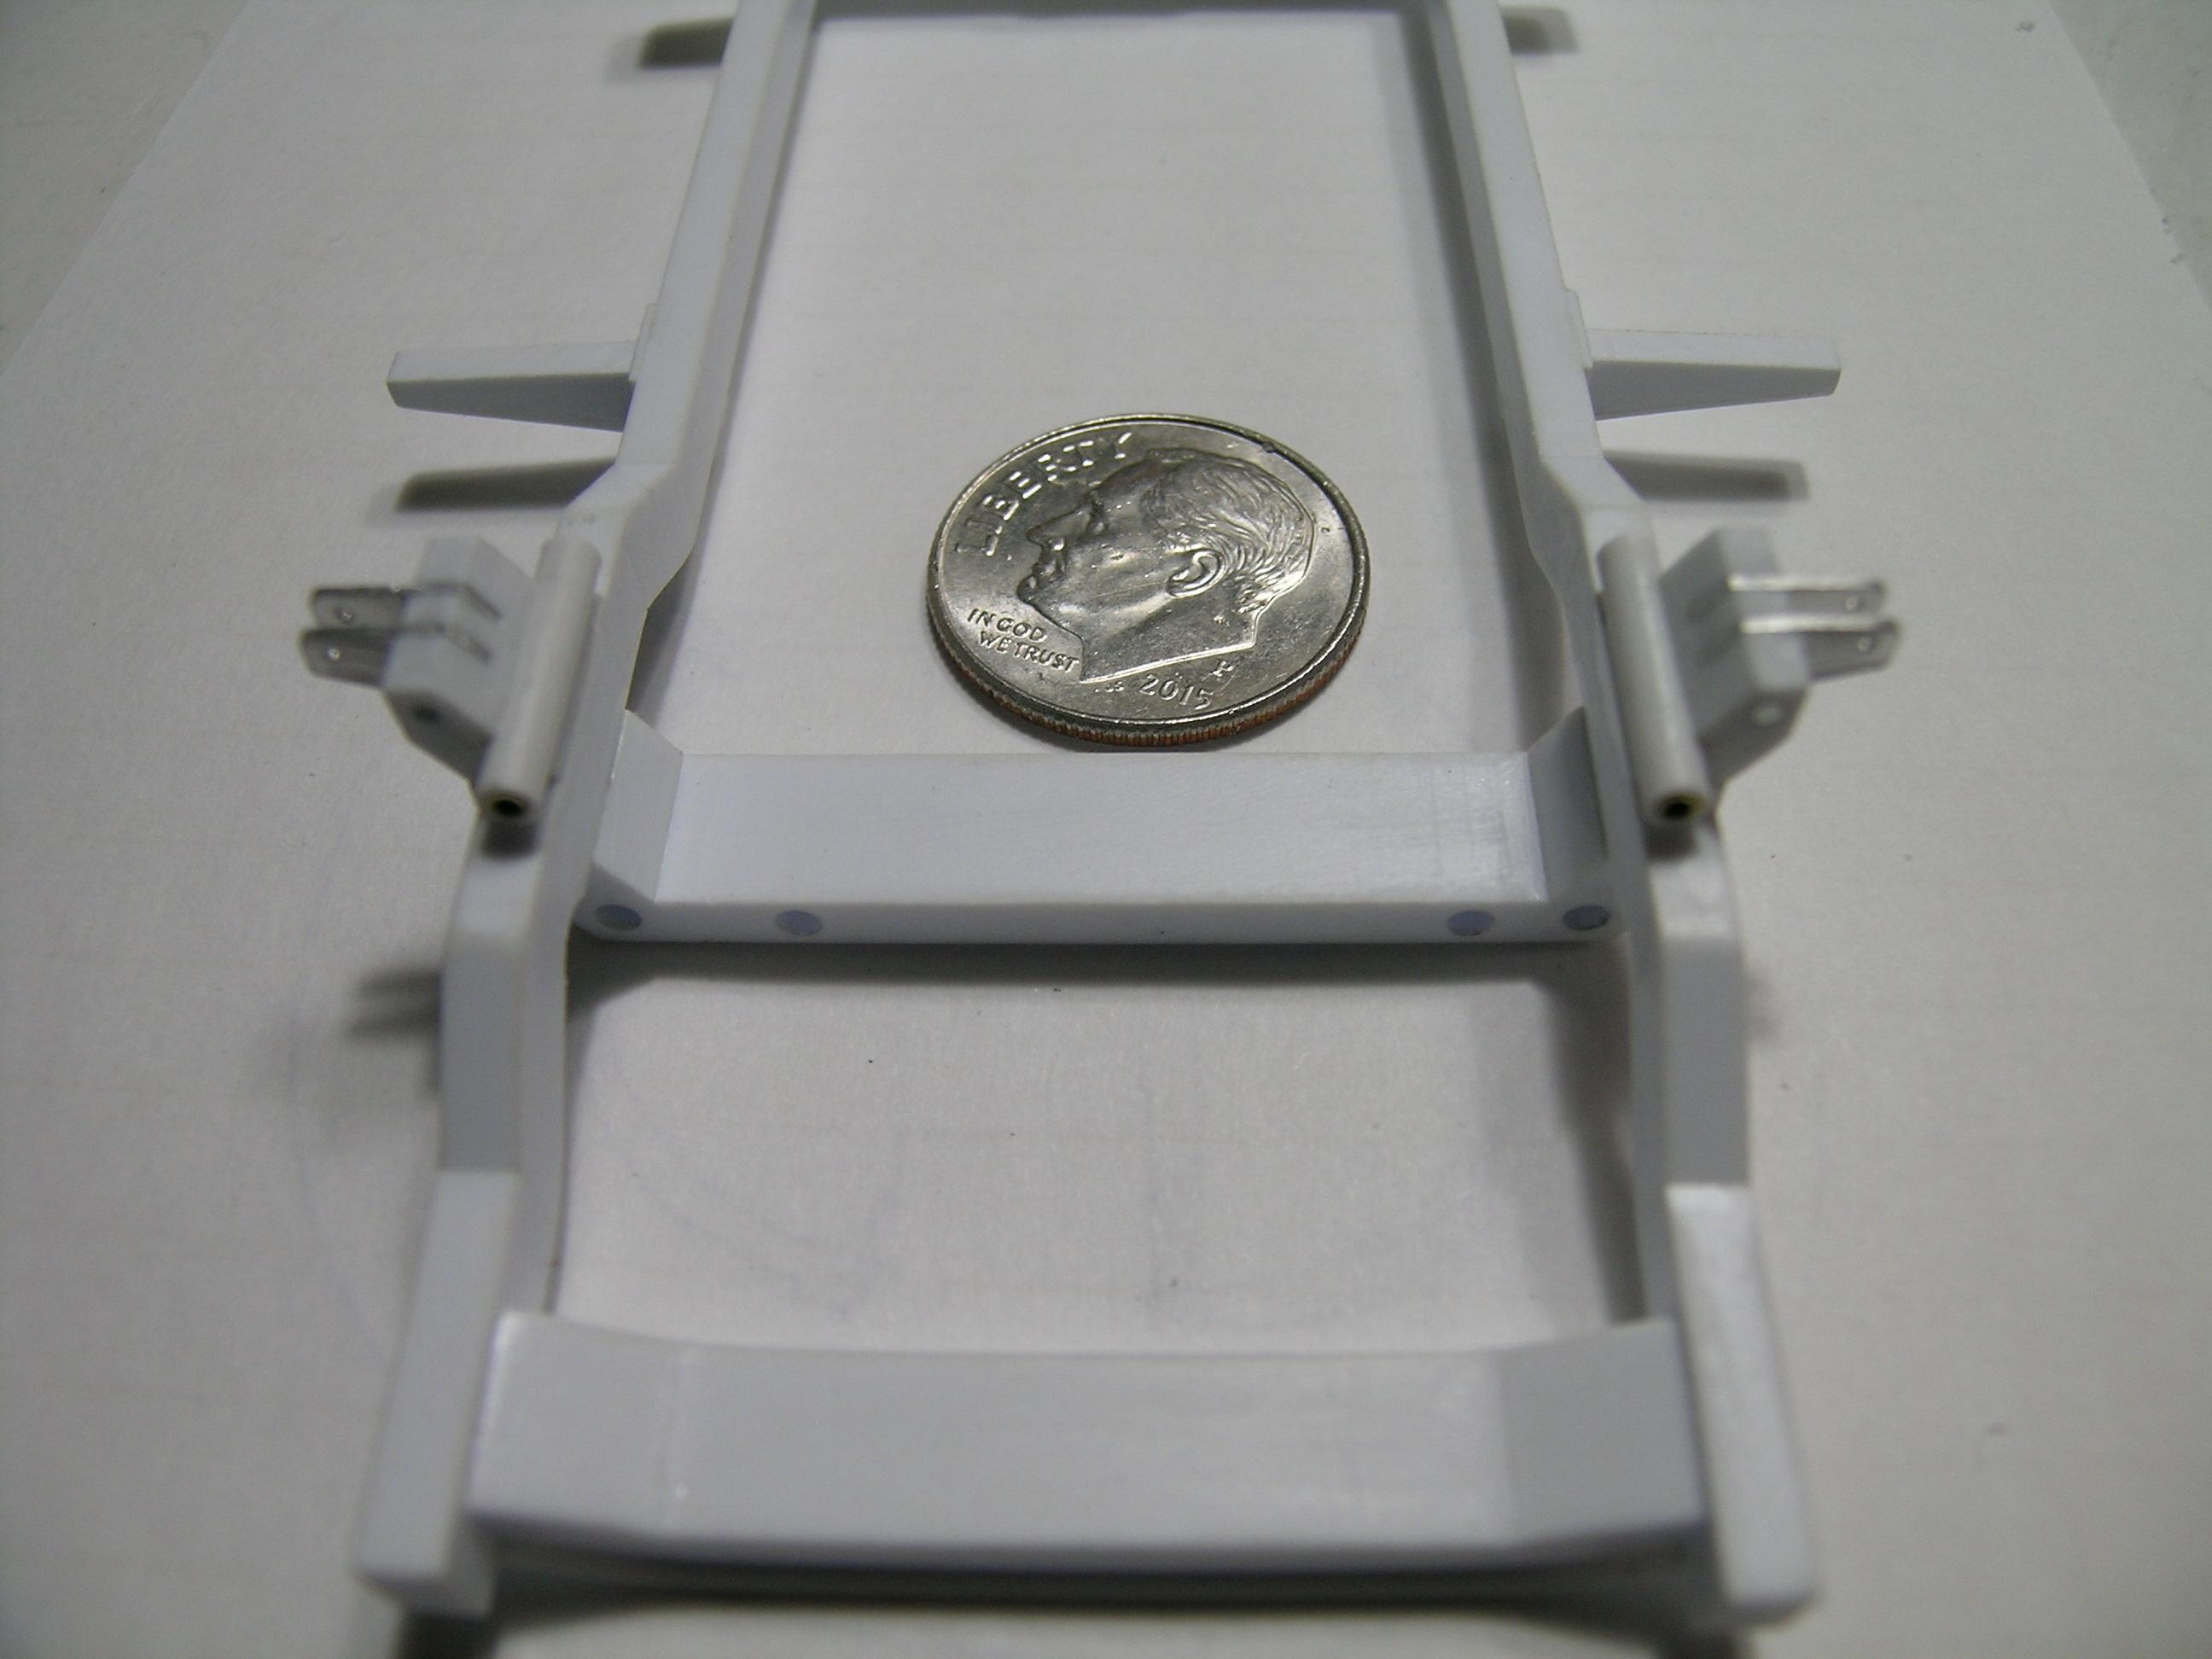
Hello Everyone, After some testing I realized that the frame was too wide between the front wheels so I had to make some adjustments. I cutted the frame and main member to gain more room for the wishbones and get enough space to make sure the front wheels turn freely. I was also forced to modified the main member in order to get enough space for the oil pan. That's the kind of issues that can be encountered when building a model from zero... Scott: I do love this patina look too! Chers, Francis
-
64 Dodge D100 Pickup Pro Street
AmericanMuscleFan replied to AmericanMuscleFan's topic in WIP: Drag Racing Models
Hello Mark, I didn't used heat but I first wrap the plastic strip around a way smaller socket overnight to give it the shape I was looking for (to make the styrene more docile I would say). The following day I wrapped the strip around the wanted size socket and held it in place with a rubber band and I glued the flat piece on one side. When both tubs were done I glued them in the bed floor openings and made the final adjustments. Hope this helpful, Francis -
64 Dodge D100 Pickup Pro Street
AmericanMuscleFan replied to AmericanMuscleFan's topic in WIP: Drag Racing Models
Thanks for your kind comments Ray! Still a long way to go but I think it's moving in the right direction. Cheers, Francis -
64 Dodge D100 Pickup Pro Street
AmericanMuscleFan replied to AmericanMuscleFan's topic in WIP: Drag Racing Models
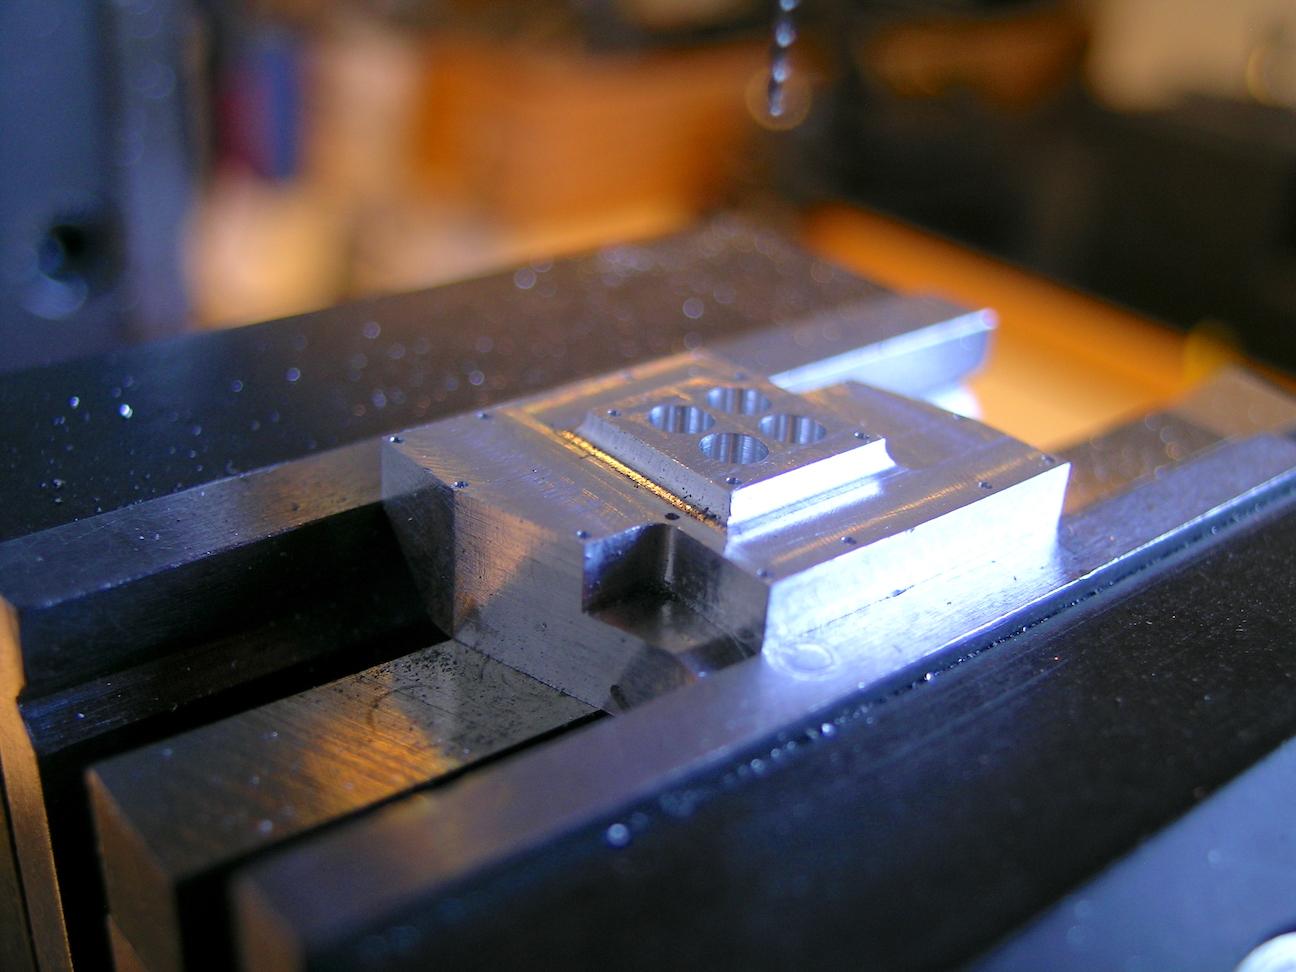
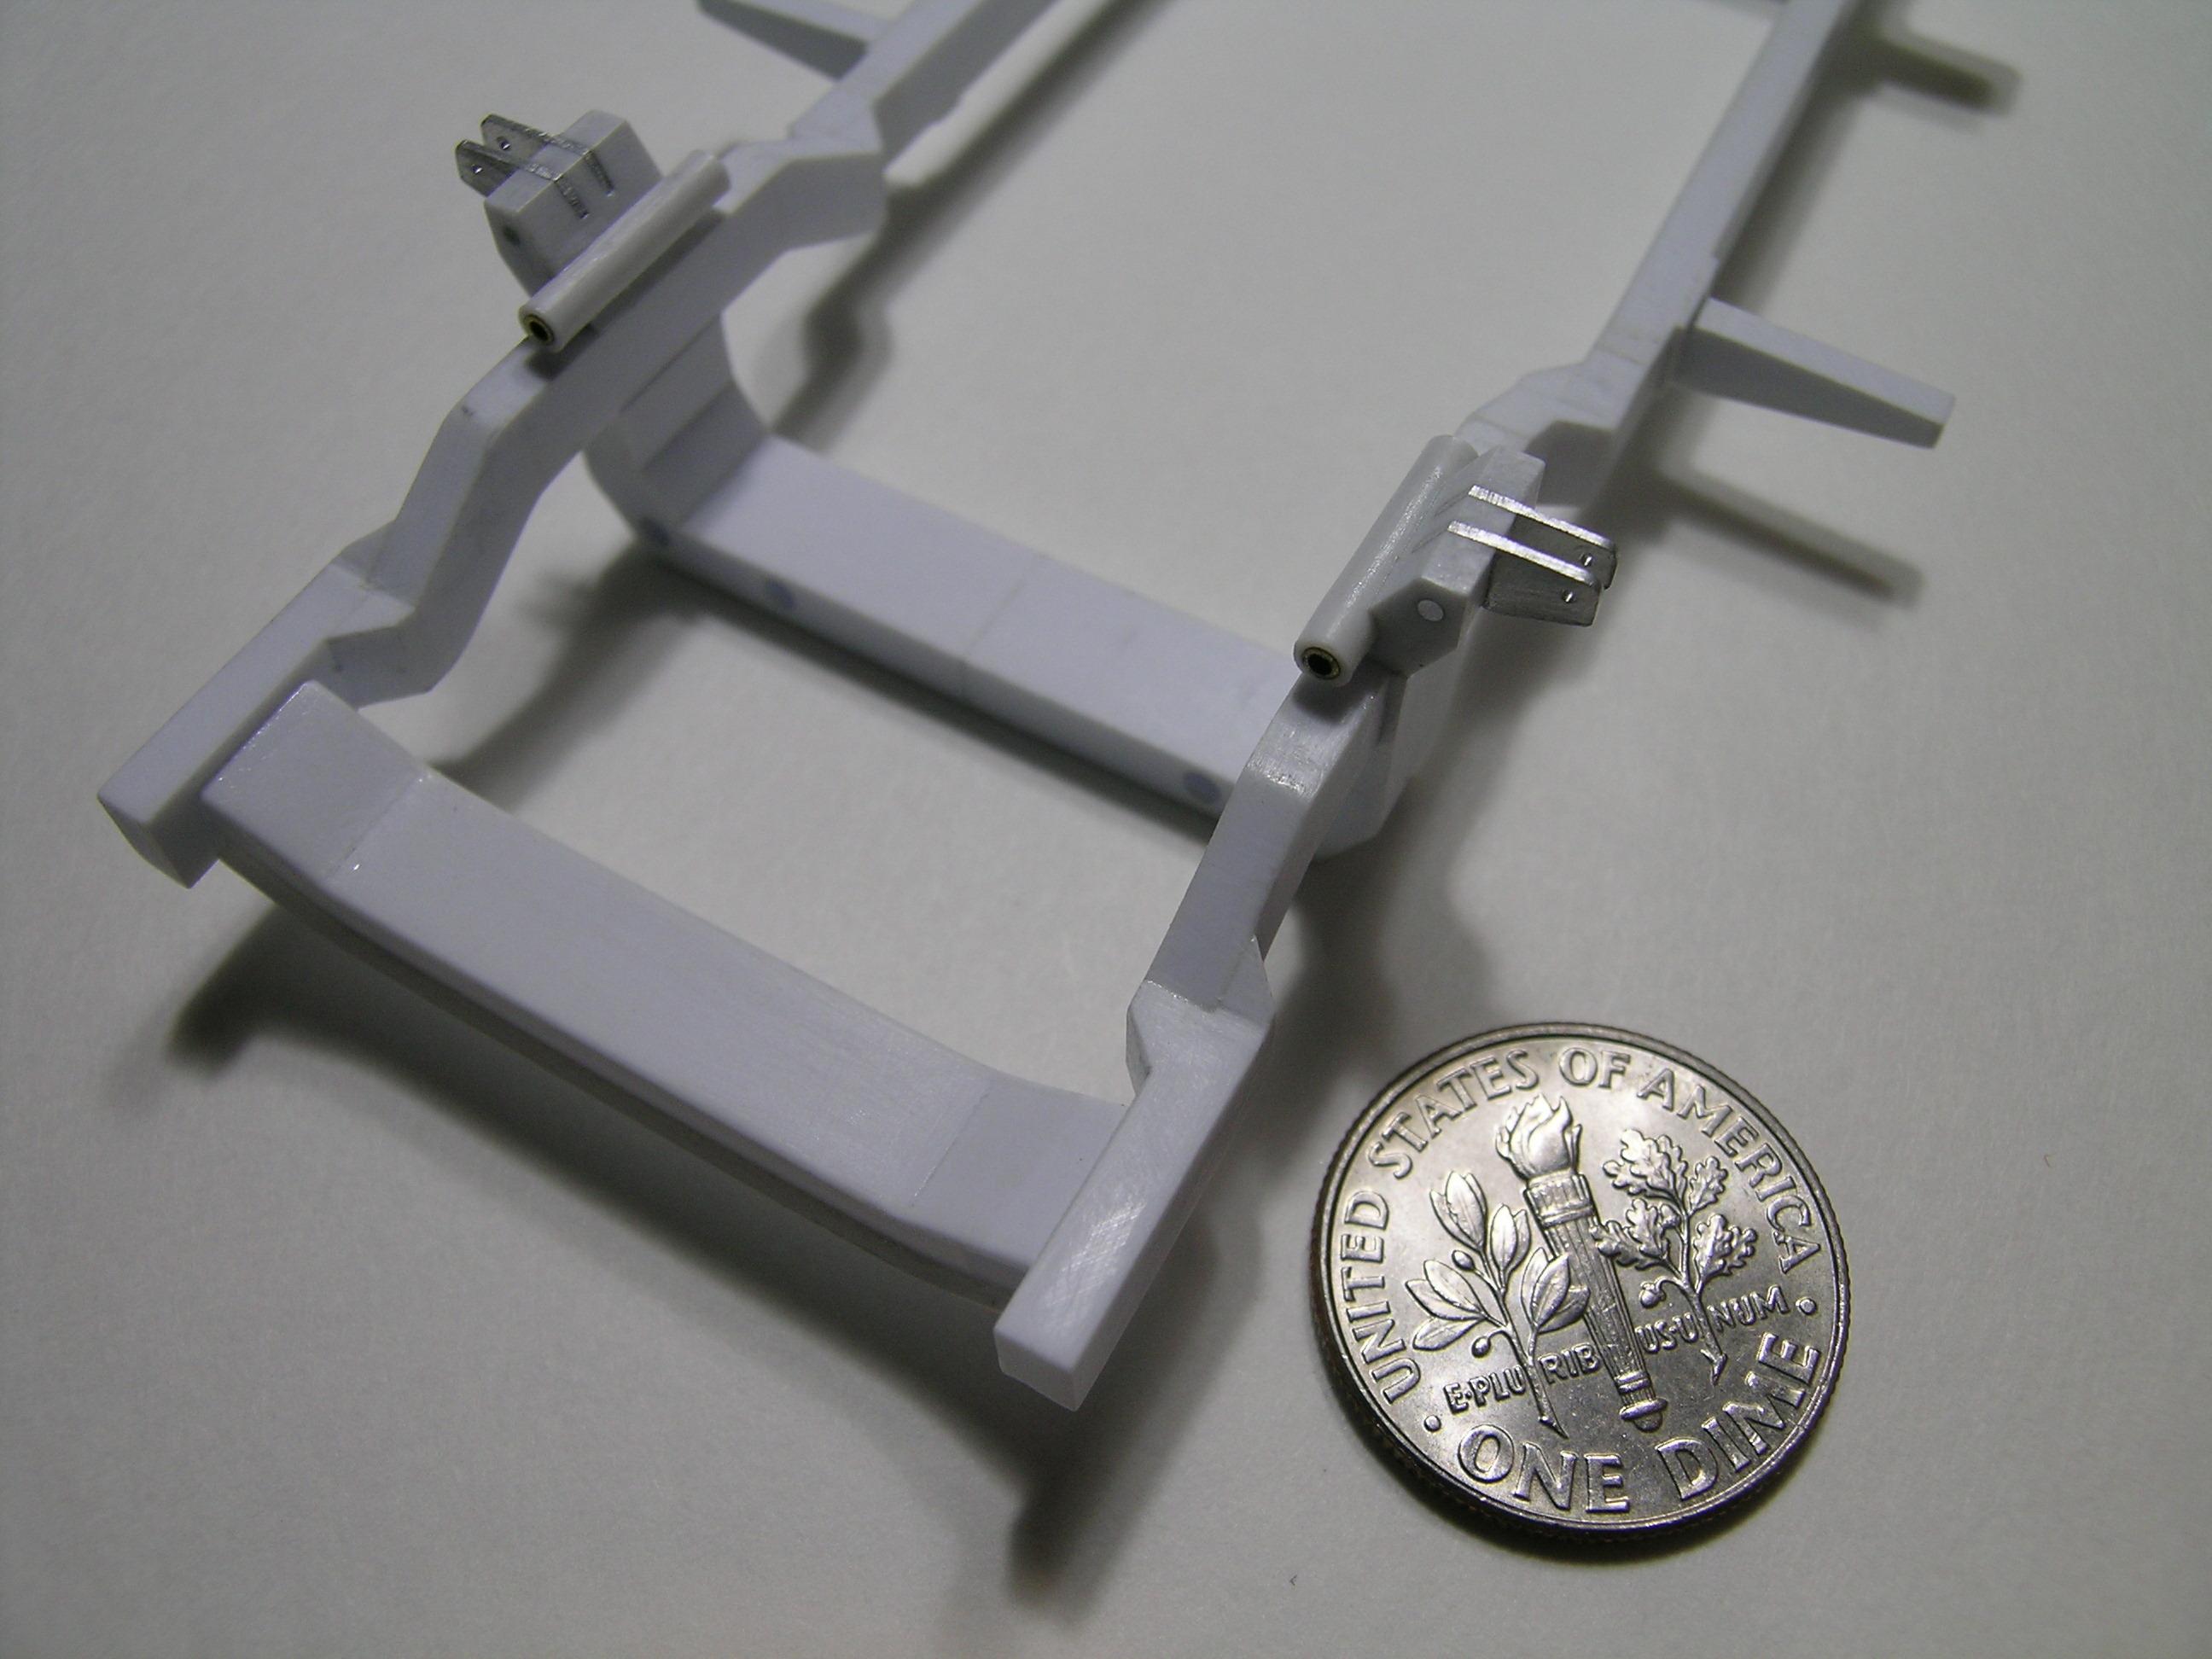
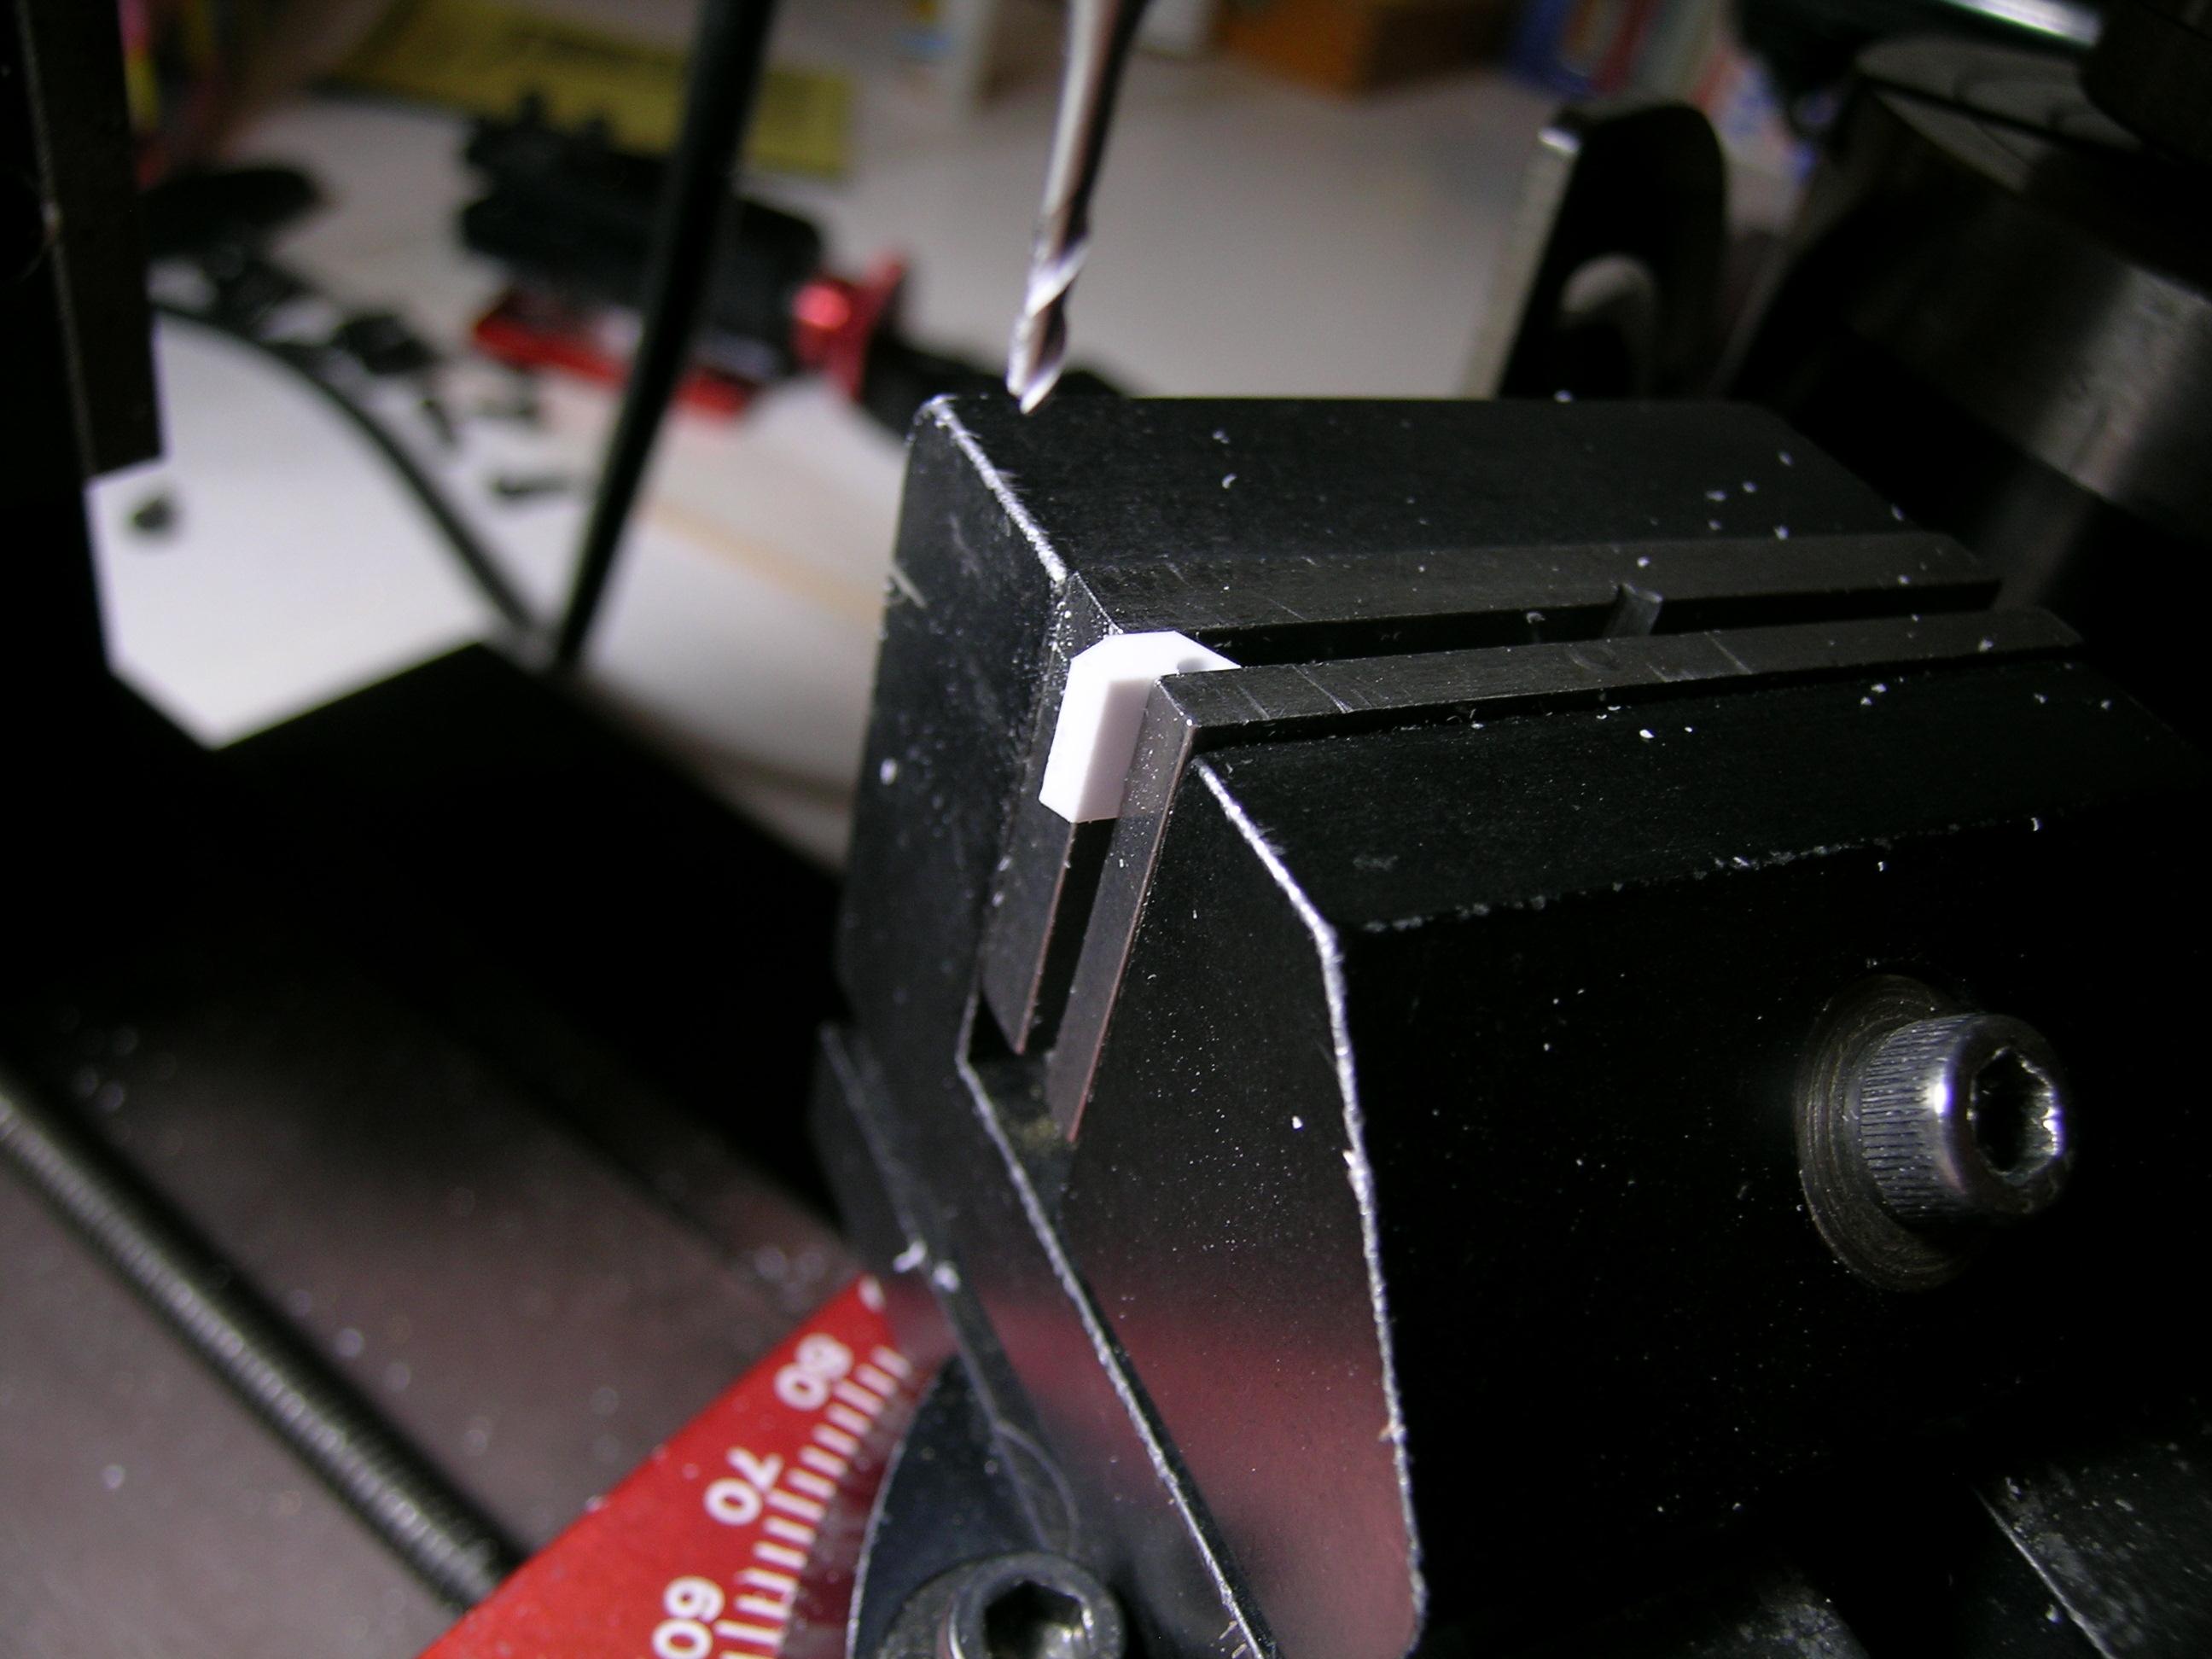
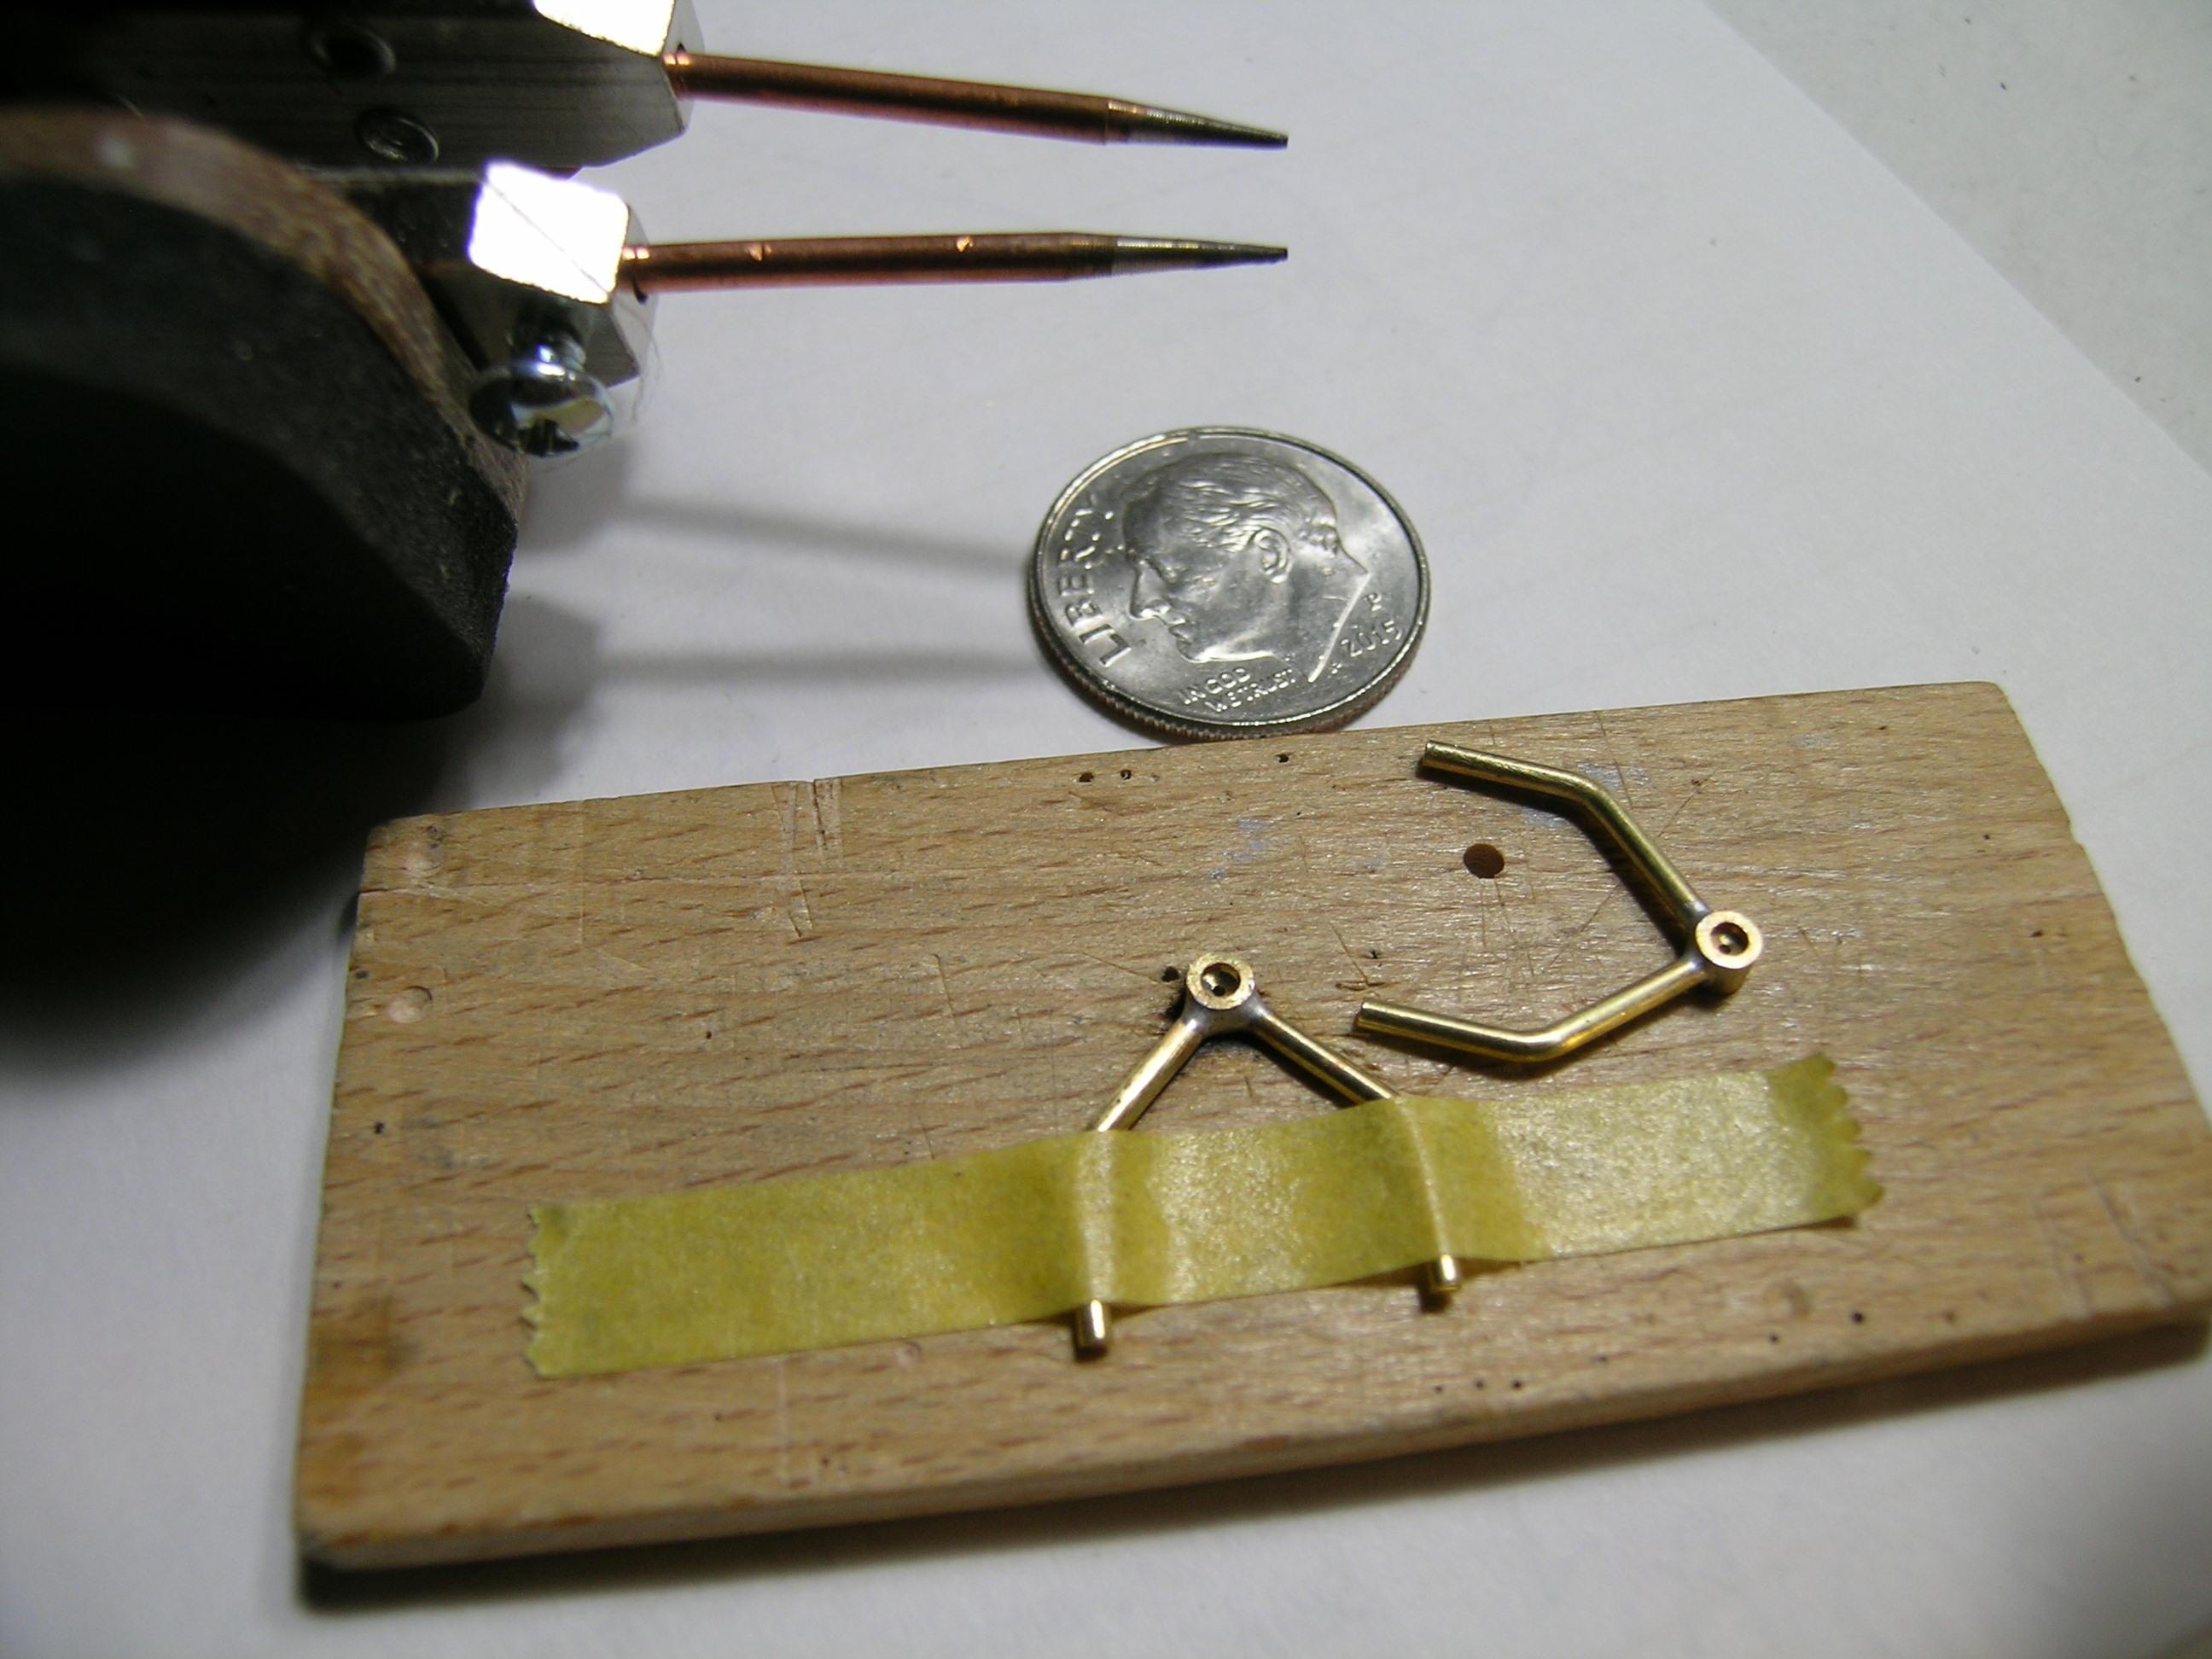
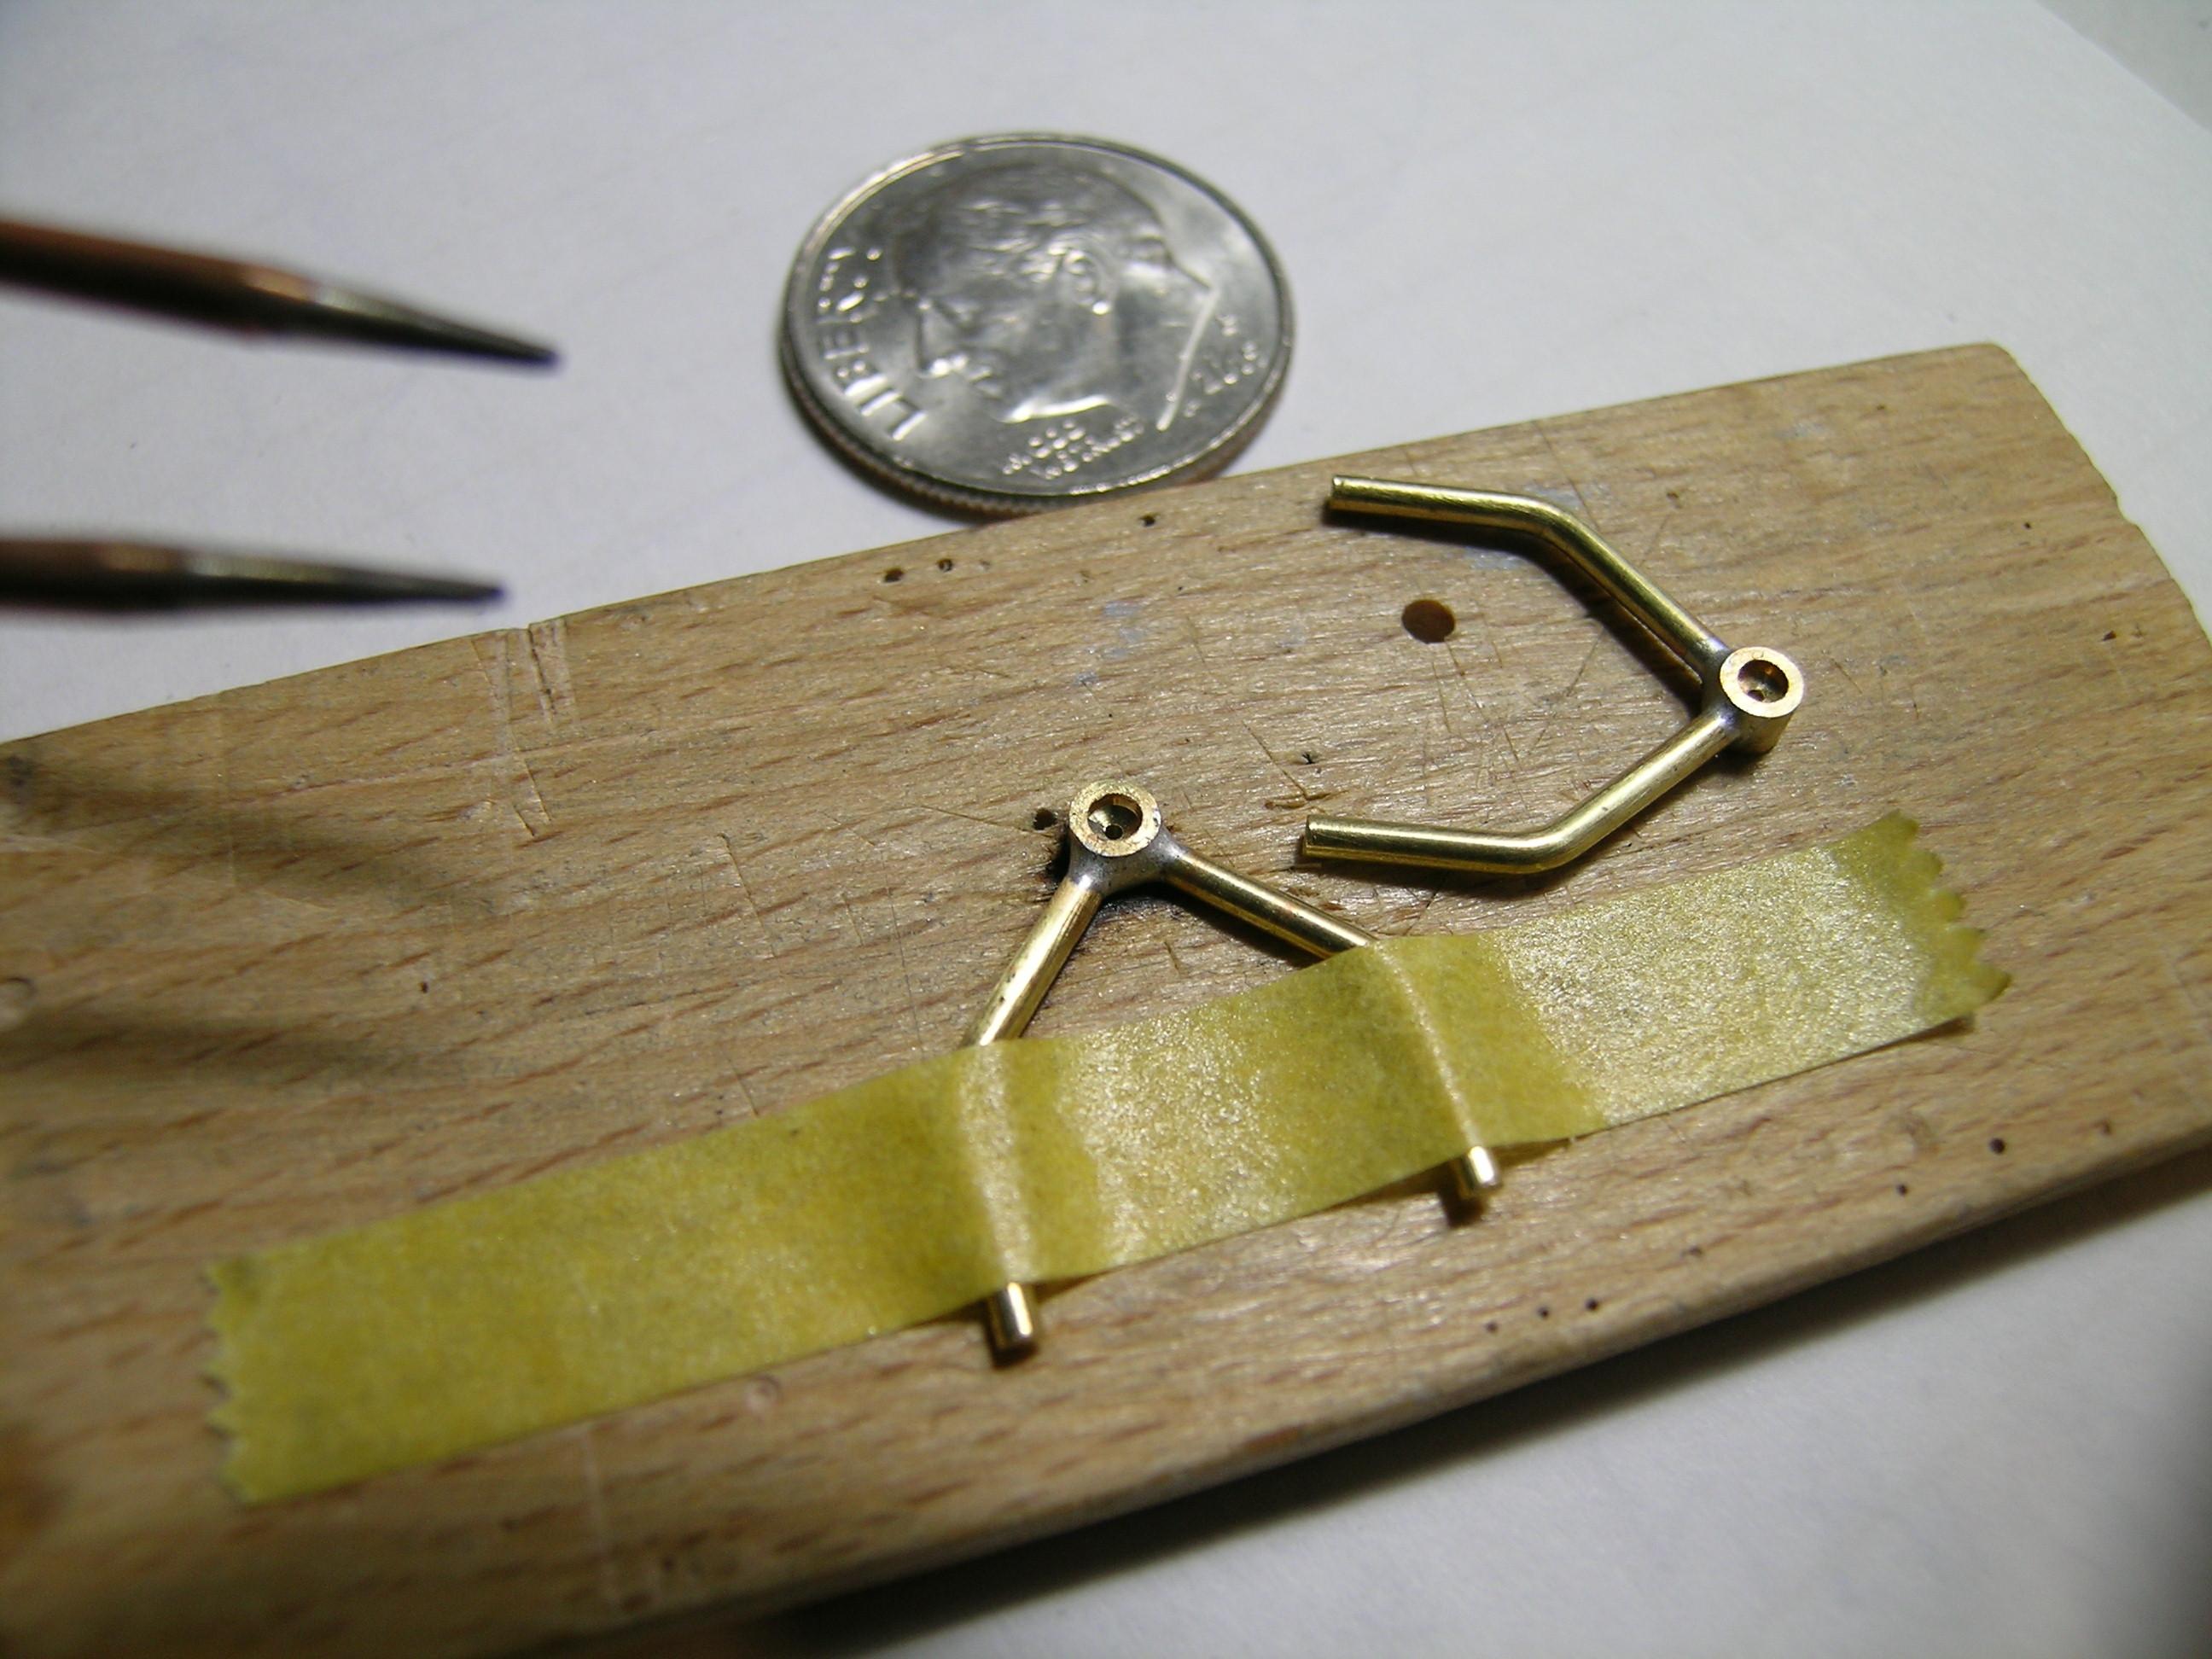
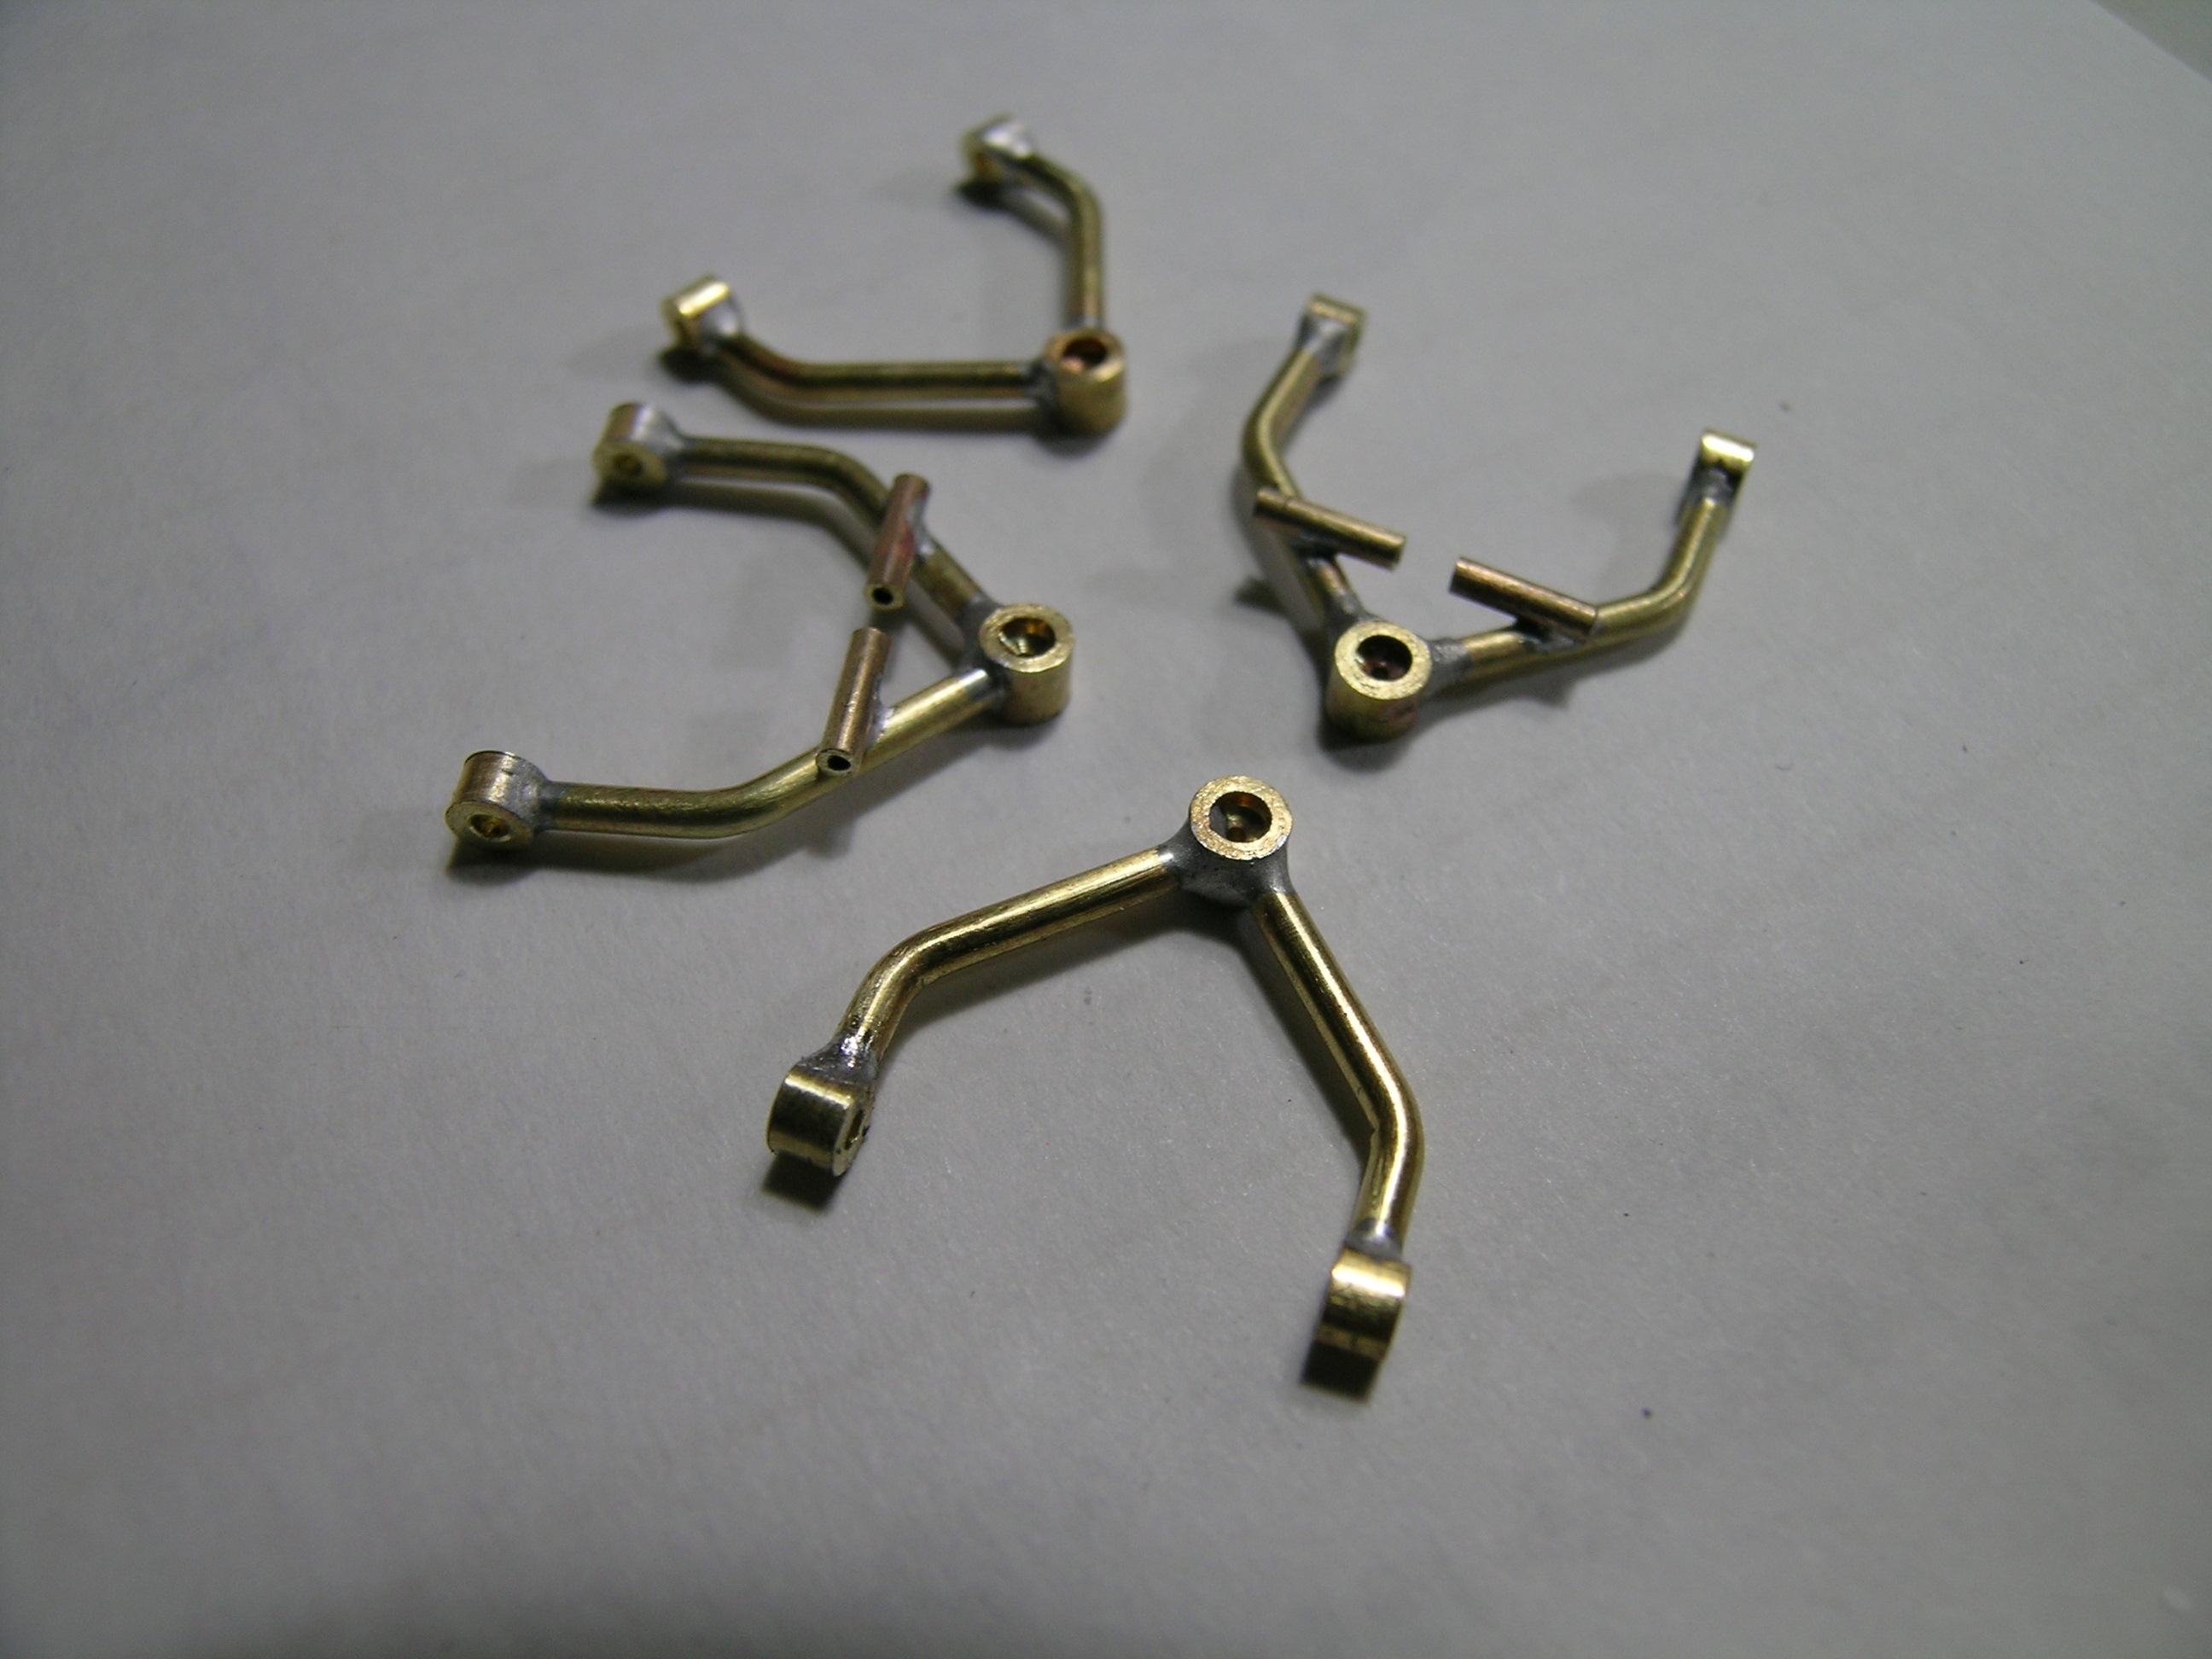
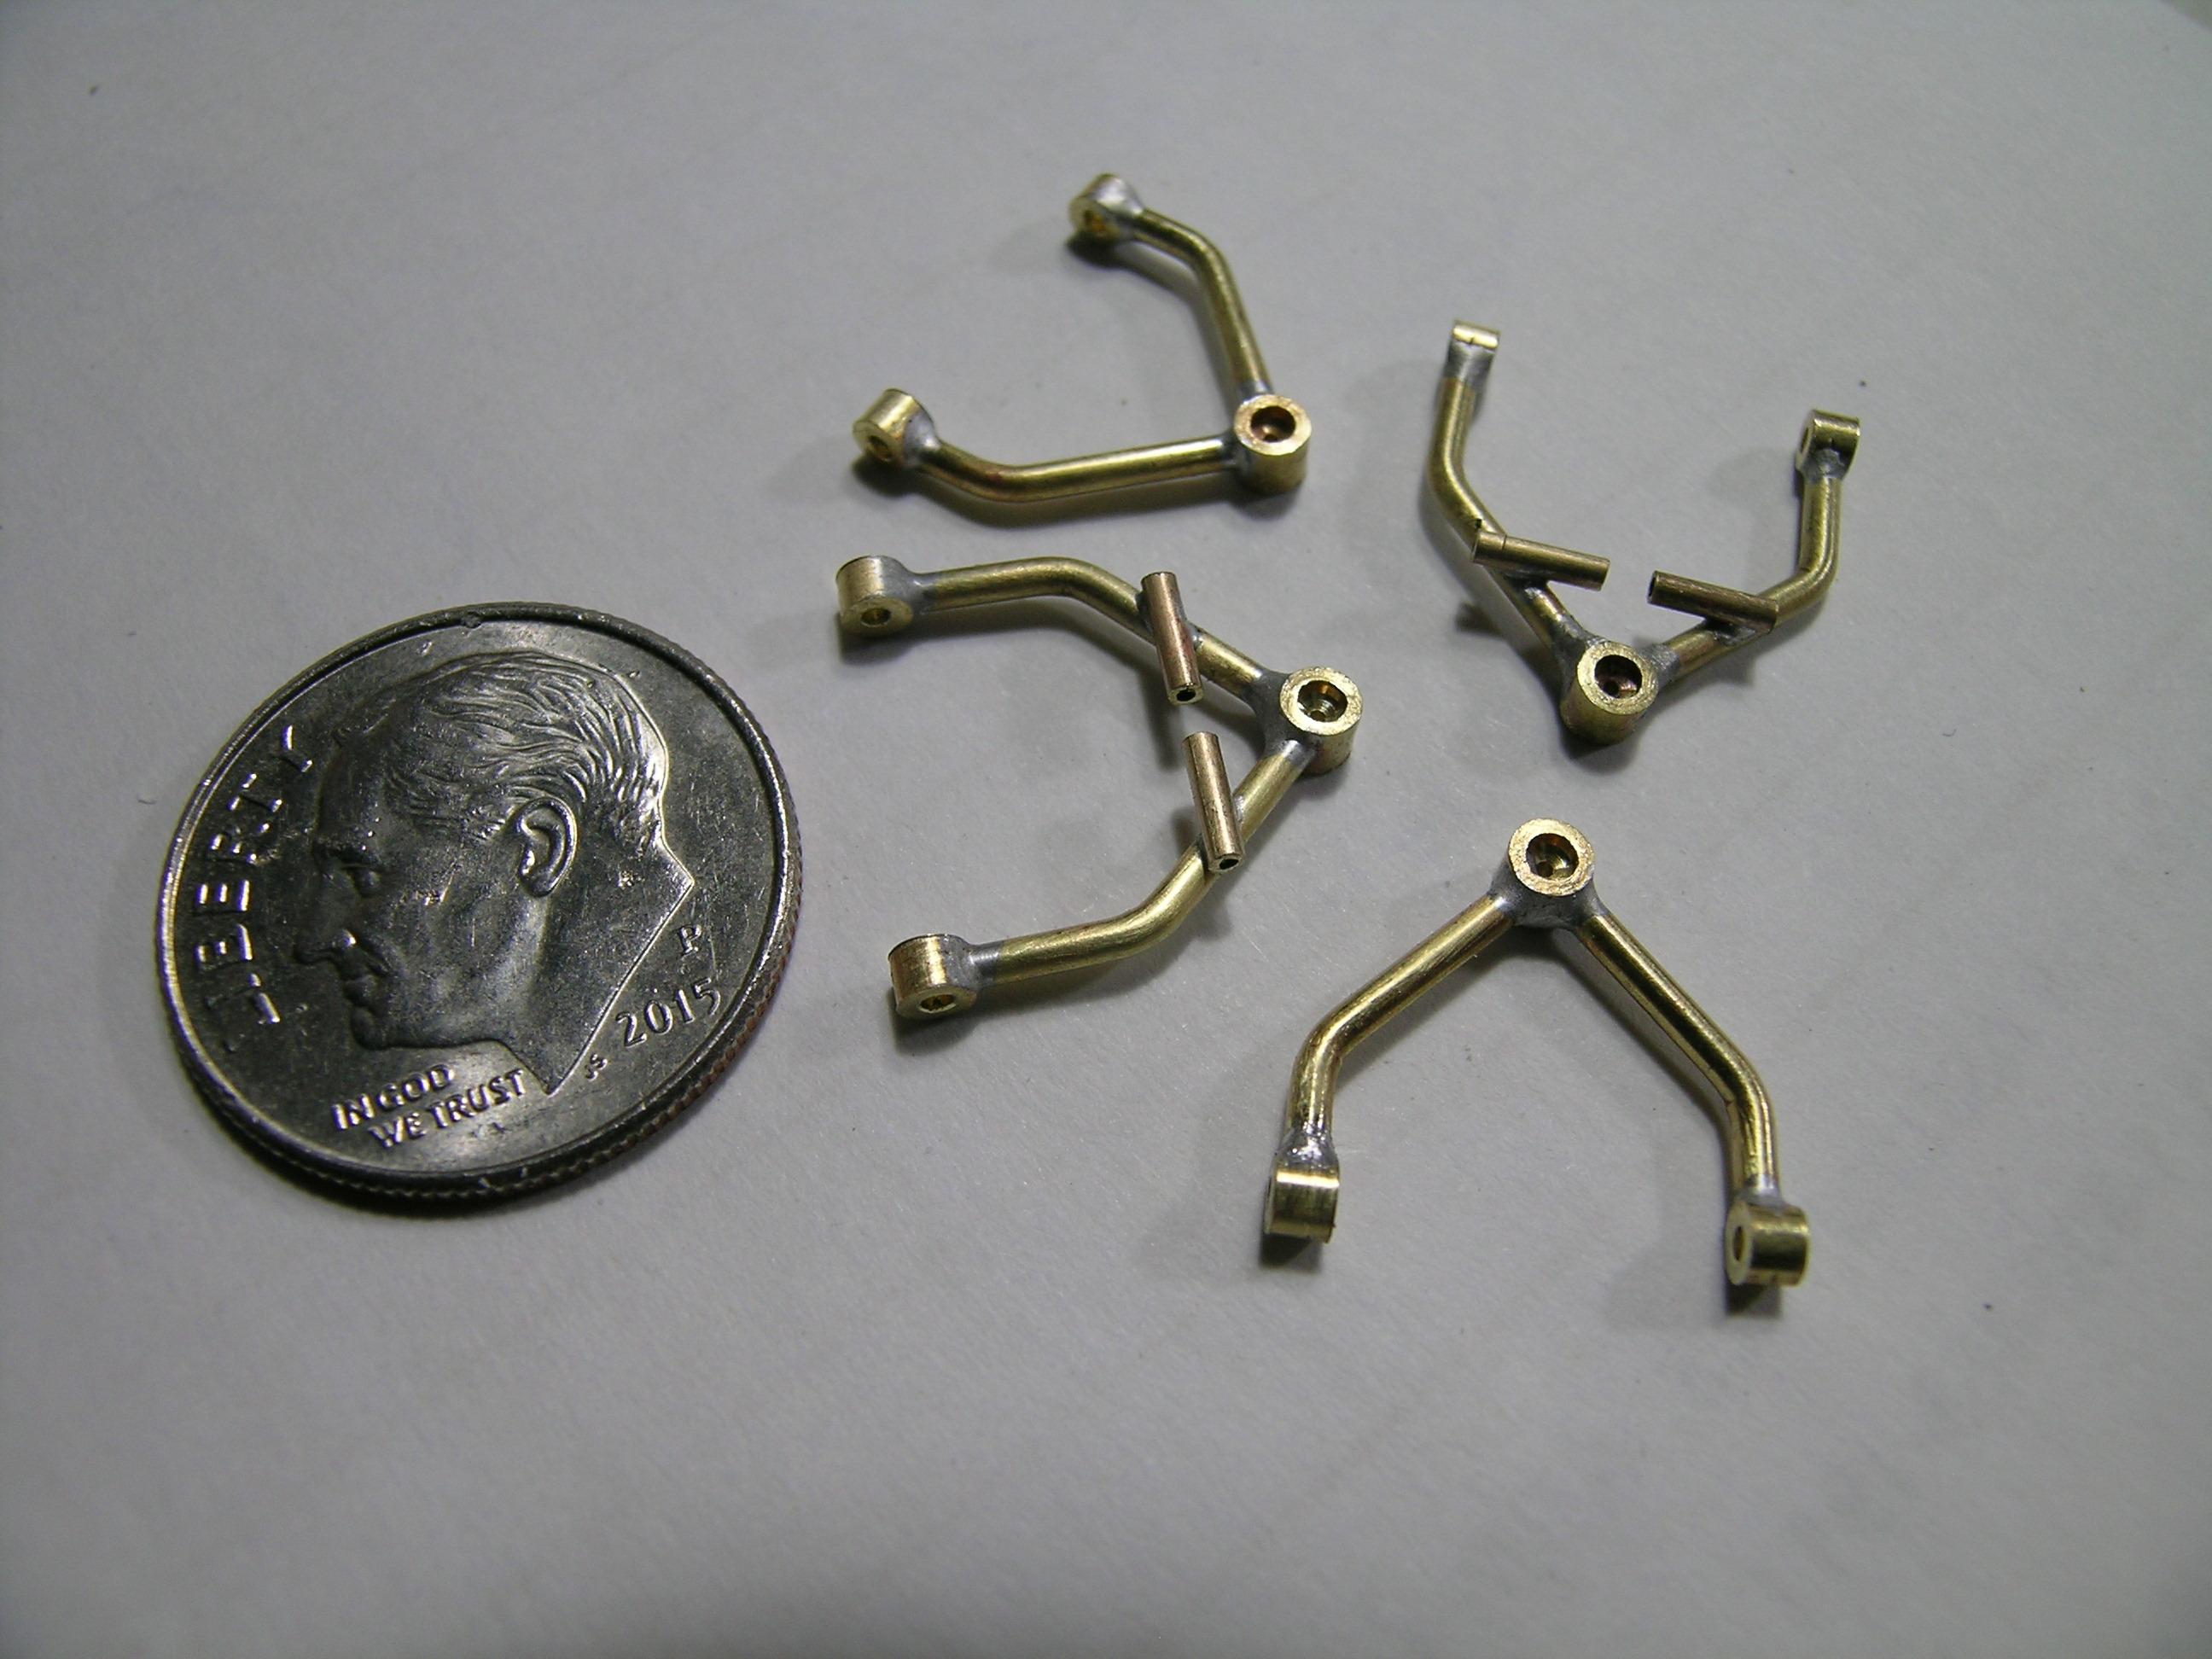
Hello All, Moving back to the structural base of this build I decided to try something new to me by making some of the front suspension components from brass. I do have few experience with welding brass parts and those are critical parts and must be as perfect and equal sized as possible to get the front straight. The brass wishbones will be stronger than plastic and the weld will also make them more reliable than aluminum. The glueing points are too small and the superglue might surrender after some time. Again, I might have to make some adjustment during the construction, it's almost inevitable in this kind of build. Besides, it happens in the real world during the construction of a real vehicle ... Cheers, Francis Part of the front suspension on the milling. This is a part that will receive the bracket for the upper attachment of the shock. Part of the suspension installed on the frame (I inserted aluminum anchors for durability). View of both sides. Wishbone arms in progress made with brass rods and welded by resistance. Closer view Upper and lower wishbones with mounting eyelets. Same pieces, note the perpendicular tiny tubes are the lower shocks mounts.
-
Jo-Han Maverick-Dyno Don's Ride
AmericanMuscleFan replied to mustang1989's topic in WIP: Drag Racing Models
Good job Joe, One step at a time and you will get there! These decals are always nice looking on the carrier sheet but often very difficult to apply. Another step in the right direction! Keep doing your great work! -
64 Dodge D100 Pickup Pro Street
AmericanMuscleFan replied to AmericanMuscleFan's topic in WIP: Drag Racing Models
Thanks for your visit and your kind words Adam! Cheers, Francis -
64 Dodge D100 Pickup Pro Street
AmericanMuscleFan replied to AmericanMuscleFan's topic in WIP: Drag Racing Models
Thanks Joe! I'm still working hard to reach that goal, a lot of new things to come... Cheers, Francis -
Jo-Han Maverick-Dyno Don's Ride
AmericanMuscleFan replied to mustang1989's topic in WIP: Drag Racing Models
WOW Joe! The red base color is very beautiful and this color fits like a glove on the Maverick body! Nice job too on the back tire adjustment, this will be a killer looking drag car. Can't wait to see the decals on the body. Cheers, Francis -
64 Dodge D100 Pickup Pro Street
AmericanMuscleFan replied to AmericanMuscleFan's topic in WIP: Drag Racing Models
Hello Dave, Thank you so much for your kind words! A fellow member had already indicated to me that he would like to see this truck reproduced in resin but by its construction it would be very difficult if not impossible to make a mold of it. I built it like as close as possible to the real truck and all the panels are curved inward without counting all the nooks that would be bubble traps. I know well that I could make some money but it's not the goal... I consider your suggestion as a compliment and I thank you again for this! Stay tuned!!! Cheers, Francis -
64 Dodge D100 Pickup Pro Street
AmericanMuscleFan replied to AmericanMuscleFan's topic in WIP: Drag Racing Models
Hello TJ, I had thought about it but I never did a patinated finish and I must admit that when it is done well it gives a beautiful look. The base color of the "Fast and Loud" is the same that my uncle was (a good old farm truck) but I think it's not the right color choice for a drag racing machine. Thanks for the suggestion anyway and come back soon! Cheers, Francis -
64 Dodge D100 Pickup Pro Street
AmericanMuscleFan replied to AmericanMuscleFan's topic in WIP: Drag Racing Models
Thanks for your good words Jim! I still have many pictures to upload and I will try to do it on a weekly basis until I get to where I am now. If you like small parts then wait to see the engine and all the accessories. Cheers, Francis -
64 Dodge D100 Pickup Pro Street
AmericanMuscleFan replied to AmericanMuscleFan's topic in WIP: Drag Racing Models
Hello Phil and thanks for your visit! I have seen one painted Plum Crazy on internet and It's pretty nice (FC7 It's one of my favorite Mopar high Impact color). One of the most tough decision will be the color choice for this truck and it will require much second thought (It's not a common subject...). Fortunately I still have quite a few time to think about it before I plug the air brush! Thanks again for the suggestion and come back soon! Cheers, Francis -
64 Dodge D100 Pickup Pro Street
AmericanMuscleFan replied to AmericanMuscleFan's topic in WIP: Drag Racing Models
Thanks Bob! You're right even if not much remain from the Ford body it was a good canvas but I dare say that the devil is in the details... The sacrifice was a tough decision to take since I do love those old Ford truck too! Cheers, Francis -
64 Dodge D100 Pickup Pro Street
AmericanMuscleFan replied to AmericanMuscleFan's topic in WIP: Drag Racing Models
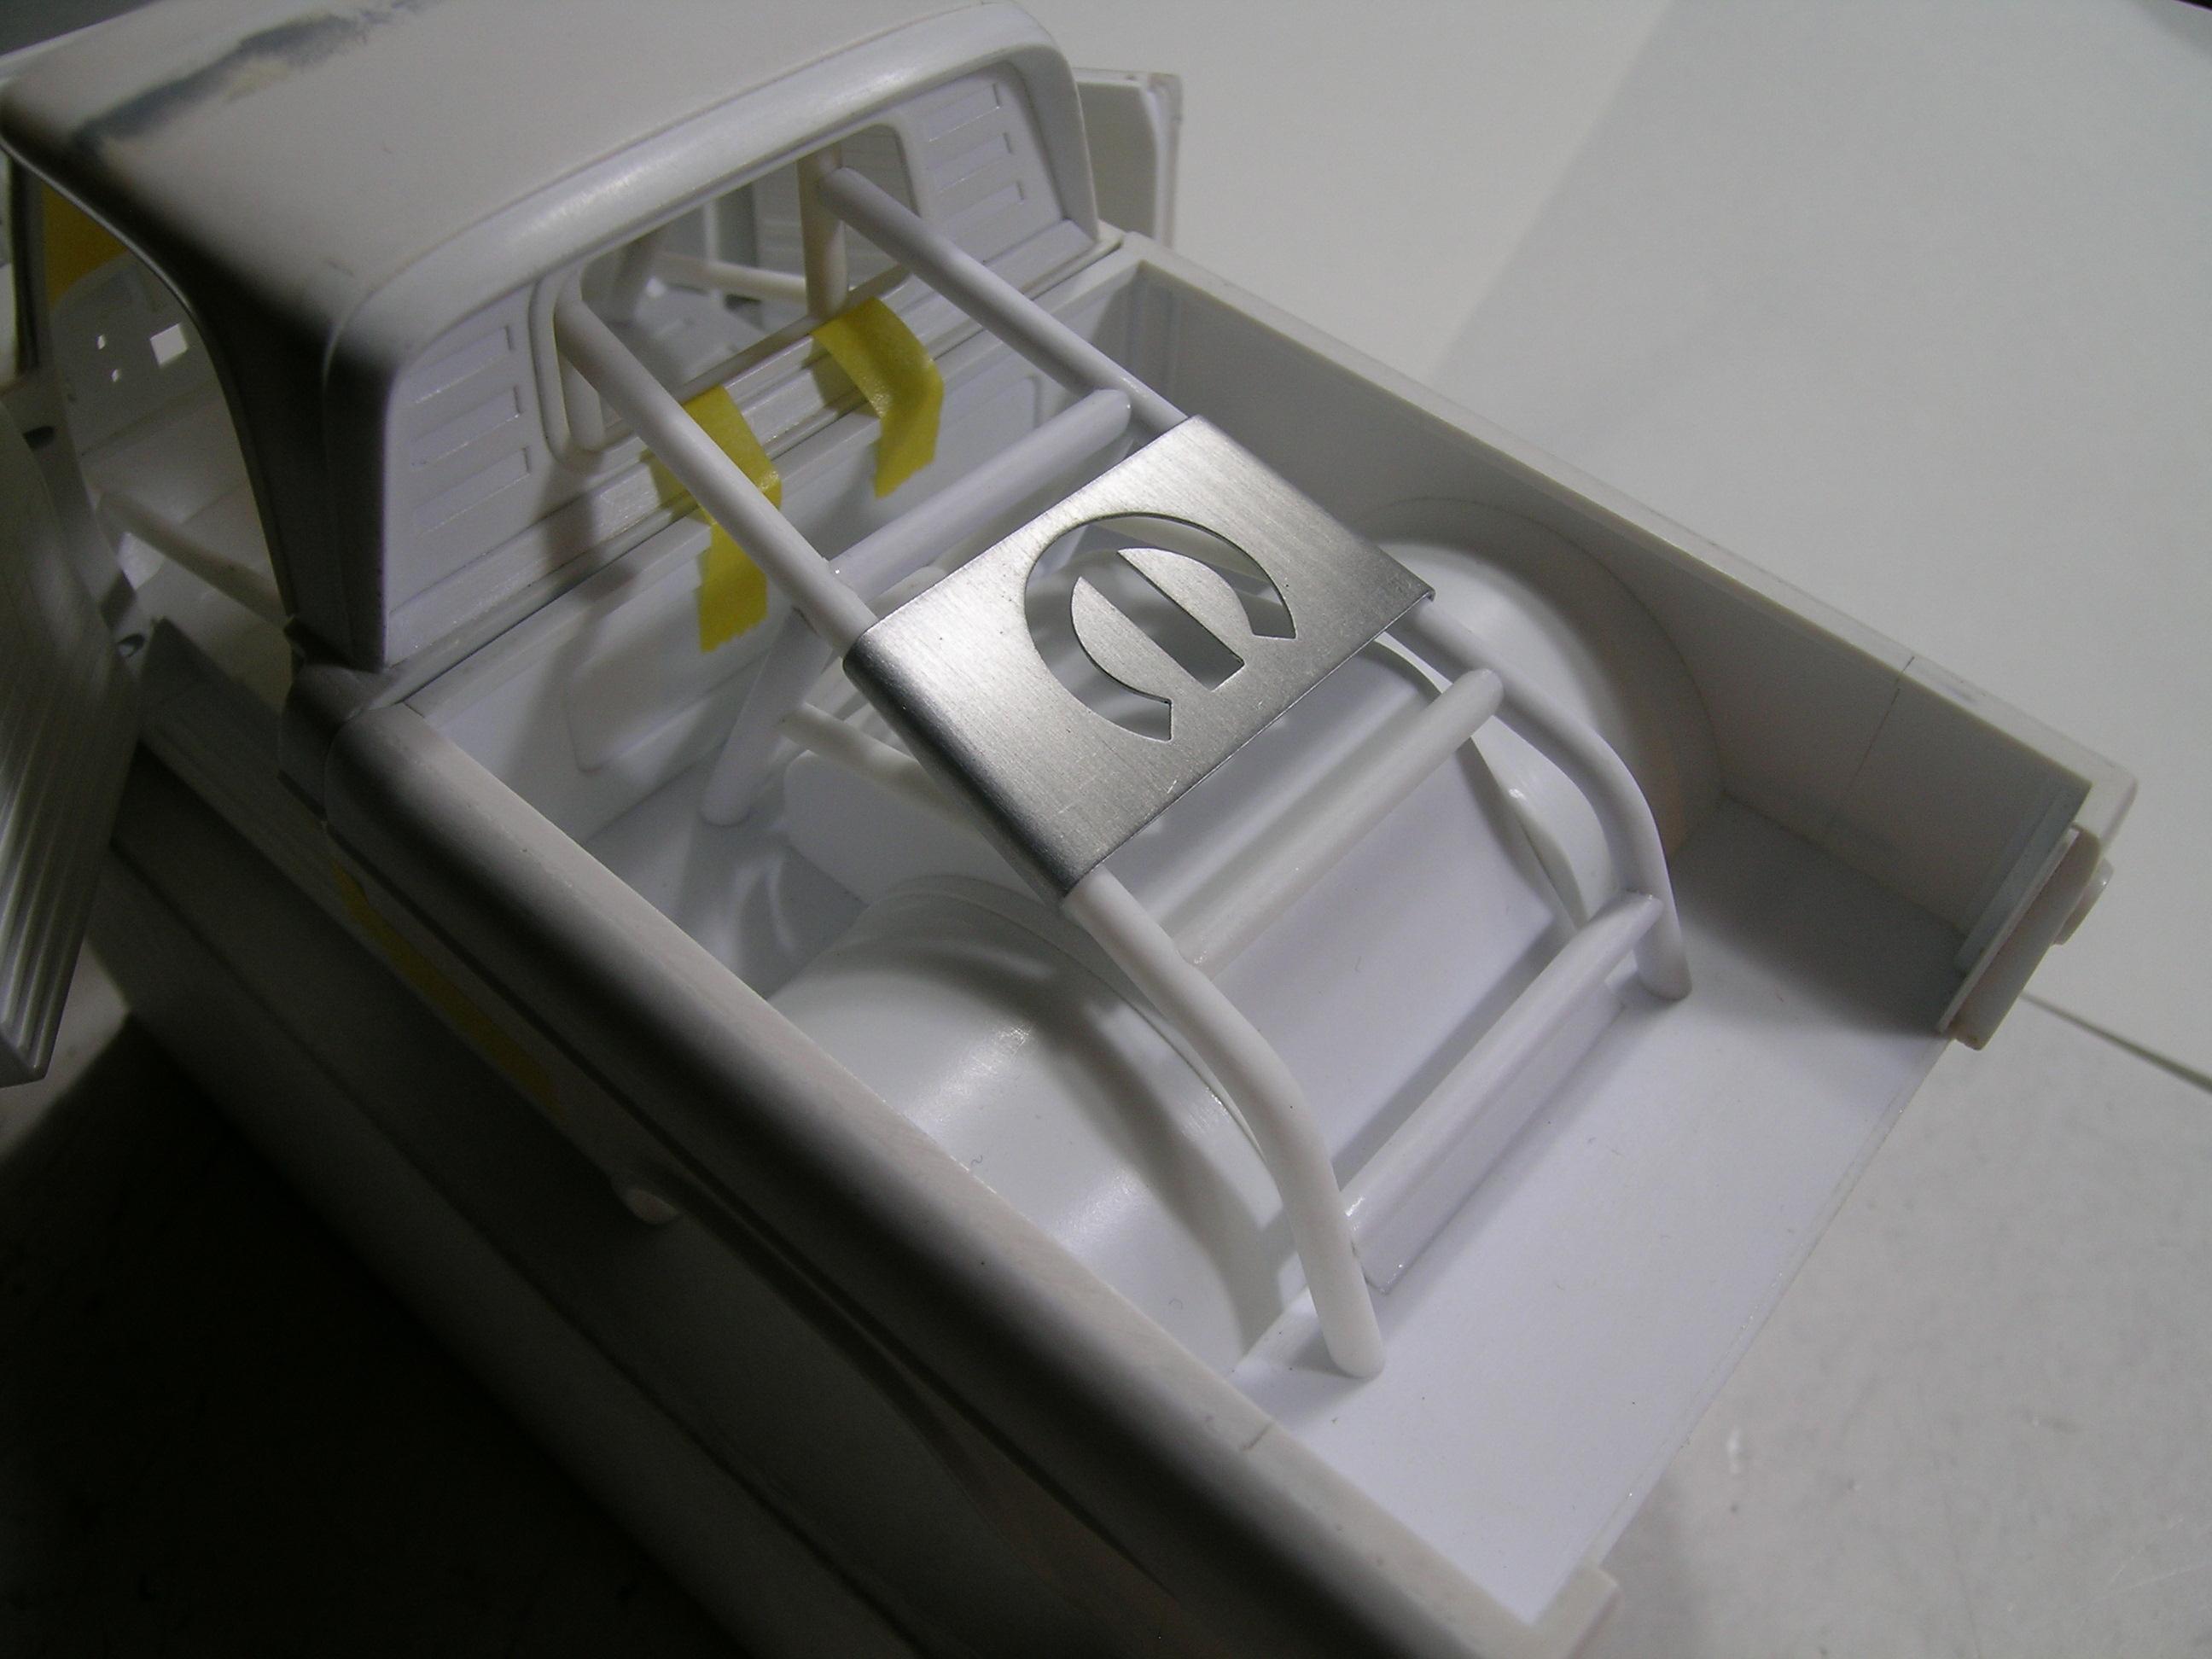
Thanks for the comments Scott but I still a long way to go! Cheers, Francis Thanks for the compliments Rooster! I didn't consider the welded on look because the plate will stay brushed metal or maybe polished (crome finish) and the roll cage will be painted. I will just drill 2 or 3 holes on each side and I will use small bolt heads from RB Motion for the mounting. Thakns again for your suggestion, Francis -
64 Dodge D100 Pickup Pro Street
AmericanMuscleFan replied to AmericanMuscleFan's topic in WIP: Drag Racing Models
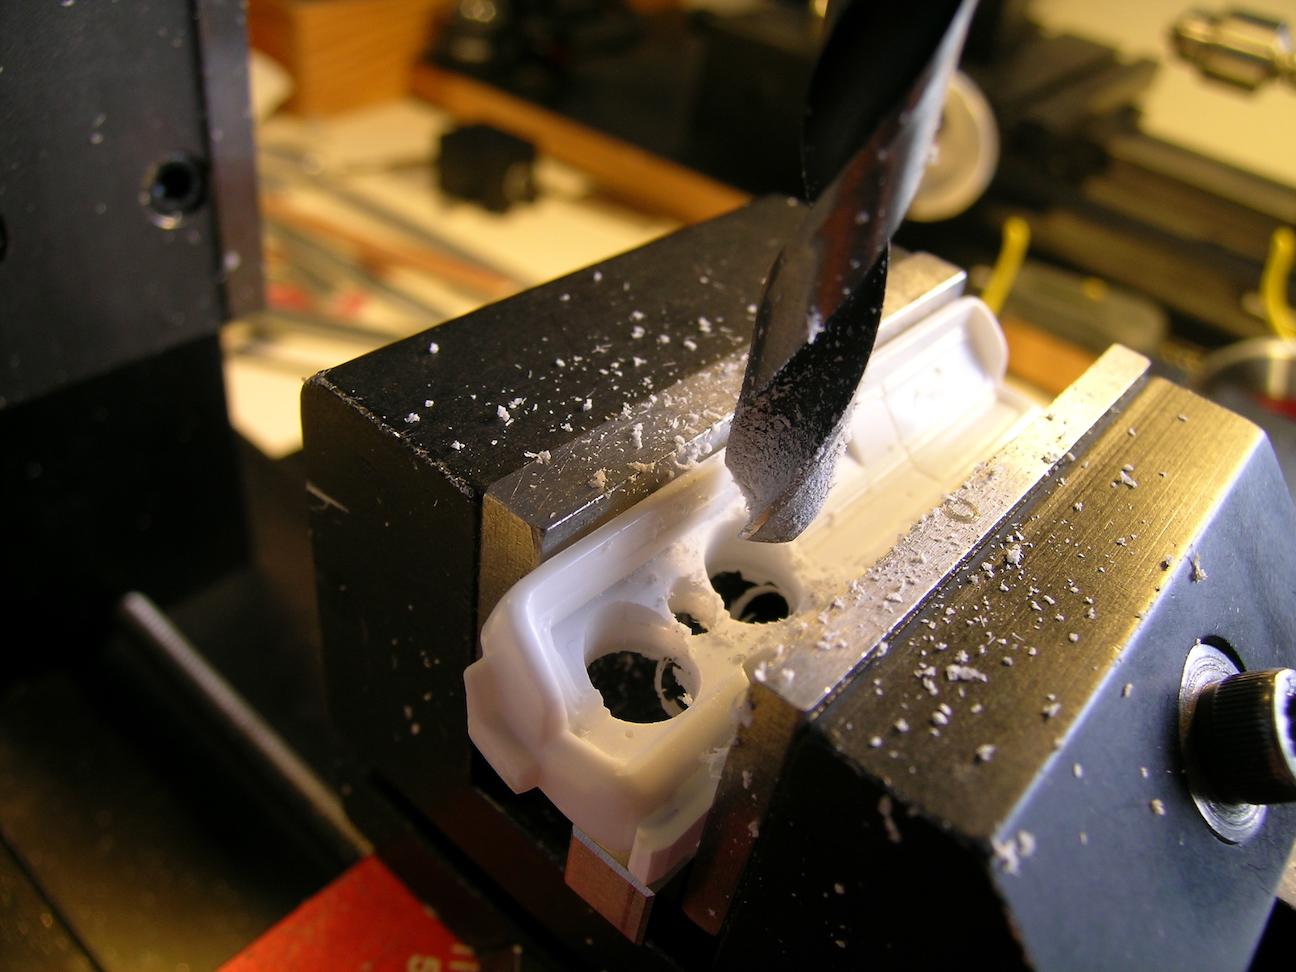
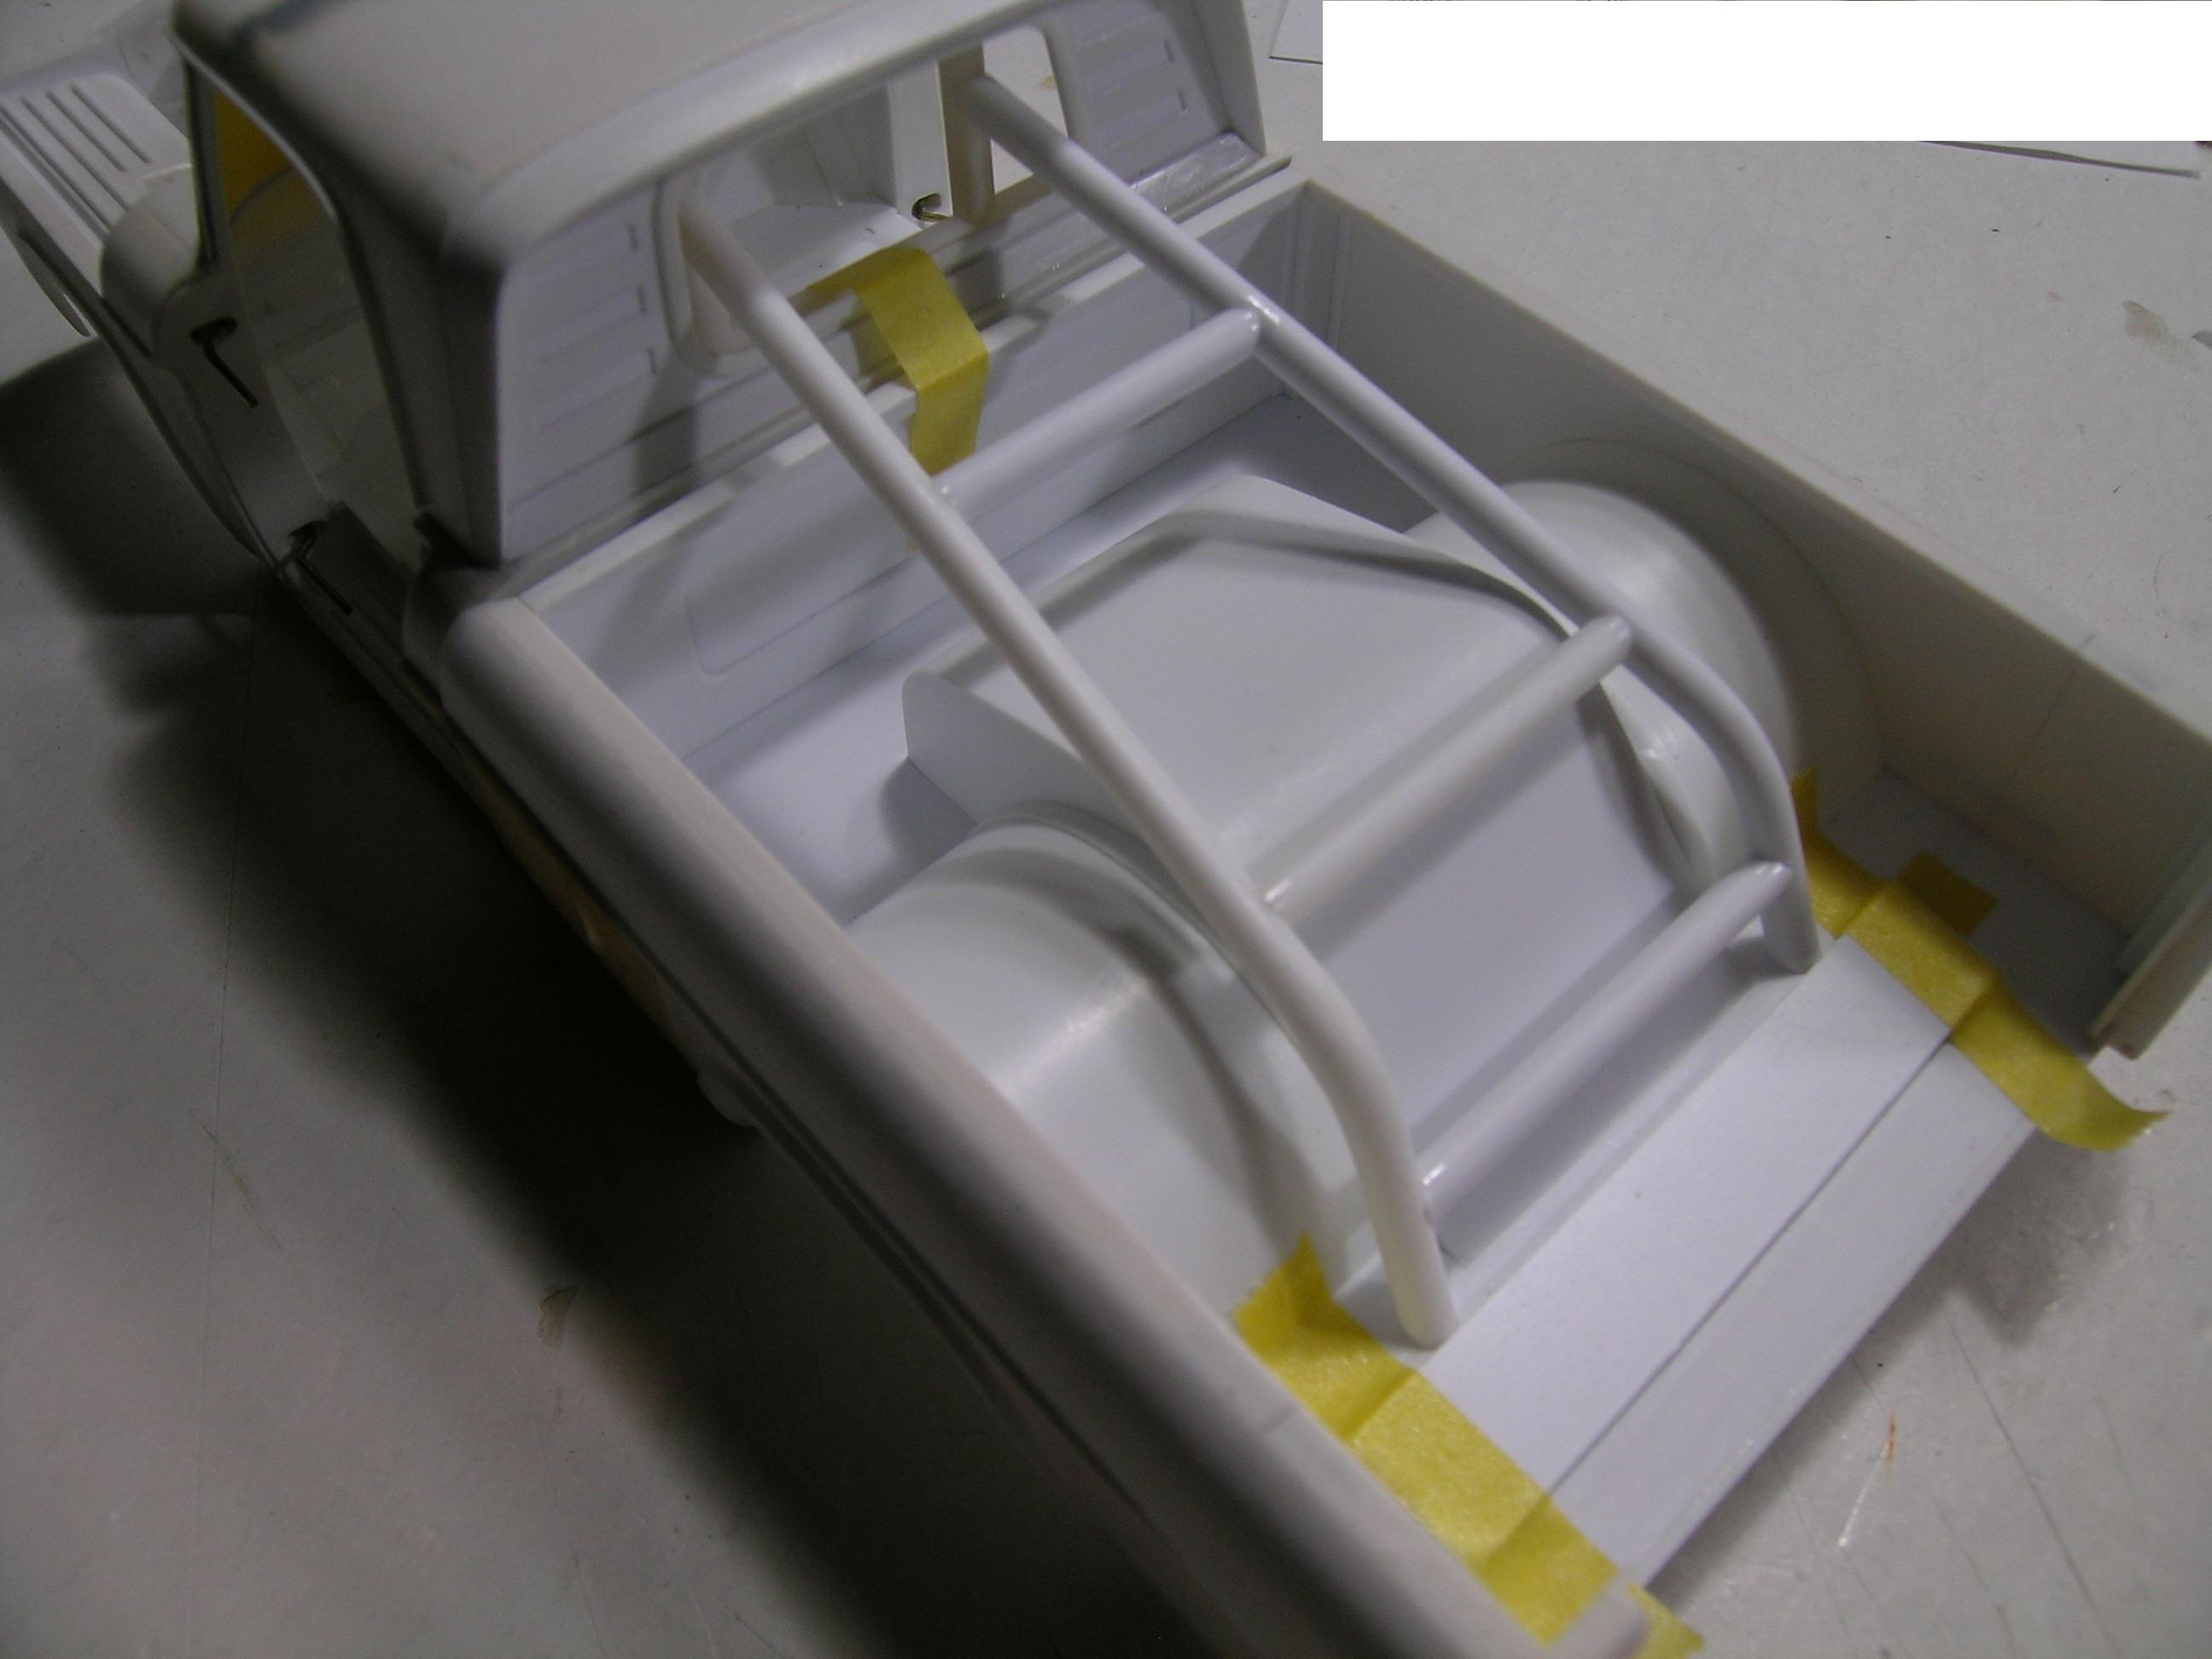
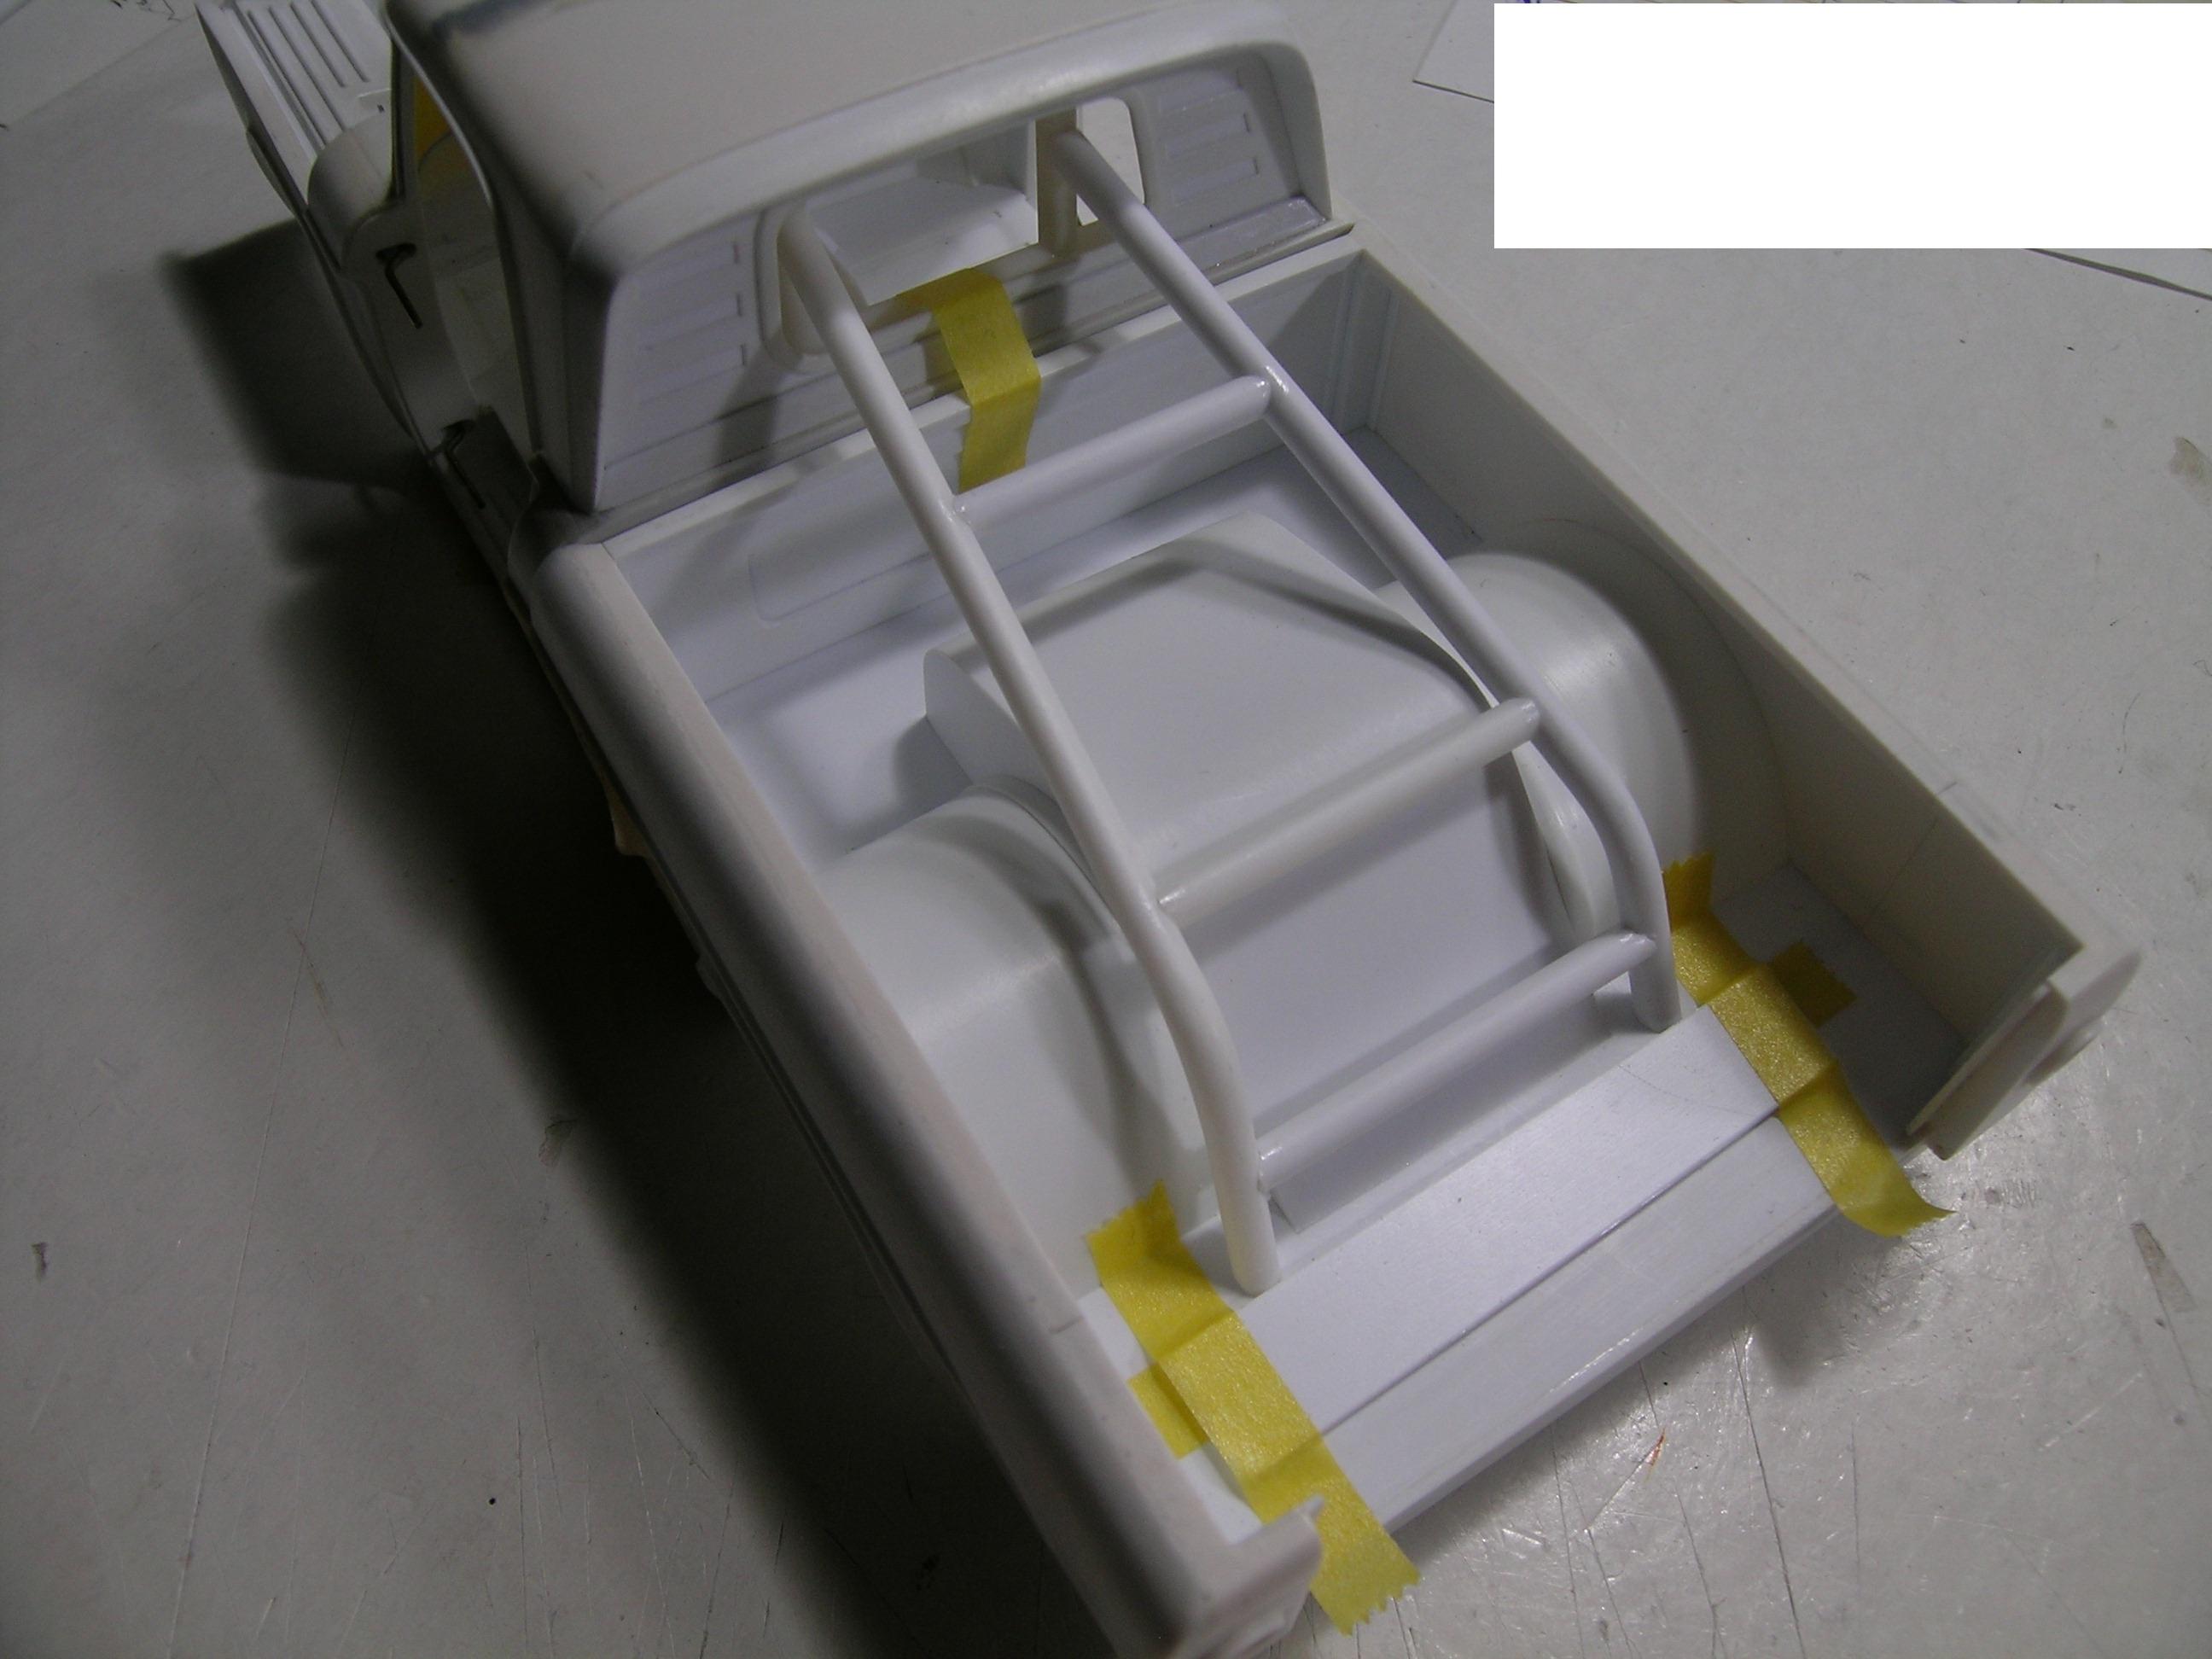
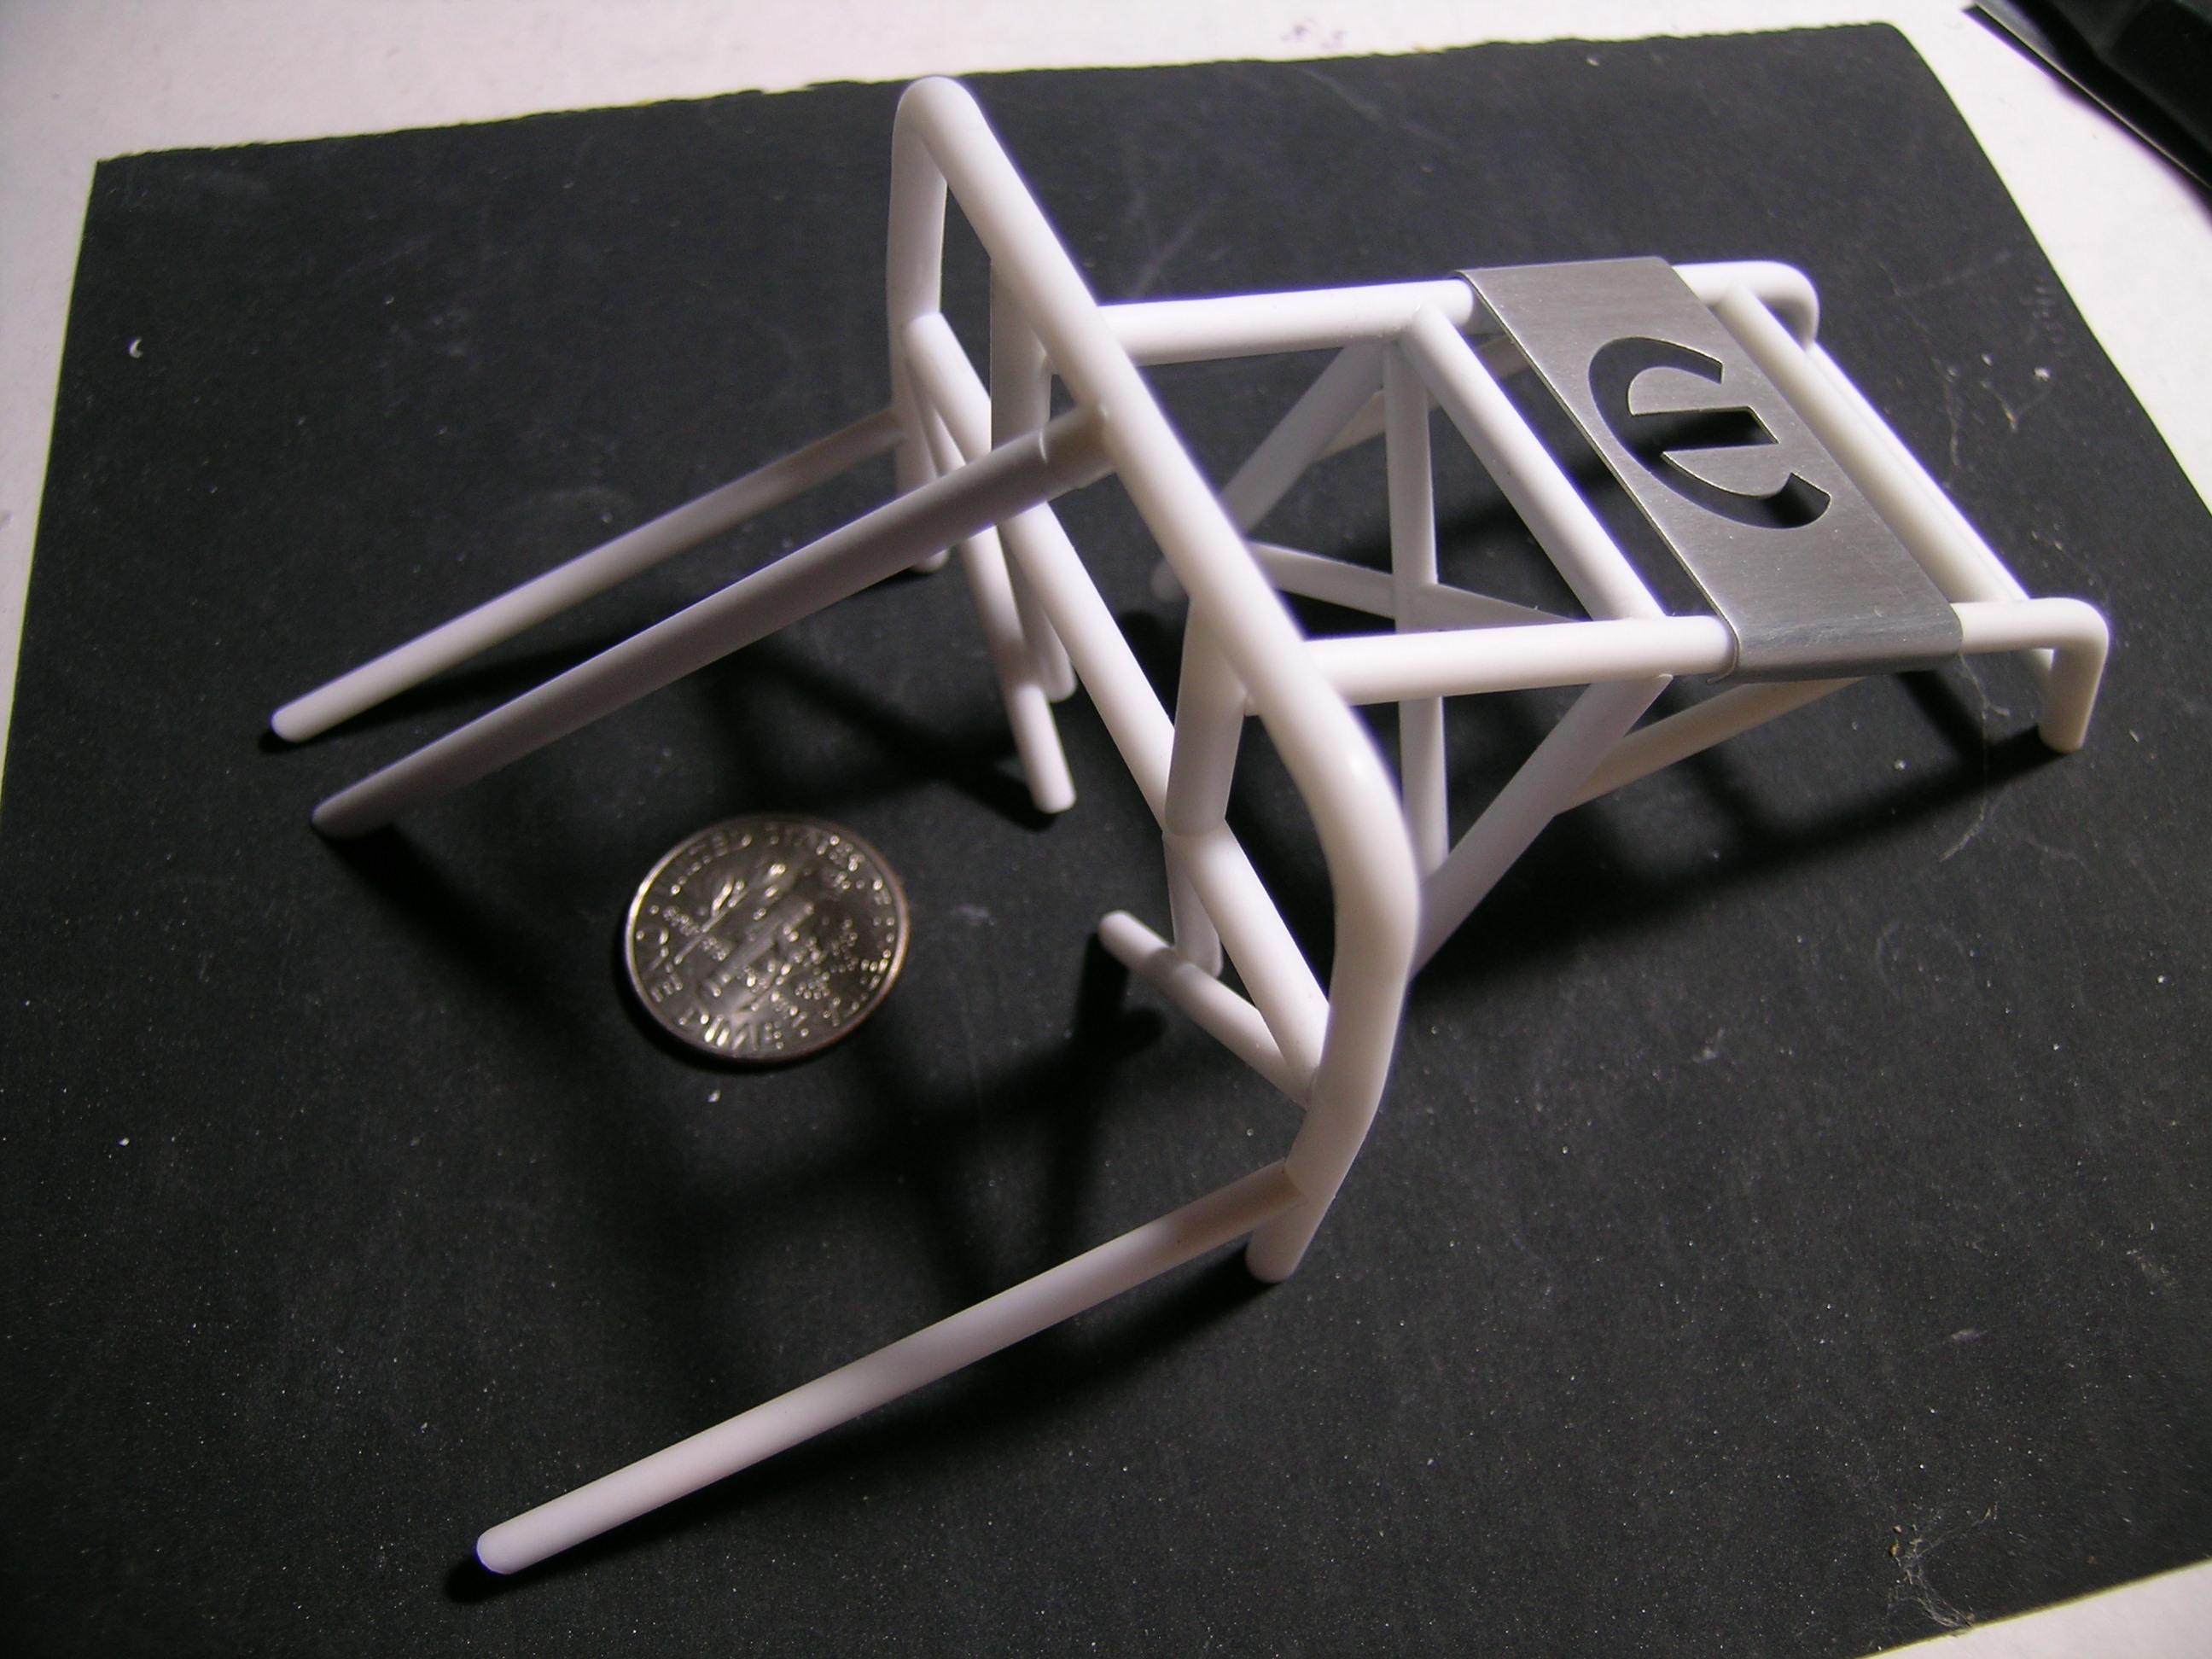
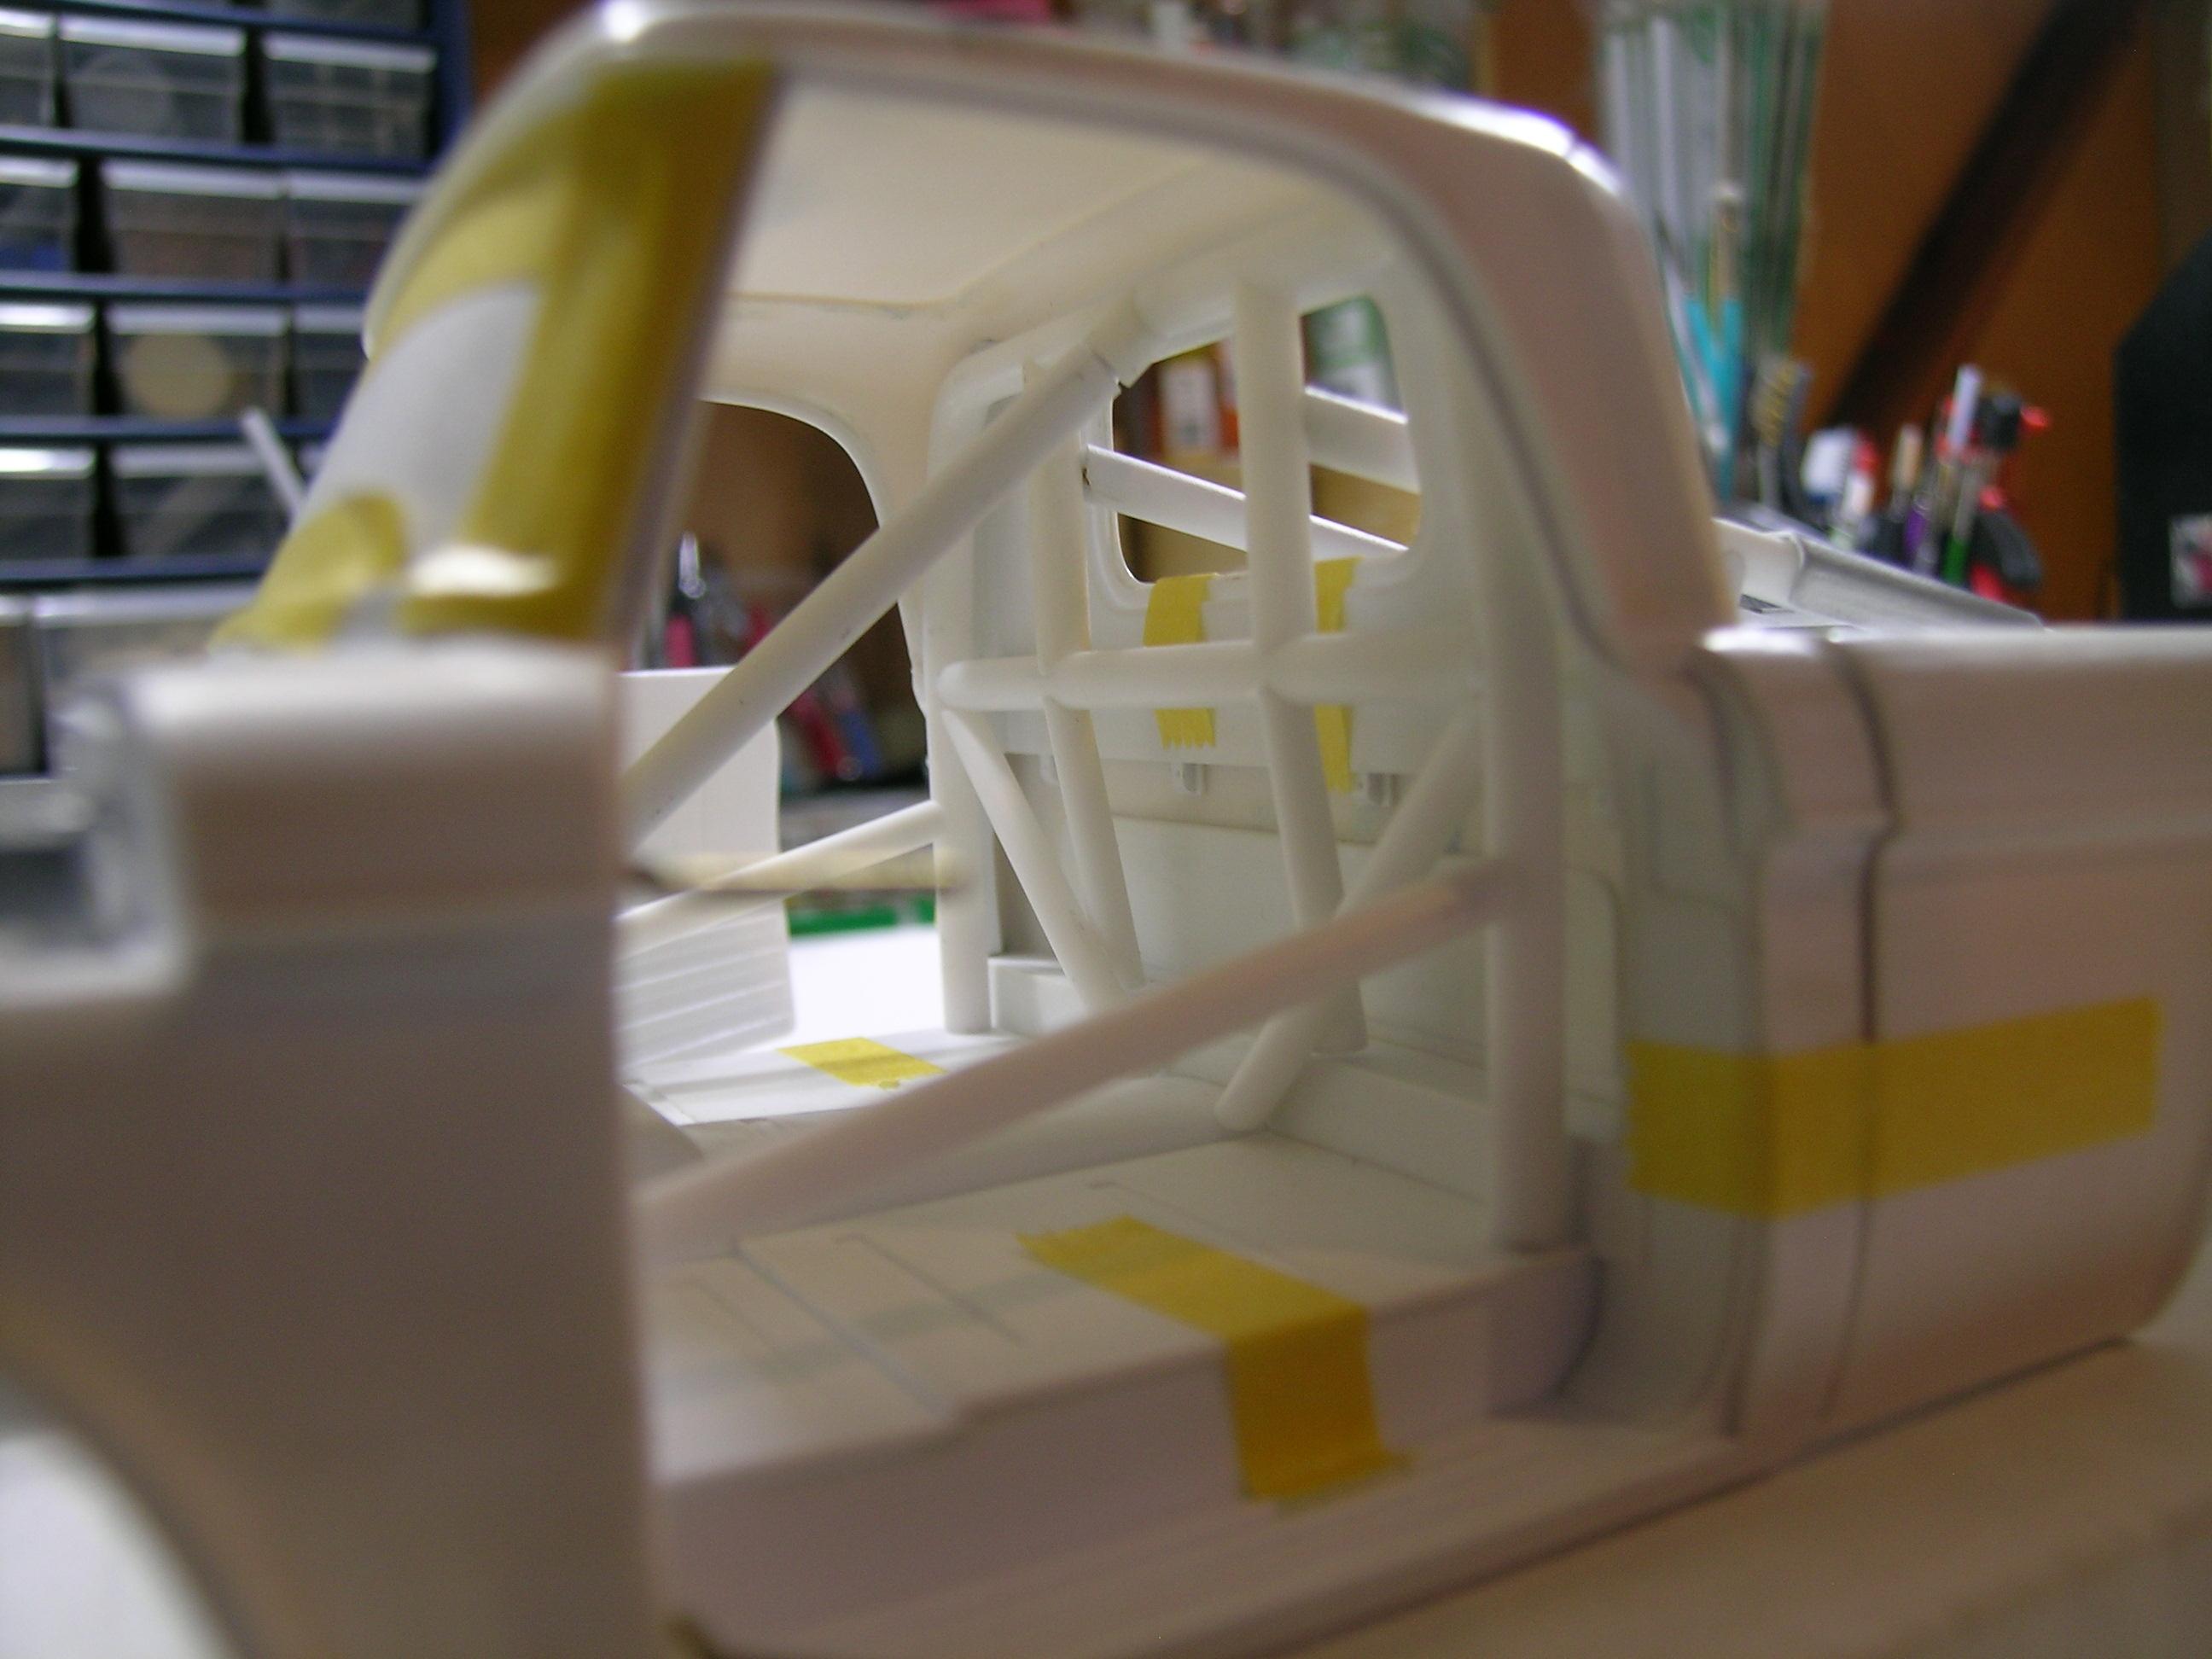
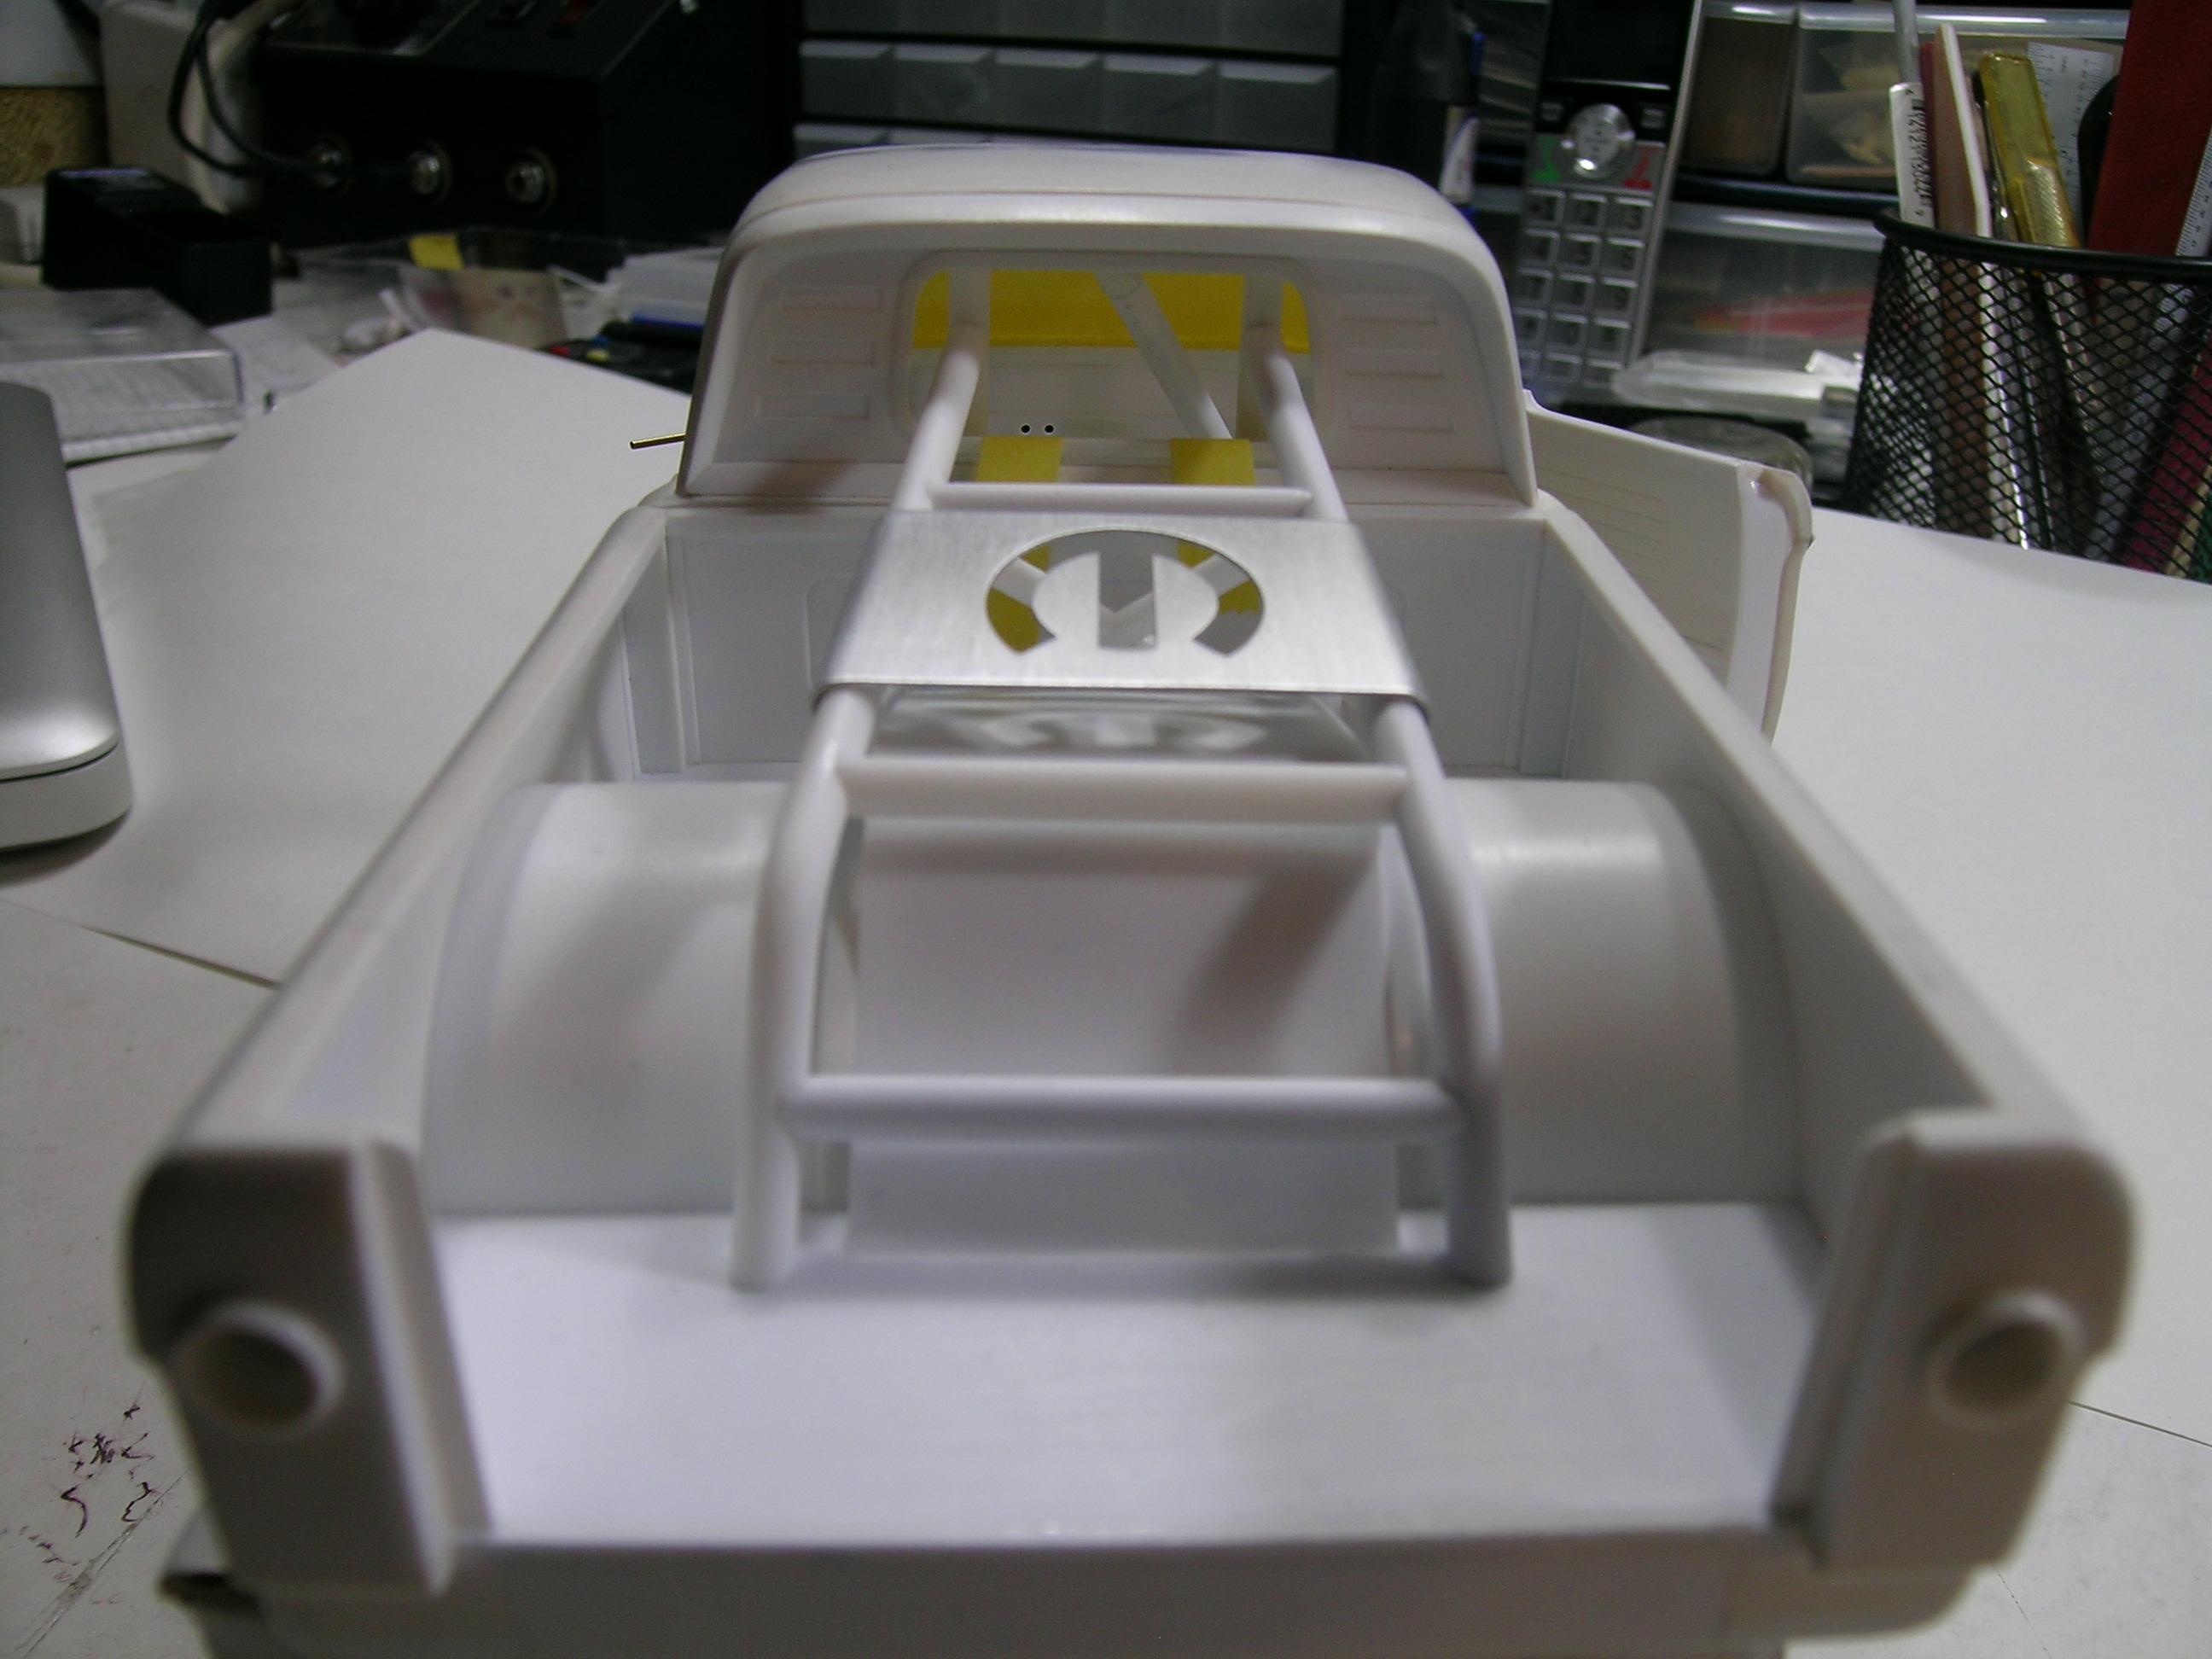
Hello Everyone! Today's update is for the roll cage. I was dealing with the idea to make the bed tilt but after some reflexion I do prefer to keep it bolted to the frame and add a roll cage to stick with the drag racing soul that I want to implant to this build. Some of the details between the back of the cab and the bed will be hidden but it's like that on the real truck anyway and you all know that I've made them. The section inside the cab that touch the transmission tunnel could need some adjustments. I'm not 100% sure yet but I think that I will machinate a Lenco transmission so the tunnel will probably need a major modification. After the roll cage for the cab was made I decided it would be cool to add a section in the bed like the NASCAR trucks. The main tubes are made with 0.125’’ styrene rods for a sturdy look. Different angle, I taped a strip of styrene to keep the main tubes straight during the construction. I decided to add a reinforcement plate so I made one with 0.010’’ aluminum sheet. I used 0.125’’ solid brass rod as a guide to rounded the edges in order to make them fit the main tubes. I thought it would be cool to add a MOPAR logo so I drawn one and made an opening with a 0.063’’ drill bit and opened up the logo using a half-round jeweler file. I did test fit the plate on the roll cage and looks great! I will drill small holes and put some small aluminum bolts on final installation. Completed roll cage including the section inside the cab. I will probably open 2 holes in the back window in order to connect both sections together. Roll cage in position for test fit. Roll cage seen from inside the cab. View from the back.
-
64 Dodge D100 Pickup Pro Street
AmericanMuscleFan replied to AmericanMuscleFan's topic in WIP: Drag Racing Models
Hello Joe, Always a pleasure to get your support! You are a loyal partner! Cheers, Francis -
64 Dodge D100 Pickup Pro Street
AmericanMuscleFan replied to AmericanMuscleFan's topic in WIP: Drag Racing Models
Thanks for your encouragement, I really appreciate! Cheers, Francis -
64 Dodge D100 Pickup Pro Street
AmericanMuscleFan replied to AmericanMuscleFan's topic in WIP: Drag Racing Models
Hello Martin, Thanks for your support, it's very appreciated. I don't know if I will go again that far in scratch building on another project so I'm ready to push it to the max the details... Wait to see the engine, I think you will love it (my best so far)! Cheers, Francis -
64 Dodge D100 Pickup Pro Street
AmericanMuscleFan replied to AmericanMuscleFan's topic in WIP: Drag Racing Models
Hello TJ, Thanks for your kind words! I not sure about the color but I think that a dark color might be nice? Fell free to make your suggestion, I'm open minded! Cheers, Francis -
64 Dodge D100 Pickup Pro Street
AmericanMuscleFan replied to AmericanMuscleFan's topic in WIP: Drag Racing Models
Hi Claude! Always a pleasure to get your comments and you always find a way to surprize me with your comparaisons, it's the proof of a very cultivated person (your reputation precedes you)! This thing won't be ready for the RAM and I still don't know when it will be finished but I will certainly be ready to go to the show with you if it's possible. Thanks again for your kind comments, Francis -
Don Carlton Mopar Missile FINISHED
AmericanMuscleFan replied to dragmodels44's topic in WIP: Drag Racing Models
Very nice build Scott! This is exactly my kind of build and you done it right. It's always sad to know that someone decides to leave this wonderful hobby and I hope you will have the opportunity to come back to it if your time permits. There was hard time in my career that this hobby have helped me to overcome by reducing the stress and it was like a benediction. Wish you all the best in your other projects. -
64 Dodge D100 Pickup Pro Street
AmericanMuscleFan replied to AmericanMuscleFan's topic in WIP: Drag Racing Models
Henry: Thanks for visiting and your positive comment on my build. Cheers, Francis Daniel: Thanks for your kind and encouraging words. I usually make a lot of scratch modifications on my kits because I'm often unhappy with some parts of a given model but it's my first time ever to attempt building everything from scratch. This will be a long process and I will still have to adjust things during the progress but I'm pretty proud of the build so far. It's very motivating to get your support and I really appreciate it. Stay tuned for more update! Cheers, Francis