AmericanMuscleFan
-
Posts
3,058 -
Joined
-
Last visited
Content Type
Profiles
Forums
Events
Gallery
Everything posted by AmericanMuscleFan
-
 Thanks for sharing this Bill, I really like these guys, they are masters and very knowledgeable in the field (Mopar). All this information is very useful to me because structural details are hard to find and that is what I prefer to build in my models.
 -
It would be hard not to say that you have no imagination John, but there is one thing for sure, your talent to materialize your vision is in a class by itself. Probably the best way not to go unnoticed during a Sunday afternoon stroll, I love it! ?
-
Everything is so beautiful and well done Charlie, I love every update and you keep us (me... ?) fully motivated! I too prefer black wall tires but it is your build so your choice will be the right one.
-
’72 Dodge Demon Drag Racer 1/25 scale
AmericanMuscleFan replied to AmericanMuscleFan's topic in WIP: Drag Racing Models
Hi Ron, thanks for your comments and kind words my friend ! The trunk lid appears to be rather thin in the photo but the Duster's plastic is less opaque than Evergreen styrene. I'm not worried about warping, a good coat of primer should provide good protection and even though it looks thin in some places, the plastic is still about 0.020 inches thick at its thinnest. Francis -
You never cease to amaze me Charlie, everything you make is impressive and of great quality, another masterpiece in the making. My current project is not from the same era but I will be back to see your prowess and your custom tools inspire me my friend. I like what I see! ?
-
’72 Dodge Demon Drag Racer 1/25 scale
AmericanMuscleFan replied to AmericanMuscleFan's topic in WIP: Drag Racing Models
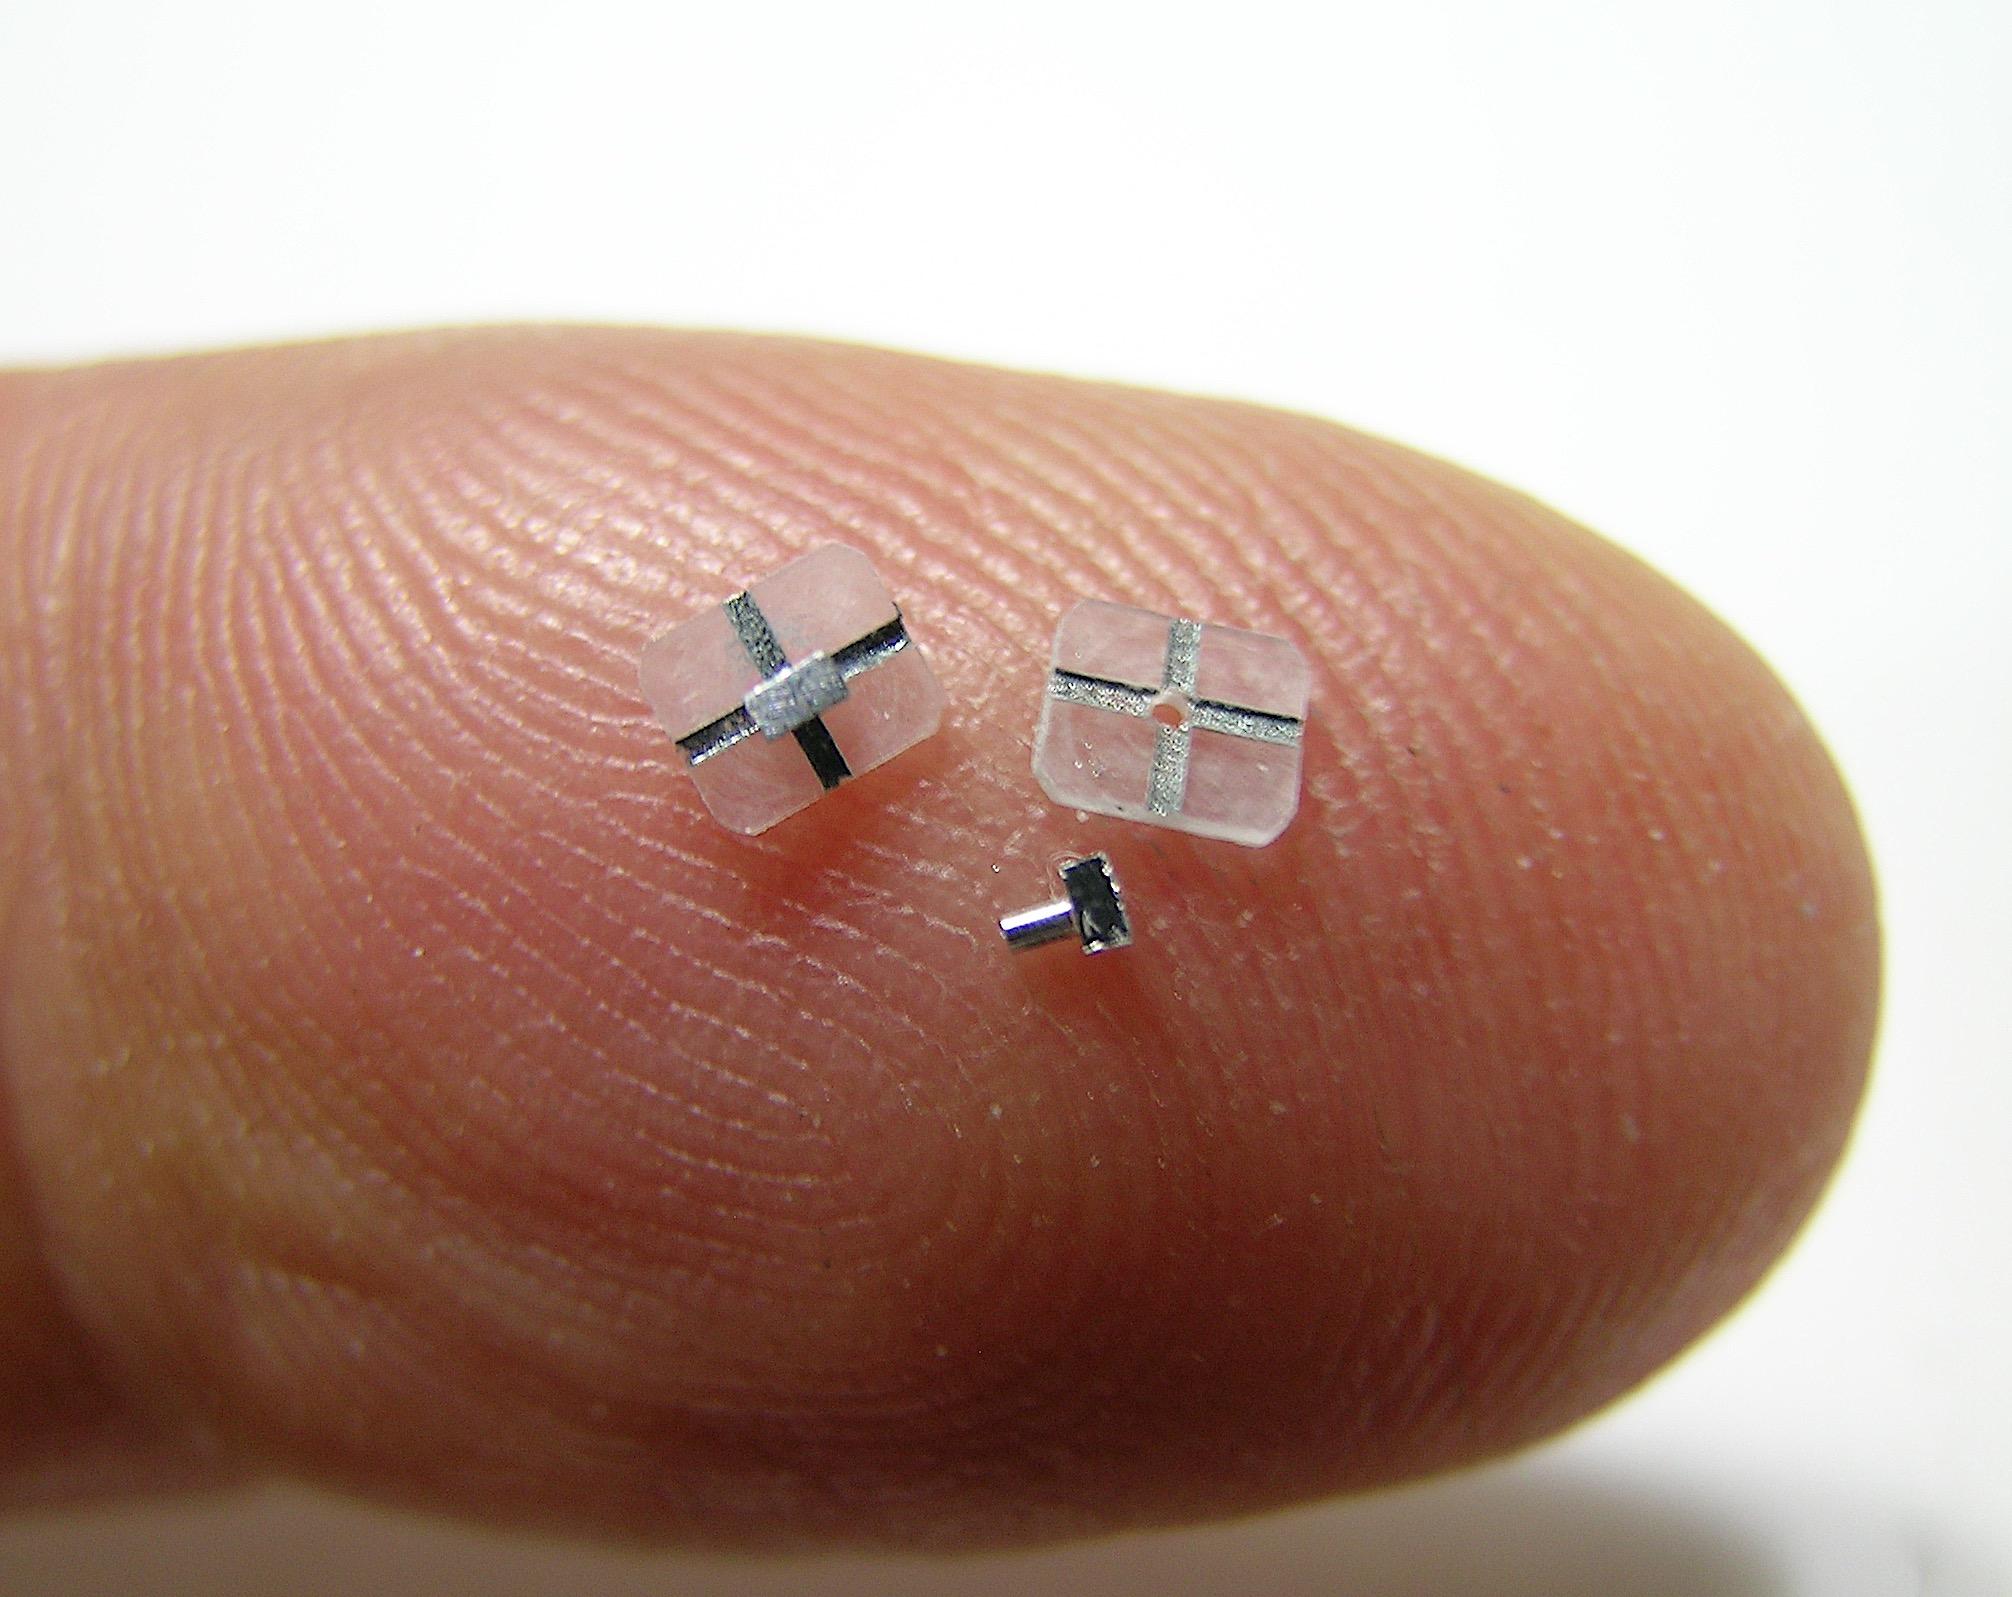
Hello everyone, Now that much of the rear body detailing has been done or is well underway, it's time to move on to making the front grille. I've been thinking about building this car for a while, but resin grille offers for the 72 are rare and their details unsatisfactory to my taste. I have a good plan and some ideas to build it, my first intention was to modify the grille of the 71 to convert it into that of the 72 but after much reflection, I decided to build it from scratch because they are too different. The grille of the 71 will only serve as a guide for the position and size of the headlights and the proportion of the turn signals. Speaking of turn signals, this is the first part I tackled and here is what I made, I hope you'll like it but I have to say I'm pretty happy with the result. It will be a lot of work but I hope to have something more substantial to show you in the next few days. One thing is for sure, it will be a bit more difficult to make than the simplistic grille of my D100 pickup but as much distinctive so please be patient as I have a lot of expectations, towards myself and I will proceed with a lot of precautions. Comments are welcome. See you soon, Francis A good picture I found on the internet. I started with a round styrene rod. With a little more refinement... I drilled a small hole for two reasons, stay tuned... After a little sanding and filing. I machined the lenses from clear acrylic like for the back-up lights. I wanted to do the cross lines with aluminum but it's very, very small so I decided to paint them with a Molotow pen. The central elements are made of aluminum. Both sides are made. A little test, I think it should do the trick. I will probably have more adjustments to make when they are inserted into the grille.
-
’72 Dodge Demon Drag Racer 1/25 scale
AmericanMuscleFan replied to AmericanMuscleFan's topic in WIP: Drag Racing Models
You are absolutely right my friend! What happens most of the time for many enthusiasts is that they accumulate a lot of kit thinking they will have time to put it all together over the years. I am one of them and I realize today that at the speed I am working I will have to start making choices one day and give up what was an unrealistic ambition! Doing less but doing better is my motivation, the pleasure of making or materializing my vision outweighs the desire to have a copy of everything that is or has been offered over the years. ? Is this what we call the beginning of wisdom... ? Francis -
Great details Daniel, your talent is always evident with each update and your explanations very helpful. For me, you really embody the obvious fun and resourcefulness, I know I'm repeating myself but I can't help it! Everyone takes this hobby to their own level or limits but if someone wants to go beyond what a kit offers, your tips are the perfect example of what can be done without breaking the bank! ?
-
’72 Dodge Demon Drag Racer 1/25 scale
AmericanMuscleFan replied to AmericanMuscleFan's topic in WIP: Drag Racing Models
Thanks Ian, the body modifications are less spectacular (if I may say so) but sometimes, all these little things are well appreciated by the more specialized connoisseurs. As far as my face is concerned, all tastes are in nature as we say around here but the years are slowly starting to take effect. I hope that my hands, my eyes and my brain will take their time before giving me the signal to put my tools away! Francis -
’72 Dodge Demon Drag Racer 1/25 scale
AmericanMuscleFan replied to AmericanMuscleFan's topic in WIP: Drag Racing Models
Thanks Marcos, I have to admit that making and modifying are my favorite aspects of this hobby. Francis -
’72 Dodge Demon Drag Racer 1/25 scale
AmericanMuscleFan replied to AmericanMuscleFan's topic in WIP: Drag Racing Models
Thanks Daniel, I can give myself without restraint and without guilt with the modifications (or improvements...), this old body was sleeping in a box and would probably never have been used. I think I can only take it to a better level... ? Francis -
’72 Dodge Demon Drag Racer 1/25 scale
AmericanMuscleFan replied to AmericanMuscleFan's topic in WIP: Drag Racing Models
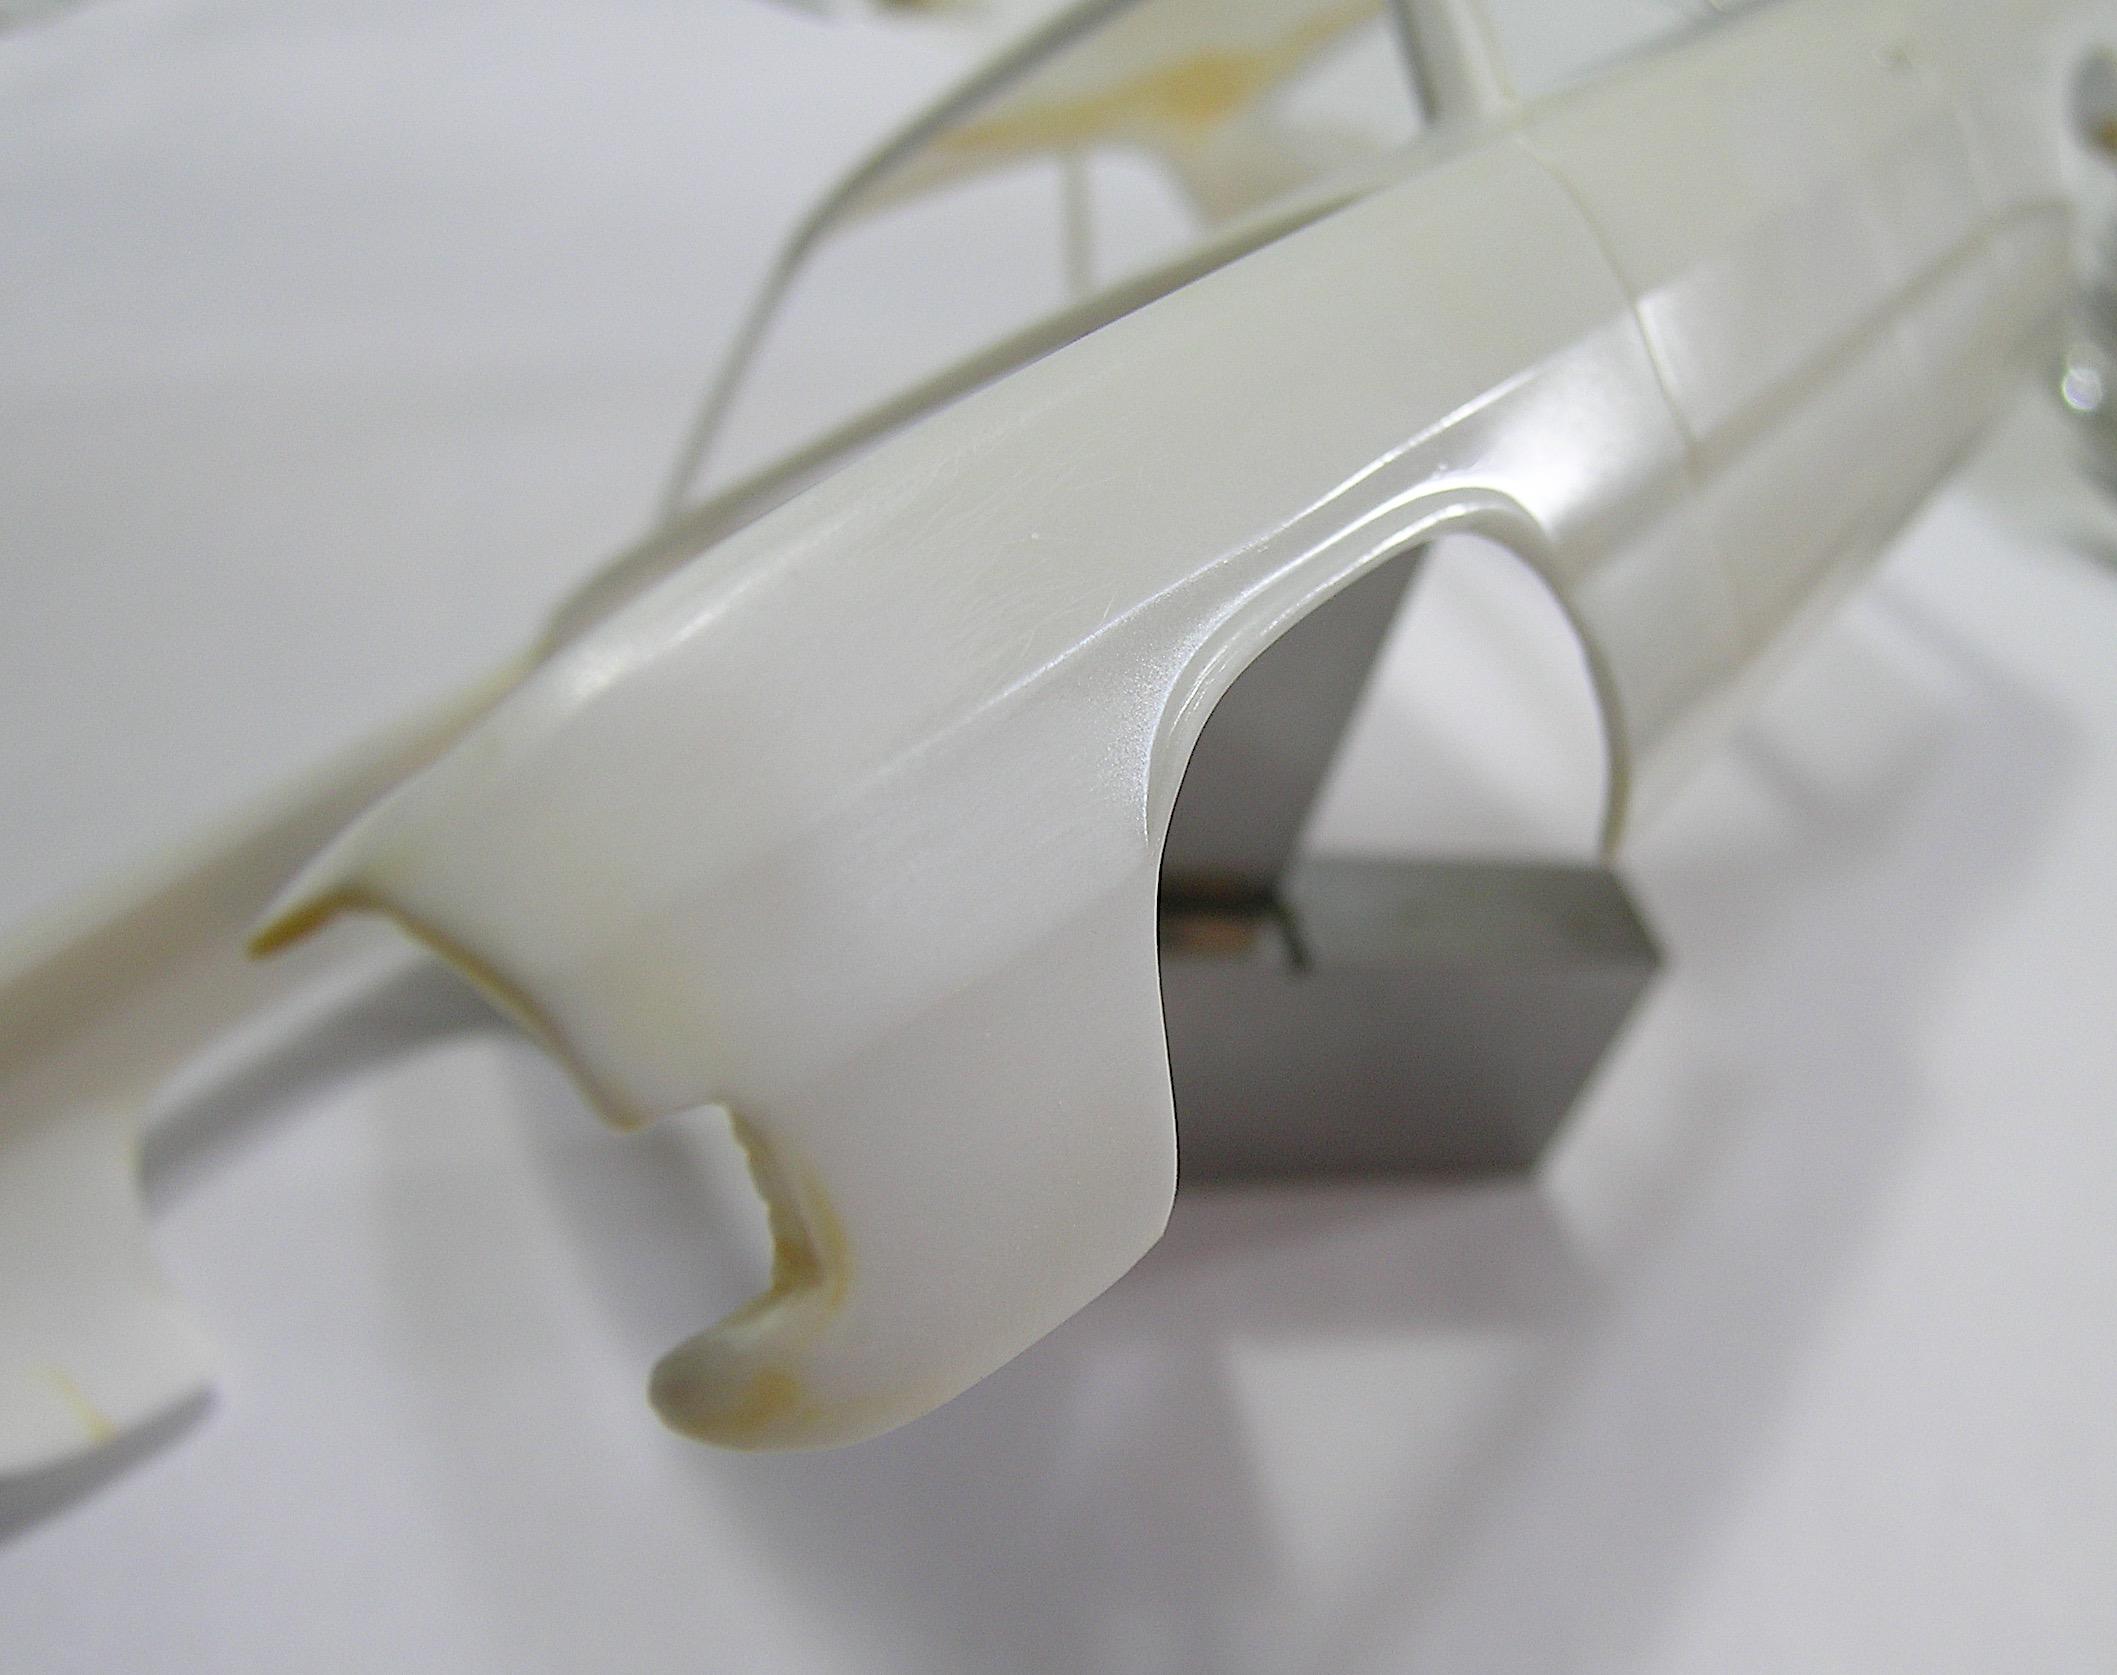
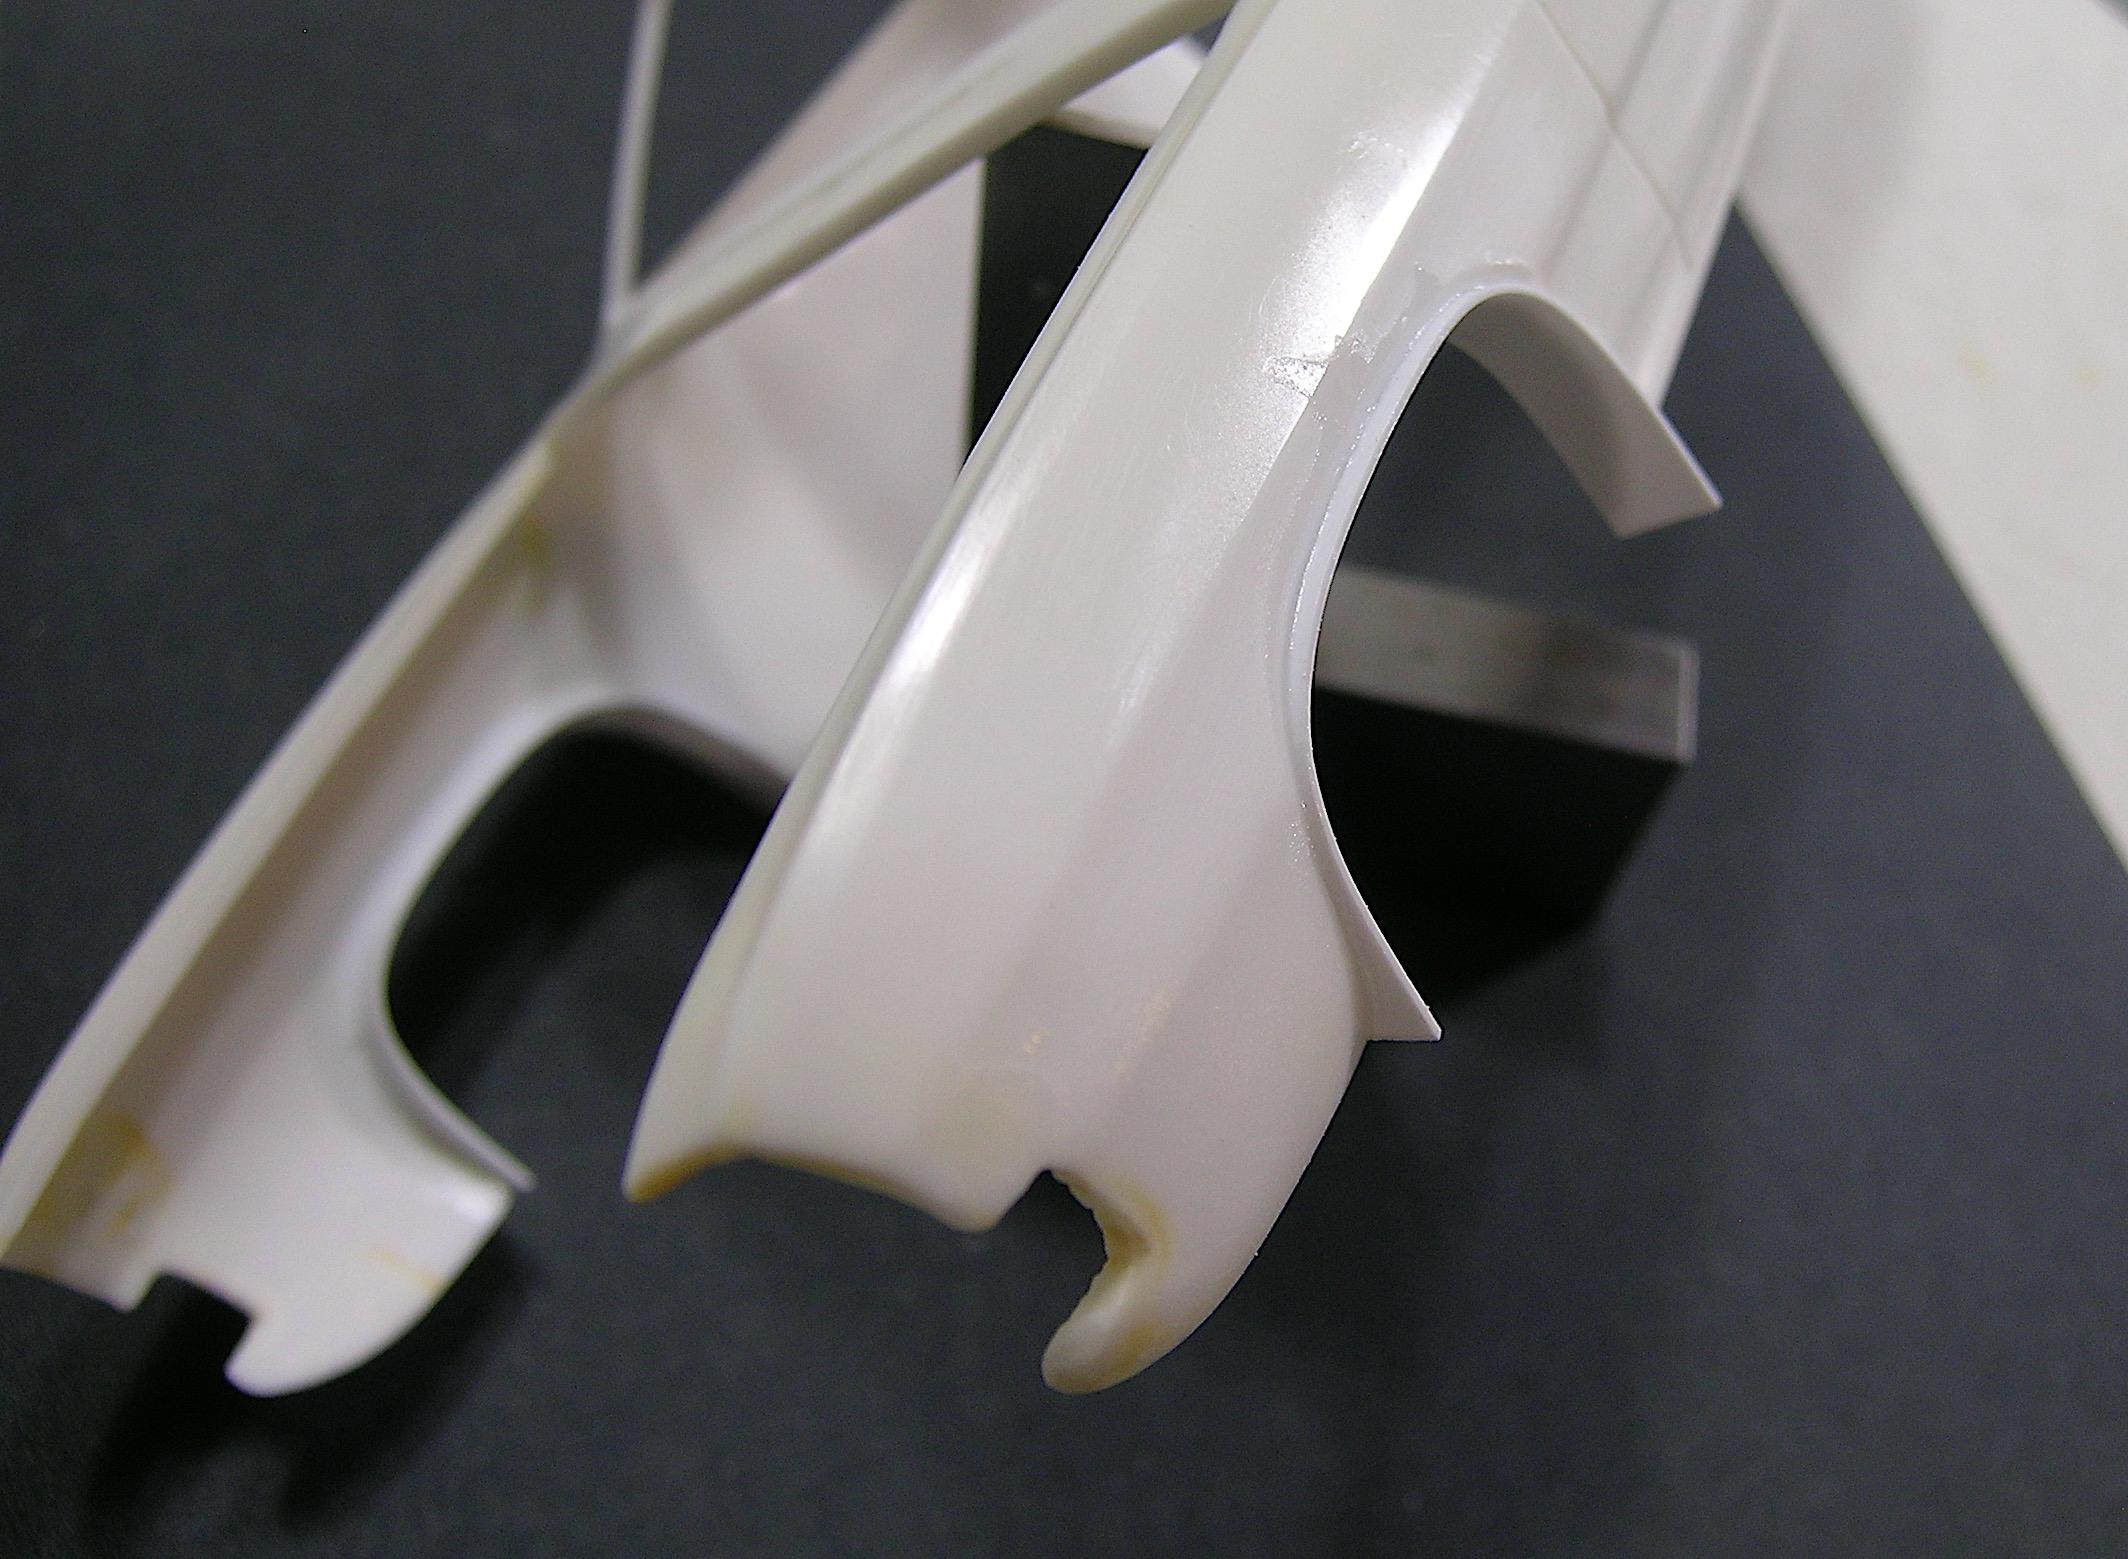
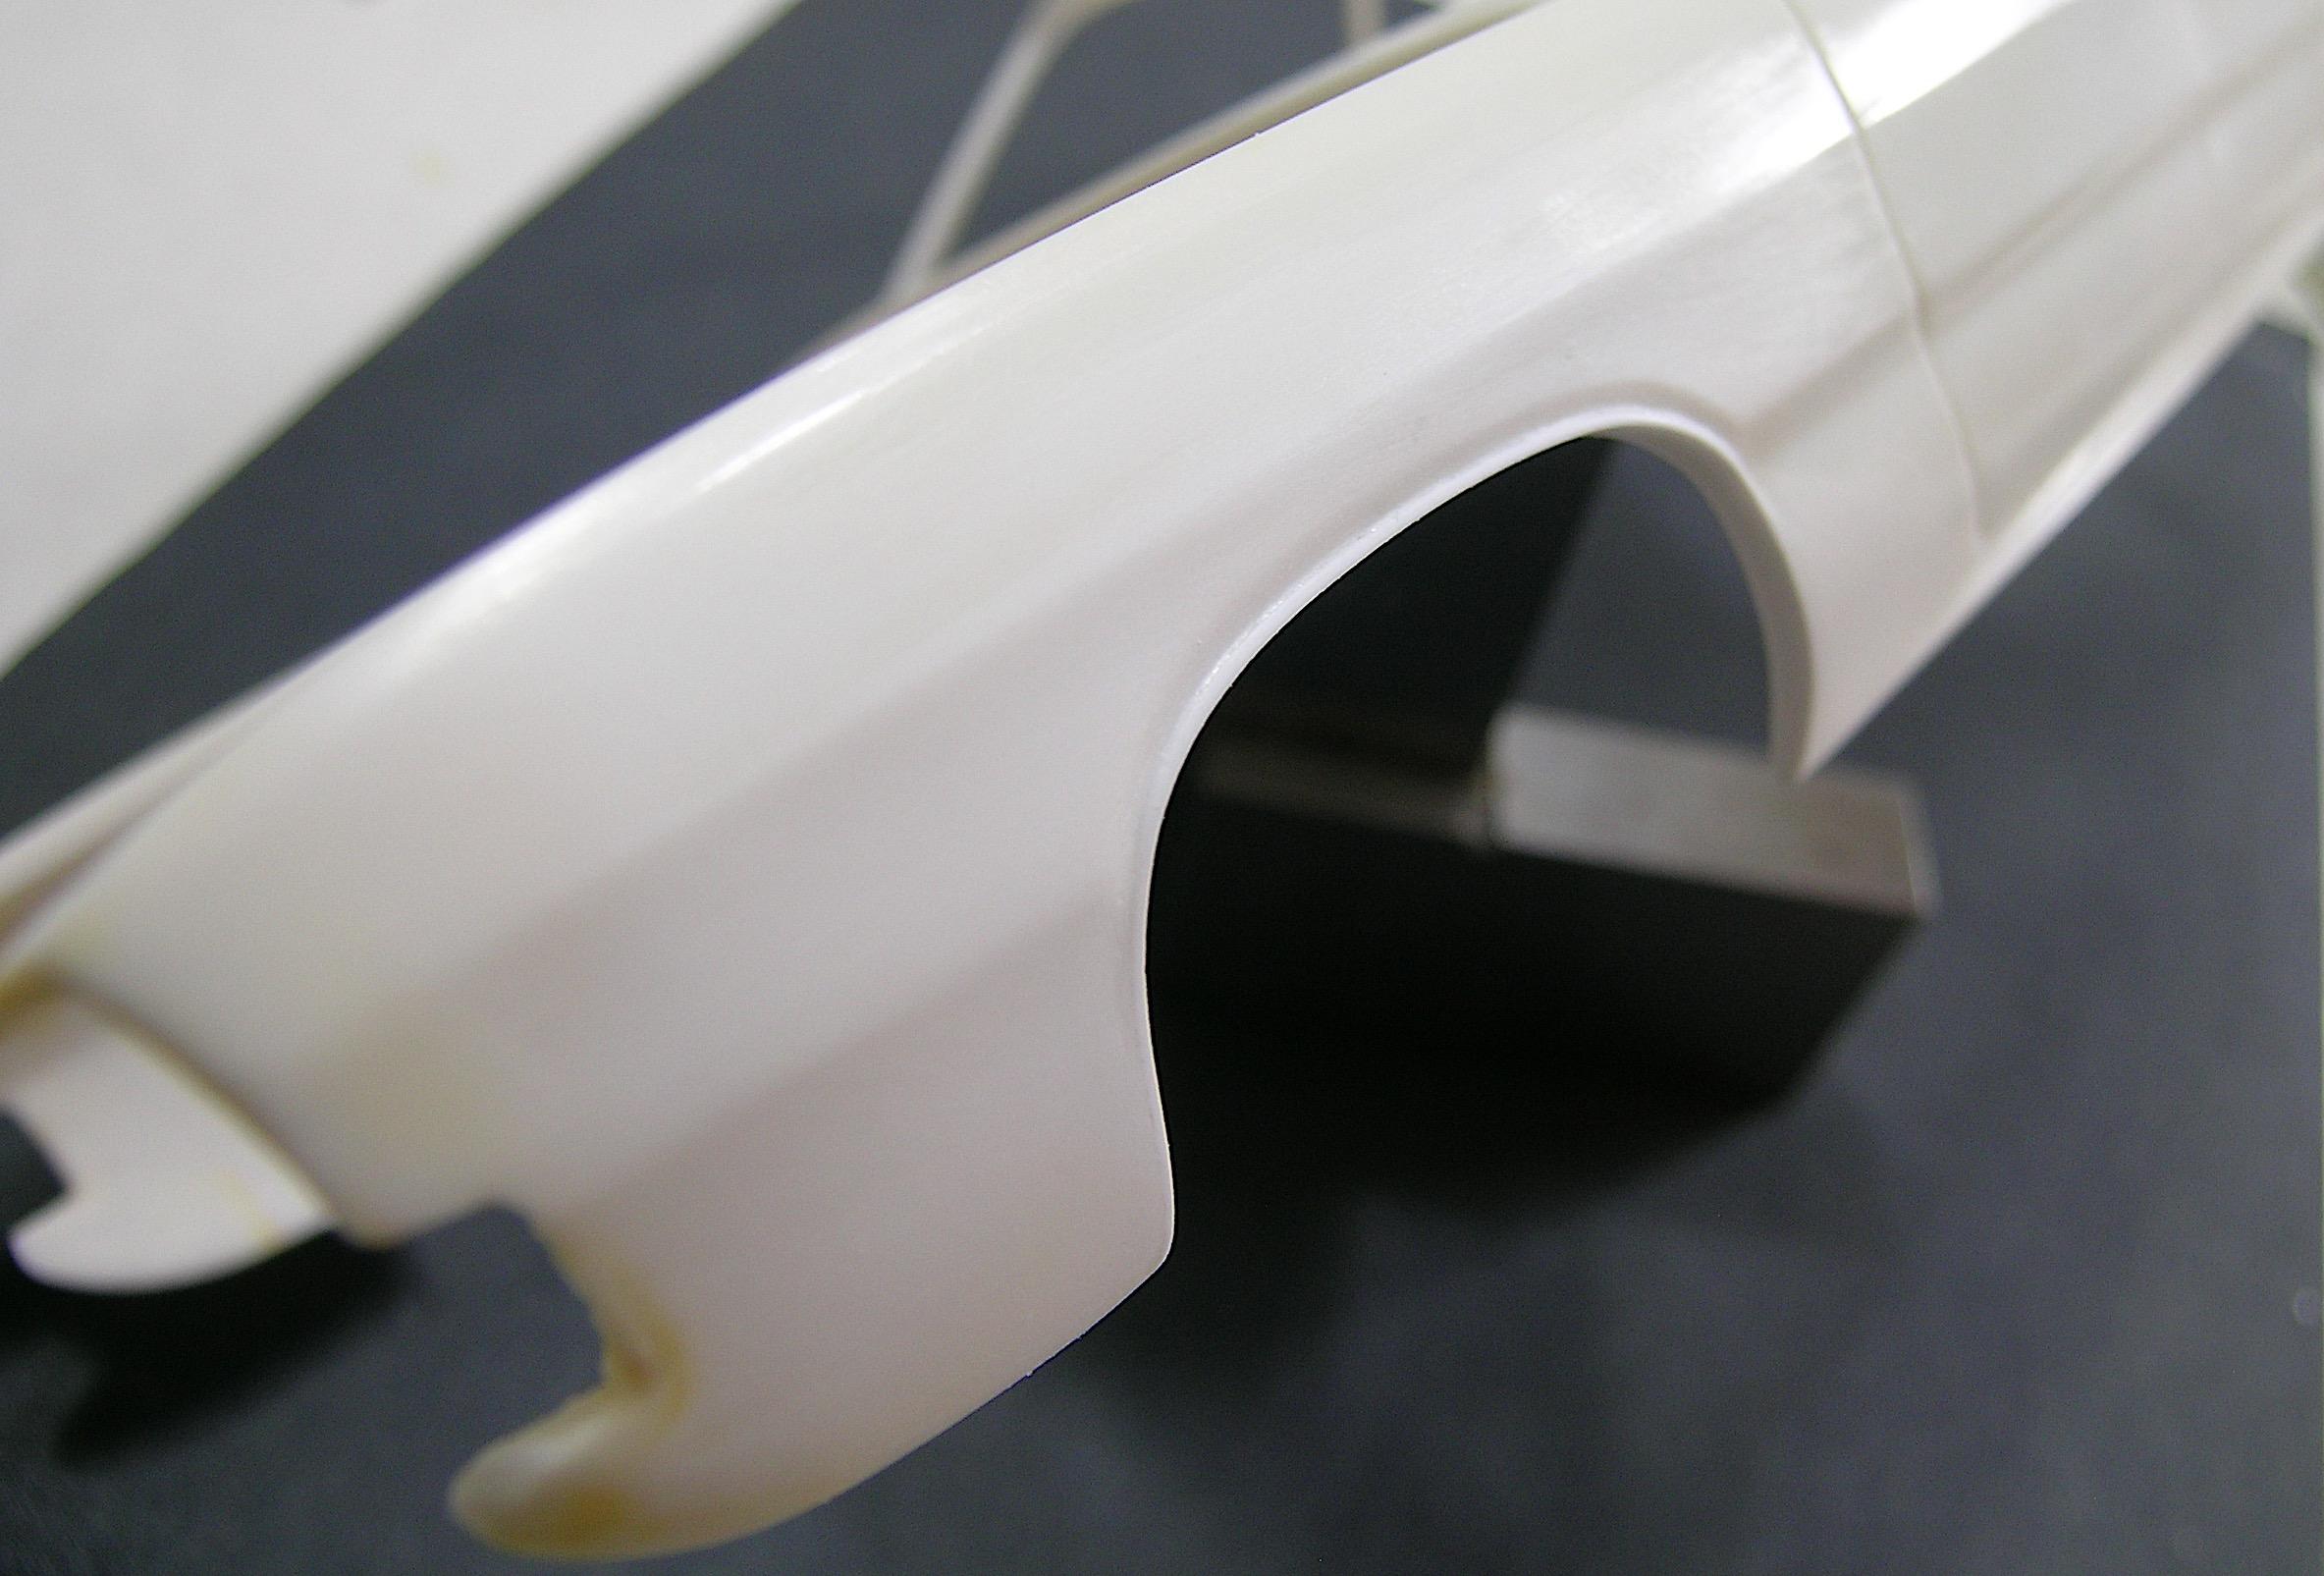
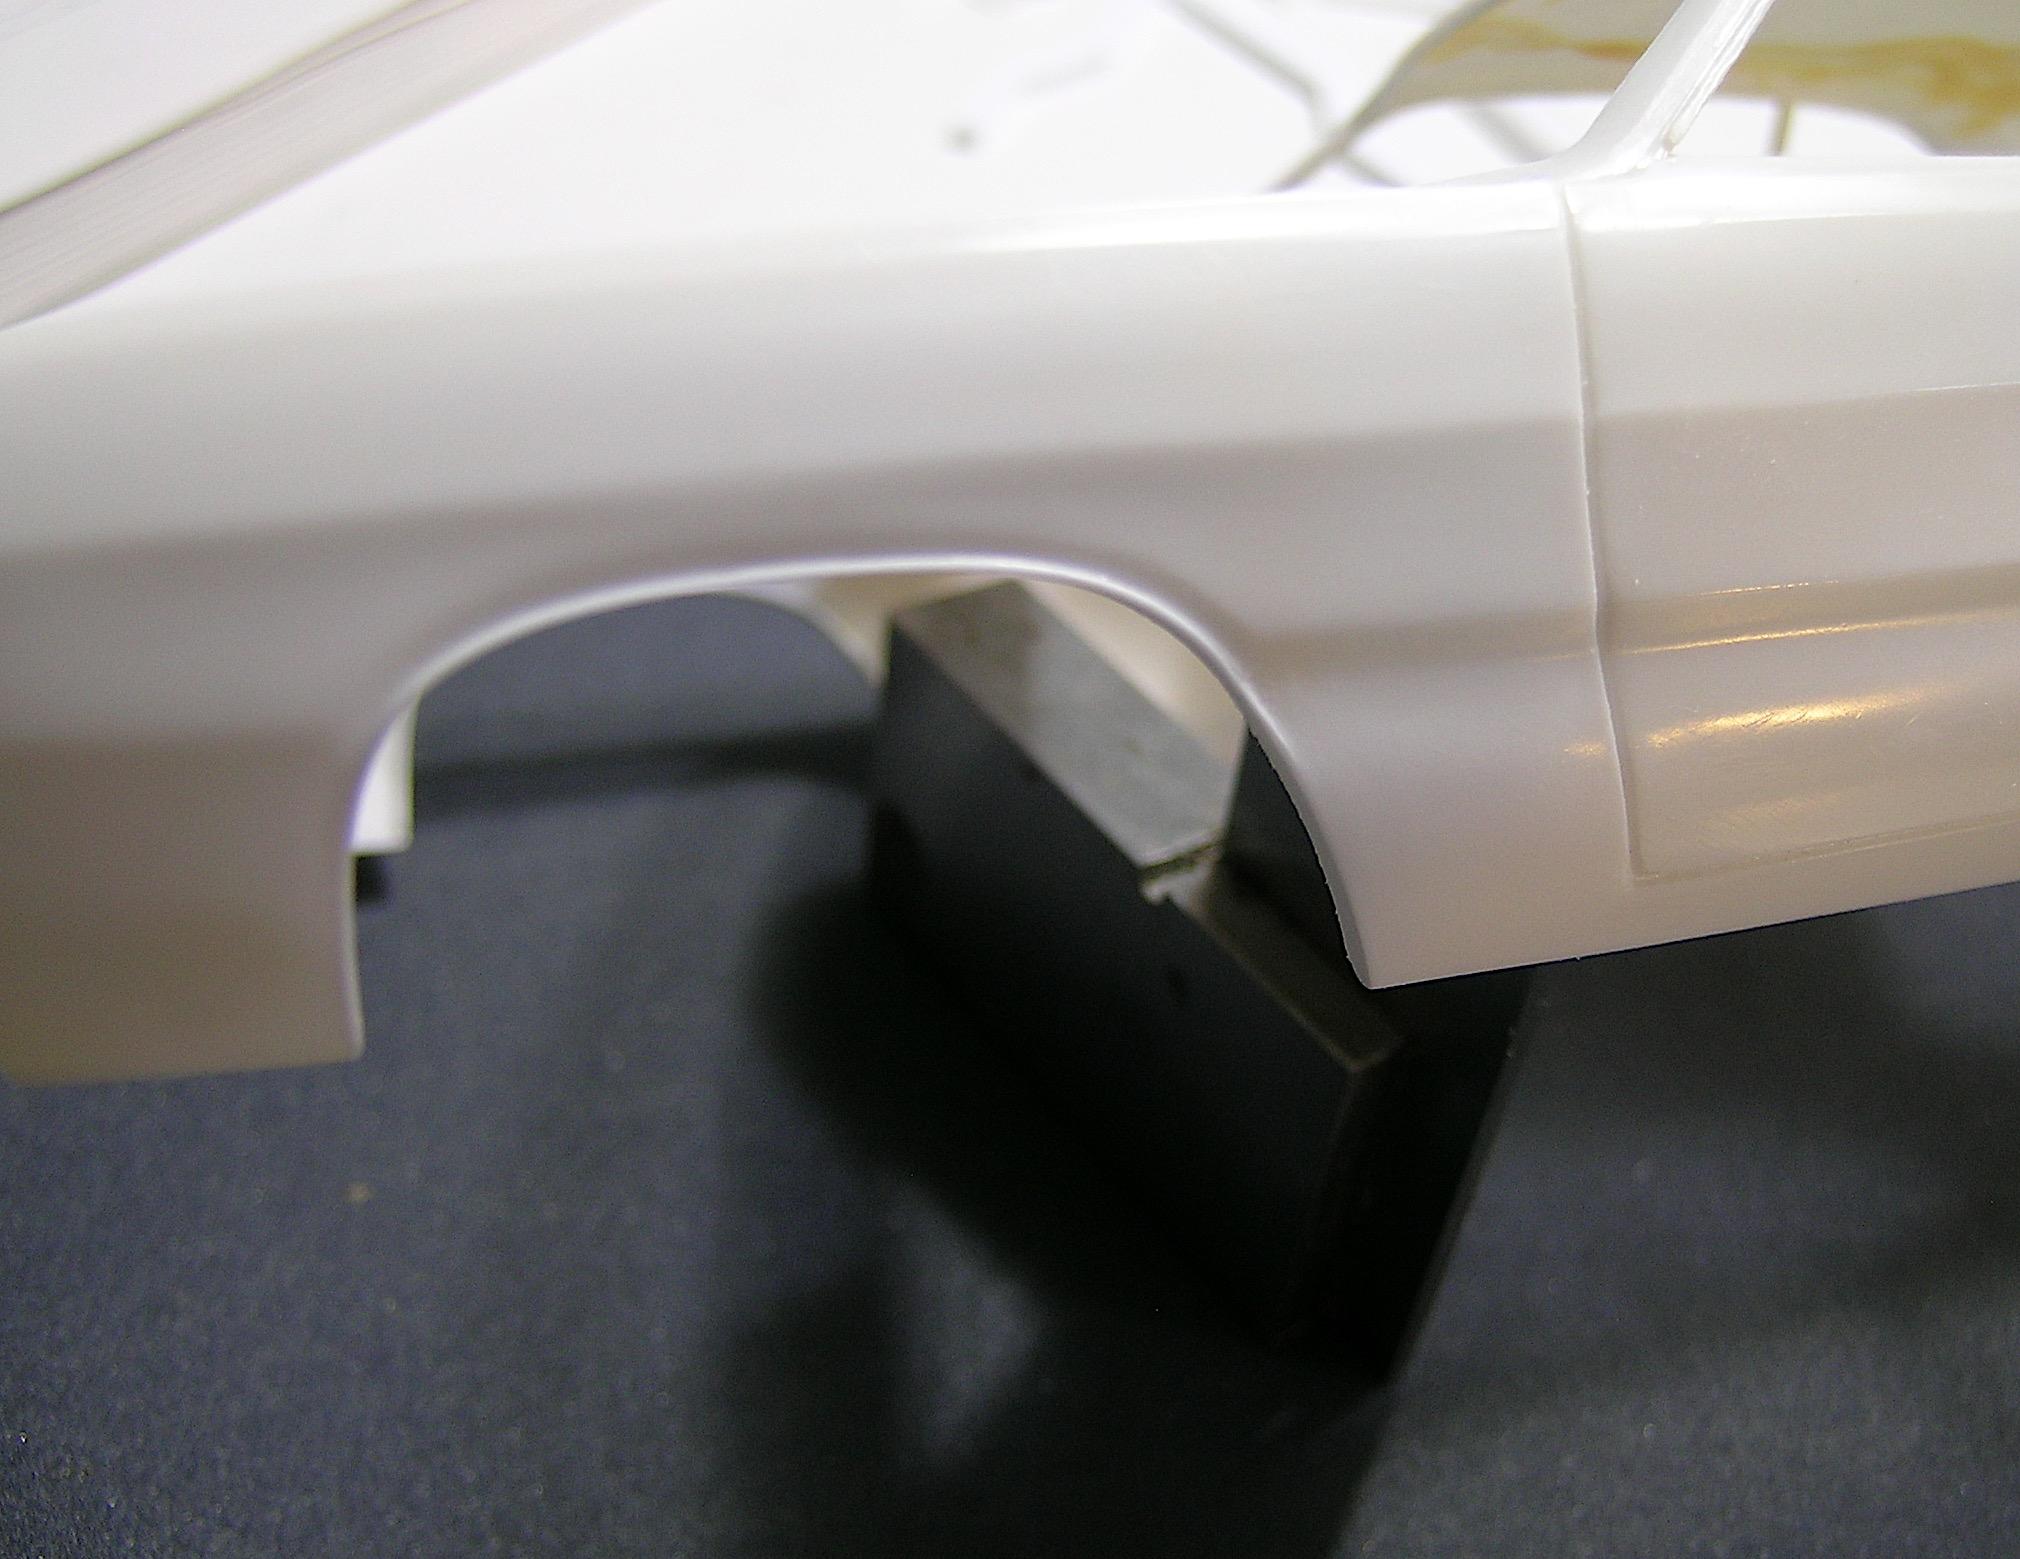
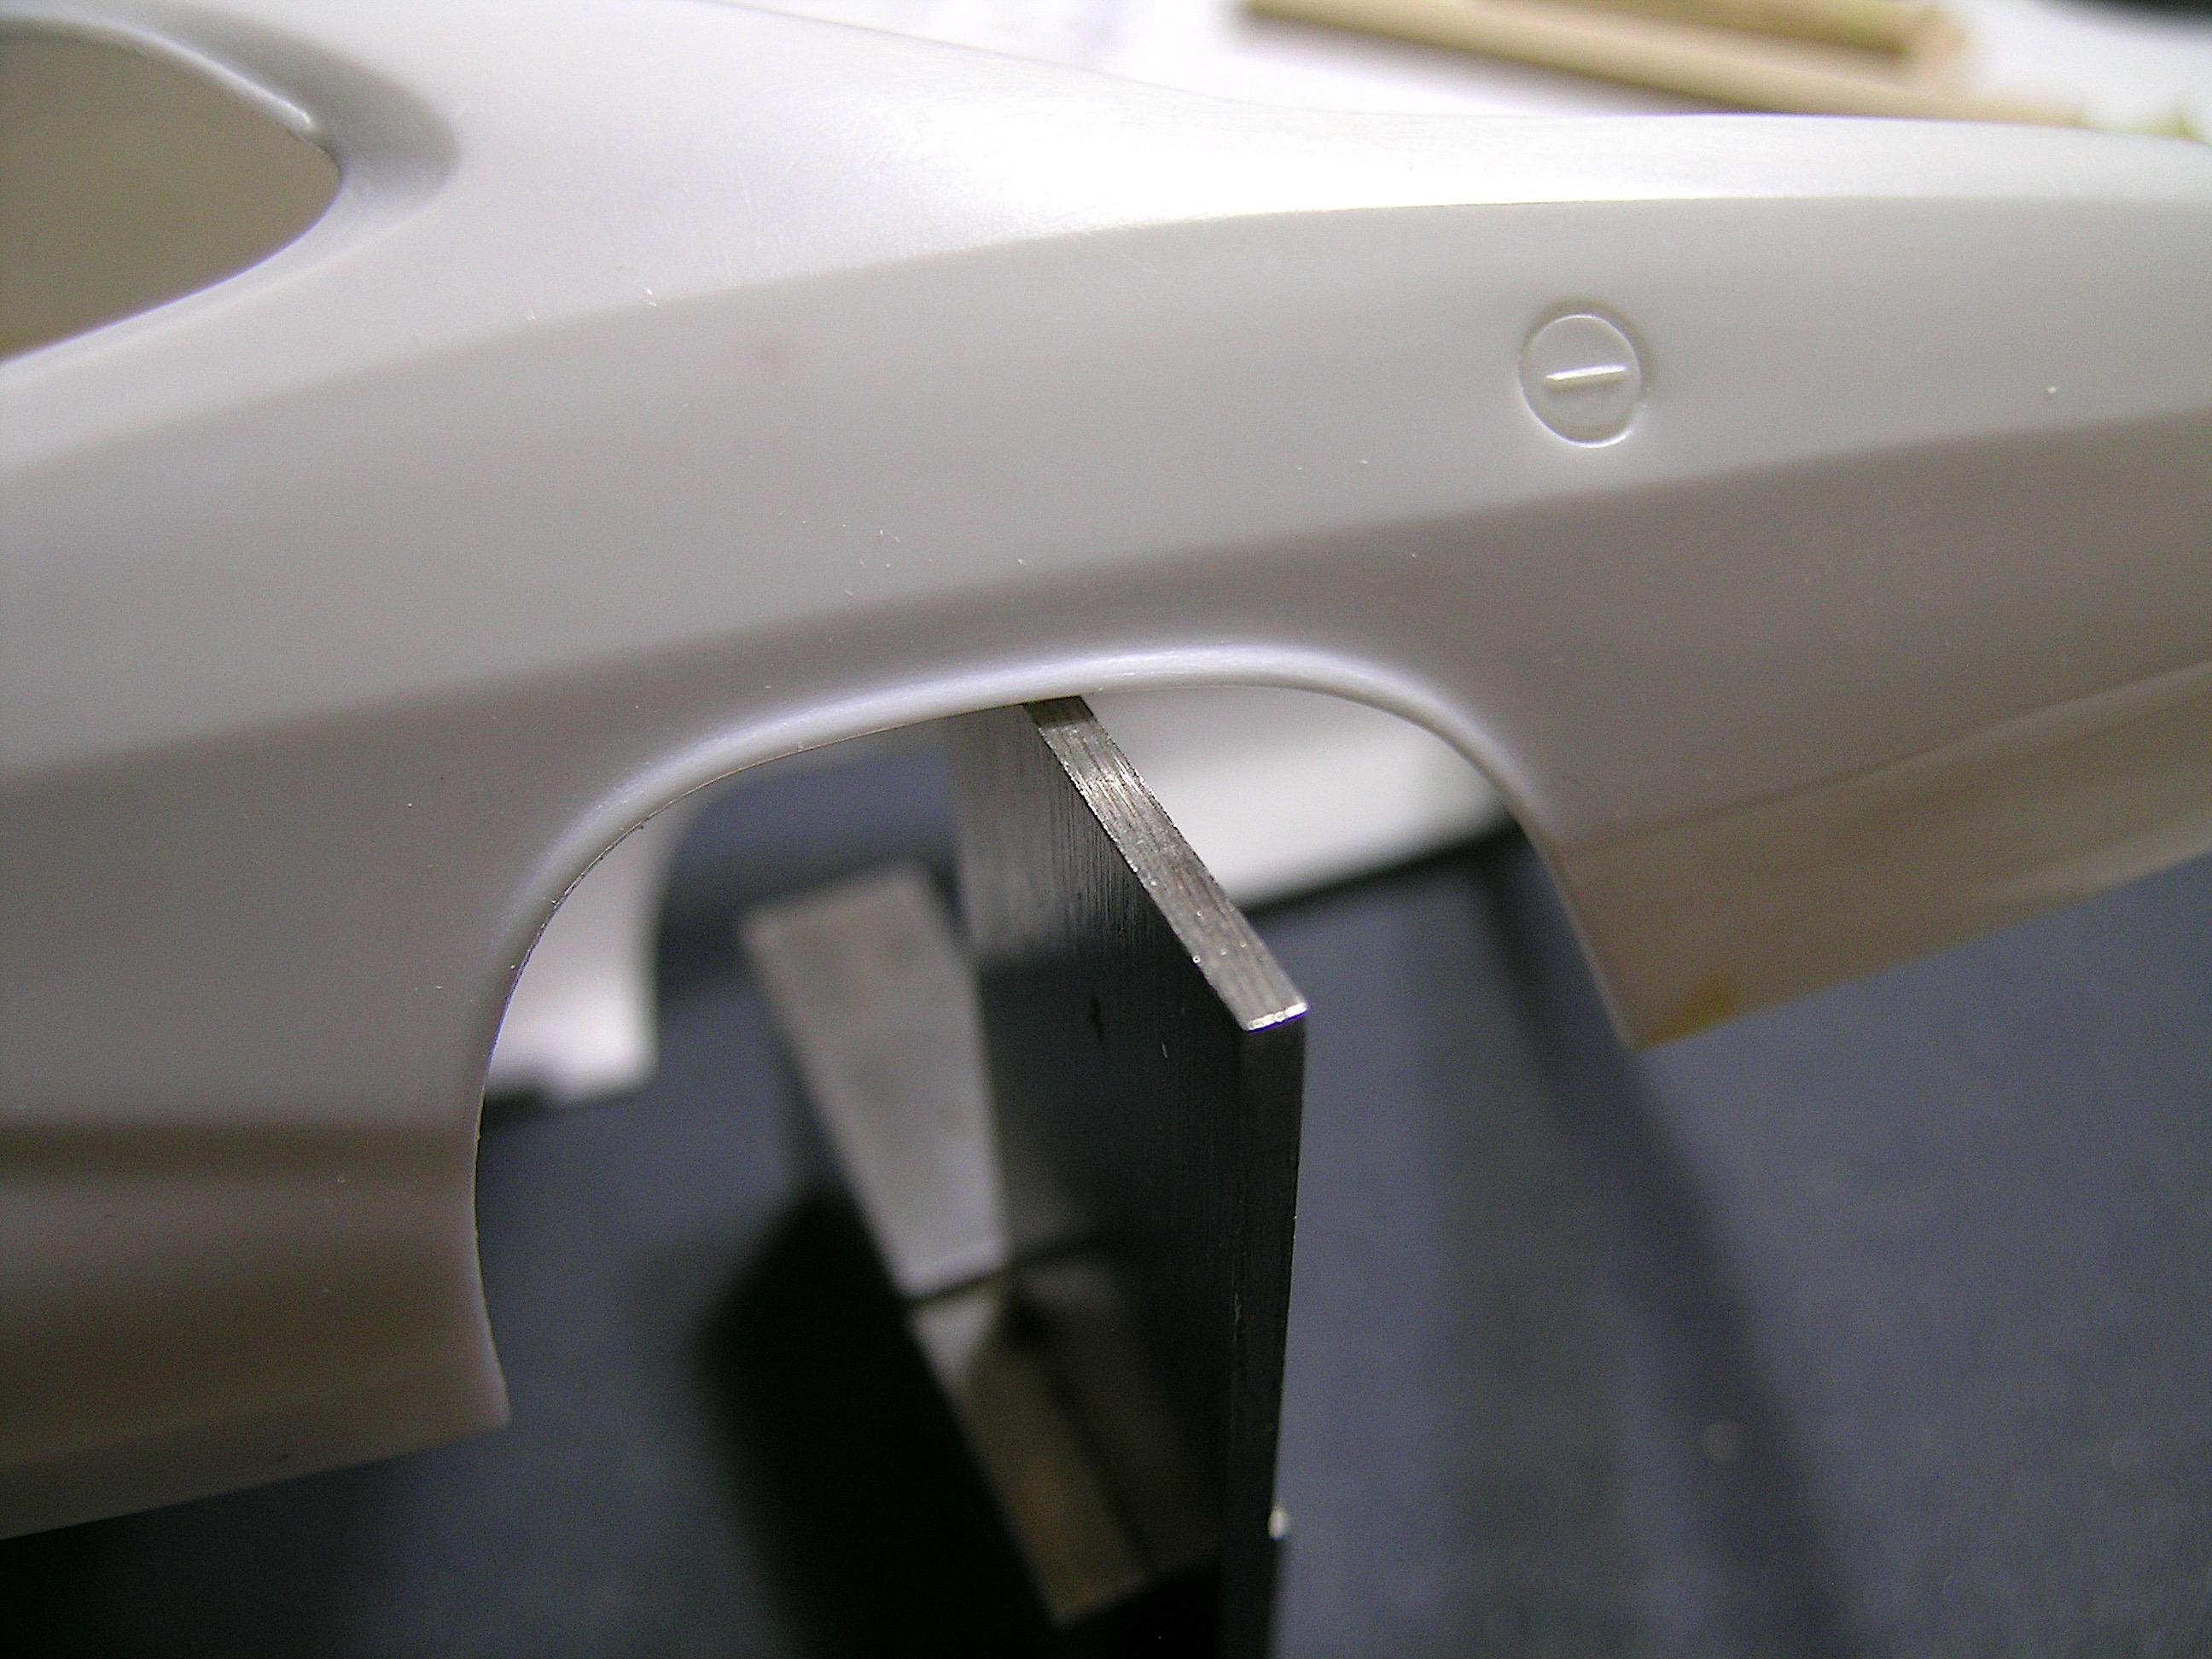
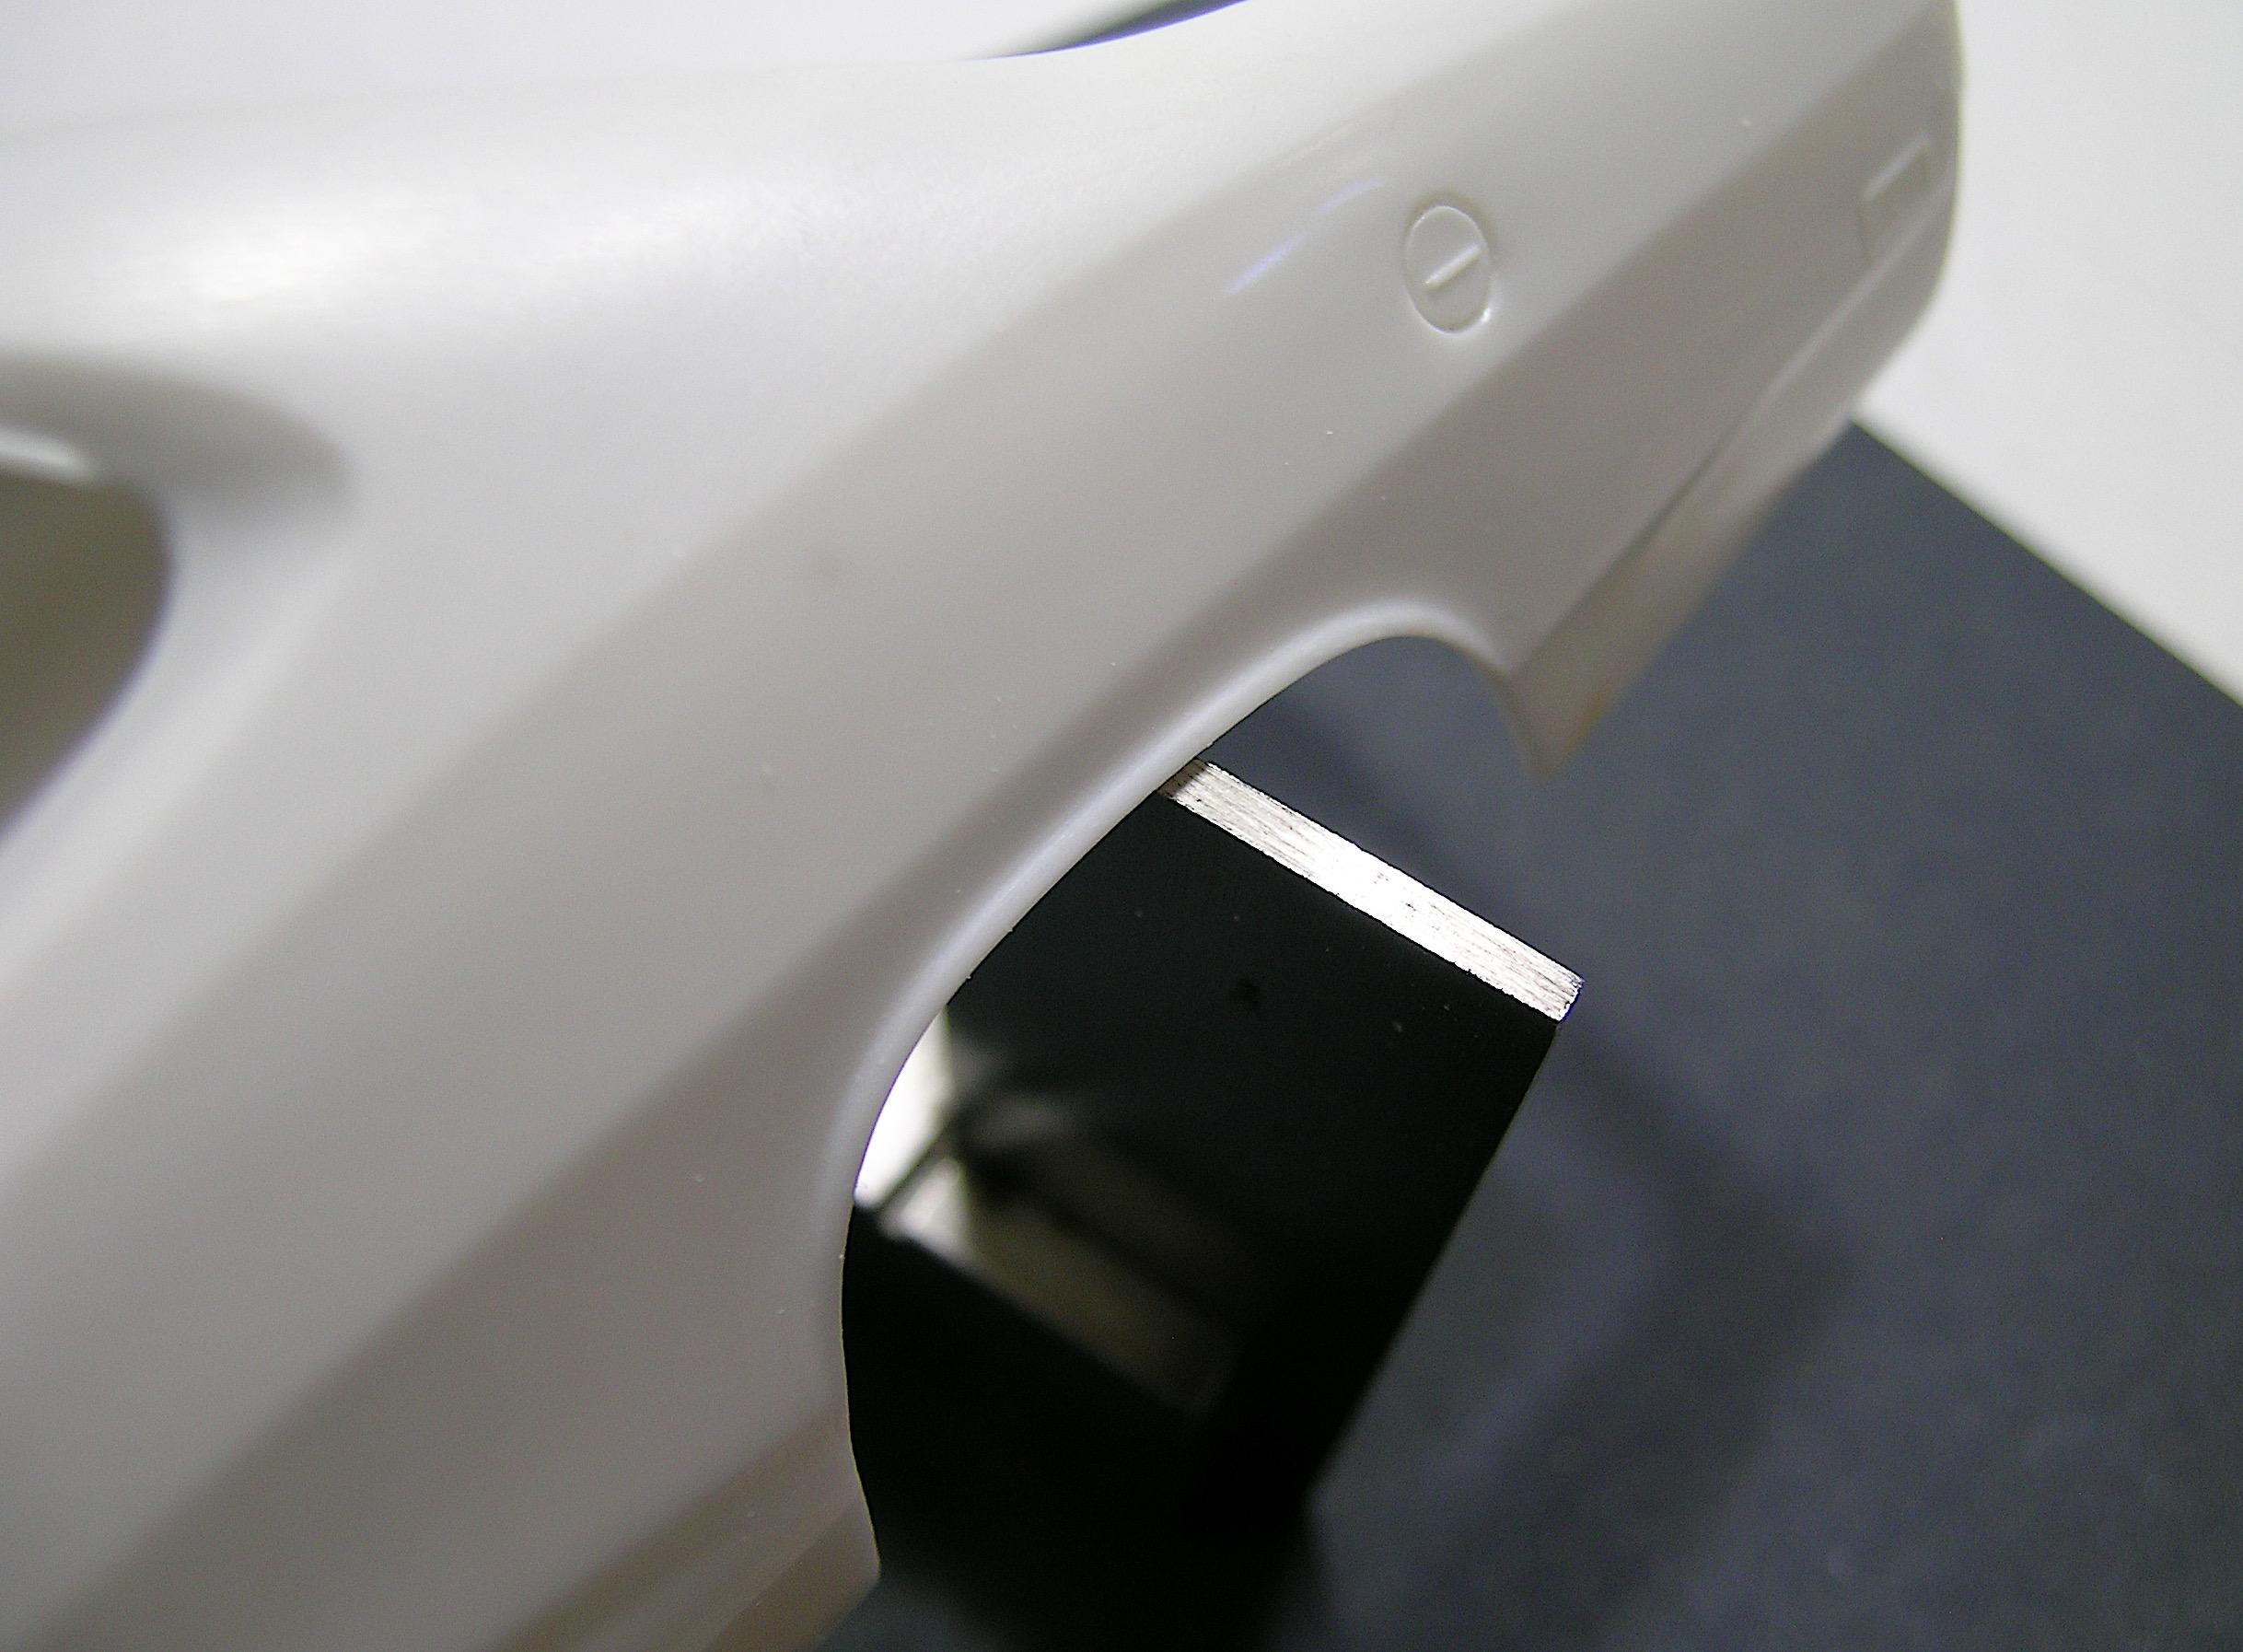
Hello everyone, Progress resumed on the bodywork and I concentrated on correcting (at the front) and improving (at the rear) the wheel openings. It looks pretty easy to do but I had to be very careful not to touch the subtle straight line that simulates the center fold of the body. The rear fenders needed the small lip at the top of the fender softened and rounded, but the front openings needed more work. I enlarged the opening by about the same thickness as the styrene strip I added (to keep the original size), and this was used to recreate the lip after correcting the shape of the top. I also corrected the rear shape to be more angular and closer to the door rather than going down in an almost straight line. For those who are familiar with this body model, I hope that my corrections will pass the test, it is not easy to recreate exactly because the body is more curved towards the inside than the scale model which must be able to be ejected from the mold. Comments and suggestions are welcome, as usual, and work on the body and its components continues. Francis The modified back fenders. From a different angle. The target for the front fender shape. The original body before modification. I first removed the same thickness of plastic as the styrene strip I added and sanded (filed) at an angle to create the shape between the center fold and the wheel opening. You can see more clearly (I hope...) the shape I have made between the lip and the center fold. From this angle you can see the corrected shape on the back between the wheel opening and the door. I corrected the front where the valance will be attached. I also engraved a line to simulate the front fender extension.
-
’72 Dodge Demon Drag Racer 1/25 scale
AmericanMuscleFan replied to AmericanMuscleFan's topic in WIP: Drag Racing Models
Thank you Charlie but rest assured that your exploits are still of great interest to me, I just need to find a way to replicate your wonders at the scale of my project. Unfortunately there are limits to the smallness of what I can make so I'll have a look at your page! ? Francis -
Great job Daniel, I love the seat, it fits perfectly in the cage. I was wondering to know what is the thickness of the flashing you used for the canards and the wing? This material is probably easy to get at the hardware store, but I have some old .005" offset printing plates and I know that .007" plates from larger presses are available, do you think this is a material that would also do the trick?
-
1969 camaro street machine
AmericanMuscleFan replied to charlie libby's topic in WIP: Drag Racing Models
WOW!!! The engine block and the clutch system are fantastic Charlie, good thing you are not motivated.... ? -
I really like it !!! ? Thanks for your explanation for the floor and I'm sure your solution to fixing it in place will be the right one!
-
’72 Dodge Demon Drag Racer 1/25 scale
AmericanMuscleFan replied to AmericanMuscleFan's topic in WIP: Drag Racing Models
Thanks Ian! Don't worry my friend, it's never too late to stop by and your comments are always appreciated, your own current project is absolutely fantastic! Francis Thanks for your kind words Keith! I can see by your profile picture that you love the Dodge Demon and I can only promise that I will do my best to improve the flaws in the original MPC kit body and convert it as best I can into a '72 that will be convincing. I should be taking action with the grille in the next few days (or weeks...) so come back and check in from time to time. I don't know if you have a real Demon but feel free to point me in the right direction if what I'm doing doesn't respect the original, I make everything from photos found on the internet. Francis -
You're headed in the right direction Daniel ! ? Note that you could make the flange by gluing a thin sheet of aluminum under the valve cover and then drilling the holes for the bolts.
-
WOW, that's great Ian! So the floor will be made of thin steel sheet, will you weld it to the brass frame or will it be held in place with some kind of rivets?
-
’72 Dodge Demon Drag Racer 1/25 scale
AmericanMuscleFan replied to AmericanMuscleFan's topic in WIP: Drag Racing Models
Thanks to all you guys for taking the time to comment on my latest update. I know this isn't the most difficult or spectacular part I've done so far, but I thought it was relevant to show how the tail lights would be mounted. I'm moving slowly but I'm trying to anticipate the next steps by not making elements too hastily that would have to be redone later in the build. This has happened to me several times with my pickup and it has delayed my progress not to mention the risk of ruining other components attached to it. I also take the time to evaluate the pros and cons of using plastic or soft metal (brass or aluminum) for certain parts to get the best detail, knowing that most of these parts will be painted over in the end. I have made good progress with the rear part of the vehicle and I intend to start working on the front, including modifying the wheel opening, making front valance and the grille. I've been thinking about a way to make the grille for a long time and I can't wait to take action and make it happen. I hope to be back soon with new and more substantial progress. Francis -
’72 Dodge Demon Drag Racer 1/25 scale
AmericanMuscleFan replied to AmericanMuscleFan's topic in WIP: Drag Racing Models
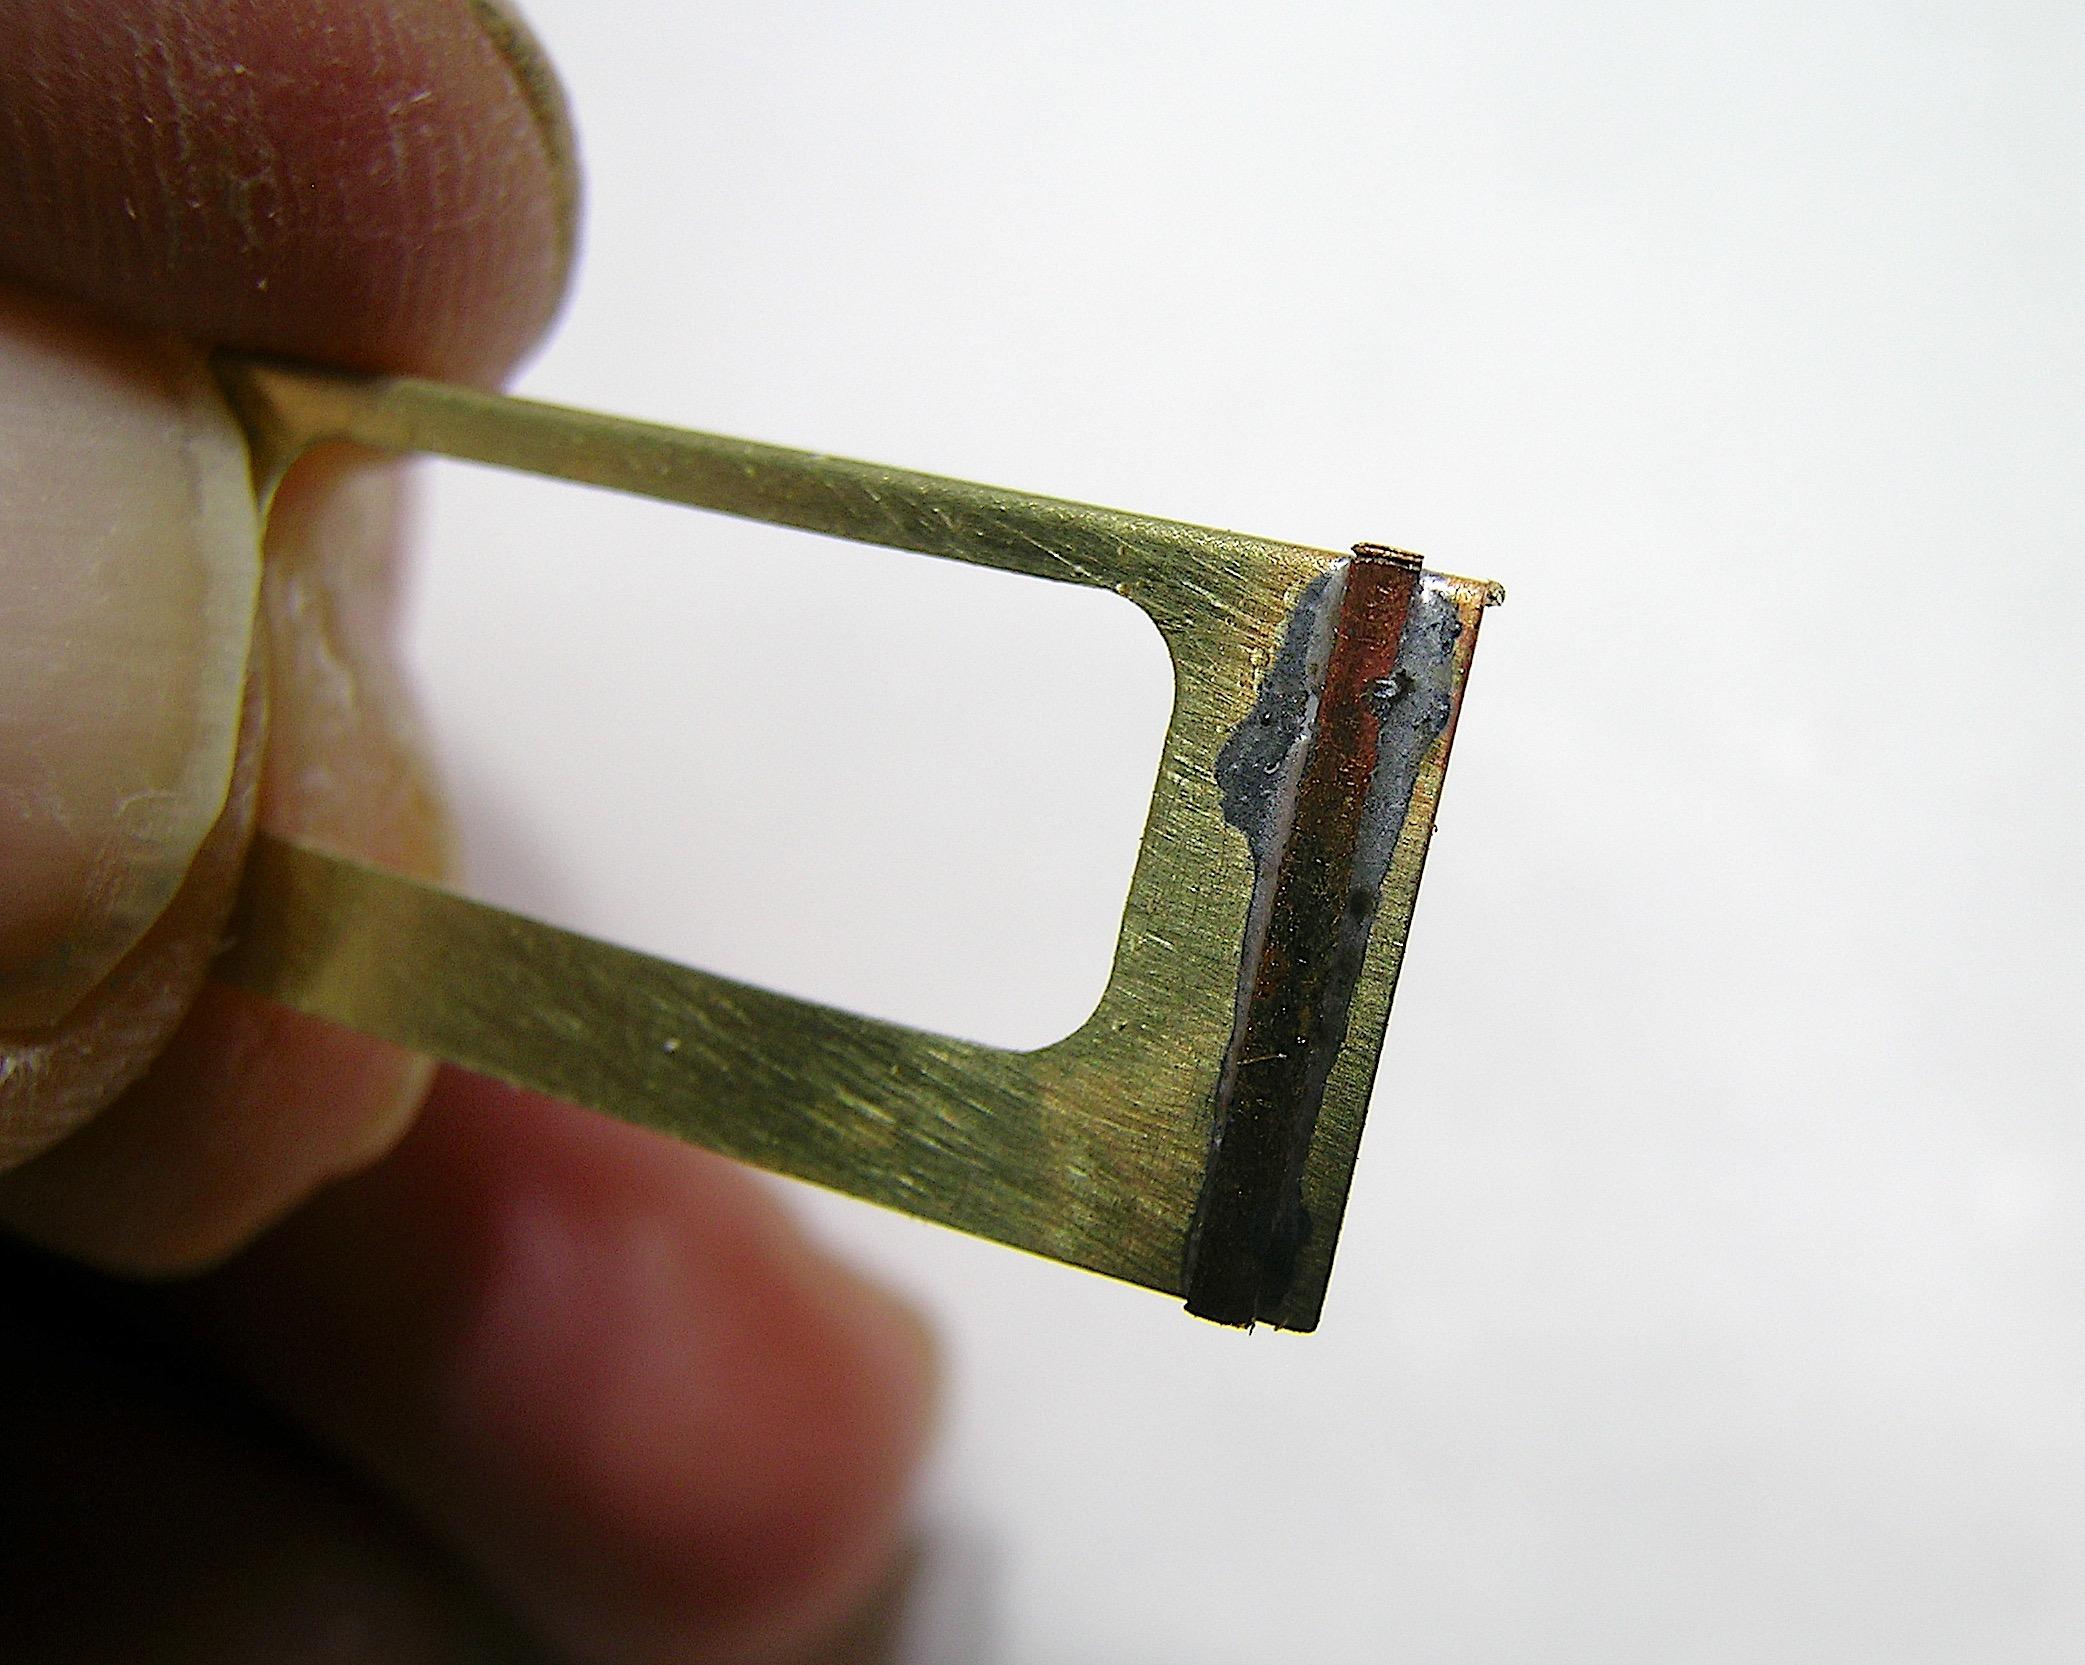
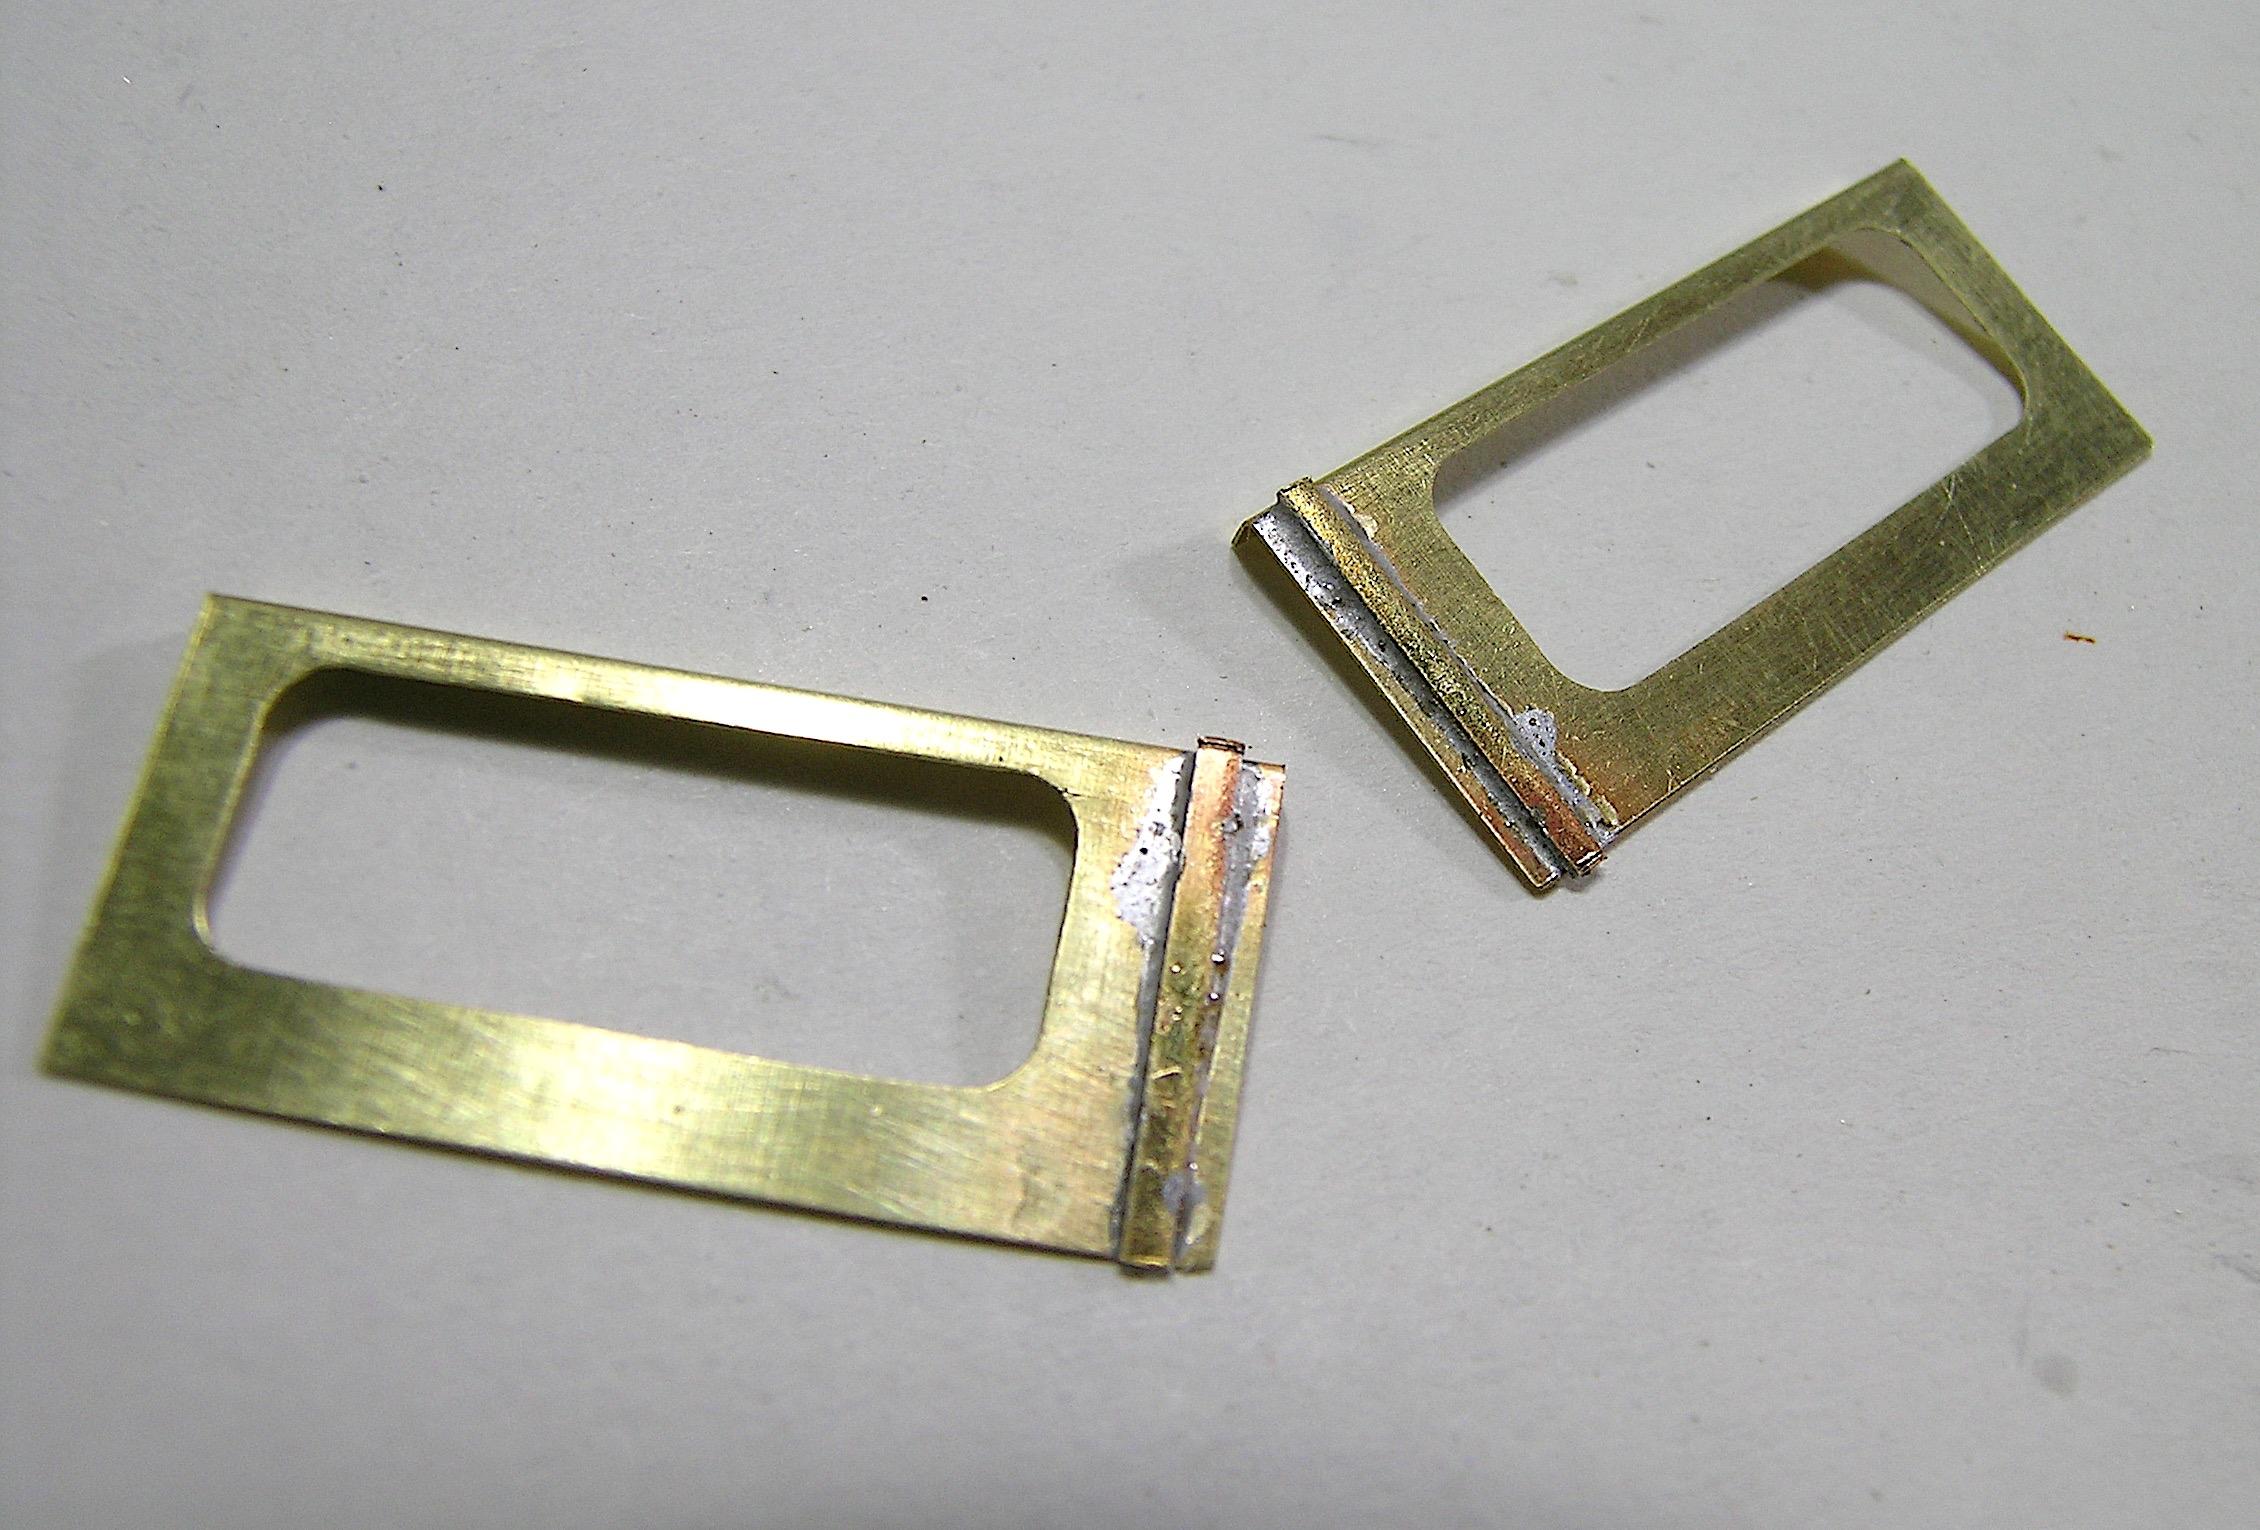
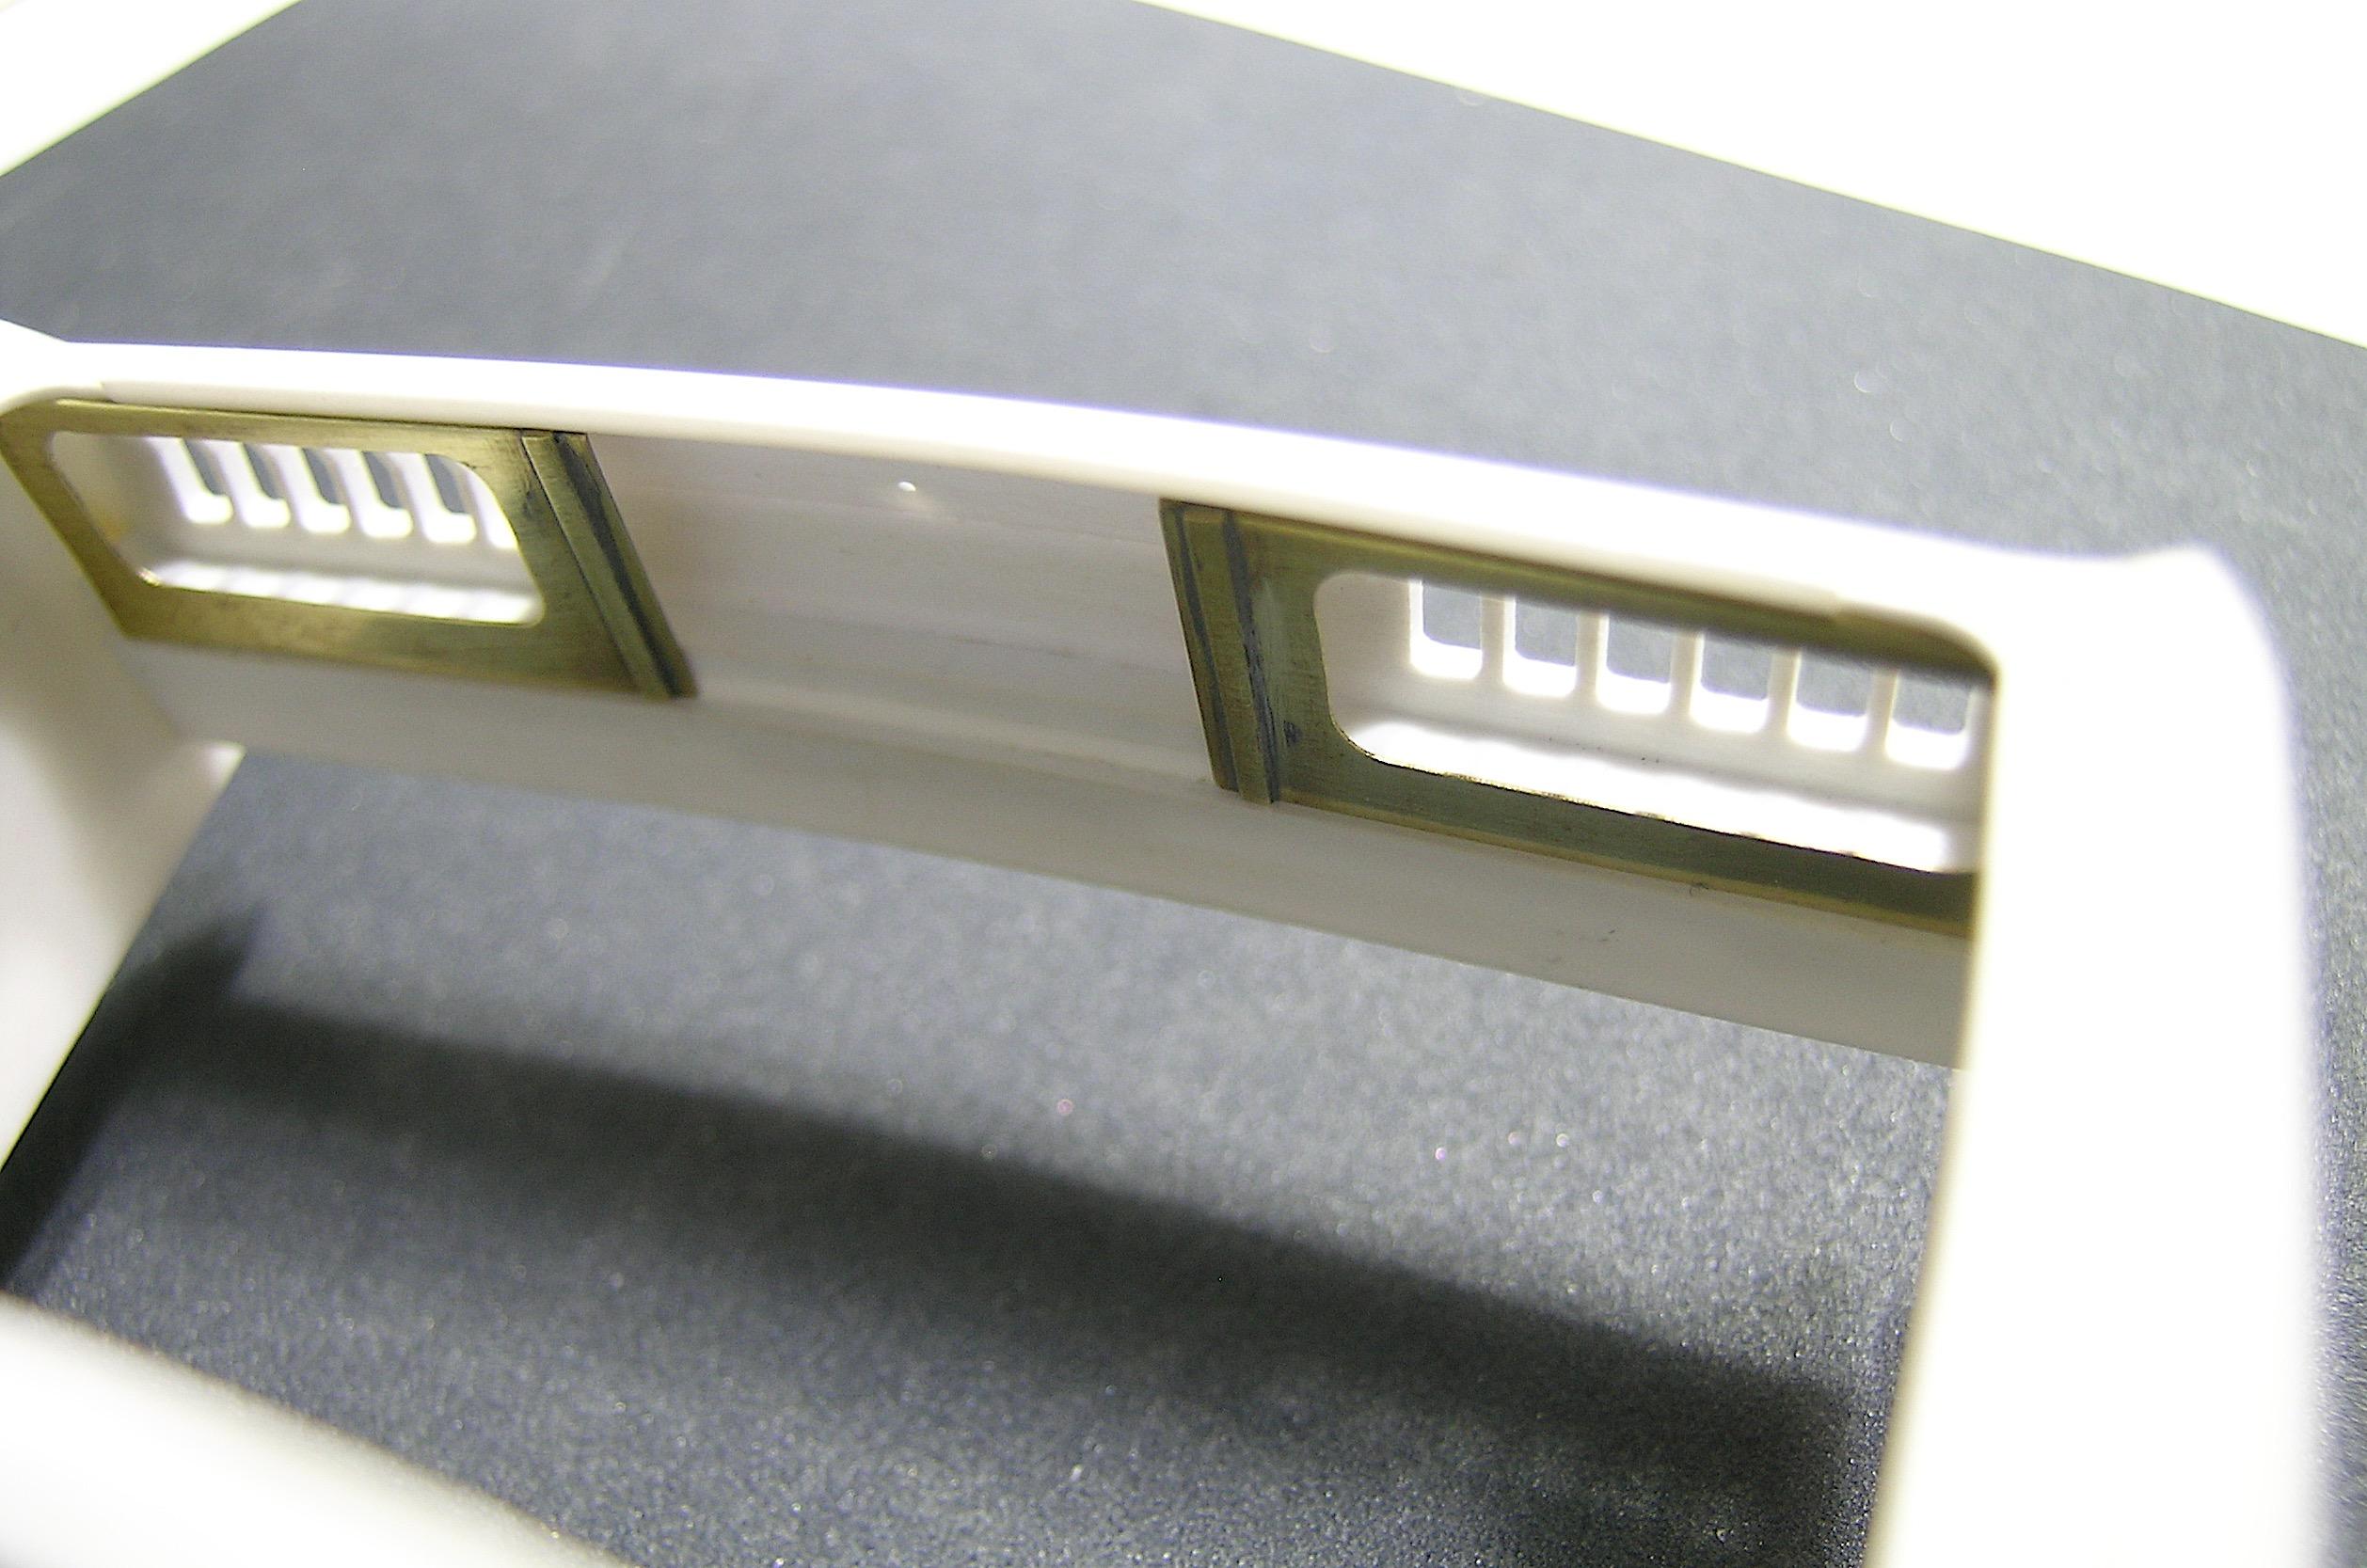
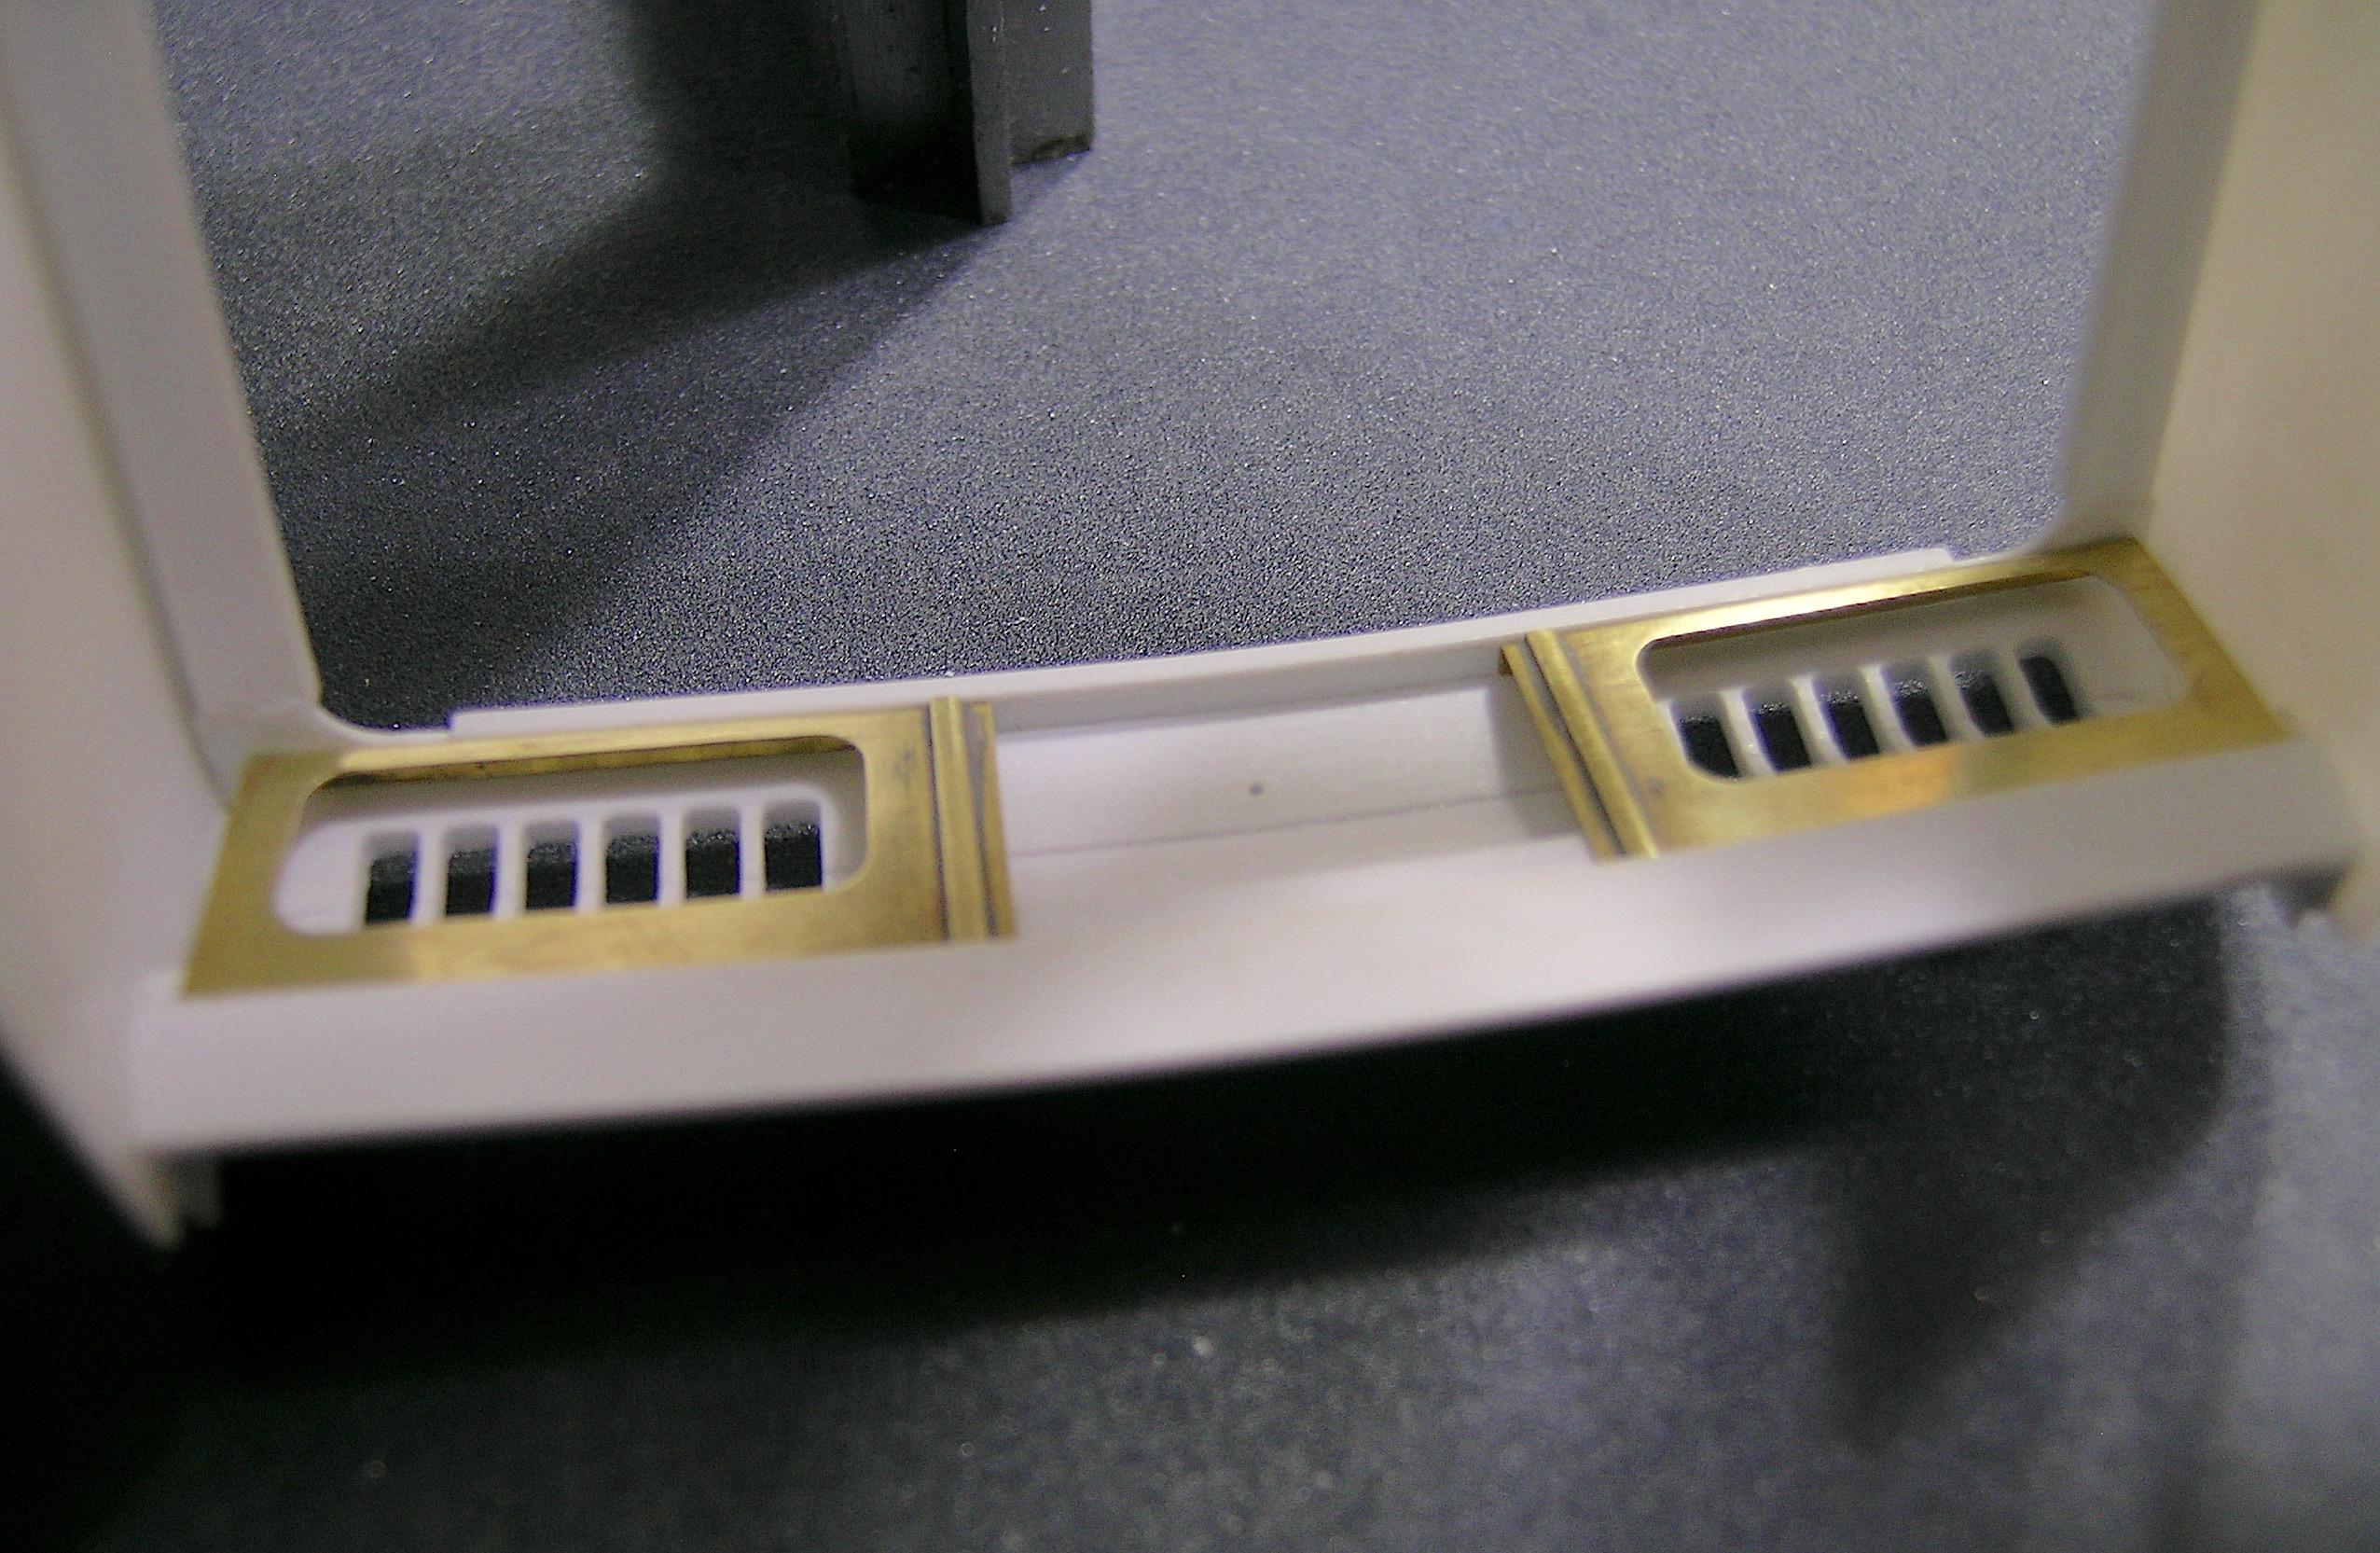
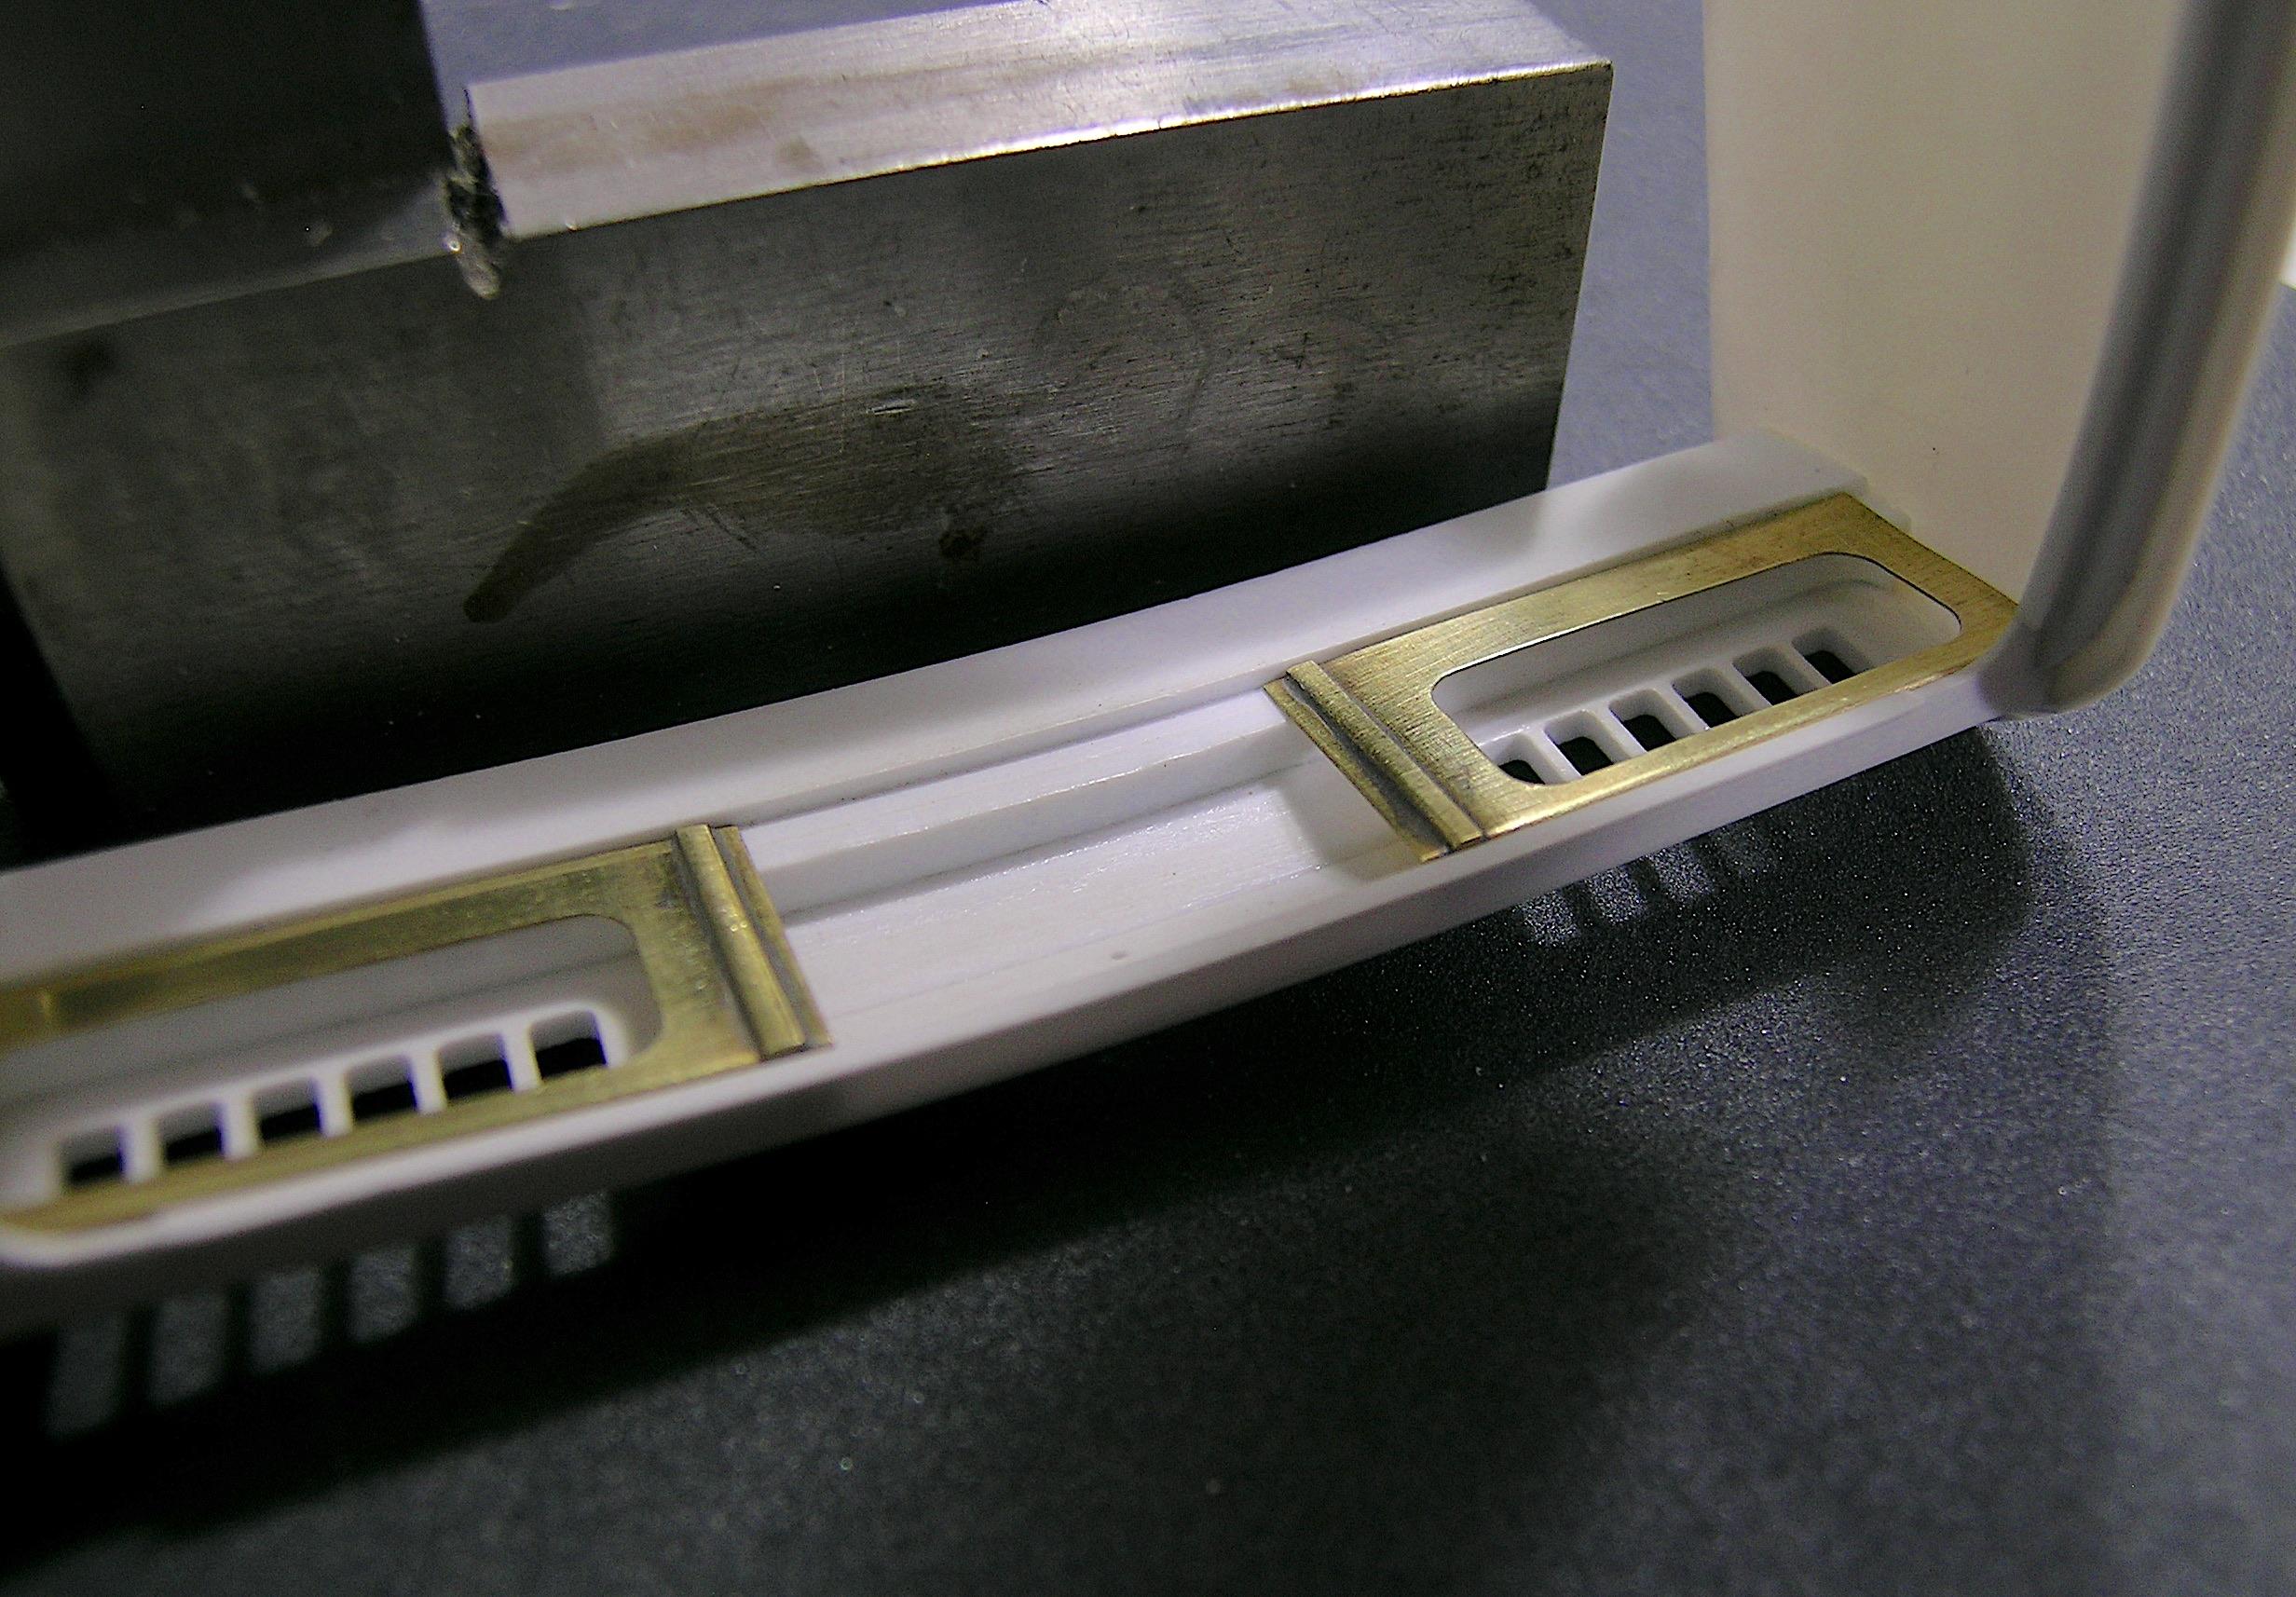
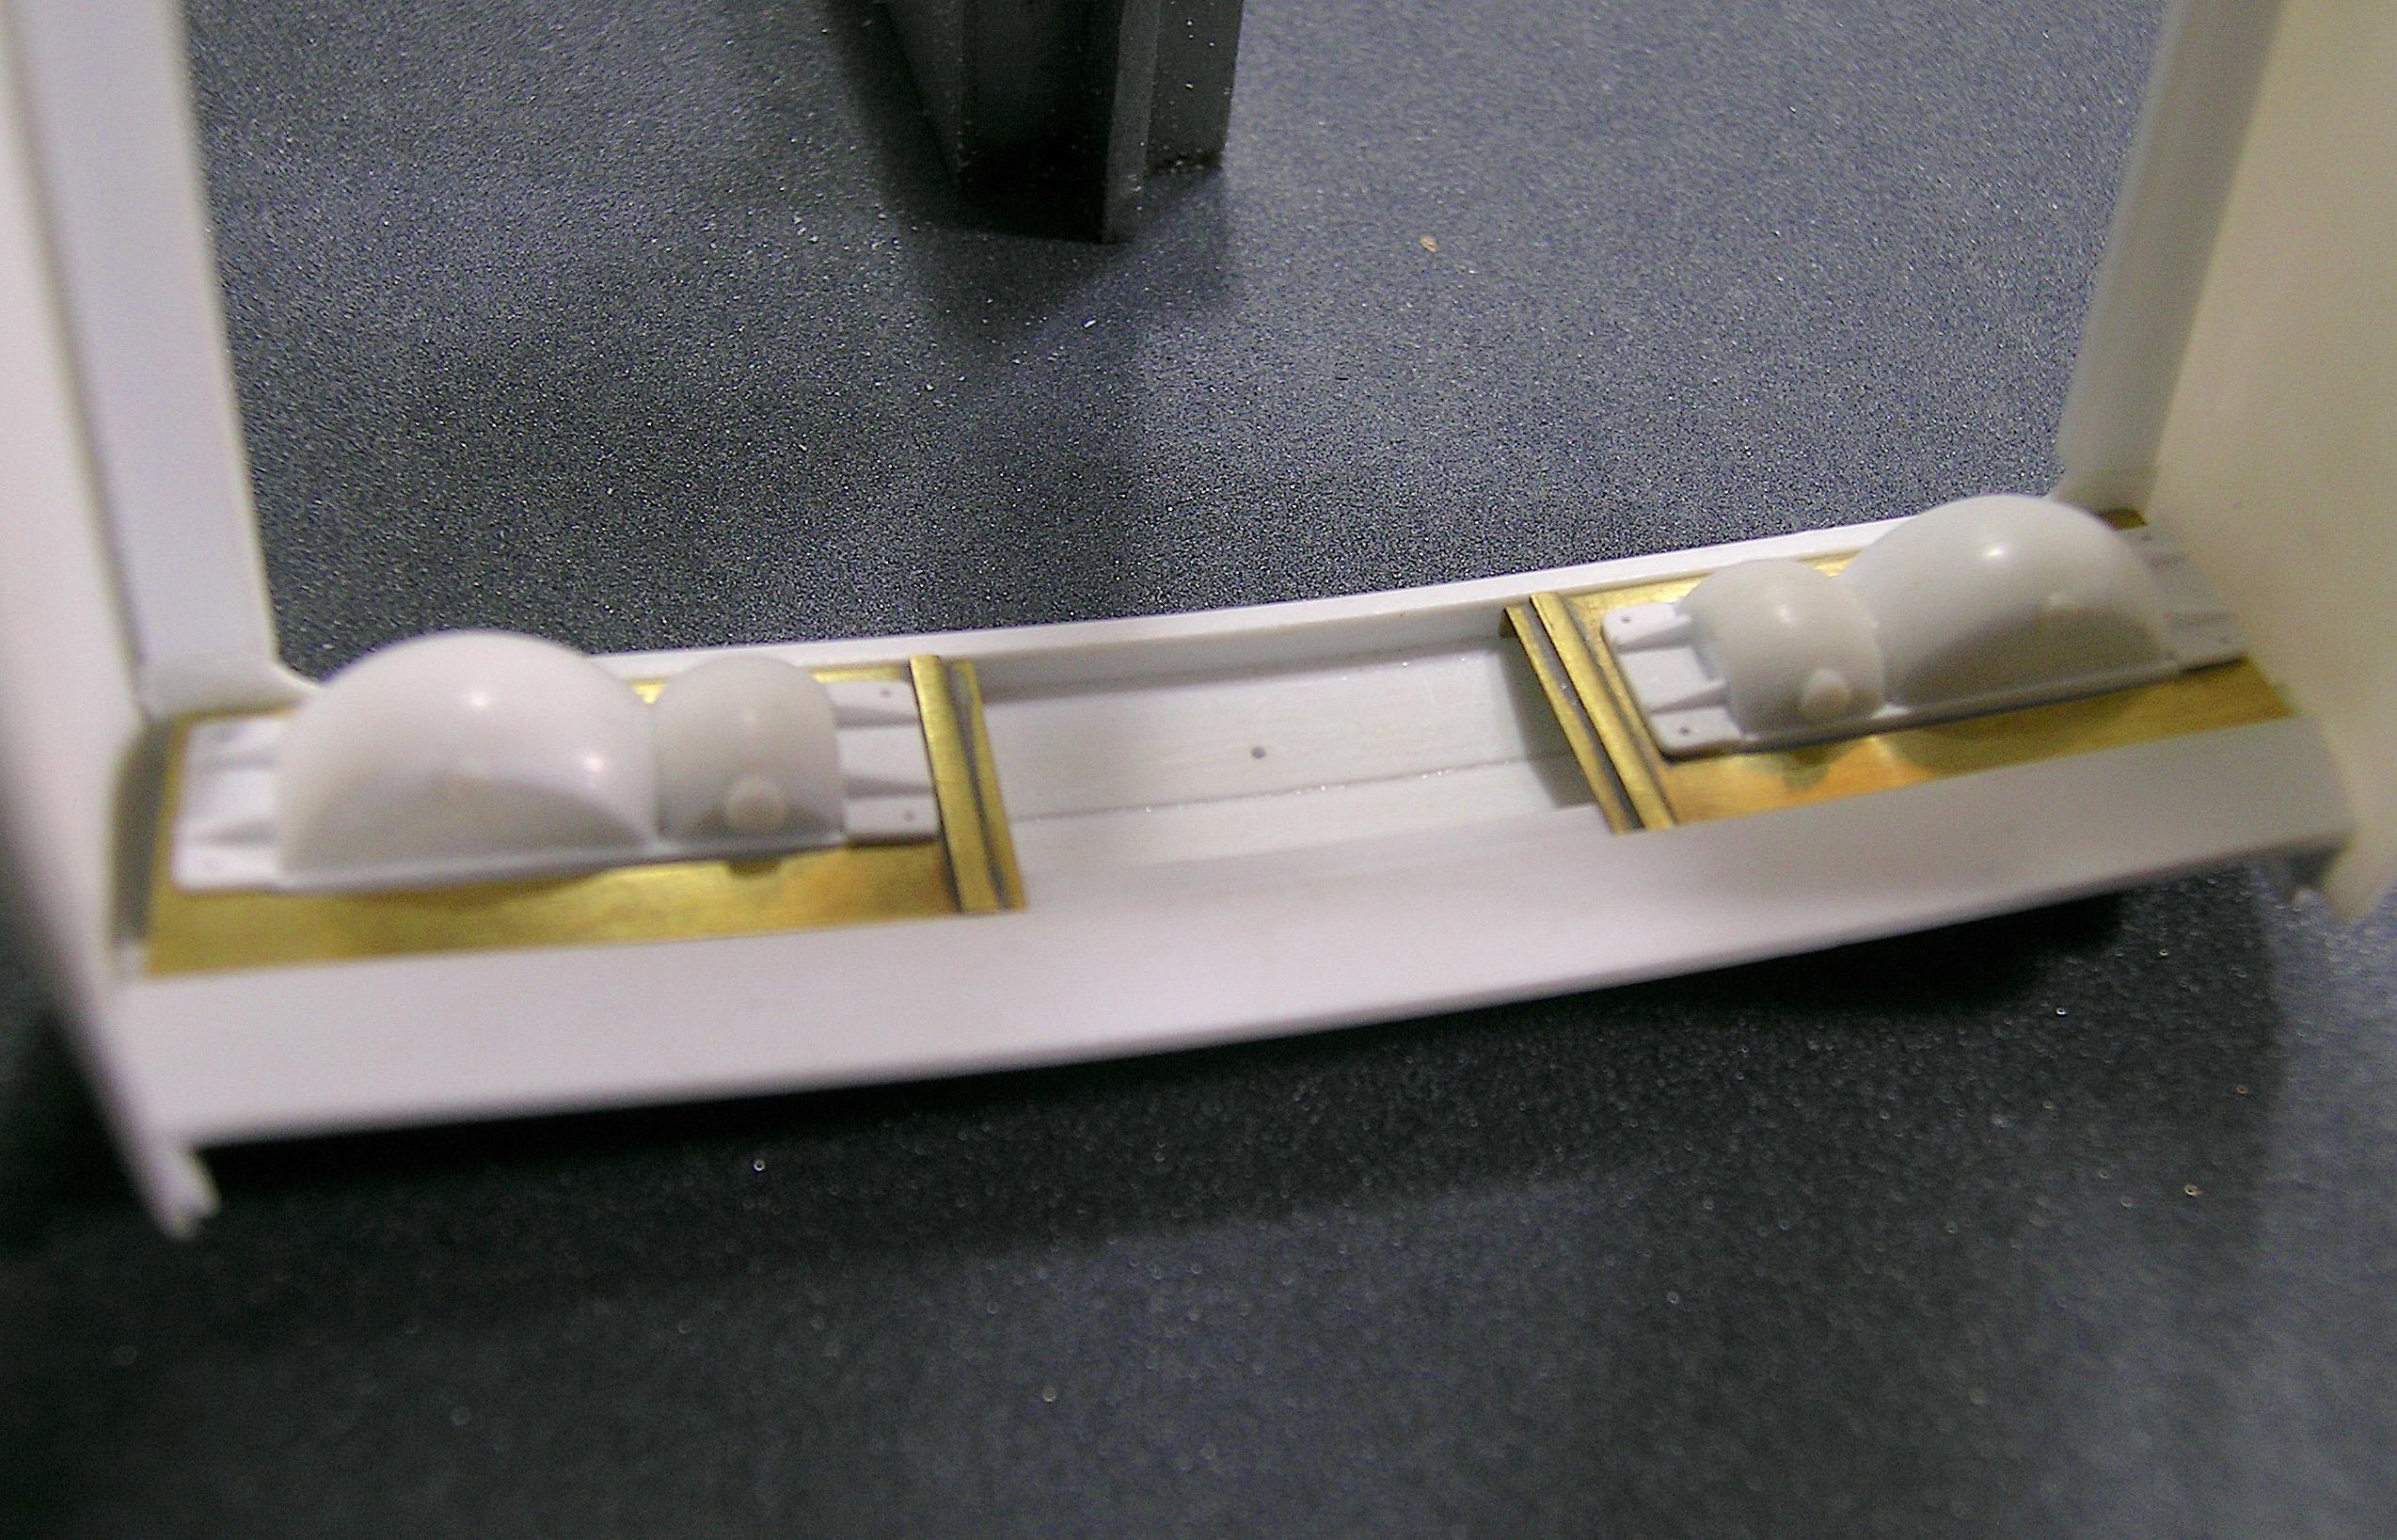
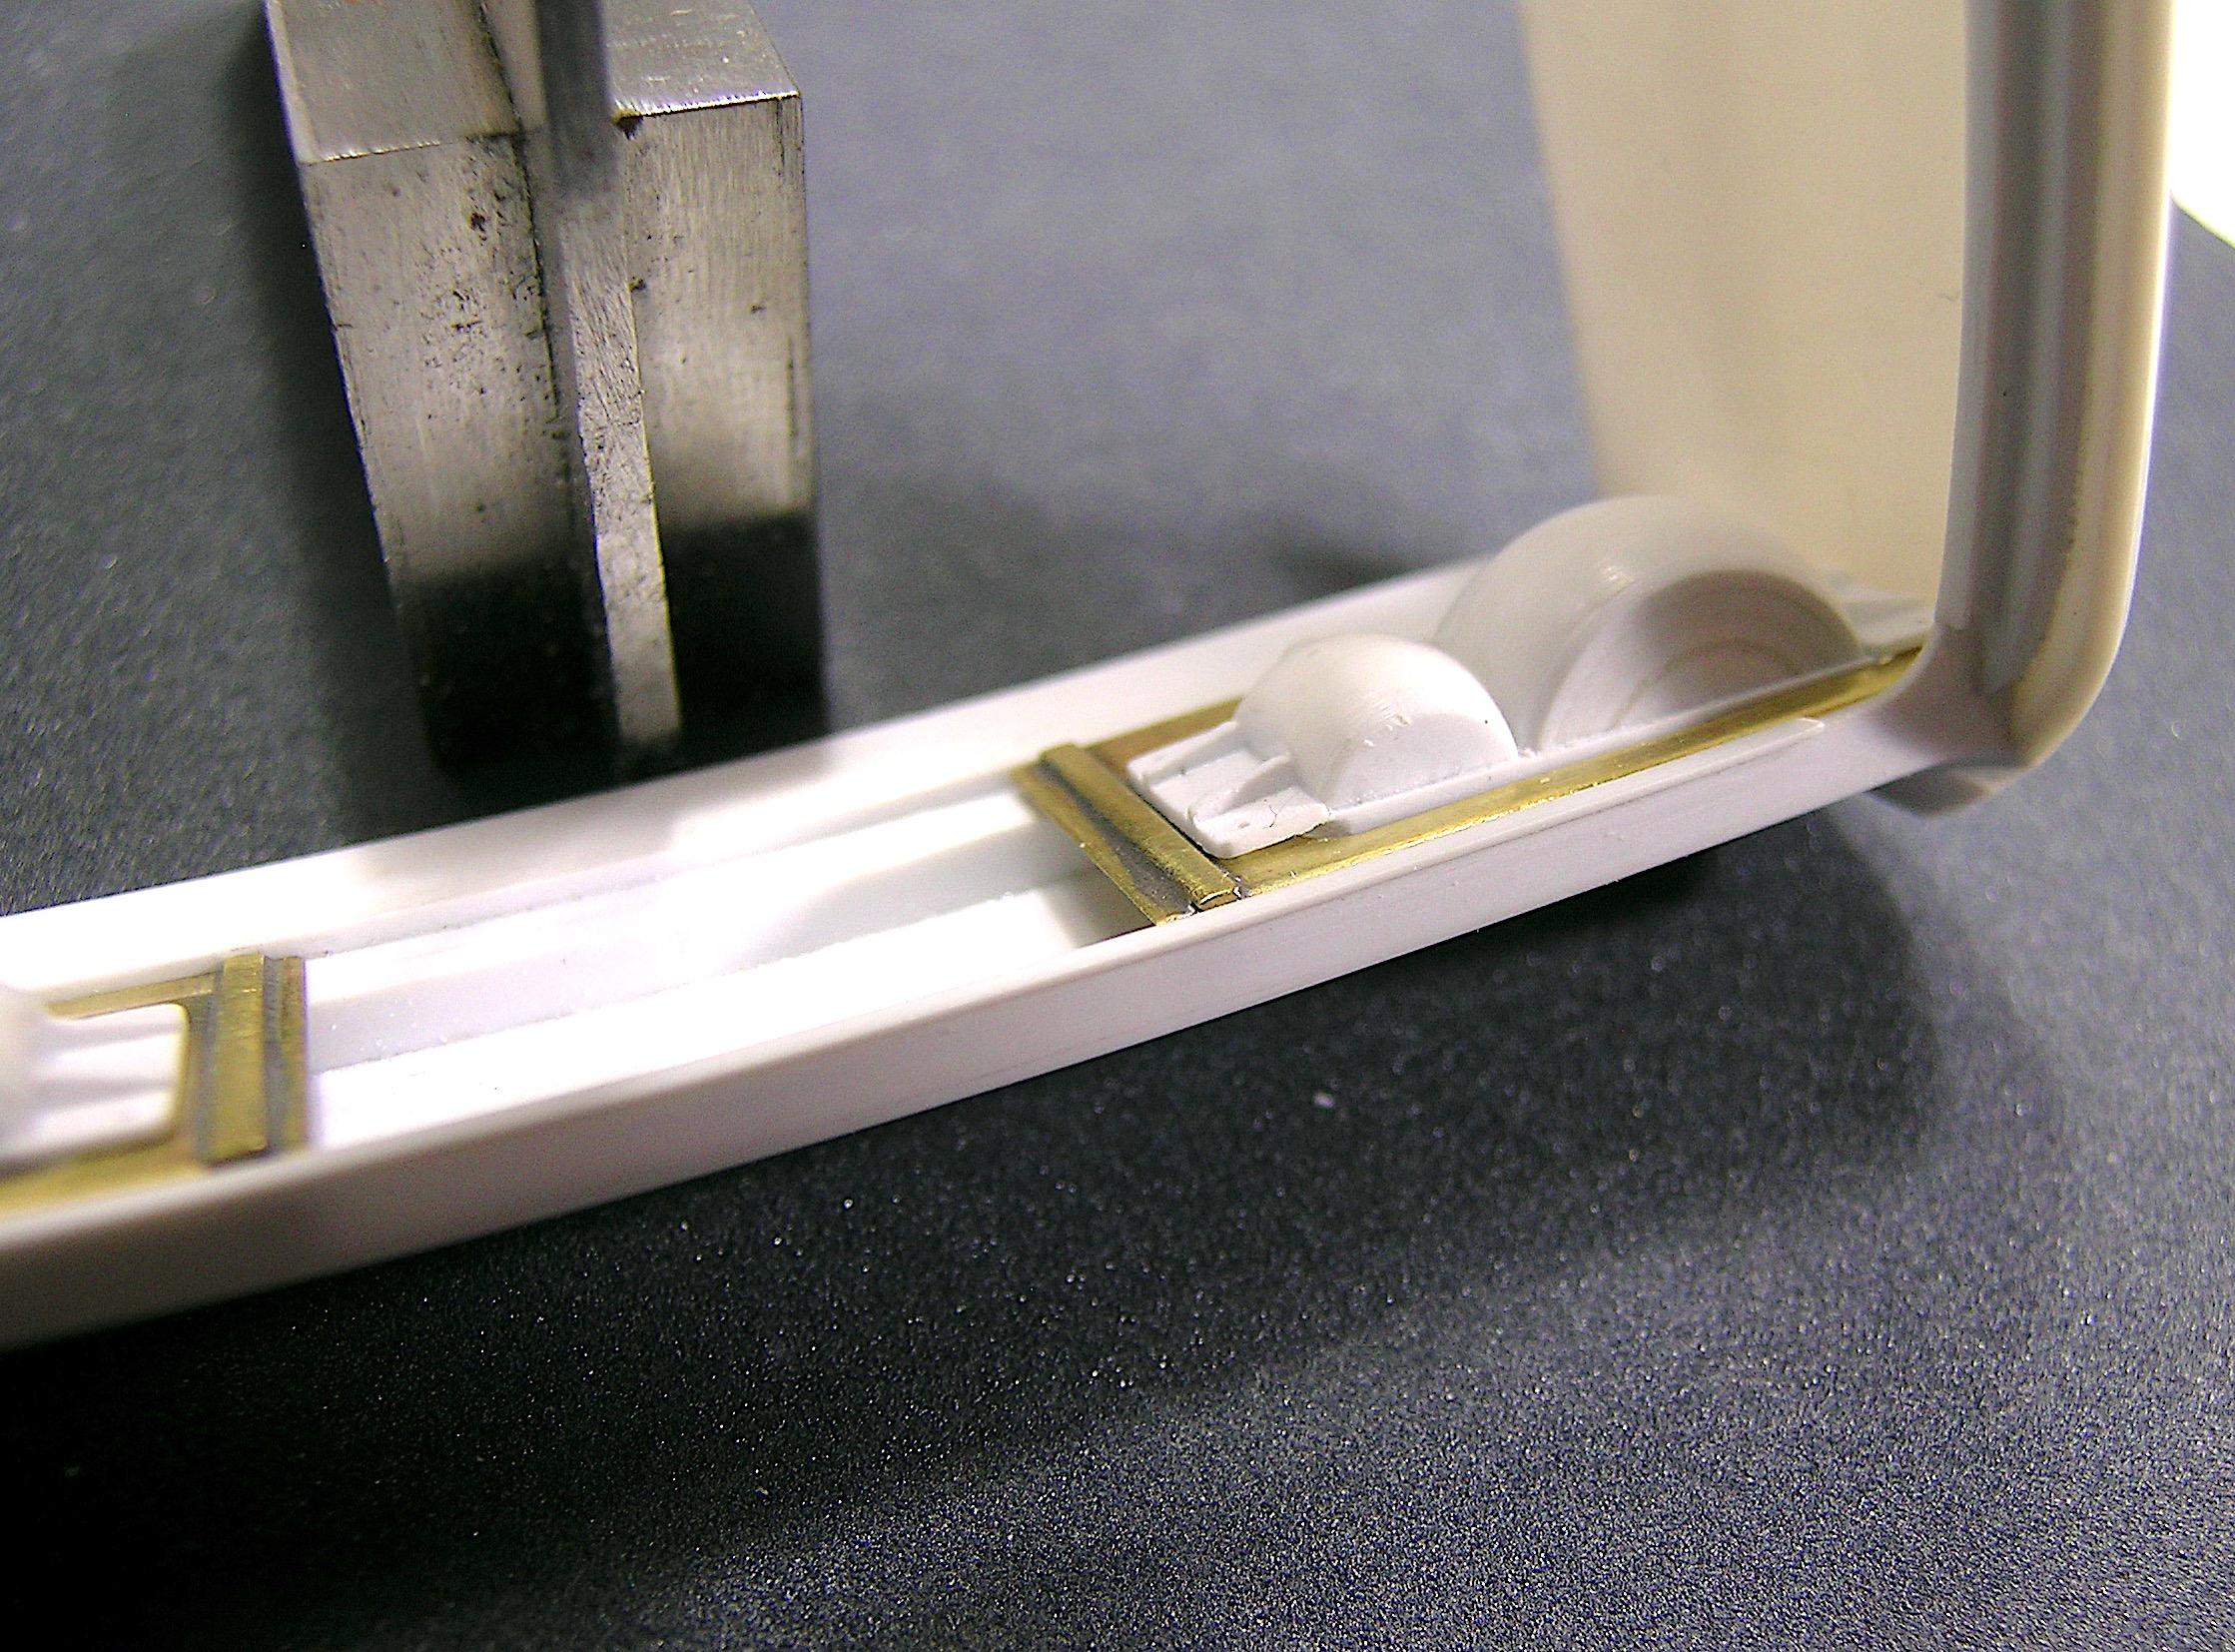
Hello Everyone, The last two weeks were not very productive due to the holiday season, and the fact that I worked because the plant was not closed. I still found some time to do a few things and today I'm going to show you the brackets I made for the rear light bezel. I chose brass in order to have thin and rigid parts since 0.010" Styrene would have been too fragile. Plus, it will appeal to fans of this material so there will definitely be some brass in this project! ? I'll be back soon with more stuff and a happy new year to all ! Francis The part I tried to reproduce. I made the opening and soldered to a brass strip to simulate the fold. Both pieces are fabricated but need a little sanding. The brackets are spot welded on the real car, but I made mine to fit between the 2 Styrene strips. View from under. This picture is a little less blurry I think. With the bezels in place. I will drill holes in the brackets to add small bolts to hold the bezels to them.
-
That's freaking cool Dave!!! Everything is so well done and put together. Fortunately, your workspace is there to make us realize that this is not a real car! ?
-
All this shiny stuff is cool and everything is really well made like you used to. Your experience in the racing world is obvious! ?
-
Happy New Year Daniel, I see you don't waste time to bring us great tips, the solution for Dzus fasteners is just great. I really like your ingenuity my friend, it's only January and you still have plenty of time to impress us! ?
-
’72 Dodge Demon Drag Racer 1/25 scale
AmericanMuscleFan replied to AmericanMuscleFan's topic in WIP: Drag Racing Models
Thanks Tim! As I mentioned in a previous post, the direction of the project is not yet final. I have a ton of work to do on the body so you'll definitely see more updates and I'll try to post as many photos as possible, especially for the more difficult parts to create. I look forward to seeing more updates on your own spectacular project, it will certainly benefit mine too! ? Francis