AmericanMuscleFan
-
Posts
3,058 -
Joined
-
Last visited
Content Type
Profiles
Forums
Events
Gallery
Everything posted by AmericanMuscleFan
-
 It's delicious as I've heard before. The color is very nice, it gives a rich impression and it fits well with jewelry! ?
 -
Fantastic update Ian! Good thing you used your fingers to operate the mechanism in the video, I was convinced I was looking at the components of a real frame! The wheels are awesome by the way!
-
Nice start on the hood Charlie, the new rear shocks are a nice improvement over the previous ones which were already very well done! ? I agree with the window on the bell housing, on my side, I had also kept the inspection trap open and I had not put the flywheel protection cover on my pickup in order to see a bit the clutch system.
-
’72 Dodge Demon Drag Racer 1/25 scale
AmericanMuscleFan replied to AmericanMuscleFan's topic in WIP: Drag Racing Models
Thanks Daniel! I have also seen several articles on the subject in specialized publications or on websites, but it is difficult to find a "universal" solution that works in all cases. I thought of making the door pillars and integrating them into the body so that the doors would be part of the body, this way, the fit obtained during the building stage will remain the same at the final assembly. At least, that's what I hope! ? More in the next few days, Francis -
’72 Dodge Demon Drag Racer 1/25 scale
AmericanMuscleFan replied to AmericanMuscleFan's topic in WIP: Drag Racing Models
Thanks Ron! It seems that I like to complicate my life, yet I'm more of a couch potato, it seems that this hobby compensates for my rather conservative side! ? Francis -
’72 Dodge Demon Drag Racer 1/25 scale
AmericanMuscleFan replied to AmericanMuscleFan's topic in WIP: Drag Racing Models
Thanks Marcos, as they say, you don't have anything for nothing, you have to know how to take risks and get out of your comfort zone, it's just a piece of styrene and it will always be possible to glue the doors back in place if it doesn't work! Thanks Scott! Thanks Charlie, I have a plan (in my head as usual...) but all the elements will have to be perfectly aligned for it to be functional. Francis -
The flywheel and clutch are amazing Charlie, I really like what you are doing and I am sure I am not the only one! ? You make me want to machine but I'm not there yet. ?
-
’72 Dodge Demon Drag Racer 1/25 scale
AmericanMuscleFan replied to AmericanMuscleFan's topic in WIP: Drag Racing Models
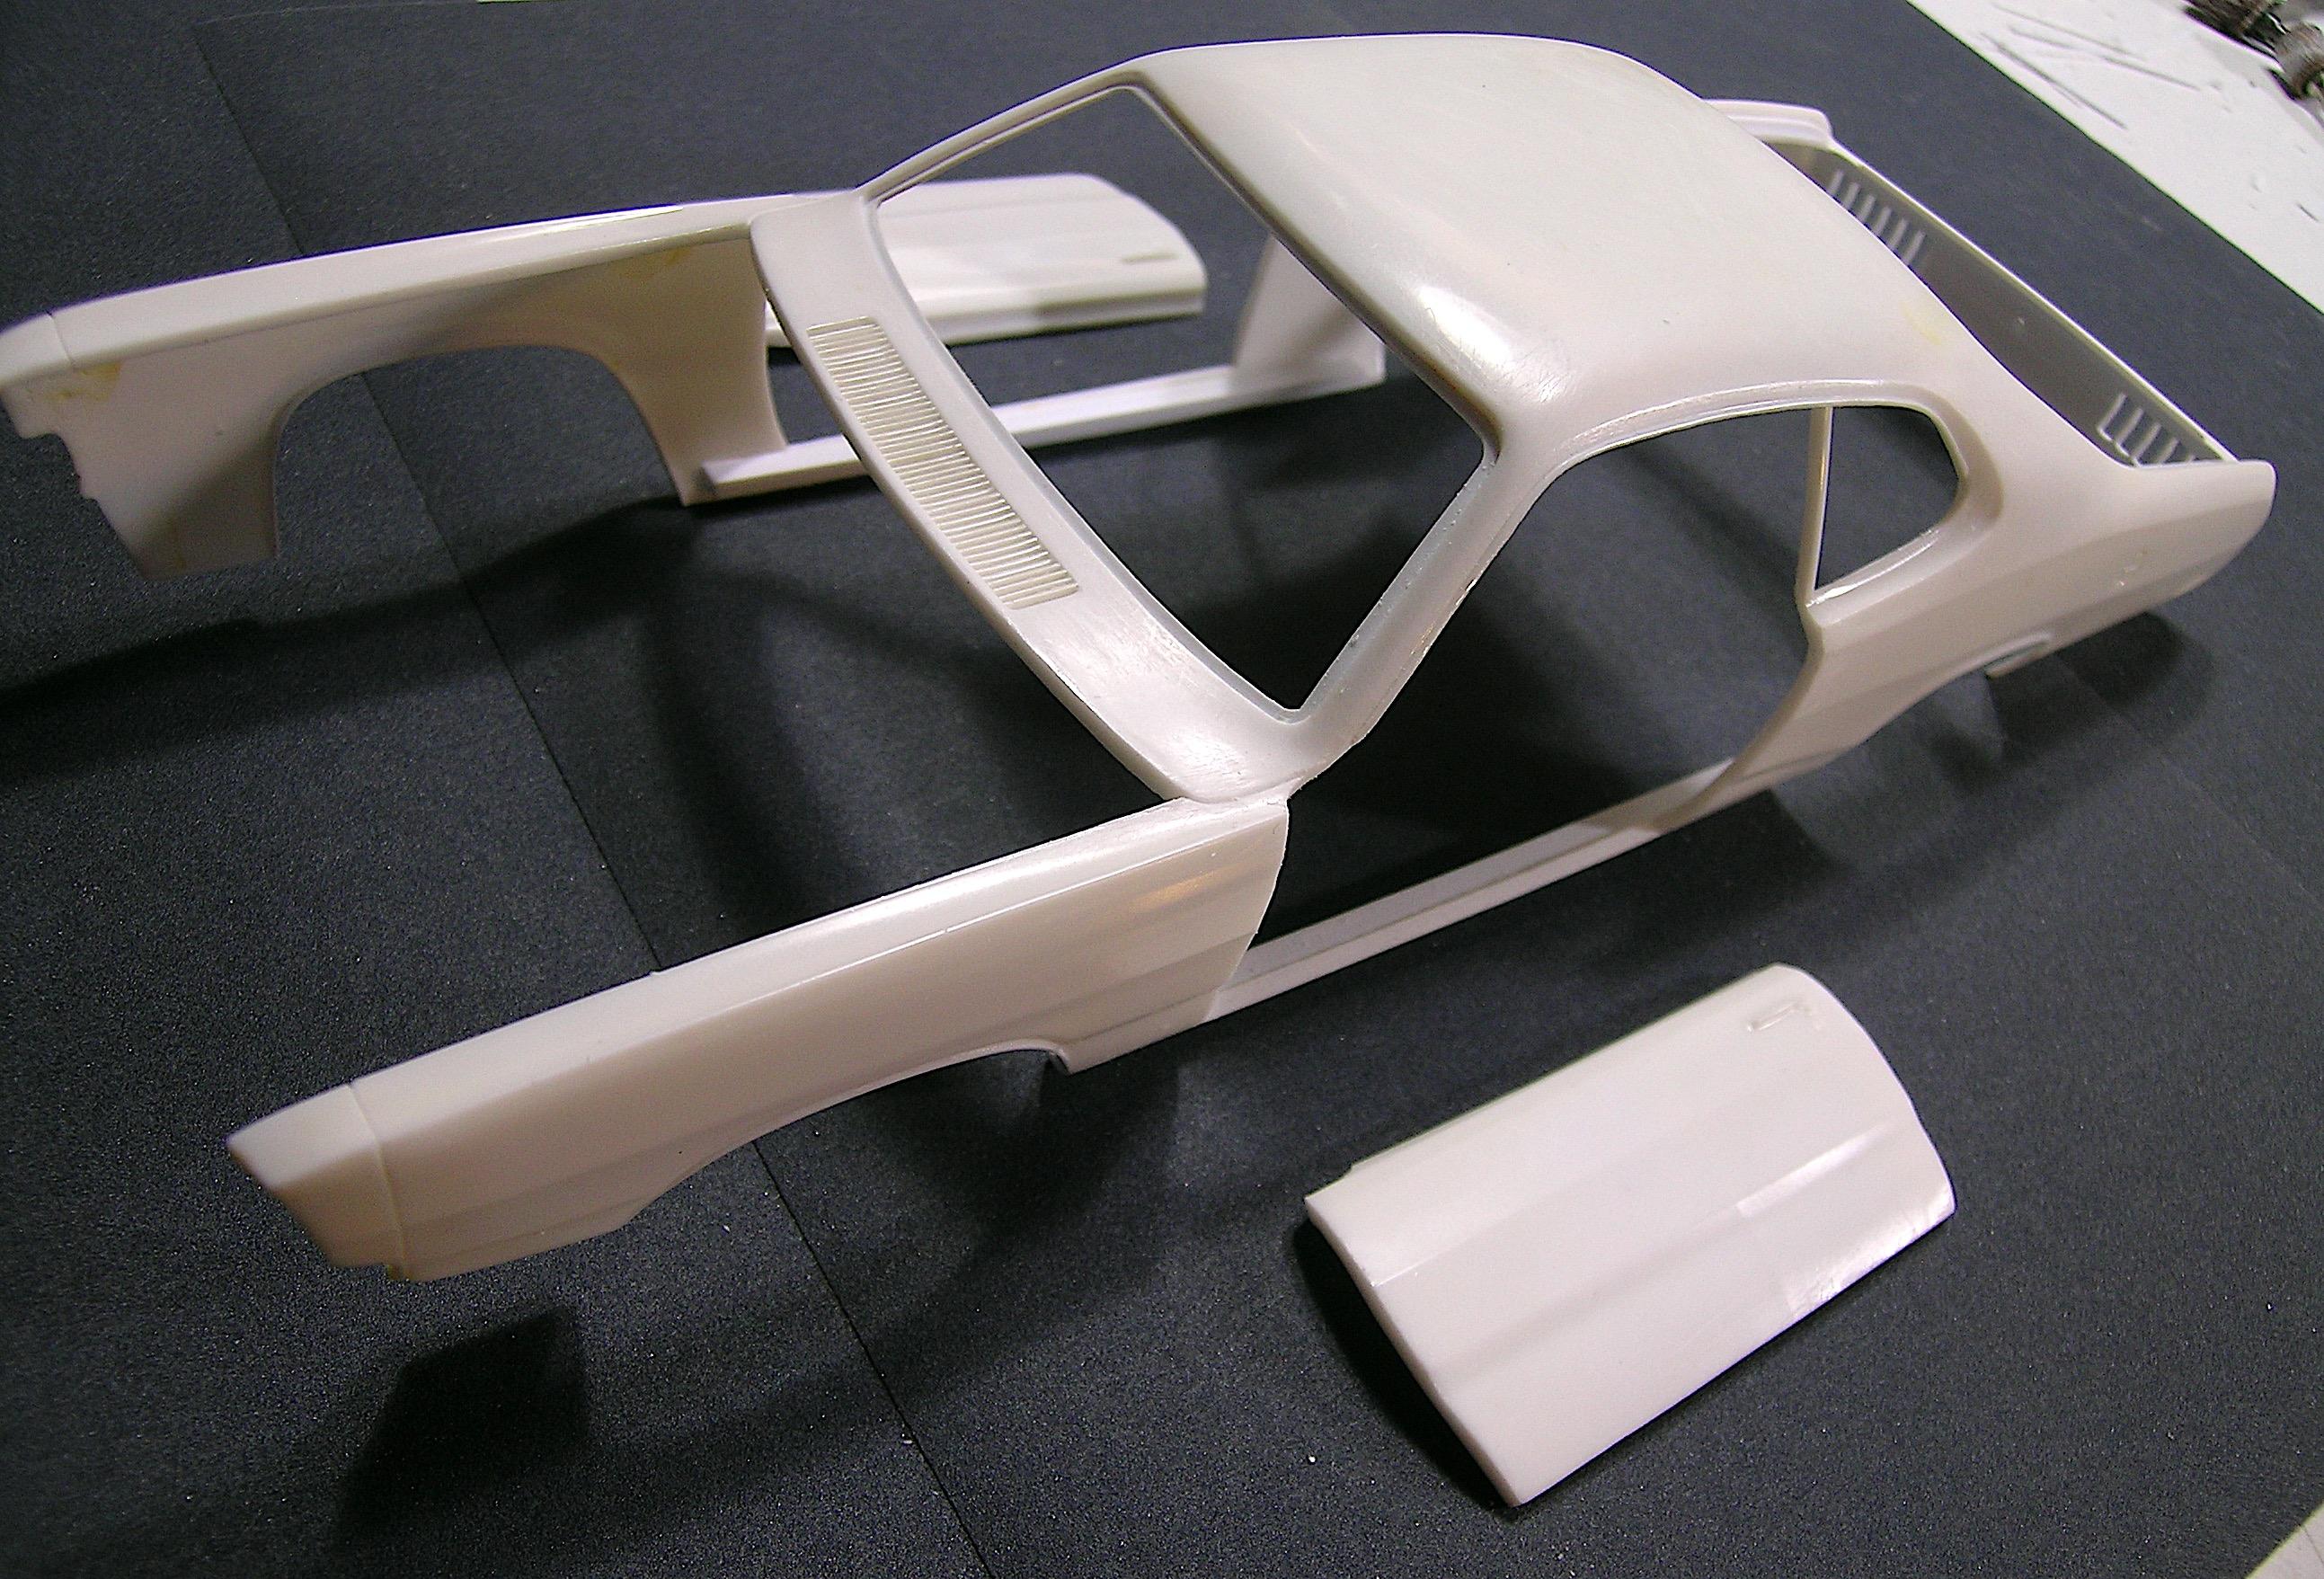
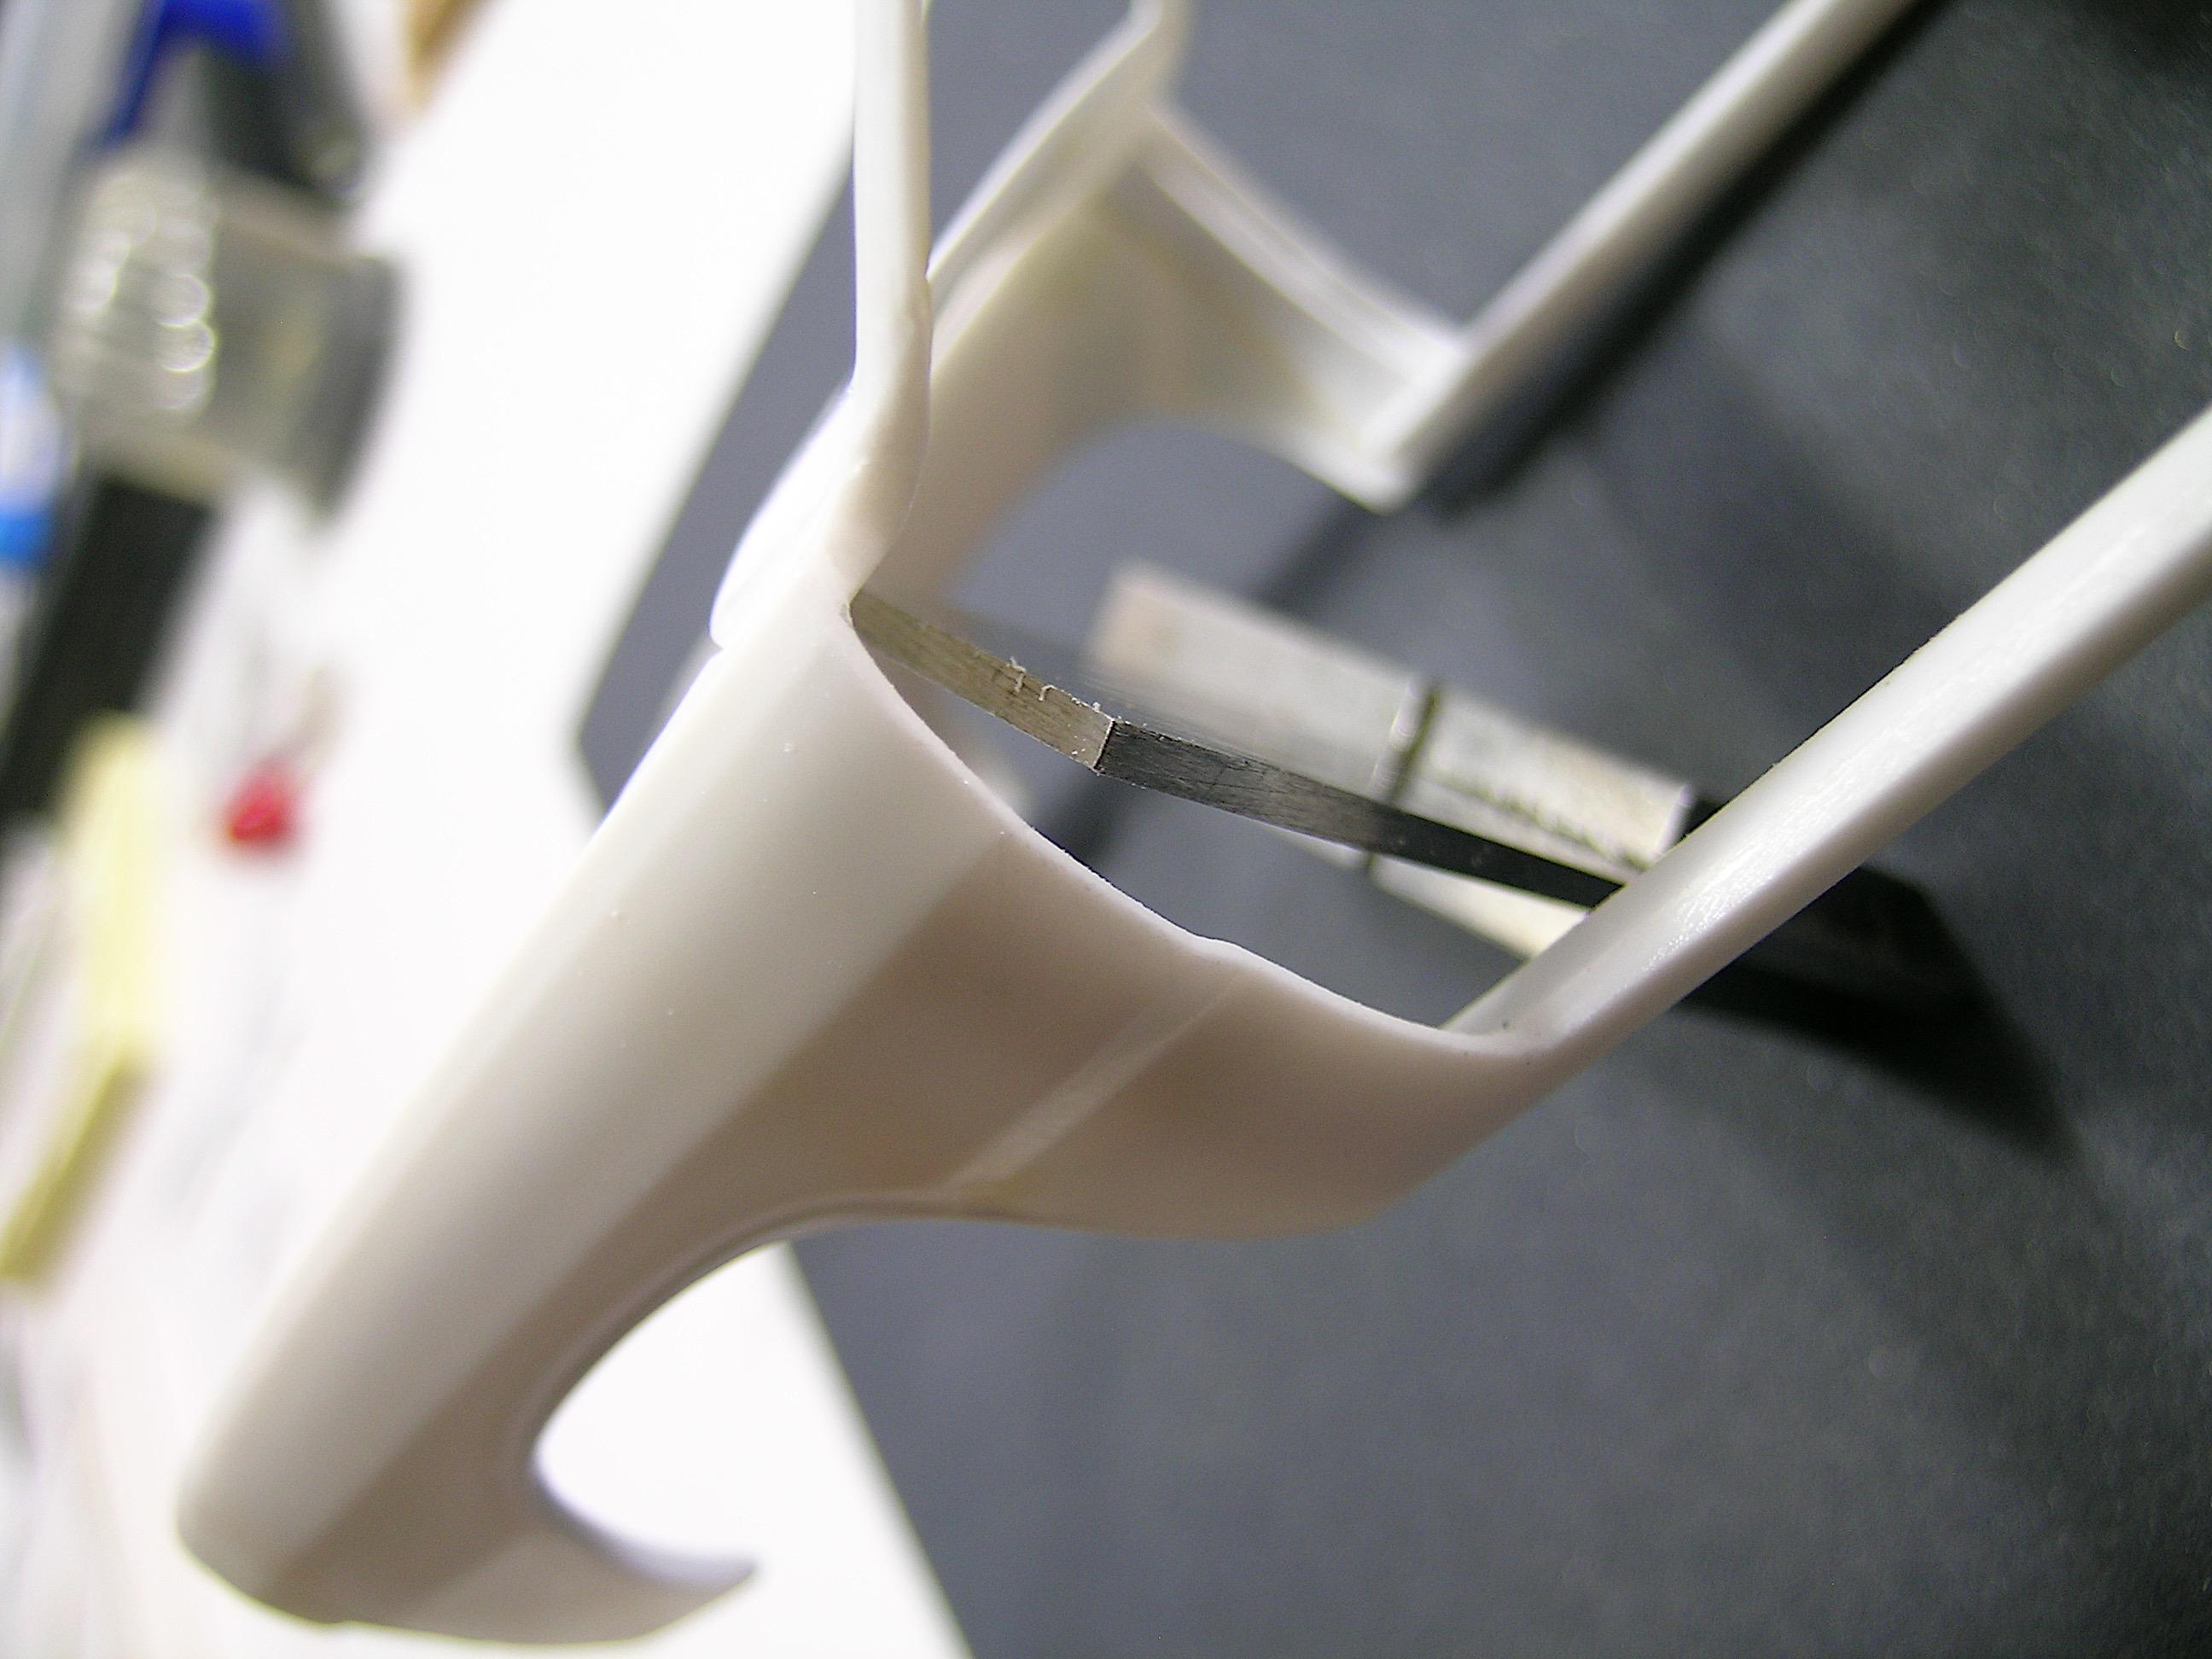
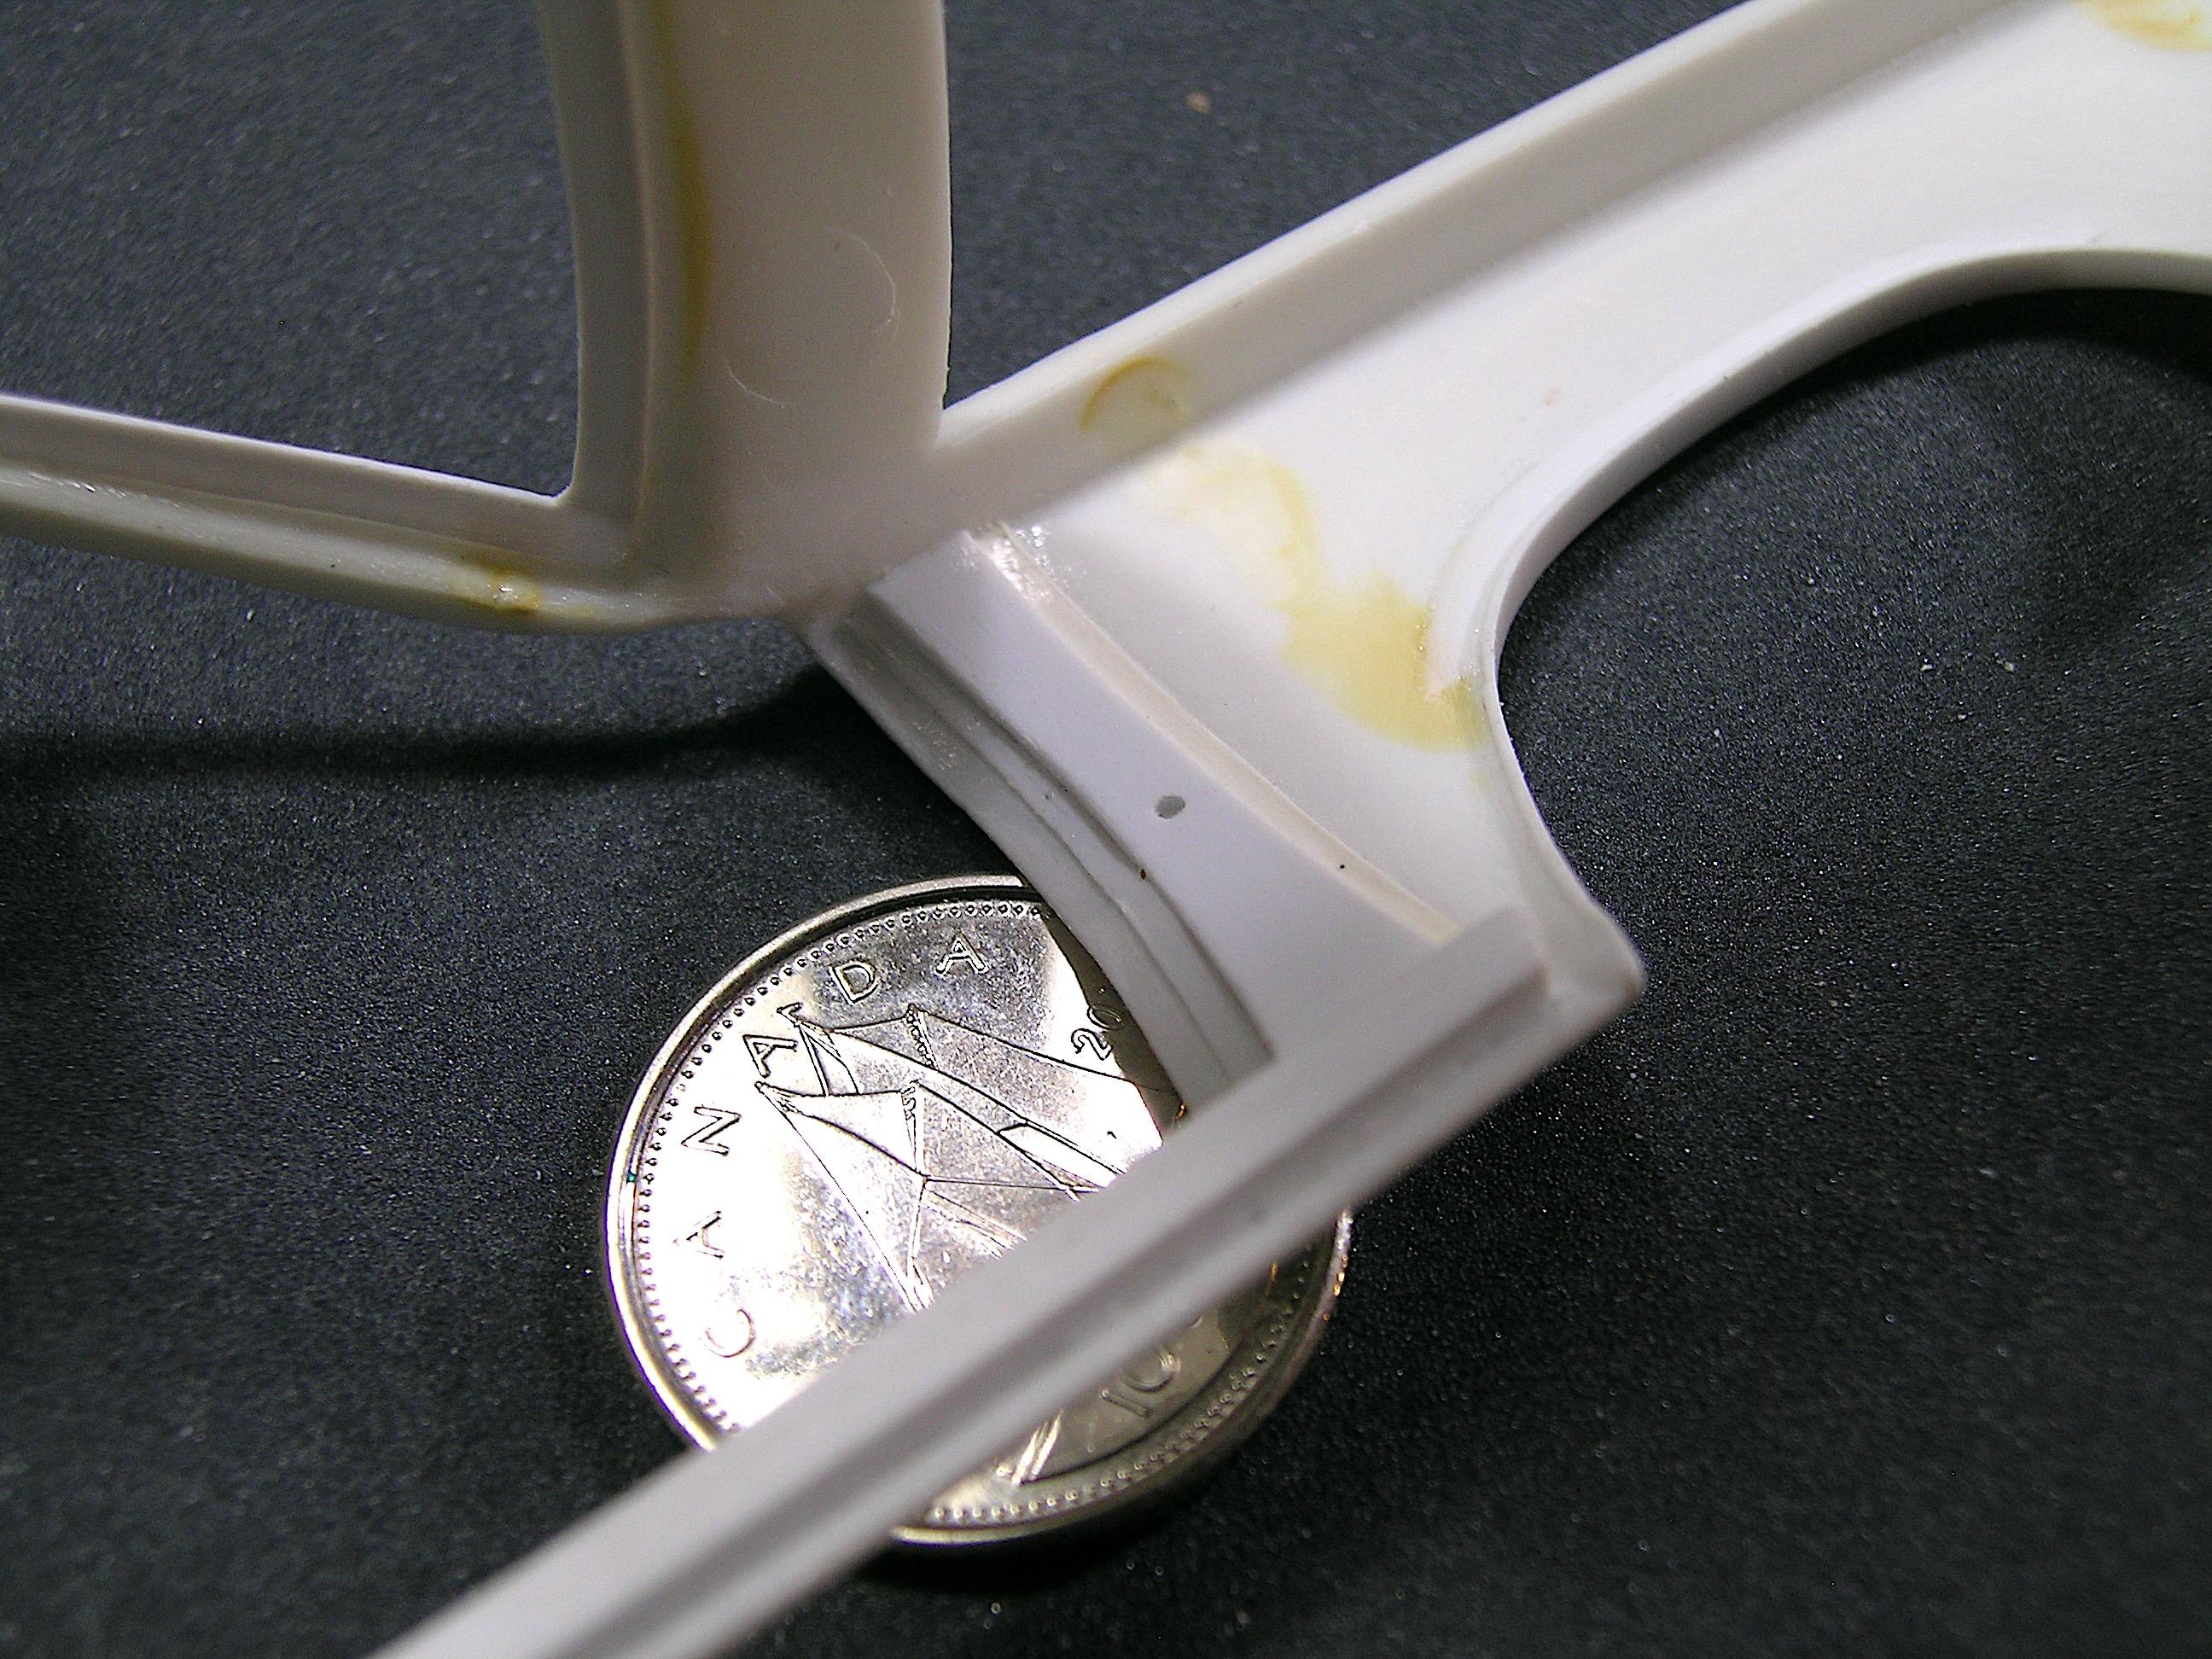
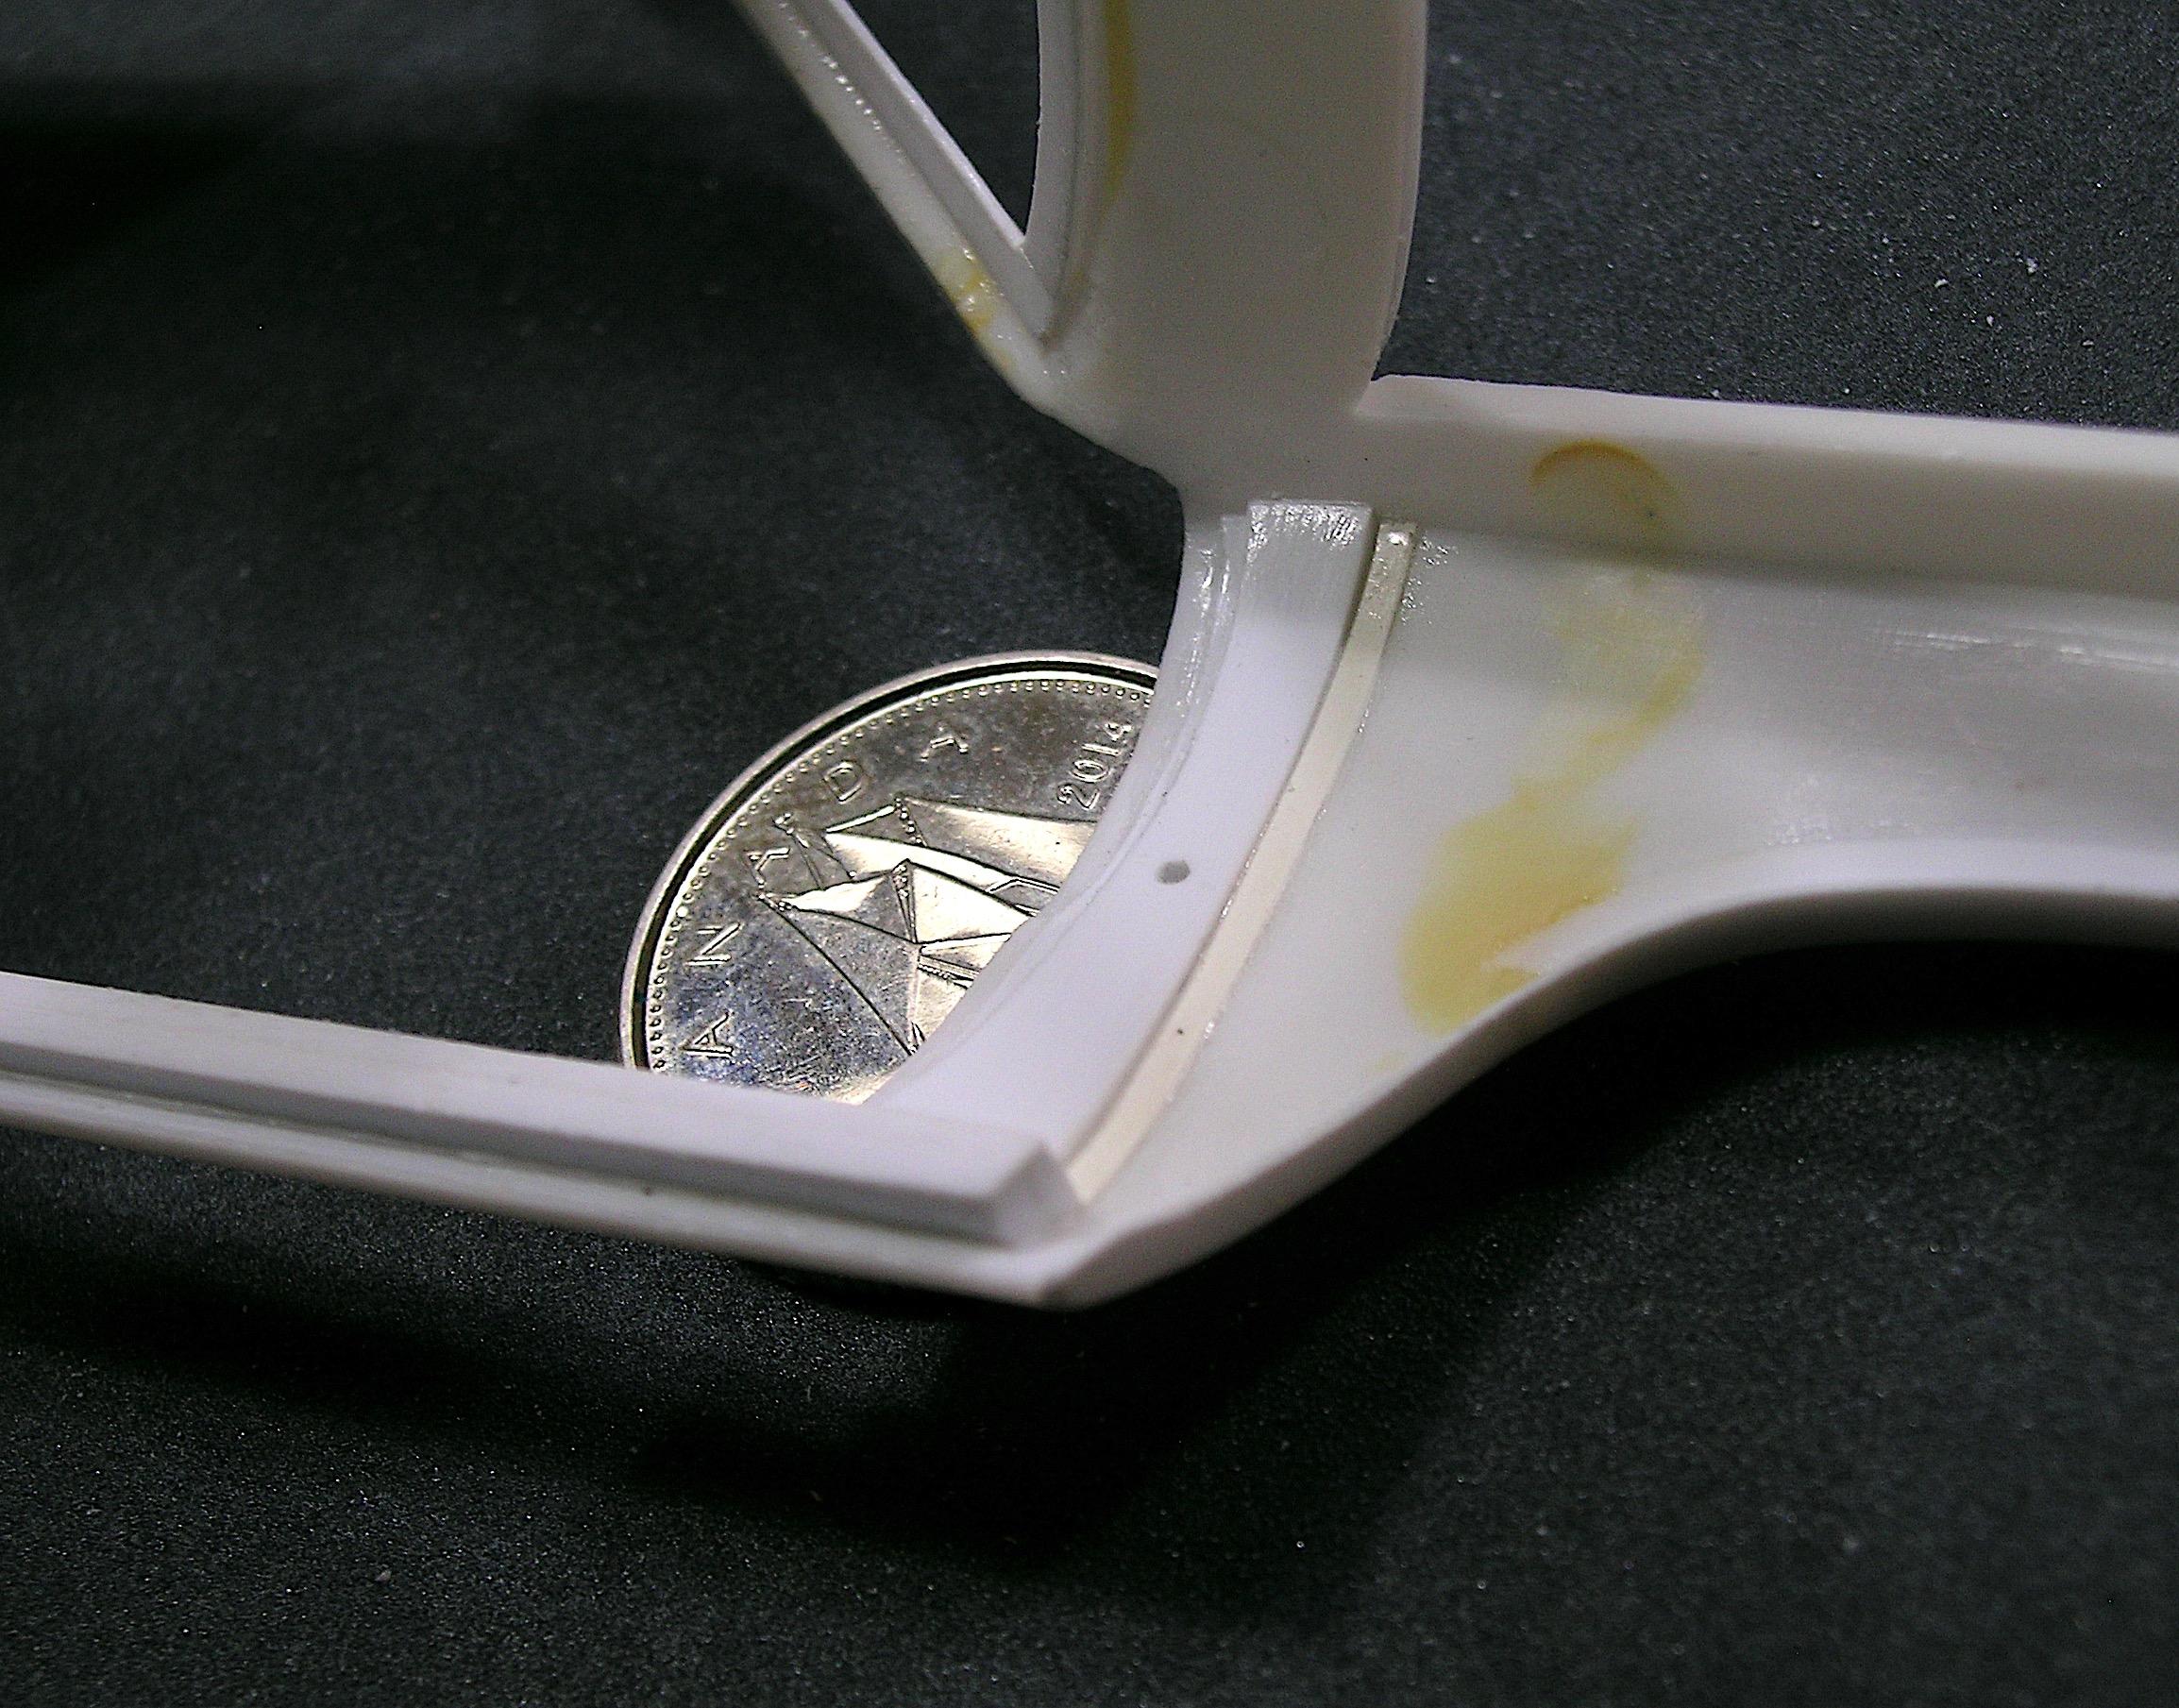
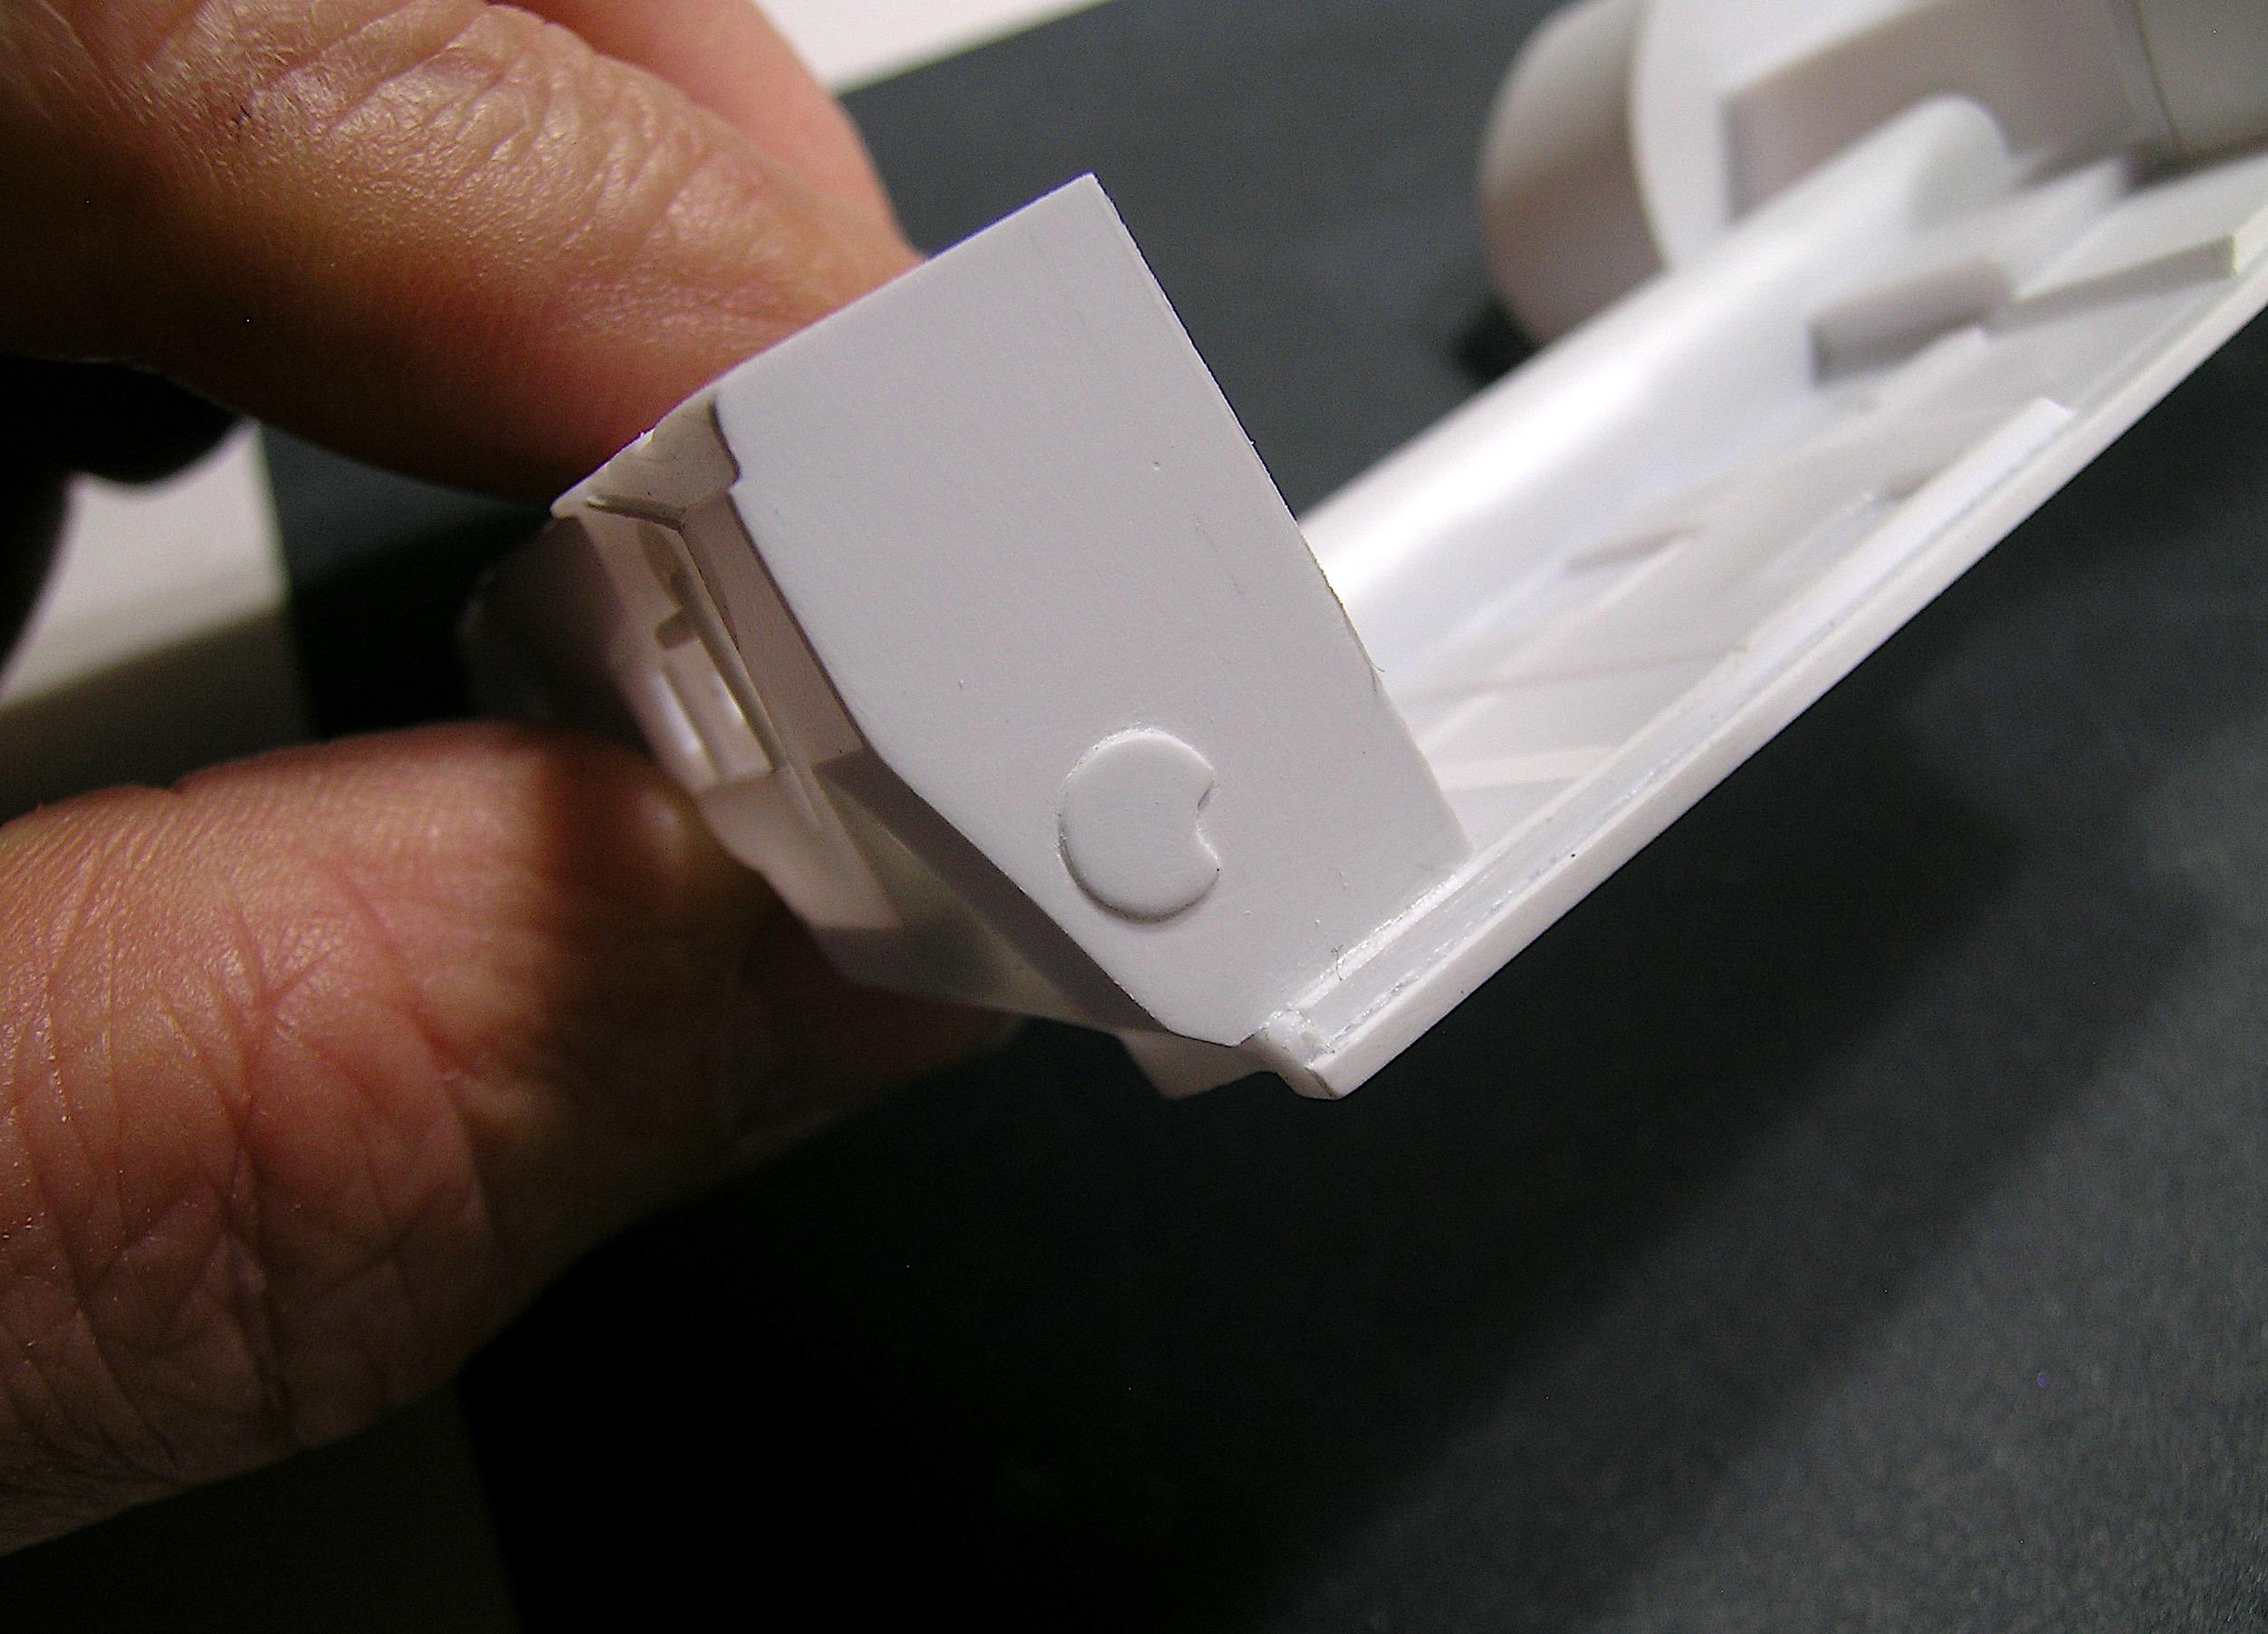
Hello everyone, Now that the main elements of the floor pan are done, I tackled over the weekend the opening of the doors. I proceeded very carefully because I didn't want to scratch the body (at least, as little as possible...) and I noticed that these old bodies were as thick as the new ones. I've done this several times to open trunk panels but this is only the second time I've opened doors, the D100 pickup being my first effort. For this project, I want the doors to work like on a real car, with the door entering towards the body (behind the front fenders), so I'll have to make more elaborate hinges. The body panels are very thick, as I mentioned earlier, so I had to thin out the edges of the fenders so the doors could work as I intended. This is the first part of the operation I'm showing you today, nothing fancy but the process is underway! See you later with more updates, Francis After hundreds of passes with the back of a thinned #11 X-Acto blade. You can notice that I added a reinforcement, which will be part of the rocker panel and will also ensure the desired position of the floor pan in the body. This thing is thick, my fingers hurt. My caliper shows the proof. I thinned the edge of the front fenders to allow the doors to enter the body. I will adjust or refine more if needed. I made the front fenders reinforcements to hide the thickness of the rest of the fenders, I couldn't thin the fenders from end to end! ? From a different angle, it looks like it will be more work than expected... as usual... ?
-
Whatever path you take, the goal is to find satisfaction in it and making your own custom parts is very rewarding, 3D is just another way to keep the hobby going and that's a good thing!
- 352 replies
-
- 1
-

-
- brass
- tube chassis
- (and 2 more)
-
I love all the details Daniel, an amazing dragster in the making! ?
-
48 Ford Ranchero
AmericanMuscleFan replied to Butter 1's topic in WIP: Model Trucks: Pickups, Vans, SUVs, Light Commercial
Nice touch on the headlight Ron, very nice improvement! I have always found the headlights on many models to have a toy-like (or fake) effect and what you have done will lend a lot of credibility to the final product. ? -
The gas pump is beautiful Ian, I like the way you made it, it shows that there is more than one way to achieve our goal, hard to do better! ?
- 352 replies
-
- 1
-
-
- brass
- tube chassis
- (and 2 more)
-
Good timing to ask and enjoy this fantastic result! Simply gorgeous!!! ? In 25 years we will probably put away our tools... ?
-
’72 Dodge Demon Drag Racer 1/25 scale
AmericanMuscleFan replied to AmericanMuscleFan's topic in WIP: Drag Racing Models
The words of a wise man! ? -
’72 Dodge Demon Drag Racer 1/25 scale
AmericanMuscleFan replied to AmericanMuscleFan's topic in WIP: Drag Racing Models
Thanks Ron, I will continue to share my adventures and my process as long as people appreciate it, the goal is not to reinvent the wheel but to show that it is always possible to improve things. This is exactly what you are doing with your 48 Ford Ranchero! Francis. -
Great job as usual Daniel, the dash and drain valve are both superb! Do you use a special type of "etching primer" like Ian used on the brass frame of his last project? I have never applied paint to brass and was wondering how a conventional primer or paint would adhere to this type of surface.
-
48 Ford Ranchero
AmericanMuscleFan replied to Butter 1's topic in WIP: Model Trucks: Pickups, Vans, SUVs, Light Commercial
WOW, great job Ron! Everything you've done so far is contest quality and you can be proud, few dare to go into that kind of detail but you'll appreciate all your hard work in the end I'm sure. ? -
’72 Dodge Demon Drag Racer 1/25 scale
AmericanMuscleFan replied to AmericanMuscleFan's topic in WIP: Drag Racing Models
You already do it very well Marcos, I'm just older and I work slowly because I can't keep up with the others! Francis Thanks James! -
’72 Dodge Demon Drag Racer 1/25 scale
AmericanMuscleFan replied to AmericanMuscleFan's topic in WIP: Drag Racing Models
Thanks Ian, I'm inspired by the best of this hobby ? and good advice from guys like you! The engine will certainly be Mopar because I don't want to make any enemies and that I can do nothing else! ? Francis -
’72 Dodge Demon Drag Racer 1/25 scale
AmericanMuscleFan replied to AmericanMuscleFan's topic in WIP: Drag Racing Models
Thanks Bob! Sorry I didn't take pictures of this, but I took an aluminum rod and wrapped a piece of sandpaper around it to create the desired opening size. I used the same aluminum rod to force the .020" styrene sheet to stay in place while the glue cured, the sandpaper had added about .020" to the opening in the previous operation. For the funnel part, I cut a sheet of thin cardboard to trace the desired shape and then transferred that drawing to a sheet of 0.020" styrene. This is also why I had to do the firewall at the same time because both parts are connected together. I hope it makes sense to you, but basically I took more time to pre-cut the shapes to minimize the finish. Francis -
Good trick for the belt Marcos, this is the kind of finding I really like and I am not the only one.... ?
-
’72 Dodge Demon Drag Racer 1/25 scale
AmericanMuscleFan replied to AmericanMuscleFan's topic in WIP: Drag Racing Models
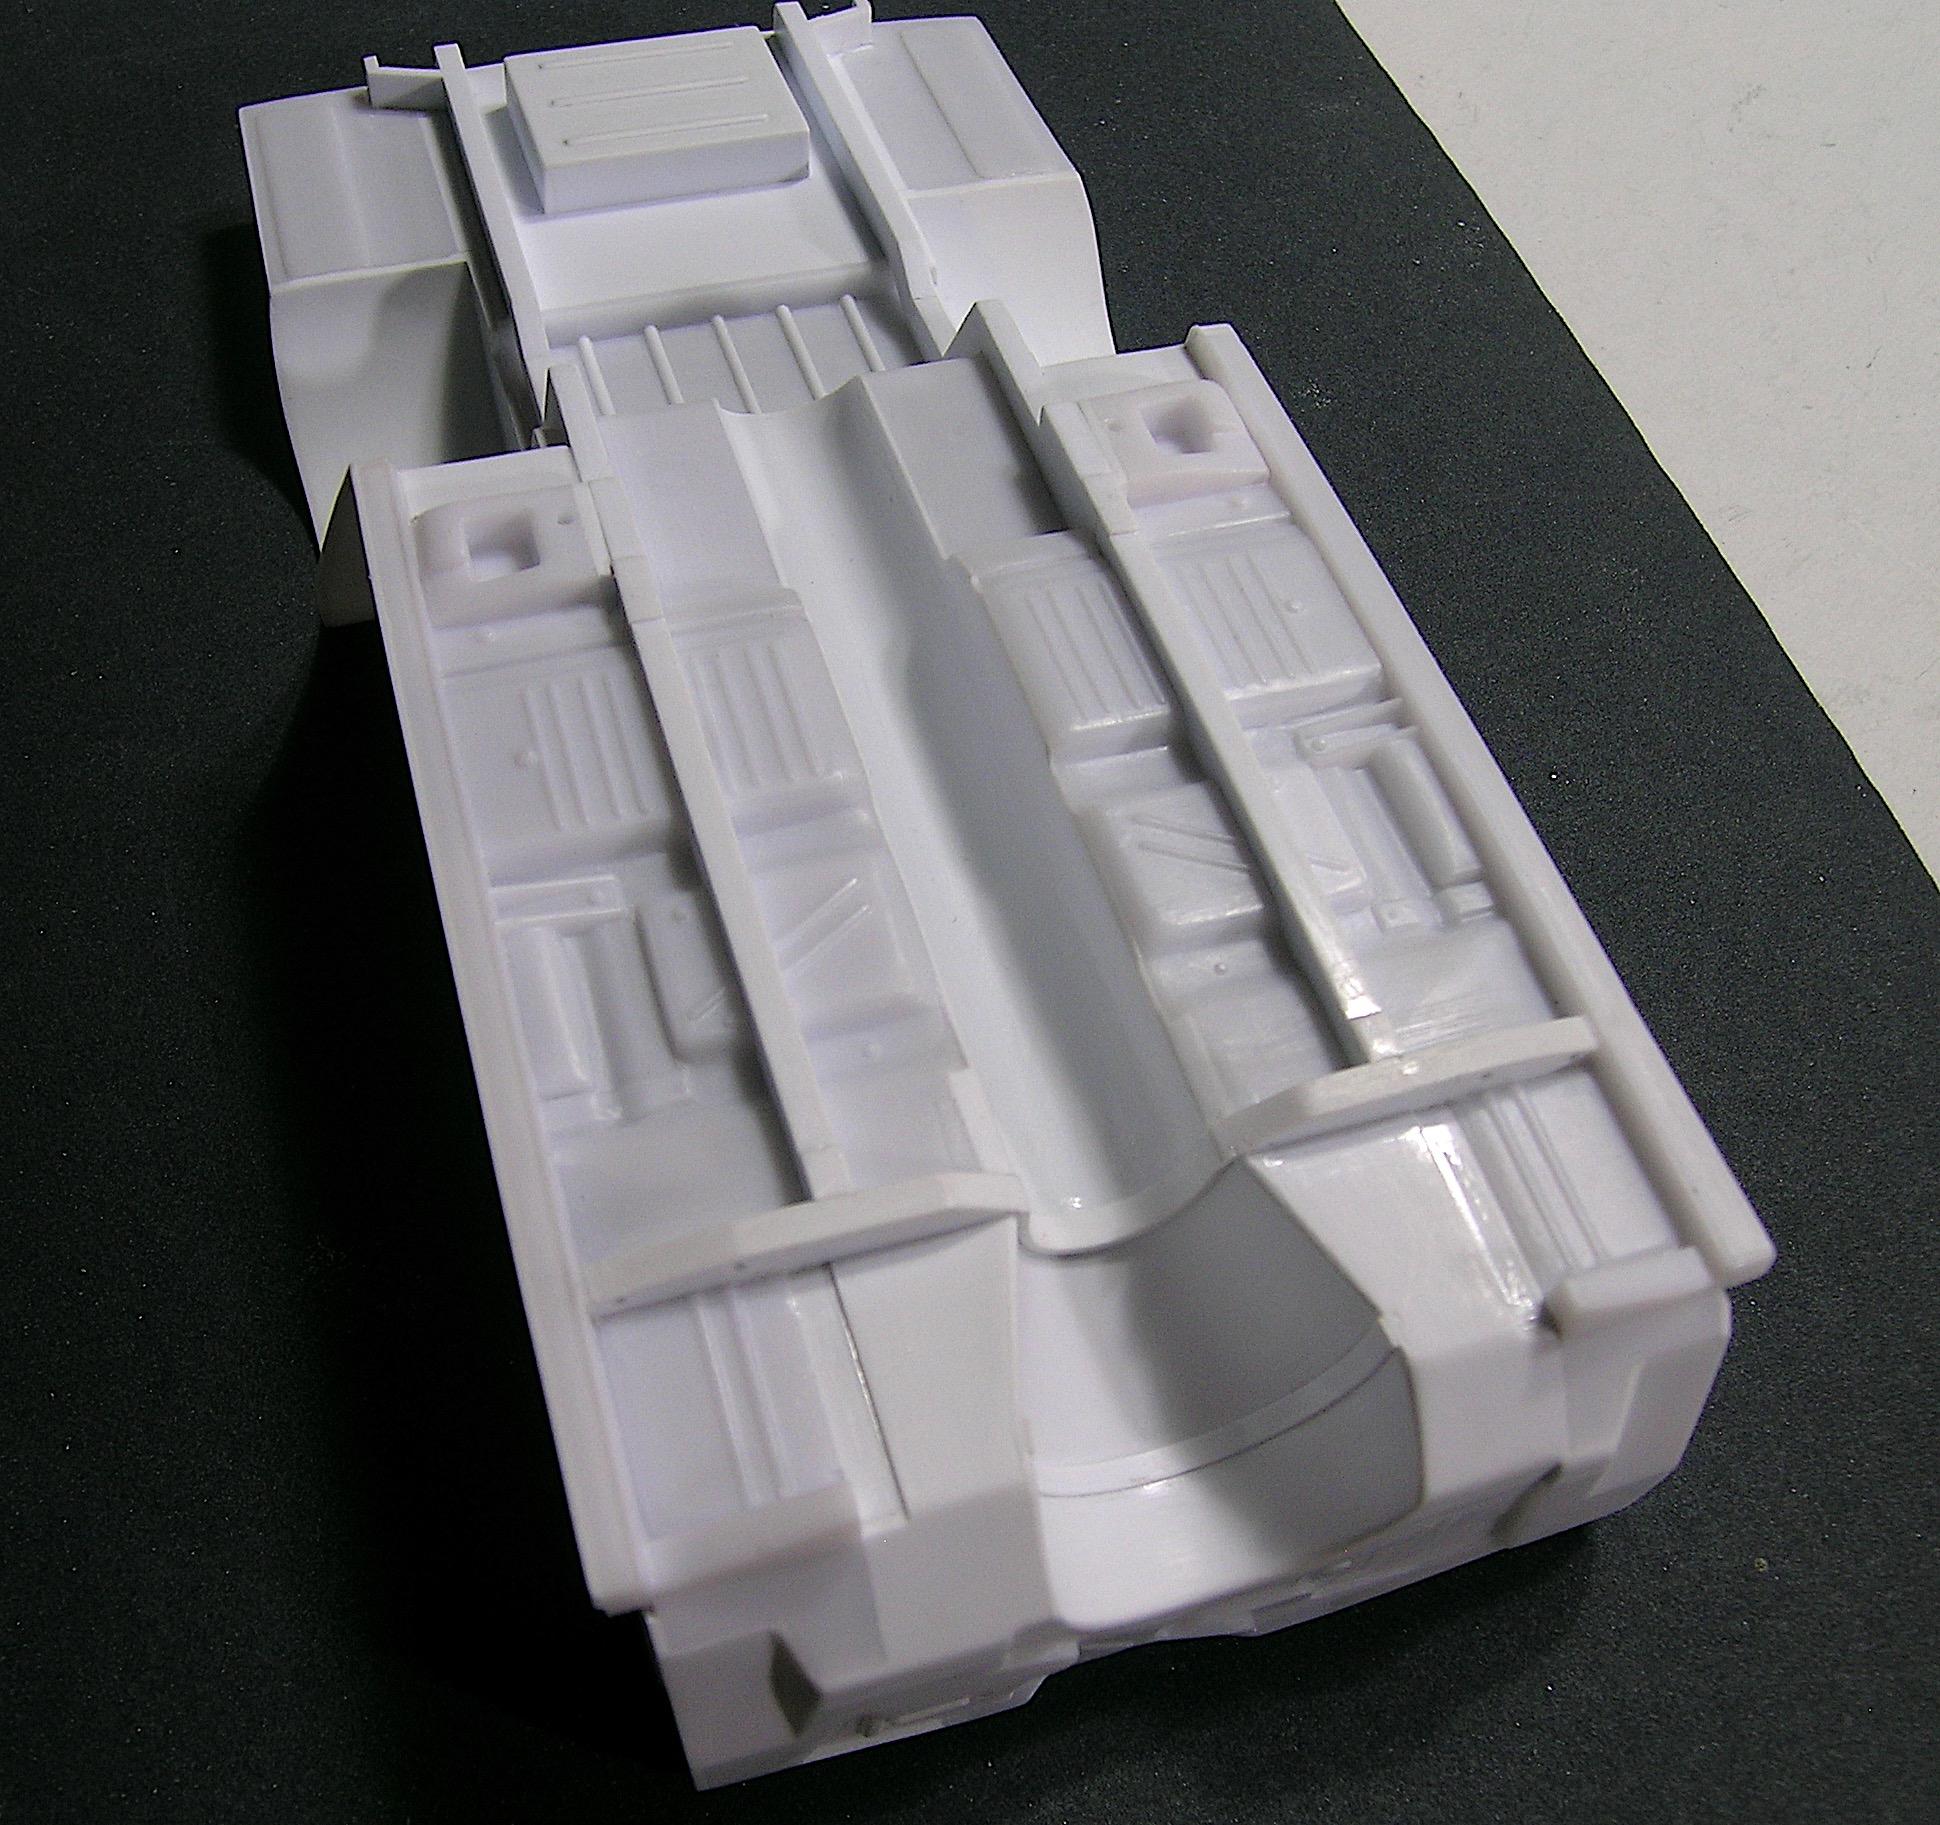
Hello everyone, I made some progress on the floor pan over the weekend and it's time to share the photos I took with you. After preparing the opening to receive the transmission tunnel, I glued the whole thing and made the firewall because it was necessary to give rigidity to the whole. I also removed the rails from the front frame as I will custom make new ones a bit later when I have decided how the engine bay will be dressed. I plan to open the doors and make them functional so you will understand later why the firewall is made like this, I have a plan but it won't be easy! In addition, I do not plan to put torsion bars and a more modern or racing suspension will be used, to be continued... Your comments are welcome and appreciated. Francis I made a clean, straight opening for the transmission tunnel that I custom made using 0.020" Evergreen styrene. The choice of transmission is not yet final but I made the tunnel large enough (I hope) for a Lenco style planetary transmission. The cross frame was cut and I continued the shape to simulate the support and/or reinforcement of the tunnel I added some basic shapes to the side of the firewall referring to pictures of restoration site on the internet. I have provided openings in the cross frame for wiring and plumbing. You can also see where the front frame rails will be located, the spacing will be about the same as the kit but adjusted to my needs Seen from the back, it is progressing but there is still a lot of work to do.
-
’72 Dodge Demon Drag Racer 1/25 scale
AmericanMuscleFan replied to AmericanMuscleFan's topic in WIP: Drag Racing Models
Thanks Trevor! I had planned a less difficult project than the pickup but I think that reality is slowly catching up with me, the work on the body details are longer than I had anticipated. ? Francis -
I join the group that loves it very much! ?
-
’72 Dodge Demon Drag Racer 1/25 scale
AmericanMuscleFan replied to AmericanMuscleFan's topic in WIP: Drag Racing Models
Thanks Charlie! Yes, I wrapped them around a socket, you can always find the perfect size for your need as they are all a little larger than each other and sometimes there are even small and useful variations in sizes between manufacturers for the same size bolts. Francis