-
Posts
4,666 -
Joined
-
Last visited
Content Type
Profiles
Forums
Events
Gallery
Everything posted by MarkJ
-
.jpg.b9265433dc8c3b550370b1d0e4e4d2fc.thumb.jpg.915f5b46e3c9402eeaa6972073121c87.jpg)
Herb Thomas 1955 Chevy
MarkJ replied to MarkJ's topic in WIP: Stock Cars (NASCAR, Super Stock, Late Model, etc.)
Thanks guys. I really appreciate the replies. -
.jpg.b9265433dc8c3b550370b1d0e4e4d2fc.thumb.jpg.915f5b46e3c9402eeaa6972073121c87.jpg)
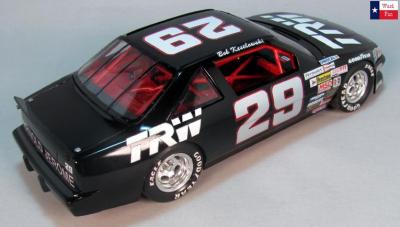
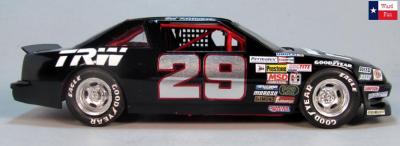
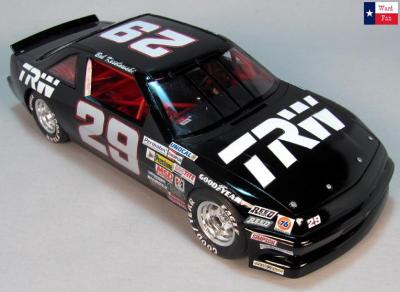
1989 Bob Keselowski Pontiac
MarkJ replied to MarkJ's topic in WIP: Stock Cars (NASCAR, Super Stock, Late Model, etc.)
Thanks guys. -
.jpg.b9265433dc8c3b550370b1d0e4e4d2fc.thumb.jpg.915f5b46e3c9402eeaa6972073121c87.jpg)
1970 Daytona 500 Winner
MarkJ replied to satterwhite78's topic in WIP: Stock Cars (NASCAR, Super Stock, Late Model, etc.)
Excellent build. -
.jpg.b9265433dc8c3b550370b1d0e4e4d2fc.thumb.jpg.915f5b46e3c9402eeaa6972073121c87.jpg)
Kodak Nascar
MarkJ replied to Narampa's topic in WIP: Stock Cars (NASCAR, Super Stock, Late Model, etc.)
Wow, OC. Where have you been hiding this one? Excellent as always -
.jpg.b9265433dc8c3b550370b1d0e4e4d2fc.thumb.jpg.915f5b46e3c9402eeaa6972073121c87.jpg)
Derricke Cope .............
MarkJ replied to Old Coyote's topic in WIP: Stock Cars (NASCAR, Super Stock, Late Model, etc.)
Excellent build and paint as always. -
.jpg.b9265433dc8c3b550370b1d0e4e4d2fc.thumb.jpg.915f5b46e3c9402eeaa6972073121c87.jpg)
Frank Mundy Hornet .
MarkJ replied to Silver Foxx's topic in WIP: Stock Cars (NASCAR, Super Stock, Late Model, etc.)
Awesome build. The best I've seen done using this kit. -
.jpg.b9265433dc8c3b550370b1d0e4e4d2fc.thumb.jpg.915f5b46e3c9402eeaa6972073121c87.jpg)
1989 Bob Keselowski Pontiac
MarkJ replied to MarkJ's topic in WIP: Stock Cars (NASCAR, Super Stock, Late Model, etc.)
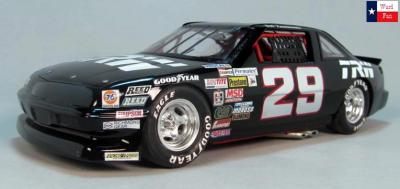
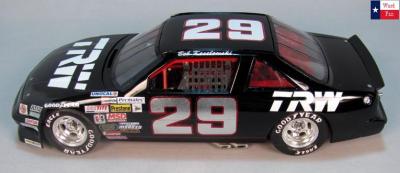
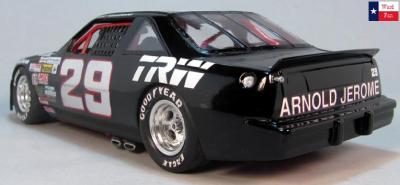
Its the amt Richard Petty 1989 Pontiac nascar kit built box stock. No I did not do any body mods to it. I built a 1995 Ward Burton Grand Prix that I had to elongate the front but not this one. -
.jpg.b9265433dc8c3b550370b1d0e4e4d2fc.thumb.jpg.915f5b46e3c9402eeaa6972073121c87.jpg)
Herb Thomas 1955 Chevy
MarkJ replied to MarkJ's topic in WIP: Stock Cars (NASCAR, Super Stock, Late Model, etc.)
Jimmie, I did not know there was a Herb Thomas kit. I built mine from an amt 55 chevy bel air kit -
.jpg.b9265433dc8c3b550370b1d0e4e4d2fc.thumb.jpg.915f5b46e3c9402eeaa6972073121c87.jpg)
Herb Thomas 1955 Chevy
MarkJ replied to MarkJ's topic in WIP: Stock Cars (NASCAR, Super Stock, Late Model, etc.)
Beats me. It seems like it would be a lot of work routing them through there. Hosted on Fotki -
.jpg.b9265433dc8c3b550370b1d0e4e4d2fc.thumb.jpg.915f5b46e3c9402eeaa6972073121c87.jpg)
Herb Thomas 1955 Chevy
MarkJ replied to MarkJ's topic in WIP: Stock Cars (NASCAR, Super Stock, Late Model, etc.)
I did. They are inkjet decals printed on testors paper. One was a white sheet for the contengecies and the other was a clear sheet for the numbers and letters such as Herb's name and the items on the hood and trunk and front fenders. The white stripes for the numbers were slivers cut from the leftover white decal sheet. Those were very painstaking. The only sheets I could find to purchase had the wrong colors for the items on the roof, hood and front fenders and the quarterpanel chevrolet decals were also wrong. I guess whoever made the decals for those sheets used the museum car as their guide to what the colors should be. I found color pictures of the real car to make mine. -
.jpg.b9265433dc8c3b550370b1d0e4e4d2fc.thumb.jpg.915f5b46e3c9402eeaa6972073121c87.jpg)
Smokey Yunick's Chevelle
MarkJ replied to MarkJ's topic in WIP: Stock Cars (NASCAR, Super Stock, Late Model, etc.)
Thanks guys. I really appreciate all the replys. -
.jpg.b9265433dc8c3b550370b1d0e4e4d2fc.thumb.jpg.915f5b46e3c9402eeaa6972073121c87.jpg)
Richard Petty Plymouth
MarkJ replied to MarkJ's topic in WIP: Stock Cars (NASCAR, Super Stock, Late Model, etc.)
No, just the kit and some scratchbuilt parts from evergreen styrene. -
.jpg.b9265433dc8c3b550370b1d0e4e4d2fc.thumb.jpg.915f5b46e3c9402eeaa6972073121c87.jpg)
Smokey Yunick's Chevelle
MarkJ replied to MarkJ's topic in WIP: Stock Cars (NASCAR, Super Stock, Late Model, etc.)
Thanks Brett but it looks like my bandwidth is already back. I will go fix my fotki though. thanks for the info. -
.jpg.b9265433dc8c3b550370b1d0e4e4d2fc.thumb.jpg.915f5b46e3c9402eeaa6972073121c87.jpg)
A.J.Foyt Oldsmobile.
MarkJ replied to Silver Foxx's topic in WIP: Stock Cars (NASCAR, Super Stock, Late Model, etc.)
Excellent build. Super clean. -
.jpg.b9265433dc8c3b550370b1d0e4e4d2fc.thumb.jpg.915f5b46e3c9402eeaa6972073121c87.jpg)
Smokey Yunick's Chevelle
MarkJ replied to MarkJ's topic in WIP: Stock Cars (NASCAR, Super Stock, Late Model, etc.)
I did. But when you post your pics from Fotki they are pretty small. I'll just wait for a while to see if they come back. -
.jpg.b9265433dc8c3b550370b1d0e4e4d2fc.thumb.jpg.915f5b46e3c9402eeaa6972073121c87.jpg)
Smokey Yunick's Chevelle
MarkJ replied to MarkJ's topic in WIP: Stock Cars (NASCAR, Super Stock, Late Model, etc.)
Out of bandwidth? Anybody know how to get it back without paying for it?

