charlie libby
-
Posts
416 -
Joined
-
Last visited
Content Type
Profiles
Forums
Events
Gallery
Everything posted by charlie libby
-
so nice i find it out of this world. get that surgery and get healthy and back to the shop again.
-
T41 Bugatti sport coupe
charlie libby replied to charlie libby's topic in WIP: Other Racing: Road Racing, Land Speed Racers
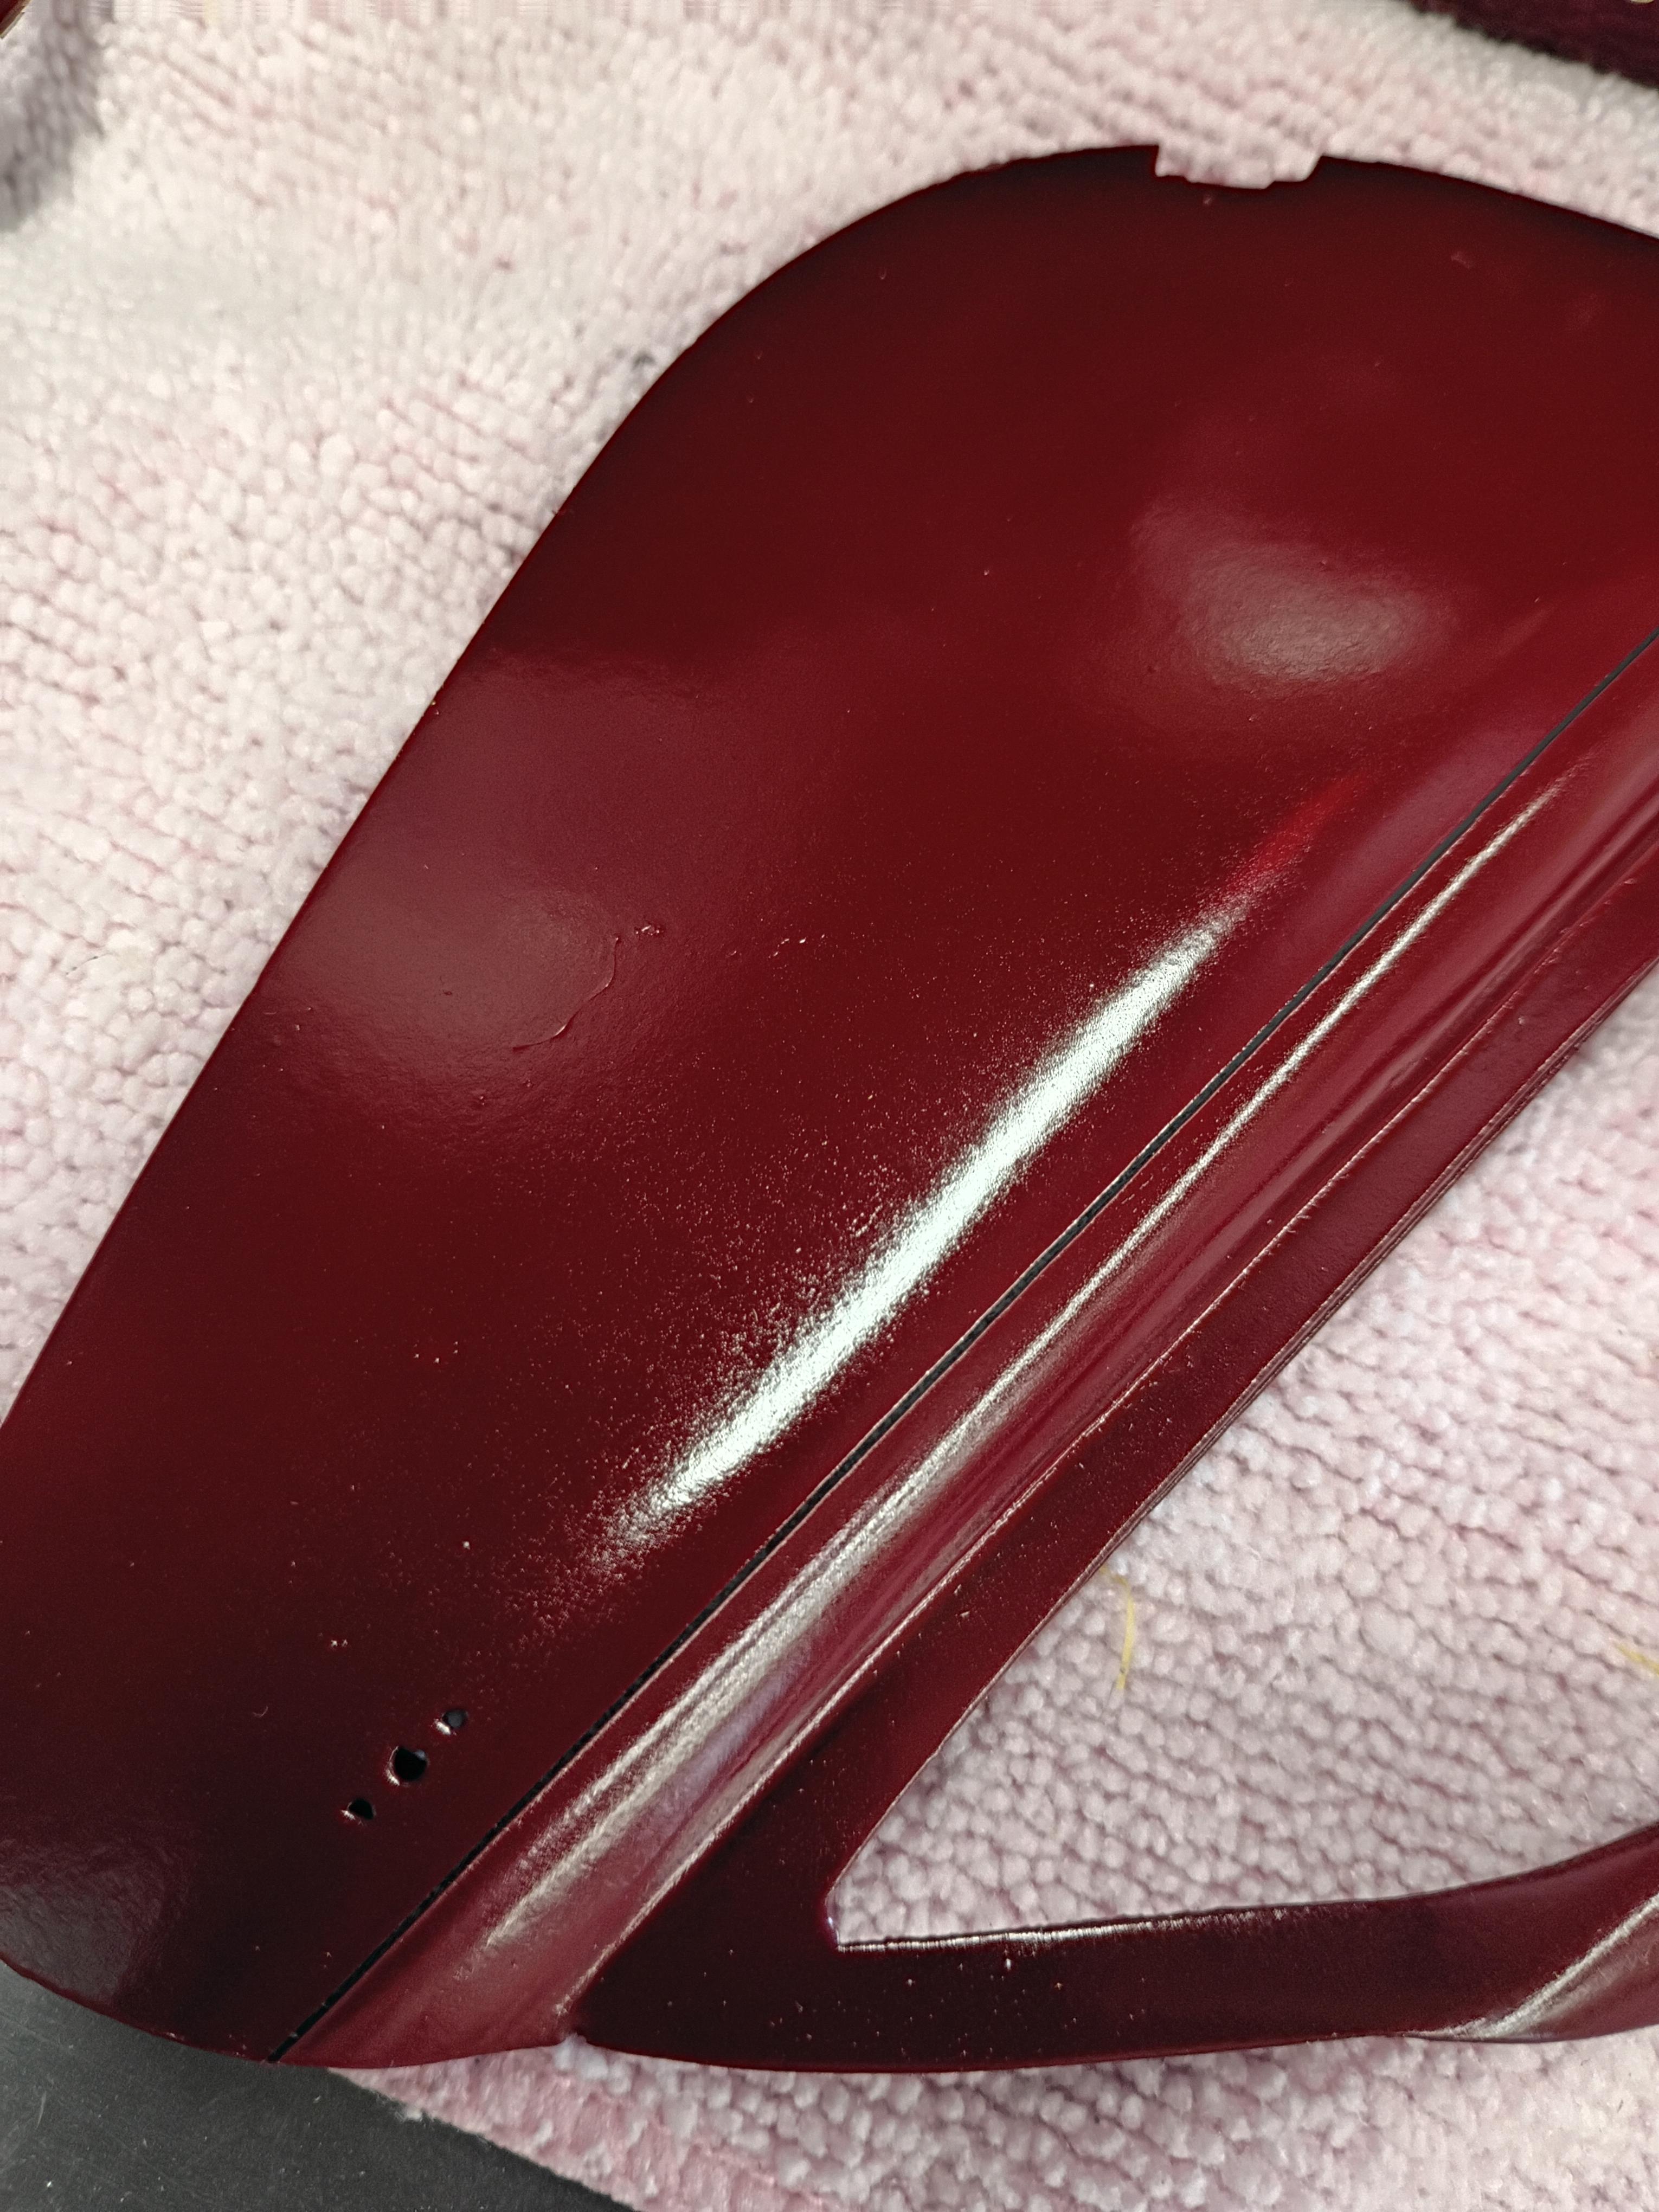
i have been painting ,sanding and polishing. red is coming long well. i thought the pin stripe was going to be .040 but it is more to scale at .015 but hard to see in the pictures. none of these have been sanded or polished . i will start that this saturday. i like to wait a week after painting. the front fenders are sanded but not finished polishing. thanks ken .
-
Tim so sorry to hear of your injury.i hope all goes well.keep us informed
-
formula 55 chevy
charlie libby replied to charlie libby's topic in WIP: Other Racing: Road Racing, Land Speed Racers
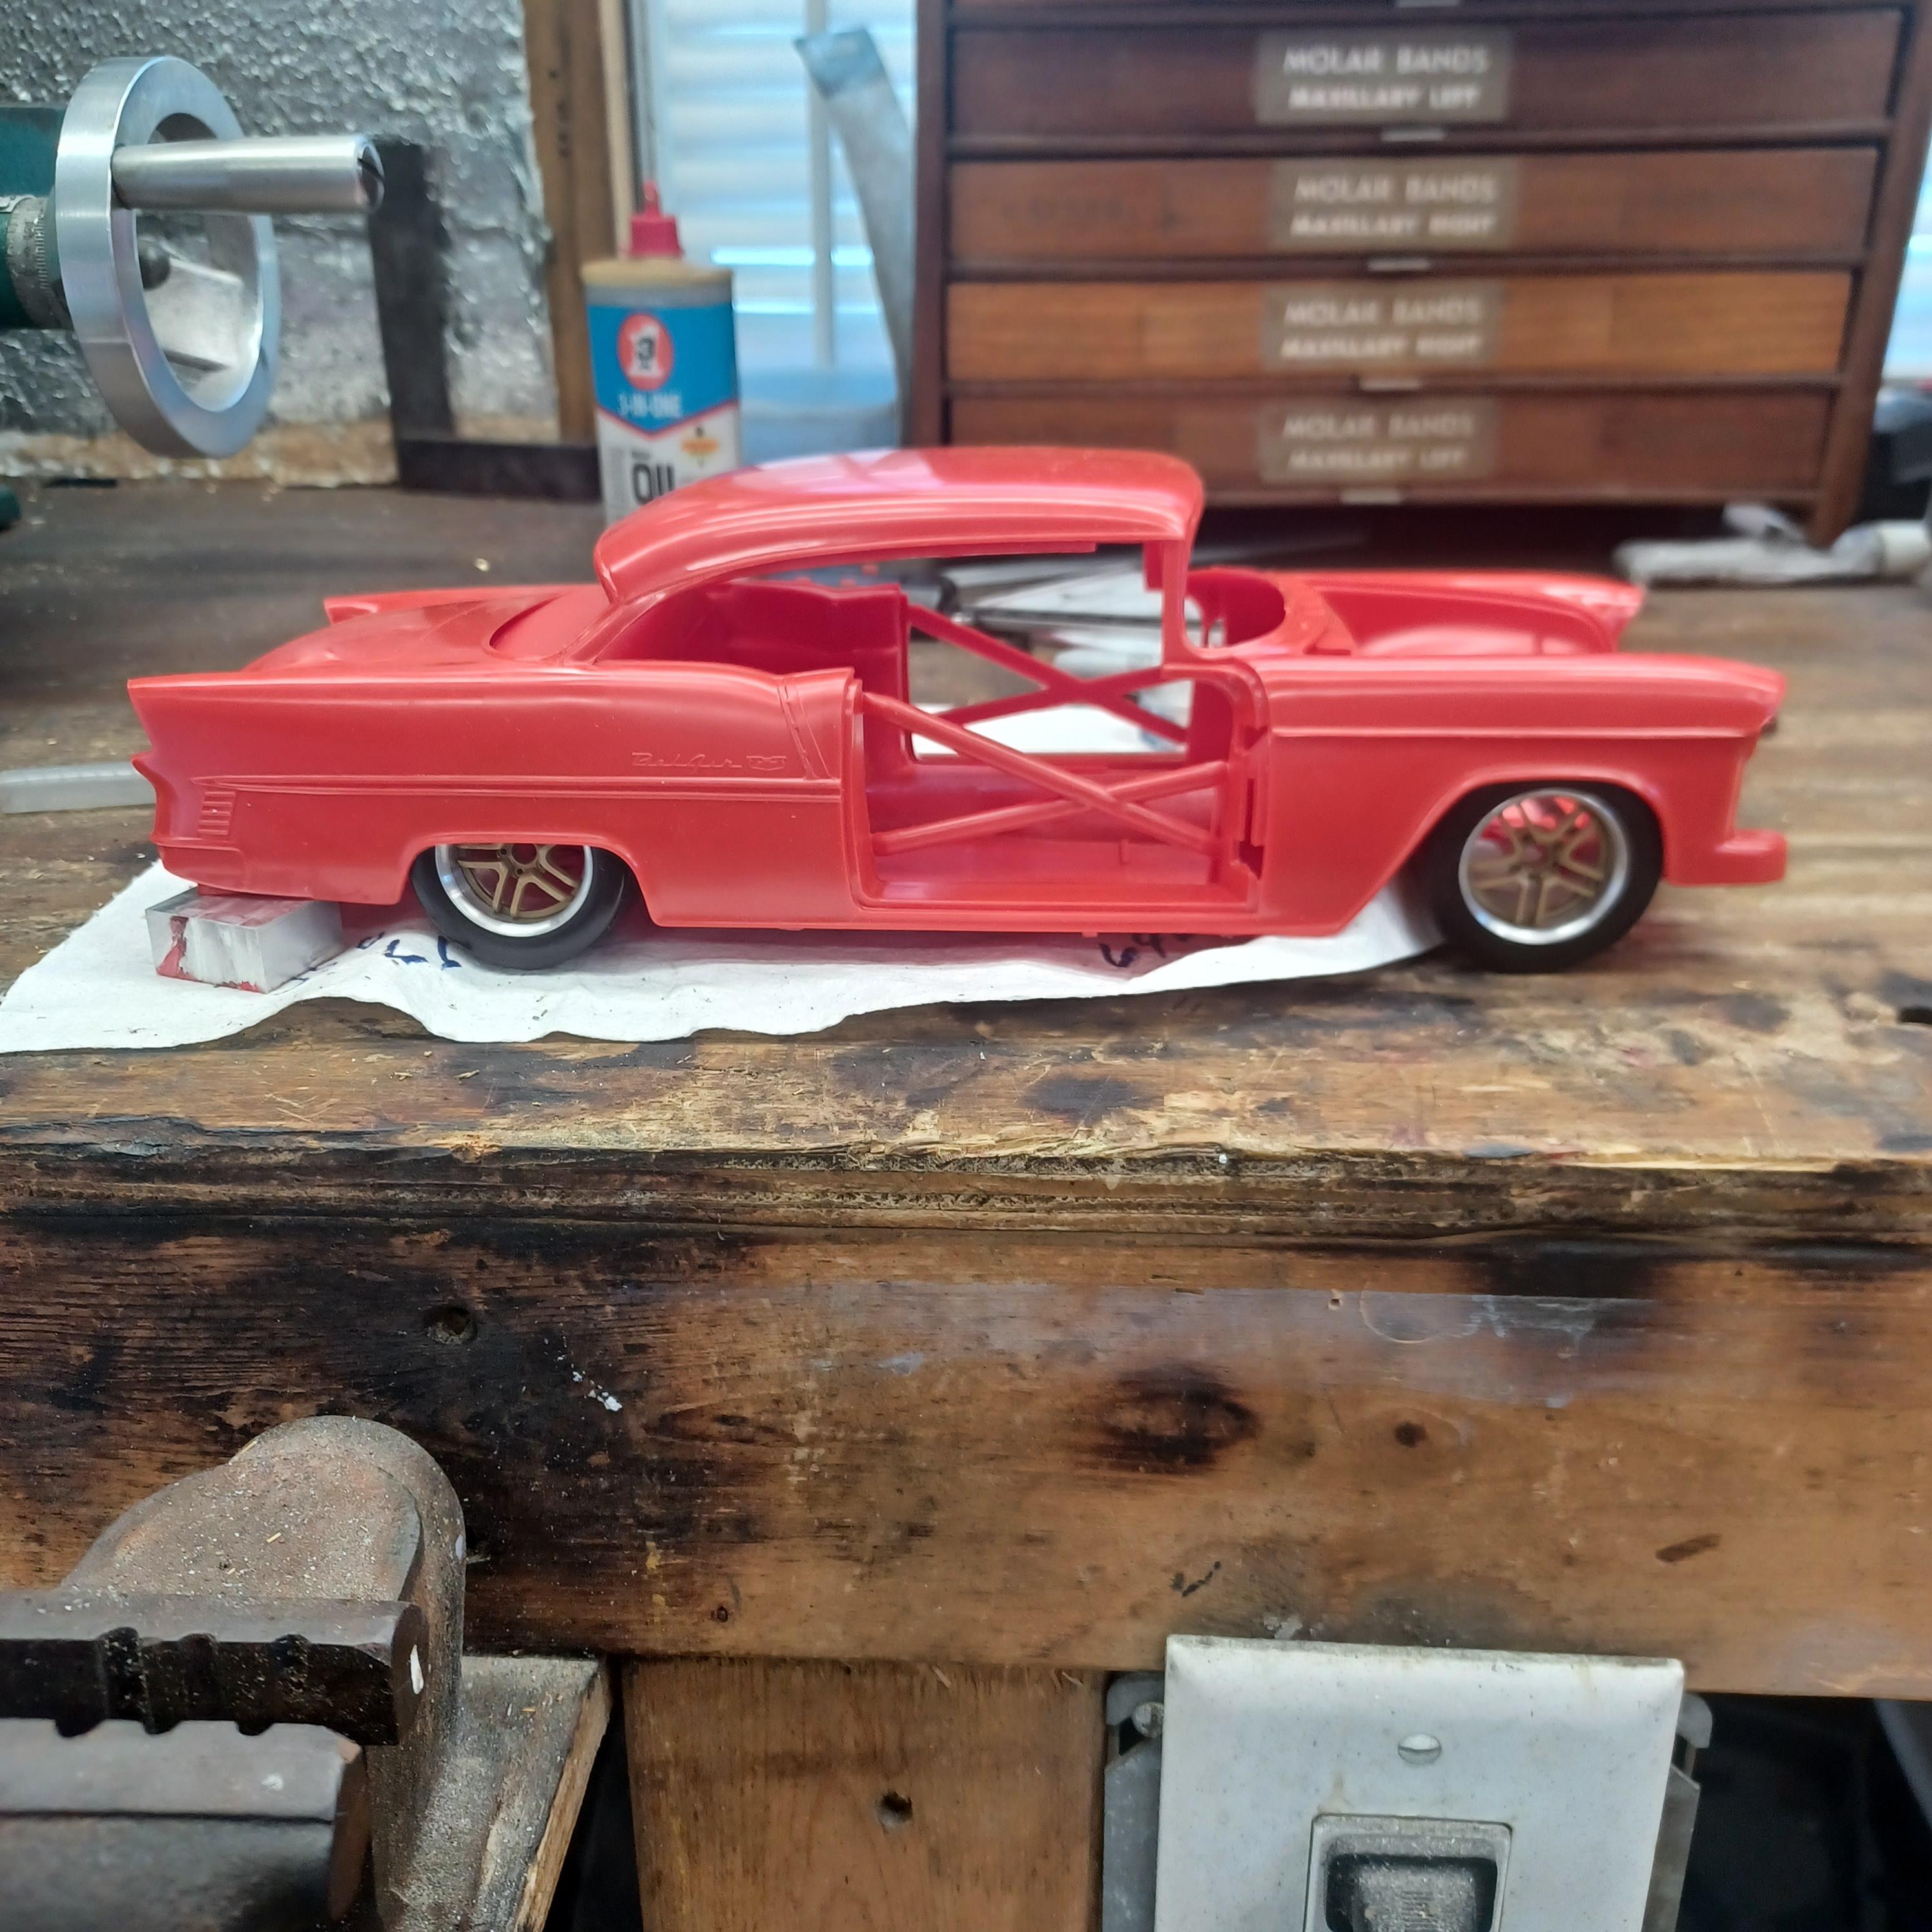
my finger is doing well,six months they say for the nail to grow back. thanks for asking. yes it is 1/16scale, hard to get used to . it all looks so small. i thought this was an unusual idea. but i really like the way it looks. styrene is fun,its so easy to cut and machine. ill save alot of money on tooling. thanks for your comments
-
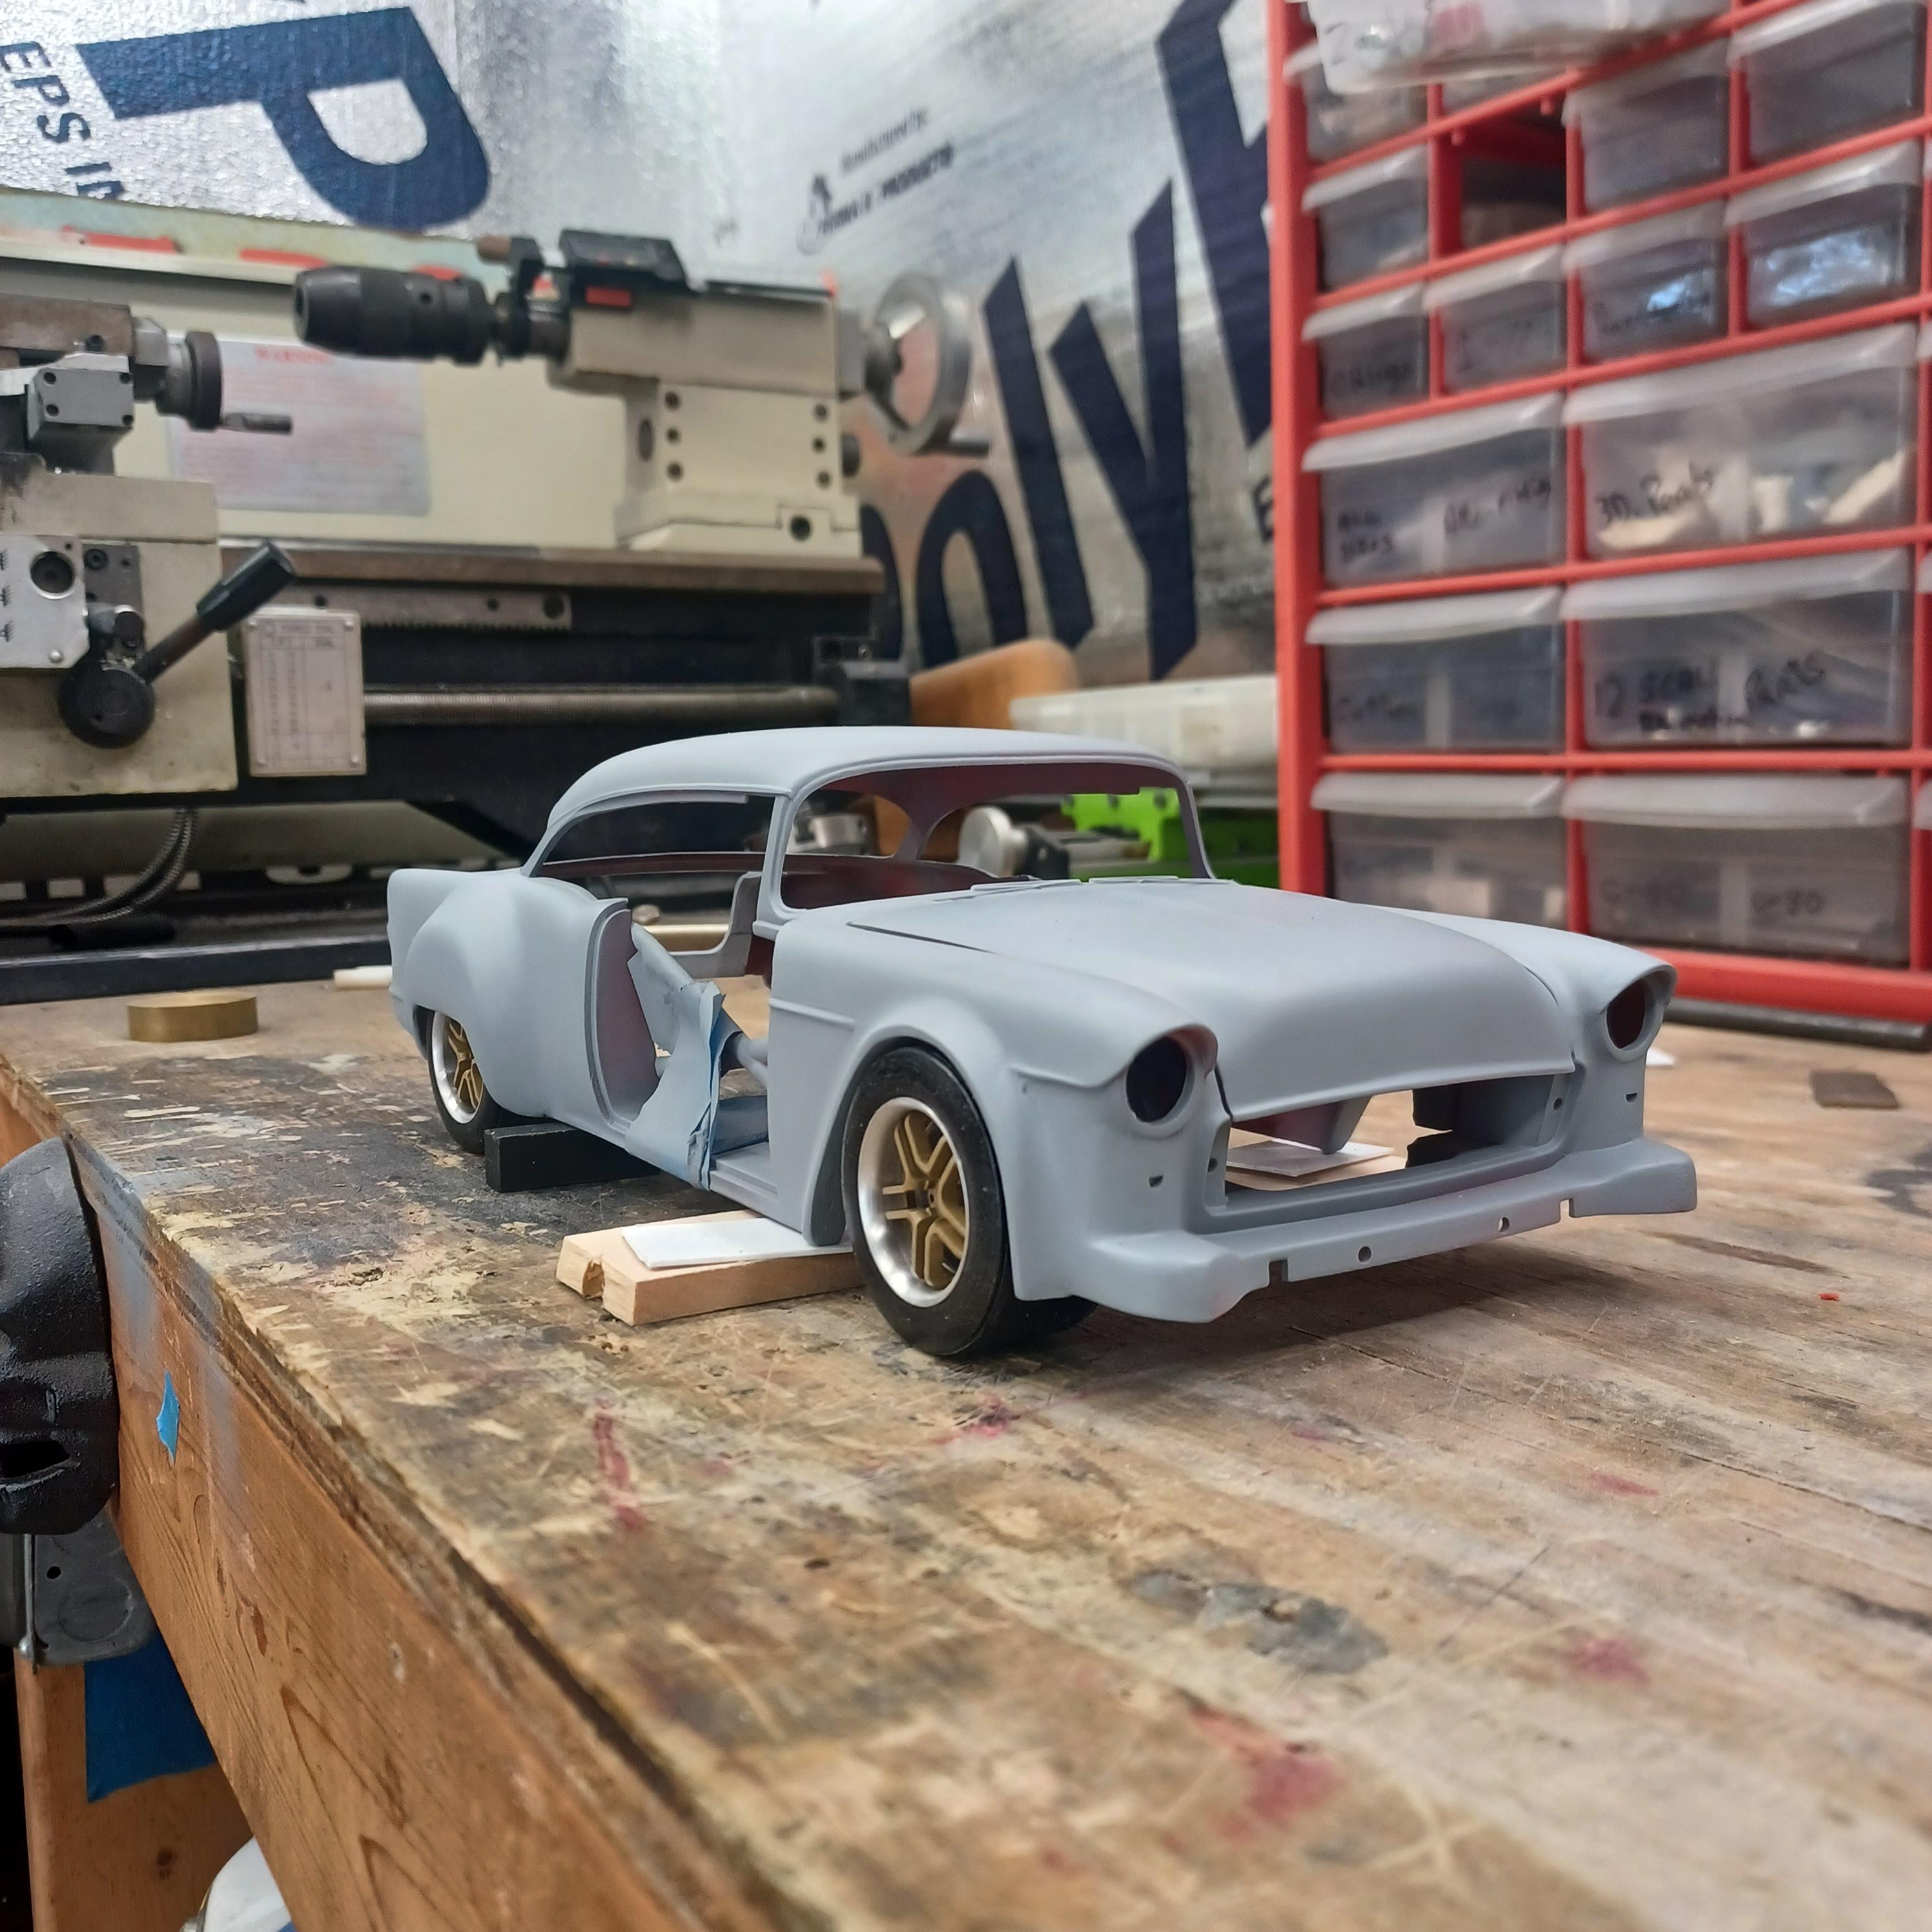
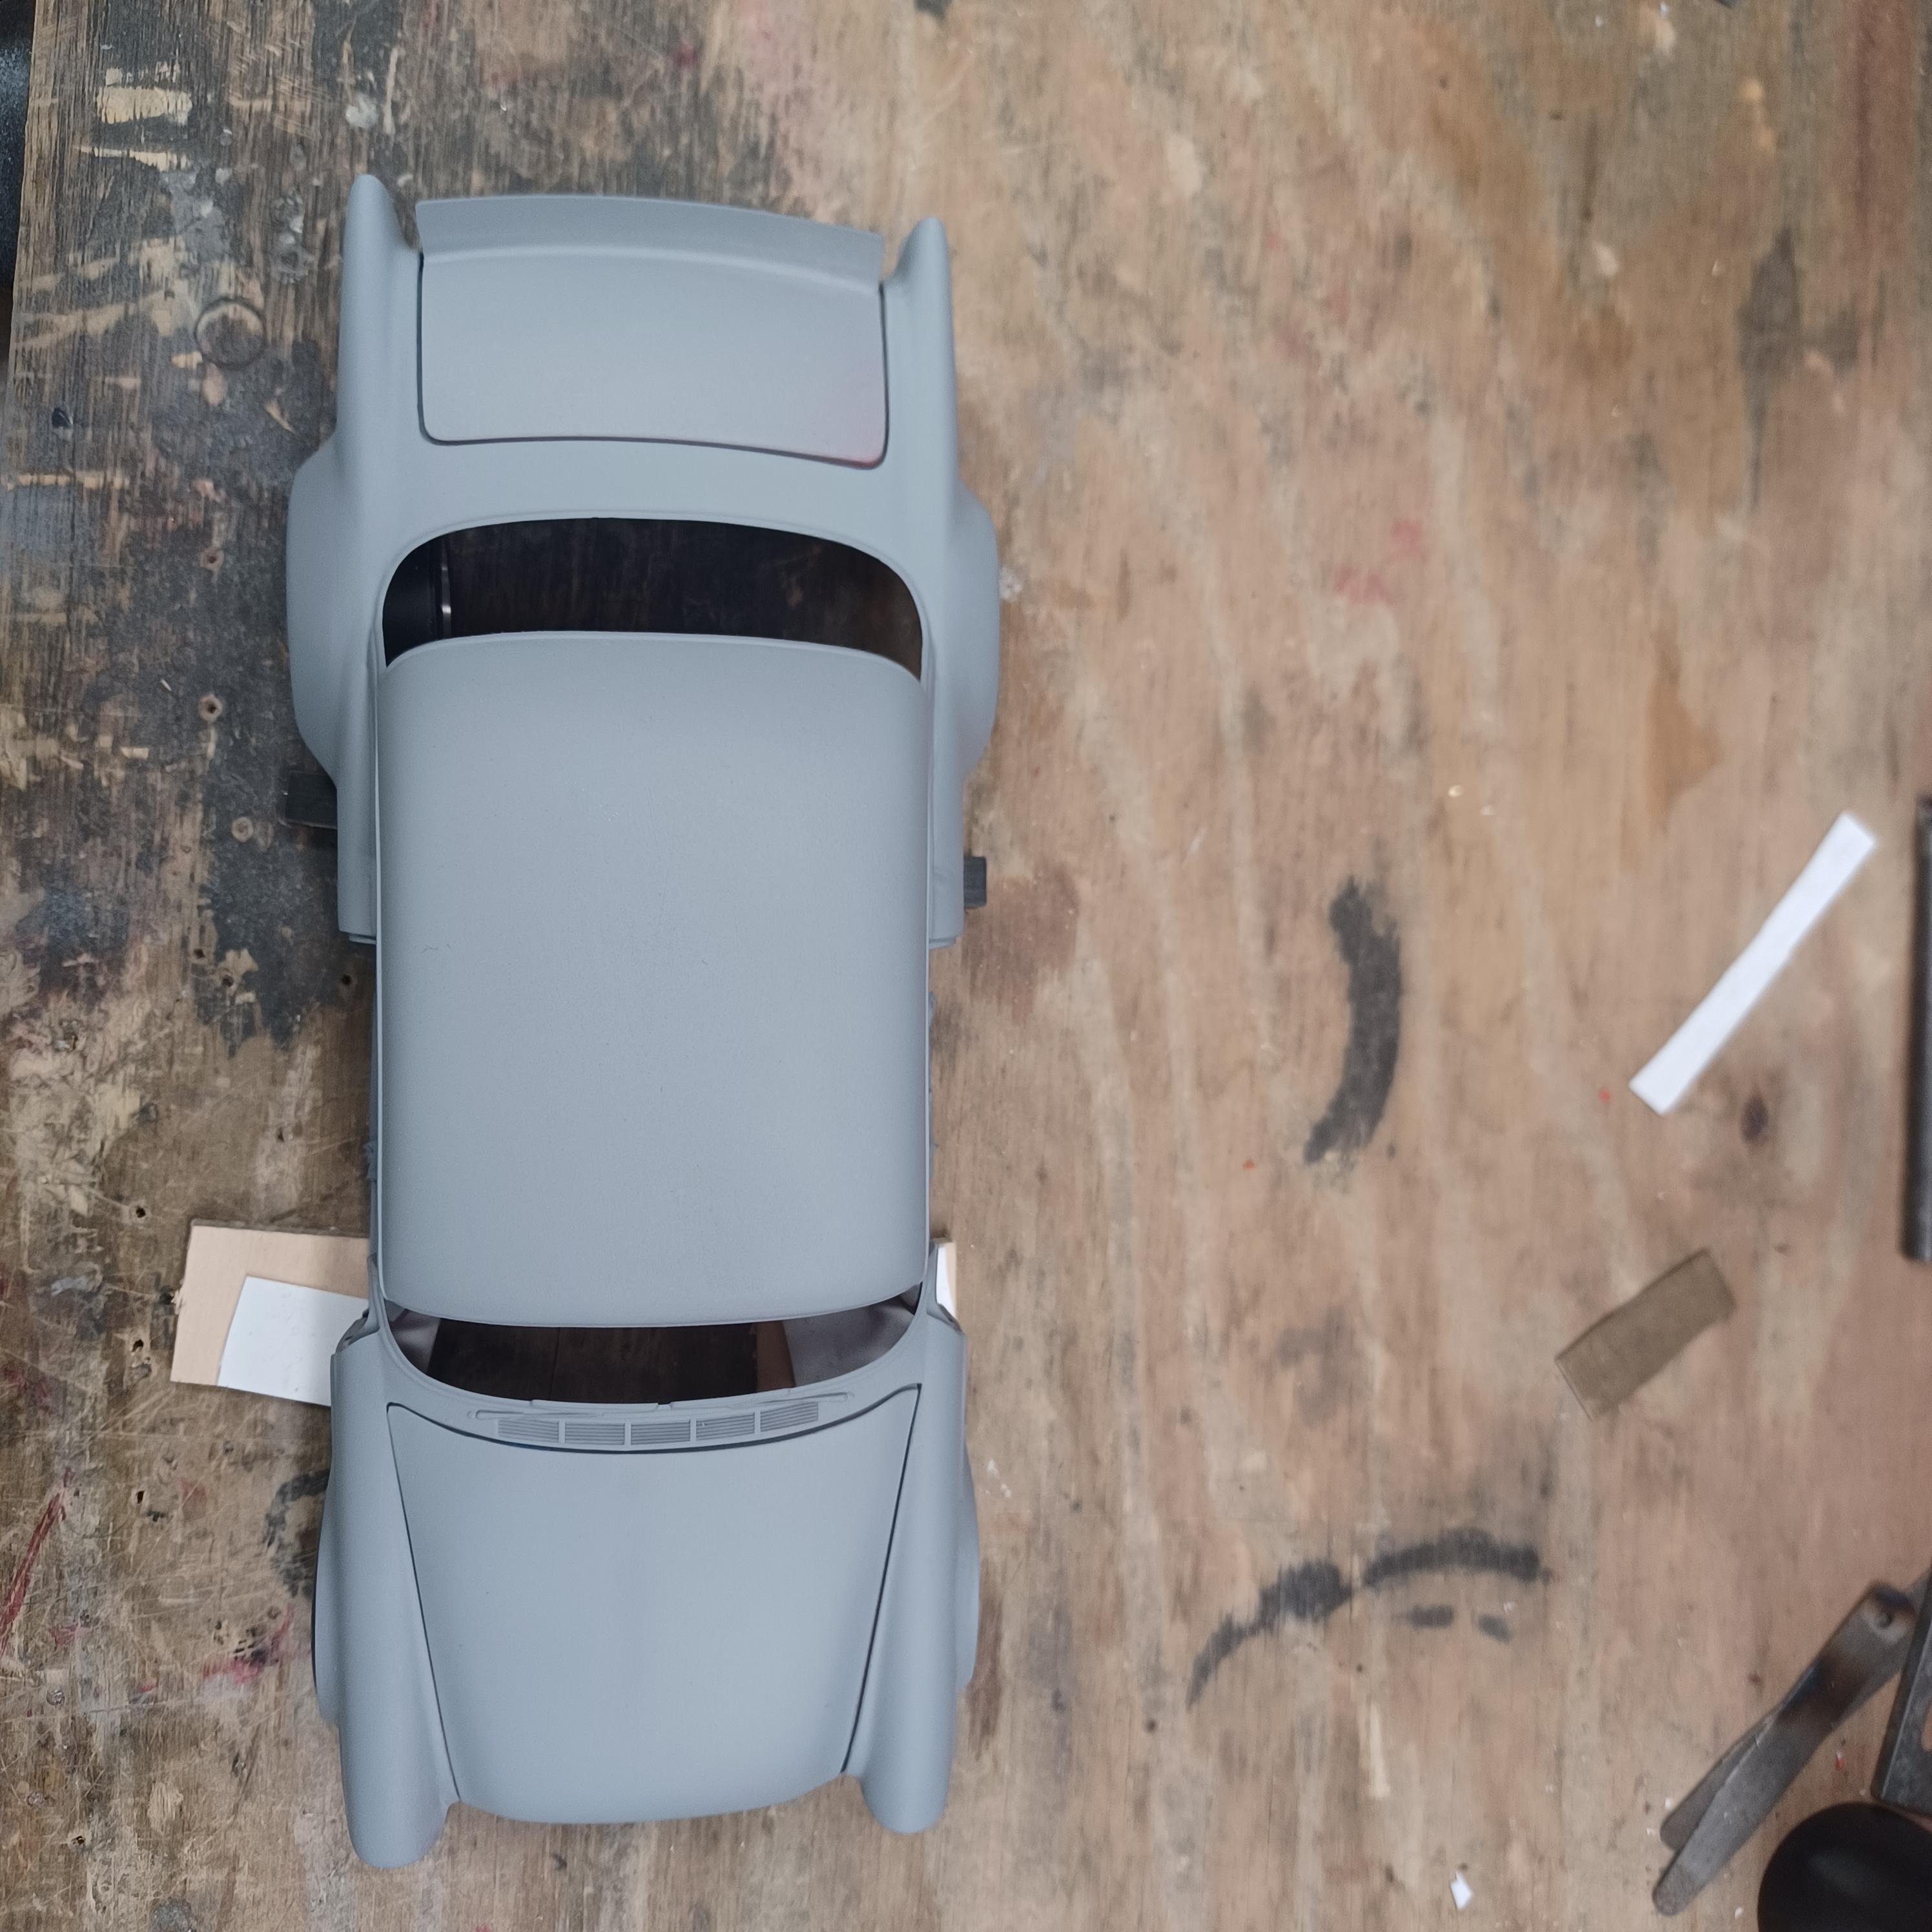
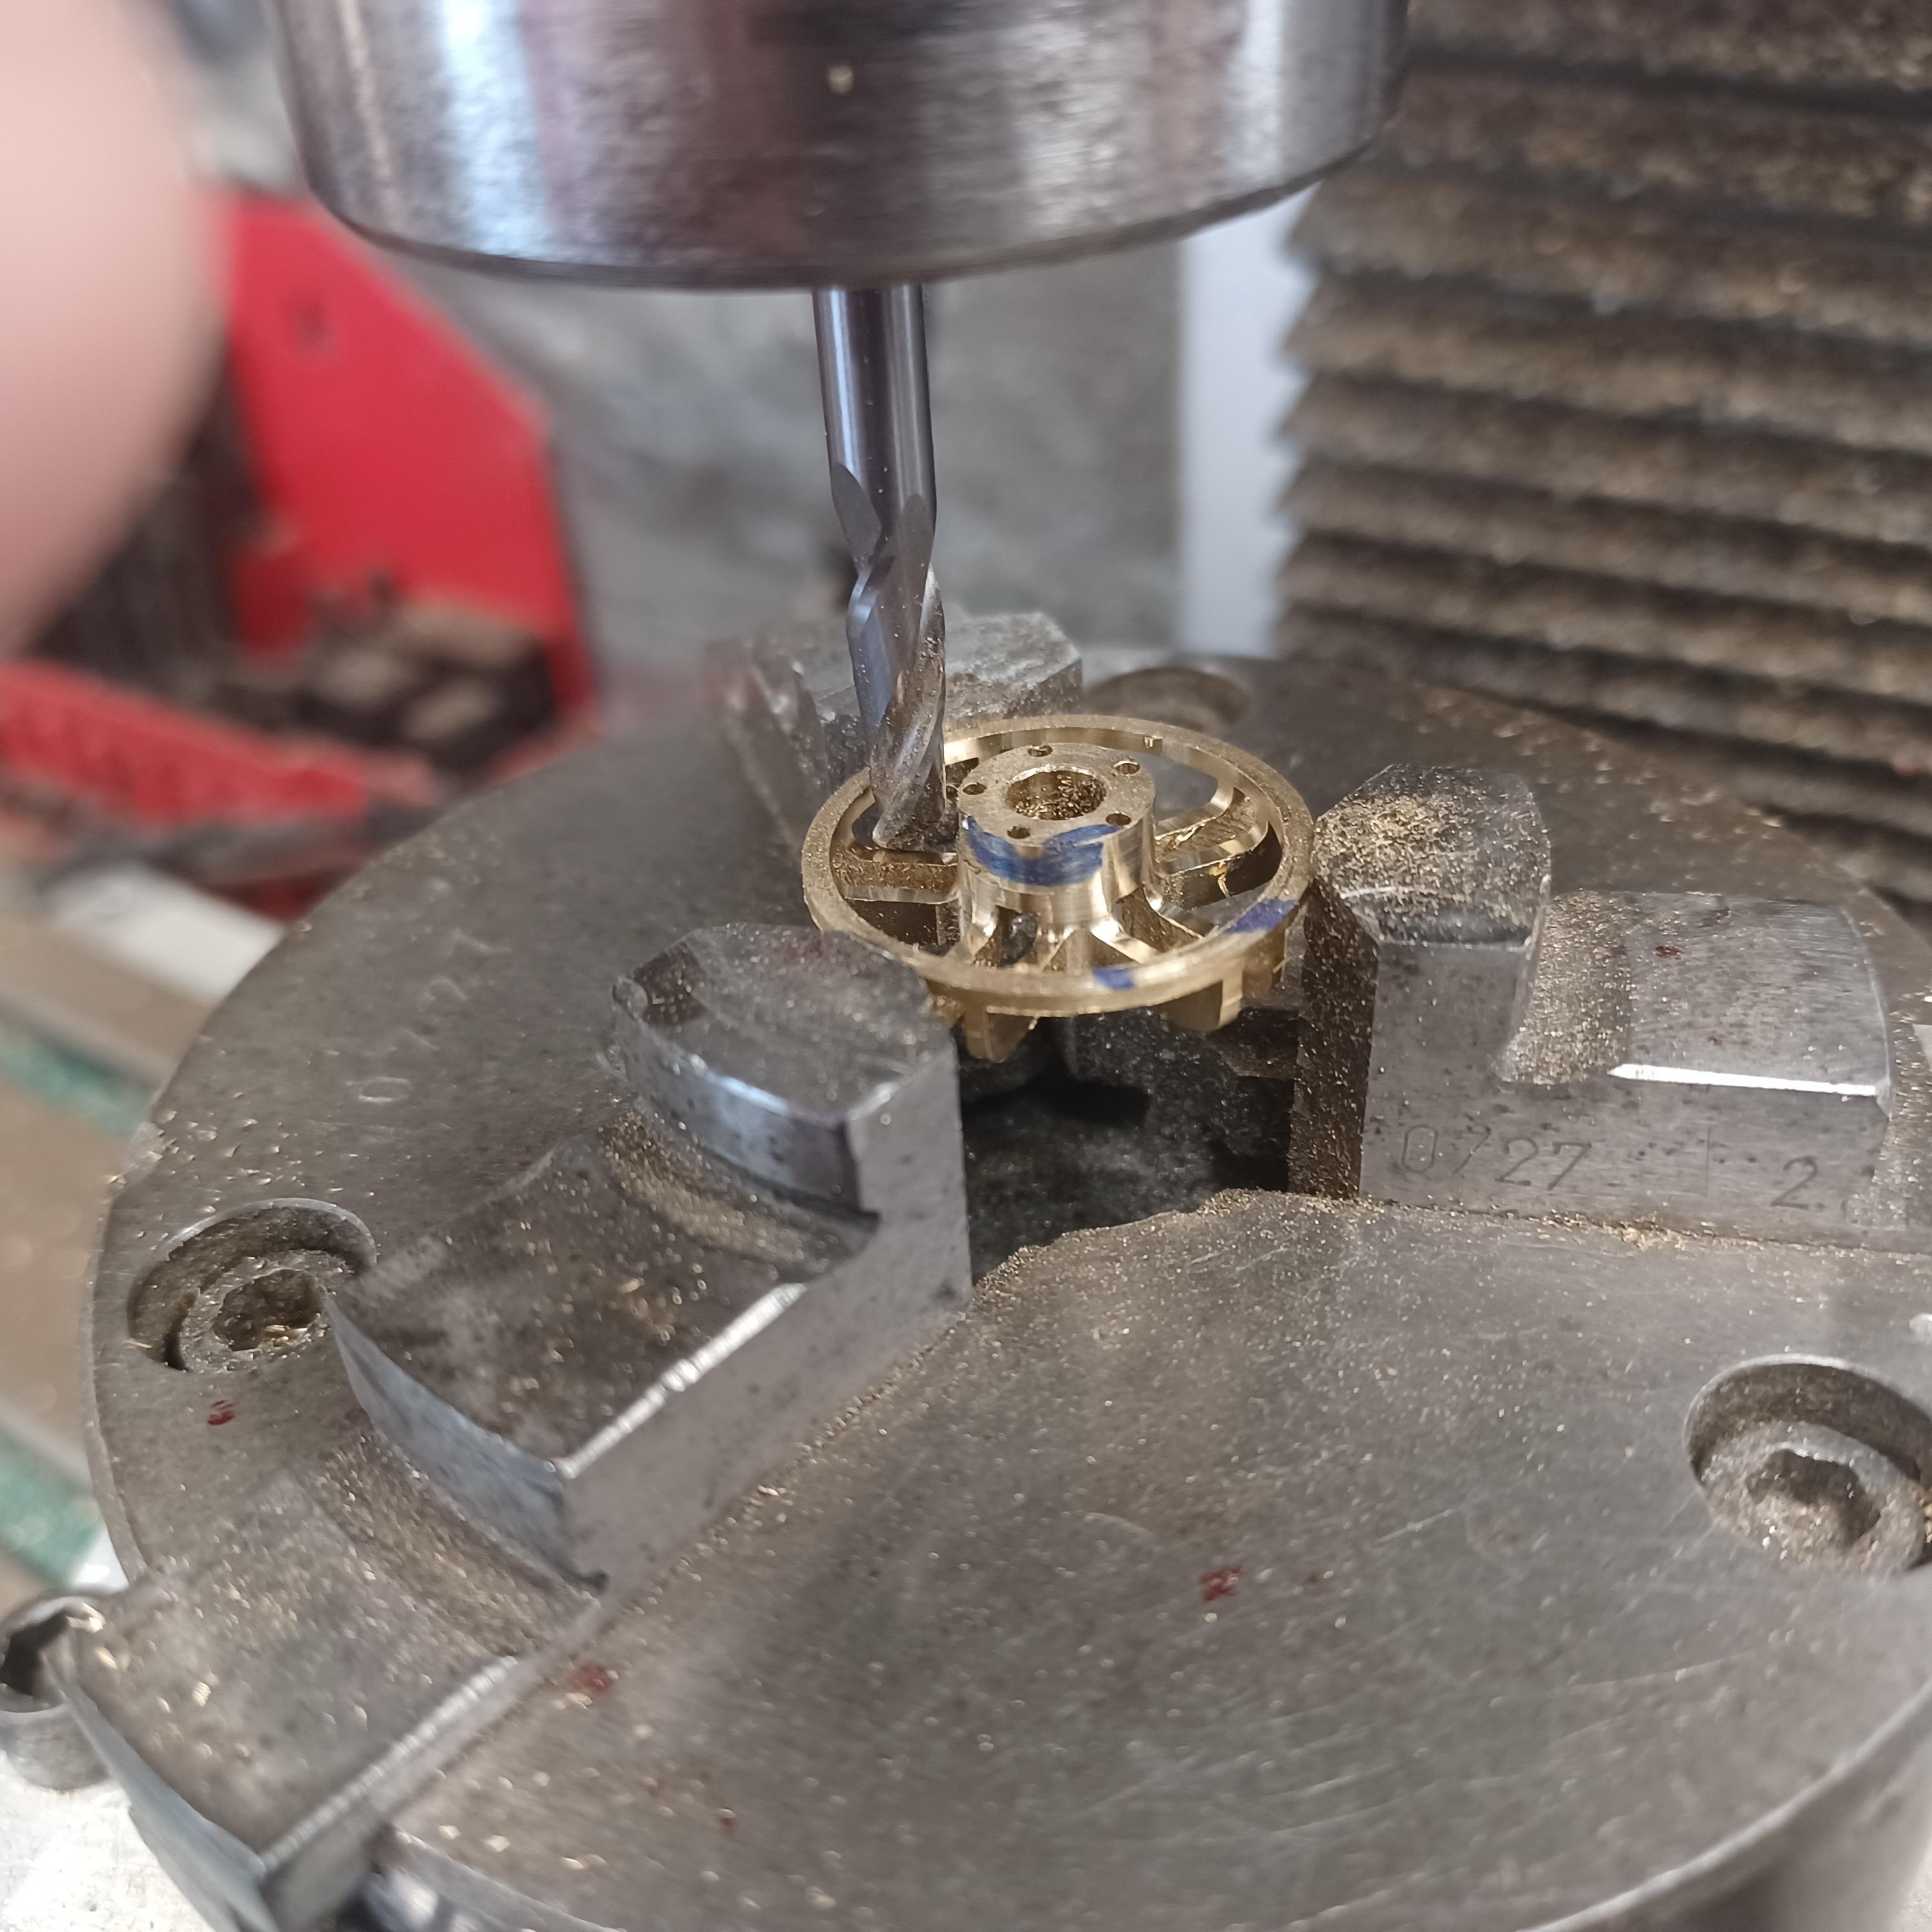
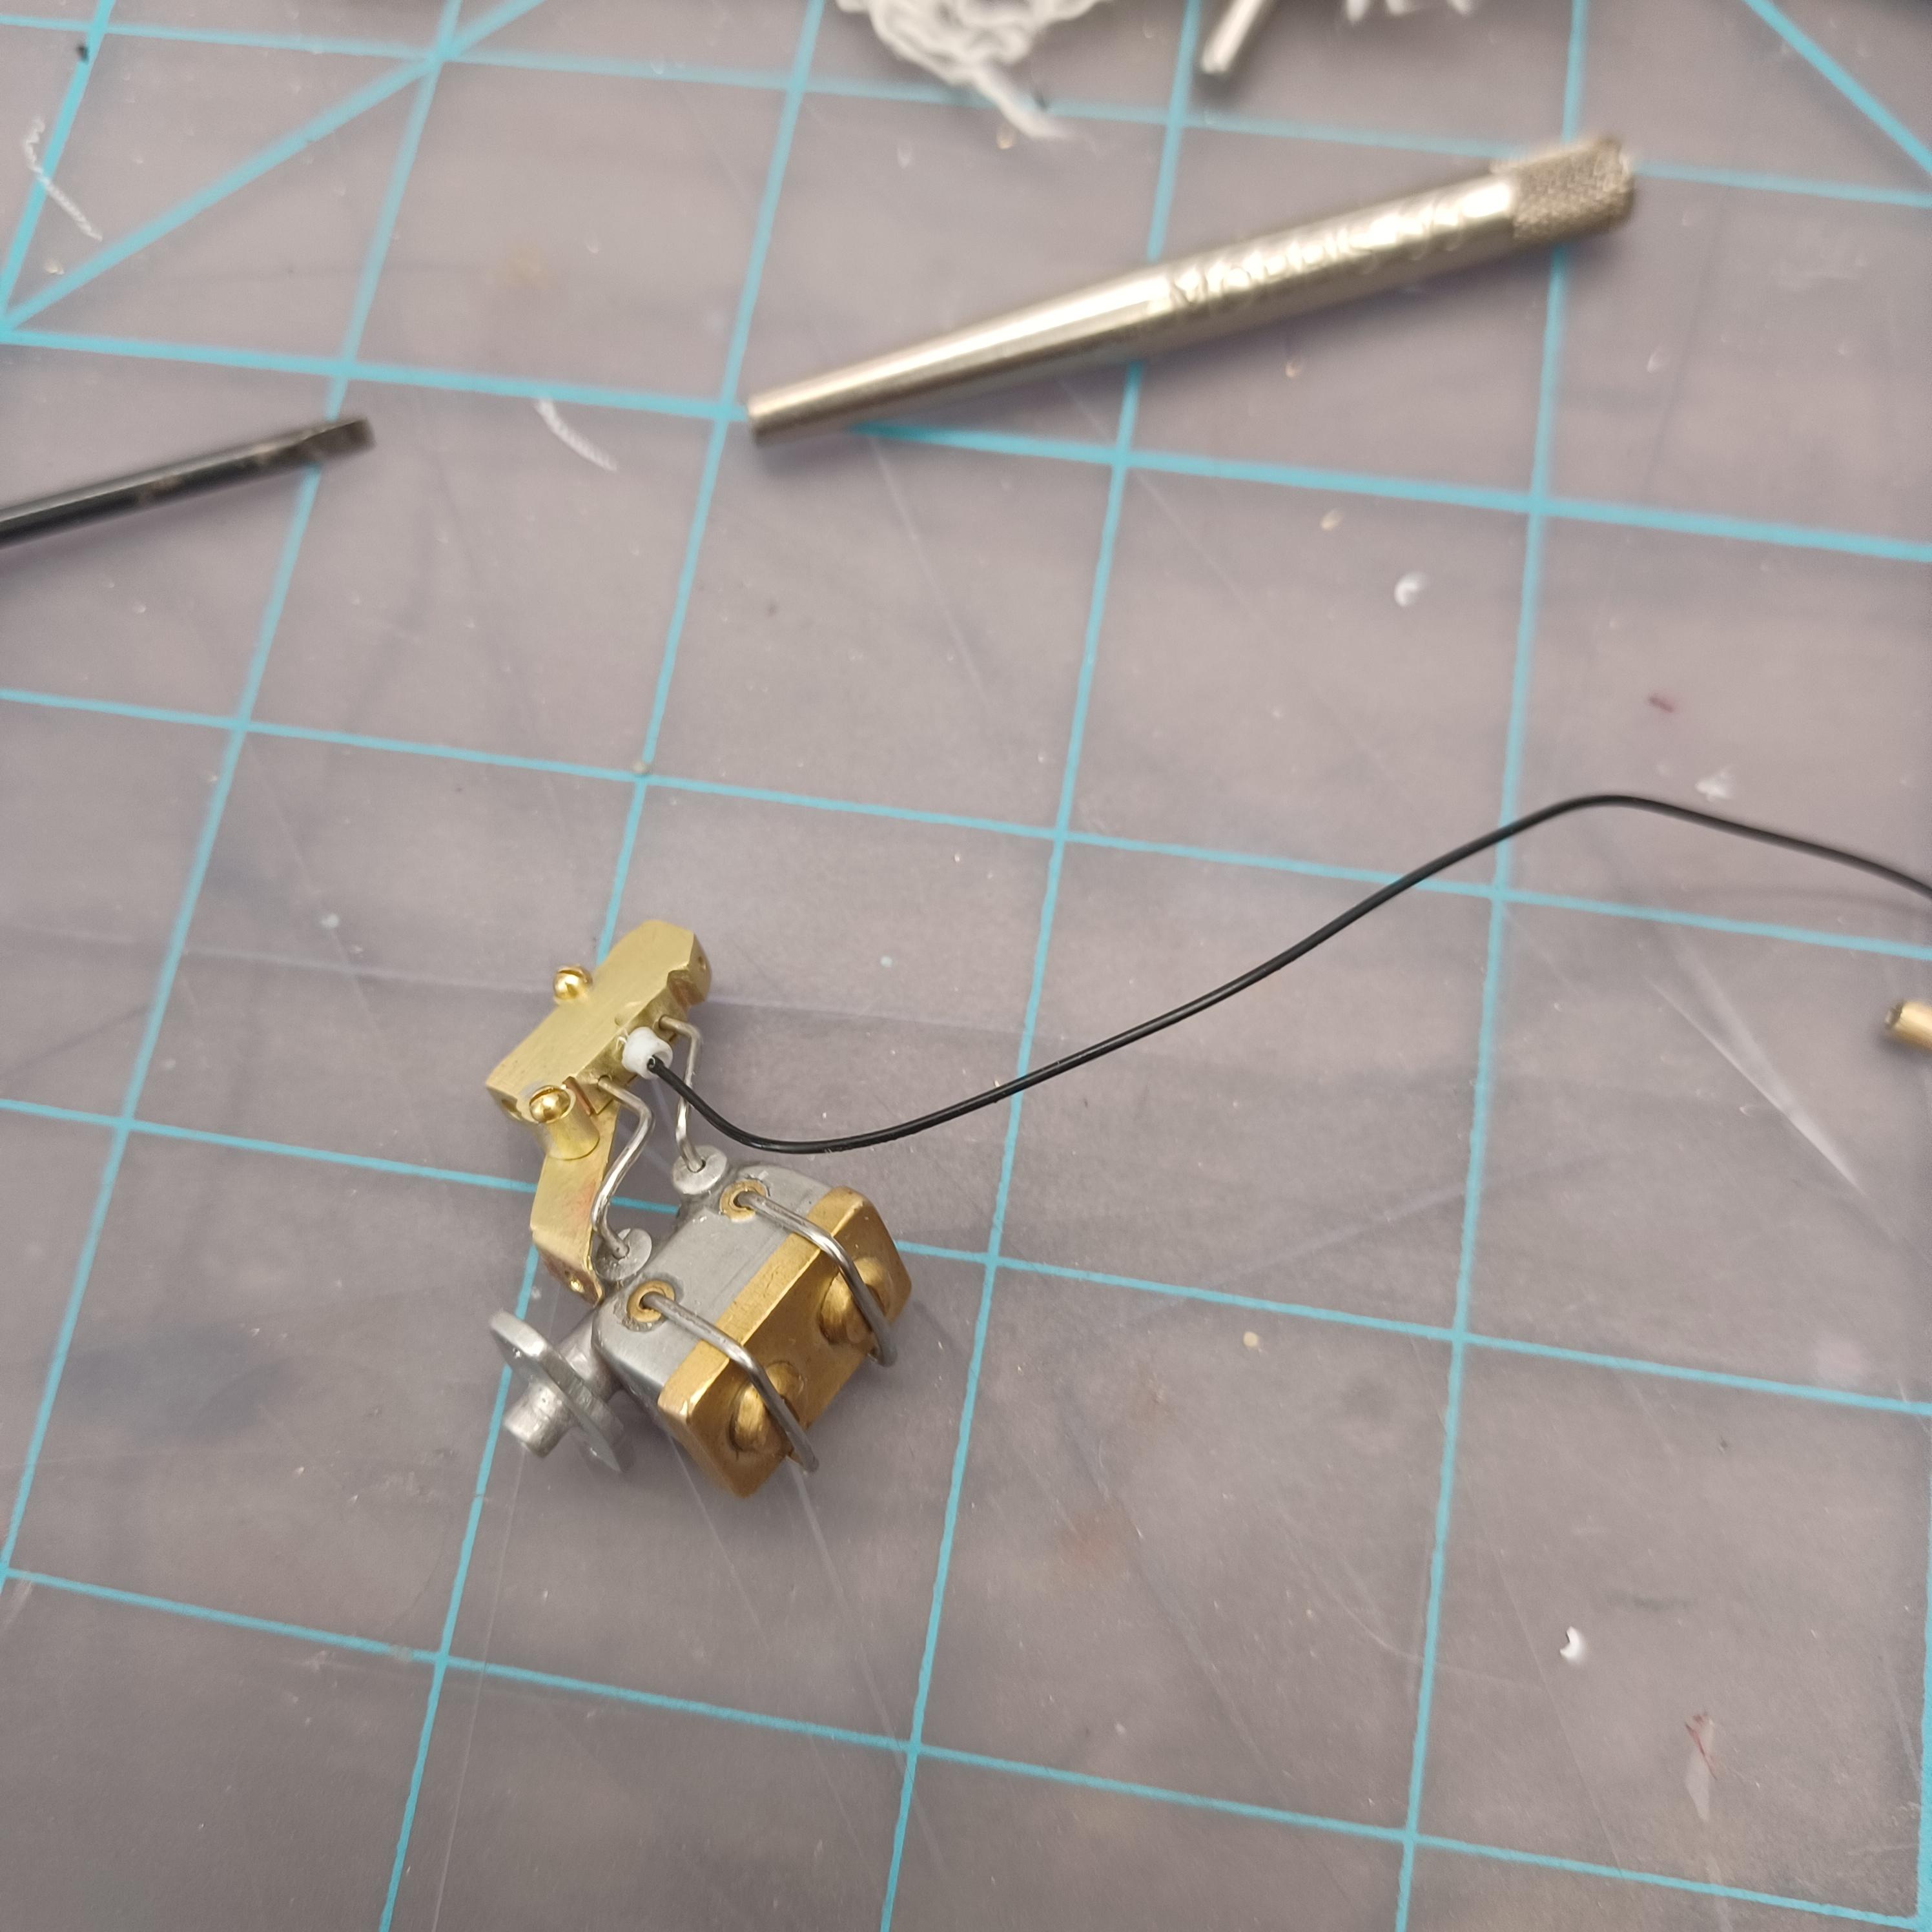
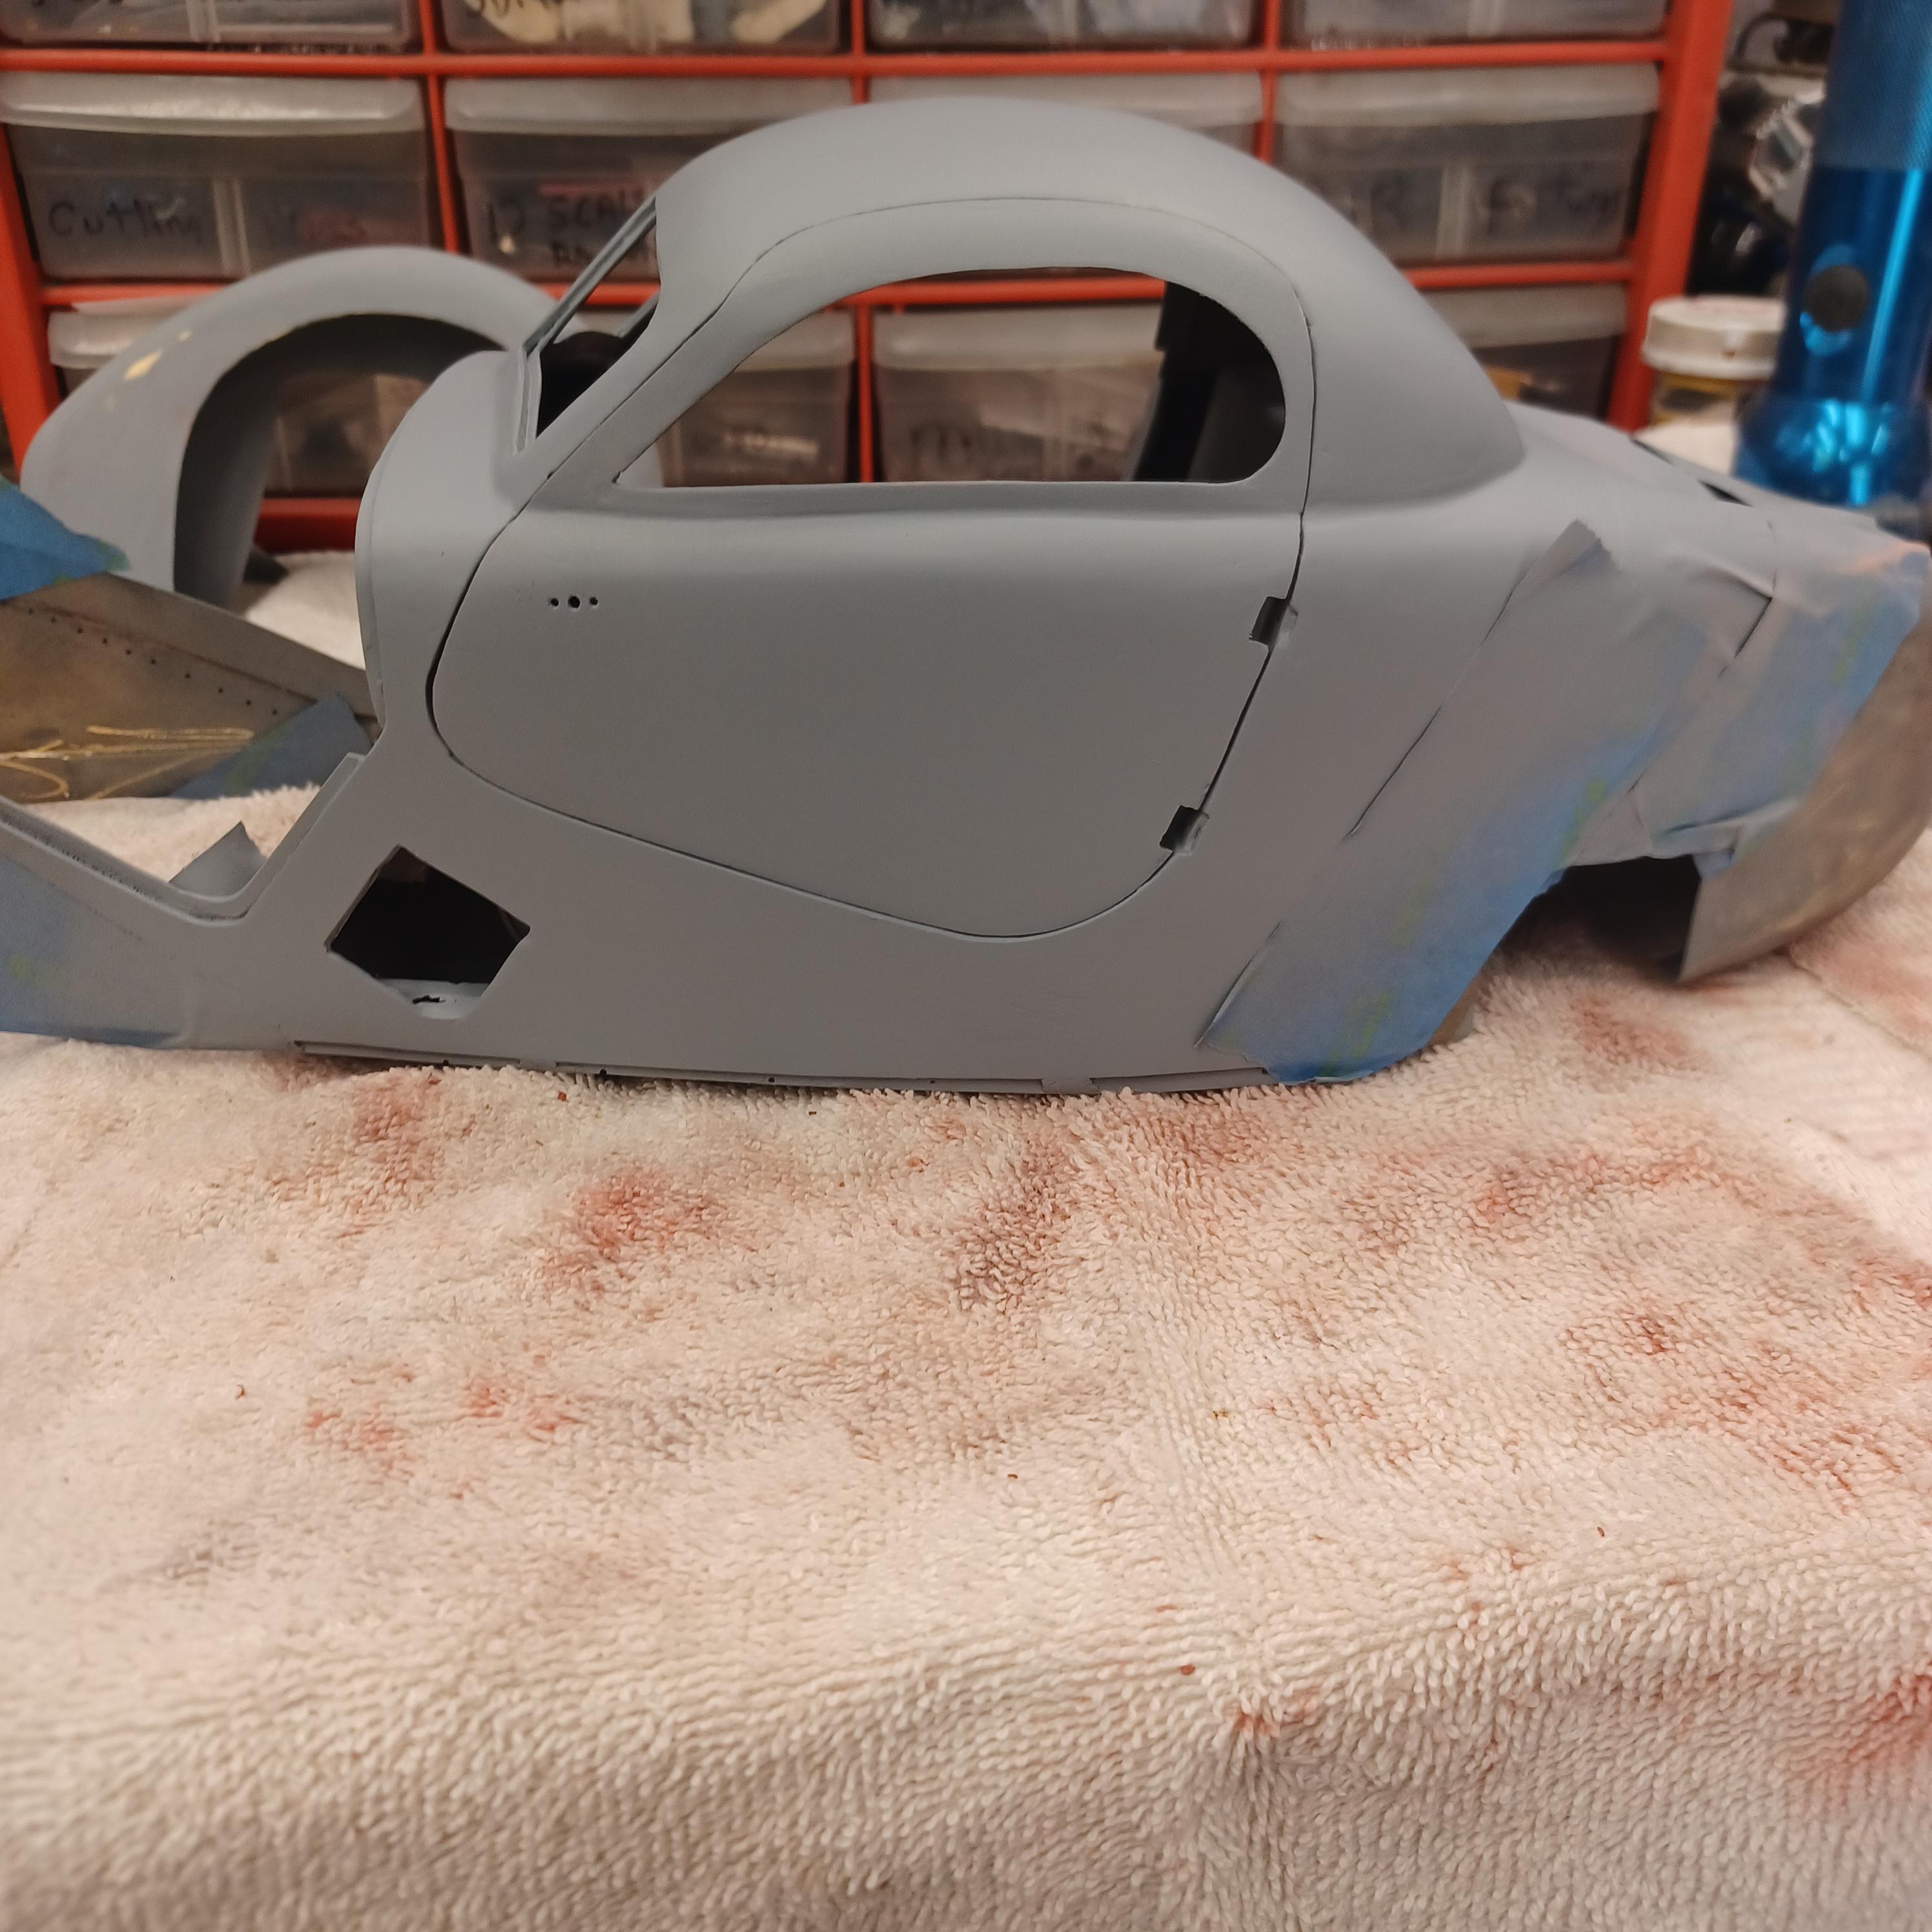
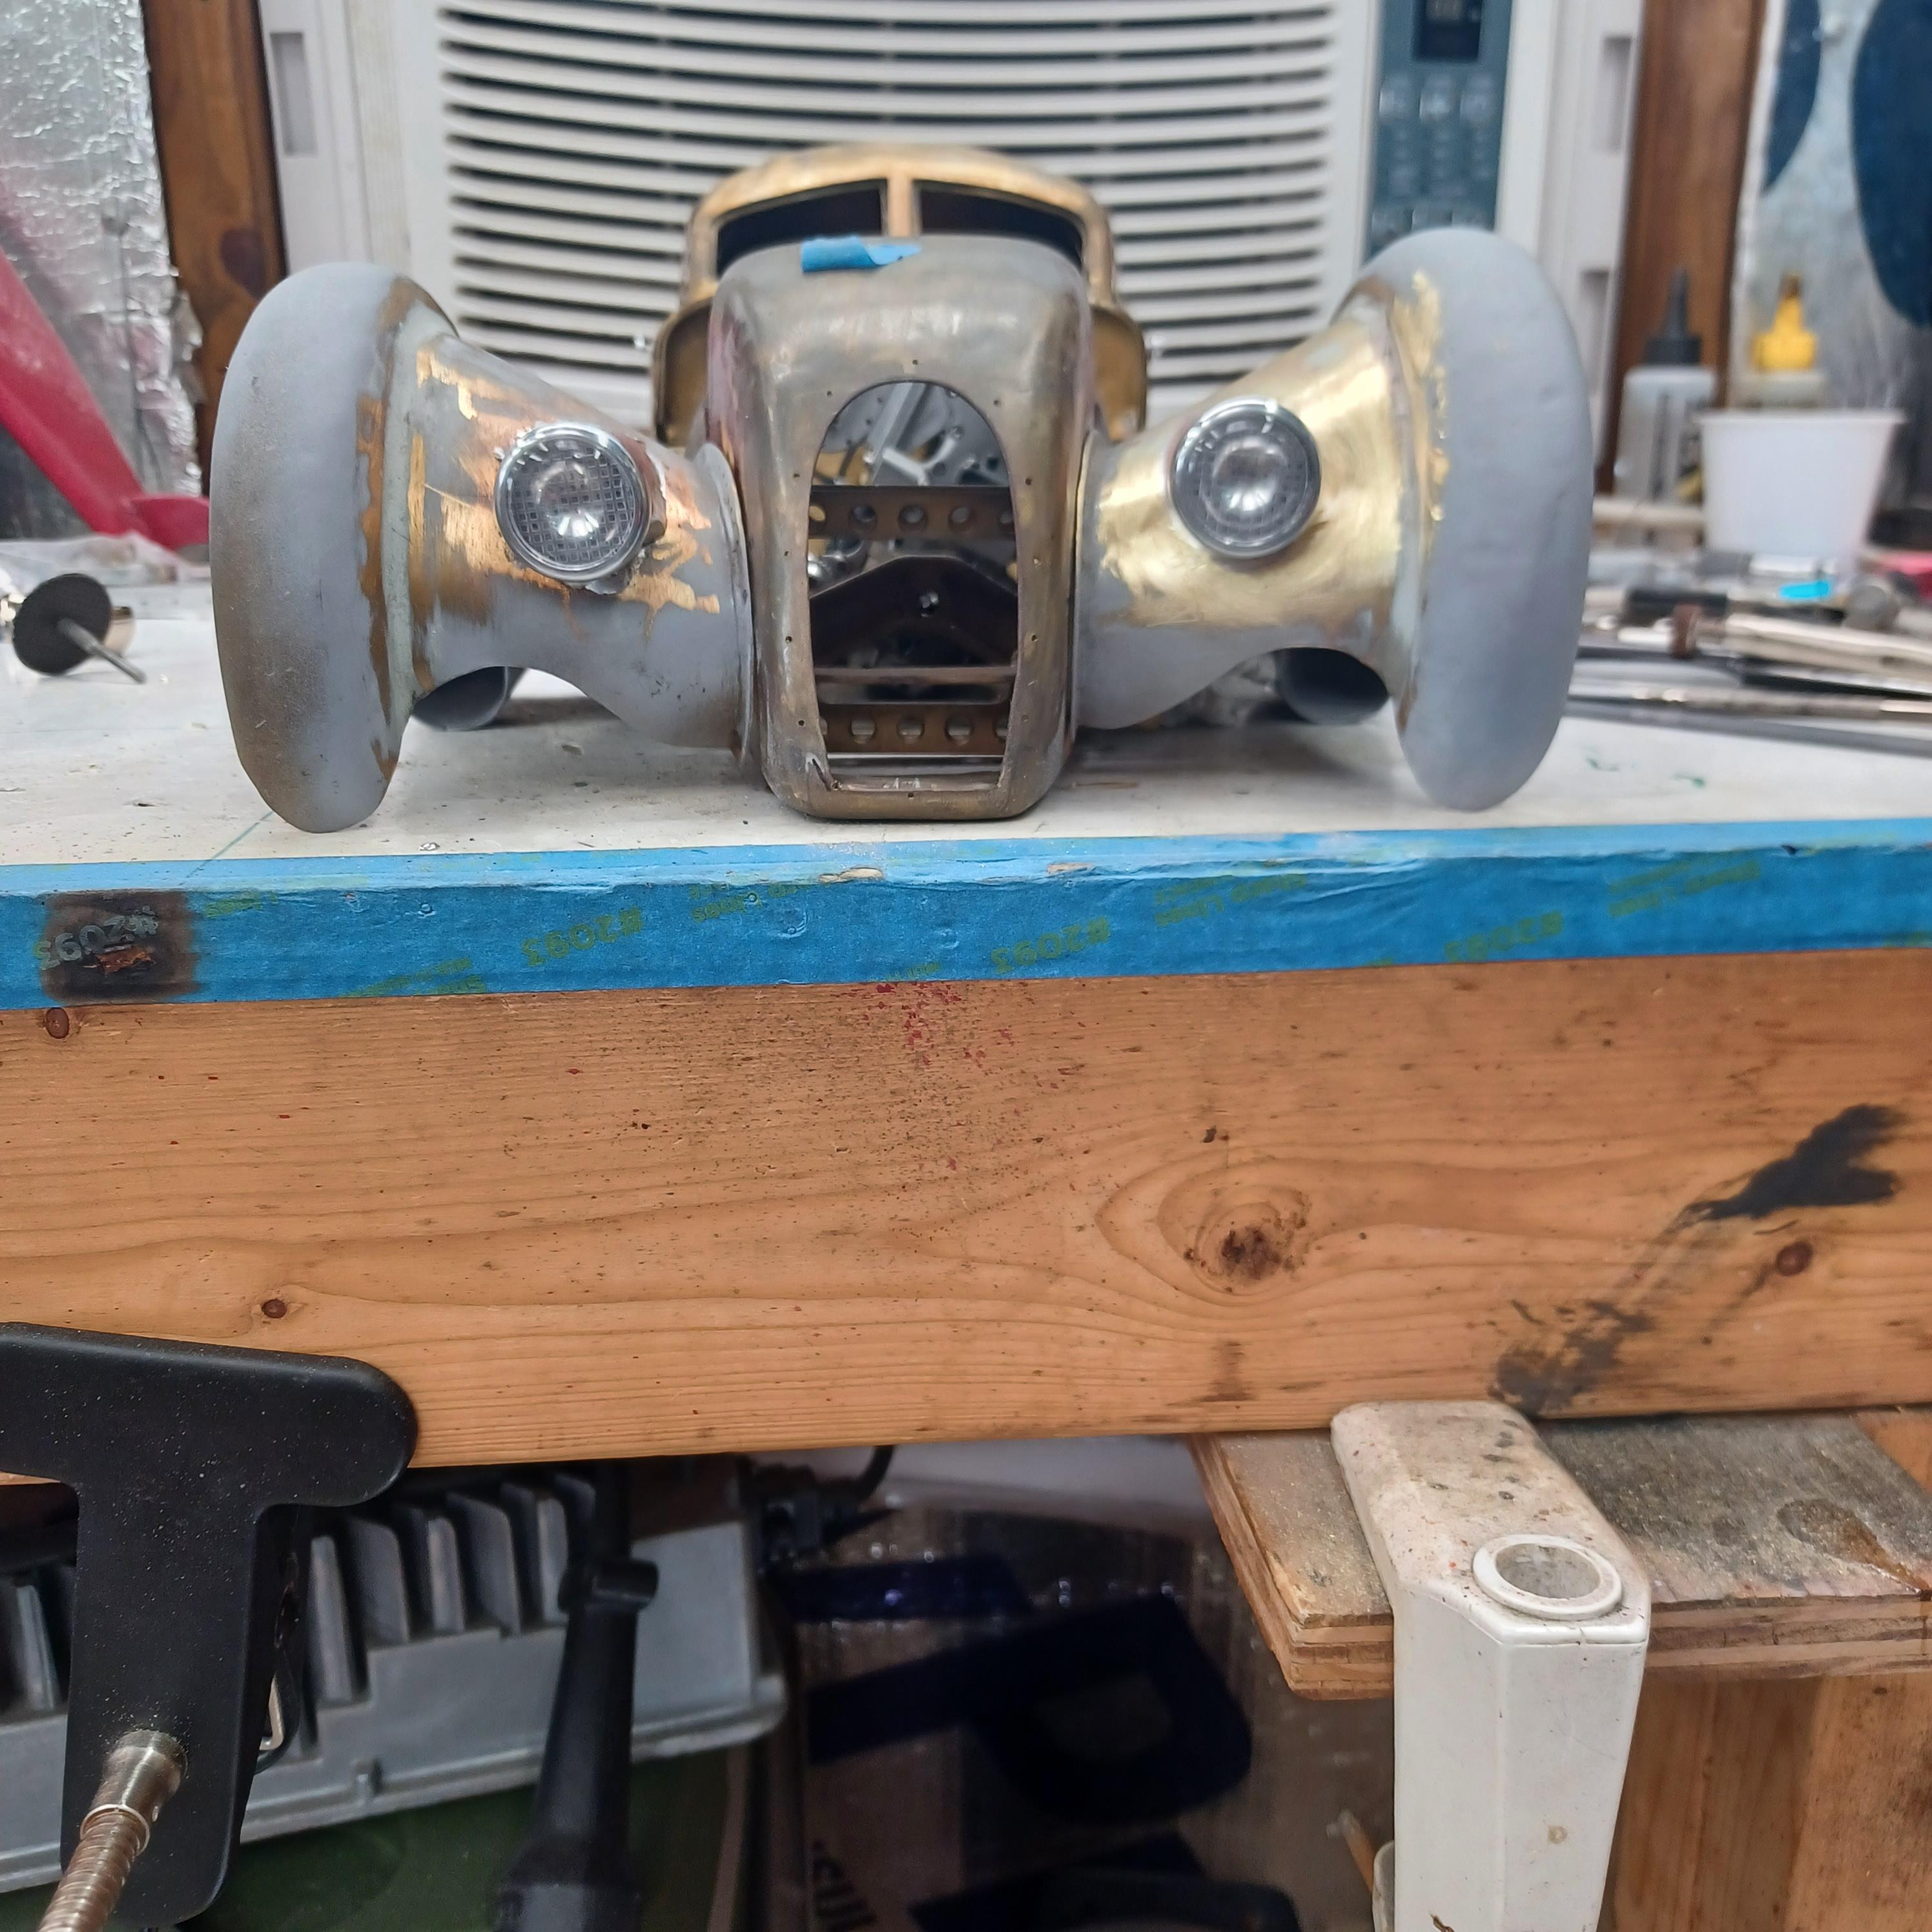
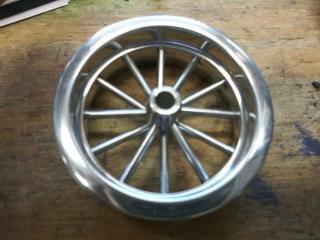
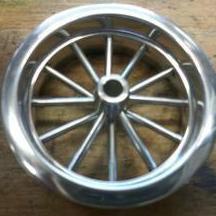
had this idea for awhile i had said i wanted to use a novi v8 for something different but i am not a researcher so i am having trouble finding pictures and info on the novi but i havent given up yet. if i dont find it i will go with an Ls . got my wheels made and am happy with them. made the brake rotors and front hubs. i opened the trunk, this is the first time i have tried that. the doors were already separate. alot of cutting and modifying of the wheel openings. I am not sure how many pictures i can put on here at one time so i will stop for now. thanks , more to come in between the Bugatti paint and assembly
-
T41 Bugatti sport coupe
charlie libby replied to charlie libby's topic in WIP: Other Racing: Road Racing, Land Speed Racers
i finally polished one fender. 4000,8000, and polish. it looks good .i always afraid when it comes to sanding the clear, its so easy to sand through on the edges. i put the body back together to do a pin stripe and i could not get it to go back together. i had to make some adjustments in the frame rails and i dont know why. but it fits now. have to sand blast and repaint the frame .i will put the ..040 pin stripe tape on and take it apart and start painting the red. i have been working on the 55 chevy in between.more after some of the parts are painted red
-
’72 Dodge Demon Drag Racer 1/25 scale
charlie libby replied to AmericanMuscleFan's topic in WIP: Drag Racing Models
I always learn so much from you francis.your work is amazing.i wish i could learn patients from you.i am always in a hurry. As i get older i am getting a little better. -
Looks awesome.realy like the color.i am just starting a 55 chevy road race car in between painting my other car.hope my pint comes out as nice as yours
-
Hi tim,cant wait to see it go down the track.looks so real and at that size wow. You amaze me.
-
T41 Bugatti sport coupe
charlie libby replied to charlie libby's topic in WIP: Other Racing: Road Racing, Land Speed Racers
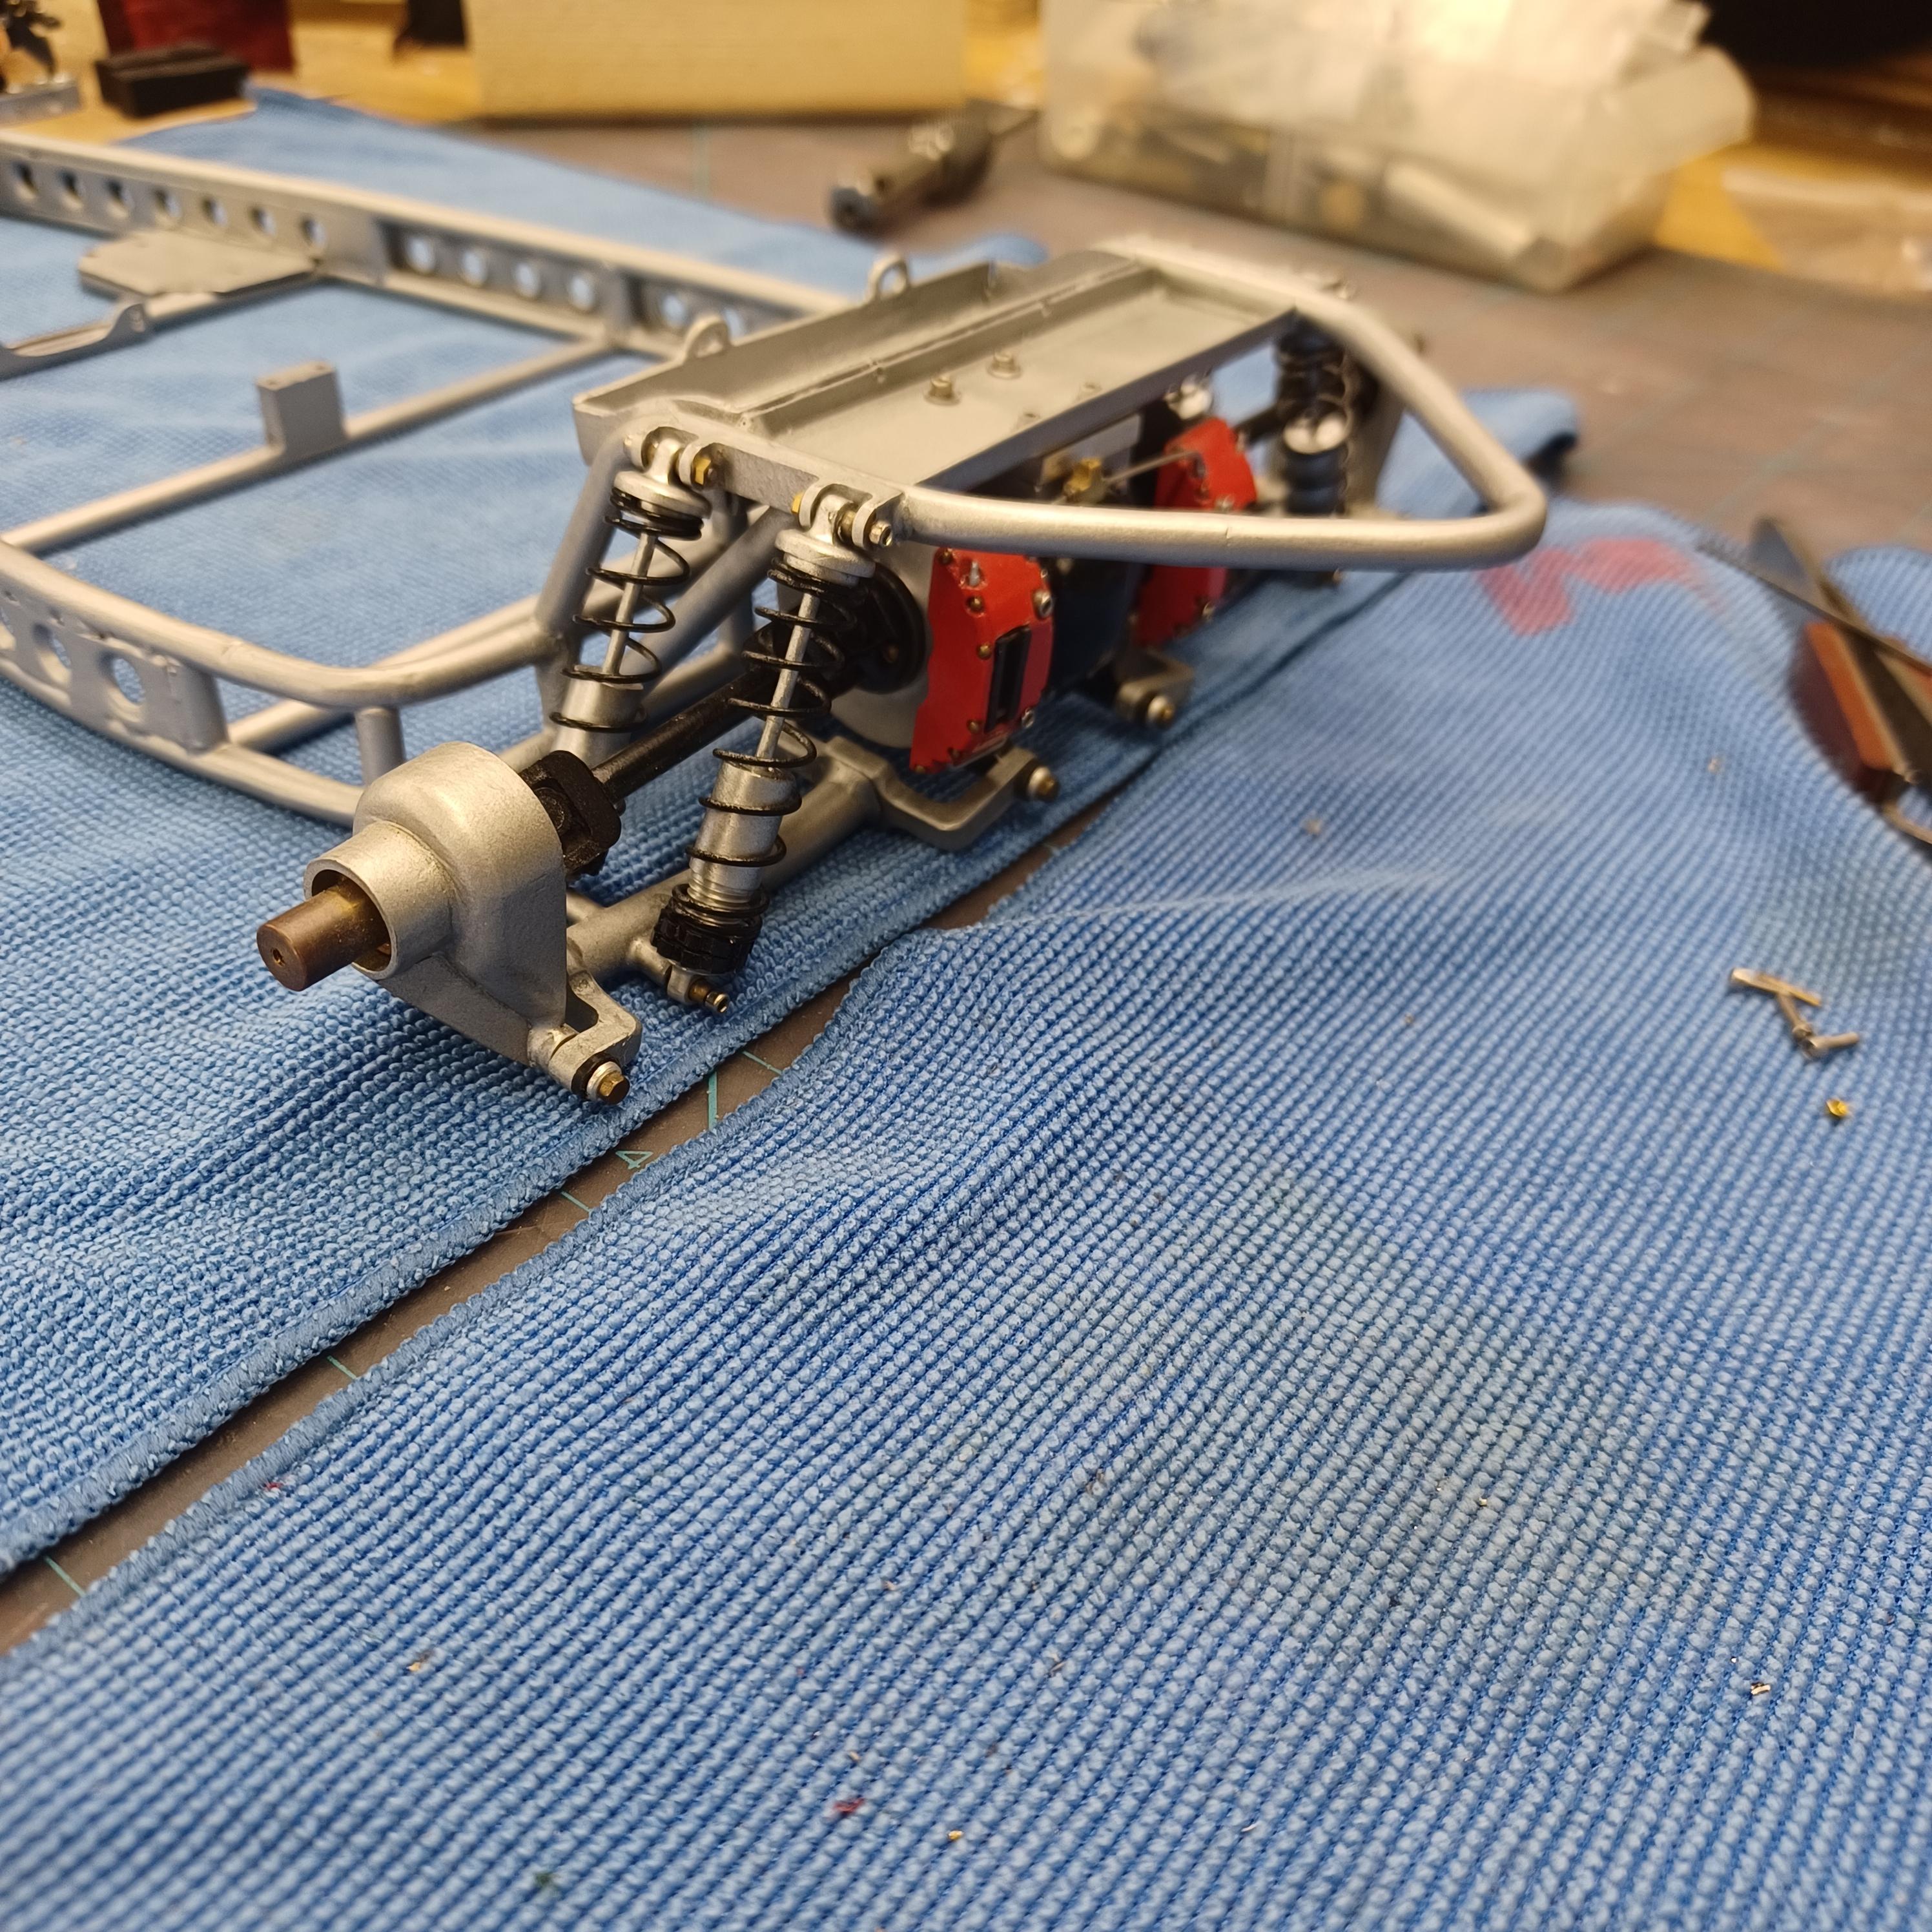
thank you all for your kind thoughts . it is doing well. stiches are all out. got to keep it bandage for at least 4 for weeks. didn't slow me done as much as i thought it would. alot of sanding and painting and alot of plastic gloves. got the front fenders in black with 4 coats of clear. i can sand and buff next week. i have found thru test pieces a huge difference in the red if i paint it over gray primer or black. i painted the entire body black so that i can put it all back together to put 1/16 pin stripe tape down the length of both side with the doors , hood and nose lined up properly then disassemble and paint the red on the parts separately. chassis is going together well, it should its been apart and back together enough times. more time invested in drying time , but i am working on my new project in between.thank you all
-
1/12 Italeri Lancia Stratos!
charlie libby replied to jaymcminn's topic in WIP: Other Racing: Road Racing, Land Speed Racers
If i send an engine will you mske it look as real as yours WOW! I thuoght it was pictures of the real thing , its amazing -
T41 Bugatti sport coupe
charlie libby replied to charlie libby's topic in WIP: Other Racing: Road Racing, Land Speed Racers
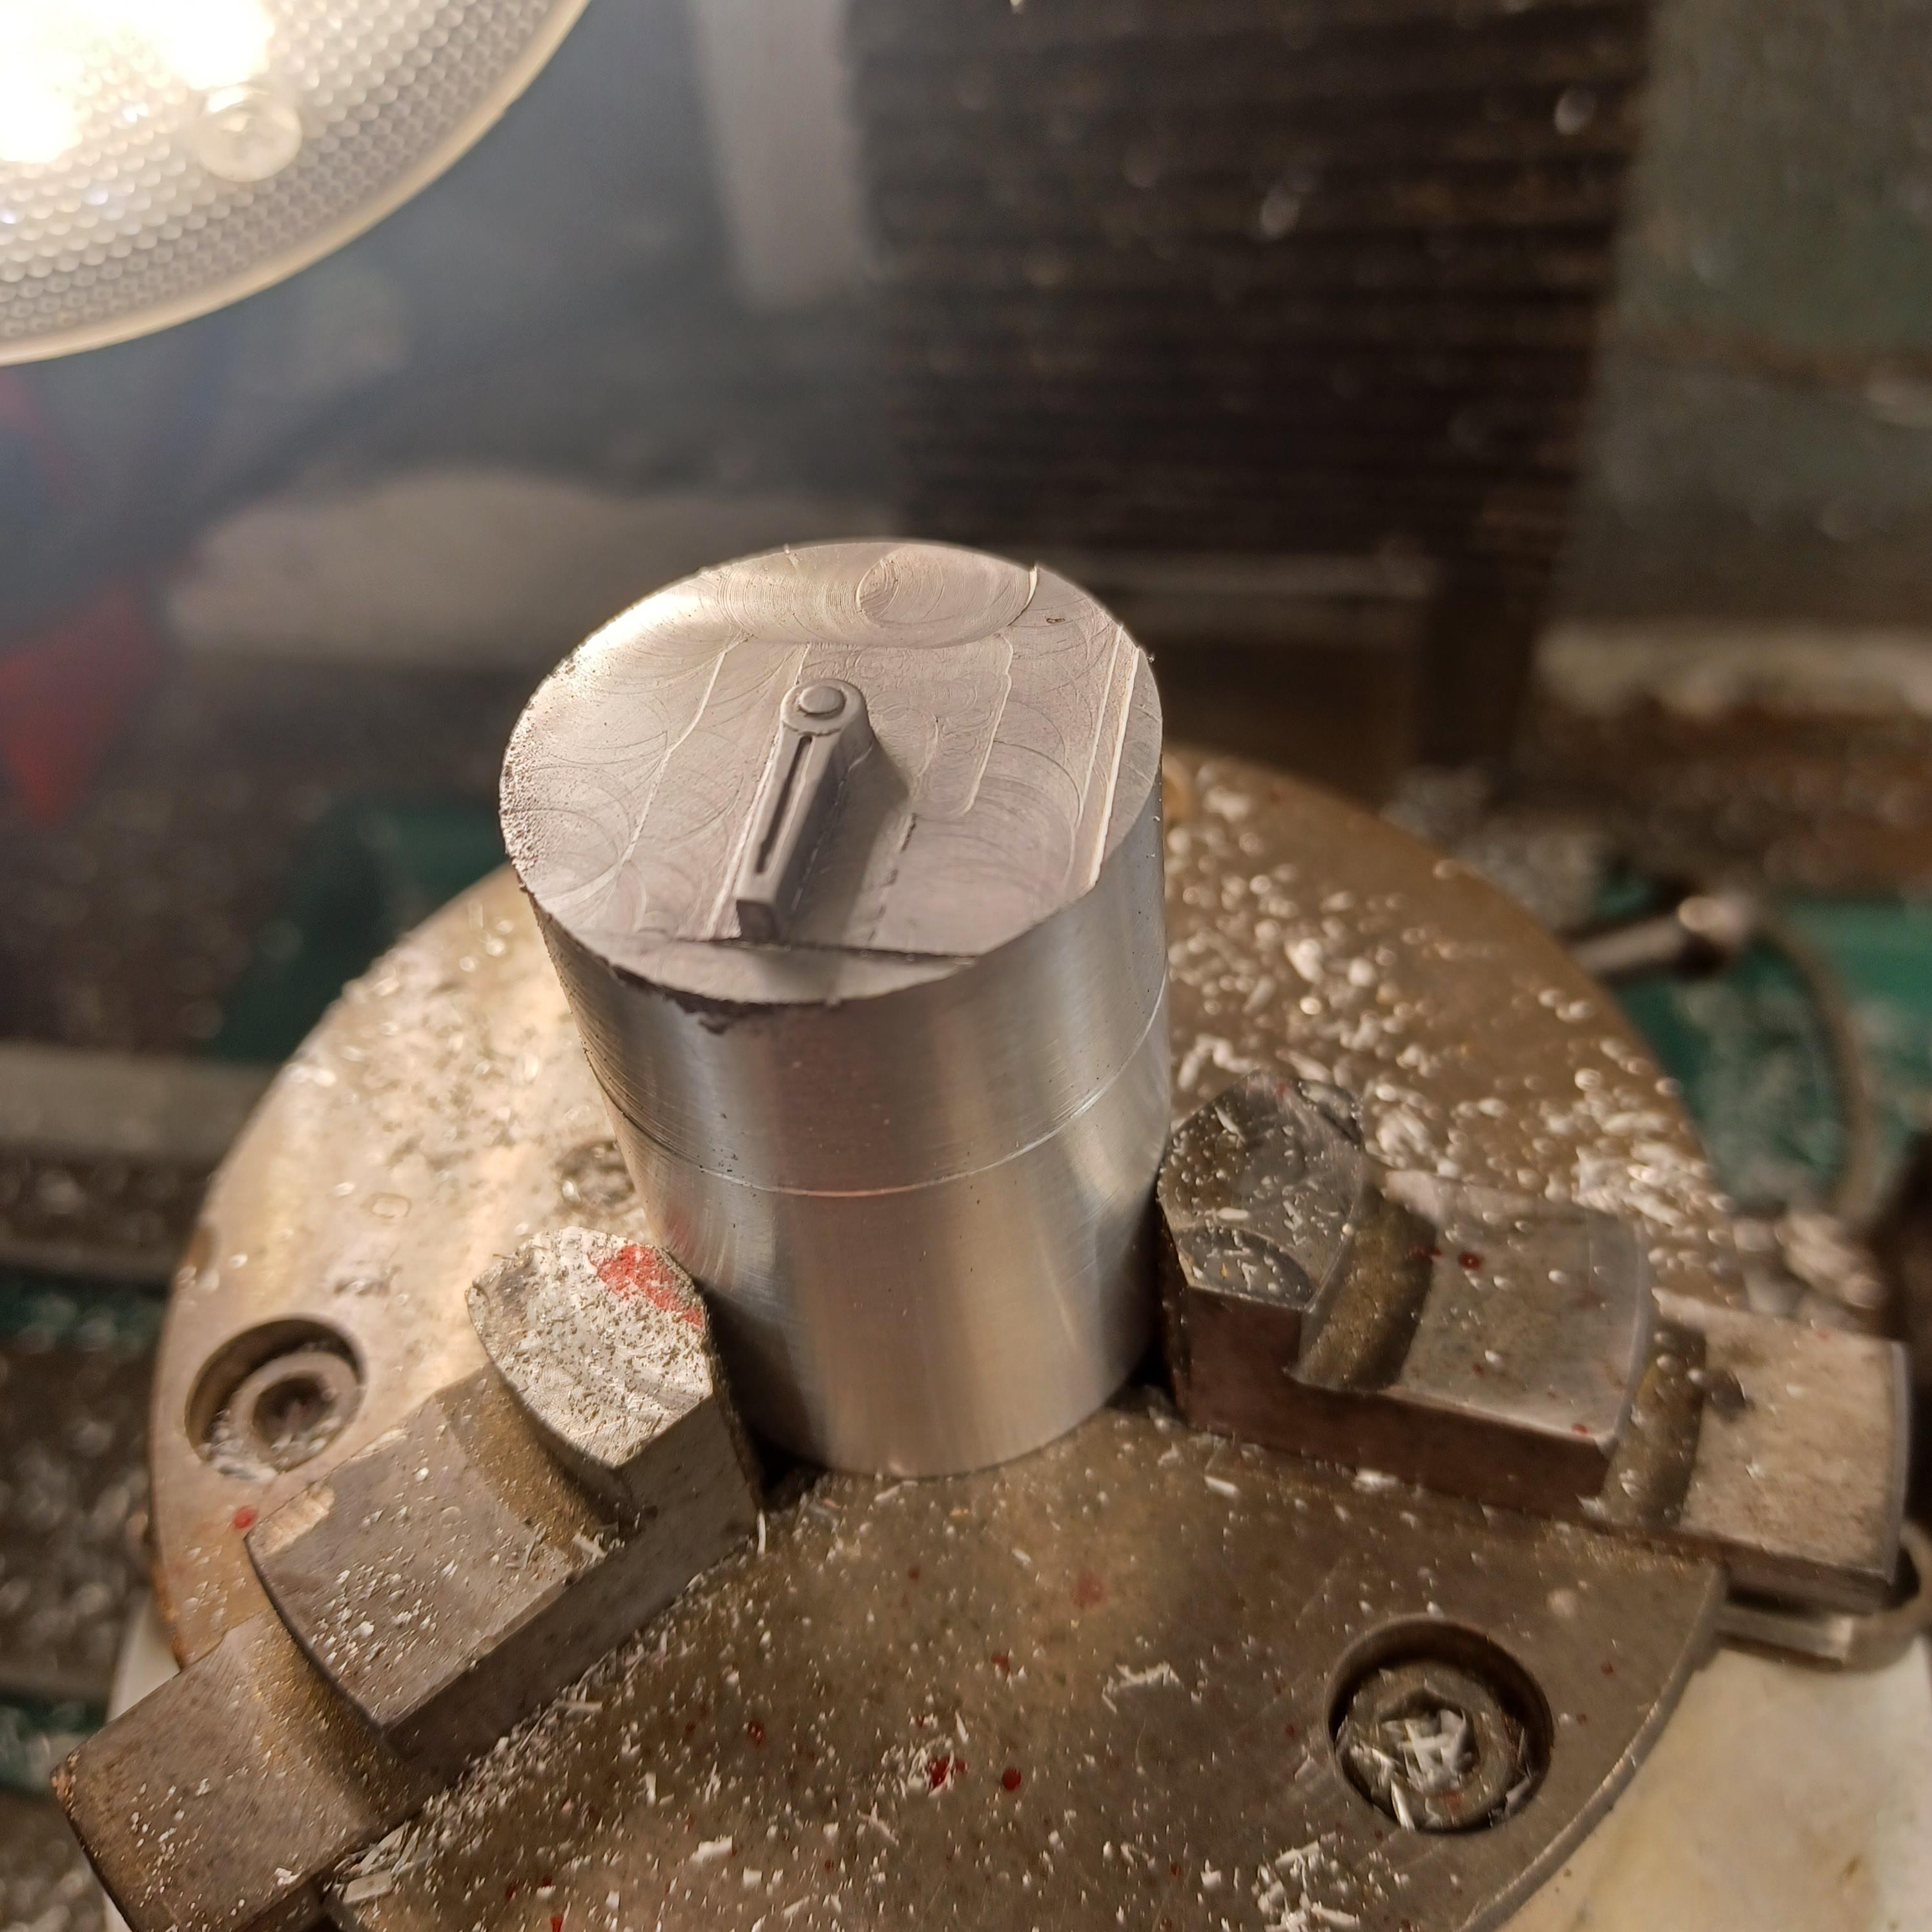
last week was a tough week.i drove to charleston sc. to help a friend with his car. i went to do englishwheel work for him,which i did but got my finger crushed an air cylinder and spent 4hours in surgery puting it back together. 6 to 8 weeks to heal. but got the parts made anyway. going to slow my progress a little but not to much. here is a few pictures of the car we were working on. starting to work on paint the body will be the dark carmine red with black fenders. painted this old hood the see them together. just test for color. i did some work on my wheels or the next project while paint dried.i will probably start a new thread for it in a couple of weeks. thank you brian,i could only hope to be that good someday,at 70 i dont think there is enough time for me to get that good. tim and francis are already there. be back after more paint and assembly. thank you all for your commentary. it is appreciated.
-
T41 Bugatti sport coupe
charlie libby replied to charlie libby's topic in WIP: Other Racing: Road Racing, Land Speed Racers
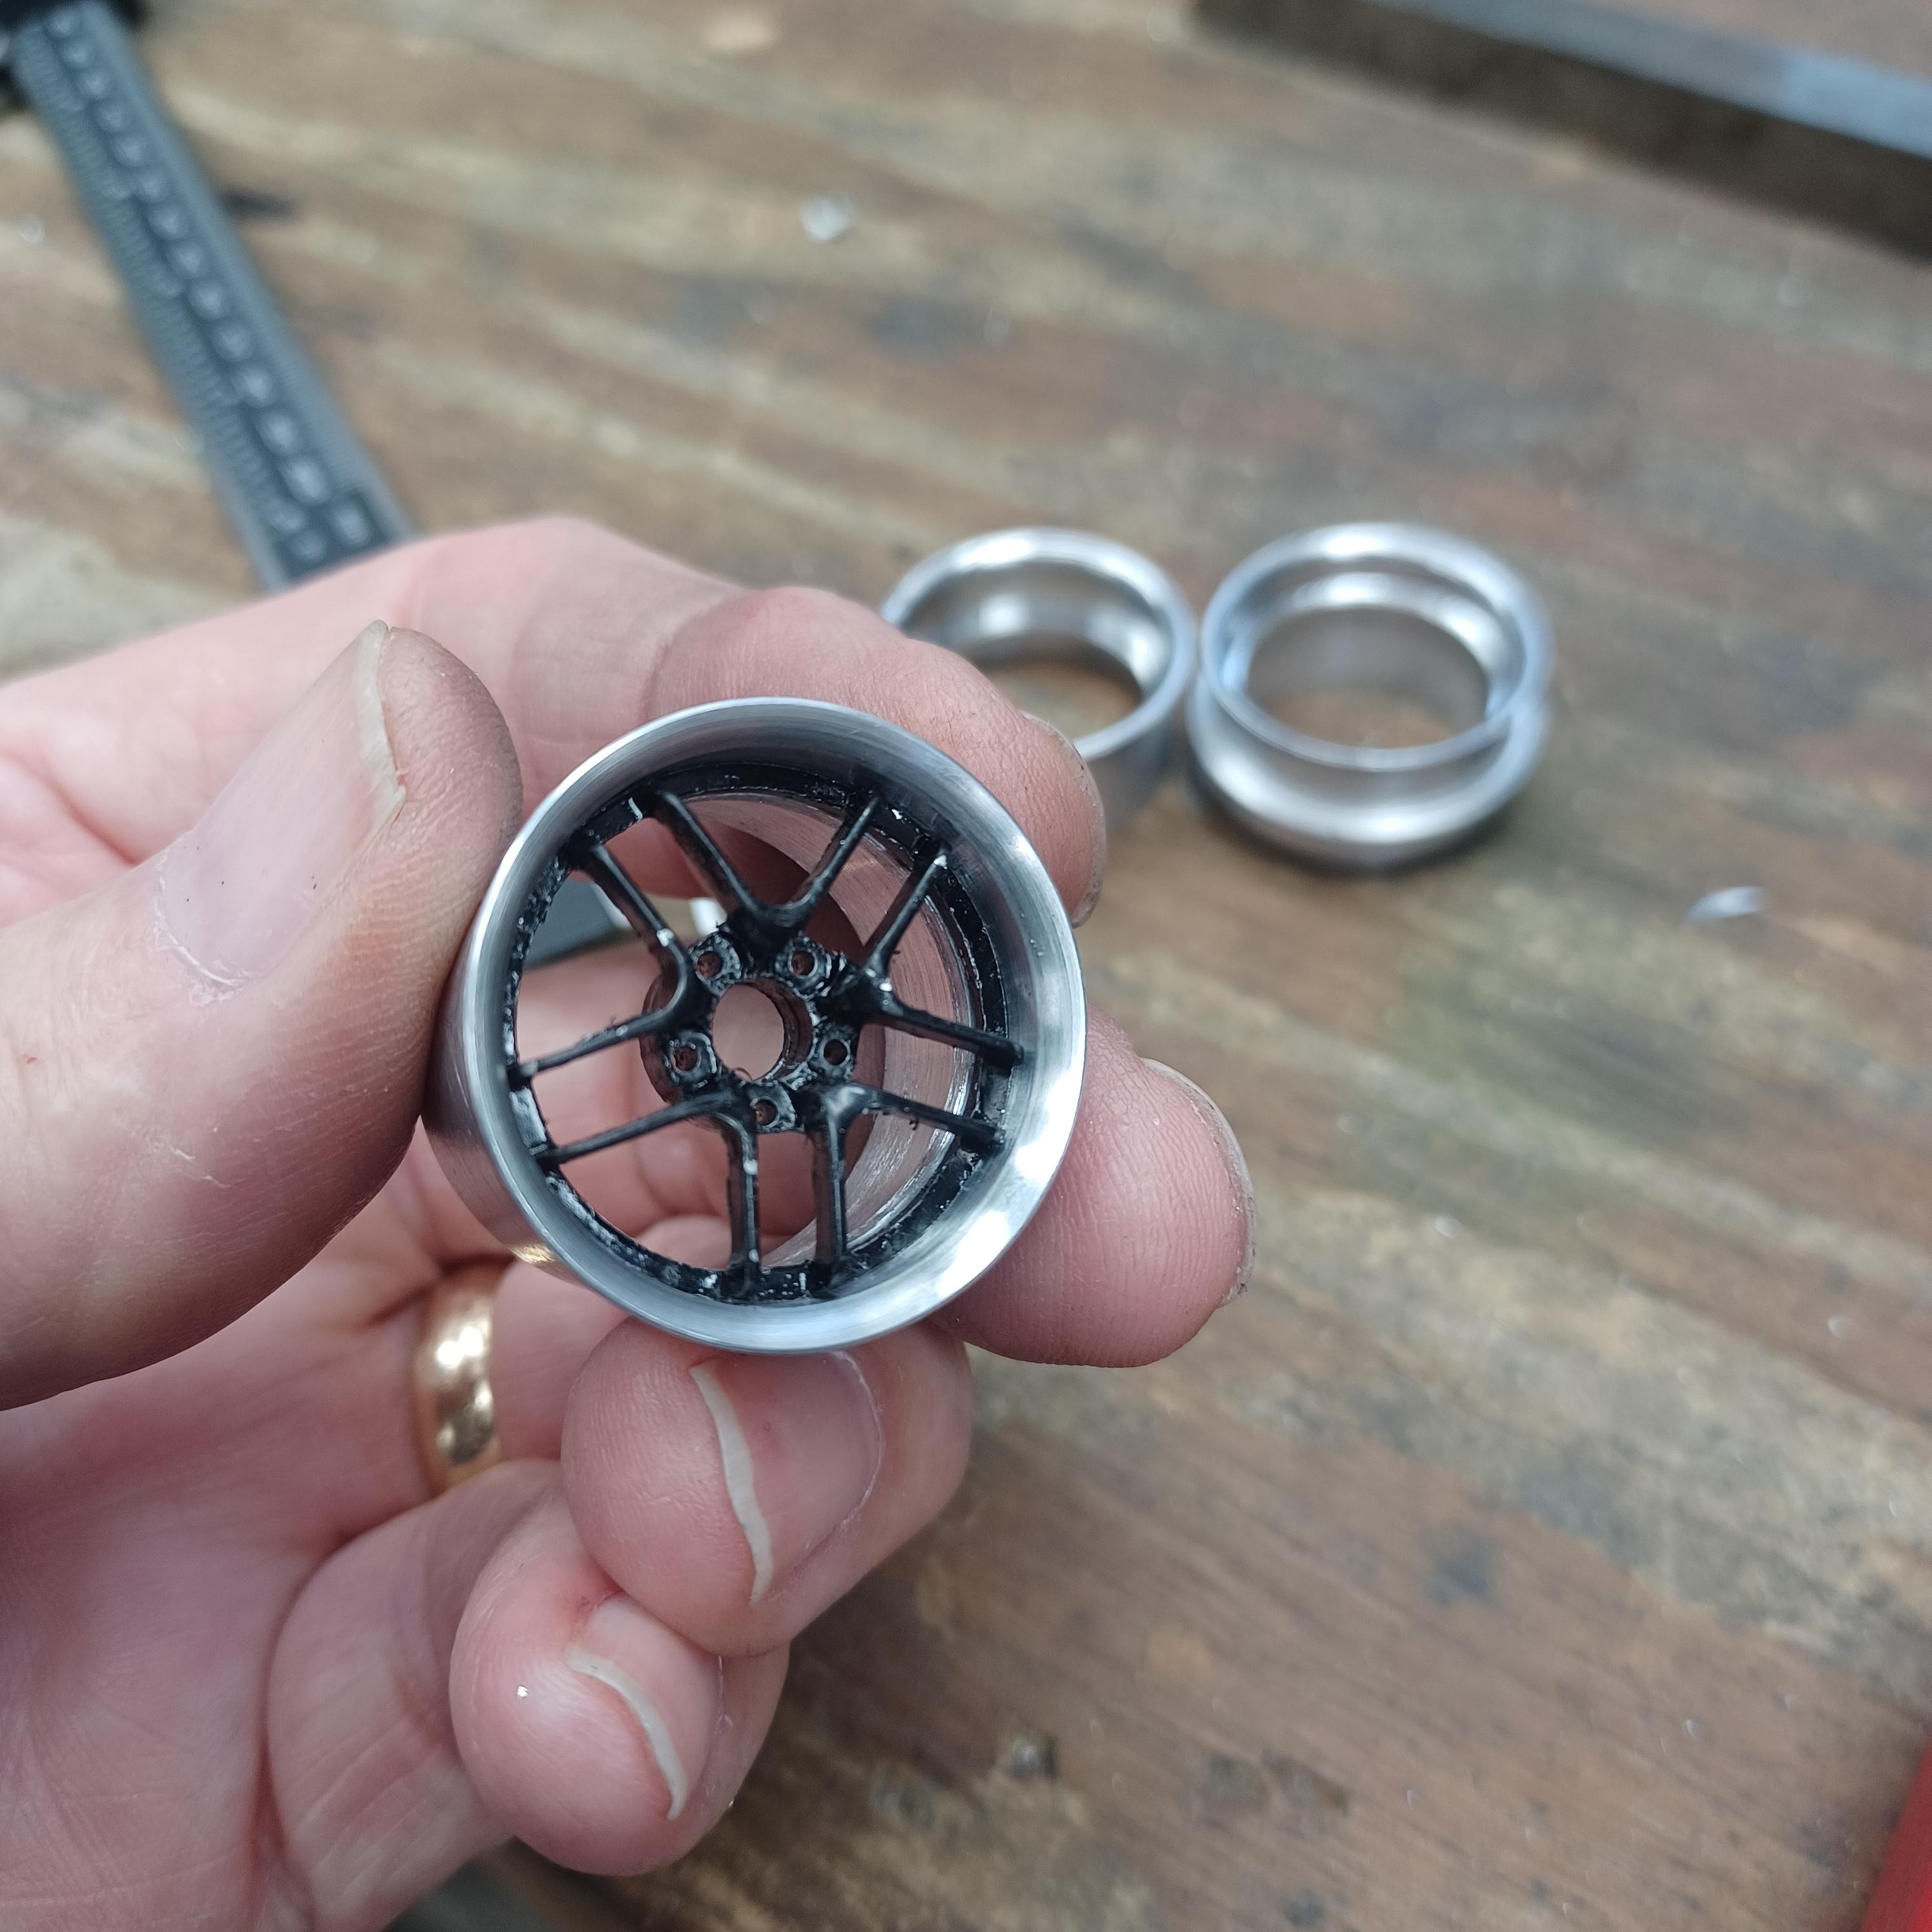
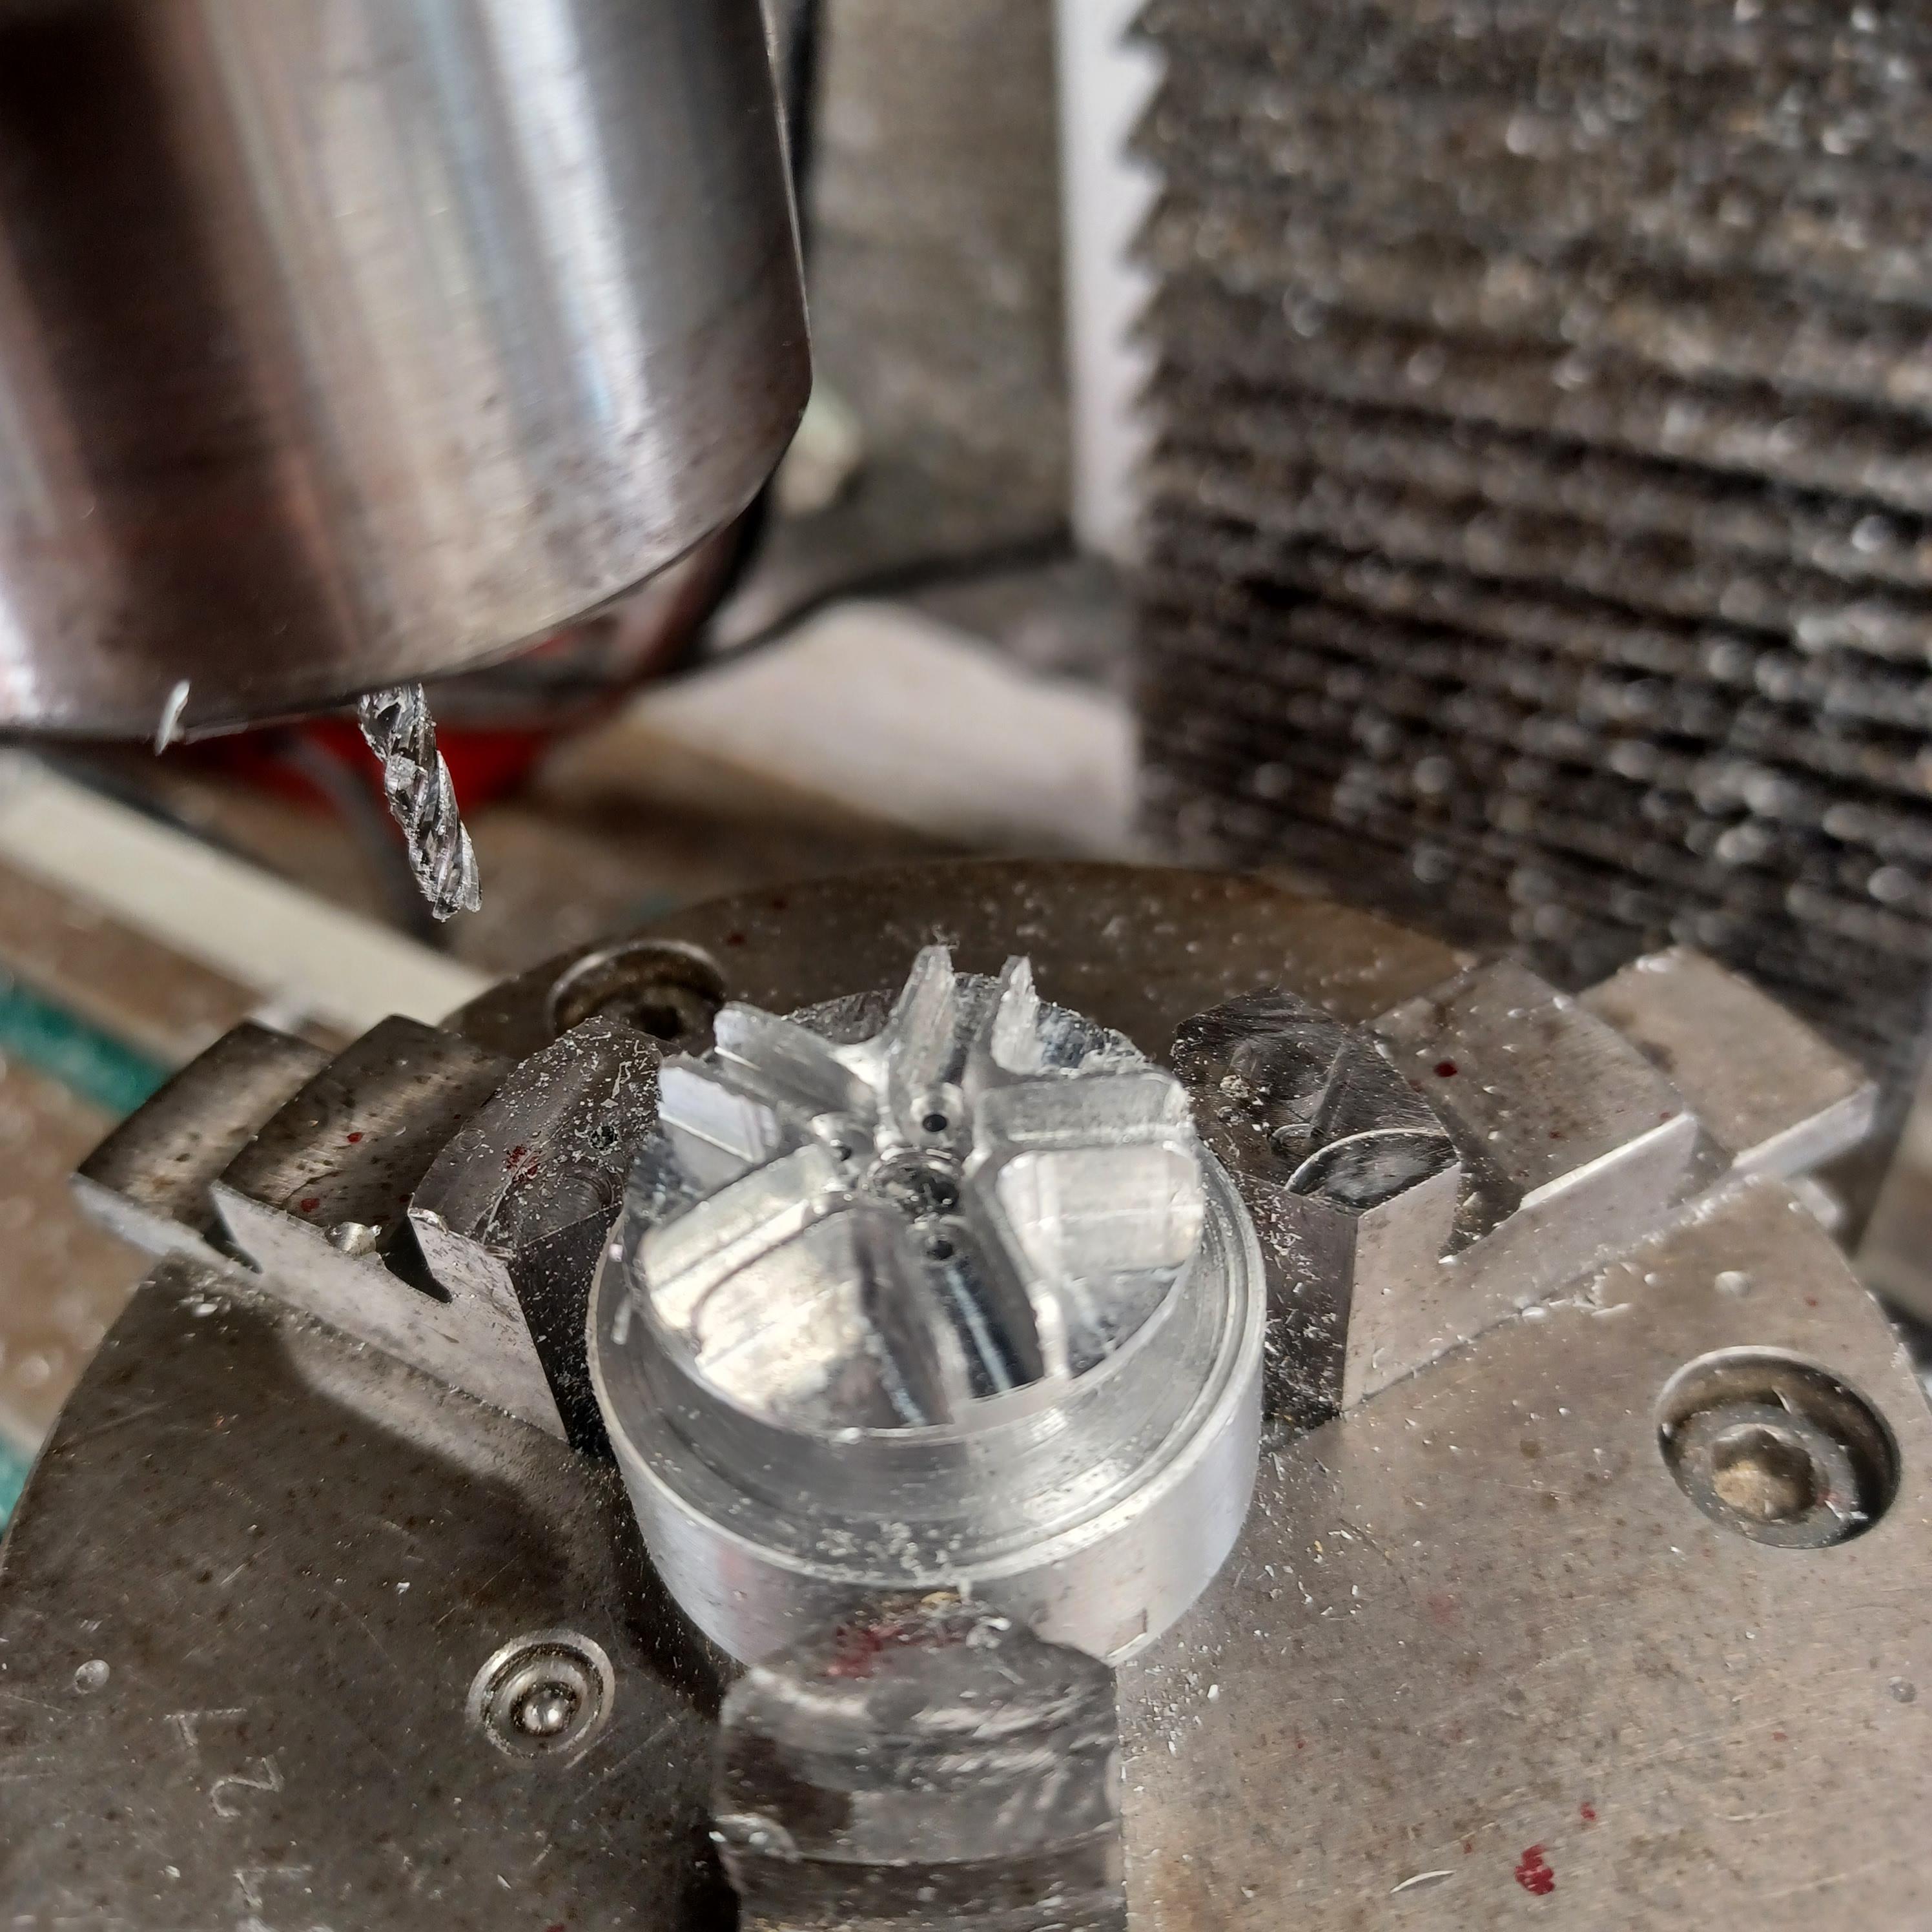
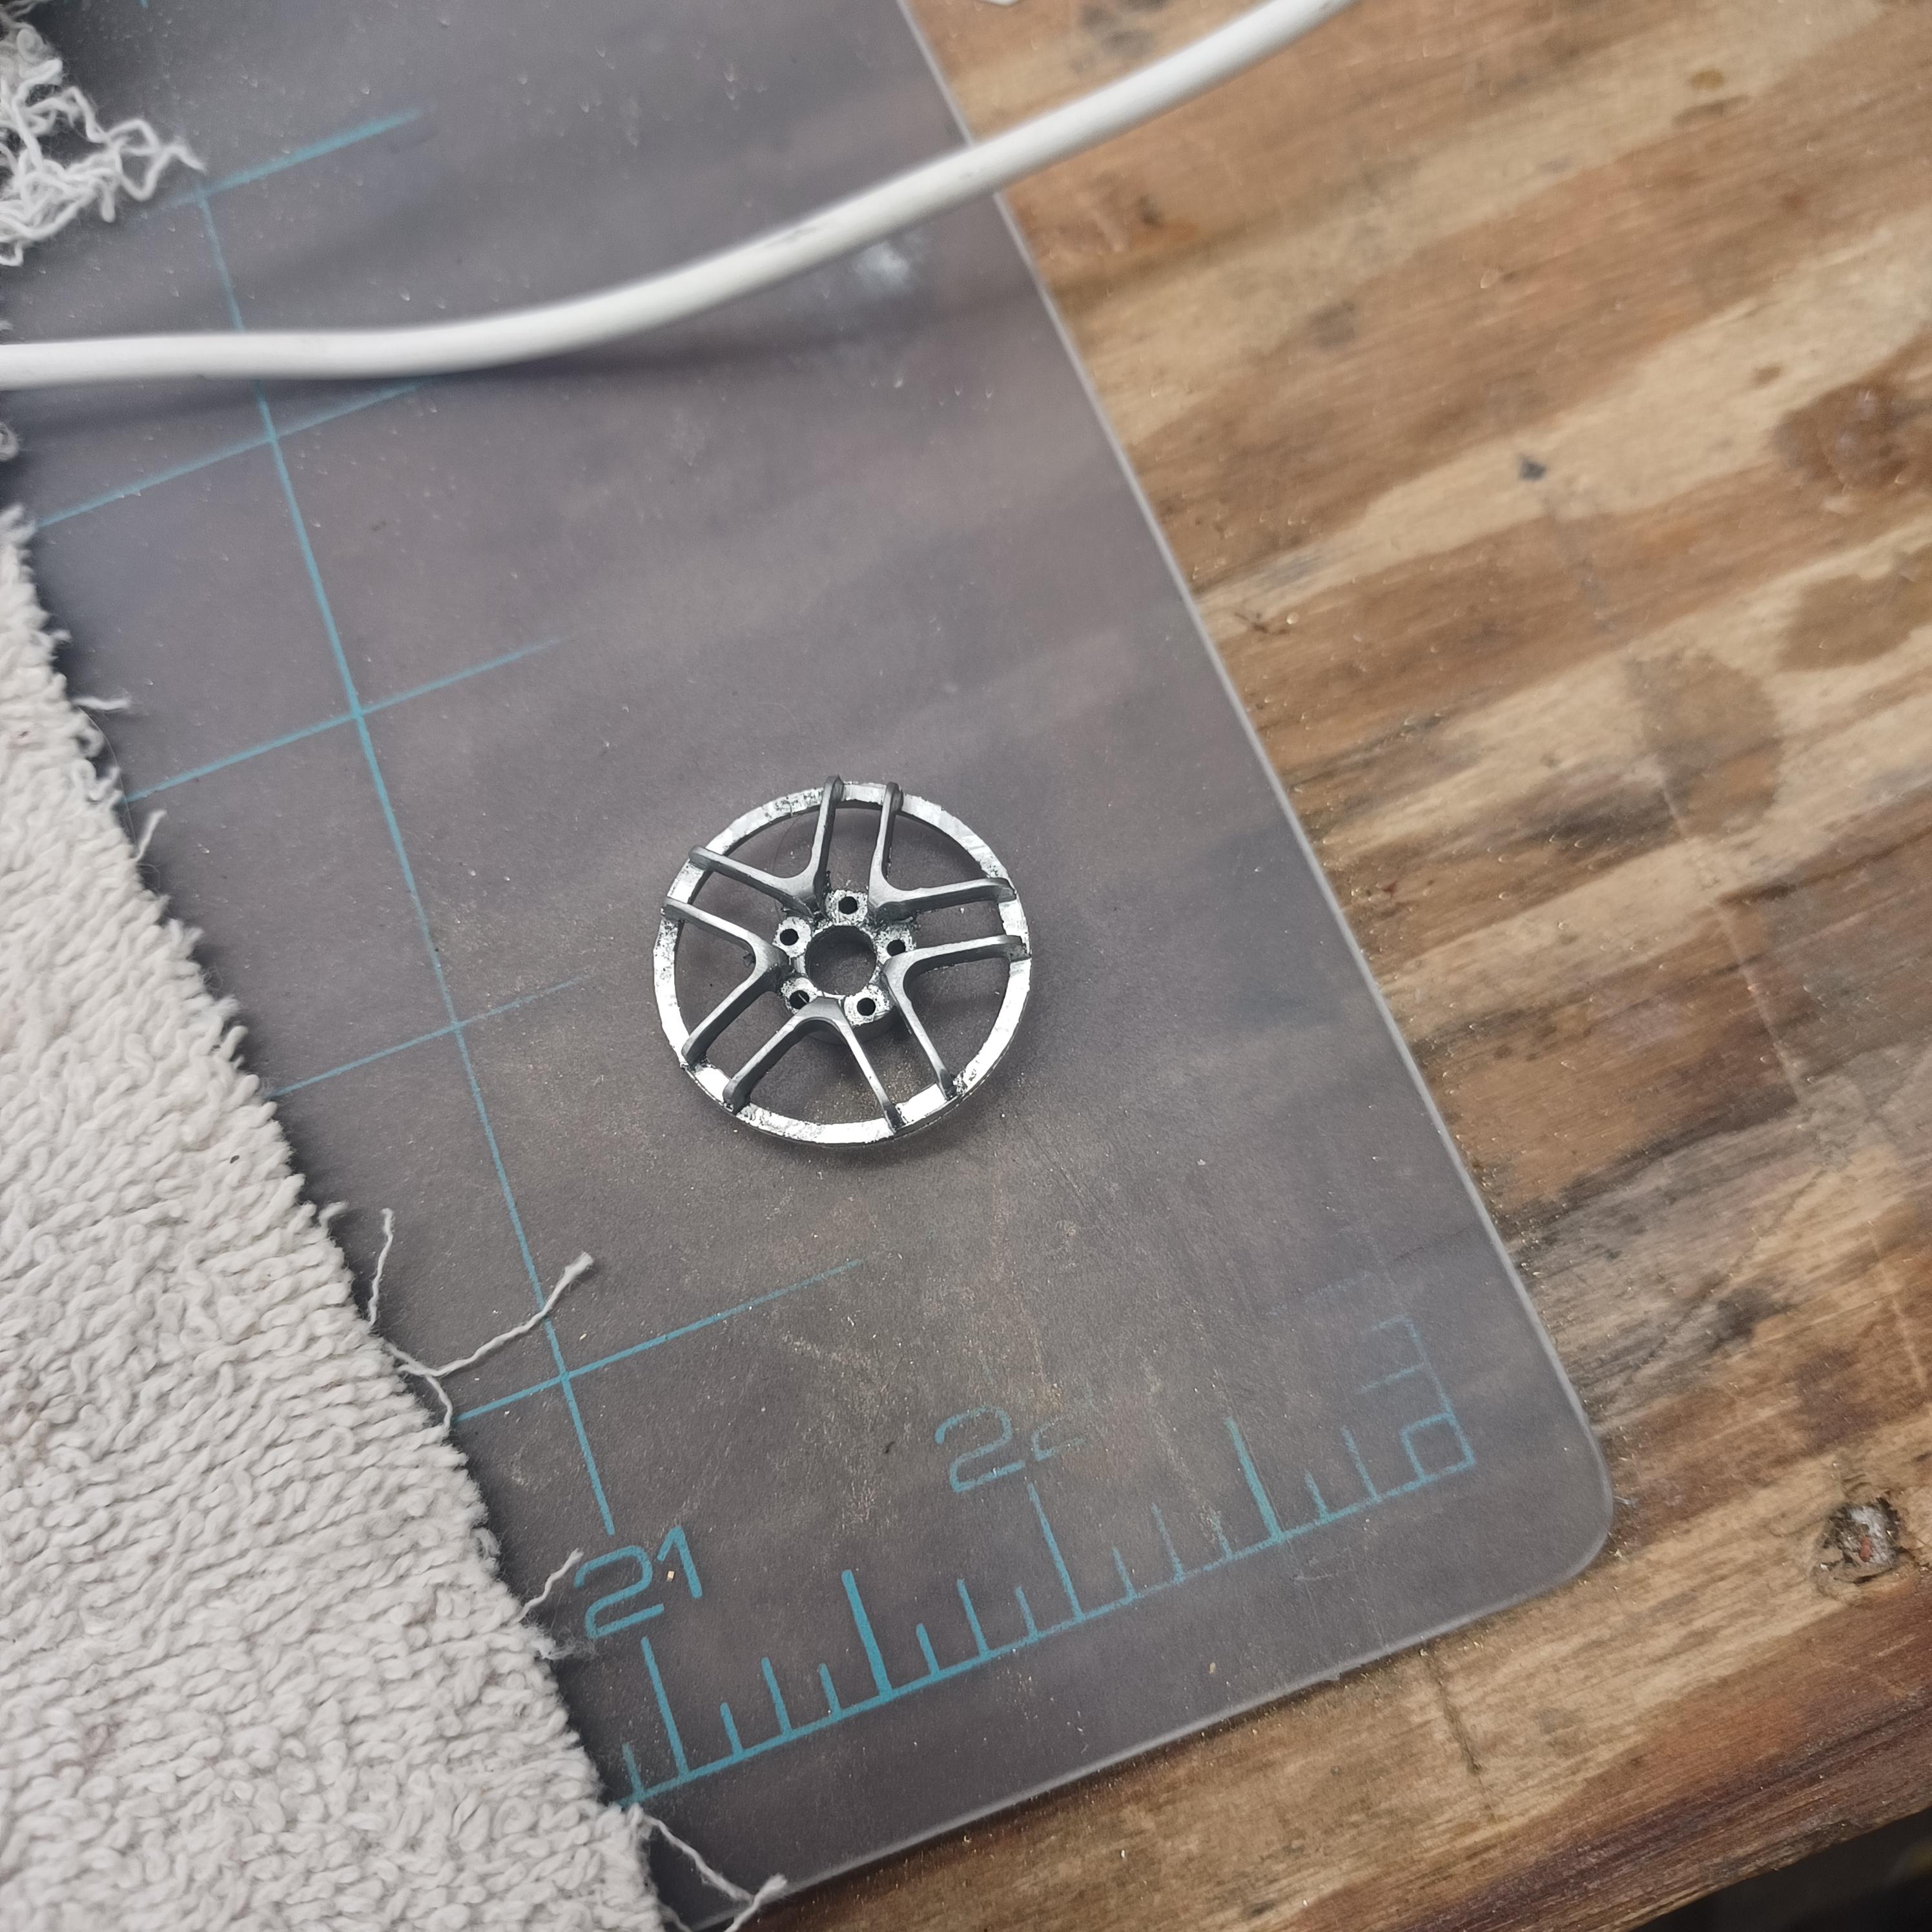
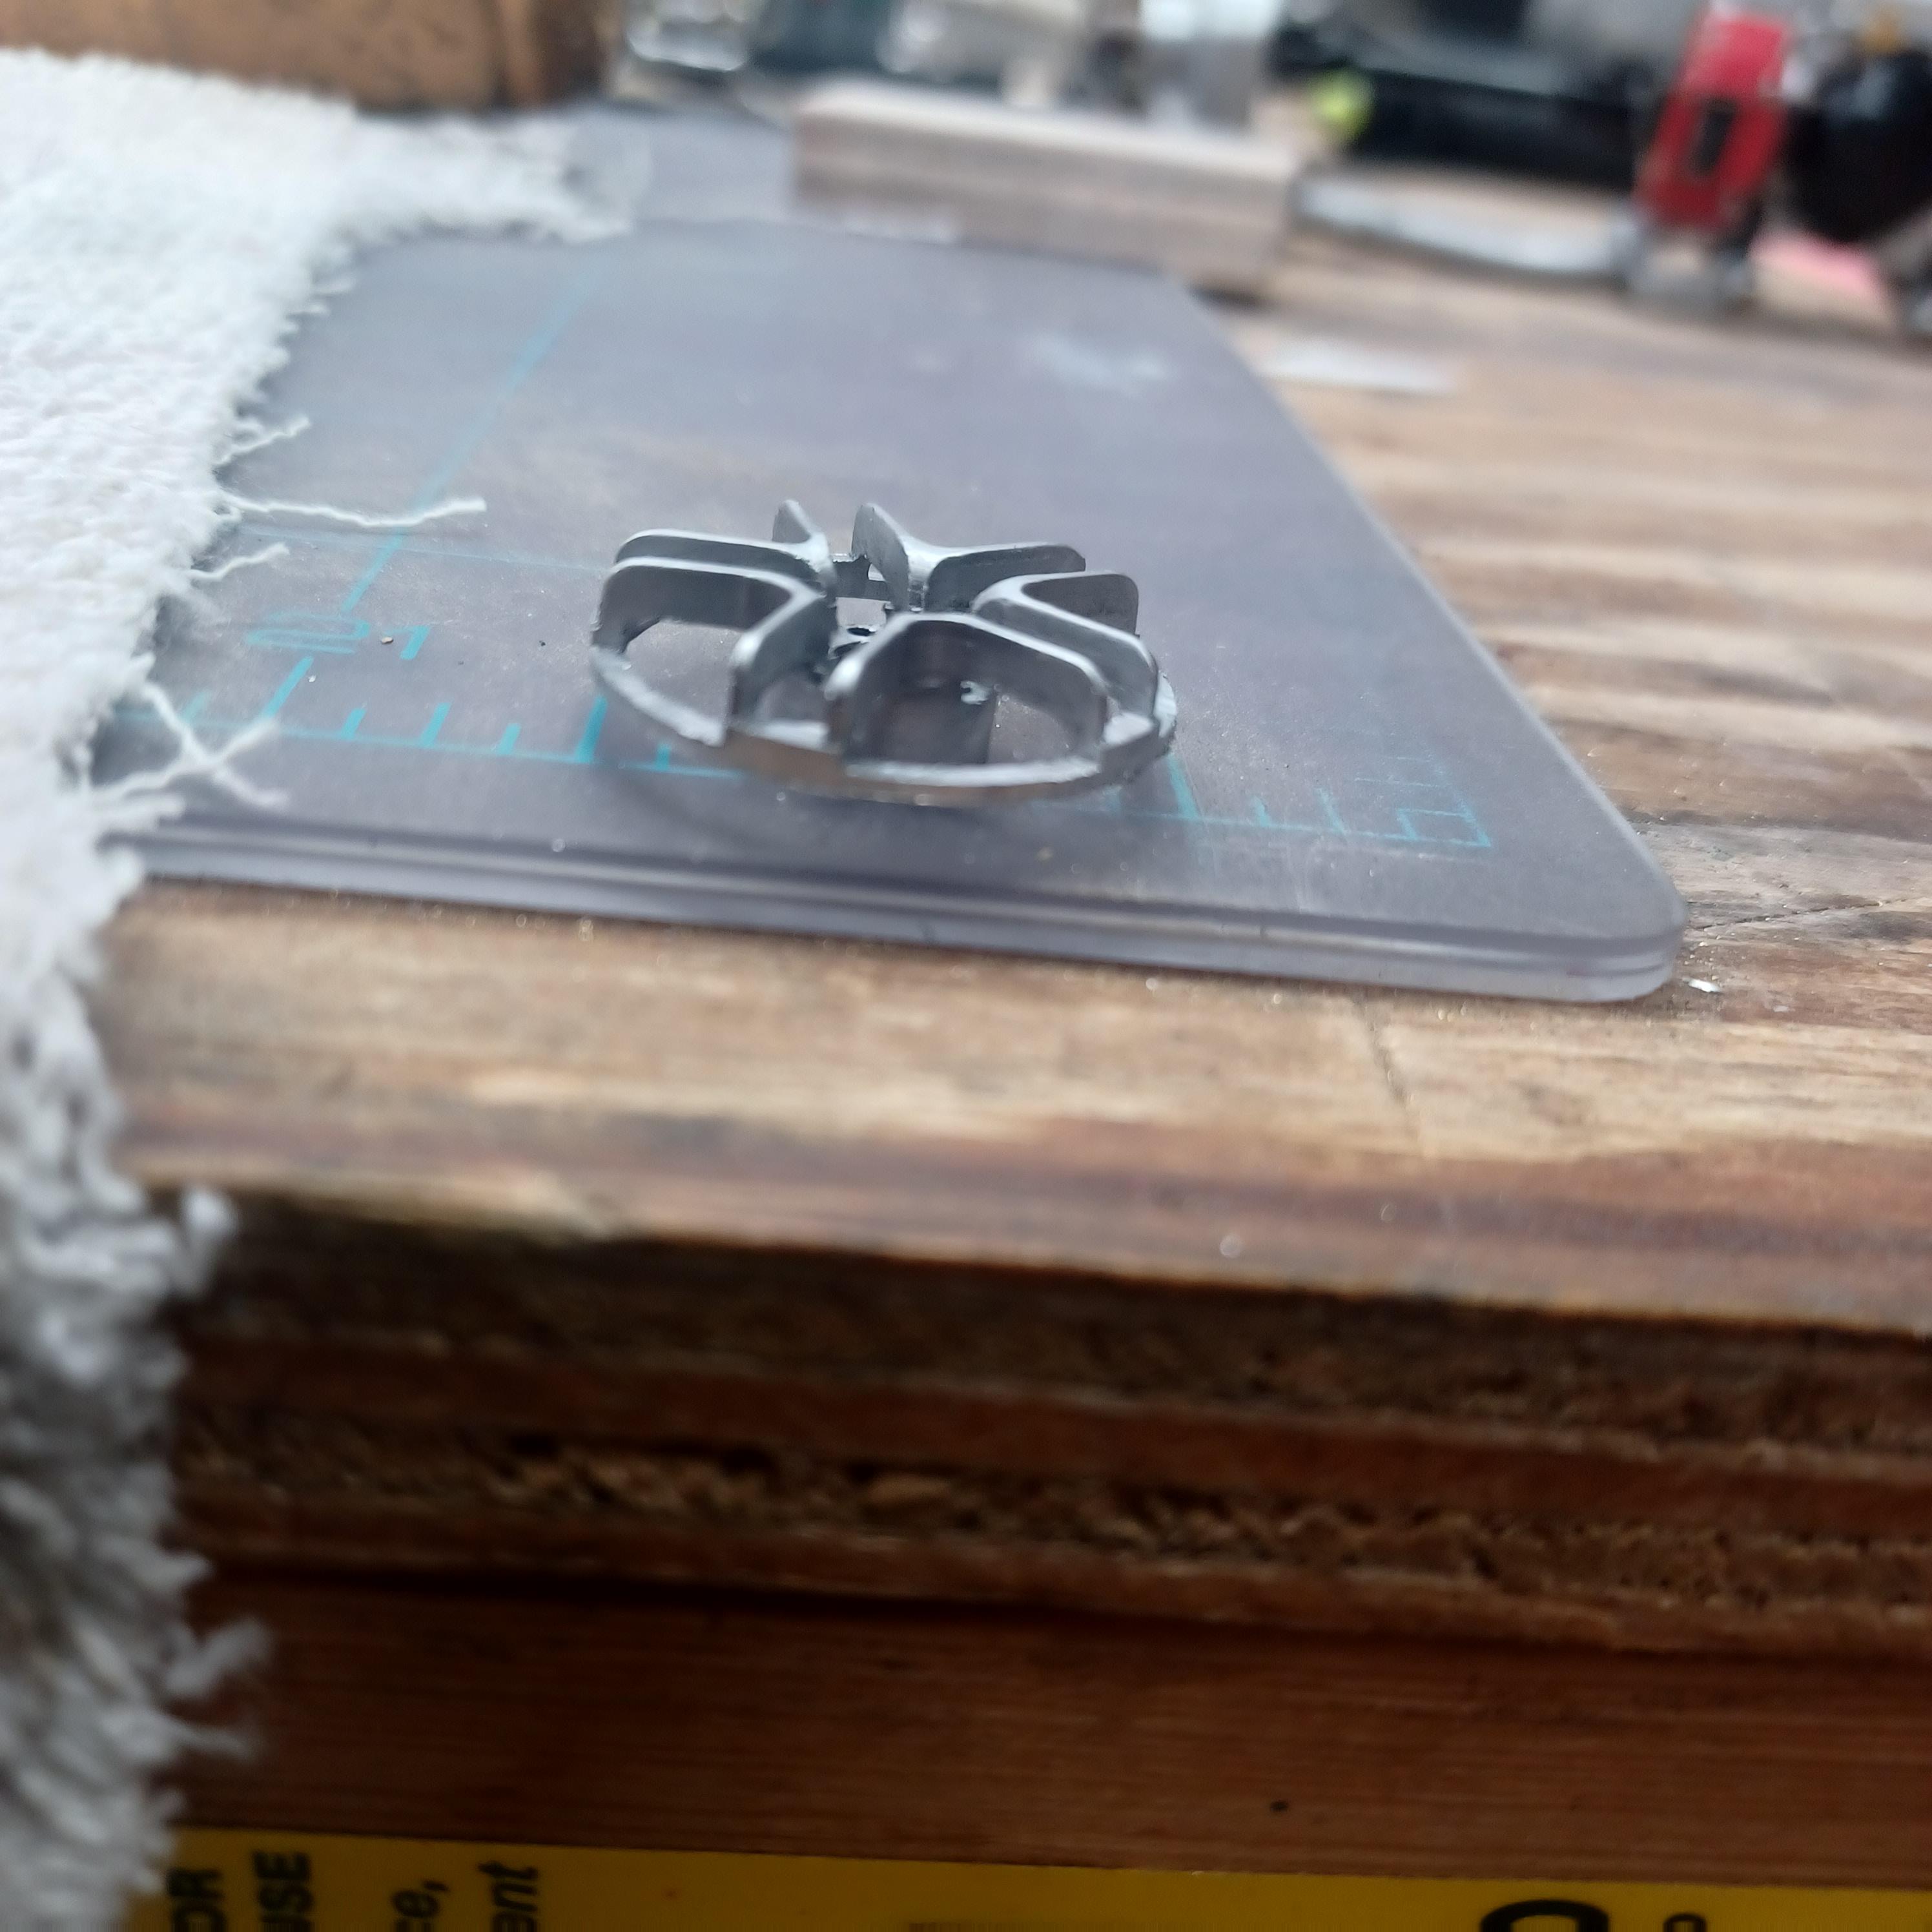
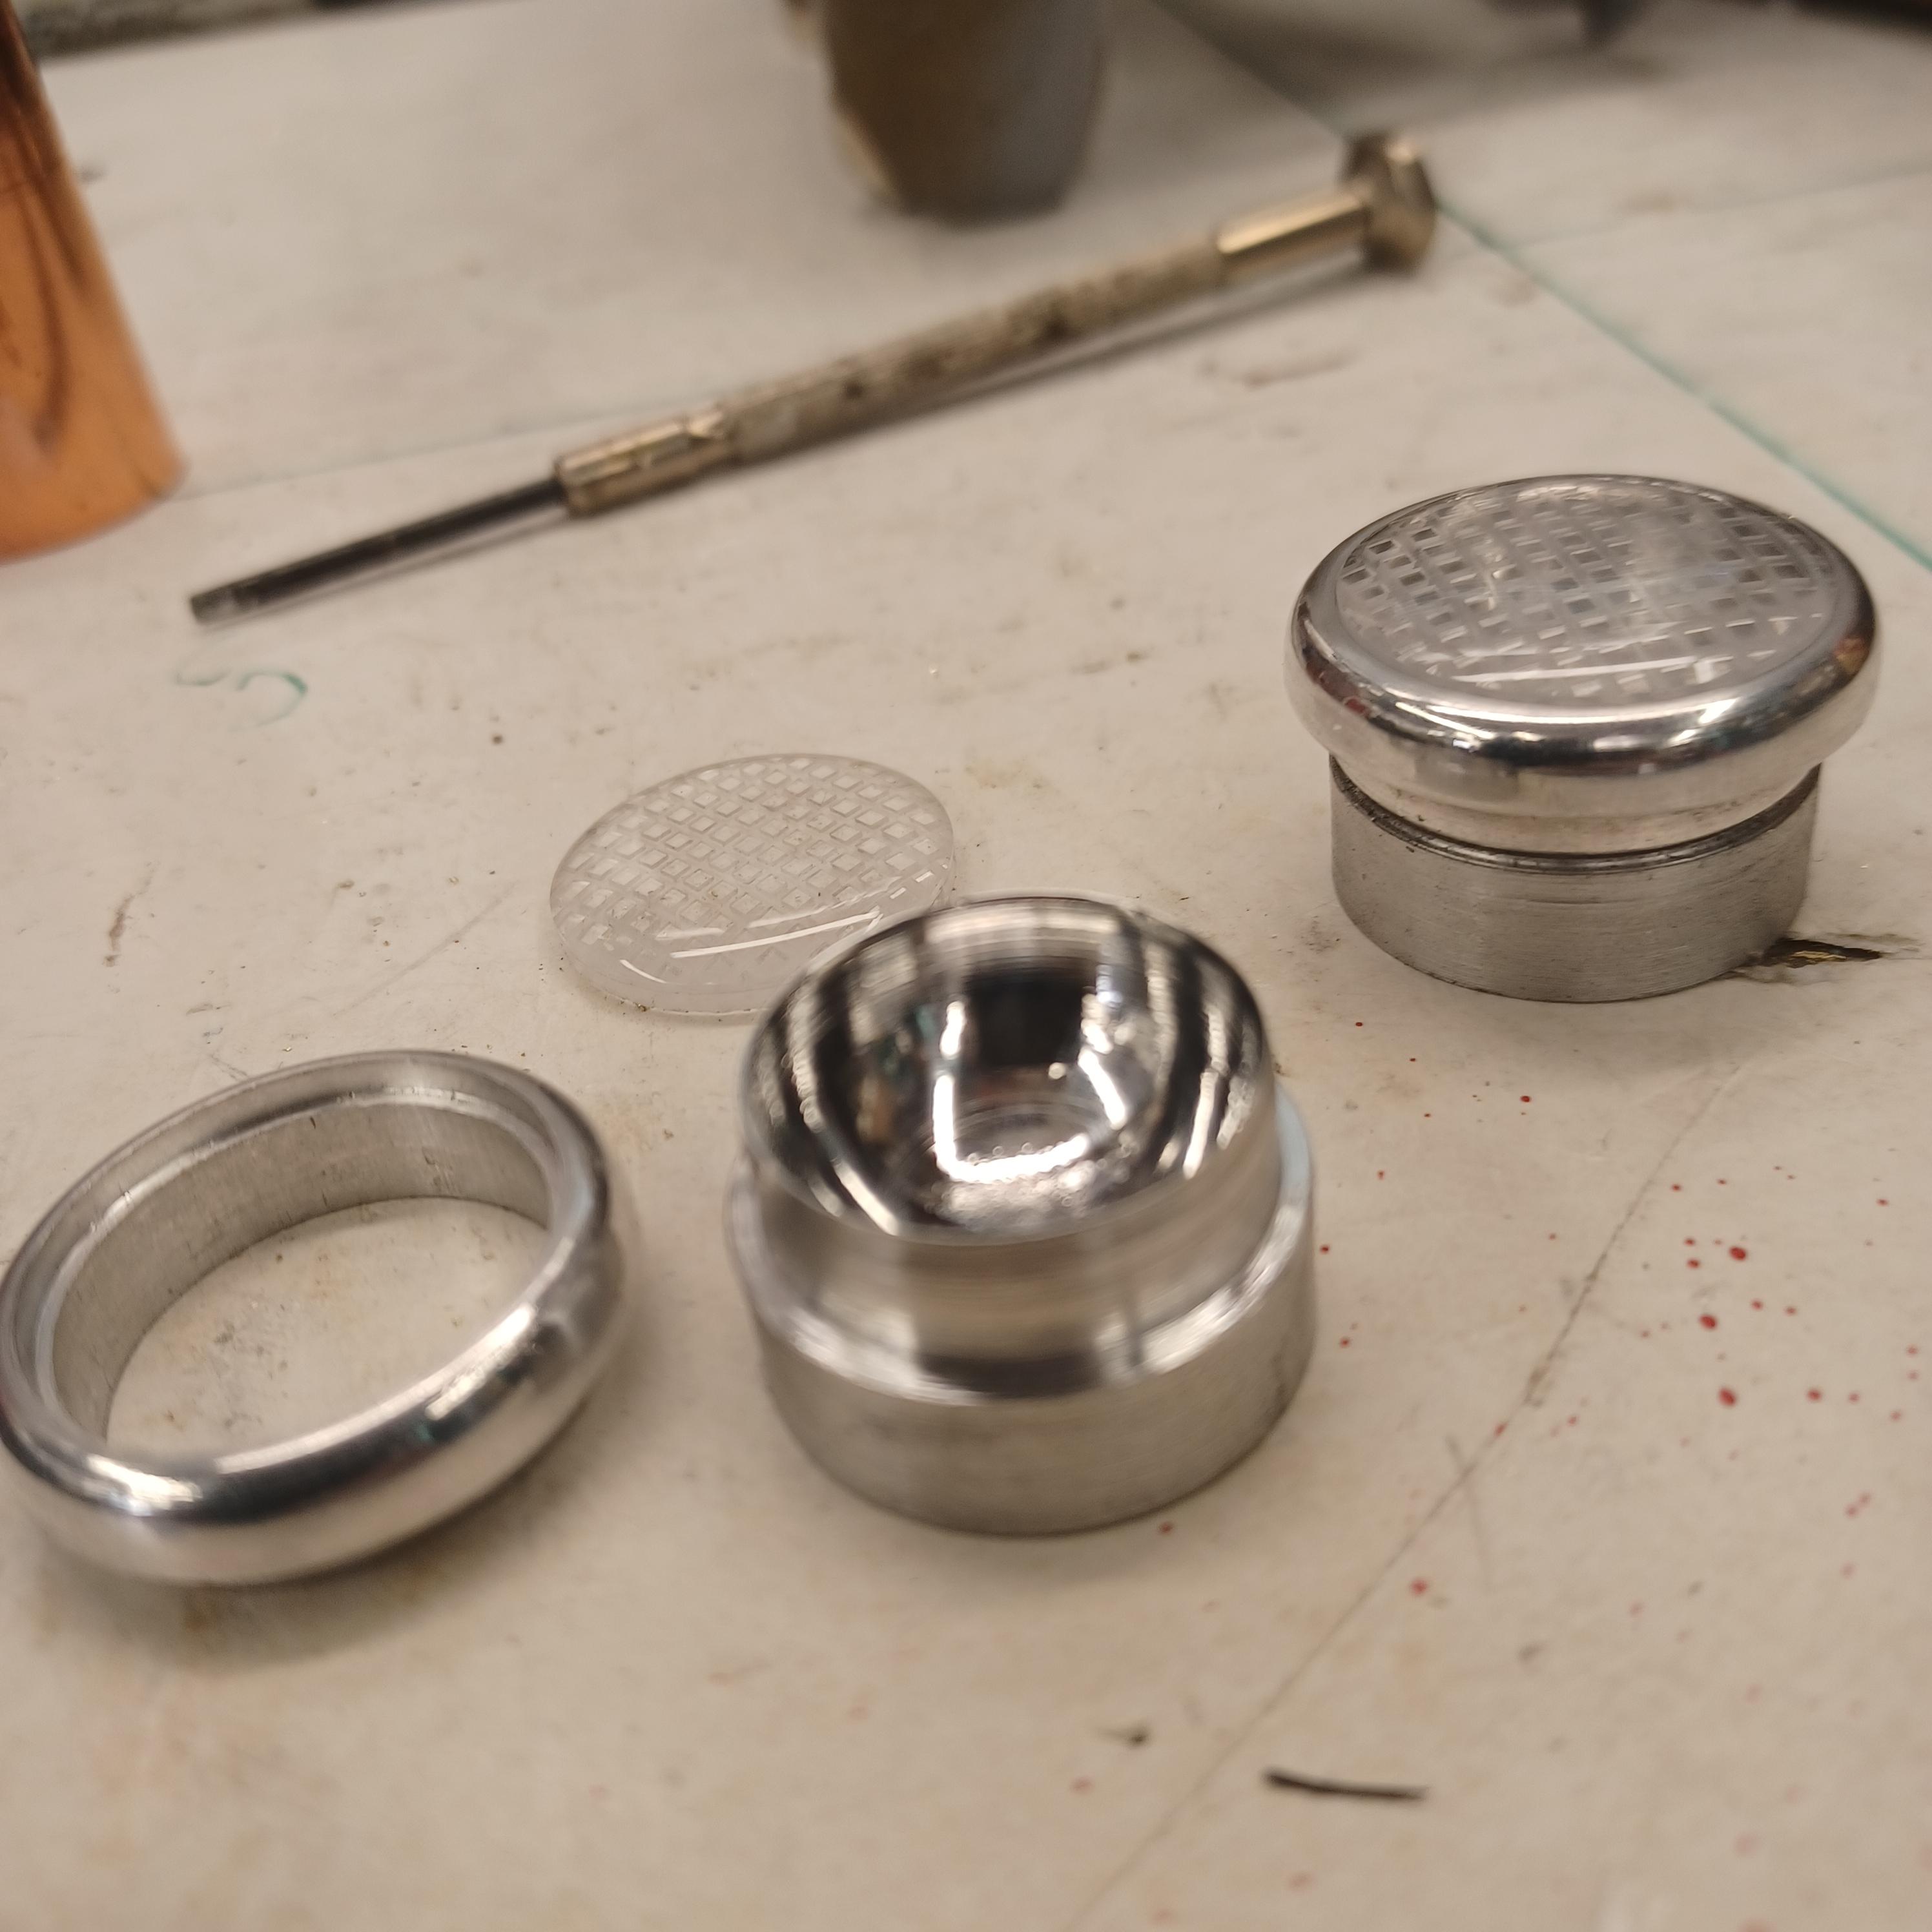
thank you all ,its always nice to hear from you all. not much of the bugatti parts but an interesting test of my new vacuum tank for removing bubbles. did what the instructions said and made kaltiki the immortal monster. i think its because the 2 parts are quite old and may have gathered moisture in my shed. i just got some new product i will try again maybe tomorrow. continuation of the wheel test for my next project in 1/16 scale. i like it but i think the spokes should be a little thicker, what do you think? i machined the tire out of white polyurethane makes quite a mess. ready to start the painting process but have been holding off because of the temp. and i have nowhere to paint inside. maybe in a couple of weeks. till next time thank you all again.
-
T41 Bugatti sport coupe
charlie libby replied to charlie libby's topic in WIP: Other Racing: Road Racing, Land Speed Racers
good thing my photography is top notch -
T41 Bugatti sport coupe
charlie libby replied to charlie libby's topic in WIP: Other Racing: Road Racing, Land Speed Racers
All i know is whats on the books cover. If you know as something else let me know. -
T41 Bugatti sport coupe
charlie libby replied to charlie libby's topic in WIP: Other Racing: Road Racing, Land Speed Racers
just a few more details done. i keep finding things that need to be finished . hi mark nice to hear from you. got the dash bolted to the fire wall and mounted the steering wheel. i took a day off the try my hand at making a wheel for my next project, it will be 1/16 scale so its alot smaller than what i am used to. i might make a slight change to the spokes but i am pretty happy with it. next to engines wheels are my favorite things to machine. i am going to practice a little with my air brust to get ready to pint the body and fenders. can't wait to see how it comes out. should of been using it for awhile, Andrew convinced me to try it, says i won't go back to spray cans. does anyone out there know of a kit for the LECo mk2. thank you
-
’72 Dodge Demon Drag Racer 1/25 scale
charlie libby replied to AmericanMuscleFan's topic in WIP: Drag Racing Models
Looks perfect. Where do you buy your toolng francis? Looking at yours and tims post i need more practice.WOW -
Hi tim amazed as always . Looked at this and went to my little shop and tossed my radiator in the trash. If i send measurments will you build me one?
-
T41 Bugatti sport coupe
charlie libby replied to charlie libby's topic in WIP: Other Racing: Road Racing, Land Speed Racers
thank you mark, very nice to hear from you. the interior is a little farther along . trying to finish the details before paint. seems like this has been going on forever. i am happy to be close to paint . one more complete assembly to make sure it all goes together correctly.
-
T41 Bugatti sport coupe
charlie libby replied to charlie libby's topic in WIP: Other Racing: Road Racing, Land Speed Racers
just a quick update. i have been working on the interior as well as the exterior. got the inside about 80 % done. just got some final trimming and glueing of the leather. still haven't mounted the steering wheel. just alot of details left and paint. thank you all for your nice comments and hope you all had a great christmas
-
T41 Bugatti sport coupe
charlie libby replied to charlie libby's topic in WIP: Other Racing: Road Racing, Land Speed Racers
work continues, had to make an air cleaner that fit under the hood. got the driveshaft done, now to make the u joint's. not alot of parts left to make. need to make a fuel tank. brake lines and some wiring . got to mount the steering wheel and plan the dashboard mounting. keep preping the body in between parts. its getting closer. i do have an issue with the nose. after its attached to body i cant install the body on the frame , i will figure out. I'm with you daniel , just wierd stuff in my brain, wait till you see the crazy one thats next. hi andrew,nice to hear from you.francis glad you are back at it. thanks for looking mark,come back again. thank you brian
-
’72 Dodge Demon Drag Racer 1/25 scale
charlie libby replied to AmericanMuscleFan's topic in WIP: Drag Racing Models
Francis glad your back.happy to hear from you.happy to see your work again.must be getting cold up there.i know how you feel,i think i will never finish car.i finaly feel like i might get it done. As always i learn from your pictures. Awesome little parts.i am going to 1/16 on my next car.i dont know if i can do it but we will all find out together.glad to see your back making great parts for insperation for all .thanks -
T41 Bugatti sport coupe
charlie libby replied to charlie libby's topic in WIP: Other Racing: Road Racing, Land Speed Racers
thank you for visiting and your kind comments. i have been working on some of the body details. i keep finding more and more parts to be made. here is a few of the small pieces. i am not sure what is next to be made.i have the steering column made but i need to mount it. brake pedals and gas pedal are mounted. i will probably go back to the upholstery again for awhile. cant wait to assemble the entire car and make sure it all goes together and then take it back apart for paint. thanks for looking.
-
T41 Bugatti sport coupe
charlie libby replied to charlie libby's topic in WIP: Other Racing: Road Racing, Land Speed Racers
Yep -
T41 Bugatti sport coupe
charlie libby replied to charlie libby's topic in WIP: Other Racing: Road Racing, Land Speed Racers
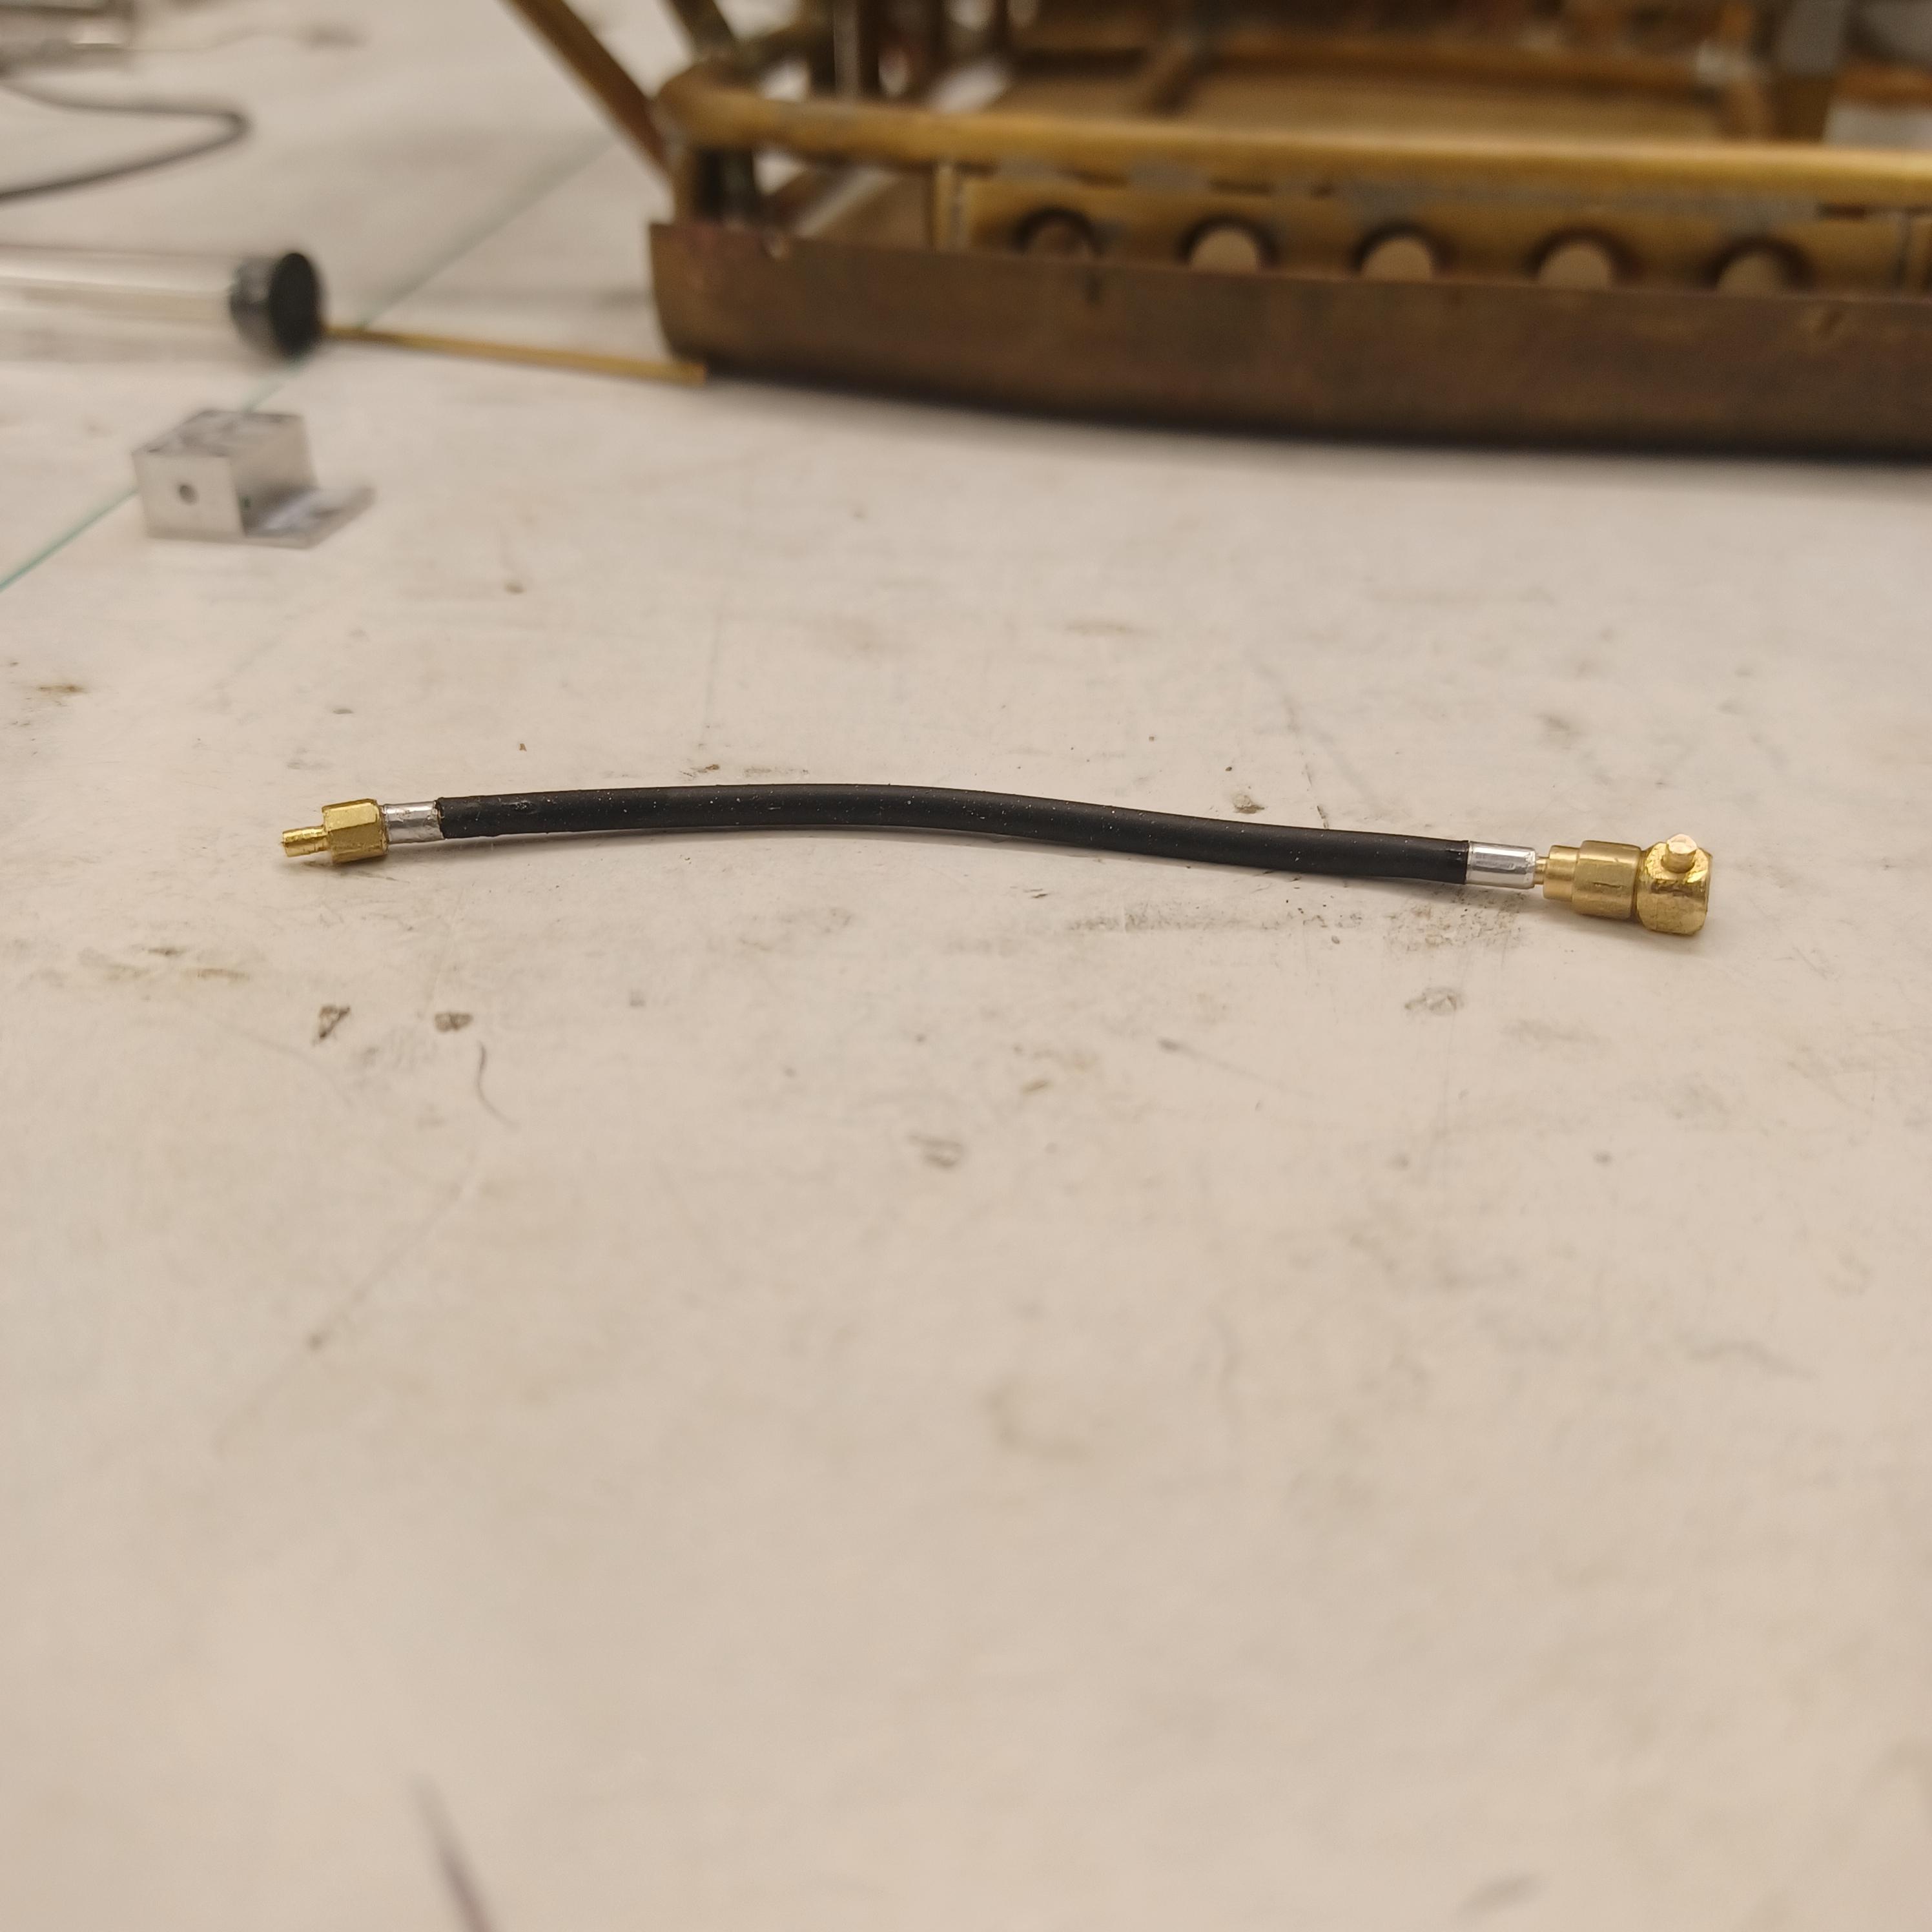
sorry i have been busy. for 2 .5 weeks i have been a pole deputy until tuesday when voting ended, i am glad thats done. i got a little bit done ,not much. worked on the gas and brake pedals and the fuel injection hoses. i had to machine the fittings and the mechanical pump. only about 1000 more pieces to make. i started making door handles today, i have not figured out the door latches yet.got the glass cut but i have to put some curve in the front and rear. a very small amount. i found on my last project the water temp. from the coffee maker is the perfect temp to curve 1/16 lexan. i will be back at again , more pictures to come. Noel nice to hear from you again thank you. thanks for the nice comments Brian